NieR: Automata
# Game Introduction for NieR: Automata **Genre:** Action role-playing game (ARPG) / Hack and slash / Open world **Developer:** PlatinumGames, Square Enix (development lead: Yoko Taro) **Publisher:** Square Enix **Release Timeline:** - PlayStation 4: February 23, 2017 (Japan), March 7, 2017 ...
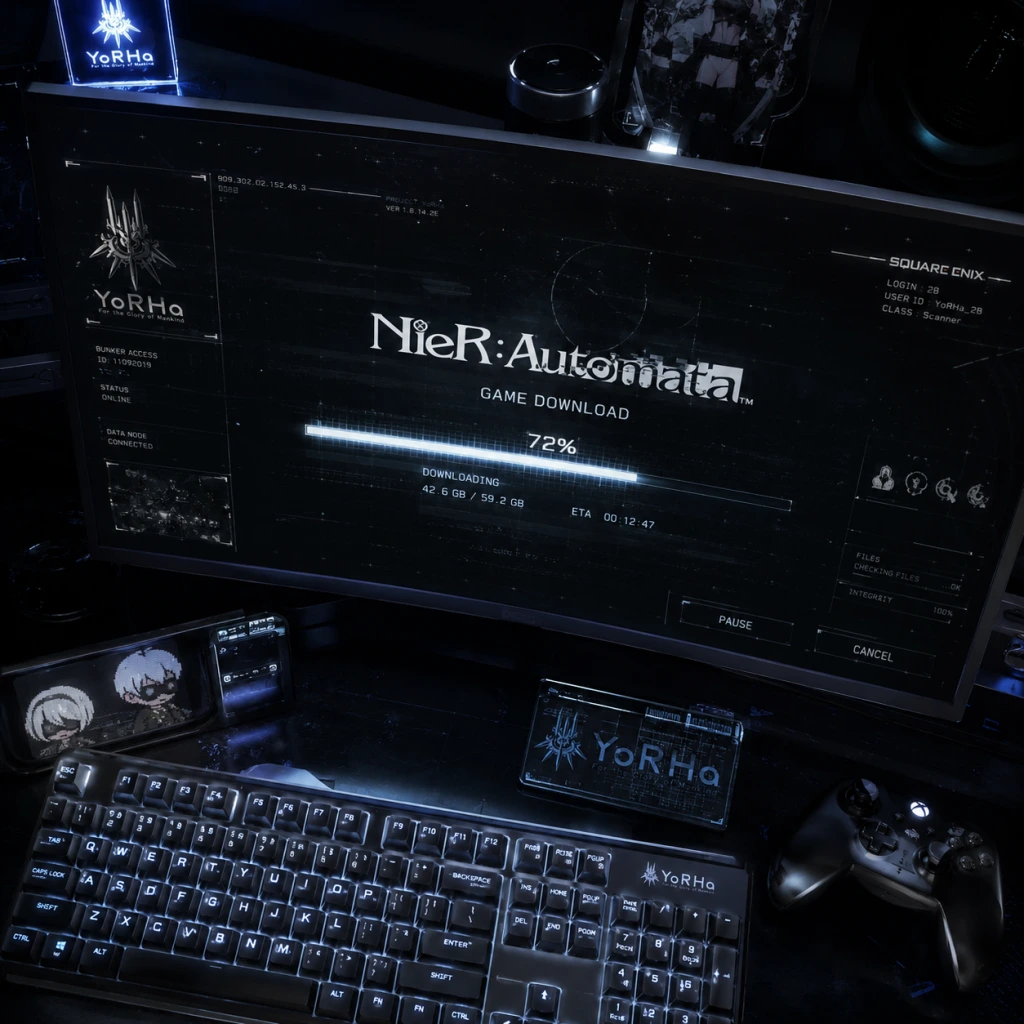
Download & Installation
Download & Installation Guide for NieR: Automata
This guide covers all official platforms where NieR: Automata can be legally purchased and installed, including PC (Steam and Microsoft Store), PlayStation 4, Xbox One / Xbox Series X|S, and Nintendo Switch. Mobile versions (iOS/Android) do not exist for this title. Follow the steps for your platform to ensure a smooth installation.
---
System Requirements
PC (Steam / Microsoft Store)
| Component | Minimum | Recommended |
|---|---|---|
| OS | Windows 7 64-bit SP1 or Windows 10 64-bit | Windows 10 64-bit (version 2004 or later) |
| CPU | Intel Core i3-2100 or AMD FX-4350 | Intel Core i5-4670 or AMD Ryzen 3 1200 |
| RAM | 4 GB | 8 GB |
| GPU | NVIDIA GeForce GTX 760 (2 GB VRAM) or AMD Radeon R9 270X | NVIDIA GeForce GTX 980 (4 GB VRAM) or AMD Radeon RX 580 |
| DirectX | Version 11 | Version 11 |
| Storage | 50 GB available space | 50 GB (SSD recommended) |
| Sound | DirectX compatible sound card | DirectX compatible sound card |
PlayStation 4 / PlayStation 5 (via backward compatibility)
- Storage: 50 GB free space
- PS4 Pro / PS5: Supports higher frame rates (up to 60 FPS on PS5) but no native PS5 version.
- Storage: 50 GB free space
- Xbox Series X|S: Enhanced with faster load times and higher resolution.
- Storage: 13.8 GB (digital version); physical cart requires no download but may need additional storage for updates.
- Performance: Runs at 30 FPS, 720p handheld / 900p docked.
- PC Steam: [Steam Store - NieR:Automata](https://store.steampowered.com/app/524220/NieRAutomata/)
- PC Microsoft Store: [Microsoft Store - NieR:Automata](https://www.microsoft.com/en-us/p/nierautomata/9nblggh6f0z9) (requires Windows 10/11, supports Xbox Play Anywhere)
- PlayStation 4/5: PlayStation Store (search "NieR: Automata")
- Xbox One / Series X|S: Microsoft Store (Xbox console or web)
- Nintendo Switch: Nintendo eShop (search "NieR:Automata The End of YoRHa Edition")
- Digital Purchase:
- Physical Disc:
- Digital:
- Physical:
- Digital:
- Physical:
- Steam: Free Steam account required. No additional accounts needed.
- Microsoft Store (PC/Xbox): Microsoft account (Xbox profile) required for both purchase and cloud saves.
- PlayStation: PlayStation Network account (free or PS Plus, though PS Plus not needed for single-player).
- Nintendo Switch: Nintendo Account (free) to access eShop. Online features (if any) require Nintendo Switch Online subscription (but the game is single-player only, so not needed).
Xbox One / Xbox Series X|S
Nintendo Switch
---
Official Download Sources
Note: Physical discs/cartridges are also available for all consoles. No mobile or Epic Games Store version exists.
---
Step-by-Step Installation
PC – Steam
1. Create/Log in to Steam Account: If you don't have one, create at [store.steampowered.com](https://store.steampowered.com/).
2. Install Steam Client: Download and install the Steam desktop app from the official site.
3. Purchase the Game: Go to the NieR:Automata store page and complete the purchase.
4. Initiate Download: In your Steam Library, find the game, click "Install", choose the installation folder (ensure at least 50 GB free on an SSD for best performance), and click "Next".
5. Wait for Download: The game will download approximately 48 GB of data. A progress bar will show.
6. Launch: Once installed, click "Play".
PC – Microsoft Store
1. Microsoft Account: Sign in with a Microsoft account on Windows 10/11.
2. Open Microsoft Store: Launch the Store app from the Start menu.
3. Search and Purchase: Search for "NieR:Automata" and buy it.
4. Install: Click "Install" – it will automatically download and install to your default drive (you can change location in Settings > System > Storage).
5. Launch: After installation, you can launch from the Start menu or through the Store.
PlayStation 4/5
1. On your PS4/PS5, go to PlayStation Store.
2. Search for "NieR: Automata" and purchase it.
3. Go to Library > Purchased, find the game, and select "Download".
4. Wait for download (50 GB) and installation.
1. Insert the disc into the console.
2. The game will begin installing automatically. Follow on-screen prompts.
3. Insert disc each time you play.
Xbox One / Xbox Series X|S
1. From your Xbox dashboard, open Microsoft Store.
2. Search for the game and purchase it.
3. It will automatically download. You can monitor progress in My Games & Apps.
1. Insert the disc. The console prompts to install.
2. Follow the installation wizard.
3. Keep the disc in the drive to play.
Nintendo Switch
1. From the Home menu, open Nintendo eShop.
2. Search for "NieR:Automata The End of YoRHa Edition" and purchase.
3. The game will download (13.8 GB). Ensure enough free space (manage data in System Settings).
1. Insert the game card into your Switch.
2. The game will install automatically (may require a small update).
3. No need to keep the card inserted after the initial install? Actually, for Switch physical, the game runs from cart, but updates are stored on internal memory. You need the card to play.
---
Account Requirements
---
First Launch Setup
1. Graphic Settings (PC): On first launch, the game presents options for resolution, display mode (Fullscreen/Windowed/Borderless), and quality presets. Select based on your hardware. Important: The default resolution may be capped at 1920x1080 due to a known bug. Installing the FAR Mod (Fix Automata Resolution) is highly recommended for 4K/ultrawide support and improved performance.
2. Controller Setup: The game natively supports Xbox and PlayStation controllers (wired or Bluetooth). If using a PlayStation controller, you may need a third-party driver like DS4Windows for proper button prompts.
3. Audio & Language: Choose subtitles and voice language (English or Japanese). Note that the PC version sometimes has audio issues (cut-out); reducing audio quality in Windows sound settings may help.
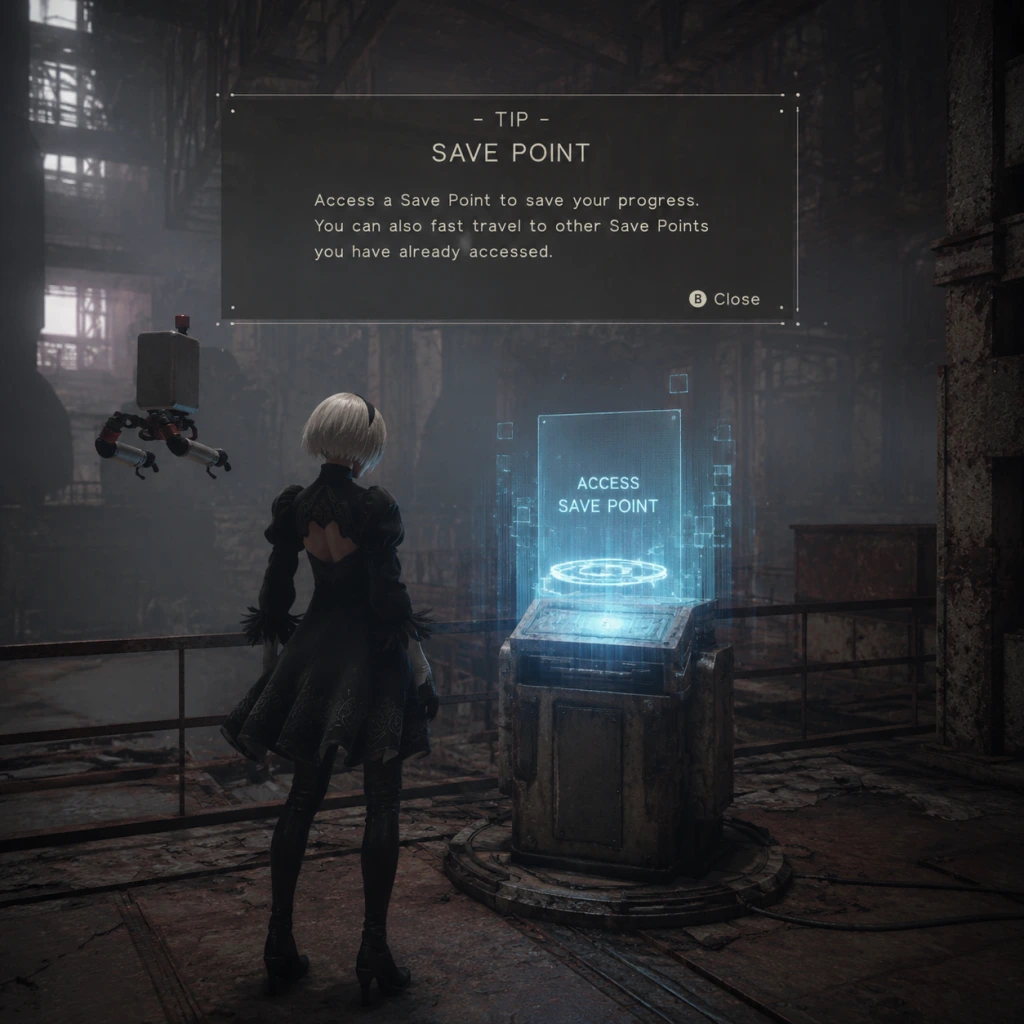
4. Saving: The game auto-saves at certain points (marked by a triangle icon). Physical save points are rare; rely on auto-save.
For all platforms: The game may have a brief intro video and title screen. Press any button to proceed.
---
Common Installation Errors and Fixes
| Error / Issue | Cause | Solution |
|---|---|---|
| PC: "d3dx9_xx.dll missing" | DirectX files not installed | Install DirectX End-User Runtimes from Microsoft. The game’s _CommonRedist folder (in installation directory) has required redistributables – run them. |
| PC: Crash on startup (white screen) | FAR mod conflicts or GPU driver issues | Update graphics drivers. If you have FAR mod, try deleting or updating it. Run the game as Administrator. |
| PC: Stuttering / low FPS | Default settings too high or FAR mod not configured | Lower graphics settings, disable anti-aliasing, install FAR mod and cap FPS to 60. |
| PC: Error 0x887A0006 (DXGI_ERROR_DEVICE_REMOVED) | GPU overclock or driver timeout | Reduce GPU overclock, increase TdrDelay in registry (risk). |
| Console: “Cannot start application” | Corrupted installation or insufficient space | Delete and re-download/install. Ensure free space > required amount. |
| Switch: Download stuck | Network issues or low storage | Cancel and restart download, free up space, switch to wired internet. |
| PlayStation: CE-30005-8 error | Hard drive issue | Rebuild database (Safe Mode) or reinstall game. |
| Xbox: Installation stopped | Network congestion or disc read issue | Pause and resume, clear local cache, restart console. |
- Always install the latest system updates (Windows, firmware, OS).
- For PC, verify integrity of game files via Steam (Properties > Local Files > Verify integrity) or Microsoft Store (Use the “Reset” option in Apps & Features).
- Reboot your device before reinstalling.
- Save Backups (PC): Manually back up your save files located in `%APPDATA%\NieRAutomata` or `Documents\My Games\NieR_Automata`.
- Cross-Platform Saves: Not supported. Each platform uses its own save system.
- DLC: The game includes the "3C3C1D119440927" DLC (colosseum battles) which is pre-installed in all versions. The Switch version also includes the "6C2P4A118680823" DLC and all prior DLC.
- Steam: [NieR:Automata Community Hub](https://steamcommunity.com/app/524220)
- Square Enix Support: [support.square-enix.com](https://support.square-enix.com)
---
Post-Installation Verification
1. Check File Size:
- PC (Steam): ~48 GB
- PC (Microsoft Store): ~48 GB
- PlayStation: ~46 GB
- Xbox: ~47 GB
- Switch: ~13.8 GB (digital)
2. Verify Launch: The game should load to the title screen without errors. If you see only a black screen, it may be a known issue – press Alt+Enter to force windowed mode, then adjust settings.
3. Test Controls: Move the character in the first area (the ruined city) to ensure all buttons work.
4. Check for Updates: On consoles, check for game updates (option in system menu). On PC, Steam auto-updates. For Microsoft Store, updates are handled by Windows Update.
5. Optional Mods (PC): The FAR Mod is essential for stability and resolution. Download from GitHub (search "NieR Automata FAR") and extract files into the game folder. Also consider the Special K mod for additional fixes.
---
Additional Tips
For further assistance, consult the official support pages:
---
This guide was last updated in October 2023. Check for patches or updates on your platform.

Game Introduction
Game Introduction for NieR: Automata
Genre: Action role-playing game (ARPG) / Hack and slash / Open world
Developer: PlatinumGames, Square Enix (development lead: Yoko Taro)
Publisher: Square Enix
Release Timeline:
- PlayStation 4: February 23, 2017 (Japan), March 7, 2017 (Worldwide)
- Microsoft Windows (Steam): March 17, 2017
- Xbox One: June 26, 2018
- Nintendo Switch (as NieR: Automata – The End of YoRHa Edition): October 6, 2022
- 2B (YoRHa No.2 Type B): A stoic combat android, skilled in melee and ranged combat.
- 9S (YoRHa No.9 Type S): A scanner android focused on hacking and intelligence gathering.
- A2 (YoRHa Type A No.2): A prototype battle android with a mysterious past.
- Pod 042 and Pod 153: Support pods that assist the androids and provide tactical commentary.
- Single-player story campaign (multiple endings, including main endings A-E)
- Side quests and exploration
- Chapter select after completion
- Secret boss fights and collectibles
- The game encourages multiple playthroughs to unlock the full narrative.
- Offline: Complete single-player experience
- Online (PS4, PC): Leaderboards for certain challenges; sending and receiving salvageable items from other players (chip system). No required online connectivity.
- 3C3C1D119440927 (also known as The Colosseum of Machines / The God of War): Adds three colosseum-style arenas, new costumes, and new boss fights. Available as paid DLC.
- Pre-order bonuses included alternate costumes and the Machine Mask accessory.
- Multiple playthroughs from different character perspectives that completely change the narrative context.
- The "bullet hell" shooting sections integrated into the third-person action.
- The ability to "hack" enemies as 9S, altering combat flow.
- The seamless transition between top-down, side-scrolling, and third-person perspectives.
- The meta-narrative and self-referential elements (e.g., the credits sequence, the "End of YoRHa" themes).
- A soundtrack that was widely acclaimed and won awards.
- The game's willingness to deconstruct typical RPG tropes and challenge player expectations.
Platforms: PlayStation 4, PC (Steam / Microsoft Store), Xbox One, Xbox Series X|S (via backward compatibility), Nintendo Switch
Story Overview:
Set in a post-apocalyptic future where extraterrestrial machines have driven humanity to flee to the Moon, the game follows androids of the YoRHa squad as they fight to reclaim Earth. The story explores themes of existence, consciousness, and what it means to be human. Players take control of 2B, a battle android, alongside 9S and A2, through multiple playthroughs that reveal deeper layers of truth.
Setting:
Earth is a desolate wasteland overrun by machine lifeforms. Ruins of cities, forests, deserts, and abandoned factories serve as battlegrounds. The narrative unfolds across several distinct regions, each with its own biomes and lore.
Main Characters:
Core Appeal:
NieR: Automata is celebrated for its deep philosophical narrative, innovative multi-perspective storytelling, fluid combat system crafted by PlatinumGames, and a hauntingly beautiful soundtrack. The game blends fast-paced action with RPG elements, bullet-hell segments, and subtle genre shifts.
Target Audience:
Fans of action RPGs, Yoko Taro's previous works (Drakengard, NieR Gestalt/Replicant), players seeking emotional storytelling, and those interested in existential themes.
Game Modes:
Online/Offline Support:
DLC/Expansion Overview:
What Makes This Game Unique:
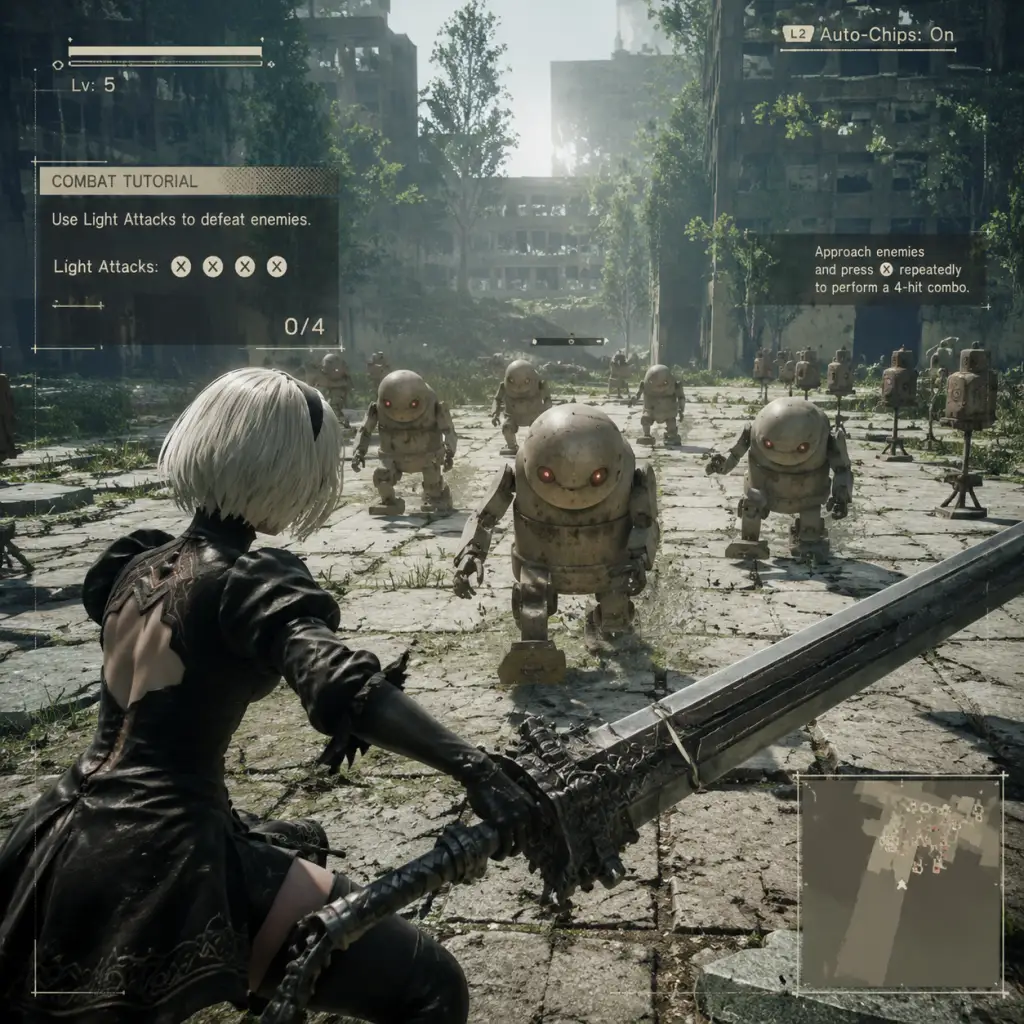
Getting Started
Getting Started Guide for NieR: Automata
This guide is designed to help brand-new players survive the first few hours, avoid common pitfalls, and get the most out of this unique action RPG. No prior knowledge of the series is required.
Before You Begin: Understanding the World and Your Role
You play as 2B, an android soldier of the YoRHa squad, fighting against machine lifeforms that have taken over Earth. The story is nonlinear and will ask you to replay sections from different perspectives – this is intentional. The prologue is long and cannot be saved, so you must complete it in one sitting. If you die during the prologue, you restart from the very beginning.
Character Creation? The “Name Input” System
There is no character customization in NieR: Automata. At the start, you are prompted to enter a name for your save file. This name is used in menus and can be anything – it does not affect gameplay or story. You will always play as 2B (and later as 9S and A2) without any visual or stat customization.
First Hour Walkthrough: Prologue and First Boss
1. Opening Cinematic: Watch the intro. You learn that Earth has been abandoned by humans.
2. Tutorial Combat: You control 2B in a hangar. Learn basic moves: light attack (square on PS4), heavy attack (triangle), jump (cross), dodge (circle). Enemies are weak – practice combos.
3. Pod Introduction: Your floating companion, Pod 042, will appear. It can shoot (R1/RB) and later be upgraded. Pod fire is weak but useful for staggering enemies.
4. Rail Shooter Segment: You get on a flight unit (mecha) and navigate a scrolling shooter section. Move with left stick, shoot with R2/RT, dodge with L1/LB. Don’t stress – this section is forgiving.
5. Boss Encounter: The first boss (a large Goliath-class machine). Use your flight unit’s missiles (R2/RT) and dodge (L1/LB) its attacks. When it grabs you, mash the circle/B button to break free.
6. Second Phase: The flight unit is destroyed. Fight the boss on foot. Dodge its stomps and lasers. Hit its legs and core. Use pod fire to chip away health.
7. Third Phase – The Screen Goes Black: You’ll face a surprise attack. Do not panic. Dodge repeatedly and counterattack. If you die, you restart the entire prologue.
8. End of Prologue: You reach a save point at the Bunker (YoRHa headquarters). Save immediately – this is your first opportunity to save.
Controls on All Platforms
| Action | PlayStation (PS4/PS5) | Xbox One/Series | PC Keyboard (Default) | PC Gamepad (Xbox layout) |
|---|---|---|---|---|
| Move | Left Stick | Left Stick | WASD | Left Stick |
| Camera | Right Stick | Right Stick | Mouse/Arrow Keys | Right Stick |
| Light Attack | Square | X | Mouse 1 | A Button (Xbox) |
| Heavy Attack | Triangle | Y | Mouse 2 | X Button |
| Jump | Cross (X) | A | Spacebar | Y Button |
| Dodge / Run | Circle (not X) | B | Left Shift | B Button |
| Pod Fire | R1 | RB | V | Right Bumper |
| Pod Program (special) | R2 | RT | Ctrl | Right Trigger |
| Lock-On | R3 (press right stick) | R3 | Middle Mouse Button | Press Right Stick |
| Use Item (Heal) | D-Pad Up | D-Pad Up | E | D-Pad Up |
| Change Weapon | D-Pad Left/Right | D-Pad Left/Right | Q/E | D-Pad Left/Right |
| Menu | Options | Menu/Start | Escape | Start |
| Map | Touchpad (tap) | View button | M | View button |
UI Overview
- Top-left corner: Health bar (white) and visible part of the chip load (below health). Damage reduces health; black bar is temporary damage that can recover via healing items.
- Pod display: Shows ammo type (pod program) and cooldown.
- Bottom-right: Mini-map with cardinal directions. White dots = friendly NPCs, red dots = enemies, yellow triangles = objective markers.
- Center of screen: Crosshair for pod aiming (appears when you hold pod fire).
- When locked on: A red reticle appears around the target.
- Item shortcut: D-Pad up to use healing items. A small icon appears when item is available.
- Quests: Active quests show in the top-right corner; main objective is gold, side quests are silver.
- Save every 10 minutes after the prologue. Multiple save slots are allowed.
- Loot everything: Break boxes and spoils for repair kits, machine parts, and crafting materials.
- Talk to all NPCs in the Resistance Camp – they give side quests and lore.
- Upgrade your Pod (Pod A) ASAP – it improves damage and unlocks homing missiles.
- Equip Auto-Heal chips if you found them (they restore health automatically over time).
- Learn to dodge – dodging gives invincibility frames (i-frames). Practice on small machines.
- Don’t sell weapons or chips until you know their value. Many are needed for upgrades.
- Don’t ignore tutorials – the game explains chip fusion, pod programs, and combo system.
- Don’t rush into the desert zone (level 20+ enemies) early – you will be outmatched.
- Don’t skip side quests labeled “?” – they unlock chips, weapons, and endings.
- Don’t try to “grind” levels – weapon upgrades and chips matter more than raw levels.
Essential Early Objectives
1. Complete the prologue (no saves).
2. Save at the Bunker (first available save point).
3. Talk to the Operator (60) to learn about missions.
4. Deploy to Earth – choose the mission “Resistance Camp” from the Bunker’s mission board.
5. Land near the Resistance Camp and explore the city ruins. Collect items (Machine Cores, small gears).
6. Speak with the Resistance Leader (Anemone) to unlock side quests.
7. Complete the side quest “Resistance Contract” (simple fetch quest for meat).
8. Upgrade your Pod at the Resistance base (pay 500 G and 1 Small Gear).
9. Buy a weapon upgrade kit (500 G) from the Resistance merchant.
What to Do First and What to Avoid
Do First:
Avoid:
Early Resource Priorities
| Resource | Priority | Use |
|---|---|---|
| Machine Cores (small, medium, large) | High | Pod upgrades, weapon upgrades |
| Small Gears | High | Pod upgrades (first 2 levels) |
| Weapon Upgrade Kits | High | Found in chests or bought – upgrade your starting weapons (Virtuous Contract and Virtuous Treaty) |
| Repair Kits (small/medium) | Medium | Health recovery during combat |
| Recovery (heal) items | Medium | Buy from Resistance merchant (500 G for 3) |
| G | High | Use to buy upgrade materials, chips, heal items |
| Chips (Plug-In Chips) | Medium | Equip stat boosters; sell duplicates after fusing |
Common Beginner Mistakes
1. Dying in the prologue and losing 30 minutes of progress – Always heal before battles, learn boss patterns, and don’t get greedy.
2. Not saving frequently – The game has no autosave. Save at every terminal.
3. Ignoring side quests – They reward unique chips, weapons, and lore. Do “The Lost Girl” early for a useful Pod program.
4. Underestimating the dodge and chip system – Chips like “Auto-Heal” and “Damage Reduction” make the game significantly easier. Fuse duplicate chips to upgrade them.
5. Selling weapons or chips – Many weapons are needed for “A” endings or later upgrades. Only sell chips if you have 2+ duplicates.
6. Trying to fight every enemy – Avoid large groups of enemies until you have better gear. The city ruins have level 5-10 machines; farm those.
7. Thinking the first ending is the end – The game has 26 endings. “Ending A” (Route A) is only about 30% of the story. Keep playing!
Day-One Checklist
Follow this step-by-step checklist for your first session (aim for 2-3 hours).
- [ ] 1. Adjust settings: Go to System → Settings → Set camera speed to fast, invert Y axis if desired, enable subtitles.
- [ ] 2. Play the prologue without dying. If you die, restart from the last checkpoint (not beginning).
- [ ] 3. Save at the Bunker (first terminal). Create at least 2 save files to avoid corruption.
- [ ] 4. Equip the default chips (Auto-Heal, Attack Up, Defense Up) – they are in your inventory.
- [ ] 5. Deploy to Earth via the mission board.
- [ ] 6. Explore the city ruins – loot every container. Collect “Machine Core x3” and “Small Gear x2” for pod upgrade.
- [ ] 7. Find the Resistance Camp near the large bridge. Talk to Anemone.
- [ ] 8. Purchase Pod upgrade (500 G, 1 Small Gear) from the Resistance merchant.
- [ ] 9. Buy a Weapon Upgrade Kit (500 G) and upgrade your “Virtuous Contract” sword once.
- [ ] 10. Complete side quest “The Lost Girl” (follow the crying girl marker) – rewards Pod Program: Mirage (useful for dodging).
- [ ] 11. Save again at the Resistance Camp terminal.
- [ ] 12. Experiment with chip fusion: Open menu → Plug-In Chips → Combine two duplicate chips to create a stronger one.
- [ ] 13. Optional but recommended: Equip a “Move Speed Up” chip for easier dodging.
- [ ] 14. End your session by saving and exiting properly (avoid power-off mid-save).
Follow this guide, and you will breeze through the first hours with confidence, avoid frustrating restarts, and properly prepare for the deeper systems that NieR: Automata offers. Good luck, and enjoy the journey through the machine-infested Earth.
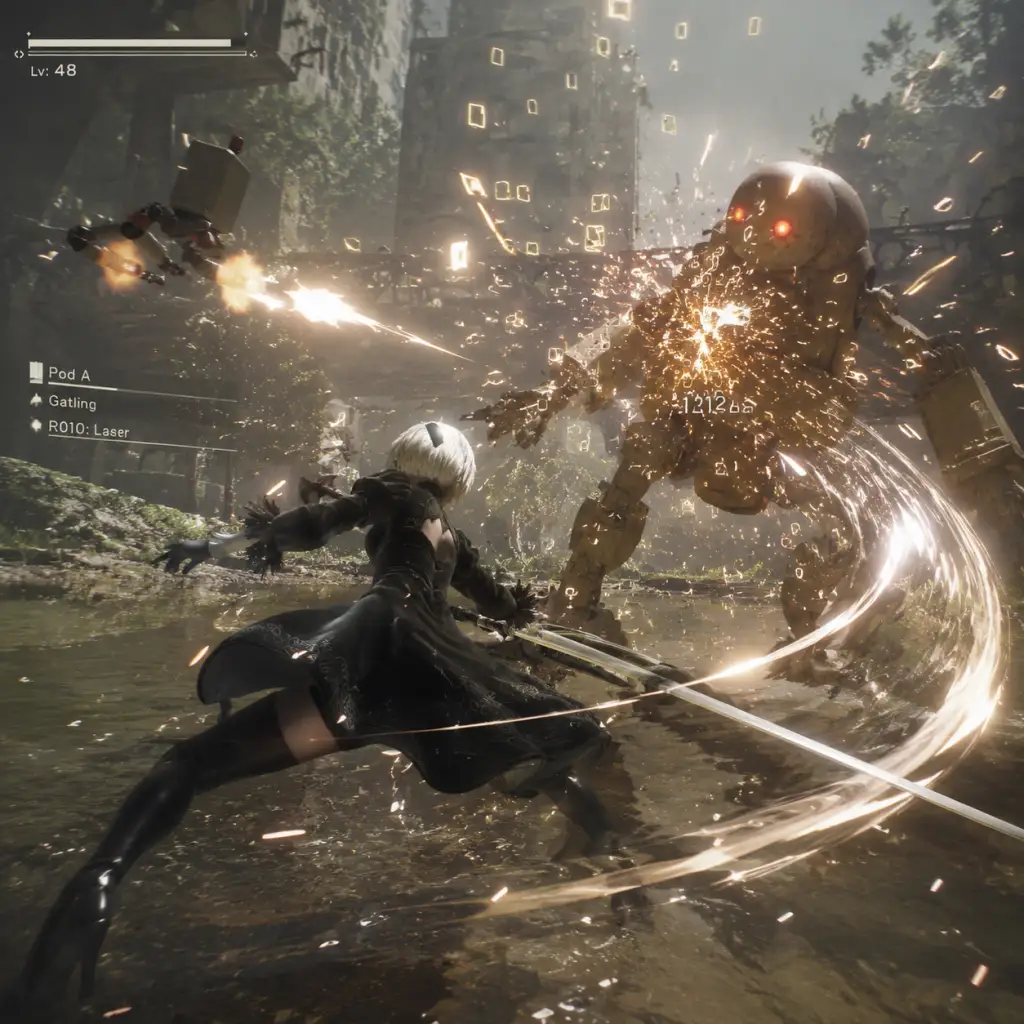
Core Gameplay
Core Gameplay Guide for NieR: Automata
This guide breaks down the core gameplay systems of NieR: Automata into four distinct progression tiers: Early Game, Mid Game, Late Game, and Endgame. Understanding how each tier changes the game’s loop will help you maximize your efficiency and enjoyment.
---
Foundation: Universal Mechanics
Before diving into tiers, here are the key systems you will use throughout the entire game:
- Main Gameplay Loop: Explore → Encounter enemies → Combat/Pod hacking → Loot/Progress story → Upgrade equipment → Repeat.
- Combat Basics: Two attack buttons (Light/Heavy), jump, dodge (with i-frames), Pod fire (hold for auto-fire), Pod programs (special attacks on cooldown), self-destruct (hold L1+R1 on PS4, limited uses per area).
- Plug-in Chips: Equippable items that modify stats and abilities (e.g., Auto-Heal, Shockwave, Movement Speed). Chips take up memory; better chips take more space or are more efficient.
- Hacking (9S only): A bullet-hell mini-game that replaces combat. Successful hacks instantly kill weaker enemies, deal big damage to strong ones, open shortcuts, disable obstacles, and loot items.
- Exploration Tools: Pod can scan for materials, enemies, and quest markers. Later you gain a Pod upgrade for breaking glowing walls.
- Leveling: XP from kills increases max HP and base stats. Chip fusion and weapon upgrades are the main form of stat progression beyond level.
- Combat: You control 2B (with 9S as follower). Use Light attack strings (square) and Heavy attacks (triangle). Dodge (R2) is your best friend; timing gives brief invincibility. Combine attacks: light-light-heavy for a launcher, then aerial combo. Pod fire (R1) deals chip damage and can be toggled to auto-fire. Pod programs (L1+R1) unlock after finding Pods in the world (Pod A, Pod B, Pod C). Recommended early programs: Mirage (decoy), Wire (grapple enemies).
- Plug-in Chips: You start with a few basic chips. Buy Auto-Heal (recover health after no damage for a few seconds) from the Resistance Camp vendor (cost: 500G). Also grab Shockwave (damages enemies near killed ones) – both are cheap and make early fights much easier. Equip chips wisely; you have limited memory. Don’t overload with +Attack or +Defense crystals; use smaller chips to free space.
- Quests: Side quests become available after finishing the first City Ruins encounter. Prioritize: “Amnesia” (gives a weapon), “The Lost Girl” (gives upgrade materials), “The Mercenary” series (early money). Main story quests scale with your level; side quests are usually underleveled but offer valuable items.
- Exploration: The world map opens after Chapter 2. Key early areas: City Ruins (main hub), Abandoned Factory (story), Desert Zone (optional). Look for glowing doors (locked, need hacking or later ladders). Do not climb ladders into flooded area until you’re around level 20. Gather Memory Alloys and Titanium Alloys from the Resistance Camp trader.
- Economy: Money is scarce early. Sell unneeded vendor trash like Animal Parts, Machine Parts (keep some for upgrades). Fishing is a reliable early money-maker: buy a fishing rod (500G) from the fishing spot in City Ruins near the fountain. Fish in the City Ruins pond for Tin Fish Small (sell for 1,500G each) – best early game income.
- Weapon Upgrades: You can upgrade weapons at the Resistance Camp blacksmith (up to level 2 with simple materials). Focus on one weapon type per character: for 2B, the Virtuous Contract (your starting sword) is excellent for the whole game. Upgrade it to level 2 as soon as you have 5 Copper Ore and 5 Silver Ore (drops from small machines in City Ruins).
- Use Pod fire to break its arms. Dodge the swipes. When it falls, unleash a light-heavy-combo then Pod program (Mirage) to distract it. Stay mobile.
- Character Growth: By now you have both 2B and 9S at similar levels. Use 9S’s hacking against medium enemies (Stubby, Medium bipeds) – it’s faster and safer. For bosses, hacking after depleting their health bar can insta-kill them, skipping phases. Level up hacking damage via the Hacking Attack chip.
- Plug-in Chips: Mid game offers higher capacity chips (8 slots per chip). Craft Movement Speed Up +2 or +3 by fusing chips from vendor (Resistance Camp sells base chips). Weapon Attack Up and Melee Defence chips become essential. Also get Anti-Chain Damage (prevents infinite stun). Start specializing: for 2B, prioritize damage; for 9S, hacking buffs and defense.
- Weapon Upgrades: Now you can upgrade weapons to level 3 (requires Pure Tungsten and Metal Batons – farmable from Amusement Park machines and desert enemies). Don’t spread resources; upgrade two weapons max. For 2B, Virtuous Contract and Type-40 Sword (found in Abandoned Factory) are top choices. For 9S, the Combat Bracers (Forest Kingdom) are strong.
- Quests: Many side quests open in midgame. Important ones: “The YoRHa Deserter” (ends in Chapter 10ish – gives a rare chip). “The Roaming Centipede” (exploration, rewards Movement Speed Up +3 chip). “The Reaper” (boss fight – gives Weapon Attack Up +3). Focus on quests that reward unique chips or weapons.
- Exploration: Unlock the Forest Castle and Flooded City areas. The Flooded City requires the Pod upgrade Scanner (found in Amusement Park secret area) to break certain walls. Explore the Desert: Underground Cave for rare materials (Pyrite, Gold Ore). Use Pod Program Wire to swing across gaps.
- Economy: Sell small fish from earlier; upgrade to bigger fish in Flooded City (use Sardines bait). Alternatively, farm Machine Cores from heavy machines in the Desert (30G each, drop rate ~20%). Endgame money is less important than chips.
- Pod Programs: Obtain Pod A (starting), Pod B (City Ruins – after leaving factory), Pod C (Forest Kingdom – after beating the boss). Each Pod learns programs from found or bought upgrade items (e.g., R010: Laser – buy from Resistance Camp for 10,000G, or find in Desert). Use R030: Blade for high burst damage.
- Phase 1: Stay at range, dodge her arm swings. Use Pod fire to build chain. Attack from behind when she’s distracted by 9S’s hacking.
- Phase 2: She fires lasers. Use dodge i-frames. After her barrage, close in for melee combo. Hacking the floating arms removes them quickly.
- Character Growth: Your level caps at 99. Use the Secret Areas (e.g., the “N2” arena in the Commercial Facility) to gain massive XP. Bring the XP Chips (from side quests) to speed up leveling. Route C gives access to A3 (unlockable character after Route C), who has unique attacks (berserk mode).
- Plug-in Chips: Now you can use +6 and +8 chips (found in high-level machines or fused). Best chip setup for 9S: Hacking Attack Up +8, Move Speed Up +8, Weapon Attack Up +8, Anti-Stun (3 slots), Auto-Use Items (late game optional). For A3: Berserk Mode Duration, Healing on Kill, Ranged Attack Up (Pod fire).
- Weapon Upgrades: Level 4 weapons require Pyrite and Pristine Screws (both farmable from Amusement Park boss and certain machines). A level 4 weapon gives +30% attack and a new combo string. For 9S, Type-40 Sword and Virtuous Contract (level 4) are top. For A3, Spear of the Usurper (found in Flooded City) is excellent.
- Quests (Route C): Only a few new quests appear: “The Wandering Couple” (tragic, gives Healing Orb chip). “The Weapon Story” (collect all weapons). Focus on main story to unlock endgame. Side quests in Route C are short and mainly reward chips.
- Exploration: Late game introduces The Tower (final dungeon). Secret areas: The Bunker (space station – accessible early, but late game you can revisit). The Amusement Park basement (secret boss). The Desert: Hollow – find the “Red” enemies for rare drops.
- Economy: By now you have 100,000G+ easily. Buy all Pod programs (L1+R1 variants) from the vending machine in Resistance Camp (cost ~30,000G total). Use money to buy upgrade materials (e.g., Pure Tungsten from the Flooded City vendor).
- Endgame Preparation: Before tackling Route C final boss, make sure you have:
- Phase 1 (Adam): Use 9S’s hacking to remove his arms as he charges. Stay mobile; his attacks have long range. After hacking, close in for melee.
- Phase 2 (Eve): She summons multiple copies. HACK the real one (the one with different color) to deal massive damage. Use Pod program R050: Spear to clear copies quickly.
- Phase 3 (Both): Alternate between hacking and melee. Keep Auto-Heal active.
- Route D/E: After finishing Route C, the game asks you to choose a moment to return to. Route D is a 9S-only chapter (similar to C but with different final boss). Route E is the secret chapter unlocked by starting a new game after Route D and refusing to give up during the credits sequence. Route E is the canonical end and unlocks Chapter Select for all routes.
- Chapter Select: Unlocked after Route E. You can replay any chapter with any character (including different routes’ chapters). This is used to complete all side quests, find all weapons, and battle optional superbosses.
- Optional Bosses (Superbosses):
- Weapon Collection: There are 40 weapons total (including the YoRHa-issue series from the Resistance Camp). Collect all to unlock the “Weapon Master” achievement and Emil’s side quest. Many weapons are found in secret rooms (use Pod scan).
- Chip Fusion: Endgame is about creating perfect chips. Fusion combines two chips of same type and level to increase level (e.g., two Weapon Attack Up +8 → Weapon Attack Up +9). Max chip level is +8 for most, but some can go to +9 (rare). Use the Chip Creator at the Resistance Camp to fuse chips. Optimal chip sets for each character:
- Economy: Money becomes irrelevant. Use workshop to sell excess chips. The only valuable commodity is Machine Cores (for fusing high-level chips) – farm in the Abandoned Factory.
- Completionist Tips:
---
Early Game (Routes A/B, Levels 1–30, Chapters 1–6)
Focus: Learning combat basics, understanding Pod mechanics, getting comfortable with exploration and quests. The game linearizes in the first few chapters before opening up.
Progression
Combat Example (Early Game Boss: Marx)
---
Mid Game (Routes A/B, Levels 30–50, Chapters 7–12)
Focus: Transition to 9S’s hacking, deeper chip customization, weapon fusion, and tackling harder optional content. The world expands to the Forest Kingdom and flooded city.
Progression
Combat Example (Mid Game Boss: Simone)
---
Late Game (Route A/B, Levels 50–70, Post-Ch. 12 / Route C)
Focus: Route C (9S exclusive chapters) and high-level optional content. The game shifts to 9S’s perspective with permadeath (once during route C) and a more linear story.
Progression
- All three Pods at level 4 (each requires a specific material: Machine Arm, Large Battery, Memory Alloy – farm from heavy machines).
- At least one weapon at level 4.
- Chips: Auto-Heal +3, Weapon Attack +8, Hacking Attack +8 (for 9S), Move Speed +3.
- Complete “The Lost World” side quest (gives an extra chip slot).
Combat Example (Late Game Boss: Adam and Eve)
---
Endgame (Post-Game / Route D/E, Level 80–99)
Focus: Completing all endings, fighting optional bosses, achieving 100% completion, and unlocking the final true ending (E).
Progression
- Emil’s Determination (secret boss in City Ruins, needs all weapons at level 4? Actually just talk to Emil after getting all weapons + beating his story quest). A massive boss that drops Emil Heads (unique plug-in chips).
- Socrates (Engels A/B variant) – found in the Flooded City after finding all three Pod upgrade items. Drops Gold Chips.
- Machines in the Commercial Facility – high-level enemies respawn that drop +8 chips.
- The Arena (Colosseum) – located in the Desert. Fight waves of enemies for rewards. Best source of +6 chips and money.
- 2B: Weapon Attack +8, Shockwave +8, Move Speed +8, Auto-Heal +3, Offensive Heal +3.
- 9S: Hacking Attack +8, Move Speed +8, Weapon Attack +8, Anti-Stun, Auto-Use Potion.
- A3: Berserk Duration +8, Ranged Attack +8, Move Speed +8, Healing +8.
- Complete “The Weapon Story” quest by speaking to Emil after collecting all weapons (he appears in City Ruins north of the commercial facility).
- Unlock all Pods (there are 3 totals – you have them by endgame) and get all Pod programs (buy them all from Resistance Camp machine).
- Beat the “Colosseum: Secret” (desert arena) to get “Machine Hacking” (hacking entry for enemies).
- For Route E, you will play a long bullet-hell shooter. Accept help from other players in the network – it makes the section much easier.
Endgame Activities Structure
| Activity | Purpose | Recommended Level | Rewards |
|---|---|---|---|
| Emil’s Determination | Superboss | 80+ | Emil Head chips (unique) |
| Colosseum (all tiers) | Arena waves | 50-99 | +6 chips, money, titles |
| Secret Machine Room (Flooded City) | Farming +8 chips | 60+ | High-level chip drops |
| Fish for Royal Fish | Money | Any | 25,000G per fish |
| Chip Fusion | Optimize build | Any | Perfect chip sets |
| All Endings | Story completion | N/A | Achievements, Chapter Select |
Summary of Progression Tiers
| Tier | Levels | Focus | Key Systems |
|---|---|---|---|
| Early | 1–30 | Learn combat, basic chips, quests | Pod fire, dodge, simple chip sets |
| Mid | 30–50 | Master hacking, weapon upgrades, chip fusion | Hacking, pod programs, weapon level 3 |
| Late | 50–70 | Route C, high-level chips, secret bosses | Pod level 4, weapon level 4, chip fusion |
| Endgame | 80–99 | Superbosses, 100% completion, perfect chips | Chapter Select, arena, chip optimization |
By following this tier-based approach, you will understand how the game evolves and what to prioritize at each stage. Enjoy your journey through NieR: Automata.
Game Tips
Game Tips for NieR: Automata
This guide compiles essential tips for every stage of NieR: Automata, from your first hour to post-game optimizations. Tips are grouped by category and marked with difficulty levels: Beginner, Intermediate, Advanced.
---
1. Combat Tips
#### Master the Perfect Dodge (Beginner)
- What: Press the dodge button (R2/RT on controller, Shift on keyboard) right before an enemy lands a hit. You'll see a blue flash and briefly slow down time.
- Why: It's the safest way to avoid damage and creates a huge window to counterattack. Almost all attacks are dodgeable, including unblockable ones.
- When: Use it against every enemy type. Practice on the first few Goliath-class machines.
- What: Pods can be assigned special abilities (e.g., Laser, Wire, Hammer, Blade). Hold L1/LB (or R1 for some versions) to activate.
- Why: Many programs stagger enemies, break shields, or clear groups. Laser is great for long-range chip damage; Wire pulls small enemies in for finishers; Hammer stuns heavy foes.
- When: Use Laser on flying enemies before they get close. Hammer on bosses to interrupt charge attacks. Wire on robots that run away.
- What: After a light attack chain, dash or dodge immediately to reset the combo and extend it.
- Why: This lets you stay aggressive without pausing. Combine with a heavy attack for a powerful finisher before the enemy recovers.
- When: Use this on staggered enemies or during the slowed time after a Perfect Dodge.
- What: Press the weapon swap button (arrow up/down or LB/L1) between attack sequences.
- Why: Different weapons have different attack speeds and ranges. A fast weapon (e.g., Small Sword) can launch enemies, then a slow heavy weapon (e.g., Great Sword) can smash them down.
- When: After a launcher (upward slash) from a small sword, swap to a large sword for the ground slam.
- What: In the early game, find and activate the access points (green glowing pillars) in each zone. They grant instant travel between discovered points.
- Why: The world is large, and backtracking on foot is tedious. Fast travel saves hours.
- Where: The City Ruins has several near the Resistance Camp and amusement park entrance.
- What: Hold R1/RB (or tap L3) to have your Pod scan the environment. It will highlight items, enemies, and quest objectives.
- Why: Many materials and hidden chests are hard to spot. The scanner also reveals breakable walls and underground passages.
- When: Always keep scanning as you enter a new area.
- What: NieR: Automata hides story fragments, memories, and side quests in seemingly empty spaces. Check behind buildings, inside pipes, and on rooftops.
- Why: These often reward rare chips, unique weapons, or lore that deepens the narrative.
- Example: In the Flooded City, climb the broken highway pillars to find a weapon and a side quest trigger.
- What: Hold jump + dash midair to get a small boost from your Pod. You can also glide by holding jump.
- Why: It lets you reach higher ledges and cross gaps without taking damage. Many optional areas are only accessible this way.
- When: Always try a Pod-assisted jump when you see a glowing ledge above.
- What: Items like “Small Gear,” “Copper Ore,” and “Machine Oil” are used for upgrading Pods and weapons.
- Why: Selling a stack of 99 may give quick cash, but you'll regret it later when you need 50 for an upgrade. Keep at least 30 of each common material.
- Tip: Check the upgrade requirements at the Resistance Camp vendor before selling.
- What: Fishing at designated spots (shown on map) can yield rare fish that sell for high G (Gil) or are used in quests.
- Why: Some fish are required for side quests (e.g., “The Great Desert Fishing Tournament”) and cannot be bought.
- Where: Best spots are the Desert: Oasis and the City Ruins: Coast.
- What: Golden machines are rare, high-level enemies that drop large amounts of G and rare chips.
- Why: They are the best source of endgame money and high-tier chips.
- Where: They spawn randomly in the Desert and Forest zones. Use a high luck build (Luck Up chips) to increase drop rate.
- What: Chips like “Melee Attack Up,” “Shockwave,” and “Auto-Heal” are extremely valuable early on.
- Why: Shockwave adds damage to every melee hit at no extra cost. Auto-Heal saves healing items. Melee Attack Up doubles your damage output.
- Where: Buy from Resistance Camp vendor or find as loot.
- What: You have limited memory (space) for chips. Some chips cost more than others.
- Why: You cannot equip everything. Focus on 2-3 categories (e.g., Offense, Defense, Utility). Swap sets for different scenarios.
- Strategy: Have a “Boss” set with more HP/Defense chips, and a “Farming” set with loot-related chips (Drop Rate Up, EXP Up).
- What: Each android has unique combat styles. Build accordingly:
- Why: These maximize each character's strengths, making fights much easier.
- What: Combine four identical +0 chips at a vendor to create a +1 version (up to +8). Each level reduces cost and increases effect.
- Why: +8 chips are incredibly efficient, freeing up memory for more abilities. This is the key to endgame god-like builds.
- How: Farm identical chips from enemies or buy in bulk from the Machine Village vendor after unlocking.
- What: Chips you've outleveled or don't use can be sold for decent G.
- Why: They accumulate quickly. But keep at least 2 of each type for future builds.
- Better: Sell low-grade chips from low-level enemies, not the ones you might fuse later.
- What: Many side quests reward large sums of G and rare items. Some repeatable quests (like “The Wandering Couple”) are profitable.
- Why: Main story gives little money. Side quests are your primary income source until late game.
- Tip: Do “The Lover's Post” and “The Runaway Son” early for 8000+ G each.
- What: After unlocking the Colosseum in the Forest Kingdom, you can fight waves of enemies for rewards.
- Why: High-level Colosseum matches give 20,000+ G per run and rare weapon upgrade materials.
- When: Best done around level 40+ with a strong chip set.
- What: Main story chapters often lock you out of zones or advance time. Side quests can expire.
- Why: Many quests have unique story implications and unlock permanent upgrades (e.g., Pod B, additional combat maneuvers).
- Rule: Whenever you get a main objective that says “Proceed to…” finish all available side quests in that region first.
- What: Some quests are only available during specific chapters. For example, “The Wandering Swordsman” is only in Route A.
- Why: Missing them means you lose unique weapons or lore.
- How: Use a quest checklist or talk to all NPCs after story events.
- What: NieR: Automata has a manual save system (access points). Keep at least 3 save slots rotated.
- Why: Some decisions lock you out of content. If you accidentally trigger a point of no return, reload a backup save.
- When: Before every major story boss or chapter transition.
- What: The game requires multiple playthroughs (Routes A, B, C, D, E). After Route A, start a new game as 9S (Route B) – don't delete saves.
- Why: Ending E is the true ending and gives closure. Route C/D choices change which ending you get first.
- Tip: After Route B, chapter select becomes available – use it to replay key moments for differing endings.
- What: Equip EXP Up chips and kill high-level enemies in the Desert / Amusement Park.
- Why: Higher level increases chip memory and damage scaling. Level 99 is the cap.
- Method: Use the Colosseum’s “Kill x enemies” challenges for fast EXP.
- What: 9S hacking minigame can one-shot most enemies if timed right.
- Why: Hacking ignores enemy defenses and deals massive damage. It's also required for some puzzles and optional bosses.
- When: Use hacking on stunned enemies or from a distance with the Pod. Upgrade Hacking Attack chips.
- What: This chip heals you for a percentage of damage dealt on kills.
- Why: With a high-damage build, you can become nearly immortal in mob fights. Combine with low HP chips for extra attack.
- Character: Best on A2 with her Charge Attack.
- Desert: Upper level machines drop Drop Rate Up +6 chips.
- Forest Castle: Knights and centaurs drop Melee Attack Up +8 chips.
- Flooded City: Large mermaids drop Shockwave +5 chips.
- What: In the item menu, you can mark certain items as “favorites” so they don't get sold accidentally.
- Why: Prevents loss of rare upgrade materials.
- How: Highlight an item and press square/X to mark.
- What: The game's philosophical themes and emotional weight can be draining. Side activities like fishing, exploring, or listening to music at the camp can reset your mood.
- Why: NieR: Automata is designed to make you reflect. Rushing through may miss the point.
- What: The 3C3C1D119440927 DLC adds three colosseum battles that reward exclusive costumes and chips.
- Why: Costumes change appearance, and chips like “Taunt” can be fun for challenge runs.
- Tip: Tackle these at level 70+.
#### Use Pod Programs Liberally (Intermediate)
#### Weapon Combo Canceling (Advanced)
#### Switch Weapons Mid-Combo (Intermediate)
---
2. Exploration Tips
#### Unlock Fast Travel ASAP (Beginner)
#### Scan with the Pod (Beginner)
#### Explore Every Corner for Lore (Intermediate)
#### Use the Pod Jump / Glide (Intermediate)
---
3. Resource Management Tips
#### Don't Sell All Your Components (Beginner)
#### Fish for Rare Items (Intermediate)
#### Farming Golden Machines (Advanced)
---
4. Build Customization Tips
#### Prioritize Your First Plug-in Chips (Beginner)
#### Balance Your Chip Memory (Intermediate)
#### Use Dedicated Chip Builds for 9S, A2, and 2B (Advanced)
- 2B: Heavy melee focus – equip Melee Attack Up, Shockwave, and increased combo length chips.
- 9S: Hacking focus – equip Hacking Attack Up, Decrease Hack Time, and Virus Resistance.
- A2: Berserker – use Offensive Heal (heals on kill), Charge Attack Up, and low HP bonuses.
#### Overclocking Chips (Advanced)
---
5. Economy & Money Tips
#### Sell Unneeded Plug-in Chips (Beginner)
#### Complete Side Quests for Wealth (Intermediate)
#### Grind the Colosseum (Advanced)
---
6. Side Quests & Story Tips
#### Do Side Quests Before Major Main Missions (Beginner)
#### Pay Attention to Missable Quests (Intermediate)
#### Save Frequently and Use Multiple Slots (Intermediate)
---
7. Advanced & Endgame Tips
#### Unlock All Endings for Full Story (Important!)
#### Maximize Experience Gain (Intermediate)
#### Master Hacking as 9S (Advanced)
#### Utilize the “Offensive Heal” Chip (Advanced)
#### Endgame Chip Farming Locations (Advanced)
Use these spots to build perfect gear.
---
8. Miscellaneous Power Tips
#### Use the Item Bookmark (Beginner)
#### Take Breaks from Combat (Intermediate)
#### Customize Your Equipment with DLC (Optional)
---
Remember: Glory to Mankind, and enjoy one of the most profound gaming experiences ever created.
Game Settings
Game Settings Guide for NieR: Automata
This guide covers all configurable options in NieR: Automata across PC and console platforms. Settings are grouped by category: Graphics, Audio, Controls, Accessibility, Language, Network, and Gameplay. Where applicable, recommendations are provided for different hardware tiers (Low, Mid, High, Ultra) and attention points highlight common misconfigurations.
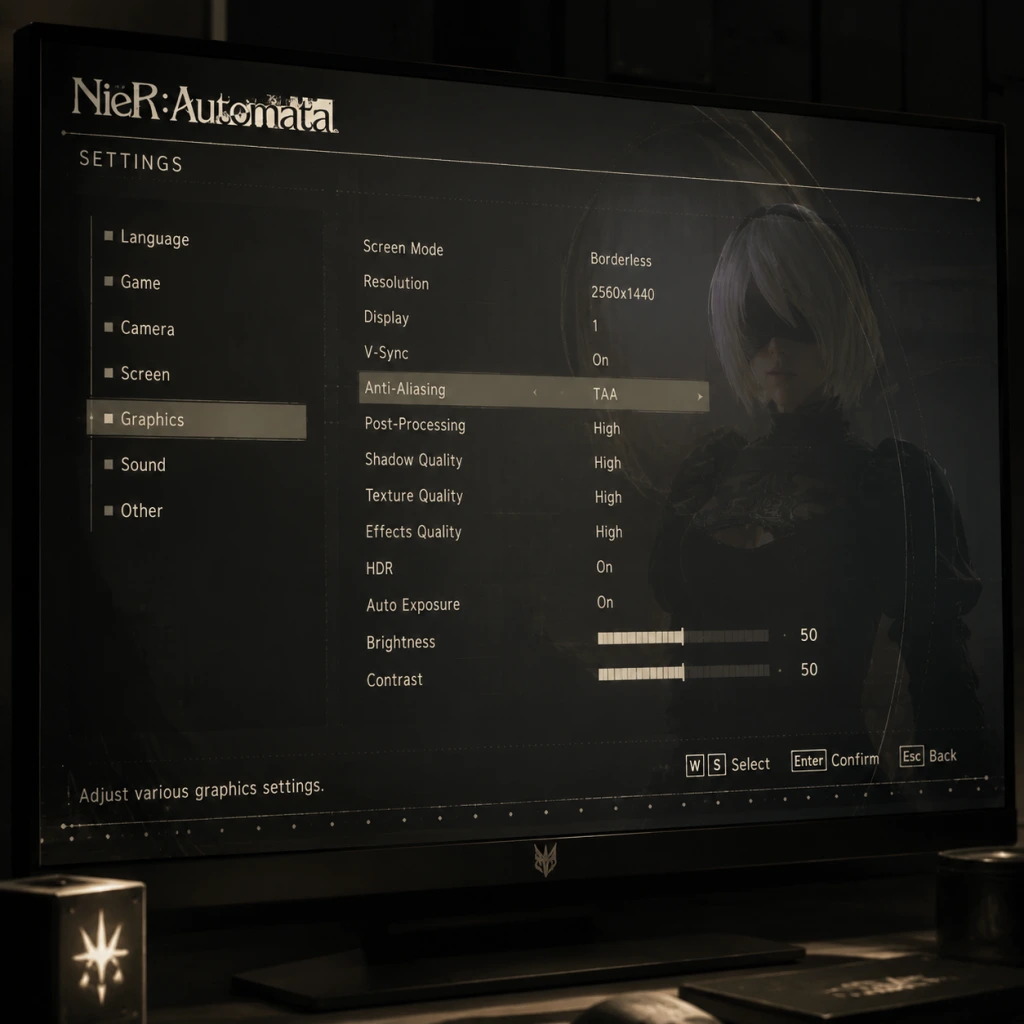
1. Graphics Settings
Available in the Options → Graphics menu. PC version offers more granular options; console versions have fewer but include performance/quality presets on PS4 Pro, Xbox One X, and newer consoles via backward compatibility.
| Setting | Description | Recommended Value | Notes |
|---|---|---|---|
| Resolution | Display resolution. PC only (console uses fixed output). | Native monitor resolution (e.g., 1920×1080 for 1080p). | On PC, do not use a resolution higher than your monitor’s native unless you want supersampling (performance cost). |
| Display Mode | Fullscreen, Borderless Windowed, Windowed. PC only. | Borderless Windowed improves Alt+Tab stability and reduces input lag in some cases. Fullscreen can be fine if you don’t alt-tab. Avoid Windowed mode (lower performance). | Many PC players report that Borderless Windowed is more stable than exclusive Fullscreen for this game. |
| Anti-Aliasing | Post-process FXAA only (no MSAA). | On – reduces jagged edges. No quality levels. | Toggle only. FXAA blurs slightly; if you prefer no blur, turn off and rely on high resolution. |
| Ambient Occlusion | SSAO (Screen Space Ambient Occlusion). | On – adds depth and realism. Performance impact is moderate. Turn off on very low-end hardware. | |
| Texture Quality | Two options: Standard or High. | High if VRAM ≥ 2 GB (PC) or on PS4 Pro/Xbox One X. Standard on base consoles or low-end PC. | High-quality textures use significantly more VRAM. On PC with 1 GB VRAM, stick to Standard to avoid stuttering. |
| Shadow Quality | Low, Medium, High. | High on high-end PC, Medium on mid-range, Low on low-end. On consoles, usually fixed to Medium. | High shadows have longer draw distance and softer edges. Performance hit is noticeable on weak CPUs. |
| Effects Quality | Controls particle effects, bloom, and post-processing. | High recommended on capable hardware; Low reduces visual clutter but may make some attacks harder to see. | Low effects can improve FPS significantly on older GPUs. |
| Anisotropic Filtering | 2x, 4x, 8x, 16x. | 16x – negligible performance cost on modern GPUs; improves ground texture clarity. | Set to 16x always; even low-end PCs handle it well. |
| V-Sync | On/Off. | Off if you have G-Sync/FreeSync, otherwise On to prevent screen tearing. Turning off V-Sync can increase input responsiveness. | On PC, disabling V-Sync may cause physics glitches if frame rate exceeds 60 FPS (game engine ties physics to 60 FPS). Do not uncap FPS above 60 without a mod (FAR) that decouples physics. |
| Frame Rate Cap | 30/60/Uncapped (PC). | 60 FPS is the intended target. 30 for consistent framerate on weak hardware (e.g., Intel HD). Uncapped causes glitches (fast game speed, broken physics) – avoid unless using FAR mod. | Console versions are always 60 FPS (with occasional drops). On PC, use the official 60 FPS cap or a community mod like FAR. |
| HDR | Not natively supported. PC and console versions lack HDR. | N/A | If you want HDR, inject via GPU driver or use a software solution; results vary. |
| Brightness | Calibration slider. | Adjust until the test image is barely visible. | Useful to set black levels correctly on different displays. |
| Tier | Example GPU | Resolution | Graphics Settings | Expected FPS |
|---|---|---|---|---|
| Low | Intel HD 520, GT 1030, Vega 3 | 1280×720 or 1366×768 | Texture: Standard, Shadows: Low, Effects: Low, AO: Off, AA: Off, AF: 4x, Borderless Windowed, V-Sync: On, Frame Rate Cap: 30 | 30 stable |
| Mid | GTX 1060 6GB, RX 580 8GB | 1920×1080 | Texture: High, Shadows: Medium, Effects: High, AO: On, AA: On, AF: 16x, VSync: Off (if adaptive sync), Frame Rate Cap: 60 | 60 stable |
| High | RTX 2070, RX 5700 XT | 2560×1440 | All High except Shadows: High, Frame Rate Cap: 60 | 60 stable |
| Ultra | RTX 3080+, RX 6800 XT+ | 3840×2160 (4K) | All High (including Shadows: High), Frame Rate Cap: 60; consider using DSR/VSR for supersampling if performance headroom allows | 60 stable |
2. Audio Settings
Found under Options → Audio. Settings apply across all platforms.
| Setting | Description | Recommendation |
|---|---|---|
| Master Volume | Overall volume. | 100% (adjust system volume accordingly). |
| Music Volume | Background music. | 100% – the soundtrack is iconic. |
| SFX Volume | Sound effects (attacks, enemies, etc.). | 100% (reduce if too loud compared to music). |
| Voice Volume | Character voices (during dialogue, combat). | 100% (or 80% if you prefer to hear the music more). |
| Speaker Configuration | Monaural / Stereo / 5.1 Surround / 7.1 Surround. | Stereo for headphones or standard speakers. Choose surround if set up correctly. |
| Dynamic Range | Night/Standard/Dynamic. | Normal for standard listening; Night compresses loud sounds for quiet environments; Dynamic preserves wide range but may require high volume. |
| Subtitles | On/Off. | On – essential for understanding dialogue, especially if using Japanese voices. |
| Subtitle Size | Small / Medium / Large. | Medium or Large for readability if playing on a small screen or far away. |
Audio language is set separately (see Language Settings section). The game offers both English and Japanese voice tracks. Recommendations:
- Japanese voices – original performance; many fans prefer them for emotional delivery. Requires subtitles.
- English voices – well-done localization; good if you prefer not to read subtitles.
3. Controls Settings
Options → Controls on all platforms. Key binding is available only on PC; console has fixed presets.
| Setting | Description | Recommendation |
|---|---|---|
| Controller / Keyboard & Mouse | Choose input method (PC). | Controller is highly recommended – the game was designed with a controller in mind. Keyboard & mouse works but requires remapping for comfortable play. |
| Controller Layout | Type A / Type B / Type C (console and PC). | Type A is default (attack on square, dash on cross). Type B swaps attacks and dodge. Type C changes pod program button. Try each briefly during the intro segment. |
| Camera X/Y Sensitivity | Adjusts how fast the camera moves. | Start at 50%; increase to 70% if you want quicker turns in combat. |
| Camera Auto-Rotate | On/Off. | On helps keep enemies in view; Off gives more manual control. |
| Invert Y-Axis | For camera and aiming. | As per personal preference. |
| Vibration | Controller vibration intensity. | On for immersion; may drain batteries quickly. |
| Analog Stick Deadzone | Only adjustable via mods on PC. Not in vanilla settings. | N/A – if aiming feels sluggish, consider a mod or hardware fix. |
The default keyboard layout is awkward (e.g., dodge on Shift, pod program on Q). Recommended changes:
- Dodge → Right mouse button or side mouse button.
- Move → WASD (default fine).
- Camera → Mouse (default fine).
- Lock-on → Middle mouse button or mouse wheel click.
- Pod Program → Q or E (easy to reach).
- Weapon Swap → 1/2 or scroll.
- Quick Item → Tab or R.
- Subtitles and Subtitle Size (see Audio) – enable for deaf/HoH players.
- Difficulty Level (see Gameplay) – Easy mode includes automatic chips (auto-dodge, auto-use items) that can reduce motor skill demands.
- Controller Remapping (see Controls) – allows customization for physical disabilities on PC; console has layout presets only.
- Color Blindness – no specific options; rely on UI contrast and audio cues. Plug-in chips like “Enemy Sensor” show enemy direction via audio ping.
- Hearing Impaired – Always enable subtitles. The game has no visual indicators for directional dialogue; spatial audio helps.
- Motion Sickness – Turn off camera auto-rotate and lower camera sensitivity. Use a larger FOV? Unfortunately, FOV is not adjustable. Sitting farther from the screen or reducing screen brightness may help.
> Special attention: The game’s dodge window can be tight; assigning dodge to a comfortable button (mouse side button or right click) avoids hand cramp.
4. Accessibility Settings
NieR: Automata has limited dedicated accessibility options, but several settings affect accessibility:
> There is no dedicated accessibility menu. Utilize the flexibility of Difficulty and Plug-in Chips (see Gameplay Settings) to tailor the experience.
5. Language Settings
Options → Language sets menu and subtitle text language. Audio language is set separately in the same menu.
| Setting | Options | Notes |
|---|---|---|
| Text Language | English, French, Italian, German, Spanish, Japanese, etc. (Platform-dependent). | Changes all UI text and subtitles. |
| Audio Language | English or Japanese (all platforms). | Japanese voices are the original; English localization is well-acted. Can be changed anytime. |
6. Network Settings
Options → Network controls online asynchronous features.
| Setting | Description | Recommendation |
|---|---|---|
| Enable Online Features | On/Off. When on, the game sends/receives messages about player deaths, and you can view other players’ death locations on the map. Also allows retrieval of player data (e.g., “Player Data” items). | On for full experience – adds atmospheric reminders that you’re not alone. Turn Off if you want solitude or are playing offline. |
| Loot Mode | Affects how player data is displayed (positive/negative). Not a critical setting. | Default is fine. |
7. Gameplay Settings
These are found in Options → Gameplay and Options → Battle Settings (some on console).
| Setting | Description | Recommendation |
|---|---|---|
| Difficulty | Easy, Normal, Hard, Very Hard. | Normal for balanced experience. Easy if you struggle with action games or want a story-focused playthrough. Hard for a challenge (enemies deal more damage, have more health, and are more aggressive). Very Hard – enemy damage is extreme (most hits kill you). |
| Auto-Use Items | Plug-in Chip (found in game; not menu setting). Can be equipped to automatically use healing items. | Equip on Easy mode or if you want less inventory management. Not available from start. |
| Auto-Evade | Plug-in Chip – automatically dodges enemy attacks. | Equip on Easy mode to greatly reduce mechanical difficulty. |
| Lock-On | Toggle or hold. In Options → Battle Settings, set lock-on type to “Hold” or “Toggle”. | Toggle is easier for most players – press lock-on once to stay locked until you press again. |
| Camera Speed (Combat/Field) | Separate sliders for combat and field exploration. | 50% to start; increase for faster target tracking. |
| Pod Program Input | How you activate pod special attack (e.g., Pod A’s “Homing Missiles”). | Default (R1/RB) is fine. |
| Quick Item | Assign healing/item to a button. | On controller, default is D-pad up/left/right. On keyboard, assign to easy-to-reach hotkey. |
| Weapon Switch | Assign to a button. | Default well-placed (press shoulder button + face button on controller). |
| Auto-Dash | Plug-in Chip – character automatically sprints. Available later. | Equip if you dislike holding sprint. |
| Auto-Fire (Pod) | Plug-in Chip – Pod automatically shoots at enemies. Available later. | Useful for maintaining chip damage without pressing the fire button. |
| Auto-Heal | Plug-in Chip – automatically uses healing items when HP is low. | Equip for convenience, but it may waste items. |
8. Easy-to-Misconfigure Settings & Special Attention Points
- PC Frame Rate Cap (critical): Never set “Frame Rate” to “Uncapped” without using the FAR mod. The game’s physics engine runs at 60 FPS; uncapped causes double-speed gameplay, broken collision, and softlocks. Always use either 30 or 60 cap, or install FAR (Fix Automata Resolution) to safely uncap.
- PC Resolution and Display Mode: If you select Fullscreen, the game may not respect your chosen resolution (known bug). Borderless Windowed is recommended for stability. Also, setting a resolution higher than your monitor’s native may cause black borders or performance issues.
- Controller Layout: The default “Type A” has dodge on Cross (A on Xbox). This can be unintuitive for players used to Dark Souls or other action games. Experiment with Types B and C in the first safe area.
- Subtitles Off by Default: Subtitles are turned off! If you play with Japanese audio, you must enable subtitles. Even with English audio, subtitles help with ambient dialogue.
- Online Features Off by Default? Actually, they are on by default. But if you want a completely isolated experience, turn them off. Leaving them on is fine.
- Difficulty Locked During Tutorial? No, difficulty can be changed from the pause menu even during the prologue. Remember to adjust if you’re stuck.
- HDR Missing: If you have an HDR display, you cannot enable HDR within the game. You must use system-level HDR or special tools (e.g., AutoHDR on Windows 11).
- Keyboard Prompts on Console: If you’re playing on PC with a controller, the game might show keyboard prompts if you’ve pressed a keyboard key. Restart the game to fix.
- PC: Install the FAR mod for better performance, resolution options, and decoupled physics. Configure graphics as per hardware tier above. Use Borderless Windowed, V-Sync off if adaptive sync available, cap at 60 FPS. Remap keyboard controls if necessary.
- PlayStation 4/5 (backward compatible): On PS4 Pro, select “Resolution Priority” for 4K (checkerboard) or “Performance” for 1080p 60fps. On PS5, the game runs at a locked 60 FPS via backwards compatibility with no special enhancements. No settings need changing beyond control layout.
- Xbox One / Xbox Series X|S: On Xbox One X, the game runs at 4K 30 FPS (use performance mode if available for 1080p 60 FPS). Xbox Series X|S runs at 60 FPS with dynamic resolution scaling. Adjust only difficulty and controls.
- Switch (cloud version): Not officially released as of now; no settings advice.
9. Final Setup Recommendations
> Final Tip: The most crucial setting is Difficulty. Don’t feel ashamed to start on Easy; the story will still resonate. You can always increase it later. Enjoy the philosophical journey, and remember: everything has meaning.
Important Notes
Important Notes for NieR: Automata
Save Management & Irreversible Choices
- Manual Saves Only: The game does not autosave. You must manually save at access points (glowing save cubes). Remember to save frequently—especially before and after major story milestones, side quests, or boss fights. A loss of progress can be severe.
- Multiple Save Slots: Use multiple save slots. This is critical because certain choices or quest failures can lock you out of content permanently. Keep at least one backup save before any major decision point.
- Route A, B, C – One Save File? The game tracks your progress across routes via a single save file. Do not delete or overwrite your save file after finishing Route A; you must continue the same file to unlock Routes B and C. Starting a new game will reset everything.
- Irreversible Endings: NieR: Automata has 26 endings (A–Z). Some endings (Chapter Select required) are unlocked by making specific choices or completing certain conditions. The final \"true\" ending (E) requires completing Routes A, B, and C, then choosing to fight or accept help. You cannot get ending E on the first playthrough.
- Permanent Consequences for NPCs: Some side quests involve choices that permanently kill NPCs or alter their states. For example, the quest \"The Wandering Couple\" can result in one NPC dying. There is no way to reverse this outside of reloading a save.
- Chapter Select Unlock: After finishing Route C, you unlock Chapter Select. This allows you to replay any chapter from the main story, but it does not let you change past choices or redo missable side quests that are tied to a specific route or time window.
- Time-Sensitive Quests: Many side quests are only available during specific story chapters or after certain events. Once you progress the main story past a point, the quest may become permanently missable. Check a guide for a list of timed quests.
- The \"Emil's Memories\" Quests: These quests appear only after completing Route A and before starting Route B. If you neglect them, you will lose the chance to obtain Emil's weapon and the \"Mysterious\" weapon set until a later playthrough.
- Collectibles & Fishing: Certain fish, materials, and weapons are only obtainable in specific areas during certain weather conditions or times of day. Some weapons (e.g., \"Virtuous Treaty\") require completing the entire \"The Wandering Couple\" quest chain before a specific story event.
- Precious Pods (Like Weapon Pods): Pods are permanent upgrades found in specific locations. They do not despawn, but if you miss a pod in an area that becomes inaccessible, you cannot return until Chapter Select is unlocked. Example: Pod 042 is missable if you leave the introductory area without picking it up.
- Side Quests That Affect Ending: The quest \"The YoRHa Betrayers\" can influence whether you unlock Ending Y (if allowed to fail). Be aware of which quests have lore implications.
- Route B (9S Hacking): Route A is relatively easy; Route B introduces hacking segments that require precise timing and patience. Many players find the hacking difficulty a significant spike. Tip: Upgrade your hacking chips (attack power, cooldown) via the chip system. Use the “Counter” plug-in chip to reflect enemy bullets during hacking.
- Boss Fights: Early bosses like the Goliath Electricity Biped (Moscow) and the Opera Singer can be challenging. Save often before them. Recommended: Level up to at least level 10 before the first boss, and equip healing items.
- Adam & Eve Fights: The Adam fight in Route C (or Route A if you explore) is notoriously difficult due to his rapid attacks and bullet patterns. Strategy: Use pod programs like “Mirage” to stagger him, and keep distance. Use offensive chips (melee attack up, critical up).
- Endgame Areas: The Factory area (Route C) and the Tower are filled with high-level enemies. You should be at least level 50+ for the Tower. Grinding is not necessary if you use good chips and pod programs.
- Enemy Scaling: Enemies in the open world scale with your level, but areas have level caps. If you are underleveled, return to earlier areas to farm materials or experience.
- The Desert Dungeon Grind: Some guides suggest endlessly grinding in the desert for XP. This is inefficient. Instead, use the following better methods:
- Avoid Over-Leveling: You can become overleveled quickly, which makes the game trivial and boring. The game does not scale enemies beyond area caps. If you find enemies too easy, consider removing level-up chips or avoid grinding.
- Material Grinding: Some materials (e.g., Pariedosa Shell, Gold Ore) have low drop rates. Do not waste hours farming them individually. Instead, complete side quests that reward them, or use the “Item Drop Rate Up” chips and “The Divine’s Secret Parlor” shop that sells rare materials.
- Chip Fusion Wasting: Fusing chips incorrectly can waste valuable chips. Do not fuse chips of different ranks (e.g., rank 3 with rank 1) unless you are sure the result will be worth it. Use the “Chip Fusion Calculator” online to optimize.
- No Multiplayer: NieR: Automata is a single-player game. There is no PvP or co-op. Online features are limited to leaderboards for the Colosseum arenas and the ability to send/receive in-game messages (like in Dark Souls).
- Colosseum Leaderboards: The Colosseum challenges (in the City Ruins) have online leaderboards. These are populated by players from all platforms. There is no anti-cheat or matchmaking; leaderboards are primarily for bragging rights.
- In-Game Messages: You can leave and view messages from other players at specific locations. These messages can contain hints, jokes, or spoilers. Warning: Some messages may spoil story twists or hidden items. Disable online messages (in Settings -> Network Settings) if you want a spoiler-free experience.
- No Anti-Cheat on PC: The PC version (Steam/Microsoft Store) has no built-in anti-cheat. Using mods or trainers will not get you banned, but they can corrupt your save file or cause crashes. Use mods like FAR (Fix Automata Resolution) to improve performance without cheats.
- No Anti-Cheat Software: The game does not use any anti-cheat programs like EasyAntiCheat or Denuvo (except for Digital Rights Management, which is separate). You can use memory trainers without fear of bans, but beware of save corruption.
- Modding Risks: Popular mods (like the “NieR: Automata - Enhanced Edition” mod) are safe if installed correctly. However, mods that alter core files (e.g., replacing .cpk archives) can break the game after updates. Always back up your game files before modding.
- Cheat Engine Usage: If you use Cheat Engine for infinite health or items, the game may crash during cutscenes or during chip fusion. Use only for single-player purposes and avoid overwriting save files while cheating.
- Online Leaderboards & Cheating: If you use cheats and then participate in the Colosseum leaderboards, your scores will be recorded. There is no automated detection, but fair play is encouraged. Bragging about cheated scores is not acceptable in the community.
- Skipping Side Quests: Many players skip side quests only to later realize they needed the rewards (weapons, chips, lore) for the true ending. Do not ignore side quests, especially those marked with a red exclamation mark – they are often important.
- Not Using Pod Programs: Pod programs are powerful abilities (like laser, hammer, etc.) that can trivialize fights. Many players forget to equip them. Always keep at least one offensive pod program equipped.
- Neglecting Chip Management: Chips are the core of your build. Storing unnecessary chips in the expansion slot (only 128 chips max) is wasteful. Regularly sell or fuse low-rank chips.
- Saving Over the Wrong Slot: With no autosave, it's easy to accidentally overwrite your progress. Double-check the save slot before confirming.
- Not Understanding the 9S Hacking Minigame: Many players hate Route B because of the hacking. Practice the hacking minigame in the early areas (e.g., at the Bunker). You can also skip some hacking sequences by using the "Chiptune" chip that increases hacking speed.
- Missing the “Flower” Weapon: The “Flower” weapon (for 2B) is missable if you do not collect all “Memory Cores” in the Abandoned Factory before a certain story event. Check a guide for locations.
- Permanent Death of NPCs: If you kill certain NPCs (like the machine lifeforms in the desert), you may lock yourself out of quests or endings. Be cautious when attacking non-hostile characters.
- Save Before Final Bosses: The final bosses of each route (especially Route C’s final boss) are unskippable and can last 10-20 minutes. If you die, you must restart from your last save. Save just outside the boss arena.
- Ending E Requires Internet (Optional): To unlock Ending E, you must accept help from other players during the credits sequence. This does not require an internet connection, but if you are offline, you will face a very difficult solo challenge. If online, other players' data will assist you. It is recommended to be online for this.
- No New Game+ in Traditional Sense: After Credit Roll, you return to the Chapter Select menu. You cannot start a New Game+ with your levels and items (but you keep chips and weapons). To experience the story again fresh, you must manually delete your save file (which is also needed for Ending E’s choice).
- Achievement/Trophy Spoilers: Some achievements (e.g., “Ending E”) are story-related. Avoid looking up achievement lists if you want to avoid spoilers.
- Performance on PC: The PC version has known issues: frame rate drops in certain areas, resolution scaling problems, and the infamous “borderless fullscreen bug.” Install the FAR (Fix Automata Resolution) mod to fix most issues. Without it, you may experience stuttering or crashes.
Missable Content & Side Quests
Difficulty Spikes & Recommended Strategies
Grinding Traps & Efficient Leveling
- Route B – The PSO2 Mini-Game: In Route B, you can play the PS2-style minigame “The Flying Turret” at the resistance camp. It gives XP and chips for no risk.
- Route C – The Amusement Park: The enemies here (especially the golden robots) drop high XP and have predictable patterns.
- The “Machine Girl” Farming Spot: In the Forest Kingdom, near the entrance, there are respawning enemies that drop many chips. Use “Drop Rate Up” chips.
Networking & Online Features
Anti-Cheat Notes (PC)
Common Pitfalls & Regrets
Final Warnings
This guide reflects common experiences from the community. Always listen to your own enjoyment – if something is too frustrating, take a break or lower the difficulty. Remember: \"To fight is to die.\" (From the game's lore.)
All Game Items
All Game Items Guide for NieR: Automata
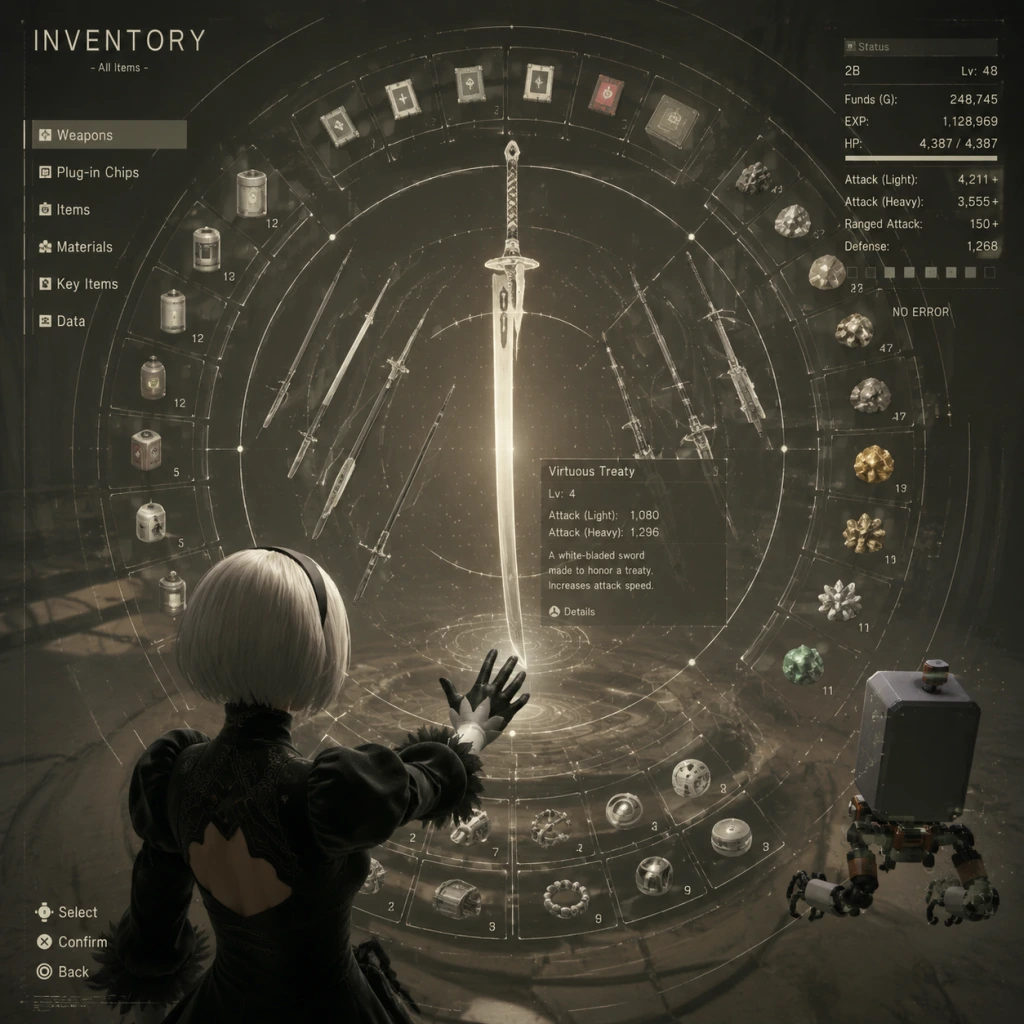
This guide categorizes every significant item in NieR: Automata, including weapons, Pods, Pod Programs, plug-in chips, consumables, currencies, key items, quest items, materials, and collectibles. Note that there is no armor equipment; defensive and utility bonuses come entirely from plug-in chips.
Weapons
NieR: Automata features four weapon types: Small Swords, Large Swords, Spears, and Combat Bracers. Each weapon can be upgraded to level 4 (max) using materials and money. Upgrading increases attack power and unlocks new weapon stories. Some weapons are exclusive to certain characters or playthroughs.
Small Swords (One-Handed)
| Weapon | Description | Location | Notes |
|---|---|---|---|
| Faith | A standard blade, balanced for beginners. | Starting weapon for 2B (Route A). | Reliable early-game choice. |
| Virtuous Contract | A sleek, high-speed sword. | Starting weapon for 9S (Route B). | Good for combo-heavy play. |
| Cruel Oath | An upgraded version of Faith. | Found in the Flooded City after completing certain side quests. | Slightly higher stats. |
| Type-40 Sword | A military-grade blade. | Purchased from the Resistance Camp vendor (requires progression). | Balanced, good all-rounder. |
| Beastlord | A brutal sword with a beast motif. | Dropped by the big machine in the Desert Zone (rare). | High critical chance. |
| Ancient Overlord | A sword from a forgotten era. | Found in the Forest Zone (hidden chest). | High attack but slow. |
| Virtuous Dignity | A pure white sword, part of the Virtuous series. | Completed side quest "The Mercenary" (Route A). | Excellent for short combos. |
| Cruel Lament | A dark sword that inflicts poison. | Obtained from a side quest in the City Ruins (Route B). | Has status effect. |
| Engine Blade | A prototype blade with high stun chance. | Purchased from the Amusement Park vendor (post-route A). | Good for staggering enemies. |
| Iron Pipe | A literal pipe. Weak but funny. | Found in the Abandoned Factory (hidden area). | Low attack but fast. |
| Demon's Cry | A cursed sword that drains HP over time but boosts damage. | Found in the Copy Factory (Route C). | Risk/reward weapon. |
| Virtuous Contract (A2) | Same as 9S's starting sword, but available for A2. | Automatically obtained when playing as A2 (Route C). | Identical stats. |
| Cruel Oath (A2) | Alternative version for A2. | Same location as original but in Route C. | Slight stat differences. |
| Kainé's Sword | A large sword in small-sword category (weapon memory). | Pre-order bonus or DLC purchase. | High damage, special design. |
| Type-3 Sword | A composite-material blade. | Found in the Forest Zone (post-game). | Good for endgame builds. |
| Machine Sword | A simple machine-made blade. | Dropped by various machines. | Can be farmed easily. |
| Phoenix Dagger | A dagger with fire effect. | Dropped by flying machines in the City Ruins. | Lightweight, fast. |
Large Swords (Two-Handed)
| Weapon | Description | Location | Notes |
|---|---|---|---|
| Virtuous Treaty | A massive white greatsword. | Starting weapon for 2B (Route A). | Slow but powerful. |
| Cruel Arrogance | A heavy dark greatsword. | Starting weapon for 9S (Route B). | High stagger. |
| Type-40 Blade | A military greatsword. | Purchased from the Resistance Camp. | Good for guard-breaking. |
| Beast's Hide | A greatsword made from machine parts. | Dropped by the huge machine in the Desert Zone. | High base damage. |
| Ancient Overlord (Large) | A giant sword from the past. | Found in the Flooded City (hidden chest). | Very heavy but packs a punch. |
| Iron Will | A sword that can't be dropped. | Completed side quest "The Lost Girl" (Route A). | Unique aesthetics. |
| Demon's Cry (Large) | A cursed greatsword. | Found in the Copy Factory (Route C). | Same HP drain effect. |
| Virtuous Contract (Large) | Large version for A2. | Automatically for A2 (Route C). | Standard large sword. |
| Machine Blade | A machine-made greatsword. | Dropped by machines. | Can be farmed. |
| Type-3 Blade | Advanced machine greatsword. | Found in the Desert Zone (post-game). | High attack. |
| Orochi | A legendary serpent-like sword. | DLC (3C3C1D119440927) or special event. | Unique moveset. |
Spears (Polearms)
| Weapon | Description | Location | Notes |
|---|---|---|---|
| Virtuous Grief | A white spear. | Starting weapon for 2B (Route A). | Good range, medium speed. |
| Cruel Serenity | A dark spear. | Starting for 9S (Route B). | Fast thrusts. |
| Type-40 Lance | Military spear. | Resistance Camp vendor. | Balanced. |
| Beast's Fang | A spear with beast motif. | Dropped by big machine in Desert. | High critical. |
| Ancient Overlord (Spear) | Ancient spear. | City Ruins hidden chest. | High attack, slow. |
| Spirit's Whisper | A spear that heals on hit (rare). | Completed side quest "The Runaway Couple" (Route A). | Unique healing effect. |
| Demon's Cry (Spear) | Cursed spear. | Copy Factory (Route C). | HP drain. |
| Machine Lance | Machine-made spear. | Dropped. | Common. |
| Type-3 Lance | Advanced spear. | Forest Zone (post-game). | Good. |
| Dragon Spear | Mythical spear. | DLC (3C3C1D119440927). | High stats. |
Combat Bracers (Fist Weapons)
| Weapon | Description | Location | Notes |
|---|---|---|---|
| Virtuous Fury | White gauntlets. | Starting for 2B (Route A). | Fast, close-range. |
| Cruel Wrath | Dark gauntlets. | Starting for 9S (Route B). | Strong combos. |
| Type-40 Fists | Military bracers. | Resistance Camp. | Balanced. |
| Beast's Paws | Beast-style bracers. | Desert machine drop. | High critical. |
| Ancient Overlord (Fists) | Ancient bracers. | Flooded City chest. | High damage, slow. |
| Angel's Embrace | Bracers that boost healing. | Side quest "The Twins" (Route A). | Unique support effect. |
| Demon's Cry (Fists) | Cursed bracers. | Copy Factory (Route C). | HP drain. |
| Machine Fists | Machine-made bracers. | Dropped. | Common. |
| Type-3 Fists | Advanced bracers. | Desert Zone (post-game). | Good. |
| Jade Bracers | Decorative bracers. | DLC (3C3C1D119440927). | High stats. |
Pods
Pods are floating companion units that provide fire support, hacking assistance, and can be upgraded. Each pod has a unique ranged attack and can be equipped with a Pod Program. You can have up to three pods active at once (one per character).
| Pod | Description | How to Obtain |
|---|---|---|
| Pod 042 | Standard pod with balanced stats. Default for 2B and 9S. | Automatically obtained at the start of the game. |
| Pod 153 | Support-oriented pod with faster fire rate. Default for 9S. | Obtained early in Route A (abandoned factory). |
| Pod B | Pod with increased attack power but slower fire rate. | Found in the Flooded City (after obtaining flight unit). |
| Pod C | Pod with homing missiles. | Found in the Forest Zone (after clearing certain enemies). |
| Pod D | Pod that fires lasers. | Found in the Desert Zone (deep in the pit). |
| Pod E | Pod with spread shot. | Found in the Copied City (Route C). |
| Pod F | Pod that fires a continuous beam. | Found in the Amusement Park (after defeating the mid-boss). |
| Pod G | Pod with long-range sniper shots. | Found in the Abandoned Factory (upper levels). |
Pod Programs
Pod Programs are special abilities that can be equipped to any pod. They consume energy and have cooldowns. Some are obtained via quests, others from chests or machines.
| Program | Effect | Location |
|---|---|---|
| Mirage | Creates decoys to draw enemy aggro. | Resistance Camp vendor (purchase). |
| Blade | Fires a quick blade projectile. | Default for Pod 042. |
| Hammer | Summons a large hammer that smashes the ground. | City Ruins (chest in underground area). |
| Spear | Throws a piercing spear. | Forest Zone (chest near castle). |
| Laser | Fires a continuous laser beam. | Desert Zone (chest near oasis). |
| Mine | Deploys floating mines. | Amusement Park (chest after roller coaster). |
| Gravity | Creates a gravitational field that pulls enemies. | Flooded City (chest on top of building). |
| Slow | Slows down enemies in an area. | Copied City (chest after boss fight). |
| Repair | Heals the pod's energy (rarely needed). | Abandoned Factory (chest). |
| Salvage | Increases item drop rate temporarily. | Side quest "Data Analysis Freak 2". |
| Gravity Well | Powerful gravity blast. | DLC (3C3C1D119440927). |
Plug-in Chips
Plug-in chips are the only form of character customization in NieR: Automata. They modify stats, add abilities, and occupy memory slots. Chips come in different grades (low, mid, high; white, blue, purple, gold) and can be fused to increase their capacity efficiency.
Chip Types
| Category | Examples | Description |
|---|---|---|
| Attack | Attack Up, Weapon Attack Up, Critical Up | Increase raw damage. |
| Defense | Defense Up, HP Up, Auto-Heal | Damage reduction and survivability. |
| Support | Move Speed Up, Evade Range Up, Shockwave | Mobility and utility. |
| System | OS Chip (required), Anti-Chain Death, Counter | Core system abilities; OS Chip is mandatory. |
| Hacking (9S) | Hacking Speed Up, Virus Resistance | Boost hacking efficiency. |
| Pods (A2) | Pod Charge Speed Up, Pod Attack Up | Enhance pod performance. |
Notable Chips
- OS Chip: Cannot be removed; without it the character dies. Always keep it equipped.
- Shockwave: Adds a ranged shockwave to melee attacks; highly recommended.
- Auto-Heal: Automatically restores health out of combat; great for exploration.
- Evade Range Up: Increases dodge distance; essential for avoiding damage.
- Anti-Chain Death: Prevents instant death combos; useful in higher difficulties.
- Counter: Automatically parries incoming attacks when timed right.
Chip Locations
Chips are dropped by enemies, found in chests, purchased from vendors, or obtained as quest rewards. Higher grade chips appear in later routes. Vendors at the Resistance Camp, Amusement Park, and Pascal's Village sell basic chips. The best chips are farmed from golden machines or high-level enemies in post-game.
Consumables
Consumable items are used from the item menu or assigned to quick slots. They include healing, revive, buff, and utility items.
| Item | Effect | How to Obtain |
|---|---|---|
| Small Recovery | Restores 20% HP. | Enemies, chests, vendor (Cheap). |
| Medium Recovery | Restores 50% HP. | Enemies, chests, vendor. |
| Large Recovery | Restores 100% HP. | Rare drop from large machines, vendor (expensive). |
| Full Recovery | Restores 100% HP and cures status effects. | Very rare: side quests, golden machines. |
| Regen Syringe | Regenerates HP over time (30 seconds). | Found in chests, purchased. |
| Stamina Berry | Increases stamina regeneration. | Gather from plants in City Ruins. |
| Attack Boost | Increases attack power by 50% for 30 seconds. | Quest reward, vendor. |
| Defense Boost | Reduces damage taken by 50% for 30 seconds. | Quest reward, vendor. |
| Speed Boost | Increases movement speed for 30 seconds. | Vendor. |
| HP Regain | Restores a small amount of HP over time; less effective than Regen Syringe. | Enemies. |
| Life Recovery | Revives a fallen partner. | Rare, purchased from Resistance Camp. |
| Anti-Virus | Cures virus infection. | Easily crafted or bought. |
| Machine Oil | Temporarily increases attack against machines. | Vendor. |
| Potion (generic) | Various temporary buffs. | Collected. |
Currencies
| Currency | Usage | How to Obtain |
|---|---|---|
| G (Gold) | Standard currency for buying items, weapons, chips, and upgrading. | Dropped by enemies, loot from chests, selling items. |
| Machine Components (materials) | Used for weapon upgrades and chip fusion. | Destroying machines; trade at vendors. |
| Fish | Can be sold for G or exchanged for rare items. | Fishing in various water bodies. |
| Old-World Coins (rare) | Used to unlock special vendor items. | Rare finds in chests or from high-level enemies. |
| Prestige Points (online) | Used in the colosseum DLC. | Participating in online colosseum battles. |
Key Items
Key items are essential for progression, quests, or unlocking content. They cannot be discarded.
| Item | Purpose | Obtained |
|---|---|---|
| Flight Unit Control Key | Activates flight units. | Early game, Resistance Camp. |
| Access Key | Opens sealed doors. | Given by Devola and Popola (Route A). |
| Memory Key (various) | Unlocks specific memory pods. | Side quests, chests. |
| Machine Core | Used to upgrade pods. | Defeating certain bosses. |
| Pod Upgrade Kit | Required to upgrade pod abilities. | Side quests, rewards. |
| Data Log (various) | Story-related collectibles. | Throughout the world. |
| Boss Key | Opens boss doors in the Abandoned Factory. | Found in factory. |
| Gold Machine Key | Activates golden machines (for farming). | Rare drop. |
| Fish Bait | Required to catch certain fish. | Bought from vendor. |
| Metal Detector | Allows finding buried items. | Side quest "The Hunt for Treasures". |
Materials
Materials are used for weapon upgrades and chip fusion. Common materials can also be sold for G.
| Material | Source | Used For |
|---|---|---|
| Machine Part (Small) | Small machines. | Basic upgrades. |
| Machine Part (Medium) | Medium machines. | Mid-tier upgrades. |
| Machine Part (Large) | Large machines / bosses. | High-tier upgrades. |
| Memory Alloy | Chests, late-game enemies. | Weapon upgrades to level 3-4. |
| Crystal | Desert Zone, golden machines. | Special upgrades. |
| Pearl | Fishing, underwater chests. | Rare upgrades. |
| Meteorite | Rare drop from large machines. | Final weapon upgrades. |
| Pyrite | Common from machines. | Chip fusion fuel. |
| Chipped Chips | Dropped by machines. | Fuse to create better chips. |
| Animal Hides | Hunting animals (boars, deer). | Selling, quests. |
| Fossil | Digging in Desert Zone. | Rare trade materials. |
Collectibles
Archives (Documents/Emails)
Scattered throughout the world, these provide lore, side stories, and sometimes lead to quests. There are 115 archives total. Some are found in chests, others dropped by enemies or given as quest rewards. Collecting all unlocks a trophy/achievement.
Fish
There are 20 fish species. Each can be caught at specific locations with specific bait. Fish can be sold or traded for rare items at the Fishing Vendor in the Amusement Park.
Pod Programs (see above)
All 10 programs (including DLC) are collectible.
Weapons (see above)
Collecting all weapons is required for a trophy.
Plug-in Chips (see above)
Complete the chip catalogue for an achievement.
Important Synergies & Upgrades
- Weapon Upgrade Path: Focus on upgrading one weapon per type to level 4 early; materials are scarce. Prioritize weapons with special effects (e.g., Spirit's Whisper for healing).
- Chip Fusion: Combine two identical chips to get a higher-capacity version. Use chips with + sign to reduce memory cost.
- Pod Programs: Combine with specific pods for synergy: e.g., Pod B (slow fire) + Hammer for heavy burst; Pod G (sniper) + Laser for precise damage.
- Attack + Shockwave: Essential combo for melee characters; makes short work of groups.
- Auto-Heal + HP Up: Great for survival in higher difficulties.
- 9S Hacking: Equip Hacking Speed Up and Virus Resistance chips to dominate machine battles.
- A2 Berserk Mode: Use Attack Up and Defense Up consumables, plus chips that boost damage at low HP, for maximum berserk efficiency.
- There is no armor equipment in NieR: Automata. All defensive benefits come from plug-in chips. Equip chips wisely based on your playstyle.
- Some items are exclusive to specific routes (A, B, C, D, E). Make sure to explore thoroughly in each playthrough.
- DLC items (like the 3C3C1D119440927 colosseum weapons) are only available after purchasing the DLC and completing the colosseum challenges.
- Save often before attempting rare item farming; drop rates can be low.
Notes
This guide covers all major item categories. For specific farming routes or optimization, refer to dedicated farming guides.
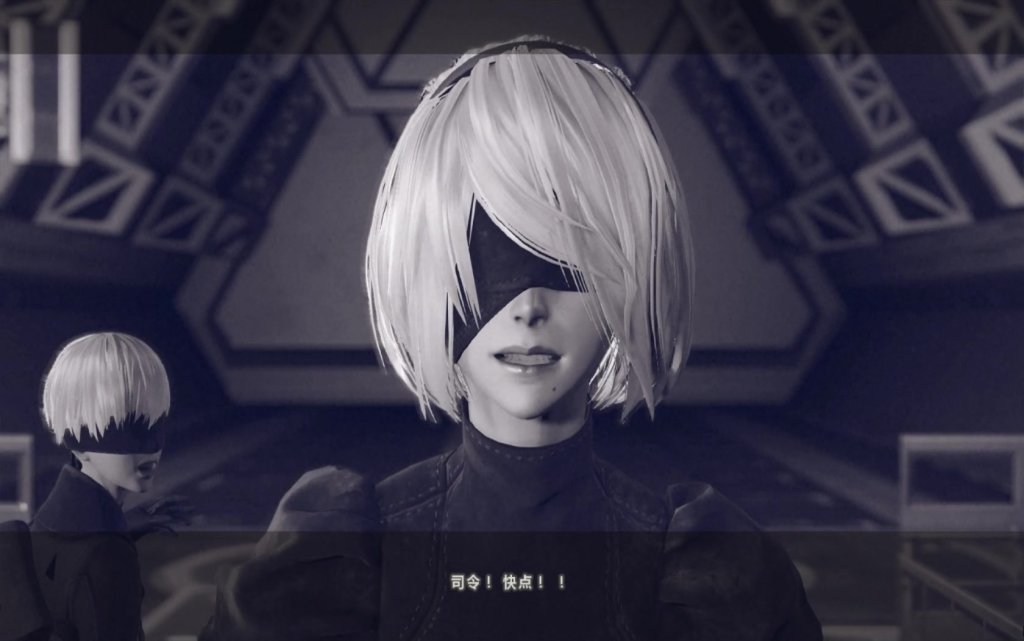
Character Skills
Character Skills Guide for NieR: Automata
This guide covers every active skill, special move, and Pod Program available to the three playable characters: 2B, 9S, and A2. Passive abilities (Plug-in Chips) are not included. All skills are described with effects, cooldowns, upgrades, combos, synergies, and use cases.
---
2B (YoRHa No.2 Type B)
2B is a balanced fighter focusing on direct melee combat. Her unique active skill is Self-Destruct.
#### Self-Destruct
- Activation: Hold L3 + R3 (or assigned button) until the Pod sequence completes.
- Effect: 2B detonates herself, dealing massive AoE damage (based on remaining HP) and destroying all enemy projectiles in range. 2B is reduced to 1 HP (if not killed outright) and is staggered for a few seconds.
- Cooldown: None, but can only be used when HP is above a threshold (cannot use if at 1 HP). The cooldown is effectively the time to heal back to safe HP.
- Upgrades: None (fixed).
- Combos: Use before a heavy attack combo to clear surrounding enemies, then follow up with a Pod Program like Wave or Volt.
- Synergies: Pairs with Auto-Heal chips to recover quickly after explosion. Also useful as a desperation move when surrounded.
- When to use: Crowded fights, boss adds, or as a last resort. Avoid using against single strong enemies because the damage is proportional to HP lost.
- Activation: Press Up on D-Pad (default).
- Effect: 2B performs a taunting gesture. No damage, but can attract enemy aggro briefly in multiplayer? (Single player still triggers enemy response animation). Mostly cosmetic.
- Cooldown: None.
- Use: Only for style or to interrupt enemy attack patterns.
- Activation: Press R1 (or assigned button) when a hacking target is highlighted.
- Effect: 9S interfaces with the target (enemy, machine, or object) and initiates a hacking minigame. The minigame involves shooting a green dot into a circle while avoiding red obstacles. Success deals massive damage, stuns, or grants control of the target. Failure causes 9S to take damage and be staggered.
- Hack Levels:
- Cooldown: None, but must be close enough to the target. Some enemies have a cooldown before they can be hacked again.
- Upgrades: Hacking damage and difficulty are tied to 9S's level and the target's level. No specific upgrades, but using higher-level chips can reduce hazard damage.
- Combos: Hacking is best used from a distance or after a dodge. Follow a successful hack with a Pod Program or melee combo to finish off stunned enemies.
- Synergies: Pair with Pod Wire to pull enemies closer before hacking. Use Slow Pod Program to make the minigame easier (slower obstacles).
- When to use:
- Risks: Hacking leaves 9S vulnerable; if interrupted, he takes damage. Avoid hacking when surrounded by aggressive enemies.
- Activation: Press R3 (default) to toggle scanner vision.
- Effect: 9S can see enemy health, weaknesses, and hidden items. Also reveals hackable objects.
- Cooldown: None (toggle).
- Use: Always have it active in new areas to spot secrets. In combat, use it to identify weak points for hacking.
- Unlock: After a certain story point, 9S can hack at range by having his Pod fly to the target.
- Effect: Same as normal hacking but from a distance. The Pod returns to 9S after hacking.
- Use: Allows hacking of flying or distant enemies without approaching.
- Activation: Hold L3 + R3 (or assigned button) until the Pod sequence completes. Requires at least 30% HP.
- Effect: A2 enters a rage state for a limited time (approx. 10 seconds). During Berserk:
- Cooldown: Once Berserk ends, it cannot be reactivated until the meter recharges (takes about 45 seconds out of combat).
- Upgrades: None (fixed). Duration and damage are static.
- Combos: Activate Berserk, then use charge attacks and Pod Programs like Wave or Volt for massive AoE. Follow with a Heavy combo finisher.
- Synergies: Use with Auto-Heal chips to offset HP drain. Best with high-damage chips to end fights quickly. Avoid in prolonged encounters.
- When to use: When facing a single strong enemy or a tightly packed group. Use as a last resort when low on health? Not recommended because of drain.
- Activation: Hold Heavy Attack button (R2 default) for a short charge, then release.
- Effect: A2 charges her current weapon and releases a powerful thrust or slam, depending on weapon type. The charge time is about 1 second. Fully charged attacks have increased range and damage (approx. 2x normal heavy attack).
- Cooldown: None, but requires a short wind-up.
- Combos: Use after a dodge for a guaranteed hit. Combine with Berserk for massive burst.
- Synergies: Use Pod Slow to freeze enemies, then charge attack for high damage.
- When to use: Against slow enemies or after knockdowns. Avoid using on fast-moving enemies without slowing them first.
- Effect: A2's dodge has a unique property – after a perfect dodge, she can immediately counter with a strong attack that has a wider hitbox than 2B's counter. The counter also grants temporary invincibility frames.
- Use: Essential for aggressive play. Chain dodges and counters to maintain pressure.
- Effect: Fires a rapid stream of bullets forward for 3 seconds. Moderate damage, good for breaking enemy shields/armor.
- Cooldown: 4 seconds (base). Reduces with Pod upgrades.
- Upgrades: Increases bullet count and damage per bullet.
- Combos: Use while jumping to hit aerial enemies. In melee combos, weave in between hits.
- Best for: General DPS, shield breaking.
- Effect: Fires a continuous laser beam for 2 seconds that pierces through enemies. High damage per second.
- Cooldown: 5 seconds (base).
- Upgrades: Faster fire rate and longer duration.
- Combos: Use after a knockdown to maximize damage. Excellent against large hitbox enemies.
- Best for: Boss fights, crowd control.
- Effect: Pod creates a shockwave cone that deals heavy damage and knocks back enemies. Has a slight area of effect.
- Cooldown: 8 seconds (base).
- Upgrades: Increased range and damage.
- Combos: Knock enemies away to create space, then follow with a charge attack.
- Best for: Defensive pushes, interrupting enemy attacks.
- Effect: Fires a projectile that creates a gravity well, pulling enemies toward its center. Enemies are briefly stunned.
- Cooldown: 6 seconds (base).
- Upgrades: Larger pull radius and longer stun duration.
- Combos: Use before a heavy area attack (e.g., Berserk slam, Blade program). Great for grouping enemies.
- Best for: Crowd control, setup for AoE.
- Effect: Fires a volley of small homing missiles that track enemies. Each missile does moderate damage. Excellent for distant or fast enemies.
- Cooldown: 7 seconds (base).
- Upgrades: More missiles and better tracking.
- Combos: Use while evading to keep up DPS. Combine with Slow to ensure hits.
- Best for: Finishing fleeing enemies, airborne targets.
- Effect: Creates a glowing shield around the character for 3 seconds that blocks incoming attacks and projectiles. Does not block all status effects.
- Cooldown: 12 seconds (base).
- Upgrades: Longer duration and larger shield area.
- Combos: Activate before charging into enemy fire or using slow recovery moves.
- Best for: Surviving heavy enemy barrages, boss laser attacks.
- Effect: Fires a wire that grabs a single enemy and pulls them toward the character. If the user is airborne, they are pulled toward the enemy instead. Stuns the enemy briefly.
- Cooldown: 5 seconds (base).
- Upgrades: Faster pull speed, longer range.
- Combos: Pull an enemy into a heavy melee combo. Can yank flying enemies down.
- Best for: Initiating combos, repositioning enemies.
- Effect: Creates 3 afterimages of the character that dash forward and attack enemies along their path. Each afterimage deals moderate damage and can hit multiple times. Afterimages disappear after a short distance.
- Cooldown: 9 seconds (base).
- Upgrades: More afterimages and higher damage.
- Combos: Use while dashing through a group for extra hits. Afterimages track slightly.
- Best for: Hit-and-run tactics, clearing corridors.
- Effect: Summons a large energy sword that slashes downward in front of the character. Deals very high damage and has a small AoE. Can be charged slightly for more damage but no charge needed.
- Cooldown: 10 seconds (base).
- Upgrades: Larger sword and extra damage.
- Combos: Use after a gravity pull for massive damage. Great as a finisher.
- Best for: High burst damage against single targets or small groups.
- Effect: Creates a bubble that slows down all enemies inside it for 5 seconds. Movement speed and attack speed are reduced by approximately 30%.
- Cooldown: 15 seconds (base).
- Upgrades: Larger bubble radius and longer slow duration.
- Combos: Use before any slow heavy attack (charge, Blade, etc.). Enables easier hacking for 9S.
- Best for: Controlling fast enemies, supporting 9S hacking.
- Effect: Creates a wide shockwave that travels forward, dealing damage to all enemies in a line. Good for clearing rows of enemies.
- Cooldown: 8 seconds (base).
- Upgrades: Wider wave and more damage.
- Combos: Use after gathering enemies with Gravity Shot. Also useful in narrow corridors.
- Best for: Crowd clearing.
- Effect: Fires a bolt of lightning that strikes a targeted area (or nearest enemy), dealing heavy damage and stunning all enemies in a small radius.
- Cooldown: 12 seconds (base).
- Upgrades: Larger AoE and longer stun.
- Combos: Stun a group, then follow with Blade or Berserk.
- Best for: Interrupting boss attacks, stunning large groups.
- Effect: Summons a large energy spear that strikes the ground, creating a delayed explosion. The explosion damages all enemies in a wide area. The spear can be aimed manually.
- Cooldown: 14 seconds (base).
- Upgrades: Faster spear drop, larger explosion.
- Combos: Use on a group that is slowed or grouped together.
- Best for: AoE damage on clustered enemies.
- Unlock: Most programs are bought from the Resistance Camp merchant (starting Chapter 2) or found as quest rewards. A few (Gravity Shot, Homing Missiles, Guard) are obtained via side quests. Check the "All Game Items" guide for specific locations.
- Upgrade: Each Pod (A, B, C) can be upgraded at the Resistance Camp mechanic. Upgrading a Pod increases the effectiveness of its programs (damage, cooldown reduction). Programs themselves cannot be individually leveled; all programs equipped to a pod benefit from the pod's upgrade level. A pod at Level 4 has the best performance.
- Active Skill: Self-Destruct as emergency.
- Pod Programs: Homing Missiles (consistent damage), Slow (setup for combos), Blade (burst).
- Playstyle: Use melee combos with occasional Pod programs. Self-Destruct only when surrounded.
- Active Skill: Hacking (primary), Scanner Mode always on.
- Pod Programs: Slow (makes hacking easier), Wire (pull enemies into hack range), Gravity Shot (group enemies for area hack).
- Playstyle: Avoid direct melee; hack from a distance. Use Pod programs to control enemy positioning.
- Active Skill: Berserk Mode, Charge Attacks.
- Pod Programs: Slow (setup for charges), Volt (stun), Blade (finisher).
- Playstyle: Activate Berserk only when you can quickly eliminate the threat. Use dodge counters liberally.
- PC (Keyboard/Mouse): Pod Program 1 is middle mouse button (default), Pod Program 2 is V. Self-Destruct/Berserk is G (hold). Hack is E. Customizable.
- PlayStation 4/5: Pod Program 1 is R2, Pod Program 2 is L2. Self-Destruct/Berserk is L3+R3. Hack is R1.
- Xbox One/Series: Pod Program 1 is RT, Pod Program 2 is LT. Self-Destruct/Berserk is LS+RS. Hack is RB.
#### 2B's Taunt
#### 2B's Dodge / Evade
While not a skill per se, 2B's dodge has a unique Perfect Dodge that triggers a slow-motion counter window. This is universal but 2B's counter attacks are standard.
---
9S (YoRHa No.9 Type S)
9S is a hacker/scanner. His primary unique ability is Hacking. He also has a Scanner Mode (passive) and can perform Remote Hacking.
#### Hacking (Active Skill)
- Basic Hack: Simple pattern, low damage.
- Virus Hack: Unlocked later, faster but with more obstacles; higher damage.
- Area Hack: Can hack multiple small enemies at once.
- Machine Control: Temporarily take over a machine enemy to fight for you.
- Against large groups: hack one to cause chain explosions.
- Against bosses: weak points can be hacked for huge damage (e.g., Simone, Engels).
- To disable dangerous attacks (e.g., stop a boss laser).
#### Scanner Mode (Passive/Active)
#### Remote Hacking (Pod Skill)
---
A2 (YoRHa Type A No.2)
A2 is an aggressive melee fighter with a unique Berserk Mode and Charge Attacks. She also has a unique Dodge Counter that differs from 2B/9S.
#### Berserk Mode
- Attack power increases by 50%.
- Movement speed increases.
- All attacks become unblockable.
- Defense is reduced by 50% (takes double damage).
- HP continuously drains (approx. 1% per second).
- Can perform a special Berserk Slam (heavy attack) during the mode.
#### Charge Attacks
#### A2's Dodge Counter (Unique)
---
Pod Programs (Common to All Characters)
Pod Programs are special skills that can be equipped to any Pod (up to 2 programs per Pod, 1 assigned to R2/L2). They have cooldowns and can be upgraded at shops. Below is the complete list, including effects and use cases.
#### R010: Machine Gun (Default for Pod A)
#### R020: Laser (Default for Pod B)
#### R030: Hammer (Default for Pod C)
#### R040: Gravity Shot
#### R050: Homing Missiles
#### R060: Guard
#### R070: Wire
#### R080: Mirage
#### R090: Blade
#### R100: Slow
#### R110: Wave
#### R120: Volt
#### R130: Spear
---
Unlock Conditions & Upgrades for Pod Programs
---
Recommended Skill Builds
#### For 2B (Main DPS)
#### For 9S (Hacker Focus)
#### For A2 (Aggressive Burst)
---
Platform-Specific Controls
---
Combat Synergies Table
| Skill Combo | Characters | Effect |
|---|---|---|
| Slow + Blade | All | Immobilize enemies then high burst |
| Gravity Shot + Wave/Volt | All | Group enemies then AoE |
| Wire + Hack (9S) | 9S only | Pull enemy close for easy hack |
| Berserk + Charge Attack (A2) | A2 only | Massive single-target damage |
| Slow + Self-Destruct (2B) | 2B | Ensure enemies are gathered before explosion |
| Homing Missiles + dodge | All | Keep DPS while evading |
| Guard + any charging skill | All | Safe setup |
This guide covers all active skills in NieR: Automata. Use the recommended builds and synergies to maximize your combat effectiveness across all three playthroughs.
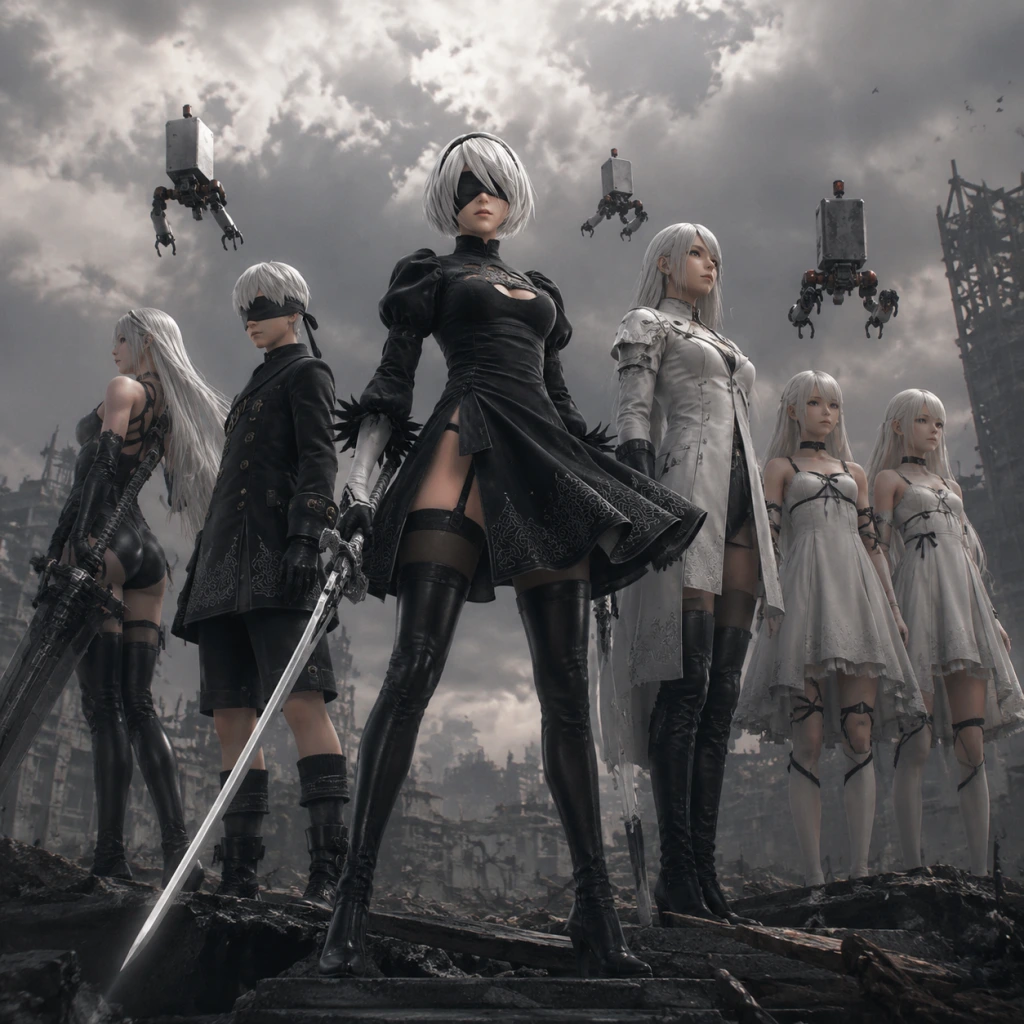
Characters & Roles
Characters & Roles Guide for NieR: Automata
This guide covers every major character in NieR: Automata, with a primary focus on the three playable androids: 2B, 9S, and A2. Each character has a unique combat role, backstory, and optimal build strategies. Additionally, we detail the most significant non-playable characters that drive the story. All information is based on the base game (no DLC-specific characters except the cosmetic ones).
Playable Characters
2B (YoRHa No.2 Type B)
Background: 2B is a high-performance YoRHa android of the "Battler" type, specialized in close-quarters combat. She is part of the elite YoRHa forces deployed to reclaim Earth from machine lifeforms. Her black outfit and blindfold-like visor are iconic. She is partnered with 9S and initially appears cold and duty-bound, but her true nature is more complex.
Strengths:
- High Melee Damage: 2B’s attacks have the highest base damage among the three main characters, especially with heavy weapons.
- Excellent Mobility: She can dash, slide, and perform aerial combos with ease. Her evade has generous invincibility frames.
- Versatile Weapon Loadout: She can equip two weapons simultaneously (one light, one heavy) and switch between them mid-combo.
- Pod Programs: She can use Pods effectively, though her strength is melee.
- No Hacking: 2B cannot hack enemies. She must rely on raw combat and Pod Programs to disable or destroy tough foes.
- Lighter Armor: Compared to A2, 2B has slightly less defense and cannot enter Berserk mode.
- Limited Ranged Options: Her ranged attacks are limited to Pod fire and throwable weapons (e.g., spears), which are less powerful than dedicated ranged builds.
- Weapons:
- Plug-in Chips:
- Pod Programs:
- Build Focus: Maximize raw melee output. Use Critical Up chips to exploit her high crit multiplier.
- Hacking Ability: 9S can hack almost any enemy, shutting them down temporarily, dealing massive damage, or even turning them into allies. Hacking is his signature mechanic.
- Versatile Weapons: He can use light swords, spears, and combat bracers (unique to him). Bracers are very fast and have short range.
- Excellent Against Groups: Hacking can instantly destroy weaker enemies and disable powerful ones, giving 9S unmatched control.
- Longer Ladder of Combos: His light weapon combos have more hits than 2B’s, allowing for extended damage.
- Fragile: 9S has lower health and defense than 2B or A2. He must rely on evasion and hacking to survive.
- Hacking Vulnerability: While hacking, 9S is stationary and vulnerable if the hacking fails or is interrupted. Some enemies have powerful counter-hacks.
- Weapon Limitations: Heavy weapons are less effective; he cannot use the largest swords or greatswords.
- Less Pod Efficiency: His Pod fire is the same as others, but his damage output without hacking is lower.
- Weapons:
- Plug-in Chips:
- Pod Programs:
- Build Focus: Maximize hacking effectiveness. Hack Up chips are essential for high-level enemies. Combine with Attack Up for hacked foes to increase damage output.
- Berserk Mode: Activating Berserk quadruples damage output but slowly drains HP. With proper chip setups (like Auto-Heal), this can be sustained for long periods.
- Highest Damage Potential: In Berserk mode, A2 deals more damage than any other character, especially with heavy weapons.
- Aggressive Dodging: Her dodge has a unique jump-back animation that can be chained into a counterattack.
- Pod Love: She has slightly better Pod synergy than 2B due to her extended combos.
- Health Burn: Berserk mode can kill A2 if not managed carefully. She requires constant healing or chip support.
- No Hacking: Like 2B, A2 cannot hack. She must brute-force enemies.
- Weapon Choices: She can use all weapons, but her heavy weapon attacks are slower than 2B’s.
- Less Mobility: Her dodge is less versatile than 2B’s slide-dodge for gap closing.
- Weapons:
- Plug-in Chips:
- Pod Programs:
- Build Focus: Keep Berserk active as long as possible with Berserk Up chips. Pair with Auto-Heal and Deadly Heal to mitigate health loss. If you can’t sustain, remove Berserk chips and play as a standard heavy melee.
Weaknesses:
Playstyle:
2B is a pure melee powerhouse. The ideal playstyle involves aggressive combos using both light and heavy weapons, weaving in Pod Programs for crowd control or elemental damage. Utilize her dodge-slide to close gaps and maintain pressure. She excels in 1v1 encounters but can handle groups with wide-swinging heavy weapons like the "Type-40 Sword" or "Beastbane."
Unlock Conditions: Available from the start of the game (Route A).
Recommended Equipment & Builds:
- Light: Virtuous Contract (starting sword) or Cruel Oath (upgraded). Both have good speed and combo potential.
- Heavy: Type-40 Sword (high stagger) or Iron Pipe (quick heavy attack). For late game, consider the "YoRHa-issue Blade" or "Emil's Head" (bizarre but powerful).
- Offense: Melee Attack Up +6, Critical Up +6, Combo Attack Up +6
- Defense: Armor +6, Shockwave +6 (ranged pressure), Auto-Use-item (for safety)
- Utility: Movement Speed Up, Evade Range Up, Collectible Auto-Loot
- Pod A (or B): Mirage (creates stationary decoys that draw aggro) or Bomb (area damage).
- Pod Program: Hammer (stun) or Blade (damage).
Team Synergy:
2B functions best as the frontline damage dealer. When paired with 9S (during Route B sequences where you switch characters), 9S can hack high-priority targets while 2B handles the mass. In Route C, where all three are available, 2B is the primary attacker; A2 can be the off-tank or berserker. 2B does not require any special synergy to shine – she simply needs a support android to keep enemies off her back.
---
9S (YoRHa No.9 Type S)
Background: 9S is a Scanner-type YoRHa android. His primary role is reconnaissance and data analysis, but he is also equipped with combat capabilities. He is curious, emotional, and forms a strong bond with 2B. His specialty is hacking – the ability to enter the machine network and destroy enemies from within.
Strengths:
Weaknesses:
Playstyle:
9S should spend most of his time hacking key enemies. Use light weapons (like "Virtuous Dignity") for quick strikes and bracers (e.g., "Angel's Folly") for fast, safe combos. His playstyle is hit-and-run: dash in, land a few hits, then hack from a distance. For groups, hack the biggest threat first. In boss fights, hacking can skip phases entirely or deal %-based damage.
Unlock Conditions: Available from the start of Route A (as partner) but not playable until Route B. After completing Route A, you start Route B as 9S.
Recommended Equipment & Builds:
- Light: Virtuous Dignity (fast, balanced) or Cruel Dignity (higher damage).
- Heavy: Spear (e.g., "Virtuous Treaty") for reach, or Bracers (e.g., "Type-3 Tactic") for speed.
- Offense: Melee Attack Up +6, Attack Up (for hacked enemies), Hack Up +6 (Reduces hacking difficulty/increases damage).
- Defense: Evade Range Up +6, Auto-Use Potion, Anti-Status chips.
- Utility: Movement Speed Up, Scan Range (for hacking targets), Collectible Auto-Loot.
- Pod A (or B): Wire (to yank enemies into hacking range) or Mirage.
- Pod Program: Blade (aerial damage) or Hammer (stun).
Team Synergy:
9S is the ultimate support and control character. When paired with 2B, he can hack targets so 2B can unleash combos safely. With A2, 9S can disable threats while A2 uses Berserk mode. In Route C, switch to 9S to hack powerful machines like the Adam/Eve bosses or the secret final boss. He also excels in farming materials via hacking.
---
A2 (YoRHa Type A No.2)
Background: A2 is a prototype YoRHa android of the Attacker type, designed for guerrilla combat. She is a survivor of the original Pearl Harbor descent mission, and her appearance is more battle-worn. She is initially hostile to 2B and 9S but later becomes a key ally. Her unique ability is Berserk Mode, which dramatically increases damage but drains her health.
Strengths:
Weaknesses:
Playstyle:
A2 is a high-risk, high-reward melee specialist. Use Berserk mode only when you have healing chips (Auto-Use Potion, Auto-Heal). Spam heavy attacks with weapons like "Type-40 Sword" or "Beastlord". Her aerial combat is also strong; use Pod Programs to keep enemies airborne. For survival, wear at least one defensive chip and always have a potion bound.
Unlock Conditions: Available from Route C (after a certain story point). You control A2 during key segments and can switch to her after unlocking the Character Select feature.
Recommended Equipment & Builds:
- Light: Virtuous Grief (good speed) or Devil’s Cry (high crit).
- Heavy: Beastlord (massive damage) or Type-40 Blade (balanced).
- Offense: Melee Attack Up +6, Critical Up +6, Berserk Up +6 (extends duration), Combo Attack Up.
- Defense: Auto-Heal +6, Armor +6, Deadly Heal (heals on kill).
- Utility: Movement Speed Up, Collectible Auto-Loot, Evade Range Up.
- Pod A (or B): Bomb (area clear) or Wave (stacking damage).
- Pod Program: Hammer (interrupt) or Blade (aerial combos).
Team Synergy:
A2 works best with a dedicated healer or support. Since there is no traditional healer in NieR: Automata, her synergy comes from having 9S disable dangerous enemies while A2 goes Berserk. In Route C, if you control both, switch to 9S to hack, then to A2 to kill. She also pairs well with the Pod Program “Mirage” to distract enemies.
---
Non-Playable Major Characters
Below is a list of important NPCs who are not directly controllable but play crucial roles in story and gameplay (e.g., quest givers, vendors, key story figures).
| Character | Role | Background & Significance |
|---|---|---|
| Commander (White) | Leader of YoRHa | The stern commander who assigns missions to 2B and 9S. She is central to the conspiracy behind YoRHa. No combat interaction. |
| Operator 21O (21O) | 9S's Operator | Provides mission briefings and occasional support. She later evolves in story. Has a small quest line. |
| Operator 42O (42O) | 2B's Operator | Offers combat data and commentary. Less story prominence than 21O. |
| Pascal | Leader of a peaceful machine village | A pacifist machine who becomes a key ally. Provides side quests, upgrades (Weapon Upgrades), and emotional weight. His village is a safe hub. |
| Adam | Male humanoid machine | The primary antagonist, a machine who craves human emotions. Boss battles in Route A and B. Not playable. |
| Eve | Adam's brother | Another machine boss, feral and protective of Adam. Appears in Route B. |
| Emil | Mysterious android | A powerful android with a tragic past (from NieR). Sells weapons and has optional boss fights. Gives the "Emil's Head" weapon. |
| Devola & Popola | Twin android sisters | They run the resistance camp. Provide quests, upgrades, and lore. Have a significant story role later. |
| Anemone | Leader of the Resistance | A veteran android who commands the Resistance camp. She offers side quests and story guidance. |
| Jackass | Resistance scientist | Obsessed with explosions and research. Provides quests for experimental weapons and chips. |
| The Red Girls | ?? | Mysterious entities that appear late game. They represent the machine network's ultimate form. |
| 211 (YoRHa Unit 211) | Unseen until post-game | A minor YoRHa unit with a specific side quest about upgrades. |
| The Machines (generic) | Enemy lifeforms | Countless varieties, from small Stubby to large Goliath-class. Each has unique weaknesses (e.g., hacking vulnerability). Not playable but essential to gameplay. |
Character Roles Summary
| Character | Primary Role | Secondary Role | Best Suited For |
|---|---|---|---|
| 2B | Melee Damage Dealer | Tank (with heavy build) | Players who prefer direct combat and combos |
| 9S | Support / Control | Stealth / Recon | Players who enjoy tactical hacking and exploration |
| A2 | Berserker / Glass Cannon | DPS | Players who want maximum damage with high risk |
Final Tips
- Switching Characters: In Route C and beyond, you can switch between 2B, 9S, and A2 at any save point. Use this to tackle specific challenges: switch to 9S for hacking puzzles, to 2B for tough bosses, or to A2 for speedrunning areas.
- Leveling Synergy: Your characters share experience? No, each levels individually. But you can farm easily with one high-level character and then level others via side quests.
- Build Versatility: Experiment with different weapon combinations and chips. Each character can be customized to fill almost any role, but their inherent strengths shine best with focused builds.
This concludes the comprehensive Characters & Roles guide for NieR: Automata. Use this information to master every android and survive the machine war.

Cheats & Secrets
Cheats & Secrets Guide for NieR: Automata
NieR: Automata does not contain traditional cheat codes (e.g., invincibility, level skip, item spawning) commonly found in other games. However, it is packed with developer-intended secrets, hidden content, Easter eggs, and gameplay exploits that can feel like cheats. This guide covers everything from alternate endings and secret bosses to exploitable mechanics and deep-cut references.
---
1. Hidden Endings & Secrets
#### The 26 Endings (A–Z)
The game features 26 distinct endings, labeled A through Z. Only endings A–E are story-critical. The rest are joke/game-over endings triggered by specific actions during the campaign. To see them all, you must deliberately fail or act unexpectedly:
| Letter | How to Unlock |
|---|---|
| F | Let the bridge collapse on 2B during the prologue (refuse to move). |
| G | Fail the hacking sequence in the Abandoned Factory (or let 9S die during hacking tutorial). |
| H | Refuse to complete the side quest "The Wandering Couple" by abandoning it. |
| K | Repeatedly pick up and drop the same fish in front of the fishing pond vendor. |
| L | Eat a Mackerel from your inventory at the beginning of Route B (9S will mime eating). |
| M | Let 9S die from the boss fight against the Book of Prophecy (ignore the prompts). |
| N | Fall into the pit in the Flooded City during the side quest "The Flooded City Rescue." |
| O | Repeatedly fail the escape sequence in the Bunker (when it explodes). |
| P | Defeat the game's final boss but don't accept the gift of knowledge (ending P). |
| Q | Die to the very first enemy in the Forest Castle (the little robot). |
| R | Attempt to leave the Amusement Park arena before defeating the boss. |
| S | Let the credits run without shooting during Ending E. |
| T | Refuse to fight in the colosseum DLC. |
| U | Die to the hidden Emil boss. |
| V | Let 9S die to the infected machine in the Bunker's server room. |
| W | Fail the escort mission in the Copied City. |
| X | Stay in the Bunker's hallway after Pod 042 gives you the flight unit. |
| Y | During the final battle with A2/9S, choose to spare your opponent repeatedly. |
| Z | Delete your save file at the end of Ending E. |
---
2. Secret Bosses & Hidden Encounters
#### Emil (The Wandering Merchant's True Form)
- Condition: Complete the side quest "The Wandering Merchant" (Emil's Memories) from Route B onward. Afterward, fast travel to the Commercial Facility (the desert area). Emil will be there as a giant head. Talk to him repeatedly until he asks for a fight.
- Reward: The Emil Heads weapon (a pair of rare blunt weapons) and the Precious Boots accessory.
- Tip: This fight is extremely tough. Bring high-level chips and the "Auto-Heal" chip.
- Condition: During Route C, after the Copied City sequence, return to the same location after the story. A massive golden robot (similar to the one from the DLC) appears.
- Reward: Large amounts of EXP and rare chips.
- Note: This is a high-level enemy (level 80+). Not required for any achievement.
- Required: Pod Program "Wire" (obtained from the desert area in Route A).
- Method: Jump, then press the Pod Program button while in the air. You can then jump again immediately. Repeat to gain altitude indefinitely.
- Use: Access hidden ledges, skip sections, or simply explore vertically. This is entirely intentional—a reward for exploration.
- Location: The flooded city has a rare gold-colored machine enemy that appears in the underground area after completing the main story. It spawns every few in-game hours.
- Method: Equip +EXP chips and farm this enemy. It yields massive experience (up to 500,000 per kill at high levels).
- Warning: The gold machine is very strong—consider using the "Auto-Heal" chip and ranged attacks.
- How to Access: There is no official debug room in the retail version. However, on PC, you can mod the game or use Cheat Engine to teleport to unused maps. This is not recommended for first-playthrough as it breaks progression.
- Console: Not possible without hacks.
- Pod Design: You can change the color and design of your Pod by purchasing the Pod Color items from the Resistance Camp's vendor (after completing certain side quests).
- 2B's Dress: The Amusement Park has a secret dress code: If you wear the Machine Mask (from the quest "Machine Mask") while talking to the NPCs, they will react differently.
- Location: The bunker's secret office (accessible after completing the game and loading your clear data). Walk into the wall near the bunker's entrance—there's a hidden corridor leading to a room with Taro's mask and a message.
- Grimoire Weiss: In the Resistance Camp, after completing the game, you can see a book that looks exactly like Weiss from the original NieR.
- The Shadowlord's Castle: The final area of the game is heavily inspired by the Shadowlord's castle from NieR Replicant.
- Kainé's Story: The side quest "The Lost Girl" and the enemy design (the red-eyed girl) are direct references to Kainé.
- Location: In the Amusement Park, find the hidden room with the glowing vending machine. Interact with it to see a message from the developers.
- During Ending E: The bullet-hell sequence is a reference to classic shooter games. If you die, you can accept help from other players (their names appear as encouragement). The music is a chiptune remix of the game's themes.
- Mechanic: You can equip multiple copies of the same plug-in chip to stack effects. For example, equipping two +30% Movement Speed chips gives +60% speed.
- Best Use: Combine with the "Auto-Heal" and "Offensive Heal" chips to become nearly invulnerable in any difficulty.
- Tip: While locked onto an enemy, certain Pod programs (like "Mirage" or "P-Shield") can be spammed faster because the target stays centered.
- Method: Equip the "Counter" chip and alternate between light attack and heavy attack while guarding. This animation cancels can keep enemies stun-locked.
- Conditions: After beating the game once, you can replay the prologue on Very Hard. This unlocks the "Level 99" trophy/achievement.
- Note: Very Hard mode is not recommended for new players—enemies can kill you in one hit.
- Secret: The paid DLC "Become as Gods" adds three colosseums. Each has a hidden boss (the three sisters) and rewards unique weapons and outfits.
- Free DLC: The 4YoRHa Edition includes the colosseums without extra purchase.
#### The Secret Boss in the Copied City
---
3. Exploit-Safe Secrets & Hidden Features
#### Infinite Jump (Pod Program Exploit)
#### Infinite EXP Farming (The Gold Machine Trick)
#### The Debug Room (Developer-Only Area)
#### Name Change / Pod Skin
---
4. Easter Eggs & References
#### Yoko Taro Cameo
#### NieR Gestalt/Replicant References
#### Square Enix Cafe Easter Egg
#### The "True Ending" Minigame
---
5. Developer-Intended "Cheats" (Gameplay Exploits)
#### Chip Stacking
#### Pod Program Locked-On
#### Infinite Combo with "Guard"
---
6. Unlockable Content
#### Extra Difficulty (Level 99)
#### Colosseum (DLC)
---
7. Conclusion
NieR: Automata rewards curiosity and perseverance. The lack of traditional cheat codes is offset by a wealth of hidden content designed to make players feel like they've discovered something special. Whether you're chasing every ending, farming the secret golden machine, or unlocking Emil's true form, the game offers plenty of secrets for the dedicated explorer. Remember: save often, and don't forget to shoot the credits during Ending E.