
No Man's Sky
## Genre **No Man's Sky** is a genre-blending experience that combines **action-adventure, survival, sandbox crafting, space simulation, and exploration** elements. It defies easy categorization, offering a unique mix of survival mechanics, base building, trading, combat (both ground and space), and...
Download & Installation
No Man's Sky Download & Installation Guide
Overview
No Man's Sky is an expansive procedurally generated space exploration game developed by Hello Games. It is available on multiple platforms: PC (Windows), PlayStation 4/5, Xbox One/Series X|S, and Nintendo Switch. There is no official mobile version. This guide covers all legitimate download sources, step-by-step installation, system requirements, first launch setup, and troubleshooting.
---
1. Platform-Specific Download Sources
PC (Windows)
- Steam: Store page at [steampowered.com](https://store.steampowered.com/app/275850/No_Mans_Sky/)
- Epic Games Store: [epicgames.com/store/en-US/p/no-mans-sky](https://store.epicgames.com/en-US/p/no-mans-sky)
- GOG.com (DRM-free version): [gog.com/game/no_mans_sky](https://www.gog.com/game/no_mans_sky)
- Microsoft Store (Xbox Play Anywhere): Included with Xbox Game Pass for PC or purchased separately.
- PlayStation Store: Purchase and download directly from the console or via the web store.
- Disc version: Insert disc, then download mandatory updates from PSN.
- Microsoft Store: Purchase or download via Xbox Game Pass.
- Disc version: Insert disc, install and update.
- Nintendo eShop: Digital purchase and download.
- Game Card: Insert cartridge, download updates.
PlayStation (PS4 / PS5)
Xbox (One / Series X|S)
Nintendo Switch
---
2. System Requirements (PC)
| Component | Minimum | Recommended |
|---|---|---|
| OS | Windows 10 64-bit | Windows 10/11 64-bit |
| CPU | Intel Core i3 | Intel Core i7 or AMD Ryzen 7 |
| RAM | 8 GB | 16 GB |
| GPU | NVIDIA GTX 1060 3GB / AMD RX 470 4GB | NVIDIA RTX 2060 / AMD RX 5700 |
| DirectX | Version 12 | Version 12 |
| Storage | 15 GB available space (SSD recommended) | 15 GB SSD |
| Network | Broadband internet (for updates/multiplayer) | Broadband internet |
| Additional | Requires a 64-bit processor and operating system | – |
---
3. Account Requirements
Before downloading, ensure you have an account for your chosen platform:
- PC (Steam): Steam account
- PC (Epic): Epic Games account
- PC (GOG): GOG account
- PC (Microsoft Store/Xbox): Microsoft account
- PlayStation: PlayStation Network (PSN) account
- Xbox: Xbox Live / Microsoft account
- Nintendo Switch: Nintendo Account
- Graphics: If performance is low, lower Shadows and Reflections first.
- Control: Keyboard & mouse or controller (Xbox/PlayStation/Switch Pro).
- VR: If using PC VR (SteamVR), ensure VR headset is connected before launch.
Optional: For cross-play and online features, you may need to link your platform account to a Hello Games account (prompted during first launch).
---
4. Step-by-Step Installation
4.1 PC – Steam
1. Launch Steam and log in to your account.
2. Go to Store and search for No Man's Sky.
3. Click Add to Cart and complete purchase.
4. Click Library → find No Man's Sky → click Install.
5. Choose installation directory (ensure 15+ GB free).
6. Click Next → wait for download and automatic installation.
7. Once done, click Play.
4.2 PC – Epic Games Store
1. Open Epic Games Launcher, log in.
2. Go to Store → search No Man's Sky → Buy or Get (if free).
3. After purchase, go to Library → click Install on No Man's Sky.
4. Select install location and options, then Install.
5. Wait for download and installation.
6. Launch from Library.
4.3 PC – GOG Galaxy
1. Install GOG Galaxy 2.0 and log in.
2. Navigate to Store → search No Man's Sky.
3. Buy and add to your library.
4. In Owned Games, click No Man's Sky → Install.
5. Choose folder → Install. (GOG version is DRM-free; you can also download offline installers from your web account.)
4.4 PC – Microsoft Store (Xbox Game Pass / Purchase)
1. Open Microsoft Store app (Windows 10/11).
2. Search No Man's Sky → click Get or Install (if you own it via Game Pass).
3. Sign in with your Microsoft account if prompted.
4. Allow download; the installer runs automatically.
5. You can also install via Xbox app (beta) from Windows Store.
6. Launch from Start menu or Xbox app.
4.5 PlayStation 4 / 5
#### Digital
1. On PS4/PS5 go to PlayStation Store.
2. Search No Man's Sky → Add to Cart → purchase.
3. Confirm purchase and start download.
4. Wait for download to finish (icon will appear under Games).
5. Select the game to launch.
#### Disc
1. Insert the disc. Installation begins automatically (PS4) or prompts to copy data (PS5).
2. Optionally, install the update from notifications once available.
3. Launch from the home screen.
4.6 Xbox One / Series X|S
#### Digital
1. Press Xbox button → Microsoft Store or Store.
2. Search No Man's Sky → Buy or Install with Game Pass.
3. Follow prompts to download.
4. Game appears in My games & apps → ready to play.
#### Disc
1. Insert disc → installation begins automatically.
2. Download required updates when prompted.
3. Launch from home.
4.7 Nintendo Switch
#### Digital
1. Open Nintendo eShop from Home menu.
2. Search No Man's Sky → Proceed to Purchase → confirm.
3. Download starts automatically; you can monitor progress from Home screen.
4. Once downloaded, select the game icon to play.
#### Game Card
1. Insert No Man's Sky game card into the cartridge slot.
2. An icon appears on Home screen; select it to begin installation (may prompt for update).
3. Download any updates via internet connection.
4. Launch game.
---
5. First Launch Setup
When you first start No Man's Sky, expect these steps:
1. Language Selection – Choose from available languages.
2. User Agreement – Accept the EULA.
3. Graphics Calibration – The game may auto-detect settings; you can adjust later.
4. Linking Accounts (optional) – If you want cross-save or multiplayer, link your platform to a Hello Games account.
5. Tutorial – The game will start with an introductory sequence. You can adjust controls and display options in the Options menu.
Recommended Initial Settings
---
6. Common Installation Errors & Fixes
| Error | Possible Cause | Solution |
|---|---|---|
| "Insufficient disk space" | Not enough free space | Free up space: uninstall old games, move files, or install on a different drive. |
| Installation stuck at 0% or cancels | Corrupted download / network issue | Pause and resume download, restart launcher, or clear download cache (Steam: Library → Settings → Downloads → Clear Download Cache). |
| Missing DLL (e.g., MSVCP140.dll) | Missing Visual C++ redistributables | Install the latest Visual C++ Redistributable from Microsoft. |
| Antivirus blocking installation | False positive | Temporarily disable antivirus while installing, or add the game folder to exclusions. |
| "No Man's Sky has stopped working" on launch | Outdated drivers / corrupt files | Update GPU drivers. Verify file integrity (Steam: right-click game → Properties → Local Files → Verify. Epic: similar option in Library). |
| Black screen on startup | GPU driver compatibility / fullscreen issues | Launch in windowed mode: edit the config file (\Steam\steamapps\common\No Man's Sky\Binaries\SETTINGS\TKGRAPHICSSETTINGS.MXML) or use launch options `-windowed`. |
| Download too slow | Server congestion / ISP restrictions | Pause and resume, use a wired connection, or try changing download region in launcher settings. |
| PlayStation/Xbox error codes (NW-xxxx, 0x8007xxxx) | Network or server issues | Restart console, check PSN/Xbox Live status, or reinstall the game. |
| Nintendo Switch download error (e.g., 2137-xxxx) | eShop maintenance or full storage | Free up space, update system, restart console. |
7. Post-Installation Verification
After installation, perform these checks to ensure the game is ready:
- Verify File Integrity (PC only):
- Check Disk Space: Ensure you have at least 20 GB free after installation for updates and save files. (PS4/5, Xbox, Switch also require free space for updates.)
- Update Graphics Drivers: Ensure you have the latest drivers for your GPU (NVIDIA, AMD, Intel).
- Run the Game: Launch from the respective platform. Confirm the logo screen appears, then the main menu. If you encounter crashes, note the error and refer to Section 6.
- Check for Updates: After launching, the game may prompt for a patch. Accept and download to ensure you have the latest features (e.g., Expeditions, cross-play).
- Cross-Play: No Man's Sky supports full cross-play across all platforms. To enable, link your platform account to a Hello Games account during first launch.
- VR Support: On PC, No Man's Sky supports SteamVR and Oculus VR. On PS4/PS5, PSVR1 & PSVR2 are supported (PS5 requires PSVR2 and adapter for original). On Switch, no VR.
- Game Save Cloud: Steam, Epic, GOG, and console platforms all support cloud saves. PlayStation and Xbox require PS Plus / Game Pass Core for cloud saves.
- Pre-Loading: Not available for No Man's Sky on most platforms; you must download after purchase.
- Steam: Right-click No Man's Sky in Library → Properties → Installed Files → Verify integrity of game files.
- Epic: Library → click three dots on No Man's Sky → Verify.
- GOG Galaxy: Right-click game → Manage installation → Verify/Repair.
- Microsoft Store / Xbox App: Open the app, go to No Man's Sky → three dots → Manage → Files → Verify and repair.
---
8. Additional Tips
---
Conclusion
Installing No Man's Sky is straightforward across all platforms. Follow the steps specific to your device, ensure you meet the requirements, and troubleshoot common issues with the fixes provided. The game receives frequent updates, so keeping your installation up-to-date is essential for the best experience. Enjoy exploring the universe!

Game Introduction
Genre
No Man's Sky is a genre-blending experience that combines action-adventure, survival, sandbox crafting, space simulation, and exploration elements. It defies easy categorization, offering a unique mix of survival mechanics, base building, trading, combat (both ground and space), and infinite procedural discovery.
Developer & Publisher
Developed and published by Hello Games, an independent British studio based in Guildford, UK. The team, initially known for the Joe Danger series, took an enormous leap with this ambitious project.
Release Timeline
- Original launch: August 9, 2016 (PS4, PC) – critically divisive due to missing features at release.
- Major updates (all free):
- Ongoing: Regular expeditions and community events continue to add content.
- PC (Windows, macOS via Steam, GOG, Microsoft Store)
- PlayStation 4 and PlayStation 5 (with free PS5 upgrade)
- Xbox One and Xbox Series X|S (optimized for Series X|S)
- Nintendo Switch (released October 2022, includes most updates but slightly scaled-back visual fidelity)
- VR: Supported on PC VR (SteamVR) and PlayStation VR / PS VR2.
- The Traveller (Player) – a silent protagonist with no fixed identity; you can customize appearance and name. You are an anomaly, hinted to be a fragment of the Atlas.
- The Atlas – a mysterious artificial intelligence that may be dreaming the universe. Interacting with Atlas Interfaces reveals philosophical dialogues.
- Nada – a non-binary, friendly Korvax explorer aboard the Space Anomaly. Provides guidance and optional lore.
- Polo – a small, enthusiastic Gek expedition leader who tracks your milestones and offers rewards.
- Artemis – a deceased Traveller whose story you uncover through terminals; a central figure in the Artemis Path.
- Autophage (introduced in Echoes update) – a robotic race made from Traveller remnants, adding new lore and gameplay.
- Unlimited Exploration: The universe is vast – you can land on any planet, any moon, and discover unique flora, fauna, and landscapes.
- Freedom: No forced narrative; you choose to explore, trade, fight, build, or just wander.
- Procedural Creativity: Ships, multitools, creatures, and even words in alien languages are procedurally generated, offering near-infinite variety.
- Base Building: Construct elaborate bases on planets or massive freighters, farm resources, and automate production.
- Multiplayer Cooperation: Up to 32 players in a lobby (on console/PC) to explore, build, and complete missions together.
- Constant Evolution: Over seven years of free updates have transformed the game from a sparse launch to a content-rich universe.
- Exploration enthusiasts who love discovering new worlds and documenting them.
- Sandbox and creative players who enjoy building, crafting, and setting their own goals.
- Sci‑fi fans who appreciate a dense, lore‑rich universe with alien races and philosophical themes.
- Survival/crafting fans who like resource management, upgrading, and progression.
- Casual and hardcore gamers – difficulty settings (from creative to permadeath) suit many playstyles.
- VR players – the full game is playable in VR (PC/PSVR), offering immersive exploration.
- Foundation Update (Nov 2016) – base building, freighter ownership, creative mode.
- Path Finder (Mar 2017) – vehicles, exocraft, PS4 Pro support.
- Atlas Rises (Aug 2017) – story overhaul, multiplayer foundations, procedural missions.
- NEXT (Jul 2018) – full multiplayer, visual overhaul, third-person mode.
- Beyond (Aug 2019) – VR support, expanded multiplayer hubs (The Nexus), more social features.
- Origins (Sep 2020) – planetary diversity, new biomes, weather, fauna.
- Frontiers (Sep 2021) – settlement management.
- Endurance (Jul 2022) – freighter overhaul, new space encounters.
- Waypoint (Oct 2022) – difficulty customization, improved UI.
- Fractal (Feb 2023) – Mac launch, new expedition.
- Singularity (Jun 2023) – AI-themed expedition and narrative.
- Echoes (Aug 2023) – new alien race (Autophage), staff weapons, more.
- Omega (Feb 2024) – large lore expansion, new expedition.
Platforms
Available on:
Story Overview
The game begins with you – a Traveller – stranded on a random planet, your starship damaged. The central narrative is a philosophical mystery revolving around The Atlas, a sentient computer that may have created the entire universe. By following clues, decoding alien languages, and interacting with three dominant races (the militaristic Vy'keen, the mercantile Gek, and the technologically advanced Korvax), you learn that the universe might be a simulation. The primary goal is to reach the centre of the galaxy, which triggers a reset and launches you into a new galaxy. Along the way, you can choose to follow the Atlas Path (gathering Atlas Stones to learn the truth) or the Artemis Path (a more personal story involving another Traveller). The lore is deep, hidden in ruins, abandoned outposts, and conversations with enigmatic figures like Nada and Polo aboard the Space Anomaly.
Setting
A procedurally generated universe consisting of 255 numbered galaxies (each containing billions of star systems). Every system has planets, moons, space stations, and anomalies. Planets have varied biomes: lush forests, frozen tundras, scorched deserts, toxic swamps, radioactive wastelands, airless moons, and bizarre exotic worlds. Day/night cycles, weather, and sentinel enforcement add to the dynamic. The universe is persistent and shared – players can discover, name, and upload planets, flora, and fauna to the No Man's Sky servers.
Main Characters
Core Appeal
Target Audience
Game Modes
| Mode | Description |
|---|---|
| Normal | Balanced experience with moderate resource consumption and enemy aggression. |
| Survival | Harsher hazards, more aggressive sentinels, higher resource drain; more challenging. |
| Permadeath | Survival difficulty with only one life – death ends the save. |
| Creative | Unlimited resources, no health/damage, flight without fuel – focus on exploration and building. |
| Expeditions | Time‑limited seasonal events with curated starting conditions, communal goals, and unique rewards. Expires after a period but then the rewards become available via other means later. |
| Custom | Full difficulty sliders to tweak everything from combat to resource availability. |
Online & Offline Support
- Offline Single‑player: Fully playable without an internet connection. Discovery uploading and base sharing are disabled offline, but all content is accessible.
- Online Multiplayer: Requires internet. You can play alone or with friends (drop‑in co‑op). The Space Anomaly is a social hub where players meet, group up, and access Nexus missions. Cross‑play is supported across all platforms (except Switch in some contexts).
- Servers: Global discovery servers allow players to name and share planets, flora, and fauna. PvP is optional and can be toggled in settings.
- Procedural Generation at Scale: Every planet, creature, ship, and tool is algorithmically generated from a seed, creating a practically infinite universe that is consistent across all players (same seed = same planet).
- Seamless Transitions: No loading screens when flying from space to planetary atmosphere or landing on a planet – a technical marvel even years later.
- A Redemption Story: Hello Games famously overcame a disastrous launch by working tirelessly for years to deliver on promised features and far more, rebuilding trust and creating a beloved live‑service experience.
- Player‑Driven Discovery: You are the first person to see and name countless worlds. This sense of being a true explorer is rarely replicated.
- Philosophical Undertones: The narrative questions reality, simulation, and purpose, fitting the existential scale of the game.
- Continuous Evolution: Seven years of free updates have kept the game fresh, with the developers still releasing major content as of 2024.
DLC / Expansion Overview
No Man’s Sky has no paid DLC or expansions. All major content updates – including massive additions like base building, multiplayer, VR, freighters, settlements, and new storylines – have been released as free updates. There are no microtransactions. The game’s monetization is limited to the initial purchase (with occasional sales).
What Makes This Game Unique
Getting Started
Getting Started with No Man's Sky: A Newcomer’s Guide
Welcome, Traveller! No Man’s Sky can be overwhelming at first, but this guide will help you survive your first hour, understand the basics, and avoid common pitfalls. Follow this step-by-step walkthrough, check the controls for your platform, know your priorities, and use the day-one checklist to get off to a strong start.
First Hour Walkthrough (Spoiler-Free)
1. Wake Up on a Random Planet
- You start inside a crashed starship. Your suit’s life support is draining. Don’t panic.
- Immediate objective: Repair your ship’s launch thrusters and pulse engine to leave the planet.
- Break down the small rocks, plants, and ferrite dust crystals around you.
- Prioritize: Sodium (yellow flowers) – recharges your hazard protection. Oxygen (red flowers) – recharges life support. Carbon – refuels mining beam.
- Use your Analysis Visor (key/button T on PC, D-Pad Up on controller) to scan flora, fauna, and minerals. This rewards units and nanites.
- Follow the HUD marker (white icon) to your crashed ship. As you approach, you’ll see damage sites – use your Multi-Tool’s mining beam to harvest the required components.
- Launch Thrusters: Requires 50 Di-hydrogen (blue crystals) and 1 Metal Plating (crafted from 50 Ferrite Dust).
- Pulse Engine: Requires 1 Hermetic Seal (crafted from 60 Condensed Carbon – refine Carbon with your Portable Refiner) and 2 Metal Plates.
- Ship Shields and Weapons are optional for now.
- Once repaired, enter the ship, open the Galaxy Map (Options/Start > Galactic Map), and follow the mission marker to the Space Station.
- After your first warp, you’ll encounter a distress signal from the Space Anomaly (giant spherical station). Fly inside and speak to Nada and Polo. They give you essential tech like the Advanced Mining Beam and possibly a freighter later.
2. Gather Essential Resources (Survival Mode)
3. Scan Everything
4. Locate Your Ship
5. Repair the Ship
6. Get into Space
7. Meet the Anomaly
Character Creation
No Man’s Sky does not have character creation in the traditional sense. You start as one of three preset Traveller appearances (randomly selected). Customization becomes available later when you visit the Appearance Modifier in the Space Anomaly or at Space Stations. You can change your gender, race (Anomaly, Gek, Vy’keen, Korvax), suit style, and colours.
Controls Overview (All Platforms)
| Action | PC (Mouse+Keyboard) | PS4/PS5 | Xbox One/Series X | S | Switch (Docked/Handheld) |
|---|---|---|---|---|---|
| Move | W,A,S,D | Left Stick | Left Stick | Left Stick | |
| Look / Aim | Mouse | Right Stick | Right Stick | Right Stick / Gyro | |
| Interact | E | Square (Hold) | X (Hold) | A | |
| Mine / Confirm | Left Click | R2 | RT | R | |
| Jump | Space | X | A | B | |
| Scan / Analysis Visor | F / Q to toggle | L1 / R1 to toggle | LB / RB to toggle | L / R to toggle | |
| Menu / Inventory | Tab | Options | Menu (Hamburger) | + (Plus) | |
| Quick Menu | X | D-Pad Down | D-Pad Down | D-Pad Down | |
| Use Jetpack | Space (hold) | X (hold) | A (hold) | B (hold) | |
| Ship Flight Controls | W/S accelerate/decelerate, A/D roll, Mouse pitch/yaw | Left Stick (pitch/yaw), R2/RT accelerate, L2/LT brake, L3/R3 roll | Same as PS | Analog sticks |
- Rebind keys if needed – go to Options > Controls.
- On controller, double-tap Scan (R2/RT) to switch between visor modes.
- Use Quick Menu (X / D-Pad Down) to recharge hazard protection, life support, call your ship, place a save beacon, etc.
- Top left: Life Support (oxygen symbol), Hazard Protection (shield icon), and Environment suit status.
- Top right: Compass and mission waypoints. Yellow markers = main mission, Blue = optional, Red = combat.
- Bottom center: Interaction prompts (e.g., “Press E to interact”).
- Bottom left: Multi-Tool ammo count and mode indicator.
- Bottom right: Scanner/Visor mode indicator.
- Suit Inventory: 3 rows initially. Tech slots are separate (upgrade modules).
- Ship Inventory: carry more items.
- Multi-Tool: 1 equipped; you can own up to 3 later.
- Exosuit Cargo: unlockable via Drop Pods or Space Station vendors.
- Access to: recharge life support/hazard, place save point, summon ship, call exocraft, teleport to base (if placed), galactic map shortcuts.
- Always carry Sodium and Oxygen – they are your lifelines.
- Scan everything for units and nanites.
- Save often by using the Save Beacon (buildable) or hopping in/out of ship.
- Experiment with Refining – combine raw materials into advanced elements.
- Follow the main quest (Awakenings / Artemis Path) at your own pace.
- Fighting Sentinels early – unless you are prepared. They escalate aggression quickly.
- Ignoring your hazard protection – especially on extreme weather planets.
- Hoarding high-value items without using them – you can always sell or refine later.
- Trying to reach the galactic core immediately – it’s a long journey.
- Getting attached to one planet – always be ready to warp away.
- Survival Resources: Sodium (yellow flowers) > Oxygen (red) > Carbon (plants). Craft Life Support Gel from Oxygen + Di-hydrogen for emergency recharges.
- Fuel: Di-hydrogen (blue crystals) + Tritium (pink asteroids in space) for pulse drive; Warp Cells (Antimatter + Antimatter Housing) for hyperdrive.
- Building: Ferrite Dust (rocks) → Pure Ferrite (refine) for basic base parts; Chromatic Metal (refine Indium, Cadmium, etc.).
- Currency: Units (sell high-value items like Activated Indium or Salvaged Data). Nanites (buy upgrade modules from Space Station vendors). Quicksilver (special event currency from the Anomaly).
- [ ] Spawn, collect Sodium and Oxygen nearby.
- [ ] Repair your ship: gather 50 Di-hydrogen, craft 1 Metal Plate, repair Launch Thrusters.
- [ ] Craft Portable Refiner and Condensed Carbon (2 Carbon → 1 Condensed Carbon).
- [ ] Craft Hermetic Seal (60 Condensed Carbon). Build 1 more Metal Plate for Pulse Engine.
- [ ] Repair Pulse Engine.
- [ ] Fly to Space Station (first warp triggers encounter).
- [ ] Land at Space Station, use the teleporter to mark it.
- [ ] Speak to NPCs; buy an Exosuit upgrade slot from the vendor (blue backpack terminal).
- [ ] Answer the Anomaly call; warp to its coordinates.
- [ ] Inside Anomaly: accept quests from Nada & Polo, visit Appearance Modifier if desired, buy upgrades from vendors.
- [ ] Build a basic base (Base Computer, floor, walls, roof) on a safe planet – this unlocks the base-building missions.
- [ ] Scan flora/fauna/minerals on each new planet for nanite rewards.
- [ ] Save game often (use ship exit or save point).
UI Overview
Heads-Up Display (HUD):
Inventory Screen (Tab / Options > Inventory):
Quick Menu (X / D-Pad Down):
Essential Early Objectives
1. Survive the first planet: Keep your hazard protection and life support charged.
2. Repair your ship and leave the planet.
3. Reach the Space Station – this acts as a fast travel hub (teleporter).
4. Visit the Space Anomaly – get key tech and quests.
5. Follow the “Awakenings” main mission until you own a freighter (you get a free one after 3-5 warps).
6. Expand your Exosuit inventory – buy a slot at each new Space Station (exosuit upgrade terminal) and repair Drop Pods planetside.
7. Build a small base – to progress the base computer missions and unlock construction parts.
What to Do First vs. What to Avoid
✅ DO:
❌ AVOID:
Early Resource Priorities
Common Beginner Mistakes
1. Not recharging hazard protection before it’s empty. Once depleted, health drains fast.
2. Forgetting to refuel the mining beam – always have Carbon or Condensed Carbon handy.
3. Selling all rare materials – some are used for base parts or upgrades (e.g., Wiring Looms, Salvaged Data).
4. Not expanding inventory early – buy one slot per system (costs 0 units for first purchase!).
5. Ignoring the exosuit cargo and tech slots – they allow more upgrades.
6. Building a base before completing the tutorial – wait until you unlock the Base Computer mission.
7. Warping without a clear goal – follow the main quest lines to unlock tech and story.
Day-One Checklist
Once you complete this checklist, you will have a solid foundation. Explore freely, follow the Artemis story, and remember: there is no wrong way to enjoy No Man’s Sky. Happy exploring, Traveller!
Core Gameplay
Core Gameplay Overview
No Man's Sky is a procedurally generated universe where you play as a Traveller exploring, surviving, trading, building, and uncovering the mysteries of the cosmos. The core gameplay loop revolves around exploration → resource gathering → crafting/upgrading → new exploration. This cycle is enhanced by a rich narrative, multiple alien races, base building, space combat, and a shared universe.
Progression Tiers
Early Game (First 5–10 Hours)
Goal: Survive, repair your ship, leave the first planet, and learn basic systems.
Main Gameplay Loop:
1. Start on a random planet. Your first priority is to repair your multi-tool and ship.
2. Gather basic resources: Ferrite Dust (from rocks), Oxygen (from plants), Carbon (from flora).
3. Use the Analysis Visor to scan for nearby materials and points of interest.
4. Recharge your hazard protection (e.g., Ion Batteries for toxic, Thermal Protection for cold/heat).
5. Locate your ship and repair its launch thrusters and pulse engine (requires Pure Ferrite and Di-hydrogen).
6. Launch into space and visit the Space Station. Warp to the next system using Hyperdrive (fuel: Warp Cells).
7. Follow the 'Awakenings' Artemis path missions to get basic blueprints (e.g., Portable Refiner, Base Computer).
Combat & Interaction:
- On-foot: Limited; avoid Sentinels early on. Use your Mining Beam (multitool) to shoot rocks; it can also stun animals. Get a Boltcaster upgrade from the Space Station vendor.
- Space: Minimal; avoid pirate attacks by staying near planets or the station. You can recharge shields using Sodium.
- Interactions: Talk to aliens at the Space Station. Learn a few words to improve standing.
- Technology: Install the Analysis Visor (already built), Scanner for units, and Survival upgrades (Aeration Membrane, Life Support modules) from exosuit drop pods or Space Station merchants.
- Multi-tool: Buy a better one on the Space Station or from planetary shelters. Focus on higher slots and scanner range.
- Starship: Stick with your starting ship; upgrade launch thrusters and hyperdrive first. Buy a new ship later.
- Scan all flora and fauna on starting planet for Nanites and Units.
- Visit a few buildings: Manufacturing Facilities (blueprints), Drop Pods (exosuit slot upgrades), and Ancient Ruins (for lore).
- Use the Signal Booster to locate distress signals (crashed ships), settlements, and alien monoliths.
- Artemis Path (Primary story): Introduces the Atlas Interface and anomaly.
- Secondary: Base Computer Archives, expanding your base.
- Side: Guild missions from Space Station (e.g., kill creatures, mine resources) for reputation and rewards.
- Units: Earn by scanning everything (350–2500 per scan with S-class upgrades), selling resources like Cobalt, and looting cargo drops. Early target: ~500k units for a better ship.
- Nanites: Find Buried Technology modules, refine residual sludge, and complete missions. Trade for blueprints at the Space Station's vendor.
- Quicksilver: Unlocked after meeting Nada (Anomaly): for cosmetic items from the Quicksilver shop.
- Exosuit: Maximize inventory slots by buying drops at each Space Station (use Drop Pod Coordinate Data).
- Technology modules: Focus on protection (S-class Radiation/Heat/Toxic/Cold shields) and environmental movement (Rocket Boots).
- Multi-tool upgrades: Scan range and Analysis Visor efficiency.
- Sentinels: Can now fight waves using upgraded weapons (Pulse Spitter or Scatter Blaster). Learn to retreat when the 5-star sentinel walker appears.
- Space Combat: Upgrade ship weapons (Positron Ejector, Infra-Knife Accelerator) and shields. Fight pirates for cargo drops. Learn barrel roll and shield recharge during combat.
- Predators: Kill dangerous fauna with plasma launcher or burst-fire.
- Interaction: Increase standing with three alien races: Gek (trade), Korvax (tech), Vy’keen (combat). Learn language quickly by talking to every NPC.
- Technology: Unlock exosuit upgrades like S-class movement modules (Rocket Boots + Sprint Module), life support upgrades, and hazard protection. Get the Personal Refiner to refine on the go.
- Multi-tool: Upgrade to an S-class 24-slot experimental or alien multi-tool. Install S-class scanner, mining beam, and weapon modules.
- Starship: Get a better ship: Fighters have best damage, Haulers for storage, Explorers for hyperdrive range. Install Economy Scanner (find trade routes) and Conflict Scanner.
- Freighter: The free one is a C-class; later trade for an S-class with 34 tech slots. Build fleet command rooms and send frigates on 2–6 hour missions.
- Visit Derelict Freighters for upgrades and lore (use Emergency Broadcast Receiver from Space Station).
- Explore Anomalous planets (e.g., anomalous fields, metal planet) for rare resources like Activated Indium.
- Use Ancient Ruins for language and artifacts. Dig up Buried Technology for nanites.
- Locate Settlements to become Overseer; manage population happiness and production for a steady income.
- Artemis Path: Continue until 'The Purge' (reset simulation) – includes exploring 16 glyphs to unlock portals.
- Base Building: Unlock more structures (large refiner, trade terminal) via Base Computer Archives.
- Space Anomaly: Nada and Polo give milestones; complete them for unique rewards.
- Frigate Expeditions: Send groups; check for damaged frigates to repair.
- Units: Earn millions by:
- Nanites: Daily tasks (Helios at Anomaly), scanning planets completely, refining Platinum and Runaway Mould into nanites.
- Units per hour: A good Indium farm yields 100M+ per day.
- Exosuit: Max out general and tech slots (48/14 with S-class upgrades). Install hazard protection and movement modules.
- Multi-tool: Ideal setup: S-class scanner (65000% bonus), S-class mining (speed and yield), two S-class weapons (e.g., scatter blaster + pulse splitter).
- Starship: S-class upgrades for hyperdrive range (3000+ light-years), shield S-class, weapon S-class.
- Freighter: Install matter beam (remote access to freighter inventory), and economy/conflict scanners.
- Sentinels: Full wave combat can be ended by destroying the Sentinel Holographic Scanner or killing the final walker. Gain 'Spawn Resistance' upgrade to reduce aggression.
- Pirate Systems: Fight high-level pirates for S-class modules. Use the Emergency Warp to escape danger.
- PvP: Take part in community events (Anomaly missions). Other players can damage you only if you allow.
- Interaction: Max race standing (100), then you can buy starship and multitool upgrades cheaper. Learn all words via monolith and NPCs.
- Technology: Unlock all installable exosuit, ship, and multitool upgrades (S-class across all categories). Many are sold at Space Stations and Anomaly vendors.
- Freighter: Fully upgrade tech slots: warp drive upgrades, fleet rooms, hyperdrive range, matter beam. Command up to 30 frigates.
- Settlements: Become an A-class overseer; upgrade to S-class for max production.
- Quicksilver: Earn via daily Nexus missions and weekend events. Buy jetpack trails, base decorations, etc.
- Portals: Use 16 glyphs to travel anywhere in the galaxy. Combine with Pilgrim’s Path coordinates to reach reported points.
- Galaxies: After completing 'The Purge', you can choose a new galaxy type (Lush, Raging, Harsh, Empty). Each has different planet generation rules.
- Planet scanning: Aim for 100% discoveries on rare planetary systems (e.g., binary stars, extreme sentinel planets).
- Exocraft: Max out speed and durability. Use Nautilon for deep ocean navigation, Pilgrim for land speed.
- Primary: 'The Purge' final mission – leads to galaxy reset. Can be done repeatedly to visit all galaxies.
- Secondary Unlocks: All base building parts from Industrial, Agriculture, Construction terminals. Complete 'Dreams of the Deep' for underwater base.
- Navy: Complete all fleet expeditions to unlock cargo bulkheads and S-class freighter upgrades.
- Living Ship: Complete 'The Space Encounter' (requires 3 days of waiting). Get a biological ship that uses neural upgrades.
- Units: Use farms for Stasis Device (15M each) or Fusion Ignitor (20M each). Set up multiple mineral extractors and supply depots per hotspot.
- Max Units: 4,294,967,295 (2^32). Once reached, you have effectively infinite money.
- Nanites: S-class modules from fleet missions and scanning. Max nanites: 9999.
- Quicksilver: Cap at 5000. Spend on exclusive items.
- Exosuit: All 48 general, 14 tech, 48 cargo (via upgrade drops). All S-class movement, survival, and hazard modules. Install Environmental Shield to ignore most hazards.
- Multi-tool: Have 3–5 multi-tools: scanning specialist (max range/mining), combat (max damage/splash), utility (terrain manipulator primary).
- Starships: Up to 9 ships, each specialized: fighter (war), hauler (cargo), explorer (range), shuttle (balanced), exotic (stats), living (quirky).
- Freighter: S-class with 34 tech slots and full upgrades. Matter beam for inventory access anywhere.
- Max combat perks: Exosuit shields never break, ship shields recharge instantly, multi-tool does 20,000+ DPS. Pirate fights become trivial.
- Space Combat: With max ship upgrades, you can destroy a pirate dreadnought in seconds.
- Sentinels: Only annoying when stealing resources. Higher difficulty planets still have wave spawns.
- Player Interaction: Join random multiplayer teams for base tours, races, or co-op base building. Use the Communication Station to chat.
- Tech cap: All upgrades are S-class supercharged or god-rolled via mods on PC. No further upgrades exist.
- Atlas Path: Interact with Atlas Interfaces repeatedly to gain 'Remembrance' and learn secrets behind the simulation.
- Unlock all titles: Rise in reputation with all races to maximum (once per galaxy?).
- True End: After 16 Atlas Interface encounters, the final choice: reset simulation or remain. Resetting gives a new galaxy with rare planets.
- Black Holes: Use them to fast-travel across galaxy (70k LY). Every warp moves you closer to center.
- Lost Civilizations: Discover abandoned systems with ancient ruins.
- Anomalies: Find strange planets: 'Bubble world', 'Cable cars', 'Shattered planet'.
- Atlas Path revisited: Complete 'The Great Deception' for final lore.
- Community Research: Participate in weekend events unlocking exclusive decor.
- Fashion: Collect all Appearance Modifier options (species, head, body, armor) via quicksilver and achievements.
- Units: Can't spend them all. Use for buying whole inventory of trade goods from other players.
- Nanites: Farm via derelict freighters (S-class upgrades) then scrapping.
- Quicksilver: Maxed; no further need.
- Perfection: Multiple save slots for different play styles. All milestones maxed.
- Exosuit: All slots full, all S-class modules with optimal adjacency bonuses.
- Fleet: 30 S-class frigates, each specialized. Freighter tech maxed.
- Base Complex: Massive base spanning entire planetoid, multiple landing pads, trade terminals, multiple refiners.
Progression:
Exploration:
Quests/Missions:
Economy:
Character/Build Growth:
---
Mid Game (10–40 Hours)
Goal: Establish a robust base, refine crafting, acquire a freighter, expand fleet, and tackle higher difficulty planets.
Main Gameplay Loop:
1. Continue the Artemis story (now leads to the Anomaly).
2. Warp to three different star systems; you’ll be offered a free Freighter after your 4th or 5th warp.
3. Build a permanent base with power (solar panels + batteries or electromagnetic generators), farming (hydroponic trays for Carbon, Cobalt, etc.), and refiners.
4. Mass-produce valuable resources: Cobalt for selling, Plantable items (Starshul, Bubbles, etc.) for cooking or crafting.
5. Expand fleet by commanding frigates and sending them on expeditions for rare materials.
6. Build a submarine (Nautilon) for underwater exploration and a Colossus or Roamer exocraft for planet travel.
Combat & Interaction:
Progression:
Exploration:
Quests/Missions:
Economy:
- Building an Activated Indium farm (requires S-class hotspot).
- Crafting high-value items: Fusion Ignitor or Stasis Device (advanced crafting with many components).
- Trading routes: Buy low (e.g., tech in one system), use trade terminals to sell in a rich economy.
Character/Build Growth:
---
Late Game (40–100 Hours)
Goal: Achieve maximum efficiency, complete major storylines, unlock all technologies, own multiple ships and freighters, dominate the economy.
Main Gameplay Loop:
1. Finish the Artemis path and choose to reset the simulation (you can refuse and keep your base).
2. Unlock all base building parts via Quicksilver and settlement missions.
3. Fine-tune your 'outfit' – multiple multitool loadouts for different tasks (scanning, combat, mining).
4. Engage in high-end trading: Craft Stasis Devices / Fusion Ignitors in bulk (requires farming or mining complexes).
5. Explore the Permadeath mode for ultimate challenge (optional).
6. Collect all Wormhole Data and explore every galaxy (there are 255+).
Combat & Interaction:
Progression:
Exploration:
Quests/Missions:
Economy:
Character/Build Growth:
---
Endgame (100+ Hours)
Goal: Become the most powerful Traveller, explore unreachable places, join community events, build massive creations, and complete the Atlas Path to the end.
Main Gameplay Loop:
1. Galaxy hopping: Use portals to travel to the center of Euclid, then Hilbert, etc., resetting the simulation each time. Each galaxy has different planet types and difficulty.
2. Hardcore challenges: Permadeath mode – one death erases save. Survive extreme planets (1,000°C, -300°C) with minimal tech.
3. Creative Mode: Build for pure aesthetics – no resource cost. Combine with base parts to create megastructures.
4. Community Missions: At the Anomaly, run repeatable missions for Quicksilver and unique rewards.
5. Catalogue completion: Visit all 255 galaxies? Unlikely, but try to visit each type.
6. Speedrunning: Set a personal record to reach the galaxy center (Euclid center is 1.1 million light-years from any start; can be reduced via black holes).
Combat & Interaction:
Progression:
Exploration:
Quests/Missions:
Economy:
Character/Build Growth:
---
Summary of Key Systems
| System | Early Game Tip | Mid Game Tip | Late/Endgame Tip |
|---|---|---|---|
| Combat | Boltcaster; avoid Sentinels | Upgrade to Scatter Blaster; fight pirates | Max DPS multi-tool; ship with Insta-kill |
| Exploration | Scan everything; learn language | Use exocraft; visit derelict freighters | Use portals for galaxy center travel |
| Economy | Sell cobalt; buy exosuit slots | Build Indium farm; trade routes | Stasis Device farm; infinite units |
| Base Building | Emergence shelter; small base | Power grid; large refiner; hangar | Megabase with multiple specialised rooms |
| Quests | Follow Awakenings; unlock Anomaly | Complete Artemis; start fleet missions | Finish Atlas Path; all galaxy centers |
| Character | Early survival modules | S-class movement & protection | All S-class with max adjacency |
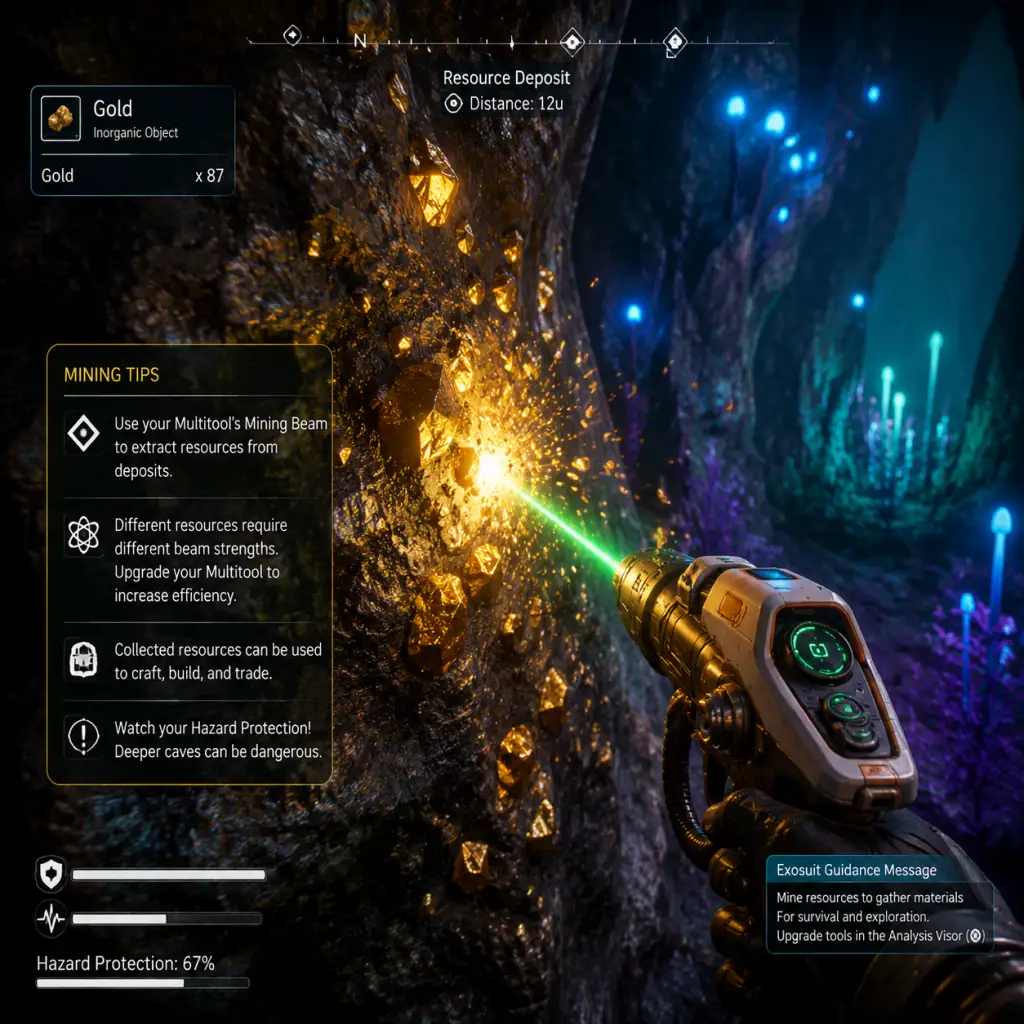
Game Tips
No Man's Sky Game Tips – Comprehensive Guide
This guide provides essential tips for every Traveller, from the first moments on a hostile world to late-game fleet operations. Tips are grouped by category, with difficulty levels indicated (Beginner / Intermediate / Advanced).
---
1. Beginner Survival & Early Game
1.1. Always Mine Carbon, Ferrite Dust, and Di-hydrogen First
- Why: Carbon fuels your Mining Beam, Ferrite Dust repairs your ship, and Di-hydrogen refuels your jetpack and life support. Neglecting these basics leads to stranding or death.
- When: Immediately after fixing your scanner and Analysis Visor.
- Pro Tip: Punch trees? Yes, melee attack on flora gives a few carbon when your beam is low.
- Why: Extreme weather depletes hazard protection rapidly. Digging a hole with the Terrain Manipulator (craft after fixing ship) creates instant shelter.
- When: Any time a storm icon appears on the HUD.
- Advanced: Use the Terrain Manipulator to create a tunnel under your ship, then emerge safer.
- Why: The Base Computer unlocks teleportation and tutorial progression. A simple wooden shack with a bed (for respawn point) is enough.
- When: After obtaining chromatic metal (from copper/hot planets).
- Cost-saving: Place only a Base Computer, a Teleporter, and a Biofuel Reactor (with a few solar panels later) to save materials.
- Why: Scanning flora, fauna, and minerals earns Nanites and Units. Fully scanning a planet gives bonus Nanites when uploaded to the Discovery Services.
- When: Always keep the visor active during exploration. Hold the scan button to identify multiple things.
- Tip: Fauna scanning is tricky; crouch and wait for creatures to stop moving. Explosive animals are safe if you juke.
- Why: Following these lines often leads to wealthy systems (economy tier: ★, ★★, ★★★). Wealthier systems have better ships, multi-tools, and prices.
- When: After obtaining an Economy Scanner (learn from manufacturing facility blueprint).
- Advanced: Install Conflict Scanner to avoid high-conflict systems if you're not combat-ready.
- Why: Exocraft (like the Roamer) have dedicated scanners to locate alien structures, drop pods, and buried tech modules. They also provide hazard protection and infinite fuel (after upgrades).
- When: After building the Exocraft Geobay from the Anomaly or base missions.
- Beginner Alternative: The Pilgrim exocraft is fast but fragile; the Nomad hovers over water.
- Why: Save Beacons create permanent waypoints that survive relogging. Useful for marking rare resource deposits, portal locations, or a nice view.
- When: When you find a spot you need to return to frequently.
- Better: Also place a Base Teleporter near your most-used spots.
- Why: Portals allow instant travel across the galaxy using 12-glyph addresses. Once activated, you can use coordinates shared by other players to reach specific planets.
- When: After completing the Artemis path or locating a portal via alien monolith.
- Tip: Collect all 16 glyphs by finding Traveller graves (get coordinates from NPC Travellers in space stations). For quick access use the “Catalyst” questline.
- Why: Oxygen plus a catalyst (like Carbon) can create many useful materials. For example, Oxygen + Ferrite Dust → pure Ferrite. Oxygen + Ammonia → Ammonium Chloride (for starship fuel).
- When: Always carry a portable refiner and keep oxygen plants in your base.
- Advanced: Oxygen + Fungal Mould → Mordite (or other elements via farm). This is a core recipe for endless crafting loops.
- Why: These metals refine into Chromatic Metal which is essential for building warp drives, advanced technology, and base components. Each tier allows to other color stars.
- When: First Copper for basic chromatic, then Cadmium (red stars), Emeril (green), Indium (blue).
- Optimization: Refining 1 Indium + 2 Chromatic Metal = 4 Indium (duplication glitch fixed; this recipe now gives more but not infinite). Use Indium to craft warp hypercores.
- Why: The Freighter Matter Beam lets you access all stored items on your freighter from anywhere in the same star system. This saves trips back to base.
- When: After obtaining a freighter (first free one after a few warps).
- Setup: Install the Matter Beam in the freighter’s tech inventory (blueprint from freighter upgrade terminal).
- Why: Some resources like Storm Crystals (only during extreme storms) and Ancient Bones (buried) are high-value. Always keep a few stacks for trading.
- When: Check weather forecast in ship cockpit; fly to extreme planets during storms to grab Storm Crystals.
- Location: Use the Survey Device (exocraft upgrade) to locate resource hotspots – build mineral extractors there for passive income.
- Why: Photon Cannon is decent but has slow fire rate. The Infra-Knife Accelerator fires rapidly, shreds shields, and with upgrade modules melts enemy ships. Best for dogfights.
- When: Install as soon as you can buy the blueprint from the Anomaly or get from crashed ship tech.
- Advanced: Combine with the Cyclotron Ballista (slows enemies) for crowd control.
- Why: Sentinels have different weaknesses: the Blaze Javelin (charged shot) one-shots small sentinels, while the Pulse Spitter (high fire-rate) is better for large walkers.
- When: Use Blaze Javelin + Advanced Boltcaster for most fights. Plasma Launcher is risky (can kill you).
- Tactic: When fighting Walkers, shoot the legs first to immobilize, then the top weak point.
- Why: The Personal Forcefield blocks all damage from one direction, including sentinel attacks. Allows you to heal safely even in combat.
- When: Bind it to a hotkey. Use when surrounded or when hazard protection is low.
- Tip: Also useful for mining hazardous plants safely.
- Why: Better engines let you outrun pirates; shields absorb more hits. A fully upgraded shield allows you to charge through asteroids without damage.
- When: As soon as you have Nanites, buy S-class upgrades for shields and pulse drive.
- Advanced: The Positron Ejector is a shotgun-like weapon that destroys asteroids and enemies quickly – best close-range.
- Why: Solar panels generate power during day, stored in batteries for night. Electromagnetic Generators (if you find a hotspot) give 24/7 free power, but require locating with the Survey Device.
- When: Build at least 2 batteries per row of solar panels to avoid brownouts during storms (cloudy reduces solar output).
- Pro Tip: On planets with high sentinel activity, build underground to avoid detection and power loss from attacks.
- Why: A single Biodome with ladders can harvest up to 16 planting slots instantly. Compare to trays that need manual picking.
- When: After unlocking the Armorer's questline or the blueprint from the Anomaly (requires Salvaged Data).
- Layout: Build a biodome on a flat roof, connect via corridor. Use ladders stackable for multiple floors.
- Why: Each container holds 20 slots but you cannot rename them. Use color-coding in the build menu: red for combat, blue for crafting, green for food, etc. Then place signs.
- When: Immediately after getting the blueprint (base computer archives).
- Tip: You can access all containers from your freighter if you install the material hauler and containers on the freighter.
- Why: The NPC specialists (Scientist, Farmer, Armorer, Exocraft) give unique blueprints and open more advanced tech. Finish their quests before building a mega base.
- When: After building a small base, hire each specialist from space stations.
- Note: Scanning terminals require a multitool with a scanner – some blueprints are gated behind these missions.
- Why: Each system has two economies (buy and sell). Items like “Geodesite” are scarce in mining economies but common in high-tech ones. Scan the terminal to see “Demand” percentages.
- When: Install the Economy Scanner on your ship. Set galaxy map filter to “Economy”. Visit a high-tech (★) system with “Trading” as primary economy – sell tradeable items like Gold or Platinum for profit.
- Advanced: Use the “Cobalt Crash” method: buy Cobalt in a normal system (sell to ships) then sell it in a wealthy system (drops price), then buy back cheap and repeat. But be careful – crashing a market removes profit.
- Why: Solving the puzzles (choose correct technology) gives free blueprints worth millions of Units worth of savings. Also gives Nanites.
- When: Always break into a facility; use the Exocraft's advanced mining beam to breach quickly.
- Puzzle Tip: The password system is based on random numbers. Cheat sheet available online but in-game: the correct answer is usually the one with the most logical connection to the game's lore.
- Why: Your frigates (combat, exploration, trade, etc.) can be sent on expeditions that return with Units, Nanites, crafting materials, even Storied items (like Salvage Frigate Modules).
- When: After obtaining a freighter and constructing a fleet command room. Start with one mission, build more rooms to send multiple.
- Optimization: Purchase only S-class frigates; they level up faster and have fewer problems. Replace damaged C-class ones.
- Why: The Nutrition Processor can turn simple ingredients into high-value food like “Herb Encrusted Flesh” or “Delicious Vegetable Stew”. Selling to NPCs on the Anomaly yields double the base value.
- When: After you have a farm (plants) or hunting (meat from fauna). Install the nutrition processor on your freighter.
- Tip: The most efficient recipe is “Stewed Vegetables” = 2 fungal mould + 1 cactus flesh + 1 pulpy roots: sells for ~30k Units each.
- Why: Higher class (C, B, A, S) means better stats and potential damage. S-class Alien or Experimental tools have the best damage and scanning bonuses.
- When: Save nanites to upgrade your multi-tool from space station vendors or from missions. Do not waste upgrades on low-slot tools.
- Location: Check all space stations, minor settlements on planets (with a settlement chart), and crashed ships (some have tools).
- Why: Pulse Drive upgrades (from the Anomaly or random drops) significantly increase warp distance when placed adjacent to each other (adjacency bonus). Also improve maneuverability.
- When: After you have your first A/S class fighter or explorer (explorers have hyperdrive bonus).
- Arrangement: Place three upgrades in a square in the tech inventory, then three more in general inventory (but check adjacency – each upgrade group works separately).
- Why: The technology inventory gives a 25% bonus to installed modules. Always place upgrades there when possible. General inventory is for storage only.
- When: Max out ship slots (48+21+21 = 90 total slots) via spending Units at space stations or using Starship AI Valves (rare).
- Tip: Buy cheap ships and scrap them at stations for salvage (modules that can be sold for nanites or installed).
- Why: Derelict freighters (random encounters in space) yield Tainted Metal, which refines 1:1 into Nanites (1 Tainted Metal = 1 Nanite). Also give freighter upgrade modules and storage augmentation plans.
- When: Once you have a strong multi-tool with a combat scope (S-class). Bring plenty of ammo and shield packs.
- Method: Each freighter has a captain's log and a single nest of creatures. Clear the nest, loot the engineer's terminal, and grab all salvage. Then teleport out.
- Why: Stasis Devices sell for ~15 million Units each. Building one requires complex recipes (like Iridesite, Hot Ice, etc.) but the materials can be gathered from base farming and gas extraction.
- When: Endgame only – you need a massive base with gas extractors (Sulfurine, Radon, Nitrogen) and crystalized minerals from frigates or mining.
- Shortcut: Trade via galactic market manipulation is faster for early wealth; Stasis Devices require hundreds of hours of setup.
- Why: The intergalactic trade network or Civilised Space communities share portal addresses for bases with activated Indium farms, nip-nip buds, or exotic ships.
- When: After activating all 16 glyphs (or using a save editor).
- Resources: Websites like NMS Coordinate Exchange have current addresses.
- Why: The Living Ship quest chain takes time (real time waiting) but gives a unique organic starship that can only be upgraded with nanites. It has unique modules for hyperdrive and pulse drive.
- When: After you have a freighter for storage. The quest requires specific materials like Neural Stem, etc. – best to start early and let timers run in background.
- Tip: Keep one spare ship slot when eggs mature; accept the living ship mission from the Anomaly.
- Quick Actions: Use the D-pad (or keyboard shortcuts) to quickly refill hazard protection, life support, and pulse engine without opening menus.
- Exocraft Radar: While in an exocraft, you can ping for nearby buildings using the same button as scan on foot – useful for finding trade terminals.
- Warp Cell Economy: Instead of crafting Warp Cells one by one, build an antimatter reactor (blueprint from freighter missions) to produce antimatter from carbon and chromatic metal on the fly.
- Storage Is Cheap: Always buy one extra ship slot per stop at a space station. Costs scale up but 50 million Units is nothing late game.
- Play in Permadeath for Trophies: Permadeath mode is for challenge runs; use the tips above but be extra careful – storms are deadlier, sentinels more aggressive.
- Don’t hoard early Nanites – Spend them on S-class upgrades for your multi-tool and ship. Nanites are plentiful later from frigate missions.
- Don’t ignore the Anomaly – It’s the hub for multiplayer, buying blueprints with salvage data, and upgrading everything. Visit often.
- Don’t build a massive base on your first planet – You will outgrow it quickly. Instead, build a simple shack and move to a lush, low-sentinel planet later.
- Don’t sell your first freighter – The first one offered is free; accept it even if it’s low-class. You can buy a better one later and transfer everything.
- Don’t ignore the Atlas Path – Completing it gives black holes that warp you closer to the center. It’s a core story element.
1.2. Shelter During Storms
1.3. Crafting Your First Base Computer – Don’t Build a Huge Base
1.4. Use the Analysis Visor on Everything
---
2. Exploration & Navigation
2.1. The Galaxy Map – Grey Lines are Trade Routes
2.2. Use Exocraft for Planetary Exploration
2.3. Mark Points of Interest with Save Beacons
2.4. Portal Travel – Activate One Portal Per Galaxy
---
3. Resource Management & Refining
3.1. Refiner Recipes – The Value of Oxygen
3.2. Stellar Metals – Copper, Cadmium, Emeril, Indium
3.3. Store Excess in a Matter Beam (Freighter)
3.4. Group Resources by Rarity – Harvest Every Day
---
4. Combat & Survival
4.1. Damage Types – Photon Cannon vs. Infra-Knife
4.2. Sentinel Combat – Use Blaze Javelin or Pulse Spitter
4.3. Shield Management – Install Personal Forcefield (Tau, Sigma)
4.4. Space Combat – Upgrade Pulse Drive and Shield
---
5. Base Building & Production
5.1. Power Management – Solar + Batteries for Normal Planets
5.2. Farming Modules – Biodomes are OP
5.3. Storage Containers – Color Code Them
5.4. Exocraft Specialist Missions – Unlock All Blueprints
---
6. Economy & Trading
6.1. Buy Low, Sell High – Use Trade Terminal Data
6.2. Manufacturing Facilities – Learn Blueprints, Not Just Loot
6.3. Frigate Missions for Passive Income
6.4. Cooking – Actually Profitable
---
7. Multi-Tool & Ship Optimization
7.1. Multi-Tool Classes – Focus on S-Class with Max Slots
7.2. Ship Upgrades – Install Pulse Drive Upgrades for Hyperdrive Range
7.3. Inventory Expansion – Cargo vs Technology
---
8. Advanced & Endgame Tips
8.1. Derelict Freighters – Earning Tainted Metal
8.2. Maxing Out Units – Stasis Device Farming
8.3. Portal Travel to Player Bases
8.4. Living Ship Missions – Don’t Rush
---
9. Miscellaneous Quality-of-Life Tips
---
10. Common Mistakes to Avoid
---
This guide covers the entire journey from starter planet to galactic mogul. Adapt your strategies as new updates arrive – Hello Games frequently adds content. Remember: the universe is your oyster; explore, build, trade, and survive.
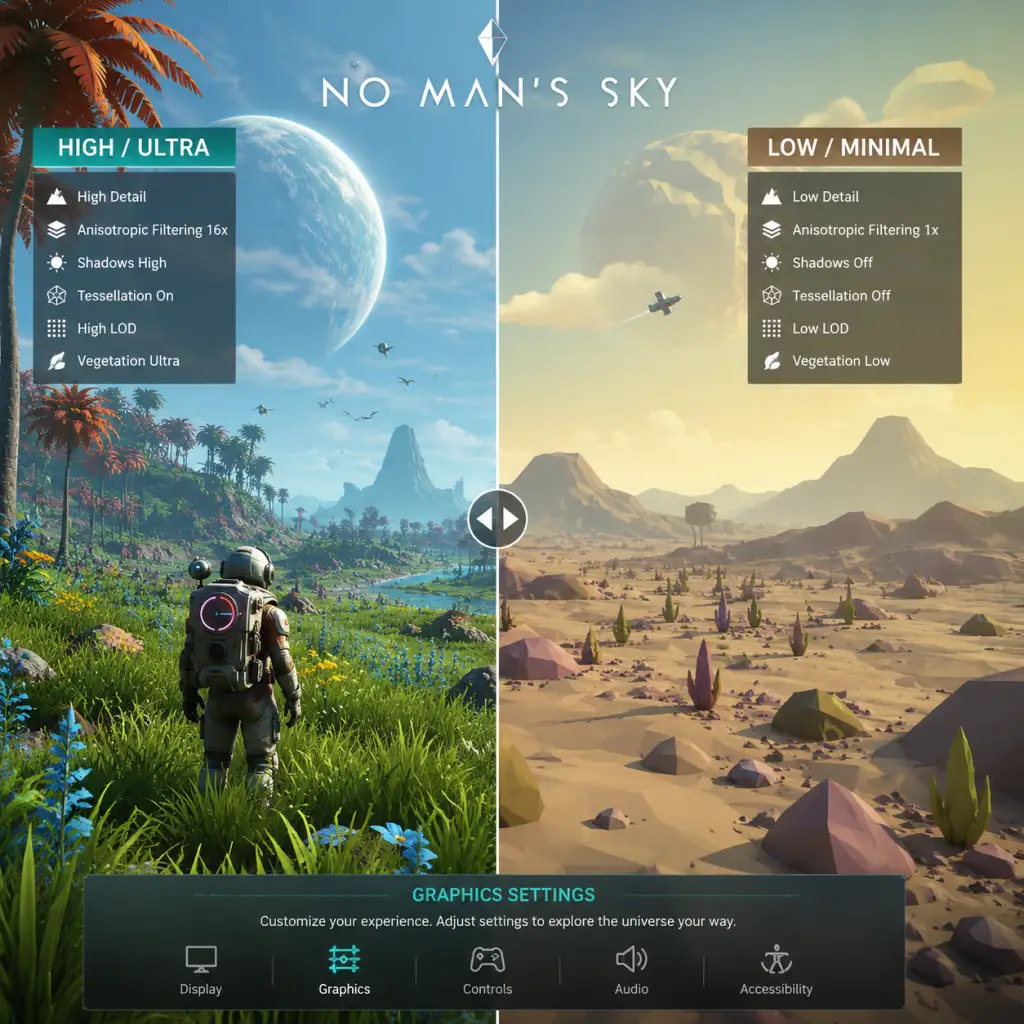
Game Settings
No Man's Sky Game Settings Guide
No Man's Sky offers a wide array of settings that let you tailor the experience to your hardware and preferences. This guide covers every major settings menu, explains what each option does, and provides recommended configurations for low-end, mid-range, high-end, and ultra hardware. We also highlight settings that are easily misconfigured and point out special considerations during initial setup.
---
1. Graphics Settings
Graphics settings have the largest impact on performance and visual quality. The game uses the proprietary engine from Hello Games, which is well-optimized but can be demanding in dense planetary environments or during base building.
#### Key Graphics Options (PC)
| Setting | Description | Recommendation |
|---|---|---|
| Display Mode | Fullscreen, Borderless Windowed, Windowed | Fullscreen for best performance. Borderless Windowed can cause slightly higher input lag. |
| Resolution | Native monitor resolution | Match your monitor's native resolution. Lowering can boost FPS significantly but makes UI tiny. |
| Resolution Scale | Renders at a percentage of chosen resolution | Leave at 100% for native. Lower to 75-85% if struggling. High-end GPUs can use 125-150% for super-sampling. |
| Monitor | Select display if multiple | Ensure correct monitor is selected. |
| VSync | Synchronizes frame rate with monitor refresh | Off unless you experience screen tearing. If on, use Adaptive or Triple Buffering (NVIDIA Fast Sync) to reduce input lag. |
| Fullscreen Mode | Exclusive or borderless | Choose Exclusive Fullscreen for lowest latency. |
| Anti-Aliasing | Controls jagged edges | TAA (Temporal Anti-Aliasing) is recommended for best quality/performance balance. FXAA is lighter but blurrier. None for maximum FPS. |
| Texture Quality | Affects sharpness of surfaces | High on GPUs with 4GB+ VRAM (6GB+ for Ultra). Medium for 2-3GB cards. Low is very blurry. |
| Animation Quality | Skeletal and object animation detail | High is fine for most. Low reduces creature animation complexity, may cause stiffness. |
| Shadow Quality | Resolves shadow sharpness and draw distance | Medium provides a good balance. High and Ultra are heavy on GPUs. Low causes blocky shadows. |
| Post-Processing | Bloom, motion blur, depth of field | Medium is safe. Disable motion blur if it bothers you. High can cause haze. |
| Reflections | Screen-space reflections (SSR) | Medium works well. High is expensive on water and metals. Low disables SSR, using cube maps instead. |
| Light Shafts | God rays from sun/light sources | On for atmosphere. Off gains ~10% FPS in daytime planets. |
| Planet Quality | Multi-resolution texturing for terrain | High for detail. Ultra can drop frames on complex planets. Medium if VRAM limited. |
| Terrain Tesselation | Adds 3D displacement to ground | Off is recommended for performance. On increases GPU load significantly and may cause flickering on older GPUs. |
| Terrain Shadows | Shadows on ground from terrain | Ultra is very expensive. High is good. Medium for performance. |
| Motion Blur | Blurs fast movement | Off for clarity and responsiveness. Only enable if you are motion sick without it. |
| GTAO | Global illumination approximation | Off or Low. High is heavy. This adds ambient occlusion but can darken caves too much. |
| HBAO (NVIDIA only) | Horizon-based ambient occlusion | Slightly better than GTAO but same performance cost. Use Off for more FPS. |
| Volumetric Clouds | Adds 3D cloud formations | Low for performance. Ultra looks fantastic but can cut FPS in half on older GPUs. |
| DLSS (NVIDIA RTX) | AI upscaling | Quality is recommended for clean image. Balanced or Performance for higher FPS. Ultra Performance is blurry. |
| FSR (AMD) | Spatial upscaling | Quality is decent. Performance is softer. Use if DLSS unavailable. |
| Reflex Low Latency | Reduces input lag (NVIDIA) | On + Boost for competitive feel. Enable if you have NVIDIA GPU. |
| Frame Rate Limit | Caps max FPS | Set to monitor refresh rate (e.g., 60, 144) or leave uncapped. Use limit if you experience screen tearing or to reduce GPU heat. |
| Brightness | Adjusts gamma | Follow the on-screen calibration: the middle logo should be barely visible. |
| FOV | Field of View | Default 75 is fine. Increase to 90-100 for wider view, but it reduces FPS slightly. |
On consoles, graphics settings are limited to Resolution Mode (4K/30 FPS) vs Performance Mode (1080p-1440p/60 FPS) on PS5/Xbox Series. PS5 also has VRR (Variable Refresh Rate) support. HDR can be calibrated under Video Output.
#### Recommended Presets by Hardware Level
Low-End (GTX 1060 / RX 580 / 8GB RAM)
- Resolution: 1080p
- Quality Preset: Standard (or custom as below)
- Textures: Medium
- Shadows: Low
- Reflections: Low
- Volumetric Clouds: Low
- Post-Processing: Low
- All AO, tessellation, motion blur: Off
- Anti-Aliasing: FXAA or TAA (light)
- FSR Quality or DLSS Performance (if available)
- Frame Limit: 60
- Resolution: 1080p or 1440p
- Quality Preset: Enhanced (with tweaks)
- Textures: High
- Shadows: Medium
- Reflections: Medium
- Volumetric Clouds: Medium
- Post-Processing: High
- AO: Low (GTAO)
- Anti-Aliasing: TAA
- DLSS Quality or FSR Quality
- Frame Limit: Match display, or 60 if 1440p
- Resolution: 1440p or 4K (with upscaling)
- Quality Preset: Ultra (with some compromises)
- Textures: Ultra
- Shadows: High
- Reflections: High
- Volumetric Clouds: High
- Post-Processing: High
- AO: High (GTAO or HBAO)
- Terrain Tessellation: Off (still expensive)
- Anti-Aliasing: TAA
- DLSS Quality (4K) or Balanced (1440p)
- Reflex: On+Boost
- Resolution: 4K native (or with DLSS Quality for extra smoothness)
- Quality Preset: Ultra – all sliders to max
- Volumetric Clouds: Ultra
- Terrain Tessellation: On (if you like the look, but FPS may drop 10%)
- Reflections: Ultra
- Shadows: Ultra
- Post-Processing: Ultra
- AO: HBAO High
- Anti-Aliasing: TAA
- DLSS: Off or Quality (personal preference)
- Frame Limit: To monitor max (120/144/165)
- Terrain Tessellation is one of the heaviest settings. It adds real geometry to ground but often causes micro-stutters even on high-end systems. Most players leave it off.
- Volumetric Clouds on Ultra can tank FPS by 20-30% on planets with thick atmospheres. Consider keeping it on High or Medium.
- Anti-Aliasing: TAA is preferred but can cause a slight blur. FXAA is sharper but shows more jaggies. Do not use MSAA as it is not supported.
- DLSS vs FSR: DLSS is superior in image quality. If you have an RTX card, always use DLSS Quality. For AMD, FSR Quality is fine. Do not use FSR Ultra Performance as it becomes mud.
Mid-Range (RTX 2060 / RX 6600 / 16GB RAM)
High-End (RTX 3070 / RX 6800 / 16GB RAM)
Ultra (RTX 4090 / RX 7900 XTX / 32GB RAM)
Special Attention Points:
---
2. Audio Settings
| Setting | Description | Recommendation |
|---|---|---|
| Master Volume | Overall game volume | 80-100% |
| Music Volume | Ambient and combat music | 70% (helps with immersion without overpowering) |
| SFX Volume | Sound effects (engines, tools, creatures) | 100% |
| Voice Volume | In-game dialogue and NPC speech | 100% |
| UI Volume | Menu sounds and clicks | 50-70% (can be annoying at high levels) |
| Dynamic Range | Compression vs wide range | High for headphones, Low for TV speakers to avoid loud peaks |
| Voice Chat | In-game proximity chat (multiplayer) | Mute if not needed. Push-to-talk recommended. |
| Sound Output | Stereo, Surround, or Headphones | Headphones for 3D audio. Surround only if you have genuine 5.1/7.1 setup. |
| Subtitles | Display spoken text | On recommended, especially for lore |
| Subtitle Background | Darkens behind text | On to improve readability |
- Dynamic Range: If you hear explosions or ship engines as distortion, set to Low. High dynamic range is fine for quiet environments.
- Voice Chat: Default is open mic; it can pick up background noise. Switch to Push-to-Talk and bind a key.
---
3. Controls Settings
#### Keyboard & Mouse
| Setting | Recommendation |
|---|---|
| Mouse Sensitivity | Start at 50%, adjust for comfortable turning. Higher for quick 180s. |
| Mouse Smoothing | Off for raw input |
| Invert Y-Axis | Personal preference |
| Flight Controls | Normal (roll with mouse) or Legacy (yaw with mouse) |
| Quick Menu | Default 'X' – consider rebinding to a thumb button |
| Inventory | Tab – keep default |
| Scan | 'F' – keep default |
| Sprint | Left Shift – hold vs toggle (toggle recommended) |
| Melee | 'Q' – keep or rebind to mouse thumb |
| Jetpack | Space – hold to boost |
| Build Menu | 'Z' – useful to have on a side button |
| Photo Mode | 'X' (with menu) – rebind if you use it often |
| Markers/Place Waypoint | 'E' (use button) – keep default |
| Hotkeys | Use 1-9 for weapon/multi-tool modes |
| Setting | Recommendation |
|---|---|
| Controller Sensitivity | 60-80% |
| Dead Zone | Default (10-15%) is fine. Lower if you have drift. |
| Invert Y | Off default |
| Button Layout | Standard or Custom – can swap triggers for flight |
| Vibration | On for immersion, Off for battery saving or competitive |
| Trigger Threshold | Default – no need to change |
- Flight Controls: The default Normal mode uses mouse roll/joystick roll. If you prefer yaw (like in most space sims), switch to Legacy mode. This changes how you steer ships.
- Melee/Jetpack Boost: This is a popular movement tech. It requires pressing Melee then Jetpack quickly. The default bindings (Q then Space) work but some rebind melee to a thumb button for speed.
- Quick Menu: The 'X' key is used for context actions, but also opens the quick menu. Rebinding to 'V' or a mouse button can reduce accidental activations.
---
4. Accessibility Settings
No Man's Sky has robust accessibility options.
| Feature | Description | Recommendation |
|---|---|---|
| Color Blind Mode | Filters for Protanopia, Deuteranopia, Tritanopia | Enable if applicable. It recolors UI elements (hazard icons, discovery names). |
| Large Text | Increases font size | On if you play on a small screen or TV far away |
| High Contrast Mode | Inverts or enhances UI contrast | On reduces eye strain. Can look jarring – test in menus. |
| Hold to Confirm | Requires holding a button for actions | Off for faster interactions, On to prevent misclicks. |
| Auto-Move | Continues moving forward without input | Off default. Useful for long flights. |
| Auto-Jump on Planets | Automatically hops over small obstacles | Off (can interfere with precise movement). Enable if you have difficulty with jumping. |
| Dialogue Auto-Advance | Moves to next line automatically | Off (helps when reading) |
| Subtitle Size | Adjust subtitle text size | Large recommended for readability |
| Screen Reader (PC only) | Reads UI text aloud (Windows Narrator) | Requires activation. Useful for visually impaired players. |
| Controller Remapping | Full remapping for analog and buttons | Use if default layout is uncomfortable. |
- Hold to Confirm default is Off. If you find yourself accidentally selling items or deleting bases, turn it On.
- Auto-Jump can cause you to stumble into hazards (e.g., jumping into water on a toxic planet). Keep it off until you are comfortable.
- Language: No Man's Sky supports many languages (English, French, German, Spanish, Italian, Japanese, Simplified/Traditional Chinese, Korean, Russian, Portuguese, Polish, Dutch, Swedish, etc.).
- Voice Language: Covers in-game dialogue and NPC voices. Not all languages have voice acting; if a language has no voice, it falls back to English.
- Text Language: Independent of voice – you can have English voices with Spanish subtitles.
- Change during game: Language can be switched at any time in the Options menu under Language. No restart required for text, but voice change may take effect after loading a save.
- The language setting is separate from the system language. If you accidentally switch to a language you cannot read, navigate blindly by remembering the menu order: Language is under Options (second tab) and the first option is the language dropdown. You can reset by moving left/right.
---
5. Language Settings
Easy to Misconfigure:
---
6. Network Settings
| Setting | Description | Recommendation |
|---|---|---|
| Online Discovery Services | Connect to servers for player discoveries | On (default) – without it, you won't see other players' named planets. |
| Multiplayer | Enable/disable joining other players | On if playing co-op, Off for single-player to avoid unwanted visits. |
| PvP | Player versus Player damage | Off by default. Turn On only if you want to fight other players. |
| Voice Chat | Enable/disable voice | Off or Push-to-Talk |
| Crossplay | Play with users on other platforms | On (recommended) – No Man's Sky has true crossplay. |
| Network Mode | Precision setting for connection quality | Auto works well. If you have a poor connection, try Low Bandwidth mode to reduce lag. |
| Show Other Players | Display player models, markers, and names | On (you can hide them individually) |
| Base Sharing | Allow others to see/edit your base | Friends Only (default) is safest. Anyone can cause griefing. |
| Report Player | When you encounter offensive behavior | Use the quick menu > Report function. |
- PvP is OFF by default, but if you join a group, the group host can force PvP on. Always check the group settings before entering potentially hostile areas (e.g., community events).
- Discovery Services sometimes become overloaded; if you see yellow 'ON' text at the top right of the Discovery screen, you are connected. If it is red, try restarting the game or waiting.
- Base Sharing set to Anyone can allow strangers to build or edit your base (if you have permissions enabled). Change to Friends Only or Nobody to protect your builds.
---
7. Gameplay Settings
This category includes difficulty modifiers and gameplay toggles.
#### Difficulty Settings (Customizable)
No Man's Sky offers a Difficulty Presets system (Creative, Normal, Survival, Permadeath, and Custom). You can change difficulty at any time via Options > Difficulty. Key toggles:
| Subsetting | Effect | Recommendation |
|---|---|---|
| Damage Received | Multiplier on incoming damage | Normal (1x). Survival (2x) is harsh. |
| Depletion Rates | How fast hazard protection, life support drain | Normal (slow). Survival (fast). |
| Fuel Usage | Starship, vehicle, base fuel consumption | Normal (1x). Survival (3x). |
| Resources Availability | Amount of resources from mining | Normal (1x). Abundant (more resources per node). |
| Start with Technology | Ship and Exosuit initial tech | Normal (basic). Rich start gives better gear. |
| Enemy Damage | Damage from sentinels, pirates, predators | Normal (moderate). Survival (lethal). |
| Death Consequences | Lose items? Drop on death? | Normal: lose inventory items that break. Survival: lose items permanently. Permadeath: save deleted. |
- If you crank up Resources Availability to Abundant, you may get bored quickly because everything is too easy. Conversely, Scarcity forces you to scavenge.
- Switching to Permadeath cannot be undone (the save itself is deleted on death). Do not toggle Permadeath accidentally – it is clearly labeled but still easy to misclick.
- Start with Technology can give you a head start, but may spoil the early progression. Recommended for second playthroughs.
#### Gameplay Toggles
| Setting | Description | Recommendation |
|---|---|---|
| Auto-Move | Forward hold not required | Off default |
| Auto-Jump | Automatic hopping over obstacles | Off default |
| Camera Roll | Head-tilt when turning in ship | On for immersion, Off to prevent motion sickness |
| Screen Shake | Screen effect from explosions | Off if it distracts |
| Motion Blu r (separate setting) | Overlap with Graphics | Off recommended |
| Show HUD | Toggle head-up display | On for info. Press H to hide for screenshots. |
| Marker Limit | Maximum waypoints shown | 50 (default). Lower if map is cluttered. |
| Photo Mode Settings | Camera controls, filters, depth of field | Access with 'X' (default) – no performance impact. |
| Cursor Speed (UI) | Speed of pointer in menus | 100% default. Speed up if you find menus sluggish. |
- Camera Roll causes the cockpit view to tilt when you bank. This can induce motion sickness for some players. If you feel dizzy, turn Camera Roll Off.
- Screen Shake is on by default and can be intense during storms or combat. Many players turn it Off for clarity.
- Marker Limit: If you use many custom waypoints, you may have trouble seeing them all. Increase the limit if needed.
- First Launch: After installing, go directly to Options > Graphics and apply a preset that matches your system (options: Standard, Enhanced, Ultra). Then adjust from there.
- Console Players: On PS5/Xbox Series, choose Performance Mode for 60 FPS unless you prefer 4K visuals. Note that Performance Mode still looks great.
- Cloud Saves: If you play on PC Game Pass, save files are synced via Xbox cloud. On Steam, cloud saves are automatic. Do not manipulate save files externally unless you know what you're doing.
- VR Users: Settings for VR are the same as flat, but you may need to lower Graphics to maintain 90 FPS. Use DLSS Quality if available. Enable Comfort Mode in VR settings to reduce motion sickness.
- Experimental Branch: On Steam, you can opt into Experimental for the latest fixes and features. This may introduce bugs. Settings may reset after switching branches.
---
Summary of Easy-to-Misconfigure Settings
1. Terrain Tessellation – Looks nice but depletes FPS heavily. Leave off.
2. Flight Controls (Normal vs Legacy) – If you can't steer your ship intuitively, check this setting.
3. PvP – Off by default, but group hosts can turn it on. Double-check when joining multiplayer.
4. Hold to Confirm – Turn On to avoid accidental deletes.
5. Difficulty Presets – Permadeath is irreversible. Customize carefully.
6. Language – If you accidentally change to an unknown script, navigate the menu blind to revert.
---
Final Tips for Setting Up No Man's Sky
With these settings, you'll be ready to explore the universe comfortably. Tweak them further as you discover what matters most to you—whether it's breathtaking vistas or smooth combat.

Important Notes
Important Notes for No Man's Sky
This guide covers critical warnings, irreversible choices, missable content, grinding traps, online etiquette, and save management tips that every Traveller should know before diving deep into the universe.
1. Irreversible Choices & Permanent Consequences
- Faction Standing & Missions: Choosing a side in certain faction missions (e.g., the "The Space Anomaly" story path or settlement decisions) may lock you out of specific rewards or dialogue options. However, most decisions can be undone via the Terminal at the Space Anomaly (costly nanites) or by resetting the mission. Still, your reputation with each faction cannot be reset completely – once you lose standing, you must rebuild via missions or gifts.
- Atlas Path & Ending Choices: At the end of the main story (Artemis Path), you are given a choice: reset the simulation (start a new galaxy), refuse, or continue. Choosing to reset will transport you to a new galaxy (e.g., Eissentam, Hilbert) and permanently change your home system. Your base and starship inventory are kept, but your technology in suit, multitool, and ship will break (unless you store them before). You cannot undo this. If you refuse, you stay in Euclid but lose the chance to reset later (unless you use a save editor).
- Missions with Time Limits: Some Nexus missions (e.g., protecting a freighter) have hidden time limits; failing can cause permanent damage to your reputation with that species. Always check the mission timer before accepting.
- Base Deletion: If you build a base and then delete the base computer, you permanently lose that base (you can reclaim the parts via the base salvage capsule, but the location is lost). Similarly, claiming a new base while at capacity will delete the oldest unclaimed base.
- Expeditions: Seasonal expeditions (e.g., "Pioneer", "Beachhead") are time-limited (typically 6-8 weeks). Once the expedition ends, you cannot start it, but rewards (ships, multitools, titles) may become available later via the Quicksilver Synthesis Companion at the Space Anomaly for a high cost. Miss the expedition and you may never get the unique items unless Hello Games re-releases them.
- Community Research Missions: The Quicksilver vendor offers rotating community missions. Some rewards are only available during specific events (e.g., "Season of the Sentinel" or "Outlaw"). If you don't complete them in time, those cosmetics vanish potentially forever.
- Pre-Order Bonuses & Twitch Drops: Some exclusive ships or decorations were only available via pre-order or Twitch Drop events. They cannot be obtained in-game unless Hello Games reintroduces them (rare).
- Planet-Based Anomalies: Certain unique interactions (e.g., the "Giant Worm" encounter, the "Death Egg" planet) are procedurally generated but extremely rare. If you leave the system, you may never find another like it. Plaque stones and monoliths can be missed if you don't interact with them during story missions – but they respawn on other planets.
- First Planet Survival: The very beginning can be brutal. Run out of sodium (for hazard protection) and you die quickly. Always mine sodium from yellow flowers early on. Pulmonary protection (oxygen) is critical; die and you lose your inventory (unless you turn on "Keep Inventory" in settings).
- Sentinel Aggression Increases: As you level up your weapon or build more mining lasers, sentinel alert levels rise. Level 5 sentinel waves spawn walkers that can one-shot you if unprepared. Avoid conflict until you have a good shield and scatter blaster.
- Space Combat Tuning: Early pirate attacks are manageable, but late-game battles with Pirate Dreadnoughts or Sentinel Freighters require strong shields, upgraded pulse engines, and phase beams. New players often get melted. Tip: Install phase beam and shield upgrades early.
- Technology Breakdown in New Galaxies: When you reset the simulation (ending the Artemis Path), all your installed technology breaks. You can avoid this by storing all tech in exosuit cargo slots before entering the center or by using a freighter as a base. If you've invested heavily in upgrades, this is a major setback.
- Mining Everything: Don't mindlessly mine every resource pile. Focus on Ferrite Dust, Carbon, Sodium, Oxygen, and Di-hydrogen for early survival. Later, use refiner recipes to create rare elements faster (e.g., Condensed Carbon -> Radon).
- Unnecessary Unit Grinding: You don't need billions of units. The Chromatic Metal economy (buying and selling at stations) is outdated. Instead, Cobalt crashing (buying cheap from one system, sell at inflated prices in another) or Activated Indium farms are efficient. But even that can be overkill – Larval Cores from whispering eggs give 95k each. Don't waste hours on low-profit trading.
- Pointless Scanning: Scanning every plant and animal on a planet for 100% completion gives only ~250 nanites per planet. It's not worth the time unless you're a completionist. Focus on discovering rare fauna or upload 25+ planets for quick nanites.
- Freighter Upgrades: Buying a new freighter costs millions, and upgrading its stats with salvaged frigate modules is a massive time sink. Only upgrade your freighter if you plan to use it as a mobile base. Warp upgrades and matter teleporter are essential; others can wait.
- Cooking Recipes: The cooking system (Nutrient Processor) is mostly cosmetic/trophy. Don't spend hours hunting for rare ingredients unless you want the "Master Chef" title.
- Manual vs. Autosave: The game autosaves when you exit your ship. Always do a manual save before major decisions (buying a freighter, starting a base, entering a black hole). Manual saves are done via Save Beacons (craftable) or Save Point portable tech. I've lost progress to crashing after a critical autosave.
- Multiple Save Slots: You can have up to 15 manual saves plus autosaves. Use different save slots for different playthroughs or before risky expeditions. If you're doing a permadeath run, enable "Save at will" setting to avoid losing everything.
- Permadeath Mode Warning: In permadeath, death is permanent. Even falling from height or ship explosion ends your journey. There is no second chance. Play cautiously.
- Cloud Saves (Steam/PS+/Xbox): Disable automatic cloud sync if you're experimenting with risky mods or save editors. A corrupted save might sync and overwrite your good save. Back up your save folder manually: `%AppData%\HelloGames\NMS\` on PC.
- Multiplayer Interaction: When visiting another player's base, do not edit or delete their base parts. This is considered griefing. Also, do not kill players in pacifist systems unless you both consent to PvP. Turn off PVP damage in network settings if you want to avoid friendly fire.
- Comm Balls: Avoid placing communication stations that spam profanity or spoilers. These can be reported.
- Mods & Anti-Cheat: No Man's Sky does not have a built-in anti-cheat, but using mods in multiplayer may cause desynchronization or crashes. If you use mods, play in single-player or with friends who have the same mods. Hello Games occasionally bans accounts for stat manipulation (e.g., changing save files to unlock everything). Use save editors for quick item unlocks at your own risk.
- Reporting: You can report players for harassment, building offensive structures, or exploiting. The system is manual; Hello Games reviews reports.
- You can rename discovered systems and planets. Use the Discovery menu to claim a system name – it's permanent (unless you revert via save editing). I wish I had named my home system creatively.
- The Analysis Visor can tag resources, creatures, and points of interest at long range. Hold right-click (PC) or L2 (console) to scan; use it constantly.
- Exosuit Cargo Slots: You can buy one extra cargo slot per space station from the exosuit vendor. But you can also get a second slot by visiting the Space Anomaly and purchasing from the vendor there (per system). This doubles your early cargo expansion.
- Technology slots matter: Don't install upgrades in cargo or main inventory if you plan to switch ships. Use tech slots for essential modules (life support, shields) to free up general slots.
- The Refiner is your best friend. Use it to refine Chromatic Metal (indium x2 into chromatic metal) or Oxygen + Condensed Carbon for massive profits. Learn recipes by experimenting.
- Starship Launch Thrusters require Uranium or Launch Fuel – but you can install the Efficient Thrusters upgrade to reduce consumption by 95%. Don't waste time farming Di-hydrogen.
- The Terrain Manipulator can be used to mine resources faster than the regular mining beam (with upgrades). But it's slow underwater; use the Aqua-Jets or optical drill.
- You can ride wild animals by feeding them. This is not just a gimmick – it helps traverse planets quickly early on (scan for creatures, feed, then mount).
- Portal Glyphs are essential for fast travel. Collect them by finding Traveller graves (using a portal manual) or by completing the Atlas Path. Don't ignore them.
- The Nada and Polo questlines give unique Exosuit and Ship upgrades. Do these early for free modules.
2. Missable Content & Timed Events
3. Difficulty Spikes & Progression Traps
4. Grinding Traps & Time Wasters
5. Save Management & Safety Procedures
6. Online Etiquette & Anti-Cheat Notes
7. Things Players Commonly Regret Not Knowing Earlier
Summary Table: Critical Do's and Don'ts
| Do | Don't |
|---|---|
| Manual save before resetting galaxy | Delete bases without salvaging tech |
| Install Efficient Thrusters upgrade | Grind Di-hydrogen for launch fuel |
| Visit both space station and Anomaly for extra cargo slot | Skip the Artemis storyline (unique rewards) |
| Use refiner to make Chromatic Metal | Mine pure ferrite when you can refine it |
| Turn off PvP damage in network settings | Grief other players' bases |
| Check expedition timers before starting | Over-upgrade a freighter you'll replace soon |
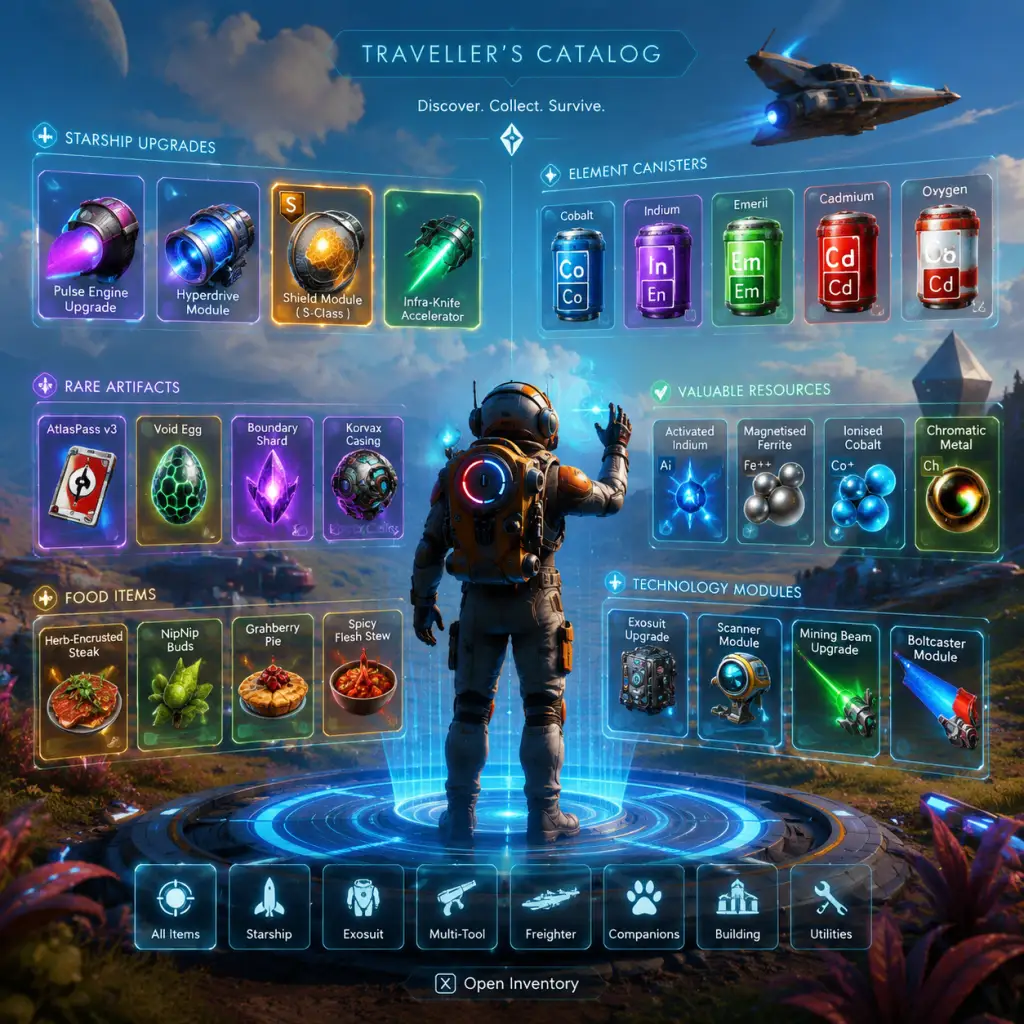
All Game Items
No Man's Sky All Game Items Guide
This guide provides a comprehensive catalog of every major item category in No Man's Sky, including descriptions, acquisition methods, usage tips, and important upgrades or synergies. Items are grouped by function for easy reference.
Materials
Materials are the building blocks of crafting, refueling, and base building. They come in three tiers: Raw, Refined, and Crafted.
Raw Materials
Obtained by mining flora, rocks, deposits, or from planetary interactions.
| Item | Description | How to Obtain | When Useful | Synergies/Upgrades |
|---|---|---|---|---|
| Ferrite Dust | Grey powder from rocks. Used for basic metal components. | Mining common rocks with Multi-tool. | Crafting plates, wiring, base parts. | Refine into Pure Ferrite or Magnetised Ferrite. |
| Pure Ferrite | Refined metal, stronger than dust. | Refine Ferrite Dust (1:1) or mine metal deposits. | Advanced crafting, structural parts. | Combine with Carbon for alloy crafting. |
| Magnetised Ferrite | Highest tier ferrite. | Refine Pure Ferrite (2:1) or mine rare deposits. | Strongest structural components, fusion reactors. | Used in high-end base parts. |
| Carbon | Organic material from plants. | Harvesting flora (red crystals, trees). | Fuel for portable refiner, base lighting, survival. | Refine into Condensed Carbon (2:1). |
| Condensed Carbon | Dense carbon. | Refine Carbon (2:1) or mine glowing crystals. | High-efficiency fuel, advanced crafting. | Refine from Carbon with Salt or other catalysts for faster yield. |
| Sodium | Yellow flora resource. | Harvesting yellow-flowered plants. | Recharging hazard protection, crafting batteries. | Refine into Sodium Nitrate (2:1). |
| Sodium Nitrate | Enhanced sodium. | Refine Sodium (2:1) or mine glowing yellow crystals. | High-capacity hazard protection refills. | Used in ion battery crafting. |
| Di-hydrogen | Blue crystals found near water or on planets. | Mining blue crystals or refining from jelly. | Crafting starship launch fuel, frigate fuel. | Craft into Di-hydrogen Jelly (40:1) for storage. |
| Oxygen | Gas from flora or atmosphere. | Harvesting glowing red plants, or using Atmosphere Harvester. | Life support refill, crafting, and refining. | Refine with Carbon for Condensed Carbon (1:1). |
| Chromatic Metal | Metal refined from other metals. | Refine Copper (2:1), Cadmium, Emeril, Indium (1:2). | Crafting warp hypercores, base teleporters. | Different metals give different ratios: Indium gives highest. |
| Paraffinium | Rare crystalline element. | Mining blue crystals on frozen or radioactive planets. | Life support gel, fuel for exocraft. | Used in advanced hazard protection modules. |
| Uranium (Gamma Root) | Radioactive mineral. | Mining green crystals on radioactive planets. | Recharging hazard protection and fuel cells. | Craft into anti-matter housing. |
| Pyrite | Yellow-gold mineral. | Mining on barren/hot planets. | Pulse engine fuel, crafting. | Refine with Ferrite Dust for Magnetised Ferrite. |
| Dioxite | White/green mineral. | Mining on frozen planets. | Life support recharge, refiner fuel. | Craft into Life Support Gel. |
| Phosphorus | Red mineral. | Mining on hot planets. | Hazard protection recharge. | Used in heat-resistant modules. |
| Radon | Gas from radioactive planets. | Using Gas Extractor on radon clouds. | Crafting nitrogen-based products. | Combine with Sulfurine for Thermic Condensate. |
| Sulfurine | Gas from hot planets. | Gas Extractor on sulfur vents. | Crafting temperature-resistant items. | Combine with Radon for Thermic Condensate. |
| Nitrogen | Gas from frozen planets. | Gas Extractor on frozen vents. | Crafting cryogenic chambers. | Used in stasis devices. |
| Faecium | Organic waste. | From animal droppings, digging. | Farming, crafting agriculture items. | Refine into Mordite. |
| Mordite | Biological matter. | Refine from Faecium or killing creatures. | Crafting explosive components, bait. | Used in unstable plasma crafting. |
Refined Materials
Created by processing raw materials in a Refiner (portable or large).
| Item | Recipe | Use | Synergies |
|---|---|---|---|
| Glass | Frost Crystal (2:1) | Base building windows, containers. | Can be tinted with dyes. |
| Lubricant | Faecium + Mordite | High-end crafting (e.g., Living Ship parts). | Needed for Living Ship upgrades. |
| Enriched Carbon | Condensed Carbon + Nitrogen | Crafting high-efficiency fuel cells. | Used in advanced base tools. |
| Nanotubes | Carbon (50) | Crafting advanced technology modules. | Base of many upgrades. |
| Thermic Condensate | Radon + Sulfurine | Creating hyperwarp drives, anti-matter. | High-temperature protection. |
Crafted Materials (Intermediate Products)
These are items that must be assembled in a blueprint or advanced workbench.
| Item | How to Obtain | Use | Synergies |
|---|---|---|---|
| Antimatter | Crafted: Condensed Carbon (50) + Chromatic Metal (50) | Warp cell fuel, drives. | Needed for warp travel. |
| Warp Cell | Antimatter (1) + Antimatter Housing (1) | Fuels hyperdrive for inter-system jumps. | Can be upgraded to Warp Hypercore for longer jumps. |
| Warp Hypercore | Antimatter + Storm Crystal (1) | Top-tier warp fuel, double range of Warp Cell. | Use with emergency warp modules. |
| Life Support Gel | Di-hydrogen (40) + Carbon (20) | Recharges life support. | More efficient than oxygen alone. |
| Ion Battery | Sodium Nitrate (1) + Cobalt (1) | Recharges hazard protection and multi-tool. | Efficient power storage. |
| Starship Launch Fuel | Di-hydrogen (40) + Metal Plating (1) | Fuels starship launch thrusters. | Craft in bulk for exploration. |
Currencies
No Man’s Sky has three primary currencies and several secondary resources that act as trade tokens.
| Currency | Description | How to Earn | Best Uses | Important Notes |
|---|---|---|---|---|
| Units | Standard monetary unit. | Trading, missions, scanning planets/animals, selling. | Buying ships, freighters, base parts, upgrades. | Infinite cap (4.2 billion). Platinum resource can be sold for units. |
| Nanites | Currency for upgrading technology modules. | Discovering fauna/flora, analyzing data, missions. | Buying S-class modules from Space Station vendors, upgrading ship class. | Use with the Vector, Chronus etc. for best value. |
| Quicksilver | Special currency from the Nexus. | Weekend updates, daily missions, Starbirth missions. | Cosmetics: twitching exosuit, custom ship trails, base decorations. | Can be converted from Tainted Metal at the Nexus. |
| Tainted Metal | Rare currency from derelict freighters. | Opening containers on derelicts. | Trade at Space Station scrap dealer for Units or Quicksilver. | Also used for certain upgrades. |
| Salvaged Data | Ancient blueprints from buried technology modules. | Digging up buried technology (red icon). | Unlock base building parts at the Construction Research Station. | One of the most important grind items early game. |
| Navigation Data | Used to locate special structures. | From small shelters, beacons, or space stations. | Activate signal boosters to find outposts, factories, etc. | Combine with other data for advanced mapping. |
| Factory Override Unit | Unlock blueprints at manufacturing facilities. | Completing facility puzzles. | Unlock crafting recipes without nanites. | Save before trying; answers vary. |
| Storage Augmentation | Increase ship or freighter slots. | Crashed ships, derelict freighters, scrap dealers. | Expand cargo space without nanites. | Use on ships you want to keep. |
Weapons & Multi-tool
The Multi-tool is your primary tool and weapon. It can be upgraded with various modules.
Multi-tool Classes
- Pistol – Balanced, best for combat.
- Rifle – Better scanning, mining.
- Alien – Unique stats, often high damage.
- Experimental – Max scanning range.
Weapons (Modules for Multi-tool)
| Weapon Module | Description | How to Obtain | When Useful | Synergies/Upgrades |
|---|---|---|---|---|
| Boltcaster | Default rapid-fire projectile weapon. | Pre-installed or from crashed ships. | General combat against Sentinels and creatures. | Upgrades: Boltcaster SM (faster), Boltcaster Ricochet (bounces). |
| Scatter Blaster | Shotgun spread, high damage up close. | Blueprint from Manufacturing Facility or Anomaly. | Close-quarters combat, clearing rooms. | Upgrades: Scatter Blaster Reload (speed), Scatter Blaster Damage. |
| Pulse Spitter | Automatic weapon with high fire rate but low damage per shot. | Blueprint from Manufacturing Facility or Anomaly. | Suppressing enemies, dealing sustained DPS. | Upgrades: Pulse Spitter Clips (magazine), Pulse Spitter Projectile. |
| Blaze Javelin | Chargeable sniper rifle with high damage and range. | Blueprint from Manufacturing Facility or Anomaly. | Long-range sniping, taking out sentinels from distance. | Upgrades: Blaze Javelin Reload, Blaze Javelin Damage. |
| Plasma Launcher | Grenade launcher with area damage. | Blueprint from Manufacturing Facility. | Crowd control, destroying groups of sentinels. | Be careful: self-damage is high. Upgrade radius. |
| Geology Cannon | Fires explosive projectiles for terrain manipulation. | Obtain from scrap dealer or specific missions. | Mining large areas, damaging multiple enemies. | Can destroy own resources if misaimed. |
| Combat Scope | Adds zoom and targeting. | Installed on any multi-tool. | Better aim with ranged weapons. | Synergizes with Blaze Javelin and Pulse Spitter. |
Other Multi-tool Modules
| Module | Effect | Where to Get |
|---|---|---|
| Optical Drill | Increased mining speed and yield. | Blueprint or upgrade vendor. |
| Advanced Mining Laser | Cuts through any material, including crystals. | Install from Anomaly. |
| Survey Device | Underground scanning for buried items. | Upgrade from Anomaly (requires salvaged data). |
| Signal Booster | Locates structures (non-worn). | Pre-installed; upgrade range. |
| Personal Refiner | Portable refiner that fits in exosuit. | Unlock with nanites at Anomaly. |
Armor & Exosuit Upgrades
The exosuit provides protection and utility. Upgrades are installed in general, technology, or cargo slots.
Hazard Protection
| Module | Protection Type | How to Obtain | When Useful | Upgrades |
|---|---|---|---|---|
| Radiation Protection | Reduces rad damage | Blueprint or purchased | On radioactive planets | Upgrade to S-class for 3x protection. |
| Thermal Protection (Heat) | Resist extreme heat | Blueprint or purchased | On hot planets | Combine with cooling system for longer duration. |
| Thermal Protection (Cold) | Resist extreme cold | Blueprint or purchased | On frozen planets | Heaters can be installed in base. |
| Toxicity Protection | Resist toxic atmospheres | Blueprint or purchased | On toxic planets | Upgrade to S-class with Ion Battery synergy. |
| Shield Module | Absorbs physical damage | Blueprint or upgrade | Against sentinel attacks | Install multiple for stronger shield. |
| Life Support Module | Automatically refills life support from oxygen | Upgrade from Anomaly | Long expeditions, reduces manual refill | Upgrade for faster recharge. |
Movement & Utility
| Module | Effect | How to Obtain |
|---|---|---|
| Jetpack Boost | Increased jump height/distance | Nanites from Anomaly vendor. |
| Jetpack Efficiency | Less fuel spent per jump | Same. |
| Movement Module | Run speed + sprint duration | Upgrade from Anomaly or contraband. |
| Underwater Protection | Longer oxygen tank, better swim speed | Blueprint from underwater ruins. |
| Night Vision | See in dark without torch | Recipe from manufacturing facility. |
| Cloaking Device | Temporary invisibility (multi-tool) | Anomaly for nanites (2000 cost). |
Exosuit Slots
Increase cargo capacity and tech slots by finding drop pods (signal booster) or buying from Space Stations (one per station).
Consumables
Items that are used up for immediate effects.
Food & Drink (Nutritional Processor)
| Item | Effect | How to Obtain |
|---|---|---|
| Processed Meat | +50% health, +10% hazard protection | Cooked from creature meat. |
| Fruit | Minor health and oxygen | Harvested from flora. |
| Herbal Crunchies | +30% movement speed for 30s | Processed from pulpy roots. |
| Dough | Base ingredient for higher-tier foods | Made from grain. |
| Advanced Nutrients | Restores all hazard protection | Complex cooking recipe. |
Medicine
| Item | Effect |
|---|---|
| Oxygen Capsule | Refills 25% life support |
| Ion Battery | Refills 50% hazard protection |
| Life Support Gel | Refills 75% life support |
| Standard Shield (Shield Booster) | Recharges shields to full |
Boosters & Tech Consumables
| Item | Effect |
|---|---|
| Starship Launch Fuel | One launch for ship |
| Warp Cell | One warp jump |
| Pulse Engine Jelly | Refills pulse engine fuel (10%) |
| Plasma Cartridge | Ammo for Plasma Launcher |
| Geology Cannon Shell | Ammo for Geology Cannon |
Collectibles & Key Items
These items are not consumed but are essential for progression or cosmetic rewards.
| Item | Description | Where to Find | Use |
|---|---|---|---|
| Atlas Pass v1/v2/v3 | Opens locked containers and doors on Space Stations and ruins. | v1 from complex manufacturing, v2/v3 from crashed freighters or missions. | Get v1 asap to access early loot. |
| Memory Fragment | Lore item from ancient ruins. | Digging at alien ruins. | Gives language words and lore. |
| Gek Relic / Korvax Convergence Cube / Vy’keen Dagger | Faction items for reputation. | From ruins, space station vendors, or missions. | Trade for reputation with respective races. |
| Gravitino Ball | Rare green orb, highly desired by Korvax. | Found on extreme planets (gravitational anomalies). | Sell for 100k+ units or trade for faction standing. |
| Stasis Device | Most valuable crafted item (~15M units). | Complex crafting chain involving radon, sulfurine, etc. | Ultimate unit farm; can be duplicated. |
| Fusion Ignitor | Another high-value craft (~18M units). | Similar to Stasis Device but needs different gases. | Highest unit return per slot. |
| Void Egg | Starts the Living Ship questline. | Purchased with Quicksilver (3200 QS) at Anomaly. | Hatch into a Living Ship after a multi-day quest. |
| Dream Aerial | Used to attract Living Ships after the initial quest. | Build via blueprint from Anomaly (requires Living Ship). | Deploy to receive signal for new Living Ship. |
| Freighter Bulkheads | Expand freighter cargo. | Derelict freighter rewards or fleet missions. | Increase storage capacity of your capital ship. |
| Salvaged Frigate Modules | Unlock freighter upgrades (command rooms, tech). | Derelict freighters, frigate missions. | Essential for freighter improvements. |
Key Equipment
Long-term tools and vehicles that expand gameplay.
Exocraft
| Vehicle | Terrain | How to Obtain | Key Upgrade |
|---|---|---|---|
| Roamer | General all-terrain. | Blueprint from Anomaly (Salvaged Data). | Boost engine, mining laser. |
| Nomad | Hovercraft, good over water. | Same. | Airthrusters for fast travel. |
| Pilgrim | Fast bike, poor turning. | Same. | Speed upgrades. |
| Colossus | Heavy hauler with large inventory. | Same. | Ramp for loading. |
| Minotaur | Exomech with high power and weaponry. | Same (requires specific components). | AI pilot option, advanced weapons. |
| Nautilon | Submarine for ocean planets. | Same. | Sonar to locate underwater points. |
Freighter
| Component | Description | How to Obtain |
|---|---|---|
| Capital Ship | Player-owned mobile base. | Defend from pirates and receive reward, or buy. |
| Fleet Command Room | Manage frigate expeditions. | Built with Salvaged Frigate Modules. |
| Matter Beam | Teleport items from freighter to exosuit anywhere. | Unlock via Salvaged Frigate Modules. |
| Orbital Exocraft Materiel Bay | Summon exocraft from freighter. | Same. |
| Freighter Upgrade Modules | Improve hyperdrive range, combat ability. | From derelict freighters. |
Base Building Parts
Thousands of parts exist via blueprints unlocked with Salvaged Data at the Anomaly Construction Research Terminal. Key categories:
- Rooms & Hallways
- Power (Solar panels, Biofuel Reactor, Electromagnetic Generator)
- Refineries (Portable, Medium, Large)
- Storage Containers (linked across bases)
- Teleporter
- Farming Modules (Hydroponics, Planters)
- Decorations (Decals, Furniture)
Multi-tool Enhancements (Non-weapon)
| Module | Effect |
|---|---|
| Scan Range | Increase scanner radius. |
| Analysis Visor | Auto-scan animals and plants. |
| Mining Beam Efficiency | Faster mining with less heat. |
| Terrain Manipulator | Dig tunnels, smooth ground. |
| Combat Scope | Zoom for weapons. |
Special Items (Quest & Lore)
| Item | Context |
|---|---|
| The Atlas Treats | Story items from Atlas path. |
| Remembrance | Final Atlas story completion reward. |
| Star Seed | Another Atlas end reward (grants blue star travel). |
| Pillar of Life | Auto-phage questline. |
| Echo Seed | Used in Living Ship quest. |
| Soul of the Ancients | Collect during Laylaps expeditions. |
| Hypercore Not to be confused with Warp Hypercore; a mission item. |
Synergy Summary
- Crafting chain: Raw Materials -> Refined -> Intermediate -> Advanced products (Stasis Device, Fusion Ignitor). Prioritize gases (Radon, Sulfurine, Nitrogen) for high profit.
- Nanite farming: Scan all fauna/flora on each planet (complete for bonus nanites).
- Units farming: Stasis Device from scratch or Chlorine expansion (Chlorine + Oxygen in medium refiner yields 4x Chlorine).
- Ship upgrades: Install S-class modules from vendor; combine three same-class upgrades for adjacency bonus (increase stats).
- Exosuit: Install six shield upgrades (three in tech + three in general) for invincibility against most foes.
- Freighter: Use Salvaged Frigate Modules to unlock Matter Beam first – then you can access freighter inventory from planets.
This guide covers all essential game items as of update 4.x (Waypoint/Echoes). Always check the latest patch notes for new additions.
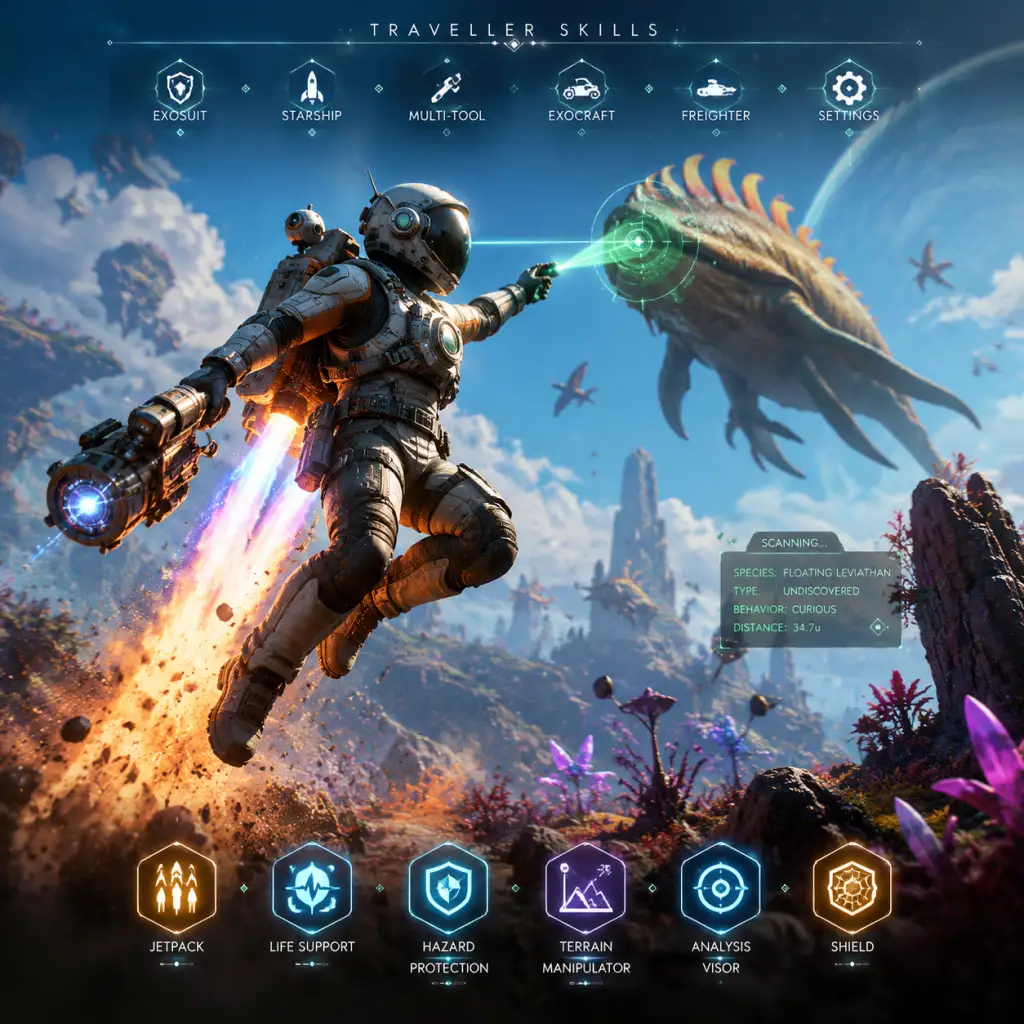
Character Skills
No Man's Sky Character Skills Guide
Overview
In No Man’s Sky, the Traveller is the only playable character, but your capabilities are defined entirely by the technology modules you install in your Exosuit, Multi-tool, Starship, Freighter, and Exocraft. There are no traditional skill trees or classes – instead, you unlock and upgrade modules that grant active abilities (e.g., cloaking, weapon fire modes) and passive bonuses (e.g., hazard protection, movement speed). This guide covers every meaningful “skill” you can acquire, organized by equipment category. Each entry includes effects, cooldowns, upgrades, combos, synergies, recommended builds, and when to use.
---
1. Exosuit Skills
Your Exosuit is your primary survival and mobility tool. It can be upgraded with various Technology Modules (C, B, A, S-class) and blueprints from the Space Anomaly or vendors.
1.1 Movement Abilities
- Jetpack (built-in)
- Cloaking Device (Tech module)
- Hazard Protection (built-in modules for environmental protections)
- Life Support (built-in)
- Personal Forcefield (Multi-tool tech, but accessible from exosuit? Actually it’s a multi-tool module – see below.)
- Personal Shield (not in game as exosuit tech; it’s a multi-tool module)
- Barrier Unit (not in game; closest is Shield Battery consumable)
- Note: No exosuit weapon abilities; all combat is via multi-tool or starship.
- Analysis Visor (built-in)
- Survey Device (blueprint from Anomaly)
- Portable Refiner (not a skill; is a deployable item)
- Max jetpack duration combined with Airburst Engine for aerial combat.
- Cloaking Device + high hazard protection for stealth survival on extreme planets.
- All builds benefit from Shield Upgrade modules (S-class) for extra survivability.
- Effect: Propels you upward or forward; drains fuel (recharges over time). Base duration ~2 seconds full burn.
- Upgrades:
- S-Class Jetpack Modules (+15-21% boost duration)
- Sprint Upgrade (Faster ground movement)
- Rocket Boots (Auto-jump while sprinting; no cooldown)
- Airburst Engine (Air dash with directional control; 3-second cooldown)
- Combos: Use airburst to avoid projectiles or reach ledges; combine with jetpack for triple jumps.
- Builds: Essential for all builds; prioritize S-class modules for explorers.
- Effect: Grants invisibility for ~30 seconds; can’t use multi-tool while cloaked; enemies lose target. Cooldown: 60 seconds after deactivation.
- Upgrades: No direct upgrade but increased duration via S-class cloak modules (max +15 seconds).
- Synergies: Pair with Scatter Blaster (can fire while cloaked? Actually no – you must decloak to shoot. But cloak allows repositioning for ambushes.) Also useful for avoiding sentinels or predators.
- Best for: Stealth combat or escaping.
1.2 Survival Abilities
- Types: Heat, Cold, Radiation, Toxin. Each reduces damage from that hazard. Upgrades: Thermal Buffer, Coolant Network, etc.
- Effect: Extends time before hazard damage starts. Modules drain battery; must recharge via Sodium or technology.
- Recommended: Explorer builds max all protections.
- Effect: Regenerates health when out of combat. Upgrade modules increase recharge speed (e.g., Life Support Module +15% recharge).
- Notable: Shield Upgrade modules also improve shield regen.
1.3 Combat Abilities (Exosuit-mounted)
1.4 Utility Abilities
- Effect: Scans flora, fauna, minerals, and points of interest. Shows name, resource composition, and rarity. No cooldown.
- Upgrades: S-Class Scanner Range (increases scan radius), S-Class Scanner (adds bonus units for scanning creatures).
- Synergies: Use with Survey Device for deep mineral deposits.
- Effect: In Analysis Visor mode, highlights underground deposits (gas, minerals, power hotspots). No cooldown.
- Needed for: Base building with geothermal power.
1.5 Exosuit Synergies
---
2. Multi-tool Skills
Your Multi-tool is your primary tool for mining, combat, and scanning. It has several weapon modes and support modules.
2.1 Mining Beam
- Effect: Continuous beam that mines resources; damages enemies slowly. Base cooldown (overheat) after ~8 seconds of continuous fire.
- Upgrades:
- Optical Drill (improves yield, faster mining)
- Combat Scope (adds damage and accuracy; also reduces zoom spread)
- Best for: Material gathering; not primary combat.
2.2 Terrain Manipulator
- Effect: Changes terrain shape; can dig, flatten, or restore. No cooldown but consumes fuel.
- Upgrades: None directly, but Advanced Mining Laser module increases manipulation speed.
- Use: Creating caves or flattening base sites.
2.3 Weapon Systems
| Weapon | Damage | Fire Rate | Range | Special | Cooldown |
|---|---|---|---|---|---|
| Boltcaster | Medium | Slow | Long | None | Very short (no cooldown, just reload) |
| Pulse Spitter | Low | Very High | Short | Ricochet chance | Short overheat |
| Scatter Blaster | High (per pellet) | Medium | Very Short | Spread | Long reload |
| Blaze Javelin | Very High | Single shot | Long | Charged, +% damage | ~1 sec charge, moderate cooldown |
| Neutron Cannon | High area | Slow | Short | AoE explosion | Long overheat |
- Upgrades for weapons: S-Class Damage modules (increase damage up to +30%), S-Class Fire Rate, Reload Speed, Magazine Size. Each weapon has specific modules (e.g., Scatter Blaster has Hydraulic Firing Mechanism).
- Combos:
- Best for: Fighter builds use Scatter Blaster or Blaze Javelin; explorer builds may stick with Mining Beam only.
- Analysis Visor (same as exosuit; duplicated? No, multi-tool has its own visor? Actually the visor is part of the exosuit, but multi-tool has Scanner modules that improve scan range.
- Survey Device (shared with exosuit)
- Personal Forcefield (Tech module)
- Forcefield + Scatter Blaster: Peek around shield, fire, hide.
- Blaze Javelin + Combat Scope: Extreme range precision.
- Mining Beam + Optical Drill: Max resource per second.
- Pulse Engine: Used for in-system travel. Upgrades: S-Class Pulse Engine (improves maneuverability and boost speed).
- Hyperdrive: For interstellar jumps. Upgrades: S-Class Hyperdrive (increases warp range). Requires fuel (Warp Cells).
- Synergy: Economy Scanner and Conflict Scanner are utility modules that reveal system info before warping.
- Scatter Blaster + Cloaking Device for stealth point-blank kills.
- Blaze Javelin for long range sniping (use Combat Scope).
- Pulse Spitter for sustained close combat (use Ricochet Module).
2.4 Scanning and Analysis Tools
- Effect: Creates a directional shield that blocks projectiles and melee. Zoom to aim. Cooldown: 0 (toggle on/off), but shield energy depletes under fire; recharges out of combat.
- Upgrades: S-Class Shield Capacity (+20% max shield).
- Synergy: Use while mining dangerous resources (e.g., whispering eggs).
2.5 Multi-tool Combos
---
3. Starship Skills
Your starship is your primary vehicle for space combat and traversal. It has several technology slots for weapons, shields, engines, and utilities.
3.1 Pulse Engine and Hyperdrive
3.2 Weapon Systems
| Weapon | Damage | Rate | Range | Special | Cooldown |
|---|---|---|---|---|---|
| Photon Cannon | Medium | Fast | Long | None | None (ammo unlimited) |
| Cyclotron Ballista | High | Slow | Very Long | Shield damage bonus | Long reload |
| Infra-Knife Accelerator | High | Very Fast | Medium | Sustained fire | Overheats quickly |
| Positron Ejector | High | Slow | Short | AoE blast | Long reload |
| Phase Beam | Medium | Fast | Medium | Drains target shields & heals you | Short overheat |
- Upgrades: Each weapon has S-class damage, fire rate, and magazine modules. E.g., Infra-Knife benefits from Cooling System to reduce overheat.
- Combos:
- Best for: Fighter starships favor Infra-Knife or Cyclotron; explorer/trader use Photon Cannon for efficiency.
- Shields: Built-in. Upgrades: S-Class Shield Module (+20% capacity, faster recharge).
- Cloak (not available for starship – only exosuit cloak exists).
- Emergency Warp Unit: Allows escape from combat if shields drop below 10%. Cooldown: 5 minutes.
- Launch System: Refuel via Launch Fuel or Uranium; upgrade Launch Auto-Recharger (slowly refills over time).
- Teleport Receiver (from Anomaly quest): Allows teleportation to base teleporters. No cooldown but requires unlocked.
- Boost: Each exocraft has a boost ability. Cooldown ~10 seconds after boost ends.
- Special Abilities:
- Minotaur Cannon: High damage, splash. Cooldown: short reload.
- Roamer Laser: Mining and combat. Overheat cooldown.
- Propulsion Upgrades: S-Class Boost and Maneuverability.
- Exocraft Radar: Highlights resources (upgraded with S-Class Scanner).
- Atlas Pass: Opens certain doors (v1, v2, v3). Rechargeable? No, permanent.
- Remembrance: Allows interaction with terminals for lore; no cooldown.
- Anomaly Portal: Unlocks after Artemis quest; allows warping to Anomaly. Cooldown: none, but requires Anomaly already discovered.
- Exosuit: Max jetpack duration and air dash. S-class scanner modules for unit income. Full hazard protections.
- Multi-tool: Only Mining Beam with Optical Drill; no weapons (avoid sentinels). Survey Device.
- Starship: Max hyperdrive range, economy scanner, no weapons upgrades.
- Exocraft: Roamer with full radar upgrades.
- Playstyle: Scan everything, find S-class planets, trade resources, avoid combat.
- Exosuit: S-class shield modules, Cloaking Device. Sprint upgrade.
- Multi-tool: Scatter Blaster (S-class damage), Personal Forcefield. Also Blaze Javelin for ranged.
- Starship: Infra-Knife Accelerator with overheat reduction, Phase Beam, max shields. Emergency Warp.
- Exocraft: Minotaur with cannon upgrades.
- Playstyle: Engage sentinels, pirates, and walkers. Use cloak to approach, scatter blaster for kill.
- Exosuit: Cargo bulkhead upgrades for more inventory. Life support not prioritized.
- Multi-tool: Mining beam for survival, Survey Device for gas hotspots (to sell).
- Starship: Hauler type with max cargo slots, economy scanner, conflict scanner to avoid fights.
- Freighter: Max fleet command for trade expeditions.
- Playstyle: Buy low, sell high across systems. Use teleport network.
- Exosuit: Balanced – 3 jetpack mods, 3 shield mods, 1 life support. Cloaking device optional.
- Multi-tool: Scatter Blaster + Mining Beam (two weapons). Personal Forcefield.
- Starship: Cyclotron Ballista for ranged, Photon Cannon as backup.
- Playstyle: Adapt to any situation.
- Phase Beam + Shield Upgrade: Drain enemy shields while regenerating yours.
- Positron Ejector for dogfighting at close range.
3.3 Defense Systems
3.4 Utility Abilities
---
4. Freighter Skills
Your freighter is a mobile base; its “skills” are mostly passive.
4.1 Fleet Command
- Effect: Send frigates on expeditions. No cooldown per se, but each frigate takes time (real-time hours).
- Upgrades: S-Class Fleet Command modules improve frigate stats.
4.2 Freighter Warp Drive
- Effect: Allows system jumps without using starship fuel. Upgrades: S-Class Freighter Upgrade (increases warp range).
4.3 Exocraft Summoning
- Effect: From freighter, summon any owned exocraft to planet surface via the menu. No cooldown but requires freighter in system.
4.4 Base Building Abilities
- Effect: Build rooms, storage, technology. No skills per se.
---
5. Exocraft Skills
Exocraft (Roamer, Nomad, Colossus, Minotaur, Pilgrim, Nautilon) have their own technology slots.
5.1 Movement Abilities
- Minotaur: Can walk underwater and has cannon.
- Nomad: Hover over water.
- Pilgrim: Fast on land.
- Nautilon: Submarine.
5.2 Weapons and Upgrades
5.3 Scanning Utility
---
6. Special Abilities from Quests
---
7. Recommended Builds
7.1 Explorer Build
7.2 Fighter Build
7.3 Trader Build
7.4 Mixed Build
---
8. When to Use Each Skill
| Skill | When to Use |
|---|---|
| Jetpack | Always for movement; avoid ground hazards. |
| Airburst | Dodging attacks, reaching high ledges. |
| Cloaking | Stealth approach to sentinels, avoiding predators, escaping combat. |
| Analysis Visor | Scan new fauna/flora for units; locate resources. |
| Survey Device | Find deep deposits for base power or mining. |
| Personal Forcefield | While mining dangerous deposits, reviving in combat. |
| Scatter Blaster | Close range vs sentinels or aggressive creatures. |
| Blaze Javelin | Snipe sentinels from afar, destroy armor plates. |
| Pulse Spitter | Suppressive fire; ricochet modules can hit behind cover. |
| Neutron Cannon | Crowd control vs multiple enemies. |
| Phase Beam (starship) | Space combat vs shielded enemies; heal yourself. |
| Infra-Knife | DPS race vs pirates. |
| Emergency Warp | Escape overwhelming battle. |
| Exocraft Boost | Traverse large distances fast. |
| Minotaur Cannon | Combat on foot before you exit the exocraft. |
| Freighter Fleet | Send expeditions when you’re offline or exploring. |
Conclusion
There are no “character classes” in No Man’s Sky, but your tech loadout defines your capabilities. By understanding each module’s effect, cooldowns, and synergies, you can tailor your Traveller to any playstyle. Upgrade your Exosuit, Multi-tool, Starship, Freighter, and Exocraft with S-class modules whenever possible. Experiment with weapon combos and movement tech to master the universe.
Characters & Roles
Characters & Roles in No Man's Sky
No Man's Sky does not feature traditional character classes or heroes. Instead, you play as a Traveller, a lone explorer in a vast procedurally generated universe. Your identity and abilities are defined by your suit, multitool, starship, and the technology you install. The game focuses on player-driven roles and several key NPC characters that drive the story and lore. This guide covers both the non-player characters (NPCs) that you will encounter and the distinct playable roles (playstyles) you can adopt.
---
1. NPC Characters
#### 1.1 The Traveller (Player Character)
- Background: You are an interdimensional Traveller, an amnesiac who wakes up on a strange planet with a damaged starship. The Atlas, a mysterious entity, calls you to explore, survive, and uncover the secrets of the universe. You are the only playable character.
- Strengths: Unlimited customization through upgrades; ability to be anything (explorer, builder, trader, fighter); permanent death optional (Permadeath mode).
- Weaknesses: No inherent skills; need to install tech modules to improve; limited inventory early game.
- Playstyle: Fully flexible – you define your own journey.
- Unlock conditions: None; start the game.
- Recommended equipment/builds:
- Team synergy: Play solo; no direct party system, but you can play together with friends in multiplayer (up to 4 players). Roles can complement: one builds, one mines, one fights.
- Background: Artemis is a young Traveller you encounter through mysterious communication signals. They are trapped in a simulated world and you must help them by finding their crashed ship and saving their consciousness. Central to the “Traveller” questline.
- Role in story: Quest giver; emotional anchor; reveals the truth about the universe simulation.
- How to interact: Follow the “Artemis Path” quest after the initial Awakening. Final choice: you can either save Artemis (as a soul in a Traveller Shell) or leave them lost.
- Impact: Affects endgame decisions regarding Atlas and the universe reset.
- Background: Apollo is a mysterious Traveller who communicates via holograms. They are investigating the same mystery as Artemis and the Atlas. Apollo represents a more detached, analytical view of the universe.
- Role: Provides key story missions; forces you to make difficult choices about the nature of reality.
- Interactions: Appears during the “Atlas Path” and “The Purge” missions. You can choose to side with Apollo or the Atlas.
- Background: A rogue Traveller who has become obsessed with the truth of the simulation. Despises the Atlas and wants to break free. -null- is a dangerous entity encountered in the “Anomaly” and during the “Portal” quests.
- Role: Antagonist/anti-hero; provides lore and warns you about the Atlas's lies.
- Important: You can choose to attack -null- or listen; this influences story branches.
- Background: Polo is a Gek (a species) scientist who runs the Space Anomaly – a hub where Travellers gather. Polo is driven by a desire to understand all things, and collects data from travellers.
- Role: Quest giver for “Polo’s Quests” (Milestones); grants rewards like Nanites, blueprints, and coordinates to special systems (e.g., Black Holes, Atlas Stations).
- Unlocks: Completing Polo’s milestones unlocks powerful technologies and access to the Anomaly’s Teleporter and Exocraft summoning station.
- Background: Nada is a Korvax (a species) Traveler assistant who helps Polo. Nada is calm, wise, and provides philosophical insights about the universe and the Traveller’s journey.
- Role: Secondary quest giver; offers guidance and lore; can give you coordinates to specific systems (e.g., “Ancient Ruins” or “Portals”).
- Note: Nada’s dialogue often provides hints about the nature of the simulation.
- Background: The Atlas is a universal AI that created the simulation. It appears as a giant red orb with a single eye. It speaks to Travellers and offers them the choice to either reset the universe or continue.
- Role: Endgame entity; provides the Atlas Pass and key lore; final decision point.
- Interactions: Only in late-game quests (“The Purge”). You can give it materials to receive technology or choose to birth a new universe.
- Background: Various alien species (Gek, Korvax, Vy’keen) man space stations. They offer technology modules, blueprints, and upgrades for Nanites or Units.
- Roles: Vendors; each species specializes: Gek (Trade/Wealth), Korvax (Science), Vy’keen (Combat).
- Important: Building reputation with each species unlocks better prices and more advanced blueprints.
- Focus: Scanning flora/fauna, finding rare planets, visiting new systems.
- Essential upgrades:
- Multi-tool: Scanner-focused, Mining Beam for resource gathering.
- Starship: Explorer-type (high hyperdrive range) or Exotic (balanced).
- Exocraft: Nomad or Roamer for ground exploration.
- Multiplayer synergy: Act as scout; find valuable resources or interesting planets for the team.
- Focus: Buying low, selling high; flipping trade goods; running a trading fleet.
- Essential upgrades:
- Multi-tool: Not critical; any tool with terrain manipulator for resource collection.
- Starship: Hauler with maximum cargo slots (48+8).
- Fleet: Freighter with trade-focused frigates (Trade stat >30).
- Multiplayer synergy: Provide team with Units to buy materials; manage the team’s economy.
- Focus: Destroying pirates, Sentinels, biological horrors; protecting others; raiding facilities.
- Essential upgrades:
- Multi-tool: Scatter Blaster or Pulse Spitter with damage upgrades.
- Exocraft: Minotaur (with AI pilot) for ground combat.
- Multiplayer synergy: Frontline defender; clear enemies for builders/miners.
- Focus: Constructing bases, farms, automated resource extraction; creating community hubs.
- Essential upgrades:
- Unlocks: Purchase blueprints from the Anomaly using Salvaged Data and Nanites.
- Multiplayer synergy: Build a shared base with refiners, greenhouses, and landing pads for the team.
- Focus: Gathering rare resources (Activated Indium, Cadmium, etc.), farming, selling raw materials in bulk.
- Essential upgrades:
- Bases: Build simple outposts with power, storage containers, and a teleporter near rich deposits.
- Multiplayer synergy: Provide team with raw materials for building or selling.
- All-rounder: S-class movement upgrade, Advanced Mining Laser, Economy Scanner, Conflict Scanner, Shield upgrades.
- Specialist: Focus on one area (e.g., pure combat: max Pulse Spitter, S-class Sentient upgrades).
#### 1.2 Artemis
#### 1.3 Apollo
#### 1.4 -null- (Null)
#### 1.5 Polo
#### 1.6 Nada
#### 1.7 The Atlas
#### 1.8 Space Station NPCs (Merchants/ Tech vendors)
---
2. Playable Roles (Playstyles)
No Man’s Sky does not lock you into a single class. You can switch between roles freely, but specializing your tech upgrades enhances effectiveness. Below are the five primary roles, their recommended loadouts, and how they synergize in multiplayer.
#### 2.1 Explorer (Scout/Discoverer)
- Scanner upgrades: S-class (3x Range, 3x Reward) – make 100k+ Units per scan.
- Hyperdrive upgrades: S-class (max 2500+ LY range) to jump far.
- Storm Crystal protection: Thermal Protection upgrades, Energy Shield.
- Jetpack: S-class jetpack upgrades for fast exploration on foot.
#### 2.2 Trader (Merchant/Economist)
- Economy Scanner: Crucial – find wealthy systems with demand.
- Conflict Scanner: Avoid pirate systems.
- Pulse Drive upgrades: Faster travel between stations.
- Cargo exosuit upgrades: More inventory slots for trade goods.
- Starship: Hauler (high cargo capacity) for bulk trading.
#### 2.3 Fighter (Combat/Killer)
- Weapon Systems: Pulse Spitter (high DPS) or Positron Ejector (shotgun-like, space combat).
- Shield upgrades: S-class (3x for near-immortality in combat).
- Starship: Fighter-type (high maneuverability, bonus damage).
- Exosuit: S-class Hazard Shield; personal shield upgrades; Health module.
- Technologies: “Combat Amplifier” for multitool; “Squadron” (hiring wingmen).
#### 2.4 Builder (Architect/Base Builder)
- Terrain Manipulator: Build and reshape land.
- Base Computer: All basic building parts unlocked via blueprint analyzers.
- Exosuit: Maximum inventory; personal refiner for on-the-go crafting.
- Starship: Not critical; but a Hauler can carry building materials.
- Exocraft: Colossus (large cargo) or Minotaur (with mining laser).
#### 2.5 Survivalist (Harvester/Miner)
- Advanced Mining Laser (Optical Drill for rare minerals).
- Hazard Protection (S-class heat/cold/toxin/radiation).
- Exosuit: Cargo slots; “Life Support” upgrades (Oxygen filter).
- Exocraft: Roamer (fast) or Nomad (amphibious) with mining attachments.
- Starship: Hauler for transporting large quantities.
---
3. Team Synergies in Multiplayer
While playing solo is the default, you can team up with up to 3 friends (or join a public session). Here’s how roles complement each other:
| Player Role | Team Contribution | Ideal Partner Roles |
|---|---|---|
| Explorer | Locates valuable systems, planets, and trade routes. | Trader (to capitalize on discoveries); Fighter (to protect from sentinels). |
| Trader | Funds the team with Units; buys expensive upgrades. | Explorer (finds profitable goods); Builder (creates storage). |
| Fighter | Clears hostile NPCs, protects the group during mining or building. | Survivalist (vulnerable while mining); Explorer (encounters pirates). |
| Builder | Constructs shared base/hub; sets up farms and refiners. | Survivalist (provides materials); Trader (sells excess). |
| Survivalist | Supplies raw materials for crafting and selling. | Builder (uses materials); Trader (sells surplus). |
---
4. Unlocking Additional “Roles” via Technology
Certain upgrade paths effectively unlock sub-roles:
- Cooking: Install Nutrient Processor and learn recipes from Space Station nexus – becomes a Chef role.
- Photography: Use Photo Mode (default is X on PC, D-pad up on controller). Not a role but a common activity.
- Sequence Breaking: Some players become “Portal Masters” – learning all 16 Glyphs via Traveller Graves to fast-travel anywhere.
- Exobiology: Studying and cataloging all fauna on a planet to earn Nanites; not a distinct role but enhanced by scanning upgrades.
---
5. Frequently Asked Questions
Q: Can I change my role mid-game?
A: Yes. There is no permanent choice. You can respect your exosuit, multitool, and ship technologies at any time (some upgrades can be dismantled for half resources).
Q: Do I need to choose a “class” at the start?
A: No. The game has no class system. Your starting status is the same for everyone.
Q: How do I unlock the Artemis/Apollo story?
A: After fixing your ship and leaving the first planet, an incoming transmission will start the “Artemis Path” quest. Just follow it.
Q: What is the best role for new players?
A: Start as an Explorer/Survivalist hybrid. Learn the basics of scanning, mining, and upgrading before specializing.
---
6. Conclusion
No Man’s Sky offers maximum freedom by letting you define your own character through choices and technology. The NPC characters provide rich lore and moral dilemmas, while playable roles allow you to tailor your experience. There are no wrong choices – experiment with different setups and discover the Traveller you want to be.
Cheats & Secrets
Cheats & Secrets in No Man's Sky
No Man's Sky does not feature traditional cheat codes (like invincibility or infinite resources) that can be entered via a menu or key sequence. However, the game contains a wealth of hidden content, developer-intended secrets, Easter eggs, and some legacy exploits that are safe to use within the game's evolving sandbox. This guide covers all known hidden features and secrets as of the latest major update.
1. No Official Cheat Codes
- No console commands exist for standard gameplay. On PC, you can open the developer console by pressing `~` (tilde) if you launch with `-console` in the launch options, but this is intended for debug/testing and can corrupt your save. Do not use unless you are a developer or accept the risk. Commands like `toggledebug` or `spawn` are not officially supported.
- Save editors (e.g., Goatfungus) are community-made tools that let you modify inventory, stats, and more. These are not cheats in the traditional sense but can be considered unofficial hacks. Use at your own risk.
- How to find: On certain extreme desert planets, you may witness a massive worm bursting from the ground. It’s a rare environmental event. No kill or interaction possible – purely atmospheric.
- Location: Found on planets with "Infected" or "Scorched" biomes. Often appears near player structures.
- During the main story, when you reach the final Atlas station, you can choose to Reset the Simulation or refuse. If you reset, you get a new galaxy (e.g., Eissentam). This is a narrative secret that changes the game’s state permanently.
- Unlock: Complete the Artemis path and the Atlas path.
- Trigger: Buy a Void Egg from the Space Anomaly for 3,200 Quicksilver. Warp to any system and pulse around until you encounter a strange message. This starts a quest line that rewards a fully functional organic starship.
- Secret: The quest involves cryptic coordinates and locations. It’s a multi-day mission with unique interactions.
- Throughout the game, the number 16 appears frequently (16 glyphs, 16 minutes to respawn, 16 planets in some systems, etc.). This ties into the lore of the Atlas simulation. It’s not a cheat but a story secret.
- Uncover: By reading all logs and story terminals, you’ll piece together the meaning.
- There are 16 ancient glyphs used to activate portals. You can input specific sequences to teleport to special locations like the Galaxy Center, the coordinates of the final planet (New Lennon), or the Galactic Hub community bases.
- Secret addresses: The first glyph repeated 12 times leads to a planet very close to the galaxy center. Try different combinations to find exotic planets or player-created cities.
- A rare planet type with a perfect cube shape – reminiscent of the Borg cube from Star Trek. It’s called a "Mega Exotic" biome. Visiting it triggers a unique entry in your discovery log.
- Certain space stations have a music track that sounds like the Cantina Theme from Star Wars. No confirmation from Hello Games, but fans agree.
- On some frozen worlds, you can find a small, bipedal creature with a horned helmet that looks like a Viking. It’s purely cosmetic.
- On certain lush planets, blocks of green grass can appear floating in the air, reminiscent of Minecraft terrain. Break them to get Carbon.
- On the planet New Lennon (the system that appears in the game's first trailer), there is a gravestone with the names of the Hello Games developers. It’s a memorial to their hard work. Coordinates have been shared by the community.
- These buildings often contain holographic logs and creepy stories. One log tells of a crew that went mad after being trapped in a time loop – a reference to the game Groundhog Day? Possibly original.
- How it worked: Place a Portable Refiner on the ground, put items in input, then stack refiners on top. Picking up the refiner while something is processing would duplicate the input. No longer works as of 4.0 (Waypoint) update.
- Method: In multiplayer, have a friend invite you to their game. Drop items from your inventory onto a storage container in their base. Then, both you and your friend can pick up the same stack. This duplicates items. Use cautiously – it may ruin progression.
- How: If you are in a combat situation, you can use an Emergency Warp (installed in the starship) to instantly flee to a random nearby system. This is intentional but often overlooked as a cheat-like survival tool.
- How: When rescuing a freighter from pirates, you can ask for a reward (like a frigate module) instead of the freighter itself. Then later, another rescue mission can give you a free freighter without spending units. This is legitimate but feels like an exploit.
- A real website (galacticatlas.com) maps player-discovered systems. Certain systems are intentionally left blank for community events. Finding the "First Spawn" systems or the "Anomaly" is a collective secret.
- In past expeditions, Hello Games hid clues leading to a special reward. Keep an eye on official channels for future timed secrets.
2. Hidden Features & Developer-Intended Secrets
Hello Games has intentionally left many secrets for players to discover. These are not glitches but legitimate content accessible through normal gameplay.
#### 2.1 The Giant Sand Worm (Sandworm)
#### 2.2 The "Meltdown" Event (Atlas Station)
#### 2.3 The Living Ship Quest (Void Egg)
#### 2.4 The "16" Mystery
#### 2.5 Portal Glyphs – Secret Addresses
3. Easter Eggs & Pop Culture References
#### 3.1 The "BORG" Planet
#### 3.2 The "Star Wars" Reference
#### 3.3 The "Wiking" Creature
#### 3.4 The "Minecraft" Easter Egg
#### 3.5 The "Hello Games" Gravestone
#### 3.6 The "Abandoned Building" Messages
4. Legacy Exploits (Safe & Mostly Patched)
These are mechanics that Hello Games has either intentionally left in or have not removed entirely. Use them for convenience, but be aware that future updates may remove them.
#### 4.1 The "Portable Refiner" Dupe (Patched in Waypoint)
#### 4.2 The "Chest Dupe" (Still works on some platforms)
#### 4.3 The "Emergency Warp" Trick
#### 4.4 The "Freighter Free" Method
5. Secrets Hidden Behind Community Coordination
#### 5.1 The Galactic Atlas
#### 5.2 The "Day of the Butterfly" Secrets
6. Important Note on Legitimate Hidden Content
No Man’s Sky is designed so that every player can discover something new. The true “cheat” is the save editor or mods (like RaYRoD’s Overhaul). Hello Games has stated they do not ban players for using single-player cheats, but online etiquette may frown upon it. Always backup your save before experimenting.
Conclusion
While No Man’s Sky lacks traditional cheat codes, its universe is filled with developer-intended secrets, community-driven mysteries, and a few harmless legacy tricks. The best way to experience them is to explore relentlessly – the game rewards curiosity with hidden wonders.