Outlast
## Game Introduction: Outlast --- ### Genre & Developer Information - **Genre:** First-person psychological survival horror, stealth-based exploration - **Developer:** Red Barrels (independent Canadian studio) - **Publisher:** Red Barrels ### Release Timeline & Platforms | Platform | Release Da...
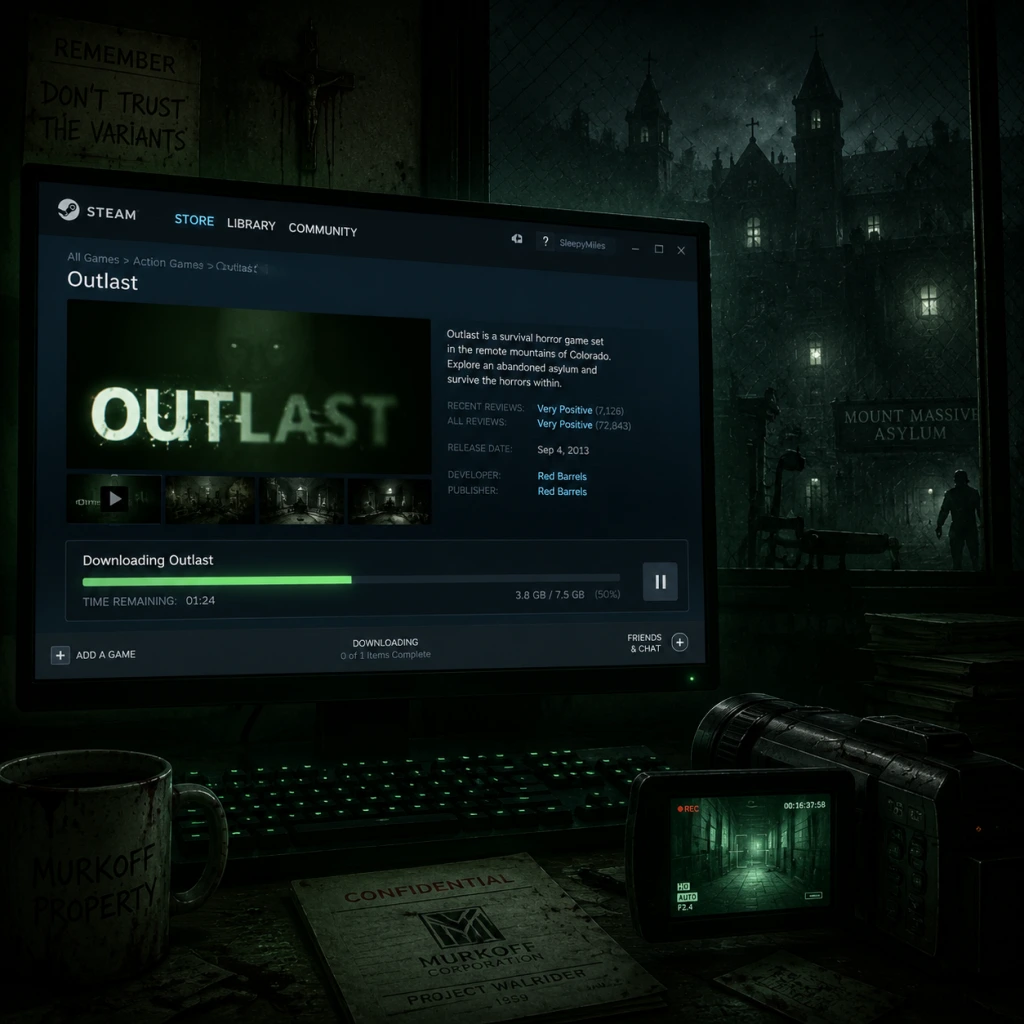
Download & Installation
Outlast Download and Installation Guide
This guide covers every legitimate method to download and install Outlast (the first game) on PC, PlayStation, Xbox, Nintendo Switch, and mobile devices. Follow the steps for your platform.
---
1. Official Sources
| Platform | Official Store | Region Availability |
|---|---|---|
| PC (Steam) | [Steam Store](https://store.steampowered.com/app/238320/Outlast/) | Worldwide |
| PC (Epic Games) | [Epic Games Store](https://store.epicgames.com/en-US/p/outlast) | Worldwide |
| PC (GOG) | [GOG.com](https://www.gog.com/game/outlast) | DRM-free |
| PlayStation | PlayStation Store (PS4, PS5 via backward compatibility) | All regions |
| Xbox | Microsoft Store (Xbox One, Xbox Series X/S) | All regions |
| Nintendo Switch | Nintendo eShop | All regions |
| iOS (iPhone/iPad) | App Store | Most regions |
| Android | Google Play Store | Most regions |
---
2. System Requirements (PC)
#### Minimum Requirements
- OS: Windows Vista / 7 / 8 / 10 (64-bit)
- Processor: 2.2 GHz Dual Core CPU
- Memory: 2 GB RAM
- Graphics: DirectX 10 compatible GPU (e.g., NVIDIA GeForce 8600 GT / AMD Radeon HD 4000 series)
- DirectX: Version 10
- Storage: 2.5 GB available space
- Sound: DirectX compatible sound card
- OS: Windows 7 / 8 / 10 (64-bit)
- Processor: 2.8 GHz Quad Core CPU
- Memory: 4 GB RAM
- Graphics: DirectX 11 compatible GPU (e.g., NVIDIA GeForce GTX 460 / AMD Radeon HD 6000 series)
- DirectX: Version 11
- Storage: 2.5 GB available space
- Steam: Free Steam account
- Epic Games: Free Epic Games account
- GOG: Free GOG account (optional for purchase, but required to download the installer)
- PlayStation: PlayStation Network (PSN) account (free)
- Xbox: Microsoft/Xbox Live account (free for single-player)
- Nintendo Switch: Nintendo Account (free)
- iOS: Apple ID (required for purchase from App Store)
- Android: Google account (required for Google Play)
- Turn on console, sign in to PSN.
- Open PlayStation Store from home screen.
- Search "Outlast".
- Select the game and click Download.
- Installation starts automatically (approx. 2.5 GB).
- Once done, launch from library or home screen.
- Ensure console is connected to internet and signed in to Xbox Live.
- Open Microsoft Store from guide.
- Search "Outlast".
- Select the game, click Install.
- The game downloads and installs automatically.
- Play from My games & apps.
- From HOME menu, open Nintendo eShop.
- Sign in with your Nintendo Account.
- Search "Outlast".
- Purchase if needed, then select Download.
- Game will appear on HOME screen after installation (~2.2 GB).
- Start the game by tapping its icon.
- Open App Store on your Apple device.
- Search "Outlast".
- Tap Get and install via Face ID / Touch ID / password.
- Wait for download (~1.5 GB).
- Tap Open after installation.
- Open Google Play Store.
- Search "Outlast".
- Tap Install (ensure enough free space).
- Wait for download (~1.5 GB).
- Tap Open.
- Language Selection: The game defaults to English. You can change language in the options menu.
- Graphics Settings (PC only): The game auto-detects hardware. You can adjust:
- Audio Settings: Adjust master volume, music, SFX.
- Controls: Keyboard/Mouse or controller. Remap keys if desired.
- Brightness: Calibrate gamma using the in-game test image.
- Camera Orientation: Choose invert Y-axis if needed.
#### Recommended Requirements
Note: The game runs on low-end hardware but benefits from faster CPUs and GPUs for smoother frame rates.
---
3. Account Requirements
---
4. Installation Steps by Platform
#### 4.1 PC (Steam)
1. Install Steam Client from [steampowered.com](https://store.steampowered.com/about/).
2. Launch Steam, log in (or create a free account).
3. Go to Store > search "Outlast".
4. Click Add to Cart and complete purchase.
5. Go to Library > find Outlast in your games list.
6. Click Install and choose installation directory (ensure at least 3 GB free space).
7. Wait for download and installation (approx. 2.5 GB).
8. Once ready, click Play.
#### 4.2 PC (Epic Games)
1. Download and install Epic Games Launcher from [epicgames.com](https://store.epicgames.com/en-US/download).
2. Log in with your Epic account.
3. Go to Store > search "Outlast".
4. Click Get or purchase.
5. Go to Library > locate Outlast.
6. Click Install (choose drive path).
7. After download and install (approx. 2.5 GB), click Launch.
#### 4.3 PC (GOG – DRM-free)
1. Visit [GOG.com](https://www.gog.com/game/outlast).
2. Log in or create a free account.
3. Purchase the game and download the offline installer via GOG Galaxy or direct download link.
4. Run the installer (.exe) and follow setup wizard (choose destination folder).
5. Launch game from Start Menu or desktop shortcut.
#### 4.4 PlayStation (PS4 / PS5)
#### 4.5 Xbox (Xbox One / Series X|S)
#### 4.6 Nintendo Switch
#### 4.7 iOS (iPhone / iPad)
#### 4.8 Android
---
5. First Launch Setup
When you start Outlast for the first time:
- Resolution (match monitor native)
- Texture quality (affects VRAM usage)
- Shadows, anti-aliasing, vsync, etc.
Tip: For the best horror experience, use headphones and play in a dark room.
---
6. Common Installation Errors & Fixes
| Error | Possible Cause | Solution |
|---|---|---|
| "Not enough disk space" | Insufficient free space | Free up at least 3 GB. Check that the selected drive has space. |
| Installation stuck at X% | Corrupted download, network issue | Pause and resume download, restart client, or verify files (Steam/Epic). |
| Missing DLL / runtime errors | Missing Visual C++ redistributables | Install latest VC++ from [Microsoft](https://aka.ms/vs/17/release/vc_redist.x64.exe). |
| Black screen on launch | Outdated GPU drivers | Update graphics drivers (NVIDIA GeForce Experience / AMD Adrenalin). |
| Anti-virus blocking | False positive | Temporarily disable antivirus during install, then add exception for game folder. |
| Purchased but not in library | Regional restrictions or payment issue | Contact store support (Steam/Epic/PSN/Xbox). |
| "Outlast has stopped working" | Corrupted game files | Verify integrity of game files: Steam: Library > Right-click Outlast > Properties > Local Files > Verify. Epic: Click three dots > Manage > Verify Files. |
| Mobile app won't install | Incompatible OS version | Ensure device runs iOS 13+ or Android 7+. Free up storage. |
7. Post-Installation Verification
After installation, confirm everything works:
1. PC (Steam):
- Right-click Outlast in Library > Properties > Local Files > "Verify integrity of game files".
- Launch the game and play the first few minutes (no crashes).
2. PC (Epic Games):
- Click the three dots on Outlast > Manage > Verify Files.
- Launch and test.
3. GOG:
- The offline installer doesn’t have a verify function. Run the game; if it starts normally, it's fine.
4. Consoles:
- Check for any pending updates by pressing Options/Start on the game tile > Check for Updates.
- Launch and ensure the menu loads.
5. Mobile:
- Open the app. If it shows the title screen and allows settings, it's installed correctly.
---
8. Additional Tips
- Steam Cloud: Enable cloud saves for syncing progress across PCs.
- Mods (PC only): The game supports some mods via the Steam Workshop or manual installation. Backup original files first.
- Performance: On low-end PCs, lower resolution and disable shadows to maintain 30+ FPS.
- Offline Play: GOG version is completely offline. Steam can be played offline after initial authentication.
- Reinstallation: If you encounter persistent issues, uninstall completely and re-download from scratch.
- PC Steam: Right-click > Manage > Uninstall.
- PC Epic: Click three dots > Uninstall.
- GOG: Use Windows "Add or Remove Programs" or run uninstaller.
- Consoles: Delete game from storage (but keep license to redownload later).
- Mobile: Long-press app icon > Delete/Remove.
- [x] Game is purchased and downloaded from an official store.
- [x] System requirements met (PC) or enough free space (all).
- [x] Account is active and signed in.
- [x] Game files verified (if option exists).
- [x] Latest game patch installed (usually automatic).
- [x] Audio and display settings configured.
---
9. Uninstallation Guide
---
10. Final Checklist
Before playing, ensure:
Enjoy your terrifying experience in Mount Massive Asylum!
---
Last updated: 2025. This guide is for Outlast (original). For Outlast 2 or Outlast: Whistleblower (DLC), similar steps apply but check individual store pages.
Game Introduction
Game Introduction: Outlast
---
Genre & Developer Information
- Genre: First-person psychological survival horror, stealth-based exploration
- Developer: Red Barrels (independent Canadian studio)
- Publisher: Red Barrels
Release Timeline & Platforms
| Platform | Release Date |
|---|---|
| Windows (Steam, GOG) | September 4, 2013 |
| Mac OS X (Steam) | December 13, 2013 |
| Linux (Steam) | March 5, 2014 |
| PlayStation 4 | February 4, 2014 |
| Xbox One | June 19, 2014 |
| Nintendo Switch | February 27, 2018 |
| Android / iOS | August 14, 2018 (limited release via Feral Interactive) |
---
Story Overview & Setting
Outlast drops you into the abandoned psychiatric Mount Massive Asylum in the remote mountains of Leadville, Colorado. You play as Miles Upshur, an investigative journalist who receives a tip from a mysterious whistleblower named “The Mole.” The asylum, run by the sinister Murkoff Corporation, has been shut down after reports of unethical human experimentation. But when you arrive, you discover the facility is far from empty.
The Plot: Miles enters the asylum seeking the truth, only to be trapped inside as the building’s security doors slam shut. The patients have been turned into violent, monstrous “Variants” due to the Morphogenic Engine – a machine designed to access the deepest fears of the human mind. Pursued by these twisted creations, Miles must navigate through blood-soaked hallways, cell blocks, laboratories, and underground tunnels, piecing together the horrific story of what happened. The nightmare escalates when he encounters the Walrider, a supernatural entity that possesses the asylum's inmates and the security director, Chris Walker (a hulking giant who stalks the player). As Miles uncovers the truth, he learns of a larger conspiracy involving the Murkoff Corporation and the true nature of the Walrider.
- Setting: A vast, decaying asylum with multiple floors, outdoor areas, underground sewers, and a chapel. Each area is meticulously designed with environmental storytelling – patient notes, medical reports, and video logs reveal the horrors.
- Atmosphere: Constant darkness, flickering lights, dripping water, distant screams, and a dynamic soundtrack that heightens tension. The asylum feels alive with menace.
- Core Appeal: Pure, unadulterated horror that relies on helplessness, atmosphere, and psychological dread rather than combat. The game forces you to run, hide, and survive using only your wits and a night-vision camcorder (which requires scavenging for batteries).
- Target Audience: Horror enthusiasts who enjoy tension-heavy experiences; players who value narrative and immersion over action; fans of games like Amnesia: The Dark Descent, Alien: Isolation, or Silent Hill; and anyone who wants a short but intense single-player scare (campaign length ~5–6 hours).
- Age Rating: ESRB M (Mature 17+) for intense violence, gore, disturbing imagery, and strong language. Recommended for mature audiences.
- Single-Player Campaign: The main story mode (linear but offers multiple paths for exploration). No difficulty settings; the challenge is fixed.
- New Game + (PC/Console): After completing the game, you unlock a harder difficulty mode called “Insane” (permadeath – one death forces you to restart the entire game). This is for dedicated players seeking a true test of survival.
- No Multiplayer or Co-op: The experience is entirely solitary to preserve the isolation and horror.
- Offline Support: Fully playable offline (no internet required once installed).
- Achievements/Trophies: 50+ achievements on Steam, 22 trophies on PlayStation, comparable on other platforms.
- Outlast: Whistleblower (released May 6, 2014 on all platforms) – This is a prequel/parallel story DLC where you play as Waylon Park, a software engineer who worked for Murkoff and set up the Morphogenic Engine. The story overlaps with the main game and reveals the fate of “The Mole.” It introduces new areas, new Variants (including the terrifying Eddie Gluskin – “The Groom”), and continues the Walrider narrative. Whistleblower is considered essential for full understanding of the lore.
- Outlast 2 – A separate sequel released in 2017, also by Red Barrels, set in a different location and with new characters (not covered in this guide).
- No Combat: The player cannot fight back. All encounters are about evasion, hiding in lockers, under beds, or running through corridors. This creates a constant vulnerability that many horror games avoid.
- Camcorder Mechanic: The night-vision camcorder is both a tool and a liability – it drains batteries that are scarce. Using it is necessary in dark areas, but the limited battery life adds a resource-management layer to every moment.
- Environmental Storytelling: The asylum tells its horrific story through scattered notes, videos, and environmental details. No cutscenes interrupt the immersion; all narrative is discovered organically.
- Audio Design: The game uses binaural audio to create a 3D soundscape – you can hear footsteps, breathing, and door creaks with eerie accuracy, making wearing headphones almost mandatory for full effect.
- Replayability: Despite a linear story, the hidden documents and the Insane difficulty mode encourage multiple playthroughs.
---
Main Characters
1. Miles Upshur – The protagonist and player character. A journalist driven by a desire for truth, he has no combat skills and relies entirely on stealth, hiding, and running.
2. Chris Walker – The primary recurring antagonist. A former security guard turned massive, muscle-bound Variant who relentlessly hunts the player, often by sound or sight.
3. Richard Trager – A former surgeon turned sadistic warden of the asylum’s gurney room. He is methodical and grotesque, using surgical tools to torment victims.
4. The Walrider – A mysterious, ghostly entity that can possess Variants and attacks in bursts of violence. Its origins are tied to a patient named Billy Hope, who serves as the nexus of the Morphogenic Engine.
5. “The Mole” – The anonymous informant who lured Miles to the asylum (later revealed in the Outlast: Whistleblower DLC).
---
Core Appeal & Target Audience
---
Game Modes & Features
---
DLC & Expansions Overview
Outlast has a major expansion:
---
What Makes Outlast Unique?
---
Summary
Outlast stands as a landmark in the survival horror genre, proving that terror doesn’t require weapons. It delivers a relentless, disturbing, and unforgettable experience through its oppressive atmosphere, deep lore, and heart-pounding gameplay. Perfect for players who want to be truly scared without the safety of a gun. Whether you explore the main game or dive into the Whistleblower DLC, Mount Massive Asylum will leave a lasting impression.
Recommended for: Horror fans, journalists in training, and anyone who thinks they can handle the dark.
---
Getting Started
Getting Started with Outlast
Welcome to Mount Massive Asylum. This guide is designed for brand-new players who have never played a survival horror game or Outlast specifically. You will die. You will jump. You will be terrified. That’s the point. But with this practical advice, you’ll survive your first hour and learn the core loop without rage-quitting.
Character Creation (None)
There is no character creation in Outlast. You play as investigative journalist Miles Upshur, a predetermined character with a fixed appearance, backstory, and no dialogue choices. Your only customization is choosing your graphics settings. This is a linear narrative experience.
First Hour Walkthrough (Spoiler-Free)
1. Opening Cutscene – You arrive at the asylum gates in a car. Drive inside and park. The game begins with you standing at the front entrance.
2. Enter the Asylum – Go through the main doors. A short hallway leads to a locked door on the right. Look left—there’s a window you can climb through. Smash it (press the interact button) and crawl inside.
3. The Camera – In the next room, you’ll find a camcorder on a desk. Take it immediately. This is your only tool for seeing in the dark (via night vision) and documenting evidence. You cannot drop it.
4. First Encounter – Explore the corridors. You’ll hear shouting and screaming. Avoid direct confrontation. Enter a room with a locked door; you need to find a key or a code. Look for a note on a desk explaining a code for a door lock (usually `962` for the first door).
5. Library & Admin – Navigate through the library (watch for broken glass) and reach the Administration wing. Use the code `962` on the door keypad to proceed.
6. First Pursuit – Shortly after, a patient (Chris Walker) will chase you. Do not try to fight him. Run and hide in a locker or under a bed. Remain still until he leaves. Crouch to move quietly.
7. Batteries & Documents – Throughout the first hour, grab every battery you see. They power your camera’s night vision. Collect documents and notes to learn the story and unlock achievements.
8. First Major Puzzle – In the Female Ward, you’ll need to restore power by pulling two switches while avoiding a new enemy (The Twins). Use the vents and lockers to evade.
9. Exit First Area – After restoring power, a heavy door will open. Go through to reach a new section, completing the first major checkpoint. Save game via the menu (manual save is not available—autosave triggers at checkpoints).
> Pro Tip: The first hour teaches you the three pillars: Hide, Run, and Use Camera Night Vision sparingly. Never use the camera light unless absolutely necessary—it drains battery fast and alerts enemies.
Controls on All Platforms
| Action | PC (Keyboard + Mouse) | PlayStation (4/5) | Xbox (One/Series) | Nintendo Switch |
|---|---|---|---|---|
| Move | W/A/S/D | Left Stick | Left Stick | Left Stick |
| Look | Mouse | Right Stick | Right Stick | Right Stick |
| Run (Hold) | Shift | L3 (click left stick) | L3 | L3 |
| Crouch (Toggle) | Ctrl | Circle (B) | B | B |
| Interact / Use | F | Triangle (Y) | Y | X |
| Camera Night Vision | Right Mouse Button | R1/RB | RB | R |
| Zoom Camera | Middle Mouse Button | R3 (click right stick) | R3 | R3 |
| Pause / Menu | Escape | Options | Menu | + |
| Journal (Notes) | Tab | Touchpad (PS4/5) / Select | View | - (minus) |
| Hide in Locker | Press interact (F) near locker | Triangle near locker | Y near locker | X near locker |
| Look Behind | Q | L1/LB | LB | L |
| Peek Around Corner (while crouched) | A/D + mouse | Left/Right on stick while pressing crouch | Left/Right | Left/Right |
UI Overview
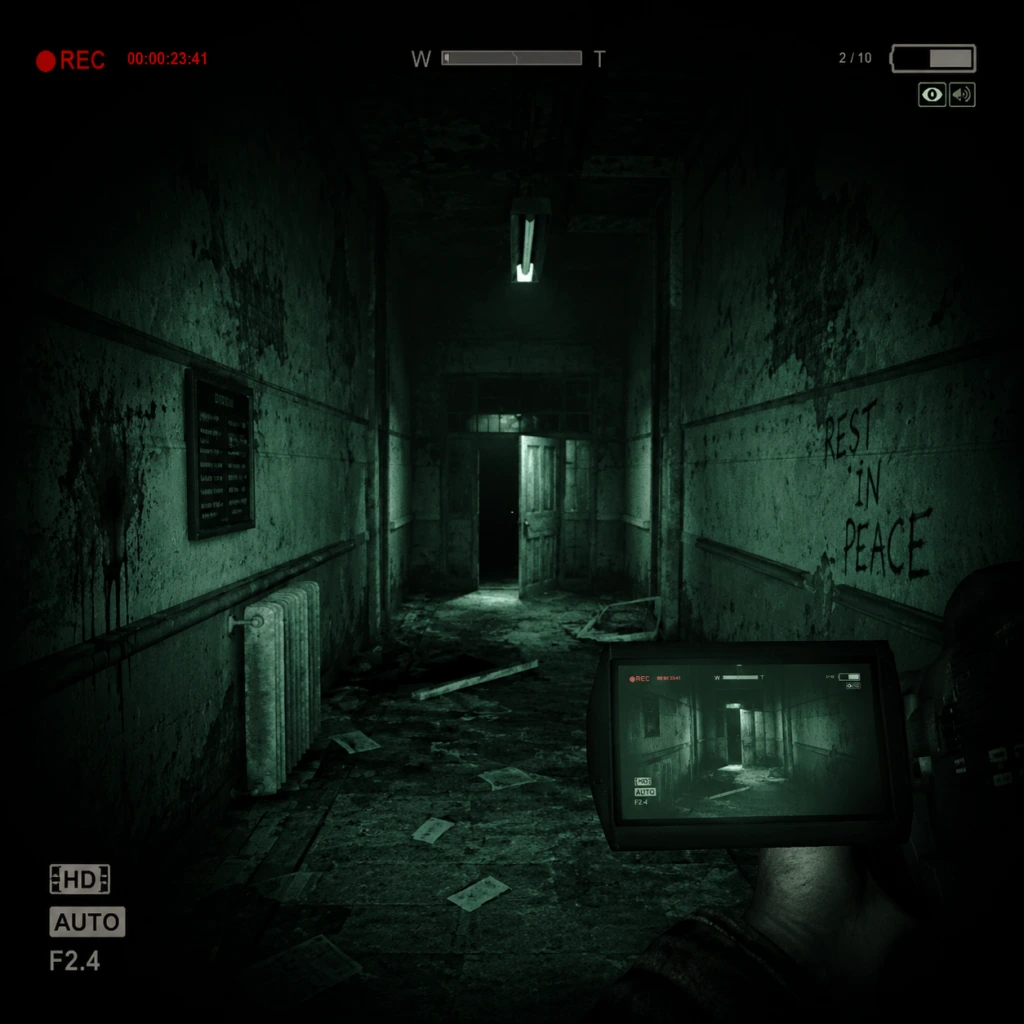
Outlast has a minimalist HUD to preserve immersion. Here’s what you see on screen:
- Health bar – A faint red indicator at the bottom center. When you take damage (falling, being grabbed), the screen flashes red and the health bar decreases. No health pickups—rest at checkpoints or die to retry from last save.
- Camera night vision indicator – A green/blue glow around the screen when night vision is active. A battery icon appears at the top-left of the camera view showing remaining charge. When battery is low, the screen flickers.
- Battery counter – Number of spare batteries shown in the bottom-left of the camera view (e.g., `2`).
- Camera recording indicator – A small red dot in the camera view when you are recording (always on when using night vision or zoom). Recording does not affect gameplay but is used for achievements.
- Interaction prompts – When near usable objects, a contextual icon appears (e.g., hand icon for lockers, door icon for doors).
- No crosshair – You cannot aim or shoot. The camera is your only tool.
- No minimap or objective marker – You must listen to audio cues and read documents to know where to go. The environment is your map.
- Crouch-walk most of the time. Running makes noise and attracts enemies.
- Check every corner for batteries and documents.
- Listen carefully. Audio cues (footsteps, breathing, distant screams) tell you when an enemy is near.
- Use the environment: climb into vents, crawl under beds, open lockers to hide.
- Peek around corners (crouch + look) before entering a room.
- Save batteries by only using night vision in pitch-black areas. If there’s ambient light, turn it off.
- Don’t try to fight or attack. You are unarmed. Every enemy can one-hit kill you or severely injure you.
- Don’t run constantly. It drains your stamina (shown by heavy breathing) and alerts enemies. Sprint only when fleeing.
- Don’t hoard batteries for later. Use them when needed but never let the battery die completely in a dark area—you’ll be blind and terrified.
- Don’t leave lockers immediately after hiding. Wait until the enemy’s footsteps fade away completely.
- Don’t ignore environmental clues. Blood trails, footprints, or flickering lights often point to the correct path.
- Batteries are the most critical resource. You cannot progress without night vision in many areas. Always carry at least one spare.
- Documents are infinite (no limit). Collect them for lore and achievements. They are not used for crafting or inventory management.
- Health cannot be restored. Avoid falls and enemy attacks. Falling from high places causes damage. If you get grabbed, mash the interact button to break free quickly.
- No weapons or items exist beyond batteries and the camera. The only resource you manage is camera battery power.
- [ ] Install the game via Steam, Epic Games Store, GOG (PC); PlayStation Store, Xbox Store, Nintendo eShop. The mobile version (iOS/Android) is a paid port; ensure touch controls work for you.
- [ ] Adjust settings before starting:
- [ ] Learn controls by playing the opening sequence (first 5 minutes). Die on purpose to understand death mechanics (respawn at last checkpoint).
- [ ] Find and collect at least 3 batteries before reaching the Female Ward.
- [ ] Complete the first hour (stop after restoring power and entering the new area). You will have encountered the core mechanics.
- [ ] Review your journal (press Tab on PC, Touchpad on PS, View on Xbox). Read the documents you found—they explain the asylum’s backstory.
- [ ] Prepare mentally for jump scares and helplessness. Outlast is an experience, not a power fantasy. Embrace the fear.
Essential Early Objectives
1. Survive the first chase – After taking the camera, you’ll be chased by Chris Walker. Learn to hide in lockers, under beds, or behind obstacles. Crouch and stay still. Enemies have sharp hearing—running, opening doors loudly, or using night vision near them will attract attention.
2. Find batteries – Your first battery is on a table in the room where you get the camera. Grab it. Later, check desks, shelves, and even toilets. Batteries are your lifeline.
3. Read every document – They contain story context, locker codes, and hints for puzzles. Press `Tab` (PC) or `Touchpad` (PS) to open your journal and review collected documents.
4. Solve the first door code puzzle – A note in the library gives the code `962` for the door to the Admin area. If you miss it, you can try random codes (it’s fixed).
5. Restore power in the Female Ward – This is the first major set-piece. Two switches in different rooms. Use lockers and vents to avoid the Twins. Once both switches are pulled, a door opens.
6. Reach the first checkpoint – After passing through the opened door, the game autosaves. Look for a glowing door or a safe room (no enemies spawn inside).
What to Do First vs What to Avoid
DO:
DON’T:
Early Resource Priorities
Common Beginner Mistakes
1. Overusing Night Vision – New players leave night vision on constantly, draining batteries rapidly. You won’t find enough replacements early on. Use it only when you can’t see the floor or obstacles.
2. Running into Danger – Many beginners sprint blindly into corridors and trigger enemy aggro. Move slowly and peek first.
3. Ignoring Lockers – Lockers are safe havens. Enemies can open them sometimes, but they will not always check every locker. Hide in them frequently.
4. Trying to Outrun Enemies – You cannot outrun Chris Walker or the Twins in open spaces. Use obstacles to break line of sight and hide.
5. Forgetting to Look Behind – Enemies can flank you. Use the “Look Behind” button (Q on PC, LB/L1 on console) while running to check pursuers.
6. Not Saving Manually – Wait, there is no manual save. The game autosaves at checkpoints. If you quit mid-chapter, you may lose progress. Checkpoint frequency is generous but not constant.
7. Staying in the Light – The asylum is dark. You might think staying near a light source is safe, but enemies have no fear of light. You should still hide.
Day-One Checklist
- Sensitivity: Lower it if you get motion sick (common in horror games). Aim for 50-60% sensitivity on PC, medium on console.
- Invert Y-axis if desired.
- Brightness: Set so that the environment is dark but not completely black. Calibrate using the in-game brightness slider (first time you use night vision).
- Audio: Use headphones! Critical for directional audio cues. Set volume to 70-80%.
> Final Advice: Turn off all lights in your room, put on good headphones, and commit to playing at least 60 minutes. The game respects patience and caution. Run and hide; never fight. Good luck, Mr. Upshur.
Core Gameplay
Core Gameplay: Outlast - Asylum Survival
Overview
Outlast is a first-person survival horror game that strips away traditional combat. The core gameplay loop revolves around exploration, stealth, and evasion. You play as investigative journalist Miles Upshur, armed only with a camcorder (with night vision) and a desperate will to survive. There are no weapons, no health regeneration, and no direct attacks. Success means outsmarting enemies, managing resources (batteries, hiding spots), and solving environmental puzzles to advance through Mount Massive Asylum.
Main Gameplay Loop
1. Explore – Navigate linear but branching corridors, rooms, and outdoor areas. Search for documents, notes, and keys to unlock progress.
2. Evade – When an enemy appears, run, hide, and break line-of-sight. Use lockers, under beds, vents, and shadows. The camcorder's night vision is essential in darkness but consumes batteries.
3. Solve Environmental Puzzles – Find items (e.g., fuses, valves, keycards) to open doors, restore power, or activate elevators.
4. Survive Scripted Encounters – Many sections are triggered sequences where you must sprint to a specific exit while avoiding an unstoppable pursuer.
5. Collect Lore – Read documents and watch optional notes to piece together the asylum's dark history.
Combat / Interaction Systems
- No Combat – You cannot fight back. Any direct confrontation leads to instant death (or quick-time event death).
- Interactions – Context-sensitive actions: pick up items, open doors/closets, climb ladders, break glass, pull levers. Only one button is used (E on PC, X/Square on consoles).
- Camcorder – Toggle night vision with a button (press F on PC). It drains batteries; screen goes black if battery dies. You must hold the camcorder up to see in the dark (default toggle).
- Hiding – Press interact to enter/exit lockers, under beds, or behind curtains. Enemies check these spots if they suspect you.
- Running / Stamina – You can sprint (Shift on PC) but stamina depletes quickly and recovers slowly. Sprinting attracts noise.
- No Health System – You take damage from attacks (grabs, direct hits). If caught, you die immediately (except in scripted chases where you can slip away). No healing items exist – death means reload from last checkpoint.
- Linear Story – The game is divided into chapters (e.g., Entry, Prison Block, Male Ward, Underground, etc.). Progress is gated by finding key items and completing puzzles.
- No Experience Points or Skill Trees – Miles never gains abilities. The only progression is unlocking new areas and story revelations.
- Difficulty Progression – Enemies become more aggressive, environments more dangerous (e.g., flooded corridors, gas-filled rooms), and puzzles more complex.
- Semi-Linear – Most maps have a clear main path but reward off-the-beaten-path exploration with documents, optional notes, and sometimes alternate hiding spots or shortcuts.
- Locked Doors – Many doors require a key or a solved puzzle. Some are blocked by debris that must be moved.
- Environmental Storytelling – The asylum is filled with gory details, patient diaries, and security logs that flesh out the narrative. Thorough reading enriches the experience but is optional.
- No Traditional Quests – The game has a single objective: "Get to [location]" or "Fix [system]". These are guided by the main character's narration and objective markers (in the form of a yellow icon on the camcorder).
- Examples:
- Scripted Encounters – Many missions are really chase sequences (e.g., the "Chris Walker" basement encounter) where the goal is simply to survive while following a linear path.
- No Currency or Trading – The only resource is batteries for the camcorder. You find them scattered throughout the asylum in drawers, on tables, in dead bodies.
- Battery Management – Batteries are finite per chapter. Wasting night vision can leave you stumbling in the dark, making evasion impossible. Conserve by turning off night vision in well-lit areas.
- No Item Shop – All batteries are pickups. There is no way to craft or buy items.
- No Character Customization or Stats – Miles has no levels, skills, or attributes. The only "growth" is the player's own skill in memorizing layouts, learning enemy patrols, and conserving batteries.
- No Equipment Upgrades – The camcorder remains the same throughout. You cannot improve its battery life or night vision quality.
- Player Skill Progression – Real-world improvement: better route planning, quicker sprint-timing, more efficient reading of objective markers.
- Single Ending – After the final chapter ("The Ward" at the asylum exit),a story cutscene plays. No post-game content, no New Game+, no replay value beyond achievements/trophies.
- Achievements / Trophies – Some require completing the game on Insane difficulty (no saves, die once = restart), or collectible-related (find all documents). These are the only endgame goals.
- No Multiplayer or DLC – The base game has no additional modes. (DLC "Outlast: Whistleblower" is a separate campaign.)
- Objective: Survive the initial shock and learn the basics. You wake up in the asylum entry, need to find a way into the main building.
- Gameplay Focus: Very linear; tutorials on camcorder usage, hiding, and sprinting. Enemies are few but terrifying (e.g., Chris Walker). The main challenge is learning to break line-of-sight and find hiding spots.
- Batteries: Generous placements – plenty of batteries to let you experiment with night vision.
- Puzzles: Simple: find a key on a desk, pull a lever, climb a ladder.
- Pacing: Slow and scary; emphasis on atmosphere. You die mostly from panicking.
- Key Section: The first encounter with Chris Walker in the chapel – you must hide in a confessional and wait for him to leave.
- Objective: Navigate more complex environments with multiple routes and more aggressive enemies. Introduce new threats (e.g., the Twins, the wardens).
- Gameplay Focus: Stealth becomes critical. Enemies patrol fixed routes. You can no longer just run blindly; you must plan your path, anticipate enemy movement, and manage battery life carefully.
- Batteries: Less frequent – you may need to backtrack or skip dark rooms.
- Puzzles: Multi-step puzzles – e.g., rewire a fuse box by aligning symbols, or find two items (valve wheel + keycard) to open a door.
- Pacing: Increasingly frantic; scripted chase sequences (e.g., running from the Swimmer in the flooded basement) test your reflexes.
- Key Section: The "Women's Ward" where you must avoid the warden while solving a steam valve puzzle to unlock a gate.
- Objective: Survive the most intense sections of the asylum as the story reaches its climax. Enemies are relentless, and the environment is hostile (flooding, gas, darkness).
- Gameplay Focus: Pure evasion and puzzle-solving under extreme pressure. Many sections have no safe hiding spots – you must keep moving. Battery management is punishing; you will often be forced to stay in the dark for short periods.
- Batteries: Very scarce – you may have to run through lit areas deliberately to save batteries for crucial dark passages.
- Puzzles: Complex and time-sensitive – e.g., the "Escape the Morgue" sequence where you must unlock multiple doors while a monstrous patient stalks you.
- Pacing: Constant tension; minimal downtime. Enemies are nearly unstoppable – any detection means instant death.
- Key Section: The "Underground Laboratory" – you must navigate a maze of corridors while avoiding multiple enemies and turning on oxygen pumps to survive a gas-filled room.
- Objective: Reach the asylum exit amidst a chaotic environment (fire, collapsing walls).
- Gameplay Focus: A final gauntlet of scripted events with no room for error. You must sprint through corridors, dodge falling debris, and avoid the last enemy (Chris Walker again, but even faster).
- Batteries: Practically zero pickups. Use what you have sparingly.
- Puzzles: Minimal – mostly linear pathfinding.
- Pacing: Breakneck. The game throws everything at you: fire, explosions, insta-kill traps. The goal is simply to run.
- Key Section: The chase up to the roof – you must jump across collapsing floors and climb a ladder while Chris Walker pursues.
- After Completion: Credits roll; no post-game content. For achievement hunters, the Insane difficulty run requires replaying the entire game without dying (uses same tier progression but permadeath). There is no New Game+.
Progression
Exploration
Quests / Missions
- Early Game: "Find the key to the Male Ward"
- Mid Game: "Activate the elevator power by solving the fuse box puzzle"
- Late Game: "Navigate the flooded basement to reach the exit"
Economy
Character / Build Growth
Endgame Structure
Player Progression Tiers
Early Game (Chapters: Entry, Prison Block, Male Ward part 1)
Mid Game (Chapters: Male Ward part 2, Female Ward, Underground Lab)
Late Game (Chapters: Underground Lab, The Morgue, The Administrative Block)
Endgame (Chapter: The Ward - Final Escape)
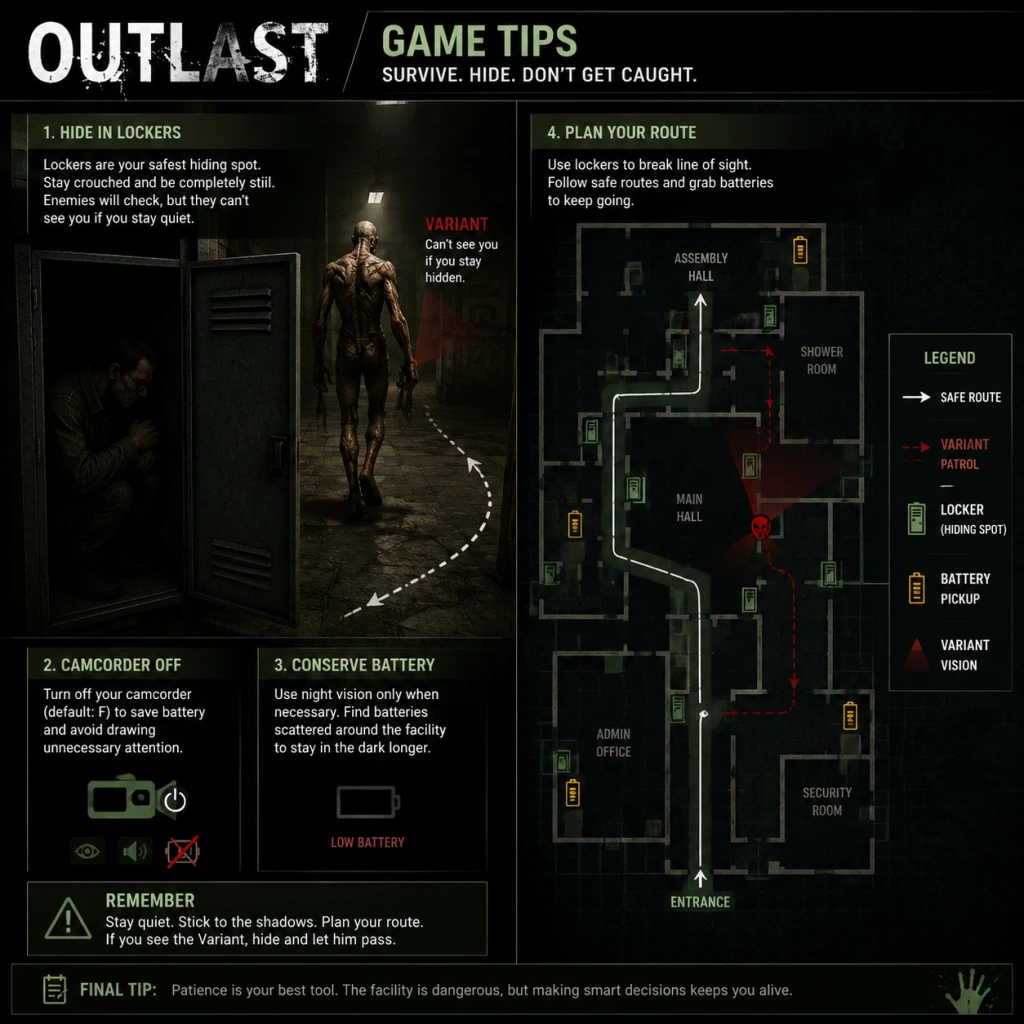
Game Tips
Game Tips: Outlast - Master Mount Massive Asylum
This section provides essential tips grouped by gameplay aspect. Since Outlast has no combat, builds, or economy, the tips focus on stealth, camera management, exploration, and survival.
Beginner Tips (First Time Players)
1. Learn the Night Vision Toggle Early
- Press the default key (right mouse button / R2 on controller) to toggle night vision on/off. Do not leave it on constantly; it drains batteries fast. Only activate in truly dark areas or when searching for clues.
- Why it works: Saves battery life for critical moments (e.g., chase sequences in total darkness).
- When to use: During slow exploration; you can see outlines with minimal light.
2. Never Sprint Unnecessarily
- Sprint (Shift / L3) creates loud footsteps that alert enemies from far away. Walk or crouch-walk instead.
- Why it works: Sound is the primary detection method. Walking allows you to pass close to patrolling enemies without triggering an alert.
- When to use: Only sprint when enemies are already chasing you or you have a clear, safe path.
3. Check Every Corner and Locker
- Lockers and closets are your primary hiding spots. Enter them (press interact) and wait until the threat passes.
- Why it works: Many enemies have a limited search radius. Once they lose sight of you, they will eventually return to their patrol route.
- When to use: When an enemy is heading directly toward you and you have no other escape route.
4. Listen to Audio Cues
- The game uses directional sound to indicate enemy locations (footsteps, grunts, doors opening). Use headphones for best results.
- Why it works: You can anticipate where an enemy is heading and plan your movement.
- When to use: Always. Even without night vision, sound gives you spatial awareness.
5. Save Batteries for Critical Sections
- Batteries are finite. Only use night vision when absolutely necessary (document reading in dark rooms, navigating unlit corridors). In well-lit areas, keep the camera off.
- Why it works: Running out of batteries in a dark area during a chase means instant death.
- When to use: Prioritize conservation; pick up batteries whenever you find them, even if you are full (they will not be wasted if you are at maximum? Actually, you cannot exceed capacity, so only pick up when below max).
Exploration & Navigation
1. Memorize the Asylum Layout
- Outlast uses a semi-open level design. Learning room connections, shortcuts (e.g., vents, broken windows), and dead ends reduces panic during chases.
- Why it works: Panicking leads to wrong turns. Familiarity lets you escape quickly.
- When to use: After dying in a section, take note of alternate paths.
2. Use the Camera Zoom
- The camcorder has a zoom function (right mouse button while holding camera? Actually, zoom is separate: middle mouse button or L1+R1 on controller). This can help spot documents, key items, or enemies in the distance.
- Why it works: Increases your reconnaissance range without moving closer.
- When to use: Before entering a new room, zoom to check for threats.
3. Look for Environmental Clues
- Red Barrels placed subtle hints: blood trails indicate recent enemy activity, flickering lights mean an unstable area, open doors suggest a route.
- Why it works: These cues guide you toward progress items or warn of danger.
- When to use: When stuck, examine the environment for pathways or objects.
4. Vault Over Obstacles
- Press spacebar (X on controller) to vault over low walls, desks, and pipes. This can create distance during chases.
- Why it works: Vaulting briefly slows enemies (they may take a different path or climb over).
- When to use: When an enemy is 10–15 feet behind you, vault to gain a few seconds.
Night Vision & Batteries (Resource Management)
1. Turn Off Night Vision When Hiding
- Once you are safely inside a locker or under a bed, switch off the camera. The glow of the night vision can sometimes be seen by enemies.
- Why it works: Prevents visual detection and saves battery.
- When to use: Immediately after entering a hiding spot, turn it off.
2. Stagger Battery Usage
- Do not use night vision continuously even in dark areas. Pause every 30 seconds to turn it off and listen. If you hear no footsteps, you can proceed briefly without it.
- Why it works: Greatly extends battery life; you may find replacement batteries before depletion.
- When to use: Any time you are exploring a large, dimly lit area.
3. Know Battery Spawn Locations
- Batteries respawn? No, they are fixed pickups. Memorize where they are (e.g., on shelves, in drawers). Once used, they are gone. Plan your route to pass known battery locations.
- Why it works: Ensures you have enough for the next dark room.
- When to use: On repeat playthroughs, optimize your route.
4. The Camera Can Be Used Without Night Vision
- Even without night vision, the camera viewfinder shows a slightly brighter image than the naked eye. Use it in low light (not total darkness) to see better without draining battery.
- Why it works: Saves battery while providing minor visual assistance.
- When to use: In areas with ambient light (e.g., rooms with moonlight or emergency lights).
Stealth & Evasion (Enemy Encounters)
1. Understand Detection Mechanics
- Enemies have a cone of vision (about 120 degrees) and hearing range. They do not see in complete darkness unless you shine a light. They react to sound: footsteps, opening doors, camera clicks.
- Why it works: You can predict when you are safe to move.
- When to use: Always keep this in mind when moving.
2. Use Crouch Walk (Ctrl / R3)
- Crouch walking is nearly silent and reduces your profile. Use it when enemies are nearby, even if they are facing away.
- Why it works: Prevents sound detection; also makes you harder to spot visually.
- When to use: When an enemy is within 30 feet and you are not in immediate danger.
3. Lure Enemies with Camera Noise
- Equipping the camera and turning it on/off makes a distinct beep or click sound (depending on version). You can use this to attract an enemy to a location, then circle around.
- Why it works: Creates a distraction; enemies will investigate the source of the sound.
- When to use: When an enemy blocks a doorway you need to pass.
4. Fake Out by Hiding in Plain Sight
- Some areas have curtains, under desks, or behind boxes. If an enemy is about to see you, quickly hide behind a large object. Often they will patrol past without checking.
- Why it works: AI does not always check every hiding spot; they have a limited search pattern.
- When to use: When you have no time to reach a locker.
5. Break Line of Sight During Chases
- When spotted, run away but break the enemy's visual contact as soon as possible by turning corners, going through doors, or dropping down. Once out of sight, quickly hide.
- Why it works: Enemies lose track of you after a few seconds of no visual contact. They will search the last known area.
- When to use: Immediately after being spotted.
6. Different Enemies Have Different Behavior
- Chris Walker (the large orderly) chases you relentlessly once spotted; you cannot outrun him for long. The crazy patients are slower but patrol in groups late game. Study each enemy's pattern.
- Why it works: Tailor your approach: for Chris, never stay still; for patients, use stealth.
- When to use: Adapt based on the type of enemy.
Intermediate Strategies (Advanced Tips)
1. Learn the Movement Speed Tiers
- Normal walk: slow, silent. Sprint: faster but noisy. Crouch walk: very slow, silent. Jump+vault: moderate speed, some noise. Master when to use each.
- Why it works: Helps in timed scenarios (e.g., running from a breaking door).
- When to use: Practice in safe areas.
2. Use the Camera Flash (Light) to Stun?
- In Outlast, the camera's bright light does not stun enemies. Do not attempt it. The light only illuminates areas; it does not affect enemies. Misconception from other games.
- Why it works: Avoids wasting time trying to fight.
- When to use: N/A.
3. Plan Battery Routes
- Before entering a dark zone, check your battery count. If low, backtrack to a known battery pickup. It is worth the extra time.
- Why it works: Prevents being caught without power.
- When to use: Whenever you approach a new area (e.g., basement, sewer).
4. Replay Chapters to Memorize Enemy Patterns
- The game has chapter select after completion. Use it to practice specific sections (e.g., the prison block, the cafeteria).
- Why it works: Reduces failure rate on subsequent playthroughs.
- When to use: If you are stuck on a particular encounter.
Advanced Optimizations (Speedrun & Hardcore Tips)
1. Skip Cutscenes (Not always possible) - Not applicable in Outlast 1; cutscenes are brief and unskippable.
2. Use Wall Humps for Precision
- When hiding, press against walls to maximize your view angle. This allows you to peek around corners without exposing your body.
- Why it works: Gives you information while staying safe.
- When to use: When scouting ahead.
3. Speedrun Trick: Use Door Glitches
- On PC, some doors can be bypassed by quickly spamming interact while moving. Not intended, but effective for speedruns.
- Why it works: Saves time.
- When to use: Only for speedrunning; not recommended for first playthrough.
4. Minimize Inventory Management
- Never hold more than one item (the camera and documents). There are no weapons or inventory slots. Only documents and batteries matter. Always carry max batteries (10).
- Why it works: No decision paralysis.
- When to use: Always.
5. Use the Environment to Slow Pursuers
- Knock over carts or chairs? You cannot; Outlast does not allow environmental interactions like that. Instead, use doors to block enemies slightly (they may take time to open).
- Why it works: Creates a short delay.
- When to use: When running, close doors behind you.
Conclusion
Mastering Outlast requires patience, observation, and resource management. There is no combat, so all tips revolve around staying unseen and conserving batteries. Practice makes perfect—each death teaches you something new about the asylum's layout and enemy behavior. Good luck, and try to keep your sanity.
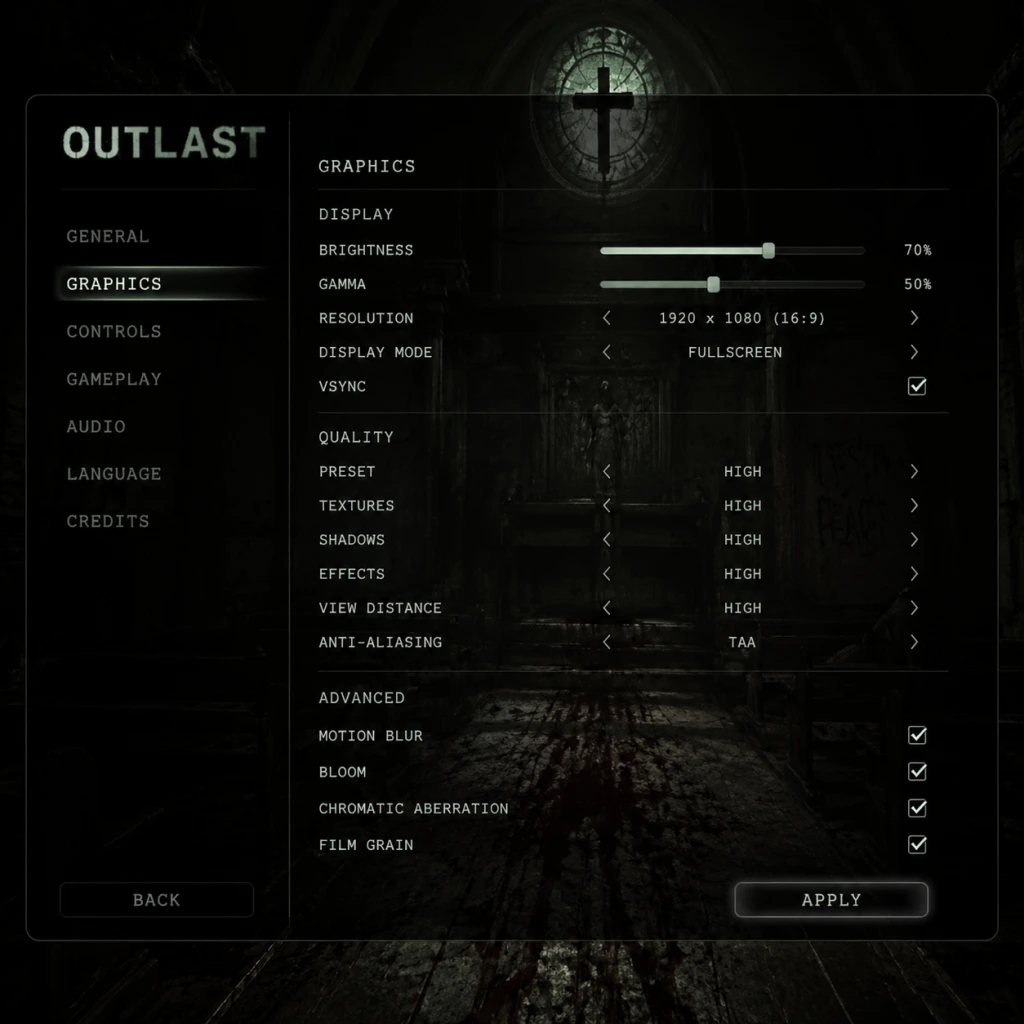
Game Settings
Game Settings Guide: Outlast
This section covers every setting available in Outlast on PC, PlayStation 4, Xbox One, and Nintendo Switch. We’ll explain each option, recommend optimal configurations for performance vs. quality on different hardware tiers, and point out common pitfalls during setup.
---
Graphics Settings (PC)
Outlast runs on the Unreal Engine 3.5 and is well-optimized, but certain options can drastically affect performance. Below is the full list of graphics settings and recommended values.
| Setting | Options | Low-End (GTX 650 / HD 7770) | Mid-Range (GTX 960 / RX 470) | High-End (GTX 1060 / RX 580+) | Ultra (RTX 20-series+) |
|---|---|---|---|---|---|
| Resolution | Native desktop / custom | 1366×768 or 1600×900 | 1920×1080 | 1920×1080 | 2560×1440 / 4K |
| Display Mode | Fullscreen / Windowed / Borderless | Fullscreen | Fullscreen | Fullscreen | Fullscreen |
| VSync | On / Off | Off (if no screen tearing) | Off (use driver vsync) | Off (use G-Sync/FreeSync) | Off |
| Frame Rate Limit | 30 / 60 / 120 / Unlimited | 30 (steady) or 60 | 60 | 60 | 60 or monitor max |
| Anti-Aliasing | Off / FXAA / MSAA 2x / MSAA 4x / TxAA | Off or FXAA | FXAA | 2x MSAA | 4x MSAA or TxAA |
| Texture Quality | Low / Medium / High / Very High | Medium | High | Very High | Very High |
| Shadow Quality | Low / Medium / High | Low | Medium | High | High |
| Post-Processing | Off / Low / Medium / High / Very High | Low | Medium | High | Very High |
| Ambient Occlusion | Off / Low / High | Off | Low | High | High |
| Motion Blur | On / Off | Off | Off (preference) | Off | Off |
| Field of View | Slider (65° – 90°) | 70° | 75° | 80° | 80° |
| Texture Streaming | On / Off | On | On | On | On |
| Resolution Scale | 50% – 200% | 100% | 100% | 100% | 100% (or 120% if headroom) |
- Motion Blur is often left on by default; disabling it improves clarity during fast camera turns and reduces nausea for some players.
- Field of View defaults to 65°, which can feel claustrophobic. Increase to 75°–80° for better peripheral awareness, but be aware that higher FoV slightly reduces performance.
- Texture Quality to Very High uses noticeably more VRAM. If you have less than 2GB VRAM, stay at High or Medium.
- Resolution Scale below 100% makes the game blurry. Only use if you need a huge performance boost.
- VSync in-game can introduce input lag. Prefer to cap frame rate via driver or in-game frame limit and disable VSync for better responsiveness.
- For 60 FPS on low-end hardware: 1366×768, all settings Low, FXAA off, shadows Low, post-processing Low, FoV 70°, motion blur off.
- For 60 FPS on mid-range: 1080p, High textures, medium shadows, FXAA, post-processing High, ambient occlusion Low.
- For 4K on high-end: 4K resolution, Very High textures, High shadows, TxAA, post-processing Very High, ambient occlusion High, but expect drops in the outdoor courtyard area – drop shadows to Medium if needed.
Performance targets:
---
Audio Settings
Outlast relies heavily on audio cues for enemy location and atmosphere. Proper configuration is critical.
| Setting | Options | Recommended | Notes |
|---|---|---|---|
| Master Volume | 0–100 | 80–90 | Leave headroom for other sounds |
| Effects Volume | 0–100 | 100 | Footsteps, doors, breathing – keep max |
| Music Volume | 0–100 | 70–80 | Atmospheric but not overwhelming |
| Voice Volume | 0–100 | 100 | Player grunts and enemy dialogues (rare) |
| Ambient Volume | 0–100 | 100 | Crucially, whispers, distant screams, machinery |
| Audio Output | Speakers / Headphones / Auto | Headphones | Headphones are strongly recommended for directional audio. The game has no 3D audio simulation; it uses simple panning, but headphones help isolate cues. |
| Sound Quality | Low / Medium / High | High | Affects sample rate; negligible performance impact |
---
Controls Settings
Outlast is played with keyboard/mouse or controller. We cover both.
#### Keyboard and Mouse Default (PC)
| Action | Default Key | Personalization Tips |
|---|---|---|
| Move | W/A/S/D | Keep default |
| Look | Mouse | Adjust sensitivity to your liking |
| Interact | E | Keep |
| Use Camera | F | Keep – frequent toggle |
| Zoom Camera | Right Mouse Button | Very important for seeing in darkness |
| Toggle Night Vision (hold) | F (or hold) | Default is hold; many prefer toggle. See accessibility. |
| Run | Left Shift | If you change to a different key, ensure it’s comfortable for long periods |
| Crouch | Left Ctrl | Default is toggle crouch; holding is not possible |
| Reset Camera View | R | Rarely used |
| Pause / Menu | Esc | Keep |
| Journal | J | Not essential |
| Action | Default Mapping | Notes |
|---|---|---|
| Move | Left Stick | |
| Look | Right Stick | |
| Interact / Use Camera | X (Xbox), Square (PS) / Y (Switch) | Camera toggle is on face button – takes thumb off stick, so use right stick click? Not available. But controller players adapt. |
| Zoom Camera | Left Trigger | Good placement |
| Run | Left Stick Click (L3) | Can be fatiguing. Some prefer to swap with a bumper. |
| Crouch | Right Stick Click (R3) | Also risky during combat. |
| Night Vision (hold) | Left Bumper (LB) | Hold to keep on. Toggle not available on controller natively. |
| Pause | Start / Options |
- Night Vision is hold-to-use on both PC and controller. If you want toggle (press once to enable/disable), this can only be changed via config file editing (on PC) – not in the in-game settings. See Accessibility below.
- Camera zoom uses right mouse button on PC; left trigger on controller. If your mouse has side buttons, you can rebind but the game’s limited rebinding may not allow it – only a few actions are remappable on PC.
- Running uses L3 or Left Shift; these can become uncomfortable in tense moments. If possible, rebind run to a button that doesn’t require constant downward pressure.
---
Accessibility Settings
Outlast is notoriously unforgiving. Red Barrels included minimal accessibility options, but some workarounds exist.
| Setting | Options | Recommendation |
|---|---|---|
| Subtitles | On / Off | Set to On – they display enemy dialogue and occasional notes read by the player. Important for non-English speakers or hearing-impaired. |
| Camera Shake | On / Off | Off – reduces motion sickness from fast camera bobbing during sprint and hits. |
| Invert Y-Axis | On / Off | Personal preference |
| Controller Vibration | On / Off (only on controller) | Off if it interferes with fine camera control; on for immersion. |
| Mouse Sensitivity | Slider | Start at 1.0 and adjust. |
| Controller Look Sensitivity | Slider | Similar, start at 0.5. |
| Night Vision Mode | Hold (press & hold) / not toggleable in menus | To make toggle: on PC, edit `...Outlast/UDKGame/Config/UDKInput.ini` and search for `NightVision`. Change `Hold=true` to `Hold=false`. This is a user-level mod and is safe. |
| Colorblind Modes | None | Not available. Use post-processing or GPU driver filters if needed. |
| UI Scale | Not adjustable | Fixed UI sizes – may be small on 4K. |
- Many players miss the Camera Shake toggle and complain of dizziness. Go into Settings → Gameplay and turn it Off.
- Subtitles are off by default – turn them on for story clarity.
- Night Vision toggle is a huge quality-of-life improvement for players with hand fatigue. Edit the config file only if you are comfortable with simple text files.
---
Language Settings
| Setting | Options | Recommendation |
|---|---|---|
| Language | English, French, German, Spanish, Italian, Russian, Polish, Portuguese-Brazil, Japanese, Chinese (Simplified & Traditional) | Choose your preferred language. |
| Subtitles Language | Same list | Can match or differ from audio. |
| Text Language | Same list | Overrides UI text. |
- Attention: If you set the language to a non-English option, subtitles may default to that language as well. Check the subtitle option separately.
- The game supports only one audio track (English) regardless of language selection; all other languages are text/subtitle only. So select “English” for audio and your native language for subtitles if you want English voices.
---
Network / Online Settings
Outlast is a single-player only game. There are no multiplayer, co-op, or online connectivity settings. However, the game does have Steam Cloud saves on PC.
| Setting | Notes |
|---|---|
| Steam Cloud (PC) | Enable via Steam client (right-click game → Properties → Cloud). Saves progress across computers. |
| DRM | None beyond Steam/Origin/GOG client. Offline play is fully supported. |
| Leaderboards / Achievements | No leaderboards. Achievements are offline. |
---
Gameplay Settings
These affect the core experience beyond graphics and controls.
| Setting | Options | Recommendation | Notes |
|---|---|---|---|
| Camera Shake | On / Off | Off (as mentioned). | |
| Auto-Aim (controller only) | On / Off | Off – there is no combat, but auto-aim may affect camera interaction. Test it. | |
| Quick Turn | On / Off (controller) | On – pressing down on right stick snaps camera 180°. Invaluable while escaping. Not present on PC. | |
| Hints / Tutorial Prompts | On / Off | On for first playthrough; off for replays or immersion. | |
| Crosshair | On / Off | Always on (small dot) – cannot be disabled. | |
| Camera Battery Display | Always visible as battery gauge on camera. No options. | ||
| Save System | Autosave only at checkpoints. No manual saves. |
---
Special Attention Points During Setup
1. Night Vision toggle vs hold: Most players find holding F or LB for the entire game fatiguing. If you have trouble, edit the config file (PC) as described in Accessibility section. On console, you are stuck with hold unless you use controller macro remapping (for example, Xbox Accessories app or PlayStation button assignments).
2. Field of View: Default 65° is very narrow. Change it to at least 75° as soon as you start the game. Wide FOV helps you see threats from the side without turning.
3. Audio Output: The game does not auto-detect headphones. Manually select “Headphones” under Audio Settings to get proper stereo imaging.
4. Graphics Presets: The in-game presets (Low, Medium, High, Very High) are a good starting point, but often set Texture Quality to Very High even on 2GB cards – causing stuttering. Manually lower Textures if you experience hitches.
5. Controller Deadzone: There is no deadzone adjustment. Some Xbox/PS controllers with drift may cause camera drift. Use external software (e.g., JoyToKey or Steam Controller Config) to add deadzone.
6. Windowed Mode Glitch: If you switch to Windowed mode and then back to Fullscreen, the game may lose proper resolution. Always set resolution before switching to Fullscreen. If glitched, restart the game.
---
Conclusion
Outlast’s settings are relatively simple but have a few traps. Prioritize audio and FoV adjustments for a better horror experience. On PC, disable motion blur and camera shake for clarity, and consider toggling night vision via config. Console players have fewer options but can still enable Quick Turn and disable camera shake. With these recommendations, your descent into Mount Massive Asylum will be as smooth as it can be – which is not very smooth, but terrifyingly good.
For further fine-tuning, consult PC-specific guides on the `UDKInput.ini` and `UDKEngine.ini` files for advanced tweaks (e.g., disabling film grain, increasing shadow map resolution).
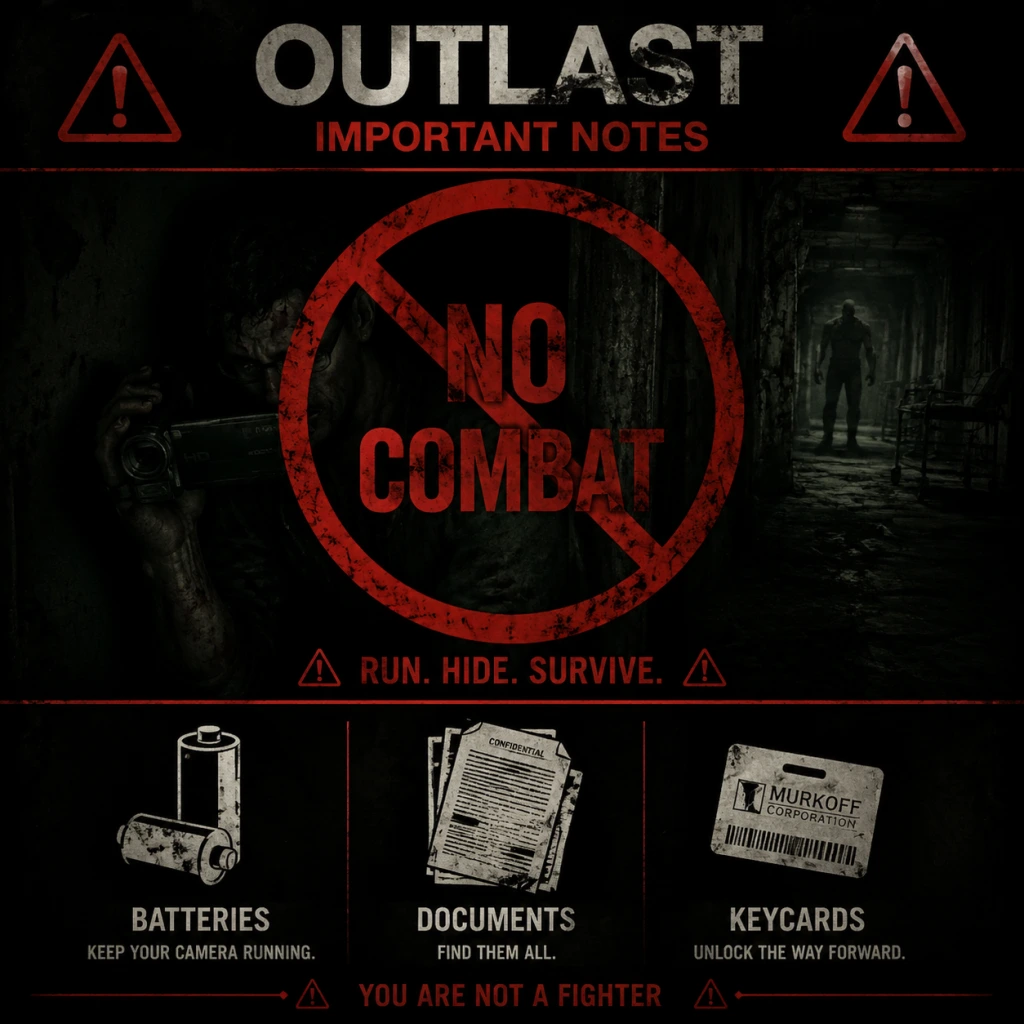
Important Notes
Important Notes: Outlast
⚠️ Critical Warnings
- No Combat: You cannot fight enemies. Your only options are running, hiding, and using your camera’s night vision. Trying to attack or push enemies will result in instant death.
- Camera Battery is Life: Your camcorder’s battery depletes even when not using night vision (slowly). Running with night vision on drains it faster. Letting the battery die leaves you completely blind in dark areas—certain death. Always plan battery usage and pick up every spare battery you see.
- Sound Betrays You: Enemies have sharp hearing. Running, opening doors loudly, or even breathing near a hiding spot can alert them. Crouch-walk as your default movement, especially when you hear footsteps or breathing nearby.
- Death is Permanent (Almost): There are no checkpoints mid-chase. If you die during a scripted chase sequence, you restart from the last autosave (usually at the start of the area or encounter). This can set you back several minutes.
###
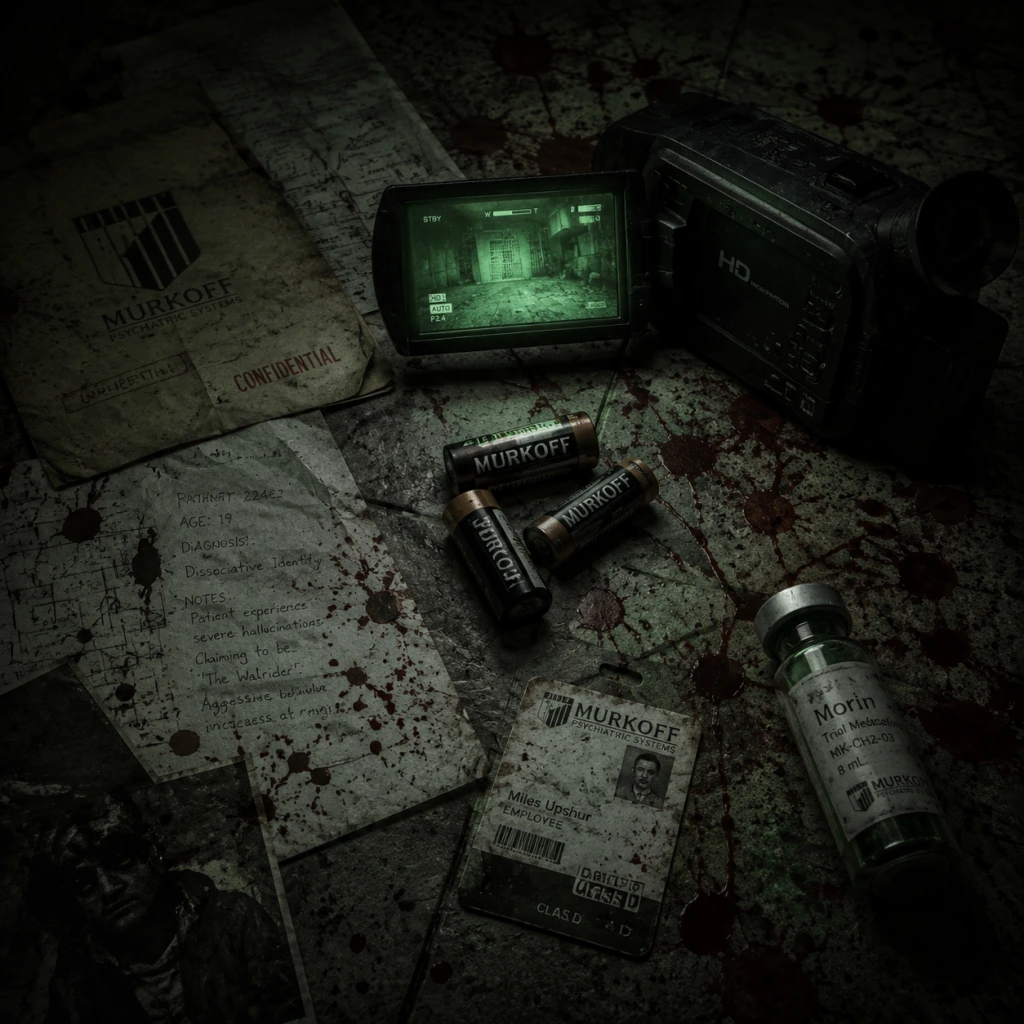
All Game Items
All Game Items in Outlast
Outlast is a survival horror game with no combat, weapons, or armor. Items are limited to essential equipment, consumables, collectibles, and story-related key items. This guide lists every obtainable item, its purpose, acquisition method, and strategic importance.
---
Key Equipment
#### Camcorder
- Description: The protagonist's handheld digital video camera with night vision and optical zoom. The camera is always equipped and cannot be dropped or lost.
- Obtained: Automatically at the start of the game. The camera is already running when the game begins.
- Functions:
- Upgrades: None. The camera functions identically throughout the game.
- Synergies: Night vision is the only way to navigate completely dark areas (e.g., sewers, basements). Battery management is critical to maintain functionality.
- Description: AA batteries that power the camcorder's night vision.
- Appearance: Small cylindrical batteries, typically found on desks, shelves, or inside drawers.
- Effects: Each battery restores a fixed amount of night vision charge. The exact charge varies by difficulty but generally lasts 30–60 seconds of continuous use. The camera shows a battery gauge on its display.
- How to Obtain: Scattered throughout Mount Massive Asylum. Can be found in most rooms, corridors, and hidden areas. Some are in lockers or require opening drawers. Batteries are finite—no infinite sources.
- When to Use: Only when night vision is active and battery is low. Avoid using night vision unnecessarily (e.g., in lit rooms) to conserve batteries for mandatory dark sections.
- Important Notes: There is no way to increase battery capacity or recharge them outside of picking up new ones. Running out of batteries in a dark area effectively blinds you, forcing reliance on sound and memory or leading to death.
- Synergies: Essential for the camcorder's night vision. Always stockpile batteries before entering long, dark areas (e.g., the chapel, prison block).
- Description: Written reports, patient files, emails, and other in-game text that expand the asylum's backstory. Each document is a collectible that contributes to the “Collectibles” achievement/trophy (there are 70 total in the base game).
- Appearance: White paper sheets, sometimes pinned to bulletin boards, lying on desks, or held by corpses. They glow faintly when near.
- How to Obtain: Found in fixed locations throughout all chapters. Many are in plain sight; some are hidden behind furniture or in dark corners. Must be picked up (press interact). Once collected, they appear in the main menu's “Collectibles” gallery.
- Gameplay Value: No mechanical benefit. Their value is purely narrative—they reveal character motivations, the asylum's history, and the events leading to the outbreak. Reading them also unlocks additional lore notes.
- Completion Requirements: To get the “Panic” or “Pacifist” related achievements, you do not need all documents, but there is an achievement for finding all 70 (“Keep ‘em Comin’”).
- Description: Brief handwritten passages, often left by survivors or patients. They serve as smaller narrative snippets.
- Appearance: Yellow notepad paper, sometimes attached to walls or lying on objects.
- How to Obtain: Same as documents—found throughout the environment. Notes are separate from documents but also count toward the collectible count? In Outlast, “documents” is the overarching term; there is no separate “notes” category in the in-game menu. All written collectibles are considered documents. The game distinguishes them by style, but mechanically they are identical.
- Synergies: None.
- Night Vision: Activated by pressing the designated button (e.g., `F` on PC, `RB` on Xbox, `R1` on PlayStation, or `ZR` on Switch). Toggles green-tinted vision in darkness. Dramatically increases visibility but drains battery.
- Zoom: Right-click (PC) or left trigger (console) to zoom in. No battery drain, useful for reading distant documents or observing enemies.
- Recording: The camera records continuously, but recording has no gameplay effect; it is purely narrative.
---
Consumables
#### Batteries
---
Collectibles
#### Documents
#### Notes
---
Key Items (Plot-Progression Items)
Outlast uses key items to unlock doors or activate certain events. These are often one-time-use and cannot be kept after their purpose is fulfilled.
| Item Name | Location / Chapter | Use | Notes |
|---|
Keycard | Briefing level (Security Office desk) | Opens the door to the Administration wing. | Must be picked up after the initial explosion. |
|
Elevator Key | Admin wing, on a table after the first Variant encounter | Activates the elevator in the main hall. | Takes you to the Female Ward. |
|
Fuse | Found in a locker in the Female Ward | Restores power to a locked door. | Required to progress past the electrified floor section. |
|
Wheel Crank | Prison block, on a corpse next to a window | Winds open a spiral staircase gate. | Needed to access the underground tunnels. |
|
Skylight Crank | Underground tunnels, on a desk | Opens a skylight in the chapel area. | Used to escape the chapel after the Chris Walker boss sequence. |
|
Key #?? (varies) | Multiple locations (e.g., lockers, patient rooms) | Unlocks specific doors (e.g., patient cells, security rooms). | These keys are color-coded and labeled. You can carry multiple keys at once. |
- How to Obtain: Each is found in a specific location, often guarded by enemies or after completing a puzzle. Pay attention to environmental clues (e.g., highlighted interact prompts, notes suggesting a key's location).
- When to Use: As soon as you find them. Most are required to progress the story. Some can be skipped if you find alternative routes, but the game generally funnels you through key-item gates.
- Important Notes: Key items appear in your inventory (shown on the camera display) but do not take up physical space. You can always carry multiple keys. Using a key normally consumes it (it disappears from the inventory after unlocking).
- Inventory slots: Outlast does not have a traditional inventory grid. The camera is always equipped. Batteries are automatically used when you pick them up (they are stored as a reserve count shown on the camera). Keys are displayed on-screen but do not occupy slots.
- No item storage: You cannot place items in a container. Everything you pick up is used immediately or stored invisibly.
- Synergies: The only synergy is between batteries and night vision. There are no weapon upgrades, armor, or stat boosts. The game emphasizes resource scarcity and minimal inventory to increase tension.
- Battery Conservation: Use night vision sparingly. In well-lit areas, rely on normal vision. Learn the layout of dark areas so you can dash through without night vision if necessary.
- Collectibles: Documents are missable. If you want the achievement, consult a guide to ensure you collect all 70. Some are in areas that cannot be revisited after a story event.
- Key Items: Pay attention to your objective marker. If you are stuck, it is likely because you missed a key item. Check every drawer, desk, and corpse.
- No Currencies or Materials: There are no in-game shops or crafting. The only "resource" is batteries, which are finite. Use them wisely.
---
Summary of Inventory Management
---
Final Tips
This guide covers all items in Outlast (base game). The DLC Outlast: Whistleblower adds additional items (such as the “Cell Phone” and new key items), but those are not covered here.
Character Skills
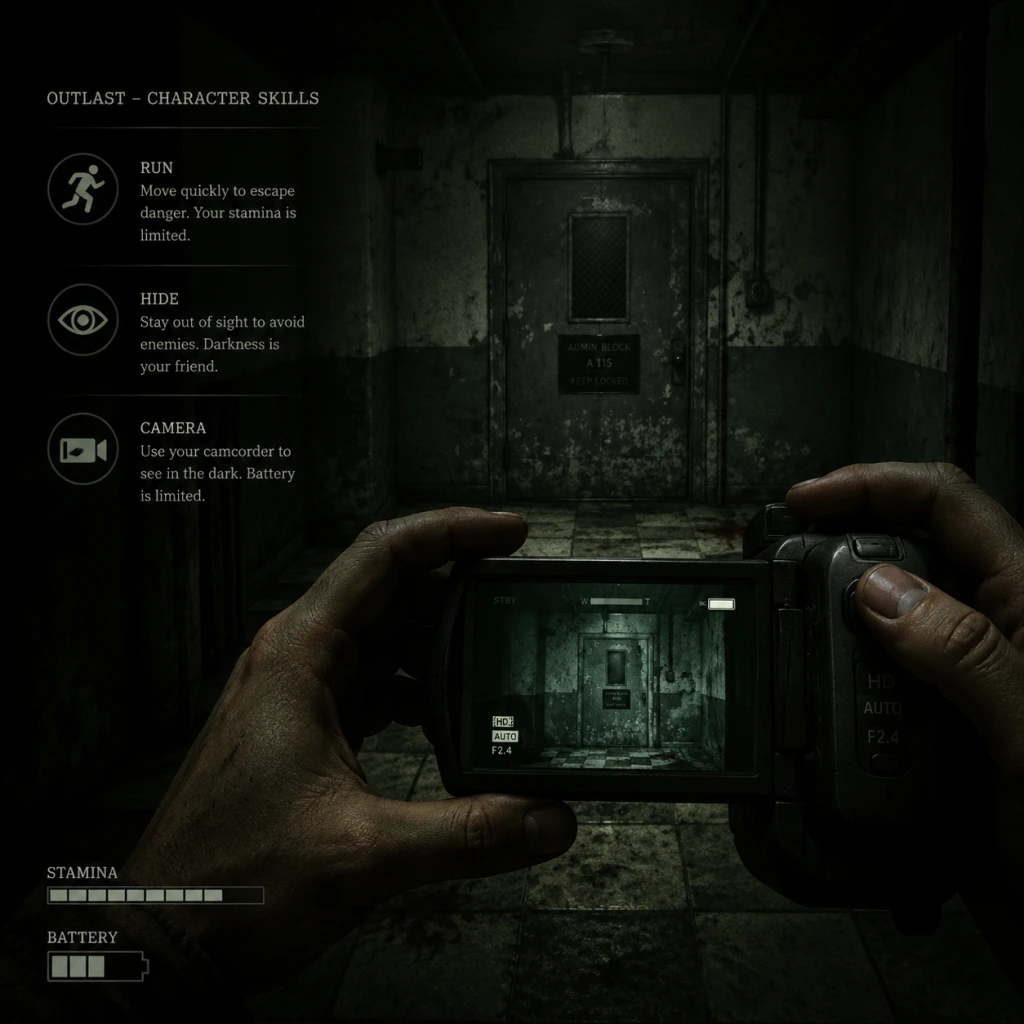
Character Skills Guide: Outlast
Overview
Outlast is a survival horror game with no traditional skill trees, spells, or combat abilities. The player character possesses a set of instinctive and equipment-based actions—here called "skills"—that are used to survive the horrors of Mount Massive Asylum. This guide covers all playable characters and every actionable skill, including movement, stealth, camera functions, and evasion techniques. Since there are no upgrades, cooldowns are minimal and based on stamina or battery regeneration. Combos, synergies, and builds are nonexistent; player effectiveness relies on proper timing and resource management.
---
Playable Characters
Both protagonists share identical skill sets. Differences are purely narrative.
| Character | Game | Availability |
|---|---|---|
| Miles Upshur | Outlast (base game) | Only playable character |
| Waylon Park | Outlast: Whistleblower (DLC) | Only playable character |
---
Core Player Skills
Each skill is described with its effect, any limitations, and tactical usage advice. No skills can be upgraded, altered, or combined.
#### 1. Sprinting (Run)
- Effect: Increases movement speed significantly for a short burst. The player can only sustain a sprint for approximately 3–4 seconds before an audible heavy breathing loop begins, indicating stamina depletion. After stamina is exhausted, the player automatically slows to a walk. Sprinting causes the camera to bob more aggressively, reducing visual clarity.
- Cooldown / Regeneration: Stamina regenerates after 2–3 seconds of not sprinting. No visual stamina bar exists; rely on audio cues (heavy breathing ends).
- Upgrades: None.
- When to Use:
- Tips: Never sprint unnecessarily indoors—noise attracts enemies. Sprint only when you have a clear path to a hiding spot or exit.
- Effect: Default movement speed, quiet enough to avoid alerting most enemies unless you bump into objects. No stamina drain.
- Cooldown: None.
- When to Use: Primary movement mode for exploration and stealth. Use when enemies are nearby but not in direct line of sight.
- Effect: Slows movement to a creep, reduces noise to minimum. Makes the player shorter, allowing hiding behind low obstacles. Crouching does not reduce visibility to enemies (they still see you if in plain sight) but reduces sound detection radius.
- Cooldown: None.
- When to Use:
- Tips: Crouching is essential for passing through areas with multiple enemies (e.g., the male ward). Combine with hiding for maximum safety.
- Effect: Activates the camcorder’s night vision, illuminating dark areas in green monochrome. Required to navigate most of the asylum—without it, you are effectively blind. While active, the camera battery drains at a rate of about 1 bar every 30–40 seconds (depending on brightness setting).
- Cooldown: None—can be toggled on/off instantly. Battery regeneration does not occur; battery life is finite and must be replenished via pickups.
- Upgrades: None.
- When to Use:
- Tips: Conserve battery by turning night vision off when entering well-lit rooms (e.g., near windows, emergency lights, or in the chapel). Use short bursts of night vision rather than leaving it on continuously.
- Effect: Tapping the zoom button (mouse wheel click or default key) brings the camera closer, reducing field of view and allowing distant objects to be seen more clearly. Does not consume battery.
- Cooldown: None.
- When to Use:
- Tips: Zoom can be held while moving slowly, but it disables night vision if toggled simultaneously. Use zoom sparingly to avoid disorientation.
- Effect: Pressing the interact button (F) on specific objects—such as lockers, under beds, cabinets, or closets—makes the player character enter a hiding spot. While hidden, the player is invisible to enemies unless discovered. Detection occurs if an enemy opens the locker or looks directly under the bed during a search. Hiding can also be used to stop enemy detection if you are not holding still.
- Cooldown: None—can exit hiding anytime.
- Upgrades: None.
- When to Use:
- Tips: Not all objects are hiding spots; look for interact prompts. Do not stay in one spot for too long—some enemies (Chris Walker) will check lockers systematically. Avoid hiding directly in the path of a chasing enemy—they may ram the locker and cause a game over.
- Effect: Generic interact button for doors, drawers, documents, batteries, and key items. No special skill—purely functional.
- Cooldown: None.
- When to Use: Constantly, to progress the story and collect resources.
- Tips: Always interact with doors slowly; slamming them can alert enemies. Listen for sounds before opening a door (enemy breathing or footsteps on the other side).
- Effect: Not a skill with a button; the player can hear in-game sounds through speakers/headphones. Outlast relies heavily on directional audio to detect enemy presence. You can hear footsteps, breathing, doors opening/closing, and growls.
- Cooldown: N/A.
- Upgrades: None.
- When to Use: Always—actively listen before moving into unknown area. Use headphones for best results.
- Tips: If you hear heavy breathing or footsteps getting louder, an enemy is near. Stop moving and find a hiding spot.
- Struggle / Grapple Escape: During some chase sequences, enemies like Chris Walker will grab the player. The player must rapidly press the indicated button (F or mouse click) to break free. If successful, you can continue running. If failed, game over.
- Jump / Vault: The player can vault over low obstacles (e.g., over a desk) by running toward them. This is automatic and not a discrete skill.
- Ledge Drop: Some ledges allow you to drop down. Holding forward and pressing interact triggers the drop.
- None. The game does not feature any skill combination mechanics. The only effective synergy is:
- Evading immediate threat when an enemy has spotted you and is chasing.
- Covering open ground between hiding spots.
- Escaping scripted chase sequences (e.g., Chris Walker in the courtyard).
#### 2. Walking (Normal Movement)
#### 3. Crouching (Stealth Walk)
- Moving near patrolling enemies.
- Traversing crawlspaces and vents (mandatory in some sections).
- Staying behind cover (desks, beds) while enemies search.
#### 4. Night Vision (Camera Mode)
- In any area where ambient light is insufficient to see clearly (most of the game).
- During chase sequences in darkness to spot obstacles and hiding spots.
- When examining documents or key items in dark rooms.
#### 5. Camera Zoom (Focus)
- Examining far-away items or writing on walls.
- Reading documents that cannot be approached (e.g., timing puzzles).
- Scouting enemy positions from a distance before moving.
#### 6. Hiding (Interact with Environment)
- When an enemy is approaching and you have no escape route.
- During scripted sequences where enemies are searching (e.g., inside the administration building).
- To wait out a patrol pattern before moving to the next area.
#### 7. Interactive Actions (Open, Pick Up, Read)
#### 8. Listening (Environmental Audio)
---
Special Moves / Scripted Actions
There are no player-controlled special moves. The following are scripted events that happen automatically in certain story beats:
These are context-dependent and cannot be practiced or upgraded.
---
Skill Combos & Synergies
- Crouch + Night Vision: Stealth through dark corridors while conserving battery by turning night vision on only when necessary.
- Listen + Crouch: Detect enemy while staying quiet.
There are no chain combos or bonus effects.
---
Recommended “Builds”
Outlast has no character builds. The only strategic decisions involve resource management (battery conservation) and route planning. There is no skill point allocation.
---
When to Use Each Skill – Quick Reference
| Situation | Recommended Skill(s) |
|---|---|
| Exploring dark area | Night Vision |
| Enemy patrol nearby | Crouch + Listening |
| Being chased | Sprint toward hiding spot or exit |
| Need to see far | Camera Zoom |
| Enemy searching your last known location | Hide (locker/bed) |
| Reading documents | Night Vision (if dark) + Zoom |
| Opening a door slowly | Walk (not sprint), listen first |
---
Final Notes
Since Outlast deliberately removes combat and RPG elements, the "skills" listed are the full extent of player capabilities. Mastery comes from understanding enemy AI patterns, map layout, and battery management—not from unlocking new abilities. Use the skills above with caution and always expect the unexpected.
---
End of Character Skills Guide.
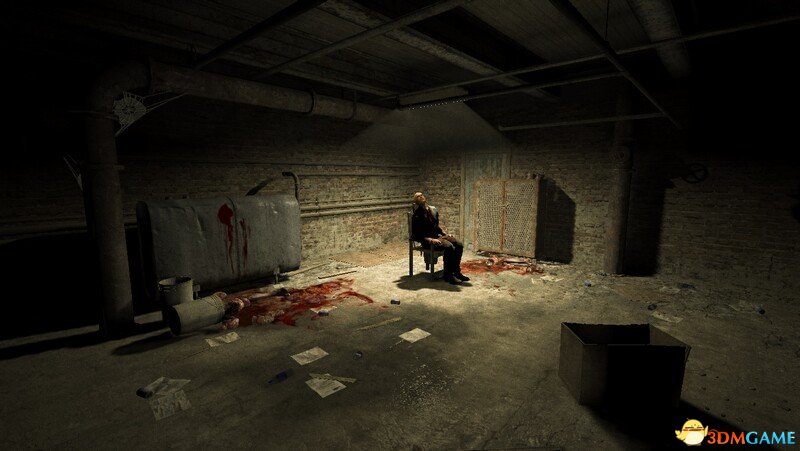
Characters & Roles
Characters & Roles in Outlast
Overview
Unlike traditional games with multiple playable characters or classes, Outlast features a single protagonist—Miles Upshur—and a cast of non-playable characters (both allies and enemies). Mastery of the game comes from understanding the behavior, strengths, and weaknesses of every major NPC, as well as how Miles’ own abilities and limitations shape survival. This guide covers all major characters and their roles in the narrative and gameplay.
---
Playable Character: Miles Upshur
Background
Miles Upshur is a freelance investigative journalist from Phoenix, Arizona. After receiving a cryptic email from a whistleblower inside Mount Massive Asylum, he drives to the remote facility to uncover its illegal activities. Miles is an ordinary man with no special training—a fact that makes his ordeal all the more terrifying.
Strengths
- Athletic: Can sprint for short bursts, climb obstacles, and vault over low walls.
- Resourceful: Uses his camcorder’s night vision to see in darkness (though critically limited by battery life).
- Determined: Despite severe psychological trauma, he continues forward to expose the truth.
- No Combat Ability: Cannot attack or defend himself. Any direct contact with hostile enemies results in instant death or severe injury.
- Fragile Health: One hit from an enemy (except scripted sequences) kills him. No health regeneration; only story checkpoints save progress.
- Battery Dependency: Night vision is essential, but batteries are finite. Running out of power in dark areas leaves you blind and vulnerable.
- Sprint Stamina: Sprinting depletes quickly; excessive use forces exhaustion, slowing movement.
- Stay hidden (lockers, under beds, behind cover).
- Listen for enemy footsteps and vocal cues.
- Conserve batteries by using night vision only when necessary.
- Learn patrol routes and timing to slip past enemies.
- Sprint only to quickly traverse open areas or escape immediate danger.
- Camera – Your primary tool. Use night vision sparingly. Carry at least three spare batteries at all times.
- Batteries – The only consumable item that directly affects survival. Prioritize collecting them even if you have full charge, as they are scattered sparingly.
- Documents – While not equipment, collecting them provides story context and achievements, but does not affect gameplay.
- Background: Waylon Park is the whistleblower who sent Miles the email. He is a software engineer who worked at Mount Massive Asylum and witnessed the atrocities conducted by the Murkoff Corporation. He is being pursued by the asylum’s warden and is hiding elsewhere in the facility.
- Role: Provides story exposition through voice logs and occasional radio messages. He also gives crucial hints about puzzles and enemy locations.
- Interaction: Non-interactive; you cannot see him in person during the main campaign. His transmissions are triggered by story progression.
- Strengths (as a character): Knowledgeable about the facility layout and Morphogenic Engine experiments.
- Weaknesses: Unable to physically help; often panicked, leading to unclear instructions.
- Background: Father Martin is a charismatic inmate who leads the heretical cult that emerged among the patients (Variants). He believes the Morphogenic Engine’s experiments reveal divine truths and seeks to “enlighten” Miles by forcing him to witness his “revelations.”
- Role: Mission giver. He manipulates Miles into performing tasks (e.g., finding keys, reaching the chapel) by promising to let him leave the asylum. His guidance is often misleading or ends in deadly traps.
- Strengths: Appears everywhere, seemingly omniscient; uses psychological tactics to control Miles’ path.
- Weaknesses: Never directly attacks; relies on other Variants to do his bidding.
- How to Deal: Follow his instructions only when the game forces you to. His paths often lead to chases or ambushes, so be ready to run.
- Background: A former Mount Massive security guard who was subjected to Morphogenic experiments. He became a hulking, mentally degraded brute obsessed with “pain” and killing anyone he considers “unclean.” He has severe cognitive impairment but a powerful physique.
- Gameplay Role: The most persistent and dangerous stalker enemy. He chases Miles across several chapters and appears in specific areas.
- Strengths: Extremely fast when charging; can break through doors and obstacles; kills instantly upon catching Miles.
- Weaknesses: Blind in total darkness (cannot see Miles if night vision is off and area is pitch black); predictable patrol routes; limited to specific zones (cannot leave his designated chapters).
- How to Avoid: Use darkness to your advantage—turn off camera night vision when hiding; listen for his heavy footsteps; lock doors behind you to slow him; do not stay in one spot too long.
- Key Encounter: Chapter: “The Male Ward” – he patrols the corridor after you retrieve a key.
- Background: Patients driven insane by the Morphogenic Engine’s “engine piloting” procedure. They exhibit a range of violent behaviors—some wander, some chase, some are stationary.
- Types:
- Strengths (as opponent): Numbers; many are in unexpected places; can hear your camera’s zoom buzz.
- Weaknesses: Predictable patterns; can be outpaced; blind if you hide and stay quiet.
- How to Deal: Crouch-walk near them; never sprint unless you are already spotted; use lockers sparingly (they can check lockers occasionally).
- Background: Two mentally linked Variants who patrol the area outside the Walrider chamber. They are slower and more cautious than Chris Walker but work together.
- Strengths: Coordinate their search patterns; one can stay at an exit while the other searches; difficult to sneak past if they block corridors.
- Weaknesses: Slow movement; you can lure them with noise (throw objects).
- How to Deal: Use the environment—create distractions by tossing a battery or nearby object to redirect them. Wait for them to separate, then move.
- Background: The Walrider is a swarm of nanites controlled by the comatose patient Billy Hope. It is the ultimate product of the Morphogenic Engine. It manifests as a shadowy, humanoid swarm that can kill instantly.
- Gameplay Role: Acts as the final enemy. Miles must evade it through a sequence while guided by Waylon Park.
- Strengths: Extremely fast, can move through vents, appears anywhere, kills on contact.
- Weaknesses: Must avoid direct sightlines; scripted sections have specific paths to escape.
- Player Shift: During a very short final segment, you temporarily control the Walrider to pursue Jeremy Blaire (the villain). This segment is free of difficulty.
- Background: The corporate face of the Murkoff Corporation. He oversaw the illegal experiments at Mount Massive and is responsible for the atrocities. He is a cold, calculating man with no combat abilities but significant power.
- Role: Final chase target. After escaping from Miles, he becomes the victim of the Walrider.
- Gameplay: A non-combat sequence; you must run from him in the final office area until he is killed by the Walrider.
Weaknesses
Playstyle
Miles’ playstyle is purely stealth and evasion. You must:
Unlock Conditions
Miles is available from the start of the game. No unlock requirements.
Recommended Equipment
Team Synergy
Miles operates alone. No allies accompany him during gameplay. However, he occasionally receives guidance from Waylon Park (via walkie-talkie) and Father Martin (scripted encounters). Their information helps navigate the asylum, but they cannot assist during chases or hiding.
---
Non-Playable Characters (NPCs)
Ally / Informant: Waylon Park
Antagonist / Cult Leader: Father Martin
Major Enemy: Chris Walker
Standard Enemies: The Variants (Inmates)
- Wanderers: Slow, patrol aimlessly, react to sound/light (e.g., footstep noise or camera light).
- Chasers: Fast, will pursue when they spot or hear you (e.g., the Twins – see below).
- Cultists: Follower of Father Martin; sometimes block paths or stand guard.
Special Enemy: The Twins (Weeping Twins) – Walrider Chamber Guards
Boss: The Walrider (Playable for a Segment)
Antagonist: Jeremy Blaire (Murkoff Executive)
---
Summary Table: Major NPCs
| Character | Type | Role | Threat Level | Strategy |
|---|---|---|---|---|
| Waylon Park | Ally | Informant | None | Listen to his messages for hints. |
| Father Martin | Neutral/Enemy | Mission giver | Low (psychological) | Obey or ignore; always leads to danger. |
| Chris Walker | Stalker | Persistent hunter | High | Use darkness, outrun, lock doors. |
| Variants (Wanderers) | Common enemy | Patrol | Medium | Stealth, distractions, avoid locks. |
| The Twins | Special enemy | Coordinated guards | High | Lure and separate, use stealth. |
| The Walrider | Boss | Final chase | Extreme | Follow scripted path, sprint when allowed. |
| Jeremy Blaire | Antagonist | Final victim | None (run from him) | Simple chase, then he dies. |
Conclusion
Outlast is a solo experience with one protagonist and many distinct, memorable NPCs. Success hinges on learning each character’s behavior—know when to run, when to hide, and when to use the environment. Miles’ lack of combat makes every encounter a puzzle of timing and resource management. Understand the roles of the Variants, avoid Chris Walker relentlessly, and follow the cryptic guidance of Waylon and Father Martin (with caution). Once you master these characters’ patterns, Mount Massive Asylum becomes a terrifying but navigable nightmare.
Cheats & Secrets
Outlast Cheats & Secrets Guide
Overview
Outlast is a linear survival horror game that intentionally provides no cheat codes, unlockable commands, or developer console. Red Barrels designed the experience to be purely immersive with no shortcuts. However, the game contains several carefully hidden Easter eggs, secret areas, and developer-intended surprises. This guide documents every known discoverable secret.
---
Important Note: No Traditional Cheats Exist
- No cheat codes can be entered anywhere in the game (menu, gameplay, pause screen).
- No debug console is present in released versions.
- No invincibility, infinite battery, or level skip commands exist.
- The game does not have an in-game cheat menu or unlockable modifiers.
- Location: Administration building, first floor, in a small office with a filing cabinet.
- How to find: After entering the administration building, go through the first door on your left. On the wall is a childlike crayon drawing of Mount Massive Asylum labeled "Funny Farm," with stick figures and a smiling sun. This is a reference to the common horror trope of asylums being called funny farms.
- Significance: Purely cosmetic Easter egg; no gameplay effect.
- Location: Female ward, second floor, inside a bathroom stall.
- How to find: In the female ward, after the scene with the hanging body, enter the women's restroom. Check the last stall: on the wall you will see "REDRUM" written in red paint, a direct homage to Stephen King's The Shining.
- Significance: Homage to classic horror; no gameplay effect.
- Location: Underground laboratory, near the end of the game.
- How to find: After descending into the underground lab, in the room with the large vat of green fluid, look for a door that appears locked. There is a scripted event where a deformed patient (nicknamed "Skin Condition" by the community) will burst out and run past you. This enemy is unkillable and only appears once; he cannot be encountered again.
- Significance: A unique, non-recurring enemy that serves as a jump scare.
- Location: Sewers beneath the asylum.
- How to find: In the sewer area after the male ward, search the corner of a large pipe junction. You will see a grotesque, moving pile of feces nicknamed "Larry" by fans. It is a small, harmless but visually disturbing object that slides along the floor.
- Significance: Possibly a leftover from a cut enemy or a joke; no gameplay impact.
- Location: Administration building, second floor, a locked office.
- How to find: After obtaining the key in the infirmary, unlock the office at the end of the hall. Inside, a skeleton is seated at a desk playing chess against another skeleton. A document nearby suggests they were doctors.
- Significance: Environmental storytelling; no interaction.
- Location: The game's main menu background features a subtle message.
- How to find: On the main menu, wait for the asylum hallway background to scroll. In the dark corner of a doorframe, you can barely see the words "WELCOME TO THE ASYLUM" scratched into the wood.
- Significance: Easter egg only visible if you inspect closely.
- Location: Various mirrors throughout the game, notably in the admin washroom.
- How to find: Stand close to a mirror and look down with the camera. In some versions, you can briefly see Miles Upshur's face reflected as a crude 3D model, contrary to the game's deliberate hiding of the protagonist's face.
- Significance: Unintentional or semi-intentional; allows a rare glimpse at Miles.
- Note: Outlast does not have a New Game Plus mode. Completion rewards are limited to achievements/trophies and the Whistleblower DLC (if purchased).
- False: There is only one ending. No choices affect the outcome.
- Out-of-bounds areas: Some players have glitched through walls to access unused rooms, such as a hidden test chamber with floating chairs. These are development leftovers, not intended secrets.
- Infinite battery glitch: Not a legitimate secret; only possible via memory editing (PC), which is not considered a cheat by the developer.
- No cheat codes or unlock commands exist.
- Six confirmed Easter eggs in the base game (Funny Farm, Redrum, Skin Condition, Larry, Chess Skeletons, Welcome to the Asylum).
- Developer-intended hidden secrets are all environmental and purely cosmetic or lore-based.
- No gameplay modifications can be unlocked without external tools (not recommended).
---
Easter Eggs & Hidden Secrets (Base Game)
#### 1. The "Funny Farm" Drawing
#### 2. The "Redrum" Shining Reference
#### 3. The Man with a Skin Condition (Hidden Enemy)
#### 4. Larry the Walking Turd (Cut Character Reference)
#### 5. The Skeleton Playing Chess
#### 6. The "Welcome to the Asylum" Hidden Message
#### 7. Mirror Reflection Glitch (Easter Egg?)
---
Unlockable Content (Legitimate)
#### 1. New Game Plus
#### 2. Alternate Endings?
---
Secrets Requiring Speedrunner/Exploits (Not Cheats)
---
Summary
For players seeking extra content, the Whistleblower DLC offers additional secrets and a complete parallel story. That DLC also contains its own Easter eggs (e.g., the "Outlast 2 demo" reference in the file room).
---
Guide written for Outlast version 1.0 (PC, PS4, Xbox One, Switch). Secrets verified across all platforms.