Overwatch 2
## Overview Overwatch 2 is a **free-to-play team-based hero shooter** developed and published by **Blizzard Entertainment**. It serves as both a sequel and a direct replacement to the original Overwatch, which released in 2016. The game launched on **October 4, 2022** in early access form (replacin...
Download & Installation
Overview
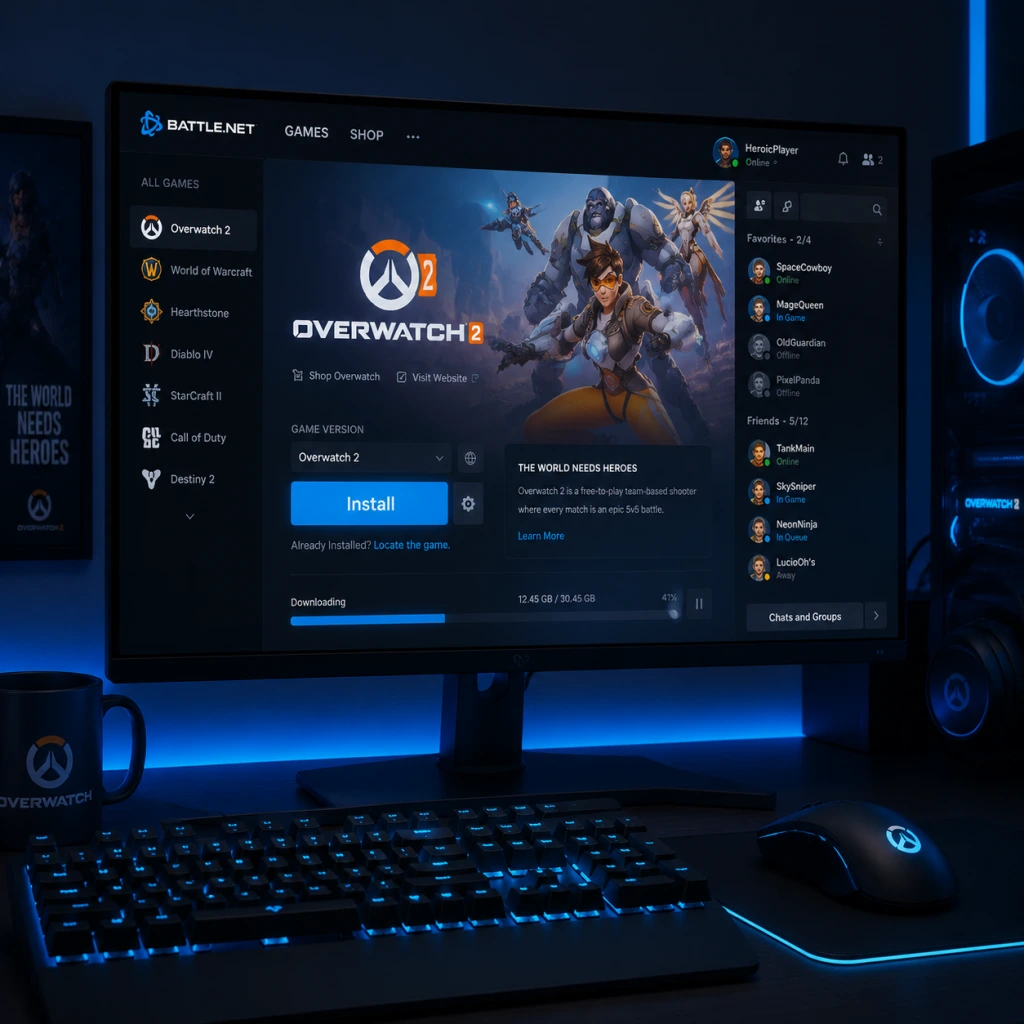
Overwatch 2 is a free-to-play team-based shooter available on Windows PC (via Battle.net, Steam, and Epic Games Store), PlayStation 4/5, Xbox One, Xbox Series X|S, and Nintendo Switch. There is no official mobile version. This guide covers legitimate sources, step-by-step installation, system requirements, account setup, first-launch configuration, common errors, and post-install verification.
---
Platform Availability & Download Sources
| Platform | Official Source | Notes |
|---|---|---|
| PC (Windows) | [Battle.net](https://battle.net) (primary), [Steam](https://store.steampowered.com/app/2357570), [Epic Games Store](https://store.epicgames.com/p/overwatch-2) | Available free-to-play on all three. Cross-progression requires Battle.net account linking. |
| PlayStation 4/5 | PlayStation Store | Free download. Requires PS Plus for online multiplayer (not mandatory for installation). |
| **Xbox One / Series X | S** | Microsoft Store |
| Nintendo Switch | Nintendo eShop | Free download. Nintendo Switch Online required for online multiplayer. |
| Mobile | N/A | No official mobile client. Third-party streaming services (e.g., GeForce NOW) may work but are not covered here. |
---
System Requirements (PC)
Minimum (for 30 FPS at 720p low settings)
- OS: Windows 10 64-bit (latest Service Pack) / Windows 11
- CPU: Intel Core i5 or AMD Phenom II X3 (or better)
- GPU: NVIDIA GeForce GTX 600 series or AMD Radeon HD 7000 series (at least 1GB VRAM)
- RAM: 6 GB (8 GB for Intel HD Graphics)
- Storage: 50 GB available space (SSD recommended)
- Internet: Broadband connection
- OS: Windows 10 64-bit / Windows 11
- CPU: Intel Core i7 or AMD Ryzen 5
- GPU: NVIDIA GeForce GTX 1060 (6GB) or AMD Radeon R9 380 (or better)
- RAM: 8 GB
- Storage: 50 GB SSD
- Internet: High-speed broadband
- Battle.net account is mandatory on all platforms. It stores your progress, cosmetics, and competitive rank.
- Console accounts (PSN, Xbox Live, Nintendo Account) must be linked to your Battle.net account. This is done during first launch via browser or in-game prompt.
- Cross-progression is enabled across all platforms when linked.
- No additional purchase needed – Overwatch 2 is free-to-play. In-game purchases are optional.
- Age restrictions: You must be at least 13 years old (or the age of digital consent in your region).
Recommended (for 60+ FPS at 1080p medium/high)
Note: Actual performance depends on game settings and background tasks. Laptop hardware may underperform.
---
Step-by-Step Installation
PC – Battle.net (Blizzard's Launcher)
1. Create/Log into Battle.net account at [Battle.net](https://battle.net). If you have an old Overwatch 1 account, use the same email to retain cosmetics and stats.
2. Download and install the Battle.net desktop app from the official site. Run the installer.
3. Sign in to the app.
4. In the Games tab, find Overwatch 2 (or search). Click Install.
5. Choose installation location (ensure at least 50 GB free). A faster SSD is recommended.
6. The download size is ~50 GB. The launcher will download and verify files.
7. Once complete, click Play to launch the game.
PC – Steam
1. Install Steam from [store.steampowered.com](https://store.steampowered.com) and log into your Steam account.
2. Go to the Store and search for Overwatch 2 or navigate to [Steam page](https://store.steampowered.com/app/2357570).
3. Click Play Game (free). A prompt will ask to link your Steam account with Battle.net – this is mandatory.
- If you don't have a Battle.net account, you'll be redirected to create one.
- If you have one, sign in and authorize the link.
4. Click Install on the Steam store page. Select a library folder (at least 50 GB free).
5. Steam downloads the game files (~50 GB).
6. After download, click Play from your library. The game will launch the Battle.net overlay briefly to verify ownership.
7. First-time launch: You may need to sign into Battle.net again in the in-game browser.
PC – Epic Games Store
1. Install Epic Games Launcher from [store.epicgames.com](https://store.epicgames.com) and log in.
2. Go to the Store and search Overwatch 2. Click Get (free).
3. Install – choose destination folder (50 GB free).
4. The launcher downloads the game (~50 GB).
5. Launch. The first run will prompt you to link your Epic account to Battle.net (if not already linked). Follow the browser window to sign in to Battle.net.
6. Once linked, the game starts.
PlayStation 4 / PlayStation 5
1. On your console, go to the PlayStation Store.
2. Search for Overwatch 2. Select the game.
3. Click Download (free). Make sure you have at least 50 GB free space.
4. The console downloads and installs automatically.
5. After installation, launch the game. You will be prompted to log into your Battle.net account (or create one) and link your PSN ID.
6. Complete the initial setup (language, accessibility settings).
7. To play online, an active PS Plus subscription is required (not for installation).
Xbox One / Xbox Series X|S
1. From the Home screen, open the Microsoft Store.
2. Search for Overwatch 2.
3. Click Get (free) or Install.
4. Ensure at least 50 GB free on internal drive or external SSHD.
5. The console downloads and installs.
6. Launch the game. Sign in with your Microsoft account, then link your Battle.net account when prompted.
7. An active Xbox Game Pass Core or Ultimate is needed for online multiplayer.
Nintendo Switch
1. Open the Nintendo eShop from the Home menu.
2. Search for Overwatch 2.
3. Select Free Download (requires Nintendo account).
4. Download – file size is approximately 25-30 GB (compressed) but may expand to near 50 GB after installation. Insert a microSD card if internal storage is insufficient.
5. After download, icon appears on Home screen.
6. Launch and link your Battle.net account (or create one).
7. An active Nintendo Switch Online subscription is required for online play.
---
Account Requirements
---
First Launch Setup
After installation, the first launch includes:
1. Language selection (can be changed later in settings).
2. Accessibility options: toggle subtitles, colorblind modes, aim assist (console), etc.
3. Graphics/Video settings (PC only): Choose from presets (Low, Medium, High, Ultra) or custom. Default is often Low/RECOMMENDED. Adjust resolution, refresh rate, vsync, and graphics quality.
4. Audio settings: Master volume, music, SFX, voice chat.
5. Controls: Keyboard/mouse (PC) or controller bindings (console/PC). You can adjust sensitivity, aim type (dual zone/exponential/etc.).
6. Tutorial: The game offers a forced introductory match against AI – you can skip it, but it teaches basic controls.
7. Data centers: The game selects the region with best ping. You can change in settings.
8. Account linking (if not done during install flow) – follow on-screen prompts.
---
Storage Space Requirements
| Platform | Download Size | Installed Size | Recommended Drive |
|---|---|---|---|
| PC (Battle.net/Steam/Epic) | ~50 GB | ~50 GB | SSD (SATA or NVMe) |
| PlayStation 4 | ~45 GB | ~50 GB | Internal HDD or SSD |
| PlayStation 5 | ~45 GB | ~50 GB | Internal SSD |
| Xbox One | ~45 GB | ~50 GB | Internal HDD |
| Xbox Series X | S | ~45 GB | ~50 GB |
| Nintendo Switch | ~25 GB (download), ~30-35 GB installed | ~30-35 GB | microSD card or internal |
---
Common Installation Errors & Fixes
PC – Download/Install fails to start
- Error: "Blizzard Update Agent is already running" or "Could not install update".
- Fix:
- Reason: Network congestion, ISP throttling, or Blizzard server load.
- Fix:
- Error: Black screen, or "Overwatch 2 has encountered an error" after launch.
- Fix:
- Reason: Windows reserved space, or the installer needs extra temporary space.
- Fix:
- Fix:
- Fix:
- Error: "Account linking failed" or "Region mismatch".
- Fix:
1. Restart the Battle.net app (or Steam/Epic).
2. Run the launcher as Administrator.
3. Delete the `Blizzard Entertainment` folder in `%ProgramData%` (for Battle.net) after backing up settings.
4. Temporarily disable antivirus software (re-enable after installation).
PC – Slow download or stalled
- Pause and resume the download.
- Switch to a wired connection.
- Change DNS to Google (8.8.8.8 / 8.8.4.4).
- In Battle.net settings, limit download bandwidth to 0 (unlimited) or set a lower value if issues persist.
PC – Game crashes on launch
1. Update GPU drivers (NVIDIA/AMD/Intel).
2. Verify game files:
- Battle.net: Click gear icon next to Play -> Scan and Repair.
- Steam: Right-click game -> Properties -> Local Files -> Verify integrity of game files.
- Epic: Click three dots on Overwatch 2 -> Manage -> Verify.
3. Disable overlays (Discord, NVIDIA GeForce Experience, Xbox Game Bar).
4. Run the game in Windows 8 compatibility mode (right-click `Overwatch.exe` in install folder).
PC – "Insufficient disk space" despite having space
- Free up at least 60 GB before installation.
- Run Disk Cleanup (clean temporary files).
- Ensure drive is formatted as NTFS (FAT32 has 4GB file limit).
Console – Download fails or stuck
- Restart console (cold reboot: hold power button until fully off).
- Check network connection (test in system settings).
- Delete partially downloaded game and redownload from library.
- Ensure console firmware is up to date.
Nintendo Switch – Error code 2002-0001
- Clear cache: System Settings -> System -> Formatting Options -> Reset Cache.
- Archive and redownload game from eShop.
- Free up microSD space – Overwatch 2 requires at least 32 GB free before download.
General – Linking account errors
- Check that the console region matches your Battle.net region (e.g., American PSN with Americas Blizzard account).
- Unlink accounts at [Battle.net Connections](https://account.blizzard.com/connections) and re-link in-game.
---
Post-Installation Verification
After installation, perform these steps to ensure the game is ready:
1. Launch the game – it should open to the title screen (with login/account linking if needed).
2. Check for updates – the game may download a small patch on first launch.
3. Test a quick play match – play a Practice vs. AI round to verify controls and sound.
4. Verify file integrity (PC): Use the launcher's scan/repair tool if you encounter crashes.
5. Check in-game settings:
- Graphics options meet your expectations.
- Audio devices correct (headset/speakers).
- Network: open Settings -> Options -> Social -> Network; ensure NAT type is Open (moderate/strict may cause connection issues).
6. Ensure cross-progression – log into Battle.net website to confirm that your console account appears under "Connected Accounts".
7. Delete leftover installers – free up space by deleting the Battle.net setup executable or Steam/Epic pending files (if not needed).
---
Summary
Overwatch 2 is free and available on all major platforms. The installation process is straightforward if you meet storage and account requirements. Always download from official stores and keep your Battle.net account linked for seamless cross-play and progression. If you encounter errors, refer to the fixes above or visit Blizzard's support site.
For further assistance: [Blizzard Support](https://support.blizzard.com) or [Overwatch 2 Forums](https://us.forums.blizzard.com/en/overwatch/).
Game Introduction
Overview
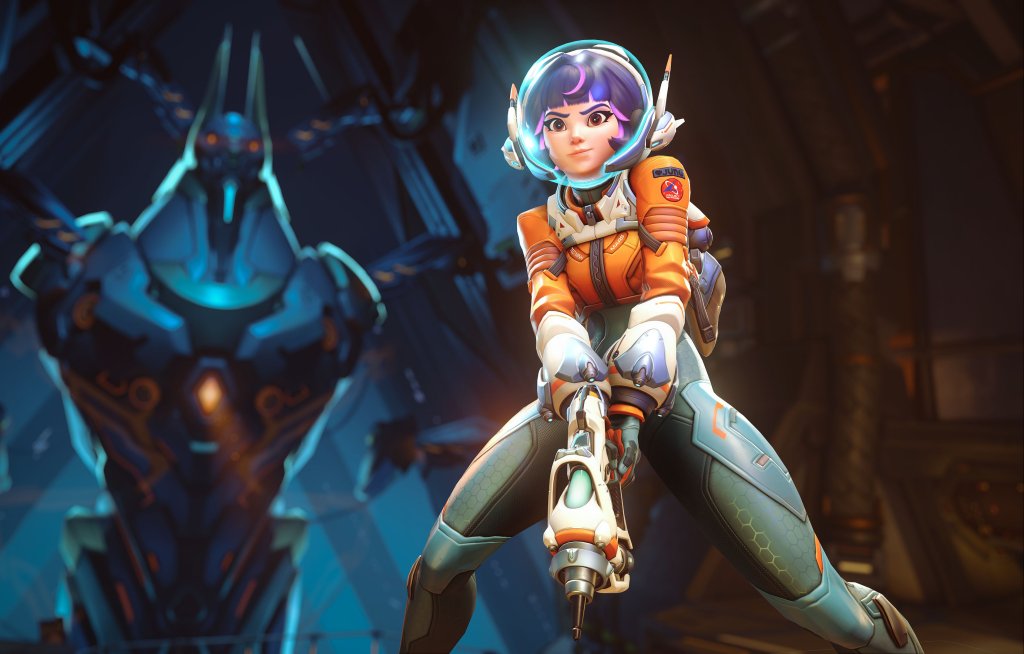
Overwatch 2 is a free-to-play team-based hero shooter developed and published by Blizzard Entertainment. It serves as both a sequel and a direct replacement to the original Overwatch, which released in 2016. The game launched on October 4, 2022 in early access form (replacing Overwatch 1 servers) and has since evolved through regular seasonal updates. There is no official mobile version.
Platforms
Overwatch 2 is available on:
- PC (via Battle.net, Steam, and Epic Games Store)
- PlayStation 4 & PlayStation 5
- Xbox One & Xbox Series X|S
- Nintendo Switch
- Tracer (Damage) – The iconic time-jumping British pilot.
- Reinhardt (Tank) – A massive German knight with a rocket hammer and barrier shield.
- Mercy (Support) – A Swiss angelic healer with resurrection powers.
- Genji (Damage) – A cybernetic ninja from Japan.
- Ana (Support) – A veteran sniper healer.
- Sigma (Tank) – A gravitational physicist with reality-bending powers.
- Kiriko (Support) – A Japanese shinobi healer who can teleport through walls.
- Quick Play – Standard unranked matches (Payload, Control, Escort, Hybrid).
- Competitive Play – Ranked matches with placement system (Bronze to Top 500).
- Arcade – Rotating fun modes (e.g., Mystery Heroes, Deathmatch, 3v3 Elimination).
- Custom Games – Create or join community-created modes with custom rules.
- Co-op Missions (PvE) – Limited-time story missions in the “Invasion” season (2023), with future expansions expected.
- Practice vs. AI – Train against bots.
- Workshop – Community-driven scripted game modes.
Crossplay and cross-progression are supported across all platforms via a Blizzard account.
Story & Setting
Set in a near-future Earth after the fall of the international peacekeeping force known as Overwatch, the world faces new threats from rogue AI (the Omnics), terrorist organizations (Talón), and internal strife. The narrative follows a revived Overwatch as they reunite to combat these dangers. The setting ranges from futuristic cities like King’s Row and Numbani to ancient temples (Hanamura) and space stations (Horizon Lunar Colony). The story is primarily told through in-game cinematics, comics, seasonal events, and the limited PvE missions released in 2023.
Main Characters
Overwatch 2 features over 35 playable heroes, each with unique abilities and roles. Key characters include:
Each hero has distinct backstories tied to the Overwatch/Talón conflict.
Core Appeal & Target Audience
Overwatch 2 appeals to FPS fans who enjoy team coordination, diverse abilities, and constant role-switching. Its fast-paced matches (typically 10–15 minutes) reward game sense, aim, and character mastery. The 5v5 format (one Tank, two Damage, two Support) increases individual impact compared to its predecessor. The game is accessible for casual players through Arcade modes and quick play, while competitive players can climb ranks in a dedicated Competitive Play mode. The art style is vibrant and colorful, attracting a wide age range (rated T for Teen).
Game Modes
All modes require a persistent internet connection; there is no offline support. The game is always online, even for single-player practice.
Online Support & Content Model
Overwatch 2 uses a live service model with Seasonal Battle Passes (free and premium tracks). Each season (~9 weeks) introduces a new hero, map, cosmetics, and balance changes. The game does not have traditional paid DLC; all gameplay content (heroes, maps) is free to all players. Monetization is through battle passes, cosmetic bundles, and the in-game shop (Overwatch Coins).
What Makes Overwatch 2 Unique?
1. Hero-Switching Mechanic – Players can swap heroes mid-match to counter the enemy team, creating a dynamic rock-paper-scissors experience.
2. Role-Based Team Structure – Tanks initiate and protect, Damage deals, Support heals and enables; synergy is critical.
3. 5v5 Shift – Overwatch 2 moved from 6v6 to 5v5, reducing visual clutter and increasing each player’s impact.
4. Ping System – Contextual ping system for quick communication without voice.
5. Vibrant Art & Lore – A colorful, optimistic sci-fi world with deep character narratives, unlike gritty military shooters.
6. Cross-Platform Progression – Play on any platform, keep your cosmetics and rank.
7. Accessible yet Deep – Low barrier to entry but high skill ceiling due to ability interactions and team coordination.
---
For detailed gameplay mechanics, hero guides, and strategies, see the remaining sections of this guide.
Getting Started
Overview
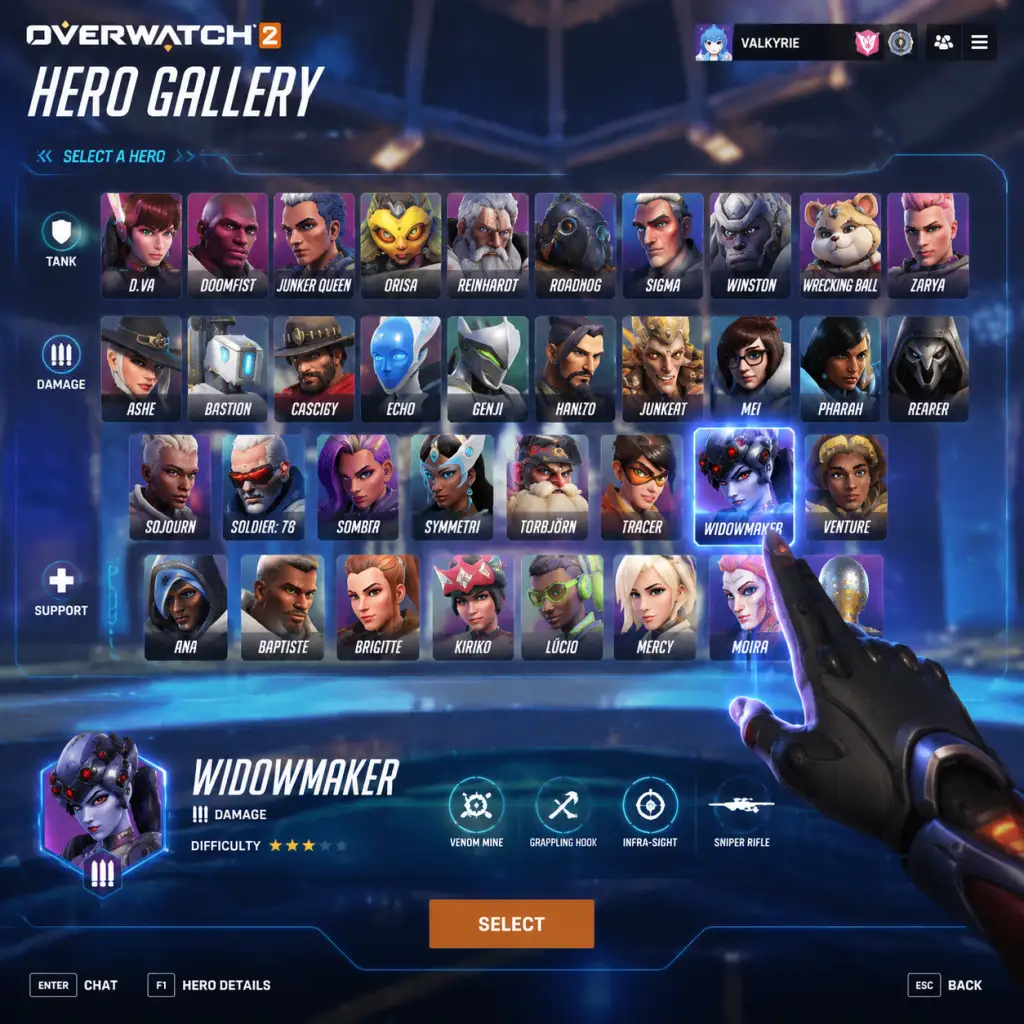
Overwatch 2 is a free-to-play team-based hero shooter. There is no character creation—instead, you choose from a roster of over 36 unique heroes, each with distinct abilities and playstyles. This guide will walk you through your first hour, explain controls on all platforms, break down the UI, and give you a clear day-one plan. Whether you're on PC, PlayStation, Xbox, or Nintendo Switch, these tips will help you avoid common pitfalls and start having fun immediately.
First Hour Walkthrough
Step 1: Complete the Tutorial (5-10 minutes)
- Launch the game and log in with your Blizzard account.
- The game will automatically start the tutorial (a short mission with Soldier: 76). Follow on-screen prompts to learn basic movement, shooting, and abilities.
- Tip: Pay attention to the objective markers and the ping system. The tutorial teaches you how to call out enemies and locations.
- After the tutorial, you’ll be taken to the main menu. From the Play menu, select Training > Practice Range.
- Test different heroes by pressing F1 (PC) to change heroes. Try at least one hero from each role: Damage (e.g., Soldier: 76), Tank (e.g., Reinhardt), Support (e.g., Mercy).
- Learn the ultimate ability timing (press Q on PC, Y/Triangle on console). Practice moving and aiming while using abilities.
- Go to Play > Vs. AI. Select Easy difficulty and any map. This mode has no penalty for losing and lets you practice against bots.
- Focus on the objective: push the payload or capture the point. Don’t just chase kills.
- Try a few different heroes. If you die often, switch to a hero with more survivability (e.g., Soldier: 76 for mobility, Moira for self-heal).
- New accounts have a limited hero pool (19 heroes initially). You must play matches in Quick Play (Role Queue or Open Queue) to unlock the remaining heroes (about 17 more).
- Complete the FTUE challenges (shown on the main menu) to speed up unlocks. These include winning matches, dealing damage, and healing.
- Tip: Stick to the hero you’re unlocking until you get a feel for their kit. Avoid switching heroes every life—commit to learning one per match.
- Go to Play > Quick Play. Choose Role Queue if you want a specific role (Tank, Damage, Support) and guaranteed queue times. Open Queue lets you switch roles freely but matches may be less balanced.
- Warm up by selecting your practiced hero. Communicate with your team using the ping wheel (press G on PC, Up on D-pad console).
- Remember: The objective wins games, not kills. Stay with your team and contest the point.
- Movement: WASD
- Jump: Spacebar
- Crouch: Left Ctrl
- Primary Fire: Left Mouse Button
- Secondary Fire (if hero has one): Right Mouse Button
- Abilities 1,2,3: E, Shift, and sometimes Mouse Buttons (see hero info)
- Ultimate: Q
- Reload: R
- Interact (payload, teleporter): F
- Ping: G
- Communication Wheel: C (hold for quick commands)
- Melee: V
- Push-to-Talk: Y (hold to speak)
- Scoreboard: Tab
- Hero Select: H (during spawn)
- Left Stick: Move
- Right Stick: Look/Aim
- Jump: X (PS4/5)
- Crouch: Circle (hold to toggle)
- Primary Fire: R2
- Secondary Fire: L2
- Ability 1: L1
- Ability 2: R1
- Ultimate: Touchpad (PS4/5) or L1+R1? Actually default: Triangle for ultimate (check settings)
- Reload: Square
- Interact: × (press on objective)
- Ping: D-Pad Up
- Communication Wheel: D-Pad Down/L1? In training it’s Select (Share button) but can be remapped
- Melee: R3 (click right stick)
- Switch Hero: Options button (hold menu)
- Scoreboard: Touchpad (swipe?)
- Left Stick: Move
- Right Stick: Look
- Jump: A
- Crouch: B (hold to toggle)
- Primary Fire: RT
- Secondary Fire: LT
- Ability 1: LB
- Ability 2: RB
- Ultimate: Y
- Reload: X
- Interact: A on objective
- Ping: D-Pad Up
- Communication Wheel: D-Pad Down (or LB+RB? Check)
- Melee: R3
- Switch Hero: View (two squares) or hold Start
- Scoreboard: View or Back button
- Left Stick: Move
- Right Stick: Look
- Jump: B
- Crouch: A (hold)
- Primary Fire: ZR
- Secondary Fire: ZL
- Ability 1: L
- Ability 2: R
- Ultimate: X
- Reload: Y
- Interact: B on objective
- Ping: D-Pad Up
- Communication Wheel: D-Pad Down (or pressing +?)
- Melee: Right Stick click (RS)
- Switch Hero: + Menu
- Scoreboard: – Minus button
- Learn the three roles: Tank (absorb damage and create space), Damage (deal high damage and secure kills), Support (heal teammates and provide utility).
- Master one hero per role before branching out. Start with Soldier: 76 (Damage – straightforward gunplay), Reinhardt (Tank – simple shield and hammer), Mercy (Support – easy healing and mobility).
- Understand game modes: Payload (push a cart), Capture Point (hold a zone), Hybrid (capture then push), Push (control a robot), Clash (capture sequential points – new in Overwatch 2).
- Complete daily and weekly challenges for Battle Pass XP, Overwatch Coins, and hero unlocks. Open the Challenges tab (main menu) to track progress.
- Unlock all heroes ASAP by playing Quick Play and completing FTUE challenges. Avoid spending Overwatch Coins on hero unlocks (they are all free with playtime).
- Play the tutorial – it’s mandatory and teaches the basics.
- Practice alone in the Practice Range to test heroes.
- Play vs. AI until you feel comfortable with a hero’s abilities.
- Use voice lines or pings to communicate – even without a mic, pings are powerful.
- Stay with your team – Overwatch 2 is about teamwork, not lone-wolfing.
- Adjust settings – sensitivity (see below), graphics to achieve 60+ FPS, crosshair style.
- Watch the kill feed – know when your team is outnumbered.
- Learn to counter-pick – if the enemy team has a strong flanker, switch to a hero that can handle them (e.g., if an enemy Tracer is killing your supports, play Brigitte or Moira).
- Playing competitive mode until you are comfortable with at least 2-3 heroes in each role (minimum level 25? Actually competitive unlocks after winning 50 Quick Play matches – but wait until you understand the game).
- Spending Overwatch Coins on cosmetics – save them for Battle Pass premium or limited-time skins. You can earn free cosmetics through events and loot boxes (if still available).
- Toxicity – do not flame teammates. Use constructive pings instead.
- Sticking to one hero – counterpicking is key to winning. If you’re being hard-countered, switch.
- Ignoring objective – kills don’t win matches; capturing/pushing does.
- Wasting ultimate abilities – use them at key moments (team fights, objective pushes), not randomly.
- Overextending – don’t chase kills deep into enemy territory; you’ll die and leave your team vulnerable.
- Overwatch Coins – Premium currency (earned via weekly challenges and Battle Pass). Use them to purchase the Battle Pass (1000 coins per season) or cosmetic items in the shop. Don’t waste on hero unlocks – all heroes are earnable for free.
- Battle Pass XP – Earned by playing matches, completing challenges. Leveling the Battle Pass gives you skins, emotes, and more. Focus on completing weekly challenges for big XP boosts.
- Credits (legacy currency) – Earned from duplicates or events. Can be used to buy older cosmetics in the Hero Gallery. Save these for limited-time events if you really want a skin.
- Overwatch League Tokens (optional) – Earned by watching OWL on YouTube. Used for team skins.
- Complete tutorial and FTUE challenges.
- Play 3 vs. AI matches.
- Try each role at least once.
- Set your mouse/controller sensitivity to a comfortable level (e.g., 800 DPI, 7-10 in-game sens for PC; start at 50% on console and adjust).
- Join the Overwatch 2 Discord or subreddit for beginner tips.
- [ ] Download and install Overwatch 2 via Battle.net (PC), PlayStation Store, Xbox Store, or Nintendo eShop.
- [ ] Create a Blizzard account (if not already done).
- [ ] Complete the in-game tutorial (takes ~10 minutes).
- [ ] Spend 10 minutes in the Practice Range – test at least 3 heroes (one from each role).
- [ ] Play 3 Vs. AI matches on Easy difficulty.
- [ ] Play your first Quick Play match (Role Queue or Open Queue).
- [ ] Check your settings – adjust sensitivity, crosshair, graphics for performance (100% render scale, medium shadows, etc.).
- [ ] Review the scoreboard after each match; look at your eliminations, damage, healing, deaths.
- [ ] Complete at least one daily challenge to earn Battle Pass XP.
- [ ] Watch one beginner guide video on YouTube for the hero you want to main.
- [ ] Set a goal for the first week: unlock all heroes, learn one hero per role to a comfortable level.
- Have fun – Overwatch 2 is chaotic and vibrant. You will die a lot, but every death is a learning opportunity.
- Use the replay system – After a match, you can watch replays from any camera angle. Use this to see why you died and how to improve.
- Communicate positively – A simple “nice try” or “gg” goes a long way.
- Experiment – Don’t be afraid to try weird heroes. Some of the most fun moments come from unexpected plays.
- Remember: The only way to get better is to play. Enjoy the journey from newcomer to seasoned veteran!
Step 2: Explore the Practice Range (5-10 minutes)
Step 3: Play vs. AI (15-20 minutes)
Step 4: Unlock All Heroes via First-Time User Experience (FTUE)
Step 5: Play Your First Quick Play Match (10-20 minutes)
Controls (All Platforms)
PC (Default Keyboard & Mouse)
PlayStation 4/5 (Default Controller)
Xbox One/Series X|S (Default Controller)
Nintendo Switch (Default Controls)
Note: You can customize all controls in Options > Controls. Many players remap abilities to paddles (advanced controllers) or change jump to a bumper (e.g., L1/LB) for easier wall-riding (Lucio, Mercy).
UI Overview
Your Heads-Up Display (HUD) contains critical information:
1. Health Bar (bottom center) – Shows your hit points (HP) and armor/shields. Colors: White (HP), Yellow (Armor), Blue (Shields).
2. Ability Icons (bottom right) – Circle cooldown timers. Grey icon = ability on cooldown. Bright = ready.
3. Ultimate Charge (bottom center, below health) – Shows percentage (0-100%). Full = ultimate ready to use.
4. Crosshair – Center screen. Customizable in settings.
5. Kill Feed (top right) – Kills, assists, and deaths. Red = enemy kill, blue = ally kill.
6. Team Health Icons (left side) – Shows team members’ HP and ult status (checkmark = ult ready).
7. Objective Indicator (center top) – Shows objective status (capturing, contested, payload progress).
8. Scoreboard (Tab/Back button) – Detailed stats: eliminations, deaths, damage, healing, time on objective.
9. Ping Wheel (G or D-Pad Up) – Context-sensitive commands. Use to call out enemies, fall back, or warn of danger.
10. Map/Compass (top left) – Shows objective direction and teammate positions.
Essential Early Objectives
What to Do First vs. What to Avoid
✅ Do:
❌ Avoid:
Early Resource Priorities
The main currencies in Overwatch 2 are:
Priority checklist for day one:
Common Beginner Mistakes
1. Standing still while shooting – Always strafe (move left/right) to make yourself harder to hit.
2. Not contesting the objective – Sometimes you must sacrifice a life to keep the payload moving.
3. Spamming abilities without a plan – Example: using Reinhardt’s Charge into a group of enemies usually gets you killed. Think before pressing the button.
4. Ignoring ultimate economy – Don’t use your ultimate when your team is dead or when the fight is already won/lost. Coordinate ults with teammates.
5. Not grouping up – After dying, wait for your team before running in alone. Losing one-by-one is a common mistake.
6. Bad hero picks – If you’re playing a sniper on a close-quarters map, you’re not helping. Switch to a suitable hero.
7. Forgetting to heal (as Support) – Your primary job is keeping teammates alive. Damage should come second.
8. Not using cover – Always be near walls or shields. Peek and shoot, don’t stand in the open.
Day-One Checklist
Final Tips
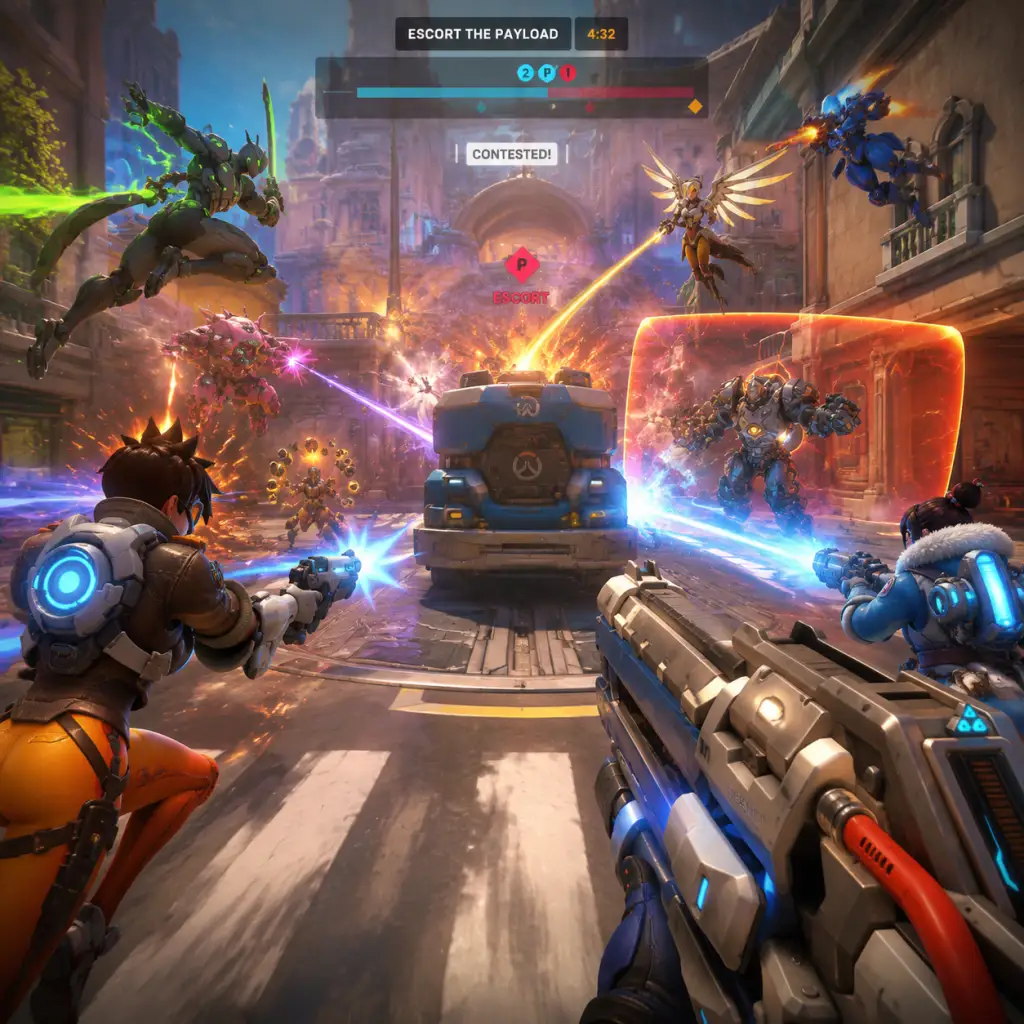
Core Gameplay
Overview
Overwatch 2 is a team-based hero shooter where two teams of five players compete in objective-driven game modes. The core gameplay loop revolves around selecting a hero from over 36 unique characters, coordinating with your team to capture or defend objectives, and using each hero’s distinct abilities and ultimate to outplay the enemy team. Unlike traditional shooters, there is no single best weapon or build—success hinges on hero composition, teamwork, and mastery of individual hero mechanics.
This section breaks down the game’s core systems and progresses through the player journey—from your first matches to high-level competitive play—explaining how the gameplay loop, progression, economy, and endgame evolve as you improve.
---
1. Core Gameplay Loop
The fundamental loop in Overwatch 2 is simple but deep:
1. Select a Hero – Each match you pick from three main roles: Tank, Damage, or Support. Your choice defines your team role and responsibilities.
2. Fight for the Objective – Almost every mode (Escort, Control, Push, Flashpoint) has a central objective. You must either capture, push, or defend it.
3. Use Abilities and Ultimates – Each hero has four abilities (including an ultimate). Managing cooldowns and positioning is key.
4. Team Fights and Respawns – When your hero is eliminated, you respawn and rejoin the fight. The team that wins more fights controls the objective.
5. Win the Round – Win by completing the objective (e.g., pushing the payload to the end, capturing two control points).
Example Early Game Experience: As a new player (say level 1–25), you’ll play Quick Play. You pick Soldier: 76 (a straightforward damage hero). Your goal: stay with your team, shoot enemies, use your Sprint and Biotic Field to survive, and use Tactical Visor for easy eliminations. You’ll learn the basic flow: spawn, fight, die, respawn, repeat.
---
2. Combat and Interaction Systems
Overwatch 2 is fundamentally a shooter, but every hero has unique weapons and abilities. Combat is about aim, ability management, and positioning.
- Primary Fire – Most heroes have a standard attack (e.g., Ashe’s rifle, Reinhardt’s hammer). Some are hitscan (instant bullet), others projectile.
- Secondary Fire – Many heroes have alternate attacks (e.g., Sigma’s accretion rock, Hanzo’s Storm Arrows).
- Abilities – Each hero has up to three cooldown-based abilities (e.g., Tracer’s Blink, Ana’s Sleep Dart). These provide utility, mobility, or damage.
- Ultimate – Charged by dealing damage, healing, or other actions. Powerful, game-changing abilities (e.g., Zarya’s Graviton Surge, Lucio’s Sound Barrier).
- Role Passive Abilities:
- XP – Earned by completing matches, challenges, and daily/weekly tasks. Each 10,000 XP = 1 level.
- Battle Pass – Free and Premium tracks. Levels give cosmetics (skins, emotes, voice lines, player icons). Premium includes exclusive skins and faster XP gain.
- Role-specific Challenges – Unlock heroes (e.g., new players start with limited roster; play ~50 games to unlock all original heroes).
- Competitive Unlock – Account level 50 required to unlock Competitive mode.
- Each hero has a separate level (1–100+). Leveling a hero earns exclusive loot boxes (called “Hero Boxes”) and cosmetic items (sprays, icons, name cards).
- No stat increases—purely cosmetic.
- Early Game: Account level 1–50. Learning roles, heroes, basics.
- Mid Game: Level 50–150. Unlock Competitive, start ranking in Bronze–Platinum.
- Late Game: Level 150–500+. Deep hero pool, advanced strategies, high elo (Diamond–Grandmaster).
- Endgame: Level 500+ and high Competitive rank (GM, Top 500). Focus on meta mastery, team coordination, scrims.
- Health Packs – Small and large packs scattered across maps. Knowing their locations is crucial for survivability, especially for supports and flankers.
- High Ground – Controlling high ground gives damage advantage. Many fights revolve around maintaining or contesting elevated positions.
- Chokepoints and Flanks – Each map has natural chokepoints (e.g., the bridge on King’s Row) and flank routes (side alleys, windows). Learning these allows you to surprise enemies.
- Environmental Hazards – Some maps have pits or ledges (e.g., Well on Ilios). Heroes with knockback (Lucio, Pharah) can secure environmental kills.
- Quick Play – Casual, role queue or open queue. 5v5 matches with random map.
- Competitive – Ranked play. 5v5 role queue. Seasons last ~2 months. Win/loss affects SR.
- Arcade – Rotating modes (e.g., 6v6 Mystery Heroes, 1v1 Limited Duel, PvE events).
- PvE Story Missions – Limited-time co-op missions (e.g., King’s Row Uprising, Underworld). Not permanent core gameplay.
- Challenges – Daily and weekly objectives (e.g., “Win 3 games as Support”, “Deal 30,000 damage”). Earn XP, Battle Pass progress.
- In-Game Currency – Credits (earned from Battle Pass, challenges) for buying rare and epic skins; Overwatch Coins (premium currency) for seasonal legendary skins, Battle Pass, pick-up bundles. Hero Boxes from hero progression also drop cosmetics.
- Loot Boxes – Removed from Overwatch 2. Instead, direct purchase in the shop or earn through Battle Pass.
- Battle Pass – 80 tiers. Free track gives 1–2 skins, coins, and icons. Premium track ($10) gives many skins, including a mythic skin at tier 80.
- No Pay-to-Win – You cannot buy damage, health, or abilities. Competitive advantage comes only from skill.
- Hero Mastery – You improve your mechanics (aim, movement) and game sense (positioning, ability timing, ult economy). This is your “build”.
- No Perks/Items – Each hero is fixed; there is no customization of abilities. However, you can switch heroes mid-match on respawn to counter the enemy team.
- Role Flexibility – Learning multiple heroes in your role is essential. For example, a Support main might learn Ana, Kiriko, and Lucio to adapt to different team comps and map types.
- Meta Shifts – Balance patches (every few months) change hero viability. Adapt your hero pool accordingly.
- Competitive Ranks – Bronze (1–1499 SR) → Silver → Gold → Platinum → Diamond → Master → Grandmaster (4000+) → Top 500 (highest SR players in region).
- Seasonal Rewards – Competitive points (earn golden weapons), player titles, and sprays.
- Scrims and Tournaments – Third-party leagues (e.g., Overwatch Collegiate, amateur tournaments). Players join organized teams and practice weekly.
- Role Queue and Open Queue – Two separate competitive ladders. Role Queue is standard for OWL-style 2-2-1 (now 1-2-2? Overwatch 2 uses 1-2-2). Open Queue allows any composition.
- eSports Spectacle – Watch Overwatch League (OWL) or contenders to learn high-level teamwork, meta trends, and map rotations.
- Tanks: Reduced knockback and ultimate charge from enemies (role passive).
- Damage: Speed boost on elimination (role passive).
- Supports: Automatic health regeneration after not taking damage for a short time.
- Role Queue (Competitive) ensures each team gets 1 Tank, 2 Damage, 2 Supports.
Example Mid Game Combat: A mid-level player (approx. account level 50–100, skill rating Silver–Gold) understands ability combos. You play Ana (Support). You learn to land Sleep Dart on an ulting enemy (e.g., a charging Reinhardt) and communicate “Rein slept!”. You also use Biotic Grenade to anti-heal enemies and boost team healing. Your positioning behind natural cover improves.
---
3. Progression Systems
Progression is account-wide and hero-specific, but not power-based. It gives cosmetics and unlocks competitive modes.
Account Progression (Levels and Battle Pass)
Hero Progression (Leveling Heroes)
Player Level Ranks (Early, Mid, Late, Endgame)
---
4. Exploration and Maps
Overwatch 2 maps are designed for verticality, flank routes, and sightlines. Exploration is about learning map layouts and resource spawns.
Example Late Game Exploration: A Diamond-ranked player on Eichenwalde knows exactly when to push past the first choke using a Dive composition (Winston, Genji, Lucio). They use the castle’s upper windows to bypass the main gate and attack the backline.
---
5. Quests and Missions
Overwatch 2 has no traditional story quests. The primary “mission” structure is game modes:
Example Late Game Mission Focus: A Master-ranked player’s “mission” is climbing the Competitive ladder. They play 10 placement matches each season to get a rank, then grind SR. They review their replays, practice specific hero mechanics in aim trainers.
---
6. Economy System
Overwatch 2 uses a free-to-play economy with no pay-to-win elements. All gameplay-affecting content is free.
Example Early Game Economy: A new player might save their free Battle Pass coins to buy a legendary skin for their main hero (e.g., Mercy). They complete daily challenges to earn XP and passes.
---
7. Character and Build Growth
Heroes do not have levels, skill trees, or gear. Build growth is about player skill progression, not character progression.
Example Endgame Growth: A Top 500 Tank player has at least 500 hours on Reinhardt, Winston, and Sigma. They know exact cooldown rotations, shield breakpoints, and when to swap. They analyze pro matches and integrate advanced techs (e.g., Reinhardt’s “super jump” shatter).
---
8. Endgame Structure
The endgame in Overwatch 2 is Competitive ranked play at high levels, combined with community-driven events.
Example Endgame Activity: A Grandmaster player logs in, queues for Competitive Role Queue (Damage role). They play 3–5 matches, review their VOD (video on demand) with a coaching tool like Overanalyzer, and practice widow headshots in custom games. They discuss meta picks (e.g., Sojourn, Tracer) with teammates on Discord.
---
Summary Table by Progression Tier
| Tier | Account Level | Competitive Rank | Focus | Example Hero Mastery |
|---|
| Mid Game | 50–150 | Silver–Gold | Understand ability combos, map knowledge, role synergy. | Ana, Tracer, Winston.
| Late Game | 150–500 | Platinum–Diamond | Master 2–3 heroes per role, ult economy, advanced positioning. | Lucio, Genji, Zarya.
| Endgame | 500+ | Grandmaster / Top 500 | Perfect execution, pro strats, team coordination, meta adaptation. | Sojourn, Echo, Kiriko, Ball.
---
Conclusion
Overwatch 2’s core gameplay is a layered system of hero selection, combat, and objective control. Progression is skill-based, not stat-based. The journey from new player to Top 500 relies on learning heroes, maps, and teamwork. The endgame is pure competitive climbing and community engagement, supported by a cosmetic economy that never impacts gameplay power. By understanding these tiers and systems, you can plan your own growth and enjoy the depth Overwatch 2 offers at every level.
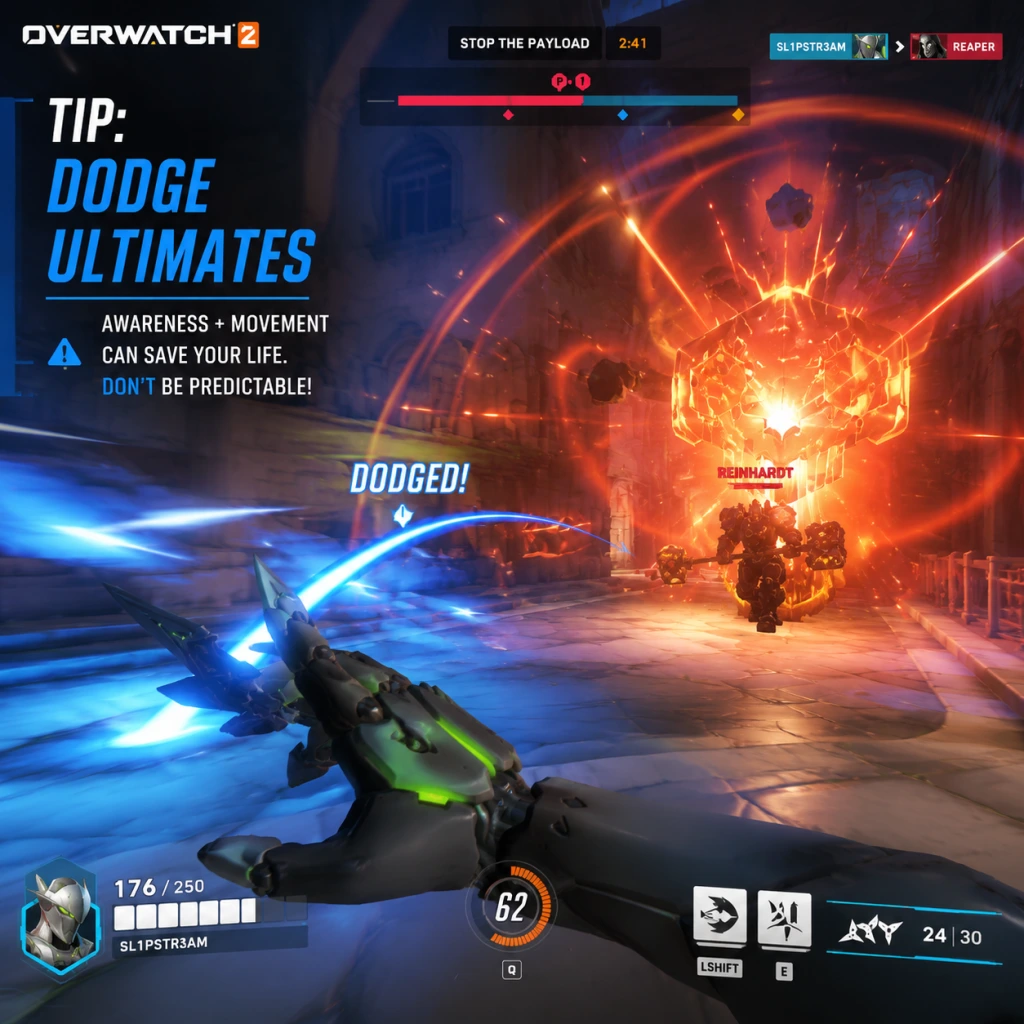
Game Tips
Overview
Overwatch 2 is a fast-paced team-based hero shooter where every decision matters. This guide compiles actionable tips for all skill levels, covering combat, positioning, team play, ultimate economy, hero mastery, and more. Whether you're new or aiming for Top 500, these strategies will elevate your game.
Beginner Tips
Combat Fundamentals
- Aim at head level: Always keep your crosshair at head height (approximately the top of doorways). This reduces vertical adjustment time and improves headshot consistency.
- Use cover constantly: Never stand in the open. Peek corners, use pillars, and retreat behind shields. The less damage you take, the less pressure on your supports.
- Reload wisely: Reload only when safe. Wait for a lull in combat, or use an ability to create distance. Example: Tracer can reload while blinking behind cover.
- Listen to audio cues: Footsteps are loud. Learn to identify hero footsteps (e.g., Doomfist's heavy boots, Genji's light steps) to anticipate flanks.
- Stay with your team: This is the #1 mistake. If you're alone, you're an easy kill. Stick within healing range of your supports and line of sight of your tank.
- High ground is king: Control high ground whenever possible. It gives you a damage boost (easier headshots) and forces enemies to expend cooldowns to reach you.
- Don't overextend: Know when to back off. If your team is dead or low, retreat to a safe position and wait for regroup. Feeding staggers the team.
- Use the ping system: Press the ping key (default `G` on PC, `Left D-pad` on console) to call out enemies, flanks, or objectives. Pings highlight through walls for 1.5 seconds.
- Group up before engaging: Wait for all 5 teammates to respawn and gather. Trickling in one by one loses games. Use the "Group Up" voice line or chat.
- Switch heroes when countered: If you're playing Pharah and the enemy has two hitscans (Soldier, Ashe), you're practically useless. Swap to a different damage hero or role.
- Track enemy ultimates: Keep mental note of when enemies used their ults. Common rule: most ults charge in 1–2 full teamfights. If Zarya used Graviton Surge last fight, she likely won't have it next fight.
- Combine ultimates: Combo ults for maximum value. Classic combos: Zarya Grav + Hanzo Dragon, Ana Nano + Genji Blade, Reinhardt Shatter + Bap Window. Time them together, not sequentially.
- Use ultimates to win fights, not start them: Don't pop your ultimate when your team is already winning 5v3. Save it for a decisive moment or to turn a losing fight.
- Counter-ult when possible: If enemy Genji uses Blade, use Sound Barrier (Lucio) or Transcendence (Zenyatta) to negate damage. Or use CC like Sleep Dart (Ana) to cancel.
- Identify the enemy carry: Who is causing the most trouble? If it's a Tracer, swap to Brigitte or Cassidy (flashbang) to shut her down. If it's a Pharah, pick Ashe, Soldier, or D.Va.
- Swap roles if needed: Sometimes the team lacks peel (protection for supports). If you're a DPS and supports keep dying, swap to a backline defender like Torbjörn or Cassidy.
- Adapt mid-match: Don't one-trick. Have 2–3 heroes per role you're comfortable with. If your initial pick isn't working after two deaths, change immediately.
- Control Points (e.g., Ilios): Contest the point but don't all stand on it. Spread out to cover flanks and high ground. Lucio speed boost can help retake.
- Payload maps: On offense, stay near the payload to push it. On defense, use the payload as mobile cover. Don't let it stall in open areas.
- Hybrid maps (Assault + Payload): First point is critical. If you lose it fast, you have limited time for the payload. Defend first point aggressively with ults.
- Push maps: The robot follows the path. Control the robot's line of travel. Use flanks to catch enemies off guard.
- Count enemy cooldowns: Example: When playing Winston, note when Ana uses Sleep Dart (12-second cooldown). Dive her immediately after she misses. Track Sigma's Accretion (rock stun) and bait it out.
- Animation canceling: Some heroes can cancel animations to speed up combos. Genji can cancel the end of his dash with Swift Strike (hold secondary fire during Dash). Ana can cancel her reload by meleeing after the bullet loads.
- Use sound cues for ability usage: Zarya's personal bubble has a unique ping sound. When you hear it, wait before shooting her to avoid charge.
- Aim training: Use custom games or aim trainers (like Aim Lab or Kovaak's). But in-game, practice flick tracking with heroes like McCree/Ashe. Set bots to move randomly.
- Movement practice: Strafing is critical. Avoid predictable straight lines. Use ADAD spam (left-right-left) and crouch peaks unpredictably.
- Console-specific: Adjust sensitivity and aim assist window size. Many pros use linear ramp with 100% aim assist window and 0 aim smoothing. Test in practice range.
- Pre-assign ult combos: Before the match, agree on ultimate combos. Example: "I'll Nano you if you Blade." Use in-game voice or text.
- Shotcalling: If you have game sense, call out enemy positions and ult statuses. Keep calls short: "Reaper above, no wraith" or "Zarya grav?"
- Stagger denial: After winning a teamfight, do not chase kills deep into enemy spawn. Instead, contest the objective and let them come to you. This prevents staggering.
- Reinhardt: Use charge sparingly. It's a death sentence if missed. Fire strike at least twice before charging to build ultimate quickly.
- Winston: Dive supports first (Ana, Zen, Mercy). Use shield to block cooldowns like Sleep Dart and Biotic Grenade. Jump pack melee combo for burst.
- D.Va: Use Defense Matrix to eat enemy projectiles (including Graviton Surge, Blizzard, and Moira orbs). Fly to high ground and boost out of danger.
- Sigma: Keep distance. Use Accretion to stun enemies out of ults (like Reaper or Pharah). Shield is flexible—don't deploy it in one spot.
- Roadhog: Hooking a target is not always beneficial. Hook squishy DPS or supports, not an ulting tank. After hook, step forward and shoot+melee for one-shot kill.
- Soldier 76: Use Sprint to reposition quickly. Drop Biotic Field in cover for self-heal. Helix Rockets are best used on grouped enemies or at close range.
- Tracer: Manage blinks (3 charges) and recall. Don't blink aimlessly. Close distance, unload clip, then recall out. Stay behind enemy lines to distract supports.
- Snipers (Ashe, Widowmaker): Always control high ground. If you miss two shots in a row, reposition or change angle. Use dynamite (Ashe) to harass close enemies.
- Reaper: Flank from unexpected angles. Use Wraith Form to escape after getting kills or to dodge ults. Death Blossom works best when dropped from above.
- Echo: Duplicate the most impactful enemy hero (usually tank or support). Use flight to stay mobile. Spam biotic orbs for area denial.
- Ana: Save Sleep Dart for enemy ults (e.g., Death Blossom, Whole Hog) or to peel for yourself. Nano Boost should be used on a decisive DPS (Genji, Soldier) or tank (Rein, Winston) when they engage.
- Mercy: Damage boost is more valuable than heal when the other support can handle healing. Boost a sniper or Soldier during tactical visor. Guardian Angel to a flying ally to dodge.
- Lucio: Speed boost let's your team engage/ disengage. Use Amp It Up for speed when pushing. Wall ride to become evasive and contest high ground.
- Zenyatta: Orb of Discord is the strongest debuff in the game. Put it on the enemy your team is focusing. Keep Harmony orb on your dive tank or flanker. Position behind your team; you have no mobility.
- Baptiste: Use Immortality Field proactively, not reactively. Place it behind cover just before a heavy engage. Exo Boots (crouch-jump) to reach high ground.
- Use the Practice Range: Learn ability ranges and combos. Custom games with invincible bots let you practice combos (e.g., Doomfist punch combos).
- Watch your replays: Review losses to see where you died and why. Note positioning mistakes and missed cooldowns.
- Don't rely on battle pass cosmetics: They give no gameplay advantage. Focus on improving fundamentals.
- No in-game purchases affect gameplay: Overwatch 2 is free-to-play with purely cosmetic microtransactions. Do not spend money on loot boxes or skins expecting a stat boost.
- Battle Pass: Provides cosmetic items and 60% XP boost (paid version). The free track still gives enough to unlock new heroes (if any) and some cosmetics.
- Learn health pack locations: Every map has small and large health packs. Memorize spawns. Critical in off-angles or when your supports are busy.
- Know flank routes: Every map has multiple paths. On maps like King's Row, the high ground path behind the point is a common flank. Use it to surprise enemies.
- Breakable objects: Some walls and floors can be destroyed (e.g., on Havana, the floor above first point). Use this to create new sightlines or escape routes.
- PC vs Console: Console has aim assist; PC has greater precision. On console, use gyro aiming if supported (PlayStation, Switch). Lower sensitivity can help tracking.
- Crossplay: If you play with PC friends, you will be matched against PC players. This puts console players at a disadvantage; consider using heroes that rely less on aim (e.g., Winston, Mercy, Reinhardt).
- Performance Settings: On PC, reduce graphics settings for higher FPS. Disable V-Sync for lower input lag. On console, enable 120Hz mode if supported.
Positioning Basics
Teamwork Essentials
Intermediate Strategies
Ultimate Economy
Counter-Picking
Map-Specific Tactics
Advanced Optimizations
Ability Tracking & Cooldown Awareness
Mechanical Drills
Team Coordination (Advanced)
Hero-Specific Tips by Role
Tank Tips
Damage Tips
Support Tips
Additional Categories
Resources (Time & Practice)
Economy (Not applicable in traditional sense)
Exploration (Map Knowledge)
Platform-Specific Notes
Final Advice
Overwatch 2 rewards game sense more than raw aim. Focus on positioning, communication, and team coordination. Constantly ask yourself: "What is my role in this fight?" and "Can I do something more useful?" Adapt to the enemy's tactics and never stop learning. Good luck!
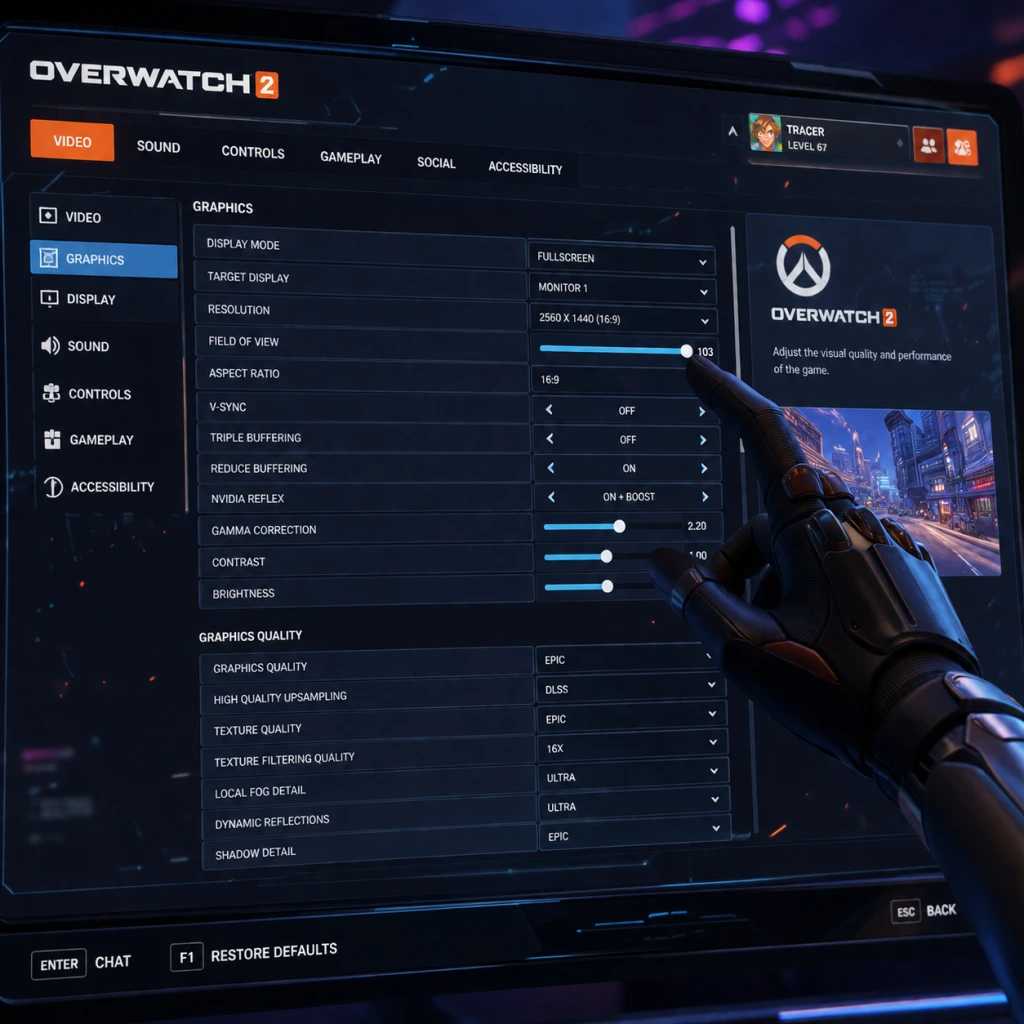
Game Settings
Overview
Overwatch 2 offers a comprehensive settings menu that lets you fine-tune every aspect of the game. This guide covers Graphics, Audio, Controls, Accessibility, Language, Network, and Gameplay settings. We’ll recommend optimal configurations for different hardware levels and highlight settings that are often misconfigured or require special attention.
---
Graphics Settings
Graphics settings are split into Video and Advanced tabs. The following table shows recommended presets for various hardware tiers. Adjust individual options as needed.
Recommended Presets by Hardware
| Hardware Tier | Example GPU | Recommended Preset | Notes |
|---|---|---|---|
| Low | GTX 1050 / RX 560 | Low | Aim for consistent 60+ FPS. Turn off shadows and reflections. |
| Mid | GTX 1060 / RX 580 | Medium / High | Can enable medium shadows and low effects. Render Scale at 100%. |
| High | RTX 2070 / RX 5700 XT | High | Keep render scale 100%. Enable some reflections and dynamic shadows. |
| Ultra | RTX 3080 / RX 6800 XT | Ultra / Epic | Maxed out at 1440p or 4K. Fine-tune scaling and anti-aliasing. |
Key Graphics Settings and Recommendations
- Display Mode: Always choose Fullscreen for best performance. Borderless Windowed may introduce input lag.
- Resolution: Match your monitor’s native resolution. Lowering resolution (e.g., 1080p on a 1440p monitor) can hurt clarity.
- Field of View (FOV): 103 is the max and gives the widest peripheral view. Set to 103 – it’s not a performance hog and improves situational awareness.
- Aspect Ratio: Use 16:9 or your monitor’s native ratio.
- VSync: Turn OFF to minimize input lag. Enable only if you experience screen tearing and cannot tolerate it.
- Triple Buffering: Turn OFF when VSync is off. Only relevant with VSync enabled.
- Render Scale: Keep at 100% for native resolution clarity. Lowering (e.g., 75%) can boost FPS but blurs image. Setting above 100% (e.g., 150%) forces supersampling, which is very demanding.
- Frame Rate Cap: Set to your monitor’s refresh rate or a bit higher (e.g., 144 FPS for 144Hz). Use Custom and input your target. Avoid “Display-Based” as it can introduce input lag.
- Reduce Buffering: Turn this ON to minimize input delay. It reduces the frame buffer queue. Do not leave it off.
- Texture Quality: Low saves VRAM; High improves visual sharpness. On low-end PCs, set to Low.
- Texture Filtering (Anisotropic): High doesn’t cost much performance. Set to 16x.
- Effects Quality: Medium or High for ability clarity. Low can make enemy abilities harder to see.
- Shadows: Low to Medium saves performance. Off removes shadows entirely but can make it harder to judge verticality.
- Lighting Quality: Low for performance; High for atmosphere.
- Anti-Aliasing: FXAA is lightweight; SMAA offers better quality but costs some FPS. MSAA is very heavy. Recommended: SMAA High for most setups, FXAA for low-end.
- Reflections: Turn OFF or Low. Real-time reflections are costly.
- Ambient Occlusion: OFF for performance; HBAO+ for visual depth.
- Local Reflections: OFF.
- Fog Quality: Medium.
- Dynamic Reflections: OFF.
- Model Detail: Low can help with FPS, but may render heroes less distinct. Set to Medium.
- Particle Density: Low reduces clutter. High makes ultimate effects more visually informative.
- Reduce Buffering (mentioned above) – many players leave it off, causing unnecessary input lag.
- VSync and G-Sync/FreeSync: If you have adaptive sync, turn VSync ON in the game but cap FPS slightly below refresh rate (e.g., 141 for 144Hz) to prevent V-Sync from engaging during dips. Confusing, but this is standard practice.
- Render Scale: Mistakenly set to 50% by some users for “smoother” gameplay, but it ruins clarity and hit detection.
- Frame Rate Cap: Setting “Unlimited” can cause micro-stutters if your GPU can’t maintain a stable high FPS. Always cap to a manageable number.
- Sound Mix: Choose from Studio Reference (most accurate), Home Theater, Night Mode (compresses dynamic range), and Headphones (spatial audio via Dolby Atmos on compatible devices). For competitive play, Headphones with Dolby Atmos enabled (if available) gives excellent directional cues.
- Main Volume: Keep near 100% and control volume via OS or headset.
- Voice Chat: Adjust Voice Chat Volume and Microphone Volume in-game. Test with friends.
- Sound Effects Volume: 100% – footstep and ability audio are critical.
- Music Volume: Lower to 50-70% to hear game sounds better, or mute entirely.
- Voice Lines Volume: Keep high – enemy ultimate voice lines are loud and distinct.
- Subtitles: Enable if you want to ensure you catch hero dialogue.
- Spatial Audio: If supported, turn ON for better directional awareness.
- Voice Chat Channels: Ensure you’re in the correct channel (Team vs Group) during matches. Many players accidentally mute themselves or join wrong channel.
- Sound Mix for Headphones: If you’re using stereo headphones, “Headphones” mix is best. But if you have Dolby Atmos enabled, the game will automatically use spatial audio – leaving it on “Home Theater” may be fine.
- Sensitivity: Start around 3-4 at 1600 DPI or 6-8 at 800 DPI. Adjust by feeling. Pro players often use 800 DPI with in-game sens 4-8.
- Aim Smoothing: Turn OFF to remove acceleration-like smoothing. Many players leave it on by default; turning it off makes aim feel more responsive.
- Aim Ease In: Set to 0 for immediate aim response. Some prefer slight ease in (10-20) for tracking, but competitive standard is 0.
- Relative Aim Sensitivity While Zoomed (Scoped heroes like Widowmaker/Ana): Most pros use 30-50, with 38 being a common conversion. Adjust based on your muscle memory.
- Crosshair: Customize type (Circle, Dot, Crosshairs), color (preferably bright, high-contrast like green or cyan), thickness, and opacity. Set outline opacity to 100% for visibility.
- Hero-Specific Settings: Overwatch 2 allows per-hero controls. For example, you can set Toggle vs Hold for abilities like Mercy’s Guardian Angel, or adjust scope sensitivity for each sniper. Take advantage of this to optimize each hero.
- Aim Technique: Dual-Zone is popular – slow inner zone for precision, fast outer zone for flicks. Others prefer Linear with aim ease in adjusted.
- Aim Ease In: Start at 0 and increase to 10-20 if you find stick movement too twitchy.
- Aim Smoothing: Leave at 100 (default) for console, but reducing can make aim snappier if you can handle jitter.
- Aim Assist Strength: Keep at 100 for console. Decrease if you find it “pulls” too much.
- Aim Assist Window Size: Default (100) is large. Reducing to 50-70 makes aim assist kick in only when closer to target.
- Aim Assist Legacy Mode: OFF unless you prefer the Overwatch 1 behavior.
- Button Layout: Consider Dual-Zone with Jump on L2/L1 (bumper jumper) for easier movement while aiming. Use Jump on Left Stick Click as an alternative.
- Rumble: Turn OFF for competitive play to avoid distraction.
- Aim Smoothing (PC/Console): Often left default ON, causing noticeable input lag. Turning it OFF makes aim feel more direct but may initially feel too raw.
- Toggle Ability vs Hold: For heroes like Mercy (Guardian Angel), Toggle allows one press to fly, while Hold requires holding the button. Misconfiguring can cause accidental movements.
- Toggle Zoom: For scoped heroes, choose whether to hold right-click or toggle. Many Widowmaker players prefer hold for quick scoping.
- Controller Vibration: Vibration can interfere with fine aim; turn off for competitive advantage.
- Colorblind Modes: Deuteranopia, Protanopia, Tritanopia – change team colors (friendly, enemy, and UI). Can also customize enemy and friend outline colors manually. This is crucial for players with color vision deficiency.
- Subtitle Display: Turn ON to see hero dialogue and ultimate callouts. Can adjust size.
- Camera Shake: Reduce or disable to avoid disorientation.
- Screen Shake: Same as above.
- Menu Background Animations: Turn OFF to reduce visual clutter and potential motion sickness.
- Text-to-Speech and Speech-to-Text: Available for voice chat – useful for players who cannot speak or hear.
- High Contrast Mode: When enabled, changes UI colors to high contrast for better readability.
- Rotate Minimap: Lock or free rotate (only relevant if minimap is enabled in future updates; currently Overwatch 2 does not have a traditional minimap).
- Respectful Player Name Display: Option to show hero names instead of player names.
- Colorblind Settings: If you’re not colorblind, leave these off. Changing them can make enemy outlines harder to distinguish.
- Screen Shake: Often forgotten. If you feel dizzy after playing, check this setting and reduce it.
- Text Language: Choose your preferred language for UI and subtitles.
- Audio Language: Choose voiceover language (heroes’ voice lines, announcer, etc.). This is separate from text. Some players prefer native language for voice lines to identify ultimates faster.
- Bandwidth Limit: Set to 0 (unlimited) if you have a stable connection. If you experience lag spikes while others use the network, set a cap (e.g., 100 Mbps) to avoid overloading your connection.
- High Precision Mouse Input: Turn ON for more accurate mouse polling. This can reduce input lag on high-polling-rate mice (e.g., 1000 Hz).
- Enable Network Stats: Turn ON to display latency (ping), packet loss, and other metrics. This helps diagnose connection issues during gameplay.
- Show Round-End Statistics: Enable if you want delay numbers after a match.
- Hero Specific Controls: As mentioned, you can set different control schemes per hero. Access via Controls > Change Hero > select hero. Adjust:
- Confirmation for Ultimate: Some heroes have to hold button (e.g., D.Va self-destruct). You can set “Confirm Ultimate” to ON to require a second confirm; OFF for instant use. Most players leave OFF.
- In-Game HUD:
- Movement:
- Communication:
- Auto-Play Hero Intro: Turn OFF to avoid being stuck in an intro when you want to skip.
- Skip Player Icon Animation: Turn ON to reduce time in menus.
- Toggle/Hold for Abilities: For example, if you play Genji and have “Swift Strike” on toggle, you might accidentally use it while trying to aim. Set to Hold if you want more control.
- Confirmation for Ultimate: If you play D.Va and have Confirm Ultimate ON, you need to press ult twice. Many forget and try to blow up but fail. Turn OFF if you want instant use.
- Ally Health Bars: Support players often forget to enable this – it’s critical to see teammates’ health at a glance.
- Display Mode: Fullscreen
- Resolution: 1280x720 or 1600x900
- Render Scale: 100%
- Frame Rate Cap: 60
- Reduce Buffering: ON
- VSync: OFF
- Texture Quality: Low
- Texture Filtering: 2x
- Effects Quality: Low
- Shadows: Off
- Lighting Quality: Low
- Anti-Aliasing: FXAA Only
- Reflections: Off
- Ambient Occlusion: Off
- Model Detail: Low
- Particle Density: Low
- Display Mode: Fullscreen
- Resolution: 1920x1080
- Render Scale: 100%
- Frame Rate Cap: 144 (or your monitor’s refresh)
- Reduce Buffering: ON
- VSync: OFF
- Texture Quality: High
- Texture Filtering: 8x
- Effects Quality: High
- Shadows: Medium
- Lighting Quality: High
- Anti-Aliasing: SMAA High
- Reflections: Off
- Ambient Occlusion: Low
- Model Detail: High
- Particle Density: Medium
- Display Mode: Fullscreen
- Resolution: Native
- Render Scale: 100% (use 150% for supersampling only if you have excess GPU)
- Frame Rate Cap: 237 (for 240Hz) or 144 (for 144Hz) – leave slight headroom for G-Sync
- Reduce Buffering: ON
- VSync: ON (if using G-Sync) or OFF
- Texture Quality: High or Ultra
- Texture Filtering: 16x
- Effects Quality: High or Ultra
- Shadows: High
- Lighting Quality: Ultra
- Anti-Aliasing: SMAA High
- Reflections: Low (or off for max FPS)
- Ambient Occlusion: HBAO+
- Model Detail: Ultra
- Particle Density: High
- Field of View: Increase from default to 90-100 on PS5/XSX for better awareness (Switch version is locked lower).
- Sensitivity: Start low (around 30 horizontal/vertical) and increase gradually.
- Controller Layout: Use Dual-Zone with aim ease in at 0. Consider “Jump on L1” layout.
- Aim Assist: Keep at 100 strength, window size 70.
- Video Output: On PS5/XSX, if you have 120Hz display, enable “Performance Mode” (120Hz output) in console settings and in-game. Overwatch 2 supports 120 FPS on these platforms. On Switch, use “Performance Mode” in options (reduces resolution for 60 FPS target).
Easy-to-Misconfigure Graphics Settings
---
Audio Settings
Important Audio Settings
Easy-to-Misconfigure Audio Settings
---
Controls Settings
Keyboard and Mouse (PC)
Controller (PlayStation/Xbox/Nintendo Switch)
Easy-to-Misconfigure Controls
---
Accessibility Settings
Overwatch 2 includes robust accessibility options. Key settings:
Easy-to-Misconfigure Accessibility
---
Language Settings
Note: Changing these typically requires restarting the client. If you play on PC via Battle.net, you can also swap language in the launcher settings for a smaller download.
---
Network Settings
Special Attention: Network Stats Display
Many players don’t realize they can show live ping and packet loss. Enable this from Settings > Network > Show Network Stats (Ctrl+Shift+N in-game). Watch for spikes in “Interpolation Delay” or “Packet Loss”. If you see constant packet loss, check your Wi-Fi or use a wired connection.
---
Gameplay Settings
These settings affect how the game feels and how abilities behave.
- Toggle vs Hold for abilities (e.g., Mercy Guardian Angel, Tracer Blink).
- Zoom toggle vs hold (Widowmaker, Ana, Ashe).
- Ability keys (some players rebind ult to mouse button).
- Enable Kill Feed: Always ON.
- Show Health Bars: Always ON.
- Show Ally Health Bars: ON for support players; OFF if you find it distracting.
- Show Ultimate Status: ON to see teammates’ ult charge.
- Backwards Walk Speed: Not adjustable, but you can rebind backwards movement (default S).
- Crouch: Toggle or Hold. Many players prefer Hold for easier crouch-spamming.
- Ping Key: Default Middle Mouse. Can be rebound. Use frequently to ping enemies, locations, and abilities.
- Communication Wheel: Customize four quick chat options.
Easy-to-Misconfigure Gameplay Settings
---
Special Attention Points During Setup
1. Reduce Buffering: Ensure it’s ON. It’s one of the most impactful input lag reducers.
2. Frame Rate Cap: Cap FPS to your monitor’s refresh rate or a stable value. Do not leave at “Unlimited” if your PC fluctuates heavily.
3. Aim Smoothing (PC): Turn OFF for direct cursor movement.
4. Sound Mix: Select Headphones (or Studio Reference if using high-end speakers) for competitive audio.
5. Network Stats: Display latency and packet loss using Ctrl+Shift+N. Diagnose issues early.
6. Per-Hero Controls: Spend 15 minutes setting up keybindings for your most-played heroes. This can drastically improve performance.
7. Crosshair: Pick a high-contrast color (e.g., green or cyan) and ensure outline is enabled. Avoid red – it blends with enemy outlines.
8. Controller Users: Consider bumper jumper layout (jump on L1/LB) for better mobility without sacrificing aim.
9. Accessibility Check: Not colorblind? Leave colorblind modes off. But do enable subtitles if you want to hear ultimate callouts clearly in noisy environments.
10. Backup Settings: On PC, settings are stored in `Documents/Overwatch/Settings_v0.ini`. You can copy this file to backup your configuration.
---
Optimal Settings for Different Hardware Levels
Low-End PC (Target 60 FPS stable)
Mid-Range PC (Target 144 FPS at 1080p)
High-End PC (Target 240+ FPS at 1080p or 144 FPS at 1440p)
Console (PlayStation 5 / Xbox Series X / Nintendo Switch)
Consoles have limited settings menus, but you can adjust:
---
Use this guide as a reference when entering the settings menu for the first time, or to fine-tune your experience. Remember to test changes in the Practice Range or quick play before jumping into competitive matches.
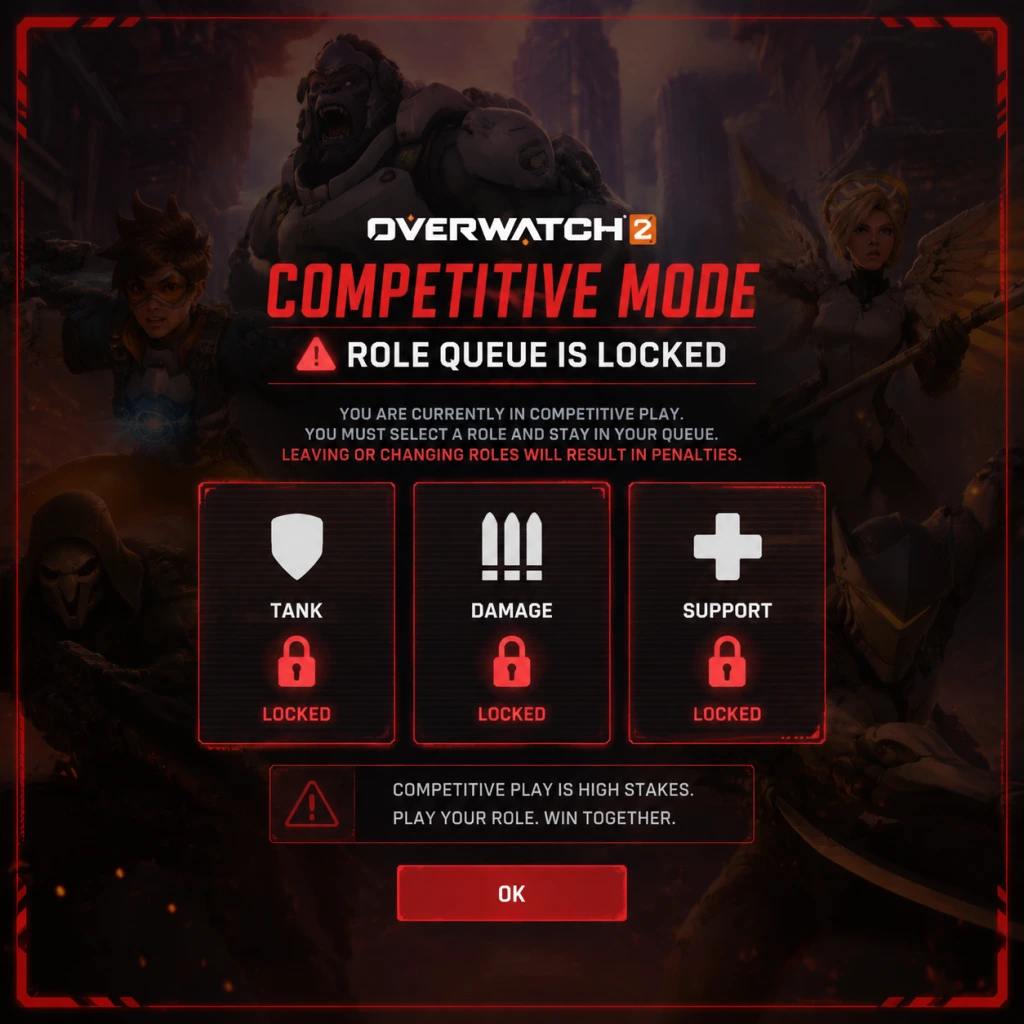
Important Notes
1. Warnings & Pitfalls
- Role Queue is Mandatory in Competitive: You cannot switch roles mid-match. If you queue as Damage, you are locked to Damage. Misqueueing can waste your match. Always double-check your selected role.
- Ultimate Charge Carryover: When you switch heroes mid-round, your ultimate charge resets to 0%. Only switch when you have already used your ultimate or if the situation drastically demands a counter.
- Avoid Negative Behavior Penalties: Leaving a competitive match early, being inactive, or receiving multiple reports will reduce your endorsement level and can lead to a season ban from Competitive Play. A temp ban can also cause a 75% XP penalty for a period.
- No Hero Limit in Quick Play, But One Per Team in Role Queue: In Quick Play Classic and Arcade, multiple players can pick the same hero. This can lead to unbalanced teams. Use it for fun, but don’t expect synergy.
- Hero and Skin Purchases with Credits: Credits (the free currency) can be used to buy cosmetics from the Hero Gallery. Most purchases are permanent and not refundable. Be certain before spending credits, as they are scarce.
- Battle Pass Level Skip: Using coins to skip levels on the Battle Pass is irreversible. Only do this if you are certain you won’t unlock that tier through gameplay before the season ends.
- Competitive Role Queue Commit: Once you queue for a specific role in Competitive, you cannot change that role for the entire match. There is no “flex” queue that lets you switch mid-game—flex queue just assigns you a random role at the start.
- Associating Phone Number with Account: To play Competitive on PC, you must add a phone number to your Battle.net account. This is irreversible and the phone number cannot be reused on another account for the same purpose. Choose wisely.
- Seasonal Battle Pass Cosmetics: Each season introduces a new Battle Pass with exclusive skins, emotes, and items. Once the season ends (typically every 9 weeks), those items become unobtainable—at least for a long time. They may appear in the shop later for real money, but never via free credits.
- Weekly Challenges and Event Rewards: Many limited-time events (e.g., Summer Games, Halloween Terror) have unique earnable skins and items. These only return during the same event the following year, so complete the challenges each time.
- Arcade Mode Rotations: Game modes like “Mystery Heroes,” “Total Mayhem,” and “Capture the Flag” rotate weekly. Some legendary skins are gated behind achieving wins in these modes during their availability.
- Overwatch League Tokens: If you watch official Overwatch League broadcasts on the app or website while logged in, you earn OWL tokens that can be exchanged for team skins. These tokens and the associated skins are only available during the OWL season (typically February–October).
- Learning Curve for Individual Heroes: Heroes like Genji, Ana, and Doomfist require high mechanical skill and game sense. You might feel useless for your first 10–20 hours on them. Practice in Quick Play or Arcade before taking them into Competitive.
- Competitive Tiers and Placement: After your initial five placement matches, you are placed in a rank (Bronze through Grandmaster). You may be placed lower than expected because the system recalibrates. Be prepared to climb from a lower rank—this is normal.
- Team Coordination in Higher Ranks: Above Gold rank, communication and strategy become critical. Teams that use voice chat and execute coordinated dives or ultimates will dominate. Solo carrying becomes nearly impossible.
- Hard Counters: Some heroes are hard-countered by others (e.g., Pharah by Widowmaker, Bastion by Ana sleep dart). If you don’t swap, you will feel helpless. Learn at least one hero from each role to adapt.
- Battle Pass Grind: The free Battle Pass requires approximately 45–60 minutes of gameplay per day to fully complete (around 80 tiers). Missing a week can make it impossible to finish without paying. Plan your playtime.
- Weekly Challenge Completion: Some weekly challenges require 20+ wins in specific modes. If you only play a few hours per week, focus on the challenges that reward the most XP (e.g., “Role Queue Wins” for 5,000 XP).
- Credit Farming: Credits are earned slowly through the Battle Pass (repeatable credits at certain tiers) and by duplicating event loot boxes (which are rare). Do not rely on credits to buy expensive legendary skins; they cost 1,500 credits while the free pass gives only about 600 per season.
- Avoid “Flex Queue” for XP: Flex queue gives bonus XP but often lands you in the least popular role (usually Tank). Playing Tank in low ranks can be frustrating and may not improve your skill in your preferred role.
- Voice Chat Etiquette: Use voice chat for callouts (e.g., enemy positions, ultimate status), but avoid toxicity, blaming teammates, or making offensive comments. Reports for abusive chat can lead to silences or bans.
- Anti-Cheat (Defender): Blizzard uses the proprietary Defender anti-cheat system. Do not run any third-party software that injects into the game (e.g., cheat engines, auto-aim scripts). Even overlay tools like Discord’s “Overlay” should be disabled if they cause conflicts.
- Reporting System: Use the “Report Player” feature for hacking, griefing, abusive chat, or inactivity. Excessive false reports can harm your own account if you abuse the system.
- Endorsement System: After each match, you can endorse teammates for good sportsmanship, shotcalling, or good teamwork. Higher endorsement levels grant occasional bonus XP and loot (but never anything exclusive). Being a good teammate helps everyone.
- Stream Sniping: If you stream your game with a delay, set your stream to a 90–120 second delay to prevent opponents from using your stream to gain an advantage. This is considered poor etiquette and can get you banned if caught.
- All Progress is Cloud-Saved: Your account, stats, cosmetics, and settings are stored on Blizzard’s servers. There is no local save file. You can play on one account across PC, PlayStation, Xbox, and Nintendo Switch, but you must merge accounts first via Battle.net.
- Cross-Progression Merge: You can only merge one console account per platform with your Battle.net account. Once merged, you cannot unlink or change. Choose your main console account carefully—in-game purchases and progress from both will combine, but you cannot split them later.
- Settings Sync: Custom video, sound, and control settings are not automatically synced across platforms. You must manually replicate them. Take screenshots of your settings on one platform to recreate on another.
- No Backup Option: Since everything is online, a ban or suspension permanently locks all progress. Never share your account credentials or engage in account boosting services, as that violates the terms of service and can result in a permanent ban.
- Wasting Credits on Common Items: New players often buy common sprays or voice lines with credits. Credits are better saved for legendary skins (1,500) or event items that cannot be earned otherwise.
- Not Learning Support Early: Many players start with Damage roles and struggle to find matches quickly. Queue times for Support are often instant, and learning support improves your game sense for all roles.
- Ignoring Practice Range and Workshop: Spend 15 minutes in the practice range to test every hero’s abilities. Many players jump into matches without understanding cooldowns or combos. The Workshop mode allows custom games to practice aim or specific scenarios—use it.
- Not Muting Toxic Players Early: If a teammate is toxic, mute them immediately using the social menu (P key on PC). Engaging usually worsens team morale and your performance. Your mental state directly affects your play.
- Overlooking Replays and VOD Review: You can watch your past matches from the Career Profile > Replays. Reviewing your deaths and decision-making is one of the fastest ways to improve. New players rarely do this and plateau.
- Buying Shop Skins with Real Money Near Season End: Skins in the “Just for You” or “Weekly” sections rotate out. If you buy a skin with real money right before a season ends, it may appear in the Battle Pass or as a free reward later—many players regret early impulse purchases.
2. Irreversible Choices
3. Missable Content
4. Difficulty Spikes
5. Grinding Traps
6. Online Etiquette & Anti-Cheat
7. Save Management & Cross-Progression
8. Common Regrets
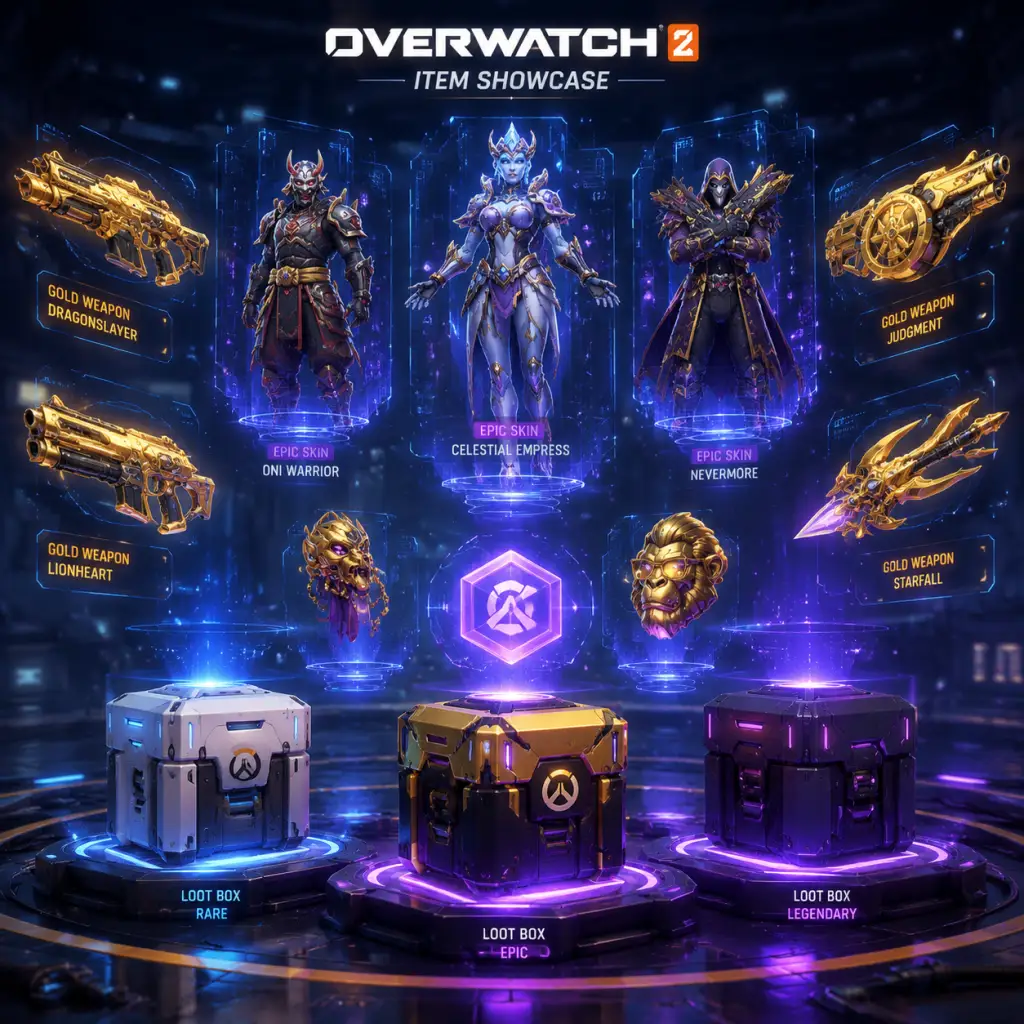
All Game Items
Overview
In Overwatch 2, the term “items” refers to a broad range of game elements, including hero-specific weapons and abilities, in-game consumables, currencies, cosmetic collectibles, and key equipment such as role passives. Unlike traditional RPGs, Overwatch 2 does not feature armor, stat-boosting equipment, or lootable weapons. All heroes are balanced and any player can access the same pool of items based on progression or purchase. This guide categorizes every major item type, explains how to obtain and use them, and highlights synergies or best practices.
---
1. Hero Weapons and Abilities
Each of the 36+ heroes has a unique primary weapon, secondary fire (if applicable), three abilities (including one ultimate), and a passive. These are inherent to the hero and cannot be swapped or upgraded. Understanding each weapon’s function is crucial for mastering a hero.
Primary Weapons
- Example – Ashe’s Viper: Semi-automatic rifle with a scope. Deals high damage at range. Fires one shot per click; hold down primary fire for a second shot in hip-fire mode. Requires reload every 12 shots.
- Example – Reinhardt’s Rocket Hammer: Melee weapon that swings in a wide arc, dealing 85 damage. No ammo, unlimited usage.
- Example – Mercy’s Caduceus Staff: Healing beam (primary fire) or damage boost beam (secondary fire). No ammo, channeled.
- Cooldown-based skills like Soldier: 76’s Sprint or Tracer’s Blink. Can be used strategically for mobility, damage, or utility.
- Some abilities are passive (e.g., Genji’s Swift Strike resets on elimination).
- Charged over time or by dealing/healing damage. Examples: Zarya’s Graviton Surge (gravity well), Lucio’s Sound Barrier (temporary shields).
- Each ultimate has a specific voice line and visual cue; crucial for team fight wins.
- Combining ultimates (e.g., Zarya Grav + Hanzo Dragonstrike) creates devastating wombo combos.
- Weapon type synergy: heroes with hitscan (Ashe, McCree) pair well with damage-boosting supports (Mercy, Ana).
Abilities (non-ultimate)
Ultimate Abilities
Synergies
Note: Weapons and abilities are not obtainable items; they are part of the hero kit. Practice each hero’s kit in the Practice Range.
---
2. In-Game Consumables
Overwatch 2 maps contain health packs and shields packs that restore hit points or shields. These are temporary pickups that respawn after a set time.
Health Packs
| Type | Heal Amount | Respawn Time | Visual Indicator |
|---|---|---|---|
| Small Health Pack | 75 HP | ~10 seconds | Blue cross-shaped object |
| Large Health Pack | 250 HP | ~15 seconds | Golden, larger cross |
- How to obtain: Walk over the pack. They are placed at fixed locations on all maps.
- When useful: During combat to restore HP without relying on supports. Prioritize large packs for tanks or low-health targets.
- Synergies: Heroes with mobility (e.g., Tracer, Genji) can quickly reach health packs. Sombra can see health pack cooldowns through walls (passive).
- Example – Paris map: Small shield packs that grant 25 temporary shields for 15 seconds.
- Rare in standard rotation; mostly seen in Event modes or Archives.
- Symbol: Coin with OW logo.
- How to obtain: Purchase with real money (prices: $4.99 for 500 coins, $19.99 for 2200, etc.). Also earnable via Weekly Challenges (up to 60 coins per week).
- Use: Buy items in the Hero Gallery (skins, emotes, etc.) or in the Shop (bundles, single items).
- Exchange rate: Roughly 1 coin = $0.01 (varies by bundle).
- Best practices: Save coins for items that only appear in the shop (like Mythic skins) or limited-time event bundles.
- Symbol: A white credit card icon.
- How to obtain: Earned from Battle Pass free tier (up to 1,500 per season), duplicate cosmetics (from loot boxes pre-OW2, now rare), or event challenges.
- Use: Purchase cosmetic items from a rotating selection in the Hero Gallery (similar to old currency). Not usable for Battle Pass or shop bundles.
- Note: Credits are slowly being phased out; many items now require coins.
- Symbol: A gold triangle with three dots.
- How to obtain: Playing Competitive matches. Earn 15 points per win, 5 per draw, and bonus at season end based on rank.
- Use: Purchase Golden Weapons (3000 points) and Jade Weapons (3000 points – seasonal variant). Each weapon is unique to a hero and purely cosmetic.
- Best practices: Focus on one hero’s golden weapon to show dedication. Golden weapons are highly visible in-game.
- Symbol: A ticket with the number 1.
- How to obtain: Purchased with Overwatch Coins (200 coins each) or earned through Battle Pass progression (rarely).
- Use: Instantly complete one Battle Pass tier.
- Synergy: Use tokens to unlock specific tiers early (e.g., to get a Mythic skin at tier 80).
- Symbol: A stopwatch icon.
- How to obtain: Earned during special events (e.g., Overwatch Anniversary, Archives). Not active outside events.
- Use: Purchase exclusive event cosmetics in the Overtime Shop.
Shield Packs (Map-specific)
Important: Health packs do not affect shields (blue HP) or armor (yellow HP). They only restore base health.
---
3. Currencies and Materials
Overwatch 2 uses several currencies for purchasing cosmetics, battle pass levels, and competitive rewards. None affect gameplay stats.
Overwatch Coins (Premium Currency)
Overwatch Credits (Legacy Currency)
Competitive Points
Battle Pass Tokens (Tier Skips)
Overtime Tokens (Overtime Shop currency)
Note: There is no material crafting system (e.g., no scrap metal). All items are either earned via progression or bought with currency.
---
4. Collectibles and Cosmetics
Cosmetics are purely visual items that do not affect gameplay. Overwatch 2 has an extensive collection system organized in the Hero Gallery.
Types of Cosmetics
| Category | Examples | How to Obtain |
|---|---|---|
| Skins | Full character appearance changes (Rare, Epic, Legendary, Mythic). | Battle Pass (free/premium), Shop, Challenges, Events. |
| Weapon Skins | Golden, Jade, Galactic, or event-themed weapon variations. | Competitive Points (Golden/Jade), Shop, Battle Pass (Galactic). |
| Emotes | Character animations (e.g., dance, sit, special). | Battle Pass, Shop, Events. |
| Highlight Intros | Unique cinematic intro for Play of the Game. | Battle Pass, Shop, Events. |
| Victory Poses | Pose shown after match victory. | Battle Pass, Shop, Events. |
| Sprays | Decorative images placed on surfaces. | Hero leveling (up to level 13), Battle Pass, Events. |
| Voice Lines | Quips and phrases used in communication wheel. | Hero leveling, Battle Pass, Shop. |
| Player Icons | Small icon visible on career profile and loading screen. | Battle Pass, Challenges, Events. |
| Souvenirs | Decorative items held by hero in game (e.g., a mug). | Overtime Shop, limited events. |
| Name Cards | Border art around player name. | Battle Pass (premium tier 80), Shop. |
Synergies
- No gameplay synergies. Use cosmetics to personalize your experience and show off achievements (e.g., Golden Weapon for a main hero).
- Some skins have unique visual/audio effects (e.g., Mythic skins change form), but hitboxes remain identical.
- Each hero has a progression bar (1-13) that awards 3 sprays, 2 voice lines, 3 player icons, and 1 souvenir. This is the only free way to earn hero-specific cosmetics.
- Effect: Reduces knockback and ultimate charge gained by opponents by 30%. Also gives 50% reduced knockback when using an ability.
- How to obtain: Automatically applied when you select a Tank hero.
- Use: Tanks can hold positions more effectively against displacement abilities.
- Effect: Movement speed increased by 10% after eliminating an enemy (lasts 1.5 seconds).
- How to obtain: Automatically applied for Damage heroes.
- Use: Encourages aggressive play and cleanup after kills. Synergizes with flankers (Tracer, Genji).
- Effect: Automatically regenerate 15 HP per second after not taking damage for 1.5 seconds.
- How to obtain: Automatically applied for Support heroes.
- Use: Allows supports to survive longer without health packs. Essential for sustain in prolonged fights.
- Items: 1,500 Overwatch Credits total, a few skins (rare/epic), 2-3 player icons, sprays, voice lines, and a small amount of cosmetics.
- How to unlock: Earn XP by playing matches, completing weekly challenges, and using double XP weekends.
- Cost: Free for all players.
- Items: All free items plus exclusive cosmetics: 5-6 epic/legendary skins, an animated weapon skin (Galactic), an animated player icon, a mythic skin (tier 80), multiple emotes, highlight intros, victory poses, and up to 4,000 Overwatch Credits.
- Cost: 1,000 Overwatch Coins (approximately $10).
- Synergy: Buying the premium pass instantly gives you a legendary skin (tier 1) and a 20% XP boost for the season.
- The highest rarity skin, exclusive to premium Battle Pass tier 80. These skins have multiple customizable parts (e.g., color, helmet, weapon glow).
- Example: Season 1 Mythic – Genji’s Cyberdemon; Season 5 – Kiriko’s Amaterasu.
- How to obtain: Reach tier 80 on premium track. Cannot be purchased later (season exclusive).
- Sometimes include an event-specific pass (like “Event Pass” for Archives) granting exclusive items.
- Items: Event skins, weapon skins, sprays, emotes, etc. Usually themed.
- How to obtain: Purchase with coins or complete event challenges.
- Many older items (from Overwatch 1) are still obtainable through the Heros Gallery using Credits or Coins, but newer event items are only available during the event or in future loot box returns (none yet).
- Warning: Do not spend coins on returning skins if you intend to use them for future events; prices are fixed but availability is unpredictable.
- Items: 4-6 bundles (e.g., skin + emote + spray for 2,200 coins), 2-3 single skins (epic for 1,500, legendary for 1,900).
- How to access: Main menu -> Shop.
- Best practices: Only purchase bundles if you want at least 2 items; single skins are usually overpriced. Wait for discounts or use Credits where possible.
- Large bundles with multiple skins, weapons, and other items (e.g., Ultimate Bundle with 5 skins for 5,600 coins).
- Often tied to new hero releases or seasonal events.
- No gameplay-impacting items exist – all items are cosmetic or currencies for cosmetics.
- Weapons and abilities are hero-locked – learn each hero’s kit to master the game.
- Health packs are vital – map awareness of pack locations can save your life.
- Prioritize your currency spending – save Overwatch Coins for must-have skins or Battle Pass; use Credits for gallery items; invest Competitive Points in one golden weapon.
- Cosmetics do not affect hitboxes – skins are purely aesthetic (except some minor clarity issues, but officially no pay-to-win).
- Role passives are essential equipment – adapt your playstyle to your role’s passive.
Hero Leveling
---
5. Key Equipment – Role Passives
While not traditional items, role passives are key equipment that every hero in a given role automatically receives. They significantly impact gameplay.
Tank Role Passive
Damage Role Passive
Support Role Passive
Important: These passives are role-wide and cannot be changed. They are considered core equipment for balance.
---
6. Battle Pass Items
The Battle Pass is the primary progression system, available each season (about 9 weeks). It contains both free and premium tracks.
Free Track (Tiers 1-80)
Premium Track (Tiers 1-80)
Mythic Skins
---
7. Special Event Items
Overwatch 2 runs seasonal events (e.g., Summer Games, Halloween Terror, Winter Wonderland, Anniversary). Each event introduces limited-time cosmetics and modes.
Event Passes
Past Event Cosmetics
---
8. Shop Items
The in-game shop refreshes weekly and features bundles, single cosmetics, and occasionally discounted items.
Weekly Shop
Featured Bundles
---
9. Key Takeaways
This guide covers every item category in Overwatch 2. For specific hero weapon stats or ability cooldowns, refer to individual hero guides within the game or official patch notes.
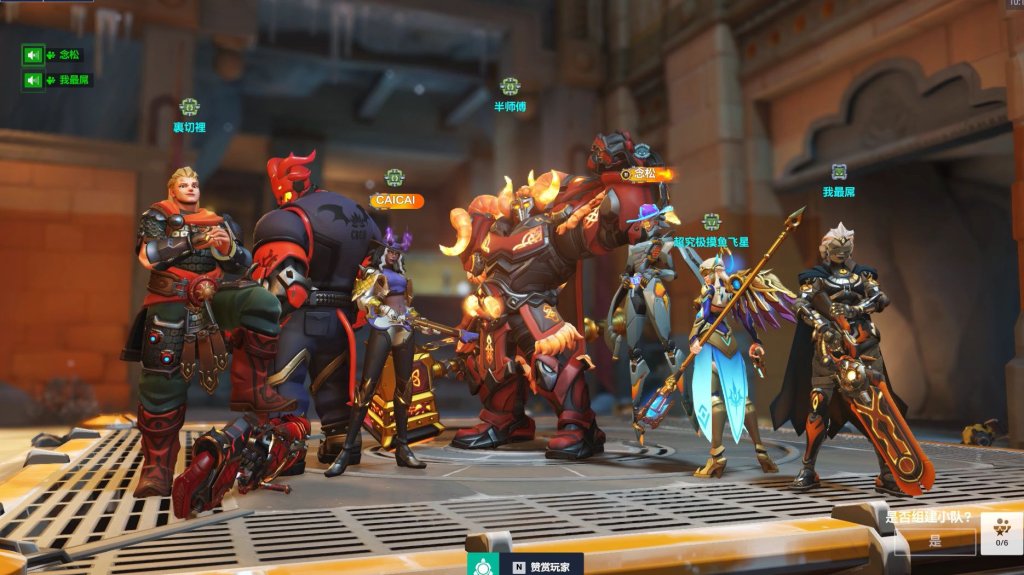
Character Skills
"content": "## Overview
In Overwatch 2, every hero possesses a unique set of abilities that define their playstyle. There are no skill trees or leveling systems; instead, abilities are fixed per hero. However, role passives apply to all heroes in a given role. This guide covers every hero’s full kit: primary fire, alternate fire (if any), ability 1, ability 2, ultimate, and any inherent passives. For each ability, we detail effects, cooldowns, usage tips, combos, synergies, and recommended contexts. We also include role-specific passives and general strategies.
In Overwatch 2, every hero possesses a unique set of abilities that define their playstyle. There are no skill trees or leveling systems; instead, abilities are fixed per hero. However, role passives apply to all heroes in a given role. This guide covers every hero’s full kit: primary fire, alternate fire (if any), ability 1, ability 2, ultimate, and any inherent passives. For each ability, we detail effects, cooldowns, usage tips, combos, synergies, and recommended contexts. We also include role-specific passives and general strategies.
Role Passives
Tank Passive
- Knockback Resistance: Tanks reduce the duration and strength of knockback effects by 30%.
- Ultimate Charge Reduction: Tanks take 30% less ultimate charge when damaged by enemies.
- Health Pool: All Tanks have a large health pool (generally 500–700 HP), often split between health and armor/shields.
- Speed Boost on Elimination: Gain 25% movement speed for 2 seconds after securing an elimination.
- Reload While Sprinting: Some Damage heroes can reload while using movement abilities (e.g., Genji, Tracer).
- Self-Heal: Supports passively regenerate 15 HP per second after not taking damage for 1.5 seconds. This is paused while actively healing others.
- Ultimate Charge from Healing: Supports earn ultimate charge equal to a percentage of the healing they deal.
- Primary Fire (Fusion Cannons): Automatic cannons that fire constantly, dealing 0.5–2 damage per bullet (falloff range 10–20m). No spread when moving slowly; spread increases with movement. Use to pressure shields and close-range enemies.
- Secondary Fire (Micro Missiles): Fires a burst of 8–18 missiles (salvo) that deal 7 damage each (direct hit) or 3.5 splash. Cooldown: 8s. Synergy: Use while boosting into targets for burst damage.
- Ability 1 (Boosters): Fly in any direction for up to 2 seconds, dealing 10 damage and knockback on contact. Cooldown: 4s (after boost ends). Use to engage, disengage, or boop enemies off ledges.
- Ability 2 (Defense Matrix): Hold to create a frontal barrier that absorbs enemy projectiles and abilities for up to 2s. Cooldown: 1.5s recharge (after depletion). Use to eat ultimates (e.g., Graviton Surge, Blizzard) or protect teammates.
- Ultimate (Self-Destruct): Eject from mech; after 3s, mech explodes dealing 1000 damage (inner circle) to 250 damage (outer) in a 20m radius. Use when enemies are grouped or on objective. Counterplay: Hide behind cover.
- Passive (Eject!): When mech is destroyed, D.Va exits in a small pilot with 150 HP, pistol (5 rounds, 70 damage each). Survive to call a new mech (charge by damage/healing).
- Combo: Boost + Missiles + Defense Matrix to safely dive. Synergy: Works well with Ana Nano Boost (makes mech more durable).
- Primary Fire (Rocket Hammer): Wide swing dealing 85 damage per hit. No ammo. Use in melee range; can hit multiple enemies.
- Secondary Fire (Fire Strike): Throws a piercing projectile dealing 100 damage. Cooldown: 6s. Use to poke, finish kills, or build ultimate.
- Ability 1 (Barrier Field): Deploy a large transparent shield with 1600 HP that moves with you. Cannot attack while holding. Use to protect team from incoming damage. Tip: Lower shield to regen HP faster (100 HP/s after 1s inactive).
- Ability 2 (Charge): Rush forward, pinning the first enemy hit against a wall for 300 damage. Cooldown: 10s. Use to pick off isolated enemies or displace. Warning: Can be canceled reactively.
- Ultimate (Earthshatter): Slam the ground, stunning all enemies in a 20m cone for 2.5s and dealing 50 damage. Use after dropping shield or when enemies are grouped. Combo: Fire Strike → Earthshatter → charge for guaranteed kill.
- Passive (Armor): Takes 30% reduced damage from shotguns and beams. Also reduces incoming damage from multiple hits by 5.
- Synergy: Merky Zarya can grant bubble during Charge to make Reinhardt unstoppable.
- Primary Fire (Particle Cannon Beam): Continuous beam dealing 95–190 DPS (scales with weapon charge). Range 15m. Use to melt enemies when high charge.
- Secondary Fire (Particle Cannon Bomb): Lob a grenade that deals 45 direct + 25 splash. Can bounce off walls. Use for poke or to hit behind shields.
- Ability 1 (Particle Barrier): Shield self for 2s, absorbing damage to increase weapon charge (max 100%). Cooldown: 10s. Use when engaging or taking damage.
- Ability 2 (Projected Barrier): Shield an ally for 2s, also increasing your charge. Cooldown: 8s. Use on teammates who are taking heavy fire (e.g., diving Winston, stunned ally).
- Ultimate (Graviton Surge): Fire a gravity orb that pulls enemies into a tight sphere for 4s, dealing 15 damage. Use to combo with damage ultimates (e.g., Hanzo Dragonstrike, Pharah Barrage, Reinhardt Earthshatter). Counterplay: D.Va can eat it, Genji can reflect, some abilities escape.
- Passive (Energy): Damage output increases with charge up to 100%. Charge decays by 2 per second after 1s of no damage absorption.
- Combo: Self-bubble → take damage → high charge → melt enemies. Synergy: Pair with aggressive tanks like Winston to project barrier onto them.
- Primary Fire (Tesla Cannon): Short-range (8m) lightning beam dealing 60–75 DPS (can hit multiple targets simultaneously). Use against grouped or armored enemies.
- Ability 1 (Jump Pack): Leap in the direction you’re facing, dealing 50 damage on landing. Cooldown: 6s. Use to engage backline or escape. Tip: Can be used while in air for double jump.
- Ability 2 (Barrier Projector): Deploy a 600 HP dome shield (radius 5m) that lasts 5s. Use to block enemy fire while contesting objective or protecting healers. Tip: Place on point to block capture.
- Ultimate (Primal Rage): Transform for 10s: health increases to 900, melee attack does 40 damage and knocks enemies back. Jump Pack cooldown reduced to 2s. Use to displace enemies off point or knock them into walls for environmental kills. Synergy: Ana Nano Boost makes Winston nearly unkillable.
- Passive (Apex Predator): Can be healed while using Barrier? (No, but he has armor).
- Primary Fire (Augmented Fusion Driver): Automatic cannon that fires projectiles, 12 damage each, 10 rps. Use to spam shields and pressure enemies.
- Secondary Fire (Energy Javelin): Throw a javelin that impales first enemy hit, dealing 80 damage and stunning for 0.3s. Cooldown: 8s. Use to interrupt ults (e.g., Death Blossom) or push enemies.
- Ability 1 (Fortify): Become immune to crowd control, gain 125 overhealth, and reduce damage taken by 30% for 4s. Cooldown: 10s. Use when engaging or to survive burst damage.
- Ability 2 (Javelin Spin): Spin a javelin in front of you, destroying enemy projectiles and dealing 30 damage to enemies hit; also knocks them back. Cooldown: 7s. Use to block abilities like Graviton Surge or to displace enemies.
- Ultimate (Terra Surge): Anchor into ground, gaining 40% damage reduction and pulling enemies toward you. After 3s, release a shockwave dealing 250 damage in a cone. Use with shield and Fortify to survive. Combo: Use Javelin Spin before Terra Surge to protect yourself.
- Passive (Armored): Reduces damage from shotguns by 10% and from beams by 20%.
- Primary Fire (Void Accelerator): Fires a burst of 6 projectiles (each 5 damage) in a spread. Use to spam at mid-range.
- Secondary Fire (Omnic Form - Void Accelerator alt): Hold to charge a single powerful shot that deals 100 damage (requires 2-second charge). Use to poke or finish.
- Ability 1 (Void Barrier): Deploy a transparent wall (1000 HP) that can be placed anywhere in line of sight. Cooldown: 8s. Use to block sightlines or protect teammates.
- Ability 2 (Ravenous Vortex): Fire a projectile that creates a slowing field (50% slow, 1s after exit) for 4s. Cooldown: 12s. Use to area denial or slow enemies for combos.
- Ultimate (Annihilation): Transform into Nemesis Form for 8s: gain 200 armor, melee attacks deal 100 damage and regenerate armor (25 per hit). Also pulse damage aura (60 DPS) in 10m radius. Use in tight spaces or on point. Synergy: Use with Zarya Bubble.
- Passive (Nemesis Form): While in Nemesis, Ramattra cannot use Void Barrier or Ravenous Vortex but gains armor.
- Primary Fire (Hyperspheres): Launch two explosive spheres that bounce and detonate on enemies, dealing 55 damage each direct. Use to spam around corners.
- Secondary Fire (Accretion): Throw a rock that deals 100 damage and stuns for 0.6s on direct hit. Cooldown: 8s. Use to interrupt ults or peel.
- Ability 1 (Kinetic Grasp): Absorb incoming projectiles into a personal shield (max 400 HP). Cooldown: 10s. Use to eat abilities like Pulse Bomb or to gain shield.
- Ability 2 (Experimental Barrier): Deploy a mobile barrier (700 HP) that floats wherever you aim. Hold ability to recall it. Cooldown: 2s after recall. Use to protect team or block key sightlines.
- Ultimate (Gravitic Flux): Lift all enemies in an AOE into the air, then slam them down dealing 50% max HP damage and 1s slow. Use to set up kills or land environmental eliminations. Counterplay: Can be escaped with certain abilities (e.g., Reaper Wraith).
- Passive (Armor): Reduces damage from shotguns and beams.
- Primary Fire (Quad Cannons): Automatic pistols that fire 20 rounds, dealing 5 damage each. Use while in ball mode for mobility.
- Secondary Fire (Grappling Claw): Fire a claw; while attached, press jump to swing. Can slam down on release. Cooldown: 5s after release. Use to deploy mines or initiate.
- Ability 1 (Roll Mode): Transform into a ball for mobility; increases speed and allows jumping. Use to escape or engage. Can bump enemies (30 damage).
- Ability 2 (Adaptive Shield): Gain temporary shields equal to 150 + 100 per enemy nearby (max 1000). Cooldown: 10s. Use before diving into enemy team.
- Ultimate (Minefield): Deploy 15 proximity mines that deal 130 damage each. Lasts 20s. Use on point or chokepoints. Synergy: Use with Gravitic Flux to trap enemies.
- Passive (Roll Mode): While rolling, you cannot be headshot and take less damage from splash? (No, but you become faster).
- Primary Fire (Scattergun): Shotgun with 8 pellets, each 6 damage. Use at close range.
- Secondary Fire (Jagged Blade): Throw a blade that deals 30 damage (direct) and can be recalled. On recall, pulls enemies toward you. Cooldown: 8s. Use to initiate or finish.
- Ability 1 (Commanding Shout): Shout, granting all allies within 15m +100 temporary HP and 30% move speed for 3s. Cooldown: 12s. Use to engage or save teammates.
- Ability 2 (Carnage): Swing axe in a wide arc, dealing 100 damage. Hitting enemies reduces cooldown by 2s per enemy hit. Cooldown: 8s. Use to farm ultimate or secure kills.
- Ultimate (Rampage): Rush forward, dealing 150 damage and wounding enemies (healing blocked for 4s). Use to break through enemy lines or finish low HP enemies. Synergy: Combine with Ana’s Biotic Grenade to prevent enemy healing.
- Passive (Adrenaline): Dealing damage heals Junker Queen for a portion of damage dealt (15% for primary, 25% for abilities).
- Primary Fire (Chaingun - Left Hand): Continuous fire, 4 damage per bullet, high spread. Use for suppressive fire.
- Secondary Fire (Chaingun - Right Hand): Fires explosive rounds, 3.5 damage direct + 7 splash. Use for crowd control.
- Ability 1 (Overdrive): Gain 150 temporary health and 30% damage reduction but take 30% more damage from headshots. Lasts 5s. Cooldown: 14s. Use when engaging or using ultimate.
- Ability 2 (Cardiac Overdrive): Alternates: when active, deals AOE damage per shot? Actually: Press ability to toggle a buff that causes your shots to heal you for 40% of damage dealt. Lasts 4s. Cooldown: 12s. Use in close brawls.
- Ultimate (Cage Fight): Deploy a barrier dome (radius 10m) that slows enemies inside and prevents healing from outside. Enemies inside take 20% more damage. Lasts 6s. Use to isolate a target or secure point.
- Passive (Berserker): Dealing damage with left chaingun increases damage output by 15% per stack (max 3 stacks) for 3s. Right chaingun builds charge?
- Primary Fire (The Viper): Semi-automatic rifle, 40 damage per shot (headshot 80). ADS zoom reduces fire rate but increases accuracy. Use for mid-range poke.
- Secondary Fire (Coach Gun): Shotgun blast that deals 75 damage and knocks back both Ashe and enemy. Cooldown: 10s. Use to escape or boop.
- Ability 1 (Dynamite): Throw a dynamite that sticks to surfaces; on timer or shot, it explodes dealing 50–100 damage over time. Cooldown: 12s. Use to zone or damage behind shields.
- Ability 2 (B.O.B. - Ultimate): Summon a bot that charges forward, dealing 50 damage and knocking up enemies. Bob then auto-aims at enemies for 10s. Use to create space or contest objective. Tip: Bob can be booped off edges.
- Passive (Jumpshot): While jumping, you can still fire accurately? (Yes, slight spread increase).
- Primary Fire (Configuration: Assault): Automatic rifle, 35 damage per shot, 5 rps. Use for medium range.
- Secondary Fire (Configuration: Recon): Fires a grenade that bounces and detonates on enemy hit, dealing 115 damage. Cooldown: 10s. Use to finish or clear corners.
- Ability 1 (A-36 Tactical Grenade): Throw a grenade that sticks to surfaces and detonates after 1s or when shot, dealing 150 damage. Cooldown: 8s. Use for burst.
- Ability 2 (Reconfigure): Transform between Assault and Recon mode. No cooldown (instant). Use to adapt to situation.
- Ultimate (Configuration: Artillery): Enter stationary artillery mode: fire 5 shells (each 200 damage) in a circle pattern. Use on grouped enemies or to break shields. Tip: Can be cancelled early.
- Passive (Ironclad): Take 20% less damage while in Assault or Artillery mode.
- Primary Fire (Peacekeeper): Revolver, 70 damage per shot (headshot 140). Use for precise shots.
- Ability 1 (Flashbang): Throw a grenade that stuns enemies for 1s and deals 25 damage. Cooldown: 10s. Use to cancel ults or Peel.
- Ability 2 (Combat Roll): Roll a short distance, reloading your weapon instantly. Cooldown: 6s. Use to dodge or reposition.
- Ultimate (Deadeye): Lock onto visible enemies for 0.6s per target, then fire at all locked targets dealing 550 damage each. Use when enemies are low or stationary. Tip: Can be canceled early by shooting.
- Passive (Fan the Hammer): After using Combat Roll, the next shot fires instantly? No, that's old. Actually, his passive is Peacemaker: None?
- Primary Fire (Sticky Bombs): Fires 6 sticky projectiles that detonate after 0.5s, dealing 17 damage each direct. Use to stick to enemies.
- Secondary Fire (Tri-Shot): Fire a burst of 3 energy bolts in a spread, each 17 damage. Use for ranged poke.
- Ability 1 (Flight): Fly upward; can hover while holding. Cooldown: 6s. Use to gain height.
- Ability 2 (Focusing Beam): Hold to fire a continuous beam that deals 175 DPS to targets below 50% HP, and 50 DPS above. Cooldown: 8s after use. Use to finish low HP enemies.
- Ultimate (Duplicate): Transform into an enemy hero for 15s, copying their full kit and gaining 200% ultimate charge rate. Use to replicate powerful ults (e.g., Graviton Surge, Blizzard).
- Passive (Glide): While airborne, hold space to slow descent.
- Primary Fire (Shuriken - Triple): Fires 3 projectiles in a spread, each 27 damage. Use close range.
- Secondary Fire (Shuriken - Fan): Fires a fan of 3 shuriken in a slight arc, each 30 damage. Use for mid range.
- Ability 1 (Swift Strike): Dash forward, dealing 50 damage and resetting on elimination. Cooldown: 8s. Use to finish or escape.
- Ability 2 (Deflect): Hold to block incoming projectiles and reflect them back. Cooldown: 8s. Use to counter abilities like Graviton Surge or Pharah rockets.
- Ultimate (Dragonblade): Unsheathe a sword for 6s: each swing deals 110 damage in a wide arc. Use after Swift Strike to get in melee range. Synergy: Ana Nano Boost increases damage to 170 per swing.
- Passive (Cyber-agility): Climb walls and double jump.
- Primary Fire (Storm Bow): Charged arrow: 125 damage full draw (headshot 250). Use for one-shot kills.
- Secondary Fire (Sonic Arrow): Fires an arrow that reveals enemies in a 10m radius for 6s. Cooldown: 15s. Use to scout.
- Ability 1 (Storm Arrows): Fire 6 quick arrows in succession (each 65 damage). Cooldown: 15s. Use for burst damage.
- Ability 2 (Lunge): Leap sideways while in air. Cooldown: 5s. Use to dodge.
- Ultimate (Dragonstrike): Fire a pair of dragons that travel forward for 40m, dealing 200 DPS to enemies inside. Use to clear points or combo with Graviton Surge. Counterplay: D.Va can eat them.
- Passive (Wall Climb): Climb walls.
- Primary Fire (Frag Launcher): Lob grenades that bounce and explode on enemy hit or after 2s, dealing 120 damage direct. Use for indirect fire.
- Ability 1 (Concussion Mine): Place a mine that detonates on command, dealing 120 damage and knockback. Cooldown: 10s (2 charges). Use to jump or boop.
- Ability 2 (Steel Trap): Place a trap that immobilizes enemies for 2.5s and deals 100 damage. Cooldown: 12s. Use to trap high-traffic areas.
- Ultimate (RIP-Tire): Summon a remote-controlled tire that climbs walls and explodes for 600 damage. Use to wipe out groups. Counterplay: Shoot the tire.
- Passive (Total Mayhem): Drops grenades on death that deal 250 damage total.
- Primary Fire (Endothermic Blaster): Freezing spray that slows and freezes enemies after 1.5s (freeze lasts 1.5s). Deals 55 DPS. Use to control enemies.
- Secondary Fire (Icicle): Fire a long-range icicle that deals 75 damage (headshot 150). Use for finishing.
- Ability 1 (Cryo-Freeze): Freeze yourself in a block of ice, becoming invulnerable and healing 150 HP. Cooldown: 12s. Use to survive ults.
- Ability 2 (Ice Wall): Create a wall of ice (250 HP per pillar, 5 pillars) that blocks movement and LOS. Cooldown: 15s. Use to separate enemies or block abilities.
- Ultimate (Blizzard): Throw a drone that creates a slowing field for 4s, then freezes enemies for 4s. Use to lock down an area. Combo: Use with Ice Wall to trap enemies.
- Passive (Frostbite): Slows enemies hit by primary fire.
- Primary Fire (Rocket Launcher): Fires rockets that deal 120 damage direct (60 splash). Use to spam from above.
- Ability 1 (Jump Jet): Propel upward. Cooldown: 10s. Use to gain height.
- Ability 2 (Concussive Blast): Fire a blast that knocks back enemies. Cooldown: 9s. Use to boop or peel.
- Ultimate (Barrage): Hover and fire a torrent of rockets (55 each, 30 total) for 3s. Use on grouped enemies. Synergy: Use with Zarya Graviton Surge.
- Passive (Hover Jets): While airborne, hold space to hover briefly.
- Primary Fire (Hellfire Shotguns): Two shotguns, 20 pellets each, 6 damage per pellet (headshot 12). Use at close range.
- Ability 1 (Wraith Form): Become invulnerable and move faster for 3s, cannot attack. Cooldown: 8s. Use to escape or reposition.
- Ability 2 (Shadow Step): Teleport to a visible location after 1s channel. Cooldown: 10s. Use to flank.
- Ultimate (Death Blossom): Spin and fire shotguns in all directions, dealing 170 DPS for 3s. Use after teleporting behind enemies. Counterplay: Can be stunned or blocked by shields.
- Passive (The Reaping): Souls drop from enemy kills; collecting them heals Reaper for 20 HP per soul.
- Primary Fire (Railgun - Primary): Automatic fire, 9 damage per shot, 15 rounds/s. Use to build energy.
- Secondary Fire (Railgun - Secondary): Hold to charge, then fire a single high-damage shot (100 energy: 130 damage, headshot 260). Use to finish.
- Ability 1 (Power Slide): Slide forward, can cancel into jump. Cooldown: 6s. Use to dodge.
- Ability 2 (Disruptor Shot): Fire an orb that slows enemies and deals 50 damage over 2s. Cooldown: 10s. Use to area denial or debuff.
- Ultimate (Overclock): Gain auto-charging railgun (max energy instantly) and shots pierce enemies for 6s. Use to shred tanks.
- Passive (Energy): Primary fire builds energy (max 100) that enhances secondary fire.
- Primary Fire (Heavy Pulse Rifle): 25 damage per shot, 9 rounds/s. Use for consistent damage.
- Secondary Fire (Helix Rockets): Fire a burst of 3 rockets that each deal 40 damage direct (20 splash). Cooldown: 8s. Use for burst.
- Ability 1 (Sprint): Run faster, can reload while sprinting. Cooldown: none (toggle). Use to reposition.
- Ability 2 (Biotic Field): Place a healing beacon that heals allies for 35 HP/s over 5s. Cooldown: 15s. Use to sustain team.
- Ultimate (Tactical Visor): Auto-aim at visible enemies for 6s, dealing full damage. Use in open areas. Synergy: Use with Nano Boost.
- Passive (Reload While Sprinting): Yes.
- Primary Fire (Machine Pistol): 8 damage per shot, 20 rps. Use at close range.
- Ability 1 (Hack): Channel for 1s to disable enemy abilities for 5s (10s for Tanks). Also reveals them to team. Cooldown: 6s (if interrupted, 4s). Use to disable key abilities or ults (e.g., hack enemy Tracer before Pulse Bomb).
- Ability 2 (Translocator): Throw a beacon that after activation teleports you to its location. Cooldown: 6s after throw, 3s after teleport. Use to escape or reposition.
- Ultimate (EMP): Detonate an energy burst that hacks all enemies in radius, dealing 50% of current HP as damage (max 100 damage). Lasts 8s. Use to initiate fights or cancel ults.
- Passive (Opportunist): Can see enemies below 50% HP through walls.
- Primary Fire (Photon Projector): Beam that deals 60–180 DPS as it ramps up over 2s. Use close range.
- Secondary Fire (Photon Orb): Fire a slow orb that deals 30–120 damage based on charge. Use to poke through shields.
- Ability 1 (Sentry Turret): Place up to 3 turrets that slow and damage enemies (40 DPS each). Cooldown: 6s per turret. Use to control area.
- Ability 2 (Teleporter): Place a two-way portal between two points (lasts 12s). Cooldown: 12s. Use for team mobility.
- Ultimate (Photon Barrier): Deploy a large shield that blocks damage and moves forward slowly. Lasts 12s. Use to push or protect the team.
- Passive (Shield Generator): No longer exists. Instead, she has no passive.
- Primary Fire (Rivet Gun): Fires rivets that deal 70 damage (headshot 140) or can secondary fire to lob a cluster bomb. Use for consistent damage.
- Ability 1 (Deploy Turret): Place a turret that auto-aims and deals 28 DPS (levels up to 45 DPS if left alone). Cooldown: 5s (if destroyed, 10s). Use to zone or control flanks.
- Ability 2 (Overload): Gain 100 armor and 30% attack speed for 5s. Cooldown: 10s. Use when engaging.
- Ultimate (Molten Core): Spew molten lava that deals 160 DPS and slows enemies. Lasts 10s. Use on point or chokepoints.
- Passive (Armor Pack): Was removed. Now Torb has no passive? Actually, his passive is Scrap Collector: Collect scrap from dead enemies to build turret? Not in OW2; his turret auto-repairs?
- Primary Fire (Pulse Pistols): Dual pistols, 6 damage per shot, 40 shots per clip. Use at close range.
- Ability 1 (Blink): Teleport a short distance in the direction of movement. Cooldown: 3s (3 charges). Use to dodge or flank.
- Ability 2 (Recall): Rewind to your position 3 seconds ago, restoring health and ammo. Cooldown: 12s. Use to escape or undo mistakes.
- Ultimate (Pulse Bomb): Stick a bomb on an enemy that detonates after 1s, dealing 350 damage. Use on tanks or supports. Combo: Blink behind enemy, stick bomb, then recall.
- Passive (Time Rewind): No.
- Primary Fire (Smart Excavator): Fires a burst of 3 projectiles, each 15 damage. Use for mid-range.
- Secondary Fire (Drill Dash): Rush forward with drill, dealing 60 damage and knockback. Cooldown: 8s. Use to initiate or escape.
- Ability 1 (Burrow): Dig underground for 3s, becoming invulnerable and moving faster. Press again to erupt dealing 100 damage and knocking enemies up. Cooldown: 10s. Use to ambush.
- Ability 2 (Tectonic Shock): Slam the ground creating a shockwave that deals 75 damage and slows enemies. Cooldown: 12s. Use to area denial.
- Ultimate (Clobber): Summon a massive drill that spins, dealing 150 DPS and pulling enemies toward center. Use in enclosed spaces.
- Passive (Drill Charge): Drill Dash and Burrow break shields? Yes, deals extra damage to shields.
- Primary Fire (Widow's Kiss): Sniper rifle: unscoped deals 13 damage per shot (auto), scoped deals 120 damage (headshot 300). Use for long-range picks.
- Ability 1 (Grappling Hook): Hook to a ledge, pulling you upward. Cooldown: 10s. Use to reach high ground.
- Ability 2 (Venom Mine): Place a mine that poisons enemies for 75 damage over 4s. Cooldown: 15s. Use to protect flanks.
- Ultimate (Infra-Sight): Reveal all enemies through walls for 15s. Use before fight to track positions.
- Passive (Sniper): Hold breath while scoped to stabilize? Actually, no passive.
Damage Passive
Support Passive
Tanks
D.Va
Reinhardt
Zarya
Winston
Orisa
Ramattra
Sigma
Wrecking Ball (Hammond)
Junker Queen
Mauga
Damage Heroes
Ashe
Bastion
Cassidy
Echo
Genji
Hanzo
Junkrat
Mei
Pharah
Reaper
Sojourn
Soldier: 76
Sombra
Symmetra
Torbjörn
Tracer
Venture (New Hero? As of 2025, Venture is a Damage hero with drill abilities. Confirm abilities.)
Widowmaker
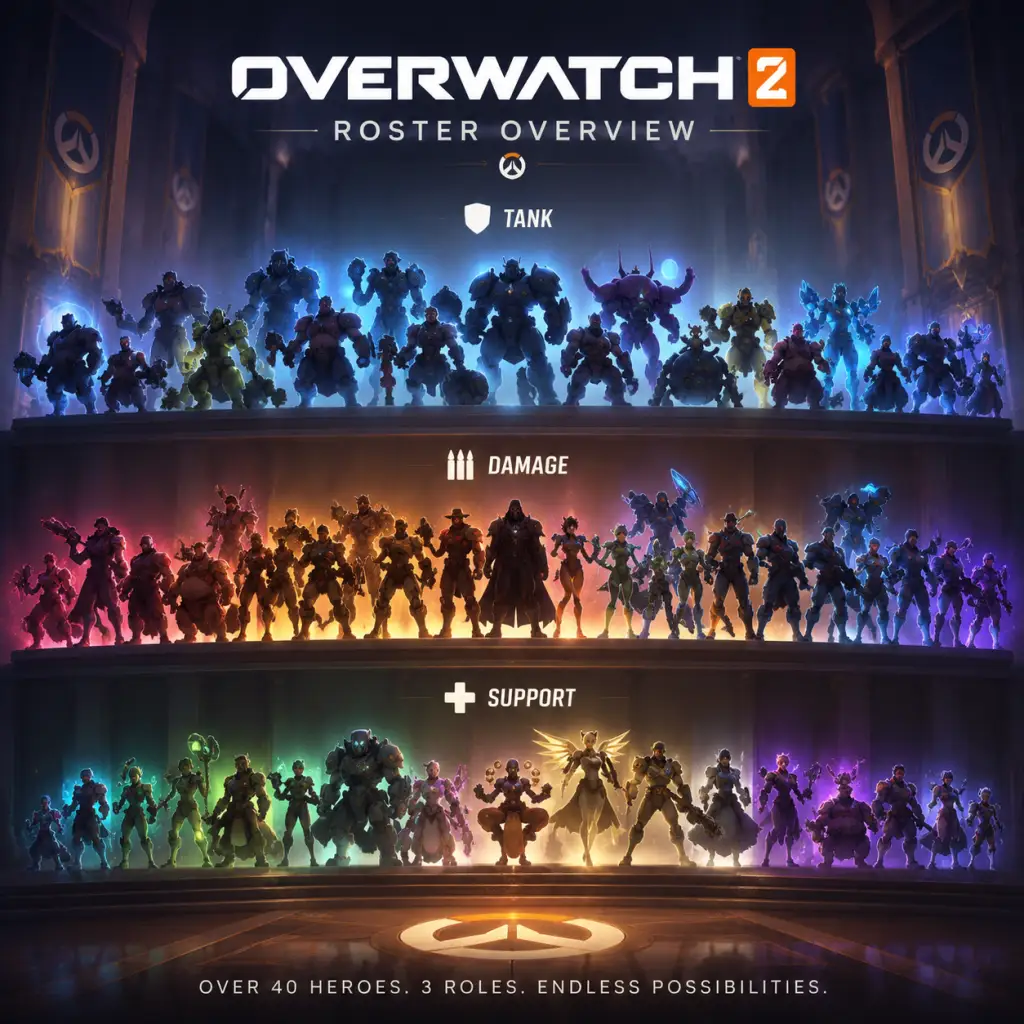
Characters & Roles
"content": "## Overview
Overwatch 2 features a diverse roster of over 40 unique heroes divided into three roles: Tank, Damage, and Support. Heroes are not created; you select from a complete roster. All base heroes are free. New seasonal heroes (e.g., Kiriko, Ramattra, Lifeweaver, Illari, Mauga, Venture) can be unlocked by progressing the free Battle Pass or completing Hero Challenges. This guide covers every hero's background, strengths, weaknesses, playstyle, unlock conditions, recommended settings, and team synergy.
Tanks are durable frontline heroes who create space, absorb damage, and protect teammates. Role Passive: Reduced knockback and 30% less ultimate charge from enemy damage.
Damage heroes specialize in eliminating enemies and contesting objectives. Role Passive: Gain 25% movement speed for 2 seconds after getting a kill.
Support heroes heal allies and provide utility abilities. Role Passive: Automatically regenerate health after not taking damage for 2 seconds.
---
Overwatch 2 features a diverse roster of over 40 unique heroes divided into three roles: Tank, Damage, and Support. Heroes are not created; you select from a complete roster. All base heroes are free. New seasonal heroes (e.g., Kiriko, Ramattra, Lifeweaver, Illari, Mauga, Venture) can be unlocked by progressing the free Battle Pass or completing Hero Challenges. This guide covers every hero's background, strengths, weaknesses, playstyle, unlock conditions, recommended settings, and team synergy.
Role Overview
Tank
Tanks are durable frontline heroes who create space, absorb damage, and protect teammates. Role Passive: Reduced knockback and 30% less ultimate charge from enemy damage.
Damage
Damage heroes specialize in eliminating enemies and contesting objectives. Role Passive: Gain 25% movement speed for 2 seconds after getting a kill.
Support
Support heroes heal allies and provide utility abilities. Role Passive: Automatically regenerate health after not taking damage for 2 seconds.
---
Tank Heroes
D.Va
- Background: Former pro StarCraft II player Hana Song pilots a mech with rocket thrusters and a Defense Matrix that eats projectiles.
- Strengths: High mobility, can eat enemy ultimates (e.g., Graviton Surge), strong at contesting high ground.
- Weaknesses: Large head hitbox, mech can be destroyed quickly if overextended, weak against beam weapons (e.g., Symmetra, Zarya).
- Playstyle: Dive enemy backline with Boosters, use Micro Missiles for burst, then retreat. Use Self-Destruct to clear objectives.
- Unlock Conditions: Unlocked from start.
- Recommended Settings: Increase sensitivity for quick turn Boosts; toggle Defense Matrix to hold.
- Team Synergy: Works with Winston for dual dive; Zarya can bubble her when mech is low.
- Background: A knight in Crusader armor, Reinhardt wields a rocket hammer and a massive Barrier Field.
- Strengths: Huge shield (1600 HP) for team protection, powerful cleave damage with hammer, Earthshatter stuns multiple enemies.
- Weaknesses: Slow, vulnerable from behind, shield can be broken quickly by concentrated fire.
- Playstyle: Advance with shield, block key abilities, then charge or swing to deal damage. Use Fire Strike to gain ultimate charge. Communicate when shield is low.
- Unlock Conditions: Unlocked from start.
- Recommended Settings: Use toggle shield; adjust sensitivity for hammer swings.
- Team Synergy: Pairs with Ana (Nano Boost), Zarya (bubble when charging), and McCree/Ashe for shield break.
- Background: A ruthless Australian enforcer with a scrap gun and a hook that yanks enemies closer.
- Strengths: Self-healing (Take a Breather) provides survivability, hook combo can one-shot squishies, high burst damage at close range.
- Weaknesses: No armor, large hitbox, feeds enemy ultimate charge, vulnerable when healing.
- Playstyle: Flank or stay with team, hook & kill key targets (supports), then retreat to heal. Use Whole Hog to boop enemies off cliffs or clear point.
- Unlock Conditions: Unlocked from start.
- Recommended Settings: Lower sensitivity for hook accuracy; use toggle for Take a Breather.
- Team Synergy: Complements off-tanks like Sigma; supports like Ana (anti-heal combo) or Kiriko (suzu to cleanse during hook).
- Background: A genetically engineered gorilla scientist from Horizon Lunar Colony, Winston uses Tesla Cannon and Jump Pack.
- Strengths: Highly mobile, can dive supports and squishies, Tesla Cannon pierces barriers, ultimate (Primal Rage) knocks enemies away and heals him.
- Weaknesses: Low single-target damage, large hitbox, vulnerable without bubble shield.
- Playstyle: Leap onto enemy backline, drop Barrier Projector, deal area damage, then jump out. Use Primal to disrupt or secure environmental kills.
- Unlock Conditions: Unlocked from start.
- Recommended Settings: Bind quick melee for Primal combo; adjust Jump Pack sensitivity.
- Team Synergy: Works with D.Va for double dive; supports like Ana (Nano), Lucio (speed boost).
- Background: A Russian bodybuilder and soldier, Zarya uses a particle cannon that becomes stronger as she absorbs damage with barriers.
- Strengths: High damage at high energy, can save allies with bubbles, ultimate (Graviton Surge) groups enemies for combos.
- Weaknesses: Low damage when low energy, limited mobility, shield dependent.
- Playstyle: Bubble teammates before they take damage to gain energy, then melt enemies. Use Graviton to combo with damage ultimates (e.g., Hanzo, Pharah, Junkrat).
- Unlock Conditions: Unlocked from start.
- Recommended Settings: Use self-bubble quickly; adjust crosshair for beam tracking.
- Team Synergy: Combos with almost all damage ultimates; supports like Mercy (damage boost) or Baptiste (Immortality Field).
- Background: An astrophysicist who gained gravity powers from an experiment, Sigma uses two hyperspheres and a kinetic grasp.
- Strengths: Versatile shield (can place anywhere), high burst damage, Accretion stun, ultimate (Gravitic Flux) lifts and slams enemies.
- Weaknesses: Low mobility, shield has limited longevity, requires good positioning.
- Playstyle: Use barrier to block key paths, throw Accretion to interrupt ultimates, absorb damage with Kinetic Grasp. Use Flux to pick off isolated targets.
- Unlock Conditions: Unlocked from start.
- Recommended Settings: Toggle shield placement; adjust sensitivity for hypersphere aiming.
- Team Synergy: Works with Orisa for brawl; supports like Brigitte (rally) or Ana (Nano for sustain).
- Background: A rebuilt omnic war machine, Orisa protects with her barrier and javelin spin.
- Strengths: Strong barrier, capable of brawling, Energy Javelin stuns, Fortify makes her immune to CC, ultimate (Terra Surge) charges up then damages.
- Weaknesses: Large hitbox, slow, barrier cooldown can leave team exposed.
- Playstyle: Place shield, use Fortify when engaging, javelin to cancel enemy abilities. Use Terra Surge with team follow-up.
- Unlock Conditions: Unlocked from start.
- Recommended Settings: Use toggle for Fortify; adjust crosshair for javelin accuracy.
- Team Synergy: Pairs with Sigma for double barrier; supports like Mercy (damage boost during Terra Surge) or Moira (healing orb).
- Background: A genetically engineered hamster in a giant mech, Wrecking Ball rolls around and uses a grapple to swing into enemies.
- Strengths: Extremely high mobility, can disrupt backline, Adaptive Shield makes him durable, ultimate (Minefield) zones area.
- Weaknesses: Difficult to control, requires practice for grapple, large hitbox when not rolling, can feed ultimate.
- Playstyle: Swing in, knock enemies into air, then activate shield, damage and escape. Use mines to block escapes or objective.
- Unlock Conditions: Unlocked from start.
- Recommended Settings: Increase grapple sensitivity; use toggle roll.
- Team Synergy: Supports like Lucio (speed boost) or Zenyatta (discord on targets) help secure kills.
- Background: A former Talon leader with a gauntlet that delivers powerful punches.
- Strengths: High burst damage, shields from abilities, strong mobility, ultimate (Meteor Strike) deals large area damage.
- Weaknesses: Requires ability landing for shields, can be focused easily, weak to CC.
- Playstyle: Use Seismic Slam to engage, Power Block to reduce damage and empower next punch, then Rocket Punch enemies into walls. Use Meteor Strike to escape or finish.
- Unlock Conditions: Unlocked from start.
- Recommended Settings: Use toggle Power Block; adjust sensitivity for punch aim.
- Team Synergy: Works with Zarya (bubble during slam) or Ana (Nano).
- Background: The scrappy queen of Junkertown, she uses an axe and a shotgun with bleed effects.
- Strengths: Self-healing from bleed damage, Carnage hits multiple, Jagged Blade slows and pulls, ultimate (Rampage) deals damage and prevents healing.
- Weaknesses: No shield, needs close range, can be kited.
- Playstyle: Throw Jagged Blade to pull an enemy, then Carnage for bleed; use Commanding Shout for speed and health. Use Rampage to initiate fights.
- Unlock Conditions: Unlocked via Battle Pass (Season 1) or later through hero challenges.
- Recommended Settings: Increase sensitivity for axe swings.
- Team Synergy: Pairs with Lucio for speed; supports like Kiriko (cleanse during Rampage) or Baptiste (sustain).
- Background: A revolutionary omnic, Ramattra can switch between a staff and a blocky form with a shield.
- Strengths: Flexible: long-range poke in Omnic form, close-range brawl in Nemesis form, barrier blocks damage, ultimate (Annihilation) creates a harmful vortex.
- Weaknesses: Vulnerability during transformation, shield is stationary, no mobility.
- Playstyle: Use Omnic form to poke and build ultimate, then switch to Nemesis to push with shield and damage. Use Annihilation when enemies are grouped.
- Unlock Conditions: Unlocked via Battle Pass (Season 2) or hero challenges.
- Recommended Settings: Bind transformation for quick access.
- Team Synergy: Works with Zarya to protect him; supports like Moira or Ana for healing.
- Background: A Samoan warrior with dual chainguns, Mauga recently joined the roster.
- Strengths: High sustained damage, berserker rage (Cardio Overdrive) heals while dealing damage, can set enemies on fire, overhealth mechanic.
- Weaknesses: Large hitbox, requires constant aggression, needs good support.
- Playstyle: Hold left and right click for dual fire, use Overdrive when low or engaging, Cage Fight (ultimate) traps himself and enemies for close-range brawl.
- Unlock Conditions: Unlocked via Battle Pass (Season 8) or hero challenges.
- Recommended Settings: Turn on toggle for overdrive.
- Team Synergy: Needs strong healers like Ana or Kiriko; pairs with Lucio for speed.
- Background: A veteran Overwatch agent, Soldier: 76 uses a pulse rifle and biotic field for healing.
- Strengths: Well-rounded, hitscan rifle, sprint mobility, self-heal, tactical visor (aim assist).
- Weaknesses: No burst damage, ultimate can be blocked by shields, predictable.
- Playstyle: Maintain medium range, use sprint to reposition, biotic field to sustain, activate Visor when enemies are exposed.
- Unlock Conditions: Unlocked from start.
- Recommended Settings: Adjust scope sensitivity; use toggle sprint.
- Team Synergy: Works with any tank; supports like Mercy (damage boost) or Ana (nano).
- Background: A former Blackwatch agent, Reaper uses shotguns and wraith form.
- Strengths: High close-range burst, self-heal from damage (passive), Wraith for escape, Death Blossom (ultimate) wipes grouped enemies.
- Weaknesses: Short range, can be kited, predictable ult.
- Playstyle: Flank behind enemies, shoot tanks or squishies, use Wraith to disengage. Use Death Blossom from above or after a flank.
- Unlock Conditions: Unlocked from start.
- Recommended Settings: Increase sensitivity for quick 180s; toggle wraith.
- Team Synergy: Pairs with Zarya (bubble during Blossom) or Lucio (speed boost).
- Background: A cowboy gunslinger, Cassidy uses Peacekeeper revolver and Flashbang.
- Strengths: Good mid-range damage, flashbang interrupts abilities, Deadeye combo potential.
- Weaknesses: Low mobility, requires good aim, flashbang range limited.
- Playstyle: Stay with team, use cover, flash enemies then headshot, high noon when enemies are in open.
- Unlock Conditions: Unlocked from start.
- Recommended Settings: Lower ADS sensitivity for revolver.
- Team Synergy: Works with barriers for cover; supports like Mercy (damage boost) or Ana (nano).
- Background: A former vigilante with a rocket launcher and jetpack.
- Strengths: Aerial mobility, splash damage, can peek over obstacles, ultimate (Barrage) deals huge damage if unprotected.
- Weaknesses: Vulnerable in the air, loud, can be hit by hitscan, ultimate leaves her stationary.
- Playstyle: Fly high and shoot rockets at groups, use Concussive Blast to boop enemies or reposition. Use Barrage with a tank shield or after enemy disables hitscan.
- Unlock Conditions: Unlocked from start.
- Recommended Settings: Toggle hover jets; use rocket direct hit crosshair.
- Team Synergy: Mercy can follow her for heals and damage boost (PharMercy). Also good with Orisa shield.
- Background: A cyborg ninja, Genji uses shurikens and a blade.
- Strengths: High mobility, can deflect projectiles, resets dash on elimination, Dragonblade (ultimate) kills in two swings.
- Weaknesses: Low health, difficult to master, deflect cannot block beams or melee.
- Playstyle: Flank and poke with shurikens, dash to finish low enemies, use Deflect to block key abilities. Use Dragonblade with dash combo.
- Unlock Conditions: Unlocked from start.
- Recommended Settings: Increase sensitivity for blade swings; toggle deflect.
- Team Synergy: Works with Ana (Nano Blade combo) or Zarya (grav for blade).
- Background: A master archer, Hanzo uses a bow with storm arrows and sonic arrows.
- Strengths: One-shot headshots, storm arrow burst, sonic reveals enemies, ultimate (Dragonstrike) passes through barriers.
- Weaknesses: Requires accuracy, no mobility, can be countered by dive.
- Playstyle: Maintain high ground, spam arrows, use sonic arrow to check corners. Dragonstrike combos with Graviton or Zarya.
- Unlock Conditions: Unlocked from start.
- Recommended Settings: Use bow sensitivity adjustment; toggle storm arrows.
- Team Synergy: Zarya’s Graviton guarantees Dragonstrike hits; also pairs with Orisa’s Terra Surge.
- Background: A Junkertown scavenger who uses grenades and a mine.
- Strengths: High area damage, can bounce grenades, Concussion Mine for mobility, RIP-Tire (ultimate) can wipe squads.
- Weaknesses: Weak at long range, self-damage, tire can be shot.
- Playstyle: Spam chokepoints, trap enemies, use mine to jump or boop. Tire from behind enemy lines.
- Unlock Conditions: Unlocked from start.
- Recommended Settings: Increase grenade sensitivity; toggle mine placement.
- Team Synergy: Zarya’s Graviton groups enemies for tire; Reinhardt shield protects him.
- Background: A climatologist with an ice gun and cryo-freeze.
- Strengths: Can slow/freeze enemies, self-heal (Cryo-Freeze), ice wall blocks paths, Blizzard (ultimate) freezes large area.
- Weaknesses: Short range, low mobility, wall can block teammates.
- Playstyle: Use primary fire to slow enemies, secondary icicle for long-range, wall to isolate targets. Blizzard then kill frozen foes.
- Unlock Conditions: Unlocked from start.
- Recommended Settings: Toggle Cryo-Freeze for quick heal; adjust wall sensitivity.
- Team Synergy: Works with Reinhardt (wall behind enemy) or Zarya (grav plus blizzard).
- Background: A Swedish engineer, Torbjörn builds a turret and throws armor packs (now overhealth).
- Strengths: Turret provides consistent damage, can upgrade it, Overload gives temporary health and speed, ultimate (Molten Core) slows enemies and deals AoE damage.
- Weaknesses: Turret immobile, low personal damage at range, can be countered by dive.
- Playstyle: Place turret on high ground, keep it alive, use Overload when pressured. Molten Core to zone point.
- Unlock Conditions: Unlocked from start.
- Recommended Settings: Bind quick hammer for turret repair.
- Team Synergy: Pairs with Symmetra for turret synergy; supports like Brigitte for armor.
- Background: A hard-light architect, Symmetra uses a photon projector and turrets.
- Strengths: Turrets slow and damage, primary fire ramps up damage on barriers, teleporter for team rotation, ultimate (Photon Barrier) is a large moving shield.
- Weaknesses: Low damage initially, requires close range for ramp up, teleporter can be intercepted.
- Playstyle: Place turrets on flanks, charge beam on barriers, teleport teammates behind enemy lines. Use barrier to block ultimates.
- Unlock Conditions: Unlocked from start.
- Recommended Settings: Increase beam sensitivity; toggle teleporter placement.
- Team Synergy: Works with Torbjörn for turret synergy; Orisa can protect her.
- Background: An omnic that transforms from recon to sentry mode.
- Strengths: High sustained damage in sentry mode, self-heal, configuration artillery (ultimate) fires three long-range rockets.
- Weaknesses: Low mobility in sentry, large hitbox, vulnerable while transforming.
- Playstyle: Use recon to move, sentry to hold corners, heal when low. Artillery to bombard point.
- Unlock Conditions: Unlocked from start.
- Recommended Settings: Toggle transformation; increase sentry sensitivity.
- Team Synergy: Reinhardt shield or Orisa barrier protect him; Ana nano for damage.
- Background: A hacker from Talon, Sombra can hack abilities and become invisible.
- Strengths: Hack disables enemy abilities, invisibility for flanking, EMP destroys barriers and shields, can teleport via Translocator.
- Weaknesses: Low damage, hack can be interrupted, requires map knowledge.
- Playstyle: Hack health packs, flank and hack key enemies (tanks or supports), then eliminate them. EMP combos with ultimates like Graviton or Blizzard.
- Unlock Conditions: Unlocked from start.
- Recommended Settings: Toggle translocator timer; use sensitivity for aim.
- Team Synergy: Works with Zarya (EMP + Grav), Reinhardt (Earthshatter).
- Background: A Talon sniper, Widowmaker uses a sniper rifle with grapple hook and venom mine.
- Strengths: One-shot headshots at long range, grapple mobility, ultimate (Infra-Sight) reveals all enemies.
- Weaknesses: Low damage body shots, vulnerable in close range, requires high accuracy.
- Playstyle: Stay at high ground, pick off squishies, use venom mine to protect flanks. Infra-Sight to track enemies.
- Unlock Conditions: Unlocked from start.
- Recommended Settings: Lower scope sensitivity for finer aim.
- Team Synergy: Shields protect her; Mercy damage boost enhances one-shot potential.
- Background: A leader of the Deadlock Gang, Ashe uses a lever-action rifle and a dynamite throw.
- Strengths: Good mid-range damage, dynamite provides area denial and damage over time, Coach Gun to boop enemies, ultimate (B.O.B.) summons a friendly omnic.
- Weaknesses: Slow fire rate, requires aim, dynamite can be shot.
- Playstyle: Use primary fire to pressure, throw dynamite and shoot it to ignite, Coach Gun to reposition or push targets away. B.O.B. to contest point or deal damage.
- Unlock Conditions: Unlocked from start.
- Recommended Settings: Adjust ADS sensitivity; toggle aiming for dynamite.
- Team Synergy: B.O.B. can be healed; Mercy damage boost works well. Tank shield for protection.
- Background: An advanced AI robot created by Dr. Mina Liao, Echo can fly and duplicate enemy heroes.
- Strengths: High mobility (flight), sticky bombs for burst, focusing beam melts low-health targets, ultimate (Duplicate) copies an enemy for 20 seconds.
- Weaknesses: Low health, beam requires aim, ultimate can be wasted if wrong hero.
- Playstyle: Poke at range with tri-shot, use beam to finish, fly to high ground. Ultimate copy a tank or support for sustainability.
- Unlock Conditions: Unlocked from start.
- Recommended Settings: Toggle flight; increase beam sensitivity.
- Team Synergy: Works with dive tanks; supports like Mercy or Zenyatta.
- Background: A Canadian cybernetic soldier, Sojourn uses a railgun that can charge for a powerful shot.
- Strengths: Hitscan primary fire, sliding mobility, railgun secondary can one-shot (headshot) when charged, ultimate (Overclock) gives auto-charged railgun.
- Weaknesses: Requires aim for railgun headshots, slide is short, vulnerable when charging.
- Playstyle: Poke with primary to charge railgun, then shoot charged shots at heads. Use slide to evade. Overclock to eliminate multiple enemies.
- Unlock Conditions: Unlocked from start (base game).
- Recommended Settings: Toggle slide for quick movement.
- Team Synergy: Mercy damage boost combines with railgun; Zarya bubble during charge.
- Background: An archaeologist with a drill and seismic powers (gender non-binary).
- Strengths: Burst damage, mobility (burrowing), can shield themselves, ultimate cleaves a trench that damages and knocks up.
- Weaknesses: Short range, telegraphy, needs good cooldown management.
- Playstyle: Burrow to engage or disengage, use drill for burst, shoot from cover. Ultimate (Tectonic Shock) zones area.
- Unlock Conditions: Unlocked via Battle Pass (Season 10) or hero challenges.
- Recommended Settings: Increase sensitivity for drill turns.
- Team Synergy: Works with Zarya (bubble during burrow) or Lucio (speed).
- Background: An angelic field medic, Mercy uses a staff to heal or damage boost allies, and Guardian Angel to fly to them.
- Strengths: High single-target healing, damage boost amplifies team damage, resurrection brings dead ally back, ultimate (Valkyrie) enables flight and chain beams.
- Weaknesses: Low self-defence, dependent on teammates, must stay mobile.
- Playstyle: Stay behind cover, beam from distance, use Guardian Angel to evade, resurrect when safe. Valkyrie to enable team push or survive.
- Unlock Conditions: Unlocked from start.
- Recommended Settings: Toggle Guardian Angel; use beam toggle.
- Team Synergy: Pairs with Pharah (PharMercy), hitscan like Ashe or Cassidy, pocket a DPS.
- Background: A DJ from Rio, Lucio uses sound waves to heal or speed boost, and can wall run.
- Strengths: Group healing, speed boost, Soundwave boops enemies, ultimate (Sound Barrier) provides massive temporary shields.
- Weaknesses: Low healing per second, requires proximity, vulnerable to CC.
- Playstyle: Switch between healing and speed based on situation, wall ride for mobility, boop enemies off edges. Use Sound Barrier to counter enemy ults.
- Unlock Conditions: Unlocked from start.
- Recommended Settings: Toggle crossfade; adjust wall ride sensitivity.
- Team Synergy: Speed boost enables brawl comps (Reinhardt, Mei) or dive (Winston, D.Va). Works with Zenyatta.
- Background: An omnic monk, Zenyatta uses orbs for healing and damage.
- Strengths: Consistent healing orb, Discord Orb amplifies damage against a target, high damage potential, ultimate (Transcendence) makes himself and nearby allies invulnerable (except environmental kills).
- Weaknesses: Low mobility, low health, no escape, requires good positioning.
- Playstyle: Orb of Harmony on a flanker, Orb of Discord on priority target, use primary fire to add damage. Use Transcendence to survive enemy ults or heal team in grav.
- Unlock Conditions: Unlocked from start.
- Recommended Settings: Toggle orb target; adjust sensitivity for aiming.
- Team Synergy: Discord plus any high-damage hero (Soldier, Junkrat). Works well with Lucio for speed and heal mixing.
- Background: A veteran sniper turned support, Ana uses a biotic rifle that heals allies and damages enemies.
- Strengths: Long-range healing, biogrenade prevents healing on enemies and boosts healing on allies, Sleep Dart stops enemies, Nano Boost increases damage and reduces damage taken.
- Weaknesses: Requires aim, no mobility, can be dived.
- Playstyle: Position at distance, heal tanks, use grenade aggressively to anti-heal, sleep dangerous enemies (e.g., ulting Reaper). Nano Boost a tank or DPS for push.
- Unlock Conditions: Unlocked from start.
- Recommended Settings: Toggle zoom; increase sleep dart sensitivity.
- Team Synergy: Nano combos with Genji (Nano Blade), Reinhardt (Nano Shatter), Soldier (Nano Visor). Pairs with Kiriko for cleanse.
- Background: A geneticist from Talon, Moira uses a biotic grasp that drains health or heals, and
Reinhardt
Roadhog
Winston
Zarya
Sigma
Orisa
Wrecking Ball (Hammond)
Doomfist (now Tank)
Junker Queen
Ramattra
Mauga
---
Damage Heroes
Soldier: 76
Reaper
Cassidy
Pharah
Genji
Hanzo
Junkrat
Mei
Torbjörn
Symmetra
Bastion
Sombra
Widowmaker
Ashe
Echo
Sojourn
Venture
---
Support Heroes
Mercy
Lucio
Zenyatta
Ana
Moira
Cheats & Secrets
Overview
Overwatch 2 does not feature traditional cheat codes, unlock codes, or console commands that give unfair gameplay advantages. Blizzard Entertainment designed the game to be competitive and fair, with no single-player cheats or hidden developer menus. However, the game is filled with Easter eggs, secret locations, hidden interactions, and developer-intended secrets that reward exploration and attention. This guide catalogs all known hidden content across all platforms (PC, PlayStation, Xbox, Nintendo Switch) and notes which secrets may be legacy from the original Overwatch.
---
1. No Traditional Cheats or Unlock Codes
- No console commands: Overwatch 2 does not have a developer console for cheat codes on PC. The `~` key opens chat only.
- No unlock codes: All heroes, maps, and game modes are accessible through normal gameplay or purchase. There are no secret codes to unlock exclusive characters or items.
- No in-game cheats: Activating god mode, unlimited ammo, or speed hacks is impossible without third-party software, which violates the Terms of Service and results in a permanent ban.
---
2. Hidden Map Easter Eggs (Confidential & Exploit-Safe)
Overwatch 2 maps contain dozens of hidden references, interactive objects, and secret areas. These are safe to explore and do not provide competitive advantages.
2.1 Route 66 – UFO Alien
| Location | Steps | Reward |
|---|---|---|
| Near the second checkpoint (payload area) | 1. Look up at the sky near the large overpass. 2. You’ll see a small flying saucer with a beam of light. 3. Shoot the UFO repeatedly until it glows and the beam stops. | A “Extraterrestrial” player icon (legacy spray from Overwatch 1; may still be unlocked if not previously obtained). |
2.2 Volskaya Industries – Secret Room
| Location | Steps | Reward |
|---|---|---|
| Inside the large factory near point B | 1. On the second floor, find a wall with a small crack. 2. Press the interact button (default: F on PC, X on Xbox, Square on PlayStation, Y on Switch) near the crack. 3. A door will slide open, revealing a hidden room with a small shrine. | An achievement/trophy (if playing on console) and a lore audio log (Overwatch 1). In Overwatch 2, the room still exists but awards no new items. |
2.3 Hollywood – Hidden Movie Screen
| Location | Steps | Reward |
|---|---|---|
| In the attacker spawn room (Hollywood) | 1. There is a movie poster on the wall. 2. Shoot the poster repeatedly. 3. A short clip from the original Overwatch cinematic trailer plays on a nearby screen. | Cosmetic only; no unlock. |
2.4 Ilios – Hidden Message
| Location | Steps | Reward |
|---|---|---|
| On the Ilios Ruins map, near the central well | 1. Stand on the edge of the well and look down into the water. 2. On certain seasonal events (especially Halloween), the well contains a hidden message or spooky reflection. | A brief visual Easter egg. |
2.5 Eichenwalde – Secret Path
| Location | Steps | Reward |
|---|---|---|
| Behind the castle in the final area | 1. From the attacker’s perspective, go to the far-right wooden ramp. 2. Jump onto the rock ledge and follow the narrow path along the cliff edge. 3. You’ll reach a small alcove with a broken wagon. | A view of the entire castle; no items. |
2.6 Hanamura – Hidden Dragon
| Location | Steps | Reward |
|---|---|---|
| On the Hanamura map (now removed from regular rotation but available in Custom Games) | 1. Near the point B, look up at the large roof. 2. A dragon can be seen flying across the open sky if you wait long enough. | Visual Easter egg only. |
2.7 Oasis – Speaking Doors
| Location | Steps | Reward |
|---|---|---|
| In the Oasis University map | 1. Approach the large doors near the point. 2. They have a chance to say voice lines from various Overwatch heroes (e.g., “Are you sure?”). | No reward; just fun. |
3. Secret Hero Interactions
Many hero pairs have hidden voice lines triggered when they meet, kill, or heal each other. These are developer-intentional and add flavor.
| Hero Pair | Trigger | Example Line |
|---|---|---|
| Soldier: 76 / Reaper | When both are on the same team near each other (idle) | “Jack? Is that you?” / “Gabriel.” |
| Genji / Hanzo | After Hanzo kills Genji or vice versa | “You are no longer my brother!” / “Forgive me, brother.” |
| Mercy / Pharah | When Mercy resurrects Pharah | “I’ll always have your back, Fareeha.” |
| Tracer / Widowmaker | When Tracer kills Widowmaker | “Sorry, love, but you’re on the wrong side.” |
| Reinhardt / Brigitte | When Reinhardt gets a kill near Brigitte | “Ha! Did you see that, Brigitte?” / “I saw, Uncle.” |
| Sigma / Moira | During hero select screen if both are selected? | “The universe sings to me.” / “And I alone can hear it.” |
---
4. Developer-Intended Hidden Content
4.1 Practice Range Secrets
- The Sphere: In the Practice Range, you can shoot a small, metallic sphere on the ground near the moving bots. After enough damage, it will spin and emit a sound. No reward.
- The Hidden Bot: In the far-left corner of the range, behind a crate, there is a bot that never attacks. You can shoot it indefinitely.
- Origin: Popular Overwatch streamer Brandon “Seagull” Larned inspired a hidden interaction. If Pharah’s “Rain” skin is used and a Seagull voice line is played (“Maa-maaa!”), a small seagull may appear and circle Pharah. (Confirmed in Overwatch 1; may still be present in Overwatch 2.)
- The Workshop (Custom Game settings) allows players to create complex game modes using a scripting language. Some community-made modes contain hidden Easter eggs (e.g., a secret room that only opens after completing a series of tasks). These are not official but are developer-supported.
- Lunar New Year – Fireworks: During the Year of the Rooster/other events, shoot the floating lanterns on maps like Lijiang Tower to get a burst of fireworks.
- Halloween Terror – Unlock Billy the Bot: In the “Junkenstein’s Revenge” brawl, hitting a certain switch in the castle can spawn a small robot named “Billy.” This grants a voice line.
- Winter Wonderland – Yeti’s Cave: On Necropolis (Yeti Hunter mode), there is a hidden cave with a Yeti’s lair. You can emote there to trigger a rare voice line from Winston.
- All Easter eggs are available in Quick Play, Arcade, and Custom Games. Some may be absent in Competitive due to map changes.
- No third-party tools are required. Simply play and explore.
- To view legacy sprays/player icons awarded from Overwatch 1 secrets, you must have earned them before the Overwatch 2 transition. New players cannot obtain them unless Blizzard reissues them.
4.2 The “Seagull” Reference
4.3 Workshop Mode “Secret” Mods
---
5. Exploit-Safe Secrets
The following hidden features are safe to use (no ban risk) and often overlooked:
---
6. How to Access Hidden Content
---
7. Conclusion
While Overwatch 2 lacks cheats or codes, its world is rich with secrets and Easter eggs that enhance the experience without breaking fairness. Exploring with friends or even alone can uncover nods to developer humor, lore, and community history. Always check map updates each season, as Blizzard occasionally adds new hidden content (e.g., the “PvE mission” secrets in Overwatch 2: Invasion).