Path of Exile
## Welcome to Path of Exile **Path of Exile (PoE)** is a dark fantasy, free-to-play Action Role-Playing Game (ARPG) developed and published by **Grinding Gear Games** (GGG). It was first released on **October 23, 2013** for PC, followed by an Xbox One release on **August 24, 2017**, and a PlayStati...

Download & Installation
Path of Exile: Complete Download & Installation Guide
This guide covers everything you need to know to download and install Path of Exile (PoE) on all supported platforms. PoE is a free-to-play action RPG available on PC (standalone client, Steam, Epic Games Store), PlayStation 4/5, and Xbox One/Series X|S. Nintendo Switch and mobile versions are not currently available.
---
1. System Requirements
Before downloading, verify your hardware meets the minimum requirements. Path of Exile is a demanding game, especially in endgame scenarios.
| Component | Minimum (Low Settings, 1080p) | Recommended (High Settings, 1440p) |
|---|---|---|
| OS | Windows 7 SP1 (64-bit) | Windows 10 (64-bit) |
| CPU | Intel Core i5-6500 / AMD Ryzen 3 1200 | Intel Core i7-7700 / AMD Ryzen 5 2600 |
| RAM | 8 GB | 16 GB |
| GPU | NVIDIA GeForce GTX 650 / AMD Radeon HD 7870 (2 GB VRAM) | NVIDIA GeForce GTX 1060 / AMD Radeon RX 580 (4 GB VRAM) |
| Storage | 40 GB available space (SSD recommended) | 50 GB available space (SSD required) |
| DirectX | Version 11 | Version 11 |
| Internet | Broadband connection | Broadband connection |
---
2. Official Download Sources
Only download from these legitimate sources to avoid malware:
- PC Standalone Client: [Path of Exile official website](https://www.pathofexile.com/download)
- Steam: [Steam Store page](https://store.steampowered.com/app/238960/Path_of_Exile/)
- Epic Games Store: [Epic Store page](https://store.epicgames.com/en-US/p/path-of-exile)
- PlayStation (PS4/PS5): PlayStation Store (search "Path of Exile")
- Xbox (One/Series X|S): Microsoft Store (search "Path of Exile")
- PC users: Create an account at [pathofexile.com/register](https://www.pathofexile.com/register) or use your Steam/Epic account (they will auto-link).
- PlayStation/Xbox users: The game uses your PSN or Xbox Live account. You can link a PoE account for cross-platform progression (only within same platform family, not cross-save with PC).
All sources provide the same game and updates. The standalone client receives patches slightly earlier than Steam/Epic, but the difference is minimal.
---
3. Step-by-Step Installation by Platform
#### 3.1 PC - Standalone Client
1. Go to the [official download page](https://www.pathofexile.com/download).
2. Download the PathOfExileInstaller.exe file (approx. 80 MB).
3. Run the installer as Administrator (right-click > Run as administrator).
4. Choose your language (English, French, German, Spanish, etc.).
5. Select installation directory (ensure at least 50 GB free space on an SSD).
6. The installer will download the full game client (~30-40 GB). This can take a while depending on your connection.
7. Once download completes, the game will automatically launch. Close it for now.
> Tip: You can choose a custom folder (e.g., `D:\Games\Path of Exile`) to keep your system drive clean.
#### 3.2 PC - Steam
1. Open Steam client and log in.
2. Go to Store and search "Path of Exile".
3. Click the game and press Play Game (it's free).
4. Add it to your library if prompted.
5. The game appears in your library. Click Install.
6. Choose installation folder (default: `\Steam\steamapps\common\Path of Exile`).
7. Steam downloads the full game. Wait for completion.
8. Press Play in Steam to launch.
#### 3.3 PC - Epic Games Store
1. Open Epic Games Launcher and log in.
2. Go to Store and search "Path of Exile".
3. Click Get to add to your library.
4. Go to Library, find Path of Exile, click Install.
5. Choose installation directory (SSD recommended).
6. Epic downloads and installs the game. This may take a while.
7. Click Launch to start.
#### 3.4 PlayStation (PS4 / PS5)
1. From your console's home screen, go to PlayStation Store.
2. Search "Path of Exile".
3. Click Download (free).
4. The game installs automatically. Wait for completion.
5. Once installed, you can launch from your game library.
> Note: PS5 users play the PS4 version via backward compatibility. No native PS5 version exists yet, but it runs at 60fps on PS5.
#### 3.5 Xbox (One / Series X|S)
1. Press the Xbox button to open the guide.
2. Go to Microsoft Store.
3. Search "Path of Exile".
4. Select the game and choose Install (free).
5. The game downloads and installs. Launch from My games & apps.
> Performance: Xbox Series X|S and Xbox One X run at 60fps. Original Xbox One runs at 30fps.
---
4. Account Requirements
You must create a free Path of Exile account to play.
> Important: Linked accounts allow you to access your PoE profile, stash, and purchases across all PCs but NOT between console and PC.
---
5. First Launch Setup
After installation, launch the game. For PC clients, a patching screen appears. Wait for it to check files. Then:
1. Login Screen: Enter your PoE account credentials (or link Steam/Epic).
2. Select Gateway: Choose a server region closest to you (e.g., Washington DC, London, Sydney).
3. Graphics Settings: The game auto-detects settings. For best performance on low-end PCs:
- Preset: Low or check Adaptive Resolution.
- Disable Dynamic Resolution if unstable.
- Turn Shadows and Global Illumination off.
4. Sound and UI: Adjust volume and key bindings as needed.
5. Create or Select Character: You must create at least one character to play.
---
6. Common Installation Errors & Fixes
| Error | Cause | Solution |
|---|---|---|
| Download stuck at 0% | Firewall/antivirus blocking | Add PoE installer and client to firewall whitelist; temporarily disable antivirus. |
| "Unable to download patch files" | Corrupted installer or insufficient permissions | Run installer as Administrator; clear temp files (`%temp%`); re-download installer. |
| Missing MSVCR110.dll / VCRUNTIME140.dll | Missing Visual C++ Redistributables | Install [Visual C++ Redistributable packages](https://aka.ms/vs/17/release/vc_redist.x64.exe). |
| DirectX Error (e.g., DX11 not supported) | Outdated GPU drivers or unsupported GPU | Update GPU drivers; if GPU is too old (e.g., Intel HD 4000), game won't run. |
| Black screen on launch | Graphics conflict | Try `-dx9` or `-dx11` launch option in Steam/Epic/Standalone properties or create shortcut with `--dx9` flag. |
| Low FPS / Stuttering | CPU bottleneck or insufficient RAM | Lower graphics settings; close background apps; consider upgrading hardware. |
| Installation hangs on "Packaging" | Slow disk or antivirus scanning | Disable real-time scanning during installation; install on SSD. |
| PSN/Xbox download fails | Console storage full or network issue | Free up space; restart console; check internet connection. |
---
7. Post-Installation Verification
After successful installation, verify the game works correctly:
1. File Integrity Check (PC):
- Standalone: Run `PathOfExile.exe` with `--verify` flag (create a shortcut with `--verify` at end of target).
- Steam: Right-click the game > Properties > Local Files > Verify integrity of game files.
- Epic: In library, click three dots on PoE > Verify.
2. Launch Game: You should see the login screen. If you see only a black window, try running in windowed mode (`-windowed` launch flag).
3. Check Version: After login, the main menu shows the current patch version (e.g., 3.23.0). Compare with [official forums](https://www.pathofexile.com/forum) to ensure you're up-to-date.
4. Performance Test: Create a level 1 character and run around the first area (The Twilight Strand). Expected FPS on recommended hardware: 60+ fps at 1080p high.
---
8. Additional Tips
- SSD is mandatory for comfortable play; HDDs cause long load times and texture popping.
- Disable Discord overlay or other overlays that might cause crashes.
- For laptop users: Ensure the game runs on your dedicated GPU (not integrated graphics). Set high performance in GPU control panel.
- Cross-platform purchases are NOT shared between PC and consoles. Microtransactions are platform-specific.
If you follow these instructions, you should be able to download and install Path of Exile without issues. Enjoy the grind in Wraeclast!
Game Introduction
Welcome to Path of Exile
Path of Exile (PoE) is a dark fantasy, free-to-play Action Role-Playing Game (ARPG) developed and published by Grinding Gear Games (GGG). It was first released on October 23, 2013 for PC, followed by an Xbox One release on August 24, 2017, and a PlayStation 4 release on March 26, 2019. The game is available on PC (Windows), macOS (via Steam/standalone), Xbox One, Xbox Series X|S, PlayStation 4, and PlayStation 5. It is fully cross-platform between PC and Mac, but console versions are separate ecosystems.
Story & Setting
Set in the grim, corrupted world of Wraeclast – a former imperial prison continent now overrun by nightmarish monsters and ancient horrors – players take on the role of an exile who has been banished for crimes unknown. The story unfolds through cryptic lore, item flavor texts, and quests, revealing a history of a fallen empire, forbidden magic, and the awakening of the Sleeping Gods. The central antagonist is Kitava, the Beast of the Apocalypse, whose awakening threatens to consume all life. Players journey to stop Kitava and uncover the truth behind the world's corruption.
Main Characters
- The Exile: The player character, chosen from one of seven classes (Marauder, Duelist, Ranger, Shadow, Witch, Templar, Scion). Each class starts in a different area and has an associated Ascendancy (specialization) later.
- Kitava: The ultimate antagonist, a monstrous god of corruption.
- Innocence: A fallen god who once helped humanity but now opposes Kitava.
- Siosa: A scholar who provides lore and quests.
- Captain Fairgraves: A ghost pirate who offers side quests.
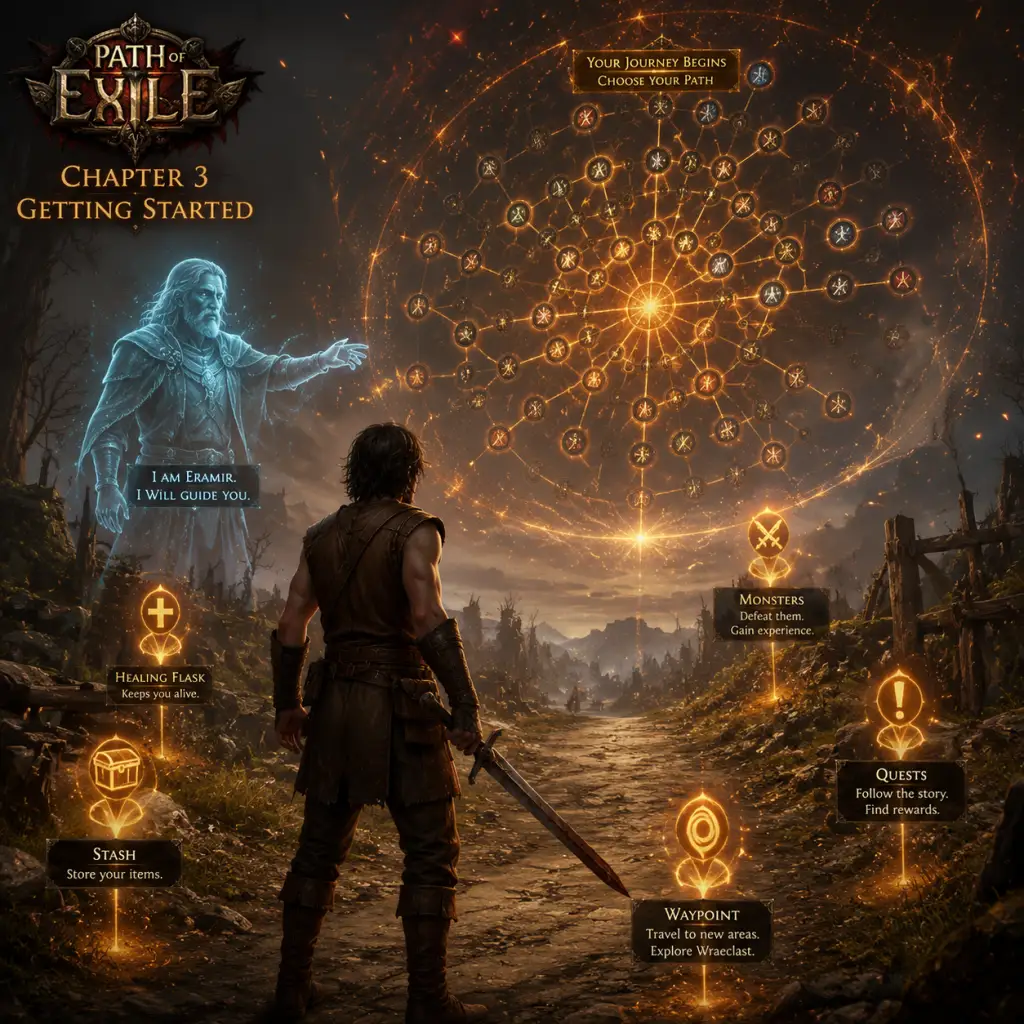
- Eramir: A ranger who guides the player early on.
- Hardcore ARPG enthusiasts who enjoy deep theorycrafting and complex builds.
- Diablo franchise veterans seeking a free, challenging alternative.
- Players who love grinding for loot, progression, and crafting.
- Those who enjoy seasonal content with fresh economies and balance changes.
- Standard: Permanent league with all previous content.
- Hardcore: Single death = character moves to Standard.
- Solo Self-Found (SSF): No trading, no party play – pure self-sufficiency.
- Private Leagues: Custom rulesets hosted by players.
- Race Events: Temporary events with competitive objectives.
- The Fall of Oriath (2017): Added Act 5-10, new acts, and the Scion class rework.
- War for the Atlas (2017-2018): Introduced the Atlas of Worlds endgame system.
- Conquerors of the Atlas (2019): Revamped the Atlas with new bosses.
- Echoes of the Atlas (2021): Added Maven boss and passives tree.
- Siege of the Atlas (2022): Overhauled Atlas passive tree and added Eldritch Horrors.
- The Forbidden Sanctum (2022): Roguelike dungeon expansion.
- Crucible (2023): Weapon skill tree.
- Trial of the Ancestors (2023): Autobattler mode.
- Affliction (2023): Wildwood expansion.
Core Appeal & Unique Features
Path of Exile is renowned for its unparalleled skill customization through a massive, 1500+ node Passive Skill Tree and the ability to link support gems with active skill gems in equipment sockets, creating millions of possible skill combinations. The game emphasizes trade through an economy based on currency items (Orbs) that also serve as crafting materials. A rogue-like endgame includes the Atlas of Worlds – a mapping system where players explore randomized endgame maps, unlock bonuses, and fight powerful bosses. The game has no pay-to-win elements; all microtransactions are cosmetic or quality-of-life (stash tabs).
Target Audience
Game Modes
Online/Offline Support
Path of Exile is always-online – it requires an internet connection even for solo play. There is no offline mode. It supports co-op parties (up to 6 players) and player-versus-player (PvP) arenas. Trading and guild systems are fully integrated.
Expansions & Leagues
The game releases a major expansion every 3-4 months called a "League" – a new challenge league with exclusive mechanics, items, and story (e.g., Legion, Expedition, Harvest, Ultimatum). These are large free updates. Major expansions have included:
Additionally, Path of Exile 2 is a separate, upcoming sequel that will share the endgame but feature a new campaign, skill gems, and classes. It's planned for early access in 2024/2025.
Why Play Path of Exile?
Path of Exile stands out for its combination of deep complexity, fair monetization, and relentless content updates. It is the gold standard for free-to-play ARPGs, offering a rewarding grind, an immense variety of builds, and a passionate community. Whether you crave theorycrafting, speed-running maps, farming unique items, or tackling the hardest bosses, PoE delivers a challenging and infinitely replayable experience.
Getting Started
Path of Exile: Getting Started Guide for New Players
Welcome to Wraeclast! This guide will walk you through your first hour, explain character creation, controls, the UI, and help you avoid the most common beginner pitfalls. If you haven't installed the game yet, check the [Download & Installation Guide](#) and [Game Introduction](#) for context.
1. Character Creation: Picking Your First Class
PoE has seven base classes, each starting in a different area of the massive passive skill tree. For beginners, the easiest choices are:
- Marauder (strength) – tanky, good for melee builds.
- Duelist (strength/dex) – balanced melee/ranged.
- Ranger (dexterity) – fast, ranged attacks.
- Witch (intelligence) – spell caster, minions.
- Shadow (dex/int) – traps, critical strikes.
- Templar (str/int) – elemental spells/melee.
- Scion (unlocked later) – flexible but not for first character.
- Step 1 – Move and Attack: Use WASD (PC) or left stick (controller) to move. Left-click on zombies to attack. Collect the Scroll of Wisdom from the first chest.
- Step 2 – Find the Skill Gem: Near the end of the strand, a dead exile lies beside a chest. Open it to get a Skill Gem (e.g., Split Arrow for Ranger, Fireball for Witch). Right-click the gem in inventory to learn it, then drag it to an empty socket on your gear.
- Step 3 – Talk to Nessa: At the end of the strand, click on Nessa (a blue-haired woman). She gives you the Tattered Cloak and a Portal Scroll. Use the portal scroll (right-click) to create a portal to town.
- Step 4 – Enter Lioneye's Watch: Step through the portal. You're now in the first hub town. Talk to Tarkleigh (the guard captain) to get the quest "The Dweller of the Deep" (optional). Then talk to Nessa again to get a Support Gem – link it to your skill gem for extra power.
- Step 5 – Your First Fight: Exit town via the waypoint to The Coast. Kill zombies and rhoas. Look for a cavern entrance – inside you'll find Hailrake (a boss). Kill it and loot the Tidal Island quest item (shell). Return to town for a skill point reward.
What matters most: Your class only determines starting location on the passive tree and ascendancy (specialization) options. Any class can use any skill gem, so pick the fantasy you like. Recommended beginner classes: Marauder (for simple melee) or Witch (for easy minion builds).
#### Create a Character
1. Launch the game and log in.
2. Click "Create New Character."
3. Choose a name (must be unique).
4. Select your class and league. Always start in the current challenge league (e.g., Affliction, Necropolis) – it has more content and a fresh economy.
5. Click "Create."
2. First Hour Walkthrough: From Beach to Town
Your journey begins on the Twilight Strand – a beach with a few zombies and a chest. Here's your exact sequence:
3. Controls on All Platforms
#### PC (Mouse + Keyboard)
| Action | Default Key |
|---|---|
| Move / Attack (basic) | Left click |
| Move Only | Hold Shift + Left click |
| Interact | Left click on NPC/object |
| Skill slots 1-8 | Q,W,E,R,T,A,S,D or 1-8 |
| Potion slots 1-5 | 1-5 (life, mana, utility) |
| Open Inventory | I |
| Passive Skill Tree | P |
| Map Overlay | Tab (hold for full) |
| Quest Log | U |
| Town Portal | Right-click Portal Scroll in inventory |
| Loot Filter | Toggle with Ctrl+Shift+L (or via menu) |
| Action | Xbox | PlayStation |
|---|---|---|
| Move | Left stick | Left stick |
| Interact / Attack | A | Cross |
| Skill bar | RB + Face buttons | R1 + Face buttons |
| Potion (life) | LB | L1 |
| Open Inventory | Select (back) | Touch pad (or Options) |
| Open Passive Tree | View button | Touch pad (swipe up) |
| Map Overlay | Right stick click | R3 |
| Quick Portal | Hold LB + RB | Hold L1 + R1 |
4. UI Overview
- Top-left: Health globe (red) and Mana globe (blue). Below them: experience bar and flask charges.
- Bottom-center: Skill bar with active skills. Use number keys or controller buttons to cast.
- Bottom-right: Flask slots. Press 1-5 (or LB/L1) to drink.
- Mini-map: Top-right corner; hold Tab for full map overlay.
- Quest Tracker: Default top-right; shows active quests and objectives.
- Inventory: Press I (or Select/Touch pad). It has grid slots for gear, flasks, and currency items.
- Passive Tree: Press P. It's a huge web of nodes – allocate points as you level up (1 point per level up to 100).
- Follow the main quest line. Side quests are optional but give skill points – aim to complete them before moving to next act.
- Pick up every Scroll of Wisdom and Portal Scroll – you'll need hundreds.
- Pick up Orbs of Transmutation – use them on flasks and white gear with good base types.
- Upgrade your flasks every 5-10 levels by buying from vendors (Nessa sells them).
- Use Armour, Energy Shield, or Evasion based on your class – but prioritize life on gear (without life, you’ll die instantly starting Act 3).
- Don't trade with other players until you understand currency values (e.g., Chaos Orbs are mid-tier, Exalted Orbs are high-end). You'll likely get scammed.
- Don't try to craft gear with Exalted Orbs or Chaos Orbs early – save them for endgame gear.
- Don't ignore your resistances (fire, cold, lightning). After Act 5, the game expects 75%+ resistance or you'll die very fast.
- Don't pick up everything – use a loot filter (Neversink's filter is standard, included in game options).
- Don't stay in one zone too long – you earn experience faster by progressing story.
- Don't use skill gems that do zero damage – each gem has a damage type; make sure you support it accordingly.
5. Essential Early Objectives
1. Learn your skill gem: Equip it, then immediately put a support gem in a linked socket to empower it. (e.g., Fireball + Added Lightning Damage).
2. Complete the first three quests: "The Dweller of the Deep" (tidal island, reward: skill point), "Mercy Mission" (rescue Tarkleigh in The Coast), and "Breaking Some Eggs" (kill rhoa nests in The Mud Flats).
3. Reach Level 4-6 before the first major boss (Hillock in The Twilight Strand? Actually Hillock is in the strand. Defeat him for a skill point and first support gem).
4. Get a movement skill: By Act 2 you should use Dash, Flame Dash (Witch/Shadow), or Leap Slam (Marauder). They vastly improve survival.
5. Capress your flask: When you reach town, buy/find a second life flask. Use an Orb of Transmutation on it to get mods like "Immunity to Bleeding."
6. Open all white chests and strongboxes – they drop map fragments and currency.
6. What to Do First and What to Avoid
#### Do First:
#### Avoid:
7. Early Resource Priorities
| Resource | Priority | Use |
|---|---|---|
| Scroll of Wisdom | High | Identify items (you need them to see if gear is good) |
| Portal Scroll | Medium | Return to town quickly – keep 5+ in inventory |
| Orb of Transmutation | High | Upgrade your flasks (life, mana, utility) |
| Orb of Alteration | Low | Save for later; don't waste on low-level gear |
| Orb of Augmentation | Low | Same as above |
| Chaos Orb | Keep | Endgame currency; don't use or trade early |
| Regal Orb | Keep | Used to turn a magic item into rare – advanced |
| Gemcutter’s Prism | Keep | Quality up your main skill gem at endgame |
8. Common Beginner Mistakes
1. Ignoring flask management – You have 5 flasks, but you only use one for life. You should have a life flask, a mana flask (if needed), and utility flasks (quicksilver, granite, etc.).
2. Not linking sockets – Support gems only work if the sockets are linked (connected by a line). Always check links when equipping gear.
3. Over-leveling without planning – The passive tree is huge. Either follow a beginner build guide (look up “Enki’s Arc Witch” or “Zizaran’s Max Block Gladiator”) or focus on life and damage for your skill type.
4. Trying to do all side content immediately – Side quests give skill points, but you can come back later. Focus on main story for faster progression.
5. Not using movement skills – PoE is about speed. Get a movement skill as soon as possible (level 4-10).
6. Logging out instead of using death penalties – When you die, you lose 5% of your current experience (if you are level 1-9, no penalty). Don’t worry, just keep going.
7. Not using a loot filter – By default, the game shows every item. Download Neversink’s filter via the in-game menu (Options → UI → Loot Filter) – it hides trash and highlights valuable items.
9. Day-One Checklist
- [x] Installed the game and chosen a league (challenge league).
- [x] Created your first character (recommended: Marauder or Witch).
- [x] Completed the Twilight Strand and entered Lioneye's Watch.
- [x] Used your first skill gem and linked a support gem.
- [x] Defeated the first major boss (The Dweller of the Deep? Actually the first boss is Hailrake on the Tidal Island, then The Siren in The Cavern of Wrath at end of Act 1).
- [x] Reached at least level 8-10 and finished Act 1 (The Siren).
- [x] Activated a loot filter (in Options).
- [x] Bought or crafted a second life flask from Nessa.
- [x] Joined a beginner-friendly guild or /global chat channel (type /global 820 for tips).
- [x] Learned how to use a portal scroll (bind it to a key for quick use).
- [x] Understood that dying is normal – don’t give up!
Remember: PoE is a marathon, not a sprint. Your first character will likely hit a wall in Act 4 or 5 because of resistances or build inefficiencies. That's okay – your second character will be much stronger. Until then, follow these steps and enjoy the dark world of Wraeclast!
Core Gameplay
Core Gameplay
Overview of the Core Gameplay Loop
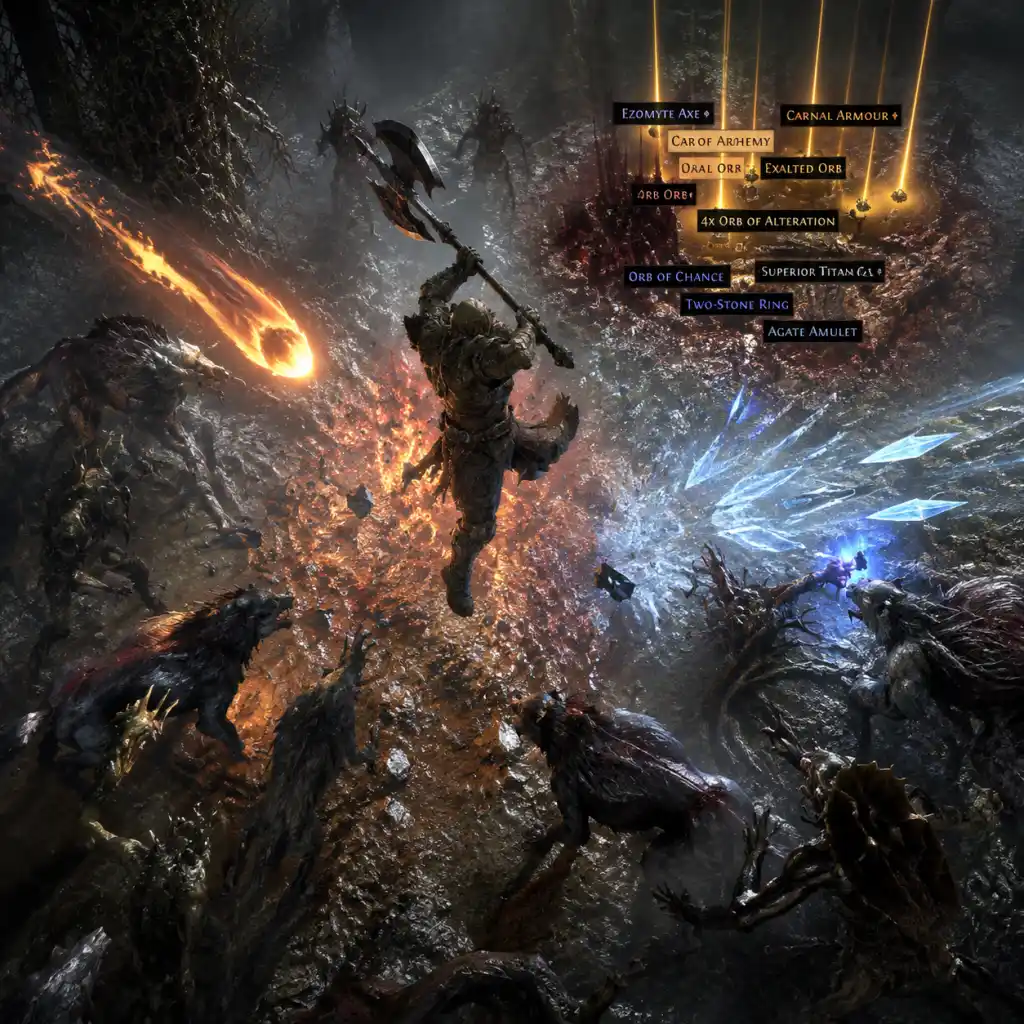
Path of Exile (PoE) is built around a relentless cycle: explore dangerous zones → slay hordes of monsters → collect loot and currency → upgrade your character's gear, skills, and passive tree → take on even tougher content. This loop repeats across the story acts and into the infinite endgame. Your ultimate goal is to create a powerful build capable of clearing screens of monsters, surviving deadly boss mechanics, and accumulating wealth to craft or trade for better equipment.
Combat & Interaction Systems
- Skills & Support Gems: All active skills come from skill gems socketed into gear. Support gems modify those skills (e.g., adding damage, area of effect, or multiple projectiles). Linking support gems to a skill gem in the same piece of gear (matching socket colors) empowers that skill. Example: "Fireball" linked with "Added Lightning Damage" and "Greater Multiple Projectiles" creates a volley of lightning-enhanced fireballs.
- Flasks (Potions): You have a belt of up to five flasks that restore life, mana, or provide temporary buffs (e.g., immunity, movement speed). On PC, flasks are bound to 1–5 keys; on console, they are assigned to R1/L1 + face buttons. Pressing a flask quickly can save your life – always keep them refilled (pressing 'R' on PC or down on d-pad on console refills from the ground).
- Movement & Positioning: Most builds use a movement skill like "Dash", "Flame Dash", or "Leap Slam" for mobility. Kiting, dodging telegraphed attacks, and using terrain are essential. Standing still is death.
- Targeting: On PC, you aim with the mouse cursor. On console, the game auto-targets the nearest enemy, but you can switch targets with the right stick. Skills like "Frost Blades" or "Arc" auto-target multiple enemies.
- Crafting & Interaction: You can interact with objects (chests, levers, altars) by pressing 'E' on PC or 'X' on console. The crafting bench in your hideout allows adding mods to gear using currency.
- Experience & Levels: Killing monsters grants experience. Leveling up gives passive skill points and improves life/mana.
- The Passive Skill Tree: A massive web of nodes. You earn one skill point per level and additional points from quests. Plan a path through the tree to reach keystones and cluster jewels that define your build.
- Ascendancy Classes: After completing the Lord's Labyrinth (first available in Act 3), you choose an Ascendancy subclass. Each Ascendancy offers specialized passives (e.g., Necromancer for minions, Slayer for two-handed melee). You must run the labyrinth multiple times (Normal, Cruel, Merciless, Endgame) to unlock all Ascendancy points.
- Quest Rewards: Main quests grant skill gems, support gems, passive points, and sometimes permanent stat bonuses. Side quests often give skill points or additional rewards like respec points.
- Main Story Quests: Spanning ten acts. They introduce zones, bosses, and mechanics. Example: The "Enemy at the Gate" quest (Act 1) takes you from Twilight Strand to The Coast, fighting Hailrake and eventually rescuing Tarkleigh.
- Side Quests: Often optional but highly recommended. For instance, "The Caged Brute" quest rewards an additional passive point. Some side quests are needed to unlock important features like the map device.
- League & Endgame Quests: After the story, the Atlas quest chain guides you through mapping and introduces endgame bosses like the Elder and the Shaper.
- Skill Gems: Level up your main skill gem and its supports. Higher gem levels = more damage. Support gems can be leveled for improved bonuses.
- Passive Tree Specialization: Focus on nodes that enhance your chosen skill (e.g., increased fire damage, projectile speed, life). Do not spread points too thin.
- Gear: Prioritize life, resistances (especially elemental resistances), and damage mods. As you progress, upgrade to 4-link and eventually 6-link gear to maximize damage.
- Ascendancy Progression: Run the Labyrinth at least twice to get your fourth ascendancy point (usually around level 35–40 for Normal lab, then 55–65 for Cruel lab). Ascendancy passives dramatically amplify your build's power.
- Bandits Quest (Act 2): You can choose to help one of three bandit groups or kill all. Each choice grants a passive benefit (e.g., +40 life, +8% attack speed, or one passive point). Check your build guide for the optimal choice.
- Atlas Progression: Complete maps to earn Atlas bonus completion, which increases the chance of higher tier maps dropping.
- Sirus, Awakener of Worlds: The main endgame boss after opening 32 watchstones.
- Conquerors of the Atlas: Four mini-bosses (Baran, Drox, Al-Hezmin, Veritania) that drop watchstones used to upgrade maps.
- Other Endgame Activities: Delve (infinite mine), Heist (thieving contracts), Incursion (time-travel temple), Blight (tower defense), Betrayal (spy network), and more. Each has its own progression and rewards.
- Bosses: Shaper, Elder, Uber Elder, Maven, The Feared, and others require specific map fragments and high-tier gear.
- Goal: Complete the first three acts, reach level 38–40, and finish the Normal Labyrinth.
- Combat: You have limited links (often 1- to 4-socket items). Use a main skill that clears efficiently (e.g., "Freezing Pulse" for spellcasters, "Sunder" for melee). Rely on life flasks heavily; abuse flasks to sustain mana.
- Gear: Focus on sockets and links over stats. Try to cap fire, cold, and lightning resistances at 75% (this becomes critical by mid game). Use salvage items and vendor recipes for starting currency.
- Exploration: Clear each zone for experience and loot. Use Portal Scrolls to town to sell items and refill flasks. Complete every side quest for skill points.
- Economy: Collect Wisdom Scrolls and Portal Scrolls. Trade with vendors using transmutation and alteration orbs for early upgrades. Do not spend Chaos Orbs yet; save them.
- Build Advice: Follow a league starter build guide. Do not over-specialize; get life nodes and a few damage nodes. Use the passive tree calculator online to plan.
- Goal: Complete acts 4 through 7, reach the end of Cruel difficulty, acquire your Ascendancy points through the Cruel Labyrinth (around level 55–65).
- Combat: By now you should have a 4-link main skill. Support gems (e.g., Added Cold, Elemental Focus) massively boost damage. Monsters hit harder; you must cap elemental resistances (75% for all three). Use a movement skill to avoid damage.
- Gear: Upgrade weapons for higher base damage and look for gear with +life and resistances. A 4-link chest or two-handed weapon is a priority. Start using Orbs of Alchemy on jewelry or weapons.
- Exploration: Zones become larger and more dangerous. Use waypoints to skip already-cleared zones. Side quests like "The Sceptre of God" provide skill points.
- Economy: Begin accumulating Chaos Orbs from the Chaos Recipe. Sell rare sets to vendors (item level 60–74) to generate early wealth. Learn to price items on the trade website.
- Build Advice: Your build should now specialize. Allocate key keystones if recommended (e.g., "Resolute Technique" for melee if accuracy is low). Start using cluster jewels if your build requires them.
- Goal: Finish the story, reach level 70, complete the Merciless Labyrinth (levels 65–75) to unlock your fourth and sixth Ascendancy points.
- Combat: You'll encounter map-like difficulty. Maximize your resistances to 75% (chaos resistance is nice but not mandatory). Use a 5-link if possible (6-link is endgame luxury). The final boss of Act 10, Kitava, corrupts your resistance by 30% – you must overcap to still be at 75% after the fight.
- Gear: Use crafting bench in your hideout to add missing resistances or life. Upgrade to gear with item level 70+ for better mods. Use Essences to guarantee certain stats.
- Exploration: The Desecrated Chambers and final zones test your mobility. Be prepared to dodge many area-of-effect attacks. Trigger boss phases carefully.
- Economy: Convert currency into Chaos Orbs and Exalted Orbs. Use the trade website to buy essential uniques (e.g., Tabula Rasa for 6-link early, or build-defining items). Vendor recipes like Jeweller's Touch can be valuable.
- Build Advice: Your passive tree should be mostly complete by level 70. You may need to respec some points using regret orbs from quests or trade. Prepare a character that can handle white and yellow maps (tiers 1–10).
- Goal: Run maps to level 90+, complete Atlas progression (earn watchstones, fight Conquerors and Sirus), tackle Uber bosses, and optimize gear for high-tier maps (tiers 11–16) and Delirium/Beyond.
- Combat: Full 6-link with optimized support gems. Flasks must be used proactively (e.g., Silver Flask for onslaught, Quicksilver for speed). Use guard skills like "Steelskin" or "Molten Shell" for survivability. For bossing, study mechanics (e.g., Shaper's bullet hell, Elder's degen pools).
- Gear: Focus on high life rolls, 30%+ movement speed on boots, chaos resistance, and damage suffixes. Craft influenced items (Shaper/Elder mods). Use Awakener's Orbs to combine mods. For extreme power, acquire Headhunter or Mageblood unique belts.
- Exploration: Map layouts matter – learn which ones are efficient for clear speed. Use Sextants, Scarabs, and Atlas passives to juice maps for higher loot and difficulty. Use the Atlas passive tree to specialize in mechanics you enjoy (e.g., Essence, Delve, Heist).
- Economy: Generate wealth through mapping (sell excess maps, currency, valuable uniques). Bulk trade common currency for Exalted Orbs (the main high-value currency). Craft items for profit or flip items on the trade market. Learn boss drop strategies (e.g., Sirus drops Awakener Orbs, Maven drops Maven Orbs).
- Build Advice: At high endgame, you must invest heavily into damage and survivability. Consider cluster jewels with powerful notables (e.g., “Fuel the Fight” for flasks). Use PoB (Path of Building) to min-max. Adapt your build to the content you target: fast mapping builds differ from boss killers.
Progression Systems
Exploration & Zones
Each story act contains several interconnected zones. The game uses a semi-randomized layout – you'll learn to spot landmarks (e.g., totems, dead bodies) that hint at the direction of the exit or quest objective. Waypoints are scattered throughout; activating them allows fast travel between them. It is wise to activate every waypoint you find to save backtracking later. Secret areas (e.g., Vaal side areas) can be accessed with special items like Vaal Orbs or by finding hidden entrances.
Quests & Missions
Economy & Currency
PoE's economy is unique: no gold. Instead, currency items (orbs, scrolls, essences) serve dual purposes as both crafting materials and mediums of exchange. The most common trade currency is the Chaos Orb, while the Exalted Orb is a high-value unit. Players trade on the official trade website (for PC) or in-game trade channels (console). Important currency includes: Portal Scrolls, Wisdom Scrolls (identify items), Orb of Alchemy (upgrade magic to rare), Orb of Fusing (re-link sockets), and Glassblower’s Bauble (quality flasks).
Vendor Recipes: Selling certain item combinations to NPCs yields currency or useful items. Example: selling a full set of rare items (helmet, body armour, gloves, boots, belt, two rings, amulet, two weapons) all of item level 60–74 gives Chaos Orbs (the Chaos Recipe).
Character & Build Growth
Building a character revolves around:
Endgame Structure
After Act 10, you enter the Mapping Endgame. The Atlas of Worlds is a map device that allows you to open high-level zones called maps. Maps have tiers (1–16) and modifiers (magic, rare, corrupted). Key endgame systems include:
Progression Tiers (Detailed)
Early Game (Acts 1–3, Levels 1–40)
Mid Game (Acts 4–7, Levels 40–60)
Late Game (Acts 8–10, Levels 60–70)
Endgame (Maps, Levels 70+)
Conclusion
Mastering Path of Exile's core gameplay is an ongoing journey. The loop of killing monsters, gathering loot, and upgrading your character never gets old due to the immense depth of systems. Start with a beginner-friendly build, learn the basics of the passive tree and support gems, then gradually delve into crafting, trading, and Atlas mechanics. Each tier brings new challenges and rewards, culminating in the satisfaction of defeating the game's hardest bosses. Welcome to Wraeclast – embrace the darkness and the grind.
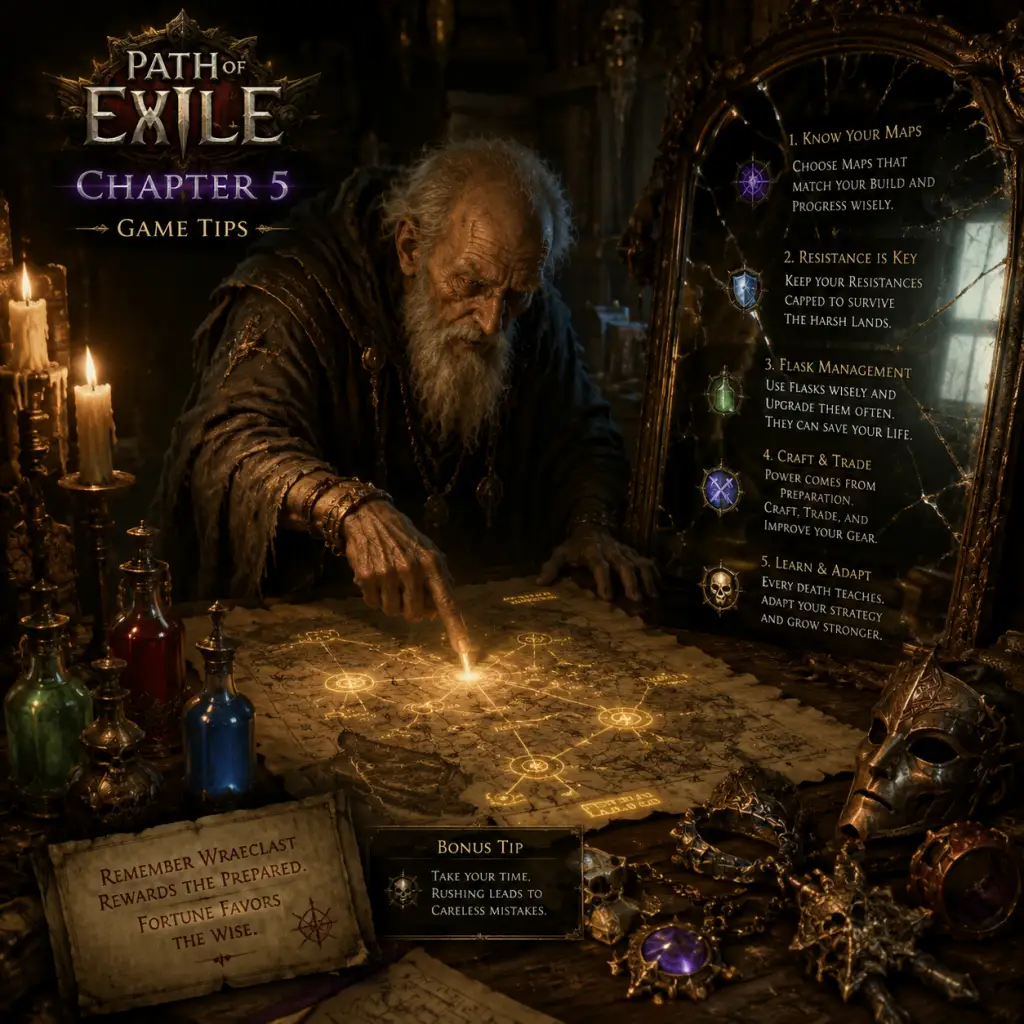
Game Tips
Path of Exile: Comprehensive Game Tips Guide
This guide covers a massive collection of practical tips for Path of Exile, organized by category. Whether you're a new exile or a veteran, you'll find actionable advice to improve your gameplay, efficiency, and understanding of the game's depth.
---
1. Beginner Tips: Surviving Your First Steps
- Don't worry about your first character – it will likely fail. The game is complex; your first build will probably hit a wall in Act 5 or 10. Use it to learn mechanics, not to reach endgame. Expect to make multiple characters.
- Focus on life and elemental resistances on gear. The simplest mistake is ignoring defensive stats. Aim for +life on every armour piece and cap your fire, cold, and lightning resistances at 75% (the default cap). This is crucial from Act 5 onward.
- Use the Currency Tab (or stash space wisely). Currency items like Chaos Orbs, Exalted Orbs, and Divine Orbs are valuable. Keep them in a dedicated tab or a single stash quad. Don't waste them on low-level gear.
- Link your skills with support gems. A skill alone is weak. Insert support gems into the same sockets that are linked (connected by lines) to multiply its power. For example, Fireball + Added Fire Damage + Faster Projectiles is much stronger than Fireball alone.
- Pick up all useful items early, but be selective later. In Acts 1–3, pick up rare (yellow) items and identify them for potential upgrades. From Act 5 onward, only pick up currency, maps, and high-base-type rares (e.g., ilvl 84+).
- Learn flask management. Always have a life flask, a mana flask (if you use mana), and utility flasks (e.g., Quicksilver for speed, Granite for armour, Bismuth for resistances). Use flasks proactively, not just when you're in trouble. Bind them to comfortable keys.
- Use the crafting bench (from Hideout) sparingly. The crafting bench can add life, resistances, or other mods to items, but it costs currency. Use it only when you need a guaranteed stat to fix a weakness.
- Don't be afraid to look up builds. Path of Exile is overwhelming. Follow a beginner-friendly build guide for your class (e.g., a \"Enki's Arc Witch\" or \"Zizaran's Toxic Rain Pathfinder\"). This will save you countless hours of frustration.
- Keep moving. Standing still is death. Always be repositioning to avoid ground effects (fire, chaos clouds, etc.) and telegraphed attacks. Use movement skills (Flame Dash, Dash, Shield Charge) constantly.
- Learn monster attack tells. Every dangerous monster or boss has a wind-up animation before a big hit. For example, the Brine King's slam, or the Minotaur's burrow. Practice dodging by watching the animation, not the monster's health.
- Use flasks for burst damage and survivability. Quicksilver for repositioning, Sulphur for increased damage, Taste of Hate or Jade for evasion/armour. Pop them before engaging a tough pack or boss.
- Stun immunity is critical. Later content (maps, bosses) constantly stuns you. Use the \"Eye of the Chayula\" unique amulet, the \"Unwavering Stance\" keystone, or craft \"Cannot be Stunned\" on gear. Also, stun avoidance from tree or jewels helps.
- Curses are powerful. Apply Vulnerability (physical), Elemental Weakness, Conductivity (lightning), etc. before attacking. Use a curse on hit ring or the Blasphemy support to auto-curse nearby enemies.
- Understand damage types – physical vs elemental. Most damage is either attack (based on weapon) or spell (based on gem). Stack modifiers for your main damage type. For example, if you use Fireball, stack \"added fire damage\", \"increased spell damage\", \"fire penetration\".
- Avoid reflect maps. For melee, avoid \"Monsters Reflect Physical Damage\". For casters, avoid \"Monsters Reflect Elemental Damage\". Ignoring this will kill you instantly. Use the map's modifiers on the Atlas to check before entering.
- Use the overlay map (Tab) to scout. Before entering a crowded room, toggle the overlay map to see monster clusters and avoid walking into a deadly trap. Also use it to find the exit quickly.
- Follow the main quest line in Acts. The game guides you through zones. Don't stray too far unless you're farming a specific area. Main quests give passive skill points and ascendancy points, so prioritize them.
- Pick up waypoints. Always activate waypoints (large glowing stones) when you see them. This allows fast travel and makes backtracking trivial.
- Use the \"M\" map (quest map) to see zone layouts. Some zones are linear, some are open with multiple exits. For open areas, look for the minimap's edge – often the exit is opposite the way you entered.
- Learn to identify zone generation patterns. Act 1's The Crossroads: exit is generally north-east. Act 2's The Chamber of Sins: rooms are connected by spiral staircases. Act 6's The Brine King: follow the coast. Experience improves your navigation.
- In maps (endgame), use the Atlas overlay (G) to plan your route. For bosses, circle the map counter-clockwise from spawn for best layout. Use the search function (Ctrl+F) to find specific map nodes.
- Don't be afraid to use a movement skill to skip unimportant areas. In maps, you don't need to kill every monster. Only kill magic/rare packs for loot, and then move to the boss.
- Loot filters are mandatory. Install a loot filter like Neversink's filter (from FilterBlade.xyz). It highlights valuable items, hides junk, and tells you when to pick up currency/unique items. This speeds up exploration immensely.
- Never use Chaos Orbs on low-level items (below ilvl 75). Chaos Orbs are used for consistent crafting later. Instead, sell them to vendors or trade with players for gear.
- Know currency conversion rates. 1 Exalted Orb = ~200 Chaos Orbs (varies by league). 1 Divine Orb = ~200-250 Chaos. Use poe.ninja or pathofexile.com/trade to check live prices.
- Sell items to players for profit. Use the official trade site (pathofexile.com/trade) to list your gear. Price items using the site's price checker tool (Awakened PoE Trade overlay).
- Collect valuable bases. Items with high item level (ilvl 86+) and good base types (Vaal Regalia, Hubris Circlet, Opal Ring, etc.) are worth picking up to sell or craft.
- Harvest crafting is powerful. In endgame, use the Sacred Grove (Harvest mechanic) to add mods, re-roll numbers, or augment items for free. Learn to recognize which harvest crafts are valuable (e.g., \"Augment a Physical modifier\", \"Reforge a Life modifier with luck\").
- Run heist for early currency. Heist (from Act 2) gives plenty of coins, currency, and rare items. Focus on blueprints with specific wings (like 'Deception', 'Brute Force').
- Do the Chaos recipe at low levels. For gear with ilvl 60-74, identify all rares and vendor a full set (helm, chest, gloves, boots, 2 rings, amulet, belt, 2 weapons) to get a Chaos Orb. This is good early game.
- Store valuable items in premium stash tabs. For selling, use a public premium tab. Right-click the tab, set it to "Public", and price items within. This auto-publishes to trade.
- Plan your build before you start. Use Path of Building (PoB) Community fork to plan passive tree, gear, skills, and damage. Import a guide's PoB or build one yourself. PoB shows your real damage, defense, and effective hit pool.
- Life is king. For most builds, aim for at least 150% increased maximum life from the tree by end of acts. For endgame, 200%+ is typical.
- Resistances matter more than damage early. Cap fire, cold, lightning at 75% as soon as possible. Use the passive tree's +12% all resistance nodes (e.g., near Marauder start) if needed.
- Choose a main skill and support it with 4 or 6 linked sockets. A 6-link is a huge damage multiplier. Use corrupted items (from Vaal Orbs) or farm for a 6-link unique (like a Loreweave, Belly of the Beast).
- Ascendancies define your build. Each class has 3 ascendancies. Pick one that synergizes with your skill. For example, for minion builds, Necromancer (Witch) is best. For melee, Juggernaut (Marauder) or Champion (Duelist).
- Use jewels to fix weaknesses. Jewels can add life, damage, or unique effects. The passive tree has sockets where you can slot them. Look for "Life + % increased damage for your skill type" jewels.
- Keystones are powerful but dangerous. Examples: \"Chaos Inoculation\" (CI) makes you immune to chaos damage but sets life to 1 – you need energy shield. \"Resolute Technique\" makes attacks never miss but can't crit – good for beginner melee. Understand the trade-off.
- Don't skimp on mana sustain. Use mana flasks, the Clarity aura, the 'Energy Leech' support, or craft '−X total mana cost' on rings. Mana starvation kills you as much as low life.
- Learn early league economy. In the first week, fusings, alts, and chaos are most liquid. Exalted Orbs are rare until about day 3-4. Sell everything you don't need for chaos.
- Use time as a resource. The best way to make currency is to farm efficiently, not to overprice items and wait. Run maps fast (under 3 minutes per map) using a zoomy build. Speed = currency.
- Sell in bulk. Buyers pay a premium for large quantities. For example, sell 100 Chaos Orbs as a stack for 0.5 Exalted instead of one by one. Use poe.trade and bulk selling tools.
- Craft items for profit. Learn basic crafting: use essences on high-ilvl bases, then use harvest to add mods, or use fossil resonators (Delve) to create targeted items. Sell the results.
- Flip items using trade. Buy underpriced items (e.g., a unique ring that sells for 10c but is listed for 5c accidentally), then relist at market price. Requires knowledge and quick reactions.
- Use the official trade site's live search. Set up a search for an item you want, then click the bell icon to get notifications when new items appear. This helps you snag good deals.
- Don't spend currency on random gear. If you need an upgrade, trade for it. Crafting random gear is generally a waste unless you know what you're doing (e.g., metacrafting mods).
- Master the Atlas passive tree. Unlock all 4 watchstones and use passive points to farm specific content (e.g., Harvest, Delirium, Blight). Focus points on a single mechanic for maximum returns.
- Run high-tier maps (T14+) for best loot. But you need to sustain them. Use chisels (20% quality), Alch & Go (alchemy orb + scour to reroll), and buy map frags from Zana or trade. Also use the 'Horizon Orb' to change maps within a tier.
- Learn boss mechanics for endgame bosses (Sirus, Maven, Uber Elder, Shaper). Watch videos. Practice in softcore first. Mechanics like degen pools, memory game (Maven), and void zones are fatal if ignored.
- Optimize your gear progression. After acts, get your 6-link, then look for influenced items (Sirus, Warlord, Hunter, etc.) for better mods. Then work on cluster jewels for massive damage.
- Use the crafting bench metacrafts. 'Can have multiple crafted modifiers' is a must for advanced gear. Use 'Prefixes Cannot Be Changed' or 'Suffixes Cannot Be Changed' to lock mods while you re-roll other affixes with harvest or fossils.
- Run juiced maps with delirium orbs (like Skittering Delirium Orbs). Stack multiple orbs on a map for tons of loot, but increased difficulty. Use a build that can handle it.
- Understand item quantity/rarity vs speed. Magic find (IIQ/IIR) is strong for currency but hurts clear speed. Find a balance. Typically, you want at least 50 IIQ and 100 IIR on gear without sacrificing damage/defense.
- Learn to use the Path of Exile API and tools. Use 'Exile Diary' to track map runs, 'Poe Ninja' for pricing, 'Blight Helper' for optimized blight towers, and 'Delirium Calculator' for best orb combos.
- Join a guild. Guilds offer hideout sharing, free loot, and advice. Many have crafting benches and portals to high-level maps.
- Set up item filters early. Neversink's filter is standard. Customize it with FilterBlade to highlight items you care about (e.g., specific unique items, high-ilvl bases).
- Take breaks. Path of Exile is a marathon, not a sprint. Burnout is common. Stop if you're tired or frustrated.
- Use the currency exchange (Bulk Trade) for large trades. Saves time on whisper spam.
- Always carry a portal scroll. You never know when you need to leave a map quickly.
- Read patch notes. Each league changes mechanics, skills, and items. Stay updated to avoid surprises.
- Watch streams and guides. Players like Zizaran, Mathil, and Grimro produce excellent educational content.
---
2. Combat Tips: Mastering the Fight
---
3. Exploration Tips: Navigating Wraeclast Efficiently
---
4. Resources (Currency & Items) Tips
---
5. Builds & Passive Skill Tree Tips
---
6. Economy & Trading Tips
---
7. Advanced Optimizations (Endgame)
---
8. Miscellaneous Tips & Final Advice
---
Final Note: Path of Exile rewards knowledge and practice. Don't be discouraged by early failures. Use these tips as a foundation, and you'll progress from a lost exile to a farming machine. Good luck, and may the RNG be ever in your favor!
Game Settings
Game Settings Overview
Path of Exile (PoE) offers a wide range of settings that significantly impact performance, visuals, and gameplay feel. This guide covers every major settings category—graphics, audio, controls, accessibility, language, network, and gameplay—with recommendations for low, mid, and high-end hardware. Pay special attention to settings that are easy to misconfigure, as they can cause stuttering, crashes, or unfair gameplay disadvantages.
---
Graphics Settings
Display Mode
- Fullscreen: Exclusive fullscreen (preferred for maximum performance on older systems).
- Windowed Fullscreen: Borderless window (better for alt-tabbing, slightly more input lag).
- Windowed: Small window (useful for troubleshooting).
- Set to your monitor's native resolution for best clarity. Lower resolutions can boost FPS but will look blurry.
- DirectX 11: Most stable, widely compatible. Good for older GPUs (NVIDIA 900 series and earlier, AMD RX 500 series and earlier).
- DirectX 12: Better multi-threading, lower CPU overhead. Recommended for newer GPUs (NVIDIA 1000 series+, AMD RX 5000 series+). Can cause occasional driver crashes.
- Vulkan: Excellent for AMD GPUs and some NVIDIA cards. Often provides the smoothest frame times in busy areas (e.g., 5-ways, delirious maps).
- Enabled: Automatically lowers render resolution when FPS drops below target (default 30 or 60 FPS). Very effective for maintaining fluidity, but visuals become blurry.
- Disabled: Always runs at full resolution. Use only if you have a very powerful PC.
- Low, Medium, High, Ultra: Pre-set combinations of shadows, textures, lighting, and effects.
- Custom: Manual tweaking.
Resolution
Renderer (DirectX 11 / 12 / Vulkan)
Recommendation: Use Vulkan if you have an AMD GPU (RX 5000+) or a recent NVIDIA card (GTX 1000+). Start with DirectX 11 if you encounter instability.
Dynamic Resolution
Easy to misconfigure: Leaving dynamic resolution disabled on a weak PC causes constant stuttering. Enable it and set the target FPS to 60.
Graphics Quality Presets
Individual Graphics Settings
| Setting | Low-End | Mid-Range | High-End | Notes |
|---|---|---|---|---|
| Texture Quality | Low (512 MB VRAM) | Medium (1 GB) | High/Ultra (2+ GB) | Reduces blurriness, but uses more VRAM. Critical for maps like Mesa or Coves. |
| Shadow Quality | Off | Low or Medium | High | Shadows are heavy on CPU. Off gives big FPS gain. |
| Lighting Quality | Low | Medium | High | Affects ambient and skill effects. Low reduces visibility in dark areas (e.g., The Twilight Strand). |
| Global Illumination | Off | Off | On (Ultra) | Very expensive. Turn off for performance. |
| Anti-Aliasing | FXAA or Off | TAA or SMAA | TAA + MSAA (if FPS allows) | FXAA blurs; TAA is modern and smooth. MSAA costs a lot. |
| Anisotropic Filtering | 2x or 4x | 8x | 16x | Minimal performance impact, improves ground textures. |
| Bloom | Off | Off | On | Artistic effect, can cause eye strain. |
| Water/Terrain Detail | Low | Medium | High | Water reflections can hurt FPS in maps like Sulphur Vents. |
| Number of Lights | 1 | 3 | 6 | More lights = better ambiance, heavy impact during dense combat. |
Special Attention: Post Processing Effects
- Screen Shake: Turn off to avoid disorientation.
- Chromatic Aberration: Off – it adds blur that reduces clarity.
- Lens Flare: Off – hides important telegraphs (e.g., Shaper balls).
- Keep master at 100%. Adjust SFX, music, dialogue separately.
- Music can be lowered to 50% to hear loot drops and enemy sounds more clearly.
- Low: 64 channels – saves CPU. May cut off distant sounds.
- High: 128+ channels – full spatial audio. Recommended for hearing off-screen monsters (e.g., Porcupines).
- Disable both to reduce CPU load and avoid audio clutter.
- Keyboard & mouse is the standard for precise aiming and quick inventory management.
- Gamepad offers analog movement and auto-aim, but makes flask piano harder. Many players use controller for mapping but keyboard for trading/management.
- Move Only: Bind to a secondary key (e.g., W) to avoid click-moving into packs.
- Force Stop: Bind to a comfortable key (e.g., Space) to halt movement instantly.
- Flask Keys: Traditional is 1-5. Consider rebinding to Q,W,E,R,T for easier reach.
- Quick Skills: Bind main skills to left/right mouse buttons, secondary skills to Q, W, E.
- High DPI mice (1600+ DPI) allow fast turning but risk overshooting. Most top players use 800-1200 DPI with in-game sensitivity 30-50.
- Enable Raw Input to bypass OS acceleration.
- Colorblind Modes: Deuteranopia, Protanopia, Tritanopia options for ground effects and minimap.
- Text Scale: Increase UI text size (increased from 100% to 150% helpful for reading item mods).
- Sticky Keys: Not in-game – use OS options for people with motor impairments.
- Lockstep: Server validates every action; no desync but requires stable low-latency (~<100 ms). Best for low ping players.
- Predictive: Client acts immediately, corrects later. Better for high ping or packet loss. Can cause rubberbanding.
- Auto: Picks server with lowest ping. Can be wrong (e.g., connecting to California from Europe if ping is similar).
- Manual: Select the region closest to you. Use for consistent latency.
- Check Packet Loss and Latency in game (F1 graph). If spikey, switch to Predictive and lower sound channels.
- Path of Exile supports many languages: English, French, German, Spanish, Portuguese, Russian, Japanese, Korean, Chinese, Thai, etc.
- Change in main menu under Options > Language. Requires restart.
- Note: Trade chat uses separate channels per language. If you want to play with a specific community (e.g., Korean players for trade), set language accordingly.
- Enable Loot Filter: Mandatory. Download and activate a filter like Neversink's (Soft/Hard/Strict/Uber Strict).
- Set Filter Level: Adjust strictness based on your progression.
- Always Show Minimap: Turn on for navigation.
- Large Minimap: Enable to see more of the area. Helpful in open maps (e.g., Strand).
- Rotate Minimap vs Fixed: Personal preference. Fixed keeps north always up; rotate turns with character.
- Always Show Item Labels: Off (hold Alt to see). Saves screen clutter.
- Pickup Range: Default Medium. Increase to Large for faster looting (especially with tight click-y builds).
- In-game options: None. Controller has auto-aim; keyboard does not.
- Health/Mana/ES Bars: Always show on top of character (enable in UI settings).
- Show Buffs/Effects: Keep on for visibility of flasks and auras.
- Do NOT bind a flask to left click permanently – you'll waste flasks while moving. Keep a movement skill or default attack.
- Rendering: DirectX 11, Dynamic Resolution ON (target 30 FPS), resolution 720p or 900p.
- Graphics: Low preset, shadows off, textures low, lighting low, AA off, bloom off.
- Audio: 64 channels, disable reverb and ambient.
- Network: Predictive mode (even with low ping) to avoid lockstep spikes.
- Loot Filter: Use Strict or Uber Strict to reduce item rendering.
- Additional: Play on a SSD (optional but helps loading).
- Rendering: Vulkan or DirectX 12, Dynamic Resolution ON (target 60 FPS), 1080p.
- Graphics: Medium preset, shadows medium, textures medium-high, lighting medium, AA TAA.
- Audio: 128 channels.
- Network: Lockstep if ping under 80 ms; Predictive otherwise.
- Rendering: Vulkan or DirectX 12, Dynamic Resolution OFF (or target 144 FPS), 1440p or 4K.
- Graphics: High/Ultra, shadows high, textures ultra, lighting high, global illumination off (still high cost), TAA.
- Audio: 256 channels.
- Network: Lockstep.
- [ ] Install from official site (or Steam) – avoid third-party.
- [ ] Set renderer to Vulkan (if GPU supports) or DirectX 11 (fallback).
- [ ] Enable Dynamic Resolution (target 60 FPS).
- [ ] Download and enable a loot filter (Neversink's).
- [ ] Bind a 'Move Only' key.
- [ ] Set network mode to Lockstep if low ping; Predictive otherwise.
- [ ] Adjust sound channels based on CPU (start with 128).
- [ ] Turn off screen shake, chromatic aberration, lens flare.
- [ ] Test in The Twilight Strand – if stutters, lower shadows and lighting.
---
Audio Settings
Master Volume & SFX Volume
Sound Channels
Easy to misconfigure: Setting channels too low for your system can cause sound stuttering. Use low only on very weak CPUs.
Ambient Sound & Reverb
---
Controls Settings
Input Method (Keyboard & Mouse / Gamepad)
Key Bindings (Important tweaks)
Special Attention: Mouse Sensitivity
Accessibility Controller Options
---
Network Settings
Networking Mode
Easy to misconfigure: Playing Lockstep with high ping (>150 ms) causes constant stutter. Switch to Predictive if you have unstable connection.
Auto-server Select vs Manual
Network Quality
---
Language Settings
---
Gameplay Settings
Loot & Item Filters
Minimap Settings
Item Labels & Pickup
Target Lock & Auto-Aim
Character Panel Display
Special Attention: Flasks on Left Click
---
Performance Recommendations by Hardware Tier
Low-End (e.g., Intel HD 620, GT 1030, 8 GB RAM, HDD)
Mid-Range (e.g., GTX 1060, RX 580, 16 GB RAM, SSD)
High-End (e.g., RTX 3080, Ryzen 5800X3D, 32 GB RAM, NVMe)
---
Troubleshooting Common Misconfigurations
1. Stuttering on fast builds (e.g., Tornado Shot, Cyclone)
- Cause: Dynamic Resolution off + DirectX 11. Switch to Vulkan + Dynamic Resolution ON.
- Also: Disable 'Engine Multithreading' in config file if crashes occur (rare).
2. Sound cutting out during combat
- Cause: Sound channels too high for CPU. Reduce to 64 or 96.
3. Desync / Rubberbanding
- Cause: Lockstep with packet loss. Switch to Predictive.
4. Low FPS in Delirium / Beyond
- Enable Dynamic Resolution, set target to 30 FPS.
- Lower shadow quality to off.
- Use Community-made 'PoE Performance' script to clear cache.
5. Black screen on launch
- Delete `production_Config.ini` in `%userprofile%/Documents/My Games/Path of Exile`. Or launch with `--reset`.
---
Final Checklist for New Exiles
This guide ensures you have optimal performance and clarity to enjoy Path of Exile without unnecessary frustration.
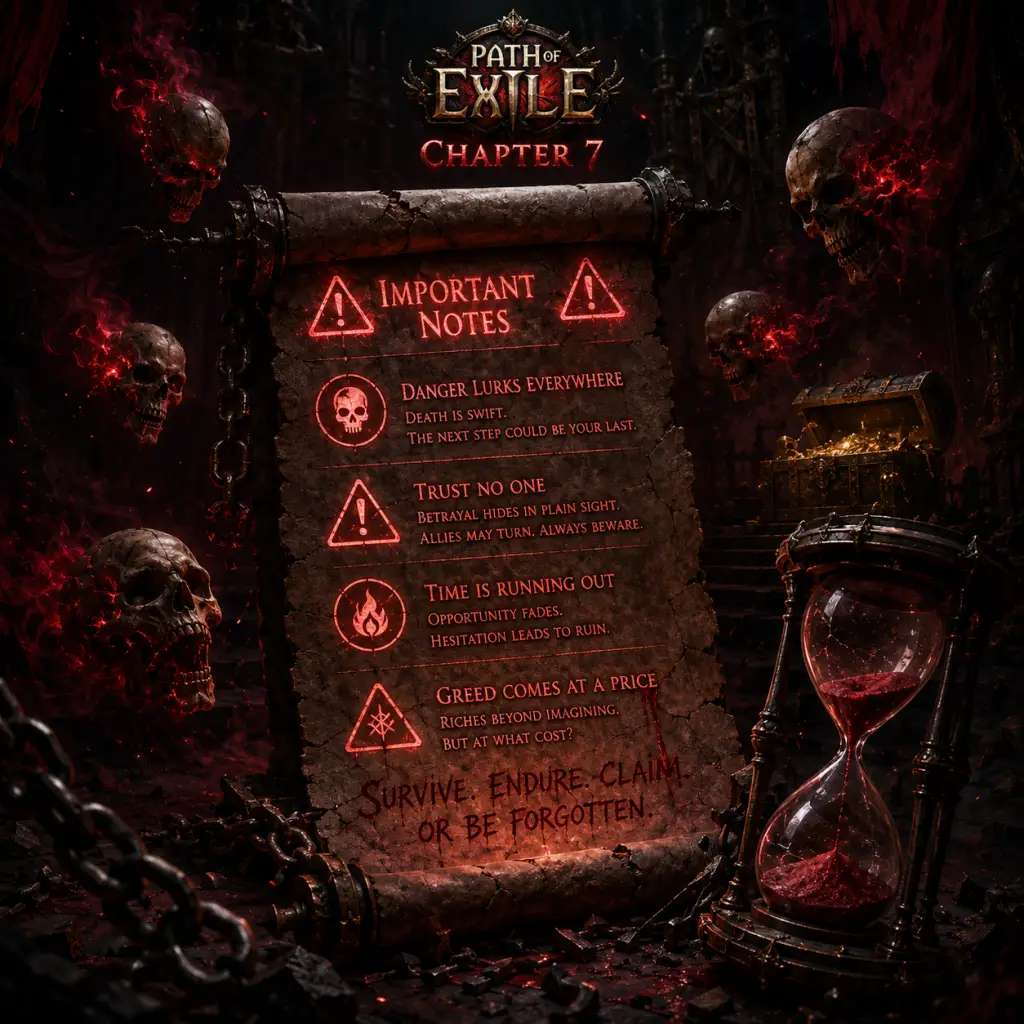
Important Notes
Important Notes for Path of Exile
This section covers critical information every player should know before diving into Wraeclast. Ignoring these notes can lead to wasted time, lost progress, or even a banned account. Read carefully.
1. Irreversible Choices & Permanent Consequences
- Passive Skill Tree Respeccing is Limited: While you can respec passive points, it's costly. You get 24 respec points from quest rewards (one per 8 campaign quests). Beyond that, you must use Orb of Regret (currency item). Major build mistakes early on can be frustrating. Recommendation: Follow a beginner-friendly build guide (e.g., Enki's Arc Witch, Zizaran's builds) to avoid costly mistakes.
- Ascendancy Class is Permanent: Once you choose an Ascendancy (at the Labyrinth, around level 33), you cannot change it without using a very rare item (Orb of Unmaking) or starting a new character. Think carefully about your class choice.
- Bandit Quest Rewards: In Act 2, you must either kill all three bandits (gives 2 passive points) or help one (each gives a different permanent bonus). The choice is permanent per character. Most builds take the 2 passive points, but some benefit from the bandit rewards. Check your build guide.
- Masters & Hideout: Your hideout’s master (e.g., Helena) is chosen early and cannot be changed. It doesn't affect gameplay much, but you can't swap them without rebuilding.
- League Type is Permanent: Characters are tied to their league (Standard, Hardcore, Solo Self-Found (SSF), etc.). You cannot move a character from Hardcore to Standard if you die (they go to Standard). SSF characters cannot trade. Choose wisely.
- League-Specific Content: PoE operates on 3-4 month leagues (seasonal resets). League-exclusive mechanics, items, and challenges are only available during that league. After a league ends, the content may go core (with changes), but not always. Participate in leagues to experience new content and earn league rewards.
- Daily/Weekly Missions: Some content resets on a schedule (e.g., Incursion temples, Betrayal safehouses, Alva missions). If you don't complete a mission or map within a session, progress is saved, but some league mechanics reset after logging out or after a period. Check patch notes.
- Vendor Recipes: Many valuable vendor recipes (e.g., Chaos Orb recipe, Regal Orb recipe) are missable if you don't know the exact item combinations. Example: Selling a full set of rare ilvl 60-74 items gives a Chaos Orb. Not knowing this can cost you a lot of currency early on.
- Quest Rewards: Some quests reward skill gems or unique items that are only available once per difficulty. If you sell or delete them, you can't get them again on that character. Be careful with rewards like the Portal or Detonate Mines gems.
- Act 1 Boss: Hillock: The first boss is easy, but his attacks can kill a glass-cannon build in 2 hits. Always invest in life nodes on the passive tree early (aim for 300 life by end of Act 1).
- Act 2: The Weaver's Chamber: The Weaver boss applies a strong poison DoT. New players often die here. Bring Antidote flasks or have ailment immunity from the tree.
- Act 3: The Vaal Oversoul & Piety: These fights have telegraphed attacks but punish standing still. Learn to dodge by moving during the beam attacks.
- Act 5-10 (Kitava): After killing Kitava in Act 5, you permanently lose 30% to all resistances (-30%). In Act 10, you lose another 30% (total -60%). This is a massive spike. You must cap your elemental resistances (75%) after each kill using gear (rings, amulets, flasks). Failure to do so will result in one-shots from white monsters.
- Maps (Endgame): At tier 1 maps, enemies are stronger than Act 10. Be prepared to have at least 3k life, capped resists, and a functional build.
- Over-farming Low-level Areas: Don't stay in acts longer than necessary. The best EXP and loot progress by clearing zones once and moving forward. Only farm zones like The Dried Lake (Act 4) or Blood Aqueducts (Act 9) for a few levels if you're struggling.
- Ignoring the Crafting Bench: The hideout crafting bench is unlocked early (Act 2). It allows you to add missing resists or life to gear for cheap. New players often ignore it and suffer. Use it!
- Selling Currency Too Early: Never sell valuable currency items (e.g., Chaos Orb, Exalted Orb) to vendors for scrolls or wisdom shards. Use them for trading with players. A single Chaos Orb can buy multiple pieces of good leveling gear.
- Spending Chaos Orbs on Gear Before Maps: Avoid buying expensive leveling gear (more than 1-2 chaos) until you reach yellow maps. Most gear becomes obsolete quickly.
- Rage-Quitting During Campaign: The campaign is long (10 acts) and can feel tedious. It is a tutorial for the endgame. Don't give up; many players enjoy the endgame mapping more.
- Trading Etiquette: Use the official trade site (pathofexile.com/trade). When whispering a seller, use a standard message (e.g., "Hi, I'd like to buy your [item] listed for [price] in [stash tab]."). Be patient; sellers may be busy. Do not spam or harass traders.
- Party Play: If you join a public party, communicate clearly, don't loot everything instantly, and avoid stealing valuable loot. Use /invite or /trade for organized parties.
- No RMT (Real Money Trading): Buying or selling in-game currency for real money is strictly prohibited and leads to permanent bans. Do not engage in RMT or use third-party currency sellers.
- Third-Party Tools: Most tools like Path of Building, trade macros (e.g., Mercury Trade), and loot filters (Neversink's) are allowed. However, any automation that plays the game for you (bots, auto-flask scripts) is forbidden and can get you banned.
- Reporting: Use /report to report toxic behavior, scammers, or bots. Do not retaliate; just report and ignore.
- No Manual Saves: PoE is an online-only game. Your character data is stored on servers. There is no local save file. Progress is saved in real-time when you exit an instance or log out.
- Account Security: Use a strong, unique password and enable two-factor authentication (2FA) via email or authenticator app. Many accounts are hijacked by phishing or weak passwords. Never share your password or steam account.
- Linked Accounts: If you play on Steam, your PoE account is linked to your Steam account. Be careful about Steam security breaches.
- Stash Tabs: Your stash tabs are account-wide. If you lose access to your account, you lose everything. There is no recovery without support.
- Logout Macro: You can use a logout macro (allowed) to instantly disconnect in Hardcore mode. This is not mandatory but can save your character. Make one keybind for /exit.
- Loot Filters are Essential: Download a loot filter (e.g., Neversink's) before you even start playing. It highlights valuable items and hides trash. Without one, you'll miss currency drops and waste time picking up junk.
- Currency is Not Just for Crafting: Items like Chaos Orbs are the primary trade currency. Don't use them to craft low-level gear. Save them.
- Sockets and Links Matter More Than Item Level: A 5-link or 6-link item (even white) is incredibly valuable. Always check socket colors and links before vendoring.
- Flasks are More Important Than You Think: You can use up to 5 flasks. Have a mix of life, mana, and utility flasks (e.g., Quicksilver, Granite, Stibnite). Flasks are your main defensive tool early on.
- Vendor Recipes for Gear: Selling magic items with specific mods (e.g., +1 to level of all fire spell skill gems) can yield better items. Learn the "Chaos Orb recipe" (full rare set ilvl 60-74) and "Regal Orb recipe" (ilvl 75+).
- The Wiki is Your Best Friend: The official Path of Exile Wiki (poewiki.net) is comprehensive. Bookmark it. Use it for mechanics, quests, and item details.
- PoB (Path of Building) is Mandatory: Plan your build in Path of Building before committing. It shows your actual DPS, defenses, and passive tree pathing. Copying a build without understanding why is a common regret.
- Don't Be Afraid to Ask for Help: The global chat channels (/global 1, 2, etc.) are usually friendly. You can also join the official Discord. New players are welcome.
- Do not attempt to install mods or cheat tools. The game has strong anti-cheat (GGG's proprietary system) and bans are permanent and non-negotiable.
- Do not trade with suspicious accounts (e.g., level 1 characters offering big deals). They might be scammers using stolen currency.
- Backup your account email and keep it secure. If you lose access, recovery is very difficult.
2. Missable Content & Time-Limited Events
3. Difficulty Spikes & Common Pitfalls
4. Grinding Traps & Time-Wasters
5. Online Etiquette & Anti-Cheat Notes
6. Save Management & Account Security
7. Things Players Commonly Regret Not Knowing Earlier
Final Warnings
Remember: PoE is a marathon, not a sprint. Take your time, learn from mistakes, and use the community resources. Welcome to Wraeclast!
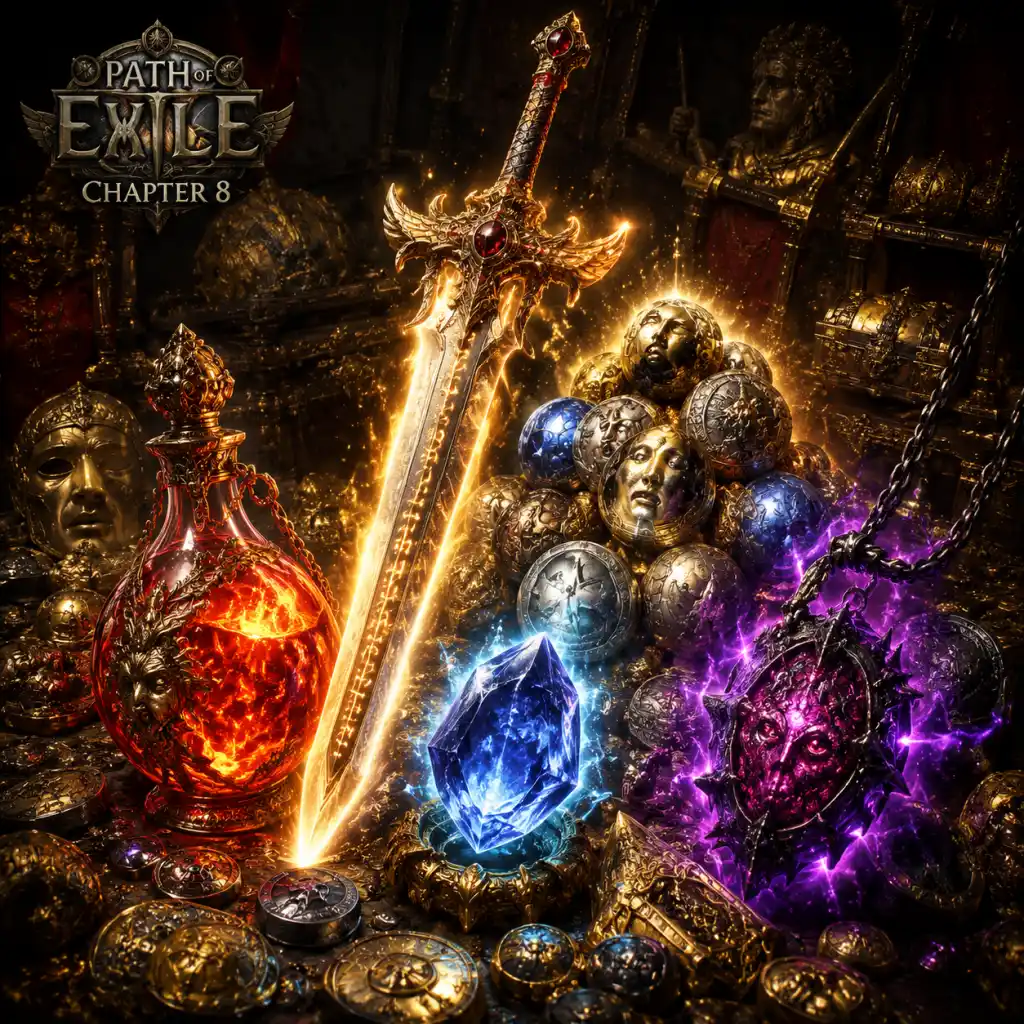
All Game Items
Path of Exile: Comprehensive All Game Items Guide
This guide provides a detailed overview of every major item category in Path of Exile (PoE). Items are grouped logically by function—currencies, equipment, consumables, crafting materials, collectibles, and quest items—with explanations of what each does, how to obtain it, when it is useful, and important synergies or upgrades. Note that PoE has thousands of unique items; this guide covers the fundamental categories and representative examples.
---
1. Currencies (Orbs)
Currencies in PoE are more than just money—they are crafting tools that modify items. Most drop from monsters, chests, and league mechanics. The exchange rate between orbs fluctuates based on player trading (via the official trade site or third-party tools).
#### 1.1 Basic Currency Orbs
| Orb | Effect | Obtain | When Useful |
|---|---|---|---|
| Orb of Alteration | Reforges a magic item with new random modifiers | Monster drops, vendoring items | Rolling powerful early-game magic items; rerolling flasks |
| Orb of Augmentation | Adds a second random modifier to a magic item with one mod | Drops, vendoring | Completing a 2-mod magic item |
| Orb of Transmutation | Turns a normal item into a magic item with one random mod | Drops, vendoring | Starting a craft; creating initial magic rares |
| Orb of Chance | Turns a normal item into a random rarity (magic, rare, or unique) | Drops, vendoring | Gambling for specific unique items (e.g., Headhunter from a specific base) |
| Portal Scroll | Opens a town portal | Drops, vendoring | Returning to town quickly; selling items |
| Scroll of Wisdom | Identifies an unidentified item | Drops, vendoring | Essential for identifying loot |
| Armourer's Scrap | Increases quality on armour (up to 20%) | Drops, vendoring quality items | Improving armour defenses; required for crafting recipes |
| Blacksmith's Whetstone | Increases quality on weapons (up to 20%) | Drops, vendoring quality items | Improving weapon damage; crafting recipes |
| Glassblower's Bauble | Increases quality on flasks (up to 20%) | Drops, vendoring quality flasks | Increasing flask recovery effectiveness |
| Gemcutter's Prism | Increases quality on skill gems (up to 20%) | Drops, vendoring quality gems | Improving gem stats (e.g., damage, duration) |
| Cartographer's Chisel | Increases quality on maps (up to 20%) | Drops, vendoring maps | Boosting map quantity and pack size |
| Orb | Effect | Obtain | When Useful |
|---|---|---|---|
| Orb of Alchemy | Turns a normal item into a rare item with random mods | Drops, vendoring | Quick rare crafting; mapping sustain |
| Chaos Orb | Reforges a rare item with new random modifiers | Drops, vendoring, chaos recipe | Core crafting reroll; trading currency |
| Vaal Orb | Corrupts an item, adding a random implicit or effect | Drops, vendoring; Vaal side areas | Gambling for powerful corruption outcomes; enabling Vaal skills on gems |
| Exalted Orb | Adds a new random modifier to a rare item | Very rare drop; Divination cards | Endgame crafting; adding a desirable mod |
| Divine Orb | Randomizes the numeric values of modifiers on an item | Rare drop; Divination cards | Optimizing rolls on good items |
| Orb of Annulment | Removes a random modifier from a rare item | Rare drop; Harvest crafts | Precision removal of unwanted mods |
| Orb of Scouring | Removes all modifiers from a magic/rare item, turning it normal | Drops, vendoring | Base item recovery; starting fresh craft |
| Regal Orb | Upgrades a magic item to rare, adding one new mod | Drops, vendoring | Upgrading a good magic base to rare; used in many crafting recipes |
| Orb of Fusing | Reforges links between sockets on an item | Drops, vendoring | Achieving desired 6-link; required for some crafting |
| Jeweller's Orb | Reforges the number of sockets on an item | Drops, vendoring | Changing socket count; needed for linking |
| Chromatic Orb | Reforges socket colors on an item | Drops, vendoring | Matching gem color requirements |
| Blessed Orb | Randomizes implicit modifier values on unique items | Drops, vendoring | Optimizing unique item implicits |
| Orb of Binding | Upgrades a normal item to rare with 4 linked sockets | Rare drop; vendor recipe | Quick 4-link for leveling |
These drop primarily from their respective league mechanics.
| Currency | League Source | Use |
|---|---|---|
| Perandus Coin | Perandus league (chests, Cadiro) | Buying items from Cadiro Perandus |
| Silver Coin | Prophecy league | Activate prophecies |
| Breach Splinter / Breachstone | Breach league | Open Breach domains; upgrade to Breachstone |
| Sulphite | Delve league | Fueling the Crawler in Azurite Mine |
| Azurite | Delve league | Upgrading mine items (light radius, flares, etc.) |
| Delve Fossils (e.g., Scoured Fossil) | Delve | Crafting resonators with specific modifiers |
| Essence (e.g., Screaming Essence) | Essence league | Applying a set of mods to normal/magic items |
| Bestiary Orb (e.g., Orb of Einhar) | Bestiary | Capture beasts; craft items |
| Incubator (e.g., Time-lost Incubator) | Delirium league | Accumulate kills to unlock reward |
| Simulacrum Splinter / Simulacrum | Delirium | Enter Simulacrum boss encounter |
| Sacrifice Fragment (Atziri sets) | Vaal side areas | Access Atziri's Temple |
| Mortal Fragment | Atziri's Temple | Access Uber Atziri |
| Prophecy (not a currency but a consumable) | Proph. league | Encounter specific events |
2. Equipment
Equipment includes weapons, armor, accessories, and flasks. Most items have implicit and explicit modifiers. Rarity tiers: Normal (white) → Magic (blue) → Rare (yellow) → Unique (orange).
#### 2.1 Weapons
Weapons are divided by type (one-handed, two-handed, ranged, caster weapons). Each base type has implicit stats (e.g., critical strike chance, attack speed). Common bases:
| Weapon Type | Examples | Key Implicit | Best For |
|---|---|---|---|
| Dagger | Royal Dagger, Golden Kris | Critical strike chance | Crit-based attack builds |
| Wand | Opal Wand, Profane Wand | Spell damage / cast speed | Spellcasters |
| Sword (1H/2H) | Exquisite Blade (2H), Vaal Rapier (1H) | Varies by base | Melee attack builds |
| Axe (1H/2H) | Marakite Axe (1H), Fleshripper (2H) | Physical damage | Physical attack builds |
| Mace (1H/2H) | Sceptre (1H), Void Mace (2H) | Elemental damage | Elemental melee builds |
| Staff | Judgement Staff, Eclipse Staff | Spell damage / block chance | Caster builds, some melee |
| Bow | Spine Bow, Decimation Bow | Critical strike chance | Ranged attack builds |
| Claw | Imperial Claw, Harpoon Claw | Life gain on hit | Life-on-hit attack builds |
- Oro's Sacrifice (2H Sword) – Fire damage, enables fire conversion builds.
- The Saviour (1H Sword) – Creates clone of yourself.
- Wand: Void Battery – High critical, grants power charges.
- Bow: The Tempest – Lightning damage, high attack speed.
#### 2.2 Armour
Armour pieces: Body Armour, Helmet, Gloves, Boots, Shield.
| Slot | Examples | Key Stats | Typical Sources |
|---|---|---|---|
| Body Armour | Astral Plate, Vaal Regalia | Armour/ES/Evasion; socket links | Drops, crafting, unique drops |
| Helmet | Eternal Burgonet, Hubris Circlet | Defenses; +skill gems | Drops, crafting |
| Gloves | Gripped Gloves, Sorcerer Gloves | Attack speed, unique implicits | Drops, essences |
| Boots | Two-Toned Boots, Sorcerer Boots | Movement speed, resistances | Drops, crafting |
| Shield | Aegis Aurora, Rumi's Concoction (unique) | Block chance, life, resists | Drops, unique |
- Body: Belly of the Beast – High life, good for life-based builds.
- Helmet: Devoto's Devotion – Movement speed, chaos res.
- Gloves: Tombfist – Added physical damage per abyssal jewel.
- Boots: Seven-League Step – Insane movement speed for fast mapping.
- Shield: The Surrender – Recovery on block.
#### 2.3 Accessories
Jewelry: Rings, Amulets, Belts.
| Slot | Examples | Implicit | Key Mods |
|---|---|---|---|
| Ring | Diamond Ring, Two-Stone Ring | By base: increased crit, elemental resist | Life, resists, damage, minion mods |
| Amulet | Onyx Amulet, Marble Amulet | All attributes; life regen | Skill gems, life, resists, damage |
| Belt | Leather Belt, Stygian Vise | Flask charges, life; abyssal socket | Life, resists, flask effect |
- Ring: Pariah – High resistances, all attributes.
- Amulet: The Perfect Form – +1 to level of socketed cold gems.
- Belt: Headhunter – (Very rare) Gain rare monster mods on kill; extremely powerful for mapping.
#### 2.4 Flasks
Flasks are consumable potions with separate slots. They are essential for survivability and utility.
| Flask Type | Examples | Effect |
|---|---|---|
| Life Flask | Divine Life Flask, Healthy Life Flask | Heals life over time |
| Mana Flask | Eternal Mana Flask | Heals mana over time |
| Hybrid Flask | Ample Hybrid Flask | Heals both life and mana |
| Utility Flask | Quicksilver Flask, Silver Flask, Diamond Flask | Movement speed, onslaught, crit |
| Unique Flask | Atziri's Promise, Rumi's Concoction, The Wise Oak | Special effects (chaos damage, block, resist penetration) |
Upgrades: Quality (via Glassblower's Bauble) increases recovery amount. Enchantments via betrayal or lab trials grant additional effects.
---
3. Consumables
Consumables are single-use or limited-use items that provide temporary effects or access to content.
#### 3.1 Skill Gems
Gems are the primary way to gain skills. They are socketed into equipment and level up with experience.
| Category | Description | Examples |
|---|---|---|
| Active Skill Gems | Grant an active skill | Cleave, Fireball, Summon Skeleton, Spark |
| Support Skill Gems | Modify linked active gems | Added Fire Damage, Increased Area of Effect, Multistrike |
| Awakened Support Gems | Superior versions of support gems (drop from late game bosses) | Awakened Added Fire Damage, Awakened Multistrike |
| Vaal Skill Gems | Corrupted version with a Vaal skill (requires souls) | Vaal Summon Skeletons, Vaal Spark |
Upgrades: Level up by equipping and gaining XP. Quality improves via Gemcutter's Prism. Vaal Orbs can corrupt them into Vaal versions or transform them.
#### 3.2 Maps & Map Fragments
Maps are the endgame content item. They are placed into the Map Device in your hideout.
| Map Type | Rarity | Use |
|---|---|---|
| White Map | Normal | Tier 1-5 |
| Yellow Map | Magic/Rare | Tier 6-10 |
| Red Map | Rare | Tier 11-16 |
| Unique Map | Unique | Special zones with unique bosses (e.g., The Coward's Trial, Mao Kun) |
| Fragments | Misc | Parts of boss keys: Sacrifice pieces, Mortal pieces, Timeless Conflict splinters |
Modifiers: Maps can be altered with currency orbs (Alchemy, Chaos, Chisels, Vaal) to increase difficulty and rewards.
#### 3.3 League Consumables
Various league-specific items that unlock encounters or crafting.
| Item | League | Effect |
|---|---|---|
| Breachstone | Breach | Opens a Breach domain (upgraded from splinters) |
| Simulacrum | Delirium | Opens the Simulacrum (wave-based) |
| Prophecy | Prophecy | Triggers a specific event when conditions are met |
| Incubator | Delirium | Unlocks rewards after kill count |
| Tribute | Heist | Spend in the Rogue Harbour for items |
| Expedition Logbook | Expedition | Unlocks a special map with expedition encounters |
4. Crafting & Upgrade Materials
These items are used to modify, enhance, or craft new equipment.
#### 4.1 Essences
Essences are powerful single-mod items applied to normal/magic items. They guarantee a specific mod type.
| Essence Tier | Example | Effect |
|---|---|---|
| Whispering | Essence of Woe | +% minion damage |
| Muttering | (stronger version) | |
| Screaming | Most common for endgame crafting | |
| Shrieking | Adds higher tier mod | |
| Deafening | Highest tier, rare | |
| Remnant of Corruption | (item) | Corrupts a stack of essences |
#### 4.2 Fossils & Resonators
Fossils are socketed into Resonators (Delve crafting) to modify items.
| Fossil Effect | Example |
|---|---|
| Scorched Fossil | Adds Fire modifiers |
| Frigid Fossil | Adds Cold modifiers |
| Corroded Fossil | Adds Chaos modifiers |
| Prismatic Fossil | Adds Random Elemental mods |
| Bound Fossil | Adds Minion mods |
| Aetheric Fossil | Adds Caster mods |
Synergies: Combining fossils can force specific combinations (e.g., Corroded + Aetheric for chaos casters).
#### 4.3 Catalysts
Catalysts are used on jewelry (rings, amulets, belts) to improve specific modifier types and add quality.
| Catalyst | Affected Mods |
|---|---|
| Fertile Catalyst | Life and mana regen; recovery |
| Prismatic Catalyst | Elemental resistances |
| Attuned Catalyst | Attribute modifiers |
| Noxious Catalyst | Chaos damage and chaos resistance |
| Accelerating Catalyst | Increased cooldown recovery |
#### 4.4 Oils
Oils are used in the Blight league mechanic. They can be applied to rings/amulets (via Cassia) to anoint passive skills or to create Blight maps.
| Oil | Passives Unlocked |
|---|---|
| Clear Oil | Small passive nodes (minor stats) |
| Sepia Oil | Notable passive nodes |
| Amber Oil | Keystone passives (e.g., Resolute Technique) |
| Crimson Oil | Rare keystones (e.g., Chaos Inoculation) |
| Opaque Oil | Special notables from Blight |
#### 4.5 Delirium Orbs
Delirium Orbs are applied to maps to add the Delirium mechanic (fog, increased monster density, rewards).
| Orb Type | Effect on Map |
|---|---|
| Delirium Orb (Unique) | Adds a specific reward type (e.g., cluster jewels, currency) |
| Simulacrum Splinter | 300 splinters -> Simulacrum |
#### 4.6 Harvest Crafts (via Lifeforce)
Harvest is a league mechanic where you collect lifeforce from plants and use it to craft items. Crafting options include:
- Reroll a rare item, keeping certain mods
- Remove/add a specific modifier type
- Augment a modifier if possible
Lifeforce types: Wild (green), Vivid (blue), Primal (yellow). They are collected and stored in the Horticrafting Station (Hideout) or used as they drop.
---
5. Collectibles
Collectibles have no direct use but are tradeable, used in crafting recipes, or required for challenges/achievements.
#### 5.1 Divination Cards
Divination Cards are stackable items that, when the full set is collected, can be turned in to Tasuni (Act 4) for a specific reward (unique item, currency, etc.).
| Card Set | Reward |
|---|---|
| The Doctor | Headhunter (leather belt) |
| The Last One Standing | A Tabula Rasa (unique body armour) |
| The Wolf's Shadow | A specific rare item with good rolls |
| Mawr Blaidd | A shaped map or certain unique |
Strategy: Many players farm specific maps known to drop valuable cards (e.g., Burial Chambers for The Doctor).
#### 5.2 Prophecies
Prophecies are conditional events that trigger during gameplay. They are consumable items stored in a prophecy tab.
| Prophecy Example | Effect |
|---|---|
| The Lost Maps | An even more lost map drops from bosses |
| Twice Enchanted | Labs grant an additional enchantment |
| The Unbreathing Queen | Spawns a specific boss (Atziri) |
Use: Prophecy automatically activates when conditions are met. They can be sealed and traded.
#### 5.3 Bestiary Items
Bestiary is a mechanic where you capture beasts using nets (or using Einhar's trap) and then sacrifice them in the Menagerie to craft items.
| Item | Use |
|---|---|
| Beast (captured) | Used in recipes |
| Orb of Einhar | Crafting currency from Bestiary |
| Imprinted Beast (mod) | Adds a bestiary mod to an item |
- Split Beasts – Split an item into two separate items, each with half the mods (imprints the original as a copy).
- Combine Beasts – Add a bestiary implicit mod to a weapon or armour.
#### 5.4 Leaguestones (Legacy)
Leaguestones were used in the Legacy league (2017). They are no longer in the core game but exist in Standard. They activate a past league mechanic for a limited number of areas.
---
6. Quest Items
These items are required for completing the main story (Acts 1-10). They cannot be traded and usually disappear after use.
| Item | Quest | Use |
|---|---|---|
| Deshret's Banner | Act 2: Sharp and Cruel | Captured by the bandits; used to remove skill point penalty |
| Decanter of Virtue | Act 3: Deals with the Dead | Used to create the Malachai's puppet |
| Silk's Key | Act 3: Piety's Pets | Opens the door in The Lunaris Temple |
| Maligaro's Map | Act 8 | Used to enter the Vaal Pyramid |
| The Eye of Deshret | Act 10 | Used to enter the The Ravaged Square |
---
7. Miscellaneous Consumables & Keys
| Item | Source | Use |
|---|---|---|
| Sacrifice at Midnight | Vaal side areas | Opens Atziri's Temple |
| Mortal Hope / Ignorance / Greed / Rage | Atziri's Temple | Opens Uber Atziri |
| Fragmented Key (Shaper maps) | Shaper guardians | Opens Shaper's Realm |
| Cortex Key | Synthesis map | Opens the Cortex boss |
| Maven's Invitation | Maven's beacon | Activates boss rush fight |
| Onyx Amulet (quest) | Act 1: Enemy at the Gate | Required to unlock the passive skill tree |
8. Important Synergies & Upgrades
- Flasks + Quality: Use Glassblower's Bauble to hit 20% quality for maximum recovery. Enchant with "of the Order" (staunching, heat, grounding) via betrayal.
- Orb + Item Level: High item level is needed for top-tier mods. Always check ilvl before using Exalted Orbs.
- Essences + Fossils: Combining essences with fossils in resonators produces deterministic outcomes. Example: Corroded + Sanctified + Aetheric for chaos spell damage.
- Divination Cards: Flipping cards (buying low, turning in, selling rewards) is a common trade strategy.
- Harvest Crafts: Can modify an item without destroying it. Save high-ilvl bases for augment/remove mods.
- Vaal Orbs: Can brick an item (turn it into a rare with corrupted mods) or create a powerful implicit. Use on items you are willing to lose.
- Map Sustain: Use Chisels, Alchemy, and Vaal Orbs on maps. Run influenced maps (Shaper/Elder/Maven) for better returns.
- Unique Items: Many unique items are build-defining (e.g., Shavronne's Wrappings for low-life casters, Loreweave for max res). Check global trade for prices.
---
This guide covers the vast majority of item types in Path of Exile. For real-time data and specific unique items, refer to the official Path of Exile Wiki (https://www.poewiki.net) and the Path of Exile Trade site (https://www.pathofexile.com/trade).
Character Skills
Path of Exile: Comprehensive Character Skills Guide
Path of Exile (PoE) has no fixed character classes or predefined skill trees. Instead, Skills are acquired through Skill Gems that you socket into equipment. These gems have levels and qualities, and they can be supported by Support Gems to modify their behavior. Your character’s role is determined by your Ascendancy class (a subclass you choose after completing the Lord’s Labyrinth), your passive skill tree choices, and the combination of skill gems you use.
This guide covers all categories of skill gems, explains how they work, and provides tips for building around them.
1. Understanding Skill Gems Basics
- Active Skill Gems: Grant a skill you can use (attack, spell, aura, etc.). They have a mana cost, a cast time, and often a cooldown.
- Support Gems: Modify an active skill – increasing damage, adding area of effect, granting extra projectiles, etc. Support gems must be linked to an active gem via sockets connected on gear.
- Vaal Skill Gems: Corrupted versions of some active skills that grant a powerful Vaal version with a separate soul-based cooldown.
- Awakened Skill Gems: High-level corrupted gems that are stricter in their requirements but more powerful.
- Transfigured Gems (PoE 3.22+): Alternative versions of existing skills obtained from the Library or Ultimatum, offering different mechanics.
All skills can be leveled up (gem experience) and increase their base damage or effect. Quality (via Gemcutter’s Prisms) adds bonuses like increased damage, area radius, or faster casting.
2. Active Skill Categories & Key Examples
#### 2.1 Attack Skills (Use Weapon Damage)
Attack skills deal damage based on your weapon’s physical or elemental damage. They scale with weapon stats, attack speed, and accuracy.
| Skill Name | Type | Description | Key Uses & Combos |
|---|---|---|---|
| Cyclone | Channeling AoE | Spin while moving, dealing physical damage to enemies around you. No cooldown. | Great for clearing; pair with Fortify, Melee Physical Damage, Infused Channelling. Used in Cyclone Slayer or Facebreaker builds. |
| Split Arrow | Ranged Attack | Fires an arrow that splits into multiple arrows. Good for clear. | Combine with Pierce, Chain, Barrage Support for multi-target. Used in Tornado Shot alternatives. |
| Molten Strike | Melee Projectile | Strikes enemies and releases molten projectiles. | Scales with projectiles and melee damage. Synergizes with Ancestral Call, Multiple Projectiles, Elemental Damage with Attacks. |
| Blade Flurry | Channeling AoE | Charges up a series of slashes, then releases a powerful final strike. | High single-target; use with Melee Physical Damage, Multistrike, Close Combat. |
Upgrades: Gem level increases base damage. Quality adds attack speed or damage modifiers. Awakened versions exist for some (Awakened Multistrike, etc.).
Recommended Builds:
- Cyclone: Slayer (for cull, leech), Gladiator (for block), Champion (for impale).
- Split Arrow: Deadeye (chain + pierce), Raider (attack speed).
- Molten Strike: Juggernaut (endurance charges), Berserker (rage).
#### 2.2 Spell Skills (Scale with Gem Level & Spell Damage)
Spells deal damage based on the gem itself, not your weapon. They scale with spell damage, cast speed, and critical strike chance.
| Skill Name | Type | Description | Key Uses & Combos |
|---|---|---|---|
| Fireball | Projectile Spell | Launches a fiery projectile that explodes on hit. | Great clear; pair with Chain, Pierce, Fork, Controlled Destruction. Use in Ignite builds with Elemental Overload. |
| Arc | Chaining Spell | Shoots lightning that chains to nearby enemies automatically. | Excellent clear; no aiming needed. Combine with Chain, Spell Echo, Lightning Penetration. |
| Blade Vortex | AoE Spell | Creates spinning blades around you that hit nearby enemies. | Stack duration; use with Increased AoE, Concentrated Effect, Unleash Support. Top-tier boss killer. |
| Freezing Pulse | Projectile Spell | Fires a wave of ice that pierces and chills. | Good clear; pair with GMP, Controlled Destruction, Hypothermia. Elementalist or Hierophant. |
Upgrades: Gem level is primary scaling. Quality often adds projectile speed, area, or damage. Awakened versions exist for most damage supports.
Recommended Builds:
- Fireball: Elementalist (ignite proliferate), Trickster (cast speed), Chieftain (fire damage).
- Arc: League starter (any class) – often Templar or Witch for spell damage nodes.
- Blade Vortex: Assassin (crit), Occultist (profane bloom), Pathfinder (flask sustain).
#### 2.3 Minion Skills (Summon Allies)
Minion skills summon creatures that fight for you. They scale with minion life, damage, and support gems.
| Skill Name | Type | Description | Key Uses & Combos |
|---|---|---|---|
| Summon Raging Spirit | Temporary Minion | Summons flaming skulls that attack enemies. | Low duration but high damage; use with Minion Damage, Elemental Damage, Feeding Frenzy, and Spell Echo for faster summoning. |
| Summon Phantasm on Kill | Support/Creation | When you kill an enemy while supported, a Phantasm spawns. | Works with any skill that kills; great for clear speed in minion builds. |
| Herald of Agony | Aura+Minion | Gives a virulence stacking mechanic and summons a powerful Agony Crawler. | Used with poison builds to maintain virulence. Supported by Increased Minion Damage, Vicious Progeny, etc. |
| Animate Weapon | Temporary Minion | Animates a weapon item on the ground, creating a melee minion. | High physical damage; use with Minion Damage, Melee Splash, Multistrike. Requires weapon drops. |
Upgrades: Gem level increases minion base stats. Quality adds minion speed or damage. Awakened versions for support gems like Minion Damage.
Recommended Builds:
- Summon Raging Spirit: Necromancer (supports minions), Elementalist (golems + SRS), Guardian (auras).
- Herald of Agony: Pathfinder (poison flask), Gladiator (bleed) – but more often a Necromancer.
- Animate Weapon: Necromancer or Scion (Necromancer sub).
#### 2.4 Channeling Skills (Hold to Cast)
Channeling skills have a continuous effect while you hold the button. They allow for movement or constant damage.
| Skill Name | Type | Description | Key Uses & Combos |
|---|---|---|---|
| Cyclone | Attack (listed earlier) | Classic channeling melee. | Use with Fortify, Infused Channelling, Melee Physical Damage. |
| Scorching Ray | Spell | Channel a beam of fire that burns enemies. | Applies a stacking fire resistance debuff. Use with Elemental Overload, Burning Damage, Efficacy. |
| Winter Orb | Spell | Channel to charge up a hovering orb that fires projectiles automatically. | Scales with duration; use with Spell Echo, Controlled Destruction, Faster Casting. |
| Penance Brand | Spell | Channel to attach a brand to enemies; after delay it explodes. | High single-target; use with Brand Support, Swiftbrand, Concentrated Effect. |
Upgrades: Gem level increases base damage. Quality often adds cast speed or damage. Awakened supports like Awakened Controlled Destruction.
Recommended Builds:
- Scorching Ray: Trickster (cast speed), Elementalist (ignite), Chieftain (fire).
- Winter Orb: Occultist (crit), Hierophant (arcane surge), Assassin (power charges).
- Penance Brand: Inquisitor (crit), Elementalist (shock), Ascendant.
#### 2.5 Aura & Herald Gems (Buffs)
Auras reserve a portion of your mana to provide persistent buffs to you and allies. Heralds are temporary auras that trigger on kills.
| Skill Name | Type | Description | Key Uses & Combos |
|---|---|---|---|
| Anger | Aura | Adds fire damage to attacks and spells. | Used by fire builds; reserve mana with reduced reservation nodes. |
| Hatred | Aura | Adds cold damage and a physical-to-cold conversion. | Core for physical conversion builds; often paired with Herald of Ice for shatter. |
| Pride | Aura | Impales enemies and increases physical damage taken. | Best for impale builds (Champion, Slayer). |
| Herald of Ice | Herald | On shattering an enemy, creates an icy explosion. | Adds clear speed; pair with Hatred and increased AoE. |
| Herald of Thunder | Herald | On killing a shocked enemy, summons lightning bolts. | Great for lightning builds, especially with Storm Brand or Arc. |
Upgrades: Gem level increases buff magnitude. Quality adds aura effect or reservation efficiency. Awakened versions for support gems like Generosity (which boosts aura effect on allies).
Recommended Builds:
- Hatred + Herald of Ice: Any physical cold build (e.g., Deadeye Tornado Shot, Frost Blades Raider).
- Anger + Herald of Ash: Fire builds (e.g., Fireball Elementalist, Blade Vortex Chieftain).
- Pride + War Banner: Impale builds (Champion, Slayer).
#### 2.6 Support Gems – The Backbone of Customization
Support gems modify linked active skills. They have their own levels and quality. You can link up to 5 supports to an active gem (6 total in a six-linked item).
| Support Gem | Effect | Best For |
|---|---|---|
| Greater Multiple Projectiles (GMP) | Adds 2 extra projectiles but reduces damage. | Bow skills, spells like Freezing Pulse, Fireball. |
| Multistrike | Causes melee attacks to repeat twice (melee only). | Cyclone, Blade Flurry, Double Strike. |
| Spell Echo | Causes spells to repeat twice (spell only). | Any spell, especially Arc, Fireball, Ball Lightning. |
| Controlled Destruction | Increases spell/elemental damage but reduces critical strike chance. | Non-crit spell builds. |
| Elemental Focus | Increases elemental damage but prevents elemental ailments (ignite, shock, freeze). | Builds that don’t rely on ailments. |
| Inspiration | Reduces mana cost of supported skills based on elemental damage. | Mana-hungry builds. |
| Awakened Added Fire Damage | Adds fire damage based on physical damage. | Melee physical builds converting to fire. |
| Fortify | Grants Fortify buff on melee hit (reduced damage taken). | Melee builds, especially Cyclone or Blade Flurry. |
Upgrades: Leveling support gems increases the magnitude of their modification. Quality adds bonuses like increased area, speed, or damage.
Recommended Builds:
- Cyclone + Infused Channelling + Melee Physical Damage + Fortify + Brutality + Pulverise (for physical).
- Fireball + GMP + Spell Echo + Controlled Destruction + Combustion + Ignite Proliferation (for ignite).
- Arc + Spell Echo + Lightning Penetration + Faster Casting + Inspiration + Energy Leech (for casters).
3. Vaal Skills (Empowered Versions)
Vaal skill gems are corrupted versions that grant a second, powerful skill that uses souls (gained from kills near you). They share a cooldown with the regular version.
| Vaal Skill | Effect | When to Use |
|---|---|---|
| Vaal Haste | Grants massive attack/cast speed and movement speed for a short time. | Boss burst phases; map clearing speed boost. |
| Vaal Summon Skeletons | Summons a large number of skeletal warriors that explode on death. | Boss melting; use with Summon Skeletons for extra damage. |
| Vaal Blade Vortex | Creates a huge Blade Vortex that lasts longer and hits harder. | Boss DPS window. |
| Vaal Arc | Chains many times to all nearby enemies. | Excellent for clearing dense packs; also single-target with chains. |
| Vaal Discipline | Grants a huge energy shield for a short duration. | Survivability in emergencies; often used in low-life builds. |
Upgrades: Gem level increases the power of the Vaal skill but not the regular skill. Quality adds bonuses to the Vaal version.
Recommended Builds: Prioritize Vaal versions for any build that can fit them; Vaal Haste is universal, Vaal Blade Vortex for BV, Vaal Summon Skeletons for minion builds.
4. Transfigured Gems (PoE 3.22+)
Transfigured gems are alternative versions of existing skills with different mechanics. They are obtained from the Library (via tomes) or from Ultimatum rewards.
| Example | Description |
|---|---|
| Transfigured Fireball | Fireball now also has a chance to roll on the ground, causing burning ground. |
| Transfigured Arc | Arc now chains indefinitely until it hits the same target twice. |
| Transfigured Earthshatter | Spikes now propagate in a pattern instead of random. |
Cooldowns/Upgrades: Same as regular skills. Quality and level scale as usual.
5. Ascendancy Classes & Skill Synergies
While all characters can use any skill gem, your Ascendancy choice heavily influences which skills excel.
| Ascendancy | Best Skills | Reason |
|---|---|---|
| Slayer | Cyclone, Bladestorm, Lacerate | 20% cull, massive leech, melee splash. |
| Elementalist | Fireball, Arc, Blade Vortex, Golems | Elemental damage penetration, exposure, golem buffs. |
| Necromancer | Summon Raging Spirit, Spectres, Skeletons | Minion attack/cast speed, offering auras, corpse consumption. |
| Deadeye | Tornado Shot, Ice Shot, Split Arrow | Extra projectiles, chain, far shot, tailwind. |
| Guardian | Aura stackers, minion hybrids | Increased aura effect, charge generation, sentinel minions. |
6. Skill Combos & Synergies
- Curse + Blasphemy Support: Make your curses into auras. Pair with Elemental Weakness, Enfeeble, Temporal Chains.
- Mark + Assassin’s Mark: Grants power charges and increased critical chance. Use with crit builds.
- Spell Totem Support + Any Spell: Place a totem that casts the spell automatically. Great for bossing (e.g., Scorching Ray Totem).
- Cast on Critical Strike + Ice Spear: Trigger Ice Spears on crits. Use with high crit chance bow or wand builds.
- Cast When Damage Taken + Guard Skill (e.g., Molten Shell, Steelskin): Automated defense when you take enough damage.
- Leveling: Use skills with low mana cost and good clear (e.g., Arc, Fireball, Cyclone, Summon Raging Spirit). Swap to endgame skill at level 34-38 when you can equip higher-tier gems.
- Mapping: Prioritize skills with large area coverage or fast projectiles (e.g., Winter Orb, Cyclone, Split Arrow).
- Boss Killing: Switch to single-target focused skills or use Vaal versions. Consider swapping supports (e.g., replace GMP with Slower Projectiles for bosses).
- Defense: Always use a guard skill (Molten Shell, Steelskin, Immortal Call) linked to Cast When Damage Taken. Keep an aura that boosts defenses (e.g., Determination, Grace, Discipline).
- Physical Melee: Cyclone (Slayer/Champion) + Pride + Dread Banner + Fortify.
- Ignite Caster: Fireball (Elementalist) + Ignite Proliferation + Combustion + Deadly Ailments.
- Minion Necro: Summon Raging Spirit + Minion Damage + Feeding Frenzy + Unleash.
- Tornado Shot Deadeye: Tornado Shot + GMP + Inspiration + Mirage Archer + Chain.
- Crit Blade Vortex: Blade Vortex (Assassin) + Unleash + Conc Effect + Controlled Destruction + Energy Leech.
- Gem Experience: Kills grant experience to all equipped skill gems. You can also use Gemcutter’s Prisms to increase quality (up to 20%).
- Corruption: Using a Vaal Orb on a gem may turn it into its Vaal version or add up to 30% quality randomly.
- Awakened Gems: Dropped by endgame bosses; they have higher level caps and superior bonuses.
- Gem Levels: Max is 20 (or 21 with corruption, 25 with +level from gear). Each level significantly boosts damage or effect.
- Always link your main skill to proper supports – 6-link is ideal.
- Use at least one movement skill (Dash, Flame Dash, Shield Charge, Leap Slam).
- Don’t neglect utility skills – a curse, a guard, a herald/aura, and perhaps a banner.
- Experiment with Transfigured gems – they can completely change how a skill feels.
- Follow a build guide if overwhelmed – but this guide gives you the knowledge to customise.
7. When to Use Each Skill – Practical Advice
8. Recommended Build Archetypes (Summary)
9. Skill Gem Progression & Upgrading
10. Final Tips
This guide covers all core skill categories, notable gems, and how to use them effectively. Path of Exile offers immense flexibility—master the gem system and you can create your own perfect build.
Characters & Roles
Characters & Roles
Path of Exile features seven playable character classes (Exiles) plus the unlockable Scion. Each class has three ascendancy specializations that define advanced roles. Below we cover each class, their backgrounds, strengths, weaknesses, playstyle, unlock conditions, recommended builds, and team synergy, followed by a summary of major non-playable NPCs.
---
Marauder
- Background: A hulking exile from the Vaal prison, brutality hardened by Wraeclast’s horrors.
- Strengths: High strength, life, and physical damage; excels at melee and tanking.
- Weaknesses: Low intelligence; limited mana pool and spellcasting ability.
- Playstyle: Frontline face‑tanker. Builds stack life, armour, melee damage, and endurance charges.
- Unlock: Always available at character creation.
- Recommended Equipment: Weapons – axes, maces, or two‑handers; Armour – pure armour or armour/life gear; Flasks – life and granite.
- Recommended Builds (Ascendancies):
- Team Synergy: Provides proximity shields (e.g., Endurance Charge support), high single‑target damage, and can taunt enemies.
- Background: A former arena gladiator seeking redemption in Wraeclast.
- Strengths: Balanced strength and dexterity; fast melee attacks, evasion, and dual‑wielding proficiency.
- Weaknesses: Lower life than Marauder, needs careful positioning against crowds.
- Playstyle: Hybrid melee – uses swords, claws, or daggers with speed and crit; often combines armour and evasion.
- Unlock: Always available.
- Recommended Equipment: Weapons – one‑handed swords, claws, or rapiers; Armour – evasion/armour hybrid; Flasks – life and quicksilver.
- Recommended Builds (Ascendancies):
- Team Synergy: Slayer provides culling for parties; Champion provides Fortify and damage reduction; Gladiator can bleed and tank.
- Background: An archer from the forests of Ezomyr, exiled for poaching.
- Strengths: High dexterity; ranged combat, evasion, and projectile skills.
- Weaknesses: Low strength; very squishy in melee.
- Playstyle: Kite enemies with bows or wands, stack evasion and dodge; uses traps or mines as alternative.
- Unlock: Always available.
- Recommended Equipment: Weapons – bows, wands, or quivers; Armour – pure evasion; Flasks – life, jade, and silver.
- Recommended Builds (Ascendancies):
- Team Synergy: Deadeye grants party accuracy and Pierce; Pathfinder shares flask charges; Raider provides frenzy charges.
- Background: A master assassin from the Guild of the Shadow in Oriath.
- Strengths: High dexterity and intelligence; critical strikes, traps, and poison.
- Weaknesses: Low life and armour; very fragile if caught.
- Playstyle: Hit‑and‑run, use traps/mines, chaos damage over time, or crit dagger attacks.
- Unlock: Always available.
- Recommended Equipment: Weapons – daggers, claws, wands; Armour – evasion/es hybrid; Flasks – life, quicksilver, and mana.
- Recommended Builds (Ascendancies):
- Team Synergy: Assassin grants power charges; Saboteur mines provide burst; Trickster offers evasion aura.
- Background: A necromancer from the Crimson Council, exiled for dark arts.
- Strengths: High intelligence; summons, elemental spells, and energy shield.
- Weaknesses: Low strength and dexterity; very little life, no armour.
- Playstyle: Cast spells from range or raise minions; stack energy shield, cast speed, and elemental/chaos damage.
- Unlock: Always available.
- Recommended Equipment: Weapons – wands, sceptres, staves; Armour – energy shield (ES) base; Flasks – life, mana, and quicksilver.
- Recommended Builds (Ascendancies):
- Team Synergy: Necromancer raises minions as meat shields and provides auras; Occultist curses lower enemy resistances; Elementalist can share exposure.
- Background: A former inquisitor of Oriath’s church, exiled for heresy.
- Strengths: Balanced strength and intelligence; hybrid melee/caster, aura support, and elemental damage.
- Weaknesses: No particular weakness but not min‑maxed in one area.
- Playstyle: Use spells or melee with elemental conversion; often a support aurabot or totem user.
- Unlock: Always available.
- Recommended Equipment: Weapons – staves, sceptres, maces; Armour – armour/ES hybrid; Flasks – life, mana, and utility.
- Recommended Builds (Ascendancies):
- Team Synergy: Guardian provides massive defensive auras; Inquisitor gives crit bonus; Hierophant places totems for extra damage.
- Background: A mysterious woman who escaped from Wraeclast’s Vaal ruins – the “Ascendant.”
- Strengths: Versatile – can access any ascendancy node after picking a “starting” class; high flexibility.
- Weaknesses: Less specialized than other classes; loses some passive tree pathing efficiency.
- Playstyle: Build around whatever ascendancy combination you choose; often used for aurabots or generic spell builds.
- Unlock: Complete the Normal Labyrinth (first trial) in the Apex of Sacrifice with any other class.
- Recommended Equipment: Varies hugely by build; commonly uses wands, sceptres, or bows.
- Recommended Builds (Ascendancy): The Ascendant ascendancy itself – allows picking two nodes from other ascendancies (e.g., Raider+Slayer, Necromancer+Guardian). Best for support builds or hybrid role coverage.
- Team Synergy: Ascendant aurabots are top tier for parties; can fill missing roles (e.g., cull, charge generation).
- Juggernaut: Unstoppable tank, immunity to stuns, huge life regeneration.
- Berserker: High attack speed and damage, but takes increased damage (glass cannon melee).
- Chieftain: Fire‑based totems and physical‑fire conversion, strong survival from leech.
---
Duelist
- Slayer: AoE melee, culling strike, leech that never ends; great for clearing.
- Gladiator: Bleed specialist, dual‑wield block; tanky and strong single‑target.
- Champion: Team support with permanent Fortify, taunt, and aura bonuses.
---
Ranger
- Deadeye: Projectile speed, extra arrows, tailwind – the ultimate bow clear.
- Raider: Frenzy charge generation, phasing, very fast movement; works for both bow and melee.
- Pathfinder: Flask‑based sustain (life/mana), chaos damage, and elemental conversion.
---
Shadow
- Assassin: Crit specialist – huge crit multi and power charges; deadly for spells and attacks.
- Saboteur: Trap and mine expert – infinite sustain, huge AoE, and blind.
- Trickster: Evasion and energy shield, ghost shroud recovery; excellent defensive layer for DOT builds.
---
Witch
- Necromancer: Minion master – zombies, spectres, skeletons, and auras; team support via offerings.
- Occultist: Chaos damage, curses, and powerful energy shield recovery; can stack ES and curse enemies.
- Elementalist: All elemental damage, exposure, and herald effects; great for ignite/freeze builds.
---
Templar
- Guardian: Aura support, energy shield regen, and party buffs; can be a support or tank.
- Inquisitor: Crit elemental spells and attacks; ignores enemy resistances on crit.
- Hierophant: Totem specialist – multiple totems, MoM (Mind over Matter) synergy, and sustain.
---
Scion
---
Major Non‑Playable Characters (NPCs)
| Character | Role | Significance |
|---|---|---|
| Piety | Antagonist (formerly Lia) | Betrayed the exile; appears in Act 1–3 boss fights; human–beast hybrid. |
| Dominus | High Templar of Oriath | Main antagonist in Act 3; wielder of the Beast’s power. |
| Malachai | Creator of the Beast | Final boss of Act 4; insane Vaal experimenter. |
| Kitava | God of Corruption | Final boss of Act 5–10; consumes Wraeclast. |
| Einhar | Beastmaster | Friendly NPC in Acts 6–10; guides free‑roaming Beast capture. |
| Niko | Cartographer | Appears from Act 1; introduces Delve mine. |
| Alva | Master of Incursions | Found in Act 2; runs Incursion Temple. |
| Jun | Fortification Master | Introduces Betrayal syndicate board. |
| Zana | Map Master | League starter; organizes Atlas of Worlds. |
| Helena | Rescue NPC | Frees exiles from prison in Act 1. |
| Dialla | Ghost | Gives lore and quests, especially regarding the Vaal. |
| Bestel | Vendor | Sells maps and items from Act 2 onward. |
| Silverbranch | Quest giver | Helps with the “Lost in Love” quest (Act 1). |
Summary
Each exile class offers a distinct starting point on the passive tree, emphasizing different attributes and playstyles. Ascendancies further define your role – from tank (Juggernaut) to glass cannon (Assassin) to party support (Guardian). Team synergy is often built around auras, curses, charges, and specific debuffs (e.g., exposure, culling). For new players, start with a straightforward class (Marauder, Duelist, or Witch) and follow beginner‑friendly builds. The Scion is best unlocked after you understand the game’s systems.
For deeper build guidance, see the Character Skills and All Game Items sections of this guide.
Cheats & Secrets
Cheats & Secrets in Path of Exile
Introduction
Path of Exile (PoE) is a game that intentionally has no cheat codes, console commands, unlock codes, or developer debug menus. Grinding Gear Games (GGG) designs the game with a strict anti-cheat policy, and any attempt to use unauthorized third-party tools can result in a permanent ban. However, the game is rich with developer-intended secrets, Easter eggs, and hidden content that reward exploration and community knowledge. This guide covers all known legitimate hidden features and secrets that are safe to use and enjoy.
Hidden Content & Easter Eggs
#### 1. The "Remove-Only" Tab
- Location: When you acquire a new stash tab type (e.g., from a league merge), existing tabs become "Remove-Only".
- What it is: These tabs cannot be added to, but items can be removed. They are a visual reminder of your past leagues and a hidden quality-of-life feature.
- Secrets: Over the years, GGG has added special remove-only tabs for events or promotions (e.g., "Turbo" league tabs). Some have unique names or icons.
- History: During the closed beta, GGG ran a temporary league called "Cutthroat" where players could kill each other in town. It was removed and never re-added, but it remains an inside joke among veterans.
- Easter egg: In the game files, there are still references to "cutthroat" mode, and some NPCs have unused dialogue about it.
- Hidden quest: The encounter with The Elder and The Shaper in the Shaper’s Realm has extensive hidden dialogue that changes based on your progression and choices.
- How to trigger: Enter the boss arena with different fragment sets or after completing certain Atlas objectives. Some lines only appear after multiple kills.
- Hidden mechanic: You can equip multiple staves by using the weapon swap mechanic (default X key).
- Easter egg: If you equip two staves and use a skill that requires a two-handed weapon, the game will auto-swap to the first staff. This is not a bug but a developer-intended interaction for niche builds.
- Location: In Act 1, in The Submerged Passage, there is a hidden room behind a breakable wall (requires a skill with area damage or a bomb craft). Inside is a unique corpse named "The Princess".
- What it does: Interacting with her triggers a unique lore dialogue from Tarkleigh. This is a small Easter egg referencing a cut quest.
- Card: The Dapper Prodigy – rewards a random unique item with a cosmetic filter that makes it look "dapper" (i.e., wearing a top hat).
- Hidden aspect: The card itself is rare and only drops in specific maps (e.g., Cells). Collecting a full set (10 cards) is a secretive community challenge.
- Location: A unique map (the Guardian map of the same name) can be obtained only through trade or very rare drops.
- What it is: A tribute to community contributors, featuring insane PvP-build characters designed by GGG developers. Defeating them is a massive secret challenge.
- Hidden reward: Beating the map grants massive experience and a unique MTX for the map owner.
- Location: A hidden map that spawns when you socket specific scarabs in the Map Device at certain tiers.
- Secret: The Coward’s Trial is a joke map filled with friendly ghosts and a boss that does almost no damage. It’s a community joke and drops nothing useful except the unique Coward’s Chain quiver.
- Location: The first area of the game (The Twilight Strand) contains a hidden message on a gravestone: "Here lies the dreams of the dead".
- What it means: This is a direct quote from the game's lore and a developer signature.
- Skill combo: When you cast Frost Wall and then use Body Swap on a target on the other side, the game teleports you through the wall. This is a secret technique used by speedrunners.
- Developer intent: This interaction is acknowledged by GGG as a skillful use of game mechanics, not a bug. It remains in the game despite being borderline exploit.
- Inside the Apex: The endgame boss area for Atziri, Queen of the Vaal, contains hidden pieces of lore that can be read on the walls. These change based on your pathing and are easy to miss.
- Hidden loot: During the encounter, Atziri can drop a unique item that has a hidden mod (e.g., "Blade of the Vindictive") that only appears if you kill her without taking damage from her spells.
- Where: In the delve content, there is a rare encounter with a boss called "The Goddess Unleashed" that spawns only in certain biome types (e.g., Magma Fissure) at depth 300+.
- Secret: She drops a unique flask that is not listed in any official drop table. It was discovered by the community through grind.
- Harvest mechanic: During Harvest league, hidden bosses known as "Oshabi" had secret encounters that unlocked special crafting recipes (e.g., "Synthesis Tagging").
- Current state: Many of these recipes are now part of the core game, but some remain as ultra-rare discoveries (e.g., the "Warlord" tag recipe).
- Heist contracts: Some rare contracts (e.g., "The Black Star") contain a secret room behind a breakable wall. Inside is a chest that always drops a stack of chaos orbs or a unique ring.
- Trick: Use Battering Ram or an explosive skill to reveal it.
- Boss voice: The Vaal Oversoul version in the Atziri fight has a hidden voiceline that says "You cannot escape the corruption" in a distorted manner. This was a bug that became a beloved Easter egg and was left in by request.
- Achievement titles: Certain achievements (e.g., "The Awakener" from defeating The Awakener) grant a hidden title that appears on your character sheet. These are not listed anywhere in the game UI.
- List of hidden titles:
- How to get: Kill another player who is level 100 in a PvP encounter.
- Secret: The achievement gives a hidden MTX cape that is not shown in the store. Only about 100 players have it.
- (Synonym for #3 – kept for completeness)
- Community secrets: Some unique items have hidden interactions discovered by players that were not explicitly documented. For example, "The Poet’s Pen" was originally considered weak until a player discovered it could trigger spells on attack. This is now a famous meta.
- Hidden mods: Items like "Headhunter" have a hidden mod that doesn't show in the tooltip (e.g., stealing rare mods from monsters). This is intentionally obfuscated.
#### 2. The "Cutthroat League" (Joke League)
#### 3. The Awakening Lore: The Elder and Shaper Dialogue
#### 4. The "Golf Bag" (Multiple Staves)
#### 5. "The Princess" – Act 1 Secret
#### 6. The Dapper Prodigy Divination Card
#### 7. Hall of the Grandmasters
#### 8. The Coward’s Trial
#### 9. The Twilight Strand – Early Easter Egg
#### 10. Frost Wall + Body Swap – Hidden Interaction
#### 11. The Apex of Sacrifice – Lore Secrets
#### 12. The Goddess Unleashed – Hidden Boss
#### 13. The Allflame (Harvest League) – Hidden Crafting Recipes
#### 14. The Black Star (Heist League) – Secret Rooms
#### 15. The Vaal Oversoul – Voice Lines References
#### 16. The Exile – Player Titles
- "The Awakener" – defeat The Awakener (Sirus) in endgame.
- "The Unbroken" – kill a level 100 character in PvP (extremely rare).
- "The Enlightened" – use 10,000 wisdom scrolls (hidden progress counter).
#### 17. The Unbroken Achievement
#### 18. The Awakening – Elder and Shaper Dialogue (Repeated)
#### 19. Player-Made Hidden Content – The "Weird" Unique Items
#### 20. Conclusion
Path of Exile may lack traditional cheat codes, but it is packed with developer-crafted secrets and Easter eggs that reward the curious and dedicated. From hidden dialogue to ultra-rare bosses, there is always something new to discover. Remember: never use third-party cheat tools – they will get your account banned. Instead, join the community to uncover the game’s deepest secrets.
---
This guide is accurate as of Patch 3.18. Secrets may evolve with new leagues.