Phasmophobia
## Game Overview **Phasmophobia** is a cooperative psychological horror game developed and published by **Kinetic Games**. It first launched in **Early Access on Steam** in September 2020, quickly becoming a viral sensation. The full 1.0 release arrived on **October 28, 2024**, with simultaneous la...
Download & Installation
Download & Installation Guide for Phasmophobia
This guide covers all officially supported platforms for Phasmophobia. The game is available on PC (Steam & Epic Games Store), PlayStation 5, and Xbox Series X|S. It is not currently available on Nintendo Switch, mobile devices, or older consoles.
1. PC (Steam)
#### Official Source
- Only download from the official Steam store page: [Phasmophobia on Steam](https://store.steampowered.com/app/739630/Phasmophobia/)
#### Step-by-Step Installation
1. Install Steam if not already installed – download from [steampowered.com](https://store.steampowered.com/about/).
2. Log in to your Steam account (free to create).
3. Go to the Store tab, search for "Phasmophobia", and click Add to Cart (or Buy).
4. Complete the purchase (currently $19.99 USD).
5. After purchase, click Install from the game’s store page or from your Library.
6. Choose installation directory (default: `C:\Program Files (x86)\Steam\steamapps\common\Phasmophobia`).
7. Wait for the download (~15 GB) and automatic installation.
8. Once installed, the Play button will appear in your Library.
#### System Requirements (PC)
| Component | Minimum | Recommended |
|---|---|---|
| OS | Windows 10 64-bit | Windows 10/11 64-bit |
| CPU | Intel Core i5-4590 / AMD FX-8350 | Intel Core i7-6700 / AMD Ryzen 5 1600 |
| RAM | 8 GB | 16 GB |
| GPU | NVIDIA GTX 970 / AMD Radeon R9 290 | NVIDIA GTX 1070 / AMD Radeon RX 580 |
| VRAM | 4 GB | 8 GB |
| DirectX | Version 11 | Version 12 |
| Storage | 21 GB available space (includes DLC) | 21 GB SSD recommended |
| Network | Broadband internet connection | Broadband internet connection |
---
2. PC (Epic Games Store)
#### Official Source
- Only from the Epic Games Store: [Phasmophobia on Epic](https://store.epicgames.com/en-US/p/phasmophobia-14f2e6)
- Purchased and downloaded exclusively from the PlayStation Store on your PS5 console or via the web store.
- Available on the Microsoft Store (Xbox console or web) and via Xbox Game Pass (included with Game Pass Ultimate and PC Game Pass).
#### Step-by-Step Installation
1. Download and install the Epic Games Launcher from [epicgames.com](https://store.epicgames.com/en-US/download).
2. Log in to your Epic Games account (free).
3. Go to the Store tab, search for "Phasmophobia", and click Get (purchase required).
4. Complete purchase. The game is added to your Library.
5. In your Library, find Phasmophobia and click Install.
6. Choose installation location and options (default: `C:\Program Files\Epic Games\Phasmophobia`).
7. Wait for the download and installation to finish.
System Requirements – Same as Steam version (see table above).
---
3. PlayStation 5
#### Official Source
#### Step-by-Step Installation
1. On your PS5, navigate to the PlayStation Store (home screen icon).
2. Search for "Phasmophobia" using the on-screen keyboard.
3. Select the game, then choose Add to Cart and proceed to checkout.
4. Complete payment (PS Store credit or linked card).
5. After purchase, the download will begin automatically. You can also manually start it from your Game Library > Purchased.
6. The game requires ~20 GB of free space. Installation will complete once the download finishes.
7. Once installed, the game appears on your home screen.
System Requirements – PS5 only; internal SSD space required (no external drive support for play).
---
4. Xbox Series X|S
#### Official Source
#### Step-by-Step Installation
Option A: Purchase outright
1. On your Xbox Series X|S, open the Microsoft Store.
2. Search for "Phasmophobia" and select it.
3. Choose Buy (or Install with Game Pass if you have an active subscription).
4. Complete transaction. The download will start immediately.
5. Monitor download progress in My Games & Apps > Manage > Queue.
Option B: Xbox Game Pass
1. Ensure you have an active Xbox Game Pass Ultimate or PC Game Pass subscription.
2. Open Xbox Game Pass app on console or PC. Search for Phasmophobia.
3. Click Install (the game is available for both console and PC with Game Pass).
4. Choose installation drive (internal or external USB 3.0 – but performance may vary).
Storage Space: ~20 GB on Xbox. Ensure enough free space.
---
Account Requirements
| Platform | Account Needed | Notes |
|---|---|---|
| Steam | Steam account (free) | Must own game on Steam. |
| Epic Games | Epic Games account (free) | Must own game on Epic. |
| PlayStation 5 | PlayStation Network (PSN) account (free, but subscription for online play? Phasmophobia requires PS Plus Essential or higher for online multiplayer. | |
| **Xbox Series X | S** | Xbox Live account (free, but Xbox Game Pass Core or Ultimate required for online multiplayer). |
---
First Launch Setup
After installation, follow these steps to get started:
1. Launch the game from your platform’s library/home screen.
2. Unity engine splash will appear; wait for it to load.
3. Main Menu – You’ll see options: Play, Tutorial, Options, etc.
4. Audio/Video Settings – It’s recommended to:
- Set Graphics Quality to match your hardware (start with Medium and adjust).
- Enable V-Sync if you experience screen tearing.
- Set Field of View to 90-110 for comfort.
- Adjust Volume for microphone and overall sound.
5. Create/Select Save – The game auto-creates a local save. No manual save naming needed.
6. Tutorial – Highly recommended to play the short tutorial to learn basic mechanics.
7. Microphone Permissions – On PC, the game may ask for microphone access. Allow it for voice chat. On console, the platform handles mic permissions.
8. Online Connection – Ensure you are connected to the internet. The game requires a network for matchmaking and to load player data.
---
Common Installation Errors & Fixes
| Error | Cause | Solution |
|---|---|---|
| "Not enough disk space" | Insufficient free space on the selected drive. | Free up space (delete old files, clear recycle bin) or choose a different drive. Minimum 21 GB required. |
| Steam "Missing file privileges" | Steam cannot write to installation folder. | Run Steam as Administrator (right-click > Run as admin). |
| Epic Games "Installation Failed" | Corrupted download or antivirus interference. | Pause and resume download; temporarily disable antivirus; clear Epic launcher cache (Settings > Troubleshooting). |
| PS5 "Cannot download" | Network issue or storage corruption. | Restart console in safe mode (hold power button until two beeps) and rebuild database. Check network. |
| Xbox "Installation stopped" | Slow download or server issue. | Hard reset console (hold power button 10 seconds); clear local Xbox cache (Settings > System > Console info > Reset, keep games & apps). |
| Game crashes on launch | Outdated GPU drivers or corrupted files. | Update graphics drivers; verify game files: Steam: right-click game > Properties > Local Files > Verify integrity. Epic: click three dots next to game > Manage > Verify. Console: Delete and reinstall. |
| Microphone not working in-game | Incorrect default device or permissions. | PC: Check Windows Sound settings, set correct input device. Set game to use default. Console: Check party/game chat settings. |
| "Failed to connect to backend" | Server outage or firewall block. | Check [Phasmophobia Server Status](https://twitter.com/KineticGame) or Downdetector. Temporarily disable Windows Firewall or add game exception. |
Post-Install Verification
After installation, perform these checks to ensure everything is working:
- Check Disk Space: On PC, right-click the game folder and check properties. Should be near 21 GB. On console, verify in Storage settings.
- Launch the game: It should open without error messages.
- Test Online Features: Try hosting a public lobby or quick join a game. If you can connect, online functionality is working.
- Verify Audio: In the settings menu, test your microphone (use voice chat test) and headphones (volume levels).
- Check for Updates: After initial installation, the game may auto-update to the latest version. Ensure you have the newest patch.
- Play Tutorial: Completing the tutorial confirms controls work.
If you encounter persistent issues after verifying files and updating drivers, visit the [Phasmophobia Official Discord](https://discord.gg/phasmophobia) or the [Kinetic Games Support page](https://www.kineticgames.co.uk/support) for further assistance.
---
Last updated: 2025. Game versions and requirements subject to change. Always check official store pages for the latest information.
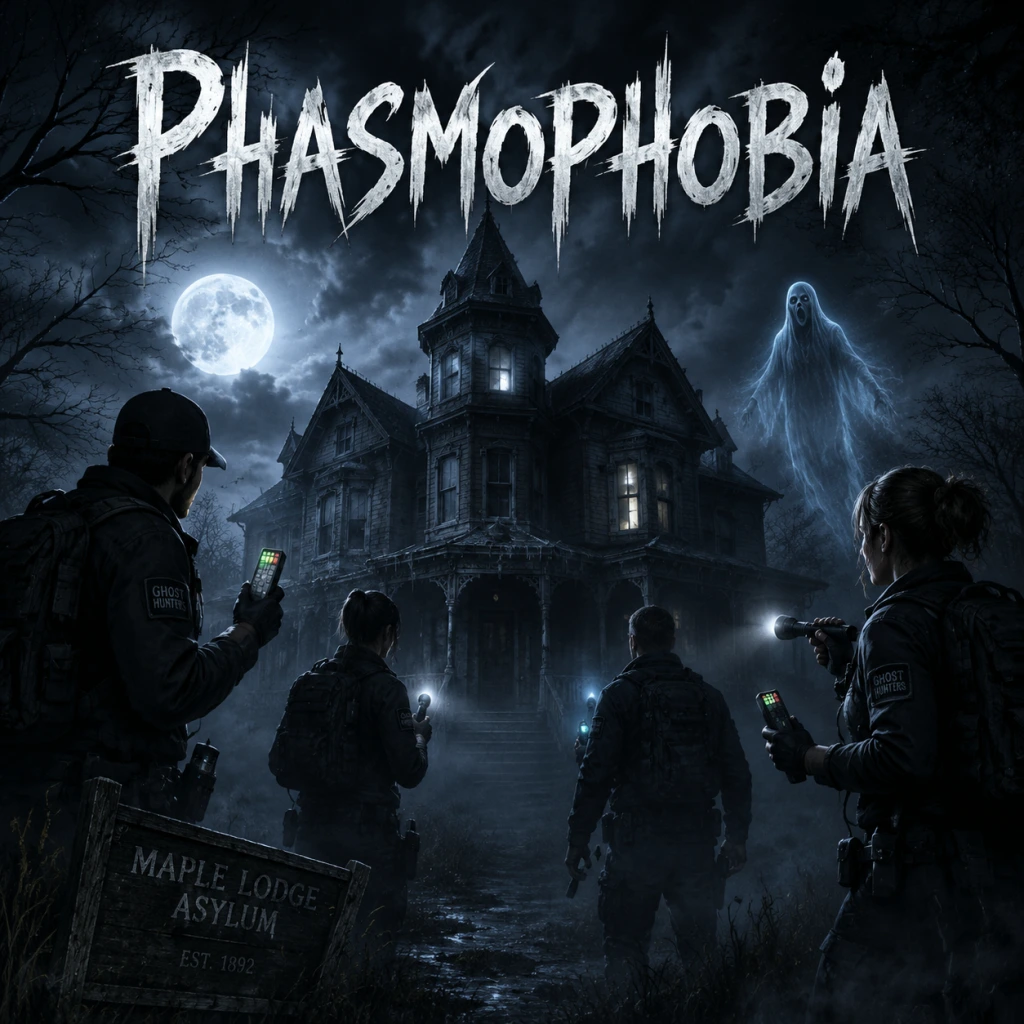
Game Introduction
Game Overview
Phasmophobia is a cooperative psychological horror game developed and published by Kinetic Games. It first launched in Early Access on Steam in September 2020, quickly becoming a viral sensation. The full 1.0 release arrived on October 28, 2024, with simultaneous launches on PlayStation 5 and Xbox Series X|S. As of the latest updates, the game also fully supports PC VR (Oculus Rift, HTC Vive, Valve Index, and SteamVR headsets) and PSVR2 on PlayStation 5, offering an even more immersive experience. Phasmophobia is available on Steam, Epic Games Store, PlayStation Store, and Microsoft Store.
Story & Setting
While Phasmophobia lacks a traditional narrative campaign, its core premise is simple yet compelling: you are a member of a paranormal investigation team contracted to identify and document ghostly activity at various haunted locations. The game takes place across a series of increasingly dangerous sites—from suburban houses and abandoned asylums to a cursed prison and a high-school. Each location is procedurally designed with randomized ghost types, evidence spawns, and environmental cues, ensuring no two investigations feel the same. The overarching lore is subtle, hidden in collectible cursed objects, ghost descriptions, and the occasional “ghost death” hints, but the true story is the one you create with your team through shared fear and discovery.
Main Characters
Players do not control pre-defined characters; instead, each session you create a custom avatar with adjustable gender, appearance, and voice pitch. The only recurring “character” is the ghost, which has a unique personality determined by its type (e.g., Spirit, Wraith, Phantom, Poltergeist, Demon, etc.). The ghost’s behavior—favorite room, hunting patterns, response to equipment—is randomized, making every ghost feel like a distinct entity. There are also ghost models with unique visual designs that change each match.
Core Appeal
Phasmophobia’s appeal lies in its genuine terror, deep cooperation, and realistic ghost hunting simulation. The game uses proximity-based voice chat (walkie‑talkies and local chat) where your teammates hear you in-game and ghosts can react to your voice, creating tense moments when you must whisper or stay silent to avoid detection. The paranormal investigative tools (EMF readers, spirit boxes, UV lights, D.O.T.S. projectors, video cameras, and crucifixes) feel authentic and require teamwork to use effectively. The horror is amplified by the game’s atmospheric sound design, dynamic lighting, and the perpetual threat of being hunted by a ghost that learns from your actions.
Target Audience
- Co-op Horror Fans: Players who enjoy shared scares with friends, similar to games like Dead by Daylight or Left 4 Dead but with a slower, more methodical pace.
- Ghost Hunting Enthusiasts: Those fascinated by real-world paranormal investigations—the game’s equipment and procedures are inspired by actual ghost hunters.
- VR Gamers: The VR mode offers unparalleled immersion, making it a must-try for players with compatible headsets.
- Casual & Hardcore Players: Difficulty levels range from Amateur (friendly ghost starting without hunting) to Professional and Nightmare, plus a new Custom Difficulty system that lets you tailor every parameter.
- Streamers & Content Creators: The emergent gameplay and frequent jump scares make for highly entertaining broadcasts.
- Amateur: A tutorial-friendly mode with a longer grace period before the ghost begins hunting; ideal for learning.
- Intermediate: Standard difficulty with balanced ghost aggression and a moderate grace period.
- Professional: The ghost is more active, hunts sooner, and players have fewer safety nets.
- Nightmare: Hardcore mode where the ghost hides some evidence, making identification harder; two ghost types are possible.
- Custom Difficulty: Added in the full release, this mode allows players to adjust over 30 parameters (ghost speed, hunting frequency, sanity drain, etc.) to create their perfect challenge.
- Challenge Mode: Weekly rotating challenges with fixed settings that reward special cosmetics and currency.
- Single-Player/Co-op: Play solo or with up to 3 friends (4 players total). The game supports online multiplayer only; there is no local split-screen.
- Online Multiplayer: Full support for up to 4 players via public lobbies or private games with friends. Requires a persistent internet connection (no offline mode).
- Solo Play: You can play alone, but the game still requires an internet connection to access the hub and load maps. There is no true offline single-player component.
- Cross-Play: Full cross-play exists between PC, PlayStation 5, and Xbox Series X|S. Players can team up regardless of platform as long as they all own the game.
- Voice Chat: Built-in proximity voice chat works across platforms; you can also use third-party apps, but the in‑game system is triggered by ghost reactions.
- Proximity Voice Chat & Ghost Reaction: Your voice can attract the ghost, making whispering, hiding, and strategic communication essential.
- Procedural Evidence & Ghost AI: Each ghost type has unique behaviors (e.g., Poltergeist throws objects, Banshees target only one player) and evidence is never guaranteed, forcing players to deduce through observation.
- Realism & Immersion: The game simulates real-world investigation gear, from EMF readers to parabolic microphones, and includes sanity meters, global event triggers, and interaction logs.
- VR Integration: Full room-scale VR support with motion controls—using a spirit box by holding it to your mouth or shining a UV light by physically pointing—adds an unmatched layer of fear.
- Ever‑Evolving Experience: Continuous free updates, a passionate community, and the horror of the unknown keep even seasoned players on edge. No two investigations are alike, ensuring high replayability.
Game Modes
Phasmophobia offers several continuous game modes that affect the ghost’s aggression and available evidence:
Online/Offline Support
DLC/Expansions
Phasmophobia has no paid DLCs or expansions. All new content—including maps, ghost types, equipment, and game modes—has been added through free updates since early access. The full 1.0 release introduced the Point Hope lighthouse, Sunny Meadows Mental Institution (revamped), Camp Woodwind, and the Custom Difficulty system. Kinetic Games continues to release seasonal events (e.g., Halloween, Christmas) that add temporary ghosts and cosmetics. The only monetization is the base game purchase; no microtransactions exist.
What Makes Phasmophobia Unique?
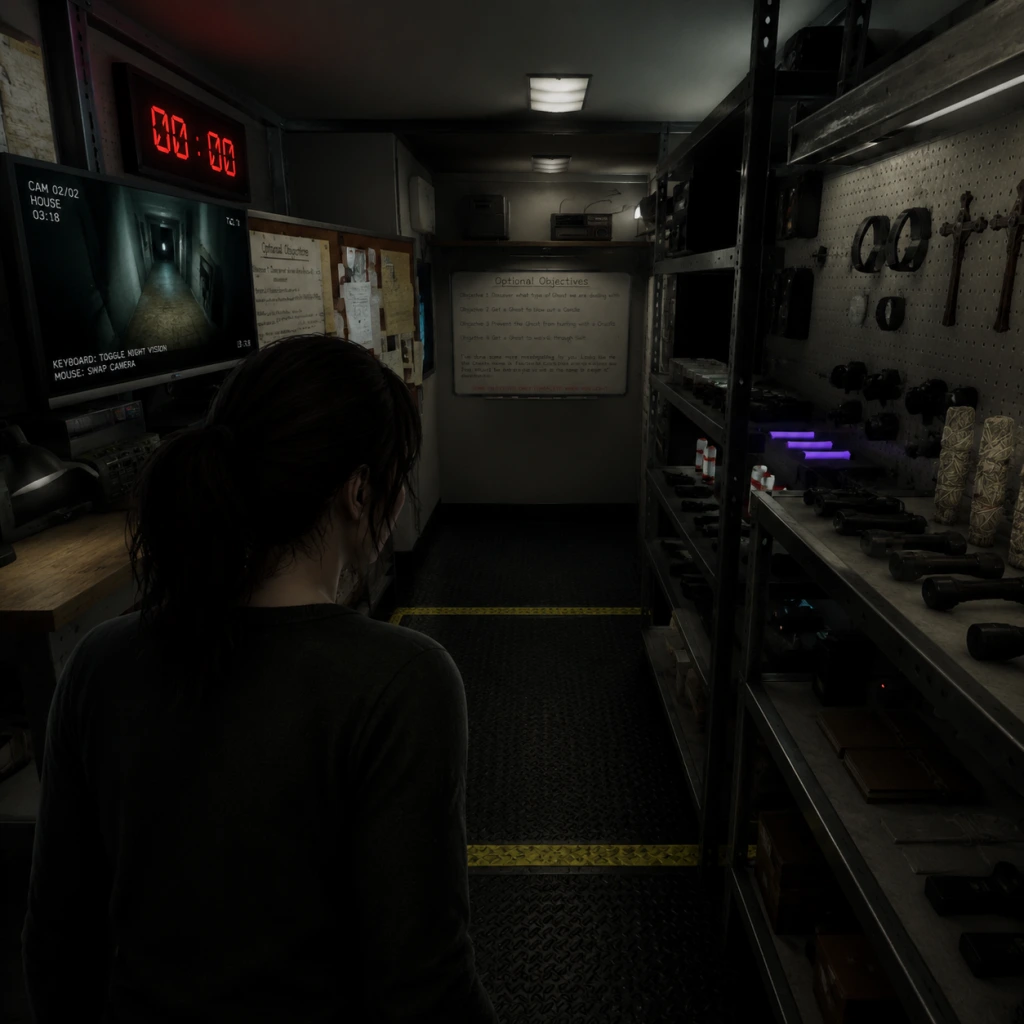
Getting Started
Getting Started with Phasmophobia: Your First Hour & Beyond
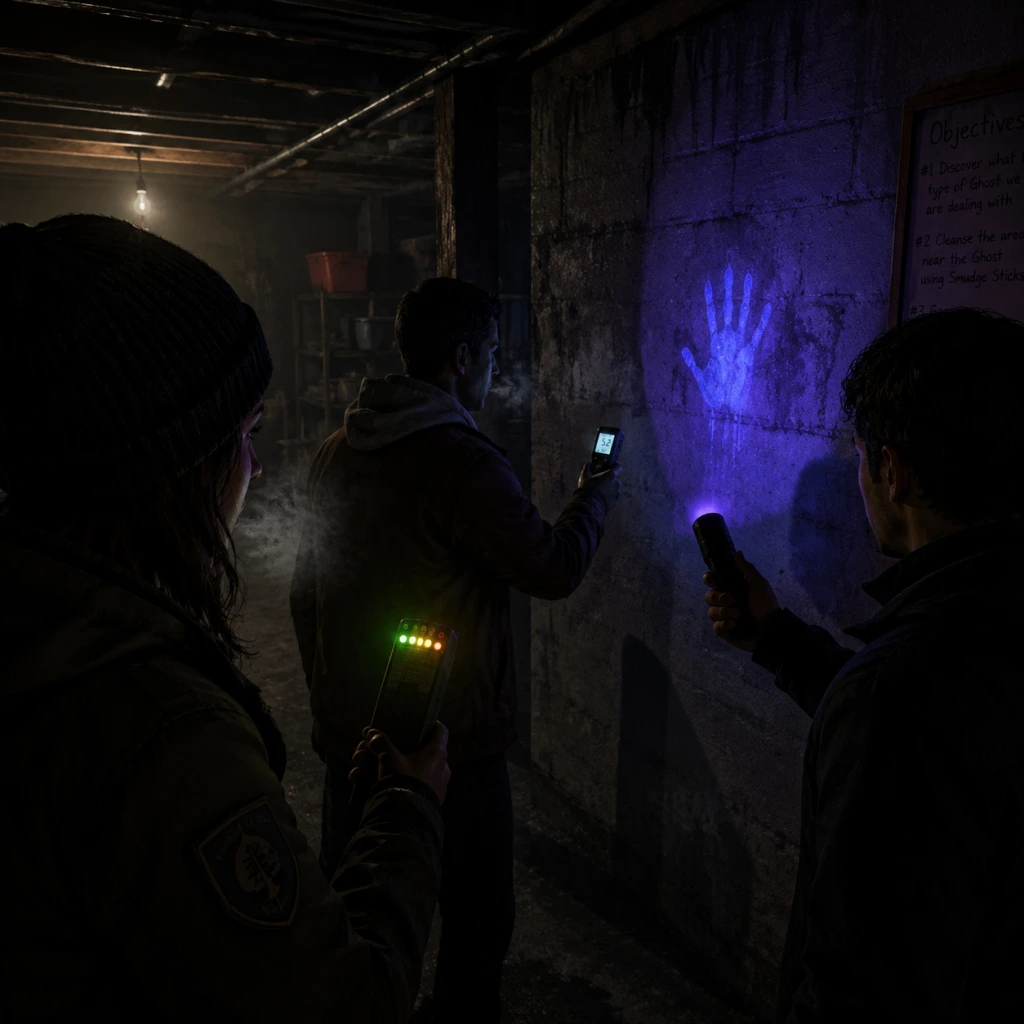
Welcome, rookie investigator! This guide is designed to get you from the lobby to a successful (or at least survivable) first contract. Phasmophobia has no character creation — you are a nameless, faceless ghost hunter. Your only identity is your inventory and your voice. Let's begin.
First Hour Walkthrough (Step-by-Step)
1. Launch the Game: After installing from Steam, Epic, or console store, you'll see the main menu. Click Start Game (or "Play").
2. Choose a Lobby: You can Host your own or Join a public/private lobby. For your first time, select Host and set the lobby to Private so you can learn alone or with friends.
3. Select a Map: The tutorial will likely default to Tutorial mode (if you haven't dismissed it). Do it! It's a safe, single-player walkthrough that teaches the basics. If you skipped it, you can find it again in the Options menu under Tutorial.
4. Equip Your Gear: All players start with a flashlight, photo camera, and EMF reader. In the van, you can purchase additional equipment on the wall-mounted PC. But for the first hour, stick with the starter gear.
5. Enter the Building: Walk through the front door of the house. Proceed slowly; listen for sounds (doors creaking, footsteps, ghost interactions).
6. Initial Sweep: Use your EMF reader in every room. Work with your team (or yourself) to identify the ghost room — the room where the ghost is most active. Signs: cold breath (visible breath in cold rooms), objects thrown, EMF readings near 5, or ghost activity sounds.
7. Gather Evidence: Place equipment like the Spirit Box or Thermometer in the suspected ghost room. Wait for EMF spikes, Spirit Box responses, or temperature drops below 3°C (freezing temperatures).
8. Identify the Ghost: Once you have 2–3 of the 3 possible evidence types for that difficulty, cross-reference with the Journal (press J on PC) to identify the ghost type.
9. Complete Objective: After identifying, you can optionally do optional objectives (take photos of the ghost, prevent a hunt, etc.) but the main goal is to survive and leave alive.
10. Exit & Collect Rewards: Return to the van and press the Leave button (or walk out of the map boundary). You'll get money and XP.
Character Creation
There is no character creation in Phasmophobia. Every player uses the same default model (a generic person in casual clothes). You can change your Voice (in Settings) to alter your microphone processing, but not your appearance.
Controls on All Platforms
#### PC (Keyboard & Mouse)
| Action | Key |
|---|---|
| Move | W/A/S/D |
| Interact / Pick Up | E |
| Drop / Place | Q |
| Flashlight | F |
| Toggle Crouch | Left Ctrl |
| Journal | J |
| Push-to-Talk (Local) | V |
| Push-to-Talk (Global) | B |
| Use Item (Primary) | Left Click |
| Use Item (Secondary) | Right Click |
| Walk Slowly | Left Shift (toggle) |
| Sprint | Left Shift (hold) |
| Action | Button |
|---|---|
| Move | Left Stick |
| Look | Right Stick |
| Interact / Pick Up | R1 |
| Drop / Place | L1 |
| Flashlight | R3 |
| Toggle Crouch | Circle |
| Journal | Touchpad |
| Push-to-Talk (Local) | Down on D-Pad |
| Push-to-Talk (Global) | Up on D-Pad |
| Use Item (Primary) | R2 |
| Use Item (Secondary) | L2 |
| Walk Slowly | Square |
| Sprint | Cross (hold) |
| Action | Button |
|---|---|
| Move | Left Stick |
| Look | Right Stick |
| Interact / Pick Up | RB |
| Drop / Place | LB |
| Flashlight | R3 |
| Toggle Crouch | B |
| Journal | View (button) |
| Push-to-Talk (Local) | D-Pad Down |
| Push-to-Talk (Global) | D-Pad Up |
| Use Item (Primary) | RT |
| Use Item (Secondary) | LT |
| Walk Slowly | X |
| Sprint | A (hold) |
UI Overview
The HUD (Heads-Up Display) is minimal on purpose:
- Top-left: Sanity percentage (starts at 100%, decreases in ghost presence, below ~50% ghost can hunt).
- Bottom-center: Equipment indicator — shows what item you are holding and its battery life (for electronics).
- Lower-left: Player health (when injured) and activity monitor (pulsing bars during ghost events).
- Screen edges: Red glow during a ghost hunt (indicates imminent danger).
- Van camera screens: Located in the truck, showing live feeds from placed cameras.
- Journal (Press J / Touchpad / View): Contains your ghost journal (evidence checkboxes), map, objectives, and sanity graph.
- Primary Objective: Identify the ghost type (always required).
- Optional Objectives: Earn bonus money. For beginners, focus on: "Take a photo of the ghost" (easiest with camera) or "Detect the ghost with EMF" (often happens naturally). Avoid objectives like "Prevent the ghost from hunting" until you understand mechanics.
- Don't split up in your first games — stay together. The ghost will hunt when sanity is low; if you're alone, you're easy prey.
- Don't run during a hunt — walking or crouching reduces noise. Running attracts the ghost.
- Don't bring expensive equipment until you are confident you can get it back. Losing a $50 video camera hurts early on.
- Don't ignore your sanity — if it's below 50%, consider leaving to avoid a hunt.
- Don't hide in closets/wardrobes near the ghost room — the ghost can open doors and find you. Hide behind furniture or in corners away from line of sight.
- Money: Earned from completing contracts. Save up for EMF Reader (Level 1) (you get one free) then upgrade to Video Camera and Thermometer.
- Equipment Purchase Order:
- Do not buy the Tarot Cards, Voodoo Doll, or Music Box until you learn ghost mechanics — they can backfire.
- Upgrade your equipment when you can: Level 2 gear has better durability/range. Focus on EMF, Spirit Box, Thermometer, Photo Camera.
- [ ] Complete the Tutorial (Options > Tutorial)
- [ ] Learn to use the EMF reader (press E to equip, hold left-click to activate)
- [ ] Complete one contract on Tutorial difficulty (if available) or Amateur with all objectives
- [ ] Practice finding the ghost room without dying
- [ ] Collect 3 evidence types in one game
- [ ] Identify the ghost correctly using the Journal
- [ ] Survive your first ghost hunt (hide, stay quiet, hold breath if possible)
- [ ] Spend your first earnings on a Video Camera (place it in the ghost room)
- [ ] Unlock at least one optional objective for bonus cash
- [ ] Join a public lobby on Amateur difficulty with a friendly team (use in-game voice)
Essential Early Objectives
When you start a contract, you will see:
What to Do First (Priorities)
1. Locate the Ghost Room: Use EMF reader, listen for sounds, and check for cold breath. Once found, pile equipment there.
2. Place a Video Camera: Aim it at a key area (door, center of room) to see ghost orbs later.
3. Set up a UV Light: To detect footsteps/fingerprints on doors/windows.
4. Use Spirit Box: Turn off lights in the ghost room, ask questions like "Are you here?" or "How old?".
5. Check Temperature: Use the Thermometer to find freezing temperatures (< 0°C for some ghosts, but < 3°C is cold; likely ghost room).
What to Avoid (Immediate Mistakes)
Early Resource Priorities
1. Cheap essentials (candle + lighter, UV flashlight, salt)
2. Extra video cameras (for multiple rooms)
3. Parabolic Microphone (for long-range sound detection)
Common Beginner Mistakes
1. Not turning on the flashlight — you won't see ghost orbs or evidence. Always have it on when inside.
2. Forgetting to bring the Journal — you need it for evidence tracking. Always have it equipped (you start with it).
3. Using the Spirit Box outside the ghost room — it only works in the same room as the ghost. Turn off nearby electronics (like your flashlight) to avoid interference.
4. Standing in line of sight during a hunt — hide behind something. The ghost cannot see through closed doors (if you don't move).
5. Leaving the van with no gear — always grab a flashlight and at least one piece of equipment from the wall. Otherwise you're helpless.
6. Talking too much in voice chat — ghosts can hear you and may be attracted. Speak only when using Spirit Box or coordinating quietly.
7. Ignoring the ghost event — if the ghost manifests and doesn't hunt, take a photo for bonus money. But don't scream — it can still cause sanity drop.
Day-One Checklist
Remember: Dying is normal. The ghost is not punishing you — it's teaching you. Respect the ghost, communicate with your team, and always have an escape route. Good luck, and welcome to the paranormal investigation team.
Core Gameplay
Core Gameplay in Phasmophobia: A Progression Tier Guide
Phasmophobia is a cooperative horror investigation game where players must identify a ghost type by gathering evidence while surviving its hostile activity. There is no traditional combat; the only way to survive a ghost hunt is to hide, run, or use defensive items. The game’s core loop revolves around contracts — missions to a procedurally generated haunted location. This guide breaks down the gameplay by progression tiers, covering the main loop, interaction systems, progression, economy, and endgame content.
Core Gameplay Loop
The cycle repeats with every contract:
1. Select Contract — Choose a difficulty (Amateur, Intermediate, Professional, Nightmare, or Custom) and a location from the van map.
2. Loadout — Purchase equipment from the van’s item cabinet using in-game money. Items are shared among the team.
3. Investigate — Enter the location, find the ghost room (where the ghost is most active), and gather evidence (EMF, Spirit Box, Ghost Writing, Freezing Temperatures, D.O.T.S., Ghost Orbs). Use tools like thermometers, UV lights, and video cameras.
4. Survive — The ghost becomes more aggressive as sanity drops. It may initiate a hunt (teleports nearby, closes doors, hunts players). Survive by hiding in lockers/closets, turning off electronics, or using smudge sticks/incense.
5. Identify — Based on evidence collected, choose the correct ghost type in the Journal. Correct identification gives bonus cash and XP.
6. Complete Optional Objectives — Each contract has 1–3 optional objectives (e.g., take a ghost photo, smudge the ghost during a hunt, prevent a hunt with a crucifix). These provide extra rewards.
7. Exit — Return to the van (dead players spectate). Surviving players gain sanity back. Cash earned is added to your balance.
Combat / Interaction Systems
Phasmophobia has no direct combat. Instead, players interact with the ghost through:
- Equipment: Thermometers, EMF readers, Spirit Box, UV flashlight, video camera, D.O.T.S. projector, parabolic microphone, sound sensor, motion sensor, etc. Each has a specific use for evidence or tracking.
- Defensive Items: Crucifix (prevents hunts, with a limited radius), Smudge Sticks / Incense (can stop a hunt temporarily and blind the ghost), and Salt (makes the ghost leave footprints, but only useful for UV evidence).
- Hiding: During a hunt, players must hide behind furniture, in closets, or in lockers. Turn off all electronics (including head-mounted cameras) or the ghost can hear/see them. Holding a candle or lighter does not attract the ghost if you are still.
- Sanity Management: Every player starts with 100% sanity. Sanity drops over time when in the dark, seeing ghost events, or being near the ghost. Low sanity increases hunt frequency. Use sanity pills (unlock later) to restore sanity.
- Ghost Behaviour: Ghosts have unique traits. Some are more aggressive (e.g., Demon), others hide their evidence (e.g., Shade). Understanding ghost types is key to survival.
- Equipment (new items at certain levels, e.g., Tier I flashlight at level 1, Tier II at level 18, Tier III at level 36)
- Difficulty Options (higher difficulties unlock as you reach certain levels, plus custom difficulty settings at level 30)
- Prestige (after reaching level 100, you can reset to level 1 with a prestige badge and some cosmetic rewards)
- Income: Earned per contract based on difficulty, correct ghost identification, optional objectives completed, and any bonus objectives like taking photos of the ghost or bone (a random human bone that appears in each map – photo + retrieval gives money).
- Expenses: Equipment costs money only if you lose it (die or leave it behind). You can buy items for free in the van if you already own them (they are stored in your account). To get new items, you pay once (e.g., Tier I flashlight costs $15, Tier II costs $90).
- Saving Money: Always retrieve your equipment before leaving. Dying means you lose all gear you had on you (except any inventory items like the flashlight).
- Nightmare Difficulty: Only two pieces of evidence are guaranteed (the third is hidden, so you must deduce the ghost via its behaviour). High risk, high reward (double money).
- Custom Difficulty: Unlocked at level 30, allows full control over ghost speed, aggression, sanity drain, evidence count (0-3), and more. Players create “challenge modes” for extreme difficulty or fun.
- Prestige: After reaching level 100, you can prestige, resetting to level 1, gaining a unique badge and potentially new cosmetic Tier I items (different colors). You keep your money and equipment (but item unlocks are tied to level, so you lose access to higher-tier items until you re-unlock them). There is no level cap after prestige; you can prestige multiple times, each giving a distinct badge.
- Achievements: Over 50 achievements, some requiring extreme feats (e.g., identify ghost with 0 evidence on Nightmare, survive a hunt without hiding, complete Apocalypse challenge).
- Weekly Challenges: “Apocalypse” challenges (three tiers) that force a specific high-difficulty setting on a specific map, with special rewards.
- Competition: While not directly competitive, players compare high scores, speedrun times, and challenge completions.
- Focus: Learn the basics. Stick to Amateur or Intermediate difficulty on small maps (Tanglewood, Willow, Edgefield).
- Equipment: Start with Tier I flashlight, EMF, Spirit Box, UV light, camera, video camera. Save money for Tier II items.
- Ghost Evidence: You always get 3 evidence pieces on Amateur (and 2 on Intermediate). Use the journal to check possible ghosts.
- Survival: Sanity drains slowly. Hunts are rare (starts at 50% average sanity). Practice hiding in closets and turning off electronics.
- Goals: Complete all optional objectives on each run. Unlock Tier II flashlight, parabolic microphone, and head gear.
- Money Tips: Always take a photo of the ghost (if you catch it) – that gives bonus cash. Also find the bone (glowing white) and take a photo of it, then pick it up (worth $5–$15).
- Focus: Move to Intermediate/Professional difficulty. Start playing larger maps (farmhouses, prison). Start using evidence deduction more efficiently.
- Equipment: Unlock Tier II items – much better performance. Example: Tier II Spirit Box has longer range. Tier II flashlight has better battery.
- Ghost Hunting: Ghosts become more aggressive. Hunt frequency increases. Use smudge sticks and crucifixes strategically. Learn ghost behaviours (e.g., Wraith cannot step in salt, Phantom blinks out when photographed).
- Optional Objectives: Harder optional objectives appear, like smudging the ghost during a hunt or taking a photo of the ghost within 5 meters.
- Custom Difficulty: At level 30, experiment with custom settings to prepare for Nightmare.
- Economy: Start saving for Tier III items. Avoid dying to not lose expensive gear.
- Focus: Nightmare difficulty (or high custom difficulty). Master all ghost types.
- Equipment: Unlock Tier III everything. These are costly but provide best efficiency (e.g., Tier III flashlight never runs out of battery while on, Tier III head gear has night vision).
- Evidence: On Nightmare, you only get 2 evidence pieces; you must deduce the third from ghost activity. For example, if you have EMF 5 and Ghost Writing, the ghost must be a type that has those two plus a unique third – like a Yokai (Spirit Box). But if you can’t get a Spirit Box response, you rule out Yokai and check other possibilities.
- Survival: Hunts are frequent and dangerous. Use salt, motion sensors, sound sensors to track ghost location. Coordinate with team. Use paramic to hear ghost from a distance.
- Challenges: Attempt Apocalypse challenges (Gold, Silver, Bronze) on Sunny Meadows (asylum) with insane custom settings. This is the hardest content.
- Prestige: At level 100, decide whether to prestige. Prestiging gives you a new badge (Bronze, Silver, Gold, Diamond, etc.) and resets all item unlocks to level 1. You keep money, so you can buy Tier I items immediately. However, you lose access to higher tiers until you level up again. This extends replayability.
- Status: Multiple prestiges (some players have prestige 20+). All items unlocked again but with cosmetic variants from prestige rewards.
- Focus: Optimizing runs for maximum money, solo challenges (Apocalypse Gold), speedrunning, or role-playing. Participate in community challenges.
- Custom Difficulty: Create extreme settings: 0 evidence, ghost speed 150%, sanity drain 200%+, no hiding spots, instant hunts at 60% sanity. Complete for bragging rights.
- Economy: Money is essentially infinite once you have all items. You may still need to buy equipment if you die, but with high skill, death is rare.
- Goals: Earn all achievements, reach max prestige level (currently max prestige badge is Nightmare or similar?), or complete 100% of weekly challenges.
- Bronze: Complete a contract on Sunny Meadows with custom difficulty settings: 1 evidence, ghost speed 75%, player speed 100%, sanity drain 150%, no hiding spots, no electronics, etc. You must identify the ghost correctly and survive.
- Silver: Same but with 0 evidence, ghost speed 100%, player speed 100%, etc.
- Gold: 0 evidence, ghost speed 125%, lingering fog, higher sanity drain, and must complete all optional objectives (smudge, photo, prevent hunt) while identifying ghost. Only the best players achieve Gold.
Progression Systems
Player progression is purely based on level and money. There is no skill tree or character classes. Leveling up unlocks:
Money is earned from contracts and spent on buying equipment (one-time purchases that are then available permanently in the van). Equipment has three tiers: Tier I (basic, cheap), Tier II (better range/effectiveness, moderate cost), Tier III (best, expensive). Higher tiers are unlocked at higher levels.
Exploration / Quests & Missions
Each contract is a self-contained mission on one of many maps (e.g., Tanglewood Street House, Willow Street House, Ridgeview Road House, Grafton Farmhouse, Bleasdale Farmhouse, Prison, Asylum, Camp Woodwind, Point Hope). Map size and complexity vary. Exploration is essential to find the ghost room and evidence. Players must navigate dark environments, use flashlights, and communicate via local voice or proximity chat (in-game radio for van communication). Quests are the optional objectives; there are no story missions beyond the investigation.
Economy
Character/Build Growth
There is no character customization beyond cosmetic items (outfits, gloves, badges) unlocked via achievements and prestige. Player skill growth is entirely knowledge-based: learning ghost patterns, evidence combinations, map layouts, and effective hiding spots. The only “build” comes from equipment choices – e.g., bringing a strong flashlight vs. a head-mounted camera, or choosing to invest in Tier III items before tackling harder difficulties.
Endgame Structure
The endgame in Phasmophobia begins around level 50+ and continues indefinitely:
Progression Tiers Breakdown
#### Early Game (Levels 1–15)
#### Mid Game (Levels 16–50)
#### Late Game (Levels 51–99)
#### Endgame (Prestige + 100+)
Endgame: The Apocalypse Challenge
This is the ultimate test. Three tiers:
Summary Table
| Tier | Levels | Difficulty Focus | Key Unlocks | Survival Tips |
|---|---|---|---|---|
| Early | 1–15 | Amateur/Intermediate | Tier I items, basic maps | Stay together, hide in closets |
| Mid | 16–50 | Professional, start custom | Tier II items, custom difficulty | Use smudge sticks, learn ghost traits |
| Late | 51–99 | Nightmare, high custom | Tier III items | Deduce evidence, aggressive hiding |
| Endgame | 100+ / Prestige | Custom/Apocalypse | Prestige badges, all items | Master knowledge, challenge runs |
Game Tips
Comprehensive Game Tips for Phasmophobia
Beginner Tips: Survive Your First Hunts
1. Always have an exit plan. Before entering the ghost room, mentally map the nearest hiding spots (closets, lockers, behind beds) and know the quickest route to the front door. During a hunt, sprinting is loud — if the ghost is close, hide immediately rather than trying to run far.
2. Leave the front door open. A common rookie mistake is closing the door behind you. An open door gives you a clear line of sight to escape if a hunt starts right as you enter. In larger maps, open interior doors as you go to avoid dead ends.
3. Turn off your flashlight and electronics. Electronics (flashlight, EMF reader, UV light, parabolic mic, video camera) emit a sound and light that the ghost can track. When you hear the ghost signature or see lights flickering, switch to your unpowered gear (just a video camera or head-mounted camera) or turn everything off. The ghost still knows your last location but won't lock onto you if you break line of sight and hide.
4. Use the “S” key to walk slowly. Walking (default shift) is silent and leaves no footsteps. Always walk inside the building; running outside is fine but inside alerts the ghost to your position if it's wandering.
5. Identify the ghost room with multiple tools. The ghost room is where the ghost spends most of its time. Use EMF Reader (level 5 spike), Thermometer (below 10°C / 50°F visible breath), and Video Camera (orb detection) together. If you find cold breath, check the thermometer; if it's 3°C or below, you're likely in the ghost room.
Exploration & Investigation Tips
6. Sound is your best friend. Use the Parabolic Microphone to hear ghost sounds (footsteps, whispers, interactions) from up to 30 meters away. Point it toward suspected rooms. Also use the built-in directional audio headset — close your eyes and listen for doors opening or objects being thrown.
7. Use Salt to confirm ghost movement. Ghosts cannot pass through a salt pile without leaving footprints (visible under UV light). Place salt in doorways of the ghost room. If salt is disturbed, you've confirmed the ghost's pathing and can set up motion sensors.
8. Motion Sensors and Sound Sensors for large maps. In maps like Brownstone High School or Asylum, place motion sensors in hallways to track the ghost's path. This helps you triangulate the ghost room and avoid ambushes during a hunt.
9. Ghost Orbs are not always in the ghost room? (Clarify: Since recent updates, ghost orbs are tied to the ghost's roaming area. They can appear in adjacent rooms. Use them as a general area indicator, then cross-reference with freezing temperatures or EMF 5.)
10. Take photos of everything. Each photo (fingerprints, bone, disturbed salt, ghost, crucifix burn) gives money and experience. Use the photo camera with flash, and prioritize the ghost photo (if safe). A perfect photo set (3-star) earns maximum cash.
Survival & Evasion (Combat category)
11. Smudge Sticks – your only “weapon”. Smudge sticks (bought from the shop) temporarily blind the ghost for 6 seconds (12 with Tier III). Light a smudge stick with a lighter and walk near the ghost during a hunt to break its line of sight. After smudging, move immediately to a hiding spot because the effect ends quickly.
12. Crucifix prevents hunts. Place a crucifix (Tier I: 3m radius, Tier II: 4m, Tier III: 5m) in the ghost room. If the ghost tries to start a hunt within that radius, the crucifix is consumed and the hunt is cancelled. Use this to protect the team while gathering evidence.
13. Hiding spots: closets and lockers are safest. Enter a closet or locker and close the door from inside—the ghost cannot open it unless it knows you're there (if it saw you enter). Hold the door shut? No, just close it. Do not speak or use any electronics. The ghost will pass by if it didn't see you.
14. If cornered during a hunt, break line of sight. Round a corner and immediately put a wall between you and the ghost. Crouch and stay still. The ghost's AI requires direct vision to chase. If you break sight and hide behind a door or a large object, it will wander off.
15. Learn the ghost's hunt threshold. Each ghost type has a sanity threshold at which it can hunt. Average is 50%, but some (Demon: 70%) hunt early, others (Spirit: 50% but longer cooldown). Use sanity pills only when necessary to push investigations.
Resources & Economy (Building a Loadout)
16. Never buy all T1 gear. The starter equipment (Tier I) is free but limited. Instead, invest in the van items first: Video Camera (Tier II or III) and Head-Mounted Camera (allows others to see your view). The video camera is critical for orbs and ghost photos.
17. Focus upgrades on high-value items. Priority upgrade list: EMF Reader (T2 gives 5-reading, T3 gives 4-reading with screen), Thermometer (T2 shows instant reading, T3 has radius), and Parabolic Microphone (T2 range, T3 noise filter). Avoid upgrading UV Light — the T1 works fine.
18. Make money by taking photos. The most lucrative part of each investigation is the photo rewards. Focus on: Bone photo ($10 base), Fingerprints ($10 each), Ghost photo ($20), Disturbed Salt ($10), Interaction ($5). A full album of 3-star photos can net $70-$100 per contract.
19. Sell cursed possessions for cash. During investigation, you can find cursed possessions (Ouija Board, Music Box, Summoning Circle, etc.). If you find one and complete the objective without using it, you can sell it for $50-$100 at the shop. That’s free money.
20. Don't buy sanity pills every round. Sanity pills (T1 restores 40%, T2 50%, T3 60%) are expensive. Use them only when you need to prevent a hunt while still gathering evidence, or during a challenge where sanity drains fast (e.g., Jinn, Oni).
Ghost Behavior & Identification
21. Use ghost writing for definitive proof. A Book placed in the ghost room can reveal writing if the ghost is that type. If you get writing, you eliminate all ghosts that don't have it. Combined with orbs and spirit box, you narrow down to 2–3 possibilities.
22. Listen to the ghost's footsteps speed. Some ghosts (Revenant, Jinn) have unique footstep speed. Revenant is slow when far but incredibly fast when hunting line of sight. Hantu moves faster in cold rooms. Use this to identify without tools.
23. Spirit Box works only if you are alone in the ghost room. The ghost will only respond to players who are alone (no other living player within ~3m). If you get a response, you've confirmed Spirit Box evidence. Use a secondary player to stand just outside the room.
24. Ghost events vs. hunts. A ghost event (apparition, airball, door bang) doesn't drain sanity much but can reveal the ghost's face. If you see a ghost event, do NOT run to a hiding spot — it's not a hunt. Save your crucifix for actual hunts.
25. Learn the D.O.T.S. mechanic. D.O.T.S. Projector (Tier I throws light, Tier II projects pattern). Ghosts that have D.O.T.S. evidence will appear as a silhouette when passing through the projector's beam when the ghost is not hunting. Place it in the ghost room and watch via a camera in the van.
Advanced Strategies & Optimizations
26. Perfect Investigation Strategy. On Professional or higher, you must collect all three pieces of evidence to identify the ghost. Use the following order: 1) Set up video camera with night vision in ghost room for orbs. 2) Place book and EMF reader. 3) Use Spirit Box while alone. 4) Test for freezing temps (breath + thermometer). 5) Look for fingerprints (UV light on doors/windows). This covers all evidence types efficiently.
27. No-Evidence Challenges (Nightmare/Insanity). On these difficulties, the ghost only gives 2 evidence pieces. You must use behavior cues. For example: Mimic has ghost orbs (unique), Wraith never steps in salt, Phantom disappears when photographed, Banshee targets one player. Memorize the unique behaviors for each ghost.
28. Cursed Possession Tactics. Use the Ouija Board to ask for the ghost's location (“Where are you?”) — this drains sanity but pinpoints the ghost room. The Music Box can force a ghost event, giving you a photo opportunity. The Summoning Circle summons the ghost for a photo (be ready to smudge and hide). The Voodoo Doll can force interactions.
29. Solo Strategy (extended). In solo, take it slow. Before entering, place a Motion Sensor at the front door to detect any ghost leaving. Keep sanity high with pills. Use the Parabolic Mic from the entrance to listen for early sounds. When you find the ghost room, drop all gear and use only one item at a time.
30. Team Roles for Efficiency. Assign roles: Investigator (carries EMF, thermometer, book), Sludge (carries salt, UV light, motion sensor), Camera Operator (carries video camera, head cam, D.O.T.S.), Support (carries smudge sticks, lighter, crucifix, sanity pills, photo camera). This covers all evidence types and survival needs in minimal trips to the van.
Map-Specific Tips
31. Small maps (Tanglewood, Willow, Edgefield, Grafton, Bleasdale): The ghost room is usually one of the bedrooms or living room. Check hot spots: kitchen fridge (opens), nursery (ball bounces). Use sound to quickly pinpoint. Hide in closets or behind beds. Avoid the basement if possible — it's a death trap.
32. Medium maps (Prison, Sunny Meadows Mental Institution): These have long corridors with many rooms. Bring a Parabolic Microphone to sweep hallways. Place motion sensors at crossroads. The ghost room can be far from the entrance — set up a base camp in a nearby room with a crucifix.
33. Large maps (Brownstone High School, Willow Street Houses?): Actually, large maps are Asylum (Sunny Meadows) and High School. In these, the ghost room might be on a different floor. Use many flashlights and leave a trail of open doors to mark your path. Use the van to cross-reference evidence cameras. Consider using the Global Chat? Not really — rely on voice communication.
34. Sunny Meadows (Restricted): The cursed possession spawns more often (Ouija Board in the chapel). The ghost has many hiding spots. Use the hallway lockers as safe hides. The ghost can roam far — use the Parabolic Mic on the second floor.
Economy & Progression
35. Money Management. You earn money per contract based on objectives, photos, and survival. The best way to grind money is to play on Professional (1.5x multiplier) with a full team. Take every photo opportunity. Do not waste money on hundreds of smudge sticks — buy only 1 per player per contract for emergencies.
36. Experience points boost your level. Higher levels unlock Tier II and Tier III equipment. To level up fast, complete optional objectives (e.g., prevent hunt with crucifix, escape a hunt). Use cursed possessions to force objectives: for example, use the Ouija Board to trigger a ghost event for photo objective.
37. Apocalypse Challenge. For the ultimate prestige, attempt the Apocalypse challenge on Sunny Meadows (with all modifiers: no flashlight, no sprint, etc.). This requires knowing every ghost behavior perfectly. Use the Summoning Circle to quickly identify the ghost via its response to smudge or movement speed.
Final Progression Tips
38. Always enter with a plan of evidence to collect. Write down (or mentally note) the three evidence types you're aiming for. Don't run around gathering everything; finish one piece before moving to the next. Time is money.
39. Use tier upgrades wisely. Tier II items are generally a huge improvement over Tier I. Save money to buy Tier II of EMF, Thermometer, Video Camera first. Tier III is a luxury but provides quality-of-life (e.g., Thermo T3 shows both temps). Don't rush to Tier III of items you rarely use.
40. Learn from death. Every death is a lesson. Review the ghost type after death and think: did you miss a behavior? Did you hide in a bad spot? Use the journal to take notes on ghost types and their tells.
Remember: The goal is not to kill the ghost—it's to identify it and survive. Patience, communication, and a methodical approach will make you a master investigator.
Game Settings
Game Settings Guide for Phasmophobia
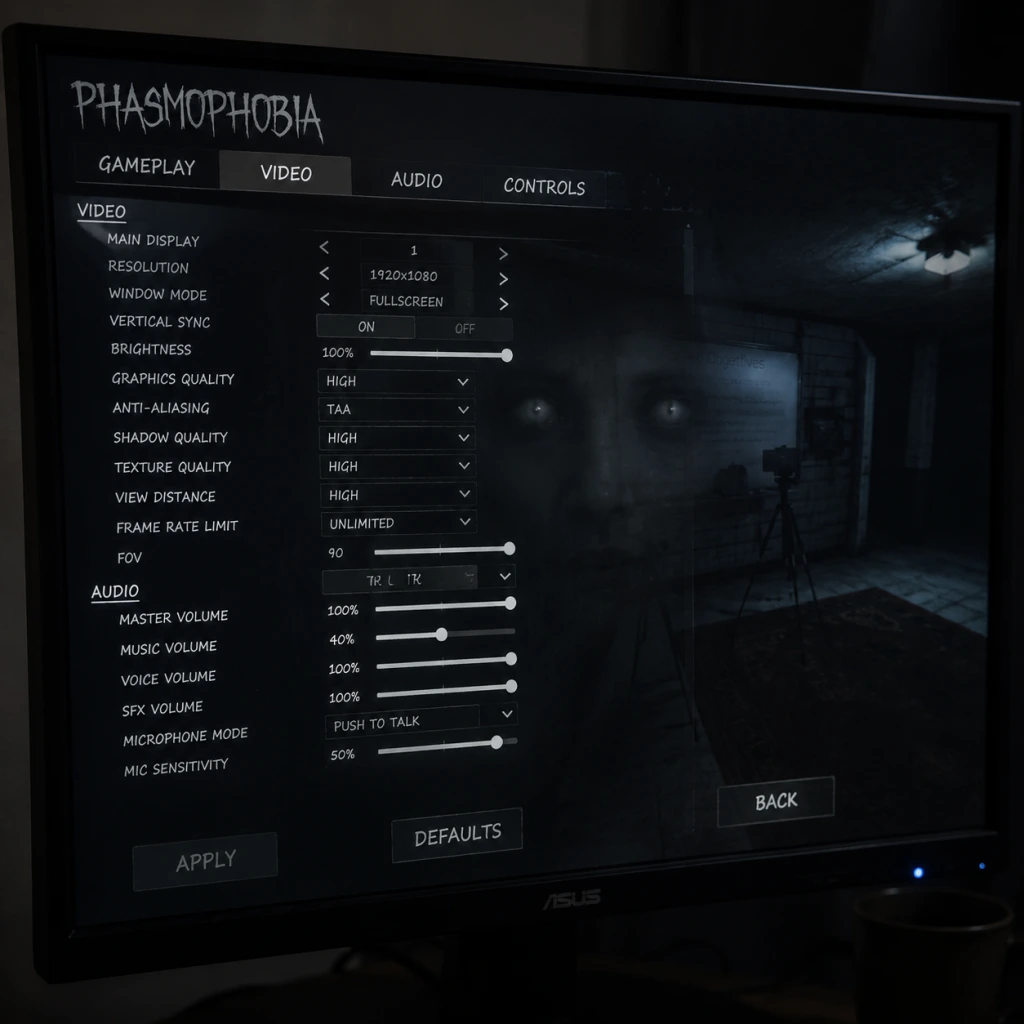
This comprehensive guide covers all settings in Phasmophobia, from graphics and audio to controls and gameplay. Proper configuration can improve performance, enhance immersion, and help you survive longer. We include recommended settings for different hardware tiers and highlight common pitfalls.
---
Graphics Settings
Access via Options > Graphics. Settings affect visual quality and performance.
| Setting | Description | Low-End (GTX 1060 / RX 580) | Mid-Range (RTX 3060 / RX 6600) | High-End (RTX 3080 / RX 6800 XT) |
|---|---|---|---|---|
| Resolution | Native monitor resolution. Lower reduces GPU load. | 1920x1080 | 1920x1080 or 2560x1440 | 4K (3840x2160) |
| Display Mode | Fullscreen, Borderless, Windowed. Fullscreen reduces input lag. | Fullscreen | Fullscreen | Fullscreen |
| VSync | Synchronizes frame rate with monitor refresh. Disable for lower input lag. | Off | Off | Off |
| Quality Preset | Overrides many individual settings. | Low | Medium/High | High/Ultra |
| Texture Quality | Detail on surfaces. VRAM intensive. | Low | Medium | High |
| Shadow Quality | Shadow resolution and distance. Crucial for spotting ghost movements. | Low | Medium | High |
| Reflection Quality | Screen-space reflections. Minor impact. | Low | Low | Medium |
| Ambient Occlusion | Adds shading in corners. Slight performance hit. | Off | SSAO | HBAO |
| Anti-Aliasing | Smoothes edges. TAA recommended. | Off or FXAA | TAA | TAA |
| Post-Processing | Bloom, Eye Adaptation, etc. Disable for clarity in dark areas. | Off | On | On |
| Volumetric Lighting | Light beams from flashlights. Heavy on GPU. | Off | Low | Medium |
| Depth of Field | Blurs far objects. Artistic, not needed. | Off | Off | Off |
| Field of View (FOV) | Horizontal view angle. Higher FOV reveals more but can warp edges. | 90 | 100 | 110 |
- Variable Rate Shading (VRS): Available on Nvidia cards. Can improve FPS but may cause blurry highlights. Test per hardware.
- Eye Adaptation & Bloom: These can make dark areas even darker. Disable for competitive advantage.
- VSync: Enable only if screen tearing is bothersome; input lag can hurt during hunts.
- Master Volume: Overall game sound.
- SFX Volume: Ghost sounds, doors, footsteps.
- Voice Chat Volume: Volume of other players.
- Voice Chat Mic Volume: Your microphone input.
- Push-to-Talk (PTT) vs Voice Activation: PTT reduces background noise. Always use PTT for clarity.
- HRTF (Head-Related Transfer Function): CRITICAL. Enable for directional audio through headphones. Simulates 3D sound. Disable if using external surround software.
- Global Chat vs Proximity Chat: Global allows all players to hear you anywhere. Proximity restricts range for immersion. Adjust per preference.
- Use HRTF ON with stereo headphones.
- Set SFX Volume high (80-100%) to hear ghost footsteps and events.
- Disable Voice Activation to avoid TV noises.
- Master Volume: 70-80% to avoid ear damage from sudden screams.
---
Audio Settings
Access via Options > Audio. Sound is critical for locating ghosts and communicating with teammates.
Optimal Settings:
---
Controls Settings
Access via Options > Controls. Customize keyboard/mouse or controller.
Key Bindings (Recommended Defaults with Notes):
| Action | Key | Alternative | Notes |
|---|---|---|---|
| Move Forward | W | (controller: left stick) | |
| Move Backward | S | ||
| Strafe Left | A | ||
| Strafe Right | D | ||
| Walk (Toggle) | Left Shift | Hold to toggle? | Many players prefer Toggle Walk to avoid accidental running during hunts. |
| Sprint | Left Ctrl | (hold) | Sprint consumes sanity faster; map to a thumb button if possible. |
| Interact | E | F | |
| Pick Up / Drop | G | ||
| Use Item | Mouse Left | ||
| Secondary Use | Mouse Right | ||
| Inventory | Tab | Quick-switch wheel. | |
| Push-to-Talk | B | V | Essential for voice comms. |
| Global Chat | C | Y | Speak to all dead teammates. |
| Crouch | C | (toggle recommended) | Helps hide in small spaces. |
| Lean | Q & E | (hold) | For peeking around corners. |
| Flashlight | F | T | Toggle on/off. |
| Journal | J | ||
| Photo Camera | Middle Mouse | ||
| Drop Held Item | Q (hold) |
- Sensitivity: Default 5. Lower to 3-4 for precision; higher for fast turning. Adjust in practice.
- Invert Mouse Y: Off.
- Smoothing: Off (adds input lag).
- Fully supported on PC (Xbox/PlayStation). Works on consoles natively.
- Enable `Controller Prompts` in Accessibility menu.
- Adjust stick dead zone (default 0.1) to reduce drift.
- Colorblind Mode: Protanopia, Deuteranopia, Tritanopia options. Affects UI elements and ghost activity indicators.
- Subtitle Size: Small, Normal, Large. Enable subtitles for ghost voices and team comms.
- Controller Prompts: Shows Xbox or PlayStation button icons.
- Crosshair Settings:
- Text Chat Size: On-screen chat text scale.
- Motion Sickness Reduction: Disable head bob and camera shake (in gameplay settings).
- Game Language: Select interface language (supports many). Requires restart.
- Voice Language: Not changeable – all ghost voices are English. Subtitles will be in your chosen language.
- Region: Automatically selects server region from Steam/Epic. No manual region lock in game. Use Steam download region to influence matchmaking.
- Host Migration: If host disconnects, game ends. Ensure stable internet if hosting.
- Voice Chat: P2P, bandwidth usage minimal.
- Port Forwarding: Not required for clients. Hosts with Strict NAT may have connection issues. Forward UDP port 27015 for smoother hosting.
- Network Quality: Use wired connection. If using Wi-Fi, check signal strength.
- Invert Y: For camera/aiming (if using VR or controller).
- Head Bob: Off for less motion sickness.
- Camera Shake: Off.
- Hold to Run vs Toggle: Most use Hold to run for better control.
- Toggle Crouch: Recommended.
- Enable Proximity Voice: Turn On for realistic horror experience.
- Global Voice Chat Button: Set to a key (default C).
- Auto-switch to Last Equipment: Off (keep manual control).
- Photo Sensitivity: Default (controls how much movement required for photo to count).
- Amateur: 5 min setup timer, 50% starting sanity, 2 evidence.
- Intermediate: 2 min setup, 75% sanity, 2 evidence.
- Professional: No setup, 100% sanity (still decays), 2 evidence.
- Nightmare: No setup, 100% sanity, 1 evidence (trickier).
- Insanity: No setup, 0% sanity, 0 evidence.
- Custom: Modify all parameters.
- Evidence Count, Grace Period, Hunt Timer, Ghost Speed, Player Speed, Sanity Pill Effectiveness, etc. Adjust for challenge or practice.
- HRTF Audio: The number one setting misconfigured by new players. Without it, ghost footsteps lack direction. Always enable when using headphones.
- Toggle Walk vs Hold to Run: Default is press to walk, hold to run. Many accidentally run during hunts, increasing noise. Change to Toggle Walk (so running is hold) to stay quiet.
- FOV Too High: 110 FOV may cause fish-eye effect and distort distance judgment. Stick to 90-100 for better depth perception.
- Graphics Post-Processing: Bloom and Eye Adaptation can hide ghost shapes in bright flashes. Turn off if struggling to see.
- Voice Activation: Can pick up fan noise. Always use Push-to-Talk.
- Resolution Scale: In graphics, sometimes set below 100% to boost FPS. Keep at 100% for clarity.
- Photo Camera Sensitivity: If photos are blurry, increase sensitivity slightly.
Controller Support:
---
Accessibility Settings
Access via Options > Accessibility.
- Crosshair Color: Change to red or green for visibility.
- Crosshair Style: Dot, Cross, Circle.
- Size: Adjust to preference.
Important: Set subtitles to Large if playing on TV from a distance. Crosshair color to bright green helps against dark backgrounds.
---
Language & Region Settings
Access via Options > Language.
---
Network Settings
Phasmophobia uses Peer-to-Peer (P2P) networking. No in-game network sliders, but understanding helps.
---
Gameplay Settings
Access via Options > Gameplay.
General:
Journal & Equipment:
Difficulty Presets (in Lobby):
Custom Difficulty Settings (Note):
---
Special Attention Points
If you experience stuttering, reset to `Low` preset and incrementally raise settings. Use `FPS` counter (Steam overlay) to monitor.
---
By tuning these settings, you can achieve smoother performance, clearer audio, and better control for more successful ghost hunts. Good luck, investigator!
Important Notes
Important Notes for Phasmophobia
This section highlights critical warnings, common pitfalls, and knowledge that many players wish they had from the start. Avoid these mistakes to save time, money, and frustration.
⚠️ Warnings & Pitfalls
- Don't turn on all lights immediately. Ghosts have a sanity drain mechanic related to darkness, but turning on every light can also make it harder to find the ghost room (since the ghost tends to interact with lights). Learn to use a candle or flashlight to navigate while keeping sanity.
- Starting the investigation without a plan. Before entering the building, agree on who carries what (e.g., EMF, UV light, Spirit Box), where to set up cameras, and an escape route. Running in blindly often leads to early deaths.
- Ignoring the in-game tutorial. Skipable, but actually tutorial covers basic mechanics like using equipment, hiding, and identifying evidence. Replaying it is worth 5 minutes.
- Using cursed possessions without knowledge. Each cursed object (Ouija board, music box, etc.) has specific rules and consequences. Activating them carelessly can start a hunt early or drain sanity. Read the journal entries or watch a guide first.
###
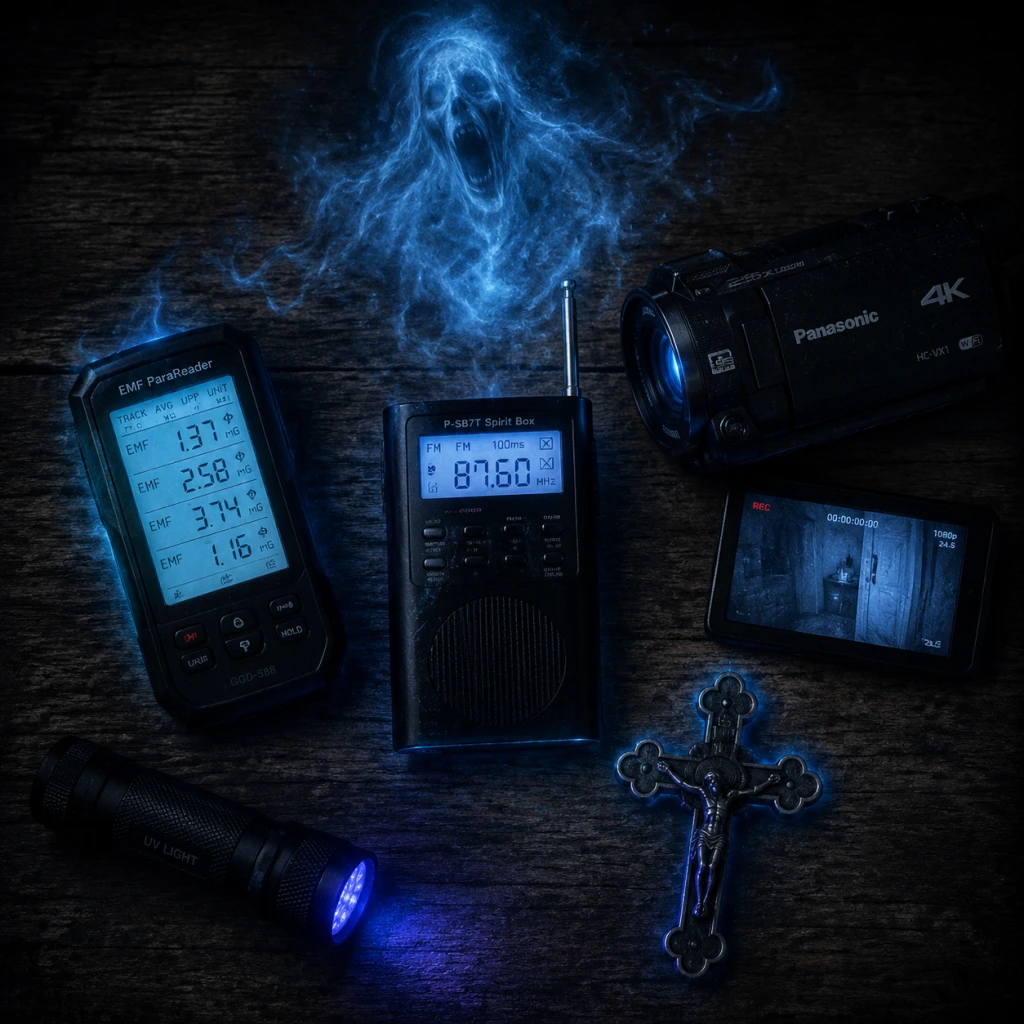
All Game Items
All Game Items
This guide covers every interactive item in Phasmophobia, grouped by category. All gear is purchased in the Lobby Shop using in-game currency earned from completing contracts. Equipment tiers (I, II, III) unlock as you gain experience and level up.
Investigation Equipment
These are the primary tools for gathering evidence and monitoring ghost activity. Most items have three tiers; higher tiers provide better range, durability, or features.
| Item | Description | How to Obtain | When Useful | Upgrades / Synergies |
|---|---|---|---|---|
| EMF Reader | Detects electromagnetic fluctuations when ghost interacts with environment. T1: needle meter; T2: digital display with 5 lights; T3: smartphone-shaped with precise readings. | Starter; T2/T3 unlock at higher levels | Identify ghost room; confirm ghost events; distinguish from false positives. | Use with Spirit Box for cross-referencing. |
| Spirit Box | Global voice chat device; ghost may respond to questions via radio. T1: static-only; T2: static + possible words; T3: clearer audio with automatic recording. | Starter; upgrades via leveling | Evidence type (Spirit Box is required for ghosts like Spirit, Wraith). | Combine with Ghost Writing to rule out certain ghosts. |
| Ghost Writing Book | Book placed in ghost room; ghost may write in it. T1: single page; T2: multiple pages with faster writing; T3: automatic trigger on placement. | Starter; upgrades unlock | Evidence (required for Obake, Yurei). | Place near interaction points for higher chance. |
| UV Light | Reveals fingerprints, footprints, and handprints. T1: weak glow stick (1 use); T2: flashlight-style with UV bulb; T3: UV flashlight with battery. | Starter; upgrades | Evidence (UV prints required for Poltergeist, Onryo). | Use on doors, windows, light switches after ghost interaction. |
| Thermometer | Measures ambient temperature; cold spot indicates ghost room. T1: slow analog; T2: digital instant; T3: laser thermometer with range. | Starter; upgrades | Quickly locate ghost room; detect ghost freezing temperatures (evidence). | Use early after setup to narrow search area. |
| DOTS Projector | Projects green or UV dots; ghost’s silhouette visible when walking through. T1: static projector; T2: rotating (covers wider area); T3: UV version invisible to human eye but visible on camera. | Unlock at level 2; upgrades later | Evidence (DOTS required for Goryo, Hantu). | Place in open areas of ghost room; view via video camera. |
| Parabolic Microphone | Headset that amplifies distant sounds; shows direction of noise. T1: basic; T2: has display with wave pattern; T3: can filter out non-ghost sounds. | Unlock at level 4; upgrades | Detect ghost activity from outside room; locate ghost during hunt via sound. | Useful on larger maps; synergizes with Motion Sensor for hunt tracking. |
| Motion Sensor | Tripod laser beam; detects movement across its path. T1: single direction; T2: dual direction; T3: adjustable angle. | Unlock at level 6; upgrades | Monitor ghost movement; trigger ghost events. | Connect to Video Camera for visual confirmation. |
| Sound Sensor | Decibel meter placed on wall; alerts when noise exceeds threshold. T1: basic alert; T2: sound level display; T3: directional arrow. | Unlock at level 8; upgrades | Detect ghost interactions (throwing objects, footsteps). | Pair with Parabolic Microphone for pinpointing. |
| Video Camera | Handheld camcorder; essential for seeing ghost orbs. T1: black & white night vision; T2: color night vision; T3: includes recording. | Starter; upgrades | Evidence (Ghost Orbs); night mode reveals UV DOTS. | Use with Tripod for stationary observation; Head Mounted Camera for hands-free. |
| Head Mounted Camera | Worn on player’s head; live feed sent to van monitor. T1: standard; T2: night vision; T3: enhanced zoom. | Unlock at level 10; upgrades | Allow teammate in van to see your perspective; useful for DOTS observation. | Sync with Video Camera in van for dual views. |
| Photo Camera | Captures evidence photos for additional reward money. T1: 5 shots; T2: 10 shots; T3: 15 shots with better quality. | Starter; upgrades | Document ghost interactions, bone, and cursed possessions for bonus cash. | Best used with Tripod for steady shots. |
| Tripod | Mount for Video Camera or Photo Camera; can be placed on floor or table. | Unlock at level 3 | Stabilize camera for long-term observation; essential for DOTS and orb evidence. | Required for stationary camera setups. |
Consumables & Utilities
One-time use items that aid survival, block hunts, or provide temporary benefits.
| Item | Description | How to Obtain | When Useful | Upgrades / Synergies |
|---|---|---|---|---|
| Smudge Sticks | Burnable incense; when lit, prevents ghost hunting in a small area for ~5 seconds (T1), longer at higher tiers. Also smudges ghost during ghost event to break line of sight. | Purchased in shop (always available) | During hunts: light to block ghost’s ability to kill nearby; or during events to get ghost to leave. | Must be used with Lighter. Tier III smudge sticks last 6 seconds and have larger radius. |
| Lighter | Ignites smudge sticks and firelight; one lighter lasts entire contract. | Starter (always available) | Required for any fire-based item. | No synergy beyond ignition. |
| Incense | Similar to smudge sticks but lasts longer and can be placed as a stationary smoke curtain. T1: short duration; T2: mid; T3: long. | Unlock at level 12; upgrades | Block line of sight during hunts; confuse ghost pathfinding. | Combine with Crucifix for delayed hunt prevention. |
| Salt | Pour on floor; ghost walking over it leaves UV footprints. Also slows ghost during hunts slightly. T1: 3 piles; T2: 5 piles; T3: 7 piles. | Starter; upgrades | Confirm ghost location; create small speed debuff. | Use with UV Light to see footprints. |
| Crucifix | Cross; when placed in ghost room, prevents hunt if ghost is nearby. T1: prevents hunts within 3m; T2: 5m; T3: 7m. | Unlock at level 5; upgrades | Defense against hunt; place near most common ghost spawn. | Does not stop ghost during active hunt; only prevents new hunt. Pair with Motion Sensor to know when to activate. |
| Candle | Provides light; ghost can blow it out (detectable via sound). T1: single candle; T2: three pack; T3: longer burn time. | Starter; upgrades | Light dark areas without attracting ghost as much as flashlight; also used for evidence (Yokai). | Use with Lighter to ignite. |
| Firelight | Handheld long-burning torch; bright light but loud. T1: short battery; T2: medium; T3: long. | Unlock at level 15; upgrades | Better illumination than flashlight; but louder so may attract ghost. | No special synergy. |
| Flashlight | Basic handheld light. T1: weak, flickers; T2: strong, steady; T3: tactical with zoom and strobe. | Starter; upgrades | Essential for navigation. Strobe on T3 can disorient players (not recommended). | Better than candles for mobility. |
| Radio (Walkie-Talkie) | Communication device; default equipment, can't be dropped. | Always provided | Talk to teammates across map. No substitutes. | Integral for coordination. |
| Key (varies) | Found in map; used to unlock doors (storage, lockers, etc.). | Looted on site | Unlock hiding spots or access blocked rooms. | Keys are map-specific and one-time use. |
Currencies & Progression Items
Non-physical items that track progression and enable purchases.
| Item | Description | How to Obtain | When Useful |
|---|---|---|---|
| Money ($) | In-game currency; spent on equipment, upgrades, and cosmetics. | Earned per contract (survival bonus, evidence photos, objectives). | All purchases. |
| Experience (XP) | Levels up character; unlocks higher tier equipment. | Earned per contract (survival, objectives, bonus). | Every level unlocks new gear and tiers. |
| Equipment Unlock Points | Implicit from leveling; not a visible item but controls access to T2/T3 versions. | Obtained at specific levels (e.g., 5, 10, 15, etc.). | Must be spent (automatically) to purchase upgraded gear. |
| Cursed Possessions | Unique items found in maps: Ouija Board, Music Box, Voodoo Doll, Tarot Cards, Summoning Circle, Monkeys Paw. Used for special interactions but come with risk. | Found on each map (one per contract). | Can break sanity or force ghost events; useful for optional objectives or quick evidence. |
Collectibles & Cosmetics
Items that provide no gameplay benefit but enhance personalization or completion.
| Item | Description | How to Obtain | When Useful |
|---|---|---|---|
| Ghost Photos | Take photo of ghost during hunt or event for bonus money and journal entry. | Any camera; must capture ghost. | Evidence photo objective; money bonus. |
| Bone | Skeleton piece found randomly on map; take photo for extra cash. | Looted; location varies. | Bonus photo objective. |
| Cursed Items Photos | Photo of any cursed possession for bonus. | Each map has one cursed item; take photo. | Additional money. |
| ID Card | Your player’s identification; cosmetic only. | Always owned; can change style in shop. | No gameplay effect. |
| Badges | Cosmetic badges displayed on ID card. | Purchased with money or earned via achievements. | Show off achievements. |
| Clothing | Outfits for your character; some unlocked via leveling, others via DLC. | Shop or achievements. | Purely cosmetic. |
| Grave Marker | Cosmetics that appear on your character’s grave after death. | Unlocked via levels or shop. | No gameplay effect. |
Important Synergies & Upgrades
- Smudge Sticks + Lighter: Essential combination for safety. Always carry both.
- Video Camera + Tripod + DOTS Projector: Triangulation method to see DOTS from van via night vision.
- Motion Sensor + Sound Sensor: Create perimeter alarm to detect ghost location during hunt.
- Thermometer + EMF Reader: Fast room confirmation; cold room with EMF spikes confirms ghost room.
- Crucifix + Incense: Use crucifix to prevent hunt, then incense to block line of sight if it fails.
- Flashlight + Candle: Alternate light sources to conserve battery or avoid attracting ghost (candle is quieter).
- Salt + UV Light: Reveal ghost movement patterns through footprints.
- Loadout slots: You can carry 3 items in hand (plus flashlight and walkie). Backpack in van holds extra gear.
- Tier upgrades: Higher tiers cost more money but drastically improve performance. Prioritize EMF, Spirit Box, and Flashlight early.
- Cursed Possessions: Extremely dangerous; only use if you understand the consequences (e.g., Tarot Cards can cause instant death).
- Photo Camera: Always bring for money bonus; bone photos give $10 bonus each.
Item Management Tips
---
This guide covers all items as of the 1.0 release. Check official patch notes for future additions.
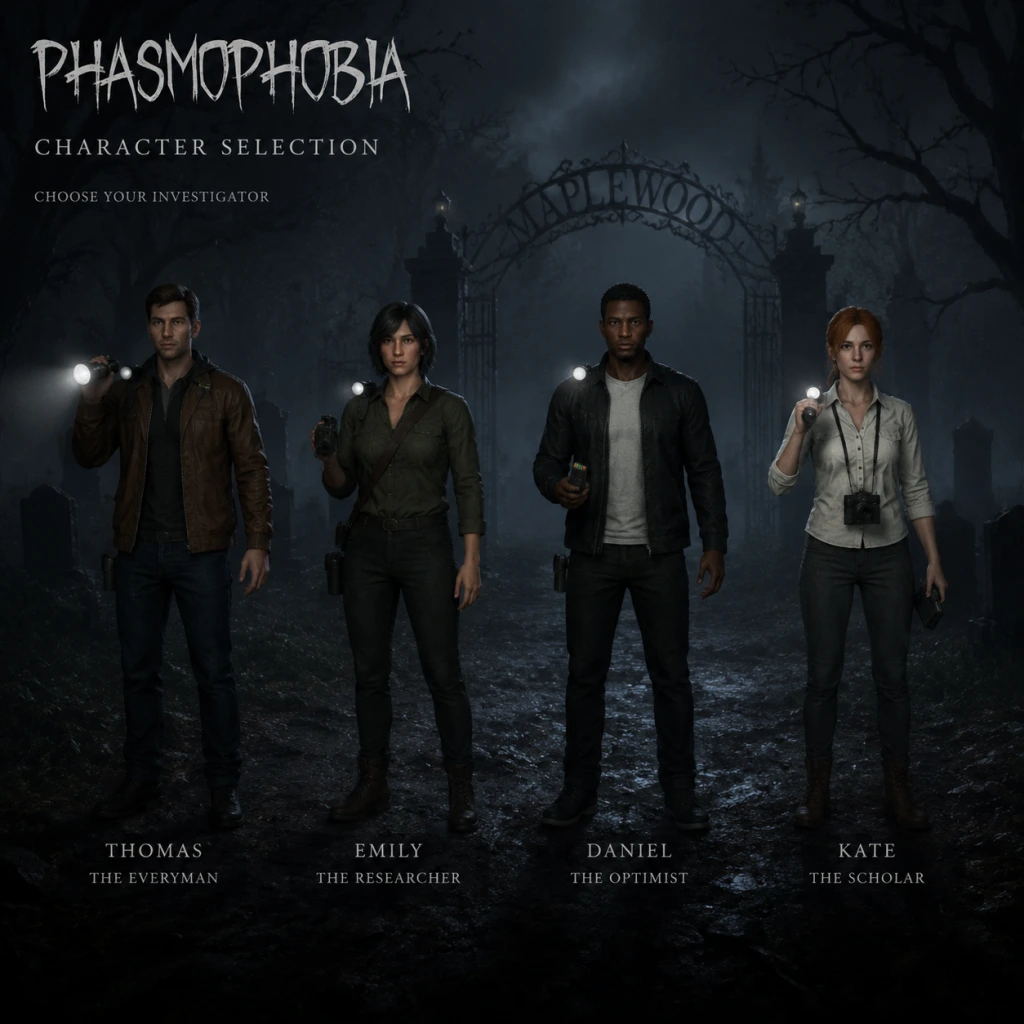
Character Skills
Overview
Phasmophobia does not feature traditional character classes, skill trees, or unique abilities per player. Every investigator is mechanically identical — your success depends entirely on equipment choice, team coordination, and game knowledge. However, the game offers a range of universal actions, cursed possessions (which function like spells or special moves), and equipment synergies that can be considered the closest equivalent to “character skills.” This guide breaks down these mechanics into actionable skills: what they do, when to use them, and how to combine them for maximum effectiveness.
---
Core Player Abilities (Universal Actions)
These are basic actions every player can perform at any time. They have no cooldowns or resource costs beyond sanity and stamina.
1. Sprint
- Effect: Temporarily increases movement speed by ~50%.
- Duration: ~5 seconds before stamina depletes; recharges over ~10 seconds when walking.
- Use: Escape a hunting ghost, reach a hiding spot, or quickly reposition during an investigation.
- Tip: Never sprint near the ghost during a hunt — it attracts the ghost. Sprint only when you have a clear escape route.
- Effect: Opens doors, turns on light switches, picks up items, activates equipment.
- Use: Opening closet doors for hiding, turning on lights to slow sanity drain, grabbing the ghost writing book, etc.
- Tip: Pressing interact while looking at a door will close it silently (good for hiding).
- Effect: Activates the held item’s primary function (e.g., turn on EMF reader, speak into Spirit Box, ignite lighter).
- Use: Depends on item; essential for gathering evidence or triggering cursed possessions.
- Effect: Drop current item (Q / Down D-Pad) or toggle flashlight (F / Triangle / Y).
- Use: Dropping items to place them strategically (e.g., UV flashlight on a door), or saving sanity by turning off lights when not needed.
- Effect: The ghost can hear your voice via Spirit Box or during hunts. Also used for Phasmophobia’s voice recognition to ask questions.
- Use: Asking “Where are you?” with Spirit Box, or shouting to taunt the ghost into a hunt (risky but can force an early photo opportunity).
- Effect: When held and activated, amplifies ghost sounds and footsteps within ~15 meters.
- Use: Determine ghost location without entering the room — skill-based listening.
2. Interact (E / Square / X)
3. Use Item (Right Click / L2 / LT)
4. Drop Item / Toggle Flashlight
5. Voice Chat (Push-to-Talk / Open Mic)
6. Motion Sense (Parabolic Microphone)
---
Cursed Possessions (Special Moves / Spells)
Cursed possessions are high-risk, high-reward items found randomly on maps. Using them consumes sanity or triggers dangerous effects. They function like “spells” or “ultimate abilities” in other games. Each can only be used once per contract (except the Music Box which plays until the song ends).
Cursed Possession Table
| Item | Effect | How to Activate | Sanity Cost | Risk / Downsides | Best Use Cases |
|---|---|---|---|---|---|
| Ouija Board | Answers ghost questions via text. Gives ghost location, age, deaths, etc. | Say “Ouija” or type questions. | 50% per question. | Ghost can start a hunt if board is broken by leaving unanswered. | Quick ghost room identification when equipment is limited. |
| Mirror (Haunted) | Shows a vision of the ghost room for ~2 seconds. | Pick up and hold. | 60% on use. | Breaks after one use; ghost becomes aggressive. | Pinpoint ghost room without walking through map (good on large maps). |
| Music Box | Plays melody that attracts ghost to the box. Ghost cannot hunt while box is playing. | Pick up and press interact. | 0% initial, but ghost activity increases. | Ghost will hunt if box stops or is dropped; high chance of hunt. | Take photo of ghost while it is mesmerized, or lead ghost away from teammates. |
| Summoning Circle | Summon ghost to circle; allows photo opportunity. | Light all 5 candles in order. | ~80% total (each candle drains sanity). | Ghost will immediately hunt after a few seconds. Must be ready to hide. | Guaranteed ghost photo for objective; excellent with smudge sticks. |
| Voodoo Doll | Stabs pins to force ghost interactions. Each pin event drains 5-10% sanity. | Press interact to stab. | Per pin. | Pins can trigger a hunt (when sanity drops below threshold). | Force ghost events for photo or evidence (e.g., ghost writing). |
| Tarot Cards | Random effect: 10 cards (e.g., Sun → restore sanity, Death → start hunt, Hermit → hide ghost). | Draw a card. | Varies. | Extremely unpredictable; 50% chance of negative effect. | Desperate situations or when you know the ghost type (e.g., use The Tower to force a hunt). |
| Monkey Paw (up to 3 wishes) | Grants wishes (e.g., light all lights, trap ghost, locate bone). Each wish has a negative side effect. | Hold and speak wish. | 80% per wish. | Side effects (e.g., “Light all lights” makes you blind for 10 seconds). | Check off objectives safely when you have high sanity left. |
- Always have a smudge stick ready if you plan to use a cursed item that may trigger a hunt.
- Coordinate with team — one player uses the item, others prepare hiding spots.
- Avoid using cursed possessions below 60% group sanity; you risk an instant hunt.
- Gear: EMF Reader + Spirit Box + UV Light + Photo Camera.
- Synergy: Use EMF to find ghost room, then Spirit Box for voice evidence, then UV for fingerprints — all in one sweep.
- When: Starting investigation; ideal for small maps.
- Gear: Smudge Sticks (2) + Lighter + Crucifix + Flashlight.
- Synergy: Crucifix prevents hunts in an area; if hunt starts, light smudge stick to repel ghost for 6 seconds, then hide.
- When: During cursed possession usage or when ghost is highly active.
- Gear: Parabolic Microphone + Motion Sensor + Sound Sensor + Video Camera.
- Synergy: Use parabolic mic to locate ghost, place motion sensors to track movements, set up camera for ghost orbs.
- When: Large maps (e.g., Prison, High School) where tracking ghost path is crucial.
- Gear: Cursed possession (whatever found) + Smudge Stick + Lighter + Photo Camera.
- Synergy: Use cursed item to force ghost event, snap photo, then smudge to escape hunt.
- When: Objectives require ghost photo or forced event; high risk, high reward.
---
Equipment Synergies & Combos (Builds)
Since all players have the same abilities, “builds” are about equipment loadouts. Below are powerful synergies that mimic skill combos.
The Ghost Hunter (Aggressive Evidence Gatherer)
The Smudge Runner (Defense / Hunt Survival)
The Sensor Master (Map Control)
The Cursed Specialist (Risk Taker)
---
Recommended Loadouts (by Play Style)
| Play Style | Tier I Loadout (beginner) | Tier III Loadout (advanced) | Why |
|---|---|---|---|
| Beginner | EMF, Spirit Box, Flashlight, Photo Camera | Same + Night Vision Goggles | Simple evidence collection; minimal risk. |
| Solo Player | Crucifix, Smudge Sticks, Lighter, Strong UV Flashlight | Tier III Crucifix, Head Mounted Camera | Survive alone; crucible prevents first hunt. |
| Speed Runner | Parabolic Mic, Motion Sensors, Sound Sensors, Video Camera | Tier III Sensors + Tripod | Identify ghost type fast via behavior. |
| Photographer | Photo Camera (3+), Smudge Sticks, Lighter, UV Flashlight | Tier III Camera + Tripod for ghost orbs | Maximize photo objectives. |
When to Use Each Skill
- Sprint: Only during a hunt to reach a hiding spot. Never sprint when ghost is near normally.
- Cursed Possessions: Use when you have a clear escape plan and decent sanity. Avoid using late-contract when sanity is low.
- Smudge Sticks: Use to escape a hunt, or to block the ghost from entering a room during an objective.
- Crucifix: Place early in suspected ghost room to prevent first hunt. Upgrade tiers increase range.
- Parabolic Microphone: Use when you suspect ghost but cannot locate room — listen for footsteps or sounds.
- Voice Chat (Spirit Box): Use when EMF reader indicates ghost activity in a room; ask clear questions.
- All player characters have identical stats: movement speed, stamina, sanity drain rate, etc. No character has an advantage.
- The “skills” in Phasmophobia are the equipment and teamwork. Learning to combine items effectively is the core of mastery.
- Cursed possessions are powerful but can end a contract quickly if misused. Treat them like a ultimate ability with a long cooldown (once per contract).
- There are no spells or talents. Everything is inventory-based.
---
Important Notes
---
This guide covers all character-agnostic skills in Phasmophobia. Focus on equipment synergy, map knowledge, and communication to become a top investigator.
Characters & Roles
Characters & Roles in Phasmophobia
Overview
Phasmophobia does not feature traditional character classes, heroes, or unique abilities. Every player-controlled investigator is mechanically identical—same movement speed, same health, same sanity, and same inventory capacity. All players share the same starting equipment loadout and can use any item in the shop. There are no unlockable characters; you begin with the same skeleton model and can only change your appearance through cosmetic clothing purchases in the lobby shop (purely visual, no gameplay effect).
Despite the lack of predefined roles, effective teamwork in Phasmophobia relies on players voluntarily adopting specialized roles to maximize efficiency and survival. These roles are fluid—you can switch between them mid-contract or even on the fly. Below are the most common and effective roles used by experienced teams.
---
1. The Investigator (Generalist)
Background: The default role for any player. The Investigator is the jack-of-all-trades, responsible for locating the ghost room, collecting evidence, and completing objectives. No special background; every player starts here.
Strengths:
- Versatile – can handle any task.
- No dependency on specific equipment.
- Good for learning game mechanics.
- Less efficient than a dedicated role.
- May waste time switching between tasks.
- Enter the building first with a Thermometer (Tier I or II) to find the cold room (ghost room).
- Once located, place evidence-gathering equipment (EMF Reader, Spirit Box, Ultraviolet Light) and check for interactions.
- Monitor sanity and call out ghost events or hunts.
- Be ready to run for hiding spots during hunts.
- Thermometer (Tier I or II) for initial room detection.
- EMF Reader (Tier I or II) for evidence.
- Flashlight (Tier I is fine).
- Optional: Video Camera for ghost orbs.
- Can bring multiple high-value items at once (e.g., 4x Tripods, 3x Video Cameras).
- Efficient setup reduces time wasted.
- Can quickly retrieve forgotten gear from the truck.
- Carrying many items slows movement slightly (no speed penalty, but you have less free hands).
- May be slower to react during a sudden hunt if overloaded.
- Often leaves no room for a light source (rely on others).
- Load up on equipment before entering. Take Tripods, Video Cameras, D.O.T.S. Projectors, Salt Shakers, Crucifix (Tier I or II).
- After the ghost room is located, place all gear: tripod cameras, D.O.T.S projector on a wall, salt at entrances, crucifix on the floor.
- Return to the truck for additional items (Sound Sensors, Motion Sensors, Parabolic Microphone) if needed.
- During hunts, drop items or hide immediately—do not try to save gear.
- Video Camera (Tier II or III) + Tripod (multiple).
- D.O.T.S. Projector (Tier I or II).
- Salt Shaker (at least 2).
- Crucifix (Tier I or II) – place in ghost room.
- Flashlight (Tier I) – keep one on your belt.
- Extends investigation time before the ghost starts hunting.
- Prevents premature hunts caused by low sanity.
- Can save teammates from insanity (sanity reaching 0).
- Requires good communication and knowledge of sanity thresholds.
- Wasting pills on high sanity is wasteful.
- May need to stay in the truck to monitor sanity on the monitor (but can be in the building).
- Check the sanity monitor in the truck periodically (it shows individual and average sanity).
- Call out when average sanity drops below 70% (hunt threshold for most ghosts is around 50%, but some hunt at higher sanity like 60% or 80% – e.g., Demon, Yokai).
- Distribute Sanity Pills: Each pill restores ~40% sanity. Encourage teammates to use them when their personal sanity is below 50%.
- Keep track of how many pills remain (up to 4 total carried by the team).
- In the truck, you can also use the Head-Mounted Camera to watch teammates for ghost events.
- Sanity Pills (2-3 per player, but the Sanity Manager should carry at least 2).
- Head-Mounted Camera (to watch from truck).
- Optional: Parabolic Microphone to detect ghost sounds from safety.
- Knows the map layout and best hiding spots.
- Can survive longer during hunts by using advanced techniques (e.g., smudge sticks, lockers).
- Reduces team deaths.
- Less focused on evidence gathering.
- May waste time marking hiding spots instead of helping with setup.
- If hiding spot is compromised (e.g., ghost pathing), they may die.
- At the start of the contract, run through the map (if safe) to note all possible hiding spots: closets, lockers, behind beds, behind shelves, etc.
- Communicate the locations to the team via voice chat.
- During a hunt, lead teammates to the closest safe spot.
- Carry a Smudge Stick and Lighter to escape if the ghost finds you.
- After a hunt, stay hidden until the music stops (or sanity increases).
- Smudge Stick (Tier I or II) + Lighter.
- Flashlight (Tier I) – never turn it on during a hunt (ghosts see light).
- Optional: Crucifix (if placed near hiding spot).
- Efficiently completes objectives for extra money and XP.
- Can work independently.
- Often uses advanced equipment like Parabolic Microphone, Motion Sensor, Sound Sensor.
- May ignore evidence gathering, slowing down ghost identification.
- Often takes risks (e.g., using the Spirit Box near the ghost during a hunt).
- May die if objectives require direct ghost interaction.
- Read the objectives before entering: e.g., "Get a ghost photo", "Clean the ghost room with Smudge Sticks", "Walk through the ghost during a hunt".
- Prioritize objectives that are easy/safe first (e.g., motion sensor activation, ghost writing).
- Use the Photo Camera to snap pictures of the ghost, interactions, or disturbed objects.
- For "Walk through the ghost during a hunt", wait for a hunt and let the ghost pass through you (high risk).
- For "Complete a Ouija Board session", locate the board and ask a question that drains sanity.
- Photo Camera (Tier I or II) – always bring one.
- Ouija Board (if objective requires it).
- Parabolic Microphone (to detect ghost sounds without entering ghost room).
- Motion Sensor (to place in hallway for objective).
- High chance of getting Spirit Box response.
- Can quickly identify ghosts that require Spirit Box (e.g., Banshee, Yokai, Jinn).
- Calm under pressure – speaks clearly during ghost events.
- Must be alone in the ghost room for Spirit Box to work (ghost must be nearby and lights off).
- Vulnerable during hunts (needs to stop using Spirit Box and hide).
- May drain sanity with Ouija Board questions.
- Turn off all lights in the ghost room (use a flashlight).
- Stand alone in the room (other players must leave or be far away).
- Use the Spirit Box: ask simple yes/no questions like "How old are you?" or "Are you here?"
- Listen for a response in the radio (not spoken aloud).
- For Ouija Board: place the board, activate it, ask questions (sanity drain).
- Avoid using the Spirit Box when the ghost is hunting (it will not respond and you risk death).
- Spirit Box (Tier II or III for better range/response rate).
- Ouija Board (if needed).
- Flashlight (Tier I) – keep on at all times (lights off in room).
- Optional: Head-Mounted Camera for teammates to watch your interaction.
- Can quickly cause ghost activity for photo opportunities or objective completions.
- Can force a hunt early to observe ghost behavior (e.g., phantom doesn't show on camera during hunt? actually phantom is invisible on camera during ghost events).
- High risk, high reward – often completes contracts faster.
- Very dangerous – can cause chain hunts.
- Drains team sanity rapidly (Cursed Possessions drain sanity when used).
- May get teammates killed if hunts start unexpectedly.
- Find a Cursed Possession in the map (e.g., Tarot Cards, Ouija Board, Music Box, Summoning Circle, Monkey Paw, Doll, Voodoo Doll).
- Use it strategically: e.g., draw Tarot Cards to get the "Sun" card (restores sanity) or "Death" card (triggers immediate hunt).
- During a forced hunt, observe the ghost's speed (fast/slow), whether it shows visible footsteps, etc.
- Always have an escape route and smudge stick ready.
- After the forced hunt, the ghost may cool down – use this time to gather evidence.
- Smudge Stick + Lighter (essential for survival).
- Crucifix (to prevent hunts near you – but if you want to force one, place it elsewhere).
- Photo Camera (to take a photo of the ghost during the hunt).
- EMF Reader (to detect ghost steps during hunt).
Weaknesses:
Playstyle:
Recommended Equipment:
Team Synergy: Works best when paired with a dedicated Equipment Carrier and a Sanity Manager. The Investigator can focus on evidence while others handle setup.
---
2. The Equipment Carrier (Looter / Setup Specialist)
Background: This role emerged from the need to transport heavy gear quickly. The Equipment Carrier is the team's mule, responsible for bringing all necessary equipment into the map and setting up the ghost room.
Strengths:
Weaknesses:
Playstyle:
Recommended Equipment:
Team Synergy: Cooperate with the Investigator to know where to set up. The Equipment Carrier should communicate when gear is deployed so others can check evidence.
---
3. The Sanity Manager (Pill Popper / Stress Control)
Background: Sanity is a shared resource that depletes faster when players are near the ghost or when ghost events occur. The Sanity Manager monitors sanity levels and uses Sanity Pills strategically to keep the team alive.
Strengths:
Weaknesses:
Playstyle:
Recommended Equipment:
Team Synergy: Works closely with the Investigator to decide when to pill. A good Sanity Manager can keep the team from triggering early hunts, especially on higher difficulties (Nightmare, Insanity) where sanity drains faster.
---
4. The Hiding Spot Scout (Survivor / Camper)
Background: During hunts, surviving is paramount. The Hiding Spot Scout memorizes all hiding locations on the map and guides teammates to safety.
Strengths:
Weaknesses:
Playstyle:
Recommended Equipment:
Team Synergy: Essential for new players. Works well with the Equipment Carrier to ensure hiding spots have crucifixes planted nearby. The Hiding Spot Scout should call out when a hunt starts and guide everyone.
---
5. The Objective Hunter (Mission Specialist)
Background: Each contract has 3 optional objectives and sometimes a daily/weekly objective. The Objective Hunter focuses on completing these side goals without dying.
Strengths:
Weaknesses:
Playstyle:
Recommended Equipment:
Team Synergy: Cooperate with the Investigator to know the ghost type early, which might affect how you complete objectives (e.g., a Banshee will only target one player). The Objective Hunter should communicate what they need so others can help (e.g., hold a smudge stick while you snap a photo).
---
6. The Ghost Whisperer (Evidence Gatherer / Spirit Box Specialist)
Background: Some players excel at coaxing clues from the ghost. The Ghost Whisperer is the designated communicator, using the Spirit Box and Ouija Board to obtain evidence and optional objectives.
Strengths:
Weaknesses:
Playstyle:
Recommended Equipment:
Team Synergy: Needs teammates to stay away from the ghost room while using Spirit Box. The Sanity Manager should monitor the Ghost Whisperer's sanity, as Ouija Board usage drains it quickly.
---
7. The Ghost Hunter (Hunter / Aggressive Player)
Background: For players who want to force interactions and hunts to gain evidence faster. The Ghost Hunter uses Cursed Possessions (Tarot Cards, Music Box, etc.) to trigger events.
Strengths:
Weaknesses:
Playstyle:
Recommended Equipment:
Team Synergy: The Ghost Hunter must warn the team before using a Cursed Possession. The Sanity Manager should be ready to pill everyone after a sanity drain. The Hiding Spot Scout should know where everyone can hide.
---
Summary Table: Roles at a Glance
| Role | Primary Focus | Key Item | Risk Level | Best for... |
|---|---|---|---|---|
| Investigator | Evidence collection | Thermometer, EMF | Low | Beginners |
| Equipment Carrier | Setup/gear placement | Tripods, Cameras | Low | Organized teams |
| Sanity Manager | Sanity monitoring | Sanity Pills | Low | Strategists |
| Hiding Spot Scout | Survival during hunts | Smudge Stick, Lighter | Medium | Experienced players |
| Objective Hunter | Side objectives | Photo Camera | Medium | Completionists |
| Ghost Whisperer | Spirit Box/Ouija | Spirit Box, Ouija | Medium | Communication experts |
| Ghost Hunter | Forcing hunts | Cursed Possessions | High | Risk-takers |
Unlock Conditions & Progression
There are no unlockable characters or roles. All roles are available from the start; you simply need to buy the required equipment from the shop using in-game currency (earned from completed contracts). Equipment tiers (I, II, III) unlock as you gain higher player levels (Level 1 to 100+). Higher tier items often have better performance (larger range, longer battery, etc.) and can make your role more effective, but the role itself is never locked.
Team Synergy & Composition
An ideal team of 4 often includes:
- 1 Investigator (room finder, evidence gatherer)
- 1 Equipment Carrier (setup)
- 1 Sanity Manager (pill distribution)
- 1 Ghost Whisperer or Ghost Hunter (depending on objectives)
But any combination works. Communication is key – assign roles at the start of the contract via voice chat.
Conclusion
While Phasmophobia has no built-in character classes, the emergent roles above allow for deep strategic play. Mastering each role will make you a versatile investigator and increase your survival rate. Remember: roles are flexible – if your Sanity Manager dies, another player can pick up the pills. Adapt and survive.
Cheats & Secrets
Cheats & Secrets for Phasmophobia
Official Cheat Codes: None
Phasmophobia does not include any built-in cheat codes, console commands, or developer debug menus accessible by players. The developers, Kinetic Games, maintain a strict policy against cheating, and using third-party tools or memory editing will result in a permanent ban from the game's anti-cheat system. There is no way to spawn items, unlock achievements, or skip progression via legitimate in-game commands.
Hidden Features & Secrets
While traditional cheats are absent, Phasmophobia is rich with secrets, Easter eggs, and hidden content designed by the developers. These include cursed possessions, environmental clues, lore items, and seasonal events.
#### 1. Cursed Possessions
Cursed possessions are special interactive items that spawn randomly on each map. They are not hidden in the sense of requiring discovery, but many players consider them "secrets" because they have unique effects and are not essential to the main objective.
- Tarot Cards: A deck of 10 cards that when drawn trigger random effects ranging from instantly starting a hunt to resurrecting a dead teammate.
- Ouija Board: Use it to ask the ghost questions, but incorrect usage can drain sanity or trigger a hunt.
- Voodoo Doll: Stick pins into the doll to force ghost interactions; each pin costs sanity.
- Music Box: Its music enrages the ghost.
- Ghost Writing Book: Can be used as a standard ghost writing book, but if the ghost writes in it, it's evidence.
- Summoning Circle: A circle of candles that, when lit, forces the ghost to appear.
- Haunted Mirror: Shows the ghost's current location.
- Monkey Paw: Grants wishes (five) with dire consequences.
- Halloween Event (e.g., 2021, 2022, 2023): Special maps, cursed items, and unique ghost behaviors. For example, the "Maple Lodge Campsite" had hidden pumpkins.
- Christmas Event: Maps decorated with snow and presents, and the "Priscus" ghost type was added temporarily.
- Anniversary Event: Often features a carnival theme with additional lore.
- Tanglewood Street House: A note in the basement mentions "the accident" and a child's drawing.
- Edgefield Street House: Photos and letters reveal a family's tragic history.
- Prison: Prisoners' cells contain scratch marks and cryptic messages.
- Sunny Meadows Mental Institution: Patient files and asylum records build a narrative about the facility's decline.
- The Mimic: This ghost can copy the abilities of other ghosts, including the appearance of orbs (though they are not evidence for the Mimic). Discovering this distinction is a secret.
- The Twins: Two ghosts that can interact at separate locations simultaneously. The "real" twin is faster, which is a hidden mechanic.
- The Goryo: If you use a DOTS projector, the Goryo can only be seen through a video camera, not with the naked eye. This is a hint.
- "Boo!": Get a photo of a ghost during a ghost event (exact condition varies).
- "Not a Ghost": Have a ghost event where the ghost appears but doesn't hunt.
- "Lucky": Draw the "Death" tarot card and die immediately (unlocks achievement).
- "The One That Got Away": Successfully escape a hunt while being the last alive.
- "We Need a Bigger Van": Complete all objectives on all maps (achieved in versions before 1.0).
- Kinetic Games Logo: Sometimes appears on a whiteboard or computer screen in the lobby (e.g., in the truck).
- "Ghost Hunters" Reference: The font and style of the equipment resemble the TV show.
- Player Character Models: The default character models are based on the developers and their friends.
- Patchnotes Items: Occasionally, the lobby contains items referencing patch notes (e.g., a "1.0" cake during the full release).
- Ghost Writing in Multiple Languages: The ghost book can write in English, but occasionally in other languages based on the ghost's name? (Not confirmed).
- Voodoo Doll Pins Cause Specific Events: Each pin (head, heart, etc.) triggers a different ghost interaction (e.g., head pin forces a ghost event). This was discovered by the community.
- Ouija Board Exact Coordinates: Player-created map coordinates for throwing the board into a specific location (e.g., in the basement) can trigger a unique ghost event. (Debatable, likely myth.)
- Sanity Monitor in Truck: The sanity monitor can be used to detect the ghost's activity level indirectly; lower sanity triggers more hunts. Not a secret, but useful.
- Spirit Box Responses: The ghost responds only if you are alone and in its room (for some ghosts). Knowing this is a key strategy.
- EMF Reader Level 5: If you get a reading of 5 on the EMF, it confirms ghost interaction, but level 5 is rare and sometimes missed.
These are intended game mechanics but feel like secrets upon discovery.
#### 2. Seasonal Events & Special Modes
Kinetic Games frequently adds limited-time content:
These events are now retired but are considered hidden content.
#### 3. Lore & Environmental Storytelling
Each map contains details that hint at the game's lore:
These are not secrets but are easy to overlook.
#### 4. Ghost Behavior Easter Eggs
Certain ghost types have specific hidden behaviors:
These are not immediately obvious.
#### 5. Hidden Achievements
Some Steam achievements are secret until unlocked:
Check the official achievement list for more.
#### 6. Developer Easter Eggs
Evidence of the developers' presence:
#### 7. Community Discoveries
Players have found subtle secrets:
Exploit-Safe Secrets
These are legitimate secrets that do not involve cheating:
Conclusion
Phasmophobia rewards exploration and attention to detail. While there are no cheat codes, discovering the cursed possessions, lore notes, and advanced ghost behaviors provides a sense of uncovering secrets. Always play fairly, as exploiting bugs can lead to bans.