
Pokémon Red and Blue
## Pokémon Red and Blue – Game Introduction ### Genre Pokémon Red and Blue are **role-playing games (RPGs)** with elements of **adventure, strategy, and creature collection**. They are the founding titles of the Pokémon franchise, blending turn-based combat, exploration, and monster taming. #...
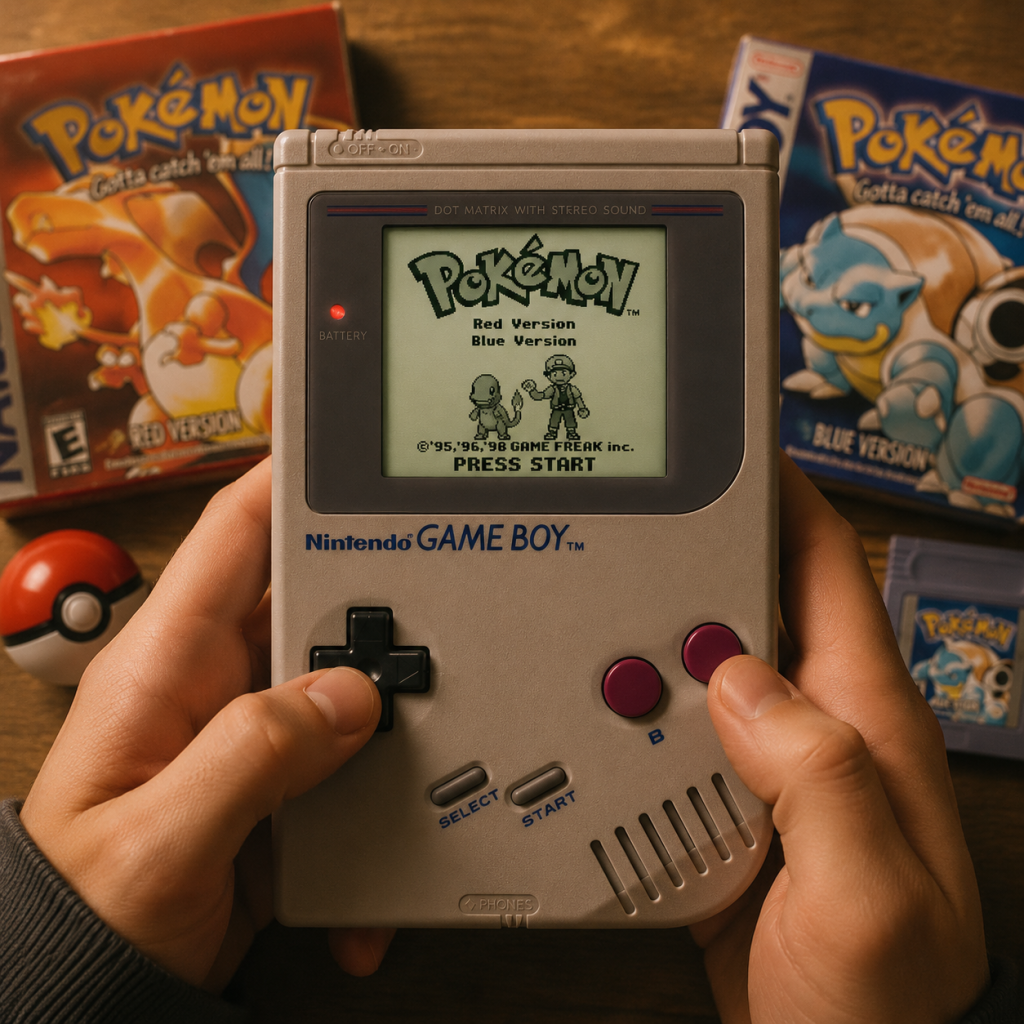
Download & Installation
Overview
Pokémon Red and Blue are classic Game Boy titles originally released in 1996. They are not available on modern platforms such as PC (Steam/Epic), PlayStation, Xbox, Nintendo Switch (eShop or Nintendo Switch Online), or mobile devices. The only official and legitimate ways to play the original games are:
- 3DS Virtual Console (discontinued – available only if previously purchased before the eShop closure in March 2023)
- Physical Game Boy cartridge (requires a Game Boy, Game Boy Color, or Game Boy Advance)
While there are unofficial emulation methods, this guide strictly covers official download and installation sources.
---
Official Download Sources
| Platform | Source | Status |
|---|---|---|
| Nintendo 3DS | Nintendo eShop (Virtual Console) | Discontinued. No longer available for purchase. Existing owners can re-download from their account history. |
| Game Boy / GBA | Physical cartridge (new or used) | Still available through second‑hand markets (e.g., eBay, retro game stores). |
| PC, PS, Xbox, Switch, Mobile | None | Not released officially on any of these platforms. |
Step‑by‑Step Installation
1. Nintendo 3DS (Virtual Console – existing purchases only)
#### Prerequisites
- A Nintendo 3DS, 3DS XL, 2DS, or New 3DS family system.
- Nintendo Network ID (NNID) linked to the original purchase.
- A valid Nintendo eShop account (still usable for re‑downloads).
- A compatible handheld: original Game Boy, Game Boy Pocket, Game Boy Color, Game Boy Advance, or Game Boy Advance SP.
- A legitimate Pokémon Red or Blue cartridge (check for “Nintendo” logo and proper label).
- Minimum: A functioning Game Boy, Game Boy Color, or Game Boy Advance.
- Recommended: A backlit model (GBA SP AGS‑101, or modded Game Boy) for easier visibility.
- Minimum: Any 3DS family system (original 3DS, 3DS XL, 2DS, New 3DS, New 3DS XL, New 2DS XL).
- Recommended: New 3DS family for faster system menus, though performance of the game itself is identical.
- Minimum PC: 1 GHz processor, 512 MB RAM, DirectX 9.0c compatible GPU, Windows 7.
- Recommended PC: 2 GHz dual‑core, 2 GB RAM, OpenGL 3.3 or Vulkan support, Windows 10/11.
#### Steps
1. Power on your 3DS and connect to the internet.
2. From the HOME menu, open the Nintendo eShop icon.
3. Tap the Menu icon (three horizontal lines) in the top‑left corner.
4. Select Download History.
5. Scroll through the list to find Pokémon Red Version or Pokémon Blue Version.
6. Tap the Download button next to the game.
7. Wait for the download to complete. The game will appear on your HOME menu as a Virtual Console icon.
> Note: If you never purchased the game before the eShop closure, you cannot buy it now. No workaround exists.
2. Physical Game Boy Cartridge
#### Prerequisites
#### Steps
1. Insert the cartridge into the slot with the label facing outward (for Game Boy classic) or upward (for GBA).
2. Power on the system.
3. The game will boot automatically. If you’re using a Game Boy Advance, it will boot in original Game Boy mode (black‑and‑white on GBA screen, unless using a GBA SP with frontlight).
> Hint: For the best visual experience, a Game Boy Color or Game Boy Advance SP (AGS‑101) provides a backlit screen. Original Game Boy screens require good lighting.
---
System Requirements
Original Hardware (Game Boy / GBA)
Nintendo 3DS (Virtual Console)
Emulation (Unofficial – not covered in this guide, provided for reference only)
> ⚠️ Using emulators to play ROMs that you do not own the original cartridge for is illegal in most jurisdictions. This guide only advocates for legitimate ownership.
---
Storage Space
| Method | Space Required |
|---|---|
| 3DS Virtual Console download | ~8 MB (KB?) Note: Virtual Console games are a few megabytes; actual size is negligible. |
| Physical cartridge | 0 MB (no install) |
| Save file on 3DS | ~0.5 MB (stored on SD card) |
| Save file on cartridge | Internal battery (saves kept while battery lasts; replaceable) |
Account Requirements
- 3DS Virtual Console: You must have a Nintendo Network ID (NNID) that was used to purchase the game before the eShop closure. No other accounts are required.
- Physical cartridge: No account or internet connection required. Simply insert and play.
---
First Launch Setup
On 3DS (Virtual Console)
1. Tap the game icon on the HOME menu.
2. The game will display the original startup screen with the Game Boy logo and a brief copyright notice.
3. Press Start (or A) on the title screen to begin a new game.
4. If you have a save from a previous session, it will load automatically.
On Game Boy / GBA (Physical)
1. Turn on the system with the cartridge inserted.
2. The Game Boy logo appears briefly; if you see a “Nintendo” logo with a black background, the cartridge is authentic.
3. Press Start on the title screen.
4. The game begins with Professor Oak’s introduction. There is no language or region setup.
---
Common Installation Errors & Fixes
| Error | Cause | Fix |
|---|---|---|
| 3DS “This software cannot be downloaded” | The game was never purchased on your NNID, or eShop servers are unreachable. | Verify your purchase history. If not purchased, no official method exists. |
| Game Boy cart “No game inserted” | Dirty or bent pins in cartridge or slot. | Clean cartridge contacts with isopropyl alcohol and a cotton swab. Insert firmly. |
| Game Boy cart fails to load / freezes at logo | Corrupted cartridge (battery leak, damage) or incompatible system (e.g., original Game Boy on a Game Boy Micro). | Try on a different system. If still fails, the cartridge may be defective. |
| Save file corrupt on 3DS | Improper shutdown or SD card error. | Restore from backup (if you had one). Otherwise, the save is lost. |
| Battery‑backed save on cartridge fails | Internal battery is dead (common after ~10–20 years). | Replace the battery (CR1616 or CR2025) using soldering, or use a backup device like GBxCart. |
Post‑Installation Verification
After installation or insertion, confirm the game runs correctly:
1. Boot the game and wait for the title screen.
2. Start a new game (if no save exists). You should see Professor Oak’s opening dialogue.
3. Play for a few minutes – move your character, encounter a wild Pokémon, save the game.
4. Power cycle the device, then reload the save to ensure it persists.
5. For 3DS, check that the game appears in your Activity Log and that save data is stored on the SD card.
If all steps succeed, your installation is complete.
---
Final Notes
Pokémon Red and Blue are historic titles that have never been officially re‑released on modern consoles. The only legitimate ways to play are via original hardware or the now‑discontinued 3DS Virtual Console. For those who missed these opportunities, considering purchasing authentic cartridges from reputable retro dealers is the sole legal option. Always avoid pirated copies and ROM sites.
Game Introduction
Pokémon Red and Blue – Game Introduction
Genre
Pokémon Red and Blue are role-playing games (RPGs) with elements of adventure, strategy, and creature collection. They are the founding titles of the Pokémon franchise, blending turn-based combat, exploration, and monster taming.
Developer & Publisher
Developed by Game Freak and published by Nintendo. The games were originally released for the Nintendo Game Boy handheld console.
Release Timeline
- Japan: February 27, 1996 (Pokémon Red & Green); later Pokémon Blue as a mail-order/event cartridge.
- North America: September 30, 1998 (as Pokémon Red and Blue, based on the enhanced Japanese Blue version).
- Europe: October 5, 1999.
- Australia: November 3, 1999.
- Original: Nintendo Game Boy (compatible with Game Boy Color and later models).
- Virtual Console: Re-released on Nintendo 3DS via the eShop (2016, for the franchise’s 20th anniversary).
- Nintendo Switch: Available exclusively for Nintendo Switch Online subscribers as part of the Game Boy – Nintendo Switch Online library (released in February 2023).
- Pallet Town – your peaceful hometown.
- Viridian City – a small city near a forest.
- Pewter City – home to the Rock-type Gym.
- Cerulean City – water-themed city with a bridge.
- Vermilion City – port town with a ship, the S.S. Anne.
- Celadon City – urban center with a Department Store and Game Corner.
- Lavender Town – known for its haunting Pokémon Tower.
- Fuchsia City – home to the Safari Zone.
- Saffron City – a metropolis controlled by Team Rocket.
- Cinnabar Island – volcanic island with a laboratory.
- Indigo Plateau – the site of the Pokémon League.
- Red (You): The silent protagonist and the starting Trainer.
- Professor Samuel Oak: The region’s leading Pokémon researcher who provides the Pokédex.
- Blue (Rival): The grandson of Professor Oak. He is a competitive, talkative trainer who chooses the Pokémon with a type advantage over yours.
- Gym Leaders: Eight formidable trainers, each specializing in a Pokémon type: Brock (Rock), Misty (Water), Lt. Surge (Electric), Erika (Grass), Koga (Poison), Sabrina (Psychic), Blaine (Fire), and Giovanni (Ground; also the leader of Team Rocket).
- Elite Four & Champion: The final challenge – Lorelei (Ice), Bruno (Fighting), Agatha (Ghost), Lance (Dragon), and the Champion (Blue after you defeat the Elite Four).
- Team Rocket Grunts & Executives: Antagonists spread across Kanto, with Giovanni as their boss.
- Catch ’em All: Over 150 unique Pokémon to find, capture, and evolve, encouraging completionist gameplay.
- Strategic Turn-Based Battles: Choose moves wisely, exploiting type matchups (Fire beats Grass, Water beats Fire, etc.).
- Personal Connection: Naming your Pokémon and forming a team you care about.
- Sense of Progression: Growing from a novice to the Champion, earning badges, and learning new moves.
- Multiplayer Trading: Link cable required to trade Pokémon between versions, essential for completing the Pokédex (since each version has exclusive Pokémon).
- Nostalgia & Legacy: As the first games in the franchise, they defined the formula for decades of future titles.
- Ages: Primarily 6–14 at original release, but appeals to all ages due to its simple mechanics and deep strategy.
- Fans of: Classic RPGs, monster-collection games, competitive strategies, and retro Nintendo titles.
- New players: The games are accessible, with clear tutorials (e.g., Professor Oak teaching basic mechanics).
- Veteran players: Revisiting these games offers nostalgia, and the Virtual Console / NSO releases add save states and rewind functions.
- Trade Pokémon between versions to complete the Pokédex.
- Battle head-to-head using their own teams.
- Offline: The entire single-player story is offline. You can play the campaign entirely solo without an internet connection.
- Online (NSO only): Requires active Nintendo Switch Online subscription. Enables global trading and battling with friends or random players via the Game Boy – NSO app. The original Game Boy and 3DS Virtual Console versions supported only local multiplayer (cable or infrared).
- Birth of a Phenomenon: Pokémon Red and Blue launched a global craze, spawning an anime, trading card game, movies, toys, and countless sequels. Their release marked the beginning of the largest media franchise in history.
- Version-Exclusive Pokémon: The two versions feature different Pokémon (e.g., Sandshrew only in Red; Ekans only in Blue), forcing players to trade with friends who own the opposite version – a revolutionary social element for handheld gaming.
- Simple Yet Deep Mechanics: The original 151 Pokémon, 15 types, and straightforward battle system hide surprising depth: IVs, EVs (though not visible), critical hit rates, and type effectiveness chart memorization.
- Iconic Visuals & Audio: The monochrome pixel art with color hints on Game Boy Color, and the unforgettable 8-bit battle music and cries (e.g., the “Pikachu” cry, the Gym Leader battle theme).
- Cultural Impact: Phrases like “Gotta Catch ‘Em All!” and the universally recognized spelling of “Pokémon” (with the accent) stem from these games. They introduced the world to Pikachu, Charizard, Mewtwo, and countless other beloved creatures.
- No Handholding: Unlike modern entries, the game gives minimal direction – you must talk to NPCs and explore to find your way, offering a pure, unfiltered RPG experience.
Platforms
> Note: Pokémon Red and Blue are not available on PC (Steam/Epic), PlayStation, Xbox, or mobile devices (iOS/Android) as official releases.
Story Overview
You play as Red (the default protagonist name, though you can choose your own) – a young Trainer from Pallet Town in the Kanto region. Your journey begins when Professor Oak, a renowned Pokémon researcher, entrusts you with your first Pokémon: Bulbasaur, Charmander, or Squirtle. Your main goal is to collect all 151 Pokémon to complete the Pokédex, challenge and defeat the eight Gym Leaders to earn Badges, and ultimately battle the Elite Four and the Champion to become the new Pokémon League Champion. Along the way, you must thwart the nefarious plans of Team Rocket, a criminal organization that uses Pokémon for illegal activities, including stealing and exploiting them. A friendly rival (you can name him; default is Blue or Gary) constantly challenges you, pushing you to grow stronger.
Setting
The game is set in Kanto, a fictional region based on the real-world Kantō region of Japan. The region features diverse locations, including:
The world is interconnected through routes, caves, and water passages, encouraging exploration.
Main Characters
Core Appeal
The core appeal of Pokémon Red and Blue lies in the captivating loop of exploration, collection, and competition:
Target Audience
Game Modes
The original Game Boy cartridge offered a single single-player campaign. However, thanks to the Game Boy’s Link Cable, two players could:
The Virtual Console re-release added Wireless connectivity via the 3DS’s infrared (limited to local trading/battling with other Virtual Console copies). The Nintendo Switch Online version supports online trading and battling with other NSO subscribers globally, and includes Save States and Rewind features.
Online / Offline Support
DLC / Expansions
Pokémon Red and Blue were released as complete, self-contained games with no DLC or expansions. However, they are part of a larger franchise where the equivalent content was later added in remakes (e.g., FireRed and LeafGreen) or sequels (Pokémon Gold, Silver, Crystal). The games themselves do not have post-launch downloadable content.
What Makes This Game Unique
Pokémon Red and Blue remain timeless classics that every fan of the series should experience, whether for the first time or as a nostalgic trip back to 1998. Their simplicity, charm, and addictive gameplay have earned them a permanent place in gaming history.
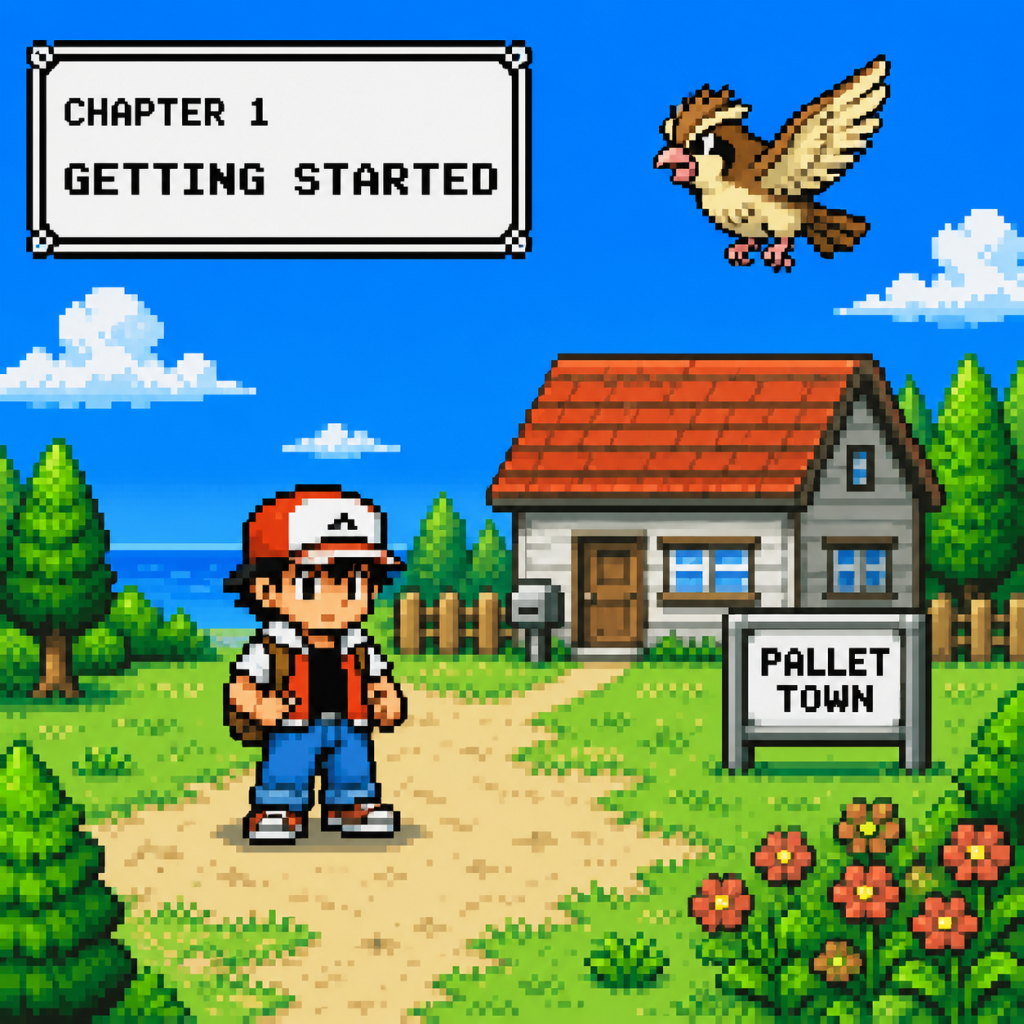
Getting Started
Getting Started in Pokémon Red and Blue
Introduction for Complete Newcomers
Welcome to the world of Pokémon! This guide is designed for brand-new players jumping into Pokémon Red and Blue for the first time. These classic Game Boy titles are the foundation of the entire Pokémon franchise, but they can feel a little rough around the edges compared to modern games. We’ll walk you through the first hour, cover essential controls, and help you avoid common pitfalls so your journey starts smoothly.
---
First-Hour Walkthrough (From New Game to Viridian City)
1. Start the Game – After the title screen, you’ll be asked to choose a save file (press A on an empty slot). You cannot skip this – saving is required.
2. Name Your Character – You are asked “What is your name?” Enter any name (up to 7 letters). This is your player character’s name. No other appearance options exist.
3. Name Your Rival – Professor Oak then asks, “What is your rival’s name?” Enter a name (the game suggests “BLUE” if you don’t change it). This is your rival; they will appear throughout the game.
4. Wake Up in Pallet Town – You start in your house on the second floor. Walk downstairs (press Up on the d-pad and then Down to exit your room and go downstairs).
5. Visit Professor Oak’s Lab – Go north out of your house, then east into the lab (the building with the red roof). Walk toward the counter – the professor will stop you.
6. Choose Your Starter Pokémon – Oak will lead you to three Poké Balls on a table. You can only pick one. The choices:
- Charmander (Fire) – Good early power, but tough against the first two Gyms (Rock and Water).
- Squirtle (Water) – Easy mode for early Gyms, learns Water Gun early.
- Bulbasaur (Grass/Poison) – Strong against the first two Gyms, but weak to many later challenges.
Advice for absolute beginners: Squirtle is the most forgiving choice.
7. Rival Battle – Immediately after choosing, your rival will challenge you. Your starter has only one move (Tackle or Scratch). Just spam that move to win. No items needed yet.
8. Leave Pallet Town – After the battle, Oak will give you a Pokédex and 5 Poké Balls. Walk north out of town to Route 1.
9. Route 1 – This long grassy path is full of wild Pokémon (Pidgey, Rattata). Catch at least 2-3 Pokémon here for practice. Use a Poké Ball when their health is low (red bar).
10. Arrive in Viridian City – At the north end of Route 1, you enter Viridian City. Your first objective: go to the Pokémon Center (the building with a red roof and a Poké Ball symbol) to heal your Pokémon for free.
11. First Gym? Not Yet – The Viridian City Gym is locked. You must visit the Poké Mart next door to buy more Poké Balls (200 Pokédollars each). Then proceed east to Route 2 (watch for a guard who will let you pass once you have a Pokémon above level 10 or after you’ve received the Pokédex; you can pass right away by talking to him).
12. Viridian Forest – Enter the forest to the east. This is a maze with many Bug-type Pokémon (Caterpie, Weedle). Stock up on Poké Balls before entering. Save often! Walk slowly to avoid random encounters.
13. Arrive in Pewter City – After clearing the forest, you reach Pewter City. Heal at the Center, then challenge the Pewter City Gym (Rock-type leader Brock). If you chose Squirtle, use Water Gun. For Charmander, you’ll need to train your Pikachu (if you caught one in Viridian Forest) or catch a Mankey on Route 22 (west of Viridian). For Bulbasaur, use Vine Whip.
---
Character Creation
There is no customization beyond naming. You cannot change gender, appearance, or clothes. The game forces a male protagonist (Red). Your rival’s name is the only other input. Simply follow the prompts on screen.
---
Controls (Game Boy and Emulation)
Pokémon Red/Blue were designed for the original Game Boy, but are commonly played on emulators, Nintendo 3DS Virtual Console, or via the Game Boy Player on GameCube. The following controls apply to the original hardware. Emulators map these to keyboard/controller:
| Original Game Boy Button | Function |
|---|---|
| D-Pad (Up/Down/Left/Right) | Move character, navigate menus, select moves |
| A Button | Confirm/select/interact with NPCs or objects |
| B Button | Cancel/back out of menus / hold B while walking to run (in some versions, but not Gen I – running isn’t possible in Red/Blue) |
| Start | Open the main menu (Pokémon, Items, Save, etc.) |
| Select | Toggle item/status menu (usually opens the item bag in overworld) |
Emulator tips:
- Save states are available on emulators – use them often (F5 to save state, F7 to load in many emulators). But also use the in-game save (Start → Save) to avoid corruption.
- Speed up (fast forward) is common – use it to skip long text or slow walking. But avoid while in battles or menus to prevent bugs.
- Overworld Screen: You see your character from a top-down perspective. The top bar shows your current location name. The bottom has no HUD (HP bars only appear in battle).
- Battle Screen: Shows your Pokémon’s HP bar at the bottom left, the opponent’s HP bar and name at the top. Options: FIGHT (choose a move), BAG (use an item), POKÉMON (switch), RUN (flee).
- Main Menu (Start):
- Phone? No PokéGear – just basic menus.
- Save before entering tall grass – random encounters can wipe a weak team.
- Talk to every NPC – many give important items (Potions, Poké Balls, TMs) or useful tips.
- Check the PC in Pokémon Centers – you can withdraw stored Pokémon and items from the Bill’s PC (after getting the S.S. Anne ticket).
- Buy at least 10 Poké Balls before starting any serious catching.
- Heal at Pokémon Centers (it’s free).
- Don’t skip the tutorial guy in Viridian City – he teaches you how to catch Pokémon (but you can skip if you’re comfortable).
- Don’t waste money on Potions early – free Potions are found on the ground. Save your cash for Poké Balls.
- Don’t try to catch every Pokémon you see – focus on building a balanced team of 3-4 first.
- Don’t ignore type matchups – Fire beats Grass, Water beats Fire, Grass beats Water, etc. A quick reference: use super-effective moves for 2x damage.
- Don’t fight without healing – if your lead Pokémon faints, the next one comes out; if all faint, you black out and lose half your money (max $5000) and are sent to the last Pokémon Center.
- Don’t release your starter – you cannot get it back! Keep it always.
- Money (Pokédollars): Earned from Trainer battles (not wild Pokémon). Spend on: Poké Balls (200 each) > Antidotes (100) > Potions (300). Do NOT buy Great Balls until you reach Cerulean (better catch rate).
- Poké Balls: Your most important early item. Catch wild Pokémon to build a team. Always carry at least 10.
- Antidotes: Poison is common from Weedle/Zubat. Buy 2-3 early.
- PP (Power Points): Moves have limited uses. Restore PP at Pokémon Centers. Use weaker moves (Tackle) on low-level wild Pokémon to save PP for strong moves.
- Experience Points (XP): The fastest way to level up is battling wild Pokémon on routes near towns. Avoid grinding on weak Pokémon (Pidgey, Rattata) – move to higher level areas (Route 3 after Pewter).
- [ ] Start a new game and name your character and rival.
- [ ] Choose your starter Pokémon.
- [ ] Win the first rival battle.
- [ ] Receive Pokédex and 5 Poké Balls.
- [ ] Catch at least 2 wild Pokémon on Route 1 (Pidgey, Rattata).
- [ ] Arrive in Viridian City.
- [ ] Heal at Pokémon Center.
- [ ] Buy 10 Poké Balls from the Poké Mart.
- [ ] Explore Route 2 and enter Viridian Forest.
- [ ] Save and heal before entering the forest.
- [ ] Navigate through the forest (watch for bug catchers and wild Pokémon).
- [ ] Reach Pewter City.
- [ ] Challenge Brock’s Gym (have a super-effective move ready).
- [ ] Save your game after earning the Boulder Badge.
- Talk to the old man in Viridian City (the one who says “I was walking in tall grass…”). He gives you a free Potion.
- Check the hidden items – look for red/blue squares on the ground (use the Itemfinder later). But for now, just explore.
- Use the in-game save (Start → Save) every time you enter a new city or before a gym battle.
- Don’t be afraid to lose – you can always come back stronger. The game is forgiving except for the money loss on blackout.
- Have fun exploring! The magic of the original Pokémon games is the sense of discovery. Don’t rush.
---
UI Overview
- Pokédex – see Pokémon you’ve caught (press Select to change modes).
- Pokémon – view your team, check stats, rearrange order, use HMs (field moves).
- Bag – all items sorted by pocket (Items, Key Items, etc.).
- Save – save your game (only possible outside of battle and in buildings/towns).
- Options – text speed (recommend Fast), battle animation (ON/OFF), sound (stereo/mono).
---
Essential Early Objectives
1. Get the Pokédex – Already done after leaving the lab.
2. Catch your first wild Pokémon – Buy Poké Balls, then find a wild Pokémon, weaken it (use Tackle/Scratch until HP is red), throw a Ball. Success rate increases with lower HP and status conditions (Sleep, Paralysis).
3. Collect 8 Gym Badges – Start with Brock in Pewter City (Rock-type), then Misty in Cerulean (Water), etc.
4. Defeat the Elite Four – Endgame challenge.
5. Complete the Pokédex (optional) – Catch all 151 Pokémon.
---
What to Do First & What to Avoid
Do:
Avoid:
---
Early Resource Priorities
---
Common Beginner Mistakes
1. Not saving – The game only saves when you use the in-game save menu. Power loss = lost progress. Save every 10 minutes.
2. Over-leveling one Pokémon – Your starter will become strong, but if it faints, you have no backup. Keep 3-4 Pokémon evenly leveled.
3. Using the Master Ball too early – You get one Master Ball (guaranteed catch). Save it for a rare legendary like Mewtwo at the end.
4. Teaching bad TMs – TMs (Technical Machines) are one-time use. Don’t waste them on weak moves (e.g., Water Gun is a TM but also learned by Squirtle naturally).
5. Ignoring the PC – You can only carry 6 Pokémon. Store extras in the PC. If your team is full and you try to catch one, you’ll be asked to release or swap. Always choose to send to PC.
6. Fighting wild Pokémon without Balls – If you’re low on Poké Balls, run from wild battles to avoid fainting.
7. Trying to beat Brock without Grass or Water moves – Use a Nidoran (learns Double Kick at level 12, which is Normal/Fighting? Actually Nidoran male learns Horn Attack at 12 – better to catch a Mankey on Route 22 or evolve a Nidoran into Nidorino for Fighting moves).
---
Day-One Checklist
---
Final Tips for Newcomers
Good luck, Trainer! The road to becoming the Pokémon League Champion starts now.

Core Gameplay
"content": "## Core Gameplay
The core loop of Pokémon Red and Blue is: explore routes and towns → battle wild Pokémon and trainers → capture new Pokémon → train and evolve your team → defeat Gym Leaders → progress the story → defeat Team Rocket → challenge the Pokémon League. Each step reinforces the cycle of growing stronger through battles, strategic team building, and mastery of type matchups.
Main Gameplay Loop
The core loop of Pokémon Red and Blue is: explore routes and towns → battle wild Pokémon and trainers → capture new Pokémon → train and evolve your team → defeat Gym Leaders → progress the story → defeat Team Rocket → challenge the Pokémon League. Each step reinforces the cycle of growing stronger through battles, strategic team building, and mastery of type matchups.
Combat/Interaction Systems
- Turn-based battles: Each Pokémon takes one action per turn (attack, use item, switch, or run). Speed determines order. Critical hits (based on base Speed) deal 1.5× damage (Gen1 formula).
- Type matchups: 15 types with a rock-paper-scissors system. Use the in-game move “X Accuracy” or the Pokédex’s type chart (press B?). Key super-effective combos: Water > Fire, Fire > Grass, Grass > Water; Fighting > Normal, Ghost > Psychic (Ghost moves are Physical and only affect Psychic types due to a bug in Gen1), Bug > Psychic, Ice > Dragon, Electric > Water/Flying.
- Status conditions: Burn (halves Attack), Paralyze (Speed halved, 25% no action), Sleep (1–7 turns), Freeze (chance to thaw each turn), Poison (damage per step outside battle).
- Capture mechanics: Lower HP (red zone best), apply Sleep/Paralysis, use appropriate Poke Balls (Great Balls, Ultra Balls later). Each wild Pokémon has a catch rate.
- Fainting and healing: Fainted Pokémon cannot battle; heal at Pokémon Centers or using items. PP (Power Points) limit move usage.
- Badges: 8 Gym Badges increase your control over traded Pokémon (up to level 70) and allow use of HMs outside battle (e.g., Cut, Surf, Strength, Fly). Badges also boost your Pokémon’s stats (e.g., attack, defense) during battle.
- Pokémon evolution: Many evolve at specific levels (e.g., Charmeleon → Charizard at level 36) or via trade (Machoke → Machamp) or use of stones (Thunderstone, Water Stone, Fire Stone, Leaf Stone, Moon Stone).
- Level cap: Wild and trainer Pokémon scale with location. Max level in the wild is around level 40–50 (Fighting Dojo, Victory Road). No formal level cap; you can grind to 100 before the Elite Four.
- HM/TM moves: Key abilities are unlocked via HMs (Cut, Fly, Surf, Strength, Flash). TMs teach one-time moves, so use wisely.
- Overworld: Grid-based maps with tall grass (wild encounters), caves (Zubat, Geodude, etc.), water surfaces (Surf required), and buildings (gyms, shops, houses).
- Hidden items: Use Itemfinder to locate invisible items (e.g., Leftovers in the Rocket Hideout, Rare Candies).
- Routes: Numbered 1–25 (plus water routes 19–21). Each route has a defined set of possible wild Pokémon and trainer levels.
- Legendary birds: Zapdos (Power Plant), Moltres (Victory Road), Articuno (Seafoam Islands). They require good preparation and many Ultra Balls.
- Main story: Beat the 8 Gym Leaders → defeat Team Rocket (Celadon Hideout, Silph Co., Saffron City, Pokémon Mansion) → collect HMs → win the Pokémon League (Elite Four + Champion).
- Side quests: Rescue Bill’s Eevee (Route 25), get the Old Amber (Pewter Museum), obtain the Silph Scope (Lavender Tower), receive Lapras (Silph Co.), catch the Legendary Birds and Mewtwo (Cerulean Cave post-game).
- Optional objectives: Complete the Pokédex (151 species), challenge the Fighting Dojo (Hitmonlee or Hitmonchan trade), get the Bicycle, Super Rod.
- Currency: PokéDollars ($). Earned from trainer battles, selling items (e.g., Nuggets, TMs), and the Amulet Coin (doubles prize money).
- Spending: Poke Balls (basic $200), Great Balls ($600), Ultra Balls ($1200), healing items (Potion $300, Super Potion $700), status curing items, TMs (some $1000–$5500 in Celadon Dept. Store).
- Item farming: Use Vs Seeker (reusable trainer battle item—available in Gen1? No, Vs Seeker introduced later. In Gen1 you can re-battle trainers by talking to them again? Many trainers do not rematch. So economy is limited to one-time battles and selling wild-caught Pokémon (not profitable). Better to sell Nuggets from wild Meowth or from Rock Tunnel.
- Trainer level: Not a number; represented by badges and ability to control higher-level traded Pokémon.
- Pokémon stats: Each Pokémon has base stats (HP, Attack, Defense, Special, Speed) and individual values (IVs) from 0–15 for each stat (called DVs in Gen1). IVs determine stats, Hidden Power type, and shiny status (not possible in Gen1). Effort Values (EVs) are gained from defeating specific Pokémon (e.g., defeating a Machop gives +1 Attack EV). EVs increase stats up to 65535 per stat (max 255). This affects overall performance.
- Move sets: Choose from level-up moves and TMs. Max 4 moves per Pokémon. Moves have categories (Physical, Special based on type in Gen1—e.g., Fire is Special).
- Evolution timing: Decide when to evolve; some moves are only learned at earlier levels (e.g., Growlithe learns Flamethrower at level 50, but evolves via Fire Stone early—so delay evolution).
- Cerulean Cave: Unlock access (Surf required) to catch Mewtwo at level 70—the strongest Pokémon in the game. Bring many Ultra Balls and status moves.
- Complete the Pokédex: Catch or trade for all 151 species. Version exclusives (e.g., Ekans in Red, Sandshrew in Blue) require trading. Legendary birds and Mewtwo are required. Mew is only obtainable via event or glitch (not official endgame).
- Fishing: Use Super Rod to catch rare water Pokémon like Dratini (Route 10, Safari Zone), Horsea, Staryu, etc.
- Trading and Linking: Use Link Cable to trade or battle with other players (requires physical connection). No online features.
- No Battle Tower or rematches: Once you beat the game, the only challenges are catching Mewtwo and completing the Dex. Some minor quests (e.g., talk to Game Freak for a diploma after completing the Dex—requires 150 species, Mew not needed).
- Goals: First two Gyms (Brock – Rock type, Misty – Water). Catch a variety of Pokémon to cover weaknesses. For example:
- Key areas: Viridian Forest (caterpie, weedle, pidgey), Pewter City, Mt. Moon (Clefairy, fossils).
- Economy: Early funds are tight. Buy a few Poké Balls, use Potions sparingly. Sell nuggets from wild Meowth? Route 5/6 has Meowth at night.
- Progression: First badge gives obedience up to level 20. Second badge boost to level 30 (but traded Pokémon require badges). Focus on leveling two or three core Pokémon.
- Example team: (Starter) + Pidgey (evolves to Pidgeot, learns Fly) + Nidoran (evolves to Nidorino/Queen with Moon Stone) + Zubat (evolves to Golbat, useful for Confusion later).
- Battle tips: Use status moves like Growl to lower attack, Sand Attack to drop accuracy. Save Paralyze Heals for dangerous wild encounters.
- Goals: Defeat Lt. Surge (Vermilion Gym – Electric), Erika (Celadon Gym – Grass), Koga (Fuschia Gym – Poison), Sabrina (Saffron Gym – Psychic) optionally before Koga? Order may vary. Key plot: infiltrate Team Rocket’s Celadon Hideout and Silph Co. in Saffron.
- Team building: By now you should have a balanced team of 4–6 Pokémon at levels 25–40.
- Exploration: Safari Zone (catch Scyther, Pinsir, Kangaskhan), Pokémon Mansion (Burn mansion – learn Strength, get Secret Key), Rock Tunnel (Flash needed). Fishing with Good Rod yields Poliwag, Goldeen.
- Economy: You can afford Great Balls and Ultra Balls. Amulet Coin in route 16? Actually Amulet Coin is given by the mother after you pick up the Celadon Condo... No, in Gen1 Amulet Coin is held by a Meowth at the Rocket Hideout? It's actually on a Meowth in the Rocket Hideout (Celadon). Use it to double prize money.
- Example quest: Rescue Bill (Route 25) – get his Eevee (you can evolve into Vaporeon, Jolteon, Flareon using stones). But you typically get Eevee after you have a water stone from the Celadon Dept. Store.
- Goals: Defeat Blaine (Cinnabar Gym – Fire), Giovanni (Viridian Gym – Ground), then Victory Road.
- Key locations: Seafoam Islands (Articuno), Power Plant (Zapdos), Cinnabar Mansion (find Mewtwo? No, Mewtwo is post-game).
- Team levels: 40–55. Your starter should be around level 45+.
- Victory Road: Requires Strength, Surf, and Flash. Wild Pokémon include Onix, Graveler, Marowak (Cubone line can be found).
- Capturing Legendaries: Zapdos (level 50) is strong—save before battle. Use the Master Ball if you want a guaranteed catch, or save it for Mewtwo later. Articuno (level 50) in Seafoam is easier; bring Full Heals and Ultra Balls.
- Economy: Buy Ultra Balls ($1200 each) and Full Restores ($3000). You can also sell rare Candy from Pickup? No, Pickup doesn’t exist in Gen1. Instead, use the Nugget from Cinnabar Mansion.
- Goal 1: Catch Mewtwo.
- Goal 2: Complete the Pokédex.
- Goal 3: Legendary Birds. If you missed them earlier, go back to get Articuno, Zapdos, Moltres. They are not required for the diploma but desirable for a complete living Dex (in storage).
- Goal 4: Additional side content.
- Glitches (optional): The Mew glitch (using trainer encounter on Route 8) can get Mew, but this is not official. Also the Ditto glitch for cloning Pokémon via PC box. These are considered exploits.
- End of game: After completing the Pokédex, you can trade or battle with friends via Link Cable. The game file remains saved—you can continue training Pokémon to level 100.
Progression
Exploration
Quests/Missions
Economy
Character/Build Growth
Endgame Structure
After defeating the Elite Four and becoming Champion:
Core Gameplay by Player Progression Tiers
Early Game (Pallet Town to SS Anne / third badge)
Scope: You start with one Pokémon (Charmander, Squirtle, Bulbasaur) and learn the basics.
- Vs Brock: Use Squirtle’s Water Gun or Bulbasaur’s Vine Whip. Charmander is weak; catch a Mankey or Nidoran (Double Kick line) or Butterfree (Confusion) for super-effective damage.
- Vs Misty: Use Pikachu (if you got it in Viridian Forest), Oddish, or Bellsprout. Starmie’s Water Pulse can be dangerous—level up your team to at least 20.
Mid Game (SS Anne through Fuchsia City / fifth to sixth badge)
Scope: Now you have Cut, Surf, and access to more areas.
- Vs Surge: Use Dig (from TM in Mt. Moon) on Nidoran line, or a Ground-type like Dugtrio (Diglett Cave). Avoid Flying types.
- Vs Erika: Use Fire or Flying moves. Charizard, Pidgeot, or even a leveled Butterfree with Sleep Powder + Gust.
- Vs Koga: Many Poison types; use Psychic or Ground moves. Hypno (Drowzee line) is excellent.
- Vs Sabrina: Psychic types are immune to Ghost (due to Gen1 bug), so use Normal moves (Body Slam, Hyper Beam) or Dark? No Dark type in Gen1. Use fast Pokémon with high Attack and confuse/paralyze strategies. Alternatively, use Swords Dance + Slash.
Late Game (Fuschia City to Victory Road / seventh to eighth badge)
Scope: You have the Silph Scope, Master Ball (from Silph Co.), and access to the Power Plant.
- Vs Blaine: Use Rock, Ground, or Water moves. Be careful of Fire Blast with high accuracy (85% in Gen1).
- Vs Giovanni: Use Water, Grass, or Ice moves (e.g., Blizzard on Starmie). His Rhydon and Nidoking are tough; use Surf or Ice Beam.
Endgame (After Champion – Post-Elite Four)
Scope: You’ve beaten Blue (the Champion) and become the Pokémon League Champion. The game continues with post-game content.
- Location: Cerulean Cave (north of Cerulean City, requires Surf). Inside is a complex maze leading to Mewtwo at level 70.
- Strategy: Save before the encounter. Use Sleep or Paralyze, lower its HP, then throw Ultra Balls. The Master Ball is perfect here if you saved it.
- Team requirements: Must have Pokémon that can survive a few hits (Psychic, Recover, etc.). Use Snorlax with Body Slam and Yawn? No Yawn in Gen1. Use Gastly line (Curse? No, Lavender Town? Actually Gengar is good with Hypnosis and Dream Eater).
- Obtain: All 150 (or 151 including Mew if possible via glitch/event). Trade with friends for version exclusives. Use the Pokédex to track entries. The game gives you a Certificate of Completion (diploma) after showing the Professor 150 caught species.
- Locations for remaining Pokémon: Dratini (Super Rod in Route 10 or Safari Zone), Grimer (Power Plant; also Koffing in Red), Hitmonlee/Hitmonchan (Fighting Dojo in Saffron), Aerodactyl (revive Old Amber from Pewter Museum).
- No rematches with Gym Leaders or Elite Four. The game does not support rematches in Gen1.
- Fishing for rare Pokémon: Use Super Rod to catch Poliwrath, Tentacruel, Seaking, Staryu, etc.
- Hidden items: Use Itemfinder in every route and cave—you may find leftovers (Bicycle Road hidden? Actually Leftovers is not in Gen1). But you can find Rare Candies in Cerulean Cave.
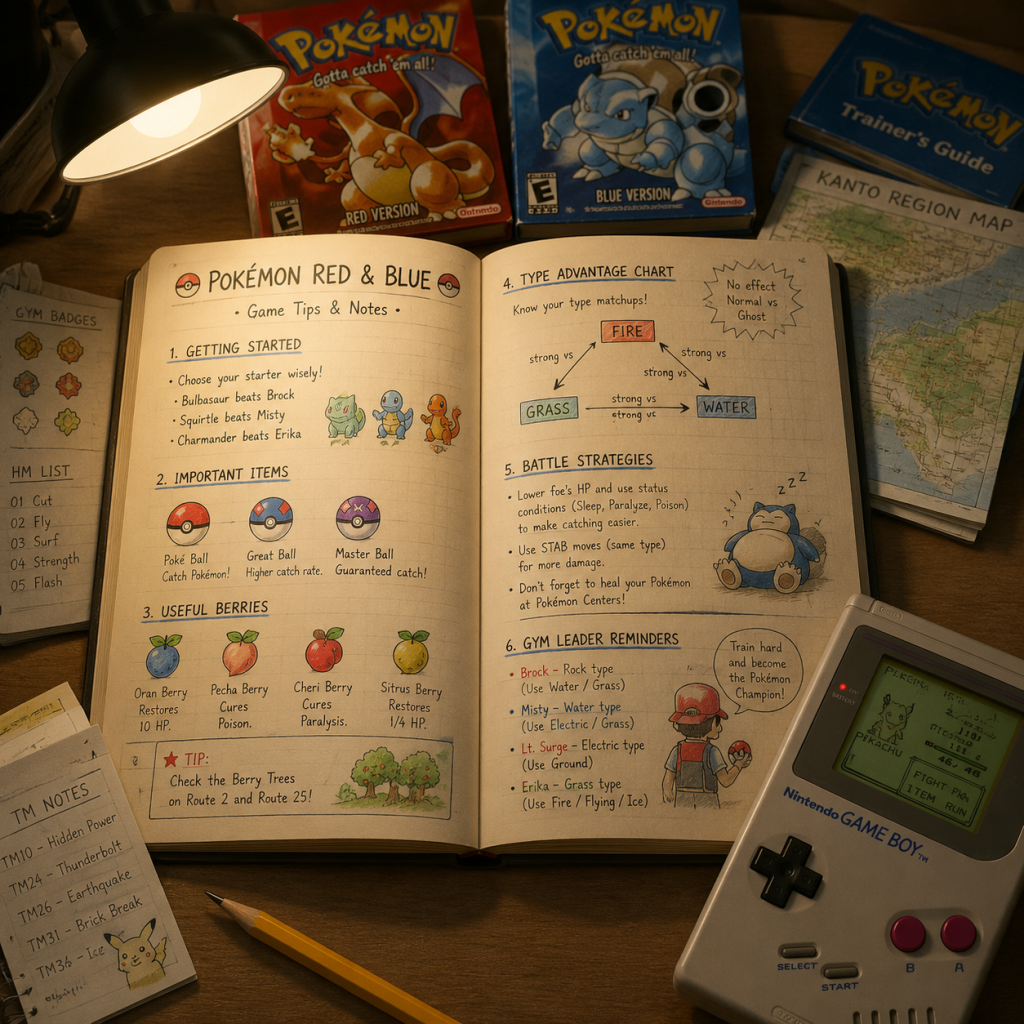
Game Tips
Game Tips – Pokémon Red and Blue
A comprehensive collection of tips for new, intermediate, and expert trainers. Each tip includes an explanation of why it works and the best situations to use it.
---
Beginner Tips
#### Always save before a major battle (Gym Leader, Rival, Legendary)
- Explanation: Saving lets you retry without losing progress. If you lose, you’ll restart from your last save point outside the Gym/route.
- When to use: Before entering any Gym, before fighting your rival on routes, before attempting to catch Legendary birds or Mewtwo.
- Explanation: Different balls have different catch rates. Great Balls (2x) and Ultra Balls (3x) drastically improve capture success for stronger Pokémon. Also save Master Ball for Mewtwo (guaranteed catch).
- When to use: Use regular Poke Balls for common low-level Pokémon; Great/Ultra for rare or high-level ones; Master Ball only on Mewtwo (or if you absolutely cannot risk a miss).
- Explanation: Building a diverse roster gives you options for type coverage. Duplicates can be traded or used as filler for HM slaves. Also, catching many Pokémon increases your Pokédex count, which helps get the EXP. All from Professor Oak later.
- When to use: Always have at least 10-15 empty slots in your party/Pokédex. Catch every new species you encounter; release duplicates after using them for HMs.
- Explanation: Water-types are abundant and can learn Surf (powerful 95 base power Water move) and Strength (80 base power Normal move). This frees up move slots on your main battlers.
- When to use: As soon as you get HM03 Surf (after beating Misty) and HM04 Strength (after beating Erika). Assign to a Pokémon like Lapras, Vaporeon, or a strong Water-type from the Safari Zone.
- Explanation: Paralyze, Sleep, and Freeze drastically reduce a Pokémon’s ability to fight. For example, Sleep prevents them from acting 1-7 turns. This makes catching or defeating strong opponents easier.
- When to use: Before using a super-effective move on a wild Legendary (e.g., Sleep on Articuno, then Ultra Ball). Also, in Gym battles, Paralyze the Gym Leader’s ace to buy time.
- Explanation: STAB (Same-Type Attack Bonus) adds 50% damage, but hitting a 2x weakness adds 200% damage. A non-STAB move that hits weakness is often stronger than a STAB neutral move. Example: a Sandslash using Rock Slide (non-STAB) on a Flying type deals more than a normal attack.
- When to use: Always check the type chart. Against Brock, use Water or Grass moves (not Normal). Against Misty, use Electric or Grass. Plan your moves based on the Gym Leader’s team.
- Explanation: Faster Pokémon get the first attack. In tight battles, a faster Pokémon can KO the enemy before taking damage. X Speed items boost speed by 1 stage; Quick Claw gives a 23% chance to move first regardless.
- When to use: Use X Speed before a tough rival fight or against a Gym Leader known for fast Pokémon (e.g., Surge). Give Quick Claw to a slow but powerful Pokémon like Snorlax.
- Explanation: Moves like Swords Dance (attack +2), Amnesia (special +2), or Growth (special +1) can let one Pokémon sweep an entire team. First, use a status move (Thunder Wave/Sleep) to disable the enemy, then boost 2-3 times, then attack.
- When to use: Against Elite Four members. Example: Use Dragonite with Agility + Swords Dance + Wrap + Hyper Beam. Wrap locks the opponent, then boost, then Hyper Beam kills.
- Explanation: Hyper Beam does massive damage, but forces you to recharge next turn. If you faint the opponent, you don’t have to recharge – you can switch or attack again. But if you don’t KO, you’re vulnerable.
- When to use: Only when you are sure you will KO the target. Against weakened Pokémon or those you have a type advantage over.
- Explanation: Many NPCs give free items, TMs, or key info. For example, the man in Cerulean City gives a Bike Voucher; the old man in Viridian City teaches you how to catch Pokémon. Hidden items are also under carpets or behind obstacles.
- When to use: In every new city, go in every building. Check behind signs in Pewter Museum, Celadon Mansion, etc.
- Explanation: Repel prevents encounters with Pokémon lower than your party leader’s level. This saves time when traveling through caves (Mt. Moon, Rock Tunnel) and allows you to target only stronger wild Pokémon (like Legendaries).
- When to use: When you want to quickly get through an area without random battles, or when hunting for a specific high-level Pokémon (e.g., Chansey in Safari Zone).
- Explanation: Escape Rope instantly takes you to the cave entrance. Without it, you might get lost and waste time/food trying to exit. The first cave (Mt. Moon) is a prime example.
- When to use: Before entering any cave or tunnel. Buy several in Pewter City or Celadon.
- Explanation: Items like Rare Candy, Elixir, and Nuggets are scattered. For example, on Route 2 (near Viridian Forest) hidden in the tree, or on Route 12 next to Snorlax. Use Itemfinder if available.
- When to use: After passing a new area, backtrack to search thoroughly. Use the Itemfinder (obtained from Professor Oak’s aide) to reveal hidden items in places like the S.S. Anne.
- Explanation: In Gen I, trainers do not rematch. However, there are many trainers in Cinnabar Gym’s quiz room that can be rebattled infinitely by using a glitch? Actually, you can fight the Gym trainers again by entering and leaving the Gym? No, in Gen I they only fight once. Better: Sell extra Nuggets, Stardust, and Big Pearls found by using Rock Smash? But Rock Smash is not in Gen I. In Gen I, best money sources: battling the Elite Four repeatedly (earn 18,000+ per run), or using the “Pay Day” move and fighting wild Pokémon. Also sell TMs you don’t need.
- When to use: Before buying expensive items (Bicycle for 1,000,000? No, it's free via voucher. Actually Bike costs 1,000,000 but you get voucher. In Celadon, all items are expensive. So farm money by fighting the Elite Four multiple times after beating the game.
- Explanation: Regular Potions heal 20HP; Super Potions heal 50HP but cost 700 vs 300 – better value per HP? Actually Super Potions heal 50 for 700 (14 per HP), Regular 20 for 300 (15 per HP). Hyper Potion heals 200 for 1200 (6 per HP). Best value is Hyper Potions for raw HP, but Full Restore (heals all HP + status) for critical fights.
- When to use: In mid-game, buy Super Potions. Late-game, use Hyper Potions. For Elite Four, stock Full Restores.
- Explanation: You can store up to 20 boxes of 20 Pokémon each. Keep duplicates for trading or for HM moves. Also, some Pokémon (like Ditto) are useful for breeding in later games (though not in Gen I). Keep at least one of each evolution line for completeness.
- When to use: When your party is full and you find a rare Pokémon, deposit it. Release only common types you already have multiple.
- Explanation: A good team has at least one Water, Fire, Electric, Grass, Psychic, and Normal type. This ensures you can counter any Gym or rival. For example: Charizard (Fire/Flying), Lapras (Water/Ice), Raichu (Electric), Exeggutor (Grass/Psychic), Snorlax (Normal).
- When to use: Build your team gradually. Swap in new Pokémon when you catch them. Don’t box your starter – they’re strong.
- Explanation: Evolution boosts base stats, granting higher HP, Attack, Defense, Speed, Special. Example: Evolving a Pikachu into Raichu immediately increases its stats and lets it learn stronger moves faster (via Thunderstone).
- When to use: Use Thunderstone on Pikachu when you have it (around level 25-30). Use Leaf Stone on Gloom/Bellsprout as soon as you need Grass power. However, for Pokémon that learn moves only before evolving (e.g., Growlithe learns Flamethrower at Lv 50; Arcanine doesn’t get it), delay evolution until you learn the move. Check move lists.
- Explanation: Ice is super effective against Dragon (Lance’s Dragonite) and Grass. Many Water-types (Lapras, Blastoise) can learn Ice Beam via TM. This covers a common weakness.
- When to use: Get the Ice Beam TM from the Game Corner or by buying with coins. Teach to your Water starter or Lapras before facing the Elite Four.
- Explanation: MissingNo. can appear via the old man glitch. It can duplicate items in your sixth slot, giving infinite Rare Candies, Master Balls, etc. But using missingNo. often corrupts Hall of Fame data and can break your save file. Use with caution.
- When to use: Only if you don't mind glitchy outcomes. For legitimate play, avoid it.
- Explanation: Dream Eater only works if the target is asleep and recovers HP equal to half the damage dealt. Hypnosis has 60% accuracy. A Pokémon like Gengar (or Haunter) can put foes to sleep then drain their HP.
- When to use: In long battles where you want to heal while attacking. Particularly good against slow foes like Onix.
- Explanation: Moves like Wrap, Bind, Clamp, and Fire Spin trap the target for 2-5 turns, dealing residual damage each turn. The target cannot attack while trapped. This is excellent for wearing down tough Pokémon or gaining free turns.
- When to use: Use a fast Pokémon with Wrap (e.g., Dragonite, Tentacruel) to trap and then set up boosts or switch to a hard hitter.
- Explanation: Moves like Hydro Pump (80% acc), Thunder (70%), Blizzard (70%) miss often. X Accuracy raises accuracy by 1 stage (multiply by 1.33). Two uses make nearly any move 100% accurate.
- When to use: Before using a one-hit KO move (Fissure, Horn Drill) or a high-power low-accuracy move. Especially useful in the Elite Four where missing can cost the battle.
- Explanation: PP Up permanently increases a move’s PP by 20% (rounded up). Important for moves with limited PP like Softboiled (10), Recover (10), or high-damage moves like Hyper Beam (5). Gives you staying power.
- When to use: Use on your main recovery move or on your strongest attack move. Example: Use PP Up on Snorlax’s Body Slam (15 base PP) to get 18 uses.
- Explanation: Substitute creates a decoy that absorbs 1/4 of the user’s max HP. As long as the substitute is active, the user takes no direct damage and is immune to status moves (paralysis, sleep, etc.). This allows risky setup moves.
- When to use: On a bulky Pokémon (Snorlax, Slowbro) that can survive to set up a Swords Dance or Amnesia. Use after switching in against a predicted status move.
- Explanation: Mewtwo is the hardest Pokémon to catch (catch rate 3, like all Legendaries). Ultra Ball has a 1% chance even at low HP, while Master Ball is 100%. Using it on anything else is wasteful.
- When to use: Only when facing Mewtwo in Cerulean Cave (post-game).
- Explanation: After beating the game (or earlier), talk to Professor Oak’s aide on Route 15 to get the Itemfinder. It beeps when you’re near a hidden item on the ground. There are several excellent items like Nuggets, Rare Candies, and Elixirs in hidden spots.
- When to use: In every area after obtaining it. Walk around pressing A while moving; when it beeps, stand still and press A to find the item.
- Explanation: Version exclusives: Red has Ekans, Oddish, Mankey, Growlithe, Scyther, etc. Blue has Sandshrew, Bellsprout, Meowth, Vulpix, Pinsir, etc. To complete your Pokédex, you must trade. Link cable or emulator trading required.
- When to use: After obtaining the Pokédex and having a suitable trade partner.
- Conclusion: Stick to Gen I mechanics. One final tip: Always carry a Pokémon that knows Fly to quickly travel between cities. This saves time and lets you heal cheaply at Poké Centers.
#### Carry a mix of Poke Ball types – regular, Great, Ultra, and special balls
#### Catch everything you see early on (even duplicates)
#### Teach Surf and Strength to a Water-type Pokémon
---
Combat Strategies
#### Use status conditions to weaken tough foes
#### Exploit type weaknesses – STAB doesn't matter as much as type chart
#### Speed determines turn order – boost it with X Speed or hold a Quick Claw
#### Set up with status + stat boosts before sweeping
#### Use Hyper Beam only as a finisher
---
Exploration Tips
#### Always visit every house and talk to every NPC
#### Use Repel to avoid weak wild Pokémon
#### Always carry an Escape Rope when entering caves
#### Check items and hidden nooks on every route
---
Resources & Economy
#### Earn money by battling trainers rematch (if possible) – but only once per trainer
#### Stock up on Super Potions and Full Restores rather than regular Potions
#### Use the PC to store excess Pokémon – don’t release them early
---
Team Building & Evolution
#### Aim for a balanced team covering many types
#### Evolve key Pokémon as soon as possible – stats improve
#### Teach Ice Beam to any Water-type for Dragon coverage
#### Consider using “glitch” Pokémon like MissingNo. only for fun, not competitive
---
Advanced Strategies
#### Use the “Dream Eater” combo – Hypnosis + Dream Eater
#### Exploit the “Wrap” pattern – lock down opponents
#### Use X Accuracy to make inaccurate moves reliable
#### Master the “PP Up” item to increase move uses
#### Use Substitute to block status and reduce damage
---
Miscellaneous Pro-Tips
#### Save your Master Ball strictly for Mewtwo
#### Use the Itemfinder to uncover hidden items
#### Trade between Red/Blue Versions for exclusives
#### Use the “Odd Egg” trick (if playing Yellow) – Not applicable to Red/Blue
---
End of Game Tips – Master your journey in Kanto!
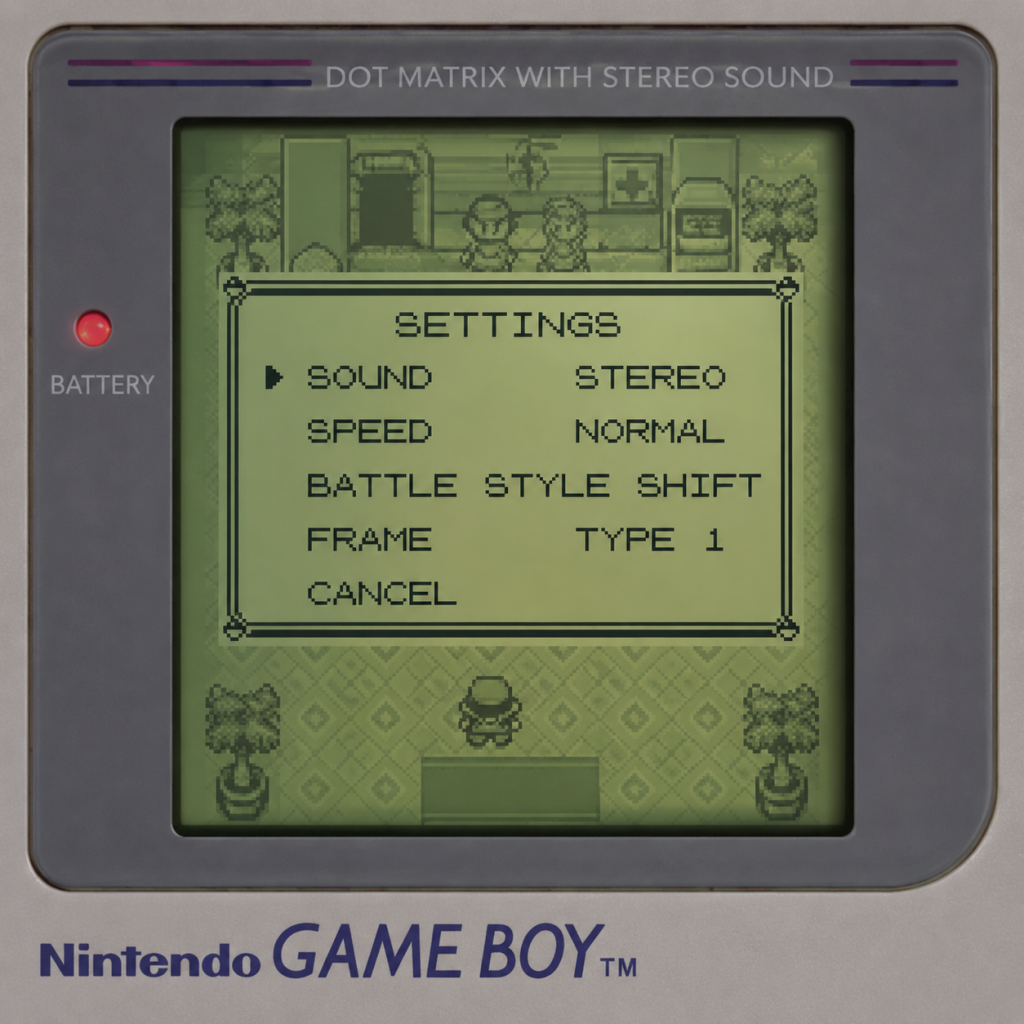
Game Settings
Game Settings – Pokémon Red and Blue
Overview
Pokémon Red and Blue were designed for the original Game Boy, which had no graphics, audio, or control settings beyond the hardware buttons. However, when playing via emulators (on PC, mobile, or other platforms) or the Nintendo 3DS Virtual Console, additional settings become available. This guide covers both the limited in‑game options present in the original cartridge and the emulator/Virtual Console settings that can enhance your experience. The goal is to help you choose configurations for optimal performance and quality on your hardware.
> Important: The original Game Boy ROM has no dedicated settings menu for resolution, framerate, or network. All such features are provided by the emulator or Virtual Console environment.
---
In‑Game Options (Original Cartridge)
Even in the original Game Boy version, players can adjust a few gameplay parameters via the Options menu (accessible from the main menu). These settings are saved to the game’s battery‑backed save file.
| Setting | Options | Default | Description |
|---|---|---|---|
| Battle Style | Shift / Set | Shift | Shift asks you if you want to switch Pokémon after knocking out an opponent’s Pokémon; Set forces you to send out your next Pokémon without being asked. |
| Text Speed | Slow / Mid / Fast | Fast | Controls how quickly text scrolls during conversations and battles. |
| Sound | Mono / Stereo | Mono | On the original Game Boy, this only affects the headphone jack output. Stereo pans sound effects left/right; Mono plays both channels equally. |
- Battle Style: Most speedrunners and experienced players prefer Set to save time, but Shift is safer for beginners. Change it if you find the prompt annoying.
- Text Speed: Always set to Fast – there is no reason to use slower speeds.
- Sound: Use Stereo if you are playing on a device with headphone output or emulated stereo; otherwise Mono is fine.
---
Emulator Settings (For PC, Mobile, and Other Platforms)
When playing the game via emulation, you gain access to a wide range of settings beyond the original game. Below are the key categories, with explanations and recommended values.
#### Graphics Settings
| Setting | Options | Recommended | Notes |
|---|---|---|---|
| Internal Resolution | 1x, 2x, 3x, 4x+ (original is 160×144) | 2x or 3x for balance; 4x on powerful hardware | Higher = sharper, but more GPU load. On low‑end devices, stick to 1x or 2x. |
| Scaling / Aspect Ratio | Stretch, Keep Aspect, Pixel Perfect | Keep Aspect (4:3 or 1:1) | Stretching to full screen distorts the image. Use integer scaling (2x or 3x) for crisp pixels. |
| Video Filter | None, Bilinear, Bicubic, xBR, LCD Grid, CRT Curvature | None or LCD Grid | Filters can soften or add scanlines. LCD Grid simulates the original Game Boy screen. Avoid bilinear – it blurs pixels. |
| Shader | Various (e.g., CRT‑Royale, Game Boy Palette) | None for raw speed; Game Boy Color palette shader for nostalgic color | Shaders are GPU‑intensive. Use only on mid‑range or high‑end hardware. |
| Framerate | 60 FPS (original speed) or unlocked | Original 60 FPS | Running at higher FPS may break game logic. Some emulators offer “turbo” keys – use those only for grinding, not for normal play. |
| Setting | Options | Recommended | Notes |
|---|---|---|---|
| Emulation Accuracy | Interpreter, Fast, Synchronous, Asynchronous | Asynchronous for low latency; Synchronous for perfect accuracy | On low‑end devices, use Fast or Asynchronous to avoid crackling. |
| Sample Rate | 22050 Hz, 44100 Hz, 48000 Hz | 44100 Hz (CD quality) | Higher sample rates increase CPU usage with minimal audible benefit for Game Boy audio. |
| Volume | Slider | 100% (adjust system volume) | Use your system’s volume control rather than emulator gain to avoid clipping. |
| Channels | Mono / Stereo | Stereo if available | Original Game Boy had mono speaker; stereo works via emulation. |
| Setting | Options | Recommended | Notes |
|---|---|---|---|
| Keyboard Mapping | Remap each button (A, B, Start, Select, Directional Pad) | Use keyboard layout that mimics Game Boy: Z = A, X = B, Enter = Start, Shift = Select, Arrow keys = D‑Pad | Some emulators allow custom presets. Avoid overlapping keys that cause ghosting. |
| Controller Support | Xbox, PlayStation, Switch Pro, or generic USB | Map D‑Pad to left analog stick or digital pad; A/B to face buttons | Many players prefer the D‑Pad for directional precision. Test responsiveness before starting. |
| Turbo / Speed Toggle | Assign keys to increase speed | Assign to F1 (hold) or a shoulder button | Great for fast walking or grinding, but disable during battles to avoid mistakes. |
| Save State Hotkeys | F5 (save), F7 (load), F9 (quick load) | Use default or choose your own | Save states are not compatible between versions; always maintain a battery save as backup. |
- Color Palettes: Many emulators offer custom palettes (e.g., Game Boy Color default, Super Game Boy, custom green). Choose one that reduces eye strain. For example, a high‑contrast monochrome palette can help players with color blindness.
- Screen Magnification: Use the emulator’s zoom function (often Ctrl + and Ctrl ‑) to enlarge the display. Integer scaling avoids blurriness.
- Speed Controls: Emulators often allow speed‑up (2x, 3x, 4x) to reduce grinding time. Bind a convenient hotkey.
- Save State Quick Saves: Use save states before difficult sections (e.g., long caves, Gym Leaders) to quickly retry without replaying the entire route.
- The original English ROM has no language selector. There are fan‑translation patches for other languages (e.g., Spanish, French, German). Apply these to a legitimate ROM if you want a different language.
- The Japanese version (Pokémon Red/Green) can be played on a Japanese emulator, but text will be entirely in kanji/kana. Most players use the English version.
#### Language Settings
#### Network / Link Cable Emulation
| Feature | Options | Recommended | Notes |
|---|---|---|---|
| Trading / Battling | Local (same PC, multiple emulators), Online (via services like Netplay) | Local for simplicity; Online if you have a friend | Some emulators (e.g., mGBA, BizHawk) support link cable via a second window or TCP/IP. Requires two instances of the emulator. |
| Time Sync | Real Time / Emulated | Emulated (use in‑game clock logic) | The original games have no real‑time clock, so network play uses the emulator’s internal timing. |
---
Recommended Settings by Hardware Level
#### Low‑End Hardware (e.g., older PC without GPU, Raspberry Pi 3, Android phone with limited RAM)
- Graphics: 1x internal resolution, no filters, keep aspect ratio, no shaders.
- Audio: Fast or Interpreter emulation, sample rate 22050 Hz.
- Controls: Keyboard or simple USB gamepad.
- Accessibility: Save states disabled (to save CPU), use only battery saves.
- Result: Playable at full speed, minimal battery drain.
- Graphics: 2x or 3x integer scaling, LCD Grid filter, no shaders, keep aspect ratio.
- Audio: Asynchronous emulation, 44100 Hz.
- Controls: Controller recommended.
- Accessibility: Save states enabled, moderate speed‑up (2x) for grinding.
- Result: Crisp pixel art with slight nostalgia filter, smooth 60 FPS.
- Graphics: 4x or 5x integer scaling, shader (e.g., CRT‑Lottes or Game Boy Color palette), LCD Grid overlay optional.
- Audio: Synchronous emulation, 48000 Hz for perfect quality.
- Controls: Controller with turbo function mapped, joy‑to‑key for speed buttons.
- Accessibility: Full save state management, 4x speed‑up available, instant load.
- Result: Pixel‑perfect image with authentic “screen door” effect, flawless audio.
#### Mid‑Range Hardware (e.g., 5‑year‑old PC with integrated GPU, PS Vita, Nintendo Switch homebrew)
#### High‑End Hardware (e.g., modern gaming PC with dedicated GPU, high‑end Android tablets)
---
Settings That Are Easy to Misconfigure
| Setting | Common Mistake | Why It Matters | Proper Configuration |
|---|---|---|---|
| Battle Style (in‑game) | Leaving it on Shift and forgetting to switch can waste time in repeated battles. | Shift adds an unnecessary prompt after each KO. Speedrunners and efficiency‑minded players want Set. | If you are not a beginner, change to Set immediately. |
| Scaling / Aspect Ratio | Stretching to full screen (16:9) without keeping aspect ratio. | Stretches sprites into ovals, causing ugly distortion and breaking pixel art. | Always select Keep Aspect Ratio (4:3) or Integer Scale (e.g., 2x, 3x). |
| Save State vs. Battery Save | Using only save states and ignoring battery saves. | Save states can become corrupt or incompatible with newer emulator versions. You lose progress. | Always maintain at least one battery save (in‑game save). Use save states as supplements. |
| Link Cable Emulation | Trying to connect two different ROM versions (e.g., Red with Green) or mismatched save types. | Incompatible ROMs may cause freezes or desyncs. Each player must have the exact same ROM and save type (SRAM). | Use two instances of the same emulator with identical ROMs; verify save type in emulator settings (usually SRAM 128KB). |
| Speed‑Up Hotkey | Holding speed‑up during dialogue or battle transitions. | Some event scripts (e.g., Poke Ball shaking, evolution) depend on real‑time logic. Speeding through can cause glitches or softlocks. | Only use speed‑up while walking in tall grass or riding a bike. Release it for menus and battles. |
| Audio Sample Rate | Setting sample rate to 96000 Hz on low‑end hardware. | Increases CPU load without any audible benefit for Game Boy music. | Stick to 44100 Hz for most setups. Only go higher if you have surplus CPU and a good DAC. |
Special Attention Points During Setup
1. BIOS Requirement: Some emulators (e.g., Visual Boy Advance for Game Boy games) require the Game Boy boot ROM (BIOS) to run accurately. Without it, the emulator runs in “bare metal” mode, which may break some games. Always provide the correct BIOS file if the emulator asks.
2. Region Differences: Pokémon Red/Blue were released in multiple regions (USA, Europe, Japan). The English versions are near identical, but Japanese Red/Green have different Pokémon and some bugs. Ensure you are using the correct ROM for your intended language/features.
3. Palette Modes: The original Game Boy was monochrome (4 shades of green). Emulators often apply a default green palette. For authenticity, use a GB‑like palette; for visibility, try high‑contrast black‑and‑white.
4. Save File Location: Many emulators store save files (`.sav` or `.srm`) in the same folder as the ROM. If you move the ROM, the save may not sync. Configure a dedicated save directory in the emulator’s settings to avoid losing your progress.
5. Multi‑Window Trading: To trade Pokémon with yourself, you need two emulator windows. Set up separate save files for each window. Use the link cable option in the emulator (e.g., “Link” > “Start Link Mode”). Make sure both windows have unique Player IDs or you cannot trade.
6. Screen Recording / Streaming: If you plan to stream or record, disable any shaders that cause performance drops. Use a simple LCD filter and limit speed to 1x to avoid desyncs in your capture software.
Important Notes
Important Notes
Irreversible Choices
- Starter Pokémon: Your choice of Bulbasaur, Charmander, or Squirtle is permanent. This affects early-game difficulty, Gym matchups, and which Legendary birds you can more easily handle. There is no way to change your starter later without trading.
- Rival’s Name: You input your rival’s name at the start. This cannot be changed later, but it has no gameplay impact.
- Master Ball: You receive only one Master Ball in the entire game (during Team Rocket’s hideout). Use it wisely on a Pokémon you absolutely want to catch without fail. Common regrets include wasting it on a common Pokémon or missing the chance to catch Mewtwo or a Legendary bird.
- Evolution Stones: Fire, Water, Thunder, Leaf, and Moon Stones are limited (some only one per game). Using them on a common Pokémon (e.g., using Thunder Stone on Pikachu too early) may prevent you from evolving rarer ones like Raichu, Ninetales, or Vileplume later.
- NPC Trades: Certain in-game trades are one-way. For example, trading a Pokémon for a Farfetch’d or Mr. Mime – you cannot get your traded Pokémon back. Make sure you have a spare of the Pokémon you give away.
- Purchasing at Game Corner: The Game Corner in Celadon City sells Pokémon (e.g., Porygon) and TMs for coins. Coins require grinding or real money (in-game). Buying these consumables uses up coins that could be saved for other items. You can always earn more coins, but it's tedious.
- Version-Exclusive Pokémon: Red and Blue have different wild Pokémon. For example, Ekans and Vulpix are in Red; Sandshrew and Meowth are in Blue. To complete your Pokédex, you must trade with the opposite version. If you never trade, these are permanently inaccessible.
- S.S. Anne Items and Pokémon: The S.S. Anne is a timed location. Once you obtain the Cut HM and leave the ship, it sails away and you cannot return. Ensure you collect all items, talk to all trainers, and catch any rare Pokémon (like the wild Pokémon in the lower decks) before leaving. The HM01 for Cut itself is on the ship – find the captain’s bed area.
- Lapras in Silph Co. : In Silph Co. (Saffron City), a Team Rocket member gives you a free Lapras. If you skip this dialogue or defeat the Rocket without claiming Lapras, you lose the chance forever.
- Fossil Pokémon: You choose one fossil at Mt. Moon (Helix or Dome). The other fossil becomes permanently unavailable until presumably post-game trades (but you can't trade for it easily). Choose based on whether you want Omanyte or Kabuto.
- Rare encounters that flee: Abra (teleports), Chansey (appears rarely in Cerulean Cave), and the Legendary birds (if you defeat them they disappear forever – always save before encounters).
- HM TMs and Key Items: Certain TMs like TM29 (Psychic) are only available once from specific locations (e.g., the Rocket hideout). If you sell or use them incorrectly, you cannot get another without restarting or trading.
- Brock (Pewter Gym): Uses Rock-type Pokémon (Geodude, Onix). If you chose Charmander, you have no advantage and will struggle. Catch a Mankey (Route 22) or Nidoran (Route 2) before challenging.
- Misty (Cerulean Gym): Her Starmie is fast and powerful (Water Pulse). Grass-types like Oddish or Bellsprout help, or you can use a Pikachu with Thundershock.
- Lt. Surge (Vermilion Gym): Electric-types. Ground-types (Diglett, Sandshrew) are immune. If you haven’t caught one, consider training a Geodude or using Dig from Diglett.
- Sabrina (Saffron Gym): Psychic-types are extremely strong in Gen I due to a glitch – Ghost moves (the only one is Lick) do not affect Psychic because Lick is coded as Normal-type. Your best bets are Dark-types (none exist in Gen I) or using Bug moves (like Pin Missile) which are super effective against Psychic. Also use high Special stat Pokémon to take hits.
- Koga (Fuchsia Gym): Poison-types with toxic moves. Psychic-types or Ground-types are helpful.
- Blaine (Cinnabar Gym): Fire-types. Water or Rock-types are recommended.
- Elite Four: Lorelei uses Ice/Water, Bruno uses Fighting, Agatha uses Ghost, Lance uses Dragon. Lance’s Dragonite has Hyper Beam which can one-shot many Pokémon. A balanced team (e.g., Lapras, Snorlax) is crucial.
- Over-leveling early: In Gen I, traded Pokémon will disobey you if their level exceeds the badge cap. Wild Pokémon you catch yourself always obey. Avoid trading a high-level Pokémon early unless you have the appropriate badge.
- Efficient experience: Grinding on wild low-level Pokémon yields poor exp. Instead, repeatedly battle the E4 (after beating them) or use the VS Seeker-like mechanic? Actually, there is no VS Seeker in Gen I. Best grinding spots: outside the E4 victory road, or the upper floors of Cerulean Cave for high-level wild Pokémon.
- Rare Candy misuse: Rare Candies level up a Pokémon without increasing EVs (Effort Values). If you use them too early, your Pokémon will be weaker than if you gained stats through battles. Use them only for the final levels or to achieve evolution.
- Money management: Buying too many Poké Balls or Potions early can leave you broke for important items (e.g., Bike, which costs 1,000,000? Actually the Bike is 1,000,000 in the Game Corner? No, you get a Bike Voucher from the Bike Shop in Cerulean for free; then you get a discount). Save money for TMs, evolution stones, and the Safari Zone entry fee (500 per visit).
- Time wasted on Safari Zone: The Safari Zone has a limited number of steps and a limited encounter rate for rare Pokémon like Chansey. If you waste steps, you may run out before finding one. Use the correct bait and rock strategy.
- Always save before:
- Multiple save files: The original cartridge has only one save slot. On emulators, you can take advantage of save states (use them at key moments) but be aware that using save states can lead to unintended sequence breaks or glitches. It’s recommended to also use the in-game save feature.
- Battery backup: Original Game Boy cartridges have a battery that powers the save memory. If the battery dies, your save is lost. If playing on original hardware, consider replacing the battery or using a modern flash cart.
- Avoid overwriting: Don’t save while in the middle of a battle or during a cutscene – it can corrupt the save. Always save in a safe location (e.g., a Poké Center).
- Gen I link cable: Trading and battling are done via physical link cable or emulated link. When battling, be aware of known glitches:
- Hacked Pokémon: Some players use GameShark or external devices to generate illegal Pokémon (e.g., a Mew with moves it cannot learn). If you receive such a Pokémon via trade, it may have weird properties or crash the link. Agree on a “no hacks” rule before trading.
- Trading etiquette: Be honest about the Pokémon you are offering. Not disclosing that a Pokémon has a held item (e.g., Leftovers) is fine, but if you trade a Pokémon that will immediately evolve (like a Haunter without holding an Everstone), let the other player know.
- MissingNo. glitch: Using the infamous MissingNo. glitch (via the Old Man trick) can multiply certain items, but it also has a high risk of corrupting your save file, causing graphical glitches, or even freezing the game. It is not intended and is considered cheating by many. Use at your own risk.
- Type chart is crucial: Many new players ignore type advantages and get stuck. Learn the basic weaknesses: Water beats Fire, Electric beats Water, Grass beats Water, etc. Gen I also has a bug where Ghost moves are ineffective on Psychic (use Bug moves instead).
- Using the Master Ball too early: Common regret is using it on a Snorlax (which blocks a route but can be caught with Ultra Balls) instead of saving for Mewtwo.
- Not catching or training a balanced team: Relying solely on your starter often leads to a hard block at the Elite Four. Always have a Water, Fire, Grass, Electric, and Flying type coverage.
- Not talking to every NPC: Many NPCs give free items (like the Old Rod, Good Rod, Bike Voucher, and TMs). Missing these can make the game harder or require backtracking.
- Selling rare items for quick money: TMs like Psychic cannot be obtained again. Selling the Bike Voucher forces you to eventually buy a Bike at full price (but you can still get the Bike later).
- Not knowing about the Safari Zone mechanics: Bait reduces catch rate but makes Pokémon stay longer; Rock increases catch rate but makes them flee faster. Throw bait first for rare Pokémon, then throw balls.
- Not understanding stat experience (EVs): In Gen I, battling specific Pokémon raises specific stats (e.g., fighting Geodude raises Defense). If you grind only on common route Pokémon that give HP and Attack, your Pokémon might have unbalanced stats. For hardcore players, this matters for competitive play.
- Not saving before entering the S.S. Anne: Many players rush through the ship and miss items or rare encounters. Take your time.
Missable Content
Difficulty Spikes
Grinding Traps
Save Management Advice
- Legendary encounters (Articuno, Zapdos, Moltres, Mewtwo) – if you faint or fail to catch, you can soft-reset.
- Using the Master Ball – though it’s a guaranteed catch, you might regret using it on a common Pokémon if you save after.
- Evolving a Pokémon with a stone – if you change your mind, reset before saving.
- Facing Gym Leaders or the Elite Four – you may lose and lose money.
Online Etiquette / Anti-Cheat (Link Cable Trading & Battling)
- Focus Energy actually halves critical hit rate instead of raising it – using this move is considered a waste.
- 1/256 miss glitch: Moves that normally never miss (e.g., Swift) can miss 1/256 of the time due to a programming bug. Accept this as a rare occurrence.
- Stat-lowering moves (e.g., Growl) can overflow and increase the target’s stat if used too many times (the “stat overflow” glitch). This can be exploited to create massively overpowered Pokémon – but it’s considered unfair in casual play.
Things Players Commonly Regret Not Knowing Earlier
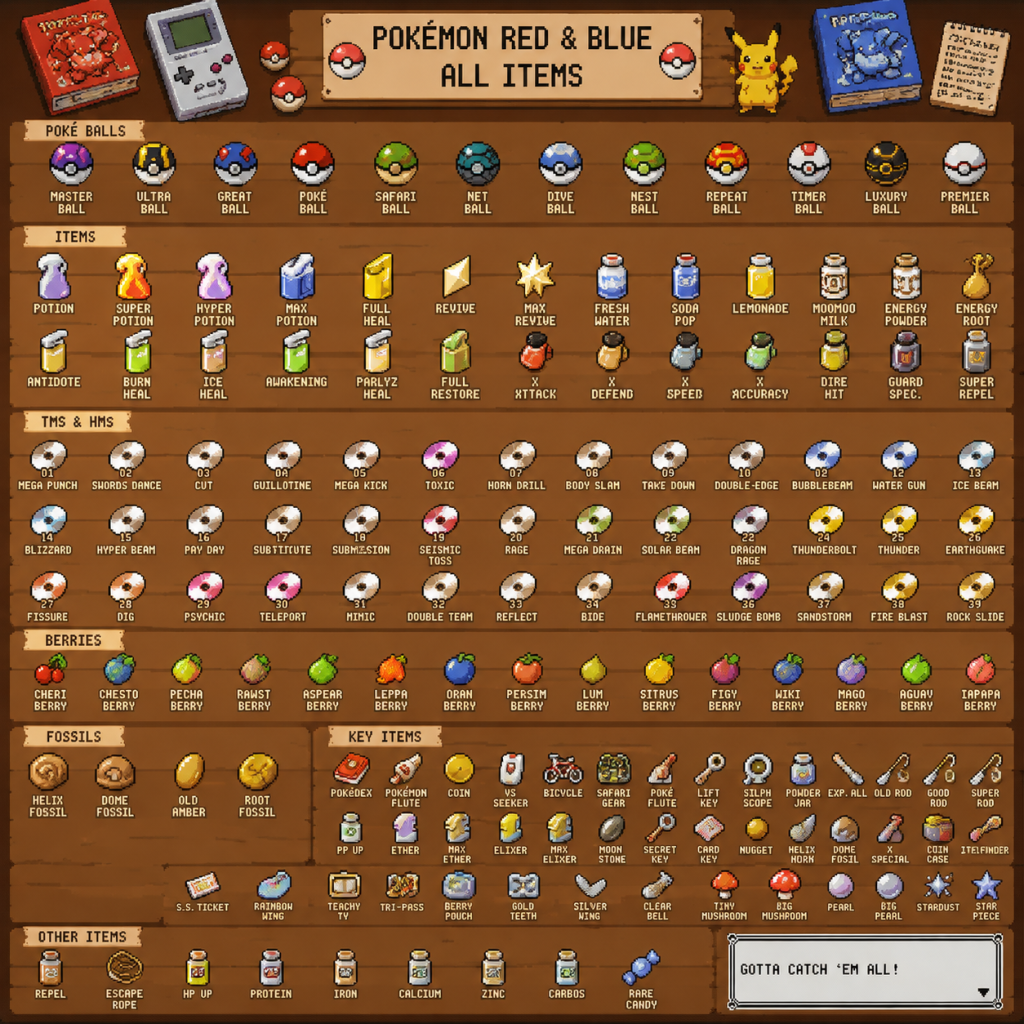
All Game Items
Overview
Pokémon Red and Blue feature a wide array of items that assist in capturing, training, and battling Pokémon. Unlike many RPGs, there are no weapons or armor for the player character; all items are either consumable (used in battle or in the field), key items (required for story progression), or teaching machines (TMs/HMs). Below is a complete categorization and description of every obtainable item in the game.
---
Item Categories
1. Poké Balls (Capturing Items)
| Item | Effect | How to Obtain | When Useful |
|---|---|---|---|
| Poké Ball | Basic ball with a capture rate of 1×. | Purchased at any Poké Mart (¥200). | Early game; use on weak or common Pokémon. |
| Great Ball | Capture rate 1.5×. | Purchased at Poké Marts after defeating Lt. Surge (¥600). | Mid-game for higher catch rates. |
| Ultra Ball | Capture rate 2×. | Purchased at Poké Marts after obtaining the Gold Scale? Actually after defeating Koga? In Gen 1, Ultra Balls become available after you have 5 badges? They appear in Celadon City Department Store (¥1200). | Best ball before Master Ball; use on legendaries or rare Pokémon. |
| Master Ball | 100% capture rate (guaranteed catch). | Won from Silph Co. executive after defeating Giovanni. | Save for Mewtwo or any Legendary bird that gives you trouble. |
2. Healing Items (HP Restoration)
All healing items can be used in battle or in the overworld.
| Item | HP Restored | How to Obtain | When Useful |
|---|---|---|---|
| Potion | 20 HP | Poké Mart (¥300). | Early game for minor damage. |
| Super Potion | 50 HP | Poké Mart (¥700). | Mid-game standard healing. |
| Hyper Potion | 200 HP | Poké Mart (¥1500). | Late game for bulky Pokémon. |
| Max Potion | Fully restores HP | Rarely found; gift from Celadon Condominium? Actually won from the woman in the Celadon Condominium (3rd floor); also sold at Lucky Stadium? Not available in shops. | Critical moments; save for tough battles. |
| Full Restore | Fully restores HP and cures all status conditions | Rare; found in Cerulean Cave, some gift/trade. | Use before a major battle (e.g., champion). |
| Fresh Water | 50 HP | Sold in Celadon Department Store (¥200). | Cheaper than Super Potion but restores less. |
| Soda Pop | 60 HP | Celadon Department Store (¥300). | Better than Fresh Water but not great value. |
| Lemonade | 80 HP | Celadon Department Store (¥350). | Best drink for cost-effective healing. |
| Moomoo Milk | 100 HP | Only obtainable via trade in Generation 1 (not available in Red/Blue natively). Actually not present in Red/Blue; it's from Gold/Silver. | Omitted. |
3. Status Healing Items
| Item | Cures | How to Obtain | When Useful |
|---|---|---|---|
| Antidote | Poison | Poké Mart (¥100). | Essential for early routes with poison-type Pokémon or poison sting. |
| Paralyz Heal | Paralysis | Poké Mart (¥200). | Use after being hit by Thunder Wave or Stun Spore. |
| Burn Heal | Burn | Poké Mart (¥250). | Keep handy against fire-types. |
| Ice Heal | Freeze | Poké Mart (¥250). | Rarely needed; freeze is uncommon. |
| Awakening | Sleep | Poké Mart (¥200). | Important vs. Hypno, Jigglypuff, or sleep-inducing moves. |
| Full Heal | All status conditions | Poké Mart (¥600). | Multi-purpose; cures any single status. |
4. Revival Items
| Item | Effect | How to Obtain | When Useful |
|---|---|---|---|
| Revive | Revives a fainted Pokémon with 50% HP | Poké Mart (¥1500). | Critical for long dungeons (e.g., Pokémon Tower, Victory Road). |
| Max Revive | Revives a fainted Pokémon with full HP | Found rarely; gift from Saffron Gym trainer? Actually not in shops; found in Cerulean Cave. | Use against high-level opponents where full HP recovery matters. |
5. PP Restoration (Ether/Elixir)
| Item | Effect | How to Obtain | When Useful |
|---|---|---|---|
| Ether | Restores 10 PP to one move | Found in overworld (e.g., Mt. Moon). | Keep for moves with low PP (e.g., Thunder, Blizzard). |
| Max Ether | Fully restores PP to one move | Rare; found in Silence Bridge? Actually in Cerulean Cave. | Restore key moves before a boss. |
| Elixir | Restores 10 PP to all moves | Found in Victory Road. | Good for healing entire team's PP. |
| Max Elixir | Fully restores PP to all moves | Extremely rare (one in Cerulean Cave). | Save for the Elite Four. |
6. Vitamins (Stat Boosters)
Each vitamin permanently increases a specific base stat of a Pokémon (up to 255 effort values? In Gen 1, they add 10 to the stat's experience value, capped at 256? Actually they increase the stat's EVs by 10 each; max 256 per stat, but you can only use 255? Use up to 255? In practice, you can use up to 255 worth, but each vitamin gives 10).
| Item | Stat Boosted | How to Obtain | Price |
|---|---|---|---|
| HP Up | Hit Points (HP) | Celadon Department Store (¥9800). | Use on Pokémon with high HP potential (e.g., Chansey, Snorlax). |
| Protein | Attack | Celadon Department Store (¥9800). | Best for physical sweepers like Machamp, Golem. |
| Iron | Defense | Celadon Department Store (¥9800). | Useful for tanks (e.g., Onix, Golem). |
| Calcium | Special | Celadon Department Store (¥9800). | Essential for special attackers (e.g., Alakazam, Starmie). |
| Zinc | Speed | Celadon Department Store (¥9800). | Speed is critical; use on fast glass cannons (e.g., Jolteon, Aerodactyl). |
| Carbos | Speed (same as Zinc? In Gen 1, Carbos and Zinc both affect Speed? Actually Carbos was the Speed vitamin in Red/Blue, Zinc was added later. In Gen 1, only HP Up, Protein, Iron, Calcium, and Carbos exist. Zinc is not present. So omit Zinc. | Carbos: Celadon Department Store (¥9800). | Boosts speed. |
| PP Up | Increases max PP of one selected move by 20% (max 3 uses per move). | Found in dungeons (e.g., Power Plant, Safari Zone). | Use on high-damage moves with limited PP (e.g., Hyper Beam, Earthquake). |
7. Battle Items (X Items & Dire Hit)
These are used in battle only to temporarily boost stats. They do not carry over after battle.
| Item | Effect | How to Obtain | Price |
|---|---|---|---|
| X Attack | Raises Attack by 1 stage for one Pokémon in battle. | Celadon Department Store (¥500). | Use before a strong physical move (e.g., Slash, Submission). |
| X Defense | Raises Defense by 1 stage. | Celadon Department Store (¥550). | Useful for surviving super-effective hits. |
| X Speed | Raises Speed by 1 stage. | Celadon Department Store (¥350). | Helps outspeed faster opponents. |
| X Special | Raises Special (both Special Attack and Special Defense) by 1 stage. | Celadon Department Store (¥350). | Excellent for special sweepers (e.g., Starmie, Alakazam). |
| X Accuracy | Raises Accuracy by 1 stage. | Celadon Department Store (¥950). | Use with low-accuracy moves like Hypnosis, Thunder. |
| Dire Hit | Raises critical hit ratio by 2 stages (effective +1 stage in Gen 1). | Celadon Department Store (¥700). | Combine with high crit moves (e.g., Slash, Razor Leaf) for devastating crits. |
| Guard Spec | Preents stat reduction from opponent's moves for 5 turns. | Celadon Department Store (¥1500). | Use against opponents with Growl, Sand-Attack, etc. |
8. Repels & Escape Items
| Item | Effect | How to Obtain | Price |
|---|---|---|---|
| Repel | Repels wild Pokémon (weaker than your party's highest level) for 100 steps. | Poké Mart (¥350). | Good for early routes when avoiding Zubat or Rattata. |
| Super Repel | 200 steps. | Poké Mart (¥500). | More cost-effective than Repel for longer trips. |
| Max Repel | 250 steps. | Poké Mart (¥700). | Use in caves like Rock Tunnel or Victory Road. |
| Escape Rope | Instantly warps you to the entrance of a cave/dungeon. | Poké Mart (¥550). | Essential for navigating long caves (e.g., Mt. Moon, Seafoam Islands). |
9. Evolution Stones
Evolution stones are key items that evolve certain Pokémon when used on them. They are consumed upon use.
| Stone | Evolves | How to Obtain | Notes |
|---|---|---|---|
| Fire Stone | Vulpix → Ninetales, Growlithe → Arcanine, Eevee → Flareon. | One hidden in Route 52? Actually purchased at Celadon Department Store (¥2100). | Flareon is good but not top-tier; consider saving for Ninetales. |
| Water Stone | Poliwhirl → Poliwrath, Staryu → Starmie, Eevee → Vaporeon. | Celadon Department Store (¥2100). | Starmie is excellent; Vaporeon is a solid water type. |
| Thunder Stone | Pikachu → Raichu, Eevee → Jolteon. | Celadon Department Store (¥2100). | Raichu is okay; Jolteon is very fast and strong. |
| Leaf Stone | Gloom → Vileplume, Weepinbell → Victreebel, Exeggcute → Exeggutor. | Celadon Department Store (¥2100). | Victreebel and Exeggutor are strong grass types. |
| Moon Stone | Nidorina → Nidoqueen, Nidorino → Nidoking, Clefairy → Clefable, Jigglypuff → Wigglytuff. | Found in Mt. Moon (two total; one hidden). | Nidoking and Nidoqueen become very powerful; use one early for a strong Ground-type. |
10. Key Items (Story Progression)
These cannot be bought or sold; they are obtained through quests and required to progress.
| Key Item | Purpose | How to Obtain |
|---|---|---|
| Oak's Parcel | Delivered to Prof. Oak to get the Pokédex. | Given by the Viridian City Poké Mart clerk. |
| Pokédex | Records seen/caught Pokémon; required to get certain items later. | Received from Prof. Oak after delivering parcel. |
| Town Map | Shows a map of Kanto; required for certain events. | Received from Prof. Oak's assistant after leaving Pallet Town. |
| Bicycle | Increases overworld speed; required to ride cycling road. | Ticket from Celadon City's Bike Shop (exchange with voucher from Rival). |
| Old Rod | Allows fishing for common Pokémon (e.g., Magikarp). | Given by a fisherman in Route 12. |
| Good Rod | Better fishing rod (catches better water Pokémon). | Given by fishermen at Fuchsia City. |
| Super Rod | Best fishing rod (catches rare Pokémon like Dratini, Horsea, etc.). | Given by fisherman on Route 12 or in the Seafoam Islands area. |
| S.S. Ticket | Board the S.S. Anne to get HM01 Cut. | Given by the captain's aide in Vermilion City after helping aboard. |
| Silph Scope | Required to see ghosts in Pokémon Tower (Lavender Town). | Given by Mr. Fuji after rescuing him from Team Rocket. |
| Poké Flute | Awakens sleeping Snorlax blocking routes; also can be used in battles to wake up Pokémon. | Given by Mr. Fuji in Lavender Town after obtaining Silph Scope. |
| Card Key | Opens doors in Silph Co. building. | Found on the 5th floor of Silph Co. after defeating a Rocket. |
| Lift Key | Activates the elevator in Silph Co. | Found on the 11th floor of Silph Co. |
| Basement Key | Used in the Rocket Hideout in Celadon City to unlock the elevator. | Given by a Rocket Grunt after a battle in the Game Corner. |
| Master Ball | Already listed under Poké Balls; it's a key item in practical terms. | From Silph Co. after defeating Giovanni. |
| Exp. All (Exp. Share precursor) | Divides experience among all party Pokémon (not held item; activates when used). Actually it's called the Exp. Share in later games; in Gen 1 it's a key item that when activated, gives half EXP to all Pokémon. Obtained from Prof. Oak after catching 30 Pokémon. | |
| Fossils (Helix, Dome, Old Amber) | Revived into Pokémon at the Cinnabar Island Lab. | Helix from Mt. Moon; Dome from Mt. Moon; Old Amber from the Pewter City Museum. |
| Tea | Used to bypass the guard at Saffron City. | Given by a thirsty old woman in Celadon City (or obtained from the Celadon Mansion). |
| Gold Teeth (Not in Red/Blue; it's from Gold/Silver). Omitted. |
11. TMs & HMs (Technical & Hidden Machines)
There are 50 TMs and 5 HMs in Pokémon Red and Blue. Each can be used only once (except HMs, which are reusable and can be used outside of battle). TMs teach a move permanently; HMs teach moves that can also be used in the overworld (e.g., Cut, Surf, Strength, Fly, Flash). Some TMs are found in the wild, some bought, some won from gym battles. Below is a list of the most notable ones.
| TM Number | Move | Effect | Where to Find |
|---|---|---|---|
| TM01 | Mega Punch | Powerful Normal move (80 BP, 90% Acc) | Buy at Celadon Department Store (¥3000). |
| TM05 | Mega Kick | Very powerful Normal move (120 BP, 75% Acc) | Celadon Department Store (¥3000). |
| TM09 | Take Down | Recoil move (90 BP, 85% Acc) | Victory Road. |
| TM13 | Ice Beam | Ice special move (95 BP, 100% Acc) | Celadon Department Store (¥3000). |
| TM14 | Blizzard | Ice special move (120 BP, 90% Acc) | Celadon Department Store (¥5500). |
| TM15 | Hyper Beam | Normal special move (150 BP, 90% Acc) | Celadon Department Store (¥7500). |
| TM20 | Rage | Physical move that boosts Attack when hit | Pokémon League. |
| TM24 | Thunderbolt | Electric special (95 BP, 100% Acc) | Celadon Department Store (¥3000). |
| TM25 | Thunder | Electric special (120 BP, 70% Acc) | Celadon Department Store (¥5500). |
| TM26 | Earthquake | Ground physical (100 BP, 100% Acc) | Victory Road. |
| TM27 | Fissure | One-hit KO move (Ground) | Viridian City Gym. |
| TM29 | Psychic | Psychic special (90 BP, 100% Acc) | Celadon Department Store (¥3000). |
| TM31 | Mimic | Copies opponent's last move | Celadon Department Store (¥3000). |
| TM32 | Double Team | Raises evasiveness by 1 stage | Celadon Department Store (¥1500). |
| TM33 | Reflect | Halves physical damage for 5 turns (Psychic type) | Celadon Department Store (¥3000). |
| TM34 | Bide | Waits then returns double damage | Pokémon League. |
| TM35 | Metronome | Uses a random move | Celadon Department Store (¥3000). |
| TM36 | Selfdestruct | User faints, deals massive damage | Celadon Department Store (¥3000). |
| TM38 | Fire Blast | Fire special (120 BP, 85% Acc) | Celadon Department Store (¥5500). |
| TM41 | Submission | Fighting move (80 BP, 80% Acc, recoil) | Celadon Department Store (¥3000). |
| TM44 | Rest | Heals all HP, sleeps for 2 turns | Celadon Department Store (¥3000). |
| TM45 | Thunder Wave | Paralyzes opponent (Electric) | Celadon Department Store (¥2000). |
| TM46 | Psych Wave | Inflicts damage equal to user's level x random factor | Celadon Department Store (¥3000). |
| TM48 | Rock Slide | Rock physical (75 BP, 90% Acc) | Celadon Department Store (¥3000). |
| TM49 | Tri Attack | Normal special (80 BP, 100% Acc, may cause burn/freeze/paralyze) | Celadon Department Store (¥3000). |
| TM50 | Substitute | Uses 25% max HP to create a decoy | Celadon Department Store (¥3000). |
| HM | Move | Overworld Use | Where to Get |
|---|---|---|---|
| HM01 | Cut | Cuts small trees | Captain on S.S. Anne (after beating Rival). |
| HM02 | Fly | Travels to already visited towns | Guard in Celadon City's Route 16 (near the house). |
| HM03 | Surf | Travels across water | Safari Zone secret house (requires 50 steps? Actually given by girl in Fuchsia City after defeating the Gym). |
| HM04 | Strength | Moves boulders | Silph Co. (on a desk). |
| HM05 | Flash | Lights up dark caves | Professor Oak's assistant in Route 2 (after capturing 10 Pokémon). |
12. Miscellaneous & Collectibles
| Item | Description | How to Obtain |
|---|---|---|
| Boulder Badge | Gym badge (not an item per se, but counts as a key item for progression). | From Brock after defeating him. |
| Cascade Badge, Thunder Badge, etc. | All 8 gym badges plus the Earth Badge from Giovanni. | From respective gym leaders. |
| Pokédex (as item) | Already listed; it is a key item. | |
| Mystery Gift | Not in Red/Blue; introduced in later games. | |
| Safari Ball | Used in Safari Zone only; cannot be bought. | Given by Safari Zone attendant at start (30 balls). |
| Coin (not an item, but currency at Game Corner) | Used to buy Pokémon (e.g., Porygon, Dratini) and TMs. | Exchange real money using the Coin Case. |
| Bike Voucher | Exchange for a Bicycle in Celadon City. | Won by beating the Rival on the S.S. Anne? Actually given by the Rival? No, the Bicycle is obtained with a ticket from the Bike Shop. The voucher is not an item; the Bike Shop guy gives the bike after you show him the ticket. |
13. Special Notes & Strategies
- Stacking Items: You can hold a maximum of 99 of each consumable item (except key items). The bag has unlimited space (only limited by quantity).
- Synergy: Combine Dire Hit with moves that have high critical-hit ratios (e.g., Slash, Body Slam, King's Rock? In Gen 1, critical hit rate is based on Speed. So boosting Speed with X Speed or using Carbos can increase crit chance). Also, X Special is great before using Psychic or Thunderbolt.
- Saving TMs: Many TMs are one-time use, so choose wisely. Buying multiple TMs from the Celadon Department Store (except unique ones) is safe.
- Evolution Stones: It’s often better to evolve your Pokémon later when they learn useful moves. For example, wait until your Eevee learns Bite (level 30) before using a Thunder Stone for Jolteon.
---
This comprehensive item guide will help you maximize your efficiency in Pokémon Red and Blue. Always stock up on Repel, Full Heal, and Revives before entering a dungeon, and remember that the Master Ball is best saved for the strongest wild Pokémon.
Character Skills
"content": "## Character Skills
In Pokémon Red and Blue, the skills used in battle are the moves your Pokémon learn. The Trainer themselves have no direct combat abilities; their skill lies in choosing the right Pokémon and moves. This guide covers every move available in Generation I, providing details on their effects, strategy, and usage.
#### Normal-Type Moves
#### Fire-Type Moves
#### Water-Type Moves
#### Electric-Type Moves
#### Grass-Type Moves
#### Ice-Type Moves
#### Fighting-Type Moves
#### Poison-Type Moves
#### Ground-Type Moves
Overview
In Pokémon Red and Blue, the skills used in battle are the moves your Pokémon learn. The Trainer themselves have no direct combat abilities; their skill lies in choosing the right Pokémon and moves. This guide covers every move available in Generation I, providing details on their effects, strategy, and usage.
Move Statistics Explained
- Power: Base damage. Higher is stronger.
- Accuracy (Acc): Chance to hit (%).\"--\" means never misses.
- PP: Power Points; how many times the move can be used.
- Effect: Additional effects such as status conditions, stat changes, or trapping.
- STAB: Same Type Attack Bonus (1.5x damage) when the move's type matches the user's type.
- Type Chart: Use type effectiveness to choose moves (e.g., Water beats Fire).
Complete Move List by Type
#### Normal-Type Moves
| Move | Power | Acc | PP | Effect | Notes |
|---|---|---|---|---|---|
| Barrage | 15 | 85% | 20 | Hits 2-5 times | Unreliable, low power. Avoid. |
| Bide | -- | -- | 10 | Stores damage for 2-3 turns, returns double | Can catch opponents off guard. |
| Bind | 15 | 85% | 20 | Traps for 2-5 turns, deals damage | Annoying but weak. |
| Bite | 60 | 100% | 25 | 30% flinch | Good early move. |
| Body Slam | 85 | 100% | 15 | 30% paralyze | Excellent for spreading paralysis. |
| Comet Punch | 18 | 85% | 15 | Hits 2-5 times | Unreliable. Use on physical attackers. |
| Constrict | 10 | 100% | 35 | May lower Speed | Very weak; replace quickly. |
| Conversion | -- | -- | 30 | User becomes type of first move | Porygon's gimmick; rarely useful. |
| Cut | 50 | 95% | 30 | None | HM; weak in battle. |
| Defense Curl | -- | -- | 40 | Raises user's Defense | Setup move for bulky monsters. |
| Dizzy Punch | 70 | 100% | 10 | 20% confuse | Decent filler. |
| Double Slap | 15 | 85% | 10 | Hits 2-5 times | Unreliable. |
| Double Team | -- | -- | 15 | Raises Evasiveness | Annoying but risky. |
| Double-Edge | 120 | 100% | 15 | Recoil 25% | Powerful but hurts user. |
| Egg Bomb | 100 | 75% | 10 | None | Inaccurate. |
| Flash | -- | 100% | 20 | Lowers opponent's accuracy | HM; niche in battle. |
| Focus Energy | -- | -- | 30 | Raises critical hit rate | Often not worth a turn. |
| Fury Attack | 15 | 85% | 20 | Hits 2-5 times | Unreliable. |
| Fury Swipes | 18 | 80% | 15 | Hits 2-5 times | Unreliable. |
| Glare | -- | 100% | 30 | Paralyzes opponent | Good status move on Normal types. |
| Growth | -- | -- | 40 | Raises user's Special | Setup for special attackers. |
| Guillotine | -- | 30% | 5 | OHKO | Very unreliable. |
| Hammer Arm | 100 | 90% | 10 | Lowers user's Speed | Powerful but reduces speed. |
| Headbutt | 70 | 100% | 15 | 30% flinch | Reliable physical STAB. |
| Horn Attack | 65 | 100% | 25 | None | Decent early move. |
| Horn Drill | -- | 30% | 5 | OHKO | Unreliable. |
| Hyper Beam | 150 | 90% | 5 | User must recharge next turn | Devastating but risky. |
| Karate Chop | 50 | 100% | 25 | High critical hit rate | Good for early Fighting types (Normal type in Gen I). |
| Leer | -- | 100% | 30 | Lowers opponent's Defense | Debuff for physical sweepers. |
| Lovely Kiss | -- | 75% | 10 | Puts opponent to sleep | Inaccurate but crippling. |
| Mega Kick | 120 | 75% | 5 | None | High power, low accuracy. |
| Mega Punch | 80 | 85% | 20 | None | Decent. |
| Metronome | -- | -- | 10 | Uses a random move | Fun but unpredictable. |
| Mimic | -- | -- | 10 | Copies opponent's last move | Situational. |
| Minimize | -- | -- | 20 | Raises Evasiveness | Same as Double Team. |
| Pound | 40 | 100% | 35 | None | Basic starting move. |
| Quick Attack | 40 | 100% | 30 | Priority +1 | Great for finishing low HP foes. |
| Rage | 20 | 100% | 20 | Raises user's Attack after each hit | Can snowball. |
| Razor Wind | 80 | 100% | 10 | Charges turn 1, attacks turn 2 | Two-turn move; unreliable. |
| Recover | -- | -- | 20 | Heals 50% HP | Excellent for longevity. |
| Reflect | -- | -- | 20 | Halves Physical damage for 5 turns | Boosts team survivability. |
| Rest | -- | -- | 10 | Heals all HP, user sleeps 2 turns | Full heal but leaves user vulnerable. |
| Roar | -- | 100% | 20 | Forces opponent to switch | Useful for disrupting setups. |
| Rock Slide | 75 | 90% | 10 | 30% flinch | Good coverage move. |
| Sand Attack | -- | 100% | 15 | Lowers opponent's accuracy | Utility move. |
| Scratch | 40 | 100% | 35 | None | Basic. |
| Screech | -- | 85% | 40 | Sharply lowers opponent's Defense | Good for physical sweepers. |
| Seismic Toss | -- | 100% | 20 | Deals damage equal to user's level | Consistent damage. |
| Self-Destruct | 200 | 100% | 5 | User faints | Nuke move. |
| Skull Bash | 130 | 100% | 10 | Charges turn 1, raises Defense | Two-turn move. |
| Slam | 80 | 75% | 20 | None | Low accuracy. |
| Slash | 70 | 100% | 20 | High critical hit rate | Reliable STAB. |
| Smog | 20 | 70% | 20 | May poison opponent | Inaccurate. |
| Smokescreen | -- | 100% | 20 | Lowers opponent's accuracy | Utility. |
| Soft-Boiled | -- | -- | 10 | Heals 50% HP | Excellent recovery. |
| Spore | -- | 100% | 15 | Puts opponent to sleep | Reliable sleep move (user must be Grass-type). |
| Stomp | 65 | 100% | 20 | 30% flinch | Good. |
| Strength | 80 | 100% | 15 | None | HM, decent. |
| Substitute | -- | -- | 10 | Uses 25% HP to create a decoy | Useful for protection. |
| Super Fang | -- | 90% | 10 | Cuts opponent's HP in half | Great for whittling down tough foes. |
| Supersonic | -- | 55% | 20 | Confuses opponent | Low accuracy. |
| Surf | 95 | 100% | 15 | None | Powerful Water move, HM. |
| Swift | 60 | -- | 20 | Never misses | Reliable finishing move. |
| Swords Dance | -- | -- | 20 | Sharply raises user's Attack | Key setup for physical sweepers. |
| Tackle | 35 | 95% | 35 | None | Starter move. |
| Tail Whip | -- | 100% | 30 | Lowers opponent's Defense | Weak debuff. |
| Take Down | 90 | 85% | 20 | Recoil 25% | Strong but risky. |
| Teleport | -- | -- | 20 | Escape from wild battle | Useless in trainer battles. |
| Thrash | 120 | 100% | 10 | User confused after 2-3 turns | Powerful but leaves user confused. |
| Thunder Wave | -- | 100% | 20 | Paralyzes opponent | Excellent status move. |
| Toxic | -- | 85% | 10 | Badly poisons opponent | Worsens each turn. |
| Transform | -- | -- | 10 | User copies opponent's moves and stats | Ditto's signature; can copy powerful foes. |
| Tri Attack | 80 | 100% | 10 | 20% chance of burn/freeze/paralyze | Good coverage. |
| Vice Grip | 55 | 100% | 30 | None | Decent early move. |
| Vise Grip | 55 | 100% | 30 | None | Same as Vice Grip. |
| Waterfall | 80 | 100% | 15 | None | HM, good Water move. |
| Wrap | 15 | 90% | 20 | Traps for 2-5 turns | Similar to Bind. |
| Move | Power | Acc | PP | Effect | Notes |
|---|---|---|---|---|---|
| Ember | 40 | 100% | 25 | 10% burn | Basic Fire move. |
| Fire Blast | 120 | 85% | 5 | 30% burn | Powerful but inaccurate. |
| Fire Punch | 75 | 100% | 15 | 10% burn | Good for physical attackers. |
| Fire Spin | 15 | 70% | 15 | Traps for 2-5 turns | Annoying but weak. |
| Flamethrower | 95 | 100% | 15 | 10% burn | Reliable Fire STAB. |
| Move | Power | Acc | PP | Effect | Notes |
|---|---|---|---|---|---|
| Bubble | 20 | 100% | 30 | May lower Speed | Very weak. |
| Bubble Beam | 65 | 100% | 20 | May lower Speed | Good early Water move. |
| Clamp | 35 | 85% | 10 | Traps for 2-5 turns | Low power, unreliable. |
| Crabhammer | 100 | 85% | 10 | High crit | Kingler's best move. |
| Hydro Pump | 120 | 80% | 5 | None | Strong but inaccurate. |
| Surf | 95 | 100% | 15 | None | Excellent Water STAB, HM. |
| Water Gun | 40 | 100% | 25 | None | Basic. |
| Waterfall | 80 | 100% | 15 | None | HM, decent. |
| Withdraw | -- | -- | 40 | Raises Defense | Setup for Water types. |
| Move | Power | Acc | PP | Effect | Notes |
|---|---|---|---|---|---|
| Thunder | 120 | 70% | 10 | 30% paralysis | Powerful but inaccurate; accurate in rain. |
| Thunder Punch | 75 | 100% | 15 | 10% paralysis | Good coverage. |
| Thunder Shock | 40 | 100% | 30 | 10% paralysis | Basic. |
| Thunder Wave | -- | 100% | 20 | Paralyzes opponent | Excellent status. |
| Thunderbolt | 95 | 100% | 15 | 10% paralysis | Best Electric move. |
| Move | Power | Acc | PP | Effect | Notes |
|---|---|---|---|---|---|
| Absorb | 20 | 100% | 20 | User recovers half HP dealt | Early recovery move. |
| Leech Seed | -- | 90% | 10 | Drains HP each turn | Great for stalling. |
| Mega Drain | 40 | 100% | 15 | User recovers half HP dealt | Upgrade from Absorb. |
| Petal Dance | 120 | 100% | 10 | User confused after 2-3 turns | Powerful but leaves user confused. |
| Razor Leaf | 55 | 95% | 25 | High crit | Good Grass STAB. |
| Sleep Powder | -- | 75% | 15 | Puts opponent to sleep | Inaccurate but crippling. |
| Solar Beam | 120 | 100% | 10 | Charges turn 1 | Two-turn move; avoid. |
| Spore | -- | 100% | 15 | Puts opponent to sleep | Perfect accuracy (Grass type). |
| Stun Spore | -- | 75% | 30 | Paralyzes opponent | Inaccurate. |
| Vine Whip | 35 | 100% | 10 | None | Basic Grass move. |
| Move | Power | Acc | PP | Effect | Notes |
|---|---|---|---|---|---|
| Aurora Beam | 65 | 100% | 20 | May lower Attack | Good. |
| Blizzard | 120 | 90% | 5 | 30% freeze | Powerful but inaccurate. |
| Haze | -- | -- | 30 | Resets all stat changes | Useful for resetting boosts. |
| Ice Beam | 95 | 100% | 15 | 10% freeze | Reliable Ice STAB. |
| Ice Punch | 75 | 100% | 15 | 10% freeze | Good coverage. |
| Mist | -- | -- | 30 | Protects against stat reduction for 5 turns | Niche. |
| Powder Snow | 40 | 100% | 25 | May freeze | Basic. |
| Move | Power | Acc | PP | Effect | Notes |
|---|---|---|---|---|---|
| Brick Break | 75 | 100% | 15 | Breaks Light Screen and Reflect | Useful. |
| Counter | -- | 100% | 20 | Returns double physical damage | Niche but can OHKO. |
| Cross Chop | 100 | 80% | 5 | High crit | Strong but inaccurate. |
| Double Kick | 30 | 100% | 30 | Hits twice | Reliable. |
| Jump Kick | 85 | 95% | 25 | Crash damage if miss | Risk-reward. |
| Karate Chop | 50 | 100% | 25 | High crit | Normal-type in Gen I but listed here (known as fighting). |
| Low Kick | 50 | 90% | 20 | 30% flinch | Decent. |
| Rolling Kick | 60 | 85% | 15 | 30% flinch | Moderate. |
| Seismic Toss | -- | 100% | 20 | Damage = user's level | Consistent Fighting-type damage. |
| Submission | 80 | 80% | 25 | Recoil 25% | Powerful but risky. |
| Move | Power | Acc | PP | Effect | Notes |
|---|---|---|---|---|---|
| Acid | 40 | 100% | 30 | May lower Defense | Good early move. |
| Acid Armor | -- | -- | 40 | Sharply raises Defense | Setup for bulky Poison types. |
| Poison Gas | -- | 55% | 40 | Poisons opponent | Low accuracy. |
| Poison Powder | -- | 75% | 35 | Poisons opponent | Inaccurate. |
| Poison Sting | 15 | 100% | 35 | May poison | Weak. |
| Sludge | 65 | 100% | 20 | May poison | Decent. |
| Smog | 20 | 70% | 20 | May poison | Inaccurate. |
| Toxic | -- | 85% | 10 | Badly poisons | Worsens each turn. |
| Move | Power | Acc | PP | Effect | Notes |
|---|---|---|---|---|---|
| Bone Club | 65 | 85% | 20 | 30% flinch | Marowak signature. |
| Bonemerang | 50 | 90% | 10 | Hits twice | Reliable. |
| Dig | 100 | 100% |
Characters & Roles
Characters & Roles
Overview
Pokémon Red and Blue feature a single player character you control, a rival, a professor, eight Gym Leaders, an Elite Four, a Champion, and members of Team Rocket. The true playable units are the Pokémon themselves, each filling a strategic role on your team. This guide covers all key characters and explains how to leverage Pokémon roles for success.
---
1. Player Character (Red)
Background – A young Trainer from Pallet Town who begins their journey at age 11. The player chooses between Bulbasaur, Charmander, or Squirtle as their starter. Red is a silent protagonist with no dialogue, but serves as the main viewpoint.
Strengths/Weaknesses – No inherent strengths or weaknesses; success depends entirely on Pokémon choices and strategy.
Playstyle – The player dictates all decisions: which Pokémon to catch, which moves to teach, when to battle or flee, and how to traverse the world. The playstyle is fully flexible.
Unlock Conditions – Immediately available at game start.
Recommended Equipment/Builds – No equipment for the trainer. Carry a Pokédex (given by Oak), Poké Balls, Potions, Antidotes, Escape Ropes, and the Bicycle for speed. For battle, stock up on Full Restores and Revives before the Elite Four.
---
2. Rival (Blue / Gary)
Background – Grandson of Professor Oak, neighbor to the player, and your rival throughout the game. Competitive, cocky, and skilled. He chooses the starter strong against yours (e.g., if you pick Charmander, he picks Squirtle).
Role – Appears 6 times as a mandatory battle (routes, towns, and endgame). His team evolves over time, culminating in a powerful final team. His defeat is required to become Champion.
Strengths/Weaknesses – His team is well-rounded but lacks a single type focus. He uses the starter’s evolved form, a Normal-type, a Flying-type, an Electric-type, and later a Psychic-type. Weak to well-prepared coverage.
Playstyle – He uses efficient moves and switches often. Be prepared for high-power moves like Hyper Beam on his final team.
Unlock Conditions – First encounter on Route 22 (after leaving Pallet Town). Subsequent battles trigger after major milestones.
Recommended Strategy – Bring a strong Fighting-type (Poliwrath, Hitmonlee) or Rock-type to handle his Normal and Fire types. A Ground-type (Dugtrio) counters his Jolteon. Always have a plan for his Alakazam (use Shadow Ball or Dark moves via the type chart note: in Gen I, Ghost is ineffective against Psychic, so use Bug or a high-Special Pokémon).
---
3. Professor Oak
Background – Renowned Pokémon Professor residing in Pallet Town. He gives you your starter and Pokédex, and later evaluates your progress. Not a battler.
Role – Quest giver and mentor. He also teaches you how to catch Pokémon.
Unlock Conditions – Met in his lab at the start.
---
4. Gym Leaders
4.1 Brock – Pewter City Gym (Rock-type)
- Pokémon – Geodude (Lv. 12), Onix (Lv. 14)
- Strengths – High Defense, lots of Rock moves (Rock Throw).
- Weaknesses – Water, Grass, Fighting, and Ground moves (but Onix is part Ground so Water hits hard).
- Strategy – Use Bulbasaur or Squirtle. If you picked Charmander, catch a Mankey, Nidoran (learns Double Kick), or Butterfree (Confusion).
- Pokémon – Staryu (Lv. 18), Starmie (Lv. 21)
- Strengths – Fast, Starmie has strong Water Pulse and Swift.
- Weaknesses – Electric, Grass.
- Strategy – Catch an Oddish or Bellsprout, or use Pikachu (if you have one from Viridian Forest). Even a strong Pidgeotto can wear her down.
- Pokémon – Voltorb (Lv. 21), Pikachu (Lv. 18), Raichu (Lv. 24)
- Strengths – High Speed, Raichu’s Thunderbolt hits hard.
- Weaknesses – Ground-types (immune to Electric).
- Strategy – Diglett/Dugtrio from Diglett’s Cave are perfect. Use Dig or a strong Ground move.
- Pokémon – Victreebel (Lv. 29), Tangela (Lv. 24), Vileplume (Lv. 29)
- Strengths – Status moves (Sleep Powder, Stun Spore), Grass attacks.
- Weaknesses – Fire, Ice, Flying, Bug, Poison.
- Strategy – Use a Fire-type (Growlithe, Vulpix) or Flying-type. A Flying Pokémon with Aerial Ace (or Fly) sweeps easily.
- Pokémon – Koffing (Lv. 37), Muk (Lv. 39), Koffing (Lv. 37), Weezing (Lv. 43)
- Strengths – High defense, Explosion, Toxic.
- Weaknesses – Ground, Psychic.
- Strategy – A strong Psychic-type (Alakazam, Mr. Mime, Hypno) one-shots with Psychic. Alternatively, a Ground-type (Nidoking) with Earthquake.
- Pokémon – Kadabra (Lv. 38), Mr. Mime (Lv. 37), Venomoth (Lv. 38), Alakazam (Lv. 43)
- Strengths – Extremely high Special, fast, use Psychic and status moves.
- Weaknesses – Bug (especially Pin Missile), Ghost (but Gen I bug: Ghost moves are physical and Psychic is immune; use Twisted Spoon? Actually in Gen I, Ghost is ineffective vs Psychic, so use strong Special attackers or high-level Pokémon. Dark type doesn’t exist yet. Use a fast Bug-type like Scyther with Fury Cutter or a strong Normal-type with Hyper Beam.
- Strategy – Overlevel a Pokémon (Charizard with Flamethrower can work) or use a Scyther/Fearow with Fury Attack. Alternatively, use a Gengar with Lick (though weak STAB) or just brute force with high stats.
- Pokémon – Growlithe (Lv. 42), Ponyta (Lv. 40), Rapidash (Lv. 42), Arcanine (Lv. 47)
- Strengths – High Attack and Special, Fire Spin traps.
- Weaknesses – Water, Ground, Rock.
- Strategy – A Water-type (Blastoise, Starmie) with Surf does massive damage. Also use Rhydon with Earthquake.
- Pokémon – Dugtrio (Lv. 50), Persian (Lv. 53), Nidoqueen (Lv. 53), Nidoking (Lv. 55), Rhydon (Lv. 55)
- Strengths – High Attack, diverse moves (Earthquake, Rock Slide, Slash).
- Weaknesses – Water, Ice, Grass.
- Strategy – Use Blastoise (Surf/Ice Beam), Starmie, or a Grass-type like Exeggutor. Ice Beam covers his Ground/Rock types.
- Pokémon – Dewgong, Cloyster, Slowbro, Jynx, Lapras (all Lv. 54–56)
- Weakness – Fire, Fighting, Rock, Steel (Steel not in Gen I). Strong Fire-types like Charizard or Arcanine work. Also use Fighting moves for her Ice-types.
- Pokémon – Hitmonlee, Hitmonchan, Machamp (x2), Onix (Lv. 53–56)
- Weakness – Psychic, Flying, Ghost (Ghost ineffective vs Fighting in Gen I? Actually Ghost is immune to Normal/Fighting but suffers from Normal. Use Psychic types like Alakazam, or Flying like Zapdos.
- Pokémon – Gengar (x2), Golbat, Haunter, Arbok (Lv. 54–58)
- Weakness – Psychic, Ground, Ghost (but Ghost vs Ghost in Gen I is super effective? Actually Ghost moves are physical and against Ghost they do normal damage; but Ghost is weak to Ghost. Use Psychic moves for super effective on Poison sub-types. A strong Psychic type erases her team.
- Pokémon – Dragonair (x2), Aerodactyl, Dragonite (x2) (Lv. 56–62)
- Weakness – Ice, Rock, Dragon (Dragon only vs Dragon). Ice Beam is the best counter. Blizzard on a high-Special Pokémon (Starmie, Lapras, Articuno) dominates.
- Bulbasaur – Early Grass/Poison. Good vs early Gyms (Brock, Misty). Evolves into Venusaur. Learns Razor Leaf and Solar Beam. Weak to Fire/Psychic/Flying.
- Charmander – Early Fire/Flying (as Charizard). Powerful offensive sweeper. Weak to Water/Rock. Requires more careful training early game.
- Squirtle – Early Water. Evolves into Blastoise. Defensive powerhouse with Surf and Ice Beam. Covers many types.
- Articuno (Ice/Flying) – High Special, learns Blizzard. Good for Lance.
- Zapdos (Electric/Flying) – Very fast, powerful Thunder. Excellent for Water-types.
- Moltres (Fire/Flying) – High Sp.Atk, good for Grass/Steel (non-existent) but Fire coverage.
- Pseudo-Legendary – Dragonite (Dragon/Flying) exceptional stats, but hard to evolve.
- Special Sweeper – Alakazam (Psychic), Starmie (Water/Psychic), Gengar (Ghost/Poison).
- Physical Wall – Snorlax (Normal), Chansey (Normal), Rhydon (Ground/Rock).
- Mixed – Nidoking (Poison/Ground) covers many types with Blizzard, Thunder, Earthquake.
- Status – Jigglypuff (Sing), Parasect (Spore), Butterfree (Sleep Powder).
- Blastoise (Surf, Ice Beam, Earthquake, Bite)
- Zapdos (Thunder, Drill Peck, Thunder Wave, Fly)
- Alakazam (Psychic, Shadow Ball, Thunder Wave, Reflect)
- Snorlax (Body Slam, Earthquake, Rock Slide, Rest)
- Exeggutor (Razor Leaf, Psychic, Hypnosis, Stun Spore)
- Arcanine (Flamethrower, Dig, Take Down, Leer)
- Charizard (Flamethrower, Fly, Earthquake, Slash)
- Starmie (Surf, Ice Beam, Thunderbolt, Psychic)
- Golem (Earthquake, Rock Slide, Explosion, Body Slam)
- Gengar (Thunderbolt, Psychic, Lick, Night Shade)
- Dragonite (Hyper Beam, Blizzard, Thunder, Fire Blast)
- Snorlax (Body Slam, Earthquanke, Rock Slide, Selfdestruct)
4.2 Misty – Cerulean City Gym (Water-type)
4.3 Lt. Surge – Vermilion City Gym (Electric-type)
4.4 Erika – Celadon City Gym (Grass-type)
4.5 Koga – Fuchsia City Gym (Poison-type)
4.6 Sabrina – Saffron City Gym (Psychic-type)
4.7 Blaine – Cinnabar Island Gym (Fire-type)
4.8 Giovanni – Viridian City Gym (Ground-type)
---
5. Elite Four
The Elite Four must be defeated in order. Each specializes in a type.
5.1 Lorelei – Ice-type
5.2 Bruno – Fighting-type
5.3 Agatha – Ghost/Poison-type
5.4 Lance – Dragon/Flying-type
---
6. Champion (Blue)
After defeating the Elite Four, you face your rival who has become Champion. His team is strong: Pidgeot, Alakazam, Rhydon, Arcanine/Exeggutor (depends on starter), Gyarados, and his starter’s final form (e.g., Charizard if you chose Squirtle).
Strategy – Use a balanced team covering all types. Have a strong Electric move for Gyarados, Ice for Rhydon/Dragonite, Psychic for Alakazam, Rock for Pidgeot/Arcanine. Overlevel to at least Lv. 60.
---
7. Team Rocket
Giovanni – Leader of Team Rocket, also Gym Leader (Viridian). Battles you in Silph Co. and later in his Gym. Uses Ground-types.
Other notable members – Jessie & James from the anime appear in a few early game encounters (not canon to games). Grunts are encountered in Mt. Moon, Nugget Bridge, Game Corner, Silph Co. They use Ratatta, Zubat, Grimer, and Koffing.
Role – Antagonists blocking progress; must be defeated to obtain key items (Lift Key, Silph Scope, Master Ball).
---
8. Pokémon as Playable Units & Roles
Each Pokémon you catch can fill one or more roles on your team. Build a balanced party of 6.
#### 8.1 Starter Role
#### 8.2 Legendary Birds (post-game encounters)
#### 8.3 Other Notable Roles
---
9. Recommended Team Synergy Examples
Example 1 (Blastoise-centric)
Example 2 (Charizard sweep)
---
10. Summary
Success in Pokémon Red and Blue comes from understanding characters, type matchups, and the role each Pokémon plays. Pick a starter that fits your preferred playstyle, counter Gym Leaders with the appropriate types, and build a team that covers each other’s weaknesses. Good luck, Trainer!
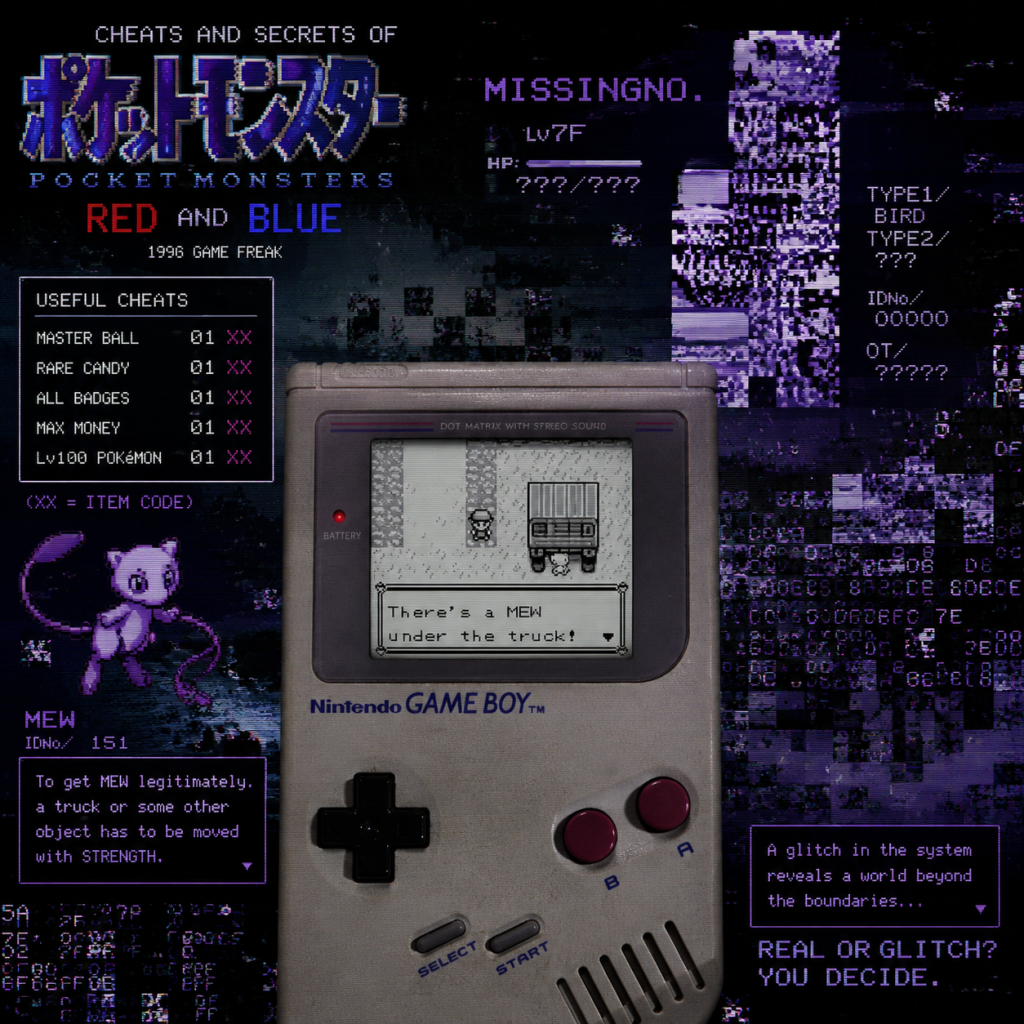
Cheats & Secrets
Cheats & Secrets – Pokémon Red and Blue
Overview
Pokémon Red and Blue do not contain any official, developer-intended cheat codes (like entering a password to unlock items). However, the games are famous for a wealth of exploitable glitches, hidden features, and Easter eggs. Additionally, players using emulators or original hardware with cheat devices can access powerful Game Genie and GameShark codes. This guide covers all significant secrets, including:
- Glitches and Exploits (including the Mew glitch, MissingNo., item duplication, and more)
- Hidden Features and Developer Secrets (including debug menus in some versions, unused content, and Easter eggs)
- Cheat Device Codes (Game Genie and GameShark) for those who want to manipulate the game directly
- What it does: Allows you to encounter a wild Mew (normally unobtainable without cheating) in Cerulean City.
- How to perform:
- Notes: The exact Mew encounter depends on the Special stat of the last Pokémon you fought; using a Slowpoke with a specific Special value triggers Mew. Many online guides provide step-by-step for specific in-game events.
- What it does: Causes a glitch Pokémon named MissingNo. (or 'M) to appear in the wild. It can duplicate the 6th item in your inventory and can be fought for large amounts of experience.
- How to perform:
- Prerequisite: You must have spoken to the old man in Viridian City who teaches you how to catch Pokémon. This sets a flag that allows the glitch to work.
- Effects: After catching or defeating MissingNo., your inventory's 6th item (the one in slot 6 of the item bag) will be multiplied by 128 or 255 (depends on version). This is extremely useful for duplicating Rare Candies, Master Balls, or TMs.
- Risks: MissingNo. can corrupt your Hall of Fame data and cause graphical glitches. It does not typically break your save file, but be cautious.
- What it does: Duplicate any item that can be deposited (like TMs) or held by Pokémon.
- Method (PC Box Duplication):
- Simpler method with MissingNo.: As described above, MissingNo. automatically duplicates the 6th item slot.
- What it does: Allows you to stay in the Safari Zone indefinitely without running out of steps.
- Method:
- Better method: Use a Bike (if you have the Bike Voucher) to enter the Safari Zone; the step counter won't decrease while on the Bike. This is a known oversight.
- What it does: Forces a wild encounter with any Pokémon by manipulating memory. Used to catch Mew, but can also catch other rare species like Snorlax without using the Poké Flute.
- Method: Similar to Mew glitch but adjusted for different target species. Requires careful calculation of the last Pokémon's Special stat.
- What it does: Walk through walls by using the Pokémon menu glitch.
- Method: Requires a Pokémon with a certain move (like Fly) and specific steps. This is a more advanced glitch and can lead to areas like the back of the SS Anne or the truck where Mew was rumored (only a rumor; no Mew there).
- What it is: The Japanese Pokémon Blue contains a debug menu that can be accessed by holding specific buttons at the title screen. In the international versions, this was removed.
- How to access (Japanese Blue): Press and hold A + B + Select + Start on the title screen, then press Left. A debug menu appears allowing you to set flags, warp to any map, and spawn Pokémon.
- Pokémon: The game data contains entries for unreleased Pokémon like the other Starter's evolutions in the wild (e.g., Venusaur, Charizard, Blastoise) but they are not normally encountered. Using glitches, you can encounter them.
- Items: The item list includes an unused "Pokédex upgrade" (the Poké Flute upgrade that never was), and the "Silph Scope" has no special power outside the Lavender Tower.
- MissingNo. is a glitch, but its name (Missing Number) and its behavior are a consequence of the game's memory handling. Some consider it a humorous oversight.
- The old man in Viridian City who shows you how to catch a Pokémon actually gives you a free chance to catch a wild Rattata (or Pidgey). This is the only way to encounter Pokémon in Viridian City before getting Poké Balls.
- What it does: You can board the SS Anne without the ticket by using the Surf glitch. If you use a Pokémon with Surf to approach the ship from the east side, you can enter the ship's interior through a glitched door. However, this is not recommended as it can cause severe glitches.
- If you catch all 150 Pokémon (including Mew? Actually Mew is #151 but not required), Professor Oak will reward you with a Diploma. This is a small Easter egg on the second floor of his lab.
- If you do not have the Bike Voucher, you can still get a Bike by glitching your trainer name or using the item duplication to get the voucher without completing the quest.
- Infinite Money: 0106D3CF (Press Select for $999999)
- Walk Through Walls: 0100F2D0
- Catch Any Pokémon (First slot): Change the encounter code. For example, to encounter Mew (Pokémon index 151) you can use code 01FF6ED3 (but this is complex).
- Rare Candies in Item Slot 1: Use 01758EDF (then use item to level up
- Master Ball x99: Use 0106C3CF to get 99 Master Balls in item slot 1
- Note: Game Genie codes are region and version specific. Codes for Red are often different from Blue. Always check code lists for your exact version.
- Wild Pokemon Modifier (Red/Blue): Use code 01FF6ED7 (or similar) to change the next wild encounter to Mew.
- Infinite PP of first move: 01FFC0CF
- Unlimited Item Uses: 0106D3CF (also affects money)
- Many code databases exist online; be sure to use ones verified for your ROM dump.
- The Bills House in Cerulean: The telephone on the wall rings if you press A repeatedly; it's just a sound effect.
- Prof. Oak's Reaction: If you try to leave Pallet Town without a starter, Oak will stop you and make you choose.
- Lavender Town Music: The eerie music in Lavender Town was meant to evoke a haunted atmosphere; some fans claim it causes headaches (a myth).
- Fossil Revival: The Cinnabar Island lab revives fossils only one at a time; you can manipulate the game clock to revive multiple by glitching.
- Rival's Name: If you name your rival "ASH" (Red's default name in the anime), the game will not prevent it. Similarly, naming the player "GARY" (rival's default) is allowed.
- The Legend of the Truck:** Rumors say that using Strength on a truck near the SS Anne docks with a level 100 Pokémon will reveal Mew. This is false – no such trigger exists.
> Caution: Many glitches can corrupt save data or cause game freezes. Always save before attempting any exploit, and use cheat codes at your own risk.
---
Glitches and Exploits
These are unintended behaviors that can be used to gain advantages, catch rare Pokémon, or duplicate items. They are reproducible on original Game Boy hardware and most emulators.
#### 1. The Mew Glitch (Trainer-Fly Glitch)
1. Before battling the camper on Route 25 (north of Cerulean), save your game.
2. Defeat or catch the Slowpoke on Route 25. Do not battle the camper yet.
3. Fly to Cerulean City. You must have the Fly HM already (obtainable after defeating Misty).
4. Walk to the north exit of Cerulean (towards Route 24). Immediately press Start to open the menu when the screen fades.
5. Fly back to Cerulean City. This will cause a "glitch walking" animation.
6. Now walk to the house of the old man who teaches How to Catch Pokémon (the one in Viridian City is easiest). Talk to him and watch the demonstration (press B to skip the battle if needed). The old man will walk away.
7. Immediately fly to Lavender Town and walk to Route 8 (or any route with a trainer that has a Slowpoke or a Pokémon that learns the same moves as Slowpoke). The glitch will cause a wild Mew to appear at level 7 (or higher if you battled stronger trainers earlier).
#### 2. MissingNo. (Missing Number) Glitch
1. Go to Cinnabar Island.
2. Surf along the coastline on the right side of the island (the eastern shore).
3. Walk up and down the shore in the water; you will encounter a wild MissingNo. (appears as a scrambled tile sprite).
#### 3. Item Duplication (Using Pokédex and Pokémon Storage)
1. Go to a Pokémon Center and access the PC.
2. Move a Pokémon holding the item you want to duplicate into a box.
3. Withdraw the Pokémon, but cancel at the last moment (depends on version; precise timing required). This is easier with an emulator’s save state.
#### 4. Safari Zone Infinite Step Glitch
1. Enter the Safari Zone normally.
2. Press Start to open the menu, then press B to close it. This resets the step counter to 500 (instead of the original 500 that decreases). Actually, you can repeatedly open and close the menu to keep the step count high.
#### 5. Trainer-Fly Glitch (General)
#### 6. Brock Through Walls Glitch
---
Hidden Features and Developer Secrets
These are intentional or unintentional extras that are not obvious to normal players.
#### 1. Debug Mode (Japanese Blue Version Only)
#### 2. Unused Pokémon and Items
#### 3. The MissingNo. as a Developer Easter Egg
#### 4. The Old Man's Demonstration
#### 5. SS Anne Ticket Glitch
#### 6. The Pokédex Completion Reward
#### 7. The Bike Shop Freebie
---
Cheat Device Codes (Game Genie / GameShark)
These codes allow you to modify the game directly. They work on original Game Boy with a cheating device, or through emulator built-in cheat systems.
#### Game Genie Codes (Some Common Examples)
#### GameShark Codes (For Emulators)
---
Easter Eggs and Trivia
---
Final Notes
Pokémon Red and Blue are beloved for their hidden depths. While not designed with cheat codes, the community has uncovered countless exploits that became legendary. Use these secrets to enhance your experience, but be aware of the risks. For any glitch, always save manually before trying. Happy exploiting!