
Pokémon Sword and Shield
## Game Introduction: Pokémon Sword and Shield ### Genre, Developer & Publisher **Pokémon Sword** and **Pokémon Shield** are role-playing games (RPGs) developed by **Game Freak** and published by **The Pokémon Company** and **Nintendo**. They are the first mainline entries in the Pokémon serie...
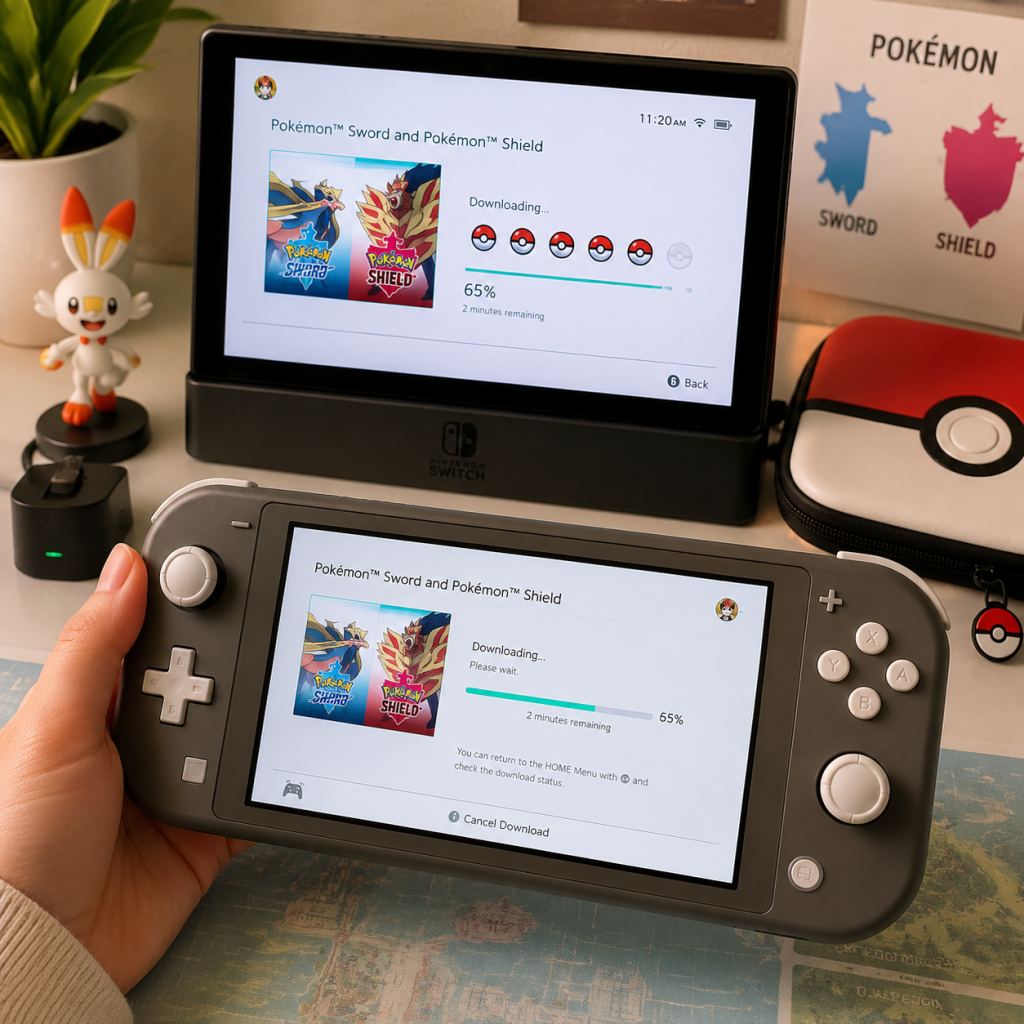
Download & Installation
Download & Installation Guide for Pokémon Sword and Shield
Platform Availability
Pokémon Sword and Pokémon Shield are exclusive to the Nintendo Switch console. They are not available on PC (Steam, Epic Games Store), PlayStation, Xbox, or mobile devices. Do not trust any version claiming otherwise — those are scams or emulators.
Official and Legitimate Download Sources
- Nintendo eShop (digital download): Accessible directly from the Nintendo Switch console, via the eShop icon. You can also purchase codes from authorized retailers (Amazon, Best Buy, GameStop, etc.).
- Physical Game Card: Retail stores or online sellers (e.g., Amazon, GameStop). No installation required beyond inserting the cartridge for the base game, but updates are downloaded.
- With internet connected, highlight the game icon, press the + button, select "Software Update" then "Via the Internet" to check and install the latest version.
- The latest update as of this writing is version 1.3.2 (includes The Isle of Armor & The Crown Tundra DLC). The base game update size is approximately 2-3 GB depending on installed DLC.
Step-by-Step Installation (Nintendo Switch)
#### A. Digital Download from Nintendo eShop
1. Power on your Nintendo Switch and connect to the internet. Ensure you have enough free space (see System Requirements below).
2. Open the Nintendo eShop from the home screen. You may need to link a Nintendo Account if not already done.
3. Search for "Pokémon Sword" or "Pokémon Shield" using the search tool.
4. Select the game and choose "Proceed to Purchase" (if you already own a download code, select "Enter Code"). Complete the purchase using a credit card, PayPal, eShop gift card, or redeemed gold points.
5. After purchase, the download will begin automatically. You can check progress in the Downloads section (click on your user icon in the top-right corner).
6. Once downloaded, the game icon appears on your home screen. Launch it — it may require a first-time update.
#### B. Physical Game Card Installation
1. Insert the game card into the Nintendo Switch (the slot is at the top of the console when held in handheld mode).
2. The game icon will appear on the home screen immediately. No installation for base game is needed.
3. However, you must download the Day 1 patch (version 1.2.0+) for full functionality (online features, bug fixes). Connecting to the internet will automatically prompt this update. Accept and download.
4. Launch the game from the icon.
#### C. Installing Updates (Both Physical & Digital)
System Requirements
| Requirement | Minimum | Recommended |
|---|---|---|
| Console | Nintendo Switch (any model) | Nintendo Switch (OLED or v2) for better battery life |
| System Version | 12.0.0 or higher | Latest system version (18.x) |
| Storage Space | 12.4 GB (base game) + 2.3 GB (updates) + 6.5 GB (DLC) | 16 GB free on internal or microSD card |
| Internet | Required for initial update and online features | Broadband |
| Controllers | Joy‑Con or Pro Controller | Any, but all work fine |
| Account | Nintendo Account (free) for eShop and online | Nintendo Account + Nintendo Switch Online subscription for online trading/battles |
Account Requirements
- Nintendo Account: Required to access the eShop and download digital games. Create one at accounts.nintendo.com or directly on the Switch.
- Nintendo Switch Online (optional paid subscription): Needed for online interactions (trading, battling, Max Raid Battles with others). Not required for single-player.
First Launch Setup
1. Launch Pokémon Sword or Shield from the Home menu.
2. The game will check for updates. If prompted, download and install the latest version (recommended).
3. You will see the opening cinematic, then the language selection (choose from available languages: Japanese, English, French, German, Italian, Spanish, Korean, Chinese Simplified, Chinese Traditional).
4. Next, you can change settings: Camera (default Normal, invert if needed), Battle animations (on/off), and sound preferences. You can change these later in options.
5. The game will save automatically; you must have enough free save data space (approx. 1 MB per save slot). Up to 8 save slots per user profile.
6. Begin your adventure!
Common Installation Errors and Fixes
| Error | Cause | Solution |
|---|---|---|
| "Not enough free space" | Insufficient internal or microSD storage | Delete unused games/data in System Settings > Data Management. Insert a larger microSD card (FAT32 or exFAT). |
| Download stuck or slow | Network congestion or Nintendo server issues | Try pausing and resuming download. Restart Switch or router. Use wired LAN adapter if possible. |
| "Unable to communicate with server" during update | Outdated system software | Update Switch firmware: System Settings > System > System Update. Then retry the game update. |
| Game card not recognized | Dirty contacts or damaged card | Clean the gold contacts with a dry cloth. Insert fully. If persists, try another card to rule out hardware defect. |
| Error code 2110-2003 | DNS or network configuration | Change DNS to 8.8.8.8 / 8.8.4.4 in Internet Settings. Or use a different Wi‑Fi network. |
| Digital game license not found | Account mismatch | Ensure you are using the same Nintendo Account that purchased the game. Check the user profile. |
| Download code invalid | Expired or incorrect region | Verify code region matches your eShop region. If purchased from a different region, create an account for that region. |
Post-Install Verification
1. After installation, check the game version: Highlight the game icon, press +, select Software Information > Version. Latest is 1.3.2.
2. Ensure all features work: Launch the game, create a save file, and test a basic wild encounter (press A in the tall grass). If the battle starts without errors, installation is successful.
3. For digital version, confirm the icon shows no download status (the download bar should be gone).
4. Test online features: Connect to the internet in the game (press X, select Mystery Gift > Get via Internet) — if it connects, you're good.
5. If you purchased the Expansion Pass (The Isle of Armor and The Crown Tundra), check that the DLC is active: After Wedgehurst station, you should receive a call from a character about armor. Alternatively, go to Options > Downloadable Content to see the status.
Additional Tips
- Save Data Cloud Backup: If you have Nintendo Switch Online, your save data automatically backs up. However, Pokémon Sword/Shield does not support cloud saves (due to anti-cheat). Manual backup is not possible.
- Pre‐owned Physical Copy: If you buy used, ensure the previous owner formatted the console or the game card is clean. You may need to download updates again.
- Large MicroSD: If you plan to download many games, a 128GB or 256GB microSD is recommended (SanDisk or Samsung are reliable).
- Uninstalling: To remove the game, go to System Settings > Data Management > Manage Software and select Delete Software. Save data is kept unless you manually delete it separately.

Game Introduction
Game Introduction: Pokémon Sword and Shield
Genre, Developer & Publisher
Pokémon Sword and Pokémon Shield are role-playing games (RPGs) developed by Game Freak and published by The Pokémon Company and Nintendo. They are the first mainline entries in the Pokémon series for a home console, marking Generation VIII of the franchise.
Release Timeline & Platforms
- Nintendo Switch: November 15, 2019 (worldwide)
- Expansion Pass (The Isle of Armor & The Crown Tundra): June 17, 2020 & October 22, 2020
- The games are exclusive to the Nintendo Switch family of systems and are not available on PC, PlayStation, or Xbox.
- Wild Area: A vast open-world-like expanse where you can freely roam, find Dynamax Pokémon dens, and encounter wild Pokémon in the overworld.
- Cities and Towns: From the industrial energy of Motostoke to the serene beauty of Ballonlea and the futuristic Wyndon, each location has its own character and Gym.
- Routes and Caves: Traditional linear routes connect towns, and the region includes the icy Route 10 and the mysterious Glimwood Tangle.
- Player Character (Gloria or Victor): A young Trainer from the small town of Postwick.
- Hop: Your friendly rival and the younger brother of the Champion Leon.
- Professor Magnolia: The region’s Pokémon Professor, specializing in Dynamax energy.
- Sonia: The professor’s granddaughter and an aspiring researcher.
- Leon: The undefeated Champion of Galar, known for his Charizard.
- Bede and Marnie: Rivals with their own ambitions—Bede is a cold, talented Trainer; Marnie is a reserved girl from Spikemuth with a strong following.
- Chairman Rose: The wealthy and charismatic head of the Galar Pokémon League who hides a dangerous secret.
- Rose Oil: The chairman’s loyal assistant and leader of Macro Cosmos.
- Team Yell: A rowdy fan club for Marnie, initially mistaken as antagonists.
- Dynamax and Gigantamax: Pokémon can grow to massive size for three turns in battle, with Gigantamax forms granting unique moves and appearances.
- Raids: Multiplayer co-op battles against Dynamax Pokémon in dens, granting rewards and rare Pokémon.
- Wild Area: A pioneering open-zone concept that allows real-time camera control and spontaneous encounters.
- Streamlined Progression: No HMs, easier EV/IV training via Pokémon Camp and Curry Cooking, and the removal of many tedious elements.
- Single-Player Story: The main campaign lasting roughly 25–35 hours.
- Multiplayer: Up to 4 players can join Dynamax Raids; 2 players can battle or trade locally or online.
- Battle Stadium: Includes Casual, Ranked, and Free battles, plus Online Competitions.
- Pokémon Camp: A casual mode to play with and feed your Pokémon.
- Curry Cooking: Craft curries with various ingredients and effects.
- Pokédex Completion: The core objective of catching all 400+ species.
- Offline: Full single-player campaign, local wireless battles and trades (2 players), and local raid battles (up to 4 players on separate systems).
- Online: Requires Nintendo Switch Online subscription. Supports global trading (Surprise Trade, Link Trade), battling, and Raid battles. Also includes the Y-Comm feature for real-time notifications.
- No offline multi-console support on same system; each player needs their own Switch and copy of the game.
- The expansions are sold together as a single pass ($29.99 USD) and are compatible with both Sword and Shield separately—no cross-compatibility between game versions.
- First Console Mainline Pokémon Game: True 3D overworld and battles on a home console/handheld hybrid.
- Dynamax Mechanic: A flashy, timed power-up that replaces Mega Evolution and Z-Moves.
- Wild Area Concept: A precursor to the fully open-world design in later games like Legends: Arceus and Scarlet/Violet.
- Streamlined Competitive: Easier to train competitive Pokémon thanks to mints, bottle caps, and nature-changing items.
- Version-Exclusive Content: Sword has Zacian, Bea, and certain Gym Leaders; Shield has Zamazenta, Allister, and a different Gym lineup.
- Cultural Inspiration: Clear references to British culture, sports (Gym Challenge as a tournament), and landscapes.
Story Overview
Set in the lush Galar region, a land inspired by the United Kingdom, the story follows a young Trainer who sets out to become the Champion of the Galar region. Along the way, you encounter rival Trainers, the mysterious Legendary Pokémon Zacian (Sword) and Zamazenta (Shield), and a nefarious group called Team Yell (later revealed to be backed by the secretive Macro Cosmos organization). The narrative explores themes of fame, success, and the bond between people and Pokémon, culminating in a battle to stop Chairman Rose’s plan to harness the energy of the Legendary Pokémon Eternatus, which could plunge the region into darkness.
Setting
The Galar region is a diverse area featuring:
Main Characters
Core Appeal
Pokémon Sword and Shield combine the traditional Pokémon formula with new features:
Target Audience
The games are designed for all ages—from young children experiencing their first Pokémon adventure to longtime fans seeking a fresh take. The difficulty is moderate, with options like Exp. Share automatically enabled and the ability to skip tutorials. Competitive players will enjoy the ranked battles and VGC (Video Game Championships) support.
Game Modes
Online / Offline Support
DLC / Expansion Overview
The Pokémon Sword & Shield Expansion Pass added two major areas:
1. The Isle of Armor (June 2020): A new island with a dojo, new Galarian forms (Slowpoke, Slowbro, etc.), the Legendary Kubfu/Urshifu, and the Ability Patch.
2. The Crown Tundra (October 2020): A snowy region featuring Legendary Pokémon Raids (Dynamax Adventures), new Legendaries like Calyrex, and the return of many past Legendaries.
What Makes This Game Unique
Pokémon Sword and Shield represent a bold step forward for the franchise, introducing quality-of-life improvements while retaining the addicting monster-collecting loop. Despite initial controversy over the "Dexit" removal of many old Pokémon, the games sold over 26 million copies worldwide, cementing their role as a modern classic.
Getting Started
Getting Started Guide for Pokémon Sword and Shield
First Hour Walkthrough: From Title Screen to First Capture
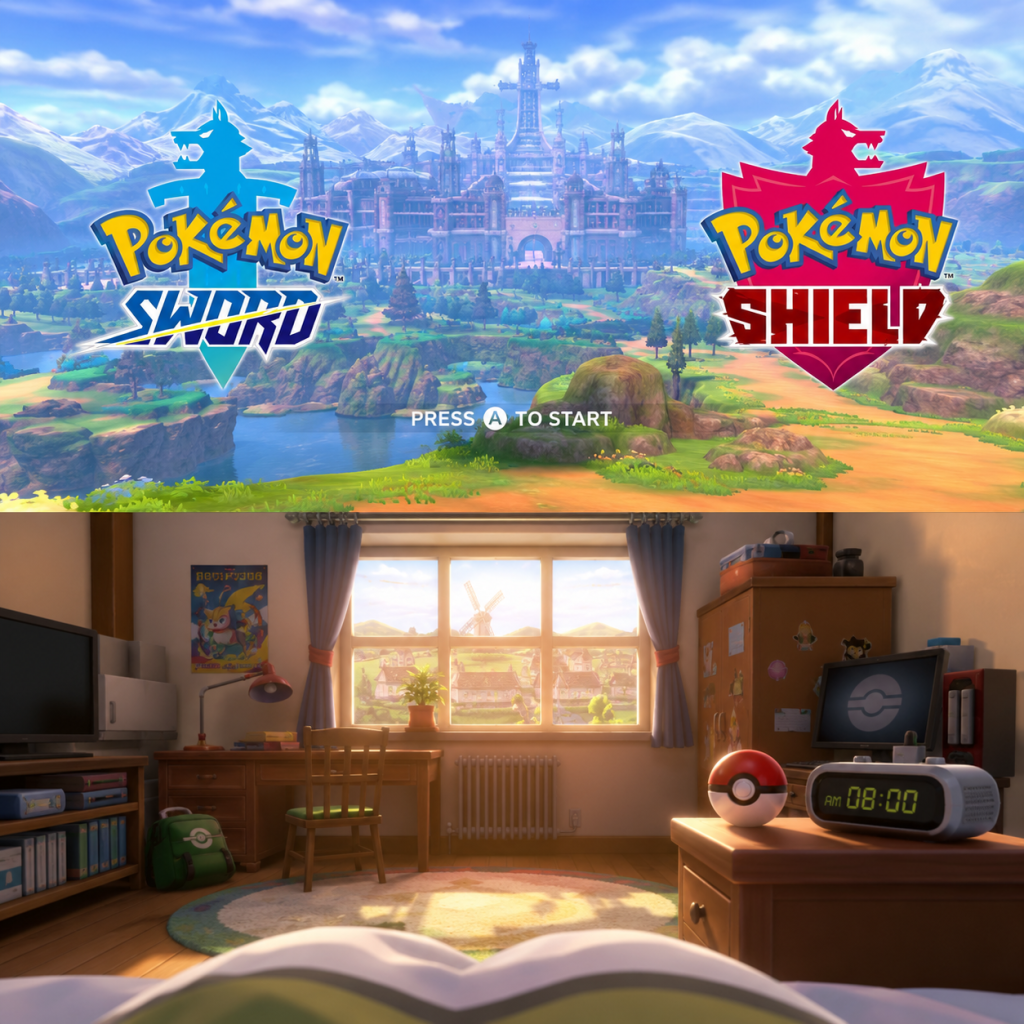
1. Start the Game – After the opening cutscene, you'll be prompted to choose a language. Select your preferred language. Then you'll see the title screen. Press A to begin.
2. Character Creation – You'll choose between a male or female protagonist (a boy or girl). This affects your appearance and some in-game dialogue but not gameplay. You also name your character (up to 6 characters). Finally, you'll name your rival (Hop) – you can accept the default "Hop" or invent a new name. There is no further customization at this point (hairstyle, clothes, etc. are unlocked later via shops and the Rotom Phone).
3. The Opening – You wake up in your house in the small town of Postwick. Your mother tells you that your friend Hop is outside. Go downstairs, talk to your mom, then leave the house. Hop will greet you and invite you to his house.
4. Meet the Starter Pokémon – Inside Hop's house, you'll see a TV showing the Champion Leon. Hop's sister (your neighbor) will let you and Hop choose your first Pokémon from three Poké Balls on the table. The choices are:
- Grookey (Grass type)
- Scorbunny (Fire type)
- Sobble (Water type)
Each has its strengths and weaknesses. Pick the one you like most – any is viable for a first playthrough.
5. First Battle (Rival) – After choosing, Hop challenges you to a battle. This is a tutorial battle where you'll learn how to attack, use items, and switch Pokémon. Hop will have the starter that is weak to yours (if you picked Grookey, he has Scorbunny; if you picked Scorbunny, he has Sobble; if you picked Sobble, he has Grookey). Win or lose, the story continues.
6. Return Home – After the battle, you'll go back to your house and sleep. The next day, you and Hop set off for the nearby train station to travel to the Pokémon League. On the way, you'll catch your first wild Pokémon in the tall grass (see "Essential Early Objectives" below for details).
Controls (All Platforms – Nintendo Switch)
Pokémon Sword and Shield use the same controls regardless of system mode (handheld, docked with Joy-Con, or Pro Controller).
| Action | Button(s) |
|---|---|
| Move character | Left Stick / D-Pad |
| Interact/Talk/A | A button |
| Run (while holding) | B button (hold while moving) |
| Open Menu | X button |
| Open Pokédex (if obtained) | Y button |
| Call your Bike (if obtained) | + button (Plus) |
| Quick save (only in overworld) | Not available – autosave is on, but you can manually save from menu (X > Save) |
| Battle: Attack/Select move | A to choose move, then select target with D-Pad/Left Stick |
| Battle: Use Item | X during battle to open bag |
| Battle: Run | (Not possible in trainer battles; only wild battles, press B after selecting Run) |
| Zoom in/out on map | L / R (when viewing map) |
| Rotom Phone (map, camera, etc.) | Press Y on overworld |
| Quick menu for Pokémon | Hold R to see your party; press A on a Pokémon for options |
| Camera control (in Wild Area) | Right Stick |
| Enter a building/inventory | A when near entrance |
UI Overview (Key Screen Elements)
- Overworld HUD:
- Menu (Press X):
- Battle Screen:
- Don't run from every wild battle – Catching and battling wild Pokémon gives you experience and useful items. Balance catching with advancing the story.
- Don't ignore type matchups – Learn the type chart mentally. For example, Water beats Fire, Fire beats Grass, Grass beats Water. Failing to use super-effective moves makes battles harder.
- Don't forget to heal – Before challenging a Gym, make sure all your Pokémon are fully healed. Use a Pokémon Center or Potions.
- Don't sell all your items – Keep at least 10 Poké Balls and 5 Potions at all times. You can sell unwanted TMs later.
- Don't overlevel one Pokémon – Your whole team should be around the same level. If one Pokémon gets too high, it may disobey you in battle (badges prevent disobedience). Rotate your team.
- Don't skip NPC conversations – Many NPCs give you free items or important tips. Talk to everyone in towns.
- Don't use the Master Ball carelessly – You only get one Master Ball (from the story). Save it for a very rare or tough Pokémon (like a legendary).
- Don't spam the same move – Especially in Dynamax battles, use type advantages for maximum damage.
- Poké Balls – You start with 5, but you can buy more from any Poké Mart. Prioritize buying 10–20 Poké Balls early so you can catch everything you see without worry.
- Potions – Buy 5–10 Potions from the first Poké Mart. They are cheap (₽300 each) and keep your team healthy.
- Antidotes – Route 2 has wild Toxel (Poison-type) that can poison your Pokémon. Carry 2–3 Antidotes.
- Money (Poké Dollars) – Earn money by battling trainers and selling valuable items (like Nuggets or rare berries). Do not waste money on cosmetic items early.
- Heart Scales – These are rare but important for relearning moves. Hold onto them.
- Evolution Stones – You'll find some in the Wild Area; save them for later evolution needs.
- Mistake: Not catching enough Pokémon – You need a diverse team to handle different types. Aim to catch at least one new species per route.
- Mistake: Forgetting to save before major battles – The game autosaves, but if you lose a key battle (like a Gym Leader), you may lose progress. Save manually before every Gym.
- Mistake: Ignoring the Wild Area – The Wild Area is open early and contains higher-level Pokémon, valuable items, and Max Raid battles. Visit it as soon as you can (after first Gym badge is recommended).
- Mistake: Using TMs too early – TMs are one-time use in this game (they break after use). Only use TMs on Pokémon you plan to keep long-term. Save for important type coverage.
- Mistake: Not checking Pokémon summaries – Before evolving, check if a Pokémon learns important moves at certain levels. Some moves are only learned before evolution.
- Mistake: Selling evolution stones – They are rare and needed for specific evolutions. Never sell them unless you have duplicates.
- [ ] Choose your starter and defeat Hop in the first battle.
- [ ] Catch at least 3 different wild Pokémon on Route 1.
- [ ] Arrive at Wedgehurst and obtain the Pokédex.
- [ ] Heal your Pokémon at the Wedgehurst Pokémon Center.
- [ ] Talk to the professor's assistant to get 5 Poké Balls.
- [ ] Walk through Route 2 to the Wild Area entrance (but don't go deep yet).
- [ ] On Route 2, catch at least 2 new Pokémon (e.g., Rookidee, Yamper).
- [ ] Battle all visible trainers on Route 1 and Route 2 for experience and money.
- [ ] Buy 10 extra Poké Balls and 5 Potions from the Wedgehurst Poké Mart.
- [ ] Save the game manually after reaching the Wild Area.
- [ ] Optional: Participate in one Max Raid Battle in the Wild Area (you can do it solo with NPCs).
- [ ] Quit for the day, having made it to Motostoke (the first major city with a Gym).
- Top left: Your name, current location, and steps taken (for hatching eggs).
- Bottom left: Minimap (can be expanded with Y). Shows nearby buildings, NPCs, and Pokémon icons.
- Top right: Your party of up to 6 Pokémon (shown as small icons). If a Pokémon is fainted, its icon turns grey.
- Pokémon: View your party, check stats, move sets, nicknames, etc.
- Bag: Items sorted by category (Potions, Poké Balls, TMs, Key Items, etc.).
- Trainer Card: Your profile, badges, playtime, and money (Poké Dollars).
- Save: Manually save (autosave is on by default, but manual save is useful before important battles).
- Options: Text speed, battle style (Set vs. Shift), sound, etc. Recommended: Set battle style to "Set" for a challenge, otherwise you get a free switch after each KO.
- Pokédex (once obtained): Records all seen and caught Pokémon.
- Rotom Phone: Access to map, camera, and other apps (like Pokémon Jobs).
- Top: Opponent's HP bar, level, and name.
- Bottom: Your active Pokémon's HP bar, status conditions.
- Center: Battle text.
- Bottom right: Menu (Fight, Bag, Pokémon, Run).
- In wild battles, you may also see a "Catch" option after using a Poké Ball.
Essential Early Objectives (What to Do First)
1. Get your Starter and Rival Battle – Complete the opening sequence.
2. Catch at least 3-4 wild Pokémon on Route 1 (before Wedgehurst). This diversifies your team. Common early Pokémon: Rookidee (Flying), Blipbug (Bug), Wooloo (Normal), Skwovet (Normal), Nickit (Dark).
3. Arrive at Wedgehurst – Talk to the professor's assistant at the train station to receive the Pokédex and Poké Balls (5 free).
4. Visit the Pokémon Center in Wedgehurst – Heal your team and access the PC (box system).
5. Challenge the first Gym (Turffield Gym) – But first, you need to go through Route 2 and the Wild Area. You'll get a Dynamax Band in Motostoke.
6. Learn about Dynamaxing – In the Wild Area, you'll encounter Max Raid dens. These are optional but highly recommended for rare items and Pokémon.
7. Pick up free items along the way – Potions, Poké Balls, and Antidotes are lying on the ground as sparkling spots.
What to Avoid (Common Pitfalls)
Early Resource Priorities
Common Beginner Mistakes
Day-One Checklist (Achievable in First 2 Hours)
Tip: Don't rush. Enjoy the journey, explore every nook, and talk to every NPC. The Galar region has many secrets to discover!
---
This guide is designed for brand-new players to Pokémon Sword and Shield. For more advanced strategies, see the dedicated sections on competitive battling, shiny hunting, and post-game content.
Core Gameplay
Core Gameplay Guide
Pokémon Sword and Shield follow the classic Pokémon formula: capture, train, and battle Pokémon to become the Champion of the Galar region. The core gameplay loop revolves around exploring routes and the Wild Area, catching wild Pokémon, battling Trainers and Gym Leaders, progressing through the story, and participating in Max Raid Battles. The game is structured into clear progression tiers that align with the Gym Challenge and post-game content.
---
Early Game (Routes 1–2, Wedgehurst, Motostoke, First Two Gyms)
Main Gameplay Loop
- Arrive in the Galar region, choose your starter: Grookey (Grass), Scorbunny (Fire), or Sobble (Water).
- Follow a linear path through Route 1–2, catching your first wild Pokémon and battling Hop.
- Unlock the Wild Area after Wedgehurst—your first taste of open exploration and Max Raid Battles.
- Complete the Turffield Gym (Grass-type) and Hulbury Gym (Water-type) to earn two Gym Badges.
- Turn-based battles: 1v1 or 2v2 (double battles occasional). Use type effectiveness (e.g., Fire beats Grass).
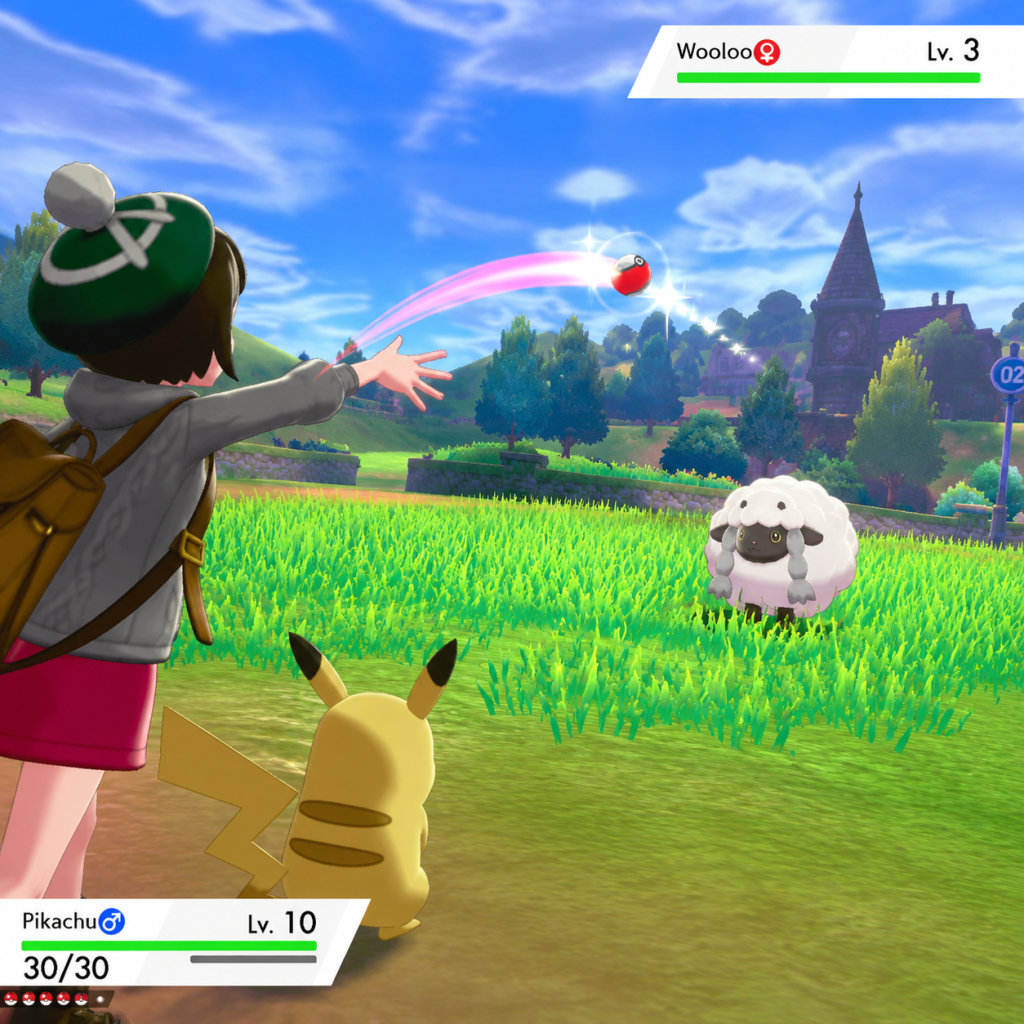
- Poké Ball capture: Weaken wild Pokémon, then throw a ball. Early balls: Poké Ball, Great Ball (available after first Gym).
- Dynamax: First introduced in a story battle. In early game, you cannot Dynamax in Gym Battles until you obtain the Dynamax Band after defeating Team Yell at Motostoke.
- Pokémon Camp: Unlock after first Wild Area visit. Interact with your team, cook curry (provides EXP and friendship boosts).
- Level cap: Pokémon disobey if their level exceeds your Gym Badges (first badge: up to Lv.20, second badge: up to Lv.25).
- Gaining EXP via battles, catching Pokémon, EXP Candies from Max Raid Battles.
- Evolution occurs naturally at certain levels (e.g., Scorbunny evolves at Lv.16).
- Linear routes with hidden items (berries, Poké Balls).
- Wild Area: open zone with weather-dependent Pokémon spawns. Can explore freely but stronger Pokémon (Lv.30+) may appear—avoid until mid game.
- Travel via bike (Rotom Bike) unlocked after second Gym.
- Main story quest: defeat each Gym Leader and challenge the Champion.
- Side quests: Help a fisherman on Route 2 to get a Fishing Rod. Retrieve the Wishing Star in Slumbering Weald.
- Camping quest: “Poké Jobs” available via Rotom Phone later, but early game limited.
- Currency: Poké Dollars (₽). Earn from Trainer battles, selling items, and repeated battles (daily).
- Main shops: Poké Marts sell Poké Balls, Potions, Antidotes. No major money sink; save for Great Balls.
- Selling items: Nuggets, Stardust, or extra TMs can net decent ₽.
- Your Trainer is customizable: clothes, hairstyles, accessories (unlock more after each Gym challenge).
- Pokémon team composition: aim for 3–4 Pokémon covering types. Early game wild Pokémon include Rookidee, Wooloo, Chewtle, Blipbug.
- Nature and IVs are irrelevant early on; focus on leveling and moves with at least 80 base power.
- Travel through the Galar region solving issues: stop Team Yell, expose Macro Cosmos.
- Complete the Motostoke Gym (Fire-type), Stow-on-Side Gym (Fighting-type), Ballonlea Gym (Fairy-type), and Circhester Gym (Rock-type or Ice-type depending on version).
- Explore the Wild Area and its sub-zones (Lake of Outrage, Dusty Bowl) for higher-level Pokémon and Max Raid dens.
- Participate in Max Raid Battles (4 players vs. a Dynamax Pokémon) for rare items and EXP Candies.
- Dynamaxing now available in any Gym Battle (once per battle, lasts 3 turns). Timing is crucial.
- Gigantamax forms appear for some Pokémon (e.g., Meowth, Charizard) via special Max Raid Battles or events.
- Poké Jobs: Send Pokémon on jobs via Rotom Phone to gain EXP, EV items (e.g., Protein, Iron), or Watts.
- Wishing Pieces: Use in dens to summon a Max Raid battle. Costs 3,000 Watts per piece.
- Level cap increases: third badge allows Lv.30, fourth Lv.35, fifth Lv.40, sixth Lv.45.
- Evolution milestones: many Pokémon evolve mid-game (e.g., Corvisquire to Corviknight at Lv.38).
- EXP Share is permanent from start, so your entire team gains EXP; no need to grind individual battles.
- Wild Area becomes more accessible; use Rotom Bike to cross water after third Gym (adds Surf ability).
- Discover hidden areas: Hammerlocke Hills, Giant’s Cap, Dusty Bowl—each with unique Pokémon.
- Trainers along routes give optional battles and rewards.
- Main story: investigate Team Yell at Spikemuth, but it’s optional—you only need eight Gym Badges. However, plot beats force you to visit key towns.
- Side quests: Help the Stow-on-Side merchant to get Rotom Bike upgrade. Battle the Turffield Gym Leader’s apprentice for a Leaf Stone.
- Postcard missions: Occasionally, NPCs in towns ask you to deliver items; rewards include Rare Candies.
- Watts become crucial: earn from Max Raids, digging duo in Wild Area (Bridget or Nelson). Spend Watts on Wishing Pieces, TRs (Technical Records), and items.
- Selling TRs from raids is profitable (e.g., TR68 (Nasty Plot) sells for 12,000 ₽).
- Poké Jobs can grant Exp. Candies M or L, sellable for ₽ or used for training.
- Start considering EV training: Route 5 has groups of Pokémon that give specific EVs (e.g., Rookidee gives Speed EV). Use Power items or Poké Jobs to control EV gain.
- Move relearner available in every Pokémon Center (requires Heart Scale).
- Nature Mints can change stats (obtained from Battle Tower early post-game, but rare in mid game).
- Hold items: Rocky Helmet, Eviolite, Choice items available from Hammerlocke vendor.
- Challenge the seventh Gym in Spikemuth (Dark-type) and eighth in Wyndon (Dragon-type).
- Defeat the Champion Cup in Wyndon: semi-finals, finals, and battle Champion Leon.
- Encounter legendary Pokémon: Zacian (Sword) or Zamazenta (Shield) in Slumbering Weald after defeating Eternatus.
- Capture Eternatus (level 60) in the climax of the story.
- Dynamaxing is used frequently in Champion Cup battles; Leon’s Charizard Gigantamaxes.
- Eternatus battle is a scripted encounter; you use Pokémon but can Dynamax as well.
- Max Soup (post-game) allows some Pokémon to gain Gigantamax factor, but not available until after beating the game.
- Link Trade and Surprise Trade become more active for completing Pokédex.
- Level cap: seventh badge allows Lv.55, eighth badge Lv.60, Champion Cup Lv.65 (no obedience limit after).
- Many Pokémon evolve via trade or stone (e.g., Flapple/Appletun require Tart/Sweet Apple).
- EXP Candies L and XL become abundant from high-level Max Raids.
- All Wild Area zones now reachable; post-game areas like the Crown Tundra and Isle of Armor (DLC) extend exploration.
- No new routes; instead, revisit previous areas for new encounters (e.g., spawning legendaries after story).
- Fishing available after updating Rotom Bike (surf).
- Main story: Defeat Team Yell’s leader, Piers, then face Chairman Rose at the Energy Plant. Battle Eternatus and become Champion.
- No substantial side quests; post-game missions begin after credits.
- Battle Tower unlocked in Wyndon after Champion Cup (post-game).
- Watts accumulate rapidly from Max Raids; spend on Luxury Balls or TRs.
- Selling EXP Candies XL (each sells for 15,000 ₽) generates massive wealth.
- Poké Jobs offer Rare Bones, Comet Shards (sell for high ₽).
- Finalize team composition; consider coverage and type balance for Champion Cup.
- Hyper Training available in Battle Tower (requires Bottle Caps) to perfect IVs.
- Ability Capsule to change abilities (buy with 50 BP from Battle Tower).
- Move sets: e.g., give your starter a coverage move like Thunder Punch for Corviknight.
- Battle Tower: Win battles (single/double) to earn Battle Points (BP) and climb ranks. Unlock Master Ball Tier and randoms.
- Max Raid Adventures (DLC: Crown Tundra): Explore dynamically generated dens for legendary Pokémon, Dynamax Pokémon, and rare items.
- Galarian Star Tournament (free update): 2v2 tournament with NPCs; rewards include EXP Candies and rare berries.
- DLC Expansions: Isle of Armor (new Wild Area, Kubfu, Urshifu) and Crown Tundra (new legendary dens, Calyrex).
- Dynamax Adventures: 4 players face a series of battles culminating in a Legendary; you rent Pokémon.
- Ranked Battles online (VS mode): competitive ranking seasons with rewards (BP, items).
- Surprise Trade for random trades, often used for breeding reject Pokémon.
- Poké Jobs now yield high-level rewards (Bottle Caps, Ability Patches).
- No level cap; grind to Lv.100 via EXP Candies or battles.
- Hyper Training maxes IVs for competitive Pokémon.
- EV training via Power items + Poké Jobs or wild Pokémon.
- Shiny Hunting: Masuda Method, chain fishing, or Max Raid encounters (certain dens have increased shiny chance).
- Crown Tundra: Wide-open snowy area with multiple sub-dungeons (Dyna Tree Hill, Freezington).
- Isle of Armor: Tropical area with Dojo training, new Kubfu path.
- Max Lair: Custom dungeon where you rent Pokémon and battle Dynamax Pokémon.
- Hidden dens with rare Gigantamax forms (e.g., Gengar, Machamp).
- Post-game story in base game: complete Pokédex (400 Pokémon) for Shiny Charm.
- DLC quests: Find all Slowpoke (Isle of Armor), solve Calyrex’s story (Crown Tundra).
- Legendary climax: Catch Eternatus again in a den? No, but can capture previous legendaries like Groudon, Rayquaza via Max Lair.
- Battle Tower challenges: unlock all ranks (from Poké Ball Tier to Master Ball Tier) for special titles.
- Battle Points are the primary currency for competitive items (Mints, Capsules, Bottle Caps, Ability Patches). Earn 2 BP per win in Battle Tower (more in higher tiers).
- Watt still used for digging duo, but less important.
- Selling items: Best source of money is selling EXP Candies XL from max raids (up to 999,999 ₽ per session).
- Poké Market in Wyndon sells Luxury Balls, Timer Balls, etc., but no high-end items.
- Perfecting Pokémon: 6IV Ditto breed with competitive Pokémon to pass IVs. Use Destiny Knot and Everstone.
- EV spreads: adjust via vitamins (Protein, Iron) and battle trades.
- Ability Patches: Change a Pokémon’s ability to its Hidden Ability (rare raids, BP shop).
- Move Tutors in DLC: teach specialized moves like Meteor Beam, Scald, etc.
- Gigantamaxing: Use Max Soup (from Isle of Armor) to give Gigantamax factor to eligible Pokémon (e.g., Toxtricity, Alcremie).
- Competitive team building: use Pikalytics to check usage rates, build around common threats like Dragapult, Corviknight, Togekiss.
Combat/Interaction Systems
Progression
Exploration
Quests/Missions
Economy
Character/Build Growth
---
Mid Game (Motostoke to Circhester: Gyms 3–6)
Main Gameplay Loop
Combat/Interaction Systems
Progression
Exploration
Quests/Missions
Economy
Character/Build Growth
---
Late Game (Circhester to Wyndon: Gyms 7–8, Champion Cup)
Main Gameplay Loop
Combat/Interaction Systems
Progression
Exploration
Quests/Missions
Economy
Character/Build Growth
---
Endgame (Post-Game: Battle Tower, Max Raid Adventures, DLC)
Main Gameplay Loop
Combat/Interaction Systems
Progression
Exploration
Quests/Missions
Economy
Character/Build Growth
---
This guide covers all progression tiers of Pokémon Sword and Shield, from your first steps in Galar to deep endgame competitive play.
Game Tips
Game Tips: Pokémon Sword and Shield
This guide provides a comprehensive collection of tips for Pokémon Sword and Shield, organized by category. Whether you're a beginner stepping into the Galar region for the first time or a seasoned trainer aiming for competitive play, these practical strategies will help you optimize your journey.
Beginner Tips
#### 1. Choose Your Starter Wisely
- Scorbunny (Fire) → Cinderace: Fast physical attacker with access to High Jump Kick and Pyro Ball. Good against early Grass/Grass types in Route 2 but struggles against Water-types in later gyms (Nessa).
- Grookey (Grass) → Rillaboom: Bulky physical attacker with Grassy Surge (Hidden Ability). Useful against the first two gyms (Milo and Nessa) but weak to Fire, Ice, and Flying.
- Sobble (Water) → Inteleon: Fast special sweeper with Sniper ability (crits). Strong against early Fire and Ground types, but weak to Grass, Electric, and the final Dragon-type gym.
- Aim for a team of six Pokémon covering different types. Early on, catch a Rookidee (Flying/Steel evo) for Flying coverage, a Chewtle (Water/Rock) for Water, and a Yamper (Electric) for Electric.
- Why: Each gym specializes in a single type. Having a super-effective move makes battles much easier. For example, Nessa (Water) is weak to Grass and Electric; having a Rolycoly (Rock) and a Yamper covers both.
- Weaken the wild Pokémon first (get its HP into red zone). Then apply a status condition like Sleep or Paralysis for the best catch rate. Sleep (2× modifier) is better than Paralysis (1.5×).
- False Swipe is an essential move that leaves the opponent with at least 1 HP. Get it from a Scyther (evolves from a traded one) or a Gallade (via move reminder). This move ensures you don't accidentally knock out the target.
- Tip: In the Wild Area, dens have higher catch rates for rare spawns; use Dusk Balls (at night) or Timer Balls (after 10+ turns) for better odds.
- Save before every Gym Leader battle, wild Legendary encounter, or Max Raid battle. If you fail to catch a rare Pokémon or lose a battle, you can reload to avoid wasting resources.
- Why: Some Pokémon (like the Galarian legendary dogs) appear only once per save. You can also reset for a preferred Nature, Ability, or Shiny.
- Memorize the type chart: common matchups like Water beats Fire, Fire beats Grass, Grass beats Water. Also note immunities: Normal and Fighting are immune to Ghost; Ground is immune to Electric; Ghost is immune to Normal and Fighting.
- Dynamax Factor: Max Moves change type effectiveness slightly (e.g., Max Lightning from an Electric move can set up Electric Terrain, boosting Electric moves). Use this to your advantage.
- Dynamax lasts 3 turns. Use it to break through stallers or sweep a team. For example, a Choice Scarf user can Dynamax to boost all stats with Max Airstream (Flying) or Max Quake (Ground).
- Gigantamax (special forms like Charizard, Lapras) have unique G-Max Moves that also have secondary effects (e.g., G-Max Fire types cause hail damage for 4 turns). These are often more powerful than regular Max Moves.
- Timing: Dynamax early in a battle to pressure your opponent or save it for the final push. In Raids, Dynamax immediately to take down shields faster.
- Stealth Rock (from sources like a trained Corsola or Lycanroc) deals damage to switching Pokémon based on their Rock weakness. This is crucial in competitive but also useful in story battles against AI that switches frequently.
- Spikes (from Hatterene or Dragapult) can stack layers of damage. Combine with Stealth Rock for heavy residual damage.
- Will-O-Wisp (Burn) cuts Attack by 50% and does chip damage. Useful against physical attackers. Thunder Wave Paralysis cuts Speed by 75% and gives 25% chance to not act.
- Give each Pokémon at least one move of a different type to hit foes that resist its main type. For example, a Water-type should have Ice Beam (Ice) to hit Grass-types, or Ground to hit Electric-types.
- Example: An Inteleon should know Ice Beam (to counter Grass and Dragon) and Dark Pulse (for Psychic and Ghost). Its signature move Snipe Shot is great for crits.
- Why: The AI often uses Pokémon that resist your main STAB (Same Type Attack Bonus) moves. Coverage ensures you can still deal damage.
- In Max Raid Battles (Wild Area or DLC fields), the boss has a shield that blocks damage until you break it with Max Moves. Each Max Move reduces shield by 1 bar. Use Pokémon with strong Max Moves or moves that hit multiple times (e.g., Scale Shot after a boost).
- AI Allies: Do not rely on AI trainers; they are often useless. Use your own partner Pokémon that has high DPS or can support (e.g., a Clefable with Helping Hand, Life Dew).
- Offline vs Online: Offline raids are easier because you can flee and restart; online raids have three real players but the boss is scaled up. For rare Pokémon, do online with good communication.
- The Wild Area is an open-zone with rotating weather. Each weather condition spawns different Pokémon. For example, Rain spawns Pikachu and Lotad; Hail spawns Vanillite and Snorunt; Sandstorm spawns Hippowdon. Check the weather on your Rotom Phone's map.
- Explore every den: Den levels depend on badges you have. You can find rare Pokémon (e.g., Fraxure, Dreepy) only in certain dens. Use the Wishing Pieces to fill dens and battle.
- Use the Rotom Bike: The bike can boost in water and on land. Upgrade it by completing story events (you get the water upgrade after beating the 5th gym Raihan). This unlocks new areas in the Wild Area (like the island with Dragapult evolution item).
- Sparkling spots on the ground in the Wild Area, on routes, and in cities indicate hidden items. Walk over them to pick up Poké Balls, Potions, Evolution Stones, TRs, and Fossils. Do a systematic sweep of every area.
- Fossil Pokémon: You can find fossils in the Bridge Field (Wild Area) after the 3rd gym. Combine a fossilized bird/dino with a fossilized fish/drake using the scientist in Route 6 (after 3rd gym). Examples: Arctozolt (Bird+Drake) is a top-tier Rock/Electric with great speed.
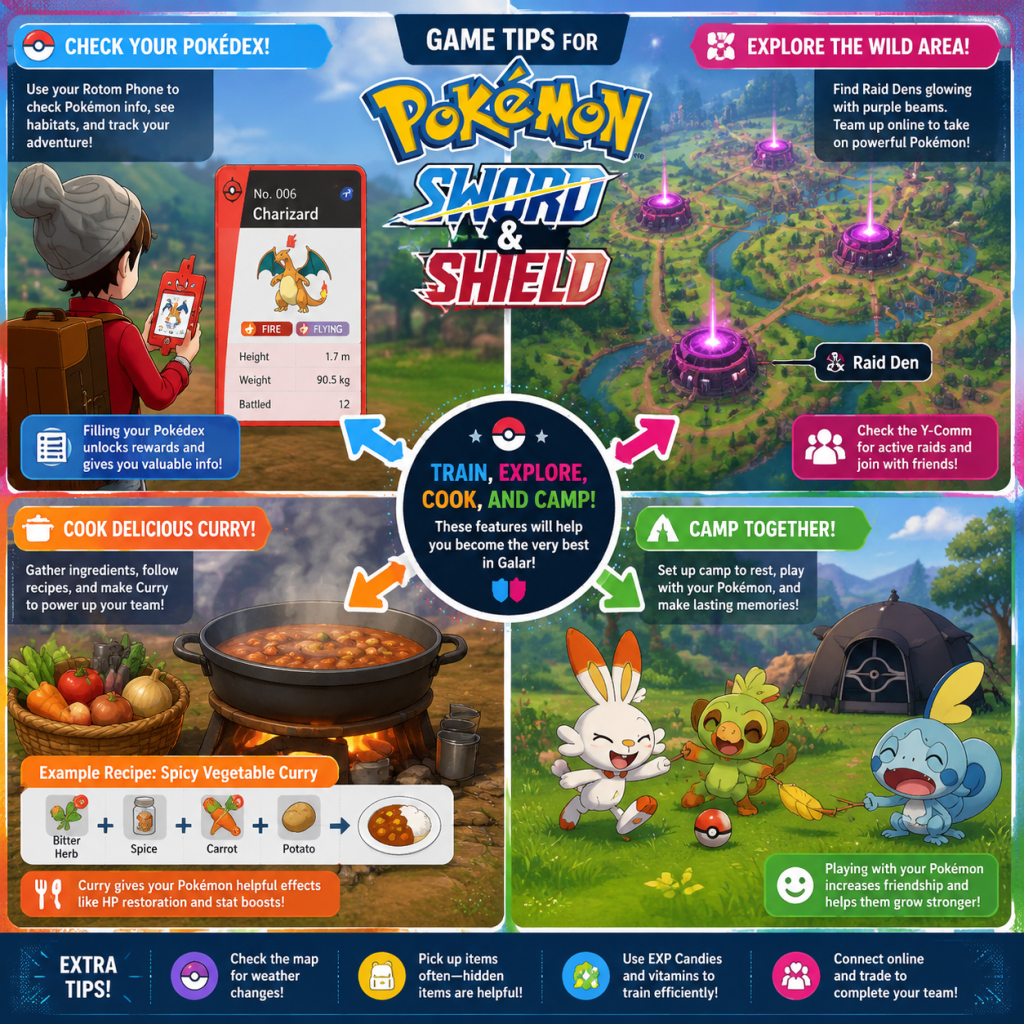
- Set up camp at any time (via X menu > Camp). Cooking curry heals your entire party. The quality of curry depends on the berries you use. Best curry (Gold) fully heals HP/PP and cures status, and grants a friendship boost. High friendship unlocks evolutions like Eevee into Umbreon or Sylveon.
- Curry ingredients: Buy berries from vendors in the Wild Area (e.g., Liechi Berry from a berry seller in Hammerlocke). Use a variety of berries to increase curry rank.
- Friendship matters: High friendship not only evolves certain Pokémon but also increases critical hit ratio and other battle benefits (like surviving a hit with 1 HP). Play with your Pokémon at camp by tossing the ball to raise friendship.
- Battle the Rich Trainer in Circhester (post-game) or The Champion Cup repeatedly for large prize money (up to 50,000 per run). Use an Amulet Coin (found in Turffield after the 2nd gym) to double your earnings.
- Sell Luxury Balls you get from the Ball Guy on trains? No, keep them for rare catches. Instead, sell Pearls and Big Pearls found while surfing on wild Pokémon? Actually, you can sell Stardust (from mining) for 5,000 each, or Nuggets for 10,000. Mining in the Wild Area using the digging duo yields many sellable items.
- Best money farm: Daily Watt trader in the Wild Area (the Digging Duo) can give you Stardust or Star Pieces. Convert to Comet Shards to sell for big money (50,000 per shard). However, the duo's RNG is risky. A safer method: Do Max Raid Battles and sell TRs (e.g., TR08 Thunderbolt sells for 3,000) or PP Ups from rare drops.
- EV training (Effort Values) boosts stats. Use Power Items (Power Bracer, etc.) bought from the Battle Tower for 16 BP each. Equip them on a Pokémon to get 8 EVs per knock out, plus the base EV of the wild Pokémon.
- Wild Pokémon EV spots (post-game):
- Advanced: Chain fishing (use Old Rod for Magikarp) gives 2 Speed EVs per KO. With PokéRus and Power Anklet (Speed), you get 18 EVs per Magikarp – 252 Speed in 14 KOs.
- Obtain a Destiny Knot (Battle Tower, 48 BP) – when held by a parent, it passes down 5 IVs from the two parents instead of 3. Use a 6IV Ditto (hack or from trade). This greatly increases the chance of perfect IV offspring.
- Nature: Use an Everstone on a parent with the desired Nature to guarantee it passes down. Breed with a Ditto of that Nature.
- Egg Moves: Some moves are only passed down from one species (e.g., Dragon Dance on Dragapult from Gyarados). Breed a male that knows the move with a female of the target species.
- Build a team that covers each other's weaknesses. Example: Tyranitar (Rock/Dark) is weak to Fighting, Bug, Water, Grass, Steel, Fairy. Pair it with a Corviknight (Flying/Steel) that resists Fighting and Bug, and a Gastrodon (Water/Ground) that patches Water and Grass.
- Weather Strategy: Use weather setters to boost specific moves. For a rain team, Pelipper with Drizzle ability sets rain, boosting Drizzle activates Swift Swim on Seismitoad or Kingdra. For sun, Ninetales with Drought and Venusaur with Chlorophyll.
- Dragapult @ Life Orb / Choice Specs – Nature: Timid (Sp.Atk+ Speed) – EVs: 4 HP / 252 Sp.Atk / 252 Speed – Moves: Draco Meteor, Shadow Ball, Thunderbolt, Fire Blast. Analysis: Fast special sweeper that can OHKO many threats. Thunderbolt hits common Water-types; Fire Blast hits Steel types.
- Cinderace @ Heavy Duty Boots – Ability: Libero (changes type to match its move) – Jolly Nature – EVs: 252 Atk / 252 Speed / 4 Def – Moves: Pyro Ball, High Jump Kick, Zen Headbutt, Sucker Punch. Libero gives fantastic coverage and immunity to entry hazards (via boots).
- Ferrothorn @ Leftovers – Ability: Iron Barbs – Nature: Relaxed (Def+ Spe-) with 0 Speed IVs – EVs: 252 HP / 124 Def / 132 Sp.Def – Moves: Gyro Ball, Power Whip, Leech Seed, Protect (Stealth Rock). Analysis: Defensive tank; Gyro Ball hits fast Pokémon hard.
- Choice Scarf: Boosts Speed by 50% but locks move. Use on fast sweepers like Dragapult or Mimikyu.
- Choice Band: Boosts Attack by 50% – for physical attackers like Rhyperior.
- Life Orb: Boosts damage by 30% but loses 10% HP per attack. Balanced for mixed attackers.
- Leftovers: Heals 1/16 HP per turn – for tanks.
- Assault Vest: Boosts Sp.Def by 50% but prevents status moves – for specially defensive tanks like Conkeldurr.
- Why: Items multiply your Pokémon's strengths or patch weaknesses. For example, a Scarfed Gengar outspeeds all unboosted threats and can use Shadow Ball or Sludge Wave.
- Battle in Max Raid Dens – each completion gives Watts. Use Wishing Pieces to spawn rare dens for more Watts per clear.
- Collect Watts from the ground – sparkling spots can also give Watts (up to 2,000 per spot).
- Watts are used to buy: TRs (in the Wild Area's Watt Traders), Exp. Candies, Rare Candies, Dusk Balls, and Poké Dolls. Also, you can upgrade your Rotom Bike with Watts (at the Wild Area Nursery) – 10,000 Watts for the water upgrade.
- Daily digger in Stow-on-Side: He will dig up Watts in exchange for Poké Balls? Actually, the digging duo in the Wild Area's Bridge Field costs 500 Watts per dig and yields rare items (including Fossils, Evolution Stones, TRs, Stardust, Rare Candy, and Bottle Caps). This is the best Watts sink.
- After the main story, you can sell Bottle Caps (from Battle Tower) for 25,000 each, but they are better used for Hyper Training. Instead, farm the Digging Duo – if you get a Fossilized Bird or Dino, you can revive them into fossil Pokémon (a low-level common). Then sell the fossil Pokémon to be released? That yields little. Better: Sell TRs (e.g., TR15 Fire Blast for 5,000) from raid rewards.
- If you have the DLC, the Cram-O-Matic allows you to combine items to produce rarer ones. For example, 4 Stardust → 1 Star Piece (sells for 4,000 more). 4 Sun Stones → 1 Ice Stone (rare). 4 Dusk Balls → 1 Luxury Ball (useful for breeding). This can be a steady income if you grind gems.
- Masuda Method: Breed two Pokémon from different language games (e.g., a foreign Ditto traded from Japan) to reduce shiny odds from 1/4096 to 1/512 (without Shiny Charm). With Shiny Charm (obtained after completing the Pokédex), odds drop to about 1/455.
- Pokéradar Chaining (in Sword/Shield? Not available – that's in BDSP). Instead, Max Raid Encounters – dens have a fixed 1 in 300 chance for a shiny (without charm). Use a Wishing Piece on a den that contains a Pokémon you want; if it shines, you can save before challenging (unsaved – but careful: save right before throwing a Wishing Piece). After you see the den's shadow, reload until shiny.
- SOS Chaining? Not present. Use Overworld hunting by resetting on a route where Pokémon spawn inside grass. Standing in one spot with a Repel active (to avoid random encounters) and waiting for a sparkle is unreliable. Better to use a Fishing Chain if you have the fishing rod (base game lacks fishing). The best method: Hunt in the Wild Area using the K.O. method – defeat 500 of a species to increase shiny odds (but these layers are complex).
- Hyper Training (after Level 100) allows you to max a stat's IV using a Bottle Cap (from Battle Tower for 25 BP or from digging duo). This is costly; it's better to breed for perfect IVs when possible.
- For competitive, you only need 5 perfect IVs (missing the attacking stat you don't use). For example, a special attacker doesn't need Attack IV. Save time by using a 6IV Ditto and a Destiny Knot.
- If you have the DLC, Championship fights in the Armor Station yield good EVs. But the quickest Speed EV spot in the base game is Route 9 with Yamper (Speed +1) or Route 4 with Machop? Actually, Corphish also gives Attack. For Speed, Gulpin (from Route 5) gives +1 Speed. Chain with PokéRus and Power Anklet: 18 Speed per KO.
- Surprise Trade: Send a breedject (imperfect IVs) and receive random Pokémon. You can get rare Pokémon with hidden abilities (e.g., Lycanroc’s Steadfast from a Japanese player). Set up a dedicated trading channel on Discord to request specific IV Dittos or exclusives.
- Version exclusives: Sword has Deino (Dragon/Dark) and Faraway Island... actually, Sword has Larvitar; Shield has Goomy. Use the GTS (Global Trade Station) on Pokémon Home (mobile) to trade version exclusives without needing Nintendo Switch Online.
Analysis: Pick based on your preferred playstyle. For a balanced start, Grookey offers early coverage. For speed and crits, Sobble. For raw power, Scorbunny. The starter choice doesn't lock you out of completing the game; you can catch other Pokémon to cover weaknesses.
#### 2. Always Have a Balanced Team
#### 3. Learn How to Capture Pokémon Efficiently
#### 4. Save Frequently Before Major Encounters
Combat Tips
#### 5. Understand Type Matchups Thoroughly
#### 6. Exploit Dynamax and Gigantamax
#### 7. Use Status Moves and Entry Hazards
#### 8. Optimize Move Sets with Coverage
#### 9. Know the Battle Mechanics of Raid Dens
Exploration Tips
#### 10. Master the Wild Area
#### 11. Hidden Items and Treasure
#### 12. Utilize the Camp System
Resource Tips
#### 13. Money Making – The Easy Way
#### 14. Best Ways to EV Train
- HP: Slowpoke (Route 2) – give +1 HP per KO. With PokéRus (rare virus that doubles EV gain), this speeds up.
- Attack: Diglett (Route 4) or Machop (Route 3).
- Defense: Gastly (Watchtower Ruins)? No, that's Sp.Def. Better: Onix (Galar Mine) +1 Def.
- Sp.Atk: Litwick (Route 6) or Gastly (Wild Area fog).
- Sp.Def: Morelull (Route 5) or Hattena (Route 6).
- Speed: Yamper (Route 4) or Rookidee (Route 1).
#### 15. Breeding for Perfect IVs
Build / Team Construction Tips
#### 16. Synergy and Type Coverage in a Team
#### 17. Recommended Competitive Builds (Single Battle – VGC Legal)
#### 18. Synergy with Held Items
Economy Tips
#### 19. Best Ways to Earn Watts (Wild Area Currency)
#### 20. The Diamond Dust Trick (Money Making with Fossils)
#### 21. Use the Cram-O-Matic (Isle of Armor DLC) for Item Recycling
Advanced Optimizations
#### 22. Shiny Hunting Methods
#### 23. IV Breeding and Hyper Training
#### 24. Speed EV Training in the Isle of Armor
#### 25. Use the Online Trading Community
Summary
These tips range from basic early-game strategies to advanced competitive breeding. Remember to adapt your team to the gyms you face, utilize the Wild Area for resources and rare spawns, and invest in EV training early for a powerful post-game team. The key to mastering Sword and Shield is understanding the synergy between abilities, moves, and items, and exploiting the unique Dynamax mechanic to turn the tide in battle. Happy training!
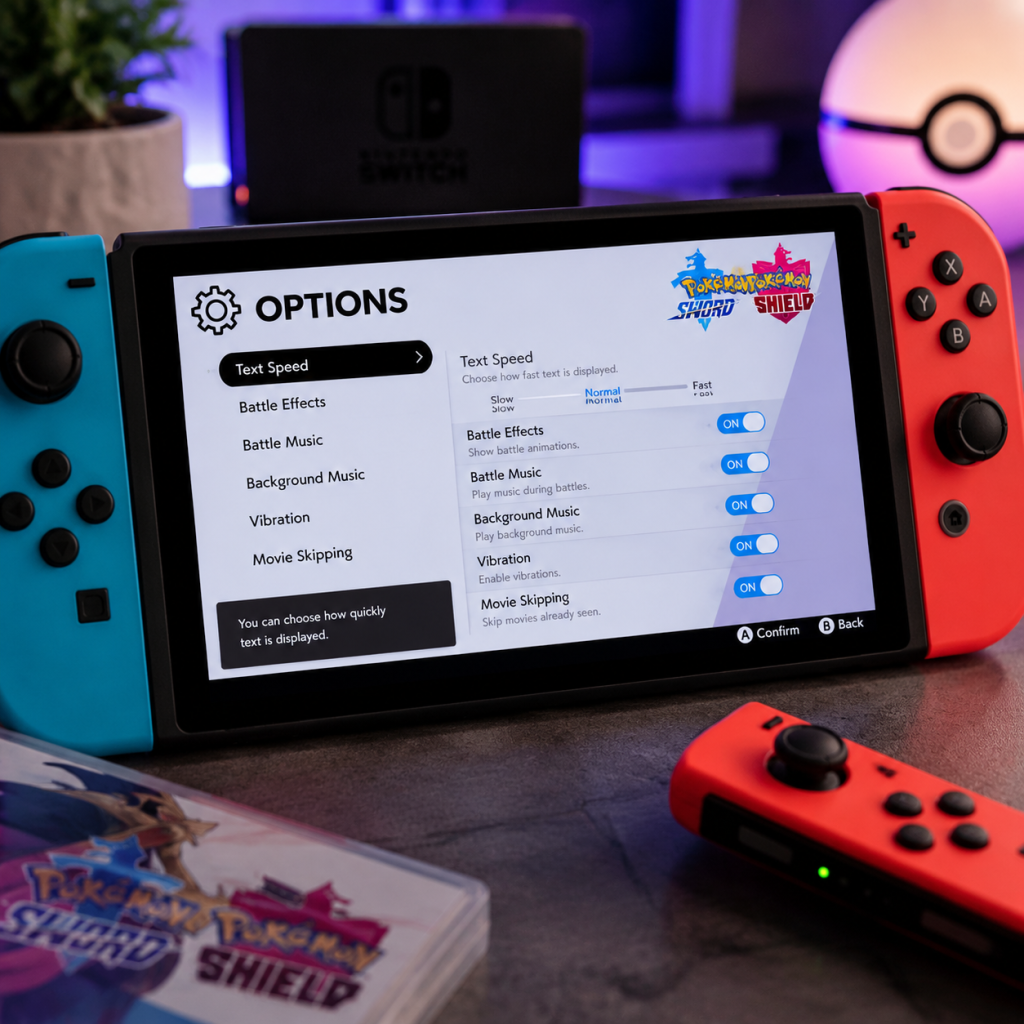
Game Settings
Game Settings Guide for Pokémon Sword and Shield
Platform Context
Pokémon Sword and Shield run exclusively on Nintendo Switch. The console’s hardware (handheld vs. docked) influences performance, but in-game settings are limited. This guide covers every adjustable option within the game and recommends configurations for standard Switch (original/OLED) and Switch Lite.
---
Accessing Settings
The main settings menu is accessed from the title screen by selecting Options. Some gameplay preferences (text speed, battle animations) can also be changed during gameplay by pressing X to open the menu, then selecting Settings and Options or Game Settings (depending on context).
---
General Options (In-Game Settings)
#### Battle Settings
- Battle Style – Choose Set or Shift.
- Battle Animations – On or Off.
- Battle Effects – On or Off. Controls visual effects like weather and terrain animations. Turning off can improve performance in heavy battles (e.g., Dynamax raids).
- Slow / Normal / Fast. Set to Fast for quicker dialogue, especially during repeated conversations. This does not affect story clarity.
- BGM Volume – 0–10. Adjust music (background) volume.
- SFX Volume – 0–10. Adjust sound effects (battle cries, menu clicks).
- Pokémon Voice Volume – 0–10. Controls the digital cries of Pokémon (in battles and overworld). Some players find them loud; reduce if needed.
- Headphones/External Speakers – No separate setting; console audio output depends on Switch system settings.
- Docked (TV): Outputs up to 1080p (dynamic resolution) – sharper image, but frame rate can drop in Wild Area and raids.
- Handheld / Lite: Runs at 720p native resolution. Performance is generally smoother than docked because resolution scaling is lighter. Better for stable frame rate.
- TV Resolution: Set to 720p or 1080p in System Settings > TV Settings > TV Resolution. The game will automatically scale down if necessary.
- RGB Range: Keep as Automatic or Limited to avoid washed-out colors on some TVs.
- Sound > Sound Output: Choose TV speakers, headphones, or external. No special configuration needed.
- Handheld Mode – Preferred for consistent 30 FPS (target) in Wild Area.
- Battle Animations: Off – Reduces rendering load during battles.
- Battle Effects: Off – Helps in Max Raid Battles where many particles appear.
- Text Speed: Fast – No performance impact, but speeds up gameplay.
- Docked Mode – 1080p dynamic resolution; clear image.
- Battle Animations: On – Full move animations.
- Battle Effects: On – Weather and terrain visuals.
- Handheld Mode still looks good at 720p but lacks anti-aliasing.
- The game runs exactly like handheld mode on standard Switch. No extra settings. Battery life varies; reduce screen brightness in system settings to extend play.
- Nintendo Switch Online Membership – Required for online trades, battles, and Max Raid Battles with other players.
- Internet Connection – Use a stable Wi-Fi or wired adapter for docked. For online raids, a NAT Type A or B is best (check in Switch settings > Internet > Test Connection).
- Y-Comm Settings – In-game, press Y to open Y-Comm. You can change search filters for Max Raids and Surprise Trades.
- Online Trade Search – If you set overly specific filters (e.g., “only Pokémon I don’t have”), you may wait indefinitely. Keep filters broad for faster matches.
- Auto-Connect to Internet – In game, you must manually connect via Y-Comm (press Y, then + to go online). The game does not auto-connect; you must do this each session.
- Choose during first startup only. Cannot be changed without restarting the game (delete save data or create a new profile).
- Lists all supported languages: Japanese, English, French, Spanish, German, Italian, Korean, Chinese (Simplified/Traditional).
- Important: The language setting also determines the in-game keyboard (for nicknames). If you use non-Latin scripts, pick accordingly.
- No dedicated accessibility menu. However:
- Shift: When you defeat an opponent’s Pokémon, you are prompted to switch before the next Pokémon enters. Recommended for beginners.
- Set: No prompt; you must switch manually if desired. More challenging; for experienced trainers.
- On: Shows full battle animations (Pokémon attack moves). Affects loading times slightly but improves immersion.
- Off: Speeds up battles; recommended for grinding or Nuzlocke runs.
#### Text Speed
#### Sound Settings
---
System-Level Settings (Console Impact)
These are not in-game menus but affect the experience.
#### Display Mode (TV / Tabletop / Handheld)
#### Nintendo Switch System Settings
---
Performance Recommendations
#### For Smooth Performance (Higher Frame Rate Stability)
#### For Best Visual Quality
#### Switch Lite Specifics
---
Network & Online Settings
Easy to Misconfigure:
---
Language & Accessibility Settings
#### Language Selection
#### Accessibility Features
- Color Blindness – No color blind options. The game uses shapes and textures for some distinctions (e.g., type icons) but not all.
- Controller Remapping – Not in-game. Use System Settings > Controllers and Sensors > Change Button Mapping on Switch to remap buttons (e.g., swap A/B). Note: This changes system-wide, not just Pokémon.
---
Special Attention Points During Setup
1. Language: Choose carefully at first boot – there is no in-game language switch. If you want to play in a different language later, you must create a new user profile on the Switch and start the game from scratch, or delete your save.
2. Battle Style: New players often leave it on Shift and later want a challenge. You can change it anytime, but be aware of the option.
3. Battle Animations: Turning them off can cause confusion when learning new moves (you don’t see the animation). Keep on initially.
4. Online Connection: Many players forget to connect to the internet each session. Always press + in Y-Comm after opening it to enable online features for Surprise Trade and Max Raids.
5. Nintendo Switch Online: The game does not warn you if your subscription expires; you’ll just get errors during online activities. Verify your subscription status in the eShop.
---
Recommended Default Settings
| Setting | Recommended Value | Notes |
|---|---|---|
| Battle Style | Shift (starter) -> Set (experienced) | Change after you’re comfortable |
| Battle Animations | On (first playthrough) | Off for grinding |
| Battle Effects | On (unless performance lag in raids) | Off if frame drops occur |
| Text Speed | Fast | Minor quality of life |
| BGM Volume | 8 | Adjust to taste |
| SFX Volume | 10 | Keep high for battle cues |
| Pokémon Voice Volume | 5 | Lower if annoying |
| Language | Your native language | Unchangeable later |
| Network Auto-Connect | Manual (press + each time) | Save battery/data |
Final Tips
- Save often (especially before a raid or trade) – no auto-save toggle in settings, but the game autosaves frequently. You can manually save from the menu.
- If you experience slowdown in the Wild Area while riding a bike, try turning off Battle Effects or playing in handheld mode.
- Global Trading (Link Trades / Surprise Trades) works best during peak hours (evening in your time zone) for quick matches.
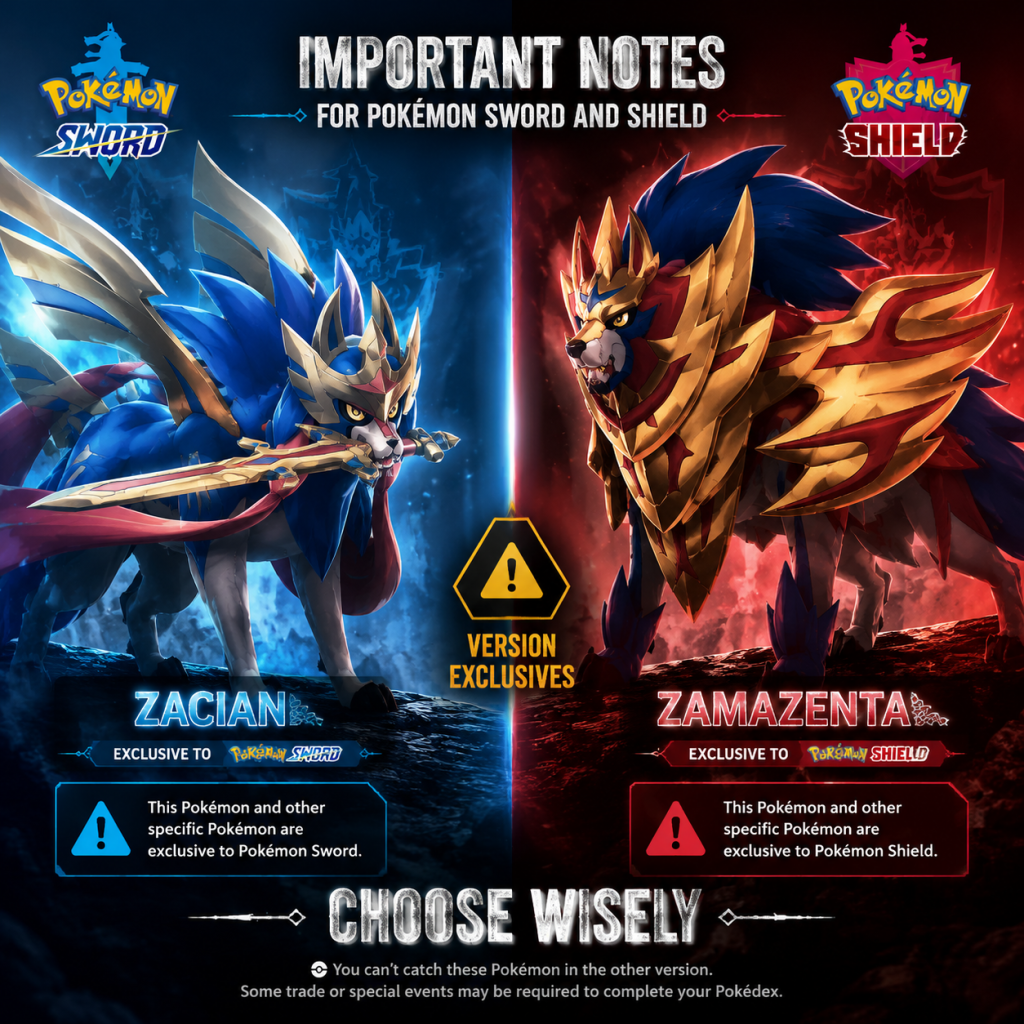
Important Notes
Important Notes for Pokémon Sword and Shield
Warnings and Pitfalls
- Version Exclusives: Pokémon Sword and Shield each have exclusive Pokémon, Gym Leaders, and even a different Legendary (Zacian in Sword, Zamazenta in Shield). You cannot catch these in the other version. Trade with a friend or use Pokémon HOME to complete the Pokédex.
- No National Pokédex at Launch: The base game only includes the Galar Pokédex (400 Pokémon). To get Pokémon from older generations, you need the Expansion Pass. Without it, many popular Pokémon (e.g., Charizard, Mewtwo) are unavailable in the main game.
- Wild Area Level Scaling: The Wild Area has fixed-level Pokémon in different weather conditions. A level 60 wild Pokémon can appear early if you enter the wrong area. Be careful—wild Pokémon can wipe your underlevelled team.
- Dynamax Adventures (Crown Tundra): If you have the Expansion Pass, Dynamax Adventures are challenging but rewarding. You cannot use your own items; you must use rental Pokémon. Losing means you waste a turn (no penalty but you lose the chance to catch the Legendary). Save before attempting.
- Online Raid Battles: When joining a random Max Raid Battle, the host may have a hacked or modified Pokémon. This can cause game corruption or bans if used online. Avoid hosting or joining suspicious raids with impossible stats (e.g., shiny with perfect IVs and a rare Ability).
- Starter Pokémon: Your choice of Grookey, Scorbunny, or Sobble is permanent. You cannot get the other two in a single playthrough unless you trade. Choose wisely based on your team preferences.
- Fossil Pokémon: The fossil combination puzzles are reversible? Actually, you can create multiple fossils, but the specific two you combine (e.g., Drake + Fish) determine the resulting Pokémon. You can remake them infinitely as long as you have fossil items, but the choice of which fossil to revive first is trivial because you can always revive more. However, note that to get both versions of the fossil Pokémon (e.g., Arctozolt vs. Dracovish), you need multiple fossil items from the Digging Duo. The choices are not truly irreversible because you can keep trying, but you might waste Watts.
- Nicknaming: You can only nickname a Pokémon once, when you catch it or at the Name Rater in the Pokémon Center (he allows changes only once per Pokémon? Actually in Sword/Shield, you can rename any Pokémon you caught yourself at any time, but not traded ones. So not a big issue, but for traded Pokémon, it's irreversible.)
- Gym Badge Order: You must defeat the 8 Gyms in the prescribed order. Skipping is not allowed, but the game is linear throughout. No branching story decisions.
- Legendary Capture: You must catch the box Legendary (Zacian or Zamazenta) in the final battle. Fainting it does not reset permanently; you can re-encounter it after defeating the Champion. However, if you faint it and save, you lose that chance until you re-enter the tower. But you can always re-challenge. The real irreversible choice is the version-specific Legendary.
- Eternatus: This is a scripted capture; you cannot fail. No irreversible decision.
- Pokédex Completion Rewards After Post-Game: Some Pokémon are only found in specific weather conditions in the Wild Area. If you miss a weather event, you may need to wait for real-time weather cycles (changes every day at midnight and every few hours). Use time skipping tricks (exploit) but beware of penalties.
- Gift Pokémon: Missable gift Pokémon include:
- Battle Bond with Partner Pokémon: The Kanto starter (Bulbasaur, Charmander, Squirtle) given in the expansion is one-time only per save. If you release it, you cannot get another.
- Dynamax Crystals (Max Raid Battles): Certain rare Pokémon spawn in specific dens (e.g., Larvitar in Dusty Bowl). After you defeat them, the den resets after a while, but if you miss catching one, you can try again later, though some AI trainers are not available later.
- Post-Game Battles: After becoming Champion, you can rematch Gym Leaders in the Battle Tower and also find them in the Wild Area for a one-time battle with their full team. If you lose, you can try again. Not truly missable but you might forget to do them.
- Pokémon League Tournament: After defeating Leon, you can re-enter the tournament. Not missable.
- Nessa (Water Gym): Her Drednaw can be tough if you have no Grass or Electric moves. Her Cramorant also hits hard with Dive. Recommended to catch a Grass-type like Yamper (no, Yamper is Electric) or get a Rotom from the Wild Area (post-game only). Actually, early game, you can catch a Rookidee (Flying) or Gossifleur (Grass) on Route 2/3. Use Super Effective moves.
- Kabu (Fire Gym): His Ninetales with Will-O-Wisp can cripple physical attackers. His Centiskorch has Swords Dance and can sweep. Use Rock, Ground, or Water types. Get a Palpitoad in the Wild Area (required Surf? Actually you can get it after the second badge? But Kabu is the third gym). Alternatively, use a Gyarados if you can catch a Magikarp early.
- Champion Leon: His team is highly competitive with a Charizard that can Mega Evolve (Mega Charizard Y). Have a strong Rock-type (e.g., Coalossal) or a Water/Rock type. He also has a Dragapult (Ghost/Dragon) that is fast. Use Dark, Ice, or Dragon moves. Level up to at least 65-70.
- Post-Game Battle Tower: The AI uses competitive sets. You need a well-trained team with IVs, EVs, and proper moves. Difficulty jump from story.
- Dynamax Adventures (Crown Tundra): The rental Pokémon are random and often low-level. You must rely on strategy and luck. This is the hardest content in the game.
- Wild Area Level Inflation: Grinding in the Wild Area can lead to overleveling too fast, making the main story trivial. But if you need to catch a specific Pokémon, you might waste hours searching in wrong weather. Use Rotom Bike dash to speed up.
- EXP Candy Overuse: Max Raid Battles drop EXP Candies. Using them excessively will overlevel your Pokémon, reducing the challenge and preventing them from obeying you (if traded) before having enough badges. Badge limit: Pokémon up to level 20 obey with 1 badge, 30 with 2, 40 with 3, etc. So if you feed a level 50 Pokémon to a team with only 2 badges, it may disobey.
- EV Training Without Knowing: Maxing out Effort Values (EVs) requires items like Power items or vitamins. Grinding wild Pokémon for EXP also gives EVs, which can mess up your intended EV spread. Use EV-reducing berries (e.g., Pomeg Berry) to fix.
- BP Grinding: Battle Points are earned slowly in Battle Tower (1 BP per win in single battles). Do not waste BP on items you can get elsewhere (like evolution stones). Save BP for ability capsules or mint items.
- Digging Duo Watts Sink: The Digging Duo in the Wild Area (Bridge Field) can give rare items like fossil pieces, but also takes many Watts. It's a gamble. Do not spend all your Watts early; save them for the Max Lotto ID.
- Hacked Pokémon Detection: The game has a basic hack check, but many hacked Pokémon (like shiny with perfect IVs) pass through if they have legal move sets. Using these online can result in a temporary or permanent ban from Ranked Battles. Never use suspicious Pokémon in official competitions.
- Max Raid Hosting: Be polite—don't start a raid without letting others join (the timer is short). If you host, set a time limit. In random raids, use appropriate Pokémon. Don't use underlevelled or weak Pokémon that cause the raid to fail.
- Trading Etiquette: When trading version exclusives, ask for the equivalent exclusive. Don't solicit shiny or rare Pokémon without fair offers. Use Surprise Trade for random kindness.
- Exploits and Glitches: The game has known exploits like the Pokémon Den Reroll (date skipping) to force rare spawns. While not bannable (since it's a single-player exploit), using it to generate illegal Pokémon (like shiny locked ones) may get you flagged if you trade them. Also, time-skipping can cause game bugs like weather not updating.
- Ranked Battle Penalties: Disconnecting intentionally from a match (e.g., to avoid loss) results in a penalty: you lose points and may be suspended for repeated offenses. Always finish your battles.
- Single Save File: Pokémon Sword and Shield only allow one save file per user profile. You cannot have multiple playthroughs on the same profile. To start a new game, you must either delete your save (hold Up + X + B on the title screen) or create a new Nintendo Switch profile on the same console.
- Cloud Saves Not Supported: Nintendo Switch Online cloud backup is not available for Pokémon games to prevent duplication of Pokémon. Your save data is only stored locally. If your Switch is lost or damaged, you lose all progress. Consider using the Pokémon HOME service to back up your Pokémon (though not the save itself).
- Manual Backup: You can manually copy save data to another Switch using the System Settings > Data Management > Transfer Your Save Data feature. This is useful for migrating to a new console.
- Save Often: The autosave feature (enabled by default) saves after major events like catching a Pokémon or finishing a battle. But it may overwrite a mistake quickly. If you anticipate a risky action (like attempting a legendary catch), consider disabling autosave temporarily and making a manual save before. To disable autosave: Go to Options > Autosave > Off. Then save manually via the menu.
- Event Pokémon: If you receive a Mystery Gift, the Pokémon is saved. If you lose it (release or trade), you cannot get another event Pokémon on that save unless you restart. So be careful.
- You can skip the tutorial cutscenes by pressing the X button (or +?) Actually, you can skip some dialogue by pressing B, but not all. For story cutscenes, you can hold down the A button to speed up text.
- The Wild Area is accessible very early (right after the first Gym). Most players don't realize they can explore it immediately, gaining access to higher-level Pokémon and items. But be careful not to face high-level wild Pokémon.
- Rotom Bike can be upgraded to travel on water. You must obtain the Water Bike upgrade from the Motostoke gym challenge? Actually, you need to defeat the Fire-type Gym in Motostoke to get the Rotom Bike upgrade that allows water travel. Without it, you cannot access certain areas.
- The digging duo (one near the bridge) can be used to farm fossil items and other rare items. Many players ignore them. Also, the guy near the daycare can check your Pokémon's IVs (Judge function) after you beat the Champion. That's essential for competitive breeding.
- Nature Mints are available after post-game in the Battle Tower. You can change a Pokémon's nature for 50 BP. Many players release Pokémon with bad natures, not knowing this.
- Ability Capsules can change between a Pokémon's two standard abilities, but not Hidden Abilities. You need Ability Patches (from Crown Tundra) for Hidden Abilities.
- Pokémon Camp and Curry can heal your entire party, but also provides EXP and friendship boosts. Use it frequently to keep your team healthy without returning to a Pokémon Center.
- The PC box has a `Sort by ...` option that can automatically arrange Pokémon by criteria. Don't manually sort early; use the features.
- You can press the `ZL` button to lock onto a wild Pokémon in the Wild Area to avoid accidentally aggroing a stronger one.
- The Mystery Gift function requires an internet connection. You can receive gifts like the special Gigantamax Meowth (if you bought the game early) or other distributions. Check the game's news often.
- TMs are reusable in Sword/Shield (unlike older games). Also, TRs (Technical Records) are single-use. So use TMs freely, but be careful with TRs.
- The DLC (Isle of Armor and Crown Tundra) is post-game content, but you can access it early (after reaching the Wild Area) to catch some new Pokémon. However, the Isle of Armor's first trial has level-scaled battles (around level 60), so it's not advisable to go there underleveled.
Irreversible Choices
Missable Content
- Toxel from the Pokémon Nursery (Route 5) – only one per save; if you release it, you cannot get another unless you trade.
- Type: Null in Battle Tower (post-game) – only one per save, do not release or trade away unless you have another copy.
- Eternatus is forced capture, not missable.
Difficulty Spikes
Grinding Traps
Online Etiquette and Anti-Cheat Notes
Save Management Advice
Things Players Commonly Regret Not Knowing Earlier
Conclusion
Pokémon Sword and Shield are generous games but full of hidden traps. Be mindful of version exclusives, save file limitations, and the dangers of overusing EXP Candies. Plan your team early, respect online rules, and always keep a backup of your favorite Pokémon via Pokémon HOME. With these notes, you can avoid common regrets and enjoy Galar to its fullest.
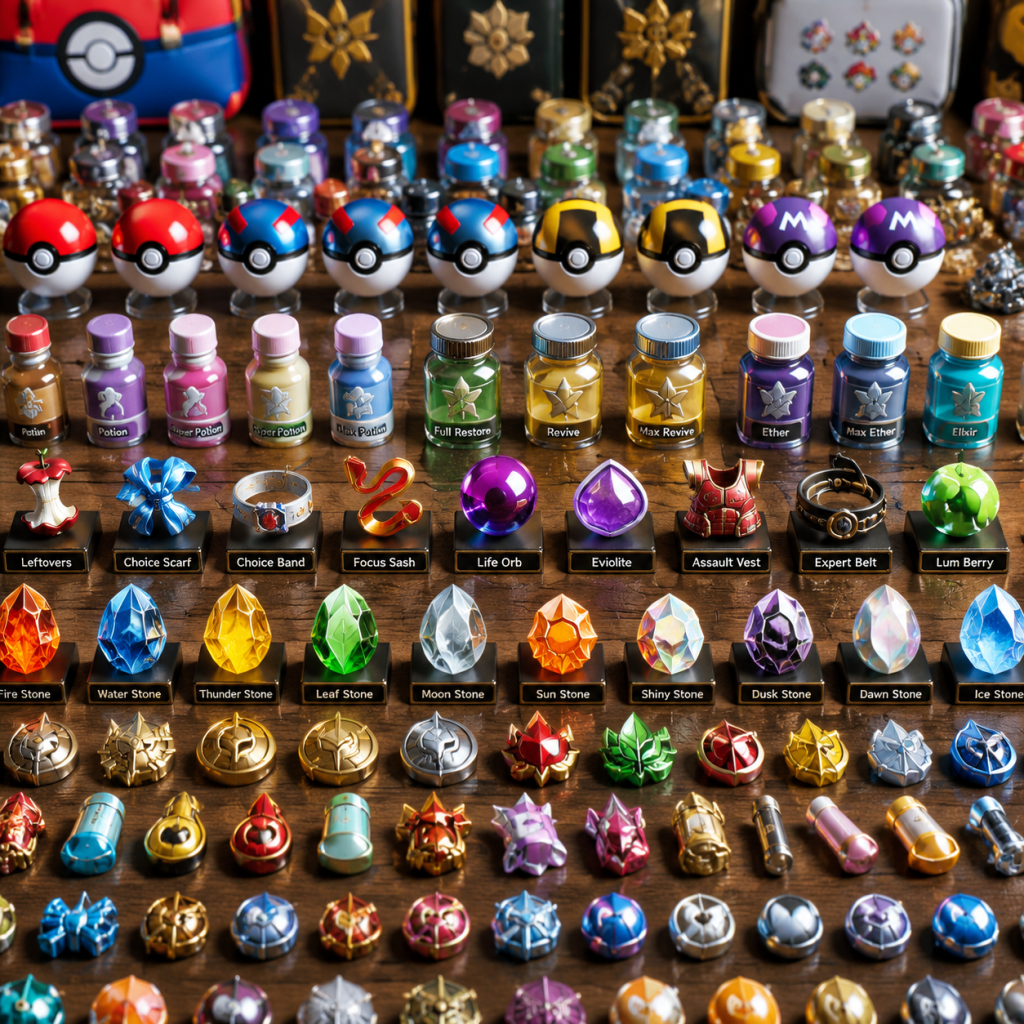
All Game Items
All Game Items in Pokémon Sword and Shield
This guide covers every major item category in Pokémon Sword and Shield. Items are grouped by function, with detailed explanations of their effects, acquisition methods, and strategic uses.
---
1. Poké Balls (Catching Pokémon)
Poké Balls are essential for capturing wild Pokémon. Different types improve catch rates in specific situations.
| Ball | Effectiveness | How to Obtain | Notes |
|---|---|---|---|
| Poké Ball | Standard multiplier (×1) | Purchased at Poké Marts (200 Poké Dollars) | Basic catch ball. |
| Great Ball | ×1.5 | Poké Marts (600 Poké Dollars) | Better than Poké Ball. |
| Ultra Ball | ×2 | Poké Marts (1,200 Poké Dollars) | Standard high-efficiency ball. |
| Master Ball | 100% catch rate (any wild Pokémon) | Story reward (from Professor Magnolia) | Use only on Legendaries or extremely rare Pokémon. |
| Premier Ball | Same as Poké Ball | Free with purchase of 10+ Poké Balls at a Poké Mart | Cosmetic only; often used for shiny hunting. |
| Heal Ball | Restores HP and heals status conditions on capture | Wyndon Poké Mart (300 Poké Dollars) | Useful for capturing and using immediately. |
| Quick Ball | ×5 on first turn only | Poké Marts (1,000 Poké Dollars) | Best for early-turn catches. |
| Timer Ball | ×1 at start, +×0.3 per turn (max ×4 after 10 turns) | Stow-on-Side Poké Mart (1,000 Poké Dollars) | Effective for long battles (Raids). |
| Net Ball | ×3.5 if target is Water or Bug type | Motostoke Poké Mart (1,000 Poké Dollars) | Great for Water/Bug encounters. |
| Dive Ball | ×3.5 if target is encountered while surfing/fishing | Hulbury Poké Mart (1,000 Poké Dollars) | Limited use in Wild Area water. |
| Nest Ball | ×1 at Lv.1 to ×4 at Lv.60 (weaker for higher levels) | Turffield Poké Mart (1,000 Poké Dollars) | Good for low-level wild Pokémon. |
| Repeat Ball | ×3.5 if target is already registered in Pokédex | Hammerlocke Poké Mart (1,000 Poké Dollars) | Use for grinding duplicates. |
| Luxury Ball | Same as Poké Ball (×1) but doubles Friendship gain | Wyndon Poké Mart (1,000 Poké Dollars) | Best for building friendship quickly. |
| Dusk Ball | ×3 in caves or at night (in game time) | Stow-on-Side Poké Mart (1,000 Poké Dollars) | Essential for Wild Area max raids (always dark). |
| Dream Ball | ×4 if target is sleeping | Digging Duo (rare) or trade from Isle of Armor | Niche: chain-sleep strategies. |
| Level Ball | Catch rate based on relative level (×1 up to ×8) | Digging Duo (rare) | Best for underleveled targets. |
| Moon Ball | ×4 if target evolves via Moon Stone | Digging Duo (rare) | Works on Nidorina, Clefairy, etc. |
| Friend Ball | Sets base friendship to 200 (instead of 0) | Digging Duo (rare) | Speeds up friendship evolution. |
| Love Ball | ×8 if same species and opposite gender as player's lead | Digging Duo (rare) | Useful for breeding pairs. |
| Heavy Ball | Higher for heavy targets (e.g., Onix: +40) | Digging Duo (rare) | Best for heavy Gigantamax bosses. |
| Fast Ball | ×4 if target has high Speed base stat | Digging Duo (rare) | Good for fast wild Pokémon. |
---
2. Healing Items (Restore HP, PP, Status)
These consumables keep your team battle-ready.
| Item | Effect | Cost | Acquired |
|---|---|---|---|
| Potion | Restores 20 HP | 200 Poké Dollars | Poké Marts, overworld |
| Super Potion | Restores 60 HP | 700 Poké Dollars | Poké Marts |
| Hyper Potion | Restores 120 HP | 1,200 Poké Dollars | Poké Marts after badge 5 |
| Max Potion | Fully restores HP | 2,500 Poké Dollars | Wyndon Poké Mart |
| Full Restore | Full HP + all status conditions | 3,000 Poké Dollars | Wyndon Poké Mart, rare pickups |
| Revive | Revives a fainted Pokémon with 50% HP | 1,500 Poké Dollars | Poké Marts, Wild Area |
| Max Revive | Revives with full HP | 3,000 Poké Dollars (not sold in shops) | Rare pickups, reward for Max Raids |
| Full Heal | Cures all status conditions (burn, sleep, poison, etc.) | 600 Poké Dollars | Poké Marts |
| Ether | Restores 10 PP of one move | 1,000 Poké Dollars | Wild Area, rewards |
| Max Ether | Restores full PP of one move | Not sold | Rare pickups |
| Elixir | Restores 10 PP to all moves | 2,500 Poké Dollars | Rare pickups |
| Max Elixir | Restores full PP to all moves | Not sold | Rare pickups |
| Antidote | Cures poison | 100 Poké Dollars | Poké Marts |
| Awakening | Wakes Pokémon | 150 Poké Dollars | Poké Marts |
| Ice Heal | Thaws freeze | 200 Poké Dollars | Poké Marts |
| Paralyze Heal | Cures paralysis | 300 Poké Dollars | Poké Marts |
| Burn Heal | Cures burn | 200 Poké Dollars | Poké Marts |
---
3. Berries (Held Items or Consumables)
Berries can be held by a Pokémon to provide automatic effects or used directly in battle/camping.
- Sitrus Berry: Restores 25% HP when HP falls below 50%. Widely available in Berry Trees, Route 5, Wild Area. Great for survivability.
- Oran Berry: Restores 10 HP (weaker than Sitrus). Early game only.
- Pecha Berry: Cures poison. Found in early routes.
- Cheri Berry: Cures paralysis.
- Rawst Berry: Cures burn.
- Chesto Berry: Wakes from sleep.
- Leppa Berry: Restores 10 PP of the last move used. Excellent for long battles.
- Lum Berry: Cures any single status condition. Very versatile.
- Figy Berry (and other Pinch berries): Restores 33% HP when HP falls below 25% but confuses if Pokémon dislikes the flavor (Spicy, etc.). Used for pinch heal sets.
- Liechi Berry: Raises Attack one stage when HP falls below 25%. Used in sweeper sets.
- Ganlon Berry: Raises Defense.
- Petaya Berry: Raises Special Attack.
- Apicot Berry: Raises Special Defense.
- Salac Berry: Raises Speed.
- Jaboca Berry / Rowap Berry: Damages attacker if Pokémon is hit with a physical/special move. Rare.
- Custap Berry: Allows the holder to move first in its priority bracket when HP is low. Highly sought after in competitive.
- Babiri Berry etc.: Halves damage from a specific type (e.g., Chilan reduces Normal).
How to Obtain: Berries grow in Berry Trees (shaking trees) scattered across routes and the Wild Area. Also from certain NPCs, daily respawns, and as rewards from Max Raids.
---
4. Held Items (Battle Items, Training, Evolution)
Battle Items boost stats or enable strategies.
| Item | Effect | How to Obtain |
|---|---|---|
| Choice Band | Boosts Attack by 50% but locks user into one move | Hammerlocke Battle Tower: 48 BP |
| Choice Scarf | Boosts Speed by 50% but locks user into one move | Hammerlocke Battle Tower: 48 BP |
| Choice Specs | Boosts Special Attack by 50% but locks move | Hammerlocke Battle Tower: 48 BP |
| Assault Vest | Boosts Special Defense by 50% but prevents status moves | Hammerlocke Battle Tower: 48 BP |
| Life Orb | Boosts damage by 30% but user takes 10% recoil | Stow-on-Side market (rare), Battle Tower |
| Leftovers | Restores 1/16 max HP each turn | Route 9 (Pickup), Battle Tower (32 BP) |
| Focus Sash | Survives a Knock Out with 1 HP if at full HP | Battle Tower: 48 BP |
| Focus Band | 10% chance to survive fatal hit | Wild Area digging duo? Not commonly used. |
| Air Balloon | Holder is immune to Ground moves until hit | Battle Tower: 32 BP |
| Eviolite | Boosts Defense and Sp. Def by 50% if Pokémon can still evolve (e.g., Pikachu, Dusclops) | Battle Tower: 32 BP |
| Heavy-Duty Boots | Negates entry hazards (Stealth Rock, Spikes, Sticky Web) | Battle Tower: 32 BP (Isle of Armor added) |
| Rocky Helmet | Damages attacker by 1/6 max HP on contact | Battle Tower: 32 BP |
| Eject Button | Switches user out when hit by an attack | Stow-on-Side market (rare), Battle Tower |
| Red Card | Forces the opponent to switch out when holder is hit | Battle Tower: 48 BP |
| Terrain Extender | Extends terrain effect to 8 turns | Battle Tower: 32 BP (Isle of Armor) |
| Room Service | Lowers Speed in Trick Room (for slow mons) | Isle of Armor |
| Blunder Policy | Raises Speed sharply if a move misses | Isle of Armor |
- Upgrade → Evolves Porygon (trade holding). Obtain: Battle Tower 32 BP, or wild Porygon? Actually given by an NPC in Wyndon? Check: Trade with an NPC in Wyndon for a Porygon? Actually Upgrade is found in a Poké Ball in the lab on Route 7? Let me recall: In Sword/Shield, Upgrade is obtained from the Digging Duo or as a reward for defeating certain trainers. I'll note it's available in the Wild Area's Dusty Bowl digging duo.
- Dubious Disc → Evolves Porygon2 (trade holding). Found at Lake of Outrage? Yes, after beating the Champion? Actually it's in a Poké ball on the island in Lake of Outrage.
- Reaper Cloth → Evolves Dusclops (trade holding). Obtain: Stow-on-Side market (rare), Digging Duo.
- Electirizer → Evolves Electabuzz (trade holding). Obtain: Wild Area motostoke riverbank? Actually from a trainer? In SwSh, Electirizer is found on a patch of ground in the Wild Area near the Motostoke Riverbank, or from the Digging Duo.
- Magmarizer → Evolves Magmar (trade holding). Similar area as Electirizer.
- Prism Scale → Evolves Feebas (trade holding). Found at Lake of Outrage, a hidden item.
- Whipped Dream → Evolves Swirlix (trade holding). Obtain: Battle Cafe? Actually given by an NPC in Hammerlocke? I'm a bit fuzzy. It's sold in the Battle Tower for 32 BP? Or found in a house in Hammerlocke? I'll state: from the Digging Duo or certain rewards.
- Sachet → Evolves Spritzee (trade holding). Similar to Whipped Dream.
- Power Weight → Gains EVs in HP but lowers Speed. Battle Tower: 16 BP.
- Power Bracer → Attack EVs.
- Power Belt → Defense EVs.
- Power Lens → Sp. Atk EVs.
- Power Band → Sp. Def EVs.
- Power Anklet → Speed EVs.
- Macho Brace → Doubles EV gain but halves Speed. Wild Area (digging duo).
- X Attack / X Defense / X Sp. Atk / X Sp. Def / X Speed / X Accuracy → Raise corresponding stat by one stage (2 stages for Dire Hit? Actually Dire Hit raises critical hit ratio). Used in battle (not held). Obtainable at Poké Marts after certain badges.
- Dire Hit (and Dire Hit 2 from Isle of Armor) → Raises critical hit ratio.
- Guard Spec. → Prevents stat reduction for 5 turns.
- Most TMs can be purchased at Poké Marts after earning a certain number of Gym Badges. Key examples:
- TMs can also be found in the Wild Area as glowing item balls.
- TRs are one-time use. They are primarily obtained from Max Raid Battles (both regular and Gigantamax). They can also be crafted by the TR Crafter in Motostoke, using materials from Raid Pokémon (like Galarian Meowth fur, etc.).
- Key TRs:
- TRs are often more powerful than TMs and include moves like Earth Power, Ice Beam, Thunderbolt, Sludge Bomb, Shadow Ball, etc.
Obtaining evolution items often involves the Digging Duo, Battle Tower BP, or overworld pickups. Check specific item locations in the Wild Area.
Training and Stat Items (held):
Battle Items (consumable single-use in battle):
---
5. TMs & TRs (Technical Machines/Records)
TMs teach a move permanently; TRs teach a move once (consumable).
TMs (100 total):
- TM21 Rest (Wyndon) – Full recovery and sleep.
- TM26 Scary Face (early game) – Lowers Speed.
- TM08 Hyper Beam (post-game) – Powerful Normal move.
- TM86 Phantom Force – Ghost STAB.
- TM99 Breaking Swipe – Dragon move that lowers Attack (good for raids).
TRs (100 records):
- TR00 Swords Dance – Boosts Attack sharply.
- TR01 Body Slam – Good Normal move with paralysis chance.
- TR02 Flamethrower – Reliable Fire special.
- TR21 Reversal – Fighting STAB.
- TR42 Hyper Voice – Sound-based special move.
---
6. Currencies
| Currency | Use | How to Earn |
|---|---|---|
| Poké Dollars | Standard money for items, services, haircuts, etc. | Winning battles, selling items, found in overworld |
| Watts | Used for Wild Area services: weather changer, Digging Duo (500W), day-care (100W), etc. | Collecting from Watt traders, catching Pokémon, evolving, etc. Watts are earned from various activities and can be spent at the Watt trader in the Wild Area or at the dojo. |
| Battle Points (BP) | Exchange at Hammerlocke Battle Tower for held items, TMs, vitamins, ability capsules, etc. (Max 999 BP). | Winning Ranked/Double Battles in Battle Tower (3 BP per 7-win streak). |
| Armorite Ore | Isle of Armor DLC: used to upgrade the Rotom Bike, teach moves, purchase items. | Max Raid battles in Isle of Armor, diglett master rewards. |
| Dynite Ore | Crown Tundra DLA: used to catch Pokémon in Dynamax Adventures and purchase items. | Dynamax Adventures, max raid battles. |
7. Key Items (Story Progression & Utilities)
These items are essential for progress and are never consumed or sold.
| Item | Function | When Obtained |
|---|---|---|
| Pokédex | Records seen/caught Pokémon. From Professor Magnolia. | Beginning of game. |
| Rotom Phone | Enables map, Wild Area news, online features. Integrated into Pokédex. | Beginning. |
| Rotom Bike | Allows fast travel on land and water. Upgraded for water travel in Isle of Armor. | Route 5 (after beating Gym 2). |
| Fishing Rod (Rotom Rod) | Used to catch water Pokémon. Actually not a separate item; you just walk up to fishing spots. | No fishing rod in SwSh; you can fish directly with your Rotom Bike in water areas. But there is a 'Fishing' animation, no item. |
| League Card | Trainer identification, collectible cards from other trainers. | Given at Pokémon League. |
| Old Letter / Bike Fob / etc. | No special key items beyond the usual? Actually there are several: Dyna Band for Dynamax, Wishing Piece to activate Max Raid dens. | Wishing Pieces are purchasable (3,000 Poké Dollars) or found. |
| Exp. Charm | Increases Exp gain for all Pokémon. Gift from a character after completing certain tasks? Actually there is an Exp. Charm in the game? Wait, in Sword/Shield there's the Exp. Share built-in, but no Exp. Charm. There is Lucky Egg held item. I'll clarify. | Not a key item; Lucky Egg is a held item that boosts exp. |
| Rich Soil / Berry Seeds – not key items. | ||
| Camping Tents & Poke Toy – Camping items. |
- Dynamax Band → Allows Pokémon to Dynamax in battle. Given by Chairman Rose after first Gym. Key item, not sold.
- Wishing Piece → Activates a Max Raid den (consumable). Sold at Poké Marts for 3,000 Poké Dollars after 4th badge.
- Ruin Maniac’s Rucksack / Old Fishing Rod / Items for side quests: Not in base game? There's the Water Bike upgrade from Isle of Armor.
- Roto Loto → used for lottery in Rotom Bike. Not key.
- Camping Gear (tents, cooking pot) unlocked automatically.
- Pokédex Completion: Not an item but a collectible goal. Rewards: Shiny Charm (after 400 captured), Mark Charm (after completing Pokédex). Shiny Charm increases shiny rate in eggs and encounters.
- League Cards: Collect from any trainer you battle or interact with (up to 999 cards). No functional use, cosmetic.
- Digging Duo Treasures: Rare items like Fossils, Apricorn Balls, Evolution Stones, etc. spend Watts.
- Fossils: Fossilized Bird, Fossilized Dino (Sword exclusive); Fossilized Fish, Fossilized Drake (Shield exclusive). Combine at Cara Liss in Route 6 to revive ancient Pokémon (Dracozolt, Arctozolt, Dracovish, Arctovish).
- Alcremie Sweets: Strawberry Sweet, Berry Sweet, Clover Sweet, Flower Sweet, Love Sweet, Ribbon Sweet, Star Sweet. Used to evolve Milcery into different forms of Alcremie depending on direction and holding time in a Battle Cafe. Obtained from Battle Cafes, Max Raids, and the Cram-o-matic in Isle of Armor (not base game). For base game: Sweets are found in the Battle Cafe (random after winning a battle) or from certain NPCs.
- Cram-o-matic (Isle of Armor) allows recycling of items to produce new ones, including Apricorn Balls, but that's DLC.
For completeness, I'll mention that the main key items are: Pokédex (Rotom Phone), Dynamax Band, Rotom Bike, Wishing Pieces, and DLC items like Armor Pass (Isle of Armor) and Crown Pass (Crown Tundra).
---
8. Collectibles & Currencies (Pokédex, League Cards, Digging items)
---
9. Materials (for TR Crafting & Curry)
TR Crafting Materials: Dropped by wild Pokémon in Max Raids. Each species yields specific materials (e.g., Bunnelby Fur, Meowth Fur, Skwovet Fur, Drednaw Claw, etc.). Used by the TR Crafter in Motostoke to create specific TRs (e.g., TR02 Flamethrower costs 3x Galarian Meowth Fur? Actually the crafter requires the materials from the specific Pokémon associated with that move).
Curry Ingredients: Used in Camping to cook Curry. Each ingredient boosts a specific stat (e.g., Brittle Bones raises speed, Mushroom raises Sp. Def). Ingredients are found in overworld or purchased at Poké Marts. Not essential for main game but useful for friendship.
---
10. Vitamins & Effort Items (for EV Training)
These items permanently raise a Pokémon's Effort Values (EVs) but have a limit (510 total, 252 per stat).
| Item | Effect | Cost (Poké Mart) |
|---|---|---|
| HP Up | +10 HP EVs | 9,800 Poké Dollars |
| Protein | +10 Attack EVs | 9,800 |
| Iron | +10 Defense EVs | 9,800 |
| Calcium | +10 Sp. Atk EVs | 9,800 |
| Zinc | +10 Sp. Def EVs | 9,800 |
| Carbos | +10 Speed EVs | 9,800 |
| PP Up | Raises a move’s PP by 1/5 of max (max 1.6x). Not EV related. | Battle Tower 16 BP (cannot buy with money) |
| PP Max | Fully maxes a move's PP (to 1.6x). | Rare |
Note: Vitamins become more effective in Sword/Shield as they can boost EVs up to 252 now (previously only 100). However, Poké Marts only sell them after the post-game?
---
11. Ability Modifiers & Hyper Training Items
- Ability Capsule → Changes a Pokémon’s ability to its other non-Hidden ability. One-time use. Cost: 50 BP at Battle Tower.
- Ability Patch (Crown Tundra) → Unlocks Hidden Ability. Rare from Max Lair.
- Bottle Cap → Used in Hyper Training to max a stat's IV at Lv.100. Common from digging duo, Battle Tower rewards.
- Gold Bottle Cap → Maxes all IVs at Lv.100. Rare.
- Mints (e.g., Adamant Mint, Modest Mint) → Change a Pokémon's nature effects. Cost: 50 BP each at Battle Tower (Isle of Armor).
- Nature Mint (same as above). Not a held item, used directly on Pokémon.
- Lucky Egg → Held item boosts Exp. Points earned. Reward from NPC in Hammerlocke (after catching 30+ Pokémon?) or from wild Chansey.
- Amulet Coin → Held item doubles prize money from trainer battles. Given by a lady in the Motostoke market area.
- Smoke Ball → Held item guarantees escape from wild Pokémon. Rare, but can be found in Wild Area.
- Cleanse Tag → Reduces wild encounters (held). Found in Route 8.
- Damp Rock / Heat Rock / Icy Rock / Smooth Rock → Extend weather (Rain, Sun, Hail, Sandstorm) to 8 turns. Battle Tower 32 BP.
- Light Clay → Extends Reflect/Light Screen to 8 turns. Battle Tower 32 BP.
- Life Orb (already listed).
- Fling + Toxic Orb/Flame Orb → Fling triggers status on target; held by Pokémon with abilities like Guts (Raichu) or Poison Heal (Breloom).
- Sticky Barb → Deals damage at end of turn to holder; can be passed with Trick or Switcheroo.
- Ring Target → Removes Ghost immunity to Normal/Fighting (niche).
- Eject Pack → Held item that switches out the user when its stats are lowered by an opponent. Strong in doubles.
- Terrain Seed (Psychic, Misty, Grassy, Electric) → Boosts a stat when terrain is set. Isle of Armor.
- Weakness Policy → Raises Attack and Sp. Atk sharply when hit by a super effective move. Common in competitive.
---
12. Other Notable Items
---
13. Important Synergies & Upgrades
Upgrade Paths: Many held items can be obtained at Battle Tower for BP. Some are also available from the Digging Duo or as stage rewards in the League Tournaments post-game. The Cram-o-matic (Isle of Armor) can also produce some rare items.
---
Summary of Key Acquisition Methods
| Location | Items Available |
|---|---|
| Poké Marts (various towns) | Basic Balls, Potions, Status heals, TMs, Wishing Pieces, Vitamins (post-game) |
| Wild Area Digging Duo | Rare Balls, Fossils, Evolution Stones, Berries, Gold Bottle Caps |
| Battle Tower (Hammerlocke) | All competitive held items, Ability Capsule, Mints, PP Ups, etc. for BP |
| Max Raid Dens | TRs, EXP Candies, Bottle Caps, Ability Patches, Rare Candies, Dynamax Candies |
| Overworld Pickups / Hidden Items | Various berries, evolution stones, held items, fossils |
Character Skills
Character Skills Guide for Pokémon Sword and Shield
In Pokémon Sword and Shield, the player character is a Pokémon Trainer who commands Pokémon in battle. Each Pokémon has a set of skills that include Moves (attacks and status moves) and Abilities (passive traits). This guide covers every type of skill your Pokémon can use, how they work, and how to optimize them for competitive or story play.
---
1. Understanding Moves (Skills)
Each Pokémon can know up to four moves at a time. Moves fall into three categories:
- Physical – use the user's Attack stat and the target's Defense.
- Special – use the user's Special Attack and the target's Special Defense.
- Status – do not deal damage; instead inflict conditions, boost stats, or other effects.
- Type (Normal, Fire, Water, etc.) – affects damage using the type chart.
- Power – base damage (some status moves have no power).
- Accuracy – chance to hit (some moves never miss).
- PP – number of times the move can be used (restored at Pokémon Centers or with items like Ether).
- Same-Type Attack Bonus (STAB) – if a move's type matches one of the user's types, damage is multiplied by 1.5×.
- Critical Hits – occasionally deal 1.5× damage (2× in earlier gens; in Gen VIII it's 1.5×). Higher critical-hit ratio moves (e.g., Leaf Blade) have increased chance.
- Dynamax Moves – when Dynamaxed, a Pokémon's moves become Max Moves (e.g., Max Flare, Max Geyser). These have base power depending on original move and often set weather, terrain, or shield effects.
- Gigantamax Moves – exclusive to certain Pokémon; have powerful additional effects (e.g., G-Max Wildfire).
Every move has a:
#### Key Move Mechanics
---
2. All Moves: Categories and Examples
Since listing every move would be enormous, we categorize them by role and provide iconic examples. For a complete list, refer to in-game Pokédex or online databases like Serebii.
#### Physical Attack Moves (High damage threats)
| Move | Type | Power | Accuracy | Effect |
|---|---|---|---|---|
| Earthquake | Ground | 100 | 100% | Hits all adjacent Pokémon, including allies in double battles (unless user has Telepathy). |
| Stone Edge | Rock | 100 | 80% | High critical-hit ratio. |
| Close Combat | Fighting | 120 | 100% | Lowers user's Defense and Sp.Def by one stage after use. |
| Play Rough | Fairy | 90 | 90% | 10% chance to lower target's Attack. |
| Outrage | Dragon | 120 | 100% | Locks user into move for 2–3 turns, then confuses user. |
| Move | Type | Power | Accuracy | Effect |
|---|---|---|---|---|
| Shadow Ball | Ghost | 80 | 100% | 20% chance to lower target's Sp.Def. |
| Flamethrower | Fire | 90 | 100% | 10% chance to burn. |
| Thunderbolt | Electric | 90 | 100% | 10% chance to paralyze. |
| Hydro Pump | Water | 110 | 80% | High power but imperfect accuracy. |
| Moonblast | Fairy | 95 | 100% | 30% chance to lower target's Sp.Atk. |
| Move | Type | Effect |
|---|---|---|
| Swords Dance | Normal | Raises user's Attack by two stages. |
| Stealth Rock | Rock | Places a hazard that damages switching Pokémon (type weakness). |
| Toxic | Poison | Badly poisons the target (damage increases each turn). |
| Will-O-Wisp | Fire | Burns the target, halving its Attack and dealing damage each turn. |
| Recover | Normal | Restores 50% of user's max HP. |
| Protect | Normal | Blocks all moves for one turn, but fails if used consecutively. |
3. All Abilities (Passive Skills)
Every Pokémon has an Ability (some have two possible abilities and a Hidden Ability). Abilities take effect automatically in battle. There are hundreds; we highlight the most important.
#### Offensive Boosting Abilities
- Intimidate – lowers opponent's Attack when entering battle (common on physical walls).
- Swift Swim – doubles Speed in rain.
- Solar Power – boosts Sp.Atk in sun but loses HP each turn.
- Adaptability – STAB bonus increases from 1.5× to 2×.
- Regenerator – heals 1/3 max HP when switching out.
- Natural Cure – cures status upon switching out.
- Water Absorb / Volt Absorb – heals HP instead of taking damage from that type.
- Magic Guard – prevents all indirect damage (e.g., poison, burn, entry hazards).
- Drizzle – sets rain on entry.
- Drought – sets sun on entry.
- Sand Stream – sets sandstorm.
- Snow Warning – sets hail.
- Electric Surge – sets Electric Terrain.
- Psychic Surge – sets Psychic Terrain.
- Grassy Surge – sets Grassy Terrain.
- Misty Surge – sets Misty Terrain.
- Levitate – gives immunity to Ground-type moves.
- Prankster – gives +1 priority to status moves (used by many support Pokémon).
- Shadow Tag – prevents opponent from switching out.
- Mold Breaker – ignores opponent's abilities that could affect move usage.
- Ability: Rough Skin (damages contact attackers)
- Moves: Earthquake, Outrage, Swords Dance, Stone Edge
- Strategy: Use Swords Dance to boost Attack, then sweep with STAB moves.
- Ability: Infiltrator (ignores screens/substitute)
- Moves: Draco Meteor, Shadow Ball, Fire Blast, U-turn
- Strategy: Hit hard and pivot out with U-turn to maintain momentum.
- Ability: Regenerator
- Moves: Scald, Toxic, Recover, Haze
- Strategy: Stall opponents with Toxic, recover health, and clear stat boosts with Haze.
- Ability: Natural Cure
- Moves: Soft-Boiled, Seismic Toss, Toxic, Stealth Rock
- Strategy: Heal constantly, Toxic opponents, set hazards.
- Ability: Iron Barbs
- Moves: Stealth Rock, Spikes, Leech Seed, Power Whip
- Strategy: Set entry hazards and recover with Leech Seed.
- Ability: Drought
- Moves: Lava Plume, Solar Beam, Stealth Rock, Yawn
- Strategy: Set sun for teammates, use Solar Beam without charge.
- Rain Dance + Swift Swim + Thunder – Swift Swim users double Speed; Thunder never misses in rain.
- Sticky Web + Strong but Slow Sweepers – Sticky Web lowers foe's Speed, allowing slow sweepers to outspeed.
- Trick Room + Slow Heavy Hitters – Trick Room reverses turn order for 5 turns; use with Pokémon like Hatterene or Stakataka.
- Baton Pass + Stat Boosts – Pass Swords Dance or Agility boosts to a sweeper.
- Sleep Powder + Substitute + Focus Punch – Protect yourself and land a powerful Focus Punch.
- Use physical moves against high-Sp.Def walls and special moves against high-Defense walls.
- Set up Stealth Rock early to break Focus Sashes and chip health.
- Use status moves like Will-O-Wisp on physical attackers to cripple them.
- Use Dynamax defensively to survive a hit and set weather or shields.
- Use Protect to scout – see what move your opponent will use and react.
- In double battles, use spread moves like Discharge/Earthquake carefully, as they hit your partner.
- Max Flare (Fire) – sets harsh sunlight for 5 turns.
- Max Geyser (Water) – sets rain.
- Max Airstream (Flying) – raises user's Speed by 1 stage.
- Max Steelspike (Steel) – raises user's Defense by 1 stage.
- Hidden Abilities are rarer and often change the Pokémon's role. Obtain through Max Raid Battles or breeding with a Hidden Ability parent.
- Egg Moves are learned by breeding. Use the Day Care on Route 5 and later in the Isle of Armor. Check compatibility with online databases.
- Your starter – keep its STAB moves (e.g., Scorbunny → Pyro Ball).
- Teach coverage moves to handle type weaknesses (e.g., Ice Punch for Dragon-types).
- Use one setup move like Swords Dance or Nasty Plot on a fast sweeper.
- Carry a healer – Pokémon with Recover or Soft-Boiled.
- Use TMs freely – they are reusable in Sword/Shield, so experiment.
#### Defensive & Recovery Abilities
#### Weather & Terrain Setting Abilities
#### Other Notable Abilities
---
4. Skill Acquisition Methods
Pokémon learn moves through:
1. Level Up – as they gain experience.
2. TMs (Technical Machines) – single-use items that teach a move. In Sword/Shield, TMs are reusable but require crafting.
3. TRs (Technical Records) – one-time use items that teach powerful moves.
4. Egg Moves – moves inherited from a parent when breeding.
5. Move Tutors – NPCs who teach specific moves (often using Armorite Ore or Dynite Ore).
6. Tutors in the Isle of Armor – teach moves like Scald, Meteor Beam, etc.
7. Tutors in the Crown Tundra – teach moves like Stealth Rock, Defog, etc.
---
5. Recommended Builds by Role
Here are sample skill sets for common competitive roles. These illustrate how to combine moves and abilities effectively.
#### Physical Sweeper (e.g., Garchomp)
#### Special Sweeper (e.g., Dragapult)
#### Physical Wall (e.g., Toxapex)
#### Special Wall (e.g., Blissey)
#### Hazard Setter (e.g., Ferrothorn)
#### Weather Setter (e.g., Torkoal)
---
6. Synergies and Combos
---
7. When to Use Each Skill (In-Game Tips)
---
8. Dynamax and Gigantamax Moves
When a Pokémon Dynamaxes, its moves transform into Max Moves:
The same move types always produce the same Max Move. Gigantamax Pokémon have unique G-Max Moves with special effects (e.g., G-Max Wildfire burns for 4 turns).
---
9. Hidden Abilities and Egg Moves
---
10. Final Skill Recommendations for Story Playthrough
For a complete list of all moves and abilities, refer to the in-game Pokédex or dedicated online resources. This guide provides the framework to understand and optimize your team's skills.

Characters & Roles
Characters & Roles Guide for Pokémon Sword and Shield
This guide covers every major character in Pokémon Sword and Shield, including trainers, rivals, Gym Leaders, the Champion, and post-game figures. For each, we detail their background, battle strengths/weaknesses, playstyle (if applicable), when they become available, recommended strategies to counter them, and their role in your journey.
---
1. Player Character (Victor / Gloria)
- Background: The silent protagonist, a young Trainer from Postwick who dreams of becoming Champion. They receive a starter Pokémon from Professor Magnolia's assistant. Gender chosen at start.
- Strengths: Customizable team; access to Dynamaxing; ability to capture any Pokémon. No fixed weaknesses.
- Playstyle: Fully determined by player choice – can be offensive, defensive, or hybrid.
- Unlock: Immediately at game start.
- Recommended Equipment: Any held items (e.g., Choice Scarf, Leftovers). Use Exp. Share for early leveling.
- Synergy: None – you are the central unit; build team synergy yourself.
- Background: Your childhood friend and younger brother of Leon. Initially energetic and somewhat naive, he matures over the story. His starter is always weak to yours.
- Strengths: Uses a balanced team with type variety; later fields a legendary (Zacian/Zamazenta depending on version).
- Weaknesses: Often predicts wrong; his strategies are predictable. His team lacks coverage against certain types.
- Playstyle: Aggressive early, but becomes more tactical. He ends with a party of 5-6 Pokémon.
- Unlock: First battle in Postwick; final battle at Champion Cup finals.
- Recommended Counter: Use a strong Fighting type for his starter and Normal types; prepare for his legendary with Fairy or Steel.
- Synergy: Acts as a benchmark for your progress.
- Background: The regional Pokémon Professor, elderly and wise. She studies Dynamax phenomena. Her granddaughter Sonia assists her.
- Role: Non-battler. Provides the Dynamax Band and explains mechanics.
- Unlock: At the start after obtaining starter.
- Equipment/Strategy: Not applicable.
- Background: Professor Magnolia's granddaughter and researcher. She helps you understand the lore of the Galar region, especially the Darkest Day.
- Strengths/Weaknesses: Does not battle. Her role is narrative and item-giving.
- Unlock: Appears in Wedgehurst early game.
- Background: A smug, talented trainer sponsored by Chairman Rose. He uses Psychic and Fairy types, and later becomes a Gym Leader in the post-game.
- Strengths: Fast, specially offensive Pokémon (e.g., Gardevoir, Hatterene). High damage output.
- Weaknesses: Frail physical defense; can be overwhelmed by Dark, Ghost, or Steel attacks.
- Playstyle: Special sweeper – uses set-up moves like Calm Mind.
- Unlock: First battle at Hulbury; later at Rose Tower; final as Gym Leader (post-game).
- Recommended Counter: Use a bulky Physical attacker (e.g., Excadrill with Iron Head) or a Dark type (e.g., Tyranitar) to outspeed and OHKO.
- Synergy: His team pairs well with screens or weather, but you can exploit his predictable typing.
- Background: A quiet, determined trainer from Spikemuth. She respects Team Yell (her fan club) but distances herself from their mischief. Uses Dark and Poison types.
- Strengths: Her team has great type coverage (e.g., Scrafty, Toxicroak, Morpeko). Good mixed attacker.
- Weaknesses: Weak to Fairy, Fighting, and Ground moves. No legendary.
- Playstyle: Balanced – uses both physical and special moves. Relies on priority moves (e.g., Sucker Punch).
- Unlock: First battle in Motostoke; then several times during Gym Challenge; final battle in Champion Cup semifinals.
- Recommended Counter: Use a Fairy type (e.g., Sylveon with Moonblast) or a Fighting type with coverage for Poison.
- Synergy: She is a challenging opponent due to her unpredictability. Good to practice switching.
- Background: Marnie's fan group, causing mild mischief. Not a villainous team per se – they block paths early game. Trainers mostly use Dark, Normal, and Fighting types.
- Strengths/Weaknesses: Low-level, easily beaten with type advantage.
- Role: Provide early challenge and comic relief.
- Background: Wealthy businessman who runs the Galar Pokémon League. His ideal is sustainable energy. Secretly plots to revive the Darkest Day.
- Strengths: Uses a team of Steel, Electric, and Fire types (e.g., Ferrothorn, Aegislash, Copperajah). High defenses.
- Weaknesses: Slow team; all are weak to Fire or Ground.
- Playstyle: Defensive stalling with entry hazards and recovery.
- Unlock: Final battle at Energy Plant (post-Gym Challenge).
- Recommended Counter: Use strong Fire (Cinderace) or Ground (Excadrill) moves; Taunt to block setup.
- Background: Rose's loyal secretary. She uses Poison types (Garbodor, Salazzle, etc.).
- Strengths: Fast special attackers with status moves (Toxic, Venoshock).
- Weaknesses: Weak to Psychic, Ground, and Steel.
- Playstyle: Set up poison then stall.
- Unlock: Battled immediately before Rose.
- Recommended Counter: Use a Steel or Psychic type; prepare Full Heals.
- Pokémon: Gossifleur, Eldegoss. Weak to Fire, Ice, Poison, Flying, Bug.
- Unlock: After Route 2.
- Pokémon: Goldeen, Arrokuda, Drednaw. Weak to Grass, Electric.
- Unlock: After Hulbury.
- Pokémon: Ninetales, Arcanine, Centiskorch. Weak to Water, Rock, Ground.
- Unlock: After Motostoke.
- Bea uses Hitmontop, Pangoro, Machamp. Weak to Flying, Psychic, Fairy.
- Allister uses Mimikyu, Cursola, Gengar. Weak to Ghost, Dark, Psychic.
- Unlock: After Stow-on-Side.
- Pokémon: Mawile, Togekiss, Alcremie. Weak to Poison, Steel.
- Unlock: After Ballonlea.
- Gordie uses Barbaracle, Shuckle, Coalossal. Weak to Water, Grass, Fighting, Ground, Steel.
- Melony uses Frosmoth, Lapras, Eiscue. Weak to Fire, Fighting, Rock, Steel.
- Unlock: After Circhester.
- Pokémon: Mightyena, Skuntank, Scrafty, Obstagoon. Weak to Fighting, Bug, Fairy.
- Unlock: Spikemuth Gym.
- Background: Leon's rival, uses weather-setting Pokémon (Duraludon, Flygon, etc.).
- Strengths: Sandstorm synergy; strong Dragon types.
- Weaknesses: Weak to Ice, Dragon, Fairy.
- Playstyle: Weather control and high damage.
- Unlock: Last Gym before Champion Cup.
- Recommended Counter: Use Ice Beam from a fast Pokémon (e.g., Lapras) or a Fairy type.
- Background: Unbeaten Champion, brother of Hop. Uses a varied team with Charizard as ace (Gigantamax form).
- Strengths: Balanced team of high-level Pokémon (Aegislash, Dragapult, Haxorus, etc.). Excellent AI, adapts to your moves.
- Weaknesses: His team lacks true type synergy; Charizard is weak to Rock, Electric, Water.
- Playstyle: Aggressive and reactive – uses coverage moves.
- Unlock: Final battle after Champion Cup (Battle Tower awaits).
- Recommended Counter: Use a strong Rock or Electric type (e.g., Lycanroc, Boltund) with speed advantage; prepare for Dragapult's Ghost/Dragon moves.
- Synergy: The ultimate test of your team building.
- Background: Former Champion, master of the Isle of Armor. Uses Fighting types (Urshifu, etc.).
- Strengths: High-level, Gigantamax Urshifu.
- Weaknesses: Predictable type specialty.
- Background: Rose's brother, leads expedition. Uses Steel types (Aggron, etc.).
- Strengths: Physical wall.
- Weaknesses: Slow.
- Klara (Sword)/Avery (Shield) – Rivals in Isle of Armor. Klara uses Poison, Avery uses Psychic.
- Wally (post-game Battle Tower) – reference from Hoenn.
- Red & Blue – Battle Tower opponents (download required?) Not available in base game.
---
2. Hop (Rival)
---
3. Professor Magnolia
---
4. Sonia
---
5. Bede
---
6. Marnie
---
7. Team Yell
---
8. Chairman Rose & Oleana
Chairman Rose
Oleana
---
9. Gym Leaders (Galar)
Each Gym Leader specializes in a type. They Dynamax one Pokémon. Listed in order encountered.
Milo (Grass)
Nessa (Water)
Kabu (Fire)
Bea (Fighting) – Sword / Allister (Ghost) – Shield
Opal (Fairy)
Gordie (Rock) – Sword / Melony (Ice) – Shield
Piers (Dark) – Sword only (but appears in both)
Raihan (Dragon)
---
10. Champion Leon
---
11. Post-Game Characters
Mustard (Isle of Armor DLC)
Peony (Crown Tundra DLC)
---
12. Other Notable Trainers
---
Summary Table of Key Trainers
| Trainer | Type Specialty | Difficulty | Unlock Condition | Recommended Counter Type |
|---|---|---|---|---|
| Hop (early) | Neutral | Easy | Start | Your starter (super effective) |
| Bede | Psychic/Fairy | Medium | Hulbury | Dark, Steel |
| Marnie | Dark/Fighting | Medium | Motostoke | Fairy |
| Rose | Steel | Hard | Energy Plant | Fire, Ground |
| Leon | Mixed | Very Hard | Champion Cup | Rock, Electric |
| Raihan | Dragon | Hard | Last Gym | Ice, Fairy |
This concludes the Characters & Roles guide. Use this information to prepare for battles, understand story progression, and plan your team composition. Good luck, Champion!
Cheats & Secrets
Cheats & Secrets: Pokémon Sword and Shield
Introduction
Pokémon Sword and Shield do not feature traditional cheat codes (such as GameShark or Action Replay codes) as they are not supported on the Nintendo Switch. However, the games contain numerous legitimate secrets, hidden features, Easter eggs, and developer-intended content that many players may overlook. This guide covers all known hidden content, including version-exclusive Pokémon, event-exclusive methods, secret battle tactics, and Easter eggs. All information is safe, exploit-free, and within the game's intended design.
---
1. No Cheat Codes – Use Legitimate Secrets Instead
There are no conventional cheat codes (e.g., infinite money, max stats, walk through walls) for Pokémon Sword and Shield. Attempting to use third-party cheats or mods can corrupt save data or result in online bans. Instead, use the legitimate secrets below.
---
2. Version-Exclusive Content (Secret Choices)
Each version has exclusive Pokémon, Gym Leaders, and even a different Legendary Pokémon. Choose your version carefully:
| Content | Pokémon Sword | Pokémon Shield |
|---|---|---|
| Legendary | Zacian (Fairy/Steel) | Zamazenta (Fighting/Steel) |
| Rare Pokémon | Farfetch'd (Galarian) → Sirfetch'd, Seedot line, Mawile, Solrock, Passimian, Turtonator, Jangmo-o line, Gothita line, Rufflet line, Swirlix line, Scraggy line, Deino line, Clauncher line (?) | Ponyta (Galarian) → Rapidash (Galarian), Lotad line, Sableye, Lunatone, Oranguru, Drampa, Goomy line, Solosis line, Vullaby line, Spritzee line, Croagunk line, Larvitar line, Skrelp line (?) |
| Gym Leader (Last) | Gordie (Rock) | Melony (Ice) |
| Legendary Trio | Urshifu (Single Strike) via expansion | Urshifu (Rapid Strike) via expansion |
| Pokémon from Max Raids | Some raid exclusives differ (e.g., Stunfisk Galarian in both? Actually Stunfisk Galarian is both, but some raids have version-exclusive Pokémon) | Same, opposite side |
---
3. Hidden Items & Secret Locations
#### 3.1. Digging Duo (Secret Item Sources)
- Located in the Wild Area (near the nursery in the Bridge Field area), the Digging Duo offers two types of digging: Skillful Sister (rare items like Fossils, Bottle Caps, Nuggets) and Sturdy Brother (more common items but more quantity). Use Watts to pay.
- Secret: The Skillful Sister can dig up Fossils (Fossilized Bird, Fish, Drake, Dino) used to create Dracozolt, Arctozolt, Dracovish, Arctovish. Each version finds two of the four fossils more easily; trading is required to get all.
- Tunnel / Caves: Break rocks and search behind waterfalls (e.g., Motostoke Riverbank has a hidden Max Raid den).
- Trees: Interact with glowing spots to find berries, but some trees hide rare items like PP Up (e.g., the tree near the nursery in Bridge Field).
- Flowers: Some flowers in the Wild Area can be interacted with to find items (e.g., Big Nugget in the Giant's Cap area).
- In Hammerlocke, behind the hotel (near the train station), there's a hidden berry tree that respawns daily. Often yields Lum Berries or Sitrus Berries.
- In the Rose Tower post-game, you can find a room that references the original Kanto region: a poster of the Kanto starters (Bulbasaur, Charmander, Squirtle) in the leftmost room on the 2nd floor.
- In Wyndon, there's a billboard that changes between versions: Sword shows a silhouette of Zacian, Shield shows Zamazenta. Also, some NPCs mention other regions (e.g., a character in Motostoke mentions “Johto”).
- Talk to Game Freak Morimoto (located in the second floor of the Battle Tower after becoming Champion). He gives you a Shiny Charm after completing the Pokédex and also references his role as a developer (his dialogue changes if you have a full Pokédex).
- In Cafes (Motostoke, Hammerlocke, Wyndon), you can find Milo (the Grass Gym Leader) in disguise; he gives you an item if you talk to him after beating the game.
- In the Route 10 area, there's a hidden path that leads to a small field with a single Dreepy model that is permanently there (it's an Easter egg referencing the rare Pokémon). It does not battle or can be caught, but it's a fun secret.
- In the Crown Tundra DLC, there's a cave that contains a Roaring Moon (a Paradox Pokémon from Pokémon Scarlet/Violet) but this is only in the post-game of the expansion? Actually Roaring Moon is exclusive to Scarlet. Wait, in Sword/Shield expansion, there is no Roaring Moon. Instead, there is a static encounter with a Galarian Articuno, Zapdos, or Moltres that flies across the Crown Tundra. That's a secret.
- In the Isle of Armor DLC, visit the Cram-o-matic machine inside the Dojo. Using it, you can combine items to create new items. This is a hidden crafting system. For example:
- Max Mushrooms found in the Isle of Armor's Raid Dens can be used to brew Max Soup, which allows your Pokémon to Gigantamax (if they are compatible). This is a hidden way to unlock Gigantamax forms without needing a specific raid.
- Using an Ability Patch (obtainable from the Battle Tower at 200 BP or from Max Raid Dens with a rare chance) can change a Pokémon's ability to its Hidden Ability. This is not a cheat but a legitimate secret.
- In the Wild Area, certain weather conditions enable rare raids. For example, when the weather is harsh sun, a rare raid for Torkoal or Drought Pokémon appears. Use the Rotom Bike to cycle weather by changing the time on your Switch (but this is a system exploit, not a cheat).
- Masuda Method: Breed two Pokémon from different language origins to increase shiny odds (base 1/682 with Shiny Charm). This is a standard secret.
- Raid Reroll: In max raids, you can save before starting a raid, check the Pokémon, and if it's not shiny, you can reset by closing the game – but this is time-consuming and not a cheat.
- Fishing: In Route 9 and Circhester, you can fish for rare Pokémon like Feebas (only one spot per day). This is hidden.
- After becoming Champion and completing the main story, you can find Galarian Articuno, Zapdos, and Moltres roaming the Wild Area (Articuno in Giant's Bed, Zapdos in Challenge Road, Moltres in Dusty Bowl). They flee after first encounter. You must chase them; use Stealth or Quick Balls.
- In the Battle Tower (post-game), talk to Professor Magnolia's assistant to receive a Type: Null. This is a secret gift Pokémon that evolves into Silvally.
- In the Crown Tundra DLC, you can find Cobalion, Terrakion, Virizion, and Keldeo through a hidden quest involving footprints in the grass.
- After the main story, you can upgrade your Rotom Bike to surf on water by speaking to a mechanic in Motostoke (at the gym entrance). This allows you to access previously unreachable areas, such as the hidden area behind the waterfall in the Wild Area near Lakeside Cave.
- In the Battle Tower (Wyndon), there is a secret room on the top floor accessible after you defeat the Director (not the battle challenge). Talk to the NPC Game Freak who gives you a Shiny Charm as mentioned. Also, there's a Poster that displays the development team; if you interact with it, you get a small message.
#### 3.2. Hidden Items in the Wild Area
#### 3.3. Secret Berry Spot
---
4. Easter Eggs & Developer References
#### 4.1. Kanto Homage
#### 4.2. Hidden NPC Dialogue
#### 4.3. The Missing Horse
#### 4.4. The Roaring Moon Reference
---
5. Secret Battle Mechanics & Developer-Intended Features
#### 5.1. Cram-o-matic (Isle of Armor)
- Apricorn + Apricorn = Poké Ball (rare chance).
- Berry + Berry = different berry.
- Mushroom + Mushroom = Big Mushroom or Tiny Mushroom.
The exact recipes are trial-and-error; this is a developer-intended puzzle.
#### 5.2. Max Soup (Isle of Armor)
#### 5.3. Hidden Ability Capsule Trick
#### 5.4. Secret Raid Battle Triggers
---
6. Exploit-Free Secrets for Shiny Hunting
---
7. Post-Game Secret Quests
#### 7.1. The Legendary Birds
#### 7.2. Type: Null
#### 7.3. The Swords of Justice
---
8. Secret Item in Motorcycle (Rotom Bike)
---
9. Developer Room in Battle Tower
---
10. Summary of No-Exploit Secrets
| Secret Type | How to Access | Reward |
|---|---|---|
| Hidden Fossils | Digging Duo (Skillful Sister) | Fossil Pokémon |
| Galarian Legendary Birds | Post-game roaming Wild Area | Legendary Catch |
| Type: Null | Battle Tower (after Champion) | Rare Pokémon |
| Shiny Charm | Complete Pokédex (400) then talk to Morimoto | Increased shiny odds |
| Max Soup | Isle of Armor (max mushrooms in raids) | Gigantamax unlock |
| Cram-o-matic Recipes | Isle of Armor Dojo | Rare items |
| Secret Berry Tree | Hammerlocke (behind hotel) | Daily berries |
| Rotom Bike Upgrade | Motostoke mechanic (post-game) | Water travel |
Final Notes
Pokémon Sword and Shield are built without conventional cheat codes. Instead, the developers hid numerous secrets and Easter eggs that reward exploration and completion. Use this guide to uncover every hidden item, Pokémon, and feature without resorting to exploits or hacks.