
Prey (2017)
## Prey (2017) – Game Introduction ### Genre & Developer **Prey (2017)** is a first-person immersive sim action-adventure game with survival horror and RPG elements. Developed by **Arkane Studios** (the creators of *Dishonored*, *Dishonored 2*, and later *Deathloop*) and published by **Bethesda S...
Download & Installation
Prey (2017) – Complete Download & Installation Guide
This guide covers all official ways to download and install Prey (2017) on PC (Steam, Epic Games Store, Xbox Game Pass for PC), Xbox One/Series X|S, and PlayStation 4 (including backward compatibility on PS5). Prey is not available on Nintendo Switch, Android, or iOS.
---
Platform Overview & Legitimate Sources
| Platform | Store / Subscription | Account Required | Notes |
|---|---|---|---|
| PC (Windows) | [Steam](https://store.steampowered.com/app/480490/Prey/) | Steam account | DRM-free? No, uses Denuvo (removed in later updates? Actually Denuvo was removed in 2020, so no DRM now). |
| PC (Windows) | [Epic Games Store](https://store.epicgames.com/en-US/p/prey) | Epic Games account | Includes all DLC (Mooncrash). |
| PC (Windows) | Xbox Game Pass (PC) | Microsoft account | Requires active Game Pass subscription. Uses Xbox app. |
| **Xbox One / Series X\ | S** | Microsoft Store (digital) / Physical disc | Microsoft account (for digital) |
| PlayStation 4 / PS5 | PlayStation Store (digital) / Physical disc | PlayStation Network account | PS5 runs via backward compatibility; no native PS5 version. |
| PC (Windows) | Bethesda.net Launcher (legacy, now closed) | N/A | No longer available; migrate to Steam.[^1] |
---
System Requirements (PC)
#### Minimum
- OS: Windows 7/8/10 (64-bit)
- CPU: Intel Core i5-2400 or AMD FX-8320
- RAM: 8 GB
- GPU: NVIDIA GTX 660 (2 GB) or AMD Radeon 7850 (2 GB)
- DirectX: Version 11
- Storage: 20 GB free space (HDD recommended; SSD improves loading)
- Sound: DirectX compatible
- OS: Windows 10 (64-bit)
- CPU: Intel Core i7-2600K or AMD FX-8350
- RAM: 16 GB
- GPU: NVIDIA GTX 970 (4 GB) or AMD R9 290 (4 GB)
- DirectX: Version 11
- Storage: 20 GB free space (SSD strongly recommended)
- Sound: DirectX compatible
- Digital: Purchase from Microsoft Store on console or web. It auto-adds to your library. Go to My games & apps → select Prey → Install.
- Physical: Insert disc. Console installs from disc (and downloads patches).
- Storage: ~20 GB. Ensure enough internal or external drive space.
- Playing on Series X|S: Prey runs via backward compatibility with auto HDR and faster load times.
- Digital: Buy from PlayStation Store (on console or web). Download from Library → Purchased.
- Physical: Insert disc. Install from disc.
- PS5: Insert PS4 disc (or launch digital version from library). PS5 runs in backward compatibility mode. No separate PS5 version.
- Storage: ~20 GB. Use internal or external USB drive (PS4 games can be played from extended storage on PS5).
- Steam: Free Steam account; must own game.
- Epic Games: Free Epic account; game must be purchased.
- Xbox (PC/Console): Microsoft account; Game Pass subscription needed for PC Game Pass.
- PlayStation: PlayStation Network account; game must be purchased.
#### Recommended
Note: The game runs well on modern hardware. For ray tracing or high FPS, stronger GPU/CPU is needed – Prey does not support RTX natively.
---
Installation Step-by-Step by Platform
#### PC – Steam
1. Install Steam: Download from [store.steampowered.com](https://store.steampowered.com) and install.
2. Create/Log in to your Steam account.
3. Purchase Prey (or redeem a key). Go to Store → search "Prey". Add to cart and complete purchase.
4. Install: Go to your Library → find Prey → click Install.
5. Choose Location: Select drive (ensure at least 20 GB free). Click Next.
6. Download: Steam downloads ~20 GB. Internet speed affects time.
7. Launch: After download, click Play. First launch may install prerequisites (DirectX, Visual C++).
#### PC – Epic Games Store
1. Install Epic Games Launcher from [epicgames.com](https://www.epicgames.com/store/en-US/).
2. Log in to your Epic account.
3. Claim/Buy Prey: Search "Prey" in store. If purchased, it appears in Library.
4. Install: In Library, click Prey → Install. Choose location and confirm.
5. Wait for Download: Similar size ~20 GB.
6. Launch: Click Launch button.
#### PC – Xbox Game Pass
1. Subscribe to Xbox Game Pass Ultimate or PC Game Pass via Microsoft Store or [xbox.com](https://www.xbox.com/en-US/games/pc-game-pass).
2. Install Xbox App from Microsoft Store (if not already).
3. Log in with your Microsoft account.
4. Find Prey: In Xbox App, search "Prey". Click Install.
5. Select Drive: The app installs to default WindowsApps folder (customizable in Settings).
6. Download & Play: Installation proceeds; click Play when ready.
#### Xbox One / Series X|S
#### PlayStation 4 / PS5
---
Account Requirements
No additional Bethesda.net login is required for any version (legacy launcher discontinued).
---
First Launch Setup
1. Graphics Options: At first launch, the game detects hardware. Adjust settings:
- Resolution: Match your monitor.
- V-Sync: Off if you have adaptive sync monitor.
- Graphics Quality: Start with High; lower if FPS below 60.
- FOV: Default 90; can increase for wider view (up to 110).
2. Audio: Ensure correct output device and language.
3. Controls: Keyboard/mouse or gamepad. Adjust sensitivity.
4. Accessibility: Subtitles can be toggled, text size options exist.
5. Save & Exit: Once in main menu, settings saved automatically.
Note: The game may prompt to install additional components (DirectX, VC++). Accept.
---
Common Installation Errors & Fixes
| Error | Cause | Solution |
|---|---|---|
| Disk Write Error (Steam) | Corrupted download cache or insufficient permissions | Verify integrity (see below); run Steam as admin; clear download cache in Settings → Downloads. |
| Missing DLL (e.g., xinput1_3.dll) | DirectX not installed | Install DirectX from [Microsoft](https://www.microsoft.com/en-us/download/details.aspx?id=35) or from _CommonRedist folder in game directory. |
| Low FPS / Stutter | Outdated drivers or background apps | Update GPU drivers (NVIDIA/AMD); close overlays (Discord, Xbox Game Bar); lower graphics settings. |
| Installation stuck at 0% (Xbox App) | Corrupted Microsoft Store cache | Run `wsreset` in Command Prompt as admin; reset Xbox app via Settings → Apps. |
| Game won't launch / black screen | Antivirus blocking | Add game executable to antivirus exceptions; run as admin. |
| Sound issues | Audio format mismatch | Set Windows audio to 16-bit 48000 Hz; disable spatial sound. |
| Save game corruption (rare) | Cloud sync conflict | Disable cloud saves temporarily (Steam: right-click game → Properties → General → uncheck cloud). |
- Steam: Right-click Prey → Properties → Local Files → Verify integrity of game files.
- Epic: In Library, click three dots on Prey → Manage → Verify.
- Xbox App: In My Library, select Prey → ... → Manage → Files → Verify and repair.
- Console (Xbox/PS): No direct verify; delete local save? Uninstall and reinstall if issues persist.
- Denuvo Removal: Prey's original Denuvo DRM was removed in a 2020 update; no performance impact from DRM now.
- Mods: Prey supports mods (via Nexus Mods). Install using Vortex or manually. Enable mods in `Documents\My Games\Prey\gameprefs.ini`.
- Ultrawide Support: Native 21:9 support is good; HUD can be modded for 32:9.
- High Refresh Rate: The engine (CryEngine) supports high FPS; cap via in-game V-Sync or external.
---
Post-Installation Verification
1. Launch the game and check that the main menu loads without errors.
2. Start a new game and play for at least 5 minutes to ensure no crashes.
3. Check for updates:
- On PC, store/launcher auto-updates. Manually check for patches.
- On console, ensure latest console system update and game patch installed.
4. Verify DLC (Mooncrash): If purchased, it should appear in main menu under "New Game" → "Mooncrash".
5. Adjust settings for optimal performance. Use benchmarks like inside the game (Volta area) or external tools.
6. Back up saves:
- Steam: `C:\Program Files (x86)\Steam\userdata\[userID]\480490\remote`
- Epic: `C:\Users\[username]\Documents\My Games\Prey\SaveGames`
- Xbox: Cloud saves only (manual backup not possible).
- PlayStation: Cloud save via PS+ or USB backup.
---
Additional Tips
---
[^1]: Bethesda.net launcher shut down in May 2022. Players could migrate their game libraries to Steam. If you owned Prey on Bethesda.net, you should have received a free Steam key. Contact Bethesda support if missing.

Game Introduction
Prey (2017) – Game Introduction
Genre & Developer
Prey (2017) is a first-person immersive sim action-adventure game with survival horror and RPG elements. Developed by Arkane Studios (the creators of Dishonored, Dishonored 2, and later Deathloop) and published by Bethesda Softworks, the game was released on May 5, 2017 for Microsoft Windows, PlayStation 4, and Xbox One. It has received backward compatibility updates for Xbox Series X|S and PlayStation 5 via enhanced performance modes.
Story Overview
The game takes place in the year 2032 aboard Talos I, a massive space station orbiting the Moon. You play as Morgan Yu, a scientist who wakes up on the station with amnesia, only to discover that an alien species called the Typhon has overrun the facility. The Typhon are hostile, shape-shifting organisms that can mimic everyday objects and even possess human corpses. Morgan must unravel the mystery of the Typhon outbreak, explore the station’s interconnected environments, and make crucial choices that affect the story’s ending—all while surviving against relentless alien threats and uncovering the morally ambiguous experiments conducted by the corporation TranStar.
Setting
Talos I is a beautifully designed, interconnected space station that feels like a character itself. Divided into multiple themed sectors—like the Arboretum, Life Support, Neuromod Division, and the Hull Breach—the station is a mix of luxury corporate spaces, sterile laboratories, and hazardous maintenance areas. Zero‑gravity sections, explosive decompression, and environmental puzzles reward thorough exploration and creative problem‑solving.
Main Characters
- Morgan Yu – The protagonist, whose gender and background can be partially customized. Morgan is a researcher on Talos I, and their choices throughout the game define the narrative.
- Alex Yu – Morgan’s brother and the CEO of TranStar. He guides you via radio transmissions, but his true intentions are ambiguous.
- January – An AI construct created by Morgan to assist with amnesia recovery and to stop the station’s self‑destruct sequence.
- Typhon – The alien species. Notable subtypes include the floating Mimic (can disguise as objects), the Phantom (humanoid psychic attacker), the Technopath (controls machinery), the Weaver (spawns smaller Typhon), and the Nightmare (a fearsome hunter that appears at random).
- Prey: Mooncrash (released June 2018) – A standalone roguelike expansion set in a lunar facility. You control multiple characters in a time‑loop scenario, each with unique abilities and objectives. It adds procedural generation, permadeath, and a high replayability focus.
- Prey: Typhon Hunter (free content update, 2018) – A multiplayer hide‑and‑seek mode where one player is a human survivor and the rest are Typhon Mimics disguised as objects. This mode is no longer officially supported but remains accessible for local matches.
- Cosmetic packs – Several DLC packs offer weapon skins and other cosmetic items; they are purely aesthetic and do not affect gameplay.
- Mind‑bending environmental puzzles – Use the GLOO Cannon to create platforms, block turrets, or freeze enemies. Navigate zero‑gravity with the Artax Propulsion System. Use the Recycler Charge to break down objects for crafting materials.
- Neuromods & Skill Tree – Players can install Neuromods to unlock human (security, hacking, crafting) or alien (mimic matter, telekinesis, psychoshock) abilities. The choice to use alien upgrades triggers a security system and affects story outcomes.
- Dynamic AI & Oxygen System – Turrets can be reactivated, and hacking allows you to set them on enemy or ally. Explosive decompression is a constant threat in breached areas.
- Moral Narrative – The story explores themes of identity, memory, corporate ethics, and what it means to be human. Your decisions impact the ending and the fate of the station’s crew.
- No hand‑holding – The game rarely marks objectives on a map; you must read emails, listen to audio logs, and piece together clues organically.
Core Appeal
Prey excels in offering player agency and emergent gameplay. There is rarely a single solution to any obstacle: you can hack, repair, use psychokinetic abilities via Neuromods, craft tools, or simply find alternate paths. The game rewards cautious exploration, lateral thinking, and resource management. Its immersive sim DNA means you can approach combat, stealth, and puzzle‑solving exactly as you wish.
Target Audience
This title is ideal for fans of immersive sims (System Shock, BioShock, Dishonored), science‑fiction horror, and non‑linear narratives. It appeals to players who enjoy uncovering lore through emails and audio logs, experimenting with different skill trees (human vs. alien abilities), and replaying to see alternate endings based on moral choices.
Game Modes & Online/Offline Support
Prey (2017) is a single‑player only game. There are no multiplayer or co‑op modes. The base game features a single campaign with multiple branching paths. A New Game + mode is available after completion, allowing you to carry over some upgrades. The game is fully playable offline once installed; no internet connection required for campaign progression.
DLC / Expansions
What Makes Prey Unique
In summary, Prey (2017) is a masterclass in immersive sim design—a haunting, intricate, and deeply rewarding experience that challenges your creativity and decision‑making at every turn.
Getting Started
Getting Started
Welcome to Prey (2017), Arkane Studios’ masterful immersive sim set aboard the space station Talos I. This guide is written specifically for brand-new players to make your first hours smooth, efficient, and fun. We’ll cover everything from the opening moments to your first day’s goals, so you can avoid common pitfalls and start mastering the station from the very beginning.
---
First Hour Walkthrough
Your journey begins in a simulation. Here’s a step-by-step breakdown of the first hour (spoiler-free for story but detailed for gameplay):
1. Waking Up in Morgan’s Apartment (10 min)
- You start in a tidy apartment. Explore every drawer, cabinet, and locker. Look for the keycard on the desk, the wrench, and the Tranq gun (sedative pistol).
- Talk to the brother (through the glass) and complete the initial tests (sign a waiver, use the arm scanner).
- Crucial: Find the Neuromod device on the coffee table and install it – this unlocks your first ability (sprint).
- Head to the testing area. Scan the objects as instructed, then pick up the dart gun and shoot the target.
2. The Simulation Test (10 min)
- You enter a replica of the station – this is a test of your skills.
- Follow the objectives: locate the Mimic, use the wrench to kill it.
- After killing it, a fake Morgan appears; examine the body for a keycard.
- Use the elevator to reach the shuttle bay.
- Pro tip: Take your time. Loot everything – there are plenty of resources even in the simulation.
3. The Real Wake-Up (10 min)
- After the simulation, you wake in the real Morgan’s apartment.
- The station is now in chaos. Grab the wrench and the GLOO Cannon (on the wall near the kitchen).
- Use GLOO to block the broken window (or just avoid it) and head to the lobby.
- You’ll encounter your first real Mimic – use the wrench (or GLOO to slow it) to kill it.
- Important: Scan the Mimic with the Psychoscope (you’ll get it soon) to unlock its research.
4. Meeting January & First Objectives (20 min)
- In the lobby, you’ll hear January (an operator) over the intercom. Follow it to the Neuromod Division.
- January gives you the Psychoscope (wear it to scan enemies and objects) and a fabrication plan for the Shotgun.
- Your first clear goal: Get to the Hardware Labs to find the Shotgun parts.
- Along the way, scavenge everything: suit repair kits, spare parts, ammo, recycler charges, food.
- Don’t skip the side office with the fabricator – you can make the Shotgun once you have the plan and materials.
---
Character Creation
Prey’s character creation is minimal:
- Gender: You choose Morgan Yu’s gender (male or female) at the very start. This affects only voice lines and appearance – no gameplay differences.
- Name: Morgan Yu is fixed.
- No stats or class selection: All skills are learned later via Neuromods.
Confirmation: The choice is made in the first scene when you look in the mirror. Pick whichever you prefer – there’s no wrong answer.
---
Controls (All Platforms)
#### PC (Keyboard + Mouse)
| Action | Key |
|---|---|
| Move | W, A, S, D |
| Look | Mouse |
| Jump | Space |
| Crouch | Ctrl |
| Run | Shift (hold) |
| Interact | E |
| Attack (melee) | Left-click |
| Throw object | G |
| Inventory | Tab |
| Weapon Wheel | Q (hold) |
| Reload | R |
| Use Medkit | H |
| Use Psi | Z (if you have psi abilities) |
| Lean | Q + side mouse button? Actually lean is automatic near edges. |
| Scanner (Psychoscope) | Middle Mouse Button or V |
| Fabricator & Recycler | Stand near, press E |
| Quick switch weapon | 1, 2, 3, 4 (or mouse wheel) |
#### Xbox (Xbox One / Series X|S)
| Action | Button |
|---|---|
| Move | Left Stick |
| Look | Right Stick |
| Jump | A |
| Crouch | B (hold) |
| Run | Left Stick (click) |
| Interact | X |
| Attack | Right Trigger (shoot), left trigger (alt fire/throw) |
| Reload | Y |
| Inventory | Menu button |
| Weapon Wheel | RB (hold) |
| Scanner (Psychoscope) | LB |
| Use Medkit | D-Pad Up |
| Use Psi | D-Pad Down (if equipped) |
| Lean | Auto – hold left stick toward cover edge |
| Fabricator | Stand near, press X |
| Action | Button |
|---|---|
| Move | Left Stick |
| Look | Right Stick |
| Jump | X |
| Crouch | Circle (hold) |
| Run | L3 (click left stick) |
| Interact | Square |
| Attack | R2 (shoot), L2 (alt fire/throw) |
| Reload | Triangle |
| Inventory | Touchpad (click) or Options |
| Weapon Wheel | R1 (hold) |
| Scanner (Psychoscope) | L1 |
| Use Medkit | D-Pad Up |
| Use Psi | D-Pad Down |
| Lean | Auto – hold left stick against wall |
UI Overview
Your HUD is minimalist but informative:
- Health Bar (top left): Your physical health. Red when low.
- Suit Integrity (below health): Your space suit’s durability. If it reaches zero, you take damage in vacuum or hazardous areas.
- Psi Bar (green bar, right of health): Only appears after you install a psi ability. Used for powers.
- Crosshair (center): Changes shape when aiming at interactables.
- Weapon & Ammo (bottom right): Current weapon, ammo count (magazine / total).
- Objective Marker (top center): Shows your current mission waypoint.
- Compass (top): Shows direction and points of interest (green dots for objectives, white for loot containers).
- Stamina Ring (around crosshair): Appears when sprinting or using heavy attacks.
- Quick Slots (bottom left): Up to 4 items (medkit, psi hypo, etc.) assigned via inventory menu.
- Inventory Screen (Tab / Menu): Shows all items, weapon wheel (hold Q/R1/RB).
- Psychoscope Scanner Overlay: When using scanner, enemies/objects highlight with info and research progress.
- Fabricator / Recycler: When near a machine, a UI appears showing available materials and recipes.
- Save the technician from the fire (in the starting area).
- Find the safe code in the Lobby office (code: 0451?).
- Look for the “Morgan’s Office” side quest to learn about the story.
- Explore thoroughly: Search every desk, vent, and locker. Loot is the lifeblood of Prey; you’ll need everything.
- Read emails and notes: They provide quest clues, passwords, and lore.
- Use the GLOO Cannon creatively: Fire at walls to create climbing steps, block vents (prevent enemies from spawning), or freeze mimics.
- Recycle everything you don‘t need: Junk like bananas, cups, and spare parts can be turned into raw materials.
- Fabricate often: Use materials to make ammo, medkits, and neuromods.
- Save frequently: The game has no auto-save in some areas; manual save (F5 on PC, quick save menu on consoles) every 10 minutes.
- Scan enemies early: Researching mimics and phantoms unlocks damage bonuses.
- Upgrade the Wrench: It’s your most reliable weapon – upgrade it at workbenches.
- Carry a Recycler charge: They can instantly turn a pile of junk into materials and also harm enemies.
- Don’t engage multiple enemies without a plan: Mimics can swarm – use GLOO to block paths or climb to safety.
- Don’t ignore suit integrity: If your suit is damaged, you’ll take damage from vacuum. Always carry a repair kit.
- Don’t waste ammo on environmental objects: Use melee or GLOO to clear debris instead.
- Don’t sell or recycle neuromods: They are essential for unlocking new skills – use them on the chair immediately.
- Don’t skip side objectives that grant neuromods: They are the fastest way to grow stronger.
- Don’t neglect hacking or repair skills early: Some doors and turrets require these to progress easily.
- Neuromods – Use them at the injection chair (in Morgan’s office, Neuromod Division).
- Fabrication Materials – Minerals, Synthetic Materials, Biological Materials (needed for everything).
- Weapon Upgrade Kits – Save for shotgun and wrench upgrades.
- Weapon Parts – To repair your weapons at workbenches (reduces damage).
- Medkits – Keep at least 3 at all times.
- PSI Hypo – If you plan to use abilities, keep 3-4.
- Bananas, cups, bottles, cans – They give materials.
- Spare parts (if you have a lot) – Keep 2-3 for repairs, recycle the rest.
- Junk weapons (like the pistol you find early) – Keep one, recycle duplicates.
- Unwanted food – Only keep enough to heal (~100 hp total); recycle the rest.
- [ ] Completed the simulation test and woke up on the real Talos I.
- [ ] Installed the first Neuromod (sprint ability).
- [ ] Obtained the Psychoscope from January.
- [ ] Scanned at least 1 Mimic and 1 environment object (crate, plant).
- [ ] Fabricated the Shotgun (found the plan in Hardware Labs or bought it).
- [ ] Upgraded either the Wrench or Shotgun at a workbench at least once.
- [ ] Crafted at least 2 Suit Repair Kits.
- [ ] Saved the game manually at least once.
- [ ] Recycled all banana peels, cups, and other junk.
- [ ] Stashed important items in a safe spot (e.g., Morgan‘s office).
- [ ] Listened to all audio logs and read emails in the main office areas.
- [ ] Reached the Hardware Labs and found the first “full” shotgun blueprint.
- [ ] Unlocked at least one Security Station (the map update helps navigation).
- [ ] Killed at least 3 Mimics using the GLOO + wrench combo.
- [ ] Unlocked the “Repair” skill (requires one Neuromod – recommended before Hacking).
Note: The game pauses when you open inventory or weapon wheel – use this to plan quickly during combat.
---
Essential Early Objectives
Your first main quests (in order of appearance):
1. Wake Up – Escape your apartment and reach the lobby.
2. The Neuromod – Install the device from the coffee table.
3. The Simulation – Complete the test (auto-trigger after leaving apartment).
4. Reach the Neuromod Division – Follow January’s voice to the Neuromod office (level 1 of the station).
5. Get the Psychoscope – January gives it to you.
6. Obtain the Shotgun – Fabricate or find the Shotgun plan, then build it.
7. Visit the Hardware Labs – Collect the spare parts and fabrication materials.
8. Learn to Scan – Scan at least one Mimic and one environment object (to unlock research).
9. Get a Suit Repair Kit – Find or craft one to restore suit integrity.
10. Access GUTS – You’ll need to go through the GUTS (zero-g tunnel) to reach the Arboretum later.
Side Objectives (not required but highly recommended):
---
What to Do First and What to Avoid
#### ✅ Do First
#### ❌ Avoid
---
Early Resource Priorities
Resources are finite. Prioritize these:
Always Keep:
Recycle Immediately:
Crafting Priorities (first 2 hours):
1. Shotgun ammo – Most useful early weapon.
2. GLOO Cannon ammo – Used for puzzles and blocking.
3. Medkits – You’ll burn through them.
4. Suit Repair Kits – Essential for exploring vacuum areas.
5. Neuromods (if you have the advanced recipe) – Requires specific materials.
---
Common Beginner Mistakes
1. Not saving often – You can lose 30 minutes of progress if you die. Manual save every 5-10 minutes.
2. Killing mimics with guns from a distance – They’re fast. Use the wrench + GLOO combo: freeze them with GLOO, then whack.
3. Ignoring the Psychoscope scanning – Scanning yields research points that give you permanent damage bonuses.
4. Over-encumbering yourself – Inventory weight is limited (you can carry unlimited inventory, but heavy items slow you? Actually no weight limit, just capacity limits? Prey uses a grid inventory – items have size, not weight. So you can carry many small items. But you have limited space. Don’t hoard unnecessary junk that eats grid space. Prioritize small, valuable items like neuromods and ammo.)
5. Not using the environment – You can climb on GLOO platforms, throw explosive canisters, hack turrets to fight for you.
6. Wasting Neuromods on weak skills – Avoid early skills like “Hacking I” unless you need it. Prioritize “Sprint”, “Wrench Proficiency”, “Shotgun Proficiency”.
7. Fighting Phantoms head-on – They have ranged attacks. Use cover, throw recycler charges, or avoid until you have a shotgun.
8. Forgetting to repair weapons – Weapons deal reduced damage when worn. Check workbenches and use Weapon Parts.
9. Not reading crew emails – Many safes and turrets have passwords hidden in office emails.
10. Trying to kill every enemy – Some are best avoided by sneaking or using alternative paths (vents, breakable walls).
---
Day-One Checklist
Use this list to ensure you’re on the right track after your first play session (roughly 2-3 hours).
Final Advice: Don’t be afraid to die – you’ll learn. The game rewards curiosity. If you get stuck, look for a vent, a loose grate, or a new path. Prey is about finding your own way. Good luck, Morgan. The station is yours to save – or not.
---
End of Getting Started guide. Remember: Always save before a big fight, recycle often, and use every tool at your disposal.
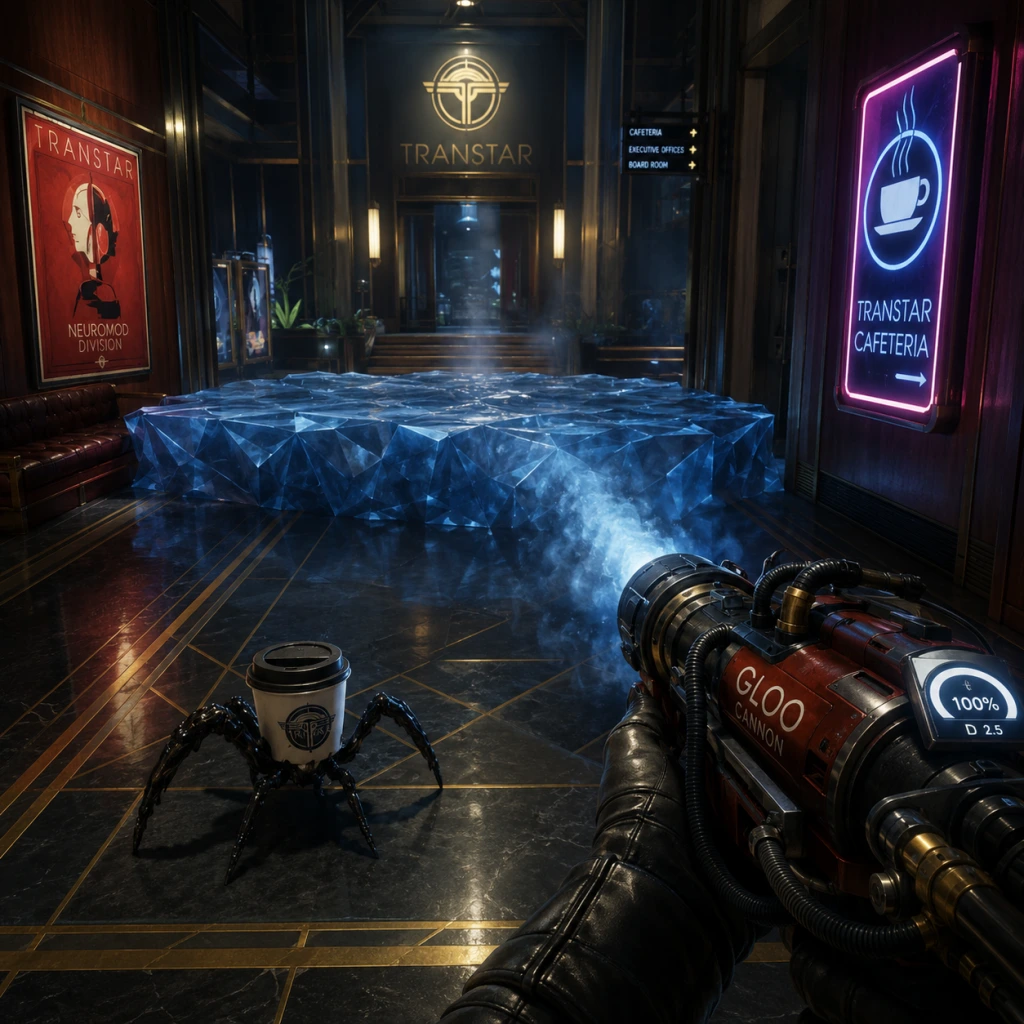
Core Gameplay
Core Gameplay Overview
Prey (2017) is an immersive sim that blends first-person action, survival horror, and RPG systems. You play Morgan Yu, aboard the space station Talos I after a Typhon outbreak. Every choice you make—from combat tactics to how you upgrade your abilities—shapes your experience. The core gameplay loop revolves around exploration, scavenging, combat, upgrading, and problem-solving.
Main Gameplay Loop
1. Explore the interconnected environments of Talos I (lobbies, labs, crew quarters, cargo bays, zero-g sections).
2. Scavenge for resources (materials, weapons, ammo, neuromods, chipsets) from corpses, crates, cabinets, and recycler stations.
3. Combat hostile Typhon enemies (Mimics, Phantoms, Technopaths, etc.) using a mix of weapons, GLOO, and Typhon powers.
4. Progress by completing main quests and side missions, which open new areas and provide neuromods.
5. Upgrade Morgan via neuromods (human or Typhon abilities) and weapon chipsets.
6. Craft items at fabricators using recycled materials; repair tools, fabricate ammo, medical kits, and exotic items.
Combat & Interaction Systems
- Weapons: Wrench (melee), GLOO Gun (freeze enemies, create platforms), Pistol, Shotgun, Disruptor Stun Gun (stun robotic enemies), Harpoon (later), Q-Beam (high-energy beam), Golden Gun (unique pistol for finishing moves).
- Typhon Powers: Acquired via Neuromod implants:
- Stealth: Crouch to reduce noise, use GLOO to block vents, hack terminals to disable security, disable cameras/turrets with Disruptor Stun.
- Environment Interaction: Open/close doors, hack (if skill learned), pick locks with Mimic Matter, use fabrication, hack operator bots, recycle items, move heavy objects with Kinetic Blast.
- Neuromods: Consumable items that grant skill points. Installed at Neuromod Division chairs. Each neuromod adds a point, used to unlock tiers of human or alien skills.
- Skill Trees:
- Chipsets: Passive boosts (e.g., faster reload, extra health, reduced damage) found or fabricated.
- Upgrade Kits: Enhance weapons (damage, magazine, fire rate) found throughout the station.
- Talos I is a fully explorable space station with multiple interconnected areas. Many sections require backtracking after acquiring new abilities (e.g., Power Phantasm to break weak walls, Mimic Matter to slip through small gaps, Repair to fix elevators).
- Zero-g areas (outside, certain labs) require a Jetpack (Suit Mod) or Arming Key locations. Use GLOO to create floating platforms.
- Secret rooms and stashes often accessible via hidden vents, passwords from emails, or destroying breakable walls with explosives.
- Main Quests: “The Empty Threat” (get to Neuromod Division), “The Lost and Found” (retrieve Morgan’s keycard), “Abandoned Ship” (investigate the escape pod), “The Breach” (reactivate satellite), “The Prison” (face your past), “The Apex” (final confrontation).
- Side Quests: “The Black Market” (smuggler), “Dr. C’s Request” (research terminal), “The Arms Dealer” (weapons upgrade), “Crew Members” (rescue or help survivors).
- Radio Calls: Random survivors or quest triggers broadcast on station frequency.
- Materials: Organic, Synthetic, Mineral, Exotic. Scavenged from environment, recycled from items.
- Fabricators: Use materials to create ammunition, medical kits, weapons, chipsets, neuromods (if you have blueprint).
- Kiosks: Vending machines that sell minor items (soda, candy) for spare parts; can be hacked for discounts.
- Neuromods themselves are currency—trade them (via vendors or specific NPCs) for favors or upgrades.
- Human Specialist: Focus on Repair, Hacking, Security, and Stealth. Ideal for non-lethal approaches, turret control, and exploring secured areas.
- Typhon Dominant: Invest in alien powers—high damage output, area control, but attracts Nightmare (special Typhon that hunts you).
- Balanced: Mix human and alien skills for versatility. Many puzzles require specific abilities (e.g., Mimic Matter to enter small spaces, Repair to restore broken doors).
- Endgame Flexibility: Neuromods can be removed/replaced (via Research skills) but with cost. Respec is possible late-game through a special machine in Deep Storage.
- After completing “The Apex” (opening corrupted heart) and confronting the Typhon boss, you choose between several endings (activate Nullwave, use the Neuromod bomb, trigger station self-destruct, or escape).
- There is no traditional post-game; once you finish, the game resets to the last save before the final choice. However, completion unlocks a New Game+ mode (if you import a save) or the Prey: Mooncrash standalone expansion (not part of base game).
- The Apex fight requires heavy resource preparation—stockpile medkits, Psychoshock (to interrupt its attacks), and high-damage weapons (Q-Beam, Shotgun with fire ammo).
- Mimics are fast but weak; one wrench strike often kills a normal Mimic. Use GLOO to freeze them for easy kills.
- The GLOO Gun can also block vents (prevents enemies from spawning) and create makeshift stairs.
- Avoid engaging Phantoms (first encountered in Psychotronics) until you have a pistol or at least a charged wrench attack. Use stealth to bypass them.
- Gather resources: recycle any excess items (coffee cups, spare parts) at yellow Recycler machines. Fabricate medkits and pistol ammo.
- Use the Recycler charges (green spheres) to recycle large collections of items (throw in a pile of junk).
- Fabricate ammunition in bulk but prioritize neuromods (blueprint found in Psychedelic lab or from dead scientists).
- Unlock the Power Phantasm ability (alien) to break red structural walls—opens many shortcuts.
- Mimic Matter (need 1 alien mod) lets you slip through small maintenance hatches (often leading to hidden rooms with neuromods).
- Human: Invest in Suit Modification (increase inventory), Medical (better medkits), and Security (turret hacking). This path supports exploration longevity.
- Alien: Get Psychoshock (ranged damage + silence) and Kinetic Blast (push enemies). Keep no more than 3 alien mods to avoid persistent Nightmare.
- Balanced: 1–2 points in Hacking, 1 in Psychoshock, 1 in Kinetic Blast, rest in human skills. This is recommended for first playthrough.
- Heavy Alien: All tree points into Typhon powers. Get Mind Jack (control robots) and Superthermic Charge (area burn). Combine with Combat Focus from human tree for unstoppable combos.
- Human Stealth: Max Stealth, Security, Repair, and Leverage (pick up heavy objects). Use silenced pistol or Disruptor to clear rooms undetected.
- Jack-of-all-trades: At least 1 point in Hacking, Repair, Suit Modification, Psychoshock, Kinetic Blast, and Mimic Matter. Fill remaining points into Combat Focus and Medical.
- Return to the Neuromod Division to install any remaining neuromods. Respec if needed (use the machine in Deep Storage – sacrifice neuromods to redistribute points, or use the “Reset” machine in Psychotronics after finding the access code).
- Craft at least 30 medkits, 100 rounds of shotgun ammo, 40 Q-Beam charges, and 5–10 Recycler charges.
- Equip the Psychoscope (mandatory) and the Artemis Armor (best in slot, found in the self-sacrifice of a crew member near the Shuttle Bay).
- Bring a Disruptor Stun Gun with extra cells for robotic Typhon segments.
- Consider a high-level Hacking (to disable security nodes) and Repair (to fix broken panels).
- Nullwave Transmitter: Activates a device that destroys all Typhon within range, including Morgan (suicide).
- Neuromod Bomb: Detonates the station’s neuromod supply, wiping out Typhon and killing all survivors (evil).
- Self-Destruct: Blows up Talos I (can escape in escape pod if you repaired it earlier).
- Escape Alone: Leave Morgan to his fate? Actually, the final cutscene shows Morgan hitting the escape pod alone, leaving the station to be destroyed or Typhon to spread? The escape ending requires you to have repaired the pod and not taken the self-destruct option.
- Kinetic Blast (push enemies), Remote Manipulation (grab objects), Mind Jack (temporarily control robotic enemies), Psychoshock (damage and silence Typhon), Phantom Shift (dodge), Superthermic/Electrostatic/Corrosive charges, Mimic Matter (transform into objects).
Progression System
- Human: Strength, Repair, Medical, Security, Hack, Stealth, Suit Modification, Laboratory Research, etc.
- Alien: Typhon powers (Kinetic Blast, Psychoshock, Mimic Matter, etc.) — these increase Typhon awareness and risk of Nightmare attacks.
Exploration
Quests & Missions
Economy & Crafting
Character & Build Growth
Endgame Structure
---
Core Gameplay by Player Progression Tiers
Early Game (Hours 1–5)
Starting location: Morgan’s Apartment → Skylight Bridge → Neuromod Division. You have a wrench, a GLOO Gun, and limited supplies.
Primary Objectives: Learn basic survival: how to kill Mimics (use wrench or GLOO + wrench combo), how to recycle items, and how to install the first neuromod. The main quests send you to the Lobby, Psychotronics, and Talos I Hallways.
Combat Tips:
Exploration: Focus on main path but pick up every neuromod (glowing orange). Hidden rooms: use the GLOO Gun to extinguish fires (fire extinguisher or GLOO) to access locked lockers. Read emails for passwords (e.g., safe codes).
Quests: “The Empty Threat” introduces combat; “The Lost and Found” teaches hacking (or Mimic Matter) to open locked doors. Side quest “Breaking the Ice” (in Crew Quarters) rewards a keycard.
Build Advice: Early neuromods should go into Repair (fix turrets) and Hacking (open locked containers). One point in Combat Focus (slow time) greatly eases fights. Avoid Typhon powers until you have a handle on combat and resources.
Mid Game (Hours 6–15)
Location Expansion: Arboretum, Cargo Bay, Crew Quarters, Hardware Labs, Arboretum Greenhouse, GUTS (zero-g tunnel).
Weapons & Upgrades: You now have access to a shotgun (near Hardware Labs after power restoral), Disruptor Stun Gun (for robotic enemies like Operators), and possibly a Harpoon (from wounded volunteer side quest). Upgrade kits for weapons become more common.
Typhon Encounters: Phantoms appear regularly; some are upgraded (Etheric, Thermal). Mimics occasionally mimic furniture. Technopaths (Tech-phantom) appear in Cargo Bay—shock them with Disruptor or target weak spot. Nightmare can appear if you have high alien neuromod investment.
Exploration & Resource Management:
Key Side Quests: “The Black Market” (find smuggler’s stash in Cargo Bay), “Dr. C’s Request” (collect research data from various labs), “The Arms Dealer” (upgrade wrench to max and get Golden Gun).
Build Options:
Combat Strategy: Use GLOO to freeze Phantoms, then shotty them point-blank. For Technopaths: destroy the white glowy sphere under their body (if visible) or use Disruptor. Against Nightmare: run and hide behind doors (it cannot open doors) or use Psychoshock to weaken it.
Late Game (Hours 16–25)
Areas Unlocked: Deep Storage (requires Mimic Matter or Repair to bypass security), Exterior areas (requires Arming Key from Deep Storage), Life Support (poisonous gas), Power Plant (radiation hazards), Shuttle Bay (escape pod parts).
Weapons & Abilities: Acquire the Q-Beam (requires blueprint from the Lobby safe after hacking – code 0451). The Golden Gun (from side quest “The Arms Dealer”) deals heavy damage. You can now fabricate Neuromods at the fabricator (costs exotic materials). Typhon powers like Mimic Matter II and Phantom Shift become available.
Enemy Scaling: Heavy Phantoms (with shields or flame aura) appear. Telepath enemies (control enemies via psychic blast) in Deep Storage. Apex Typhon begins sending multiple Nightmares if you have high alien mods.
Progression Checkpoints: The main quests “The Breach” (activate satellite), “The Prison” (enter Coral bubble), “The Apex” (final mission). Side quests like “Crew Members” (find survivor bodies) and “Ammo Press” (make ammo fabricator) are great for resource building.
Build Optimization: By now you should have 15–20 neuromods. Specialize:
Resource Strategy: Late game, exotic materials are rare; use Recycler on Typhon corpses to get Exotic. Fabricate Neuromods only when needed (25 exotic per mod). Stockpile ammo and medkits before final areas.
Puzzles & Secret: The “Statue Puzzle” in Deep Storage requires Kinetic Blast or Mimic Matter to align statues. The “Voice of the Stars” audio logs help locate hidden crew stashes.
Endgame (Final 2–4 hours)
Location: The final area is the Apex—a living Typhon asteroid attached to Talos I. Once you enter the corrupted heart, you cannot return to the station. Prepare thoroughly.
Preparations Before Apex:
The Apex Fight:
1. Move through the Typhon biological structure, using Psychoshock to destroy bulging cyst-like obstacles.
2. Face waves of Phantoms and Mimics. Use GLOO to block paths and create high ground.
3. Encounter “The Heart” – shoot its three glowing nodes while avoiding its tentacle sweeps. The Q-Beam is most effective. Dodge its attacks using Phantom Shift or Combat Focus.
4. After destroying the Heart, the station will start to collapse. Run to the escape pod.
Ending Choices (all activated via the giant command panel in the Apex):
No Post-Game: After credits, you can reload save before final choice or start New Game Plus (which carries over your neuromods, upgrades, and weapons) for a more powerful playthrough. There is no additional content after ending.
Summary Table of Tier Highlights
| Tier | Key Areas | Main Threats | Essential Upgrades | Recommended Build |
|---|---|---|---|---|
| Early | Neuromod Division, Lobby, Psychotronics | Mimics, Basic Phantoms | Wrench, GLOO Gun, 1 Hacking | Human (Repair, Hacking) |
| Mid | Cargo Bay, Arboretum, Hardware Labs | Etheric/Thermal Phantoms, Technopaths | Shotgun, Disruptor, 1 Psychoshock | Balanced (Hacking+1 Alien) |
| Late | Deep Storage, Exterior, Life Support | Heavy Phantoms, Telepaths, Nightmare | Q-Beam, Golden Gun, Mimic Matter II | Heavy Alien or Jack-of-All |
| Endgame | The Apex (Corrupted Heart) | Apex Boss, Endless Typhon | All neuromods, Artemis Armor | Optimized (choose one focus) |
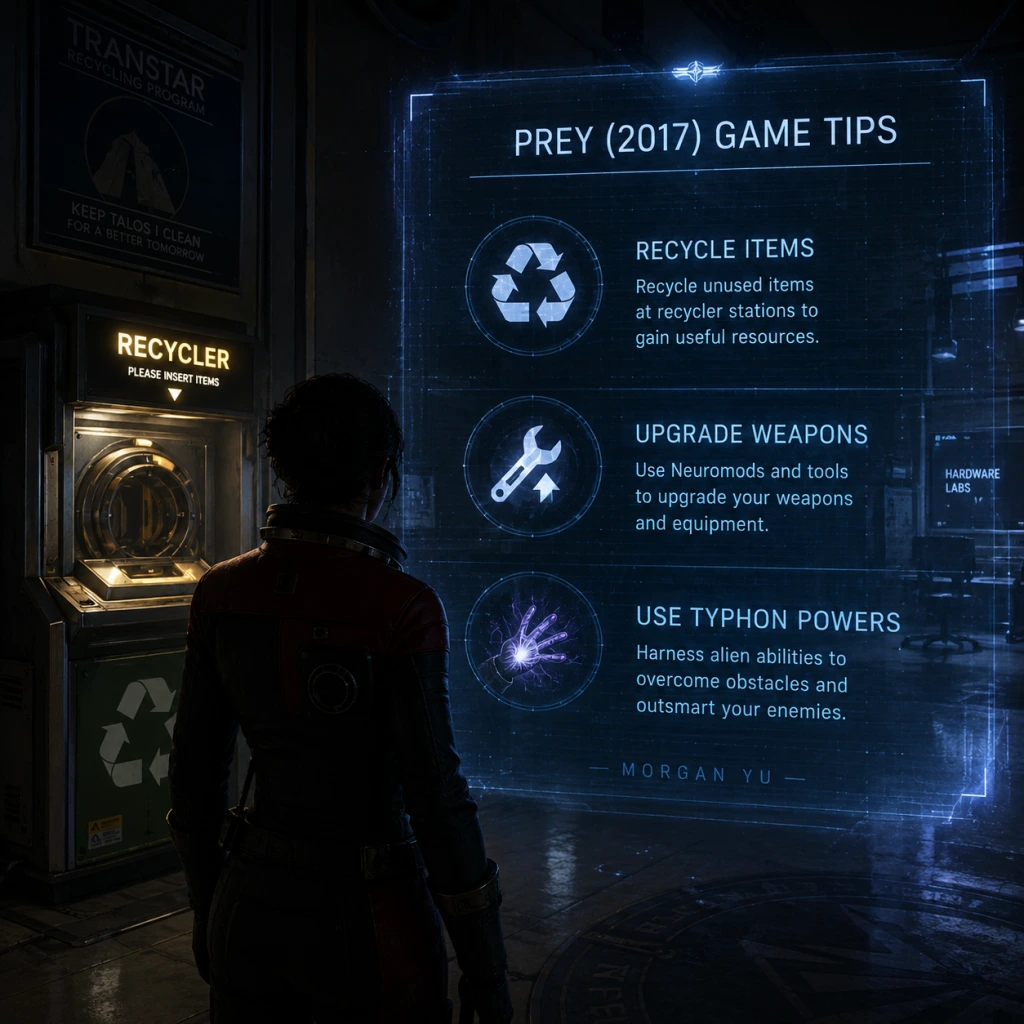
Game Tips
Comprehensive Game Tips for Prey (2017)
This guide covers every essential tip to survive Talos I, grouped by playstyle and game system. From your first step out of your apartment to the final decision, these strategies will enhance your experience.
---
Beginner Tips (First 4 Hours)
1. Loot Everything – Even the Obvious
- Prey is a resource-hungry game. Break every crate, search every drawer, and scan every corpse. Materials like Mineral Material, Synthetic Material, and Organic Material are used for crafting everything from ammo to medkits. Even junk items (cups, spoons, pipes) can be Recycled for components. Use the Psychoscope to see lootable objects through walls (once you have it).
2. Melee is Your Best Friend (Early Game)
- The Wrench is silent, infinite-ammo, and surprisingly powerful against Mimics. Side-step while swinging to avoid their pounce. For Mimics, a single charged swing often kills them on Normal difficulty. For Phantoms, use the environment (explosive canisters, gas pipes) to soften them before finishing with the wrench.
3. Save Often – Manual Saves Are Critical
- Autosaves are infrequent. Quicksave (F5 on PC) before entering any new area, before a tough fight, or before a hacking attempt. Load manually if you make a costly mistake (e.g., accidentally aggroing a Nightmare). There is no penalty for saving; use it liberally.
4. The GLOO Cannon is Swiss Army Knife
- GLOO not only freezes enemies (giving you time to beat them down with the wrench) but also creates platforms, blocks vents, and can put out fires. Use it to create bridges over electrified water or reach high ledges. It’s also silent, useful for stealth.
5. Examine Body Positions – Mimics Pose as Objects
- Mimics can disguise as any small prop: coffee cups, boxes, even chairs. If a room looks ”too tidy” or a single item is out of place, suspect a Mimic. Use the Psychoscope to identify them (highlights in orange). The GLOO Cannon can reveal them if you splash nearby.
---
Combat Tips (Intermediate to Advanced)
1. Remap your Quick Access Slots
- Keybind weapons/items to 1-4. Keep Wrench (1), GLOO (2), Pistol (3), and Shotgun (4). This allows instant swapping without opening the inventory. For controller, use radial menu but practice quickly selecting.
2. The ”Shotgun + GLOO” Combo
- GLOO a Phantom (takes 3-4 shots), then walk up and fire the shotgat point blank. The frozen enemy takes extra damage and shatters on death. This kills a standard Phantom in 2-3 shotgun blasts on Hard difficulty. Works on Technopaths too, but they move more.
3. Use the Environment
- Explosive canisters (red), oxygen pipes, electrical panels, and even security turrets (once hacked) can turn the tide. Lure enemies near a gas leak and shoot it. For large groups, set off a fire extinguisher to create a smoke screen.
4. Headshots Matter
- Human enemies (Typhon Phantoms, Technopaths) take bonus damage from headshots. Use the silenced Pistol (if you have the mod) to take out weak enemies from stealth. The Disruptor Stun Gun also has a headshot multiplier.
5. Dodge and Parry
- The Wrench can actually parry melee attacks? Yes, you can time a swing to intercept an incoming attack, staggering the enemy. This nullifies Phantom slams. Practice timing; it’s easier against Mimic jumps.
6. Nightmare Enemy – Avoid or Fight Smart
- The Nightmare appears when you have many Typhon Neuromods. It can kill you in one or two hits. Best to avoid: hide in small vents or locked rooms. If you must fight, use Psychoshock (Typhon power) to disable its abilities, then shotgun its tentacles. It has a weak spot on the back of its head.
---
Exploration Tips
1. Always Scan the Surroundings
- The Psychoscope is your most important tool. Scan every Typhon creature to unlock damage bonuses and neuromods. Also scan debris, bodies, and items for clues. Some hidden areas can only be discovered by scanning a wall for a false panel.
2. Vents are Your Highways
- Many areas have alternative paths via air ducts. Use GLOO to reach high vents. These routes often bypass locked doors or security turrets. Listen for humming or fan noise indicating an openable vent grill.
3. Mark Map Points of Interest
- The game has a complex 3D map. Use the marker system to tag locations you want to revisit (e.g., a safe you can’t unlock yet, a locked door). This saves time backtracking.
4. Look Up (and Down)
- Many hidden areas are above or below main paths. Jump on crates, climb pipes, or use the GLOO Cannon to create stairs. The Executive Suites have a hidden maintenance hatch on the ceiling.
5. Zero-G Navigation
- In space walks, use the GLOO to create tether points. Boost packs consume oxygen; conserve it. Search debris for loot. Some Typhon can fly (like the Mimic variant) so be ready to shoot instantly.
6. Reading Computers and Emails
- Every computer and email provides lore but also hints for codes, keycard locations, and security weaknesses. The email about a ”garden door code” may give you a safe combination. Always check.
---
Resource Management
1. Recycler Charges – Use Wisely
- Each recycler charge can be placed on a pile of junk, turning everything into raw materials. Don’t waste them on single items. Save them for when you have a large haul (e.g., after clearing an entire section). Combine with fabricators to craft ammo instantly.
2. Fabricator Priorities
- Always craft Repair Kits (keep at least 3), Medkits, and Ammo (depending on weapon used). Avoid fabricating food; it’s abundant. Also, craft Psychoscope battery upgrades early.
3. How to Get More Neuromods
- Neuromods are rare. You can manufacture them from Typhon organs (Dream Catcher questline) or from fabrication (once you get the plan). Also, complete side missions that reward Neuromods. They are not infinite; plan your build.
4. Mimic Detection from Junk
- You can throw a physics object (like a chair) into a suspicious pile. If it bounces off, it’s real. If it passes through, it’s a Mimic. Saves ammo.
5. Suit Repair and Upkeep
- Your spacesuit has durability. Repair it with Suit Repair Kits at any workbench. Damaged suit reduces protection. Keep an eye on the suit integrity icon on your HUD.
---
Builds (Neuromod Allocation)
General Strategy: Early game focus on survival (Medkit efficiency, health upgrades), then specialize. You can reset Neuromods with a special machine (Psychotronics) but it’s one-time per run. Choose wisely.
1. Human-Only Build (”Pure Survivor”)
- Allocate into Combat Focus, Stealth, Hacking, Repair, and Science. This avoids Typhon abilities that attract Nightmare. Very powerful for a first playthrough. Use silenced weapons and turrets. High resource efficiency.
2. Typhon-Hybrid Build (”Psychic Power”)
- Invest in at least one Typhon ability early (like Psychoshock or Electrostatic Burst) to overcome tough enemies. Combine with human skills to manage Nightmare (use Nullwave Transmitter or Psy Propulsion). Requires heavy Neuromod investment.
3. Engineer Build
- Max Repair (for turrets and fabricator speed), Hacking (to control robots), and Leverage III (to throw heavy objects). Fabricator can be upgraded to produce ammo faster. Best for players who like indirect combat.
4. Spray-and-Pray Build
- A beginner-friendly build: invest in Pistol damage, Shotgun damage, Combat Focus, and increased inventory. Use GLOO to immobilize, then shotgat. Requires minimal Neuromod planning.
---
Economy (Scrap, Recycler, Fabricator)
1. Recycle Before Fabricating
- Always recycle junk first to get materials. Then fabricate only what you need. The fabricator converts materials at a 1:1 ratio (except for special items). Keep a mental note of material costs: 4 Mineral + 2 Synthetic = 1 Pistol Bullets (5).
2. Money vs. Materials
- Credits are technically infinite (loot from enemies), but materials are limited. Don’t sell recyclable materials; recycle them. You can sell weapons (like extra pistols) to vendors. Use credits to buy Neuromods when available.
3. Vendors – Buy/sell wisely
- Each vendor (like the one in the Arboretum) has a finite inventory. They restock after story progression. Check vendors often for rare Neuromods or weapon upgrades. Prices are not negotiable.
4. Crafting Ammo – Which Type?
- Pistol Ammo is cheap (4 Mineral + 1 Synthetic for 5). Shotgun shells cost more but are powerful. Grenades and Boltcaster darts are situational. Prioritize ammo for your primary weapon. Fabricating medkits uses Organic Material; don’t overcraft.
---
Stealth and Non-Lethal Tactics
1. Silent Takedowns
- Sneak up behind a human (like Volunteers) and perform a takedown (button prompt). This is non-lethal but not stealth if seen. Use for guards or survivors you don’t want to kill. Works on Mimics? No, they are monsters.
2. Hiding from Nightmare
- The Nightmare patrols specific zones. Hide in a vent, behind furniture, or in a closet. If it detects you, run to a safe room (like a locked office). Wait for it to lose interest (about a minute).
3. Distract and Lure
- Use the Boltcaster to shoot glass, make noise, or hit a button from afar. This aggro enemies away from you. Useful for clearing a path through a room with multiple Phantoms.
4. Crouch for Sound Reduction
- Crouching reduces footsteps noise. Combine with the “Slowwalk” (hold run button while moving forward) to be almost silent. Use when near Typhon.
---
Advanced Optimizations
1. Speedrun Tactics
- Learn ”GLOO jumps”: shoot GLOO at your feet and walk up the glob to climb walls. Can skip entire sections. Also, the ”Backwards Long Jump” glitch? Use if you want, but consider it a bug.
2. Overwhelming Enemy Density
- On higher difficulties, enemies respawn? Actually, some areas do (like Psychephonic). Manage aggro by closing doors behind you. Break line of sight to reset enemy positions.
3. End-Game Resource Hoarding
- Save large amounts of mineral and organic for the final hours. You’ll face many Telepaths and Technopaths. Craft a ton of explosives (Typhon Lure, Recycler Charges) to clear final areas quickly.
4. Multiple Playthroughs
- Each story choice (including the initial ”Who is Morgan?”) affects loot and task availability. For 100% trophies/achievements, you need New Game Plus. Use a build you didn’t try the first time.
---
Platform-Specific Tips
PC: Rebinding keys helps; put GLOO on mouse side button. Enable ”Hold to Crouch” for better control. Adjust FOV (90-100 recommended).
Xbox/PlayStation: Use the radial menu with d-pad for quick inventory. Aim assist is generous; turn off for more challenge. Use vibration feedback (helps detect hidden Mimics).
Game Settings
Prey (2017) – Game Settings Guide
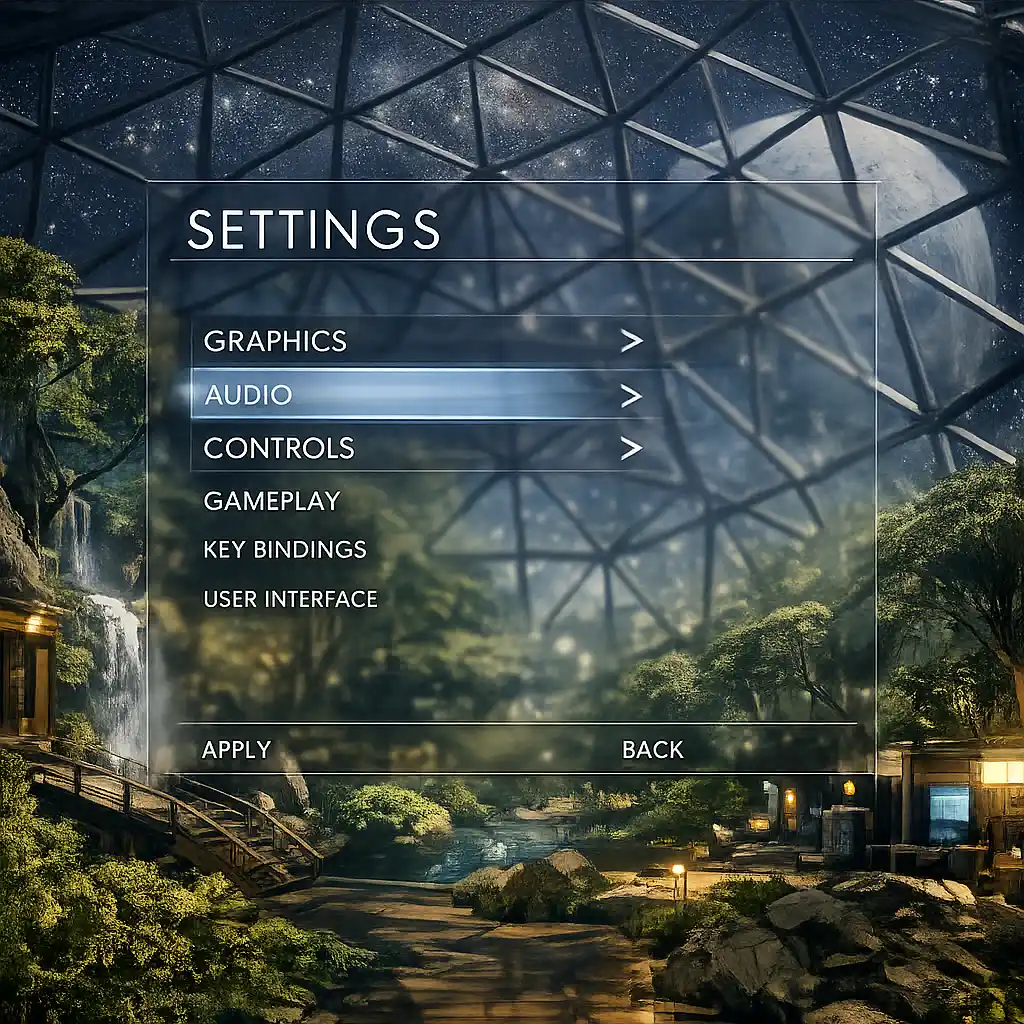
This guide covers all configurable settings in Prey (2017) across graphics, audio, controls, accessibility, language, network, and gameplay. It provides optimal settings for different hardware tiers and highlights settings that are often misunderstood. All recommendations are based on the PC version (Steam/Epic/GOG) unless noted; console settings are simpler but comparable.
---
1. Graphics Settings
Prey runs on the CryEngine and is generally well-optimized, but certain settings heavily impact performance. Below is a breakdown of every graphics option.
#### 1.1 Display Mode & Resolution
- Display Mode: Fullscreen (best performance and input latency), Windowed Borderless (useful for multi-monitor), Windowed (not recommended).
- Resolution: Set to native monitor resolution. Lowering resolution can improve performance but makes UI too small.
- Refresh Rate: Match monitor max (e.g., 60Hz, 144Hz).
- VSync: Off (unless screen tearing is noticeable; use Fast Sync or G-Sync if available).
#### 1.2 Graphics Presets
Prey offers presets: Low, Medium, High, Very High. Customize individual options for best balance.
#### 1.3 Individual Graphics Options
| Setting | Low | Medium | High | Very High | Performance Impact | Notes |
|---|---|---|---|---|---|---|
| Anti-Aliasing | Off | FXAA | SMAA 1x | SMAA 2x | Low | Use SMAA 1x for best quality/performance trade-off. FXAA causes blur. |
| Texture Quality | Low | Medium | High | Very High | Medium (VRAM) | Higher uses more VRAM. Set to High (4GB VRAM), Very High (6GB+). |
| Shader Quality | Low | Medium/High | High | Very High | Medium | Affects lighting and material detail. High is good for most GPUs. |
| Shadow Quality | Low | Medium | High | Very High | High | Very High has shadows at full resolution; High is almost identical. |
| Object Quality | Low | Medium | High | Very High | Medium | Controls draw distance for small objects. High is fine. |
| Water Quality | Low | Medium | High | Very High | Low | Minimal impact on framerate. High looks nice in areas like Arboretum. |
| Ambient Occlusion | Off | SSAO | HDAO | HBAO+ | Medium-High | HBAO+ provides best depth effect but costs performance. SSAO is good. |
| Motion Blur | Off | On | – | – | Low | Personal preference; off for clarity. |
| Depth of Field | Off | On | – | – | Low | Blurs distant objects; can hide pop-in but also reduce visibility. |
| Lens Flares | Off | On | – | – | Very Low | Visual flair only. On recommended. |
| Bloom | Off | On | – | – | Very Low | Affects bright light halos. Keep on. |
| FOV (Field of View) | 60-90 (default 70) | – | – | – | Negligible | Increase to 80-90 for better peripheral vision. Higher FOV may reduce performance slightly but not much. |
For PC users, advanced tweaks can be made via `prey.cfg` in `%USERPROFILE%\Saved Games\Prey\GameData\`. Options like `r_TexMaxAnisotropy` (16 for best filtering), `r_VSync` (0=off), `r_Gamma` (adjust brightness). Editing these is optional and not recommended for novices.
#### 1.5 Optimal Settings by Hardware Tier
Benchmark Note: Use the in-game area near the Arboretum or during Typhon combat for testing.
Entry-Level PC (e.g., GTX 1050 / RX 560, 8GB RAM, 1080p):
- Preset: Low → Custom
- Resolution: 1080p (or 900p if needed)
- Anti-Aliasing: Off
- Texture Quality: Medium
- Shader Quality: Low
- Shadow Quality: Low
- Ambient Occlusion: Off
- All other effects: Off/Low
- Expected: 30-45 FPS, playable with some stutter.
- Preset: High → Custom
- Anti-Aliasing: SMAA 1x
- Texture Quality: High
- Shader Quality: High
- Shadow Quality: High
- Ambient Occlusion: SSAO
- Water Quality: High
- Motion Blur: Off
- Expected: 60 FPS stable.
- Preset: Very High → Custom
- Anti-Aliasing: SMAA 2x
- Texture Quality: Very High
- Shader Quality: Very High
- Shadow Quality: Very High
- Ambient Occlusion: HBAO+
- Everything else: On
- Expected: 60-90 FPS.
- Preset: Very High, all max
- Anti-Aliasing: SMAA 2x (or off, use DSR/FSR)
- Expected: 60+ FPS at 4K with minor dips.
- Anti-Aliasing: SMAA is preferable over FXAA. Many players leave it on FXAA and wonder why everything looks blurry.
- Ambient Occlusion: HBAO+ is high quality but heavy; SSAO is a good middle ground. Not recommended to turn off completely.
- VSync: Leave off unless screen tearing is an issue; it adds input lag.
- FOV: Default 70 is narrow for an immersive sim; increase to 80-90 for better situational awareness but may cause slight performance drop on low-end PCs.
- Master Volume: 80% (default). Adjust to taste.
- Music Volume: 70% – music is atmospheric but can obscure enemy sounds.
- SFX Volume: 100% – crucial for hearing Typhon footsteps, mimics rustling, and weapon sounds.
- Voice Volume: 100% – dialog is important for story and clues.
- Dynamic Range: Select “Headphones” or “Speakers” based on output. “Headphones” enhances positional audio for stereo headsets.
- Audio Language: See Language section.
- Subtitles: On (recommended) – helps with ambient dialog and foreign phrases.
- Closed Captions: Off (unless hearing impaired).
Mid-Range PC (e.g., GTX 1060 / RX 580, 16GB RAM, 1080p):
High-End PC (e.g., RTX 2060 Super / RX 5700, 16GB RAM, 1440p):
Ultra PC (e.g., RTX 3080 / RX 6800 XT, 32GB RAM, 4K):
#### 1.6 Settings Easy to Misconfigure
---
2. Audio Settings
Special Note: Prey’s sound design is exceptional. Use a good headset for directional audio to detect mimics and enemies behind walls. The game uses 7.1 surround; if you have a 7.1 headset, enable it in Windows sound settings.
---
3. Controls Settings
#### 3.1 Keyboard & Mouse (PC)
Prey allows full remapping. Default controls are standard for FPS, but some actions are unique:
| Action | Default Key | Recommended Rebinding | Reason |
|---|---|---|---|
| Sprint | Left Shift | Keep | Standard |
| Crouch | C | Keep or use Ctrl | Mimics often require crouching under vents. |
| Jump | Space | Keep | |
| Interact | E | Keep | |
| Use Item | Q | Keep (quick access medkits) | |
| Weapon Wheel | Tab | Keep | Pauses game for hot-swapping |
| GLOO Cannon | 3 | Keep | Primary tool |
| Psychoscope | F | Keep | Essential for scanning |
| Lever Action | Mouse 4 (if available) | Optional | Quick melee |
| Look Around | Mouse movement | Adjust sensitivity: 3-5 for most players | Higher sensitivity may cause micro-errors during precise gloo aiming. |
- Mouse Sensitivity: 3-5 (default 5) – lower for precise shooting.
- Invert Y: Off
- Mouse Smoothing: Off (adds input lag).
- Enable Raw Mouse Input: On (bypasses OS acceleration).
- Vibration: On (enhances immersion, especially when mimic appears).
- Aim Assist: Medium (default) – Prey has slight aim assist on consoles; set to High if struggling.
- Controller Sensitivity: 2-4 (default).
- Invert Y: Off.
- Mouse Smoothing: Often overlooked; having it on introduces input lag that feels floaty. Turn off.
- Weapon Wheel Behavior: By default, pressing Tab opens the wheel and pausing the game (single-player). Some users prefer it to not pause; the option “Pause with Weapon Wheel” is toggleable in Gameplay settings. For less interruption, set to “Only in Menu” (but then wheel doesnt pause). Recommended: Keep default (pause) for tactical swaps.
- Quick Save / Load: Map F5 (quicksave) and F9 (quickload) – Prey auto-saves frequently, but manual quicksave is vital before dangerous encounters.
- Subtitles: On (improves comprehension for hearing impaired).
- Closed Captions: Not available natively; only subtitles for spoken dialog.
- Difficulty Level: Affects damage taken, enemy health, resources. Accessible through New Game or anytime via options? (Cannot change mid-game without restart). Choose Story mode for minimal combat challenge.
- FOV: Wider FOV helps motion-sickness prone players. Set to 80-85.
- Motion Blur & Depth of Field: Turn off to reduce nausea.
- Color Blindness: No specific settings; rely on visual cues (mimics glow slightly) and audio.
- Control Remapping: Full keyboard/mouse remapping helps with mobility issues.
- Audio Cues: Essential for enemies – keep SFX high.
- Saving: Prey has quicksave (F5 on PC) and manual saves. Use frequently.
- Text Language: Choose from available languages (English, French, German, Spanish, Italian, Polish, Russian, etc.). This changes all menus, dialog subtitles, and UI.
- Audio Language: Usually only English voiced; other languages may have subtitles only. Check on Steam before purchase.
- Subtitle Mode: On/Off; also choose “Subtitles Only” for deaf players.
- Online Features: Achievements, cloud saves (if supported by platform).
- Steam Cloud: Enable to sync saves across PCs.
- Bethesda.net Account: Not required for offline play, but needed for rewards? (If you bought through Bethesda launcher). Ignore if playing on Steam.
- No dedicated server options. Disable internet connection for purely offline play.
- Difficulty: Normal is balanced. Hard increases enemy damage and reduces resources. Story mode makes combat trivial.
- Objective Marker: On (default) – shows current mission waypoint. Off for immersive exploration.
- HUD Transparency: Adjust from 0% (opaque) to 100% (invisible). 20% recommended for minimal distractions.
- Weapon Wheel Pause: Pauses game while selecting weapons. Enables safe weapon swapping; disable for more action-oriented gameplay (but risky).
- Quick Switch: Enable to instantly switch to last weapon without wheel.
- Reticle: Show/Hide. Keep show for aiming.
- Damage Numbers: Off (by default). Can be enabled in .cfg? Not in options. Not recommended.
- Auto-Save Frequency: Can’t adjust directly, but the game saves at checkpoints. Manual save often.
- Camera Shake: Not toggleable in menu; reduce motion sickness by lowering sensitivity or enabling mods.
- Difficulty cannot be changed mid-game – choose wisely.
- Weapon Wheel Pause: Many players dislike the pause, but it’s very useful for swapping between GLOO, shotgun, and wrench quickly. Keep on unless you prefer frantic switching.
- Objective Marker: Turning it off increases immersion but may cause confusion for first-time players. Recommend leaving on until you know Talos I layout.
#### 3.2 Gamepad (Console & PC)
Important: Gamepad controls on PC have some delay; for competitive feel, use keyboard/mouse.
#### 3.3 Easy-to-Misconfigure Control Settings
---
4. Accessibility Settings
Prey (2017) has limited dedicated accessibility options compared to modern titles, but several settings help:
Recommendation: For players with visual impairments, increase brightness slightly (Gamma 0.7-0.8) and turn off HUD transparency below.
---
5. Language Settings
Platform Note: On console, language is typically tied to system language. On PC, set via game launcher or options menu.
---
6. Network Settings
Prey (2017) is a single-player game with no multiplayer, so network settings are limited to:
---
7. Gameplay Settings
These affect how the game behaves beyond graphics/controls.
#### 7.1 Special Attention Points
---
Final Setup Checklist
1. Set display to fullscreen at native resolution with proper refresh rate.
2. Adjust graphics preset based on hardware; fine-tune Anti-Aliasing to SMAA, Ambient Occlusion to SSAO, Texture to High.
3. Increase FOV to 80-85.
4. Disable Motion Blur and Depth of Field if prone to motion sickness.
5. Audio: SFX 100%, Music 70%, Voice 100%, Dynamic Range = Headphones, Subtitles On.
6. Controls: Raw mouse input, disable mouse smoothing, adjust sensitivity to 4, rebind quick melee to thumb button.
7. Gameplay: Difficulty Normal, Weapon Wheel Pause On, Objective Marker On, HUD Transparency 20%.
8. Save your settings, then test in the first area (lobby).
With these settings, you will enjoy optimal performance, clear visuals, responsive controls, and an immersive audio experience tailored to Prey’s atmospheric horror.
Important Notes
Important Notes
General Warnings & Pitfalls
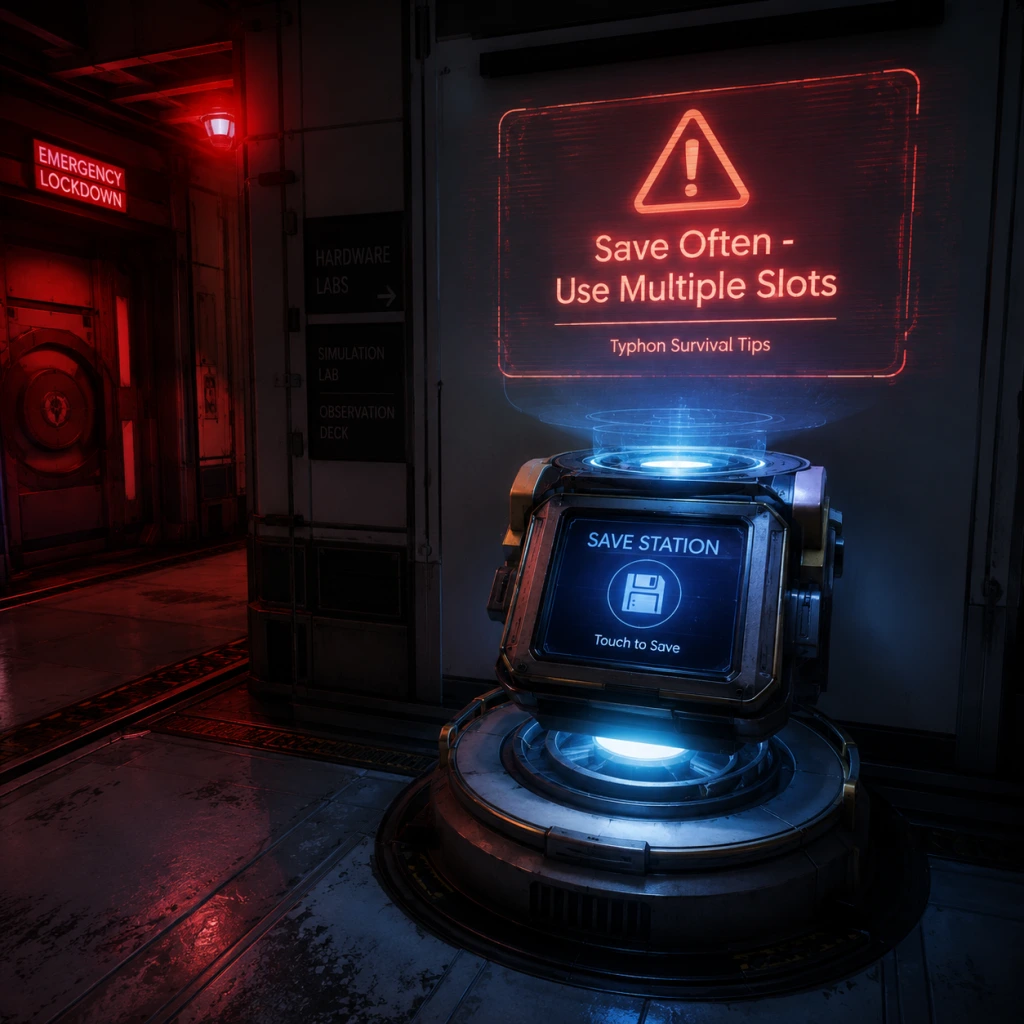
- Save Often and Use Multiple Slots: Prey has no autosave between objectives. Manual saves are crucial. Always rotate save slots to avoid being locked into a bad situation. The game does not have a quicksave on console, but on PC you can use F5 (quicksave) and F9 (quickload). Use them.
- Irreversible Choices: Your decisions during the quest "The G.U.T.S." and especially the endgame affect which ending you get. Also, using Typhon Neuromods permanently locks you out of certain Turret-friendly abilities and makes turrets hostile to you. You cannot remove Neuromods. Some side quests become unavailable if you advance the main story too far.
- Missable Content: Several crew members (e.g., Mikhaila, Dr. Calvino) can be killed if you are careless, locking you out of side quests. Items like the Psychoscope upgrade chips are missable if you don't explore thoroughly. The side quest "The Cook's Request" is easy to miss if you don't read emails and explore crew quarters.
- Difficulty Spikes: The first encounter with a Phantom in the lobby can be tough if you are not prepared. The Telepath at the Crew Quarters is a major spike. The final area (the Cargo Bay) is intense. Save before entering new areas.
- Human vs Typhon Neuromods: You can mix and match, but if you install any Typhon Neuromod, the turrets on Talos I will become hostile to you. There is a way to temporarily befriend turrets via the "Remote Manipulation" ability or hacking, but they will remain hostile. To avoid this, stay purely human or be prepared for turret hostility.
- Respec is Not Possible: Once you install a Neuromod, it's permanent. There is no way to unlearn abilities. Plan your build carefully. Perhaps keep a save before using any Neuromods.
- Key Neuromods to Prioritize: Repair II (to fix turrets and doors), Hacking (to access safes and computers), Leverage (to move heavy objects), Suit Modification (to increase inventory), Combat Focus (a lifesaver against tough enemies). For weapons, invest in Shotgun and Pistol skills early.
- Use manual saves before every major encounter, before using a Neuromod, and before entering a new zone.
- The game has a history of save corruption on rare occasions, especially if you save during combat or while your health is zero. Always save in safe rooms.
- On PC, avoid using cloud save sync if you plan to reload often; some players report issues.
- Don't Hoard Mindlessly: Resources are finite. You can craft items using the Fabricator. However, materials like Mineral Material and Synthetic Material are used for both crafting and repairing. Use Fabrication wisely – don't craft everything.
- Recycler Charges are valuable: Use them to turn large objects (like chairs, corpses) into raw materials. But don't waste them on small items.
- Weapon Repair Kits: You can repair your weapons with spare parts. Don't let your weapons break completely; they become unusable. Keep at least one repair kit on hand.
- Ammo: Shotgun shells are the most powerful but rare. Use the Pistol for weaker enemies. The GLOO Cannon is essential for traversal but also useful in combat.
- Always Use the Environment: Lure enemies into gas pipes or electrical junctions. Use the GLOO Cannon to freeze enemies then shatter them with the wrench.
- Stealth is Viable: Most enemies can be avoided. Sneak past Phantoms if you have low health. Use the Look ability (unlocked via Neuromod) to see through walls.
- The Wrench is Underrated: It's free, infinite use, and can be upgraded. Upgraded Wrench with Combat Focus can take down even Phantoms quickly.
- Psychoscope is Key: Always equip it to scan enemies. Scanning provides damage bonuses and unlocks research. Upgrade your Psychoscope with chips found throughout the station.
- Prey is a Single-Player Game: There is no online multiplayer or anti-cheat software. Modding is allowed and encouraged. Be careful with mods that affect game balance; they can break achievements.
- No Leaderboards or PvP: So no etiquette needed.
- Not scanning enemies early enough. Scanning is essential for damage bonuses.
- Not exploring Crew Quarters thoroughly; many side quests and lore reside there.
- Using Typhon Neuromods early without realizing the turret hostility.
- Not saving before boss fights (e.g., the Nightmare, Telepath, Technopath).
- Selling too many quest items (like crystals) to the KASMA orders vendors before knowing their use.
- Not using the Recycler often enough – many players run out of materials mid-game.
- Not crafting Neuromods: You can create them using materials from enemies and recycling. Don't rely solely on finding them.
- The quest "The G.U.T.S." has a major choice: you can either blow up the station or try to save it. This affects the ending.
- Your relationship with the survivors (e.g., the Crew) determines who lives and who dies.
- The "A Better Ending" achievement requires saving all survivors, which is very missable if you are not careful.
Neuromod & Typhon Ability Choices
Save Management
Grinding & Resource Traps
Combat & Stealth Tips
Online & Anti-Cheat
Common Player Regrets
Endgame & Irreversible Decisions
All Game Items
All Game Items – Prey (2017)
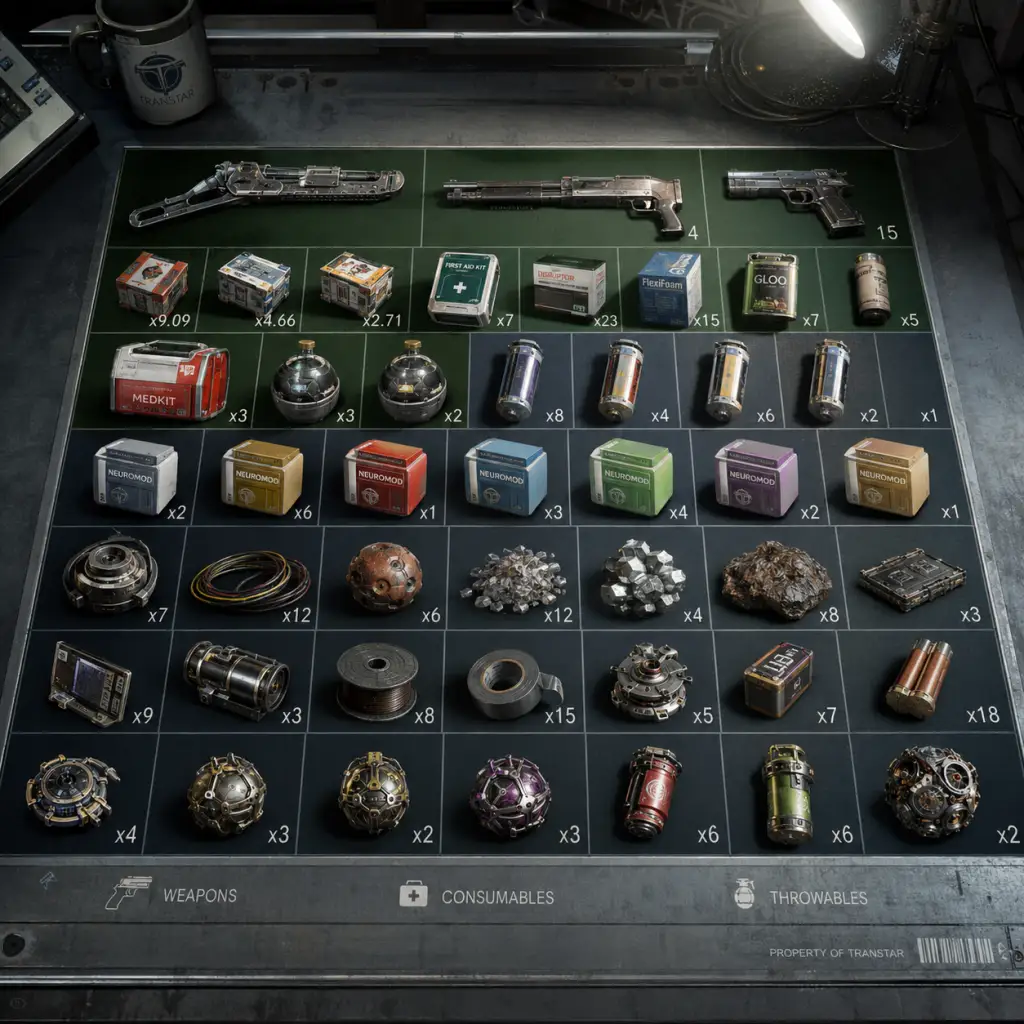
This section covers every major item category in Prey (2017). Items are grouped logically with descriptions, acquisition methods, usage tips, and synergies. All names follow the in-game terminology.
Weapons
Weapons are used for combat and sometimes for utility. Most can be upgraded at Fabrication Stations using Weapon Upgrade Kits. Each weapon has a unique role.
#### Wrench
- Description: A heavy, melee weapon. Infinite durability. Standard attack deals moderate damage; charged attack (hold attack button) deals heavy damage and can knock back smaller enemies.
- How to Obtain: Found in Morgan’s office (first area) – on the desk. Cannot be missed.
- Usage: Optimal against Mimics early game. Good for saving ammo. Upgrades increase swing speed, stamina cost reduction, and damage.
- Upgrades:
- Synergies: Combine with the Combat Focus neuromod ability (time slow) to land charged hits safely.
- Description: Semi-automatic pistol. Can be fitted with a suppressor for stealth kills. Moderate damage, slow rate of fire.
- How to Obtain: Security station in the Arboretum (given by Security Officer). Also found in storage rooms.
- Usage: Best for headshots on humans and smaller Typhon. Suppressor reduces aggro range.
- Upgrades:
- Synergies: Stealth builds; pair with Silent Operator chipset and Sneak attack bonus.
- Description: Pump-action shotgun. High close-range damage. Fires shells.
- How to Obtain: Crew Quarters – found in a locked bathroom stall; or from the Trauma Center after side quest.
- Usage: Devastating against Phantoms and Telepaths at close range. Can stagger enemies.
- Upgrades:
- Synergies: Use with Combat Focus to quickly unload multiple shells.
- Description: Electrical weapon. Fires a bolt that stuns organic enemies and overcharges robotic enemies (dealing damage over time).
- How to Obtain: Hardware Labs – on a table in the main room. Also loot from Operators.
- Usage: Stuns Typhon for easy kill or escape. Effective against Operators (overloads them).
- Upgrades:
- Synergies: Combine with Wrench or Pistol to kill stunned enemies.
- Description: Fires a foam-like substance that hardens on impact. Can block vents, create temporary staircases, and immobilize enemies.
- How to Obtain: Psychotronics – given by Dr. Calvino after fixing the broken test. Also found in multiple locations.
- Usage: Non-lethal option. Use to extinguish fires (in corridors), create platforms to reach high areas, temporarily freeze Mimics and Phantoms.
- Upgrades:
- Synergies: Combine with Combat Focus to freeze multiple enemies quickly.
- Description: Experimental weapon that fires a continuous beam of quantum energy. Very high damage over time. Requires Q-Beam ammo (spores).
- How to Obtain: Power Plant – in a locked room (requires Leverage 2 or hacking). Also found in the GUTS.
- Usage: Destroys large Typhon (Technopath, Telepath, Nightmare) quickly. Beam can be swept across groups.
- Upgrades:
- Synergies: Use after stunning an enemy with Disruptor or GLOO.
- Description: Handheld device that restores PSI points. Not a weapon but essential for Typhon abilities.
- How to Obtain: Loot from operators, found in MedBays and Neuromod Division.
- Usage: Consumes a PSI Hypo charge. Quickly restores PSI for abilities like Psychoshock, Kinetic Blast, etc.
- Description: Thrown grenade that creates a green field. All destructible objects and organic matter within are recycled into raw materials. Explosive damage to enemies.
- How to Obtain: Fabricate at Recycler (requires Recycler Charge recipe). Also found as loot.
- Usage: Destroy obstacles. Generate materials from junk. High damage to clusters of enemies.
- Upgrades: None.
- Synergies: Use on piles of junk after combat to gather resources.
- Description: Thrown charge that emits an electromagnetic pulse. Disables electronics, destroys robots, and stuns Operators.
- How to Obtain: Fabricate or loot from security rooms.
- Usage: Useful against Technopaths and turrets. Can disable security cameras briefly.
- Upgrades: None.
- Synergies: Combine with Stun Gun for double EMP effect.
- Description: Deployable device that creates a field nullifying Typhon abilities. Blocks Mimic attacks, phantom ranged attacks, etc.
- How to Obtain: Side quest “The Missing Crew” or fabricate.
- Usage: Throw at a cluster of Typhon to suppress their powers for several seconds. Also protects you from Mindjack.
- Upgrades: None.
- Description: A throwable device that emits a scanning pulse. Reveals enemies, lootable objects, and hidden areas on the map temporarily.
- How to Obtain: Fabrication or loot.
- Usage: Use in unfamiliar rooms to detect Mimics. Also highlights recyclable junk.
- Upgrades: None.
- Description: Deployable device that emits a sound to attract nearby Typhon to its location. Explodes on proximity or after a duration.
- How to Obtain: Fabrication or found in security lockers.
- Usage: Bait enemies away from your path or into traps. Could be coupled with explosive canisters.
- Upgrades: None.
- Description: Flashlight attachment for weapons (Pistol, Shotgun). Improves illumination in dark areas. Can be crafted at Fabrication.
- How to Obtain: Found on some weapons or fabricated.
- Usage: Essential in areas like Crew Quarters, Power Plant tunnels. No combat benefit other than visibility.
- Upgrades: None.
- Description: The wrench doubles as a leverage tool to move heavy objects (Leverage I). Higher levels allow moving larger objects.
- Note: Strength upgrade from neuromods enhances leverage capability.
- Usage: Unblock doors, create paths, reveal hidden caches.
- Description: Interactive terminal where you can craft items using blueprints and materials. Not an item per se but a key system.
- Description: Injectors that grant new powers or upgrades. Separate from suit mods. Covered in Core Gameplay, but relevant as items.
- How to Obtain: Fabrication (requires Neuromod blueprint, 1000 Manufacturing materials, 3 Typhon Organs, 75 Synthetic Materials), loot, rewards.
- Description: Physical chips inserted into suit’s chipset slots. Provide passive bonuses.
- How to Obtain: Scattered on desks, inside security lockers, found on dead operators.
- Common Chipsets:
- Equipping: Use the suit chipset interface (Pause menu -> Suit -> Chipset slots).
- Description: Permanent upgrades to the suit found as blueprints.
- Types:
- How to Obtain: Locate blueprints in specific zones, then fabricate at suit upgrade station (found on multiple floors).
- Description: Restores 40 HP instantly. Common throughout Talos I.
- How to Obtain: First aid kits, restrooms, medical rooms, loot from operators. Can be fabricated (requires 5 Organic Parts, 5 Synthetic Materials).
- Usage: Keep in quick slot for emergencies.
- Description: Cures major wounds (bleeding, broken bones, burns, etc.). Rare.
- How to Obtain: Found in medical bays, trauma center. Fabrication requires Neural Mod and Synthetic Materials.
- Usage: Use after taking critical physics damage.
- Description: Restores PSI gauge by 20-25 points. Allows more ability uses.
- How to Obtain: Loot, fabrication (requires 1 Neuromod blueprint, 2 Typhon Organs, 1 Synthetic Material).
- Usage: Essential for Typhon ability users.
- Candy Bar – small health (10 HP).
- Alcoholic Beverages (Wine, Vodka, etc.) – temporary buffs: increased stamina (whiskey) or increased PSI regeneration (wine). Some have negative effects (blurred vision).
- Soda – restores a tiny amount of PSI (e.g., 1-2).
- Water – restores PSI (5-10).
- Fruit/Edibles – minor health. Often found in Crew Quarters.
- Description: Repairs broken objects, such as turrets, operators, door mechanisms.
- How to Obtain: Fabrication (requires 5 Organic Parts, 5 Mineral Materials).
- Usage: Fix security turrets to fight for you. Repair broken oxygen pipes.
- Description: Temporary max HP increase (e.g., +25 for 60 seconds) and speed boost. Very rare.
- Improved Durability (less stamina cost)
- Increased Swing Speed
- Increased Damage
#### Silenced Pistol
- Extended Mag
- Damage Increase
- Reflex Sight (better hipfire accuracy)
#### Shotgun
- Increased Damage
- Increased Rate of Fire
- Reduced Spread (tighter pellet pattern)
#### Disruptor Stun Gun
- Increased Charge Capacity (more shots)
- Faster Recharge
#### GLOO Cannon
- Increased Capacity
- Reduced Spread (tighter stream)
#### Q-Beam (Quantum Beam)
- Increased Damage Output
- Longer Beam Duration (capacitor)
#### PSI Booster (not a weapon but utility)
#### Recycler Grenade
#### EMP Charge
#### Nullwave Transmitter
Tools & Equipment
These are non-combat items that aid exploration and puzzle solving.
#### Scout Charge
#### Typhon Lure
#### Tactical Flashlight
#### Leverage Tools (wrench, etc.)
#### Fabrication Station Access
Suit Upgrades & Chipsets
These are installed in the combat suit to enhance abilities.
#### Neuromods (for abilities)
#### Chipset Mods
- Chipset: Silent Operator – reduces step noise.
- Chipset: Kinetic Absorber – converts damage to PSI.
- Chipset: Life Support Efficiency – increases suit oxygen duration in vacuum.
- Chipset: Repair Efficiency – faster repair speed.
- Chipset: Combat Focus Duration – extends slow motion.
#### Suit Upgrades (Physical)
- Armor Plating – increases damage resistance. Blueprint found in Crew Quarters.
- Oxygen Upgrade – increases air capacity for EVA. Blueprint in Hardware Labs.
- Health Regeneration – slowly regenerates health over time. Blueprint in Trauma Center.
- Mobility Upgrade – increases sprint speed and jump height. Blueprint in GUTS.
Consumables & Medical Items
Used for healing, buffing, or restoring resources.
#### MedKits
#### Trauma Kits
#### PSI Hypo
#### Liquids Consumables
#### Repair Kits
#### Stimpak (rare)
Materials & Resources
Basic components used for crafting and repairing.
| Material | Description | Common Sources |
|---|---|---|
| Organic Parts | From dead humans, food, plants. Used for medkits, repair kits. | Loot bodies, break plants. |
| Synthetic Materials | Plastics, circuit boards. For nearly all crafting. | Break chairs, desks, CRTs. |
| Mineral Materials | Metals, scrap. For weapons and upgrades. | Break metal objects, lockers. |
| Typhon Organs | From Typhon corpses. Essential for neuromod fabrication. | Loot dead Typhon (Mimic, Phantom, etc.). |
| Q-Beam Spores | Ammo for Q-Beam. Found on Typhon or as loot. | Rare. |
| Weapon Upgrade Kits | Used to upgrade weapons at Fabrication stations. | Loot from security containers, some enemy drops. |
| Manufactured Parts | Combined resource used in some blueprints (e.g., 1000 Manufactured = 10 Organic + 10 Synthetic + 10 Mineral). | Fabricated at Recycler. |
Key Items & Quest Items
These cannot be consumed and are essential for progression.
#### Transcribe (Audio Logs)
- Description: Collectible recordings that provide story context and hints.
- How to Obtain: Found on desks, in dead bodies, in computers. Over 300 logs in total.
- Usage: Not required but adds lore.
- Description: Unlock specific doors or access restricted areas.
- Examples:
- How to Obtain: Quest rewards or loot (e.g., from dead staff).
- Description: Required to fabricate neuromods. Found in Psychotronics.
- Usage: Unlocks neuromod crafting.
- Description: The Leverage ability (strength) allows moving heavy objects without special tools.
- Description: Red barrels that explode when shot. Used as traps.
- How to Obtain: Scattered in environment.
- Usage: Shoot to damage nearby enemies.
- Description: Not an item but a neuromod ability that lets you turn into small objects. Acquired from Typhon abilities.
- Description: Items like wedding rings, dolls, etc. Part of side quests or just nostalgia.
- How to Obtain: Loot from specific crew quarters.
- Description: Digital notes with story or quest info. May contain passwords.
- How to Obtain: Computers, found on desks.
- Description: No gameplay function, only lore.
- Description: Used to unlock their personal logs.
- Primary Currency: Materials (Organic, Synthetic, Mineral, Typhon Organs).
- Secondary: Weapon Upgrade Kits (limit weapon upgrades).
- Fabrication Cost: Every craftable item has a material cost. Recycling junk yields materials.
- Synergies: Combining items with neuromod abilities (Combat Focus, Psychoshock) drastically increases effectiveness. For example, GLOO + shotgun = freeze and blast.
- Upgrades: Prioritize weapon upgrades early for the Pistol and Shotgun. Chipset mods greatly enhance survivability (e.g., Kinetic Absorber).
- Economy: Always carry a Recycler Grenade to turn clutter into materials. Break everything in safe rooms.
- Hidden Items: Many items are hidden behind vents accessible by GLOO staircases or by moving objects with Leverage.
#### Keycards & Keychains
- Morgan’s Office Key – open locked drawer in office.
- Arboretum Keycard – needed for main story.
- Deep Storage Keychain – required for endgame.
#### Neuromod Blueprint
#### Repair Tools (not an item but ability)
#### Explosive Canisters
#### Typhon Ability (Mimic Matter)
Collectibles
Items that track completion but have no gameplay use.
#### Crew Members’ Personal Effects
#### Datapads
#### Books & Magazines
#### Operators’ I.D. Tags
Currencies
No traditional currency. The game uses Fabrication Materials and Weapon Kits as de facto currency. You trade resources at Fabrication stations to craft items.
Important Notes
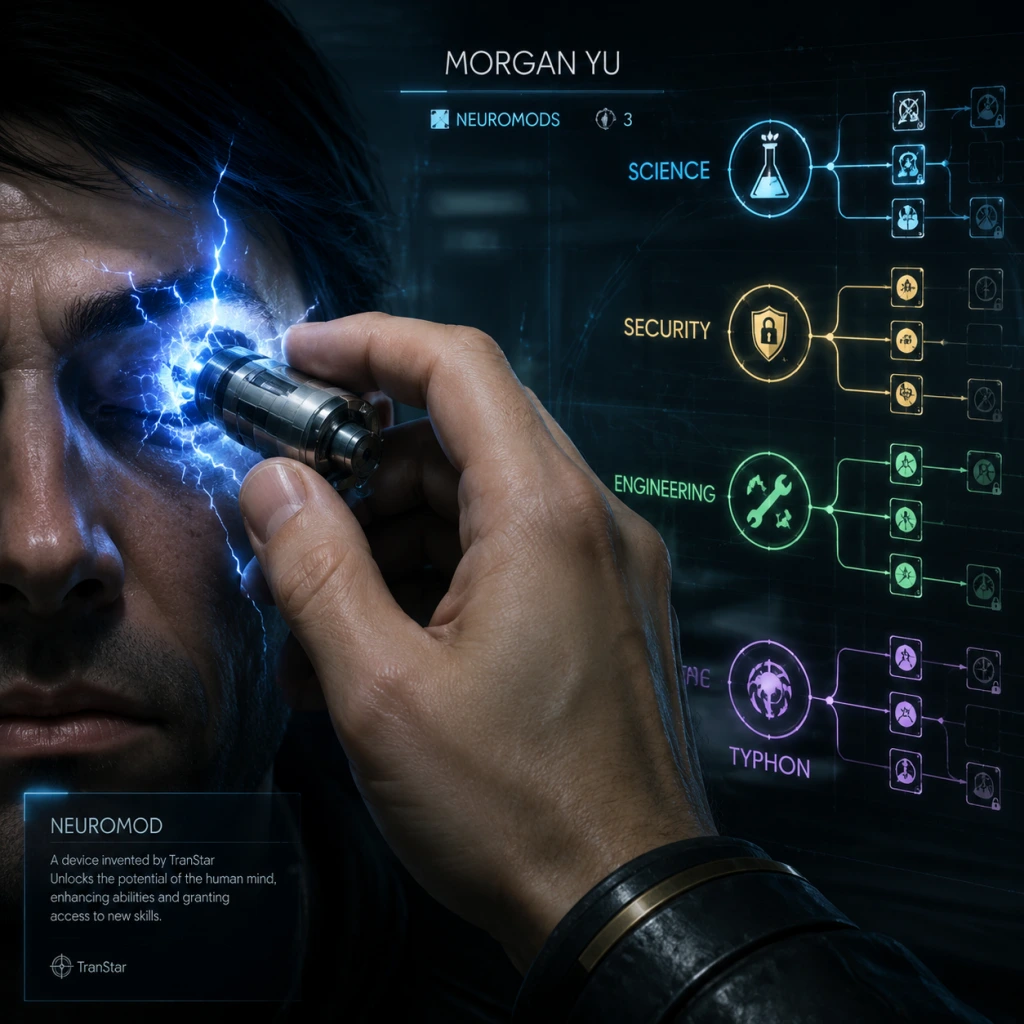
Character Skills
"content": "## Character Skills – Prey (2017)
In Prey (2017), you play as Morgan Yu, whose skills are divided into Human Abilities (passive and active neuromods) and Typhon Abilities (alien powers acquired from Typhon neuromods). Each skill has three levels, increasing in effectiveness, cost, and sometimes unlocking new mechanics. All skills are learned via Neuromods, which can be fabricated or found. Using Typhon neuromods raises your Typhon affinity, causing hostile turrets to attack you unless you install a Typhon Neutralizer chipset (found later in the game). The skills below cover all human and Typhon trees, detailed with effects, cooldowns, upgrades, combos, synergies, recommended builds, and usage tips.
#### Combat Focus
In Prey (2017), you play as Morgan Yu, whose skills are divided into Human Abilities (passive and active neuromods) and Typhon Abilities (alien powers acquired from Typhon neuromods). Each skill has three levels, increasing in effectiveness, cost, and sometimes unlocking new mechanics. All skills are learned via Neuromods, which can be fabricated or found. Using Typhon neuromods raises your Typhon affinity, causing hostile turrets to attack you unless you install a Typhon Neutralizer chipset (found later in the game). The skills below cover all human and Typhon trees, detailed with effects, cooldowns, upgrades, combos, synergies, recommended builds, and usage tips.
Human Skills
#### Combat Focus
- Type: Active
- Description: Slows time for a short period, allowing precise aiming and dodging.
- Upgrades:
- Cooldown: Reduces per level as above.
- Combos: Activate before using shotgun for devastating point-blank bursts, or with a high-damage pistol for headshots. Combine with Psychoshock (Typhon) to lock down enemies while slowed.
- Synergies: Excellent with any weapon build; especially powerful with Q-Beam charged shots. Pair with Stealth for slow-motion sneak attacks.
- Recommended Builds: Essential for any combat-heavy playstyle. Max as soon as possible.
- When to Use: Use when outnumbered, against fast Typhon (e.g., Phantoms, Weavers), or during boss fights. Pop it before entering combat or when ambushed.
- Type: Passive
- Description: Increases damage with all ballistic firearms (pistols, shotguns, rifles, etc.).
- Upgrades:
- Combos: Works multiplicatively with weapon upgrades and other damage skills.
- Synergies: Pairs with Shotguns and Pistols skills for focused builds.
- Recommended Builds: A must for any gunslinger. Level early for raw damage.
- When to Use: Always active; invest early to improve all gun damage.
- Type: Passive
- Description: Improves damage and handling of shotguns (reduced spread, faster reload).
- Upgrades:
- Combos: With Combat Focus, one-shot most common enemies.
- Synergies: High damage per shot; pair with Leverage to stagger heavy enemies.
- Recommended Builds: Shotgun-only builds or close-quarters combat.
- When to Use: Use against Phantoms, Operators, and Human enemies at close range. Upgrade to level 2 or 3 for main weapon.
- Type: Passive
- Description: Increases damage and accuracy of pistols (reduced recoil, tighter hip fire).
- Upgrades:
- Combos: Headshot multiplier stacks; use with Psychoshock (stun) for easy headshots.
- Synergies: Pairs with Stealth for silent headshots.
- Recommended Builds: Stealth pistol build or general combat.
- When to Use: Versatile for medium range; upgrade if pistol is your primary.
- Type: Passive
- Description: Reduces detection by enemies and increases melee or weapon damage when attacking from behind (sneak attacks).
- Upgrades:
- Combos: Sneak attack + Shotgun or Pistol can one-shot most Typhon. Use with Phantom Shift for repositioning.
- Synergies: Excellent with Mimic Matter for hiding in plain sight then ambushing.
- Recommended Builds: Stealth sniper or assassin build.
- When to Use: Use to thin patrols silently before a fight; always try to get first hit from hiding.
- Type: Passive
- Description: Allows bypassing security locks on computers, safes, and doors. Higher levels unlock advanced terminals.
- Upgrades:
- Combos: No direct combat combo, but opens up many shortcuts and resources.
- Synergies: Pairs with Repair to fix broken hackable terminals? Not directly, but both support exploration.
- Recommended Builds: Engineer/Explorer builds.
- When to Use: Hack terminals before breaking glass to avoid alarms; hack safes for neuromods.
- Type: Passive
- Description: Allows repairing broken machinery and weapons. Higher levels fix more severely damaged items.
- Upgrades:
- Combos: Repair turrets to fight for you; combine with Hacking to control them.
- Synergies: With Suit Modification to keep suit durable.
- Recommended Builds: Engineer builds; helpful in all runs for fabricators.
- When to Use: Repair turrets and fabricators to secure safe areas and craft items.
- Type: Passive
- Description: Increases ability to move heavy objects, affecting melee damage with thrown items? Also affects kinetic damage when striking with heavy items.
- Upgrades:
- Combos: Throw heavy objects at enemies for massive damage; also block doorways with objects.
- Synergies: Minimal, but can be used to create temporary barriers.
- Recommended Builds: Situational; useful for both combat and puzzle-solving.
- When to Use: Move objects to reach hidden areas, create cover, or kill weak enemies with thrown items.
- Type: Passive
- Description: Increases the quality and quantity of loot from Typhon corpses.
- Upgrades:
- Combos: No direct combat use, but provides resources for crafting.
- Synergies: Important for crafting Neuromods from Typhon parts.
- Recommended Builds: Essential for any build that crafts Neuromods.
- When to Use: Loot all Typhon corpses to maximize materials.
- Type: Passive
- Description: Increases effectiveness of medkits and healing items.
- Upgrades:
- Combos: Use with Suit Modification to survive longer.
- Synergies: Pairs with Typhon Regeneration for passive + active healing.
- Recommended Builds: Survival builds, especially in harder difficulties.
- When to Use: Invest early if you rely on medkits; later levels become less necessary.
- Type: Passive
- Description: Increases inventory space and suit durability (reduced damage from hazards).
- Upgrades:
- Combos: No direct combat; helps carry more weapons and resources.
- Synergies: Good with all builds for inventory management.
- Recommended Builds: Highly recommended for all players; level 1 or 2 is often enough.
- When to Use: Especially useful when looting many items; upgrade as needed.
- Type: Active (Typhon)
- Description: Generates a concussive blast that pushes enemies and deals physical damage. Can be charged for increased power.
- Upgrades:
- Cooldown: Reduces per level as above.
- Psi Cost: Approx. 20 psi per use (varies with upgrades).
- Combos: Knock enemies into environmental hazards (e.g., fire, electricity, chasms). Great for staggering groups.
- Synergies: Pairs with Psychoshock (stun) to set up juggles; or with Phantom Shift to get behind foes then blast them into traps.
- Recommended Builds: Combat mage or area denial.
- When to Use: Use against clusters of Mimics or Phantoms; knock Weavers off ledges. Charged version destroys smaller Typhon instantly.
- Type: Active (Typhon)
- Description: Fires a bolt of psychic energy that damages and briefly stuns organic enemies (both Typhon and humans).
- Upgrades:
- Cooldown: Very short; can be spammed at level 3.
- Psi Cost: Low (around 10-15 psi).
- Combos: Stun-lock enemies; follow up with a charged Kinetic Blast or shotgun blast. Works well on all organic targets.
- Synergies: With Combat Focus, you can land multiple headshots during stun. Also good with Mimic to disorient before striking.
- Recommended Builds: Aggressive psi-focused mage builds.
- When to Use: Use as opener against any organic enemy; interrupt abilities of Phantoms or humans. Ideal against Mimics and Operators?
- Type: Active (Typhon)
- Description: Teleports a short distance forward, phasing through enemies and solid obstacles. Leaves a brief decoy at the origin point (level 3).
- Upgrades:
- Psi Cost: Moderate (20-25 psi).
- Combos: Use to dodge attacks, reposition for stealth kills, or escape tight spots. Decoy can distract enemies for ambush.
- Synergies: With Stealth for safe positioning; with Mimic to change form and avoid detection after shift.
- Recommended Builds: Mobility-focused builds.
- When to Use: Whenever you need fast relocation; especially against Phantoms with area attacks. Great in tight corridors.
- Type: Active (Typhon)
- Description: Transforms Morgan into a small inanimate object to hide or bypass obstacles. Higher levels allow larger objects (vending machines, statues).
- Upgrades:
- Cooldown: One-time transformation; can cancel early.
- Psi Cost: Level 1: 10 psi per second sustained; level 2: 8 psi/s; level 3: 5 psi/s (approximately).
- Combos: Hide as an object to perform sneak attacks. Can also become a heavy object to crush enemies? Not directly.
- Synergies: With Stealth for ambushes; with Phantom Shift to rapidly change form and position.
- Recommended Builds: Stealth/puzzle builds; also for exploring tiny vents.
- When to Use: Use to bypass locked doors (by becoming small objects to fit through cracks), hide from enemies, or initiate a sneak attack from within a group of mimics.
- Type: Active (Typhon)
- Description: Emits a wave of fire that ignites enemies, dealing initial damage and burning over time.
- Upgrades:
- Cooldown: 8 seconds (approx) after firing ends.
- Psi Cost: Heavy (30-40 psi per use).
- Combos: Ignite enemies then use Kinetic Blast for an explosion-like effect? Not directly. But fire can cause panic.
- Synergies: Good against organic enemies; less effective against robots. Fire can explode gas pipes and damage nearby foes.
- Recommended Builds: Pyromancer builds.
- When to Use: Use against groups of Mimics, Phantoms, or humans; also to create traps by igniting flammable areas.
- Type: Active (Typhon)
- Description: Launches a bolt of electricity that damages and stuns robotic enemies (Operators, Technopaths, etc.) and also disrupts electronics. Can chain to multiple targets at higher levels.
- Upgrades:
- Psi Cost: Moderate (25-30 psi).
- Combos: Stun robotics then use wrench or shotgun; also can hijack? Not directly.
- Synergies: Essential for robot-heavy areas; pairs with Kinetic Blast to finish off stunned enemies.
- Recommended Builds: Tech-priest builds for dealing with Operators and Technopaths.
- When to Use: Use against any robotic threat; also to disable security turrets temporarily. Does not harm organic enemies as much.
- Type: Passive (Typhon)
- Description: Gradually restores health over time.
- Upgrades:
- Combos: Stacks with Medical Operator for enhanced healing.
- Synergies: Pairs with Suit Modification to reduce damage taken.
- Recommended Builds: Any Typhon-heavy build.
- When to Use: Always active; helps sustain between fights without medkits.
- Skills: Stealth (3), Pistols (2–3), Firearms (3), Combat Focus (1–2), Mimic Matter (1–2), Phantom Shift (1).
- Tactics: Use Mimic to sneak into position, Phantom Shift to escape, Stealth and Pistols for massive headshot damage.
- Gear: Pistol with silencer (if you find), later Disruptor Stun Gun for robotics.
- When to Use: Ideal for clearing rooms before triggering alarms.
- Skills: Hacking (3), Repair (3), Leverage (2–3), Suit Modification (2), Necropsy (3), Medical Operator (1).
- Tactics: Focus on resource gathering, hacking all terminals, repairing turrets, and opening all locked areas. Minimal combat; rely on turrets and thrown objects.
- Gear: Shotgun or pistol for emergencies.
- When to Use: Perfect for players who want to explore every nook and collect maximum resources.
- Skills: Psychoshock (3), Kinetic Blast (3), Combat Focus (3), Superthermal (2), Phantom Shift (2).
- Tactics: Spam Psychoshock for stuns and damage, use Combat Focus to slow time and line up multiple hits, Kinetic Blast for area denial, Superthermal for burning groups.
- Gear: Shotgun for cleaning up stunned enemies.
- When to Use: Best in open combat situations; be mindful of psi consumption.
- Skills: All Typhon skills maxed, especially Mimic Matter (3), Phantom Shift (3), Psychoshock (3), Kinetic Blast (3), plus Typhon Regeneration. Avoid human skills to keep psi low? Actually use any human utility.
- Tactics: Rely entirely on psi powers; use Mimic to hide and gather resources, Phantom Shift for mobility, and offensive powers for combat.
- Gear: Minimal guns – only for emergencies.
- When to Use: High-risk, high-reward; early game is tough until you max powers. Turrets become hostile – use Electrostatic to destroy them.
- Combat Focus + Shotgun/Pistol: Pop Combat Focus, then unload into enemies for massive burst.
- Psychoshock + Kinetic Blast: Stun with Psychoshock, then instantly blast with Kinetic Blast to send enemy flying into hazards or off edges.
- Phantom Shift + Mimic Matter: Shift into a crowd, then immediately transform into an object to break combat and reposition for a sneak attack.
- Electrostatic + Kinetic Blast: Stun robotic groups with Electrostatic, then push them all away with Kinetic Blast to buy time or knock them into pits.
- Superthermal + Gas Pipes: Ignite superthermal near gas leaks to create massive explosions that kill many enemies at once.
- Stealth + Mimic Matter + Psychoshock: Use Mimic to get close, emerge behind enemy, cast Psychoshock to stun, then finish with wrench or pistol for 4× sneak damage.
- Level 1: Duration 5 seconds, cooldown 60 seconds.
- Level 2: Duration 7 seconds, cooldown 45 seconds.
- Level 3: Duration 10 seconds, cooldown 30 seconds.
#### Firearms
- Level 1: +15% damage.
- Level 2: +30% damage.
- Level 3: +45% damage.
#### Shotguns
- Level 1: +20% damage, -20% spread.
- Level 2: +40% damage, -40% spread.
- Level 3: +60% damage, significantly reduced spread, faster cycling.
#### Pistols
- Level 1: +20% damage, less recoil.
- Level 2: +40% damage, significantly less recoil.
- Level 3: +60% damage, near-zero recoil, improved critical chance? (Actual game: slight headshot multiplier).
#### Stealth
- Level 1: 2× damage multiplier on sneak attacks.
- Level 2: 3× damage multiplier plus reduced movement noise.
- Level 3: 4× damage multiplier plus enemy detection radius halved.
#### Hacking
- Level 1: Basic (green lock level).
- Level 2: Advanced (blue locks).
- Level 3: Expert (red locks).
#### Repair
- Level 1: Basic repairs (e.g., broken consoles).
- Level 2: Advanced repairs (e.g., damaged turrets, lift controls).
- Level 3: Expert repairs (e.g., broken fabricators, large machine).
#### Leverage
- Level 1: Can move light objects (chairs, small boxes).
- Level 2: Medium objects (filing cabinets, barrels).
- Level 3: Heavy objects (large crates, dead bodies). Also increases melee damage with thrown objects.
#### Necropsy
- Level 1: 50% more loot (more Typhon materials).
- Level 2: 100% more loot.
- Level 3: 150% more loot (plus rare drops like Neuromods).
#### Medical Operator
- Level 1: +25% healing.
- Level 2: +50% healing.
- Level 3: +100% healing (medkits heal 200% normal).
#### Suit Modification
- Level 1: +15 inventory slots, +20% suit durability.
- Level 2: +30 slots, +40% durability.
- Level 3: +50 slots, +60% durability.
Typhon Skills
#### Kinetic Blast
- Level 1: 50 damage, knockback, 15-second cooldown.
- Level 2: 100 damage, wider radius, 13-second cooldown.
- Level 3: 150 damage when charged, huge knockback, 10-second cooldown; charged version has longer range and more damage.
#### Psychoshock
- Level 1: 100 damage, 2-second stun, 5-second cooldown (approx).
- Level 2: 200 damage, 3-second stun, 4-second cooldown.
- Level 3: 300 damage, 4-second stun, 3-second cooldown.
#### Phantom Shift
- Level 1: Range 10 meters, cooldown 15 seconds.
- Level 2: Range 15 meters, cooldown 12 seconds.
- Level 3: Range 20 meters, cooldown 8 seconds; leaves a decoy that draws enemy fire for a moment.
#### Mimic Matter
- Level 1: Can become small objects (cups, boxes). Very effective for hiding.
- Level 2: Medium objects (chairs, barrels). Can fit into certain passages.
- Level 3: Large objects (vending machines, body). Can become a turret? Actually you can become a mimic yourself? The exact mechanics: level 3 allows morphing into larger objects and also allows 'mimic' to create a clone? Not exactly; it's just transformation size increase and reduced psi cost.
#### Superthermal
- Level 1: Cone of fire, 50 damage initially, 20 burn damage over 5 seconds.
- Level 2: Wider arc, 100 initial damage, 40 burn over 5 seconds.
- Level 3: Continuous stream of fire (like a flamethrower), 150 initial, 60 burn over 5 seconds, igniting gas leaks.
#### Electrostatic (sometimes called Static Discharge)
- Level 1: Single bolt, 75 damage, stuns for 2 seconds, 10-second cooldown.
- Level 2: Two chains, 100 damage each, stuns for 3 seconds, 8-second cooldown.
- Level 3: AOE burst around player, 120 damage, chains to all robots in area, stuns for 4 seconds, 6-second cooldown.
#### Typhon Regeneration
- Level 1: +0.5 HP per second.
- Level 2: +1 HP per second.
- Level 3: +2 HP per second.
Recommended Builds
#### Stealth Sniper (Human + Typhon)
#### Engineer/Explorer (Human Heavy)
#### Combat Mage (Typhon Focus)
#### Pure Typhon (Dangerous but Powerful)
Synergies and Combos
When to Use Each Skill (Quick Reference)
| Skill | Best Used Against | Situation |
|---|---|---|
| Combat Focus | All enemies | Group fights, boss battles, slow-motion aiming |
| Firearms | All enemies | General combat; always active |
| Shotguns | Phantoms, Operators | Close quarters, high burst |
| Pistols | Mimics, humans | Stealth headshots, medium range |
| Stealth | All enemies | Ambushes, bypassing patrols |
| Hacking | – | Opening locked terminals/safes |
| Repair | – | Fixing turrets, fabricators |
| Leverage | All enemies | Throwing objects for damage, blocking paths |
| Necropsy | – | Looting Typhon for materials |
| Medical Operator | – | Healing efficiency |
| Suit Modification | – | Carrying capacity and durability |
| Kinetic Blast | Phantoms, Weavers, groups | Crowd control, environmental kills |
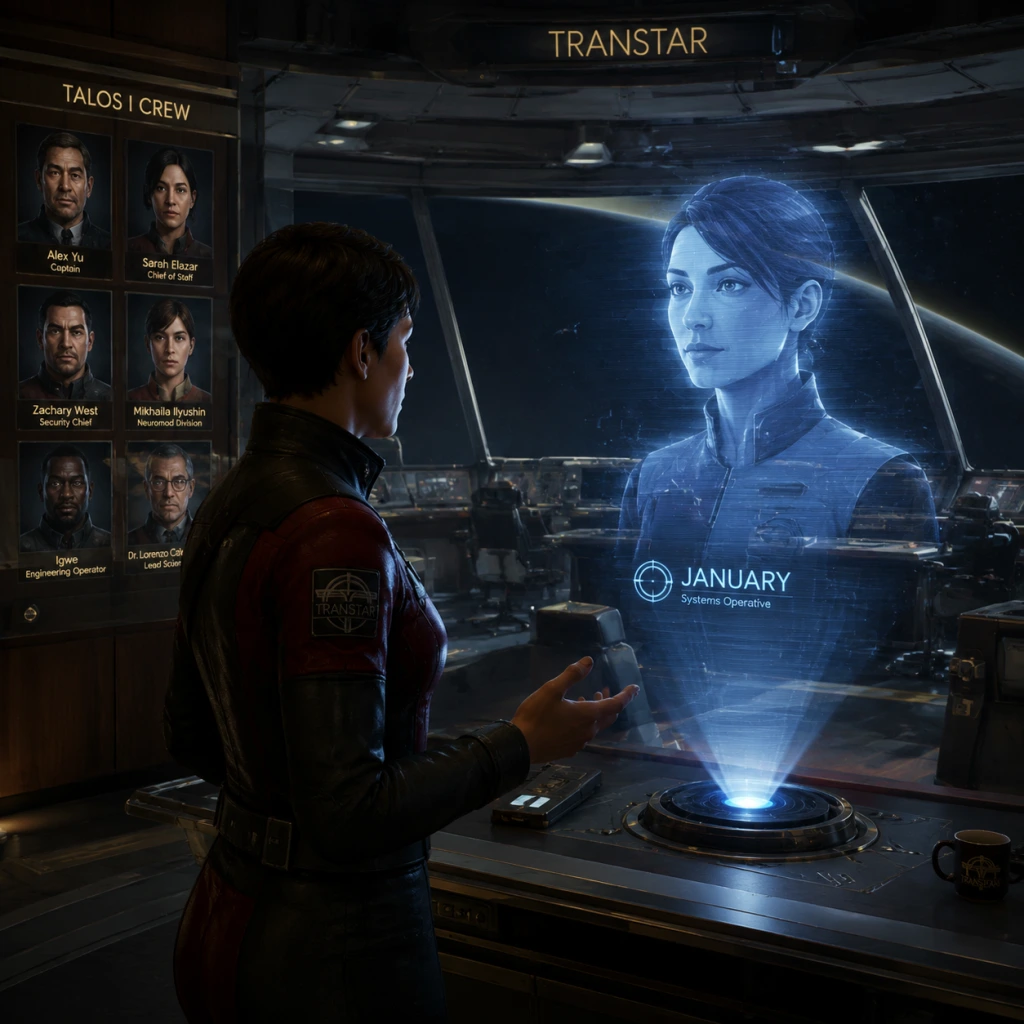
Characters & Roles
Characters & Roles in Prey (2017)
Prey (2017) is a single-player immersive sim with a single playable character, Morgan Yu, but the game’s deep skill system lets you define your own role through Neuromod investments. This guide covers every major character—both allies and enemies—and the distinct playstyles (roles) you can adopt.
---
1. Playable Character: Morgan Yu
Background: Morgan Yu is the protagonist, a scientist aboard the space station Talos I. They are the test subject for Neuromod technology, which allows instant skill acquisition. Depending on player choices, Morgan can be male or female (player-selected). Morgan’s memories have been tampered with by their brother, Alex Yu, as part of a secret project.
Strengths:
- Highly adaptable: Can learn any combination of Human and Typhon abilities.
- Default access to all weapons and tools (once found).
- Can use the Psychoscope to scan and mimic Typhon.
- No inherent combat bonuses without Neuromods.
- Squishy against Typhon without proper gear or powers.
- Limited inventory space early on.
- Role: Morgan’s brother and the Director of Talos I. He is a morally ambiguous figure who often withholds information.
- Background: Alex created the Neuromod program and conducted experiments with Typhon. He uses Morgan as a test subject.
- Strengths: Brilliant scientist, manipulative, has access to all station resources.
- Weaknesses: Arrogant, untrustworthy, physically vulnerable.
- Interaction: Alex communicates via transcribe and appears in flashbacks. The player must decide whether to trust him or defy him. He can become an ally or an obstacle.
- Role: A recorded AI copy of Morgan’s memories, created to help Morgan survive and expose Alex’s secrets.
- Background: Created by the real Morgan before the outbreak. January is stored in a suitcase-sized device.
- Strengths: Provides objective guidance, can unlock doors, reveals hidden lore.
- Weaknesses: Limited physical presence; can be destroyed by Typhon.
- Playstyle: January is a passive guide. Listen to her suggestions for a more story-driven path.
- Unlock: Found early in Morgan’s office in the Talos I Lobby.
- Role: Another AI fragment of Morgan, advocating for immediate destruction of Talos I.
- Background: December believes the only way to stop the Typhon is to nuke the station.
- Strengths/Weaknesses: Opposing January; creates a moral dilemma. No direct gameplay benefit.
- Interaction: Appears on the Arboretum roof. Choosing December’s path leads to a different ending.
- Role: A medical officer who is immune to Typhon pheromones.
- Background: Mikhaila was born on Talos I. She suffers from a disease that makes her immune but also causes pain.
- Strengths: Can provide medical supplies, crucial for crafting Neuromods (she gives you the recipe for Typhon Lures).
- Weaknesses: Vulnerable to Typhon if not protected (though rarely in combat).
- Interaction: She is a quest giver. Rescue her in the Crew Quarters to gain her trust.
- Role: A psychologist and Neuromod specialist.
- Background: Igwe is researching Typhon psychology and can help you understand the Typhon hive mind.
- Strengths: Can upgrade your Psychoscope, gives you the Typhon Detection chipset.
- Weaknesses: Needs to be rescued multiple times.
- Interaction: Find him locked in a container near the Power Plant. He’s essential for the ‘Social Integration’ quest.
- Role: Security officer, skeptical of Morgan.
- Background: A guard who blames Morgan for the outbreak.
- Strengths/Weaknesses: Can be a hostile NPC depending on choices.
- Interaction: Can be avoided, killed, or convinced to help. He appears in the Neuromod Division.
- Role: Engineer, one of the few survivors.
- Background: Aaron knows the station’s systems well and helps maintain critical equipment.
- Strengths: Provides access to the GUTS (Gravity Utility Tunnel System) and gives you the Repair skill chipset.
- Weaknesses: Non-combatant; dies easily if left hostile.
- Interaction: Find him in the Maintenance area of the Life Support section.
- Description: Small, spider-like Typhon that can disguise as common objects.
- Strengths: Surprise attacks, high speed, can ambush from mimicry.
- Weaknesses: Low health, vulnerable to GLOO (freezing), fire, and melee.
- Counter: Use the Psychoscope to reveal them, then shoot or melee.
- Description: Humanoid Typhon that uses telekinetic attacks.
- Variants: Normal, Etheric (cloaks), Thermal (explodes), Voltaic (shocks).
- Strengths: Strong ranged attacks, can create shockwaves.
- Weaknesses: Slow movement, predictable attack patterns, can be distracted by Lures.
- Counter: Use Nullwave grenades to disable powers, then shotguns or kinetic blast.
- Description: Large, floating Typhon that creates smaller Weavers and Mimics.
- Strengths: Spawning enemies, can shoot explosive webs.
- Weaknesses: Immobile while spawning, weak to fire and explosive weapons.
- Counter: Focus fire with Q-Beam or explosives while dodging webs.
- Description: Typhon that controls machinery and electronics.
- Strengths: Can hack turrets, raise dead machines, disable electronics.
- Weaknesses: Vulnerable to EMP grenades, Nullwave, and direct damage when its shields are down.
- Counter: Use EMP to stun, then attack with physical weapons.
- Description: Typhon that controls human minds.
- Strengths: Can turn survivors into Phantoms or mind-controlled slaves. Telepathic blast.
- Weaknesses: Can be killed quickly with shotgun headshots; the controlled humans can be saved if you have Nullwave.
- Counter: Kill the Telepath first to free its thralls.
- Description: A giant, powerful Typhon that periodically hunts you after you install Typhon Neuromods.
- Strengths: Very high damage, can phase through walls, devastating attacks.
- Weaknesses: Can be temporarily banished with a powerful nullwave or by hiding in safe rooms.
- Counter: Avoid engagement until late game; use the Disruptor stun gun and heavy weapons.
- Small, exploding creatures that swarm. Weak to gunfire.
- Focus: Use tools, turrets, and environment to survive.
- Key Skills: Repair (to fix turrets), Hacking (to open doors and control machines), Leverage (to move heavy objects), Materials Expert (to craft more), and Security (better armor).
- Equipment: Shotgun (for close range), GLOO Cannon (for traversal and freezing), Turrets (deployable assistants), Recycler Grenades (for loot).
- Strengths: Self-sufficient, can create resources, dominate with automated defenses.
- Weaknesses: No Typhon powers; vulnerable to Nightmare until you find nullwave.
- Synergy: Works well with January (hacking bonuses) and Mikhaila (crafting).
- Focus: Avoid combat or kill from the shadows.
- Key Skills: Sneak (increase movement speed while crouching), Deadly Focus (slow time while aiming), Combat Focus (temporary slow time), and Piloting (to control stations).
- Equipment: Silenced Pistol, Disruptor Stun Gun (non-lethal), GLOO Cannon (to freeze enemies), Distract device (like the Typhon Lure).
- Strengths: Efficient ammo usage, can bypass many enemies, high survivability through avoidance.
- Weaknesses: Poor against groups without gadgets; requires patience.
- Synergy: Use January’s clues to avoid danger.
- Focus: Leverage alien powers to dominate or manipulate.
- Key Skills: Mimic Matter (turn into objects to hide or reach areas), Kinetic Blast (telekinetic push), Psychoshock (damage and disable Typhon), Superthermal (fire AoE), Electrostatic Burst (stun group), Phantom Shift (decoy and teleport).
- Equipment: Psychoscope (essential), Q-Beam (for heavy Typhon), Recycler Grenades, and the Typhon Lure.
- Strengths: Extremely versatile, can handle any situation with powers, high damage potential.
- Weaknesses: Using Typhon powers increases your “Typhon Awareness”, making Nightmare spawn more often; Human faction (Alex) may distrust you.
- Synergy: Use Telepath’s mind-control or Mimic Matter to bypass security; combine with human weapons for emergencies.
- January vs. December: Choosing one over the other changes the final objective.
- Mikhaila & Dr. Igwe: Saving both yields the best ending (they survive and help humanity).
- Typhon Lures from Mikhaila are essential for distracting enemies.
- Will Mitchell can be persuaded to not report your illegal activities if you have high enough Hacking or Security skills.
Weaknesses:
Playstyle: Neutral – Morgan’s approach is entirely determined by your skill choices and equipment. You can be a stealthy hacker, a heavy-guns engineer, or a psychic Typhon master.
Unlock Condition: Immediately available as the main character.
Recommended Equipment & Builds: See “Roles” section below. Core equipment includes the GLOO Cannon, Recycler Grenades, and a fully upgraded Psychoscope.
Team Synergy: Morgan is a lone wolf; allies (NPCs) provide quests, lore, and occasional support (e.g., January’s hacking assistance or Mikhaila’s medical supplies). The Typhon abilities can synergize with human tools – e.g., using Kinetic Blast to scatter enemies before shooting.
---
2. Supporting Characters (Allies & Antagonists)
2.1 Alex Yu
2.2 January
2.3 December
2.4 Mikhaila Ilyushin
2.5 Dr. Igwe (Gabriel Igwe)
2.6 Will Mitchell
2.7 Aaron Ingram
2.8 Dayo Igwe (Dr. Igwe’s brother) – Not a major character, but notable.
General Note: NPCs cannot be directly controlled. Their “synergy” comes from the quests they give and the upgrades they provide. Saving them all (Leverage III required) is needed for the “Make a Better World” achievement.
---
3. Typhon – The Antagonists
These are the alien enemies aboard Talos I. Each has distinct behaviors, strengths, and weaknesses.
3.1 Mimic
3.2 Phantom
3.3 Weaver
3.4 Technopath
3.5 Telepath
3.6 Nightmare
3.7 Cystoid & Cystoid Nest
---
4. Roles (Playstyles via Neuromod Builds)
In Prey, you define your role by investing Neuromods into Human or Typhon skill trees. Here are three primary archetypes.
4.1 Engineer (Human Abilities: Engineering, Repair, Hacking)
4.2 Stealth Specialist (Human Abilities: Stealth, Agility, Sneak Attacks)
4.3 Typhon Master (Typhon Abilities: Mimic Matter, Kinetic Blast, Psychoshock, etc.)
Hybrid Builds: The most powerful builds mix human and Typhon skills. For example, take Combat Focus (human) and Psychoshock (Typhon) for a deadly combo. Or combine Repair for turrets with Mimic Matter to become a shapeshifting engineer.
Unlock Conditions for Typhon Powers: You must first obtain the Psychoscope (early in the game) and then install Typhon Neuromods. Each power has a prerequisite chipset or scanned Typhon.
---
5. Team Synergy & Character Interactions
While Prey is single-player, the NPCs you rescue and aid affect the story and available resources.
Summary Table:
| Character | Role | Contribution | Condition for Best Outcome |
|---|---|---|---|
| Morgan Yu | Player | All gameplay | N/A |
| Alex Yu | Antagonist/Guide | Story clues, nullwave chair | Save him or not? |
| January | Guide | Hacking, story direction | Keep her safe |
| Mikhaila | Crafter | Medical supplies, Typhon Lures | Rescue in Crew Quarters |
| Dr. Igwe | Tech support | Psychoscope upgrades | Rescue in Power Plant |
| Aaron Ingram | Engineer | Repair, GUTS access | Rescue in Life Support |
| Will Mitchell | Security | Possible ally or enemy | High Hacking/Leverage |
This guide covers all major characters and the roles you can assume in Prey (2017). Adapt your playstyle to your preferred approach—whether it’s engineering, stealth, or psychic domination—and remember that every choice impacts your journey through Talos I.
Cheats & Secrets
Cheats & Secrets – Prey (2017)
Introduction
Prey (2017) does not include traditional cheat codes, developer consoles, or built-in cheat menus. However, Arkane Studios packed the game with intentional secrets, hidden areas, Easter eggs, and clever exploits that remain safe to use. This guide covers all known secret content—from hidden rooms to pop-culture references—and explains how to access them without breaking the game.
No Traditional Cheats
Unlike many games, Prey (2017) offers no:
- Console commands (even in PC debug mode)
- Secret menu sequences
- God mode, infinite ammo, or unlock-all codes
Secret Codes & Keypad Combinations
Several keypad doors and safes have codes hidden in emails, notes, or environment. These are not cheats but essential secrets for loot and progression. Always check computer terminals and audio logs for hints.
| Location | Code | Reward |
|---|---|---|
| Morgan Yu’s safe (Apartment) | 0526 | Neuromod, recycler charges, and pistol |
| Hardware Labs – storage room keypad | 8714 | Golden gun (unique pistol) |
| Crew Quarters – Captain’s safe | 1234 | Suit upgrade kit (Necropsy module) |
| Psychotronics – director’s safe | 9713 | Personnel file on Alex Yu |
| Life Support – water treatment door | 9411 | Access to explosive canisters and materials |
| Shuttle Bay – armory door | 4590 | Weapons and ammunition |
| GUTS – control room | 0526 | Same as apartment safe code (emergency override) |
| Arboretum – greenhouse door | 5245 | Recycler charge fabricator recipe |
| Cargo Bay – secure storage | 0039 | Typhon Lure and spare parts |
Easter Eggs & Pop-Culture References
#### The “Gravity Glove” Reference
In the Crew Quarters, you can find a novel titled “The Gravity Glove” – a direct nod to the Gravity Glove from Prey (2006), the game that precedes this reboot.
#### “Looking Glass” Holograms
Throughout Talos I, you’ll encounter Looking Glass display panels. Interact with one in Morgan’s office to see a developer message: “Stay sharp, Morgan.” This is an intentional Easter egg from Arkane.
#### Mimic Puppy (aka “Mimic Jr.”)
In the Arboretum, near the greenhouse, a Mimic is found hiding inside a doghouse. It does not attack and will follow you if you stay still. Successfully coax it into a spare room leads to an achievement: ”Mimicry”.
#### The “There’s a Mimic in This Room” Painting
In the Hall of Fame section of the Crew Quarters, a painting titled “There’s a Mimic in This Room” actually hides a Mimic behind the frame. Shoot the painting to reveal it.
#### Red Maze Robes
In the Shuttle Bay, wear the Red Maze Robes (found in the Crew Quarters laundry) and interact with the replicator in the Cargo Bay to get a unique line: “I see you’ve been to the maze.” The “Red Maze” is a reference to the training course from Dishonored.
#### “The Prey (2006) Revengeance”
In the Cargo Bay, a computer terminal contains a file called ”Prey 2006 Revengeance.txt”, a humorous callback to the original Prey’s development.
#### Morgan Yu’s First Day Dream
Early in the game, Morgan’s apartment has a TV showing a simulation of the first day at work. Wait for about 2 minutes without moving to trigger a short cutscene that shows Morgan’s nightmare. This is an Easter egg for patient players.
#### “Loot All the Things” Achievement Hint
In the Hardware Labs, a whiteboard reads “Remember: GLOO walls can be crossed. Always check for hidden rooms.” This is a developer hint encouraging players to use the GLOO cannon creatively.
Hidden Locations & Secret Rooms
#### The “Abandoned Office” (Hardware Labs)
Use the GLOO Cannon to create a platform to reach a ceiling vent in the main Hardware Labs corridor. Enter to find a small office with an audio log, a Neuromod, and a note from a former employee.
#### The “Secret Garden” (Arboretum)
In the Arboretum, navigate to the top of the greenhouse using GLOO stairs. Behind a large leafy plant, you’ll find a hidden nook with a recycler charge recipe and a rare Typhon Lure.
#### The “Crash Site” (Shuttle Bay upper deck)
After the Cargo Bay airlock, go up the collapsed catwalk near the Shuttle Bay. Jump across broken pipes using GLOO to reach a hidden room with a weapon upgrade kit and two Typhon Organoids.
#### The “Memory Lane” (Morgan’s Apartment – after reboot)
If you return to Morgan’s apartment after the game’s second act, a new terminal message appears from a mysterious user named “January”. This is a secret tie-in to the game’s AI narrative.
Exploit-Safe Secrets (Intended Mechanics)
#### Recycler Charge Clipping
Using a Recycler Charge on a locked door can sometimes force it open if the charge is placed at the exact hinge point. This is a known intentional interaction that allows early access to certain areas.
#### GLOOO Staircase Anywhere
The GLOO Cannon can create platforms anywhere, letting you reach high ledges or bypass obstacles. Arkane deliberately left many areas accessible via GLOO stairs to reward creativity.
#### Mimic Transformation Avoidance
If you remain completely still when a Mimic is near, it will not attack or transform. This is not a bug – Mimics are programmed to respond to motion. Exploit this to pass dangerous rooms safely.
#### Free Neuromod from January
Early in the game, before leaving the Helipad, turn back and check the office behind you. January will have placed a Neuromod there – a hidden gift if you explore fully before exiting.
Developer-Intended Hidden Content
#### New Game Plus (NG+)
After completing the campaign, you can start New Game Plus. All Neuromods, weapon upgrades, and key items carry over – but not story progress. NG+ features increased enemy spawns and a special “Game Over” screen if you die to a Mimic in the opening simulation (a tongue-in-cheek developers’ joke). To unlock NG+: finish the game once on any difficulty.
#### The “True Ending” Requirements
To access the game’s true ending (the one involving the “transporter” choice), you must complete all side quests related to the “December” and “January” storylines. Specifically, you need to:
- Find and talk to December (the operator in the Arboretum)
- Complete the “Gifts from the Dead” quest
- Read all of Alex Yu’s emails
- Activate the Nullwave transmitter during the finale instead of destroying it
#### Skilled-Only Dialogue Trees
Certain dialogue options are locked behind high skill levels. For example, Leverage III allows you to intimidate some enemies into not attacking. Hacking IV lets you bypass locked doors without a keycard. These are not cheats but reward specialization.
Summary
Prey (2017) rewards explorers and patient players with numerous secrets, Easter eggs, and hidden mechanics. While no traditional cheats exist, the game’s design encourages creative problem-solving, and the list above contains all known legitimate secrets. Always save before experimenting, and enjoy the deep lore and references Arkane Studios embedded into Talos I.