
Red Dead Redemption 2
## Red Dead Redemption 2 – Comprehensive Game Introduction ### Genre & Classification Red Dead Redemption 2 is an **action-adventure** game with strong **open-world**, **Western**, and **third-person shooter** elements. It blends cinematic storytelling, survival mechanics, and sandbox exploration...
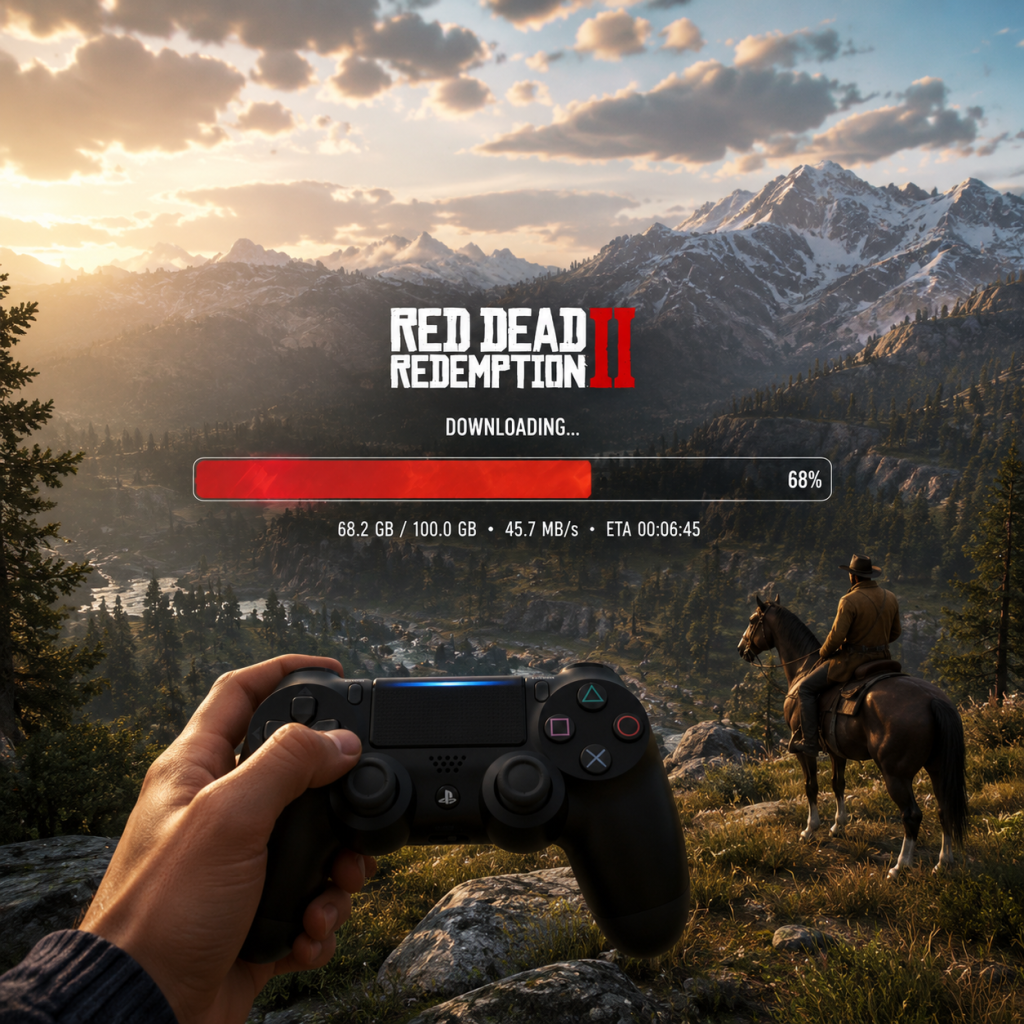
Download & Installation
Red Dead Redemption 2 Download & Installation Guide
This guide covers all major platforms where Red Dead Redemption 2 (RDR2) is officially available: PC (Rockstar Games Launcher, Steam, Epic Games Store), PlayStation 4/5, and Xbox One / Xbox Series X|S. The game is not available on Nintendo Switch or mobile devices.
Platform Overview
| Platform | Store / Source | Notes |
|---|---|---|
| PC | Rockstar Games Launcher (RGL) | Primary launcher; required even if you buy elsewhere. |
| PC | Steam | Purchases require RGL to play. |
| PC | Epic Games Store | Same as Steam; RGL required. |
| PlayStation 4/5 | PlayStation Store (digital) or retail disc | PS5 runs via backward compatibility. |
| **Xbox One / Series X | S** | Microsoft Store (digital) or retail disc |
System Requirements (PC)
Minimum Requirements
- OS: Windows 10 (64-bit, v1803 or later)
- CPU: Intel Core i5-2500K / AMD FX-6300
- RAM: 8 GB
- GPU: NVIDIA GeForce GTX 770 2GB / AMD Radeon R9 280 3GB
- DirectX: Version 11
- Storage: 150 GB available space (SSD recommended)
- Sound Card: DirectX compatible
- OS: Windows 10 (64-bit, v1803 or later)
- CPU: Intel Core i7-4770K / AMD Ryzen 5 1500X
- RAM: 12 GB
- GPU: NVIDIA GeForce GTX 1060 6GB / AMD Radeon RX 480 4GB
- DirectX: Version 11
- Storage: 150 GB SSD
- Sound Card: DirectX compatible
- Rockstar Games Social Club: Required for all PC versions and for online features on all platforms. Free account.
- Steam Account: Only needed if purchasing via Steam.
- Epic Games Account: Only needed if purchasing via Epic Games Store.
- PlayStation Network (PSN): Required for digital store and online play.
- Xbox Live / Microsoft Account: Required for digital store and online play.
- Digital: Purchase from PlayStation Store, then go to Library > Purchased > select RDR2 > Download. Installation happens automatically.
- Disc: Insert disc. Game installs from disc; you may need to download a patch (usually 5–15 GB). Ensure you have enough storage (minimum 100 GB free).
- Digital: Same as PS4; the PS5 version is backward compatible. If you own the PS4 version, you can download the enhanced PS5 version (if you have the PS5 version of the game – note: Rockstar has not released a native PS5 version; it runs via backward compatibility at higher performance).
- Disc: Insert PS4 disc; PS5 will install the game and apply any updates. You may need to keep the disc in the drive to play.
- Digital: Purchase from Microsoft Store. The game appears in your library; select Install. Smart Delivery will automatically give you the best version for your console.
- Disc: Insert disc, follow on-screen prompts to install. Updates download automatically when online.
Recommended Requirements
> Note: For 4K or high-framerate (60+ fps) at Ultra settings, an RTX 2070 Super or better is recommended.
---
Account Requirements
---
Download & Installation Steps
PC – Rockstar Games Launcher
1. Go to [Rockstar Games Launcher website](https://socialclub.rockstargames.com/rockstar-games-launcher) and download the installer.
2. Install the launcher (run as administrator if prompted).
3. Create or log in to your Rockstar Social Club account.
4. Click "Store" > "View All" or find Red Dead Redemption 2.
5. Purchase the game or redeem a code.
6. Click "Download" – the launcher will begin downloading the game files.
7. After download, click "Play" – the game will install additional dependencies (DirectX, Visual C++).
8. Launch and follow first-time setup.
PC – Steam
1. Install the Steam client from [steampowered.com](https://store.steampowered.com).
2. Log in to your Steam account.
3. Browse to Red Dead Redemption 2 and purchase.
4. Click "Install" – Steam will download the game.
5. Upon first launch, Steam will prompt you to install the Rockstar Games Launcher (if not already installed).
6. After Rockstar Launcher installs, you must log in/link your Rockstar account.
7. The game will then launch via Rockstar Launcher and proceed with installation.
8. Wait for all updates and then play.
PC – Epic Games Store
1. Install the Epic Games Launcher from [epicgames.com](https://www.epicgames.com).
2. Log in and purchase RDR2 from the store.
3. Click "Library" > find RDR2 > "Install".
4. The Epic Launcher will download the game.
5. On first launch, you will be prompted to install the Rockstar Games Launcher.
6. Log in to Rockstar Social Club and link accounts if needed.
7. Game will launch after everything is set up.
PlayStation 4
PlayStation 5
Xbox One / Xbox Series X|S
---
First Launch Setup
PC
1. After installation, launch the game.
2. Graphics Configuration: The game will auto-detect your hardware and recommend settings. You can adjust later.
3. Benchmark: You may be prompted to run an initial benchmark to optimize settings.
4. Social Club Login: Ensure you're logged into Rockstar Social Club. If you bought elsewhere, your accounts must be linked.
5. Sign into RDR Online: You can skip this for single-player.
6. Calibration (if using HDR): Follow on-screen HDR setup to adjust brightness and peak brightness.
7. Story Mode/Online: Choose between Story Mode or Red Dead Online.
Consoles
1. On first launch, the game may check for updates (ensure online connection).
2. You'll be prompted to set brightness and display options.
3. For online, sign in to your respective online service (PSN / Xbox Live) and link your Rockstar account if required.
---
Common Installation Errors & Fixes
| Error / Issue | Cause | Solution |
|---|---|---|
| Download stuck at 0% (PC) Server issues / firewall | Restart launcher, disable antivirus temporarily, or use a VPN. Check Rockstar server status. | |
| Rockstar Launcher fails to install | Permissions / corrupt installer | Run installer as Administrator. Clear temp files. Download fresh copy. |
| "Activation limit reached" | Social Club account conflicts | Contact Rockstar Support. Ensure you haven't exceeded the 50 PC activations (rare). |
| Game crashes on launch | Outdated drivers / conflicting software | Update GPU drivers. Disable overlays (Discord, Steam). Run in windowed mode. Verify game files. |
| Insufficient storage space | Game requires 150 GB; more for future updates | Free up space. Ensure drive is formatted as NTFS. |
| DirectX error | Missing runtimes | Install DirectX from the _CommonRedist folder in game directory. Reinstall VC++ 2015-2022 redistributable. |
| Slow download speeds | ISP throttling / server load | Pause/resume download. Switch to wired connection. Use a download manager (Epic/Steam store). |
| PS4/Xbox disc not read | Dirty disc or drive issue | Clean disc. Restart console in safe mode (PS4 rebuild database; Xbox clear cache). |
| Game won't start after update (console) | Corrupted cache | Power cycle console (unplug for 30 seconds). Reinstall game if persists. |
File Verification Steps
- Rockstar Launcher: Go to Settings > Installed Games > RDR2 > Verify Integrity.
- Steam: Right-click game > Properties > Local Files > Verify integrity of game files.
- Epic Games: Click the three dots on RDR2 in Library > Manage > Verify.
- Consoles: No built-in verification; reinstall as last resort.
- SSD strongly recommended – drastically reduces load times, especially in fast travel or entering towns.
- Windows page file: Ensure your system has a proper page file (at least 16 GB) if RAM is 8 GB.
- Console storage: Consider an external USB 3.0 HDD/SSD for faster loading on base PS4/Xbox One.
- Reinstalling: If you uninstall and reinstall later, remember that Rockstar Launcher may retain licenses; simply re-download.
- Mods: PC version supports mods (via offline mode or modding tools), but always back up original files and be careful with online bans.
---
Post-Installation Verification
After installation, do the following to confirm everything is working:
1. Launch the game and get past the initial splash screens.
2. Check version number (menu > Settings > General > Game version). Should match latest patch.
3. Load into Story Mode – ensure no crashes within first 5 minutes.
4. Adjust graphics (PC) or display settings (console) to your preference.
5. Test audio – make sure speech, music, and effects work.
6. Verify save file functionality – create a manual save in Story Mode; load it successfully.
7. For online: Attempt to enter Red Dead Online – verify connection and character loading.
8. Storage usage: After installation, the game folder should be approx. 115–150 GB (PC). On consoles, check system storage.
> Important: Keep your Rockstar Social Club account linked and enable two-factor authentication for security.
---
Additional Tips
---
If you encounter persistent issues, visit the official [Rockstar Support](https://support.rockstargames.com) or the [RDR2 Subreddit](https://reddit.com/r/reddeadredemption) for community help.

Game Introduction
Red Dead Redemption 2 – Comprehensive Game Introduction
Genre & Classification
Red Dead Redemption 2 is an action-adventure game with strong open-world, Western, and third-person shooter elements. It blends cinematic storytelling, survival mechanics, and sandbox exploration into a deeply immersive single-player experience, accompanied by the massive multiplayer component Red Dead Online.
Developer & Publisher
- Developer: Rockstar Studios (primarily Rockstar San Diego, with contributions from other Rockstar studios worldwide)
- Publisher: Rockstar Games
- PlayStation 4 & Xbox One: October 26, 2018
- PC: November 5, 2019 (Rockstar Games Launcher, Epic Games Store, Steam – with Steam release on December 5, 2019)
- Stadia: November 19, 2019 (service now discontinued)
- PlayStation 5 & Xbox Series X|S: Backward compatible since launch; enhanced version (60 FPS) delivered via patch on March 26, 2021 for PS5 and Xbox Series X|S
- No native “remaster” for current-gen consoles, but performance and resolution improvements are available via backward compatibility.
- PC (Rockstar Games Launcher, Steam, Epic Games Store)
- PlayStation 4
- PlayStation 5 (via backward compatibility)
- Xbox One
- Xbox Series X|S (via backward compatibility with enhanced patch)
- Ambarino (mountains, forests, snowy peaks)
- New Hanover (plains, rivers, towns like Valentine and Annesburg)
- Lemoyne (swamps, bayous, the city of Saint Denis)
- West Elizabeth (prairies, the town of Blackwater, and Tall Trees)
- New Austin (deserts, canyons, Armadillo) – partially accessible in the epilogue and online.
- Arthur Morgan – The protagonist, a rugged but complex outlaw with a personal code.
- Dutch van der Linde – The charismatic, increasingly erratic leader of the gang.
- Hosea Matthews – The wise, aging con-man and Dutch’s longtime friend.
- John Marston – A younger version of the protagonist from the first game; Arthur's surrogate brother.
- Abigail Roberts – John’s wife, fiercely protective of their son Jack.
- Micah Bell – A hot-headed, treacherous gang member who sows discord.
- Sadie Adler – A widow turned ruthless bounty hunter and close ally of Arthur.
- Charles Smith – A quiet, capable mixed-race warrior and moral compass.
- Lenny Summers – A young educated African-American outlaw.
- Dutch’s inner circle and many other memorable supporting characters.
- Fans of open-world epics (GTA series, The Witcher 3, Skyrim)
- Western enthusiasts and lovers of historical fiction
- Players who appreciate slow-burn storytelling, realism, and rich character development
- Mature audiences (rated M for Blood, Intense Violence, Nudity, Sexual Content, Strong Language, Use of Drugs)
- Casual and hardcore gamers alike due to adjustable difficulty and pace (missions vs. free roam)
- Story Mode (Offline) – A single-player campaign spanning 6 chapters plus a two-part epilogue, totaling roughly 50–80 hours of main content, with hundreds of hours of side activities.
- Red Dead Online (Online) – A shared persistent world supporting up to 32 players in free roam, with cooperative missions, competitive modes, role-based progression, seasonal updates, and microtransactions for cosmetic/virtual items.
- Free Roam (in both modes) – Explore, hunt, fish, rob, interact with strangers, and engage in emergent sandbox gameplay.
- Photo Mode – Available in both story and online, allowing deep camera control with filters, depth effects, and poses (added via update).
- No traditional single-player story DLC was released for RDR2 (unlike GTA IV or RDR).
- Red Dead Online receives ongoing content updates (roles, events, weapons, horses, clothing, and seasonal festivities). Major updates include:
- Special Edition / Ultimate Edition bonuses include exclusive outfits, horses, weapons, and cash for both story and online (no story DLC).
- Outlaw Pass (seasonal battle pass) offered time-limited cosmetics, currency, and XP boosts during its active period (discontinued for new purchases but legacy items remain).
- Offline play: Full story mode is playable offline on all platforms (no internet required after initial installation/update).
- Online play: Red Dead Online requires an active internet connection and, on consoles, a PlayStation Plus (PS4/PS5) or Xbox Game Pass Core/Ultimate (Xbox) subscription.
- Cross-platform: No cross-play or cross-progression between PC and consoles.
Release Timeline
Platforms
Official platforms as of 2025:
Note: No native macOS or Linux support; streaming services like GeForce NOW may offer access.
Story Overview
The game is a prequel to the original Red Dead Redemption (2010), set in 1899. It follows Arthur Morgan, a senior enforcer of the Van der Linde gang, a group of outlaws fleeing the collapse of the American frontier. After a failed heist in the town of Blackwater, the gang is forced into the rugged wilderness of five fictional U.S. states. As the authorities and rival gangs close in, Arthur must grapple with loyalty to his mentor Dutch van der Linde, the changing world, and his own morality. The narrative explores themes of redemption, honor, loyalty, and the death of the Wild West, culminating in a deeply personal and emotional journey.
Setting
The game world spans five distinct regions:
The setting is a dense, living, and reactive open world with dynamic weather, wildlife, day/night cycles, and AI-driven NPC routines.
Main Characters
Core Appeal & What Makes It Unique
1. Unmatched Immersion – Every encounter feels handcrafted; NPCs react to your appearance, actions, and reputation.
2. Detailed Simulation – Hunting (skin, cook, craft), fishing, camp management, horse grooming, gun cleaning, and even skinning animations are rigorously modeled.
3. Cinematic Presentation – Over 500,000 lines of dialogue, motion-captured performances, and a dynamic score make it feel like an interactive Western film.
4. Moral Choice & Honor System – Your actions (helping strangers, committing crimes) affect your honor level, altering story outcomes and NPC interactions.
5. Living World – Animals migrate, predator-prey cycles exist, towns grow or decay, and the world remembers your deeds.
6. Non-linear Exploration – Dozens of stranger missions, random encounters, collectibles (cigarette cards, dinosaur bones, dreamcatchers), and secrets.
7. Deep Player Customization – Weapons, outfits, horse bonding, camp upgrades, and perk systems via tonics/trader skill trees.
8. Red Dead Online – The multiplayer component offers a persistent world with roles (Bounty Hunter, Trader, Collector, Moonshiner, Naturalist), heists, showdowns, free roam events, and a separate narrative arc.
Target Audience
Game Modes
DLC/Expansion Overview
- Frontier Pursuits (roles system)
- Moonshiners (bootlegging missions)
- Naturalist (animal sampling/trading)
- Blood Money (crime contracts)
- Call to Arms (wave-based survival)
Online / Offline Support
Summary
Red Dead Redemption 2 is widely regarded as one of the greatest video games ever made, praised for its staggering attention to detail, emotional storytelling, and the sheer depth of its open world. It is a landmark title that redefines what a realistic game world can be, offering both a powerful single-player narrative and a persistent online universe. Whether you are drawn to the tragic outlaw saga of Arthur Morgan or the lawless frontier of Red Dead Online, the game delivers an unforgettable journey into the heart of the American West.
Getting Started
Getting Started with Red Dead Redemption 2: A Beginner's Guide
Welcome to the sprawling, unforgiving world of Red Dead Redemption 2 (RDR2). This guide will walk you through your first hours, explain the controls, and help you avoid common pitfalls so you can enjoy the journey as Arthur Morgan.
First Hour Walkthrough: The Prologue & Chapter 1
No Character Creation: RDR2 does not feature character creation. You play as Arthur Morgan, a seasoned outlaw. Your appearance and stats are fixed, but you can later customize Arthur's outfits, hair, and beard through barbers and clothing stores.
Chapter 1: Colter (Snowy Mountains)
Your first hour is a tutorial-heavy prologue set in a blizzard. Follow these steps:
1. Follow Dutch and the gang. Keep moving forward; you can't get lost. The game introduces movement, camera, and basic interaction.
2. Horseback basics: On your horse, you'll learn to ride, gallop, and calm your horse (L3/LS click on most platforms). Press the left stick repeatedly to pat your horse when it gets scared.
3. Shooting tutorial: During a shootout, you'll learn to aim (L2/LT), fire (R2/RT), and use Dead Eye (R3/RS click). Dead Eye slows time and lets you mark targets – a crucial mechanic.
4. Hunting and skinning: You'll track a deer, kill it, and skin it. Loot the carcass for materials. This teaches you how to collect food and animal parts.
5. Return to camp: Follow the marker back to camp. You'll learn to donate items to the camp ledger.
6. Chapter 1 ends after a train robbery cutscene. You'll then be in Chapter 2: Horseshoe Overlook, where the open world truly opens up.
Controls Overview (All Platforms)
The controls are complex. Here's a quick reference for the main actions:
| Action | PS4/PS5 | Xbox One/Series | PC (Default Keyboard) | PC (Xbox Controller) |
|---|---|---|---|---|
| Move | Left Stick | Left Stick | WASD | Left Stick |
| Look | Right Stick | Right Stick | Mouse | Right Stick |
| Run | Hold X | Hold A | Shift | Hold A |
| Interact/Loot | Triangle | Y | E | Y |
| Jump | Square | X | Space | X |
| Aim Weapon | L2 | LT | Right Mouse Button | LT |
| Fire | R2 | RT | Left Mouse Button | RT |
| Dead Eye | R3 (click right stick) | R3 | Middle Mouse Button | R3 |
| Call Horse | Up on D-Pad | Up on D-Pad | H | Up on D-Pad |
| Map | Touchpad | View Button | M | View Button |
| Weapon Wheel | L1 | LB | Tab | LB |
| Item Wheel | Right on D-Pad | Right on D-Pad | Q | Right on D-Pad |
UI Overview: The HUD and Menus
- Health, Stamina, Dead Eye cores: Top left. Solid rings are your current levels; icons inside show core drain rates. Keep cores full by eating, sleeping, or using tonics.
- Mini-map: Top right. Icons are explained in the legend. White dots are allies; red dots are enemies; yellow markers are mission start points.
- Bounty/Wanted: Appears when you commit crime. Evade the law icon to lose wanted status.
- Weapon wheel (L1/LB): Hold to slow time and select weapons, items, or horse commands.
- Satchel Menu (Tab on PC, D-Pad down?): Hold the appropriate button to open your satchel – contains provisions, materials, tonics, valuables, etc.
- Progress Menu: (Hold Start button/View) – check story progress, challenges, compendium, and settings.
- Loot every body and container – ammo, money, collectibles are everywhere.
- Pet your horse often and brush it (hold L2/LT + square/X on horse). Bonding increases stamina and health.
- Eat regularly – your cores deplete over time. Buy canned food or hunt game.
- Save manually often (pause > Story > Save). Autosaves can be overwritten.
- Accept stranger missions (white icons) for extra cash, honor, and unique items.
- Don't rush main missions – explore first. The game punishes no side content.
- Don't commit crimes without planning – bounties grow quickly. Avoid killing civilians or stealing horses unless necessary.
- Don't ignore your horse's health – if it dies, it's gone unless you reload a save. Feed it and avoid cliffs.
- Don't sell unique items (e.g., gold bars, treasure maps) – you'll need them later for crafting or high-value sales.
- Don't skip the tutorials (controls, hunting, fishing) – they explain core mechanics.
- Money: Earned from missions, looting, selling pelts/herbs, and treasure maps. Don't waste it on cosmetics early.
- Food & Medicine: Loot provisions and health tonics. Purchase snake oil (deadeye) and bitters (health).
- Ammo: Always replenish at gunsmiths or loot dead enemies.
- Perfect Pelts: Essential for satchel upgrades and trapper outfits. Use correct weapons: Varmint rifle for small game, rolling block rifle for large game, bow for animals you want clean kills.
- Herbs & Flowers: Gathered from the wild – craft tonics and sell for small profit. Use Eagle Eye (click both sticks) to highlight collectible plants.
- [ ] Complete Chapter 1 and reach Chapter 2.
- [ ] Do at least one story mission at Horseshoe Overlook.
- [ ] Buy a second rifle (Springfield recommended) from Valentine's gunsmith.
- [ ] Hunt one perfect deer pelt (use rifle, aim for head).
- [ ] Upgrade Arthur's satchel once (requires perfect deer pelt at camp leatherworking tools).
- [ ] Save the game manually (optional but recommended).
- [ ] Pet and brush your horse to bond level 1.
- [ ] Loot all bodies in early missions – you'll find a gold bar on the train (it's there!).
Essential Early Objectives (Chapter 2)
Once you reach Horseshoe Overlook (Chapter 2), the world opens. Prioritize:
1. Do the main story missions first (yellow icons). They unlock new features: hunting, fishing, camp upgrades, and better weapons.
2. Visit a gunsmith to buy/clean your weapons. Use the gun oil found in loot to keep weapons from jamming.
3. Purchase the Springfield Rifle or Varmint Rifle from a gunsmith for hunting (perfect pelts require specific weapons).
4. Fully upgrade your satchel at camp. This increases item carry capacity dramatically. You need perfect pelts from hunting.
5. Complete the "Money Lending and Other Sins" missions to earn cash and unlock the camp ledger (for upgrades).
What to Do First & What to Avoid
DO:
DON'T:
Early Resource Priorities
Your top resources in the first few hours:
Common Beginner Mistakes
1. Not saving manually – you can lose progress if you die or get arrested.
2. Ignoring horse bonding – lower bonding means your horse bucks you off and runs away.
3. Using wrong weapons for hunting – ruins pelts. Use binoculars to study animals, check compendium for weapon requirement.
4. Trying to fight multiple lawmen head-on – it's suicide early on. Flee, hide, or pay bounties.
5. Skipping camp upgrades – Arthur's quarters, horse station, and fast travel map (requires money and materials) save time.
6. Not reading tutorials – many players miss Dead Eye manual marking or how to fish.
Day One Checklist
Before you end your first session (roughly 2-3 hours), ensure you've done:
Final Tip: Take your time. RDR2 is a slow burn – enjoy the scenery, greet strangers, and immerse yourself in Arthur's story. The world is reactive: if you help people, honor increases; if you murder, the law and civilians will treat you differently. Good luck, partner.
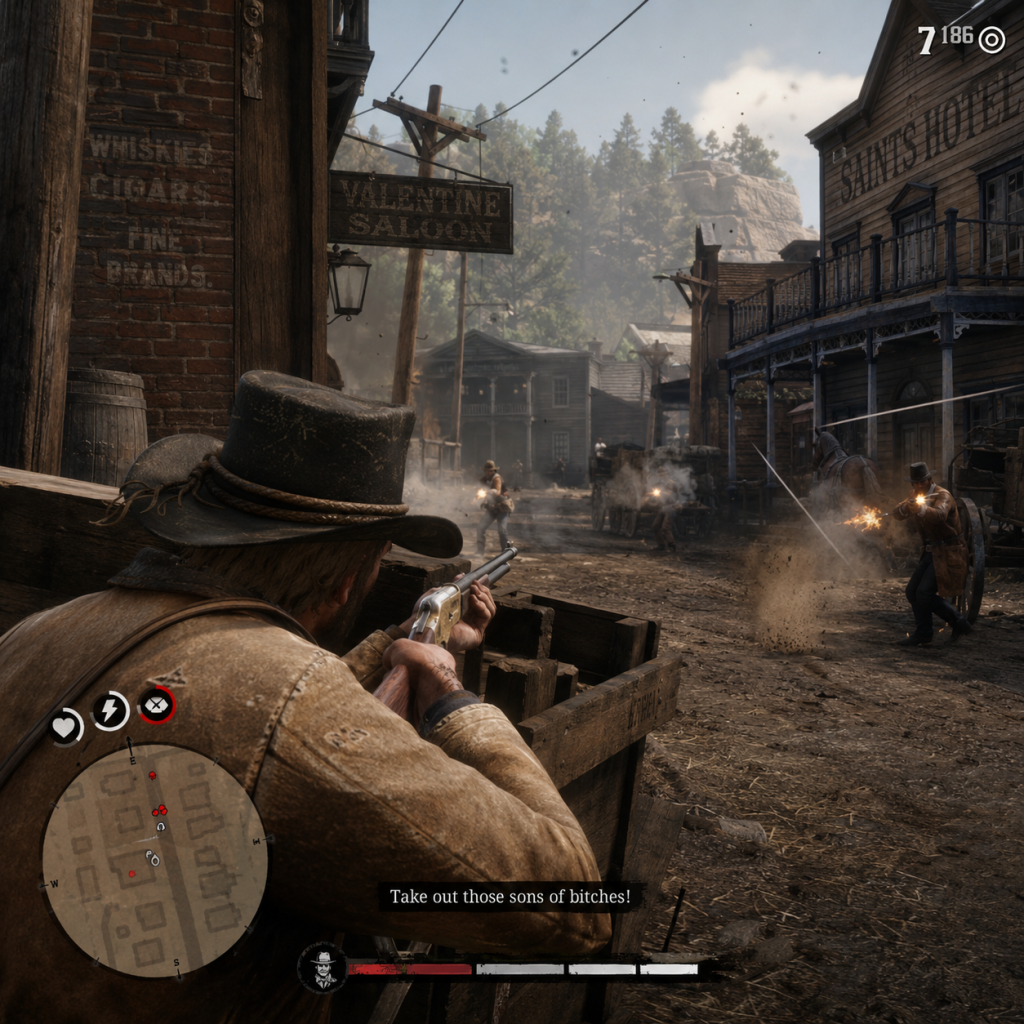
Core Gameplay
Core Gameplay Guide: Red Dead Redemption 2
This guide explains the main gameplay loop, combat/interaction systems, progression, exploration, missions, economy, character/build growth, and endgame structure. It is organized by player progression tiers: Early Game, Mid Game, Late Game, and Endgame.
---
Early Game (Chapters 1-2: Colter to Horseshoe Overlook)
Main Gameplay Loop: During the early game, the loop revolves around surviving the harsh mountain environment, establishing a foothold in the Heartlands, and learning the basics of movement, shooting, and interaction. Key activities: completing story missions, hunting for food and materials, maintaining cores (health, stamina, dead eye), and bonding with your horse.
Combat/Interaction Systems: You start with limited weapons (revolver, carbine repeater, bow). Cover system is essential—press L2 (or right-click on PC) to take cover behind objects. Dead Eye is introduced slowly; at first you can only manually target it. Interaction with NPCs uses the radial menu (L1/LB or Tab on PC). Greet/Antagonize options affect honor. Early game teaches melee combat (punching, tackling) and the lasso for hogtying.
Progression: Progression is heavily story-gated for the first few hours. You gain access to the camp ledger (donations, upgrades), fast travel via stagecoaches and trains (after Chapter 2), and the satchel system. Honor starts neutral. The main objective is to survive the blizzard and reach Valentine.
Exploration: Limited to the snowy region (Ambarino) and later the Heartlands. You can explore on foot or with the temporary horse from the intro. Fast travel is unavailable until after the mission "Exit, Pursued by a Bruised Ego" in Chapter 2. Collectibles like cigarette cards and dinosaur bones are present but difficult to reach.
Quests/Missions: Linear story missions available from allies. Side activities include hunting (legendary animals via stranger missions after Chapter 2), Stranger encounters (e.g., Mary-Beth’s book), and camp chores. The first free-roam mission is "The Aftermath of Genesis" – then you get a horse and basic gear.
Economy: Very tight. You start with little money ($10-$20). Sell pelts and meats to butchers or trappers. Robbing trains or coaches is risky early on. Invest in a reliable knife, bow, and small game arrows. Camp donations improve morale but cost resources.
Character/Build Growth: Core stats (health, stamina, dead eye) improve through use (e.g., running increases stamina, shooting increases dead eye). Outfits provide no stat bonuses but affect temperature regulation. Early game focuses on strengthening Arthur’s bond with his horse (feeding, brushing).
Endgame Structure (Early): Not applicable—this tier ends around Chapter 2.
---
Mid Game (Chapters 3-4: Clemens Point to Rhodes, Shady Belle)
Main Gameplay Loop: The loop expands to include gang camp management, robbery planning, and more complex missions. You balance story progress with side activities (fishing, treasure hunting, tracking bounties). Dead Eye upgrades to manual tagging (paint targets) after Chapter 3.
Combat/Interaction Systems: You now have access to repeaters, shotguns, and rifles (e.g., Springfield Rifle, Pump-action Shotgun). Improved Dead Eye allows marking multiple targets. Melee finishers and combat rolling become more effective. Use stealth mechanics (cover, distracting animals) more freely. The bounty system escalates; you can pay off bounty or serve time to reset.
Progression: Honor can shift significantly through player choices. Camp upgrades become crucial (fast travel map, better provisions). Unlock boat upgrades at Shady Belle. You can purchase better horses (Arabian, Turkoman) from stables. Your satchel capacity increases with Pearson’s upgrades.
Exploration: The entire map opens—New Hanover, Lemoyne, West Elizabeth (Blackwater is restricted until later). Legendary animals, gang hideouts, and random encounters become more frequent. Treasure maps (Jack Hall Gang, Poisonous Trail) yield gold bars worth $500 each. Fast travel via camp map or trains is reliable.
Quests/Missions: Story missions are interwoven with optional robberies (e.g., train robbery with John, coach robbery with Micah). Side quests: Dr. Valiant’s sea shells, Sister Calderón / Reverend Swanson. Stranger missions become more complex (e.g., The Inevitable Truth with Mary Linton). Bounty hunting is available (posters at post offices).
Economy: Mid game sees a surge in income from heists (train robbery nets ~$5,000 but requires planning) and treasure maps. Bulk selling big game meat and perfect pelts yields steady cash. The trapper sells unique clothing and trinkets (e.g., Bear Head Hat, Buck Antler Trinket). Donate to camp or buy supplies.
Character/Build Growth: Maximum stamina and health reach high levels through continued use. Dead Eye rank increases to 6-7 (allows slow-motion marking). Crafting at campfire: potent tonics, special ammo (express, explosive). Bond Level 4 horse unlocks rearing, drifting, and sliding. Arthur’s stats directly affect hunting (bow draw speed, lasso throw range).
Endgame Structure (Mid): N/A – mid game ends around Chapter 4.
---
Late Game (Chapters 5-6: Guarma to Beaver Hollow)
Main Gameplay Loop: High-stakes survival with escalating law enforcement and gang tension. The loop shifts from expansion to confrontation. Story missions become morally complex, and the open world responds to Arthur’s deteriorating health (coughing, low stamina). Side activities remain available but urgency increases.
Combat/Interaction Systems: Full Dead Eye level 8 (manual paint/auto-mark). Enemies are tougher (Bounty hunters in groups, Pinkertons). You can craft volatile dynamite, fire bottles, poison throwing knives. Stealth is harder due to enhanced AI. The honor system heavily influences ending cutscenes.
Progression: Arthur’s physical decline is scripted—during free roam, you may need to rest frequently. Honor can be redeemed with good deeds. Camp morale drops; upgrades are less useful. The game pushes toward the final mission choices. Unlock the ability to bond with a war horse (rare).
Exploration: The open world is fully accessible (including Blackwater, New Austin, but John unlocks New Austin later). Legendary animals and fish remain collectible. Guarma is a temporary location (missable collectibles like parrots, boas). Side quests like The Veteran (Hamish Sinclair) and The Widow (Mrs. Downes) appear.
Quests/Missions: Story missions heavily feature gang raids (Bank of Rhodes, Bronte mansion), shooting set pieces, and moral choices (e.g., helping a sick family). Honor missions: helping Sister Calderón, releasing debtors. Stranger missions with John (The Marriages). The final mission chain includes "Red Dead Redemption" (if low honor) or "The Fine Art of Conversation" (if high honor).
Economy: Money becomes abundant from story heists (e.g., Saint Denis bank robbery nets $2,500). Legendary animal parts sold at trapper yield high prices. However, Arthur can no longer buy new outfits or weapons after Chapter 6. Bounty forgiveness is recommended before the final missions.
Character/Build Growth: Arthur’s cores are capped (maximum level 8 for all stats). Bond Level 4 horse available. Crafting allows potent miracle tonics, special archery. No further stat improvement possible. Focus on acquiring all weapon variants (e.g., High Roller Revolver from Dr. Manic). Honor final transition (knights of the round table influence).
Endgame Structure (Late): After Chapter 6, you control John Marston in free roam. The post-game is considered Endgame.
---
Endgame (Epilogue: Pronghorn Ranch to Beecher’s Hope)
Main Gameplay Loop: After the main story, you play as John Marston. The loop focuses on building a new life—ranch chores, buying property, completing side content, and tying up loose ends. Story missions are replaced with epilogue quests leading to the final credits.
Combat/Interaction Systems: Same as late game with John. John has slightly different stamina/health stats but plays identically. All weapons carry over from Arthur’s playthrough (except unique mission items). Honor is reset to neutral (can be changed again). Bounty and law system remains.
Progression: Unlock the ability to purchase and upgrade Beecher’s Hope house (via Abigail and Uncle). John can buy new outfits, horses, and equipment. The trapper inventory is shared with Arthur’s progress. The “American Lumber” mission tree is available. After finishing the epilogue, you can visit Arthur’s grave for a cutscene.
Exploration: Full access to all states except Guarma (gone). Every location is now accessible – New Austin’s gang hideouts (Fort Mercer, Tumbleweed) spawn again. Legendary animals and fish can be collected. Treasure maps (e.g., Elemental Trail) still work. The poker table in Saint Denis is open.
Quests/Missions: No main story missions left. Side content: all Stranger missions persist (e.g., The Scientist, The Photographer). Bounty hunting now has a reward board at every post office. Random encounters (e.g., snake oil salesman) continue indefinitely. Legendary hunts and fish remain completable.
Economy: Money flows easily from bounties (up to $200 each), robbery missions (e.g., "The Bank Job"), and hunting. No camp expenses. You can buy everything – clothing, horses, fast travel. The Del Lobo gang hideouts respawn quickly.
Character/Build Growth: John reaches maximum stats through use (similar to Arthur). No new perks. Horse bonding resets but can be raised again. Outfits are cosmetic only. Completionist goals: skin all animals, find all dreamcatchers, achieve 100% game completion.
Endgame Structure: The game technically has no traditional endgame after the epilogue. Players can continue free roaming indefinitely. There is no New Game Plus. The only definitive ending is the main story; post-epilogue offers a sandbox to complete collector challenges, bounties, and miscellaneous tasks. A soft “end” is reaching 100% completion, which unlocks a special cutscene at the train station in Blackwater.
---
Summary Table: Key Differences by Tier
| Aspect | Early Game (Ch1-2) | Mid Game (Ch3-4) | Late Game (Ch5-6) | Endgame (Epilogue) |
|---|---|---|---|---|
| Dead Eye | Manual, slow | Manual + auto paint | Full manual paint | Same as late |
| Weapons | Revolver, carbine, bow | Rifles, shotguns, repeaters | All + explosives | All + explosive rounds |
| Economy | Tight (under $100) | Moderate ($500-2000) | Abundant ($2000+) | Infinite (bounties) |
| Horse | Temporary horse, slow bonding | Stables, bond 4 possible | Bond 4 achieved | Bond 4 again |
| Exploration | Ambarino, Heartlands | All states (except New Austin) | Full map (New Austin locked) | Full map with New Austin |
| Honor | Neutral | Can change significantly | Affects ending | Reset to neutral |
| Camp | Colter, Horseshoe Overlook | Clemens Point, Shady Belle | Beaver Hollow | Beecher’s Hope |
This guide covers the core gameplay of Red Dead Redemption 2 through meaningful tiers. Adjust your playstyle as you move from a vulnerable outlaw to a legendary gunslinger to a settled rancher.
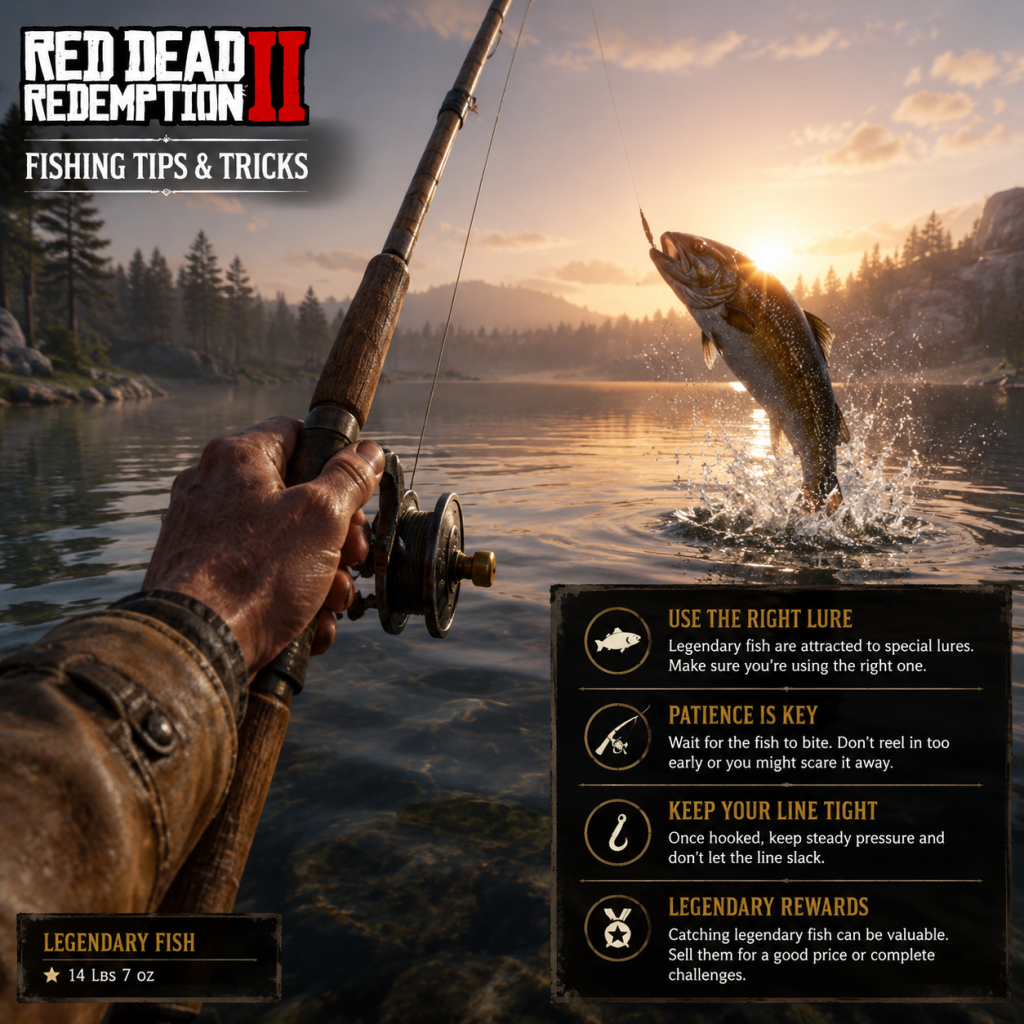
Game Tips
Red Dead Redemption 2 – Game Tips Guide
This guide provides a comprehensive collection of tips for Red Dead Redemption 2 (RDR2), grouped by category. Each tip includes an explanation and analysis of why it works. Tips are labeled as Beginner, Intermediate, or Advanced to help you prioritize.
Combat Tips
#### 1. Master Dead Eye (Advanced)
- Explanation: Dead Eye allows you to slow time and mark multiple targets. Upgrade it by completing story missions and using it frequently. Once fully upgraded, you can manually target weak spots (head, heart) for instant kills.
- Why it works: Headshots are one-shot kills with most weapons. Using Dead Eye outside of combat (e.g., scouting enemies) lets you plan shots. Activate Dead Eye just before peeking around cover to get a full view.
- When to use: Always against groups of enemies or when you need precise shots. Use it sparingly early game; later, it recharges quickly with tonics.
- Explanation: Press the cover button (Q on PC, RB on controller) near walls, rocks, or trees. While in cover, you can aim and fire without exposing your whole body.
- Why it works: RDR2 enemies are accurate. Standing in the open gets you killed fast. Peeking reduces your hitbox. Fire in bursts and duck back to reload.
- When to use: In every firefight against human enemies, especially at medium range.
- Explanation: Revolvers have fast draw speed but lower accuracy. Repeaters (e.g., Lancaster) offer good rate of fire and accuracy. Rifles (e.g., Bolt Action) have high damage and range but slow fire.
- Why it works: Choose based on engagement distance. Close quarters: dual-wield sawed-off shotguns or revolvers. Medium: Lancaster Repeater with express rounds. Long range: Rolling Block Rifle with scope.
- Example: Against bounty hunters on open plains, use a scoped rifle from max distance. In a bar fight, switch to fists or a revolver.
- Explanation: Thrown explosives can clear groups or force enemies out of cover.
- Why it works: Enemies bunched up behind a wagon? One dynamite stick kills multiple. Molotovs cause panic and area denial.
- When to use: When facing 3+ enemies clustered together, or when you need to flush an enemy from behind a barricade.
- Explanation: Weapons degrade over time from dirt, blood, and mud. Clean them regularly using gun oil from general stores or loot.
- Why it works: A dirty weapon has a larger reticle and more bloom (inaccuracy). Clean weapons maintain tight aim.
- When to use: After every major fight or when you notice the reticle spread. Check weapon condition in the weapon wheel (holding Tab on PC).
- Explanation: To get perfect pelts, you need to use the correct weapon and hit a clean kill on a three-star animal. Study animals with binoculars to see star rating. Use a rifle for large game (deer, bear), a varmint rifle for small game (rabbits, foxes), and a bow with small game arrows for birds.
- Why it works: Perfect pelts are required for upgrading your satchel at the Trapper, which increases carrying capacity. Also needed for certain clothing and camp upgrades.
- When to use: Whenever you encounter a three-star animal. Always carry a varmint rifle and a bow. Hunt in the early morning or late afternoon when animals are more active.
- Explanation: The minimap can be expanded to full map (hold M or Start). Legend shows icons for towns, camps, points of interest.
- Why it works: RDR2’s world is huge. Fast travel is limited (only from camp or by buying train/coach). Understanding the map saves time.
- Example: Set a waypoint marker on your map; a trail appears on the minimap. Follow it while staying on main roads for fastest travel, but take shortcuts through open terrain if you want random encounters.
- Explanation: White blips on the map indicate side missions, random encounters, and hidden locations. Talk to strangers marked with a white question mark.
- Why it works: These often reward unique items, money, honour boosts, or unlock new opportunities (e.g., gunslinger missions). They also add depth to the story.
- When to use: Explore when you have free time between story missions. Many stranger missions are time-sensitive or only appear during certain chapters, so check your map frequently.
- Explanation: Many mountains, towers, and rock formations have unique viewpoints. Climb them and you may find hidden loot, dreamcatchers, or a complete map of the area.
- Why it works: High ground gives you a tactical advantage against enemies and reveals hidden paths. Some collectibles (like dinosaur bones or rock carvings) are only spotted from above.
- When to use: When you see a distinct outcrop or tower on the map. Use your horse to approach steep slopes then dismount and climb on foot.
- Explanation: Tonics restore health, stamina, Dead Eye, and cores. You can craft them from herbs (e.g., ginseng, sage) or purchase from doctors.
- Why it works: Combat and wilderness survival drain cores quickly. Having 20+ health tonics prevents death from ambushes or predator attacks.
- When to use: Always keep at least 5 of each tonic. Craft them by holding Tab and selecting “Crafting” when you have ingredients. Prioritize “Potent” versions.
- Explanation: Ammo is sold at gunsmiths and general stores. Hunt animals for meat that you can cook at campfires to restore cores.
- Why it works: Running out of ammo mid-mission is frustrating. Cooked meat is free and effective. Large game meat (venison, prime beef) restores more health than small game.
- Example: After hunting 3 deer, skin them, cook the meat (3 pieces per deer), and store in satchel. Always resupply ammo before leaving town.
- Explanation: The Legend of the East satchel (crafted from perfect pelts) increases carrying capacity to 99 for most items, including herbs, tonics, and meat.
- Why it works: Without it, you’ll constantly hit inventory caps and need to discard valuable loot. The satchel upgrades are a game-changer for inventory management.
- How to do: Complete Pearson’s requests at camp. Hunt perfect pelts for each satchel type (e.g., opossum, badger, raccoon, deer, cow). The final satchel requires a perfect panther pelt—hunt in the Bayou at night.
- Explanation: Treasure maps lead to gold bars worth $500 each. You find maps from purchase (fence) or loot from random events (e.g., a treasure hunter’s corpse).
- Why it works: Gold bars are the fastest way to earn large sums early. $500 can buy all weapons and camp upgrades.
- When to use: Immediately after Chapter 2. The “Jack Hall Gang” treasure map is obtainable from a stranger in Limpany or from Madame Nazar (online) but in story mode, find maps in the world.
- Explanation: Different buyers give different prices. Fences buy stolen goods, jewelry, and gold bars. Trappers buy pelts and craft clothing. Doctors buy herbs and tonics. General stores buy everything else.
- Why it works: You maximize profit. For example, selling a perfect wolf pelt to the trapper yields $4.50, while selling to a general store yields only $2.25. Always check price.
- When to use: Whenever you have valuables. Keep a mental note: fences for rare items, trappers for pelts, doctors for herbs.
- Explanation: After battles, methodically loot every body. Press the search button (E on PC, Square on PS) to find cash, ammo, tonics, and sometimes treasure maps.
- Why it works: Even small amounts add up. You may find gold wedding rings worth $7 each, or collectible jewelry that sells for more. Also loot horses' saddlebags for minor items.
- When to use: After every gang camp clearance, bounty hunter attack, or random ambush.
- Explanation: The camp ledger allows you to buy provisions, ammo, fast travel (Arthur’s tent upgrade), and cosmetic upgrades. Donation to the camp fund increases honour but doesn’t directly benefit you.
- Why it works: The fast travel map from Arthur’s tent upgrade (requires $220 and chapter 2) is a huge time saver. Donate small amounts regularly for honour but keep most cash for yourself until you have a comfortable stock.
- When to use: After you have at least $500 and a good weapons set, then upgrade the tent and buy fast travel. Then focus on upgrading Pearson’s crafting tools for better satchels.
- Explanation: Honour affects NPC reactions, shop prices, and story outcomes. High honour gives discounts and opens certain cutscenes. Low honour gives different interactions and a darker tone.
- Why it works: Honour is binary but not limiting; you can switch easily by greeting people (+honour) or robbing/killing (-honour). Play how you want, but be aware that very low honour attracts bounty hunters more often.
- When to use: If you want the “good” ending, maintain high honour. For pure chaos, low honour is fine. Use honour as a roleplaying tool.
- Explanation: You increase core levels by performing related actions: health from taking damage or fistfights, stamina from running/swimming, Dead Eye from killing with headshots. Your cores level up periodically when you reach thresholds (e.g., health will level up after earning 300 XP in that category).
- Why it works: Higher cores mean more survivability, longer sprints, and slower drain of tonics. Max cores make you a tank.
- When to use: Actively seek opportunities to improve them. For stamina, go for long rides. For health, duel with NPCs or fight bears. For Dead Eye, practice headshots on animals.
- Explanation: You can carry only a limited number of long weapons on your horse (2 rifles, 2 repeaters, 2 shotguns) and a few pistols/revolvers. You cannot swap mid-combat from horse unless near it.
- Why it works: Customize your loadout based on mission type. For open-field combat, take a scoped rifle and repeater. For urban missions, take a sawed-off shotgun and revolver. For stealth, use bow and throwing knives.
- Example: Before the “Blessed Are the Peacemakers” mission, equip a repeater and a shotgun since it involves close-quarters fighting in Valentine.
- Explanation: If you accidentally ruin a perfect pelt (e.g., used wrong weapon, got attacked by predator while hunting), reload a recent manual save to retry. The animal spawns again on reload.
- Why it works: Perfect pelts are rare; losing one wastes hours. Save before attempting difficult kills (e.g., panthers or cougars).
- When to use: When pursuing a legendary animal or a rare perfect pelt for a specific satchel upgrade. Manual saves are done from the pause menu.
- Explanation: While in combat, holding Tab (PC) or the weapon wheel button (L1 on PS) slows time. You can swap weapons, choose ammo type (regular, high velocity, express, explosive), and even throw weapons.
- Why it works: You can adapt to a changing situation without dying. If you run out of ammo in a repeater, switch to revolver instantly.
- When to use: Bind shortcuts for your favorite weapons in the settings. Practice in low-stakes fights.
- Explanation: Bonding with your horse (by feeding, brushing, patting, and riding) increases its stats (speed, stamina, health) and unlocks abilities like rearing on command or sliding stops. Get to Bonding Level 4 for maximum benefit.
- Why it works: A bonded horse is faster and less likely to throw you during a predator encounter. It also responds quickly to navigation commands.
- How to do: At camp, brush and feed your horse every time you return. When riding, calm it (press G on PC) during predator encounters. The bond increases slowly over time.
- Explanation: In addition to fast travel, camp upgrades provide quality-of-life improvements: the medical table unlocks recipe for special tonics, the wagon upgrades allow fast travel from any camp (with mod), and the Provisions Wagon offers free food.
- Why it works: Upgrading camp makes long treks easier and provides passive benefits.
- Prioritize: Arthur’s Tent (fast travel) > Pearson’s Tools (satchel upgrades) > Medical Wagon (potent tonics) > Decorations (cosmetic). Donate to camp funds only when you have excess cash.
- Explanation: Many side quests reward unique items or weapon variants. For example, “The Noblest of Men, and a Woman” yields a rare revolver and treasure. “Arcadia for Amateurs” lets you photograph animals and eventually get a unique hat.
- Why it works: These items can be sold for high prices or used as trophies. They also provide enjoyable content.
- When to use: Explore every white icon on the map, especially during Chapter 2-4 when the world is most open.
- Explanation: Each legendary animal (bear, wolf, elk, panther, etc.) is marked by a question mark on the map but requires study and tracking. Killing them yields a legendary pelt that can be sold to the Trapper for exclusive clothing items.
- Why it works: Legendary pelts are always perfect (no weapon requirement) and grant unique outfits with stat bonuses (e.g., bear coat gives 10% cold resistance). The Trapper’s legendary gear is some of the best in game.
- How to do: Use Eagle Eye to track clues. Approach the area with caution—the animal will attack. Kill with a high-powered rifle or explosive ammunition.
- Manual Saves: Make manual saves before risky missions or major purchases. Autosave often overwrites; manual saves let you revert mistakes.
- Camp Greetings: Greet strangers in towns to boost honour quickly. In Saint Denis, you can greet dozens of people in a few minutes for a huge honour boost.
- Dual Wielding: Unlock by purchasing an off-hand holster from the gunsmith. Dual revolvers or pistols double your fire rate but reduce accuracy.
- Horse Whistle: Whistle (hold H on PC) calls your horse even from far away. Use it often to keep your horse near.
- Weather Effects: Cold weather drains health and stamina cores. Wear appropriate clothing (check the temperature indicator on the HUD). Hot weather requires light clothing. Always carry a change of clothes.
- Train Robbery: To rob a train, first cut the baggage car lock or stop the train in a tunnel to avoid detection. Looting the safe yields cash and gold.
- Poker & Gambler Challenges: If you need money, play poker at saloons. You can also complete Gambler challenges for money and honour.
- Photo Mode: Use the in-game photo mode (activate via pause menu) to capture stunning landscapes. It helps you appreciate the world.
#### 2. Use Cover and Peak Firing (Beginner)
#### 3. Revolvers vs. Repeaters vs. Rifles (Intermediate)
#### 4. Use Dynamite and Molotovs for Crowd Control (Intermediate)
#### 5. Improve Weapon Accuracy with Cleanliness (Beginner)
Exploration Tips
#### 1. Always Hunt for Perfect Pelts (Intermediate)
#### 2. Utilize the Compass and Map Legend (Beginner)
#### 3. Discover Points of Interest and Stranger Missions (Intermediate)
#### 4. Climb High Points for Vistas and Collectibles (Advanced)
Resource Management Tips
#### 1. Fill Your Satchel with Tonics (Beginner)
#### 2. Stock Up on Ammunition and Cook Meat (Intermediate)
#### 3. Upgrade Your Satchel ASAP (Advanced)
Economy & Money Making Tips
#### 1. Focus on Treasure Maps (Intermediate)
#### 2. Sell to the Right People (Beginner)
#### 3. Loot Every Enemy (Advanced)
#### 4. Invest in the Camp Ledger Only After Priorities (Intermediate)
Character Build & Progression Tips
#### 1. Balance Honour and Outlaw Actions (Beginner)
#### 2. Upgrade Health, Stamina, and Dead Eye Cores (Intermediate)
#### 3. Choose Your Weapons Wisely (Advanced)
Advanced Optimizations & Exploitation of Mechanics
#### 1. Save Scum for Perfect Pelts (Advanced)
#### 2. Use the Weapon Wheel to Quickly Switch Between Loadouts (Intermediate)
#### 3. Exploit Horse Bonding (Beginner)
#### 4. Plan Your Camp Upgrades (Intermediate)
Exploration & Side Activities Tips
#### 1. Participate in Stranger Missions for Unlockable Bonuses (Intermediate)
#### 2. Find Legendary Animals for Rare Items (Advanced)
Final General Tips
This guide covers the essentials. As you play, remember that RDR2 rewards patience and exploration. The more you immerse yourself, the more you’ll discover.
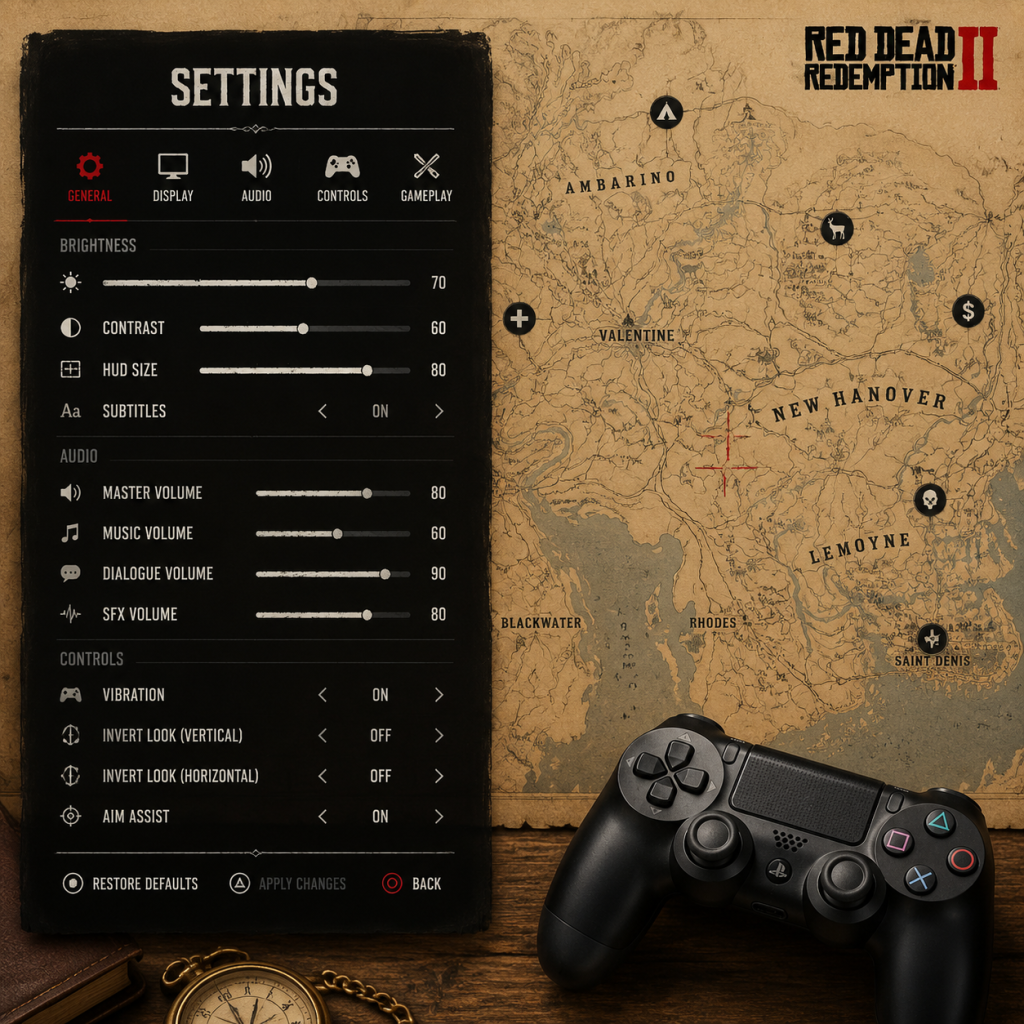
Game Settings
Red Dead Redemption 2 – Comprehensive Game Settings Guide
This guide covers all major settings categories in Red Dead Redemption 2 (RDR2) for PC, PlayStation 4/5, and Xbox One/Series X|S. It includes recommendations for optimal performance and visual quality across different hardware tiers, highlights commonly misconfigured options, and explains special attention points during initial setup.
> Note: Console versions have limited adjustable settings; PC offers the most granular control. This guide focuses heavily on PC settings but also covers console-specific options.
---
1. Graphics Settings (PC)
RDR2’s graphics settings are extensive. The game provides a VRAM Usage Bar at the bottom of the Graphics menu – never exceed your GPU’s VRAM capacity or performance will crater.
#### 1.1 Basic Graphics Settings
| Setting | Description | Recommendation |
|---|---|---|
| Resolution | Native display resolution. | Use monitor native. For performance, lower to 1080p or 900p. |
| Refresh Rate | Must match monitor’s max refresh (e.g., 60Hz, 144Hz). | Set to monitor’s maximum. |
| VSync | Synchronizes frame rate to refresh rate; can cause input lag. | Off if you have G-Sync/FreeSync; otherwise On to prevent tearing. |
| Triple Buffering | Reduces stutter with VSync On. | On when VSync is On; Off if VSync Off. |
| Graphics API | Vulkan (default) or DirectX 12. | Vulkan for most Nvidia GPUs; DX12 for some AMD cards and RTX 20/30 series (better ray tracing support). Test both. |
| Resolution Scale | Renders at a % of resolution then upscales. | 100% for best quality. Lower to 50-75% for massive FPS gain (blurry). |
| Texture Quality | Affects sharpness of surfaces. | Ultra if you have 4+ GB VRAM; High otherwise. |
| Anisotropic Filtering | Sharpens angled textures. | x16 (minimal performance cost). |
| Lighting Quality | Shadows, ambient occlusion, global illumination. | Medium to High; Ultra is heavy. |
| Global Illumination Quality | Affects indirect lighting. | Medium (good balance) or High (performance hit). |
| Shadow Quality | Draw distance and detail of shadows. | Medium or High; Ultra is expensive. |
| Far Shadow Quality | Shadows from distant objects. | Medium (low impact). |
| Screen Space Ambient Occlusion | Adds depth to crevices. | High or Ultra (minor performance cost). |
| Reflection Quality | Reflections on water, glass, etc. | Medium (performance) or High (visuals). |
| Mirror Quality | Mirror reflections. | High (low cost). |
| Water Quality | Water surface detail and reflections. | Medium (good enough). |
| Volumetrics Quality | Fog, clouds, smoke. | Medium (heavy at Ultra). |
| Particle Quality | Dust, sparks, etc. | High (low cost). |
| Tessellation Quality | Adds geometry detail to terrain/objects. | Medium or High; Ultra can cause issues. |
| TAA | Anti-aliasing method. | High (best temporal stability). TAA Sharpening: 1/4 to 1/2 slider for clarity. |
| FXAA | Fast but blurry AA. | Off (TAA is better). |
| MSAA | Multisampling AA – very expensive. | Off (except for screenshots). |
| Motion Blur | Blur during camera movement. | Off (personal preference; helps hide low FPS). |
| Depth of Field | Blur in cutscenes/distance. | Off or On (minimal performance impact). |
These are hidden behind an “Unlock” toggle. Only change these if you have VRAM headroom and understand the impact.
| Setting | Description | Recommendation |
|---|---|---|
| Unlocked | On enables advanced options. | Leave Off until you’ve set basic settings; these can crash or degrade performance. |
| Water Refraction Quality | Underwater refraction. | High (low cost). |
| Water Reflection Quality | Water reflection detail. | Medium. |
| Grass Shadows | Shadows on grass blades. | Medium (can cause flickering at Ultra). |
| Soft Shadows | Shadow edge softness. | High (looks natural). |
| Grass LODs | Level of detail for distant grass. | 1-3 steps below maximum to save performance. |
| Decal Quality | Number of bullet holes, blood splatters. | Ultra (minimal cost). |
| Fur Quality | Animal fur detail. | High (only affects certain animals). |
| Tree Tessellation | Adds geometry to tree trunks. | Off (can cause visual bugs). |
Low-End (GTX 1060 / RX 580 – 8GB VRAM, 1080p, 30-45 FPS)
- Preset: Medium (then adjust)
- Textures: High (VRAM permitting)
- Shadows: Low
- Reflections: Low
- Volumetrics: Low
- TAA: Medium
- Resolution Scale: 85% if needed
- VSync: Off (limit FPS via driver or RivaTuner)
- Preset: High (then tweak)
- Textures: Ultra
- Lighting: High
- Shadows: Medium
- Reflection: Medium
- Volumetrics: Medium
- TAA: High
- Resolution Scale: 100%
- VSync: Off (use G-Sync/FreeSync)
- Preset: Ultra (reduce a few settings to stay within VRAM)
- Textures: Ultra
- Lighting: Ultra
- Shadows: Ultra
- Reflection: High
- Volumetrics: High
- TAA: High + Sharpening 1/2
- Resolution Scale: 100%
- Advanced: Unlock only if VRAM permits; set Grass Shadows to High, Tree Tessellation Off.
- Max everything, 4K, 60-100 FPS
- Use DLSS/FSR Quality if needed for ray tracing (RDR2 does not have RT natively; mods may add it).
Mid-Range (RTX 2060 / RX 5600 XT – 6-8GB VRAM, 1440p, 40-60 FPS)
High-End (RTX 3070 / RX 6800 – 8-16GB VRAM, 4K, 60+ FPS)
Ultra/Beyond (RTX 4080 / RX 7900 XTX)
> Special Attention: The Graphics API can cause crashes or poor performance on certain hardware. If you experience stuttering, switch from Vulkan to DX12 (or vice versa). Also, Triple Buffering + VSync = noticeable input lag; disable both to reduce lag.
---
2. Audio Settings (PC & Console)
| Setting | Description | Recommendation |
|---|---|---|
| Output Configuration | Stereo, Surround, Headphones. | Headphones for spatial awareness in multiplayer; Stereo for TV speakers. |
| Master Volume | Overall game volume. | 70-80% – leaves headroom for explosions. |
| Music Volume | Background score. | 80% – important for atmosphere. |
| SFX Volume | Gunshots, footsteps, animals. | 100% – critical for gameplay awareness. |
| Dialogue Volume | Voiceovers. | 100% – you won't miss story cues. |
| Cinematic Volume | Cutscene audio. | Keep same as Dialogue or slightly lower. |
| Voice Chat (Online) | Input/output volume for player voice. | Adjust to avoid feedback. |
| Proximity Chat (Online) | Enable/disable. | On for immersion; Off for privacy. |
---
3. Controls Settings (PC & Console)
#### 3.1 Controller vs. Keyboard & Mouse
- Controller (Xbox/PS4/PS5): Best for horse riding, combat, and menu navigation. RDR2 was designed with a controller in mind.
- Keyboard & Mouse: Superior precision for aiming; requires rebinding many keys for efficient gameplay.
- Default bindings are atrocious (e.g., `E` for everything). Remap to:
- You can create multiple control schemes in `Settings > Controls > Controls Menu`.
#### 3.2 Key Bindings (PC)
- Interact: `F`
- Run/Sprint: `Shift` (hold)
- Crouch: `Ctrl`
- Cover: `Q`
- Melee: `Mouse5` or `V`
- Dead Eye: `Middle Mouse Button`
- Radial Menu (Weapon Wheel): `Tab` or `Caps Lock` (hold)
#### 3.3 Aim & Look Sensitivity
| Setting | Description | Recommendation |
|---|---|---|
| Look Sensitivity | Mouse/right stick speed. | Start at 50% and adjust. |
| Aim Sensitivity | Speed while aiming down sights. | Slightly lower than look sensitivity for easier tracking. |
| Aim Assist (Controller) | Snaps to targets. | Narrow or Wide as preferred; Off for realism. |
| Dead Zone (Controller) | Minimum stick movement before response. | Lower to ~5% to avoid drift; increase if stick is wonky. |
| Acceleration | Speed increase with sustained movement. | Set to 0 (linear) for most control. |
---
4. Accessibility Settings
| Setting | Description | Recommendation |
|---|---|---|
| Subtitles | Speech text. | On for hearing impaired or noisy environments. |
| Subtitle Background | Dark box behind text. | On for readability. |
| Colorblind Mode | Changes UI colors (Deuteranopia, Protanopia, Tritanopia). | Enable if needed; also affects minimap icons. |
| Text Size | Scale of UI text. | Largest for visibility. |
| Controller Vibration | Haptic feedback. | On (immersion) or Off (if annoying). |
| Quick Time Events | Visual cues for button prompts. | On (default). Can’t be turned off, but awareness helps. |
| Tutorials | Pop-up hints. | On for first playthrough. |
| Auto-Aim (Story Mode) | Locks onto enemies when tapping aim. | Off for challenge; On for easier combat. |
| Lock-On Mode | How tight the auto-aim sticks. | Narrow (less sticky) or Wide (very sticky). |
---
5. Language Settings
- Text Language: Choose your interface language.
- Audio Language: English (default), French, German, Spanish, etc. Note: The game’s lip-sync is only in English; other languages may have mismatched mouth movements.
- Subtitles Language: Overrides audio language for subtitles (e.g., play English audio with Spanish subtitles).
> Special Attention: If you change the audio language, you may need to restart the game for full effect. Also, subtitles are tied to Audio Language unless you manually set them differently.
---
6. Network Settings (Red Dead Online)
| Setting | Description | Recommendation |
|---|---|---|
| Connection Type | Automatic vs. Manual DNS/MTU. | Leave Automatic unless troubleshooting. |
| Enable Voice Chat | Turn on/off voice communication. | Off if you don’t want to hear other players; On for coordination. |
| Proximity Chat | Voice only to nearby players. | On for immersion; Off for privacy. |
| Microphone Mode | Push-to-Talk or Open Mic. | Push-to-Talk to avoid broadcasting background noise. |
| Matchmaking Region | Prefer server location. | Set to your region for lower ping. |
| Spawn Preference | Where you appear when entering Free Roam. | Last Location or Camp. |
---
7. Gameplay Settings
These affect game mechanics and HUD behavior.
| Setting | Description | Recommendation |
|---|---|---|
| Auto-Equip Better Weapons | Automatically switches to stronger weapons when picked up. | Off – you might lose your custom loadout. |
| Weapon Wheel Configuration | Quick select slots. | Manually set 4-8 favorite weapons. |
| Minimap | Show/hide mini-map. | Expanded (default) or Compass (smaller). |
| Mini-Map Rotation | Rotates or stays fixed north. | North Facing (static) or Player Facing (dynamic). |
| HUD Opacity | Transparency of HUD elements. | 60-80% to avoid clutter. |
| Camera Follow Level | How aggressively camera auto-centers behind player. | High (stickier) for controller; Low for mouse. |
| Horse Controls | How horse responds to stick (Relative vs. Camera). | Camera Relative (easier) or Horse Relative (more realistic). |
| Dead Eye Targeting | Manual (players choose target) or Automatic (auto-lock). | Manual for skill; Automatic for ease. |
| Aim Sensitivity Curve | Linear vs. Exponential response. | Linear for muscle memory (PC); Exponential for controller. |
| Run/Toggle | Hold to sprint (default) or toggle. | Tap to Sprint (toggle) – easier on fingers. |
| Crouch Mode | Hold to crouch or toggle. | Toggle (Set) to avoid holding button. |
| Cover Mode | How entering/leaving cover works. | Tap to Enter/Exit or Press to Enter, Hold to Exit. |
---
8. Console-Specific Settings (PS4/PS5, Xbox One/Series)
Consoles offer fewer options, but still important:
- PS5: Go to `Settings > Saved Data and Game/App Settings > Game Presets` to set preferred performance mode.
- Xbox Series X|S: The game runs at 30 FPS in Quality mode and 60 FPS in Performance mode (if supported). Choose Performance for smoother gameplay.
- PS4 Pro / Xbox One X: Similar choice between Resolution and Performance – prefer Performance to avoid dips below 30 FPS.
- HDR Settings: If your TV supports HDR, enable it in `Display > HDR Calibration`. Adjust brightness and paper white to prevent crushed blacks.
---
9. Special Setup Checklist
1. Update GPU drivers – Nvidia Game Ready or AMD Adrenalin.
2. Set Graphics API – Test both Vulkan and DX12; choose the one with fewer stutters.
3. Adjust Resolution Scale – Only if FPS is low; start at 100%.
4. Turn off VSync and Triple Buffering – Unless you are stuck with screen tearing.
5. Unlock Advanced Graphics – Only after tweaking main settings and checking VRAM.
6. Remap controls (PC) – Prioritize weapon wheel, interaction, and sprint.
7. Disable Auto-Equip Better Weapons.
8. Set Audio Output to Headphones if using a headset.
9. Enable Subtitles for readability.
10. Save your settings and restart the game to apply changes fully.
---
By carefully tuning these settings, you can achieve a smooth 60 FPS experience on most modern PCs or enjoy a stable 30 FPS on consoles with high visual fidelity. Pay special attention to the pitfalls highlighted above to avoid frustration during your cowboy adventure.
Important Notes
Important Notes for Red Dead Redemption 2
This section covers crucial warnings, irreversible decisions, missable content, difficulty spikes, grinding traps, online etiquette, save management advice, and common regrets. Read this before diving deep into the game to avoid costly mistakes.
---
Warnings & Pitfalls
- Manual Save is Your Lifeline: The autosave system overwrites your most recent checkpoint, and story missions can lock you into outcomes you dislike. Always create a manual save before every mission (especially missions with a yellow icon or that are marked as "chapter end") and after major purchases or upgrades. Manual saves are separate from autosaves and can be loaded at any time.
- Horse Bonding & Temporary Horses: Bonding with a horse (level 1–4) is permanent while the horse lives. If your horse dies permanently (not just injured), bonding progress is lost. Always have a stable slot for your main horse, and never leave a temporary horse untended in dangerous areas—it may despawn or be killed.
- Weapon Degradation & Maintenance: All weapons degrade with use. A dirty weapon loses accuracy, damage, and reload speed. Clean your weapons regularly at camps, gunsmiths, or using gun oil. Ignoring this leads to frustrating failures in combat.
- Bounties & Wanted Levels: Killing lawmen or committing crimes in towns accumulates a bounty. Bounties cannot be paid from the player menu; you must visit a post office or pay at a train station. If you die while wanted, you lose money (taken from your cash, not gold bars). High bounties attract bounty hunters who can ambush you. Pay off bounties promptly to avoid nuisance.
- The Honor System: Your honor (good vs. bad) affects NPC reactions, discounts, and story outcomes (including the final mission). Honor is changed by actions: greeting strangers (increases), robbing/killing innocents (decreases). It cannot be reset once set, but can be shifted gradually. There is no "neutral" route; your choices have consequences.
- Story Mission Outcomes: Some story missions have binary choices (e.g., "Save or Abandon" a character, choosing which side to take in a conflict). These choices affect who lives or dies, which items you get, and the ending. Many are irreversible and affect the epilogue. Save before making any decision you're unsure about.
- Chapter-Specific Content: Certain side missions, stranger encounters, and collectibles are only available in specific chapters. Once you advance a chapter, you cannot return to earlier areas (temporarily) or complete missed missions. See "Missable Content" below.
- The Arthur Morgan Journey: Arthur’s health and stamina are influenced by story events. A key irreversible choice occurs near the end of Chapter 6 that determines Arthur's fate and leads to the epilogue. This choice cannot be undone. Save before the mission "Red Dead Redemption" (the final mission of Chapter 6).
- Grinding for 100% Completion: Some tasks (like studying all animals or finding all dinosaur bones) must be done before the epilogue because certain animals or locations become inaccessible after the main story ends. Check missable guides for 100% completion.
---
Irreversible Choices
---
Missable Content
The table below lists the most common missable items, missions, and collectibles. Bold means the content is permanently missable (cannot be obtained after a certain point).
| Content | When to Complete | Notes |
|---|---|---|
| Stranger missions (e.g., "The Noblest of Men, and a Woman", "Arcadia for Amateurs") | By end of Chapter 6 | Many require multiple stages; restarting them after a chapter change may break the chain. |
| Legendary Animals | Any time before epilogue | Some animals are region-locked; after Chapter 6, certain areas are blocked. |
| Bounty Hunter missions | Chapter 2–6 | These unlock items like reinforced lasso. Missable if you don't start them. |
| Treasure maps (e.g., Jack Hall Gang) | By Chapter 6 | Some maps are found at dead bodies that despawn after a chapter. |
| Dreamcatchers & Rock Carvings | By Chapter 6 | Collectibles that reward unique items; they don't carry over if missed. |
| Hunting Requests (from the trapper) | Available from Chapter 2 onward, but some animals become rare or extinct in later chapters. | Complete early. |
| Bank robbery in Valentine | Chapter 2 only | Part of a stranger mission "The Bank Job". If you progress beyond Chapter 2, it's gone. |
| The Veteran (Hamish) | Chapter 4–6 | If you don't complete all 4 steps before Arthur's death, the final reward (a horse) is lost. |
| Albert Mason's missions | Chapters 2–5 | After Chapter 5, he disappears. |
| Princess Isabeau (a missable side quest) | Chapter 2–4 | Rarely triggered; requires exploring a specific area. |
---
Difficulty Spikes
- Chapter 1 (Colter): The snow section is linear and slow. It teaches basic controls but can feel tedious. Be patient—it's short.
- Chapter 2 (Horseshoe Overlook): After the open world opens up, the learning curve steepens: hunting, crafting, combat, and the wanted system all at once. Don't rush story missions; practice hunting and combat in the wild.
- Chapter 3 & 4 (Lemoyne): Enemy AI becomes more aggressive, and the region introduces swamps with alligators (instant kill). Use cover and explosives carefully.
- Chapter 5 (Guarma): A linear island section with harsh weather, limited resources, and tough soldiers. Stock up on ammo and health items before starting the mission "Banking, the Old American Art".
- Chapter 6 (Annesburg area): High honor players may find emotional difficulty, but combat-wise, enemies are numerous and well-armed. Use Dead Eye upgrades.
- Epilogue Part 1 (Princess): Only one main story mission, but many random encounters. Difficulty is low.
- Epilogue Part 2 (Beecher's Hope): Low difficulty overall, but the final mission ("American Inferno, Burnt Out") can be tough if you aren't prepared for a shootout.
- Online Mode (Red Dead Online): The first few hours are brutal. Low health, weak weapons, and experienced players will grief you. Play in defensive mode and avoid show-downs until you have improved ability cards.
- Hunting for Money: You can earn cash by hunting and selling pelts, but the return diminishes quickly. Better ways: treasure hunts (maps give gold bars), bounty hunting (online), or story missions. Don't waste hours hunting perfect pelts unless you need for crafting.
- Legendary Animal hunts: These are one-time events. If you kill a legendary animal and don't skin it, the pelt is lost forever (and the animal doesn't respawn). Always skin immediately and sell to the trapper.
- Money vs. Gold Bars: In story mode, gold bars are the best currency. Save them for camp upgrades or tool purchases. Don't sell gold bars—they are used for crafting trinkets and upgrading your satchel at the trapper.
- Spending money on horse revivers: These are cheap but essential. Always carry at least 2. Don't waste cash on cosmetic items before upgrading your weapons.
- Online Grinding: Getting rich in Red Dead Online requires repetitive activities: bounty hunting, collector role (maps), and trader role (deliveries). Avoid buying overpriced items early (e.g., clothing). Focus on role upgrades.
- Defensive Mode: Enable this in Online Options. It prevents other players from lock-on targeting you and reduces damage from griefers. You can still fight back, but defensive mode signals you want peace.
- Griefing: Some players kill on sight. Avoid retaliating; you'll waste time. Just respawn and fast travel away.
- Voice Chat: Be aware that voice chat in lobbies can be toxic. Mute all non-friends in the interaction menu.
- Cheaters on PC: Rockstar's anti-cheat (BattlEye) is active but imperfect. Cheaters can teleport, spawn money, or crash servers. If you encounter a cheater, record a video and report to Rockstar. Do not accept modded money—it can lead to a ban.
- No Cross-Platform: Red Dead Online does not support cross-play between PC, PlayStation, or Xbox. You can only play with people on the same platform.
- Use Multiple Save Slots: Rotate between at least 3–5 manual saves. Label them with chapter numbers or a description (e.g., "CH2 before hunting", "CH6 before final mission").
- Before Major Decisions: Save before any mission where you are forced to make a choice (yellow missions often have these). Also save before starting a new chapter—some chapters lock you out of side content.
- Cloud Saves: On PC (Rockstar Launcher), enable cloud saves. On console, the saves are local only. Back up your save files periodically (PC: %USERPROFILE%\Documents\Rockstar Games\Red Dead Redemption 2\Profiles).
- Corrupted Saves: Rare but possible. If a save fails to load, try a backup. Keep a copy of your save folder on an external drive or cloud storage.
- Autosave Caution: The autosave will overwrite previous auto saves. Disable autosave if you want full control, but then you must manually save every few minutes. Recommended: leave autosave on, but manual save before risky actions.
- Spending money on camp upgrades: The camp ledger has many upgrades, but the most useful are: the leather-working tools (unlock satchel upgrades), the horse station (fast travel from camp to major towns), and the fast travel map (for Arthur). Other upgrades are cosmetic or minor.
- Ignoring the Trapper & Customizations: The trapper can craft unique outfits and items from perfect pelts. Collect all legendary animal pelts early—some are only available in certain chapters. Also, buying the Legend of the East satchel (from the Trapper) increases carrying capacity dramatically.
- Not learning Dead Eye upgrades: Dead Eye is essential for headshots and slowing time. Upgrade it by completing story missions and reading newspapers. Buy the "Dead Eye: Level 3" upgrade at any gunsmith (it allows manually painting targets).
- Selling unique weapons: Some weapons are unique (e.g., the Semi-Automatic Pistol from "The Noblest of Men, and a Woman" mission). Selling them is irreversible. Keep all unique weapons in your weapons locker.
- Not exploring enough: The world is full of random events, treasure maps, and hidden loot. Don't fast travel everywhere—ride your horse and explore. You'll find gold bars, rare items, and stranger missions.
- Killing too many animals without skinning: Hides and carcasses degrade over time. Always skin immediately and store on your horse or sell. Leaving a carcass on your horse for too long reduces its value.
- Not using the horse whistle properly: Your horse can be called from a distance, but it may not follow you into tight spaces. If you're in a town, the horse may be hit by a train—whistle to keep it nearby.
- Wasting time on collectibles without a plan: Some collectibles (like dinosaur bones) require a guide. Without one, you'll waste hours searching. Use online maps.
- Enjoy the Journey: RDR2 is a slow-paced game with a rich story. Rushing through missions will make you miss its best moments. Take your time, hunt, fish, and chat with strangers.
- Use the Compendium: Study animals and plants to fill your compendium for 100% completion. This helps with achievements/trophies.
- Keep Multiple Manual Saves: This cannot be overstressed. A single corrupt save or a bad decision can ruin many hours of progress.
- Check Online Resources: For treasure maps, collectible locations, and 100% guides, consult a dedicated walkthrough. Red Dead Redemption 2's world is deep, and missing content is easy.
- Patience with Glitches: The game can have minor bugs (e.g., horse not responding, NPCs stuck). Reloading a save usually fixes them. Don't panic.
---
Grinding Traps
---
Online Etiquette & Anti-Cheat Notes (PC)
---
Save Management Advice
---
Common Regrets Players Wish They Knew Earlier
---
Final Advice
Remember: No guide covers every possible scenario, but with these notes, you'll avoid most major pitfalls. Good luck, cowboy.
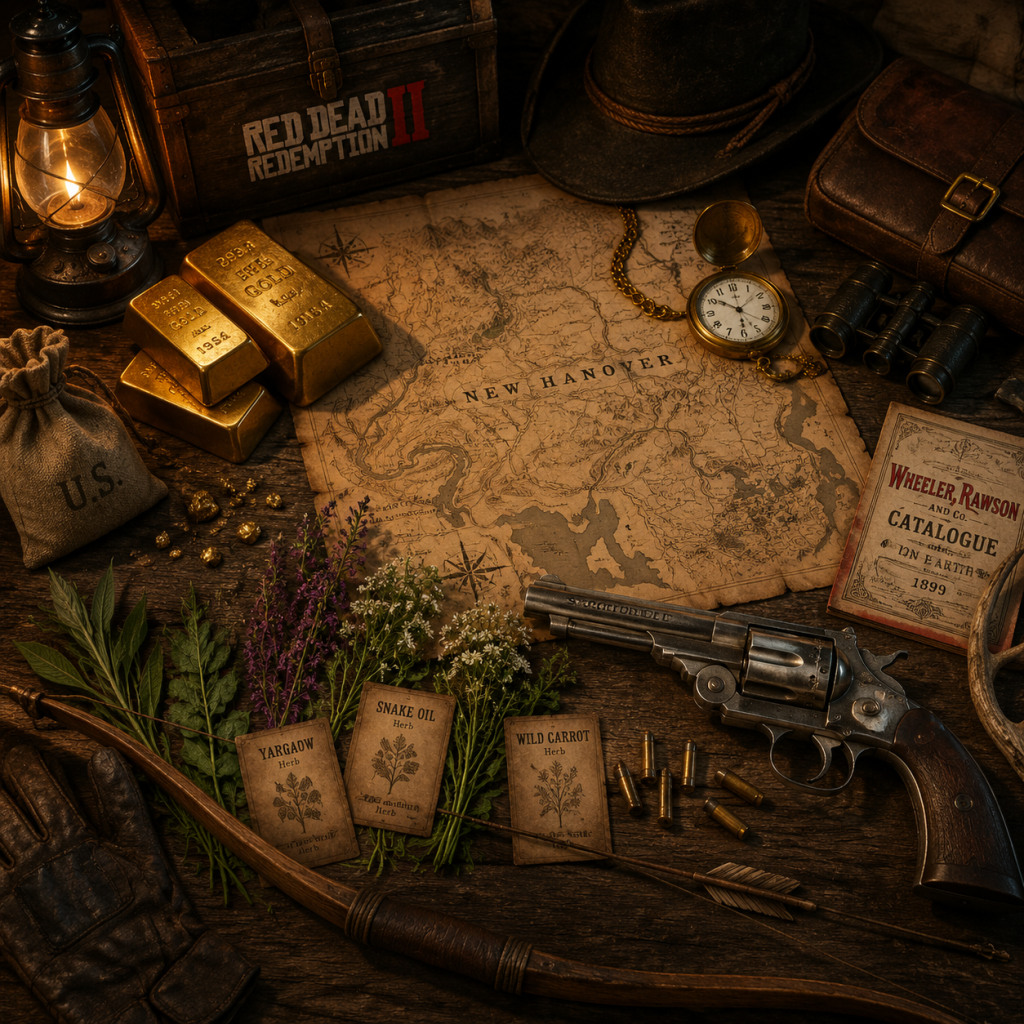
All Game Items
All Game Items
This guide covers every major item category in Red Dead Redemption 2, including Story Mode and Red Dead Online. Items are grouped logically with descriptions, acquisition methods, usage tips, synergies, and upgrade paths.
---
1. Currencies
Story Mode Currencies
- Cash ($) – Used to buy weapons, horses, outfits, ammo, food, and services. Earned from missions, selling loot, hunting, treasure hunting, and robbing. Max carry is $9999.00 at any time; surplus goes to camp funds.
- Gold Bars – Collectible items worth $500 each. Found in treasure maps, lockboxes, and occasional loot. 22 total in the main game. Can be sold to any fence.
- Camp Funds – Donate cash or valuables to the camp ledger for upgrades. Separate from personal money.
- Cash – Same uses as story, but also for ability cards, pamphlets, and horses. Earned from missions, free roam events, and roles.
- Gold Bars (Online) – Premium currency. Used for role unlocks, outlaw passes, and some cosmetics. Earned through daily challenges, treasure maps, and gold payout missions (0.08–0.16 gold per mission).
- Role Tokens – Earned by leveling a role (Bounty Hunter, Trader, Collector, Moonshiner, Naturalist). Spent on role-specific items and upgrades.
- Cattleman Revolver – Default. Balanced stats. Free at start. Good early-game.
- Schofield Revolver – More accurate. Purchase from gunsmith or find in some lockboxes.
- Double-Action Revolver – Fast fire rate, low damage. Unlocked mid-game. Good for rapid shots.
- LeMat Revolver (Online only) – 9-round cylinder + shotgun barrel. Expensive but versatile.
- Mauser Pistol – High fire rate, low damage. For hip-fire and close combat. Drops from some enemies.
- Semi-Automatic Pistol – Fast, accurate. Available after Chapter 3.
- Volcanic Pistol – High damage, slow fire rate. Stopping power but small magazine.
- Carbine Repeater – Default. Balanced. Decent range.
- Lancaster Repeater – Accurate, fast fire. Best all-around repeater. Can be obtained early from a mission or bought.
- Litchfield Repeater – High damage, slower rate. Unlocked later. Good for skilled shots.
- Evans Repeater – Large magazine (26 rounds). Available in Online only.
- Bolt Action Rifle – Accurate, powerful, medium scope optional. Versatile for hunting and combat. Unlocked after Chapter 1.
- Springfield Rifle – Single shot, high damage. Best for hunting large game. Unlocked early.
- Rolling Block Rifle – Sniper rifle. High damage, very long range. Unlocked during mission “The Sheep and the Goats”.
- Carcano Rifle – Semi-auto sniper. Faster fire than Rolling Block. Unlocked late-game.
- Varmint Rifle – Small caliber, used for hunting birds, snakes, small critters without damaging pelts. Unlocked after Chapter 2.
- Rare Rolling Block Rifle – Unique golden model obtained from a mission in Epilogue.
- Pump-Action Shotgun – Good fire rate. Available mid-game.
- Double-Barrel Shotgun – Two shots, quick follow-up. Found early.
- Semi-Auto Shotgun – Rapid fire. Unlocked later or found.
- Repeating Shotgun – Large magazine (6 rounds). Excellent for crowds. Expensive.
- Regular Bow – Obtainable early (mission “Polite Society, Valentine Style”). Quiet, ideal for stealth hunting.
- Improved Bow – Higher damage, better range. Crafted at the Trapper after buying the pamphlet (found in world or bought from fence). Use improved arrows for maximum effectiveness.
- Homing Tomahawk – Buyable pamphlet; tomahawks track targets a bit. Not a bow but ranged thrown.
- Throwing Knives – Silent, recoverable. Can be crafted from two animal bones. Good for stealth.
- Tomahawks (Regular, Ancient, Homing) – Regular: bought or looted. Ancient (unique, found in grave). Homing: crafted after pamphlet. More damage than knives.
- Dynamite – Area damage. Craftable or bought. Useful for clearing enemies or blasting safes.
- Molotov Cocktails – Fire damage. Craftable with moonshine + rag.
- Knife – Default melee. Can be improved with a pirate sword? (Machete is separate).
- Machete – Found in a grave. High damage but heavy.
- Hatchet – Found; good for hunting animals silently and melee.
- Viking Hatchet – Unique, found on a frozen corpse. Strong and fast.
- Rare Shotgun (Sawed-off) – Actually a sidearm? The game has a Sawed-Off Shotgun as a sidearm. Obtained early.
- Legendary Bear Outfit – Crafted from Legendary Bear pelt. +2 Cold Resistance, excellent for snowy areas.
- Legendary Wolf Outfit – +2 Cold, good Stamina core bonus.
- Bounty Hunter Outfits (Online) – Stat boosts for tracking.
- Trader and Moonshiner Role Outfits – Provide bonuses for their respective activities (e.g., increased animal spawns, reduced damage while carrying moonshine).
- Special Story Outfits – Unique outfits from missions (e.g., “The Drover” from Valentine, “The Saint” from Saint Denis). Mostly cosmetic but some have modest core bonuses.
- Canned Goods – Baked beans, peaches, sardines, etc. Heal health and restores some stamina. Found everywhere.
- Fresh Meat – Game meat, prime beef, mutton. Cook over campfire to create seasoned or plain cooked meat (restores more, spoils slower).
- Seasoned Meat – Cooked with herbs (oregano, thyme, mint) for special effects (Fortify: damage reduction, etc.).
- Biscuits, Bread, Candy – Quick snacks. Candy gives a tiny Dead Eye boost.
- Camp Stew – Free at camp; restores all cores fully.
- Herbalist Specials – Cooked recipes can heal all cores and give temporary buffs.
- Health Tonic – Restores health and health core. Available in potent, miracle, and special variations.
- Stamina Tonic – Same, for stamina.
- Dead Eye Tonic – Restores Dead Eye and core. Key for extended Dead Eye usage.
- Miracle Tonic – Heals all cores fully. Rare, can be crafted from ginseng and other herbs.
- Horse Reviver – Revives a downed horse. Essential for survival.
- Horse Ointment – Cures horse injuries.
- Chewing Tobacco – Restores Dead Eye core. Can be chewed indefinitely; reduces health core slightly.
- Cocaine Gum – Restores stamina core. Negative effect on health? Actually increases stamina.
- Cigarettes – Smoke to fill Dead Eye but reduces health core. Collecting 30 different cigarette cards gives a reward; smoking also contributes to “cigarette card” mechanic? No – cards are separate.
- Premium Cigarettes – More valuable, but same effect.
- Coffee – Restores stamina core. Can be crafted at camp.
- Perfect Pelts – From clean kills with appropriate weapon (e.g., Varmint for small animals, Rifle for large). Needed for all Trapper outfits and camp satchels.
- Feathers – Flight feathers, hawk, eagle, etc., used for tonic crafting and accessories.
- Claws, Teeth, Horns – Legendary animal parts used for trinkets (e.g., Legendary Bear Claw → Bear Claw Talisman: increases health core).
- Animal Fat – Used to craft explosive ammo. From ducks, geese, pigs, etc.
- Skins and Horns – Sell for cash or craft unique items (e.g., cougar saddle, alligator saddle).
- Ginseng – American, Alaskan, etc. Used for miracle tonics.
- Oregano, Thyme, Mint – For seasoning meat. Each adds a Fortify, Predator, or Herbalist buff.
- Yarrow, Sage, Burdock Root – Used in potent tonics.
- English Mace, Creeping Thyme – Also seasoning.
- Poisonous Plants – Oleander, Bitterweed – used for poison throwing knives? Actually not; poison weapons use animal venom.
- Gold Nugget, Silver Nugget, Platinum Nugget – Sold for cash (higher value at fences).
- Jewelry – Watches, rings, necklaces – found in houses or from robbing. Sell at fence for cash.
- Ore – Can be smelted into metals? No, only nuggets appear as loot.
- Kit Satchel – Increase capacity for tonics, provisions, and materials.
- Leather Satchel – For animal parts and herbs.
- Tools Satchel – For tools and other items.
- Treasure Satchel – For valuables (jewelry, gold bars).
- Legend of the East Satchel – All-in-one, max capacity for everything. Requires all previous satchels plus perfect cougar panther and boar pelts. Endgame objective but very useful.
- Lodging Upgrades – Arthur’s tent (fast travel map), Dutch’s tent (decorative), funds for better supplies.
- Chicken Coop – Eggs and meat.
- Weapon Locker – Store unused weapons.
- Horse Station – Fast travel from camp (upgrade Arthur’s lodging).
- Leisure Items – Decoration only.
- Saddles – Each has stats: speed, acceleration, health core drain reduction. Best are trapper saddles (e.g., Panther, Cougar) or the “Racing” saddles from stables.
- Stirrups – Added to saddles for further speed/acceleration bonuses. Hooded Stirrups are the best.
- Bedrolls – Aesthetic on horse.
- Masks – Cosmetic.
- Horse Lantern – Adds light. Nighttime riding easier.
- Horse Care Items – Brush (clean dirt), Horse Meal (restore cores), Horse Reviver (revive), Horse Ointment (cure injuries). All are consumables.
- Cigarette Cards – 144 sets of 12 (12 sets). Each set completed gives a cash reward and a unique outfit. Found in packs, world pickups, or bought from general stores (expensive).
- Dream Catchers – 20 in Ambarino + New Hanover. All must be collected to unlock a secret cave with a treasure.
- Rock Carvings – 10 located across the world. Solved puzzle gives a reward.
- Dinosaur Bones – 30 bones. Complete for a reward (watch cutscene).
- Exotic Animal Parts – Items for Algernon Wasp’s quest line (egrets, spoonbills, orchids). 4 parts sets for final reward hat.
- Legendary Fish – 13 species. Catch all and mail to Jeremy Gill for cash + reward.
- Treasure Maps – Multiple chains: Jack Hall Gang, High Stakes, Poisonous Trail, etc. Each leads to gold bars.
- Unique Weapons – Rare items like Ancient Tomahawk (on a skeleton), Viking Hatchet (ice cave), Civil War Knife (Fort Brennand), Rare Double-Barrel Shotgun (Fence mission), etc.
- Collector’s Items – Tarot cards, flowers, alcohol bottles, arrowheads, eggs, coins, jewelry, fossils, heirlooms, family heirlooms. Sell to Madam Nazar for cash and role XP.
- Horse Lantern (different from story) – Buy from stable.
- Lantern – Illuminates dark areas. Found in camp and some loot. Can be used while fishing or hunting at night.
- Camera – Only in Story Mode via special missions? Not a free-use item; it’s for certain stranger quests (e.g., the photographer). In Online, you can buy the Advanced Camera for daily challenges but it’s not essential.
- Fishing Rod – Acquired from a mission “A Fisher of Fish” (Chapter 2). Allows casting and catching fish. Can be upgraded? No, but different lures exist.
- Binoculars – Obtainable early from a mission or buy from fence. Scouting ability, marks up to 4 targets for Recon toggle.
- Detective Mode – Dead Eye and Eagle Eye are built-in abilities, not items. Use by holding appropriate button.
- Lasso – Default in inventory. Used for hogtying humans and animals. Also used for hunting large animals (knife kill).
- Bolas – Online only. Throw to entangle targets. Unlocks Bounty Hunter role.
- Metal Detector – Online Collector role. Digs up buried collectibles.
- Shovel – Online Collector role. Dug up dirt piles.
- Pamphlets – One-time purchases that teach crafting recipes (e.g., split point ammo, dynamite arrows). Found in stores or loot.
- Treasure Maps – Consumable items that reveal treasure locations. Once used, the map is consumed.
- Lockbreakers – Not really; dynamite or a cartridge and a shot can open locked boxes and safes.
- Card Types – Dead Eye Cards (e.g., Paint It Black, Slippery Bastard, Slow and Steady) affect how Dead Eye functions.
- Passive Cards – Three slots: for health, defense, offense (e.g., Iron Lung, Fool Me Once, Peak Condition).
- Cards are purchased with cash and gold, then upgraded using $ and XP. Max level = 3
- Hunting Synergy – Varmint Rifle + Improved Bow + Poison Arrows = perfect pelts. Use Eagle Eye to track, knife for skinning.
- Camp Upgrades → Satchel Upgrades – Get the Legend of the East Satchel early by hunting all required pelts (especially cougar, panther, boar). Maximizes all carrying capacity, making everything easier.
- Trinkets from Legendary Animals – Legendary Buck Antler Trinket (improved pelt quality chance) is one of the best early pickups. Others: Legendary Beaver Tooth Trinket (horse bonding faster).
- Trapper Outfits + Weather – In cold climates, equip Legendary Bear or Wolf outfit to avoid health core drain.
- Weapon Aesthetics – Brass varnish increases accuracy slightly on some weapons? No, only cosmetic.
- Ammo Pamphlets – Split point ammo gives free Dead Eye shots (in story) and more accuracy. Explosive ammo for shotguns is devastating but rare.
- Store excess loot in your camp lockbox (at your tent). It won’t disappear.
- Always carry gun oil – Weapon condition degrades fast in wet or sandy areas.
- Horses – Buy the best saddle early (e.g., Trapper’s Beaver Saddle) to reduce stamina drain.
- Pursue the Legendary Buck early – Its antler trinket increases chance of perfect pelts from good kills, saving hunting time.
- Don’t hoard gold bars – Sell them at a fence immediately; they are weightless but you need cash for camp upgrades.
- Online: Invest in a role first – Bounty Hunter gives gold and cash; Collector gives cash and XP; Trader gives money and supplies.
Red Dead Online Currencies
---
2. Weapons
Every weapon can be customized at a gunsmith (barrels, sights, wraps, engravings, metals, varnish). Weapon condition degrades with use; clean often using gun oil.
Sidearms
Repeaters
Rifles
Shotguns
Bows
Thrown & Melee Weapons
Weapon Upgrades – Gunsmiths offer rifling, improved sights, barrel length changes (for some), and stock/scope attachments. Pamphlets allow crafting of special ammo (split point, express, high velocity, explosive, incendiary).
---
3. Outfits & Clothing
Clothing provides temperature bonuses (hot/cold resistance) and health/stamina/dead eye core bonuses. No traditional armor; but some outfits increase resistance to damage or slow health loss. Each clothing piece has a core bonus (e.g., +Health Core). Full outfits can be bought at stores or crafted by the Trapper from legendary animal pelts.
Notable Outfits
Clothing Layers – You can wear a shirt, vest, coat, pants, boots, hat, gloves, and accessories (suspenders, neckwear). Each piece may affect your visual and temperature rating. The game will warn if you are underdressed for extreme weather (affects health core drain).
---
4. Consumables
All consumables have a weight class (e.g., 0.1 lb) and may take time to use. Some have immediate effects, others heal cores over time.
Food
Tonics
Provisions (Chewables, Smokables)
---
5. Materials & Crafting Components
Animal Parts
Used for crafting satchels, clothing at the Trapper, and trinkets/talismans. Also sold for cash.
Herbs & Plants
Metals & Jewels
---
6. Satchel & Camp Upgrades
Satchel Upgrades
Pearson at camp can craft upgraded satchels from perfect pelts and crafting materials. Each satchel increases carry capacity for a specific item type.
Camp Improvements
---
7. Horse Items
Horses are not equipment per se, but they have gear.
---
8. Collectibles
Story Mode Collectibles
Red Dead Online Collectibles
---
9. Key Equipment
---
10. Dead Eye & Ability Cards (Online Only)
Dead Eye is a core mechanic with tiers (1–5 in story, 3 tiers in Online). Ability Cards are equipped and leveled to modify combat.
---
11. Synergies & Upgrade Paths
---
12. Tips for Managing Items
---
This guide covers all major item categories in Red Dead Redemption 2. For specific item stats, complete catalogs, or deep dives on weapon performance, refer to dedicated guides or the official compendium.
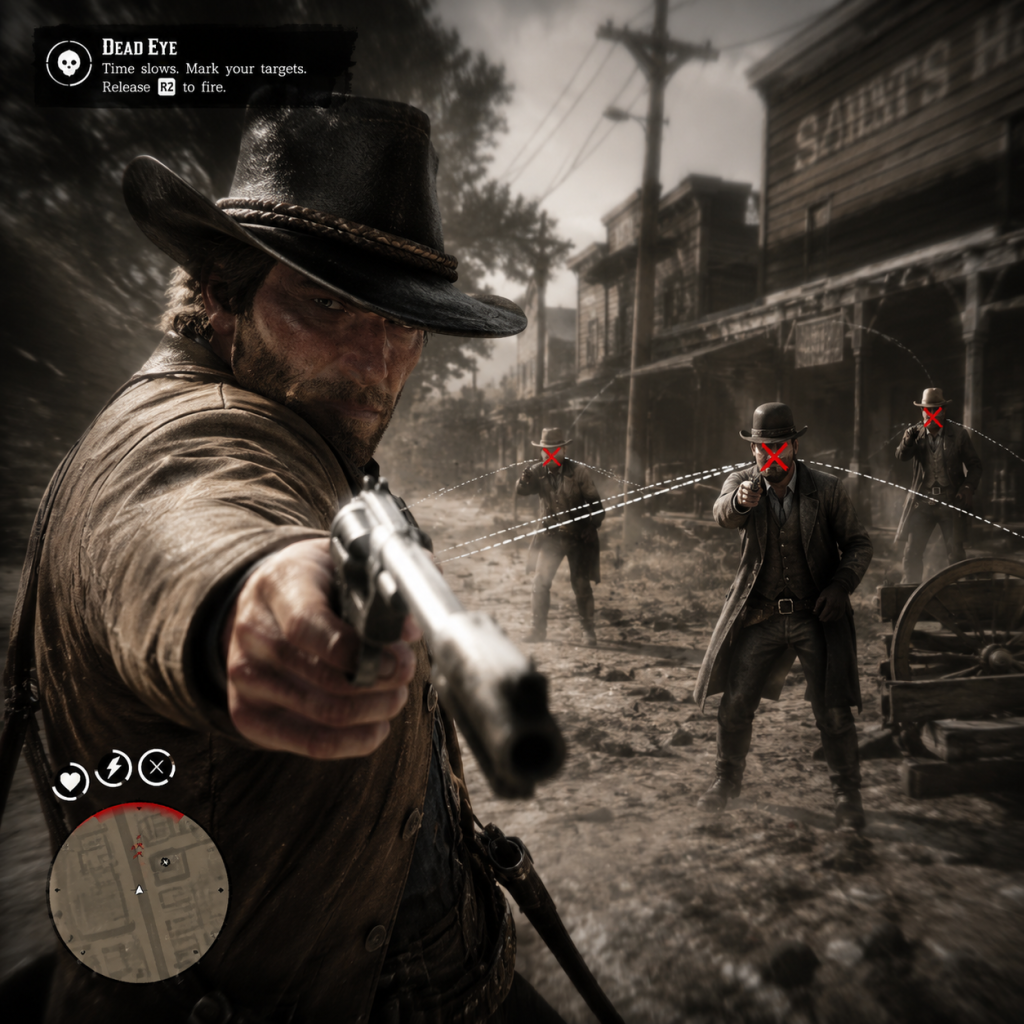
Character Skills
Character Skills Guide for Red Dead Redemption 2
This guide covers all playable characters (Arthur Morgan / John Marston in Story Mode) and the custom character in Red Dead Online. It includes every major skill, ability, talent, and special move, along with effects, cooldowns, upgrades, combos, synergies, recommended builds, and usage tips.
---
Story Mode Skills (Arthur Morgan / John Marston)
Story Mode does not have traditional skill trees. Instead, abilities are gained through gameplay progression, item usage, and stat improvements tied to the Honor system and core stats. Key "skills" include Dead Eye, Horse Bonding, Weapon Expertise, Crafting & Cooking, Stealth, and Melee.
1. Dead Eye
Dead Eye is a slow-motion targeting ability that allows precise shots. It is unlocked in Chapter 1 and upgrades automatically through story missions.
Dead Eye Levels
| Level | Unlock Method | Effect |
|---|---|---|
| 1 | Chapter 1 (After "Enter, Pursued by a Memory") | Manual targeting; R3 zooms in; time slows slightly. |
| 2 | Chapter 2 (After "Pouring Forth Oil") | Paint targets with R1 (manual tagging – one bullet per paint). |
| 3 | Chapter 3 (After "The Fine Art of Conversation") | Auto-tags enemies when targeting (paints one shot per head/body). |
| 4 | Chapter 4 (After "The Joys of Tobacco") | Paint multiple targets freely; can cycle between them with R1. |
| 5 | Chapter 5 (After "Dear Uncle Tacitus") | Maximum critical damage; reticle paints faster; no delay between paints. |
- Cooldown: Dead Eye drains while active. Recharge by killing enemies, looting bodies, or using tonics (e.g., Dead Eye Tonic, Chewing Tobacco). Recharge rate increases with higher level.
- Upgrades: The only upgrades are the automatic level progression and the ability to use tonics that extend duration or refill instantly.
- Combos: Use Dead Eye with a Repeater for mid-range precision, a Sniper Rifle for long-range kills, or a Shotgun for close-range crowd control. Combining Dead Eye with Express or High-Velocity ammo increases damage.
- Synergies: High Honor grants a small Dead Eye regeneration bonus; Low Honor grants a damage bonus during Dead Eye. Equipping trinkets (e.g., Eagle Talon Talisman) extends Dead Eye duration.
- Recommended Builds: Always keep a supply of Dead Eye tonics. Use Level 4+ for multiple target elimination. For stealth missions, use Level 1 to conserve Dead Eye.
- When to Use: In combat against multiple enemies, during ambushes, for hunting (to get perfect kills), and in duels (manual paint for the largest score).
Dead Eye Tonics (External Abilities)
| Tonic | Effect | Duration |
|---|---|---|
| Chewing Tobacco | Refills 20% Dead Eye | Instant |
| Dead Eye Tonic | Refills 50% Dead Eye | Instant |
| Potent Dead Eye Tonic | Refills full Dead Eye + 25% regeneration for 45 seconds | Instant + regen |
| Miracle Tonic | Fills all cores and Dead Eye, high potency | Instant |
2. Horse Bonding
Bonding with your horse unlocks skills and attributes. Bonding level increases by riding, feeding, brushing, and calming your horse.
| Bonding Level | Unlock | Effect |
|---|---|---|
| 1 | Base | Basic handling, health and stamina cores visible. |
| 2 | Bonding | Horse responds to whistle from farther away; increased stamina core. |
| 3 | Bonding | Horse rears on command (L3 + R3); increased health core; less likely to buck in danger. |
| 4 | Bonding | Horse drifts/does tight turns; increased speed and acceleration; max health/stamina. |
- Skills: At Level 3, you can calm the horse more effectively; at Level 4, you can perform a drift stop. These are not cooldown-based but tied to the horse's stats and your control.
- Synergies: A bonded horse with a good saddle (e.g., Panther Trail Saddle) boosts stamina regeneration and reduces core drain.
- When to Use: Always maintain high bonding for better combat performance and horse survival.
- Upgrades: Clean your weapon frequently (oil) and use it often to maintain high familiarity.
- Combos: Pair a long weapon with a sidearm. Switch between them to manage familiarity across multiple arms.
- When to Use: Always try to keep at least one long arm and one sidearm at gold familiarity before major fights.
- Skills: [[Craft]](Crafting) is a skill unlocked from the start but improved by recipes from pamphlets. Cooking requires a campfire and ingredients.
- Cooldowns: None; only ingredient limits.
- Upgrades: Purchase or loot recipes from NPCs, loot, or shops.
- Synergies: Cooked meat combined with appropriate tonics maximizes core health/stamina/Dead Eye. For example, use Minty Big Game Meat (Gold Health Core) + Potent Health Cure (instant heal) for tanking.
- Recommended Builds: Carry a variety of cooked meats for different situations. Minty for health, Oregano for stamina, Thyme for Dead Eye.
- When to Use: Before hunting legendary animals, before gang hideouts, and during survival challenges.
- Combos: Use deadeye with bow for silent multi-kills.
- Synergies: Wearing dark clothing reduces visibility at night. The Legendary Buck Trinket improves pelt quality and helps stay hidden.
- When to Use: Raiding camps, stealth missions, or avoiding lawmen.
- Skills: Brawler (higher health) from Honor. No special moves except the assassination prompt (off-hand knife kill) when hidden.
- Cooldowns: None.
- Combos: Throw a knife mid-combat for a quick kill.
- When to Use: Bar fights, stealth kills, or when out of ammo.
- Dead Eye Slot: Equip one Dead Eye card.
- Passive Slots: Up to three passive cards (any combination of Combat, Defense, Recovery).
3. Weapon Expertise
While not a skill tree, proficiency with weapons improves as you use them. This is represented by "Weapon Familiarity" – you earn temporary stat boosts for using the same weapon repeatedly in a session. Head to the weapon wheel to see your current familiarity level (bronze, silver, gold icons). Gold gives +10% damage and +5% accuracy.
4. Crafting & Cooking
Arthur can craft items like ammunition, tonics, and throwables at campfires. Cooking meat provides temporary stat boosts (e.g., Seasoned Big Game Meat gives Gold Core health).
5. Stealth
Stealth is a gameplay mechanic, not a skill tree. You can execute silent takedowns (hold Triangle/Y behind an enemy) and use a bow or throwing knives for silent ranged kills. There is no cooldown, but detection is based on sound and line-of-sight.
6. Melee Combat
Melee includes punches, grapples, and take-downs. Timing matters for counters during fistfights. Unarmed combat can be enhanced by stats like Stamina.
---
Red Dead Online Skills (Ability Cards)
In RDO, you create a custom character and unlock Ability Cards (passive skills) that define your build. There are four card classes: Dead Eye Cards (active ability), Combat Cards, Defense Cards, and Recovery Cards. You can equip one Dead Eye card and three other passive cards (one from each class or duplicates? Actually only one per class except you can mix. The slot system: one Dead Eye card, and three other cards from Combat/Defense/Recovery. You cannot equip two from same archetype unless you have a duplicated slot? As of current update, you can have one Dead Eye and three passive slots that can be any of Combat, Defense, or Recovery, but you cannot equip two cards of the same type? Actually you can have multiple from same type; there's no restriction. I'll clarify below.)
Card Slots:
Cards are leveled up by using them and earning XP. Upgrades happen automatically after certain usage milestones. Each card has 3 tiers (I, II, III).
Dead Eye Cards
| Card Name | Effect (Tier I) | Upgrade Effects | Cooldown/Usage |
|---|---|---|---|
| Paint It Black | While Dead Eye is active, manually paint targets with R1. Shoot to hit painted targets. | Tier II: Paint faster. Tier III: Paint persists after Dead Eye ends (can shoot later). | Dead Eye drains normally. Use soon. Recharges by killing. |
| Slow and Steady | While Dead Eye active, walk slowly, reduce damage taken by 30%, and headshots do not kill you. Can still shoot. | Tier II: 40% damage reduction. Tier III: 50%. | Drain rate increased. Use when tanking. |
| Focus Fire | While Dead Eye active, damage increases by 10% for you and nearby teammates. | Tier II: 15%. Tier III: 20%. | Drain rate normal. Use in team fights. |
| Slippery Bastard | While Dead Eye active, you become harder to target (enemy lock-on range reduced, auto-aim disabled for them). | Tier II: Longer effect. Tier III: Also increases your evasion. | Drain rate increases with movement. Use for close-range dodging. |
Combat Cards (Passive)
These affect offensive capabilities.
| Card Name | Effect (Tier I) | Upgrade | Notes |
|---|---|---|---|
| Winning Streak | Consecutive shots on same target deal +5% damage per shot. Resets on miss or change target. | Tier II: +6%. Tier III: +7%. | Best for repeaters and pistols. |
| Peak Condition | While stamina is full or near full, deal +5% damage. | Tier II: +7%. Tier III: +10%. | Pair with stamina tonics. |
| Landón's Patience | Deal +10% damage when not moving for 3 seconds. | Tier II: +15%. Tier III: +20%. | Good for sniping. |
| Gunslinger's Choice | Increases accuracy and damage when duel-wielding. +5% damage per shot. | Tier II: +7%. Tier III: +10% with increased accuracy. | Must use two sidearms. |
| Sharpshooter | Increases damage by +10% when scoping (with scoped rifles or sniper scopes). | Tier II: +15%. Tier III: +20%. | Affects all scoped weapons. |
| Short Game | Deal +10% damage within 30 meters. | Tier II: +15%. Tier III: +20%. | Best for shotguns, revolvers. |
| Express Ammo (Consumable passive) – not a card. Actually there is no such card; Express ammo is separate. |
Defense Cards (Passive)
These reduce damage taken or improve survivability.
| Card Name | Effect (Tier I) | Upgrade | Notes |
|---|---|---|---|
| Fool Me Once | Taking damage reduces damage from subsequent hits by 10% for a short time. Stacks up to 3 times. | Tier II: 12%. Tier III: 15%. | Essential for tank builds. |
| Iron Lung | While stamina is full or near full, reduce damage by 10%. | Tier II: 15%. Tier III: 20%. | Combine with Peak Condition. |
| Never Without One | A hat that protects against headshots. If hat is shot, you survive but hat falls off. Cooldown: 30 seconds to put hat back on. | Tier II: Cooldown 25s. Tier III: Cooldown 20s. | Vital for PvP. |
| Cold Blooded | Killing an enemy regenerates 5 health. | Tier II: 10 health. Tier III: 15 health. | Great for PvE. |
| Come Back Stronger | Health regenerates faster and starts sooner after taking damage. | Tier II: +20% regen speed. Tier III: +30%. | Passive recovery. |
| To Have and To Hold (never used) Actually such card doesn't exist. |
Recovery Cards (Passive)
These restore cores or stamina faster.
| Card Name | Effect (Tier I) | Upgrade | Notes |
|---|---|---|---|
| Eye for an Eye | Headshots refill +20% Dead Eye. | Tier II: +25%. Tier III: +30%. | Synergy with Paint It Black. |
| Strange Medicine | Damage you deal heals you for 20% of the damage. | Tier II: 25%. Tier III: 30%. | Best for aggressive builds. |
| The Gift of Gab | Melee kills restore stamina and health. Not widely used. | Tier II: more. Tier III: more. | Niche. |
| Unblinking Eye | Dead Eye drains 20% slower. | Tier II: 30%. Tier III: 40%. | Combo with any Dead Eye card. |
Role-Specific Abilities (Unlockable from Role Licenses)
Each role gives passive or active abilities upon reaching certain ranks.
Bounty Hunter
- Eagle Eye +: While tracking bounties, you can see clues from farther away. (Passive, no cooldown)
- Tracker: At rank 20, you can call your hunting wagon? Actually Bounty Hunter wagon is a vehicle, not a skill. Skills: "Tackle" (press Triangle/Y to tackle fleeing bounties) is a move.
- Bounty Hunter Wagon: Skill unlocked at rank 10 to summon a wagon with a cage. Cooldown: 5 minutes if destroyed.
- Reinforced Lasso: At rank 5, you can use a stronger lasso that bounties cannot break. (Passive, infinite use but only with that lasso type).
- Bolos: Unlock at rank 5, throwable to entangle enemies. Can be upgraded to improved bolos at rank 15.
- Hunting Wagon: Rank 10, summons a wagon to store multiple large pelts. Cooldown 2 minutes.
- Large Delivery Wagon: Rank 14, for selling goods.
- Crafting Speed: Passive improvement at rank 12.
- Resupply Speed: Passive at rank 16.
- Special Stews: At camp, Cripps can cook stew that gives temporary gold cores.
- Collector's Bag: Rank 1, allows picking up collectibles.
- Shovels and Metal Detector: Rank 10, passive tools.
- Horse Lantern: Passive light? Not a skill.
- Tonics: Cheap or improved recipes at higher ranks.
- Moonshine Shack: Property.
- Moonshine Recipes: Passive unlock of flavors.
- Band Camp: Unlock passive income from band? Not skill.
- Strong Moonshine: Increase buzz and damage?
- Animal Transformations: Not a skill, but you can temporarily become an animal using Pheromones? Actually you can only sedate and sample. Legendary animal skinning gives trinkets.
- Animal Reviver: Craft sedative ammo.
- Horse Mask: Cosmetic.
- Diving: Press square/X while sprinting to dive. No cooldown. Good for evasion.
- Sliding: Down on D-pad while sprinting to slide. For cover or fun.
- Swimming: Can only swim a short distance before stamina drains. Use tonics.
- Climbing: Hold R2/RT to climb. Unlimited but slow.
- Dead Eye: Paint It Black (III) – for easy headshots.
- Combat: Peak Condition (III) – constant damage boost.
- Defense: Fool Me Once (III) – reduces damage over time.
- Recovery: Strange Medicine (III) – heal from damage.
- Synergies: High stamina keeps Peak Condition and Iron Lung? But we used Fool Me Once. Alternative: Iron Lung + Peak Condition for constant buffs. Use tonics to replenish stamina.
- Dead Eye: Slippery Bastard (III) – avoid lock-on.
- Combat: Winning Streak (III) – consecutive damage.
- Defense: Never Without One (III) – anti-headshot.
- Recovery: Eye for an Eye (III) – refill Dead Eye.
- Synergies: Slippery Bastard forces enemies to free-aim; use hip-fire or scoped weapons.
- Dead Eye: Slow and Steady (III) – high damage reduction.
- Combat: Landón's Patience (III) – sit still for damage boost.
- Defense: Iron Lung (III) – extra damage reduction.
- Recovery: Strange Medicine (III) – heal from shooting.
- Usage: Find cover, activate Dead Eye, soak damage, deal heavy shots.
- In Story Mode, prioritize upgrading Dead Eye to Level 4 as soon as possible. Complete story missions to unlock higher levels.
- In Online, never waste gold on buying card tiers; rank them up naturally by using them.
- Always carry a mix of tonics (Health, Stamina, Dead Eye) for any situation.
- For hunting in both modes, use Dead Eye Level 1 or Paint It Black (Online) to tag critical spots.
- In Online, build synergy between your Dead Eye card and passive cards. For example, Paint It Black + Eye for an Eye + Strange Medicine creates a cycle of kills restoring Dead Eye and health.
Trader
Collector
Moonshiner
Naturalist
General Gameplay Abilities (No Cards)
Recommended Builds (Online)
PvE General Purpose
PvP Aggressive
Tank Build
---
Usage Tips
---
Note: There are no true "spells" or "talents" in the traditional sense. All abilities are grounded in realistic Western combat. This guide covers everything that functions like a character skill.
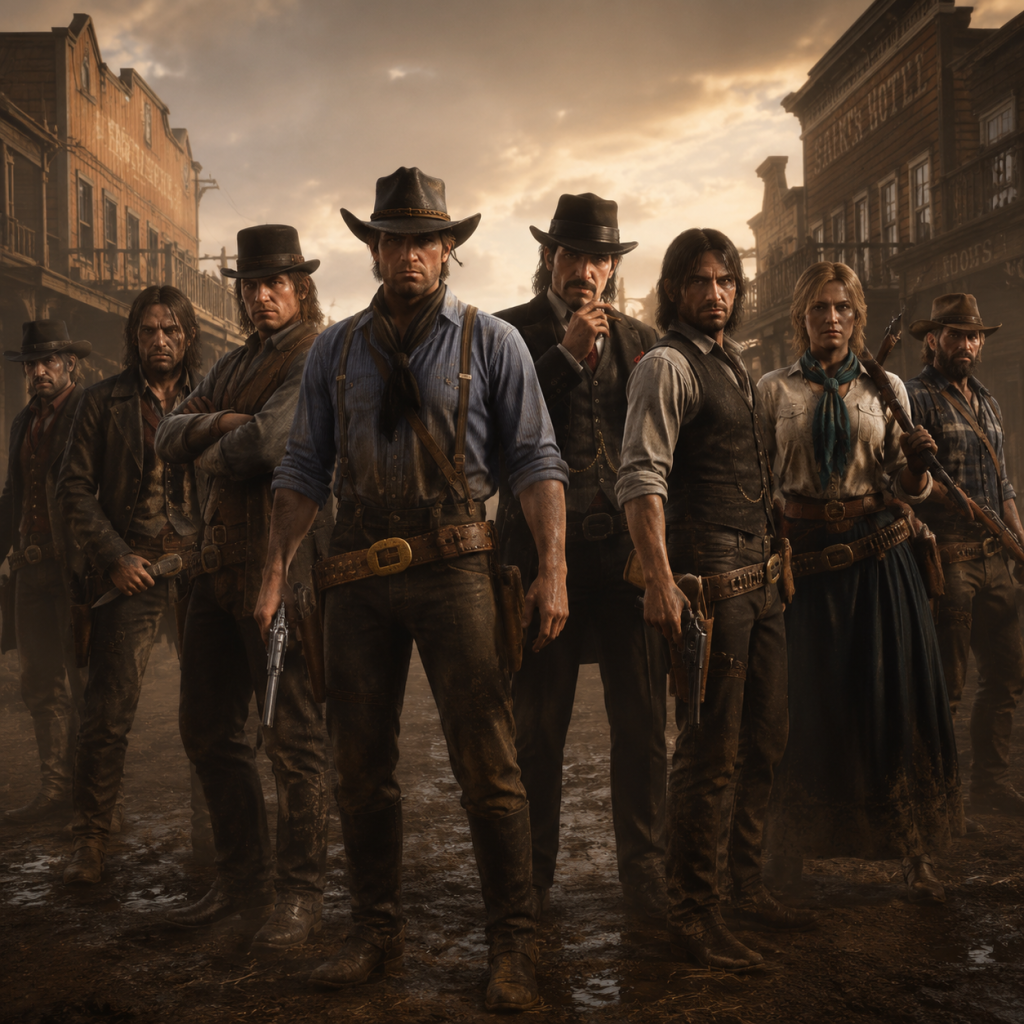
Characters & Roles
Characters & Roles
This guide covers all playable characters in Red Dead Redemption 2 (Story Mode) and all five specializations (Roles) in Red Dead Online. Each entry includes background, strengths, weaknesses, playstyle notes, unlock conditions, recommended equipment or builds, and team synergy where applicable.
---
Story Mode Playable Characters
#### Arthur Morgan
- Background: Arthur Morgan is the main protagonist of Story Mode. A senior member of the Van der Linde gang, he is a seasoned outlaw, gunslinger, and enforcer. Arthur is deeply loyal to Dutch and the gang but begins to question their path as the story unfolds.
- Strengths: High health and stamina; versatile in combat (can use any weapon); dead eye ability improves as the game progresses; can hunt, fish, and craft effectively. Arthur’s high honor choices yield discounts and unique story interactions.
- Weaknesses: Low honor leads to negative reactions from NPCs and law enforcement; cannot swim in deep water (though this is a minor limitation). Arthur’s story arc is finite (ends at Chapter 6).
- Playstyle: Play Arthur as a rugged, all-round outlaw. Focus on gunslinging (revolvers, repeaters, rifles), brawling, and exploration. Use Dead Eye for slow-motion targeting. Engage in main missions to progress the story, but also free-roam to build supplies, upgrade camp, and complete side content.
- Unlock Conditions: Available from the start of the game (Chapter 1). No unlock required.
- Recommended Equipment:
- Team Synergy: Arthur leads most missions alone, but can have temporary partners (e.g., Dutch, Hosea, Sadie, John). His high combat stats make him the best choice for direct confrontation. In stranger missions, his dialogue varies with honor level.
- Background: John Marston is a former gang member turned rancher and family man. He becomes the protagonist during the Epilogue (after Chapter 6). John is the central character of the original Red Dead Redemption.
- Strengths: Similar stats to Arthur (maxed health/stamina after Epilogue); can access all weapons; Dead Eye improves to level 8 (identical to Arthur). John has unique dialogue and interactions in the Epilogue world.
- Weaknesses: John’s main story is limited to the Epilogue (about 20% of total game content). He cannot progress Arthur’s camp upgrades (those are lost). John also cannot use the satchel from Arthur’s game (but can craft a new one).
- Playstyle: John plays identically to Arthur in combat. The Epilogue focuses on ranching, building a house, and eventually confronting the remaining enemies. Playstyle is more about rebuilding life and completing the story. John’s honor also affects NPC interactions.
- Unlock Conditions: Unlocked automatically at the start of the Epilogue (after completing Chapter 6).
- Recommended Equipment:
- Team Synergy: John works with his family (Abigail, Jack) and occasionally Sadie Adler and Charles Smith. He is less involved with the gang; his missions are more personal.
- Background: Become a licensed bounty hunter and hunt down wanted criminals across the five states. Work with Sheriff’s offices and the legendary bounty hunter, Trelawny.
- Strengths: High action and combat; fast gold and cash earnings (especially with bounties); fun PvE and PvP bounties; unlocks items like reinforced lasso, bolas, and unique clothing.
- Weaknesses: Requires active hunting (not passive); high risk (can die and lose the bounty); long travel times to deliver bounties.
- Playstyle: Use tracking skills, lasso, and guns to capture or kill targets. Use horse for chases. Use Eagle Eye to track clues. Bounties can be completed solo or in a posse.
- Unlock Conditions: Spend 15 Gold Bars to purchase the Bounty Hunter License from any Sheriff’s Office or the Bounty Board.
- Recommended Equipment:
- Team Synergy: Good for posse play—multiple players can split up to find and capture targets. High synergy with Trader (use bounty earnings to buy supplies) and Collector (find collectibles while traveling).
- Background: Run a trading business with Cripps. Hunt animals and produce goods at your camp, then sell them for profit.
- Strengths: Passive income generation over time (once supplies are gathered and processed); large payouts for long-distance deliveries; unlocks hunting wagon, medium/large delivery wagons, and camp upgrades.
- Weaknesses: Requires significant time investment to gather materials (hunting); vulnerable to attacks during deliveries; limited by camp location.
- Playstyle: Hunt animals, donate carcasses and pelts to Cripps, who produces goods. Once goods are ready, sell locally or long-distance (more money, but risk). Focus on hunting efficiency (use rifles for perfect pelts).
- Unlock Conditions: Purchase the Trader Role from Cripps at your camp for 15 Gold Bars.
- Recommended Equipment:
- Team Synergy: Partner with a Bounty Hunter (who can provide protection during deliveries) or a Collector (who can find materials along the way). A posse can help defend the wagon during long-distance runs.
- Background: Seek rare collectibles across the map for Madam Nazar. Use her maps or search manually for tarot cards, flowers, arrowheads, lost jewelry, coins, and fossil eggs.
- Strengths: Best XP and money per hour when using collector maps; no combat risk (mostly peaceful); unlocks unique items like the Metal Detector, Shovel, and rare clothing; can be done solo.
- Weaknesses: Repetitive (cycle through locations); relies on daily cycles and Madam Nazar’s location which moves daily; no combat benefits (aside from role unlocks like reinforced lasso? No).
- Playstyle: Use a collector’s bag to store items. Buy maps from Madam Nazar or find items using your metal detector and shovel. Complete entire sets for maximum value. Explore thoroughly.
- Unlock Conditions: Purchase the Collector’s Bag from Madam Nazar for 15 Gold Bars.
- Recommended Equipment:
- Team Synergy: Collector pairs well with Bounty Hunter (travel to new regions) and Trader (sell goods for cash to buy maps). Solo activity but posse members can share collectible locations if they know the cycle.
- Background: Run a moonshine operation under the guidance of Maggie Fike. Produce and sell flavored moonshine while avoiding law enforcement and rival bootleggers.
- Strengths: High passive income after initial investment; fun story missions and bootlegger missions; unlocks moonshine shack (social hub), unique bar upgrades, and special recipes.
- Weaknesses: Requires a large upfront gold investment (25 Gold Bars total: 1 Trader role required, then 25 for Moonshiner); production takes time (48 minutes per batch); delivery can be risky (players and NPCs attack).
- Playstyle: Buy ingredients (fruits, herbs), start production, and deliver moonshine. Avoid breakage (slow travel, no jumping). Upgrade still and equipment for higher profits. Complete missions to reduce mash cost.
- Unlock Conditions: First purchase Trader role (15 Gold), then purchase Moonshiner Role from Maggie at the Emerald Ranch fence for 25 Gold Bars.
- Recommended Equipment:
- Team Synergy: Best with a posse of 4 to guard the wagon and fend off attackers. Works well with Trader (shared camp proximity) and Collector (gather ingredients).
- Background: Study and protect wildlife with Harriet Davenport (a conservationist) or hunt legendary animals with Gus Macmillan (a trapper). Sample animals, learn behaviors, and unlock wilderness camp fast travel.
- Strengths: Unique items (legendary animal coats, trinkets), new ability to tame wild horses, access to wilderness camp, role XP through sampling. Provides a peaceful alternative to hunting.
- Weaknesses: Conflicts with Trader role (sampling vs. killing); Harriet will spray you if you kill too many animals; legendary animal hunts require special sedative rounds; role is less profitable initially.
- Playstyle: Use sedative rounds (Varmint Rifle with sedative ammo) to sample animals. Use binoculars and tracking to study. Complete free roam events (Animal Tagging, Protect the Legendary Animal). Buy legendary animal missions from Harriet (every 45 minutes).
- Unlock Conditions: Purchase Naturalist Role from Harriet Davenport at Strawberry or any other location for 25 Gold Bars.
- Recommended Equipment:
- Team Synergy: Naturalist can provide legendary animal materials for Trader (via Gus) or for sale. Works well with Bounty Hunter (travel together) and Collector (exploration). Not ideal to have a Trader in the posse who kills many animals (they conflict with Naturalist’s sampling).
- All Roles have 20 regular ranks and, for some, an optional Prestigious upgrade (e.g., Bounty Hunter Prestigious, Trader Prestigious, Collector Prestigious, Moonshiner Prestigious, Naturalist Prestigious). Prestigious licenses cost an additional 15-20 Gold Bars and offer 10 extra ranks with unique rewards.
- Roles can be active simultaneously; players can switch between role activities whenever they wish. However, roles have separate XP and progress tracks.
- Ability Cards (see Character Skills guide) are independent of roles and can be swapped freely.
- For recommended builds, focus on a single role at first to maximize rewards, then branch out.
- Weapons: Schofield Revolver (balanced damage/accuracy), Lancaster Repeater (fast fire rate), Bolt Action Rifle (for hunting and long range), Pump-Action Shotgun (close quarters).
- Items: Binoculars, bow (for stealth), knives (for hunting/skinning).
- Horse: Arabian or Turkoman (high speed/stamina).
- Outfits: Wear the "Legendary Bear" outfit (gives protection) or similar warm/heavy clothing in cold regions.
#### John Marston
- Weapons: Same as Arthur; John can find the same weapons (e.g., the Rare Rolling Block Rifle).
- Items: Satchel upgrades (buy from trapper or craft), improved horse.
- Horse: The same breeds available (including Buell from Hamish quest).
---
Red Dead Online Roles
Red Dead Online allows players to pursue specialized professions called Roles. Each Role is unlocked by purchasing a license from a specific vendor. Roles provide unique gameplay loops, unlock items, and rank-based rewards.
#### Bounty Hunter
- Weapons: Lasso (reinforced lasso for tighter holds), Bolas (ranged immobilization), Repeater (e.g., Lancaster), Revolver with high damage (e.g., Navy Revolver).
- Items: Bounty Hunter Wagon (to transport multiple targets), Improved Bow and Tracking Arrows (for non-lethal? Actually, lethal is fine).
- Horse: Any fast horse like the Missouri Fox Trotter.
#### Trader
- Weapons: Rolling Block Rifle or Carcano Rifle for long-range clean kills (perfect pelts), Bow with small game arrows for small animals (perfect carcasses), Varmint Rifle for small game (e.g., rabbits, birds).
- Items: Hunting Wagon (store multiple carcasses), Medium or Large Delivery Wagon.
- Horse: Any moderate stamina horse (e.g., Hungarian Halfbred).
#### Collector
- Weapons: Any, but no special combat needs. Bow or Varmint Rifle for self-defense.
- Items: Metal Detector (unlocks at Collector rank 5), Shovel (rank 1), refined binoculars (for Eagle Eye).
- Horse: Any, but a fast horse helps cover ground.
#### Moonshiner
- Weapons: Shotguns (combat with revenues), repeaters, sidearms. Defensive loadout.
- Items: Moonshine Shack upgrades (still, bar, band), strong moonshine recipe (e.g., Poison Poppy), polished rock for bar decor (optional).
- Horse: Strong, brave horse (e.g., Ardennes) to handle combat during deliveries.
#### Naturalist
- Weapons: Varmint Rifle with Sedative Rounds (for sampling), Bow with Poison Arrows (for self-defense), any firearm for predators (if attacked).
- Items: Animal Reviver (to revive penned animals for honor), Legendary Animal Pheromones (from Harriet), fast travel pamphlet (from Naturalist role).
- Horse: Any calm horse that doesn’t spook easily (e.g., American Paint).
---
Notes on Roles
This concludes the Characters & Roles overview for Red Dead Redemption 2.
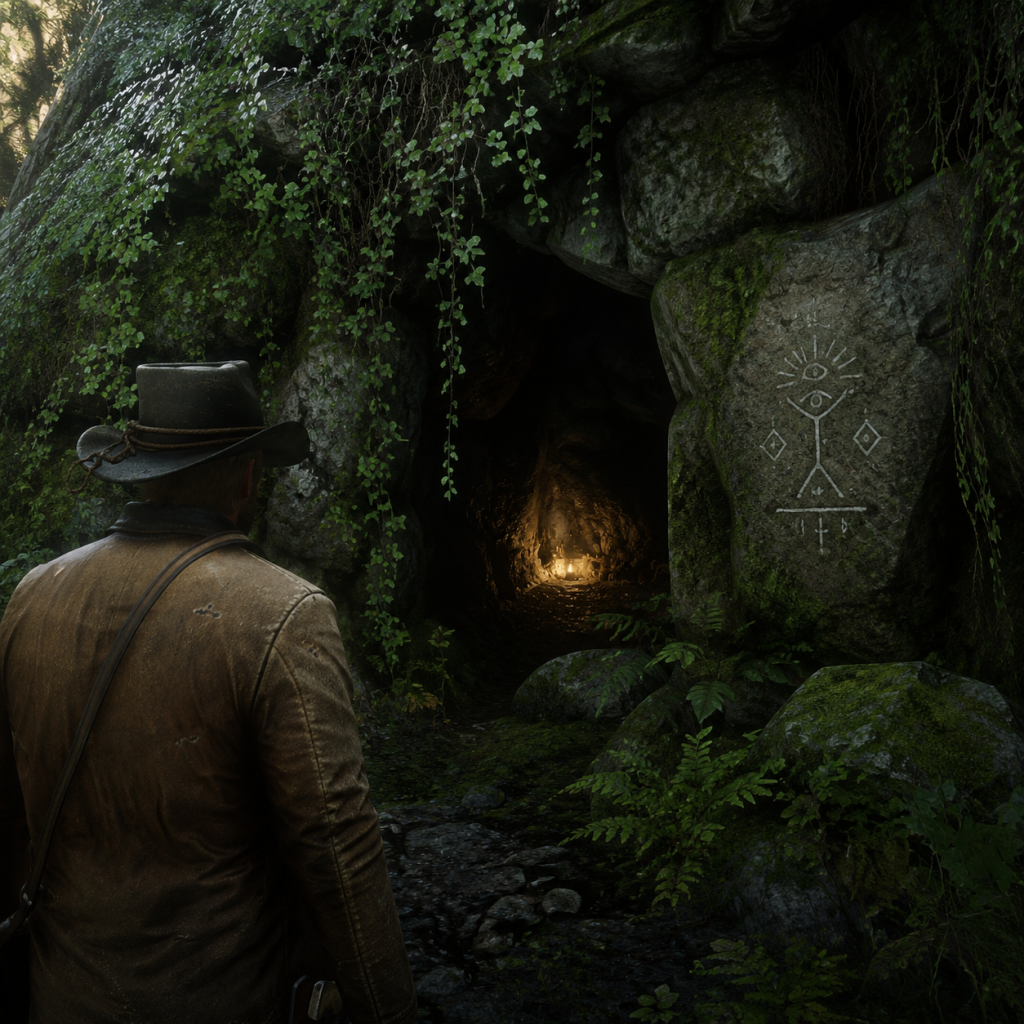
Cheats & Secrets
Cheats & Secrets
This guide covers all known cheat codes, hidden features, Easter eggs, and developer-intended secrets in Red Dead Redemption 2 (RDR2). Note that using any cheat code will disable achievements/trophies for that save file until you reload a save without cheats enabled. Cheats are available in Story Mode only; Red Dead Online has no cheat codes.
Table of Contents
- [How to Activate Cheats](#how-to-activate-cheats)
- [List of Cheat Codes](#list-of-cheat-codes)
- [Easter Eggs & Secrets](#easter-eggs--secrets)
- [Conclusion](#conclusion)
- [Weapon & Ammo Cheats](#weapon--ammo-cheats)
- [Health & Stats Cheats](#health--stats-cheats)
- [Money & Items Cheats](#money--items-cheats)
- [World & Weather Cheats](#world--weather-cheats)
- [Miscellaneous Cheats](#miscellaneous-cheats)
- [UFO Encounter](#ufo-encounter)
- [The Vampire of Saint Denis](#the-vampire-of-saint-denis)
- [The Ghost Train](#the-ghost-train)
- [The Serial Killer Side Mission](#the-serial-killer-side-mission)
- [The Strange Man’s Cabin](#the-strange-mans-cabin)
- [Giant Boar (The Legendary Boar)](#giant-boar-the-legendary-boar)
- [The Man-Made Mutant (The Frankenstein Robot)](#the-man-made-mutant-the-frankenstein-robot)
- [Meteorite House](#meteorite-house)
- [The Pagan Ritual Site](#the-pagan-ritual-site)
- [The Cabin of the Cannibal (The Strange Mans)](#the-cabin-of-the-cannibal-the-strange-mans)
- [The Ghost of the Old West (The Strange Man’s Painting)](#the-ghost-of-the-old-west-the-strange-mans-painting)
- [Sheep Herding with UFO?](#sheep-herding-with-ufo)
- [The Hermit’s Treasure](#the-hermits-treasure)
- [The ‘I Know You’ Questline](#the-i-know-you-questline)
- [The Hidden Cave Painting (The Strange Man)](#the-hidden-cave-painting-the-strange-man)
- [The Man in the Desert (The Strange Man)](#the-man-in-the-desert-the-strange-man)
- [The Dog Who Waits](#the-dog-who-waits)
- [The Lost Princess of Bayou](#the-lost-princess-of-bayou)
- [The Wild West Show (The Circus)](#the-wild-west-show-the-circus)
- [The Giant’s Bones](#the-giants-bones)
- [The Ghost of the Woods (The Night Folk)](#the-ghost-of-the-woods-the-night-folk)
- [The Haunted Swamp (The Ghost of the Swamp)](#the-haunted-swamp-the-ghost-of-the-swamp)
- [The Devil’s Cave](#the-devils-cave)
- [The Sunken Church](#the-sunken-church)
How to Activate Cheats
1. Open the Pause Menu.
2. Go to Settings.
3. Select Cheats.
4. A list of blank slots appears. Select one.
5. Enter the cheat code exactly as shown (case-sensitive, spaces included).
6. Confirm. The cheat will activate immediately.
You can find cheat codes in-game by reading newspapers, finding notes on dead bodies, or discovering them in the world. Alternatively, use the full list below. Once activated, cheats remain active until you restart the game or load a save without cheats. You can apply multiple cheats, but each can be used only once per save. To reset, reload a save that hasn’t had cheats activated.
Important: Cheats permanently disable achievements/trophies for that save. To regain them, you must load a pre-cheat save or start a new game. Save manually before experimenting.
List of Cheat Codes
#### Weapon & Ammo Cheats
| Code | Effect |
|---|---|
| `A fool on a journey` | Unlock all weapons (but you still need to purchase ammo) |
| `Death is silence` | Unlock all weapons and infinite ammo |
| `History is written by idiots` | Unlock all weapons and full ammo |
| `The quick and the clever` | Unlock all melee weapons (knife, tomahawk, etc.) |
| `A vain and foolish endeavor` | Unlock all ranged weapons except unique ones |
| Code | Effect |
|---|---|
| `You need more than luck` | Restore health, stamina, and Dead Eye fully |
| `Vanity. All is vanity` | Max out all cores (health, stamina, Dead Eye) |
| `Heaven knows, Meg` | Increase Dead Eye level to maximum (unlocks all Dead Eye abilities) |
| `The best of the best` | Max out all stats (health, stamina, Dead Eye) and increase Dead Eye level |
| `A quiet time` | Slow down time (like Dead Eye but always active) – stacks with Dead Eye |
| Code | Effect |
|---|---|
| `The house is a joke` | Receive $500 |
| `God walks among us` | Receive $5000 |
| `You can live in hope` | Receive $500 and some valuables |
| `We all must eat` | Spawn a satchel full of food and tonics |
| `The greedy and the ambitious` | Spawn a satchel full of gold bars and jewelry |
| Code | Effect |
|---|---|
| `You don't have to go home, but you can't stay here` | Set time to midnight (12 AM) |
| `Be careful what you eat` | Set weather to heavy rain |
| `A terrible idea` | Set weather to fog |
| `The sun is not always in the sky` | Set weather to clear and sunny |
| `Ain't it fine out` | Set weather to perfect sunny |
| `When the snow melts` | Set weather to snow (if in cold region) |
| `It's all you can handle` | Enable god mode (invincibility) |
| Code | Effect |
|---|---|
| `The rain falls, the sun shines` | Reset all wanted levels and bounties |
| `I want to be sedated` | Spawn a wagon (random type) |
| `Let the good times roll` | Spawn a stagecoach |
| `You who remain` | Spawn a wagon with two horses |
| `I am a man of considerable means` | Spawn a random horse (usually good quality) |
| `Run, you coward` | Increase horse stamina |
| `Escape to America` | Unlock all fast travel destinations |
| `The garden of ease` | Unlock all camp upgrades |
| `The mountain of ecstasy` | Unlock all weapon equipment (holsters, bandoliers) |
| `I ain't never been lost` | Reveal the entire map (fog of war removed) |
Easter Eggs & Secrets
RDR2 is filled with hidden encounters, mysterious locations, and nods to pop culture. Many require specific conditions (time of day, chapter, weather, outfit). Here are the most notable:
#### UFO Encounter
- Location: The shack on top of Mount Shann (southwest of Valentine).
- Requirements: Be at the shack at 2:00 AM in any chapter. You must find the note inside the shack first (it’s a map with strange symbols).
- Event: A greenish UFO appears, hovers, and then disappears. No interaction possible. Also, in the Epilogue, you can see a UFO at the same location but with different color.
- Location: Saint Denis, specifically the alleyways at night.
- Requirements: Find all five mysterious writing on walls around the city (they appear only at night). After finding all five, the vampire appears in the cemetery near the park.
- Event: A fast, feral vampire attacks. Loot his body for a unique dagger. Permanently missable if you don’t find the writings before a certain point?
- Location: Along the train tracks in the Bayou (Lemoyne), near the bridge southwest of Saint Denis.
- Requirements: Be at the tracks between 3:00 AM and 4:00 AM during a foggy night?
- Event: A ghostly, glowing green train appears and passes through. You cannot board it; it disappears.
- Location: Starts by finding a corpse in the wilderness (three different corpse locations). After investigating all three, you track the killer to his cabin.
- Unlock: This is a full side quest chain, not a cheat. The killer’s cabin contains a hidden room with a map leading to a treasure. The treasure is a unique revolver, the Midnight’s Pistol (actually a Schofield Revolver with unique engravings).
- Location: Near the river west of Annesburg.
- Access: The cabin appears only after completing the main story (Epilogue). The Strange Man is a mysterious figure who comments on your actions. Inside, you can see a painting that changes based on your honor. He is also tied to the “I Know You” questline in Blackwater.
- Location: West of Annesburg, near the river.
- Requirements: Complete the “The Veteran” side mission (stranger called Hamish Sinclair) until you eventually hunt the legendary boar. It’s a large, aggressive boar that drops a unique tusk for crafting.
- Location: In a cave south of Valentine, along the Dakota River.
- Requirements: Must be in Chapter 2 or later. The cave entrance is near the riverbank. Inside is a diary of a scientist who created a monster. The monster itself appears only if you read the diary and then revisit at night? The creature is a giant, deformed man that attacks.
- Location: Northwest of Annesburg, in the Roanoke Ridge area. A small house with a huge meteorite crater.
- Event: Inside the house, you can find a meteorite piece that can be sold or used for a crafting. The house is destroyed with a body inside. An Easter egg referencing the 1908 Tunguska event?
- Location: In the forest north of Strawberry, near the “Pagan’s Site” marker (not on map).
- Event: A stone circle with a skeleton tied to a post. You can loot a unique pagan mask that reduces damage from wildlife.
- Location: Near the river southwest of Van Horn.
- Requirements: Enter the cabin and find a note about a family who ate each other. The cabin appears empty but if you return later, a ghostly apparition may appear.
- Location: In the Strange Man’s cabin (see above), a painting on the wall changes appearance based on Arthur’s honor. If you have high honor, the painting shows a peaceful scene; low honor shows a grim scene. If you shoot the painting, it bleeds.
- Location: Near Hanging Dog Ranch in Big Valley, at night.
- Event: You can see sheep being herded by green lights from above – a UFO reference. Occurs only if you haven’t triggered the main UFO encounter yet.
- Location: A hermit’s shack in the heart of the Grizzlies (near Cairn Lake?).
- Event: Inside, you find a letter and a map that leads to a buried treasure on a small island. The treasure is a gold ingot.
- Location: Blackwater – a stranger named “The Strange Man” or “Mr. Black” appears to John in the Epilogue. He speaks cryptically and you can find his cabin (see above) to see the painting that reflects your honor.
- Location: Inside a cave near the river east of Valentine. The painting shows the Strange Man watching you.
- Location: Near the New Austin desert (accessible only as John in Epilogue). A wizard-like man named “The Strange Man” appears near a rock formation, giving cryptic advice.
- Location: At a grave near the river west of Rhodes (under a big tree).
- Event: A dog sits by a grave. If you approach, the dog runs away but returns later. This is a reference to the Japanese story of Hachiko.
- Location: Near the swamps of Bayou Nwa, at night, you can hear a woman crying. Follow the sound to find a ghostly woman who disappears. This is a reference to the ghost of a drowned princess.
- Location: A traveling circus show can be found at various random spots (e.g., near Valentine). It features a strongman, a bearded lady, and a lion tamer. You can watch or participate.
- Location: In the far west of the map (New Austin), near the river. A giant skeleton can be found, implying a giant creature once lived.
- Location: The swamps of Lemoyne at night, you may encounter the Night Folk – a group of masked, cannibalistic humans. They ambush randomly. A rare encounter features a woman calling for help who turns out to be a trap.
- Location: The swamp near Saint Denis, you might see a ghostly figure of a woman in white. She appears and disappears quickly.
- Location: In the Grizzlies, a cave with a pentagram drawn on the floor. If you stand in the center at midnight, you may hear whispers.
- Location: In Flat Iron Lake, near the island northwest of Rhodes. A partially submerged church can be explored. Inside, you can find a treasure map.
#### The Vampire of Saint Denis
#### The Ghost Train
#### The Serial Killer Side Mission
#### The Strange Man’s Cabin
#### Giant Boar (The Legendary Boar)
#### The Man-Made Mutant (The Frankenstein Robot)
#### Meteorite House
#### The Pagan Ritual Site
#### The Cabin of the Cannibal (The Strange Mans)
#### The Ghost of the Old West (The Strange Man’s Painting)
#### Sheep Herding with UFO?
#### The Hermit’s Treasure
#### The ‘I Know You’ Questline
#### The Hidden Cave Painting (The Strange Man)
#### The Man in the Desert (The Strange Man)
#### The Dog Who Waits
#### The Lost Princess of Bayou
#### The Wild West Show (The Circus)
#### The Giant’s Bones
#### The Ghost of the Woods (The Night Folk)
#### The Haunted Swamp (The Ghost of the Swamp)
#### The Devil’s Cave
#### The Sunken Church
Conclusion
Red Dead Redemption 2 is packed with hidden content. Cheats are fun for experimentation but disable trophies, so save before using. Easter eggs reward exploration and attention to detail. For the full experience, avoid cheats on your first playthrough. Happy hunting!