Resident Evil 2
## Resident Evil 2 (2019) – Game Introduction **Genre:** Survival Horror / Third-Person Shooter **Developer & Publisher:** Capcom **Release Timeline:** - **PlayStation 4, Xbox One, PC (Steam):** January 25, 2019 - **PlayStation 5, Xbox Series X|S (Enhanced Version):** June 13, 2022 (via free upda...
Download & Installation
Resident Evil 2 (2019) Download & Installation Guide
This guide covers legitimate download sources and installation procedures for Resident Evil 2 (the 2019 remake) on all major platforms: PC (Steam, Epic Games Store), PlayStation 4/5, and Xbox One/Series X|S. The game is not available natively on Nintendo Switch or mobile devices (cloud streaming may be possible via Xbox Cloud Gaming or similar services, but not covered here).
---
Platform Availability
| Platform | Digital Store(s) | Disc Support | Notes |
|---|---|---|---|
| PC | Steam, Epic Games Store | No disc (DRM-free version not available) | Requires 64-bit OS; supports controllers |
| PlayStation 4/5 | PlayStation Store (PS4, PS5 backward-compatible) | Yes (PS4 disc; PS5 disc not produced) | PS5 runs via backward compatibility; separate PS5 upgrade available |
| **Xbox One / Series X | S** | Microsoft Store (Xbox One, Series X | S) |
Official Download Sources (Legitimate Only)
- Steam: [store.steampowered.com/app/883710](https://store.steampowered.com/app/883710)
- Epic Games Store: [store.epicgames.com/en-US/p/resident-evil-2](https://store.epicgames.com/en-US/p/resident-evil-2)
- PlayStation Store: Available via PSN (search for "Resident Evil 2")
- Microsoft Store: Available via Xbox Store (search for "Resident Evil 2")
- OS: Windows 7 64-bit (or higher)
- CPU: Intel Core i5-4460 / AMD FX-6300
- RAM: 8 GB
- GPU: NVIDIA GeForce GTX 760 / AMD Radeon R7 260x (2 GB VRAM)
- DirectX: Version 12
- Storage: 26 GB (varies slightly with updates; recommend 30 GB free)
- Sound: DirectX-compatible sound card
- OS: Windows 10 64-bit (or higher)
- CPU: Intel Core i7-3770 / AMD FX-9590 or better
- RAM: 8 GB
- GPU: NVIDIA GeForce GTX 1060 / AMD Radeon RX 480 (3 GB VRAM or more)
- DirectX: Version 12
- Storage: 26 GB (SSD recommended for faster loading)
- Sound: DirectX-compatible sound card
- Language Selection – Choose interface and voice language (some languages require separate download).
- Graphics Settings (PC only): Set resolution, texture quality, shadows, etc. Use recommended automatic detection.
- Brightness Calibration – Adjust to see the logo barely visible.
- Controller Configuration – Supports PlayStation, Xbox, or generic controllers. Keybindings can be changed.
- Frame Rate Options (PC): Unlock or cap (30, 60, 120).
- HDR (if supported): Enable for compatible displays.
---
PC – System Requirements
Store listings (Steam/Epic) list identical requirements.
Minimum Requirements
Recommended Requirements
Note: For ray tracing (PC version update), a more powerful GPU is required (e.g., RTX 2060 or RX 6600).
---
PC Installation – Step-by-Step
Steam
1. Create/Login to Steam Account – If not already, download the Steam client from [store.steampowered.com](https://store.steampowered.com) and create a free account.
2. Purchase the Game – Navigate to the Resident Evil 2 page and complete purchase.
3. Install the Client – Ensure Steam client is installed and logged in.
4. Initiate Download – Go to Library > Resident Evil 2 > Click "Install" or "Download".
5. Choose Install Location – Default is `C:\Program Files (x86)\Steam\steamapps\common`. You can change it.
6. Wait for Download – The game downloads and installs automatically (includes all updates).
7. Launch – Once complete, click "Play".
Epic Games Store
1. Create/Login to Epic Account – Download Epic Games Launcher from [epicgames.com](https://www.epicgames.com) and sign in.
2. Purchase the Game – Search for Resident Evil 2, buy it.
3. Install the Launcher – Ensure Epic Games Launcher is running.
4. Initiate Download – Go to Library > Resident Evil 2 > Click "Install".
5. Choose Install Location – Similar to Steam.
6. Wait for Download – Launcher handles installation.
7. Launch – Click "Launch" from library.
Note: Both stores require a persistent internet connection for initial activation.
---
PlayStation (PS4 / PS5) Installation
Digital Download
1. Sign In to PSN – On your console, sign in with your PlayStation Network account.
2. Go to PlayStation Store – Search for "Resident Evil 2".
3. Purchase & Download – For PS4, select the PS4 version. For PS5, you can also buy the PS4 version (backward-compatible) or look for the PS5 upgrade (available separately or via upgrade).
4. Initiate Download – The game will be added to your library and begin downloading automatically (ensure you have sufficient storage).
5. Install – Once download finishes, the game installs automatically. You may need to confirm installation.
6. Launch – From the home screen or game library.
Disc Installation (PS4)
1. Insert Disc – Insert the PS4 disc into the console (PS4 or PS5).
2. Follow On-Screen Prompts – The console will begin copying data from the disc (may require a download for patches).
3. Complete Installation – After disc copy, any available updates will download and install.
4. Launch – Game will be ready to play.
PS5 Note: The PS4 disc works on PS5 digital edition? Only on disc-based PS5. Digital Edition requires digital purchase.
---
Xbox (One / Series X|S) Installation
Digital Download
1. Sign In to Xbox Live – On your console, sign in with your Microsoft account.
2. Go to Microsoft Store – Search for "Resident Evil 2".
3. Purchase & Download – Choose the version (Xbox One or Xbox Series X|S; Smart Delivery provides the best version).
4. Initiate Download – The game will download and install automatically. You can monitor progress in My Games & Apps.
5. Launch – From the dashboard or My Games & Apps.
Disc Installation (Xbox One)
1. Insert Disc – Insert the Xbox One disc into your console (Xbox One or Series X|S).
2. Install from Disc – The console copies game data from disc. A prompt appears.
3. Download Updates – After initial copy, updates download automatically (requires internet).
4. Launch – Game appears in your library.
Series X|S Note: Disc works on Series X (disc drive), not on Series S (digital only).
---
First Launch Setup
On all platforms, the first launch may present:
Important: On PC, after first launch, check "Graphic Options" for ray tracing (if your GPU supports it) – this is a separate toggle.
---
Common Installation Errors & Fixes
PC
| Error / Issue | Likely Cause | Fix |
|---|---|---|
| "Missing DLL (e.g., MSVCP140.dll)" | Missing Visual C++ Redistributables | Install latest VC++ from Microsoft (`vc_redist.x64.exe`). Steam/Epic may auto-install. |
| "DirectX Error" | DirectX not updated | Download DirectX End-User Runtimes from Microsoft. |
| "Low disk space" | Full drive | Free at least 30 GB; check that install location has space. |
| "Antivirus blocking installation" | False positive | Temporarily disable AV during installation or add exception for the game folder. |
| "Steam/Epic download stuck" | Network or cache | Restart client, clear download cache (Settings > Downloads > Clear Cache). |
| "Game crashes on launch" | Corrupted files or GPU driver | Verify game files (Steam: Right-click > Properties > Local Files > Verify). Update GPU drivers. |
| "Black screen on start" | Fullscreen/display issue | Press Alt+Enter to switch to windowed mode; change settings manually in config files. |
PlayStation
- „Cannot install” error – Insufficient storage or corrupted download. Delete unneeded content, retry download. Rebuild database (Safe Mode) if persistent.
- Disc read error – Clean disc, ensure no scratches. Try another disc to rule out drive issue.
- Update download fails – Check PSN status; restart console; try wired connection.
- „Installation stopped” – Hard drive full or heavy background downloads. Free space, pause other downloads.
- Disc not recognized – Clean disc; check if console is outdated. Update console firmware.
- Game not appearing after install – Go to My Games & Apps > See all > Wait for syncing. Hard restart console.
- Account Requirements: All platforms require a free online account (Steam, Epic, PSN, Xbox Live) to download and play. No subscription needed for single-player, but online features (if any) may require PS Plus or Xbox Live Gold.
- Resident Evil 2 Deluxe Edition – Includes extra costumes and soundtrack swap; installation same as standard, content unlocks automatically.
- Mod Support (PC) – Unofficial mods can be installed via Nexus Mods; always backup original files. Not covered here.
Xbox
---
Post-Install Verification
After installation, perform these checks:
1. Launch the Game – Confirm it loads past logos and main menu.
2. Check for Updates – Ensure the latest patch is installed. On PC, Steam/Epic auto-update; on consoles, check for game updates in your library.
3. Verify Game Files (PC) – Steam: Right-click game > Properties > Local Files > Verify Integrity of Game Files. Epic: Library > click three dots on RE2 > Manage > Verify.
4. Storage Space – Confirm game folder size matches expected (\( \)26 GB on PC; similar on consoles).
5. Run a Benchmark – On PC, use the built-in performance test (Options > Graphics > Performance Test) to ensure stability.
6. Check Achievement/Save Sync – Ensure your respective platform account syncs (cloud saves).
---
Additional Notes
If you encounter any issues not listed, consult the respective platform’s support pages or the game’s official forums.
Game Introduction
Resident Evil 2 (2019) – Game Introduction
Genre: Survival Horror / Third-Person Shooter
Developer & Publisher: Capcom
Release Timeline:
- PlayStation 4, Xbox One, PC (Steam): January 25, 2019
- PlayStation 5, Xbox Series X|S (Enhanced Version): June 13, 2022 (via free update for existing owners)
- Nintendo Switch: Not available natively (Cloud version in some regions, but not officially released as a physical/digital download)
- PC (Windows) via Steam and Epic Games Store
- PlayStation 4
- PlayStation 5 (backward compatible with enhanced performance modes)
- Xbox One
- Xbox Series X|S (optimized with Ray Tracing and 60 FPS mode)
- Leon S. Kennedy: A rookie cop on his first day, eager but unprepared for the horror. His scenario focuses on rescuing a young girl named Sherry Birkin and uncovering Umbrella’s crimes.
- Claire Redfield: A college student searching for her brother (Chris Redfield from the first Resident Evil). Her path intertwines with Sherry and reveals the tragic story of the Birkin family.
- Ada Wong: A mysterious, flirtatious spy with hidden agendas who helps Leon on multiple occasions.
- Sherry Birkin: The young daughter of the scientists who created the G-Virus. She becomes a key to the virus’s future.
- William Birkin: A brilliant but deranged Umbrella researcher who, after being attacked, injects himself with the G-Virus, transforming into a grotesque monster.
- Annette Birkin: William’s wife, a scientist who tries to stop her husband’s madness.
- Marvin Branagh: A wounded officer who helps Leon/Claire early in the RPD.
- Mr. X: The relentless Tyrant sent by Umbrella to retrieve a sample of the G-Virus. He stalks the player throughout the police station, adding constant tension.
- Main Campaign (Leon A / Claire B and Claire A / Leon B): Two distinct storylines that differ based on character choice and scenario order. The “A” scenario is the first playthrough; “B” offers a different perspective, different boss fights, and altered item placements.
- Second Run: Unlocked after completing one campaign, this is the other character’s “B” scenario, providing a fresh (harder) playthrough with reshuffled puzzles and enemy encounters.
- The Ghost Survivors: Three bonus “what-if” scenarios featuring minor characters like the gun shop owner Robert Kendo, the mayor’s daughter Katherine, and a zombie soldier. These are challenging, arcade-style survival missions with limited resources and specific goals.
- No Return Mode – Not included (this mode is part of Resident Evil 4 Remake, not RE2). For RE2, the only additional mode is the Ghost Survivors and the 4th Survivor (classic bonus mode: Hunk’s escape).
- No online multiplayer modes.
- Offline: The entire game, including all campaigns and bonus modes, can be played without an internet connection.
- Online: Leaderboards for The Ghost Survivors are available, and the game supports cloud saves. No online co-op or multiplayer exists.
- Free DLC:
- Paid DLC: There is no paid story DLC for Resident Evil 2 Remake. The Deluxe Edition includes bonus costumes (Leon/Claire noir, Samurai Edge skin, and more) and the original soundtrack swap option, but these are cosmetic/sound tweaks.
- No expansion packs.
Platforms:
Story Overview:
Set in September 1998, the game follows rookie police officer Leon S. Kennedy and college student Claire Redfield as they arrive in the zombie-infested Raccoon City. The T-Virus, a deadly bioweapon developed by the Umbrella Corporation, has escaped containment, turning the city’s population into ravenous undead (and worse). Leon and Claire must navigate the crumbling police station, the sewers, and an underground laboratory to survive, uncover the truth, and escape. Their paths intertwine, and the choices they make (especially in the second scenario) reveal different perspectives of the same nightmarish event.
Setting:
The game primarily takes place in Raccoon City, specifically the Raccoon City Police Department (RPD) – a gothic, maze-like building designed to evoke dread. Players also explore the dark sewers, an abandoned orphanage, the underground laboratory known as NEST, and the remnants of the city streets. The atmosphere is oppressive, with dim lighting, claustrophobic corridors, and persistent threat of ambushes from zombies and more grotesque creatures like the Lickers and Mr. X (the Tyrant).
Main Characters:
Core Appeal:
Resident Evil 2 (2019) is a masterclass in survival horror, combining classic fixed-camera-era tension with modern over-the-shoulder action and stunning visuals. The game emphasizes resource management, puzzle-solving, and atmospheric exploration. Every bullet counts, and the persistent threat of enemies (especially Mr. X) keeps players on edge. The dual-perspective campaign offers high replayability, and the game’s intricate level design rewards meticulous exploration.
Target Audience:
This title appeals to fans of horror games, especially those who enjoy a challenging, tense experience. It’s suitable for players who appreciate atmospheric storytelling, puzzle mechanics, and strategic combat. While newcomers can jump in, the game references the original 1998 title and the Resident Evil universe, enriching the lore for series veterans.
Game Modes:
Online/Offline Support:
DLC/Expansion Overview:
- The Ghost Survivers update (added post-launch) including three scenarios: No Time to Mourn (Robert Kendo), Runaway (Katherine Warren), and Forgotten Soldier (a zombie soldier).
- Extreme Battle Mode – Not present in the 2019 remake. Instead, the bonus 4th Survivor (Hunk) and Tofu Survivor are unlockable through gameplay, not DLC.
What Makes This Game Unique:
1. Revitalizing a Classic: Capcom’s reimagining of the 1998 masterpiece retains the original’s puzzles, atmosphere, and dual-story mechanic while modernizing controls, graphics, and storytelling.
2. Mr. X as a Persistent Threat: Unlike scripted stalkers, Mr. X appears dynamically based on player actions, making each playthrough unpredictable. His heavy footsteps and ability to follow into rooms (except safe rooms) create unprecedented tension.
3. Resource Scarcity: Ammunition and healing items are deliberately limited, forcing players to decide between fighting, fleeing, or saving supplies. This systemic tension is a hallmark of the survival horror genre.
4. Interwoven Dual Campaigns: The A/B scenario system (Leon A → Claire B or vice versa) rewards multiple playthroughs with new puzzle solutions, different boss encounters, and a complete narrative picture.
5. Stunning Visuals & Audio: Built on Capcom’s RE Engine, the game features photorealistic graphics, dynamic lighting, and 3D audio that immerse players in the decaying Raccoon City. The sound design is crucial, from the squelch of zombie footsteps to the distant stomps of Mr. X.
6. Respect for Legacy: It includes fan-favorite elements like the item box, typewriters for saving, ink ribbons (on Normal/Hardcore), and iconic puzzles (the statue puzzle, the library clock) while adding new lore and character depth.
Overall, Resident Evil 2 (2019) stands as a benchmark for modern survival horror, delivering both a faithful homage and a fresh, terrifying experience that defines the genre.
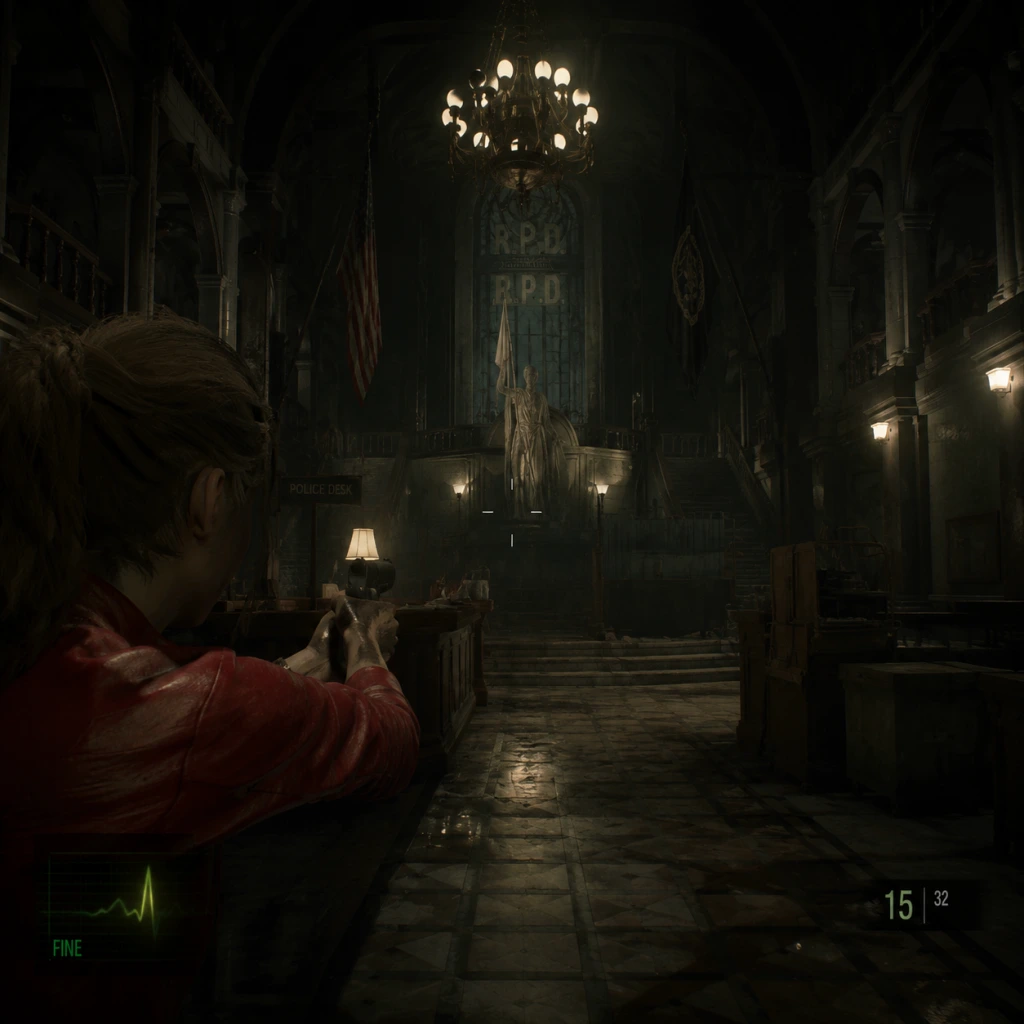
Getting Started
Getting Started with Resident Evil 2 (2019)
This guide is for brand-new players. It covers the first hour, controls, UI, early objectives, common mistakes, and a day-one checklist. For download/installation or game introduction, refer to the previous sections.
1. Character Selection (No Character Creation)
Resident Evil 2 offers two story campaigns: Leon S. Kennedy (rookie cop) and Claire Redfield (college student). There is no character creation. The choice affects weapons, key items, and some story events. For your first playthrough, both are equally valid. We recommend Leon for a slightly more straightforward early weapon (handgun vs. Claire's handgun with less stopping power), but Claire has a stronger early area (the Jail). You can play the other character in a second run (2nd Run mode) after finishing one. Tip: Save both characters' campaigns for a complete story.
2. Controls (All Platforms)
Default controls are listed. You can customize in the Options menu. Essential actions:
| Action | PC (Keyboard + Mouse) | PlayStation 4/5 | Xbox One/Series X\ | S |
|---|---|---|---|---|
| Move | W/A/S/D | Left Stick | Left Stick | |
| Look | Mouse | Right Stick | Right Stick | |
| Aim | Right Mouse Button | L2 | LT | |
| Shoot | Left Mouse Button | R2 | RT | |
| Interact / Pick up | E | R1 | RB | |
| Run | Shift (hold) | R2 (hold) | RT (hold) | |
| Reload | R | Square (PS5: X) | X | |
| Knife Melee | V | R3 (press stick) | R3 (press stick) | |
| Map | M | Touchpad (left) | View button | |
| Inventory | Tab | Options | Menu | |
| Examine Item | E (while holding item) | R1 (in menu) | RB (in menu) |
3. User Interface (UI) Overview
- Health Indicator: Bottom left – a heart icon changes from green (healthy) to yellow (caution) to red (danger). Red means you are about to die from one more hit. Status effects (poison) show a skull icon.
- Ammo Counter & Weapon Icon: Bottom right – shows current weapon and ammo count. Reload when safe.
- Inventory Grid: Press Tab/Menu – limited slots (initially 8). Manage items here. You can combine herbs, examine items, and discard.
- Map: Press M/View – reveals rooms you’ve visited. Blue rooms are unexplored; red means you have cleared all items? (actually red indicates all items collected). Map shows locked doors (red icons) and key items needed.
- Subscreen: Inventory, Map, Files, Options. Files contain lore and hints.
- You start in a gas station. Pick up the Handgun and Handgun Ammo from the officer’s body. Immediately equip it (inventory menu).
- Pick up the Key from the cash register. Loot everything: ammo, green herb (heals), and the Film Roll (important for later).
- Exit through the back door. You'll meet your first zombie. Do not waste ammo – just run past it. Run toward the car blocking the road; a cutscene triggers.
- After the cutscene, follow the path to the Raccoon City Police Department (RPD). Through the front gate, you’ll see a helicopter crash. Enter the station through the main doors.
- Inside the main hall: grab the Shotgun (Leon) or Grenade Launcher (Claire) from the front desk (only if you have the The 4th Survivor DLC? No, standard game has shotgun behind the reception desk glass – you need the Keycard from the West Office later). Actually, for early game: you can’t get it yet. Focus on looting the Red Herb and Handgun Ammo from the main hall. Go left to the West Office.
- In the West Office, pick up the Bulletin Board Key (Leon) or Claire’s Key (unlocks a locker). Examine any file for lore.
- Find the Darkroom (connected to West Office). Inside, pick up the Film Roll if you missed it, and use the Darkroom Developer to process the film. This reveals a safe combination later.
- First Save: Use the typewriter in the Darkroom. Save before proceeding. Use Ink Ribbons – they are limited! Save only when you’ve made significant progress (e.g., solved a puzzle, reached a new area).
- Use the Bulletin Board Key to open the door near the main hall stairs (leads to the Press Room). Inside, get the Spade Key (Leon) or Heart Key (Claire).
- Now explore the second floor. Go up the stairs in the main hall. Use the Spade/Heart Key to open rooms like the Waiting Room and S.T.A.R.S. Office. In the S.T.A.R.S. Office, you’ll find the Weapon Locker Key Card (temporarily) – but you need a Battery to power it. That’s for later. For now, grab the Shotgun (if you have the card) or focus on collecting Green Herbs and Handgun Ammo.
- Avoid the Licker in the West Corridor (second floor) – it’s fast and deadly. Run away.
- Return to the Darkroom (your first safe room). Combine Green Herb + Green Herb to make a stronger healing item, or Green Herb + Red Herb for full heal. (Green + Green = 50% heal; Green + Red = 100% heal; Green + Blue = poison cure.)
- Put items you don’t need immediately into the Item Box (blue box in safe rooms). Always keep: Ink Ribbon, at least one knife (for escape from grabs), and your best weapon.
- Proceed to the East Office (through main hall). You’ll encounter more zombies. Conserve ammo – headshots are good but not guaranteed kills.
- Don’t waste ammo on downed zombies – They can get up again. Only shoot if you must push through. Use the knife to finish off crawling zombies to save bullets.
- Don’t ignore the map – Unexplored rooms (blue) may hide items. But locked doors waste time; check map icons.
- Don’t hoard ink ribbons – Use them only at typewriters after major progress. Running out of saves can be frustrating.
- Don’t run everywhere – Zombies can break doors if you run near them. Walk when sneaking.
- Don’t discard key items – You can’t drop story items unless you solve a puzzle and they transform. Keep everything until you know it’s safe to discard.
4. The First Hour – What to Do
#### First 5 Minutes: The Gas Station
#### 5-15 Minutes: Arriving at RPD Station
#### 15-30 Minutes: West Office & Darkroom
#### 30-50 Minutes: The First Key & Locked Doors
#### 50-60 Minutes: First Safe Room & Combine Herbs
5. Essential Early Objectives (What to Do First)
1. Reach the RPD Station – The game truly begins here.
2. Find the Darkroom – Your first safe room. Save, combine herbs, store items.
3. Obtain the Spade Key (Leon) / Heart Key (Claire) – Opens several doors on first and second floors.
4. Pick up all Green Herbs you see – Combined, they keep you alive.
5. Acquire the Shotgun (Leon) / Grenade Launcher (Claire) – Crucial for stronger enemies. For Leon: get the Shotgun from the S.T.A.R.S. Office using the Weapon Locker Key Card (requires a battery from the Parking Garage later). For Claire: the Grenade Launcher is in the Fire Escape after the garage. Both are priority.
6. Solve the Safe Combination in the West Office – Using the developed film roll, you get the combination (left 9, right 15, left 7 – varies per difficulty? Standard: 9-15-7). The safe contains a valuable W-870 Shotgun Stock (Leon) or MUP Handgun (Claire).
6. What to Avoid
7. Early Resource Priorities
| Item | Priority | Reason |
|---|---|---|
| Green Herbs | High | Combine for heals; you’ll take damage early. |
| Handgun Ammo | Medium | For standard zombies; don’t waste on walls. |
| Shotgun Shells (Leon) / Grenades (Claire) | High | For Lickers and boss fights; limited supply. |
| Knife | High | Use to escape zombie grabs (press V/R3). Also effective for finishing off downed enemies. |
| Ink Ribbons | Medium | Only use at save points. Each ribbon = 1 save. |
| Blue Herbs | Low | Only when poisoned (icon appears). |
| Red Herbs | Medium | Combine with Green for full heal. |
| Keys (Spade, Heart, Club, Diamond) | High | Required to progress; keep them until used. |
8. Common Beginner Mistakes
- Running out of ammo too early – Acknowledge that you don’t have to kill every zombie. Avoid combat unless necessary.
- Ignoring the map – The map shows item locations with a red dot after you examine an area. Use it to know where you’ve been.
- Forgetting to use the item box – You only have 8 inventory slots. Store extra herbs, ammo, and keys to free space.
- Not examining items – Sometimes a key item has a clue on the back (e.g., a drawing). Press Examine to rotate and see all sides.
- Saving too often or too rarely – Try to save every 20-30 minutes or after unlocking a new area. Don’t waste ribbons on every room.
- Not combining herbs – Green+Green is fine, but Green+Red is more efficient. Learn herb combinations early.
9. Day-One Checklist
Follow this order on your first play session:
1. Start a new game – Choose Leon or Claire (see section 1).
2. Adjust settings – Set difficulty to Standard (or Assisted if you struggle with aiming). Disable auto-aim if you want challenge. Change controller layout if needed.
3. Play through the gas station – Grab handgun, ammo, film roll, green herb. Run past first zombie.
4. Enter the RPD – Explore main hall, West Office, get the Spade/Heart Key.
5. Find the Darkroom – Save, combine herbs, store film roll.
6. Solve the safe puzzle – Use developed film photo: 9-15-7 (if standard). Get the upgrade.
7. Open doors with your first key – Especially the Press Room and second floor rooms.
8. Locate the Shotgun/Grenade Launcher – Follow the path to the second floor S.T.A.R.S. Office (Leon) or Fire Escape (Claire). You need a battery – go to the Parking Garage (through the East Office).
9. Loot the Parking Garage – Get the Battery (from the broken police car in the garage). Return to the S.T.A.R.S. Office to unlock the weapon locker.
10. Save before proceeding – Use an ink ribbon at the Darkroom. You now have a solid weapon and the basics down.
Pro Tip: If you die, you lose progress from your last save. Reload and try a different approach – conserve resources. Good luck, rookie!
Core Gameplay
Core Gameplay Overview
Resident Evil 2 (2019) is a survival horror game that combines tense exploration, puzzle-solving, resource management, and third-person combat. The core loop is: explore a dangerous environment → find keys/items → solve puzzles to unlock new areas → fight or avoid enemies → manage limited ammo and health → progress the story.
Main Gameplay Loop
1. Explore: Navigate interconnected environments (Raccoon City Police Station, sewers, underground lab). Each area is filled with locked doors, hidden items, and shortcuts.
2. Gather: Collect key items (keys, medallions, plugs), healing items (green herbs, mixed herbs), ammunition, and weapon upgrades.
3. Solve Puzzles: Use keys to open doors, combine items, and solve environmental puzzles (e.g., the statue puzzle, clock tower, chess plug puzzle).
4. Survive: Manage health and ammo carefully. Enemies range from slow zombies to fast Lickers and tough Tyrant (Mr. X).
5. Progress Story: Complete objectives to advance the narrative. The game has two main scenarios: Leon’s and Claire’s, each with unique story beats, weapons, and puzzles.
Combat & Interaction Systems
- Weapons: Each character has a starting pistol and acquires unique weapons (Leon: shotgun, flamethrower, magnum; Claire: grenade launcher, SMG, Spark Shot). All weapons can be upgraded with parts found in the environment (e.g., suppressor, extended mag, scope).
- Aiming & Recoil: Aim with L2/LT. Headshots stun zombies temporarily. Limbs can be blown off to slow enemies. Precise aiming is rewarded – critical headshots kill zombies with fewer bullets.
- Knife: A close-range weapon that can be used indefinitely but degrades quickly. It can also be used to escape grapples or finish off downed zombies. The knife is essential for conserving ammo.
- Defensive Items: Grenades and flashbangs serve as defensive tools. If grabbed, press the button prompt while aiming to use a defensive item and escape. They can also be thrown offensively.
- Health System: Green herbs heal progressively more when mixed: two green herbs > one green. Green + Red = full heal. No poison status exists in this game.
- Ammo Crafting: Combine gunpowder (Small, Large) to create specific ammo types:
- Linear with Branches: The game follows a strict order: RPD → Sewers → Lab. However, within each area, you can explore multiple paths, often needing specific keys (e.g., Heart Key, Spade Key) to unlock doors. Some doors are one-way shortcuts.
- Character-Specific: Leon and Claire have different weapons, stories, and some unique puzzles. You must play both to get the full story (encouraged via 2nd Run).
- Ink Ribbons & Save Points: Saving requires limited ink ribbons on Hardcore difficulty. On Standard or Assisted, saving is unlimited. Typewriters serve as save points.
- Safe Rooms: Rooms with a typewriter are safe havens – enemies never enter. Use them to save, organize your inventory, and craft. Music changes to indicate safety.
- Item Placement: Items are randomized on some difficulties (Hardcore) but fixed on Standard. Key items are found in logical locations (e.g., key in the library, medallions in offices).
- Shortcuts: Unlocking shortcuts (e.g., raising the shutter in the RPD lobby) reduces backtracking. Memorizing the layout is crucial for fast play.
- Hidden Items: Many weapons upgrades, hip pouches, and health items are hidden in side rooms or behind locked doors. Thorough exploration pays off.
- Main Objectives: The game provides clear objectives (e.g., “Find the key to the main hall”). These are displayed in the menu. There is no side-quest system; everything is story-driven.
- Puzzle Sub-quests: Examples:
- Optional Bosses: There are no optional bosses, but some areas (e.g., the jail cells in RPD) contain enemies that can be avoided.
- No Currency: There is no money or merchant. Everything is found or crafted.
- Resource Scarcity: Ammo and healing are limited, especially on Hardcore. The game encourages avoiding combat rather than killing everything.
- Consumable Categories:
- Inventory Management: You can carry only limited items. Important to discard unnecessary keys after use (they are automatically removed) and combine herbs when possible. Healing items and ammo take up space.
- No Character Levels: Progression is tied to item acquisition: upgrading weapons, finding hip pouches, and unlocking new weapon types.
- Weapon Upgrades: Each weapon has 1–3 mod slots. Mods (e.g., long barrel, compensator, red dot sight) improve accuracy, firepower, or reload speed. Some are character-specific.
- Unlockable Infinite Weapons: After earning certain achievements (e.g., completing Hardcore with S+ rank), you unlock infinite versions of the Rocket Launcher, Minigun, etc. This changes the “build” to a more action-oriented playstyle.
- Ability to Craft More: As you progress, you find High-Grade Gunpowder that doubles ammo output. This effectively allows a “build” focusing on conserving resources.
- After Main Story: The game offers a “2nd Run” scenario (B Scenario). This plays differently: starting area changes, enemy layout is different, and Mr. X appears earlier. You need to complete both A and B to see the true ending.
- Difficulty Levels:
- Rank System: At the end, you receive a rank (S+ is best). Rank depends on completion time, number of saves, and healing items used. S+ rank unlocks infinite weapons.
- Bonus Modes:
- Replayability: The game encourages multiple playthroughs to see different character stories, achieve higher ranks, and unlock extras.
- Objective: Find your way to the Underground Garage and power up the train.
- Combat: Mostly zombies; learn to conserve ammo by stunning with headshots or using knife. Encounters are few but dangerous.
- Exploration: Focus on the first floor of RPD. Unlock doors using the Spade Key, Club Key, etc. Solve the medallion puzzle to open the main hall.
- Key Items: Obtain the bolt cutters, wait speaker, valve handle, etc. Collect the three medallions.
- Economy: Ammo is tight. Craft handgun ammo from small gunpowder. Use green herbs exclusively.
- Build: Find the first hip pouch (in the dark room) – now you can carry up to 6 items. Start using the shotgun (Leon) or grenade launcher (Claire) sparingly.
- Example Sequence: After the opening gas station, you reach the RPD lobby. The goal is to get to the helipad. This involves the detective’s office, the library, the press room, and the morgue.
- Objective: Navigate the sewers to reach the Orphanage (Leon) or the Cradle (Claire), then move to the underground lab.
- Combat: New enemies: Lickers (blind but fast, rely on sound – walk slowly), G-Adults (spit acid), and Zombie dogs. Mr. X appears in the RPD but leaves for the sewers. In the sewer, you face the G-Virus mutated Birkin (first proper boss fight).
- Exploration: Sewers have many flooded areas, ladders, and puzzles (e.g., the chess plug puzzle). Watch out for the rotating fans.
- Economy: You find High-Grade Gunpowder here. Combine it with standard gunpowder to craft stronger ammo. Start mixing red+green herbs for full heals.
- Build: Acquire new character-specific weapons: Leon gets the flamethrower (excellent against Lickers and the Plant 43 zombies in the lab); Claire gets the Spark Shot (stuns and kills G-Adults). Also find a second hip pouch, expanding inventory to 8 slots.
- Example Sequence: After leaving RPD through the underground parking, you descend into the sewers. You must find the two key items to power the cable car. Solve the valve puzzles to drain water areas. Fight Birkin in the garbage room.
- Objective: Activate the vaccine self-destruct sequence and escape.
- Combat: Tougher zombies, Plant 43 (ivy-like creatures that only die to fire – Leon’s flamethrower or flame rounds for Claire), and final Birkin fight (multiple forms).
- Exploration: Lab is relatively linear but has several locked doors and puzzles (the three computer terminals, the power panel). Safe rooms have typewriters.
- Economy: Abundant gunpowder and herb spawns. You should have enough resources to go loud if needed.
- Build: By now, you have all weapon upgrades. Decide which ammo to prioritize: for Leon, magnum rounds are precious; for Claire, acid rounds for the grenade launcher. Use the spark shot (Claire) or flamethrower (Leon) as primary.
- Example Sequence: Enter the lab through the cable car station. Navigate the main hall, find the entrance to the embryo room, and eventually reach the control room. Collect the three keycards to access the self-destruct terminal. Defeat the final Birkin on the train platform.
- After Completing First Scenario: You are encouraged to start a “New Game – 2nd Run” which is the other character’s perspective. This mode is harder, has different item placement, and features Mr. X from the beginning of the RPD. Completing both scenarios unlocks the true ending.
- Hardcore Mode: For experienced players. Only 3 autosaves? Actually Hardcore allows manual saves with ink ribbons. Enemies deal double damage, and item locations are randomized.
- Unlockables: S+ rank on Standard or Hardcore yields infinite weapons (Rocket Launcher, Minigun, etc.). These make subsequent playthroughs easy.
- The Ghost Survivors DLC: Three short scenarios – “No Time to Mourn”, “Runaway”, “Forgotten Soldier” – that challenge you to survive with limited resources and a specific objective. These can be played after finishing the main story.
- Extra Modes: In the Main Menu “Bonus” section, you can view models, listen to music, and toggle the Noir filter after unlocking it.
- Speedrunning: The game is popular for speedruns due to its tight gating and puzzle memorization. Use rank rewards to optimize runs.
- Small + Small = Handgun Ammo
- Large + Large = Shotgun / SMG Ammo (depending on character)
- Small + Large = Magnum / Grenade / Spark Shot Ammo (depending on character)
- Gunpowder + High-Grade Gunpowder (found later) yields stronger ammo.
Progression
Exploration
Quests / Missions
- Statue Puzzle: Insert three medallions (Unicorn, Lion, Maiden) in the RPD main hall.
- Clock Tower Puzzle: Set the clock hands to specific times obtained from a memo.
- Chess Plug Puzzle: Retrieve six plugs with chess symbols and place them correctly in the lab.
- Weapon Parts: Locate hidden weapon parts (e.g., Matilda stock, SLS 60 speedloader) to upgrade your firearms.
Economy & Resource Management
- Ammo (pistol, shotgun, magnum, etc.) – craft from gunpowder.
- Herbs – green for heals, red+green for full heal.
- Grenades – used for defense or offense.
- Hip Pouches – increase inventory slots (max 8 slots per character).
Character / Build Growth
Endgame Structure
- Assisted: Auto-aim, more ammo, regenerating health after damage.
- Standard: Normal experience.
- Hardcore: Fewer saves, tougher enemies, limited ink ribbons, no auto-aim.
- The Ghost Survivors: Three “what if” scenarios with unique characters and objectives (survive, escape, kill all).
- Noir Filter: Unlockable black-and-white filter.
- Infinite Weapon Rewards: Unlockable via challenges.
Progression Tiers
Early Game: Raccoon City Police Station (First Half)
Mid Game: Sewers and Underground Facility
Late Game: Umbrella Laboratory
Endgame: Post-Primary Scenario & Bonus Content
Summary
Resident Evil 2 is a masterclass in survival horror where every decision matters. From the tense early hours in the RPD to the frantic escape from the lab, the core gameplay loop of explore–solve–survive keeps you engaged. Resource management, precise combat, and environmental storytelling are the pillars. Master the systems, and you’ll be rewarded with a deeply satisfying experience.
Game Tips
Game Tips for Resident Evil 2 (2019)
This guide provides essential tips for surviving the zombie-infested Raccoon City. Whether you're a new player or a seasoned veteran, these strategies will help you conserve resources, navigate dangers, and conquer the game's toughest challenges.
---
Combat Tips
#### 1. Aim for the Head, But Don't Always Shoot
- Explanation: Headshots deal the most damage and can stagger zombies, but they consume precious ammunition. Only engage when necessary.
- Analysis: Zombies can take multiple headshots even on Standard difficulty. Save ammo by using the knife for downed zombies or avoiding fights altogether. On Hardcore, every bullet counts.
- Explanation: When a zombie falls, you can slash it with your knife to permanently kill it before it gets up.
- Analysis: This conserves handgun ammo and prevents the zombie from turning into a tougher enemy later. But be careful: the knife has durability (on Hardcore) or can be used infinitely (on Standard). On Hardcore, use the knife sparingly.
- Explanation: The shotgun's spread is wide. Only use it against groups of zombies or when you need a guaranteed stagger at close range.
- Analysis: Against a single zombie, a headshot with the handgun is more efficient. The shotgun is best for clearing tight corridors or stopping charging lickers.
- Explanation: Both frag grenades and flash grenades have powerful effects. Use frags for large groups or bosses, and flash grenades to escape tight situations or blind tough enemies like the Tyrant (Mr. X).
- Analysis: Flashes are especially useful on Hardcore to avoid damage when you're cornered. They also stun lickers and the Tyrant for several seconds, giving you time to run.
- Explanation: Leon gets a submachine gun (MP5) and Claire gets a magnum revolver. Both are powerful but ammo is scarce.
- Analysis: Save these for bosses or emergency situations. The SMG can shred the G monsters, while the magnum can one-shot certain enemies with headshots.
- Explanation: When grabbed by a zombie, you can press a button (shown on screen) to shove it away using a defensive item (knife, grenade, or sub-weapon).
- Analysis: Always carry at least one defensive item. On Hardcore, you can only survive one hit without it. Practice the timing to avoid wasting items.
- Explanation: The map shows rooms you've visited. Doors you can't open are marked in red.
- Analysis: Prioritize unlocking these doors because they often lead to shortcuts, safe rooms, or key items. Use small keys and key items as soon as you find the corresponding door.
- Explanation: Safe rooms (no enemies spawn) are marked on the map. They also have typewriters for saving (on Standard) and item boxes.
- Analysis: In a pinch, if you're being chased by the Tyrant, head to the nearest safe room. He cannot enter. Use these to reorganize inventory.
- Explanation: Ammo, herbs, and key items are often hidden in desks, filing cabinets, and lockers.
- Analysis: Some lockers require a combination (like 1-2-3 or 0-9-0). Try common codes found in documents. Searching thoroughly reduces backtracking later.
- Explanation: Zombies moan, lickers hiss, and the Tyrant has heavy footsteps. Use sound to detect threats before you see them.
- Analysis: Equip headphones for better spatial awareness. When you hear the Tyrant stomping, he's likely close. Crouch and walk to avoid detection; running attracts him.
- Explanation: After looting a chest or statue, it disappears from the map. If you see a chest icon on the map, it's still full.
- Analysis: This is a great way to ensure you don't miss ammo or healing items. The final chest in the parking garage (Leon A) has an assault rifle.
- Explanation: Green herbs heal, blue herbs cure poison, and red herbs boost the effect. Green+Red = full heal + damage resistance.
- Analysis: Always combine a red herb with a green herb for the best healing efficiency. Never use a green herb alone unless necessary. Save blue herbs for poison rooms (like the sewer spiders).
- Explanation: The game provides enough ammo for essential fights. Crafting early wastes gunpowder.
- Analysis: Wait until you have a stockpile of gunpowder and high-grade gunpowder, then craft large amounts at once. On Hardcore, prioritize shot shells over handgun ammo because they are more effective.
- Explanation: Hip pouches are found in specific locations and permanently add 2 inventory slots.
- Analysis: There are 4 hip pouches in the game (e.g., in the East Wing waiting room, the Art Room, etc.). Collect them all as early as possible to reduce inventory management headaches.
- Explanation: Puzzle items like the Spade Key, Heart Key, etc., are only needed for certain doors. Once you've used them, they disappear from inventory. But some items (like the Battery) are used in multiple places.
- Analysis: Don't discard items until you're sure they're not needed later. The game will normally let you drop items only if they're no longer required, but it's safer to keep them in the item box until you check thoroughly.
- Explanation: Inventory space is limited. Only carry what you need: a weapon, ammo, healing, and a defensive item.
- Analysis: If you have multiple weapons, choose one ranged and one melee (knife). Use the item box regularly, especially before boss fights. Discard blue herbs if you're not in a poison area.
- Explanation: Many puzzles have clues hidden in documents. For example, the statue puzzle in the library requires turning statues based on a story clue.
- Analysis: If you're stuck, open your inventory and read the notes you've collected. They often contain passwords (e.g., the electronic safe code is in the intro report).
- Explanation: Some puzzles (like the chess piece puzzle in the sewers) require matching symbols. Take a screenshot or use photo mode to compare.
- Analysis: This saves mental effort. On PC, use F12 to screenshot. On consoles, use the share button.
- Explanation: In the RPD office, there is a jigsaw puzzle. Start by placing corner and edge pieces.
- Analysis: This is straightforward but can be time-consuming. Use the clue in the note to know the final image.
- Explanation: The clock in the RPD lobby must be set to 11:15? Actually, the time is \"9:15\" according to the mayor's note.
- Analysis: Check the note near the clock. Setting correctly opens a secret compartment with a key.
- Explanation: Shooting a zombie's leg can cripple it, making it crawl. It's then easier to avoid.
- Analysis: This is excellent for conserving ammo. A crawling zombie can still be a threat, but it's much slower. Works best with the handgun. On Hardcore, kneecapping is more reliable than headshots because headshots require precise aim.
- Explanation: Lickers are blind but have extreme hearing. Walking, crouching, or moving slowly won't alert them. Running triggers an attack.
- Analysis: If you must pass a licker, crouch-walk. Firing any weapon will aggro it. Use flash grenades to stun them or grenades to kill them if necessary. On Hardcore, it's better to sneak past.
- Explanation: The Tyrant slowly pursues you in many areas. He cannot open doors that require key items, but he can break through normal doors.
- Analysis: Use tight corners and switchback corridors to break line-of-sight. Flash grenades stun him for about 5 seconds. There are specific safe rooms he cannot enter (e.g., the Stars Office). If he catches you, take damage and he'll back off briefly. On Hardcore, he is faster and hits harder.
- Explanation: Various forms of G (William Birkin) have weak spots – their eyes. Shooting the eyes causes them to stagger and exposes their core.
- Analysis: Use the shotgun or magnum at close range. The knife is also effective against G's arm when it grabs you. On Hardcore, you'll need precise aim and lots of ammo. Use the grenade launcher (Claire) or SMG (Leon) for the final forms.
- Explanation: Dogs are fast and can leap. They often pause before attacking.
- Analysis: When a dog stops and pounces, shoot it mid-air. A headshot with the handgun will kill it instantly. Alternatively, use the knife when they're close.
- Explanation: On Standard difficulty, the knife has infinite durability. You can repeatedly slash downed zombies.
- Analysis: After stunning a zombie with a headshot, you can slash it dozens of times to kill it without using extra ammo. This is a great way to clear areas without gunfire. On Hardcore, the knife breaks after a few uses, so be careful.
- Explanation: In rooms with multiple doors, you can bait the Tyrant to punch you while you dodge, causing him to stop momentarily.
- Analysis: This is risky but can buy you time. Combine with flash grenades for a safe escape. Advanced players can use the tight corridors in the RPD to keep him at a distance.
- Explanation: Play through the game twice – once as Leon A/Claire B (or vice versa) to get both scenarios and all weapons.
- Analysis: Each scenario gives different key items and enemies. By playing both, you can unlock infinite ammo weapons and the Rocket Launcher (for S+ rank). This is essential for speedruns.
- Explanation: To achieve S+ rank (Hardcore), you must complete the game under 2.5 hours (or 2 hours for some) with only 3 saves.
- Analysis: Learn the exact routes and skip all unnecessary fights. Use the Rocket Launcher for bosses. Memorize puzzle solutions. Avoid picking up excess items. There are many video guides available.
- Explanation: Some achievements require completing the game without healing (or without using recovery items).
- Analysis: This requires perfect timing, knowledge of enemy placements, and use of defensive items. Prioritize avoiding combat. Use flash grenades and the knife efficiently. Restart if you take damage.
- Explanation: You can find upgrades like the High-Capacity Magazine (in the RPD Stars Office) and the Suppressor (in the parking garage).
- Analysis: The suppressor is useful for stealth – it reduces noise and prevents attracting distant enemies. The high-cap mag allows more shots before reloading. Equip these immediately.
- For Leon (A scenario): Handgun + Shotgun + Knife + Grenade. For ranged, use the shotgun for big groups; handgun for single zombies. Save the SMG for bosses (like G).
- For Claire (A scenario): Handgun + Grenade Launcher + Knife + Flash Grenade. The grenade launcher uses explosive rounds against G and groups. Acid rounds are effective against lickers.
- General Rule: Carry only one primary weapon plus the knife to save space. Keep ammo for that weapon in the box.
- Explanation: There is no vending machine in RE2. Instead, you combine resources at workbenches. But there is a specific item (the \"Green Herb\") that you shouldn't hoard.
- Analysis: Actually, you can discard items in the item box. There's no economy system like buying ammo. Resource management is purely about what you carry.
- Explanation: Some players complete the game using only the knife (Standard difficulty). This tests your melee skills.
- Analysis: Requires constant movement and dodging. Use the knife's infinite durability to your advantage. Avoid enemies whenever possible. This is not recommended for first playthroughs.
- Start on Standard Difficulty: Normal is forgiving enough to learn the mechanics. Hardcore is brutal – enemies deal more damage, you can only save with ink ribbons, and items are scarcer.
- Save Often (Standard): Use typewriters. On Hardcore, save only when you've made significant progress.
- Don't Be Afraid to Run: Not every fight is mandatory. If you're low on ammo, sprint past zombies. They're slow.
- Learn the Map: Familiarize yourself with the RPD, sewers, and lab. Knowing shortcuts reduces panic.
- Use the Sub-Weapon Slot: Always have a knife or grenade ready for defensive moves.
#### 2. Use the Knife to Finish Downed Enemies
#### 3. Shotgun: Wait for Clumps
#### 4. Grenades Are Your Best Friend
#### 5. Use the Submachine Gun (Leon) or SLS 60 (Claire) Wisely
#### 6. Melee Survival: Timing the Counters
---
Exploration Tips
#### 1. Always Check Map for Red Doors
#### 2. Memorize Safe Room Locations
#### 3. Search Every Corner, Especially Desks and Drawers
#### 4. Listen for Audio Cues
#### 5. Use the Map to Track Unopened Chests and Statues
---
Resource Management Tips
#### 1. Combine Herbs Wisely
#### 2. Don't Craft Unnecessary Ammo Early
#### 3. Use the Hip Pouch to Increase Inventory
#### 4. Save AT LEAST 1 of Each Key Item
#### 5. Do Not Hoard Everything – Prioritize
---
Puzzle Solving Tips
#### 1. Read All Files and Notes
#### 2. Use the Photo Mode for Puzzles
#### 3. Solve the Jigsaw Puzzle by Prioritizing Edge Pieces
#### 4. The Clock Tower Puzzle
---
Enemy-Specific Tips
#### 1. Zombies: Kneecap or Headshot?
#### 2. Lickers: Avoid Alerting Them
#### 3. Mr. X (Tyrant): Use Obstacles
#### 4. G Mutants: Shoot the Eyes
#### 5. Zombie Dogs: Wait and Shoot
---
Advanced Techniques & Optimizations
#### 1. Knife Glitch (Standard Difficulty)
#### 2. Baiting the Tyrant into a Stun Loop
#### 3. Resource Maxing: The "Two Run" Strategy
#### 4. Speedrun Techniques
#### 5. The "No Damage" Run
---
Economy & Weapon Builds
#### 1. Weapon Upgrades
#### 2. Recommended Weapon Loadouts
#### 3. Selling Useless Items at the Vending Machine?
#### 4. The "Only Knife" Challenge
---
Beginner Tips
---
Conclusion
Resident Evil 2 rewards careful planning and execution. By mastering these tips, you'll minimize wasted resources, survive tougher encounters, and experience the game's tension without unnecessary frustration. Good luck, and remember: the Tyrant is always listening.
---
Guide written for players of all skill levels. Last updated: [Current Date]
Game Settings
Resident Evil 2 (2019) – Comprehensive Game Settings Guide
This guide covers every setting in Resident Evil 2 (2019) across PC (Steam, Epic Games Store), PlayStation 4/5, and Xbox One/Series X|S. We explain what each setting does, recommend optimal values for different hardware tiers, and highlight settings that are easy to misconfigure.
---
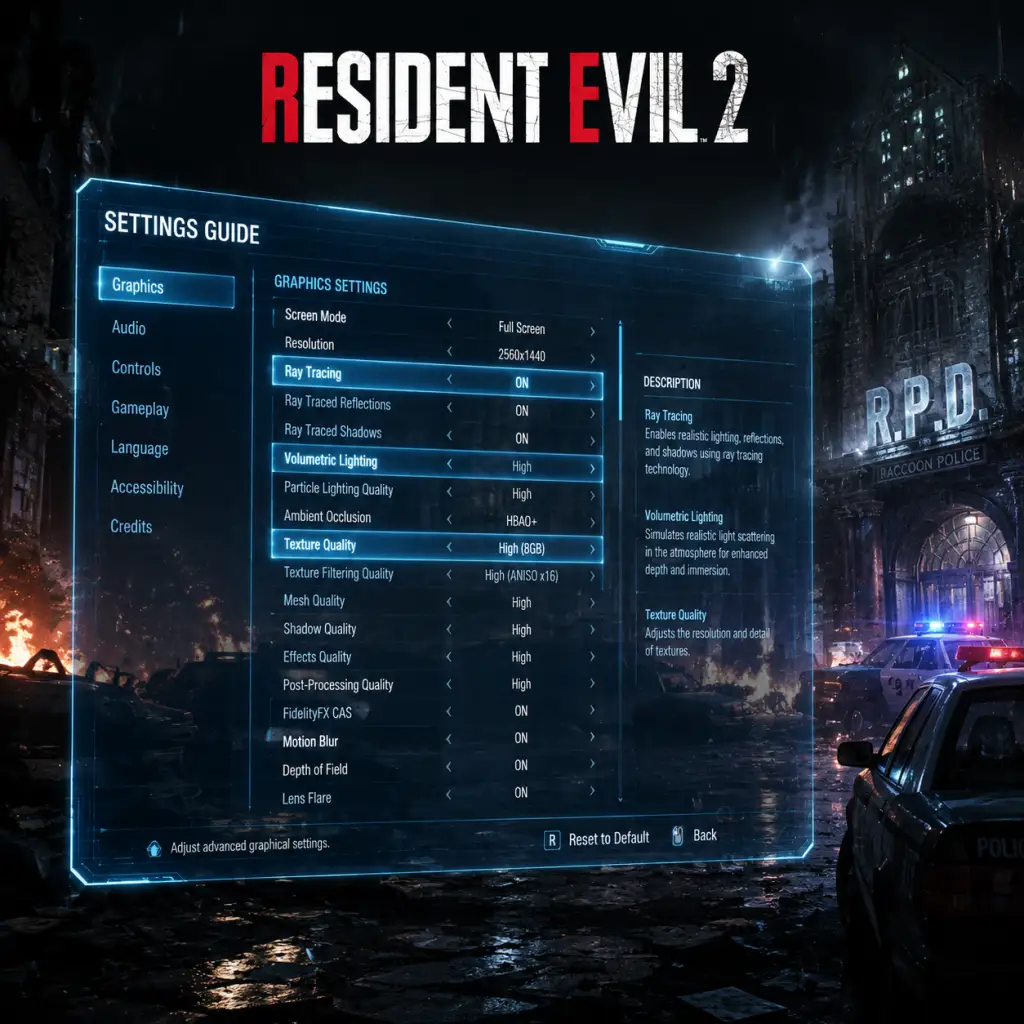
Graphics Settings
PC Graphics Tiers (Recommended Presets)
| Tier | GPU Example | Resolution | Target FPS | Quality Preset | Notes |
|---|---|---|---|---|---|
| Low | GTX 1050 Ti / RX 560 | 720p-1080p | 30-60 | Low | Use 50% resolution scaling if needed. |
| Medium | GTX 1060 / RX 580 | 1080p | 60 | Medium (custom: textures High, shadows Medium, AA FXAA) | |
| High | RTX 2060 / RX 5600 XT | 1440p | 60 | High (with ray tracing off) | |
| Ultra | RTX 3070 / RX 6800 | 4K | 60 | Max (ray tracing on, DLSS Quality if available) |
Key Graphics Settings Explained
- Graphics Preset: Quick way to set quality. Custom is recommended for fine control.
- Display Mode: Fullscreen (best performance), Windowed, Borderless (alt-tab friendly).
- Resolution: Native monitor res. For consoles, automatic based on output.
- Render Scale: Adjusts internal resolution. 100% = native. Lower for performance but causes blur.
- Image Quality (Resolution Scaling): Alternative to Render Scale, uses dynamic resolution scaling. Easy to misconfigure – setting this too low will make the game very blurry. Keep at 100% unless desperate for FPS.
- Anti-Aliasing: TAA (smooth but softens image), FXAA (light, good for low-end), SMAA (sharp but more taxing). TAA + sharpening is best for most.
- Texture Quality: High uses more VRAM (4GB+). If VRAM is low, drop to Medium to avoid stutter.
- Texture Filter: Affects distant texture clarity. Anisotropic 16x has near-zero performance cost.
- Shadow Quality: Medium looks decent; High+ for clarity. Very performance-heavy on low-end.
- Ambient Occlusion: Adds depth shadows. SSAO (cheap), HDAO (better), HBAO+ (best, heavy). Turn off on low-end.
- Volumetric Lighting: Atmosphere effects. Off/Low for performance.
- Contact Shadows: Extra shadow detail on objects. Minor cost.
- Bloom: Glow effects. Personal preference.
- Depth of Field: Blur on distant objects. Turn off for sharper image.
- Lens Flare: Can cause distractions. Off recommended.
- Ray Tracing (PC & PS5/XSX): Adds realistic reflections and shadows. Very demanding. Recommended only for high-end GPUs (RTX 3060+ or equivalent) at 1080p/1440p. On PS5/XSX, RT runs at lower resolution – use Quality mode for RT.
- Variable Rate Shading (VRS, PC only): Increases performance by reducing quality in non-essential areas. May cause flickering – test per scene.
- FidelityFX CAS (PC): AMD sharpening filter. Use with TAA for improved clarity.
Console Graphics Modes
| Console | Mode | Resolution | Target FPS | Features |
|---|---|---|---|---|
| PS4 / Xbox One | Standard | 1080p | 30 | No RT |
| PS4 Pro / Xbox One X | Quality | 2160p (checkerboard) | 30 | Higher shadows, textures |
| PS4 Pro / Xbox One X | Performance | 1080p-1440p | 60 | Lower settings |
| PS5 / Xbox Series X | Quality | 2160p | 30 | RT on, max effects |
| PS5 / Xbox Series X | Performance | 2160p (dynamic) | 60 | RT off, high settings |
| PS5 / Xbox Series X | Ray Tracing | 2160p (lower res) | 45-60 | RT reflections, variable |
---
Audio Settings
- Master Volume: Overall loudness.
- Music Volume: Background score. Can increase tension; keep default.
- Sound Effects: Footsteps, gunshots, zombie groans. Increase to hear threats.
- Voice Volume: Dialogue and cutscenes.
- Surround Sound: Choose Stereo (headphones), 5.1, or 7.1. Headphones recommended for directional audio.
- Audio Quality: High (full dynamic range) or Low (compressed). High always.
- Reduce Loud Sounds: Compresses audio to prevent sudden loud explosions (for hearing safety). Recommended ON if using headphones.
- Voice Language: See Language section.
- Surround Sound with headphones can cause weird spatial effects – stick to Stereo.
- Reduce Loud Sounds may mute important audio cues if set too aggressively. Keep at default.
- Keyboard & Mouse (PC): Default is good. Remap:
- Controller (All platforms): Default (Type A/B). Type B swaps run/aim triggers.
- Aim Sensitivity: Fine-tune for precise headshots. Start at 50%, adjust upwards.
- Camera Sensitivity: Higher for quick turns, lower for steadier aim. Default is manageable.
- Invert Camera: Y-axis invert for flight-sim style.
- Aim Assist (PC & Consoles): Auto-aim to nearest enemy. Easy to misconfigure – turning OFF makes game harder but forces skill. ON for beginners.
- Vibration: ON provides tactile feedback (door opens, damage). OFF saves battery.
- Quick Turn: Double-tap back (controller) or default key. Essential for escaping danger.
- Run by Default: Toggle or Hold. Hold is safer to control sprint.
- Auto-Fire (PC): Hold trigger for continuous fire. Not recommended – ammo conservation is key.
- Cutscene Subtitles: ON recommended; shows spoken lines.
- Subtitle Background: Dark background makes text readable. ON.
- Subtitle Size: Small/Medium/Large. Choose Large if sitting far from screen.
- Colorblind Mode: Protanopia, Deuteranopia, Tritanopia – changes UI colors (health, ammo) for clarity. Test in pause menu.
- Screen Shake: Reduces camera shake during explosions. OFF if prone to motion sickness.
- Motion Blur: Blurs during camera movement. OFF for clarity, ON for cinematic feel.
- Player Health Display: Shows approximate health (danger, caution, fine) instead of numbers. Fine for casual.
- High Contrast Mode (PC only): Enhances object outlines. Use if needed.
- Camera Auto-Aim: Snap to enemy when drawing weapon. ON simplifies targeting.
- Colorblind Mode affects map symbols as well – test early in the RPD.
- Subtitle Background can obscure on-screen action; small background is fine.
- Audio Language: Choose English, Japanese, French, German, etc. Japanese audio with English subtitles is popular for authenticity.
- Subtitle Language: Separate from audio. Set to your preferred language.
- Menu Language: Only available at first launch. To change later, edit the game config file (PC) or change console system language.
- If you cannot read menus, check your console/PC region settings. RE2 does not have an in-game menu for UI language change on consoles – you must reboot with a different system language. On PC, open "re2_config.ini" and change "Language=" value.
- Ghost Survivors / No Way Out (DLC): Leaderboards for survival modes. Requires internet connection for scores.
- Automatic Updates: Check for updates on startup (console/pc).
- Data Sharing: Option to send anonymous usage data. Disable if privacy-conscious.
- Assisted: Auto-aim, enemies do less damage, more item drops. Best for learning. No trophy/achievement penalty.
- Standard: Balanced survival horror. Recommended for first playthrough.
- Hardcore: Enemies tougher, less ammo, no auto-saves (only ribbon saves). For veterans.
- Auto-Save Interval: Only relevant in Assisted/Standard (Hardcore uses manual saves). Default every 15 minutes. Set to 5 minutes if you forget to save often.
- Auto-Heal: Automatically uses healing items when low health. OFF to conserve resources.
- Auto-Equip Sub-Weapon (e.g., knife): Automatically readies sub-weapon when grabbed. ON helps survival.
- Item Auto-Sort: Organizes inventory automatically. ON reduces micromanagement.
- Chat Window (PC): For keyboard only – not used in single-player.
- Auto-Heal can waste valuable herbs and first-aid sprays when you are only slightly injured. Turn OFF for better resource management.
- Auto-Save Interval set too long can lose progress; set to short.
- Hardcore difficulty cannot be changed mid-game. Choose carefully.
Easy to Misconfigure
---
Controls Settings
Recommended Layouts
- Reload (R) to side mouse button.
- Melee (F) to middle mouse.
- Sub-weapon (Q) to thumb button.
Sub-Settings
---
Accessibility Settings
Important Note
---
Language Settings
Easy to Misconfigure
---
Network Settings
Resident Evil 2 is a single-player game with limited online features:
There are no multiplayer or co-op settings. Network has minimal impact.
---
Gameplay Settings
Difficulty Selection (New Game)
In-Game Options
Easy to Misconfigure
---
Special Attention Points During Setup (Checklist)
1. PC only: After first launch, the game may default to 30 FPS in windowed mode. Switch to Fullscreen and disable V-Sync if you want 60+ FPS.
2. FOV (Field of View): Not adjustable in vanilla game. Use config file edits (PC) or 3rd-party tools at your own risk.
3. HDR Settings: If using HDR TV/Monitor, ensure Windows HDR is ON before launching. In-game HDR brightness calibration – set to make darkest areas visible, but not gray.
4. Controller dead zone: Default is fine, but if joystick drifts, increase dead zone in config file (PC) or as per platform.
5. Save file corrupt prevention: Do not exit during auto-save or manual save icon. Wait for save confirmation.
6. Keyboard input lag: If using mouse with high polling rate (1000Hz), reduce to 500Hz if stutter occurs.
7. Razer/Logitech software: Close overlays to avoid crashes.
---
Conclusion
Optimize your Resident Evil 2 settings for your hardware and playstyle. Start with the preset that matches your GPU tier, then fine-tune with the details above. Remember that survival horror benefits from high frame rate (60 FPS) for responsive dodging and aiming, and good audio for immersion. Use the checklist to avoid common pitfalls during setup.
Important Notes
Important Notes for Resident Evil 2 (2019)
This guide covers crucial warnings, pitfalls, irreversible choices, missable content, difficulty spikes, save management, and common regrets. Read before or during your first playthrough to avoid frustration.
Warnings and Pitfalls
- Don't try to kill every enemy. Ammo is scarce even on Standard. Run past slow zombies, avoid lickers, and only shoot when necessary.
- Zigzagging makes you an easy target. Zombies lunge unpredictably; strafe and backtrack instead.
- Knife durability is limited. The knife breaks after a few uses. Use it to finish downed zombies permanently (stab them while on the ground) or for tight spaces, but save a knife for boss fights (e.g., Birkin’s eye weak point).
- Explosive barrels kill you too. Shoot them at safe range. Don’t stand near them when they explode.
- Inventory management is critical. You only have 8-12 slots (plus hip pouch upgrades). Always leave something behind in item boxes; don’t hoard unneeded keys.
- Combining herbs is essential. Green+Green = full heal. Green+Blue = heal + antiviral. Green+Red (later) = big heal. Green+Red+Blue = max heal + antiviral. Red alone is useless. Blue alone is useless.
- Gunpowder recipes matter: Regular Gunpowder (white) = handgun or SMG ammo. High-Grade Gunpowder (yellow) = shotgun shells. Mix equal numbers of both = magnum rounds (if you have the weapon). Don’t waste high-grade on handgun ammo.
- Mr. X is persistent but not invincible. Stun him with a grenade or a few headshots. You can lose him by breaking line of sight and hiding, but he tracks sound. Avoid running or shooting unnecessarily.
- Doors are your friends. Closing doors slows Mr. X and other enemies. Use them to buy time.
- Zombies can revive. If you see a zombie’s body twitching, it will get up. Stab it while down or shoot the head to stop it permanently.
- Choosing your starting character (Leon or Claire) is the only major narrative choice. This cannot be changed mid-run. The two stories intersect but have different weapons, puzzles, and key items. Playing both runs (A and B scenarios) reveals the full story.
- Points of no return: Once you leave the Raccoon Police Department (RPD) for the sewers via the underground passage, you cannot return to the RPD or its amenities until the very end (and only briefly). The same applies to the sewers after reaching the laboratory. Collect everything in each area before leaving.
- The “2nd Run” scenario is unlocked after beating the game once. It changes puzzle solutions, enemy placement, and item locations. You cannot replay a scenario differently after finishing it, so save your first run for exploration and a second run for speed/rank.
- There are no branching story endings. The final outcome is fixed based on your playthrough, but your rank (S, S+, etc.) affects unlocks.
- Mr. Raccoons: 15 per scenario (Leon A, Claire A, Leon B, Claire B). Many are in areas you cannot revisit, e.g., the RPD main hall, the parking garage, the sewers. Check every nook. Missing even one prevents the “Champion of Racoon City” achievement.
- Weapon parts & upgrades: Examples include the Matilda stock (Leon, RPD break room) and the SLS 60 speed loader (Claire, RPD parking garage). These drastically improve weapons but are easily overlooked before leaving the RPD.
- Files: Some files (e.g., ‚ÄúCaptain‘s Diary,‚Äù ‚ÄúA Mother‘s Letter‚Äù) are only found in one scenario. Others are missable if you skip rooms. Read everything for lore and achievements.
- Infinite weapons: Unlocked by earning S+ rank on Hardcore difficulty. This requires finishing under certain time constraints and using limited saves. If you want these, plan a dedicated speedrun; you can‘t get them afterward.
- The ‚ÄúGhost Survivors‚Äù DLC extras: The ‚ÄúNo Way Out‚Äù scenario requires surviving 100 enemies; it‘s easy to miss if you don‘t check the main menu after completing the game.
- First Licker in the RPD: Appears in the west office after a scripted moment. It is fast, lethal, and has no weak point (only body shots). Run away or use a grenade.
- First Birkin fight (parking garage): He is aggressive and has a giant eye weak point. Use handgun or shotgun from mid-range. Learning his attack patterns is key to surviving.
- Mr. X chase (RPD helicopter crash): After the helicopter crashes, Mr. X begins actively stalking you. The RPD becomes a new maze; panic often leads to wasted resources.
- Sewer section with G mutants: The submerged corridor forces you to move slowly while enemies attack. Conserve herbs and use grenades or flashbangs to escape.
- Laboratory Ivies (plant zombies): These are immune to bullets unless you first hit their glowing spots. They can kill in two grabs. Use flame rounds or grenades.
- Final boss (Super Tyrant): The arena is small, and the boss has devastating attacks. Use the rocket launcher (if Leon) or high-power weapons. Staying mobile is critical.
- There is no experience system or level grinding. Wasting time killing every zombie just consumes ammo without reward. Focus on completing objectives.
- If you want infinite weapons, grinding for S+ rank is replay-based, not in-game grinding. The only “grind” is repeating scenarios many times to memorize routes and enemy placements.
- Don‘t fall into the trap of repeatedly killing Mr. X for drops (he doesn’t drop items). He is a timed obstacle, not a loot pinata.
- The ‚ÄúGhost Survivors‚Äù DLC has high difficulty. Don‘t attempt it without finishing the main game first; it requires skill and knowledge you won’t have yet.
- Resident Evil 2 (2019) is a purely single-player game. There is no online multiplayer, no leaderboards, and no form of public interaction. No etiquette is needed.
- PC version uses Denuvo DRM. This may affect performance (especially on older hardware) but is not anti-cheat. Some players report stuttering after combat; disabling fullscreen optimizations may help.
- Modding is possible but may disable achievements or cause instability. Capcom does not ban for mods, but avoid mods that alter the core gameplay in online leaderboards (there are none). Use mods at your own risk and only from trusted sources.
- The game has no anti-cheat software. All unlocks are earned through single-player progress; there is no cheating in competitive sense.
- Standard mode: Unlimited saves. Save often, especially before entering new rooms or after collecting key items. You can overwrite saves, but keep at least two separate files in case of mistakes.
- Hardcore mode: Ink ribbons are limited (you find them as items). Plan your saves sparingly. Save before major boss fights or after completing a puzzle. Avoid saving just because you see a typewriter.
- Save slots: You have three slots. Use them for: (1) your main progress, (2) a backup before a risky area, (3) an alternative route/run if you want to experiment.
- Don‘t save over your only file during a boss fight. If you‘re low on health and ammo, reload a prior save. Hardcore mode has no autosave.
- On Assisted mode, autosaves exist, but you still have ink ribbons? Actually, Assisted mode has unlimited saves and no ink ribbons. Use the autosave as safety, but manual saving is still recommended before story triggers.
- You can craft better ammo with high-grade gunpowder. Don‘t hoard it; use it for shotgun shells or magnum rounds. For example, combine 4 regular gunpowder + 1 high-grade to make 8 shotgun shells (approx).
- Knife can kill downed zombies permanently. Stab them after they fall to prevent revival. This conserves ammo over headshots.
- The “tactical knife” (unlockable) is unlimited. After unlocking it (via S+ rank on Hardcore), you never need to worry about knife durability again.
- The hip pouch expansion is essential. There are two per scenario. One is in the RPD (inside the library, after moving the bookshelf). The other is in the sewers (near the chess plug puzzle). Carry them always.
- You can use the map to identify locked doors. Red = locked with specific key. Blue = locked but can be opened from other side. Use the map to plan routes.
- The rook & pawn keys correspond to different doors. Don‘t discard them until all associated doors are opened.
- Once you leave an area, doors revert to unlocked? Some doors auto-lock again. Always check your map for new shortcuts.
- The weapon upgrades (e.g., stock, silencer) drastically improve accuracy and recoil. Install them as soon as you find them.
- Sherry‘s segment (Claire’s campaign) is pure stealth. You have no weapons; use noise distractions and avoid enemies at all costs.
- Ada‘s segment (Leon’s campaign) has limited ammo. Use stealth as well; you have a pistol and can avoid most fights.
- The rocket launcher in the lab (Leon) is a one-hit kill on the final boss (Super Tyrant). Save it for that moment; don‘t waste it on Mr. X.
- If you‘re playing Hardcore for the first time, choose Leon for his shotgun and easier boss fights. Claire has the grenade launcher (more versatile) but her second boss is harder for beginners.
- You can heal yourself by combining herbs in the inventory screen. No need to use a health spray for minor injuries.
- Ammo conservation tip: Aim for the head, but if a zombie is about to grab you, shoot its leg to stagger it. This buys time to run.
- The game‘s ranking system (S, S+) affects unlocked extras (infinite weapons, costumes). To get S+, you must finish Hardcore under certain time with ≤3 saves and no infinite weapon usage. Plan accordingly.
- The “Find All Mr. Raccoons” achievement is missable. Check a guide for locations in each scenario, as some are in rooms you only visit once.
Irreversible Choices
Missable Content
Difficulty Spikes
Grinding Traps
Online Etiquette & Anti-Cheat Notes
Save Management Advice
Things Players Commonly Regret Not Knowing Earlier
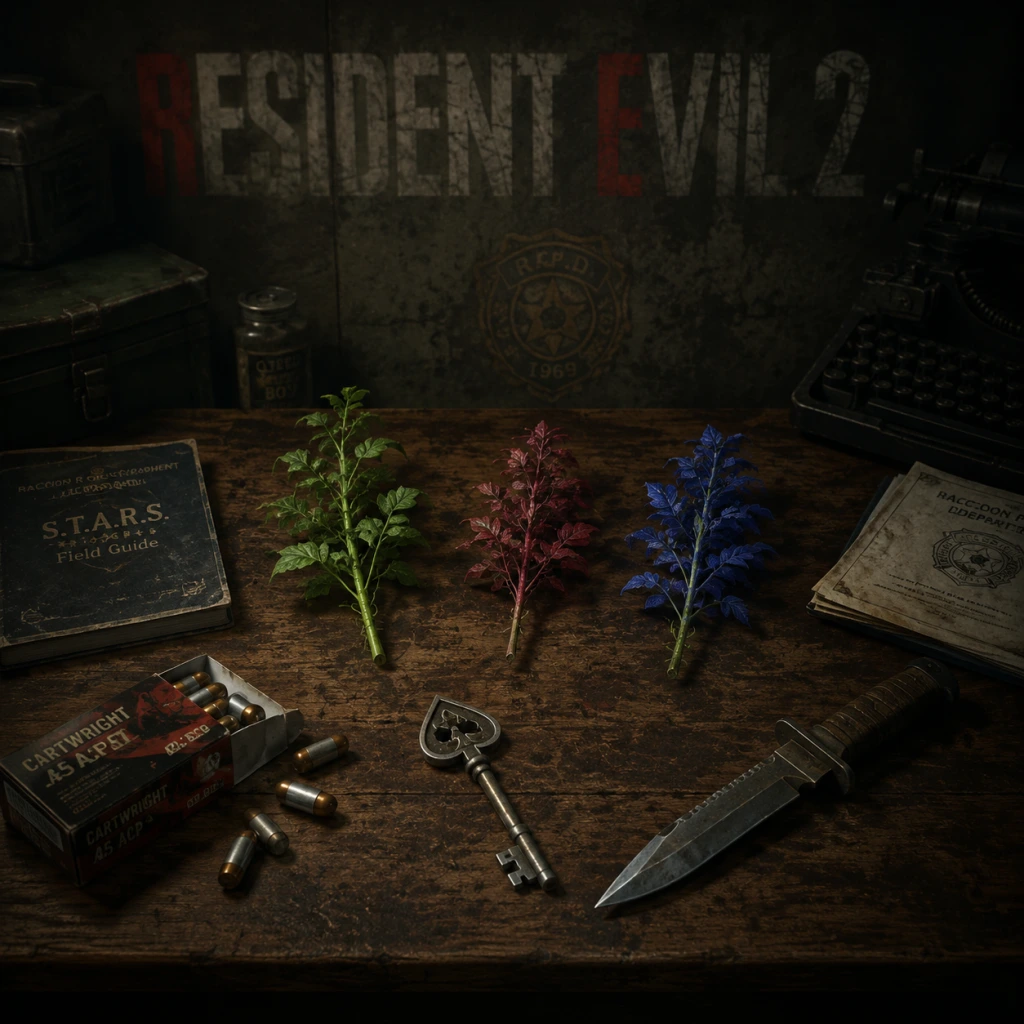
All Game Items
Resident Evil 2 (2019) – All Game Items Guide
This guide catalogs every significant item in Resident Evil 2 (2019), grouped by category. Descriptions cover purpose, acquisition, optimal use, and any upgrades or synergy.
---
Weapons
Weapons are your primary means of defense. Most can be upgraded with parts found throughout RPD and the sewers.
| Weapon | Ammo | Acquisition | Notes |
|---|---|---|---|
| Matilda (9mm Handgun) | 9mm | Leon’s starting weapon. | Standard semi-auto. Upgrade with: High-Capacity Magazine (RPD East Office safe 9►15►7) – 24 rounds; Silencer (Boiler Room in Sewers – narrow room) – stealth headshots; Red Dot Sight (Sewers, near orphic puzzle) – improved accuracy. |
| W-870 (Shotgun) | Shotgun Shells | Leon: RPD West office lockers (use bolt cutters). Claire: S.T.A.R.S. office at RPD (after getting club key). | Pump-action. Upgrade with Stock (RPD – after statue moves from library) – faster fire rate & reload. Best used on lickers or multiple enemies. |
| GM 79 (Grenade Launcher) | Flame, Acid, Explosive Rounds | Floor 3 of RPD (find in locked cabinet in the library/study, requires the hidden ladder). | Claire only. Explosive rounds for boss fights, flame rounds for IVy zombies. |
| Lightning Hawk (Magnum) | Magnum Rounds | Parking Garage – inside a locked container (use diamond key from RPD safe). Also in sewer’s weapons locker. | Extremely powerful; save for bosses or tough enemies (lickers, G-adults). Ammo scarce. |
| JMB Hp (Handgun) | 9mm | Claire’s starting weapon. | Same upgrade options as Matilda (magazine, suppressor, red dot). |
| Sparkshot (High Voltage) | High Voltage Cartridges | RPD 2F waiting room (inset into a panel – uses crank wheel to open). | Stuns enemies temporarily, consumes rare cartridges. Good for saving resources. |
| Flamethrower | Fuel (found in red canisters) | Sewers – in the maze-like section near the “control room” after the piston puzzle. | Only available to both characters. Devastating against bugs, ivy zombies, and organic bosses. Fuel can be mixed from large canisters? Actually, you find full canisters. |
| Rocket Launcher (AT4) | One-shot | Reward for completing Scenario A (both characters). Appears in item box at start of Scenario B. | One-hit kills on most bosses. Use on final boss (Super Tyrant) for instant stage completion. |
| Grenade | – | Found in many crates and from certain enemies (zombies drop occasionally). | Standard throwable. Stuns groups, kills weak enemies. Can be combined with flash to blind + damage? Only standalone use. |
| Flash Grenade | – | Found near stairwells, lockers. | Blinds all enemies in radius, stuns lickers, destroys Mr. Raccoon collectible if thrown? No, only temporarily disables them. |
| Combat Knife | – | Infinite durability (secret) – Reward for finishing game on hardcore with S+ rank. Standard one breaks after a few uses. | Default melee. Stun enemies, break crates. Replaceable – many found. |
| Hand Grenade | – | Same as grenade – different naming? In RE2 they are “Grenade” only. | – |
- Weapon Stock – Faster fire rate and reload for shotgun.
- High‑Capacity Magazine – Increases ammo capacity for handguns.
- Red Dot Sight – Tightens crosshair for better accuracy.
- Suppressor – Quiet shots prevent attracting nearby enemies.
- Extended Magazine for Matilda – Actually the high-cap is the only one.
Synergy: Pair suppressor with handgun for stealth kill chains; use grenade launcher flame rounds on ivy zombies before using shotgun. Flash grenade + knife combo for crowd control.
---
Consumables
| Item | Effect | Notes |
|---|---|---|
| Green Herb | Heals a small amount of health. | Combine with Green Herb for Green+Green (better) or Blue (temporary defense) or Red (full heal). |
| Blue Herb | Cures poison or provides defense. | Combine with Green for Green+Blue (heal + poison cure). |
| Red Herb | Boosts healing when combined with Green (Green+Red = full heal). | Rare – found in labs and sewers. |
| Mixed Herb (any variant) | See above. | |
| First Aid Spray | Fully restores health (from Danger to Fine). | One use; can be used on partner in co-op? Not in this game. |
| Hand Grenade | Explosive; kills weak zombies, stuns bosses. | – |
| Flash Grenade | Blinds enemies; breaks licker hearing temporarily. | Essential against Mr. X (stuns him for a few seconds). |
| Knife | Melee; can be thrown? Only used for slashing. | Breaks after 7-8 hits on zombies. Used to escape grabs? Yes, from lickers or enemies. |
| Handgun Ammo | 9mm rounds. | Combine with gunpowder for more. |
| Shotgun Shells | Ammo for W-870. | – |
| Grenade Rounds | Ammo for GM79. | – |
| Submachine Gun Ammo | – | Not in base RE2 remake – only in “Ghost Survivors” DLC. |
| High Voltage Cartridges | For Sparkshot. | Rare – only 6 total per playthrough. |
| Fuel | For Flamethrower. | Found in red canisters in sewers and lab. |
| Magnum Rounds | For Lightning Hawk. | Very rare – about 18 total if you collect all. |
| Regular Grenades | – | Same as hand grenade. |
| Air Spray | Not an item; first aid spray. | – |
- Green + Green = Medium heal (restores half health from Caution).
- Green + Red = Full heal (from Danger to Fine).
- Green + Blue = Heal + poison cure.
- Green + Red + Blue = Full heal + poison cure + defense boost (temporarily reduces damage).
- Blue + Blue = Defense boost only (no heal).
Synergy: Always carry at least one herb mix. Save First Aid Sprays for emergencies or boss fights. Use flash grenades on Mr. X to escape or during combat.
---
Key Items (Plot & Puzzle Necessary)
These items cannot be discarded and are essential for progression.
| Item | Function | Acquisition |
|---|---|---|
| Spark Key (Leon) / Skeleton Key (Claire) | Unlocks certain doors in RPD (marked with red/blue diamonds). | Leon: From the jack puzzle in the shower room; Claire: From the safe in the S.T.A.R.S. office or other puzzle? Actually both get a key from the parking garage or later. |
| Club Key | Opens green-symbol doors. | Both: From the RPD safe in the east office (9-15-7) or after the main hall puzzle? |
| Heart Key | Opens heart-symbol doors. | Both: From the sewer control room after solving the water puzzle. |
| Iconic Key (Leon) / Red Jewel Key (Claire) | Opens the darkroom lockers. | Leon: In the parking garage office; Claire: In the S.T.A.R.S. office. |
| Circuit Board | For the underground tram – powers the train. | Sewers: From the generator room after pushing the crate. |
| T-Virus Vaccine | Used to cure the infected (Sherry). | Lab – from the freezer. |
| Film Roll (3 types) | Develops photos for locker codes. | Found in various desks and hidden compartments. |
| Portable Safe | Contains a weapon part or ammo; needs to be opened. | East office (RPD) – combination from a memo. |
| Electronic Gadget (Sherry’s piece) | Combines with other gadgets to make the vaccine? Actually different. | Sherry part – found in the orphanage. |
| Gears (small/large) | Repair the crane in the sewers to lower the bridge. | – |
| Battery | For the gate in the parking garage. | Found in the boiler room. |
| Spade Key – not used? In original. | – | |
| S.T.A.R.S. Badge | Opens the S.T.A.R.S. office in RPD. | – |
| Key Card (Level 1/2/3) | Lab doors. | – |
| USB Dongle | Unlocks weapon locker in parking garage? | – |
---
Armor & Defensive Items
| Item | Effect | Acquisition |
|---|---|---|
| Body Armor (Riot Gear) | Reduces damage from attacks; breaks after absorbing a few hits. | Claire: Found in the S.T.A.R.S. office; Leon: In the kennel area. |
| Hip Pouch | Increases inventory space by +2 slots. | Multiple: RPD Main Hall (statue base), East Office (after breaking pot?), Parking Garage (in a crate), Sewers (near the chess puzzle), Lab (freezer). |
| Defense Magazine (not in base game) | Not present in RE2 remake; only in RE3. | – |
| Blue Herb (preemptive) | If consumed before combat, provides temporary defense boost (requires blue+blue or green+blue combo). | – |
---
Collectibles & Currencies
| Item | Use | Notes |
|---|---|---|
| Mr. Raccoon | 15 collectible figurines. Destroy all for infinite knife. | Hidden in RPD, sewers, lab. Use knife or shoot. |
| Zombie Photographs (Sheldon’s files) | No direct use – backstory. | Found scattered. |
| Documents | Lore, puzzles. | – |
| Safe Combination Notes | Unlock various safes. | – |
| Lockpick (optional) | Opens simple padlocks. | Found in a drawer. Can be used to skip some puzzles. |
| Bolt Cutters | Cut chain locks. | Required to open certain doors. |
| Crank Wheel | Turn gear mechanisms. | – |
| Diamond Key (need use) | Opens container in parking garage. | – |
| Coins | Not a currency in RE2; there are pocket coins that increase defense/attack as part of the Deluxe Edition or DLC. | |
| Bonus Items (Shop) | Unlockable infinite ammo weapons, costumes. Buy with points from challenges. | – |
| Raccoon Tokens | Not in RE2 remake – are from RE3. | – |
---
Materials (Crafting)
Crafting in RE2 involves mixing herbs and combining gunpowder to create ammo.
| Material | Creates |
|---|---|
| Gunpowder (Large) | Combine with small gunpowder to create high capacity rounds? Actually gunpowder comes in small and large. Small + Small = Handgun ammo; Small + Large = Shotgun shells; Large + Large = Magnum rounds. |
| Gunpowder (Small) | See above. |
| Herbs (Green, Red, Blue) | See herb mixing table above. |
| Fuel Canisters | Refill flamethrower. |
| High Voltage Cartridge | Already usable – no crafting. |
---
Special & DLC Items
| Item | Acquisition | Effect |
|---|---|---|
| Infinite Knife | Destroy all 15 Mr. Raccoons. | Unbreakable knife in new game plus. |
| Infinite Rocket Launcher | Complete Hardcore mode with S+ rank (Scenario A). | One-shot kill on any enemy. |
| Infinite Ammo (Handgun or Shotgun) | Purchase from the Extra Content Shop with points. | – |
| Costumes: Noir, Vintage, etc. | Bonus content. | Cosmetic only. |
| Hip Pouch (extra) | Included in Deluxe Edition. | Extra inventory at start. |
| Pocket Coins (Defense/Attack) | Part of Deluxe Edition. | Increase damage dealt or reduce damage taken. Equip in inventory. |
Inventory Management & Synergies
- Always keep at least one defense item: flash grenade or knife to escape grabs.
- Prioritize hip pouches to expand slots.
- Combine gunpowder based on current enemy density: shotguns for corridors, magnums for bosses.
- Herb combos: Green+Red for full heal; Green+Green for mid-heal; Green+Blue for poison areas (lab).
- Use body armor during boss encounters where you know you’ll take hits.
- Store key items in item box when not needed; never discard them (can’t anyway).
- Red Herbs: In sewer reachable only after lowering water; also in lab B4.
- Body Armor (Riot Gear): In S.T.A.R.S. office for Claire, or in kennel for Leon (behind bust).
- Hip Pouch #1: In main hall immediately after the zombie cutscene – behind the lion statue.
- Hip Pouch #2: East office after using the green herb puzzle? Actually you need to break the glass case.
- Mr. Raccoon #15: On the lab’s generator – shoot it before escaping.
- Flamethrower Fuel: Two canisters in the sewer’s safe room; one in nest.
---
Frequently Missed Items
---
This guide covers all items in Resident Evil 2 (2019). Use wisely, conserve ammo, and always have a backup plan. Good luck surviving Raccoon City.
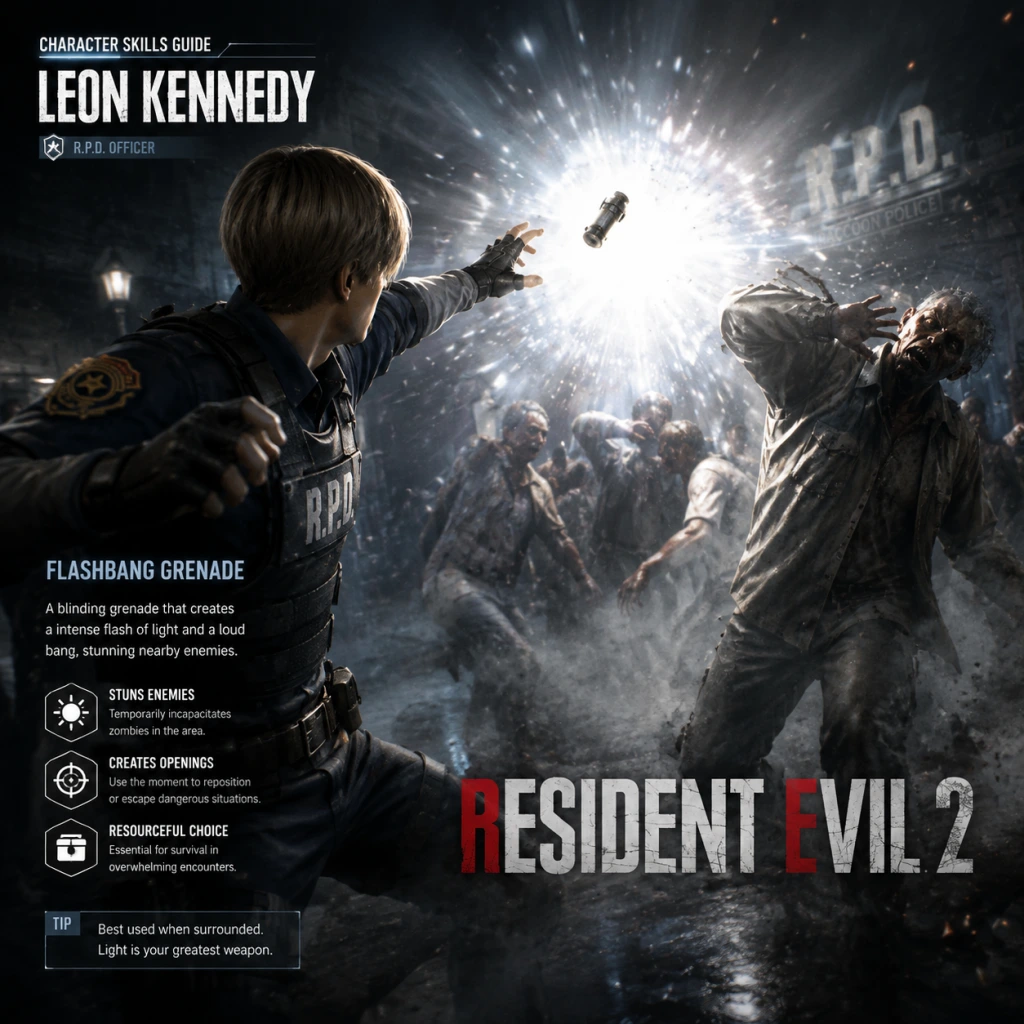
Character Skills
Resident Evil 2 (2019) – Character Skills Guide
Although Resident Evil 2 is not a traditional RPG with skill trees or spells, each playable character possesses unique abilities, exclusive weapons, defensive tools, and item-specific actions that function as their “skills.” This guide covers every special move, unique item, and combat technique for Leon S. Kennedy and Claire Redfield across both scenarios (A/B). For clarity, we treat each unique weapon, gadget, or action as a skill with defined effects, usage, and synergy.
---
Leon S. Kennedy
Leon’s skill set emphasizes precision, resource conservation, and defensive utility. His unique tools excel in crowd control and safe disengagement.
1. Survival Knife (Melee Counter / Finisher)
- Type: Melee / Defensive Trigger
- Effect: When a zombie grabs Leon, press the prompted button (◻/X on controller, F on PC) to slash the zombie and break free. Also usable as a manual slash (hold attack button) to finish stunned enemies or break boxes, but each slash reduces knife durability.
- Cooldown: No cooldown, but the knife has durability (about 20 slashes before breaking). Once it breaks, it disappears permanently (unless using an unlockable infinite knife).
- Upgrades: None direct, but an infinite Survival Knife can be unlocked by completing the game with an S rank on Standard or higher. The infinite knife never breaks.
- Combos: Use a Flash Grenade to stun a group → dash through → finish one with the knife to conserve ammo. After a Submachine Gun burst to stun, follow up with a knife slash.
- Synergies: The knife pairs well with defensive items (e.g., body armor) because it reuses the same interrupt slot. Use it when you lack a grenade.
- Recommended Build: Prioritize knife for early-game ammo savings; keep it for emergency escapes. Replace with the infinite knife as soon as possible.
- When to Use: Only when grabbed by a single enemy (to save ammo) or to finish a downed zombie instead of wasting a bullet. Avoid using it for breaking boxes unless you have a spare.
- Type: Starting Handgun / Precision Sidearm
- Effect: Standard semi-automatic pistol. Fires 9mm rounds. Can be equipped with a High Capacity Mag (increases ammo to 24) and a Stock (reduces recoil and improves accuracy).
- Cooldown: Reload time ~2 seconds (varies with equipped upgrades).
- Upgrades:
- Combos: Use Flash Rounds (with the Matilda? No, flash rounds are for the grenade launcher) – incorrect. Instead, pair the Matilda with a shotgun for close range cleanup; use Matilda for headshots on single targets.
- Synergies: Works with all ammunition (9mm). No special ammo type.
- Recommended Build: Always install both upgrades as soon as possible. This turns the Matilda into a very accurate, high-capacity weapon ideal for critical hits.
- When to Use: Medium range, single enemies, or when you need a reliable headshot. Switch to shotgun for groups.
- Note: The game has no dedicated dodge button. The knife counter is the only “dodge” skill.
- Effect: When a zombie lunges, if you time a knife swing just before it grabs, you can stagger it (knockdown). This is risky but can save ammo.
- Cooldown: None, but knife durability applies.
- Upgrades: See infinite knife above.
- Combos: Not reliable for combos due to timing.
- Synergies: Works best with Defensive Items (grenade/body armor) as a backup.
- Recommended Build: Not a core strategy; use only if you have infinite knife.
- When to Use: Only attempt when you have high confidence in timing; otherwise, use grenade.
- Type: Throwable / Crowd Control
- Effect: Throw to blind all enemies in radius for ~5 seconds. Does no damage but enables safe escapes or revives.
- Cooldown: No cooldown, but you must have one in inventory. Can hold up to 4.
- Upgrades: None.
- Combos: Flash → run past → knife finish. Flash → Grenade Launcher (fire at stationary group). Flash → Submachine Gun sweep.
- Synergies: Pairs with any weapon, but best for bypassing unavoidable zombie corridors.
- Recommended Build: Always carry at least one flash grenade for boss fights or tight spaces.
- When to Use: When surrounded, to avoid damage, or to create a window to solve a puzzle under attack.
- Type: Heavy Weapon
- Effect: Fires various grenade types: Explosive (damage single target), Acid (damage DoT), Flame (area denial). Each round does heavy damage.
- Cooldown: Reload ~3 seconds.
- Upgrades: No mods, but you find different ammo types.
- Combos: Explosive round to stagger boss → follow up with Matilda. Flame round to block hallway → shotgun the advancing zombies.
- Synergies: Perfect for bosses (Birkin, Tyrant) – acid rounds for DoT, flame for crowd.
- Recommended Build: Prioritize acid and explosive rounds. Save flame for crowd management.
- When to Use: Boss encounters, large groups, or to instantly kill multiple enemies.
- Type: Heavy Revolver
- Effect: Fires .357 Magnum rounds. Slow fire rate but high damage and piercing. Can be upgraded with speed loader and long barrel.
- Cooldown: Reload ~2.5 seconds (standard), faster with speed loader.
- Upgrades:
- Combos: Use with Submachine Gun (see below) for versatility: revolver for heavy, SMG for light.
- Synergies: Works with .357 ammo (rare but powerful).
- Recommended Build: Always install both mods for maximum effectiveness. Use as primary boss-fighting weapon.
- When to Use: Against bosses (Birkin, G mutants), or to one-shot regular zombies with headshots.
- Type: Automatic Rapid-Fire
- Effect: Fires 9mm rounds at high rate. Low damage per bullet but high DPS. Has moderate recoil.
- Cooldown: Reload ~2 seconds. Ammo consumption is high.
- Upgrades: None in base game. You can find extended mag? No, only the High Capacity Magazine is for Matilda. The SMG has a fixed 32-round magazine.
- Combos: Flash grenade → SMG sweep to kill multiple zombies. SMG burst → revolver headshot.
- Synergies: Pairs excellently with Grenade Launcher (if acquired in B scenario) but not in Claire A. Use SMG to clear crowds before using inventory.
- Recommended Build: Use SMG as your primary crowd control weapon. Save revolver for heavy targets.
- When to Use: When facing 2+ zombies, during boss phases when you need sustained damage, or to break boxes quickly.
- Type: Stun / Damage over Time
- Effect: Fires a wire that electrocutes a single enemy for several seconds, stunning and dealing damage. Uses batteries as ammo.
- Cooldown: Reload ~2 seconds. Each battery lasts one shot.
- Upgrades: None.
- Combos: Spark Shot a Licker → while stunned, knife its back (extra damage). Spark Shot a zombie → revolver headshot.
- Synergies: Great against fast enemies (Lickers, Zombies) because it immobilizes them. Also useful against G mutants to briefly stop their charge.
- Recommended Build: Keep for Lickers and special enemies. Not ideal for groups.
- When to Use: Licker encounters, any single fast enemy, or to safely close distance on a powerful foe.
- Effect: Identical. Claire can also use flash grenades.
- Combos: Flash → SMG sweep or Spark Shot a stunned Licker.
- Synergies: Same as Leon.
- Effect: Body armor absorbs one grab or bite and breaks. Back Defense triggers a stumble preventing a back grab (rare item).
- Cooldown: One time use per item.
- Upgrades: None. You find multiple vests.
- Combos: Use body armor to survive a grab without using knife, saving durability.
- Synergies: Works with all weapons.
- Recommended Build: Always equip body armor when available.
- When to Use: Before entering a known dangerous area.
- Effect: When grabbed, press action button to use knife (if equipped) to escape. Same as Leon’s knife skill, but both characters can do it.
- Cooldown: Knife durability.
- Use: Same as Leon.
- Effect: When grabbed, if you have a grenade (frag or flash), you can use it to escape. Frag grenade does damage to you and enemies; flash blinds only.
- Cooldown: Consumes the grenade.
- Use: Emergency escape especially against multiple attackers.
- Effect: Precision aiming reduces spread. Not automatic; you must hold the aim button.
- Cooldown: None.
- Use: Always for headshots or long-range shots.
- Effect: Increased movement speed. Can be toggled or held.
- Cooldown: Unlimited, but stamina? No stamina bar in RE2R. Infinite sprint.
- Use: Evade enemies, traverse quickly.
- Core: Matilda (with both mods) + Survival Knife (eventually infinite).
- Secondary: Grenade Launcher (acid/flame rounds) + Flash Grenades.
- Playstyle: Headshots with Matilda, use grenade launcher for bosses or groups. Save knife for emergency counters.
- Skill Priority: 1. Flash grenade (always keep one), 2. Grenade launcher ammo, 3. Knife durability.
- Core: SLS 60 Revolver (with mods) + Submachine Gun.
- Secondary: Spark Shot (if in scenario B) + Flash Grenades.
- Playstyle: SMG for crowd control, revolver for heavy hitters, Spark Shot for special enemies.
- Skill Priority: 1. SMG ammo, 2. Revolver ammo, 3. Spark Shot batteries.
2. Matilda (LE 5 Handgun) – Exclusive Weapon
- High Capacity Magazine – Found in RPD Main Hall secret; increases magazine from 15 to 24.
- Stock – Found in the Underground Garage; reduces recoil and spread.
3. Combat Knife (Dodge / Counter) – Alternative Interpretation
4. Flash Grenade (Defensive Tool)
5. Grenade Launcher (Acquired in RPD) – Unique to Leon A Scenario (shared with Claire in B scenario)
---
Claire Redfield
Claire’s skill set focuses on mobility, suppressive fire, and utility traps. She trades Leon’s precision for raw firepower and area control.
1. Quickdraw Army (SLS 60 Revolver) – Exclusive Starting Weapon
- Speed Loader – Found in RPD, allows faster reload (press reload once partially empty).
- Long Barrel – Found in Underground Garage, increases accuracy and damage.
2. Submachine Gun (GM 79) – Exclusive Weapon (Claire A) / Leon B variant
3. Spark Shot (Electric Taser) – Exclusive Weapon (Claire B)
4. Flash Grenade – Same as Leon
5. Defensive Items (Shared Mechanic)
Both characters can equip Body Armor (reduces damage from one hit) and Back Defense (auto-dodge from behind). This works as a passive skill.
---
General Skills (Both Characters)
1. Knife Defensive Counter (Universal)
2. Grenade Defensive Counter (Universal)
3. Aim Down Sights (Skill/Ability)
4. Sprint (Skill)
---
Recommended Builds & Synergies
Leon – The Tactical Survivor
Claire – The Run-and-Gunner
---
When to Use Each Skill (Quick Reference Table)
| Skill | Character | Best Use Case | Avoid Use |
|---|---|---|---|
| Survival Knife | Leon | Counter grab, finish stunned zombie | Against groups (unless infinite) |
| Matilda | Leon | Medium range, single targets | Close quarters (use shotgun) |
| Grenade Launcher | Leon | Bosses, crowd control | Small rooms (self-damage risk) |
| Combat Knife (dodge) | Both | Desperate counter | If you have a grenade |
| Flash Grenade | Both | Escape, boss stun | Already safe area |
| SLS 60 | Claire | Heavy damage, bosses | Fast enemies (hard to aim) |
| SMG | Claire | Crowd control, DPS | Long range (inaccurate) |
| Spark Shot | Claire B | Lickers, G mutants | Groups (single target) |
| Body Armor | Both | Known danger zones | Against instant-kill attacks (e.g., Birkin’s grab) – still works but it saves you once |

Characters & Roles
Characters & Roles in Resident Evil 2 (2019)
This guide covers every playable character and unit in Resident Evil 2 (2019), including the main campaign heroes, temporary playable roles, and unlockable characters from extra modes. For each character, you’ll find their background, gameplay strengths and weaknesses, recommended playstyle, unlock conditions, ideal equipment or loadout, and how they fit into the game’s narrative or co-op-like scenario system.
---
Main Campaign Characters
#### Leon S. Kennedy
- Background: A rookie police officer arriving in Raccoon City on his first day. He becomes one of the primary survivors of the outbreak. Leon is empathetic, determined, and resourceful.
- Strengths: Well-balanced stats; access to the powerful Lightning Hawk magnum and the rocket launcher (in certain scenarios); has the highest health pool among main characters; can use defensive items (knife, flashbang) effectively.
- Weaknesses: Slower movement speed than Claire; no inherent weapon bonuses; his scenario (Leon A/Leon B) has a slightly harder early game due to tighter corridors.
- Playstyle: Cautious, methodical resource manager. Use the Lightning Hawk for tough enemies (Lickers, Mr. X, bosses). Save your knife for instant defensive breaks when grabbed. Leon’s tactical approach rewards headshots with the Matilda pistol due to its high capacity.
- Unlock Conditions: Available from the start. Choose “Leon” when beginning a new game.
- Recommended Equipment: Matilda pistol (upgrade to high-capacity magazine), Lightning Hawk (even without extended magazine), combat knife, grenade launcher with flame rounds for crowd control. Always carry a defense item.
- Team Synergy: Leon’s scenario (A or B) pairs with Claire’s counterpart. In the story, they collaborate via notes, locked doors, and key items – one player’s actions affect the other’s path. For example, Leon’s actions in the underground garage affect Claire’s encounter with Mr. X.
- Background: A college student searching for her missing brother, Chris Redfield. She is tough, impulsive, and fiercely protective of others, especially Sherry Birkin.
- Strengths: Slightly faster movement than Leon; access to the devastating M79 grenade launcher with multiple ammo types (acid, flame, explosive) for elemental damage; can craft subweapons (e.g., flashbang using gunpowder).
- Weaknesses: Lower health than Leon; the grenade launcher’s ammo is scarce early; her starting pistol (SAA) has slow reload and low capacity.
- Playstyle: Aggressive when possible, using the grenade launcher to decimate groups. Claire excels at crowd control with flame rounds and can deal high burst damage with explosive rounds. Use the Quick Draw Army (SAA) for headshots, but upgrade to the JMB Hp3 pistol later for consistency.
- Unlock Conditions: Available from the start. Choose “Claire” when beginning a new game.
- Recommended Equipment: M79 grenade launcher (prioritize acid rounds for G-virus enemies, flame for insects), JMB Hp3 pistol (fast reload, high crit chance), combat knife. Always keep a defense item.
- Team Synergy: Claire’s story is intertwined with Sherry Birkin. Her scenario (A or B) is the opposite of Leon’s. They share inventory and puzzle items through the “Alice” (RPD) and “Broken Shotgun” (parking garage) exchanges.
- Background: A mysterious woman who claims to be a journalist but is actually a spy sent to retrieve the G-virus sample. She is pragmatic, skilled, and has her own agenda.
- Strengths: Plays as a brief but powerful solo section in Leon’s scenario (after the RPD helicopter crash). Ada wields a unique pistol (Broomhandle Mauser with Infrared Sight) that is extremely accurate and powerful.
- Weaknesses: Very short duration (about 20 minutes of gameplay); no inventory management – she is invulnerable during this segment (cannot take damage); limited to her pistol only.
- Playstyle: Stealth and precision are not needed – you are essentially invincible. Use the infrared sight to line up headshots on Lickers and zombies. You cannot be killed, so you can be extremely aggressive.
- Unlock Conditions: Automatically encountered as Leon. Play Leon’s scenario until Ada takes control (after the two G-birkin boss fight in the parking garage).
- Recommended Equipment: No choice – you have the unique pistol and unlimited ammo. Use cover to avoid unnecessary grappling (even though you can’t die, it slows progress).
- Team Synergy: Ada’s actions help Leon survive (e.g., lowering bridges, distracting Mr. X). She only appears in Leon’s story, not Claire’s (except in B scenarios where she appears briefly).
- Background: The young daughter of Dr. William Birkin and his wife Annette. Sherry is a scared but resourceful child trying to survive and escape the city.
- Strengths: Playable segment in Claire’s scenario (after the orphanage). Sherry can crawl through small spaces, cannot fight, but she can use items left by Claire. She has a stun grenade to temporarily blind Mr. X.
- Weaknesses: Extremely vulnerable; any contact with Mr. X is instant game over; very limited item capacity (only a few inventory slots).
- Playstyle: Stealth is mandatory. Use the stun grenade to create openings when hiding from Mr. X. Avoid all enemies; run and hide. The segment is primarily scripted chase sequences and simple puzzles.
- Unlock Conditions: Automatically encountered as Claire. Play Claire’s scenario until you reach the orphanage and switch to Sherry.
- Recommended Equipment: No choices – only the stun grenades and a keycard. Use cover and wait for Mr. X to pass.
- Team Synergy: Sherry’s survival is Claire’s primary motivation. Claire provides weapons and items for Sherry (via locker codes). The story reveals Sherry’s infection and subsequent curing.
- Background: An Umbrella Security Service (U.S.S.) operative, known as the “Grim Reaper.” He must escape the Raccoon City sewers and defeat the G-virus monster.
- Strengths: Extremely high damage output; starts with a high-power submachine gun (MP5), grenades, and flashbangs; high mobility; has a unique roll dodge that can evade grabs.
- Weaknesses: No healing items except for ones found on enemies (zombies drop grenades, ammo, perhaps health? Actually no health drops – you must find green herbs on the ground). Extremely difficult – one or two hits from a Licker can kill you.
- Playstyle: Run-and-gun meets survival horror. Keep moving, use grenades to clear corridors, and never stop. Prioritize Lickers and G-Adults. Use flashbangs on Mr. X to buy time.
- Unlock Conditions: Complete the main campaign (Leon A/Claire B or any combination). Then it appears in the main menu as “The 4th Survivor.”
- Recommended Equipment: Loadout is fixed – MP5, grenade, flashbang, knife. No customization. Use grenades liberally against crowds. The MP5’s high ammo capacity allows sustained fire.
- Team Synergy: Single-player only. No synergy.
- Background: A block of tofu (extra firm) that is inexplicably alive and must escape the sewer. It’s a joke character with a ridiculous premise.
- Strengths: Extremely high damage resistance? Actually tofu takes less damage from bites? Let’s check: In Resident Evil 2 (2019), Tofu has very high health but takes damage like a normal character. He is immune to poison? No. In the original RE2 Tofu was indestructible? In remake, Tofu has absurdly high health (takes many hits) but low mobility. Can use only a knife as a weapon (sometimes a rocket launcher? In the remake, Tofu can use only a knife? Actually in the 2019 version, Tofu starts with a combat knife only, but later versions have weapon variants? There are multiple Tofu variants: "Annin Tofu", "Moya Moya Tofu", "Kraft". Wait, in the 2019 remake, the Tofu Survivor mode features several Tofu characters with different weapons: regular Tofu (knife only), Annin Tofu (with a magnum), Moya Moya Tofu (with a sub-machine gun), etc. But the base Tofu is knife-only. For clarity, we'll describe the basic Tofu.
- Weaknesses: Very slow movement; no firearms; must melee everything. Limited combat ability.
- Playstyle: Stealth-based melee. Use the knife to perform crouch slashes on zombie legs to trip them, then stomp. Avoid confrontation when possible. Use the roll dodge to evade.
- Unlock Conditions: Complete “The 4th Survivor” (Hunk) to unlock Tofu. Then it appears as “Tofu Survivor” in the main menu.
- Recommended Equipment: Only a knife (no other weapons). The knife is infinite durability for Tofu? In some versions it can break, but you can find spares. Use the knife to block (it helps reduce damage from grabs).
- Team Synergy: None.
- Background: The owner of the Kendo Gun Shop. He is trying to protect his daughter, who has been infected. He is desperate and resourceful.
- Strengths: Starts with a powerful shotgun (W-870) and a handgun, plus several rounds of ammo. High firepower; can use grenades for area denial.
- Weaknesses: Limited inventory (only 6 slots); enemies are numerous and tough; must survive until the supply drop arrives over multiple waves. Time limit adds pressure.
- Playstyle: Defensive survival. Camp in the gun shop, use shotgun to blow away approaching zombies, conserve ammo. Use flashbangs to escape if cornered. Prioritize taking out zombies before they break the windows.
- Unlock Conditions: Complete the main campaign (any route). “The Ghost Survivors” DLC (free). Then select “No Time to Mourn” from the extra menu.
- Recommended Equipment: Fixed loadout: W-870 shotgun, M9 pistol, knife, 2 grenades, 1 flashbang, first aid spray. Use the shotgun for close-range kills, pistol for distant headshots. Place grenades near windows to clear waves.
- Team Synergy: Solo mode. No teamwork.
- Background: A gas station attendant who gets caught up in the chaos. She is trying to reunite with her father (a RPD officer).
- Strengths: Starts with a chemical weapon – a flamethrower, which is devastating against groups and Lickers. Also has a pistol and a stun gun (which can stun enemies briefly).
- Weaknesses: The flamethrower fuel is limited; the stun gun has a long cooldown. Enemies are aggressive, especially the G-adult in the sewer. Low health.
- Playstyle: Aggressive with flamethrower, but conserve fuel for tight spots. Use the stun gun on G-adults to freeze them. Prioritize burning zombie bodies to prevent regeneration (not a major mechanic, but flames stop them).
- Unlock Conditions: Same DLC. Select “Runaway”.
- Recommended Equipment: Fixed: Flamethrower, pistol (with 2 magazines), stun gun (single use per encounter; it's an item you activate). Use flamethrower only for groups or tough enemies. The pistol is weak but reliable.
- Team Synergy: None.
- Background: An unnamed Raccoon City police officer who managed to survive inside the RPD. He is a veteran but low on resources.
- Strengths: Starts with the JMB Hp3 pistol (high accuracy, fast reload) and a tactical knife (dual-wield? Actually you can switch to knife). Can find extra ammunition and herbs. Has the ability to use a “tactical retreat” (roll dodge).
- Weaknesses: No healing items at start; must rely on found herbs. The RPD is infested with Lickers and zombies. Time limit is very tight.
- Playstyle: Fast, mobile, and careful. Use the pistol’s high crit for headshots. Knife can be used for quick melee to trip zombies. Navigate the RPD quickly to avoid being cornered.
- Unlock Conditions: Same DLC. Select “Forgotten Soldier”.
- Recommended Equipment: Fixed: JMB Hp3, knife, 2 flashbangs. The pistol is great; conserve ammo for Lickers. Use flashbangs to stun Mr. X if encountered (he doesn’t appear in this scenario? Actually he might).
- Team Synergy: None.
#### Claire Redfield
#### Ada Wong
#### Sherry Birkin
---
Extra Mode Characters (The Ghost Survivors & Others)
#### HUNK (The 4th Survivor)
#### Tofu (Tofu Survivor)
#### Robert Kendo (No Time to Mourn)
#### Katherine Warren (Runaway)
#### Unnamed RPD Officer (Forgotten Soldier)
#### The Mayor's Daughter (The Ghost Survivors: No Way Out)
Wait, “No Way Out” is a bonus survival mode where you play as a generic survivor (maybe the mayor’s daughter?) but it’s not a character with depth. The character is unnamed. We'll skip for brevity.
---
Summary Table of Playable Characters
| Character | Type | Scenario/Mode | Health | Unique Weapon | Playstyle |
|---|---|---|---|---|---|
| Leon S. Kennedy | Main | Campaign A or B | High | Lightning Hawk | Cautious, well-rounded |
| Claire Redfield | Main | Campaign A or B | Medium | M79 Grenade Launcher | Aggressive, crowd control |
| Ada Wong | Temporary | Leon’s scenario | Invulnerable | Infrared Pistol | Rambo invincible |
| Sherry Birkin | Temporary | Claire’s scenario | Very low | Stun grenade | Stealth, avoid combat |
| HUNK | Extra | The 4th Survivor | Medium | MP5 | High-speed run & gun |
| Tofu | Extra | Tofu Survivor | Very high | Knife (melee) | Stealth melee |
| Robert Kendo | Ghost Survivors | No Time to Mourn | Medium | Shotgun | Defensive survival |
| Katherine Warren | Ghost Survivors | Runaway | Low | Flamethrower | Aggressive flamer |
| RPD Officer | Ghost Survivors | Forgotten Soldier | Medium | JMB Hp3 Pistol | Fast, accurate |
Team Synergy in the Main Campaign
The A/B scenario system is the core cooperative mechanic. Two characters (Leon and Claire) cannot directly interact, but their actions affect each other’s paths through unlocked doors, items left in boxes, and narrative sequences. For example:
- The player who plays Leon A will access the parking garage before Claire B, leaving a key item (the club key) for Claire B to find.
- The player who plays Claire A will use the diamond key in the RPD, which affects Leon B’s ability to open certain doors.
- Both characters can deposit items in storage boxes that are shared globally across all characters in that save file (but only within the same scenario run). This allows resource trading between scenarios.
- In co-op (not officially supported but via mods), players can coordinate ammo distribution and door unlocking. Officially, it’s single-player with story synergy.
---
Final Notes
Each character offers a distinct gameplay experience, from the methodical resource management of Leon to the high-octane dash of HUNK. Unlockable characters and ghost survivors provide extended challenges and variations. Experiment with different scenarios (A vs B) to see how story elements shift. For completionists, mastering all characters is essential for unlocking infinite weapons and the Platinum trophy.
Cheats & Secrets
Cheats & Secrets for Resident Evil 2 (2019)
Resident Evil 2 (2019) does not feature traditional cheat codes (e.g., button combinations entered at a menu). All in-game advantages, such as infinite ammo weapons and bonus items, are unlocked exclusively through completing specific gameplay milestones. This guide covers every legitimate unlockable bonus, hidden feature, Easter egg, and developer-intended secret across the game’s campaigns and extra modes.
---
Unlockable Bonus Items (Playthrough Rewards)
Once you finish a campaign on any difficulty, you unlock special bonus items that can be used in new playthroughs. These are available from the storage box (Item Box) after starting a new game with the same or different character.
| Item | How to Unlock | Effect |
|---|---|---|
| LE 5 Machine Gun | Complete Leon’s 1st Run (Standard or Hardcore) | Submachine gun with high fire rate, uses 9mm ammo. Spawns in Item Box with 300 bullets. |
| SIG 556 Assault Rifle | Complete Claire’s 1st Run (Standard or Hardcore) | Accurate assault rifle, uses 9mm ammo. Spawns in Item Box with 300 bullets. |
| ATM-4 Anti-Tank Rocket Launcher (Infinite Ammo) | Complete Leon’s 2nd Run (Standard or Hardcore) | One-shot kills most enemies. Infinite ammo – does not consume inventory space. |
| MQ 11 Submachine Gun (Infinite Ammo) | Complete Claire’s 2nd Run (Standard or Hardcore) | Fast-firing SMG, uses 9mm ammo. Infinite ammo – does not consume inventory space. |
| JMB Hp3 Handgun (Infinite Ammo) | Earn an S Rank on any scenario (Standard) | Powerful handgun with infinite ammo. Must obtain S rank (beat the game under a time limit with limited saves). |
| Lightning Hawk Magnum (Infinite Ammo) | Earn an S Rank on any scenario (Hardcore) | Massive .50cal handgun, infinite ammo. Same S rank conditions but on Hardcore. |
| Minigun (Infinite Ammo) | Complete both Leon and Claire stories (1st and 2nd Run) on any difficulty | Rapid-fire weapon, infinite ammo. Do not need S rank. |
| Rocket Launcher (Infinite Ammo) | Complete both Leon and Claire stories (1st and 2nd Run) on Hardcore | Devastating infinite ammo rocket launcher. |
---
Secret Weapons & Items
The Matilda Handgun (Enhanced) – Leon
- How to unlock: Find all three weapon parts hidden in the Raccoon City Police Station (R.P.D.) during Leon’s scenario. Combine them with the standard Matilda to upgrade its damage, rate of fire, and magazine capacity. This is not a cheat, but a hidden upgrade path.
- How to unlock: Collect all three weapon parts for Claire’s .45 pistol. These are hidden in similar locations as Leon’s parts (e.g., the library, the press room). The enhanced version holds 8 rounds and hits hard.
- How to unlock: Obtain the Shock Prod parts from the sewers and combine them with the standard Spark Shot. This gives it a melee attack that can stun enemies.
- How to unlock: Found in the sewers during Leon’s campaign. Not a cheat, but a powerful weapon that consumes fuel.
- How to unlock: Found in the police station’s trunk. Fires acid, flame, and grenade rounds.
- In the opening cutscene outside the gas station, look for a billboard featuring Ada Wong. It’s a callback to her role in the original game and is only visible for a few seconds. No interaction possible.
- There are 15 hidden Mr. Raccoon statues throughout the game (Leon and Claire share the same set). Destroying all 15 unlocks the “Godspeed” infinite ammo weapon – a rocket launcher with unlimited shots. This is a legitimate unlockable, not a cheat.
- Locations include: the lounge, the art room, the S.T.A.R.S. office, the morgue, the sewers, etc. Destroying all 15 in a single save file unlocks the infinite rocket launcher for that save file only.
- In the main hall of the R.P.D., there’s a locked drawer in the west office. The “Bejeweled Key” (found in the sewers) opens it, revealing a film roll – not a cheat, but a puzzle reward.
- In the orphanage basement, you can find a crib with a moving mobile. It’s a creepy Easter egg that triggers a jump scare if you examine it.
- The shooting range in the R.P.D. has targets that can be shot for fun. No real reward, but it’s a hidden interactive environment.
- In the police station’s east wing (the one with the broken window), you can actually break the glass by shooting it. This is an early game event, but it’s often missed because players run past.
- In Sherry’s segment, the toy blocks can be arranged to form different pictures. The correct combination yields a reward – but the combination is randomized each playthrough, making it a secret puzzle.
- The game does not have an official “No Hope” mode. However, Hardcore difficulty is the highest – enemies are tougher, ink ribbons are scarce, and auto-saves are disabled. There is no cheat to enable an even harder mode.
- On PC, modders have created a debug menu that allows noclip, item spawning, and enemy manipulation. This is not developer-intended and is considered a mod. Not covered here as per cheat guide ethics.
- There are four endings depending on which character you play first and whether you save everyone. No cheat to force a specific ending; it’s determined by story choices and gameplay.
- These are unlocked after completing both characters’ campaigns. They are not cheats, but hidden game modes:
- A known exploit: While using the knife to break a window or attack an enemy, pause and select “Equip” to swap to another weapon. The knife’s durability resets. This is a glitch, not a secret – not recommended for legitimate play.
The Quickdraw Army (Enhanced) – Claire
The Spark Shot (Jury-Rigged) – Claire
The Flamethrower – Leon
The GM 79 Grenade Launcher – Claire
---
Easter Eggs & Hidden Details
“Ada” Billboard
Mr. Raccoon Collectibles
The “Leon’s Personal Item” Glove Compartment
Zombie Chef & Baby Crib
Police Station Shooting Range
The “Unbreakable” Window
Sherry Birkin’s Blocks
---
Developer Secrets & Hidden Features
“No Hope” Mode (Unofficial Hard Mode)
Debug Menu (PC Only – Mod Required)
The “Nice” Ending Variant
“The 4th Survivor” and “The Ghost Survivors” Extra Modes
- The 4th Survivor: Unlocked by completing both Leon and Claire A scenarios. Play as HUNK, survive a gauntlet with limited ammo.
- The Ghost Survivors: Unlocked by completing The 4th Survivor. Three “what-if” scenarios with special conditions.
- Extreme Battle Mode: Unlocked by completing The Ghost Survivors (all three). A time-based arena shooter.
Infinite Knife Durability (Exploit – Use at Own Risk)
---
Conclusion
Resident Evil 2 (2019) is designed to reward skilled play rather than provide instant cheats. All bonus weapons and infinite ammo are earned through campaign completion and rank achievements. The game is rich with environmental Easter eggs and hidden details that reward exploration. If you are looking for a way to bypass difficulty, the only legitimate method is to unlock infinite ammo weapons via the S-rank system. No console command or button combination offers a shortcut.