
Resident Evil Village
## Resident Evil Village – Game Introduction **Genre:** Survival Horror / First-Person Shooter (with action and exploration elements) **Developer:** Capcom Division 1 **Publisher:** Capcom **Release Timeline:** - **Original release:** May 7, 2021 - **Gold Edition (with DLC):** October 28, 2022 - ...
Download & Installation
Resident Evil Village – Download & Installation Guide
This guide covers everything you need to download, install, and verify Resident Evil Village (also known as Resident Evil 8 or RE8) on every major platform. Follow the section for your system.
---
1. System Requirements
PC (Windows)
| Component | Minimum | Recommended |
|---|---|---|
| OS | Windows 10 (64-bit) | Windows 10/11 (64-bit) |
| CPU | AMD Ryzen 3 1200 / Intel Core i5-7500 | AMD Ryzen 5 3600 / Intel Core i7-8700 |
| RAM | 8 GB | 16 GB |
| GPU | AMD Radeon RX 560 (4GB) / NVIDIA GeForce GTX 1050 Ti (4GB) | AMD Radeon RX 5700 (8GB) / NVIDIA GeForce GTX 1070 (8GB) |
| DirectX | Version 12 | Version 12 |
| Storage | 45 GB (SSD strongly recommended) | 45 GB (SSD) |
| Additional | 4GB VRAM | 8GB VRAM, high-quality audio device |
PlayStation
| Platform | Storage Required | Notes |
|---|---|---|
| PS4 / PS4 Pro | ~45 GB | Base PS4 runs at 1080p/45 FPS; PS4 Pro at 4K checkerboard/60 FPS |
| PS5 | ~45 GB | Full 4K/60 FPS with ray tracing; supports adaptive triggers and haptic feedback |
Xbox
| Platform | Storage Required | Notes |
|---|---|---|
| Xbox One / One X | ~45 GB | Xbox One X: 4K/30 FPS |
| Xbox Series S | ~45 GB | 1440p/60 FPS; no ray tracing |
| Xbox Series X | ~45 GB | 4K/60 FPS with ray tracing (performance vs. quality mode) |
Nintendo Switch (Cloud Version Only)
| Requirement | Details |
|---|---|
| Internet | Stable high-speed connection (at least 10 Mbps download, 5 Mbps upload) |
| Storage | ~300 MB for the launcher app (game data is streamed) |
| Account | Nintendo Account + Nintendo Switch Online membership (optional but recommended for stability) |
iOS / iPadOS (Mobile)
| Device | Requirements | Storage |
|---|---|---|
| iPhone | iPhone 15 Pro / Pro Max running iOS 17.0+ | ~7.5 GB (one-time download after streaming) |
| iPad | iPad with M1 chip or later (iPad Pro 2021+, iPad Air 5, iPad 10th gen? Actually only M1 or M2) running iPadOS 17.0+ | ~7.5 GB |
| Internet | Required for initial download and streaming; game data is stored locally after a one-time download of ~7.5 GB (but still requires online check-ins). |
2. Where to Buy & Legitimate Sources
| Platform | Official Store | Price (approx.) |
|---|---|---|
| PC (Steam) | [Steam Store](https://store.steampowered.com/app/1196590/Resident_Evil_Village/) | $39.99 (base) / $59.99 (Gold Edition) |
| PC (Epic Games Store) | [Epic Store](https://store.epicgames.com/en-US/p/resident-evil-village) | $39.99 (base) / $59.99 (Gold Edition) |
| PlayStation 4/5 | PlayStation Store | $39.99 (base) / $59.99 (Gold Edition) |
| **Xbox One/Series X | S** | Microsoft Store |
| Nintendo Switch | Nintendo eShop (cloud version) | $39.99 (includes all DLC? Check) |
| iOS/iPadOS | App Store (requires iPhone 15 Pro or M1 iPad) | $39.99 (universal purchase – one buy for phone and tablet) |
---
3. Step-by-Step Installation
PC – Steam
1. Create a Steam account if you don’t have one at [store.steampowered.com/join](https://store.steampowered.com/join).
2. Install the Steam client from [store.steampowered.com/about](https://store.steampowered.com/about).
3. Launch Steam and log in.
4. Purchase the game: Visit the [Resident Evil Village page](https://store.steampowered.com/app/1196590/Resident_Evil_Village/) and click “Add to Cart”, then complete checkout.
5. Go to your Library and find Resident Evil Village.
6. Click Install. Choose a destination drive (ensure at least 45 GB free).
7. Wait for the download and automatic installation. The game will create shortcuts.
8. (Optional) For DLC (e.g., Shadows of Rose), purchase and install the Gold Edition or the DLC separately.
PC – Epic Games Store
1. Install the Epic Games Launcher from [epicgames.com](https://www.epicgames.com/store/en-US/download).
2. Create or log in to your Epic Games account.
3. Purchase the game: Search “Resident Evil Village” in the Store, click to the product page, and buy.
4. Go to your Library and locate Resident Evil Village.
5. Click Install. Choose installation path and language.
6. The launcher will download and install the game. Shortcuts will be added.
PlayStation 4 / PlayStation 5
1. Digital purchase:
- On the console, go to PlayStation Store.
- Search for “Resident Evil Village”.
- Select the edition (Standard, Gold, or Deluxe) and purchase.
- The download will begin automatically. You can check progress under Notifications > Downloads.
2. Physical disc:
- Insert the disc into the console.
- The game will begin installing from the disc. You will need to download a day-one patch (size varies, ~5-10 GB).
- Ensure you have enough free space (~45 GB).
3. PS5 upgrade: If you own the PS4 version, you can upgrade to the PS5 version for free. Insert the PS4 disc (or own digital license) and go to the game hub, then select the “PS5 upgrade” offer. Download the PS5 version (separate install).
Xbox One / Xbox Series X|S
1. Digital purchase:
- Press the Xbox button, go to Microsoft Store.
- Search for the game and purchase.
- The download will start immediately. You can monitor from My Games & Apps.
2. Physical disc:
- Insert the disc. The console will prompt you to install the game.
- A mandatory update will download (patch).
3. Smart Delivery: If you own an Xbox One copy, the Xbox Series X|S will automatically get the optimized version when installed on the newer console (digital or disc).
Nintendo Switch (Cloud Version)
1. Connect to a stable Wi‑Fi network (wired Ethernet is strongly recommended).
2. Open the Nintendo eShop on your Switch.
3. Search for Resident Evil Village Cloud Version.
4. Purchase the game (requires a Nintendo Account).
5. Download the launcher app (~300 MB). Once downloaded, launch it.
6. The game will stream to your console. You must have an active internet connection to play. No offline mode.
7. (Optional) Purchase the Shadows of Rose DLC separately from eShop.
iOS / iPadOS (Mobile)
1. Check compatibility: You need an iPhone 15 Pro / Pro Max or an iPad with an M1 chip (or newer) running iOS 17.0+ / iPadOS 17.0+.
2. Open the App Store.
3. Search for “Resident Evil Village”.
4. Tap Get or the price to purchase (requires Apple ID payment method).
5. The initial download is about 7.5 GB. Ensure you have free space and a good Wi‑Fi connection. This may take 30–60 minutes.
6. After download, you can play without an internet connection for some time, but periodic online checks are required.
7. (Optional) Buy the Winters’ Expansion via in-app purchase.
---
4. Account Requirements
| Platform | Accounts Needed |
|---|---|
| PC Steam | Steam account (free) |
| PC Epic | Epic Games account (free) |
| PlayStation | PlayStation Network account (free for digital purchase; no account needed for disc after patch? But PSN required for updates and online features) |
| Xbox | Microsoft / Xbox Live account (free for basic; Game Pass optional) |
| Switch | Nintendo Account (free) |
| iOS/iPadOS | Apple ID (with payment method) |
---
5. First Launch Setup
1. Launch the game.
- PC: Double-click the desktop shortcut or launch from Steam/Epic Library.
- PlayStation/Xbox: Start the game from the home screen.
- Switch: Open the cloud launcher and wait for connection.
- iOS: Tap the app icon.
2. Adjust graphics settings (PC only):
- On first launch, the game will detect your hardware and suggest a preset (Low, Medium, High, Max, or Ray Tracing). You can change these later in Options > Graphics.
- Recommended: Set screen resolution to native, turn on FidelityFX Super Resolution (FSR) if you need better performance, and enable ray tracing only if your GPU can handle it (RTX 2060 or better).
3. Language and audio: Choose your preferred language for text and voice. The game supports multiple languages.
4. Display calibration (if prompted): Adjust brightness using the in-game HDR calibration tool (if your display supports HDR).
5. Load screen timeout: Be patient – the first load may take a few minutes, especially on HDDs. This is normal.
6. Main menu: You can start a new game, load a save, adjust settings, or enable accessibility options (subtitles, difficulty, etc.).
---
6. Common Installation Errors & Fixes
| Error / Symptom | Possible Cause | Fix |
|---|---|---|
| “Not enough disk space” | Drive full or incorrectly reported. | Free up at least 50 GB (the game needs 45 GB plus temporary files). Check drive formatting (NTFS for PC). |
| Steam “Content file locked” | Antivirus or permission issue. | Temporarily disable real-time scanning, or add Steam and game folder exceptions (e.g., `C:\Program Files (x86)\Steam\`). |
| Epic “Installation Failed” | Corrupted download cache. | In Epic Launcher, go to Settings > Manage Games > verify files? Or clear cache: Settings > Troubleshoot > Clear Web Cache. |
| PlayStation “Cannot install” | Insufficient space or patch stuck. | Delete unnecessary data. Restart console in safe mode and rebuild database. |
| Xbox “Installation stopped” | Network drop or disk error. | Go to My Games & Apps > Manage queue, cancel and reinstall. Hard reset console (hold power button 10 seconds). |
| Switch cloud version lag / disconnects | Poor internet. | Use a wired adapter. Close other apps. Ensure NAT type is open. |
| iOS “App not compatible” | Device not supported. | Verify device model and iOS version. Only iPhone 15 Pro/Pro Max and M1 iPad or newer are compatible. |
| PC crash on launch | Outdated drivers or missing VC++ runtimes. | Update GPU drivers (NVIDIA Game Ready, AMD Adrenalin). Install or repair Microsoft Visual C++ Redistributables. |
| Black screen after logo | DirectX 12 issue or HDR conflict. | Disable HDR in Windows display settings. Run the game in windowed mode (add `-windowed` to launch options in Steam). |
| Stuttering / low FPS | High settings for hardware. | Lower graphics settings, enable FSR, turn off ray tracing. |
- Steam: Right-click game in Library > Properties > Local Files > Verify integrity of game files.
- Epic: Click the three dots next to the game > Manage > Verify.
- PlayStation: Settings > Storage > select game > Check for corrupted data.
- Xbox: Settings > System > Storage > Clear local saved games (does not delete saves).
- PC users: For the best experience, install the game on an SSD. Loading times on HDD can exceed 2 minutes.
- Cross-platform progression: Saves are not transferable between platforms (e.g., Steam to PS5).
- Game updates: Enable automatic updates to receive patches and fixes.
- Mods: PC version supports modding, but be careful – mods may disable achievements or cause crashes. Always back up your save file (`%AppData%\Local\RE8` on Windows).
- Demo: Try the free Resident Evil Village Gameplay Demo before buying (available on all platforms except Switch? Actually Switch cloud version may have a demo too).
- Refunds: Digital purchases are generally non-refundable after download, but check the store’s policy (Steam allows refunds within 14 days/2 hours playtime).
---
7. Post-Installation Verification
After installation, ensure everything is working correctly:
1. Check game size:
- PC: Go to the installation folder (e.g., `Steam\steamapps\common\RE8`). Total size should be ~45 GB (with DLC slightly more).
- Consoles: In storage management, the game should show ~45 GB (PS5: ~40 GB after compression).
- iOS: Check in iPhone/iPad Storage settings; the app should be ~7.5 GB.
2. Test start: Launch the game and get past the title screen. The game should not crash.
3. Graphics benchmarks: PC users can run the in-game benchmark (Options > Graphics > Benchmark). A score of 60+ FPS on your target settings is good.
4. Achievements/Trophies: Check that your account is linked and you see the achievement list.
5. DLC activation: If you purchased the Gold Edition or additional DLC, confirm in-game that Shadows of Rose is accessible from the main menu (New Game > Bonus Content > Shadows of Rose).
6. Patch version: The game should be updated to the latest version (e.g., v1.05 or higher). Check in Settings > Update History.
---
8. Additional Tips
---
9. Download Size Overview
| Platform | Download Size | After Install |
|---|---|---|
| PC (Steam/Epic) | ~45 GB | ~45 GB |
| PS4 / PS5 | ~30–45 GB | ~45 GB |
| Xbox One / Series X | S | ~45 GB |
| Switch (Cloud) | ~300 MB launcher | N/A (streamed) |
| iOS / iPadOS | ~7.5 GB | ~7.5 GB |
---
10. Contact Support
If you encounter persistent issues, contact official support:
- Capcom Support: [support.capcom.com](https://support.capcom.com)
- Steam Support: [help.steampowered.com](https://help.steampowered.com)
- Epic Games Support: [epicgames.com/help](https://www.epicgames.com/help)
- PlayStation Support: [playstation.com/support](https://www.playstation.com/support)
- Xbox Support: [support.xbox.com](https://support.xbox.com)
- Nintendo Support: [nintendo.com/consumer](https://www.nintendo.com/consumer)
- Apple Support: [support.apple.com](https://support.apple.com)
---
Enjoy your survival horror experience in Resident Evil Village! Stay safe, and check your corners.

Game Introduction
Resident Evil Village – Game Introduction
Genre: Survival Horror / First-Person Shooter (with action and exploration elements)
Developer: Capcom Division 1
Publisher: Capcom
Release Timeline:
- Original release: May 7, 2021
- Gold Edition (with DLC): October 28, 2022
- Last major update: Winters’ Expansion (October 2022)
- PlayStation 4, PlayStation 5
- Xbox One, Xbox Series X|S
- PC (Steam, Microsoft Store, GOG)
- macOS, iOS (via RE Engine port)
- Stadia (discontinued)
- Ethan Winters: The player character, a desperate father willing to endure unimaginable suffering to save his daughter. (Note: In third‑person DLC, Rose is playable.)
- Lady Alcina Dimitrescu: The towering, vampire‑like noblewoman who rules over a castle of mutants. Known for her elegance, sadism, and three daughters.
- Karl Heisenberg: A manic, psychokinetic industrialist who controls metal and embraces body horror.
- Salvatore Moreau: A grotesque, fish‑like lord who hides in a flooded swamp, obsessed with acceptance.
- Donna Beneviento: A reclusive, doll‑obsessed lord who uses illusions and a creepy living doll named Angie.
- Mother Miranda: The mysterious, centuries‑old scientist and cult leader who orchestrates the village’s horrors. She is the main antagonist.
- Chris Redfield: The legendary BSAA agent whose actions in the opening cause the story’s conflict. His motives are later revealed.
- The Duke: A mysterious, cheerful merchant who aids Ethan throughout the game, providing weapons, upgrades, and lore.
- First‑Person Horror with Action: Combines tense exploration, puzzle solving, and resource management with visceral gunplay and melee combat.
- Diverse Enemies: From lycans (werewolf‑like creatures) to vampire nobles, mechanical puppets, and fish mutants—each area offers a unique threat.
- Atmosphere & Story: A deep, tragic narrative that pays off plot threads from Resident Evil 7 while introducing new lore. The setting feels both medieval and otherworldly.
- Replayability: New Game+, optional bosses, treasure hunting, and a Mercenaries mode encourage multiple playthroughs.
- Fans of survival horror (especially Resident Evil 7 and RE4).
- Players who enjoy first‑person exploration with a strong narrative.
- Those comfortable with graphic violence, body horror, and jump scares.
- Gamers looking for a linear horror experience with moderate difficulty and high polish.
- Main Story: A single‑player campaign lasting 8–12 hours on first playthrough.
- Mercenaries (Survival Mode): An arcade‑style mode where players fight waves of enemies across village stages, earning points for high combos. Added in the Gold Edition: additional playable characters (Lady Dimitrescu, Heisenberg) and scenarios.
- Third‑Person Mode (DLC): An alternative way to play the main story (and the Shadows of Rose DLC) from a third‑person perspective.
- Fully Offline: The entire main story and Mercenaries mode can be played without an internet connection after installation.
- Online Features (Optional): Leaderboards for Mercenaries (score uploads), and some cosmetic DLC require online authentication, but no mandatory online subscription for single‑player.
- No Multiplayer: The game is purely single‑player, with no co‑op or PvP.
- Winters’ Expansion (Gold Edition): Includes:
- Pre‑Order & Deluxe Bonuses: Weapon charms, artbook, soundtrack, and extra items. (Not essential for gameplay.)
- No paid expansions beyond the Gold Edition.
Platforms:
---
Story Overview
Resident Evil Village directly continues the story of Ethan Winters from Resident Evil 7: Biohazard. After the events of the Baker estate, Ethan and his wife Mia now live peacefully in Europe with their infant daughter, Rose. But their tranquility is shattered when Chris Redfield (a longtime series ally) unexpectedly murders Mia and kidnaps Ethan and Rose. Ethan awakens in a mysterious, snow‑bound village where he must search for his daughter while confronting horrifying creatures and a coven of four powerful lords—Lady Dimitrescu, Karl Heisenberg, Salvatore Moreau, and Donna Beneviento—all ruled by the enigmatic Mother Miranda. The story blends gothic horror, grotesque body horror, and tragic mythology, ultimately revealing the origins of the Mold and its connection to the series’ iconic bioweapons.
Setting
The game takes place in a remote, unnamed European village (inspired by Romanian architecture and folklore), surrounded by mountains, forests, and a massive reservoir. The village is divided into distinct territories: the opulent Castle Dimitrescu, the flooded Moreau reservoir, the doll‑filled Beneviento house, the industrial Heisenberg factory, and the underground ruins of a Megamycete (a giant fungal hive mind). The atmosphere shifts from claustrophobic interiors to sweeping outdoor vistas, all rendered in Capcom’s RE Engine with stunning detail.
Main Characters
Core Appeal
Target Audience
Game Modes
Online / Offline Support
DLC / Expansion Overview
- Shadows of Rose – A story DLC where the player controls an older Rose Winters in a nightmare version of the village, featuring new powers and bosses.
- Third‑Person Mode – Alternate camera for the main story.
- Mercenaries Additional Orders – New characters (Lady Dimitrescu, Heisenberg, etc.) and stages for Mercenaries.
What Makes This Game Unique?
Resident Evil Village stands out for its daring shift from the cramped, mold‑infested house of RE7 to a sprawling gothic fantasy world. It combines the horror of a classic vampire story with the biological dread of Resident Evil, offering a “greatest‑hits” of horror tropes: a giant vampire lady, a creepy dollhouse, a mad scientist factory, and a tragic final boss. The game is also notable for its focus on a father’s love as a motivator, a rarity in the series, and its seamless integration of puzzles, combat, and lore into a cohesive, cinematic experience. The Mercenaries mode and DLC add significant replay value, while the RE Engine delivers breathtaking visuals and smooth performance across all platforms.
Getting Started
Resident Evil Village – Getting Started Guide
Welcome to Resident Evil Village (RE8). This guide is designed for brand-new players, covering everything you need to survive your first hour, understand the controls on every platform, read the UI, prioritize resources, avoid critical mistakes, and complete a day-one checklist. Since the game has no character creation (you play as Ethan Winters), focus immediately on mastering your surroundings.
---
Your First Hour Walkthrough (Spoiler-Free)
The game opens with a gut-wrenching cutscene. After the prologue, you’ll wake up in a crashed vehicle. Follow these steps:
1. Move forward – You’re in a snowy forest. Follow the linear path until you reach a gate.
2. Meet the old woman – She’ll give you a cryptic warning. Keep going straight.
3. Enter the village – You’ll see a bonfire with villagers. Avoid being seen; the path is linear but you must sneak past them? Actually, you can’t avoid them at first – you’ll be chased. Run forward and into a house.
4. First combat encounter – A lycan will attack you. Use the knife (right trigger on controller) to fend it off until you can escape. Do not try to kill it – you have no gun yet.
5. Get your first weapon – After the scare, you find a handgun in a drawer. Equip it (Tab on PC, Y/Triangle on controller to open inventory).
6. Survival tutorial – A few more lycans will attack. Aim for headshots to stagger them. Conserve ammo – you only have about 15 bullets.
7. Reach the safe room – Follow the objective marker to a house with a bright red door. Inside is a typewriter (save point) and a storage chest. Save immediately.
8. The Duke – After a cutscene, you meet the Duke, a merchant. He sells supplies, weapons, and upgrades. For now, buy nothing except maybe the lockpick (if you have 2,000 Lei) to open green chests later. Otherwise, save your money.
9. Enter Castle Dimitrescu – The game funnels you toward the castle doors. Save before entering; the difficulty spikes slightly.
---
Controls on All Platforms
#### PlayStation 5 / PlayStation 4 (DualSense / DualShock 4)
| Action | Button |
|---|---|
| Move | Left Stick |
| Look | Right Stick |
| Run | L3 (click left stick) |
| Aim (hold) | L2 |
| Fire/Attack | R2 |
| Reload | R3 (click right stick) |
| Interact | L1 (tap) or R1? Actually default is R3? Wait, correct: Interact = L1 (hold for contextual) |
| Inventory/Map | Touchpad (PS5) / Options (PS4) |
| Knife | L1 (hold) – but better to equip via inventory |
| Dodge | L1 + Left Stick direction (when unarmed or with knife out) |
| Block | L1 (hold while weapon drawn) |
| Use item | R1 (tap) |
| Sprint | X (while moving) – or hold L3? Actually sprint is by clicking L3 while moving forward. |
#### Xbox Series X|S / Xbox One
| Action | Button |
|---|---|
| Move | Left Stick |
| Look | Right Stick |
| Run | Left Stick click (L3) |
| Aim (hold) | LT |
| Fire/Attack | RT |
| Reload | Right Stick click (R3) |
| Interact | LB (hold for context) |
| Inventory/Map | View button (select) |
| Knife | LB (hold) |
| Dodge | LB + Left Stick direction (knife out) |
| Block | LB (hold while weapon drawn) |
| Use item | RB (tap) |
| Sprint | Click L3 while moving |
| Action | Key |
|---|---|
| Move | W/A/S/D |
| Look | Mouse movement |
| Run | Shift (hold) |
| Aim (hold) | Right Mouse Button |
| Fire/Attack | Left Mouse Button |
| Reload | R |
| Interact | E |
| Inventory/Map | Tab |
| Knife | F (equip / swing) |
| Dodge | F + Direction (with knife) |
| Block | Q (hold) |
| Use healing | C (if herb mixed) or through inventory |
| Sprint | Left Shift (hold) |
---
UI Overview
- Health bar – Bottom left. A red gauge; when empty, you die. After taking damage, you can heal with herbs or first-aid med.
- Item wheel – Press and hold the inventory button (Tab on PC, Touchpad/View). You can assign healing, ammo, and tools. Reorganize with mouse or right stick.
- Ammo counter – Bottom center (for equipped weapon).
- Map – Opens full screen with objective markers, color-coded rooms (red = inaccessible, green = visited).
- Objective reminder – Top-right corner, flashes when you have a new goal.
- Duke’s shop – A menu that appears when near the Duke; includes “Buy”, “Sell”, “Craft”, “Upgrade”.
- Inventory grid – Limited space; 8 slots initially. Expand with waist pouches found later. Key items (like crank, mask) do not take up space – they go into a separate pocket.
- Explore thoroughly – Break crates, vases, and wooden boxes with your knife to find Lei, ammo, and herbs.
- Conserve ammo – Use your knife on breakable objects and on slow enemies (like the zombies in the castle) if possible. Headshots often kill with one bullet.
- Block attacks – Hold block (L1/LB/Q) to reduce damage by 70% (with a weapon drawn). This is crucial against lycan swipes.
- Check Duke’s inventory – He sells a Field Manual (weapon upgrade part) and gun parts that improve stats. Buy these when you have extra Lei.
- Mix herbs – Combine a green herb with another green herb to make a healing mixture. Do not waste green herbs alone; they only heal a small amount.
- Use the knife as a tool – It can cut down animal carcasses to get meat, which you can sell or cook? Actually cooking is later at Duke’s after you find recipes. But meat is valuable for permanent health upgrades.
- Wasting ammo on unkillable enemies – In the village, some enemies (like the giant lycan) cannot be killed until later. Run past them.
- Selling all treasures – Keep at least one of each treasure until you know its use. Some can be combined into higher-value items (e.g., crystal fragments with a necklace).
- Ignoring the knife – It’s weaker but infinitely useful for breaking boxes and finishing off downed enemies to save bullets.
- Forgetting to dodge – You can dodge by pressing block + direction while unarmed or with knife out. Use it to avoid grabs.
- Leaving the Duke too soon – Always check his stock after each major event. He may have new items.
- Not saving before boss fights – Save at every typewriter before a big door or cutscene. Boss fights can kill you instantly if you’re unprepared.
- Not using the Duke’s upgrade bench – You can upgrade weapons (increase damage, reload speed, capacity) at the Duke. Prioritize the LEMI handgun (the first pistol) or the W870 shotgun (found in the castle). Upgrade damage first.
- Ignoring the handgun’s laser sight – You can equip a laser sight (found in the castle) to improve hip-fire accuracy. Attach it via the inventory menu by selecting the weapon and choosing “Attachments”.
- Running out of ammo – Always craft ammo whenever you have gunpowder and the Duke is nearby. Never carry more than 10 unused bullets; it’s better to craft and store extra in the item box.
- Selling everything – Some items like “Ladies’ Brooch” or “Ring” may be needed for a later side quest. Check the description – if it says “Treasure” it’s safe to sell, but keep multiples until you find a recipe.
- Overhealing – Don’t heal if you’re only at 70% health. Save healing items for emergencies. You can always block to avoid damage risk.
- Not blocking enemy grabs – Some enemies will try to grab you. If you fail the button prompt, you take heavy damage. Spam the block button to break free.
- [ ] Play through the prologue and survive the village attack.
- [ ] Find and equip the LEMI handgun.
- [ ] Locate the typewriter in the safe house and save the game.
- [ ] Buy a lockpick from the Duke (2,000 Lei) and open at least one green chest.
- [ ] Find the Village Map (on the wall in the safe house).
- [ ] Enter Castle Dimitrescu (the main gate).
- [ ] Collect at least 5 green herbs and mix them into two stacks of two (save the single herb for later).
- [ ] Break all crates in the village and castle entrance for items.
- [ ] Upgrade your handgun once (damage or capacity) at the Duke’s bench when you have 3,000 Lei.
- [ ] Save after entering the castle and before any major exploration.
- [ ] If you find a Field Manual, equip it immediately to boost handgun damage.
- [ ] Avoid killing the giant lycan in the village – run past.
- [ ] Use the knife to destroy breakable objects at least 10 times.
---
Essential Early Objectives
1. Save every 10–15 minutes – Use typewriters (they look like old manual typewriters). Save often; you can only save at typewriters.
2. Find the handgun – It’s in a drawer in the house after the first lycan attack (mandatory).
3. Collect the first lockpick – Buy from Duke for 2,000 Lei. Use it on green chests to get treasures or ammo.
4. Get the map of the village – In the house with the save typewriter, there’s a map on the wall. Interact to get the village map.
5. Enter Castle Dimitrescu – This is the first major area. Do not try to explore too far beyond the castle early on; you need story progression to unlock gates.
---
What to Do First and What to Avoid
#### ✅ Do:
#### ❌ Avoid:
---
Early Resource Priorities
1. Lei (money) – Spend wisely. First priority: Lockpick (2,000 Lei) to open green chests for better loot. Then: Field Manual (improves weapon power).
2. Herbs – Always pick up green herbs. Combine two for a full heal. Later you’ll find red and blue herbs for stronger mixtures.
3. Gunpowder – Used to craft handgun ammo. Find it in crates and from enemies. Craft ammo on the Duke’s “Craft” menu (he must be present).
4. Meat – From animals like chickens and pigs. Sell to Duke to earn Lei. Or later you can cook it for permanent health upgrades.
5. Treasures – Items like “Necklace”, “Crystal”, etc. Keep until you know if they combine (e.g., “Crystal Fragment” + “Silver Ring” = “Crystal Necklace” which sells for more).
---
Common Beginner Mistakes
---
Day-One Checklist (First Play Session)
---
With this guide, you’ll survive your first hour and start Resident Evil Village with confidence. Remember: explore carefully, save often, and hoard resources like a true survivor. Good luck, Ethan.
Core Gameplay
Resident Evil Village – Core Gameplay Guide
This guide breaks down the core gameplay of Resident Evil Village into four progression tiers: Early Game, Mid Game, Late Game, and Endgame. For each tier, we cover the main gameplay loop, combat & interaction systems, progression, exploration, quests/missions, economy, character/build growth, and endgame structure.
Core Gameplay Loop
At its heart, Resident Evil Village follows a survival-horror loop:
1. Explore the village, castles, and other distinct areas.
2. Fight monsters (Lycan, zombies, bosses) using ranged and melee weapons.
3. Manage resources (ammo, health items, crafting materials).
4. Solve puzzles to unlock new areas and story progression.
5. Upgrade weapons and buy consumables from the Duke (the traveling merchant).
6. Progress the story through boss fights and scripted sequences.
Every tier introduces new enemies, tools, and challenges.
Early Game (Chapters 1–3: The Village & Castle Dimitrescu)
#### Main Gameplay Loop
- Explore the village: search houses, find locked doors, and solve simple puzzles (e.g., find the lockpick, move a statue).
- Fight Lycan and zombies with the knife and L.E.M.I. pistol. Ammo is scarce—use headshots and stagger to save bullets.
- Interact with objects (open drawers, push shelves, read notes) to find treasure, crafting materials (gunpowder, pipe bombs), and key items.
- Manage health: use herbs (green combined with red for full heal), first aid med, or cooked food from the Duke.
- Earn Lei from enemies, breakable pottery, and treasures (e.g., crystal skull, necklace). Spend at the Duke (wagon found after Lycan attack) for upgrades and supplies.
- Aiming & Shooting: Use L2/LT to aim, R2/RT to fire. Headshots stagger most enemies; follow with a knife slash or kick (R3/right stick click) to save ammo.
- Guarding: Hold L1/LB to block with Ethan’s hands—reduces damage but depletes block gauge. Perfect Guard (block just before hit) avoids all damage and staggers enemy.
- Knife: Default weapon, infinite use. Best for finishing downed enemies or breaking boxes.
- Shooting while moving: You can move slowly while aiming; strafe to avoid attacks.
- Quick reload: Reload animation can be cancelled by sprinting or blocking.
- Weapons: Start with knife → get L.E.M.I. pistol → find M1911 (pistol) in castle → shotgun (W870 TAC) in castle dining room. First magnum (STAKE) can be bought later.
- Inventory: 8 slots initially; expand via Backpack upgrade from Duke (costs Lei).
- Story progression: Enter castle, defeat Lady Dimitrescu, obtain first flask.
- The Village: Central hub with multiple paths (locked gates, well, church). Find “Labyrinth” puzzles for rewards.
- Castle Dimitrescu: Linear path with branching rooms. Break windows to find treasure, save Lady D’s daughters fights.
- Hidden items: Look for sparkles (items), behind paintings, inside breakable urns.
- Main objective: Find Rose and retrieve flasks. Side tasks: “The Five Labyrinth” (complete four small mazes to unlock a weapon part), “Animal Locator” (kill flying enemies for Duke requests).
- Duke’s Requests: optional side missions (e.g., “Vanquish the Lycan” – kill 20 Lycan). Rewards: recipe for chem fluid, lei, or weapon parts.
- Currency: Lei – drop from enemies (2-20), sell treasures (necklace, crystal skull, etc.) to Duke. Treasures can be combined (e.g., jewel on ring) for higher sell price.
- Spending priority: Upgrade weapons (power, fire rate, reload) before buying consumables. Save for Backpack (20,000 Lei) and Magnum (150,000 Lei).
- Crafting: find recipe from Duke, then use gunpowder + weapon part to craft ammo. Early on, craft handgun ammo only.
- Ethan Winters: No skill trees or stats. Growth is entirely through weapon upgrades, inventory space, and consumables.
- Build strategy: Focus on one pistol (L.E.M.I. or M1911) and the shotgun early. Upgrade damage first.
- Healing items: Herbs are free; combine green+green for partial heal, green+red for full heal. Use only when needed.
- Explore more open areas: House Beneviento (puzzle-heavy, no combat), Moreau’s Reservoir (water area), and the Stronghold (intense Lycan gauntlet).
- Fight new enemies: Moreau’s minions (gators?), armored Lycan, and the giant Moreau boss.
- Interact & solve major puzzles: House Beneviento’s doll puzzle (key item + hidden boss), elevator rotation puzzle in reservoir.
- Resource management: Ammo becomes more plentiful due to crafting recipes from Duke. Still conserve for boss fights.
- New weapons: SYG-12 shotgun (semi-auto), V61 Custom pistol (fully auto), F2 Rifle (bolt-action sniper).
- Granade types: Pipe bombs (craftable) and flashbangs (useful against Lycan swarms).
- Blocking + melee: Guarding is vital against Moreau’s charge; kick or shoot crystals on enemies.
- Environmental hazards: Water (Moreau stage) has limited movement; use turrets? (no, but you can shoot explosive barrels).
- Boss mechanics: Moreau fights in three phases: chase through water, shoot weak spots on back, final arena with poison pools.
- Weapon upgrades: Now can upgrade to level 3-4 stats. Unlock new customization parts (e.g., high-capacity mag, compensator).
- Inventory: Should have at least 12 slots; consider buying second backpack.
- Story: Obtain Second flask from Moreau, then defeat Moreau and return to village for exposition.
- House Beneviento: Small, claustrophobic. Focus on puzzle (find mannequin pieces, avoid infant monster). No combat but heavy horror.
- Reservoir: Open waterways. Search for treasure hidden in corners, break boxes for gunpowder. Look for “rusty key” to unlock special rooms.
- Stronghold: Linear combat gauntlet before leaving for factory. Collect “Labyrinth” pieces here.
- Duke’s Requests: “Animal Locator II” (kill 10 more crows), “Hunting the Beast” (kill a special Lycan). Rewards: rifle stock part, lei.
- Treasure side quest: “The Lost Treasure” – find all map pieces to locate a valuable chalice.
- Earning Lei: Now 50-200 per enemy, plus treasures like “Sanguine Virgin” (12,000 Lei).
- Spending: Upgrade rifle or magnum to prepare for late-game. Buy “Crafting Recipes” (e.g., shotgun shells, rifle ammo) if needed.
- Crafting: Gunpowder drops increase; craft large amounts of handgun and shotgun ammo. Save rare materials for magnum rounds.
- Weapon specialization: Choose between close range (shotgun) or long range (rifle). Both are viable; upgrade one heavily and the others moderately.
- Maxing inventory: Second backpack bought here for 20,000 Lei. Keeps healing items separate.
- Health recovery: Cooked food from Duke (e.g., “Rat Stew” increases max health permanently).
- Explore Heisenberg’s grim industrial factory: linear tunnels, conveyor belts, and exposed machinery.
- Fight new enemies: Soldats (armored automatons), Strigoi (flying bat-like), and the final Lycan siege in the village.
- Complete multi-stage puzzles: Factory floor button sequences, smashing destructible walls to find shortcuts.
- Survive the village defense sequence (chapter 9) where you must protect the house using trap barriers and turrets.
- New weapons: WCX (assault rifle) from Duke—fully automatic, great for swarms. Also get “Punch” magnum upgrade (if found).
- Soldats: Use flashbangs to stun, then shoot their glowing back vent or weak knee joints. Or use pipe bombs.
- Field repairs: Not applicable—but you can kick open doors to avoid being grabbed.
- Boss fight: Heisenberg drives a giant metal contraption; you must shoot his weak point (head) while dodging scrap debris. Use your rocket pistol? No—just shoot with rifle or magnum.
- Village defense: Set up traps (electric fence, machine gun turrets) and shoot Lycan from windows. Manage resources—you cannot leave area.
- Weapon upgrades: Fully maxed out possible (level 6 stats) with infinite ammo achievable? Not yet—unlock infinite ammo via New Game+ challenge points.
- Inventory: Should have 16-20 slots; final backpack upgrade may be available if skipped.
- Story: Obtain third flask from Heisenberg, fight final boss Miranda.
- Factory: Many branching paths with hidden loot (treasures like “Silver Chalice”, weapon parts). Use map to find unlockable doors (Dimitrescu key, etc.).
- Final village: After factory, revisit village (temporarily) to stock up before final showdown.
- Treasure: Find “Goat of Chaos” collectibles (for challenges).
- Duke’s Requests: “The Ultimate Challenge” – kill 10 Soldats with melee (hard). “Hunting the Wraith” – kill 5 Strigoi. Rewards: high-capacity magnum magazine, lei.
- Optional boss: There is no true optional boss, but a “Mini-boss” Chimera can be encountered in factory.
- Lei hoard: Enemies drop 200-400 Lei. Treasures like “Dual Ring” sell for 30,000 Lei. You can now buy Infinite Ammo upgrades? No, those are Endgame.
- Spending: Buy WCX parts (e.g., compensator, scope). Upgrade final weapon to near-max.
- Crafting: Craft magnum rounds if you have the recipe (bought from Duke). Rifle ammo also useful.
- Final build: One high-damage magnum (STAKE) for bosses, an assault rifle for mobs, and a shotgun as secondary. Keep knife for emergencies.
- Max inventory: Buy all backpack upgrades before final boss (total 20 slots).
- Health: Eat Duke’s final meal (max health increase).
- Carryover: Keep all weapons, upgrades, inventory, Lei, treasures, recipes, and Duke’s upgrades. Story items reset.
- Difficulty unlock: Completing game unlocks Village of Shadows difficulty (hardest). NG+ on this difficulty is brutal.
- Infinite Ammo weapons: Earn Challenge Points (CP) by completing challenges (e.g., kill 1000 Lycan, find all goats). Then purchase Infinite Ammo for specific guns (2x CP cost). Requires multiple playthroughs.
- Unlimited ammo: Makes subsequent runs easier for speedruns or high difficulty.
- Separate mode: Combat gauntlet with waves of enemies, time limit, and combo scoring.
- Stages: Set in different areas (village, castle, factory). Unlock new characters (e.g., Lady Dimitrescu) and weapons.
- Rewards: Complete all stages with S rank to unlock “LZ Answerer” lightsaber? Actually, in Village, you unlock “Unlimited Ammo” for reward? No, Mercenaries has its own progression—completing all stages with S ranks unlocks a weapon charm for main game.
- Skill tree: In Mercenaries, you level up, buy skills between rounds.
- In-game challenges: Found in menu. Examples: “Complete the game within 3 hours”, “Use no healing items in a playthrough”, “Defeat 500 Lycan”.
- Rewards: CP (Challenge Points) used to buy Infinite Ammo, Model viewer, concept art.
- Goal: Accumulate enough CP to fully upgrade your arsenal for NG+.
- Collectibles: Still missing goats or treasures? Return to areas (via chapter select) to find them. Achievements tied to finding all treasures, all recipes, all weapon parts.
- Higher difficulties: Hardcore and Village of Shadows change enemy damage, health, and item placement. Forces new strategies (e.g., perfect guarding becomes mandatory).
- Speedrun: “Complete within 3 hours” challenge unlocks knife-only? No, but gives CP. Use Infinite Ammo to breeze through.
- S-Tier loadout: Infinite Ammo Magnum (STAKE) + Infinite Ammo Rifle (F2) + Knife. This melts everything.
- Healing: With infinite ammo, you can sell all herbs; just carry a single healing item for emergencies.
- Strategy: Don’t waste time on trash mobs; sprint past when possible. Use magnum for bosses.
- Resource management: On NG+, Lei is abundant; buy all upgrades immediately.
#### Combat & Interaction Systems
#### Progression
#### Exploration
#### Quests/Missions
#### Economy
#### Character/Build Growth
---
Mid Game (Chapters 4–7: House Beneviento, Reservoir, Stronghold)
#### Main Gameplay Loop
#### Combat & Interaction Systems
#### Progression
#### Exploration
#### Quests/Missions
#### Economy
#### Character/Build Growth
---
Late Game (Chapters 8–10: Heisenberg’s Factory & Final Village Defense)
#### Main Gameplay Loop
#### Combat & Interaction Systems
#### Progression
#### Exploration
#### Quests/Missions
#### Economy
#### Character/Build Growth
---
Endgame (After First Playthrough)
#### New Game+ (NG+)
#### Mercenaries Mode
#### Challenge System
#### Post-Game Activities
#### Build Optimization for Endgame
---
Summary Table
| Tier | Key Areas | Main Weapons | Economy Focus | Progression Goal |
|---|---|---|---|---|
| Early | Village, Castle | L.E.M.I., knife, shotgun | Save Lei for upgrades | Survive Lady D and escape castle |
| Mid | House Beneviento, Reservoir, Stronghold | V61, SYG-12, F2 | Buy backpack, craft shotgun shells | Obtain second flask, defeat Moreau |
| Late | Heisenberg’s Factory, Village defense | WCX, STAKE | Max weapon upgrades | Defeat Miranda |
| Endgame | NG+, Mercenaries | Infinite ammo weapons | Collect CP, buy infinite ammo | Complete all challenges |
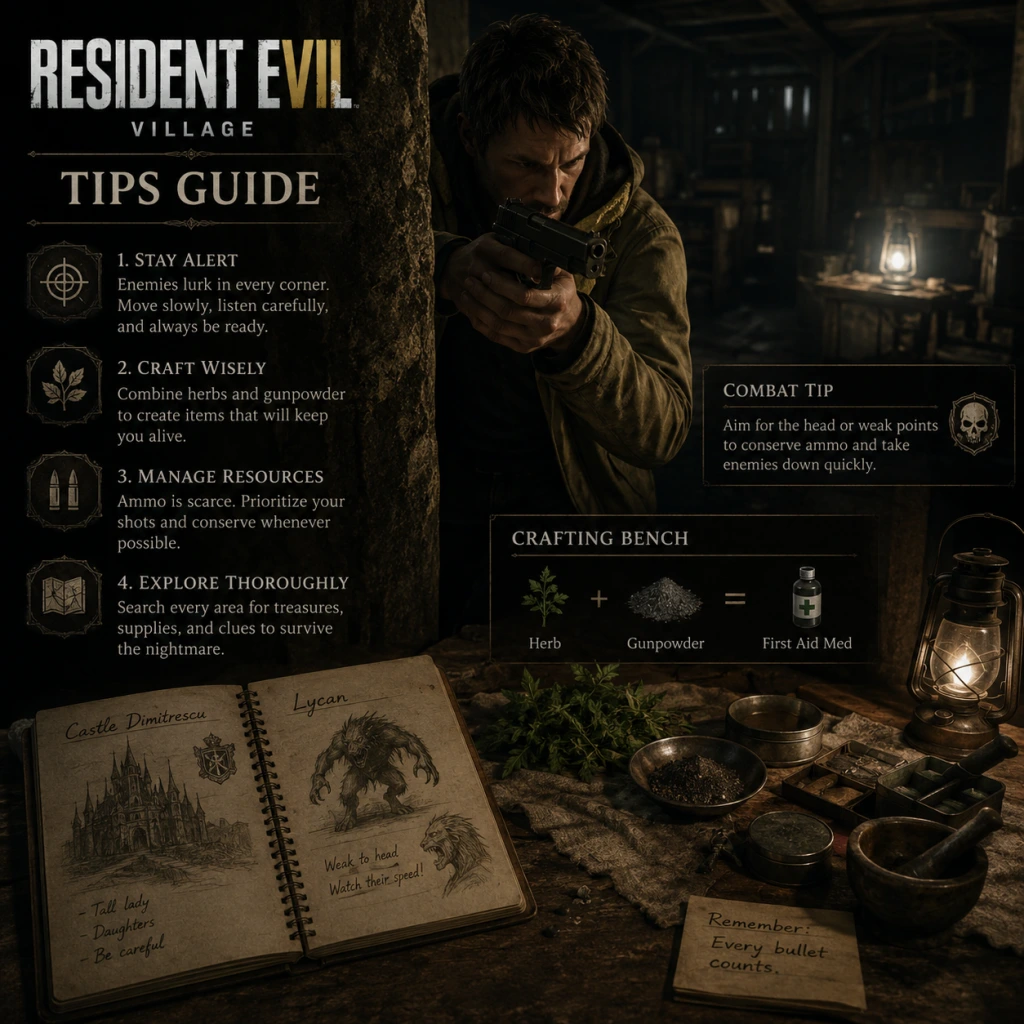
Game Tips
Resident Evil Village – Comprehensive Game Tips Guide
This guide provides essential tips for mastering Resident Evil Village, covering combat, exploration, resource management, economy, character builds, and progression strategies. Tips are organized by difficulty level: Beginner, Intermediate, and Advanced.
---
Beginner Tips (First Playthrough)
#### 1. Always Search Thoroughly
- Why: The game hides many valuable items in drawers, cabinets, behind objects, and in breakable crates. Missing them means losing ammo, healing, and crafting materials.
- Tip: Use the interact button (E on keyboard, X on PlayStation, A on Xbox) on every container, desk, and shelf. Break all wooden crates and barrels with your knife or gun – they often drop Lei (currency) or materials. The flashlight can reveal hidden pickups in dark corners.
- Why: The map shows unexplored rooms (red doors/chests after progression), locked doors, and item locations. It prevents backtracking with missed areas.
- Tip: Open the map frequently (Tab on PC, Touchpad on PS, View button on Xbox). Rooms become blue when fully looted. Red icons indicate locked doors or items you can't yet access – return later with required keys or tools (e.g., Jack's Head, Lovers' Key).
- Why: Blocking reduces damage significantly, especially from basic enemies. Combined with the Duke’s “Guard” upgrades, it can make you nearly invincible against some attacks.
- Tip: Hold the guard button (Right Mouse on PC, L1 on PS, LB on Xbox) when an enemy is about to strike. Release at the exact moment of impact to perform a Perfect Guard (also called “Parry”), which stuns the enemy and negates all damage. This is crucial against Lycans and the daughters.
- Why: Ammo is scarce, especially early on. The knife is infinite durability (unlike previous RE games) and can be used to down weaker enemies like Moroaică (the zombie-like enemies) and even stun larger ones.
- Tip: Circle strafe while slashing with the knife. For example, in the village square after the initial Lycan attack, you can kill a few Moroaică with knife slashes to the head to conserve shotgun shells for more dangerous threats.
- Why: Herbs and first aid meds are limited. Many healing opportunities appear at scripted intervals (e.g., before boss fights). Over-healing wastes resources.
- Tip: Only heal when your health is in the red/orange danger zone. Combine green and red herbs to make strong medicine (herbs can be mixed from the inventory menu). Also, red flowers (Rusty Flower) can be found in the environment and crafted into health items.
- Why: Lei (in-game currency) is finite per playthrough. Wasting it on early weapons that you'll replace is inefficient. The Duke sells upgrades for all weapons at his shop.
- Tip: Prioritize upgrades for the LEMI (starting pistol) in early game, then later switch to M1911 or a magnum. The shotgun (W870) is worth upgrading for power but sell it when you find the SYG-12 (pump shotgun with high damage). For snipers, the F2 Rifle is excellent for long-range damage. Always upgrade reload speed and ammo capacity first – they improve DPS and reduce downtime.
- Why: Each enemy type has a specific vulnerability. Knowing these saves ammo and time.
- List:
- Why: You can craft bullets, health items, and grenades from materials found in the field. Knowing what to craft when is crucial.
- Tip: Early game, craft Handgun Ammo from LMO (powder) and Shotgun Shells only when needed – they require rare materials (Sulfur). Save Gunpowder for grenades – they are powerful crowd control. Later, craft Magnum Ammo for bosses. Always keep a stack of at least 3 First Aid Meds in your inventory; craft more when you find herbs.
- Why: Duke’s shop has limited inventory. Many valuable items are hidden in optional rooms. For example, the Lovers' Stone in the church opens a treasure room in the castle with high-value loot.
- Tip: Check every locked door you pass; many keys are found as you progress (e.g., Iron Key, Lovers' Key, House Key). Use the map to mark locked doors you can't open yet. Return after obtaining keys. Areas like the Altar in the village, the Windmill, and the Crypt hold rare treasures.
- Why: For achievements like “Frugalist” (complete without healing) or “Knifed” (only knife). Requires precise routing and exploit knowledge.
- Tip: On a speedrun, skip unnecessary fights. Use the shortcut in Castle Dimitrescu to bypass the second daughter fight by dropping from the balcony. For the Frugalist challenge, never take damage; restart if hit. Use the NF (Necessary Force) boost from the Duke’s “Attack” upgrades if playing on easier difficulties.
- Why: Once you unlock infinite ammo weapons after multiple playthroughs, you can customize your loadout.
- Best weapons for NG+:
- Tip: Unlock infinite ammo by fully upgrading a weapon and spending 1,000 CP (Challenge Points) at the Extra Content Shop. Prioritize the Stake for boss fights – it can kill Lady Dimitrescu in 4 shots on Hardcore.
- Why: The environment is deadly to enemies too. Explosive barrels, electrical panels, and flaming furnaces can wipe out groups.
- Tip: In the Stronghold sequence (Moreau's reservoir), lure Lycans into the water and electrified pools. In Heisenberg’s factory, shoot the blue gas tanks to create explosions. In Castle Dimitrescu, knock down chandeliers onto enemies by shooting their chains.
- Why: Limited inventory space forces you to leave items behind. Selling or hoarding correctly is key.
- Tip: Always carry a knife, a powerful weapon, and healing. Sell extra treasures you don’t need for Lei. Upgrade the Inventory Capacity at the Duke as soon as possible – it’s one of the most cost-effective upgrades (5,000 Lei per slot). Later, use the Pouch items found to get free slots.
- Lady Dimitrescu phase 1: Shoot her until she staggers, then whack with the knife. Use the Ladder trick in the dining room – climb up and down to avoid her grab.
- Moreau: Shoot the weak spots on his body when he surfaces. Dodge his vomit attack by running perpendicular.
- Beneviento: Use the baby’s statue and hide in the wardrobe. No combat – pure stealth + logic puzzle.
- Heisenberg’s Mecha: Use the Horizontal Slider attack by holding shield and running into his legs when he charges. The Stake is excellent here.
- Why: Completing these gives rare rewards like weapon parts, collectible figurines, and a special knife.
- List:
- Tip: Always pick up the requests from the Duke’s counter before advancing a major area. They are missable.
- Early game: Upgrade the LEMI capacity and fire rate. Buy the W870 shotgun from the Duke when available (20,000 Lei).
- Mid game: Upgrade the F2 Rifle for long-range. Buy the SYG-12 when you find it (free, but upgrade it). Invest in Guard and Health upgrades at the Duke’s shop.
- Late game: Buy the Stake magnum (120,000 Lei). Fully upgrade it for infinite ammo. Also buy “Attack” and “Defense” boosts.
- Why: Treasures like the Lady’s Necklace and Silver Knife are worth thousands of Lei. But some are needed for side quests.
- Tip: Only sell treasures after checking if they are part of a merchant request. For example, the Crystal Skull is needed for the “Ducking” request. If you sell it, you can’t get the reward. Use a guide to know which are safe to sell.
- Play on Casual first: To enjoy the story and explore without stress. Save Hardcore and Village of Shadows for later runs.
- Use the photo mode (if on PC) to scout areas for hidden items without risk.
- Save frequently (manual saves) before major fights. The game only autosaves at key checkpoints.
- Learn the “Punching” parry: The Duke sells a special knife that can be used to punch enemies – a fun alternative.
#### 2. Use the Map to Track Progress
#### 3. Master the Guard (Block) Mechanic
#### 4. Save Ammo by Using the Knife
#### 5. Use Heals Conservatively
---
Intermediate Strategies (Second Playthrough & Harder Difficulties)
#### 6. Upgrade Weapons Strategically at the Duke
#### 7. Exploit Enemy Weaknesses
- Lycans: Weak to fire (pipes, grenades). Headshots stagger them. A well-placed explosion can kill a group.
- Moroaică: Headshots kill instantly with a pistol. They are slow, so kite them.
- Varcolac (Large Lycan): Aim for the unarmored head. Use explosive barrels in the environment. Flashbangs blind them.
- Daughters (Dimitrescu sisters): They are vulnerable to fire and close-range shotgun blasts. Use the Crystal Fragment item to weaken Daniela.
- Sturm (Propeller Man): Shoot the turbine vent on his back when he pauses.
- Heisenberg's Metal Mutants: Weak to explosives; shoot the glowing yellow weak spots.
#### 8. Master the Crafting System
#### 9. Explore Thoroughly for Loot Rooms
---
Advanced Optimizations (Hardcore & Challenge Runs)
#### 10. Speedrun & No-Hit Run Tips
#### 11. Optimal Weapon Loadout for Endgame
- WCX Assault Rifle – infinite ammo, high rate of fire, great for clearing mobs.
- Stake (Magnum) – highest damage per shot; one-shots most enemies on Normal.
- S Y G-12 Shotgun – powerful spread for close combat.
#### 12. Use Environmental Hazards to Your Advantage
#### 13. Manage Inventory Space
#### 14. Boss Fight Patterns (Condensed)
#### 15. The Duke’s Side Quests (Merchant Requests)
- “The Guns-Maiden” – deliver a green herb to a wounded woman in the village; reward: a treasure map.
- “The Lost Runners” – find and photograph four wooden ducks hidden across the castle.
- “Shadows of the Past” – photograph all seven historic paintings.
---
Economy & Upgrades: Best Investments
#### 16. Lei Spending Priority
#### 17. Selling Treasures
---
Final Pro Tips
This guide covers the most impactful tips for every stage of Resident Evil Village. Adapt your strategy based on your chosen difficulty and playstyle. Good luck, and enjoy your journey through the village!
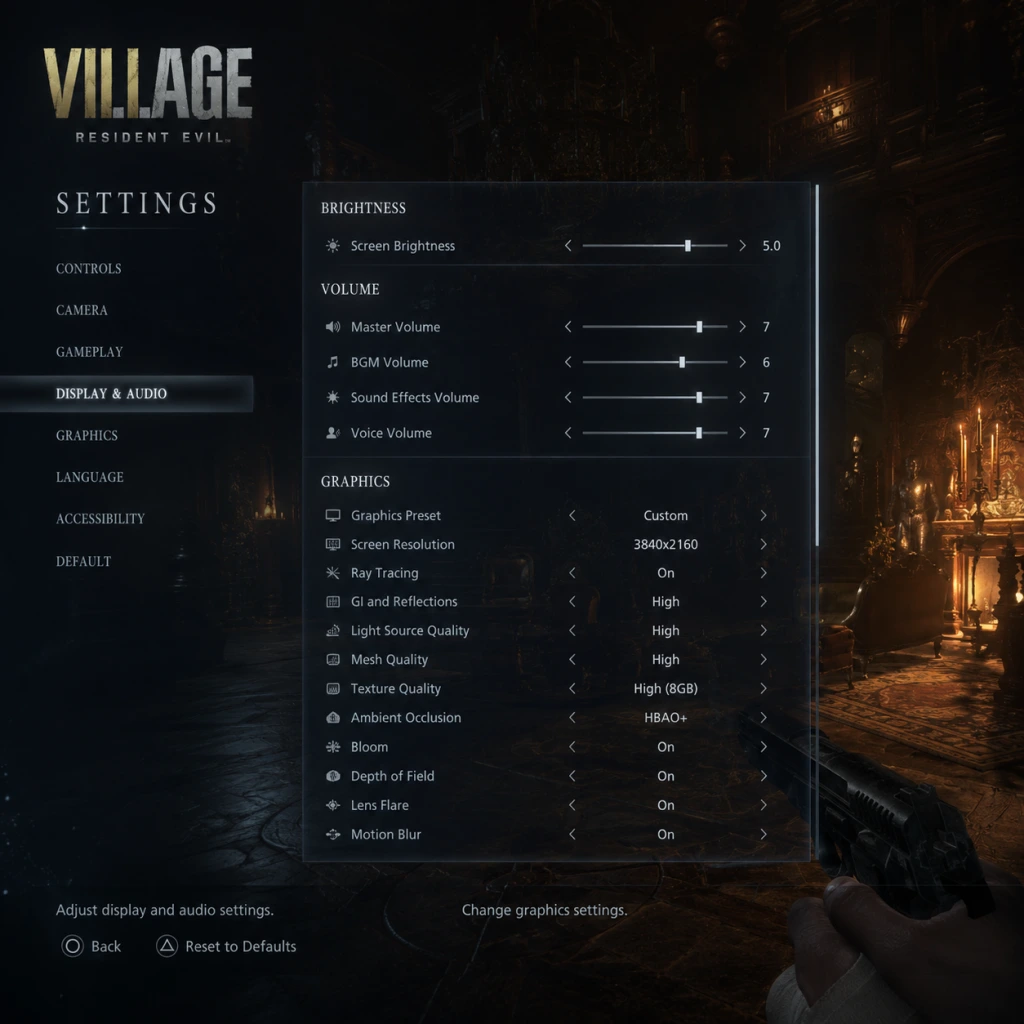
Game Settings
Resident Evil Village – Comprehensive Game Settings Guide
This guide covers every measurable setting in Resident Evil Village (RE8) across Graphics, Audio, Controls, Accessibility, Language, Network, and Gameplay. We provide optimal recommendations for different hardware tiers (Low, Medium, High, Ray Tracing) and highlight settings that are often misconfigured or require special attention during setup.
---
1. Graphics Settings
Graphics settings are the most impactful for performance and visual fidelity. RE8 uses Capcom’s RE Engine, which is well-optimized but still demands careful tuning.
1.1 Display Settings
| Setting | Options | Recommendation | Notes |
|---|---|---|---|
| Display Mode | Full Screen, Borderless, Windowed | Full Screen for best performance. Borderless is recommended for multi‑monitor setups. | Full Screen gives the most dedicated GPU resources. |
| Resolution | Native monitor resolution | Native (e.g., 1920×1080, 2560×1440, 3840×2160) | Lowering resolution gains large FPS but reduces clarity. |
| Refresh Rate | 60Hz, 120Hz, 144Hz, etc. | Maximum your monitor supports | Ensure Windows display settings match. |
| V‑Sync | On, Off, Adaptive (1/2, 1/3) | Off for lower input lag if your monitor supports G‑Sync/Freesync. Otherwise, set to On to prevent tearing. | V‑Sync adds latency; disable if you have adaptive sync. |
| Frame Rate Limit | 30, 60, 90, 120, 144, Unlimited | Unlimited if you have high‑refresh monitor and can maintain high FPS; otherwise cap at 60 or target FPS. | Use to stabilise performance when CPU/GPU limited. |
| HDR | On, Off | On if you have a proper HDR display (10‑bit, 600+ nits). Otherwise Off to avoid washed‑out colours. | Requires in‑game calibration brightness to 0.000 nits (black) and 2000 nits (white) typical. |
| Brightness | Slider 0–5 | 2.0 – 2.5 as default; adjust until the test image logo is barely visible. | Too high = washed‑out blacks; too low = lost details in shadows. |
| Monitor / Display Selection | Drop‑down list | Primary monitor | If using multiple GPUs, choose the dedicated GPU in Windows settings. |
1.2 Graphics Quality Presets & Individual Tuning
RE8 offers presets: Low, Medium, High, Max (Ray Tracing). Below is the breakdown of key individual settings.
| Setting | Low | Medium | High | Max (RT) | Performance Impact | Notes |
|---|---|---|---|---|---|---|
| Image Quality (Resolution Scale) | 70% | 85% | 100% | 100% | Very High – lower = sharper but blurry; use only as last resort. | 100% = native. For 4K, 85% is often indistinguishable. |
| Texture Quality | Low (0.5GB) | Medium (1GB) | High (2GB) | High (2GB) | Moderate – affects VRAM usage. Use High if VRAM ≥ 4GB. | Textures have huge memory pool; lowering reduces visual detail but helps low VRAM cards (e.g., GTX 1050 Ti). |
| Texture Filtering (Anisotropic) | 2x | 4x | 8x | 16x | Low – almost no FPS cost. Always set to 16x on anything above Low. | Improves ground/surface clarity at angles. |
| Mesh Quality | Low | Medium | High | High | Moderate – controls geometric detail (rocks, foliage). | Low can cause pop‑in. Medium is a good compromise. |
| Anti‑Aliasing | FXAA+TAA | TAA | TAA High | TAA High | Low to Moderate – TAA High is sharper. FXAA+TAA blurs more. | TAA High is recommended for balance. SMAA not available. |
| Shadow Quality | Low | Medium | High | High | Moderate – Low reduces shadow resolution; may cause flickering. | High is visually rich but costly on older GPUs. |
| Ambient Occlusion | Off | Low (SSAO) | High (HBAO+) | High (HBAO+) | Moderate – HBAO+ adds realistic contact shadows. | Off saves FPS; SSAO is lighter. |
| Bloom | On/Off | On | On | On | Very Low – negligible FPS hit. | Adds glow to bright lights; keep On for atmosphere. |
| Motion Blur | Off | Off | On | On | Low – subjective. | Many players disable for clarity; recommended to turn Off. |
| Lens Flare | Off | On | On | On | Negligible | Keep On for immersion unless you dislike it. |
| Volumetric Lighting | Low | Medium | High | High | High – Large FPS drain in smoky/fog areas. Low disables most volume. | Medium is a good compromise; High can cut FPS by 15‑20% in Castle interiors. |
| Reflections | Low (SSR) | Medium (SSR) | High (SSR) | Max (Ray Traced) | Very High with RT; SSR High still heavy. | Ray tracing reflections are extremely demanding. Use only on RTX 3060 Ti+ or RX 6800+ for 60fps. |
| Subsurface Scattering | Off | On | On | On | Low – improves skin looks. Keep On if possible. | |
| Shader Cache | On / Off | On | On | On | None – prevents stuttering. Always enable. | Must be enabled for smooth gameplay after shaders compile. |
| Ray Tracing | Off | Off | Off | On (Cascade) | Extreme – can drop FPS by 30‑50% even on high‑end GPUs. | Only for RT reflections and shadows; turn off if losing target FPS. |
| Variable Rate Shading (VRS) | Off | Off | Off | On | Low to Moderate – increases performance where shadows reduce pixel detail. | Supported on NVIDIA Turing+ and AMD RDNA2+. Leave Off if no performance issue. |
| FidelityFX CAS | Off / On | Off | Off | Off | Low – optional sharpening filter. | Can help when using resolution scaling; keep Off at native. |
1.3 Hardware Tier Recommendations
####
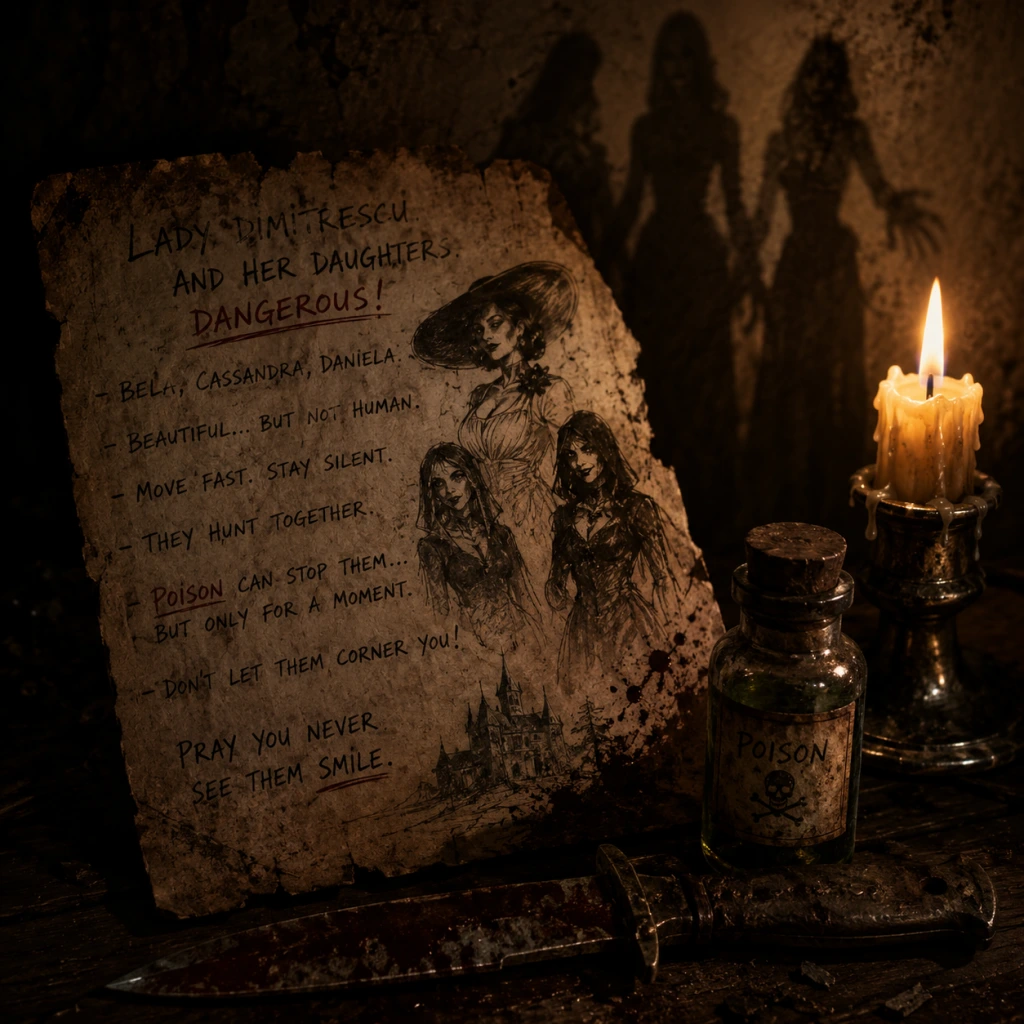
Important Notes
Resident Evil Village – Important Notes
This guide provides critical warnings, pitfalls, irreversible choices, missable content, difficulty spikes, grinding traps, save management advice, and common player regrets. Read this before starting to avoid frustration and make the most of your playthrough.
⚠️ General Warnings & Pitfalls
- Difficulty Cannot Be Changed Mid-Game: Once you select a difficulty (Casual, Standard, Hardcore, or Village of Shadows), you cannot change it until you start a New Game+. Plan accordingly. Hardcore is recommended for returning players; Standard for newcomers; Casual for story-focused players. Village of Shadows is only available after beating the game once.
- Limited Drops from Enemies: Most enemies do not respawn after you leave an area. Resources (ammo, herbs, Lei) are finite per playthrough. Use them wisely.
- The Duke’s Prices Increase: After defeating certain major bosses (e.g., Lady Dimitrescu, Moreau), The Duke’s upgrade prices increase. Buy essential upgrades (like weapon parts or health upgrades) before progressing too far.
- No Manual Save During Combat: The game autosaves frequently, but you cannot manually save during combat or scripted sequences. If you die, you may respawn at an earlier checkpoint. Use the save rooms (with typewriters) to manually save before risky encounters.
- Item Box is Shared: All storage boxes are connected. You do not need to carry everything. Stash excess ammunition, crafting materials, or valuables for later.
- Crafting is Limited: You can only craft ammo, health items, and pipe bombs using recipes found in the field. Do not craft unnecessarily – save materials for emergencies.
###

All Game Items
Resident Evil Village – All Game Items Guide
This guide catalogs every major item in Resident Evil Village (RE8), organized by category. For each item, you'll find its function, how to obtain it, when it's most useful, and any important upgrades or synergies. Items are grouped into Weapons, Consumables & Healing, Ammo & Crafting Materials, Key Items & Quest Items, Collectibles, Currencies, Treasures & Sellable Items, and Special Equipment.
---
1. Weapons
Weapons are your primary means of survival. They can be upgraded at Duke's workshop using Lei. Each weapon has a base variant and may have a custom (fully upgraded) version unlocked later.
#### 1.1 Handguns
| Weapon | Base Damage | Ammo | How to Obtain | Best Use | Upgrades (Final Stats) |
|---|---|---|---|---|---|
| LEMI | 90 | Handgun Rounds | Found in room after first Lycan attack (village) | Early game, decent capacity | High-Capacity Mag, Power, Reload Speed; custom variant: WCX (see below) |
| M1911 | 110 | Handgun Rounds | Purchase from Duke after finding the first treasure (early village) | Slightly stronger than LEMI, better for headshots | Power upgrade; eventually replaced by other handguns |
| V61 Custom | 130 | Handgun Rounds | Duke after collecting all 7 treasure pieces in the village (near waterfall) | Excellent damage, burst-fire mode | All upgrades; best handgun in base game |
| LZ Answerer | 200 | Handgun Rounds | New Game+ or bonus content (unlocked after beating the game once) | Highest handgun damage, infinite ammo possibility | Must be fully upgraded to unlock infinite ammo |
#### 1.2 Shotguns
| Weapon | Base Damage | Ammo | How to Obtain | Best Use | Upgrades |
|---|---|---|---|---|---|
| F2 Sniper (actually a shotgun) | 200 (per pellet, 8 pellets) | Shotgun Shells | Found in Casa Dimitrescu cellar (after first Lady D encounter) | Crowd control, destroy shields | Power, Reload, Capacity; custom variant: SYG-12 (full-auto shotgun) |
| SYG-12 | 220 (per pellet) | Shotgun Shells | Duke after completing the Stronghold segment (mid-game) | Automatic shotgun, immense DPS | All upgrades; become the ultimate close-range weapon |
#### 1.3 Rifles
| Weapon | Base Damage | Ammo | How to Obtain | Best Use | Upgrades |
|---|---|---|---|---|---|
| W870 TAC | 120 | Rifle Rounds | Found in house near the graveyard (village) | Early rifle, good for mid-range | Power, Scope; custom variant: WCX (see below) |
| M1851 Wolfsbane | 160 | Rifle Rounds | Purchase from Duke after reaching the Stronghold (mid-game) | Powerful semi-auto rifle | Power, Capacity; best non-magnum rifle |
| WCX | 180 | Rifle Rounds | Duke after collecting all 9 treasure pieces in the village (near waterfall) | Fully automatic rifle, excellent for all ranges | All upgrades; top-tier rifle |
#### 1.4 Magnums (Special Weapons)
| Weapon | Base Damage | Ammo | How to Obtain | Best Use | Upgrades |
|---|---|---|---|---|---|
| M1000 | 450 | Magnum Rounds | Found in Heisenberg’s factory (late game) | One-shot many enemies, especially bosses | Power, Capacity; extremely rare ammo |
| S.T.A.K.E. | 500 | Magnum Rounds | Duke after completing the factory (late game) | Highest damage weapon, best for bosses | All upgrades; worth investing for final boss |
| Rocket Pistol | 600 | Magnum Rounds | New Game+ (unlocked after beating the game on any difficulty) | Insane damage, but limited ammo | No upgrades (infinite ammo available via bonus) |
#### 1.5 Grenade Launcher (Explosives)
- Grenade Launcher (GM79): Found in the village near the church (flooded area). Fires grenades (explosive, flash, pipe bombs). Requires Grenade Rounds. Essential for crowds and shielded enemies. Upgradable for capacity and reload.
- Knife (default): Basic slash, low damage. Can be upgraded via Duke (combat knife) to a lethal weapon after finishing the game.
- Combat Knife: Unlocked via bonus content. High damage, can stun enemies.
#### 1.6 Melee Weapons
Synergy: Use knife to finish downed enemies or conserve ammo.
---
2. Consumables & Healing Items
All healing items can be found or crafted. They restore health and cure status effects.
| Item | Effect | How to Obtain | When Useful | Notes |
|---|---|---|---|---|
| Giant's Medicine | Full health + cure poison | Rare drop from giant enemies; Duke sells (expensive) | Before boss fights | Save for emergencies |
| First Aid Med | 50% health | Looted, purchased from Duke | Frequent use | Combine with herbs? Not possible in this game |
| Green Herb | 25% health | Found in fields, gardens | Early game, combine with nothing | Use directly or sell? Sell for Lei (20 each) when low on health |
| Red Herb | No effect alone; used in crafting | Rare herb | Only use in crafting (see materials) | Do not eat raw |
| Pipe Bomb | Explosive damage | Crafting (1 Gunpowder + 1 Metal Scrap) | Clearing groups or opening blocked paths | Also used for puzzles (e.g., metal doors) |
| Flash Grenade | Stuns enemies for 5 seconds | Crafting (1 Gunpowder + 1 Glass) | Escaping Lycan packs or blinding bosses | Ineffective on some bosses |
| Health Boost | Temporary max health increase | Unlock via Duke’s cooking (see below) | Before tough areas | Lasts until death or reload |
- Health Boost (1000 Lei) – +25 max HP
- Damage Boost (1500 Lei) – +10% damage for 1 hour
- Defense Boost (1500 Lei) – -10% incoming damage for 1 hour
- Handgun Rounds: 1 Gunpowder + 1 Metal Scrap
- Shotgun Shells: 2 Gunpowder + 1 Metal Scrap
- Rifle Rounds: 1 Gunpowder + 1 Plastic
- Magnum Rounds: 3 Gunpowder + 1 Metal Scrap (rare)
- Grenade Rounds: 1 Gunpowder + 1 Metal Scrap + 1 Chemical
- Pipe Bomb: 1 Gunpowder + 1 Metal Scrap
- Flash Grenade: 1 Gunpowder + 1 Glass
- Gunpowder: Common from enemies, crates, chests.
- Metal Scrap: Common from mechanical enemies, chests.
- Plastic: Found in houses, factory areas.
- Chemical: Rare; found in lab areas (factory, castle).
- Glass: Broken windows, labs.
---
3. Ammo & Crafting Materials
Ammo is crafted from gunpowder and other components. You can also find pre-made ammo.
Crafting Recipes:
Material Locations:
Tips: Always carry at least 10 gunpowder for emergency ammo. In early game, prioritize shotgun shells for Lycans.
---
4. Key Items & Quest Items
These items are needed to progress the story or unlock areas.
| Item | Use | Location |
|---|---|---|
| Crystal Skull | Opens gate in village (first major puzzle) | Inside castle, after defeating Alcina Dimitrescu |
| Dimitrescu's Key | Unlocks treasure room in castle | Given by Dimitrescu after first encounter |
| Metal Bolt | Used in the factory to activate an elevator | Found in factory |
| Gear (various) | Used to fix machinery in Heisenberg’s factory | Scattered throughout factory |
| Doll's Head | Used in dollhouse area (House Beneviento) | After puzzle with the dolls |
| Rose's Doll | Key item for the final area | After completing all four lords' domains |
| Labyrinth Puzzle Pieces (7 total) | Used to unlock the WCX and V61 Custom | Hidden in village, castle, reservoir, factory |
| Treasure Pieces (9 total) | Used to unlock the WCX and V61 Custom | Scattered across all areas |
---
5. Collectibles
These are optional but unlock bonus content and achievements.
| Collectible | Count | Unlocks | Locations |
|---|---|---|---|
| Goat of Warding | 20 | Infinite ammo for one weapon (when all are destroyed) | Hidden in every area; some are tricky to see. Use a guide. |
| Mr. Everywhere Statues | 20 | Model viewer, infinite ammo for another weapon | Same as Goats (they are the same in RE8? No, it’s the LZ Answerer infinite? Actually, Goats unlock infinite ammo for one weapon per file. Check: Destroying all 20 gives unlimited ammo for the weapon you choose. Also, there are 20 “Mr. Everywhere” statues in some versions; in RE8 it’s Goats. Verify: RE8 has 20 Goat of Warding. Breaking all yields infinite ammo for the weapon of your choice. Also, the “Lucky Charm” is a different collectible. |
| Lucky Charm | 1 | Heals 50% health when health is low (passive) | Found in Castle Dimitrescu after puzzle |
| Treasure Map | 1 | Marks all treasures on map | Sold by Duke for 1000 Lei (unlocks treasure markers) |
| Files (Notes/Diaries) | Many | Story exposition, no gameplay reward | Throughout the game |
| Photographs | 3 | Unlocks concept art | Hidden in village, castle, factory |
6. Currencies
- Lei: Main currency. Earn from selling treasures, defeating enemies, finding in bins. Use at Duke to buy weapons, upgrades, healing, cooking boosts, and maps.
- CP (Completion Points): Earned from challenges (e.g., beat game on Hardcore, kill 100 enemies). Exchange at the Extra Content Shop for infinite ammo, new weapons, and models.
---
7. Treasures & Sellable Items
Treasures are valuable items with no gameplay function other than selling for Lei. Some are required for crafting (e.g., Crystal Skull? No, sellable).
| Treasure | Value (Lei) | Location | Notes |
|---|---|---|---|
| Silver Ring | 500 | Village, castle | Common |
| Gold Ring | 1000 | Castle, factory | Common |
| Diamond | 1500 | Factory (rare) | Very valuable |
| Ruby | 2000 | House Beneviento (hidden) | Rare |
| Emerald | 2500 | Heisenberg’s factory (locked safe) | Sell for high price |
| Jewelry (various gold/silver pieces) | 500-3000 | All areas | Mix of rings, necklaces |
| Crystal Skull (treasure variant) | 2000 | Castle (after defeating daughters?) | Also a key item? No, only one key item skull. The rest are sellable crystals. |
| Crystal (pearl, sapphire, etc.) | 300-1000 | Various | Often hidden in breakable containers |
| Gold Flask | 4000 | Endgame area (factory vault) | Highest value sellable |
---
8. Special Equipment & Upgrades
| Item | Effect | How to Obtain |
|---|---|---|
| Sniper Scope | Attaches to rifles for zoom | Found in the village (near church) |
| Shotgun Choke | Tightens shotgun spread | Duke sells after you find the first shotgun |
| Handgun Silencer | Reduces noise, doesn’t aggro distant enemies | Duke after you complete the castle |
| Flashlight | Built-in to your gear; no upgrade needed | Always with you |
| Night Vision Goggles | Unlocks night vision mode (cosmetic) | Bonus content (CP shop) |
- Weapon Power (increases damage), Capacity, Reload Speed, Fire Rate (some weapons).
- Cooking Boosts: Health, Damage, Defense (temporary).
- Treasure Map (permanent map marker).
---
9. Infinite Ammo Weapons (Endgame)
After completing the game, you can unlock infinite ammo for specific weapons via the Extra Content Shop (requires CP).
| Weapon | CP Cost | Notes |
|---|---|---|
| LEMI | 5000 | Good for early runs |
| M1911 | 5000 | |
| V61 Custom | 10000 | Excellent |
| LZ Answerer | 15000 | Best handgun |
| F2 Sniper | 10000 | |
| SYG-12 | 15000 | Powerful shotgun |
| W870 TAC | 5000 | |
| M1851 Wolfsbane | 10000 | |
| WCX | 20000 | Ultimate rifle |
| M1000 | 20000 | Rare |
| S.T.A.K.E. | 25000 | Top magnum |
| Rocket Pistol | 30000 |
---
10. Summary & Synergies
- Early Game: Prioritize LEMI with upgrades. Collect treasures for Lei. Save green herbs for emergencies.
- Mid Game: Invest in SYG-12 or WCX. Use pipe bombs for crowds. Unlock cooking boosts before bosses.
- Late Game: Magnums are key for bosses. Finish collecting all treasure pieces for the best weapons.
- New Game+: Unlock infinite ammo for your favorite weapon. Combine with damage cooking boost for maximum carnage.
This guide covers every item in Resident Evil Village. Use it to plan your loadout, manage resources, and dominate the village.
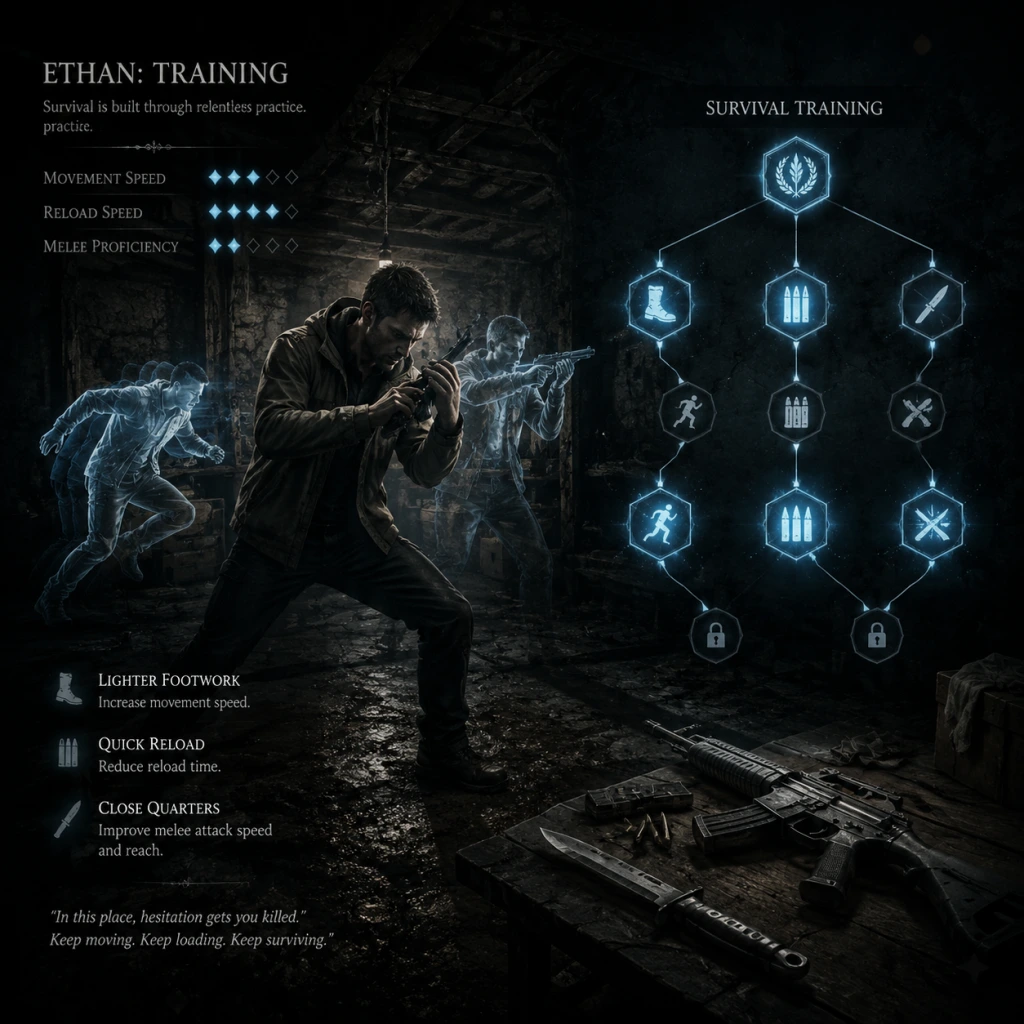
Character Skills
Resident Evil Village – Character Skills Guide
This guide covers every playable character in Resident Evil Village (RE8) and their unique skills, abilities, and special moves. The main campaign features Ethan Winters, while Mercenaries Mode (base game and Additional Orders DLC) includes Chris Redfield, Lady Dimitrescu, Karl Heisenberg, and Mother Miranda. The Shadows of Rose DLC adds Rose Winters with her own mold-derived powers. Skills are described in detail including effects, cooldowns (where applicable), upgrades, and when to use them.
---
1. Ethan Winters (Main Campaign)
Ethan has no traditional skill tree; his abilities come from story progression, item upgrades, and the Duke’s shop. Below are all his combat, survival, and progression-related skills.
1.1 Passive Abilities
- Block (L1/LB): Hold to raise arms and reduce damage by 70%. Does not block all attacks (e.g., Lady Dimitrescu’s claw swipes). Can be used reactively to trigger a Parry.
- Parry (Tap L1/LB just before hit): Timing a block just before an enemy strikes knocks them back briefly and stuns them. Costs stamina (blue bar). Effective against humanoid enemies, Lycans, and even some boss attacks. Stamina recovers over time.
- Knife Parry: Using the combat knife to parry projectiles (e.g., Heisenberg’s scrap) or melee attacks. Extremely tight window but allows counter-attack.
- Sprint (L3/left stick click): Increases movement speed but depletes stamina. Cannot shoot or parry while sprinting. Useful for repositioning or escaping.
- Vault (press A/X near low obstacles): Ethan automatically climbs over objects if prompted. No cooldown.
- Quick Turn (B + left stick back / Circle + back): Instantly rotate 180°. Essential for fleeing enemies.
1.2 Duke’s Upgrade Skills (Lei Purchases)
These are permanent upgrades bought from the Duke using Lei (currency). They affect weapon performance and character stats.
| Upgrade Category | Specific Skill | Effect | Cost & Phase |
|---|---|---|---|
| Weapon Attachments (per weapon) | Long Barrel | Increases damage range (small boost). Purchase each weapon separately. | Varies (early game ~3,000 Lei) |
| High-Capacity Mag | Increases magazine size by 5–8 rounds. Essential for LEMI and M1911. | Mid game (~5,000 Lei) | |
| Laser Sight or Reflex Sight | Improves hip-fire accuracy or aim-down-sights precision. | Mid–late game (6,000–8,000 Lei) | |
| Silencer | Reduces noise radius; surprises enemies. Only available for some weapons (e.g., V61 Custom). | Late game (8,000 Lei) | |
| Character Upgrades | Increased Health (via Cooking with Duke) | Permanently raises max HP. Each level adds ~200 HP. Max 4 boosts. | Requires Lei + ingredients (rare meats) |
| Reload Speed (via Cooking) | Reduces reload animation time by 10% per rank. | Same as above | |
| Movement Speed (via Cooking) | Slightly increases sprint speed and stamina recovery. | Late game only; requires special fish | |
| Defensive Drinks (via Duke’s shop) | Reduces damage taken by 15% for the rest of the area. Available after completing the game once. | 10,000 Lei per drink |
1.3 Healing & Crafting Skills
- First Aid Med (Herbs + Chem Fluid): Craft in inventory or at Duke’s shop. Heals 25% HP. Always carry at least one.
- Green Herb + Green Herb = More potent heal (40% HP).
- Green Herb + Red Herb = Full heal + temporary damage reduction (20% for 30 seconds). Rare recipe.
- Chem Fluid + Gunpowder = Handgun Ammo or Shotgun Shells depending on ratio.
- Pipes: Place explosive (later game). Remote bomb with timer.
- Weak Point Exploitation: Enemies often have glowing weak spots (e.g., Lycan heads, Sturm’s fan). Aiming specifically there deals 2x–3x damage.
- Environmental Kills: Lure enemies into explosive barrels, crushers in factory, or cliffs. Saves ammo.
- Knife Finish: When an enemy is downed, approach and press Y/Triangle to perform a lethal knife stab. Uses durability but conserves bullets.
- Block/Parry: Use against single humanoid enemies to save ammo. Parry bosses like Heisenberg’s punches for a temporary stun.
- Sprint: Only for repositioning in open areas; avoid in tight corridors (enemies can grab).
- Attachments: Prioritize High-Capacity Mag for your main handgun (e.g., LEMI) first, then Long Barrel for damage.
- Health upgrades: Invest early; maxing health drastically increases survivability. Combine with Defensive Drinks in New Game+.
- Stealth/Resource Saver: Silenced pistol + knife + parry focus. Upgrade movement speed.
- Aggro Tank: Magnum (Wolfsbane or S.T.A.K.E.) with Long Barrel + High-Capacity Mag. Max health and Defensive Drinks.
- Speedrunner: Minimal upgrades, prioritize movement speed and reload. Avoid parrying (risk).
- Special Ability: Tactical Reload (RB/R1) – Automatically reloads all equipped weapons instantly. No cooldown, but uses a charge (shown on HUD). Refills 1 charge per 10 combo points earned. Best used when your main weapon runs dry in a fight.
- Combo Finisher: Shoulder Tackle (press RT/R2 when meter full) – A powerful rushing attack that knocks down multiple enemies. Deals ~500 damage. Recharges meter by 30% per use. Use to clear groups or interrupt dangerous enemies.
- Unique Melee: Knee Strike – Quick kick that stuns a single enemy (press B/Circle near downed foe). Combos into finisher.
- Weapons: Assault Rifle (high capacity, moderate damage), Shotgun (pump-action), Handgun (backup).
- Special Ability: Bloodlust (RB/R1) – Increases movement speed by 30%, attack damage by 50%, and grants life steal (10% of damage dealt returns HP) for 10 seconds. Cooldown: 20 seconds. Activate before entering a large room or during boss waves.
- Combo Finisher: Airborne Swipe (RT/R2) – Lady D leaps into the air and crashes down with a claw sweep, dealing AoE damage (~800) and staggering all enemies within 5 meters. Can be aimed with left stick. Use when surrounded.
- Unique Melee: Claw Rip – Horizontal claw swipe that damages and pushes enemies back. Fast recovery. Can be chained up to 3 times.
- Weapons: None; relies solely on claws. Infinite ammo, but no ranged attacks except thrown items (press X/Square to toss a wall section, deals minor damage).
- Special Ability: Magnetism (RB/R1) – Pulls all metallic objects (enemies’ weapons, scrap piles, explosive barrels) toward Heisenberg in a cone. Damages enemies they hit (50–200 damage per object). Also collects nearby Lei automatically. Lasts 3 seconds. Cooldown: 15 seconds. Use to group enemies and deal damage simultaneously.
- Combo Finisher: Hammer Slam (RT/R2) – Heisenberg’s giant hammer comes down with a shockwave, dealing massive damage (1,200) and knocking down everything in a 10-meter radius. Charges combo meter by 50% if it kills multiple enemies. Excellent for crowd control.
- Unique Melee: Magnetic Punch – A quick jab that knocks back one enemy. Can be followed by a second punch if timed.
- Weapons: Pipe Wrench (melee, moderate damage), Handgun (for far enemies).
- Special Ability: Devour (RB/R1) – Summons a Cadou tentacle that grabs a single enemy and drains health (heals Miranda ~300 HP). Also steals combo points from dead enemies. Cooldown: 10 seconds. Use on high-health foes or to heal in a pinch.
- Combo Finisher: Mold Eruption (RT/R2) – Creates a giant mold geyser underfoot that damages all enemies in a large AoE (1,000 damage). Stuns for 2 seconds. Charges combo meter by 40% per kill. Best used in chokepoints.
- Unique Melee: Wing Slash – A sweeping slash with her wing-like arm, covering 180 degrees. Fast but low damage (150). Combos into Devour.
- Weapons: None (mold attacks only). Has a ranged mold projectile (weak) that can be charged for more damage.
- Each character can upgrade their Special Ability cooldown reduction (up to 40% less wait) and Combo Finisher damage (up to 60% more damage) using Lei earned in Mercenaries runs.
- Recommended upgrades: For Chris – Tactical Reload charge rate. For Lady D – Bloodlust duration. For Heisenberg – Magnetism pull range. For Miranda – Devour heal amount.
- Mold Blast (RT/R2) – Primary ranged attack. Fires a bolt of mold energy that deals 50 damage. Hold to charge for a stronger shot (120 damage) that staggers. Unlimited ammo but requires a short recharge (2 seconds) after 6 rapid shots.
- Mold Shield (LT/L2) – Generates a semicircular barrier in front of Rose for 2 seconds. Blocks all incoming damage (including boss attacks) but consumes 25% of her mold energy gauge. Cooldown: 5 seconds. Essential for parrying tough attacks.
- Mold Grasp (RB/R1) – Rose’s left hand transforms into a tendril that grabs an enemy and holds them in place for 3 seconds. Can throw them into walls or other enemies (deals 100 damage). Use to control dangerous foes or create space.
- Mold Step (A/X while aiming) – A short teleport dash (dodge) that moves Rose 4 meters in any direction. No cooldown but costs 10% mold energy. Tracks to avoid bullets and melee.
- Energy Combo: After mold blasts hit an enemy, a floating mold spore appears. Collecting it restores 5% energy. Chain shots quickly to generate spores.
- Finisher (Y/Triangle near downed enemy): Rose performs a devastating mold attack dealing 300 damage and fully restoring energy if it kills. Use on strong enemies.
- Mold Blast: Primary damage. Use charged shots for armored enemies.
- Mold Shield: Timing is key; use it to block boss charges (e.g., Resurrections).
- Mold Grasp: Ideal for isolating mini-bosses like the Drowned. Throw them into explosive barrels for bonus damage.
- Mold Step: Spam to avoid swarms; always keep 20% energy reserved for an emergency shield.
- All characters benefit from understanding enemy patterns. Parry (Ethan) or Mold Shield (Rose) can turn the tide.
- In Mercenaries, use Special Abilities at the start of each wave to maximize combo score.
- Upgrade order for Ethan: Health > Reload Speed > Movement Speed.
- For Rose, prioritize energy upgrades over shield – you can dodge most attacks.
1.4 Special Techniques
When to Use Each:
Recommended Builds:
---
2. Mercenaries Mode Characters
Mercenaries mode (base game and Additional Orders DLC) lets you play as four unique characters, each with a Special Ability (activated with RB/R1) and a Combo Finisher (after building combo meter).
2.1 Chris Redfield
Recommended Playstyle: Aggressive; use Tactical Reload to keep firing, spam Shoulder Tackle to break enemy formations. Prioritize combo meter for more special charges.
2.2 Lady Dimitrescu (Alcina)
Recommended Playstyle: Melee-focused; use Bloodlust before engaging clusters. Build combo meter with quick claw attacks, then use Airborne Swipe. Watch out for ranged enemies—use pillars to close distance.
2.3 Karl Heisenberg
Recommended Playstyle: Use Magnetism to gather enemies and scrap, then Hammer Slam. Wrench is strong but slow; use handgun to build combo meter safely. Prioritize combo meter upgrades.
2.4 Mother Miranda (Additional Orders DLC)
Recommended Playstyle: Versatile; use Devour to sustain, then Mold Eruption to clear crowds. Because she has no guns, stay close to enemies. Build combo meter with rapid wing slashes.
Cooldowns & Upgrades (All Characters)
---
3. Shadows of Rose DLC (Rose Winters)
Rose has unique mold-derived abilities that replace conventional weapons. She uses a Mold Hand to project energy.
3.1 Mold Abilities
3.2 Combo System
3.3 When to Use Each Skill
Recommended Build: Upgrade energy capacity first (allows more dashes/blasts), then shield duration. In late game, combo finisher damage upgrades to one-shot weaker enemies.
---
4. Synergies & General Tips
Final Note: This guide covers all skills as of the latest update (Winter’s Expansion). Future patches may adjust cooldowns and damage values. Always check in-game tooltips for current stats.

Characters & Roles
Characters & Roles
This guide covers every major character in Resident Evil Village (RE8), including playable protagonists, antagonists, and supporting NPCs. For each playable unit—Ethan Winters, Chris Redfield, Lady Alcina Dimitrescu, Karl Heisenberg, and Rose Winters—we provide detailed background, strengths, weaknesses, playstyle tips, unlock conditions, recommended equipment/builds, and any relevant team synergy (though the game is single-player, synergy here refers to story interactions or complementary abilities in Mercenaries mode). Non-playable characters are also summarized.
---
Playable Characters
#### 1. Ethan Winters
- Background: Ordinary everyman from Resident Evil 7, now searching for his infant daughter Rose in a mysterious European village. He is the sole playable protagonist for the main campaign.
- Strengths: Can wield every weapon type (pistols, shotguns, rifles, magnums, explosives). Crafts healing and offensive items. Uses a block to reduce damage. Can upgrade weapons and purchase attachments from the Duke.
- Weaknesses: No special superhuman abilities; relies on items. Low health pool compared to later characters. Slow movement speed and no sprint stamina upgrade. Limited inventory space until you buy upgrades.
- Playstyle: Conservative, methodical resource management. Use blocking to survive Lycan attacks. Aim for weak points (e.g., Lycan heads). Prioritize upgrading the S.T.A.K.E. pistol or Wolfsbane magnum for high damage. Use the Pipe Bomb or mines for crowd control. Explore thoroughly for Lei and crafting materials.
- Unlock conditions: Automatically at game start.
- Recommended equipment/builds:
- Team synergy: N/A as solo protagonist. Interacts with Chris (Chapter 7) but has no direct control over his actions. The Duke serves as a merchant and information source.
- Background: Legendary BSAA operative and series veteran. Takes over control briefly in Chapter 7 and during the final boss sequence.
- Strengths: High health pool; starts with powerful weapons: a high-capacity machine gun (LZ Answerer?) actually uses a custom machine pistol and a grenade launcher. Fast movement speed. Can punch enemies in close combat.
- Weaknesses: Fixed loadout—no inventory management or weapon upgrades. Limited ammo supply; must pick up from fallen enemies. No blocking ability (uses dodge roll instead). Has a timer in his segment (House Beneviento) that adds pressure.
- Playstyle: Aggressive but resource-aware. Use the machine pistol for headshots; save grenade rounds for armored enemies or groups. In House Beneviento, avoid unnecessary detection and conserve ammo for the final showdown. During the final boss (Miranda), use the grenade launcher to stun while Ethan deals damage.
- Unlock conditions: Automatic during story: Chapter 7 (House Beneviento) and Chapter 11 (final boss).
- Recommended equipment/builds: Not applicable—weapons are fixed. However, on harder difficulties, prioritize grenade launcher shots over machine gun spray. The dodge roll timing is crucial against Lycans.
- Team synergy: Works alongside Ethan in the final battle; Chris's constant suppressive fire allows Ethan to close in. In lore, Chris's assault diverts enemies from Ethan.
- Background: Matriarch of House Dimitrescu, a towering vampire-like aristocrat obsessed with blood. Playable in the "Another Traversal" mode of Mercenaries (part of the Winters' Expansion DLC).
- Strengths: Very high health pool. Powerful melee claw swipes that hit multiple enemies. Can summon her daughters (Cassandra, Daniela, Bela) as temporary allies. Special ability: Bloodthirst—a devastating area attack that deals massive damage and heals a portion of health.
- Weaknesses: Extremely slow movement speed; cannot run or dodge effectively. No ranged weapons except the ability to throw environmental objects (barrels, metal pipes). Limited mobility makes her vulnerable to fast enemies unless using Bloodthirst.
- Playstyle: Methodical, crowd-control approach. Stay in central open areas; use claw combos (light-light-heavy) to break enemy guards. Summon daughters when overwhelmed to create distractions. Use Bloodthirst only against large groups or bosses to regain health. Avoid chasing fast enemies; let them come to you. In tight corridors, use wall-crushing attacks.
- Unlock conditions: Purchase the Winters' Expansion DLC (or included in Gold Edition). Unlocked for Mercenaries after completing any one stage with Ethan? Actually it's immediately available after downloading the DLC, but must be selected from the character menu before starting a Mercenaries run.
- Recommended equipment/builds: No traditional equipment; upgrades within Mercenaries modify innate stats. Prioritize following in upgrade menu:
- Team synergy: The daughters act as temporary teammates—they can finish downed enemies or distract targets. In co-op? Not applicable. The synergy is internal: using daughters to buy time for Bloodthirst recharge.
- Background: Lord of metal, a sadistic engineer who controls magnetic fields. Playable in the same mode as Dimitrescu.
- Strengths: Unique magnetic abilities: can grab metal objects (pipes, barrels, metal sheets) from a distance and throw them with high accuracy and damage. Has a powerful slam attack (ground pound) that knocks back enemies. Can also create a protective metal shield briefly.
- Weaknesses: Slow attack execution; throws have a wind-up. Very low health compared to Dimitrescu. Vulnerable during magnetic pull animation. No close-range melee attacks except the slam (which is slow). Resource management: thrown objects are finite per area (they regenerate, but slowly).
- Playstyle: Medium-range combatant. Stay at a distance, scan for metal objects (highlighted in blue). Prioritize picking up pipes and barrels—they cause AoE damage on impact. Use slam when enemies cluster around you. Use shield only as an emergency block against gunfire or rushing Lycans. Conserve health; rely on kill combos to restore a small amount via combo bonuses.
- Unlock conditions: Same as Dimitrescu—immediately available with Winters' Expansion DLC.
- Recommended upgrades:
- Team synergy: None directly, but his playstyle benefits from open arenas with abundant metal debris. He synergizes with his own abilities by chaining pulls and throws.
- Background: Ethan and Mia's daughter, now a teenager with latent abilities tied to the Mold. Protagonist of the Shadows of Rose story DLC.
- Strengths: Can use the "Hallucination" mechanic to temporarily alter the environment (reveal hidden paths, disable traps, create safe zones). Has a powerful melee attack with her hand (Mold-infused slashes). Can enter a "Power" state that makes her invincible and enhances damage, but drains a resource called "Power Gauge." Can cure her own infection with a limited resource.
- Weaknesses: Low base health; most attacks stagger but do not kill quickly. Power state is limited and must be activated manually. Environmental hallucinations consume Power Gauge as well. Cannot use conventional firearms—only melee and the Transmutation ability (which is puzzle-oriented, not direct combat). Must manage two resources: Health and Power Gauge.
- Playstyle: Stealth and timing. Use hallucinations to avoid fights or ambush enemies. Save Power Gauge for boss encounters or large groups. Engage from behind with charged slashes. Use the environment (e.g., exploding barrels, water hazards) to compensate for low damage. In the overworld, use Transmutation to solve puzzles, revealing items and shortcuts.
- Unlock conditions: Purchase the Shadows of Rose DLC (included in Gold Edition/Winters' Expansion). Requires completion of the main campaign (any difficulty) to unlock the new game slot.
- Recommended equipment/builds: No weapon choices; upgrades are found as collectible items in the DLC:
- Team synergy: None (solo). The story has NPC allies (e.g., the Duke-like figure?) but no direct team mechanics. Rose's abilities are self-synergistic: using hallucinations to create distance then activating Power state for finishing blows.
- Early Game: LEMI pistol (upgrade to optional M1911? Actually LEMI is good, but later the M1911 is better). Shotgun (W870 TAC). Focus on reload speed and power.
- Mid Game: SYG-12 shotgun (pump-action? Actually there's a semi-auto shotgun later). F2 Rifle for long range. Use Lei for weapon upgrades over healing items unless critically low.
- Late Game: Wolfsbane (magnum) for bosses; S.T.A.K.E. (high-capacity pistol) for general use. Equip Survival Knife for quick switches. Use accessories like the Foraging Charm to increase drop rates.
- Build priority: Weapon damage > Reload speed > Stability > Capacity. Defense upgrades (body armor) are expensive but worth it on Hard difficulty.
#### 2. Chris Redfield
#### 3. Lady Alcina Dimitrescu (Mercenaries Mode - Winters' Expansion)
- Health Increase (maximize to 200%)
- Attack Power Increase (claw damage)
- Bloodthirst Cooldown Reduction (to use more often)
- Daughter Summon Duration (keep them longer)
- Avoid move speed upgrades as they are minimal; focus on tankiness.
#### 4. Karl Heisenberg (Mercenaries Mode - Winters' Expansion)
- Magnetic Pull Speed (faster grab)
- Throw Damage (increase projectile damage)
- Shield Duration (better defense)
- Ground Pound Radius (wider knockback)
- Health upgrades are less critical due to low base, but take if you struggle.
#### 5. Rose Winters (Shadows of Rose DLC)
- Power Gauge Capacity (increase max gauge)
- Healing Efficiency (restore more HP per use)
- Speed Boost Charms (improve dodge and movespeed)
- Attack Power Upgrades (increase slash damage)
- Prioritize Power Gauge first for sustainability.
---
Major Non-Playable Characters
These characters are crucial to the story but cannot be controlled. They are included for context.
| Character | Role | Key Traits |
|---|---|---|
| Mother Miranda | Main antagonist; a false deity who experiments with the Mold. | Shapeshifting, powerful supernatural abilities. Boss fights in story. |
| Alcina Dimitrescu | Lord of Castle Dimitrescu; a towering vampire matriarch. | Regal, sadistic, can transform into a swarm of flies. Boss in castle. (Also playable in Mercenaries—see above.) |
| Donna Beneviento | Lord of House Beneviento; a reclusive dollmaker. | Uses psychic illusions and a creepy doll (Angie). No direct combat; her segment is a psychological horror puzzle. |
| Salvatore Moreau | Lord of the Reservoir; a deformed, aquatic mutant. | Hunchbacked, can spew acid, mutate into a giant fish. Boss in reservoir area. |
| Karl Heisenberg | Lord of Factory; a manic metal manipulator. | Controls magnetic fields, constructs traps and a giant metal monster. Boss in factory. (Also playable in Mercenaries—see above.) |
| Mia Winters | Ethan's wife and Rose's mother. | Supportive NPC; appears in flashbacks and early game as a hostage. Not playable. |
| The Duke | Merchant and informant; a mysterious corpulent figure. | Sells items, provides upgrades, offers quests, and gives lore. Indispensable for progression. |
| Eva / Rose (child) | Rose as a baby; central to the plot. | Not playable except in DLC as teenager. |
| Chris Redfield's Squad | BSAA operatives (e.g., Hound Wolf Squad members). | Briefly controlled in one segment; not fully playable. |
Summary of Playable Characters by Mode
| Mode | Character | Availability |
|---|---|---|
| Main Campaign (Story) | Ethan Winters | Always from start |
| Main Campaign (interlude) | Chris Redfield | Chapter 7 & 11 |
| The Mercenaries (base game) | Ethan Winters | Unlock by completing story |
| The Mercenaries (Winters' Expansion) | Lady Dimitrescu, Karl Heisenberg | Purchase DLC |
| Shadows of Rose (DLC) | Rose Winters | Purchase DLC, complete main story |
Tips for Choosing a Character in Mercenaries
- Ethan: Best for long-range and careful players; can use all weapon types, but requires good resource management.
- Lady Dimitrescu: For players who prefer close-quarters combat and tanking; high risk/high reward with Bloodthirst heal.
- Karl Heisenberg: For players who like projectile-based puzzles; requires spatial awareness to find metal objects.
- Rose (Shadows of Rose): For players who enjoy stealth and supernatural abilities; the DLC's unique mechanics offer a different pace.
For team synergy in a single-player context, note that these characters never fight together simultaneously. The synergy is purely in the narrative (e.g., Chris supports Ethan) or in your personal strategy within a character's own moveset.
---
This concludes the comprehensive Characters & Roles guide for Resident Evil Village. Use the tables and descriptions above to choose your preferred playable unit and understand the major figures of the game.
Cheats & Secrets
Cheats & Secrets Guide for Resident Evil Village
Resident Evil Village does not feature traditional cheat codes (e.g., entering a button sequence or typing a command). However, it is packed with developer-intended unlockable bonuses, hidden easter eggs, and secret content. Below is a comprehensive list of every known cheat-like secret, unlockable reward, and easter egg.
---
No Traditional Cheat Codes
There are no in-game menus where you can type a passcode or press a combination of buttons to activate cheats such as infinite health, instant kill, or level select. The game’s cheat-like features are all earned through progression, challenges, or DLC.
---
Unlockable Bonus Weapons & Items (Post-Game Rewards)
After completing the main story at least once, you can purchase infinite-ammo variants of certain weapons from the Duke’s shop using CP (Completion Points) earned by completing challenges. These effectively function as cheats in subsequent playthroughs.
| Weapon | Unlock Condition | CP Cost | Notes |
|---|---|---|---|
| LZ Answerer (Lightsaber-like melee weapon) | Complete the “Mercenaries” mode (included in base game) on all stages with at least B rank. Then purchase from the Extra Content Shop. | 50,000 CP | Infinite durability; one-hit kills most enemies. Only usable in the main campaign after unlocking. |
| Infinite Ammo: Wolfsbane | Complete the main story on any difficulty (New Game+ required to apply infinite upgrade). | 70,000 CP | Must first purchase the Wolfsbane magnum from the Duke during the game, then unlock infinite ammo for it. |
| Infinite Ammo: S.T.A.K.E. | Complete the main story. | 80,000 CP | Unlock after purchasing the S.T.A.K.E. magnum. |
| Infinite Ammo: Rocket Pistol | Pre-order DLC or buy the “Trauma Pack” DLC. | N/A (carry-over from DLC) | Actually a separate weapon with infinite ammo by default. |
| Infinite Ammo: WCX (Assault Rifle) | Uplift challenge: eliminate 50 enemies with a submachine gun in Mercenaries mode. Then purchase from Extras. | 30,000 CP | Requires the “Winters’ Expansion” DLC (paid). |
| Infinite Ammo: Shotgun | Various challenge completions (e.g., finish game on Hardcore). | 60,000 CP | Applies to the primary shotgun (M1897 or SYG-12). |
---
Hidden Content & Easter Eggs
#### 1. Mr. Raccoon Figurines (Secret Collectibles)
There are 20 Mr. Raccoon figurines hidden throughout the game world. Destroying all of them earns you the “It’s a Waste of Ammo” achievement/trophy and unlocks the Infinite Ammo for the LEMI handgun in the Extra Content Shop. This is the only way to get infinite ammo for the starting pistol.
#### 2. Jill Sandwich Reference
In the castle, near the dining room where Lady Dimitrescu first appears, there is a painting of a sandwich with a note saying “Master of Unlocking”. This is a direct callback to Resident Evil (1996) and its infamous line “Jill Sandwich”.
#### 3. “Master of Unlocking”
In the same castle area, examine a small shelf in the kitchen to find a keychain with the text “Master of Unlocking”. Another nod to the classic RE1 dialogue.
#### 4. Duke’s Secret Dialogues
If you linger in certain rooms and repeatedly interact with the Duke, he will occasionally deliver unique lines. For example, in the graveyard, he might comment on the crypt. These are purely cosmetic easter eggs.
#### 5. Lady Dimitrescu’s Secret Chamber
In the castle’s basement, you can find a sealed door that requires both the Dimitrescu Signet Ring and the Iron Key. Behind it is a hidden room with a note from Lady Dimitrescu’s mother, hinting at the family’s past.
#### 6. Ethan’s Shadow
During the opening escape sequence, if you look down at your feet, you’ll notice Ethan’s shadow does not match his movements. This is a subtle bug? Actually it’s an intentional effect to unsettle players, but not an easter egg per se.
#### 7. “Bloody River” Difficulty Name
The hardest difficulty, “Bloody River” (Winters’ Expansion only), is a reference to the river of blood in the Moreau area. It also ties into the “Village of Shadows” difficulty in RE7.
#### 8. The “Crow” Puzzle
In the castle, solving the swinging bell puzzle to get the Tragonite mask uses the same logic as RE7’s birthday puzzle. Fans of the series will notice the similarity.
#### 9. Goose Easter Egg
In the village, near the first house you enter after the opening, search the backyard of a destroyed house. There’s a small, unbreakable toy goose. If you shoot it repeatedly, it honks. No reward, just fun.
#### 10. “Heisenberg’s Hammer” Secret Room
In the factory area, look for a wall with a cracked brick. Use the Hammer (the one you get from the Duke’s quest) to break it, revealing a hidden room with a treasure and a note about Heisenberg’s past.
---
Developer-Intended Secrets (Exploit-Safe)
These are features built into the game that can be bypassed or fast-tracked only via specific conditions (not glitches):
- New Game+ with All Weapons Carried Over: Complete the game once; on your next playthrough, all weapons, upgrades, and items (except key items) are retained. You can essentially start with a full arsenal.
- “Village of Shadows” Difficulty Unlock: Finish the game on Hardcore once to unlock Village of Shadows, the hardest difficulty (included in base game). No further secrets needed.
- Mercenaries Mode Characters: In the Winters’ Expansion, completing Mercenaries stages unlocks additional characters like Lady Dimitrescu, Heisenberg, and Chris Redfield with unique abilities.
- Guard Breaking: All enemies can be staggered with a heavy weapon (e.g., shotgun blast to the face). This can be exploited to keep enemies pinned until ammo runs out.
- Duke’s Storage: Use the Duke’s storage to hold extra items, but also to “dupe” items via New Game+ (since your inventory carries over). This is not a bug; it’s how the game is designed.
- Environment Kills: Use explosive barrels, swinging chandeliers, or the steam valves in the factory to kill groups of enemies without spending ammo.
---
Exploit-Safe Secrets (No Glitches)
These are intentional mechanics that veteran players might consider “cheats”:
---
Summary
Resident Evil Village does not have cheat codes like older games, but its robust unlockable system (via CP and challenge completion) provides the closest equivalent. Hidden easter eggs add charm for series veterans. For a true “cheat” experience, prioritize unlocking the LZ Answerer (one-hit-kill melee weapon) or Infinite Ammo for your favorite gun. All secrets listed here are legitimate, patch-safe, and intended by the developer.