
RimWorld
## RimWorld Game Introduction **RimWorld** is a critically acclaimed colony simulation game developed and published by **Ludeon Studios**. Originally released for PC via Steam Early Access on **December 15, 2014**, the game officially launched on **October 17, 2018**. It was later ported to Xbox On...

Download & Installation
RimWorld Download & Installation Guide
This guide covers official, legitimate ways to download and install RimWorld on all supported platforms. RimWorld is available on PC (Steam, GOG, Microsoft Store), macOS, Linux, Xbox One, Xbox Series X|S, PlayStation 4, and PlayStation 5. It is not available on Nintendo Switch, mobile devices, or the Epic Games Store.
---
System Requirements
Minimum Requirements
| Component | Requirement |
|---|---|
| OS | Windows 7 64-bit / macOS 10.12+ / Linux Ubuntu 16.04+ |
| CPU | Intel Core 2 Duo or AMD equivalent (2.0 GHz dual-core) |
| RAM | 4 GB |
| GPU | Intel HD Graphics 3000 or better, 1 GB VRAM |
| Storage | 2 GB free space |
| DirectX | Version 9.0c or higher (Windows only) |
| Internet | Not required for single-player, needed for Steam Workshop mods |
Recommended Requirements
| Component | Requirement |
|---|---|
| OS | Windows 10 64-bit / macOS 10.14+ / Linux Ubuntu 20.04+ |
| CPU | Intel Core i5 3.0 GHz or AMD equivalent |
| RAM | 8 GB |
| GPU | NVIDIA GTX 660 / AMD Radeon HD 7850 or better, 2 GB VRAM |
| Storage | 4 GB free space (including mods) |
| DirectX | Version 11 (Windows only) |
---
Platform-Specific Installation Guides
1. PC/Mac/Linux – Steam
1. Create a Steam account at [store.steampowered.com](https://store.steampowered.com) (or log in if you already have one).
2. Download and install the Steam client from the website.
3. Launch Steam and log in.
4. Purchase RimWorld via the Steam Store (search \"RimWorld\") or redeem a Steam key if you bought it elsewhere.
5. In your Steam Library, find RimWorld and click Install.
6. Choose installation directory (default is fine) and ensure sufficient disk space.
7. Wait for download and installation to complete.
8. First Launch: Click Play in Steam. The game will launch with the Unity engine initialization. After the splash screen, the main menu appears. You may need to adjust resolution and language settings.
2. PC/Mac/Linux – GOG (DRM-Free)
1. Create a GOG account at [gog.com](https://www.gog.com).
2. Purchase RimWorld from the GOG store.
3. Download the GOG Galaxy client (optional, but recommended for automatic updates) or download the offline installer directly.
4. Using GOG Galaxy:
- Install and log in.
- Go to your Library → RimWorld → Install.
5. Using offline installer:
- Download the installer file (a single .exe or .sh file).
- Double-click to run. Follow the setup wizard, choosing destination folder.
- After installation, launch via the created shortcut or the .exe in the game folder.
6. First Launch: Same as Steam version. No DRM; runs directly.
3. Windows 10/11 – Microsoft Store (Also Includes Console Versions via Xbox Play Anywhere)
Note: RimWorld on Microsoft Store is a different purchase than Steam/GOG. It supports cross-save with Xbox consoles if you own both.
1. Open the Microsoft Store on your Windows PC.
2. Search for \"RimWorld\" and select the game.
3. Purchase or Install (if you own it via an Xbox Game Pass subscription? RimWorld is not on Game Pass at this time; you must buy it).
4. Click Install – ensure you are logged in with your Microsoft account.
5. The game installs to your default WindowsApps folder (managed by Xbox app, not manually accessible).
6. First Launch: Click Launch from the Store or find it in the Start menu. It will open like any UWP app.
4. Xbox One / Xbox Series X|S
1. Turn on your Xbox console and connect to the internet.
2. Go to Store (Microsoft Store) on the dashboard.
3. Search for RimWorld.
4. Buy the game (price varies by region).
5. After purchase, the game will automatically start downloading. You can also initiate download from My Games & Apps → Ready to Install.
6. Wait for download (approx. 1–2 GB).
7. First Launch: Launch from Home or My Games & Apps. The Xbox interface handles sign-in, and the game will present controller-friendly menus.
5. PlayStation 4 / PlayStation 5
1. Turn on your PS4 or PS5 and sign in to your PSN account.
2. Open the PlayStation Store.
3. Search for RimWorld.
4. Purchase the game.
5. Select Download (or set to auto-download).
6. The game will install automatically. You can monitor progress from Notifications → Downloads.
7. First Launch: Go to your game library and select RimWorld. The game supports DualShock 4 / DualSense controllers natively.
---
Account Requirements
- Steam: Steam account (free) + purchase.
- GOG: GOG account (free) + purchase.
- Microsoft Store (PC/Xbox): Microsoft account (free) + purchase. Xbox Game Pass does not include RimWorld.
- PlayStation: PSN account (free) + purchase.
- Game install size: ~1.5–2 GB (base game). Mods can add 500 MB–2 GB each.
- Save files:
- Backup your saves regularly, especially before adding mods.
- Cause: Outdated graphics drivers or incompatible GPU.
- Fix: Update GPU drivers (NVIDIA, AMD, Intel) to latest version. For integrated Intel HD Graphics, ensure the game is set to run on the dedicated GPU (not CPU-integrated).
- Cause: Missing Visual C++ Redistributables or .NET Framework.
- Fix: Install both x86 and x64 versions of [Visual C++ Redistributable](https://aka.ms/vs/17/release/vc_redist.x64.exe) (2015-2022). Also install [.NET Framework 4.7.2](https://dotnet.microsoft.com/en-us/download/dotnet-framework/net472) or later.
- Cause: Permissions issue with WindowsApps folder.
- Fix: Run the Store as administrator, or install to a secondary drive via Store settings. Do not manually move the game folder.
- Cause: Steam requires extra space for caching.
- Fix: Free up more space (at least 4 GB) or change Steam library folder to a drive with more capacity.
- Cause: macOS security Gatekeeper blocking the app.
- Fix: Right-click the RimWorld.app → Open (the first time). After that, it will be trusted. Alternatively, disable Gatekeeper (temporarily) via Terminal: `sudo spctl --master-disable`.
- Cause: Usually a corrupted install or Bluetooth interference (PS5).
- Fix: Reinstall the game from the console store. For PS5, ensure controller firmware is updated.
- Cause: Internet connection or Steam client issue.
- Fix: Verify internet, restart Steam, log out/in. Check if Steam is in offline mode – switch to online.
- 64-bit OS required: RimWorld does not support 32-bit Windows.
- Antivirus exclusions: Add the game folder (`%ProgramFiles(x86)%\\Steam\\steamapps\\common\\RimWorld` on Steam) to your antivirus exceptions to avoid false positives.
- Mod safety: Always back up your saves before adding mods, and check mod compatibility with your game version.
- Console versions: Console editions may lack some mods and have a slightly different UI but receive parity updates.
No subscription is required for online play because RimWorld is offline single-player. However, to download mods (on PC) you need internet connectivity and a Steam/GOG account (for Workshop access only on Steam; GOG mods are manual).
---
First Launch Setup
After installation, follow these steps:
1. Language Selection: RimWorld defaults to English. You can change language from the main menu → Options → Language.
2. Resolution & Fullscreen: Options → Display → set resolution, windowed/borderless/fullscreen.
3. Controls: If on PC, keyboard + mouse. On console, controller setup is automatic.
4. Tutorial: The game offers a tutorial scenario (\"Crashlanded\") which is highly recommended for new players.
5. Mods (PC only): From the main menu, click Mods to enable/disable. Steam Workshop mods are automatically downloaded when subscribed; manually installed mods go in the `RimWorld/Mods` folder.
6. Quick Performance Check: Before starting a colony, go to Options → Gameplay → change \"Allow auto-save interval\" to 15 minutes if you have a slower hard drive.
---
Storage Space & Save Game Locations
- Steam: `%appdata%\\..\\LocalLow\\Ludeon Studios\\RimWorld by Ludeon Studios\\Saves` (Windows) / `~/Library/Application Support/RimWorld/Saves` (macOS) / `${XDG_DATA_HOME}/RimWorld/Saves` (Linux)
- GOG: Same as Steam (saved in the same Unity persistent data folder).
- Microsoft Store / Xbox / PlayStation: Managed by the OS; no direct file access without developer tools.
---
Common Installation Errors & Fixes
Error: \"Failed to initialize renderer\" (PC)
Error: \"Unity Player : Unable to load mono\" or \"DLL not found\"
Error: \"Access denied\" when installing on Windows (Microsoft Store only)
Error: \"Not enough disk space\" even if free space is available (Steam)
Error: Game crashes on launch on macOS
Error: Controller not working on console versions
Error: \"Can't connect to Steam Workshop\" (PC)
---
Post-Installation Verification
1. Launch the game and confirm you see the main menu with the "RimWorld" title and the game's distinctive pixel-art style.
2. Check version number (bottom left of main menu). The latest version is usually 1.5 (as of 2025) – note that RimWorld is still being updated.
3. Create a new colony with default settings – if the game loads into the map with colonists, installation is successful.
4. Test mod loading (if installed): Go to Mods screen → enable all desired mods → sort according to load order recommendations (use RimPy Mod Manager for complex setups).
5. Save & load test: Press ESC → Save → give a name → exit to main menu → Load → select the save. If it loads correctly, save function works.
---
Additional Tips
---
Troubleshooting Checklist
1. Verify game files (Steam: right-click → Properties → Local Files → Verify integrity...; GOG: Galaxy → Manage Installation → Verify).
2. Run the game as administrator (Windows) if crash on launch.
3. Disable overlays (Steam, Discord) as they can interfere.
4. Check Windows Event Viewer for detailed crash logs.
5. Visit the [RimWorld official forums](https://ludeon.com/forums/) or [RimWorld subreddit](https://reddit.com/r/RimWorld) for community help.
---
This guide covers all legitimate methods to obtain and install RimWorld. Remember to only download from official stores to avoid malware. Enjoy building your colony!

Game Introduction
RimWorld Game Introduction
RimWorld is a critically acclaimed colony simulation game developed and published by Ludeon Studios. Originally released for PC via Steam Early Access on December 15, 2014, the game officially launched on October 17, 2018. It was later ported to Xbox One and Xbox Series X|S on July 28, 2022, and remains available on Windows, macOS, Linux, and Xbox consoles (via Xbox Game Pass and digital stores). The game is not available on PlayStation or mobile platforms.
Genre & Core Gameplay
RimWorld blends colony management, survival, strategy, and emergent storytelling. Players oversee a group of survivors—usually three—who crash-land on a procedurally generated planet. The goal is to build a self-sufficient colony, defend against threats, and ultimately escape the planet. The game is often described as a "story generator" because every playthrough produces unique narratives driven by the AI storyteller, character personalities, random events, and player decisions.
Story & Setting
There is no fixed storyline. Instead, the game creates a new story each time. The setting is a rimworld—a lawless, frontier planet on the edge of civilized space. The planet is randomly generated with varying biomes (tropical, arid, boreal, tundra, etc.), weather patterns, and resources. Several AI-controlled factions (hostile, neutral, and friendly) inhabit the world, along with ancient ruins, hidden dangers, and wildlife. The game’s underlying lore involves a sprawling human civilization across the galaxy, but the story remains focused on your small colony’s struggle for survival.
Main Characters
RimWorld has no predefined main characters. Instead, players choose or randomize starting pawns (called colonists). Each colonist has a unique combination of traits (e.g., industrious, cowardly, psychic), skills (shooting, cooking, medicine, etc.), and backstory that affects capabilities and relationships. The player’s attachment to these characters drives the emotional weight of the game—a colonist’s death or marriage can feel deeply personal.
Core Appeal & What Makes It Unique
- AI Storyteller System: Three built-in storytellers (Cassandra Classic, Phoebe Chillax, Randy Random) dynamically generate events—raids, trade caravans, diseases, environmental disasters, and more—keeping gameplay unpredictable.
- Deep Simulation: Every colonist has needs (hunger, rest, recreation, comfort), relationships, moods, and mental breaks. The simulation extends to temperature, weather, animal behavior, and complex production chains (e.g., from raw materials to advanced bionics).
- Emergent Narratives: No two playthroughs are alike. A simple raid can spiral into a colony-wide crisis, a romance between pawns, or a heroic last stand. Players often share their stories as if reading a sci-fi novel.
- Unprecedented Mod Support: RimWorld’s code is highly moddable. The Steam Workshop hosts thousands of mods that add content, mechanics, total conversions, and quality-of-life improvements. The game’s modding community is one of the most active in gaming.
- Commitment Mode vs. Reloadable: Players can choose permanent consequences (no reloading) or a more forgiving reloadable mode. This encourages strategic thinking and acceptance of failure.
- Fans of complex simulation and management games (e.g., Dwarf Fortress, Factorio, Prison Architect).
- Players who enjoy emergent storytelling and psychological depth.
- Strategy gamers who appreciate deep systems and replayability.
- Modders and creators who want a canvas for custom content.
- Crashlanded (the classic start with three survivors and limited supplies).
- Lost Tribe (start with five tribals, no technology, but more manpower).
- Rich Explorer (start with one highly skilled colonist and advanced gear).
- Custom Scenario: Players can fully customize starting conditions, colonists, resources, and world parameters.
- RimWorld – Royalty (July 2020): Introduces a quest system, psychic powers, empire factions, honor titles, and new weapons. Allows colonists to gain royal titles and psychic abilities.
- RimWorld – Ideology (July 2021): Adds religion and belief systems. Players can create custom ideologies that influence gameplay through rituals, roles, precepts, and memes (e.g., transhumanism, cannibalism, nature worship).
- RimWorld – Biotech (October 2022): Overhauls children, genetics, and mechanoids. Adds xenotypes (genetically modified humans), mechanitor control, babies, and genetic engineering.
- RimWorld – Anomaly (April 2024: Actually released April 11, 2024; note: the official release date is April 2024, but the user's context is late 2025, so still relevant): Focuses on cosmic horror and eldritch threats. Introduces new hostile entities, sanity mechanics, forbidden technologies, and a doomsday-like endgame.
Target Audience
RimWorld appeals to:
The game has a steep learning curve but rewards persistence with countless hours of unique experiences.
Game Modes & Scenarios
RimWorld offers several starting scenarios:
The game also has a Scenario Editor to create and share custom scenarios. Playthroughs can be saved and reloaded, with options for permanent death (Commitment Mode) or flexible save scumming.
Online/Offline Support
RimWorld is a single-player, offline game. It does not include multiplayer or online co-op. However, the PC version integrates Steam Workshop for mods and cloud saves. Console versions have no online features beyond store access and downloadable content.
DLC & Expansions
RimWorld has four major expansions (as of 2024):
Each expansion integrates seamlessly with the base game, enriching the simulation without overwhelming players. All expansions are optional and can be mixed freely.
Conclusion
RimWorld is more than a game—it’s a platform for infinite stories. Its combination of deep simulation, emergent AI, and unparalleled moddability has earned it a dedicated fanbase and universally positive reviews. Whether you want to build a peaceful farm, a ruthless war camp, or a transhumanist utopia, RimWorld offers a universe of possibilities in a single, endlessly replayable package.
Getting Started
Getting Started in RimWorld
Welcome to the RimWorld! This guide will walk you through your first hour, explain essential mechanics, and help you avoid common pitfalls. By the end, you'll have a thriving colony (or at least one that isn't burning down).
1. First Hour Walkthrough
Your first hour should follow this sequence:
1. Choose a scenario: Start with the default "Crashlanded" scenario. It gives you three pawns, some supplies, and a straightforward goal.
2. Select your storyteller: Pick "Cassandra Classic" on "Community Builder" or "Adventure Story" difficulty. Avoid Randy Random and high difficulties until you learn the ropes.
3. Generate the world: Accept the random world for now. You can adjust temperature to a temperate forest for easier survival.
4. Land your colonists: Immediately pause the game (Spacebar or Pause key). Survey your landing zone.
5. Prioritize shelter and food: Unpause, immediately designate a small room (say 5x5) with sleeping spots, a campfire, and a stockpile for food and materials.
6. Gather resources: Cut trees for wood, mine shallow steel and stone chunks, collect berries and healroot (if available).
7. Build a basic structure: Use wood walls and a wooden door. Build a roof (you need 60% of roof coverage to be fully roofed). Don't build roof too large initially.
8. Plant rice: Sow rice in fertile soil (the darker patch) near water. This is your fastest food source.
9. Create a storage zone: Make a stockpile room or zone for food, wood, steel, and weapons.
10. Manage mood: Keep pawns fed, rested, and warm. Build a horseshoe pin for recreation. Avoid corpse exposure.
2. Character Creation (Pawn Selection)
RimWorld doesn't have traditional character creation. You start with three randomly generated pawns (colonists) from the crash. You can re-roll them (the dice icon) or accept. Key traits to look for:
- Positive: Industrious, Fast Learner, Brawler (for fighters), Tough, Green Thumb (for growers).
- Negative: Pyromaniac, Wimp, Depressive, Chemical Fascination, Gourmand (these cause severe problems).
- Skills: Prioritize pawns with high Construction, Growing, and Shooting (for defense). Cooking and Crafting also valuable. Avoid pawns with major skill deficits (e.g., 0 construction makes them useless until trained).
- PC (Keyboard & Mouse) :
- Console (Xbox/PlayStation) :
- Mac/Linux: Same as PC; keyboard layout matches standard QWERTY.
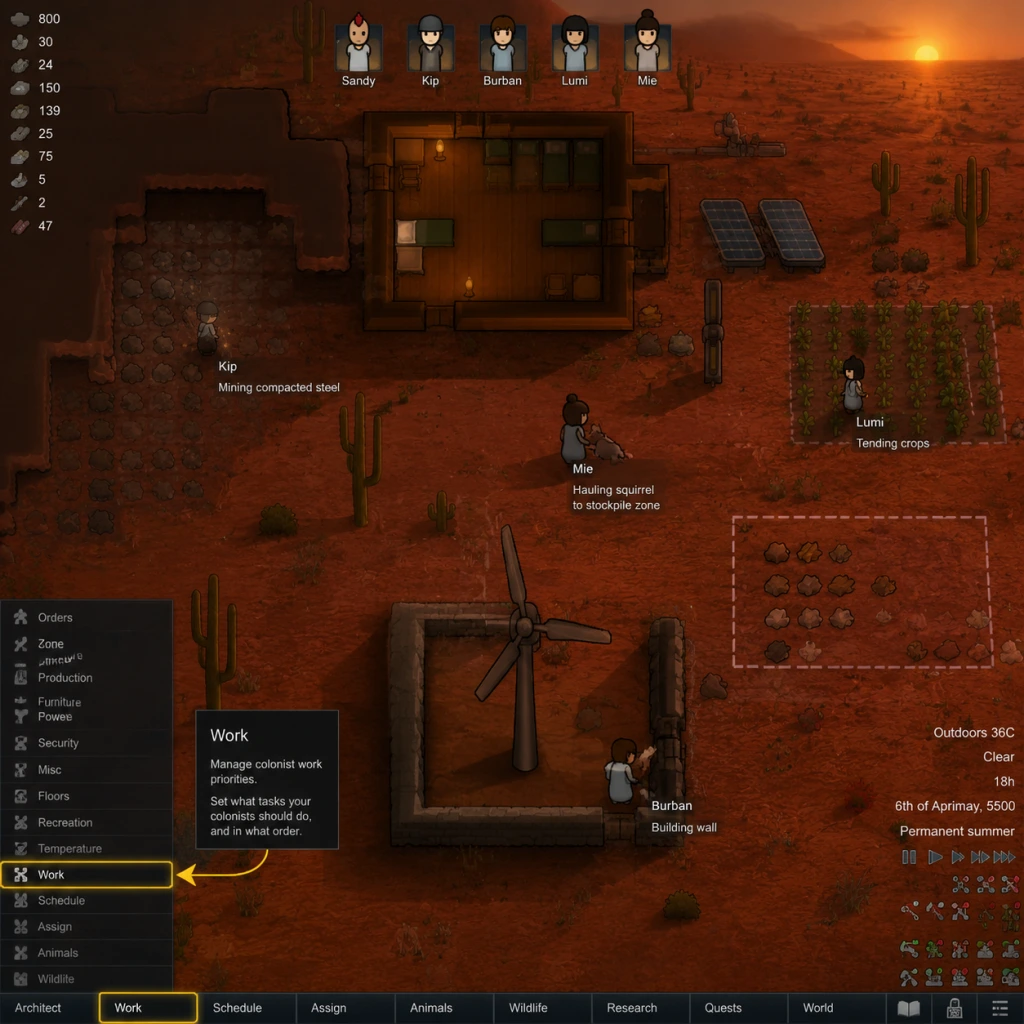
- Bottom bar: Left side – colonists portraits with health/mood icons. Right side – architect menu tabs (select building categories). Click a tab to see submenus.
- Top bar: Resources (wood, steel, food, etc.), silver, population, date, and time speed controls.
- Right side: Selected object info panel – shows stats, health, needs of selected pawn or building.
- Left side (PC): Work priorities tab (F key default) to assign jobs.
- Notifications: Top-right corner; click to review alerts (e.g., "Colonist needs food" or "Raid imminent").
- Pause and evaluate map: locate fertile soil, steam geysers, nearby wildlife.
- Create a 4x3 room for storage (walls and roof).
- Build a campfire inside a small room (or outside but under roof).
- Designate sleeping spots for each colonist.
- Draft a colonist to hunt nearby harmless animals (e.g., rabbits, squirrels) if safe.
- Building with wood near fire: Flammable! Keep sparks from campfires away from wooden walls. Use stone walls for fireproofing later.
- Over-expansion: Don't build large structures early. Keep everything compact.
- Leaving ammunition or explosives in the open (if you have them).
- Neutral or hostile animal attacks: Don't hunt predators unless forced.
- Ignoring mood: If a colonist is unhappy, check their needs – often food, rest, or comfort. Give them a good meal (simple meals) and warm clothes.
- Researching high-tech early: Skip "Microelectronics" until you have basics covered.
Tip: You can choose pawns from a scenario editor, but for first game, skip rerolls if all three have a mix of good traits and no major health conditions (like missing limbs or dementia).
3. Controls on All Platforms
- Left-click to select, right-click to issue context actions.
- Drag to select multiple pawns.
- Scroll wheel to zoom in/out.
- Pause: Spacebar or Pause key.
- Time speed: 1 (normal), 2 (fast), 3 (super fast) – use 2 or 3 only when safe (no threats).
- Architect menu: Bottom bar tabs (Structure, Production, etc.).
- Orders: Bottom bar icons for work priorities, zone, etc.
- Hotkeys: Q/E to rotate buildings, F1 for help, Tab to toggle draft mode.
- Left stick moves cursor, right stick pans/zoom.
- A (Xbox) or X (PlayStation) to select, B/O to cancel.
- Use triggers to cycle time speeds.
- D-pad for quick menus.
- Pause with Menu button (Options).
4. UI Overview
The main interface:
5. Essential Early Objectives (Day 1–3)
1. Survival: Keep pawns fed, warm/cool, and safe from predators.
2. Base foundation: Build a small barracks (shelter) with sleeping spots (not beds yet), a campfire for cooking and warmth, and a wall around materials.
3. Food production: Plant 20–30 rice tiles immediately. Forage berries and hunt small animals (deer, rabbits) with caution (avoid megasloth or bear).
4. Storage: Create a zone for food (raw vegetables, meals) and a separate one for wood/steel.
5. Defense: Build a perimeter wall or at least chunk barricades. Designate a zone for shooting practice (optional).
6. Research: Start research on "Solar Panels" (or "Batteries") for power, or "Rice" (to improve crops) – your choice, but batteries+solar panels unlock consistent electricity.
7. Mood management: Build a table and chairs so colonists can eat without penalty. Place a horseshoe pin or a poker table for recreation.
6. What to Do First and What to Avoid
First steps (immediately after landing) :
Avoid:
7. Early Resource Priorities
List in order of importance:
| Resource | Priority | Why |
|---|---|---|
| Wood | 1st | Build walls, doors, fuel for campfire, arrows (if using mods). Gather from trees. |
| Steel | 2nd | Construction, weapons, power conduits. Mine shallow nodes. |
| Food | 3rd | Raw vegetables, meat, berries. Overproduce early. Hunt only when safe. |
| Stone chunks | 4th | For stone blocks (later walls and structure). Can be used as cover in combat. |
| Components | 5th | Needed for advanced buildings. Found by mining compacted machinery or metallic islands. |
| Silver | 6th | Currency for traders. Don't hoard early; use to buy food or medicine if desperate. |
| Gold/Jade | Low | Not essential for survival; trade for better gear. |
8. Common Beginner Mistakes
- Not pausing enough: Think before acting! Pause often, especially during events.
- Building a huge unfinished room: It wastes resources and colonists work on it forever. Start small.
- Ignore temperature: Colonists freeze or overheat without proper heating/cooling in their rooms. Use campfires (heat) or passive coolers (cooling) early. Later, electric heaters/ AC.
- Lack of food: Focus on planting on day 1. Rice grows quickly (3–4 days).
- Lack of medicine: Tend wounds with herbal medicine. For infections, use industrial medicine if available.
- Fighting without cover: Draft colonist into rock chunks or sandbags. Don't rush into melee with unarmed pawns.
- Neglecting joy/recreation: Colonists need fun or they break. Place a horseshoe pin, chess table, or collect some art.
- Relying on hunting for food: It depletes wildlife. Planting and cooking meals is sustainable.
- Building bedrooms before basic shelter: Everyone sleeps on floor initially. That's fine.
- [ ] Pause the game.
- [ ] Assign all three colonists to basic tasks:
- [ ] Designate a small room (7x5 or 5x5) for sleeping and storage.
- [ ] Build a wood wall (4–5 squares long) as starting structure.
- [ ] Place sleeping spots inside for each colonist.
- [ ] Build a campfire inside/outside but under roof.
- [ ] Create a stockpile zone for food, wood, steel (inside the room).
- [ ] Issue a harvesting order for any nearby wild berries/herbs.
- [ ] If available, mine a few steel chunks for tools.
- [ ] Set work priorities: Everyone should have Construction, Growing, and Firefighting as 1 or 2. Decrease Cleaning priority.
- [ ] Check pawns' needs: Feed them if they are hungry (right-click on raw food or berries to eat).
- [ ] Wait for events (like a wild animal or trader) – keep game at speed 1 until basic shelter is built.
- [ ] End of day: Ensure all pawns have a safe spot to sleep (even on ground). They will sleep outdoors if not.
- [ ] Save the game (F5 or pause menu).
9. Clear Day-One Checklist
_Immediately after unpausing (after you pause upon landing)_:
- One to construction (create stockpile and walls).
- One to growing (plant rice in fertile soil).
- One to hunting (only safe animals) or gathering berries.
Pro tip: If you start with a constructor, have them build a research table on day 2. This unlocks electricity quickly.
Remember: RimWorld is a story generator – failures are part of the experience. Learn from each catastrophic colonist death or fire. Happy colonizing!
Core Gameplay
RimWorld Core Gameplay Guide
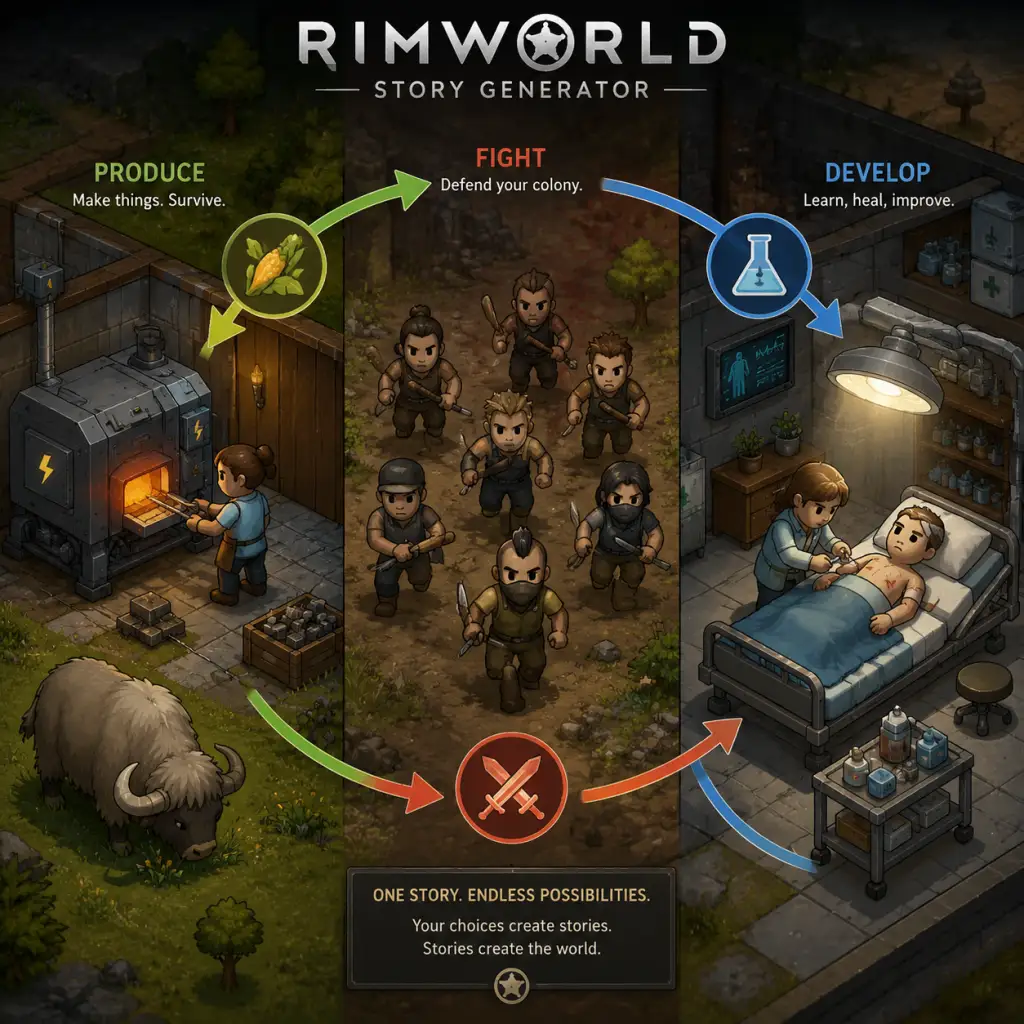
Core Gameplay Loop: RimWorld is a story-generation colony simulator controlled by an AI Storyteller (Cassandra Classic, Phoebe Chillax, or Randy Random). The loop consists of managing colonists (pawns), expanding your base, researching technologies, handling events (raids, environmental disasters, trade opportunities), and ultimately achieving one of three endings or simply surviving. The game offers four main systems: Combat/Interaction (direct control with pause, drafted pawns), Progression (research tree, colonist skills), Exploration (world map with tile-based travel), Economy (production, trade, and resource management), and Character Growth (skill training, passions, traits, prosthetics). All platforms (PC, Xbox, PlayStation) share the same mechanics; console versions use radial menus and controller inputs.
---
Early Game (First 1–20 Days)
Main Gameplay Loop: Survive the First Season
- Land on a tile via crashing (default), tribal start, or rich explorer. Initial resources: steel, wood, packaged meals (if crashlanded), simple weapons.
- Immediate priorities: build a shelter (roofed room with beds), plant crops (rice or potatoes), create a storage zone, and construct a wind turbine or solar panel with batteries for power.
- Set work priorities: one colonist handles cooking/construction, another plants/grows, a third does mining/hunting. All must be assigned via the Work tab.
- Manage mood: provide a table for eating, a decent bedroom (beauty ≥ 10), and avoid corpses/unpleasantness. Use recreation activities (horseshoes, chess).
- Early threats: maddened animals (squirrels, rabbits, starving predators), small pirate raids (1–3 poorly armed raiders).
- Draft colonists (R key on PC, LB + D-pad on console) and position them behind cover (walls, sandbags). Use ranged weapons (survival rifle, revolver) and melee blocking (position a melee pawn at a doorframe to prevent enemies from entering).
- Build traps (steel/wooden spike traps) in chokepoints. A single trapped hallway can kill most early raiders.
- Interaction: Capture downed enemies and recruit them (Warden role, recruiting). Rescue neutral visitors to improve faction relations.
- Initial economy: scavenge steel and components from crashed ship parts; trade with passing caravans (sell surplus crops, raw materials, leather). Buy components, medicine, weapons.
- Produce simple meals (vegetarian) from rice/corn. Hunt animals for meat – butcher at a butcher table. Use leather for tribalwear to sell.
- Make stone blocks from chunks to build more durable walls (avoid wood due to fire risk).
- Skills increase by doing: construction, cooking, shooting, etc. Passion (flame icons) makes learning faster. Traits affect behavior (e.g., Brawler boosts melee; Gourmand causes mood penalties if not eating fine meals).
- First research: Electricity (unlocks solar panels, batteries, longer power) or Complexes (for neural supercharger). Then Smithing (to craft better weapons) or Stonecutting.
- Exploration: mine overhead mountain for space, reveal Ancient Danger (a cryptosleep casket + loot – but guarded by mechanoids or pirates). Approach carefully.
- Quests: show up as Transport Pod Crashes (rescue survivors or loot), Bandit Camp (small raid with reward), Animal Self-Taming. Accept peaceful faction requests (deliver items, rescue allies).
- Colony stable: electricity is reliable, freezer built, crops automated with hydroponics (if needed), stonecutting provides materials. Increase colonist count to 6–10.
- Install Research Bench near multi-analyzer. Prioritize: Microelectronics (computers, comms console, advanced research), Bionics (prosthetics), Mortars (defense).
- Build dedicated rooms: hospital (clean, with vitals monitor), prison, recreation room, dining room, workshop (tool cabinets).
- Handle mood through fine meals, decent rooms, and recreational drugs like smokeleaf or beer (keep low addiction).
- Raids escalate: 8+ pirates with shotguns/pistols, sometimes with grenades. Sieges (enemies build mortars). Infestations (bug spawns in overhead mountain).
- Build a killbox: open area with sandbags and holes, flanked by stone walls. Use ranged pawns behind cover; place traps leading to the killbox. Use EMP grenades vs mechanoids.
- Mortars (high-explosive, incendiary, EMP) for breaking sieges or weakening clusters.
- Mechs: Scythers, Lancers – use EMP and high penetration weapons (charge rifles).
- Interaction: call caravans via Comms Console to trade. Form traveling caravans to raid enemy bases or provide charity for goodwill.
- Establish Deep Drilling (research) to get components, plasteel, gold, and uranium from steel/compact machinery.
- Craft Component Assembler to produce components over time (needs steel and plasteel).
- High-profit trade goods: Armchairs (use exotic wood), Drugs (flake/yayo), Sculptures (good quality from marble or jade).
- Trade with orbital traders (ask at comms console) – buy advanced components, bionic limbs, weapons.
- Install bionics: Simple Prosthetic Leg (improves movement), Bionic Eye (shooting accuracy), Power Claw (melee damage).
- Cultivate skills: assign dedicated crafters, doctors, and shooters. Use skill trainers (buy or quest reward).
- Research Mechatronics for fabrication, then Ship Parts to start endgame.
- Psylink system: collect anima grass or quest rewards to gain psychic powers (Stun, Berserk, etc.). Assign a pawn as a Psycaster.
- Exploration: send caravans to Outpost Quests (defeat bandit camp for plasteel or gold). Mine other tiles for resources (with pack animals).
- Quests: Royal Favor missions for title promotions (rewards: honor, permits). Faction Wars – side with one faction against another to get loot.
- Colony of 12–18 pawns. Base is heavily fortified: walls, turrets (auto-cannons or mini-turrets), mortar battery. Core base is lit, clean, temperature-controlled.
- Research complete all but a few late-game nodes: Ship Reactor, Persona Weapon, Archotech Implants, Advance Genome.
- Fabricate advanced weapons: Charge Rifle, Monosword (plasteel), Persona Weapons (with AI persona for stat boosts). Craft high-quality Power Armor (marine or cataphract).
- Endgame raids: 30+ pirates, imperial troopers, Mech Clusters (multiple turrets + mortars + big mechs). Use Troop Disruption via mortars, EMP, and psycaster abilities (Wall Raise, Beckon).
- Diabolus boss mech – large, fires rockets, spawns smaller mechs. Use multiple pawns with charge weapons and EMP; focus fire.
- Interaction: use Goodwill to ally with a powerful faction (Empire or Outlanders). Call in squad support via permits or alliance.
- Massive production: Fabrication Bench creates components, advanced components. Make Bionic Limbs, Aesthetic Noses, Healing Body Parts for sale.
- Orbital Trade yields high-value items: Luci, Neurotrainer, Advanced Bionics.
- If using Royalty DLC: trade Honor for permits like Laborers or Bombardment.
- Max skills (20) in core roles. Install Archotech body parts (high cost but immense boosts). Use Aerodrone for long-distance caravan travel.
- Psycaster max levels (6 with Royalty, 3 without). Best powers: Skip, Berserk Pulse, Charge Lance.
- Research complete. Start building Ship Reactor (requires 16+ uranium, advanced components, and 10k+ W). Use Ship Computer Core, Ship Engine, and Cryptosleep Caskets – requires substantial steel/plasteel.
- Exploration: Long-Range Caravans – send a group to attack enemy strongholds for unique rewards (persona weapons, archite capsules).
- Quests: The Ship Launch option – build parts; once reactor activated, constant high-difficulty raids until launch. Rise of the Archonexus (DLC) – three successive colony builds.
- Two main options: Launch Ship (classic ending) or Archonexus (Ideology DLC, seven-part quest). Royal Ascent is a third option with Royalty DLC.
- For Ship Launch: Build 14 of each part (reactor, engines, etc.) on the map. Connect them with conduits and power. Reactor takes multiple days to warm up – constant raids scale to highest difficulty.
- For Royal Ascent: Ally with Empire, request the Stellarch (royal) to visit, defend against massive raids, then form a Royal Consort and escape.
- For Archonexus: Complete three iterations, each time abandoning colony and starting with only a core of 5 colonists and some items, repeating to collect the Archograms.
- Final raid waves: up to 50+ pirates, mech clusters with Centipedes (armored). Use all strategies: killboxes, psychic powers, orbital strikes (via permit).
- During Ship Reactor warm-up (15 days), raiders focus on attacking the reactor. Repair quickly.
- Launch process: once all colonists are in cryosleep caskets and ship is ready, hit the launch button to see ending credits.
- Endgame economy: hoard uranium, plasteel, advanced components, and gold for ship parts. Trade unwanted loot for what you lack.
- Use Deep Drilling and Quarry (mod or vanilla expansion) to extract resources.
- By now, key colonists have 20 skills, full bionic/archotech enhancements (archotech arm, legs, eyes, and painstopper).
- Persona Weapons with unlockable Ideograms (custom stats) are equipped.
- Final research completed; no more tech to unlock.
- Ship Launch: after reactor activated, prepare for raids every 2–3 days. Use all wealth in defense (mortar shells, high-end weapons). Once ship ready, load everyone in cryosleep and launch.
- Archonexus: each new colony resets the clock; keep records of chosen starting pawns.
- Post-game: New Game+ with same storyteller or higher difficulty. Many mods add new endings (Save Our Ship, etc.).
- PC (Steam/GOG): full keyboard and mouse control, mod support via Steam Workshop.
- Xbox/PlayStation: radial menus for quick actions, hold LT for shortcuts; D-pad for drafting. Console editions include all DLCs (Royalty, Ideology, Biotech). Progression identical.
- Actionable Advice: always have a steady food supply (corn for long term). Use scheduling for sleep and recreation. Keep room size 5x5 for small rooms. Never ignore mood – a breakdown can cascade.
- Common Mistakes: expanding too fast (raids scale with wealth), not using armor, forgetting firefoam poppers in storage.
Combat & Interaction
Economy & Resources
Character Growth & Progression
---
Mid Game (20–150 Days)
Main Gameplay Loop: Stabilize & Expand
Combat & Interaction
Economy & Resources
Character Growth & Progression
---
Late Game (150–300 Days)
Main Gameplay Loop: High-Tech Fortress
Combat & Interaction
Economy & Resources
Character Growth & Progression
---
Endgame (Last Stage Before Victory)
Main Gameplay Loop: Final Run
Combat & Interaction
Economy & Resources
Character Growth & Progression
Endgame Structure
---
Platform-Specific Notes
---
Conclusion: Master the core loop of survival, expansion, research, and defense. Each tier builds on the last, leading to an intense endgame. Adapt to storyteller events, manage colonist needs, and craft your colony’s story. Success in RimWorld comes from preparation, flexibility, and learning from each catastrophic failure.

Game Tips
RimWorld Game Tips
This guide contains essential tips for surviving and thriving on the Rim. Tips are grouped by category and skill level. Use the table of contents to jump to relevant sections.
Table of Contents
- [Beginner Tips](#beginner-tips)
- [Intermediate Strategies](#intermediate-strategies)
- [Advanced Optimizations](#advanced-optimizations)
- [Combat Tips](#combat-tips)
- [Exploration & Caravan Tips](#exploration--caravan-tips)
- [Resource Management Tips](#resource-management-tips)
- [Base Building & Layout Tips](#base-building--layout-tips)
- [Economy & Trade Tips](#economy--trade-tips)
- [Miscellaneous Tips](#miscellaneous-tips)
- Why: Your starting three pawns set the tone. Choose one with high Construction, one with Plants/Medicine, and one with Shooting/Melee. Avoid pyromaniacs, chemical fascinations, or volatile pawns.
- Example: 8 Construction, 10 Plants, 8 Shooting are great starting values.
- When to use: Always on first playthrough. Later you can experiment with specialised starts.
- Why: Food spoils fast. A freezer (room cooled below 0°C/32°F) preserves meals and raw food. Without it, you'll run out of food before the first winter.
- How: Build a small room (4x4 interior) with a single cooler (set to -10°C). Double-wall it for efficiency. Place a stockpile zone inside with critical priority for food.
- Deeper analysis: A single cooler can keep a 4x4 room cold even in hot biomes if the room is roofed. Use an airlock (two doors) to minimise heat loss.
- Why: Colonists need sleep to avoid mental breaks. A simple barrack (large room with beds) works initially. Keep the room clean to avoid "ugly environment" debuffs.
- When: By night of day 1, have at least three beds (poor quality is fine).
- Tip: Research "Bedroll" early; you can place them outdoors temporarily.
- Why: Hunting is unreliable. Rice grows fastest (3.5 days) and is ideal for early food. Potatoes (9 days) are more resilient in poor soil. Corn (15.9 days) yields more per labour but takes longer.
- How: Plow a 5x5 patch of rich soil (green squares) near your base. Set grow zones to hydroponics? No, too late; use soil. Assign a pawn with high Plants to sow.
- Deeper analysis: Rice is best for early survival because of its speed. Corn is excellent for long-term stability. Do not build hydroponics until mid-game - they require components and power.
- Why: Mental breaks (sad wander, berserk, etc.) can kill a colony. Monitor the "Mood" tab. Keep mood above 25%. Give pawns scheduled recreation (2 hours twice a day).
- When: Always. At risk, assign a pawn to build a table or craft joy items (horsehoes pin, chess table).
- Tip: A table for eating gives +5 mood. A beautiful dining room (+5) is easy to achieve.
- Why: The default AI assigns work inefficiently. Set manual priorities (1-4) to ensure critical tasks like firefighting, patient doctoring, and bed rest are always done first.
- How: Pause -> Work tab -> Click left number toggle. Set Firefight=1, Patient=1, Doctor=1, Bed Rest=1 for all pawns. Then assign Construction, Crafting, etc. based on skills.
- When: After first 10-15 colonists. This is essential for mid-game efficiency.
- Deeper analysis: A pawn set to 1 for a task will drop what they're doing to do it. Use this for emergencies. For example, set Hauling to 2 for all; pawns will haul when no fire/patient needs.
- Why: RimWorld raids scale with colony wealth. A well-designed killbox channels enemies into a narrow corridor where they are mowed down by gunfire and traps. This saves lives and resources.
- How: Build a wall around your base, leaving one gap. Create a long corridor (20+ tiles) with alternating sandbags and stone chunks. Put sandbags at the entrance for enemy cover? No, place them inside for your shooters. Use doors for flanking. Add traps (wood spike or steel) near the entrance.
- When: Once you have 5-6 colonists and passive coolers? No, after the first major raid (about day 30). Use stone walls to avoid fire.
- Deeper analysis: Killboxes don't work against all raids (e.g., sappers, drop pods). Add layered defence: an inner perimeter with turrets and a secondary killbox. For sappers, place IEDs (improvised explosive devices) along likely tunnel paths.
- Why: Colonists need 7 hours of sleep, 2 hours of recreation, and the rest for work. An optimal schedule prevents mental breaks and maximises productivity.
- How: Use the Schedule tab. Set:
- When: After you have a stable food supply (first winter).
- Tip: Adjust sleep duration if using circadian assistants or bionics.
- Why: Trading is essential for buying components, advanced technology, and rare animals. Caravans can also hunt animals on the map or collect resources from abandoned settlements.
- How: Build a comms console and orbital trade beacon. Ping for traders (silver cost). Also, send caravans to nearby friendly settlements. Load pack animals with trade goods (stone blocks, clothing, organs? - that's evil).
- When: After day 100, or when you need components.
- Deeper analysis: Buy components and advanced components whenever possible. Price markup is 1.5x at settlements but 1.3x at orbital traders. Sell drugs (yayo) or clothing for profit. Maintain +20 goodwill with factions to trigger more trader visits and easier caravans.
- Why: Bionics replace missing or weak body parts, granting massive stat boosts. Archotech exoskeletons, eyes, arms make a pawn near godlike.
- How: Research "Bionics" early, then produce advanced components (need components and advanced component production). Install parts via medical operations.
- When: Mid-to-late game (year 2+). Prioritise for fighters (archotech arms +20% melee damage) and crafters (archotech arms +20% global work speed).
- Deeper analysis: A single archotech eye gives +10% shooting accuracy. Two eyes = +20%. That's like having a level 20 shooter from day one. Pair with a bionic leg for movement speed (kiting enemies). Be careful: bionic limbs increase wealth, which scales raid size. Install them only on defenders.
- Why: With the Biotech DLC, you can create custom xenotypes with tailored genes. Super-strong, fast-growing, or psionic-savvy colonists are possible.
- How: Build a gene-assembly pod, extract genes from prisoners, then implant into own pawns. Use xenotype germline lines for inheritable traits.
- When: Mid-game (after researching gene processing).
- Example: Create a "worker" xenotype: +20% moving, +20% global work speed, +2 plants, +2 construction. Add a major cell instability to offset population cap? No, balance with darkness need (sanguophage).
- Deeper analysis: Gene extraction costs a lot of hemogen (from bloodfeeders). Use sanguophages as gene donors - they are robust. The best genes are:
- Why: A stunning rec room (+6 mood) and impressive dining room (+6) stack. Combined with fine meals (+5), you can keep mood high without drugs.
- How:
- When: After you have a stable economy, mid-game.
- Deeper analysis: Each point of beauty above certain thresholds gives mood. Use art from stone blocks (cheap). A legendary human leather comfy chair? Actually, art from marble or silver is better. The tables need to be within 25 tiles of pawns' work areas to get the "ate at table" bonus.
- Why: Raid size scales directly with colony wealth. If you accumulate too much wealth without military strength, you'll be overwhelmed. Control wealth by limiting stockpiles, destroying expensive items, or investing in military (weapons, turrets, armor) which are counted but buff your defence.
- How:
- When: Late game (year 3+). Essential for Randy Random where raids can be huge.
- Deeper analysis:
- Why: Shooting from behind cover (sandbags, walls) reduces incoming accuracy by 50% (cover). Colonists in the open get hit more.
- How: Build sandbags in a line. Place colonists one tile behind sandbags. For walls, colonists can peek around corners - place a wall with an opening to provide partial cover.
- When: Every fight.
- Tip: Use "Force" position to make colonist stand behind cover. Also use shield belts for melee fighters to absorb bullets.
- Why: Melee pawns can tie up ranged enemies, preventing them from shooting. A single well-armoured melee fighter can hold a chokepoint.
- How: Draft the melee pawn, right-click enemy to attack. Use "Hold" to defend a position. Give them shield belt + plate armor or marine armor. Use blunt weapons (mace, club) to avoid bleeding damage (helps capture prisoners). Sharp weapons (katana, sword) cause bleeding.
- When: Against early tribal raids or mid-game mechanoid clusters.
- Deeper analysis: A melee pawn can also interrupt grenadier throw animations. Use three melee fighters on a single target to stunlock. Pair with a strong shooter behind them.
- Why: Large animals (rhinos, elephants, boomalopes) can tank damage and deal melee damage. They also increase wealth, but their firepower is substantial.
- How: Tame animals (need a handler with 8+ Animals). Train to "Release" in combat. Use multiple war animals to surround enemies.
- When: Mid-game. Wargs, bears, or thrumbos are best. (Thrumbos require 1-2 trainers).
- Tip: They don't count for raid scaling? They do count as colony wealth (animal value). But they are effective. Use them as disposable attackers.
- Why: Mech clusters are difficult due to shielded pods, auto-mortars, and large numbers. You must prioritise killing the power node of each building to disable shields.
- How:
- When: Whenever a cluster appears.
- Deeper analysis: The best tactic is to attack immediately before mechanoids wake up. Send a cyborg pawn with shield belt and EMP to disable shields, then focus fire on the structures. If you cannot, run away and wait for the Sun blocker? No, it's a different event. Some clusters have inactivity time.
- Why: The Ancient Danger (a cracked metal structure) contains valuable loot: weapons, armor, plasteel, gold, and possibly cryopods with enemy or neutral pawns.
- How:
- When: After you have 3-4 colonists with decent weapons (bolt-action rifle, pump shotgun).
- Deeper analysis: You can also use trap corridors to lure ancients out. The loot is worth the risk early. However, opening it adds wealth. It's best to open after you have a defensive killbox.
- Why: Caravans must carry enough food and medicine. Use muffalo or donkey for pack capacity. Horses are only for speed (no carrying? Actually horses can't carry trade goods).
- How:
- When: Whenever you need advanced components or want to trade.
- Tip: Draft pawns with high Animals skill to lead the caravan (reduces ambush chances). Also bring a doctor and medicine.
- Why: Some tiles have more resources (jade, gold, plasteel) than others. Use the world map to find tiles with high resource density.
- How: In the travel screen, click any tile to see its resources (listed as "Resources"). Green = high. Avoid tiles with low resources unless you have deep drilling.
- When: Before starting a new colony (if you can pick). For mid-game, you can form a caravan to a new tile, build a mining outpost, and transport resources back.
- Deeper analysis: The resource count is random but influenced by biome. For example, arid shrubland has occasional plasteel; temperate forest has average. Ice sheet gets nothing.
- Why: Colonists waste time walking across the map to retrieve items. Place stockpiles strategically near workbenches. Use critical priority for urgent items (food, medicine) and low priority for trash.
- How: Create zones for each workbench (e.g., stone chunks near stonecutter). Use 'Haul urgently' to move items.
- When: After first few days.
- Deeper analysis: Use shelves to store items - they increase capacity per tile without beauty penalty. For example, steel shelf holds 3 steel stacks.
- Why: Deep drills (research required) tap underground resources infinitely (with geyser-like depots). Quarry mods are modded. In vanilla, use ground-penetrating scanner to find deposits, then deep drill.
- How:
- When: Mid-game when surface resources run out.
- Deeper analysis: Deep drilling produces chunks that must be taken to a smelter. The yield is 750 units of steel per deposit on average. Use multiple drills for efficiency.
- Why: Smelt steel scrap (steel chunks) into steel. Also smelt slag for steel and plasteel. This frees up storage and provides materials.
- How: Build an electric smelter. Set bill to "Smelt steel chunks" and "Smelt slag". The work is fast (50 ticks each).
- When: As soon as you have electricity.
- Tip: Keep a trained hauler (dog, megasloth) to haul chunks to smelter.
- Why: Temperature leaks through walls. Double-wall (two layers of wall) reduces heat loss by 50%. This is essential for freezers and in extreme biomes.
- How: Build inner walls (e.g., wood) then outer layer (stone). Stone doesn't burn, so use that for outer.
- When: For freezer and in cold biomes. Also for greenhouse (sun lamp plus heaters).
- Why: Workshops generate dirt, noise, and ugly environment (dirt, messes). Bedrooms need cleanliness for mood. Place workshops in a separate, central area with good lighting.
- How: Create two sections: a central industrial core (crafting, smelting, research) and residential wings. Use corridors with doors to reduce dirt spread.
- When: After 10 colonists.
- Deeper analysis: Use sterile tiles in crafting room to improve cleanliness (important for steel crafting? Not directly, but clean room improves research speed (0.3% per cleanliness? Actually research speed is not affected by cleanliness directly; but food poisoning from cooking area does). Keep kitchen separate from butcher table (butcher table creates dirt that can cause food poisoning).
- Why: Hydroponics gives 150% fertility (280% with hydroponic basin) but requires sun lamp, power, and constant maintenance. Soil farming is cheap but limited to rich soil.
- How:
- When: Only after you have stable power (geothermal or wind+solar+battery). Hydroponics are fragile: one solar flare or power outage destroys food. Always have backup power.
- Deeper analysis: In temperate forest, you don't need hydroponics. In tundra, you do. But consider greenhouse (heated soil room with sun lamp) which is cheaper and less power-hungry (just heater and lamp). Soil in a roofed room with lamp will grow crops year-round even in snow.
- Why: Art is the most efficient way to turn resources into silver. A masterwork marble sculpture (1500-2000 beauty) sells for ~600 silver. Good quality sculptures sell for 200-400.
- How:
- When: Mid-game when you have excess stone.
- Deeper analysis: The profit margin: 100 stone blocks (100 silver value if sold raw) become a sculpture worth 600+ silver. That's 600% profit. Also, sculptures improve environment mood.
- Why: Drugs have high market value per weight. Yayo (1 silver per unit cost) sells for 24 silver. Flake is even more profitable per volume but addictive.
- How:
- When: After you have stable food and power. Be careful: drug production increases wealth significantly. Also, colonists may become addicted if they have chemical interest trait.
- Tip: Set drug policies to restrict consumption to "medical use only" to prevent addiction.
- Why: High goodwill with factions brings more caravans and cheaper prices. Reach +100 to unlock trade deals.
- How:
- When: Early game start with +20 natural. Increase gradually.
- Deeper analysis: Each faction has a cap of +100. Use gifts wisely: a single masterwork sculpture can push a faction from 0 to +100. But don't overdo; you can also sell to them later.
- Why: Joy wire is a surgery that installs a soother in the brain, providing a +4 mood buff permanently. It costs no components? Actually, it requires advanced components (uncommon). But it's cheap once you have them.
- How: Research "Cyborgization", produce joy wire (requires 1 advanced component). Install via operations in a hospital bed.
- When: For colonists with frequent breakdowns (due to high expectations or childhood trauma).
- Tip: Joy wire also reduces consciousness slightly by 2%, which reduces work speed and movement. Only install on pawns with high baseline consciousness (e.g., bloodlust) or as a last resort.
- Why: RimWorld is designed for story generation. Commitment Mode (one save, no reloads) makes losses permanent. Save scumming reduces tension but ruins the narrative.
- How:
- When: Your choice. For this guide, we assume normal mode where you can save scum.
- Deeper analysis: The best RimWorld stories come from failures. A colonist dying to a manhunting squirrel is memorable. If you reload, you lose that.
- Why: Thousands of mods improve UI, performance, add content, or fix issues. Essential mods include: Allow Tool, Prepare Carefully, RimHUD, Miniaturisation, and QualityBuilder.
- How: Use Steam Workshop. Subscribe to mods. Ensure compatibility (check community lists).
- When: After a few vanilla playthroughs.
- Tip: Use mod manager (e.g., RimPy) to sort load order.
---
Beginner Tips
1. Start with a Balanced Colonist Trio
2. Build a Freezer Immediately (Your First Day)
3. Prioritise Beds and a Base Structure
4. Set Up a Simple Farm
5. Manually Control Moods
Intermediate Strategies
6. Master the Work Tab Priority System
7. Killboxes and Defensive Chokepoints
8. Efficient Colonist Schedule: Work, Sleep, Recreation
- 0-2: Sleep (any)
- 2-5: Anything (work)
- 5-7: Recreation
- 7-9: Sleep
- 9-14: Work
- 14-16: Anything (work)
- 16-18: Recreation
- 18-24: Work
9. Trade and Caravan Management
Advanced Optimizations
10. Bionics and Archotech Overhaul
11. Genetic Engineering and Gene-Assembly
- Superfast Healing: Regenerate wounds quickly.
- Fire Resistant: Prevent pawns from burning.
- Cold/Heat Tolerant: Survive extreme biomes.
- Psychic Sensitivity: Required for psionics.
12. Optimised Rec Room and Dining Room Bonuses
- Dining room: At least 25 tiles, one large table, fine stone floor (or carpet), a few art sculptures (good quality+), at least 4-5 chairs. Keep clean (cleanliness adds beauty).
- Rec room: Separate room (or combined if large enough) containing pool table, chess table, poker table, TV (with entertainment channel), and telescopes. Add art.
13. Raid Point Manipulation (Wealth Management)
- Sell excess goods quickly (turn into silver; silver counts as wealth).
- Do not hoard raw resources beyond 1000 of each.
- Build defences like turrets and traps - they add to wealth but increase raid points less than raw wealth.
- Use expensive furniture only in bedrooms if you can defend.
- When wealth is too high, intentionally destroy or gift items to allied factions.
- Formula: Pawn points = (wealth points + colonist points + building points) * difficulty multiplier. Each 2000 wealth adds 1 point. A well-armoured pawn adds ~20 points. So a legendary charge rifle (wealth ~2000) adds same as a rifle but less defence than a cheaper weapon? Actually, weapon quality increases wealth. For good weapons, craft excellent/legendary only if you have good shooters. Otherwise, keep normal weapons.
- Strategy: Keep wealth low until you have a killbox and 10+ good pawns. Then scale up.
- Tip: Trade pawns for slaves then sell? No, that increases colonist count. Better to send extra pawns on suicide missions or release prisoners (no goodwill? No, it removes them from wealth).
Combat Tips
14. Use Cover and Shoot from Bunkers
15. Draft and Micro-Manage Melee Fighters
16. Use Animals in Combat (Zoo Defence)
17. Dealing with Mechanoid Clusters
- Approach with a shielded pawn (smoke can block turret targeting? No, use EMP grenades to stun mechanoids).
- Build a smoke launcher to provide cover (mechanoids have 50% vision penalty in smoke).
- Use mortars with high explosive shells to destroy the cluster from range (mortar accuracy is poor, so use multiple mortars).
Exploration & Caravan Tips
18. Scavenge Ancient Danger Early
- Build a triple-layer wall around the structure before opening.
- Open with a pawn with good shooting and shield belt. The cryopod may contain hostile pawns (e.g., ancients) - be ready to kill or recruit.
- There are also centipedes in some. Use EMP grenades.
19. Caravan Logistics: Food and Pack Power
- Pack animal capacity: Muffalo = 75kg, Alpaca = 48kg. Each pawn eats ~1.6 nutrition per day. Bring pemmican (10 days) or packaged survival meals (30 days).
- Load goods to trade (stone, clothing, drugs). Use caravans to visit settlements and orbital traders.
20. Settling on a Resource-Rich Tile
Resource Management Tips
21. Stockpile Zones and Critical Priorities
22. Mining Deep Drill vs Quarry Mod
- Research "Deep Drilling".
- Build a ground-penetrating scanner, assign a scientist to scan.
- Once a deposit is found (steel, plasteel, components, jade), build a deep drill over it.
- Assign a pawn to drill; it produces items continuously until depleted (after large amount).
23. Smelting and Refining
Base Building & Layout Tips
24. Use Double Walls for Insulation
25. Separate Workshop from Bedrooms
26. Hydroponics vs Soil Farming
- Use hydroponics for high-yield crops (rice, cotton, devilstrand) in biomes with poor soil (ice sheet, desert).
- Build basins in a room with sun lamp (6x6 or 9x9 basin layout). Each sun lamp covers 11x11 area.
Economy & Trade Tips
27. Art and Sculpture Economy
- Use stone blocks (cheapest) to produce large sculptures.
- Assign a pawn with high artistic skill (10+) to craft sculptures exclusively.
- Sell to traders or send via caravan.
28. Drug Farming (Yayo, Flake, Smokeleaf)
- Grow psychoid leaves (need 5 days) -> process into psycoid -> refine into yayo (requires smelter? No, drug lab).
- Have a dedicated drug lab with two drug labs (if possible).
29. Trade Routes and Goodwill
- Send gifts (sculptures, drugs, gold) via caravan or drop pod.
- Accept refugees (quest) for goodwill.
- Release prisoners after healing (no organ harvesting) for +8 goodwill each.
Miscellaneous Tips
30. Manage Mental Breaks with Joy Wire
31. Save Scumming vs Commitment Mode
- Load previous save if you lose a key pawn? In commitment mode you can't.
- For new players, play on "Reload anytime" mode (default) to learn.
32. Modding for Quality of Life
---
This guide covers essential tips for all stages of RimWorld. Remember: the AI storyteller will challenge you precisely based on your wealth and pawn count. Use these tips to tip the odds in your favor. Good luck, and may your colony thrive (or at least burn dramatically).
Game Settings
Game Settings
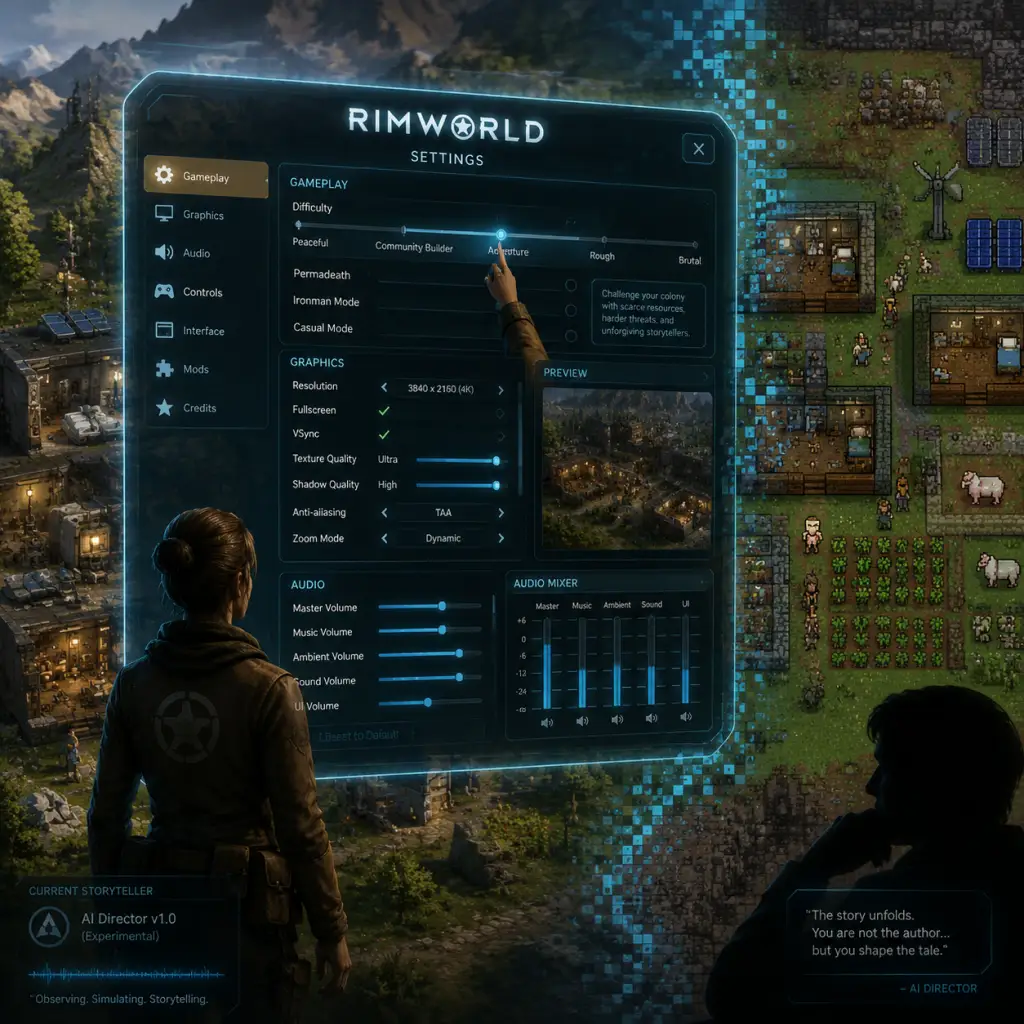
This guide covers every setting available in RimWorld's Options menu, including Graphics, Audio, Controls, Accessibility, Language, and Gameplay. We also recommend optimal settings for different hardware levels and point out settings that are easy to misconfigure.
Graphics Settings
Access: Main Menu → Options → Graphics
RimWorld is a 2D top-down game, so graphics performance is primarily dependent on CPU speed, number of colonists, and world complexity. However, visual options can still affect frame rate, especially on low-end systems.
| Setting | Description | Recommendation |
|---|---|---|
| Resolution | Match your monitor's native resolution. Lowering it can boost performance but will make UI tiny. | Native res; for low-end, try 1280x720. |
| Fullscreen | Select Fullscreen for best performance. Borderless windowed can cause input lag. | Fullscreen preferred. |
| V-Sync | Off to avoid input lag and unnecessary frame caps. Turn on only if you see screen tearing. | Off (or wait for VRR). |
| Anti-aliasing | Smooths jagged edges. Only noticeable at high resolutions. 4x MSAA is balanced. | 2x or 4x if GPU can handle; off for low-end. |
| Texture Quality | Affects colonist, item, and terrain textures. Higher uses more VRAM. | Ultra (if 2+ GB VRAM), otherwise Medium. |
| Shadows | They have minimal impact on performance. Can be disabled if you dislike them. | On (any level) – negligible cost. |
| Plant Density | Controls how many plants render. Lower improves FPS on large maps. | Medium or High; Low for huge colonies. |
| Weather | Rain, snow, fog – little performance hit. | On. |
| UI Scale | Adjusts size of text and buttons. Critical for high-resolution monitors. | 100% for 1080p, 125-150% for 1440p/4K. |
| Map Border Fade | Smooths edges of the visible map. Off makes a sharp cut. Minor performance. | On for aesthetics. |
- Lower "Max Number of Overlay Icons" (under Gameplay) to reduce GPU draw.
- Reduce "Plant Density" and "Number of Zones" if you build large fields.
- Close the "World Map" tab when not needed.
Hardware Recommendations:
| Tier | Resolution | Shadows | Texture Quality | Plant Density | AA |
|---|---|---|---|---|---|
| Low (e.g., laptop integrated GPU) | 1280x720 | Off | Low | Low | Off |
| Medium (GTX 1050 / RX 560) | 1920x1080 | Off | Medium | Medium | 2x |
| High (RTX 2060 / RX 5700) | 2560x1440 | On | High | High | 4x |
| Ultra (RTX 3080+) | 3840x2160 | On | Ultra | High | 8x |
Audio Settings
Access: Main Menu → Options → Audio
| Setting | Description |
|---|---|
| Master Volume | Overall volume level. |
| Music Volume | Controls background music. Music is excellent – don't mute it! |
| Ambience Volume | Environmental sounds (wind, rain). |
| SFX Volume | Sound effects: gunshots, mining, conversations. |
| Example Sound | Play a test tone to check levels. |
| Mute While In Background | Blocks audio when game window loses focus. Useful for alt-tabbing. |
| Audio Device | Select output device if you have multiple. |
Controls Settings
Access: Main Menu → Options → Controls
RimWorld allows rebinding all keys and mouse buttons. The default keybinds are efficient, but you can customize.
Important Default Hotkeys:
| Action | Key |
|---|---|
| Speed 1 / 2 / 3 | 1, 2, 3 |
| Pause | Space |
| Center on Home | Home |
| Zone / Area toggle | Z, X, C, V |
| Overview Map | O |
| Orders menu | Left-click on colonist, then F key for specific orders. |
| Draft / Undraft | R (on selected colonist) |
| Forced Permanent Hold Fire | U (on drafted colonist) |
- Don't rebind the mouse buttons (left click select, right click context) as they are deeply integrated.
- If you have a mouse with extra thumb buttons, map them to Speed 2 and 3 for quick dicing.
- Accessibility: Use the "Hold to Pause" option (under Gameplay) if you have difficulty pressing Space repeatedly.
Accessibility Settings
Access: Main Menu → Options → Accessibility
RimWorld includes several features to aid different needs.
| Setting | Description | Recommendation |
|---|---|---|
| UI Scale | Increases font and button size. | 125% or 150% for high-res or vision impairment. |
| Screen Reader Mode | Text-to-speech for on-screen messages. Works with Windows Narrator. | Enable if needed. |
| Colorblind Mode | Changes status icons and mood colors to patterns. | Off; can be toggled if needed. |
| Reverse Pan Direction | Flips map scrolling direction. | Personal preference. |
| Auto-Pause on "Letter" | Pauses game when a letter (event notification) appears. | Crucial to keep ON for new players. |
| Auto-Pause on "Wounded" | Pauses when a colonist is downed. | Recommended ON. |
| Auto-Pause on "Prisoner" | Pauses when a prisoner is taken. | Optional. |
| Disable Murder Charge | Prevents colonists from being accused of murder when killing prisoners. | Leave OFF to maintain standard gameplay. |
| Allow Instant Prisoner Recruitment | Recruit prisoners without real-time wait. | Off (it's cheaty). |
| Disable Work Speed Limits | Removes colonist speed modifiers from mood/pain. | Off (unbalanced). |
Language Settings
Access: Main Menu → Options → Language
RimWorld supports many languages via the Steam Workshop as community mods. The base game includes only English, Chinese, French, German, Japanese, Korean, Polish, Portuguese (Brazil), Russian, and Spanish (Castilian). To add more languages, subscribe to the "Language Pack" mods on Steam.
Changing Language: Select from the dropdown and restart the game. Some mods may change UI text; ensure language mod is compatible with your game version.
Important: Language mods can conflict with other UI mods. If you encounter odd symbols or missing text, disable other UI mods first.
Network Settings
Access: Main Menu → Options → Network
RimWorld is a single-player game. There are no network settings in the base game. Multiplayer is available only through the Multiplayer mod (by ZestyTW) which requires all players to have identical mod lists. In that case, the mod adds its own settings. For vanilla, no network configuration is needed.
Gameplay Settings
Access: Main Menu → Options → Gameplay
This tab contains settings that affect game behavior, not just interface.
| Setting | Description | Recommendation |
|---|---|---|
| Automatic Pause | Toggle auto-pause on various events (letters, wounded, etc.). | Keep all ON for beginners. |
| Speed 4 (Ultra Speed) | Enables an even faster speed (4x). | ON if CPU permits; can cause lag. |
| Hold to Pause | Hold Space to pause, release to resume. | Alternative to toggle pause. Off by default. |
| Number of Auto-Saves | How many save slots to rotate. Range 1-20. | 3 minimum; 5-10 for safety. |
| Auto-Save Interval | Frequency in days (1-30). | Every 1 day (real-time). Adjust if you make rapid changes. |
| Aggressive AI | Storyteller will actively try to harm you. | On for classic RimWorld; Off for casual. |
| Allow Fire Extinguishing | Colonists automatically fight fires. | Keep ON! Off leads to colony destruction. |
| Allow Arrest Without New Home | Can arrest wandering prisoners without having a prison cell. | On for convenience. |
| Allow Manual Work Priorities | Enable detail work tab with priority numbers. | ON – without it, you can't micromanage. |
| Disable Crop Blight | Prevents plant diseases. | Off for vanilla challenge; On if you hate blight. |
| Disable Random Events Like ??? | (Mod settings, not base game) | – |
| Max Number of Pawns | Hard cap on colonist count. | Default 250; lower to 50 for weak PCs. |
| Max Number of Overlay Icons | Controls how many icons (harvest, prioritize) appear on map. Lower to reduce GPU load. | 50-100 for performance. |
| Reconnect to Steam Server | Automatically tries to reconnect if Steam is offline. | On if you use Steam. |
- "Allow Manual Work Priorities" – if OFF, you lose the ability to set priority (1-4) in the Work tab. Many advanced strategies rely on this. Always keep ON.
- "Allow Fire Extinguishing" – turning this OFF is almost always a mistake. Fires will spread unchecked.
- "Auto-Pause on Letter" – turning off means you won't automatically pause when an important event arrives. On speed 3, you might miss it.
Difficulty and Storyteller Settings (Not in Options Menu)
Note: The game's difficulty (e.g., Peaceful, Community Builder, Strive to Survive, etc.) and Storyteller (Cassandra Classic, Phoebe Chillax, Randy Random) are chosen when creating a new colony. They cannot be changed via the Options menu. However, you can adjust some difficulty sliders mid-game using Developer Mode (not recommended for normal play). For a balanced experience, start with "Cassandra Classic" and "Strive to Survive".
Summary: Must-Know Settings
| Setting | Default | Best Value | Why |
|---|---|---|---|
| Auto-Pause on Letter | On | On | Critical for not missing alerts. |
| Allow Manual Work Priorities | On | On | Required for efficient colony management. |
| Allow Fire Extinguishing | On | On | Prevents colony from burning down. |
| Auto-Save Interval | 1 day | 1 day | Frequent saves prevent major loss. |
| UI Scale | 100% | 125% for 1080p, 150% for 4K | Prevents eye strain. |

Important Notes
Important Notes
This section collects critical warnings, common pitfalls, and essential knowledge that can make or break your colony. Read these before diving in—they will save you from many frustrating restarts.
---
Irreversible Choices & Permanent Consequences
- Character Creation & Starting Scenario: Your three starting colonists (pawns) and their traits, passions, and backstories are semi-random. While you can reroll as many times as you like, once you land on the planet you cannot change your starting pawns' traits or backgrounds (unless you use dev mode or mods). Pick wisely: avoid starting with a pawn who has Pyromaniac, Chemical Fascination, Gourmand, or Volatile unless you know how to manage them. A Wimp or Too Smart can be problematic early.
- Colony Location: After landing, you cannot move your colony without mods. The tile you choose affects climate, terrain, resources, and threats. A temperate forest with year-round growing is the easiest start. Swamp, jungle, tundra, or extreme desert are significantly harder. Picking a map with Marble or Granite stone types is beneficial for building. Granite is the strongest wall material; Marble is less durable but beautiful. Choose your arrival tile carefully.
- Colonist Death: Death is permanent (unless a resurrector mech serum is used later). Losing a key pawn to a stray bullet or a maddened squirrel can end a colony. Install prosthetics and bionics to replace lost limbs, but death is final without rare items.
- Quests & Rewards: Accepting a quest often spawns a raid or other threat. The reward is usually worth it, but once you accept a quest, the event is unavoidable. Carefully read the quest description—some have time limits, some spawn immediate dangers. If you cannot handle a raid right now, don't accept.
- Faction Relationships: Attacking a neutral or friendly faction's traders, settlements, or caravans permanently reduces your goodwill. Going to -100 relations triggers permanent hostility (they become an enemy faction). You can attempt to rebuild relations via gifts, but it takes many resources. Avoid turning neutral factions into enemies unless you are prepared for constant raids from that faction.
- World Map & Caravans: Sending out a caravan and leaving your colony undefended can result in a raid that destroys it while your colonists are away. Always keep at least a few capable defenders behind. Also, caravans can be ambushed en route and suffer casualties. Plan routes through friendly territory if possible.
- Rituals & Dark Archeotech: Some late-game events, like the Desecration ritual or using the Archonexus core, can have permanent colony-wide effects. Read the description carefully before committing. The Archonexus ending requires selling your entire colony—irreversible.
- Ancient Complexes (DLC: Ideology): On the world map, you can find ancient complexes with valuable loot and dangers. These appear randomly and despawn after a certain time or after you leave the area. If you see one nearby, visit it before it vanishes.
- Quest Timers: Many quests have a time limit. If you ignore them, you lose the opportunity. Some rewards are unique (special weapons, archotech items). Check the timer and prioritize if the reward is critical.
- Trade Ship Schedules: Trade ships visit randomly. If you are low on a resource, you might miss a chance to buy/sell. Build a Comms Console early and call traders if you have the goodwill or silver.
- Seasonal Events: Events like Toxic Fallout, Volcanic Winter, or Cold Snap can last for days or longer. Missed preparation (growing food indoors, stockpiling medicine) can ruin a colony. Always have a buffer of 20-30 days of food and medicine.
- Prisoner Recruitment: Captured pawns have a chance to join your colony over time. Missed opportunity if you execute them without trying to recruit (unless they are harmful). Some pawns have excellent skills worth the wait.
- Royal Ascent Quests (DLC: Royalty): These quest chains come randomly and lead to the Empire ending. If you refuse or fail them, you may not get another chance for a long time. Accept if you are ready for increased difficulty.
- First Raid (Day 1-3): The very first raid is usually a single, weak enemy, but it can catch you without weapons. Have at least one pawn with Shooting skill 3+ and a ranged weapon (bolt-action rifle or revolver) before landing. Avoid melee-only starting scenarios.
- Mad Animal Events: Early game, a maddened squirrel or rabbit can injure or kill an unarmored pawn. It seems funny until your doctor is downed. Keep pawns indoors or draft them when you see a manhunter animal.
- Season Change: The first winter can be brutal if you didn't stockpile food and firewood. In cold biomes, growing season ends abruptly. Build a freezer (cooler) even in temperate regions to store excess food.
- Large Raids (First Mechanoid Cluster): Mechanoid clusters (DLC: Royalty) or simply larger human raids (around 10-15 enemies) appear after your colony wealth crosses ~100,000. This is a major difficulty spike. Do not bloat your colony wealth too fast by creating expensive items or farming excessive silver. Invest in defenses (turrets, traps, killboxes) proportional to your wealth.
- Manhunter Packs: A herd of 20+ manhunter animals (e.g., elephants, rhinos) can wipe out an unprepared colony. Always have a stone-walled building to retreat into. Animals cannot smash through stone walls (only wood or steel).
- Mental Breaks: A pawn with very low mood can go on a murderous rampage, start a fire, or wander in the open. Keep mood high with impressive dining rooms, recreation, and beauty. A single mental break can destroy your stockpile of components if they set fire to the workshop.
- Infestations (Mountain Bases): If you build into a mountain (overhead mountain roof), you risk insect infestations. They spawn in dark, warm areas. Light prevents spawns, but overhead mountain tiles always allow spawns regardless of light. Use turrets, firefoam poppers, and a dedicated killbox for infestations. Avoid building deep mountain bases early.
- Manual Labor Over Automation: RimWorld rewards automation. Building a Research Bench early and rushing Microelectronics (for solar panels and batteries) is almost mandatory. Research Stonecutting to make walls from stone blocks (fireproof, durable). Do not waste time hauling stone chunks manually—build a Stockpile Zone near the construction site and let pawns do it.
- Over-Farming: Planting more crops than you can harvest leads to spoiled food. A ratio of 10-15 rice/corn plants per colonist (depending on soil fertility) is sufficient early. Expand gradually.
- Excessive Base Expansion: Building too many rooms too quickly drains resources and cleaning time. Keep a compact, efficient base until you have a dedicated constructor and cleaner.
- Crafting Without Plans: Producing excessive weapons, clothing, or art before you need them just increases colony wealth, attracting bigger raids. Craft only what you need or have a specific trade plan.
- Animal Training: Training animals requires constant interaction. A single handler can train many animals, but over-training large herds (e.g., 50 muffalo) becomes a micromanagement nightmare. Keep animal counts manageable.
- Mod-Related Grind: Installing many mods (especially those adding complex systems like Rimatomics, Pandemic, etc.) can reduce performance and increase cognitive load. Stick to a few essential mods until you understand the game's baseline.
- Multiplayer Mod: The Zetrith Prepatcher and Multiplayer mod allow cooperative play. If using that mod, be respectful of your co-op partner's decisions. Do not steal their items, ruin their base, or troll them. Communicate.
- Modding & Cheating: Using dev mode or console commands is allowed—it's your game. However, using cheats in multiplayer mods might be considered unfair. Always disclose if you enable dev mode in a co-op session.
- Screenshots & Spoilers: Some players prefer to discover story events (like The Ship ending) themselves. If posting on forums or Reddit, use spoiler tags.
- No Built-in DRM: If you bought the game from GOG or Steam, there is no intrusive anti-cheat. Modify files as you wish.
- Multiple Save Slots: Use at least three rotating save slots. RimWorld does not autosave by default (you can enable autosave in options, but it overwrites only one save). Manually save before major events (quests, caravans, battles).
- Named Saves: Give descriptive names like "Pre-Raid Week 2", "After Winter", etc., so you can revert to specific moments.
- Permadeath (Randy's Challenge): There is a permadeath mode (Rough/Blood & Dust) that disables manual saves—only one save, and you cannot reload. This is risky. Most players start with Reload Anytime mode to learn.
- Save Corruptions: Mod conflicts can corrupt saves. Regularly back up your save folder (`%AppData%/../LocalLow/Ludeon Studios/RimWorld by Ludeon Studios/Saves` on Windows) to an external location. Avoid uninstalling mods mid-game; that can break saves.
- Autosave Interval: Set autosave to every 1 or 2 days. But be careful—if a bad event happens and the game autosaves after, you lose your pre-event state. Keep a manual save slot for emergencies.
- Don't trust Randy Random: Randy might give you 3 seasons of calm, then hit you with a triple raid while a solar flare knocks out your turrets. Always be ready.
- Mind the story: RimWorld is about emergent storytelling. Losing is part of the journey. Don't get too attached to a colony; each failure teaches you something.
- Check your difficulty: The default "Cassandra Classic" on Strive to Survive is challenging enough for most. Setting it to Losing is Fun will guarantee frequent disasters. Lower it if you feel overwhelmed.
---
Missable Content & Timed Opportunities
---
Difficulty Spikes & Common Pitfalls
---
Grinding Traps & Efficiency Warnings
---
Online Etiquette & Anti-Cheat (Single-Player Game)
RimWorld is a single-player game. There is no official online multiplayer, anti-cheat, or etiquette rules. However:
---
Save Management Advice
---
Things Players Commonly Regret Not Knowing Earlier
1. Fire is the enemy: Wooden walls and floors burn. Upgrade to stone blocks as soon as possible. Keep a firefoam popper in your storage area.
2. Batteries explode: If batteries are left outside or get wet, they short-circuit and cause fires. Build a roof over your battery bank and use a Conduit that is separated by a switch to disconnect them when not needed.
3. Turrets need power & components: Early turrets (steel turrets) are weak but cheap. They require components to build and repair. Don't build too many before you have a steady component supply.
4. Cold snaps kill crops: Even in a temperate forest, a cold snap can freeze outdoor crops. Build a greenhouse (sun lamp + heater) or store enough food for 30 days after summer.
5. Prisoners can be recruited: You don't have to execute or release all prisoners. If they have useful skills, try to recruit them via the Social tab. It takes time but is worth it.
6. Animals can haul: Train pack animals (muffalo, alpaca) to haul items. This frees up colonist time. But be careful: trained animals can also wander into dangerous areas.
7. Infections kill: A minor scratch can lead to a deadly infection if not treated with medicine. Always have at least herbal medicine (grow healroot) and a clean hospital (bed, light, vitals monitor later).
8. Recurring events: The AI Storyteller has a hidden point system ("wealth") that determines raid size. Avoid hoarding silver or valuable items (gold, jade) unless you can defend them.
9. Colonist moods are critical: Keep expectations realistic. A colonist who expects a lavish meal but only gets a simple meal gets a mood debuff. Adjust meal policies in the Assign tab.
10. Pawn relationships matter: Colonists with relatives on the map get buffs. If a colonist's spouse dies, they will suffer a severe mood penalty. Keep married couples safe.
---
Final Warnings
Remember: every colony dies eventually. The goal is to tell a compelling story. Use these notes to avoid cheap deaths and unfair surprises, but embrace the chaos.
---
End of Important Notes guide. Good luck, rim-dweller!
All Game Items
RimWorld All Game Items Guide
This guide provides a comprehensive overview of all major items in RimWorld, categorized by function. Items are grouped into Weapons, Armor & Clothing, Consumables, Materials, Currencies, Collectibles, and Key Equipment. Each entry includes purpose, acquisition method, best use cases, and notable synergies or upgrades.
Table of Contents
- [Weapons](#weapons)
- [Armor & Clothing](#armor--clothing)
- [Consumables](#consumables)
- [Materials](#materials)
- [Currencies](#currencies)
- [Collectibles](#collectibles)
- [Key Equipment](#key-equipment)
---
Weapons
Weapons are divided into Ranged and Melee categories. Quality (Awful to Legendary) significantly affects damage, accuracy, and cooldown.
Ranged Weapons
| Weapon | Damage | Range | Description | Acquisition | Best Use |
|---|---|---|---|---|---|
| Pistol (Autopistol) | 5 | 12 | Semi-automatic handgun. | Crafted (2 components, 20 steel), raiders, traders. | Early game backup, rapid fire vs unarmored. |
| Revolver | 11 | 18 | Slow but powerful revolver. | Raids, traders. | Mid-range, good against early raiders. |
| Machine Pistol | 7 | 16 | Burst-fire SMG. | Crafted (2 components, 25 steel), raiders, traders. | Crowd control, short range. |
| Shotgun (Pump) | 12 | 14 | Single target high damage. | Crafted (3 wood, 40 steel, 1 component), raiders. | Close quarters, tribal raids. |
| Assault Rifle | 12 | 29 | Full-auto long range. | Crafted (3 components, 40 steel), advanced technology. | All-purpose, best for mid-late game pawns with high shooting. |
| Sniper Rifle | 25 | 45 | Extremely long range, single shot. | Crafted (3 components, 40 steel, 1 plasteel). | Sniper duels, picking off dangerous enemies. |
| Charge Rifle | 18 | 31 | High-tech energy weapon, burst. | Crafted (2 components, 1 advanced component, 15 plasteel, 2 uranium). | Heavy armor penetration, mechanoid fights. |
| Minigun | 7 (x6) | 28 | Heavy, slow, enormous burst. | Crafted (3 components, 50 steel, 2 plasteel). | Suppression, large groups of unarmored. |
| Heavy SMG | 10 | 16 | Short range, high damage. | Industrial tech, raids. | Close combat, breach raids. |
#### Ammunition (if using Combat Extended mod) – Vanilla has no ammo system; all guns use generic "bullets" from crafted ammo nodes in base game? No, vanilla RimWorld does not have consumable ammo. Guns fire unlimted rounds. So ignore.
Melee Weapons
| Weapon | Damage | AP | Description | Acquisition | Best Use |
|---|---|---|---|---|---|
| Club | 15 | 0 | Primitive blunt weapon. | Crafted (20 wood). | Early unskilled pawns, pacifists. |
| Knife | 10 | 0.25 | Small stabbing weapon. | Crafted (10 steel). | Quick, low damage. |
| Shortsword | 13 | 0.25 | One-handed sword. | Crafted (15 steel). | Good for nimble melee pawns. |
| Longsword | 20 | 0.35 | Two-handed sword. | Crafted (30 steel, 1 component). | High damage vs humans. |
| Mace | 18 | 0.40 | Blunt weapon, good vs armor. | Crafted (35 steel, 1 component). | Melee tanks, countering armored enemies. |
| Spear | 18 | 0.30 | Reach, decent damage. | Crafted (30 steel). | Kiting, alpha strike. |
| Plasteel Longsword | 20 | 0.55 | Better AP, lighter. | Crafted (20 plasteel, 1 component). | Endgame melee, vs mechanoids. |
| Uranium Mace | 22 | 0.65 | Heavy blunt, high AP. | Crafted (20 uranium, 1 component). | Mechanoid slayer. |
| Zeushammer | 28 | 0.80 | Tech melee, EMP on hit. | Crafted (2 advanced components, 20 plasteel, 30 uranium). | Stuns mechs, ultimate blunt. |
| Monosword | 25 | 0.90 | Ultra-tech blade, ignores armor. | Quest reward, Archotech structure. | Best melee vs anything. |
| Persona Weapons | Varies | Varies | Sentient weapons with traits (e.g., kill fury, psychic sensitivity). | Quests, ancient ruins. | Specialized benefits, but can cause mental breaks. |
---
Armor & Clothing
Armor reduces damage taken. Clothing can be made from various materials (leather, cloth, hyperweave) affecting stats.
Basic Clothing
- Tribalwear: 0.05 sharp/heat, 0 blunt. Apparel: shirt/pants. Material: cloth or leather. Primitive.
- Button-down Shirt + Pants: 0.10 sharp/heat, 0.10 blunt. Industrial. Can be made from cloth or hyperweave.
- Duster: 0.25 sharp/heat, 0.25 blunt. Outer layer, good for temperature.
- Tinfoil Hat: Psychic sensitivity -50%, doesn't count as apparel for armor. Useful against psychic assaults.
- Flak Vest: 0.50 sharp, 0.60 heat, 0.40 blunt. Crafted with 60 steel + 2 components. Essential for combat pawns.
- Plate Armor: Full body (chest, arms, legs). 0.75 sharp, 0.75 heat, 0.70 blunt. Heavy, slows pawn. Crafted with 150 steel, 8 components. Good for dedicated tanks.
- Marine Armor: High-tech, 0.90 sharp, 0.80 heat, 0.70 blunt. +30% movement? Actually +0.05 move speed penalty. Crafted with 80 plasteel, 4 advanced components, 10 uranium. Mid-late game.
- Recon Armor: Lighter marine, 0.80 sharp, 0.70 blunt, 0.70 heat. Crafted with 40 plasteel, 3 advanced components, 5 uranium. Good mobility.
- Cataphract Armor: Best non-archotech, 1.30 sharp, 1.30 heat, 1.20 blunt. Very heavy. Crafted with 160 plasteel, 8 advanced components, 40 uranium. Endgame.
- Locust Armor: Recon variant with jump pack. Crafted with 50 plasteel, 4 advanced components, 10 uranium. Allows short-range teleport.
- Phoenix Armor: Cataphract variant with heat immunity. Crafted with 200 plasteel, 10 advanced components, 50 uranium. For firefights.
- Steel Broadhelm: 0.70 sharp, 0.50 blunt. Basic. Crafted 40 steel.
- Flak Helmet: 0.80 sharp, 0.60 blunt. Crafted 60 steel, 1 component.
- Marine Helmet: 0.90 sharp, 0.70 blunt. Crafted 20 plasteel, 1 advanced component, 5 uranium.
- Cataphract Helmet: 1.30 sharp, 1.10 blunt. Crafted 40 plasteel, 2 advanced components, 10 uranium.
- Wooden Shield: +0.05 melee dodge chance. Crafted 40 wood.
- Metal Shield: +0.10 melee dodge chance. Crafted 80 steel.
- Hyperweave: Best for clothing – high sharp/heat resistance, lightweight. Obtained from traders, crafting (requires advanced tech).
- Thrumbofur: Good armor and cold insulation, from thrumbos.
- Devilstrand: Excellent sharp/heat resistance, slow growth plant.
- Plasteel: Used in high-end armor, very strong.
- Uranium: Heavy, good blunt resist, used in advanced armor.
- Simple Meal: 0.85 nutrition, +0 mood. Crafted from any raw food.
- Fine Meal: 0.90 nutrition, +5 mood. Crafted from 2 different food types (e.g., meat + vegetables).
- Lavish Meal: 0.92 nutrition, +12 mood. Crafted from 3 food types, requires high cooking skill.
- Packaged Survival Meal: 0.85 nutrition, no mood. Non-perishable. From traders, raids.
- Raw Food: Berries, rice, meat, etc. Consumed raw gives mood penalty.
- Beer: +15 mood, -5% consciousness. Brewed from hops. Use for recreation, social fights.
- Wine: +15 mood, -5% consciousness. Brewed from grapes. Similar to beer.
- Psychite Tea: +10 mood, +5% movement, +5% consciousness. Brewed from psychoid leaves. Addictive.
- Coffee: +12 work speed, +10% movement. Brewed from coffee beans. No addiction.
- Herbal Medicine: 0.50 potency. Grows wild or planted. Use for minor injuries.
- Medicine (Industrial): 1.00 potency. Crafted from neutroamine + cloth. Standard for surgeries.
- Glitterworld Medicine: 1.50 potency. Rare, from traders or quests. Best for vital surgeries.
- Luciferium: Permanent, addicting drug. +10% manipulation, +10% blood pumping, +10% moving, can regenerate lost digits? Actually heals scars over time. Causes psychosis if not fed every 6 days. One stack lasts ~30 days.
- Healroot: Raw plant used in herbal medicine crafting. Grown.
- Neutroamine: Rare component for industrial meds. From traders.
- Malari-Block: Prevents malaria.
- Penoxycyline: Prevents the plague? Actually prevents multiple diseases: malaria, plague, sleeping sickness. Administered weekly.
- Go-juice: +50% movement, +50% melee damage, -10% pain. Addictive, crash after.
- Wake-up: +20% consciousness, +10% manipulation. Negates sleep need temporarily. Addictive.
- Yayo: +15% workspeed, -10% pain. Mildly addictive.
- Flake: +15% workspeed, -20% pain, -5% consciousness. Cheap, addictive.
- Component: Basic building block for electronics, weapons, workbenches. Crafted from 2 steel? Actually requires machining (component per 60 steel).
- Advanced Component: Used in high-tech items. Crafted from 3 components, 1 gold, 1 steel after research.
- Chemfuel: Fuel for generators, vehicles (mod). Distilled from organic matter or mined.
- Steel: Most used material. Mined from compacted steel.
- Plasteel: Rare, shiny metal. Mined or deep drill. Used in high-end.
- Uranium: Heavy, radioactive. Mined. Used for armor, weapons.
- Gold: Used for advanced components, art. Mined low but valuable.
- Silver: Currency (see below).
Armor Vests
Helmets
Shields (Tribal)
Material Effects
Combat Pawn Loadout: Flak vest + Duster (devilstrand or hyperweave) + Marine Helmet. For endgame: Cataphract armor + helmet.
---
Consumables
Food & Drink
Medicine
Drugs (Recreational & Complicated)
Components & Crafting Consumables
---
Materials
RimWorld has many raw and refined materials. Key ones:
| Material | Source | Uses | Notes |
|---|---|---|---|
| Wood | Trees | Construction, furniture, fuel (burner generators), traps. | Renewable, but creates risk of fire. |
| Steel | Compacted steel, scrap, deep drilling. | Most buildings, weapons, armor, structures. | Primary structural material. |
| Plasteel | Deep drilling, trading, ship chunks. | High-end armor, weapons, prosthetics. | Very strong, hard to acquire. |
| Uranium | Deep drilling, some traders. | Advanced armor, maces, wastepacks. | Heavy, high blunt defense. |
| Gold | Mining, deep drilling, traders. | Advanced components, art, sculptures, bribery. | High trade value, low structural use. |
| Silver | Mining, traders, quests. | Currency (see below), some recipes (marble?). | Standard currency. |
| Jade | Mining, deep drilling, traders. | Art, floors, walls (beauty). | Decorative, no structural strength. |
| Marble | Quarries, deep drilling. | Sculptures, floors. | High beauty, low HP. |
| Granite | Quarries. | Walls, traps. | Highest HP stone. |
| Limestone | Quarries. | Walls, floors. | Good HP, available. |
| Sandstone | Quarries. | Walls, floors. | Easiest to cut. |
| Slate | Quarries. | Walls, floors. | Low HP, beautiful. |
| Cloth | Cotton plant. | Clothing, bedrolls, research. | Renewable. |
| Devilstrand | Devilstrand mushroom. | High-end clothing. | Takes long to grow. |
| Hyperweave | Trader, dismantling clothing. | Excellent clothing. | Lightweight, high resist. |
| Thrumbofur | Thrumbo hunting or taming. | Warm clothing, high armor. | Rare, huge animals. |
| Synthread | Crafting at drug lab? Actually not craftable; from traders. | Mid-range clothing material. | Good middle ground. |
| Leather (various) | Butchering animals. | Clothing, shoes, furniture covering. | Different types confer armor/temperature. |
Currencies
- Silver: Primary currency. Used to buy items from traders. Can be minted as coins, but default is ingots. Found in mining, rewards.
- Gold: Secondary currency. High trade value (1 gold = 5 silver at base). Used for advanced components, bribes (royalty).
- Uranium: Not a currency but valuable for trade.
- Plasteel: Extremely valuable, often used as barter.
- Neutroamine: Rare, used as trade item for exotic goods.
- Advance Components themselves are valuable.
- Artifacts (Archonexus): From the Archonexus quest chain: Artifact pieces, Neuroformer, etc.
- Persona Core: Used to unlock AI persona in ship structure. Found in ancient dangers or quests.
- Psychic Reader / Psy-Emitting Device: From Royalty DLC; allow pawns to use psycasts.
- Eltex Staff / Helmet / Necklace: Psychically attuned items that boost psycasting. Crafted from components or quest rewards.
- Aurora Tablets: ? Actually, the artifacts from scattered ruins: Technology prints, etc.
- Gold and Jade Sculptures with high quality: Art pieces that boost beauty and impress traders.
- Royalty Titles and Related Items: Bionic eyes, Honorific tokens, etc. but not physical collectibles.
- Ship Computer Core / AI Persona Core: Required to build ship.
- Cargo Pods with Food or Random Items: Can contain rare books? Not really.
- Modded Collectibles: Not covered; vanilla only.
Traders have limited silver; high-value items may require multiple trades or selling goods in exchange.
---
Collectibles
Collectibles are unique or rare items with special significance, often from quests or events.
In vanilla, there are no "collectible" cards or albums. The closest are items required for specific quests, like the Glimmerworld medicine or unusual artifacts from ancient dangers (e.g., a golden statue).
---
Key Equipment
Workbenches, power generators, and critical structures.
Production Stations
| Station | Requirement | Function |
|---|---|---|
| Electric Smelter | Research: Electric Smelting | Smelt slag to steel. |
| Electric Tailoring Bench | Research: Electricity | Craft clothing, armor. |
| Machining Table | Research: Machining | Craft components, weapons, armor. |
| Fabrication Bench | Research: Fabrication | Craft advanced components, bionics, high-end gear. |
| Drug Lab | Research: Drug Production | Craft drugs. |
| Hi-Tech Research Bench | Research: Hi-Tech Research | Faster research, needed for advanced tech. |
| Brewery | Research: Brewing | Make beer, wine. |
| Biofuel Refinery | Research: Biofuel | Convert organic matter to chemfuel. |
| Deep Drill | Research: Deep Drilling | Mine deep resources. |
| Ground Penetrating Scanner | Research: Deep Drilling | Locate deep resources. |
| Long Range Mineral Scanner | Research: Mining | Find surface deposits on map. |
Power Generation
| Generator | Output | Fuel | Notes |
|---|---|---|---|
| Solar Panel | 1700W (day) | Sun | Needs battery for night. |
| Wind Turbine | 0-2300W avg 900W | Wind | Unreliable, blocks space. |
| Wood-Fired Generator | 1000W | Wood | Constant, needs refueling. |
| Chemfuel Generator | 1000W | Chemfuel | Can be automated with biofuel. |
| Geothermal Generator | 3600W | Geothermal vent | High output, requires research, one per vent. |
| Water Mill Generator | 600-2400W | Moving water | Variable, map-specific. |
| Tokamac Reactor? Actually Nuclear Reactor is mod. Vanilla base power ends at geothermal + chemfuel. |
Storage & Temperature
- Freezer (Cooler): Preserves food._

Character Skills
RimWorld Character Skills Guide
This guide covers every skill, ability, and special move available to pawns (characters) in RimWorld, including all DLCs (Royalty, Ideology, Biotech). Skills are the core stats that determine task efficiency, quality, and speed. Abilities are special actions unlocked through traits, implants, genes, psycasts, or role-based commands.
---
1. Core Skills Overview
RimWorld has 11 primary skills (12 with Royalty's Intellectual skill). Each skill ranges from 0 to 20 and affects related tasks. A pawn’s skill level, combined with their passion (minor = 1 flame, major = 2 flames, burning = 3 flames), determines learning rate and maximum level. Skills improve by doing tasks, with bonuses from passions and traits.
| Skill | Affects | Tasks |
|---|---|---|
| Shooting | Ranged weapon accuracy, aiming time | Firing guns, mortars, turrets |
| Melee | Melee hit chance, dodge chance, damage | Melee attacks with weapons or fists |
| Construction | Build speed, construction quality | Building walls, furniture, floors, deconstructing |
| Mining | Mining speed, yield | Digging rock, harvesting chunks, smoothing floors |
| Cooking | Cooking speed, food poisoning chance | Butchering, cooking meals, brewing |
| Plants | Plant grow speed, harvest yield | Sowing, harvesting, cutting plants |
| Animals | Animal handling, taming chance, train chance | Taming, training, milking, shearing, doctor for animals |
| Crafting | Crafting speed, item quality | Smithing, tailoring, machining, drug production |
| Artistic | Artistic quality, speed | Sculpting, stone art, furniture art |
| Medicine | Surgery success chance, tend quality | Treating wounds, surgeries, feeding patients |
| Social | Trade price improvements, recruit chance, peace talks | Trading, recruiting prisoners, converting, caravans |
| Intellectual (Royalty DLC) | Research speed, medical operation chance | Research, hacking, scanning, surgery success bonus |
- Skill Level 0–20: Each level increases task success and speed with diminishing returns. Level 10+ unlocks higher quality crafts and faster work.
- Passion Flames:
- Minor (1 flame): ×1.5 learning, +20% max level? Actually max level remains 20, but passion increases XP gain and may allow reaching 20 faster. Burnout disabled.
- Major (2 flames): ×2 learning
- Burning (3 flames): ×3 learning (only through certain events or mods; base game max is 2)
---
2. Traits That Grant Abilities or Modifiers
Traits are innate and permanent, affecting skills directly or granting special actions. Key combat and utility traits:
| Trait | Effect |
|---|---|
| Brawler | +4 melee hit chance, +5 melee dodge chance, –10% ranged accuracy; pawn prefers melee weapons |
| Trigger-happy | –25% ranged accuracy, –20% aiming time (fires faster but less accurately) |
| Careful Shooter | +25% ranged accuracy, +20% aiming time (slower but more accurate) |
| Nimble | +5 melee dodge chance, +10% move speed |
| Tough | –25% incoming damage |
| Iron-Willed | +100% mental break threshold (breaks later) |
| Jogger | +20% move speed |
| Fast Learner | +75% global learning rate |
| Great Memory | Learning rate +60% |
| Industrious | +35% work speed (all tasks) |
| Very Industrious | +70% work speed |
| Gourmand | +6 cooking skill, eats twice as much, mood buff from fine meals |
| Bloodlust | Mood boost from killing, but may cause violent breaks |
| Kind | +8 opinion from others, reduces social fighting |
| Psychopath | No mood penalty from corpse or organ harvesting, –10 opinion from others |
| Sanguine | Permanent +12 mood |
- Brawler pawns should never use ranged weapons. Give them plasteel longswords or monoswords.
- Trigger-happy is good for low-skill shooters using fast-firing weapons like SMGs.
- Careful Shooter pairs well with sniper rifles or bolt-action rifles.
- Berserk (35 heat): Drives a single target into a berserk state, attacking friend and foe for 15 sec. Best used on dangerous enemies in a crowd.
- Burden (20 heat): Slows a target by –40% move speed for 30 sec. Useful for kiting.
- Painblock (10 heat): Blocks pain for 20 sec, allowing pawn to fight longer without going down.
- Stun (30 heat): Stuns target for 3 sec. Excellent panic button.
- Charm Animal (15 heat): Calms a wild animal for 24 hours. Great for taming dangerous animals or passing through herds.
- Invisibility (40 heat): Makes target invisible for 10 sec. In combat, enemies cannot target the pawn but can still hit with AoE.
- Skip (40 heat): Teleports a pawn (ally or enemy) up to 15 tiles away. Use to reposition allies or disrupt enemies.
- Smokepop (15 heat): Creates a puff of smoke that blocks line of sight for 10 sec. Good for covering retreats.
- Beckon (20 heat): Pulls a target toward caster (up to 15 tiles). Can drag enemies into traps or melee.
- Chaos Skip (50 heat): Teleports two random pawns (could be anything) to swapped positions. Unpredictable but can break enemy formations.
- Focus (15 heat): Boosts caster’s consciousness by 30% for 30 sec. Increases global work speed and combat effectiveness.
- Roof Collapse (40 heat): Collapses a roof tile (must be roofed and not open sky). Can crush enemies or block paths.
- Berserk Pulse (60 heat): AoE berzerk on all enemies in a 7.9-tile radius (duration 15 sec). Powerful crowd control but may hit allies if they are within range.
- Flash (30 heat): AoE stun in 4.9-tile radius for 2.5 sec. Invaluable against groups.
- Maddening Pulse (60 heat): Causes mental break on enemies in radius (low chance, but can cause a cascade).
- Skipshield (40 heat): Places a shield that blocks projectiles for 15 sec. Does not block melee.
- Mass Chaos (70 heat): Teleports all pawns within a large area to random locations within range. Extremely disruptive.
- Neuroquake (100 heat): Causes a massive psychic wave that downs all pawns (friend and foe) within 25 tiles for 12 sec, leaving them downed. Caster also goes down. Last resort.
- Vertigo Pulse (60 heat): Causes vomit and incapacitation in a radius for 5 sec. Good for disabling enemies.
- Waterskip (40 heat): Cleans up filth (blood, dirt) in a small area. Not combat.
- Pain Pulse (70 heat): AoE pain damage to all enemies in radius. Can easily down low-pain-threshold foes.
- Revocation (70 heat): Removes all psycast effects in area (good if allies are berserked by enemies).
- Split (50 heat): Creates a clone of caster that lasts 10 sec. Clone has same gear and attacks enemies.
- Psychic hypersensitivity gives +50% psycast strength (range/duration) but –30% heat limit.
- Psychic sensitizer implant increases heat limit by +30.
- Eltex gear (staff, armor) reduces heat cost by up to 30%.
- Stun + Skip: Stun an enemy, then Skip them into your killbox or melee line.
- Focus + Berserk Pulse: Use Focus to boost consciousness, then cast a powerful AoE while maintaining concentration.
- Invisibility + Roof Collapse: Make a pawn invisible, then collapse a roof on enemies from above in a mountain base.
- Designate one or two psychically sensitive pawns as "psykers". Give them Eltex gear and a persona weapon with psychic properties. Level them through meditation with an animus stone (if tribal) or from empire permits.
- For combat psykers, prioritize Invisibility, Stun, and Berserk. For support, Focus and Skipshield are top.
- Mechanoid Surge: (If using certain mods or Vanilla Expanded, but base game: no active ability beyond commands.)
- Pair a mechanitor with a high-crafting pawn to repair mechs faster.
- Mechanitor should have high Intellectual and Crafting for research and mech building.
---
3. Special Abilities from Royalty DLC (Psycasts)
Psychic powers (psycasts) are unlocked via the Psyconnect ability and level up through tree meditation. Each psycast costs psychic heat (max 100). Heat generation varies per cast and can be reduced by psychic sensitizer implants or gear.
#### 3.1 All Psycasts by Level
Level 1
Level 2
Level 3
Level 4
Level 5
Level 6
Upgrades:
Combos:
Recommended Build:
---
4. Biotech DLC: Mechanitor Abilities
A mechanitor is a pawn implanted with a mechanitor spinal structure, allowing control of mechanoids. Their main ability is Mech Command.
Mech Command: Allows the mechanitor to give direct orders to mechanoids (attack, move, etc.). Range is limited but can be extended by the Bandwidth implant.
Bandwidth: Determines how many mechs can be controlled. Start with 4, upgrade via implants and research. Each mech occupies bandwidth (light mechs = 1, medium = 2, heavy = 3).
Summon Mech: Using a mech assembler, mechanitors can build new mechs from steel and components. Types: Scyther, Lancer, Pikeman, Centipede, Diabolus, etc. No cooldown but resource cost.
Self-Destruct (middle mouse button or context): Forces a mech to explode after a short delay, dealing damage in a small radius. Use on damaged mechs near enemies.
Reclaim (context): Deconstruct a mech for parts.
Special Moves:
Synergies:
---
5. Biotech DLC: Gene Abilities (Xenogenes & Endogenes)
Genes can be implanted into pawns (xenogenes) or inherited (endogenes) from hybrid parents. Many grant active or passive abilities. Here are the most notable:
| Gene | Type | Effect |
|---|---|---|
| Fire Breath | Active | Pawn can breathe fire in a cone, causing burns and igniting enemies. Cooldown: 5 sec. High hunger drain. |
| Venom Fangs | Active | Pawn can bite enemies in melee, injecting venom that causes toxic buildup. |
| Psychic Sensitivity | Passive | Increases psychic sensitivity, enhancing psycast range but lowering heat limit. |
| Psychic Bonding | Passive | Pawn must bond with another pawn; both gain +12 mood when near. |
| Dead Calm | Passive | Pawn never goes berserk or violent mental breaks. |
| Fast Runner | Passive | +0.4 c/s move speed. |
| Slow Runner | Passive | –0.4 c/s move speed. |
| Low-Light Vision | Passive | No penalty in darkness. |
| Aesthetic | Passive | +25 opinion from others. |
| Awful | Passive | –50 opinion from others. |
| Toxic Immune | Passive | Completely immune to toxic buildup. |
- Fire Breath is excellent for clearing groups of tribals or insects. Combine with a melee pawn so they can run into formation and burn.
- Venom Fangs on a brawler adds toxic damage over time.
- Fast Runner on all combat pawns is always good.
- Fire Speech: Boosts mood of colonists by +10 for 1 day. Cooldown: 20 days.
- Celebrate: Organizes a festival that gives mood buffs. Takes time.
- Convert: Reduces pawn's certainty in own ideoligion, making them open to conversion by a high-social pawn.
- Preach: Increases mood and certainty for listening colonists.
- Counsel: Single target mood boost, can prevent breaks.
- Mediate: Two pawns with negative opinions are called to talk, possibly improving relationship.
- Each role gives a work speed boost for related tasks (e.g., Construction Specialist: +50% construction speed). No active abilities but passive buffs.
- Use Fire Speech before a caravan or raid. Use Convert on high-value prisoners.
- Moral Guide's Counsel is essential to stop mental breaks early.
---
6. Ideology DLC: Role Abilities
Roles (leader, moral guide, etc.) grant unique abilities that affect colony mood and production. These require the appropriate role assigned in the Ideoligion.
#### 6.1 Leader
#### 6.2 Moral Guide
#### 6.3 Mediator
#### 6.4 Specialist Roles (Academy, Driller, etc.)
When to use:
---
7. Implant and Bionic Abilities
Bionic and archotech implants grant passive bonuses or active abilities:
| Implant | Ability/Effect |
|---|---|
| Psychic Reader | Active: Can see stats of a pawn (opinions, health, skills). Useful for recruitment evaluation. |
| Psychic Soothe | Active: Emits a calming aura (mood boost for nearby pawns) for a few hours. Cooldown: 2 days. |
| Psychic Sensitizer | Passive: +30 psychic heat limit, increases range. |
| Bionic eye | +20% sight, improves accuracy. |
| Archotech leg | +80% move speed. |
| Coagulator | Stops bleeding instantly on applied pawn. No active. |
| Healer Mech Serum | One-time use item: heals a random permanent injury or scar. Not an implant but a consumable ability. |
- Bionic eyes + Careful Shooter = sniper god.
- Archotech legs + Jogger = runner for hauling or kiting.
- Bite: Basic melee attack.
- Claw/Strike: Some animals have sharp claws with armor penetration.
- Pack Predator: Wolves and some others get buffs when attacking with pack mates.
- Taming: Not a skill, but animals can be trained up to 5 levels:
- Trained wargs or bears are excellent mobile melee fighters. Keep a handler with high animal skill (12+) to train them to Release and Obey.
- Shooting + Trigger-happy + Bionic eye: Fast-firing, good accuracy, high DPS with minigun.
- Melee + Brawler + Tough + Nimble: Frontline tank with high dodge and damage reduction. Equip uranium mace or power claw.
- Crafting + Industrious + Bionic arms: Masterwork/excellent weapons and armor quickly.
- Social + Kind + Psychic Soothe: Negotiator for peaceful trades and recruitment.
- Farming: High Plants + Industriou: Crop yield boost with fast work.
- Mining: High Mining + Bionic arms + Drill: Resource extraction specialist.
- Shooting: Every raid fight. Pawns with Shooting >10 should be assigned to turrets or sniper positions.
- Melee: Use melee pawns to block doors or charge into ranged enemies. High Melee for kiting with animals.
- Construction: Build infrastructure as soon as possible. High construction for better furniture (mood) and walls (durability).
- Mining: Early game to dig out mountain bases. Mid-late for scanning and deep drilling.
- Cooking: Daily task to avoid food poisoning. Skill >8 ensures no poisoning.
- Plants: Planting crops and trees. Keep skill >6 for stable harvests.
- Animals: Taming dangerous animals early for defense. High skill needed for elephants, rhinos.
- Crafting: Produce weapons, armor, components. Focus one pawn here.
- Artistic: Build sculptures for mood. One dedicated artist.
- Medicine: Doctor deals with wounds and surgery. Keep skill >8 for safe surgery.
- Social: Recruit prisoners and trade. High skill for best prices.
- Intellectual: Research and scanning. Full-time researcher often needed.
- Traits: Brawler, Tough, Nimble
- Skills: Melee >14, Shooting irrelevant
- Implants: Bionic arm, Archotech leg, Coagulator
- Gear: Plasteel longsword, recon armor, shield belt
- Role: Frontline tank, door-blocker
- Traits: Careful Shooter, Jogger
- Skills: Shooting >16
- Implants: Two bionic eyes, bionic leg
- Gear: Sniper rifle, flak vest, devilstrand duster
- Role: Pick off high-value enemies from distance
- Traits: Industrious, Fast Learner
- Skills: Crafting >20, Construction >12, Artistic >10
- Implants: Bionic arms x2, bionic brain (upgraded)
- Gear: None needed, but keep safe
- Role: Produce masterwork weapons and armor for colony
- Traits: Kind, Sanguine
- Skills: Social >15, Animals >10
- Implants: Psychic Soothe, Psychic Reader
- Role: Recruit prisoners, lead caravans, boost mood
---
8. Animal Skills and Abilities
Animals have skills too, though limited. Attack animals (wolves, bears, megasloths) have innate abilities:
1. Release (attack), 2. Rescue, 3. Obey, 4. Haul, 5. Attack (advanced).
Each training step requires animal skill of the handler.
Recommended Build:
---
9. Combos and Synergies
---
10. When to Use Each Skill (Practical Tips)
---
11. Recommended Build Examples
Build 1: Combat God (Melee)
Build 2: Sniper
Build 3: Master Crafter
Build 4: Charismatic Leader
---
12. Summary
Skills and abilities in RimWorld form a deep specialization system. While every pawn can learn any skill via practice, focusing on passions and traits yields massive gains. Abilities from psycasts, genes, implants, and roles add tactical depth. Always match skills to colony needs. For beginners: prioritize one shooter, one builder, one crafter, and one doctor. Expand as you grow. Use the combos above to optimize your colony's performance.
This guide covered every core skill, trait, psycast, gene, implant, and role ability. Mods may add more, but vanilla + DLC abilities are complete here.
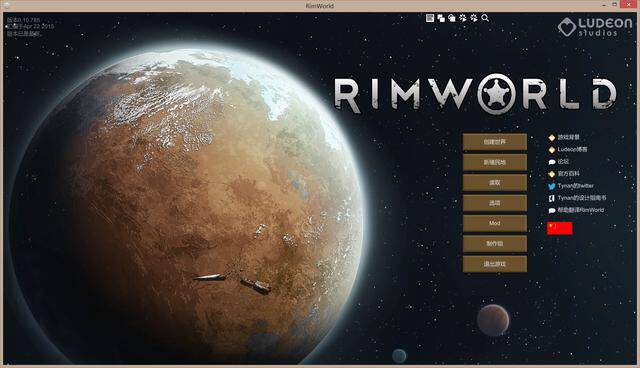
Characters & Roles
Characters & Roles Guide for RimWorld
RimWorld does not have fixed classes or heroes. Instead, each colonist (pawn) is a unique individual defined by their backstory, traits, skills, and health. Their role in your colony emerges from how you specialize them. This guide covers all major character types and roles available in the base game and DLCs (Royalty, Ideology, Biotech).
---
Base Game Colonists
#### Crashlanded Start Colonists
These are your three starting pawns from the classic crashlanded scenario. They are randomly generated with two backstories (childhood and adulthood) and traits. No two are alike.
- Background: Survivors of a transport ship crash on the rimworld. They have suffered some minor injuries and must build a colony from scratch.
- Strengths: Adaptable; you can choose any starting equipment for them (weapons, items) via the loadout system.
- Weaknesses: No special abilities beyond their skills and traits. Usually have one major passion and several minor ones.
- Playstyle: Foundation of your colony. Assign them roles based on their passions: e.g., a doctor, a builder, a researcher. Their backstories provide starting skill levels.
- How to Obtain: Always present in Crashlanded scenario. In other scenarios or via random joins, you get similar pawns.
- Recommended Equipment: Early game – bolt-action rifle, pistol, or survival rifle. Melee backup: steel knife. Apparel: tribalwear or dusters.
- Team Synergy: Best when diverse: one combat specialist, one builder/miner, one social/medical. Cross-train all in basic shooting and melee.
- Background: Varied: former pirates, ascetic monks, urbanite workers, etc.
- Strengths: Can fill specific skill gaps. Sometimes have rare traits like Industrious (less sleep) or Tough (50% damage reduction).
- Weaknesses: May come with liabilities: chemical fascination, pyromaniac, or rapid aging. Backstories may give major health drawbacks.
- Playstyle: Use as specialists. Manage their mood and expectations.
- How to Obtain: Random events, prisoner recruitment, or buying slaves.
- Recommended Equipment: Depends on role. Combatants get best weapons; laborers get tools like the Drill (if modded) or just good tools.
- Team Synergy: Pair a tough brawler with a trigger-happy shooter. Avoid putting a pyromaniac near stored chemfuel.
- Background: Can be any starting pawn; title is earned through favor with the Empire faction.
- Strengths: Title gives specific demands and permits (e.g., orbital bombardment, worker permits). Higher titles allow more permits and access to powerful psychic powers.
- Weaknesses: Nobles require lavish lifestyle: throne room, royal beds, fine meals, specific apparel. Refusing causes mood penalties and relationship loss with Empire.
- Playstyle: Build a dedicated royal wing. Keep the noble happy with constant recreation and luxury. Use permits strategically (e.g., for raids).
- How to Unlock: Gain honor by completing Empire quests. Titles range from Yeoman to Countess.
- Recommended Equipment: Royal apparel (eltex garments, psychic hoods, prestige armor for combat). Weapons: persona weapons (rank S) or uranium maces for melee.
- Team Synergy: The noble remains in colony; heavy protection teamates (in brawler/picket line) to guard them in battle. Psykers in background.
- Background: Any pawn can become a psyker if they have a link (from quests or artifacts). Empire can also grant links. Some backstories (e.g., "Psycaster") give starting sensitivity.
- Strengths: Versatile abilities – crowd control (Stun, Berserk), healing (Charm, Nature?), damage (Painlance), utility (Teleport, Skip).
- Weaknesses: Psycasts cost neural heat; overheat causes pain and unconsciousness. Requires meditation daily in a focus room. High psychic sensitivity also makes them vulnerable to psychic droners.
- Playstyle: Use as support/control caster. Keep out of direct combat to avoid neural heat from pain.
- How to Unlock: Obtain a psylink from Empire quests, crashed psychic ship (risk of infestation), or via permit. Then assign a pawn to equip the link item (e.g., Psylink Neuroformer). Train psycasts through meditation and gaining levels (max 6-7).
- Recommended Equipment: Eltex apparel (increase psyfocus gain), high quality. Weapon: a good long-range weapon (charge rifle, sniper) or skip-focused melee.
- Team Synergy: Pair with a tough frontline to take advantage of Skip or Mass Chaos for crowd control. Combine with brawlers for teleport ambushes.
- Background: Any pawn. Usually a high social skill pawn.
- Strengths: Great for converting captured pawns, increasing colony mood through sermons. Can lead ceremonies (like festival).
- Weaknesses: Must be assigned to this role; takes time away from other work. If mood drops from conversion failure, can worsen colony.
- Playstyle: Keep him in good mood, hold regular rituals. Build a temple or altar.
- Unlock: Activate the Ideology system and assign a pawn to the "Moral Guide" role in the ideoligion screen.
- Recommended Equipment: Royal or prestige apparel for style. Melee weapon for self-defense.
- Team Synergy: Works with all pawns; especially valuable if you have many prisoners or large colony.
- Background: Any pawn with high social and leadership traits (like Persuasive, Kind).
- Strengths: Provides a constant mood aura. Can also wield persona weapons? (Not exactly; leaders can have special weapon from quests).
- Weaknesses: If the leader dies, major mood penalty. Also, leader must have a private bedroom and fine meals.
- Playstyle: Assign as leader early. Keep them alive and happy.
- Unlock: Designate via Ideology screen after unlocking leader role through a quest or tech.
- Recommended Equipment: Best armor (prestige marine or recon). Good ranged weapon.
- Team Synergy: The leader is the face; keep them in the central part of colony. Other high social pawns can assist.
- Background: Any pawn with high skill in the chosen field.
- Strengths: +50% work speed in that skill, faster skill gain.
- Weaknesses: Cannot do other work types; must have other pawns to fill gaps.
- Playstyle: Min-maxing. Example: a Warden specialist with high social can recruit prisoners 50% faster. A Doctor specialist heals faster.
- Unlock: Select the specialist precept during ideology creation or via development role system.
- Recommended Equipment: Gear that boosts their specialty: e.g., advanced bionic arms for doctor.
- Team Synergy: Pair with a generalist to cover other tasks.
- Background: Any pawn can become a mechanitor by crafting the Helixien gas and helmet from research. Existing mechanitors appear in events.
- Strengths: Control up to X mechs (based on skill). Direct mechs to mine, haul, fight, construct. Mechs don't need food or sleep, only recharging at a mech recharger.
- Weaknesses: Mechanitor themselves are weaker – no combat enhancements. Mechs can be destroyed, losing resources. Mechanitor must be near a mech link to control; range is limited without link extension.
- Playstyle: Build a mech hive. Use haulers (Lifters) to automate hauling, Agribots for farming, Constructoids for building. Combat mechs: Scyther, Lancer, Centipede. Manage bandwidth and recharge time.
- How to Unlock: Research "MechTech" then build Mech Repairs? Actually: craft standard mech chips and Helixien. The first mech arrives via quest or you can build a basic one from mech assemblies (from crashed mech ship parts or trade).
- Recommended Equipment: Focus on mental boosting gear: psychic sensitivity, traits like Tough. Gear to survive: good armor. The mechanitor must stay alive to control mechs.
- Team Synergy: Works well with a self-sufficient colony; mechs handle labor while colonists do skilled work. Pair with a builder to repair mechs quickly.
- Background: Born from two colonists (via love) or purchased/saved. Human, or with custom genes (xenotypes).
- Strengths: Can be molded from birth: raise skills with proper training, assign traits through growth moments (Biotech).
- Weaknesses: Long time to become adults. Children are small, slow, can't do most work until they reach age 3? Actually children can do minor tasks, but heavy work restricted. They require care, food, and sleep.
- Playstyle: Invest in a dedicated nursery or child-rooms. Use growth vats for quick aging (5x speed if resources available). Prioritize good bedrooms and recreation.
- Unlock: Enable children in settings; they can be born via love (both pawns must be assigned to same bed and not using contraception). Or purchase child slaves/prisoners.
- Recommended Equipment: Child-specific clothing for comfort. When they reach adult, assign them to best roles.
- Team Synergy: Requires a dedicated caretaker (high medical skill to treat childhood illnesses). Good for long-term colony sustainability.
- Each xenotype has inherent strengths and weaknesses:
- Playstyle: Choose xenotypes that fit your colony needs. Hussars for soldiers, Neanderthals for miners and melee, Genies for crafting, Highmates for social/ handling. Sanguophages are endgame powerful but need strict control.
- How to Obtain: Random chance for pawns to belong to a xenotype based on faction. Can be created via gene extraction and implantation from a custom xenotype.
- Recommended Equipment: Tailor equipment to exploit strengths: give Neanderthals heavy plasteel maces, Hussars go-juice injectors plus bionic legs for speed, Sanguophages get night vision and melee weapons.
- Team Synergy: Mix xenotypes to cover each other's weaknesses. For example, a Genie fixes weapons while Neanderthals tank.
- Prisoner Rescue: A rescued prisoner may have unique backstory like "Genius Researcher" or "Ex-Bounty Hunter".
- Refugee: Random backstories.
- Space Refugee: From a drop pod; similar.
- Wandering Trade Ships: Provide temporary colonists (you can accept them via joining).
#### Wanderer Joins/Random Recruit
Pawns that join your colony via events (wanderer joins, chased refugee, or captured and recruited). They have random backstories and traits.
---
DLC: Royalty – Nobles and Psykers
This DLC adds a hierarchy system based on imperial titles and psychic powers.
#### Nobles / Honor-Bound Kings
Pawns who earn imperial titles (Knight, Baron, etc.) through quests or favors.
#### Psykers (Psychic Users)
Pawns with psychic sensitivity, able to cast psycasts (spells) after linking to a specific psylink.
---
DLC: Ideology – Roles and Precepts
This DLC adds a custom religion system with roles for colonists.
#### Moral Guide
A colony role that provides mood buffs via preaching, leading rituals, and converting prisoners.
#### Leader
A pawn designated as the colony's leader; grants bonuses to work speed, mood, and ideoligion satisfaction for all pawns.
#### Role: Specialist (e.g., Warden, Doctor, Researcher)
Ideology can also create limited specialist roles (via certain precepts). These restrict the pawn to only that job type but greatly boost efficiency.
---
DLC: Biotech – Mechanitors and Children
This DLC introduces genes, mechanoids, and children.
#### Mechanitor
The ultimate mechanoid controller. A pawn who connects to the Mechanitor helmet (Helixien) and can direct friendly mechs.
#### Children (Born or recruited young)
Children grow up over 18 in-game years (18 quadrums). They have
#### Xenotypes (Genetic Races)
Biotech adds gene editing and xenotypes like Neanderthals, Highmates, Genies, Hussars, etc.
- Neanderthal: +5 melee, +5 mining, -2 intelligence, faster melee cooldown, dark vision. Weak: social and crafting.
- Highmate: +2 social, beautiful, rapid sex? Actually: +2 social, ×60% more love, no violence precept? Highmates cannot attack humans or animals (pacifist). Very weak in combat.
- Genie: +4 crafting, -2 shooting? Actually: Genie has high crafting, medium research, low mining. Excellent crafters.
- Hussar: +2 melee, +2 shooting, but aggressive and require go-juice (need wake-up). Very fast moving.
- Sanguophage: Vampire-like, need hemogen (blood), can infect others. Nearly immortal but weak in sun and must feed. Powerful combat abilities.
- And most importantly: custom xenotypes via gene assembler.
---
Special Named Characters
Some events introduce fixed backstory pawns:
None of these are fixed "heroes" but they can become legendary.
---
Final Advice
Role assignment is fluid – you can reassign any pawn to any role through job priorities. The best colony has balanced skills and low conflict traits. Always monitor mood, and remember: RimWorld’s story comes from the unexpected. That pawn with a depressive trait and a passion for art might become your master sculptor and keep morale high.
---
This guide covers all major character types and roles as of RimWorld 1.5 with all DLCs. Future updates may add new roles.
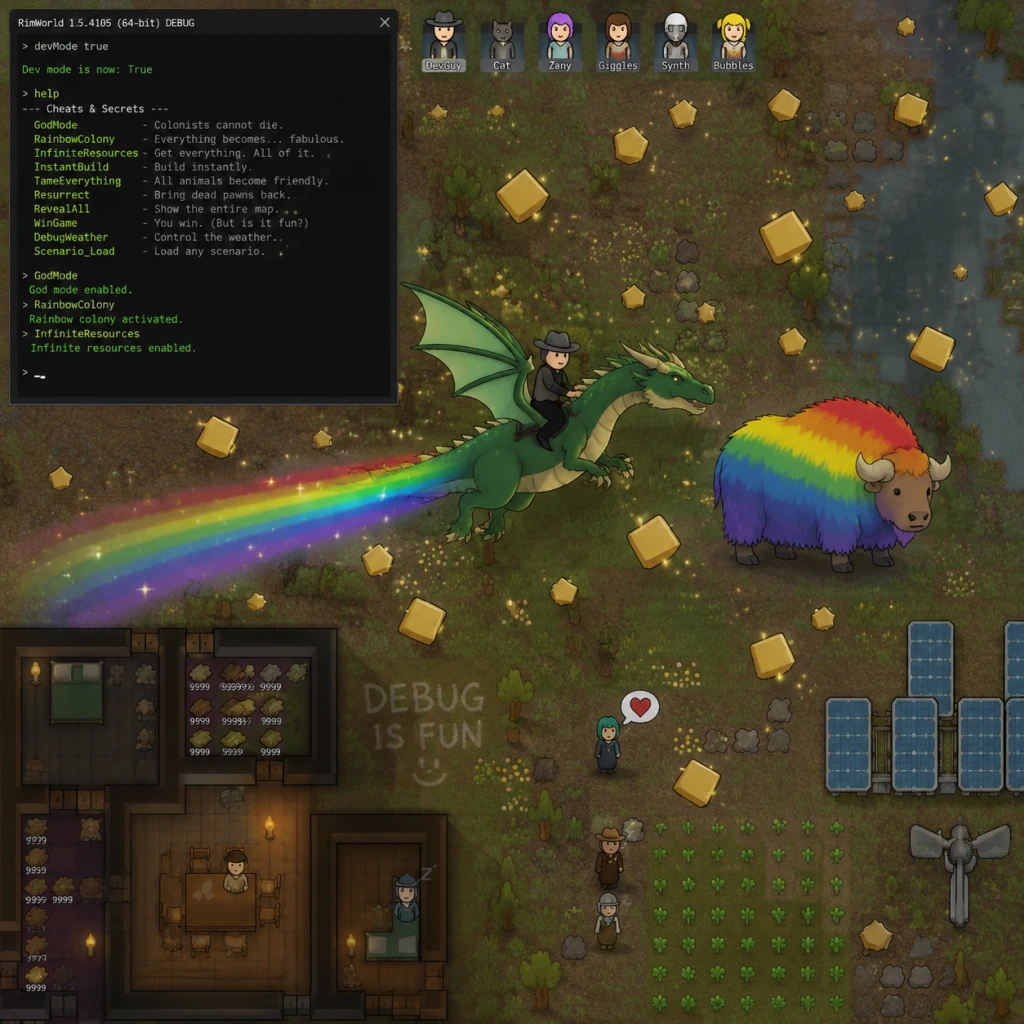
Cheats & Secrets
Cheats & Secrets
RimWorld does not include traditional cheat codes or unlock codes. However, the game provides powerful Developer Mode and Debug Actions intended for testing and modding, which can be used as "cheats." Additionally, there are several hidden features and Easter eggs.
Developer Mode
To enable Developer Mode, edit the game's settings file or use the in-game menu:
- On PC (Steam/GOG/Windows): Open the game's configuration folder (usually `%AppData%/../LocalLow/Ludeon Studios/RimWorld by Ludeon Studios/Config/`), find `Options.txt`, set `customDifficulty=false` and enable developer mode by adding `devMode=true`. Restart the game.
- In-Game: Go to Menu > Options > Tick "Developer Mode" (if visible). Alternatively, press `Ctrl+F12` to open debug console.
- God Mode: Toggle pawn invincibility, instant building, no resource cost.
- Pawn List: Spawn any character, animal, or item.
- Incident Tool: Force events (raid, trader, etc.).
- View Settings: Change world parameters.
- And more... See table below.
Once enabled, a new toolbar appears at the top with many debug tools. Use with caution – they can break your save.
Debug Actions Toolbar
The debug toolbar includes icons for:
| Icon | Name | Description |
|---|---|---|
| ! | God Mode | Enables invincibility, instant construction, free building. |
| A | Spawn Thing | Spawn any item or animal from a list. |
| B | Spawn Pawn | Spawn any colonist, enemy, or humanoid. |
| C | Incident | Trigger any incident: raid, meteor, gift, etc. |
Debug Console Commands
With Developer Mode on, you can press ` (backtick) or ~ to open the debug console. Type commands; some useful ones:
- `god` – Toggle god mode.
- `killall` – Instantly kills all non-player pawns (use with caution).
- `spawn thing` – Opens spawn menu.
- `weather clear` / `weather rainy` etc. – Change weather instantly.
- `timetool` – Adjust game speed, time.
- `researchall` – Unlock all research instantly (must have researched at least one tech already).
- `levelup <skill> <amount>` – Increase a pawn's skill (e.g., `levelup shooting 10`).
- `damage` – Deal damage to selected pawn.
- Scenario World: In the scenario editor, there is a hidden option to start on a world that is a perfect sphere (debug feature). Not normally accessible.
- AI Storyteller Randy Random: While not hidden, his randomness is often considered a "secret" to chaotic fun.
- Infinite Chemreactor: A rare event where a crashed ship part can be used indefinitely for components (arguably a hidden mechanic).
- Animal pulser: Hidden device that can be found from ancient dangers.
- A Tree Named... Occasionally, a tree named "A Tree" will appear. If destroyed, the pawn that did so gets a mood debuff "I kind of liked that tree."
- Friendly Fire: A hidden achievement (not listed) for having a colonist killed by friendly fire.
- Crashed Ship: The crashed ship part that begins the game is a nod to the classic sci-fi trope.
- Hats on Humans: The infamous "human leather" economy is a dark Easter egg referencing the game's community.
- Reference to other games: Items like the "Muffalo" are a play on "buffalo."
- Developer's names: Some backstories reference Ludeon team members.
- Healing Serum: Can be obtained from traders or quests – a rare resource.
- Resurrector Mech Serum: Brings a colonist back to life.
- Persona Weapons (Royalty DLC): Hidden psychic weapons with unique properties.
- Anima Trees (Royalty DLC): Hidden spiritual focus for tribal colonists.
Hidden Features
Easter Eggs
RimWorld is known for subtle references:
Exploit-Safe Secrets
These are hidden but legitimate mechanics:
Note on "Cheat Codes"
There are no secret button combos or built-in cheat codes. The only way to "cheat" is via Developer Mode. Mods like "Cheat Tools" or "Character Editor" offer more user-friendly ways to cheat, but these are not official.
This covers all official secrets and hidden content. Use responsibly.