Rocket League
## Game Introduction **Rocket League** is a high-octane hybrid of arcade-style soccer and vehicular mayhem, developed and published by **Psyonix**. Originally released on **July 7, 2015** for PlayStation 4 and Windows, it quickly expanded to Xbox One (February 2016), Nintendo Switch (November 2017)...
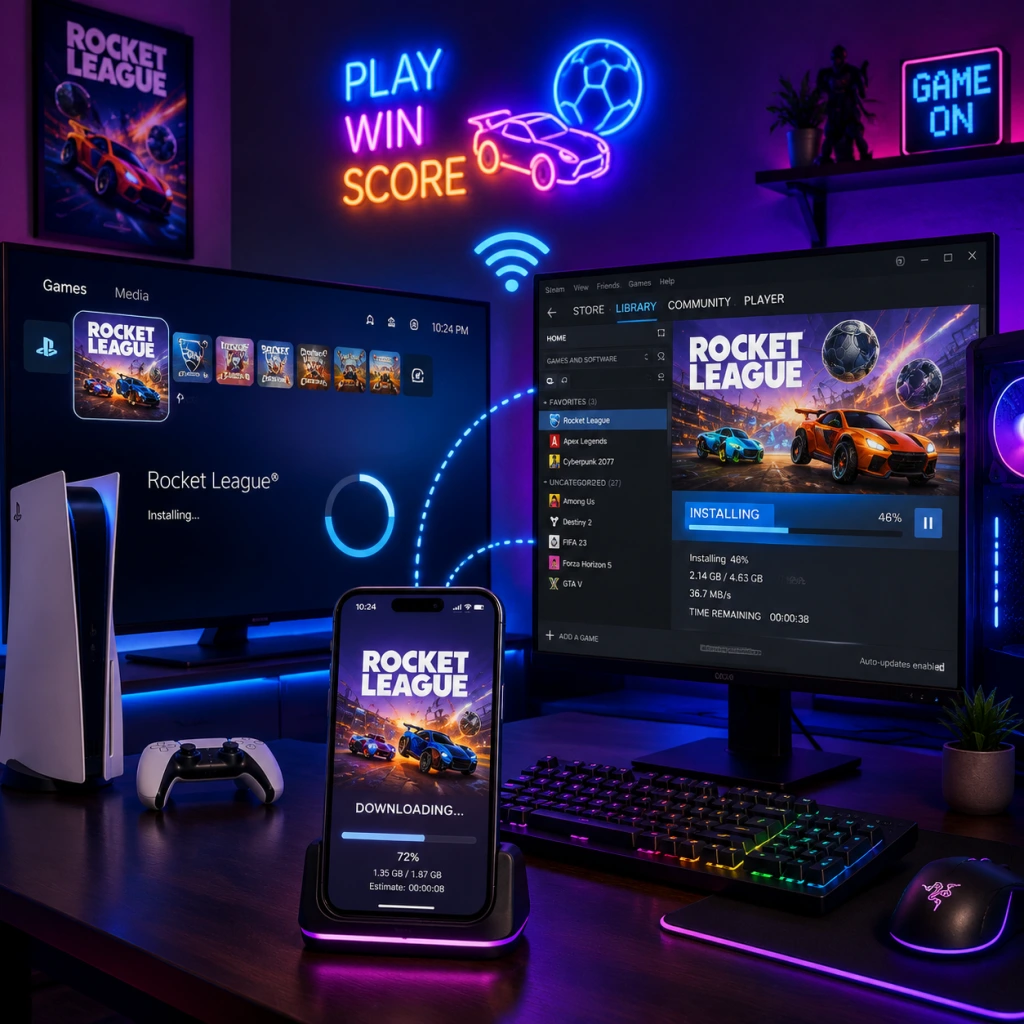
Download & Installation
Rocket League Download & Installation Guide
Rocket League is currently free-to-play on all platforms. Below is a comprehensive breakdown covering official download sources, step-by-step installation, system requirements, account linking, first-launch setup, common errors, and post-install verification.
---
1. Official Download Sources (Legitimate Only)
| Platform | Store / Source | Notes |
|---|---|---|
| PC | [Epic Games Store](https://store.epicgames.com/en-US/p/rocket-league) | Free. Epic Games account required. (Note: No longer sold on Steam for new users; existing Steam owners can still download via Steam.) |
| PlayStation | PlayStation Store (PS4 / PS5) | Free. PSN account required. |
| Xbox | Microsoft Store (Xbox One / Series X\ | S) |
| Nintendo Switch | Nintendo eShop | Free. Nintendo Account required. |
---
2. System Requirements (PC)
| Component | Minimum | Recommended |
|---|---|---|
| OS | Windows 10 (64-bit) | Windows 11 (64-bit) |
| CPU | Intel Core i5-4460 / AMD FX-6300 | Intel Core i7-6700 / AMD Ryzen 5 1600 |
| RAM | 8 GB | 16 GB |
| GPU | NVIDIA GeForce GTX 760 / AMD Radeon R9 270X | NVIDIA GeForce GTX 970 / AMD Radeon RX 480 |
| DirectX | Version 11 | Version 12 |
| Storage | 20 GB free space (SSD recommended) | 20 GB free space (SSD) |
| Network | Broadband internet connection | Broadband internet connection |
3. Step-by-Step Installation
#### PC (Epic Games Store)
1. Create an Epic Games account at [epicgames.com](https://www.epicgames.com) if you don’t already have one.
2. Install the Epic Games Launcher from the same site.
3. Log in to the launcher with your Epic account.
4. Search for “Rocket League” in the store or go directly to the [Rocket League page](https://store.epicgames.com/en-US/p/rocket-league).
5. Click “Get” (or “Download” if already owned).
6. The game will be added to your library. Click “Install” and choose installation location (default: `C:\Program Files\Epic Games\RocketLeague`).
7. Wait for download and installation to complete (~20 GB).
8. Launch the game from your Epic Games library.
#### PC (Steam – for existing owners only)
1. Open Steam and log in.
2. Go to Library and find Rocket League.
3. Click Install and follow on-screen prompts.
4. After download, launch from Steam.
> If you never purchased Rocket League on Steam before 2020, you cannot install it via Steam. Use the Epic Games Store.
#### PlayStation (PS4 / PS5)
1. Power on console and log in to your PSN account.
2. Go to the PlayStation Store.
3. Search for “Rocket League”.
4. Select the game and choose “Download” (it’s free).
5. The game will install automatically. You can monitor progress from the home screen.
6. Once installed, launch the game from your library or home screen.
#### Xbox (One / Series X|S)
1. Log in to your Xbox Live account.
2. Open Microsoft Store (or Store on Xbox dashboard).
3. Search for “Rocket League”.
4. Click “Get” or “Install”.
5. The download will start. You can check progress under My Games & Apps.
6. After installation, launch from the game tile.
#### Nintendo Switch
1. Turn on the console and open the Nintendo eShop from the home menu.
2. Select your user account and enter the eShop.
3. Search for “Rocket League”.
4. Scroll to the game and select “Free Download”.
5. Confirm the download. The game will install to your system or SD card (make sure you have enough space).
6. After installation, find the game on your home screen and launch.
---
4. Storage Space Requirements
| Platform | Approximate Download Size | Additional Space for Updates |
|---|---|---|
| PC (Epic/Steam) | ~20 GB | ~5 GB extra during patching |
| PS4 | ~22 GB | |
| PS5 | ~22 GB | |
| Xbox One / Series X\ | S | ~20 GB |
| Nintendo Switch | ~15 GB |
---
5. Account Requirements
- Epic Games Account is mandatory for all platforms to enable cross-progression, cross-play, and inventory sharing.
- You can link your platform account (PSN, Xbox Live, Nintendo Account) to an Epic account during first launch or via [Epic Games Account Linking](https://www.epicgames.com/account/connections).
During first launch on any platform:
1. The game will prompt you to sign in with an Epic Games account.
2. If you already have one, enter credentials. If not, create a new one.
3. After linking, your progress and items will sync across all linked platforms.
> Without an Epic account, you can still play offline or locally, but online features and cross-save will be disabled.
---
6. First Launch Setup
1. Language/Region selection – Choose your preferred language and region.
2. Video calibration – Adjust brightness and screen bounds (if needed).
3. Controller setup – The game will detect your controller automatically. You can rebind controls later in settings.
4. Tutorial – You can choose to play the built-in tutorial or skip it.
5. Online connection – Ensure you are online to link your Epic account (if not done during install).
6. Confirm account link – Follow on-screen steps to connect your platform account to your Epic account.
7. Accessibility settings – Optional: adjust camera, audio, and gameplay settings.
---
7. Common Installation Errors & Fixes
| Error | Platform | Cause | Solution |
|---|---|---|---|
| “Download Failed” | PC (Epic) | Network interruption, antivirus blocking | Restart launcher and router; add Epic Games Launcher & Rocket League to antivirus exceptions. |
| “Insufficient Disk Space” | All | Not enough free space | Free up space or install to a different drive. Minimum 25 GB free recommended. |
| “Unable to Start” or “Missing DLL” | PC | Corrupted game files or missing Visual C++ redistributables | Verify game files in Epic Launcher (Library > Rocket League > three dots > Verify). Reinstall [Microsoft Visual C++ Redistributables](https://aka.ms/vs/17/release/vc_redist.x64.exe). |
| “Sign-in Failed” | All | Account linking issue or server outage | Check [Epic Games Server Status](https://status.epicgames.com/); unlink and relink accounts via Epic Games website. |
| “Game Crashes on Launch” | PC | Outdated GPU drivers or overlays | Update drivers; disable Discord overlay, GeForce Experience overlay, or other overlays. |
| Controller Not Working | All | Driver issue or game setting | Ensure controller is recognized in OS; in Rocket League settings, select correct controller type (e.g., Xbox, PS4, Switch Pro). |
| “Low FPS” | PC | Settings too high for hardware | Lower graphics settings (especially shadows, anti-aliasing, and resolution). Use Performance Mode in video settings. |
| “Connection Timed Out” | All | Network firewall or NAT type | Port forward UDP ports 7000-9000 for Rocket League; disable firewall temporarily. |
- Restart your device and router.
- Update the game to the latest version.
- Reinstall the game if all else fails (back up replays/config first).
- Rocket League receives regular updates (seasonal content, patches). Keep the game updated for online play.
- On PC, you can launch Rocket League directly from the Epic Games Launcher or create a desktop shortcut.
- If you own the game on multiple platforms, you only need one Epic account to unify your progress.
---
8. Post-Installation Verification
After installation, confirm everything works by:
1. Launching the game – It should open within 30 seconds.
2. Checking the main menu – You should see the “Play Online” button and a connection indicator.
3. Playing a tutorial or exhibition match – Ensure controls and physics work smoothly.
4. Verifying account linking – Go to Settings > Account to see if your Epic account is connected.
5. Checking for updates – The game will prompt you if a patch is available.
6. Testing online matchmaking – Queue for a casual match. If it works, installation is complete.
---
Final Notes
For further help, visit the official [Rocket League Support Site](https://support.rocketleague.com).
Game Introduction
Game Introduction
Rocket League is a high-octane hybrid of arcade-style soccer and vehicular mayhem, developed and published by Psyonix. Originally released on July 7, 2015 for PlayStation 4 and Windows, it quickly expanded to Xbox One (February 2016), Nintendo Switch (November 2017), and later to all current-gen platforms (PS5, Xbox Series X|S) with native enhancements. On September 23, 2020, Rocket League transitioned to a free-to-play model, removing the purchase barrier and welcoming millions of new players. It is available on PC, PlayStation 4/5, Xbox One/Series X|S, Nintendo Switch, and Linux/macOS via Steam (though official support ended for macOS/Linux in 2020).
Story & Setting
Rocket League has no traditional narrative or single-player campaign. The "story" is purely emergent: players are rocket-powered cars competing in massive, enclosed arenas. The setting is a fictional sports league where teams of custom vehicles hit a giant ball into the opponent's goal. The only "characters" are the cars themselves, each with unique appearances and customizable parts. There are no named protagonists or antagonists – the focus is entirely on gameplay and competition.
Core Appeal
Rocket League’s core appeal lies in its simple-to-learn, impossible-to-master mechanics. Players control a car that can jump, boost, dodge, and flip to strike a ball. The physics are exaggerated but consistent, enabling spectacular aerial plays, wall bounces, and team coordination. Matches are fast-paced (5 minutes long) with sudden-death overtime. The game rewards creativity, precision, and teamwork while maintaining a low barrier to entry: anyone can drive and hit the ball, but mastering aerials, rotations, and boost management takes hundreds of hours.
Target Audience
Rocket League appeals to a broad audience:
- Casual players who enjoy pick-up-and-play fun with friends.
- Competitive gamers seeking a deep ranked mode with seasons and rewards.
- Esports enthusiasts – the game has a thriving professional scene with major tournaments like the Rocket League Championship Series (RLCS).
- Fans of sports games who want a twist on traditional soccer.
- Solo players can queue in matchmaking, but the game is best enjoyed with friends.
- Soccar (standard 3v3, 2v2, 1v1) – the core mode, scored by goals.
- Extra Modes (rotating): Hoops (basketball), Snow Day (ice hockey with a puck), Rumble (power-ups like grappling hooks and freeze), Dropshot (destructible floor panels), and Heatseeker (homing ball).
- Seasonal Events – limited-time modes like Spike Rush, Gridiron (football), and Chaos (4v4).
- Training – free-play, custom drills, and a workshop for PC.
- Custom Matches – private lobbies with full rule customization.
- Tournaments – in-game tournaments with brackets at various skill levels.
- Split Screen – local multiplayer for up to 4 players on console and PC.
- Offline – Exhibition matches vs AI, season mode (offline league), free play, training, and local split-screen multiplayer require no internet connection.
- Online – Casual, ranked, extra modes, tournaments, and all progression (Rocket Pass, item drops, trading) require internet. The game uses Epic Games account linkage (since 2020) for cross-platform play, friends list, and inventory sync. Cross-platform matchmaking is enabled by default across all platforms, though console players can disable it in settings.
- Rocket Pass – a seasonal progression system with 70+ tiers of cosmetic rewards (wheels, decals, goal explosions, player banners). A premium track costs 1000 credits (approx. $10) and pays back enough credits to purchase the next pass.
- Item Shop – rotating daily/weekly cosmetics, including licensed vehicles from other media (e.g., Fast & Furious, Batman, Back to the Future, Hot Wheels). Prices range from 200–2000 credits.
- Blueprint System – earned after matches; blueprints can be crafted into items for credits or traded up.
- No pay-to-win – all gameplay-affecting mechanics are identical for every account. Visual customization is purely cosmetic.
- Bundles and starter packs are also available on some platforms.
- Esports Shop – team decals and fan rewards supporting RLCS teams.
Game Modes
Rocket League offers a variety of modes, both competitive and casual:
Online & Offline Support
Rocket League is primarily an online experience with dedicated servers. Fully offline play is limited:
DLC, Expansions, and Microtransactions
Since going free-to-play, Rocket League relies on optional monetization:
What Makes Rocket League Unique
Rocket League stands alone in the gaming landscape as a perfect fusion of two simple concepts: cars and soccer. Its physics system allows for infinitely creative plays – players can hit the ball at extreme angles, chain aerial maneuvers, and use the walls and ceiling in ways no other sports game permits. The game’s momentum-based movement and boost management create a deep skill gap while remaining fun for beginners. No other title offers the same blend of fast-paced action, elegant physics, and team-based competition. The rock-solid netcode and cross-platform play mean you can team up with friends on any console or PC seamlessly. Rocket League has also nurtured one of esports’ most accessible and watchable scenes, where matches are decided by split-second decisions and mechanical skill. Over a decade after its initial release, Rocket League remains a benchmark for indie-turned-triple-A success and a constant source of “just one more match” addiction.
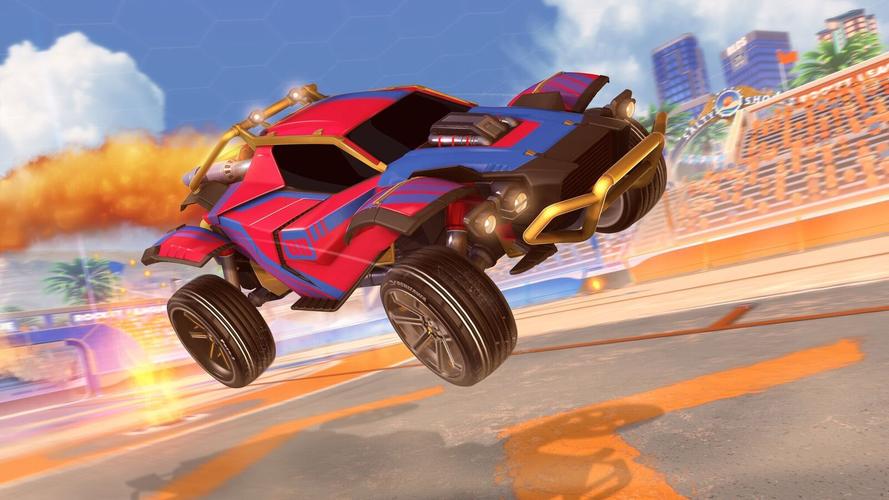
Getting Started
Getting Started in Rocket League
Welcome to Rocket League! This guide will walk you through your very first hour, explain the core concepts, and set you up for success as a new player. Rocket League is free-to-play and available on PC, PlayStation, Xbox, and Nintendo Switch. There is no character creation — your identity is your car and its cosmetic customization.
---
First Hour Walkthrough (Day One)
1. Download & Launch: After installing (see previous section), launch the game. The title screen appears with a short cinematic. Press any button to skip.
2. Account Linking (Optional but Recommended): You may be prompted to link an Epic Games account. Do this to enable cross-platform progression, save your inventory, and allow future account recovery. It takes 1–2 minutes.
3. Main Menu First Look: The main menu shows options: Play, Garage, Rocket Pass, Challenges, Settings, Extras. Spend 30 seconds clicking through them to get familiar. Don't jump into a match yet.
4. Tutorials Are Mandatory: Go to Play > Training > Tutorial. Complete the Basic Tutorial (driving, boosting, jumping, dodging, ball striking). It takes about 5 minutes. Then do the Advanced Tutorial (aerial hits, quick jumps) — another 5 minutes. Do not skip these.
5. Customize Your First Car: Open Garage. You have a default Octane (best for beginners). You can equip any free items you received (like a decal or wheels) from the Starter Pack or by completing challenges. Don't spend credits yet.
6. Play a Casual Match: Go to Play > Casual > 3v3 (Standard). This is the most populated playlist. The matchmaking will find opponents of similar skill. Play one full match (5 minutes). Focus on making contact with the ball, using boost, and positioning yourself near goal when on defense.
7. Adjust Settings (Crucial): After that first match, press Options (PS/Xbox) or Esc (PC) and go to Settings:
- Camera: Change "Camera Shake" to OFF. Set "Field of View" to 100-110 (max recommended). Set "Distance" to 270-280, and "Height" to 100-110. These give a wider view.
- Controls: If on controller, consider binding "Boost" to R1/RB (instead of circle) for easier boosting while jumping — this is optional but many pros use it. For keyboard, default is fine.
- Video: Set resolution to native, turn off V-Sync, lower graphics if performance lags.
8. Complete Rookie/AI Matches (Optional): For extra practice, play a match vs. bots (Play > Exhibition) on Rookie difficulty. This helps you learn without pressure.
---
Controls on All Platforms
Rocket League supports controllers primarily, but keyboard/mouse works on PC. Below are the default control schemes. Hold the controller to follow along.
#### PlayStation (DualShock 4 / DualSense)
| Action | Button |
|---|---|
| Accelerate | R2 |
| Brake/Reverse | L2 |
| Steer | Left Analog Stick |
| Jump | X (Cross) |
| Boost | Circle (O) |
| Handbrake (Powerslide) | Square (□) |
| Toggle Ball Cam / Rear View | Triangle (△) |
| Look Behind | Hold Triangle (△) |
| Quick Chat Press | Hold D-Pad Up |
| Scoreboard | Touchpad |
| Pause / Options | Options |
| Action | Button |
|---|---|
| Accelerate | RT |
| Brake/Reverse | LT |
| Steer | Left Analog Stick |
| Jump | A |
| Boost | B |
| Handbrake | X |
| Toggle Ball Cam | Y |
| Look Behind | Hold Y |
| Quick Chat | Hold D-Pad Up |
| Scoreboard | Back (Select) |
| Pause | Menu (Start) |
| Action | Button |
|---|---|
| Accelerate | ZR |
| Brake/Reverse | ZL |
| Steer | Left Analog Stick |
| Jump | B |
| Boost | A |
| Handbrake | Y |
| Toggle Ball Cam | X |
| Look Behind | Hold X |
| Quick Chat | Hold D-Pad Up |
| Scoreboard | – (minus) |
| Pause | + (plus) |
| Action | Key |
|---|---|
| Accelerate | W |
| Brake/Reverse | S |
| Steer | A / D |
| Jump | Space |
| Boost | Shift (Left) |
| Handbrake | Q |
| Toggle Ball Cam | Tab |
| Look Behind | Hold C |
| Quick Chat | Y / T + number |
| Scoreboard | Backspace |
| Pause | Escape |
---
User Interface (UI) Overview
#### Main Menu Screen
- Top Bar: Player name, XP level, Rocket Pass tier, Credits (yellow coin icon), Items (currency for cosmetics).
- Center: Large game logo and rotating background.
- Left/Right Options: Play (largest button), Garage, Rocket Pass, Challenges (daily/weekly), Profile, Settings, Extras (like training, item shop).
- Bottom: Social features (friends list, party), news ticker.
- Top Center: Timer (5:00 down to 0:00), then overtime. Score of each team on either side.
- Bottom: Boost meter (blue bar - 100 max). Small car icon shows if you have a teammate near you.
- Center of screen: Your car and the ball (camera can be fixed on ball or car). See below.
- Scoreboard (press your select/back/touchpad button): Shows player names, goal/assist/save counts, ping, etc.
- Quick Chat (e.g., "Nice shot!") appears in the upper left.
- Ball Cam (default off?): Press the Ball Cam toggle (Triangle/Y/X/Tab) to lock camera on the ball. Most pros play 95% of the time with Ball Cam ON. Turn it OFF only when dribbling the ball on top of your car or looking for boost pads.
- Car Cam: Camera follows your car. Use to see boost pads and teammates.
- STOP Camera Shake (Settings > Camera > off).
- Set FOV to 100-110.
- Bind Boost to a shoulder button if on controller (optional but recommended after 10 hours).
- Play the Basic & Advanced Tutorial.
- Play 3v3 Casual (most beginners), not 1v1 or 2v2.
- Check Challenges tab daily for easy XP and cosmetics.
- Watch a short YouTube video on "Rocket League beginner rotation" for visual help.
- Buying Credits (C$) with real money until you understand the game. You get free items from drops and Rocket Pass tiers.
- Opening Item Shop early — you'll be tempted by expensive cosmetics. Wait.
- Playing Ranked (Competitive) until you can consistently hit the ball in the air and understand rotation. You'll get placed in a low rank and frustrate teammates.
- Chasing the ball relentlessly — you'll leave your net open. Spend 30% of your time in the goal area on defense.
- Using Ball Cam OFF all the time — you lose awareness of where the ball is. Keep it ON.
- Pressing Jump + Boost simultaneously wrong (you need to jump first, then boost immediately for a fast aerial).
- Spamming Quick Chat "What a save!" after conceding — toxic behavior can get you muted.
- Credits (Premium Currency): Earn them for free through Rocket Pass (free tier) and occasional drops. Do not spend them until you hit Level 30. Then consider buying the Rocket Pass (if you plan to play often) for more earnings.
- Drops (Crate-like rewards): You get Rare, Very Rare, Import, etc. drops from leveling up or completing challenges. Do not trade them in (upgrade) early — keep them as they are for now. You can open them for free in the Garage > Items menu.
- XP / Leveling: Focus on completing daily challenges (found in the Challenges tab). These give massive XP and Rocket Pass progress.
- Blueprints: These show up after matches. You can build the item for a credit cost. Never build a blueprint unless you absolutely want that specific item — most are overpriced. Ignore them.
- Garage Customization: Equip free decals and wheels you get. Don't buy anything from the item shop until you know which car body you like (Octane is best, Fennec is similar but more expensive).
- [ ] Install Rocket Lake on your platform.
- [ ] Launch and skip intro.
- [ ] Link Epic Games account (if prompted).
- [ ] Complete Basic Tutorial (Play > Training > Tutorial).
- [ ] Complete Advanced Tutorial (same menu).
- [ ] Go to Settings:
- [ ] Open Garage and equip any free items you like (don't buy anything).
- [ ] Play one 3v3 Casual match (Play > Casual > Standard).
- [ ] After match, go to Training > Free Play and spend 5 minutes hitting the ball around the pitch with boost.
- [ ] Check Challenges tab and complete any easy ones (e.g., "Score a goal in Casual" for free items).
- [ ] Play two more casual matches (try to rotate and not chase).
- [ ] Have fun and don't worry about losing! Every miss is a learning step.
#### In-Game HUD (During a Match)
#### Camera Modes
---
Essential Early Objectives (First 10 Hours)
1. Complete the Tutorials and all Rookie A.I. matches (play vs. bots until you can win 5-0 easily).
2. Learn to hit the ball consistently. Drive into the ball, even if it means missing. Be patient.
3. Practice boosting while jumping (hold jump + boost to fly briefly). Do the aerial training packs (playground > custom training > aerial shots rookie).
4. Understand basic rotation: In 3v3, after you hit the ball, rotate back toward your own goal (not toward where the ball is going). Let a teammate challenge next. This prevents double-committing.
5. Collect small boost pads (the 12 small round pads) to keep boost up. Don't only go for big boosts (100) unless safe.
6. Unlock your first non-cosmetic items: Complete the Starter Challenge path (in Challenges tab) for free decals, wheels, and a few credits.
7. Play at least 10 casual matches before trying ranked. Casual matches still match by skill and reduce pressure.
---
What to Do First vs. What to Avoid
#### ✅ Do First
#### ❌ Avoid
---
Early Resource Priorities (What to Spend and Save)
---
Common Beginner Mistakes (and How to Fix Them)
1. Ball Chasing – You follow the ball everywhere. Fix: Practice "rotation" — after you hit the ball, turn around and head toward your own goal. Let a teammate take over.
2. Not Using Ball Cam – You play with camera fixed on your car. Fix: Press the toggle (Triangle/Y/X/Tab) to turn Ball Cam ON. Only toggle it off briefly when grabbing boost or dribbling.
3. No Boost Management – You use boost constantly, run out, then can't save a goal. Fix: Use boost in short bursts. Pick up small pads to maintain 30+ boost. Don't boost to where you could roll.
4. Trying to Aerial Too Early – You see pro players flying, so you spam jump+boost and miss. Fix: Wait until you can consistently hit ground balls and roll into the air after 20+ hours. Practice with aerial training packs first.
5. Ignoring Defense – You always go forward, leaving the net empty. Fix: In casual 3v3, start by playing "goalie" for the first few minutes: sit inside your goal line, move side to side, and clear the ball toward corners.
6. Not Using Quick Chat – Communication is key. Fix: Learn three basics: "I got it!" (when you go for ball), "Defending..." (when you hang back), and "Nice shot!" (for positivity).
7. Overcommitting as a Team – All three teammates charge at the ball at once. Fix: Only one player goes for the ball; the other two stay back. If you see 2 teammates already there, rotate back.
---
Day-One Checklist (Print This)
- [ ] Camera Shake = OFF
- [ ] Field of View = 100-110
- [ ] Camera Distance = 270-280
- [ ] Camera Height = 100-110
- [ ] Bind Boost to R1/RB (if comfortable; otherwise skip).
---
Remember: Rocket League has a steep learning curve. The first 50 hours are about building muscle memory and game sense. You will miss a lot, you will get scored on, and you might feel frustrated. That's normal. Focus on one small skill per session (e.g., hitting the ball hard, or rotating back) and watch your improvement accelerate. Good luck!
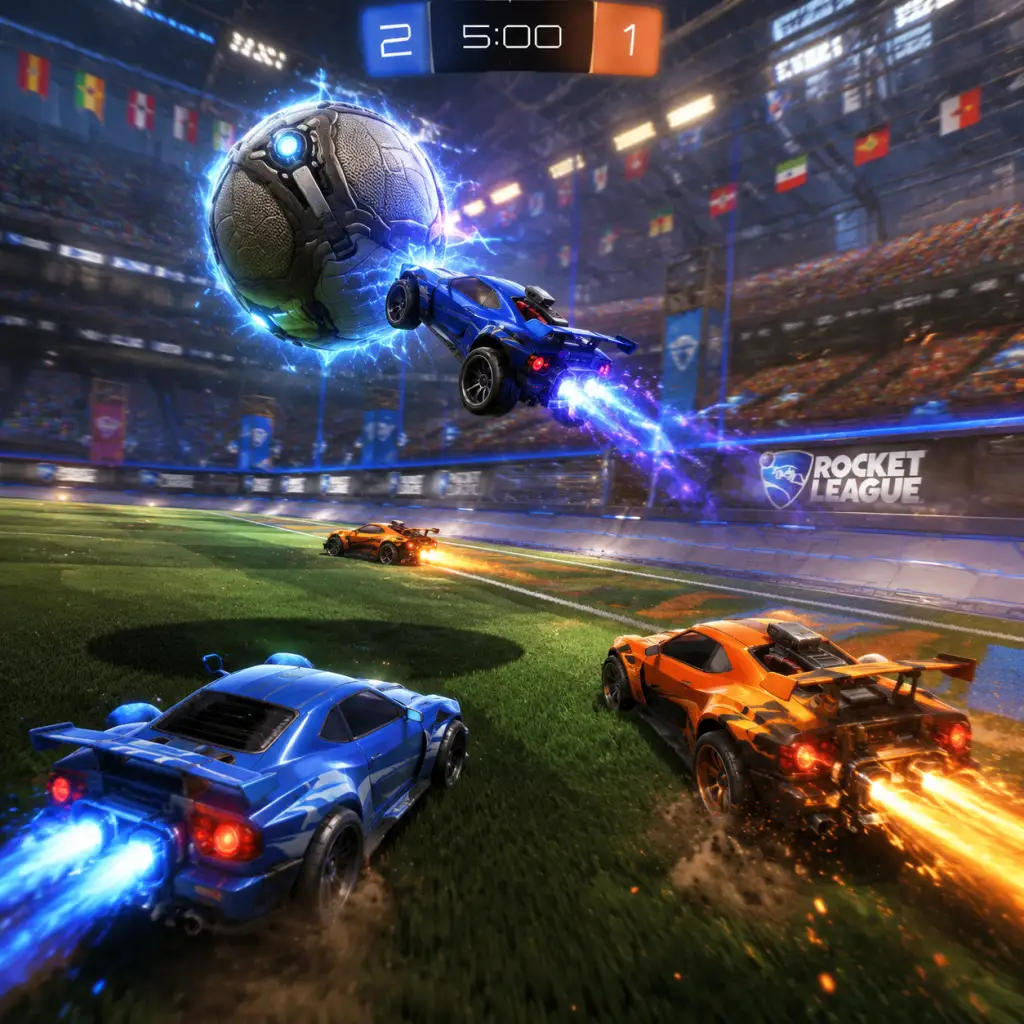
Core Gameplay
Core Gameplay Overview
Rocket League combines arcade soccer with rocket-powered cars. Matches are 5-minute rounds where two teams (1v1, 2v2, 3v3, or extra modes) try to score a giant ball into the opponent's goal using car hits. The core loop: drive, boost, jump, dodge, and aerial to control the ball. Interaction is purely physical – no weapons or abilities – relying on car contact, demolition (hitting an opponent at supersonic speed), and bumping. Progression is account-based: player levels, Rocket Pass tiers, competitive skill rating (MMR). There is no open-world exploration; maps are closed arenas with unique layouts. Quests are replaced by daily/weekly challenges and seasonal events. Economy uses Credits (premium currency), Blueprints, and item trading. Character growth is cosmetic – car presets (body, decals, wheels, etc.) have no impact on performance except for certain hitbox types (Octane, Dominus, etc.) which affect feel. Endgame focuses on reaching high competitive ranks (Grand Champion, Supersonic Legend), mastering advanced mechanics, collecting rare items, and participating in tournaments.
Progression Tiers
Early Game (Levels 1–75 / Bronze–Silver Ranks)
Gameplay Loop: You learn basic controls: accelerate, brake, boost (B or circle), jump (A or X), dodge (double-tap jump + direction). Almost all time is on the ground. Matches feel chaotic; you chase the ball. Primary goal: make contact and drive toward goal.
Combat/Interaction: The only interactions are car-to-car bumps and light demos (rare at this level). Focus on hitting the ball rather than opponents. Boost management is critical – pick up small pads (12 boost) and big pads (100 boost) scattered on the field.
Progression: Each match grants XP toward account level. Daily wins (+1000 XP) and weekly tasks (+1500 XP) accelerate. Unlock free Rocket Pass items, drops (rare, very rare, import) that yield random cosmetics. Competitive rank starts after 10 placement matches. Early ranks (Bronze I to Silver III) are forgiving – you rarely derank until you reach Gold.
Exploration (Arenas): Only a few standard maps (DFH Stadium, Mannfield, etc.) plus the occasional non-standard map like Neo Tokyo or Utopia Coliseum (Retro). No exploration; you learn common kickoff spots and boost locations.
Quests/Missions: Daily and weekly challenges: “Score 5 goals”, “Play 3 matches in casual”, “Win 2 games in competitive”. Seasonal events (e.g., Frosty Fest) add limited-time challenges for themed items.
Economy: You earn free drops, occasional blueprints (pay-to-craft or trade). No need to spend Credits yet. Trading is unlocked at level 30 (formerly), but now account level 100+? Actually, trading requires XP level 100 (500+ wins) and 2FA. Early game: ignore trading, use default items.
Build Growth (Car Customization): Choose any car body; the most popular early choice is Octane (balanced handling). Hitbox presets: Octane (best all-round), Dominus (flatter for power shots), etc. No stat upgrades – only visual. Create presets with unlocked decals, wheels, toppers. Performance depends entirely on player skill.
Endgame Structure (not applicable in early game): None yet – focus on learning.
Mid Game (Levels 75–200 / Gold–Platinum Ranks)
Gameplay Loop: You understand rotation: attack, support, defend. Basic aerials (jump + boost + air roll) to hit aerial balls. Passing plays begin to work. Consistency improves: you can clear the ball, shoot on target, and save occasionally. Average match score: 1-3 goals per side.
Combat/Interaction: Demolitions become deliberate – supersonic boosts into opponents near goal. Bumps disrupt saves. You learn to avoid demos by jumping or dodging. The ball is contested in the air more often.
Progression: XP gain remains the same; Rocket Pass progression yields better items (painted, certified). Competitive ranks: Gold I to Platinum III. You start earning season rewards (wheels, decals) based on highest rank. Blueprints accumulate – you can trade them up (5 of same rarity for 1 higher) or craft with Credits. The trading economy becomes relevant: trade blueprints, drops, and items for Credits (platform-specific, not cross-platform). Use sites like RL Garage or RL Insider.
Exploration: You play more arenas including non-standard like Starbase Arc (with ramps) and Wasteland (odd shape). Learn each map’s boost placements and wall angles for dribbling.
Quests/Missions: Same daily/weekly challenges, but you can also complete ‘Season Challenges’ (110 challenges per season) for bigger rewards like goal explosions, wheels. Mid-game players finish most of these.
Economy: Credits are earned through Rocket Pass (free track gives 100 Credits per tier? No, free passes gave decryptors, now removed. Only Rocket Pass Premium gives Credits – 1000 Credits for pass, earn back up to 1000 Credits over tiers. So many players go infinite. You can also earn Credits by trading items from drops. The crafting cost for blueprints ranges from 100 (Very Rare) to 2000 (Black Market). Mid-game: trade up blueprints to Black Market, then sell for Credits to buy Rocket Pass.
Build Growth: You refine your preset. Octane is still king, but some switch to Dominus or Fennec for different flick power. No performance upgrades, but you may buy a specific item like a goal explosion or a painted body. At Platinum, some players use bakkesmod (PC only) for cosmetics but that’s not official.
Endgame Structure (preparation): You queue for tournaments (auto-generated brackets) that happen at scheduled times. Winning tournament matches gives titles and tournament items (untradeable). You also start focusing on specific training packs (e.g., aerial shots, redirects) to improve mechanics.
Late Game (Levels 200–500 / Diamond–Champion Ranks)
Gameplay Loop: High-paced aerial play. Fast aerials (jump + boost quickly) are standard. Air dribbles, ceiling shots, flip resets, and double-taps occur regularly. Rotations are tight: you trust teammates to rotate back after every touch. Passing plays use walls and backboard. Defences are strong – double commits are rare. Average score 2-4 goals per side.
Combat/Interaction: Demolitions are tactical: demo the goalkeeper before a teammate shoots, or clear the net for a pass. Bumps are used to disrupt dribblers. You also learn to “fake” challenges to force opponents to commit, then punish.
Progression: XP level matters less; focus is on rank. Diamond I to Champion III. Season rewards are better (painted wheels, animated decals). Rocket Pass premium is essential for all players to earn exclusive items and Credits (if you don’t trade). Trading is major: you may collect full sets of painted items (e.g., Octane set, Dieci wheel set). Engage with the trading community on Reddit (RocketLeagueExchange) or third-party sites. You might buy Credits at lower rates from traders (risky).
Exploration: All maps, including ‘Labs’ (non-standard) become familiar. You can choose game modes like Dropshot (floor breaks), Hoops (basketball), Snow Day (hockey puck) for variety. Competitive also has Extra Modes with their own ranks (Diamond in Snow Day, etc.).
Quests/Missions: Seasonal challenges from Rocket Pass are completed quickly. You may grind for specific tournament titles (e.g., “Diamond Tournament Winner”). Limited-time events like “Spring Fever” offer exclusive items.
Economy: Credits are accumulated. You may invest in high-value items (Black Market decals, Titanium White Octane) that hold value. Trading is the primary way to get specific items without opening loot boxes. Blueprints are often traded for Credits (e.g., 10-50 Credits per very rare, depending on item). Crafting is inefficient – only craft if you desperately want that item.
Build Growth: Car choice often narrows to Octane or Fennec (same hitbox) or occasionally Dominus. Customization is about showing skill and status – rare items signal dedication. You may use “Alpha Console” (PC) to test items but not in ranked. No build diversity; all cars with same hitbox are identical in performance.
Endgame Structure: You compete in tournaments regularly. Aim for “Champion” tournament winner title. You also start playing in “Rocket League Championship Series (RLCS)” qualifiers if you are high enough (Champion III+). Many players join Discord communities to find consistent teammates. Training routines become structured: 10-15 minutes of freeplay, 20 minutes of ranked, plus replay analysis.
Endgame (Grand Champion–Supersonic Legend / Levels 500+)
Gameplay Loop: Near-perfect mechanical execution and game sense. Every touch is purposeful: backboard clears, pass placements, demos on rotating players, prejumps. The game is incredibly fast – players can air dribble from anywhere, double tap from any angle. Rotations are split-second decisions. Goals come from punishing the slightest error.
Combat/Interaction: Demolitions are normalized – top players regularly demo opponents and avoid demos with advanced movement (air rolling to dodge). Bumps are used as part of defense (bumping the ball carrier off line). The few interactions that exist are fully mastered.
Progression: Rank is everything. Grand Champion (GC) has sub-tiers (I, II, III) and Supersonic Legend (SSL) is the highest – less than 0.5% of players. XP level is largely cosmetic (title). Rocket Pass items become common. Seasonal rewards are highly coveted (e.g., GC wheels). Trading: you own entire collections, maybe a full set of every painted apex wheel. Some players trade for real money (against ToS) but most use Credits.
Exploration: You know every boost location, every wall bounce angle, every map quirk (e.g., the glass on Mannfield night has a slight shine that can distract). No new content – you master existing.
Quests/Missions: Done trivially. You only care about special missions that give limited items (e.g., Golden Egg series). You may not even bother with casual challenges.
Economy: You have thousands of Credits. You attend “item showcase” servers. You rarely open crates; instead, you trade for specific items. The market dynamics matter – you follow price trends. You may “flip” items (buy low, sell high) for profit.
Build Growth: Car choice is min-maxed: most use Octane/Fennec, but some use Dominus for crisp flicks or Breakout for low profile. No stat variation. You customize with ultra-rare items (e.g., Striker-certified Titanium White Apex wheels, Gold Alpha Reward items that cost thousands of USD). Build is a status symbol.
Endgame Structure: Competitive is the core – you grind for SSL title each season. Tournaments: winning during the 2.5-hour windows gives exclusive titles (e.g., “RLCS X Grand Champion”). You may compete in third-party leagues like “The Brawl” or “Six Invitationals”. Content creation (YouTube, Twitch) is common. Some players go pro – salaries, orgs, RLCS LAN events. The ultimate endgame is reaching the top of the leaderboard (top 100). After that, it’s about maintaining rank, mastering new mechanics (e.g., “Musty flick”, “double flip reset”), and enjoying the community through coaching, creating training packs (e.g., “Aerial Car Control” by Poquito), or exploring Rocket League mods (PC custom maps like Lethamyr’s rings map).
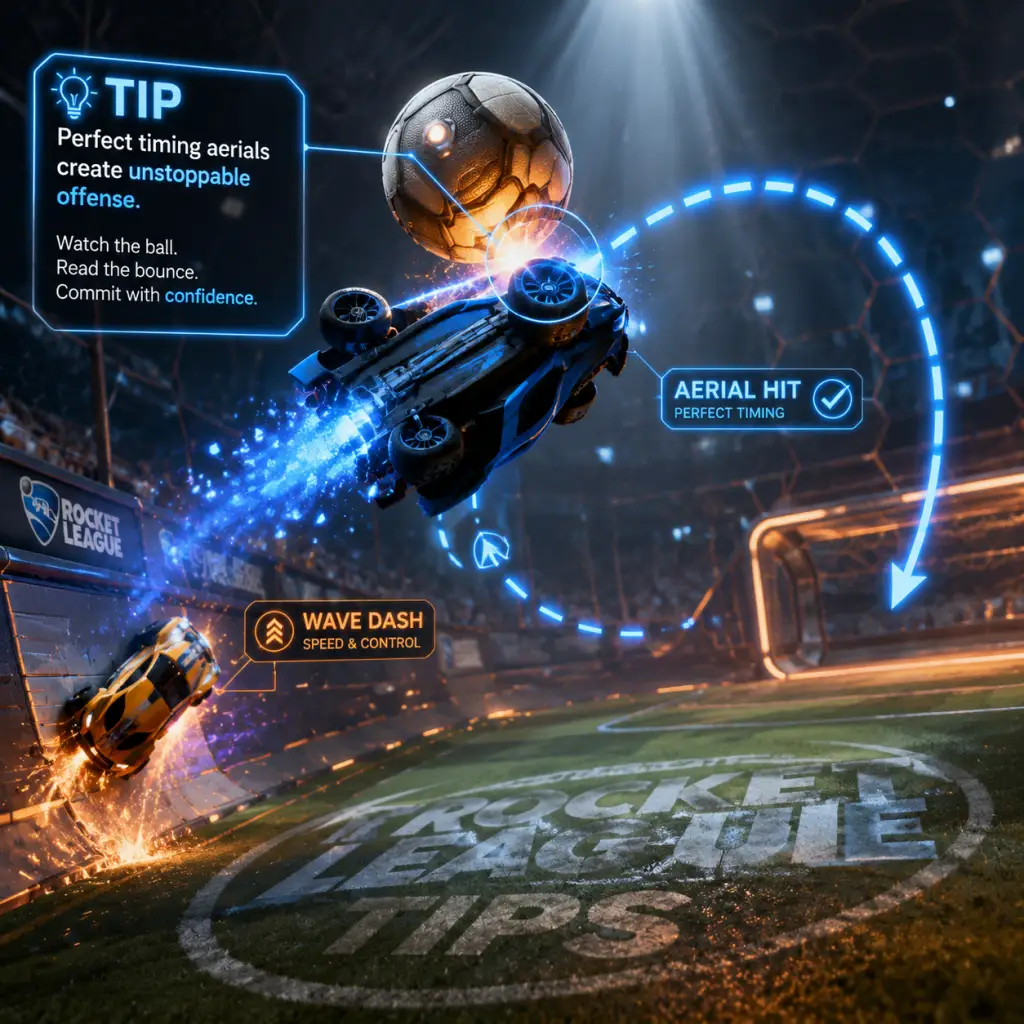
Game Tips
Game Tips for Rocket League
This guide covers essential tips from beginner to advanced levels, grouped by gameplay category. Each tip explains why it works and when to apply it for maximum effectiveness.
---
Beginner Fundamentals
#### 1. Use Ball Cam Mode (Mostly)
- Tip: Toggle ball cam with the default key (Triangle on PS, Y on Xbox) and keep it on 90% of the time. Switch to car cam only when dribbling or rotating back.
- Why it works: Ball cam keeps the ball centered on your screen, giving you constant awareness of its position and trajectory. Without it, you’ll lose track of the ball easily.
- When to use: Always during general play; car cam when you need precise car control (e.g., dribbling on top of the car) or when rotating back to see if you have boost pads ahead.
- Tip: To jump high quickly, press jump, then immediately tilt back and jump again while boosting. This is a “fast aerial.” Practice until it’s smooth.
- Why it works: A single jump takes you low; double-jumping without tilt wastes upward potential. Fast aerial lets you reach high balls faster than opponents who jump normally.
- When to use: Any time the ball is above the height of your car and you want to challenge or clear it. Especially important for saves and aerial shots.
- Tip: Hold powerslide (default: Square on PS, X on Xbox) while turning to maintain momentum. Release immediately after the turn.
- Why it works: Powersliding lets your car rotate faster without losing speed. It prevents oversteering and helps you face the correct direction quickly.
- When to use: Sharp turns in the corner, after landing awkwardly, or when rotating back to goal. Practice in free play until you can do a full 180 with minimal speed loss.
- Tip: Always be aware of teammates’ positions. If two teammates are near the ball, rotate back to a defensive position instead of joining the crowd.
- Why it works: Cluster plays leave the goal open. One player hits the ball, another should be ready for the pass or rebound, and the third should be last man back. Breaking the ball-chasing habit prevents easy counter goals.
- When to use: Any time you see two teammates ahead of you. Rotate toward your own goal and look for a clear path to collect boost or defend.
- Tip: While driving backward, press jump, tilt analog stick forward (or backward depending on input), then air roll to land on your wheels facing the opposite direction.
- Why it works: A half flip is the fastest way to reverse direction without losing forward momentum. It’s crucial for recovering from a whiffed aerial or getting back to goal quickly.
- When to use: When you overshoot a challenge or are caught facing backward while rotating. Practice until it becomes reflexive (sub-1 second execution).
- Tip: Balance the ball on your car’s hood by tapping the accelerator slightly and steering gently. Once stable, jump and tilt forward to flick the ball.
- Why it works: Dribbling lets you control the ball’s path, making you unpredictable. Flicks can launch the ball over defenders or into the goal quickly.
- When to use: When you have space ahead and no immediate pressure. Flicks are effective in 1v1 situations or when an opponent is charging you. Practice in free play with the “Dribbling Challenge 2” custom map if possible.
- Tip: While air rolling, use the left stick to adjust your car’s orientation. Practice aerialing to all points of the ball (top, sides, bottom) using air roll to flip your car.
- Why it works: Air roll allows you to angle your car for more precise touches – e.g., a side roll to hit the ball downward or a backflip to redirect it. Advanced players use constant air roll to make micro-adjustments.
- When to use: In any aerial challenge. Start with simple aerial hits, then incorporate air roll for power/accuracy. For recovery, air roll to land on all four wheels and hold powerslide.
- Tip: Drive up the wall, jump off, then use air roll to align your car upside-down on the ceiling. When you drop off, you can use your flip again (flip reset). Combine with a shot.
- Why it works: A flip reset gives you an extra dodge in the air, allowing deceptive maneuvers like delayed shots or passes. Ceiling shots are hard to save because of the unpredictable trajectory.
- When to use: Only when you have mastered basic aerials and air roll. Use in free play extensively before trying in matches. Ideal for solo plays or unexpected offensive moves.
- Tip: In any 3v3, mentally assign roles: one player challenges (front), one supports at mid-field (middle), one stays deep as last man (back). Rotate clockwise or counter-clockwise as the play moves.
- Why it works: This prevents overcommitment. The last man can always cover a mistake, the middle can follow up, and the front applies pressure. Rotation keeps the team balanced.
- When to use: Always in 3v3 (and adapt to 2v2 with two roles: attacker and support). If you are last man, never leave the goal vulnerable. Let teammates rotate through you.
- Tip: When defending alone against an opponent dribbling, stay between them and your goal but at a distance. Drive backward or slowly toward your goal while watching their car.
- Why it works: Shadow defense forces the opponent to make a move. You stay close enough to challenge if they flick, but far enough to react to a low shot. It cuts off angles.
- When to use: Any 1v1 defensive situation (breakaway in 2s or 3s). Do not ball-chase; let them commit, then intercept. Master this to save many goals.
- Tip: When rotating to defend, always rotate to the far post (back post) of your goal. Wait there while scanning the field.
- Why it works: The backpost gives you the best view of the play and allows you to react to shots from any angle. If the ball goes high, you can jump from the backpost to save top corners.
- When to use: Every time you return to goal. Rotate wide and drive to the backpost, then turn to face the ball once you are positioned. Avoid standing at the front post (near the play) – it leaves the far side open.
- Tip: Learn the locations of the 12 small boost pads (12 each side). Drive over them when rotating to keep boost above 30-40 without going for full big boosts.
- Why it works: Big boosts create predictable paths; opponents may camp them. Small pads keep you mobile and boost efficient. Collecting 2-3 small pads equals a big boost.
- When to use: Any time you are rotating back or repositioning. After using 30+ boost, scoop a small pad to keep your reserve. Avoid leaving the play for a big boost unless you are low on boost and safe.
- Tip: If you are up a goal in the last minute, take the opponent’s corner boost after a clear. Also, steal the big boost in their half when they are slow to rotate.
- Why it works: Limiting opponent’s boost reduces their offensive threat. They cannot aerial well or challenge effectively if they have <30 boost.
- When to use: When you have ball possession advantage and can safely drive over their big boost pads. Do not overcommit; only steal boost if you are the last man or the play is in their half.
- Tip: Demolitions (when a supersonic car hits an opponent) remove a player for 3 seconds. Use them to create temporary 2v1 or 1v0 situations.
- Why it works: Removing a goalie or defender creates an open net for your teammate. Demos are not toxic if used strategically; they are part of high-level play.
- When to use: When an enemy is stationary (e.g., in goal, waiting for a pass) and you have supersonic speed. Aim for the back of their car for a demo. Avoid chasing demos constantly – only when opportunity arises.
- Tip: Instead of shooting directly at a heavily defended net, pass the ball across the goal or high up for a teammate to finish.
- Why it works: The defense moves to block your shot, leaving space for a teammate. A pass can be unexpected and open a scoring chance. In 2v2, a pass off the backboard is extremely effective.
- When to use: When you see a teammate in a scoring position (near opponent’s goal) and the net is guarded. Learn to read their position before committing to a shot.
- Tip: If you are last man and your team loses possession, immediately rotate back and face your goal. Do not try to keep the play alive if the ball is deep in your half.
- Why it works: The opposition will likely counter-attack. By rotating early, you give your team a chance to reset defensively instead of overextending.
- When to use: As last man, if the ball is cleared over you or your teammate loses the challenge, turn and boost to the backpost. Do not turn back into the play.
- Tip: Download or create custom training packs for specific skills: saves, backboard clears, redirects, air dribbles. Use the built-in browser (Options -> Training -> Custom -> Browse).
- Why it works: Repetition in controlled scenarios builds muscle memory. For example, a pack with 50 random high saves will improve your aerial save speed.
- When to use: Spend 10-15 minutes daily on a pack. Focus on skills you struggle with in matches. Popular codes: Aerial pack “Aerials – Redirects” (code 6EB1-79B2-33B8-681C) or Goalie pack “Goalie – All Ranks” (code 84C9-3080-035A-6D4B).
- Tip: Enter free play and practice hitting the ball hard off the wall, dribbling, and recoveries. Use unlimited boost to focus on mechanics.
- Why it works: Free play has no pressure. You can repeat actions instantly. Drilling wall reads and power shots in free play translates to match situations.
- When to use: 20-30 minutes daily. Try specific exercises: shoot 100 power shots off the wall into the goal, then practice 50 fast aerials from the ground.
- Tip: After a loss, save the replay and watch it from the opponent’s point of view. Note where you were out of position or made a slow rotation.
- Why it works: It reveals weaknesses you didn’t notice during the match. You might see that you double-jumped too early or rotated ball-side instead of net-side.
- When to use: For every ranked loss, especially if you felt outplayed. Set aside 5 minutes to review 2-3 key goals against you.
- Tip: Use a camera distance of 260-270, height 100-110, angle -3 to -5, stiffness 0.35-0.50, swivel speed 6-8, transition speed 1.0-1.2. Disable camera shake.
- Why it works: These settings give a wide field of view while keeping the ball prominent. Too close reduces awareness; too far reduces precision. Many pros use similar values.
- When to use: Adjust these in Settings -> Camera. Experiment in free play and matches until comfortable.
- Tip: Set air roll left and air roll right to L1/R1 (or LB/RB). This allows you to air roll without interfering with boost (R2/RT) or jump.
- Why it works: Separating air roll from the left stick gives you finer control. You can boost, jump, and air roll simultaneously. Most high-rank players use this setup.
- When to use: Change in controller bindings. Then practice aerials and recoveries with the new bindings for at least a few hours until muscle memory adapts.
- Tip: Set controller deadzone to 0.05-0.10 and dodge deadzone to 0.50-0.70. Disable “Toggle Ball Cam” (keep it hold if possible) for instant switching.
- Why it works: Lower deadzone reduces input lag, making small adjustments easier. Higher dodge deadzone prevents accidental flips when you want to fast aerial.
- When to use: In Settings -> Controls -> Deadzone. Test in free play: if you feel twitchy, increase slightly; if unresponsive, lower.
- Tip: Use the walls and ceiling for setups. Hoops has a smaller ball and no goal – placement is key. Practice double-touch shots off the backboard.
- Why it works: Hoops requires precision aerial control. The ball bounces differently (higher) than standard. Wall plays are common because the court is narrow.
- When to use: Play Hoops to improve aerial consistency. Use standard rotation principles but expect more vertical play.
- Tip: Save power-ups for key moments. Plunger + Spike + Boot = easy goals. Use the Disruptor (blue electricity) before a teammate’s big shot.
- Why it works: Power-ups can turn a losing play into a goal if used at the right time. For example, a Tornado can lift the ball for an easy aerial.
- When to use: Rumble is chaotic; focus on collecting boost and positioning normally. Use power-ups defensively if needed (e.g., Freezer to stop a counter-attack).
- Tip: When you and an opponent arrive at the ball at the same time, jump before the contact (pre-jump) to get a better angle for the 50/50.
- Why it works: Pre-jumping makes your car taller and allows you to win the ball toward your teammates or net. If you stay on the ground, you lose to an approaching jumper.
- When to use: Any 50/50 scenario, especially in midfield. Time your jump so you hit the ball with your car’s roof after flipping.
- Tip: Drive toward the ball as if you will hit it, then brake or turn away at the last second. Opponents will dodge or panic, leaving them out of position.
- Why it works: It forces an opponent to commit early. Then you can collect the free ball or pass to a teammate. It’s a mind game that disrupts flow.
- When to use: When defending a dribbler – fake a challenge to make them flick early or low. Also on offense to create space for a shot.
- Tip: In 2v2, after a teammate shoots, drive into the opponent goalie to bump them, even if you miss the ball. This clears the net for your teammate’s follow-up.
- Why it works: A bump removes the goalie for a split second – enough for a goal. It’s a low-risk play because you are already rotating out.
- When to use: Whenever your teammate has a shot and the goalie is positioned directly in front of the net. Aim to drive through the goalie’s position.
#### 2. Learn to Fast Aerial (Beginner Version)
#### 3. Master Basic Powerslide
#### 4. Stop Ball-Chasing
---
Advanced Mechanics
#### 5. Half Flip
#### 6. Dribbling and Flicks
#### 7. Aerial Car Control (Air Roll & Recovery)
#### 8. Celling Shots and Flip Resets (Advanced)
---
Positioning & Rotation
#### 9. The 3-System: Last Man, Middle, Front
#### 10. Shadow Defense
#### 11. Backpost Rotation
---
Boost Management
#### 12. Collect Small Boost Pads
#### 13. Boost Starvation (Advanced)
---
Game Sense & Strategy
#### 14. Understand When to Demolish
#### 15. Pass the Ball to Teammates
#### 16. Recognize When to End the Play
---
Training & Practice
#### 17. Use Custom Training Packs
#### 18. Free Play Drills
#### 19. Watch Replays from Opponent’s Perspective
---
Customization & Settings
#### 20. Optimize Your Camera Settings
#### 21. Bind Air Roll to L1 (or Left Bumper)
#### 22. Adjust Deadzone Settings
---
Special Game Modes
#### 23. Hoops (Basketball Mode)
#### 24. Rumble Mode Tips
---
Advanced Tactics
#### 25. Pre-Jumping for 50/50s
#### 26. Fake Challenges
#### 27. Bump and Demo Tactics for Solo Queue
---
Conclusion
Rocket League mastery comes from consistent practice, smart positioning, and game sense. Start with the beginner fundamentals, then gradually add advanced mechanics. Use training packs and free play daily, watch your replays, and adjust settings for comfort. Rotate, communicate (with quick chat “I got it!” / “Defending…”), and stay positive. Good luck on the pitch!
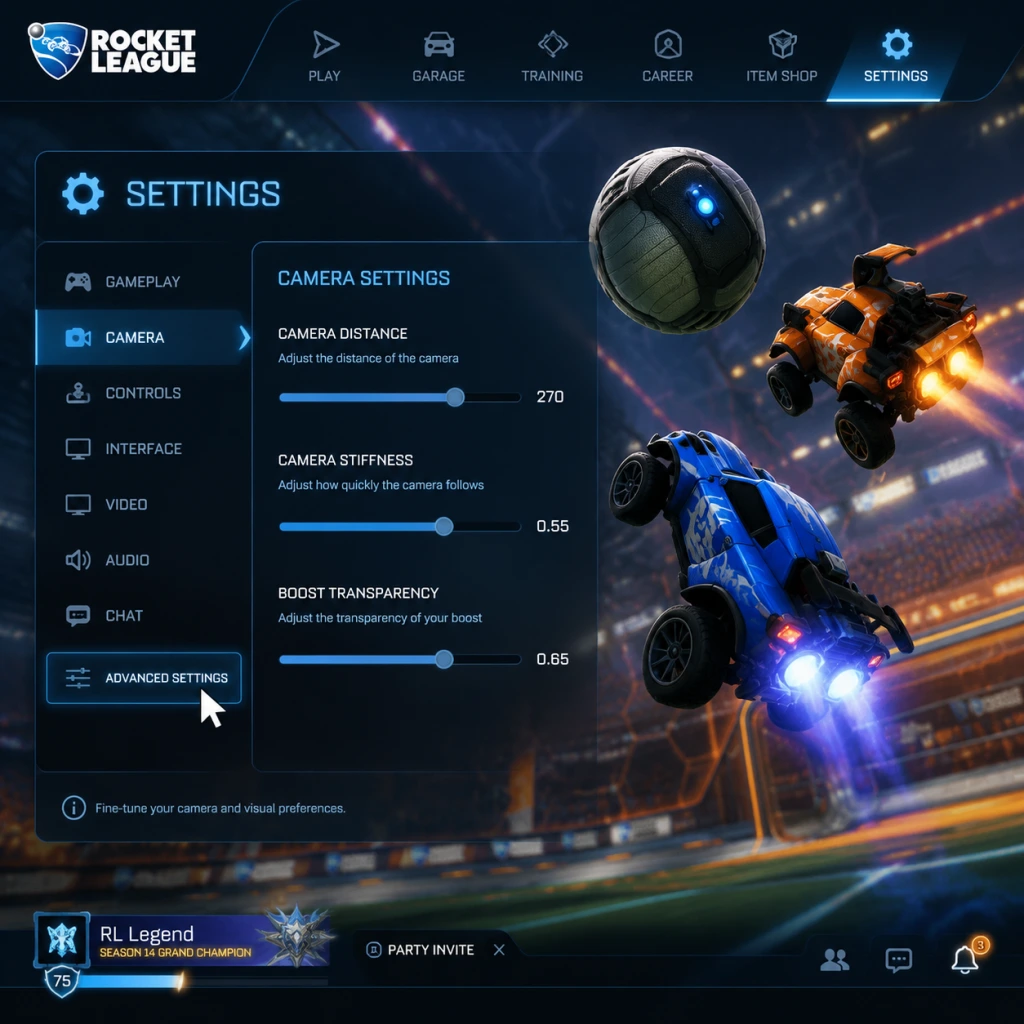
Game Settings
Game Settings Guide for Rocket League
This guide covers every major setting in Rocket League, explaining what each does, how to adjust it, and which options are best for performance versus visual quality. Settings are organized into seven categories: Graphics, Audio, Controls, Accessibility, Language, Network, and Gameplay. Special attention points highlight common pitfalls that can affect your gameplay experience.
1. Graphics Settings
Rocket League is well-optimized and runs on a wide range of hardware. Adjust these settings in Options → Video.
Performance vs. Quality – Quick Recommendations:
- Low-end PC (e.g., Intel HD Graphics, low-end laptops): Set everything to Performance or Low Quality; disable anti-aliasing, shadows, and motion blur.
- Mid-range PC (e.g., GTX 1060 / RX 580): Use High Quality preset, then tweak shadows to high and anti-aliasing to FXAA for a balance of smoothness and clarity.
- High-end PC (e.g., RTX 3070+): Max everything, enable High Quality and 8x MSAA if your monitor supports high refresh rates.
- Console (PS4/PS5, Xbox One/Series, Switch): The game auto-optimizes. On PS5/Xbox Series, you can toggle Performance vs. Quality in the console’s system settings (not in-game). On Switch, set to Performance for 60 FPS.
Detailed Settings Table:
| Setting | Options | Performance Impact | Recommendation |
|---|---|---|---|
| Preset | Quality / Performance / Custom | Major | Start here. Performance lowers most sub-settings. |
| Resolution | Native, Downscale, Upscale | Major | Use native resolution. Downscale can improve FPS but blurs image. |
| VSync | On / Off | Medium | Off – reduces input lag. Enable only if you see screen tearing. |
| Anti-Aliasing | Off / FXAA / 4x MSAA / 8x MSAA | High (MSAA) | FXAA for low cost; MSAA for sharp edges. On low-end, use Off. |
| Render Quality | Low / Medium / High / Very High | High | Very High is for high-end. Medium is a safe middle ground. |
| Texture Detail | Low / Medium / High / Very High | Medium | Very High uses more VRAM. Low helps on 2GB cards. |
| Shader Detail | Low / Medium / High / Very High | Medium | High improves reflections and lighting. Low is fine for competitive. |
| Shadows | Off / Low / Medium / High / Very High | Very High | Off or Low for extra FPS. High adds depth but can hide opponents. |
| Motion Blur | On / Off | Low | Off – it reduces clarity and can cause motion sickness. |
| Light Shafts | On / Off | Medium | Off for FPS and visibility. |
| Bloom | On / Off | Low | Off – makes the ball easier to see. |
| Depth of Field | On / Off | Low | Off – blurs background; distracts in gameplay. |
| Lens Flares | On / Off | Low | Off – reduces visual noise. |
| Color Blind Mode | Off / Protanopia / Deuteranopia / Tritanopia | None | Use if needed – changes ball and team indicator colors. |
- VSync: Always turn it off unless you experience severe screen tearing. VSync adds noticeable input lag, which can ruin your timing in aerials and fast turns.
- Motion Blur, Bloom, Depth of Field, Lens Flares: These are purely cosmetic and can actually make it harder to see the ball in chaotic moments. Turning them off is a competitive advantage.
- Anti-Aliasing (MSAA): 4x or 8x MSAA looks crisp but hits performance hard. On lower-end systems, use FXAA or Off.
- Shader Detail: Setting to "Low" can suppress some particle effects that might distract you, but also removes some visual cues (like car reflection on the ground). Most pros use High or Very High.
2. Audio Settings
Found under Options → Audio. Audio is crucial for hearing engine sounds, boost, and ball hits.
| Setting | Options | Recommendation |
|---|---|---|
| Master Volume | 0 – 100 | 80 – 100; keep it high enough to hear engine and boost. |
| Music Volume | 0 – 100 | 0 or low – music can distract. Many turn it off. |
| SFX Volume | 0 – 100 | 100 – essential for hearing ball touches and opponent cars. |
| Announcer Volume | 0 – 100 | 50 – useful for kickoff countdown and goal call, but can be annoying. |
| Voice Chat Volume | 0 – 100 | Adjust per preference; 50 is typical. |
| Voice Chat | On / Off / Party Only | Off or Party Only to avoid toxic voice chat. |
| Push to Talk | On / Off | On – avoids background noise from your mic. |
| Audio Output | Auto / Stereo / Surround (Headphones) / Surround (Speakers) | Set to your actual hardware. For headsets, choose Headphones mode for spatial cues. |
- Audio Output – Using the wrong mode can mess with directional audio. If you use standard stereo headphones, set to "Headphones" (not Surround) to avoid phase issues.
- Music Volume: The in-game music can be loud and may mask important sound cues. Many competitive players set it to 0.
- Voice Chat: Public voice chat is rarely useful and often negative. Turning it off (or setting to Party Only) is recommended for a better experience.
3. Controls Settings
Access via Options → Controls. These settings can make or break your mechanical consistency. Ensure your controller is connected before adjusting.
Binding Profiles: You can have multiple profiles; create one for your preferred controller (e.g., Xbox, PlayStation, Switch Pro).
Essential Bindings:
| Action | Default | Pro Recommendation | Why |
|---|---|---|---|
| Jump | A / Cross | A / Cross | Standard – keep unless you have a reason. |
| Boost | B / Circle | Right Bumper (R1) | Allows you to jump and boost simultaneously without claw grip. Many pros use this. |
| Powerslide | X / Square | Left Bumper (L1) | Lets you powerslide while boosting or jumping. Easy to fat-finger X. |
| Air Roll | (default unbound) | Left or Right Bumper (L1 or R1) | Bind air roll left/right to separate buttons for advanced aerial control. Common: Air Roll Left→L1, Air Roll Right→R1, or use standard Air Roll on L1 and boost on R1. |
| Rear View | Right Stick Click (R3) | Left Stick Click (L3) – optional | Useful for checking behind you. Some bind to L3 for quick access. |
| Scoreboard | Tab / Back | Left D-pad – easy to reach. | Not needed frequently, but keep accessible. |
| Reset Shot | L3+R3 | Same – okay. | Used in training; rarely changed. |
Controller Deadzone & Sensitivity:
| Setting | Range | Recommendation |
|---|---|---|
| Controller Deadzone Shape | Cross / Square / Circle | Circle – more intuitive for circular analog stick movement. Cross and Square can cause diagonal snapping. |
| Deadzone (Analog Stick) | 0.00 – 0.99 | 0.10 – 0.20 – lower is more responsive but may cause stick drift. 0.15 is a safe starting point. |
| Dodge Deadzone | 0.00 – 1.00 | 0.50 – 0.80 – higher prevents accidental dodges when trying to jump. Many pros use 0.50. |
| Steering Sensitivity | 1.00 – 10.00 | 1.00 – 1.50 – higher values make turning more twitchy; most pros use 1.00. |
| Aerial Sensitivity | 1.00 – 10.00 | 1.00 – 2.00 – same logic; higher is harder to control. 1.00 is common. |
| Controller Deadzone (Triggers) | 0.00 – 0.99 | 0.30 – 0.50 – prevents accidental input from light trigger resting. Adjust if you notice phantom boosts. |
- Air Roll and Powerslide bindings: Do not bind both to the same button (e.g., L1). Rockets League differentiates them based on whether you are airborne, but rebinding both to L1 can cause issues when sliding then jumping. Instead, bind Powerslide to L1 and Air Roll to L1 (they can share the same button because the game uses context). But if you want separate air roll left/right, use different buttons.
- Dodge Deadzone: Too low a value and you might dodge accidentally when trying to double-jump; too high and quick double-jumps may not register as a dodge. Start at 0.50 and adjust.
- Vibration: Off is strongly recommended for competitive play. The tactile feedback is not worth the latency.
4. Accessibility Settings
Found under Options → Accessibility. These are important for players with disabilities.
| Setting | Options | Recommendation |
|---|---|---|
| Color Blind Mode | Off / Protanopia / Deuteranopia / Tritanopia | Choose based on your color vision deficiency. It changes team colors (e.g., orange vs. blue becomes other color pairs). |
| High Contrast Goal Indicator | On / Off | On – makes the goal explosion more visible; useful for low vision. |
| Subtitle Language | Multiple languages | Adjust as needed; subtitles are for menus, not gameplay. |
| Text Size | Small / Normal / Large | Large is easier to read on small screens or for reading impairment. |
| Quick Chat Only | On / Off | On – if you want to disable all text chat and only allow quick chat. Reduces social noise. |
| Chat Filter | Off / Friendly / Strict | Friendly or Strict to hide profanity and toxic messages. |
| Camera Shake | On / Off | Off – causes disorientation; not recommended. |
| Motion Sickness Reduction | On / Off | On – reduces camera movement and effects that trigger motion sickness. |
- Camera Shake: Turn it off as soon as possible. It adds jarring screen movement on hits and demos, which can be disorienting and even cause headaches. It offers no gameplay benefit.
- Motion Sickness Reduction: If you feel dizzy after matches, enable this setting. It disables some camera transitions.
- Text Language: Interface and menus in your chosen language.
- Audio Language: Affects announcer and in-game voice lines. Usually matches text language.
5. Language Settings
Located in Options → Language. Rocket League supports major languages. Changing language will restart the game.
Recommendation: Set to your native language for easier menu navigation, but note that some community terms (e.g., "dribble", "aerial") remain in English. There is no gameplay advantage in switching language.
6. Network Settings
Found under Options → Network. These affect online connectivity and matchmaking.
| Setting | Options | Recommendation |
|---|---|---|
| Region | Auto / specific regions (NA East, NA West, Europe, etc.) | Select the region with lowest ping. If you are on the border, use Auto. |
| Matchmaking Region | Same as Region | Use the same as above. |
| Platform Matchmaking | All / Same Platform / Same Console / Same PC | Use "All" for fastest queue times, but you may face PC players with better frames. If you want to avoid PC, select "Same Console". |
| Cross-Play | On / Off | On – larger player pool. Off only for custom games or to avoid specific platform issues. |
| Lobby Voice Chat | On / Off | Off to reduce bandwidth and toxicity. |
- Region: Manually set it to your closest region. Auto sometimes picks a farther region with similar ping but may cause unstable latency. Check your ping in the start screen.
- Cross-Play: Leave on. The player base is large, but cross-play can introduce tiny desync differences. It’s negligible for most.
- Platform Matchmaking: If you are on console, limiting to "Same Console" can reduce the number of highly mechanical PC players, but queue times may increase.
7. Gameplay Settings
Access via Options → Gameplay. These tweak how the game behaves.
| Setting | Options | Recommendation |
|---|---|---|
| Camera Settings | Custom sliders (FOV, Height, Angle, Distance, Stiffness, Swivel Speed, Transition Speed) | See below – camera is critical for spatial awareness. |
| Rumble Mode | On / Off | Off for competitive; On for casual fun. |
| Extra Modes | Dropshot, Hoops, Snow Day, etc. | Personal preference. |
| Team Colors | Side-based / Player preference | Use side-based to see team colors clearly. |
| Quick Chat | All / Team Only / Quick Chat Only / Disabled | Team Only for less clutter. |
| Transparent Goalposts | On / Off | Off – solid goalposts make it easier to judge shots near the goal. |
| Game Overlay (e.g., Steam, Discord) | On / Off | On if you want; can cause FPS drops in some cases. |
| Setting | Range | Typical Pro Value |
|---|---|---|
| Field of View (FOV) | 90 – 110 | 110 – max for best peripheral vision. |
| Camera Height | 90 – 130 | 100 – 110 – higher gives more overview, but lower is better for dribbling. Common: 100. |
| Camera Angle | -5 – 0 | -3.0 – slightly downward for better ground vision. |
| Camera Distance | 250 – 300 | 260 – 280 – far enough to see field, close enough for control. Example: 270. |
| Camera Stiffness | 0.00 – 1.00 | 0.35 – 0.70 – higher = less camera movement. Many use 0.40. |
| Camera Swivel Speed | 1.00 – 10.00 | 3.00 – 5.00 – how fast you can look around. 5.00 is common. |
| Camera Transition Speed | 1.00 – 2.00 | 1.20 – 1.50 – smoothness when ball cam switches. 1.30 is a good middle. |
| Ball Cam | On / Off (toggle with Y/Triangle) | On by default; toggle off when dribbling or rotating. |
- Transparent Goalposts: Turn to Off. Transparent goalposts can make it hard to see the ball near the line; solid posts give a clear reference.
- Camera Settings: These are highly personal but start with the pro values above. A too-high FOV can distort edges, but 110 is standard. Adjust one slider at a time and test in free play.
- Ball Cam: Learn to toggle it. Ball cam stays on most of the time, but turn it off when you need to see your car's orientation or when dribbling.
Final Setup Checklist
1. Graphics – Reset to Performance if FPS drops below 60. Turn off VSync, motion blur, bloom, depth of field, and lens flares.
2. Audio – Set SFX to 100, music to 0, voice chat to Party Only. Use Headphones audio mode.
3. Controls – Bind boost to R1, powerslide/air roll to L1. Vibration OFF. Deadzone circle shape with 0.15 stick deadzone and 0.50 dodge deadzone.
4. Accessibility – Camera Shake OFF, Motion Sickness Reduction ON if needed.
5. Network – Set correct region, cross-play ON.
6. Gameplay – Camera FOV 110, Height 100, Distance 270, Stiffness 0.40, Swivel 5.00, Transition 1.30. Transparent goalposts OFF.
Remember that settings can be changed at any time, even during a match (except language). Take time to experiment in free play or casual matches before committing. Good luck in your Rocket League journey!
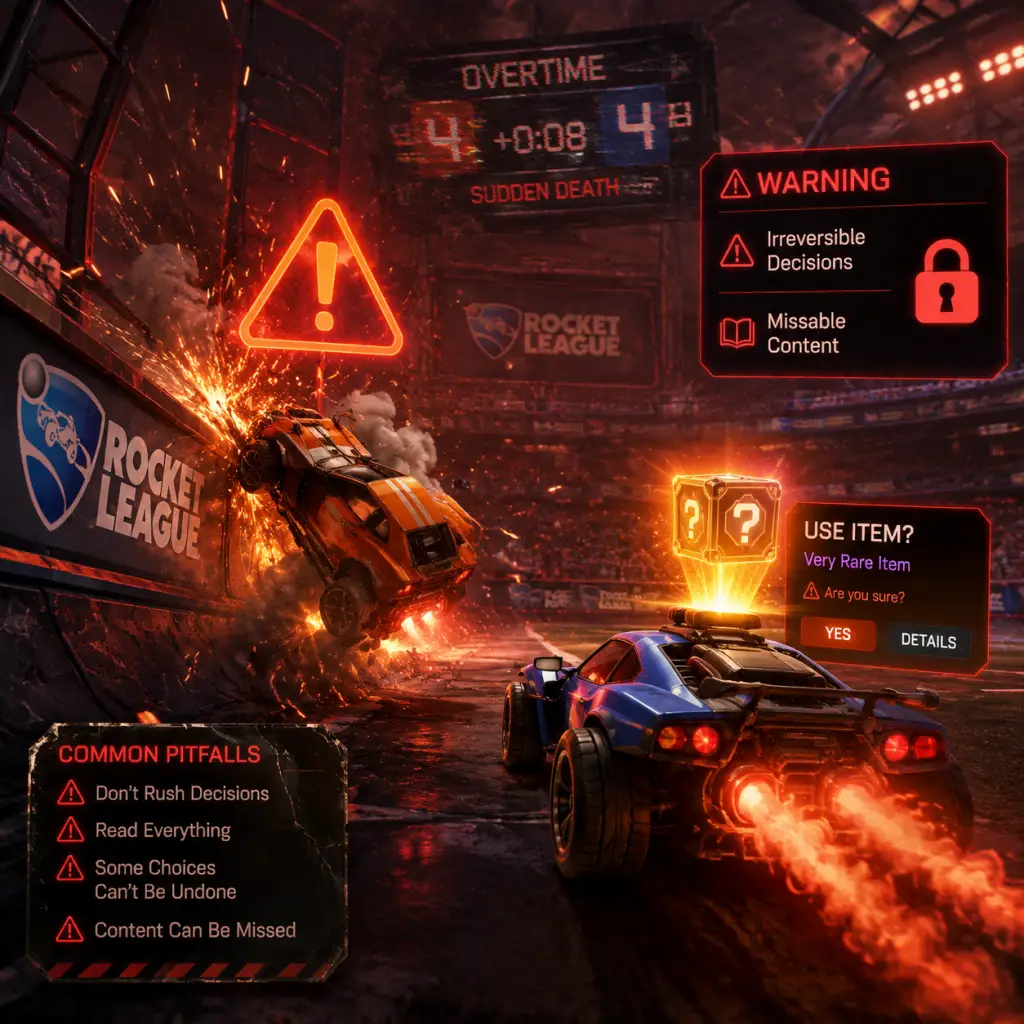
Important Notes
Important Notes
This section consolidates crucial warnings, common pitfalls, irreversible decisions, missable content, difficulty spikes, grinding traps, online etiquette, anti-cheat policies, save management advice, and things players often wish they’d known from the start. Read carefully to avoid wasted time, lost items, or account issues.
Irreversible Choices
- Trading Items: Many item trades are final and irreversible. Once you confirm a trade, you cannot undo it. Double-check every slot before accepting. Scams exist where others offer a rare item then switch it at the last second. Always verify the final trade window.
- Using Blueprints to Build Items: Spending credits to craft a blueprint is permanent. You cannot refund credits or revert the item. Only build items you are certain you want.
- Account Linking (Platform Merges): If you link platforms (e.g., Steam to Epic Games), your progress, items, and Rocket Pass levels from both platforms merge into one Epic Games account. This is irreversible without contacting support, and some items (like platform-exclusive DLC) may be lost. Read the official linking guide carefully before proceeding.
- Renaming Your Club: Club names can be changed, but there is a cooldown and a fee (in credits). Choose wisely if you care about the name.
- Rocket Pass Premium Purchase: Once you buy the Rocket Pass, it cannot be refunded. You also automatically unlock all previous tiers up to your current level. If you buy late in the season, you get those rewards instantly.
- Seasonal Rewards: Competitive season rewards are only obtainable if you reach the required rank by the end of the season (usually 10 wins at that rank). Miss the deadline, and those rewards are gone forever (except for future reskins).
- Limited-Time Events & Items: Events like Frosty Fest, Haunted Hallows, or Neon Nights offer exclusive items in the item shop, rocket pass, or event challenges. These often never return. Check the News tab weekly to avoid missing out.
- Free Rewards in Rocket Pass: The free track of Rocket Pass includes items, drops, and credits. If you don’t play enough during the season, you lose access to those tiers once the season ends. The paid track carries over your tiers if you buy it later, but free track items are gone.
- Tournament Rewards: Tournaments have rotating reward items (e.g., painted versions, goal explosions). If you don’t earn enough tournament credits within a season, you may not be able to buy all items before they rotate out.
- Twitch Drops & Esports Shop: Watch streams to earn exclusive fan rewards. These are time-limited and often change weekly. The Esports shop also rotates team decals; older ones may disappear.
- The First 50 Hours: Rocket League has a notoriously steep learning curve. Basic car control (dodging, aerial hits) takes many hours to get comfortable. Don’t get discouraged; most players experience a plateau around Gold/Platinum.
- Aerial Play: Expect a major difficulty spike around Platinum rank when aerial hits become essential. Practice in Free Play and use custom training packs regularly.
- Mechanics like Flip Resets, Ceiling Shots, and Musty Flicks: These are high-level mechanics that can take hundreds of hours to master. Do not rush into them; focus on fundamentals first.
- Rank Resets: Every new season, your ranked MMR soft-resets. You may be placed lower or higher than expected, leading to unbalanced matches for a few weeks.
- Buying Loot Boxes (Crates): Crates are now replaced by Blueprints. Do not spend real money gambling on random items via third party sites – it’s against ToS and often a scam. Blueprints themselves are free to get; only spend credits if you truly want that specific item.
- Grinding for Every Item: Most items are purely cosmetic. Do not sink hours into trading or farming just to complete a collection unless you enjoy it. The gameplay experience is unaffected by cosmetics.
- Unnecessary Rocket Pass Grind: If you don’t finish the Rocket Pass, you don’t lose anything but future potential. The paid pass often gives enough credits back to buy the next one. Don’t burn out trying to reach Tier 100+ if you don’t have time.
- Overplaying in Competitive: Playing too many ranked games while tilted or tired can drop your rank significantly and reinforce bad habits. Take breaks and play casual or training instead.
- Chasing “Pro” Settings: Don’t blindly copy pro players’ camera, deadzone, or controller bindings. Find settings that feel comfortable for you. Pro settings are often extreme and may hinder your growth.
- Quick Chat Etiquette: Use quick chats positively. Excessive spamming of “What a save!” or “Okay.” is toxic. Avoid using quick chat to flame teammates. Report abusive behavior through the menu.
- Reporting Players: You can report players for harassment, cheating, or griefing (own-goaling, throwing). Psyonix reviews reports. False reporting can get you banned. Use the report option after a match or during.
- Anti-Cheat (BattlEye): Rocket League uses BattlEye anti-cheat on PC. Do not run macros, aimbots, or any third-party software that interacts with the game. Violations result in permanent bans with no appeal. Even using a script to auto-press keys multiple times can trigger detection.
- Smurfing: Creating new accounts to play against lower-ranked players is frowned upon and can lead to bans if detected. Psyonix has taken steps to limit smurfing via phone verification and rank restrictions in parties.
- Leaving Matches: Leaving a ranked match early gives you a temporary ban (15 minutes to 24 hours for repeat offenses). In casual, leaving has no penalty, but frequent leavers may be matched with other leavers.
- Voice Chat: In-game voice chat is available. Be respectful; use it for quick callouts (defending, rotating). Harassment via voice chat can be reported.
- Bind Your Account to Epic Games: Rocket League requires an Epic Games account on all platforms. This is your master account. Enable Two-Factor Authentication (2FA) on your Epic Games account to prevent theft. Lost accounts are very hard to recover without proof.
- Cloud Saves (PC): Your progress, settings, and replays are saved to the cloud via Steam or Epic Games Launcher. However, trained data (training progress, custom training routines) is saved locally in `%USERPROFILE%\Documents\My Games\Rocket League\TAGame\TrainedFiles`. Back up this folder regularly if you use custom training.
- Replay Files: Replays are stored locally (same folder as above). They are not backed up to the cloud by default. If you want to keep replays, manually copy them to an external drive or cloud storage. The game will delete old replays if the folder gets too large (over ~500 MB).
- Trading Inventory: Items are stored on Psyonix servers. Do not delete or sell rare items accidentally. There is no “trash bin” or undo. Be careful when using the “Sell Duplicates” feature in trading.
- Keyboard/Controller Profiles: You can save multiple control profiles in settings. Export them to a file for backup if you switch computers.
- Turn Off Camera Shake & Vertical Sync: Camera shake adds unnecessary visual noise. Disable it in Settings > Camera. Vertical Sync (VSync) increases input lag; disable it unless you have screen tearing issues.
- Bind “Air Roll Left/Right” and “Powerslide” Separately: Default controls bind all air rolls to one button plus stick. Many players later wish they mapped Air Roll Left to L1 (LB) and Air Roll Right to R1 (RB) from the start. This makes half-flips, wavedashing, and directional aerials easier.
- Increase Camera Distance & FOV: Default camera is too close. Most pros use FOV 110, Distance 260-280, Height 100-110, Angle -3 to -5. Adjust gradually.
- Use Free Play for 5 Minutes Before Each Session: Warm up in Free Play or a training pack. It drastically improves consistency over time.
- Learn Rotations Before Aerial Mechanics: Team rotation (positioning, spreading the field) is more important than flashy mechanics. Watch a Rotation guide on YouTube early.
- Custom Training Packs Are Free and Essential: There are thousands of packs created by the community. Use code “F4E0-4B36-0AB3-0AB3” for a basic aerial pack. Search for “Rocket League training packs” online.
- Boost Management: Don’t hold down boost all the time. Learn to “boost tap” for small adjustments. Collect small boost pads (12 pads) on the field instead of always going for 100 boosts.
- Avoid “Ball Chasing”: Constantly chasing the ball leaves your goal wide open. Learn when to rotate backpost defensively.
- Watch Your Replays: After a loss, watch your replay from your teammate’s perspective or opponent’s to see positioning mistakes. This accelerates improvement.
- Keep an Eye on Your Boost: The game shows your boost level. Learn to glance at it quickly. Use sound cues (low boost sounds different).
- Don’t Skip Tutorials: The built-in tutorials (especially Aerial, Striker, and Goalkeeper) teach fundamentals. New players often skip them and struggle later.
- Rocket League Is Not Pay-to-Win: All cosmetics are purely visual. Do not feel pressured to buy anything. The game is fully playable without spending a cent.
- Phishing Scams: Never give your Epic Games or Steam credentials to anyone promising free items, ranks, or credits. Official support will NEVER ask for your password. Only trade through the in-game trade window.
- Third-Party Websites: Sites that offer “free credits” or “item generators” are scams. They will steal your account. No legitimate method exists outside of official purchases.
- Account Sharing: Sharing accounts violates the Terms of Service. If your account is banned due to misconduct by another user, you lose all progress permanently.
- Esports Betting: Avoid third-party betting sites; they are not affiliated with Psyonix and can lead to account compromise.
Missable Content
Difficulty Spikes & Learning Curve
Grinding Traps (What to Avoid)
Online Etiquette & Anti-Cheat Notes
Save Management & Account Security
Things Players Commonly Regret Not Knowing Earlier
Final Warnings
By heeding these notes, you will save time, avoid frustration, and secure your progress. Remember: the journey in Rocket League is long but rewarding. Play smart, not just hard.
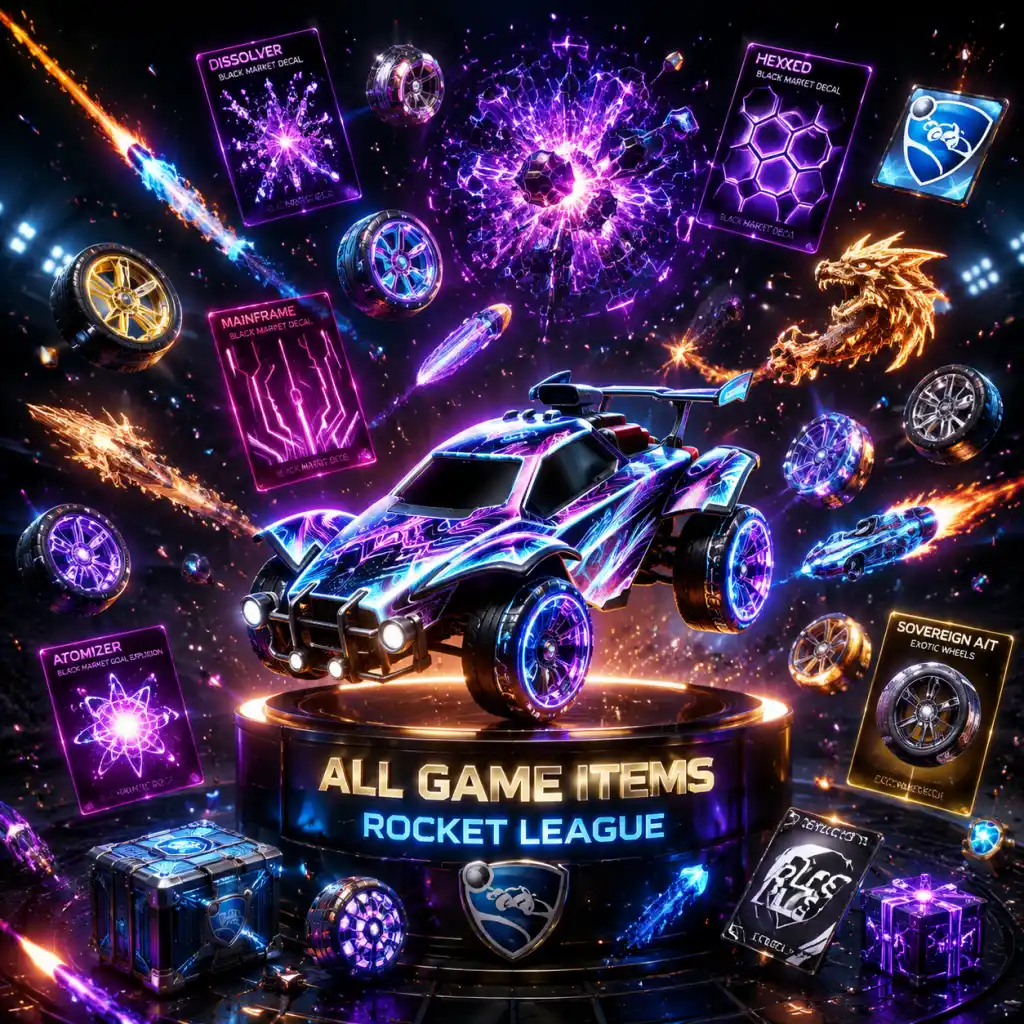
All Game Items
All Game Items in Rocket League
This guide covers every major item category in Rocket League. Items are almost entirely cosmetic, with no gameplay advantages, but they are central to progression, trading, and personalization. Items are grouped logically with explanations on how to obtain them, their uses, and any special notes.
---
Currencies
| Currency | Purpose | How to Obtain | Notes |
|---|---|---|---|
| Credits | Primary premium currency. Used to buy Rocket Pass, items from Item Shop, Blueprint crafting, trade in for items. | Purchased with real money via platform stores (Steam, Epic Games Store, PlayStation Store, Xbox Store, Nintendo eShop). | 1 Credit = $0.01 USD. Minimum purchase is usually 500 Credits. Can be traded between players (only if both have 2FA enabled). |
| Rocket Pass Tokens (RP Tokens) | Earned by leveling up the Rocket Pass (paid track). Used to unlock specific Rocket Pass items without completing tiers. | Earned at specific tiers in the Rocket Pass (e.g., every 5 tiers, 1 token). | Tokens are not tradable. They are consumed when used to claim an item from the pass. |
| Tournament Credits | Used to redeem tournament reward items from a dedicated wheel. | Earned by participating in Tournaments (any rank). Amount depends on finish position and tournament tier. | Tournament Credits reset at the end of each season. Unspent credits are exchanged for a bonus item. |
Blueprints and Crates
Blueprints are the current system (crates were removed in 2019). Blueprints drop after matches and can be crafted into an item using Credits, traded, or traded up.
| Item | Description | How to Obtain | Use |
|---|---|---|---|
| Blueprint | A blueprint shows a specific item (e.g., Titanium White Octane: Dune Racer). To craft it, you must pay Credits (varied by rarity and item). | Random post-match drop. Also from Rocket Pass free track. | Either craft with Credits, trade to other players, or trade up 5 blueprints of same series/rarity for a higher rarity. |
| Blueprint Series | Blueprints belong to series (e.g., Revival Series, Momentum Series). All blueprints in a series share a themed item pool. | As above. | Series affects trade-up outcomes. Some series are retired (e.g., Champion Series) and cannot be obtained anymore. Their blueprints are still craftable. |
---
Car Bodies
Car bodies are the chassis of your vehicle. They affect hitbox type (Octane, Dominus, Breakout, Hybrid, Merc, etc.) but the visual shape is cosmetic within the hitbox category. All cars of the same hitbox behave identically.
| Rarity | Example Bodies | Hitbox | How to Obtain | Notes |
|---|---|---|---|---|
| Common | Octane, Breakout, Merc, Venom, Paladin, etc. | Various | All players start with several. More unlock via ranked play? Actually, all common bodies are available from the start except some legacy items. | In free to play, new players receive Octane, Breakout, Merc, etc. instantly. |
| Import | Dominus GT, Takumi RX-T, Road Hog XL, Mantis, Werewolf, Diestro, etc. | Octane/Dominus/etc. | Blueprint crafting, trading, Item Shop, Rocket Pass. | Often have unique animations (e.g., engine sounds). Some are from previous Rocket Passes. |
| Exotic | None? Actually exotic are wheels. Bodies go import or black market? No, bodies max at import. | - | - | No exotic or black market car bodies exist. |
| Limited/Seasonal | Rocket Pass car bodies (e.g., Guardian GXT, Maverick GXT, Artemis GXT, Ronin GXT, Chikara GXT, etc.) | Octane/Dominus/Hybrid | Rocket Pass tiers (Premium only typically). | These are often customizable with interchangeable parts (e.g., Guardian GXT has three unique versions per body). Can be painted. |
| Legacy | Sweet Tooth, Armadillo, Hogsticker, McLaren 570S, etc. | Unique hitboxes | Platform exclusives or DLC (now retired). | Sweet Tooth (PlayStation), Armadillo (Xbox), Hogsticker (Switch). Not obtainable anymore if missed. |
---
Decals
Decals are paint jobs for your car. They range from simple stripes to animated patterns. Some decals are universal, others are car-specific.
| Rarity | Examples | How to Obtain | Notes |
|---|---|---|---|
| Common | Various for each car (e.g., Retro Stripe, Dash) | Default with car body. | Cannot be traded or painted. |
| Rare | Most animated decals? No, rare decals are non-animated (e.g., Pollinator, Jetz, etc.) | Post-match drops, Rocket Pass, blueprints. | Can have painted variants. |
| Very Rare | Animated decals (e.g., Snakeskin, Distortion, Dot Matrix) | Trade-ups, drops, blueprints. | Often have bright colors or moving patterns. |
| Import | Decals that come with import bodies (e.g., Octane MG-88, Dominus Afterlife, etc.) | Blueprint, trading. | Some are bundled with bodies. |
| Exotic | Some decals like Tora (animated) | Blueprint, trading. | Tora is an animated decal, categorized as exotic? Actually Tora is classified as Exotic? In-game it shows Exotic. |
| Black Market | High-end animated decals (e.g., Heatwave, 20XX, Mainframe, Dissolver, Trigon, etc.) | Blueprint (very rare), trading, Item Shop. | Most expensive decals. Often change color based on primary and accent. Some have special effects (e.g., Bubbly has a water effect). |
| Limited | Event or Rocket Pass decals (e.g., Rocket League Esports decals, “Rival” series, “SF Giants” etc.) | Events, Esports shop, Rocket Pass, Fan Rewards. | Often themed. Some are exclusive to specific tournaments or collaborations (e.g., Monstercat, Hot Wheels). |
---
Wheels
Wheels are another major cosmetic. They come in all rarities and often have unique animations.
| Rarity | Examples | How to Obtain | Notes |
|---|---|---|---|
| Common | Standard wheels, Alloy, Tunicas, Rat Rods, etc. | Default or drops. | Many are obtainable through trading up. |
| Rare | Wheels like Invaders, Stern, Octavian, etc. | Drops, blueprints, trading. | Can be painted. |
| Very Rare | Spiralis, FSL, Gaiden, Reaper, Doughnut, etc. | Blueprints, trading, Rocket Pass. | Some have animated treads. |
| Import | Only one? Actually many: Zomba, Draco, Infinium, Hypnotik, etc. | Blueprint, trading, Item Shop. | Zomba and Draco are very popular. Painted versions (especially Titanium White) are highly sought after. |
| Exotic | Also many: Apex, Cristiano, Illuminata, Photon, Dynamo, etc. | Blueprint, traders, occasional drop. | Some were from limited events. |
| Black Market | Only a few? Actually wheels can be Black Market? Yes, like Exotic wheels are separate. Wheels go up to Exotic? No, wheels are Common, Rare, Very Rare, Import, Exotic. There is no Black Market wheel category; that's for decals, goal explosions, etc. | - | - |
| Limited | Rocket Pass wheels, Fan Reward wheels (e.g., Decennium), Event wheels (e.g., Hallowtide, Snowday) | Events, Rocket Pass, RLCS viewership rewards. | Often have special holiday themes. Some are seasonal and may return. |
---
Boost
Boost trails that emit from the back of your car when accelerating or boosting. They have different animations and colors.
| Rarity | Examples | How to Obtain | Notes |
|---|---|---|---|
| Common | Standard boost | Default. | No animation. |
| Rare | Boost like Flowers, Lightning Yellow, etc. | Drops, blueprints. | Simple particle effects. |
| Very Rare | Dark Matter, Hypernova, Proton, etc. | Blueprint, trading. | More complex animations. |
| Import | Only one? Actually many: Flamethrower, Ion, Thermal, etc. | Rare? Wait, these are Import? No, they are classified as Import? Actually boost rarities go up to Exotic? No, boost is Common, Rare, Very Rare, Import, Exotic. Example: Black Market does not apply to boost. Let's clarify: In the trade system, boost can be Common, Rare, Very Rare, Import, Exotic. Some popular import boosts include Standard (painted), Lightning (painted), Flamethrower, etc. | - |
| Exotic | I think there are some exotic boosts like some from Rocket Pass? Actually, boost max out at Import? I recall there are Exotic boosts like the “Kaleidoscope” from a previous pass? Better to check: In the current blueprint system, boost rarities are up to Import only. The highest is Import. Exotic is for wheels and decals? Let's correct: Boost goes up to Import. Same for toppers and antennas. | - | - |
| Limited | Seasonal boosts (e.g., Candy Corn, X-Mas Boost, etc.) | Events, Rocket Pass. | Often themed. |
---
Trail
Trails appear behind your car when supersonic (max speed). They are mostly cosmetic and come in many styles.
| Rarity | Examples | How to Obtain | Notes |
|---|---|---|---|
| Common | Standard trail | Default. | Simple line. |
| Rare | Rainbow, Lightspeed, etc. | Drops, blueprints. | Longer trail effects. |
| Very Rare | Binary, Laser Wave, etc. | Blueprint, trading, Rocket Pass. | Some have segmented patterns. |
| Import | Tachyon, Fractal Fire, etc. | Blueprint, trading. | Larger particle effects. |
| Exotic | I think there are no exotic trails. Actually, trails max out at Import. | - | - |
| Limited | Event trails (e.g., Winter’s Fury, Hovercraft) | Events, Rocket Pass. | Often match event themes. |
---
Goal Explosion
When a goal is scored, this animation plays. They are one of the rarest and most expensive item categories.
| Rarity | Examples | How to Obtain | Notes |
|---|---|---|---|
| Common | Default goal explosion. | Default. | Minimal effect. |
| Rare | Uncommon? Actually, goal explosions start at Very Rare? No, they exist as Rare (e.g., “Fireworks” is Rare? Actually Fireworks is Import?) Let's check: The rarity of goal explosions: Very Rare (e.g., Butterflies, Ballistic), Import (e.g., Reaper, Vampire Bats), Exotic (e.g., Party Time, Toon, Hellfire), Black Market (e.g., Sub-Zero, Atomizer, Solar Flare, Poly Pop, etc.). | Blueprints, trading, Item Shop, Rocket Pass. | Black Market goal explosions are the most sought after. Some have interactive elements (e.g., Kaboom explodes with cartoons). |
| Limited | Seasonal goal explosions (e.g., Haunted Hallows goal explosion, Snow Day goal explosion) | Events, Rocket Pass. | Often limited-time availability. |
---
Toppers
Hats that sit on top of your car. Purely cosmetic.
| Rarity | Examples | How to Obtain | Notes |
|---|---|---|---|
| Common | Base hats (e.g., birthday cake, propeller hat) | Drops, trading up. | Many common toppers. |
| Rare | Halo, Stegosaurus, etc. | Drops, blueprints. | Some painted versions are popular (Titanium White Halo). |
| Very Rare | Many (e.g., Cherry Top, Rooster Comb) | Trade-ups, drops. | - |
| Import | Only a few (e.g., Crown Border is a banner, not topper). Actually I don’t think the topper category has Import rarity. Toppers go up to Very Rare? Check: In the game, toppers can be Common, Rare, Very Rare. No Import. | - | - |
| Limited | Event toppers (e.g., Pumpkin, Santa Hat, Top Hat) | Events, Rocket Pass. | Often seasonal. |
---
Antennas
Flags or accessories that stick out of the back of your car. Cosmetic only.
| Rarity | Examples | How to Obtain | Notes |
|---|---|---|---|
| Common | Rubber duck, piñata, etc. | Drops. | - |
| Rare | Many (e.g., Flower, Heart) | Drops, blueprints. | - |
| Very Rare | Some (e.g., Alien) | Trade-ups, drops. | - |
| Import | None? Antennas max at Very Rare. | - | - |
| Limited | Event antennas (e.g., Candy Cane, Valentine’s Arrow) | Events. | - |
Player Banners (Player Banner)
These are displayed before match and on the scoreboard. They are large rectangular images.
| Rarity | Examples | How to Obtain | Notes |
|---|---|---|---|
| Common | Default banners (e.g., Battle Axe) | Default. | - |
| Rare | Many (e.g., Dead Serious, Sticker Shock) | Drops, blueprints. | - |
| Very Rare | Animated banners (e.g., Nice Shot, RL Esports) | Blueprints, trading, Rocket Pass. | Some move slightly. |
| Import | “Howler”, “Bobo” etc. from Rocket Pass? Actually, banners go up to Very Rare? I think there are Import banners as well (e.g., from RLCS fan rewards). | - | - |
| Limited | Seasonal banners (e.g., Candy Corn, Snow Globe) | Events, Rocket Pass. | Often match event themes. |
Avatar Borders
Borders that frame your player profile picture. Cosmetic.
| Rarity | Examples | How to Obtain | Notes |
|---|---|---|---|
| Common | Default. | Default. | - |
| Rare | Some from Rocket Pass. | Rocket Pass, events. | - |
| Very Rare | Some animated borders (e.g., from Season 1 Pass). | Rocket Pass (certain tiers). | - |
| Limited | Event exclusive borders. | Tournaments, RLCS. | Rare. |
Engine Audio
Changes the sound of your car's engine. Cosmetic.
| Rarity | Examples | How to Obtain | Notes |
|---|---|---|---|
| Common | Default Octane. | Default. | - |
| Rare | Other car engine sounds (e.g., Dominus, Breakout). | From car bodies or obtainable as item? Actually engine audio items exist as separate items. They can be from Rocket Pass or trades. | - |
| Very Rare | Some unique sounds (e.g., Muscle Car, Helicopter). | Blueprint, trading. | - |
| Import | Rare engine sounds (e.g., Lime Lightning? No, those are boosts). | - | - |
| Limited | Special event sounds (e.g., Hot Wheels). | Events. | - |
Paint Finishes
Applied to primary and accent paint slots on decals. They determine the texture (e.g., metallic, matte, pearl, etc.).
| Rarity | Examples | How to Obtain | Notes |
|---|---|---|---|
| Common | Basic finishes (e.g., Matte, Glossy, Metallic). | Default. | - |
| Rare | Anodized, Anodized Pearl, etc. | Blueprint, trading, Rocket Pass. | Anodized gives a reflective chrome effect. Popular. |
| Very Rare | Many (e.g., Brushed Metal, Pearlescent). | Trade-ups, blueprints. | - |
| Import | Some? Not many. | - | - |
| Limited | Event finishes (e.g., Sunburst, Ice). | Events. | - |
Special Items: Tradeable vs. Account Bound
- Tradeable: Most non-consumable items (not from Rocket Pass, not tournament rewards).
- Account Bound: Rocket Pass items (locked to account until 3 days after acquisition? Actually they become tradeable after a few days). Tournament rewards are bound and cannot be traded.
- Consumables: None. Blueprints are not consumable; they are items you can craft or trade.
- Achievements/Trophies: Unlocked by performing specific actions (e.g., score 100 goals, earn 10 wins in a season). They are account-linked and give no in-game items.
- Challenges: Weekly and seasonal challenges. Rewards include XP, Battle Pass tokens (formerly), and sometimes items like decals or wheels.
- Banners (Player Banner) – already covered.
- Decals – covered.
- Antennas – covered.
- Goal Explosions – covered.
- Wheels – covered.
- Boosts – covered.
- Trails – covered.
- Toppers – covered.
- Avatars – your profile picture; can be changed but not an item you collect.
- Rocket Boost Paddle? Not an item.
- Play matches: Random drops (blueprints, common items) every few matches.
- Rocket Pass: Premium track provides many items each season (bodies, wheels, decals, etc.).
- Item Shop: Rotating daily offers; sometimes limited items appear.
- Blueprint crafting: Use Credits to craft specific items.
- Trade: Use trading platforms (RL Garage, Reddit, Discord) to buy/sell items.
- RLCS Fan Rewards: Watch official Rocket League Championship Series streams on Twitch with linked account to get drops (limited decals, wheels).
- Tournaments: Earn Tournament Credits to redeem unique item sets.
- Events: Seasonal events (e.g., Haunted Hallows, Frosty Fest) offer event currency to buy special items.
- Scams: Be cautious in trades. Use official trading methods only. Never trade items for real money (against ToS).
- Item duplicating/cheats: Not possible. Any site claiming to give free credits or items is a scam.
- Painted items: Most items have painted variants. They are more or less valuable based on color. Titanium White is generally the most sought after.
---
Collectibles: Achievements / Trophies / Challenges
---
Utility Items
---
Summary of Rarity Values
Common items are worthless. Rare and Very Rare have some trading value. Import, Exotic, and Black Market are valuable, especially painted in Titanium White or Black. Limited items can vary hugely based on demand (e.g., Gold Cap wheels are worth thousands of Credits due to scarcity).
---
Tips for Obtaining Items
---
Important Warnings
---
This guide covers the full scope of items in Rocket League. There are literally thousands of unique items across all categories, but the above gives you a framework to understand and collect them.
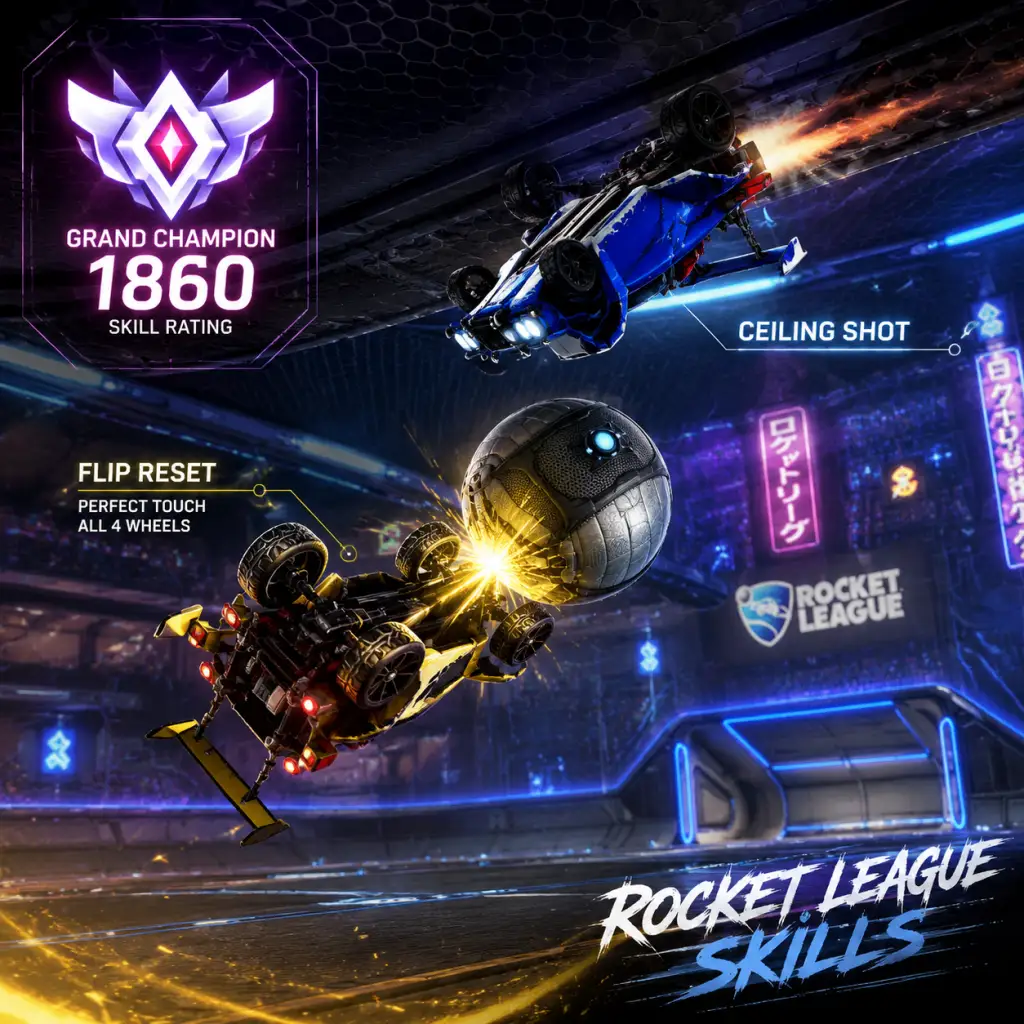
Character Skills
Character Skills Guide for Rocket League
Rocket League does not feature traditional playable characters, classes, or roles. All players control a rocket-powered car, and every car (regardless of body or hitbox type) shares exactly the same core set of abilities and mechanics. There are no character-specific spells, talents, or special moves. However, what the game lacks in traditional RPG skill trees, it more than makes up for with a deep, physics-based skill system that players can learn, practice, and master over hundreds of hours. This guide covers every fundamental and advanced skill in the game, treating each as a learnable ability with effects, execution steps, optimal usage, combos, synergies, and recommended setups.
Core Movement Skills
All movement skills are performed with the analog stick and the corresponding buttons/triggers. Timing and precision are critical.
#### 1. Drive & Reverse
- Effect: Moves the car forward or backward on the ground. Speed cap at 80 km/h (forward) and 20 km/h (reverse).
- Execution: Press the accelerator (default RT/R2/⬆) to drive forward; press brake/reverse (default LT/L2/⬇) to reverse.
- When to Use: Always on the ground. Use reverse sparingly—it is much slower than turning around.
- Upgrades: None; speed is fixed. Boost can accelerate beyond normal speed.
- Combos: Reverse into a powerslide to quickly change direction (reverse powerslide).
- Synergies: Crucial for all ball touches, positioning, and recoveries.
- Effect: Allows the car to rotate quickly on the ground while maintaining small forward momentum. Essential for sharp turns.
- Execution: Hold the powerslide button (default X/Square/LB) while turning with the analog stick.
- Cooldown: None; can be held indefinitely.
- When to Use: Any time you need to turn sharply, especially when rotating back on defense or chasing the ball at speed.
- Upgrades: None, but mastering drift control allows for tighter turns.
- Combos: Start a powerslide, then jump and dodge into a wavedash for instant speed recovery.
- Synergies: Pairs with boost to maintain high speed through corners.
- Effect: Launch the car into the air. You have two jumps per ground contact (a single jump and then a dodge or second jump).
- Execution: Press the jump button (default A/Cross/Space).
- Cooldown: None, but you must touch the ground (or reset via a wall/ceiling touch) to regain both jumps.
- When to Use: Starting aerial plays, blocking shots, jumping for 50/50s, dodging demo attempts, and initiating any airborne mechanic.
- Upgrades: The timing between first and second jump matters—fast aerial (double jump with boost) is core.
- Combos: Jump + boost = aerial. Jump + dodge = flip. Jump + tilt + second jump = high aerial.
- Synergies: Essential for all advanced mechanics.
- Effect: After the first jump, a second jump can be performed. If you tilt the analog stick before the second jump, the car performs a front, back, or side flip. This allows a powerful dodge in any direction, sending the ball toward your target.
- Execution: Jump once -> tilt analog stick -> jump again within 1.5 seconds. If no tilt, you simply double jump straight up.
- Cooldown: Must touch ground or wall/ceiling to regain both jumps.
- When to Use: Dodging into the ball for a powerful shot or clear, dodging out of ball path, or recovering with a wavedash.
- Upgrades: Speed flip (side flip cancel) for faster kickoffs, half-flip for quick 180 turns.
- Combos: Front flip + boost = speed burst. Backflip cancel into half-flip.
- Synergies: Use with boost to maintain momentum after dodge.
- Effect: Collect small (12) or large (100) boost pads scattered on the field. Managing boost is a skill in itself.
- Execution: Drive over any pad. Small pads are scattered; large pads appear at corners and center side, respawning every 10 seconds.
- When to Use: Always collect small pads when rotating. Learn routes that grab pads without slowing down.
- Upgrades: None, but develop a mental map of pad locations.
- Combos: Boosting while air rolling to feather boost efficiently.
- Synergies: Essential for aerial plays, fast recoveries, and sustained pressure.
- Effect: Tapping boost instead of holding it to conserve boost while still gaining speed.
- Execution: Tap boost button rhythmically. Each tap gives a burst; holding drains continuously.
- When to Use: When approaching supersonic (83 km/h), feather to maintain speed with minimal boost consumption. Also during aerial car control to adjust trajectory precisely.
- Upgrades: Not applicable.
- Combos: Feathering while air rolling for controlled aerials.
- Synergies: Critical for long aerial plays and recovery.
- Effect: A technique to reach high balls quickly by jumping and boosting simultaneously, then tilting back and jumping again.
- Execution:
- When to Use: Any time you need to challenge a high ball, especially on defense near your goal or on offense for backboard reads.
- Upgrades: Practice to get consistently fast execution.
- Combos: Fast aerial into air dribble, or fast aerial to block a shot.
- Synergies: Essential with directional air roll (below) for car control.
- Effect: Rotates the car in the air. Free air roll (default LB/L1/LShift) allows arbitrary rotation. Directional air roll (Air Roll Left/Right) gives consistent spin.
- Execution: Hold air roll button + move analog stick. Or press directional air roll button and the car spins automatically.
- When to Use: Adjust car angle for ball touches, recoveries, and advanced mechanics like air dribbles.
- Upgrades: Practice air rolling continuously to maintain control while tilting.
- Combos: Air roll + boost feather = pinpoint aerial targeting.
- Synergies: Must be mastered for any aerial play.
- Effect: Carry the ball on top of your car while airborne, using boost and air roll to keep the ball on your nose.
- Execution:
- When to Use: As a 1v1 offensive weapon, or to force the opponent to commit in 2s/3s.
- Upgrades: Add flicks at the end of the air dribble (air dribble flick).
- Combos: Often started from a ceiling shot setup or a wall pop. Can be followed by a reset for a flip reset.
- Synergies: Flip reset allows an extra dodge during the air dribble for an unpredictable shot.
- Effect: Drive up the wall, fall off the ceiling, and then use a dodge for a powerful shot.
- Execution:
- When to Use: In high-level offense to create unpredictable angles. Risky.
- Upgrades: Add a flip reset before the shot for extra options.
- Combos: Ceiling shot into double tap (hit the backboard then score).
- Synergies: Works best with a teammate providing a pass or distraction.
- Effect: Touch all four wheels to the ball, resetting your double jump, allowing an extra dodge in the air.
- Execution:
- When to Use: In high-level aerial plays to add a shot after an air dribble or to score from difficult angles.
- Upgrades: Musty flick (flip reset variant) where you shoot the ball from behind.
- Combos: Air dribble > flip reset > Musty flick.
- Synergies: Requires excellent car control and boost management.
- Effect: Carry the ball on top of your car while driving on the ground.
- Execution:
- When to Use: In 1v1 or when you have space. Great for baiting opponent.
- Upgrades: Add flicks (front, side, back, 45°, etc.).
- Combos: Dribble > flick > goal. Or dribble > cut > low shot.
- Synergies: Use a car with good ball control hitbox (Octane preferred).
- Effect: Quickly launch the ball from your roof with a flip, in a chosen direction.
- Execution: While dribbling, jump and dodge in the desired direction. For a Musty flick, jump, let the ball fall slightly behind, then front flip.
- When to Use: To get the ball over a defender or quickly shoot with power.
- Upgrades: Each flick type requires separate practice.
- Combos: Flicks can be chained with other moves (e.g., fake flick into low 50/50).
- Synergies: Mix with powerslide cuts to confuse defenders.
- Effect: Quickly reverse your car's facing direction in one fluid motion.
- Execution:
- When to Use: Recovering from overcommit, rotating back quickly, or avoiding a demo.
- Upgrades: Speed flip half-flip (faster).
- Combos: Essential for fast recoveries after a whiff or to chase down a ball.
- Synergies: Use with boost to maintain speed.
- Effect: Positioning yourself between the opponent with the ball and your own goal, mirroring their movements without taking the ball immediately.
- Execution: Drive backward or sideways, keep net covered, and wait for opponent to make a move. Read their intention.
- When to Use: In 1v1 and 2v2 when you are the last defender.
- Upgrades: Learn to fake challenge or delay.
- Combos: Shadow > challenge when opponent flicks or loses control.
- Synergies: Use small pads to maintain boost while shadowing.
- Effect: Proper goalkeeping: timing jumps, using power, and aiming clears.
- Execution: Position near goal line, anticipate shot, jump and boost to meet the ball, dodge into it for power.
- When to Use: Whenever the ball is coming toward your net.
- Upgrades: Learn backboard reads, fast aerials for high shots, and reverse saves.
- Combos: Save > immediate pass to teammate for counterattack.
- Synergies: Rotate back quickly after a save to regain boost.
- Effect: Systematic cycling of positions (attack, support, defense) to maintain presence and boost.
- Execution: After a touch or challenge, rotate to back post via the far side of the field, while teammate moves in.
- When to Use: Always in 2v2/3v3.
- Upgrades: Faster rotations with wavedashes and half-flips.
- Combos: Rotation + passing plays.
- Synergies: Essential for team play; communication helps.
- Effect: Hitting the ball intentionally to a teammate's position, often off the backboard or across the goalmouth.
- Execution: Aim for the area where teammate is expected to be; read their rotation.
- When to Use: When you have no shot and a teammate is open.
- Upgrades: Learn redirect passes and air roll passes.
- Combos: Wall pass followed by an aerial teammate.
- Synergies: Works with committed teammates.
- Effect: A ground-recovery technique that gives instant speed when landing.
- Execution: As you land from a jump or aerial, tilt the car and press jump + dodge just before touch down.
- When to Use: After a fast aerial, after a delay, or to maintain speed on landing.
- Upgrades: Chain multiple wavedashes.
- Combos: Wavedash into a powerslide turn.
- Synergies: Boosts recoveries dramatically.
- Effect: A variant of the side flip that allows a very fast, low-angle dodge forward, used on kickoffs and for speed gains.
- Execution: Very precise: diagonal flip canceled by pulling opposite direction and air roll to keep car straight.
- When to Use: Kickoffs (fastest option), chases.
- Upgrades: Consistent execution needed.
- Combos: Follow with a wavedash after landing.
- Synergies: Requires training in freeplay.
- Octane hitbox: Best all-rounder; easiest for dribbling, flicks, and 50/50s. Recommended for most skills.
- Dominus hitbox: Longer, lower; better for powerful shots and flicks. Aerials may feel different.
- Plank hitbox (e.g., Batmobile): Very long; excellent for 50/50s and powerful clears, harder for dribbling.
- Hybrid hitbox: Versatile, balanced between Octane and Dominus.
- All skills are possible with any hitbox, but handling nuances exist.
- Field of View (FOV): 100-110 (wider to see more)
- Distance: 260-280 (balance between ball view and field)
- Height: 100-110 (higher gives better perspective)
- Angle: -3 to -5 (slight downward)
- Stiffness: 0.35-0.60 (controls camera responsiveness)
- Swivel Speed: 3.0-6.0 (for quick looks)
- These settings help with aerials and ball control.
- Air Roll Left: L1/LB/Q
- Air Roll Right: R1/RB/E
- Powerslide: L1/LB (same as air roll left) or separate button
- Boost: Circle/B/Right Mouse Button (or preferred)
- Jump: X/A/Space
- Custom binds can improve wavedash and half-flip execution.
#### 2. Powerslide
#### 3. Jump
#### 4. Double Jump & Flip Dodge
Boost Management Skills
Boost is a resource that regenerates only through boost pads. It is not unlimited (except freeplay).
#### 5. Boost Pickup & Conservation
#### 6. Boost Feathering
#### 7. Fast Aerial
1. Press jump and boost at the same time.
2. Tilt the car backward (pull analog stick down).
3. Quickly press jump again while still holding boost.
4. Continue boosting and adjusting with air roll.
Aerial Skills
Airborne maneuvers are Rocket League's highest skill ceiling.
#### 8. Air Roll (Free & Directional)
#### 9. Aerial Dribble
1. Hit the ball off a wall or ground for a pop.
2. Jump and boost to match ball speed.
3. Tap boost and air roll to keep ball centered on car roof.
4. Control direction to dribble toward goal.
#### 10. Ceiling Shot
1. Drive up the wall at non-ball side.
2. Jump off wall toward ceiling.
3. Let car stick to ceiling, then drop off.
4. Use air roll to orient, then air dribble or dodge into the ball.
#### 11. Flip Reset
1. Launch ball into the air (e.g., off wall).
2. Jump and boost to get above the ball.
3. Air roll so the bottom of your car faces the ball.
4. Lightly touch the ball with your wheels (gently tap).
5. Now you have a fresh flip to use.
Ball Control Skills (Ground)
#### 12. Ground Dribble
1. Catch the ball by matching its speed and letting it settle on your roof.
2. Use slight adjustments with the analog stick and feathering boost to keep the ball centered.
3. Change direction to fake or flick.
#### 13. Flick (Front, Side, 45°, Back, Musty)
#### 14. Half-Flip
1. While driving forward, press reverse + jump.
2. Immediately tilt analog stick up (front flip) then cancel it by pulling down and pressing air roll button.
3. Land driving backward or forward depending on skill.
Defensive Skills
#### 15. Shadow Defense
#### 16. Save & Clear
Teamplay Skill
#### 17. Rotation
#### 18. Passing
Advanced Mechanics
#### 19. Wavedash
#### 20. Speed Flip
Recommended Builds
Although there are no skill trees, players can optimize their car choice, camera settings, and control bindings to better execute these skills.
#### Car Hitbox Selection
#### Camera Settings (for skill execution)
#### Control Bindings (common pros)
Conclusion
Rocket League's skill system is entirely player-driven. There are no abilities to unlock or levels to gain; every mechanic described above is available to every player from the moment they start. Mastery comes through deliberate practice in Free Play, custom training packs, and ranked matches. Focus on one skill at a time, use the in-game training modes, and watch replays to identify weaknesses. The skills are deeply interconnected: good boost management enables aerials, wavedashes improve recovery, and rotations create passing opportunities. Enjoy the journey – the skill ceiling is virtually infinite.
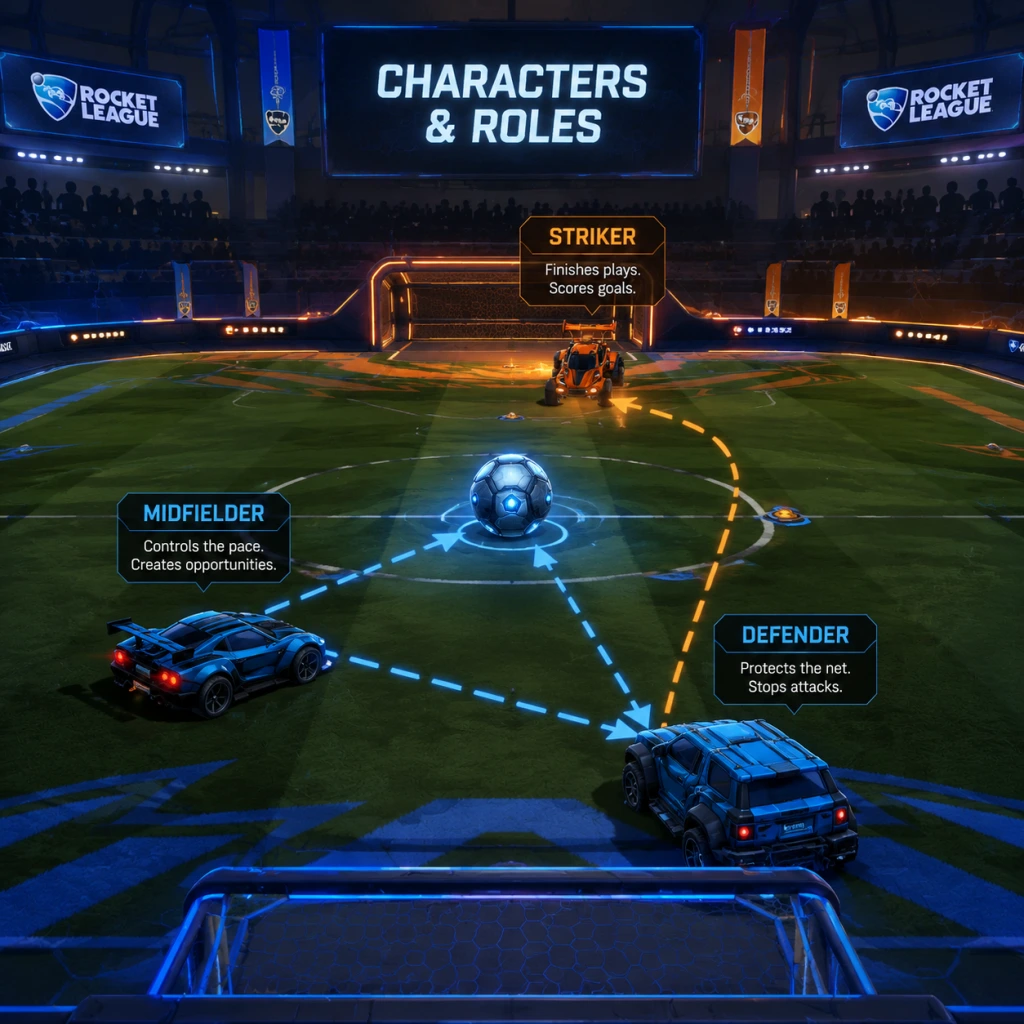
Characters & Roles
Characters & Roles in Rocket League
Rocket League does not feature traditional characters, classes, or heroes. Instead, every player controls a rocket-powered car with identical core mechanics (speed, boost, jumping, dodging, aerial control). However, different car bodies have distinct hitbox types that subtly affect ball interaction (e.g., turning radius, surface area, height). Additionally, players fulfill roles on the field based on positioning and playstyle rather than fixed classes. This guide covers both the playable car types (hitbox categories) and the common team roles.
---
Playable Units: Car Bodies & Hitbox Types
All cars belong to one of six hitbox categories. Within each category, visual differences are purely cosmetic; every car in the same hitbox shares identical dimensions and physics. Unlock conditions: Most car bodies are available via Blueprint drops, Rocket Pass tiers, DLC packs, or trading. A few (like the Octane) are free from the start. None require purchase for gameplay advantage.
#### 1. Octane Hitbox
- Example cars: Octane, Octane ZSR, Fennec, Marauder, Takumi
- Strengths: Best all-rounder. High average in height, width, length, and turning radius. Exceptionally good for 50/50 challenges, ground play, and quick aerials.
- Weaknesses: Slightly less elongated for certain flicks than Dominus.
- Playstyle: Jack-of-all-trades. Reliable for every role. Preferred by most pros due to balanced stats.
- Unlock: Octane is free starter car. Others like Fennec drop from Blueprints or trade.
- Recommended builds: Any topper or antenna; no performance impact. Boost choice is cosmetic.
- Team synergy: Fits any formation. Pairs well with tall-hitbox teammates for aerial dominance.
- Example cars: Dominus, Dominus GT, Diestro, Skyline (Fast & Furious), Nimbus
- Strengths: Longest hitbox – excellent for powerful flicks, dribbling, and 50/50 reach. Flatter than Octane, good for low aerials.
- Weaknesses: Worse height makes winning aerials above others harder. Turning radius slightly slower.
- Playstyle: Flick-heavy offense, ground dribble specialist, long-range shots.
- Unlock: Dominus is often part of DLC packs or available via trading.
- Recommended builds: Any; often paired with clean designs.
- Team synergy: Used as a main striker or aggressive defender who clears long balls.
- Example cars: Backfire, Esper, Mantis, Paladin, Twinzer, Werewolf
- Strengths: Very long and wide – huge surface area for blocking and powerful touches. Excellent for demos (hits from wide side).
- Weaknesses: Taller than Dominus but still flat; poor at high aerials. Turn radius is large.
- Playstyle: Heavy challenge style, demo-intensive, or defensive clear specialist.
- Unlock: Blueprint drops, Rocket Pass, or trading.
- Team synergy: Works as a physical enforcer or backline defender due to wide coverage.
- Example cars: Breakout, Breakout Type-S, Aftershock, Animus GP, Centio V17, Endo, Komodo, Samurai, Werewolf (also plank)
- Strengths: Taller than Plank but still long. Good for high aerials and 50/50s. Balanced turning.
- Weaknesses: Less width than Octane, so less forgiving on ball hits.
- Playstyle: Versatile striker or midfielder. Slightly more aerial-oriented than Octane?
- Unlock: Common from drops.
- Team synergy: Fills gaps in any team.
- Example cars: Jäger 619 RS, Maverick, Nimbus (also Dominus), Venom, X-Devil, Zippy
- Strengths: Combines traits of Octane and Dominus – slightly taller than Dominus, slightly longer than Octane. Good for both flicks and aerials.
- Weaknesses: Master of none; some players find it unpredictable.
- Playstyle: Adaptable; good for learning.
- Unlock: Blueprints.
- Team synergy: Use as flexible support.
- Example cars: Merc, Road Hog, Scarab, Grog, Vulcan
- Strengths: Tallest and widest hitbox – massive surface for blocking, huge aerial presence, easiest to catch the ball on roof.
- Weaknesses: Poor turning radius, slower acceleration, clumsy ground control.
- Playstyle: Pure defensive shield, goal-line camping, high-touch clears.
- Unlock: Default Merc is free; others from drops.
- Team synergy: Dedicated anchor or sweeper. Pair with agile strikers.
- Primary objective: Score goals, apply offensive pressure, create rebounds.
- Playstyle: Aggressive positioning near opponent goal, quick shots, aerial offensives, dribbling.
- Car recommendations: Dominus (flicks), Octane (versatility), Plank (power clears).
- Key skills: Power shots, flicks, fast aerials, passing.
- Primary objective: Control the middle third, support both offense and defense, pass to strikers, delay opponent attacks.
- Playstyle: rotate centrally, win 50/50s, boost management, and set up plays.
- Car recommendations: Octane, Hybrid.
- Key skills: Ball control, boost starving, passing accuracy.
- Primary objective: Protect the goal, clear dangerous balls, disrupt opponent shots, and reset possession.
- Playstyle: Sitting further back, reading opponent passes, quick rotations to back post.
- Car recommendations: Merc (big block), Breakout (clear power), Octane.
- Key skills: Shadow defense, saves, clears, power clears.
- Primary objective: Stay farthest back in rotation, cover goal if two teammates are forward, collect big boosts.
- Playstyle: Conservative positioning, waiting for opponent mistakes, long clears.
- Car recommendations: Any tall hitbox.
- Key skills: Patience, aerial saves, fast recoveries.
- Example 3v3 composition: Octane (midfielder), Dominus (striker), Merc (defender). The Octane handles quick rotations and 50/50s, Dominus provides powerful flicks in attack, Merc guards the net with massive coverage.
- In 2v2: Often both use Octane for consistency, or Octane + Dominus for flick plays.
- 1v1: Octane or Dominus is most popular due to balanced stats.
#### 2. Dominus Hitbox
#### 3. Plank Hitbox
#### 4. Breakout Hitbox
#### 5. Hybrid Hitbox
#### 6. Merc Hitbox
---
Roles on the Field
Unlike class-based games, Rocket League roles are fluid and dynamic. Players rotate between these positions based on context. Common roles:
#### Striker / Forward
#### Midfielder / Playmaker
#### Defender / Sweeper
#### Third Man / Goalie
---
Team Synergy
A balanced team typically uses a mix of hitbox types to cover all situations:
Remember: skill and teamwork matter far more than hitbox choice. Pros have reached top ranks using every hitbox type. The best "character" is the one you feel most comfortable with. Experiment with different bodies in Free Play to find your fit.
---
Unlock Conditions Summary
| Hitbox Type | Free Starter | Common Drops | Rocket Pass | DLC/Trade |
|---|---|---|---|---|
| Octane | Yes (Octane) | Octane ZSR, Takumi | Fennec | Fennec RP? |
| Dominus | No (was DLC) | Dominus GT | Some variants | Dominus (trade) |
| Plank | Paladin (free) | Mantis | Werewolf | Some exclusive |
| Breakout | Breakout (free) | Animus GP | Endo | Many |
| Hybrid | X-Devil (free) | Jäger 619 RS | Maverick | Many |
| Merc | Merc (free) | Road Hog | None | Scarab (trade) |
---
Recommended Builds (Cosmetic Only)
Since there is no performance equipment, "builds" refer to visual customization. Consider:
- Boost: Short vs. long trail; no effect on gameplay.
- Wheels: Weightless; pick what looks good.
- Decal: Flashy or clean.
- Goal Explosion: Never affects match outcome.
Pro players often use simple, non-distracting designs to stay focused.
---
In summary, Rocket League’s characters are your car’s hitbox shape, and your role is defined by your decisions on the pitch. Master your chosen hitbox, learn rotation fundamentals, and you can contribute to any team. For detailed skill mechanics, refer to the Character Skills section elsewhere in this guide.
Cheats & Secrets
Cheats & Secrets Guide for Rocket League
Important Note: No Traditional Cheat Codes
Rocket League does not feature any developer-supported cheat codes, console commands (outside of custom training), or unlock codes that grant gameplay advantages. All official content is accessed through standard progression, DLC purchases, or the Rocket Pass. However, the game is rich with intentional Easter eggs, hidden references, and secret details that pay homage to gaming culture and Psyonix's history. This guide covers every known legitimate secret and Easter egg.
---
Easter Eggs & Hidden References
1. Stadium Easter Eggs
Each arena contains subtle nods to real-world locations, other games, and Psyonix’s own history.
- DFH Stadium (Day & Night) – Look at the large scoreboard in the center of the arena. On the screen, you will see a small, scrolling text that reads “Psyonix” and “Rocket League” in a subtle green font. In the night variant, the billboard on the left side of the pitch displays the SARPBC (Supersonic Acrobatic Rocket-Powered Battle-Cars) logo.
- Utopia Coliseum – A giant “Psyonix” sign is mounted on the back wall behind the goal. It is only visible when your camera angle allows, but it’s a clear developer signature.
- Neo Tokyo – The oversized video screens on the sides of the arena occasionally show the Psyonix logo and a silhouette of a car doing an aerial flip.
- Champions Field (Standard) – The central stadium has a banner with the RLCS (Rocket League Championship Series) logo, but if you look closely in the upper rafters, you will spot a small “Psyonix” text that appears only during replays.
- Salty Shores – On the beach near the water, there is a hidden treasure chest (non-interactive) and a faint “SARPBC” carved into a rock near the halfpipe.
- Wasteland (Night) – A dilapidated sign on the edge of the track reads “Mad Max” style but actually says “Psyonix”.
2. Item Easter Eggs
Many in-game items are direct references to other franchises or inside jokes.
| Item Type | Item Name | Reference / Secret |
|---|---|---|
| Antenna | Flag of Psy | A flag bearing the same “Psyonix” eye logo found in the original SARPBC game. Unlockable as a random drop or tradeable. |
| Antenna | SARPBC | The antenna is a miniature version of the first game’s logo. |
| Topper | Mr. Hot Dog | A hot dog in a bun, a nod to the classic “Hot Dog” joke from the SARPBC community. |
| Topper | Portal Sentry Turret | Based on the turret from Valve’s Portal series. It even has a glowing red eye. (Licensed collab, but unobtainable since 2021; legacy item.) |
| Wheels | Cog | The gear-like design references the Steam platform’s cog icon. |
| Wheels | Zomba | The spinning effect is a homage to the “Tron” identity discs. The name is a portmanteau of “Zombie” and “Humba”. |
| Decal | Aftershock | The car itself is a tribute to the original SARPBC roster. The decal repeats the SARPBC logo. |
| Decal | Rocket League | The standard decal for every car displays the game’s logo, but on the Octane, the logo is replaced with a tiny “Psyonix” when viewing at certain angles. |
| Rocket Boost | Butterfly | The wing-shaped exhaust trail is a subtle nod to the Japanese anime Neon Genesis Evangelion (A.T. Field). |
| Goal Explosion | Fireworks | The explosion pattern mimics the classic “fireworks” Easter egg from older games like Super Mario Kart. |
| Player Anthem | Stayin’ Alive | The licensed track by Bee Gees is a hidden joke related to the frequency of sudden death overtime situations. |
3. Developer-Intended Secrets
- SARPBC Car Referents: All cars from Psyonix’s previous game (e.g., Aftershock, Zippy, Gizmo, Backfire, Triton) are available as fully playable vehicles in Rocket League. They are considered “legacy” content and are obtainable as base game items (no longer tradeable after free-to-play update).
- The “4-2-3-1” Formation Trick: In private matches, setting the mutator “Game Speed” to “Slow” and “Boost” to “Unlimited” while using the “Cubed Ball” creates a bizarre, almost puzzle-like experience. This is not a cheat but a developer-sanctioned sandbox for goofy play (often used by content creators).
- Secret Loading Screen Text: On the initial loading screen (before the main menu), the very faint text “Rocket League – Powered by Psyonix” appears for a split second. This is intentional, though many players never notice it.
- “Stocked” (PS4/PS5): Equip a complete set of items from the same Crate type (e.g., all items from Player’s Choice Crate). No longer obtainable due to Crate removal.
- “Good Friend”: Play a match with a player on your friends list. Simple, but often missed.
- “Rocket Repo” (Steam): Customize a car with only items from the “Rocket Pass”.
4. Hidden Achievements / Trophies
All achievements in Rocket League are visible from the start, but a few are community-touted as “secret” because they are especially challenging or obscure:
> Note: There are no in-game console commands or menu codes that unlock hidden content. Any claims of “cheat codes” for infinite boost, invincibility, or secret cars are false. Rocket League relies on skill-based progression and cosmetic microtransactions only.
---
Conclusion
Rocket League is a cheat-code-free environment, but it rewards observant players with dozens of Easter eggs, nostalgic references, and developer in-jokes. The most rewarding secrets are the subtle nods to Psyonix’s earlier work (SARPBC) and the numerous pop-culture tributes scattered across arenas and items. For the ultimate secret, simply master aerial mechanics – that is the game’s true hidden gem.