Rust
## Game Introduction ### Genre **Rust** is a hardcore multiplayer survival game that blends elements of **open-world sandbox**, **first-person shooter**, and **crafting/building** genres. It emphasizes player-driven conflict, resource management, and persistent world decay. ### Developer and Publi...
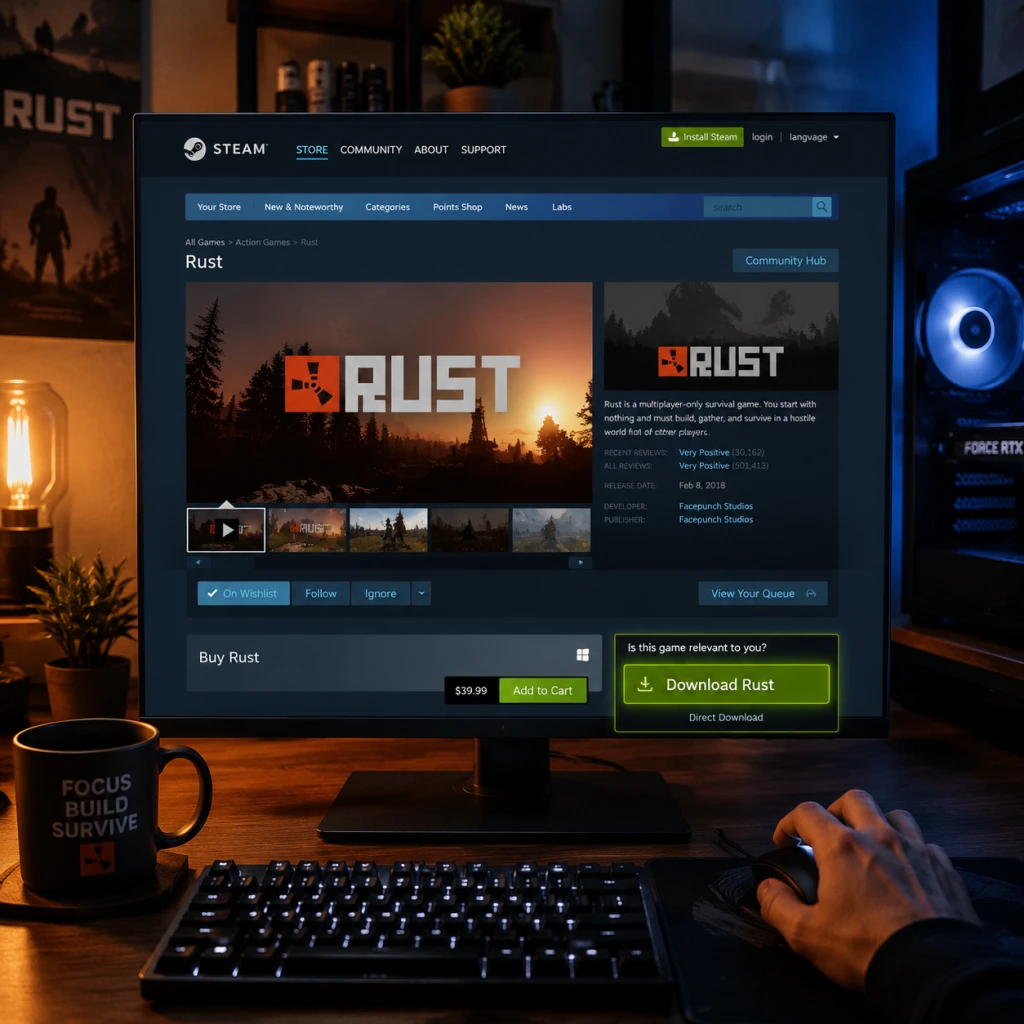
Download & Installation
Introduction
This guide covers the official, legitimate methods for downloading and installing Rust (both the PC version and Rust Console Edition). Rust is a multiplayer survival game developed by Facepunch Studios (PC) and published by Double Eleven (console). The PC version is available exclusively on Steam; console versions are available on PlayStation 4, PlayStation 5, Xbox One, and Xbox Series X|S. There is no version for Nintendo Switch, Epic Games Store, or mobile devices.
---
Platforms Overview
| Platform | Store | Version Notes |
|---|---|---|
| PC (Windows) | Steam | Full game; requires Steam client |
| PlayStation 4/5 | PlayStation Store | Rust Console Edition (separate from PC) |
| **Xbox One / Series X | S** | Microsoft Store |
---
System Requirements
PC (Steam)
Minimum:
- OS: Windows 10 64-bit (version 1909 or newer)
- CPU: Intel Core i7-3770 / AMD FX-9590 or better
- RAM: 10 GB
- GPU: Nvidia GeForce GTX 670 2GB / AMD Radeon HD 7870 2GB or better
- DirectX: Version 12
- Storage: 30 GB available space (SSD recommended)
- Network: Broadband internet connection
- OS: Windows 11 64-bit
- CPU: Intel Core i7-8700K / AMD Ryzen 5 3600X
- RAM: 16 GB
- GPU: Nvidia GeForce GTX 1080 8GB / AMD Radeon RX 580 8GB or better
- DirectX: Version 12
- Storage: 30 GB SSD
- Network: Broadband internet connection
Recommended:
PlayStation 4 / PlayStation 5
| Console | Storage Required |
|---|---|
| PS4 | ~30 GB |
| PS5 | ~30 GB (uses SSD) |
Xbox One / Xbox Series X|S
| Console | Storage Required |
|---|---|
| Xbox One | ~30 GB |
| Xbox Series X | S |
---
Download & Installation: PC (Steam)
Step 1: Create a Steam Account
1. Go to [store.steampowered.com](https://store.steampowered.com).
2. Click Login → Join Steam.
3. Follow the registration instructions (email verification required).
Step 2: Install the Steam Client
- Download the Steam installer from the official site.
- Run the installer and follow on-screen prompts to install Steam.
- Launch Steam and log in.
- Rust is a paid game (typically $39.99 USD, often on sale).
- In Steam, go to Store → search for Rust.
- Click Add to Cart → complete purchase via any accepted payment method.
- Once purchased, the game will appear in your Library.
- In your Library, find Rust.
- Click Install.
- Choose installation directory (default is `C:\Program Files (x86)\Steam\steamapps\common\Rust`). SSD is strongly recommended.
- Click Next → the download starts. The game is ~25–30 GB.
- Wait for download and installation to complete (Steam automatically decompresses files).
- Rust uses Easy Anti-Cheat (EAC). Steam will install EAC automatically during first launch.
- On first launch, you may see a prompt to install EAC; accept it.
- Rust will then update shaders and verify game files.
- You will be asked to choose language and video settings. Adjust as needed.
- Create a character and start playing.
- You must have a PlayStation Network (PSN) account. If not, create one via console or [playstation.com](https://www.playstation.com).
- Ensure your console is connected to the internet.
- On your console, go to the PlayStation Store.
- Search for Rust Console Edition.
- Select the edition (Standard or Deluxe) and purchase.
- After purchase, the game will start downloading automatically. Alternatively, you can manually start the download from your library.
- The download size is ~30 GB. Ensure you have adequate free space.
- Download and installation happen in the background.
- Once complete, you can launch the game from the home screen.
- On first launch, Rust Console Edition may prompt for optional updates (e.g., server lists).
- Accept the license agreement.
- Configure audio, video, and control settings.
- The game will initialize (may take a few minutes).
- Sign in with your Microsoft / Xbox Live account. If you don’t have one, create it via console or [xbox.com](https://www.xbox.com).
- Ensure your console is connected to the internet.
- Open the Microsoft Store on your Xbox.
- Search for Rust Console Edition.
- Choose the desired edition (Standard, Deluxe, or Ultimate) and purchase.
- The game will be added to your library and begin downloading automatically.
- The download is ~30 GB. Keep enough free space.
- Installation proceeds in the background. You can check progress in My games & apps.
- Once installed, the game tile will appear on your home screen.
- Launch the game.
- Accept any terms and updates.
- Adjust settings (graphics, controls, audio).
- The game will connect to official servers.
- Error: EAC not installed or fails to launch.
- The game requires ~30 GB free. Even after download, installation may require additional temporary space.
- Fix: Free up space by deleting unnecessary files or moving the install drive. Use Disk Cleanup on Windows.
- Some antivirus software may flag Rust executable or EAC as a threat.
- Fix: Add exceptions for `Rust.exe` and `<Steam folder>\steamapps\common\Rust\EasyAntiCheat\`.
- Fix: Change download region in Steam Settings → Downloads → Download Region (choose a different nearby region).
- Restart Steam. Alternatively, clear download cache: Steam Settings → Downloads → Clear Download Cache.
- PS4/PS5: If download stops, go to Notifications → Downloads and resume. Restart console if needed.
- Xbox: Try a hard reset (hold power button for 10 seconds). Check network connection.
- PC: In Steam, right-click Rust → Properties → Installed Files → Verify integrity of game files.
- Console: Delete the game and reinstall from your library (your purchased license is tied to your account, no need to buy again).
- Ensure your system meets requirements. Update graphics drivers (Nvidia, AMD, Intel).
- In-game video settings: reduce Graphics Quality, Shadow Quality, Draw Distance, and disable Motion Blur or Bloom.
- PC:
- Console:
- General:
- Storage Space: The game requires approximately 30 GB on all platforms. After updates and future content, the size may increase; keep at least 10 GB buffer.
- Account Requirements: You must have a separate paid account per platform (Steam, PSN, Xbox Live). Game licenses are not transferable.
- Updates: Rust receives large monthly updates (First Thursdays). Ensure you have enough bandwidth and disk space for updates.
- Offline Mode: Rust is an always-online game. No offline single-player mode exists.
- PC: [Rust Community Support](https://rust.facepunch.com/support)
- Console: [Double Eleven Support](https://double11.com/support)
Step 3: Purchase / Add Rust to Your Library
Step 4: Download & Install
Step 5: First Launch Setup (EAC)
---
Download & Installation: PlayStation (PS4 / PS5)
Step 1: PlayStation Network Account
Step 2: Purchase Rust Console Edition
Step 3: Installation
Step 4: First Launch
---
Download & Installation: Xbox (One / Series X|S)
Step 1: Xbox Live Account
Step 2: Purchase Rust Console Edition
Step 3: Installation
Step 4: First Launch
---
Common Installation Errors and Fixes
1. Easy Anti-Cheat (EAC) Errors on PC
- Fix: Right-click Rust in Steam → Properties → Installed Files → Verify integrity of game files. This reinstalls EAC.
- Alternatively, navigate to `<SteamFolder>\steamapps\common\Rust\EasyAntiCheat` and run the EAC installer manually (`EasyAntiCheat_Setup.exe`).
2. Insufficient Disk Space
3. Antivirus Interference
4. Steam Download Stuck / Slow
5. Console Download Errors
6. Corrupted Game Files
7. Low FPS or Performance Issues After Installation
---
Post-Installation Verification
After installation, perform these checks to ensure the game runs correctly:
- Launch Rust from Steam. If you get any error messages, run a file verification.
- Open the in-game console (F1) to check for missing assets or script errors.
- Try joining a server (e.g., official Facepunch server). If you cannot connect, check firewall/antivirus settings.
- Ensure the game updated to the latest version (check for updates via console menu).
- Join a server to test connectivity. If stuck on connecting, restart the game.
- Verify that the game sound works, controls are responsive, and you can see the main menu.
- If you encounter persistent crashes, reinstall the game or contact support.
---
Additional Notes
---
If you encounter any issues not covered here, visit the official support channels:
Happy surviving!
Game Introduction
Game Introduction
Genre
Rust is a hardcore multiplayer survival game that blends elements of open-world sandbox, first-person shooter, and crafting/building genres. It emphasizes player-driven conflict, resource management, and persistent world decay.
Developer and Publisher
- Developer: Facepunch Studios (PC version) — the studio behind the original Garry's Mod. The console version is co-developed by Double Eleven.
- Publisher: Facepunch Studios (self-published on all platforms).
- Original Early Access (PC): December 11, 2013 (Steam Early Access).
- Full Release (PC): February 8, 2018.
- Console Edition (Rust Console Edition): May 21, 2021 (PlayStation 4, Xbox One, and later optimized for PS5/Xbox Series X|S via backward compatibility).
- PC: Windows, macOS, Linux (via Steam).
- Console: PlayStation 4, PlayStation 5 (backward compatible), Xbox One, Xbox Series X|S (backward compatible).
- Note: No mobile or Nintendo Switch versions exist. Cross-play is not available between PC and console.
- Unforgiving Survival Mechanics: Players must manage hunger, thirst, radiation exposure, body temperature, and health. Death is permanent — you lose everything on your person (except items in secure storage).
- Player-Driven Conflict and Cooperation: The game’s heart is its social dynamics — form a clan to build fortified bases, raid enemy compounds, and dominate the server, or go solo as a stealthy scavenger. Trust is rare; betrayal is common.
- Deep Crafting and Base Building: Gather resources (wood, stone, metal, sulfur) to craft tools, weapons, armor, and complex structures. Build from simple shacks to multi-story, automated fortresses with traps and turrets.
- Procedurally Generated Maps: Every server wipe (usually monthly or bi-weekly) generates a new, unique map with varied terrain, monuments, and resource distribution, keeping the game fresh.
- No Safety Net: There are no save points, checkpoints, or safe zones (except the tutorial area, which is limited). PvP is enabled everywhere, all the time.
- Official Servers: Run by Facepunch, mostly vanilla settings (default gather rates, decay, etc.). Split into low, medium, high, and “softcore” (where sleeping bags are protected from looting) population servers.
- Community Servers: Player-run servers with custom configurations — faster gather rates, PvE-only (no player damage), roleplay (RP), modded (plugins like teleport, shops, mini-games), and creative (build without resources).
- Modded/Third-Party Servers: Use Oxide (now Carbon) modding framework. Examples: “2x” gather, “1000x” modded, battle royale-type modes, etc.
- Console Edition Servers: Similar structure but limited to official and community servers. No full modding support on console.
- Training/Combat Tags: Separate servers for aim practice (Combat Tag) where death has no penalty.
- Online Only: Rust is a persistent, multiplayer-only game. There is no offline/single-player mode. Even on private servers, you must be connected to the internet.
- No Local LAN: All server connections require internet access. However, you can host your own server (PC) on a dedicated machine or rent one, allowing you to play with friends privately — but still online.
- Server Wipes: Most official servers wipe player data (blueprints, inventory, and sometimes map) every month or every two weeks. This prevents permanent domination and forces fresh starts.
- Skin Packs and Instrument Packs: Cosmetic DLC that includes weapon wraps, building skins, and musical instruments (e.g., guitar, bagpipes, piano). These do not affect gameplay.
- Rust+ Companion App: Free mobile app that lets you monitor your base status (door open/alarms) and control smart devices (lights, alarms) if you have the appropriate in-game electrical components.
- No Season Pass or Battle Pass: Facepunch has avoided pay-to-win or subscription models. All gameplay-affecting features are free.
Release Timeline
Platforms
Story Overview and Setting
Rust does not have a traditional narrative or campaign. The setting is a post-apocalyptic island (or a procedurally generated map) where players awaken naked, alone, and with only a rock and a torch. The world is littered with the ruins of a collapsed civilization — abandoned monuments, military tunnels, power plants, and makeshift settlements. The lore is minimal and emergent, told through environmental details (e.g., radioactive zones, crashed helicopters, and roaming scientists) rather than scripted storylines. The driving force is survival against nature, radiation, hunger, thirst, and other players.
Main Characters
There are no predefined characters in Rust. Every player creates their own identity through in-game actions, clothing, weapons, and reputation. The “character” is your customizable survivor — a nameless, voiceless avatar whose only backstory is the moment they wake up on the beach.
Core Appeal
Target Audience
Rust is designed for hardcore survival enthusiasts who enjoy high-stakes PvP, endless replayability through wipes, and emergent storytelling. It appeals to players who have patience for steep learning curves, are comfortable with hours of grinding and being killed by others, and enjoy the rush of raiding or defending a base. It is not suitable for casual gamers or those who prefer single-player experiences or cooperative-only play without threat.
Game Modes
Online / Offline Support
DLC / Expansion Overview
Rust does not have major paid expansions that add new regions or storylines. Its post-launch content is delivered through free updates (bi-weekly patches) that introduce new monuments, weapons, vehicles, mechanics, and QoL improvements.
What is available for purchase:
What Makes Rust Unique
1. Total Player Freedom with Total Vulnerability: No safe zones, no NPC vendors, no quests — the only rules are physics, the game’s decay system, and other players’ decisions.
2. The Wipe Cycle: Unlike most survival games (e.g., Minecraft, The Forest), progress is periodically erased. This keeps competition fair and forces players to adapt to new map layouts and shifting alliances.
3. Complex Base Raiding Mechanics: Use explosives (C4, rockets, satchel charges) or clever bypasses (e.g., building high to jump across, using ladders) to breach fortified bases. Defenders use traps (shotgun traps, landmines), electricity (auto-turrets, sensors), and honeycombing.
4. Persistent World Even When Offline: Your base remains in the world while you’re away. Other players can raid it, loot it, or grief it. This creates real consequences for downtime.
5. No Tutorial Hand-Holding: The game intentionally leaves you to figure out crafting, survival, and social dynamics through trial and error (or online guides). The first few hours are brutal but memorable.
6. Active Development and Community: Facepunch releases weekly or bi-weekly patches with new content, balance changes, and bug fixes. The community creates mods, custom maps (via Map Editor on PC), and extensive content on YouTube and Twitch.
In summary, Rust is a relentless, uncompromising survival sandbox where the only constant is change — and the biggest threat is always another player.
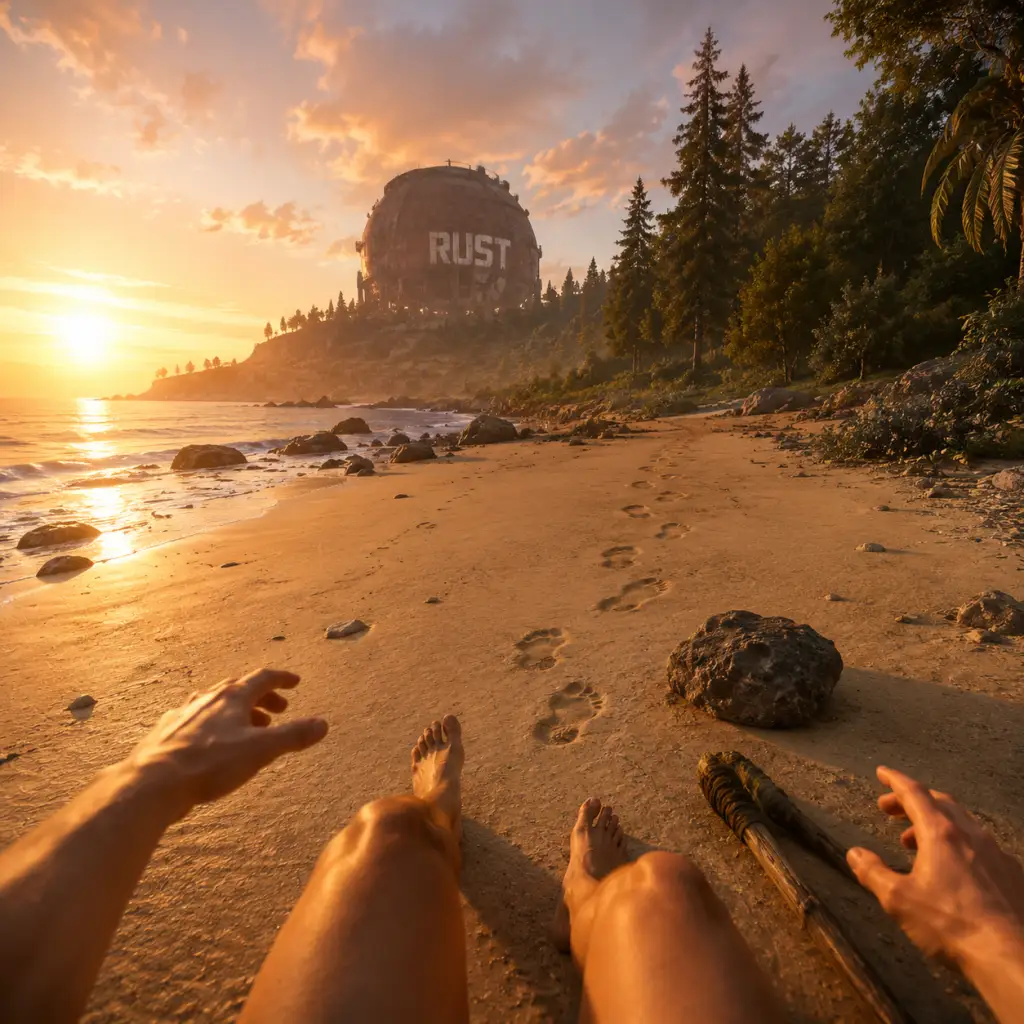
Getting Started
Introduction
Welcome to Rust, a brutal multiplayer survival game where you wake up naked on a massive island with nothing but a rock and a torch. The first hour is overwhelming—this guide walks you through every step for PC and Console Editions (Xbox, PlayStation). You will die a lot, but smart early moves set you up for survival.
---
First Hour Walkthrough (Step by Step)
1. Spawn and Initial Actions (Minutes 0–2)
- Take a breath. You spawn on a beach. Press Tab (PC) / Start/Options (console) to open inventory. You have: 1 Rock, 1 Torch (if you chose to spawn with one), and a Burlap Sack (used for sleeping bag).
- Punch a tree (left-click) until you get 3–5 Wood. Do not attack animals yet.
- Craft a Stone Hatchet: Press Q (PC) / Up on D-Pad (console) to open crafting menu. Find "Stone Hatchet" – requires 200 Wood. Click craft. You will need to gather more wood; keep punching trees until you have ~300 Wood.
- Craft a Stone Pickaxe (300 Wood). These tools let you gather resources faster.
- Gather Wood from trees using your hatchet. Collect at least 500 Wood total.
- Gather Stones (small rocks on ground) with pickaxe – aim for 200 Stones.
- Avoid players – stay near shoreline, listen for footsteps/gunshots. If you see someone, run opposite direction.
- Craft a Sleeping Bag (requires 30 Cloth). Cloth comes from hemp plants (tall green plants with yellow tops). Harvest them with hatchet – you need 30 cloth total. Alternatively, kill animals and use their fat/flesh to make cloth (but animals are dangerous early).
- Place the sleeping bag (hold E on PC / Triangle or Y on console while bag is in hotbar). Find a hidden spot (inside a bush or behind a rock) – do NOT place in open field. Your bag is your respawn point. Crucial: If you die, you can respawn at the bag if it hasn't been destroyed.
- Gather more: 1,000 Wood (total) and 500 Stones.
- Craft a Building Plan (75 Wood) from crafting menu.
- Craft a Hammer (100 Wood) – needed to upgrade/repair.
- Place a foundation: Equip building plan, left-click to place a square foundation on flat ground. Right-click to rotate.
- Place wooden walls and a door frame (you need a door). Use hammer to upgrade to wood tier (but start with twig if low on wood).
- Craft a Wooden Door (300 Wood, 2 Metal Fragments – you can get metal frags from recycling trash or mining nodes, but early on you may skip door and use a wood barricade). For simplicity: place a Wooden Barricade (100 Wood) to block entrance temporarily.
- Place a Tool Cupboard (TC) – craft with 1000 Wood, 500 Stone – inside your base. This claims the area. Keep it locked (key lock: 5 Wood per lock). Authorize yourself by holding E on TC.
- Upgrade walls to wood using hammer (costs wood). Upgrade tool cupboard to wood.
- Place a furnace (craft from 100 Wood, 200 Stone) inside base to smelt ore.
- Gather metal ore (gray rocks with yellow specks) and sulfur ore (yellow rocks). Smelt in furnace (200 wood per cycle). You need metal frags for tools.
- Craft a bow and arrows (requires wood, cloth, stone). Bows are your first ranged weapon – essential for hunting animals and defending.
- Avoid roaming at night (full dark unless you have a light). Stay inside base or near your sleeping bag.
- Build a 2x1 base (2 foundations, walls, roof). Upgrade to wood or stone.
- Place a large box (craft with 1000 Wood) for storage.
- Gather at least 2000 Wood and 1000 Stone for upgrades.
- Listen for sound cues – you may hear airdrops or cargo plane – avoid until you have weapons.
2. First 5 Minutes: Secure Basic Resources
3. First 10 Minutes: Make a Sleeping Bag
4. First 15 Minutes: Build a Shelter (1x1 Wooden Base)
5. First 30 Minutes: Expand Farm and Prepare for Night
6. First Hour End: Secure Next Steps
---
Character Creation
Rust has no traditional character creation. Your character is a random generated male/female model. You can change gender/face by pressing F1 (PC) and typing `skin.change` or by dying and respawning with a new roll (but your cosmetic items from DLCs stay). Console: No customization – purely random on each spawn.
---
Controls (All Platforms)
PC (Keyboard & Mouse)
| Action | Key |
|---|---|
| Move | W/A/S/D |
| Look/Attack | Mouse |
| Jump | Space |
| Crouch | Left Ctrl |
| Sprint | Shift |
| Interact | E |
| Inventory | Tab |
| Crafting | Q |
| Map | G |
| Voice Chat | V (push-to-talk) |
| Reload | R |
| Swap weapon | Scroll wheel or 1-9 |
| Use item | Left-click on hotbar |
| Pickup | Hold E on ground items |
Console (Xbox & PlayStation)
| Action | Xbox | PlayStation |
|---|---|---|
| Move | Left stick | Left stick |
| Look | Right stick | Right stick |
| Jump | A | X |
| Crouch | B | Circle |
| Sprint | Left stick click | L3 |
| Interact | X | Square |
| Inventory | Menu (Start) | Options |
| Crafting | Up on D-Pad | Up on D-Pad |
| Map | View (Back) | Touchpad |
| Voice Chat | Hold RB (push-to-talk) | Hold R1 |
| Reload | Y | Triangle |
| Use item | RT (right trigger) | R2 |
| Pickup | Hold X | Hold Square |
| Swap weapons | D-Pad left/right | D-Pad left/right |
UI Overview
- Inventory screen (Tab/Start): Left shows your clothing/armor slots; right shows backpack. Bottom-right is crafting menu.
- Hotbar: Bottom row of your screen – hold items by pressing number keys or D-Pad. Active item highlighted.
- Health bar: Top-left – showing health (red), hunger (brown), thirst (blue). Keep them above 30%.
- Radiation indicator: Blue bar appears if you are near radtowns (monuments) – get out quickly or wear hazmat.
- Compass: Top of screen – essential for navigation and callouts.
- Tool Cupboard UI: When near your TC, you see upkeep status – keep it filled with resources or base decays.
- Death screen: Shows cause of death and respawn options (campfire, sleeping bag, random beach).
- Don't attack bears or wolves – they will kill you in 2-3 hits.
- Don't build near monuments (radtowns, launching site) – high player traffic.
- Don't trust strangers – most will kill you on sight.
- Don't carry all resources – store them in base immediately.
- Don't sleep near campfire – others can cook you (friendly fire).
- Don't ignore hunger/thirst – eat berries, drink from rivers (hold E).
- Don't waste cloth on clothing early – save for sleeping bags.
- Don't go deep inland without weapons – more players and animals.
---
Essential Early Objectives
1. Secure a sleeping bag within 5 minutes.
2. Build a small shelter (1x1 with door) within 15 minutes.
3. Place a Tool Cupboard to claim land and lock it.
4. Craft a bow and 50 arrows – for defense and hunting.
5. Gather 500 Wood, 200 Stone, 30 Cloth as baseline.
6. Build a furnace and smelt metal ore for code locks (requires 250 metal frags).
7. Learn to use voice chat to negotiate or join a group (solo is hard).
---
What to Do First (First 5 Minutes Priority List)
1. Gather Wood (punch trees).
2. Craft Stone Hatchet and Pickaxe.
3. Find Three Hemp plants for cloth.
4. Craft Sleeping Bag and place in secure hiding spot.
5. Collect 1000 Wood and 500 Stone.
6. Build a 1x1 twig base with door frame and wooden door (or barricade).
7. Place Tool Cupboard inside and lock it.
---
What to Avoid (Beginner Blunders)
---
Early Resource Priorities (Ranked)
1. Wood – for tools, base, furnace, upkeep.
2. Stone – for base upgrade (stone tier), furnace.
3. Cloth – for sleeping bags, bow, bandages.
4. Metal Fragments – for better tools, doors, code lock.
5. Sulfur – for gunpowder (later) – stash but don't refine early.
6. Hemp/Plants – for cloth and healing tea (advanced).
7. Food – mushrooms, corn, or kill animals (risk). Better to eat berries early.
---
Common Beginner Mistakes (and Fixes)
| Mistake | Fix |
|---|---|
| Building base on the beach (near spawn) | Move inland after first bag. Beaches are camped. |
| Not locking Tool Cupboard | Craft a lock and authorize yourself immediately. |
| Sleeping bag placed outside | Always put bag inside base or hidden bush. |
| Wasting time fighting nakeds | Avoid PvP until you have weapons and armor. |
| Running across open fields | Stick to trees/rocks for cover. |
| Not listening for sounds | Learn to identify footsteps, gunshots, animals. |
| Forgetting to eat/drink | Watch your UI; eat berries or boil water. |
| Opening doors without checking | Peak through door first (hold E while looking). |
| Storing everything in one box | Spread loot across multiple boxes to limit loss on raid. |
| Attempting to raid offline | Focus on survival first; raiding requires explosives. |
Day-One Checklist
Before first night (20 minutes real time):
- [ ] Sleeping bag placed in safe location.
- [ ] 1x1 wooden base with door and tool cupboard placed.
- [ ] Tool cupboard locked and authorized.
- [ ] At least 500 Wood and 200 Stone stored.
- [ ] Crafted Stone Hatchet, Pickaxe, Bow, 50 Stone Arrows.
- [ ] Have a campfire (craft) and a water bottle (fill from river).
- [ ] Smelted 100 Metal Fragments for code lock (if possible).
- [ ] Placed a code lock on door (requires 250 metal frags?) – if not, lock with key lock.
- [ ] Avoided PvP and remained hidden.
- [ ] Expanded base to 2x1 stone walls and roof.
- [ ] Armed with bow and crossbow or pipe shotgun (if found scrap).
- [ ] Learned at least one primitive weapon blueprint (e.g., eoka pistol).
- [ ] Placed a second sleeping bag in a different area for backup.
- [ ] Located nearest recycler (at supermarket, mining outpost, etc.) to recycle trash for metal/tech.
- [ ] Gathered at least 2000 Wood and 1000 Stone for base upkeep.
- [ ] Unlocked the "Chainlink Fence" or "Watchtower" (not priority but nice).
- Play on a low-population or community server first (e.g., 50-100 players) to learn basics without constant death.
- Death is part of the learning curve. Don't rage quit.
- Join a team via Discord or in-game – solo is brutal.
- Watch YouTube starter guides for visual aids.
- Always have a backup sleeping bag – hide it somewhere else.
- Keep your base small and upgrade to stone ASAP – wood tools can break wood doors quickly.
After first night (within 2 hours):
---
Final Tips
Good luck survivor. You'll need it.
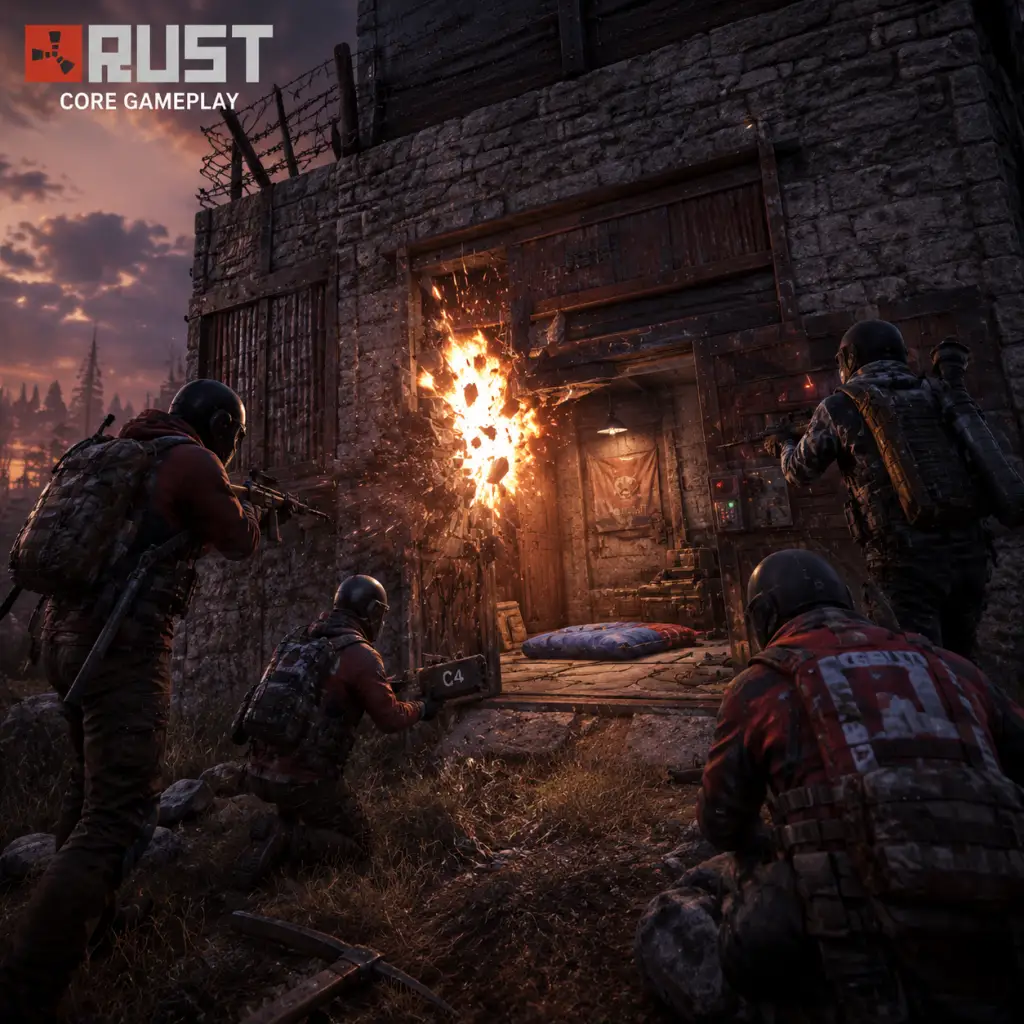
Core Gameplay
Core Gameplay Overview
Rust is a sandbox survival game with no predefined story or linear progression. Every player starts with nothing (a rock and a torch) and must gather resources, build shelter, craft tools, weapons, and defenses, while surviving against wildlife, radiation, and other players. The core loop: Gather → Craft → Build → Raid/Defend → Repeat. Progression is knowledge-based via a blueprint and scrap system, not by leveling a character. Player growth is tied to unlocking more advanced items through exploration and recycling.
---
Early Game (0–2 hours)
Goal: Secure a basic shelter, gather essential resources, and establish a primitive toolset.
Gameplay Loop
- Gather: Punch trees and rocks with your rock to collect wood, stone, and metal ore. Collect hemp for cloth.
- Craft: Build a stone hatchet and pickaxe (improves gathering speed). Craft a sleeping bag (respawn point), a wooden spear, and a campfire.
- Build: Place a tool cupboard (TC) to claim building privilege. Erect a small 1x1 or 2x1 wooden shack with a door and lock. Place your sleeping bag inside.
- Survive: Light a campfire to cook chicken or wolf meat, avoid bears and wolves at all costs. Stay away from rad towns (monuments) without proper gear.
- Combat: Only engage other nakeds (rock/stone) if necessary. Use primitive weapons (bow, spear) cautiously. Avoid fully geared players—they will kill you.
- First furnace (smelt metal ore into metal fragments).
- First code lock (secure your base from others).
- First bow and arrows (enables safe hunting and PvP from range).
- First blueprint (found in barrels or crates). Must research at a research table to unlock crafting permanently.
- Gather: Use metal tools or even salvaged tools for faster resource collection. Upgrade base walls from wood to stone or sheet metal using a hammer.
- Craft: Create a workbench (levels 1 and 2) to craft improved items. Craft revolvers, pump shotguns, crossbows, metal facemask/chestplate, and garage doors.
- Explore/recycle: Visit smaller monuments like the gas station, supermarket, or satellite dish. Use a recycler in the monument to turn components (e.g., springs, gears, propane tanks) into raw materials (metal frags, high quality metal, cloth).
- Blueprint progression: Scrap is the primary currency. Spend scrap at the workbench to “research” items you have not yet learned. Alternatively, use a research table if you have the item and enough scrap.
- Combat: Expect more PvP. Use mid-tier weapons: semi-auto rifle, Thompson, AK-47 (if you find/research). Armor should be at least roadsign or metal.
- Raiding: Build a simple raid base or use satchel charges (crafted with bean cans, gunpowder, and rope). Raid small stone bases to steal loot. Be careful—raiding expensive and time-consuming.
- Workbench Level 2 (requires 500 scrap to craft + a workbench L1).
- First garage door (stronger than wood/metal).
- First full hazmat suit (enables safe entry into rad zones without anti-rad pills).
- Unlocking metal walls and door (requires scrap research).
- First successful small raid (satchel raid on a neighbor).
- Log in, check base integrity. Repair any damage from offline raids or tool cupboards decay.
- Head to the nearest recycler monument. Bring a stack of components you’ve hoarded. Recycle everything: typical haul: 200+ scrap, 100 metal frags, some HQM.
- Return to base. Use scrap to research a Semi-Auto Rifle (SAR) at workbench (cost ~60 scrap if you have the item). Craft one or more.
- Gather sulfur from nodes (2000 sulfur + 2000 charcoal = 1000 gunpowder). Craft satchel charges (recipe requires 4 bean can grenades, 1 rope, 1 f1 grenade? Actually satchel: 4 beancan grenades + 1 rope. Need blueprint).
- Raid a two-story stone base by blowing through a stone wall (10 satchel charges needed). Collect loot: weapons, ammo, materials.
- Expand and upgrade your own base: add a honeycomb layer (double walls), build an airlock (double doors), install metal doors and garage doors.
- Gather: Focus on high-value resources: sulfur, high quality metal (HQM), and scrap. Use icepick or jackhammer for mining (faster). Build a quarry (requires fuel and low grade fuel) for passive resource generation.
- Craft: Workbench level 3 (required for AK-47, bolt action rifle, heavy armor, high-ex explosives). Craft C4 (requires tech trash, explosives, cloth, etc.) or rockets for raiding.
- Monuments: Dominate high-tier monuments like Launch Site, Military Tunnel, or the Oil Rig. Battle other players for elite loot (M249, rockets, etc.).
- Raiding: Use rockets (or C4) with recoil control to blow through armored walls. Raid multi-TC bases, externals, and large compounds. Use a supply of HV rockets for turret defense.
- Defense: Build honeycomb (multiple layers of walls), turrets (auto-turrets with shotgun shells), sam sites (if near launch site), and maintain a full repair bench. Use watchtowers and compound walls.
- Combat: Standard AK spray with aim cone and recoil control (learn the pattern). Use med sticks and syringes to heal mid-fight. Coordinate with team using voice chat (discord recommended).
- Workbench Level 3 (requires 1000 scrap to craft + a workbench L2).
- Research AK-47 blueprint (cost ~60 scrap if you already have the gun, or a lot of scrap).
- Craft first C4 (requires 4 explosives, 5 cloth, 1 tech trash).
- Build a turret defense system.
- Place a high external stone wall gate (external gate house).
- Your group controls a square of land. You have a main base (4x4 stone with metal floors, honeycomb on outer walls).
- Every player carries SAR or AK, hazmat or metal armor, meds, rad pills, and a water jug.
- Daily runs to Launch Site. Use red keycard to open elite crates in the launch tower (requires fuse, green and blue cards). Extract HQM, scrap, AKs, M249.
- Every evening, use the surplus sulfur to craft rockets for an upcoming raid on a rival group’s base. Use external TCs to protect your own base from griefing.
- Maintain a upkeep of resources (wood/stone/metal fragments) to keep base from decaying. Use a “resource pig” (furnace array) to smelt ore constantly.
- Gather: Nearly infinite resources if you control large monuments. Use clan alliances or trade routes. Scrap becomes less important as all BPs are learned by most active players.
- Craft: Mass-produce rockets (thousands of sulfur per raid). Craft auto-turrets with HQM. Build a “raid base” near enemy compounds with bunkers for safer raiding.
- Monuments: Contest oil rig events – extremely high risk, high reward. Use cargo ship if it spawns (large floating loot container).
- Raiding: Full-scale clan-on-clan raids using 20+ rockets, multiple breaching points, and combat while raiding. Use helicopters (minicopter) to air-drop into compounds (requires fast reflexes and piloting skill).
- Defense: Tetra-cobalt base design (multi-TC, honeycomb, shooting floor, double doors, and external walls with watchtowers). Use SAM sites to shoot down enemy mini-copters.
- Wipe preparation: As the last 24 hours approach, players often raid everything they can, troll, or simply go on a killing spree. Servers wipe monthly (map and/or blueprint). Endgame is the final push.
- Full blueprint completion (all useful items learned, maybe all BPs).
- Massive compound with external shell and internal main base.
- Quarries running 24/7.
- Full electricity system (solar panels, batteries, lights, traps).
- Successful defense against a massive raid (e.g., 30 players).
- Your clan of 10+ players decides to raid the largest enemy base. You build a raid base with sleeping bags and supplies near their compound. You craft 50 rockets, 10 C4, and a box of armored doors.
- The raid lasts 6 hours. You blow through four layers of honeycomb, deal with auto-turrets, and finally reach their main loot room. You find 5000 HQM, dozens of AKs, and a full set of high quality clothing.
- After the raid, you demolish their base to grief them. They either leave the server or ally with others.
- In the final 12 hours before wipe, you might transfer loot to a secondary base, or go on a rampage killing everyone you see. Many players use the end of wipe as an opportunity to practice PvP without consequences.
- After wipe, everything resets: map, blueprints (if blueprint wipe). You start again from scratch. This is the core Rust experience: endless cycles of building, raiding, and rebuilding.
- Scrap: Primary currency for research, crafting workbenches, and buying items at bandit camp/outpost. Gained from barrels, crates, recyclers.
- High Quality Metal (HQM): Used for high-end items (metal armor, AK, etc.). Mined from nodes in arctic biome or recycled from components.
- Sulfur: Converted to gunpowder → ammunition or explosives. The main raiding resource. Gather from sulfur nodes.
- Components: Found in loot: springs, gears, metal blades, tech trash, etc. Recycled into raw materials or used in high-tier crafting.
- Player trading: Use bandit camp vending machines or player-placed shops (requires electricity). No unified market—open trade with voice is common.
- No traditional levels. Growth is knowledge-based via blueprints and personal experience (map knowledge, PvP skill, base design).
- Each BP learned stays until a forced blueprint wipe (every monthly or quarterly). You can learn almost everything with enough scrap.
- Character stats are fixed; health, stamina, movement speed are uniform. Skills come from item tier and player ability (aim, positioning, game sense).
- Health is 100 base; you can increase max health temporarily with items like med syringe (heals 35) or bandage (heals 10 over time). No permanent health boost.
- Rust has no NPC quests or official missions. The only “quests” are player-driven or spontaneous: kill a bear with a rock, survive a night in the arctic, build a base that survives a raid, or complete a monument puzzle (launch site, water treatment, train yard).
- Monument puzzles: Require keycards (green, blue, red) to access elite crates. These are the closest thing to structured progressive challenges. Example: Water Treatment requires green card + fuse → blue card → red card access to high loot room.
- Events: Helicopter (patrol, transport), cargo ship, oil rig, chinook crate, and locked crate events. These are dynamic PvE/PvP encounters with high rewards. No quest log.
- No final boss or achievement. The true endgame is server domination or survival until wipe. Clans build megabases, control resources, and fight other clans. On official servers, there is no admin intervention. On community/modded servers, rules may differ.
- Many players consider the endgame to be when they have learned all desired blueprints, have a secure base, and focus on raiding/piracy. This state can last for weeks until the next wipe.
- Some players engage in roleplay (RP) on designated servers, adding their own endgame through events, economies, and stories.
Progression Milestones
Example Early Game Path
1. Spawn on beach. Punch two trees, collect 200 wood. Craft a stone hatchet.
2. Chop 500 wood, 300 stone. Craft a building plan, hammer, tool cupboard.
3. Find a flat area near water but not too close to major monuments. Place TC, build a simple 1x1 wooden foundation, walls, ceiling, door, lock.
4. Craft a sleeping bag inside. Bind your respawn point (press E on bag).
5. Smelt metal ore in a furnace. Craft a code lock, replace key lock.
6. Explore nearby roads and barrels for scrap, cloth, and low-tier components. Use bow to kill boar for cloth and food.
7. Find a research table in a dungeon or craft one (requires 50 scrap and 50 metal frags). Research your first weapon (e.g., double barrel shotgun blueprint) by placing it in the table with scrap.
---
Mid Game (2–10 hours)
Goal: Upscale base, unlock mid-tier weapons and armor, start engaging with monuments and raiding.
Gameplay Loop
Progression Milestones
Example Mid Game Session
---
Late Game (10+ hours)
Goal: Secure a heavily fortified base, obtain endgame weapons (AK-47, L96, M249), dominate monuments, and coordinate group raids.
Gameplay Loop
Progression Milestones
Example Late Game Strategy
---
Endgame (Wipe Cycle / 2-4 weeks)
Goal: Accumulate overwhelming resources, dominate the server, and prepare for the final wipe day. Endgame is about massive raids, counter-raiding, and server politics.
Gameplay Loop
Progression Milestones
Example Endgame Activities
---
Core Systems Reference
Economy
Character / Build Growth
Quests & Missions
Endgame Structure
---
Tips for Each Tier
| Tier | Tip |
|---|---|
| Early | Prioritize building a base with a code lock before exploring. Keep your first base small hidden in forest around a rock formation. |
| Mid | Always carry a tool cupboard (TC) in your inventory to place if you are raiding. Use the recycler often—components have more value as materials. |
| Late | Invest in turrets early; they deter offline raiders. Keep your primary weapon in your hotbar. |
---
This guide covers the fundamental core gameplay of Rust across all progression stages. Remember: every wipe is a new story. Adapt, improvise, and survive.
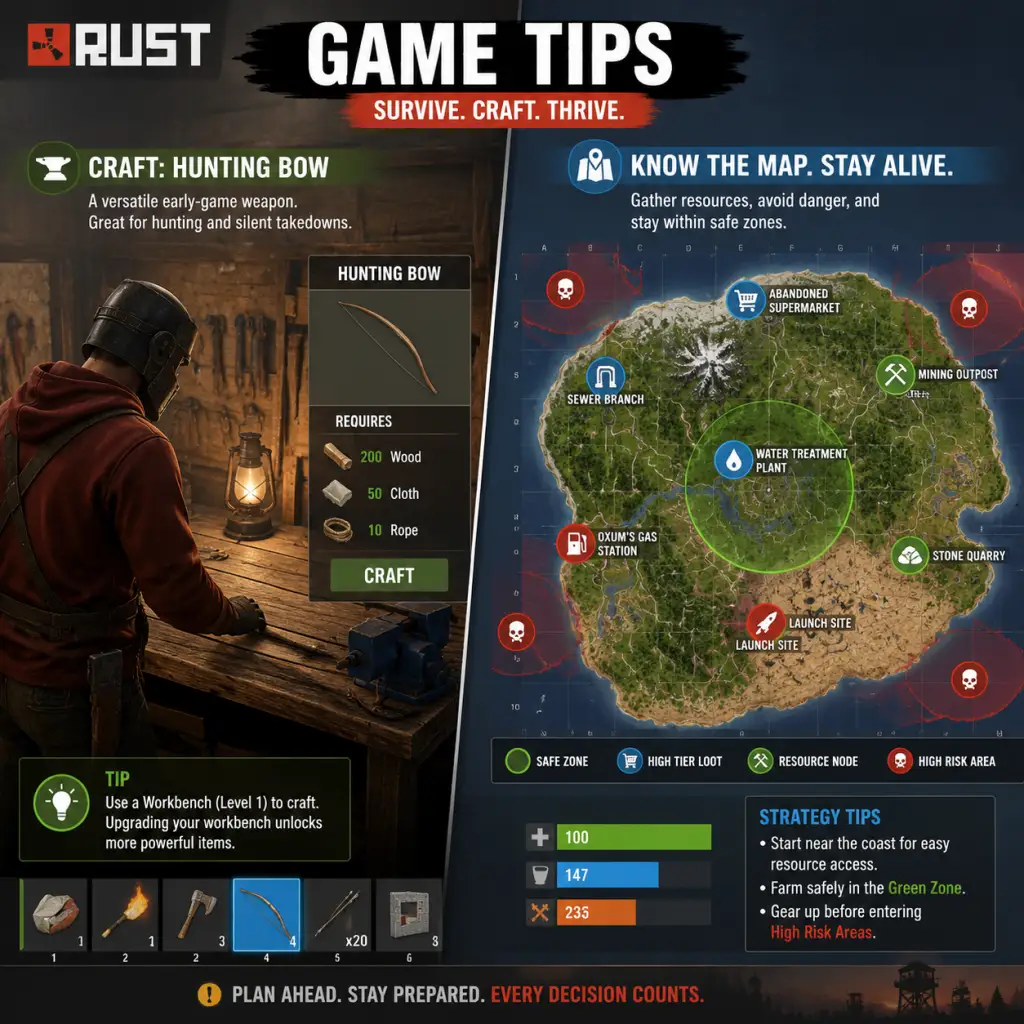
Game Tips
Game Tips for Rust
A comprehensive collection of tips for survival, progression, and dominance, organized by category and skill level.
---
Combat
1. Master recoil control – Every weapon has a unique spray pattern. Practicing on a static target (or in an aim train server) builds muscle memory. Use the "recoil compensation" technique: gently pull down and slightly to the side. Why it works: The game’s recoil is fixed; consistent practice lets you land headshots with full-auto sprays instead of tap-firing. When to use: Always in close-to-mid range engagements with SMGs (Thompson, MP5) or assault rifles (AK-47, LR-300).
2. Peeker’s advantage – When strafing out of cover, you see your enemy slightly before they see you due to latency. Use this by quick-peeking corners to gather info or bait shots. Why it works: Server netcode favors the mover. Rush enemies after they miss. When to use: Holding tight angles in monuments or base defense.
3. Aim for the head (but not always) – Headshots deal 2x damage, but the AK-47’s recoil makes them hard. Body shots are more reliable at range. Why it works: Consistency beats RNG. Land two body shots before attempting a headshot. When to use: Mid-range vs. geared players; close-range spray headshots.
4. Armor matters – Full metal facemask and chestplate reduce bullet damage by ~40%. Always prioritize these over clothing. Deep analysis: Even a cheap road sign jacket + coffee can helmet offers significant protection. Run with at least that before engaging geared players.
5. Use doors for cover – In a base raid or compound fight, open and close doors to peek corners. You can shoot through the gap while the door blocks return fire. Why it works: Doors are bulletproof and fast; you control the timing. When to use: Base defense or pushing into an enemy base.
---
Exploration
1. Know the map – Each server has a procedurally generated map (typically 3000-4000 size). Learn monument locations (Launch Site, Military Tunnels, Airfield) and their loot tables. Why it works: Efficient monument runs yield high-tier loot (guns, armor, components). When to use: Early game head to satellite dish or sewer branch for green card; late game focus on cargo ship or oil rig.
2. Radiation protection – Use hazmat suits or wooden armor + anti-rad pills. Radiation zones (nuclear reactor, sewers) require minimum protection. Deep analysis: Hazmat gives 100% radiation protection but low bullet defense; combine with a helmet if you expect PvP. The tier of radiation pills (red/blue) stack with gear.
3. The loot path – Follow a route that loops back to home. Example: Desert Road → junkyard → satellite → airfield. Avoid backtracking. Why it works: Minimizes travel time and risk of being caught on open roads. When to use: Every farming run; mark checkpoints on your map.
4. Listen for cues – Footsteps, gunshots, and raiding sounds give position info. Turn your audio up (Windows sound settings > loudness equalization off). Why it works: You can avoid fights or ambush others. When to use: Always; sound design is critical.
---
Resources
1. Tool efficiency – Use the right tool: Icepick (stone), Salvaged Sword (wood), Pickaxe (ore), Hatchet (trees). Also, pick up a chainsaw for rapid wood gathering (fuel expensive but fast). Why it works: Higher harvesting rate = faster node depletion. Each tool has optimal hit patterns.
2. Recycling – Never throw away components. A sign of an experienced player: they recycle everything they don’t need for scrap and raw materials. Deep analysis: A single sheet metal door gives 5 metal frags and 2 wood; accumulate for base upgrades. Use the recycler at monuments (Bandit Camp, Outpost) for safe recycling.
3. Farming routes – Mark all sulfur and metal nodes near your base. Go to snow biomes for more ore (rich nodes). Why it works: Sulfur is used for gunpowder; metal for armor and base walls. Snow biomes have denser node spawns.
4. Component spawns – Green card rooms (satellite, power plant) contain components like tech trash, coils, sewing kits. Use a green card + fuse + blue card for high-tier loot. When to use: After you have a workbench level 2, start monument runs for SAR, MP5, and armor.
---
Builds (Base Design)
1. The starter 2x1 – Stone walls, sheet metal door, airlock (double door). Honeycomb later with triangle foundations. Why it works: Easy to upgrade to metal, resistant to door raiding. The airlock prevents door campers from rushing you. When to use: First night.
2. External Tool Cupboards (TC) – Build a 1x1 stone bunker with a TC outside your main base, but within the TC radius. Deep analysis: This prevents others from building near you (including raid towers) and protects your main TC from being destroyed. Place them around your compound.
3. Honeycombing – Add layers of walls (usually triangles) around your core loot room. Each layer adds 250 HP for stone, 500 for metal. Why it works: Raiders must break through each layer, buying time for you to counter-raid or log in. When to use: After your core is stone, invest in honeycomb before upgrading to armored.
4. Raiding defenses – Use shotgun traps, turrets, and auto-turrets (requires electricity and ammo). Place traps inside loot rooms and hallways. Why it works: Most raiders skip shotgun traps if not expecting them; Auto-turrets scan for hostile players. When to use: Once you have electricity and scrap to craft.
5. The roof trap – Build a fake loot room on the third floor with cheap items; the real loot is in a hidden compartment near the ground floor. Deep analysis: Raiders often hit the highest floor first thinking loot is there. Bait them and defend from below.
---
Economy (Scrap & Trading)
1. Prioritize scrap – Scrap is the currency for research, workbenches, and buying items at outpost. Focus on farming roads for components (recycling gives scrap) and running monuments. Why it works: Without scrap you cannot progress past primitive stage.
2. Sell components – Bandit Camp and Outpost have vending machines where players sell items. Post your own shop for common items (explosive ammo, meds). Deep analysis: You can make profit by recycling cheap components and selling high-tier ones. Use the trade system to get items you lack without PvP.
3. Workbench upgrades – Spend scrap wisely: Level 1 - 75 scrap, Level 2 - 500 scrap, Level 3 - 3000 scrap. Focus on Level 2 first for SAR and semi-automatic pistol. Why it works: Level 2 unlocks the most used weapons and tools. Level 3 is endgame.
4. Tech Tree vs. Research – Researching an item costs 100% of its scrap value (up to 500); the tech tree costs a fixed route. For rare items (C4, rockets), the tech tree is cheaper. When to use: Tech tree for endgame; research for common items you find.
---
Progression (Blueprint & Workbench)
1. The first 30 minutes – Gather 500 wood, 200 stone, 1000 cloth (from hemp). Build a sleeping bag, tool cupboard, and stone base. Deep analysis: The sooner you claim a location with TC, the harder it is for others to build nearby. Place bag inside or hidden.
2. Blueprint tier progression – Typical order: Wooden spear → bow → crossbow → revolver → Python → SAR. Skip the pipe shotgun (inefficient). Why it works: Each tier gives you better range and damage. Crossbow + hand-made shells is a cheap door camper build.
3. Workbench library – Leave your workbench accessible (no walls obstructing) so you can craft and research. A 1x1 room with TC and workbench is sufficient early on. When to use: At all times.
4. Learn explosives early – Research explosive ammo (420 scrap) or C4 (2200) via tech tree. Explosive ammo is cheaper for door raiding. Deep analysis: Even if you don't raid, knowing the recipe allows you to defend against raiders (you can craft it if you find sulfur). When to use: After getting Level 2 workbench.
---
Survival
1. Manage temperature – Desert biomes cause heat; snow biomes cause cold. Carry a water jug in desert, and a hazmat (or fur clothing + wood) in snow. Why it works: Temperature damage drains health quickly; even a small thermal change reduces your max HP.
2. Base food sources – Plant corn, pumpkin, or hemp near your base. Hemp gives cloth for sleeping bags and clothing. Also, fish in rivers (use a spear or fishing rod). Why it works: Self-sustained food reduces need to travel for food, keeping you safe near base.
3. Medical supplies – Craft med syringes (125 scrap research) or find them in crates. Use bandages in a pinch (2 cloth each). Deep analysis: Syringes heal 30 HP instantly; bandages heal over time. Always carry at least two syringes in combat gear.
4. Water is critical – You dehydrate faster while running (shift). Fill water bottles at rivers or use a purifier. Why it works: Dehydration causes heavy blur and damage, making you useless in fights.
---
Raiding Tips
1. Offline vs Online – Offline raiding (when players are asleep) is safer but less rewarding. Online raiding (during active defending) is risky but yields more loot and thrill. Deep analysis: For solo/duo, offline is recommended; for clans, online can be coordinated.
2. Door raiding with explosive ammo – 4 explosive ammo destroy a sheet metal door (cost: 200 sulfur per ammo). Aim for the lock (the lock has less HP). Why it works: Cheaper than C4 (which is 4 satchel charges or 2 rockets). When to use: Against small wooden/stone bases.
3. Rockets vs C4 – Rockets (2 rockets = 1 door) require 1400 sulfur each; C4 (1 piece) is 2200 sulfur. Rockets are more resource-efficient for walls; C4 is better for doors (no splash). Deep analysis: Rockets also break walls behind the target, so use carefully near your own loot.
4. Ladder hatches and bunkers – Bunker bases use half-height walls and ladder hatches to prevent raiders from jumping down. Place a ladder hatch on the roof to escape quickly. When to use: For secure loot rooms; raid them by breaking floor tiles from below.
---
Advanced Optimizations
1. Electricity automation – Use solar panels + batteries for auto-turrets. Connect a timer switch to a Tesla coil for base defense. Deep analysis: Power is finite; build multiple solar panels to run turrets through the night. A small battery lasts 4 hours with one turret.
2. Farming efficiency – Use a jackhammer for stone/ore (fast mining), but it consumes low-grade fuel. Alternative: use a pickaxe (slower but no fuel cost). Why it works: Jackhammer gives 3x ore per node compared to hand tools. Best used when you have fuel.
3. Monument rushing on wipe day – On servers that wipe monthly, rush Launch Site or Military Tunnels within first hour. Loot high-tier spawns before others get guns. Deep analysis: Early dominance sets the tone for the wipe. Bring a crossbow and burlap clothing; you might get an MP5 or AK.
4. Using the Outpost safe zone – Outpost has a safe zone (no PvP allowed). Use recyclers, research tables, and vending machines there without risk. When to use: Take all your scrap-yielding components there and recycle under guard; trade with other players for useful items.
---
General Tips
1. Sleeping bag placement – Place bags near monuments (hidden in bushes or inside rubble) for respawns. Have at least one bag inside your base and one outside (1 km away). Why it works: If you die near a monument, you can respawn nearby and loot your body before others.
2. Team coordination – Use voice chat (TeamSpeak or Discord) or in-game voice. Call out enemy positions, loot, and raiding timings. Deep analysis: A team of 3-4 with good coordination can defeat a disorganized group of 6+.
3. Base naming conventions – Name your bases with signs or use the map marker system. Helps for large compounds with multiple entry points.
4. Preparation for raid night – If you expect to be raided, store your most valuable items in multiple small stashes (buried) outside your base, or in a secondary hidden base. Why it works: If raiders break into your main base, they might miss hidden stashes, saving your best loot.
5. Server selection – Choose servers with active admins (official Facepunch servers can have high cheater count). Community servers often have better rules (no cheating, team limit). Why it works: Fair gameplay reduces frustration.
---
This guide covers from the first rock swing to dominating the server. Apply these tips step by step, adapt to your playstyle, and remember: everything you have can be lost — adapt and overcome.
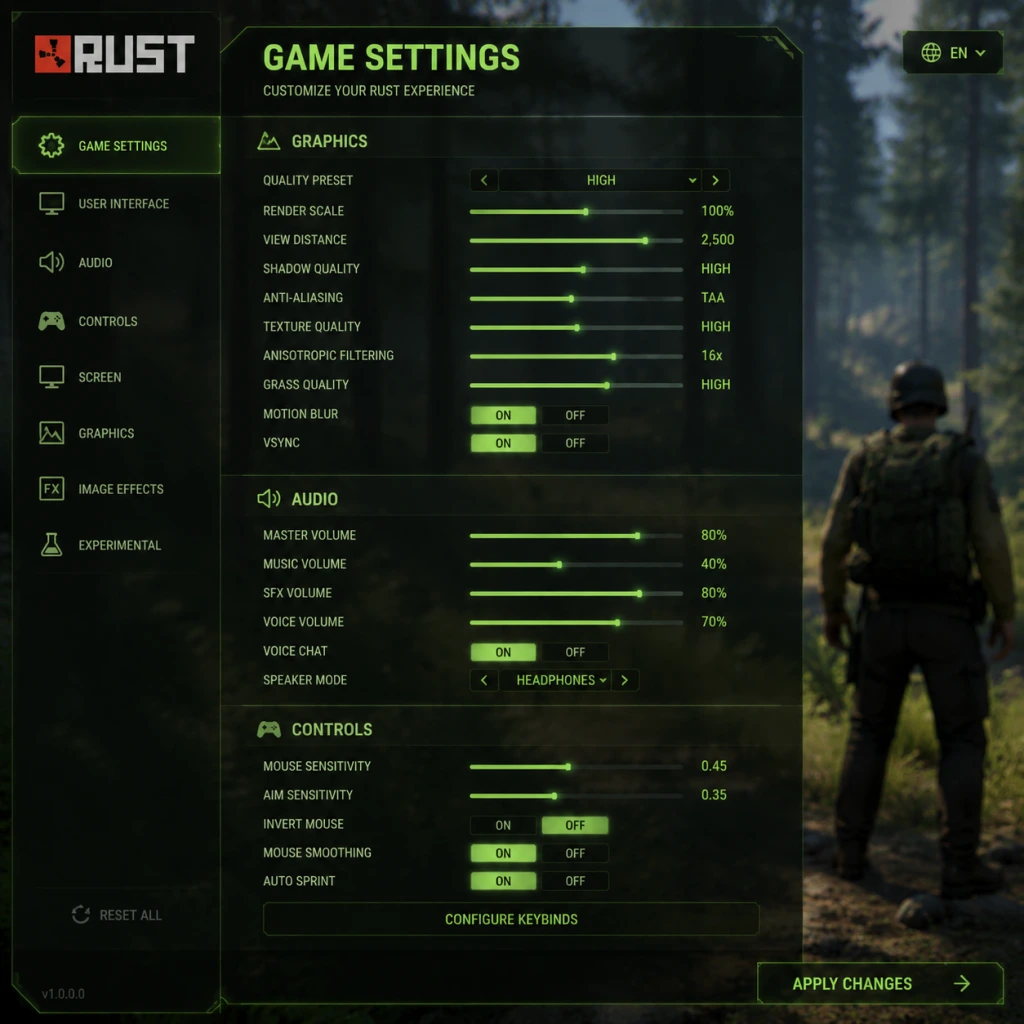
Game Settings
Game Settings
Below is a comprehensive guide to all major settings in Rust (PC and Console Edition). Proper configuration can mean the difference between a smooth 60+ FPS experience and a stuttery slideshow, or between winning a firefight and being blinded by shadows. I cover each category with recommended values for low-end, mid-range, and high-end hardware, plus common pitfalls and special attention points.
---
Graphics Settings
Graphics settings have the largest impact on performance and visibility. Rust’s Unity engine is CPU-heavy, but GPU also matters significantly.
#### Tab: Graphics
| Setting | Low-End (e.g., GTX 1050 / Ryzen 3) | Mid-Range (GTX 1660 / Ryzen 5) | High-End (RTX 3070+ / i7-10700K+) | Notes |
|---|---|---|---|---|
| Quality Preset | Fastest / Custom (manual) | Good / Custom | Beautiful / Custom | Manually fine-tune below for best performance/visibility. Presets often enable wasteful effects. |
| Resolution | Native monitor (e.g., 1920x1080) | Native | Native | Lowering resolution yields big FPS gain but makes game blurry. Use if desperate. |
| Resolution Scale | 100% | 100% | 100% | Never go below 80% unless absolutely needed; it destroys readability. |
| Display Mode | Fullscreen | Fullscreen | Fullscreen | Windowed/Borderless adds input lag. Fullscreen offers best performance. |
| VSync | Disabled | Disabled | Disabled | Enables screen tearing but massively reduces input lag. Only enable if you hate tearing. |
| FPS Limit | Unlimited (or capped at monitor refresh) | Unlimited | Unlimited | Set a cap (e.g., 144) to reduce GPU load and temps if running uncapped causes stutter. |
| Field of View (FOV) | 90-100 | 90-100 | 90-100 | Higher FOV gives peripheral vision but reduces target size. 90 is a good balance. |
| Gamma | Default (0.5) | Default | Default | Too high brightens nights but washes out colors. Keep default or adjust slightly if your monitor is dark. |
| Brightness | 0.5-0.6 | 0.5 | 0.5 | Night visibility is part of the game. Don’t cheat by maxing brightness; it ruins immersion and contrast. |
| Object Quality | 25-50% | 75% | 100% | Low values make distant bases vanish – good for FPS but can hide enemies. |
| Terrain Quality | 50% | 75% | 100% | Low can cause ground pop-in. Keep at least 50% to avoid seeing through mountains. |
| Grass and Trees | Off / Low | Low / Medium | Medium / High | Grass off gives huge visibility advantage (enemies lying in grass are invisible with grass on). Recommended to turn off for PvP. |
| Shadows | Off (or Low) | Low / Medium | High | Shadows eat FPS and can hide enemies in dark corners. Off is competitive, but Low gives directional cues. |
| Ambient Occlusion | Off | Off | On (Low) | Costs FPS, minimal benefit. Keep off. |
| Anti-Aliasing | FXAA (or Off) | SMAA (or FXAA) | TAA (or SMAA) | TAA blurs edges but causes motion blur; SMAA is sharper. FXAA is cheapest. Off gives jagged edges but highest FPS. |
| Anisotropic Filtering | x4 | x8 | x16 | Little performance cost, improves texture clarity at angles. Keep high. |
| Water Quality | Low | Medium | High | Low still shows water, just less reflections. |
| Shader Level | Low | Medium | High | Low flattens lighting; Medium is a good compromise. |
| Draw Distance | 1500-2000 | 2500 | 3000+ | Higher draw calls: enemies far away render. Low can hide players behind terrain. |
| Shadow Casting | Off | Off | On (Sun Only) | Disable for competitive play; shadows from players cost FPS. |
| Motion Blur | Off | Off | Off | Always off – reduces clarity and nausea. |
| Depth of Field | Off | Off | Off | Blurs distant objects. Off is mandatory for spotting players. |
| Lens Flare / Sun Rays | Off | Off | Off | Just visual noise. Off helps see clearly. |
| Chromatic Aberration | Off | Off | Off | Adds a cheap film look; off for clarity. |
| Film Grain | Off | Off | Off | Same as above. |
| Vignette | Off | Off | Off | Darkens edges; off for full vision. |
- Grass and Trees: Turning grass off is controversial – many servers enforce “grass on” via mods (e.g., no grass mod). In vanilla, turning it off makes players lying in bushes completely visible. This is a competitive advantage, but some consider it unfair. Use responsibly.
- Shadows: Setting shadows to Low or Off can make it hard to judge height/depth (e.g., jumping over cliffs). For building, shadows help see foundation edges. Turn them on temporarily when building.
- Draw Distance: Low draw distance can cause players to pop in at medium range, making sniper fights impossible. On mid-range hardware, set to at least 2000.
- Resolution Scale: Accidentally setting it to 50% will make everything blurry. Always keep at 100% unless FPS is terrible.
- VSync: Enables input lag – avoid for competitive play. If screen tearing bothers you, use Fast Sync (Nvidia) or Enhanced Sync (AMD) via driver control panel instead.
---
Audio Settings
Audio is crucial in Rust – footstep sounds, gunshots, environmental cues (helicopter, bear growl). Proper audio setup can alert you to enemies before they appear.
#### Tab: Audio
| Setting | Recommended | Notes |
|---|---|---|
| Master Volume | 80-100% | Keep high but not uncomfortable. |
| Music Volume | 0% (or very low) | Music is atmospheric but masks important sounds. Off is best for PvP. |
| Sound Effects | 100% | This includes footsteps, gunshots, birds. Crank it. |
| Ambient Volume | 50-70% | Nature sounds can be loud; lower if they drown out footsteps. |
| Voice Volume | 80-100% | Helps hear teammates and enemy proximity chat. |
| Input (Microphone) | Push-to-talk (not voice activation) | Voice activation can broadcast your breathing or random noise, giving away position. Bind to a key (e.g., V). |
| Output Device | Headset (not speakers) | Speakers cause echo and echo-reduction may break voice chat. Headset is essential for directional audio. |
| 3D Sound (HRTF) | On (if available) | Improves vertical and directional audio. Only works with stereo headphones. Do not use with virtual surround sound software – disable Razer Surround, etc. |
| Mute Non-Steam Voice Chat | Off | Many players use Steam voice; disabling it may cut off important communication. |
- Music off: The default music is loud and epic, but it masks footsteps. Turn it to 0% immediately.
- Headphones mandatory: Rust has directional audio (left/right, front/back, up/down). With speakers you lose positional accuracy.
- HRTF: This is a per‑player setting inside the game (under Audio). Enabling it improves sound localization but can cause slight warble on some sounds. Test in a quiet area; if you hear weird phase effects, try turning it off.
- Voice activation: Never use voice activation. Push-to-talk (PTT) ensures you only transmit when you press a key. Default is C but rebind to something more comfortable (e.g., V or Mouse4).
- Footstep equalization: Some players use third-party EQ software (e.g., Peace Equalizer) to boost footstep frequencies (around 500-1000 Hz). This is not a setting in Rust but can be done via Windows sound settings. Be careful not to violate any server rules.
---
Controls (Keyboard & Mouse / Controller)
#### Tab: Controls – Keyboard / Mouse
Most actions are rebindable. Here are the defaults and recommended changes for efficiency.
| Action | Default Key | Recommended | Reason |
|---|---|---|---|
| Forward/Back/Strafe | W/A/S/D | Same | Standard. |
| Sprint | Shift (hold) | Same | Keep; many use toggle instead – check accessibility. |
| Crouch | Ctrl (hold) | Same (or C for toggle) | Hold crouch is better for peeking; toggle is easier on hands for long sits. |
| Prone | X | Same | Not used often; fine. |
| Jump | Space | Same | No change. |
| Use / Open | E | Same | Keep. |
| Reload | R | Same | Keep. |
| Holster | H (or double tap R?) | Unbind or use mouse side button | Accidentally pressing H can get you killed. Swap to a mouse button or unbind if you never holster. |
| Inventory | Tab | Same | Keep. |
| Crafting Menu | Q | Same | Keep. |
| Map | G | Same | Keep. |
| Voice Chat (PTT) | V | Same (or C if you prefer) | Default V works. Some use Caps Lock. Ensure it’s not conflicting with crouch. |
| Voice Chat (Global) | C | Same | Global chat (proximity) is useful. |
| Team Voice | Y | Same | Only works if you are in a team (press + on numpad to invite). |
| Look Around (Free Look) | Hold Alt | Same | Essential for checking surroundings while moving forward. Do not rebind. |
| Weapon Slot 1-6 | 1-6 | 1-6 | Default fine. |
| Flashlight / Laser | F | Same | Keep. |
| Drop Item | Z | Same (or unbind) | Accidentally dropping items is disastrous. Consider unbinding or moving to a less accessible key. |
| Screenshot | F12 (Steam) | Same | No change. |
| Setting | Recommended | Notes |
|---|---|---|
| Sensitivity | 0.25 – 0.50 (for 400 DPI) or 0.15 – 0.30 (for 800 DPI) | Very low sensitivity improves aim. Most pros use ~40cm/360°. Adjust to your mousepad space. |
| ADS Sensitivity | 0.5 – 0.8 (of hipfire) | Lower ADS sens helps with precise long-range shots. |
| Invert Mouse | Off unless you prefer | Standard. |
| Mouse Acceleration | Off (in Windows and in-game) | Accelerate causes inconsistent muscle memory. Disable in Windows “Enhance pointer precision” and in game (if checkbox exists). |
| Mouse Smoothing | Off | Adds input lag. |
Rust Console has simplified controls due to gamepad limitations. Key bindings are not customizable. Important settings:
- Look Sensitivity: Start at 30-40% and adjust. Higher sensitivity helps building but hurts aim.
- ADS Sensitivity: Lower to 20-30% for better accuracy.
- Deadzone: Both sticks. Keep low (5-10%) to avoid drift, but higher if your controller has stick drift.
- Button Layout: Default, Builder Pro, or Custom. Many players prefer Builder Pro (L1=place, R1=rotate) for faster building.
- Vibration: Off – it delays reactions and drains batteries.
- Auto-Run: On – double tap left stick to autorun. Saves thumb strain.
- Invert Y: Personal preference.
- Drop Item (Z): It’s far too easy to accidentally press Z while reaching for X (prone) or C (crouch). Many veterans rebind Drop to something like U (unused) or remove binding entirely. If you want to drop items, you can drag them out of inventory instead.
- Holster: H is in a dangerous position near Y. Unbind it if you never use it. When you need to holster, press 1-6 or double-click inventory.
- Sprint Toggle vs Hold: Hold (default) lets you stop sprinting instantly for shooting. Toggle can be easier for extended travel. Test both.
- Mouse Acceleration: Windows has “Enhance pointer precision” – turn that off. Also, in Rust, there is no in-game mouse acceleration, but ensure your mouse software (Logitech G Hub, etc.) does not have it enabled.
- Controller Deadzone: On Console, a deadzone that’s too high will make fine aiming impossible – you want it as low as possible without drift.
- Subtitles: Not available in Rust. Audio cues are vital. For hearing-impaired players, consider third-party tools (not recommended due to anti-cheat).
- Colorblind Mode: None. However, you can adjust gamma and brightness (see Graphics) to improve contrast.
- Controller Support (PC): Full controller support with aim assist (toggle in settings). Aim assist can help players with motor impairments but may hinder in PvP due to aim punch. Turn it on if needed.
- Large Text / UI Scaling: There is no UI scale slider. Text is small. You can try changing Windows scaling (150-200%) before launching Rust, but UI may become blurry.
- Toggle Crouch vs Hold: In Controls, you can set crouch to toggle. This helps players who cannot hold a button for long periods.
- Toggle Sprint: Similar benefit.
- Auto-Run: Bind a key for auto-walk (default is / in chat? Actually, double-tap W for auto-walk – but not always reliable). Use an external macro at your own risk (could be flagged).
- Chat Text Size: Not configurable. Use Steam overlay zoom (Shift+Tab then +/-) to zoom in on chat.
- No subtitles: This is a major drawback. The only way to “see” audio cues is through visual indicators (footstep icons?) – none exist. Deaf players are at a severe disadvantage. Some servers provide visual footstep mods, but official Facepunch servers do not.
- High-contrast crosshair: You can install a custom crosshair overlay (e.g., Crosshair X) – but it may be considered cheating on some servers. Use at your own risk.
- One-handed play: Impossible without extensive rebinding or foot pedals. Consider a gaming keypad (e.g., Razer Tartarus) for left-hand, mouse for right.
- Game Language: Rust uses your Steam client language. To change, go to Steam > Settings > Interface > select language, then restart Steam. The game’s UI, menus, and items will update. Voice lines and item names are always in English regardless.
- In-game Chat: Text chat defaults to English. Players often use regional languages. You cannot filter or translate. Use Steam’s chat translation? Not built-in.
- Server Language: Many servers have community rules about language (e.g., English only in global chat). Check server description.
- Changing Steam language will affect all your games, not just Rust. To keep other games in English, you can change Rust’s language via launch options: `-language <code>` (e.g., `-language russian`). This only works for UI text, not all aspects.
- Item names are always English – you cannot change them. Memorization is necessary for crafting.
#### Special Attention Points – Controls
---
Accessibility Settings
Rust has limited built-in accessibility options, but some can be adjusted.
#### Special Attention Points – Accessibility
---
Language Settings
#### Special Attention Points – Language
---
Network Settings
Network settings affect ping, packet loss, and connection stability.
| Setting | Recommended | Notes |
|---|---|---|
| Region | Closest to your physical location | Select your continent (e.g., US East, Europe West) for lowest ping. Cross-region play introduces high latency. |
| Max Players | No setting – server dependent | Choose servers with <100 pop if you prefer less lag comp issues. Higher pop stresses netcode.
| Network Quality | No in-game slider | The game automatically adjusts based on your connection. If you have packet loss, try lowering graphics to reduce CPU/GPU load, which can indirectly improve network stability.
| Voice Chat Bandwidth | Default | No option to change. Voice uses separate UDP ports. |
| Port Forwarding | Not required for clients | Only server hosts need to forward ports 28015 (game) and 28016 (RCon). For players, nothing needed.
| FPS and Ping Correlation | Lower FPS can cause rubberbanding | A weak CPU can’t process network packets quickly. See FPS optimization earlier.
#### Console Specific Network
- Console Edition uses the same regional selection. NAT type can affect ability to join others. Open NAT is best. If you have moderate/strict NAT, troubleshoot router settings (UPnP enabled).
- High ping / Packet loss: If you experience rubberbanding or delayed interactions, first check your internet speed. Rust requires stable ~5 Mbps down, 1 Mbps up. Wi-Fi can cause spikes – use Ethernet if possible.
- Region mismatch: Playing on a server far away (e.g., European player on US server) will give you ~150-200ms ping. This is playable for casual runs but terrible for PvP. Always pick your region.
- VPN usage: Some servers ban VPNs. Using a VPN can increase ping and packet loss. Stick to direct connection.
#### Special Attention Points – Network
---
Gameplay Settings
These are settings that affect the gameplay experience, not performance.
| Setting | Recommended | Explanation |
|---|---|---|
| Show Information (HUD) | On | Displays health, rads, food, water, compass, etc. Turn off only for immersion or screenshots. |
| Crosshair | Default (or custom) | Default small cross is fine. Use a colored crosshair overlay if allowed by server. |
| Compass | On (enabled) | Essential for navigation and callouts. Keep it. |
| Temperature / Wetness | On | Tells you if you’re freezing or too hot. Keep on. |
| Biome Indicators | On | Shows current biome (desert, forest, snow). Useful. |
| Auto-Whitelist | Off | This is for server admin – ignore. |
| Client Info (FPS, ping) | On (via command `perf 1` in F1 console) | Allows you to monitor performance. Type `perf 1` to show small overlay. |
| Decay / Raid Block display | On (default) | Shows block timers when building. |
| Team UI | On (if in team) | Shows teammates’ health, armor, distance. |
| Item Drop Physics | Default | No setting – items dropped in world are physics objects. |
| Voice Proximity | On | Voice is local. Off disables hearing others. Keep on for social interaction. |
| Chat | Visible | Keep enabled to read messages. Can be hidden with F1 chat toggle. |
- Aim Assist: On (default) helps with controller, but can snap to wrong target. Many high-level players turn it off for more control.
- Auto-Run / Auto-Walk: On by default (double-click left stick). Essential.
- Vibration: Off (as above).
- Team UI: Same as PC.
- Crosshair: Default crosshair is tiny and white. On snowy maps it disappears. Use a neon green or pink custom crosshair (via overlay or monitor crosshair) to always see it.
- perf 1: Open console with F1, type `perf 1`, press Enter – shows FPS, ping, and memory usage. Very helpful for troubleshooting performance. Type `perf 0` to hide.
- Compass: Without compass, you’ll get lost. Always keep it visible. You can also switch to map (G) but compass is real-time.
- Team UI: If you are solo, you can turn off team UI to reduce screen clutter. There’s no direct toggle – it only appears when you’re in a team (by pressing + on numpad). To never see it, just never be in a team.
- Start with “Good” preset, then:
- Turn off motion blur, depth of field.
- Cap FPS at 75 or 90 to reduce load (if GPU is not maxed).
- Start with “Beautiful” preset, then:
- Uncap FPS or cap at monitor refresh.
- Consider enabling NVIDIA Reflex (if available in driver) for reduced latency.
- Screen space reflections: Off (they cost lots of FPS even on high-end).
- Launch Options: Right-click Rust in Steam > Properties > General > Launch Options. Add:
- Rust+ Companion App: Running on phone? It doesn’t affect PC performance.
- Memory leak: Rust has memory leaks. If FPS drops over time, open console (F1) and type `gc.buffer`, wait a few seconds, then restart game if still bad.
- Disable Steam Cloud Saves: Reduces sync overhead (not major).
- Disable Discord Overlay: Discord overlay can cause FPS drops.
- Building sensitivity: On console, building quickly requires high sensitivity. Many players use 50-70% build sensitivity and lower aim sensitivity. The game has separate sliders for “On Foot” and “ADS”. Keep building sens around 2x higher than aim sens.
- Controller deadzone: Cannot remove completely. If your controller drifts, increase deadzone slightly.
- Field of View: On console, FOV is locked (around 75-80). No slider available.
- Voice chat: Console also has proximity chat (via gamepad). Ensure your headset is connected properly.
- No custom keybindings: You are limited to preset layouts. “Builder Pro” is most popular for efficient building. Practice in a build server.
- Before tweaking, join a low‑population “build” server (e.g., Rusticated Build) to test settings without pressure.
- Use the in-game console (F1) for real-time feedback: type `toggle_visibility` to enable/disable attachments? No. But `perf 1` is essential.
- Keep a backup of your config file: locate `%APPDATA%\Rust\cfg\config.cfg` on your profile. After you perfect settings, copy this file somewhere safe – if you reset graphics, you can restore it.
- Update graphics drivers (NVIDIA Game Ready, AMD Adrenalin) regularly – Rust patches sometimes optimize GPU usage.
- Server‑side settings (Admin) are beyond this guide.
#### Special Attention Points – Gameplay
---
Performance Optimization Summary
#### Low-End Hardware (target 30-60 FPS)
1. Set Quality Preset to “Fastest” then modify:
- Object Quality: 25%
- Terrain Quality: 50%
- Grass: Off
- Shadows: Off
- Anti-aliasing: Off
- Resolution: Native (if FPS >30) else lower resolution scale to 80%.
2. Close all background apps (Discord, Chrome).
3. In NVIDIA/AMD control panel, set power management to “Maximum Performance”.
4. Disable game overlays (Steam, Discord).
5. Verify “-force-d3d11” launch option (Rust runs on DX11 anyway, but some swear by it).
6. Lower launch option: `-window-mode exclusive` (ensures fullscreen exclusive).
#### Mid-Range Hardware (target 60-90 FPS)
- Grass: Low (or Off if you want advantage)
- Shadows: Low
- Anti-aliasing: SMAA
- Ambient Occlusion: Off
- Draw Distance: 2500
- Anisotropic: x8
#### High-End Hardware (target 90-144+ FPS)
- Grass: Medium (or Low for PvP)
- Shadows: High (or Low for competitive)
- Anti-aliasing: TAA (if you can tolerate blur) or SMAA
- Ambient Occlusion: On (Low)
- Draw Distance: 3000
- Anisotropic: x16
#### Common Performance Tricks (All Levels)
`-high -maxMem=16384 -malloc=system`
`-high` gives high CPU priority; `-maxMem` sets memory limit in MB (adjust to your RAM); `-malloc=system` uses system memory allocator (reduces stutter for some).
---
Misconfiguration Pitfalls
1. Resolution Scale too low – Makes game blurry and difficult to see enemies. Keep at 100% unless extremely low FPS.
2. Grass enabled – Players become invisible in bushes. Turning grass off is a huge PvP advantage, but some servers disallow it (grass on enforced). Check server rules.
3. Music volume >0 – Masks footsteps. Turn off.
4. Drop Item on Z – Accidental presses cause you to drop your weapon. Go into controls and unbind Z, or rebind to a far key.
5. Mouse acceleration enabled – Both in Windows and mouse software. Disable for consistent aim.
6. VSync on – Adds input lag. Off for competitive play.
7. Voice activation – Breaks silence; use push-to-talk.
8. HRTF off with surround software – HRTF is for stereo; if you have virtual 7.1, disable it in your headset software and use HRTF in Rust for best directional audio.
9. Playing on server far from region – High ping leads to dying around corners. Always select your region.
10. Not using F1 console for perf – You can’t monitor FPS/ping without it. Type `perf 1` as soon as you join a server.
---
Console Specific Final Notes
---
Final Recommendations
With these settings optimized, you’ll have a smoother, more competitive Rust experience. Good luck surviving the wasteland!
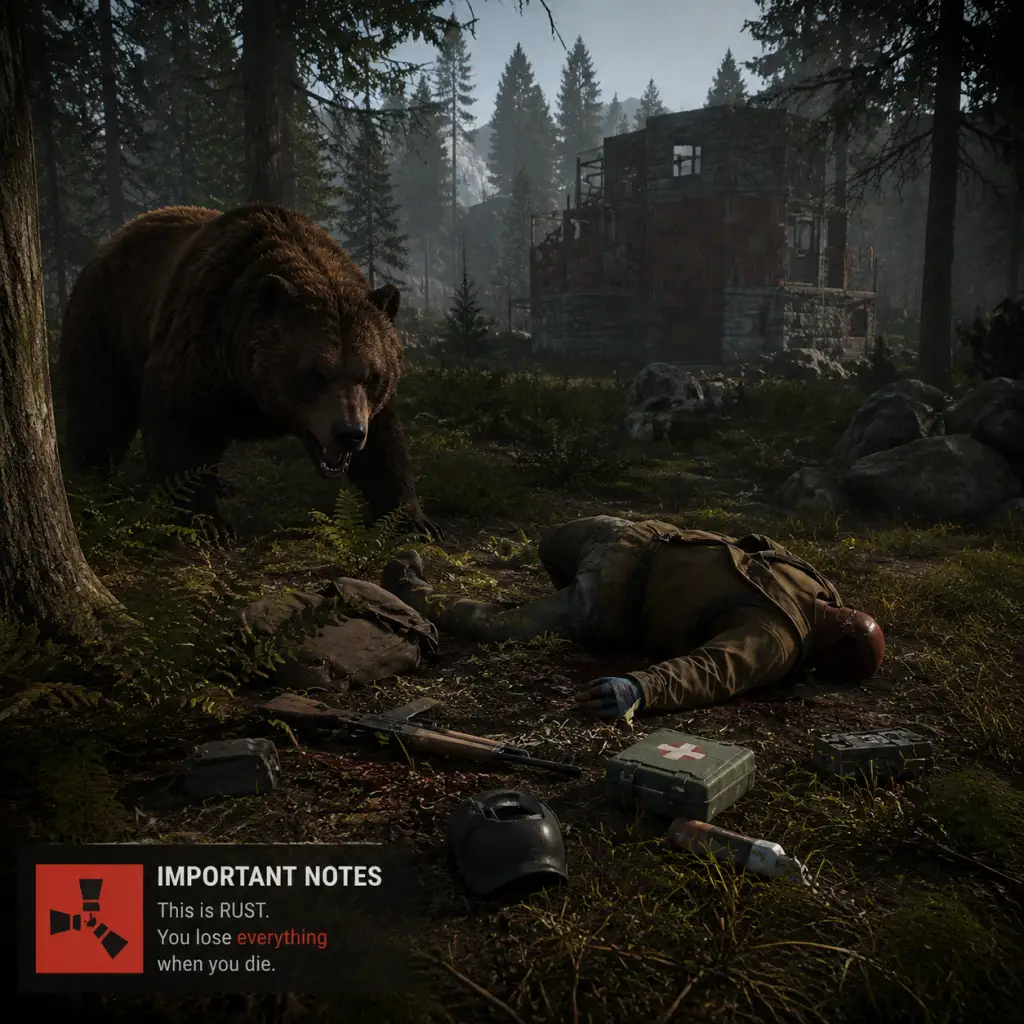
Important Notes
Important Notes for Rust
Rust is a relentlessly unforgiving game. Understanding its hidden mechanics, common pitfalls, and irreversible decisions can save you dozens of hours of frustration. This section covers everything you must know before and during your first few hundred hours.
---
⚠️ Major Warnings
- Offline Raiding is Guaranteed: If you log off, your base becomes a target. No safe zone exists. Build defensively (multiple airlocks, honeycombing) and never store all your valuables in one place. Expect to lose everything—multiple times.
- No Pity System: Rust does not care if you are a solo player. Groups of 4-8 players will dominate most servers. Consider choosing a solo/duo/trio server (e.g., Rustafied Solo/Duo/Trio) if you want a fair experience.
- Toxic Community: Verbal abuse, baiting, and deception are common. Disable voice chat in settings if it bothers you. Report harassment only for extreme cases (racism, threats) – most servers have rules, but enforcement varies.
- Game Wipes: Official servers wipe every month (first Thursday). Some servers wipe bi-weekly or weekly. Blueprints and scrap progress are wiped on forced wipes, so long-term investment is temporary. Community servers may have their own schedules.
- Cheating Epidemic: Expect cheaters (ESP, aimbot, fly) especially on official servers. Enable Report Player via F7. Facepunch bans in waves, but new accounts are cheap. Prefer community servers with active admins.
---
###
All Game Items
All Game Items in Rust
This guide covers every major item in Rust, organized by category. Items are listed with their purpose, how to obtain them, when they are most useful, and any important synergies or upgrade paths. All information applies to both PC and Console Edition unless otherwise noted.
---
Resources & Raw Materials
| Item | Description | Obtain | Useful For | Upgrades/Synergies |
|---|---|---|---|---|
| Wood | Basic building and fuel resource. | Chop trees with any tool. | Building, campfires, furnaces, bows. | Higher-tier tools (hatchet, chainsaw) increase yield. |
| Stone | Used for stronger building tiers (stone walls, foundations). | Mine rocks with pickaxe. | Tier 2 building, stone walls, furnaces, quarries. | Pickaxe upgrades to metal pick. |
| Metal Ore | Smelted into metal fragments. | Mining metal nodes with pick. | Metal tools, weapons, armor, Tier 3 building. | Use a furnace to smelt. |
| Sulfur Ore | Smelted into sulfur. | Mining sulfur nodes. | Gunpowder, explosives. | Essential for raiding. |
| High Quality Metal (HQM) | Rare metal used for top-tier items. | Mining HQM nodes, recycling components, looting crates. | Assault rifles (AK-47), bolt actions, metal facemask, chestplate. | Recycler yields HQM from certain components. |
| Fragments (Metal Fragments) | Used for crafting many items. | Smelting metal ore, recycling components. | Metal tools, weapons, armor, building upgrades. | Recycler yields fragments. |
| Cloth | Used for clothing, bandages, sleeping bags. | Harvesting hemp, looting barrels, recycling. | Burlap clothing, medical syringes, sleeping bags. | Can be crafted from hemp in the world. |
| Leather | Used for clothing and armor. | Animal hides from hunting, recycling. | Hide boots, pants, jackets, roadsign armor. | Combine with cloth for higher-tier armor. |
| Animal Fat | Used for low grade fuel. | Cooking animal meat, looting. | Low grade fuel, furnaces. | Essential for running vehicles (minicopter, boat). |
| Low Grade Fuel | Fuel for vehicles, furnaces, lanterns. | Crafted from animal fat + cloth, loot. | Running minicopter, boat, search lights, furnaces. | Store in fuel tanks or containers. |
| Scrap | Primary currency for research, workbenches, and vending machines. | Looting barrels, crates, recycling components. | Researching blueprints, buying items from vending machines, crafting workbenches. | Use at T1, T2, T3 workbenches to unlock tech tree. |
| Sulfur | Key ingredient for gunpowder. | Smelting sulfur ore. | Gunpowder → ammunition → raids. | Combine with charcoal to make gunpowder. |
| Charcoal | Byproduct of burning wood in furnace. | Burning wood. | Gunpowder, explosive materials. | Always collect from furnaces when smelting. |
Tools & Equipment
| Item | Description | Obtain | Useful For | Upgrades |
|---|---|---|---|---|
| Rock | Starting tool, weak at gathering. | Spawn with it. | Initial gathering, breaking barrels. | Replace with stone pickaxe/hatchet. |
| Torch | Provides light and warmth. | Spawn with it, craft from wood. | Night vision, prevent cold. | Can be crafted. |
| Stone Hatchet | Early wood gathering tool. | Craft from wood + stone. | Chopping trees faster than rock. | Upgrade to metal hatchet. |
| Stone Pickaxe | Early ore gathering tool. | Craft from wood + stone. | Mining stone and metal ore. | Upgrade to metal pickaxe. |
| Metal Hatchet | Faster wood gathering. | Craft from metal fragments + wood (at Tier 1). | Efficient tree chopping. | Can be upgraded to salvatored or machete? No direct upgrade. |
| Metal Pickaxe | Faster ore gathering. | Craft from metal fragments + wood. | Mining stone, metal, sulfur. | Best non-tool-cupboard pick. |
| Salvaged Axe | Higher yield on wood (jackhammer alternative). | Loot from crates, raiding. | Excellent wood farming. | Not craftable; better than metal hatchet. |
| Salvaged Hammer | Used for building placement (requires hammer to place items like doors). | Loot, crafting? Not craftable. | Essential for building structures and deploying items (furnaces, boxes). | None. |
| Bone Knife / Combat Knife | Light melee knife. | Bone knife craft from bones; combat knife loot/craft. | Harvesting animal carcasses, silent killing. | None. |
| Flashlight | Attachable to weapons. | Craft from flashlight components. | Illumination while aiming. | Can be attached to guns. |
| Laser Sight | Reduces weapon spread when ADS. | Loot or craft from tech trash. | Improves accuracy on weapons like SAR, AK. | Attach to any weapon with rail. |
| Silencer | Reduces gunshot noise. | Craft from springs + metal fragments + tech trash (T2). | Stealth gameplay, avoiding alerting players. | Lower range damage; best for SMGs. |
| Weapon Holster | Allows quick weapon swap. | Not in game? (Removed) | N/A | N/A |
| GPS | Shows position on map. | Loot from crates, fishing villages, etc. | Navigation, marking enemy bases. | None. |
Weapons
#### Melee Weapons
| Item | Damage | Obtain | Useful For | Notes |
|---|---|---|---|---|
| Rock | Minimal | Spawn | Breaking things, finishing downed animals? | Not viable for combat. |
| Bone Club | Medium | Craft from bones. | Early game melee, animal hunting. | Better than rock. |
| Longsword | High | Craft from metal fragments + wood (T2). | Ranged melee power. | High damage, slow speed. |
| Machete | High | Loot, craft from components? | Harvesting plants, combat. | Good for gathering cloth from hemp. |
| Salvaged Sword | High | Loot from crates. | Late game melee. | Very high damage. |
| Item | Description | Obtain | Useful For | Ammo |
|---|---|---|---|---|
| Bow | Starting ranged weapon. Craft from wood + cloth + rope (T1). | Early pvp, hunting. | Wooden arrows. | High skill ceiling. |
| Crossbow | Higher damage, slower reload. | Craft from metal fragments + wood + cloth (T1). | Silent mid-range kills. | Metal arrows (crafted). |
| Compound Bow | Draw and hold for more damage. | Loot from crates or research. | Stealth pvp, long range. | Arrows. |
| Item | Description | Obtain | Ammo | Notes |
|---|---|---|---|---|
| Eoka Pistol | Single-shot, unreliable. | Craft from metal fragments + wood + cloth (T1). | 12 gauge shells. | Use for early raiding doors. |
| Waterpipe Shotgun | Single-shot shotgun. | Craft from metal fragments + wood (T1). | 12 gauge shells. | High damage at close range. |
| Nailgun | Fires nails slowly. | Craft from metal fragments + wood + springs (T1). | Nails (ammo). | Low damage, but good for suppressing. |
| Item | Description | Obtain | Ammo | Notes |
|---|---|---|---|---|
| Revolver (Python) | Medium damage, 8 rounds. | Craft from metal fragments + wood + springs (T2). | Pistol bullets. | Good secondary weapon. |
| Semi-Automatic Pistol (SAR) | Slow fire rate, high accuracy. | Craft from metal fragments + metal pipes (T2). | Pistol bullets. | Great for medium range. |
| Double Barrel Shotgun | Two shots before reload. | Craft from metal fragments + wood + springs (T2). | 12 gauge shells. | Devastating at close range. |
| Custom SMG | Fast fire rate, high recoil. | Craft from metal fragments + wood + springs (T2). | 9mm. | Good for close quarters. |
| Thompson | SMG with lower recoil. | Loot from crates, research. | 9mm. | Better than custom SMG. |
| Item | Description | Obtain | Ammo | Notes |
|---|---|---|---|---|
| MP5 | Premium SMG, moderate damage. | Loot from elite crates, research. | 9mm. | Excellent handling. |
| Assault Rifle (AK-47) | Best all-around gun. | Craft from HQM, metal fragments, wood (T3). | 5.56 rifle ammo. | High damage, versatile. |
| LR-300 | Similar to AK, slightly higher fire rate. | Loot from crates. | 5.56. | Rare, very strong. |
| M39 | Semi-auto rifle, high damage. | Loot. | 5.56. | Good for peek fights. |
| Bolt Action Rifle | Sniper, single shot. | Craft from HQM + metal springs + wood (T3). | 5.56. | High damage, long range. |
| L96 | Bolt action with scope. | Loot from elite crates. | 5.56. | Rare, best sniper. |
| Item | Description | Obtain | Useful For |
|---|---|---|---|
| Satchel Charge | Timed explosive. Crafted from small explosives + cloth. | Craft at T2. | Breaking wood, stone doors/walls. |
| Explosives (C4) | High explosive. Crafted from sulfur, metal fragments, cloth. | Craft at T3. | Breaking reinforced metal, armored doors. |
| Rocket | Fired from rocket launcher. Crafted from gunpowder + metal pipes + tech trash. | Craft at T3. | Long-range base destruction. |
| Rocket Launcher | Launches rockets. | Loot from crates or craft. | Raiding. |
| Timed Explosive Charge | Same as C4. | Craft. | Same. |
| F1 Grenade | Thrown explosive. Craft from gunpowder + metal fragments. | Craft T2. | Killing players behind cover. |
| Bean Can Grenade | Crafted from gunpowder + metal fragments + cloth (T1). | Unreliable fuse. | Early raiding. |
Armor & Clothing
#### Clothing (Warmth & Protection)
| Item | Cold Protection | Bullet Protection | Obtain | Notes |
|---|---|---|---|---|
| Burlap Gloves / Burlap Shirt / Burlap Pants | Low | Very low | Craft from cloth. | Starting gear. |
| Hide Boots / Hide Pants / Hide Poncho | Medium | Low | Craft from leather + cloth. | Basic mid-tier. |
| Roadsign Jacket / Roadsign Pants / Roadsign Kilt | Low | Medium | Craft from metal fragments + metal pipes (T2). | Good protection for cost. |
| Metal Chest Plate / Metal Facemask | Very high | Very high | Craft from HQM + metal fragments (T3). | Best bullet protection. |
| Bone Armor / Wood Armor | Low | Low | Craft from bones / wood (T1). | Cheap early game armor. |
| Snow Jacket / Snow Pants | Very high | Low | Loot or craft from cloth + animal fat. | Best for cold biomes. |
| Hazmat Suit (full) | High radiation protection, low bullet protection | Low | Loot from crates, rad towns. | Essential for high radiation areas (launch site, military tunnels). |
| Item | Description | Obtain | Notes |
|---|---|---|---|
| Wooden Shield | Blocks melee and some projectiles. | Craft from wood. | Rarely used due to vulnerability. |
| Metal Shield | Better blocking. | Craft. | Same. |
Medical & Consumables
| Item | Effect | Obtain | Notes |
|---|---|---|---|
| Bandage | Heals small amount. | Craft from cloth. | Use multiple times. |
| Medical Syringe | Instant heal. | Craft from medical components + metal fragments + cloth (T2). | Essential for combat. |
| Large Medkit | Heals over time, large amount. | Craft from syringes + cloth (T3). | Best healing item. |
| Anti-Radiation Pills | Reduces radiation. | Loot from crates. | Use in rad towns. |
| Water Bottle | Quenches thirst. | Craft from metal fragments or loot. | Fill from rivers, water catchers. |
| Can of Beans | Food, small healing. | Loot from barrels, crates. | Early food. |
| Human Meat | Uncooked, causes poisoning. | Harvest from dead players | Can be cooked to remove poison? Actually, cooked human meat still gives food poisoning. Avoid. |
| Cooked Deer Meat | Good food source. | Cook raw deer meat. | Best early food. |
| Granola Bar | Medium food, no cooking. | Loot. | Convenient. |
| Chocolate | High food, low healing. | Loot. | Quick snack. |
| Raw Fish | Catch with fishing rod. | Fishing. | Cook to eat. |
| Mushrooms | Found on ground in forests. | Pick. | Minor food, poison chance. |
| Orange | Found in crates? | Not sure – maybe removed. | N/A |
Building & Construction Materials
| Item | Description | Obtain | Used In |
|---|---|---|---|
| Building Plan | Blueprint for placing foundations. | Default craft from wood. | All building. |
| Hammer (Building) | Upgrade/demolish building parts. | Craft from wood + stone (T1). | Essential for building. |
| Wood | Tier 1 building. | Gather. | Wood walls, floors, doors. |
| Stone | Tier 2 building. | Gather. | Stone walls, foundations. |
| Metal Fragments | Tier 3 building (sheet metal). | Smelt. | Sheet metal walls, doors. |
| Armored (HQM + metal) | Tier 4 building. | Craft. | Armored walls, doors, most durable. |
| Door (Wood/Metal/Armored) | Entry point. | Craft at workbench. | Base security. |
| Window Bars | Reinforce windows. | Craft. | Defense. |
| Ladder | Climb over walls. | Craft from wood and rope. | Raiding. |
| Floor Spikes | Traps. | Craft from metal fragments. | Base defense. |
| Auto Turret | Automated defense. Requires power. | Craft at T3. | Base defense. |
| Shotgun Trap / Flame Turret | Proximity traps. | Craft. | Defense. |
Electrical & Plumbing Components
| Item | Description | Obtain | Notes |
|---|---|---|---|
| Wire Tool | Run electrical wires. | Craft from metal fragments. | Must have for electricity. |
| Solar Panel | Generates power during day. | Loot from crates. | Pair with battery. |
| Wind Turbine | Generates power constantly. | Loot/craft. | Better than solar. |
| Large Battery | Stores power. | Craft. | Essential for autonomous systems. |
| Switch / Button / Timer | Control circuits. | Craft from metal fragments + tech trash. | Automation. |
| Pressure Pad | Triggers when walked on. | Craft. | Traps, lights. |
| Generator | Burns low grade fuel for power. | Craft. | Backup power. |
| Water Catcher | Collects rain water. | Craft. | Hydration source. |
| Water Pump | Extracts water from ground. | Craft. | Fill water barrels. |
| Sprinkler | Waters crops. | Craft. | Farming. |
Farming & Horticulture
| Item | Description | Obtain | Notes |
|---|---|---|---|
| Planter Box | Grow crops. | Craft from wood. | Plant seeds. |
| Seed (Corn, Pumpkin, Blueberries, etc.) | Plant to grow crops. | Harvest from wild plants or loot. | Need water and light. |
| Fertilizer | Increases growth speed. | Craft from human poop + wood. | Use on planter. |
| Watering Can | Manual watering. | Craft from metal fragments. | Fill from water source. |
| Sprinkler | Automatic watering. | Craft. | Needs water pipe. |
| Light (Ceiling Light) | Grow lights. | Requires power. | Speed up growth indoors. |
| Hemp | Source of cloth. | Harvest in world or farm. | Plant hemp seeds. |
Vehicles & Transport
| Item | Description | Obtain | Fuel |
|---|---|---|---|
| Minicopter | Small helicopter (2 seats). | Craft from HQM + metal + springs (T3). | Low grade fuel. |
| Hot Air Balloon | Slow, glider movement. | Craft from cloth + wood + rope (T2). | Low grade fuel (required for lift). |
| Rowboat | Wooden boat (1-2 player). | Craft from wood + rope (T1). | None or sails? Actually rowboat is paddled. |
| Motorboat | Faster boat. | Craft from metal + HQM + fuel? Actually requires crafting at boat vendor or using workbench? Common loot. | Low grade fuel. |
| RHIB | Fast inflatable boat. | Loot from crates or vendors. | Low grade fuel. |
| Camelback / Diving Gear | Not a vehicle but essential for underwater. | Craft from cloth, metal, etc. | N/A |
Key Items & Collectibles
| Item | Description | Obtain | Use |
|---|---|---|---|
| Blueprint (component) | Unlocks craft recipe when researched. | Loot or research. | Use at Workbench to learn item. |
| Research Table | Used to study items and unlock blueprints. | Craft from metal fragments. | Essential for progression. |
| Workbench (Tier 1/2/3) | Required to craft high-tier items. | Craft from metal + wood. | Upgrades unlock more recipes. |
| Tool Cupboard (TC) | Base ownership tool. Place to claim building privilege. | Craft from wood + metal. | Prevents others from building near. |
| Sleeping Bag | Respawn point. | Craft from cloth (T1). | Set to bed. |
| Campfire | Cook food, provide warmth. | Craft from wood + stone. | Early survival. |
| Large Furnace | Smelt ores faster. | Craft from metal fragments + stone. | Smelting efficiency. |
| Recycler | Breaks items into components. | Found in monuments. | Critical for scrap and components. |
| Vending Machine | Trade items with players. | Craft from metal fragments + coms? | Player economy. |
| Keycard (Green/Blue/Red) | Access monument loot rooms. | Loot from scientists, crates. | High tier loot. |
| Fuse | Used in electrical puzzles at monuments. | Loot from crates. | Access elite rooms. |
Currencies & Special Items
| Item | Description | Notes |
|---|---|---|
| Scrap | Primary currency for research, workbenches, buying from NPC vending machines. | Most sought-after resource. |
| Sulfur | Used to craft gunpowder, which is used for ammunition and explosives. | Valuable for raiding. |
| High Quality Metal (HQM) | Used for tier 3 weapons, armor, and building. | Rare, can be exchanged for scrap? Not directly, but used in crafting expensive items. |
| Component (e.g., Springs, Gears, Metal Pipes, Tech Trash) | Used for crafting weapons, armor, electrical items. | Recycle for scrap or use in crafting. |
| Skin (cosmetic item) | Changes appearance of items. | Purchased from Steam Market or earned. |
Ammunition Types
| Ammo | Damage | Used By | Obtain |
|---|---|---|---|
| Wooden Arrow | Low | Bow, crossbow | Craft from wood + cloth + stone. |
| Metal Arrow | Medium | Crossbow, compound bow | Craft from metal fragments + wood. |
| Stone Arrow | Low | Bow | Craft from stone + wood. |
| Pistol Bullet | Medium | Revolver, SAR | Craft from metal fragments + sulfur + gunpowder (T2). |
| 5.56 Rifle Ammo | High | AK, LR-300, Bolt | Craft from metal + sulfur + gunpowder (T3). |
| 9mm Ammo | Medium | SMGs, MP5 | Craft from metal + sulfur (T2). |
| 12 Gauge Shell | High (close) | Shotguns | Craft from metal + sulfur (T1). |
| Nails | Low | Nailgun | Craft from metal fragments (T1). |
| Handmade Shell | Very low | Eoka, waterpipe | Craft from gunpowder + metal fragments (T1). |
| Explosive 5.56 | Explosive | Explosive bullet (rare) | Craft from sulfur + metal (T3) but only explosive ammo is craftable. Actually, explosive ammo for 5.56 exists and causes area damage. |
| HV (High Velocity) Rocket | More damage | Rocket launcher | Craft rare ammo. |
Special / Event Items
| Item | Description | Notes |
|---|---|---|
| Candy Cane | Christmas event item. | Used for crafting festive things. |
| Trick or Treat Bag | Halloween. | Can contain items. |
| Mine | Land mine. | Traps. |
| Bear Trap | Traps animals and players. | Crafted. |
| Supply Signal | Calls in airdrop. | Loot from crates. |
Summary of Progression Synergies
- Early Game: Gather wood, stone, cloth. Craft bow, spear, sleeping bag. Build small base. Research at Research Table using scrap.
- Mid Game: Get Tier 2 workbench. Craft crossbow, revolver, roadsign armor. Raid using satchel charges.
- Late Game: Tier 3 workbench, AK-47, metal armor. Raid with C4/rockets. Control monuments with keycards and fuse.
Remember: The scrap economy is the backbone of progression. Always recycle components you don’t need, and prioritize researching items that give you a combat advantage or building security.
Character Skills
Character Skills
Overview
Rust does not feature traditional character classes, skill trees, or talent systems found in RPGs or MOBAs. There are no playable characters with unique innate abilities—every player starts identical: naked with a rock and a torch. However, progression in Rust is driven entirely by learned knowledge (blueprints and the tech tree) and player skill (mechanical ability, game sense, and decision-making). This guide covers every functional “skill” a player can develop, including crafted abilities, combat techniques, building mastery, and role specializations.
---
1. Blueprint & Tech Tree Skills (Crafting Knowledge)
All craftable items in Rust are unlocked by learning blueprints, either by finding them in the world, researching items, or unlocking them through the tech tree at a Workbench. The tech tree allows you to spend scrap to unlock specific item categories. This is the closest thing to a “skill tree” in Rust.
| Skill Category | Examples | How to Unlock | Scrap Cost Example |
|---|---|---|---|
| Primitive Tools | Stone hatchet, bow, wooden spear | Start known (rock/torch) or learn from world | Free (starting items) |
| Weapons | Revolver, Thompson, SAR, Bolt Action | Workbench + scrap | Revolver: ~125 scrap at W1 |
| Armor | Wood armor, Roadsign jacket, Metal chest plate | Research or tech tree | Roadsign: ~75 scrap at W1 |
| Building | Wood walls, stone walls, armored doors | Unlock as tier 1/2/3 | Garage door: ~1,000 scrap at W2 |
| Electrical | Solar panels, batteries, timer | Workbench 2 + scrap | Solar: ~75 scrap |
| Farming | Planter boxes, sprinklers, crop seeds | Workbench 2 or 3 | Planter: ~150 scrap at W2 |
| Medical | Syringe, medical kit, bandage | Workbench 1 | Syringe: ~20 scrap |
- Early game: Unlock bow, wooden spear, building plan, tool cupboard, code lock.
- Mid game: Unlock revolver, custom SMG, roadsign armor, furnace.
- Late game: Unlock AK-47, bolt action rifle, metal armor, rockets, C4, auto turrets.
- Spend scrap wisely—prioritize items that match your playstyle (e.g., raiders go for explosives; builders go for high-tier building materials).
- Research expensive items (e.g., an AK) at a research table rather than gambling the tech tree if you find one.
- Every automatic weapon has a unique spray pattern (e.g., AK-47 kicks up and to the right).
- Practice: Use a training server (UKN) or the aim train mod.
- Tip: Burst fire at medium range; hold full auto only at close range.
- Arrows have travel time and drop. Lead moving targets and aim high at long range.
- Practice: Hunt animals to learn arc.
- While scoped (bolt action, L96), press SHIFT to hold breath, stabilizing the crosshair for ~5 seconds before shaking resumes.
- Best Use: Long-range shots >100m.
- Pump shotgun and SPAS-12 have tight spreads. Aim for center mass; use slugs at range.
- Best Use: CQB (compound raids, tunnel fights).
- F1 grenades, satchel charges, and timed explosives have a 3-second fuse. Cook them (hold to delay throw) to time airbursts.
- Tip: Right-click to underhand throw over walls.
When to Use:
---
2. Player Combat Skills (Mechanical Abilities)
These are not in-game skills but real-world player skills that directly affect performance. Mastering them is essential.
#### a) Recoil Control
#### b) Bow Aim Leading
#### c) Sniper Hold Breath
#### d) Shotgun Spread Management
#### e) Grenade/Explosive Throwing
---
3. Survival & Gathering Skills
These are actions you perform repeatedly to sustain yourself and progress.
| Skill | How to Perform | Tips |
|---|---|---|
| Gathering Wood | Hitting trees with hatchet | Use a chainsaw for speed (late game) |
| Mining Stone/Metal | Hitting nodes with pickaxe | Hit the shiny part for more resources |
| Harvesting Cloth | Use a knife on dead animals | Each corpse yields 10-30 cloth |
| Fishing | Craft a fishing rod and use bait | Best source of early food and scrap (recycle fish) |
| Farming | Plant seeds in planter boxes, water, add fertilizer | Use a water purifier + hulled buckets for automation |
| Scavenging | Loot barrels, crates, NPC scientists | Prioritize roads, radtowns, underwater labs |
- Stone tools for faster gathering → metal tools → salvaged tools (best).
- Use a jackhammer for stone, chainsaw for wood.
- Place a foundation (wood, stone, metal, armored). Connect walls and ceilings. Use hammer to upgrade.
- Tip: Always put a tool cupboard (TC) inside and protect it with a metal door.
- Adding layers of walls around your core loot room to increase raid cost.
- Example: 2x1 base with 2 layers of stone walls = ~4 rockets to core.
- Place a roof, then walls with embrasures for shooting holes.
- Add auto turrets on roof, high external gates around compound.
- Connect battery to solar panels via electrical combiner. Run wires through walls.
- Common Build: Smart switch + solar + battery for turrets.
- ASAP on day one (even a 1x1 shack) to store loot.
- Expand later by adding floors or external TCs.
---
4. Building Skills (Construction & Deployables)
Building is a core skill that separates temporary shacks from unraidable bases.
#### a) Foundations, Walls, Ceilings
#### b) Honeycombing
#### c) Roof & Perimeter Defense
#### d) Wiring & Electricity
When to Build:
---
5. Role Specializations (Unofficial “Classes”)
While there are no assigned roles, players naturally specialize based on their base location and playstyle.
| Role | Primary Focus | Key Items/Skills |
|---|---|---|
| Solo/Stealth | Surviving alone, avoiding fights | Bow, crossbow, suppressor, cloth armor, bag near forest |
| Group Defenders | Protecting base and teammates | Auto turrets, shotguns, heavy armor, shotgun traps |
| Raiders | Breaking into enemy bases | C4, rockets, satchels, explosive ammo, jackhammer (for soft side) |
| Farmers | Gathering resources in bulk | Metal hatchet, jackhammer, chainsaw, horses for transport |
| PvP Chads | Fighting other players | AK-47, bolt action, armor kits, med syringes, HQM |
| Electricians | Building complex circuits | Wire tool, solar panels, batteries, memory cells, RF stuff |
| Monument Runners | Looting monuments | Hazmat suit, meds, keycards, fuse, water gun (for labs) |
- Solo beginner: Bow + 10 arrows + rock + torch (free).
- Farmer: Metal hatchet + pickaxe + horse + large backpack.
- Raider: Jackhammer + 4 satchels + wooden barricades + bandages.
- PvP: Full metal armor + AK + 4 med syringes + 3 SMG ammo stacks.
---
6. Consumable-Based “Skills” (Temporary Abilities)
Certain items grant temporary buffs or abilities.
| Item | Effect | Duration | How to Obtain |
|---|---|---|---|
| Bandage | Heal 10 HP | Instant | Craft from cloth |
| Med Syringe | Heal 15 HP instantly, +25 over time | 2 seconds | Craft from cloth + metal + HQM |
| Large Med Kit | Heal 25 HP instantly, +50 over time | 5 seconds | Craft from cloth + metal + HQM |
| Anti-Radiation Pills | Reduce rads by 30 | Instant | Loot or craft (charcoal + cloth) |
| Water Jug | Hydration +50 | Instant | Fill at water source |
| Armor (wood, leather, road sign, etc.) | Damage reduction | Until destroyed | Craft from resources |
| Adrenaline (No item, but player can “boost” by taking damage & healing) | Passive buff: increased move speed when low HP (below 40) | While low HP | N/A (game mechanic) |
- Always carry at least 1 med syringe in a fight.
- Pop anti-rad pills before entering a radtown without hazmat.
- Keep water on tool belt to avoid dehydration while farming.
- Crouch walking: No footstep sound; essential for sneaking up on enemies.
- Holding breath: Tap SHIFT while ADSing to steady scope for ~5 seconds.
- Jump sliding: Sprint + slide (crouch while sprinting) to maintain speed downhill.
- Ladder climbing: Look up to climb faster.
- Swimming: Press SHIFT underwater to move faster (but burns oxygen).
---
7. Stealth & Movement Skills
These are techniques rather than learned abilities.
Combo: Crouch around corners → ADS + hold breath → headshot with bolt action → reposition.
---
8. Synergies & Combos
Because there are no skill combos in the traditional sense, synergies come from item pairings.
| Combo | Elements | Effect |
|---|---|---|
| Solo Raid | Jackhammer + satchel + cloth + bag | Soft-side wall -> blow through -> loot -> bag out |
| Raid Defense | Shotgun traps + auto turret + high wall | Slows raiders, kills them, delays their progress |
| Farming | Chainsaw + horse + large backpack | Fast wood collection + mass transport |
| PvP Push | AK (ADS) + med syringes + armor + ballistic shelter | Suppress enemy, heal mid-fight, cover for reload |
| Monument Run | Hazmat + keycard + fuse + water gun + meds | Survive tunnels, unlock doors, loot crates |
9. Recommended Progression Path (New Players)
1. Hour 1: Gather wood and stone, craft a stone hatchet and pickaxe. Build a 1x1 wooden base with lock and sleeping bag.
2. First day: Upgrade to stone walls. Learn the bow. Farm scrap from barrels. Unlock building plan (if not default) and tool cupboard.
3. Day 2-3: Unlock revolver or custom SMG. Build a furnace. Smelt metal and sulfur. Create armor (roadsign). Start exploring radtowns with a keycard.
4. Week 1: Get AK-47 or bolt action. Build a larger base with honeycomb. Set up electricity for turrets. Establish relationships or alliances.
5. Late game: Raid neighbors, defend against counter-raids, become the dominant force on the server.
---
10. Final Notes
- Rust rewards adaptability more than any fixed skill set. The best players can switch between farming, fighting, and building on the fly.
- There is no respec—once you spend scrap on the tech tree, it’s gone. Plan ahead.
- Player skill (aim, movement, game sense) will always outclass any gear advantage. A well-aimed bow can kill a full metal AK player if they’re caught off-guard.
Use this guide as a reference for what you can learn and do in Rust. Experiment with different roles to find your niche.
Characters & Roles
Characters & Roles
Introduction
Unlike most multiplayer games, Rust does not feature any predefined characters, classes, or heroes. Every player starts as an identical naked survivor with the same stats, abilities, and progression—your only distinguishing features are the items you carry, the clothes you wear, and the skin you equip (cosmetic only). There is no skill tree, no perk system, and no unlockable class. Your role is entirely shaped by your playstyle, group dynamics, and the gear you choose to craft.
Because of this, the concept of “characters” in Rust is best understood through player-defined roles—the archetypes that emerge through gameplay. Below is a comprehensive guide to the most common roles players adopt, covering their strengths, weaknesses, recommended playstyles, equipment, and team synergy.
---
Player Roles (Emergent Archetypes)
#### Solo Survivor
- Description: A lone player who must gather, build, and defend without allies. The hardest difficulty.
- Strengths: High adaptability, low resource consumption, no resource splitting, easier to hide bases.
- Weaknesses: Extremely vulnerable to groups, long grind times, no respawn advantage, reduced base defense.
- Playstyle: Stealth, speed, and efficiency. Focus on small hidden bases (2x1 or 2x2), farming during off-peak hours, and avoiding open conflict unless certain of victory. Use doorcamps and traps to ambush.
- Unlock Conditions: No unlock—simply play alone.
- Recommended Equipment/Progression: Start with bow and arrows; rush a crossbow and revolver. Build a small metal base with code locks. Prioritize a shotgun for interior defense. Use bandages and med syringes.
- Team Synergy: None (solo role). Works best if you befriend neighbors temporarily or stay quiet.
- Description: A player dedicated to resource collection (wood, stone, metal, sulfur, components, food). Often a support role.
- Strengths: Provides the materials needed for base building and raiding. Can become wealthy quickly.
- Weaknesses: Often unarmed while farming; vulnerable to ambushes. Carrying large stacks makes you a prime target.
- Playstyle: Master node farming routes (stone/metal spawns), tree lines, and animal hunting. Use a horse or sometimes a scrap transport helicopter for speed. Always carry a weapon (crossbow or nailgun) for self-defense.
- Unlock Conditions: None.
- Recommended Equipment/Progression: Metal hatchet, pickaxe, salvaged sword or machete, burlap armor (or roadsign). Horse saddle if available. High-tier: chainsaw and jackhammer but risk noise. Carry a single weapon (e.g., Python) and extra meds.
- Team Synergy: Essential for any group. Works with builders (provides stone/wood) and raiders (provides sulfur/gunpowder).
- Description: Focuses on base design, construction, and maintenance. Often the most creative role.
- Strengths: Can create nearly unraidable structures (if skilled); knows soft-side mechanics, honeycombing, and TC authorization. Controls base access.
- Weaknesses: Requires massive amounts of resources; spends lots of time placing walls and upgrading. May lack combat prowess if too focused.
- Playstyle: Plan base layout online (use build servers or calculators for efficiency). Prioritize TC placement, airlock design, and loot room positioning. Use external TCs, shooting floors, and compound walls. Experiment with traps (shotgun traps, landmines, flame turrets).
- Unlock Conditions: None.
- Recommended Equipment/Progression: Hammer, building plan, tool cupboard, a stack of wood/stone/metal. Upgrade stone walls to metal (armored is end-game). Use a level 2 workbench for high-tier upgrades. Wiring tools for electronic defense.
- Team Synergy: Relies on farmers for materials and raiders for protecting the base. Coordinates with electrician if automation is used.
- Description: Excels at breaking into other players’ bases to steal loot. The aggressive core of PvP.
- Strengths: Can overwhelm defenses with explosives, melee tools (satchel charges, C4, rockets, explosive ammo). Good at identifying weak points (garage doors, soft-side doors, metal shop fronts).
- Weaknesses: High cost of explosives/Raiding tools. Must transport heavy loads. Loud noises attract counter-raiders. Requires intel gathering (shop fronts, door count).
- Playstyle: Scout bases visually or with drones (if unlocked). Calculate raid cost using online calculators. Use a combination of satchels, C4, and rockets. Bring pickaxes for soft-side raiding on stone/metal. Carry tools to break into TC room. Pre-raid by destroying external TCs.
- Unlock Conditions: None—but requires tech tree investment in explosive materials (gunpowder, explosives, rocket launcher).
- Recommended Equipment/Progression: Satchel charges (early), C4 (mid), rockets with HE and smoke (late). Wear heavy plate armor (or road sign). Bring a rifle for defending against counter-raiders. Medical syringes and bandages.
- Team Synergy: Works with farmers (to produce sulfur/gunpowder) and builders (to provide safe raid base or raid tower). Scout role can provide info.
- Description: Player focused solely on fighting other players—solo or in battles. Often roams with high-tier weapons.
- Strengths: Superior aim and game sense; can wipe out groups if skilled. Fast loot from kills.
- Weaknesses: High risk of losing kits; gear fear is counterproductive. May neglect base defense and farming.
- Playstyle: Roam monument areas (Launch Site, Military Tunnels, Airfield) or roads. Use bolt-action rifles, assault rifles, or custom SMG. Practice recoil control on UKN servers. Ambush players at monuments, set up sniping perches.
- Unlock Conditions: None.
- Recommended Equipment/Progression: End-game weapons: AK-47, LR-300, M249 (rare). Gear: metal facemask, chest plate, roadsign kilt, hoodie. Attachments: 4x scope, muzzle brake, laser. Carry extra ammo and meds.
- Team Synergy: Essential for group protection. Supports raiders by clearing area and defending loot. Can be a roamer while others farm.
- Description: A peaceful role focusing on buying and selling items through the game’s vending machine system or player-run shops.
- Strengths: Can acquire resources and rare items without fighting (e.g., weapons for stone). Builds reputation and alliances. Low risk if shop is well-defended.
- Weaknesses: Requires setup (shop front, vending machine, electricity if automated). Strong competition from bandit camp. Trust issues; customers may try to raid the shop.
- Playstyle: Build a small shop base near the road or near safe zones (Outpost, Bandit Camp). Stock vending machine with items for trade (e.g., 1k stone per 5 HQM). Advertise on chat or Discord. Use shop drop boxes and secure trade rooms.
- Unlock Conditions: Must craft or find a vending machine (requires level 2 workbench, sheet metal).
- Recommended Equipment/Progression: Vending machine, shop front, building plan for secure trade area. Store valuable items only when needed. Use turrets or high walls for protection.
- Team Synergy: Works with farmers for goods to sell, and with combat specialists for protection. Can also act as a neutral hub for multiple groups.
- Description: Focuses on collecting components (gears, springs, pipes, tech trash) and recycling them for high-quality metal (HQM) and other materials.
- Strengths: Fastest way to obtain end-game resources like HQM, cloth, scrap. Low startup cost.
- Weaknesses: Must travel to recyclers (safe zones) which are dangerous. Requires inventory space. Hard to defend while recycling.
- Playstyle: Run monument puzzles (Launch Site, Water Treatment, etc.) for component crates and elite crates. Collect every component from roads and barrels. Take to Outpost or Bandit Camp recycler with a car or horse. Avoid car noise near other players.
- Unlock Conditions: None.
- Recommended Equipment/Progression: Road sign armor, crossbow or nailgun, horse key. Recycler at safe zone: leave a stash nearby.
- Team Synergy: Provides HQM and scrap for builders (for metal upgrades) and raiders (for tech). Often pairs with a farmer or sniper for defense.
- Scientists: Hostile humanoids at monuments (e.g., Launch Site, Military Tunnels). They have high HP, use assault rifles, and drop military loot (guns, armor, tech trash). Cannot be negotiated with.
- Heavy Scientists: Boss-level NPCs at Oil Rig. Use LMGs, have immense HP, and require coordinated team to kill. Rewards are top-tier (M249, C4, etc.).
- Animals: Wolves, bears, boars, chickens. Provide food, cloth, and bone. Bears and wolves are dangerous early game but become trivial later. Boars are passive unless attacked; chickens are harmless.
- Roamers / Patrol Scientists: Scientists that walk along roads or patrol monuments. Same loot as static scientists.
- Autoturrets: Stationary defensive NPCs (not alive) set by players. They shoot based on authorization.
#### Farmer/Gatherer
#### Builder/Architect
#### Raider/Destroyer
#### Combat Specialist / PvPer
#### Trader / Shopkeeper
#### Scrapper / Recycler
---
Non-Playable Characters (NPCs) – For Context
While not playable, these NPCs are integral to the world:
---
Summary Table of Player Roles
| Role | Primary Task | Key Strength | Key Weakness | Best Teammates |
|---|---|---|---|---|
| Solo Survivor | All by themselves | Flexibility | Vulnerability | None (self-reliant) |
| Farmer/Gatherer | Resource collection | Material supply | Unarmed while farming | Builder, Raider |
| Builder/Architect | Base design & defense | Ultimate defense | Time-consuming | Farmer, Electrician |
| Raider/Destroyer | Breaking bases | Loot & power | High cost | Farmer, PvPer |
| Combat Specialist | PvP & roaming | Group wipe | Gear risk | Raider, Builder |
| Trader/Shopkeeper | Safe economy | Reputation & resources | Trust issues | Farmer, PvPer (bodyguard) |
| Scrapper/Recycler | HQM & components | Fast end-game materials | Danger at recyclers | Farmer, PvPer |
Final Note
Rust’s depth comes from these emergent roles, not from any class system. The most successful players often switch between roles depending on the day’s objectives. A base builder may farm when needed; a PvPer may scrap for HQM. Flexibility is the true character class of Rust. All players have access to the same tools—it’s the strategy and specialization that define their “character.”
Cheats & Secrets
Cheats & Secrets
Overview
Rust is a strictly multiplayer survival game with no official cheat codes, unlock codes, or secret commands that grant unfair advantages in normal gameplay. The game is protected by Easy Anti-Cheat (EAC) and Facepunch actively bans clients using hacks. However, there are numerous developer-intended hidden features, Easter eggs, and secret locations that enrich the world. This guide covers all legitimate hidden content—no exploits or illegal mods.
No Cheats, But…
- Console Commands (Admin Only): If you host a dedicated server (PC), you can use console commands (e.g., `give`, `teleport`, `spawn`, `god`) but these require `server.writeconfig` and `ownerid` privileges. They are not available to regular players on official servers.
- No Unlock Codes: There are no “press X to unlock” codes in the vanilla game.
- Exploit-Safe Hidden Content: Everything listed below is intended by the developers and does not require glitches or third-party software.
- Location: Power Plant monument – in a hidden room behind a breakable wall on the second floor of the main building.
- What it is: A framed painting of a banana. This is a reference to the very early legacy version of Rust where players found bananas in loot barrels. A nod to long-time players.
- Location: Airport monument – in the empty control tower, on a desk.
- What it is: A static chessboard mid-game, with fallen pieces. No interaction, just decorative.
- Location: Bandit Camp – hidden room behind a counter in the main building.
- What it is: A sign reading “No RDM” (Random Deathmatch) alongside a frying pan and a few chairs. It mocks common server complaints.
- Location: The Dome monument – climb to the very top of the Ferris wheel structure (dome). There is a single office chair floating with no visible stand. A bizarre developer joke.
- Location: Underwater Labs – in one of the side rooms of the main lab, you may find a scientist NPC sitting in a corner, asleep, with a Zzz floating above them. Rare spawn, but intentionally placed.
- Location: The Dome (Water Treatment version) – inside the central vertical shaft, a broken elevator with a skeleton sitting in it. Unsettling but deliberate.
- How to access: Smash the wooden wall behind the pipes on the second floor. Requires a melee weapon (e.g., rock, pickaxe).
- Contents: A wooden crate, often containing low-tier components and cloth. Sometimes a red barrel spawns.
- How to access: Jump from the nearby staircase onto the roof of the terminal, then onto the small balcony. Crouch through the gap into the tower. Not immediately obvious.
- Contents: A small loot box with components.
- Location: Directly behind the large wooden wall near the recycler, there is a breakable sheet of corrugated metal. Break it with any tool.
- Contents: A hidden vending machine that sells rare skins for scrap (prices vary). Also a small loot barrel.
- How to access: Dive underwater around the base of the Lighthouse. There is an underwater cave entrance (not marked on map) leading to an air pocket with a small wooden crate.
- Contents: Basic tools and components.
- How to access: Use the angled metal beams to jump to the top of the dish. Once on top, there is a small platform with a crate.
- Contents: A military-grade loot crate (green).
- Location: The large building with a conveyor belt. Behind a metal grate that can be opened with a fuse. (Fuse is found in the same monument).
- Contents: A room with a large wooden crate and a blueprint table (decorative, but used in some events).
- How to access: Enter the drainage pipe near the broken train cart. Crawl through a short tunnel to emerge inside a small hidden room.
- Contents: A barrel with cloth and low-tier items.
- Location: Inside the main junkyard building (with the safe zone sign). There is a small booth with a single chair and a note on the wall: “Tell your secrets to the metal.” Purely atmospheric.
- Giant Tree with a Platform: Sometimes a massive tree spawns with a spiral staircase leading to a small wooden platform. No loot, but a great lookout spot.
- Buried Caches: In snowy biomes, the ground sometimes has a bump with a buried loot barrel (similar to the ones you need to dig up with a shovel? Not yet – but certain terrain cracks can be harvested for components (feature removed? Still present in 2024 as a low chance).
- Abandoned Cabins: Rarely, a fully-furnished but broken-down cabin appears in the forest. Contains a note with lore (incomplete).
- Hidden Stashes: You can place a Small Wooden Sign inside a bush and store a few items behind it. Not a literal secret, but it hides loot from casual passers-by.
- Underwater Bunkers: Build a base partially submerged under the water – visibility is low and few players check waterline foundations.
- Secret Entrances: Use a combination of garage doors and stone walls to create a hidden door that looks like a solid wall from the outside. This is a common builder tactic, not a cheat.
- Loot Room Inside a Decorative Element: Place a campfire or barrel planter on top of a box to hide it. Again, intended by design.
- Banana Painting at Power Plant
- Chessboard at Airport
- Frying Pan Sign at Bandit Camp
- Office Chair at Dome (still there)
- Hidden rooms at same monuments as PC
Easter Eggs & Developer References
#### The Banana Painting
#### The Chessboard
#### The Frying Pan Sign
#### The Office Chair in the Sky
#### The Sleeping Scientist
#### The Broken Elevator
Secret Rooms & Hidden Areas
Many monuments contain breakable walls, false floors, or hidden passages that lead to extra loot or interesting sights. These are developer-intended and not glitches.
#### Power Plant Hidden Loot Room
#### Airport Control Tower Hidden Loot
#### Bandit Camp Secret Vending Machine
#### Lighthouse Underwater Cache
#### Satellite Dish Roof Crate
#### Mining Outpost Blueprint Room
#### Trainyard Underground Tunnel
#### Junkyard Confessional
Developer-Intended Hidden Content (Map-Based)
Because Rust maps are procedurally generated (unless using custom maps), exact coordinates vary. However, the terrain generator may spawn unique landmarks:
Exploit-Safe Secrets (Gameplay Mechanics)
These are not “Easter eggs” but clever mechanics that are completely intended and can give you an edge:
Notes for Console Edition
Rust Console Edition (by Double Eleven) shares the same core but lacks some monuments (e.g., Underwater Labs). However, the following Easter eggs are present:
No exclusive console secrets have been confirmed.
Final Word
Rust has zero cheat codes – any claim of a “working cheat code” is either a scam, an exploit (which will get you banned), or server-specific admin permissions. The game’s charm lies in its harsh, fair environment. Use the Easter eggs and secret rooms for lore immersion, but never expect a magic “win” button.
> “The only cheat in Rust is your willingness to wake up and try again after being raided.” – Community proverb