Sea of Thieves
## Sea of Thieves Game Introduction **Sea of Thieves** is a shared-world, action-adventure, pirate-themed multiplayer game developed by **Rare Ltd.** and published by **Xbox Game Studios**. First released on **March 20, 2018**, for Xbox One and Windows 10 (Microsoft Store), it later expanded to **S...
Download & Installation
Sea of Thieves Download & Installation Guide
This comprehensive guide covers all official methods to download and install Sea of Thieves on PC (Steam, Epic Games Store, Microsoft Store), Xbox One, Xbox Series X|S, and PlayStation 5. The game is not available on Nintendo Switch or mobile platforms.
---
System Requirements
#### PC (Windows 10/11)
| Component | Minimum | Recommended |
|---|---|---|
| OS | Windows 10 (64-bit) 18362 | Windows 11 (64-bit) |
| CPU | Intel Q9450 @ 2.6GHz or AMD Phenom II X6 @ 3.3GHz | Intel i5 6600 @ 3.3GHz or AMD Ryzen 5 2600 @ 3.4GHz |
| RAM | 8 GB | 16 GB |
| GPU | Nvidia GeForce GTX 650 / AMD Radeon HD 7750 (2GB VRAM) | Nvidia GeForce GTX 1060 (6GB) / AMD Radeon RX 580 (8GB) |
| DirectX | Version 11 | Version 12 |
| Storage | 90 GB SSD (recommended) or HDD | 90 GB SSD |
| Network | Broadband internet connection (5 Mbps minimum) | Broadband (10+ Mbps recommended) |
#### Xbox One / Xbox Series X|S
- Storage: ~90 GB (Xbox One) / ~90 GB (Series X|S) – SSD required on Series S for optimal performance.
- Internal or external storage: Game must be installed on internal drive or official Seagate Expansion Card for Xbox Series X|S to utilize Velocity Architecture.
- Storage: ~90 GB (SSD required – internal or compatible M.2 SSD). No external HDD support for PS5 games.
- Required firmware: Latest system software.
- Microsoft Account: Mandatory for all platforms. It stores your pirate, progress, friends, and purchases (including Ancient Coins). You can create one for free at account.microsoft.com.
- PlayStation Network (PSN) account: Required for PS5 version (free).
- Xbox Live account: Already part of Microsoft account; no additional subscription needed for free-to-play elements, but Xbox Game Pass Core (formerly Live Gold) is not required for Sea of Thieves on Xbox – it is playable without any subscription. On PS5, PlayStation Plus is not required for online play for this title.
- Steam / Epic account: Only needed for store features and purchases – the game itself uses Microsoft account for online services.
#### PlayStation 5
---
Official Download Sources
1. PC (Microsoft Store / Xbox App) – Best for Xbox Game Pass subscribers and cross-play with Xbox.
2. PC (Steam) – Ideal for Steam library management and achievements.
3. PC (Epic Games Store) – Occasionally offered as free game or with Epic discounts.
4. Xbox One / Series X|S – Via Microsoft Store on console.
5. PlayStation 5 – Via PlayStation Store.
Note: A Microsoft account is mandatory regardless of platform. Cross-play and cross-progression are supported across PC, Xbox, and PlayStation 5.
---
Step-by-Step Installation
#### PC – Microsoft Store / Xbox App
1. Open the Microsoft Store (or Xbox app on Windows 10/11).
2. Sign in with your Microsoft account.
3. Search for "Sea of Thieves".
4. Click "Get" or "Install" . If you have Game Pass, it will be free; otherwise, purchase the game.
5. Choose installation location (recommend an SSD with at least 100 GB free).
6. Wait for download and installation (~90 GB). Initial download may be smaller with subsequent patches.
7. Once installed, launch from Start menu, Xbox app, or desktop shortcut.
#### PC – Steam
1. Open Steam and log in.
2. Go to Store → Search "Sea of Thieves".
3. Add to Cart and complete purchase (or install if already owned).
4. Click "Install" from library. Choose installation directory (ensure 100 GB free).
5. Wait for download (~90 GB).
6. Launch from Steam library. On first launch, the game will prompt for a Microsoft account link.
#### PC – Epic Games Store
1. Launch Epic Games Launcher and sign in.
2. Go to Store → Search "Sea of Thieves".
3. Click "Get" or "Buy" . Purchase or claim if free.
4. Open Library → Find Sea of Thieves → Click Install.
5. Select install path (SSD recommended) and start download.
6. Launch when done. You will be prompted to sign in with your Microsoft account.
#### Xbox One / Xbox Series X|S
1. Turn on console and ensure internet connection.
2. Go to Microsoft Store on the dashboard.
3. Search "Sea of Thieves".
4. Select the game → Choose Install or Buy if not already owned (Game Pass subscribers can install directly).
5. Choose install location (internal or external drive; for Series X|S, use internal or expansion card for best loading).
6. The console will download and install the game (~90 GB). You can play a bit while downloading if you enable "Play while downloading" (some content may be limited).
7. Launch from My Games & Apps or Home screen.
#### PlayStation 5
1. From PS5 home screen → Select PlayStation Store.
2. Search "Sea of Thieves".
3. Select the game → Choose Download (if purchased) or Buy.
4. Wait for installation (~90 GB). You can monitor progress in Downloads.
5. First launch will require you to sign in with a Microsoft account (have it ready).
6. Optional: Adjust graphics/performance settings in the in-game menu (PS5 targets 60 FPS at 4K with dynamic resolution).
---
Account Requirements
---
First Launch Setup
1. Sign in with Microsoft account when prompted. Accept the Cross-Save and Privacy agreements.
2. Choose a pirate – you can select from a random rotating set or purchase a name change later.
3. Watch the intro tutorial (Maiden Voyage) – strongly recommended for new players. It teaches basic sailing, combat, and navigation.
4. Adjust settings:
- Video: Select resolution, quality preset (e.g., "Cursed", "Rare", "Mythical"), and frame rate cap. On PC, you can also adjust Field of View (FOV) and graphics details.
- Audio: Voice chat, push-to-talk, volume levels.
- Controls: Mouse sensitivity, controller layout (customizable), remapping.
5. Link accounts (optional) – you can connect Twitch for drops, or Xbox social features.
6. Start exploring – the main hub is the tavern on an outpost. From there you can choose voyages or sail freely.
Note: The first time you launch, the game may fetch additional assets (shaders, textures) causing a brief stall before the menu appears.
---
Common Installation Errors and Fixes
| Error / Issue | Platform(s) | Cause / Solution |
|---|---|---|
| Installation stuck at 0% | PC (Store/Game Pass) | Corrupt Windows Store cache. Run `wsreset.exe` (Windows+R) and restart. Alternatively, use the Xbox app troubleshooting: Settings → Apps → Sea of Thieves → Advanced options → Repair / Reset. |
| Download speed very slow | PC (Steam/Epic/Store) | Check for other downloads or background updates. Temporarily pause and resume. On MS Store, change download settings to "Unlimited" and clear delivery optimization cache. |
| "Something went wrong" error (0x80070005) | PC (MS Store) | Permission issue. Run Windows Update, ensure your account is admin. Reset Microsoft Store via Settings → Apps → Microsoft Store → Advanced → Reset. |
| Failed to install on external drive (Xbox) | Xbox | Ensure drive is formatted for games (NTFS). On Series X |
| Game crashes on startup / black screen | PC | Outdated GPU drivers. Update to latest from NVIDIA or AMD. Also disable overlays (Discord, Steam, GeForce Experience). Run the game in Windowed mode initially. |
| Error 0x8027025a / Installation incomplete | Xbox / PC | Insufficient storage. Free up space (at least 100 GB). If on Xbox, restart console. |
| Freeze during shader compilation | PC | RareSteam issue. Delete `%localappdata%\SeaOfThieves\Saved\Config` folder (backup if needed) and restart. Or verify game files (Steam: Properties → Local Files → Verify integrity; Epic: Manage → Verify). |
| DNS or network timeout errors | PC / Console | Restart router; use Google DNS (8.8.8.8 / 8.8.4.4). Check firewall – allow SeaOfThieves.exe and `GameBarPresenceWriter.exe`. |
| Unable to connect to Microsoft account | All platforms | Sign out and back in on the store/launcher. On PS5, go to Settings → Users and Accounts → Link with Other Services → Microsoft → Refresh. Ensure two-factor authentication isn't blocking. |
| Infinite "Preparing" on Epic Games Launcher | PC (Epic) | Clear Epic launcher cache: close launcher, delete `%localappdata%\EpicGamesLauncher\Saved\webcache` folder, restart. |
| Xbox app says "You own this game" but won't install | PC | Open Xbox app → Settings → General → Reset app. Then try installing from Microsoft Store instead. |
Post-Installation Verification
After installation, perform these checks to ensure everything works:
1. Launch the game – it should open without immediate crash. Wait for the splash screen and initial loading.
2. Check file integrity (optional)
- Steam: Right-click game → Properties → Local Files → Verify integrity of game files.
- Epic: Library → click three dots on Sea of Thieves → Manage → Verify.
- Microsoft Store: No official verify; instead use Settings → Apps → Sea of Thieves → Advanced → Repair. If problems persist, uninstall and reinstall.
3. Test performance – enter the Maiden Voyage tutorial. Monitor frame rate, loading times, and any stuttering. Adjust graphics settings if needed.
4. Audio and microphone – ensure voice chat works (push-to-talk by default). Check input/output devices in Windows sound settings.
5. Online connectivity – you must be online to play. The game will show "Connecting to Sea of Thieves..." then that you are logged in. If you get "Error: No internet connection", check your network.
6. Updates – after first launch, the game may download a small patch. Keep your game up-to-date for latest content and bug fixes.
7. Cross-play confirmation – invite a friend on a different platform to verify cross-play works fine.
---
Final Tips
- Backup settings: After configuring, you can copy `%localappdata%\SeaOfThieves\Saved\Config\WindowsClient` for PC to backup your settings.
- Game Pass: If you have PC Game Pass or Xbox Game Pass Ultimate, you can play on both PC and Xbox with the same save. No extra purchase needed.
- Storage space: Always keep at least 20 GB free beyond the game size for patches.
- Windows 11: Fully compatible; ensure you have the latest Windows updates.
- Antivirus: If you experience random crashes, try adding the game folder and executable to your antivirus exceptions.
Now you are ready to set sail! Enjoy your pirate adventures in Sea of Thieves.
Game Introduction
Sea of Thieves Game Introduction
Sea of Thieves is a shared-world, action-adventure, pirate-themed multiplayer game developed by Rare Ltd. and published by Xbox Game Studios. First released on March 20, 2018, for Xbox One and Windows 10 (Microsoft Store), it later expanded to Steam (June 3, 2020), Epic Games Store (April 6, 2023), and PlayStation 5 (April 30, 2024). The game has evolved significantly through major content updates, seasonal events, and expansions.
Story Overview & Setting
Set in a fictional, vibrant fantasy world of the Sea of Thieves, players take on the role of anonymous pirates sailing the high seas. There is no single player character; instead, you create your own pirate at the beginning. The overarching lore involves the mystical powers of the Sea of Thieves, where islands are born from the bones of ancient leviathans, the Shroud protects the borders, and the Gold Hoarders, Order of Souls, and Merchant Alliance vie for influence. The main story threads revolve around the Skeleton Lords, the Cursed Seas, and the Devil's Roar–a volcanic region. The core narrative is player-driven, with tall tales (story quests) like The Shroudbreaker, The Seabound Soul, and Heart of Fire revealing lore about Captain Flameheart, the Pirate Lord, and the ancient civilization of the Ancients.
Main Characters (Key NPCs)
While players are custom pirates, notable non-player characters (NPCs) include:
- The Pirate Lord – The mysterious guide and founder of the Sea of Thieves.
- Captain Flameheart – A ghostly skeleton lord seeking to destroy the Sea of Thieves.
- Wanda the Warsmith – A cursed pirate who forges weapons.
- Duke – A boozy tavern keeper who provides voyages.
- Larinna – The head of the Hunter's Call alliance.
- Stitcher Jim – A traitorous pirate with a personal vendetta.
- The Grand Maritime Union – A trading company representing order.
- Cooperative multiplayer (2-4 players per crew).
- Open-world exploration and PvPvE (player vs player vs environment).
- Grinding for cosmetics (no pay-to-win).
- Nautical themes and pirate fantasy.
- Adventure Mode – The main persistent world. Players sail, complete voyages (missions from trading companies), fight skeletons, sea monsters (Kraken, Megalodon), and other players. All player interactions are dynamic.
- Sea of Thieves: Arena (discontinued in 2022) – Former competitive mode.
- Seasonal Events – Limited-time activities (e.g., Festival of Giving, Hunters Call festivals).
- Anniversary Update (2019) – Added The Arena, fishing, harpoons, and Tall Tales.
- Forsaken Shores – Introduced the Devil’s Roar region.
- Seabound Soul – New Tall Tale, fire bombs.
- Heart of Fire – Storyline continuation.
- A Pirate’s Life (2021) – Crossover with Disney’s Pirates of the Caribbean, featuring Jack Sparrow and new Tall Tales.
- Season 5 – Added buried treasure, rowboat customization.
- Season 8 – Introduced new PvP faction battles (Guardian of Fortune vs Servant of the Flame).
- Season 11 – Reworked voyages and faction progression.
- True shared world PvPvE – No instances; everyone on a server can interact, fight, or ally.
- Ship physics – Complex sailing mechanics with wind direction, anchor, cannons, and repairs.
- Player-driven economy – You choose which trading company to represent, and loot is always at risk.
- Constant content updates – Rare has supported the game for 7+ years with free seasons.
- Cosmetic-only progression – No stat upgrades; all items are purely visual, keeping a level playing field.
- Voice chat proximity – Talking in-game can be heard by nearby players, enabling roleplay and negotiation.
- Dynamic world – Sea monsters, storms, volcanoes, and skeleton fleets spawn unpredictably.
Core Appeal & Target Audience
Core Appeal: Freedom of emergent gameplay – every session is unique. The game emphasizes cooperative sailing, combat (ship vs. ship, sword, gun), treasure hunting, and creating your own pirate legend. It’s a sandbox where you can betray allies, form alliances, or fight solo.
Target Audience: Ages 10+ (rated T for Teen). Best suited for players who enjoy:
Game Modes
Online / Offline Support
Online only. Requires a persistent internet connection and an Xbox Live/Game Pass Core/Ultimate subscription on Xbox, or an Xbox account linked on PC/PlayStation. There is no offline mode. Servers host up to 6 crews (max 24 players) per server, but players can also join via Discord or in-game server browser via custom games.
DLC / Expansion Overview
All major content updates are free via seasonal updates. However, there are paid expansions called “Sea of Thieves: Adventures” (free), and purchasable cosmetic packs via the Pirate Emporium (microtransactions). Notable content updates:
Additional micro-DLC packs (e.g., Soulflame Ship Collection, Eternal Freedom Ship Set) are purely cosmetic. No gameplay advantages.
What Makes This Game Unique
For a complete guide on how to get the game on PC, Xbox, and PlayStation, refer to the previous section: "Sea of Thieves Download & Installation Guide."
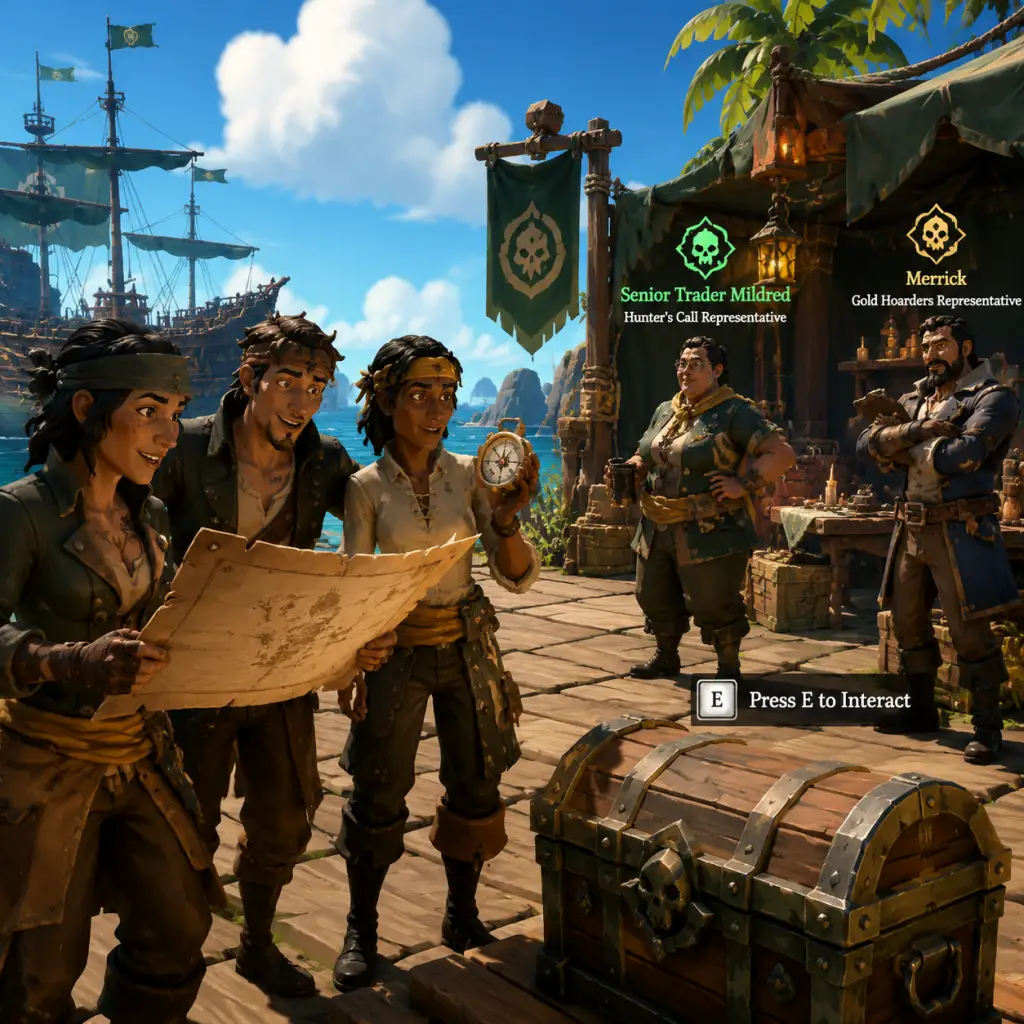
Getting Started
Getting Started with Sea of Thieves: The Ultimate New Player Guide
Welcome to the world of Sea of Thieves! This guide is designed to get you from the title screen to your first successful pirate adventure as quickly and painlessly as possible. Whether you're playing on PC, Xbox, or PlayStation 5, we'll cover everything you need for a smooth first hour—and beyond.
---
1. Character Creation: Picking Your Pirate
Sea of Thieves does not have a traditional character creator with sliders. Instead, you choose from a constantly rotating selection of pre-generated pirates (each with unique appearance, body type, hair, scars, and clothes).
- Process: At the main menu, select "Play" > "Pirate Selection" > "Customize." You'll see a set of 5–10 pirates. You can cycle through selections (it refreshes periodically).
- Tip: If you don't like any, close the game and reopen—the lineup changes. Your choice is permanent (no re-customization later, except for cosmetics unlocked via shop), so pick one that looks cool to you.
- No stats: Appearance is purely cosmetic; all pirates have equal abilities.
- Learn to move (WASD on PC, left stick on consoles).
- Pick up a lantern, find a camp, and use the ferry of the damned (death mechanics).
- Sail a single-masted sloop, raise/lower sails, steer, drop anchor, and use a compass.
- Dig up a treasure chest and sell it to a Gold Hoarder.
- Learn about supplies (cannonballs, wood, food) at the ship's barrels.
- Understand the map table and voyage table.
---
2. First Hour Walkthrough: The Maiden Voyage
Step 1: Launch the game and select "Maiden Voyage". This is the tutorial—don't skip it! It teaches core mechanics safely.
Step 2: Complete the tutorial. You'll:
Step 3: Finish the Maiden Voyage. You'll earn a small gold reward and a set of starter cosmetics. The game will prompt you to enter the Sea of Thieves proper.
Step 4: Open the main map (press M on PC, View button on Xbox, Touchpad on PS5). You'll spawn at an Outpost. Listen to the Pirate Lord's intro speech.
Step 5: Purchase your first voyage. Go to the Gold Hoarder tent (marked with a skull-and-crossbones flag) and buy a "Voyage" (e.g., "Bounty of the Gold Hoarder").
Step 6: Vote to start the voyage at your ship's voyage table (below deck on the sloop). Set sail using the ship's wheel and map.
---
3. Controls Overview (All Platforms)
Below are the essential controls. Note: you can remap in Settings.
| Action | PC (Keyboard & Mouse) | Xbox Controller | PlayStation Controller |
|---|---|---|---|
| Move | W/A/S/D | Left stick | Left stick |
| Look / Aim | Mouse | Right stick | Right stick |
| Interact / Use | E | A | X |
| Jump | Space | A (hold) | X (hold) |
| Sprint / Climb | Left Shift | Left stick click | L3 |
| Weapon 1 (Cutlass) | 1 | LB + Y | L1 + Triangle |
| Weapon 2 (Pistol/Flintlock) | 2 | LB + X | L1 + Square |
| Map | M | View (two squares) | Touchpad |
| Voyage Radial | Tab | LB (hold) | L1 (hold) |
| Emote Wheel | B | D-pad Down | D-pad Down |
| Item Radial | Q | RB (hold) | R1 (hold) |
| Crouch / Sneak | Left Ctrl | Right stick click | R3 |
| Raise Sail | F | X (hold) | Square (hold) |
| Lower Sail | R | B (hold) | Circle (hold) |
| Anchor Up/Down | Space near capstan | A near capstan | X near capstan |
| Bucket Water | Right Click (scoop), Left Click (throw) | RT (scoop), LT (throw) | R2 (scoop), L2 (throw) |
| Ship Wheel | E to grab, mouse to steer | A to grab, left/right stick | X to grab, left stick |
| Speaking Trumpet | Z | D-pad Up | D-pad Up |
| Compass | Hold right mouse button | Hold RT | Hold R2 |
---
4. UI Overview (HUD)
When on your ship:
- Top left: Ship health (wooden plank icon) – depletes when taking damage. Repair with planks from the barrel.
- Top center: Voyage objective (compass rose / skull / chest) – shows distance and direction.
- Top right: Supplies count (cannonballs, wood, food).
- Bottom center: Toolbar with currently equipped item (map, compass, spyglass, tankard, bucket, etc.).
- Left/right: Crew health bars (yourself + crewmates).
- Map table: Below deck; shows the entire world with your ship's position. Place a voyage map from the voyage table onto it.
- Voyage table: Also below deck; vote to start/activate voyages.
- Ship's wheel: Steers the ship; center it for straight course.
- Capstan: Drops/raises anchor. Always raise anchor before sailing.
- Ship's bell: Not functional beyond roleplay.
- Stick to the Sloop (1–2 players) – it's fastest and easiest to manage.
- Complete a single small voyage near an Outpost (e.g., a single map from Gold Hoarder).
- Sail with a crew – even solo is fine, but voice chat with friends helps.
- Always sell your loot immediately – don't hoard multiple chests on board; one shipwreck or pirate attack could lose everything.
- Check the horizon frequently (use spyglass or look around). Other ships can attack.
- Skipping the Maiden Voyage – you'll miss critical tutorials.
- Going into high-traffic PvP zones (Reaper's Mark, active World Events) until you're comfortable.
- Fighting other ships unless you're ready to lose everything. Running away is often the best option.
- Standing near the ship's mast during a storm – lightning can kill you.
- Ignoring food – managing hunger is vital for health regeneration.
- Leaving your ship unattended – even for a minute, it can drift or be boarded.
- Trying to unlock Pirate Legend immediately – takes weeks; focus on fun voyages.
---
5. Essential Early Objectives
1. Complete the Maiden Voyage. Absolutely do this first.
2. Learn to read the map – the world is a grid of named islands. Your voyage map shows X marks the spot relative to island shapes.
3. Gather basic supplies – fill your ship's barrels from Outpost barrels before leaving.
4. Dig up your first treasure – use the shovel on the marked spot (you'll hear a 'clink').
5. Sell treasure at the Outpost – each faction has a representative: Gold Hoarder (skull), Order of Souls (ghost), Merchant Alliance (banner).
6. Buy your first cosmetic – visit the General Clothing Shop or Equipment Shop to look more pirate-y.
7. Learn to adjust sails for wind – sails catch wind best when perpendicular to wind direction (white pennant).
8. Practice anchoring properly – raise sails before dropping anchor to stop sharply; never anchor without raising sails or you'll be stuck.
---
6. What to Do First and What to Avoid
✅ DO FIRST:
❌ AVOID:
---
7. Early Resource Priorities
| Resource | Where to Find | Primary Use | Priority |
|---|---|---|---|
| Cannonballs | Barrels on Outposts, shipwrecks, floating barrels | Defending yourself, attacking skeletons, destroying ships | High – at least 20 before leaving |
| Wood Planks | Same as cannonballs | Repairing holes in ship hull | Very High – 20+ planks essential |
| Food | Barrels, fishing, killing animals (pigs, chickens) | Health regeneration, cooking improves effect | Medium – 5–10 pieces fine |
| Fruit (Bananas, Pomegranates, etc.) | Trees on islands | Light healing, can be cooked | Low – but good supplement |
| Cannonball crates | Rare – from voyages or floating loot | Storage upgrade | Low early game |
---
8. Common Beginner Mistakes (and How to Avoid Them)
1. Dropping anchor without raising sails – You'll stop instantly but won't be able to raise anchor easily if you need to escape. Always raise sails first, then drop anchor only for a precise stop. Then raise anchor immediately.
2. Forgetting to raise the anchor before sailing – You'll be stuck. Press E (PC) or A (Xbox) / X (PS) on the capstan to raise.
3. Sailing directly into the wind with full sails – Sloop is fastest heading into wind with sails fully billowed; larger ships are slower into wind. Learn sail angle.
4. Not looking around – Other players can sneak up. Use the spyglass and check every few minutes.
5. Hoarding treasure – The wave that sinks you will come. Always sell after each voyage.
6. Shooting cannons without aiming – Practice with the cannon until you can aim at the waterline of another ship. Use the reticle elevation marks.
7. Standing on the bowsprit – You'll fall off easily. Stay on deck.
8. Fighting skeletons on islands without checking your ship – They can't sink your ship, but other players can. Keep one eye on the horizon.
9. Ignoring the map table – It shows your exact location and all islands. Use it constantly.
10. Not communicating with crew – Even solo, use the chat wheel (B) to signal "Help!" or "Someone's on our ship!"
---
9. Day-One Checklist (Practical Steps)
- [ ] Complete the Maiden Voyage tutorial.
- [ ] Choose a pirate you like (permanent choice).
- [ ] Spawn at an Outpost (random).
- [ ] Loot all Outpost barrels for supplies.
- [ ] Buy a Gold Hoarder voyage (cheapest – 1 map).
- [ ] Vote on the voyage at your ship's voyage table.
- [ ] Set sail – adjust sails for wind, follow the compass bearing to the island.
- [ ] On the island: dig with shovel where indicated. (Look for a small mound of dirt or a map clue.)
- [ ] Dig up the chest – carry it carefully back to your ship.
- [ ] Sail back to any Outpost (the nearest one).
- [ ] Sell the chest to the Gold Hoarder representative (red tent).
- [ ] Collect gold and reputation.
- [ ] Purchase a shovel and compass from the Equipment Shop if you didn't get them from the Maiden Voyage (they are free from the shop once).
- [ ] Buy a spyglass – essential for spotting threats.
- [ ] Complete 2–3 more small voyages to build confidence.
- [ ] Try a cargo run from Merchant Alliance for easy money (fetch crates and deliver with time limit).
- [ ] Unlock the Pirate Legend first cosmetics? Not needed – have fun!
- [ ] Join the Sea of Thieves Community Discord or Reddit for crew-finding.
- Play with friends – The game is more fun and safer with a crew. Use the "Looking for Crew" option on Xbox or the Official Sea of Thieves Discord.
- Embrace failure – You will sink, lose treasure, be betrayed by other pirates. That's part of the game. Learn from each loss.
- Watch the wind – The white pennant on your sail shows wind direction. Sails work best when the pennant is parallel to your sail's cloth (i.e., wind hitting from the back or side).
- Use the map at the Outpost – You can see active world events (skulls, ships) on the main map. Avoid them as a beginner.
- Don't rush – The Sea is huge. Enjoy the sunsets, the storms, and the unexpected encounters.
---
Final Tips for a Strong Start
Now, hoist the anchor and set sail! The seas await. Happy pirating!
Core Gameplay
Core Gameplay in Sea of Thieves
Sea of Thieves is an open-world multiplayer pirate sandbox where every session is a unique, emergent story. The game blends cooperative ship management, hand‑to‑hand combat, treasure hunting, PvPvE encounters, and a light progression system that respects player skill over stat gains. Below is a comprehensive breakdown of the core gameplay loop, systems, and progression tiers.
The Core Gameplay Loop
1. Choose a Session: Select a game mode (Adventure, Safer Seas, or the Hourglass PvP mode) and crew size (Sloop, Brigantine, Galleon).
2. Set Sail: Visit an Outpost to vote on Voyages from the five Trading Companies (Gold Hoarders, Order of Souls, Merchant Alliance, Reaper’s Bones, Athena’s Fortune).
3. Complete Objectives: Follow maps, riddles, or cargo manifests; dig up chests; defeat skeleton captains; deliver goods.
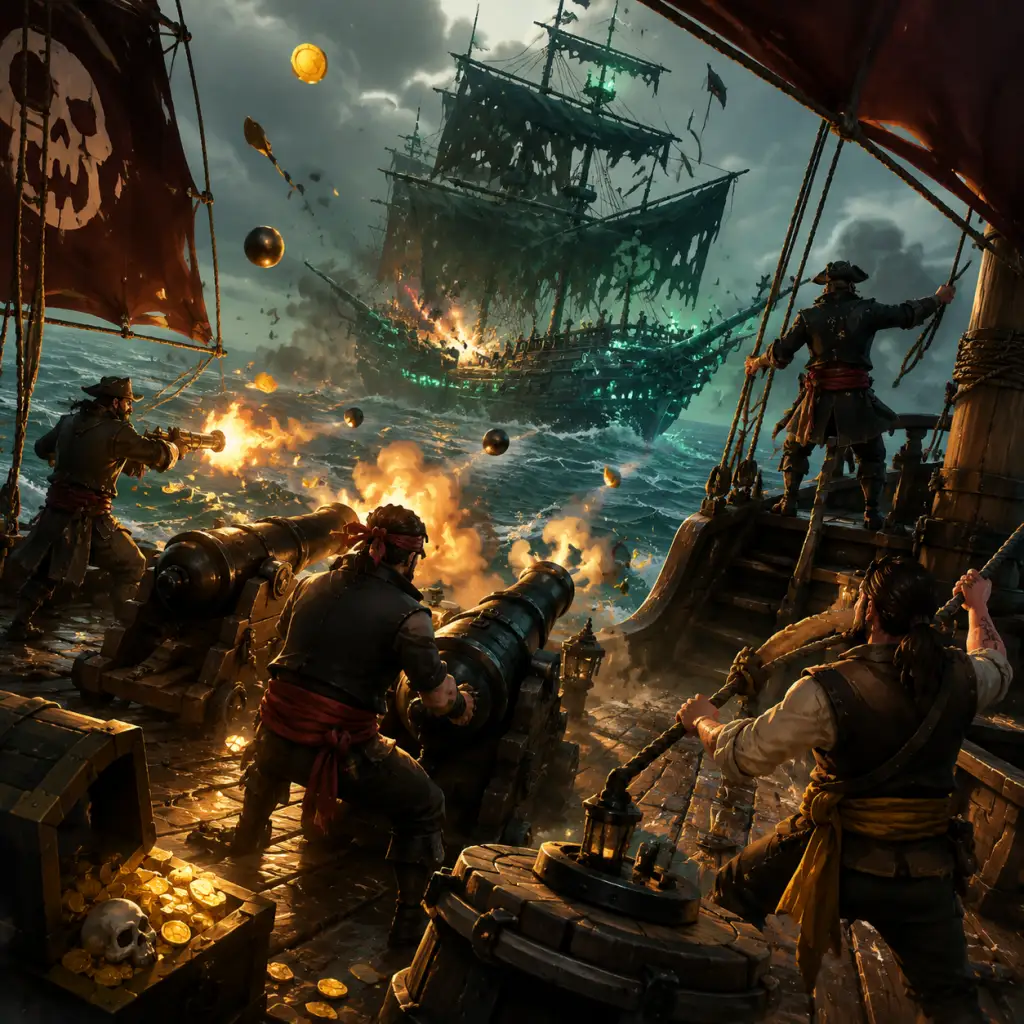
4. Encounter Emergent Content: While sailing, you’ll face skeleton ships, megalodons, Krakens, player pirates, storm weather, and random events (Skeleton Forts, Ashen Winds, Fleet, etc.).
5. Sell Loot: Return to any Outpost and sell treasures to the appropriate company representative for gold, reputation, and commendations.
6. Upgrade & Customize: Spend gold on ship cosmetics, weapons, tools, clothing, and emotes. Reputation unlocks higher‑tier Voyages and titles.
7. Risk vs. Reward: Other players can attack and steal your loot. Safer Seas mode reduces risk (no PvP, fewer rewards).
Combat & Interaction Systems
Naval Combat: Manage sails (angle, raise/lower), helm (steering), cannons (aim, load, fire), repair holes, bucket water, and use chain shots (damage mast), anchor balls, or cursed cannonballs.
Hand‑to‑Hand Combat: Use cutlass (light/heavy attack, block), flintlock pistol, eye of reach (sniper), blunderbuss (shotgun), and throwables (firebombs, blunderbombs, bone callers). Blocking and timing are key.
PvP Encounters: Flag as Reaper’s Bones to be visible on the map and engage in ship battles. The Hourglass mode pits two crews in a best‑of‑three naval battle.
PvE Encounters: Skeletons (gun, sword, plant – weak to water), Ocean Crawlers (ruby, coral, hermit – weak to fire), Phantoms, Ashen Lords, Skeleton Lords, Megalodons, Krakens (attack by shooting tentacles).
Treasure & Loot Types: Chests (castaway to legendary), skulls (foul to ashen), merchant crates (cloth, sugar, tea, rum), cargo runs (temperature‑sensitive bottles, plants, animals), and Athena’s items (legendary). Cursed chests cause passive damage (e.g., chest of sorrow cries, chest of rage explodes).
Progression
Progression is horizontal – gear does not make you stronger. Instead, you unlock cosmetics and higher‑tier Voyages. Each Trading Company has 75 reputation levels. Reaching level 50 in three companies grants Pirate Legend status, unlocking the Athena’s Fortune Hideout and Legendary Voyages.
Gold: Used to buy cosmetics, ship parts, and supplies from Outpost shops.
Reputation: Earned by selling loot to a specific company. Higher reputation unlocks more valuable Voyages and commendations.
Commendations: Achievements that unlock exclusive cosmetics, titles, and sometimes additional gold/reputation. Many are tied to specific activities (e.g., “Sailor of the Golden Sands”).
Renown: A battle‑pass system (Plunder Pass) that awards seasonal rewards for daily deeds and general playtime.
Dubloons & Ancient Coins: Dubloons are earned from commendations and used for specific cosmetics and Voyages. Ancient Coins are premium currency (earned rarely from skeleton spawns) for emotes, pets, and season passes.
Exploration & World Events
The world is divided into regions (e.g., The Shores of Plenty, The Ancient Isles, The Wilds, The Devil’s Roar). Each has unique environment, hazards (volcanoes in Roar), and ambient animals. Random events appear on the world map:
Skeleton Fort: Fortress with waves of skeletons, final boss (Skeleton Lord), and vault of high‑value loot.
Ashen Winds: Giant fiery skeleton boss that drops rare Ashen Tomes.
Skeleton Fleet: Multiple waves of skeleton ships guarding a treasure haul.
Fort of the Damned: Player‑activated event requiring ritual skull to start – extremely high reward.
Sea Forts: Small, regenerating fortresses with phantoms and modest loot.
Emergent Encounters: Megalodons (random spawn), Kraken (attacks if no active world event), Reaper’s Chests (visible to all), and messages in bottles.
Quests / Voyages
Voyages are the primary quest type. You purchase them from Trading Company representatives at Outposts. Types:
Gold Hoarders: Dig up chests using maps and riddles.
Order of Souls: Defeat skeleton captains (bounty bounty – find, kill, collect skulls).
Merchant Alliance: Deliver cargo (crates, animals, rum bottles) within time limits. Also lost shipments (find sunken merchant ship manifest).
Reaper’s Bones: Focus on PvP – steal loot from other crews. Emissary flag raises risk/reward.
Athena’s Fortune: Only for Pirate Legends – combines all types into one Legendary Voyage.
Tall Tales: Story‑driven quests with fixed narrative (e.g., “The Shroudbreaker”, “The Heart of Fire”). These are not repeatable for gold but grant exclusive cosmetics.
Economy
Gold is earned only by selling loot. Prices are flat – no haggling. Spend gold on:
Ship Customization: Hull, sails, figurehead, wheel, capstan, cannons, flag – all cosmetic.
Equipment: Spyglass, pocket watch, shovel, bucket, compass, speaking trumpet, tankard, lantern, fishing rod – one‑time purchase.
Weapons: Each weapon type one purchase, then infinite ammo (except throwables which you craft/carry).
Clothing & Emotes: Purely cosmetic.
Supplies: Wood planks, cannonballs, food – bought at Outpost or found on islands.
Ancient Coins (premium) are rare in‑game (Ancient Skeletons drop them) or bought via microtransactions. Used for emotes, pets, season pass (optional), and certain cosmetics.
Character / Build Growth
There is no level‑based character growth. Your pirate’s stats are identical to a day‑one player. “Build” refers to your loadout:
Weapons: Choose two from cutlass, pistol, eye of reach, blunderbuss. Example: Sword + Eye of Reach for mid‑range, Blunderbuss + Pistol for close‑brawler.
Cursed Cannonballs: Rare ammo types (anchorb, rigging, weary, jigball, peaceball) that affect enemy ship/crew. You stock them when found.
Food: Coconut, banana, pomegranate, cooked meats, and fish. Each restores different HP (cooked fish best).
Throwables: Firebombs (area denial), blunderbombs (knockback), bone callers (summon skeleton distraction).
Your pirate’s appearance is fully customizable (hair, beard, scars, clothes). Cosmetics are the only “growth” visible to others.
Endgame Structure
The ultimate goal is becoming Pirate Legend and then completing the Athena’s Fortune content. Endgame includes:
Athena’s Fortune Voyages: The only Legendary Voyage – longer, harder, culminates in a chest of legends (especially high value).
Tall Tales: Fully complete all 9+ Tall Tales (including “A Pirate’s Life” crossover) for exclusive curse cosmetics like the Shroudbreaker Cape.
Commendation Completion: Grind specific commendations for exclusive sets (e.g., “Legendary Thief”, “Master of the Ancient Isles”).
PvP Bragging Rights: Reaper’s Bones emissary and the Hourglass mode reward special cosmetic sets (e.g., Ghost Curse, Skeleton Curse) for winning many battles.
Gold Accumulation: Save up for the most expensive cosmetics (e.g., Ghost set, Dark Adventurer set costing millions).
Leaderboards & Seasons: Each season introduces a new Plunder Pass and limited‑time cosmetics. Compete on the leaderboard for rewards (e.g., fastest Skeleton Fort clear).
Community Events: Rare hosts periodic events (e.g., “The Sea of Thieves Championship”), double XP weekends, and live encounters (like Captain Flameheart’s return).
---
Gameplay by Progression Tiers
Early Game (Levels 1–25 in each company, Pirate Legend not yet)
Goal: Learn basics, earn gold for cosmetics and supplies, unlock first Voyage tiers.
Voyages: Purchase low‑tier Gold Hoarder (dig up chests), Order of Souls (bounty skulls), Merchant (cargo runs). Focus on learning sailing, map reading, and enemy AI. Expect simple riddles and small islands.
Combat: Practice sword blocking and timing cannon shots. Fight skeletons on beaches. Avoid PvP until comfortable with ship handling.
Economy: Spend gold on essential equipment (spyglass, bucket, shovel). Save for first ship set (Sailor set is free, but basic).
Exploration: Touch every island to learn its topography. Look for hidden barrels (good loot inside). Use the map table frequently.
Risks: Prey to random events (megalodon may be intimidating). Stick to Safer Seas if frustrated by player attacks.
Example Session: Vote for a Gold Hoarder map leading to Shark Bait Cove. Dig up 3 chests, fight some skeletons, sell at nearby Outpost. Net ~500 gold.
Mid Game (Levels 25–50 in at least two companies, approaching Pirate Legend)
Goal: Unlock higher‑tier Voyages (level 25+), start engaging world events, upgrade to better cosmetics.
Voyages: Now have multiple steps – maps with multiple X’s, riddles with harder clues, bounties with multiple captains. Merchant cargo runs may involve time limits and temperature‑sensitive items.
Combat: Comfortable with both naval and hand‑to‑hand. Start taking on Skeleton Forts (simple) and skeleton ships. Consider PvP with Reaper’s Bones emissary flag (visible on map) for extra risk/reward.
Economy: Gold now used for medium‑tier ship cosmetics (e.g., Cerulean set). May buy an animal crate for easier merchant runs.
Exploration: Familiar with all regions. Know efficient routes. Use cursed cannonballs strategically.
World Events: Participate in active Fort or Ashen Winds – coordinate with your crew to clear waves and secure the vault. Always beware of other crews.
Example Session: Vote for a level 30 Order of Souls bounty – defeat 5 skeleton captains dispersed across two large islands. While sailing, a Megalodon attacks – fight it off. Sell skulls for ~2000 gold.
Late Game (Pirate Legend unlocked, levels 50+ in three companies)
Goal: Complete Athena’s Fortune Voyages, obtain Legendary cosmetics (e.g., Pirate Legend set), attempt Tall Tales, and grind commendations.
Voyages: Athena’s Voyage is the centerpiece – long quest that combines digging, killing, cargo, and a final island with a Skeleton Lord. Requires skilled sailing and combat.
Combat: Engage in high‑risk PvP – stealing from other crews or defending your Athena loot. Use advanced tactics like booby traps (gunpowder barrels), quick anchor turns, and coordinated broadside volleys.
Economy: Save for expensive rare cosmetics (e.g., Legendary Spyglass, Ghost Captain set). Ancient Coins become more relevant for seasonal passes.
Exploration: Venture to Devil’s Roar (volcano region) for Ashen loot (fire effect, higher value). Navigate geysers and eruptions.
World Events: Now confidently take on Fort of the Damned (requires ritual skull and lantern colors – allows massive loot if successful). Form alliances with other crews for mutual protection.
Example Session: Start an Athena’s Voyage – first stage dig 3 chests, then a merchant cargo, then a skeleton kill, finally a battle at Crooked Masts. Acquire a Chest of Legends worth ~10k gold. Sell with Reaper emissary (grade 5) for massive bonus. Net ~20k gold.
Endgame (All commendations achieved, all Tall Tales completed, PvP mastery)
Goal: Obtain exclusive curses (Ghost, Skeleton), complete 100% commendations, own the most expensive ship sets (Dark Adventures, Silent Barnacle). Compete in seasons and leaderboards.
Voyages: No new voyages except those from season updates. Focus on completing commendation chains (e.g., “Skeleton Lord Slayer” – kill 500 skeleton lords). Run Athena’s Voyages for cash.
Combat: Master every weapon combination. Participate in the Hourglass PvP mode to win curses. Use advanced naval tactics – mast damage anchoring, boarding, ladder guarding, water‑handling, and chain shot precision.
Economy: Gold is a vanity resource – aim for the 1-million gold Dark Adventurer ship set. Use Ancient Coins for pets and emotes.
Exploration: Nothing left to discover, but new limited‑time events (e.g., Captain Flameheart’s return, Skeleton Fleet world event) appear. Stay updated.
World Events: Speed‑run events with crew – record times and share. Protect the fort vault with gunpowder barrel ambushes.
Example Session: Log in, check the world map for an active Skeleton Fleet – sail there, destroy all ships, collect the loot (50+ items). While selling, another crew attacks – fight them off successfully. Later, queue for Hourglass PvP and win 3 matches to progress toward the Skeleton Curse.
This tiered structure helps you understand what to expect at each stage and how to optimize your fun and progress. Remember, Sea of Thieves is about the journey – every session can be a story worth telling.
Game Tips
Game Tips
Beginner Tips
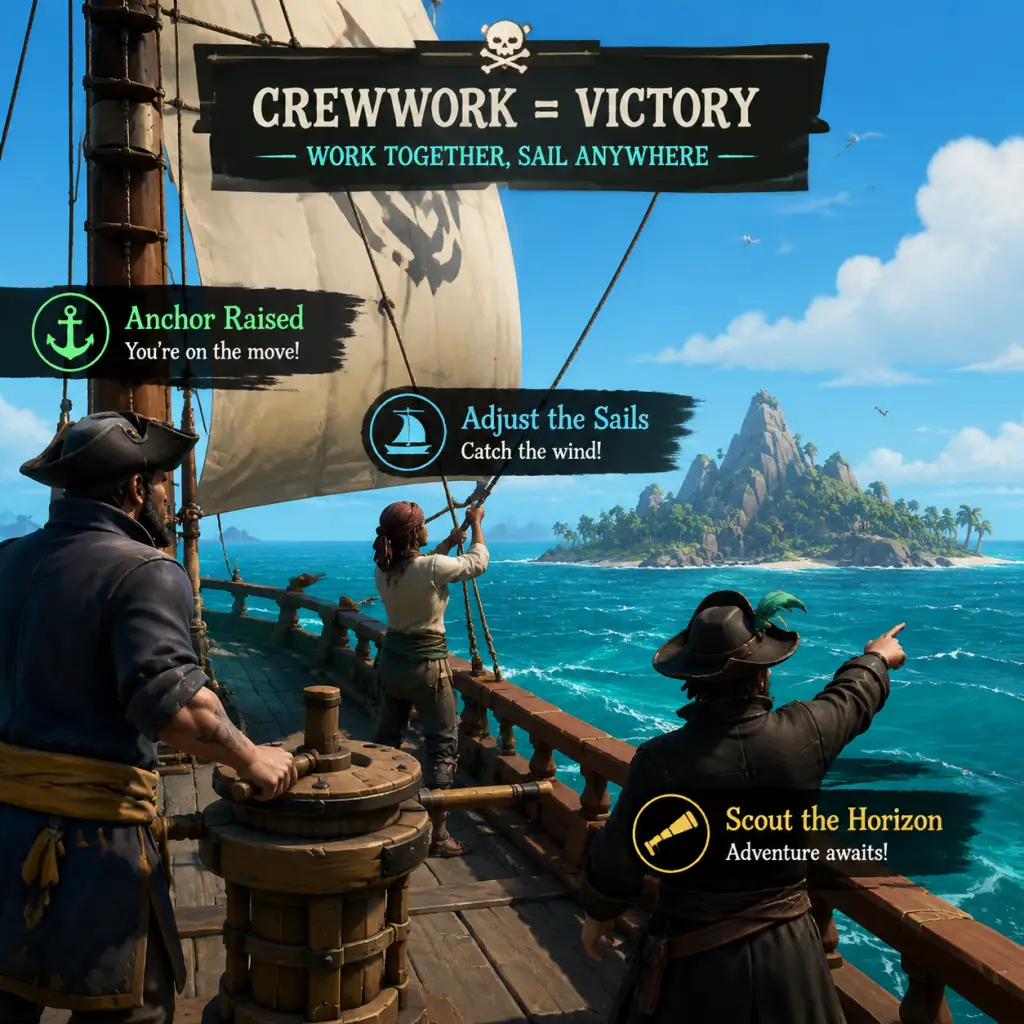
1. Always raise the anchor before sailing – Raising the anchor prevents your ship from drifting and allows quick escapes. Use sails instead for positioning.
2. Stock up on supplies at any Outpost – Before setting sail, grab wood, cannonballs, and food from barrels. Always check the ship’s barrels again before leaving.
3. Listen to the wind – The wind direction affects sail speed. Angle sails to catch wind for max speed. Use the flag on the mast to see wind direction.
4. Never leave your ship unattended – Always have at least one crewmate on board or anchor/stick to an island. Park with sails up to avoid drifting.
5. Use the map table often – Mark islands, reapers, or world events. Keep track of your heading and nearby threats.
Combat Tips (PvE and PvP)
6. Master the sword lunge – Hold block and press attack to lunge. Great for closing distance or jumping off ledges into enemies.
7. Use blunderbuss for close range, eye of reach for sniping – Blunderbuss one-shots skeletons and players if close enough. Eye of reach is best for cannon towers or distant pirates.
8. Cannon aim: lead your shots – Aim slightly ahead of moving ships. Use the range markers on cannons (white, red, purple) for distance.
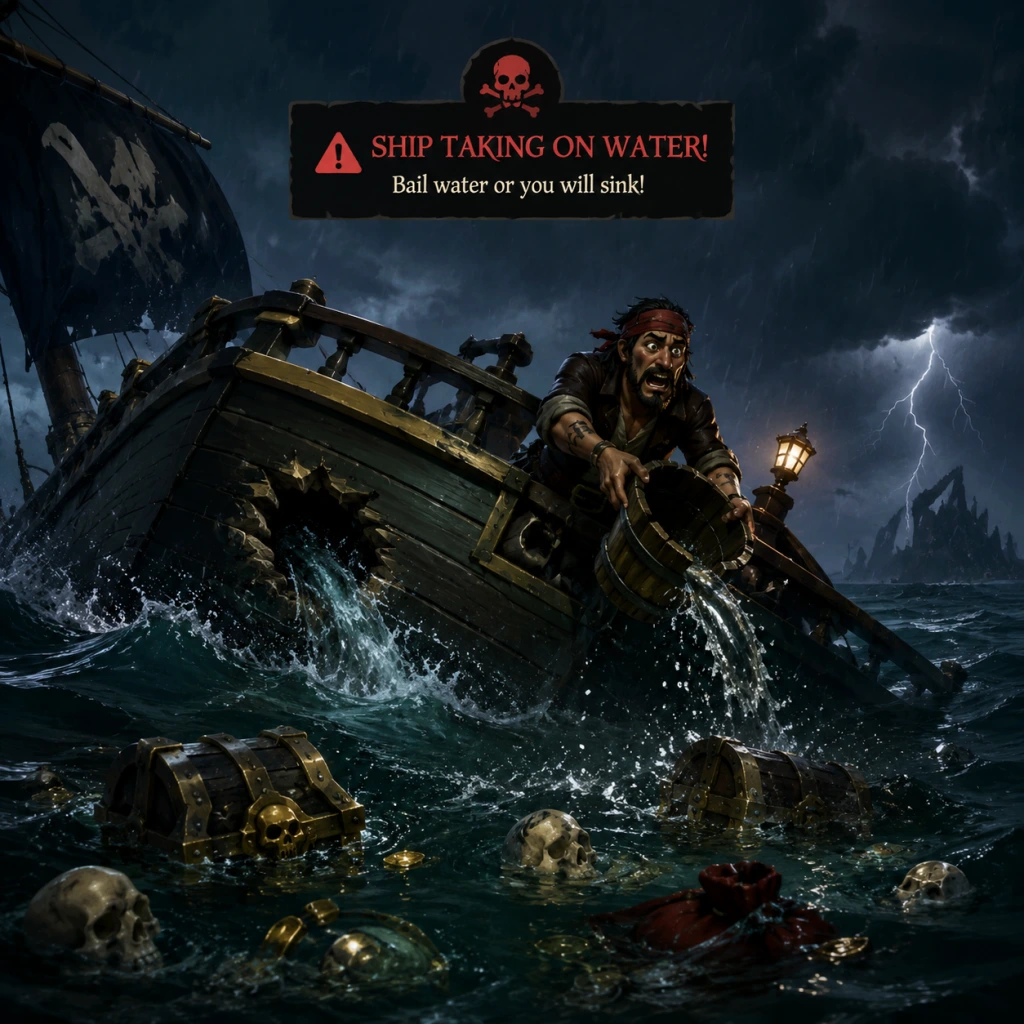
9. Repair and bail before it's too late – When taking water, one crew repairs holes while another bails. Prioritize mid-deck and below-deck holes.
10. Use firebombs to disorient enemies – Fire spreads on wooden decks and stops repairs. Throw them onto enemy ship or at clustered skeletons.
11. Chain shots are for immobilizing – Aim for enemy ship masts to break them, causing sails to drop. Great for disabling runners.
12. Cursed cannonballs – These have special effects (peaceball, grogball, etc.). Use strategically, e.g., anchorball to stop a turning ship.
Exploration and Navigation
13. Use the compass and map – Your compass shows your heading. The map table shows your location relative to islands. Collectible maps (riddle maps) require reading clues.
14. Raise the Reaper’s Mark flag with caution – This marks your location on the map for everyone and attracts PvP. Only use if you want a fight or are in an alliance.
15. Dive to shipwrecks – Shipwrecks often have loot and supplies. Swim inside with a lantern.
16. Look for seagulls – Flocks of seagulls indicate floating barrels, shipwrecks, or sunken treasure. Check them out.
17. Use the speaking trumpet – It amplifies your voice over distance. Useful for making alliances or trash talk.
Resource Management
18. Always carry three types of food – Cooked meat, bananas, and pomegranates. Cooked meat gives extra health regen. Use bananas for quick heal, pomegranates for more.
19. Gather wood and planks from islands – Trees yield wood, barrels yield planks. Always restock after a fight.
20. Manage your inventory – You can hold up to 5 of each tool (e.g., boards, cannonballs) but store extra in ship barrels. Organize by type.
21. Store valuable loot inside the ship – Don’t leave it on deck where it can be seen or fall off. Place in captain’s quarters or below decks.
Economy and Trading
22. Emissary flags increase gold and reputation – Raise emissary for a faction (Gold Hoarders, Order of Souls, Merchant Alliance, Reaper’s Bones) to get bonus. Higher grade = more bonus, but lost if sunk.
23. Sell loot to the right faction – Skulls to Order of Souls, chests to Gold Hoarders, animal crates to Merchant Alliance. Reaper’s buys everything at a slight bonus.
24. Complete world events for big loot – Forts, fleets, and skeleton ships yield high-value treasure. But expect competition.
25. Use the sovereign’s sell point – At any Outpost, you can sell all loot quickly to the sovereign representative (unlocked by reaching level 15 in any faction). Huge time saver.
Ship Management
26. Assign roles in a crew – One steers, one manages sails, one repairs, one scouts. In a duo, captain steers and the other does everything else.
27. Use the capstan (anchor) only when necessary – Dropping anchor is slow to raise. Park by raising sails and drifting to a stop.
28. Learn to harpoon – Harpoons can grab loot from water, pull enemy ships closer, or attach to islands to turn sharply.
29. Keep a rowboat handy – Rowboats are great for stealthy approaches, escaping, or ferrying loot while your ship hides.
Advanced Strategies
30. Sloop vs. Galleon tactics – Sloops are faster against the wind, galleons faster with wind. Turn battles to your advantage. Use islands to break line of sight.
31. Board enemy ships to anchor them – Swim over, climb ladder, drop anchor. Then kill their crew or set fires.
32. Use the ladder as a chokepoint – Defend your ship by guarding ladders with blunderbuss. One shot can kill a boarder.
33. Tuck on enemy ships – Hide on a ship (e.g., in crow’s nest or behind barrels) and wait for them to load loot, then steal it.
34. Learn to ‘skirt’ world events – Don’t dive directly into a skull fort; observe from a distance, wait for other crews to fight, then swoop in.
35. Alliance system – Form alliances with other crews for shared loot (50% extra to each). But trust is risky; they can betray.
Miscellaneous
36. Voice chat is key – Use push-to-talk to coordinate with randoms. Many crews are friendly if you speak.
37. The game saves your progress per session – Nothing carries over between logouts except gold and reputation. So make sure to sell before logging off.
38. Check for seasonal events – Time-limited adventures and rewards. Participate for exclusive cosmetics.
39. Use the emote wheel to taunt or celebrate – Can be fun but also a distraction.
40. Watch your health bar – Eat food when low. Use bait for fishing (also a source of food).
Game Settings
Sea of Thieves Game Settings Guide
This guide covers every setting in Sea of Thieves and provides optimal configurations for different hardware and play styles. Whether you're sailing on a low‑end PC, an Xbox Series X, or a high‑end gaming rig, these recommendations will help you balance visual fidelity, performance, and comfort.
---
Graphics Settings
Graphics settings directly impact how the game looks and performs. Below are all available options and our recommendations.
#### Display & Resolution
- Resolution: Set to your monitor's native resolution. For performance, lower to 1080p or 720p on low‑end hardware.
- Fullscreen Mode: Prefer Fullscreen for best performance. Borderless windowed is useful for alt‑tabbing but may introduce input lag.
- Monitor: Select the correct monitor if using multiple displays.
- Refresh Rate: Match your display's refresh rate (e.g., 60Hz, 144Hz).
- V‑Sync: Off for lowest input lag; enable only if you experience screen tearing. In Sea of Thieves, V‑Sync can cause frame‑pacing stutter on some systems.
- Frame Rate Cap: Cap at your monitor's refresh rate (e.g., 60, 120, 144). Uncapped can cause overheating on weak GPUs.
- Preset: Choose from Cursed (Low), Legendary (Medium), Mythical (High), or Custom. The presets are a good starting point; fine‑tune individual options below.
- Anti‑Aliasing: TAA (Temporal Anti‑Aliasing) is the best balance of quality and performance. FXAA blurs slightly but is cheaper. Off is jagged but fastest.
- Ambient Occlusion: Off on low‑end; SSAO (Screen Space Ambient Occlusion) on mid‑range; HBAO (Horizon‑Based Ambient Occlusion) on high‑end for deeper shadows.
- Shadows: Low on low‑end (can make enemies harder to spot in shadows); Medium or High on better systems.
- Textures: High on GPUs with ≥4GB VRAM; Medium on 2GB; Low on 1GB.
- Water Quality: High makes water look stunning but is expensive. Low uses flat textures—still functional for gameplay.
- Particle Effects: Medium (fires, cannon smoke). Low reduces visual clutter but may hide important cues like cursed cannonballs.
- Post‑Processing: Low disables bloom and lens flares, improving visibility. High looks cinematic but can obscure enemies in bright areas.
- Resolution Scale: Keep at 100%. Lowering (e.g., 75%) helps performance but reduces sharpness.
- Field of View (FOV): Default 75 is narrow. Increase to 85–90 on PC for better peripheral awareness, especially during ship battles. On console, FOV is fixed but can be adjusted on Xbox Series X|S in the video settings.
- Motion Blur: Off. It reduces clarity and induces motion sickness for many players.
- Depth of Field: Off. Blurs background in menus and cutscenes; never helpful for gameplay.
#### Quality Presets
#### Detailed Options
#### Easy‑to‑Misconfigure Settings
#### Recommended Presets by Hardware
| Hardware Tier | Example System | Graphics Preset | Additional Tweaks |
|---|---|---|---|
| Low‑end | Intel i3, GTX 1050, 8GB RAM | Cursed (Low) | Set resolution to 1080p or 900p; disable V‑Sync; cap FPS at 30. |
| Mid‑range | Ryzen 5, GTX 1660, 16GB RAM | Legendary (Medium) | Set textures to High; keep water at Medium; enable TAA. |
| High‑end | Ryzen 7, RTX 3060 Ti, 16GB RAM | Mythical (High) | Enable HBAO; water on High; cap at 144 FPS. |
| Ultimate | i9‑13900K, RTX 4080, 32GB RAM | Mythical (High) + Custom | Force max settings; enable 1440p/4K; uncap FPS or cap at 240. |
Audio Settings
Audio is critical in Sea of Thieves for hearing enemy footsteps, ship creaks, and distant cannon fire. Proper setup can give you a tactical edge.
- Master Volume: 80–100% (leave headroom for voice chat).
- SFX Volume: 100% – this includes everything from waves to gunshots.
- Music Volume: 50–70% – music is atmospheric but can mask important audio cues. Turn lower to hear ambient sounds.
- Voice Chat Volume: 100% – communication with crew is essential.
- Microphone Volume: Set so your voice is audible but not clipping.
- Push‑to‑Talk: Enable on PC unless you use a noise gate. On console, you can use toggle or always‑on (be mindful of background noise).
- Audio Output: Choose Stereo for most headsets; Surround only if you have a proper 7.1 setup. Windows Sonic or Dolby Atmos for headphones can improve spatial awareness.
- Spatial Audio: Enabled (Windows Sonic / Atmos) helps pinpoint sounds (e.g., a player swimming near your ladder). Keep it on.
- Narrator: Accessibility setting – can read menus aloud. Keep off unless needed.
- Mouse Sensitivity: Start at 5, adjust by ±1 until you can do a 180° turn comfortably with one swipe.
- Mouse Smoothing: Off – this adds input lag and makes aiming inconsistent.
- Invert Mouse Y: Personal preference; most players leave off.
- Key Bindings: Rebind keys for quick actions:
- Controller Type: Choose Standard (default) or Alternative (swaps bumpers/triggers).
- Look Sensitivity: 5–7 out of 10. Higher sensitivity helps quick turns but reduces fine aiming.
- Aim Assist: Keep On – it's significant on console and helps with cannon accuracy. On PC with controller, it's present but reduced.
- Vibration: Recommended Off for competitive play (hides subtle audio cues) but can be immersive. If left on, reduce intensity to 50%.
- Dead Zones: Default is fine; lower if your controller has worn sticks (increases stick drift risk).
- Button Layout:
- Mouse Acceleration: Off – causes inconsistent aim.
- Controller Look Acceleration: Set to 0 or Low – high acceleration makes fine adjustments during aiming very difficult.
- Button Hold Time: The default is 0.2 seconds for actions like “hold to raise anchor”. You can lower it to 0.1 if you want faster interactions, but be careful not to accidentally trigger actions.
- Subtitles: On – shows dialogue and game announcements (e.g., “Megladon spotted”). Helpful for hearing‑impaired players or when voice chat is off.
- Closed Captions: Additional descriptions of sounds (e.g., “[cannon fire]”). Enable if needed.
- Text Size: Large – easier to read item descriptions and UI.
- UI Opacity: 80% – keeps UI visible but not obtrusive.
- Colorblind Modes: Protanopia, Deuteranopia, or Tritanopia – modifies loot glow colors and enemy outlines. Choose the one that matches your condition.
- High Contrast Mode: Off – makes water transparent and can be disorienting. Only for severe visual impairment.
- Reduce Motion: Off – turns off camera shake and some animations. Helps with motion sickness; turn it on if you feel nauseous.
- Narrator: Already covered in audio.
- Text Language: Choose from available languages. This affects menus, item names, and dialogue subtitles.
- Voice Language: Determines the spoken language of NPCs (e.g., the Gold Hoarder). Does not affect player voice chat.
- Note: Changing voice language requires a restart. If you play with friends who use a different language, keep text in your native language and voice in English (the most supported).
- Server Region: Automatic usually selects the best region. If you frequently play with friends abroad, manually set to the region where most of your crew is located to reduce latency.
- NAT Type: Ensure your router is set to Open NAT (Type 1 on Xbox, Open on PC). Otherwise you may experience matchmaking fails or disconnects. Use UPnP or port forwarding (ports 88, 3074, 4200, 50000–50008 for Xbox; PC may require specific ports listed on Rare’s support page).
- Bandwidth Limit: Keep Unlimited. Only reduce if you have a capped data plan.
- Voice Chat Quality: High – uses more bandwidth but clearer communication.
- Prefer Performance Over Quality in Network: Off – leaving it off ensures game updates and downloads are optimized for quality.
- Auto‑Unequip After Use: On – automatically puts away items like shovels after digging. Saves a button press.
- Auto‑Put Away Weapon: On – sheathes your weapon after a few seconds of not using it. Reduces accidental swings.
- Move While Eating: On – allows walking while eating food. Essential for survival.
- Hold to Raise/Lower Anchor: On – requires holding the interact button. Prevents accidental dropping.
- Quick Select Radial: Enabled – hold the radial menu button to quickly swap items. Learn the layout for faster inventory management.
- Invert Scrolling on Map Table: Personal preference – some like to scroll down for zoom in. Default is normal (scroll up = zoom in).
- Show Crew Gamertags Overhead: On – identifies crewmates through walls. Helps avoid friendly fire.
- Show Alliances on Map: On – displays allied ships on the map table.
- Harpoon Sensitivity: 5 out of 10 – controls how fast the harpoon rotates. Lower values for precise aiming.
- Auto‑Sprint: Off – on foot, always pressing shift to sprint gives you more control; auto‑sprint can make you run when you want to walk quietly.
- Sprint on Controller: Toggle – tap stick to sprint. Hold may cause fatigue. Experiment with both.
- Glow Effect on Gems/Trinkets: On – makes valuable items easier to spot in dark environments. Turning it off is a competitive disadvantage.
---
Controls
Customize controls to reduce fatigue and improve reaction time. Both keyboard/mouse and controller schemes are fully remappable.
#### Keyboard & Mouse
- Eat (F): Very important – keep it close to movement keys.
- Bucket (R): Frequently used for bailing water.
- Sword Lunge (Hold Q): Some players rebind to a mouse button for easier sprinting.
- Raise/Lower Sail (W/S while holding sail): Learn these – essential for speed management.
#### Controller (Xbox / PlayStation / PC)
- Jump: A/X – do not rebind (intuitive).
- Crouch: B/Circle – useful for hiding.
- Interact: Y/Triangle – comfortable.
#### Easy‑to‑Misconfigure Settings
---
Accessibility
Sea of Thieves offers a range of accessibility features to make the game more inclusive.
---
Language
---
Network
Sea of Thieves is online‑only. Network settings are limited but important.
---
Gameplay Settings
These settings affect how you interact with the game world.
#### Easy‑to‑Misconfigure Settings
---
Final Setup Checklist
1. Graphics: Set preset based on hardware, then disable motion blur, depth of field, and mouse smoothing. Adjust FOV to 85–90.
2. Audio: Enable spatial audio, disable music if distracting, configure push‑to‑talk.
3. Controls: Turn off mouse acceleration, reduce controller dead zones, rebind eat and bucket to easy keys.
4. Accessibility: Turn on subtitles, adjust text size to large, enable colorblind mode if needed.
5. Network: Verify Open NAT, set server region nearest to your crew.
6. Gameplay: Enable auto‑unequip, move while eating, and show crew tags.
After applying these settings, spend a few minutes in a solo session to test everything. Tweak FOV and sensitivity to your comfort. Smooth sailing!
Important Notes
Important Notes for Sea of Thieves
Warnings & Pitfalls
- Losing All Your Loot: If your ship sinks while carrying treasure, all loot is lost unless you can retrieve it from the water before it despawns (treasure floats for about 10 minutes, then sinks; sunken treasure stays on the sea floor for another 30 minutes before despawning). Always prioritize sailing to an Outpost to sell when you have valuable items.
- Server Merges Can Cost You Progress: If you are alone on a server, the game may merge you into a busier server. When this happens, your ship and all loot on board are kept, but your ship may be relocated. Prepare by raising sails and anchoring before a merge to avoid drifting into hazards.
- Kegs (Gunpowder Barrels) Are Extremely Dangerous: Carrying a keg on your ship is a risk. One sword swipe, a firebomb, or a cannonball can detonate it, instantly sinking even a Galleon. Store kegs in the crow’s nest to minimize damage if they explode.
- Skeleton Forts & World Events Mark Your Location: The skull cloud or ship cloud above active world events makes your position visible to all players on the server. Expect PvP attacks. Never start a Fort of Fortune or Fort of the Damned without a crew you trust.
- Do Not Trust Other Pirates: It is a pirate game; betrayal is part of the experience. Alliance flags can be raised, but don’t turn your back on allies. Many players will sink you after you share loot.
- Ship Damage is Cumulative: A few holes are manageable, but if you ignore them, your ship will flood and sink. Always repair holes immediately, and bucket water out when needed.
- Captaincy (Ship Naming & Customization): You can only name your ship once for the “Captain” milestone (requires 250,000 gold and 50,000 gold to buy the Captain’s title). The name is permanent—you cannot change it later. Choose wisely.
- Emissary Flag Choice: Once you vote to raise an Emissary Flag (e.g., Gold Hoarders, Order of Souls, etc.), you are committed to that faction for the session. You cannot change it without lowering the flag (which resets your grade and loses all reputation progress for that session).
- Tall Tale Choices: Some Tall Tales have branching narratives. For example, in “The Shroudbreaker” or “The Seabound Soul,” certain choices affect later dialogue or minor loot but do not lock you out of completion. However, achieving all commendations often requires replaying a Tall Tale multiple times—your story choice is not reversible per playthrough.
- Cosmetic Purchases Are Non‑Refundable: All gold, doubloons, and ancient coins spent on cosmetics (ship parts, clothing, weapons, emotes) are final. You cannot sell them back. Research before buying.
- Limited‐Time Events: Many cosmetics and commendations are only available during seasonal events (e.g., Festival of the Damned, Haunted Ship sets). If you miss them, they may never return. Check the in-game Event Hub regularly.
- Time‐Limited Pirate Legend Voyages: After reaching Pirate Legend, you can purchase “Legendary” voyages from the Pirate Lord. Some commendations require them, but they are always available—no permanent miss.
- Tall Tale Journals & Commendations: Most Tall Tales have hidden collectibles (journals) that must be found for full 100% completion. If you finish a Tall Tale without finding all journals, you cannot get them on the same playthrough—you must replay the entire Tall Tale. Always check a guide for journal locations before starting.
- Skeleton Fleet & Kraken Encounters: These are random world events. If you ignore them, they eventually despawn. The “Killer Whale” set commendations require defeating the Kraken multiple times—if you don’t fight it when it appears, you miss the chance.
- Hunter’s Call Fishing Spots: Certain rare fish (e.g., Wreckers, BattleTuna) only appear in specific conditions (storm, night, pond vs. sea). If you leave the area, the fish despawns. You must fish at the right location at the right time.
- The Arena (Removed) & Brigantine Manoeuvres: PvP encounters ramp up quickly. A well‑coordinated brigantine crew can outmanoeuvre a skeleton ship or a galleon. If you’re in a sloop against a galleon, you are at a severe disadvantage unless you use hit‑and‑run tactics.
- Fort of the Damned (FOTD): This event requires you to light 6 special fires on the fort. Doing so summons a constant wave of skeletons, including red‑collar Shadow Skeletons that can only be killed by the light of a lantern. It requires coordination and good gear—do not attempt solo unless experienced.
- The Seabound Soul (Tall Tale): The final boss encounter can be overwhelming due to numerous firebombs and skeleton spawns. Stay mobile, use the environment for cover, and keep your health up.
- The Ashen Winds World Event: The boss (an Ashen Lord) has devastating AoE attacks and summons lava geysers. Solo players will struggle; bring plenty of food and ammo, and use the environment to dodge.
- Hidden Difficulty: Sails & Anchor Tension: Many new players don’t realize raising sails takes longer than raising the anchor. In a chase, always raise sails to stop moving quickly, not anchor (use anchor only for sharp turns). Failing to do so can get you caught.
- Don’t Farm Gold Hoarders X Marks the Spot Voyages for Reputation: These give very little reputation. Focus on World Events (Skull Forts, Skeleton Fleets) – they give huge reputation boosts in any faction when you sell the loot.
- The “Merchant Alliance” Cargo Runs Are Tedious and Low‑Reward: They are good for early gold but terrible for reputation. Instead, do lost shipment voyages (introduced later) or Emissary Ledger rewards.
- Emissary Ledgers: Don’t Chase Top 25% Just for Cosmetics: You can earn a nice reward, but the grind required may burn you out. Play naturally and check your ledger—don’t stress over it.
- Doubloons Should Be Saved for Limited‑Time Items: Doubloons can buy exclusive cosmetics during events. Using them to buy reputation (though possible) is inefficient—gold is easier to come by later.
- The “Plunder Pass” (Season Pass): Free track rewards are solid, but paying for the premium track only adds cosmetics. Never buy levels—grinding is faster. Complete daily and weekly deeds.
- Piracy is Expected: Don’t get upset if you’re sunk unexpectedly—that’s the game. Avoid toxic behaviour like insulting other players in voice chat. The “pirate code” encourages respect, not real hatred.
- Alliances Can Be Broken: An alliance is a verbal agreement. Some crews honour it, some don’t. Communicate clearly. If you want to be safe, keep a cannon loaded.
- Cheating is Banned: Rare’s anti‑cheat (Easy Anti‑Cheat) detects speed hacks, aimbots, and ESP. Reports of cheating are investigated. If you encounter a hacker, record video and report via the official website. Do not retaliate.
- Cross‑Play Etiquette: Console players may have aim assist; PC players have better manoeuvrability. Be respectful. You can disable cross‑play in settings, but it will restrict matchmaking.
- Voice Chat Toxicity: Mute abusive players via the Xbox guide (press Home, go to People, select player, mute). You can also disable voice chat entirely in audio settings.
- Cloud Saves Only: Sea of Thieves has no local save files. Your progress (reputation, gold, cosmetics, commendations) is saved server‑side. You cannot manually backup or restore. If you delete your profile, everything is lost permanently.
- Progress is Account‑Bound: Your pirate, ships, and items are tied to your Microsoft/Xbox/PlayStation account. You cannot transfer progress between platforms (e.g., Steam to Xbox) without using the same account (if linked).
- No Manual Save Slots: You cannot reload an earlier state. If you make a mistake (e.g., waste gold on a bad cosmetic), there is no undo. Plan purchases carefully.
- If You Switch Platforms: Your pirate carries over if you use the same account. However, some console‑exclusive items (like PlayStation ship sets) may not appear on other platforms until cross‑progression is enabled (available as of 2024 for Xbox/PC/PlayStation).
Irreversible Choices
Missable Content
Difficulty Spikes
Grinding Traps
Online Etiquette & Anti‑Cheat Notes
Save Management (or Lack Thereof)
Things Players Commonly Regret Not Knowing Earlier
1. Raise Sails, Don’t Drop Anchor to Stop: Anchoring is loud and makes it hard to get away quickly. Use sails to stop; lower them to resume.
2. You Can Cook Food on a Campfire or Ship Stove: Cooked meat restores more health than raw. Use the stove below deck on your ship.
3. The Sovereign’s NPCs Will Buy Any Loot (for a Fee): At the Outpost, after selling to a faction, you can sell leftover loot to the Sovereign (if you are a Pirate Legend) for gold. Good for clearing inventory.
4. Use a Spyglass to Scout Outposts Before Docking: Look for other ships, rowboats, or hidden players. Avoid surprises.
5. Sword Blocking (Right Mouse / Left Trigger) Negates 50% Damage: Use it when fighting skeletons or players.
6. You Can Cancel a Voyage Without Penalty: Vote to cancel via the table. You lose only the voyage paper; no reputation loss.
7. Diving to a New Voyage (after Season 10) Despawns Your Ship and Loot: Use the “Dive to a New Voyage” option only when you have sold everything. It destroys your current ship and makes you lose all onboard loot.
8. The Kraken Only Spawns After a World Event Disappears: If you want to fight the Kraken, wait until a skeleton fort or fleet is cleared. It often spawns near the cleared area.
9. Rowboats Are Incredibly Useful: They allow you to sneak loot past enemies or explore shallow areas. Secure a rowboat to your ship’s back; they are not always available, so grab one if you see it.
10. Hunter’s Call Reputation is Slow to Level: Start fishing early. Cook fish before selling. Use bait to catch specific fish. It’s a long grind, so don’t save it for last.
All Game Items
All Game Items in Sea of Thieves
This guide catalogues every functional and collectible item in Sea of Thieves, excluding purely cosmetic skins. Items are grouped by category. For each item we describe its purpose, acquisition method, optimal usage, and any notable synergies or upgrades.
---
1. Equipment & Tools
These items are always available from your inventory radial (default: Q on PC) and are essential for sailing, exploration, and combat.
#### Compass
- Function: Points North; shows bearing in degrees. Crucial for navigating using maps or coordinates.
- Obtain: Default equipment (cannot be dropped).
- When useful: Always, especially when following a treasure map that uses bearing and distance.
- Function: Magnifies distant objects. Helps identify ships, islands, players, or landmarks.
- Obtain: Default equipment.
- When useful: Scout for threats, read island signs, or check for reapers.
- Function: Provides light; can be turned on/off. Reduces visibility to enemies if turned off.
- Obtain: Default equipment.
- When useful: Exploring caves, night sailing, or during Skeleton Crew voyages (lights attract or repel certain entities).
- Synergy: Turn off to avoid detection in PvP.
- Function: Digs up buried treasure. Also can be used to break certain traps or interact with some environmental puzzles.
- Obtain: Default equipment.
- When useful: Gold Hoarder voyages, digging up X marks the spot.
- Function: Scoops water from inside the ship and throws it out overboard. Also can be used to scoop up vomit (for comedic effect).
- Obtain: Default equipment.
- When useful: Critical for bailing water when your ship is damaged. Always keep one handy.
- Synergy: Use with a full crew to chain bail water quickly.
- Function: Amplifies voice in voice chat. Also has a megaphone emote.
- Obtain: Default equipment.
- When useful: Communication at distance with other crews, or roleplay.
- Function: Used to drink grog (from a barrels found on outposts or ship). Drinking too much causes drunken screen shake.
- Obtain: Default equipment.
- When useful: Social interactions, overcoming hangover achievement, or as a roleplay item.
- Function: Shows in‑game time. Not essential but useful for timing events (e.g., skeleton fleet arrival).
- Obtain: Default equipment.
- When useful: Coordinating with crew during timed events.
- Function: Used for fishing. Cast line, wait for bite, reel in. Different bait types yield different fish.
- Obtain: Purchased from the Hunter's Call representative at any outpost (free? Actually initially free from the bilge rats? No, you can buy it from the shipwright? Wait, fishing rod is acquired from the Shipwright for free? Check: New players get it from the Shipwright at the outpost for 0 gold. So easily obtained).
- When useful: Hunting, fishing, completing Hunter's Call voyages, or farming meat for cooking.
- Upgrades: None, but there are cosmetic variants.
- Function: Play music. Press notes to play songs. Can be used to distract skeletons or during Sea Shanties.
- Obtain: Purchased from the General Store at outposts (for gold). Each instrument costs around 5,000 gold.
- When useful: Entertainment, group morale, or distracting skellingtons (they will dance if you play near them).
- Damage: Three hit kills on players (swing combo). Can block and perform a heavy attack.
- Obtain: Default weapon (given at start).
- When useful: Close quarters combat, swords clash, clearing skellingtons.
- Synergy: Jump + sword lunge for mobility.
- Damage: One shot headshot on players (if not damage boosted). Two body shots.
- Obtain: Weapon chests on islands, skeleton drops, or purchased from Weapon Shop (requires level 5 in any faction? Actually available at Weapon Shop for gold after a certain reputation? Check: You can buy it from the Weapon Shop at outposts for 10,000 gold once you have reached level 5 in any Trading Company. But also can be found randomly).
- When useful: Long‑range combat, picking off enemies on cannons or repairing.
- Upgrades: Scope zoom (no upgrade, but there is a rumored 'Tiny Scale'? Not official). Cosmetic only.
- Damage: Two body shots to kill player. Headshot is one hit kill.
- Obtain: Default weapon (can be chosen instead of Eye of Reach eventually). Also found as loot.
- When useful: Medium range, fast draw, good for finishing off wounded enemies.
- Synergy: Quick swap between cutlass and pistol for combo.
- Damage: Close range shotgun; one shot kill at point blank. Spread wide.
- Obtain: Weapon Shop (requires level 5 in any faction? Actually same as Eye of Reach). Also lootable.
- When useful: Boarding ships, close quarters, hitting multiple targets.
- Synergy: Hip fire while jumping to hit enemies on ladders.
- Firebomb: Thrown, creates a pool of fire that damages enemies and ignites ships. Very effective against players and skeletons.
- Blunderbomb: Thrown, explodes on impact dealing area damage and knockback. Can knock enemies off their ship.
- Bone Caller: Summons a skellie (skeleton) to fight for you for a short time? Actually there is a 'Bone Caller' item? Wait, the game has a 'Bone Caller' from the Hunter's Call? No, I recall 'Bone Caller' was a limited time item. But currently the game has 'Grog Bottles'? No. Let's be accurate: The main throwable items are: Firebomb, Blunderbomb, and the 'Horn of Fair Winds'? No, that's a tool. Also 'Ashen Winds Skull'? That's a weapon item (skull that shoots fire). But that is a quest item. For throwables, the current permanent items are:
- How to obtain: Found in barrels on islands, skeleton drops, or purchased from the Shop? Actually you can buy them from the Merchant Alliance? You can buy resources including firebombs and blunderbombs from the Merchant Alliance supply crates? Yes, with reputation level.
- When useful: Firebomb to damage ships or area denial; Blunderbomb for controlling enemy boarding attempts.
- Function: Load into cannons to fire at ships, forts, or skellingtons. Each cannon holds up to 10 balls.
- Obtain: Found in barrels on islands, floating barrels, sold by Merchant Alliance, or crafted? No crafting.
- When useful: All naval combat.
- Function: Fires a chain that wraps around masts or capstans, causing them to break or become damaged instantly. Destroys mast in one hit.
- Obtain: Same sources as cannonballs.
- When useful: Cripple enemy ship mobility by destroying mast or rudder.
- Synergy: Use with Ballastball or Anchorball for extreme disable.
- Function: Each has a special effect:
- Obtain: Random drops from skeleton ships, skeleton forts, or world events. Also from barrels but rare.
- When useful: PvP naval battles to gain tactical advantage.
- Raw fish/meat: Cooked in the ship's stove improves value and health restoration. Burnt food gives minimal health.
- Fruits (Coconut, Banana, Pomegranate): Eat raw, moderate health.
- Cooked Fish: Can be sold to Hunter's Call for reputation and gold. The rarer the fish, the more valuable.
- Meat: Kraken, Megalodon, Shark, Skeleton, etc. Sold to Hunter's Call.
- How to obtain: Fishing, hunting animals on islands, looting barrels, or buying from Merchant Alliance (crates of food).
- When useful: Always. Keep food stocked for combat.
- Synergy: Cooked food provides more healing and can be stacked (e.g., cooked kraken meat).
- Grog: Found in barrels on outposts or from supply barrels. Drinking causes screen sway and eventual vomiting. No health benefit but fun.
- Coffee? No.
- Water? No.
- How to obtain: From barrels, or bought? Grog is free.
- Earthworms: For fishing in shallow water (shore).
- Grubs: For fishing in medium depth.
- Leeches: For fishing in deep water.
- Function: Used to repair holes in the ship's hull. Each plank repairs one small hole. Also can be used to build damage? No.
- Obtain: Barrels on islands, floating barrels, Merchant Alliance crates.
- When useful: Critical for keeping your ship afloat.
- Synergy: Distribute planks among crewmates; keep at least 20-30 planks per ship.
- Wood Crate: Holds 50 planks (purchased from Merchant Alliance for gold, or found).
- Cannonball Crate: Holds 50 cannonballs.
- Food Crate: Holds uncooked food (various).
- Resource Barrels: Found on islands with random supplies.
- How to obtain: Buy from Merchant Alliance at outposts (after reaching certain reputation levels). Also loot from skeleton ships or forts.
- When useful: Stockpiling supplies for long voyages or PvP battles.
- These are quest items, stored in your inventory. Not consumable but essential.
- Function: Main currency to buy items from shops (cosmetics, weapons, tools, ship upgrades). Earned by selling loot to Trading Companies or completing voyages.
- Function: Secondary currency used for exclusive cosmetics, time-limited items, and some upgrades (like the Ashen Loot skins).
- How to obtain: Completing Bilge Rat commendations, events, or daily challenges.
- Function: Premium currency that can be bought with real money. Used for cosmetics, pets, emotes, and bundles. Also earnable rarely by killing Ancient Skeletons.
- How to obtain: Purchase, or find Ancient Skeletons (random spawns on islands).
- Function: Determines progression with each Trading Company. Higher reputation unlocks better voyages, cosmetics, and some store items.
- Companies: Gold Hoarders, Order of Souls, Merchant Alliance, Reaper's Bones, Hunter's Call, Athena's Fortune (endgame).
- How to obtain: Sell specific types of loot to each company.
- Function: Raise to represent a Trading Company. Increases loot value for that company but marks you on the map for other players (Reaper's Bones mark all).
- How to obtain: Purchase from the Emissary Table at outposts for gold (requires level 15 reputation with that company).
- When useful: To maximize gold and reputation gain, but risk being attacked for your flag.
- Chest of Legends: Athena's Fortune item, very valuable (can be sold to Repers or Athenas).
- Chest of Sorrows: Leaks water when you hold it. Must be managed while transporting.
- Chest of Ancient Tributes: Found in vaults, worth extra.
- Ashen Chest: Requires an Ashen Key to open; contains valuable loot.
- Marble, Grog, Valuable Chests: Varying gold values.
- How to obtain: Digging maps, skeleton forts, world events, shipwrecks, etc.
- Ritual Skulls: Used to unlock Skeleton Fort doors or sold to Order of Souls.
- Stronghold Skull: Valuable, from forts.
- Ashen Skull: From Ashen Lords or events.
- Normal skulls: Various values.
- How to obtain: Killing skeleton captains, forts, world events.
- Cages: For transporting chickens, pigs, snakes. Found at outposts.
- Crates: For transporting tea, silk, spices (commodities).
- Guns/Cannonball Supplies? Not really.
- How to obtain: Merchant voyages, or buying crates from the Merchant Alliance.
- Reaper's Chest: Glowing red chest that can be seen on the map by all players. Highly valuable, sold to Reaper's Bones.
- Reaper's Bounty: Same but with special glow.
- How to obtain: Skeleton ships, world events, or traps.
- Chest of Legends (already covered).
- Athena's Fortune Keg: Explosive barrel, very valuable but dangerous.
- Athena's Fortune Skull: Rare skull.
- How to obtain: Athena Voyages (Pirate Legend).
- Tea, Silk, Spices, Rum, Sugar, etc.: Stackable items in crates. Can be traded between outposts for profit (Merchant Alliance system).
- How to obtain: Buy from Merchant Alliance at one outpost, sell at another.
- Red, Blue, Green Gems: Found underwater, sell to any company for gold and reputation.
- How to obtain: Collect from sunken ships, or as random loot.
- Costumes: Full outfits (e.g., Pirate Lord, Sea Dog, etc.). Provide no stats.
- Individual pieces: Hat, shirt, pants, boots, belt, gloves, eyepatch, hook, pegleg (some are cosmetic but can be equipped).
- How to obtain: Purchased with gold, doubloons, ancient coins, or unlocked via commendations.
- Hull, Sails, Figurehead, Cannons, Capstan, Wheel: Change appearance only.
- How to obtain: Same as clothing.
- Cosmetic skins for cutlass, eye of reach, flintlock, blunderbuss, and fishing rod.
- How to obtain: Stores, limited events.
- Function: Follow you around, no gameplay impact.
- How to obtain: Purchased with Ancient Coins only.
- All cosmetic.
- Ashen Key: Used to unlock Ashen Chests. Can be dug up from Ashen Key maps.
- Ashen Chest: Contains Ashen artifacts (e.g., Ashen Skull, Ashen Tome).
- How to obtain: Ashen Loot voyages or random.
- Function: Used to start Skeleton Fort world events by placing on fort's table. Also sellable.
- How to obtain: Skeleton captain drops.
- Function: Contain multiple treasure maps. Each map leads to one piece of treasure.
- How to obtain: Purchased as trade goods or found.
- e.g., Shroudbreaker (tall tale item), Gold Hoarder's Medallion, etc. Used only during tall tales.
- Stronghold Keg: Massive explosion, can sink ships. Highly dangerous.
- Gunpowder Barrel: Smaller explosion.
- How to obtain: Forts, world events.
- When useful: Use as trap or to blow up skeleton ships.
- Resource management: Collecting wood, cannonballs, and food from every island you pass to stay supplied.
- Emissary system: Raise an emissary flag to boost gold and reputation from that company's loot.
- Cooking: Cooked meat heals more than raw. Overcooking reduces value.
- Cursed cannonballs: Combine with chainshot to quickly disable enemy ships.
- Telescoping: Use the speaking trumpet to extend voice chat distance for coordination.
- Bucket bailing: Two or more pirates bailing simultaneously can outpace small holes.
- Food variety: Carry a mix of cooked meats and fruits for quick and sustained healing.
- Pirate chat: Use instrument playing to distract skeletons while a teammate digs or shoots.
#### Spyglass
#### Lantern
#### Shovel
#### Bucket
#### Speaking Trumpet
#### Tankard
#### Pocket Watch
#### Fishing Rod
#### Instruments (Hurdy-Gurdy, Concertina, Drum)
#### Emote Radial Items? (Not considered items)
---
2. Weapons
Weapons are divided into melee, ranged firearms, and throwables. Each pirate carries one melee weapon and one firearm (or two of the same type? Actually you can equip one melee and one ranged, but you cannot carry two firearms without a melee? You can carry two ranged if you unequip melee? No, loadout is one melee slot and one ranged slot; you cannot have two firearms unless you have no melee. But the game forces one melee. So we list all weapons.)
#### Cutlass (Melee)
#### Eye of Reach (Sniper Rifle)
#### Flintlock Pistol
#### Blunderbuss
#### Throwables (Consumable but combat)
- Firebomb: Available from barrels or bought from Merchant Alliance for gold (after reputation).
- Blunderbomb: Same as firebomb.
- Chain Shot: Actually that's a cannonball type. Not thrown.
- Cursed Cannonballs: Placed in cannon.
So for throwables, only Firebomb and Blunderbomb. Also 'Blunderbomb' is called 'Blunderbombs' in game. And there is 'Bone Caller'? I think it was removed or seasonal. Let's omit.
---
3. Ammo & Cannonballs
#### Regular Cannonballs
#### Chainshot
#### Cursed Cannonballs
- Anchorball: Drops enemy anchor instantly (if they are not anchored).
- Ballastball: Fills enemy ship with water instantly (hole appears).
- Barrelball: Causes enemy food barrels to explode, spreading grog blindness? Actually it makes their food supply unusable? Wait, correct: Barrelball? There are: Anchorball, Ballastball, Barrelball, Blunderball, Chainball, Curseball of the Ashen Lord? The current permanent cursed cannonballs are: Anchorball, Ballastball, Barrelball, Blunderball, Chainball (chainshot is separate). But chainshot is not cursed; cursed ones are the ones with special effects. Actually in game: 'Cursed Cannonballs' include Anchorball, Barrelball, Ballastball, Blunderball, and 'Wreckerball'? No. I'll list common ones:
- Anchorball: Drops enemy anchor.
- Ballastball: Causes water to flood into enemy ship (makes a hole).
- Barrelball: Destroys all food barrels on enemy ship, spoiling food? Actually it causes them to explode and cover the ship in vomit? That's 'Grogball'? I think there was a 'Grogball' but not sure if still in game. Let's stick to known: Anchorball, Ballastball, Barrelball, Blunderball (which does knockback). And 'Chainball'? No, Chainshot is not a cursed ball but a separate ammo. I'll describe:
- Anchorball: Instantly drops enemy ship's anchor, forcing them to waste time raising it.
- Barrelball: Makes enemy ship's food barrels explode, causing large holes and also covering decks in grog (player drunkenness).
- Blunderball: Explodes on impact with a wide area of knockback, throwing players off the ship.
- Ballastball: Fills the enemy ship with a large amount of water from a hole on the lower deck.
---
4. Consumables & Provisions
#### Food Items
Food can be eaten to restore health. Different food types restore different amounts and may provide healing over time.
#### Drinks
#### Bait
How to obtain: Digging on islands (worms), from barrels, or purchased from Hunter's Call outpost supply crates? Actually you can buy bait from the Hunter's Call? Yes.
When useful: Fishing specific fish types that prefer certain bait.
#### Cooked Provisions: Not separate items.
---
5. Resources & Materials
#### Wood Planks
#### Cannonballs (already covered)
#### Food (already covered)
#### Resource Crates
#### Treasure Maps & Voyages
---
6. Currencies & Reputation Items
#### Gold
#### Doubloons
#### Ancient Coins
#### Reputation
#### Emissary Flags
---
7. Treasure & Collectibles
These are the primary items you find during voyages and sell for gold and reputation. They are not consumable but are the main loot.
#### Chests
#### Skulls
#### Merchant Alliance Items
#### Reaper's Chests
#### Athena Items
#### Commodities
#### Mermaid Gems
---
8. Cosmetics & Customization Items
Sea of Thieves has no functional armor or stat‑boosting gear. All clothing, ship parts, weapon skins, and pets are purely cosmetic.
#### Clothing Sets
#### Ship Customizations
#### Weapon Skins
#### Pets
#### Emotes, shanties, and accessories
---
9. Special Items & Quest Items
These are essential for certain voyages or world events. They often have a specific use and are not sellable themselves.
#### Ashen Key & Ashen Chest
#### Ritual Skulls (Active Skulls)
#### Map Bundles
#### Commendation Items
#### Kegs
#### Cannonball Crates (already covered)
---
10. Important Synergies & Upgrades
While there are no formal item upgrades, you can improve efficiency through:
---
This concludes the comprehensive item guide for Sea of Thieves. Remember that most items are tools to be used creatively; there is no strict 'best' loadout – adapt to your situation and crew synergy.
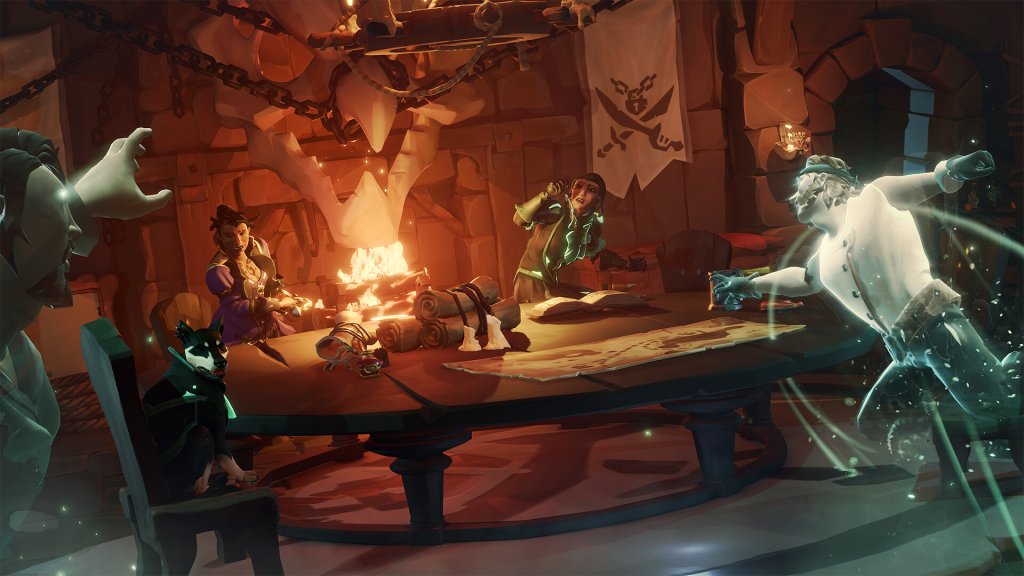
Character Skills
Character Skills in Sea of Thieves
Introduction
Sea of Thieves does not feature traditional character classes, skill trees, or level-based abilities. Every pirate shares the exact same set of innate capabilities and equipment. All differences are purely cosmetic. "Skills" in this context refer to the tools, weapons, and actions every pirate can use. Mastery comes from learning when and how to use each item effectively, not from unlocking new powers. This guide covers every functional skill, tool, weapon, and throwable available to all players, along with their uses, synergies, and recommended loadouts.
---
Tools
All tools are accessible from the Equipment Radial menu. Each tool serves a unique purpose and can be swapped freely at any time.
| Tool | Primary Use | Cooldown/Mechanics | Special Features |
|---|---|---|---|
| Spyglass | Zoom to distant locations | None (instant zoom) | Three zoom levels: 2x, 4x, 6x. Can be used while moving. |
| Shovel | Dig up treasure from marked spots | None | Must be equipped while digging; no attack function. |
| Tankard | Drink grog; vomit to attract sharks or put out fires (small) | Drink: 2s per gulp; Vomit: instant after consuming | Grog consumption causes drunken blur. Vomiting extinguishes fire on player or small fires. |
| Lantern | Provide light; signal other crews; reveal certain puzzles | None | Can be turned on/off. Different colors via ship lantern customization. |
| Speaking Trumpet | Amplify voice chat over long distances | None | Increases voice range to ~500m. Useful for negotiations or taunting. |
| Fishing Rod | Catch fish and treasure | Cast: 1s; Reel: depends on fish; No cooldown | Five rod types (same stats, different looks). Can catch fish, treasure, or even barrels. |
| Bucket | Bail water from ship; splash water at enemies; extinguish fires | Bail: 1s per use; Splash: same | Water thrown at enemies briefly blinds them and slows their movement. |
| Musical Instruments (Banjo, Concertina, Drum, Hurdy-Gurdy) | Play music to cheer crew, distract skeletons, or pass time | No cooldown | Each instrument has different melodies. Can be emoted while playing. |
- Spyglass – Essential for scanning islands, ships, and forts before committing. Use to spot loot on beaches or enemy crews. Always keep in quick slot.
- Shovel – Only used for digging. A single dig reveals a chest if you are standing on the correct spot (marked by X on map or riddle clues). Do not equip in combat.
- Tankard – Mostly for fun or roleplay. Tactically, drinking grog and vomiting can put out a single flame on you or a small fire barrel. This is niche but can save a ship from one firebomb.
- Lantern – Required for certain tall tale puzzles (e.g., lighting braziers). Useful at night to avoid stumbling over obstacles. Do not use during stealth – enemies will see your light.
- Speaking Trumpet – Critical for alliance negotiations or intimidating other crews without closing distance. Also necessary for some commendations.
- Fishing Rod – Use to catch fish for cooking (health regen) or to sell for gold. Also can hook floating loot or enemy rowboats during chases.
- Bucket – The most important tool for ship survival. Bail water non‑stop during flooding. Throw water at boarders to knock them back and disorient them temporarily.
- Musical Instruments – Playing music near skeleton forts or during voyages can distract skeletons (they dance) for a few seconds, giving breathing room. Also required for several commendations.
- Primary Attack: Swipe (forward arc, hits multiple enemies). Damage: 25 per hit. Combo: 3 quick swings.
- Heavy Attack (Charged Lunge): Hold attack to charge, release for a forward lunge dealing 40 damage and knocking back enemies. Can be held indefinitely. Lunge range ~8m.
- Block (Right Click / LT): Hold to block incoming melee attacks and reduce damage from gunshots by 30%. Blocking consumes stamina.
- Combo Attack (Block + Attack): Perform a spinning slash after a block, dealing 30 damage and knockback.
- Special Move: Sword Dash – While sprinting, press attack to perform a short dash that deals 20 damage and can interrupt enemies. Cannot be blocked.
- Reload: None (melee weapon).
- Cooldowns: No cooldown on swings, but stamina limits sprint and block. Lunge uses stamina.
- Upgrades: None (cosmetic only).
- Synergies: Combine with Blunderbuss for close quarter kills. Lunge off cliffs for mobility. Block + spin can counter multiple skeletons.
- When to Use: Always have a sword if you plan to board ships or fight skeletons. Best for crowd control and mobility.
- Primary Attack: Single shot. Damage: 50 (headshot 100). Range: ~30m effective.
- Reload: 2.5 seconds.
- Ammo Capacity: 1 shot, then reload.
- Special: None.
- Cooldowns: Reload only.
- Upgrades: None.
- Synergies: Use with Sword for medium‑range poke then lunge. Good for finishing wounded enemies.
- When to Use: Versatile – effective at mid range. Best for pirates who want a balanced loadout. Headshots one‑shot all players (except if they have health boosts from food).
- Primary Attack: Cone spread shot. Damage per pellet: 10. Maximum pellets: 10. Point blank damage: up to 100. Damage drops off quickly after ~5m.
- Reload: 3 seconds.
- Ammo Capacity: 1 shell, then reload.
- Special: Knockback – pushes enemies back even if they block.
- Cooldowns: Reload only.
- Upgrades: None.
- Synergies: Excellent for close quarters – one‑shot kill at melee range. Combine with Sword lunge for disruption.
- When to Use: Boarding actions, defending ladders, killing skeletons up close, knocking enemies off ledges or ship.
- Primary Attack: Single shot. Damage: 70 (headshot 140). Range: ~100m+ with scope.
- Reload: 3.5 seconds (slowest).
- Ammo Capacity: 1 shot, then reload.
- Special: Scope provides 4x zoom. Can aim while moving but accuracy decreases.
- Cooldowns: Reload only.
- Upgrades: None.
- Synergies: Best paired with a Sword for self‑defense or with Pistol for double tap. Crown yourself on crow’s nest to pick off ship crew.
- When to Use: Long‑range harassment, sniping players on cannons, shooting gunpowder kegs from distance. Not recommended for close combat.
---
Weapons
Every pirate can carry two weapons from four types. All weapons have the same base stats regardless of cosmetic skin. Reload times are fixed.
#### 1. Cutlass (Sword)
#### 2. Flintlock Pistol
#### 3. Blunderbuss
#### 4. Eye of Reach (Sniper Rifle)
---
Throwables (Items)
These are consumable items found in barrels or purchased from the Merchant Alliance. Each takes an inventory slot (max 5 per type).
| Item | Effect | Cooldown/Use Time | Special Notes |
|---|---|---|---|
| Firebomb | Creates a fire area on impact; sets ship parts ablaze; damages players | Throw: 1s; Fire ticks every 2s for 10s | Fire spreads to wood surfaces. Can be doused with water or bucket. |
| Blunderbomb | Large concussive blast – deals 60 damage at center, 30 at edge; knocks players back hard | Throw: 1s; Explosion: instant | Can be used to clear holes in ships or knock enemies off ladders. |
| Bone Caller | Summons 5 skeletons that attack the nearest player (including self if not careful) | Throw: 1s; Summon: 2s delay | Skeletons attack friend or foe until killed. Useful for distractions. |
| Cursed Cannonballs (not throwable but relevant) | Applied to cannons; various curses (dance, sleep, peaceball, etc.) | Must be loaded into cannon; fired like normal cannonball | Rare. Can turn tide of naval battles. Not a player skill but a crew resource. |
- Firebombs: Use against ships to force crew to repair and bail. Also effective against skeleton waves near gunpowder barrels.
- Blunderbombs: Best for boarding parties – clear the deck or knock defenders off your ship. Also useful for throwing into holes to damage enemy ship hull.
- Bone Caller: Use to distract skeletons during forts or to cause chaos on enemy ship. Be careful – they will also attack you if no other targets.
- Helmsman – Controls the wheel; adjusts sails; anchors. Must communicate turn radius and sail angles.
- Navigator – Reads maps; marks islands; watches for rocks and enemy ships.
- Cannoneer – Loads and fires cannons; adjusts aim for distance and leading targets. Skills: predicting enemy movement, using cursed balls.
- Boarder – Swims or uses rowboat to board enemy ship; employs sword and blunderbuss to kill crew, drop anchor, or steal supplies.
- Repairman – Planks holes, bails water, repairs damages. Bucket skills critical.
- Lookout – Uses spyglass from crow’s nest; calls out threats, loot, and ship direction.
- Sword Lunge + Blunderbuss: Lunge deals 40 damage, then point‑blank blunderbuss one‑shots. Ideal for boarding.
- Eye of Reach + Pistol: Double tap – snipe from range, then switche to pistol for quick follow‑up if hit not lethal.
- Blunderbomb + Sword Dash: Throw bomb to scatter enemies, then dash in for quick kills.
- Firebomb + Bucket: Light enemy ship on fire, then throw water from your bucket to extinguish your own fires or hinder enemies’ repairs.
- Bucket Water + Blunderbomb: Splash water to blind, then throw bomb to finish.
- Cutlass: Always prioritize in melee. Use block to absorb hits, then counter. Lunge to close gaps or escape.
- Flintlock: Use at medium range; aim for headshots. Reload behind cover. Swap to sword when enemy closes.
- Blunderbuss: Only fire at close range (under 5m). Use knockback to push enemies off ledges or ladders. Reload is slow – switch to sword after shot.
- Eye of Reach: Engage only from distance. Never use in close combat unless you have a backup. Aim for headshots on stationary enemies (cannoneers, repairmen).
---
Ship Roles (Crew Skills)
While not individual character skills, each crew member often adopts a role. Proficiency in these roles improves with practice.
Each pirate can fluidly switch between roles mid‑session.
---
Combos and Synergies
---
Recommended Loadouts
1. All‑rounder: Cutlass + Flintlock Pistol. Balanced for any encounter.
2. Close Quarters Boarder: Cutlass + Blunderbuss. Maximum damage in tight spaces.
3. Sniper Support: Eye of Reach + Pistol. Stay on crow’s nest or island tops.
4. Crowd Control: Blunderbuss + Blunderbombs. Good for clearing areas and knocking enemies off ship.
5. Stealth/Recon: Pistol + Spyglass (no secondary). Rarely used, but effective for pure observation.
---
When to Use Each Weapon in Combat
---
Conclusion
Mastering Sea of Thieves is not about unlocking new skills but about perfecting the use of existing tools, weapons, and teamwork. Experiment with different loadouts to find what suits your playstyle. Remember: every pirate is equal – only your wits and practice set you apart.
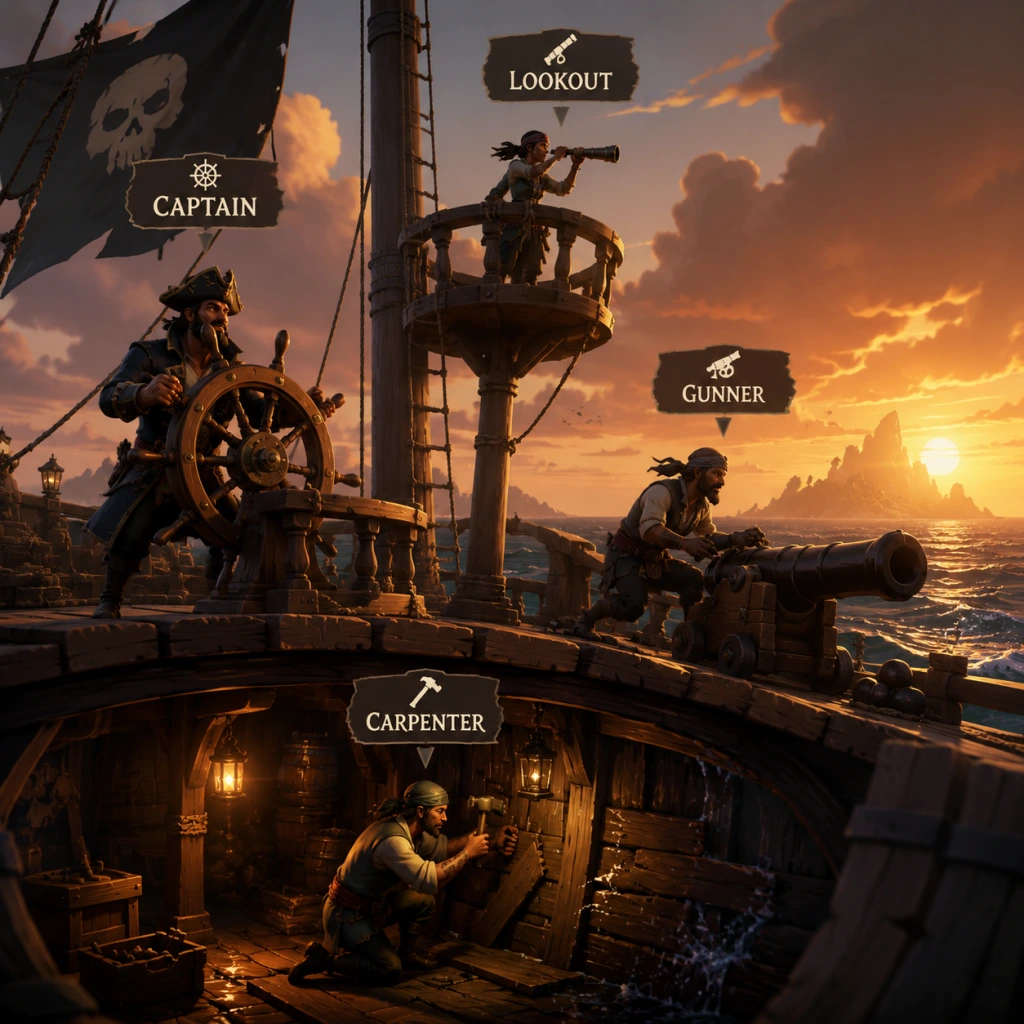
Characters & Roles
Characters & Roles in Sea of Thieves
Introduction
Sea of Thieves does not feature traditional character classes, skill trees, or level-based unlocks. Every pirate shares identical base abilities: swimming, climbing, using weapons/tools, and carrying items. However, the game’s rich lore features unique NPC characters, and crew-based gameplay naturally creates distinct roles. This guide covers both: the major NPCs (both friendly and hostile) and the essential player roles that emerge when crewing a ship.
---
Major Characters (NPCs)
These characters populate the world and drive the story via Tall Tales, world events, and daily interactions.
1. The Pirate Lord (James Morrow)
- Background: Legendary pirate who founded the Pirate’s Code. Serves as the main guide for new pirates and the host of the Pirate’s Life Tall Tales (in partnership with Disney’s Pirates of the Caribbean).
- Role: Mentor and questgiver. Appears at Outposts (in the Pirate Lord’s tent) and in the Sea of the Damned.
- Strengths: Provides lore, hands out the first Tall Tale ("A Pirate’s Life"), and offers basic advice.
- Weaknesses: Does not offer repeatable voyages; purely story-focused.
- Interactions: Starting the “Pirate’s Life” Tall Tale requires speaking to him. He also appears in the Sea of the Damned during certain events.
- Background: A former pirate captain revived as a ghostly skeleton lord. Leader of the Burning Blade fleet and main antagonist in the “Flameheart’s Revenge” world event.
- Role: World event boss. Appears as a giant spectral skull in the sky, commanding ghost ships.
- Strengths: Extremely powerful fleet; high health, fire attacks, and cannon volleys.
- Weaknesses: Vulnerable to coordinated crews using standard combat tactics; his ghost ships can be boarded and looted.
- Important Note: Defeating Flameheart’s event rewards high-value loot (Ritual Skulls, Ashen keys, etc.).
- Background: A seasoned pirate and merchant. He appears in several Tall Tales and as a temporary NPC during limited-time events (e.g., the original Hungering One event).
- Role: Quest giver and storyteller.
- Strengths: Provides unique voyages related to Hungering Deep or other events.
- Weaknesses: Only appears for specific events or Tall Tales; not always available.
- Background: An ex-Merchant Alliance member turned pirate. She is the daughter of the Pirate Lord’s original crew.
- Role: Key NPC in the “Maiden Voyage” tutorial and later in the “Pirate’s Life” Tall Tales.
- Strengths: Teaches basic pirate skills in the tutorial.
- Weaknesses: Limited post-tutorial interaction.
- Background: The proprietor of the Bilge Rat bar at each Outpost.
- Role: Provides limited-time Bilge Rat adventures, daily bounties, and story missions (e.g., “The Seabound Soul”).
- Strengths: Offers unique rewards (cosmetics, doubloons) for completing special commendations.
- Weaknesses: Her offerings rotate; some content may become unavailable after season end.
- Background: A charismatic conman and member of the Bilge Rats. Often found with Larinna.
- Role: Quest giver for the “Shrouded Spoils” and “Dark Relics” events.
- Strengths: Provides high-reward voyages for doubloons.
- Weaknesses: Similar to Larinna – content is time-limited.
- Background: A former pirate turned treacherous Reaper’s Bones agent. Central to the “Reaper’s Run” event.
- Role: Antagonist and quest giver for Reaper’s Bones related activities.
- Strengths: Guides players towards PvP combat and loot stealing.
- Weaknesses: Only appears during specific events.
- Background: The spirit of a pirate who guides players through the Sea of the Damned (Pirate’s Life Tall Tales and the “Shrouded Deep” adventure).
- Role: Navigator in the Sea of the Damned – provides flares and objectives.
- Strengths: Essential for progressing Tall Tales in that realm.
- Weaknesses: No gameplay role outside those contexts.
- Background: Various skeleton lords that command forts and fleets (e.g., Captain Graymarrow of the Fort of the Damned).
- Role: Boss enemies in Skeleton Forts, Fort of the Damned, and Sea Forts.
- Strengths: High health, unique attacks (cursed cannonballs, fire), and powerful loot.
- Weaknesses: Can be kited and taken down with coordinated tactics; ranged attacks are effective.
- Background: These are not characters but hostile megafauna.
- Role: Random encounters that attack ships.
- Strengths: Can destroy ships if unprepared.
- Weaknesses: Can be defeated with cannon fire; Krakens require targeting tentacles.
- Purpose: Find treasure via maps, riddles, and vaults.
- Progression: Sell chests, artifacts, and gold-related items at Outpost taverns.
- Strengths: Straightforward gameplay; high gold per hour if efficient.
- Weaknesses: Repetitive; vulnerable to thieves during long voyages.
- Best For: New players, solo sloopers, crews seeking consistent loot.
- Purpose: Defeat skeleton captains and bounties, collect skulls.
- Progression: Fight waves of skeletons and sell skulls at Outpost tents.
- Strengths: Action-oriented; good for PvE combat practice.
- Weaknesses: Takes time; skeleton waves can be tough for small crews.
- Best For: Players who enjoy combat and boss fights.
- Purpose: Deliver cargo (animals, plants, crates) on time.
- Progression: Complete delivery contracts with time limits.
- Strengths: Low combat requirement; predictable routes.
- Weaknesses: Time pressure; animals require careful handling; low loot value if late.
- Best For: Methodical players, crews focused on efficient sailing and logistics.
- Purpose: Embrace PvP. Sell stolen loot and Reaper’s chests/bounties.
- Progression: Sell any loot to the Reaper’s Hideout. Player ship shows up on map for all.
- Strengths: Fast progression; high risk/high reward; encourages combat.
- Weaknesses: Always visible on map; attracts enemies; requires combat skill.
- Best For: PvP enthusiasts, crews with good communication.
- Purpose: The endgame faction; undertake legendary voyages (typically long, multi-step quests).
- Progression: Complete Athena voyages (starting at level 50 in another company) to earn Athena’s Reputation.
- Strengths: Best cosmetics; satisfying multi-part quests.
- Weaknesses: High difficulty; often attracts Reapers; long time investment.
- Best For: Veteran crews, completionists.
- Purpose: Hunt and fish. Sell cooked fish, meat, and special treasures.
- Progression: Sell seafood to the Hunter’s Call representatives at Outposts or Seaposts.
- Strengths: Relaxed gameplay; can be done alongside other activities.
- Weaknesses: Low gold per hour; requires patience; fishing minigame.
- Best For: Casual players, fishermen, lore enthusiasts.
- Purpose: The now-removed Arena mode. Still referenced in some commendations.
- Legacy: No longer active; players cannot currently progress this faction.
- Note: All Sea Dogs rewards are unobtainable.
- Responsibilities: Steers the ship, reads the map, makes strategic decisions (which sails, boarding call, retreat).
- Strengths: Best view of the overall situation; controls heading.
- Weaknesses: Can be overwhelmed if multitasking poorly.
- Recommended Tools: Spyglass, speaking trumpet, compass, map bundle.
- Playstyle: Often stays at the wheel, calls out threats, decides engagements.
- Synergy: Works with Helmsman to adjust courses; relies on Lookout for enemy spotting.
- Responsibilities: Physically turns the wheel; adjusts heading on command.
- Strengths: Direct control; can make fine adjustments.
- Weaknesses: Vulnerable to boarders if alone at wheel.
- Recommended Tools: Good communication with Captain; weapon for defense.
- Playstyle: Focused on wheel; listens for Captain’s orders.
- Synergy: Must trust Captain’s navigation; can swap to Captain if needed.
- Responsibilities: Reads the map regularly, marks routes, identifies islands, calls out shallows and rocks.
- Strengths: Prevents grounding; can give early warnings.
- Weaknesses: Requires map awareness; can distract from other tasks.
- Recommended Tools: Map bundle, spyglass, speaking trumpet.
- Playstyle: At map table when safe; updates crew on heading and distance.
- Synergy: Relieves Captain from map duties; coordinates with Helmsman.
- Responsibilities: Adjusts sails (angle and lower/raise) to catch wind optimally.
- Strengths: Max speed; efficient turns; reduces need for engine.
- Weaknesses: Labor-intensive; need to move between masts on bigger ships.
- Recommended Tools: Typical tools; bring food for quick health.
- Playstyle: Watches wind direction; constantly adjusts sails when Captain calls.
- Synergy: Works with Helmsman for turns; can help with repairs in downtime.
- Responsibilities: Fix holes, bail water, repair masts and capstan. Manages ship health.
- Strengths: Keeps ship afloat; prevents sinking.
- Weaknesses: Often away from combat; requires wood and planks.
- Recommended Tools: Planks, bucket, food (to heal if damaged), spyglass for spotting leaks.
- Playstyle: Listens for cannon impacts; rushes to damage location; rotates with other roles.
- Synergy: Coordinates with Cannoneer to prioritize repairs; signals when ship is stable.
- Responsibilities: Fires cannons; aims for enemy ship hull, mast, or players.
- Strengths: Deals damage; can disable enemy ship.
- Weaknesses: Exposed to return fire; requires good aiming.
- Recommended Tools: Cannonballs, chain shots, firebombs, blunderbombs (shooters).
- Playstyle: Positions on cannon; adjusts aim based on ship movement; calls out hits.
- Synergy: With Helmsman for angle; supplies from storage; repairs when needed.
- Responsibilities: A scout/attacker. Stays on crow’s nest or prow to spot threats; boards enemy ships to steal treasure, anchor, or kill crew.
- Strengths: Surprise attacks; disrupts enemy; gathers intel.
- Weaknesses: Isolated from ship; can be killed and left behind.
- Recommended Tools: Cutlass, pistol/blunderbuss, ammo pouches, food, boarding axe (if equipped).
- Playstyle: Jumps off when close; uses ropes to board; aims for anchor or crew.
- Synergy: Works with Cannoneer (distraction); alerts crew of enemy movement.
2. Flameheart (Captain Flameheart)
3. Merrick
4. Grace Morrow
5. Larinna
6. Duke (DeMarco Singh)
7. Stitcher Jim
8. Wanda (Sea of the Damned Guide)
9. The Skeleton Lord (Captain Warsmith, Graymarrow, etc.)
10. Megalodons & Krakens (World Event Monsters)
---
Factions (Trading Companies)
These are groups that players can represent to earn reputation, gold, and special cosmetics. Each has unique voyages and rewards.
1. Gold Hoarders
2. Order of Souls
3. Merchant Alliance
4. Reaper’s Bones
5. Athena’s Fortune
6. Hunter’s Call
7. Sea Dogs (Arena – legacy)
---
Player Roles on a Crew
Even though every pirate is equally capable, a coordinated crew benefits from assigning roles. Roles can be changed at any moment, but specialization improves efficiency.
1. Captain
2. Helmsman
3. Navigator
4. Sail Trimmer
5. Bilge Rat (Repairer/Bailer)
6. Cannoneer
7. Boarder / Lookout
Role Combinations for Different Ship Sizes
| Ship Type | Recommended Roles (4-player max) | Notes |
|---|---|---|
| Sloop (1-2 crew) | 1: Captain/Helmsman + Sail Trimmer + Bilge; 2: Add Cannoneer/Boarder | Solo sloop requires frequent role swapping; use anchor wisely. |
| Brigantine (3 crew) | Captain, Helmsman/Sail, Cannoneer/Boarder (one handles repairs). | Good balance; one person covers sails and helm. |
| Galleon (4 crew) | Captain, Helmsman, Sail Trimmer, Bilge; or split Cannoneer and Boarder | Full crew needs to specialize; can have dedicated Cannoneer and Boarder. |
Equipment & Loadouts by Role
While all weapons and tools are available to everyone, certain combinations suit each role.
Recommended Weapon Loadouts
- Captain/Helmsman/Navigator: Cutlass (close defense) + Eye of Reach (sniper) for long-range scanning. Or pistol + sword for balanced defense.
- Bilge Rat: Blunderbuss (close quarters) + Cutlass (to kill boarders quickly). Also carry planks, bucket, and food.
- Cannoneer: Blunderbuss (defend cannon from boarders) + Eye of Reach (shoot enemy crew). Or pistol + sword for versatility.
- Boarder/Lookout: Sword + Blunderbuss (high burst damage) for boarding actions. Throwables (blunderbombs, firebombs) are essential.
- All roles should have a spyglass and speaking trumpet if communicating.
- Bucket is mandatory for Bilge Rats.
- Planks are vital for everyone, but Bilge Rats carry extra.
- Food (cooked meat, coconuts) is shared; each pirate should carry at least 5 pieces.
- Callouts: Calling “Ship spotted at 2 o’clock!” or “Taking water below deck!” improves response time.
- Role Rotation: On longer voyages, rotate roles to avoid fatigue. For example, after a battle, everyone helps repair.
- Shared Supplies: Assign one person to manage cannonballs/wood/food supply; keep chests well-stocked.
- Emergency Drills: Practice raising anchor, raising sails, and turning under fire.
- Role Switching: If a crew member dies, another must fill their role immediately. All pirates can do any job.
Tool Priority
---
Team Synergy & Communication
---
Conclusion
Sea of Thieves shines through player creativity and cooperation. While there are no rigid character classes, understanding the strengths of each NPC and company, and adopting clear crew roles, will make your adventures smoother and more rewarding. Whether you prefer digging treasure, sinking ships, or delivering chickens, the sea offers a place for every pirate.
Cheats & Secrets
Cheats & Secrets in Sea of Thieves
Sea of Thieves does not feature traditional cheat codes, console commands, or unlock codes. The game is designed as a shared-world live service where all players have equal capabilities, and Rare Ltd. has never implemented any official cheat codes. However, the game is rich with developer-intended secrets, Easter eggs, hidden commendations, and special interactions that reward exploration and keen observation. Below is a comprehensive list of all known legitimate hidden content.
Important Note on Exploits
This guide focuses exclusively on developer-intended secrets and does not cover exploits, glitches, or unauthorized cheating tools. Using third-party cheats violates the game's Terms of Service and can result in permanent bans.
---
Easter Eggs & Hidden Interactions
The Legend of the Shrouded Ghost
- Type: Hidden Megalodon encounter.
- Description: The Shrouded Ghost is the rarest of all Megalodon variants, appearing as a ghostly white shark with glowing purple patterns. It is not a cheat or exploit; it is an intentionally rare spawn. Many players believe it does not exist or is a myth, but Rare has confirmed it is in the game with an extremely low chance to appear (estimated 1/1000 Megalodon spawns). No guaranteed method exists; simply sail in open waters and hope for luck. Some rumored conditions: deep open sea, nighttime, and no other world events active—but none are confirmed.
- Type: Hidden encounter / Music interaction.
- Description: During the Hungering Deep campaign (2018), players had to play specific songs from the Speaking Trumpet to summon Megalodons. While the campaign is no longer active, the music interaction remains. If you play the Song of the Deep (a shanty) near certain underwater locations, you can still summon a Megalodon. The trigger spots are near the Uncharted Island east of Crooked Masts and north of Shark Bait Cove. This is a hidden mechanic.
- Type: Hidden area / Easter egg.
- Description: The Ferry of the Damned (where you appear after dying) has a small hidden tavern in the back. If you jump off the main area and swim toward the back of the ship, you'll find a small bar with a Non-Player Character (NPC) serving grog. You can drink and become intoxicated while dead. This has been in the game since launch.
- Type: Hidden location.
- Description: In the main menu tavern (the Pirate Legend area), there is a locked door near the Mysterious Stranger. To open it, you must be a Pirate Legend (Reputation 50 in three Trading Companies) and purchase the "Pirate Legend" title. Inside is a room with a map of the Sea of Thieves and some decorative items. No gameplay benefit, but a status symbol.
- Type: Interactive Easter egg.
- Description: On the island known as The Ancient Spire Outpost, there is a large stone skull sculpture. If you stand on its nose and play the "Shanty of the Damned" (unlocked via a Tall Tale), the skull's eyes will glow purple and rain will start. This is purely cosmetic but is a known developer-placed secret.
- Type: Hidden dialogue.
- Description: If you equip the full set of the Legendary Pirate outfit (requires Pirate Legend status) and speak to the Mysterious Stranger in the tavern, they will have unique dialogue referencing your status. This is a nod to the lore.
- Type: Rare loot variant.
- Description: Normally, Messages in a Bottles give maps for treasure. However, extremely rarely, a bottle may contain a poem or a message from a developer. These are known as "Developer's Messages" and are purely cosmetic Easter eggs. They cannot be turned in for gold.
- Type: Hidden room.
- Description: In the Gold Hoarder's lair on the island of Plunder Outpost, there is a bookshelf that can be interacted with. When done, it reveals a hidden tunnel leading to a small room with gold piles and a skeleton. This gives no loot, but it's a fun Easter egg.
- Type: Myth / Unconfirmed interaction.
- Description: Many players claim that playing the Shanty of the Ancient (obtained from an Ancient skeleton) near the large rock formation known as "Kraken's Fall" will increase the chance of a Kraken encounter. Rare has neither confirmed nor denied this. Test at your own risk; it may be coincidence.
- Type: Hidden collectible.
- Description: In the Pirate Legend Hideout (the hidden tavern), there is a small music box on a table. If you play a shanty near it, the music box will start playing a unique tune. This is a small auditory Easter egg.
- Type: Visual Easter egg.
- Description: If you fire yourself from a cannon directly upward in the middle of the night during a clear sky, the game will occasionally trigger a unique animation where your character briefly appears to touch the moon. This is extremely rare and may require specific timing. No gameplay effect.
- Type: Hidden commendation (achievement).
- Description: To unlock the "Legendary Storyteller" commendation, you must complete all five Journal entries of the founder of the Bilge Rats—each found in specific islands. These journals are hidden in locations like the Ancient Spire Outpost, Snake Island, etc. This gives no tangible reward but contributes to 100% completion.
- Type: Hidden title.
- Description: If you sell a specific rare fish, like the Twinkle Tide Fish, to the Hunter's Call, you can earn a unique title without needing reputation. The fish are extremely rare and found during specific in-game seasons.
- Type: Hidden interaction.
- Description: At Shipwreck Bay, there is a pulley system on the main mast. If you interact with it correctly (left, right, left, right pattern), you can lower a special flag. This flag can be sold at the Reaper's Hideout for a small amount of gold. This is a reference to the Cursed Sails campaign.
- Type: Persistent hidden location.
- Description: There is a permanently submerged shipwreck near the unmarked island between Plunder Outpost and Sanctuary Outpost. It is not marked on any map and contains a unique chest known as the "Salty Fortune's Chest" which sells for 500 gold. This is a developer-placed secret.
- Type: Clarification.
- Description: Ancient Coins are a real-money currency used in the in-game Emporium. They are not a cheat or secret; they are purely microtransactions. You can earn a small number through commendations, but there is no hidden way to generate infinite gold/coins.
- The Shroudbreaker: Hidden journal in the Ancient Vault that unlocks a secret cutscene.
- The Seabound Soul: Secret ghost ship encounter if you read a specific note in the captain's quarters.
- A Pirate's Life: This crossover Tall Tale has numerous hidden Disney references, including a hidden Mickey Mouse silhouette in the Prison level.
Hungering Deep – The Original Megalodon
The Cursed Ferryman's Tavern
The Legendary Pirate Lord's Hideout
The Skull of Destiny Easter Egg (Tale of the Monolith)
The Mysterious Stranger's Secret Dialogue
Message in a Bottle – Rare Messages
The Gold Hoarder's Secret Room
The Shanty of the Ancient – Summoning the Kraken?
The Eternal Music Box
Shooting the Moon – Cannon Easter Egg
The Legendary Storyteller – Hidden Commendation
The Hunter's Call – Titles Without Reputation
The Legend of the Cursed Sails – Shipwreck Bay Easter Egg
The Salty Fortune – Hidden Sunken Ship
The Ancient Coins – Paid Currency, No Secrets
---
In-Game Glitches (Not Advised)
Rare actively patches exploits. Past glitches included duping items, infinite ammo, and wall-clipping. None are safe to use and all are bannable. No current working glitches are documented here.
---
Developer-Intended Hidden Content via Tall Tales
Several Tall Tales (campaign-style quests) include hidden rooms, lore notes, and secret areas. Examples:
---
Console Commands? None
Sea of Thieves has no developer console. All settings can be adjusted from the Options menu. No FPS or command-line options exist.
---
Conclusion
While Sea of Thieves lacks traditional cheat codes, its world is filled with secrets that reward observant and persistent players. From rare Megalodon variants to hidden rooms and developer messages, these Easter eggs add depth to the shared-world experience. No exploits are endorsed; all the above are legitimate, developer-intended content.