Sekiro: Shadows Die Twice
## Game Introduction: Sekiro: Shadows Die Twice ### Genre Sekiro: Shadows Die Twice is an action-adventure game with strong stealth elements and a unique, posture-based combat system. It is often categorized as a "soulslike" due to its challenging difficulty and design philosophy, but it distinguis...
Download & Installation
Download & Installation Guide for Sekiro: Shadows Die Twice
This guide covers legitimate sources and step-by-step installation for all major platforms where Sekiro: Shadows Die Twice is available: PC (Steam), PlayStation 4/5, and Xbox One/Series X|S. The Stadia version was discontinued; no other official versions exist (no Switch, no mobile).
---
System Requirements
PC (Minimum)
- OS: Windows 7 64-bit | Windows 8 64-bit | Windows 10 64-bit
- Processor: Intel Core i3-2100 | AMD FX-6300
- Memory: 4 GB RAM
- Graphics: NVIDIA GeForce GTX 760 | AMD Radeon HD 7950
- DirectX: Version 11
- Storage: 25 GB available space
- Sound Card: DirectX 11 compatible
- OS: Windows 7 64-bit | Windows 8 64-bit | Windows 10 64-bit
- Processor: Intel Core i5-2500K | AMD Ryzen 5 1400
- Memory: 8 GB RAM
- Graphics: NVIDIA GeForce GTX 970 | AMD Radeon RX 570
- DirectX: Version 11
- Storage: 25 GB available space
- Sound Card: DirectX 11 compatible
- Storage: Approx. 25 GB free (PS4/PS5) or 27 GB (Xbox One/Series X|S). PS5 uses same storage, Xbox Series X|S uses Smart Delivery.
- Accounts: PSN ID (PS4/PS5) or Xbox Live account (Xbox).
- PC (Steam): A free Steam account is required.
- PlayStation: A PlayStation Network (PSN) account is required (free, but PS Plus not needed for single-player).
- Xbox: An Xbox Live account is required (free, with or without Game Pass).
PC (Recommended)
PlayStation / Xbox
---
Account Requirements
---
Platform-Specific Download & Installation
PC via Steam
1. Install Steam if not already: Download the installer from [store.steampowered.com](https://store.steampowered.com) and run it.
2. Log in to your Steam account.
3. Purchase or access the game (if you own it via library, skip to step 4).
4. In the Steam client, go to Library → locate Sekiro: Shadows Die Twice (or the Game of the Year Edition).
5. Click "Install". A pop-up will show:
- Choose installation location (default is Steam\steamapps\common).
- Ensure at least 25 GB free on the target drive.
6. Click "Next" → "Finish". Download begins.
7. Wait for download and automatic installation. Duration depends on internet speed.
8. Post-installation: Launch from Library or desktop shortcut.
PlayStation 4 / PlayStation 5
1. Power on your console and sign in to your PSN account.
2. Insert game disc (if physical) and wait for automatic installation; or go to PlayStation Store to purchase/download the digital version.
3. For digital: Search "Sekiro: Shadows Die Twice" and select Download.
4. The console will queue the download. You can monitor progress from the home screen → Notifications → Downloads.
5. Once downloaded, installation occurs automatically. Wait until the game tile appears as ready.
6. Launch from the home screen.
PS5 Note: The PS4 version is played via backward compatibility. If you own the PS5, you can install the PS4 version; no dedicated PS5 upgrade exists.
Xbox One / Xbox Series X|S
1. Sign in to your Xbox Live account.
2. Insert disc (physical) or open Microsoft Store (digital).
3. Search for "Sekiro: Shadows Die Twice".
4. Select "Install" (or "Buy" then "Install").
5. Choose installation drive (internal or external) if prompted.
6. Download and installation proceed automatically. Monitor via My games & apps → Queue.
7. Launch from the games list.
Xbox Smart Delivery: The game automatically provides the best version for your console (Xbox One or Xbox Series X|S).
---
First Launch Setup
PC
1. Double-click Sekiro.exe from Steam or desktop shortcut.
2. A configuration window may appear (if not, adjust in-game later):
- Language: Choose from Japanese or English voiceovers + text language.
- Display: Select resolution, refresh rate, windowed/fullscreen, V-Sync, graphics quality (Low/Medium/High/Max).
- Audio: Volume sliders.
- Controls: Keyboard & mouse or gamepad (Xbox/PlayStation controllers recommended).
3. Click OK or Save. The game will launch.
4. Main menu → Options → further tweak graphics, audio, controls.
PlayStation / Xbox
1. After launching, the game displays the title screen.
2. Press any button to proceed.
3. Main menu → Options to adjust:
- Display (brightness, HDR if available)
- Audio (language, volume)
- Controls (invert Y, button layout, camera speed)
4. Start a New Game or Load.
---
Common Installation Errors & Fixes
PC
| Error / Issue | Cause & Solution |
|---|---|
| "Missing MSVCP140.dll" or VCRUNTIME140.dll | Install Visual C++ Redistributable (2015-2022) from Microsoft. |
| "DirectX Error" | Update DirectX via Windows Update or install the latest DirectX runtime from Microsoft. |
| Low FPS / stuttering | Ensure graphics drivers are updated (NVIDIA/AMD). Lower settings. Verify no overlays (Discord, Xbox Game Bar) interfering. |
| Crash on launch (black screen) | Verify game files: Right-click in Steam Library → Properties → Local Files → Verify integrity. Disable antivirus temporarily. |
| Controller not working | Use Xbox/PlayStation controller via USB. Disable Steam Input per-game: Right-click game → Properties → Controller → Disable Steam Input. |
| Installation stuck / slow | Pause and resume download. Restart Steam. Clear download cache: Steam Settings → Downloads → Clear Cache. |
PlayStation / Xbox
| Error / Issue | Cause & Solution |
|---|---|
| "Cannot install" disc error | Clean the disc; ensure console is updated to latest firmware. |
| Download stuck | Pause and resume; restart console; check internet connection. |
| "The application is corrupted" | Delete the partial install and re-download. On PS: Settings → Storage → delete game data. On Xbox: Uninstall and reinstall. |
| Game won't launch after install | Restart console. Check for system updates. If disc, ensure it's inserted. |
Post-Installation Verification
PC (Steam)
1. Verify integrity of game files: Right-click Sekiro in Steam Library → Properties → Local Files → Verify integrity of game files… Steam will check and repair any corrupted/missing files.
2. Update check: The game auto-updates via Steam. Ensure latest patch is applied.
3. Check version: Main menu usually shows version number at bottom.
4. Optional: Check installation folder (default: `C:\Program Files (x86)\Steam\steamapps\common\Sekiro`) for expected files like `Sekiro.exe` and `Data` folder.
PlayStation
- Go to Settings → Storage → confirm the game size (approx. 25 GB).
- Check for updates: Highlight game tile → Options → Check for Update.
- Go to My games & apps → Manage → see file size (approx. 27 GB).
- Updates are automatic. To force: Highlight game → Menu → Manage game and add-ons → Updates.
- Game of the Year Edition: Content identical; includes all updates and some bonus items (e.g., digital artbook). Installation process same.
- Backup saves: On PC, saves are in `%APPDATA%\Sekiro` or Steam Cloud. On console, cloud syncing is automatic (with PSN/Xbox Live).
- No mobile or Switch version exists.
- Stadia version was shut down in 2023; no support.
Xbox
---
Additional Notes
---
This guide covers legitimate sources only. Always purchase from official stores to ensure security and updates.
Game Introduction
Game Introduction: Sekiro: Shadows Die Twice
Genre
Sekiro: Shadows Die Twice is an action-adventure game with strong stealth elements and a unique, posture-based combat system. It is often categorized as a "soulslike" due to its challenging difficulty and design philosophy, but it distinguishes itself significantly from the Dark Souls series.
Developer & Publisher
Sekiro was developed by FromSoftware, the acclaimed Japanese studio known for the Dark Souls series, Bloodborne, and Elden Ring. It was published by Activision (worldwide) and FromSoftware (Japan).
Release Timeline & Platforms
- Release Date: March 22, 2019
- Platforms:
- No native PlayStation 5 or Xbox Series X|S version exists, but the game runs smoothly on these consoles via backward compatibility.
- Wolf (Sekiro): The protagonist, a shinobi bound by the Iron Code to protect his master. He is silent, stoic, and highly skilled.
- Kuro (the Divine Heir): A young lord who possesses the Dragon's Heritage, granting immortality. He is kind-hearted and seeks to break the cycle of bloodshed.
- The Sculptor: A mysterious one-armed man who carves Buddha statues. He helps Wolf by upgrading the prosthetic arm and offering guidance.
- Isshin Ashina: The legendary swordmaster and founder of Ashina. He is the main antagonist, though his motives are complex.
- Genichiro Ashina: Isshin's grandson, a fierce warrior who captures Kuro and seeks the Dragon's Heritage for himself.
- Lady Butterfly: A former mentor of Wolf, revealed to have betrayed him early in the story.
- The Divine Dragon: A mythical creature that represents the source of the Dragon's Heritage.
- Hardcore gamers who enjoy challenging, skill-based action games.
- Fans of FromSoftware's previous titles (Dark Souls, Bloodborne).
- Players interested in Japanese history and mythology.
- Those who appreciate deep combat systems and rewarding difficulty.
- Offline: The game can be played entirely offline with no internet connection required.
- Online: An internet connection is only needed for downloading the game and patches. There are no online features like messages or invasions (unlike Dark Souls). However, there is a hidden "Fight to the Death" mode unlocked after completing the game once (a boss rush mode called "Gauntlets of Strength") that is entirely offline.
- Update 1.04: Added boss rush modes (Gauntlets of Strength), rematches against bosses, and cosmetic unlocks.
- Update 1.05: Added the ability to change Wolf's appearance (via unlockable outfits) and the "Reflection of Strength" feature for re-fighting bosses at any time.
- No story expansions have ever been announced or released.
- PS4/PS5: Backwards compatible on PS5 with improved loading times and stable 60 FPS (on PS5 in performance mode). No separate PS5 version.
- Xbox One/Series X|S: Backwards compatible. Xbox Series X|S users get higher resolution and 60 FPS via the game's uncapped frame rate.
- PC: Supports 4K resolution, uncapped frame rates, and keyboard/mouse or controller. Requires a decent GPU for smooth 60 FPS.
- PC (Steam)
- PlayStation 4 (backwards compatible on PS5 with performance enhancements)
- Xbox One (backwards compatible on Xbox Series X|S with performance enhancements)
- Stadia (service now defunct)
Story Overview
Set in a fictionalized version of Japan's late 16th-century Sengoku period, the story follows Wolf, a shinobi (ninja) whose master, a young lord named Kuro, is imprisoned by the Ashina clan. Wolf is brutally defeated and loses his left arm in an early encounter, but is rescued by a mysterious Sculptor who provides him with a prosthetic arm. Wolf then embarks on a quest to rescue Kuro and uncover the secrets of the Dragon's Heritage – a form of immortality that binds Wolf and Kuro together. Along the way, he faces formidable enemies, including corrupt monks, giant apes, and the tyrannical rulers of Ashina.
Setting
The game takes place in the war-torn region of Ashina, a mountainous land inspired by feudal Japanese architecture, forests, caves, and temples. The world is interconnected but not fully open; it features distinct hub areas and branching paths. The atmosphere is steeped in Japanese mythology and Buddhist symbolism, creating a somber and beautiful environment.
Main Characters
Core Appeal
Sekiro's core appeal lies in its high-risk, high-reward combat and the satisfaction of mastering its unique mechanics. Unlike typical soulslike games, Sekiro emphasizes perfect timing, deflection, and aggression over stamina management. The game rewards players who learn enemy patterns and execute precise blocks and counters. The prosthetic arm adds verticality and tactical variety through tools like the grappling hook, shuriken, and firecrackers.
Target Audience
Game Modes
Sekiro is a single-player only game. There is no multiplayer, cooperative, or competitive mode. The game features a single story campaign with multiple endings based on player choices and hidden objectives.
Online / Offline Support
DLC / Expansion Overview
Sekiro: Shadows Die Twice has no paid DLC or expansions. Post-release updates included free content:
What Makes This Game Unique?
1. Posture-Based Combat: Enemies have a visible "Posture" bar that, when broken, leaves them vulnerable for a instant-kill. This encourages aggressive play and precise deflections.
2. The Prosthetic Arm: A versatile tool that can be upgraded with various attachments (e.g., grappling hook, flame vent, loaded axe) that change combat and traversal.
3. Stealth as Core Mechanic: Unlike many action games, stealth is viable and encouraged. Wolf can perform stealth kills, hide in tall grass, and use the grappling hook to reach high vantage points.
4. Resurrection Mechanic: Wolf can die and resurrect on the spot once (or more with certain items) during combat, adding a unique risk/reward layer.
5. No Character Customization: Unlike RPGs, Sekiro has a fixed protagonist with a predetermined skill tree and weapons. Progression comes from learning skills and upgrading the prosthetic arm.
6. Sekiro's "Sekiro" Setting: A grounded, historical fantasy Japan with minimal magic, focusing on swordplay and shinobi tactics.
Compatibility with Consoles
Conclusion
Sekiro: Shadows Die Twice is a masterpiece of action game design, offering a punishing but deeply rewarding experience. Its focus on precision, deflection, and mobility sets it apart from other FromSoftware games. With no DLC, the game is a complete package from the start, though its multiple endings and post-game boss rush modes provide excellent replay value. Recommended for any player seeking a true test of skill.
---
This introduction is part of a comprehensive guide series. For installation instructions, refer to the Download & Installation section.
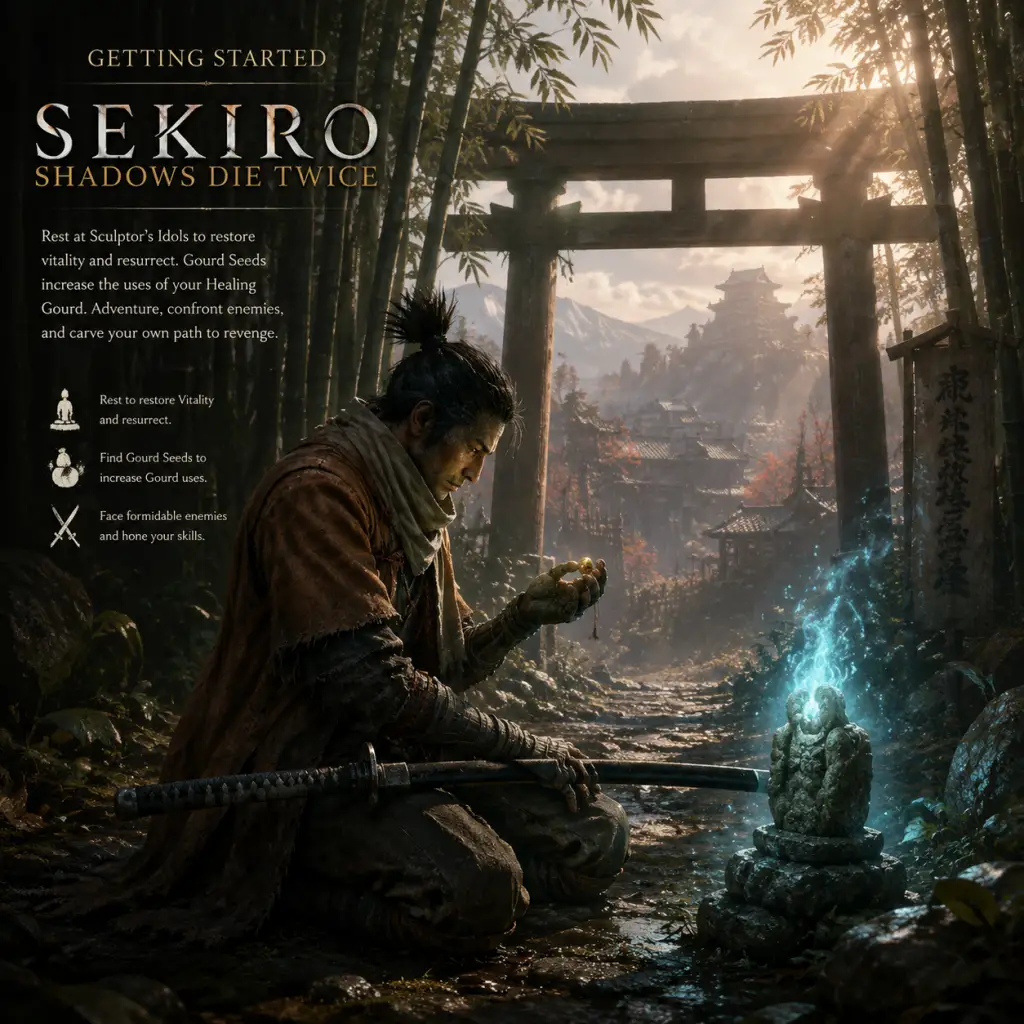
Getting Started
Getting Started: Sekiro: Shadows Die Twice – A Beginner's Guide
Welcome to Sekiro: Shadows Die Twice. This guide is designed to get you through your first hours with confidence, covering everything from controls to survival tips. Sekiro is a challenging game that rewards patience, practice, and knowledge. Let’s begin.
Character Creation
There is no character creation. You play as Wolf, a disgraced shinobi with a fixed appearance and name. Your only customization later is cosmetic (outfits unlocked via achievements or DLC). Focus on learning Wolf's moves, not on looks.
Controls (All Platforms)
The game uses the same control logic across platforms, but button names differ. Practice in the tutorial area (the Dilapidated Temple) with Hanbei the Undying.
| Action | PC (Keyboard & Mouse) | PlayStation | Xbox |
|---|---|---|---|
| Move | WASD | Left Stick | Left Stick |
| Camera | Mouse / Shift+WASD | Right Stick | Right Stick |
| Attack | Left Click | R1 | RB |
| Deflect/Guard | Right Click | L1 | LB |
| Jump | Spacebar | X | A |
| Dodge/Sprint | Shift (hold to sprint) | Circle (hold to sprint) | B (hold to sprint) |
| Prosthetic Tool | E | L2 | LT |
| Use Item (quick slot) | Q | D-Pad Down | D-Pad Down |
| Interact/Use Idol | R | Triangle | Y |
| Lock-On | Middle Mouse Button | R3 (click right stick) | R3 |
| Resurrect | Tab | R1 (when death screen appears) | RB (when death screen appears) |
| Stealth Kill | Left Click when behind enemy | R1 when behind enemy | RB when behind enemy |
UI Overview
Your HUD displays:
- Health Bar (top left): Green bar. When it reaches zero, you die.
- Posture Bar (below Health): Yellow bar. Fills when blocking or deflecting. When full (red), you are staggered and vulnerable. Enemies also have posture – break it for a deathblow.
- Resurrection Nodes (top left, below Health): Small circles. You can self-resurrect one or two times after dying (requires full node). They refill by killing enemies or using certain items.
- Emblems (top center): Used for prosthetic tools and certain combat arts. Max 20 (can be increased later). Spend on upgrades sparingly early.
- Item Quick Slot (bottom right): Your equipped items. Use D-Pad to cycle; press Q/D-Pad Down to use.
- Skill Points (bottom center): Earn XP to get a point; spend at Sculptor's Idols.
- Sen (Money) (top right): Spend at merchants. You lose half on death (but can buy Coin Purses from merchants to store safely).
- Light every Sculptor's Idol – they are checkpoints and fast travel points.
- Get the Healing Gourd – if you somehow missed it, rest at any idol and talk to the Sculptor.
- Find the Loaded Shuriken – essential for stunning enemies and hitting distant foes.
- Learn Mikiri Counter – purchase from the Skill Tree (Shinobi Arts) for 1 skill point. It turns enemy thrusts into deathblows.
- Upgrade your Healing Gourd – find Gourd Seeds (first one is near the Chained Ogre area, on a cliff). Give them to Sculptor to increase heals.
- Unlock the Shinobi Medallion (offensive tool) – not necessary day one, but get it early from the merchant in Ashina Outskirts (near the first area after the well). It costs 500 sen (skip if tight on money).
- Explore every corner; items are hidden in nooks.
- Talk to NPCs twice (they may give hints or items).
- Kill every enemy you can safely; early leveling is slow but essential.
- Use stealth: deathblow from behind to instantly kill most grunts.
- Rest at idols often to reset enemies and save progress.
- Spend Sen at merchants on Coin Purses to preserve money upon death.
- Rushing into groups – you are easily overwhelmed. Fight one-on-one when possible.
- Spamming attack – this will drain your posture and leave you open. Deflect and counter instead.
- Ignoring the posture system – blocking (holding deflect) is okay, but deflecting (timing it perfectly) builds enemy posture faster and prevents your posture from breaking.
- Trying to fight the Chained Ogre without fire (later you get the Flame Vent prosthetic, which does massive damage). You can skip him initially and come back.
- Using skills that cost emblems (like Double Ichimonji) excessively early – emblems are scarce until you find more or buy them.
First Hour Walkthrough
1. Opening Cutscene & Tutorial: After a brief story, you regain control in a cave. A wolf attacks – follow on-screen prompts to attack and deflect. You'll die (scripted). Learn the Resurrection mechanic: press R1/Tab to come back. Then escape the well by climbing the wall.
2. Ashina Outskirts (First Area): Exit the well. You'll see a Sculptor's Idol – interact to light it (this is your checkpoint/save point). Always light every idol you find.
3. First Enemies: A few soldiers patrol. Use stealth: crouch (Ctrl on PC, R3 on consoles? Actually standard crouch is not in Sekiro; you press dodge while not moving to crouch? No – you can crouch by holding the dodge button when not sprinting. On PC, hold Shift then press S? Actually better: bind crouch to a key. Default crouch is pressing the dodge button while not moving. For simplicity: you can go prone? No. Use 'Q' to sneak? Actually, quick crouch is not default. Many players rebind. For now, just walk slowly behind enemies and perform stealth deathblows (Press attack when close and undetected).
4. Reach the Sculptor: Follow the path, defeat a few weak enemies, and you'll meet the Sculptor at the Dilapidated Temple. He explains resurrection and the prosthetic arm. After some dialogue, you receive the Shinobi Prosthetic and can now use tools.
5. First Prosthetic Tool: Loaded Shuriken. Find it in a chest just outside the temple (around the corner). Equip it at an idol. Also grab the Healing Gourd from the Sculptor (he gives it after you die once or rest at an idol).
6. Practice with Hanbei: A friendly undying warrior near the temple. He teaches you basic attacks, deflecting, and the Mikiri Counter (a crucial skill: press dodge into an enemy thrust to counter). Spend at least 10 minutes here until you can consistently deflect and Mikiri.
7. First Real Boss – Chained Ogre: Later in Ashina Outskirts. But your first hour should focus on getting to the temple, lighting idols, and understanding the game systems.
Essential Early Objectives
What to Do First vs Avoid
Do:
Avoid:
Early Resource Priorities
| Resource | Priority | Use |
|---|---|---|
| Sen | High | Buy Coin Purses (store money safely), upgrade materials, and essential items (Fast Travel item? Not needed early). |
| Healing Gourd Seeds | Highest | Increase your healing flask uses. Find the first one near the Chained Ogre. |
| Pellets | Medium | Recover health slowly. Useful in long fights but not essential. |
| Confetti | Low (early) | Deals extra damage to apparition enemies (ghosts). You'll need later. |
| Scrap Iron / Magnetite | Medium | Upgrade your prosthetic tools – focus on Loaded Shuriken and Flame Vent first. |
| Mibu Possession Balloon | Low | Increases item drops; use only for farming rare materials. |
Common Beginner Mistakes
- Not deflecting: Blocking is safe but doesn't build enemy posture. Learn the timing for perfect deflections (press guard just as the attack lands).
- Neglecting vitality upgrades: Pray at idols with "Prayer Beads" (found by killing mini-bosses). Every 4 beads give a permanent health and posture boost. Prioritize finding mini-bosses in Ashina Outskirts.
- Ignoring items: Ash (blinds enemies), Firecrackers (stun beasts and humans), and the Flame Vent (sets enemies on fire) are lifesavers. Use them.
- Running away too much: Sekiro rewards aggression. Stay close to enemies, cycle between attacking and deflecting. If you run away, you lose posture advantage and enemies recover.
- Skipping the skill tree: Spend skill points early on Mikiri Counter, Shinobi Eyes (extends Mikiri), and Breath of Life (restore health on deathblow). These fundamentally change how easy combat becomes.
Day-One Checklist
Your first play session should achieve these tasks:
1. ✅ Light the first Sculptor's Idol in the well.
2. ✅ Reach the Dilapidated Temple and meet the Sculptor.
3. ✅ Get the Healing Gourd (talk to Sculptor after resting at idol if not given).
4. ✅ Find the Loaded Shuriken in the chest near the temple.
5. ✅ Spend 10-15 minutes training with Hanbei (learn deflect, Mikiri, and attack combos).
6. ✅ Purchase and equip the Mikiri Counter skill (requires 1 skill point – kill a few enemies to get it).
7. ✅ Explore Ashina Outskirts up to the first locked gate. Light all idols along the way.
8. ✅ Find the first Gourd Seed (on the cliff path left of the first patrol area, near a weeping woman).
9. ✅ Spend leftover Sen on a Coin Purse (buy from the merchant near the Outskirts idol).
10. ✅ Attempt the Chained Ogre boss at least twice to learn his moves – but don't rage-quit. You can come back later with fire.
By completing this checklist, you'll have a solid foundation. Remember: death is part of the learning. Each death teaches you a move. Embrace it, and you'll soon master the blade.
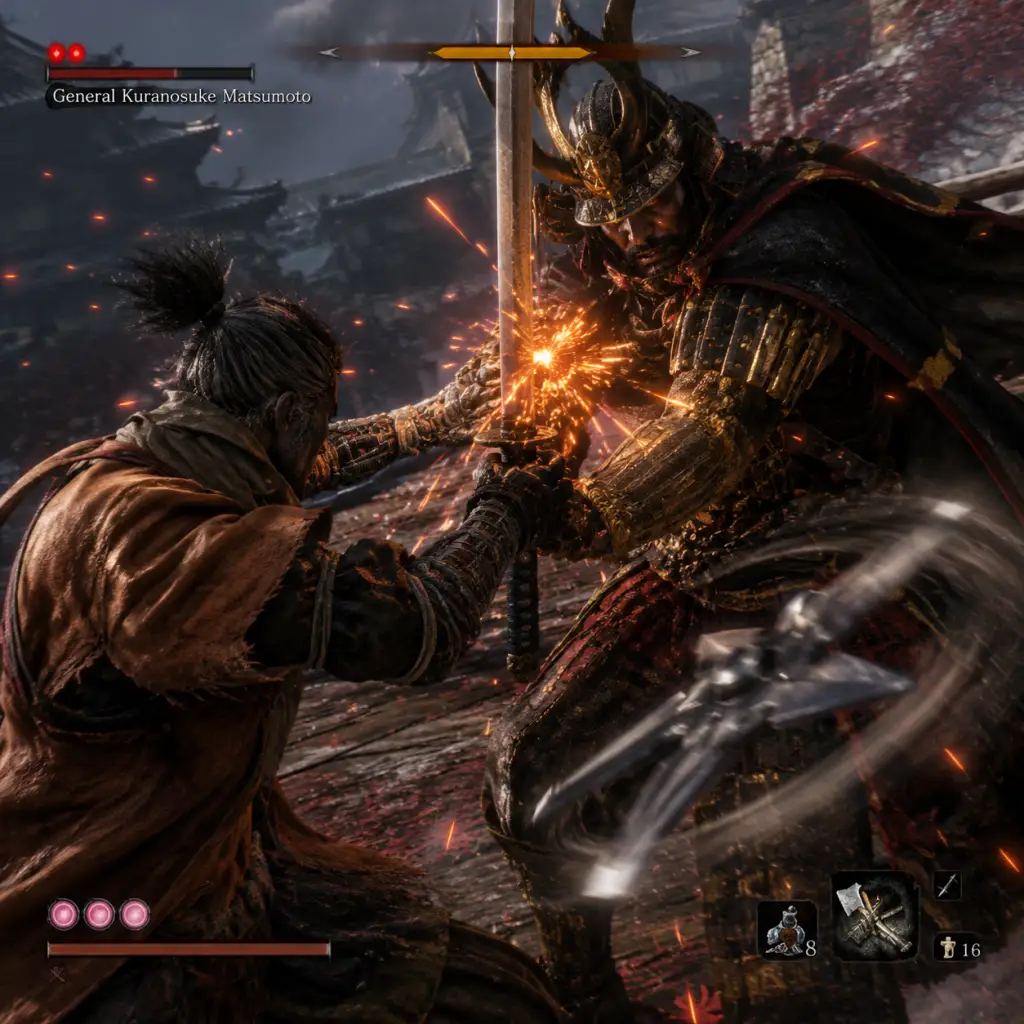
Core Gameplay
Core Gameplay Overview
Sekiro: Shadows Die Twice is a third-person action-adventure game that blends stealth, exploration, and intense sword combat. The core gameplay loop revolves around learning enemy attack patterns, managing posture and health, and using the Shinobi Prosthetic Tool. The "Resurrection" mechanic allows a second chance in combat but comes with consequences (dragonrot). Progression is tied to acquiring Skill Points, Prayer Beads, and Memories to upgrade health, posture, and attack power. The game is structured around a central hub (Ashina Castle) and branching paths leading to distinct regions.
---
Player Progression Tiers
Early Game (Ashina Outskirts through Genichiro Ashina)
Typical State: The player has just earned the Kusabimaru sword, learned basic controls, and is exploring the outskirts of Ashina. The combat tutorial with Hanbei the Undying is essential. The first major boss is the Chained Ogre, but the true gatekeeper is Genichiro Ashina atop Ashina Castle.
Core Systems in Focus:
- Combat: Posture mechanics are emphasized. Perfect deflection builds enemy posture while maintaining your own. Enemy health and posture are separate; health damage makes posture recover slower. Examples: Early enemies like Ashina Soldiers and the Samurai General can be defeated purely through deflect timing.
- Stealth: The game strongly encourages stealth kills. From hiding in tall grass to using Shinobi tools like the Finger Whistle or Gourd Seed to distract, stealth dominance in early areas (e.g., Ashina Outskirts) can trivialize many encounters. Sweeping low health enemies with stealth deathblow is the safest approach.
- Prosthetic Tool: The Shinobi Prosthetic is introduced early. The Loaded Shuriken is used against dogs and enemies in mid-air; the Loaded Axe can break shields. Later in early game, you can find Flame Vent and Mist Raven Feathers.
- Progression: Skill Points are earned by accumulating XP; they unlock passive skills and Combat Arts. The first recommended skill is Mikiri Counter (passive) for countering thrust attacks, purchasable from the Shinobi tree. Prayer Beads are found in early areas (e.g., from Headless in Ashina Outskirts, or from the Bell Demon prayer bead in Hirata Estate). Memories are obtained from bosses (e.g., Gyoubu Oniwa's Memory increases attack power).
- Exploration: Linear path from Ashina Outskirts to Ashina Castle, with optional Hirata Estate (via Bell from the Sculptor). Exploring thoroughly yields early Gourd Seeds, Prayer Beads, and prosthetic upgrades.
- Economy: Sen (currency) drops from enemies and can be used at merchants (e.g., the Information Broker in Ashina Outskirts, Anayama the Peddler). Materials like Scrap Iron and Lump of Fat are needed for prosthetic upgrades. Early game, prioritize buying Gourd Seeds and prosthetic upgrade materials.
- Quests: Main story: reach the top of Ashina Castle to confront Genichiro. Side quests: the "Father" questline involving Owl, and the "Rat" sidequest in Hirata Estate. NPC interactions: talking to the old woman in Ashina Outskirts gives the Bell to visit Hirata.
- Spend time with Hanbei to practice deflect timing and counter thrusts/sweeps. Mastering Mikiri Counter (unlock from Shinobi tree) is mandatory.
- Use stealth to clear groups before engaging stronger enemies. The Shinobi Kite area is a perfect stealth corridor.
- Save Sen and upgrade your Healing Gourd as soon as you find Gourd Seeds. Buy the Mibu Possession Balloon for bonus Sen drops.
- Don't hesitate to use Spirit Emblems for prosthetic attacks, but manage them sparingly—early game has few vendors.
- Combat: Enemy variety increases (snake eyes, monkeys, headless). Posture management becomes even more critical. Mini-bosses like the Snake Eyes Shirahagi require careful axial deflects. The Ashina Elite boss in the dojo is a pure deflection test.
- Prosthetic Tool Upgrades: The Sculptor's last upgrade path requires Ashina Castle materials. Key upgrades include the Loaded Umbrella (blocks attacks), the Sabimaru (poison damage against some enemies), and the Akou's Sacrifice effect prosthetic. The Shinobi Firecracker is excellent against beasts (e.g., Guardian Ape).
- Progression: Prayer Beads are abundant—from mid-bosses like Long-arm Centipede Giraffe, from hidden areas like the bottomless hole. Memories continue from major bosses like the Guardian Ape and Corrupted Monk. Skill Points can be invested in Ashina tree (focus on posture damage) or Shinobi tree (utility and stealth).
- Exploration: The world opens up significantly. Sunken Valley leads to the Guardian Ape area; Senpou Temple leads to the Divine Child; Ashina Depths leads to the Mibu Village and the true Corrupted Monk. Optional areas: the Abandoned Dungeon and the Poison Pool. The Great Serpent is a setpiece encounter.
- Economy: You can now acquire more Sen from farming areas (e.g., the Antechamber near Ashina Castle with Nightjar enemies). Merchants like the Dungeon Jailer sell high-cost upgrade materials. Material farming: Scrap Iron from soldiers, Black Gunpowder from spear enemies.
- Quests: Main quest now requires acquiring the Mortal Blade (right arm upgrade) from Senpou Temple, the flower from Sunken Valley (Guardian Ape's memory), and the shelter from Ashina Depths (Corrupted Monk's bell). Side quests: the Divine Child's request for the Holy Chapter, the old woman's journey to find her son, and the "Father" flashback memory.
- Explore all three main branches thoroughly before moving on. Each area has two Prayer Beads, a Gourd Seed, and a unique prosthetic upgrade late in the area.
- For Guardian Ape: use the Firecracker prosthetic to stun it in phase 1; phase 2 requires deflect-heavy approach. Bring Loaded Umbrella for the terror scream.
- Unlock the Monk Fist or Ascending/Descending Carp skills from Ashina tree to improve posture recovery and attack.
- Use the Antechamber idol to farm Sen and XP efficiently—the Nightjar and Lone Shadow Swordman drop good loot.
- Combat: The Mortal Blade's combat art (Mortal Draw) costs spirit emblems but deals massive posture damage even through blocks. Late game bosses like the Guardian Ape duo, the Great Shinobi Owl, the Corrupted Monk (true version) require precision. The final boss, Isshin, the Sword Saint, is considered one of the hardest in video games—a long multi-phase fight requiring mastery of all mechanics.
- Prosthetic Tool: By late game, most upgrades are available. Whistle (Malcontent) can stun the Demon of Hatred. The Suzaku Umbrella is essential for blocking fire attacks from the Demon of Hatred. The Purple Lily Umbrella blocks terror from Headless.
- Progression: All Prayer Beads can be collected (40 total) for maximum vitality and posture. Attack power maxes at 99 (but practically 99 not needed; 30 is enough). Skill Points in late game can be used to unlock all skills. The final skill tree (Mushin) requires having beaten all three base tree masters.
- Exploration: Fountainhead Palace is the last new area, with beautiful but treacherous platforms. The Divine Dragon boss is a spectacle. After Fountainhead, the world state changes: Ashina Castle is besieged by Interior Ministry forces, adding new tougher enemies. This is the point of no return (if you kill the Divine Dragon).
- Economy: Sen becomes abundant. The best farming spot is the Antechamber (Nightjar + Lone Shadow) or the Ashina Dojo (multi-boss). Materials like Adamantite and Mausoleum Compound items are farmable.
- Quests: Endgame quests include: completing the Divine Child's quest for the Return ending, acquiring the Father's Bell from the Sculptor (requires eavesdropping), and the Demon of Hatred optional boss. Main story: after gathering all ingredients, you return to Ashina Castle to face Owl (Father), then Isshin.
- Before fighting the Divine Dragon, ensure you have all Prayer Beads and Memory upgrades—this is the last chance to backtrack easily.
- For Isshin, the Sword Saint, learn his combos. Use Ichimonji Double (skill) to recover posture. The umbrella blocks the gunshots in phase 2. Use Mortal Blade for quick damage openings.
- For Demon of Hatred, use the Malcontent whistle (upgraded) three times per fight to stun him. Suzaku Umbrella blocks all fire attacks. Stay close to his left leg.
- If missing Prayer Beads, consult a guide for locations in Headless, Schichimen Warriors, and Folding Screen Monkeys.
- NG+ Difficulty: Enemies have significantly more health and posture, deal more damage. Giving Kuro's Charm at the start makes blocking cause chip damage (except perfect deflections). Ringing the Demon Bell increases enemy damage and drops better loot. These can be combined for maximum difficulty.
- Progression Carried Over: All skill trees, combat arts, prosthetic upgrades, and memories carry into NG+. Sen and materials carry over, but prayer beads and memories do not—you must recollect them (attack power and vitality reset to base, but you can re-upgrade).
- Combat: With all skills unlocked, players can create powerful builds. The Mortal Draw + Living Force combination allows shooting flames through Umbrella. High attack power (e.g., 30+) makes minibosses easier, but hard bosses still challenge.
- Exploration: No new areas in NG+, but the world is covered in tougher enemies. Some items are replaced (e.g., Gourd Seeds are replaced with other valuables). The Demon of Hatred is still optional.
- Economy: Sen farming becomes more efficient; the best NG+ farm is the Antechamber (Nightjar + Lone Shadow) or the Interior Ministry Ninjas near the Demon of Hatred arena.
- Quests: You can choose different endings in NG+ (Shura, Purification, Return). Shura requires making a choice at the beginning of the endgame. New Game+ is required for the Immortality Severance ending achievement if you didn't choose it.
- Other Endgame: There are no dedicated endgame activities like dungeons; the challenge is purely boss replays (via memories?) Actually, there is no boss rush mode; the only way to replay bosses is through NG+. The game has no arena or multiplayer. The toughest challenge is Charmless + Demon Bell run.
- For the Charms and Demon Bell combo, prioritize skills that improve posture damage and recovery (e.g., Ascending Carp, Descending Carp). Use sugars (e.g., Ako's Sugar) liberally.
- In NG+, remember that you can also give the father's bell to enable the Purification ending.
- Fully upgrade everything before starting NG+ to smooth the initial levels. The Senoubi merchant sells rare upgrade materials if you have enough Sen.
- Practice perfect deflects against the most aggressive enemies (e.g., Interior Ministry Ninjas) early in NG+ to acclimate to increased difficulty.
- Posture vs. Health: Enemies have both posture (stagger bar) and health. Perfect deflects build enemy posture without taking damage. When posture is full, you can do a deathblow. Health damage reduces posture recovery rate, so mixing health damage helps.
- Deflect vs. Block: Blocking reduces posture but not health; holding block recovers your posture faster. Perfect deflect (timed block) greatly increases enemy posture damage.
- Mikiri Counter: A skill unlocked from the Shinobi tree; press dodge toward a thrust attack to stomp the weapon, building massive posture. Essential against many bosses.
- Sweep Danger: Red kanji means a sweep; jump to avoid, then press jump again for a stomp on the enemy's head.
- Grab Danger: Orange kanji means a grab; dodge away or use Mist Raven prosthetic.
- You can resurrect once per combat encounter (refreshed by resting). Costs one resurrection node (up to 3 nodes). If you die after using a resurrection, you get a second chance later with a full node. Dying permanently (no resurrection left) causes Dragonrot in NPCs, reducing the chance of their quest progress. Unseen Aid chance drops.
- Upgraded at the Sculptor's idol using materials and Sen. Each tool has multiple upgrades (e.g., Shuriken: Spring Loaded, Gouging, etc.). Spirit Emblems cost to use. Effective against specific enemies (firecracker vs beasts, spear vs centipedes).
- Attack Power: Increased by using Boss Memories (one per major boss). Max 99 but soft cap around 30-40.
- Vitality & Posture: Increased by collecting 4 Prayer Beads to make a Necklace. 40 total beads = 10 necklaces = max upgrades.
- Skill Points: Earned from XP; unlock in skill trees (Shinobi, Ashina, Prosthetic, Mushin). Full completion requires about 120 skill points.
- Sen: Used for purchases, prosthetic upgrades, and material combining. Lost on death (if not used). Can be stored in the inventory by buying items.
- Materials: Scrap Iron, Bundle, Black Gunpowder, Adamantite, etc. Drop from specific enemies or purchased.
- Spirit Emblems: Cost for prosthetic and combat arts. Max 15, increased by using Prayer Necklaces? Actually, max emblems increased by collecting the rare Emblem item found in secret areas (up to 20). Can be bought with Sen.
- Main quest is straightforward: defeat bosses to progress. Side quests include: The Divine Child's wish, the old woman seeking her son, the merchant Anayama's quest, the "Father" flashback, etc. Many are missable if not started before certain events.
Actionable Advice for Early Game:
---
Mid Game (After Genichiro until acquiring Mortal Blade)
Typical State: The player has defeated Genichiro Ashina, central Ashina Castle becomes a hub, and three main paths open: Sunken Valley, Senpou Temple, and Ashina Depths. The player now has access to more prosthetic upgrades, combat arts, and has likely unlocked more skill trees.
Core Systems in Focus:
Actionable Advice for Mid Game:
---
Late Game (Mortal Blade through Final Boss Isshin)
Typical State: The player has the Mortal Blade and can now kill headless enemies, access the Fountainhead Palace, and face the final act. The endgame includes revisiting areas like the Ashina Outskirts (now burning) and the final boss rush. The game's difficulty peaks.
Core Systems in Focus:
Actionable Advice for Late Game:
---
Endgame (Post-Credits, NG+, and Other Challenges)
Typical State: After defeating Isshin, the Sword Saint, credits roll. The player can continue their current save in the same world (post-game) to clean up remaining content, then start New Game+ (NG+) cycles. True endgame involves higher difficulty via Kuro's Charm and Demon Bell.
Core Systems in Focus (NG+):
Actionable Advice for Endgame:
---
Core Systems Deep Dive
Combat System
Resurrection System
Prosthetic Tool
Character Growth System
Economy
Quests & NPCs
---
This comprehensive guide covers the core gameplay loop across all progression tiers, ensuring you understand the systems, economy, and strategies to succeed in Sekiro: Shadows Die Twice.
Game Tips
Comprehensive Game Tips for Sekiro: Shadows Die Twice
This guide provides actionable tips for all skill levels, grouped by key gameplay areas. Each tip includes an explanation of why it works and when to apply it for maximum effectiveness.
---
Combat Tips
Beginner: Master Deflection, Not Just Blocking
- Explanation: Holding L1/LB reduces damage but builds your posture. Tapping L1/LB just before an attack lands (deflection) deals massive posture damage to the enemy and prevents your own posture from breaking on deflected hits.
- When to use: Against all humanoid enemies (Samurai, Ninja, Bosses). Essential for breaking posture to land deathblows.
- Why it works: Sekiro’s combat is posture-centric. Enemies with full posture are vulnerable to immediate deathblow, regardless of health. Deflection is the fastest way to fill their posture bar.
- Thrust attacks (red kanji dodge): Use the Mikiri Counter skill. Press dodge toward the thrust at the last moment. This deals heavy posture damage and often leads to a counter-opening.
- Sweep attacks (red kanji sweep): Jump on top of the enemy (press jump then jump again to push off their head). This deals posture damage and sometimes knocks them down.
- Grab attacks (red kanji grab): Dodge sideways or backward. Never try to deflect or Mikiri.
- Why it works: Perilous attacks are punishable windows. Proper counters turn danger into massive advantage.
- When to use: As soon as you see the red kanji. Memorize which attacks are thrust/sweep/grab for each enemy type.
- Keep attacking until the enemy deflects you: When an enemy deflects your attack (bright spark, loud clang), they will counterattack. Immediately prepare to deflect that counter. This loop is the cornerstone of high-level combat.
- Use Ichimonji (Double) after a failed deflect or to regain your own posture: Hold attack during an opening to use the combat art. It recovers a large chunk of your posture while dealing posture damage.
- When to use: Against bosses like Genichiro, Lady Butterfly, or Isshin. Never let enemies regain posture; stay in their face.
- Why it works: Most bosses recover posture quickly when idle. Constant aggression prevents recovery and forces them to stay on the defensive, limiting their dangerous moves.
- Use the Grappling Hook constantly: Many enemies can be ignored, and secret areas are only reachable via grapple points. Scan the environment for the white indicator.
- Eavesdrop on enemies: Crouch near groups or behind walls. You'll learn weaknesses (e.g., a boss fears fire, an enemy sleeps) or get directions to hidden items.
- Look for small ledges and wall cracks: Sekiro can jump and grab edges. Many prayer bead locations or upgrades are tucked away off the beaten path.
- When to explore: After unlocking a new area, fully explore before progressing the main story. You'll find Gourd Seeds, Prayer Beads, and prosthetic upgrades.
- Why it works: Exploration yields permanent upgrades (health, posture, healing) that make combat much easier.
- Always have a Slightly Alive Gourd (healing): Conserve at least 1 Gourd charge during fights. You can use it after a deathblow to heal safely.
- Liberally use Pellets and other consumables: They are plentiful. Use them in tough fights to avoid wasting Gourd uses.
- Maximize Spirit Emblem usage: Firecrackers, Shurikens, and other prosthetics are very strong. Manage your emblems (max 20+ with upgrades) and buy them from merchants when cheap.
- When to use: Pellets during boss runs; Gourd only when posture is also low or you have a breather. Prosthetics for humanoid bosses that can be stunned.
- Why it works: Over-saving leads to inventory clutter and harder fights. Using consumables reduces difficulty significantly.
- Spend Sen (money) before bosses: You will likely die and lose half your Sen. Buy gold purses from merchants (they retain value even after death) or upgrade tools/skills.
- Prioritize Buying: Gourd Seeds, Prayer Beads (when missed), Upgrade Materials (like Adamantite Scrap), and Firecrackers (for beast enemies).
- Best farming spot early game: Ashina Outskirts – the path near the Chained Ogre and the soldiers near the gate. Later: Ashina Castle Antechamber (stealth kill the ministry ninja for ~1,000 XP and sen).
- When to farm: When you are a few Sen short of an important purchase. Never farm for XP unless you are also gaining Sen.
- Why it works: Sen is the primary currency for upgrades. Losing it repeatedly stalls progression. Gold purses act as a bank.
- General Purpose: Shuriken (to interrupt enemies mid-air), Firecracker (stuns all beasts and most humanoids), Loaded Umbrella (blocks terror/lightning, allows counter).
- Vs. Beasts (Blazing Bull, Headless Ape, Demon of Hatred): Firecracker + Flame Vent (Oily Finger + Flame for burn).
- Vs. Undead (Headless, Schichimen Warrior): Loaded Umbrella (Purple) + Divine Confetti. Umbrella blocks their terror attacks.
- Vs. Guardian Ape: Firecracker for first phase; Spear (drag centipede) for second phase.
- When to choose: As soon as you have 2 skill points, get Mikiri. Then focus a single tree to unlock powerful combat arts.
- Learn the dance: Each boss has a rhythm of attack sequences. Deflect the first flurry, then counter. If they pause, usually you can get 1-2 hits before they defend.
- Use the environment: For example, the Chained Ogre can be cheesed with grapple attacks; Lady Butterfly can be stunlocked with Shurikens when she is on wires.
- Always equip the correct prosthetic: If a boss is weak to fire (Beasts, Corrupted Monk), use Flame Vent. If they use lightning (Genichiro, Isshin), use the Lightning Reversal skill or Loaded Umbrella.
- When to heal: Only heal during a stagger (after a deathblow) or after dodging a long recovery attack. Never heal while the boss is active – they will punish.
- Why it works: Bosses have clear patterns. Exploiting their weaknesses reduces fight length and number of mistakes.
- Always try for a stealth deathblow on mini-bosses and first phases of bosses: You can often stealth kill one health bar, turning a two-phase fight into one phase.
- Use Gachiin’s Sugar/Spiritfall before sneaking: Makes you almost invisible. Use it before large groups or boss arenas with adds.
- Crouch walk to avoid detection: Many enemies hear sprinting or grappling. Crouch when close.
- When to stealth: Always at the start of an encounter. Also when farming or bypassing annoying enemies.
- Why it works: Stealth kills bypass the hardest part of many fights. It’s a core mechanic, not a coward’s way.
- Equip the Charmless and Demon Bell for max challenge and higher reward: Charmless means you take chip damage on blocks; Demon Bell increases enemy difficulty and drop rates. Only for those comfortable with perfect deflections.
- Use the Contact Medicine before boss fog gates: It sets you on fire but gives a huge attack buff if you also use Yashariku’s Sugar (dangerous but melts bosses).
- Speedrun trick – skip the Blazing Bull: You can run past him to Ashina Castle. Not recommended for first playthrough.
- When to use these: After beating the game once. Not advisable for beginners.
Intermediate: Counter Perilous Attacks Correctly
Advanced: Aggression and Posture Manipulation
---
Exploration Tips
---
Resource Management Tips
---
Economy and Upgrade Tips
---
Builds (Prosthetic & Skills) Analysis
Unlike RPGs, Sekiro has no stat builds, but you can customize your loadout.
Recommended Prosthetic Loadouts
Skill Tree Priority
1. Shinobi Arts (top tree): Mikiri Counter is essential. Get it first. Then Shinobi Eyes (increases Mikiri posture damage). Followed by Mid-Air Deflection and Prosthetic Tools perks.
2. Ashina Arts: Ichimonji (and Double) for posture recovery. Also get Ascending and Descending Carp for better posture damage.
3. Prosthetic Arts: All are good, but prioritize Shinobi Prosthetic (more uses) and upgrades for your favorite tools.
---
Boss and Mini-Boss Strategies
---
Stealth Tips
---
Advanced Optimizations
---
Final Words
Sekiro rewards aggressive, precise play. Deflect often, use your full toolset, and don’t be afraid to die – each death teaches a pattern. Remember: hesitation is defeat.
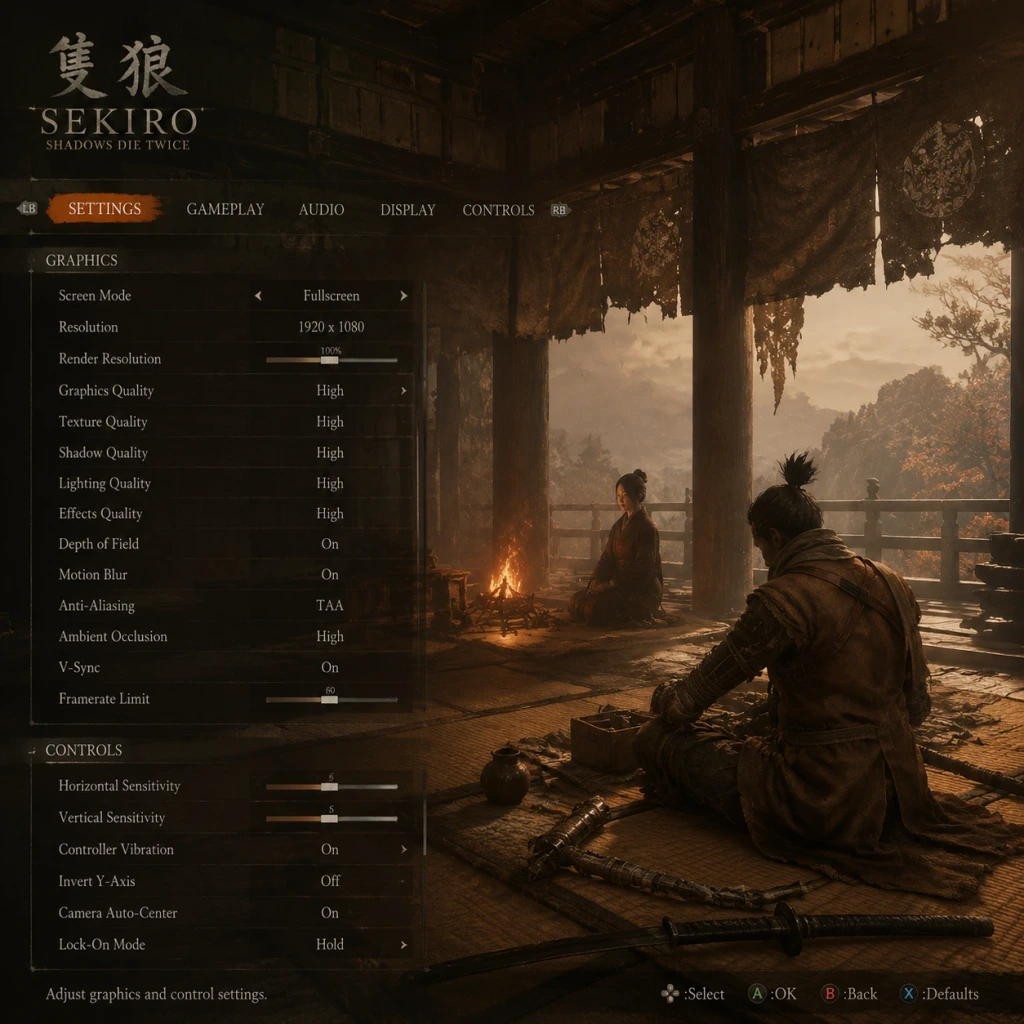
Game Settings
Game Settings: Sekiro: Shadows Die Twice
Introduction
Properly configuring your settings in Sekiro: Shadows Die Twice is crucial for both performance and enjoyment. Whether you prioritize silky-smooth framerates for the game's demanding combat or crave the highest visual fidelity for its beautiful but deadly world, this guide breaks down every major setting. We cover graphics, audio, controls, accessibility, language, network, and gameplay options, with specific recommendations for low-end, mid-range, and high-end PC hardware. Special attention is given to settings that are easy to misconfigure or that have a significant impact on gameplay.
---
Graphics Settings
Display Mode
- Fullscreen (recommended for best performance and input latency)
- Windowed / Borderless Windowed (useful for multi-monitor setups, but may introduce slight input lag)
- Set to your monitor's native resolution. Lowering resolution can drastically improve performance but reduces sharpness.
Resolution
Graphics Presets
Sekiro offers four presets: Low, Medium, High, and Ultra Higher Quality. You can also customize individual options.
#### Individual Options Table
| Setting | Low | Medium | High | Ultra (Higher Quality) | Performance Impact | Notes |
|---|---|---|---|---|---|---|
| Screen Space Reflections | Off | Low | High | Max | Medium | Subtle; can be turned off for FPS boost without huge visual loss. |
| Shadow Quality | Low | Medium | High | Max | High | Low shadows look blurry; High+ improves sharpness of dynamic shadows. |
| Lighting Quality | Low | Medium | High | Max | Medium | Affects global illumination and torch/fire effects. |
| Effects Quality | Low | Medium | High | Max | Medium | Controls particle effects (blood, smoke, etc.). |
| Depth of Field | Off | Low | High | Max | Low | Blurs distant background; can be disabled for clearer view. |
| Motion Blur | Off | Low | High | Max | Low | Can obscure enemies during frantic combat; many players turn it off. |
| Texture Quality | Low | Medium | High | Max | Medium | Low textures are very blurry; try to set to at least Medium if VRAM allows. |
| SSAO (Ambient Occlusion) | Off | Low | High | Max | Medium | Adds depth to shadows near objects; High+ improves realism. |
| Antialiasing | Off | FXAA | TAA | TAA (same as High) | Low | TAA can cause slight blur; FXAA is less effective but sharper. |
| Texture Filtering | 2x | 4x | 8x | 16x | Low | Increases sharpness of textures at angles; 4x or 8x is good compromise. |
Recommended PC Hardware Levels
#### Low-End (e.g., GTX 960, RX 470, 8GB RAM)
- Preset: Low or Custom with Medium textures
- Specific tweaks: Disable Motion Blur, Depth of Field, Screen Space Reflections. Set Shadows to Low, Effects to Low, SSAO off. Use FXAA antialiasing.
- Target: 30-60 FPS at 1080p. Set resolution to 900p or use Dynamic Resolution Scaling (if available) to maintain 60 FPS.
- Preset: High
- Specific tweaks: Keep Shadows at High, Lighting at High, SSAO High. Disable Motion Blur if you dislike it. Use TAA antialiasing. Set Texture Filtering to 8x.
- Target: 60 FPS at 1080p; can try 1440p with some Medium settings.
- Preset: Ultra Higher Quality
- Specific tweaks: Max everything. Enable all settings. Use TAA. Set Motion Blur to your preference.
- Target: 60-120+ FPS at 1440p or 4K (may need to drop to High for stable 4K60).
- Music: 70-100% – music sets the atmosphere but can be lowered if you want to hear environmental cues better.
- SFX (Sound Effects): Keep at 100% – crucial for hearing sword clangs, grapple hook, and enemy actions.
- Voice: 100% – dialogue and enemy taunts are important for situational awareness.
- Key Bindings: You can remap almost every action. Consider these adjustments for combat effectiveness:
- Mouse Sensitivity: Start around 5-7 and adjust until you can do a full 180-degree turn in one mouse movement. Lower sensitivity aids precise deflection.
- Button Layout: Sekiro supports both Xbox and PlayStation button prompts. Change under Settings > Controller > Button Icons.
- Dead Zones: Option to adjust left/right stick dead zones. Reduce to 0 for more precise camera control. If stick drift occurs, increase slightly.
- Camera Speed: Increase to 7-10 for fast tracking of enemies. Slower speed can cause disorientation.
- Invert Y-Axis: Disabled by default; enable if you prefer inverted look.
- Subtitles: On/Off. Recommended ON if you have difficulty hearing dialogue or if English is not your first language. Subtitles also appear for enemy dialogue that gives hints.
- Subtitle Background: Offers options like None, Dark, or Black. Dark or Black improves readability on bright backgrounds.
- Enabling Auto-Camera Rotation (in Camera settings) to keep enemies on screen.
- Using Lock-On (R3/Right Stick click) to track enemies; you can change lock-on behavior under Controls.
- Setting Message Display Speed to Slow if you need more time reading player hints.
- Text Language: Choose from English, French, Italian, German, Spanish, Japanese, Chinese (Simplified), and others depending on region.
- Voice Language: You can set spoken dialogue separately. Japanese voice acting + English subtitles is a popular choice for authenticity.
- Player Messages (helpful hints left by others)
- Bloodstains (see how other players died)
- Phantoms (spectral images of players near death spots)
- Allow Online Play: Turn ON to see messages and bloodstains.
- Allow Bloodstains: Separate toggle within online play.
- Allow Player Messages: Separate toggle.
- Camera Speed (X-axis / Y-axis): 7-10 recommended for both axes. Faster camera helps track agile enemies.
- Invert Y-Axis: Off (unless preferred).
- Auto Camera Rotation: Off by default. Enabling makes camera follow the locked-on enemy automatically. Can be disorienting in multi-enemy situations; try both.
- Camera Distance from Player: Adjustable slider. Pulling back gives wider field of view but may make objects smaller. Default is fine; increase slightly if you feel claustrophobic.
- Lock-On Priority: Choose between "Front of Target" (default) or "Nearest Target". "Nearest" is better when swarmed, but may switch to unintended foes. Experiment.
- Lock-On Switch: You can set a key to switch lock-on targets (default right analog stick click or scroll wheel).
- HUD Opacity: Adjustable from 0% (hidden) to 100%. Lower opacity reduces screen clutter, but you may miss posture/health bars. Recommended 80-100%.
- HUD Auto-Hide: On/Off. If On, HUD fades when not needed (out of combat, exploring). Useful for immersion but can delay seeing your health when entering combat.
- Mini-Map (Compass): Sekiro does not have a mini-map; use the compass at top of screen. No setting to change this.
- Attack Direction Indicator: On by default. Shows a small arrow when an enemy is attacking from off-screen. Keep On.
- Auto-Aim (Lock-On): Essential; always on by default. You can toggle lock-on manually.
- Posture Display: Always visible; no toggle.
- Perilous Attack Warning: The red kanji warning symbol appears above the enemy. Cannot be turned off. Pay attention.
#### Mid-Range (e.g., GTX 1060, RX 580, 16GB RAM)
#### High-End (e.g., RTX 2070 Super, RX 6700 XT, 16GB+ RAM)
Special Attention: Frame Rate Cap
Sekiro is capped at 60 FPS by default. To unlock frame rate above 60, you must use a mod (e.g., Sekiro FPS Unlock Mod). Without the mod, the game's physics and animations are tied to 60 FPS; going beyond without the mod can cause issues. For console players or those satisfied with 60 FPS, leave it as is.
Easy to Misconfigure: Resolution Scaling
In the Graphics menu, there is an option called "Resolution Scaling" (may appear as a slider). Setting it below 100% reduces internal resolution but retains UI resolution. This is a powerful performance tool but often overlooked. If you're struggling to hit 60 FPS, set it to 90% or 80% for a smoother experience with minimal visual degradation.
---
Audio Settings
Master Volume
Adjust overall volume. Recommended 80-100% for clear audio cues (footsteps, enemy dialogue, perilous attack sounds).
Music Volume, SFX Volume, Voice Volume
Special Attention: Headphone Mode
Sekiro has a dedicated Headphone Mode (under Audio settings). This enables binaural audio for headphones, greatly improving spatial awareness of enemy locations, especially during stealth. Always enable this if using headphones.
---
Controls Settings
Keyboard & Mouse
- Attack (default Mouse1): Fine as is.
- Deflect/Block (default Mouse2): Many players prefer to map Deflect to a side mouse button for faster reaction.
- Grapple Hook (default Q or E): Keep on a quick-access key (e.g., Q).
- Item/Prosthetic Use (default R, Shift+Wheel): Map prosthetic tools to number keys 1-4 for quick switching.
- Heal (default H): Move to a more accessible key like E or Mouse4.
Controller (Xbox, PlayStation, or third-party)
Special Attention: Controller vs Keyboard for Deflection
Deflecting (parrying) requires precise timing. Many players find controller triggers (R1/RB) more comfortable than keyboard clicks. If using keyboard, consider mapping Deflect to a key with low travel (e.g., Space) and Attack to a mouse button. Test both input methods to see which gives you consistent reaction.
---
Accessibility Settings
Subtitles
Colorblind Options
Sekiro does not have dedicated colorblind modes. However, you can adjust display color settings via your GPU driver or TV/monitor settings to enhance contrast. For deuteranopia/protanopia, increase color saturation or use a color filter overlay.
Difficulty-Related Accessibility
Sekiro offers no difficulty slider. However, you can make the game easier by:
Special Attention: Cursor Speed for Menus
In Controller settings, there is a Cursor Speed option for menu navigation. Set to Fast if you find the default sluggish. This affects inventory and upgrade menus.
---
Language Settings
Game Language
Special Attention: Changing Voice Language after Starting
You can change the voice language at any time from the Title Screen menu. Do not worry about being locked in. However, note that some enemy taunts and NPC dialogue will change accordingly.
---
Network Settings
Online Features
Sekiro includes optional online features:
These can be enabled/disabled in Settings > Network:
Special Attention: Offline Mode for No Spoilers
If you want to explore completely blind without hints or distractions, disable all online features. Bloodstains can spoil ambushes and message can reveal hidden walls. For first playthrough, many players turn off messages but keep bloodstains for learning dangers.
No Multiplayer
Sekiro does not have cooperative or competitive multiplayer. Network settings only affect the asynchronous features above.
---
Gameplay Settings
Camera
Lock-On Settings
Display & UI
Combat
Special Attention: Control Stick Deadzone
On controller, the left stick deadzone affects movement precision. If you find Wolf unresponsive or drifting, increase deadzone slightly (e.g., 10-15%). If movement feels sluggish, decrease to 0. This setting is under Controller > Advanced Controls.
---
Summary of Settings for Best Performance & Quality
| Setting Category | Low-End PC | Mid-Range PC | High-End PC |
|---|---|---|---|
| Preset | Custom (Low-Medium) | High | Ultra |
| Resolution | 1080p (or 900p) | 1080p (or 1440p) | 1440p or 4K |
| Resolution Scaling | 80-90% | 100% | 100% |
| Shadows | Low | High | Max |
| Lighting | Low | High | Max |
| Effects | Low | High | Max |
| Antialiasing | FXAA | TAA | TAA |
| Motion Blur | Off | Off (optional) | Off (optional) |
| Headphone Mode | On (if headphones) | On | On |
| Camera Speed | 7 | 7 | 8 |
| Subtitles | On | On | On |
| Online Features | Personal choice | Personal choice | Personal choice |
Final Tips
- Before starting your first playthrough, launch the game and run through the opening area with your chosen settings. Make small adjustments to feel how they affect combat readability.
- If you encounter stuttering, lower Effects Quality or disable Screen Space Reflections.
- For the smoothest experience, aim for a stable 60 FPS at all times – the game's rhythm relies on consistent frame timing.
- Back up your save file before modding frame rate or other settings.
Now that your settings are optimized, you are ready to face the challenges of Ashina. Remember: hesitation is defeat.
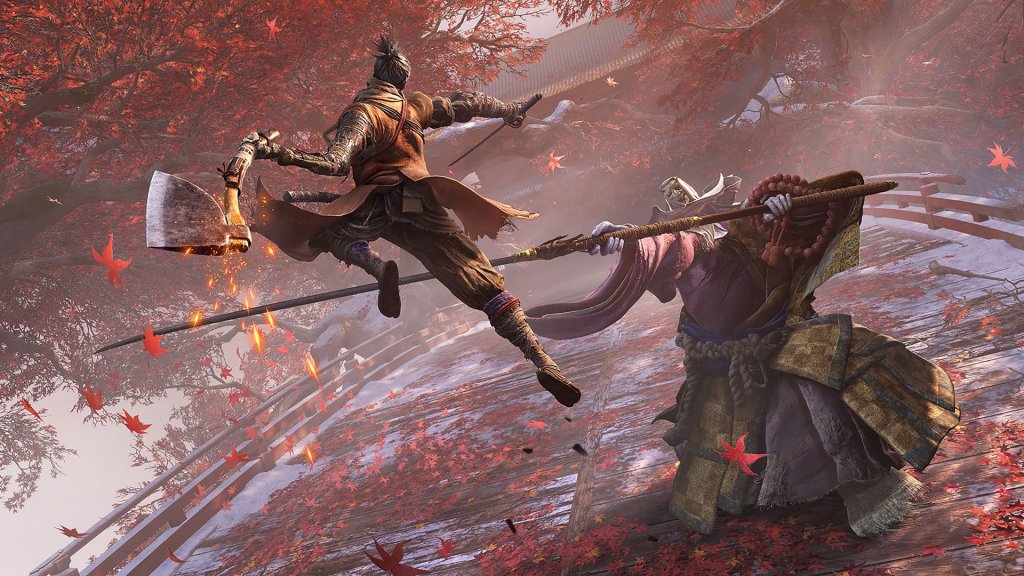
Important Notes
Important Notes for Sekiro: Shadows Die Twice
This section covers critical warnings, common pitfalls, irreversible decisions, missable content, difficulty spikes, grinding traps, online etiquette, save management, and things players often wish they knew sooner. Sekiro: Shadows Die Twice is a single-player, offline game with no multiplayer component, so all notes focus on solo play.
---
Warnings and Pitfalls
- Combat is posture-based, not hit-point-based: Many beginners try to chip away at health. Instead, focus on breaking the enemy's posture (stance meter) for a deathblow. Blocking, deflecting (parrying), and continuing pressure are essential. Running away or dodging excessively resets their posture recovery.
- Spamming deflect is risky: While tapping deflect repeatedly can work against chains, proper timing is safer. Late deflects become blocks, costing posture damage and potentially guard-breaking you.
- Death is a mechanic: When you die, you lose half your current Sen (money) and XP toward your next skill point. This can happen repeatedly. Spend Sen and use XP pellets (if available) before entering risky areas. You can recover lost Sen/XP by reaching your death spot and dealing a deathblow to the enemy that killed you (Shadow of Death mechanic). If you die again before reclaiming, they are permanently lost.
- The Dragonrot mechanic: Each time you resurrect (use a resurrection node), there's a chance to inflict Dragonrot on NPCs, which stalls their questlines and reduces your chance to resurrect temporarily. This does not permanently lock out content, but it can delay quest progression. Cure Dragonrot later with a specific item. Don't be afraid to use resurrect—you can always cure it.
- Unseen Aid: While you have Dragonrot, you lose more Sen and XP on death. Cure Dragonrot before challenging tough bosses.
- Ending branching choices: There are four endings, and your decision after defeating certain bosses (specifically after defeating the Divine Dragon) determines which ending you get. The choice is offered by Emma and the Sculptor in the Dilapidated Temple. Save your game manually (on PC) or via cloud backup (console) before this final conversation to see all endings. The choices involve obeying or breaking an oath, giving rice, eavesdropping, and collecting specific items. The most missable ending is the "Return" ending, which requires multiple steps early and mid-game.
- Killing bosses that drop key items: Some bosses (like the Corrupted Monk, Guardian Ape, etc.) are mandatory for the main path. You cannot skip them. But optional bosses (Headless, Schichimen Warriors) yield reusable items that make later fights easier. You can choose to skip them, but you lose their permanent benefits.
- Upgrade Material Farming: Once you upgrade a prosthetic tool to a certain tree, you cannot reverse it. If you upgrade the wrong path, you waste rare materials. Plan your upgrades wisely; most materials are finite until you unlock the ability to buy them later.
- Giving rice to Kuro: In the late game, you must give Kuro a special persimmon or rice for the "Return" ending. If you eat it or give it to someone else, you lock yourself out of that ending. Only give rice as directed by the quest.
- Eavesdropping opportunities: Several quest steps require eavesdropping on specific NPCs at specific times. If you clear areas or progress the story too fast, you may lose that window. For example, eavesdropping on Kuro and Emma after certain events is required for one ending.
- Prosthetic Tools: A few prosthetic tools are only obtainable during certain phases of the game. Examples include the Sabimaru (in the Sunken Valley, missable if you defeat the Guardian Ape before exploring that area), the Divine Abduction (in the Ashina Castle area before it changes after the Great Serpent scene), and the Malcontent ring (requires defeating a Headless before they disappear if you leave the area too long). Consult a checklist if you want all tools.
- Prayer Beads: Some Prayer Beads (which increase your Vitality and Posture) are found in hidden locations that become inaccessible after a story event. For instance, the one on top of Ashina Castle after the atmosphere changes (the "interior ministry" invasion) can be missed if you progress too fast. There are 40 total, and you need all to reach maximum health. Miss one and you’ll have to wait for New Game+.
- Lapiz Lazuli: These are used to upgrade prosthetic tools to their final level. You can only get a maximum of 6 per playthrough (from specific bosses, secret merchants, and the Demon of Hatred). If you kill the Demon of Hatred before buying from the Pot Noble, you lose a source. Plan your upgrades.
- NPC Quests: Several NPCs have questlines that advance only at specific story points. For example, the Anayama the Peddler quest has stages that lock if you defeat the Guardian Ape before talking to him at Ashina Outskirts. The Great Carps feeding quest is easy to miss—you must feed them multiple times with specific bait (Trout, Precious Bait) from the vendor near the feeding area. Missing these quests can deny you key items like the Finch’s Egg or Ako’s Sugar upgrades.
- Headless and Schichimen Warriors: These optional minibosses drop reusable spirit emblems (Accidentally Devouring Finger, etc.). If you defeat the final boss and start New Game+, they reset, but you can fight them then. However, if you skip them in a playthrough, you miss the permanent upgrade items.
- Early Game: Lady Butterfly (Hirata Estate) – Many players hit this wall early. She is optional but you need to beat her for the key item for one ending. Her fight teaches you to deflect rhythmically and manage pressure. Prepare snap seeds (to counter her illusions) and stay aggressive.
- Mid Game: Genichiro Ashina (Ashina Castle) – The first major skill check. He has multiple phases, including a lightning phase. You must master deflecting lightning (jump and attack while airborne during his lightning attack). Using the Loaded Umbrella can block his arrows and final blow.
- Late Game: Guardian Ape (Sunken Valley) – Deceptive because its first phase is beast-like, but second phase is a terrifying one-armed corpse that does a terror scream. Use the Firecracker prosthetic in phase 1, and the Loaded Spear to pull out the centipede in phase 2.
- Post-Game: Demon of Hatred – Optional but extremely tough. This boss is more like a Dark Souls boss (large health pool, massive damage). Use the Malcontent whistle (if you have it) to stun him, and the Fire Umbrella to block his fire attacks. Consider using the Sugar that reduces fire damage.
- Final Boss: Isshin, the Sword Saint – Four phases, each with new attacks. Deflect everything, use the Lotus Umbrella for his wind slashes, and pour firecrackers when he does the Ashina Cross wind-up. Very high posture damage required.
- Spike in enemy aggression: After a story event (the Divine Dragon), the world becomes more aggressive: enemies hit harder, minibosses respawn, and new enemies appear in previously safe areas. Be prepared.
- Do not grind XP for skill points early: The XP curve increases steeply per skill point. Grinding early is inefficient because later areas give much more XP. Focus on learning to deflect, which will carry you through the game.
- Sen (money) is best spent on Spirit Emblems: Emblems are needed for most prosthetic tools. You can buy them from the Merchant at the Dilapidated Temple and from other vendors. Cap at 999. Always keep a stock of 200-300 for tough fights.
- Pellets and Gourd Seeds: Gourd Seeds are finite; use them to upgrade your healing gourd. Pellets (healing items) are rare; don’t waste them on small damage. Save them for bosses.
- Upgrade materials are finite until late game: You can only purchase certain upgrade materials (like Adamantite Scrap) after defeating a specific boss. Until then, farm carefully. The best farm spots: for scrap iron, the Antechamber of Ashina Castle (after it’s invaded) has shadow warriors you can stealth kill; for fulminated mercury, kill the enemies at the Gun Fort idol.
- Skill point farming: The best late-game farm is the area after the Great Serpent Shrine idol in Ashina Outskirts (after the invasion). Backstab the two enemies near the bridge, then run to the present one. Alternatively, the Underbridge Valley idol (after the Invasion) yields about 1,500 XP per run with no combat.
- Don't waste skill points on skills you won't use: Many skills are niche. Prioritize the Mikiri Counter (essential), Whirlwind Slash, and later skills like Floating Passage or Ichimonji. The Ashina Arts tree has crucial skills. Avoid spending on the Shinobi Arts tree except for Mikiri Counter.
- Modded saves: Using cheat engine or mods can corrupt your save file. Always back up your save before modding (on PC). Mods that alter game balance (like randomizers) are fine for your own game but cannot be used for speedruns or leaderboards (no official leaderboards).
- No invasions or messages: No need to worry about other players interfering.
- Achievements: Achievements are tied to your save file. Some achievements are missable (like the Lapis Lazuli upgrades). You cannot earn achievements on a modded save if the game detects tampering? Actually, it is safe as long as you don't use any mod that disables achievements. Steam achievements work normally.
- Cloud saves: On Steam, cloud saves sync automatically. If you cheat and cloud save corrupts, you may lose progress. Use manual backups.
- Manual save backups: On PC, your save file is located in `%APPDATA%/Sekiro/` (or `Documents` folder). Copy this folder periodically. On console, use USB backup or PlayStation Plus cloud saves (but those only store the latest). For PC, create a backup before major bosses or decisions.
- New Game+ and save slots: The game has only one save slot per profile. You cannot have multiple separate playthroughs simultaneously unless you manually back up and restore saves. Each NG+ cycle overwrites your old save.
- Reversible choices via saves: Since the game saves automatically at every idol and major event, you cannot easily “undo” a choice. To see all endings, save at the end before the final dialogue, then reload. For earlier branching, you need a backup before the points of no return.
- Corrupted save recovery: If your save corrupts, verify integrity of game files (Steam) or restore from backup. If no backup, you may have to start over. Rare, but possible.
---
Irreversible Choices
---
Missable Content
---
Difficulty Spikes
---
Grinding Traps and Efficiency
---
Online Etiquette and Anti-Cheat Notes
Sekiro: Shadows Die Twice is a strictly single-player experience with no online multiplayer or co-op. There is no anti-cheat client, as cheats only affect your own game. However:
---
Save Management Advice
---
Things Commonly Regretted Not Knowing Earlier
1. You can deflect (parry) almost everything, including grabs? Actually, no. Grabs cannot be deflected; you must dodge or run away. But you can deflect many unblockable attacks (those with a red kanji) if they are thrust attacks (use Mikiri Counter). Important: the red kanji indicates a perilous attack, which can be a thrust (deflect or Mikiri), a sweep (jump over), or a grab (dodge). Learn to distinguish them.
2. Stealth deathblow on bosses: Many bosses have a first health bar that can be removed instantly if you sneak up on them while undetected. Example: the Corrupted Monk in the Mibu Village can be stealth deathblowed by approaching from the tree branches. This removes one of three health bars instantly.
3. You can use the Loaded Umbrella prosthetic to block the Guardian Ape’s terror scream. Seriously, it negates the scream completely.
4. Spirit Emblems are plentiful once you know the farming route. At the Dilapidated Temple, after defeating Genichiro, you can buy 100 emblems from the merchant for 120 Sen each. Later, the same merchant sells an unlimited supply. Farm Sen early and stock up.
5. The Finger Whistle (Malcontent) is amazing against the Demon of Hatred and the Shichimen Warriors. But to get it, you must kill all three Headless bosses.
6. You can swim underwater after defeating the Great Colored Carp – after feeding it 3 times with Precious Bait, it will die and drop a unique item, and you gain the ability to swim underwater (press dodge while swimming). This allows access to new areas in Fountainhead Palace.
7. The best way to increase your attack power is to collect Boss Memories (from main bosses) and use them at the Sculptor. There’s no way to respec attack power.
8. You can ring the Bell Demon (from a bell in the Senpou Temple) to drastically increase enemy difficulty but also drop rates. This is optional and reversible (by using the item that nullifies it). Not recommended for first playthrough.
9. Don't sell precious items like Divine Confetti or Fulminated Mercury. You may need them for upgrades later. Keep at least 10 Divine Confetti for Headless fights.
10. The game's map is deceptively non-linear – you can often explore multiple paths early. If you're stuck on a boss, go explore a different area. You can defeat some mini-bosses without facing the big ones.
---
By keeping these notes in mind, you can avoid common frustrations, minimize missed content, and make informed choices that maximize your Sekiro experience.
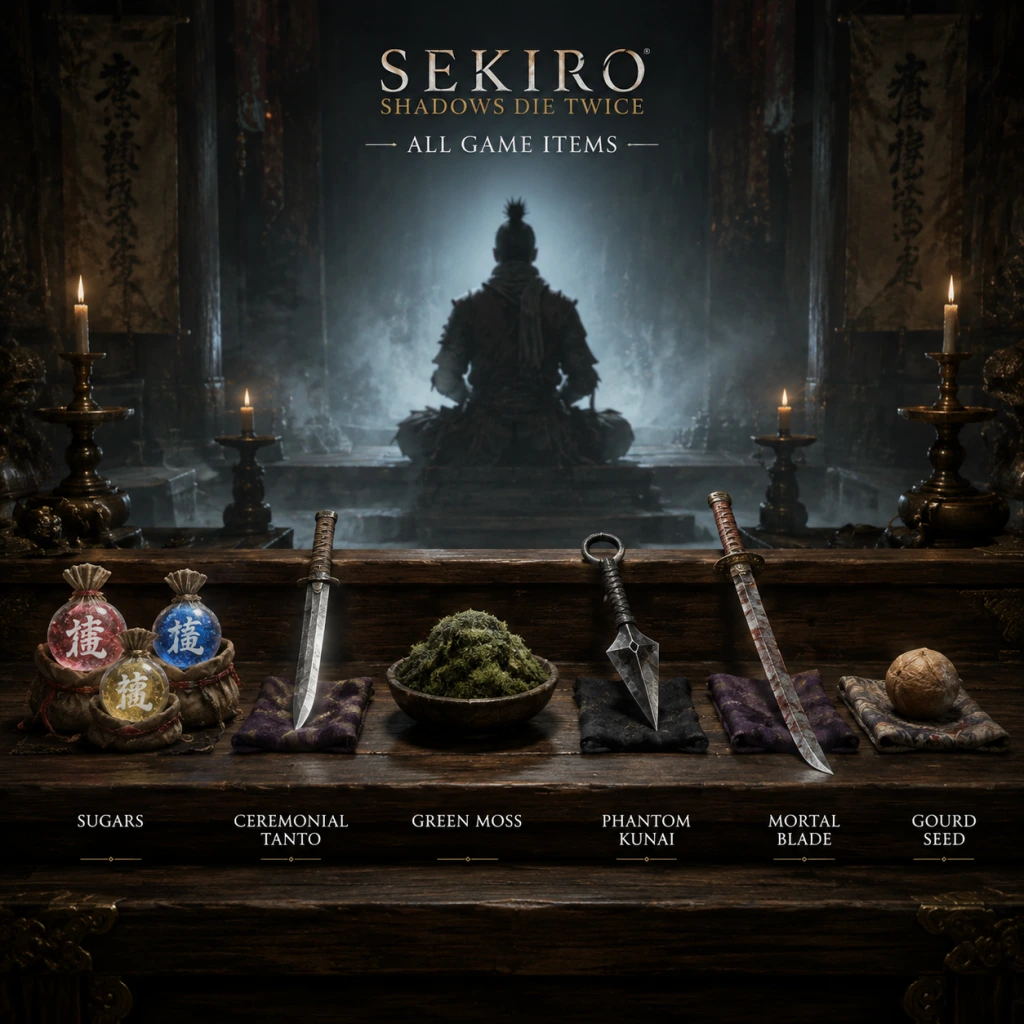
All Game Items
All Game Items in Sekiro: Shadows Die Twice
This guide covers every item category in Sekiro: Shadows Die Twice, including prosthetic tools, combat arts, consumables, upgrade materials, key items, collectibles, and currencies. Each entry explains what the item does, how to obtain it, when it is most useful, and any important synergies or upgrades.
---
1. Prosthetic Tools
Prosthetic tools are Wolf’s mechanical arm attachments that provide unique combat and traversal abilities. They are obtained from the Sculptor after acquiring the necessary upgrade materials. Each tool can be upgraded up to several levels using materials like Scrap Iron, Black Gunpowder, and Lapis Lazuli.
Shuriken (Spinning Shuriken)
- Effect: Throws a quick projectile that can interrupt enemy posture recovery and deal damage. Useful for finishing off low‑health enemies or staggering foes during combos.
- How to Obtain: Given by the Sculptor after defeating the first boss (Gyoubu Oniwa) or earlier if you find the correct upgrade path? Actually, you buy it from the Sculptor for 400 Sen after acquiring the Shinobi Prosthetic upgrade from the Dilapidated Temple.
- Upgrades:\
- Synergies: Works well with the Shinobi Execution technique.
- Effect: A heavy axe that breaks enemy shields and deals high posture damage. Can be charged for a larger swing.
- How to Obtain: Purchased from the Sculptor for 800 Sen after presenting the Attack Token? Actually, found in a chest in the Ashina Outskirts or bought after acquiring the Shinobi Prosthetic.
- Upgrades:\
- Synergies: Excellent against shield‑bearing enemies like the Ministry Soldiers.
- Effect: Spews fire that can set enemies ablaze, dealing damage over time and interrupting attacks. Can be charged for a stronger burst.
- How to Obtain: Given by the Sculptor after defeating the Blazing Bull? Actually, obtained from the Hirata Estate memory: after defeating the Drunkard, you pick it up from a corpse near the lake.
- Upgrades:\
- Synergies: Excellent against creatures weak to fire, like the Chained Ogre and Headless.
- Effect: A defensive tool that allows Wolf to teleport away when hit, leaving a trail of feathers. Useful for escaping combos or repositioning.
- How to Obtain: Found in the Hirata Estate, inside the main building after defeating Juzou the Drunkard? Actually, you get it from the Sculptor after obtaining the Hidden Temple’s item? It is located in the Ashina Outskirts – Underbridge area, near the Great Serpent’s first encounter.
- Upgrades:\
- Synergies: Can be upgraded to trigger fire damage, making it a versatile escape and punish tool.
- Effect: Creates a loud bang and flash that stuns most enemies (including beasts) for a short duration. Consumes Spirit Emblems.
- How to Obtain: Purchased from the Sculptor for 500 Sen after acquiring the Shinobi Prosthetic.
- Upgrades:\
- Synergies: Essential for staggering bosses like the Guardian Ape and the Demon of Hatred.
- Effect: A poisoned blade that can be used as a sword attachment. Deals damage over time and can inflict Poison on enemies after several hits.
- How to Obtain: Found in the Sunken Valley – Gun Fort area, on a wooden platform after the snake mini-boss? Actually, it’s inside the gun fort, near the speaker.
- Upgrades:\
- Synergies: Very effective against Okami warriors and the Headless Ape.
- Effect: A shield that blocks all frontal attacks (including gunfire and projectiles) while consuming Spirit Emblems. Can be extended to perform a counterattack.
- How to Obtain: Purchased from the Sculptor for 800 Sen after acquiring the Shinobi Prosthetic.
- Upgrades:\
- Synergies: Use against the Blazing Bull’s charge attacks and the Great Serpent’s poison spit.
- Effect: A spear that can pull enemies closer or perform sweeping attacks. Also useful for removing enemy armor or ripping off giant claws.
- How to Obtain: Found in the Ashina Reservoir, near the well where Wolf wakes up? Actually, it’s inside the Old Grave area, near the Buddha statue.
- Upgrades:\
- Synergies: Essential for the Divine Dragon fight to rip off his lightning branch? Actually, used to remove the Guardian Ape’s centipede.
- Effect: A fan that creates a vortex of air, allowing Wolf to teleport behind an enemy or steal an item from a distance.
- How to Obtain: Given by the Sculptor after progressing through the Sunken Valley? Actually, found in the Inner Sanctum after the Guardian Ape fight.
- Upgrades:\
- Synergies: Useful for stealing items from pesky enemies like the Ministry Ninjas.
- Effect: Produces a whistle noise that can distract or lure enemies. Also useful for pacifying certain creatures.
- How to Obtain: Purchased from the Sculptor for 500 Sen after acquiring the Shinobi Prosthetic.
- Upgrades:\
- Synergies: The Malcontent upgrade is crucial for the Demon of Hatred boss fight.
- Special Upgrade: A red umbrella that blocks fire attacks. Upgraded from the Loaded Umbrella using Lapis Lazuli.
- Effect: Same as Loaded Umbrella but with fire immunity.
- Ichimonji: A powerful overhead slash that restores posture.
- Mortal Draw: A strike that ignores enemies’ hyper armor.
- One Mind: A flurry of slashes that ends with a thrust.
- Shadowrush: A lunging thrust with huge posture damage.
- Effect: Restores a large portion of health. Can be upgraded with Gourd Seeds to increase number of uses.
- How to Obtain: Initial item. Gourd Seeds are found throughout the world (e.g., from certain merchants, mini-bosses).
- Synergies: Use with the Rejuvenating Sculptor’s Idol to refill.
- Effect: Small health recovery over time. Less effective than the Healing Gourd but can be used while moving.
- How to Obtain: Purchased from merchants, found in the world, or crafted from materials.
- When Useful: During exploration to save Gourd uses.
- Effect: Cures Poison status effect.
- How to Obtain: Purchased from merchants or crafted.
- When Useful: Poison swamps (Sunken Valley) or enemies like the Headless.
- Effect: Cures Terror status effect.
- How to Obtain: Crafted from materials (e.g., Persimmon).
- When Useful: Against Headless and Schichimen Warriors.
- Effect: Enchants the sword to deal bonus damage to apparition-type enemies (Headless, Schichimen, etc.) and allows normal attacks to hit them.
- How to Obtain: Purchased from merchants, found in hidden paths, crafted from materials.
- When Useful: Apparition bosses and mini-bosses. Essential for certain fights.
- Effect: Temporarily increases attack power.
- How to Obtain: Crafted from Gourd? Actually, bought or found. Various merchants sell it.
- When Useful: Before tough encounters or when needing to burst down a boss.
- Effect: Temporarily increases posture damage resistance.
- How to Obtain: Same as Ako’s Sugar.
- When Useful: When facing block-heavy enemies.
- Effect: Temporarily increases defense and reduces damage taken.
- How to Obtain: Same as Ako’s Sugar.
- When Useful: Survival during heavy enemy combos.
- Effect: Greatly increases attack power but reduces vitality. Risky but high reward.
- How to Obtain: Rare drop or purchase later.
- When Useful: Speedruns or when confident in avoiding damage.
- Effect: Temporarily cures Terror? Actually, it increases resistance to Terror and can remove Terror buildup? Wait, Snap Seeds are used to dispel illusions (e.g., in the Corrupted Monk fight).
- How to Obtain: Found in the early game near the Ashina Outskirts.
- When Useful: Against the Mist Noble or the Corrupted Monk’s phantom phase.
- Effect: Increases item drop rate for a short time.
- How to Obtain: Crafted, found.
- When Useful: Farming materials like Scrap Iron.
- Effect: Temporarily blinds an enemy, allowing for a sneak attack.
- How to Obtain: Purchased or found.
- When Useful: Against strong humanoids.
- Effect: Cures the “Moist” status (from getting wet) and prevents it.
- How to Obtain: Rare find.
- When Useful: During the Guardian Ape’s poison phase? Actually, it’s for fountainhead palace area where the water drains vitality.
- Effect: Not a consumable; it’s an upgrade material. See below.
- Use: Basic upgrade material for early prosthetic upgrades.
- How to Obtain: Common drop from samurai and ashina soldiers, found in chests.
- Use: Required for many mid-level upgrades.
- How to Obtain: Dropped by gun-wielding enemies, found in sunken valley.
- Use: Late-game upgrade material.
- How to Obtain: Dropped by stronger enemies, found in high-level areas.
- Use: The rarest material, needed for final upgrades (e.g., Lazulite tools).
- How to Obtain: Only a limited number per playthrough from certain bosses, mini-bosses, or a merchant in the Fountainhead Palace. Total of 6 per NG cycle.
- When Useful: Must prioritize which tools to upgrade to Lazulite.
- Use: Upgrade material for some advanced tools.
- How to Obtain: Dropped by the Ministry soldiers with gas masks, or from certain merchants.
- Use: Used for upgrades requiring high durability.
- How to Obtain: Rare drop from Headless and Schichimen warriors.
- Use: Not a material but a currency item. See Currencies.
- Description: The main currency for buying items from merchants and the Sculptor.
- How to Obtain: Dropped by enemies, sold bags of Sen from merchants, found in the world.
- Use: Purchase items, upgrade prosthetics, buy emblems.
- Loss on Death: Yes. You lose half your Sen on death, but can retrieve it by visiting your death spot.
- Description: A secondary resource used to activate most prosthetic tools and certain combat arts.
- How to Obtain: Can be bought from merchants (10 emblems for 180 Sen), crafted from materials, or found.
- Use: Consumed per use of prosthetic tools. Also used for the Mist Raven teleport.
- Max Capacity: 20 by default, can be increased to 25 with certain upgrades.
- Sack of Sen: Contains 100 Sen when used.
- Wealthy Coin Purse: Contains 200 Sen.
- Heavy Coin Purse: Contains 500 Sen.
- Use: Immediate Sen infusion. Useful when close to a merchant.
- Effect: Once you collect 4 Prayer Beads, you can increase your Vitality and Posture at the Sculptor. Each bead is a permanent upgrade.
- How to Obtain: Defeat minibosses (e.g., General, Headless, Drunkard). There are 40 total across the game.
- When Useful: Every bead matters; first priority for survivability.
- Effect: Increases the maximum number of Healing Gourd uses by 1.
- How to Obtain: Found in hidden locations, given by certain monks, purchased from the Memorial Mob.
- When Useful: Early game to reduce reliance on other healing.
- Effect: A sword that can kill immortal beings. Use in boss fights to trigger finishing moves.
- How to Obtain: Received from the Divine Heir after acquiring the Shelter Stone? Actually, found in the Divine Realm after defeating the Guardian Ape.
- When Useful: Required for the final battle and for executing the Mortal Draw combat art.
- Effect: Key item that allows entry to the Fountainhead Palace.
- How to Obtain: Given by the Divine Child of Rejuvenation after offering the Lotus of the Palace and the Holy Chapter.
- When Useful: Story progression.
- Effect: Used with the Shelter Stone to open the path to Fountainhead.
- How to Obtain: Found in the Sunken Valley after the Guardian Ape fight.
- When Useful: Story progression.
- Effect: Book that reveals the secret of the Dragon’s Heritage.
- How to Obtain: Given by the Divine Child after feeding her a Persimmon.
- When Useful: To unlock the Return ending.
- Effect: Revives a defeated NPC (like the Sculptor or any merchant) that died due to the Dragonrot.
- How to Obtain: Found in limited quantities, bought from certain merchants.
- When Useful: When Dragonrot affects a key NPC (Kuro, Emma, etc.) but rarely needed unless farming.
- Effect: Used to increase your Sen count when sold.
- How to Obtain: Found in hidden areas.
- When Useful: Same as other coin purses.
- Effect: A key item that allows you to use the Puppeteer Ninjutsu.
- How to Obtain: Defeat the Corrupted Monk? Actually, obtained from the Great Sakura Bull? Wait, it’s from the Headless of the Fountainhead Palace.
- When Useful: For the Return ending.
- Effect: Used to open a shortcut at the Divine Realm.
- How to Obtain: From a merchant or find in the world.
- When Useful: For optimal route to the final boss.
- Effect: These are actual items that allow you to increase your attack power by one point per memory. Each major boss drops a memory.
- How to Obtain: Defeat major bosses (e.g., Lady Butterfly, Genichiro, Guardian Ape).
- When Useful: Use at the Sculptor to permanently boost damage.
- Not an item.
- Already covered.
- Already covered.
- Effect: Key item for a sidequest (the Child of Rejuvenation’s request).
- How to Obtain: Find both from enemies near the Sunken Valley.
- When Useful: To complete the Child’s questline for the Return ending.
- Effect: Key item for the Great White Carp sidequest, can be traded for rare items.
- How to Obtain: Feed the carp in the Fountainhead Palace.
- When Useful: Obtain the Bestowal Ninjutsu or the Fine Snow ingredient.
- Effect: Key item for the Return ending, given by the Divine Child after offering the Holy Chapter: Infested.
- How to Obtain: Trade with the Pot Noble in the Fountainhead Palace using Great White Carp’s Scales.
- When Useful: Used in the Return ending ritual.
- Effect: Equipping this item increases enemy attack power and posture, making the game harder. It cannot be removed once placed? Actually, you can remove it by talking to the Sculptor.
- How to Obtain: Receive from the Sculptor after giving him a certain item? Actually, you can get it from Emma after the first death? It’s given by the Old Lady in the Ashina Outskirts after giving her a Memory? No, the Bell Demon is obtained by ringing the bell at the Dilapidated Temple after killing the Great Serpent. It is used to increase difficulty for more Sen and item drops.
- When Useful: For experienced players who want a challenge and better farming.
- Divine Confetti + Lazulite Upgrades: Apparition enemies take extra damage from both, stack for massive damage.
- Flame Vent + Oil: Combining oil (applied by the Oil item or the Flame Vent’s charge) with fire causes a massive explosion and burn effect. Oil can be purchased from merchants.
- Mist Raven + Firecracker: Use Mist Raven to escape, then follow up with a Firecracker to stun.
- Umbrella + Projecting Force: After blocking a hit with the Umbrella, you can use Projecting Force (a skill) to send a shockwave that deals heavy damage.
- Ako’s Sugar + Mortal Draw: Boost attack power then use Mortal Draw for a devastating strike.
- Malcontent’s Finger Whistle + Demon of Hatred: The Malcontent upgrade stuns the Demon of Hatred three times, giving huge windows for damage.
- Effect: Turns a humanoid enemy into an ally that fights for you.
- How to Obtain: Defeat the Armored Warrior? Actually, it’s from the Headless of the Sunken Valley.
- When Useful: Crowd control in ganks.
- Effect: After a deathblow, your sword is imbued with the enemy’s weapon (e.g., a blade of fire) for a short time.
- How to Obtain: Trade Great White Carp’s Scales with the Pot Noble.
- When Useful: Damage burst after a kill.
- Effect: After a deathblow, you become invisible to enemies for a short time.
- How to Obtain: Defeat the Blazing Bull? Actually, it’s from the Great Serpent reward? It’s given by the Sculptor after acquiring the necessary item.
- When Useful: Stealth resets.
- Phantom Kunai (adds tracking)\
- Gouging Top (increased damage)\
- Lazulite Shuriken (pierces defense)
Loaded Axe
- Sparking Axe (adds fire damage)\
- Lazulite Axe (adds lightning damage)
Flame Vent
- Spring Loaded Flame Vent (longer range)\
- Okinaga’s Flame Vent (adds lingering fire)\
- Lazulite Sacred Flame (deals holy damage)
Mist Raven
- Mist Raven’s Feathers (longer teleport distance)\
- Lazulite Mist Raven (adds fire damage on exit)
Shinobi Firecracker
- Longspark Firecracker (wider area)\
- Purple Spark Firecracker (adds lingering spark effect)
Sabimaru
- Sacred Sabimaru (higher poison buildup)\
- Lazulite Sabimaru (adds lightning damage)
Loaded Umbrella
- Magnetic Umbrella (can absorb lightning? Actually, the follow-up upgrade is the Phoenix’s Lilac Umbrella which blocks Terror)\
- Suzaku’s Lotus Umbrella (blocks fire damage)
Loaded Spear
- Thrusting Spear (increased range)\
- Spread Spear (area damage)\
- Lazulite Spear (adds lightning)
Divine Abduction
- Demon’s Abduction (adds fire damage)
Finger Whistle
- Malcontent’s Finger Whistle (can stun the Demon of Hatred)\
- Puppeteer’s Finger Whistle (can turn a humanoid enemy into an ally)
Suzaku’s Lotus Umbrella
---
2. Combat Arts & Skills (Not Items per se, but Key Equipment)
Combat Arts are special moves learned from skill trees. They are not physical items but are equipped in the skill menu. Key examples:
Each Combat Art requires Skill Points and some require earlier skills. They can be upgraded through the skill trees (Shinobi, Ashina, etc.).
---
3. Consumables
Consumables are items that are used for healing, buffs, or utility. They are crafted from materials or found in the world.
Healing Gourd
Pellets
Antidote Powder
Pacifying Agent
Divine Confetti
Ako’s Sugar
Gokan’s Sugar
Ungo’s Sugar
Yashariku’s Sugar
Snap Seed
Mibu Possession Balloon
Fistful of Ash
Red Lump
Fulminated Mercury
---
4. Upgrade Materials
These items are used to upgrade prosthetic tools at the Sculptor. They are found in the world, purchased, or dropped by enemies.
Scrap Iron
Black Gunpowder
Scrap Magnetite
Lapis Lazuli
Fulminated Mercury
Adamantite
Heavy Coin Purse
---
5. Currencies
Sen
Spirit Emblem
Treasures (Sack of Sen, Wealthy Coin Purse, etc.)
These are items that can be sold for Sen. They are found throughout the world and are often hidden. Examples:
---
6. Key Items
Key items are essential for story progression, unlocking areas, or enabling certain mechanics.
Prayer Beads
Gourd Seed
Mortal Blade
Shelter Stone
Lotus of the Palace
Holy Chapter: Infested
Dragon’s Blood Droplet
Resplendent Coin Purse
Mibu’s Soul
Aromatic Branch
---
7. Treasure Collectibles
Lapis Lazuli
Already covered.
Prayer Beads
Already covered.
Gourd Seeds
Already covered.
Memory: (Boss Memories)
Ring of Combat: (not an item, but concept)
Statue Fragments (Not in Sekiro)
Dragonrot: (mechanical debuff, not an item)
---
8. Miscellaneous Items
Pouch of Sen
Antidote
Red & White Pinwheel
Great White Carp’s Scale
Fine Snow
Mortal Blade (again)
Bell Demon (Charm)
Charm of the Sun (Not in Sekiro)
---
9. Important Synergies and Upgrades
---
10. Ninjutsu Techniques (Special Abilities)
Ninjutsu are special moves that require 4 Spirit Emblems and are activated after a successful execution (deathblow). They are learned from specific enemies.
Puppeteer Ninjutsu
Bestowal Ninjutsu
Blood Smoke
---
11. Summary of Item Priority
| Item Type | Priority | Notes |
|---|---|---|
| Prayer Beads | Highest | Increase Vitality/Posture, find all 40 |
| Gourd Seeds | High | More healing charges |
| Memories | High | Increase attack power (boss kills) |
| Prosthetic Tool upgrades | Medium | Focus on Shuriken, Flame Vent, Umbrella first |
| Lapis Lazuli | Rare | Save for favorite Lazulite upgrade |
| Divine Confetti | Medium | Essential for apparitions |
| Ako’s Sugar | Medium | Boss DPS |
This guide covers all major items in Sekiro: Shadows Die Twice. Refer to specific sections for detailed locations and farming routes. Good luck, Shinobi!
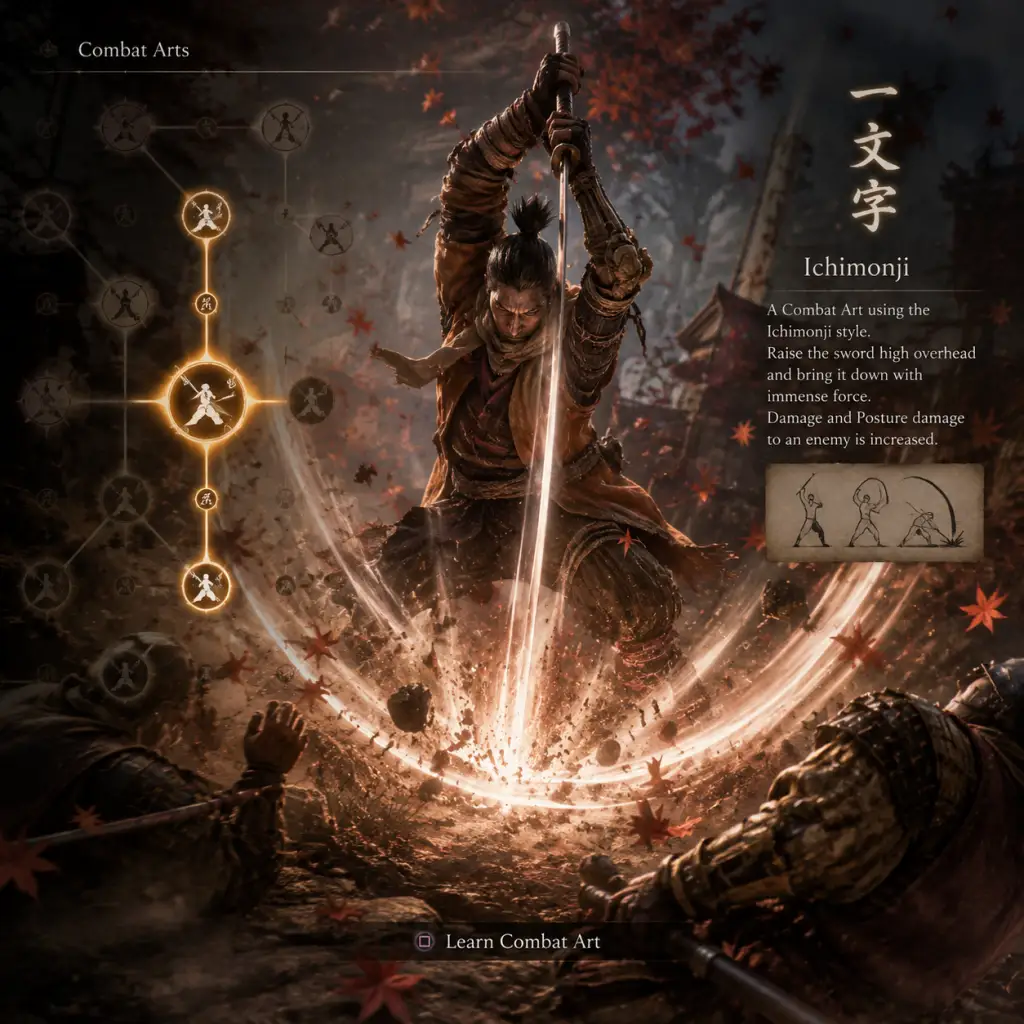
Character Skills
Character Skills Guide for Sekiro: Shadows Die Twice
This guide covers every skill, ability, and special move available to the main protagonist, Wolf (Sekiro). Skills are acquired by spending Skill Points earned through combat and exploration, and are organized into three main skill trees: Shinobi Arts, Ashina Arts, Prosthetic Arts, and several Esoteric Texts that grant unique combat arts. There are also latent skills (such as Mikiri Counter) that are unlocked via specific skill nodes.
Overview
- One playable character: Wolf.
- Skill Points: Earned by accumulating experience (EXP). One point per level; leveling requires more EXP each time.
- Skill Trees: Three permanent trees, plus temporary buffs from acquiring new Combat Arts.
- Spirit Emblems: Many prosthetic tools and combat arts consume Spirit Emblems (max capacity 20, can increase).
- Posture & Health: Skills primarily affect posture damage, health damage, or utility.
---
1. Shinobi Arts (Green Tree)
Focuses on stealth, speed, and mobility. Core skills for traversal and stealth kills.
Key Skills
| Skill Name | Effect | Spirit Emblem Cost | Upgrade Path | Synergies |
|---|---|---|---|---|
| Shinobi Eye (Latent) | Permanently increases the amount of Spirit Emblems dropped from enemies. | Passive | N/A | Essential for prosthetic-heavy builds |
| Suppressed Presence | Reduces the detection range of enemies while crouching/walking. | Passive | N/A | Pairs with stealth blows |
| Breath of Life: Light | Restore a small amount of HP upon performing a Deathblow on a standard enemy. | Passive | N/A | Sustains health during stealth runs |
| Shinobi Vitality | Increases max Vitality (HP) by a small amount. | Passive | N/A | Recommended early for survivability |
| Shinobi Posture | Increases max Posture by a small amount. | Passive | N/A | Helps against aggressive enemies |
| Ascending Carp | Increases posture damage dealt to enemies during combat. | Passive | Upgrades to Descending Carp (further increase) | Core for posture-breaking strategies |
| Nightjar Slash | Combat Art: Perform a lunging upward slash then a spinning downward slash. Can use in air. | 1 | Upgrades to Nightjar Slash Reversal (follow-up attack) | Good gap closer; combos with firecrackers |
| Chasing Slice | After deflecting or hitting a blocking enemy, you can quickly lunge at them for a slice. | Passive | N/A | Follow-up after deflect; sets up posture damage |
| Mikiri Counter | Allows you to counter thrust attacks by dodging forward into them at the right moment. Deals massive posture damage. | Passive | N/A | Essential skill; unlocks after Shinobi Arts skill tree |
| Shadowrush | Combat Art: Long-range thrust attack that can be charged for more damage. | 1 | Upgrades to Shadowfall (multi-hit thrust after dodge) | Effective against humanoid enemies; breaks guard |
---
2. Ashina Arts (Red Tree)
Focuses on sword combat, parrying, and mastering the blade. Ideal for direct combat.
Key Skills
| Skill Name | Effect | Spirit Emblem Cost | Upgrade Path | Synergies |
|---|---|---|---|---|
| Ashina Esoteric Text | Unlocked in the game; grants access to the tree. | N/A | N/A | Prerequisite |
| Ichimonji | A powerful overhead slam with a slow wind-up; deals heavy posture damage and can break guard. | 1 | Upgrades to Ichimonji: Double (two slams in a row) | Great against blocking enemies; stuns |
| Whirlwind Slash | Quick horizontal slash that hits multiple enemies. Low posture damage but good crowd control. | Passive | Unlocked early | Use on groups or after deflecting |
| Ashina Cross | A diagonal slash performed after a step-dodge. | Passive | N/A | Follow-up after dodging sweeps |
| Flowing Water | After deflecting an attack, you can immediately counter with a light slash that deals chip damage. | Passive | N/A | Encourages perfect parries |
| Spiral Cloud Passage | Combat Art: A flurry of slashes that can be chained into follow-ups. High posture damage. | 2 | N/A | Endgame skill; excellent for bosses |
| One Mind | A rapid series of slashes ending with a powerful thrust. Costs health to use. | 3 (after upgrade) | Upgrades to One Mind: Mortal (even more damage) | Use when you have HP to spare; massive damage |
| High Monk | Combat Art: A three-hit combo that can be used after deflecting or dodging. | 1 | Upgrades to High Monk: Vampirism (heals on hit) | Great for aggressive play; works with Ascending Carp |
---
3. Prosthetic Arts (Blue Tree)
Governs efficiency and upgrades for prosthetic tools (e.g., Shinobi Firecracker, Loaded Umbrella, etc.). Skills reduce cost or enhance performance.
Key Skills
| Skill Name | Effect | Spirit Emblem Cost | Upgrade Path | Synergies |
|---|---|---|---|---|
| Spirit Emblem Enhancement | Increases maximum Spirit Emblems by 2 per level (up to 5 levels). | Passive | N/A | Essential for tool-heavy play |
| Shinobi Firecracker Mastery | Reduces the delay before firecrackers detonate, improving stagger timing. | Passive | N/A | Faster stun-lock on enemies |
| Loaded Umbrella Mastery | Increases the time the umbrella can stay open without draining posture. | Passive | N/A | Better defense against fire/lightning |
| Spear Mastery | Spear pull-attack (from Loaded Spear) does more posture damage. | Passive | N/A | Useful against shield enemies |
| Mist Raven Mastery | Increases the teleport distance when using Mist Raven. | Passive | N/A | Evade through wide attacks |
| Sabimaru Mastery | Poison buildup from Sabimaru increases. | Passive | N/A | Better DOT against enemies weak to poison |
| Divine Abduction Mastery | Allows the divine fan to steal items from behind. | Passive | N/A | Rare skill, situational |
---
4. Esoteric Texts (Special Combat Arts)
These are found as key items in the world and unlock new Combat Arts (separate from skill trees). Only one Combat Art can be equipped at a time (use the menu to swap).
List of Combat Arts from Texts
| Text Name | Combat Art | Effect | Cost | Acquired From |
|---|---|---|---|---|
| The Basics of the Blade | Whirlwind Slash | Already in skill tree | Passive | Starting skill |
| Ascending/Descending Carp | Nightjar Slash | See Shinobi Arts | 1 | Part of skill tree |
| Ashina Esoteric Text | Ichimonji & others | See Ashina Arts | 1 | Early game |
| Senpou Esoteric Text | High Monk | Three-hit combo, can be upgraded | 1 | Senpou Temple |
| Mortal Blade Text | Mortal Draw | A charged slash that ignores guard and deals massive damage, but costs HP. | 2 health | Folding Screen Monkeys |
| Floating Passage | Floating Passage | A multi-hit slash that can be chained into a sweep, good for building posture. | 1 | Underwater Headless (optional boss) |
| Spiral Cloud Passage | Spiral Cloud Passage | Advanced variant of Floating Passage with more range. | 2 | Endgame (after Owl Father) |
| One Mind | One Mind | See Ashina Arts | 3 | Endgame (after Divine Dragon) |
- Mortal Draw is excellent for breaking enemy guards and dealing health damage even through blocks.
- High Monk combos well with Ascending Carp for posture break.
- One Mind is a high-risk, high-reward art; use when boss is stunned.
---
5. Latent Skills & Passive Abilities
These are learned automatically from the skill trees and are always active.
| Skill | Source | Effect |
|---|---|---|
| Shinobi Eye | Shinobi Arts (first node) | More emblem drops from enemies |
| Suppressed Presence | Shinobi Arts | Stealth detection reduction |
| Breath of Life: Light | Shinobi Arts | HP recovery on standard deathblow |
| Mikiri Counter | Shinobi Arts (required purchase) | Counter thrust attacks |
| Chasing Slice | Shinobi Arts | Dash attack after deflect/hit |
| Flowing Water | Ashina Arts | Counter slash after deflect |
| Vault Over | Shinobi Arts (after Nightjar slash) | Allows you to jump on top of enemies during a deathblow or after deflecting a sweep |
| Shinobi Vitality/Posture | Both trees | Stat increases |
| Spirit Emblem Enhancement | Prosthetic Arts | Max emblem cap increase |
6. Recommended Builds & Synergies
Build 1: Perfect Parry (Ashina-focused)
- Skills: Ichimonji (Double), Flowing Water, Chasing Slice, Ascending Carp, Descending Carp.
- Prosthetic: Loaded Umbrella for panic blocks, Firecracker for openings.
- Playstyle: Focus on deflecting everything. Use Ichimonji to punish after combos. Flowing Water gives chip damage on deflections.
- When to use: Most humanoid enemies and bosses like Genichiro, Lady Butterfly.
- Skills: Suppressed Presence, Nightjar Slash (Reversal), Shadowfall, Breath of Life: Light.
- Prosthetic: Shinobi Firecracker for distraction, Mist Raven for escape.
- Playstyle: Use stealth to clear minor enemies, use Shadowfall for quick thrust damage, Nightjar for closing distance.
- When to use: Exploration, mob clearing, bosses weak to poison (use Sabimaru).
- Skills: All Prosthetic Arts masteries, Spirit Emblem Enhancement maxed.
- Prosthetic: Varies per fight; Loaded Spear for posture, Firecracker for stun, Umbrella for elemental attacks.
- Playstyle: Switch tools frequently. Use tool attacks to build posture and then execute.
- When to use: Against monster bosses (Guardian Ape, Demon of Hatred) where tools give openings.
- Skills: Mortal Draw (Combat Art), Ascending Carp, One Mind (endgame).
- Prosthetic: Loaded Umbrella (for protection while using Mortal Draw), Yashariku’s Sugar for damage boost.
- Playstyle: Use Mortal Draw on stunned enemies. One Mind for burst damage when bosses are staggered.
- When to use: Boss fights where you have a large health pool or resurrection uses.
- Spirit Emblem Conservation: Many skills cost Emblems; always keep a reserve for emergencies.
- Combat Art Switching: You can only equip one Combat Art at a time, but can swap via menu. Consider the boss you are facing.
- Skill Point Farming: Late game, the best farm is at the Ashina Outskirts Stairway idol (after invasion) – use Divine Abduction to lure enemies.
- Respec: There is no skill reset; plan carefully. However, all skills are useful eventually, so no wasted points.
Build 2: Stealth Assassin (Shinobi-focused)
Build 3: Tool Master (Prosthetic-focused)
Build 4: High Damage Output (Mortal Draw & One Mind)
---
7. Skill Acquisition Order (Recommended Progression)
1. First 2 Skill Points: Get Mikiri Counter (Shinobi Arts) – it trivializes many enemies.
2. Next 3-4 Points: Ascending Carp (posture damage) and Chasing Slice.
3. Early-mid game: Ichimonji (Double) from Ashina Arts.
4. Mid game: Nightjar Slash for mobility, Breath of Life for sustain.
5. Late game: Prosthetic Arts masteries based on your favorite tool.
6. Post-game: One Mind, Spiral Cloud Passage, Mortal Draw.
---
8. Notes & Caveats
---
This guide covers every skill in Sekiro: Shadows Die Twice. Master the tools and arts, and you will become the one-armed wolf that defeats all foes. Good luck, shinobi.
Characters & Roles
Characters & Roles Guide for Sekiro: Shadows Die Twice
This guide covers every major character in Sekiro: Shadows Die Twice, including the playable protagonist, key allies, antagonists, and influential NPCs. Since the game features a single playable unit—Wolf (Sekiro)—we also analyze how each character interacts with his journey, their strengths and weaknesses (from a story or combat perspective), and how to approach them effectively. For bosses, we provide recommended strategies and equipment.
---
1. Wolf (Sekiro) – The Playable Protagonist
Background: A shinobi of the Ashina clan, orphaned and raised by the Great Shinobi Owl. Bound by the Iron Code to protect his lord, Kuro the Divine Heir. After being defeated by Genichiro at the game's start, he loses his arm but gains the Prosthetic Arm from the Sculptor.
Strengths:
- Versatile Combat: Can use sword, prosthetic tools, combat arts, and stealth interchangeably.
- Posture Management: Excellent at breaking enemy posture via deflection and aggression.
- Mobility: Grappling hook, wall jumping, swimming allow unmatched vertical traversal.
- Resurrection: Can resurrect once per death (more with skill upgrades).
- No Stamina Bar: All actions cost health or posture; overcommitting leaves you open.
- Limited Healing: Only 1 Healing Gourd at start (can increase via Prayer Beads).
- No Block-All Shield: Must deflect perfectly or take damage; blocking lowers posture.
- Slow vs. Multiple Enemies: Stealth and positioning are required to avoid being overwhelmed.
- General Purpose: Kusabimaru (starting katana) upgraded to max; Loaded Umbrella (for parry); Firecracker (for beast bosses); Shuriken (to interrupt enemies).
- Posture Damage Build: High attack power + skills like Floating Passage and Ashina Cross; use Gokan’s Sugar to boost posture damage.
- Stealth Build: Sabimaru (poison), Gacherin’s Sugar (sneak), Suppress Sound skill; prioritize backstabs.
- Provides the Mortal Blade (necessary to defeat immortal enemies).
- Grants the ability to resurrect (using his power).
- Key to two endings (Return and Purification).
- Cannot fight; requires Wolf’s protection.
- Misunderstands the cost of the Dragon’s Heritage (he wants to die to stop the curse).
- Provides healing items (Healing Gourd, Pellets) and upgrades them (via Gourd Seeds).
- Unlocks the Mortal Blade’s true power.
- Can teach Wolf the combat art “Ashina Esoteric Text” (if you betray Kuro in Shura ending).
- Is a boss in one ending: Shura (Emma & Isshin fight).
- Limited involvement in combat – only fights during Shura ending.
- Her boss fight is challenging due to quick combos and mobility.
- Incredible posture recovery; long combos with a spear, sword, and gun.
- Ranged attacks (Glock in the final phase of Sword Saint).
- Lightning attacks (can be reversed).
- Huge health pool and high damage.
- Old Isshin has lower mobility and health than Sword Saint.
- Sword Saint’s attacks are telegraphed; he leaves openings after his long combos.
- Weak to fire (Firecracker) and lightning reversal.
- Old Isshin (top of Ashina Castle): Deflect his one-handed strikes; watch for the Ashina Cross (fast draw) – jump to avoid. He does a slow overhead slash that can be Mikiri countered if he follows with a thrust.
- Sword Saint Isshin (final boss): Phase 1: sword only – deflect and punish. Phase 2: adds spear and gun – stay close to avoid gunfire, deflect spear thrusts and Mikiri them. Phase 3: lightning attacks – jump and press attack to reverse lightning. Use Firecrackers sparingly.
- Old Isshin: Required boss for the Shura ending.
- Sword Saint Isshin: Final boss for the other three endings (after defeating Genichiro atop the castle).
- Prosthetic: Loaded Umbrella (to block gun shots and his massive sweep), Firecracker, and Mist Raven (to dodge his lunges).
- Items: Ako’s Sugar (boost attack), Gokan’s Sugar (boost posture), Divine Grass (heal all).
- Combat Art: Ichimonji Double or Whirlwind Slash for posture damage.
- Fast combos with good reach.
- Bow attacks (arrows) that can be deflected or dodged.
- Mortal Draw (a powerful unblockable slash) in his later phases.
- Lightning attacks in phase 3 (reversible).
- His posture depletes quickly under pressure.
- Furious attacks can be baited and punished.
- Lightning reversal is his main weakness in phase 3.
- Phase 1: Aggressive – deflect his combos and Mikiri his thrusts. Jump his sweeps. Use Shuriken to interrupt his bow shots.
- Phase 2 (with lightning): Same tactics, but when he uses lightning, jump and attack to reverse it for massive damage.
- Phase 3 (if you die optional): He does Mortal Draw – dodge sideways and punish.
- Loaded Umbrella (to block Mortal Draw if you fail to dodge).
- Firecracker (to stun him).
- Gokan’s Sugar for posture damage.
- Sabimaru (poison) is less effective.
- Highly mobile with aerial attacks.
- Illusions that spawn phantom assassins.
- Throws butterflies that can be deflected.
- Quick combos and unblockable sweep.
- Low posture recovery – stay aggressive.
- Illusions can be negated by using a Snap Seed, or you can wait 30 seconds.
- Weak to Shuriken (interrupts her airborne moves).
- Keep constant pressure; she will try to jump away. Use Shuriken when she is on wires to knock her down.
- When she summons illusions, either use a Snap Seed to destroy them instantly or run around until they vanish.
- Deflect her attacks to break her posture. Her combos are short; punish after the last hit.
- Shuriken (essential for knockdown).
- Snap Seeds (if you want to dispel illusions quickly).
- Loaded Umbrella (to block her butterfly projectile volley).
- Combat Art: Whirlwind Slash for wide area damage.
- Uses poison, smoke bombs, and a large sword.
- Can revive and heal (only in Father version).
- Uses anti-heal bomb (green smoke) that prevents item use.
- Fast attacks with good range.
- Open after missed attacks (e.g., after his triple slash).
- Weak to Firecracker (stuns him).
- His posture recovers fast; need to damage health to lower posture recovery.
- Great Shinobi Owl (Ashina Castle): He uses a sword and throws anti-heal bombs. Deflect his combos, dodge the anti-heal cloud. When he throws poison, move away. Use Firecracker to interrupt his combos. He is very aggressive; stay close but react to his feints.
- Owl (Father) (Hirata Estate): Similar but he has a second phase where he uses a shadowy clone attack. He also heals once – use Shuriken to interrupt healing. More aggressive and uses a sweep attack that can be jumped.
- Great Shinobi Owl: Required boss after collecting all three ingredients for Kuro (after defeating Guardian Ape and Corrupted Monk).
- Owl (Father): Optional boss in Hirata Estate (accessed by eavesdropping on Emma and the Sculptor, then using a key item).
- Firecracker (mandatory for stuns).
- Loaded Umbrella (blocks poison and anti-heal bombs).
- Gokan’s Sugar for posture damage.
- Divine Confetti for extra damage (especially Father version).
- Upgrades your Prosthetic Arm with new tools and vitality.
- Provides lore and guidance.
- Gives you the Phantom Kunai and other items.
- Cannot fight; is vulnerable to the Shura within him.
- Will die if you progress too far in the Shura ending.
- Gives you items like Divine Grass (full heal) and Frozen Tears (for Return ending).
- Provides lore about the Dragon’s Heritage.
- Can transport you to the Divine Realm for the final confrontation.
- Very frail; she cannot defend herself.
- Requires you to feed her the Fruit of the Divine Realm.
- Very long reach with sweeping attacks.
- Can block most attacks; high posture recovery.
- Uses a terror attack in phase 2? Actually not terror but an unblockable spinning slash.
- Can produce ghostly doubles.
- Vulnerable to Snap Seeds (dispels illusions).
- Weak to Divine Confetti (increases damage).
- Her posture depletes slowly if you damage health first.
- The real one is stationary during the illusion phase.
- Phase 1: Deflect her attacks; she has long combos. Mikiri her thrust attacks. Use Divine Confetti for extra damage. After depleting some health, use Snap Seed to remove her illusion clones.
- Phase 2 (if you fight her later or the true boss): Same but she uses a spinning slash that covers huge area – jump away. She also does a shadowy attack that requires you to look for the real one (clone vanishes). Attack the real one.
- Divine Confetti (boost damage and break through her block).
- Snap Seeds (to counter illusions).
- Loaded Umbrella (to block her wide sweeps).
- Combat Art: Ashina Cross for quick posture damage.
- Fast charging attacks; long reach with its tail.
- Throws feces that causes terror.
- Headless phase: uses a sword (its own arm) and extra moves.
- Can recover its arm if not dealt with.
- Firecrackers stun it.
- Its posture recovers slowly once you deplete health.
- Vulnerable to Mortal Blade in second phase (when it slams its sword).
- Weak to fire damage (burn it with Loaded Flame Vent).
- Phase 1: Stay close and deflect its attacks; be ready to jump or dodge the grab. Use Firecrackers when it rears up. When it farts, run away to avoid poison cloud.
- Phase 2: The ape loses its head and wields its own arm. It has a long, punishing combo. Deflect or dodge. When it does the deliberate sword slam, deflect it and it will be stunned, allowing you to use the Mortal Blade (if you have it) to damage its centipede. Otherwise, keep attacking its body.
- Firecracker (essential for phase 1).
- Loaded Flame Vent (to set it on fire).
- Mortal Blade (for phase 2 kill).
- Purple Gourd (to reduce terror buildup).
- Combat Art: Ichimonji Double for good damage.
Weaknesses:
Playstyle: Aggressive pressure with constant attacking and deflecting. Mix in prosthetic tools (Firecracker vs. beasts, Loaded Umbrella vs. gunfire) and Combat Arts (e.g., Ichimonji Double for posture damage). Use stealth to eliminate weaker enemies before engaging powerful foes. Master the Mikiri Counter for thrust attacks and jumping sweeps.
Unlock Conditions: Always available from the start. New tools and skills are unlocked via Prosthetic Tool upgrades (using Upgrade Materials) and Skill Points (earned by killing enemies).
Recommended Equipment/Builds:
Team Synergy: Wolf operates alone, but his actions affect NPC fates (e.g., Kuro, Emma, Sculptor quests). Choosing different endings requires specific interactions.
---
2. Kuro – The Divine Heir
Background: A young boy with the power of the Dragon’s Heritage, enabling resurrection. He is the last of the Divine Heir line, and Genichiro seeks his blood to gain immortality. Kuro is gentle, wise, and determined to end the cycle of death.
Strengths (as an ally):
Weaknesses:
Playstyle (NPC role): Kuro stays in the Dilapidated Temple or Ashina Castle during different phases. You interact with him to progress story, receive items, and make choices. He gives you the Hidden Tooth (for Purification ending) and the Mortal Blade after completing Mortal Journey.
Unlock Conditions: You meet Kuro at the start of the game. His questline is mandatory for story progression.
Recommended Equipment/Builds: Not applicable – he is not playable. However, when escorting him (very brief segment), just avoid combat and hide.
Team Synergy: Completing Kuro’s questlines unlocks the best endings and powerful items (e.g., Divine Grass). He is the emotional center of the story.
---
3. Emma – The Physician’s Daughter
Background: A young woman trained in medicine by the Sculptor and later by Dogen. She becomes the castle physician and acts as Wolf’s primary ally. She cares deeply for Kuro and the Sculptor. She is also a skilled swordswoman, having learned from Isshin.
Strengths:
Weaknesses:
Playstyle (as boss): She uses a swift sword with long combos and a lunging grab. She can also use a combat art similar to Ashina Cross. Stay aggressive, deflect her combos, and punish after she finishes. She has low posture recovery; use Firecrackers to stun her.
Unlock Conditions (boss fight): Occurs in the Shura ending (side with Owl).
Recommended Equipment (for fighting Emma boss): Loaded Umbrella (high defense), Firecracker, and a Combat Art with high posture damage like Ichimonji Double. Use Gokan’s Sugar to boost your posture damage.
Team Synergy: Emma provides narrative support and upgrades. Her quest branch determines your ending. Treat her well to get the best outcomes (Purification ending).
---
4. Isshin Ashina – The Sword Saint
Background: The legendary founder of Ashina, the greatest swordsman of his era. He is old and dying but retains immense skill. He is the grandfather of Genichiro. Depending on the ending, you may fight him in one of two forms: Isshin Ashina (old, sick) or Sword Saint Isshin (revived by Genichiro’s sacrifice).
Strengths (boss):
Weaknesses:
Playstyle (boss fight):
Unlock Conditions (boss):
Recommended Equipment (for Sword Saint):
Team Synergy: Isshin is a symbol of Ashina’s strength. Your relationship with him (helping him or killing him) determines the flow of the second half of the game. He respects strength and will offer you sake if you prove yourself.
---
5. Genichiro Ashina – The Fallen Heir
Background: The grandson of Isshin, desperate to save Ashina from the Central Ministry. He cuts off Wolf’s arm at the start and uses Kuro’s blood to gain immortality. He is a skilled archer and swordsman.
Strengths (boss):
Weaknesses:
Playstyle (boss fight):
Unlock Conditions (boss): First encounter at the top of Ashina Castle (mandatory). Second encounter as the final boss of the Shura ending (optional).
Recommended Equipment:
Team Synergy: Genichiro is the main antagonist. Defeating him is required for all endings except Shura. He is a recurring rival.
---
6. Lady Butterfly – The Mentor Betrayed
Background: A master illusionist and Wolf’s former mentor. She raised Wolf and taught him shinobi techniques, but later betrayed Owl and sought to use Kuro for herself. She uses illusions, a flurry of kicks, and summoning butterflies.
Strengths (boss):
Weaknesses:
Playstyle (boss fight):
Unlock Conditions (boss): Defeat her in the Hirata Estate memory (accessible via the Sculptor’s fallen bell). It is an optional boss but necessary for story.
Recommended Equipment:
Team Synergy: Her defeat reveals the truth about Owl and leads to completing the Hirata storyline. She is a major character in Wolf’s backstory.
---
7. Owl (Great Shinobi) – The Ruthless Father
Background: Wolf’s adoptive father and a legendary shinobi. He orchestrated the attack on Kuro and faked his own death. He values the Iron Code above all and will betray anyone, including Wolf. He appears in two fights: Great Shinobi Owl (Ashina Castle) and Owl (Father) (Hirata Estate).
Strengths (boss):
Weaknesses:
Playstyle (boss fight):
Unlock Conditions:
Recommended Equipment:
Team Synergy: Owl is the catalyst for the Shura ending and a major story driver. Choosing to obey or betray him determines your fate.
---
8. The Sculptor (Orangutan) – The Prosthetic Craftsman
Background: A former shinobi who was once a partner of Kingfisher. He lost his hand and now crafts prosthetic tools for Wolf. He resides in the Dilapidated Temple and shows signs of turning into a Demon of Hatred if not saved.
Strengths (as ally):
Weaknesses:
Playstyle (NPC): Always available at the temple. Interact to upgrade tools. You can also give him Sake to learn his story.
Unlock Conditions: Available from the start. You need to give him Upgrade Materials to improve tools.
Recommended Equipment/Builds: Not applicable. He supports Wolf's arsenal.
Team Synergy: Completing his questline (give him all sake, eavesdrop on him and Emma) can unlock the Owl (Father) boss and Purification ending. If you do not get the Mortal Blade, he turns into the Demon of Hatred boss.
---
9. Divine Child of Rejuvenation – The Mysterious Priestess
Background: A young girl found in the Hidden Tombs beneath Ashina. She is connected to the Divine Realm and is capable of creating divine grass and other holy items. She is crucial for the “Return” ending.
Strengths (as NPC):
Weaknesses:
Playstyle (NPC): She stays in the Inner Sanctum of the Senpou Temple. Gather the items she requests (Holy Chapter: Infested, Persimmon, etc.) to deepen her questline. She will eventually give you the Frozen Tears needed for the Return ending.
Unlock Conditions: You meet her after defeating the Corrupted Monk (Mibu Village) or by exploring Senpou Temple. She appears after you obtain the Holy Chapter: Infested.
Recommended Equipment: Not applicable. She is a quest giver.
Team Synergy: She is essential for the best narrative ending (Return). Her dialogue adds depth to the world and the lore of the Divine Heritage.
---
10. Corrupted Monk – The Guardian of Mibu Village
Background: A once-pure monk corrupted by the Senpou Temple’s forbidden arts. She guards the wedding cave and the Lotus of the Palace. She wields a large naginata and uses illusion attacks.
Strengths (boss):
Weaknesses:
Playstyle (boss fight):
Unlock Conditions: Required boss in Mibu Village (mandatory for story – she drops the Lotus of the Palace). Also appears as an optional boss in the Fountainhead Palace (a weaker version called the True Corrupted Monk).
Recommended Equipment:
Team Synergy: Defeating her grants access to the Fountainhead Palace, required for all endings except Shura. She is a barrier to the endgame.
---
11. Guardian Ape – The Beast of the Sunken Valley
Background: A massive, undead ape infected with the Centipede. It guards the Sunken Valley and is extremely aggressive. It uses a combination of brute force, toxic attacks, and a scream that causes terror.
Strengths (boss):
Weaknesses:
Playstyle (boss fight):
Unlock Conditions: Required boss in the Sunken Valley. Must be defeated to obtain the Shelter Stone.
Recommended Equipment:
Team Synergy: Defeating the Guardian Ape opens the path to the Ashina Depths and the Corrupted Monk. It also provides the Fistful of Ash (upgrade material) and an important Memory.
---
12. Additional Notable Characters
While not as central, these characters play important roles:
| Character | Role | Notes |
|---|---|---|
| Hanbei the Undying | Training dummy in the Dilapidated Temple | Provides unlimited practice and teaches Mikiri. |
| Kuro’s Mother (fate unknown) | Lore | Mentioned in documents; not seen. |
| Dogen | Physician, Emma’s mentor | Dead before game start; his research is important. |
| Kingfisher | Former shinobi partner of Sculptor | Mentioned in prosthetic lore; deceased. |
| The Divine Dragon | Final boss of the Divine Realm | Symbolic fight; grants the Tears. |
| Demon of Hatred | Optional boss | Transformed Sculptor if you progress Shura ending; very challenging. |
| Shichimen Warrior | Optional miniboss | Drops precious items; uses terror attacks. |
| Headless | Optional elite enemies | Gourd seeds and spirit emblems; require Divine Confetti. |
| Mist Noble | Meme boss | Extremely weak; notable for being anticlimactic. |
Conclusion
Each character in Sekiro serves a distinct purpose—whether as a mentor, ally, rival, or obstacle. Understanding their backgrounds, motivations, and weaknesses is key to mastering the game’s story and combat. For Wolf, your only playable character, adaptability is paramount: learn to mix stealth, deflection, prosthetic tools, and combat arts to overcome every foe. The bonds you forge with NPCs shape your ending, so use this guide to ensure you meet all criteria for the outcome you desire.
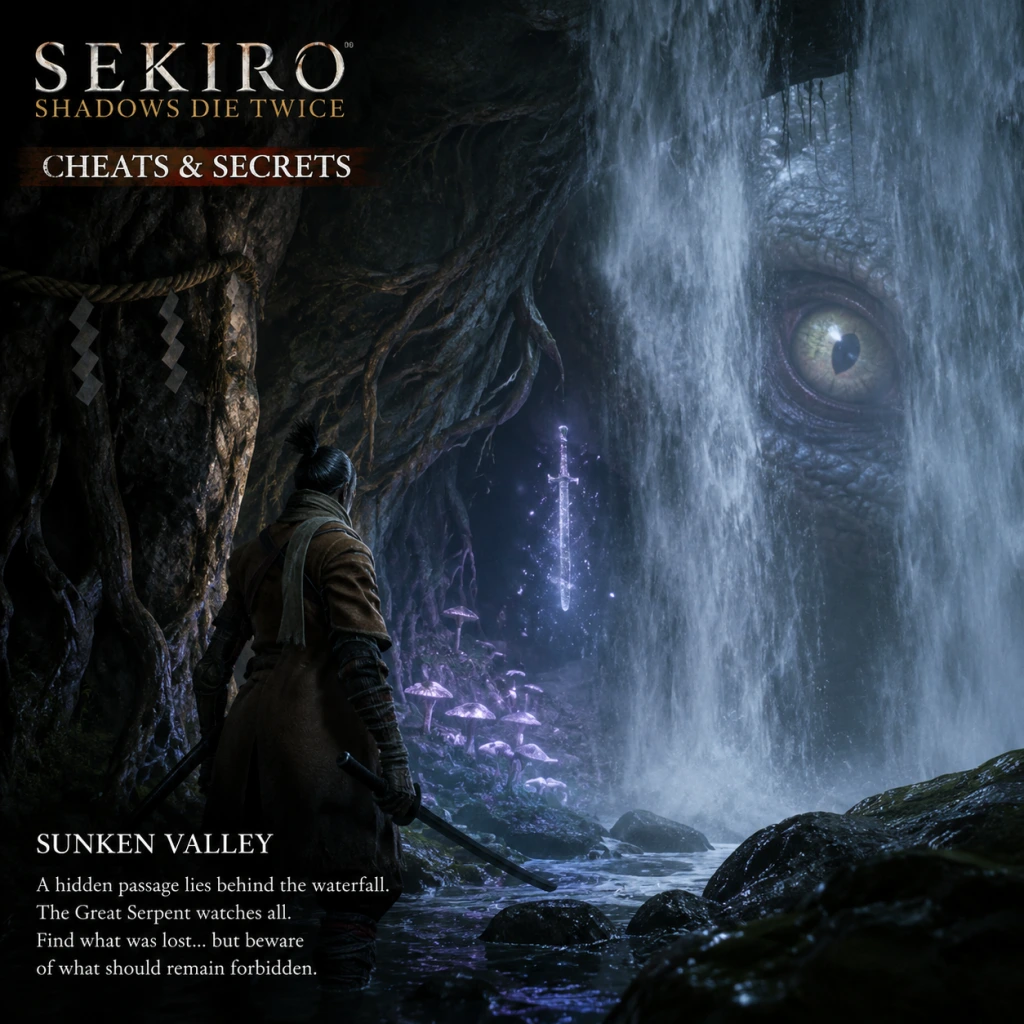
Cheats & Secrets
Cheats & Secrets Guide for Sekiro: Shadows Die Twice
Introduction
Sekiro: Shadows Die Twice is a challenging action-adventure game that does not include any official cheat codes, console commands, or unlock codes on any platform (PC, PlayStation, Xbox). There is no built-in debug menu or developer console without third-party modifications. However, the game is rich in developer-intended secrets, hidden features, and Easter eggs that reward thorough exploration and experimentation. This guide covers all legitimate hidden content, difficulty modifiers, secret bosses, and Easter eggs, as well as a note on PC mods (which are not official).
Official Cheat Codes: None
- No Cheat Codes Exist: The developers did not include any cheat codes. There are no button combinations or text entries that unlock invincibility, infinite items, or skip sections.
- No Console Commands: Unlike many PC games, Sekiro has no console that can be accessed via `~` or otherwise.
- How to Access: At the start of NG+ (New Game Plus) or after giving Kuro the "Everblossom" item, you are given the option to return Kuro's Charm to Kuro. Choosing to return it removes your ability to block chip damage and makes the game significantly harder.
- Effect: All enemy attacks deal damage through blocks unless perfectly deflected. You cannot rely on blocking, forcing mastery of deflections.
- Reward: Completing the game without Kuro's Charm (i.e., you gave it back) unlocks the "Kuro's Charm" achievement and grants a unique ending item? Actually, it's purely a self-imposed challenge that also increases XP and Sen drops slightly.
- Location: A hidden bell inside the Abandoned Dungeon area, specifically in the room with the huge bell. Interact with it to "ring the Demon Bell."
- Effect: All enemies become tougher (more health, posture, damage) but drop more XP, Sen, and upgrade materials (such as Fulminated Mercury and Scrap Magnetite).
- Note: This is reversible; you can ring the bell again at the same location to disable the curse.
- What It Is: When you die, you have a chance (base 30%) to retain your XP and Sen. This is not a secret but a core mechanic. However, you can increase Unseen Aid percentage by using Jizo Statues (restores resurrection nodes) or by not resurrecting in combat? Actually, the percentage decreases if you resurrect frequently. There is no hidden command to max it; it's tied to your "sin" of resurrecting.
- Demon of Hatred (Optional Boss): Available after defeating the Divine Dragon, in the Ashina Outskirts near the Stairway Idol. Requires a key item (Flame Barrel) to access properly, but you can also cheese him with walls. This boss is entirely optional and extremely tough.
- Owl (Father) (Alternate Hirata Estate Version): To face Owl (Father) instead of the normal Great Shinobi Owl, you must complete the Purification Ending prerequisites (listen to both Emma and the Sculptor's memories, get the Father's Bell Charm from Emma, and revisit Hirata Estate). This unlocks a harder version of the Owl fight.
- Headless & Schichimen Warrior (Spirit Mini-Bosses): These are hidden around the world. Headless (5 in total) require the Divine Confetti item to damage effectively. Schichimen Warrior is also optional but drops key upgrade materials.
- Lazulite Upgrade Materials: The rarest upgrade material, needed for max prosthetics, is hidden behind the Demon of Hatred and the Schichimen Warrior in Fountainhead Palace. Also obtained from the Great Carp quest.
- Finger Whistle (Prosthetic): Found in Sunken Valley after defeating the Guardian Ape, but the upgrade (Malcontent) requires a specific mini-boss drop from a Schichimen Warrior.
- Immortal Severance: Standard ending, defeat Isshin Sword Saint.
- Purification: Requires eavesdropping on Kuro and Emma at specific times and giving the Father's Bell Charm to the Sculptor.
- Return: Requires giving the Frozen Tears (from the Divine Child of Rejuvenation) to Kuro after feeding her three Persimmons and completing her questline.
- Shura: Choose to side with Owl at the top of Ashina Castle, fighting instead of going to the Divine Realm. This locks you out of most other content but is a secret ending.
- Bloodborne Reference (Hunter's Dream): In the Sculptor's Hut, there is a small stone statue of a hunter with a cane. It resembles the Hunter from Bloodborne. Also, the Sculptor's dialogue about "a world without rot" is a possible nod.
- Dark Souls Reference (Broken Sword): In the Ashina Outskirts, near the first Headless mini-boss, there is a broken sword stuck in a stone that resembles the Artorias the Abysswalker sword. Not confirmed but widely speculated.
- Demon's Souls Reference (Tower of Latria): The Mibu Village area has a well with a giant eel-like creature, similar to the Maneaters from Demon's Souls.
- Sekijo (The Sculptor's Past): The Sculptor was once a shinobi named "Sekijo" who nearly became a Shura. This lore is only revealed through specific eavesdropping and item descriptions, rewarding thorough players.
- Miyazaki's Dark Humor: If you stand still for extended periods, Wolf will do idle animations like stretching or examining his sword. Not an Easter egg per se, but a hidden detail.
- The "Ultimate" Item (Jizo Statue): These are not a cheat, but the game's lore hints that Jizo statues were used to revive dead warriors, tying to resurrection mechanics.
- Perfect Deflection (Mikiri Counter): Not a secret, but mastering this is essential.
- Jump on Enemy Heads (Posture Damage): Jumping on an enemy's head during their sweep attack deals massive posture damage—no cheat needed.
- Firecracker Stun: The Shinobi Firecracker prosthetic can stun most beast-type enemies (Guardian Ape, Chained Ogre) for a few seconds, allowing free hits.
- Flame Vent + Oil: Combining Oil (consumable) with Flame Vent prosthetic deals massive burn damage to many bosses.
PC Mods (Third-Party, Not Developer-Intended)
On PC, mods can be installed to alter gameplay, such as debug menus or infinite health. This is strictly third-party and not part of the game's design. Use at your own risk (e.g., Steam bans are unlikely for single-player mods, but still not official). Notable mods include "Sekiro Mod Engine" and "Debug Menu Mod." These are not considered "secrets" but are the closest thing to cheats available.
Developer-Intended Secrets & Hidden Features
#### 1. Kuro's Charm (Difficulty Modifier)
#### 2. Demon Bell (Difficulty Modifier)
#### 3. Unseen Aid (Mechanic, Not a Cheat)
#### 4. Secret Bosses & Mini-Bosses
#### 5. Hidden Prosthetic Tools
While most prosthetic tools are found through normal progression, some require specific actions:
#### 6. Alternate Endings (Four Total, Each with Hidden Steps)
The game has four endings, each with specific secret triggers:
Easter Eggs & Developer References
Exploit-Safe Secrets (Game Mechanics, Not Bugs)
Conclusion
Sekiro: Shadows Die Twice does not hide any cheat codes or unlockable cheats. Its secrets are instead woven into the gameplay—difficulty modifiers, optional bosses, multiple endings, and nods to FromSoftware's other titles. The true "secret" is mastering the combat system and exploring every corner of Ashina. For those seeking an easier experience, consider using PC mods, but be aware they are not official developer content.