
Shovel Knight
# Game Introduction ## Overview Shovel Knight is a critically acclaimed 2D action-adventure platformer developed and published by the independent studio Yacht Club Games. It originally launched via a successful Kickstarter campaign in 2013 and released in 2014 for PC and 3DS. Over the years, it ex...
Download & Installation
Overview
Shovel Knight is a critically acclaimed 2D action-adventure platformer developed by Yacht Club Games. The definitive collection, Shovel Knight: Treasure Trove, includes all four campaigns (Shovel of Hope, Plague of Shadows, Specter of Torment, King of Cards) and the multiplayer brawler Showdown. This guide covers official download and installation on PC (Steam, Epic Games Store, GOG), PlayStation 4 & 5, Xbox One & Series X|S, and Nintendo Switch. Mobile versions are no longer officially available.
---
Platform-Specific Instructions
PC (Steam, Epic Games Store, GOG)
Step-by-Step Installation
1. Steam:
- Create or log in to your Steam account.
- Open the Steam client or visit store.steampowered.com.
- Search for “Shovel Knight: Treasure Trove”.
- Click “Add to Cart” and complete purchase.
- Go to your Library, find the game, and click “Install”.
- Choose installation directory (default is fine) and wait for download.
- Once downloaded, click “Play” to launch.
2. Epic Games Store:
- Log in to your Epic Games account via the launcher.
- Visit the store and search for “Shovel Knight: Treasure Trove”.
- Purchase the game (or claim if free).
- Click “Install” from the game page in your Library.
- Select installation folder and confirm.
- After download, launch from the library.
3. GOG (Good Old Games):
- Sign in to your GOG account on gog.com.
- Use the GOG Galaxy client or browser.
- Search for “Shovel Knight: Treasure Trove” and buy.
- In GOG Galaxy, go to your Library, click on the game.
- Choose “Install” and select location.
- Offline backup installers are also available from your account.
System Requirements
| Component | Minimum | Recommended |
|---|---|---|
| OS | Windows 7+ | Windows 10/11 |
| Processor | 2.0 GHz Dual Core | 2.5 GHz Dual Core |
| Memory | 2 GB RAM | 4 GB RAM |
| Graphics | DirectX 9.0c, 512 MB VRAM | DirectX 10+, 1 GB VRAM |
| DirectX | Version 9.0c | Version 11 |
| Storage | 300 MB | 500 MB |
Storage Space:
- Base installation: ~300 MB.
- Additional save data and cloud sync: negligible.
- Steam: Free Steam account.
- Epic: Free Epic Games account.
- GOG: Free GOG account.
- Language selection (English, French, German, etc.)
- Optional: adjust resolution, fullscreen/windowed mode.
- Controller configuration (Xbox/PlayStation/Switch Pro controllers supported).
- The game will present the main menu; you can start any campaign immediately.
Account Requirements:
First Launch Setup:
Common Installation Errors & Fixes
| Error | Cause | Solution |
|---|---|---|
| “Failed to initialize graphics” | Outdated GPU drivers | Update DirectX and GPU drivers. Run the game in compatibility mode (Windows 7). |
| “Missing DLL files” | Corrupted download | Verify game files via Steam/Epic/GOG. On Steam: right-click game → Properties → Local Files → Verify. |
| Controller not recognized | Driver issue | Unplug/replug controller. Use Steam Input or JoyToKey. On Epic, ensure controller is detected in Windows. |
| Game crashes on launch | Antivirus interference | Add Shovel Knight executable to antivirus exceptions. Run as administrator. |
PlayStation 4 & 5
Step-by-Step Installation
1. Disc: Insert the Shovel Knight: Treasure Trove disc into the console. The installation will start automatically. Follow on-screen prompts.
2. Digital:
- On PlayStation Store (via console or web), purchase the game.
- From the console dashboard, go to your Library > Purchased.
- Find Shovel Knight and select “Download”.
- Installation completes automatically.
Storage Requirements:
- ~350 MB (PS4) / ~500 MB (PS5, due to backward compatibility layer).
- PlayStation Network account (free for digital purchase; optional for disc).
- Trophy support enabled automatically.
- Language follows system language.
- Option to invert analog sticks or adjust brightness.
Account Requirements:
First Launch Setup:
Common Errors & Fixes
| Error | Cause | Solution |
|---|---|---|
| “CE-30022-7” (cannot start) | Corrupted install | Delete game and re-download. |
| Game not appearing in Library | Region mismatch | Ensure you bought from the correct region store. Contact PSN support. |
| No sound | HDMI/audio settings | Check audio output settings on console. |
Xbox One & Series X|S
Step-by-Step Installation
1. Disc: Insert disc, installation begins. Wait for completion.
2. Digital:
- Purchase from Microsoft Store (console or web).
- On console, go to My games & apps > See all > Full library.
- Select Shovel Knight: Treasure Trove > Install.
- The game will download and install.
Storage Requirements:
- ~400 MB.
- Xbox Live account (free for digital purchase; disc can be played offline after install).
- Achievements enabled.
- Language follows console region.
- Adjust screen bounds if needed.
Account Requirements:
First Launch Setup:
Common Errors & Fixes
| Error | Cause | Solution |
|---|---|---|
| “0x80070005” (access denied) | Profile sync issue | Restart console, clear persistent storage (Settings > System > Storage > Clear local saved games). |
| Installation stuck | Servers down | Check Xbox Live status. Hard reboot console. |
| No audio in cutscenes | Audio codec | Update console firmware. Try changing audio format to stereo. |
Nintendo Switch
Step-by-Step Installation
1. Physical cartridge: Insert cartridge into Switch. The game icon appears on home screen. It may require a small update download (usually ~100 MB).
2. Digital (Nintendo eShop):
- Launch eShop from home menu.
- Search for “Shovel Knight: Treasure Trove”.
- Purchase and download.
- The game installs automatically; you can launch from home screen.
Storage Requirements:
- ~350 MB (digital).
- Physical version uses no internal space for gameplay (only saves).
- Nintendo Account (free) for eShop purchases; physical can be played with any user profile.
- No mandatory setup; language follows system.
- Option to display with or without screen shake when landing.
- Amiibo support (if you have Shovel Knight amiibo).
Account Requirements:
First Launch Setup:
Common Errors & Fixes
| Error | Cause | Solution |
|---|---|---|
| “Unable to start software” | Corrupted data | From System Settings > Data Management > Manage Software > Shovel Knight > Check for Corrupt Data. |
| MicroSD card slow | Slow card | Use a UHS-I U3 card for best performance. Move game to internal storage (System Settings > Data Management > Move Data Between System/microSD). |
| Controller disconnects | Low battery | Charge Joy‑Cons or Pro Controller. |
Post-Installation Verification
After installation on any platform, run the game to verify:
1. Launch the game – you should see the Yacht Club Games logo followed by the title screen.
2. Check version number – usually shown on the main menu (e.g., v5.6 or later) or in Options > About.
3. Test basic controls – navigate menus using a controller or keyboard (PC).
4. Start any campaign (e.g., Shovel of Hope). The game should load within seconds.
5. Check for updates – ensure you have the latest patch (update should be automatic on consoles; on Steam/Epic it’s automatic; GOG may require manual update check via Galaxy).
---
Final Notes
- Shovel Knight is a small, well-optimized game that runs on almost any modern hardware.
- Cross-platform saves are not supported.
- If you experience recurring crashes, visit the official Yacht Club Games support page or the game’s community forums.
- All legitimate copies include full offline play (no always-online requirement).
Game Introduction
Game Introduction
Overview
Shovel Knight is a critically acclaimed 2D action-adventure platformer developed and published by the independent studio Yacht Club Games. It originally launched via a successful Kickstarter campaign in 2013 and released in 2014 for PC and 3DS. Over the years, it expanded into the comprehensive collection known as Shovel Knight: Treasure Trove, which bundles all four campaigns and additional content. The game is available on a wide range of platforms including Nintendo Switch, PlayStation 4, PlayStation 5, Xbox One, Xbox Series X|S, Nintendo 3DS, Wii U, PC (Steam, GOG), macOS, Linux, and even Amazon Luna.
Story Overview
The plot follows the eponymous Shovel Knight, a diminutive but determined knight wielding a magical shovel. His quest is to defeat the evil Enchantress and her Order of No Quarter, who have corrupted the land. Along the way, he seeks to rescue his beloved Shield Knight, who was lost during an earlier adventure in the Tower of Fate. The narrative is presented through charming retro-style cutscenes and dialogue, with a tone that balances heartfelt emotion with lighthearted humor.
Setting
The game takes place in the fantasy realm of the Valley, a land filled with lush forests, treacherous mountains, haunted castles, and mysterious underground caverns. Each stage is themed around one of the Order of No Quarter's knights, such as King Knight's royal palace or Plague Knight's laboratory. The world is interconnected via a central overworld map, reminiscent of classic NES games like Super Mario Bros. 3 and Mega Man.
Main Characters
- Shovel Knight – The protagonist, a heroic knight armed with a shovel and a strong sense of justice.
- Shield Knight – Shovel Knight's partner, captured by the Enchantress.
- The Enchantress – The main antagonist, a powerful sorceress who leads the Order of No Quarter.
- Order of No Quarter – A group of eight knights, each with a distinct theme and boss fight: King Knight, Specter Knight, Plague Knight, Mole Knight, Tinker Knight, Treasure Knight, Propeller Knight, and Polar Knight.
- Other NPCs – Including the Black Knight, the Magicist (witch), and various townsfolk.
Core Appeal
Shovel Knight masterfully evokes the spirit of 8-bit platformers while adding modern design sensibilities. Its tight controls, clever level design, and challenging yet fair difficulty appeal to both nostalgic players and newcomers. The game emphasizes precise movement, combat, and exploration, with a focus on using the shovel for both attacking and digging.
Target Audience
The game is suitable for fans of classic platformers like Mega Man, Castlevania, and DuckTales. It has universal appeal due to its accessible difficulty options and charming art style, but it is particularly targeted at gamers who appreciate retro aesthetics, tight gameplay, and high-quality indie titles.
Game Modes
Shovel Knight: Treasure Trove includes four distinct campaigns:
1. Shovel of Hope – The original campaign starring Shovel Knight.
2. Plague of Shadows – Starring Plague Knight, with a new alchemy-based moveset.
3. Specter of Torment – A prequel campaign featuring Specter Knight, with acrobatic combat and a darker story.
4. King of Cards – Starring King Knight, focusing on card-collecting and platforming challenges.
Each campaign features unique levels, bosses, and mechanics, offering dozens of hours of content.
Additionally, Shovel Knight: Showdown is a multiplayer fighting game mode included in Treasure Trove, supporting up to 4 players locally.
Online/Offline Support
The core campaigns are single-player offline experiences. Shovel Knight: Showdown offers local multiplayer (offline) but does not include online multiplayer. The game does not have any online connectivity features beyond updates and leaderboards in some versions (e.g., challenge modes on PC). No online co-op is available.
DLC/Expansion Overview
The DLC for Shovel Knight is entirely included in the Treasure Trove edition. Outside of the four main campaigns, there are also additional free content updates such as the Body Swap mode (gender-swapping all characters) and the Cheat Codes menu. Originally, the individual campaigns were released as DLC for the base game, but Treasure Trove is the definitive package covering everything.
What Makes This Game Unique
Shovel Knight stands out for its authentic retro aesthetic—pixel art, chiptune music by Jake Kaufman, and NES-style limitations—combined with refined modern gameplay. The game's ability to weave multiple campaigns into a cohesive world without feeling repetitive is remarkable. Its boss design, level secrets, and the iconic "shoveling" mechanic (digging, bouncing on enemies) are instantly recognizable. The game's critical and commercial success helped solidify the indie game renaissance of the 2010s, and it remains a benchmark for retro-inspired game design.
Getting Started
Getting Started
Character Creation (None)
Shovel Knight offers no character creation. You play as the titular Shovel Knight – a blue-armored knight wielding a shovel. All campaigns have fixed protagonists (Shovel Knight, Plague Knight, Specter Knight, King Knight), but for your first playthrough, you will start with Shovel of Hope.
Controls (All Platforms)
The game uses identical core controls across platforms. Here's a breakdown for each input method:
| Action | Keyboard (PC) | Xbox / PC Gamepad | PlayStation | Switch |
|---|---|---|---|---|
| Move | Arrow Keys / WASD | Left Stick / D-Pad | Left Stick / D-Pad | Left Stick / D-Pad |
| Jump | Z / Space | A (Xbox) / B (Nintendo) | X | B |
| Shovel Slash | X / Mouse Left | X | Square | Y |
| Shovel Drop (down+attack in air) | Down + Z | Down + A | Down + X | Down + B |
| Relic Use | C / Mouse Right | B | Circle | A |
| Pause / Map | Enter / Esc | Start | Options | Plus |
| Interact / Talk | Up | Up | Up | Up |
| Sub-menu (Relics/Items) | Tab | RB | R1 | R |
First Hour Walkthrough
1. Open the game and select "New Game" from the main menu. You begin in the village square. A short cutscene introduces Shield Knight and the Enchantress.
2. Explore the village: Talk to the villagers. None are essential, but they provide lore, hints, and a few items. The most important: the Hub (Town Map) allows you to select levels. The Healing Screen on the left restores health for free. The Armor Shop sells upgrades. The Wandering Merchant sells relics.
3. Enter the first level: Pridemoor Keep (selected from the map). You cannot skip this.
4. Pridemoor Keep basics: The level introduces enemies, spikes, and collectible gems (gold). Your primary goal is to reach the boss room at the end. Along the way:
- Collect every red gem you see – gold is your currency.
- Find the Checkpoint Gate (blue flag with a shovel). Activate it to respawn there if you die.
- Destroy crates, lanterns, and pots for additional gems.
- The first special item you encounter is a Pharos Beam – a relic that lights dark areas. Pick it up but you don't need to equip it yet.
5. Boss: King Knight. Simple fight: avoid his charging dash and shoulder bash. Use your shovel slash when he lands from a jump. After defeating him, you get his shield as a relic (usable later).
6. Return to the village: Talk to the Wandering Merchant. Buy Health Upgrade (if you have enough gold) or save for the Shovel Blade upgrade (increases damage). The merchant also sells relics – ignore them for now; focus on health and damage.
UI Overview
- Health Bar: Top-left. Yellow hearts = full health; gray = damage taken. You start with 5 hearts.
- Gold Counter: Top-center. Your current gem count. Gold is lost on death (see below).
- Relic Icon: Top-right. Shows equipped relic. Press the relic button to use it (costs magic meter).
- Magic Meter: Small blue bar below health. Each relic use drains it. Recharge by collecting blue magic jars.
- Pause Screen: Shows map (levels unlocked), progress, and options to quit.
- Sub-menu: Press Tab / RB / R / R1 to open relic/equipment screen. Here you can equip relics, check items, and see your collection.
- Talk to the villagers – one gives you a free Health upgrade (a hidden heart piece) if you talk to her before fighting any boss. Look for a woman near the right side of the village.
- Visit the Armor Shop – buy the Phase Locket (costs 200 gold) if you can afford it. It makes you invincible for a short time, great for surviving mistakes.
- Explore each level thoroughly for secrets: breakable walls, hidden corridors, and bonus rooms containing extra gold or items.
- Hoard gold unnecessarily – dying costs you gold. Spend it at merchants or upgrade shops whenever possible.
- Ignoring the Wandering Merchant – he appears in each level near the midpoint. Buy relics from him only if they are useful (Phase Locket, Throwing Anchor, etc.).
- Rushing through levels – careful exploration yields more gold and upgrades.
- Using relics too often – magic meter is limited. Save it for emergencies or specific obstacles.
- Skipping checkpoints – always activate them. If you die, you respawn at the last checkpoint, not the start.
Essential Early Objectives
1. Defeat King Knight – unlocks the second level (Pridemoor Keep is mandatory).
2. Collect 400 gold for Health Upgrade – sold by the Wandering Merchant for 400. This gives you an extra heart.
3. Purchase the Shovel Blade upgrade – costs 500 gold. Increases damage by 1 heart per hit.
4. Find and activate Checkpoint Gates in every level – they are crucial for reducing backtracking.
5. Learn the Shovel Drop – practice pogo-ing on enemies and hazards. It’s essential for reaching hidden areas and defeating tougher foes.
What to Do First & What to Avoid
Do First:
Avoid:
Early Resource Priorities
| Resource | Priority | Reason |
|---|---|---|
| Gold (Gems) | #1 | Used for all upgrades. Collect every gem. Don't spend frivolously; save for health and damage upgrades first. |
| Health Upgrades | #2 | More hearts = more survivability. Buy the 400-gold upgrade ASAP. |
| Shovel Upgrade | #3 | Damage boost makes bosses easier. Buy when you have 500 gold after health. |
| Relics (Phase Locket) | #4 | Only if you have extra gold. Phase Locket is the most useful defensive relic early on. |
| Magic Jars | Collect but don't hoard | Recharge magic when needed, but not a priority to buy. |
Common Beginner Mistakes
- Not using the Shovel Drop – many new players ignore the down+attack pogo. It lets you bounce on spikes, break certain blocks, and attack enemies from above. Practice it in the first level.
- Dying with lots of gold – when you die, you lose a portion of your gold (the exact amount depends on the checkpoint). Always spend gold before entering dangerous areas.
- Trying to fight all enemies – you can run past many foes. Focus on reaching the boss with health intact.
- Ignoring the map – the pause screen shows level layouts. Use it to spot hidden rooms or shortcuts.
- Not talking to NPCs – the blacksmith and others offer valuable upgrades. Don't skip them.
- [ ] Complete the tutorial village (talk to at least 3 villagers).
- [ ] Complete Pridemoor Keep – defeat King Knight.
- [ ] Collect at least 200 gold from the level (easy to do).
- [ ] Return to village and buy the Health Upgrade (400 gold) if possible. If not, save until you can.
- [ ] Purchase the Phase Locket relic for 200 gold (if you have leftover gold).
- [ ] Explore the village thoroughly: find the hidden health piece (talk to the woman near the right edge of town).
- [ ] Save the game (automatic when you exit a level or use a checkpoint).
- [ ] Attempt the next level (Lich Yard or Plains of Passage – choose based on your comfort).
- [ ] Remember to practice the Shovel Drop on an enemy for 30 seconds.
Day-One Checklist
Tip: The first hour is forgiving. Don't stress about dying; you'll quickly learn enemy patterns. Focus on collecting gold and spending it wisely. The game becomes easier once you have key upgrades.
Core Gameplay
Core Gameplay
Shovel Knight's core gameplay is a refined blend of classic 2D action-platforming, with a strong emphasis on precise movement, combat using a unique shovel mechanic, and exploration of interconnected stages. The game is structured around four distinct campaigns, all sharing similar foundational systems but with unique twists per character. This guide focuses primarily on the main campaign, Shovel of Hope, as the baseline, with notes on how other campaigns diverge.
Core Gameplay Loop
The loop for Shovel of Hope is:
1. Select a stage from the World Map (e.g., Pridemoor Keep, King's Knight’s stage).
2. Traverse the stage left-to-right (or top-to-bottom) while defeating enemies, avoiding hazards (spikes, pits, falling blocks), collecting treasure, and discovering secret rooms.
3. Defeat the stage boss (an Order of No Quarter member) to earn a new Relic or ability.
4. Return to the hub (The Village) to spend gold on upgrades, health, and magic upgrades, or to buy items from the traveling merchant.
5. Advance the story by defeating more bosses, eventually facing the final boss in the Tower of Fate.
This loop applies to all campaigns, but each character has unique movement and combat mechanics (e.g., Plague Knight’s bomb jumping, Specter Knight’s dash slash, King Knight’s shoulder bash and pogo).
Combat and Interaction Systems
- Primary Attack (Shovel Blade): Shovel Knight swings his shovel horizontally. Holding the attack button performs a downward thrust (pogo) while in the air. Pogoing on enemies allows you to bounce off them, reach higher platforms, and break certain blocks. The pogo is the most versatile tool for both combat and platforming.
- Relics: Items found in stages that consume Magic (blue meter). Examples: Phase Locket (invincibility + health regen), Throwing Anchor (projectile), Dust Knuckles (wall climb), Chaos Sphere (bouncing projectile). Relics are equipped via the pause menu and used with the Relic button (default: R2/RT or keyboard Z).
- Magic Meter: Recharges by collecting magic jars (blue) dropped by enemies or found in stages. Max magic can be increased by buying upgrades from the hub.
- Sub-Weapons: In other campaigns, characters have distinct tools: Plague Knight’s bombs (with customizable casings/fuses/powders), Specter Knight’s Will Skulls (projectiles with special effects), King Knight’s Heirlooms (thrown items).
- Interaction: Most objects are struck with the shovel. Candles, pots, and breakable walls yield treasure. NPCs can be talked to by pressing the action button.
- Collecting Music Sheets (unlockable songs).
- Finding Cipher Coins (unlockable cheat codes).
- Completing Feats (achievement-like challenges).
- Backer NPCs to defeat for extra lore.
- Troupple Chef provides temporary power-ups (Troupple Chalice, Troupple Ales for health/magic).
- The Village Smithy: Upgrade Shovel Blade damage (tiers: copper -> silver -> gold).
- The Armorers: Buy armor sets that provide special effects (e.g., Conjurer’s Cloak for doubled magic, Old Man’s Hoe for faster digging).
- The Potion Merchant: Buy health and magic upgrades (max hearts and max magic bottles).
- Traveling Merchant: Appears in stages after clearing, sells limited-use items like food, armor sets, relics.
- Chester (Peddler): Sells Rare Relics for high prices.
- Weapon Upgrade: Increases damage per swing.
- Armor Sets: Equip one armor for passive bonuses. Examples: Spinning Golem (spin attack), Knight’s Plate (no knockback), Propeller Knight’s armor (double jump).
- Health/Magic Upgrades: Increase maximum health (hearts) and magic bottles.
- Relic Selection: Choose which relics to equip (up to 3 at a time via pause menu).
- New Game Plus: Harder version with increased enemy health/damage, no healing items, permadeath-style difficulty.
- Feats of Strength: Challenge stages (e.g., The Void).
- Boss Gauntlet: Defeat all bosses consecutively.
- Body Swap Mode: Play as Shield Knight with unique abilities.
- Goals: Learn basic movement (run, jump, pogo, shovel swing). Defeat the first boss (e.g., King Knight’s stage) to acquire the first Relic (usually the Phase Locket or Dust Knuckles). Collect enough gold for the first shovel upgrade (Copper) and one health upgrade.
- Exploration: Stick to main paths. Discover that pogoing on spikes is possible with Phase Locket later. Find a few hidden treasure rooms.
- Combat: Enemies are weak. Use basic shovel attacks. Pogo chain is not yet needed.
- Example: In "Pridemoor Keep", avoid the fire spears, use pogo on shielded knights to flip them. Defeat King Knight by pogoing his shoulder bash.
- Goals: Obtain multiple relics (Dust Knuckles, Throwing Anchor, etc.). Upgrade weapon to Silver. Purchase at least two health upgrades and one magic upgrade. Unlock the Musical Map and find the first secret feats.
- Exploration: Use Dust Knuckles to climb vertical shafts, Phase Locket to walk through magenta blocks. Discover hidden music sheets. Solve simple puzzles with relics.
- Combat: Enemy types diversify (flying, ranged, shielded). Use relics strategically (e.g., Chaos Sphere for crowd control). Bosses require pattern recognition (e.g., Propeller Knight’s air duel).
- Example: In "Clockwork Tower", use Dust Knuckles to climb the gear room, equip Throwing Anchor to hit distant switches. Boss: Tinker Knight (small form easy, giant form requires pogo patience).
- Goals: Max out shovel damage (Gold upgrade). Full health (8 hearts) and 6 magic bottles. Collect all relics. Equip a powerful armor set like Propeller Knight’s (double jump) or Spinning Golem. Defeat all Order of No Quarter members.
- Exploration: Revisit earlier stages with new relics to access previously unreachable rooms (e.g., using the Phase Locket to walk through magenta blocks for hidden treasure). Find the Hall of Champions (3 rematches).
- Combat: High enemy density. Use relics freely. Tower of Fate features gauntlet rooms with multiple enemies. Boss fights are intense (e.g., Shield Knight, Enchantress).
- Example: In "Tower of Fate" ascending sections, combine Phase Locket to dodge lasers, then use Throwing Anchor to destroy spawners.
- Goals: Complete all remaining Feats (e.g., No Damage Bosses, Speed Run). Collect all Music Sheets, Cipher Coins. Purchase all armor sets and upgrades. Attempt New Game Plus. Try Body Swap mode.
- Exploration: Fully explore every nook of every stage. Use Map to confirm 100% item collection. The Village now has new NPC dialogue.
- Combat: New Game Plus: enemies take reduced damage, drop no health. Use perfect pogo timing and relic management. Boss rematches are more aggressive.
- Example: The Feat "True Shovel Knight" requires completing the game with no health upgrades, perfecting early game strategies throughout.
- Plague of Shadows: Plague Knight’s bomb-jumping replaces pogo. His progression involves crafting bombs from ingredients. Economy includes purchasing bomb parts. Exploration relies on bomb trajectory puzzles.
- Specter of Torment: Specter Knight can dash mid-air, cling to walls, and has a scythe slash. Relics are replaced by Will Skulls. Progression unlocks new abilities via the hub (curse upgrades). Endgame includes a final boss gauntlet.
- King of Cards: King Knight’s shoulder bash and pogo (via Heirlooms). Progression includes card collecting (Joustus mini-game). Economy involves betting and card trading.
Progression
Progression is primarily non-linear but gated by story events. The World Map has branching paths. Defeating each boss unlocks a new Relic and often opens new routes or access to hidden stages (e.g., the optional Hall of Champions). The main story progression is tracked by the number of Order of No Quarter members defeated. After defeating a set number (usually 5), the final stage, the Tower of Fate, becomes accessible. The endgame requires defeating all eight main bosses and then the final boss.
Exploration
Each level is filled with hidden areas, alternate paths, and secret rooms. Many secrets require specific Relics like the Dust Knuckles (wall climbing) or Phase Locket (walk through obstacles). Gold is hidden in breakable walls, behind waterfalls, or in secret nooks. The Musical Map (obtained after first boss) reveals hidden paths on the World Map. In the Village, you can find NPCs to unlock optional challenges and the Body Swap mode (post-game).
Quests and Missions
There are no traditional quest logs. The main "quest" is to defeat the Order of No Quarter and rescue Shield Knight. Side objectives include:
Economy
Currency is gold. Collect gold from enemies, breakables, secret treasure. Spend gold at:
Gold is also lost on death unless you collect your dropped bag (which disappears if you die again).
Character / Build Growth
Shovel Knight has no leveling system. Growth is entirely equipment-based:
In other campaigns, character growth may include customizing bomb loadouts (Plague), upgrading scythe abilities (Specter).
Endgame Structure
After defeating the final boss (the Enchantress), you can continue playing to collect remaining relics, upgrades, and complete all Feats. The post-game unlocks:
Progression Tiers
#### Early Game (First 2-3 Stages)
#### Mid Game (Stages 3-6)
#### Late Game (Stages 7-8 and Tower of Fate)
#### Endgame (Post-Enchantress)
Cross-Campaign Notes
Regardless of campaign, the core loop of stage select -> platforming + combat -> boss -> upgrade persists. The synergy of movement (pogo/dash/bomb) and relic usage defines mastery.
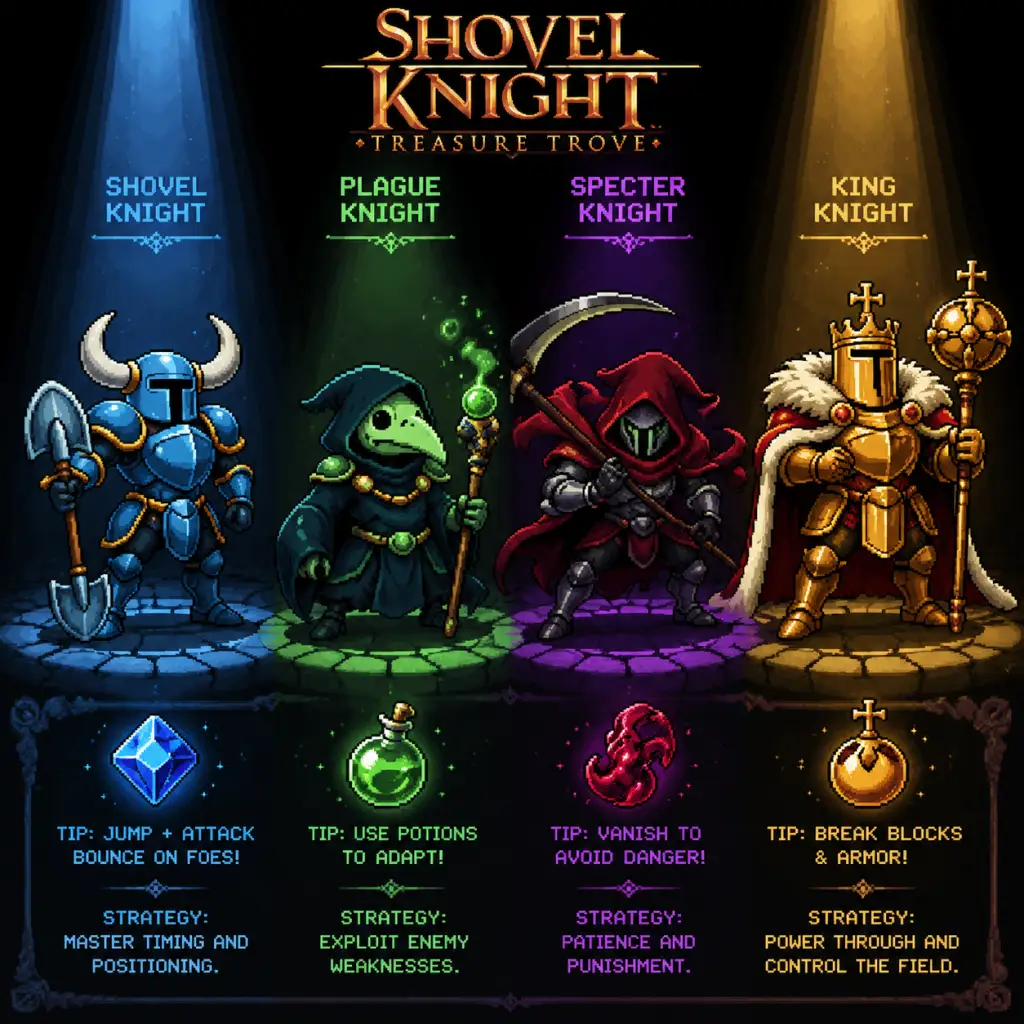
Game Tips
Game Tips for Shovel Knight: Treasure Trove
General Tips
- Game Selection Matters: Each campaign (Shovel of Hope, Plague of Shadows, Specter of Torment, King of Cards) has unique mechanics. Play Shovel of Hope first to learn core shovel mechanics; it’s the most balanced introduction.
- Always Check for Hidden Walls: Many stages have breakable walls (often with a subtle visual crack or different color). Tap them with your shovel to reveal secret rooms, relics, or money.
- Save Often: The game auto-saves at checkpoints and after clearing a stage, but you can manually exit to the map. Use this to retry boss fights without replaying the whole level.
- Listen to NPCs: The townsfolk in the hub area give hints about secret levels, relic usage, and weaknesses of Order of No Quarter members.
- Challenge Modes Unlock After Beating Campaigns: Don’t skip the main story; there are additional modes (e.g., Body Swap, Custom Knight) that add huge replay value.
- Shovel Bounce (Pogo) Is Your Best Move: Jump and press down+attack to bounce on enemies and hazards. This deals damage, allows multi-bounces on single enemies, and lets you cross spike pits safely. Master it immediately.
- Downward Thrust for High Damge: When falling, press attack to perform a downward stab. It destroys many projectiles and hits enemies below you. Great for descending pits with precision.
- Use the Shovel’s Range: Shovel Knight’s basic swing has a wide arc. Use it to clear multiple enemies in front of you (e.g., in tight corridors). The upward swing (holding up+attack) hits flying enemies directly overhead.
- Relic Management: Relics like the Flare Wand (fireball) or Phase Locket (invincibility) consume magic. Magic refills when you defeat enemies or destroy candles. Save magic for bosses or tough platforming sections.
- Throwing Anchor (a relic) is a Game Changer: It sticks to enemies and can be pulled back, dealing extra damage. Excellent against slow bosses. Combine with Shovel Bounce for hit-and-run tactics.
- Plague Knight’s Bomb Jumping: If playing Plague of Shadows, you can detonate bombs to propel yourself upward or sideways. Use this for vertical exploration and attacking enemies from above.
- Specter Knight’s Dash Slash: In Specter of Torment, holding attack while dashing performs a powerful dash slash that can kill multiple enemies in one go. Time it after a jump to hit flying foes.
- King of Cards’ Shoulder Bash: King Knight can charge his shoulder bash to break through shields and walls. Use it to access secret areas, but be careful—it leaves you vulnerable if you miss.
- Check Every Corridor Before Leaving a Room: Many secrets are in dead ends or after tricky platforming. If a path seems possible but has spikes, try Shovel Bounce on spike blocks (you can bounce on them!).
- Destroy Candles and Torches: They drop money, sometimes relics or health. Even in secret rooms, always smash them.
- Use the Propeller Dagger (a relic) to Reach High Ledges: When you acquire it, revisit previous stages to find chests you missed. This is essential for 100% completion.
- The Troupple Pond: After beating a boss, check the world map for a small pond icon. There you can trade Troupple Chalices for permanent upgrades: health, magic, or temporary boosts. Save them for hard levels.
- Secret Levels: Some stages have hidden exits (e.g., the Explodatorium’s secret room behind a breakable wall after the first checkpoint). These lead to bonus levels like the mysterious “Boss-Only” challenges or the “Plague Knight” secret ending.
- Mess with the Environment: Push blocks, pull levers, and light braziers. Some puzzles require timing (e.g., hitting a switch while on a moving platform).
- Gold Management: You lose some gold when you die (unless you buy the Golden Gavel relic which protects it). Spend gold on health/magic upgrades early: they make later stages much easier.
- Buy Relics in Order: Prioritize the Flare Wand (offensive), Phase Locket (survival), and Propeller Dagger (mobility). Shovel Blade upgrades (damage) are good but expensive; buy when you have surplus.
- Collect Music Sheets: They are hidden in each level and can be traded to the Bard in the hub for a permanent item (e.g., the Game Genie code that lets you play as a recolored knight).
- Fishing: In the hub village, you can fish for money. Cast your line where bubbles appear. Some rare fish give gems worth 500 gold. Fish after each boss to stockpile.
- Don’t Hoard Relics: You can hold up to 9 relics. Sell duplicates you find (relics respawn in some stages) to the Relic Merchant for quick cash.
- Learn Patterns: Each member of the Order of No Quarter has a distinct attack cycle. Watch for telegraphing: e.g., King Knight’s shoulder charge has a long wind-up; jump over him and strike from behind.
- Boss Weaknesses: Use the correct relic. For example, the Flare Wand deals extra damage to Red (the fire-shooting boss). The Alchemy Coin stuns Specter Knight. Experiment or read hints from townsfolk.
- Pogo on Bosses: Many bosses can be stun-locked with repeated Shovel Bounces (e.g., Treasure Knight). This is riskier but deals heavy damage if you time your bounces.
- Use Phase Locket: When a boss summons minions (like the Tinker Knight’s summons or the Propeller Knight’s wind attacks), activate the Phase Locket to become intangible and avoid damage while still moving.
- Practice Parrying (Specter of Torment): Specter Knight can parry attacks by pressing attack just before being hit. This creates a window to counter-attack. Master this for harder bosses like the Enchantress.
- Bounce off Walls: You can wall-jump on certain surfaces (usually marked with a pattern). In Shovel of Hope, only specific walls are climbable; in Specter of Torment, you can wall-slide indefinitely.
- Shovel Bounce on Spikes: Yes, you can pogo on spike blocks without taking damage. Use this to cross spike pits or climb vertical spike corridors.
- Use the Anchor to Pull Yourself: After throwing the Throwing Anchor, you can pull yourself toward the point you hit (including walls). This gives extra distance in jumps.
- Crouching to Slide: In Shovel of Hope, you can slide under low obstacles by pressing down while running. This is critical in tight tunnels and some boss rooms.
- Plague Knight’s Double Jump: Plague Knight can activate a bomb mid-air to double jump. In Plague of Shadows, you can chain bomb jumps to reach seemingly impossible heights.
- Health vs Magic Upgrade: Always buy health first (up to 5 hearts). Then magic (up to 5 bars). Only then invest in Shovel Blade damage. Survival trumps all.
- Relic Loadout: For general exploration: Flare Wand + Propeller Dagger + Phase Locket. For bosses: swap to Throwing Anchor + Alchemy Coin (if applicable) + a damage relic.
- Troupple Chalice Strategy: Save your chalices for stages with no health refills (like The Lich Yard) or for boss rushes. If you have multiple, use one for permanent health (Green chalice) early, then one for magic (Red) later.
- Crossover Gear: If you own multiple campaigns, you can unlock crossover relics like the “Shovel of Destiny” (from Shovel Knight: Showdown) which double damage. Not strictly needed but fun.
- Speedrun Techniques: Use Shovel Bounce cancelling to maintain momentum. You can also use the Phase Locket to skip certain enemy encounters by becoming intangible and dashing through.
- No Damage Run Tips: If attempting a no-hit run, equip the Phase Locket and learn enemy spawns. Use the Propeller Dagger to avoid ground hazards. Practice each level until you can clear it without taking a single hit.
- Steam Achievements: There is an achievement for not buying any upgrades (except the mandatory ones). For that, rely on relics found in chests and avoid spending gold. Use the Alchemy Coin to solve puzzles without upgrades.
- Multiplayer Co-op Tips: In co-op mode, Shovel Knight and Shield Knight have complementary moves. Use Shield Knight’s projectile to cover your approach, and Shovel Knight’s pogo to clear tight spaces. Coordinate relic use – one takes offensive relics, the other defensive.
- Body Swap Mode Mastery: In Body Swap mode, you control a different character (e.g., Plague Knight with Shovel Knight’s moves). This changes jump height and attack range dramatically – adjust your timing accordingly.
- Fish for Big Cash: The fishing minigame in the hub gives random fish sizes. Small fish give 20g, medium 50g, large 200g, and legendary 500g. After each boss fight, fish until you get a large or legendary – it’s a quick 500g.
- Buy the Golden Gavel First: In the Relic shop, the Golden Gavel costs 3000g but prevents gold loss on death. It pays for itself after a few deaths. Buy it as soon as you can afford it.
- Sell Duplicate Relics: When you acquire a relic you already own (from hidden chests), you can sell the duplicate for half its buy price. This is a good way to get extra money mid-game.
- The Bank in the Village: You can deposit money with the Banker. If you deposit enough, he will give you a special item (the Scrooge’s Bag). However, if you die too much, he may run away with your money. Keep a backup stash.
- Secret Boss: There is a hidden boss called the Reaper Knight in a secret room in the Explodatorium. To access it, you need to break a wall near the first checkpoint and then defeat a series of enemies. The reward is a powerful relic.
- Knight Gallery: After beating each campaign, you unlock a gallery of character art. There are hidden gallery pieces in each stage (e.g., a portrait of the developers). Check every corner.
- New Game Plus: After beating the game once, you unlock New Game Plus where enemies are tougher and you keep your upgrades. This is the real test of skill.
- Use the Pogo Everywhere: It’s the most versatile move in the game. Practice bouncing on different surfaces until it becomes muscle memory. Once you master pogo, the game becomes significantly easier.
Combat Tips
Exploration Tips
Resources & Economy Tips
Boss Battle Tips
Platforming Tricks
Upgrade & Build Strategies
Advanced Optimizations
Economy & Fishing Detailed
Secrets & Easter Eggs
Final Pro-Tip
By following these tips, you’ll not only complete Shovel Knight but also discover its many secrets and challenges. Happy digging!
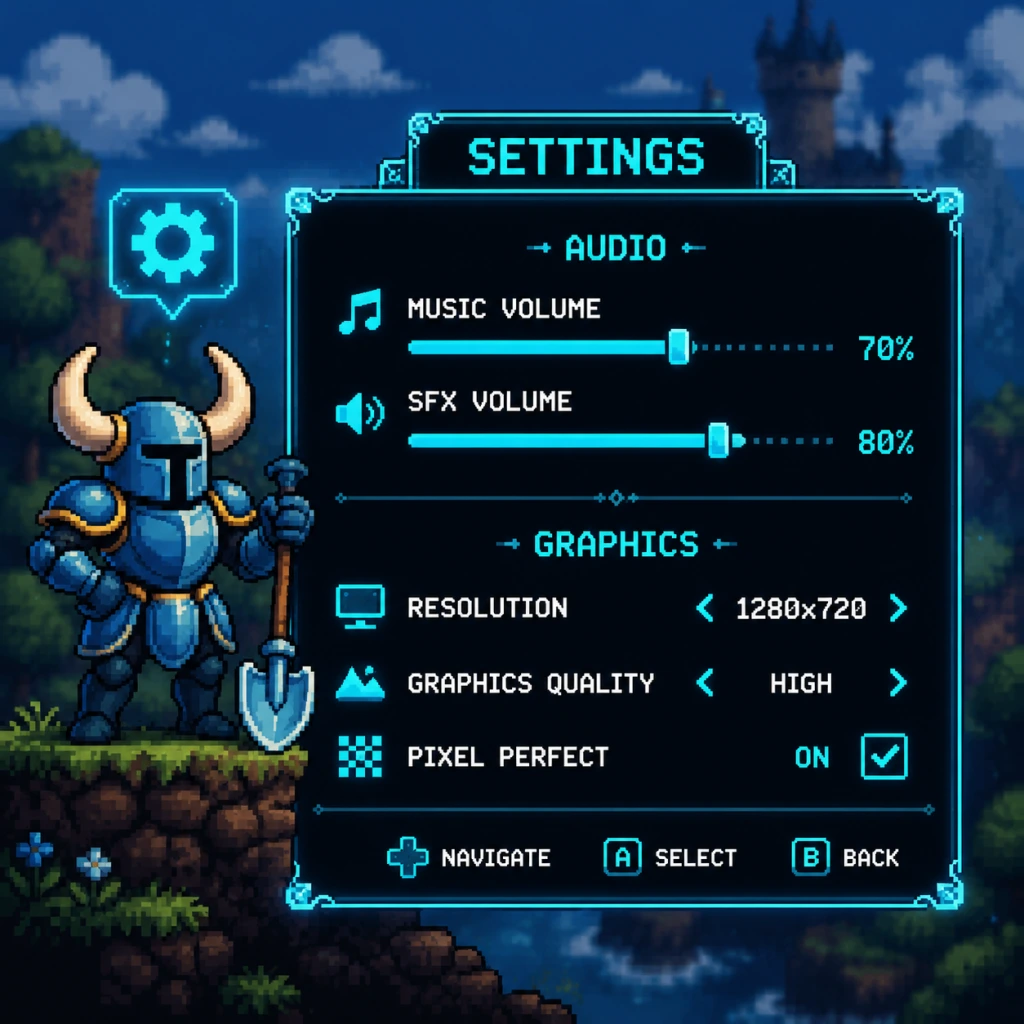
Game Settings
Game Settings Guide for Shovel Knight: Treasure Trove
Shovel Knight offers a modest but important set of settings, primarily focusing on controls and visual/audio preferences. Given its 2D pixel-art presentation and low system requirements, most options are straightforward, but some can significantly impact gameplay or comfort. Below is a comprehensive breakdown of every settings category, along with optimal recommendations for different hardware levels and pitfalls to avoid.
---
Graphics Settings
Shovel Knight uses a retro pixel-art style, so there are no resolution scaling, anti-aliasing, or texture quality sliders. The graphics section is minimal:
- Screen Resolution: Set to your monitor's native resolution. The game will scale pixel-perfectly. For CRT monitors or emulation, 4:3 aspect ratios (e.g., 1920x1440) are supported.
- Window Mode: Options are Fullscreen, Windowed, and Borderless Windowed. Recommendation: Borderless Windowed for quick alt-tabbing; Fullscreen for potential input lag reduction (very minor).
- V-Sync: On/Off. Recommendation: On to prevent screen tearing, especially if your display refreshes at 60Hz. Shovel Knight runs at a fixed 60 FPS, so V-Sync incurs negligible input lag.
- Shaders: Some versions include CRT or scanline filters. These are purely cosmetic and may cause a slight performance hit on very old hardware. Recommendation: Disabled for clarity and performance unless you prefer the retro look.
- Frame Rate Limit: Usually locked to 60 FPS. No adjustment needed.
- Master Volume: 0–100. Recommendation: 70-80% to avoid distortion while still hearing sound effects clearly.
- Music Volume: Separate slider. Recommendation: Keep at 100% for the fantastic chiptune soundtrack, but lower if you find it distracting.
- SFX Volume: Separate slider. Recommendation: 100% – critical for hearing enemy cues, treasure chests, and pogo bounce sounds.
- Ambient Volume: (Present in some versions) Controls environmental sounds like wind or water. Recommendation: 70-100% for immersion.
- Audio Output: Typically automatic. Use your system default. No surround sound or special options.
- D-Pad / Left Stick: Movement
- A (X) / Cross: Jump
- X (Square) / Triangle: Attack (Shovel swing)
- B (Circle) / Circle: Shovel Drop (Pogo) – CRITICAL
- Y (Triangle) / Square: Items / Magic
- LB / L1: Relic shortcut 1
- RB / R1: Relic shortcut 2
- Start: Pause / Menu
- Select: Map / Inventory
- Shovel Drop (pogo): Press down + jump in mid-air. Requires precise timing.
- Dive (Specter of Torment): Down + jump while sliding.
- Buttons: Standard controller, Switch Pro, etc.
- D-Pad Sensitivity: Some controllers have loose D-pads. If you get accidental diagonal inputs, consider using the analog stick (but stick can be less precise for pogo). Recommendation: D-pad for pixel-perfect 4-direction movement; analog stick for comfort if you prefer.
- Rumble: Can be enabled/disabled. Recommendation: Off for competitive play or if you find it distracting during speedruns. On for immersion.
- Arrow keys for movement, Z = Jump, X = Attack, C = Shovel Drop, A/S = items. Customizable. Recommendation: Use a controller – keyboard is fine but less natural for pogo timing.
- Difficulty Modes: In Shovel of Hope, you can enable “Checkpoint Mode” (infinite lives, but you lose gold) or “New Game+” after beating the game. Recommendation: Start on normal difficulty; use Checkpoint Mode if stuck.
- Speedrun Mode: Unlockable – removes cutscenes, adds a timer.
- Colorblind Mode: Present in some updates – offers color palette adjustments or enemy outlines. Recommendation: Enable if you have any color deficiency, especially for distinguishing blue/red chests or item colors.
- Screen Shake: On/Off. Recommendation: Off if you experience motion sickness or want a cleaner view. The game has screen shake on landing and hitting enemies; disabling it reduces visual noise.
- Subtitles: On/Off. Recommendation: On for all dialogue, including boss taunts and campfire chats.
- UI Scaling: Possibly present – scales health bar and text. Set to 100% or larger if playing on 4K.
- Text Language: English, French, German, Spanish, Italian, Japanese, Korean, Chinese (Simplified/Traditional), Russian, Portuguese (Brazilian), and more. Recommendation: Choose your preferred language. The game has full text localization, but no voice acting.
- UI Language: Usually follows text language.
- Automatic Updates (Steam, GOG, etc.): Keep enabled to receive bug fixes and new content (e.g., Showdown mode updates).
- Cloud Saves: Enabled by default on platforms. Recommendation: Keep on to sync progress across devices.
- Default Campaign: You can choose which campaign to launch when starting the game. Recommendation: Leave as “Shovel of Hope” for first playthrough.
- Stage Select: Unlocked after beating a boss – allows replaying stages. No settings needed.
- Auto-Parry: (Specter of Torment) – can be toggled on/off? Actually auto-parry is always on for Specter Knight. Not adjustable.
- Item Assignment: In the pause menu, you can assign relics to shortcut buttons (LB/RB). Recommendation: Bind the most-used relic (e.g., Propeller Dagger, Chaos Sphere) to easy-to-reach triggers.
- Quick Load/Save: Not manually configurable, but the game uses autosave at checkpoints.
Performance Notes: The game runs on virtually any hardware. Even integrated GPUs from 2010 can maintain 60 FPS. No special tweaks required. The most demanding thing is the shader filter.
---
Audio Settings
Pitfall: If you lower music volume too much, you may miss game over cues or boss phase transitions. Keep at least 50%.
---
Controls Settings
This is the most critical section. Shovel Knight relies on precise inputs for jumping, pogoing (downward stab), and using items.
#### Input Mapping
You can remap almost every action. Default (Xbox/PS layout):
Recommendation: Keep defaults, but ensure Shovel Drop is on a comfortable, easy-to-reach button. Many players accidentally map it to an awkward button and struggle with pogo combos. A common custom setup: set Attack to X (left face button) and Shovel Drop to A (bottom face button) – similar to jump + attack in other games.
Additional Button Details:
#### Controller Type
#### Keyboard Controls (PC)
Easy to Misconfigure: The Shovel Drop button. If you map it to a hard-to-reach key (e.g., R or F), pogo combos become nearly impossible. Also, avoid setting Attack and Shovel Drop to the same button – they must be distinct.
---
Accessibility Settings
Shovel Knight has limited built-in accessibility features, but some settings help:
Special Attention: Screen Shake is often overlooked; turning it off can improve precision platforming.
---
Language Settings
Pitfall: If you change the language mid-game, you may need to restart to apply fonts correctly. Do it from the main menu.
---
Network Settings
Shovel Knight does not have any online multiplayer or leaderboards in the base game. There are no network settings. The only network-related options are:
No latency, server, or matchmaking options.
---
Gameplay Settings
Mostly related to game modes and startup preferences:
Easy to Overlook: The relic shortcuts. Many players forget to assign them and have to open the menu to switch items mid-battle. Set shortcuts early.
---
Optimal Settings for Different Hardware Levels
Because Shovel Knight is a 2D pixel game, hardware differences matter very little. However, here are recommendations for different situations:
| Hardware Level | Graphics Settings | Controls | Audio | Other |
|---|---|---|---|---|
| Low-End (e.g., Intel HD 3000, Atom, Raspberry Pi) | V-Sync Off (to reduce input lag if screen tearing not an issue), Shaders Off, Borderless Window | Controller recommended; disable rumble | Master 70% | Disable screen shake, subtitles on |
| Mid-Range (e.g., GT 710, Vega 8) | V-Sync On, Fullscreen, Shaders Off or CRT filter on low resolution | Default controls; adjust D-pad sensitivity if needed | All at 80% | Enable colorblind mode if needed, screen shake off for precision |
| High-End (e.g., RTX 2060, 2020+ iGPU) | V-Sync On, Fullscreen 4K with UI scaling, Shaders (CRT or scanline) if desired | Remap shovel drop to a comfortable button (e.g., LB) – enables easy pogo | Full volume | All options enabled for full experience |
| Handheld (Switch, Steam Deck) | Borderless (Steam Deck), 720p/800p, Shaders Off for battery life | Use analog stick for pogo? D-pad can be cramped; remap shovel drop to a shoulder button | Master 60% to save speakers | Rumble off on console for battery, screen shake off |
---
Settings Easy to Misconfigure & Special Attention Points
1. Shovel Drop Button: This is the most commonly misconfigured control. Ensure it is on a button you can press while holding down and jumping. Many players accidentally put it on the same key as Attack – they are distinct actions.
2. Screen Shake: New players often leave it on and later complain about nausea or missing platforms. Turn it off if you find it disorienting.
3. V-Sync: If you turn V-Sync off on a 60Hz monitor, you may get screen tearing that distracts during speedruns. Keep it on unless you have a high-refresh display with G-Sync/FreeSync.
4. Rumble: Enabled by default; some players find it masks audio cues (e.g., chains breaking when a boss is stunned). Disable if you rely on audio.
5. Widescreen vs 4:3: The game supports both. If you use 4:3, the HUD may get slightly cutoff on some monitors. Always test.
6. Language Change: If you change language to one with non-Latin characters (e.g., Japanese, Korean), some modded fonts may break. Stick to your native language for the first playthrough.
7. Relic Shortcut Assignment: Forgetting to assign a relic to a shortcut button (LB/RB) forces you to open the pause menu. Do it at the start of each stage after acquiring a relic.
---
Summary
Shovel Knight’s settings are minimal and largely intuitive. The most important choices are the control layout – especially the Shovel Drop button – and whether to disable screen shake and rumble. For optimal performance, leave V-Sync on and shaders off unless you want a retro aesthetic. The game runs flawlessly on any modern hardware, so focus on personal comfort rather than frame rates. Use the table above for quick hardware-specific recommendations. Happy digging!
Important Notes
Important Notes for Shovel Knight: Treasure Trove
This section covers critical warnings, pitfalls, irreversible choices, missable content, difficulty spikes, grinding traps, and common regrets. Knowing these from the start will save you frustration and lost progress.
1. Irreversible Choices & Permanent Missables
- Campaign Order: You can play campaigns in any order, but Shovel of Hope is designed as the first story. Playing others first may spoil narrative reveals and introduce mechanics that are not present in the original campaign. No save file is shared between campaigns.
- Save File Slots: The game uses three save slots per campaign. Once you save over a slot, the previous data is lost. Always keep a backup slot if you want to test something risky.
- Collectibles: Music Sheets (for the bard), Feats (achievements), and Health/Magic Upgrades are permanently missable if you leave a level without collecting them. Some areas become inaccessible after the final boss of the campaign. The Troupple King’s items (e.g., the Troupple Acolyte) are only available in specific overworld locations and cannot be returned to after certain story events.
- Merchant Items: Once you purchase a Relic or an item from the traveling merchant, it’s yours forever. But there is no way to sell back unwanted items. Plan your relic purchases (especially expensive ones like the Propeller Dagger or Phase Locket) to avoid wasting gold.
- Fairy Quest (Plague of Shadows): Mona has a side-quest that requires giving her specific ingredients. Missing one ingredient means you cannot complete the quest for that playthrough. Reload an earlier save or restart the campaign.
- Each Campaign Has Unique Difficulty Curves:
- Recommended Preparation: Before tackling any boss, ensure you have at least 3 Health Upgrades and the Relic that counters the boss’s pattern (e.g., Phase Locket for invincibility frames, Alchemy Coin for range).
- Boss Rush Mode: Unlockable after clearing a campaign. Extremely challenging; save all health/ magic upgrades for the final boss.
- Gold is Scarce Early On: Avoid spending gold on cosmetic items or unnecessary upgrades before you have max health. The Big Chest (costs 1500 gold) in each level only contains a Feat, not a permanent upgrade.
- No Experience System: There is no grinding for levels—upgrades come only from collectible items. If you lose a lot of gold from dying, consider replaying earlier levels to farm safely.
- Money Loss on Death: Dying costs you roughly half your current gold (unless you have the Greedy Feat active, which worsens it). Always spend gold before tough sections. The traveling merchant can be found before most bosses and in some hidden rooms; buy there.
- Relic Upgrades: Upgrading relics costs gold and often takes priority over buying potions or temporary boosts. Prioritize the Phase Locket (invincibility) and Mobile Gear (health recovery) first.
- Secret Levels: There are hidden levels that are not marked on the map. For example, the Strike the Earth! segment in Shovel of Hope requires a specific relic (the Troupple Acolyte?) Actually, the entrance to the Lost City is behind a breakable wall in the Pridemoor Keep level. Search thoroughly.
- Feats (Achievements): Many feats are missable per playthrough. Examples:
- Secret Boss Fights: In Specter of Torment, there is a hidden Reize fight if you collect all his remains. In Plague of Shadows, defeat a hidden boss after collecting all ingredients for Mona.
- Joustus Cards (King of Cards): Some cards are only obtainable by beating specific opponents at Joustus. If you skip optional Joustus players in a town, you can return later, but some are missable after story events (e.g., the card given by the King of Cards himself).
- Manual Save Only: Shovel Knight uses checkpoint systems within levels (which can be broken for money), but saving the game is only done manually via the pause menu. Always save before quitting, especially after acquiring a major upgrade or after a boss.
- Multiple Save Slots: Use separate slots for each campaign to avoid confusion. Consider keeping one slot for a “clean” playthrough and another for experimentation.
- Backup Save: On PC, you can find save files in the game’s local folder (usually `%APPDATA%\Shovel Knight\` on Windows). Back them up occasionally to prevent corruption or loss from crashes.
- New Game+: When you clear a campaign, you unlock New Game+ which keeps your Relics and upgrades but makes enemies tougher and gold scarcer. You cannot revert to a normal save if you start NG+ – it creates a separate save slot.
- Not Buying the Phase Locket Early: Many players regret ignoring this relic because it grants invincibility frames. Purchase it as soon as the merchant offers it (after the first two levels).
- Breaking Checkpoints for Money: While it’s tempting to smash checkpoints for immediate gold, you will miss the ability to resume from that spot after death. Only break checkpoints when you are confident you can clear the section without dying.
- Skipping the Hub Village: The Village(town) in each campaign has NPCs who give lore and some side-quests. Talking to everyone unlocks feats and occasionally items (e.g., the Bard’s song).
- Not Using the Map Scroll: In the overworld, you can buy a map that reveals hidden paths. Without it, you might miss secret rooms or alternative routes.
- Thinking the Game is Linear: The order of levels is mostly open after the first two. It’s wise to tackle easier levels (like Lich Yard or Iron Whale) before harder ones (like Flying Machine).
- No Online Multiplayer: Shovel Knight has no online features. There is no anti-cheat system, and no leaderboards to worry about. Mods are allowed on PC but can corrupt save files if improperly installed. Use mods at your own risk.
- Local Multiplayer: In Showdown mode (local multiplayer), all players must be on the same screen; no online netcode exists. Settings for custom matches are straightforward.
- Speedrunning: If you intend to speedrun, note that the community uses specific version 4.2 for consistency. Avoid using cheats or external tools that modify game memory, as they will break the leaderboard rules for official submissions.
- Nintendo Switch: The game runs at 60 fps in both handheld and docked. Save backups are not easily accessible; use multiple in-game save slots.
- PlayStation/Vita: Trophies are tied to Feats. Some trophies are missable (e.g., “No Checkpoint Clear”). Reload saves before completing level if you think you missed one.
- PC: Keyboard controls have preset layouts; you may want to remap to controller for comfort. Cloud saves (Steam) can occasionally conflict; manually sync when switching computers.
- Apple iOS / Android: Touch controls are noticeably less precise. Consider using a controller. Save files are not interchangeable with PC.
- Do Not Delete Your Save File Randomly: The menu has a “Delete Save” option. Accidentally selecting it will wipe all progress without confirmation on some platforms. Always double-check.
- The Final Boss of Each Campaign Has a Second Phase: Do not use all your healing items in phase 1. The phase switch is signaled by the boss transforming or dialogue. Keep at least 2-3 healing vials for phase 2.
- Propeller Knight’s Level (Flying Machine): This level removes your Relics temporarily. Do not rely on Relics for survival; practice basic platforming before entering.
2. Difficulty Spikes & Boss Tips
- Shovel of Hope: Steady ramp, with a significant spike at the Propeller Knight airship stage and the final boss (The Enchantress). The Tower of Fate ascent is grueling.
- Plague of Shadows: More complex movement (bomb jumping) makes early levels harder. The Final Trial gauntlet is brutal.
- Specter of Torment: Faster, air-dash centric. The Lich Yard and Reize’s fight require tight timing.
- King of Cards: Card-based mechanics and a heavier emphasis on exploration. The Joustus challenges can be tricky, and the Final Castle is lengthy.
3. Grinding Traps & Economy
4. Missable Content & Secrets
- No Relic: Finish a level without using any relic.
- Manic Miner: Break all checkpoints in a level (cannot be done after clearing the level without replaying).
- Checkpointless: Complete a campaign without ever activating a checkpoint (requires perfect play).
- Feats are tracked per save file, but you can replay levels in “New Game+” to attempt missed feats.
5. Save Management Advice
6. Common Regrets & Tips to Avoid Them
7. Online Etiquette & Anti-Cheat Notes
8. Platform-Specific Notes
9. Final Warnings
By paying attention to these notes, you can ensure a smoother and more complete playthrough of Shovel Knight: Treasure Trove. The game is generous with its checkpoints and saving system, but knowledge of missable content and optimal relic purchases will greatly enhance your experience.

All Game Items
Overview
This guide covers every significant item in Shovel Knight: Treasure Trove, focusing primarily on the main campaign Shovel of Hope (the original adventure). Where applicable, cross-campaign differences are noted. Items are grouped logically into currencies, health & magic upgrades, relics (special items), armor, weapons (shovel upgrades), consumables, collectibles, key items, and materials. Each entry explains what it does, how to obtain it, when it is useful, and any important synergies or upgrades.
Currencies
| Currency | Purpose | How to Obtain | Useful For |
|---|---|---|---|
| Gold | Standard in-game currency. Used to buy items from Chester (the wandering merchant), repair armor/weapons, and purchase upgrades at shops. | Dropped by enemies, broken pots, treasure chests, and hidden rooms. | Buying relics, health/magic upgrades, armor repairs, and the Troupple Ales. |
| Blue Coins | Premium currency in Shovel of Hope. Found in hidden, often dangerous locations. | Secret rooms, well-guarded chests, and behind hidden walls. | Blue Coins are used to purchase special items from Chester: Chaos Sphere, Throwing Anchor, Dust Knuckles, Void Scepter, Robe of the Darkshine, and Phase Locket upgrades. Also needed for the Juggler achievement. |
| Red Coins | Currency in Plague of Shadows (used for cauldron and arcana upgrades). | Defeating enemies, breaking pots, secret areas. | Unlock new arcanas and upgrade the cauldron (health potions, bomb upgrades). |
| Green Coins (Skulls) | Used in Specter of Torment (Sorrowful Coins). | Defeating enemies (especially red skeletons), chests. | Purchase cursed items from the blacksmith, upgrades for the sickle, and unlock secret rooms. |
| Orbs (Blue, Red, Purple) | Used in King of Cards (Joustus cards and upgrades). | Defeating knights, completing joustus matches, hidden chests. | Buy card packs, upgrade the King's armor and weapons, and purchase items from traveling merchants. |
Health & Magic Upgrades
Health Upgrades (Milk Shakes / Heart Containers)
- Description: Increases maximum health by 1 heart (4 health points).
- How to Obtain: Found in chests at the end of each stage (or hidden in secret rooms). There are 7 total in the main game.
- When Useful: Essential for surviving tougher bosses and late-game areas. Prioritize acquiring early.
- Synergies: None directly, but more health allows safer use of risky relics.
- Description: Increases maximum magic by 10 points (fills a magic tank). Magic is used for relics.
- How to Obtain: Found in chests at the end of stages (or secret rooms). 7 magic upgrades exist.
- When Useful: Vital for relic-heavy playstyles (e.g., using the Phase Locket or Propeller Dagger frequently).
- Synergies: Works with any relic that consumes magic.
Magic Upgrades (Magic Tank)
Relics (Special Items)
Relics are items that consume magic to activate. They are purchased from Chester (the wandering merchant) using gold or blue coins. Some relics have upgrades purchasable with blue coins.
| Relic | Cost | Effect | When Useful | Upgrades |
|---|---|---|---|---|
| Shovel Blade (Upgraded) | 2000 gold | Increases shovel range and damage. | Always useful – permanent weapon upgrade. | None (purchased from Chester). |
| Ichor Bottle | 300 gold | Creates a small pool of ichor that damages enemies. | Good for stationary enemies or covering ledges. | None. |
| Flame Wand | 500 gold | Fires a fireball that travels horizontally. | Good for enemies at a distance, breaking ice blocks, lighting torches. | Flame Rod (upgrade): faster, larger fireball. |
| Dust Knuckles | 150 gold (or 3 blue coins) | Allows a dash attack that damages enemies and destroys blocks. | Great for breaking through walls, quick movement, and hitting multiple enemies. | Dust Knuckles Upgrade (3 blue coins): increases dash distance and damage. |
| Propeller Dagger | 300 gold | Propels Shovel Knight upward while holding the relic button. | Essential for reaching high platforms. Also damages enemies above. | None. |
| Mobility Boots | 150 gold | Allows walking on spikes (still takes damage if you fall on them). | Useful in spike-filled areas, but not invulnerability. | None. |
| Throwing Anchor | 200 gold (or 3 blue coins) | Throws an anchor that returns, dealing damage and destroying blocks. | Good for hitting enemies behind walls or at angles. | Throwing Anchor Upgrade (3 blue coins): faster throw and wider hitbox. |
| Phase Locket | 1500 gold (or 9 blue coins) | Grants temporary invincibility while draining magic. | Absolutely essential for the final boss (Enchantress) and many late-game gauntlets. | None (but its blue coin version is a permanent upgrade available earlier). |
| Chaos Sphere | 300 gold (or 6 blue coins) | Creates a traveling sphere that bounces off walls and damages enemies. | Great for crowded rooms and tight corridors. | Chaos Sphere Upgrade (6 blue coins): faster movement and more bounces. |
| Void Scepter | 500 gold (or 9 blue coins) | Shoots a slow-moving projectile that can pass through walls. | Useful for sniping enemies behind obstacles. | None. |
| Robe of the Darkshine | 900 gold (or 9 blue coins) | Increases magic damage by 50% (applied to all relics). | Essential for magic-focused builds. | None. |
| Troupple Ale | 300 gold (each) | Consumable that restores health and magic fully. | Emergency recovery. Can be purchased from Chester after defeating certain bosses. | None. |
Armor
Armor provides passive bonuses and can be upgraded at the Armor Outpost (after defeating the first boss) or purchased from Chester.
| Armor | Cost / How to Obtain | Effect | When Useful |
|---|---|---|---|
| Default Armor | Starting equipment | No special effects. Basic protection. | Beginning of the game. |
| Clothes of the Order | 1000 gold (Armor Outpost) | Reduces damage taken by 1 point per hit. | Good for general survival, especially early on. |
| Robe of the Darkshine | 900 gold or 9 blue coins (Chester) | Increases magic damage by 50%. | Best for relic-heavy builds (pair with Phase Locket). |
| Dreaded Gambit | 500 gold (Armor Outpost) | Doubles damage taken but also doubles gold earnings. | Useful for speedruns or farming gold if you are confident. |
| Knightly Wear | 2000 gold (Armor Outpost) | Reduces damage by 2 points. | Best defensive armor for later areas. |
| Prismstone Armor | 3000 gold (Armor Outpost) | Reduces damage by 1 point and increases magic regen. | Good balance for magic users. |
| Plague Knight's Armor (Plague of Shadows) | N/A – exclusive to that campaign | Varies: masks with different effects. | Not applicable to Shovel of Hope. |
| Specter Knight's Cloak (Specter of Torment) | N/A – exclusive to that campaign | Various cloak upgrades. | Not applicable to Shovel of Hope. |
| King Knight's Armor (King of Cards) | N/A – exclusive to that campaign | Various armor sets. | Not applicable to Shovel of Hope. |
Weapons (Shovel Upgrades)
Shovel Knight's weapon is the Shovel Blade. It can be upgraded twice.
| Upgrade | Cost | Effect |
|---|---|---|
| Shovel Blade (Standard) | Starting weapon | Basic shovel: short range, pogo bounce on enemies. |
| Shovel Blade Upgrade 1 | 2000 gold (Chester) | Increased damage and range. |
| Shovel Blade Upgrade 2 | 5000 gold (Chester) | Further increased damage, range, and added ability to break certain blocks with a downward thrust. |
> Note: Other campaigns have unique weapons: Plague Knight uses bombs, Specter Knight uses the sickle (with slash and dash), King Knight uses a shield and spear.
Consumables
| Item | Effect | How to Obtain | Notes |
|---|---|---|---|
| Health Potion | Restores 2 health hearts (8 points). | Dropped by enemies, found in chests. | Can be stored (max 1). |
| Magic Potion | Restores 1 magic tank (10 points). | Same as above. | Can be stored (max 1). |
| Troupple Ale | Fully restores health and magic. | Purchased from Chester for 300 gold per bottle. | Very valuable; only sold after defeating certain bosses. |
| Food (various: turkey, fish, etc.) | Restores 1 heart (4 points). | Found in breakable objects or enemy drops. | Common, but cannot be stored. |
| Bomb (Plague of Shadows) | Plague Knight's primary weapon; throwable bombs. | Acquired from cauldron upgrades. | Exclusive to Plague of Shadows. |
| Cursed Item (Specter of Torment) | Various consumables like skulls that heal or boost damage. | Purchased from blacksmith using Sorrowful Coins. | Exclusive to Specter of Torment. |
| Card (King of Cards) | Used for Joustus matches. | Purchased from card merchants, won from matches. | Exclusive to King of Cards. |
Collectibles
| Collectible | Campaign | How to Obtain | Use |
|---|---|---|---|
| Music Sheets | Shovel of Hope | Hidden in levels, often behind secret walls or requiring platforming. | Unlockable songs in the Sound Test menu. No gameplay effect. |
| Feats | All campaigns | In-game achievements (e.g., complete a level without dying, defeat a boss without relics). | Unlock bonus content like cheat codes, concept art, and dev commentary. |
| Joustus Cards | King of Cards | Collect all cards for completion. | Used in the Joustus minigame; also needed for 100%. |
| Skulls (Specter of Torment) | Specter of Torment | Hidden areas or defeating certain enemies. | Unlock concept art and cheats. |
| Lich Yard's Secret (Plague of Shadows) | Plague of Shadows | Specific hidden rooms. | Unlocks a bonus boss. |
Key Items (Plot-related)
These items are obtained during the story and are required to progress.
| Item | Obtained From | Purpose |
|---|---|---|
| Map of the Valley | Starting area (Tower of Fate entrance). | Shows level locations and progress. |
| Tower of Fate Key | Defeat the three main knights (King Knight, Specter Knight, Plague Knight). | Opens the door to the Tower of Fate for the final boss. |
| Shield Knight's Medal | After completing the first level. | A memento, but required for the final cutscene. |
| Enchantress's Locket | Endgame. | Used to break the curse on Shield Knight. |
| The Three Amulets (Plague of Shadows) | Defeat the three bosses – needed to enter the final level. | Plot progression. |
| The Locket of Memory (Specter of Torment) | Found in the Tower of Fate – needed to confront the Enchantress. | Plot progression. |
| The King's Crown (King of Cards) | Various – needed to prove worth. | Plot progression. |
Materials & Miscellaneous
| Item | Description | Use |
|---|---|---|
| Fish | A common food item. | Restores 1 heart. |
| Turkey | Rare food item, restores 2 hearts. | Found in hidden areas. |
| Gems (different colors) | Shiny collectibles that give extra gold when deposited at the end of a level. | Red = 10g, Blue = 25g, Green = 50g, Purple = 100g, Gold = 200g. |
| Feather (King of Cards) | Used to upgrade the King's ability to glide. | Purchased from the blacksmith. |
| Cursed Skull (Specter of Torment) | Reduces max health but increases damage. | Equipped via the blacksmith. |
| Darkness vial (Plague of Shadows) | Used to upgrade bomb types. | Found in hidden rooms. |
Important Synergies & Upgrades
- Phase Locket + Dreamed Gambit Armor: Invincibility negates extra damage taken, making gold farming safe.
- Robe of the Darkshine + Chaos Sphere: Increases damage of the sphere, excellent for crowd control.
- Upgraded Shovel Blade + Dust Knuckles: Maximum melee coverage – the shovel for pogo, dust knuckles for horizontal dashing.
- Throwing Anchor + Void Scepter: Great for hitting enemies from safe positions.
- Troupple Ale: Best used right before boss fights or during a tough room.
- Blue Coins: Prioritize Phase Locket first if possible – it makes many encounters trivial.
> Platform Note: Controls for using relics (e.g., holding the item button) vary by platform but are consistent per campaign. Refer to the Game Settings guide for default buttons.
This guide covers all major items in Shovel Knight: Treasure Trove. Keep an eye out for hidden blue coins and secret rooms to fully upgrade your arsenal!
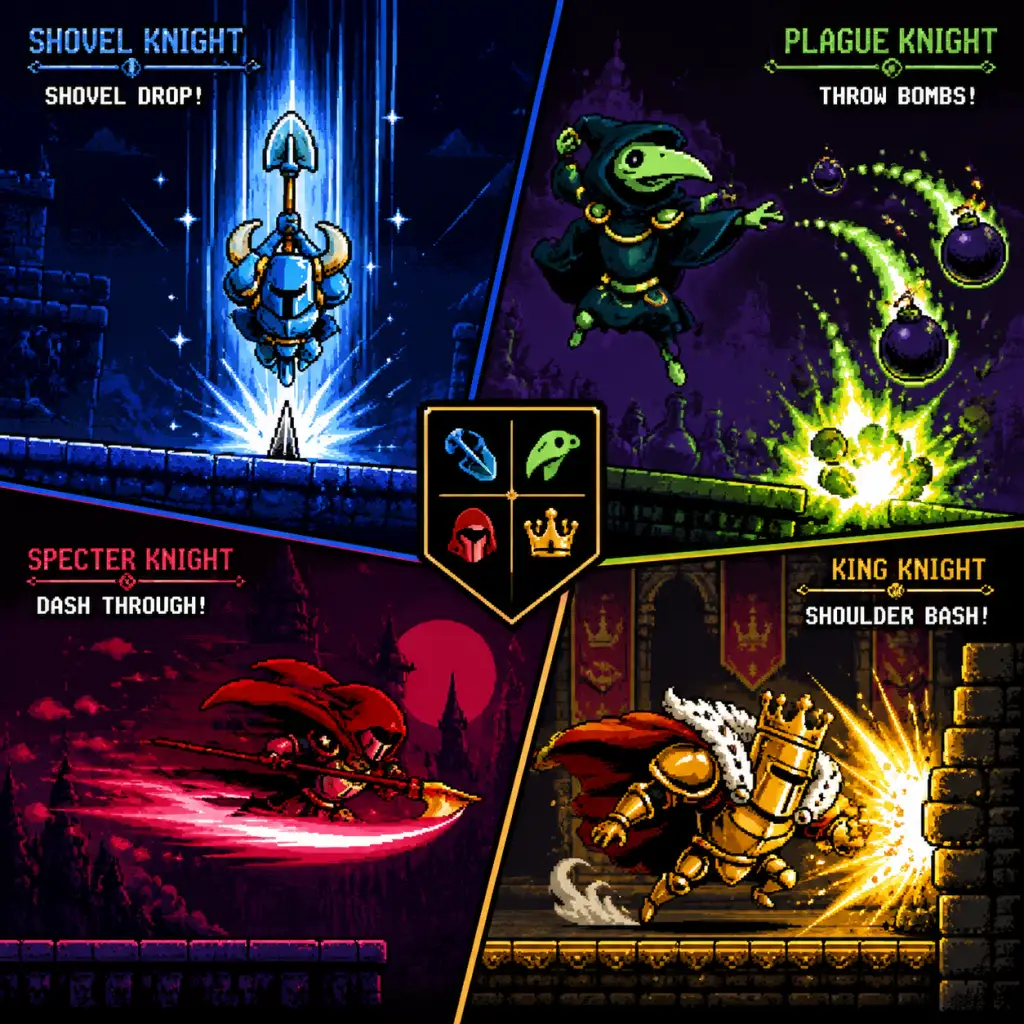
Character Skills
Character Skills
This section covers every playable character in Shovel Knight: Treasure Trove and their full arsenal of skills, abilities, and special moves. Each campaign introduces a unique protagonist with distinct mechanics, so understanding their skills is crucial for mastery.
---
Shovel Knight (Shovel of Hope)
Shovel Knight is the original hero, wielding a trusty shovel. His skills are straightforward but versatile, relying on precise timing and positioning.
#### Base Abilities
- Shovel Slash – Standard horizontal swing. Attack range is about one tile. Can be performed on ground or in air. No cooldown, unlimited use. Use for basic combat and breaking cracked walls.
- Shovel Drop – Press Down + Attack while airborne to plunge the shovel downward. This destroys certain blocks, damages enemies below, and can bounce off enemy heads for a second jump. Essential for platforming and combat.
- Digging – Press Attack while facing a soft dirt patch. Loot gems, relics, or shortcuts. No cost.
- Armor Upgrades – Purchased from the Armorer. Increase health (from 4 to 8 max) and reduce knockback. No effect on skills.
- Shovel Blade Upgrades – The Blacksmith increases Shovel Slash damage by 1 per upgrade (up to 4 total). Also adds a small wide hitbox on the final upgrade.
#### Upgrades (Passive)
#### Relics (Special Moves)
Relics are equippable items that consume Magic Meter (green bar). You can assign two to hotkeys (L/R). Each relic has a unique effect.
| Relic | Effect | Magic Cost | Cooldown | Use Case |
|---|---|---|---|---|
| Alchemy Coin | Throws a spinning coin that arcs and returns. Decent range, can hit multiple times. | 2 bars | 1 second | Crowd control, hitting distant enemies |
| Bounce Fish | Spawns a bouncing fish that travels along surfaces until it hits a wall or enemy. | 3 bars | 1.5 seconds | Clearing horizontal corridors, hitting enemies in corners |
| Chaos Sphere | Fires a slow-moving orb that passes through enemies and terrain. Can be aimed diagonally. | 4 bars | 2 seconds | Piercing multiple enemies, hitting through walls |
| Mobile Gear | Creates a spinning gear that follows walls and ceilings. Deals continuous damage. | 3 bars | 1.5 seconds | Area denial, exploring hidden passages |
| Propeller Dagger | Short dash forward that does damage and stops on hit. Use for quick repositioning or interrupting enemy attacks. | 2 bars | 0.5 seconds | Evasive maneuver, breaking enemy combos |
| Throwing Anchor | Throws an anchor that drops straight down, then pulls you to it. Can hit enemies on the way. | 3 bars | 2 seconds | Vertical mobility, hanging from ceilings, attacking below |
| Sentinel Scroll | Summons a glowing sword that orbits you and strikes nearby enemies automatically. | 4 bars | 3 seconds continuous | Passive damage while focusing on platforming |
| Dust Knuckles | Uppercut that can break blocks above and juggle enemies. | 2 bars | 1 second | Aerial combos, breaking tall obstacles |
| Phase Locket | Briefly turns you intangible and invincible. Use to pass through enemies/obstacles. | 3 bars | 1.5 seconds | Survivability, avoiding damage in tight spots |
| Fishing Rod | Cast a line to hook items or enemies. Can pull levers from afar. | 1 bar | 0.5 seconds | Interacting with objects at range, stealing enemy weapons |
| Warp Scissors | Place a warp marker (Up+Attack) and later teleport to it (Press Use). | 3 bars per use | Instant | Fast backtracking, escaping danger |
- Use Shovel Drop to bounce on enemies, then immediately use Propeller Dagger to chase them while airborne.
- Chaos Sphere + Shovel Slash: fire the sphere into a crowd, then follow up with slashes.
- Throwing Anchor can set up a high position for a free Shovel Drop.
- Shovel Drop: Primary attack against flying enemies and for breaking floor blocks.
- Shovel Slash: Standard ground combat.
- Relics: Use only when enemies are grouped or to solve puzzles. Conserve magic for boss fights.
- Bomb Toss – Primary attack. Throws a bomb that explodes on contact or after fuse. You control three components:
- Vat – Press Down in air to perform a powerful downward thrust that damages enemies and breaks blocks. Can be used as a pseudo-Shovel Drop.
- Burst – Press Jump button in air after being hit or using Vat to perform a small midair dash. Consumes a small amount of magic if you have the upgrade.
- Potion Jump – Hold Up + Jump to drink a potion that boosts jump height (costs magic).
- Component Upgrades – Unlock new casing/powder/fuse types (e.g., Drill Casing, Float Powder, Proximity Fuse).
- Passive Upgrades – Increase bomb limit (hold up to 3 types), reduce Bomb Cooldown gauge, increase damage, add explosion radius.
- Special Skills – Learn Double Jump (costs 3 Cipher Coins), Air Dash (extends Burst distance), Super Vat (Vat creates a shockwave).
Recommended Build
Prioritize Propeller Dagger and Phase Locket for survivability. Add Chaos Sphere for damage. Always keep one slot for mobility or utility.
When to Use Each Skill
---
Plague Knight (Plague of Shadows)
Plague Knight is an alchemist who uses customizable bombs and explosive mobility. His skills are modular: you choose casings, powders, and fuses to alter bomb behavior.
#### Base Abilities
- Casing: Determines bomb shape and movement (e.g., Round Casing = rolls, Arc Casing = arcs, Impact Casing = explodes on contact).
- Powder: Determines explosion effect (e.g., Black Powder = standard, Concussion Powder = pushes enemies, Poison Powder = damage over time).
- Fuse: Detonation delay (short, medium, long).
#### Upgrade System
Spend Cipher Coins at Chester’s shop to unlock new components and passive upgrades:
#### Key Bomb Combinations
| Combination | Effect | Best Use |
|---|---|---|
| Impact Casing + Black Powder + Short Fuse | Quick exploding bomb that detonates on contact. Excellent for close-range combat. | Crowded enemies |
| Arc Casing + Concussion Powder + Long Fuse | Lobbed bomb that knocks enemies away. Use to clear space or push enemies into hazards. | Boss fights, crowd control |
| Round Casing + Poison Powder + Proximity Fuse | Roller bomb that sticks to enemies and poisons them. Great for stationary targets. | Tough enemies, persistent damage |
| Drill Casing + Float Powder + Medium Fuse | Bomb drills into ground then floats upward. Hits multiple times. | Corridor cleanup |
- Vat onto an enemy, then immediately toss an Impact bomb at point-blank for massive burst.
- Use Potion Jump to reach high vantage points, then rain bombs with Arc Casing.
- Burst can cancel bomb throwing animation – use for rapid tosses.
- Early: Impact Casing + Black Powder + Short Fuse for reliability.
- Mid: Unlock Double Jump and Air Dash.
- Late: Use Drill Casing + Float Powder + Proximity Fuse for area control.
- Bomb Toss: Your main damage tool. Switch components based on enemy patterns.
- Vat: Use for downward attacks and to break platforms. Essential for reaching lower areas.
- Burst: Use defensively to escape after landing a bomb or Vat.
- Potion Jump: Only when you need extra height for secrets.
- Scythe Slash – Horizontal slash with wide arc. Can be chained into a spin attack by pressing Attack again quickly. Spin attack hits twice and carries forward momentum.
- Aerial Slash – In air, press Attack for a downward diagonal slash that can bounce off enemies, resetting aerial state.
- Dash – Default movement speed is low; tapping ZL/ZR or Shift performs a quick dash (no damage).
- Wall Cling – Hold towards a wall while in contact to stick to it. Can slide slowly.
- Shadow Dash – Press Down + Jump in air to perform a downward dash that damages enemies and breaks blocks. Consumes 1 Will.
- Ranged Elixir – Throws a projectile that explodes after travelling a short distance. Costs 2 Will. Can be upgraded to create a larger explosion.
- Healing Elixir – Restores 2 HP. Costs 4 Will.
- Shadow Strike – Press Attack while dashing to perform a lunging slash that hits multiple enemies. Costs 3 Will.
- Darkness Wall – Creates a stationary shield of shadows that blocks enemy attacks and damages on contact. Costs 5 Will, lasts 3 seconds.
- Soul Drain – Hold Attack near an enemy to slowly drain their health and restore your Will. No cost, but leaves you vulnerable.
- Shadow Dash Upgrade – Upgrades Shadow Dash to travel further and deal more damage.
- Double Jump – Unlock a second jump. No Will cost.
- Air Dash Upgrade – Allows Air Dash to be used in any direction (default only horizontal).
- Scythe Spin into Shadow Dash to quickly close gaps and hit multiple times.
- Use Ranged Elixir from a distance, then follow up with Shadow Strike when the enemy is staggered.
- Wall Cling + Shadow Dash to navigate tight vertical shafts quickly.
- Soul Drain is risky but essential for Will management on long fights.
- Prioritize Double Jump and Air Dash Upgrade first for mobility.
- Next invest in Ranged Elixir (for ranged combat) and Shadow Strike (for damage).
- Healing Elixir is situational; rely on Soul Drain for healing.
- Scythe Slash/Spin: Primary melee. Use spin for groups.
- Aerial Slash: Rebound off enemies for extended air combos.
- Shadow Dash: Break obstacles and attack from above.
- Ranged Elixir: Trigger far switches or damage enemies before approaching.
- Healing Elixir: Only when low on HP and no enemies nearby.
- Soul Drain: Use on large, slow enemies to replenish Will.
- Darkness Wall: Block projectiles in boss fights.
- Shoulder Bash – Hold Attack to charge and release for a dashing shoulder tackle that damages enemies and breaks blocks. Charge level determines distance and power. Can be angled up/down slightly.
- Pogo Slash – Press Down + Attack in air to slam downward with your shield, then bounce upward. Can bounce off enemies and shields. Use for vertical mobility and aerial attacks.
- War Horn – Tap Attack while on ground to emit a short-range shockwave that stuns nearby enemies. Consumes 1 Valor meter.
Recommended Build
When to Use Each Skill
---
Specter Knight (Specter of Torment)
Specter Knight is a reaper with a scythe and shadow powers. His skills revolve around a Will meter (blue bar) that fuels special attacks and healing. He also has a unique Wall Cling and Air Dash.
#### Base Abilities
#### Skills (Unlockable)
Purchase from the Reaper's chest using Skulls (currency):
Combos & Synergies
Recommended Build
When to Use Each Skill
---
King Knight (King of Cards)
King Knight is a pompous ruler who uses a shoulder bash and a pogo shield. His skills are fueled by Valor (pink bar) and include Heirlooms (special moves).
#### Base Abilities
#### Heirlooms (Special Moves)
Heirlooms are unique abilities found in levels and unlocked via the Joustus card game. Each costs Valor to use:
| Heirloom | Effect | Valor Cost | Use Case |
|---|---|---|---|
| Royalist Orders | Summons a spectral king knight that charges forward, knocking back enemies. | 3 | Clearing a line of enemies |
| Toad Cloak | Turns you into a toad temporarily, making you tiny and able to fit through small gaps. No damage. | 2 | Secret passages |
| Phantom Shield | Creates a large shield in front of you that blocks projectiles and damages enemies on contact. Lasts 2 seconds. | 4 | Defensive against ranged enemies |
| Burst Horn | A powerful, wide shockwave that pushes enemies away and deals moderate damage. | 5 | Crowd control and emergency escape |
| Golden Sphere | Throws a bouncing sphere that leaves trails of gold coins when it hits enemies. The coins can be collected for currency. | 2 | Farming money in combat |
| Lunar Memoir | Briefly slows time around you, allowing easier platforming and dodging. Lasts 2 seconds. | 4 | Boss fights or tricky sections |
| Heart of Valor | Immediately refills all Valor meter. | 1 (consumes item) | Emergency fuel |
- Shoulder Bash into a wall, then Pogo Slash to bounce upward – great for reaching high ledges.
- Pogo Slash on an enemy, then War Horn as you land to stun nearby foes.
- Use Lunar Memoir before a Shoulder Bash charge to guarantee a hit on fast enemies.
- Unlock Lunar Memoir and Phantom Shield early for utility.
- Burst Horn is excellent for area denial.
- Prioritize Valor upgrades (increase max meter from 8 to 12).
- Shoulder Bash: Main attack and movement tool. Use charged for breaking walls.
- Pogo Slash: Essential for reaching high platforms and bouncing on enemy heads.
- War Horn: Interrupt enemy attacks and stun groups.
- Heirlooms: Use sparingly; conserve Valor for critical moments.
- Practice in the Training Hub: Each campaign has a safe area to test skills without penalty.
- Resource Management: Magic, Will, and Valor recharge by collecting respective orbs (blue for magic, purple for Will, pink for Valor). Spend wisely.
- Master the Drop: The Shovel Drop (or its equivalent like Vat/Shadow Dash/Pogo Slash) is the most versatile skill – learn to bounce repeatedly for infinite air combos.
- Skill Synergies: Experiment with different relic/heirloom combinations in boss fights. Some skills negate boss attacks (e.g., Phase Locket, Phantom Shield).
- Upgrade Priority: Mobility upgrades (double jump, air dash) almost always take precedence over damage for easier exploration. Damage upgrades can wait until you hit a difficult boss.
Recommended Build
When to Use Each Skill
---
General Tips for All Characters
This comprehensive skill guide ensures you’ll master every character’s toolkit. Use the table of contents above to jump to your specific campaign.
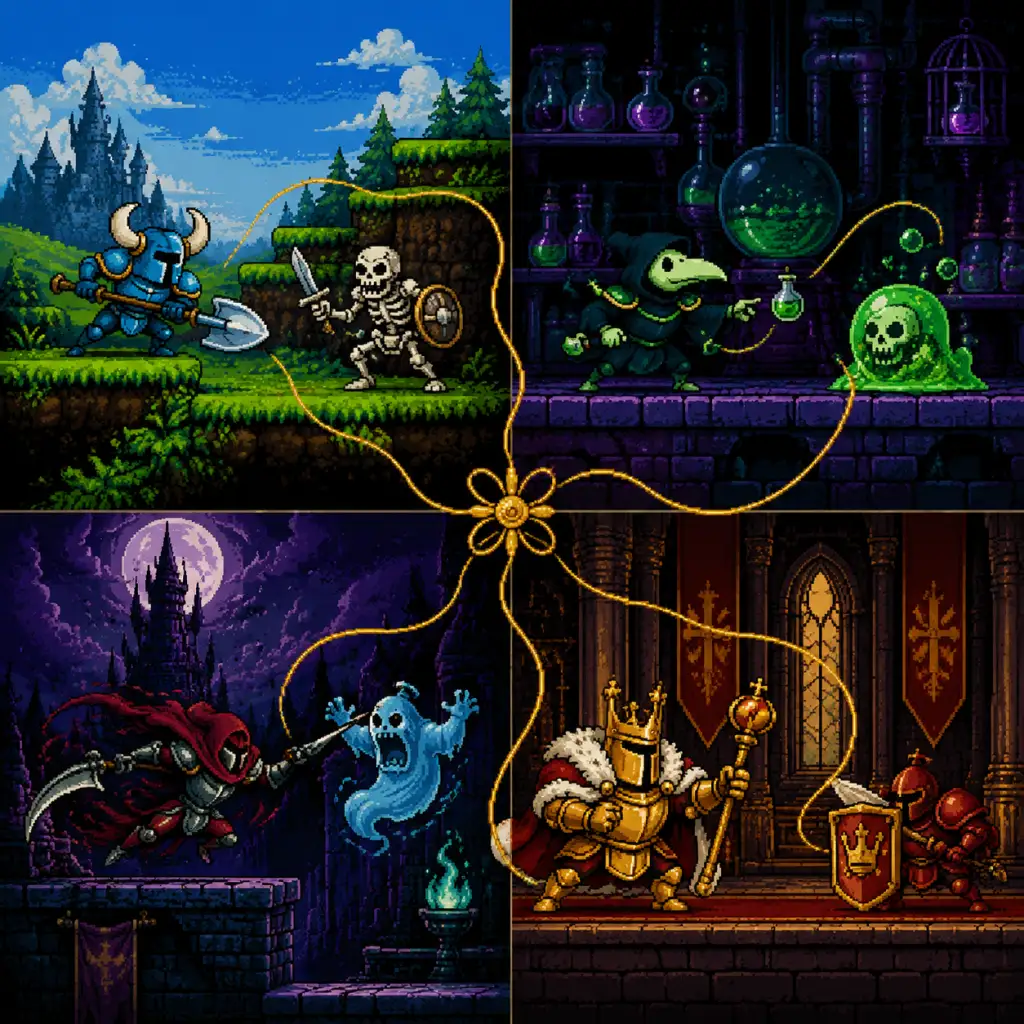
Characters & Roles
Characters & Roles
_Shovel Knight: Treasure Trove_ features four distinct campaigns, each with a unique protagonist and playstyle. While the game is single-player, understanding each character's abilities, strengths, weaknesses, and optimal equipment is crucial for mastering the game. Below is a comprehensive breakdown of every playable character.
1. Shovel Knight (Shovel of Hope)
Background
Shovel Knight is a blue-armored knight wielding a shovel, on a quest to rescue his lost partner Shield Knight from the evil Enchantress. He is the original hero of the game and the central figure of the entire series.
Strengths
- Excellent at vertical mobility: the shovel can be used to bounce off enemies and objects ("shovel drop").
- Balanced stats: moderate speed, decent health (4 HP base, upgradeable to 6).
- Versatile relic system: can equip up to 8 relics for diverse ranged attacks, mobility tools, and utility.
- Strong close-range combat with the shovel's chain attacks.
- No ranged attack by default; must rely on relics for distance.
- Relics consume magic, which requires careful management.
- Shovel drop has a narrow hitbox and requires precise timing against enemies.
- Cannot attack directly upward without relics (the Cyclone can help).
- Early Game: Buy the Phase Locket (first relic) for emergency invincibility. Upgrade the shovel (Bash) as soon as possible for increased damage and bounce range.
- Mid Game: Acquire the Propeller Dagger for vertical mobility in later stages. The Alchemon's Coin relic can be sold for money but is otherwise useless; ignore it.
- Late Game: Equip the Chaos Sphere or the Staff of Striking for ranged damage. The Wanderer's Cloak or the Purple Cape relic can help in certain levels. Focus on health upgrades (up to 6 HP) and magic upgrades (up to 5 tanks).
- Boss Fighting: Phase Locket is almost mandatory for many bosses; use it to phase through attacks. Propeller Dagger can cancel momentum. The Spinning Golem gives a temporary ally.
- High mobility via bomb jumps and double jumps.
- Extremely versatile bomb system: can customize bombs with different casings, fuses, powders, and burst types.
- Can self-damage with bombs to boost movement (advanced technique).
- Boss fights can be trivialized with bomb barrages.
- Fragile: base 3 HP, upgradeable to 5 (less than Shovel Knight).
- Bomb management is complex; wrong bomb composition can be ineffective.
- Close-range combat is risky; bombs are the primary weapon but can hurt Plague Knight.
- No shield or parry; must rely on dodging and bomb knockback to escape.
- Bomb Customization: The best all-round loadout is Black Powder (for straight arc), Remote Fuse (detonate manually), and Heavy Casing (large blast radius) with Standard Burst (neutral element). For bosses, swap to Long Fuse (timer) and Float Burst (knocks enemies upward). For farming treasure, use Fast Fuse and Small Casing to avoid accidental self-damage.
- Upgrades: Prioritize the double jump upgrade (the Vial) and the Vat (bomb capacity). Health upgrades are secondary.
- Relics: Plague Knight also finds relics, but they are less central than bombs. The Phase Locket is still useful; the Staff of Striking provides a homing attack. The Explosion Protection charm (Shield of the Alpha) reduces blast damage to self – essential.
- Exceptional mobility: wall clinging, wall jumping, double jump, and a dash attack that can cancel into more dashes.
- Scythe has a large hitbox, allowing multi-hit combos and juggling.
- Can temporarily phase through walls (with Will Skulls).
- High damage output when combos are executed correctly.
- Low health (4 HP, upgradeable to 6) but no health upgrades? Actually Specter Knight cannot increase max HP; he has a fixed 4. He can collect Skulls to gain temporary Will, which powers his dash and attack abilities.
- Will management is crucial; no Will = no dash attacks and reduced mobility.
- Scythe attacks have no vertical reach except for the upward slash.
- Certain obstacles (spikes) instantly kill Specter Knight if Will is low.
- Relics: The Will Skull is the most important: it fires a ghostly projectile that can phase through walls and stun enemies. The Red Skull (homing) is useful. The Green Skull (burst) provides area damage. The Yellow Skull (shield) is situational. Prioritize getting extra Will Skull capacity.
- Upgrades: Purchase the "Will Regeneration" upgrade early (passive regeneration after a few seconds). Also increase the number of dash attacks you can chain (up to 4). The Jump upgrade (higher jumps) is helpful.
- Recommended Build: Equip the Red and Green Skulls for offense. Use the Phase Locket relic (if available) to go through enemies. For boss fights, the Dash Cancel technique (attack + dash) is essential for dealing damage while staying mobile.
- Powerful shoulder charge that can break walls, bounce off enemies, and provide invincibility frames.
- Can collect Heirlooms (cards) that grant passive bonuses such as faster charge speed, more damage, or extra jumps.
- High damage potential with charged attacks and aerial combos.
- Unique "Card Scry" mechanic: using cards as projectiles that can be thrown in eight directions.
- Charge attack requires momentum and can be hard to control.
- Very vulnerable when not charging; basic moves are slow and have low range.
- Card throwing consumes a resource (Dexterity points) that refills slowly.
- Slippery control: King Knight has a noticeable slide when stopping, which can lead to falls if not careful.
- Heirlooms: First priority is the "Charger" Heirloom which increases charge speed. Then look for "Aerialist" for an extra midair charge, and "Heavy Bounce" for greater vertical height on bounces. "Shield Bash" allows breaking certain blocks. "Spreadshot" turns your card throw into a fan.
- Build Strategy: Focus on charge speed and air mobility. Use cards to chip away at distant enemies or bosses; save charges for big damage. The "Retaliation" Heirloom (damage on taking damage) is useful for bosses where you get hit often.
- Relics: King Knight can also use relics, but they are less central. The Phase Locket and Propeller Dagger are still good. The "Homing Lightning" relic can help with crowd control.
Weaknesses
Playstyle
Shovel Knight plays as a classic action-platformer hero. The core loop is: explore levels, defeat enemies with shovel strikes or bouncing, collect treasure to upgrade gear and buy relics, and defeat bosses. Bouncing on enemies (shovel drop) is both an attack and a movement tool, enabling high jumps and reaching secret areas. Relics supplement the kit: the Phase Locket for invincibility, the Propeller Dagger for upward thrust, the Chaos Sphere for crowd control. The playstyle rewards precision and resource management.
Unlock
Shovel Knight is the default protagonist in the _Shovel of Hope_ campaign, which is immediately available in _Treasure Trove_.
Recommended Equipment / Builds
Team Synergy
Shovel Knight is a solo character; no party system exists. However, in _Shovel Knight Showdown_ (the multiplayer brawler), Shovel Knight is a balanced fighter with strong melee and utility relics. In campaigns, he has no team synergy.
---
2. Plague Knight (Plague of Shadows)
Background
Plague Knight is an alchemist and one of the Order of No Quarter. In his own campaign, he quests to claim a powerful essence for his potion, seeking recognition from his mentor. He is a chaotic, explosive character.
Strengths
Weaknesses
Playstyle
Plague Knight is a high-skill, high-reward character. He has a double jump and a bomb jump (detonating a bomb to propel upward). His bombs are customizable via a crafting menu: choose casing (affects explosion size and damage), fuse (timing), powder (speed and arc), and burst (elemental effect like fire, poison, or ice). The default bomb is bouncy; the player can adjust. Playstyle revolves around maintaining distance, spamming bombs, and using bomb jumps for vertical exploration. Advanced players use bomb self-damage strategically (e.g., bomb jumping into hazards to reach secrets).
Unlock
_Plague of Shadows_ becomes available after completing _Shovel of Hope_ (or immediately in _Treasure Trove_ from the main menu). Select the Plague Knight campaign.
Recommended Equipment / Builds
Team Synergy
None in single-player campaigns. In _Showdown_, Plague Knight is a zoning character with area-of-effect bombs and poor close combat.
---
3. Specter Knight (Specter of Torment)
Background
Specter Knight is a reaper-like knight bound to the Order of No Quarter by the Enchantress. In his prequel campaign, he seeks a way to revive his lost brother. He wields a scythe and possesses ghostly abilities.
Strengths
Weaknesses
Playstyle
Specter Knight is a fast-paced, acrobatic character reminiscent of a ninja. The core mechanic is the Dash Attack: while dashing (tap dash button), press attack to lunge forward with the scythe, which can be followed up with additional dash attacks if it hits an enemy. This creates a juggle chain. Collecting purple Will Skulls refills the Will meter, which is consumed by dashing and some relics. Wall clinging and wall jumping allow for deep exploration. The playstyle emphasizes aggression and constant movement.
Unlock
_Specter of Torment_ is available after completing _Plague of Shadows_ (or directly from the main menu in _Treasure Trove_).
Recommended Equipment / Builds
Team Synergy
None in campaigns. In _Showdown_, Specter Knight is a rushdown character with long combos and excellent horizontal mobility.
---
4. King Knight (King of Cards)
Background
King Knight is a haughty knight who seeks to usurp the throne of the King of Cards. He is a showman and a braggart, with a playstyle centered on shoulder charges and card throwing.
Strengths
Weaknesses
Playstyle
King Knight is a momentum-based character. The shoulder charge is the primary tool: press the charge button to dash forward; upon hitting an enemy or wall, King Knight bounces back or upward. This can be used to chain attacks and reach high places. Throwing cards (up to three at once) provides a ranged option, but cards have limited range. Collecting Heirlooms (usually found in secret rooms) permanently boosts King Knight's abilities. The playstyle rewards aggressive charging and careful positioning.
Unlock
_King of Cards_ is the fourth campaign, available after completing _Specter of Torment_ (or immediately in _Treasure Trove_).
Recommended Equipment / Builds
Team Synergy
None in campaigns. In _Showdown_, King Knight is a tanky brawler with charge moves and medium-range card attacks.
---
5. Shield Knight (Non-Playable Character)
Background
Shield Knight is Shovel Knight’s partner and the true identity of the Enchantress (under the influence of the cursed amulet). She is not playable in any campaign but appears as an NPC and as the final boss in _Shovel of Hope_. In _Specter of Torment_, she appears as a stage cameo. In _King of Cards_, she is mentioned.
Role: Plot-important character; no gameplay mechanics.
Strengths/Weaknesses: N/A.
---
6. The Enchantress (Boss Only)
Background: The main antagonist of _Shovel of Hope_, later revealed to be an amulet-corrupted Shield Knight. She is not playable except in _Shovel Knight Showdown_.
---
Summary Table
| Character | Campaign | Playstyle | Complexity | Health (Base) | Mobility | Range |
|---|---|---|---|---|---|---|
| Shovel Knight | Shovel of Hope | Balanced, relic-based | Medium | 4 (6 upgraded) | Medium (with shovel bounce) | Close / Relic-dependent |
| Plague Knight | Plague of Shadows | Explosive, high mobility | High | 3 (5 upgraded) | Very high (bomb jumps) | Long (bomb spam) |
| Specter Knight | Specter of Torment | Fast, combo-centric | High | 4 (fixed) | Very high (dash + wall cling) | Close (with limited projectiles) |
| King Knight | King of Cards | Momentum-based charge attacks | Medium | 4 (6 upgraded) | Medium (charge dependent) | Close / Cards (medium) |
By mastering each character's unique mechanics, you can fully enjoy every campaign in _Shovel Knight: Treasure Trove_. Experiment with different relic and bomb combinations, and practice advanced techniques like shovel dropping, bomb jumping, dash cancels, and charge chaining to become a true shovel-wielding legend.
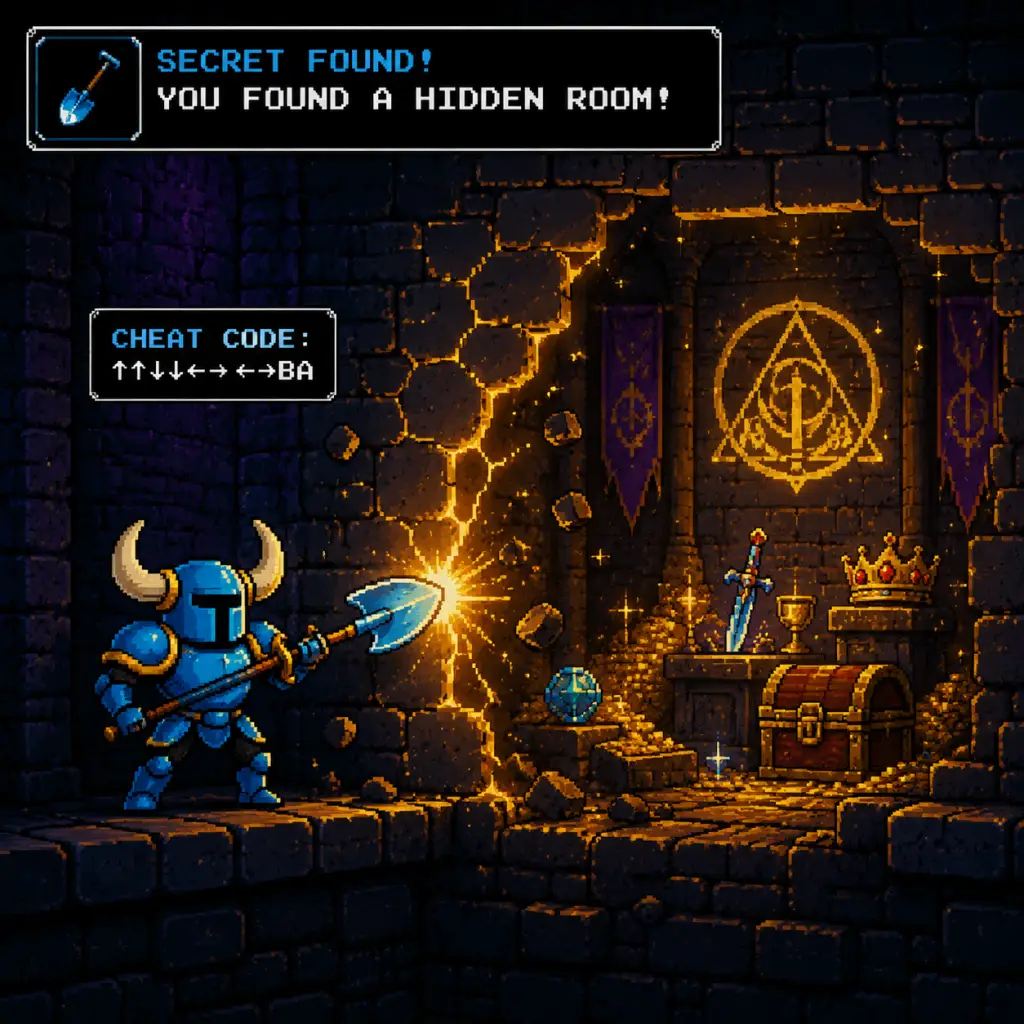
Cheats & Secrets
Cheats & Secrets
Overview
Shovel Knight: Treasure Trove does not include traditional cheat codes like god mode or level skips as standard features. Instead, Yacht Club Games has packed the game with developer-intended secrets, unlockable bonuses, Easter eggs, and hidden content that reward exploration and completion. This guide covers all known hidden commands, unlockable content via the Feats system, secret areas and Easter eggs across all four campaigns, and platform-specific hidden features. Note that any unofficial cheat codes (e.g., save file editing) are not considered legitimate secrets; only in-game methods are covered.
---
Title Screen Cheat Menu (Shovel of Hope Campaign)
On the title screen of Shovel of Hope (the original campaign), you can input a secret button sequence to open a cheat menu. This menu allows you to toggle certain gameplay modifiers—like unlimited magic, invincibility, or all relics—for that session. This code works only in Shovel of Hope (not in other campaigns) and is a legacy feature from the original release. It has been confirmed to work on all platforms (PC, PlayStation, Xbox, Switch, 3DS).
- Input Sequence (PC / Keyboard): Up, Down, Left, Right, Up, Down, Left, Right, A, B (or B, A on some versions). Press these keys rapidly on the title screen. A chime will confirm success.
- Input Sequence (Console): On a controller, input: Up, Down, Left, Right, Up, Down, Left, Right, A (or B), B (or A). The exact button for “A” and “B” may vary by controller layout (e.g., on Switch, A is the bottom button, B is the right button).
- What it unlocks: A hidden menu titled “Cheat Codes” appears. Options include:
- Important: Using this cheat menu disables Feat progress for that save file until you restart the game without cheats. It is purely for fun or testing.
- Invincibility: Player takes no damage.
- Infinite Magic: Relic energy never depletes.
- All Relics: Grants every relic in the game.
- All Feats? (Some versions include a “Unlock All” option, but this is inconsistent.)
> Note: This cheat menu is not present in Plague of Shadows, Specter of Torment, or King of Cards campaigns. If you want similar effects in those campaigns, you must complete the game normally or use platform-specific save editors (not officially supported).
---
Unlockable Secrets via the Feats System
The in-game Feats (achievements/trophies) unlock real gameplay bonuses when certain milestones are met. These are the primary way to access official secrets. Feats can be viewed from the pause menu in any campaign.
| Feat Name | Requirement | Unlockable Secret |
|---|---|---|
| Complete Shovel of Hope | Beat the final boss (The Enchantress) once. | Unlocks New Game+ for Shovel of Hope (harder difficulty, retains relics). |
| All Feats | Earn every single Feat across all campaigns. | Unlocks Gender Swap (option to play as Shovel Knight as female). Also unlocks a special “Shovel Knight Amiibo” functionality if applicable (Nintendo platforms). |
| Speed Demon | Complete any campaign in under 90 minutes. | Unlocks a Gold Medal cosmetic for that campaign’s protagonist. |
| No Damage Bosses | Defeat a boss without taking damage. | Unlocks a Boss Rush mode where you fight all bosses consecutively. |
| Perfect Platformer | Finish any campaign without dying. | Unlocks Party Mode? Not true—actually, this feat alone does not unlock a hidden mode; it contributes to the “All Feats” requirement. |
- New Game+ is available for each campaign after beating it once. It features tougher enemies, fewer checkpoints, and altered enemy placement. It does not include any new story content.
- Gender Swap is a toggle found in the Extras menu after you earn all feats. It changes the sprites of Shovel Knight, Shield Knight, and other characters to their alternate designs. It does not affect gameplay.
- Boss Rush mode: Unlocked when you earn the “No Damage Boss” feat for any campaign? Actually, the exact condition is: Defeat every boss in a campaign without taking a single hit (or across multiple runs? No, it must be in one run). This mode lets you fight all bosses back-to-back with limited resources.
- Secret Room in Plains (Stage 1-1: Plains): Near the start, drop down a hidden pit after the third checkpoint. You’ll find a chest containing a Health Upgrade (a green orb). This is missable if you don’t explore.
- Yacht Club Logo Room (The Explodatorium, Stage 3-2): At the end of a series of crumbling platforms, enter a door that appears only when you hit a hidden switch. Inside is a room with the Yacht Club Games logo and a “Thanks for playing!” message. Also contains a small gem pile.
- Duck Tales Reference (The Flying Machine, Stage 3-3): In the area with bouncing springs, bounce off a hidden spring to reach a platform with a treasure chest. The chest contains a Feather relic (a reference to Duck Tales’ pogo cane).
- Mega Man Reference (The Iron Whale, Stage 4-2): In a room with conveyor belts, there is a hidden path that leads to a room with a Met enemy (small helmet) and a health drop. Hitting the Met with the Shovel Blade causes it to drop a “Mega Buster” weapon? No, just a gem.
- The Secret Shop (Various stages): In several levels, you can find a hidden door leading to a secret shop that sells items at half price. Look for walls that look slightly different or have a crack.
- The Apprentice (Boss Fight in The Ring): After defeating the final boss, you can re-enter the arena to fight the Apprentice (the small wizard from the intro). He is an optional boss and drops a large gem.
- Hidden Cauldron Room (The Quadrangle of the Crystals): Near the end, there is a breakable wall that reveals a room with a cauldron. Interacting with the cauldron triggers a cutscene showing the Plague Knight’s past. This is part of the game’s lore.
- Secret Ending: To get the true ending, you must collect all Cipher Coins and use them to unlock the secret door in the final level. The true ending shows Plague Knight’s motives and a post-credits scene.
- Boss Rush Hint: A secret message in the room after the Plague Knight’s boss fight hints at the Boss Rush mode.
- The Lost Room (Lich Yard, Stage 2-1): In the area with the giant bookcase, jump behind the bookcase to find a hidden room containing a Curious Map that leads to a secret collectible.
- The Reaper’s Secret (Final Stage: The Tower of Fate): Before the final boss, there is a hidden path that leads to a room containing a large chest with a Golden Skull (a major gem). This room also has a journal entry from Specter Knight.
- Developer Portrait: In the background of one room in Stranded Ship (level 3-2), you can see portraits of the Yacht Club Games developers on the wall. Attack them to hear a sound effect.
- Secret Island (Joustus Adventure mode): In the overworld, there is a hidden island accessible only after you collect all Boss Cards from Joustus. This island contains a secret boss called The Card Master who awards a unique deck.
- The Milk Bar (Level: Smoothie Shop): Inside a barrel in the background, you can find a hidden switch that opens a door to a bar where all the NPCs from previous campaigns are drinking milk. This is a direct reference to the “Milk” joke from the original game.
- Hidden Relic (Level: Mushroom Mine): Drop down a hidden pit after a spike jump to find a Lucky Die relic that increases gem drops but also causes random effects.
- The King’s Shield: In various levels, if you stand still for a few seconds, a small sprite of the King Knight will appear and do a dance. This happens in the background.
- The Fishing Minigame: In Shovel of Hope’s Plains, there is a hidden pond where you can fish using the Fishing Rod relic. The fish sometimes drop rare gems. This is a hidden diversion.
- The “Anchor” Room (The Iron Whale): A hidden room contains a giant anchor that you can bounce on to reach a secret chest.
- The Mouth of the Enchantress: In the final boss fight, if you do not collect all relics, the Enchantress will have a different second phase. Collecting all relics makes the fight slightly easier and rewards a different ending cutscene.
- The “Boss” of the Airship: On the Flying Machine level, there is a hidden boss called Tinker Knight’s Tank which is actually a mini-boss that appears if you break certain background objects.
- Nintendo Switch / Nintendo 3DS: Using the Shovel Knight Amiibo (sold separately) unlocks special functions in Shovel of Hope, such as summoning a fairy companion, a one-time revival, and a custom armour colour. The Amiibo works on Switch and 3DS versions.
- PC Save File Editing: While not a cheat code, players can edit their save files (located in `%appdata%/Shovel Knight/` on Windows) to unlock all feats, relics, or campaign progress. This is not officially supported but is a common exploit for testing. This will disable Feat tracking if you modify the save with cheats.
- Speedrunner Tools: The game includes an official “Speedrun Mode” (unlocked via a feat) that shows a timer and disables certain cutscenes for faster play.
- The title screen cheat code in Shovel of Hope is a deliberate homage to classic Konami codes.
- The Feat system rewards completionists with tangible in-game bonuses.
- Hidden rooms often contain important upgrades or lore items that are part of the intended gameplay experience.
- Title Screen Cheat Menu: Unlock by entering Up, Down, Left, Right, Up, Down, Left, Right, A, B on title screen (Shovel of Hope only). Offers invincibility, infinite magic, all relics. Disables feats.
- Feats Unlocks: New Game+, Gender Swap, Boss Rush mode, Gold Medals.
- Hidden Rooms: Over a dozen secret rooms across all campaigns, many containing health upgrades, relics, or developer messages.
- Easter Eggs: References to Duck Tales, Mega Man, Castlevania, and the “Milk” gag.
- Amiibo Exclusive: Special features for Nintendo platforms with the Shovel Knight Amiibo.
---
Hidden Rooms and Easter Eggs
The game is filled with cleverly hidden rooms, developer messages, and references to classic games. Here are the most notable ones across all campaigns.
#### Shovel of Hope
#### Plague of Shadows
#### Specter of Torment
#### King of Cards
---
Easter Eggs Across All Campaigns
---
Platform-Specific Secrets
---
Safe and Exploit-Free Secrets
All secrets listed above are developer-intended and safe to use without corrupting save data. They were officially included in the game by Yacht Club Games and do not require third-party tools. In particular:
No harmful cheats exist in Shovel Knight: Treasure Trove. The game has no softlocks that are impossible to escape unless you actively try to break it (e.g., by jumping into a bottomless pit with a relic that freezes the game—but that’s just normal death).
---
Summary of Hidden Content List
Enjoy exploring every pixel of Shovel Knight: Treasure Trove—there’s always something new to discover!