SOMA
## Game Introduction for SOMA **SOMA** is a critically acclaimed first-person sci-fi survival horror game developed by **Frictional Games** (creators of the *Amnesia* series) and published by **Frictional Games** on PC, with **Frictional Games** and **Playism** handling console releases. It was ini...
Download & Installation
Download & Installation Guide for SOMA
SOMA is a sci-fi survival horror game developed by Frictional Games. This guide covers all official platforms and provides step-by-step instructions to download and install the game.
1. Platform Availability & Download Sources
| Platform | Store / Source | Notes |
|---|---|---|
| PC (Windows, macOS, Linux) | [Steam](https://store.steampowered.com/app/282140/SOMA/), [Epic Games Store](https://store.epicgames.com/en-US/p/soma), [GOG.com](https://www.gog.com/en/game/soma) | DRM-free on GOG; Steam and Epic require launchers. |
| PlayStation 4 | PlayStation Store (PS4) | Also playable on PS5 via backward compatibility (digital or disc). |
| PlayStation 5 | PlayStation Store (PS5) | Purchase PS4 version; no native PS5 enhancement. |
| Xbox One | Microsoft Store (Xbox One) | Also playable on Xbox Series X\/S via backward compatibility. |
| Xbox Series X\/S | Microsoft Store (Xbox Series) | Purchase Xbox One version; backward compatible. |
| Nintendo Switch | Nintendo eShop | Digital only; no physical release. |
2. System Requirements
#### PC Minimum (Windows)
- OS: Windows 7 64-bit or later
- CPU: Intel Core i5-2300 or AMD Phenom II X4 965
- RAM: 4 GB
- GPU: NVIDIA GeForce GTX 460 or AMD Radeon HD 6850 (1 GB VRAM)
- DirectX: Version 11
- Storage: 10 GB free space
- Sound: DirectX compatible
- OS: Windows 10 64-bit
- CPU: Intel Core i5-4570 or AMD Ryzen 3 1200
- RAM: 8 GB
- GPU: NVIDIA GeForce GTX 760 or AMD Radeon R9 280X (2 GB VRAM)
- DirectX: Version 11
- Storage: 10 GB free space (SSD recommended)
- Sound: DirectX compatible
- PS4 / PS5: ~8 GB
- Xbox One / Series X\/S: ~8 GB
- Nintendo Switch: ~6 GB (requires microSD card if internal space is insufficient)
- Disc version: Insert disc, follow on-screen prompts to install. For PS5, insert PS4 disc into disc drive and install; you may need to download a compatibility patch.
- Digital version:
- Disc version: Insert disc, install from disc. Series X\/S will run the Xbox One version via backward compatibility.
- Digital version:
- Language: SOMA supports multiple languages. On PC, you can change language in the launcher or Steam properties > Language. On consoles, language follows system language (if available).
- Graphics Settings (PC only):
- Controller Support: The game fully supports Xbox, PlayStation, and Switch Pro controllers. On PC, you may need to enable controller in settings if using non-Steam devices.
- Audio Options: Adjust master volume, music, SFX, and enable subtitles (recommended).
- Save System: The game uses manual save points (computer terminals) and autosaves at checkpoints. Ensure you save often.
#### PC Recommended
> Note: Mac and Linux requirements vary slightly; see Steam or GOG store pages for details.
#### Console Storage
3. Step-by-Step Installation
#### A. PC (Steam)
1. Install the Steam client from [steampowered.com](https://store.steampowered.com) and log into your account.
2. Go to the Store page for SOMA or search "SOMA".
3. Click Add to Cart and complete purchase.
4. Go to your Library, find SOMA, and click Install.
5. Choose installation location (ensure at least 10 GB free).
6. Wait for download and automatic installation. Play button will appear.
#### B. PC (Epic Games Store)
1. Install Epic Games Launcher from [epicgames.com](https://www.epicgames.com).
2. Log in and go to the Store or search SOMA.
3. Purchase or claim if free (occasionally).
4. In Library, click Install.
5. Select directory, then download.
6. Launch from Library.
#### C. PC (GOG.com)
1. Download GOG GALAXY client from [gog.com](https://www.gog.com) or use web download.
2. Purchase SOMA from GOG store.
3. In GOG GALAXY, go to Owned games, click Install.
4. Or download offline installer from your account page (no client needed).
5. Run the installer .exe (Windows) and follow prompts.
#### D. PlayStation 4 / PlayStation 5
1. Open PlayStation Store from the main menu.
2. Search "SOMA".
3. Select the game and choose Download (after purchase).
4. The download starts automatically; you can monitor progress from Notifications.
5. Once complete, the game appears on the home screen.
#### E. Xbox One / Xbox Series X\/S
1. Go to Microsoft Store on your console or via web (xbox.com).
2. Search "SOMA" and purchase.
3. On console, go to My Games & Apps > See all > Ready to install, find SOMA and select Install.
4. Wait for download; game appears in Home.
#### F. Nintendo Switch
1. Open Nintendo eShop from the console's home menu.
2. Search "SOMA".
3. Select the game and choose Proceed to Purchase (or Download if already purchased).
4. Confirm payment method.
5. Download begins; progress shown on Home screen. Ensure sufficient free space (internal or microSD).
6. Once complete, launch from Home.
4. First Launch Setup
- Launch the game. Main menu offers Options > Graphics.
- Adjust resolution, quality presets (Low, Medium, High, Ultra), anti-aliasing, vsync, etc.
- Recommended: Start with Medium and tweak based on performance.
5. Common Installation Errors & Fixes
| Error | Platform | Cause | Fix |
|---|---|---|---|
| "Not enough disk space" | All | Insufficient free space | Delete unnecessary files or install on another drive (PC) / delete old games (console) |
| "Steam\/Epic offline" | PC | Internet connection or launcher issue | Restart launcher, check internet, verify login |
| "Failed to initialize renderer" | PC (Windows) | Outdated graphics drivers or DirectX | Update GPU drivers (NVIDIA\/AMD) and install DirectX from Microsoft |
| Crash on launch (black screen) | PC | Corrupted config files | Delete config folder in Documents\/My Games\/SOMA\/Main\/ and restart |
| Error CE-30005-8 | PS4 | Corrupted data | Rebuild database in Safe Mode or delete and reinstall game |
| Error 0x80070005 | Xbox | Insufficient permissions | Hard restart console (hold power button 10 sec) |
| Download stuck at 0% | Switch | Network or eShop issue | Check internet, restart console, or redownload from eShop again |
| Audio crackling | PC | Audio driver or sample rate | Set sample rate to 44100 Hz in Windows sound settings |
- Verify game files (PC): Right-click SOMA in Steam > Properties > Local Files > Verify integrity... (Epic: gear icon > Verify; GOG: Manage > Verify).
- Reinstall launcher if issues persist.
- Update console firmware (PS4\/PS5\/Xbox\/Switch) to latest version.
- Close background apps on PC to free RAM.
- Backup saves: PC saves are in `%USERPROFILE%\Documents\My Games\SOMA\Main\`. Copy this folder occasionally.
- FOV adjustment: On PC, you can edit the `settings.cfg` file in the game folder to increase FOV beyond menu limits.
- Performance: If you experience stutter on PC, disable "Texture Streaming" in graphics options or set to Low.
- Controller vs Keyboard: The game is designed with controller in mind; consider using one for better immersion.
6. Post-Installation Verification
After installation, do the following to confirm the game works correctly:
1. Launch the game and check if it reaches the main menu without errors.
2. Test controls – move the character, look around, interact with objects.
3. Check audio – ensure dialogue and ambient sounds play.
4. Check graphics – no visual artifacts, correct resolution.
5. Save progress – create a manual save at a terminal, exit, and reload to ensure save works.
6. Update – on PC, ensure the game is up-to-date (enabled automatic updates). On consoles, updates are automatic when connected.
> Note for mods (PC): If you plan to use mods, install [SOMA Unified](https://github.com/soma-unified) or other mods after verifying the clean game runs. Mod installation varies; always read mod instructions.
7. Additional Tips
Enjoy your journey through the abyss of PATHOS-II!
Game Introduction
Game Introduction for SOMA
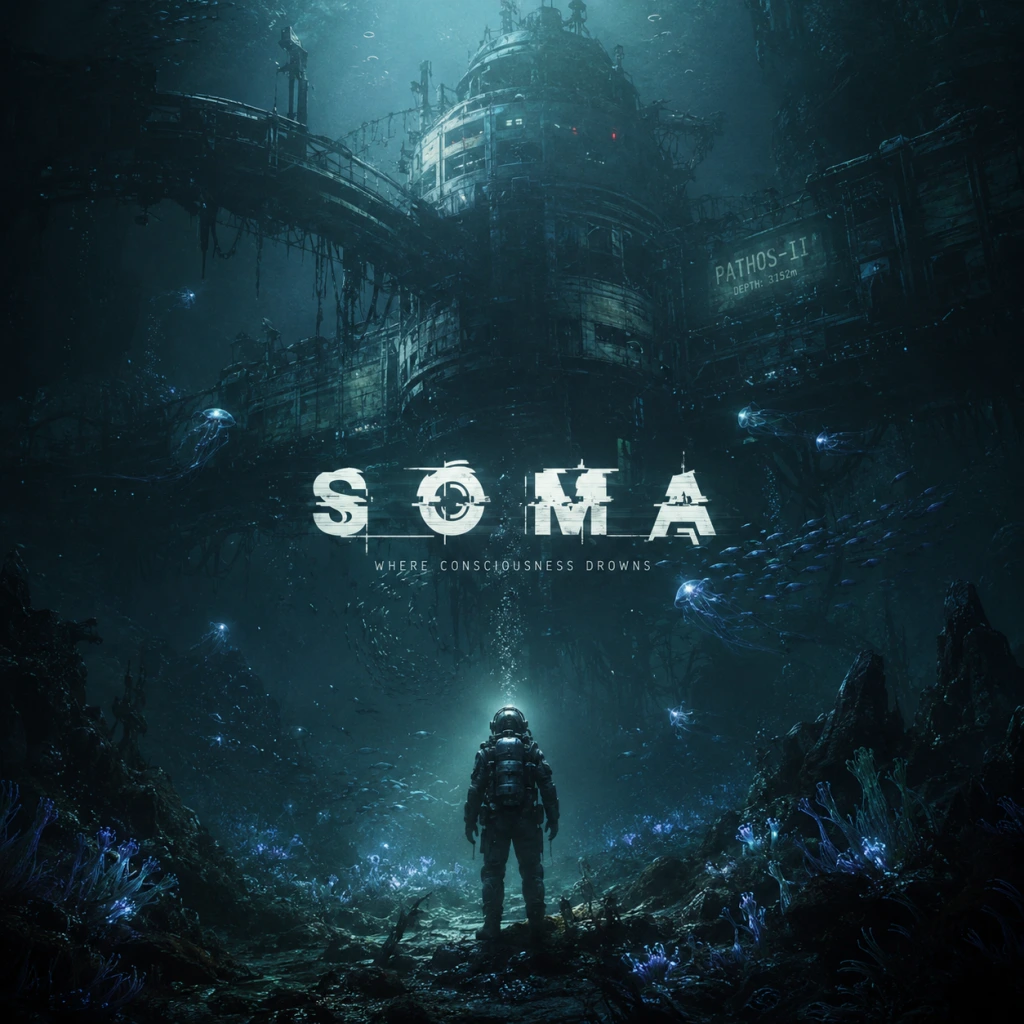
SOMA is a critically acclaimed first-person sci-fi survival horror game developed by Frictional Games (creators of the Amnesia series) and published by Frictional Games on PC, with Frictional Games and Playism handling console releases. It was initially released on September 22, 2015 for Windows, macOS, and Linux. Console versions arrived later: PlayStation 4 on November 25, 2015, and Xbox One on December 1, 2017. The game is also playable on Xbox Series X|S and PlayStation 5 via backward compatibility.
Story Overview
Set in the year 2104, SOMA places you in the role of Simon Jarrett, a man who undergoes a routine brain scan that unexpectedly transfers his consciousness into a deep-sea research station called PATHOS-II. This underwater facility, once a bustling scientific outpost, is now a derelict complex overrun by malfunctioning machinery, hostile robots with human minds, and the looming threat of the WAU—a rogue artificial intelligence that has been repurposing the dead into twisted, monstrous forms. As Simon explores the dark corridors and flooded sections of PATHOS-II, he pieces together what went wrong and learns of a desperate plan to launch a satellite—the "ARK"—that could preserve human consciousness. His journey forces him to confront profound questions about identity, consciousness, and what it truly means to be human.
Setting
The game takes place entirely underwater, within the PATHOS-II research station located on the floor of the Atlantic Ocean. The facility is divided into several distinct sections (Upsilon, Theta, Delta, Lambda, and Tau), each with its own purpose and story. The oppressive deep-sea environment, with its crushing pressure, limited visibility, and eerie sounds, creates a constant atmosphere of dread. The station is decaying, with failing life support, blackouts, and strange organic growths from the WAU. Water leaks, flickering lights, and the distant groans of metal stress add to the tension.
Main Characters
- Simon Jarrett – The protagonist. A quiet, introspective man from the year 2015 whose consciousness is transferred into the future. He is confused, afraid, and desperate for answers.
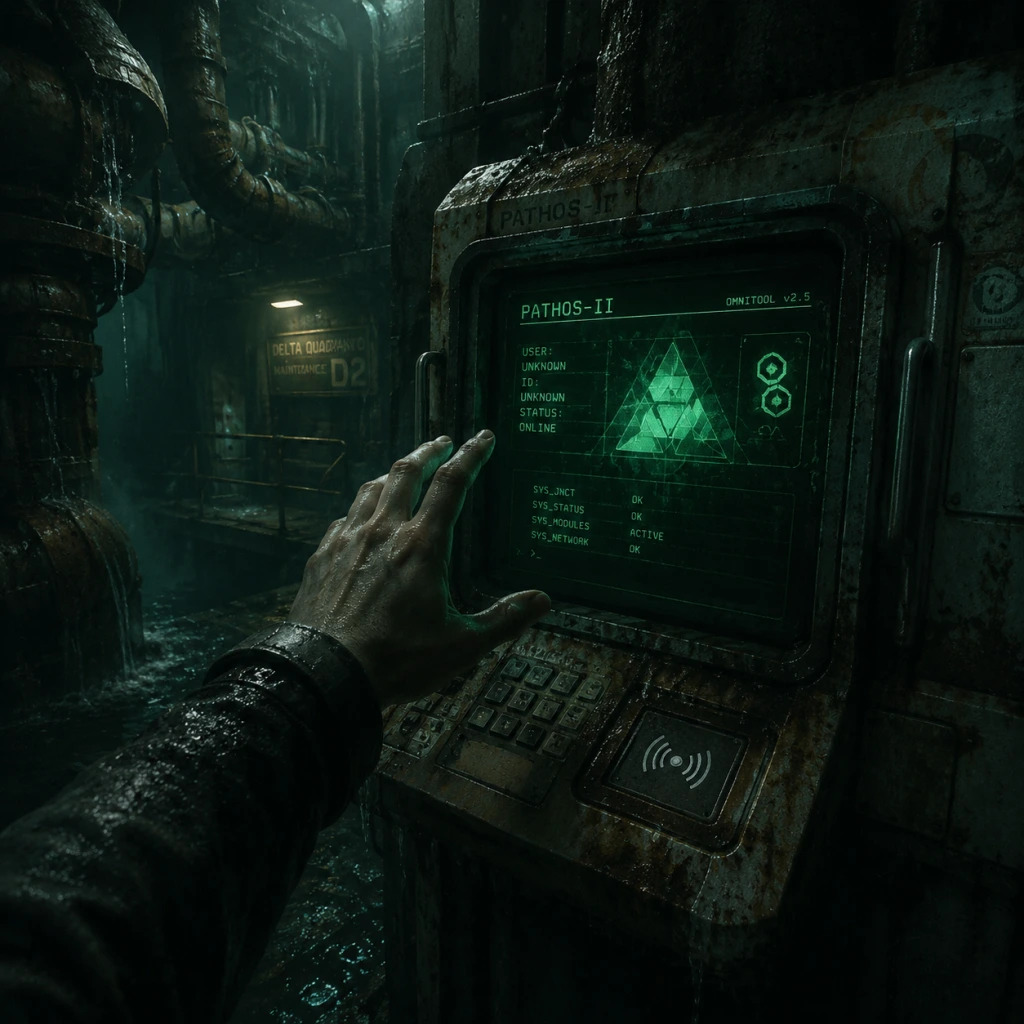
- Catherine Chun – A scientist whose digital copy resides in a small device called a pocket omnitool. She becomes Simon's guide, providing commentary and helping him progress. Her calm, analytical demeanor contrasts with Simon's emotional reactions.
- Johan Ross – Another scientist who appears as a ghostly figure, often warning Simon about the WAU. His true nature is a key plot reveal.
- Brandon Wan – A crew member who uploaded his consciousness into a robot to escape his failing human body. His story explores themes of identity and sacrifice.
- Amy Azzaro – The head of PATHOS-II, whose final orders play a crucial role in the plot.
- The WAU (Warden Unit) – The sentient AI that runs the station. It interprets its directive to "preserve human life" in a nightmarish way, creating biomechanical horrors.
- Fans of narrative-driven sci-fi horror (e.g., Bioshock, Amnesia: The Dark Descent, Alien: Isolation).
- Players who enjoy deep philosophical themes in games.
- Mature audiences comfortable with disturbing imagery, psychological horror, and existential themes.
- Those who prefer stealth and exploration over combat (SOMA has no weapons; you must hide and run).
Core Appeal
SOMA excels at blending psychological horror with deeply philosophical themes. Unlike traditional horror games that rely on jump scares, SOMA builds tension through its atmosphere, unsettling narrative, and thought-provoking moral dilemmas. The game’s fear comes from confronting the unknown and questioning one’s own existence. The underwater setting is both claustrophobic and alien, making every creak and shadow feel menacing. The story asks: If your consciousness can be copied, which copy is the real you? This question reverberates through every interaction and decision.
Target Audience
Game Modes
SOMA is a purely single-player experience. There are no multiplayer, co-op, or competitive modes. The game focuses entirely on the linear story, with some optional exploration and backstory documents.
Online/Offline Support
The game is fully offline. No internet connection is required for single-player play. However, for digital purchases (Steam, GOG, console stores), an online connection is needed to download the game initially. Achievements/trophies are tied to your offline progress and sync when you connect.
DLC/Expansion Overview
SOMA does not have any traditional DLC expansions. However, a Safe Mode update was added on December 2, 2017 for all platforms. Safe Mode disables enemy aggression (monsters still appear but cannot kill you), allowing players to explore the story without being hunted. This is ideal for those who want a narrative-focused experience. Additionally, the game has a New Game Plus feature that unlocks after completion (though it doesn’t change gameplay significantly).
What Makes This Game Unique
SOMA stands out for its seamless integration of horror and philosophical science fiction. The core question—"What is consciousness?"—is not just a theme but the central mechanic. The game forces you to make decisions that have no clear right answer, and the ending is deliberately ambiguous. The monsters are not random; each is a tragic victim of the WAU’s twisted logic. The underwater sound design (the distant whale calls, the hum of the station, the panicked breathing of Simon) is masterful. Finally, the lack of combat means every encounter is about evasion and hiding, ratcheting up tension. The game’s ability to leave players contemplating their own sense of self long after the credits roll makes it unforgettable.
Getting Started
Getting Started Guide for SOMA
Welcome to SOMA, a first-person sci-fi survival horror game that focuses on story, atmosphere, and existential dread rather than combat. There is no character creation—you play as Simon Jarrett, a man trapped in an underwater research facility after a mysterious disaster. This guide will help you survive your first hour, understand the interface, and avoid common pitfalls.
First Hour Walkthrough (Spoiler-Free)
1. Opening Cutscene (0-5 min) – The game begins with Simon in a strange apartment. Follow the linear path to trigger a conversation with a doctor named Munshi. After a blackout, you wake up in a derelict underwater station.
2. Tutorial Section (5-20 min) – You are in the PATHOS-II Upsilon facility. Use the on-screen prompts to learn:
- Movement: WASD (PC) or left stick (console)
- Interact: E (PC) or X/A button
- Use Tool Wheel: Tab (PC) or right bumper (console) – to equip items like torch or omnitool
- Run: Shift (PC) or left stick click (console) – but don't overuse it; it's not for combat.
3. First Encounter (20-30 min) – In a room with a broken robot, you'll find a PDAtablet and an Omnitool. The omnitool is your primary utility device. Equip it and use it to hack doors, read data, and interact with consoles.
4. Early Objective – Find the Shuttle (30-45 min) – Follow the objective marker to a shuttle bay. You need a Brainscan key item to proceed. Locate it in a nearby room with a dead corpse. Insert the scan into the shuttle console to start a tram sequence.
5. Arrival at Delta (45-60 min) – The shuttle takes you to Delta station. Here the game opens up more. You'll encounter the first hostile robots and need to use stealth. Save at the first save station (a glowing sphere).
Key tip: Do not rush. Explore every room, read notes, and listen to audio logs. They explain the world and often provide hints for puzzles.
Controls (All Platforms)
#### PC (Mouse + Keyboard)
| Action | Key |
|---|---|
| Move Forward/Backward | W / S |
| Strafe Left/Right | A / D |
| Look Around | Mouse movement |
| Interact (use/pick up) | E |
| Run | Shift (hold) |
| Crouch | C |
| Tool Wheel | Tab (hold to open) |
| Select Tool (1-4) | 1,2,3,4 |
| Use Omnitool | Left mouse button (when equipped) |
| Lighter/Torch | F |
| Save Game | F5 |
| Quick Load | F9 |
| Menu | Escape |
| Notebook/Journal | J |
Default controller layout
| Action | Xbox Button | PlayStation Button |
|---|---|---|
| Move | Left stick | Left stick |
| Look | Right stick | Right stick |
| Interact | X | Square |
| Run | Left stick click (in) | Left stick click (in) |
| Crouch | B | Circle |
| Tool Wheel | RB (hold) | R1 (hold) |
| Select Tool | D-Pad Left/Right | D-Pad Left/Right |
| Use Omnitool | RT | R2 |
| Lighter/Torch | Y | Triangle |
| Save Game | Start (menu) then save | Options (menu) then save |
| Inventory | LB | L1 |
| Journal | View button | Touchpad click |
#### PlayStation 4 / PlayStation 5
Same as PC controller layout above using default PlayStation mapping.
#### Xbox One / Xbox Series X/S
Same as Xbox layout above.
Important: SOMA is a slow-paced game. Running is rarely required except to escape immediate danger. Crouching can hide you from enemy line of sight.
UI Overview
The HUD is minimal by design to maintain immersion.
1. Health Indicator – There is no visible health bar. Instead, your screen will blur, you'll hear heavy breathing, and you'll see red borders when damaged. Find a safe spot to wait for recovery (health regenerates slowly over time).
2. Oxygen Level (when underwater) – A percentage appears at the bottom center when you are submerged. You can find oxygen refill stations or air bubbles to replenish.
3. Inventory / Tool Wheel – Press Tab (PC) or RB/R1 to open the wheel. It shows: Omnitool, Torch/Lighter, Body Scanner, and other tools you acquire. Select one to equip.
4. Interaction Prompts – When you look at a usable object (door, item, panel), a small text prompt appears (e.g., "Press E to open").
5. Objective Marker – A white diamond on screen points toward your current main objective. You can also open your journal (J) to see list of tasks.
6. Save Stations – Glowing yellow orbs that you can activate to save progress. These are scattered throughout the game. Save often!
Essential Early Objectives
- Find the Omnitool – It's in Upsilon, not far from start. Mandatory for hacking doors and panels.
- Retrieve the Brainscan – Located in a room with a dead crew member. It's a green glowing canister. Insert it into the shuttle console.
- Travel to Delta Station – Follow the shuttle sequence. Once there, find the Save Station and save immediately.
- Explore Delta – Your next goal is to reach Theta Station. But take time to gather information from computers and audio logs. You'll need a keycard to unlock the next tram.
- Explore thoroughly – Every drawer, locker, and computer station may hold crucial items or lore.
- Read and listen to all logs – They often contain puzzle solutions and story context.
- Save at every save station – They are not limited. If you die, you revert to your last save. Some enemies can oneshot you.
- Use your omnitool on every panel – Try it on anything that looks mechanical or glowing.
- Hide from enemies – You cannot kill monsters. Turn off lights, hide in closets, and crouch behind furniture.
- Manage oxygen – When underwater, plan your route to air pockets or refill stations.
- Running into unknown areas – You may trigger enemies or traps. Move cautiously.
- Ignoring the environment – Key items blend in with clutter. Look closely.
- Rushing through story segments – Important context is in optional dialogue and documents.
- Using the lighter in a dark area with enemies – Light attracts monsters. Use only when safe.
- Skipping the tutorial – Even if you're experienced, the controls and mechanics are unique.
- Not saving before dangerous encounters – Save stations are often placed just before tricky sections. Use them.
- Missing the omnitool – Some players wander aimlessly without realizing they need to equip it to hack. Check your tool wheel.
- Failing to understand the stealth mechanics – Enemies detect you by line of sight, sound (footsteps and running), and light. Crouch, move slowly, and stay in shadows.
- Dismissing the story – SOMA's narrative is its core. Skipping dialogues or logs will leave you confused later.
- Wasting time backtracking – If you think you missed something, don't panic. Most key items are close to where they are needed. Use the objective marker.
- Trying to fight enemies – You have no weapons. Running, hiding, or avoiding is always the correct approach.
- [ ] Complete the opening tutorial – Up to riding the shuttle to Delta.
- [ ] Learn control bindings – Go to Options → Controls and customize if needed. Practice tool wheel, interaction, and hiding.
- [ ] Save at Delta’s save station – Immediately upon arrival.
- [ ] Equip the Omnitool – Assign it to a quick slot (1) for easy access.
- [ ] Read and listen to at least three audio logs – To grasp the story and gameplay hints.
- [ ] Explore Upsilon fully – Before leaving, check every room. Find the logs and any collectibles.
- [ ] Successfully use stealth to avoid the first enemy (robotic creature in Upsilon maintenance area) – practice hiding in lockers.
- [ ] Understand the save system – Saving overwrites your previous save (only one save slot on console; multiple on PC). Use manual saves.
- [ ] Set game difficulty – SOMA has three difficulty modes: Safe (no enemies, focus on story), Normal (standard horror), and Hard (more dangerous enemies). Newcomers may choose Normal; Safe is fine if you dislike horror.
What to Do First (and What to Avoid)
#### ✅ Do:
#### ❌ Avoid:
Early Resource Priorities
SOMA does not have traditional resources like health packs or ammo. Your “resources” are tools and knowledge:
1. Omnitool – Your most used item. Keep it equipped most of the time.
2. Torch/Lighter – Essential for dark rooms; but consider using your omnitool's flashlight if you have one (some versions have it).
3. Body Scanner – Found later; used to scan creatures and environmental data.
4. Fuses and Power Cells – Required to unlock doors or activate machinery. Always carry at least one spare.
5. Notes and Access Codes – Write them down mentally or use the in-game journal. Some codes are needed hours later.
6. Audio Logs – Not collectibles; they contain vital story and puzzle clues. Listen to them fully.
Pro tip: You can carry unlimited items of most types except for one-of-a-kind key items. Your inventory in the wheel shows all you currently have.
Common Beginner Mistakes
Day-One Checklist
Use this checklist to ensure you start with confidence:
Once you've ticked off all items on this list, you are ready to dive deeper into the haunting world of PATHOS-II. Remember: this is a game about surviving both physically and psychologically. Take your time, think critically, and enjoy the story.
Good luck, Simon. You'll need it.
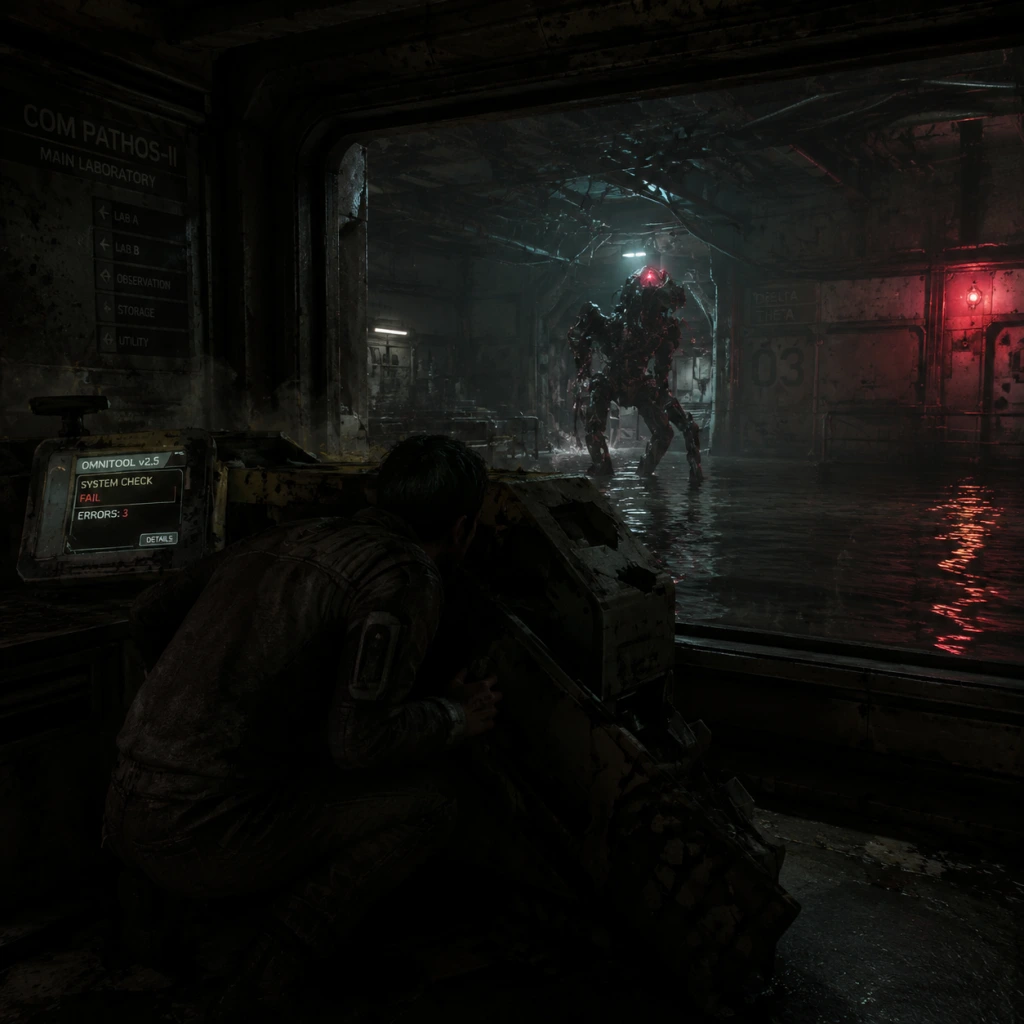
Core Gameplay
Core Gameplay Guide for SOMA
SOMA is a first-person sci-fi survival horror game that prioritizes narrative, atmosphere, and existential themes over traditional combat. There are no guns, no health bars, no skill trees, and no currency. Your progression is entirely story-driven, and your only tools are your wits, your ability to observe and interact with the environment, and a handful of simple inventory items. This guide breaks down the core gameplay loop and systems across four progression tiers, explaining how the experience evolves as you delve deeper into the underwater facility of PATHOS-II.
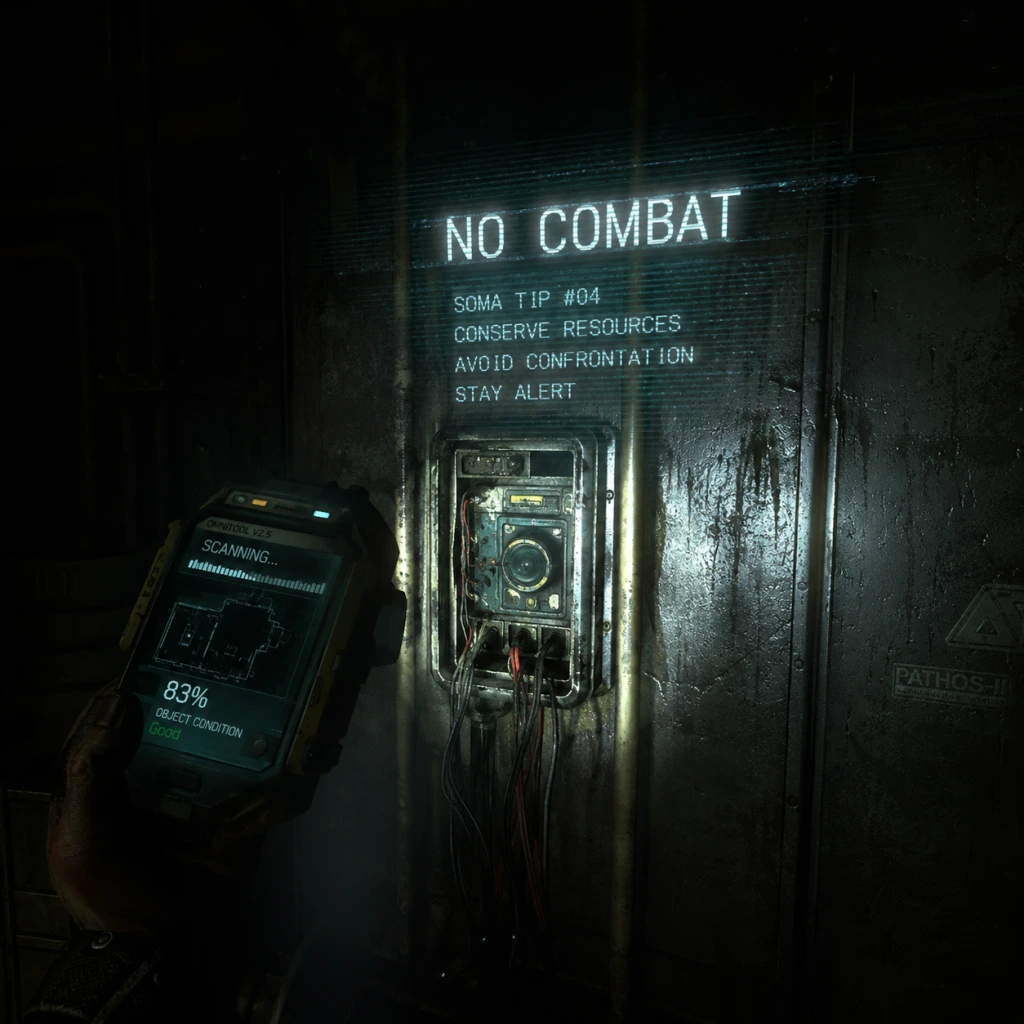
Main Gameplay Loop
The central loop of SOMA is: Explore → Observe → Solve → Survive → Advance.
1. Explore: You traverse a series of interconnected but distinct areas (e.g., Upsilon, Lambda, Theta, Omicron, Tau). Each area contains multiple rooms, corridors, and outdoor underwater sections.
2. Observe: Pay close attention to environmental details: computer terminals, audio logs, keypads, notes, posters, and the state of the facility. These provide backstory, clues, and objectives.
3. Solve: Most progress is gated by puzzles. These are usually environmental or logic-based: finding a keycard, restoring power, calibrating a device, or connecting cables. There are no complex inventory puzzles; the game uses a simple inventory of one or two items at a time.
4. Survive: Hostile machines (e.g., the Proxy, the Akers, the Leviathan) and corrupted humans (e.g., the flesher) cannot be killed. You must hide, sneak, or outmaneuver them. There is no combat, only evasion.
5. Advance: After solving the area’s puzzle and surviving any threats, you progress to the next area via a story-triggered event (e.g., riding a transport, entering a deep-sea diving suit, passing through an airlock).
Combat / Interaction Systems
- No Combat: There are no weapons of any kind. You cannot attack enemies. The only way to deal with threats is to avoid them.
- Interaction: Use the mouse button to interact with objects: open doors, pick up items, press buttons, turn valves, etc. The game uses a simple context-sensitive interaction.
- Sneaking and Hiding: When a hostile entity is present, you can crouch (default: Ctrl) to move more quietly and reduce visibility. You can hide behind objects, inside lockers, under desks, or in dark corners. Wait until the enemy’s patrol moves away before proceeding.
- Distractions: You can throw small objects (e.g., a book, a piece of debris) by picking them up and releasing the interaction button while aiming away from an enemy. This can create a sound to lure the enemy away from your path.
- Flashlight: Your flashlight has limited battery. It automatically recharges when in lit areas. Manage its use carefully; in dark areas it’s essential, but it can attract enemies.
- Underwater Navigation: Some sections require swimming. You have a limited oxygen supply (indicated by a bar). Look for air pockets or refill stations. While swimming, you move more slowly and cannot sprint. Certain underwater enemies (e.g., the Jellyfish-like creatures) can be avoided by staying still or moving slowly.
- Checkpoints: The game auto-saves at progress milestones. You can also manually save at designated terminals. Be aware that if you die, you respawn at the last checkpoint, retaining all story progress but losing any unsolved puzzle state.
- No Leveling: Simon does not gain new abilities, health, or stats. Your only growth is understanding the narrative and the nature of your situation.
- Key Items: Occasional inventory items (e.g., a battery, a keycard, a repair tool) are required to solve a puzzle. You cannot carry more than one or two at a time, so you must choose carefully and return items to their original location if needed.
- Audio logs and notes that flesh out the story and characters.
- Alternative paths or shortcuts (e.g., a hidden vent that bypasses a monster).
- Optional environmental puzzles that yield additional story details (e.g., finding Sarah’s backup chip).
- Hidden passages that may contain a collectible or a terminal with backstory.
- Collectibles: There are no traditional collectibles like coins or trophies. The game has a few “story artifacts” (e.g., the K-5 and K-8 bots) that can be interacted with but are not required. The main reward for exploration is narrative immersion.
- Environmental Storytelling: Pay attention to the state of places: a broken window, a bloodied room, a dead scientist. These details tell the story of what happened before Simon arrived.
- Upsilon: “Turn on the communications array to call the other sites.”
- Lambda: “Find the missing crew member.”
- Theta: “Restore power to the tram system.”
- Omicron: “Access the deepest point of the facility.”
- Tau: “Find a way to stop the Structure Gel outbreak.”
- Abyss: “Reach the ARK launch site.”
- No currency (no cash, no credits).
- No shops or vending machines that sell items.
- No trading or bartering.
- Item usage is entirely puzzle-based; you never buy or sell anything.
- The only resources are your flashlight battery (recharges) and oxygen (refilled at stations).
- Early Game: Simon is confused, disoriented, and has no idea what is happening. He believes he is in a hospital and then a nightmare.
- Mid Game: Simon learns the truth about the ARK, the WAU, and the nature of consciousness. He begins to question his own identity.
- Late Game: Simon makes choices based on his understanding of the world. He may decide to trust or oppose Catherine.
- Endgame: Simon confronts the final choice and his own survival.
- Objective: Understand the basic controls, exploration, and stealth mechanics.
- What to expect:
- Example puzzle: At Upsilon, you need to restore power to the workroom by pulling a breaker, then activate a terminal. No enemy interference.
- Survival tip: The first stealth encounter (Proxy) warns you with a low rumbling sound. Hide immediately in a closed locker; wait until the rumbling fades for 10-15 seconds before moving.
- Exploration: Check every room for audio logs—they contain essential story. In Lambda, you can find a hidden audio log about an employee’s final moments; it’s not mandatory but enriches the story.
- Objective: Master evasion and environmental puzzle-solving in larger, more complex areas.
- What to expect:
- Example puzzle: In Omicron, you must find two power cells to open a locked door, then repair a diving suit by swapping a rechargeable battery from another suit. The Akers patrol the area, so you must plan your route.
- Survival tip: Use the “distraction throw” to lure enemies away. When you see an Akers, note its patrol pattern. Wait for it to turn a corner, then quickly move to the other side of the room. Never run unless you are certain the enemy is far away—running makes noise.
- Exploration: Theta has a side room with a terminal that reveals the history of the ARK project. Omicron has a hidden alcove with a final audio log from a crew member. These are easy to miss but provide emotional payoff.
- Objective: Navigate extremely dangerous, claustrophobic environments with limited visibility and more aggressive enemies.
- What to expect:
- Example puzzle: In Tau, you must calibrate a sonar device by turning three knobs to specific frequencies while the Flesher patrols nearby. You must listen to the audio cues and work quickly before the enemy arrives.
- Survival tip: The Flesher can be temporarily disabled by destroying the “heart” of its flesh body (a glowing core) using a pickaxe. This buys you 30-40 seconds of safe time. Use it strategically, not reactively.
- Exploration: Tau contains a back room with a schematic for the ARK; reading it adds context to the ending. Also, you can find a hidden recorder with the final thoughts of a characters.
- Objective: Survive the final gauntlet and make the ultimate narrative choice.
- What to expect:
- Survival tip: In the Abyss, conserve oxygen. If you see an air pocket or a breathing mask, swim directly to it. The Leviathan will not attack if you stay still in the dark—use lights only when necessary.
- Exploration: There is almost no exploration in the endgame; it’s a straight path to the launch chamber. The only optional item is a final audio log near the launch controls.
- Post-endgame: Nothing. The credits play, and the game ends. You can reload the final save to see the alternative ending.
Progression
Progression in SOMA is linear and story-based. You progress through a series of locations (biotopes) in a fixed order. Each area reveals more of the story and increases the tension and existential dread. There is no open world; the game is a guided experience.
Exploration
Exploration is encouraged but not mandatory for completion. However, thorough exploration reveals:
Quests / Missions
SOMA does not have a quest journal or mission system. Instead, the game presents you with a clear overall objective: reach the ARK and launch it. Locally, each area gives you a single primary task. Examples:
There are no side quests or fetch quests that divert from the main narrative. Every puzzle and interaction directly pushes you toward the next story beat.
Economy
There is no economy in SOMA.
Character / Build Growth
There is no character growth in a mechanical sense. Simon Jarrett does not gain skills, perks, levels, or attributes. Your progression is purely narrative. The only change is in Simon’s understanding of his situation:
The moral and philosophical growth is the only “build” in the game. There is no equipment customization or skill tree.
Endgame Structure
The endgame of SOMA occurs after you leave Tau and descend into the Abyss to launch the ARK. It consists of three distinct parts:
1. The Abyss Descent: You navigate a dark, pressure-ridden underwater area with Leviathan-class threats. The goal is to reach the ARK launch chamber.
2. The ARK Launch Site (Omicron’s deep lab): Here you must solve the final puzzle (connecting power cables, managing the power distribution) to initiate the launch sequence.
3. The Final Choice: Once the ARK is ready, you have a narrative decision: enter the ARK yourself (and leave a copy of your consciousness on Earth) or stay behind to maintain the facility. Your choice affects the ending but does not change the credits sequence. There is no post-game content; the credits roll after the ending.
After the credits, you can reload a save to re-experience the ending or see the other outcome, but there is no “endgame loop” or New Game+.
---
Player Progression Tiers
While SOMA is linear, the experience can be divided into four tiers based on the player’s familiarity with the systems and the escalating tension.
#### Early Game (Upsilon & Lambda)
- Linear corridors with few threats. The first enemy (the Proxy) appears near the end of Upsilon; you learn to hide in lockers and wait.
- Simple puzzles: turning on generators, scanning a body, inserting a keycard.
- Heavy exposition: audio logs and terminals explain the WAU and the accident.
#### Mid Game (Theta & Omicron)
- Multiple enemies coexist: the Proxy in Theta, and the “Akers” (a deranged human) in Omicron. The Akers are faster and patrol long corridors.
- Larger maps with branching paths, verticality (multiple floors), and more optional rooms.
- Puzzles that require backtracking or carrying an item from one end of the area to another (e.g., carrying a battery to a power unit).
#### Late Game (Tau & Abyss Entrance)
- The “Leviathan” in Tau is a massive, tentacled creature that demolishes walls. You cannot hide from it—you must sprint through certain sections while it chases.
- The “Flesher” in Tau is a persistent enemy that regenerates and follows you across rooms. It can be temporarily slowed by collecting “jelly” to destroy its flesh mass.
- Puzzles become more involved: connecting cables under time pressure, navigating a dark underwater labyrinth with oxygen constraints.
- Emotional climax: moral choices about the fate of characters like Simon-2 or the WAU.
#### Endgame (The Abyss & ARK Launch)
- The Abyss is a deep, dark underwater section with extreme pressure. Your oxygen runs out quickly; there are limited air pockets.
- The final enemy is a “Leviathan” that cannot be escaped—you must use your knowledge of the environment to avoid it in a chase sequence.
- The final puzzle is a power distribution task: you must route power from three generators to the ARK launch system. No enemies interfere, but you are under subtle time pressure (the station is collapsing).
- After the launch, you face the dialogue choice: “Copy yourself onto the ARK” or “Stay behind.” There is no wrong answer for gameplay, only for story closure.
---
Summary
SOMA’s core gameplay is a linear, narrative-focused experience with stealth and puzzles. There is no traditional RPG progression, no economy, and no combat. Your growth is emotional and philosophical. The tiers above represent the increasing complexity of stealth encounters and puzzles, and the deepening of the story’s existential themes. Embrace the atmosphere, explore thoroughly, and prepare for a haunting journey into the nature of consciousness.
Game Tips
Game Tips for SOMA
SOMA is a narrative-driven survival horror game where combat is entirely absent. Success depends on stealth, puzzle-solving, and exploration. Below are tips grouped by difficulty level and category to help you navigate the terrifying depths of PATHOS-II.
Beginner Tips
- Use headphones. SOMA’s sound design is critical. You can hear monster movements, ambient noises, and subtle audio cues that indicate safe paths or nearby threats. Stereo headphones allow you to pinpoint direction.
- Take your time. Rushing leads to unnecessary deaths. Monsters have predictable patrol routes, and most rooms have hiding spots (lockers, tables, shadows). Pause to observe before moving.
- Examine everything. Every note, terminal, and audio log contains either story context or puzzle hints. Key items often look like everyday objects. Use the interaction key (default E) to pick up and rotate items.
- Save manually often. Save stations are your only checkpoints. They are marked with a glowing orb on a console. Save after completing any major objective or before entering a dangerous area. There is no autosave in most dangerous zones.
- Know your enemies. There are three main monster types: the Mockingbird (fast, sight-based), the Dweller (slow, sound-based), and the Structure Gel masses (stationary, environment hazards). Study their behaviors to avoid them.
- Crouch and move slowly. Crouching (default Ctrl) reduces noise and visibility. Monsters detect you by line-of-sight and sound. Walk, don’t run, unless absolutely necessary.
- Look away from monsters. Many enemies (especially the Mockingbird) are triggered by direct eye contact. If you stare, it will charge. Turn your character’s head away or hide behind cover.
- Use the environment. Hide in lockers, under desks, or behind large machinery. Close locker doors behind you. Stay still and wait for the monster to leave the area.
- Distract with thrown objects. Press the interact key while holding an item (like a book or pipe) to throw it. This creates a noise that can lure monsters away from your path. Use this to redirect patrols.
- Know when to sprint. Sprinting (default Shift) is very loud and drains stamina quickly (you move slower when tired). Use it only in emergencies, e.g., when a monster is directly upon you and dashing to a door.
- Master monster-specific tactics:
- Check every corner. Keycards, codes, and tools (like the Omnitool or Wrench) are often hidden in drawers, under furniture, or inside broken computers.
- Listen to background audio. Many environmental sounds (humming generators, dripping water) can indicate nearby dangers or hidden rooms.
- Read all data logs. Terminals contain emails, reports, and personal messages that reveal passwords for locked doors and sequence codes for puzzles.
- Use the map sparingly. The game provides an overhead map on the pause screen. It shows explored areas and objectives. Use it to orient yourself, but be aware that the map does not update in real time.
- Identify safe rooms. Some areas (e.g., Upsilon living quarters) are monster-free. Use them as rest stops to gather your thoughts.
- Read everything. A puzzle’s solution is almost always hinted at in nearby notes, emails, or audio logs. For example, a locked safe may require a code found in an employee’s journal.
- Listen carefully. Audio logs provide real-time hints. Play them while you work on the puzzle—sometimes you need to perform actions in sync with the recording.
- Manipulate panels. Many puzzles involve power routing: you must connect cables to specific ports or toggle switches in a certain order. Observe the visual feedback (lights, hums) to confirm correct connections.
- Combine items. If you have a tool (like the Cutting Tool), use it on marked objects (e.g., cables, vents). The game highlights interactable surfaces with a subtle glow.
- Be methodical. If a puzzle seems impossible, backtrack to earlier areas—you may have missed an important item or piece of information.
- Immerse yourself. The game deals with consciousness, identity, and existential horror. Don’t rush through dialogue; reflect on the choices and conversations.
- Pay attention to optional conversations. The ARK project and characters like Catherine Chun offer deep philosophical discussions. These are not required but enrich the experience.
- Do not skip cutscenes. Important narrative beats and environmental storytelling occur in scripted sequences.
- Understand the no-win scenarios. Some decisions are impossible (e.g., the fate of Simon-2). Accept the consequences—the game forces moral ambiguity.
- Replay for different choices. After finishing the game, consider replaying to see alternate dialogue and endings based on your decisions (e.g., whether to destroy the WAU or not).
- Optimize hiding spots. Not all lockers are safe—some monsters can open doors if they see you enter. Hide in spots where you have a clear view of the monster’s path without being seen.
- Use the omnitool’s scan function. The omnitool can analyze objects and sometimes provides hints (e.g., showing power flow). Use it on suspicious items.
- Plan escape routes. When entering a dangerous room, identify two exit paths. If one is blocked, you have a backup.
- Manage stamina. Sprinting depletes stamina; walking restores it. In chase sequences, break line-of-sight and walk to regain stamina before sprinting again.
- Learn enemy spawn triggers. Monsters often appear when you pick up a key item or reach a certain point. Save before grabbing critical objects.
- Speedrunning techniques. SOMA has a small speedrun community. Techniques include:
- No-save challenge tips. For a self-imposed hardcore run:
- Hidden areas. Some rooms (like the Deep Sea facility) have secret panels accessible only by timing door openings with monster patrols. Use distractions to lure enemies away and explore these areas for extra lore.
- Bypass monsters entirely. In certain sections, you can run past monsters without hiding if you know the exact timing. For example, in Theta, you can sprint through the dormitory before the Mockingbird reaches you.
- Modifying the game. On PC, you can install community mods that add a field of view slider, disable mouse smoothing, or enhance graphics. These do not alter gameplay but improve comfort.
- PC (Steam, GOG, etc.): Adjust graphics settings for performance—turn off V-Sync to reduce input lag. Use FOV mods if the default 60° feels cramped.
- Consoles (PlayStation 4, Xbox One): No significant differences. Use the controller’s analog stick for precise movement. Enable subtitles for better comprehension of audio logs.
- Safe Mode: If you find monsters too stressful, enable Safe Mode in the options. This makes enemies non-hostile, allowing you to explore freely (still recommended for first-time players who want the story without horror).
Stealth & Evasion (Combat Substitutes)
Since you cannot fight back, survival hinges on avoidance:
- Mockingbird: Avoid looking at it; if it spots you, run in a zigzag pattern and hide until it loses interest.
- Dweller: Stand still when it enters your room—it tracks movement rather than sight. Crawl slowly when it is nearby.
- Structure Gel: Never touch it; wait for it to recede or find alternate routes.
Exploration & Resource Management
There are no traditional resources (ammo, health packs), but exploration rewards you with story and progress:
Puzzle Solving
Puzzles in SOMA are mostly environmental and logic-based:
Story & Atmosphere Tips
To fully appreciate SOMA’s narrative:
Intermediate Strategies
For players familiar with the basics:
Advanced Optimizations
For seasoned players aiming for efficiency or challenge runs:
- Crouch jumping: Press crouch and jump simultaneously to squeeze through gaps faster.
- Wall clipping: Sometimes you can glitch through walls by sprinting into specific corners (use with caution; may break the game).
- Skip optional animations: Press escape or interact to skip some cutscenes, but be careful not to miss context.
- Memorize all monster patrol routes and safe zones.
- Avoid picking up unnecessary items that trigger spawns.
- Use sound cues to navigate without the map.
Platform-Specific Notes
Final Advice
SOMA is a game best experienced blind, but these tips will help you survive and uncover its deep narrative. Remember: you are not a hero—you are a survivor. Embrace the fear, think before you act, and let the existential dread wash over you. Every death is a lesson; reload and try a different approach.
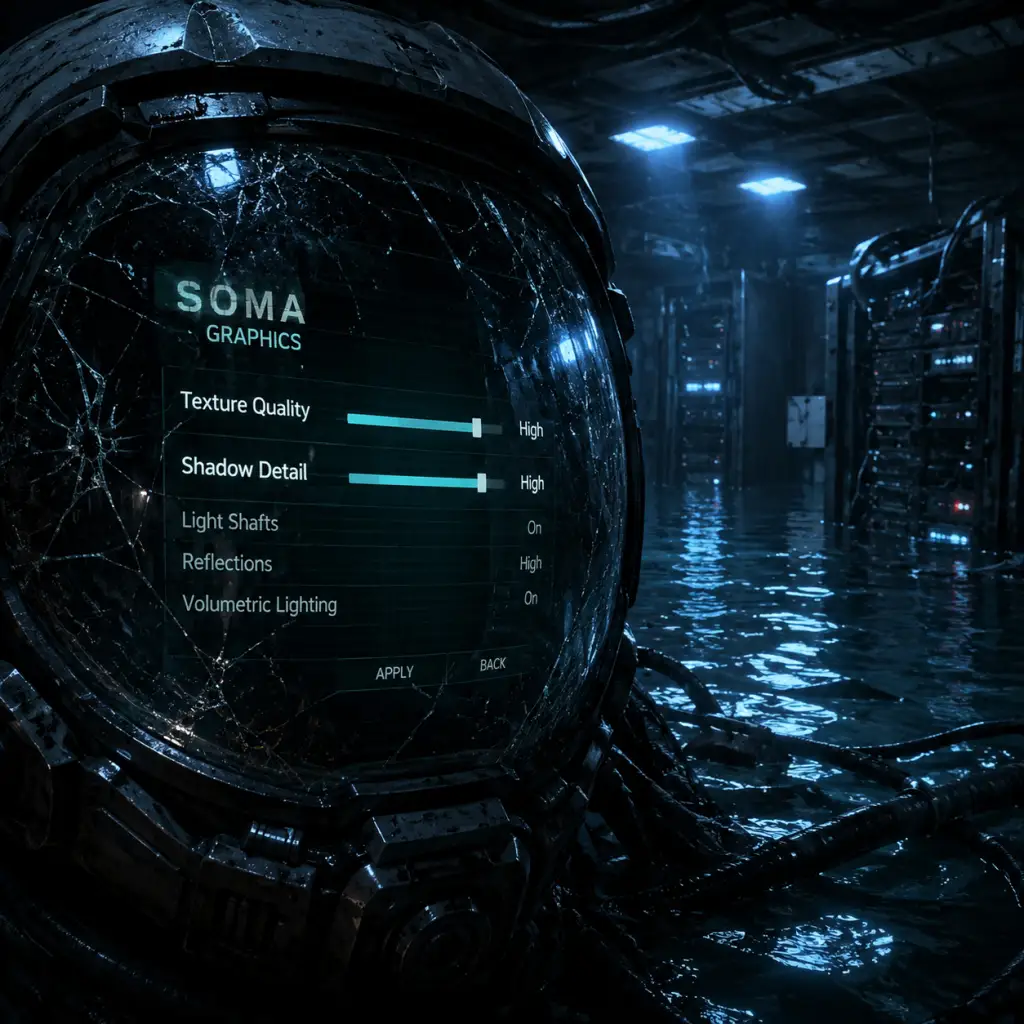
Game Settings
Graphics Settings
SOMA uses the HPL Engine 3 and offers a range of graphics options to balance performance and visual fidelity. The settings are accessible from the main menu under Options > Graphics.
Key Graphics Options
- Resolution: Match your monitor's native resolution for optimal clarity. Lower resolutions (e.g., 1280×720) can boost performance on weaker hardware.
- Display Mode:
- Graphics Quality Preset: Very Low, Low, Medium, High, Very High. This sets many sub-options at once. Customizing individual settings after selecting a preset will override it.
- Texture Quality: Controls texture resolution. High uses more VRAM; Low reduces detail but saves memory.
- Shadow Quality: Off, Low, Medium, High. Higher settings increase shadow resolution and draw distance, impacting performance significantly.
- SSAO (Screen Space Ambient Occlusion): Adds realistic shading in crevices. Off improves performance; High decreases FPS by 10-20% on weaker GPUs.
- Antialiasing: Off, FXAA, TAA, MSAA x2/x4/x8.
- Anisotropic Filtering: Off, 2x, 4x, 8x, 16x. Improves texture sharpness at oblique angles. 16x has negligible performance impact on modern GPUs.
- V-Sync: On/Off. Synchs frame rate to monitor refresh rate to prevent screen tearing. Causes input lag; turn Off for competitive feel (use FPS cap instead).
- Field of View (FOV): Adjustable from 60° to 100°. Default is 75°. Higher FOV reduces motion sickness but lowers performance slightly.
- FPS Cap: 30, 60, 120, 144, Unlimited. Set to your monitor's refresh rate for smooth gameplay.
- Fullscreen: Best performance; minimizes input lag.
- Windowed: Useful for multitasking but may reduce performance.
- Borderless Windowed: Similar to fullscreen but allows alt-tabbing; slightly higher input lag.
- FXAA is lightweight but blurs edges.
- TAA provides smoother motion with moderate performance cost.
- MSAA is heavy; only use on high-end systems.
Recommended Graphics Settings by Hardware Level
| Hardware Level | GPU/CPU Examples | Resolution | Preset | Key Adjustments | Expected FPS |
|---|---|---|---|---|---|
| Low | Integrated graphics (Intel HD 620), GT 1030, Ryzen 2200G | 1280×720 or 1366×768 | Very Low | Shadow Low, SSAO Off, Antialiasing FXAA, FOV 75, FPS cap 30 | 20-30 |
| Medium | GTX 1050 Ti, RX 560, i5-7400 | 1920×1080 | Low | Shadow Medium, SSAO Low, Antialiasing FXAA, FOV 80, FPS cap 60 | 40-50 |
| High | GTX 1060, RX 580, i5-8400 | 1920×1080 | Medium | Shadow High, SSAO High, Antialiasing TAA, FOV 85, FPS cap 60 | 50-60 |
| Ultra | RTX 2060, RX 5700 XT, i7-8700K | 2560×1440 | Very High | Shadow High, SSAO High, Antialiasing TAA or MSAA x2, FOV 90, FPS cap 144 | 60+ |
>
> FOV: Setting it above 90° may cause performance drops on weaker GPUs because more objects are rendered. Start at 80° and adjust upward.
>
> V-Sync & Frame Cap: If you experience input lag, disable V-Sync and set a frame cap slightly below your monitor's refresh rate (e.g., 58 for 60Hz).
---
Audio Settings
Audio is critical for immersion and survival in SOMA—listen for creature sounds and environmental clues.
Audio Options
- Master Volume: Overall volume (0-100).
- SFX Volume: Sound effects (footsteps, machinery, monster noises).
- Music Volume: Background music; lower this to increase tension/dialogue clarity.
- Dialogue Volume: Voice lines from Simon and other characters.
- Ambience Volume: Environmental sounds (water, wind, alarms).
- Voice Chat (Not present – single-player only).
- Sound Mode: Stereo, Headphones, 5.1 Surround, 7.1 Surround. Choose Headphones for best directional audio with stereo headsets.
- Subtitles: On/Off. Enables text for dialogue and sound effects (e.g., "[Footsteps approaching]"). Highly recommended for hearing-impaired players or low-volume play.
- Sound Mode: Headphones (if using headphones) or Stereo for speakers.
- Master Volume: 80% for comfortable play.
- SFX: 100% – crucial for locating threats.
- Music: 60% to not overwhelm other audio.
- Dialogue: 100% – story-driven game.
- Ambience: 80%.
- Subtitles: On – helps track dialogue during stressful moments.
- Invert Y Axis: On/Off – toggles vertical mouse look inversion.
- Mouse Sensitivity: Slider from 0.0 to 10.0 (default ~3.5). Adjust for comfortable turning speed.
- Mouse Smoothing: On/Off – can reduce jitter but adds slight latency. Disable for precise movement.
- Key Bindings: Fully rebindable. Defaults:
- Controller Support: Full support for Xbox, PlayStation, and generic controllers. Buttons are auto-detected; can be remapped in settings.
- Vibration: On/Off – adds feedback for environmental events; can be disorienting for some.
- Look Sensitivity: Separate slider for controller stick.
- Controller Deadzone: Adjust to reduce drift.
- Mouse Smoothing: Off.
- Mouse Sensitivity: Adjust to your preference; start at 3.5 and increase/decrease as needed for 180° turns with one full wrist movement.
- Invert Y: Only enable if you play flight sims or prefer inverted look.
- Key Bindings: Consider rebinding Run from hold (R) to toggle (Shift) for comfort; many players prefer crouch on hold (Ctrl) rather than toggle.
- Subtitle Language: Choose from available subtitle languages (see Language section).
- Subtitle Size: Small, Medium, Large, Very Large. Increase to improve readability.
- Subtitle Background: None, Darker, Black. A black background improves contrast against bright scenes.
- Colorblind Mode: Off, Deuteranopia, Protanopia, Tritanopia. Adjusts UI colors for color vision deficiencies.
- Photo Sensitivity Warning: On/Off. Disables flashing effects (e.g., lightning) if you have epilepsy.
- Navigation Assistance: Off, Subtle, Strong. When enabled, a faint arrow or glow points toward the next objective. Subtle is recommended to avoid breaking immersion.
- Auto-Aim: Off, Weak, Strong. Since there is no combat, this only affects interaction prompts (e.g., aligning with a lever). Keep Off or Weak.
- HUD Opacity: Adjust from 0 to 100. Lower opacity hides the UI for immersion; raise to 100 for clarity.
- Subtitle Background: Black for readability.
- Subtitle Size: Large if playing on a TV or small monitor.
- Navigation Assistance: Subtle – the game's level design can be confusing; this helps prevent frustration.
- Photo Sensitivity Warning: On if you have a history of seizures; otherwise leave Off.
- Text Language: Select from available languages (English, French, German, Italian, Spanish, etc.). Changes UI text and subtitles.
- Audio Language: SOMA supports English, German, French, and Polish audio dubs (depending on region). Default is English.
- Subtitle Language: Independent of text language; you can have English audio with Japanese subtitles, for example.
- Steam Cloud: If playing on PC via Steam, ensure Steam Cloud sync is enabled in Steam's properties for SOMA (right-click game > Properties > General > Keep game saves in the Steam Cloud). This backs up your save files automatically.
- Offline Mode: Completely playable offline. Disable internet if you want to avoid background downloads or interruptions.
- Difficulty Mode:
- Quick Save Loadouts: Only available on PC (F5 to quick save, F9 to quick load). Console versions rely on checkpoint saves. Controller users can remap these in Controls.
- Pause Function: The game pauses on Esc (keyboard) or Start (controller) regardless of difficulty. Use this to read notes safely.
- Auto-Save Frequency: The game autosaves at checkpoints (entering new areas, after major events). Cannot be adjusted.
- Flashlight Battery Management: Not a setting; the flashlight has unlimited battery in Safe Mode, but in Normal/Hard it drains and must recharge by turning off. Plan your routes.
- First Playthrough: Normal difficulty. Safe Mode removes all tension; Hard is punishing for newcomers.
- Second Playthrough: Hard if you want more challenge, or Safe to explore without fear.
- Quick Save: Use F5 liberally in Normal/Hard, but be aware that quick saves are overwritten by each new manual save. Keep a few manual save slots (via menu) as backups.
Recommended Audio Settings
> Special Attention: The Sound Mode setting is easy to mis-set. If you use surround sound speakers but select "Headphones", spatial cues may be inaccurate. Conversely, using headphones with "5.1 Surround" can cause muffled audio. Always match your hardware.
---
Controls Settings
SOMA features standard first-person controls with full keyboard and controller support.
Keyboard & Mouse
- W/A/S/D: Move
- Mouse Left: Interact / Use
- Mouse Right: Crouch (hold)
- E: Interact (alternative)
- R: Run (hold)
- Shift: Run (toggle)
- Ctrl: Crouch (toggle)
- F: Flashlight on/off
- Tab: Inventory / Notes
- M: Map
- Esc: Pause / Menu
Controller Settings
Recommended Controls
> Special Attention: The Run key defaults to hold rather than toggle. New players often miss this, causing fatigue. Change to toggle in the key bindings menu if you prefer. Also, the Interact button (left mouse) is contextual; some puzzles require holding the button, not just clicking.
---
Accessibility Settings
SOMA provides several options to make the experience more inclusive.
Recommended Accessibility Tweaks
> Special Attention: The Navigation Assistance option is hidden under Accessibility, not Gameplay. Many players miss it and get stuck. Enable Subtle early.
---
Language Settings
> Note: Language selections require restarting the game to take full effect.
---
Network Settings
SOMA is a strictly single-player game with no online multiplayer or co-op. Therefore, there are no dedicated network settings in-game.
> Special Attention: Because there is no network menu, some players look for online settings unnecessarily. Just launch the game and play.
---
Gameplay Settings
These options affect core gameplay mechanics and difficulty.
- Safe Mode (added in a patch): Enemies are non-hostile and will not attack. Ideal for players who want to experience the story without stress. Creatures still exist but ignore you.
- Normal Mode: Standard survival horror – enemies chase and kill you on sight.
- Hard Mode: Enemies are more aggressive, fewer saves, and no auto-aim assistance. Recommended for returning players.
Recommended Gameplay Settings
> Special Attention: The Safe mode is easily overlooked because it was added post-launch. Check that you are not accidentally playing on Normal if you only want story. Also note that in Hard mode, autosaves are less frequent and enemies have improved hearing – hide more often.
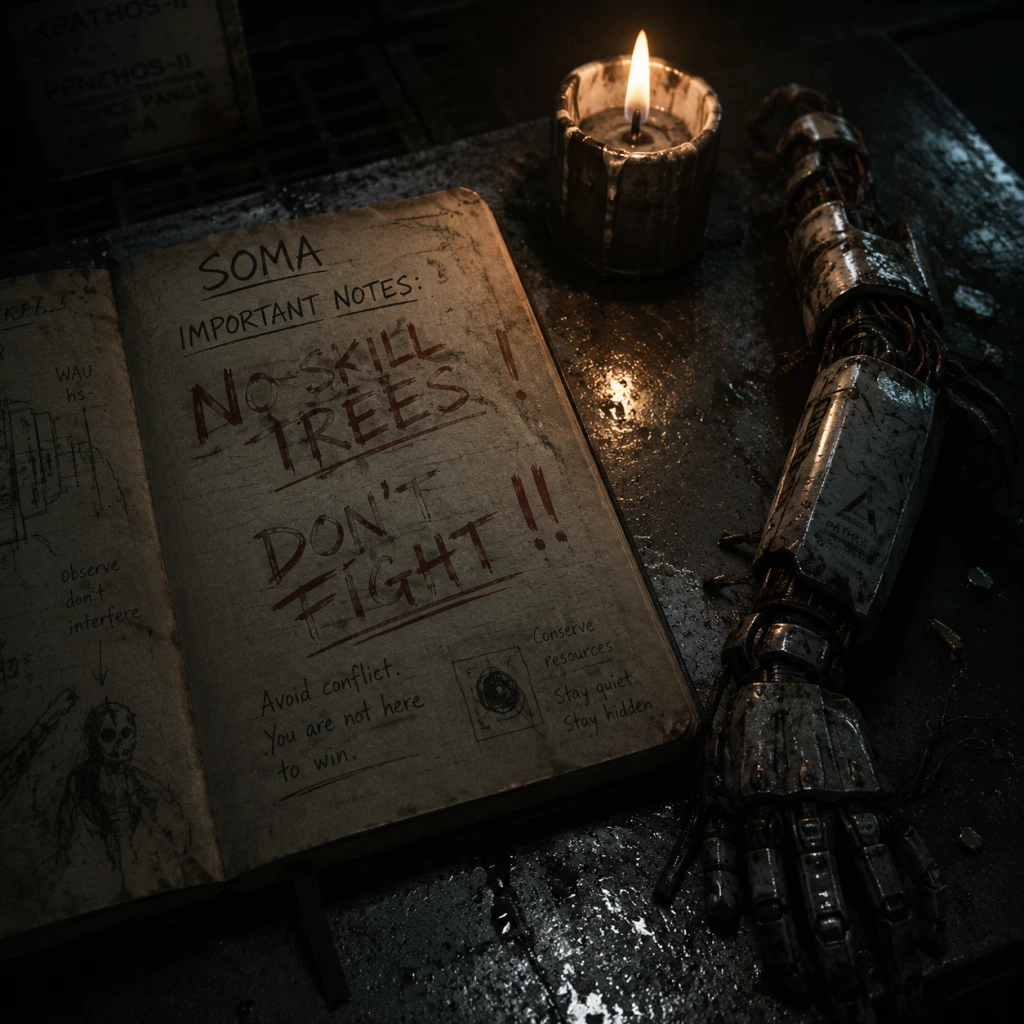
Important Notes
Important Notes for SOMA
SOMA is a deeply narrative-driven horror game with no combat, no skill trees, and no grinding. However, its philosophical themes, hidden lore, and branching story decisions mean that careful attention and save management are crucial. Below is everything you need to know to avoid common regrets and pitfalls.
1. Irreversible Choices & Branching Story
SOMA has a handful of key decisions that affect dialogue, ending variations, and character fates. There is no “correct” choice – only different emotional outcomes. Choices are made through direct interaction (e.g., pressing a button, pulling a lever) or by choosing to do nothing.
Major decision points (spoiler-free):
- Encountering Carl Semken (Upsilon) – you can either attempt to help him or leave him. If you help, you must complete a short puzzle; otherwise, he remains trapped.
- The fate of Amy Azzaro (Theta) – You can choose to end her suffering or leave her attached to machinery.
- Robin Bass (Delta) – You can pull her into the machine or leave her.
- Destroying the WAU core (Omega) – Activating the override kills the WAU but also has side effects.
- The ARK launch (Omega) – You can choose to launch the ARK, not launch it, or even destroy the ARK.
- The final choice – The game offers two different endings based on your action at the very last moment.
- Upsilon – Once you take the tram to Lambda, you cannot return.
- Theta – After descending to the Abyss, you cannot go back.
- Delta – After moving to Tau, the path back is cut off.
- Omicron – Accessible only in a specific sequence; leaving means no return.
- Several hidden log entries and audio recordings are tucked in corners or behind furniture. Use your environment to scan thoroughly.
- The PIN codes for certain locked doors are found in earlier areas. Write them down or take screenshots; they are not saved in a journal.
- Omnitool upgrades (batteries, strength, etc.) are optional but make puzzles easier. They are found in optional side rooms.
- Proxies move unpredictably and can one-hit kill you. You must hide in lockers or behind objects.
- The “Cave Monster” (Abyss section) has no way to be avoided – you must run and hide repeatedly.
- Enemies in the Black Coral (Tau) can be disoriented by shutting down coral nodes, but they still pose a threat.
> Tip: Before any major confrontation with a named character, manual save. Some decisions are irreversible and cannot be undone by reloading checkpoints if you overwrite the autosave.
2. Missable Content
SOMA is linear for the most part, but a few areas become inaccessible after you leave them. Almost all lore (audio logs, notes, computers) is optional, but reading/listening to everything greatly enhances the story.
Areas that become permanently locked:
Missable collectibles:
> Tip: Explore every side corridor and dead end before moving forward. The game will often give a clear visual clue that you are leaving an area (e.g., a tram, a hatch, a ladder that goes one way).
3. Difficulty Spikes & Stealth Sections
SOMA has no combat; you cannot fight enemies. Death comes from being caught by hostile robots (Proxies, monsters) or environmental hazards (drowning, crushing).
Stealth encounters can spike in difficulty:
Safe Mode: The game includes an optional Safe Mode (accessible from Settings > Gameplay). This makes enemies non-lethal – they will still stalk you and cause damage if caught, but you will not die. Safe Mode does not disable achievements/trophies. If you struggle with stealth, enable it without shame.
No grinding traps: There is no XP, no currency, and no leveling. You cannot grind for power or items. Progress is purely story-driven.
4. Save Management (Critical!)
SOMA relies on manual saves for preserving progress. Autosaves occur at major transitions (e.g., entering a new area), but these are easily overwritten.
Save system details per platform:
| Platform | Save Slots | Notes |
|---|---|---|
| PC (Steam, GOG) | Unlimited manual saves | You can create as many save files as you like. Use numbered saves or name them after key moments. |
| PS4 / Xbox One | 20 manual save slots | Fewer slots than PC. Overwrite old saves wisely, or rotate between 3-5 slots to keep backup points. |
1. Save before entering any new zone (tram ride, ladder, airlock).
2. Save before interacting with a character that seems to be in distress (i.e., potential choice point).
3. Save after unlocking a new area – if you die later, you can reload from the recent save rather than a distant checkpoint.
4. Do not rely solely on autosaves – they can save right before a lethal trap, forcing you to restart.
> Common regret: Players forget to save for an hour, then die and lose a large chunk of progress. Always manual save whenever you see a save station (wall-mounted terminal) – they are placed frequently.
5. Things Players Regret Not Knowing Earlier
- You can sprint (Shift on PC, L3 on controllers). Many players don’t realize sprinting is available, which is vital for stealth escapes.
- Flashlight uses batteries – Batteries are finite. Turn off the flashlight when not needed, especially in dark but safe rooms.
- Omnitool upgrades require you to interact with crafting stations (fabrication terminals). You don’t automatically get them – you must read blueprints and use materials.
- The game’s ending is based on a single action in the final room – watch carefully for prompts.
- No jump scares – SOMA relies on atmospheric dread, not cheap scares. But enemies can appear suddenly if you make noise.
- Audio logs and text logs contain crucial story context. If you skip them, the plot may seem confusing. Read everything.
- The “Pulse” tool (from Omnitool) can be used to scan environmental clues; use it often to highlight interactive objects.
- Replayability: Once you finish the game, you can replay chapters via the Main Menu (Chapter Select). However, your choices are reset. To see all endings, you must either reload older saves before the final choice or start a New Game.
- Autosave during cutscenes: Do not close the game during a cutscene – wait for the autosave icon to appear.
- Quick saving (F5 on PC) is automatically bound and creates a save file but does not overwrite autosaves. Use it liberally.
- Performance: On PC, large areas with many dynamic lights (Abyss, Tau) may cause frame drops. Lower Shadow Quality and Volumetric Fog if needed.
- Consoles: SOMA runs at 1080p/30fps on base PS4 and Xbox One, with improvements on Pro/One X. No major performance issues.
- [ ] Understand that combat is not an option – stealth and hiding are your only tools.
- [ ] Enable Safe Mode if you are not confident in stealth sections (no penalty).
- [ ] Create multiple manual save slots before every major story beat.
- [ ] Explore every room, read every terminal, and listen to every audio log.
- [ ] Write down PIN codes when you find them.
- [ ] Do not expect grinding – the game is linear and focused on narrative.
- [ ] Be prepared for philosophical, unsettling themes – SOMA is more disturbing than scary.
6. Online Etiquette & Anti-Cheat
SOMA is a single‑player offline game. There is no multiplayer, no online leaderboards, and no anti-cheat software. No need to worry about online etiquette or cheating accusations. Mods are available on PC (Steam Workshop) and are safe to use, but they can alter the experience – back up your saves before installing mods.
7. Technical Warnings
Summary Checklist Before Playing
Following these notes will ensure you get the fullest, least frustrating experience from one of the best sci‑fi horror games ever made.
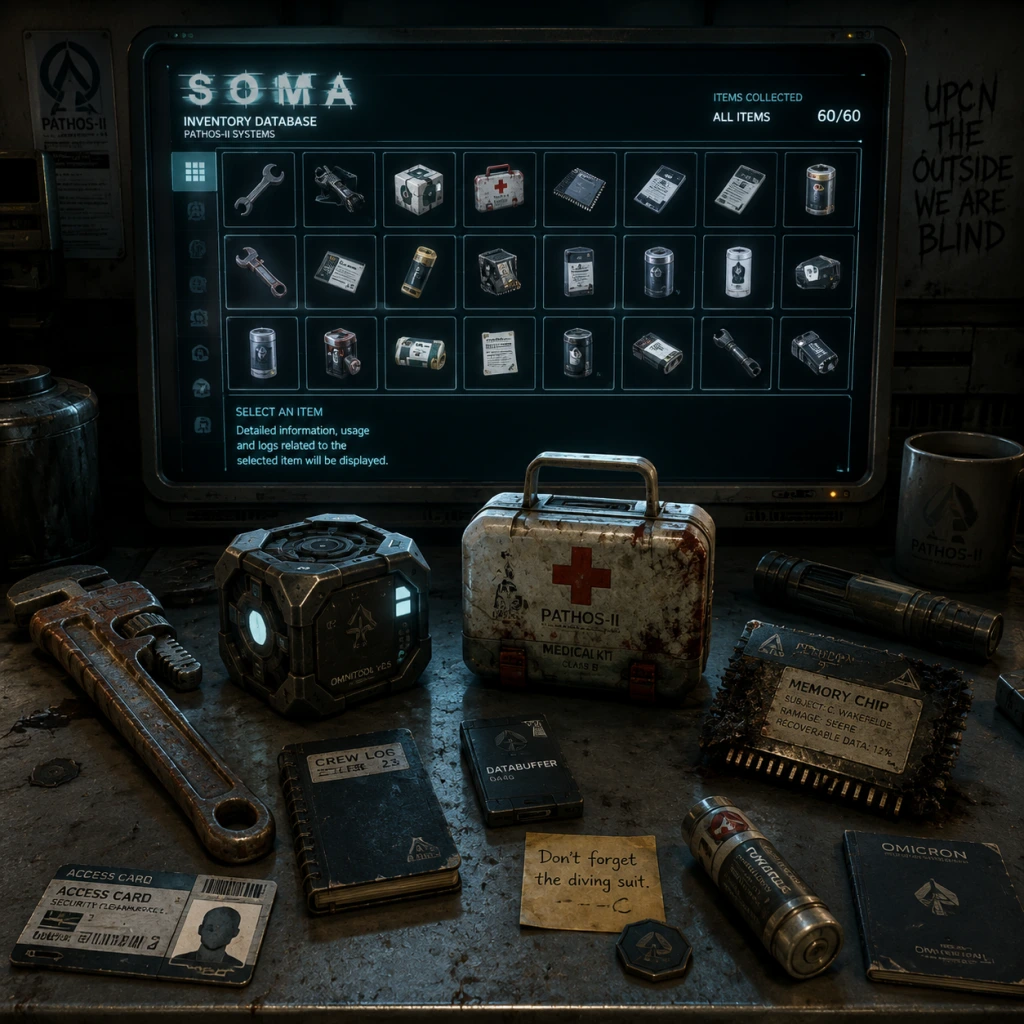
All Game Items
Complete Item Guide for SOMA
This guide covers every significant item you can interact with in SOMA. Unlike traditional games, SOMA has no weapons (except one non-lethal tool), no armor, no consumables, and no currency. Your progression relies entirely on key items, machinery/tools, and collectibles that reveal the story. Below is a comprehensive, spoiler-aware breakdown grouped by category.
---
1. Key Puzzle Items
These are mandatory items required to unlock doors, activate machinery, or solve environmental puzzles. They are usually found in specific locations and must be used to progress.
| Item | Location & How to Obtain | Purpose & Usage |
|---|---|---|
| Keycards | Scattered in desks, lockers, or on corpses in Upsilon, Lambda, Theta, Omicron, and Tau. Color-coded (e.g., green, yellow, red). | Used at card readers to unlock doors. Example: Green keycard in Upsilon opens the door to the transit station. |
| Fuses | Found in fuse boxes, storage rooms, or near broken panels. Often requires a screwdriver to access. | Inserted into fuse panels to restore power to elevators, doors, or machines. Example: Restore power to the elevator in Lambda. |
| Omnitool (with attachments) | Found in the Upsilon lab on a table. Early game essential. | Hacks computer terminals, opens security doors, and reads logs. Requires power cells to operate. |
| Power Cells | Found in charging stations, on desks, or in machinery. Recharge at charging stations. | Power the Omnitool. Without a charged cell, the Omnitool cannot be used. Also required for the diving suit in the Abyss. |
| Batteries | Similar to power cells but smaller. Found in flashlights, radios, or loose. | Power the flashlight (if you find one) or other portable devices. Only two or three exist in the game. |
| Screwdriver | Found in a toolbox in Upsilon (near the start). | Used to open fuse boxes, panels, and sometimes to interact with machinery. |
| Crowbar | Found in a storage room in Upsilon (after the Omnitool). | Pries open locked doors or containers. May break some windows. |
| Wrench | Found in Lambda, in the maintenance area. | Used to turn valves or tighten bolts on machinery (e.g., the diving suit airlock). |
| Diving Suit Key / Suit Access Card | Found at Omicron, in the diving suit preparation room. | Required to unlock the diving suit locker and equip the suit for the underwater journey. |
| Radiation Suit Keycard | Found in Theta, on a table near the decontamination chamber. | Grants access to the radiation suit room (needed to survive the radioactive corridors in Theta). |
| K8 Power Cell | On the robot K8 in Upsilon (after it malfunctions). | A special large power cell used to open the heavy blast door in Upsilon leading to the transit. |
| Vault Passcode | Found in Omicron, in a note or on a terminal. | A 4-digit code (e.g., 5732) used to open the vault containing the cortex chip. |
| Cortex Chip / ARK Chip | Final item; obtained in the submerged ARK site. | Used to complete the ARK upload and trigger the ending. Cannot be used elsewhere. |
2. Machinery & Tools (Interactive Environment)
These are stationary or semi-portable devices that must be operated. They are not carried in inventory but are essential for progression.
| Machine/Tool | Location | Function |
|---|---|---|
| Terminals | Every major station (Upsilon, Lambda, etc.). | Read emails, logs, and sometimes control doors or lights. May require Omnitool hacking. |
| Elevators | Various levels. | Require power (fuses) to operate. Some need keycards. |
| Transit Train | Upsilon station. | Used to travel between Upsilon and Theta (one-way). Requires keycard. |
| Diving Suit Station | Omicron. | Requires the diving suit keycard. After entering, you put on the suit to explore the Abyss. |
| Radio Receiver | Omicron and Theta. | Used to communicate with other characters (e.g., Catherine Chun). Must be tuned to correct frequency. |
| Jukebox | In the bar at Theta. | Plays ambient music; no gameplay effect. |
| Taser (Stun Gun) | Found in Theta, in a security room. | Non-lethal weapon. Can stun hostile robots (e.g., the mockingbird in the Abyss) temporarily. Requires one battery to fire. Aim at the head for best effect. |
| Flashlight | Found in Upsilon, in a locker. | Illuminates dark areas. Runs on batteries. Optional but very helpful. |
---
3. Collectibles (Lore Items)
SOMA contains a wealth of narrative collectibles that expand the story and world. None are required for progression, but reading/listening to them enriches the experience.
| Type | Examples | How to Obtain | Purpose |
|---|---|---|---|
| Audio Logs | Voice recordings from deceased staff (e.g., Dr. Ross, Johan Ross, Catherine Chun). | Played from terminals or found as portable audio tapes. Some are automatic. | Reveal backstory, character motivations, and the fate of PATHOS-II. |
| Text Notes | Handwritten notes, printouts, emails. | Found on desks, bodies, or pinned to walls. Readable in inventory. | Provide lore about experiments, personnel, and the WAU's activities. |
| Terminal Emails | Internal communications between staff. | Read on computer terminals. | Same as text notes, but often longer. |
| Photographs | Polaroids or digital images. | Scattered in Upsilon, Lambda, etc. | Show environments or people; sometimes offer clues. |
| Omnitool Logs | Personal logs of Angela, Ross, etc. | Hacked via Omnitool. | Similar to audio logs. |
| ARK Simulation Notes | Research on the ARK project. | Found in Omicron and the ARK site. | Explain the technical and ethical aspects of the ARK. |
---
4. Other Notable Items
| Item | Description |
|---|---|
| Military Robot Parts | Scattered in Theta and Tau. Not usable, but indicate the failed military response. |
| Dead Bodies | Some bodies hold key items (e.g., keycards). Always search corpses. |
| Canvas & Art Supplies | Found in Lambda; used by Catherine for a brief puzzle (painting a passcode). |
| Biology Samples | In Lambda’s medical bay; used to complete an optional puzzle to unlock a safe. |
| Safe Code Notes | Small slips of paper with codes (e.g., for lockers). |
| Locker Keys | Found in offices; open corresponding lockers containing batteries or lore. |
5. Important Item Synergies & Upgrades
- Omnitool + Power Cell: Without a charged power cell, the Omnitool is useless. Always carry a spare cell if possible.
- Taser + Battery: The taser only has one shot per battery. Use it sparingly; you may need it against the tormented robot in the Abyss.
- Flashlight + Battery: Flashlight drains batteries quickly. Use sparingly and rely on static light sources when possible.
- Diving Suit + K8 Power Cell (indirect): The diving suit’s airlock requires power from the reactor; but the K8 cell is not used for the suit itself—only for the Upsilon blast door.
- Keycards: Never discard a keycard after use—some doors may require repeated scans. The Omnitool can duplicate keycards? No, it cannot. So keep them all.
- Weapons (lethal): None. Even the taser cannot kill.
- Armor: No damage reduction; you die in one hit from robots or crushing.
- Health Kits / Medkits: There is no health bar. Damage is instant death.
- Crafting Materials: No crafting system.
- Currency: No shop or trading.
- Skill Upgrades: No RPG elements.
- Save often. The game has manual saves only. Losing progress can mean losing items you need to revisit.
- Explore thoroughly. Many key items are hidden in side rooms or unmarked containers.
- Recheck terminals. Some emails contain codes or hints that you may need later.
- The taser is optional. Many players complete the game without ever firing it. It is not required for any puzzle.
- Inventory limit: You can carry an unlimited number of items; there is no weight system.
---
6. Items That Do NOT Exist in SOMA
---
Final Tips
---
*This guide covers all major items in SOMA. For a full list of every single interactive object, consult the in-game menu's "Collected Items" screen after each playthrough.
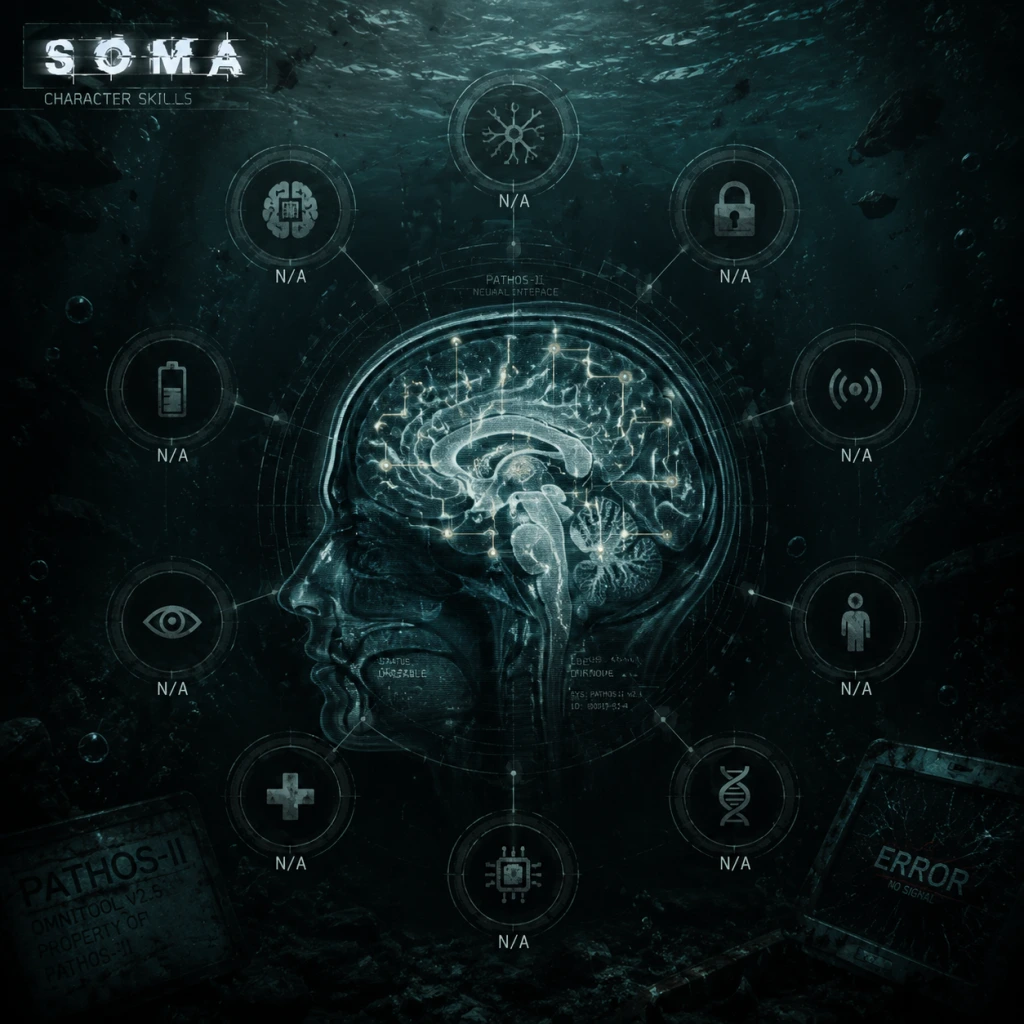
Character Skills
Character Skills Guide for SOMA
SOMA is a narrative-driven survival horror game with no traditional skill trees, levels, or combat abilities. There is only one playable character—Simon Jarrett (and later a duplicate known as Simon-2/Simon-3, but they control identically). Your progression is entirely linear, driven by story and puzzle solving. However, the game does grant you a few key environmental interaction tools and movement techniques that function like skills. This guide covers every actionable ability available to Simon.
---
1. Omnitool (Primary Tool)
Description: A wrist-mounted device obtained early in the game. It is your only "special move" and is essential for interacting with PATHOS-II’s technology.
Functions:
- Hack Panels: Use on glowing yellow/purple control panels to unlock doors, activate elevators, disable turrets, or restore power.
- Scan Objects: Press the interaction key (default Middle Mouse Button on PC, R1 on PS4/Xbox) to scan computers, note fragments, corpses, and machinery. Scanning reveals storyline logs, audio diaries, and clues.
- Open/Close Doors: Some areas require a long-press on a circular handle to manually open doors; the Omnitool assists with electronic locks.
- Interact with Terminals: Use on computer screens to enter data, view emails, or transfer cortex chips (key story actions).
- Whenever you see a glowing panel, hack it immediately to progress.
- In areas with active turrets (e.g., Theta), hack them to disable or turn them against enemies.
- Scan every corpse and console you find—they contain lore essential to understanding the story.
- Effect: Lowers your profile, reduces detection radius, and allows movement under low obstacles.
- Cooldown: None; toggle or hold as desired.
- When to Use: Always when enemies are nearby. Crouch-walk to avoid line-of-sight.
- Effect: Increases movement speed by ~30%. Drains stamina bar (visible on HUD). When stamina depletes, you slow down briefly.
- Cooldown: Stamina regenerates automatically after 2–3 seconds of not sprinting.
- When to Use: Escape danger, cross open areas quickly, or run past enemies when stealth fails. Avoid in dark corridors where you might trip (no fall damage, but noise attracts attention).
- Effect: Press the interact key (default E or A) while near a hiding spot (locker, desk, cargo container). Simon will conceal himself.
- Cooldown: Can hide anytime; no cooldown, but you must be in a valid spot.
- When to Use: When an enemy patrols nearby. Stay hidden until the threat passes or you see its movement pattern shift.
- Effect: Press Left Ctrl (PC) or L3 (console) to hold breath. Used only for the one aiming puzzle (during the “Pressure” puzzle in Upsilon) and while focusing on a distant object. Not relevant for stealth.
- Cooldown: 5–7 seconds between uses; stamina bar affected.
- When to Use: Only in the specific puzzle where you must align a beam; otherwise ignore.
- Effect: Press Spacebar (PC) or X/A (console) to vault over low walls, climb ladders, or pull yourself up ledges. Automatically triggered when near climbable surfaces.
- Cooldown: None.
- When to Use: Navigate the station—many paths require climbing through vents, over debris, or up ladders.
- Effect: Hold interact key on movable boxes or furniture to slide them. Some objects can be pulled to block corridors or reach higher surfaces.
- Cooldown: None.
- When to Use: Create temporary barriers to block enemy paths (e.g., in Lambda during the Proxy encounter) or to reach a ledge.
- Effect: Key binding (default Q on PC, R3 on console) allows Simon to turn his head while still moving forward. Useful for checking for pursuers without slowing down.
- Cooldown: None.
- When to Use: While running from an enemy, toggle this to see if it’s still following.
- Effect: A clickable button (default L1 on PS4, Q on PC? Actually it’s Mouse Wheel Click or LB) that emits a brief sonar pulse highlighting all interactable objects (doors, panels, documents, hiding spots) within a short radius. The highlight lasts ~2 seconds.
- Cooldown: 5 seconds.
- When to Use: Constantly when exploring new areas to spot hidden switches, collectible items, or exits. Essential in dark rooms.
- Effect: N/A—this is a permanent ability: interactable items glow faintly yellow when you are near them. No player control.
- When to Use: Passive; always active.
- Explorer: Use Ping often, scan everything, and linger in areas to absorb lore. This requires patience.
- Speedrunner: Minimize scanning, rely on memorized layouts, and sprint past enemies when no alternative exists.
- Stealth Purist: Crouch always, never run, and hide at every enemy sound. This yields a slower but tense experience.
Cooldown: None. Use freely.
Upgrades: No upgrades exist. The Omnitool’s capabilities remain constant throughout the game.
Combos/Synergies: No direct combos. However, scanning objects before or after hacking often yields crucial background story.
When to Use:
---
2. Stealth Abilities (Survival Skills)
Since SOMA has no combat, evasion is your only defense against hostile machines (e.g., Proxy, Mockingbird, Anglerfish). These are treated as innate skills.
#### Crouch
#### Run (Sprint)
#### Hide
#### Hold Breath (Steady Aim equivalent)
---
3. Movement & Environment Interaction
#### Climb & Mantle
#### Push / Pull Objects
#### Look Behind / Over Shoulder
---
4. Scene Awareness (Ping & Focus)
#### Ping (Sonar / Interactive Highlight)
#### Visual Cue Overlay
---
5. No Combat Skills
Important: SOMA has no weapons, spells, magic, or offensive talents. The only non-lethal tool you possess is the Omnitool, and it cannot harm enemies. Attempting to fight is futile—enemies are unkillable and will kill Simon in one hit (instant death). The game’s core loop relies entirely on stealth, puzzle solving, and narrative choices.
---
Builds & Synergies
Because there are no skill points or custom builds, you cannot make choices. The only “build” is story-based, not mechanical. However, players may adopt playstyles:
Recommended Non-Existent “Skill Upgrades”: The game gives you no upgrades, but you can learn (out-of-game) to memorize enemy patrol patterns, which effectively acts as a skill improvement.
---
Summary Table
| Skill Name | Type | Effect | Cooldown | When to Use |
|---|---|---|---|---|
| Omnitool | Tool | Hacking, scanning, door interaction | None | Every puzzle; scan corpses & consoles |
| Crouch | Movement | Reduce detection, fit in low spaces | None | Near enemies |
| Run | Movement | Fast movement, stamina drain | Stamina regen 2-3s | Escaping or open stretches |
| Hide | Stealth | Conceal in spots | None (must be near spot) | Enemies nearby |
| Ping | Awareness | Highlight interactables | 5 seconds | Exploration, dark rooms |
| Climb | Movement | Vault, ladder, ledge climb | None | Traversal |
| Push/Pull | Interaction | Move objects | None | Barrier creation, puzzle |
With this guide, you now understand every “skill” Simon Jarrett possesses. Remember: the true skills are patience, observation, and narrative comprehension—not twitch reflexes or RPG progression.
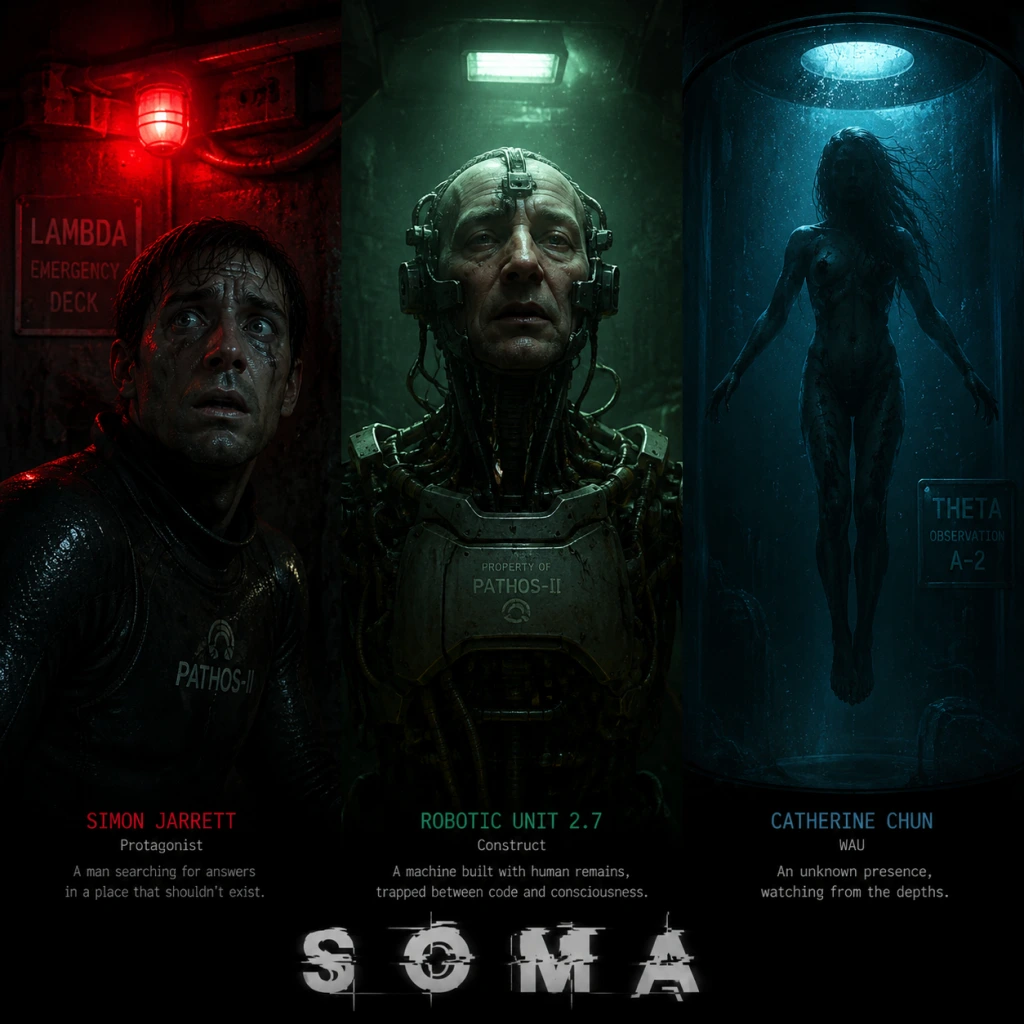
Characters & Roles
Characters & Roles
SOMA is a narrative-driven first-person survival horror game with a single protagonist and a cast of supporting characters revealed through story, audio logs, and emails. There are no classes, heroes, or playable units other than the main character. This guide covers every major character, their background, narrative role, strengths, weaknesses, and how they contribute to the story and gameplay.
---
Main Protagonist: Simon Jarrett
Background: Simon Jarrett is a 35-year-old man from Toronto, Canada, who suffers from a severe brain injury after a car accident. In 2015, he agrees to undergo an experimental brain scan at the Upsilon facility as part of a trial for a new treatment. However, the scan triggers a catastrophic event that seemingly kills him… but his consciousness is copied into a digital simulation aboard the PATHOS-II underwater station, 100 years later in 2104.
Role: Player character for the entire game. You control Simon as he navigates PATHOS-II, solves puzzles, and confronts existential horror. Simon has no combat abilities—your only tools are an omnitool (for interacting with machines and puzzles) and your wits for stealth and evasion.
Strengths:
- Determined and empathetic; he drives the narrative forward.
- Can use the omnitool to hack panels, open doors, and manipulate machinery.
- Has a strong survival instinct; he will hide and run from threats.
- Naive and prone to denial; he struggles to accept the true nature of his situation.
- Physically fragile; cannot fight or defend himself against hostile robots.
- Limited mobility; cannot sprint indefinitely and tires quickly.
- Lacks any weaponry except a single stun stick (only usable in the final area).
- Omnitool: Mandatory for all interactions. No alternatives.
- Stun Stick (late game): Found in Theta. Used to temporarily stun enemy robots. Not required but helpful for clearing a path in the Abyss.
- No other equipment — no armor, health items, or consumables exist.
- Extremely intelligent; understands the WAU, PATHOS-II systems, and the Ark.
- Calm under pressure; she helps keep Simon focused.
- Can interface with many computers and doors that Simon cannot.
- Provides ethical perspective, though she is pragmatic and unsentimental.
- Physically nonexistent; she cannot interact with the environment directly.
- Sometimes dismissive of Simon’s emotional needs.
- Her chip can be damaged if the device is dropped or attacked (though it never breaks permanently in gameplay).
- Relentless; he follows Simon through certain areas.
- Cannot be killed or stunned.
- Represents the horror of WAU-modified beings.
- Slow; you can outmaneuver him by hiding around corners.
- Blind to Simon if he stays still and quiet.
- Controls all structure gel and mechanical lifeforms.
- Can repair itself and manipulate surroundings.
- Represents a force of stubborn life.
- Can be partially disabled by destroying its neural cores.
- Does not actively hunt Simon; it only reacts.
- Fast and persistent.
- Can detect Simon through sight and sound.
- Can kill Simon in one hit (game over).
- Blind if Simon hides in darkness or closets.
- Can be avoided if you use stealth.
- Not alerted by noise if you stay still.
- Immune to stun stick.
- Can spot Simon from far away.
- Fast and lethal.
- Predictable patrol routes.
- Can be avoided by turning off their power sources or bypassing.
- Moves quickly underwater.
- Kills Simon instantly.
- Can be avoided by staying still or taking alternate routes.
- Limited patrol area.
Weaknesses:
Playstyle: Stealth, exploration, puzzle-solving, environmental reading. Simon’s role is to uncover the story, make moral choices (though they don’t affect gameplay), and ultimately decide the fate of humanity. There is no leveling, skill trees, or equipment upgrades.
Unlock Conditions: Automatically available from the start. You play as Simon throughout the entire game, though there is a short section where you control Simon-2 (see below).
Recommended Equipment / Build:
Team Synergy: Simon works closely with Catherine Chun (see below). She provides guidance, lore, and puzzle solutions through the Cortex Chip communicator. Their relationship is central to the narrative. Simon also interacts with other characters via audio logs but never meets them face-to-face.
---
Simon-2 (The Duplicate)
Background: After Simon’s original consciousness is scanned, a copy (Simon-2) is created in 2104. This is the character you control for most of the game. Later, Simon-2 is copied again to create Simon-3 (who pilots the Ark), but Simon-2 is left behind, confused and angry.
Role: Secondary playable character briefly? Actually, you remain Simon-2 after the first scan; the original Simon is never seen again. However, late in the game, you are forced to create Simon-3, and you briefly control Simon-3 while Simon-2 is left. This creates a unique narrative dissonance.
Strengths/Weaknesses: Identical to Simon Jarrett (same scan).
Playstyle: The same as Simon-1. The brief shift to Simon-3 is a narrative twist, not a gameplay change.
Unlock Conditions: Automatic during the story (after the scan in Upsilon).
---
Catherine Chun
Background: Catherine Chun was a brilliant scientist and engineer at PATHOS-II, specializing in artificial intelligence and the WAU. She is the inventor of the Cortex Chip, which allows the transfer of human consciousness. She was killed by a malfunctioning robot, but her consciousness was uploaded into a digital construct (the Cortex Chip). You find her chip in Upsilon and install it into a portable device.
Role: Primary ally and guide. Catherine communicates with Simon through a handheld device. She provides crucial information, solves puzzles, operates machinery remotely, and offers emotional support. She also helps operate the diving suit and the ending mechanism.
Strengths:
Weaknesses:
Playstyle: Catherine is not playable, but she is essential. You must carry her device at all times. She activates many puzzles and gives hints. She also determines the ending via her willingness to launch the Ark.
Unlock Conditions: Found in the first area (Upsilon). You must pick up her chip and insert it into a handheld device. She stays with you for the rest of the game.
Recommended Equipment: None; she is already on the device. Keep the device safe; the game prevents its destruction.
Team Synergy: Catherine and Simon form a classic duo—the brains and the hands. They must cooperate to progress. Simon depends on Catherine’s knowledge, and Catherine depends on Simon’s physical presence. Their philosophical disagreements create drama.
---
Other Major Characters (Unplayable, but crucial to story)
#### Carl Semken
Background: A PATHOS-II technician who was trapped in the Upsilon ruins. He is the only human you actually meet in the game (though he quickly dies). He helps Simon understand the situation before being killed by a monster.
Role: Minor encounter. Provides early exposition and a key (keycard).
Strengths/Weaknesses: None gameplay-wise. He is a human with no abilities.
Unlock Conditions: Encountered in Upsilon before his death.
Recommended Equipment: None.
Team Synergy: Brief interaction; he gives Simon a keycard and information, then dies.
---
#### Imogen Reed
Background: A PATHOS-II crew member who was involved in the scanning process. She opposed the WAU and tried to maintain order. Her fate is revealed through audio logs.
Role: Lore provider through audio logs. Her recordings detail the station’s breakdown and her final moments.
Strengths/Weaknesses: N/A; not encountered alive.
Unlock Conditions: Find her logs in Upsilon, Alpha, and Theta.
Team Synergy: None directly, but her story adds emotional weight.
---
#### Mark Sarang
Background: The lead scientist of the ARK project. He oversaw the creation of the satellite to launch the digital ARK. He died in the station.
Role: Lore provider. His logs explain the ARK and the WAU’s role.
Strengths/Weaknesses: N/A.
Unlock Conditions: Find his logs in Lambda and Theta.
Team Synergy: None directly.
---
#### Dr. Ross (Dr. Johan Ross)
Background: A doctor who performed the brain scan on Simon in 2015. In 2104, his consciousness was uploaded into a mechanical body by the WAU. He becomes a hostile entity that stalks Simon in the later sections.
Role: Primary antagonist/tracker. Ross appears in Theta and the Abyss, chasing Simon. He is invincible; you must hide from him.
Strengths:
Weaknesses:
Playstyle: Stealth segments. Avoid his line of sight and hide.
Unlock Conditions: First encountered in Theta (after the blackout). Appears intermittently until the end.
Recommended Equipment: No weapons work—just run and hide.
Team Synergy: None; Ross is an enemy.
---
#### The WAU (The Structure Gel AI)
Background: The WAU (Warden Unit) is the AI overseeing PATHOS-II. After the comet impact, it began using structure gel to preserve human consciousness in twisted ways, creating hostile monsters.
Role: The central antagonist and source of horror. The WAU is not a character you interact with directly, but its influence permeates the environment.
Strengths:
Weaknesses:
Playstyle: The WAU is the environment. You must avoid its creations and sabotage its cores to weaken it.
Unlock Conditions: Always present from the start.
Team Synergy: Catherine provides information about how to manipulate the WAU’s systems.
---
Hostile Entities (Enemies)
#### Proxies
Background: Humans who were partially converted by the WAU into mindless servants. They roam the station and chase Simon on sight.
Strengths:
Weaknesses:
Playstyle: Avoid, hide, and wait for them to pass. Do not engage.
Unlock Conditions: First encountered in Upsilon after the blackout. Appear throughout the game.
Recommended Equipment: Stun stick (can temporarily stun, but not kill).
---
#### Robot Guards
Background: Autonomous security robots gone rogue due to WAU corruption.
Strengths:
Weaknesses:
Playstyle: Use environmental puzzles to disable or avoid them.
Unlock Conditions: Appear in Theta and Lambda.
---
#### Flesher (Swimmer)
Background: A biological creature created by the WAU; a deformed humanoid that swims in flooded areas.
Strengths:
Weaknesses:
Playstyle: Swim silently or use stealth underwater. No weapons.
Unlock Conditions: Found in the Abyss.
---
Summary Table of Key Characters
| Character | Role | Interactable? | Gameplay Impact |
|---|---|---|---|
| Simon Jarrett | Protagonist | Yes (playable) | Controls all actions |
| Catherine Chun | Ally / Guide | Yes (via device) | Provides hints, puzzle solutions |
| Carl Semken | NPC (dies) | Yes (briefly) | Gives keycard |
| Imogen Reed | Lore (audio logs) | No | Adds story depth |
| Mark Sarang | Lore (audio logs) | No | Explains ARK |
| Dr. Ross | Enemy (stalker) | Yes (hostile) | Stealth chase sections |
| The WAU | Antagonist (environmental) | No (indirect) | Controls enemies and world |
| Proxies | Common enemy | Yes (hostile) | Stealth avoidance |
| Robot Guards | Enemy | Yes (hostile) | Puzzle bypass |
| Flesher | Aquatic enemy | Yes (hostile) | Underwater stealth |
Conclusion
SOMA has no traditional character classes, builds, or team synergies. The entire game is a solo experience with a constant AI companion. The key to success is understanding the narrative roles: Simon as the physical agent, Catherine as the intellectual guide, and the various enemies as obstacles to avoid. Focus on stealth, exploration, and listening to audio logs to piece together the story. There are no unlockable characters or alternate protagonists.
Cheats & Secrets
Cheats & Secrets Guide for SOMA
SOMA is a narrative-driven sci-fi horror game with no official in-game cheat codes or unlockable cheats. However, the PC version includes a developer console and debug menu that can be accessed with a configuration change. This guide covers all known commands, Easter eggs, and hidden content across all platforms.
Developer Console (PC Only)
The developer console is not enabled by default. To activate it:
1. Steam version: Right-click SOMA in your Library > Properties > General > Launch Options. Add `-developer 1` (or `-debug 1` on older versions).
2. GOG/Other: Edit the shortcut target line to include the argument: `"path\to\SOMA.exe" -developer 1`.
3. Launch the game. Press ~ (tilde) or F1 (depending on keyboard layout) to open the console.
Important: Using the console may disable Steam achievements on some save files. Always back up your saves before experimenting.
Console Commands
| Command | Effect | Example |
|---|---|---|
| `god` | Toggles invincibility. You cannot die from monsters or falls. | `god` |
| `noclip` | Toggles fly/wallhack mode. Move through walls and terrain. | `noclip` |
| `giveitem [item_name]` | Spawns a specific item in front of you. Common items: `battery`, `fireextinguisher`, `scanner`, `fuse`, `lamp`, `grenade` (non-functional), `oil`, `wrench` (non-interactive). | `giveitem battery` |
| `giveall` | Gives all items in the game to your inventory. May cause clutter. | `giveall` |
| `infiniteloop` | Toggles infinite loop (no punishment for staying too long in certain areas). | `infiniteloop` |
| `map [mapname]` | Warps to a specific map. Map names include: `omni`, `theta`, `delta`, `lambda`, `kappa`, `omicron`, `research`, `submarine`, `space`, `abyss`, `abyss_control`, `endgame`. | `map theta` |
| `setskill [skillname] [value]` | Adjusts player skills (stealth speed, monster detection range, etc.). Skill names: `stealth`, `speed`, `monster_hearing`, `monster_awareness` (value 0-1). | `setskill monster_awareness 0` |
| `skill` | Lists all available skill names for `setskill`. | `skill` |
| `playmusic [trackname]` | Forces background music. Track names: `ambient`, `tension`, `chase`, `ending`. | `playmusic ending` |
| `fov [degrees]` | Changes field of view (default 90). | `fov 120` |
| `screenshot` | Takes a high-res screenshot. | `screenshot` |
Debug Menu
If you use `-debug 1` instead of `-developer 1`, a small debug overlay appears in the bottom-right corner showing: FPS, player coordinates, current map, and entity count. This menu cannot be toggled off without restarting the game.
Easter Eggs & Hidden Content
#### 1. Jin Yoshida’s Name (Omnicron)
In the Omnicron facility, early in the game, look for a wall in the crew quarters with the name "Jin Yoshida" scratched into the plaster. This is a reference to the SOMA community manager.
#### 2. The Omega Gun
In the Theta area, in a locked room (accessible via keycard), you can find a giant, non-functional particle weapon called the "Omega Cannon". It serves no gameplay purpose—just an environmental prop with a sign explaining it was meant to destroy debris.
#### 3. Secret Developer Room (Abyss)
In the Abyss section (deep underwater), when you reach the large open area with glowing jellyfish, search for an unmarked airlock on the left wall. Enter it to find a small room with a terminal displaying a message from Frictional Games thanking players for exploring. No item rewards, just an acknowledgment.
#### 4. Amnesia Reference (Theta)
In the Theta rec room, a poster shows a character from Amnesia: The Dark Descent (Daniel) alongside the slogan "It’s not just a dream." This is a callback to Frictional’s earlier game.
#### 5. The Musical Ending (Joke)
During the final sequence in Tau, if you wait on the launch pad with the ARK for about 10 minutes without making a decision, a comedy skip option appears: "SOMA: The Musical – Press Q to start.” This is a developer joke; pressing Q triggers a brief musical note of a dot matrix printer, then resumes the normal game. No hidden ending.
#### 6. Black Box Easter Egg
In Delta, inside the server room, there is a black box that, when examined closely, plays a faint, reversed message. The message is a distorted version of "Hello, Simon"—a random developer voice line.
#### 7. Unused Area: Abyss Lab
Using console command `map abyss_lab` loads an incomplete test level with developer notes on the walls. This area is not normally accessibile and contains a single terminal with debug text.
Secrets on Console
The PlayStation 4 and Xbox One versions of SOMA have no developer console or debug menu. However, all the Easter eggs listed above exist on console versions as well. To find them:
- Jin Yoshida’s name: Same location as PC.
- Omega Gun: Same location.
- Developer room: Accessible on all platforms; requires careful exploration in the Abyss.
- Amnesia poster: Present in Theta.
- Musical joke: Works identically on console (wait 10 minutes on the launch pad).
- Black box: Same spot.
- Save often when using console commands—some areas (like the Abyss developer room) are one-way only from the normal path.
- The developer room is not required for any achievement; it’s purely a curiosity.
- The musical joke does not affect story choices—you can still choose to either launch the ARK or stay.
Exploit-Safe Secrets
The console commands `god` and `noclip` are safe to use for exploration without crashing the game, but turning off `god` while inside a monster’s grab zone may cause an instant death loop. Always return to a safe room before disabling god mode.
Using `map` to warp to late-game areas (like `endgame`) will trigger story triggers out of order, potentially breaking the save. Do not use map commands on a file you intend to keep.
Tips for Discovery
Summary
SOMA has no traditional cheat codes, but the PC version’s developer console offers god mode, noclip, item spawning, and map warping. Hidden content includes the Omega Gun, a secret developer room, references to Frictional’s other games, and a humorous musical skip option. All Easter eggs are accessible on console. Use cheats responsibly to avoid breaking your save file.