Sons of the Forest
## Game Introduction for *Sons of the Forest* ### Genre - Survival Horror, Open-World, Action-Adventure, Crafting, Building, Co-op ### Developer & Publisher - **Developer:** Endnight Games Ltd. - **Publisher:** Newnight ### Release Timeline - **Early Access Release:** January 23, 2023 (Steam) - *...

Download & Installation
Download & Installation Guide for Sons of the Forest
This guide covers everything you need to download and install Sons of the Forest on PC. The game is currently available exclusively on Steam (no console or mobile versions).
---
Official Source
- Steam: The only legitimate platform for purchasing and downloading Sons of the Forest. Visit the store page: [https://store.steampowered.com/app/1551360/Sons_of_the_Forest/](https://store.steampowered.com/app/1551360/Sons_of_the_Forest/)
---
System Requirements
| Component | Minimum | Recommended |
|---|---|---|
| OS | Windows 10 64-bit | Windows 10 64-bit |
| CPU | Intel Core i5-8400 / AMD Ryzen 3 3300X | Intel Core i7-8700K / AMD Ryzen 5 3600X |
| RAM | 8 GB | 16 GB |
| GPU | NVIDIA GeForce GTX 1060 3GB / AMD Radeon RX 580 4GB | NVIDIA GeForce RTX 3080 / AMD Radeon RX 6800 XT |
| DirectX | Version 11 | Version 12 |
| Storage | 20 GB available space (SSD recommended) | 20 GB on an SSD |
| Network | Broadband Internet connection (for download & initial validation) | Broadband Internet connection |
| Additional | Requires a Steam account | Requires a Steam account |
---
Account Requirements
- A free Steam account is mandatory.
- Purchase the game on Steam (either via the Steam client or website).
- Shader Compilation: On first and subsequent launches after updates, the game compiles shaders. This is CPU-intensive and can take 5–10 minutes. Be patient.
- Graphics Options: Set according to your hardware. Recommended for 1080p60 with recommended specs: High preset.
- Control Customization: The game supports keyboard, mouse, and controller (Xbox, PlayStation, etc.). Configure in Settings > Controls.
- Save Data: The game auto-saves at certain points (bed, cave entrances). You can manually save from the pause menu.
- Online Features: Requires a persistent internet connection for initial validation. Single-player and multiplayer modes are available.
---
Step-by-Step Installation on PC (Steam)
1. Install Steam (if not already installed)
- Download the Steam client from [https://store.steampowered.com/about/](https://store.steampowered.com/about/)
- Run the installer and follow the on-screen instructions.
- Log in with your Steam account (or create one).
2. Purchase Sons of the Forest
- In the Steam client, go to Store and search for "Sons of the Forest".
- Click the game and select Add to Cart.
- Complete the purchase (payment methods include credit card, PayPal, Steam Wallet, etc.).
3. Initiate Download
- After purchase, the game will appear in your Library.
- Click Install (the button in your Library or on the game's store page).
- Choose an installation location (default is `C:\Program Files (x86)\Steam\steamapps\common`).
- Steam will download approximately 20 GB of data. Ensure you have enough free space.
4. Wait for Download & Installation
- The download time depends on your internet speed. A 100 Mbps connection takes about 30–40 minutes.
- Steam will automatically verify the downloaded files after completion.
5. Launch the Game
- Once installed, click Play in your Library.
- On first launch, the game may compile shaders (this is normal and may take a few minutes).
- You may also see a Settings window: adjust graphics, resolution, and controls before entering the game.
---
First Launch Setup
---
Common Installation Errors and Fixes
| Error | Cause | Solution |
|---|---|---|
| "Not enough disk space" | Insufficient free space on installation drive. | Free up space or choose a different drive. Minimum 20 GB required. |
| "Steam servers too busy" | High traffic or connection issues. | Wait a few minutes and retry. Restart Steam if necessary. |
| "Files locked while writing" | Antivirus or another program interfering. | Temporarily disable real-time protection. Add Steam and the game folder to exceptions. |
| "Corrupted update files" | Partial download or disk error. | Right-click the game in Steam Library > Properties > Local Files > Verify integrity of game files... |
| "Failed to start (missing executable)" | Antivirus deleted a file or installation incomplete. | Re-run the installer via Steam (verify files). Check antivirus quarantine. |
| Shader compilation crash | Outdated drivers or unstable overclocks. | Update GPU drivers (NVIDIA/AMD). Reset GPU overclocks to default. |
| Low FPS after installation | Background processes or settings too high. | Lower graphics settings, close other apps, set Steam to offline mode. |
- Restart Steam and your PC.
- Run Steam as Administrator (right-click shortcut > Run as administrator).
- Disable VPN or proxy.
- Check your internet connection.
- Update Windows and DirectX.
- Expected file count: about 150,000–200,000 files (including dependencies).
- Verification time: 5–15 minutes depending on storage speed.
- Storage: The game benefits greatly from an SSD (faster loading, reduced pop-in).
- Multiplayer: Friends can join via Steam invite; requires all players to own the game.
- Mods: Sons of the Forest supports modding (through Steam Workshop). To enable mods, subscribe on the Workshop and ensure the game is updated.
- Backup: You can backup the installation folder (`steamapps\common\Sons of the Forest`) to avoid re-downloading after reinstalling Steam.
- Yes, Steam allows installation on external drives, but performance may be reduced on USB 2.0 or slow HDDs.
- No, currently only on Steam.
- No, only PC. No announcements for PlayStation, Xbox, or Switch.
- An internet connection is required for initial authentication and for multiplayer. Single-player can be played offline after the first launch (Steam must be in offline mode).
---
Post-Installation Verification
After installation, it's good practice to ensure the game files are intact:
1. Open Steam Library.
2. Right-click Sons of the Forest > Properties.
3. Go to Local Files tab.
4. Click Verify integrity of game files....
5. Steam will check all files and repair any corruption.
---
Additional Tips
---
Frequently Asked Questions
Q: Can I install Sons of the Forest on an external drive?
Q: Is the game available on Epic Games Store?
Q: Is there a console version?
Q: Do I need to keep an internet connection to play?
---
If you encounter any other issues, check the official Sons of the Forest community hub on Steam for solutions and patch notes.
Game Introduction
Game Introduction for Sons of the Forest
Genre
- Survival Horror, Open-World, Action-Adventure, Crafting, Building, Co-op
- Developer: Endnight Games Ltd.
- Publisher: Newnight
- Early Access Release: January 23, 2023 (Steam)
- Full Release (v1.0): February 22, 2024
- The game left Early Access after approximately 13 months of active development, during which numerous updates, bug fixes, and content additions were implemented based on community feedback.
- Current: PC (Windows) via Steam
- Note: As of now, there are no official console (PlayStation, Xbox, Nintendo Switch) or mobile versions announced. The game is optimized for keyboard & mouse and fully supports Xbox and PlayStation controllers.
- A heavily forested, mountainous island in the Pacific Northwest (fictional) during autumn/winter.
- Features diverse biomes: dense forests, snowy peaks, extensive cave systems, beaches, and abandoned camps.
- Day/night cycle and dynamic weather (rain, snow, fog) significantly impact gameplay and visibility.
- The island is littered with remnants of previous expeditions, research facilities, and ancient structures.
- The Protagonist (Player Character): A nameless ex-soldier. The player’s actions, equipment, and builds define this character. Can be customized with clothing and gear.
- Kelvin: A wounded, deaf soldier who survives the crash. He communicates via a notepad and can assist with tasks such as gathering logs, fishing, and building. His health and morale can be managed.
- Virginia: A three-legged mutant woman with an extra pair of eyes. Initially hostile, she can become a friendly companion who helps detect enemies and carries items. Her trust must be gained over time.
- Edward Puffton: The missing billionaire. The search for him drives the story.
- Other minor NPCs and hostile cannibal tribes are encountered.
- Deep Survival Mechanics: Manage hunger, thirst, stamina, body temperature, and health. Hunt, fish, gather, and craft to stay alive.
- Robust Building System: Construct complex bases from logs, stones, tarps, and more. Fortify defenses, create traps, and build furniture.
- Horror & Tension: The island is terrifying. Cannibals are intelligent – they track you, adapt to your tactics, and can be studied. Caves are claustrophobic and filled with nightmarish mutants.
- AI Companions: Kelvin and Virginia provide unique assistance, making the single-player experience feel less lonely and offering gameplay depth.
- Cooperative Multiplayer: Up to 8 players can explore, build, and fight together in seamless online co-op.
- Players who enjoy open-world survival games (The Forest, ARK, Valheim)
- Horror enthusiasts who appreciate atmosphere and jump scares
- Builders and crafters who love designing elaborate shelters
- Co-op groups looking for a challenging shared experience
- Fans of story-driven exploration games with a dark tone
- Single Player: Play alone with AI companions (Kelvin, Virginia). Full story and survival.
- Multiplayer (Co-op): Up to 8 players online. Host a public or private server. All players share progress on the same save. Difficulty scales with player count.
- No dedicated PvP mode – the focus is cooperative survival/horror.
- Single Player: Fully offline – no internet connection required. All AI and systems run locally.
- Multiplayer: Online only (requires internet and a Steam account). No local split-screen. Dedicated servers or peer-to-peer hosting (host must be online).
- Note: The game uses Steamworks for multiplayer. Cross-platform between PC and Steam Deck is supported (if both use Steam).
- As of the full release (v1.0), Sons of the Forest has no paid DLC or expansion packs. All major content updates (e.g., new weapons, enemies, building parts, story beats) were delivered for free during Early Access and continued post-launch.
- The developers have stated they may add more free content in future updates, but no specific roadmap has been promised beyond bug fixes and quality-of-life improvements.
- There are no microtransactions or in-game purchases.
- Dynamic AI Companions that Learn: Kelvin and Virginia respond to your actions. They can be ordered, they form emotional bonds (Virginia), and they can be killed permanently (Kelvin can be revived). No other survival game offers such integrated, non-player-driven companionship.
- Intelligent Enemies: Cannibals communicate with each other, retreat to regroup, set traps, and become more aggressive at night. They can be dismembered and will react to your base defenses.
- Realistic Building with Physics: Logs, stones, and planks must be physically carried and placed. Structures can collapse if poorly built. The building system allows for immense creativity.
- Seamless Open World with No Loading Screens: The entire island and cave systems are interconnected without loads, creating a truly immersive experience.
- Gore & Dismemberment System: The game features a detailed damage model where limbs can be severed, enemies can be decapitated, and environmental destruction is highly reactive.
Developer & Publisher
Release Timeline
Platforms
Story Overview
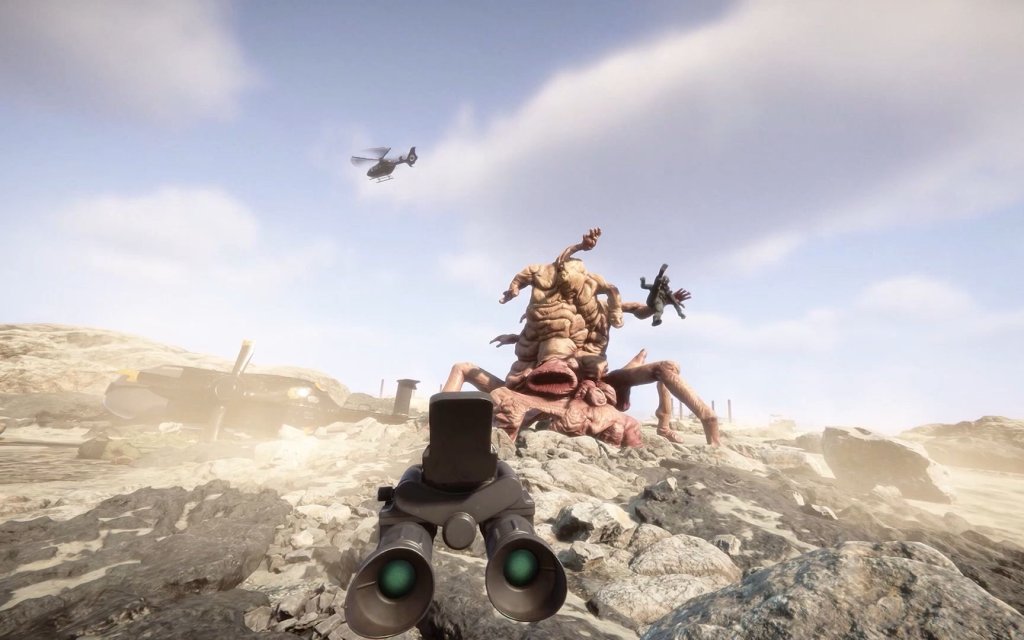
Sons of the Forest is a direct sequel to the 2018 hit The Forest. You play as a former special forces soldier sent on a rescue mission to a remote island where a wealthy billionaire, Edward Puffton, has gone missing. You are accompanied by a small team, but soon after arriving, your helicopter is shot down, leaving you stranded. The island is infested with cannibalistic mutants, strange creatures, and hidden secrets. Your primary objectives are to survive, find Edward Puffton, and uncover the truth behind the island’s horrific anomalies. The narrative unfolds through environmental storytelling, notes, audio logs, and encounters with other survivors.
Setting
Main Characters
Core Appeal
Target Audience
Game Modes
Online & Offline Support
DLC & Expansions (Overview)
What Makes This Game Unique?
---
Sons of the Forest builds on the foundation of its predecessor and refines every aspect: better graphics, deeper AI, more crafting options, and a more compelling story. Whether you explore alone or with friends, the island offers countless hours of tension, discovery, and survival.
Getting Started
Getting Started Guide for Sons of the Forest
Welcome to the island. This guide is designed to get you from the plane crash to a stable first night, covering every beginner's pain point. Sons of the Forest is a survival horror game with deep crafting, building, and combat. It is currently available exclusively on PC via Steam. No console or mobile versions exist.
---
First Hour Walkthrough (and What to Expect)
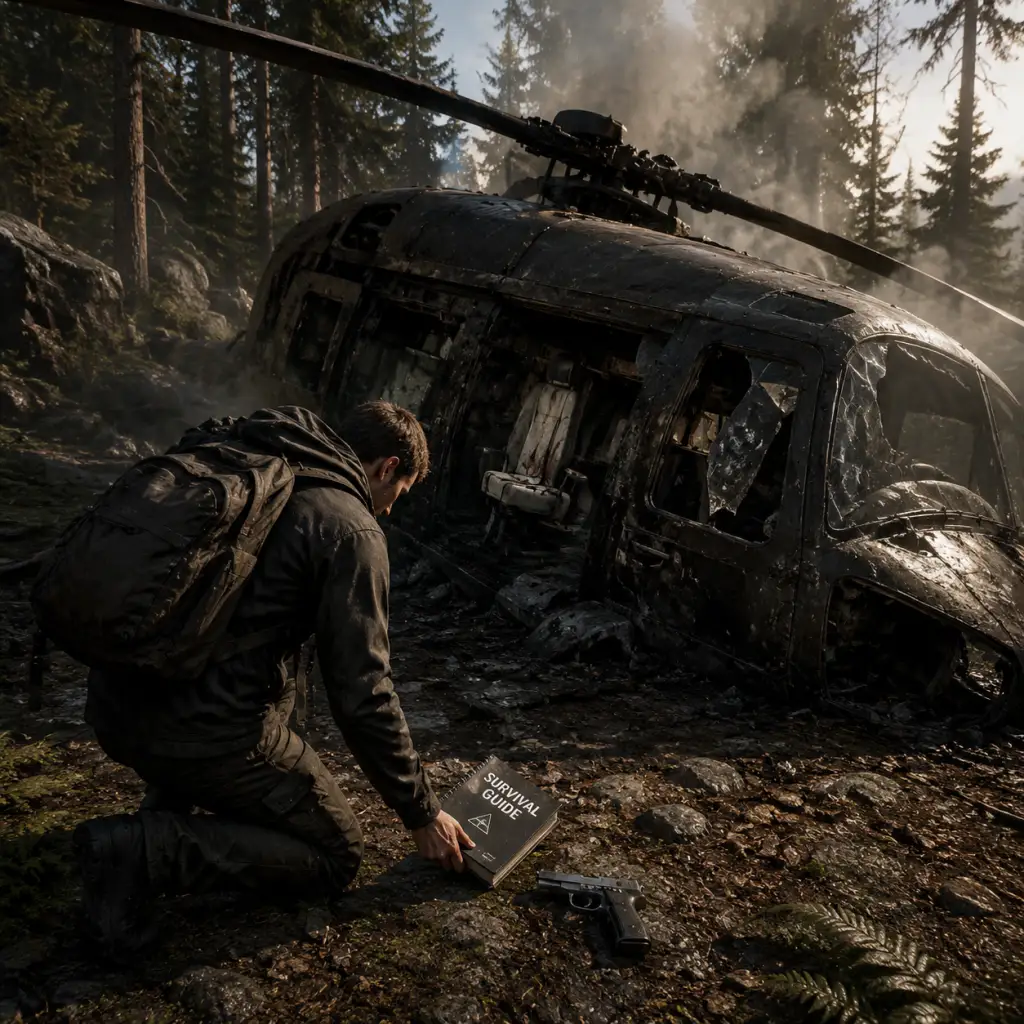
The game begins with a cutscene: your helicopter crashes on a remote island. You are automatically thrown out, and you black out. When you regain control, you are lying on the ground near the wreckage.
Your immediate goals (0-10 minutes):
1. Stand up and look around. You'll see the burning helicopter and a large crate nearby. Go to the crate and press the interact key (E on keyboard, X on controller) to open it and grab your Emergency Pack. This contains your GPS tracker (gives you a map), a flashlight, food, water, meds, and a maintenance keycard (for later).
- Important: Do NOT ignore the GPS tracker. It is your map, compass, and waypoint system.
2. Open your inventory (Tab on keyboard, Back/Select on controller). Equip the GPS tracker. Press the trackpad/use button to open it. You'll see a green dot (you) and a white quest marker (the direction of a cave you need to reach for the story). Ignore that cave for now. Your priority is survival.
3. Pick up everything from the crash site: scattered luggage, cans of food, bottles of water, cloth, duct tape, and any sticks or stones on the ground. Don't hoard too much – but don't leave anything behind.
4. Find a safe location. Look for a clearing near water. The crash site is not safe – cannibals will arrive soon. Move about 100-200 meters away from the crash, ideally into a forest patch. Keep the GPS open to track your position.
5. Gather basic resources. As you move, collect sticks (from bushes and ground), stones (gray rocks), and small rocks. Also look for berries (blueberries are safe; avoid red ones – they're poisonous).
6. Build a shelter. By the time 15-20 minutes have passed, you must have a small shelter. The simplest is a leaf shelter (see building section below). If you find a tarp (white cloth) from luggage, you can craft a tarp shelter which is quicker.
7. Make a fire. Before nightfall (around 20-25 minutes in), craft a fire pit (7 stones in a circle) and light it with a lighter (right-click on fire pit, or use lighter from inventory). A fire keeps cannibals at bay and allows cooking.
8. Get a weapon. Your first weapon is a crafted spear (2 sticks + 1 sharp stone) or a club (1 stick + 1 stone). Alternatively, find a pistol in a specific location (see later). But for early defense, a spear is fine.
9. Survive the first night. Stay near your fire, keep it roaring, and stay inside your shelter if you hear noises. Cannibals may investigate but usually won't attack directly if you have a fire.
By the end of the first hour, you should have:
- A basic shelter (leaf or tarp) near water.
- A fire pit with at least one log or several sticks.
- A crafted weapon (spear or bow).
- A small stock of food/water (3-5 canned goods, a few bottles of water, some berries).
- A GPS tracker active with your base marked (press F to place a waypoint at your base).
- Change clothes by picking up different outfits (e.g., wetsuit, thermal gear) found in suitcases or corpses.
- Equip armor (made from bones, hide, etc.) for protection.
- Customize your inventory layout (rearrange items in your backpack).
- Note: Do not expect any RPG-style customization. The game focuses on survival, not character aesthetics.
---
Character Creation and Customization
Sons of the Forest does not have a traditional character creation screen. You play as Kevin (canon name) – a middle-aged man with a beard. No gender, appearance, or name changes are available. Your character is fixed. However, you can:
---
Controls: All Platforms (PC and Controller)
The game supports Keyboard + Mouse (primary) and Xbox/PlayStation controllers natively on PC. There is no official console version, but controllers work seamlessly.
#### PC (Keyboard & Mouse) – Default Controls
| Action | Key |
|---|---|
| Move | W, A, S, D |
| Look Around | Mouse |
| Interact / Use | E |
| Open Inventory | Tab (hold for backpack) |
| Equip GPS | Tab -> click on GPS |
| Attack (Melee) | Left Mouse Click |
| Aim / Block | Right Mouse Hold |
| Reload / Action | R |
| Jump | Space |
| Sprint | Left Shift |
| Crouch | Left Control (toggle) |
| Light / Extinguish Fire | F |
| Map / Waypoints | G (open GPS) |
| Place Marker | F (while GPS is open) |
| Crafting | Open inventory -> Combine items |
| Build Mode | B (opens the construction book) |
| Radial Menu | Q (hold) – quick select items |
| Inventory Drop | Drag item out of backpack |
| Backpack | Press Tab (hold) to see bag; drag items into world |
| Action | Xbox Button | PlayStation Button |
|---|---|---|
| Move | Left Stick | Left Stick |
| Look | Right Stick | Right Stick |
| Interact | A | Cross |
| Attack (Melee) | Right Trigger (RT) | R2 |
| Aim / Block | Left Trigger (LT) | L2 |
| Open Inventory | Back (select) / View | Touchpad (or Share) |
| Jump | B | Circle |
| Sprint | Left Bumper (LB) | L1 |
| Crouch | Right Bumper (RB) | R1 |
| Light Fire | Y | Triangle |
| Crafting | Open inventory -> combine | |
| Build Mode | D-Pad Up | D-Pad Up |
| Radial Menu | D-Pad Down (hold) | D-Pad Down (hold) |
| Map / GPS | D-Pad Right | D-Pad Right |
| Item Drop | In inventory press X (Xbox) / Square (PS) on item | |
| Flashlight | Hold D-Pad Up (while equipped) | Hold D-Pad Up |
| Use Item | Click right analog stick (R3) for flashlight | R3 |
---
UI Overview
The Heads-Up Display (HUD) is minimal by design.
- Top-left corner: Health bar (red), Stamina bar (green), Energy bar (yellow) – all fill or deplete.
- Bottom center: Your currently equipped item (icon).
- Bottom-right: Temperature indicator (cold/heat); also shows if you are in combat.
- No mini-map – you must open the GPS (G) for a map.
- Inventory screen (Tab): A grid backpack. You can combine items by dragging one onto another (e.g., stick + stone = axe). Grayed-out items are locked until you learn the recipe via in-game guide book (picked up in caves).
- Build mode (B): Opens the construction book. You can place blueprints for structures (shelters, walls, traps) using planks, logs, and materials from the environment.
- Notebook: Press M to open your survival notebook. It contains crafting recipes, building plans, lore notes, and your map if GPS is active. Essential for progress.
- Quest markers appear as floating glowing orbs when you get near story objectives. They are white for main, gold for optional.
- Sound cues: The game heavily relies on ambient sounds for danger. If you hear strange growls or footsteps, hide or prepare.
- Do NOT venture into caves. They are dark, full of mutants, and you lack gear.
- Do NOT attack cannibals directly – you are weak. Use stealth or run away. Fire can deter them.
- Do NOT eat raw meat (causes food poisoning). Always cook over fire.
- Do NOT swim in deep water (no stamina, drown risk).
- Do NOT drink from stagnant puddles (sickness). Stick to rivers or rain.
---
Essential Early Objectives (First Day Checklist)
Your first day (0-24 in-game hours) must be structured. Follow this order:
#### 1. [0-5 min] Crash Site Looting
- Get Emergency Pack (GPS, flashlight, food, keycard).
- Grab every can, bottle, cloth, tape, stick, stone from the immediate area.
- Smash suitcases (by hitting them) to release items.
#### 2. [5-15 min] Find Water
- Locate a lake, river, or pond. Fresh water sources are marked on GPS if you explore. You can drink directly from them (press E while facing water), but it may make you sick after a while. Boiling water is better (craft a pot from a cooking pot found in villages). For now, drink from water sources sparingly.
- Pro tip: Collect rainwater using a turtle shell (craft a water collector later). For immediate use, find canned sodas or water bottles.
#### 3. [15-25 min] Build a Basic Shelter
- Leaf Shelter: 10 sticks + 30 leaves (gather leaves from bushes by pressing E). Place it on flat ground. This protects you from rain and gives a save point.
- Tarp Shelter: 1 tarp + 5 sticks. Faster but requires tarp found at campsites.
- Save point: Sleeping in a shelter autosaves. Manual save is at any shelter or bed.
#### 4. [25-30 min] Gather Firewood
- Collect at least 50 sticks and 3-4 logs. Logs are from chopping down trees with a crafted axe (stone + stick). Use firewood to keep fire burning through the night.
#### 5. [30-40 min] Craft Basic Tools & Weapons
- Crafted Axe: 1 stick + 1 sharp stone (from riverbeds) + 1 rope (found in villages or caves). If no rope, save this for later. Without rope, make a bone knife (1 bone + 1 stone) if you find a skull.
- Crafted Spear: 2 sticks + 1 sharp stone. Right-click to throw (left click for melee). Great for hunting deer.
- Bow & Arrows: 1 stick + 1 cloth + 1 rope for bow; arrows: 2 sticks + 1 feather (from birds). More advanced but worth crafting on day 2.
#### 6. [40-50 min] Secure Food
- Eat canned food (use from inventory). Don't waste meds on hunger.
- Hunt small animals: birds, rabbits, fish. Throw your spear at them. Cook meat on fire (press E on raw meat near fire to start cooking).
- Collect edible berries (blue and purple). Avoid red and white ones.
#### 7. [50-60 min] Prepare for Night
- Build a fire pit (7 stones in a circle). Place near your shelter, not too close to trees (can catch fire).
- Light fire with lighter (must have a lighter – you start with one in emergency pack).
- Add logs/sticks to fire to keep it burning for 6+ hours.
- Sleep in shelter to speed up time if you want (hold E while inside shelter).
What to avoid on day one:
---
Early Resource Priorities
| Priority | Resource | Why | How to Get |
|---|---|---|---|
| 1 | Sticks | Everything: fire, shelter, tools, arrows | Ground, bushes, breaking saplings |
| 2 | Stones | Weapons, fire pit, axe, sharp stones | Riverbeds, streams, scattered on ground |
| 3 | Leaves | Shelter, bedding, fire fuel | Bushes (press E near any green bush) |
| 4 | Logs | Fire fuel, building walls, bridges | Chop trees with axe (any). Logs roll downhill – use this to transport |
| 5 | Rope | Advanced crafting (axe, bow, shelter, traps) | Hanging from caves, in suitcases, villages. Rope is rare early on; prioritize finding a rope at a cannibal camp near the beach |
| 6 | Cloth | Bandages, armor, bow, molotovs | Suitcases, camps, cabins. Also used for healing (bandage + meds) |
| 7 | Food (canned) | Quick energy | Crash site, suitcases, cabins. Eat only when starving to save for emergencies |
| 8 | Water | Hydration | Rivers, bottles. Boiling or rainwater is better |
| 9 | Duct Tape | Repair tools, upgrade weapons | Suitcases, maintenance huts. Necessary for fixing flashlight or making axes |
| 10 | Bones | Knife, armor, decorations | Cannibal corpses (after killing). Boil bones for glue (advanced) |
Common Beginner Mistakes (and How to Avoid Them)
1. Wandering into the story cave immediately. The GPS points you to a cave. Do not follow it until you have a weapon, armor, and at least 10 meds. Cannibals are aggressive inside.
2. Ignoring the weather. Cold wetness reduces health and stamina. If you're shivering, sit by fire or put on dry clothes (change from inventory).
3. Not saving. The autosave only triggers when you sleep. Manual save from shelter is crucial. Save often – especially before exploring new areas.
4. Building a base too close to the crash site. Cannibal patrols spawn near the crash. Build at least 200m away, preferably with a water source.
5. Running from every fight. Sometimes you must stand your ground. If a single cannibal approaches, try to kill it with a spear – it will drop bones and rope. But if a group, run.
6. Hoarding without organizing inventory. Keep your backpack tidy: weapons in one row, food in another. Drop unnecessary items (like excess rocks) near your base.
7. Not using the radial menu (Q). It saves time. Assign your GPS, flashlight, weapon, and healing items to the hotbar.
8. Eating poisonous berries. Learn the colors: Blue = safe, Red = poison, White = poison, Purple = safe but rare. When in doubt, don't eat.
9. Not boiling water. Drinking from ponds often gives you a stomach infection (need meds). Always build a water collector (turtle shell + sticks) or use a cooking pot to boil.
10. Sleeping without fire. If you sleep outside a shelter without fire, you may freeze or be attacked. Always sleep near a fire in a shelter.
---
Day-One Checklist (Print-Friendly)
When you start a new game, tick off these before night falls:
- [ ] Pick up Emergency Pack from the crate near crash.
- [ ] Open GPS, place a waypoint at the crash site (so you don't lose it).
- [ ] Gather all items from crash area (food, waters, cloth, tape, sticks, stones).
- [ ] Move away from crash (at least 150m, preferably toward a lake).
- [ ] Find a flat spot near water to build a base.
- [ ] Gather 10+ sticks and 30+ leaves. Build a leaf shelter.
- [ ] Collect 7 stones, place a fire pit near shelter.
- [ ] Collect 10+ sticks for fire fuel; light fire with lighter.
- [ ] Craft a spear (2 sticks + 1 sharp stone).
- [ ] Hunt 1-2 small animals (birds/rabbits) or open a can of food. Cook meat on fire.
- [ ] Drink from a river (if safe) or use a water bottle.
- [ ] Equip flashlight (put in radial menu).
- [ ] Save game by sleeping in shelter.
- [ ] Stay near fire until dawn.
- [ ] Craft a stone axe (1 stick + 1 sharp stone + 1 rope) if you found rope.
- [ ] Find a trail of suitcases leading to a small camp – loot for armor and ammo.
- [ ] Scare away first cannibal by throwing a spear or lighting a fire.
Optional but recommended:
---
Congratulations – you survived the first day! From here, you can expand your base, explore caves, and eventually uncover the island's mysteries. Remember: Sons of the Forest is brutal but fair. Take it slow, respect the environment, and always carry a fire source.
Core Gameplay
Core Gameplay Guide for Sons of the Forest
This guide breaks down the fundamental gameplay systems of Sons of the Forest and organizes them into four player progression tiers: Early Game, Mid Game, Late Game, and Endgame. Each tier explains the main gameplay loop, combat/interaction, progression, exploration, quests/missions, economy, character/build growth, and endgame structure as it applies at that stage. Use this to understand what to prioritize and expect as you survive, build, and uncover the island's secrets.
---
Early Game (Days 1–5)
Main Gameplay Loop
You start with nothing after a plane crash. The loop is: gather resources → craft basic tools → find shelter → survive the first night. Priority is immediate needs: warmth, water, food, and a safe place to sleep before darkness and cannibals arrive.
Combat & Interaction
- Melee: Start with the Survival Knife (found on the plane wreckage). Basic left-click swings; hold right-click to block (consumes stamina). Early enemies (weak cannibals) can be killed in 3–4 hits but avoid groups.
- Ranged: Craft a Slingshot using a branch and a rag + duct tape (found in suitcases). Use rocks as ammo. Weak but quiet; good for hunting rabbits or stunning cannibals.
- Interaction: Press E to pick up items, hold E to interact with objects (e.g., open containers, grab logs). Use number keys to equip items from hotbar.
- Stealth: Crouch (Ctrl) to move silently. Stay out of line-of-sight and avoid running. Cannibals are attracted to noise and light.
- Basic Tools: Craft the Survival Guide to unlock recipes. Start with a Stone Axe (2 sticks + 1 rope + 1 small stone) for chopping trees and fighting. Craft a Spear (2 sticks + 1 rope + 1 sharp rock) for fishing and throwing.
- Survival Items: Make a Fire (stick + leaf + stone) for warmth and cooking. Craft Water Collector (tarp + 4 sticks) to get clean water if near rain. Build a Lean-To (10 sticks + 5 leaves) for a shelter to save the game.
- Armor: Craft Bone Armor (6 bones + 2 ropes) from animal bones; provides basic damage reduction.
- First Areas: The crash site top of a mountain. Explore the immediate forest for loot: red duffel bags, suitcases with duct tape, circuit boards, and food. Follow the coastal path east to find an abandoned camp with pop-up tent and supplies.
- Key Landmarks: Look for the Golf Course (open area with huts) and the Trader Camp (on the river). These have moderate loot but more cannibal patrols.
- Caves: Do not enter caves early; they have aggressive mutants. Stick to surface exploration and set up a base near fresh water (river or pond) and a tree line.
- Story Trigger: You are sent to find a missing billionaire and his family. The first story item is the Pistol (found in a cave near the crash site, but not recommended until you have at least a crafted bow). Early goal is to locate food and a GPS tracker (from the plane).
- Optional: Find the Shotgun (in a cave guarded by a large mutated baby) – too risky for early game. Ignore story caves until mid-game.
- No currency. Trade is not needed. Economy is pure survival: Item durability (tools break) and resource scarcity are the drivers. You loot everything you see – duct tape, cloth, wire, batteries, electronics, cloth, bones, food, meds, ammo.
- Crafting Stations: Not yet built; early game relies on hand-crafting from inventory (Press I).
- No stats or skill points. Growth is gear-based and knowledge-based: you unlock more recipes as you find the Survival Guide pages (scattered around the island) and learn enemy patterns. Your character becomes more capable through better tools, not leveling.
- Health/Stamina: Max health is 100; stamina regenerates slower when cold/hungry. Eating cooked meat restores health; drinking water restores stamina. No permanent upgrades – you remain fragile throughout.
- There is no endgame yet. Goal is to survive the first night and secure a sustainable food/water source. Once you have a basic shelter, fire, and a few weapons, transition to Mid Game.
- Primary Weapons: Craft the Crafted Bow (2 sticks + 1 rope + 1 cloth) – silent, ranged. Upgrade to Compound Bow (found in a cave) for faster draw. The Pistol (found in a cave near the beach) with 9mm ammo is a reliable backup. Molotov Cocktails (cloth + alcohol + bottle) are ideal for groups.
- Enemy Types: Standard cannibals (fast, weak), Pale Cannibals (hit harder, spawn at night), Virginia (a friendly but optional companion – you can befriend her). Mutants (creatures with multiple limbs) appear in caves; they soak up damage. Use fire or explosives.
- Blocking & Parry: Use crafted shield (stick + log + rope?) Actually, shields are not in the game – you can block with a melee weapon by right-clicking. Timing a block reduces stamina cost. No parry mechanic exists; dodge by sprinting sideways.
- Companions: Find Kelvin (injured survivor) near the crash site – he follows and helps gather logs, fish, etc. Give him commands via the guide book (B key). Virginia (three-legged mutant) can be befriended by approaching slowly and not attacking. She provides defense and gives items.
- Advanced Tools: Build the Shovel (found in a cave) – required to dig up key items and access underground bunkers. Craft Rope Gun (requires wire, rope, and a gooey part from a cave) – for ziplining and pulling structures.
- Building: Move from lean-to to Log Cabin or Fortress. Use the Building Guide (press B to open radial menu). Gather logs, planks, and rocks. Build defensive walls, spike traps, ziplines, and drying racks. Craft Explosives (circuit board + C4) from cave loot for dangerous mutants.
- Farming: Build a Planter Box (sticks + logs) and plant seeds (berries, tomatoes, potatoes) for sustainable food. Fertilize with bones and berry pulp.
- Key Areas: Enter Cave 1 (under the mountain) for the Shovel and 3D printer resin. Cave 2 (near the beach) for the Compound Bow. Surface: find the Rebreather in a cave near the lake – needed for underwater caves. GPS location markers: bunker entrances are key story points.
- Cave Combat: Mutants are blind but use echolocation. Move slowly, use flashlight sparingly. Headshots with bow kill weak mutants in 2-3 shots. Save before entering a new cave.
- Story Items: Collect the Laptop (from the bunker in the green circle on map), then find the VIP Keycard (in a cave), then access the Gold Room ( a cave that requires rebreather, shovel, and keycard). Also find the Golden Armor (in a cave) – not a story item but max armor.
- Rescue Companions: Kelvin and Virginia can be recruited; they are permanent companions. Keep them alive – they have no respawn.
- Begin 3D Printing: Use resin (found in caves and printers) at 3D printers to print items: 3D-printed sled (moves rocks/logs), Glider, Goggles, Binoculars, etc. Resin is limited – prioritize the sled for transport.
- Ammo crafting: Craft 9mm ammo at reloading station (requires brass, gunpowder, and primers) – found in bunkers and caves. .40 S&W ammo for the Shotgun.
- Inventory upgrades: Find the Better Backpack (in a cave) – increases carry capacity from 9 to 18 items. Craft a holster (requires leather) for a second weapon slot.
- Saving: Use beds or lean-to to save. You cannot save during combat. Build multiple beds across the map for save points.
- Still no endgame; you are mid-way through the story. Once you have the Shovel and Rebreather, you are ready for Late Game.
- Best Weapons: Shotgun (found in a cave near the beach) with slugs – one-shots most cannibals. Machete (found in the same cave) for fast melee. Sniper Rifle (found in a cave on the east side) for long-range kills. Crossbow (crafted from rope, stick, and fishing line?) – not in game; use bow.
- Bosses: The End Boss is the Mega Mutant found in the Gold Room. Use all explosives, shotgun headshots, and fire. The boss has three phases; run behind pillars to dodge projectiles. After defeat, you unlock the Golden Armor room.
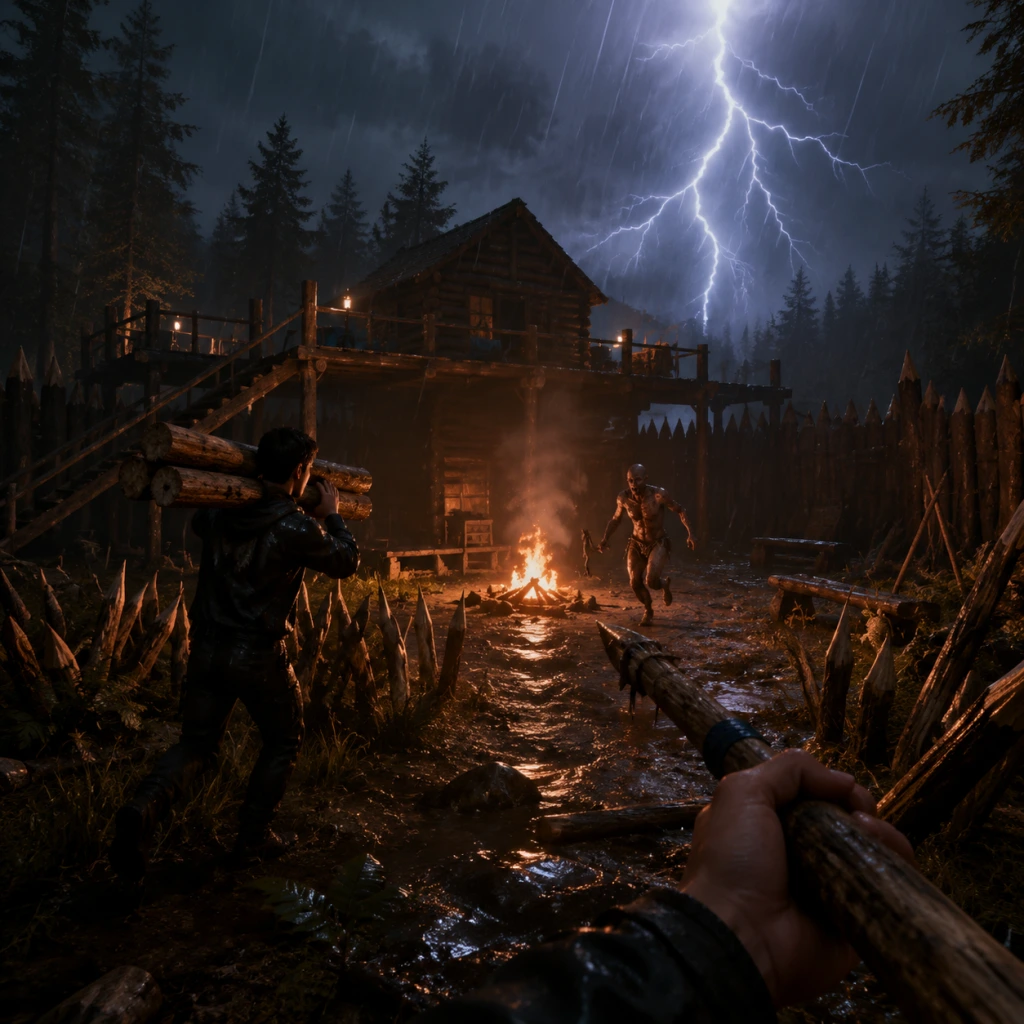
- Mutant Armies: At night, huge patrols may attack your base. Build traps (deadfall traps, spiked walls, electric fences – requires wire and solar panel from bunker). Use the Defensive Guide Book to automate some defenses.
- Final Tools: Build the Electric Fence – requires solar panel (found on a boat) and wire. Artifact Key is obtained after boss – not craftable. Golden Armor gives 95% damage protection but slows movement; wear only when fighting tough enemies.
- Automation: Build a Log Sled (requires motors? no) – just use 3D-printed sled for moving resources. You can stack multiple logs with the sled.
- All Caves: There are 7 story caves plus smaller loot caves. Late Game you should have visited all: Cave A (Shovel), Cave B (Rebreather), Cave C (Compound Bow), Cave D (Shotgun), Cave E (Sniper Rifle), Cave F (Golden Armor), Cave G (Gold Room – final). Also find Blob Island (hidden beach) with a special loot container.
- Underground Bunkers: Five surface bunkers (marked by green circles on GPS). Each contains story notes, loot, and sometimes recipes. Bunker Alpha has the laptop; Bunker Bravo has the card.
- Final Puzzles: In the Gold Room, you must place the Golden Armor on a pedestal, then use the Artifact Key (found behind the boss) to unlock the central vault. Inside, you find the Artifact (a glowing orb). This triggers the end cutscene – note that you can still play after credits.
- Alternate Solution: If you collect all three Golden Cages (from caves) and place them on the altar, you unlock a secret crafting recipe for the Grimm's Reaper mask – cosmetic only.
- Endgame resource loop: explosives and fire ammo are needed for the boss. Craft Remote Explosive Bombs (C4 + circuit board + wire) for massive damage. Alcoholic and rag for molotovs.
- Character/Build Growth: No further growth. You are maxed out on inventory slots (if you found the better backpack) and weapon upgrades. The Golden Armor is the best defense.
- After defeating the boss and watching the ending cinematic, you are returned to your save with the artifact. From here, you can continue building, exploring, and completing any unfinished caves. The artifact can be used to craft the Golden Mask (cosmetic) or just be kept. There is no New Game+.
- By now, you have all weapons. Combat becomes about efficiency: use the Sniper Rifle for long-range cannibal sniping, Shotgun for infestations, and Crossbow (if you found the blueprint) for silent kills.
- Mutant Lair Clearing: Some caves have respawning mutants? No, they do not respawn in the same session – but on new game they do. Use the Zipline mechanic to escape if overwhelmed.
- Max base building: Use the Admin Panel (creative mode? No – but you can cheat by using console commands in singleplayer). In survival, gather thousands of logs using the Log Truck (found at the lumber yard) – it can haul 30 logs at once. Build megastructures like a castle or zipline network across the island.
- Hidden Recipes: Craft the Bomb Spear (stop sign + bomb + rope) – one of the most powerful throwables. Create the Flaming Spear (spear + cloth + alcohol) for area denial.
- Full Map Reveal: Use the GPS Locator to mark all points of interest. There are 8 hidden Golden Door keycards (unlocks secret room in the cave with three display cases) – they spawn at random locations. You can also find all Survival Guide Pages (69 total) – collecting them unlocks achievements.
- Secret Area: The Underwater Lab (requires rebreather) – small flooded cave with a skeleton and lore notes.
- No story quests remain. There are consumer challenges: collect all artifacts, find all companions (all three are found already), build every buildable structure, craft every item. The Golden Mask achievement requires beating the game twice? No, only once.
- Multiplayer Co-op: If playing with friends, the host’s story progress applies. Each player must have their own inventory; there is no trading system except dropping items on the ground. You can share resources by using the same storage chest.
- Post-game resource loop is trivial: you have infinite sources if you built farms and water generators. Ammo can be mass-crafted if you collected brass/gunpowder. Use the 3D Printer for unlimited resin? No, resin does not respawn. But you can find enough for everything you need.
- No further growth. The only remaining pursuit is cosmetic: craft the Golden Mask (using the artifact) or wear the Red Mask (from cannibal camp). You remain as fragile as day one – the Golden Armor is your only defense.
- The game has no true endgame content beyond building and exploring. If you want a challenge, try a Hard Survival playthrough (enemies hit harder, resources scarce). Or restrict yourself: no Kelvin, no buildings – pure nomadic survival. The final endgame is 100% achievement completion, which requires completing all story and side objectives, collecting all items, and surviving at least 100 days for the Survivor achievement.
Progression & Crafting
Exploration & Map
Quests / Missions (Early)
Economy & Resources
Character / Build Growth
Endgame Structure (Early Tier)
---
Mid Game (Days 5–20)
Main Gameplay Loop
The loop expands: explore caves and surface POIs → craft advanced weapons → build a fortified base → rescue companions. You have stabilized basic survival and can now safely venture into dangerous territory.
Combat & Interaction
Progression & Crafting
Exploration & Map
Quests / Missions
Economy & Resources
Character / Build Growth
Endgame Structure (Mid Tier)
---
Late Game (Days 20–50)
Main Gameplay Loop
Focus is story completion: obtain the Golden Armor, clear all major caves, solve the puzzle in the Gold Room, and defeat the final boss. Your base is now a fortress. You can also explore the entire island for hidden caches.
Combat & Interaction
Progression & Crafting
Exploration & Map
Quests / Missions
Economy & Resources
Endgame Structure
---
Endgame (Post-Story, 50+ days)
Main Gameplay Loop
The story is complete. The loop shifts to: perfect your base → collect every item → explore every corner → build massive structures → play with friends in co-op. Survival mechanics remain; cannibals and mutants still spawn. Your goal is to reach 100% map exploration and unlock all achievements.
Combat & Interaction
Progression & Crafting
Exploration & Map
Quests / Missions
Economy & Resources
Character / Build Growth
Endgame Structure
---
Summary Table of Progression Tiers
| Tier | Days | Focus | Key Items Received | Goal |
|---|---|---|---|---|
| Early | 1–5 | Basic survival | Stone axe, spear, lean-to, fire | Survive first night |
| Mid | 5–20 | Exploration, caves, building | Shovel, Compound Bow, Pistol, Kelvin | Build base, start story |
| Late | 20–50 | Story completion, boss fight | Golden Armor, Shotgun, Rebreather, Artifact | Defeat final boss |
| Endgame | 50+ | Completionism, building | All weapons, 3D-printed items, max gear | 100% achievements |
This guide covers all core gameplay systems as they evolve through your journey on the island. Use the tier breakdown to know when to push story and when to focus on base upgrades. The key to success in Sons of the Forest is preparation: always carry backup weapons, food, and a sleeping bag. Good luck, survivor.
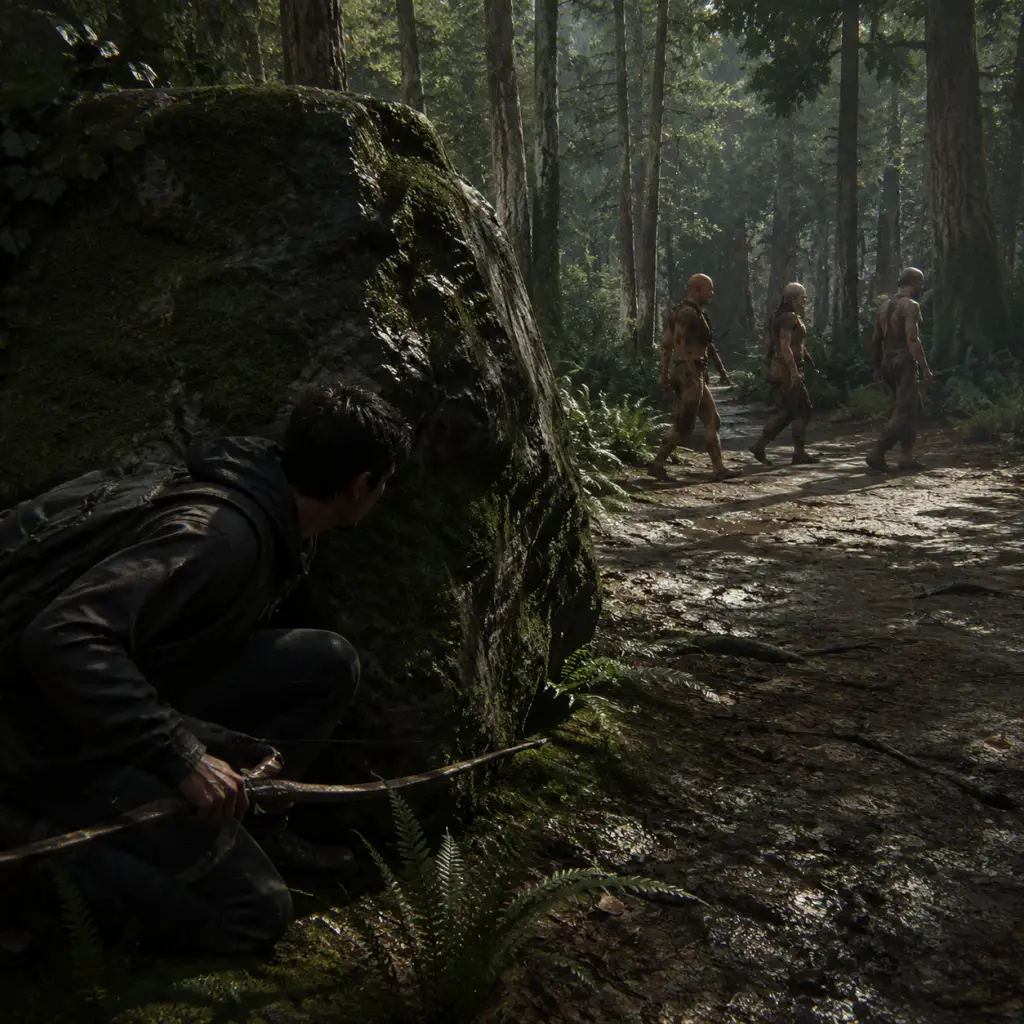
Game Tips
Game Tips Guide for Sons of the Forest
Below is a comprehensive collection of tips organized by category. Each tip includes a clear explanation and deeper analysis to help you survive, explore, and dominate the island.
---
Combat Tips
#### Beginner Level
1. Stealth Kills are King – Crouch and approach unsuspecting cannibals from behind. A single knife stab to the back instantly kills most small cannibals. Why it works: It saves ammunition, avoids alerting nearby enemies, and conserves stamina.
2. Use the Crafted Spear as a Ranged Weapon – The simple spear can be thrown for high damage. After throwing, retrieve it. When to use: Against lone enemies or from a distance to soften them up before melee.
3. Block with a Med-Slot Item – Quickly press the block key (default right mouse) while holding a torch or a repair tool to block attacks. Analysis: Reduces damage significantly and can stagger enemies if timed well.
#### Intermediate Level
4. Craft Molotovs for Crowds – Combine a cloth with a bottle of booze (found in camps). A single Molotov can set multiple enemies on fire, causing panic and damage over time. Best used: When surrounded or near flammable structures.
5. Headshots with the Slingshot – The slingshot deals massive damage if you land a headshot. Why it matters: It’s silent and uses easy-to-find stones, perfect for early-game hunting and stealth.
6. Use Traps Effectively – Place bone spears or floor spikes in chokepoints or near your base. Cannibals will walk into them. Pro tip: Combine with a noise maker (like a jar of teeth) to lure enemies into traps.
#### Advanced Level
7. Exploit Mutant Weaknesses – Mutants (like the Fingers or Twins) have specific weak points. For example, the big blue mutant is vulnerable to fire, while the crawling one takes extra damage from headshots. Strategy: Always carry a fire weapon (torch, Molotov) against fire-neutral mutants and aim for glowing red spots.
8. Learn Attack Patterns – Each enemy type has a predictable attack wind-up. Practice dodging (sprint + left/right) to avoid damage. Analysis: Mastering dodging lets you fight hand-to-hand without armor, saving resources.
9. Use the Environment for Combat – Climb onto boulders or logs to force cannibals into single-file paths. Jump down for a strike attack. Why it works: Verticality gives you a safe vantage point and limits enemy flanking.
---
Exploration Tips
#### Beginner Level
1. Mark the Map Immediately – Use the GPS locator (found in the starting cave) to mark points of interest: caves, food sources, and safe camps. Why: The island is huge; markers prevent getting lost.
2. Stick to Coastlines at Night – Night is dangerous due to increased cannibal patrols. Coastlines have fewer trees and better visibility. When to explore: Only venture inland during daytime.
3. Always Carry a Fire Source – A lit torch or lighter keeps you warm, provides light, and deters small animals. Practical use: It also ignites bushes to catch fish in streams.
#### Intermediate Level
4. Find the Rebreather Early – Located in a cave near the western coast, the rebreather lets you dive underwater to access hidden loot and cave shortcuts. Why it’s critical: Unlocks many resource caches and story progression.
5. Use the Shovel for Buried Loot – The shovel is found in the caves near the waterfall. It reveals buried suitcases, supplies, and key items. Analysis: Save time by prioritizing shovel acquisition before deep exploration.
6. Climb with Rope Gun – The rope gun (found in a cave on the eastern side) lets you create ziplines and climbable ropes. Best use: Connect high cliffs to your base for fast travel.
#### Advanced Level
7. Discover All Secret Locations – Use the green goggles found in a hidden bunker to spot gold markings on walls that lead to secret rooms. Tip: Combine with the maintenance keycard from the same bunker to open high-level loot doors.
8. Master the Caves’ Layouts – Each cave has multiple entrances and shortcuts. Learn the routes to quickly escape mutants or reach rare items like the shotgun or modern axe. Efficiency: Mark cave maps on your GPS with colored markers.
9. Utilize the Zipline Network – Build ziplines across the island to bypass dangerous forest paths. Connect high points to create a fast travel system. Advanced: Use two zipline ends to create an aerial “highway”.
---
Resources Tips
#### Beginner Level
1. Prioritize Sticks and Stones – These are the building blocks of all early tools and defenses. Gather them frequently. Why: They respawn quickly and are needed for fire, walls, and spears.
2. Fish for Infinite Food – Spear fishing in streams provides easy protein. Build a drying rack to preserve fish indefinitely. Analysis: Fish are renewable, give high hydration, and attract less attention than hunting.
3. Harvest Berry Bushes – Blueberries and blackberries restore small amounts of food and water. They respawn after rain. When to pick: Stockpile them for expeditions.
#### Intermediate Level
4. Chop Trees Efficiently – Use the modern axe (found in cave B) for faster wood cutting. Always cut trees at the base (not trunk) for more logs per tree. Why: More logs = faster building.
5. Set Up a Drying Rack – Place near your base. Racks hold up to 8 items (meat, fish, mushrooms) and dry them indefinitely. Pro tip: Roast food before drying for better preservation.
6. Collect Bones after Combat – Each cannibal drops bones. Use them for armor, bone spears, and decorations. Resource loop: Kill, skin, bone, craft, repeat.
#### Advanced Level
7. Locate the 3D Printer – Found in a bunker, it uses printer resin (collected from caves and enemy drops) to create unique items like the sled head, bomb, or extra weapons. Optimization: Focus printer resin on high-value items like the sled head for fast tree felling.
8. Understand Resource Respawning – Trees regrow after several in-game days if stumps remain. Rocks and sticks respawn near where you picked them. Advanced: Mark resource-rich areas on your GPS for repeated farming.
9. Use the GPS Plotter for Rare Resources – The plotter (found in a cave) lets you place markers for any resource type. Set one for “Cassette Tapes” or “Rope” to speed up collection. Why: Rare items like rope are needed for advanced builds.
---
Build Tips
#### Beginner Level
1. Start with a Simple Leaf Shelter – Combine 10 leaves and 2 sticks to create a basic shelter. Why: It provides a save point, warmth, and protection from rain. Later upgrade to a wooden cabin.
2. Build a Fire Pit Under Cover – Place a fire pit under a rock ledge or inside your shelter to keep it dry. Analysis: Wet fires don’t light; a roof prevents that.
3. Use Log Storage Racks – Build a log holder to organize your wood. Time saver: It allows you to store lots of logs neatly, reducing clutter.
#### Intermediate Level
4. Construct Defensive Walls – Use sharpened logs (craft with axe) to create spike walls. Cannibals will impale themselves if they run into them. Placement: Surround your base with a double layer and a gap for shooting.
5. Build Ziplines Between Cliffs – Requires rope gun and logs. Ziplines let you move goods quickly and escape enemies. Best use: Connect your base to a nearby cave or food source.
6. Create an Electric Fence – Requires wire, batteries (from caves), and a switch. Cannibals taking continuous damage while trapped. Warning: Drains batteries quickly; use sparingly.
#### Advanced Level
7. Design a Trap Corridor – Build a narrow path lined with spikes, hanging traps (from rope), and pressure-plate traps. Lure enemies with noise. Analysis: One corridor can kill multiple mutants without you lifting a weapon.
8. Use Creative Mode for Mega Bases – In single-player, activate creative mode (via settings) to build unlimited structures. Advanced tip: Design your base in creative first, then build it in survival for efficiency.
9. Elevate Your Base on Stilts – Build your main structure on tall logs or a cliff. Cannibals can’t climb steep walls. Why: It eliminates ground-level attacks and gives you a clear line of sight.
---
Economy Tips (Resource Management)
#### Beginner Level
1. Loot Everything and Store It – Every container and body yields something. Organize your chests by category (weapons, food, materials). Why: Prevents waste and saves time searching.
2. Trade with Only Kelvin and Virginia – While there’s no currency, you can give items to followers. Kelvin can be ordered to chop wood, collect fish, or clear debris. Virginia can be given firearms (shotgun, pistol) to fight alongside you. Efficiency: They automate resource gathering.
#### Intermediate Level
3. Prioritize Limited Items – Keycards, rope, wire, and ammunition are finite. Use them wisely. For example, wire is needed for traps and fences, so don’t waste it on decorations. Plan: Save rare items for essential builds.
4. Dry and Smoke Food for Longevity – Dried fish/meat lasts forever. Smoked meat (using a smoker) provides more nutrition but requires cooking. Best strategy: Stockpile dried food for exploration.
#### Advanced Level
5. Create a Resource Loop with Followers – Assign Virginia to hunt while Kelvin collects logs. You focus on exploring combat. Result: A steady income of materials without manual labor.
6. Maximize Printer Resin Yield – Only craft high-value items from the 3D printer: sled head (for tree clearing), bomb (for demolition), and extra arrows. Analysis: Printer resin is the only renewable “currency” for unique items.
---
Co-op Tips
#### Beginner Level
1. Split Roles – One player focuses on gathering resources, the other on building or combat. Communication is key. Why: Avoid duplication of effort.
2. Share Gear via Shelves – Placing weapons on weapon racks makes them accessible to all players. Tip: Build a central armory.
#### Intermediate Level
3. Use Revive Mechanics – A downed player can be revived by another if they have a medkit or a few seconds. Always carry a medkit in co-op. Strategy: Keep one player on medic duty during boss fights.
4. Designate a Base Builder – One person with advanced building knowledge can quickly construct defenses while others keep enemies at bay. Why: Efficiency.
#### Advanced Level
5. Create Staging Areas – Build small outposts with sleeping bags, food, and ammo across the map. In co-op, you can teleport to the same bed by sleeping. Use: Fast travel for the whole team.
6. Coordinate Traps and Ambushes – Use voice chat to lure cannibals into traps laid by another player. Advanced: Pre-plant bombs in chokepoints for instant kills.
---
Stealth Tips
#### Beginner Level
1. Crouch to Reduce Noise – Crouching lowers your footstep sound and makes you harder to detect. When: Always when near enemy camps.
2. Use the Crooked Fire – Carrying a lit torch creates a small light but also warms you. However, it makes you visible at night. Tip: Switch to night vision goggles (found in cave) for stealth nighttime movement.
#### Intermediate Level
3. Throw Distractions – Pebbles or jars of teeth can create noise that lures enemies away from your path. Usage: Perfect for bypassing hard enemies or drawing them into traps.
4. Silent Weapons – The crafted knife, throwing spears, and slingshot are all silent. Use them for stealth kills without alerting others. Why: No gunfire means no reinforcements.
#### Advanced Level
5. Use the Environment for Cover – You can hide in bushes or behind rocks. Enemies have a limited line of sight. Advanced: Stand still and turn to face a rock to reduce detection range.
6. Manipulate Enemy AI – Cannibals investigate noises for about 20 seconds before returning to patrol. Use this to predict their movement and position for a backstab.
---
Animal Hunting & Skinning
#### Beginner Level
1. Craft a Simple Bow Fast – Combine a stick, string, and stone arrow. It’s your first reliable hunting tool. Target: Deer and rabbits offer good meat.
2. Set Up Snares – Place rabbit snares near burrows. They catch animals automatically. Tip: Check them daily.
#### Intermediate Level
3. Use the Compound Bow for Big Game – Found in a cave, it deals more damage and has a scope. Best for: Moose and crocodiles which provide large amounts of meat and leather.
4. Skin Animals Immediately – Skinning gives you hides (for armor), bones, and meat. Don’t leave carcasses to rot. Analysis: bones are crucial for bone armor.
#### Advanced Level
5. Lure Predators with Bait – Place a dead rabbit or fish to attract wolves and cannibals. Then snipe them from a blind. Why: Harvest multiple enemies in one spot.
6. Create a Hunting Blind – Build a small elevated platform near a watering hole. Wait for animals to drink, then shoot. Efficiency: Can yield many kills quickly.
---
General Survival Tips
1. Stay Warm at Night – Build a fire or shelter to avoid hypothermia. Double benefit: Fire also deters some enemies.
2. Monitor Your Hydration – Water is separate from food. Drink from rivers (risky) or collect rainwater with a tarp. Better: Craft a canteen from a turtle shell.
3. Craft Armor Early – Bone armor (4 bones + 2 sticks) provides protection. Upgrade later to hide armor and then tech armor. Strategy: Always wear at least one piece to reduce damage.
4. Use Vitamins – Vitamin bottles boost your health restoration rate. Save them for after big fights.
5. Rest to Save and Recover – Sleeping in a shelter saves the game and restores health. Always build a shelter before exploring far.
---
Use these tips as a foundation. Every survival situation is different – adapt your strategies based on the island’s dynamic weather, enemy patrol routes, and your playstyle.
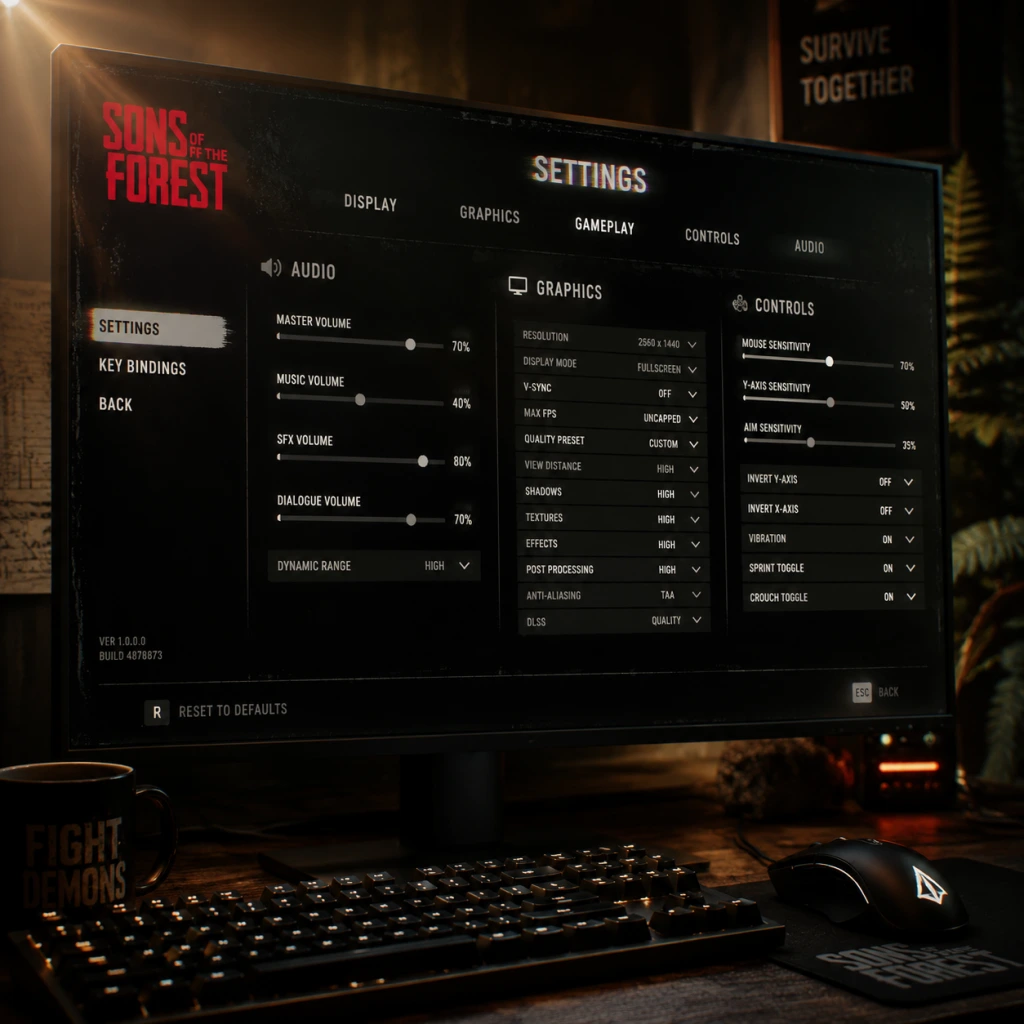
Game Settings
Game Settings Guide for Sons of the Forest
This guide covers every setting in Sons of the Forest across all categories: Graphics, Audio, Controls, Accessibility, Language, Network, and Gameplay. You'll find recommended values for different hardware levels, explanations of confusing options, and tips to avoid common misconfigurations.
---
Graphics Settings
Graphics are the most performance-impacting category. Sons of the Forest uses the Unity Engine and is more CPU-intensive than many other games due to enemy AI, building physics, and dynamic world events. Adjust these settings first.
#### Display & Resolution
| Setting | Recommendation | Note |
|---|---|---|
| Fullscreen Mode | Fullscreen | Borderless may introduce input lag. Use exclusive fullscreen for best performance. |
| Resolution | Native monitor resolution (e.g., 1920x1080, 2560x1440) | Always match your monitor's native resolution. Downscaling causes blur. |
| Resolution Scale | 100% | Lowering this makes the game blurry but improves FPS. Use Dynamic Resolution instead (see below). |
| Dynamic Resolution | Off | Unless you have severe FPS drops. When enabled, the game dynamically lowers resolution to maintain target FPS. Can cause distracting resolution shifts. |
| VSync | Off (if using G-Sync/Freesync) | Turn on only if you experience screen tearing and lack adaptive sync. Adds input lag. |
| Frame Rate Limit | Set to monitor refresh rate (e.g., 60, 144) | Prevents unnecessary GPU load. Use in-game limiter or driver cap. |
| Field of View (FOV) | 90–100 (default 75) | Higher FOV increases peripheral vision but can reduce performance slightly. Adjust to avoid motion sickness. |
Use these presets as a baseline, then fine-tune individual options.
| Hardware Tier | Example GPU | Preset | Key Changes |
|---|---|---|---|
| Low-End | GTX 1060 / RX 580 | Low | Texture Quality Medium, everything else off or low. |
| Mid-Range | RTX 2060 / RX 6600 | Medium | Shadows Medium, Ambient Occlusion SSAO, Anti-Aliasing TAA. |
| High-End | RTX 3070 / RX 6800 | High | Shadows High, Ambient Occlusion HBAO+, Textures Ultra. |
| Ultra | RTX 4090 / RX 7900 XTX | Ultra | All max, Ray Tracing On (if available), SSR High. |
| Setting | Low | Medium | High | Ultra | Note |
|---|---|---|---|---|---|
| Texture Quality | Medium | High | Ultra | Ultra | VRAM heavy. 4GB cards use Medium, 6GB+ use High. |
| Shadow Quality | Off | Low | High | Ultra | Major performance impact. High shadows look sharp, but eat FPS in forests. |
| Ambient Occlusion | Off | SSAO | HBAO+ | HBAO+ | Adds depth to shadows. SSAO is a good balance. |
| Reflections | Off | Low | SSR | SSR+ | Screen Space Reflections cause shimmer. Low acceptable. |
| Anti-Aliasing | FXAA | TAA | TAA | TAAx2 | TAA blurs slightly but reduces jaggies. TAAx2 smoothest. |
| Motion Blur | Off | Off | Off | Off | Personal preference, but often disabled for clarity. |
| Depth of Field | Off | Off | Low | Low | Blurs distant background. Off improves visibility. |
| Terrain Quality | Low | Medium | High | High | Affects draw distance of ground details. |
| Water Quality | Low | Medium | High | High | Underwater reflections cost performance. |
| Volumetric Cloud Quality | Off | Low | High | High | Heavy FPS cost in clouds. Low is fine. |
| Foliage Density | Low | Medium | High | Ultra | Dense bushes hide enemies but also cost performance. |
| Draw Distance | Low | Medium | High | Ultra | Increase if you spot pop-in. Low for FPS. |
| Ray Tracing | Off | Off | Off | On (if supported) | Only for RTX cards. Massive performance hit (~30-50%). |
- CPU bottleneck? Lower Foliage Density and Draw Distance to reduce CPU load from AI and building calculations.
- VRAM overflow? If you see stutters, lower Texture Quality and Resolution Scale.
- Use DLSS/FSR (if available)? The game may not have native DLSS. Check for updates; you can force via drivers or use Resolution Scale instead.
- Hide trees? Consider turning off Grass Sway and Tree Wind for 5-10% FPS gain.
---
Audio Settings
Audio is crucial for survival – hearing enemies, animals, and environmental cues can save your life.
| Setting | Recommended | Note |
|---|---|---|
| Master Volume | 80–100 | Keep high to hear subtle sounds. |
| Music Volume | 30–50 | Music can mask footsteps. Lower it for awareness. |
| SFX Volume | 100 | Most important for gameplay. |
| Voice Volume | 80 | For Kelvin and other characters. |
| Ambient Volume | 70–90 | Forest ambiance, rain, wind. Useful for immersion but can be reduced if you need to hear enemies. |
| UI Volume | 50–70 | Inventory clicks and menu sounds. |
| Spatial Audio | On (3D Audio) | Requires stereo or surround headphones. Enhances directional hearing. |
| Output Device | System Default or dedicated headset | Avoid virtual surround if using good stereo headphones. |
- Spatial Audio Off: If off, enemy sounds may not pinpoint direction. Enable for survival.
- Music Too Loud: New players often leave music high. Reduce to 20-30% to hear cannibal footsteps.
- Voices vs. SFX: If you play co-op and need to hear teammates, keep Voice high. Otherwise, reduce to avoid distraction.
---
Controls Settings
Sons of the Forest uses standard first-person shooter controls with extra survival actions.
| Binding | Default | Alternative | Note |
|---|---|---|---|
| Move | WASD | ESDF (if left-hand) | ESDF opens more keys for other actions. |
| Look | Mouse | Gamepad right stick | Use higher mouse sensitivity for quick turns. |
| Interact | E | F | Keep E; it's intuitive. |
| Attack | Left Mouse | Right Mouse (some prefer) | Default is fine. |
| Build Mode | B | G | Often misclicked. Remap if you accidentally open it. |
| Crouch | C | Left Ctrl | In combat, Ctrl is easier to hold while moving. |
| Run | Left Shift | Middle mouse (toggle) | Many prefer toggle run to avoid holding shift. |
| Toggle Flashlight | L | Q | Quicker access near Q. |
| Inventory | I | Tab | Tab often feels faster. |
| Map | M | - | Leave default. |
| Glider/Wingsuit | Space (double jump) | Mouse wheel up | Double jump is fine. |
- Controller recommended? For building and exploration, controller is comfortable. For combat, KBM is more precise.
- Aim Assist: Turn off if using mouse; turn on if using controller.
- Dead Zone (controller): Default 0.15; reduce to 0.10 if your analog stick has drift.
- Sensitivity: Start at 50% for mouse, 70% for controller. Adjust based on your DPI.
---
Accessibility Settings
The game offers limited accessibility options, but some can be adjusted.
| Setting | Description | Recommendation |
|---|---|---|
| Subtitles | On/Off | Always ON – dialogue helps with lore and Kelvin's notes. |
| Chat Size (co-op) | Small / Medium / Large | Medium for readability. |
| Colorblind Mode | Not natively available | You can use Windows color filters or ReShade. |
| Invert Y | On/Off | Off for most, On if flying sim muscle memory. |
| Controller Vibration | On/Off | Off if you need precision aiming. |
| Hold vs Toggle | Crouch: Toggle or Hold | Hold gives better control; Toggle reduces finger strain. |
- No UI scaling: Text may be small on 4K displays. Increase UI size via Windows display scaling.
- No separate speech-to-text: For deaf players, subtitles are essential – keep them on.
- High contrast: The game is dark. Adjust gamma in Graphics settings (default 1.0). Raise to 1.2 if you struggle to see in caves.
---
Language Settings
Available via Steam and in-game options.
| Setting | Default | Options |
|---|---|---|
| Text Language | Install locale | English, French, German, Spanish, etc. |
| Voice Language | English only | Only English voice acting. Spanish, Japanese, etc. are subtitled. |
| Subtitles | On | Turn on for non-native speakers. |
- How to change: Steam > Game Properties > Language. Some languages require downloading extra files.
- Regional differences: The game uses British spelling (e.g., "Armour"). No impact on gameplay.
---
Network Settings (Multiplayer)
For co-op play (up to 8 players).
| Setting | Explanation | Recommended |
|---|---|---|
| Multiplayer | Off/Invite Only/Friends Only/Open | Invite Only for controlled groups. |
| Server Region | Automatic or manual | Choose nearest region for lower ping. |
| Voice Chat | Push to Talk / Always On | Push to Talk (default key: V) to avoid background noise. |
| Voice Chat Volume | 50–100 | Adjust based on team communication. |
| Auto-Join Voice | On/Off | On so you hear team without manual join. |
- Host: The host's PC needs a strong CPU and decent upload speed (at least 5 Mbps).
- Ping: If you have high ping (>150ms), consider switching to a wired connection or playing with local friends.
- NAT: Ensure your router has UPnP or forward ports (27015-27020 UDP/TCP).
- Dedicated Server: Game does not have official dedicated servers; host via in-game lobby. You can rent a server from third-party providers.
---
Gameplay Settings
These affect how the game plays, not performance.
| Setting | Options | Recommendation |
|---|---|---|
| Difficulty | Normal / Hard / Hard Survival | Start on Normal. Hard Survival removes save points and map markers. |
| Story Difficulty | Separate from combat difficulty | Custom: you can adjust enemy damage, aggression, etc. |
| Compass | On/Off | On for navigation. Off for immersion. |
| GPS | On/Off | On – shows your position on map. Turn off for challenge. |
| Objective Markers | Always / Context / Off | Always for beginners. |
| Auto-Save | On/Off | Keep ON. Save frequency is adjustable (every 5/15/30 min). |
| Permadeath | On/Off | Off for learning. On for hardcore (character deleted on death). |
| Building Collapse | On/Off | On adds realism (structures can collapse). Off for creative mode. |
| Enemy Spawn Rate | Off / Low / Normal / High | Normal for balanced gameplay. High for challenge. |
| Cave Darkness | Normal / Reduced | Reduced if you fear the dark or have trouble seeing. |
| Aim Assist | Off / Partial / Full | Off for mouse; Partial for controller. |
| Crosshair | Always / Dynamic / Off | Dynamic – only shows when aiming. |
| Quick Save | F5 (default) | Remap to a more accessible key. |
| Quick Load | F9 | Caution: loads last save immediately. |
- Permadeath + Auto-Save: If you toggle permadeath, the game deletes your save on death. Only enable after you are comfortable.
- Building Collapse: New players often turn this off to avoid frustration, but it removes physics. Keep on for intended experience.
- Compass vs GPS: Compass doesn't show map coordinates; GPS does. Use GPS if you get lost easily.
- Cave Darkness Reduced: Turning it on makes caves significantly brighter. Some consider it cheating. Adjust to your comfort.
- Launch Options (Steam): Add `-window-mode exclusive` to force exclusive fullscreen if borderless causes input lag.
- Graphics Config File: Located at `%localappdata%\SonsOfTheForest\Saves\UserSettings\GameSettings.xml`. You can edit `ShadowDistance`, `DrawDistance`, etc. beyond in-game limits.
- Configurable FOV: Default 75. Edit `FOV` in the XML (e.g., `fov 100`) for a wider view without UI.
- Disable V-Sync via Driver: Override in GPU control panel (NVIDIA Control Panel / AMD Radeon Software) to avoid double buffering.
---
Advanced Configuration (Tweaks)
These settings are outside the game UI but can improve performance or quality.
> Warning: Editing configuration files may break achievements or cause instability. Backup the file first.
---
Quick Reference: Optimal Settings by Hardware
| Hardware Level | Resolution | Preset | Key Changes for Smooth 60 FPS |
|---|---|---|---|
| Low (GTX 1060 / 16GB RAM) | 1080p | Low | Textures Medium, Shadows Low, Off everything fancy. |
| Mid (RTX 2060 / 16GB) | 1080p | Medium | Shadows High, AO SSAO, TAA, Textures High. |
| High (RTX 3070 / 32GB) | 1440p | High | Shadows Ultra, AO HBAO+, Textures Ultra, Reflections Low. |
| Ultra (RTX 4090 / 64GB) | 4K | Ultra | All max, Ray Tracing On (if available), DLSS Quality (if supported). |
---
This concludes the comprehensive settings guide. Adjust based on your preferences and hardware. When in doubt, start with the recommended presets and tweak individual options until you find your perfect balance of visuals and performance.
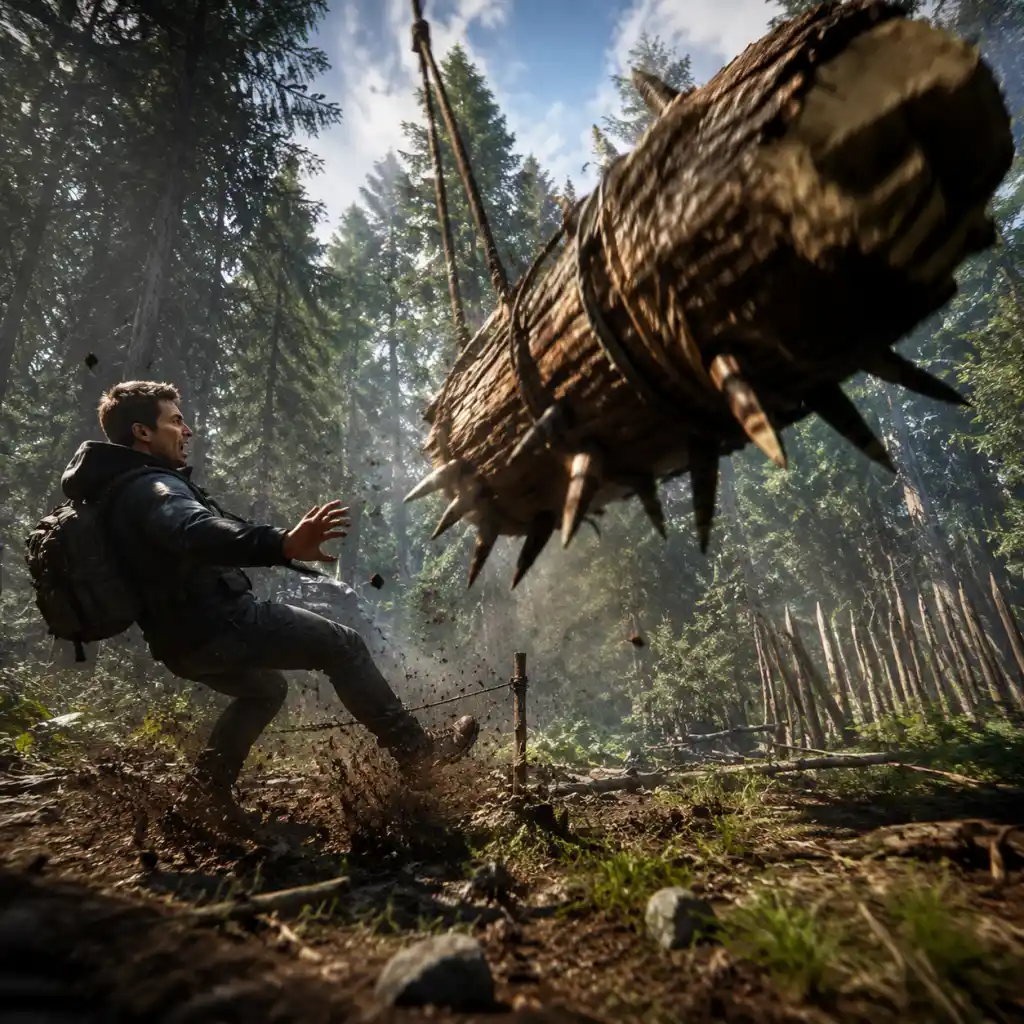
Important Notes
Important Notes for Sons of the Forest
This guide covers critical warnings, pitfalls, irreversible choices, missable content, difficulty spikes, grinding traps, online etiquette, save management, and common beginner regrets. Read before diving in to avoid frustration and wasted effort.
---
Warnings & Pitfalls
- Save Often, Save Everywhere: The game autosaves only when you sleep or enter certain caves, but manual saves are your safety net. Always save before:
- Sleeping Danger: Sleeping in a shelter during the night is safe, but sleeping outside or in an unprotected shelter can be interrupted by cannibals. Always build a basic wall or trap before settling.
- Starvation & Thirst: Don’t ignore food and water meters. Early game, berries and mushrooms are safe, but raw meat causes food poisoning. Always cook meat on a fire camp or drying rack. Water must be collected from ponds and then boiled in the crafting menu (combine a container with water + fire) or collected as rainwater with a turtle shell or bowl.
- Base Location Regret: Building in a beautiful, open area near water may seem ideal, but many locations are patrol routes. The beach shores are high-traffic; cliffs are harder to defend. Scout for natural barriers (cliffs, deep water) and proximity to caves (for resources) but also consider escape routes.
- Burning Structures: Fire is global. If you build a fire next to a wooden hut, it can catch fire and destroy your entire base. Always place fires on stone rings or far from walls.
- Dying ≠ Game Over: On Normal difficulty, you respawn at your last save with all items. On Hard Survival, you lose progress (items stay but respawn at a save shelter). Dying is not an irreversible screwup, but losing several hours of building progress is. Hence the save advice.
- Inventory Clutter: You have limited inventory space. Immediately craft a backpack (2 deer hide + 1 rope) to increase slots. Without it, you’ll be constantly dropping items.
- Story Ending Choice: At the very end, you have two options: (1) Leave the island with your friends or (2) Stay behind. This triggers one of two endings and cannot be undone (unless you reload a save before the decision). Save before entering the final bunker.
- Consuming Unique Items: Key story items like the Shovel, Rebreather, Crossbow, Pistol, and Grenade Launcher are one-time pickups. You cannot drop them, but if you lose them (e.g., thrown off a cliff), they may be recoverable from your last save. Never reload a save after picking up a unique if you can avoid it.
- Missable Lore Notes: Some lore notes (like the Painted Notes or Dead Camp Photographs) are located in specific camps. They are not needed for completion, but if you’re a completionist, explore every cave and camp before progressing to the third act (after the shovel). Check the GPS map for green question marks (unexplored points of interest).
- Killing Key NPCs: You cannot permanently kill allies like Virginia (if she’s friendly). If you attack her, she will flee and may become hostile. This can be reversed by leaving her alone and feeding her (berries), but it takes time. Similarly, Kelvin is invincible if you leave him, but if you kill him (possible with cheats), he is gone forever.
- Difficulty Selection: Once you start a game, you cannot change the difficulty. Hard Survival removes auto-saves and restricts save points to shelters only. Plan accordingly.
- Collecting Logs Manually: Chopping down trees one by one and carrying logs is slow. Instead, build a log sled (6 logs + 1 rope) early. Attach a rope to the sled to pull it, then cut trees and let the log fall onto the sled. You can stack multiple logs on it.
- Building Massive Fortresses Prematurely: A huge base requires thousands of logs and planks. Before you have a chainsaw or the replanting ability (from the shovel), stick to a small, defensible outpost. The forest regenerates very slowly in places.
- Hunting for Leather: Drying racks and furniture require leather. Instead of hunting every deer, build a trap (snare) and place it near animal paths. Check daily for trapped animals. Also, fish provide infinite food.
- Crafting Bone Armor: Bone armor is weak and breaks quickly. The Golden Armor (from a cave) is far superior (can be repaired with duct tape). Don’t waste bones on multiple sets.
- Using the Wrong Axe: The woodsman axe is fine for trees, but the Chainsaw (found in a cave on the east side) chops logs in seconds. Once you have it, manual chopping is obsolete.
- No Built-in Anti-Cheat: Sons of the Forest does not use Easy Anti-Cheat or BattlEye. Cheats are possible, but they may trigger issues with co-op if the host uses admin commands. Tip: If you join a public lobby, check if cheats are enabled (the host can toggle some).
- Shared Inventory Etiquette: In co-op, resources are shared between players. Don’t take all the logs or food from a shared storage. Communicate with your teammates.
- Building Permission: Don’t build in someone else’s designated area without asking. The host has supreme control; they can demolish your structures.
- Voice Chat & Ping: Use the in-game ping system (default Q) to mark items or locations. Voice chat is helpful, but be respectful.
- Progress Saves to Host: Only the host’s world is saved. Guests keep their inventory when they leave, but any structures built or items placed are saved only in the host’s game. If you want to continue a world, you must rejoin that host or have them share the save file.
- Dedicated Servers: There are no official dedicated servers. Co-op is peer-to-peer, so the host must be online for others to play in that world.
- Manual Saves: Press ESC > Save > Create New Save. Always use separate slots (e.g., “Before Cave”, “Base Day 10”, “Pre-Ending”). Overwriting the same slot risks losing progress if the save corrupts.
- Autosaves: The game creates an autosave when you sleep or enter a cave. Use these as backups, but don’t rely on them exclusively.
- Hard Survival Saves: Only allowed at save shelters (not autosaves). Place save shelters (built from logs) around the map—especially near important caves or bases.
- Delete Old Saves: Too many saves can lag the menu. Delete unnecessary ones from the save folder: `%USERPROFILE%\AppData\LocalLow\Endnight\SonsOfTheForest\Saves\[steam_id]`.
- Multiplayer Saves: Hosts should back up their saves before hosting a game with new players—trust issues may arise.
- Entering a new cave or bunker.
- Fighting a large group of cannibals or a boss.
- Building large structures (power outages or crashes can corrupt).
- Trying risky actions like climbing a tall rope or jumping down a cliff.
---
Irreversible Choices & Missable Content
Most of the game is open-world and revisitable, but a few points are permanent:
---
Difficulty Spikes
1. First Night: No weapons, no shelter, cold, hungry, cannibals patrol. Pitfall: Building a fire out in the open attracts attention. Build a small hut or find a pre-existing shelter (e.g., the abandoned tent on the beach).
2. First Cave (Cave of the Dead or Cave A): Introduces mutants like the Sluggy and Fingers (fast, crawling enemies). They hit hard. Bring a spear and lots of arrows. Without a rebreather, some underwater passages are blocked.
3. The Shovel Bunker: After obtaining the shovel, the game’s difficulty escalates. Enemies become more aggressive, and the final bunker has Cube enemies and the final boss. Bring the best armor (Tech Armor or Golden Armor) and the Shotgun or Grenade Launcher.
4. Final Boss: The giant mutant that chases you through the final cave. It can one-shot you if you’re not careful. Use the crossbow with explosive bolts or the grenade launcher. Save often.
Tip: Upgrade your weapon with duct tape and sharpen it to increase damage and durability. Always carry repair kits (duct tape + wood) for armor.
---
Grinding Traps & Efficiency Tips
---
Online Etiquette & Anti-Cheat
---
Save Management
---
Things Beginners Regret Not Knowing
1. The GPS Tracker Is Your Map: Press M to open the map. Right-click to place markers (caves, resources, bases). Use the red pins to mark unexplored caves. The map reveals points of interest once you get close enough.
2. You Can Replant Trees: After obtaining the shovel, you can dig holes and plant seeds from harvested berries or aloe. This provides renewable food and meds.
3. Tech Armor (Golden Armor) Exists: Found in a cave on the west side (requires rebreather). It has high defense, can be repaired with duct tape, and gives 10 inventory slots. Prioritize finding it.
4. Hotkeys Are Your Friend: Use number keys to cycle weapons. Bind items like the cooking pot or gps to hotbar slots for quick access.
5. The Crossbow Is Silent and Powerful: Crafted from parts found in the world. It can one-shot most cannibals and is excellent for stealth.
6. You Can Build Zip Lines: Using a rope and a log, you can create a zip line to transport logs downhill. Place a log sled at the bottom and fill it while above.
7. Night Is Dangerous but Rewarding: Many cannibals sleep at night, making it easier to explore camps and caves quietly—but more mutants spawn. Weigh the risk.
8. Caves Are Not Instanced: They remain in the overworld; enemies respawn over time. Don’t assume a cleared cave is safe forever.
9. You Can Dye Armor & Clothes: Combine paint with armor or clothing at a crafting station for camouflage or style—purely cosmetic.
10. The Story Is Not Deep: Read the lore notes for context. The main objectives are simple: find the missing guests, get the rebreather, the shovel, and then reach the final bunker. Don’t get lost.
---
This guide assumes version 1.0 (full release). Future updates may change mechanics. Always check the patch notes.
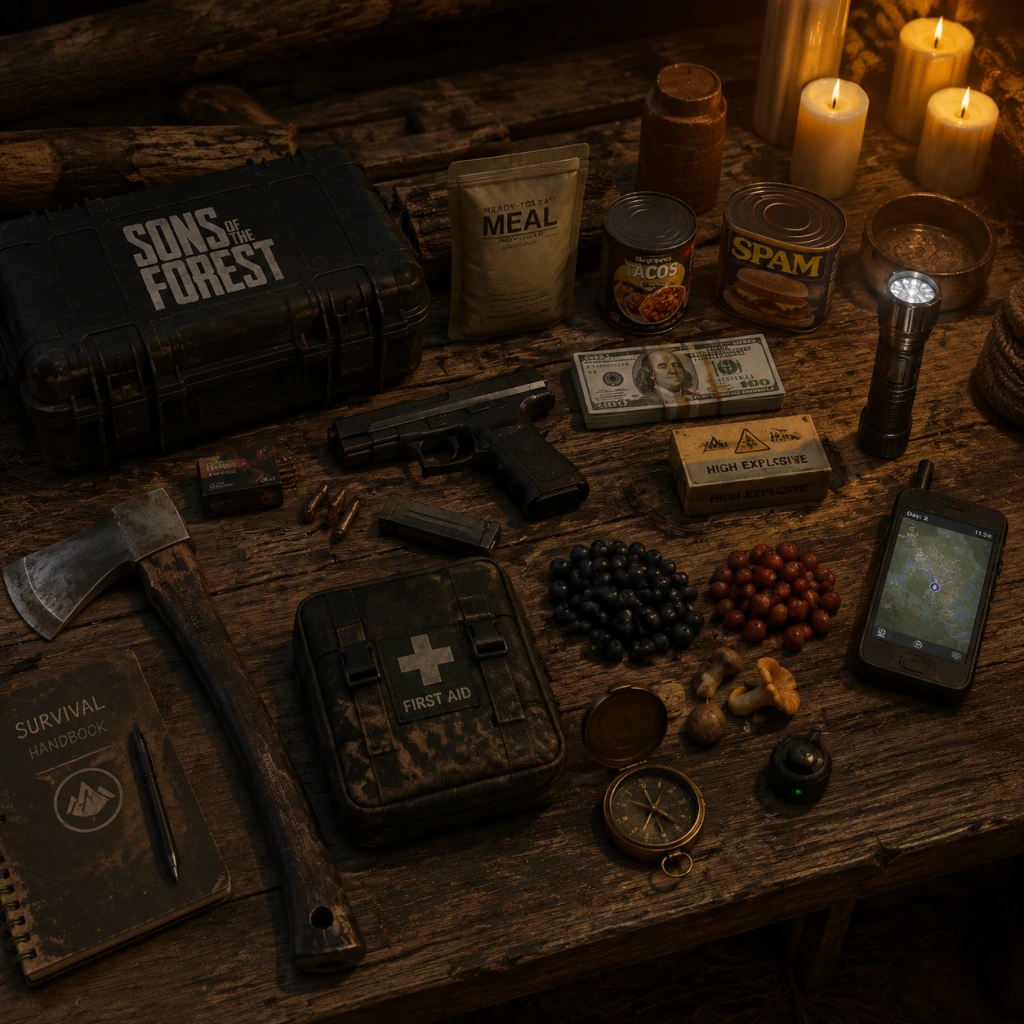
All Game Items
All Game Items Guide for Sons of the Forest
This guide catalogues every major item in Sons of the Forest, grouped by category. For each item, you'll find its function, acquisition method, optimal use cases, and any important upgrades or synergies. Items exclusive to specific game stages are noted.
---
Weapons
Melee Weapons
Crafted Spear
- Function: Versatile melee and thrown weapon. Good early-game reach damage.
- Obtain: Craft from 2 sticks + 1 knife (or 2 sticks + 1 bone). Can also be found in caves.
- Use: Best for poking mutants from a distance. Thrown spears can be retrieved.
- Upgrade: Adding cloth + resin turns it into a Fire Spear (sets enemies ablaze).
- Function: High damage melee/lumberjack tool. Found in a specific cave.
- Obtain: In the cave near the crash site (southwest beach).
- Use: Excellent for chopping wood and fighting early mutants. Slow swing but powerful.
- Notes: Cannot be upgraded, but it is a top-tier melee tool throughout the game.
- Function: Fast, moderate damage slashing weapon. Good against weak enemies.
- Obtain: Found in a hidden bunker near the golf course (requires shovel).
- Use: Great for clearing cannibals and smaller mutants due to fast attack speed.
- Synergy: Combine with flashlight attachment for night combat.
- Function: Medium speed/damage melee, can cut foliage.
- Obtain: Found on a dead body in a cave (early accessible).
- Use: Good all-rounder before getting Katana or Modern Axe.
- Synergy: Can be upgraded with a sharpening stone to increase damage (found near rivers).
- Function: Essential for skinning animals, opening boxes, and quick stabs.
- Obtain: Starting item in your inventory after the plane crash.
- Use: Always keep this in your hotbar. Also used to harvest armor from large mutants.
- Function: Slow, heavy blunt weapon. High stamina damage to block breaking.
- Obtain: Craft from a large bone + ropes (bone club) or log + ropes.
- Use: Useful for breaking open doors and stunning mutants.
- Upgrade: Can be reinforced with cloth and resin for armor damage.
- Function: Semi-automatic pistol, moderate damage, high fire rate.
- Obtain: Found in a cave (green case) early-to-mid game.
- Ammo: 9mm rounds.
- Use: Best for headshots against cannibals. Use against mutants for emergency.
- Attachment: Can attach a Silencer (crafted from bottle + cloth + tape) and a Red Dot Sight (rare, found in bunkers).
- Function: Very high close-range damage, spreads shot.
- Obtain: Found in a cave or later in the game (e.g., after crossing the lake).
- Ammo: Shotgun shells.
- Use: Best for large mutants or groups. Slow reload.
- Upgrade: Scope can be added (rare).
- Function: High damage per shot, slow fire rate. Six shots.
- Obtain: Found in a bunker on the east side of the map.
- Ammo: .357 Magnum rounds.
- Use: Excellent for taking down mutants with 2-3 headshots. Slow but powerful.
- Function: Long-range, high damage, bolt-action.
- Obtain: Near the helicopter crash site on the mountain (requires climbing or zipline).
- Ammo: .308 rounds.
- Use: Best for sniping sleeping camps or distant threats. Scope built-in.
- Function: Silent ranged weapon, retrievable bolts.
- Obtain: Found in a cave near the snowy mountains.
- Ammo: Crossbow bolts (craftable from sticks + feathers).
- Use: Perfect for stealth kills. Bolts can be retrieved from corpses.
- Function: Weak but silent, can launch berries or rocks.
- Obtain: Crafted from a stick + cloth + tape.
- Ammo: Small rocks or berries.
- Use: Early-game hunting or distraction. Not for combat.
- Grenade: High explosive, thrown. Found in crates and military bunkers.
- C4 Explosive: Customizable remote explosive. Crafted from circuit board + wire + tape + plastic. Used for destroying blocked caves or mutant camps.
- Molotov Cocktail: Crafted from cloth + alcohol + bottle. Sets area on fire.
- Poison Bomb: Crafted from plant + bomb (or grenade). Poisonous cloud.
- Bomb (Crafted): From circuit board + wire + tape.
- Function: Basic armor set, moderate defense.
- Craft: Require 10 bones + 2 rope per piece (full set uses 2 rope, 10 bones, + leaves).
- Use: Early-game protection for exploring.
- Upgrade: Can be dyed? No. Just repair with same materials.
- Function: High defense, made from mutant remains.
- Obtain: Kill large mutants (like Twins, Slugs, etc.) and harvest their skin/armor parts.
- Craft: 3 pieces of mutant skin + 1 rope per armor piece.
- Use: Best protection until endgame. Can be crafted early but requires dangerous fights.
- Synergy: Works well with stealth builds (no movement penalty).
- Function: High-end armor with added storage pockets.
- Obtain: Found in locked bunker (requires shovel and keycard).
- Use: Best armor in the game; reduces damage significantly and has extra item slots.
- Notes: Non-craftable, limited supply.
- Function: Reduces enemy detection range.
- Craft: From leaf + cloth + rope (requires blueprint found in cave).
- Use: Great for sneaking past cannibals or for hunting.
- Function: Blocks physical attacks; can block most mutant hits.
- Craft: From a log + rope + cloth.
- Use: Useful when fighting multiple enemies; hold in off-hand.
- Function: Protects against poison clouds and spores.
- Obtain: In a cave near the graveyard.
- Use: Required to pass certain poison areas.
- Rebreather: Allows underwater breathing. Found in the cave behind the waterfall.
- Rope Gun: Shoots zipline and grappling hook. Found in a cave (requires shovel).
- Shovel: Digs dirt mounds and opens burials. Found in a cave.
- Zipline Gun: Allows attaching to ziplines, not the same as rope gun. Found near golf course.
- Caving Gear: Headlamp (built-in) for dark areas. Starting item? Actually no, find flashlight later.
- Flashlight: Can be attached to weapons (e.g., pistol, shotgun). Found in cave.
- GPS Tracker: Shows player location on map. Start with it.
- Compass: Gives direction. Craftable from magnet + stick. Useful early.
- Watch: Shows time, health, hunger. Starting item.
- Firestarter: Craftable from rock + metal? Actually use: lighter (starting item) or crafted bow drill.
- Lighter: Starting item, infinite uses.
- Log Sled (blueprint buildable): Transports logs.
- Cart (blueprint buildable): Transports items, logs.
- Turtle Shell (from sea turtles): Can be used as sled or water carrier.
- Berries: Various colors – red (safe), green (poison), blue (safe), purple (hallucinogenic). Eat to restore hunger.
- Mushrooms: Ganoderma (healing), others: poisonous (red cap), edible (brown).
- Meat (raw/cooked): From deer, rabbits, squirrels, birds, fish, turtles; cook over fire for better effect.
- Canned Food: Found in lootable crates. No cooking needed.
- Energy Mix: Crafted from 3 berries + 1 leaf; provides stamina and health.
- Hydration Mix: From 2 aloe + 1 leaf; restores water.
- Water: Collect from rivers, lakes, or rain (using shells or crafted containers). Needs to be boiled (pot over fire) to avoid sickness.
- Energy Drink: Found in cans; restores energy quickly.
- Alcohol: Used for Molotovs and some recipes. Can be drunk (dehydrates).
- Medicinal Mix: Crafted from 1 aloe + 1 yarrow + 1 leaf; heals a lot.
- Aloe Vera: Eaten alone restores small health.
- First Aid Kit: Found in bunkers; fully heals but rare.
- Bandage: Crafted from cloth; stops bleeding.
- Sleeping Pill: Crafted from mushroom? Actually, rest at fire; sleeping pills found in loot.
- Aromatic Herb (e.g., Yarrow): Used in medicinal mixes, also can repel insects.
Modern Axe
Katana
Machete
Knife (Skinning Knife)
Crafted Club / Bone Club
Electric Stick (or Stun Baton) – found later in cave.
Shovel (also tool) can be used as a melee weapon, though slow.
---
Ranged Weapons
Pistol
Shotgun
Revolver
Rifle (Sniper Rifle)
Crossbow
Slingshot
Tech Pistol (Late Game) - more powerful variant.
---
Explosives & Thrown
---
Armor & Protection
Bone Armor
Creepy Armor (Mutant Armor)
Tactical Armor
Stealth Armor
Shield (Crafted)
Gas Mask
---
Tools & Equipment
Key Story Tools
Essential Gear
Storage & Transport
---
Consumables
Food
Drinks
Medicinal
Other Consumables
---
Materials & Resources
Basic Building Materials
| Item | Sources | Use |
|---|---|---|
| Logs | Trees (with ax or chainsaw) | Building structures, crafting |
| Sticks | Small trees, bushes | Spears, fires, traps |
| Rocks | Ground, caves | Crafting, throwable |
| Leaves | Bushes | Armor, fire, bedding |
| Cloth | Crates, tents, clothing items | Bandages, armor, fire versions |
| Rope | Loot, crafting (from fibrous leaves) | Armor, traps, structures |
| Tape | Crates, bunkers | Crafting explosives, repairs |
| Wire | Electronic loot, crates | C4, tech items |
| Circuit Board | Laptops, electronics | C4, tech pistol scopes |
| Plastic | Bottles, containers | C4, Molotovs |
| Duck Tape | Same as tape? Usually distinct. | Used in many crafts. |
Special Resources
- Resin (Tree Sap): Found by tapping maple trees; used for fire arrows and sticky bombs.
- Bones: From animal remains or mutant kills. Used for Bone Armor and Club.
- Feathers: From birds. Used for arrows/bolts.
- Gold Bar: Found in treasure chests; trade at secret trader? There is no trader; gold bars are only collectibles/decoration.
- Coin Piles: Decorative only?
- Aluminium: Used to upgrade weapons? Not really. Aluminium cans are scrap.
- Gold Bars: Found in caves and safes; you can place them as decoration but have no use.
- Coins: Same as above – they can be found but not spent.
- Keycards: Used to open specific doors in bunkers; not tradeable.
- Laptops and Computer Terminals: Interactable for lore, often require power. Found in bunkers.
- Notes: Scattered on tables; tell story of previous survivors or island history.
- Audio Logs: Found on tape recorders; play back story.
- Photographs: Show characters and events.
- Artifact Pieces: Parts of a powerful artefact; collecting all three unlocks the true ending. Locations: one in cave, one underwater, one in bunker.
- Strange Dolls (Voodoo Dolls): Hidden in the world; collection gives no reward but 100% completion.
- Three Keycards: Red, Green, Blue. Needed for bunker doors. Not missable but can be hard to find.
- Shovel Parts (blade and handle): Required to craft shovel; found in two separate caves.
- Rope Gun Parts (gun and cord): Two components found apart.
- Crossbow Parts (string and limb): Found in separate loot.
- Flashlight + Weapon: Attach flashlight to any firearm for night vision. Craftable light attachment.
- Silencer + Pistol: Makes pistol silent; crafted from bottle + cloth + tape.
- Red Dot Sight + Pistol/Shotgun: Improves accuracy.
- Poison Coating: Apply poison on melee weapons (crafted from poisonous mushrooms + leaves). Lasts for a few hits.
- Fire Spear: Combine spear with cloth and resin for burning damage.
- Bomb Arrows: Tape a bomb to an arrow? Not possible directly, but crossbow with explosive bolts (requires crafting).
- Grappling Hook: The rope gun can be used to pull items or traverse cliffs.
- Zipline Network: Build ziplines using rope gun and rope posts for fast travel.
- Workbench: Allows weapon upgrades (e.g., attach sights).
- Furnace: For smelting gold? Not needed. Use for cooking.
- Drying Rack: Dry food for longer shelf life.
---
Currencies
Sons of the Forest has no traditional currency system. There is no shop or NPC trading. However, some items function as tradeable goods in context:
---
Collectibles & Lore Items
Documents
Special Collectibles
Environmental Collectibles
---
Important Item Synergies & Upgrades
Crafting Stations
---
This guide covers every systematic item category in Sons of the Forest. For detailed crafting recipes, refer to the in-game handbook. Always prioritize survival tools early (axe, knife, spears) and explore caves for key upgrades.
Character Skills
Character Skills Guide for Sons of the Forest
Sons of the Forest does not feature a traditional skill tree or RPG class system. Instead, your character improves through repetitive actions, and skills are tied to player stats, companion abilities, and special item moves. This guide covers every playable character role (the Player, plus AI companions Kelvin and Virginia) and all skills, abilities, and special moves.
---
1. Player Character (The Protagonist)
Your character has innate stats that increase passively through use. There are no levels or skill points—just natural progression.
1.1 Innate Stats (Passive Skills)
| Stat | Effect | How to Improve | Max Level | Practical Use |
|---|---|---|---|---|
| Strength | Increases melee damage, tree-chopping speed, and log-carrying capacity (from 1 to 3 logs). | Swing melee weapons, chop trees, throw spears. | Level 100 (approx. 3000 swings) | Essential for combat and building; high strength one-shots weaker cannibals. |
| Stealth | Reduces detection range and noise generated by movement. | Crouch and move silently, avoid alerting enemies. | Level 100 (approx. 2000 stealthy actions) | Crucial for avoiding mutants and sneaking past cannibal camps. |
| Stamina | Increases sprint duration, swimming speed, and climbing stamina. | Sprint, swim, climb ropes, dodge. | Level 100 (approx. 5000 stamina-using moves) | Lets you flee combat, cross large rivers, and scale cliffs. |
| Health | Increases maximum HP and natural regeneration rate. | Take damage and heal (bandages, food, meds). | Level 100 (approx. 3000 HP worth of damage taken) | Higher health allows survivability against mutants and bosses. |
| Running Speed | Increases movement speed while sprinting. | Sprint repeatedly. | Level 100 (approx. 2000 sprints) | Makes kiting and exploration faster. |
| Swimming | Increases swim speed and reduces stamina drain. | Swim. | Level 100 (approx. 1000 swim meters) | Vital for reaching underwater caves and avoiding drowning. |
| Fishing | Affects fish catch rate and success. | Fish successfully. | Level 100 (approx. 500 fish caught) | Reliable food source; higher level reduces time per catch. |
- Stats are shared across all saves but reset if you start a new game (global progression tied to your account’s save file).
- Grinding stats is optional; you’ll naturally level while playing.
- You can view your current stat levels in the inventory screen (hold I, look at character model).
- Katana: Overhead Slash – Hold attack button to charge, release for a powerful downward strike. Deals 3x damage, breaks blocks. Cooldown: 2 seconds after charge. Use against shielded cannibals or single targets.
- Chainsaw: Sweep Attack – Press attack while running to do a horizontal arc. Hits multiple enemies. Fuel cost: 10%. Cooldown: 3 seconds. Best when surrounded.
- Stun Baton: Electric Poke – Hold attack to charge, then release for an AoE electric burst that stuns nearby enemies for 3 seconds. Cooldown: 10 seconds. Perfect for crowd control.
- Machete: Quick Slash Combo – Three rapid clicks deliver a fast combo. No cooldown. Use for DPS against unarmored foes.
- Spear: Throw – Equip any spear, hold attack to aim, release to throw. Can retrieve. No cooldown. Silent ranged option; good for hunting or picking off patrols.
- Shotgun: Blast – Standard shot, no special move. Use at close range.
- Pistol: Double Tap – Nothing unique; rapid fire.
- Rifle: Scope – Press aim down sights (ADS) for zoom. No extra move.
- Bow: Charged Shot – Hold draw for extra damage (up to 2x). No cooldown. Use for stealth kills.
- Crossbow: Bolt – Silent but slow reload. No special.
- Taser (Stun Gun): Shoots an electric dart that stuns a single enemy for 5 seconds. Requires batteries (rechargeable). Cool down: 0.5 seconds between shots. Use to incapacitate priority targets.
- Grenade: Throw explosion with 5m radius. Cook time 3 seconds. Cooldown: none (consumable). Use for groups or mutants.
- Flashbang: Blinds enemies in 10m radius for 4 seconds. Use to escape or set up attacks.
- Molotov Cocktail: Creates fire AoE that burns enemies for 8 seconds. Use against patrols or to block paths.
- Silencer (attachment): Reduces gun noise drastically, but lowers damage by 10%. Attach to pistol or rifle. Use for stealth.
- Block (Hold RMB): Reduces damage by 70% but drains stamina. Can block all melee attacks and some projectiles.
- Dodge (Space + Direction): Quick sidestep or backstep. Costs 15 stamina. Invincibility frames for 0.3 seconds. Essential against mutants.
- Parry (Tap RMB at impact): Timing-based deflect that stuns enemies for 1.5 seconds. Works only on melee attacks. High risk/reward.
- Stealth Kill (Crouch + Attack from behind): Instant kill on unaware enemies (humans, cannibals). No effect on mutants. Requires quiet approach.
---
1.2 Active Abilities (Equipment & Actions)
These are special moves or actions you can perform using items or basic controls.
#### Melee Weapon Special Attacks
#### Ranged Weapon Special Moves
#### Tools & Gadgets
#### Combat Maneuvers
---
2. Kelvin – AI Companion (Non-Playable)
Kelvin is a one-armed NPC you can command via the Communication Book (hold C, select from wheel). He cannot fight directly but provides essential support.
Kelvin's Available Skills
| Command | Effect | Cooldown/Usage | Best Use |
|---|---|---|---|
| Follow/Stay | Toggles following. | Instant. | Keep him safe in combat. |
| Cut Trees | Kelvin chops specified trees, pushes them, and stacks logs nearby. | Takes 1–2 minutes for a large tree. | Automated logging for construction. |
| Fill Log Holder | He gathers logs and places them on a log holder (must be built). | Works until holder is full. | Supply base building materials. |
| Collect Fish | He will catch fish from nearby water and stack them. | About 10 seconds per fish. | Steady food source. |
| Clear Vegetation | He removes bushes, berries, and small plants. | Instant area effect. | Improve camp visibility. |
| Repair Buildings | He automatically repairs damaged structures near him. | Passive while staying in base. | Save repair materials. |
| Turn On/Off Lights | He toggles placed lamps/generators. | Instant. | Conserve fuel at night. |
| Go To | He moves to a specific map pin you place. | Travel time. | Scout or fetch supplies from a distance. |
Synergies: Use Kelvin to chop trees while you build; his log stacking is invaluable for large projects. Keep him away from combat—he has very low health and cannot heal.
---
3. Virginia – Mutant Companion (Non-Playable)
Virginia is a three-armed, three-legged mutant who becomes your ally if you befriend her (by not attacking, offering food/clothes). She can be equipped with weapons (pistol, shotgun, or revolver) and provides combat support.
Virginia's Skills & Behavior
| Skill/Behavior | Effect | How to Improve | Use Case |
|---|---|---|---|
| Gunplay | She fires her equipped weapon at enemies within range. Accuracy improves over time. | Give her a weapon and let her fight. ~50 kills to maximize accuracy. | Ranged fire support during base defense or cave clearing. |
| Distraction | She moves erratically and attracts enemy attention, allowing you to flank. | Passive. | Use her as a decoy during tough battles. |
| Crawling Escape | When severely injured, she crawls quickly away to safety and self-heals. | Passive, no upgrade. | Prevents permanent death; she will return after a few minutes. |
| Item Retrieval | She occasionally brings you random loot (berries, flowers, ammo). | Dependent on affection level (feed her regularly). | Early-game resource supplement. |
| Dancing | If you play the guitar near her, she dances. No gameplay effect. | N/A. | Fun interaction; increases affection? (Unofficial) |
- Pistol: Low damage, fast fire. Best for trash mobs.
- Shotgun: High damage, slow reload. Use for mutants/bosses.
- Revolver: Medium damage, medium fire rate. Good all-rounder.
- Stun Baton + Katana: Stun enemies with baton, then overhead katana slash for instant kill on cannibals.
- Flashbang + Chainsaw: Blinds group, then sweep with chainsaw for mass damage.
- Crossbow + Stealth: Pick off single targets silently from distance.
- Creepy Armor: Crafted from mutant skin and bones. Provides 50% damage reduction but slows movement by 10%. No special ability.
- Artifact (after story): Can be toggled to attract or repel mutants. No skill per se, but a powerful tool.
- Climbing Rope: Press E to ascend/descend. No stamina cost if you rest mid-climb.
- Swimming Diving: Hold shift underwater to sprint-dive. Consumes stamina.
- Parachute/Zipline: Use from high points; no skill improvement.
- Focus stats: Stealth, Strength (for melee kills), Stamina.
- Weapons: Katana, Crossbow, Taser.
- Companion: Kelvin (stay at base); Virginia with pistol (don’t engage unless necessary).
- Playstyle: Avoid combat, sneak through caves, assassinate patrols. Use flashbangs to escape.
- When to use: Exploring hostile areas, minimizing resource waste.
- Focus stats: Health, Strength, Running Speed.
- Weapons: Chainsaw, Shotgun, Grenades.
- Companion: Virginia with shotgun (aggressive).
- Playstyle: Face enemies head-on, use block and dodge, rely on high health.
- When to use: Base defense, mutant hunting, boss fights.
- Focus stats: Strength (log carrying), Stamina, Swimming.
- Weapons: Machete, Spear, Bow (for hunting).
- Companion: Kelvin (chop trees, repair).
- Playstyle: Prioritize base construction, stockpile resources, avoid combat when possible.
- When to use: Early game, playing solo in heavy building phase.
- Strength + Logging: High strength lets you carry 3 logs; combine with Kelvin’s log stacking for mega-builds.
- Stealth + Bow: Crouch + fully drawn bow = one-shot headshot on unaware cannibals. Great for clearing camps.
- Stamina + Sprint: High stamina allows you to kite mutants and even outrun a few.
- Health + Creepy Armor: Become almost unkillable but slow.
- Virginia’s Accuracy: Give her a shotgun after ~30 kills; she’ll headshot often. Keep her healed with bandages.
- Kelvin’s repair: Place him in your base with repair enabled; he will fix buildings during attacks.
Affection System: Feed her (rabbit, fish, berries), give her clothes (shirt, dress). Higher affection = more likely to retrieve items and fight better.
Synergies: Equip Virginia with shotgun and you with a rifle; she draws fire while you pick off threats from range. Keep her healed with bandages (she can heal herself slowly).
---
4. Special Moves & Combos
Certain weapon combinations or temporary effects create special moves.
Weapon Combos (No dedicated combo system, but effective sequences)
Mutations (Crafted Armor / Artifacts)
Environmental Abilities
---
5. Recommended Builds (Playstyle Focus)
Since there are no skill points, “builds” mean which stats you prioritize via gameplay and which companion loadouts you use.
Stealth Assassin Build
Tank Brawler Build
Builder/Survivalist Build
---
6. Tips & Synergies
---
> Note: This guide reflects the Sons of the Forest 1.0 release. There are no hidden skill trees or level caps beyond 100. Skills are entirely driven by player action and repetition.
---
Summary Table
| Category | Skills | Customization |
|---|---|---|
| Player Stats | 7 passive stats | No points – progression through use |
| Player Combat | Melee special attacks, ranged, tools, maneuvers | No talent tree – only equipment |
| Kelvin | 8 commands | No upgrades |
| Virginia | 4 behaviors + weapon proficiency | Affection + weapon choice |
| Special Moves | Combos, mutations, environmental | Crafting or item-based |
End of Character Skills Guide for Sons of the Forest.
Characters & Roles
Characters & Roles Guide for Sons of the Forest
This guide covers every major character, companion, and player role in Sons of the Forest. Unlike traditional RPGs, the game has no fixed classes, but each character offers unique abilities and playstyles. Understanding their strengths, weaknesses, and synergies is key to survival.
---
1. Player Character (The Protagonist)
You play as a nameless special-ops soldier sent to find a missing billionaire on a remote island. After a helicopter crash, you must survive, build, and uncover the island's secrets. The character is mute and customizable (appearance only).
#### Background
- A trained soldier with unspecified backstory. The game reveals fragments through notes and events, but your past remains ambiguous.
- Your mission is to find Edward Puffton, but survival becomes paramount.
- Versatility: No stat limitations; can perform all actions equally well.
- Adaptability: Can equip any weapon, tool, or armor, and craft anything.
- Progressive Skill: Improves across all categories through repetition (running, climbing, combat, etc.).
- No Specialization: No innate bonuses; everything depends on equipment and player skill.
- Mortality: Easily killed early game; relies on food, water, and rest.
- Fully sandbox: You can be a stealthy archer, a heavy brawler, a base builder, or a balanced survivor. Your loadout defines your role.
- Combat style: Agile or tanky depending on armor and weapon choice.
- Exploration: Use map, GPS, and tools to navigate.
- The player character is always active from the start. No unlock required.
- Early Game: Crafted bow + spear + cloth bundle for healing. Focus on food and water.
- Mid Game: Modern axe + pistol (found in caves) + tactical armor (hide pieces).
- Late Game: Katana + shotgun + Tech armor (at the end of story). Always keep a GPS tracker and repair tool.
- Builds (loadout-based roles):
- In co-op, players fill complementary roles (see section 4). The protagonist can assign tasks to Kelvin and Virginia.
- Kelvin can gather resources while you fight; Virginia can provide ranged support.
- Fellow operative on the same mission. Injured in the crash, resulting in deafness and mutism.
- He lost the ability to communicate verbally, but retains combat and survival skills.
- Loyal to the player; his health and morale affect his efficiency.
- Reliable Gatherer: Can chop trees, gather logs, stones, sticks, and food on command.
- Carry Capacity: Can hold up to 3 logs at once, significantly speeding up building.
- Combat Support: Though weak, he can be armed with melee weapons and will attack enemies who attack you or the base.
- No Food/Water Needs: He doesn't consume your supplies, but you can give him food to heal.
- Fragile: Low health; can be easily killed by cannibals or mutants. Once dead, he doesn't respawn.
- Limited Commands: Only a few preset actions (Chop, Gather, Fish, Attack, Follow, Stay). Cannot direct complex tasks.
- AI Pathing: Sometimes gets stuck on terrain or structures.
- Loafing: If idle, he will stand still and wait, potentially in danger.
- Command him to gather resources while you explore or fight. Keep him near base or in safe locations.
- Equip him with a weapon (e.g., spear, crafted axe) for self-defense, but do not rely on him for damage.
- Use him to carry logs to your building site. He can also fish if near water.
- Found automatically after leaving the starting area (the crash site) and following the story. He appears early in the first cave or at the beach. Not missable.
- Armor: None required (he takes reduced damage from some sources? Not confirmed). But you can give him a piece of hide armor for extra protection.
- Weapon: Give him a spear or the modern axe for self-defense. Avoid giving ranged weapons (he won't use them well).
- Inventory: He can carry a few items; store extra logs or food on him.
- With Player: Acts as a dedicated gatherer and builder assistant. Frees the player to focus on combat or exploration.
- With Virginia: Virginia can provide overwatch while Kelvin gathers. Her ranged attacks can cover him.
- In Co-op: One player can command Kelvin to build while others scout.
- A mutant born from the island's strange infection. She is hostile initially, but can be tamed by feeding her raw meat or other items.
- She communicates through gestures and sounds. Her origins are tied to the story.
- Able to wield multiple weapons simultaneously due to her extra arm.
- Multi-Weapon Proficiency: Can hold and fire two guns at once (e.g., pistols, shotguns) or a melee and ranged weapon.
- Excellent Vision: She can spot enemies from long distances and will alert you by pointing.
- Agile: Fast movement and evasive – avoids many attacks.
- Ranged Support: Once armed, becomes a powerful ranged attacker.
- Loyal: She will follow you and defend you aggressively.
- Demanding Pacification: Initially hostile; requires multiple food offerings to become friendly. Can be killed if provoked.
- Weapon Ammo Economy: She consumes ammo from guns you give her; must supply her regularly.
- No Melee Protection: If she runs out of ammo or doesn't have a melee weapon, she will retreat rather than fight hand-to-hand.
- Permanent Death: If killed, she is gone for the entire save. Save before attempting to tame.
- Treat Virginia as your sniper or supportive DPS. Equip her with pistols (Glock) or shotguns for max damage.
- She is excellent for scouting ahead: send her into caves or enemy camps to trigger attacks while you flank.
- To tame: approach slowly with raw meat or human meat in hand, feed her repeatedly over several in-game days.
- Found in the open world after gaining her trust. She spawns randomly near your location after you have built a base and explored. Typically appears after 3-5 days.
- No guaranteed method, but building a base near freshwater and sleeping often increases spawn chance.
- Ranged: Give her two pistols (Glock 17 is best due to high ammo availability) or one shotgun + one pistol. She will dual-wield effectively.
- Ammo: Always carry spare pistol/shotgun ammo to feed her. You can craft 9mm ammo at workbenches later.
- Melee: Optionally give her a katana or machete for last-ditch defense, but she is weaker in melee.
- Armor: She cannot wear armor (no slot), but her dodging compensates.
- With Player: Provides cover fire while you build or explore. Her spotting ability alerts you to enemies behind obstacles.
- With Kelvin: Kelvin can gather while Virginia guards him. She will attack threats before they reach him.
- In Co-op: Works best with a player who can supply ammo and act as a front liner. She stays at mid-range.
#### Strengths
#### Weaknesses
#### Playstyle
#### Unlock Conditions
#### Recommended Equipment / Builds
- Fighter: Full tactical armor + shotgun + katana + grenades. High aggression.
- Scout: Light armor + Bowie knife + crossbow + night vision goggles. Stealth and ranged.
- Builder: Maximize inventory slot for logs with a grappling hook + rope gun + fire axe. Carry Structural materials.
#### Team Synergy
---
2. Kelvin (Companion)
Kelvin is a former soldier who survived the helicopter crash alongside you. He is deaf and mute due to head trauma, but follows simple commands via a notebook interface. He is essential for early resource gathering and base building.
#### Background
#### Strengths
#### Weaknesses
#### Playstyle
#### Unlock Conditions
#### Recommended Equipment / Builds
#### Team Synergy
---
3. Virginia (Companion)
Virginia is a three-legged, three-armed mutant woman who becomes a companion after being pacified with enough food offerings. She is mute but expressive, and her abilities make her a valuable ally for combat and scouting.
#### Background
#### Strengths
#### Weaknesses
#### Playstyle
#### Unlock Conditions
#### Recommended Equipment / Builds
#### Team Synergy
---
4. Player Roles in Co-op Mode (Multiplayer)
In multiplayer, each player controls a separate character (identical to the Player Character). No unique abilities per player, but roles emerge based on equipment and cooperation. Below are common effective roles:
| Role | Primary Focus | Recommended Gear | Synergy with Team |
|---|---|---|---|
| Builder | Resource gathering and base construction | Modern Axe, Grappling Hook, Rope Gun, GPS tracker, Inventory full of logs | Keeps base defensive, builds facilities like drying racks and beds. Relies on fighters for protection. |
| Scout / Runner | Exploration, looting caves, delivering key items | Zip line, Light armor, Crossbow, Night vision goggles, Med mixtapes (healing items) | Maps the island, finds story items, provides intel on enemy camps. Often first to find water sources. |
| Fighter | Engaging cannibals and mutants, clearing areas | Tactical Armor, Shotgun, Katana, Grenades, Repair tool for armor | Protects other roles, draws aggro, and clears caves. Uses high DPS. |
| Support / Medic | Healing, reviving teammates, maintaining ammo | Pills, Med pouch, Bandages, Healing mix, Extra ammo for team | Keeps group alive. Can also craft meds at workbenches. |
| Trapper / Defensive | Encircle base with traps and defensive walls | Spiked traps, Log walls, Gas traps, Fire bombs | Secures perimeter, harrasses enemies, reduces direct combat. Works with Builder. |
---
5. Other Notable Characters (Non-Playable)
- The Helicopter Pilot: Dies at the start of the game; his body can be looted for the GPS locator pistol (7th slot). No further role.
- Edward Puffton (Billionaire): The target of the mission. Appears in the endgame as a final boss encounter (epilogue). Not a companion.
- The Cannibals: Hostile humanoid enemies. Not playable, but their behaviors affect strategies (see Combat Guide).
- The Mutants: More dangerous creatures (e.g., Fingers, Twins, Sluggy). No player control.
- Companion Revive: Once Kelvin or Virginia die, they are gone permanently. Save often and consider reloading if they die early.
- Companion Healing: Both can be healed by feeding them items. Kelvin takes raw meat, cooked meat, or berries. Virginia prefers raw meat and human flesh.
- Gear for Companions: Kelvin can hold up to 3 logs; Virginia can hold weapons but not items. She cannot carry extra ammo on her own.
- Taming Virginia: Be patient. If you attack her or other mutants near her, she may become hostile again. Save before each feeding session.
- Co-op Communication: Use voice chat or pings to coordinate roles. The notebook commands for Kelvin are only usable by the host or the player who first interacted with him? In co-op, only the player who recruited Kelvin can control him. Same for Virginia.
---
6. Important Notes on Character Management
---
This guide covers all characters and roles in Sons of the Forest. Use the companion's strengths to cover your weaknesses, and adapt your player role to your team's needs. Survival is a collaborative effort.
Cheats & Secrets
Cheats & Secrets Guide for Sons of the Forest
This guide covers all known console cheat commands, developer-intended secrets, Easter eggs, and hidden content in Sons of the Forest. While the game does not have a traditional cheat menu, it includes a powerful developer console that can be activated with a simple keybind. Use these responsibly—some commands disable achievements or may break your save if misused.
---
Developer Console Activation
1. During gameplay, press the F1 key (default). This opens an overlay text input box at the top of the screen.
2. Type a command exactly as listed below and press Enter. No prefix (like `/` or `;`) is required unless specified.
3. To close the console, press F1 again or Escape.
> Note: The console works in both single-player and multiplayer (host only). Using cheats may disable progress toward achievements for that session. Always back up your save before experimenting.
---
List of Known Cheat Commands
| Command | Effect | Example |
|---|---|---|
| `addallitems` | Adds every obtainable item in the game to your inventory (including unique key items). | `addallitems` |
| `additem <Item Name>` | Adds a specific item by its internal name (case-sensitive). Use quotes for multi-word items. | `additem "Log"` or `additem "Pistol"` |
| `godmode` | Toggles invincibility (no damage from enemies, falls, starvation, etc.). | `godmode` |
| `speed <multiplier>` | Increases player movement speed multiplier (default 1). | `speed 3` (triple speed) |
| `infinitehealth` | Prevents health from decreasing. Does not protect from drowning or certain one-shot kills. | `infinitehealth` |
| `infiniteenergy` | Stops stamina depletion. | `infiniteenergy` |
| `instantbuild` | Structures and furniture place instantly without animation or resource consumption. | `instantbuild` |
| `nosleep` | Removes the need to sleep. Kelvin will still sleep if prompted. | `nosleep` |
| `nohunger` | Stops hunger and thirst from decreasing. | `nohunger` |
| `nocold` | Prevents hypothermia/cold mechanic. | `nocold` |
| `flymode` | Enables free-flight camera (WASD + mouse to move). Does not affect character collision. | `flymode` |
| `togglefullscreen` | Switches between windowed and fullscreen mode. | `togglefullscreen` |
| `showfps` | Displays FPS counter in the upper-left corner. | `showfps` |
| `saveworld` | Forces a manual save of the world state. | `saveworld` |
| `loadworld` | Reloads the current world from the last save. | `loadworld` |
| `settimer <hours>` | Sets the in-game clock to a specific hour (24-hour format). | `settimer 12` (noon) |
| `teleport <x> <y> <z>` | Teleports your character to the specified world coordinates. Use `whereami` first to get current coordinates. | `teleport 0 0 0` |
| `whereami` | Outputs your current XYZ coordinates and rotation to the console. | `whereami` |
| `lookat` | Shows the name and ID of the object you are currently looking at. | `lookat` |
| `togglefoliage` | Hide/Show all foliage (trees, bushes). Useful for finding objects under terrain. | `togglefoliage` |
| `togglelight` | Forcefully enables/disables global lighting. | `togglelight` |
| `toggledaynightcycle` | Freezes or resumes the day/night cycle. | `toggledaynightcycle` |
| `setsleep` | Forces your character to sleep (if Kelvin is nearby, he will also sleep). | `setsleep` |
| `sethostilesoff` | Makes all hostile NPCs passive (they will not attack unless provoked). | `sethostilesoff` |
| `setweather <type>` | Sets the weather: `clear`, `rain`, `snow`, `overcast`. Does not change instantly. | `setweather rain` |
---
Easter Eggs & Hidden Secrets
#### 1. The "Sons of the Forest" Poster
- Inside the Bunker 01 (residential bunker), near the arcade machines, a poster on the wall depicts the original The Forest logo crossed out with "Sons of the Forest" spray-painted over it. A nod to the series.
#### 2. Cat Food Can
- Across the island, you can find cans of cat food. These are a direct reference to The Forest, where cat food was a major food source. Interacting with some cans triggers a small lore note: "Still tastes like chicken."
#### 3. Golden Armor Secret
- The Golden Armor (one of the best armors in the game) is found inside a secret room within the Gold Cave (entrance near the snowy mountain). To access it, you must solve a puzzle involving ascending platforms inside the cave. This armor reduces damage from all sources and glows in the dark.
#### 4. Golf Cart Easter Egg
- Near the maintenance bunker (where you find the shovel), there is a small shed with a golf cart parked inside. It is non-functional but can be pushed around. If you examine the cart's license plate, it reads "ENDNIGHT" (the developer's name).
#### 5. The Secret Ending
- To unlock the hidden “good” ending, you must collect all 10 Golden Cubes hidden in various bunkers and caves. After assembling them on the puzzle platform at the Large Crashed Helicopter site, you gain access to a secret final cutscene that explains the true origin of the island's horrors.
#### 6. Kelvin's Sketches
- If you give Kelvin a notebook (found in the first bunker), he will occasionally draw pictures of things he sees. Some of his drawings contain spoilers for hidden locations—for instance, he may sketch the entrance to the gold cave or the location of the shovel.
#### 7. The Giant Cat
- In the Underground Laboratory (final story bunker), there is a giant stuffed cat toy sitting on a chair. It is a replica of the cat from the game's title screen. Interacting with it plays a faint meowing sound.
#### 8. The Fourth Bunker (Hidden Bunker)
- There is an unmarked bunker entrance buried under leaves near the beach on the east coast. It requires the shovel to dig out. Inside, you find a full skeleton of a giant creature, along with cryptic notes implying the island is a breeding ground for mutants.
#### 9. Developer Room
- Using the developer console command `additem "DevRoomKeycard"`, you can obtain a keycard that opens a locked door in Bunker 02 (the abandoned office). The room contains signed photos of the development team and a plaque reading "Thank you for playing - Endnight Games 2023".
#### 10. Timmy's Hat
- In the The Forest save file import, if you had the “Timmy’s Hat” item in your inventory, a special note appears in Sons of the Forest inside the first cave. This is a legacy Easter egg that acknowledges players who owned the predecessor.
---
Exploit-Safe Secrets (Legitimate Hidden Content)
These are secrets that can be found through normal gameplay without cheating, but are intentionally obscure and rewarding.
| Secret | Location | Reward |
|---|---|---|
| Golden Cube Puzzle | Large Crashed Helicopter | Secret ending + Golden Armor |
| Shovel | Maintenance Bunker (requires Keycard from Cave 2) | Access to dig spots and hidden bunkers |
| Rope Gun | Cave 1 (near the beginning) | Traversal over cliffs and gaps |
| Rebreather | Shipwreck near the ocean | Underwater exploration (oxygen tank) |
| Night Vision Goggles | Bunker 03 (requires Keycard from Gold Cave) | Ability to see in complete darkness |
| Golden Mask | Gold Cave (final puzzle) | Makes cannibals slightly less aggressive when worn |
| Story Final Bunker | Under the Golf Cart shed (dig spot) | Endgame cutscene and credits |
Conclusion
Sons of the Forest offers a rich layer of hidden content for dedicated players. The developer console is a powerful tool for those who want to experiment, but the true magic lies in uncovering the island’s secrets through exploration. Remember that cheating can break story progression—always save before using console commands. Enjoy the hunt!