Splatoon 3
## Splatoon 3 ### Genre Third-person shooter / Action / Competitive multiplayer with a focus on ink-based territory control. ### Developer & Publisher - **Developer:** Nintendo EPD (Entertainment Planning & Development) - **Publisher:** Nintendo ### Release Timeline - **Announcement:** February 1...
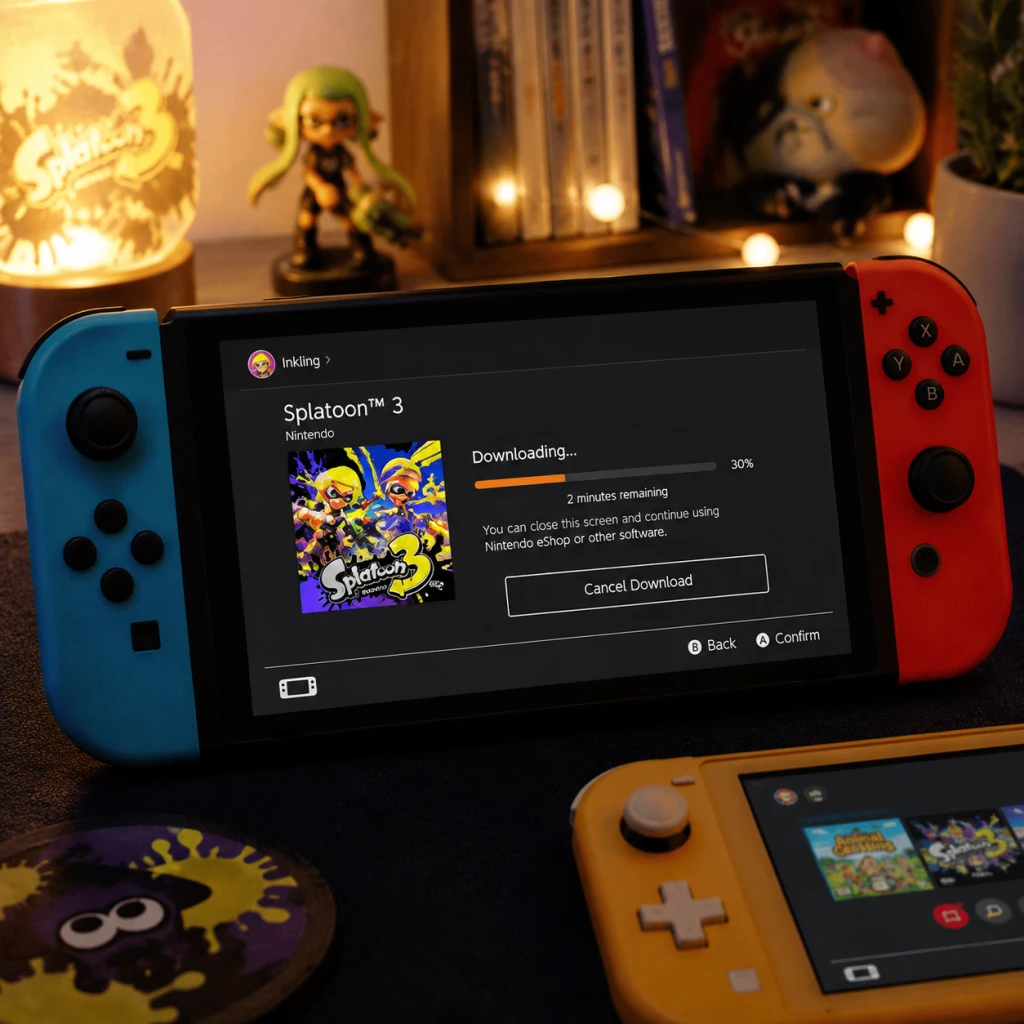
Download & Installation
Overview
Splatoon 3 is exclusively available on the Nintendo Switch family of systems (Switch, Switch Lite, Switch OLED). It is not released on PC, PlayStation, Xbox, or mobile devices. This guide covers both digital and physical installation methods, system requirements, storage, account setup, common issues, and post-install verification.
---
Platform Availability & Purchase Sources
| Platform | Availability | Official Sources |
|---|---|---|
| Nintendo Switch | ✅ Native release | Nintendo eShop (digital), Nintendo.com, retail stores (physical cartridge) |
| PC / Steam / Epic | ❌ Not available | N/A |
| PlayStation / Xbox | ❌ Not available | N/A |
| Mobile (iOS/Android) | ❌ Not available | N/A |
System Requirements
Since Splatoon 3 is a Switch exclusive, the “system” is the Nintendo Switch hardware itself.
- Minimum: Any Nintendo Switch model (Switch, Switch Lite, Switch OLED) with at least 6.0 GB of free internal storage or a compatible microSD card.
- Recommended: Nintendo Switch with a stable internet connection for online play; Switch Online subscription for online multiplayer (optional for single-player).
- Storage Space: The game’s download size is approximately 6.0 GB. With updates, plan for 7.0 GB.
- Account Requirement: A Nintendo Account (free) is required to access the eShop and download the game. For online multiplayer, a Nintendo Switch Online subscription is needed (paid).
---
Step-by-Step Installation
Digital Download from Nintendo eShop
1. Create or log in to a Nintendo Account on your Switch:
- From the HOME menu, select System Settings → User → Add User (or select an existing user).
- Link your Nintendo Account via email or social login.
2. Connect to the internet:
- Go to System Settings → Internet → Internet Settings and connect to a Wi‑Fi network.
3. Open Nintendo eShop:
- From the HOME menu, select the eShop icon.
- Choose the user you want to use.
4. Search for Splatoon 3:
- Use the search bar or browse latest releases.
- Select the Splatoon 3 product page.
5. Purchase / Download:
- If you haven’t purchased, select Proceed to Purchase and complete payment (credit card, eShop card, etc.).
- If already purchased, select Redownload (appears in your account’s “Redownloadable Software” list).
- Choose Download.
6. Monitor download progress:
- The download will start automatically. You can check progress on the HOME menu (a progress bar appears under the game icon).
- Ensure you have at least 7.0 GB free (internal or microSD). If space is low, you’ll be prompted to archive other games or use a microSD card.
7. Installation completes automatically once the download is finished.
Physical Cartridge Installation
1. Insert the game cartridge:
- Locate the game card slot on the top of the Switch (right side when in handheld mode).
- Gently push the cartridge (label side facing the back of the console) until it clicks.
2. Start the game:
- The game icon appears on the HOME menu. Select it to begin.
3. Mandatory update download (if internet is connected):
- Splatoon 3 often requires a day-one patch. If you connect to the internet, the system will prompt you to download and install updates before playing. Accept and allow the download (requires free storage space).
- If you do not connect to the internet, you can play the base version offline, but online features and many modes will be unavailable.
4. Final installation:
- The cartridge contains most data, but updates are saved to system storage. The process is fully automatic.
---
First Launch Setup
1. Launch the game by selecting its icon on the HOME menu.
2. Initial patch: If an update is needed, the game will download and apply it before the title screen appears.
3. Create/select an in-game save file:
- You’ll be asked to choose a user profile linked to your Nintendo Account.
- The game will create a save data slot for that user.
4. Internet connection check:
- For online features, the game will verify internet connectivity. If you skip, you can play the single-player “Return of the Mammalians” mode offline.
5. Nintendo Switch Online prompt:
- To enter online multiplayer lobbies (Turf War, Anarchy Battles, etc.), you must have an active Nintendo Switch Online subscription. The game will guide you to sign up or start a free trial if eligible.
6. Set game preferences:
- Adjust controls (motion or stick), audio settings, and language. These can be changed later from the Options menu.
---
Common Installation Errors & Fixes
| Error Message / Symptom | Cause | Fix |
|---|---|---|
| “Not enough space” | Storage full (internal or microSD) | Free space by archiving other games (System Settings → Data Management → Quick Archive). Insert a microSD card (up to 2TB). |
| “Software cannot be started. Please try again later.” | Corrupted download data or partial install | From HOME menu, highlight Splatoon 3, press + button → Manage Software → Check for Corrupt Data. If found, reinstall. |
| “Download failed” or “Error code 2124‑…“ | Network issues (Wi‑Fi instability, Nintendo server downtime) | Check Nintendo’s server status (status.nintendo.com). Restart your Switch and router. Go to System Settings → Internet → Test Connection. |
| Cartridge not recognized | Dirty contacts or incorrect insertion | Remove cartridge, blow gently on the contacts, reinsert fully. Try a different game to confirm the slot works. |
| “You must update the software” but update fails | Insufficient storage or corrupted update | Free up space and try again. If fails, delete update data: System Settings → Data Management → Manage Software → Splatoon 3 → Delete Update Data → redownload. |
| Online play requires Nintendo Switch Online | No active subscription | Subscribe via eShop or redeem a free trial. Note: the free trial is limited to one per account. |
Post-Installation Verification
After installation, verify the game is ready:
1. Check game version:
- From HOME menu, highlight Splatoon 3, press + → Manage Software → Version Info. The latest version should be displayed (e.g., 5.0.0+). If not, manually check for updates: select Update Via Internet.
2. Confirm save data:
- Launch the game and ensure your profile’s save file loads. You should see the title screen with your Inkling/Octoling.
3. Test online connectivity:
- Go to the menu and select Lobby → Start. If you have Nintendo Switch Online, you can queue for a Turf War. A successful connection indicates network setup is correct.
4. Run a data repair scan (optional):
- From HOME menu, highlight Splatoon 3, press + → Manage Software → Check for Corrupt Data. If no errors, the installation is healthy.
5. Storage usage check:
- System Settings → Data Management → Manage Software → select Splatoon 3. It should show around 6.0–7.0 GB used, depending on updates.
---
Additional Tips
- Redownload without re-purchasing: If you’ve bought Splatoon 3 digitally, you can redownload it anytime from the eShop under your account’s “Redownloadable Software” section.
- Use a microSD card: The internal storage of most Switch models is limited (32GB for standard, 64GB for OLED). A microSD card (UHS-I, speed class U1 minimum) is highly recommended for digital games.
- Archiving vs. Deleting: Archiving removes the game data but keeps the icon and save data. Deleting removes everything. To free space quickly, archive games you don’t play often.
- Region restrictions: Splatoon 3 is not region-locked on Switch, but some DLC or in-game events may be region-specific. Use an account matching your eShop region for consistent access.
---
Final Notes
Splatoon 3 is a Switch exclusive, so no other platforms are supported. Follow the steps above to install either digitally or via cartridge. After installation, enjoy the single-player story and chaotic 4v4 Turf Wars. If you encounter persistent errors, visit [Nintendo Support](https://support.nintendo.com) or the official [Splatoon 3 FAQ](https://splatoon.nintendo.com/en/faq).
Game Introduction
Splatoon 3
Genre
Third-person shooter / Action / Competitive multiplayer with a focus on ink-based territory control.
Developer & Publisher
- Developer: Nintendo EPD (Entertainment Planning & Development)
- Publisher: Nintendo
- Announcement: February 17, 2021 (Nintendo Direct)
- Release Date: September 9, 2022 (worldwide)
- Post-launch updates: Seasonal content drops (Fresh Seasons) ran from Autumn 2022 through Summer 2024; final content update was in August 2024. Online services remain active.
- Agent 3 (Player Character) – A customizable Inkling or Octoling recruited by the New Squidbeak Splatoon. Their gender, appearance, and weapon loadout are chosen by the player.
- Captain (formerly Cuttlefish) – The elderly former leader of the Squidbeak Splatoon, now wiser and more strategic.
- Callie & Marie – Returning pop-star idol duo and former Agents 1 and 2. They act as support and mission givers.
- Shiver – A new Octoling member of the Splatoon, cool and aloof, who provides intel and accompanies the player in key missions.
- DJ Octavio – The main Octarian antagonist, now seeking to ally with Mr. Grizz.
- Mr. Grizz – The true mastermind behind the Fuzzball invasion; a giant grizzly bear who runs a company called Grizzco Industries. He aims to turn all sea life into mammals.
- Additional: Frye, Deep Cut (the music group featured in the hub world), and various shopkeepers like Crusty Sean, Jel La Fleur, and Naut Couture.
- Age: Rated E10+ (Everyone 10 and up) by ESRB; the game is accessible to younger players but has enough depth for competitive teens and adults.
- Gamer types:
- Turf War (PvP, 4v4): Standard online mode; cover as much ground as possible in 3 minutes. Best 2 out of 3 rounds are played.
- Anarchy Battle (Ranked Modes): Ranks up to S+50; includes four rotating objectives:
- Salmon Run (PvE cooperative horde mode): 1-4 players fight waves of salmonids (fish monsters) to collect golden eggs and meet quotas. Rotation includes different weapons, boss Salmonids (Flyfish, Stinger, etc.), and special events like King Salmonids (Cohozuna, Horrorboros, Megalodontia).
- Tableturf Battle: A collectible card game spin-off mode where players use cards based on weapons and specials to claim turf on a grid. Playable against AI or online friends.
- Catalog & Seasonal Challenges: Each season (3 months) introduces a new Catalog (battle pass) with cosmetic rewards, new weapons, stages, and special events (Splatfest, Big Run, Eggstra Work).
- Private Battles & Friend Lobbies: Custom rules for private matches.
- Replay & Spectator Mode: Watch matches from any player’s perspective.
- Splatfest: Periodic themed events (e.g., “What would you bring to a desert island?”) where players choose a team and compete for clout, earning exclusive gear and a spot in a final battle.
- Online: Stable internet connection required for most multiplayer modes (Turf War, Anarchy, Salmon Run, Private Battles, Spectator). Uses Nintendo Switch Online subscription (sold separately). Has dedicated servers for matchmaking but uses peer-to-peer for actual gameplay (minimal lag for most).
- Offline: Single-player campaign “Return of the Mammalians” is fully playable offline. Also includes local multiplayer options:
- Ink mechanics: The core combat revolves around covering surfaces with ink to move (swim), ambush, and control space. The ink acts as both a resource (for your sub and special weapons) and a strategic battleground.
- No health bars: Enemies and players are downed by a single direct hit (not strictly one-hit kill; it takes about 0.3 seconds of continuous ink to splat a player). This makes combat fast, forgiving, and less reliant on twitch aiming than traditional shooters.
- Movement and mobility: Inklings/Octolings can morph into squid/octopus form to swim through their own ink, climb walls, and hide. This adds verticality and stealth elements.
- Constant updates and seasonal events: Splatoon 3 received two full years of free content updates (new weapons, stages, gear, Splatfests). The game evolves with the community.
- Fashion and customization: Gear provides abilities (main ability fixed, sub abilities random but can be rerolled). Cosmetic options are vast (hair, eyes, clothing, headgear, shoes). The game encourages personal expression—Splatfests let you represent your team’s style.
- Music and aesthetics: The soundtrack blends punk rock, pop, and electronic music with fictional bands (Off the Hook, Deep Cut). The art style is a fusion of graffiti, Japanese street fashion, and sci-fi.
- Accessible yet deep: Easy to pick up for a 10-minute turf war, but the ranked modes, Salmon Run strategies, and gear optimization reward hundreds of hours of play.
- Unique lore: The story is a light-hearted but surprisingly deep commentary on extinction, evolution, and the nature of life on a post-human Earth, told through a whimsical, ink-splatting adventure.
Release Timeline
Platforms
Exclusively available on the Nintendo Switch family of systems (Nintendo Switch, Nintendo Switch Lite, Nintendo Switch OLED). Not available on PC, PlayStation, Xbox, or mobile devices.
Story Overview
In the world of Splatoon 3, the turf war between Inklings and Octolings has largely subsided, but a new threat emerges from the mysterious region known as the "Alterna." The story campaign, titled Return of the Mammalians, follows Agent 3 (the player character) of the New Squidbeak Splatoon as they investigate a strange phenomenon: fuzzy, furry creatures called Fuzzballs that are turning Inklings and Octolings into non-splatting, mammalian-like beings. Led by Captain (formerly Callie and Marie's mentor), and assisted by Callie, Marie, and a new ally named Shiver, the team ventures into Alterna to uncover the source of the Fuzzballs and confront the machinations of the ruthless Octarian scientist DJ Octavio and a new villain, Mr. Grizz, a bear-like entrepreneur with a sinister plan to repopulate Earth with mammals. The campaign is a mix of single-player levels, boss fights, and exploration of a semi-open world hub called Splatsville in the desert.
Setting
Splatoon 3 takes place in the new hub city of Splatsville, a chaotic, sprawling urban area built in a desert canyon, often called "the city of chaos." The surrounding wilds include the Scorch Gorge, Crableg Capital, and the Alterna area (which features biomes like a cavern of crystallized fuzzy ooze, a frozen tundra, and a space station). The world is vibrant, colorful, and soaked in ink-based culture, from music to fashion. The main multiplayer stages are diverse and themed after various real-world and fictional locations: shopping districts, museums, factories, and even a giant skate park.
Main Characters
Core Appeal
Splatoon 3’s core appeal lies in its fast-paced, highly unique ink-based combat that rewards both mechanical skill (aim, movement) and strategic thinking (ink management, map control). The game’s vibrant, punk-rock aesthetic, catchy music, and constant seasonal updates keep the experience fresh. The main hook is the Turf War mode, where two teams of four compete to cover the map with their team’s ink in three minutes. The emphasis is on fun, non-lethal competition (no health bars; you splat opponents but they respawn) and creative expression through ink, fashion, and weapon variety. The single-player campaign offers a Mario-like platforming twist with shooter mechanics, appealing to both action fans and puzzle enthusiasts.
Target Audience
- Competitive multiplayer enthusiasts looking for a team-based shooter that is not gory or military-themed.
- Players who enjoy customization and fashion (gear abilities, cosmetic changes).
- Fans of Nintendo’s quirky, family-friendly franchises.
- Solo players who enjoy 3D platformers and puzzle combat.
- Speedrunners and completionists (completing all story missions and collectibles).
Game Modes
- Splat Zones (king of the hill)
- Tower Control (escort a tower)
- Rainmaker (capture and carry a damaging rainmaker)
- Clam Blitz (collect and deposit clams into the enemy goal)
Online / Offline Support
- Local Wireless: Up to 8 players can connect nearby for private battles (1-4 per Switch).
- Split-screen: Does not exist for Splatoon 3; each player must use their own Switch.
- Demo mode (Local Co-op): None for the main game; only Tableturf Battle can be played locally on the same device against AI.
- Tableturf Battle: Single-player mode (1-2 players local, 1 Switch).
DLC / Expansion Overview
The base game includes all core content. The only paid DLC is the Splatoon 3: Expansion Pass, released in two waves:
1. Wave 1 – Inkopolis Plaza (Released: Spring 2023): Adds the ability to revisit Inkopolis Plaza (from the original Splatoon) as a secondary hub, with its own shops, battles, and music.
2. Wave 2 – Side Order (Released: April 2024): A roguelike single-player expansion where you play as Agent 8 (an Octoling) climbing a procedurally generated tower called the Spire of Order. Includes new mechanics (color chips, modifiers) and a deep narrative about the Order vs. Chaos conflict. This DLC is highly recommended for solo players and those wanting more story depth.
What Makes This Game Unique
Getting Started
First Hour Walkthrough
When you first launch Splatoon 3, you'll be greeted by the game's opening cinematic. After that, the very first interactive step is character creation, which is simple but important.
Character Creation
- You can customize your Inkling or Octoling (choose whichever you prefer – they play identically).
- Options: skin tone, hairstyle, eye shape/color, eyebrow style, and legwear (pants/shoes).
- Tip: Don't stress – you can change hairstyle and skin tone later using coins at the Grizzco Barge (Salmon Run area). Legwear can be changed from the locker room. Only the initial choice of species (Inkling vs Octoling) is permanent without a save reset.
Prologue (The "Splatlands" Tutorial)
1. After creation, you're dropped into a short, on-rails tutorial where you control your character using the left stick to move and the right stick (or motion) to aim.
2. You'll learn to splat targets with ZR (shoot), ink the ground (also ZR), and swim through your own ink by holding ZL while moving.
3. A few simple navigation steps: follow the glowing ink trails, press B to jump, and use a basic sub weapon (e.g., Splat Bomb by pressing R).
4. The tutorial ends with a friendly dummy battle against AI opponents. You can't lose here.
5. After the tutorial, you'll be placed in the lobby – the main hub for online play. This marks the end of the first ~10 minutes.
Controls (Nintendo Switch)
Splatoon 3 uses two control schemes: Motion Controls (gyro aiming) and Stick Only. Motion is strongly recommended for precision, but you can disable it in Settings > Controls.
| Action | Joy-Con (Grip) / Pro Controller | Handheld Mode |
|---|---|---|
| Move | Left Stick | Left Stick |
| Look | Right Stick (or motion) | Right Stick (or motion) |
| Shoot | ZR | ZR (right bumper) |
| Sub Weapon | R | R (right bumper) |
| Special Weapon | X | X |
| Swim (hold) | ZL | ZL (left bumper) |
| Jump | B | B |
| Squid Surge (while swimming, press B) | B while swimming up walls | B while swimming up walls |
| Map | Y | Y |
| Booyah / Ouch (ping) | Up on D-Pad | Up on D-Pad |
| Change Weapon (grizzco) | + / - | + / - |
UI Overview
Main Menu (World Map)
- Battles: Enter online multiplayer (Turf War, Ranked, etc.)
- Grizzco: Salmon Run (co-op horde mode) – unlocked at level 4.
- Story: Single-player campaign "Return of the Mammalians" – accessible anytime, great for practice.
- Locker Room: Customize your gear, change your character's legwear, and view your locker decorations.
- Shop: Buy weapons, gear (clothes, shoes, headgear) with cash.
- Salmon Run: Cooperative mode where you collect golden eggs – unlocked after level 4.
- Top-left: Your ink tank gauge (shows remaining ink for your main weapon). Flashing red means you need to refill (swim in your ink or wait).
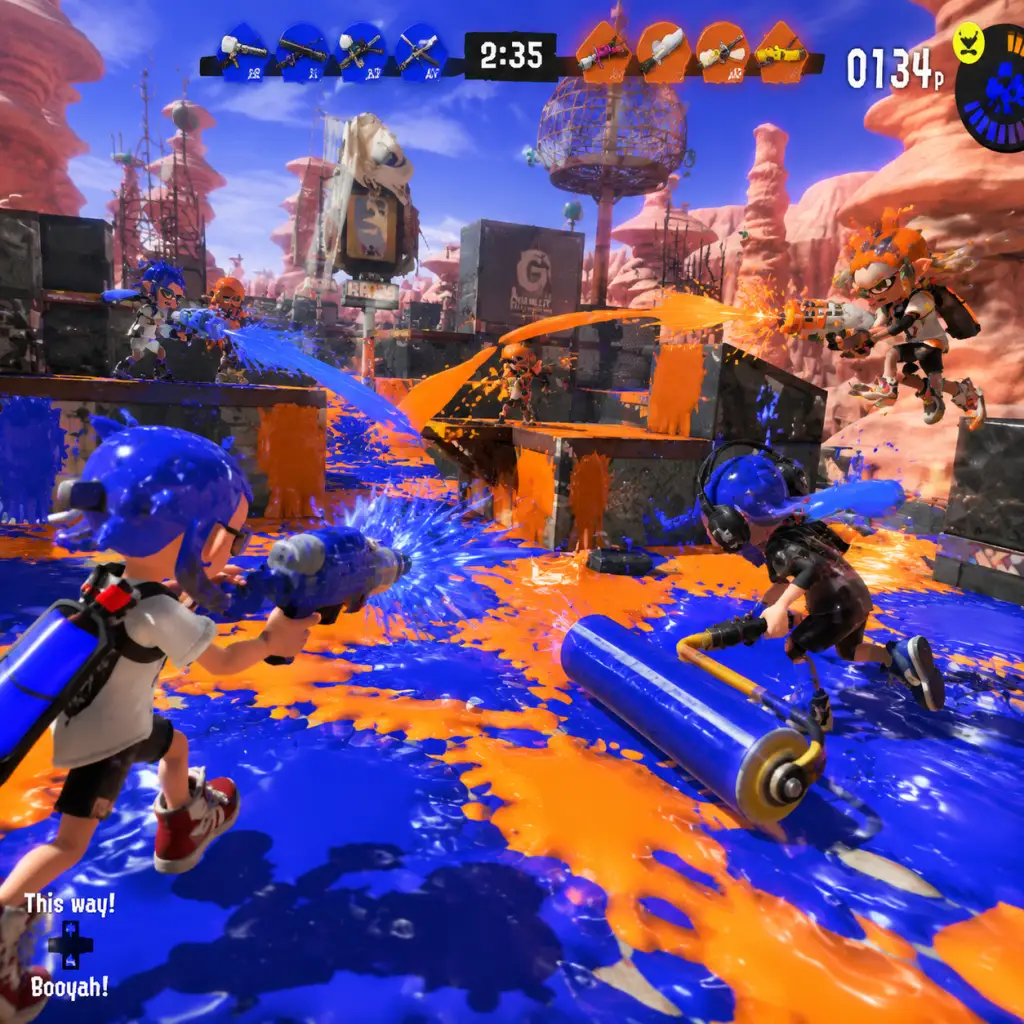
- Top-right: Team score (p) – in Turf War, shows percentage of inked area.
- Bottom-center: Sub weapon icons and special weapon charge indicator (a circle that fills when you ink turf).
- Map (Y): Shows positions of all players (you as arrow, teammates as dots, enemies as enemy ink splatter). Use it to navigate after respawning.
- Respawn: When splatted, you'll see respawn timer and can press A to move spawn point (useful to jump to a teammate).
- Level Up: Play Turf War to reach level 4 quickly. This unlocks ranked modes (Splat Zones, Tower Control, Rainmaker) and Salmon Run.
- Buy Basic Gear: Visit the shop (Hotlantis) and purchase at least one piece of gear with useful abilities (e.g., Ink Saver Main, Swim Speed Up). Gear abilities help a lot.
- Try Single-Player: The story mode teaches advanced movement (like squid roll, squid surge) in a low-pressure environment. Strongly recommended before competitive play.
- Adjust Controls: Spend 5 minutes in the training room (Options > Test) to practice aiming and movement.
- Ignoring your base turf. In Turf War, the first 20 seconds should be spent inking your spawn area. Uninked base gives the enemy free percentage.
- Overextending alone. Splatoon is a team game – always try to stay near a teammate (not all in one spot, but within 2 seconds of help).
- Dying with a full special. Use your special weapon (press X) when you have it – don't hoard it. The special meter resets on death.
- Refusing to adjust sensitivity. If you can't aim, lower sensitivity. If you can't turn fast enough, raise it.
- Not refilling ink. Always swim in your ink briefly to refill your tank. If you run out in combat, you're dead.
- Using motion controls without practice. If you choose motion, spend 5 minutes in the training room holding the controller still and aiming with small wrist movements.
- Cash (Coins): Earned from battles. Spend on gear that has good abilities (check abilities before buying). Don't buy every weapon initially – stick to one or two you like.
- Ability Chunks: Obtained by scrubbing gear (talk to Murch in the plaza). These allow you to add specific abilities later. Save them for endgame gear; don't scrub low-level gear frequently.
- Levels: Focus only on reaching level 4 to unlock Salmon Run and more gear. After that, levels matter less – just play what you enjoy.
- Gear: Prioritize Ink Saver (Main) and Swim Speed Up for general use. For weapons like rollers, Run Speed Up helps.
- Holding down ZR continuously: Some weapons (like Splattershot) fire rapidly, but always keep an eye on ink tank. Fire in short bursts to conserve ink and accuracy.
- Ignoring the map: Press Y often – especially after respawning – to see if your team is pushing or getting flanked.
- Not using squid rolls or squid surges: These are advanced movement techniques unlocked in story mode. At the very least, learn to squid roll (hold ZL while swimming, then press B to leap sideways). It makes you harder to hit.
- Staying in one spot: Keep moving. Splatoon is about map control and flanking.
- Panicking when shot: If you take damage, swim away into your ink. Don't fight unless you have advantage.
In-Match HUD
Essential Early Objectives
What to Do First (Day-One Checklist)
1. Complete the Prologue (~10 mins).
2. Change your controls (if needed). Disable motion if you despise it, else keep on.
3. Play 2–3 Turf War matches (they last 3 minutes each). Focus on inking the base first, then pushing forward.
4. Visit the Shop: Buy the cheapest weapon (e.g., Splattershot Jr. is free, but you can buy Hero Shot replica after story mode). Also buy a piece of clothing with Ink Saver (Main) to last longer.
5. Complete the first level of Story Mode (Return of the Mammalians) – easiest way to practice movement and aim.
6. Unlock Salmon Run (reach level 4 by playing Turf War; should take ~1 hour of play).
7. Spend 10 minutes in the Training Room to practice sub weapon throws and special usage.
8. Join a friend or queue solo – play until you feel comfortable.
What to Avoid (Common Beginner Mistakes)
Early Resource Priorities
Common Beginner Mistakes (Expanded)
Day-One Checklist (Summary)
| Task | Time Estimate | Purpose |
|---|---|---|
| Complete prologue | 10 min | Learn basic controls |
| Adjust settings (controls) | 5 min | Comfort |
| Play 3 Turf Wars | 20 min | Get first win experience |
| Buy one piece of gear with Ink Saver | 2 min | Longer ink |
| Do first story level | 15 min | Practice movement safely |
| Reach level 4 (may require additional matches) | ~1 hour | Unlock Salmon Run & Ranked |
| Try Salmon Run (optional) | 15 min | Learn co-op |
| Spend 10 min in Training Room | 10 min | Improve aim |
Core Gameplay
Core Gameplay
This guide breaks down the core gameplay of Splatoon 3 on the Nintendo Switch by player progression tiers. Each tier covers the main gameplay loop, combat and interaction systems, progression, exploration, quests/missions, economy, character/build growth, and endgame structures. Examples are specific to Splatoon 3 and include platform details where relevant.
Core Systems Overview
- Ink Mechanic: All your ink covers turf, damages enemies, and lets you swim (squid/octo form). Moving through enemy ink slows you down and damages you.
- Weapons: Main weapon (e.g., Splattershot, Roller), sub weapon (e.g., Splat Bomb, Burst Bomb), and special weapon (e.g., Tenta Missiles, Ink Storm).
- Controls: Use gyro aiming for precision or stick-only. Recommended: Gyro + stick for camera movement.
- Modes: Turf War (casual), Anarchy Battle (Ranked modes: Splat Zones, Tower Control, Rainmaker, Clam Blitz), Salmon Run (PvE), Tableturf Battle (card game), and Single‑Player (Alterna and Return of the Mammalians).
- Progression: Player Level (XP), Catalog Level (seasonal), Gear Abilities (via chunks, drinks, scrubbing), Weapon Freshness, and Rank (C to S+).
- Main Activity: Turf War matches (4v4). Each match lasts 3 minutes; cover as much ground with your ink as possible. After the match, you earn experience points (XP), cash, and gear for leveling.
- Supporting Activities: Play through the Hero Mode (Alterna) campaign stages to learn advanced movement, try weapons, and earn Sheldon Licenses (used to unlock weapons). Also play Salmon Run (PvE wave-based) to earn bonuses and practice in a lower-stress environment.
- Example First Steps: Complete tutorial (Turf War vs. AI), then jump into Turf War online. Use the Splattershot Jr. (default weapon) to learn ink coverage and sub weapon (Splat Bomb). After a few matches, start Hero Mode to unlock the Splat Roller or Splat Charger via Sheldon.
- Aiming & Shooting: Hold ZR to fire ink. Use right stick for horizontal aim, tilt Switch (gyro) for vertical adjustments – this is the golden standard for accuracy.
- Squid Form: Press ZL to turn into ink. Swim quickly in your ink to dodge, ambush, or reposition. While swimming, you can launch up ink walls or surfaces that you've inked.
- Sub Weapons: Press R to use sub weapon (e.g., Splat Bomb). These cost a portion of your ink tank, so manage your ink gauge (displayed on screen).
- Special Weapon: Build special gauge by covering turf or splatting enemies. Once full, press X (or R+Analog stick on Pro Controller) to activate (e.g., Tenta Missiles).
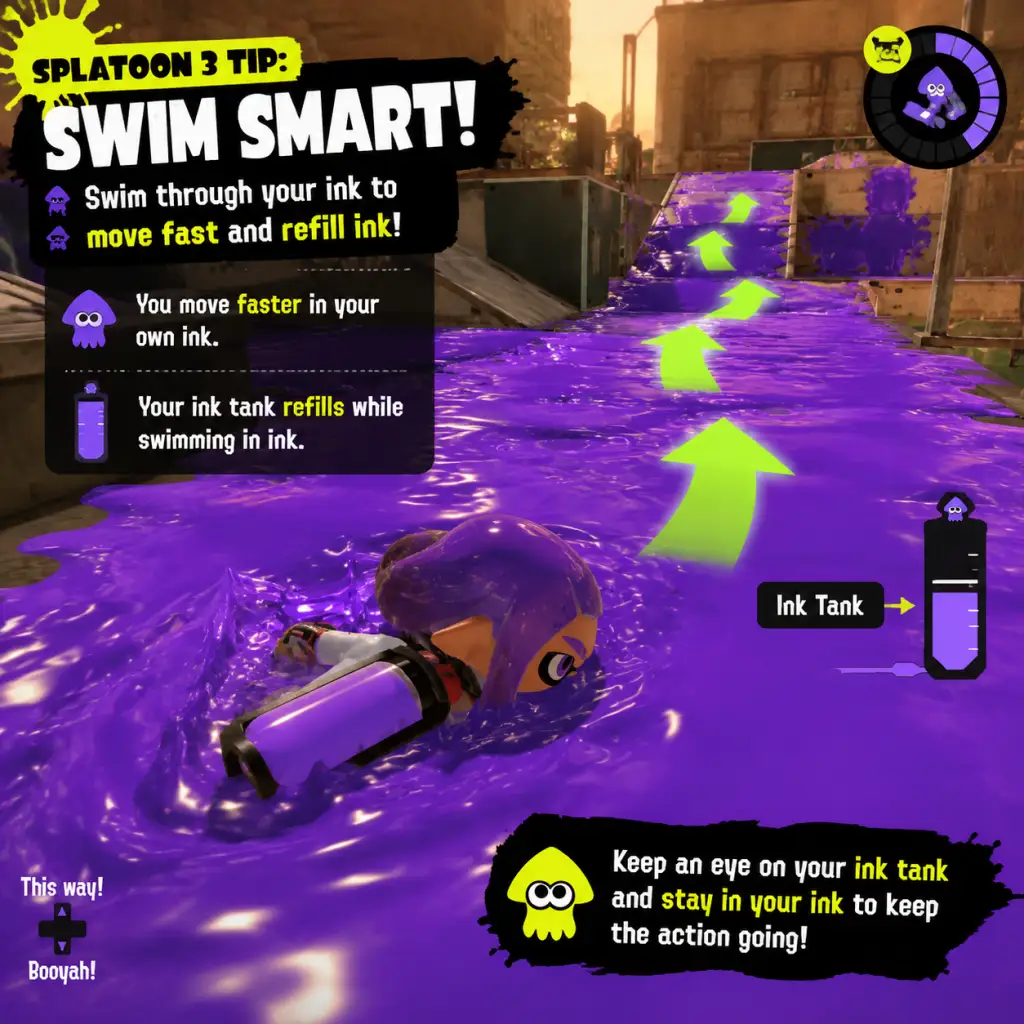
- Ink Tank: Refills by staying in your ink (squid form) or walking over ink patches. Monitor the tank icon in HUD.
- Player Level: Gain XP from matches (winning, ink coverage, kills). Level requirements: Level 1 → 2: ~500 XP, Level 10: ~3,000 XP per level. Level 10 unlocks Anarchy Battle (ranked).
- Weapon Unlocks: Use Sheldon Licenses (earned from Hero Mode and leveling) to buy weapons from the shop. Early game gives you ~10 licenses. Example: Level 4 unlocks Splattershot, Level 7 unlocks Splat Roller.
- Gear Progression: Gear (head, clothing, shoes) has base abilities + slots. Unlock slots by leveling gear (using it in battles) or using Ability Chunks. Early game: buy from shops (Cash) or receive as Tour points.
- Catalog Level: Seasonal catalog (approx. 3 months). Earn points by playing matches. Levels 1–10 give basic items like gear, cosmetics, and Super Sea Snails (for gear upgrading).
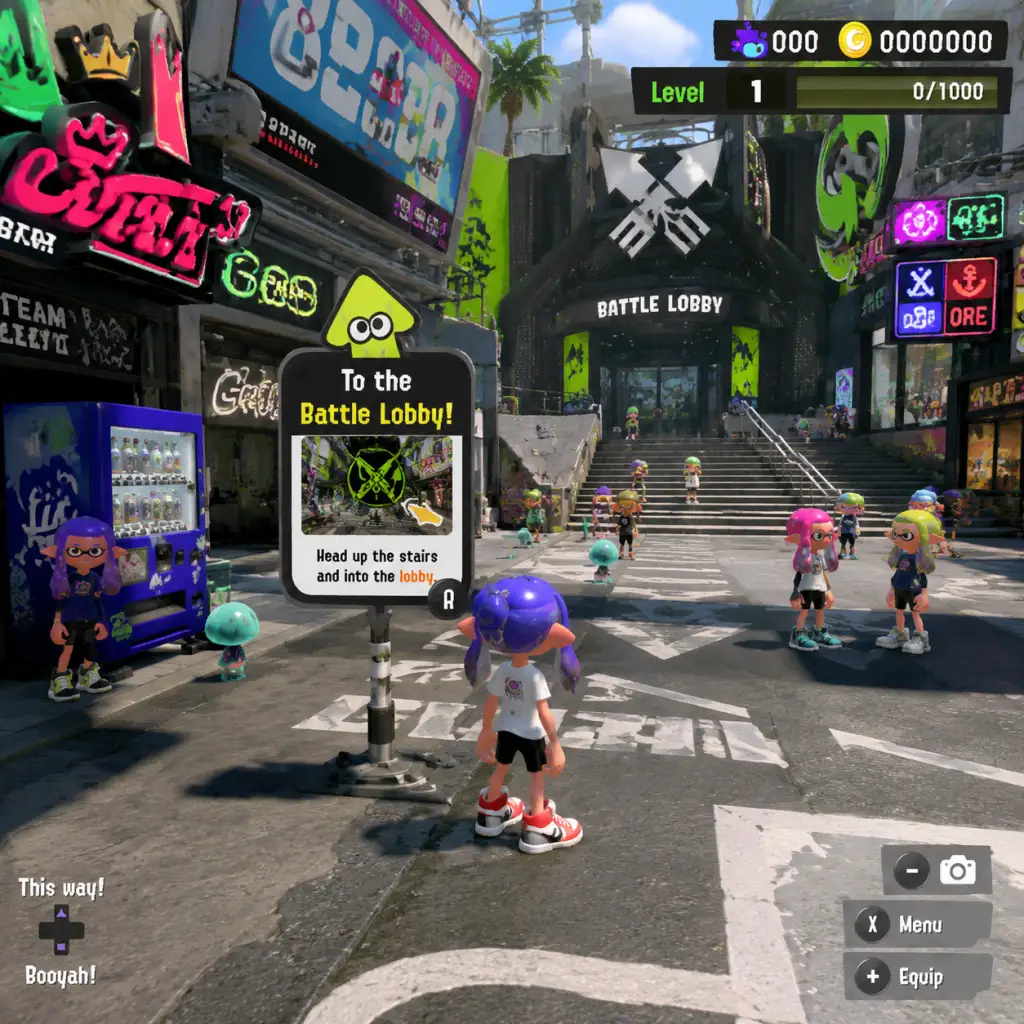
- Hub World: Splatsville / The Shoal (lobby). The Hub is small; you can practice in the lobby area or test weapons at Sheldon's shop. No open world, but you can walk around and interact with multiple booths.
- Alterna (Single-Player): Each world (e.g., Sulfurous Splatsville) contains multiple levels. Explore each level to find hidden collectibles (Sardines, Power Eggs). Early game: Focus on finishing first world to unlock basic upgrades for the story and earn Sheldon Licenses.
- Hero Mode (Alterna): Main story campaign, ~30 main levels across 6 worlds. Each level is a specific challenge (e.g., platforming, boss, ink puzzle). Completing a level rewards Power Eggs (used for upgrades) and Sheldon Licenses.
- Turf War Tutorial: The game's first mission is a guided Turf War match against computer opponents.
- Salmon Run (Shift): A PvE horde mode where you collect Golden Eggs from bosses. Each shift lasts ~2 hours; complete shifts to earn bonus points and cash. Early game: use it to earn cash and tokens.
- Tableturf Battle (Card Game): Optional 1v1 card game. Grid-based strategy using decks you build. Early game: learn the rules with a starter deck; rewards include cash and gear.
- Cash (Gold): Earned from Turf War (win bonus, coverage payout). Also from Salmon Run bonuses and selling gear. Starting capital: ~500 cash. Early game: spend on basic gear (gear costs ~1,000–3,000 cash). Save for higher-level boots or hats with desired abilities.
- Sheldon Licenses: Earn one per Hero Mode level completed and one per Player Level up to Level 20? Actually: Every 2-3 levels you get a license. Total about 50 across all content. Early game: use to unlock weapons like Splattershot Pro, Tentatek Splattershot, or Splat Charger.
- Ability Chunks: Obtained by scrubbing gear (pay cash) to remove abilities and convert them into chunks. Early game: minimal chunks; accumulate by using gear you earn and then scrub unwanted abilities.
- Shell-out Machine: Gatcha-like machine in the Hub. Costs cash, gives random items (food tickets, drink tickets, ability chunks, gear). Early game: avoid heavy spending; use only spare cash.
- Food & Drink Tickets: Improve XP or cash gain for matches. Early game: use common tickets to speed up leveling.
- Loadout: Main weapon + sub weapon + special weapon are tied to the weapon kit. Build your playstyle: e.g., aggressive with Splattershot (Splat Bomb + Tenta Missiles) or support with Splattershot Jr. (Splat Bomb + Ink Storm).
- Gear Abilities: Each piece of gear has primary ability (fixed) and up to 3 secondary slots (random when earned). Abilities improve stats: Ink Saver (Main), Swim Speed Up, Special Charge Up, etc. Early game: equip any gear; don't worry about perfect abilities – just level gear to unlock all slots.
- Weapon Freshness: Each weapon gains freshness points per win. Levels: 1–5 stars. Freshness influences score at end of match and unlocks badges. Early game: try multiple weapons to see what you like.
- No access to Ranked or higher difficulties. Focus on completing Hero Mode, reaching Level 10, and unlocking all weapon types. Play Turf War to consistently level up. Once Level 10 reached, you have the option to dive into Anarchy Battle (Ranked).
- Main Activity: Anarchy Battle (Ranked) – Four modes rotate in 2-hour blocks: Splat Zones (control a zone), Tower Control (ride a tower to enemy base), Rainmaker (carry a weapon to pedestal), Clam Blitz (collect clams and throw them into basket). This becomes the primary source of XP, cash, and rank points. Also continue Turf War for catalog.
- Supporting Activities: Salmon Run shifts with higher difficulty (Hazard Level), Tableturf Battle for collectibles, and Hero Mode completion (if not finished). Join Splatfest events (~3 per month) for exclusive gear and rewards.
- Example Progression: At Level 10, jump into Splat Zones (first unlock). Play with Splattershot (tentatek kit). Win matches to rank up from C- to B. Use ability chunks from scrubbing duplicate gear to get Swim Speed Up on shoes.
- Ranked Mode Mechanics: In Splat Zones, you must ink a designated zone and keep it under your team’s control (like a king-of-the-hill). Tower Control forces close combat; Rainmaker requires escort; Clam Blitz needs coordination. Learn map callouts (e.g., “flank left”, “push mid”).
- Special Weapons Usage: Coordinate specials with team. Example: Use Ink Storm to block enemy paths during Tower Control push. Special charge from ink coverage is vital in Ranked.
- Movement & Techniques: Mid-game you should master squid rolls (dodge), squid surges (jump out of ink), and sub strafing (throwing bombs while moving). Practice in training area at The Shoal.
- Map Knowledge: Learn common routes, choke points, and vertical mobility. Every map has inkable walls that allow fast climbing.
- Player Level: Level 10 to 30 – each level requires ~5,000–10,000 XP. Win Streak bonuses in Ranked give more XP.
- Anarchy Rank: Starts at C- (0 points). Win matches to earn rank points (+20 to +50 per win). Promotions: C → B → A → S. At Level 20, you unlock X Battle candidates? Actually X Battle is late game; Mid game you can reach A rank.
- Weapon Unlocks: New weapons available per level up to Level 30 (e.g., Level 12: Dualie Squelchers, Level 18: N-ZAP '85). Use Sheldon Licenses (you get more from leveling and Hero Mode).
- Gear Slots Unlock: Gear leveling: Each piece gains experience from matches. Mid game you can fully unlock all 3 secondary slots. Use Super Sea Snails from Splatfest to re-roll abilities on gear.
- Catalog: Reach Level 20 in catalog to earn premium items (e.g., exclusive headgear). Mid game: catalog progression gives drink tickets that help build ability sets.
- Alterna (Cont.): If you haven't completed Hero Mode, mid game is a good time to finish (especially Secret Boss). Completing all worlds unlocks the Alterna Finale and a special reward (a cool hairstyle). Also explore hidden sectors for extra Power Eggs and gear.
- Tableturf Battle: Unlock more cards by winning matches and purchasing from shops. You can build a competitive deck. Mid game: strategic deck building with cards like “Special Charge” or “Bomb Rush”.
- Salmon Run: New boss Salmonids appear (e.g., Fish Stick, Big Shots). Higher Hazard Levels (Normal → Overachieving) provide more Golden Egg quota and bigger bonuses. Requires coordination – learn boss weak points.
- Anarchy Battle (Ranked): Treat each rank promotion as a quest. Ranking up to A unlocks new weapon sets and matchmaking brackets.
- Splatfest Events: Special limited-time events (3–4 times per season). Choose a team (e.g., Team Wizard vs Team Knight vs Team Ninja). Play matches to earn Splatfest level and reward scaling. At max level, you get a special badge and gear.
- Salmon Run Personal Goals: Reach a high score (e.g., 50+ eggs) or complete a shift without losing any players. Mid game: aim for “Professional Part-Timer” rank (Eggsecutive VP 200).
- Tableturf Battle: Complete the campaign (in-game challenges). There are tiers like “Tableturf Master”. Rewards: cash, gear tokens.
- Cash: Ranked matches give higher cash. Also sell unwanted gear from Salmon Run. Mid game you will accumulate ~50k–200k cash. Spend on high-end gear from shops (e.g., 80k cash for a rare piece).
- Ability Chunks: Use drink tickets (obtained from Salmon Run and catalog) to increase chance of specific abilities. Start building optimized sets (e.g., all Swim Speed Up or all Ink Resistance). Scrub gear with cash (~20k) to convert abilities to chunks.
- Super Sea Snails: From Splatfest and level 40+ catalog. Use at Murch’s shop for ability chunk farming or to unlock gear slots. Mid game you may have 5–15 Snails.
- Food & Drink Tickets: Use XP tickets (rare) or cash tickets for Turf War. Drink tickets are key for ability farming.
- Gear Optimisation: Decide on a primary ability for each slot (e.g., head: Special Power Up, clothes: Ink Saver Sub, shoes: Swim Speed Up). Use ability chunks to fill secondary slots. Mid game you can have a 2-star gear ( 2 main abilities) with a perfect set of 3 secondary abilities.
- Weapon Kits: Experiment with different sub weapons and specials. For example, the Splattershot (Tentatek) has Suction Bomb and Ink Storm – good for support. The Splat Roller (Carbon) has Burst Bomb and Ink Vac – aggressive mobility.
- Freshness: Keep high freshness on your main weapon for badge (e.g., 5-star badge). This doesn’t affect performance but shows dedication.
- Build Examples:
- Ranked up to A rank; still climbing to S. You'll unlock X Battle at Level 30? Actually X Battle is unlocked at Rank S+ (in mid game you may reach S). Mid game ends around level 30 with a good understanding of some weapons and Ranks. The next tier is late game with S ranks and weapon mastery.
- Main Activity: Anarchy Battle X (once you reach S+0) – X Battle is the highest skill tier, with a separate rank (X Power). You play unranked but with a hidden MMR. You also continue playing Ranked (S and S+). Focus on competitive improvement: watch replays, learn positioning, and team synergy.
- Supporting Activities: Master Salmon Run Eggsecutive VP 300–999, Tableturf Battle high ranks, Splatfest (now you can reach top 100 regional leaderboards), and the Side Order DLC (released Aug 2024) if owned – but base game late game includes completing all story content and maximizing gear.
- Example Goal: Reach S+50 in Anarchy Rank, X Power above 2,000. Use the Tri-Stringer (bow weapon) you unlocked earlier. Optimize gear with 3 mains and 9 subs all abilities matching your playstyle.
- Meta Analysis: Understand current meta weapons (e.g., Splash-o-matic, Flingza Roller, E-liter 4K). Study opponent behavior and adapt weapon kits. Use bomb rushes with special combinations: e.g., Tenta Missiles with Ink Mine for area denial.
- Advanced Techniques: Squid roll with auto dodge, super jump cancellation, bomb bounce trick (throwing bombs off walls for angles). Master using the environment: ink ceilings, grate floors (no ink coverage), and moving platforms.
- Team Communication: Use the “Here!” ping (up on dpad) for super jump coordinates. Late game you should coordinate with voice chat via Nintendo Online app (optional but helpful).
- Map Control: In Splat Zones, control the middle; in Tower Control, push with support specials (e.g., Ink Storm to block enemy approach). Recognize rotation power plays (e.g., inkjet rush).
- Player Level: Level 30 to 50 (max is 50*? Actually no max but XP gains slow; you earn badges for each 10 levels). At Level 50, you unlock the “Fresh” badge and maxed gear slots.
- Anarchy Rank: From S to S+0 (requires ~500 rank points per tier). You need win streaks to climb; losses cost points. Late game: S+0 to S+50 (tiers come from accumulating points). At S+0, you unlock X Battle.
- X Battle Power: Starts at 1,500. Winning increases power; losing decreases. Aim for 2,000+ to be competitive. X Power impacts matchmaking; top players reach 2,500+.
- Gear Abilities: Fully optimized gear with 3 mains and 9 subs. Use ability chunks to craft “perfect” sets (e.g., all Swim Speed Up + Nautilus). Late game you can scrub and re-roll dozens of times.
- Catalog: Earn seasonal catalog levels up to 100. The catalog includes exclusive gear (e.g., headgear with special ability). Complete it each season for max rewards.
- Alterna 100% Completion: Find all hidden items, unlock all lore (via scrolls). Complete the Secret Boss (difficult) for a special badge. Exploration is mostly done; you may revisit for completionist purposes.
- Tableturf Battle: Reach rank “Champion” or higher. Build a top-tier deck using synergy cards (e.g., Crayfish with Special Charge, Dualies with Ink Walk). Late game: this mode is niche but offers rare badges.
- Salmon Run High Ranks: Hazard Level reaches maximum (270). Play with random or team to achieve Eggsecutive VP 999 (max). This is a significant challenge requiring perfect teamwork.
- Rank Quests: Your own goals like reaching S+0 in each of the four Ranked modes. Some players aim for “S+0 in all” to get a special badge.
- X Battle challenges: Maintain X Power above a certain threshold for the season's end leaderboard. Top 3,000 get a special reward (badge).
- Splatfest: Become “Splatfest Champion” by reaching Sovereignty rank (highest level) each event. Also consider joining a Splatfest team and competing for Top 100.
- Salmon Run: Eggsecutive VP: Complete shifts without any failures (X rank). Also try the “100 Eggs” quota in a single shift (very hard).
- Tableturf Battle: Complete all “Card Master” challenges (hard AI).
- Cash: Millions possible from Ranked and Salmon Run. Use cash to scrub gear freely, buy any weapon, and buy rare gear from shops (like toki gear). No cap, but no huge sink beyond gear upgrades.
- Ability Chunks: You may have hundreds of each chunk type. Use drink tickets wisely to farm specific sets. You can reroll gear abilities at Murch using Super Sea Snails.
- Super Sea Snails: Late game you can have 50+ from Splatfest and catalog. Use them to add slots to gear (but you likely have all slots already). Alternatively, use for ability chunk farming: reroll secondary abilities on a 3-slot gear to try to get 3 of the same ability (expensive but possible).
- Food & Drink Tickets: Max out your inventory. Use XP tickets to accelerate leveling (if still needed). Drink tickets are used in bulk for ability crafting.
- Perfect Gear Sets: Aim for a set with all same secondary ability (e.g., 3 main abilities + 9 Swim Speed Up). This requires RNG and many ability chunks. Late game you can achieve this for a few weapons.
- Weapon Mastery: Become proficient with a specific weapon or class. Contribute to online tier lists and adapt to patches. Update builds as new abilities are added.
- Ability Synergies: Pair abilities for rare combos: e.g., Respawn Punisher + Thermal Ink for tracking enemies. Or Quick Respawn + Special Saver for aggressive play.
- Freshness Badges: Get 5-star freshness on multiple weapons. Late game you can have several badges.
- Continue climbing X Battle and leaderboards. Participate in Splatfest events and Salmon Run Eggsecutive VP. This is the “fun” competitive phase. There is no formal endgame beyond improving personal skill and collecting all items.
- Main Activity: X Battle (highest competition) and maintaining X Power. Compete on the global leaderboard. The only progression is personal skill and seasonal rankings. Also engage in Splatfest events to earn exclusive badges and top placements.
- Supporting Activities: Complete all in-game collections: all weapons (via Sheldon licenses and cash), all gear (including amiibo gear, gear from Salmon Run, Splatfest), all tableturf cards, all badges. Play Salmon Run at Eggsecutive VP 999 repeatedly for fun or to help others.
- Side Order DLC (optional): If you own the DLC, you can play a roguelike mode with permanent upgrades (Palettes, Chips). This provides a deep endgame with hours of replayability. It also adds online leaderboards for score attack.
- Example: Log in daily to check X Power, play a few matches to maintain rank, then grind Salmon Run for the “Golden Scale” (rare reward from King Salmonid). Alternatively, aim for the “999” victory mark in X Battle.
- Tactical Gameplay: Use advanced techniques like “splatting from above” with Tenta Missiles, or coordinated Ink Jet pushes. Understand all specials and counters (e.g., Ink Armor vs. Ink Vac).
- Role Specialization: Become a skirmisher, slayer, support, or anchor. Perfect your role using specific loadouts. Endgame players often main one weapon and know every matchup.
- Replay Analysis: Use the “Replay” feature to review matches. Study top players’ movements. The competitive meta evolves; stay updated with patch notes.
- Player Level: No hard cap; each level grants a random item (gear, ticket, cash). Grinding levels for cosmetic badges (e.g., 100, 200).
- Anarchy Rank: Already maxed at S+50. No further rank up. The only numeric progression is X Power (seasonal reset).
- Catalog: Each new season resets catalog; endgame players try to reach Level 100 each season (takes ~4 hours/week). Rewards are cosmetic.
- Gear Optimization: Continually refine sets with new abilities added in updates (e.g., Quick Respawn rework). Try odd combos for fun (e.g., all Special Power Up to charge Booyah Bomb in 5 seconds).
- Weapon Freshness: Unlock all 5-star badges for all weapons (88 weapons). This is a long-term grind.
- Alterna 100% already done. No new areas except future updates (Nintendo has announced no new major single-player content outside side order). Explore all maps in multiplayer with new rotations.
- Salmon Run: Explore different maps (modes) at max hazard. No new exploration.
- Side Order DLC: Explore new procedural floors with unique environments. This is the only new exploration endgame content.
- All Badges: There are over 200 badges (e.g., “Gold Splatfest Champion”, “X Battle Top 500”, “Salmon Run Eggsecutive VP 999”, “All Weapons Freshness 5”). Endgame is badge hunting.
- Splatfest: Always participate to earn a badge for each event. The “Fame” level (Superstar) gives a unique badge.
- Salmon Run: Collect all scales (bronze, silver, gold) from king salmonids to buy exclusive gear from the shop (e.g., Gold Toothpick). This is a rare RNG drop.
- Tableturf Battle: Complete the card collection and achieve the “Card King” badge.
- Side Order DLC: Complete all rooms (20 floors) with all palettes, collect all Chips, and achieve high scores on the leaderboard.
- Cash: Overflow (millions). The only use is to scrub gear (20k each) or buy occasional gear from shops (but you own everything). Economy is effectively trivial.
- Ability Chunks: You will have thousands of chunks. Use them to craft perfect gear for every weapon. Consider creating themed or meme builds.
- Super Sea Snails: Hundreds from past Splatfests. Use to reroll abilities endlessly.
- Food/Drink Tickets: You likely have stacks of 99. Use for fun.
- Ultimate Build Variety: Create dozens of gear sets for different weapons and situations. Optimize for every map and mode (e.g., high Ink Resistance for The Reef, Swim Speed Up for Mincemeat Metalworks).
- Weapon Diversity: Master multiple weapons to adapt to team composition and map rotations. Endgame players often have one main per mode.
- Ability Experimentation: Test new abilities after patches. For example, when “Intensify Action” was added, endgame players tried it on Splatlings to reduce shot spread while jumping.
- Personal Goals: Set personal records: highest X Power, most kills in a match, fastest King Salmonid kill.
- The main endgame loop is self-directed: improve X Power, chase badges, play Salmon Run for scales, and participate in seasonal events. The game does not have a traditional MMO-style raid or continuing narrative beyond updates. The Side Order DLC provides a structured roguelike endgame with progression that resets per run (but permanent upgrades exist). This adds significant replayability for those who want it.
- Competitive Circuit: Nintendo hosts official tournaments (e.g., Splatoon 3 World Championship). Endgame players may form teams and compete. This is the ultimate endgame for skilled players.
- Achievement Completion: 100% completion (all badges, gear, weapons, catalog, Tableturf, Hero Mode secrets). This can take hundreds of hours.
---
Early Game (Level 1–10)
Gameplay Loop
Combat / Interaction Systems
Progression
Exploration
Quests / Missions
Economy
Character / Build Growth
Endgame Structure (Early Tier)
---
Mid Game (Level 10–30)
Gameplay Loop
Combat / Interaction Systems (Advanced)
Progression
Exploration
Quests / Missions
Economy
Character / Build Growth
- Rushdown (Splat Dualies): Run Speed Up, Swim Speed Up, Ink Saver Main.
- Support (Splat Brella): Ink Recovery Up, Special Charge Up, Sub Saver.
- Slayer (Octobrush): Swim Speed Up, Main Power Up, Quick Super Jump.
Endgame Structure (Mid Tier)
---
Late Game (Level 30–50, Ranks S to S+)
Gameplay Loop
Combat / Interaction Systems (Expert)
Progression
Exploration
Quests / Missions
Economy
Character / Build Growth
Endgame Structure (Late Tier)
---
Endgame (Beyond Level 50, X Battle Leaderboard, All Ranks Maxed)
Gameplay Loop
Combat / Interaction Systems (Mastery)
Progression (Beyond Max Level)
Exploration
Quests / Missions
Economy
Character / Build Growth (Endgame)
Endgame Structure
---
Conclusion: Splatoon 3 offers a rich core gameplay loop that evolves from beginner-friendly Turf War to high-stakes competitive X Battles. The progression system naturally guides players through early learning, mid-game ranking, late-game mastery, and endgame collection/competition. Whether you prefer PvP, PvE (Salmon Run), or the single-player campaign, there is always something to achieve. Adapt your playstyle, grind for that perfect gear set, and have fun inky battles!
Game Tips
Comprehensive Game Tips Guide for Splatoon 3
Beginner Tips (Turf War & Navigation)
1. Always Ink Your Spawn Area First
- Why it works: Inking your own base (the platform around the spawn point) gives you a safe zone to retreat, builds your Special Gauge quickly because un-inked ground yields high ink coverage points, and denies the enemy from easily flanking behind you.
- When to use: At the start of every match (Turf War) or after respawning when returning to the front line.
- Why it works: Swimming in your own ink hides you from enemy ink on the mini‑map, refills your ink tank faster, and lets you move faster than on foot. On turf that is not your color, you cannot swim and are an easy target.
- When to use: Move between positions, retreat, reload, or ambush. Always try to ink a path before advancing.
- Why it works: Motion controls (gyro) allow much finer aiming than the right stick alone. Most top players use motion + stick combo (stick for coarse turns, motion for fine aim).
- When to use: Start with the default sensitivity and adjust gradually. Practice in the training room (Shooting Range) every session.
- Why it works: The Recon mode lets you freely roam any stage without enemies. You can learn shortcuts, perches, and flank routes.
- When to use: Before jumping into a ranked mode or a new rotation. Spend 5–10 minutes per stage.
- Why it works: Sub weapons like Splash Wall create temporary barriers that block enemy shots. They protect you while charging a special or holding a chokepoint.
- When to use: Place a Splash Wall at the edge of a corridor or in front of a tower/painbrush zone. Retreat behind it when pressured.
- Why it works: While swimming in ink, press the jump button to perform a Squid Roll, which instantly changes direction and gives temporary invincibility frames during the roll. It breaks enemy aim tracking.
- When to use: When you are being chased or when you need to dodge a one‑hit‑KO weapon (e.g., E‑liter 4K). Also useful for re‑positioning after firing a few shots.
- Why it works: Splatoon 3 is about map control. A direct frontal assault often gets splatted. Taking a wide flank using walls and swim paths lets you attack enemies from behind or the side, catching them off guard.
- When to use: In Turf War, when your team is holding mid, instead of pushing further, swim around to the enemy base. In Ranked, flank the opposing team while they are focused on the objective.
- Why it works: Each weapon consumes ink at a different rate. Shooting empty ink pods leaves you defenseless. Manage your ink by tapping fire instead of holding down (unless continuous fire is needed).
- When to use: Use short bursts to ink turf or chip damage. With weapons like the Splattershot, four‑shot kills are common – fire only enough bullets to splat, then swim to refill.
- Why it works: Sub weapons like Autobomb, Ink Mine, or Suction Bomb force enemies to move away from advantageous positions. They also reveal enemies if they get hit.
- When to use: Throw a Suction Bomb onto a high perch that the enemy often occupies. Place an Ink Mine in a narrow hallway or near a splat zone. This creates “no‑go” zones.
- Why it works: A poorly timed Super Jump can land you directly in enemy fire. The landing marker is visible to everyone. Use Stealth Jump ability to hide the landing point.
- When to use: Only Super Jump to a teammate who is safe and not in combat. Jump to spawn if you need to escape. Use squid‑surge landing (press B while in air) to bounce off the ink and avoid standing still.
- Why it works: Each gear piece has main and sub abilities. Stacking the same ability (e.g., three Swim Speed Up subs) provides diminishing returns but still improves the effect. Drink Tickets from the Crust Bucket guarantee ability gains in the chosen slot.
- When to use: Build a set for one weapon: e.g., “Comeback” main ability for fast respawn boosts, “Special Saver” to lose less special gauge on death, and “Ink Resistance Up” for moving through enemy ink. Use tickets while rolling abilities (at Murch) to save chunks.
- Why it works: After throwing a bomb, you can tap the squid button to instantly enter swim form without a delay. This allows you to throw a bomb and immediately hide or relocate.
- When to use: When you want to pressure an objective (e.g., tower) and then hide behind cover. Also useful for Curling Bombs to quickly retreat after launching them.
- Why it works: Ink Storm creates a large cloud of slow‑firing ink that damages enemies over time and covers ground. The cloud moves slowly in the direction you aimed when activated. It can block sight lines and force enemies out of cover.
- When to use: Before pushing a splat zone, throw Ink Storm to deter the enemy team from defending. During Tower Control, shoot the storm on top of the tower to chip away at the rider. In Clam Blitz, use it to block pathways around the clam basket.
- Why it works: While swimming up an inkable wall, press the jump button to launch upward and gain a height advantage. You can then shoot from above or land onto a ledge.
- When to use: To reach perches quickly, to surprise an enemy camping a ledge, or to escape a threat from below. Practice timing to avoid hitting the lip of the wall.
- Why it works: Eggs are heavy; carrying them slows you down. Tossing eggs (using A) toward the egg basket or toward a teammate who is near the basket saves travel time. A teammate can catch and deposit while you collect more.
- When to use: Always prioritize throwing eggs over carrying them if you are far from the basket. In high tide, you can throw eggs over walls or directly into the basket from a short distance.
- Why it works: Certain bosses (e.g., Stinger, Flyfish) can quickly overwhelm the crew. Stingers fire from far away and can wipe a team if not dealt with. Flyfish launch missiles that require two ink bombs to destroy each bucket.
- When to use: In the first 30 seconds of a wave, identify and target high‑priority bosses. Use your special like Booyah Bomb or Splat Bomb (for Flyfish) immediately.
- Why it works: A Power Clam (gathered from 10 small clams) can break the enemy basket and allow your team to throw clams inside while it’s open. But if you die while holding it, the Power Clam drops as 3 small clams.
- When to use: Only grab a Power Clam when you have a clear path to the basket or when your team is pushing. Pass the Power Clam to a teammate with a better position using a careful toss.
- Why it works: Special Power Up increases the effectiveness of many specials. For Tenta Missiles, it increases the number of missiles launched. For Ink Vac, it extends suction radius. Stacking this can break certain thresholds (e.g., more missiles can hit more enemies).
- When to use: Use on weapons that rely on their special to secure kills or zones. Check the Splatoon 3 wiki for exact breakpoints.
- During Splatfest (Pro vs. Fun), pay attention to the “Splatfest Battle” rules. The Turf War format adds a special 10x or 100x battle that awards major points. Queue with a pre‑made team to increase odds of matching against another team and unlocking these multiplier matches.
- Use the “Splatfest Tee” with triple “Special Charge Up” to farm specials quickly in the final battle. Conch shells earned from leveling up can be used to roll gear abilities – save them for the end of the Splatfest when you know which ability you want.
- How it works: Murch (the merchant in the lobby) can add a sub ability to a gear slot using 30 chunks of that type, or reroll all slots for 20,000 gold. Sea Snails (from Splatfests and leveling) allow rerolls for free.
- Tip: Save your Sea Snails until you have a full set of three gear pieces with the perfect main abilities. Then use Snails to reroll until you get the desired subs. Drink Tickets bias certain abilities to appear more often.
- Efficient farming: Use the “Crust Bucket” (lobby NPC) to order gear from other players that has good abilities. It costs money but saves chunk farming.
- Money in Splatoon 3 is used to buy gear from shops (Hotlantis, Crust Brothers, and the Nautlouis catalog). You also need money for re‑rolling gear.
- Fast money: Sell duplicate gear from Salmon Run rewards. Also use the “Food Ticket” from the Crust Bucket to increase experience and gold earned.
- Inventory: Buy all gear that appears in the shop (even duplicates) to increase the chance of finding gear with the abilities you want later.
- The seasonal catalog (every 3 months) contains exclusive gear, emotes, and titles. Leveling it requires experience points from matches. Use a “Catalyst” food item (from the Crust Bucket) to double catalog experience.
- Tip: Play in the Salmon Run (which also gives catalog XP) on busy rotations to level faster.
- Shooters: Versatile, balanced – good for beginners. Use the Splattershot or Tentatek Splattershot.
- Rollers: Good for turf coverage and close combat. The Carbon Roller is fast; the Splat Roller is heavier with higher burst damage.
- Chargers: Long‑range sniping. Requires good aim. E‑liter 4K is lethal but slow. Bamboozler is fast but lower damage.
- Blasters: Explosive shots that deal splash damage. Good in tight corridors.
- Dualies: Roll to dodge and then fire rapidly. High skill cap but excellent mobility.
- Splat Dualies: A good starting dualie.
- Weapon: Splattershot Jr. (or standard Splattershot)
- Gear Main Ability: “Comeback” or “Last‑Ditch Effort” for comeback boosts.
- Sub Abilities: Two Swim Speed Up, two Ink Resistance Up, and one Special Charge Up. This gives a balanced setup for mobility and survival.
- On certain weapons, Main Power Up increases damage (e.g., Splat Dualies become a 3‑shot kill instead of 4). Check specific breakpoints for your weapon. For the vanilla Splattershot, one main MPU increases damage from 35 to 36 (still requires 3 hits to kill).
- When to use: On weapons that benefit from a damage threshold. For example, the Splat Roller (vertical swing) does 150 damage – one MPU makes it 153, enough to OHKO foes with slight defense. Test in the training room.
- Splat Roller + Suction Bomb: Use bomb to force enemies out of ink, then roll over them.
- N‑ZAP 85 + Autobomb: Autobomb chases enemies, revealing their location, then finish with N‑ZAP’s fast fire rate.
- Splat Charger + Sticky Bomb: Stick a bomb on a wall to create a delayed explosion, then peek around the corner to charge your shot.
- In open turf wars, sometimes players stop fighting to have a “party” (dance). This is not helpful in competitive play. Avoid it unless you are in the practice lobby with friends.
- Camera Sensitivity: Many pros use +5 horizontal and +5 vertical motion, with stick sensitivity at -1 or -2 for fine control. Experiment.
- Rumble: Disable HD Rumble if it distracts you. Enable it for weapons that tell you when you’re out of ink (some weapons rumble when empty).
- Button Layout: Left stick jump on ZL and squid on L is common. You can change “squid” and “jump” buttons in the system settings (but not in‑game). Consider mapping ZL to jump (for easier squid rolls).
- Use the Shooting Range to practice aiming at the moving dummies, test bomb trajectories, and learn weapon kill times. Also use the “Glowfly” target for tracking practice.
- The X button opens the full map. The mini‑map in the top‑right shows enemy ink and your team’s positions. If an area is suddenly covered in enemy ink, expect an ambush. Check it frequently.
- Pressing up on the D‑pad says “Booyah!” which can be used to signal “I’m ready” or “attack here!”. In Salmon Run, it can indicate “I’m incoming with an egg” or “need help here”. Use it sparingly to coordinate.
- In ranked modes, it’s better to fall back and regroup than to die and feed the enemy special gauge. If you’re low on health or ink, retreat to a safe area and heal.
- On stages like Walleye Warehouse, wait for an enemy to come to you rather than chasing them. This works especially with chargers or blasters. Let your team’s specials turn the tide.
- Many stages have multiple floors. Use the “Inkrail” to quickly ascend or descend. In Skalop Wing, the moving platforms can be inked for shortcuts. Study each stage’s vertical layout.
- Splatoon 3 is a unique game with a vibrant community. Don’t be afraid to try all weapon classes. Use the “Replay” feature to watch matches from opponents’ perspectives and learn new tactics.
2. Squid Form is Your Best Friend
3. Learn to Use the Motion Controls
4. Use the “Recon” Feature to Memorize Stages
Intermediate Strategies (Combat & Movement)
5. Master the “Inkwall” – Sub Weapons as Cover
6. Squid Roll (Snap‑Turn) for Evasion
7. Flanking over Frontlining
8. Ink Efficiency – Don’t Over‑Shoot
9. Use Sub Weapons to Zone Out Enemies
10. Super Jump with Caution
Advanced Techniques & Optimizations
11. Gear Ability Stacking & Brewing (Drink Tickets)
12. The Art of “Bomb Throw Canceling”
13. Special Timing – “Ink Storm” Zone Control
14. Squid Surge (Vertical Launch)
15. Dropping Eggs in Salmon Run – Throw to Teammates
16. Boss Priority in Salmon Run
17. Clam Blitz – “Power Clam” Carrying
18. Gear Ability “Special Power Up” for Autobombs
19. Splatfest Strategies
Economy & Resource Management
20. Farming Ability Chunks (Sea Snails & Rerolling)
21. Money – “Golden Eggs” and “Reserves”
22. Catalog Leveling – Unlock Items
Weapon & Build Advice
23. Choosing a Main Weapon Class
24. Recommended Beginner Build
25. Advanced Build: “MPU” (Main Power Up) Stacking
26. Sub Weapon Synergy
General & Miscellaneous Tips
27. Use the “Squid Party” Cautiously
28. Adjust Your Settings
29. The Training Room is Your Dojo
30. Watch Your Mini‑Map
31. Communication with “Booyah!”
32. Avoid Overcommitting
33. Use the “Camp Triggerfish” Strategy (Patience)
34. Learn the “Stratosphear” (Verticality)
35. Final Tip – Have Fun and Experiment
This guide covers the core of Splatoon 3’s gameplay. Keep practicing and adapting to the meta – the best weapon is the one you enjoy the most!
Game Settings
Overview
Splatoon 3 is a Nintendo Switch exclusive. The game has a limited but essential settings menu, accessible from the lobby by pressing X and selecting Options. There are no user-adjustable graphics settings (such as resolution or frame rate targets); the game runs with dynamic resolution scaling targeting 60 FPS on all Switch models. This guide covers every available setting, explains optimal configurations for performance and quality across hardware (original Switch, Switch Lite, Switch OLED), and highlights pitfalls to avoid during setup.
---
Graphics (Console & Display Settings)
Splatoon 3 does not contain in-game graphics sliders. Visual performance depends solely on your Switch model and whether it is docked or in handheld mode.
Performance by Hardware
| Hardware | TV Mode Resolution | Handheld Resolution | Frame Rate | Notes |
|---|---|---|---|---|
| Switch (original) | 900p (dynamic) | 720p (dynamic) | 60 FPS (stable) | Slightly softer image on TV. |
| Switch OLED | 900p (dynamic) | 720p (dynamic) | 60 FPS (stable) | OLED screen offers better contrast and colors. |
| Switch Lite | N/A (no dock) | 720p (dynamic) | 60 FPS (stable) | Smaller screen makes some UI elements harder to read. |
Recommendations for Best Visual Quality
- Dock your Switch whenever possible – TV mode delivers higher resolution (900p) and larger display, improving visibility of distant enemies and ink coverage.
- Use a gaming monitor or TV with low input lag and enable Game Mode.
- Ensure your Switch System Settings (System Settings → TV Settings) have Match TV Power State ON and RGB Range set to Full (Automatic) for proper color reproduction.
- The game does not have an in-game brightness slider. Adjust your TV/display brightness and contrast for comfortable viewing without washing out colors.
Brightness & Calibration
---
Audio
Audio settings are located under Options → Audio. They include volume sliders for game sounds and voice chat configuration.
| Setting | Description | Recommended Value |
|---|---|---|
| Sound Effects Volume | Volume for splats, shots, and ability sounds. | 90% – keeps effects audible without drowning out music. |
| Music Volume | BGM volume during battles and in lobby. | 70% – set lower to hear footsteps and ink audio cues better. |
| Voice Chat Volume | Volume of voice chat received from teammates (Nintendo Switch Online app). | 80% – adjust based on headset and team communication. |
| Output Device | Choose between TV/Headphones, Headphones Only, or Headphones + TV. | Headphones Only for competitive focus; use a wired or low-latency wireless headset. |
Special Attention Points
- Voice chat requires the Nintendo Switch Online (NSO) app on a smartphone. In-game voice chat is not built-in. To use it, open the NSO app, join a lobby, then pair via the game’s Lobby → Voice Chat setting.
- If you enable Headphones Only, game sound will not play through TV speakers even when docked – useful for late-night play.
- No audio mix presets exist; you must manually balance sliders.
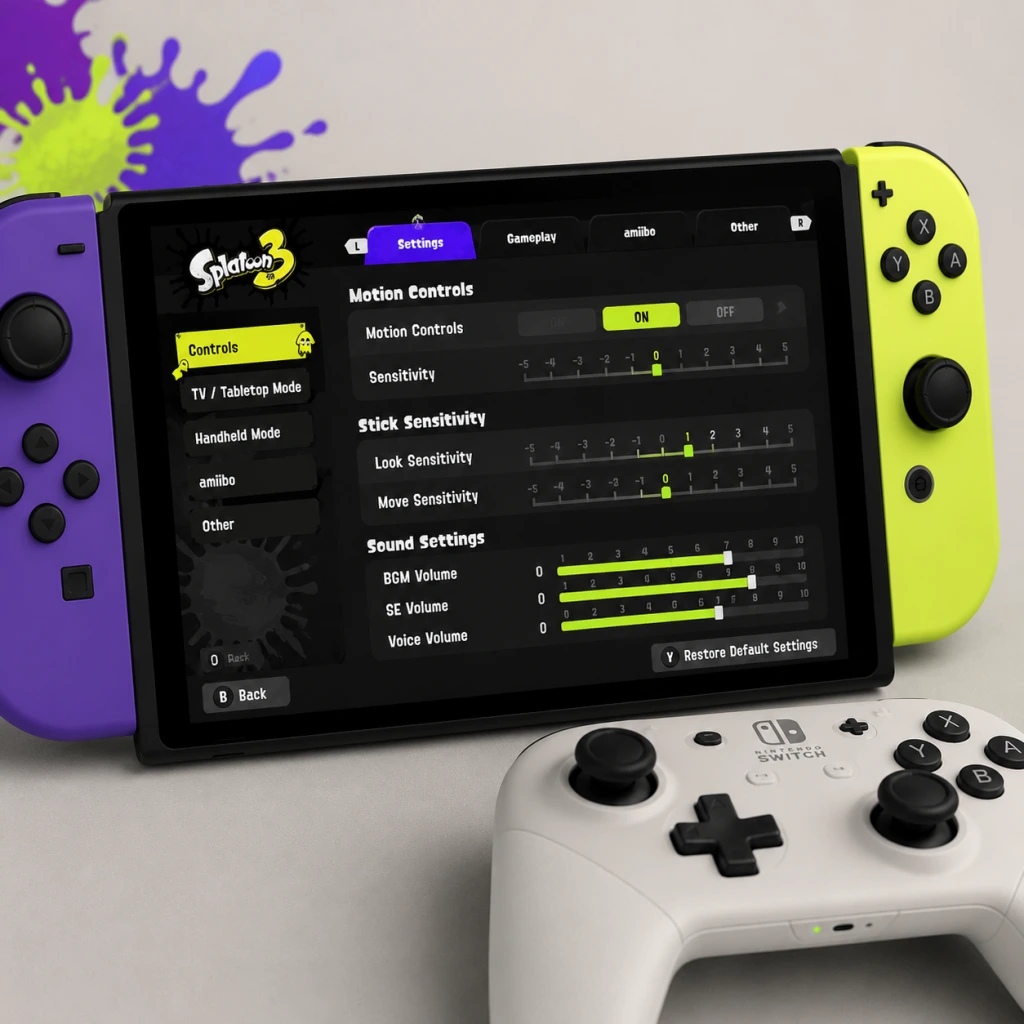
- Right Stick Sensitivity: Adjusts camera look speed (horizontal and vertical). Range: -5 (slow) to +5 (fast).
- Recommended: Start at 0 and adjust ±2 based on comfort. Too high causes overshoot, too low makes turning slow.
- Motion Sensitivity: Affects how much physical movements move the camera. Range: -5 to +5.
- Recommended: Start at +2 for fine aim while keeping large turns via stick.
- Invert Y (Stick & Motion): Separate toggles for stick and motion control inversion.
- Motion Controls On/Off: CRITICAL – If turned off, you lose gyro aiming entirely. Most top players use motion controls.
- Splatoon 3 does not offer custom button remapping. You can only swap the Jump and Sub Weapon buttons? Actually, no – button layout is fixed. However, you can use the Switch’s System Settings → Controllers and Sensors → Change Button Mapping to remap physical buttons globally. This is not recommended for Splatoon 3 due to per-game conflicts.
---
Controls
Control settings are the most impactful for gameplay. They are found under Options → Play Control. Two main categories: Stick Controls and Motion Controls.
Stick Sensitivity
Motion Controls (Gyro Aiming)
- Default: No inverted. Many players prefer Invert Y for stick but not for motion. Test in the Testing Area (accessible from the lobby).
Button Mapping
Recommended Control Setup (Competitive)
| Setting | Value |
|---|---|
| Motion Controls | ON |
| Motion Sensitivity | +2 |
| Stick Sensitivity | 0 (fine-tune later) |
| Invert Y (Stick) | OFF (or ON if you prefer) |
| Invert Y (Motion) | OFF |
| Rumble | ON (provides ink feedback) |
Special Attention Points
- Motion Controls can feel disorienting at first. Spend at least 30 minutes in the Testing Area with stationary targets before PvP.
- If you use a Pro Controller, motion controls work identically. Ensure the controller is updated via System Settings.
- Switch Lite has fixed controls (no detachable Joy‑Con) – motion controls still work but require tilting the whole unit.
---
Accessibility
Accessibility options are primarily located under Options → Other (some are in Play Control).
| Setting | Description | Recommendation |
|---|---|---|
| Color Lock | Changes ink colors (blue vs. orange, purple vs. green, etc.) for colorblind players. Four preset palettes. | Disabled unless needed. Enable one that gives clearest ink distinction. |
| Rumble | Controller vibration for hits, ink splats, etc. | ON for immersion; OFF to reduce battery drain or distraction. |
| Motion Controls (toggle) | Already covered – also an accessibility feature. | Keep ON for competitive play. |
| Camera Shake | Not directly settable – tied to motion. | If you are sensitive, reduce motion sensitivity to minimize shake. |
| Text Size | No adjustable text size. UI is fixed. Switch Lite users may find text small; consider using TV mode. |
Special Attention Points
- Color Lock drastically changes ink appearance. If you accidentally enable it, you may confuse teammates’ ink color with enemy ink. Always check before entering a match.
- There is no subtitle option for voice lines; important audio cues (like “booyah!”) are not captioned.
---
Language
Splatoon 3 supports multiple languages for text and voice (audio). Settings are under Options → Language.
| Option | Description |
|---|---|
| Text Language | Language for menus, weapon names, stage names, dialogue. |
| Voice Language | Language for announcer, news, and Squid Sisters/NEMO dialogue. |
- You can mix and match (e.g., English text with Japanese voice).
- Recommended: Set both to your native language for full comprehension. Competitive players often keep English to instantly recognize terms like “Splat Zones” or “Tower Control”.
- This setting does not affect matchmaking region; it only changes presentation.
---
Network
Network settings are critical for online play quality. Found under Options → Network.
| Setting | Description | Recommended Value |
|---|---|---|
| Matchmaking Region | Choose Any, Nearby, or a specific continent. | Nearby for lowest ping; Any if you get long queue times. |
| Connection Type | Wired LAN (via adapter) or Wi-Fi (2.4/5 GHz). | Wired LAN always if possible. Use 5 GHz Wi-Fi if wired unavailable. |
| NAT Type | Displayed in network status; not configurable. | Aim for NAT A or NAT B. Open ports required. |
| Test Connection | Runs a speed test and checks NAT. | Run periodically to diagnose lag. |
Connection Best Practices
- Use a wired LAN adapter (Nintendo Switch LAN adapter or third-party). This dramatically reduces latency and disconnections.
- If using Wi‑Fi, ensure your Switch is within line-of-sight of the router and on 5 GHz band.
- Minimum internet speed: 5 Mbps down / 1 Mbps up – Splatoon 3 uses very little bandwidth but is sensitive to jitter.
- Port forwarding for Switch (UDP 1024-65535) may help avoid NAT issues.
- Matchmaking Region set to Any can match you with players across the globe, causing noticeable lag. Only use if local queues are very slow (e.g., off-peak hours).
- The game does not show ping numbers. Pay attention to latency cues (ink splats delay, players teleporting).
Special Attention Points
---
Gameplay (Other Settings)
Under Options → Other, you’ll find miscellaneous gameplay settings.
| Setting | Description | Recommendation |
|---|---|---|
| Battle Replay | Automatically save replays of certain battles (e.g., Ranked, X Battles). | ON – helpful for reviewing mistakes. |
| Show Battle Results | Display match summary after each game. | ON. |
| Leave Lobby Automatically | When the lobby leader quits, you automatically exit. | OFF – prevents accidental lobby exit. |
| Auto-Start | in Salmon Run lobbies, auto-start after a short delay. | ON for faster starts; OFF if you need time to change weapons. |
| Motion Controls (duplicate) | Already covered in Controls. |
Special Attention Points
- Battle Replay consumes storage space. Periodically delete old replays from the Replay menu in the lobby.
- Auto-Start can be frustrating if you are customizing gear. Turn it OFF if you frequently switch weapons/abilities before Salmon Run.
---
Optimal Settings Summary by Hardware
For All Switch Models (Competitive Priority)
| Category | Setting | Value |
|---|---|---|
| Controls | Motion | ON |
| Controls | Motion Sensitivity | +2 |
| Controls | Stick Sensitivity | 0 (adjust after 10 hours) |
| Audio | Output | Headphones Only (for sound cues) |
| Network | Connection Type | Wired |
| Network | Matchmaking Region | Nearby |
| Gameplay | Battle Replay | ON |
For Handheld (Switch / OLED)
- Use lower stick sensitivity (-1 or -2) because smaller screen makes fine movements harder.
- Ensure motion controls are calibrated: go to System Settings → Controllers and Sensors → Calibrate Motion Controllers.
- No TV mode – acceptable for casual play, but consider a Pro Controller for better ergonomics.
- Motion controls require tilting the whole unit; sensitivity -1 recommended to avoid excessive shake.
- Text is small; if reading is difficult, use a magnifier attachment or play on a TV using another Switch?
- First-time calibration: The game will not prompt you to calibrate motion controls. Do it manually from System Settings → Controllers and Sensors → Calibrate Motion Controllers.
- Controller grip: If you play on a TV, sit at a comfortable distance and hold the controller loosely – tensing up reduces aim precision.
- Test before ranked: Always play a few Turf War matches after changing any control or audio setting to ensure muscle memory adjusts.
- Save slot: Splatoon 3 does not have a separate settings save file – all settings are stored on your Nintendo Account cloud save. If you delete local save data, settings will reset.
For Switch Lite
---
Settings That Are Easy to Misconfigure
1. Motion Controls switched OFF – This is the most common mistake. Many new players accidentally toggle it off while exploring settings. Solution: Always check Play Control → Motion Controls is ON before entering a match.
2. Color Lock enabled – You might select a color palette thinking it’s cosmetic, then wonder why inks look weird. Solution: In Other → Color Lock, ensure it is OFF unless you are colorblind.
3. Matchmaking Region set to Any – Leads to laggy games. Solution: Set to Nearby and only change if queue times exceed 3 minutes.
4. Inverted Y on Motion – If you invert motion, tilting the controller forward moves the camera up instead of down – this feels extremely counterintuitive. Solution: Keep Invert Y (Motion) set to OFF unless you are familiar with aircraft-style controls.
5. Voice Chat volume too low/high – You may miss callouts or be deafened. Solution: Test with a friend before playing ranked.
---
Special Attention Points During Setup
---
Conclusion
Splatoon 3’s settings are limited but each one matters. The two most important are Motion Controls ON and Network wired connection. Spend time tuning sensitivity in the Testing Area (accessible from the Lobby → Y → Testing Area). Regularly verify your settings haven’t been accidentally changed, especially after system updates. With the optimal configuration above, you will minimize latency, maximize aim accuracy, and enjoy the best visual experience the Switch can offer.
Important Notes
Warnings and Pitfalls
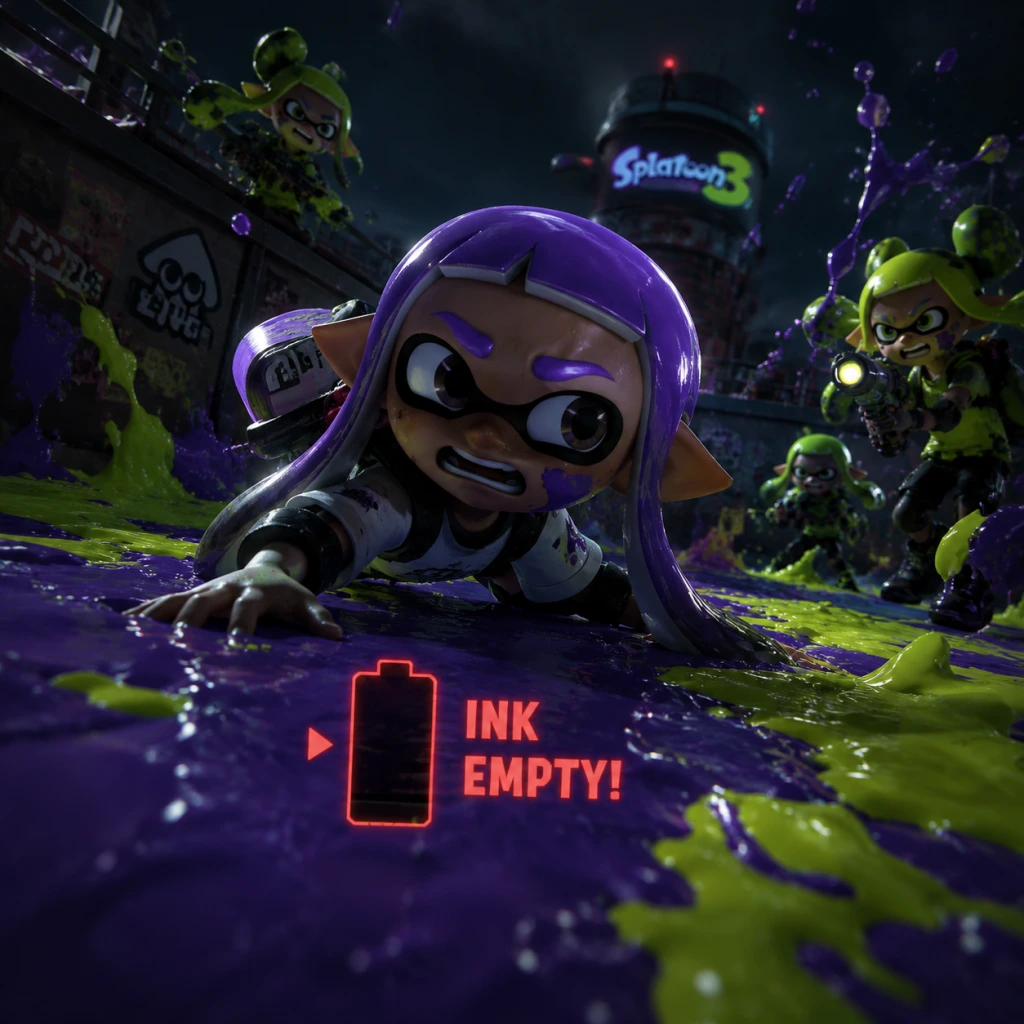
- Ink Management: Always keep your ink tank filled. Running out during a firefight is a common mistake. Swim through enemy ink to drain it, and use sub weapons sparingly.
- Overextending: Pushing too far into enemy territory without a retreat path often leads to easy splats. Use your map (X button) to check enemy positions.
- Ignoring Objectives: In Ranked modes (Splat Zones, Tower Control, Rainmaker, Clam Blitz), kills are secondary to playing the objective. A team that only focuses on splats often loses.
- Wasting Specials: Specials like Tenta Missiles or Booyah Bomb should be used strategically, not instantly when available. Coordinate with teammates.
- Poor Gear Abilities: Don't ignore ability chunks. Use them to build sets that complement your weapon (e.g., Ink Saver Main for shooters, Swim Speed Up for rollers).
- Character Creation: The appearance of your Inkling (hair, eyes, skin tone, gender) is permanent. You cannot change it later without deleting your save file. Choose carefully at the start.
- Splatfest Team: During Splatfests, you permanently receive a badge for the team you chose (e.g., Team Frye vs. Team Shiver). This badge stays on your Splashtag forever. While minor, some players regret their choice after the event.
- Save File Deletion: If you delete your save data from the Switch System Settings, all progress is lost—including story mode completion, gear, rank, and locker items. No cloud saves are supported, so there is no recovery.
- Limited-Time Events: Splatfests, Big Run, and Eggstra Work offer exclusive gear, badges, and titles that are never available again (e.g., the Splatfest Tee with the Ability Doubler perk during the event). Always participate to collect them.
- Special Gifts: Check the Nintendo Switch News channel for Splatoon 3-specific news; sometimes they distribute free gear or food tickets via news articles.
- Story Mode Scrolls: While you can replay any level, missing scrolls (lore) does not affect gameplay, but completionists must explore thoroughly. Use the map to check remaining collectibles per area.
- Mr. Grizz Boss (Story Mode): The final boss requires good utilization of all ink mechanics and patterns. Practice dodging his attacks and using the special stages wisely. Consider equipping gear with Extra Special Charge.
- Salmon Run Hazard Level Max: The highest difficulty (Hazard Level Max) can be overwhelming without a coordinated team. Focus on surviving, using the map, and throwing eggs to the basket effectively.
- Ranked Battles (S+ and above): Player skill dramatically increases. Learn all weapon roles, map callouts, and efficient movement (Squid Surge, Squid Roll) to stay competitive.
- Perfect Gear Abilities: Trying to get three identical abilities (e.g., three Swim Speed Up) on a piece of gear is extremely time-consuming. Instead, aim for two identical and one useful ability from chunks.
- Food Tickets: Use Drink Tickets (from the Shell-Out machine or events) to influence which gear ability you receive when leveling up gear. Without it, you'll get random abilities, wasting chunks.
- Grinding Salmon Run for Gear Alone: While Salmon Run rewards are good, farming solely for gear is inefficient. Use the daily bonus for extra rewards and play other modes for variety.
- Farming Ability Chunks: The fastest way is to scrub abilities from gear with slots from food tickets and replay levels in the story mode that grant chunks. Alternatively, use the Shell-Out machine (but it's random).
- No Voice Chat in Game: Use the Nintendo Switch Online app on your phone for voice communication. In-game communication is limited to "Booyah!" (praising teammates) and "This Way!" (call to action). Use them positively.
- No Cloud Saves: Nintendo explicitly disabled cloud saves for Splatoon 3 to prevent cheating. Do not rely on cloud restoration.
- Anti-Cheat Measures: The game automatically detects modified consoles or software. If you cheat, you risk a permanent ban from online services. Report suspicious players via the Nintendo Switch Online app.
- Disconnects: Frequent disconnects may lead to a temporary ban from online matchmaking. If you have unstable internet, consider playing Salmon Run (PvE) instead of PvP ranks.
- Rage Quitting: Leaving an ongoing match is considered unsportsmanlike and can result in penalties. Always finish the match even if losing; you earn experience regardless.
- No Cloud Saves: Your save data is stored only on the console. If you lose your Switch or the save gets corrupted, progress is gone. Periodically copy your user profile to another Switch via System Settings (User Transfer) to backup, but note that the save will be moved, not copied.
- Multiple Users: Each Nintendo Account has its own save file. You can have multiple accounts on one console to play from scratch without affecting each other.
- Deleting Save: To restart completely, go to System Settings → Data Management → Delete Save Data. This is the only way to change your character's appearance (though you keep online rank if you delete story mode separately?). Warning: Deleting the main save also deletes all gear, rank, and Splatfest badges. There is no partial reset.
- Motion Controls: Enable gyro aiming in Settings > Controls > Motion Controls. It dramatically improves accuracy once you get used to it. Stick sensitivity can also be adjusted.
- Swim Speed: Traveling through ink (as a squid) is faster than running. Always swim, especially when retreating or flanking.
- Sub Weapon Usage: Sub weapons (like Splat Bomb, Burst Bomb) are not just for damage. Use Splat Bombs to zone enemies, Burst Bombs to finish low-health foes, and Fizzy Bombs for long-range harassment.
- Food Tickets: Use them from the Cradle (in the lobby) before grinding gear – they increase the chance of getting a specific ability on level-up. This saves hours of grinding.
- Scrubbing Abilities: Visit Murch (the jellyfish) to scrub abilities from gear for 20,000 coins. This gives you ability chunks. Never sell gear you like just because its abilities are wrong.
- Splatfest Participation: Even if you don't enjoy Splatfests, play at least one match to earn the Splatfest Tee (which can be kept) and Sea Snails (used to add slots or re-roll abilities). You also gain exclusive badges and titles.
- Locker Customization: Your locker in the lobby can be customized with items from the Shell-Out machine or the store. This is purely cosmetic and has no gameplay advantage — don't waste coins on it early unless you enjoy it.
- Changing Splashtag: You can change your title, background, and name (nickname) from the Lobby Terminal (near the battle entrance). Experiment freely; it's not permanent.
- Ordering Gear: If you see another player wearing gear you like, go to Murch and select "Order Gear from Player." It will arrive the next day (costs coins). This is the only way to get gear from past events or region-exclusive items you missed.
- Re-Rolling Abilities: Use Sea Snails at Murch to re-roll all three ability slots of a piece of gear. This is expensive but useful if you want to optimize a favorite item without grinding chunks.
- Squid Surge and Squid Roll: While swimming in ink, press B at a wall to do a squid surge (whoosh up) or B + a direction while flicking the stick for a squid roll (evasive move). Master these for superior mobility.
Irreversible Choices
Missable Content
Difficulty Spikes
Grinding Traps
Online Etiquette and Anti-Cheat
Save Management Advice
Things Players Commonly Regret Not Knowing Earlier
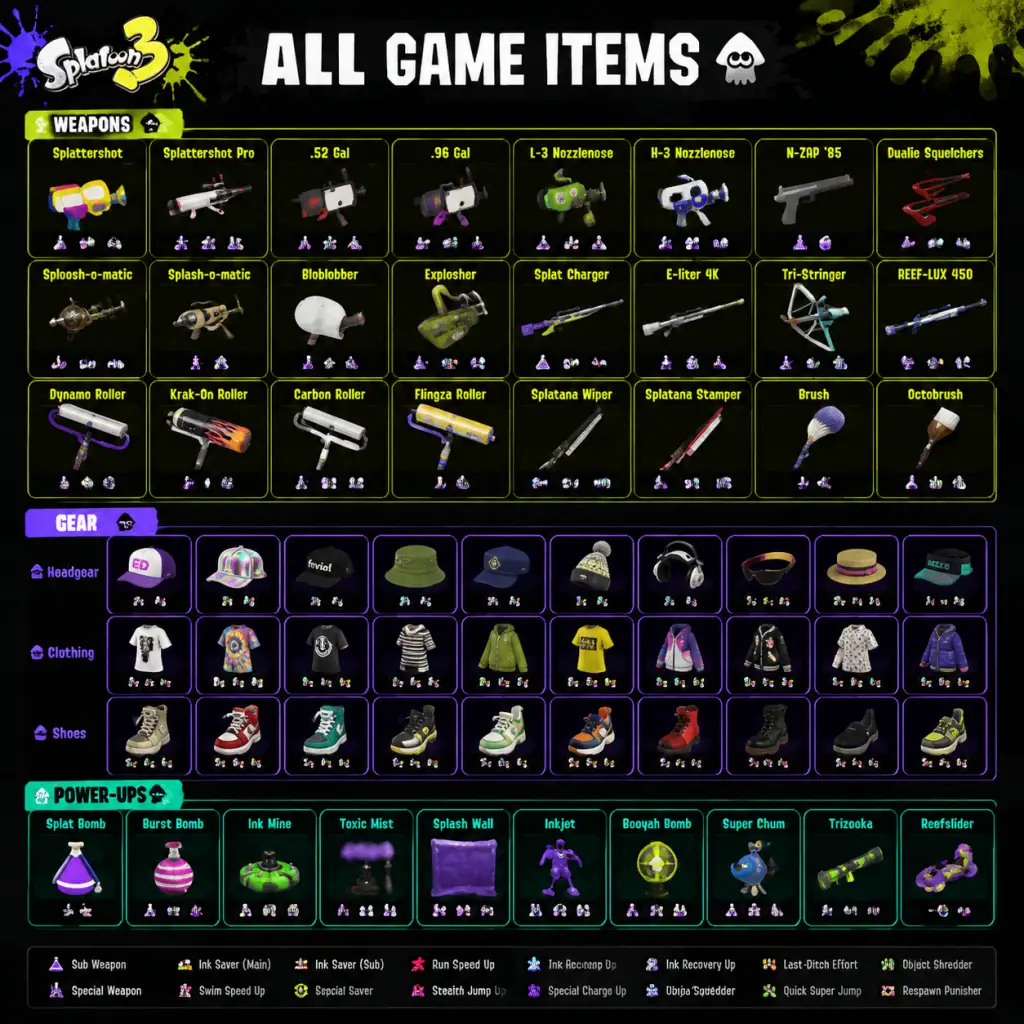
All Game Items
Overview
Splatoon 3 features a vast array of items that fall into several categories: currencies, weapons (main, sub, and special), gear (headgear, clothing, shoes with abilities), consumables (food and drink tickets), collectibles (Sunken Scrolls, Sardines, etc.), materials (ability chunks, Super Sea Snails), and key equipment (Hero Gear, amiibo rewards). This guide details every major item, how to obtain it, its practical use, and any important synergies or upgrade paths.
---
1. Currencies
| Currency | Purpose | How to Obtain | Notes |
|---|---|---|---|
| Cash | Buy weapons, gear, food/drink tickets, and reroll gear abilities. | Earned from Turf War matches, Salmon Run rewards, story mode (Return of the Mammalians) levels, and selling unused gear. | Unlimited cap. Essential for early progression. |
| Sheldon Tickets | Unlock new main weapons from Sheldon. | Level up (every level grants a ticket), complete story mode levels, or receive from Salmon Run rotations. | One ticket unlocks one weapon. Some weapons require multiple tickets. |
| Super Sea Snails | Add ability slots to gear (up to 3) or reroll gear abilities. | Earned from Splatfest rewards (winning or participating) and leveling up past level 30 (every 5 levels). | Limited supply; use wisely to optimize gear builds. |
| Ability Chunks | Craft specific gear abilities at Murch’s shop. | Earned by scrubbing gear abilities (costs cash) or as Salmon Run rewards. | Each chunk corresponds to a single ability; 10 chunks (or 20 for rare abilities) are needed to add an ability. |
| Fish Scales (Salmon Run exclusive) | Buy Salmon Run gear, locker decorations, and food tickets. | Earned from Salmon Run by completing shifts and meeting quotas. | Used only in the Grizzco Industries shop. |
| Catalog Exp | Progress the seasonal Catalog (unlocks cosmetic rewards). | Earned by playing any mode – Turf War, Anarchy Battle, Salmon Run, etc. | Not a currency you spend, but tracks your seasonal level. |
2. Weapons
2.1 Main Weapons
Main weapons are your primary inking tools. Each belongs to a class with distinct mechanics. Below are the classes and notable examples.
Shooters – Balanced range, fire rate, and ink efficiency.
- Splattershot: Starter weapon; good range, moderate damage (2-hit kill). Unlocked from the start. Synergizes with Suction Bomb and Trizooka. Best for all-around play.
- N-ZAP ’85: Fast fire rate, low damage per hit but good for inking. Unlocked via Sheldon ticket. Pairs with Curling Bomb and Tenta Missiles. Ideal for support.
- Splattershot Pro: High damage (3-hit kill), longer range, but slow fire rate and high ink consumption. Unlocked later. Use with Point Sensor and Trizooka for area denial.
- Splat Roller: Standard roller. Unlocked early. Horizontal flick is strong; vertical flick has reach. Sub: Suction Bomb. Special: Big Bubbler. Good for aggressive splatting and turf coverage.
- Carbon Roller: Lightweight, fast flicks but low damage. Unlocked via tickets. Sub: Burst Bomb. Special: Zipcaster. Useful for hit-and-run tactics.
- Splat Charger: Long charge time, one-shot kill at full charge. Unlocked early. Sub: Sprinkler. Special: Wave Breaker. Best for long-range support and picking off enemies.
- E-liter 4K: Extremely long range but very slow charge. Unlocked later. Sub: Ink Mine. Special: Tenta Missiles. Requires good aim and map awareness.
- Slosher: Standard bucket. Unlocked mid-game. Sub: Suction Bomb. Special: Triple Inkstrike. Effective on maps with ledges.
- Explosher: High ink consumption but fires a slow projectile that explodes on surfaces. Unlocked late. Sub: Point Sensor. Special: Booyah Bomb. Excellent for zoning.
- Heavy Splatling: Long rev time but sustained fire. Unlocked early. Sub: Sprinkler. Special: Booyah Bomb. Good at holding chokepoints.
- Hydra Splatling: Extremely slow rev but longest range and highest damage. Unlocked later. Sub: Auto-Bomb. Special: Killer Wail 5.1. Best for campy defense.
- Splat Dualies: Standard dualies. Unlocked early. Sub: Splat Bomb. Special: Crab Tank. Highly mobile; dodge roll is key.
- Dapple Dualies: Fast roll, low ink consumption, short range. Unlocked mid-game. Sub: Ink Mine. Special: Reefslider. Good for flanking.
- Splat Brella: Balanced shield and shot. Unlocked early. Sub: Sprinkler. Special: Ink Vac. Shield can block ink and protect teammates.
- Undercover Brella: Weak shield but can shoot while moving. Unlocked mid-game. Sub: Reginaldo? Actually Sub: Ink Mine. Special: Triple Inkstrike. Good for aggressive play behind a weak umbrella.
- Tri-Stringer: The first stringer. Unlocked via Sheldon ticket. Sub: Toxic Mist. Special: Tacticooler. Perfect for area denial and medium-range support.
- R-3 Stringer: (Available in DLC or later updates) Grizzco? Actually not in base game; but as of version updates, new stringers may appear. For simplicity, refer to Tri-Stringer as representative.
- Splatana Wiper: Fast horizontal slash, short range. Unlocked mid-game. Sub: Splat Bomb. Special: Ultra Stamp. Good for close combat and ambushes.
- Splatana Stamper: Slower but longer range; charged vertical slash is powerful. Unlocked later. Sub: Curling Bomb. Special: Triple Inkstrike. Synergizes with bomb usage.
Rollers – Large ink coverage; swing to fling ink or roll over enemies.
Chargers – Sniper rifles; hold to charge, release to fire a precise shot.
Sloshers – Buckets; slosh ink in a wide arc. Good for vertical engagement and covering walls.
Splatlings – Heavy machine guns; rev up and fire continuously. Slow move speed while firing.
Dualies – Twin pistols; dodge-roll to increase fire rate.
Brellas – Umbrella-shaped shields that shoot and can be deployed as a barrier.
Stringers – Bows that fire three arrows in a spread; charge to increase distance.
Splatanas – Sword-like weapons that slash ink in horizontal arcs; can be charged for vertical swings.
Obtaining Main Weapons: Unlock via Sheldon tickets at the weapon shop in the lobby. Some weapons are default, others require leveling up (levels 1-30) and purchasing with tickets. Sheldon’s picks and Salmon Run also grant temporary weapons (Grizzco weapons).
Synergies and Upgrades: Each main weapon comes with fixed sub and special weapons (except some variants). There is no direct upgrade path for a single weapon; instead, you unlock different weapon kits. For example, the Splattershot has the standard kit (Suction Bomb + Trizooka) and the Splattershot Jr. kit (Splat Bomb + Ink Storm). Choose based on playstyle.
2.2 Sub Weapons
Sub weapons are secondary tools thrown or placed. Most main weapons come with one type.
| Sub Weapon | Description | How to Obtain | When Useful |
|---|---|---|---|
| Splat Bomb | Standard bomb that explodes after a short fuse. | Available on many kits. | Area denial, forcing enemies out of cover, splatting enemies in ink. |
| Suction Bomb | Sticks to surfaces; detonates after a few seconds. | Same as above. | Great for attaching to walls/ceilings; useful in Splat Zones. |
| Burst Bomb | Small bomb that explodes instantly on contact; low damage but high velocity. | Common on shooters. | Quick chip damage, finishing off opponents, breaking on objects. |
| Curling Bomb | Rolls forward, leaving an ink trail; explodes on contact with enemy or wall. | Found on many weapons. | Good for creating ink paths, surprising enemies around corners. |
| Auto-Bomb | Homing bomb that seeks out nearby enemies. | Uncommon. | Useful for flushing out campers, checking blind spots. |
| Ink Mine | Placeable mine that triggers when enemy steps on it; reveals location. | On some rollers and chargers. | Perfect for guarding flanks or your base. Pairs with Special Charge Up abilities. |
| Toxic Mist | Creates a cloud of ink that slows enemies and drains their ink. | Found on stringers and some shooters. | Control zones, block pathways, counter aggressive pushes. |
| Fizzy Bomb | Bubbles that can be charged to increase range and damage; splits on impact. | Added via updates. | Versatile, can be used for zoning or direct hits. |
| Splash Wall | Deploys a temporary ink wall that blocks enemy ink and projectiles. | On some weapons. | Protect teammates, block enemy fire, control sightlines. |
| Point Sensor | Tracks enemies in its radius; highlights them on the map. | On some shooters and sloshers. | Reveal sneaky enemies, useful for coordinating team attacks. |
2.3 Special Weapons
Special weapons are powerful abilities that charge up by inking turf. Each main weapon kit has one special.
| Special Weapon | Description | How to Obtain | When Useful |
|---|---|---|---|
| Trizooka | A three-shot burst of powerful ink bullets from a launcher. | On many shooters. | Offensive push; can splat multiple enemies or break armor. |
| Tenta Missiles | Locks onto up to 4 enemies and rains missiles on them. | On some shooters and chargers. | Use to scatter enemies, force them out of positions, or finish low-health targets. |
| Booyah Bomb | Throws a large bomb that creates a shockwave; requires charging by pressing R. | On splatlings and sloshers. | Excellent for contested objectives; shockwave pushes enemies away. |
| Ink Storm | Summons a storm that inks a large area and damages enemies slowly. | On some shooters. | Zone control; covers a large area, good for Splat Zones and Tower Control. |
| Killer Wail 5.1 | A long-range sound wave that goes through walls. | On some chargers and splatlings. | Great for picking off campers behind cover; reveals enemy positions. |
| Crab Tank | Turns you into a crab tank with high firepower and armor; can also ink while moving. | On some dualies and shooters. | Powerful turf coverage and combat; good for pushing through enemy ink. |
| Reefslider | Rushes forward on a sliding shield; explodes at the end. | On some dualies and rollers. | Good for initiating team fights or escaping; can splat if direct hit. |
| Zipcaster | Grapples to walls and ceilings; can launch ink blobs from above. | On some rollers and shooters. | High mobility; use to flank or reach high ground. |
| Triple Inkstrike | Fires three slow-moving ink tornadoes. | On some sloshers and splatanas. | Area denial; can push enemies off the objective. |
| Wave Breaker | Sends out two waves that damage and push enemies. | On some chargers. | Control the battlefield; disrupt enemy pushes. |
| Ultra Stamp | A giant stamp that crushes enemies; can be charged for a long-range ink wave. | On some rollers and splatanas. | Aggressive push; can break through defenses. |
| Big Bubbler | Creates a large protective bubble that blocks enemy ink. | On some rollers. | Protect team objective; use in Splat Zones or Tower Control. |
| Ink Vac | Sucks in enemy ink and releases it as a projectile. | On some brellas. | Counter specialist; can devour enemy specials and return fire. |
| Tacticooler | Deploys a cooler that gives speed and quick respawn to teammates. | On some stringers and shooters. | Team support; helps in coordinated pushes. |
---
3. Gear and Abilities
3.1 Gear Types
Gear consists of three slots: Headgear, Clothing, and Shoes. Each piece of gear comes with one or more ability slots. Abilities enhance your inkling’s performance.
- Headgear: Includes hats, glasses, masks, etc. Common abilities: Ink Saver (Main), Ink Saver (Sub), Special Charge Up, etc.
- Clothing: Shirts, jackets, dresses. Common abilities: Swim Speed Up, Run Speed Up, Ink Resistance Up, etc.
- Shoes: Boots, sandals, etc. Common abilities: Ninja Squid, Stealth Jump, Quick Super Jump, etc.
Obtaining Gear: Purchase from shops (Splash Mob, Shell-Out Machine, Cranky’s) with cash. Also unlock through the Catalog (seasonal rewards), story mode, Salmon Run (Grizzco gear), and scanning amiibo (special exclusive gear).
3.2 Ability System
Each gear piece has up to three ability slots. The primary ability (the first slot) is fixed and cannot be changed. The secondary abilities (slots 2 and 3) are random. Use Ability Chunks (see Materials) to add a specific secondary ability to a gear piece at Murch’s shop. Super Sea Snails allow you to add a new slot to gear (max 3) or reroll secondary abilities.
Key Abilities:
| Ability | Effect | Best Synergy |
|---|---|---|
| Ink Saver (Main) | Reduces ink consumption of main weapon. | Essential for high-ink weapons like Splatlings. |
| Ink Saver (Sub) | Reduces ink consumption of sub weapons. | Useful if you spam bombs. |
| Ink Recovery Up | Speeds up ink regeneration while in swim form. | Good for aggressive players. |
| Special Charge Up | Increases special gauge gain from inking. | Pairs with special-focused weapons. |
| Special Power Up | Enhances special effects (e.g., longer Tenta Missiles lock-on, bigger Booyah Bomb). | Use with your chosen special. |
| Special Saver | Retains more special gauge after splat. | Helps keep specials alive after death. |
| Swim Speed Up | Increases swim speed. | Universal; great for mobility. |
| Run Speed Up | Increases movement speed while shooting. | Useful for shooters and chargers. |
| Ink Resistance Up | Reduces damage and movement penalty from enemy ink. | Important for all modes. |
| Intensify Action | Boosts jump accuracy and certain weapon actions. | Good for Rollers, Splatanas, and Dualies. |
| Stealth Jump | Hides super jump landing marker from enemies within a range. | Essential for flanking. |
| Ninja Squid | Hides your swimming ink trail but reduces swim speed. | Pairs with Swim Speed Up to lessen downside. |
| Quick Respawn | Reduces respawn time after being splatted (only if you splatted at least one enemy). | Use with Tenacity or in ranked. |
| Quick Super Jump | Speeds up super jump. | Useful for rapid team movement. |
| Sub Power Up | Boosts sub weapon range, damage, or duration (varies by sub). | Must pair with a specific sub. |
| Sub Resistance Up | Reduces enemy sub weapon effects. | Niche. |
| Comeback | Temporary boosts upon respawning (speed, ink, etc.). | Good for aggressive builds. |
| Opening Gambit | Boosts move speed at match start. | Good for fast initial turf coverage. |
| Last-Ditch Effort | Boosts ink efficiency when your team is losing. | Competitive games. |
| Haunt | Marks splatting enemy for your teammates. | Support build. |
| Thermal Ink | Reveals enemy location after you hit them. | Works well with long-range weapons. |
| Tenacity | Automatically charges special when teammate is splatted. | Good for defensive support. |
| Respawn Punisher | Extends enemy respawn time after you splat them (but extends yours too). | High-skill, high-risk. |
3.3 Key Gear Sets
- Hero Gear: Unlocked by completing the Story Mode (Return of the Mammalians). Each piece comes with unique abilities (e.g., Headgear has Ink Saver (Main), Clothing has Swim Speed Up, Shoes have Ink Resistance Up). Can be reordered using Murch.
- Amiibo Gear: Scan compatible Splatoon amiibo (Inkling Boy, Girl, Octoling, etc.) to unlock exclusive gear with unique appearance and fixed abilities. Example: Classic Squid Amiibo gives a vintage hat with Comeback.
- Grizzco Gear: Earned from Salmon Run rotations. Typically has random abilities. Some pieces are seasonal.
- Catalog Gear: Each season’s Catalog has exclusive gear (e.g., Chilly Terrain Coat, Neon Brim Cap). Obtainable by leveling the Catalog.
- Ancho-V Powder (Base): 1.5x EXP for winning. Costs 1,000 cash.
- N-Tri-Pie (Extra): 2.0x EXP. Costs 3,500 cash.
- Super Scoop (Super): 3.0x EXP. Costs 8,000 cash.
- Champion’s Soup (Base): 1.5x cash. Costs 1,000 cash.
- Golden Egg (Extra): 2.0x cash. Costs 3,500 cash.
- Mystery Box (Super): 3.0x cash. Costs 8,000 cash.
- Scrub gear abilities at Murch (costs 20,000 cash per scrub, returns all chunks from that gear).
- Earn from Salmon Run rewards (random chunks).
- Receive as level-up rewards after level 30 (every 5 levels gives 10 chunks of a random ability).
- Win matches with active drink ticket (gives chunks of that ability).
- Participate in Splatfest; team wins give 24 snails, losses give 21.
- After level 30, every 5 additional levels grants 1 snail (up to level 99, then prestige resets).
- Sometimes given as special event rewards.
- Hero Headphones: Ink Saver (Main)
- Hero Jacket: Swim Speed Up
- Hero Runner Sneakers: Ink Resistance Up
- Squid Amiibo: Gives a classic retro hat (Comeback ability).
- Inkling Girl Amiibo: Gives a school uniform look with Ink Saver (Sub).
- Octoling Girl Amiibo: Gives a punk jacket with Special Charge Up.
- Grizzco Blaster: Explosive shots that cover large area.
- Grizzco Charger: Infinite range and one-shot kill, but slow charge.
- Grizzco Slosher: Wide arc, high damage.
- Use Sheldon tickets to unlock weapons that fit your playstyle.
- Save Super Sea Snails for gear you use frequently.
- Farm Ability Chunks by scrubbing gear or using drink tickets in combination with wins.
- Spend cash wisely – buy food tickets for leveling and save for expensive gear.
- Collect Sunken Scrolls for lore and Hero Gear.
- Participate in Splatfests for Snails.
---
4. Consumables
4.1 Food Tickets
Food tickets provide experience boosts or cash bonuses for a set number of matches (usually 20 battles). Purchase from Crusty Sean’s food truck in the lobby using cash. There are three tiers: Base, Extra, and Super. Each ticket lasts for 20 wins (not matches, but wins).
Similarly, Cash tickets boost cash earned:
When useful: Use EXP tickets when leveling up to unlock weapons faster. Use cash tickets when saving for expensive gear or rerolls.
4.2 Drink Tickets
Drink tickets are consumed before a battle (like food tickets) but they grant a temporary ability boost for the duration (20 wins). Each drink ticket corresponds to one ability (e.g., Swim Speed Up Drink). While active, the game favors that ability showing up as a secondary on gear you earn/loot. Also increases the chance of getting that ability from gear rolls. Purchase at Crusty Sean’s for cash (1,000-8,000 depending on tier). Common drinks are: Ancho-V Powder (gives Ink Saver Main), etc.
When useful: When farming for a specific ability chunk or building a gear with a particular secondary ability.
4.3 Shell-Out Machine (Loot Boxes)
Located in the lobby, the Shell-Out Machine costs cash and dispenses random items: gear, ability chunks, food tickets, and sometimes exclusive gear (like the Golden Suction Bomb). Each pull costs 2,000 cash. Three pulls per day are available. It’s a secondary source for consumables.
---
5. Collectibles
5.1 Sunken Scrolls (Story Mode)
Sunken Scrolls are hidden collectibles in the Story Mode (Return of the Mammalians) levels. Each Scroll unlocks lore about the world. There are 32 total. Collecting them rewards you with Hero Gear (head, clothes, shoes) after completion. They also contribute to 100% completion.
How to obtain: Explore each level. Scrolls are often in secret alcoves requiring precise ink paths or special means.
When useful: Lore enthusiasts and completionists. No gameplay impact beyond cosmetic gear.
5.2 Sardines (Salmon Run)
Small collectible fish that appear in Salmon Run during special events (e.g., Big Run). Collecting them adds to your total and unlocks unique badges and locker decorations.
How to obtain: In Salmon Run shifts, sometimes Sardines spawn. Collect them before they disappear.
When useful: Cosmetic rewards and bragging rights.
5.3 Fish Scales (Salmon Run Currency)
Already covered in currencies, but these are also collectible in the sense that they are earned from Salmon Run and used for special purchases.
5.4 Locker Decorations
Not strictly items, but you can collect decorations for your personal locker in the lobby. These include stickers, figures, and trophies earned from the Catalog, Salmon Run, and special events. They have no gameplay effect.
5.5 Badges
Achievement badges earned for various milestones (e.g., level 50, winning 100 Turf Wars, collecting all Sunken Scrolls). Displayed on your player card. No mechanical influence.
---
6. Materials
6.1 Ability Chunks
Small colored cubes that represent each ability in the game. Use them at Murch’s shop to add a specific secondary ability to a gear piece. You need 10 chunks for common abilities and 20 for rare ones (like Ninja Squid, Stealth Jump, etc.).
How to obtain:
When useful: To perfect your gear builds. Always useful for competitive play.
6.2 Super Sea Snails
Rare items that allow you to upgrade gear slots (add a third slot to any gear that has fewer) or reroll all secondary abilities on a gear piece. Rerolling costs one snail and returns random abilities.
How to obtain:
When useful: To create perfect gear sets. Save snails for high-level gear you intend to use long-term.
6.3 Sheldon Tickets
Used to unlock main weapons (see Currencies). Technically a material needed for purchase.
---
7. Key Equipment
7.1 Hero Gear
A complete set of headgear, clothing, and shoes unlocked by completing the Story Mode (Return of the Mammalians). Each piece has a fixed primary ability and two empty secondary slots. The abilities are:
How to obtain: Collect all Sunken Scrolls? Actually, you get the Hero Gear after defeating the final boss and completing the story. Some pieces are given at specific levels.
Synergies: The set provides a well-rounded baseline. You can customize secondaries with chunks.
7.2 Amiibo Gear
Scanning compatible amiibo (such as Inkling Girl, Inkling Boy, Octoling, Octoling Girl, Octoling Boy, or any of the Squid amiibo) unlocks exclusive gear. Each amiibo gives one headgear, one clothing, and one shoes after scanning on different days. Examples:
How to obtain: Scan amiibo once per day until all three pieces are earned. Only one scan per day per amiibo.
When useful: Unique cosmetic looks and sometimes useful abilities. No gameplay advantage over regular gear, but the abilities are fixed and cannot be changed for primary.
7.3 Grizzco Weapons (Salmon Run)
During Salmon Run special rotations, you get temporary weapons such as:
These are only usable in Salmon Run and are not permanent.
How to obtain: Randomly appear in Salmon Run shifts. Not purchasable.
When useful: To efficiently defeat Salmonids and achieve higher quotas.
7.4 Locker Furniture
While not equipment, your personal locker in the lobby can be decorated with items earned from the Catalog, Salmon Run, and shops. These include stickers, figures, and shelves. No gameplay effect.
---
Summary
This guide covers every significant item in Splatoon 3. To maximize your efficiency:
Remember, no single item is essential; flexibility and practice are more important than gear. Yet understanding each item’s purpose allows you to optimize your builds and enjoy the game to its fullest.
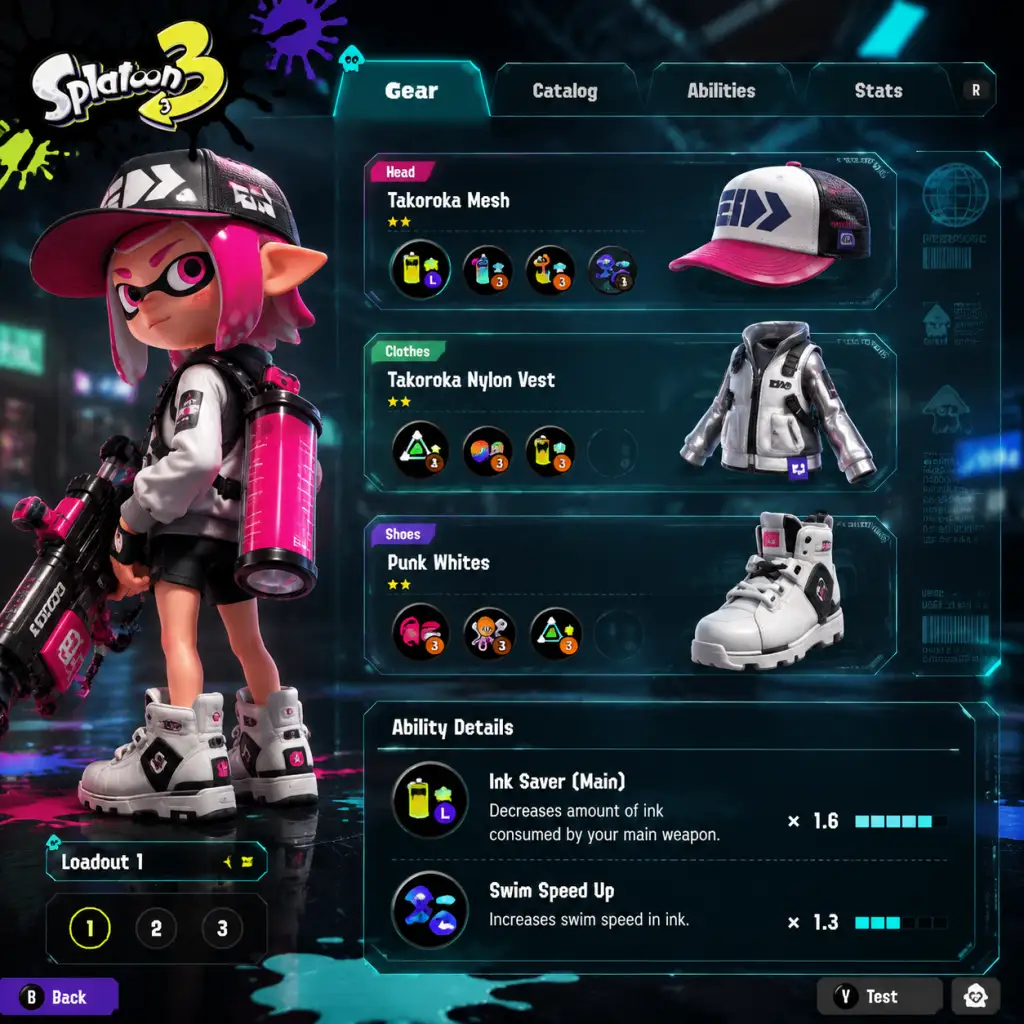
Character Skills
Overview
Splatoon 3 does not feature traditional character classes or skill trees. Instead, every player controls an Inkling or Octoling whose abilities are defined entirely by their chosen weapon loadout (main weapon, sub weapon, special weapon) and gear abilities (passive buffs). This guide covers every "skill" in the game: all sub weapons, special weapons, and key gear abilities. Each entry includes effects, usage tips, cooldowns/ink costs, upgrades (gear ability stacking), combos, synergies, recommended builds, and situational advice.
---
Sub Weapons (Secondary Skills)
Sub weapons are secondary tools fired with the R button. They consume ink from your tank (typically 40–70% of one tank). Each weapon has one fixed sub weapon. Below is every sub weapon in Splatoon 3.
Splat Bomb
- Effect: A standard fragmentation grenade that explodes after a short fuse (about 1.5 seconds). Can be thrown and will detonate on contact with an enemy or surface. Deals 180 damage (direct hit) or 30 damage in the outer blast radius.
- Ink Cost: 70% of a full tank.
- Cooldown/Refill: No cooldown, but you must wait for ink to recover.
- Upgrades: Gear abilities like Ink Saver (Sub) reduce ink cost; Sub Power Up increases throw range and blast radius.
- Combos: Excellent for flushing enemies out of ink or finishing low-health opponents. Combos well with any main weapon that can poke (e.g., Shooters, Sloshers).
- Synergies: Pairs with specials that require precision (e.g., Tenta Missiles + Splat Bomb to force enemies into the missile storm).
- Recommended Builds: Any aggressive or midline build. Use Sub Power Up to land safer throws.
- When to Use: - To deny a choke point before pushing. - To finish an enemy you can’t reach. - To break a Splash Wall or enemy armor. - As a panic defensive option.
- Effect: A small, fast projectile that explodes on impact or after a short delay. Deals 35 damage direct hit, 25 splash. Very low ink cost (40%). Can be thrown rapidly.
- Ink Cost: 40%.
- Upgrades: Sub Power Up increases damage (up to 41 direct) and explosion radius.
- Combos: Great for fishing (hitting enemies around corners) and building special gauge quickly. Combos well with high-damage main weapons like Chargers or Splatanas.
- Synergies: Works with any weapon that lacks quick poking ability.
- Recommended Builds: Use with a main weapon that has low ink efficiency (e.g., Splattershot Pro) to supplement damage. Stack Ink Saver (Sub) for more spam.
- When to Use: - To pressure enemies hiding behind cover. - To build special gauge from a distance. - To confirm kills after a partial main weapon hit.
- Effect: A bomb that sticks to surfaces (walls, floors, ceilings) and detonates after about 2 seconds. Can be attached to the tower in Tower Control. Deals 180 damage direct, 30 splash.
- Ink Cost: 70%.
- Upgrades: Sub Power Up extends the time before detonation (up to 2.5 seconds), allowing late explosions. Also increases blast radius.
- Combos: Place on a wall near an enemy’s path; time your push. Popular with weapons that have low mobility.
- Synergies: Use with Point Sensor to track enemies near your bomb.
- Recommended Builds: Defensive/support builds; good for area denial.
- When to Use: - On the Tower in Tower Control to delay the enemy team. - On a Rainmaker shield to protect it. - On a wall above a chokepoint to catch jumping foes.
- Effect: A bomb that skids across the ground in a straight line, leaving a trail of your team’s ink. Explodes on contact with an enemy or after reaching max range (about 3 seconds). Direct hit 180 damage, splash 30.
- Ink Cost: 70%.
- Upgrades: Sub Power Up increases travel speed and distance.
- Combos: Use as a rapid movement tool: throw it and swim in the ink trail. Pairs with Rollers or Brushes to close distance.
- Synergies: Great with weapons that need mobility aid (e.g., E-liter 4K).
- Recommended Builds: Aggressive slayer builds. Stack Swim Speed Up and Sub Power Up.
- When to Use: - To quickly ink forward for a surprise attack. - To retreat while leaving a defensive line. - To contest zone in Splat Zones.
- Effect: A small robot bomb that beeps and chases the nearest visible enemy. If it reaches them, it explodes for 180 damage (direct). Can be destroyed; has low HP. Moves at moderate speed.
- Ink Cost: 60%.
- Upgrades: Sub Power Up increases chase speed and detection range.
- Combos: Use to flush out campers or force enemies into your main weapon’s range.
- Synergies: Pairs with long-range weapons like Chargers to safely pressure close-range foes.
- Recommended Builds: Support or control builds.
- When to Use: - To scout hidden enemies (throw into suspected ink). - To annoy enemy snipers. - To delay an enemy push.
- Effect: Deploys a cloud of purple ink mist that lasts about 5 seconds. Enemies inside are slowed (movement speed reduced by ~50%) and take 30 damage per second over time. The mist does not ink the ground.
- Ink Cost: 60%.
- Upgrades: Sub Power Up increases duration (up to 7 seconds) and slows more.
- Combos: Follow up with a damage-over-time special (like Ink Storm) for massive area denial.
- Synergies: Works wonders with weapons that excel at close range (e.g., Splat Roller) to ensure enemies can’t escape.
- Recommended Builds: Control/trapper builds.
- When to Use: - In Narrow corridors. - On the Splat Zone to slow enemies capturing. - In Rainmaker paths to hinder the carrier.
- Effect: Throws a sensor that marks all enemies within a large radius for about 6 seconds. Marked enemies are visible through walls to your entire team. Deals no damage.
- Ink Cost: 45%.
- Upgrades: Sub Power Up increases detection radius and duration (up to 8 seconds).
- Combos: Direct your team’s fire and specials (e.g., Tenta Missiles or Ink Jet) onto marked foes.
- Synergies: Great for coordinated teams.
- Recommended Builds: Support or recon builds.
- When to Use: - Before pushing an objective. - To reveal invisible enemies (Ninja Squid). - To track the Rainmaker carrier.
- Effect: A carbonated bomb that can be charged by holding the sub button. When thrown, it bounces and leaves a trail of fizzy ink that damages enemies (10 per contact). Fully charged explodes for 150 damage direct; uncharged 60 damage. The ink trail also boosts special gauge when teammates swim through it.
- Ink Cost: 60% (uncharged), 70% (fully charged).
- Upgrades: Sub Power Up increases bounce time and explosion damage.
- Combos: Charge and roll into a group of enemies for area damage. Works well with weapons that have high mobility (e.g., Dualies, Splatana Wiper).
- Synergies: The ink trail can help allies build specials.
- Recommended Builds: Aggressive midline builds.
- When to Use: - When you anticipate enemies bunching up. - To build special gauge for yourself and nearby teammates.
- Effect: Fires a laser projectile that bounces off walls (up to 4 bounces). Deals 30 damage on hit. If you hit an enemy, they are marked (similar to Point Sensor) for 3 seconds. Also inks a thin line on surfaces.
- Ink Cost: 45%.
- Upgrades: Sub Power Up increases damage (up to 35) and marking duration.
- Combos: Use to hit enemies hiding behind cover; follow up with a main weapon.
- Synergies: Pairs well with walls and corridors.
- Recommended Builds: Defensive or midline builds.
- When to Use: - To probe enemy positions from a safe angle. - To confirm a kill on a retreating enemy.
- Effect: Creates a protective wall of ink that blocks enemy shots and ink. Lasts about 5 seconds or until destroyed (200 HP). Your own shots pass through freely. Deals 15 contact damage if an enemy touches it.
- Ink Cost: 70%.
- Upgrades: Sub Power Up increases HP (up to 300) and duration (up to 7 seconds).
- Combos: Place to protect while you charge a special or revive a teammate. Good for holding chokepoints.
- Synergies: Excellent with slow-firing weapons like the Dynamo Roller or Charge weapons.
- Recommended Builds: Defensive or anchor builds.
- When to Use: - On the tower. - In front of the Rainmaker shield. - To block a Charger’s line of sight.
- Effect: Deploys a device that slowly inks the surrounding area in a circular pattern. Lasts until destroyed (approx 12 seconds, 200 HP). Does not damage enemies. Good for building special gauge and covering ground.
- Ink Cost: 60%.
- Upgrades: Sub Power Up increases ink coverage range and duration.
- Combos: Place on high walls or unorthodox surfaces to cover large areas.
- Synergies: Works with any weapon that needs passive ink coverage (e.g., Chargers).
- Recommended Builds: Support or zone control builds.
- When to Use: - At the start of a match to ink your base. - To contest Splat Zones from a distance. - To paint the tower while you hide.
- Effect: Places a mine that is invisible to enemies until triggered. When an enemy steps near, it explodes dealing 30 damage and inks a large area. The mine remains until detonated or replaced.
- Ink Cost: 50%.
- Upgrades: Sub Power Up increases explosion radius and damage (up to 45).
- Combos: Place near your Splat Zone or Tower Control path to catch flankers.
- Synergies: Pairs with weapons that trap enemies (e.g., Octobrush).
- Recommended Builds: Defensive or trapper builds.
- When to Use: - On common flank routes. - Near rainmaker path. - Behind your team’s front line to prevent ambushes.
- Effect: Places a beacon that your teammates can super jump to (even if they don’t have it unlocked). Lasts until destroyed (200 HP). Does not damage. Up to two beacons can be placed at once.
- Ink Cost: 80%.
- Upgrades: Sub Power Up increases beacon durability and allows you to place up to three.
- Combos: Strategic super jump spots for coordinated pushes.
- Synergies: Great for maps with verticality.
- Recommended Builds: Support or flanker builds.
- When to Use: - Before a big push. - On high ledges near the objective. - In your base to facilitate quick returns.
- Effect: Fires a homing projectile that seeks the nearest enemy in its path. If it hits, deals 100 damage and leaves a spreading ink patch. If it misses, it explodes after a short time dealing splash damage.
- Ink Cost: 60%.
- Upgrades: Sub Power Up increases homing range and splash radius.
- Combos: Use to pressure backline players or finish kills.
- Synergies: Works well with weapons that have low range.
- Recommended Builds: Aggressive or midline builds.
- When to Use: - To chase a retreating enemy around a corner. - To harass enemy Chargers.
- Effect: Locks onto up to 4 enemies (if fewer, missiles repeat on locked ones). After brief wind‑up, fires 10 waves of missiles (per locked enemy) that rain down from above. Each missile deals 150 damage direct (kill) or 50 splash. Covers large area.
- Gauge Required: 190.
- Duration: Lock‑on time ~2s, missile rain ~4s.
- Strategy: Use from cover. Lock on then reposition. Combos with Point Sensor or Angle Shooter for guaranteed lock.
- Synergies: Works with long‑range weapons to control space.
- When to Use: - To break a stalemate or force enemies off an objective. - To clear a Splat Zone before a push. - To delay the enemy team (e.g., in Tower Control).
- Effect: Calls down a slow‑moving cloud of damaging ink rain over a large area (you choose starting location). Deals 30 damage per second to enemies inside, and inks the ground for your team. Lasts 6 seconds.
- Gauge Required: 190.
- Duration: 6 seconds after cloud forms.
- Strategy: Place to block escape routes or force enemies away from objective. Good for contesting zones.
- Synergies: Combine with Toxic Mist for extreme slow + damage.
- When to Use: - On the tower. - Over the Rainmaker path. - To deny a super jump landing.
- Effect: Unleashes a high‑pressure jet of ink that you can aim while moving slowly. Deals 120 damage per direct hit ( kills in ~3 hits). Lasts about 5 seconds. You can cancel early to escape.
- Gauge Required: 180.
- Duration: 5 seconds of firing.
- Strategy: Use from high ground or surprise flanks. Very good for picking off backline enemies.
- Synergies: Use with a weapon that has Sub Power Up to increase jet range.
- When to Use: - To quickly kill an exposed enemy. - To clear a perch for your team. - As a panic button if you’re being chased.
- Effect: You begin charging a massive ink explosion while glowing. During charge, you are invincible but can’t move. Press again to throw a huge bomb that deals 400 damage in a large radius (kills anything). If you hold to full charge, it’s larger.
- Gauge Required: 210.
- Duration: Charge up to 3 seconds, splash lasts ~0.5s.
- Strategy: Use when enemies are grouped or contesting objective. Charge behind cover, then throw into the fray.
- Synergies: Works well with Stealth Jump to surprise drop in.
- When to Use: - To break a Rainmaker shield. - To turn the tide in a clustered fight. - As a last‑resort counter‑push.
- Effect: Jump up and crash down, creating a damaging shockwave around you. Midair you can move slightly. Deals 140 damage in inner ring, 60 outer. Can be used while falling from a super jump.
- Gauge Required: 180.
- Duration: ~1.5 seconds animation.
- Strategy: Very risky; vulnerable to being shot out of the sky. Use from ambush or while falling from a squid jump.
- Synergies: Combine with Ninja Squid to catch enemies off guard.
- When to Use: - When surrounded and no escape. - To punish enemies who are stationary (e.g., charging a Charger). - In combination with a super jump onto an enemy.
- Effect: Deploys a large, stationary bubble shield that blocks all enemy ink and projectiles. Your shots pass through. Allies inside are protected. Lasts 7 seconds or until destroyed (500 HP).
- Gauge Required: 200.
- Duration: 7 seconds.
- Strategy: Plant near objective to protect teammates. Can be used to block a Charger’s sight line.
- Synergies: Place on the tower in Tower Control for safe ride.
- When to Use: - To shield your team while they push the Rainmaker. - To protect the Splat Zone from enemy specials. - To revive a teammate safely.
- Effect: Fires a series of three wide‑range sound waves that travel forward, ignoring walls. Each wave deals 120 damage (kills in one hit if both waves hit). Waves spread out.
- Gauge Required: 190.
- Duration: ~3 seconds for the three waves.
- Strategy: Use in narrow corridors or to cover an escape route. Can hit multiple enemies.
- Synergies: Point Sensor or Angle Shooter can help you confirm a kill.
- When to Use: - To flush enemies from behind cover. - To defend a choke point. - As a finisher after tagging with sub weapon.
- Effect: Transform into a slow, armored crab with two ink cannons. Primary fire: charged shots that pierce enemies and ink walls. Secondary fire: rapid ink blobs. You can stick to walls and ceilings. Lasts 8 seconds.
- Gauge Required: 200.
- Duration: 8 seconds.
- Strategy: Use for area denial and zoning. Stick to a wall to rain ink from above.
- Synergies: Use Sub Power Up to increase Crab Tank’s ink output.
- When to Use: - To lock down a Splat Zone. - To defend the rainmaker path. - To break a stalemate with continuous fire.
- Effect: You ride a shark‑shaped inflatable that dashes forward. Upon releasing, you leap and explode on landing (400 damage). You are invincible during the dash and jump, but the landing has a brief vulnerability.
- Gauge Required: 190.
- Duration: Dash ~1.5s, jump ~1s.
- Strategy: Ambush from ink. Dash toward grouped enemies, then leap and explode.
- Synergies: Use with Ink Mine or Toxic Mist to cluster enemies.
- When to Use: - To initiate a charge into enemy territory. - To destroy the Rainmaker shield. - To scatter a clumped enemy team.
- Effect: Mark up to three locations on the map (ground). After a delay, three giant ink pillars strike those spots, dealing damage (150 direct) and inking the area. Each pillar lasts and inks for a few seconds.
- Gauge Required: 190.
- Duration: Marking ~2s, strikes ~3s.
- Strategy: Place on objectives or known enemy positions.
- Synergies: Use with Ink Storm for layered area denial.
- When to Use: - To force enemies off the tower. - To contest Splat Zones from a distance. - To block super jump landing points.
- Effect: Deploys a cooler that dispenses drinks for you and nearby teammates. Each drink provides a random beneficial effect (e.g., faster swim, special charge up, ink recovery). Lasts about 8 seconds for each drink. The cooler itself can be destroyed (200 HP).
- Gauge Required: 190.
- Duration: Cooler lasts 15 seconds, drinks last ~8 seconds.
- Strategy: Place near your team’s push point. Great for supporting an aggressive push.
- Synergies: Works with all team compositions; especially good in tower or rainmaker pushes.
- When to Use: - Before a coordinated push. - To help teammates recover quickly after a fight. - As a morale boost (and the random effects can be clutch).
- Effect: Deploys a device that emits three expanding ink wave rings. Each wave damages enemies (30 per hit, up to 90 if hit by all three) and marks them with a red highlight visible through walls.
- Gauge Required: 190.
- Duration: Three waves over ~4 seconds.
- Strategy: Use to scout and soften enemies before engaging.
- Synergies: Combos with any special that requires precision (e.g., Tenta Missiles with marking).
- When to Use: - At the start of a fight to weaken the enemy. - To reveal hidden opponents. - To zone enemies away from an area.
- Effect: You shoot a grappling hook that lunges you forward to a surface (wall, ceiling, floor). You can then dash around while firing your main weapon (with reduced damage). Lasts 5 seconds. Hooking an enemy does damage (60).
- Gauge Required: 190.
- Duration: 5 seconds after grapple.
- Strategy: Excellent for flanking. Grapple to high ground and rain ink. Can escape quickly.
- Synergies: Use with weapons that have high burst potential (e.g., Splatana Stamper).
- When to Use: - To get behind enemy lines. - To pursue a fleeing enemy. - To escape a losing fight.
- Squid Move Speed Up (Shoes): Increases swim speed in ink and squid form.
- Dodge Roll (Shoes): Only for Dualie users? No, but the gear ability “Squid Surge” is not a thing. Actually, main abilities are not unique by slot; they can appear on any slot. The actual main abilities are:
- Any of the above can appear as sub abilities (except Ability Doubler and certain main‑only). They provide a smaller boost per slot.
- Aggressive Slayer: Swim Speed Up, Run Speed Up, Ink Saver (Main), Special Charge Up, Ninja Squid, Stealth Jump. Sub weapon: Splat Bomb or Burst Bomb. Special: Kraken? Not in S3. Use Reefslider or Zipcaster.
- Support/Area Denial: Ink Recovery Up, Sub Power Up, Special Charge Up, Special Power Up. Sub: Toxic Mist or Point Sensor. Special: Ink Storm or Tacticooler.
- Defensive Anchor: Ink Saver (Sub), Sub Power Up, Object Shredder, Quick Super Jump. Sub: Splash Wall or Sprinkler. Special: Big Bubbler or Wave Breaker.
- Rusher/Objective‑Control: Swim Speed Up, Stealth Jump, Special Charge Up, Sub Saver. Sub: Curling Bomb (for speed) or Autobomb (for distraction). Special: Crab Tank or Killer Wail.
- Point Sensor + Tenta Missiles: Guaranteed lock and increased missile accuracy.
- Toxic Mist + Ink Storm: Slows and damages enemies simultaneously, forcing them to retreat.
- Stealth Jump + Splashdown: Ambush from above.
- Ink Mine + Wave Breaker: Waves reveal enemies, mines finish them.
- Fizzy Bomb + Special Charge Up: Charge special quickly while providing ink trail for teammates.
- Sub Power Up + Curling Bomb: Maximize movement speed.
Burst Bomb
Suction Bomb
Curling Bomb
Autobomb
Toxic Mist
Point Sensor
Fizzy Bomb
Angle Shooter
Splash Wall
Sprinkler
Ink Mine
Squid Beakon
Torpedo
---
Special Weapons (Ultimate Skills)
Each main weapon has a fixed special weapon that charges by inking turf (pressing both sticks or L + R). Special gauge requires 180–210 points (varies by weapon). Duration/effect listed below.
Tenta Missiles
Ink Storm
Ink Jet
Booyah Bomb
Splashdown
Big Bubbler
Killer Wail 5.1
Crab Tank
Reefslider
Triple Inkstrike
Tacticooler
Wave Breaker
Zipcaster
---
Gear Abilities (Passive Skills)
Gear abilities are obtained from headgear, clothing, and shoes. Each piece has one main ability plus up to three sub abilities (obtained via scrolls or ability chunks). Abilities stack, but diminishing returns apply after 3–4 of the same ability.
Main Abilities (Unique to gear type)
- Ink Saver (Main): Reduces ink consumption for main weapon.
- Ink Saver (Sub): Reduces ink consumption for sub weapon.
- Ink Recovery Up: Faster refill when in ink.
- Swim Speed Up: Faster movement while swimming.
- Run Speed Up: Faster movement while running (not swimming).
- Special Charge Up: More points toward special for each unit of ink coverage.
- Special Power Up: Enhances special effects (varies by special).
- Special Saver: Loses less special gauge when splatted.
- Sub Power Up: Enhances sub weapon effects.
- Sub Resistance Up: Reduces damage from enemy subs.
- Quick Respawn: Faster respawn after being splatted.
- Quick Super Jump: Faster super jump.
- Stealth Jump: Makes super jump landings invisible (no landing ink splash).
- Ninja Squid: Swim without leaving a rippling trail (slower swim speed).
- Haunt: Mark the enemy who splatted you for a short time after you respawn.
- Comeback: Temporarily boosts stats (speed, charge) after respawning.
- Drop Roller: Perform a quick roll after super jumping to avoid damage.
- Object Shredder: Increases damage to objects (splash walls, rainmaker shield, etc.).
- Opening Gambit: Boosts speed and ink recovery for first 30 seconds of match.
- Last‑Ditch Effort: Boosts abilities when your team is behind (e.g., special charge, ink recovery).
- Thermal Ink: Marks hit enemies through walls for a short time.
- Respawn Punisher: Increases respawn time for the enemy who splats you (and yourself).
- Ability Doubler: Doubles the effects of sub abilities on that gear.
Sub Abilities (Stackable)
Build Recommendations
Synergies and Combos
---
When to Use Each Skill: Contextual Guide
| Situation | Recommended Sub | Recommended Special | Gear Focus |
|---|---|---|---|
| Opening push | Sprinkler (ink base) or Curling Bomb (rush) | Tacticooler or Ink Storm | Opening Gambit, Swim Speed |
| Holding a Splat Zone | Splash Wall, Toxic Mist, Ink Mine | Big Bubbler, Wave Breaker | Sub Power Up, Quick Respawn |
| Tower Control (attacking) | Suction Bomb (stick to tower), Point Sensor | Big Bubbler, Tenta Missiles | Special Charge Up, Sub Saver |
| Tower Control (defending) | Toxic Mist, Autobomb | Ink Storm, Booyah Bomb | Quick Super Jump, Special Power Up |
| Rainmaker (escorting) | Splash Wall, Curling Bomb | Big Bubbler, Reefslider | Object Shredder, Swim Speed |
| Rainmaker (defending) | Angle Shooter, Ink Mine | Killer Wail, Crab Tank | Thermal Ink, Respawn Punisher |
| Clam Blitz (offense) | Point Sensor, Burst Bomb | Tenta Missiles, Zipcaster | Special Charge Up, Stealth Jump |
| Clam Blitz (defense) | Splat Bomb, Squid Beakon | Wave Breaker, Tacticooler | Quick Super Jump, Sub Power Up |
| 1v1 duel | Burst Bomb, Splat Bomb | Ink Jet, Reefslider | Ink Recovery Up, Run Speed |
| Escaping a fight | Curling Bomb, Autobomb | Zipcaster, Splashdown | Swim Speed Up, Quick Respawn |
Final Notes
- Experiment with different sub/special combos on training room (the Shoal) to learn timings.
- Gear abilities can be rerolled with ability chunks obtained from Salmon Run or splatfest rewards.
- No single “best” loadout; adapt to map, mode, and team composition.
- Use this guide to understand each skill’s strengths, but always stay flexible.
This concludes the complete Character Skills guide for Splatoon 3.
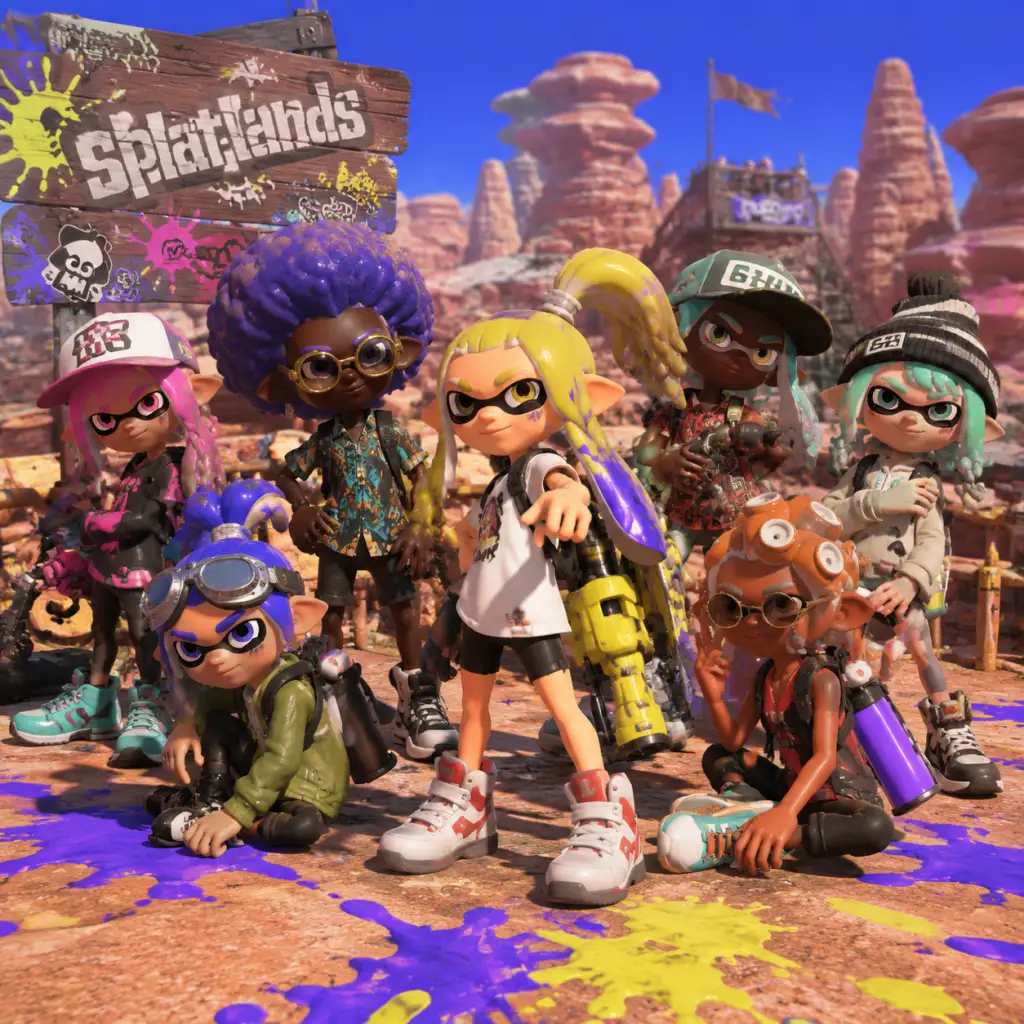
Characters & Roles
Characters & Roles in Splatoon 3
Splatoon 3 does not feature traditional character classes or a fixed hero roster. Instead, all player-controlled characters (Inklings and Octolings) are mechanically identical, with performance defined entirely by their chosen weapon, sub weapon, special, and gear. However, the game is rich with memorable story characters and distinct weapon-based roles that define team strategies in multiplayer and Salmon Run. This guide covers every major character, every playable role, and how to build and synergize effectively.
---
Story Characters (Non-Playable)
While you cannot control these characters in standard battles, they are central to the single-player campaign and lore. They are classified as “major characters” for narrative and unlock progression purposes.
Agent 3 – The Player Character in Story Mode
- Background: You assume the role of Agent 3, a rookie agent of the New Squidbeak Splatoon. Your mission is to uncover the strange occurrences in Alterna and stop the Fuzzy Ooze.
- Strengths: Fully customizable appearance, no inherent weaknesses. Learns new abilities through story progression.
- Role: Sole protagonist in the campaign. Abilities are unlocked by collecting Power Eggs and completing missions.
- Unlock: Automatically available upon starting Story Mode (single-player).
- Background: Once the protagonist of Splatoon 2’s Octo Canyon, Agent 4 is now the captain. They guide Agent 3 via radio and appear in cutscenes.
- Strengths/Weaknesses: Not playable. Provides tactical advice.
- Background: An Octoling who escaped the Deepsea Metro after the events of Splatoon 2’s Octo Expansion. They become a valuable ally and appear in the Alterna hub.
- Role: Support and lore exposition.
- Background: Idol duo present in every Splatoon. In Splatoon 3, they host the Survival Mode (anarchy battles) and appear during Splatfest.
- Role: Announcers and story characters. Not playable in battles.
- Background: Champions of Splatoon 2. In Splatoon 3, they host the Battle Lobby and provide news. Also appear in the Alterna hub.
- Role: Announcers and lore characters.
- Background: The main antagonist from the first two games. Now imprisoned and forced to help the New Squidbeak Splatoon. He appears in the campaign as a reluctant ally.
- Role: Provides special missions and rewards.
- Background: Antagonist of the Octo Expansion. Appears in Alterna as a memory.
- Role: Explains the origins of the Fuzzy Ooze.
- Background: The bear-like CEO of Grizzco Industries who runs Salmon Run. He is revealed to be a bear from space.
- Role: Manages the Salmon Run job system, provides rewards and shifts.
- Background: The new idol trio hosting Splatfest. They announce results and engage in back-and-forth banter.
- Role: Splatfest announcers. Not playable.
- Customization: You can change hairstyle, eye color, skin tone, and clothing (gear) at any time via the Lobby menu.
- Unlock: Available from the start. Octolings are unlocked for multiplayer by default (unlike Splatoon 2 where they required the Octo Expansion).
- Role: Your avatar; role is defined by weapon loadout.
- Speed (running/swimming)
- Ink usage and regeneration
- Jump height
- Description: Versatile, medium-range automatic or semi-automatic weapons. The most common class.
- Examples: Splattershot, Splattershot Pro, N-ZAP ‘85, Aerospray MG, etc.
- Strengths: Good ink coverage, reliable damage, easy to use. Suitable for beginners and veterans.
- Weaknesses: Lack of burst damage; shorter range than chargers or splatlings.
- Playstyle: Flank, ink turf, engage mid-range. Use sub weapons (e.g., Splat Bomb, Suction Bomb) to pressure opponents.
- Unlock: Most shooters are available early (level 1–10). Pro versions unlock later (level 15+).
- Recommended Gear Abilities: Ink Saver Main (for sustained fire), Ink Recovery Up, Swim Speed Up.
- Team Synergy: Works with any team composition. Shooters fill the “DPS” and “Turf Control” roles.
- Description: Heavy melee weapons that roll out ink while also being able to flick ink for mid-range spread attacks.
- Examples: Splat Roller, Carbon Roller, Dynamo Roller, Flingza Roller.
- Strengths: One-hit splat if you roll directly over an opponent; wide ink spread; high ink coverage.
- Weaknesses: Slow swing speed (especially Dynamo); prediction-heavy; vulnerable to ranged attacks.
- Playstyle: Stealth; hide in ink then ambush. Use vertical flicks for range, horizontal flicks for spread. Stand on the tower in Tower Control.
- Unlock: Starting weapon set includes Splat Roller (level 2). Others at higher levels.
- Recommended Gear Abilities: Stealth Jump, Swim Speed Up, Ink Resistance Up.
- Team Synergy: Excellent with chargers (provide cover fire), but poor alongside dualies that need space.
- Description: Sniper-like weapons that charge up to fire a long-range, precise shot.
- Examples: Splat Charger, E-liter 4K, Goo Tuber, Bamboozler 14.
- Strengths: One-hit splats at full charge; extreme range; can hold the charge briefly.
- Weaknesses: Slow fire rate; requires precision; leaves you stationary while charging.
- Playstyle: Perch on high ground, pick targets from afar. Use sub weapons like Splat Bomb or Squid Beakon to escape.
- Unlock: Splat Charger (level 4). E-liter 4K (level 20+).
- Recommended Gear Abilities: Special Saver (to keep specials longer), Ink Saver Main, Quick Super Jump.
- Team Synergy: Needs front-line teammates to push forward while you provide suppression.
- Description: Bucket-style weapons that toss ink in an arc, covering vertical and horizontal areas.
- Examples: Slosher, Tri-Slosher, Explosher, Bloblobber.
- Strengths: Great for hitting opponents behind cover; 2-3 hit kills; good ink spread.
- Weaknesses: Relatively slow fire rate; requires aim prediction; less effective on flat ground.
- Playstyle: Control chokepoints, rain ink on objectives. Use sub weapons like Toxic Mist for area denial.
- Unlock: Slosher (level 10), others at higher levels.
- Recommended Gear Abilities: Ink Saver Sub, Special Charge Up, Run Speed Up.
- Team Synergy: Pairs well with rollers or splatlings that need ink support.
- Description: Heavy weapons that function like miniguns: spin up to fire a stream of ink at long range.
- Examples: Heavy Splatling, Hydra Splatling, Nautilus 47, Ballpoint Splatling.
- Strengths: Sustained high damage output; long range; can suppress multiple enemies.
- Weaknesses: Slow movement speed while firing; long spin-up time; vulnerable if caught mid-spin.
- Playstyle: Lock down lanes from mid-range or long-range. Use the partial charge technique (Nautilus) to retain charge during swim.
- Unlock: Heavy Splatling (level 12), Hydra at level 18+.
- Recommended Gear Abilities: Ink Resistance Up, Special Charge Up, Quick Respawn.
- Team Synergy: Best with a slayer (shooter) to clean up kills while you provide covering fire.
- Description: Dual-wielded pistols that allow dodging rolls (imitating a dodge roll) for evasion.
- Examples: Splat Dualies, Dualie Squelchers, Tetra Dualies, Dark Tetra Dualies.
- Strengths: High mobility; dodge roll gives invincibility frames; fast fire rate.
- Weaknesses: Short range; requires good reflexes to dodge roll effectively; low ink coverage per shot.
- Playstyle: Rush in, dodge enemy attacks, splat quickly. Use sub weapons like Splat Bomb for burst damage.
- Unlock: Splat Dualies (level 6), Tetra at level 26.
- Recommended Gear Abilities: Ink Saver Main, Swim Speed Up, Quick Respawn.
- Team Synergy: Works well with chargers that can cover their retreat. Avoid stacking with other dualies unless highly coordinated.
- Description: Umbrella-shaped weapons that can be opened to block ink and then fired for a spreading shot.
- Examples: Splat Brella, Tenta Brella, Undercover Brella, Brella on the Brink.
- Strengths: Shield absorbs ink; can protect teammates; decent spread damage.
- Weaknesses: Low mobility while shield is up; shield can be destroyed; less offensive power than other classes.
- Playstyle: Support and defense. Pop shield when protecting a teammate or capturing the tower. Fire at mid-range.
- Unlock: Splat Brella (level 8), Tenta Brella (level 16+), Undercover (level 4?).
- Recommended Gear Abilities: Special Charge Up, Ink Recovery Up, Quick Super Jump.
- Team Synergy: Ideal with aggressive teammates like dualies or rollers who benefit from shield cover.
- Description: Fast melee weapons that ink quickly and allow for rapid movement.
- Examples: Inkbrush, Octobrush, Painbrush.
- Strengths: Very fast movement and ink coverage; low ink consumption; can splat quickly up close.
- Weaknesses: Extremely short range; low damage per hit; requires many hits to splat.
- Playstyle: Harass enemy flanks, ink turf, disrupt opponents. Use sub weapons like Splat Bomb to help splat.
- Unlock: Inkbrush (level 2), Octobrush (level 10+), Painbrush (DLC or later level).
- Recommended Gear Abilities: Ink Saver Main, Run Speed Up, Stealth Jump.
- Team Synergy: Excellent with support weapons like Brellas or sloshers that can cover their weakness at long range.
- Description: Bow-and-arrow weapons that fire multiple arrows at once, charged for more arrows.
- Examples: Tri-Stringer, Explosive Stringer (Rapid Blaster? Actually Stringer is new), Reef-Lux 450.
- Strengths: Can hit multiple targets; good splash damage; versatile range depending on charge.
- Weaknesses: Low damage per arrow; charge time; requires arc prediction.
- Playstyle: Mid-range skirmisher. Use sub weapons like Splat Bomb for close range. Charge to full to rain arrows on a zone.
- Unlock: Tri-Stringer (level 12), Reef-Lux (level 20+).
- Recommended Gear Abilities: Ink Saver Main, Special Charge Up, Swim Speed Up.
- Team Synergy: Fits in most teams; pairs well with chargers for crossfire.
- Description: Explosive weapons that fire an ink bomb that explodes on impact or after a short delay.
- Examples: Blaster, Range Blaster, Clash Blaster, Luna Blaster, Rapid Blaster, Rapid Blaster Pro.
- Strengths: Extremely high damage (often 1- or 2-hit splats); good at hitting behind cover; area denial.
- Weaknesses: Slow fire rate; poor ink coverage; requires careful aim (especially Clash Blaster).
- Playstyle: Ambush and assassination. Use explosive shots to kill groups. Move after each shot.
- Unlock: Blaster (level 8), Range Blaster (level 14+), Clash (level 4?), Luna (level 12+).
- Recommended Gear Abilities: Ink Resistance Up, Special Power Up, Quick Respawn.
- Team Synergy: Works best with a turf-inking weapon like Aerospray to maintain territory while you focus on kills.
Agent 4 (Captain of the New Squidbeak Splatoon)
Agent 8 (Octoling)
Callie & Marie (The Squid Sisters)
Pearl & Marina (Off the Hook)
DJ Octavio
Commander Tartar (Hologram)
Mr. Grizz
Shiver, Frye, Big Man (Deep Cut)
---
Player Characters: Inkling & Octoling
All players control either an Inkling or an Octoling. There is no mechanical difference between the two species – they only differ in appearance (ears, hair, leg shape).
Key attributes (same for all):
These are uniform; only gear abilities modify them.
---
Weapon Classes – The Real “Roles” in Multiplayer
In Turf War, Anarchy Battle, and X Battle, your role is determined by your main weapon’s category. Each class excels in specific situations. Below is a breakdown of all weapon classes, their strengths, weaknesses, playstyle, recommended gear, and team synergy.
1. Shooters
2. Rollers
3. Chargers
4. Sloshers
5. Splatlings
6. Dualies
7. Brellas
8. Brushes
9. Stringers (New in Splatoon 3)
10. Blasters
---
Sub Weapons and Specials – Role Enhancers
Every primary weapon comes with a fixed sub weapon and special weapon. These define your role further. Though not character-specific, understanding them is crucial for role optimization.
| Role Concept | Relevant Sub Weapons | Relevant Specials |
|---|---|---|
| Area Denial | Splat Bomb, Suction Bomb, Toxic Mist, Fizzy Bomb | Ink Storm, Tenta Missiles, Wave Breaker |
| Mobility | Squid Beakon, Autobomb | Triple Splashdown, Zipcaster, Reef Slider |
| Support | Splat Bomb, Point Sensor, Splash Wall | Spray (Tacticooler), Crab Tank, Booyah Bomb |
| Aggressive | Splat Bomb, Autobomb | Triple Inkstrike, Killer Wail 5.1, Kraken Royale |
| Defensive | Splash Wall, Torpedo | Big Bubbler, Ink Vac, Ink Barrier |
- A Roller with Stealth Jump (gear ability) can use Splat Bomb to zone enemies before jumping into the fray.
- A Charger with Special Saver can keep the Tacticooler active for the team.
- A Dualie user with Swim Speed Up can greatly benefit from the Zipcaster special to ambush from above.
- Role: Gather Golden Eggs from slain bosses and deposit them in the basket.
- Key traits: High mobility weapons (brushes, shooters). Gear with Swim Speed Up and Ink Recovery Up.
- Tips: Prioritize hauling eggs, but still fight bosses. Use “This Way!” to signal egg locations.
- Role: Focus on eliminating high-value bosses (Steelhead, Stinger, Flyfish, etc.).
- Key traits: Weapons with high burst damage (blasters, chargers, splatlings). Gear with Special Charge Up to use specials frequently.
- Tips: Learn boss weak points. For Flyfish, use Splat Bombs or the Grizzco Splatana (if available).
- Role: Clear lesser Salmonids (Chum, Smallfry) to keep the area clean.
- Key traits: Weapons with wide ink spread (rollers, sloshers, Aerospray). Gear with Bomb Defense to survive Maws explosions.
- Tips: Ink the ground to help teammates move, and use sub weapons like Splash Wall to block enemy paths.
- Role: Focus on reviving downed teammates and maintaining communication.
- Key traits: Quick Super Jump and Special Saver. Weapons can be anything, but a long-range weapon helps cover revives.
- Tips: Always keep an eye on the reviving icon; use the “Booyah!” to coordinate pushes.
---
Salmon Run – Team Roles
Salmon Run is a cooperative PvE mode where four players fight waves of Salmonids. Each player controls an Inkling/Octoling with a randomly assigned weapon set. While there are no fixed roles, successful teams naturally assume these responsibilities:
Egg Collector
Boss Slayer
Crowd Control / Support
Reviver/Keeper
Unlock: Salmon Run is available from level 1. You must work shifts for Mr. Grizz to earn rewards (including gear, banners, and experience).
---
Gear Abilities – The Build Foundation
Gear abilities are not tied to characters but to your equipment. They profoundly affect your role performance. Here are the most important abilities for each role type:
| Ability | Effect | Best For |
|---|---|---|
| Ink Saver Main | Reduces ink consumption for main weapon | Any weapon with heavy ink usage (Splatling, Slosher, Blaster) |
| Ink Recovery Up | Speeds up ink tank regeneration | All roles, especially aggressive ones |
| Swim Speed Up | Increases swimming speed | Rollers, Brushes, Dualies (flankers) |
| Run Speed Up | Increases running speed | Chargers (while charging), Splatlings (while firing) |
| Special Charge Up | Reduces points needed to charge special | Support roles, special-reliant weapons |
| Special Power Up | Enhances special effect | Depends on special (e.g., Tacticooler duration, Ink Storm size) |
| Quick Super Jump | Faster super jump startup and landing | Aggressive skirmishers, rollers |
| Stealth Jump | Hides super jump landing indicator | Flankers, assassins |
| Ink Resistance Up | Reduces damage from enemy ink | All roles, especially frontliners |
| Bomb Defense Up | Reduces damage from enemy sub/special bombs | Goalies in Clam Blitz, chargers |
| Special Saver | Retains more special charge when splatted | Chargers, support |
---
Team Composition Suggestions
In competitive play (Splat Zones, Tower Control, Rainmaker, Clam Blitz), a balanced team typically includes:
- Slayer (e.g., Splattershot, Dualies) – high kills, flanks.
- Support (e.g., Splat Charger, Brella) – anchor, covers teammates, provides utility.
- Turf Control (e.g., Slosher, Splatling) – paints zone, denies enemy ink.
- Flex (e.g., Roller, Blaster) – adaptable to situation.
- Zone Control: Slosher + Splatling + Charger + Dualie.
- Aggressive Push: Dualie + Blaster + Roller + Bride’s Support (Tenta Brella).
Example lineups:
Always adjust based on maps and modes.
---
Conclusion
Splatoon 3’s emphasis on weapon classes rather than fixed characters allows deep role customization. Whether you prefer the precision of a Charger, the chaos of a Roller, or the support of a Brella, mastering your role requires understanding its unique strengths, weaknesses, and synergy with teammates. Use this guide to build effective loadouts and communicate with your team for maximum ink-credibility.
Cheats & Secrets
Cheats & Secrets in Splatoon 3
Splatoon 3 does not feature traditional cheat codes (e.g., invincibility, infinite ink, level skip) in any version on Nintendo Switch. All content is unlocked through legitimate gameplay, progression, and optional purchases. However, the game is packed with developer-intended secrets, hidden content, and Easter eggs that reward exploration and dedication. Below is a comprehensive list of all known hidden features and secrets.
Story Mode (Return of the Mammalians) Secrets
- After Alterna – The Secret Final Level
- Sunken Scrolls – Lore Collectibles
- Hidden Super Sea Snails
- Splatfest Secret Dialogue
- Tableturf Battle Unlockable Cards
- Splatfest Shrine Trophy
- Secret Boss: King Salmonid
- Hidden Grizzco Weapon Usage
- Secret Dialogue from Mr. Grizz
- The amiibo’s gear (head, body, shoes) – most gear is exclusive and cannot be bought.
- Special photo mode props – each amiibo unlocks a unique pose or background for the Locker.
- Secret song unlock – scanning a Squid Sisters or Off the Hook amiibo adds a secret track to the jukebox in the Lobby.
- Jukebox Secret Tracks
- Locker Secret Props
- “???” in the Gear Shop
- Photo Mode Secret Locations
- Returning Character Cameos
Complete all 30 main levels (including the boss stages) in the single-player campaign, then talk to Cuttlefish near the train station in the Splatlands. He will mention a “weird noise” coming from the crater. Return to the Crater in the center of the map (where you first landed) and you’ll discover a hidden entrance. Enter to face Secret Boss: DJ Octavio (with new attacks) and play the “secret final level.” This is required for 100% completion and unlocks the “Splatland Youth” decal (a gear item).
There are 12 hidden Sunken Scrolls scattered throughout the campaign (some in levels, some in the hub world). Collecting all reveals the full backstory of the Splatoon universe. Notably, Scroll #12 is only available after completing After Alterna and is found in the Secret Area (the after-boss room).
After completing the final boss, you can obtain Super Sea Snails from Judgy (the cat). After unlocking the Splatfest concert, talk to Judgy in the Lobby to receive 1 Super Sea Snail per day (max 999). This is a hidden recurring bonus.
Multiplayer Hidden Content
During Splatfest events, speaking to Frye, Shiver, or Big Man in the Splatfest area triggers unique dialogue based on your team and previous results. The most well-known secret: if you stand idle for 30 seconds near the Splatfest Shrine, the idols will start a “secret conversation” commenting on your inactivity.
Tableturf Battle (the in-game card game) has hidden cards that can only be obtained by completing specific challenges in the card shop or scanning specific amiibo. For example, scanning a Callie amiibo unlocks the “Callie (Tableturf)” card. There are 49 cards total, 4 of which are exclusive to amiibo.
After each Splatfest, the winning team’s Shrine in the Lobby has a rotating statue that shows the winning idol’s pose. If you take a photo of the shrine with the camera emote during the post-fest results, you unlock a special Splatfest Shrine Background for your locker.
Salmon Run Secrets
In Salmon Run, increasing your Hazard Level to maximum (≥200%) and surviving long enough has a small chance to spawn a Cohozuna, Horrorboros, or Megalodontia (depending on the rotation). Defeating the King Salmonid rewards a Super Mystery Box and a unique Gold Scale. This is the only way to obtain Gold Scales, which can be traded at Grizzco for exclusive gear (e.g., the King Salmonid hat).
While rare, you can occasionally receive Grizzco weapons (e.g., Grizzco Blaster, Grizzco Stringer) in Salmon Run. These weapons have hidden stats – for example, the Grizzco Blaster fires explosive shots that cannot be deflected, and the Grizzco Stringer has homing arrows. There is no way to guarantee them; they appear randomly.
If you fail a wave of Salmon Run repeatedly (3+ times in a row), Mr. Grizz will sometimes play an exasperated audio clip or a hidden voice line via the radio. These are easy to miss because they occur only during the failure screen.
Amiibo Exclusives
Scanning any Splatoon 3-compatible amiibo (Inkling, Octoling, Callie, Marie, Pearl, Marina, Octo Expansion) gives you:
Hidden: The “Secret” amiibo
The “Splatoon 3 – Squid” amiibo (the default inkling) unlocks the Hero Suit (replica of the Splatoon 1 hero gear) and a special greeting in the Lobby. If you scan all 4 of the new Splatoon 3 amiibo (Inkling, Octoling, Smallfry), you get a hidden golden badge for your locker.
Miscellaneous Easter Eggs
In the Lobby, the jukebox has hidden songs that are not listed by default. To unlock them:
- Win 100 matches in Ranked mode to get “Seasick (Frye Remix)”.
- Collect 50 Sunken Scrolls (impossible in one playthrough, but cumulative) to unlock “Tentacular Circus”.
- Scan any Splatoon 1-era amiibo to unlock “Splatattack!” (original Splatoon theme).
Your locker can be decorated with items from Salmon Run, but there are 5 hidden props that only appear by:
- Playing 500 battles total: “Mysterious Urn”
- Reaching S+ rank in any mode: “Gold Rank Badge”
- Completing After Alterna: “Octavio’s Hat” (a mini statue)
- Scanning the Smallfry amiibo: “Smallfry Plush”
- Winning a Splatfest 100x Battle (this triggers a special animation that can be saved as a locker prop).
When visiting Sea Breeze Cove, the gear shop has a mysterious “???” item that appears after you have purchased all other gear. It takes the form of a random piece of gear from past Splatfests (like a team shirt from an old event). This is a rotating secret.
In the Splatlands hub, there are several hidden photo spots that trigger a secret stamp in your album. These include:
- The train station (stand on the tracks during evening)
- The secret alley behind the Crab-N-Go shop
- The top of the Splatsville tower (requires climbing via ink rails)
Note on “Exploit-Safe Secrets”
All secrets listed above are intended by developers and do not rely on glitches. For example, the Super Sea Snail daily bonus is a designed reward, not an exploit. There are no known safe exploits in Splatoon 3 (e.g., infinite ink or gear duplication) that are not considered bugs and thus risky to use (ban risk). This guide only covers legitimate hidden content.
Summary Table
| Category | Secret | Unlock Method |
|---|---|---|
| Story | After Alterna | Complete all 30 main levels + talk to Cuttlefish |
| Story | Sunken Scrolls | Hidden in campaign levels/hub |
| Multiplayer | Secret Splatfest Dialogue | Stand idle near Shrine for 30s |
| Multiplayer | Tableturf Cards (amiibo) | Scan compatible amiibo |
| Salmon Run | King Salmonid | Reach ≥200% Hazard Level |
| Amiibo | Exclusive Gear | Scan any Splatoon amiibo |
| Easter Egg | Jukebox Hidden Songs | Various conditions (see above) |
| Easter Egg | Locker Secret Props | Various achievements |