Squad
## Game Introduction **Squad** is a realistic, team-based tactical first-person shooter that emphasizes communication, coordination, and combined-arms warfare. Developed and published by **Offworld Industries**, Squad was initially released via Steam Early Access on **December 15, 2015**, and offic...
Download & Installation
Squad: Complete Download & Installation Guide
Squad is a realistic, team-based tactical first-person shooter developed by Offworld Industries. It is currently available exclusively on PC (Windows) via Steam and Epic Games Store. There are no console (PlayStation, Xbox, Switch) or mobile versions. This guide covers everything from purchasing to first launch.
---
Official Download Sources (Legitimate Only)
| Platform | Source | URL (not clickable) | Notes |
|---|---|---|---|
| Steam | Steam Store | store.steampowered.com/app/393380 | Primary platform, largest player base |
| Epic Games Store | Epic Games Store | store.epicgames.com/en-US/p/squad | Available, but fewer players; crossplay with Steam not supported |
---
System Requirements
Minimum Requirements
- OS: Windows 10 (64-bit)
- Processor: Intel Core i5-6400 or AMD Ryzen 3 1200
- Memory: 8 GB RAM
- Graphics: NVIDIA GeForce GTX 960 (4GB VRAM) or AMD Radeon R9 380 (4GB VRAM)
- DirectX: Version 12
- Storage: 80 GB available space (SSD strongly recommended)
- Network: Broadband Internet connection
- Sound: DirectX Compatible Audio
- OS: Windows 10/11 (64-bit)
- Processor: Intel Core i7-8700K or AMD Ryzen 5 3600X
- Memory: 16 GB RAM
- Graphics: NVIDIA GeForce GTX 1080 Ti (6GB+ VRAM) or AMD Radeon RX 5700 XT (8GB VRAM)
- DirectX: Version 12
- Storage: 80 GB SSD
- Network: Broadband Internet connection (low latency)
- Sound: DirectX Compatible Audio
- Steam Account: Required to purchase, install, and play via Steam. No additional account needed.
- Epic Games Account: Required for Epic Games Store version.
- No in-game account is mandatory for the base game. However, to use the Squad SDK (modding tools) or access server administration, you may need to register on the Offworld Industries website.
Recommended Requirements
Important: Installing on an HDD will result in very long load times and potential texture streaming issues. An SSD (SATA or NVMe) is highly recommended.
---
Step-by-Step Installation
On Steam
1. Create/Log in to your Steam account. If you don't have one, download the Steam client from [store.steampowered.com](https://store.steampowered.com) and create a free account.
2. Purchase Squad: Go to the Squad store page (search "Squad" or use link) and buy the game. It will be added to your library.
3. Install Steam Client (if not already installed): Download and install the Steam application for Windows.
4. Open Steam Library → Click the Library tab.
5. Find Squad in your game list. Click Install.
6. Choose Installation Location: Select your drive/folder. For best performance, install on an SSD with at least 80GB free.
7. Start Download: Click Next → Finish. The game will download and install automatically.
8. Wait: Download size is approximately 50-60 GB (may increase with updates). Ensure your internet is stable.
9. Launch: Once installation completes, click Play in Steam.
On Epic Games Store
1. Install Epic Games Launcher from [epicgames.com](https://www.epicgames.com). Log in or create an account.
2. Purchase Squad: Visit the Epic Store page for Squad and purchase. It will be added to your library.
3. Open Epic Games Launcher → Go to Library.
4. Find Squad and click Install.
5. Select Installation Location: Choose a folder (preferably on SSD).
6. Start Download: The launcher will download and install.
7. Launch: After installation, click Launch from the library.
Note: Squad does not support cross-platform play between Steam and Epic users. You must play with friends on the same store.
---
Account Requirements
---
First Launch Setup
After installation, follow these steps for optimal first-time experience:
1. Launch the game from your platform (Steam/Epic).
2. EULA Acceptance: Read and accept the End User License Agreement.
3. Graphics Settings: The game will auto-detect settings. Recommended:
- Resolution: Native monitor resolution.
- Graphics Quality: Start with High if your system meets recommended specs; otherwise, Medium. Adjust later based on performance.
- View Distance: At least High (important for spotting enemies).
- Shadows & Effects: Medium to High (FPS dependent).
- AA: TAA or SMAA (good balance).
4. Audio Settings: Ensure proper output device selected. Use Headphones mode for directional audio (critical for immersion).
5. Key Bindings: Default keys are fine. You may rebind voice chat (default V for local, B for squad).
6. Tutorial: Play the Training Range mode to learn vehicle handling, weapons, and communication.
7. Join a Server: Browser for servers with low ping and good population. Avoid full servers (waitlist) for first time.
---
Common Installation Errors & Fixes
| Error / Issue | Cause | Fix |
|---|---|---|
| "Disk Write Error" on Steam | Antivirus blocking write access or disk corruption. | Temporarily disable antivirus, run Steam as admin, or check disk for errors (`chkdsk /f`). |
| "Content File Locked" | Steam file verification issue. | Restart Steam and computer. If persists, verify game files (Steam: right-click Squad → Properties → Local Files → Verify integrity of game files). For Epic: Library → Squad → Settings → Verify. |
| Low FPS / Stuttering | Insufficient RAM, VRAM, or running on HDD. | Reduce graphics settings, close background apps, ensure Windows Game Mode is enabled. Move installation to SSD if on HDD. |
| "Easy Anti-Cheat" errors | Anti-cheat service not installed or blocked. | Uninstall and reinstall Easy Anti-Cheat via `Squad\EasyAntiCheat\EasyAntiCheat_Setup.exe` in game directory. Run as admin. |
| DirectX 12 crash | GPU driver or compatibility issue. | Update GPU drivers. If problem persists, launch game with `-dx11` in launch options (Steam: Properties → General → Launch Options → type `-dx11`). |
| Sound not working | Incorrect audio device or settings. | Check Windows sound settings, ensure game is using correct device. In game settings, try switching output to default. |
| Failed to connect to servers | Firewall blocking game. | Add `Squad.exe` and `SquadLauncher.exe` to firewall exceptions (both public and private). |
| Stuck on loading screen | Corrupted local config or files. | Delete `%localappdata%\Squad` folder (backup saves). Then verify game files. |
Post-Installation Verification
After installation, confirm everything works properly:
1. Check File Integrity: On Steam: Library → right-click Squad → Properties → Local Files → Verify integrity. On Epic: Library → Squad → three dots → Manage → Verify.
2. Launch the game and reach the main menu. If you see the menu with server browser, installation is successful.
3. Test Audio: Go to Settings → Audio and adjust levels. Use headset for best experience.
4. Test Performance: Join a low-population server (e.g., "Training" or empty server) and check FPS. If below 30, lower settings.
5. Update Graphics Drivers: Ensure latest drivers from NVIDIA or AMD.
6. Check updates: The game will auto-update through Steam/Epic. Keep auto-updates enabled.
---
Additional Tips
- Storage Space: The game can grow to over 80 GB with updates. Keep at least 100 GB free for future patches.
- Backup Local Config: Squad settings are stored in `%localappdata%\Squad\Saved\Config\WindowsNoEditor`. You can back up `GameUserSettings.ini` to preserve custom settings.
- Mods: Squad supports mods via Steam Workshop. Subscribe to mods (e.g., "Galactic Contention") before joining modded servers.
- Crossplay: Only between players on the same platform (Steam to Steam, Epic to Epic). No crossplay between stores.
---
Summary
Squad is a PC-only game available on Steam and Epic Games Store. Installation is straightforward, but requires a powerful PC with an SSD, 16GB RAM, and a modern GPU. Follow the platform-specific steps, resolve any errors using the table above, and verify your installation before diving into this intense team-based shooter. For further support, visit the official Squad Discord or Offworld Industries forums.
Game Introduction
Game Introduction
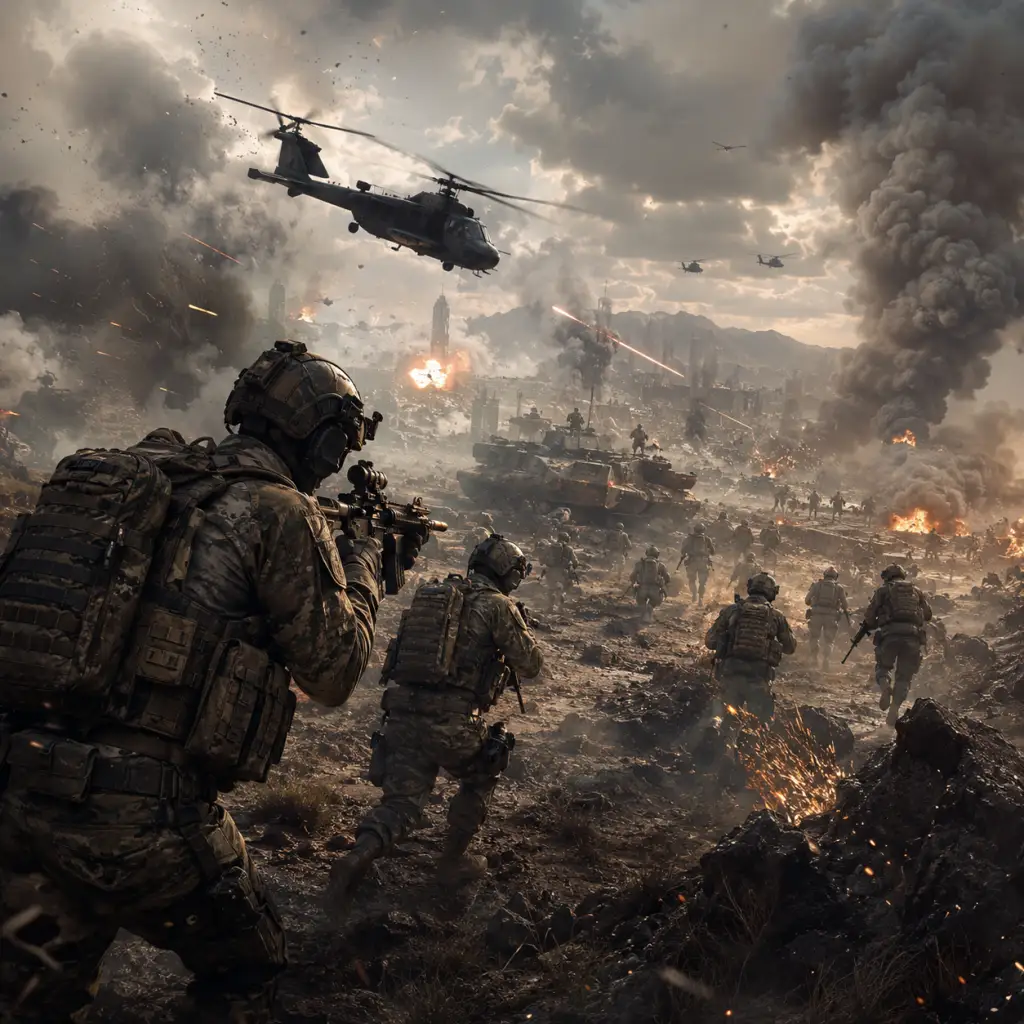
Squad is a realistic, team-based tactical first-person shooter that emphasizes communication, coordination, and combined-arms warfare. Developed and published by Offworld Industries, Squad was initially released via Steam Early Access on December 15, 2015, and officially launched as a full version on September 23, 2020. The game is available exclusively on PC (Windows) through Steam and the Epic Games Store.
Story Overview & Setting
Squad does not follow a traditional single-player narrative or campaign. Instead, it is a purely multiplayer experience set in a near-future, fictional conflict between two global factions: the United States Army (and its allied conventional forces) and a loosely organized insurgent force known as the Irregular Militia. Other playable factions include the Russian Ground Forces, the British Army, the Canadian Armed Forces, the Middle Eastern Alliance, and the Turkish Armed Forces. The game’s setting draws inspiration from contemporary asymmetric warfare in regions such as the Middle East and Eastern Europe, but it does not adhere to any specific historical event. The overarching “story” is the persistent struggle for control of strategic objectives on various maps, framed by a dynamic layer system that randomly assigns which side is attacking or defending.
Main Characters
Squad features no named protagonists or campaign characters. Instead, the player assumes the role of a nameless soldier within a 50-player team. The true “characters” are the specialized roles (kits) available to each player, such as:
- Rifleman – the standard infantryman with a basic assault rifle and ammunition.
- Medic – equipped with medical supplies to heal and revive teammates.
- Machine Gunner – provides suppressive fire with bipod-mounted machine guns.
- Anti-Tank – carries one-use rocket launchers or guided missiles against vehicles.
- Squad Leader – leads a nine-player squad, places deployable structures (rinkens, HABs), and communicates with other squad leaders via command chat.
- Commander (added post-launch) – an overarching role that can call in artillery, drones, and other strategic assets.
- Constant voice communication – players must use local (proximity) or squad chat to coordinate movements, call out enemies, and share intelligence.
- Realistic ballistics and damage models – bullets have travel time, drop, and penetration; body armor and helmets provide limited protection; one or two shots can be fatal.
- Vehicle warfare – tanks, APCs, helicopters, logistics trucks, and even towed artillery require dedicated crews.
- Player-building mechanics – squads can build forward operating bases (FOBs), defensive emplacements, and ammo crates using a logistics system.
- Large-scale 50v50 battles on maps up to 20 km², with matches lasting up to two hours.
- No killcam, no minimap enemy spotting – the game relies on situational awareness and team marking.
- Veterans of tactical shooters like Arma, Insurgency, or Project Reality (the mod that inspired Squad).
- Players who enjoy structured team play, leadership, and communication.
- Those who appreciate realistic weapon mechanics and combined-arms tactics.
- Gamers willing to invest time in learning maps, roles, and meta-strategies.
- Advance and Secure (AAS) – The most common mode. Two teams fight over a series of capture points on a map. Points must be captured in sequence (frontline).
- Random Advance and Secure (RAAS) – Unknown capture point order; the first point is revealed only after 10 minutes, forcing reconnaissance and adaptation.
- Invasion – One team attacks a set of static objectives while the other defends. The attacking team has limited tickets.
- Insurgency – Asymmetric mode where one team (Insurgents) hides weapon caches, and the other (Conventional forces) must locate and destroy them.
- Destruction – Similar to Insurgency but without caches; attackers must destroy static assets.
- Territory Control – A large grid of sectors; capture contiguous sectors to earn points.
- Seed – Used for server population buildup; simple cap wipe mode with limited tickets.
- Skirmish – Smaller-scale (v48 vs v48) with limited vehicle assets, played on smaller versions of maps, often used for fast-paced matches.
- v2.0 (2021) – Introduced the British Army and a new map (Talus).
- v4.2 (2022) – Added helicopters (transport and attack).
- v5.0 (2023) – Overhauled the destruction system and added directional audio improvements.
- v6.0 (2024) – Major update including the Turkish Armed Forces, dynamic weather, and a new map.
Each role has unique equipment and responsibilities, but no individual backstory or personality.
Core Appeal
Squad’s core appeal lies in its authenticity and teamwork. Unlike arcade shooters, Squad requires:
Target Audience
Squad is designed for players who prefer mil-sim (military simulation) experiences with a steep learning curve. It appeals to:
It is not recommended for casual players seeking fast-paced action or run-and-gun gameplay.
Game Modes
Squad offers several gameplay modes, all multiplayer, accessible via the server browser or official matchmaking:
Online & Offline Support
Squad is online-only; there is no offline single-player or bot mode. Players must connect to dedicated servers (run by Offworld Industries or community hosts). The game uses the Unreal Engine 4 networking stack, and matches require a stable internet connection. There is no split-screen or local multiplayer. Official servers are located in North America, Europe, Australia, and Asia. The server browser allows filtering by region, map, player count, and game mode.
DLC, Expansions & Monetization
Squad has no paid DLC or expansions that affect gameplay. All maps, weapons, vehicles, and factions are available to all players. The game employs a cosmetic microtransaction system called “Preorder Packs” and “Supporter Packs” that include weapon skins, uniform patterns, and vehicle camo, but these are purely visual and provide no gameplay advantage. The only notable paid content is the Squad - Digital Deluxe Edition, which comes with an exclusive weapon skin set and the game’s soundtrack. Offworld Industries has also released several free major updates, such as:
No planned DLC expansions have been announced beyond continued free content updates.
What Makes Squad Unique
Several features set Squad apart from other tactical shooters:
1. Proximity-based Voice Chat – Players can hear enemies (and be heard) up to ~50 meters, enabling ambushes, taunts, and friendly callouts.
2. Logistics System – Players must transport construction and ammunition resources from main base to forward positions using logistics trucks or helicopters.
3. Commander Role – A player elected by squad leaders can call in artillery barrages, reconnaissance drones, or even airstrikes, but must stay in a protected forward area to retain access.
4. Building & Fortification – Squad leaders can construct barricades, sandbags, ladders, and defensive emplacements using a build menu, fundamentally altering the battlefield.
5. No Respawn Waves – Players respawn at the main base or at a Rally Point (placed by squad leader) on a 30-60 second timer; there is no automatic spawn-on-squad-leader.
6. Realistic Suppression – Enemy fire causes blurry vision and increased weapon sway, making suppression a key tactical tool.
7. Body Dragging and Medical System – Medics can drag wounded soldiers (introduced in v3.0), and healing requires bandages and medical bags; reviving a downed teammate takes 8 seconds (10 with adrenaline).
In summary, Squad is a hardcore, cooperative military simulation that rewards tactical thinking, communication, and patience over individual skill alone. Its focus on authenticity, combined arms, and player-driven fortification creates an immersive and unpredictable battlefield experience.
Getting Started
Getting Started
Welcome to Squad! This guide will get you through your first hour and beyond, explaining everything from controls to common pitfalls. Squad is a team-first tactical shooter where communication and coordination are more important than individual aim. Read this before your first deployment.
First Hour Walkthrough
1. Launch the Game – After installing, start Squad from Steam or Epic Games Launcher. The main menu appears with options like `Play`, `Training`, `Settings`, and `Server Browser`.
2. Complete the Boot Camp (Mandatory) – Click `Training` → `Boot Camp`. This interactive tutorial teaches movement, aiming, healing, digging, and communication. Do not skip it – it only takes 15 minutes and covers the basics you’ll need immediately.
3. Adjust Settings – From the main menu, go to `Settings`:
- Video: Set resolution to your monitor’s native, enable fullscreen, adjust graphics quality for stable FPS (60+ recommended).
- Audio: Enable voip (Voice over IP) and set voice chat volume to 100%.
- Controls: Review key bindings (default are fine for now).
4. Join a Server – Click `Play` → `Server Browser`. Filter for servers with low ping (<100) and moderate queue (0-5). Look for servers labeled “New Player Friendly” or “Beginners Welcome”. Avoid servers with high player counts (100/100) or those running competitive mods like Squad-ops.
5. Spawn and Find Your Squad – Once in-game, press `Enter` to join a squad from the deployment screen (explained below). If no squads are open, wait for one to appear or create your own (not recommended for your first game). Press `M` to bring up the map – find your squad’s spawn point (usually a red circle with a “HAB” icon). Click to spawn there after a 10-second timer.
6. First 10 Minutes in Game – You’ll spawn near your squad’s radio. Listen to your Squad Leader (SL) – if they speak, respond. Follow the green markers on your compass (top of screen). Your SL will likely say “move to attack marker” or “defend this point”. Stay within 50m of your squad. Do not run off alone. If you see enemies, use the ping system (double-tap `Middle Mouse Button`) to mark them. Do not shoot unless ordered – stealth is crucial.
7. First Firefight – Suppressive fire keeps heads down. If you see squadmates shooting in a direction, join them. Use `B` to change fire mode (semi/auto). If you get hit, call for a medic using `Num 0` or local chat (`V`). Lie prone to reduce profile. If no medic nearby, hold `F` to bandage yourself (must have a bandage).
Character Creation & Role Selection
Squad does not have visual character creation. Your appearance is determined by the faction you’re playing (e.g., US Army, Russian Ground Forces, Militia). However, you choose a role (kit) each time you spawn. This defines your weapons, equipment, and responsibilities.
Best Beginner Roles:
- Rifleman – The most flexible role. Carries an assault rifle, frag grenades, and a bandage. Your job is to follow orders, shoot enemies, and resupply squadmates with ammo bags (`4` key) when they run low.
- Medic – Vital for keeping squadmates alive. You have a medical bag (`4`) to heal and a bandage for revives. Always stay behind cover and heal downed teammates. Avoid being the first to enter a room.
- Automatic Rifleman (AR) – Provides suppressive fire with a light machine gun. You move slower and attract attention, but you can lock down an area. Good for learning positioning.
- Squad Leader – Requires map knowledge, constant communication, and tactical planning. Play at least 20 hours before trying SL.
- Marksman – Often tempts lone-wolf behavior; you lack the ammo and utility of a Rifleman. Not recommended for new players.
- Anti-Tank (AT) / Heavy Anti-Tank (HAT) – Requires understanding of armor weak points and positioning. Wait until you know vehicle types.
Roles to Avoid as a Beginner:
Controls (PC Only)
Squad is only available on PC. Below are the essential default controls. Customize them in Settings.
| Action | Key |
|---|---|
| Move | W, A, S, D |
| Sprint | Left Shift (hold) |
| Crouch | Left Ctrl (hold) |
| Prone | Z (toggle) |
| Jump | Space |
| Lean Left/Right | Q / E (hold) |
| Reload | R |
| Fire | Left Mouse Button |
| Aim Down Sights (ADS) | Right Mouse Button (hold) |
| Change Fire Mode | B |
| Use Bandage | 5 (must have bandage) |
| Place Rally Point | 6 (Squad Leader only) |
| Toggle Map | M |
| Open Scoreboard | Tab |
| Local Voice Chat | V (hold) – talk to nearby players |
| Squad Voice Chat | B (hold) – talk only to your squad |
| Command Voice Chat | G (hold) – Squad Leaders only |
| Ping / Mark Enemy | Middle Mouse Button (double-tap) |
| Use Compass | N (toggle on/off) |
| Interact / Pick Up | F |
| Drop Ammo Bag | 4 (Rifleman) |
| Medical Bag | 4 (Medic) |
| Shovel | 6 (hold to dig/build) |
| Switch Weapon | 1, 2, 3 (primary, secondary, melee) |
| Change Zeroing | Page Up / Page Down |
UI Overview
Your screen shows:
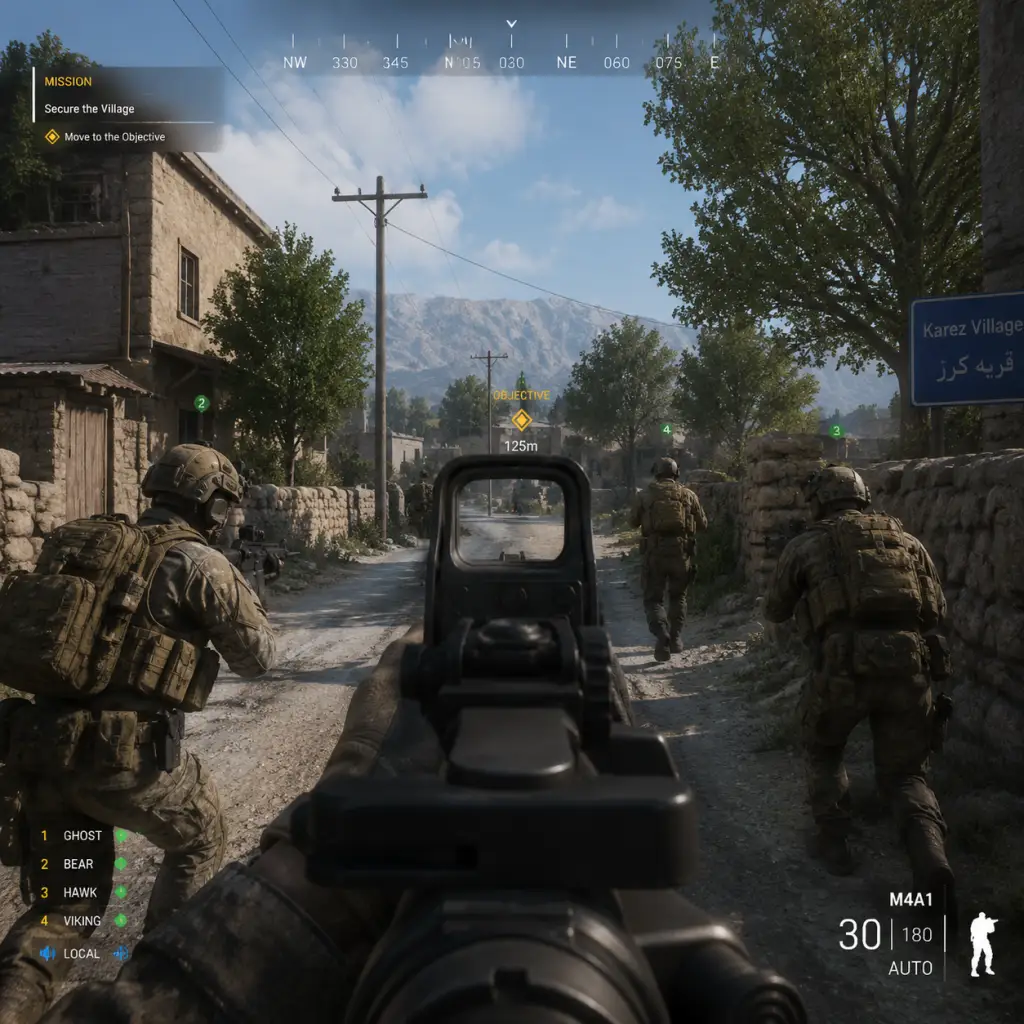
- Compass (top center) – Green markers from your SL appear as chevrons. The compass also shows bearing in degrees (e.g., N, NE, 045). Use for navigation: “Enemy at 220”.
- Stamina Bar (bottom left, below health) – Green bar depletes while sprinting. Recharge by walking or standing still.
- Health Bar (bottom left) – Red when low. Below it, ammo count and bandage icon.
- Squad List (left side) – Shows player names. A speaker icon means they have a mic. Their health is shown. If someone is down (X), medic needed.
- Action Area (top-left corner) – Current objective name and distance.
- Map (press M) – Full-screen map showing all friendly units (blue dots), squad markers, vehicles, and known enemy contacts (red). Learn to read map contours and grid coordinates (e.g., F7 keypad area).
- Radio/HAB Icon – A yellow radio symbol near your spawn point indicates the nearest radio (which must be protected). A “HAB” icon is a bunker where you spawn. The color indicates status: green = active, orange = being overrun, red = destroyed.
- VoIP indicator – Small text near the squad list shows who is talking and on which channel.
- Communicate, even if it’s just “enemy spotted”. Use local chat (`V`) for nearby enemies, squad chat (`B`) for longer-range intel.
- Play as Rifleman or Medic.
- Stay on the objective (flag).
- Request a revive from a medic if downed, but don’t spam.
- Dig enemy radios if you find them (#1 priority when behind enemy lines).
- Lone Wolfing – Running off alone gets you killed and wastes tickets. Always stay near teammates.
- Team Killing – Check your fire. Friendly markers (blue dots) appear on your screen at close range; wait to confirm before shooting.
- Ignoring the Objective – The main objective (capture/defend point) is everything. K/D ratio doesn’t matter.
- Taking Vital Roles (SL, HAT, etc.) – Let experienced players handle them until you understand the game flow.
- Spamming Voice Chat – Don’t talk over important comms. Keep chatter situational.
- Shooting at Vehicles with Rifles – You can’t hurt an armored vehicle with small arms. Call out its position to AT players.
- A player dies (1 ticket)
- A vehicle is destroyed (5-20 tickets depending on type)
- An enemy captures an objective (reduces your ticket bleed)
- Not using a microphone – Communication is mandatory. Type chat is too slow for firefights. Plug in a mic and use it.
- Not following the Squad Leader – The SL has the map and plan. Straying away makes you a liability.
- Overextending – Pushing alone into an open field results in death. Move from cover to cover.
- Firing without orders – Shooting alerts enemies to your position. Unless you have a clear shot, hold fire.
- Ignoring the map – The map shows where enemies are likely coming from. Glance at it every 10 seconds.
- Digging friendly radios – Never dig a friendly radio! Only dig enemy radios (they'll have a red icon). Friendly radios are green.
- Standing still while healing – Always crouch or go prone when using medkit/bandage.
- [ ] Complete the Boot Camp tutorial.
- [ ] Adjust settings: video, audio (voip on), controls.
- [ ] Join a low-ping “New Player Friendly” server.
- [ ] Join a squad with at least 4 players and a talking SL.
- [ ] Select Rifleman as your first role.
- [ ] Stay within 20m of your SL for the entire match.
- [ ] Learn to use the map (`M`) to navigate to the objective.
- [ ] Use local chat (`V`) to call out enemy positions.
- [ ] Practice bandaging (hold `F` when hurt).
- [ ] Do not fire your weapon unless you see a confirmed enemy.
- [ ] If you die, ask in squad chat: “Where do I spawn?”
- [ ] Play at least 3 full matches as Rifleman before switching roles.
- [ ] Watch an experienced player’s perspective (optional but helpful).
Essential Early Objectives
1. Join a Squad with a Mic – A listening squadmate is better than a silent one. If your squad is silent, leave and join another.
2. Follow Your Squad Leader – Stay within 30m of your SL. If they move, move with them. Do not wander off to “flank” alone.
3. Learn to Read the Map & Compass – Identity your squad’s marker (green star), your objective (large diamond), and nearby friendly positions. Type grid coordinates in squad chat if you see enemies (e.g., “enemy east of F7, 2 guys”).
4. Build Spawn Points – If you see a supply crate (large brown box) and your SL gives the order, use your shovel (`6` key, hold left click) to dig a radio (buries into ground) or a HAB (builds a bunker). This is critical for sustainment.
5. Stay Alive – Every death costs your team a ticket. Dying in the open also wastes a medic’s time. Use cover, avoid open fields, and retreat if outnumbered.
What to Do First & What to Avoid
Do:
Avoid:
Early Resource Priorities
Squad uses a ticket system each team has a pool (usually 300-400 per team). Tickets are lost when:
Your focus:
1. Stay Alive – Don’t waste tickets. Play cautiously.
2. Ammo – Riflemen carry an ammo bag. Drop it near teammates who request it. Ammo crates are placed near HABs by Logistics vehicles.
3. Bandages – You start with 1 bandage. Use it only when a medic is far away or you are critically bleeding out.
4. Shovel – Use to dig friendly structures or destroy enemy ones. Do not dig unless ordered.
5. Medical Supplies – Medics have unlimited healing but limited bandages. If you’re a medic, ask a Rifleman for ammo to restock bandages.
Common Beginner Mistakes
Day-One Checklist
Remember: Squad is about teamwork, not individual glory. Your first few hours may be confusing, but as you learn the flow, you’ll appreciate the depth. Good luck, and stay low!
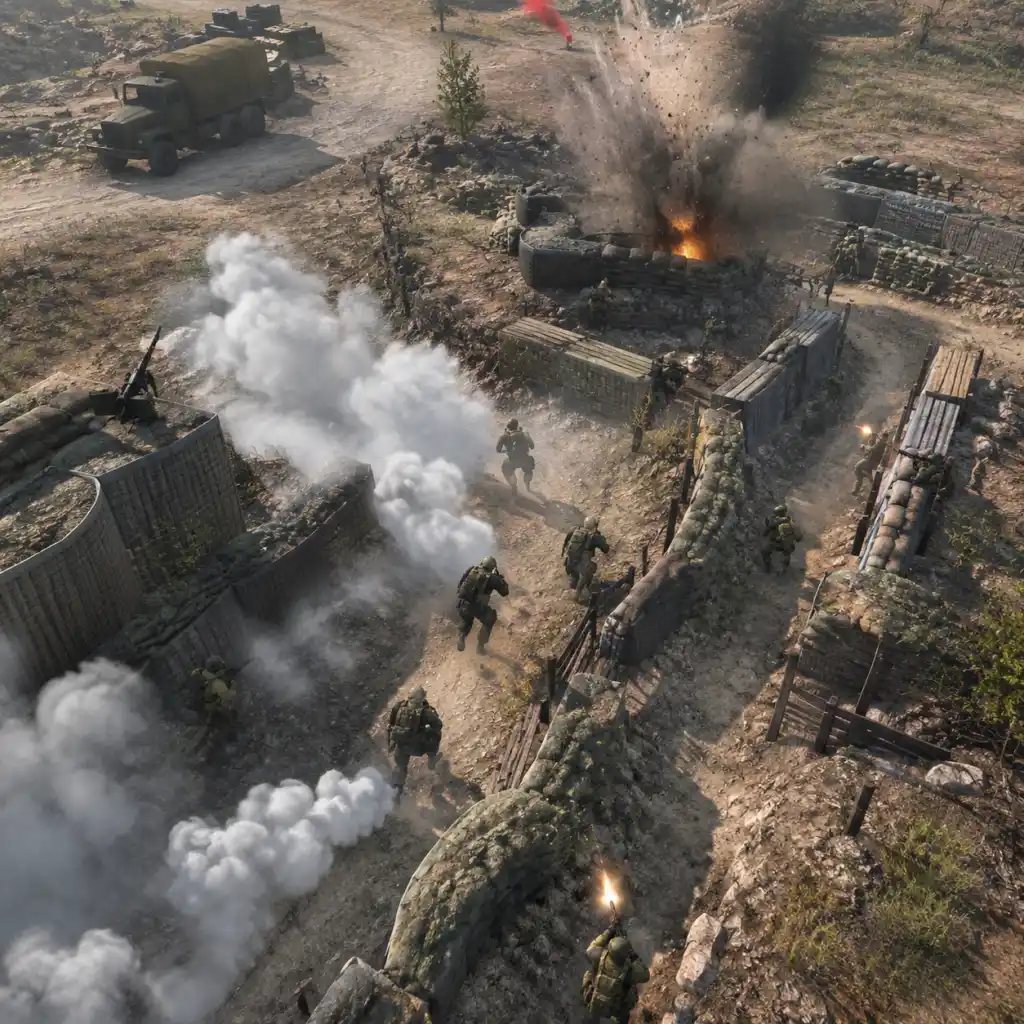
Core Gameplay
Core Gameplay Overview
Squad is a realistic, team-based tactical first-person shooter with a heavy emphasis on communication, coordination, and combined-arms warfare. The game does not feature traditional RPG elements like character levels, skill trees, or quests. Instead, progression is tied to kit (role) unlocks earned through playtime, map knowledge, and teamplay mastery. The core gameplay loop revolves around capturing and defending objectives to drain the enemy team’s ticket count while preserving your own.
- Main Gameplay Loop: Join a squad → communicate with your Squad Leader (SL) → receive orders (move to objective, build a FOB, attack/defend) → execute using your role’s equipment → fight enemies and support teammates → win or lose the round → earn experience for kit unlocks.
- Combat/Interaction Systems: Gunplay is realistic with bullet drop, suppression effects, and high damage. Interaction includes placing rally points (by SL), building emplacements (by SL or Fireteam), resupplying at FOBs (ammo boxes), and repairing vehicles (by Crewman).
- Exploration: No open world; each map is a large (4–16 km²) symmetrical or asymmetrical battle arena. Exploration means learning map layouts, flank routes, and building locations used for defense.
- Quests/Missions: No scripted quests. Each game mode (AAS, RAAS, Invasion, etc.) gives an overarching objective (capture points, destroy HABs).
- Economy: Only the Commander role manages strategic resources: Logistics (supply points on the map for vehicle repairs) and Commander abilities (artillery, UAV, supply drops) that cost Commander Points. Tickets are the currency of victory.
- Character/Build Growth: No stat growth. Unlockable kits (e.g., Grenadier, Automatic Rifleman, Marksman, LAT/HAT) become available after earning specific amounts of score (experience). You can customize your Loadout only by choosing which kit you spawn with at a FOB or main base.
- Endgame Structure: High-level play shifts to clan wars, competitive leagues (Squad League, World War League), and tournament matches where refined communication, role specialization, and map meta dominate.
- What to do: Join a squad, mark yourself as “Rifleman” (the starting kit). Stick with your squad. Use the radial menu (default: "T") to communicate via voice (local, squad, command). Your primary job is to follow your Squad Leader and shoot at enemies you see. Do not use vehicles or pilot without training.
- Combat: Get used to the slow-paced gunplay—always crouch or go prone when engaging. Use cover, check corners. Suppression (bullets landing near you) blurs your vision; stay put and wait for suppression to fade.
- Progression: You earn points by capturing objectives, healing teammates (as Medic), destroying enemy spawns (FOBs, HABs), and killing enemies. Points unlock new kits. Expect to unlock Medic, Automatic Rifleman, and Grenadier by hour 15–20.
- Exploration: Play on one or two maps repeatedly (e.g., Yehorivka, Mestia) to learn the main roads, hilltop positions, and typical FOB locations.
- Economy: Ignore Commander role. Simply resupply at friendly FOBs by walking near ammo boxes (press F to resupply your current magazine).
- Common Mistakes: Wandering alone, taking a vehicle without permission, ignoring SL orders, not using map markers (right-click on map).
- Example Scenario: Your SL says “Move to attack Bunker, we’re building a FOB.” You follow the squad, provide covering fire with your rifle, help dig the FOB radio (hold F), and then set up defensive positions. You get a few kills, capture the point, and earn 200 score.
- What to do: You now have access to LAT (Light Anti-Tank), HAT (Heavy Anti-Tank), Marksman, Machine Gunner, and Combat Engineer. Choose a role that fits your playstyle. Start communicating more: call out enemy vehicle positions, request supply drops as SL. You may begin driving logi trucks or simple transports (not main battle tanks).
- Combat: Learn engagement distances. Use LAT to disable light vehicles (MRAPs, logis) or track heavy vehicles. For HAT, you need a two-man team (spotter + shooter). Use marksman to overwatch from mid-range. Suppression from machine guns is critical to break enemy pushes.
- Progression: After ~60 hours, you unlock Commander and Crewman roles (vehicle crew). You may also unlock Pilot (helicopter). To unlock, you need to accrue score in specific categories: for Crewman, you must spend time in vehicles; for Pilot, score while flying.
- Exploration: Now you know the standard meta for each map: where to place FOBs, typical ambush spots, and how to approach each objective. You can read the minimap intelligently.
- Economy: If you become SL, you manage the squad’s rally points and build order. As Commander, you earn Commander Points by your team’s actions and spend them on artillery strikes (high-ticket cost), UAV drone, or supply drops.
- Endgame activities: Start joining community servers with active admins (e.g., “The Squad” server clan events). Participate in weekly operations where strategy matters.
- Example Scenario: Your squad is defending Hospital on Mestia. You choose HAT. Enemy BTR-80 pushes the west road. You coordinate with the LAT guy: he hits tracks, you hit the turret. BTR is immobilized and crew dismounts—you finish them with your rifle. The SL marks the kill on map and thanks you. You earn significant score.
- What to do: You are comfortable playing as Squad Leader or Commander. You understand the flow of each game mode (AAS, RAAS, Invasion). You know how to manage a squad of up to 9 players: assign fireteams, build super-FOBs or sneaky HABs, call out enemy movements. As Commander, you coordinate multiple SLs, plan artillery timing, and manage the overall strategy.
- Combat: You can execute complex maneuvers: flanking with a full squad, vehicle-infantry combined pushes (e.g., tank supporting a HAB assault), using smoke screens effectively. You can pilot a transport helo or tank crew, understanding armor angles and weak points.
- Progression: All kits unlocked. The only progression left is personal skill improvement: accuracy, map awareness, and communication speed. You may track your stats on external sites (e.g., squad-oss.com).
- Exploration: You know every map’s hidden routes, tall grass spots, and likely enemy HAB locations. You can predict enemy movements based on previous cap points.
- Economy: As Commander, you must prioritize commander point spending: Do you drop a UAV to spot enemy FOBs or call artillery on a known enemy HAB? You balance with logistics points (vehicle repair stations). Losing a critical vehicle can swing the ticket deficit.
- Endgame activities: Join a competitive clan (e.g., 1st Marine Division, 101st Airborne, [Your] Division). Participate in structured scrims and tournaments. Study meta loadouts: for example, in Invasion attacking side, heavy use of breacher (C4) and combat engineer (mines) is vital.
- Example Scenario: You are SL on a clan scrim. Your squad is tasked with flanking the enemy’s main defensive line on Chora. You split into two fireteams: Alpha pushes the field with a HAT to ambush vehicles, Bravo takes a logi around the river. You call a commander artillery prep on the point. After the strike, Bravo assaults the HAB while Alpha cuts off reinforcements. You win the cap.
- What to do: You are a veteran. You may be a clan officer, map designer (custom maps), or tournament organizer. In-game, you play roles that maximize team efficiency: Commander with perfect UAV timing, Vehicle Crew (tank duo) with near-perfect aim and positioning, or SL who can type fast and coordinate multiple squads in real-time.
- Combat: gunplay is second nature. You know spray patterns and recoil compensation for each weapon. You use sound cues (footsteps, engine type) to anticipate enemies. In vehicle combat, you know armor values for every vehicle and can disable an enemy tank in two shots.
- Progression: None. But you may enjoy achievement hunting or modding. The only “endgame” is participation in seasonal competitive leagues—e.g., the Squad World Cup or the Squad Invitational. These events have their own meta (e.g., certain maps banned due to imbalance).
- Exploration: You can teach new players map routes. You may lead map editing teams to create balanced layers for tournaments.
- Economy: Commander decisions become split-second: “Do I call arty now or hold for the next enemy push?” You track enemy Commander abilities cooldowns. You know the exact cost of UAV (10 CP) and artillery (30 CP). You manage your CP like a resource.
- Endgame activities: Coaching new players, streaming/YouTube guide creation, contributing to the community wiki, or developing competitive tier lists for maps/roles.
- Example Scenario: You are the commander in the finals of a tournament. The enemy team has a superb tank crew. You call a UAV to pinpoint their tank’s position, then coordinate two HAT squads to ambush it from opposite sides. Simultaneously, you order a smoke strike on their FOB to cover your team’s advance. Your team captures the point and ultimately wins the match with 0 tickets loss.
Player Progression Tiers
Early Game (Hours 0–20)
Focus: Learn the basics, survive, follow orders, and unlock the first few kits.
Mid Game (Hours 20–80)
Focus: Specialize in a role, master teamplay, understand vehicle basics, and unlock advanced kits.
Late Game (Hours 80–200)
Focus: Lead squads, command the team, coordinate combined arms, and play competitively.
Endgame (200+ hours, Competitive/Meta)
Focus: High-level meta, micromanagement, leadership, and team synergy.
Summary Table of Progression Tiers
| Tier | Hours | Key Unlocks | Primary Focus | Typical Roles |
|---|---|---|---|---|
| Early Game | 0–20 | Rifleman, Medic, AR, Grenadier | Follow orders, learn maps | Rifleman, Medic |
| Mid Game | 20–80 | LAT, HAT, Marksman, Engineer, Machine Gunner | Specialize, vehicle basics, PTFO | LAT/HAT, Medic, MG |
| Late Game | 80–200 | Squad Leader, Commander, Crewman, Pilot | Lead squads, combined arms, meta | SL, Commander, Vehicle Crew |
| Endgame | 200+ | All (custom loadouts) | Competitive play, clan wars, coaching | Commander, Tank Crew, Competitive SL |
Final Tips
- Always use a microphone. Communication is the single most important skill.
- Focus on playing the objective. Kills help, but capturing/holding points wins rounds.
- Learn the roles step by step. Don’t jump into Squad Leader until you understand rally point placement and map flow.
- Watch tutorials by experienced players (e.g., MoiDawg, Captain, BHM).
- Practice in the firing range to master recoil and optics for your favorite kits.
Squad’s core gameplay is a journey from a rifleman in the mud to a commander orchestrating a full-scale assault. There is no traditional endgame—only mastery and community.
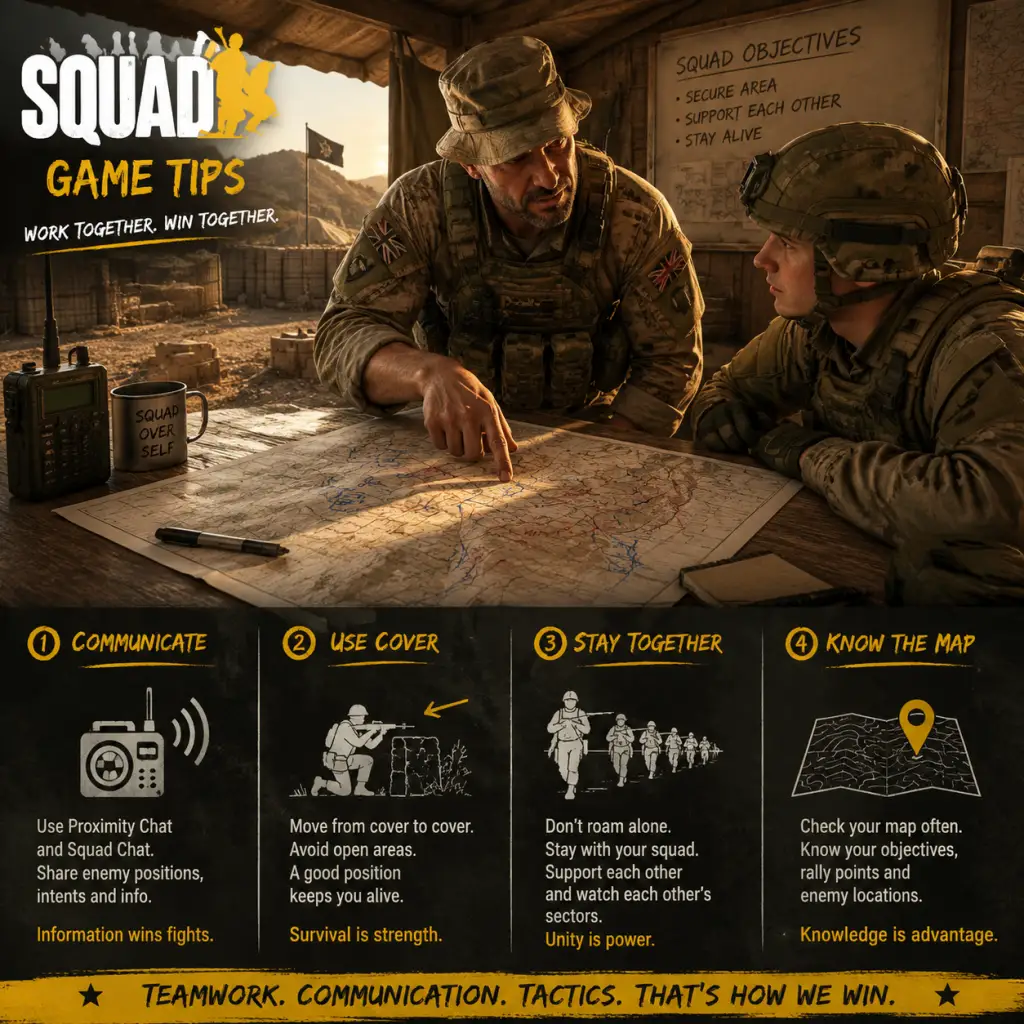
Game Tips
Game Tips
Welcome to the definitive collection of Squad tips, covering everything from your first spawn to advanced combined-arms coordination. This guide is organized by category, with each tip explained in depth, including why it works and when to apply it. Tips are labeled for beginner (B), intermediate (I), or advanced (A) players.
---
1. Communication & Teamwork (B/I/A)
B: Use Local and Squad Voice Channels Correctly
- Explanation: Local voice (Left Alt by default) transmits to nearby friendly players, while Squad voice (G) is heard only by your squadmates. Use local for short-range coordination (e.g., "enemy in the red house") and squad channel for tactical orders. Never clutter command channel unless you're the Squad Leader.
- Why it works: Prevents channel overload. New players often broadcast across all channels, causing confusion and missed calls.
- Explanation: Use the format: Direction (clock bearing from your position), Distance, Description, and Action. Example: "Contact, local, north-northwest at 10 o'clock, 100 meters, enemy infantry moving toward the compound. Requesting fire support."
- Why it works: Speed and clarity reduce time to engage. Veterans rely on consistent reports to build situational awareness.
- Explanation: As Squad Leader, relay critical information to other SLs without clogging the channel. Use markers on the map (enemy vehicles, habs, movements) to create a shared picture. Keep voice for emergencies.
- Why it works: The map is silent and persistent. Well-placed markers save time and reduce radio chatter.
- Explanation: Never stand still in the open. Move from cover to cover, using crouch and prone to reduce your silhouette. When engaging, peek around the left side of an object (exposes less of your body).
- Why it works: In Squad, suppression is lethal. A stationary target is easy prey; movement and cover make you harder to hit.
- Explanation: Suppression degrades enemy accuracy and vision. Fire at known enemy positions even if you don't have a clear shot. Use machine gunners or automatic rifles to pin down enemies so teammates can flank.
- Why it works: Suppressed enemies can't shoot effectively. This creates windows for assault or relocation.
- Explanation: Split your squad into two fireteams. One moves while the other provides cover from a position. The moving team advances 20-50 meters, then sets up cover for the next team. Repeat.
- Why it works: Minimizes exposure. If enemies engage the moving team, the stationary team can return fire immediately. Essential for crossing danger zones like fields or bridges.
- Explanation: Stay within 50 meters of your medic and SL. If you're wounded, a nearby medic can revive you. Being close to SL ensures you receive orders and can help defend/attack objectives.
- Why it works: Lone wolves die and stay dead. Squad cohesion is strength.
- Explanation: Footsteps, gunfire, vehicle engines, and even voice lines are directional. Wear headphones to pinpoint enemy locations. Learn the distinct sounds of each weapon (e.g., AK vs M4).
- Why it works: Sound is a primary intel source. You can anticipate flanking maneuvers or spot hidden enemies.
- Explanation: Capturing a hill, rooftop, or ridge overlooking an objective provides superior fields of fire. Use the terrain's natural protection (reverse slope) to avoid being seen from long range.
- Why it works: High ground gives you first shot advantage and better angles. Dominating terrain forces enemies into predictable routes.
- Explanation: Rifleman has a basic weapon, frag grenades, and an ammo bag. No complex equipment. Focus on learning map flow, shooting, and communication.
- Why it works: Reduces cognitive load. You avoid wasting specialist roles like Marksman or Sniper, which require advanced aim and positioning.
- Explanation: Medics revive and heal teammates. Carry at least 2 bandages, use smoke grenades to cover revives, and prioritize the Squad Lead. Keep your rifle for self-defense.
- Why it works: A dead squad loses momentum. Keeping your squad alive is more valuable than individual kills.
- Explanation: Grenadier uses 40mm grenades to flush enemies from buildings or cover. AR provides continuous suppression. Both require positioning to maximize blast radius or sustained fire.
- Why it works: These roles control chokepoints and deny access. Proper use breaks enemy defensive lines.
- Explanation: Most vehicles have weaker side and rear armor. Heavy armor (tanks) have vulnerable engine compartments. Use AT weapons there.
- Why it works: Front shots often ricochet or do minimal damage. One well-placed rear shot can destroy an engine.
- Explanation: Light Anti-Tank (LAT) can disable transport trucks and IFVs. Heavy Anti-Tank (HAT) destroys main battle tanks. Pair with a rifleman carrying an ammo bag to reload rockets faster.
- Why it works: Solo AT players are ineffective. Two launchers and a supply of ammo can kill multiple vehicles.
- Explanation: Logistics trucks carry construction supplies and ammo. Driving them to the frontline as a taxi wastes resources. Instead, drop supplies at FOBs and return for more.
- Why it works: A constant supply chain builds defenses and radios. Without supplies, your team crumbles.
- Explanation: FOB HABs are spawn points. Place them in low-visibility areas like dense forest, behind hills, or inside compounds. Mark them on map as 'build'.
- Why it works: Hidden HABs survive longer. Enemy players will search visible locations first.
- Explanation: Construct multiple layers of cover around a HAB. Place HESCOs (large walls) first, then sandbags and razor wire. Create a protected firing lane for defenders.
- Why it works: Layered defenses absorb explosions and slow attackers. A single wall can be flanked; multiple layers funnel enemies into kill zones.
- Explanation: Using ammo, SLs can deploy a vehicle repair station next to a FOB. This allows vehicles to repair without returning to main base.
- Why it works: Keeps armor in the fight longer. Repair stations are force multipliers.
- Explanation: The map is divided into 1km and 200m grids. Use these to call out locations (e.g., "Enemy HAB at FOB Charlie 3-2-1"). Study map legends for cap zones and objective markers.
- Why it works: Precise coordinates allow quick reaction. Without grid calls, teammates search blindly.
- Explanation: On each map, learn the common travel corridors between objectives. Note where ambushes happen. Find alternate paths through forests or wadis.
- Why it works: Predict enemy movements and avoid kills zones. You can set up ambushes or bypass defenses.
- Explanation: When an enemy HAB is active, you can hear its radio sound within ~100m. Also, destroyed radios create a static noise. Listen for these cues to locate and destroy spawn points.
- Why it works: Destroying HABs wins games more than killing players. Each radio kill reduces enemy rally points.
- Explanation: Squad Leaders can place a rally point (radio) that acts as a limited spawn. Place it in cover near the objective. Have a teammate stay near it to prevent disappearance if SL dies, but only if safe.
- Why it works: Rally points allow quick respawns close to action. They're essential for sustained assaults.
- Explanation: Riflemen carry smoke grenades, and medics have them too. Throw multiple smokes to create a corridor. Wait for them to pop before moving.
- Why it works: Smokes block line of sight for both sides. They mask advancement and reduce suppression effectiveness on you.
- Explanation: Squad Leaders can request artillery, drone strikes, or vehicle drops from the Commander. Use these on confirmed enemy HABs or dense infantry clusters. Communicate precise coordinates.
- Why it works: A single well-placed strike can wipe an entire squad and destroy a radio. Poorly used strikes waste team resources.
- Explanation: Every death costs your team tickets (unless revived). Avoid unnecessary heroics. If you're in a losing fight, retreat and regroup.
- Why it works: Ticket deficit leads to loss. Preserving lives is as important as capturing points.
- Explanation: Rally points allow respawn after 30 seconds (vs 60+ from main). Place them strategically to keep pressure on objectives.
- Why it works: Faster respawns enable continuous attacks and defenses.
- Over-reliance on Sniper Role: Most new players think snipers are useful. They're not. You'll get limited kills and contribute nothing to objectives.
- Firing From One Window Too Long: Enemies will pinpoint your muzzle flash. Shoot, move, shoot.
- Ignoring the Commander: The Commander has powerful tools. Listen and support their orders.
- Walking in Open Groups: Spread out to reduce the impact of a grenade or machine gun burst.
I: Learn to Give Clear, Concise Contact Reports
A: Use Command Radio for SLs Only – Create Passive Information Network
---
2. Combat & Firefights (B/I/A)
B: Always Use Cover and Peek from Different Angles
I: Master the Art of Suppression
A: Use Bounding Overwatch in Open Terrain
---
3. Movement & Positioning (B/I/A)
B: Stick with Your Medic and Squad Lead
I: Use Audio Cues to Detect Enemy Presence
A: Control High Ground and Key Terrain
---
4. Roles & Kits (B/I/A)
B: Choose Rifleman (Standard Kit) for Your First 20 Hours
I: Master the Medic Role
A: Play as a Grenadier or Automatic Rifleman for Area Denial
---
5. Vehicles & Anti-Armor (I/A)
I: Always Approach Vehicles from the Side or Rear
A: Coordinate LAT/HAT with Your Squad
B: Use Logi Trucks for Logistics, Not Taxis
---
6. Logistics & Base Building (I/A)
I: Place FOBs (Forward Operating Bases) in Concealed Locations
A: Build HESCO Barriers and Sandbags in Layers
A: Maintain a Repair Station for Vehicles
---
7. Map Knowledge & Navigation (B/I/A)
B: Learn the Grid System
I: Memorize Main Routes and Flank Paths
A: Use the Map to Track Enemy FOB Radios
---
8. Advanced Tactics (A)
A: Execute a “Buddy Rally” to Spawn Faster
A: Use Smoke Screens to Cross Open Ground
A: Coordinated Air Support with Commander Assets
---
9. Economy & Respawn Management (I/A)
I: Manage Your Tickets – Don't Waste Spawns
A: Use Rally Points to Reduce Spawn Time
---
10. Beginner Mistakes to Avoid
---
Final Tip: Squad is unforgiving but rewarding. Every death is a learning opportunity. Watch experienced players, ask questions, and always communicate. Now go lead your squad to victory.
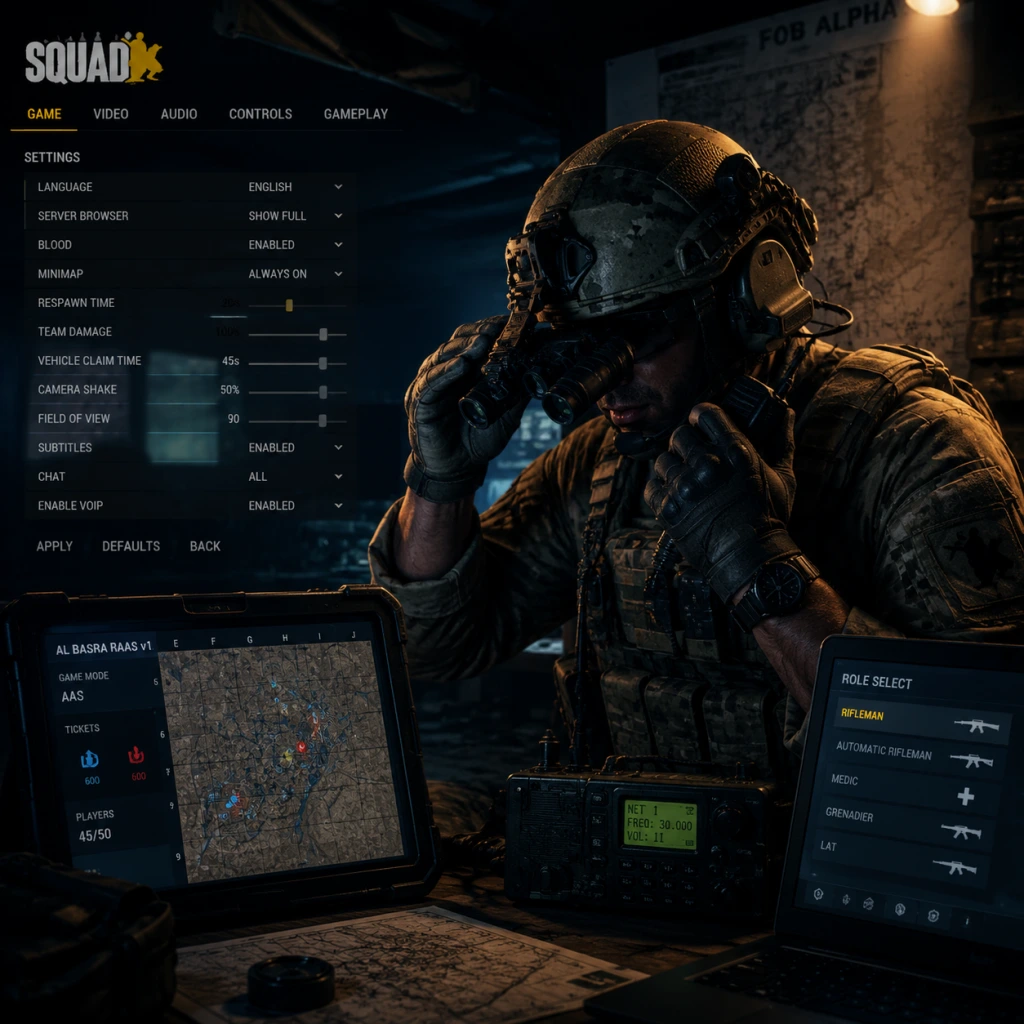
Game Settings
Game Settings Guide for Squad
Squad offers a wide array of settings that can significantly impact your performance, visual quality, and immersion. This guide breaks down each category—Graphics, Audio, Controls, Accessibility, Language, Network, and Gameplay—and provides recommendations for low-end, mid-range, and high-end systems, as well as specific tips to avoid common misconfigurations.
---
Graphics Settings
Squad’s graphics settings are divided into General, Advanced, and Resolution tabs. The game uses Unreal Engine 4, so many settings are similar to other UE4 titles but have specific performance impacts due to the large maps (e.g., 100 players, complex foliage, dynamic shadows).
#### Resolution & Display Mode
- Resolution: Set to your monitor’s native resolution (e.g., 1920x1080, 2560x1440). Lowering resolution can boost FPS significantly but will blur the image.
- Display Mode: Choose Fullscreen for best performance and lowest input latency. Borderless Windowed is useful if you alt‑tab frequently, but it typically adds slight input lag and may reduce FPS.
- VSync: Always OFF. VSync introduces noticeable input lag; use an in-game FPS cap or driver-level frame limit instead.
- Frame Rate Limit: Set to your monitor’s refresh rate (e.g., 60, 144, 240) or slightly above. Uncapped framerate can cause screen tearing and adds unnecessary GPU load.
- Overall Quality: Preset levels scale all sub‑options. For low-end, use Low; mid‑range Medium; high‑end High or Epic. Customize individual settings below the preset.
#### General (Quality Presets)
The preset dropdowns set several sub‑options at once. Start with a baseline:
#### Advanced Settings (Key Performance Drivers)
| Setting | Low-End (Target 30-60 FPS) | Mid-Range (Target 60-90 FPS) | High-End (Target 90+ FPS) | Notes |
|---|---|---|---|---|
| Anti-Aliasing | Low | Medium | High / Epic | TAA is recommended for reducing jagged edges; lower settings reduce blur but increase aliasing. MSAA is heavy on performance. |
| Post-Processing | Low | Medium | High / Epic | Controls bloom, ambient occlusion (SSAO), lens flares. High cost; on low-end leave Low. |
| Shadow Quality | Low | Medium | High / Epic | Shadows are very expensive. Low turns off most dynamic shadows, improving FPS drastically. Mid‑range players can keep Medium. |
| Texture Quality | Low | Medium | High / Epic | Mostly VRAM dependent. Low uses less VRAM but looks blurry. If you have 4+ GB VRAM, set to Medium or High. |
| Effect Quality | Low | Medium | High / Epic | Controls explosions, smoke, and particle detail. Lowering improves visibility in combat. |
| Foliage Quality | Low | Medium | High | Foliage is heavy on CPU/GPU. Low reduces grass and bush density, improving visibility of enemies hiding in cover—this is a competitive advantage. |
| View Distance | Medium | High | Epic | Determines how far objects/players are rendered. Higher values help spotting distant enemies but cost FPS. Medium is a good compromise. |
| Texture Streaming Pool | Medium | High | Ultra | Manages how textures are loaded. Lower values can cause pop‑in; higher values use more VRAM. Set to at least Medium to avoid texture blobs. |
| Motion Blur | OFF | OFF | OFF | Always disable—it reduces clarity and can cause motion sickness. |
| Decal Quality | Low | Medium | High | Controls bullet holes, debris, etc. Minimal performance impact; keep Low if needed. |
| Water Quality | Low | Medium | High | Affects reflections on water. Low is fine for gameplay. |
| Shading Rate (if available) | 1.0 | 1.0 or 0.75 | 1.0 | A newer setting that renders sub‑areas at lower resolution to save performance. 0.75 can give a good FPS boost with minimal quality loss. |
- Resolution Scale: Lowering below 100% (e.g., 80%) sharpens performance loss but blurs image. Use as a last resort.
- Foliage & Shadows: Set both to Low if you struggle with FPS—this dramatically improves visibility and performance. Many competitive players run Low foliage even on high‑end PCs to spot enemies easier.
- Supersampling / TAA: Turn off any unnecessary supersampling. TAA can blur, but it’s required for anti‑aliasing on Epic settings.
- Master Volume: 80-100% (adjust system volume separately to avoid clipping).
- SFX Volume: 90-100%—this includes footsteps and gunshots. Do not lower it.
- Voice Chat Volume: 100%—communication is critical.
- Music Volume: 0% or very low (music is atmospheric but can mask important sounds).
- Ambient Volume: 50-70%—doesn’t affect gameplay as much, but reduces background noise.
- UI Volume: Keep at default.
- Audio Output: Select your correct device (headset preferred).
- Audio Quality: High for better sound separation. Lowering may muffle subtle noises.
- Headphone Mode: ON (if available). This optimizes audio for stereo headphones, improving directional hearing.
- HRTF (Head‑Related Transfer Function): ON if you use headphones. It simulates 3D sound; essential for locating enemies.
- Spatial Sound: Enable Windows Sonic for Headphones (in Windows sound settings) or Dolby Atmos if supported. Squad does not have a built‑in surround mode; Windows Sonic works well.
- Sprint: Left Shift (default). Consider binding to a side mouse button for easier hold.
- Lean Left/Right: Q and E (default). Some players prefer toggle instead of hold—check under “Hold/Toggle” settings.
- Map: M (default). Move to a mouse button (e.g., thumb button) for quick access without lifting your movement fingers.
- Compass: N (default). Very useful for callouts; keep accessible.
- Local Voice Chat (Proximity): B (default). Essential for talking to nearby teammates.
- Squad Voice Chat: V (default). Keep as is.
- Radio (Command) Voice Chat: G (default). Only needed for SL/Commander roles.
- Toggle Inventory / Menu: Tab (default). Do not change.
- Deploy Rally Point: For Squad Leaders only—bind to a convenient key like F5.
- Place Marker / Ping: Middle mouse button (default). Works well.
- Mouse Sensitivity: Start at 5-10 at 800 DPI. Adjust to your comfort; too high causes overshoot, too low hampers turning. Many competitive players use 400-800 DPI with in‑game sens around 5-12.
- Scoped Sensitivity: Set to 1.0 or slightly lower (0.8-0.9) to avoid over‑aiming when zoomed.
- Vehicle Sensitivity: Same as general or slightly lower.
- Invert Mouse: Off.
- Mouse Smoothing: OFF (adds input lag).
- Raw Input: ON (bypasses Windows acceleration).
- Controller Deadzone: Adjust until stick drift disappears.
- Stick Response Curve: Linear or Exponential—personal preference. Linear gives 1:1 movement.
- Toggle Sprint: Some players prefer toggle to avoid holding shift. Enable in “Hold/Toggle” options.
- Toggle Crouch/Prone: Also available; helpful if holding Ctrl hurts your hand.
- HUD Scale: Increase percentage if UI elements are too small (especially text). Default 100%.
- Chat Size: Adjust chat font size and opacity.
- Colorblind Modes: Options for Deuteranopia, Protanopia, Tritanopia. Changes friendly/enemy icons and map colors.
- Subtitles: Enable for voice lines (not crucial).
- Screen Shake: Reduce or disable to prevent motion sickness.
- Field of View (FOV): Set between 90 and 110. Higher FOV improves peripheral vision but may distort visuals and reduce FPS. 90 is a good medium.
- Head Bob: ON by default; many players turn it OFF to reduce disorientation.
- Weapon Bob: Similarly, can be turned OFF.
- Language: Select your preferred language from the dropdown (e.g., English, French, German, Russian, Chinese, etc.).
- Voice Chat Language: Not a setting—voice chat is whatever players speak; no filter.
- Console/UI Text: Changes automatically with language selection.
- Network Quality: High is recommended (uses more bandwidth but reduces packet loss). Medium works on slower connections.
- Server Browser: Set your region to your closest area (e.g., North America, Europe, Oceania). Filter by ping (< 100 ms ideal).
- Enable Steam Networking: ON (default). This uses Steam’s relay for NAT traversal.
- Max Bandwidth: Auto (or set to Unlimited if you have a stable connection).
- Client/Server Tickrate: Not user adjustable—fixed by server.
- Viewmodel Settings: Adjust weapon position (distance, offset). Some players prefer a lowered viewmodel to see more of the screen.
- Crosshair: Can disable, change color, or toggle dot. Keep it visible—it helps with hip‑fire accuracy. Color green is highly visible on most backgrounds.
- Minimap Rotation: OFF (prefer static north) or ON (follows player orientation). Many players prefer static to maintain map orientation.
- Show Kills & Deaths: Toggle on/off in chat. Some prefer to disable kill feed to focus on teamwork.
- Auto-Equip Binoculars: ON—when you press the binocular key, it switches automatically.
- Inventory Management: Drag & drop is enabled by default. You can also right‑click to equip.
- Squad Leader / Commander Features: Only visible when in those roles. Enable “Place Order Markers” and “Request Fire Mission” on an accessible key.
- Preset: Custom (start Low)
- Resolution: 1920x1080 or 1600x900
- Anti-Aliasing: Low (or Off)
- Shadows: Low
- Foliage: Low
- View Distance: Medium
- Textures: Low (if VRAM <4GB) else Medium
- Post-Processing: Low
- Effects: Low
- Motion Blur: Off
- FOV: 90
- Resolution Scale: 100% (lower to 80% if needed for stable 30 FPS)
- Preset: Medium (tweak up)
- Resolution: 1920x1080
- Anti-Aliasing: Medium (TAA)
- Shadows: Medium
- Foliage: Medium (or Low for competitive edge)
- View Distance: High
- Textures: High
- Post-Processing: Medium
- Effects: Medium
- Motion Blur: Off
- FPS Target: 60-90
- Preset: High or Epic (tweak down shadows/foliage if needed)
- Resolution: 2560x1440 or 1920x1080 if chasing 144+ FPS
- Anti-Aliasing: Epic (TAA)
- Shadows: High
- Foliage: High (or Low for competitive play)
- View Distance: Epic
- Textures: Epic (needs 8+ GB VRAM)
- Post-Processing: High
- Effects: High
- Motion Blur: Off
- FPS Target: 144+ (cap at monitor refresh)
---
Audio Settings
Squad relies heavily on positional audio (footsteps, vehicle engines, gunfire direction). Proper audio settings can mean the difference between hearing an enemy flanking or not.
Misconfiguration Warning: Many players leave HRTF off or set audio to “Speakers” while using headphones—this ruins spatial awareness. Always enable Headphone Mode and HRTF.
---
Controls Settings
Squad’s controls are fully rebindable. The defaults are functional, but customizing can improve efficiency.
#### Key Bindings (Recommendations)
#### Sensitivity & Mouse Settings
#### Controller Support
Squad officially supports Xbox and PlayStation controllers. However, the game is heavily keyboard/mouse‑oriented for aiming. Controllers are viable only for casual vehicle driving or if you have no alternative.
#### Deadzone & Response Curve
#### Accessibility for Controls
---
Accessibility Settings
Squad includes several options to assist players with disabilities or specific needs.
Special Attention: FOV and Head Bob are often overlooked. A narrow FOV (60-80) makes it hard to spot enemies, while high FOV slows down pixel accuracy. Start at 90 and adjust.
---
Language Settings
Squad supports multiple languages for menus, HUD, and subtitles.
There’s no language filter for servers; you may encounter other languages in global/team chat. Use the “Mute” function under Scoreboard if needed.
---
Network Settings
Squad runs on dedicated servers with 100 players. Network settings can affect lag and connection quality.
Misconfiguration Warning: Do not enable Network Optimization for Low Bandwidth unless you have a very slow connection (< 1 Mbps). It degrades positional accuracy and can cause rubber‑banding.
VoIP (Voice Over IP): Ensure your microphone is set to your default device in Windows and that “Push to Talk” (PTT) is enabled. Squad uses three separate PTT keys (local, squad, command)—make sure they are bound and not conflicting.
---
Gameplay Settings
These settings affect in‑game behavior, HUD elements, and role customization.
Special Attention: The minimap rotation setting is frequently confused. New players often leave it on rotation, getting lost when the map spins. Turn Static until you are comfortable with navigation.
---
Recommended Optimized Settings by Hardware Level
#### Low-End (e.g., GTX 1050 Ti, 8GB RAM, Quad Core i5)
#### Mid-Range (e.g., GTX 1660 Super / RTX 2060, 16GB RAM, i5-10400)
#### High-End (e.g., RTX 3070/4070, 32GB RAM, i7/i9 or Ryzen 7)
---
Common Pitfalls & Special Attention Points
1. Foliage Quality = Competitive Advantage: In Squad, bushes and grass only render for you at your chosen level. Setting Foliage to Low drastically reduces visual clutter and lets you see prone enemies who are hidden by grass on higher settings. Many skilled players keep foliage Low regardless of their hardware.
2. Motion Blur is Always Bad: It adds latency, reduces clarity, and can cause motion sickness in a game that already has head bob. Turn it Off.
3. Headphone Mode / HRTF: Without them, you cannot accurately judge distance and direction of footsteps or gunfire. Many new players miss this and play at a severe disadvantage.
4. Minimap Rotation: If set to “follow player,” the map spins as you turn, making it nearly impossible to give accurate grid coordinates. Change to Static (North always up) for consistent callouts.
5. VSync & Frame Cap: VSync introduces input lag; use in‑game frame limiter or RTSS to cap FPS just below your monitor’s refresh rate (e.g., 141 for 144Hz).
6. Voice Chat Keys: The game has three separate PTT keys (Local B, Squad V, Radio G). Do not assign them to the same key or you will accidentally broadcast to all channels. Practice which to use when.
7. Network Settings: If you experience lag or rubber‑banding, first check ping and packet loss on the server. Do not toggle bandwidth settings unnecessarily; leave on Auto.
---
Conclusion
Adjusting these settings correctly will dramatically improve your experience in Squad. Start with the hardware-level recommendations above, then fine‑tune based on personal preference and the specific server you play on. Remember: visibility (Low foliage, high view distance) and audio (headphone mode, HRTF) are the two most impactful settings for competitive play. Take a few minutes to set them before jumping into your first match.
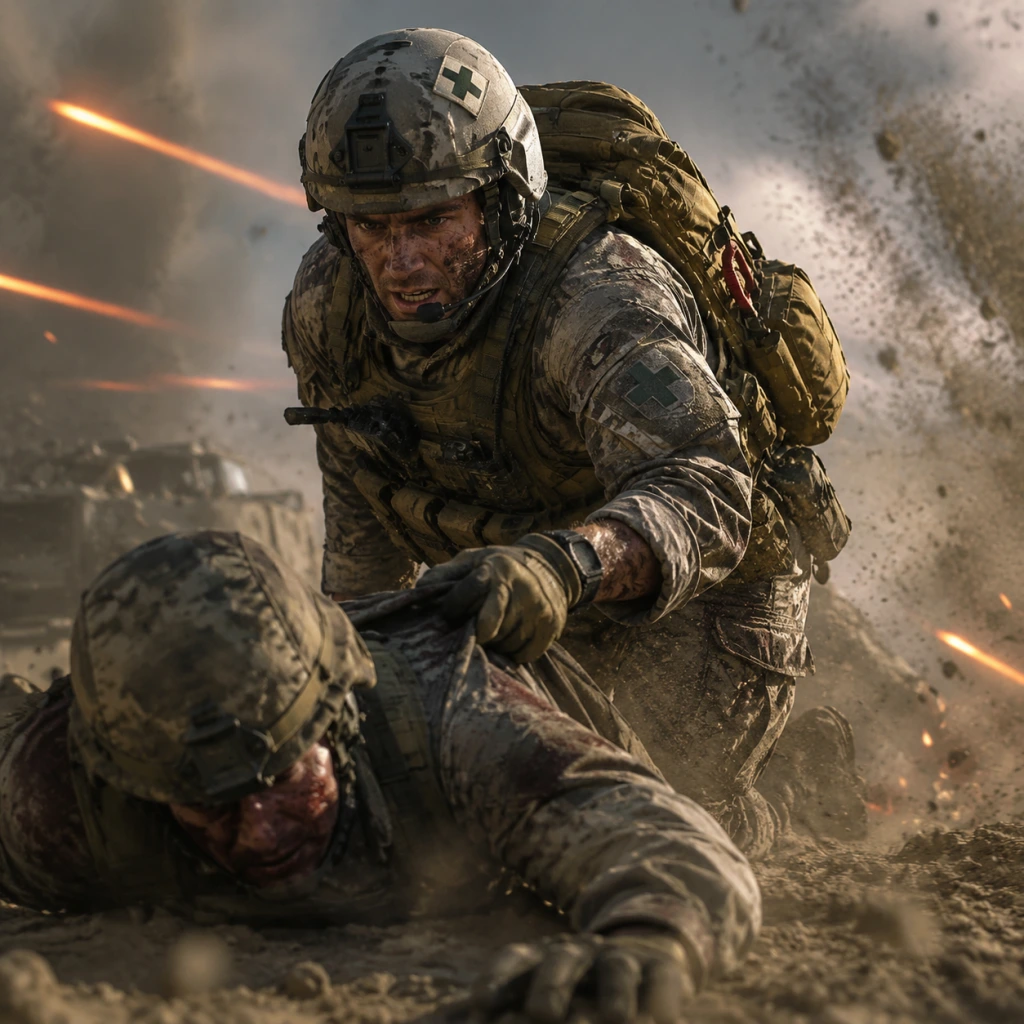
Important Notes
Important Notes for Squad
This section covers critical warnings, common pitfalls, and essential knowledge that even experienced players often wish they knew from the start. Squad is a demanding multiplayer game with no single-player story or save files, but there are many non-obvious aspects that can drastically affect your experience.
---
Warnings & Pitfalls
1. Communication is Mandatory, Not Optional
- Warning: Playing without a microphone or refusing to communicate will get you kicked from most competent squads and will severely hinder your team.
- Pitfall: Relying on text chat or ignoring squad lead calls. You will miss critical orders, enemy positions, and tactical adjustments.
- Tip: Even if you are shy, call out enemy contacts, your position, and requests for orders. Use the ingame voice channels: Local (proximity), Squad, and Command (only for squad leaders).
- Warning: Running off alone away from your squad and objective is the single fastest way to get killed and waste tickets.
- Pitfall: Thinking you can flank the entire enemy team by yourself. Squad’s maps are large, and you will likely die to a random enemy squad or a vehicle that you never saw. Every death costs the team tickets.
- Tip: Always stick with at least one other squadmate. If you must move solo, stay in cover and support the objective from a distance.
- Warning: Team kills (TKs) happen frequently, especially with grenades, vehicle cannons, or machine guns.
- Pitfall: Firing into a smoke grenade or at a friendly uniform that looks like the enemy (especially at night or in the desert where camouflage is similar).
- Tip: Identify your targets before shooting. Learn the faction uniforms (e.g., Insurgents vs. US Army) and check your map frequently to know where friendlies are. Apologize immediately if you TK and avoid repeating the mistake.
- Warning: Do not take a logistics truck, transport helicopter, or armored vehicle without permission from your squad leader or vehicle crew.
- Pitfall: Stealing a logi truck that was meant for building a forward operating base (FOB) can cripple your team’s logistics for 10+ minutes.
- Tip: Always ask before entering any vehicle. If you are not the designated driver or gunner, stick to transport or infantry roles. Logi trucks are critical – only drive them if specifically assigned.
- Warning: Rally points are limited per squad (1 active at a time, with a cooldown). Placing them in exposed or hot zones wastes them.
- Pitfall: Dying immediately after placing a rally because you placed it in the open. Also, not using a rally at all – squads that never place rallies lose momentum.
- Tip: Place rallies in buildings, behind berms, or in forests. Place a backup rally (if your squad leader is alive) before making a risky push. If your rally is red (overrun), deactivate it to refund some ammo.
- Choice: You cannot choose which faction or map to play; the server runs a rotation. However, you can leave and join a different server if you dislike the current map.
- Missable: Special events or limited-time maps occasionally appear on community servers. If you miss them, they may not return for months. Check the Squad Discord or subreddit for announcements.
- Choice: Once you pick a kit (e.g., Rifleman, Automatic Rifleman, Medic, etc.) at the start of a round or after respawning at a FOB/HAB, you are locked into that kit until you die and respawn again.
- Missable: You cannot change your role mid-life. If you pick a kit and then realize your squad needs a medic, you have to die to switch.
- Tip: Wait for your squad leader to assign roles. Don’t grab a special kit (Grenadier, Marksman) if the squad already has one. Communicate to adjust.
- Choice: When a squad leader places a FOB (radio) and builds a HAB (spawn point), that location is fixed until the radio is destroyed by the enemy or deconstructed by your team.
- Missable: Placing a FOB in a bad spot (too exposed, too far from objective) can waste your team’s build points and tickets. There is no undo.
- Tip: Before placing a FOB, check your map for enemy markers, ensure good cover, and make sure it’s within 400m of the objective you want to support. Communicate with other SLs to avoid stacking FOBs.
- Spike: The learning curve is extremely steep. You will die constantly, not know where the enemy is, and feel overwhelmed by the large maps, complex mechanics (like radio overrun mechanics, suppression, stamina), and need for teamwork.
- Tip: Spend your first few hours as a Rifleman or Medic (with a mic). Follow your squad leader, ask questions, and watch tutorials. Use the “Training” mode (under the main menu) to learn driving and shooting without pressure.
- Spike: Flying helicopters or operating tank crews requires significant practice. New pilots crash often, losing tickets and equipment.
- Tip: Use the Jensen’s Range (training mode) to practice vehicle controls. For tanks, only crew with experienced players and listen to the gunner/driver commands. Helicopter flying on live servers is discouraged until you can reliably land on helipads.
- Spike: Leading a squad is the most challenging role. You must manage the squad, place FOBs, communicate with command, and read the map simultaneously.
- Tip: Do not become SL until you have at least 50 hours of infantry experience. Volunteer as a fireteam lead first. Use the command channel for essentials only.
- Trap: Chasing kill death ratio (K/D) leads to playing passively or rushing without purpose. Squad rewards objective control, building, and revives.
- Tip: You earn more points/experience for captures, kills near objectives, revives, and repairs. There are no virtual items or progression rewards tied to kills – only cosmetic unlocks (skins, etc.) that come from playing any role.
- Trap: Thinking you need to grind to unlock better weapons. Squad has no weapon progression – all weapons are available from the start, determined by faction and kit.
- Tip: Spend your time learning the existing weapons rather than worrying about unlocks. The only grind is for cosmetic items (camos, skins) via the in-game currency “Ticket” earned from playing matches.
- Trap: Staying in Jensen’s Range for hours practicing perfect aim. Useful, but not a replacement for live games.
- Tip: Use training for 30 minutes to learn basics (recoil patterns, vehicle controls), then jump into live matches. You will learn more from real players than bots.
- Do: Use push-to-talk (PTT) – default key Caps Lock or V – to avoid broadcasting background noise. Speak clearly and concisely. Use local chat to communicate with nearby friendlies, squad chat for squad info, and command chat (only for SLs) for commander-level coordination.
- Don’t: Chat during firefights unless it’s a critical callout. Avoid lingering music, screaming, or roleplaying. Squad veterans will mute or kick you.
- Do: Follow your squad leader’s orders, even if you disagree. If you want a change, suggest it politely. If the SL is incompetent, leave the squad and join another or create your own.
- Don’t: Micromanage your SL or argue in squad chat. If you see an issue (e.g., FOB placement), wait until you respawn to discuss.
- Warning: Intentional TKs, stealing vehicles, or destroying friendly assets (like HABs) are serious offenses. Server admins ban players for these actions.
- Anti-Cheat: Squad uses Easy Anti-Cheat (EAC). Cheating (aimbots, wallhacks) results in permanent bans across all servers. There is no appeal process. Report suspected cheaters to the server admin or via the official Squad Discord.
- Pitfall: Many servers have specific rules about vehicle claiming, artillery usage, or squad composition. Ignoring them can get you kicked or banned.
- Tip: When joining a new server, press ESC and look for the “Server Rules” button. Common rules: no ramming helicopters, limited marksmen per squad (usually 1), and no shooting from main base.
- Fact: Squad is entirely multiplayer; there is no single-player campaign, auto-save, or manual save. Your progress (stats, cosmetics) is stored server-side tied to your Steam account.
- Tip: To save your controls and settings, go to the Settings menu. Your configuration is stored locally in your user profile folder (usually `%localappdata%\Squad\Saved\Config\WindowsClient`). You can back up files like `Input.ini` and `GameUserSettings.ini` if you want to transfer settings to another computer or after a reinstall.
- Pitfall: Default keybinds (especially for radio channel switching) are not optimal. New players often struggle with toggling voice channels.
- Tip: Remap Squad Chat (default V), Local Chat (default B), and Command Chat (if SL) to easy-to-reach keys. Many players use mouse buttons or side buttons. Save these settings early – you don’t want to relearn controls after 100 hours.
2. Do Not Lone Wolf
3. Friendly Fire (FF) is Always On
4. Vehicles are Not Taxi Services
5. Don’t Overuse Rally Points (Rallies)
---
Irreversible Choices & Missable Content
1. Faction and Map Selection
2. Kit Selection is Permanent for the Life of the Medic/Class
3. FOB & HAB Placement is Irreversible for that Life
---
Difficulty Spikes
1. The First 10 Hours: The “Clueless Phase”
2. Vehicle Coordination (Helicopters, Tanks, etc.)
3. Squad Leading (SL)
---
Grinding Traps
1. Don’t Grind Kills – Focus on Objectives
2. Weapon Unlocks are Cosmetic Only
3. Spending Hours in Training Mode
---
Online Etiquette & Anti-Cheat
1. Microphone Etiquette
2. Respect the Chain of Command
3. No Team Killing (TK) or Griefing
4. Server Rules Vary – Read Them
---
Save Management Advice
1. No In-Game Saves – But Save Your Keybinds
2. Rebind Your Keys Before Playing
---
Things Players Commonly Regret Not Knowing Earlier
1. You can move while healing as a medic – but at reduced speed. Many new medics stand still, making themselves easy targets.
2. The map (M key) shows enemy radio icons when you’re within 50m of a FOB. Use this to locate hidden enemy HABs.
3. Suppression effect (blur, aim shake) is heavy – do not try to outshoot suppressed enemies. Wait for it to fade or find cover.
4. Stamina management – sprinting too much drains stamina, increasing weapon sway. Walk when safe, sprint only when crossing open areas or going for close-quarters fights.
5. Shovels (entrenching tool) can dig up friendly FOBs if you hold left-click on the radio, and build/destroy constructions. Many players don’t know they can help destroy a badly placed FOB to free up build points.
6. Logistics trucks carry 1200 build points and 1200 ammo points – that’s enough for 2 full HABs. Don’t waste them on small outposts.
7. Commanders can use artillery strikes – but they require a radio and a forward observer (a squad leader near the target) to call. Don’t expect artillery to come instantly.
8. If you are not in a squad, you cannot see squad markers or use voice channels effectively. Always join a squad. If all are full, create a locked squad and wait for others.
---
Final Words
Squad is a game that punishes individual heroics and rewards patience, communication, and situational awareness. The most important note: listen to your squad leader and stick with your team. The learning curve is steep but extremely rewarding when your squad works like a well-oiled machine. Avoid the pitfalls above, and you’ll transition from a liability to an asset much faster.
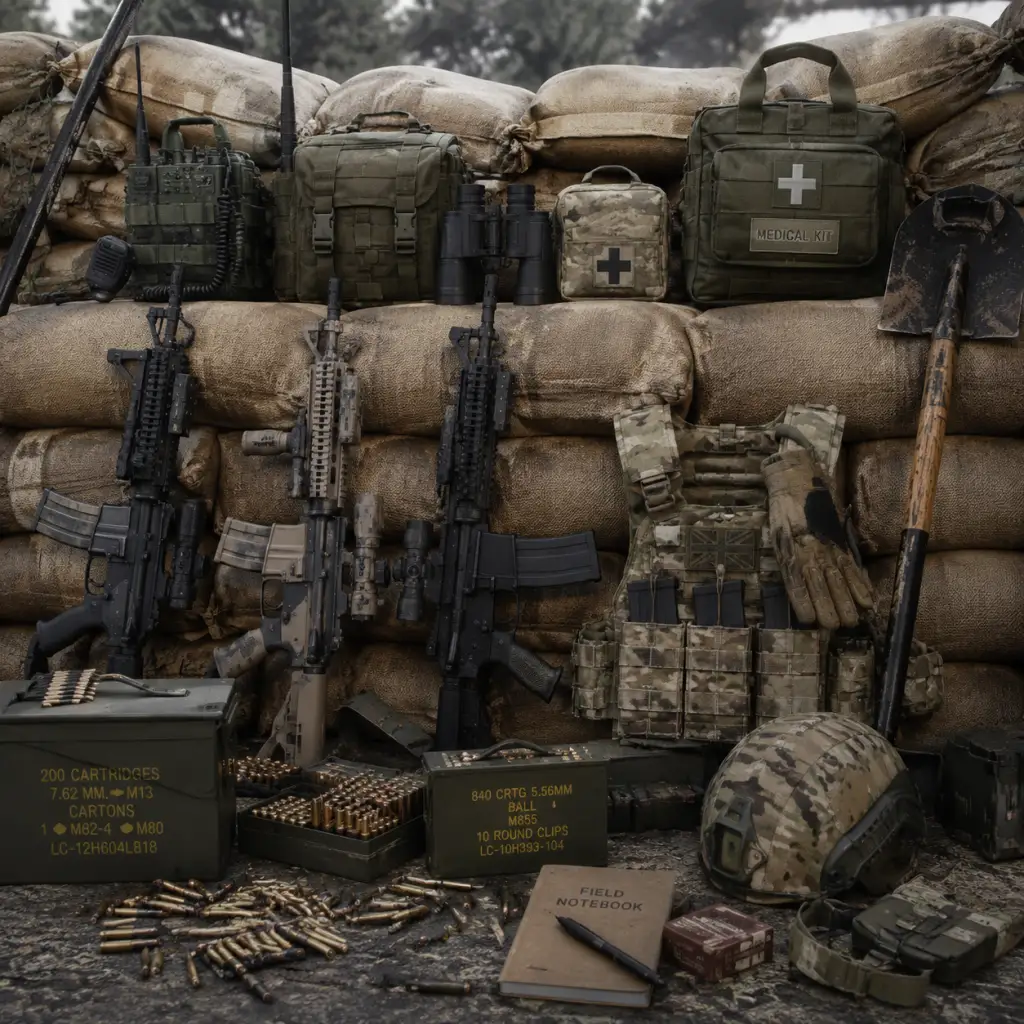
All Game Items
All Game Items in Squad
Squad is a realistic tactical shooter without traditional RPG loot or currencies. Items are divided into weapons, equipment, deployables, and vehicles, each with specific roles. This guide covers all major items obtainable via role selection, vehicle loadouts, or squad leader construction.
---
Weapons
Weapons are locked to specific classes (roles). They cannot be picked up from the ground (except weapons from dead players, which are discouraged).
Primary Weapons
| Weapon | Caliber | Role(s) | Notes |
|---|---|---|---|
| M4A1 | 5.56x45mm | US Rifleman, Automatic Rifleman (AR) | Standard US rifle. Select-fire: semi and full-auto. Low recoil. |
| M16A4 | 5.56x45mm | US Rifleman (ACOG variant) | Semi-auto only (can be glitched to full-auto). Optic standard. |
| AK-74M | 5.45x39mm | Russian, Militia, Insurgent Rifleman | Full-auto. Common with all Russian-aligned factions. |
| AKM | 7.62x39mm | Insurgent, Militia Rifleman | Higher damage than 5.45, more recoil. |
| G3A3 | 7.62x51mm | Middle Eastern Alliance (MEA) Rifleman | Powerful battle rifle, semi-auto only (unless modded). |
| L85A2 | 5.56x45mm | British Rifleman | Bullpup design, good iron sights. |
| QBZ-95-1 | 5.8x42mm | Chinese PLA Rifleman | Unique Chinese bullpup. |
| SKS | 7.62x39mm | Marksman (Insurgent, Militia) | Semi-auto DMR, iron sights or optics. |
| M110 | 7.62x51mm | US Marksman | Semi-auto DMR with variable zoom scope. |
| M249 SAW | 5.56x45mm | US Automatic Rifleman (AR) | Light machine gun, bipod deployable. High suppressive fire. |
| PKM | 7.62x54mmR | Russian, Militia, Insurgent AR | Belt-fed LMG. High damage, slow reload. |
| RPK-74M | 5.45x39mm | Russian AR | Magazine-fed LMG, lighter than PKM. |
| M240B | 7.62x51mm | US Medium Machine Gunner | Heavy MMG, bipod or tripod. |
| MG3 | 7.62x51mm | MEA Machine Gunner | High ROF MMG. |
| SVD | 7.62x54mmR | Russian Marksman | Semi-auto DMR. |
Secondary Weapons
| Weapon | Role(s) | Notes |
|---|---|---|
| M9 (Beretta) | US Officer, Crewman | 9mm pistol, low damage, last resort. |
| Makarov PM | Russian, Militia Officer | 9x18mm pistol. Weak but reliable. |
| TT-33 Tokarev | Insurgent Officer | 7.62x25mm, higher velocity. |
| Browning Hi-Power | British Officer | 9mm. |
| QSZ-92 | Chinese Officer | 5.8x21mm. |
Anti-Tank Weapons
| Weapon | Faction(s) | Notes |
|---|---|---|
| M72 LAW | US LAT | Single-shot disposable rocket launcher. One use per spawn. |
| RPG-7 | Russia, Insurgent, Militia LAT | Two rockets per spawn. Can fire HEAT or frag rockets. |
| M3 MAAWS (Carl Gustaf) | US LAT (optional) | Reusable with multiple ammo types (HEAT, HEDP, smoke). |
| RPG-29 | Russian HAT | Tandem warhead for heavy armor. Two rockets. |
| NLAW | British LAT | One-shot disposable top-attack. |
| M2 Carl Gustaf | British LAT | Similar to MAAWS. |
| PF-97 | Chinese LAT | One-shot disposable. |
| Type 69 RPG | PLA Militia LAT | Similar to RPG-7. |
Grenades & Thrown Items
| Item | Role(s) | Effect |
|---|---|---|
| M67 Frag Grenade | Rifleman, Grenadier | Lethal fragmentation, 4-second fuse. |
| RGO Frag Grenade | Russian, Militia | Impact-detonation frag. |
| F1 Frag Grenade | Insurgent | Timed frag, longer fuse. |
| Smoke Grenade | All roles | White smoke for concealment. |
| M84 Flashbang | US, British | Area stun and blinding. |
| M18 Claymore | Rifleman (sometimes) | Directional mine, command detonated. |
| IED | Insurgent Demolitions | Remote explosive, can be placed on vehicles. |
| Improvised Explosive | Insurgent Rifleman | Tripwire IED or command detonation. |
Optics & Attachments
Weapons often have fixed optics depending on the role. No customization in-base. Examples:
| Optic | Faction(s) | Used On |
|---|---|---|
| M68 CCO (Red Dot) | US | M4A1 for CQB roles |
| M150 RCO (ACOG) | US | M16A4, M4A1 for marksman |
| 1P78 (Kobra) | Russian | AK-74M, RPK |
| 1P29 (PSO-1) | Russian | SVD, PKP |
| SUSAT | British | L85A2 |
| QMK-171 | Chinese | QBZ-95 |
| ZF-4x | MEA | G3A3 |
| Iron Sights | All | Default for many roles |
Equipment & Gear
Each role carries specialist equipment.
| Item | Role | Use |
|---|---|---|
| Ammo Bag | Rifleman | Resupply teammates and vehicles; limited uses. |
| Bandage | All | Stop bleeding; 2-3 bandages per player. |
| Field Dressing | Medic | Advanced bandage that also heals (restores health). |
| Surgery Kit | Medic | Revives incapacitated players. |
| Entrenching Tool | Squad Leader, some roles | Digs fortifications, destroys enemy deployables. |
| Binoculars | Squad Leader, Scout | Long-range observation, often with stadia marks. |
| Radio (Squad Leader Kit) | Squad Leader | Drops Rally Point; must be placed. |
| Rally Point Marker | Squad Leader | Deployable spawn point limited to 1 per squad. |
| C4 / Demolition Charge | Combat Engineer, Demolitions | Destroy enemy structures, FOBs. |
| Repair Tool | Crewman, Logi driver | Repairs vehicle tracks, wheels, engine (slowly). |
| Mine Detector | Scout, Combat Engineer | Detects buried mines and IEDs. |
| Grappling Hook | Sapper (modes) | Rarely used; climb walls in some layers. |
Deployables (Buildable Items)
Built by Squad Leaders with a Logistics Truck or Helicopter carrying Construction and Ammo points.
FOB (Forward Operating Base) Components
| Item | Cost | Purpose |
|---|---|---|
| Radio (FOB Crate) | 100 Const + 50 Ammo | Hive for spawn point; must be placed in a single spot. |
| Ammo Crate | 50 Const | Resupply ammo to nearby players. |
| Construction Crate | 50 Const | Used to build other deployables. |
Defensive Structures
| Item | Cost | Use |
|---|---|---|
| Sandbag Wall | 15 Const | Low cover, stops small arms. |
| HESCO Barrier | 25 Const | Taller cover, stops medium bullets. |
| Razor Wire | 10 Const | Slows enemy; deals slight damage. |
| Hedgehog / Dragon's Teeth | 20 Const | Anti-vehicle obstacles. |
| Bunker (Wood/Steel) | 100 Const | Protected firing position. |
| Machine Gun Nest | 100 Const + 60 Ammo | Automated MG (M240/PKM). |
| Mortar Pit | 150 Const + 100 Ammo | Buildable mortar for indirect fire. |
| TOW Launcher | 200 Const + 150 Ammo | Anti-tank guided missile. |
| Repair Station | 100 Const | Repairs nearby vehicles automatically. |
Vehicles
All vehicles are faction-specific and must be driven. No player inventory items.
Logistics Vehicles
| Vehicle | Faction | Capacity | Cargo |
|---|---|---|---|
| Logistics Truck | All | 8 passengers | 1200 Construction + 1200 Ammo supply. |
| Transport Truck | All | 12 passengers | No cargo capacity. |
| M-ATV (US) | US | 4 passengers + 1 gunner | Light armored transport. |
| Ural-4320 | Russia | Similar | Open bed transport. |
Armored Fighting Vehicles
| Vehicle | Faction | Armament | Role |
|---|---|---|---|
| M2A3 Bradley | US | 25mm chaingun + TOW ATGM | IFV, carries 6 passengers. |
| BMP-2 | Russia | 30mm cannon + ATGM | Similar IFV. |
| BTR-80 | Russia | 14.5mm KPVT HMG | APC, limited AT ability. |
| Stryker MGS | US | 105mm cannon | Light tank destroyer. |
| T-72B3 | Russia | 125mm smoothbore | Main Battle Tank. |
| M1A2 Abrams | US | 120mm smoothbore | MBT. |
| Warrior IFV | British | 30mm RARDEN + ATGM | IFV. |
| ZBD-04A | China | 30mm + ATGM | IFV. |
| Type 99 | China | 125mm | MBT. |
Helicopters
| Helicopter | Faction | Role | Capacity |
|---|---|---|---|
| UH-1Y Venom | US | Transport | 8 passengers + 2 crew. |
| Mi-8 | Russia | Transport | 24 passengers or cargo. |
| AH-1Z Viper | US | Attack | Gunner + pilot; carries TOW and rockets. |
| Mi-24 Hind | Russia | Attack transport | Can carry troops and rockets. |
| CH-47 Chinook | US | Heavy lift | Large cargo. |
| SA330 Puma | British | Transport | 12 passengers. |
Consumables & Materials (Non-Player Items)
- Ammunition Points: Abstract resource used to resupply player magazines, rockets, grenades. Drawn from FOB Ammo Crates or Logistics Vehicles.
- Construction Points: Abstract resource used to build deployables. Drawn from Construction Crates or Logistics Vehicles.
- Rally Points: Not an item per se, but a deployable spawn point placed by Squad Leaders. Limited to 1 per squad; must be dug down after replacement.
- Medical Supplies: Represented by bandages/field dressings; limited per player.
- No currencies or collectibles exist in Squad. All items are role-locked. You cannot find or craft items.
- Weapons cannot be modified mid-game; they come with fixed optics and attachments per role.
- Vehicle weapons are fixed and cannot be transferred; they require a gunner seat.
- Kit sharing: Only some servers allow picking up dropped kits; generally discouraged due to teamkills.
- Upgrades: No weapon upgrades. Vehicle upgrades (e.g., armor packages) are map-specific, not player-controlled.
---
Important Notes
This guide covers all officially implemented items as of Squad version 7.1. Modded servers may add additional content.
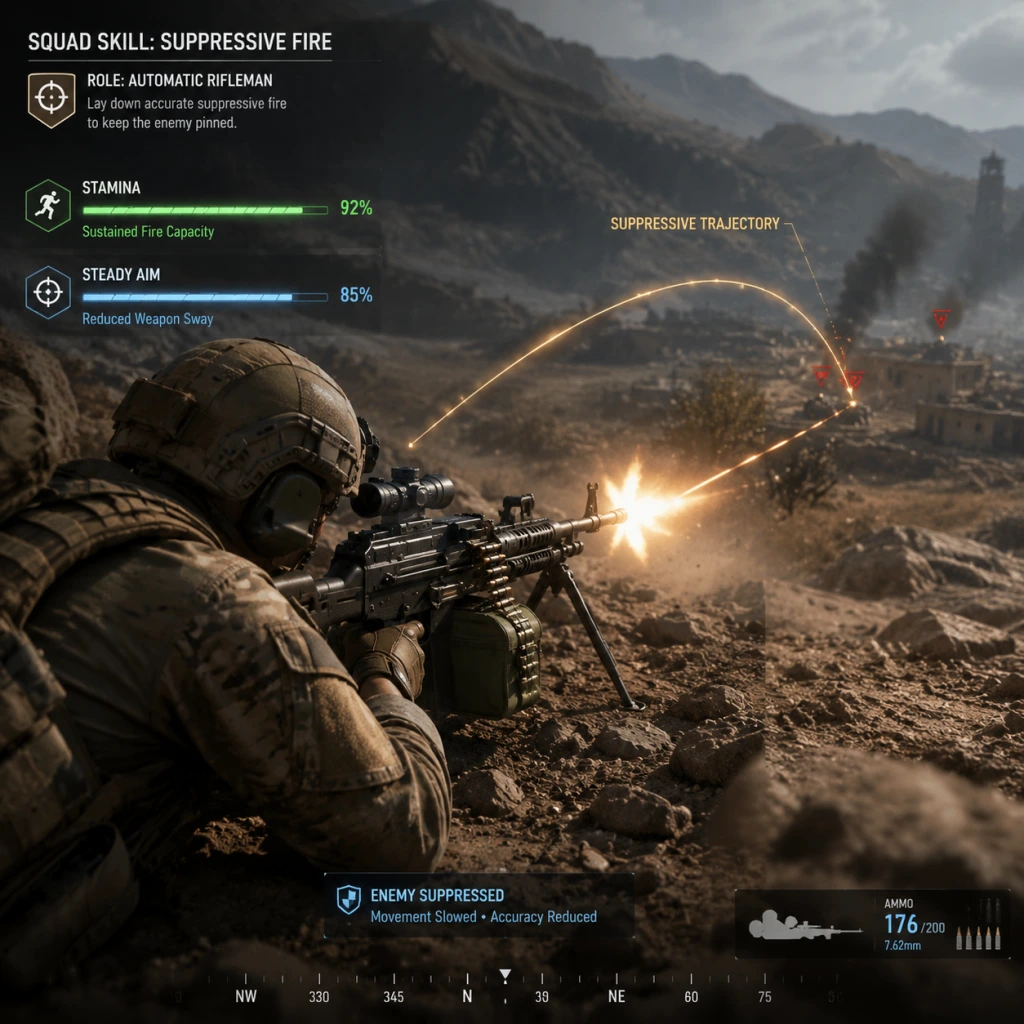
Character Skills
Character Skills Guide for Squad
Squad does not feature traditional RPG-style character classes or skill trees. Instead, it offers distinct roles (kits) within a squad, each with unique equipment and responsibilities. This guide covers every playable role, detailing their issued gear, special abilities, and how to use them effectively. Roles are unlocked by selecting a kit at the main base ammo crate or from a vehicle resupply. Some roles have limited availability per squad.
General Role Categories
- Infantry Roles (Rifleman, Medic, Automatic Rifleman, Light Anti-Tank, Grenadier, Machine Gunner, Marksman)
- Specialist Roles (Combat Engineer, Heavy Anti-Tank, Pilot, Crewman)
- Leadership Roles (Squad Leader, Fire Team Leader)
- Primary Role: General combat, sustain firepower, supply ammo.
- Unique Equipment: Ammo Bag (2 uses), Frag Grenades (2), Smoke Grenades (2).
- Skills/Abilities:
- Synergies: Pair with Automatic Rifleman or Machine Gunner to keep them fed with ammo. Stick with Medic to ensure sustained healing supplies.
- Recommended Builds: No customization; choose between iron sights, red dot, or scope variants depending on engagement distance.
- When to Use: Always a solid choice for new players. Use ammo bag near objectives or during defensive holds.
- Primary Role: Healing and reviving teammates.
- Unique Equipment: Bandages (6), Field Dressing (2 uses – revive and heal), Smoke Grenades (2).
- Skills/Abilities:
- Upgrades: Faction-specific medical gear (e.g., USMC Medic gets M9 pistol, Russian Medic gets Makarov).
- Synergies: Always stay near squad leader and rifleman for ammo resupply of bandages. Coordinate with squad for safe revives.
- Recommended Builds: Carry only necessary weapons to maximize bandages. Use scoped variant for better situational awareness.
- When to Use: Essential in every squad. Prioritize reviving squad members, then other friendlies. Use smoke before reviving in exposed areas.
- Primary Role: Suppressive fire, area denial.
- Unique Equipment: Light Machine Gun (e.g., M249 SAW, RPK-74), Bipod, Frag Grenades (1), Smoke Grenades (1).
- Skills/Abilities:
- Upgrades: Faction-specific LMGs; some have quick reload or larger magazines.
- Synergies: Pair with Rifleman for ammo resupply. Support Medic by covering advances.
- Recommended Builds: Use scoped variant for medium-range suppression.
- When to Use: Defensive positions, holding chokepoints, or providing base of fire during assaults.
- Primary Role: Destroy light armored vehicles, damage heavy armor, engage bunkers.
- Unique Equipment: Light Anti-Tank Launcher (e.g., RPG-7, M72 LAW), Heat or Frag rounds, Smoke Grenades (1).
- Skills/Abilities:
- Upgrades: Some factions have thermobaric rockets (more area damage) or tandem warheads (for ERA).
- Synergies: Scout vehicles before engaging. Work with HAT for coordinated strikes.
- Recommended Builds: Choose HEAT for vehicles, frag for anti-personnel if mission demands.
- When to Use: Ambushing supply trucks, disabling IFVs, destroying enemy FOBs or emplacements.
- Primary Role: Indirect fire, clearing rooms, smoke screening.
- Unique Equipment: Under-barrel Grenade Launcher (e.g., M203, GP-25), High Explosive (HE) grenades (6 rounds), Smoke grenades (4 rounds).
- Skills/Abilities:
- Upgrades: Some factions have airburst rounds (MIL only).
- Synergies: Suppress machine gunners, clear rooftops, create smoke screens for assault.
- Recommended Builds: Always carry smoke for versatility.
- When to Use: Attacking fortified positions, providing overhead suppression, or blinding enemy armor.
- Primary Role: Sustained heavy suppressive fire, anti-infantry.
- Unique Equipment: General Purpose Machine Gun (e.g., M240B, PKM), Bipod/Tripod, 200 round belts, Smoke Grenades (1).
- Skills/Abilities:
- Upgrades: Faction-specific – USMC MG uses M240B, Russian uses PKM, etc.
- Synergies: Protected by Rifleman ammo and Medic. Set up behind cover.
- Recommended Builds: Use scope for long-range suppression.
- When to Use: Defending static objectives, providing fire superiority.
- Primary Role: Precision elimination of high-value targets (HAT, SL, MG).
- Unique Equipment: Designated Marksman Rifle (e.g., M110, SVD) with high-magnification scope, Spotting Binoculars, Smoke Grenades (1).
- Skills/Abilities:
- Upgrades: No special upgrades, but rifles vary in caliber and magazine size.
- Synergies: Coordinate with Squad Leader to mark targets. Avoid close combat; stay at medium to long range.
- Recommended Builds: Use suppressor if available (faction-dependent).
- When to Use: Counter-sniper operations, engaging exposed enemies, covering flanks.
- Primary Role: Destroy heavy armor (tanks, IFVs, APCs).
- Unique Equipment: Heavy Anti-Tank Launcher (e.g., Carl Gustav, RPG-29), 2 rounds (HEAT or tandem), Frag grenades (1), Smoke grenades (1).
- Skills/Abilities:
- Upgrades: Some factions have laser rangefinder built into scope.
- Synergies: Must be supplied by Rifleman or FOB ammo. Identify armor weak points and coordinate with other AT.
- Recommended Builds: Tandem is best for MBTs; HEAT for lighter vehicles.
- When to Use: Only take if enemy armor is confirmed. Engage from concealed positions with good escape route.
- Primary Role: Fortification building (sandbags, walls, Habs), mine laying, explosive destruction.
- Unique Equipment: Shovel or entrenching tool, Mine (2), C4 or Demolition Charge (2), Repair Hammer.
- Skills/Abilities:
- Synergies: Works with Squad Leader to build defensive positions. Mines can be placed in chokepoints.
- Recommended Builds: No variation; the role itself is specialized.
- When to Use: On defense, building up FOBs; on offense, clearing obstacles and enemy structures.
- Primary Role: Leadership, coordination, placement of rally points and firebases.
- Unique Equipment: Binoculars, Radio Backpack for FOB creation, Rally Point (1 use per cool down), Smoke Grenades (4).
- Skills/Abilities:
- Synergies: Must constantly manage rally points and FOBs. Communicate with other SLs.
- Recommended Builds: Choose a carbine or rifle with short-to-medium optics for close engagement.
- When to Use: Always. Every squad needs an SL. Focus on spawn placement and team coordination over fragging.
- Primary Role: Assisting SL, leading a fireteam, additional marking capabilities.
- Unique Equipment: Same as base role kit but with binoculars and ability to place FTL markers (visible only to squad).
- Skills/Abilities:
- Synergies: Supports SL by marking enemy contacts and directing fireteam.
- When to Use: Large squads (8-9 players) to split into two fireteams. Useful for complex maneuvers.
- Primary Role: Operating vehicles – helicopters (Pilot) or ground vehicles (Crewman).
- Unique Equipment: Repair Hammer, Smoke Grenades (2), sometimes a wrench for repairing tracks.
- Skills/Abilities:
- Synergies: Must communicate with infantry for safe landings/pickups. Crewman supports armor squads.
- When to Use: Dedicated vehicle squads. Do not take Pilot if helicopters are not in the match.
- Ammo Management: Riflemen and Grenadiers are key for sustained infantry action. Always prioritize resupply at FOBs.
- Medic Priority: Revives > healing. Use smoke to cover revives. Keep bandages on hand.
- Anti-Armor Coordination: LAT and HAT must work together – one disables tracks, the other finishes. Disable engine first via side shots.
- Building Fortifications: Combat Engineer builds defenses; other roles can assist with shovels if available but at slower speed.
- Squad Leader’s Rally: Place rally near but not directly on the objective. Use fireteam markers for movement orders.
Each role has a primary weapon, secondary weapon (pistol or sidearm), and equipment slots for tools, grenades, and faction-specific items.
---
Rifleman
- Ammo Bag: Deploy an ammo crate that allows teammates to resupply magazines, grenades, and bandages. Cooldown: None, but limited to 2 uses per spawn. Resupply by visiting an ammo crate or vehicle.
- Grenades: Frag for anti-infantry, smoke for concealment and crossing open ground.
---
Medic
- Field Dressing: Revive a downed teammate and partially heal them. Each dressing has 2 charges. Cooldown: None per charge, but limited total supplies.
- Bandage: Heal bleeding and restore health fully if enough time. Bandages can also be used to stop own bleeding.
- Smoke Screen: Deploy smoke for cover while reviving.
---
Automatic Rifleman (AR)
- Bipod Deployment: Deploy bipod for greatly reduced recoil and increased accuracy. Can be deployed on any surface (windowsills, rocks, sandbags).
- Suppression: Sustained fire reduces enemy accuracy and visibility through suppression effects.
---
Light Anti-Tank (LAT)
- Anti-Tank Rocket: Fires a shaped charge that deals heavy damage to armor. Frag rounds can be used against infantry in buildings.
- Ammo Dependency: Only 1 round in launcher plus 1 spare (total 2) depending on faction.
---
Grenadier
- Grenade Launcher: Fires explosive or smoke rounds with a ballistic arc. Can be used for indirect fire over obstacles.
- Ammo Variety: Switch between HE and smoke during combat via weapon zeroing menu.
---
Machine Gunner (MG)
- Bipod Deployment: Similar to AR but with heavier gun; longer suppression duration.
- Belt-fed: Long continuous fire, but reload is slow. Can be interrupted by teammate with quick-assist? No, but cover required.
---
Marksman
- Ranging Scope: Scope includes mildots or BDC for long-range shots. Marksman can call out enemy positions to the squad.
- Binoculars: Better zoom than standard, useful for reconnaissance.
---
Heavy Anti-Tank (HAT)
- Tandem Warhead: Can defeat explosive reactive armor (ERA). One shot can disable or destroy most MBTs from the side or rear.
- Backblast: Launcher produces a dangerous backblast area – ensure clear space behind.
---
Combat Engineer
- Build/Repair: Use shovel to construct or repair deployables (HAB, ammo crate, sandbags). Repair hammer works on vehicles.
- Mines: Anti-tank mines that can destroy or immobilize vehicles. Can be defused by enemy engineers.
- C4/Demo Charge: Placed on surfaces and detonated manually or via timer. Used to destroy enemy HABs, dig-ins, or vehicles.
---
Squad Leader (SL)
- Rally Point: Deploy a temporary spawn point that lasts 5 minutes or until enemy is near. Cooldown: 10 minutes after dismantle or destruction. Must be placed unobstructed.
- FOB (Firebase): Build a Forward Operating Base using supplies (ammo, construction). Requires radio pack. Once placed, other SLs can build around it.
- Marking: Use binoculars to mark enemy positions for the entire team (visible on map).
- Command Chat: Access to SL radio for strategic coordination.
---
Fire Team Leader (FTL)
- Marking: Place accurate moving markers for the squad (orders).
- Rally Point: Cannot place rally point; only SL can.
---
Pilot / Crewman
- Vehicle Operation: Ability to drive/fly everything in the faction. Pilot can fly helicopters only; Crewman can drive all ground vehicles.
- Repair: Can repair vehicle tracks/engines using wrench/repair hammer.
- Stinger/AA: Some factions give pilots a man-portable anti-air missile? No – typically only ground troops have that. But pilots have a personal weapon (carbine or SMG).
---
Role Synergies & General Tactics
---
Role-Usage Tips by Situation
| Situation | Recommended Roles | Key Actions |
|---|---|---|
| Attacking a fortified objective | Grenadier, MG, Rifleman, Medic | Suppress, smoke flanks, push with medics |
| Defending a point | MG, AR, Marksman, Squad Leader | Set up arcs of fire, place FOB, rotate positions |
| Ambushing a vehicle convoy | LAT, HAT, Combat Engineer (mines) | Conceal, wait for vulnerable moments, disable tracks first |
| Assaulting an enemy HAB | Combat Engineer (C4), Grenadier, Rifleman | Clear buildings, blow up radio or HAB from outside |
| Long-range engagement (600m+) | Marksman, HAT (if stationary vehicle) | Spotting, patience, use zeroing adjustments |
| Urban combat (CQC) | Rifleman, Medic, Grendadier (smoke), LAT (frag rounds) | Room clearing, use smoke for crossing streets |
Conclusion
Squad’s roles are not skill trees but each has distinct ‘abilities’ in the sense of tools and responsibilities. There is no leveling or unlocks; all players have access to all roles depending on squad makeup and kit availability. The most effective player adapts their play style to their role’s strengths and communicates. Master each role’s equipment to become a versatile squad member.
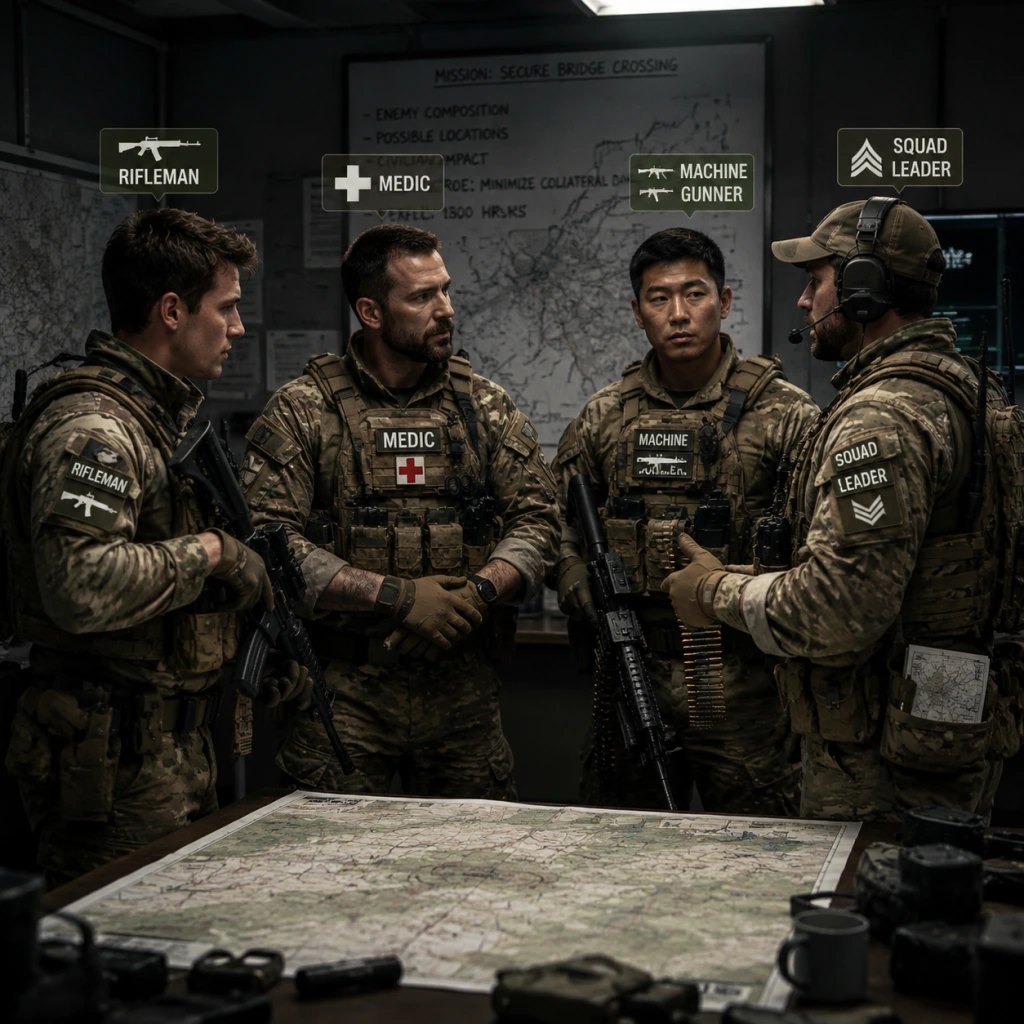
Characters & Roles
Characters & Roles in Squad
Squad does not feature named heroes or unlockable characters. Instead, it offers roles (kits) that define a player's equipment and responsibilities within a 9-player squad. Each role is available from the start—no progression gates—but a squad can only have one of each specialist role at a time. The composition is managed by the Squad Leader. Below is a comprehensive breakdown of every major role, including background, strengths, weaknesses, playstyle, recommended equipment, and team synergy.
Squad Roles Overview Table
| Role | Abbreviation | Primary Weapon (Example) | Special Equipment | Squad Limit |
|---|---|---|---|---|
| Squad Leader | SL | Assault Rifle + Binoculars | Radio, Rally Point, Command Chat | 1 per squad |
| Rifleman | RFLM | Assault Rifle | Ammo Bag, Frag Grenades | Unlimited |
| Automatic Rifleman | AR | Light Machine Gun (e.g., M249) | Bipod, Frag Grenades | 1 per squad |
| Light Anti-Tank | LAT | Assault Rifle + Rocket Launcher | Single AT rocket | 1 per squad |
| Heavy Anti-Tank | HAT | Assault Rifle + Heavy Launcher | Two AT rockets, Tripod | 1 per squad |
| Medic | MED | Carbine or Assault Rifle | Medic Bag, Bandages | 1 per squad |
| Grenadier | GRN | Assault Rifle + Underbarrel GL | HE and Smoke grenades | 1 per squad |
| Marksman | MARK | Designated Marksman Rifle | Binoculars, Frag Grenades | 1 per squad |
| Combat Engineer | CE | Assault Rifle | Explosives, Mines, Repair Tool | 1 per squad |
| Crewman | CREW | Submachine Gun or Carbine | Repair Tool (crewman kit) | Vehicle crew only |
| Pilot | PILOT | Carbine | Repair Tool (pilot kit) | Helicopter crew only |
Detailed Role Descriptions
#### Squad Leader (SL)
- Background: The backbone of the team. SL leads the squad, places rally points (RPs) for respawns, builds forward operating bases (FOBs) with the support of the team, and coordinates with other squad leaders via command channel.
- Strengths: Only role that can place RPs; has binoculars for scouting; can mark targets for the entire team.
- Weaknesses: No specialist firepower; must balance leading and fighting; high responsibility.
- Playstyle: Stay alive, keep your squad moving toward objective, communicate constantly. Use your binos to spot enemy infantry and vehicles. When possible, build a HAB near the objective.
- Equipment: Rifle with optic (or iron sights), binos, frag and smoke grenades, rally point, radio for FOB construction.
- Team Synergy: Works best with a medic and a rifleman who can supply ammo. Never go alone—always have a battle buddy.
- Background: The most flexible role, available to any player. The rifleman is the grunt of the squad, carrying extra ammunition for teammates.
- Strengths: Unlimited squad availability; carries an ammo bag that can resupply grenades, rockets, and bandages for any teammate.
- Weaknesses: No unique firepower; lacks scopes on some factions; ammo bag has limited uses (5 refills total).
- Playstyle: Stick with specialists (AR, LAT, Grenadier) and drop your ammo bag near them frequently. Always have a frag and smoke grenade ready. Use your rifle to suppress and kill enemies at medium range.
- Equipment: Assault rifle (with optic or irons), ammo bag, frag and smoke grenades, entrenching tool (shovel).
- Team Synergy: Essential for keeping AT soldiers and medics resupplied. Pair with AR to keep them firing.
- Background: The squad's base of fire. Carries a light machine gun (e.g., M249, RPK) to suppress and pin down enemies.
- Strengths: High sustained fire; bipod for stability; large magazine (100-200 rounds). Can lay down covering fire that makes enemies keep their heads down.
- Weaknesses: Slow movement while firing; vulnerable when reloading; less effective at long range after first burst.
- Playstyle: Deploy your bipod on windows, rocks, or trench edges. Fire in short bursts to conserve ammo and accuracy. Prioritize suppressing known enemy positions rather than seeking kills. Reposition after every few engagements to avoid being flanked.
- Equipment: LMG with bipod, frag grenades, entrenching tool.
- Team Synergy: Works with a rifleman to supply extra ammo. Medics should stay close as AR draws heavy fire. SL can mark targets for you.
- Background: The first line of defense against enemy armor. Carries a single-use light rocket launcher (e.g., RPG-7, M72 LAW) that can disable or destroy lightly armored vehicles.
- Strengths: Portable, one-shot AT capability; can also be used against infantry in buildings (with HE rockets on some factions).
- Weaknesses: Only one rocket; long reload; minimal damage against heavy tanks (requires multiple hits to critical components).
- Playstyle: Stay with your squad. Only fire when you have a clear shot at vulnerable parts of a vehicle (engine, tracks, turret) or to finish off a damaged target. Use cover and flanks. After firing, retreat and request ammo from a rifleman.
- Equipment: Assault rifle (irons or optic), one rocket launcher with one rocket, frag grenades.
- Team Synergy: Pair with a rifleman for immediate resupply. Coordinate with HAT to focus fire on heavy armor. SL can mark vehicle positions for you.
- Background: The dedicated tank killer. Carries a heavy launcher (e.g., Carl Gustav, RPG-29) with two rockets, often including a tripod for additional stability and a thermal sight (on some factions).
- Strengths: High damage to all armor; can destroy tanks with two well-placed shots; tripod reduces recoil and improves accuracy at long range.
- Weaknesses: Slow movement while carrying the launcher; must deploy tripod to use; limited ammo; easy target while stationary.
- Playstyle: Stay at medium-long range from enemy armor. Use terrain to hide. Deploy the tripod only when you have a clear sightline and a reliable escape route. Always aim for the engine compartment or turret ring. After firing, move immediately.
- Equipment: Assault rifle, heavy launcher with two rockets, tripod (on some factions), entrenching tool.
- Team Synergy: Essential for killing heavy armor. LAT can soften targets; a rifleman can provide one extra rocket (if the HAT uses a launcher that accepts loose rockets, like the RPG-29) or simply keep you in the fight longer with ammo bags.
- Background: The savior of the squad. Heals and revives downed teammates using medical supplies and a medic bag.
- Strengths: Can bring soldiers back from incapacitation; heals faster than bandages; revives without consuming a ticket (unlike giving up).
- Weaknesses: Weak weapon (usually carbine); no grenades (except smoke); fragile due to being a priority target.
- Playstyle: Stay in the middle of the squad. Prioritize reviving over fighting. Use smoke grenades to cover teammates while you work. Communicate with downed players to confirm it's safe to revive. Keep your medical bag stocked (use rifleman ammo).
- Equipment: Carbine or short-barreled rifle, medic bag (limited uses, refilled by ammo), bandages, smoke grenades (2), entrenching tool.
- Team Synergy: Stay close to SL and AR. Riflemen can resupply your bandages and medic bag charges. Never neglect your own safety—a dead medic helps no one.
- Background: Provides indirect fire and area denial. Uses an underbarrel grenade launcher attached to an assault rifle to fire 40mm high-explosive (HE) and smoke grenades.
- Strengths: Can clear rooms, destroy enemy FOBs, and suppress large areas with HE. Smoke can obscure enemy lines of sight.
- Weaknesses: Slow muzzle velocity; limited ammo for GL (5-10 rounds); long reload between shots; vulnerable while using launcher.
- Playstyle: Use HE to target known enemy positions (windows, trenches, bushes). Use smoke to cover your squad's advance or to block enemy snipers. Conserve GL ammo for critical moments. Your rifle is still effective in close quarters.
- Equipment: Assault rifle with underbarrel GL, frag and smoke grenades for the rifle, entrenching tool.
- Team Synergy: Works well with a rifleman for extra grenade launcher ammo. SL can mark targets for you. AR can suppress while you reload.
- Background: The designated marksman of the squad, providing accurate fire at long range. Carries a semi-automatic DMR (e.g., M110, SVD) with a high-power scope.
- Strengths: Can engage targets at distances beyond typical assault rifles; scope helps spot enemies for the squad; high damage per shot.
- Weaknesses: Slow rate of fire; limited ammo; less effective in close quarters; often tempted to lone-wolf.
- Playstyle: Stay with your squad, not far away. Use your scope to scan for enemies and report contacts via local or squad chat. Take shots at stationary or slow-moving enemies. Prioritize high-value targets like enemy SLs, medics, and AT soldiers. Reposition after 2-3 shots to avoid detection.
- Equipment: DMR with scope, binos (on some factions), frag grenades, entrenching tool.
- Team Synergy: Provide overwatch as the squad moves. A rifleman can give you extra DMR ammo. SL can use your eyes to mark positions for the rest of the squad.
- Background: The demolition and construction expert. Carries explosives (C4, mines) and a repair tool to sabotage enemy assets and repair friendly ones.
- Strengths: Can destroy enemy FOBs, vehicles, and fortifications with satchels; can place anti-tank mines; can repair friendly vehicles and structures with the welding tool.
- Weaknesses: No unique combat gear; satchel has a long fuse; easy to spot when placing mines; vulnerable while repairing.
- Playstyle: Sneak into enemy territory to place mines on roads and near FOBs. When assaulting a FOB, use your satchel on the radio. Assist engineers from other squads by repairing friendly vehicles. Your rifle is your primary weapon—use it to fight alongside the squad when not on special tasks.
- Equipment: Assault rifle, satchel charge or C4 (1-2), anti-tank mines (2), repair tool, entrenching tool.
- Team Synergy: Work closely with SL to identify high-value targets. Medics should be nearby if you're operating near enemies. Other engineers can coordinate mine placements.
- Background: The driver and gunner of armored vehicles and logistics trucks. Crewmen have the ability to drive any land vehicle and operate its weapons effectively.
- Strengths: Only role that can drive certain armored vehicles without penalties (e.g., faster repairs, better stabilization); can repair vehicle tracks and engines using the repair tool.
- Weaknesses: Limited anti-infantry capability; often confined to vehicle for prolonged periods; vulnerable when dismounted.
- Playstyle: Stay with your vehicle. When driving, keep moving and avoid ambushes. Use smoke screens (if available) to disengage. As a gunner, prioritize enemy vehicles and then infantry. Dismount only to repair or to fight on foot if the vehicle is destroyed.
- Equipment: Submachine gun or carbine, repair tool, smoke grenades (vehicle-specific).
- Team Synergy: Your squad may be the vehicle crew or you may be attached to another squad. Communicate with other vehicle crews. Infantry can spot targets for you. A combat engineer can help repair your vehicle faster.
- Background: The helicopter pilot and crew chief. Flies transport and attack helicopters. The pilot role is automatically given to the player occupying the pilot seat of a helicopter.
- Strengths: Can rapidly transport troops and supplies across the map; can provide CAS with door guns (e.g., M240D).
- Weaknesses: Requires extensive practice to fly well; helicopters are fragile and loud; easy target for small arms and AA weapons.
- Playstyle: For transport: pick up troops from main base and deliver them to safe landing zones near objectives. For attack: use door guns and rockets to support ground troops. Always maintain situational awareness—listening for engine damage, watching for AT missiles. Land carefully to avoid crashing.
- Equipment: Carbine (for self-defense when grounded), repair tool, vehicle-specific loadout (no changeable kit).
- Team Synergy: Coordinate with SLs to know where they need pickups and drops. Keep command informed of enemy positions you spot. Avoid hovering over active combat zones.
- Unlock Conditions: None. All roles are available from the start. However, team-wide limits exist: e.g., typically 2 HATs per team, 2 Marksmen, etc. Squad-level limits are 1 per squad for specialists.
- Choosing a Role: When you spawn at a HAB or main base, walk to the ammo crate and interact to open the Role Selection menu. Roles that are already taken are grayed out. If your squad already has a Marksman, that option is locked for your squad.
- Role-Specific Training: There is no tutorial for individual roles, but practice on a local co-op server (offline or with bots) to learn the recoil patterns, rocket drop, and helicopter controls.
- Team Synergy Summary: A balanced squad typically includes: 1 SL, 1 Medic, 1 Rifleman, 1 AR or Grenadier, 1 LAT or HAT, and fill the rest with Riflemen. Avoid taking two heavy AT kits in the same squad unless you have multiple riflemen to supply ammo.
#### Rifleman (RFLM)
#### Automatic Rifleman (AR)
#### Light Anti-Tank (LAT)
#### Heavy Anti-Tank (HAT)
#### Medic (MED)
#### Grenadier (GRN)
#### Marksman (MARK)
#### Combat Engineer (CE)
#### Crewman (CREW)
#### Pilot (PILOT)
Special Considerations
Conclusion
Mastering your role's equipment and responsibilities is essential to contributing effectively in Squad. Always communicate your ammo needs, repair status, and spotted enemies. No role is a "hero"—success comes from team coordination and staying alive to support your squadmates.
Cheats & Secrets
Cheats & Secrets Guide for Squad
Squad is a strictly multiplayer, realism-focused tactical shooter. There are no traditional cheat codes, unlock codes, or developer console commands that work in live multiplayer matches (doing so would violate anti-cheat policies like BattlEye). However, the developers at Offworld Industries have included several Easter eggs, hidden features, and secret content that are safe to explore. This guide documents all known legitimate secrets.
Important Note: No Cheats Allowed
- Squad does not have a single-player campaign or offline mode where you can enter cheat codes.
- Using third-party cheat software will result in a permanent ban across all servers. The game's anti-cheat (BattlEye) is very active.
- The in-game console (accessed with `~` or `²`) exists only for admin commands on dedicated servers, not for player cheats.
- Map: Gorodok (AAS v1 or v2)
- Location: Inside the large church at grid reference `F6-5-7` (use your map and compass). Look behind the altar at the far wall. A small, hard-to-see wooden plaque reads: "Squad – Offworld Industries, est. 2014."
- Easter egg type: Developer tribute. No interaction required.
- Tip: Use a high-zoom optic or binoculars to spot it. It's easy to miss.
- Map: Skorpo, during night variants only
- Location: At the bottom of the underwater cave system near grid `F2-1-3`. Swim down to the sea floor, near a sunken fishing boat. A glowing, pulsing red sphere can be found. If a player approaches it, it will briefly attract nearby loose objects (e.g., a helmet or a loose plank).
- Mechanics: It does not affect gameplay or damage players. It's a purely visual reference to a cancelled beta feature.
- Discovery: First documented by the community in 2021.
- Map: Chora
- Location: The abandoned radio station at grid `E5-3-9`. Inside the main building, there is a working radio receiver. If you stand within 2 meters of it for 15 seconds, you'll hear a faint, distorted loop: the sound of a train horn and Russian speech. This is a reference to the game's early development.
- Tip: Turn up your headset volume; the audio is extremely quiet.
- Map: Fallujah
- Location: On a wall in the middle of the city, grid `D4-8-5`. Look for a spray-painted tag reading "Squad 44" in red. This was a pre-release working title for the game.
- Access: Clearly visible in daylight, but easy to overlook during combat.
- Map: Al Basrah
- Location: The house at grid `H3-7-2`. In the backyard, there is a grill with a small grill mesh. If you approach it and press `F` (interact), a sizzling sound plays and a tiny puff of smoke appears. No other effect.
- Note: This is the only interactive non-functional object in the game. It's considered a developer's joke.
- Maps: Only available on a specific community-published modded map called "Dev Shed" – not in official maps. This mod can be found on the Steam Workshop. Once loaded, you can explore a small shed filled with props from early versions, including a cardboard cutout of a dev's face and a whiteboard with old patch notes.
- How to access: Subscribe to the "Dev Shed" mod on Steam Workshop, create a local lobby, and select the map.
- "Milk the Cow" on Manicouagan: There is no cow, no milk, no interactable animals anywhere in Squad. This is an old joke.
- "Unlockable camouflage": No, all skins are obtainable only via purchasing DLC or previous supporter packs. No hidden unlock codes.
Known Easter Eggs & Hidden Features
#### 1. The Hidden "Squad" Plaque on Gorodok
#### 2. The "Magnetic Bomb" Easter Egg on Skorpo
#### 3. The Radio Loop on Chora
#### 4. The "Squad 44" Graffiti on Fallujah
#### 5. The Deployable "BBQ" Pit on Al Basrah
#### 6. Secret Developer Room: "The Shed"
Unverified or Exploit-Like Secrets (Not Recommended)
Some players claim there are hidden weapons or invincibility spots, but these are either server-specific mods, glitches, or outright false. Attempting to exploit unintended map geometry can be considered cheating and may get you kicked or banned.
Community Myths Debunked
How to Find More Secrets
1. Explore quietly – Many Easter eggs are out-of-the-way and require you to search without enemies nearby.
2. Use the Replay system – After a match, you can freely fly around the map to scan for hidden objects.
3. Check the SDK – Offworld Industries released modding tools; some secrets are only visible in the editor.
Final Words
Squad's charm lies in its realism and teamwork, not in cheat codes. The few Easter eggs are a reward for curious players who take the time to explore. Always respect server rules and anti-cheat; stick to the secrets documented here, which are harmless and developer-approved.