Star Wars Jedi: Fallen Order
## Game Introduction **Star Wars Jedi: Fallen Order** is a single-player action-adventure game that delivers a compelling narrative-driven experience set in the beloved Star Wars universe. Developed by **Respawn Entertainment** (creators of the Titanfall series and Apex Legends) and published by **...
Download & Installation
Overview
Star Wars Jedi: Fallen Order is a single-player action-adventure game developed by Respawn Entertainment and published by Electronic Arts (EA). It is available on PC (via Steam, Epic Games Store, and EA app), PlayStation 4, PlayStation 5, Xbox One, Xbox Series X|S, and Amazon Luna (cloud streaming). There is no native support for Nintendo Switch or mobile devices.
System Requirements (PC)
Minimum Requirements (1080p / Low Settings)
- OS: Windows 7/8.1/10 64-bit
- CPU: AMD FX-6100 or Intel i5-2500K
- RAM: 8 GB
- GPU: AMD Radeon HD 7750 or Nvidia GeForce GTX 650
- DirectX: Version 11
- Storage: 55 GB free space (SSD recommended)
- OS: Windows 7/8.1/10 64-bit
- CPU: AMD Ryzen 7 1700 or Intel i7-6700K
- RAM: 16 GB
- GPU: AMD Radeon RX Vega 56 or Nvidia GeForce GTX 1070
- DirectX: Version 11
- Storage: 55 GB free space on SSD
- CPU: AMD Ryzen 7 3700X or Intel i7-10700K
- GPU: AMD Radeon RX 5700 XT or Nvidia GeForce RTX 2070 Super (or better for 4K)
- RAM: 16 GB
- Storage: 55 GB on NVMe SSD
Recommended Requirements (1080p / High Settings)
Optimal/4K Requirements
> Note: The game uses the Unreal Engine 4. An SSD significantly reduces loading times. VRAM usage can exceed 4 GB at high textures.
Platforms & Download Sources
| Platform | Digital Store | Required Account | Notes |
|---|---|---|---|
| PC (Windows) | Steam, Epic Games Store, EA app (formerly Origin) | EA Account + Store account | Cross-platform save via EA cloud? No. |
| PlayStation 4 / PlayStation 5 | PlayStation Store | PSN account + EA Account | Free PS5 upgrade if you own PS4 digital or disc version (via backward compatibility) |
| Xbox One / Xbox Series X | S | Microsoft Store | Xbox Live account (free) + EA Account |
| Amazon Luna | Amazon Luna | Prime or Luna+ subscription + EA Account | Streaming only; requires stable internet. |
| EA Play (subscription) | PC (EA app), Xbox (Game Pass Ultimate with EA Play), PlayStation (EA Play) | Same as above | Included with subscription. On PC, EA Play is available via EA app; on consoles via EA Play membership. |
Important: EA Account Requirement
Regardless of where you purchase, you must link an EA Account (free) to play. On consoles, this happens during first launch. On PC, the store (Steam/Epic) will prompt you to sign in or create an EA Account.
Step-by-Step Installation
PC via Steam
1. Open Steam and log into your account.
2. Search for \"Star Wars Jedi: Fallen Order\" or go to the store page.
3. Purchase the game (or redeem a key). If you have EA Play, note that EA Play on Steam does not include this game; you must buy it separately.
4. Click Install (green button).
5. Choose installation directory (ensure at least 55 GB free).
6. Wait for download and installation. Steam will unpack and apply updates.
7. After installation, click Play. The game will launch the EA app (installed automatically if missing) and prompt you to sign in to your EA Account.
8. Accept EA end-user license agreement and link accounts. The game will then start.
PC via Epic Games Store
1. Open Epic Games Launcher and log in.
2. Search for the game or find it in the store.
3. Purchase and add to library.
4. Click Install from library page.
5. Select installation path and language.
6. Wait for download (Epic also uses EA app integration).
7. Launch from Epic library; EA app will open.
8. Sign in to EA Account and link. Game starts.
PC via EA app (Direct)
1. Download and install the EA app from [https://www.ea.com/ea-app](https://www.ea.com/ea-app).
2. Log in with your EA Account.
3. Search \"Star Wars Jedi: Fallen Order\" or find it under \"My Library\" if already owned.
4. Click Download.
5. Choose installation folder (default `C:\\Program Files\\EA Games`).
6. Wait for download and installation.
7. Click Play.
PlayStation 4/5
1. Ensure your console is connected to the internet and has sufficient storage (55 GB).
2. Go to PlayStation Store from the home screen.
3. Search for the game.
4. Purchase (or, if you have EA Play, the game may be included; check Library).
5. Click Download.
6. The console will install automatically.
7. Launch the game. On first launch, it will ask you to link an EA Account. Follow on-screen instructions (may require opening a browser on phone/PC to log in).
8. For PS5: If you own the PS4 disc, insert it and you'll be prompted to download the free PS5 upgrade from the store. Digital owners can download the PS5 version from library.
Xbox One / Xbox Series X|S
1. Turn on your Xbox and ensure you have storage space.
2. Open Microsoft Store or search using the guide.
3. Find Star Wars Jedi: Fallen Order (available as standard or deluxe edition).
4. Purchase or access via Game Pass Ultimate (if subscribed to EA Play via GPU).
5. Select \"Install\" or \"Download to\".
6. Wait for download and installation (Smart Delivery ensures you get the best version for your console).
7. Launch game. On first launch, sign in with EA Account (use on-screen QR code or URL to link).
8. Accept agreements.
Amazon Luna (Cloud Streaming)
1. Subscribe to Amazon Luna (requires Prime or Luna+ membership).
2. Go to Amazon Luna website or app (Fire TV, browser, iOS/Android Luna app).
3. Search for the game in the channel (e.g., Luna+).
4. Click Play. No download required; game streams directly.
5. Link EA Account if prompted (usually once per account).
6. Ensure a stable internet connection (minimum 10 Mbps, recommended 20+ Mbps).
Storage Space
- PC: 55 GB (with all patches, may exceed 60 GB after updates). EA app default installs on C drive; you can move to another drive via settings.
- PlayStation 4/5: ~50-55 GB. PS5 version slightly smaller due to compression? Similar.
- Xbox One/Series X|S: ~47-55 GB depending on console generation and updates.
- EA Account (mandatory) : Free, created at [https://help.ea.com/en/help/account/](https://help.ea.com/en/help/account/) or in-game.
- Store Account: Steam, Epic, PSN, Xbox Live, or Amazon (for Luna). Each must have an active internet connection to authenticate.
- Online subscription? No. The game is single-player only; no subscription needed for online play (except for cloud saves on consoles with PS+/Xbox Live Gold? Actually, saves are local; online backups may require PS Plus or Xbox Live Gold for cloud saves, but not for playing).
> Tip: Free up space by uninstalling other games or using external storage (USB 3.0 HDD for PS4/Xbox One; SN850 for PS5/XSX for fast loading). For PC, install on SSD for faster load times—the game has many loading screens between areas.
Account Requirements
First Launch Setup
After installation, at first launch:
1. Linking EA Account: On PC, the EA app will open (if not already open). Sign in. On consoles, you'll see a prompt with an alphanumeric code or QR code. Go to [https://account.ea.com/link](https://account.ea.com/link) on a browser, sign in, and enter the code.
2. Accept EULA and privacy notices.
3. Graphics Settings: The game initially runs a quick benchmark or defaults to recommended settings. Adjust in Options > Graphics (resolution, texture quality, shadow, etc.). For PC, disable vsync if using G-Sync/FreeSync.
4. Control Scheme: Choose between default or alternate. Controller recommended for consoles; PC can use keyboard+mouse or controller.
5. Accessibility Options: Colorblind modes, subtitle settings, camera shake reduction.
6. Cloud Saves: Enabled automatically if you are signed into the respective store (Steam Cloud, PSN Cloud, Xbox Live Cloud). For EA app, save files are local by default.
Common Installation Errors & Fixes
PC Errors
| Error | Cause | Fix |
|---|---|---|
| \"EA app failed to install\" / missing component | Antivirus blocking | Temporarily disable antivirus, run EA app installer as admin. |
| \"Please make sure you have 55 GB free\" but you have space | Hidden reserved space or incorrect drive | Ensure enough space on the target drive (Windows may reserve 10% for system). Try using a different drive. |
| \"Unable to start game data download\" on Steam | Corrupt download cache | Clear download cache: Steam > Settings > Downloads > Clear Download Cache. Restart and retry. |
| Game launches to black screen or crashes | Outdated GPU drivers | Update drivers (Nvidia/AMD). Also try launching with -windowed -noborder command line arguments (add in Steam launch options). |
| \"Your graphics card does not support DirectX 11\" | Old or unsupported GPU | Minimum requirement is DX11. If your GPU is older, upgrade hardware. |
| Network error during EA app linking | Firewall blocking EA app | Add EA app and game .exe to Windows Firewall exceptions. Restart router. |
| Game freezes on loading screen | Corrupted installation or mod | Verify game files (Steam: Properties > Local Files > Verify integrity; Epic: Manage > Verify; EA app: Repair). |
| FPS drops / stutter | CPU/GPU bottleneck or thermal throttling | Lower graphics settings; disable ray tracing (not in this game); ensure adequate cooling. Update BIOS/chipset drivers. |
Console Errors
| Error | Cause | Fix |
|---|---|---|
| Installation stuck at X% | Corrupted download or slow internet | Pause and resume download; or delete and restart. Check network speed. |
| \"Cannot link EA Account\" code not working | Timeout or incorrect entry | Restart console. Generate new code. Use phone browser to link. Ensure you're on correct EA website. |
| Game not launching after installation | Missing update | Check for system updates; install game patches (check for updates). |
| Disc version on PS5 not upgrading to PS5 version | Region mismatch or disc not supported | Ensure your disc is from supported region; insert disc while on PS5 home screen; go to game hub and select upgrade offer. |
| Xbox Cloud Gaming (not Luna) not available | Backward compatibility? The game is not on xCloud (Game Pass Cloud) except through EA Play? Actually, it's not in xCloud library. | Purchase or stream via Luna. |
Post-Installation Verification
- Check file integrity: On PC, always verify after installation (see above). For consoles, the system automatically verifies during install.
- Launch the game: Create a new game and play the first level (the Bracca train sequence). If it loads without errors and you can move, installation is successful.
- Check save functionality: Pause and manually save (or autosave after first checkpoint). Then restart the game and load the save.
- Update driver: For PC, ensure GPU drivers are up-to-date (especially for Nvidia 4000 series or AMD 6000+).
- Enable cloud saves: Verify Steam Cloud or console cloud sync is enabled (Steam: Library > Properties > General > Cloud Saves).
- Delete temp files: If you encounter performance issues after installation, delete the `%TEMP%` folder (Windows) and the EA app cache folder at `C:\\ProgramData\\Electronic Arts\\EA Services\\Cache`.
- Modding: The PC version has mods via NexusMods (cosmetics, textures, cheats). But mods can break after updates; uninstall mods before patching.
- Language: The game includes full voice acting and subtitles in multiple languages. Change in Settings > Audio/Language.
- Cross-platform progression: No, saves are per platform. No cross-save.
- EA Play: If you have EA Play on PC (via EA app), you can play the game for a limited time trial (10 hours) before buying. The full game is included in EA Play Pro (premium subscription). On Xbox, EA Play is included with Game Pass Ultimate, giving full game access (but no time trial). On PS, EA Play gives a 10-hour trial only.
Additional Tips
Conclusion
Star Wars Jedi: Fallen Order is widely available on modern platforms. Follow the appropriate steps above for your store/console. Ensure you have a stable internet connection, sufficient storage, and an EA Account. Common issues are easily resolved with file verification or driver updates. Enjoy your journey as Cal Kestis!
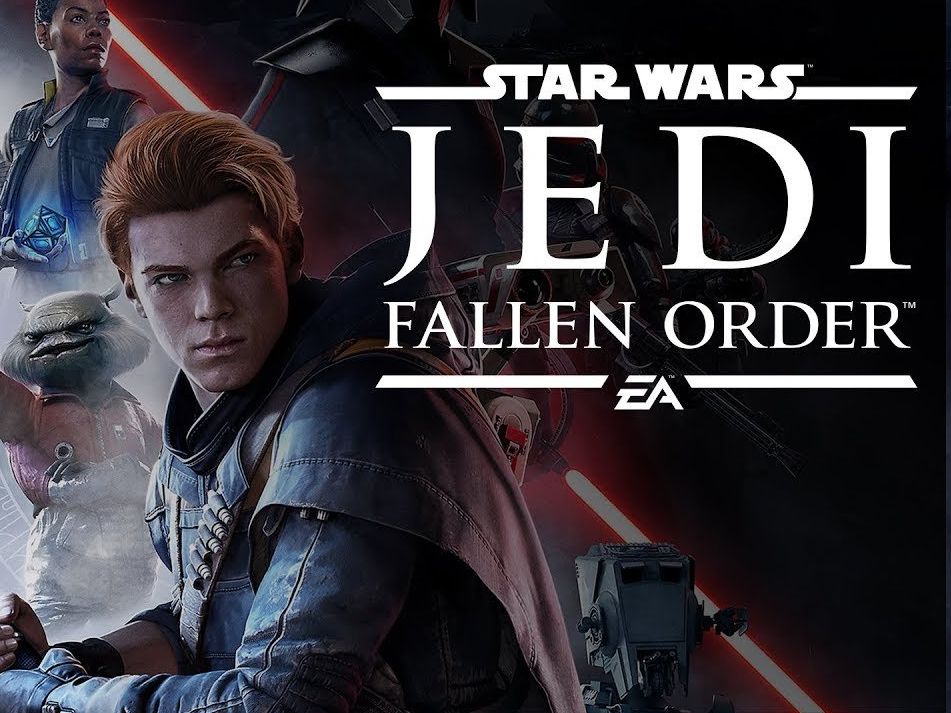
Game Introduction
Game Introduction
Star Wars Jedi: Fallen Order is a single-player action-adventure game that delivers a compelling narrative-driven experience set in the beloved Star Wars universe. Developed by Respawn Entertainment (creators of the Titanfall series and Apex Legends) and published by Electronic Arts, it was released on November 15, 2019 for PC (Steam, Epic Games Store, EA app), PlayStation 4, Xbox One, and later optimized for PlayStation 5 and Xbox Series X/S via backward compatibility with free next-gen upgrades.
Story Overview
Set five years after the events of Star Wars: Episode III – Revenge of the Sith and the execution of Order 66, the game follows Cal Kestis, a young Jedi Padawan who survived the purge. Forced into hiding, Cal lives as a scrapper on the planet Bracca, concealing his connection to the Force. When an accident forces him to use his powers publicly, he becomes hunted by the Imperial Inquisition—specifically the Second Sister, a ruthless Inquisitor. Joined by a ragtag crew including the former Jedi Knight Cere Junda and the lovable droid BD-1, Cal embarks on a quest to rebuild the Jedi Order by retrieving a list of Force-sensitive children hidden within a mysterious Holocron. Along the way, he must confront his past, master new Force abilities, and decide the fate of the galaxy’s next generation of Jedi.
Setting & World Design
The game takes players across a variety of iconic and original Star Wars planets:
- Bracca – A sprawling scrapyard world under Imperial control.
- Bogano – A lush, mysterious planet with ancient Zeffo ruins.
- Zeffo – A tomb-covered world rich in Force lore and puzzles.
- Kashyyyk – The Wookiee homeworld, ravaged by the Empire’s logging operations.
- Dathomir – A dark, dangerous planet home to the Nightbrothers and Nightsisters.
- Ilum – A frozen world containing a hidden Jedi crystal cave (later returning in Jedi: Survivor).
- Cal Kestis (voiced by Cameron Monaghan) – A resilient Padawan struggling with trauma and the weight of his Jedi heritage.
- BD-1 – A adorable and resourceful droid companion that scans the environment, stores healing stims, and assists with puzzles.
- Cere Junda (voiced by Debra Wilson) – A former Jedi Master who severed her connection to the Force after a tragic past.
- Greez Dritus – The four-armed Lateron pilot of the Mantis, providing comic relief and a fatherly presence.
- Second Sister (Trilla Suduri) – The primary antagonist, a fallen Jedi turned ruthless Inquisitor with a personal vendetta against Cere.
- Taron Malicos – A corrupted Jedi survivor on Dathomir who tempts Cal toward the dark side.
- Lightsaber Combat – Skill-based melee focusing on timing, blocking, parrying, and dodging. Cal can wield a single-blade, double-blade, and dual-wield lightsabers (the latter two unlocked mid-game).
- Force Abilities – Unlock and upgrade powers like Force Push, Pull, Slow, and eventually Jedi Flip and Force Whirlwind.
- Metroidvania Exploration – Non-linear planet progression with shortcuts and hidden areas accessible only with specific abilities.
- Customization – Outfits, lightsaber parts (hilt, blade color), and BD-1 skins, all purely cosmetic.
- Challenge & Difficulty – Multiple difficulty levels from Story Mode to Grandmaster, affecting enemy aggression, damage, and parry windows.
- Star Wars fans of all types, especially those who appreciate deep lore and post-Order 66 stories.
- Action-adventure enthusiasts who enjoy combat similar to Sekiro or Dark Souls (tight parry-based system).
- Metroidvania lovers seeking interconnected maps and ability-gated progression.
- Single-player narrative fans looking for a cinematic, character-driven experience without multiplayer or microtransactions.
- Offline single-player only: No multiplayer or online co-op. The entire experience is playable entirely offline.
- New Game Plus: Added post-launch, allowing players to carry over all cosmetics and abilities into a fresh playthrough (with difficulty scaling).
- Photo Mode: A robust tool for capturing screenshots with filters, poses, and lighting adjustments.
- No microtransactions or loot boxes: All major content updates were free.
- New Game+ (with exclusive cosmetics).
- Combat challenges (Meditation Training) featuring wave-based fights against various enemies.
- New outfits and lightsaber colors (e.g., party blaster color, tactical uniform).
Each location is semi-open, interconnected, and encourages exploration with hidden secrets, Force echoes, and collectible cosmetics. The Metroidvania-style design rewards revisiting planets after unlocking new abilities.
Main Characters
Core Appeal & Gameplay Mechanics
Target Audience
Game Modes & Online/Offline Support
DLC & Expansions
Star Wars Jedi: Fallen Order received no paid DLC or expansions. However, several free updates added:
The only additional content is the Collector’s Edition which included a statue and art book – no in-game unlockables exclusive to the edition.
What Makes This Game Unique?
1. Narrative-Driven Soulslike: Combines the challenging, parry-focused combat of the Souls genre with a canon, cinematic Star Wars story—unlike the open-world or RPG-heavy approach of other Star Wars games.
2. Original Story: Set in the gap between Episodes III and IV, it fills a crucial but unexplored era with new characters that feel authentic to the franchise.
3. Respawn’s Touch: The developers brought their expertise in fluid movement (Titanfall) and shooter mechanics (Apex) into a third-person melee-focused game, creating exceptionally smooth platforming and combat transitions.
4. Holocron Collectible Plot: The central MacGuffin is a list of Force-sensitive children, raising moral dilemmas about the Jedi Order’s future—a fresh take on the usual “find a superweapon” trope.
5. Minimal UI, Immersive World: No mini-map or quest markers; players rely on BD-1’s holographic map and environmental cues, encouraging genuine exploration.
Star Wars Jedi: Fallen Order is not just a game; it’s a love letter to the Jedi mythos, offering a tight, polished experience that respects the source material while carving its own identity. It stands as a testament to Respawn’s ability to craft memorable single-player adventures in a genre often dominated by multiplayer live-service models.
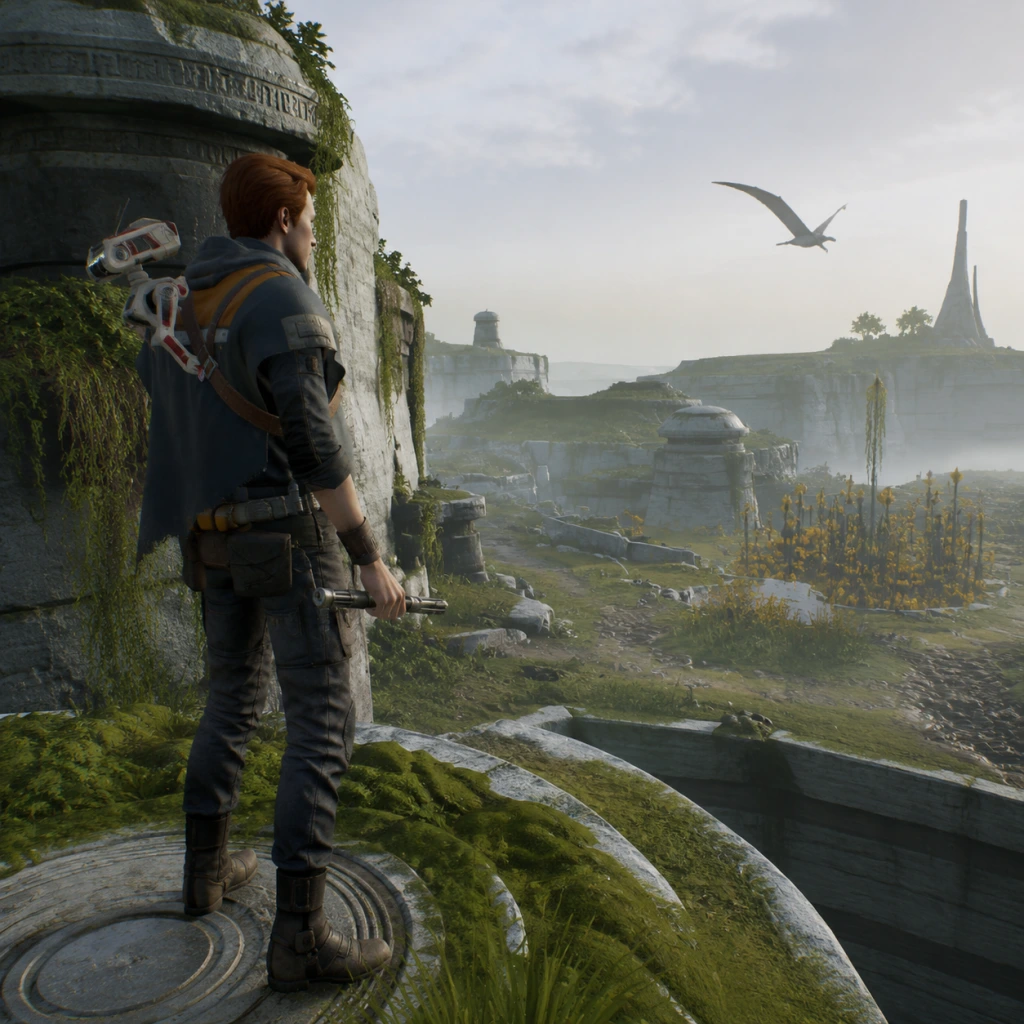
Getting Started
Overview
Star Wars Jedi: Fallen Order is a single-player action-adventure game that combines linear storytelling with Metroidvania-style exploration. You play as Cal Kestis, a young Jedi Padawan in hiding after Order 66. The game features no character creation — Cal’s appearance and abilities are fixed. Your journey begins on the scrapyard planet Bracca and quickly takes you to the mysterious world of Bogano. This guide will help you survive your first hour, understand the core systems, and avoid frustrating mistakes.
---
First Hour Walkthrough
Prologue (Approx. 5–10 minutes)
- The game opens with a flashback on the venator-class Star Destroyer. You play as young Cal during Order 66. Follow the linear path; you cannot die in this section (it’s a scripted event).
- After the flashback, you wake up 5 years later on Bracca. You are a scrapper working for the Guild. The tutorial teaches basic movement: run (hold A/X/Shift), climb, wall-run.
- Key moment: When you slip and hang from a high crane, press the indicated button to pull yourself up — many new players panic and miss the prompt.
- After a cutscene, the Inquisitor (Second Sister) attacks. You enter your first real combat tutorial. Do not try to fight her — you are meant to lose. Survive long enough until a scripted event.
- You are rescued by Prauf (a fellow scrapper) but he is killed. This triggers the Force. Press the button shown on screen to use a Force push for the first time.
- Next, you meet Greez Dritus and board the Stinger Mantis (your ship). This is your hub. Walk around, but don’t spend too much time — you’ll return later.
- You land on Bogano, a lush planet with ruins. Do not rush. This area is designed to teach you exploration and the game’s mechanics.
- Meditation Points: Green glowing circles on the ground. Activate them to save, refill health/Force, and unlock skill trees. Always activate any you see.
- BD-1: Your droid companion. He scans objects, unlocks chests, and gives you hints. Use the scan often (tap L1/LB/Q) — highlighted objects reveal lore, shortcuts, or secrets.
- First objective: Find the Vault. Follow the golden waypoint path but feel free to deviate. The vault is unopenable yet; you must return later. Focus on learning wall-running, climbing vines, and sliding.
- Combat tutorial: You encounter Scazz (creatures) and Probe Droids. Learn: block (L2/LT/Right Mouse), dodge (circle/B/Space), and parry (tap block just before hit). Parrying is key.
Bracca – Escape (Approx. 20–25 minutes)
Bogano – First Real Exploration (Approx. 30–40 minutes)
---
Controls (All Platforms)
| Action | PlayStation | Xbox | PC (Mouse & Keyboard) |
|---|---|---|---|
| Move | Left Stick | Left Stick | WASD |
| Camera | Right Stick | Right Stick | Mouse |
| Jump | X | A | Space |
| Double Jump (unlock) | X (press again) | A (press again) | Space (press again) |
| Wall Run | Hold X/Run while jumping to wall | Hold A while jumping to wall | Hold Shift + Space into wall |
| Attack | Square | X | Left Mouse |
| Heavy Attack | Hold Square | Hold X | Hold Left Mouse |
| Block | L1 | LB | Right Mouse (hold) |
| Parry | Tap L1 just before hit | Tap LB just before hit | Tap Right Mouse just before hit |
| Dodge | Circle | B | Space (while grounded) |
| Force Push | L1 + Square | LB + X | R + Left Mouse |
| Force Slow (early unlock) | L1 + Triangle | LB + Y | R + Q |
| BD-1 Scan | R1 | RB | Q |
| Stim (Heal) | R2 | RT | E (or Middle Mouse) |
| Map | Touchpad (PS) | View button | M |
| Communication (comlink) | Options | Menu | Esc |
---
UI Overview
HUD Elements (Screen corners)
- Top-left: Health bar (green) and Force bar (blue). Force recharges quickly when not using it.
- Bottom-left: Stim canister count (number inside circle). You start with 1 or 2. Using a Stim refills health but leaves you vulnerable.
- Bottom-right: BD-1’s scan indicator (appears when scanning). Also shows conversation prompts.
- Center: Temporary prompts for interactions (open, climb, etc.) and enemy lock-on (when you aim with block).
- Press Touchpad/View/M to open the holomap. It’s 3D and can be rotated. Shortcuts, elevators, and unlocked doors are marked. Use R3/RS/click and drag to rotate.
- Orange icons = current objective (golden path). Blue icons = meditation points. White dots = collectibles or secrets.
- Common beginner mistake: Not checking the map to find alternate routes. If stuck, open the map and look for pathways you haven’t taken.
- Explore every nook during your first visit to each planet. Many areas are locked but mark them on your map.
- Talk to your crew (Cere, Greez, BD-1) at the Mantis between missions. They provide lore and sometimes unlock dialogue options.
- Invest skill points early into split saber attacks (if you want more combat options) or Force abilities (e.g., Force Push upgrade). Avoid spending on cosmetic-only skill tree nodes early.
- Use BD-1’s scan constantly. It reveals hidden pathways, shortcuts, and lore that enrich the story.
- Fighting every enemy. Some encounters are optional. Running is often smarter than fighting groups — especially on Dathomir (later planet).
- Ignoring meditation points. If you die, you respawn at the last meditation point you activated. Without saving, you could lose 30 minutes of progress.
- Mashing attack buttons. This game punishes spam. Enemies have combos and will parry you. Wait for openings.
- Skipping the tutorial text. Read prompts carefully; they teach parry timing, wall-run jump height, and Stim usage.
- You earn XP from combat and exploration. Upon death, you lose unbanked XP (represented by a green bar until you reach a skill point). Always meditate to bank points.
- Best early skills:
- First priority: Find upgrades to carry more Stims. On Bogano, look for a broken door near the first meditation point — you’ll need Force Slow to open it. Inside is a Stim upgrade.
- Use Stims wisely: Don’t heal when at 90% health. Save for when you’re in the red. Also, each Stim restores one charge (not full health).
- Echoes: Blue shards. Scan them for lore and Force XP. Can be found everywhere.
- Secrets: Often hidden behind waterfalls, under debris, or on ledges. Opening them gives cosmetic items but also the satisfaction of completion.
- [ ] Activate at least 3 meditation points (Bogano has 4 before the Vault).
- [ ] Found and opened the first Stim upgrade (if you missed it, go back).
- [ ] Unlocked Force Slow (mandatory story progression).
- [ ] Opened at least 2 chests (get used to the scanning/opening mechanic).
- [ ] Spent your first skill point (recommend Dodge Slice or Force Slow Duration).
- [ ] Talked to Cere and Greez on the Mantis (they give context and sometimes map updates).
- [ ] Scanned all echoes in the starting area of Bogano (3–4 total).
- [ ] Practiced parrying against a probe droid (if you didn’t, return to the first Bogano meditation point and find one nearby).
- [ ] Saved the game by meditating at the final meditation point before quitting (do not assume auto-save covers entire progress).
- Exploration is rewarded: Always take the path less traveled. There are secrets in every corner.
- Death is not a failure: You respawn at the last point and can try again. No game over screens — just keep learning.
- Listen to BD-1: He beeps when near secrets. If he chirps, stop and scan.
- Don’t rush the story: The game is as much about the journey as the destination. Enjoy the planets, the lore, and the struggle of a young Jedi finding his way.
Map Screen
---
Essential Early Objectives
1. Activate Meditation Points. Every one you find adds a fast-travel node and saves the game. Always meditate to restore resources.
2. Learn the Force Slow ability. You unlock it on Bogano after sliding down a specific slope. Use it to freeze enemies and bypass certain puzzles.
3. Find your first Stims. On Bogano, explore the caves near the landing zone — you’ll find an upgrade that increases your Stim count. More Stims = less frustration.
4. Open all chests and secrets on Bogano before leaving (returnable later but early upgrades help). Chests contain poncho skins (cosmetic) and lightsaber parts (cosmetic) but also BD-1 skins and data entries. None are permanent stat boosts, but they build your collection.
5. Practice wall-running and climbing. The game requires precise platforming. Spend 5 minutes on Bogano’s cliffs to get comfortable.
---
What to Do First vs What to Avoid
✅ Do First
❌ Avoid
---
Early Resource Priorities
Skill Points
- Dodge Slice (lightsaber tree): Attack after dodge to stagger enemies.
- Evasive Kick (lightsaber tree): Knock down shield enemies.
- Force Slow Duration (Force tree): Makes slow last longer — essential for puzzles and combat.
- Survival Skills (survival tree): Increased health/Force recharge — but prioritize combat skills first.
Stim Canisters
Collectibles
---
Common Beginner Mistakes
1. Not parrying – Many players rely only on dodging. Parrying breaks enemy guards and leaves them vulnerable. Practice on training probes on the Mantis.
2. Ignoring the Stance Switch (later unlock) – Early game you only have single-blade. But remember that holding attack charges a heavy strike — useful against shielded enemies.
3. Running into groups – Aggro one enemy at a time using the pull ability (unlocked later). For now, use Force Slow and pick off isolated foes.
4. Forgetting to scan – Missing a scan might lock you out of a new route. Scan every suspicious pile of rubble or glowing object.
5. Over-relying on the golden path – The waypoint leads you to the main objective, but many shortcuts and upgrades are off the beaten path. Check the map for unexplained dotted lines.
6. Dying with unbanked XP – If you die before reaching a meditation point, you lose all XP you earned since the last bank. Always meditate after a tough fight.
---
Day-One Checklist
Before leaving the first session (within ~90 minutes), ensure you have done the following:
---
Final Tips
May the Force be with you, always.
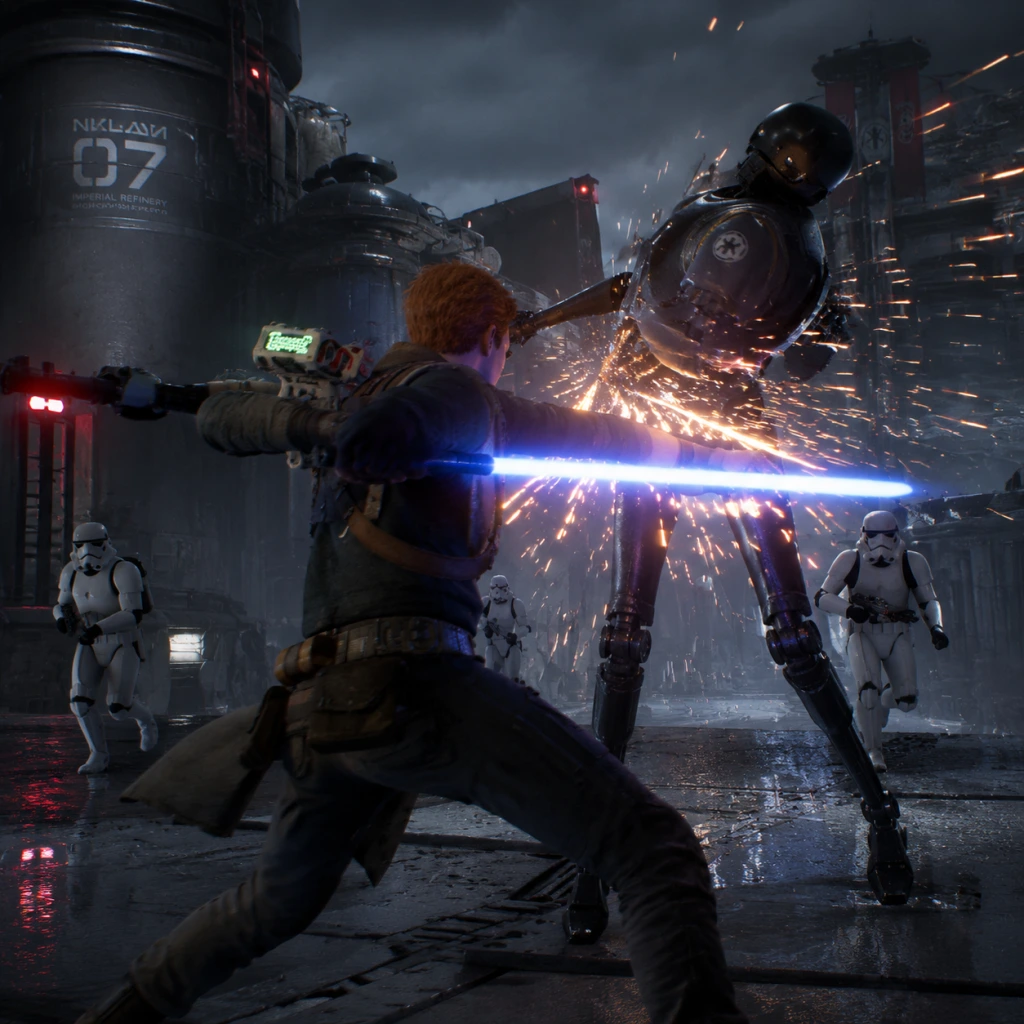
Core Gameplay
Core Gameplay Overview
Star Wars Jedi: Fallen Order is a single-player action-adventure game blending Soulslike combat, Metroidvania exploration, and a cinematic Star Wars narrative. You play as Cal Kestis, a young Jedi Padawan on the run after Order 66. The core gameplay loop revolves around: exploring interconnected planets → discovering new Force abilities and upgrades → defeating Imperial forces and native creatures → advancing the story through scripted missions → unlocking new paths to previously inaccessible areas → growing Cal’s power via skill trees and lightsaber customization. There is no traditional economy (no currency, no shops); progression relies entirely on exploration (finding collectibles), combat experience (earning skill points), and discovery (unlocking Force powers and gear).
Core Systems
- Combat: Hybrid of action and tactical timing. Use lightsaber attacks, blocks, parries, dodges, and Force powers. Enemies have stamina bars; breaking them opens them to kills. Difficulty options (Story, Jedi Knight, Jedi Master, Grand Master) adjust enemy damage, aggression, and parry windows.
- Exploration: Planets are semi-open hubs with shortcuts, secret areas, and ability-gated paths. BD-1 can slice terminals, project holograms, and reveal chests. Field Guide scans unlock lore entries.
- Progression: Skill points (XP) earned from kills and collectibles. Spend at meditation points in three skill trees: Survival (health, stim uses), Force (Force powers), Lightsaber (combat moves). Lightsaber stance upgrades (single, double-bladed, dual-wield) unlock automatically via story or hidden chests.
- Quests/Missions: Linear main story with optional side areas. No side quests per se, but planets have optional tombs, crypts, and encounters that yield abilities or cosmetics.
- Economy: None. Everything is found through exploration—no buying or selling.
- Character Builds: No classes. All players eventually unlock all skills. Build variety comes from prioritizing trees early and using different lightsaber stances/Force combos.
- Endgame: Post-story free roam, 100% completion (collectibles, secrets, achievements), Meditation Training challenges, and optional boss fights. New Journey+ (unlocked after story finish) lets you restart with all cosmetic unlocks but resets abilities and story progression.
- Linear story missions with brief exploration segments.
- Combat: Single lightsaber only. Focus on basic attacks, parrying, dodging. Enemies include stormtroopers, scout troopers, and little fauna (e.g., Bogdo slugs). Force abilities limited to Force Slow (unlocked during Bracca escape) and Force Push (first tomb on Bogano).
- Exploration: Severely limited—no double jump, no wall run, short climb distance. Many chests and secrets are behind obstacles requiring later abilities (e.g., vines, gaps, high ledges). BD-1 can only slice a few terminals.
- Progression: Initially spend skill points on Survival to increase health and Stim Canisters (healing charges). Unlocking Force Push is critical for puzzles. The first few skill points should go toward Parry Timing and Dodge Distance in Lightsaber tree.
- Quests: Main story only: escape Bracca, visit Bogano, learn about Zeffo, find the Holocron location. No side missions.
- Economy: None. Collect Tactical Guide chests for lightsaber parts and BD-1 skins; these are purely cosmetic.
- Character Growth: Cal starts weak; rely on hit-and-run tactics. At Bogano, you can find an early Stim Canister upgrade (in a cave near the landing zone).
- Example: Attempting the optional Oggdo Bogdo boss early is nearly impossible—low health and no double jump to avoid its tongue grab. Come back mid-game.
- Expanded exploration: Unlock Double Jump (from Zeffo’s Tomb of Eilram) and Wall Run (from Kashyyyk’s Imperial base). Now most areas become accessible.
- Combat: Obtain Double-Bladed Lightsaber on Dathomir (optional early) or during Kashyyyk story. New stance allows sweeping attacks and better crowd control. Enemies include Purge Troopers, Scout Commanders, spiders, and nightbrothers.
- Force Powers: Gain Force Pull (after Kashyyyk) to bring objects or enemies closer. Unlock Force Wall Run extends exploration. Rare secret: Force Slow can be upgraded to freeze enemies longer after finding secret upgrades.
- Progression: Skill points now invest in Force tree (Pull, Push upgrades, Slow duration) and Lightsaber tree (Strong Attack, Choke, and advanced combos). Survival tree’s Health Upgrades (max increased via hidden Essence of Life collectibles) are still valuable. At meditation points, upgrade stim capacity with Stim Canister upgrades (up to 10 total).
- Exploration: Many planets have branching paths and shortcuts. Return to Bogano with double jump to reach high platforms; return to Zeffo with wall run to access previously blocked chambers.
- Quests: Main story leads to Kashyyyk (free Wookiee slaves) and Dathomir (meet Taron Malicos). Optional: Tomb of Miktrull on Zeffo, Crypt of the Ancients on Bogano. These yield Force upgrades or cosmetic rewards.
- Economy: Still none. But you now find Lightsaber Material chests (change blade color, hilt style) and Stim Canister upgrades hidden in optional areas.
- Character Growth: Build a balanced playstyle. Prioritize unlocking Force Pull and Lightsaber Throw (available later in mid-game). Double jump opens many exploration shortcuts.
- Example: On Kashyyyk, you fight the Ithorian (giant spider-like creature) using double jump to avoid attacks. Use double-bladed saber against groups of purge troopers.
- Full movement kit: Unlock Lift Splash (surface run), Flying Jumps, and Climbing Gloves (from Dathomir’s tomb). Able to traverse anywhere.
- Combat: Gain Lightsaber Throw (throw saber like a boomerang) from Dathomir’s tomb. Later unlock Dual Lightsabers (two sabers) in the Fortress Inquisitorius—fast, high damage. Use both stances in combat. Enemies include Riot Troopers, Jedi Hunters, Purge Trooper Elites, and Inquisitor boss battles (e.g., Ninth Sister, Second Sister).
- Force Powers: Final Force abilities: Force Slow fully upgraded, Force Push and Pull maxed. Unlock Force Stasis (freeze enemies in place) as a rare upgrade? Actually Force Slow is the only stasis ability.
- Progression: Skill trees can be nearly maxed out if you explored thoroughly. Focus on completing Force tree (Choke, Overcharge) and Lightsaber tree (special attacks like Dash Strike, Sharpened Edge). Survival tree should be finished (max health and stims).
- Exploration: All planets are fully open. Last hidden secrets include Echo Locations (lore), Tactical Guide chests (final cosmetics), and Stim Canister upgrades (last 2–3).
- Quests: Main story becomes very linear: go to Dathomir to confront Malicos, then Fortress Inquisitorius on Nur. No new side quests, but some optional areas on each planet become accessible only now (e.g., crash site on Dathomir).
- Economy: None.
- Character Growth: Final build should have all three skill trees at least 80% complete. Experiment with stances: single saber for precision, double-bladed for crowds, dual blades for speed.
- Example: At Fortress Inquisitorius, you face waves of Purge Troopers with varied weapons. Use Lightsaber Throw to hit distant enemies, then follow with Dash Strike (if unlocked). Boss fights require perfect parry timing.
- Completionist Phase: After the final story mission (defeat Trilla, lose Holocron to Vader), you are returned to the Mantis with all abilities unlocked. The game becomes a sandbox to find every collectible, defeat optional bosses, and unlock achievements.
- Combat: Already maxed. Master any stance. Optional super-bosses include:
- Progression: Skill points overflow; you can max all three trees by farming respawning enemies (meditate to reset areas). Final ability unlocks are cosmetic—e.g., Magenta Lightsaber Crystal from Dathomir.
- Exploration: 100% map completion. Use your Field Guide to track missing chests, secrets, echoes, and scan objects. Every planet has a few hidden areas requiring all movement upgrades.
- Quests: No new story quests. However, the Meditation Training challenges become available (via the Manta’s meditation chamber). These include timed combat trials, endless waves, and boss rematches. Completing them yields cosmetic rewards and an achievement.
- Economy: None.
- Character Growth: Build is fully complete. Endgame is about mastering combat for challenges. Some builds shine in different trials: e.g., dual wielding for fast kills in timed modes, double-bladed for crowd control in endless waves.
- Endgame Structure Details:
- Example: To get the “I’m a Living Legend” achievement, defeat all four legendary beasts (Oggdo Bogdo, Nydak Alpha, etc.). Use fully upgraded Force Slow to freeze them during attack windows.
- Always prioritize Stim Canister upgrades—they increase healing during tough fights. Look for purple glowing containers on each planet.
- Exploration is rewarded. If you’re stuck, you may need a new ability. Return later.
- On Grand Master difficulty, parry windows are smaller; focus on learning enemy patterns rather than relying on Force powers.
- Use BD-1’s slicing early to open shortcuts; they persist after death.
- The game has no manual save; it autosaves at meditation points and checkpoints. Don’t quit during a boss fight unless you’re fine losing progress.
- PC: Uncapped framerate, but initial loading stutters on HDD. Use SSD. Mouse and keyboard feel fine; rebind keys if needed.
- PS4/PS5: 60fps on PS5 via backward compatibility. PS4 Pro runs at ~1440p variable. Use performance mode on PS4 Pro for smoother combat.
- Xbox: Similar performance on Series X (60fps). One X targets 1440p.
Progression Tiers
Early Game (Acts 1–2: Bracca, Bogano, initial Zeffo visit)
#### Gameplay Loop
Platform Specifics: On PS4/PS5, use R1 for parry; on PC, right mouse button. Controller vibration helps feel parry windows. Early game is a tutorial for core mechanics—don’t rush.
Mid Game (Acts 2–4: Zeffo depths, Kashyyyk, Dathomir initial, second Zeffo visit)
#### Gameplay Loop
Late Game (Acts 4–5: Return to Dathomir, Fortress Inquisitorius, final planets)
#### Gameplay Loop
Endgame (Post-Story Free Roam, Completion, New Journey+)
#### Gameplay Loop
- Oggdo Bogdo (Bogano) – defeat its young and adult forms.
- Nydak Alpha (Zeffo) – in the Derelict Refinery.
- Raider Leaders (multiple planets) – during expeditions.
1. Free Roam: Use the Mantis to revisit any planet. Fast travel between meditation points is limited—you can meditiate from any point but must traverse manually.
2. New Journey+: After completing the story, a new save slot appears. Start a fresh playthrough with all cosmetics (lightsaber parts, ponchos, BD-1 skins) unlocked from the start. You do NOT keep abilities or skill points—they must be relearned. No new enemies or modifiers.
3. No Level Scaling: Enemies remain at their original difficulty, making early post-story exploration trivial but late-game optional bosses still challenging.
4. Achievements/Trophies: Common goals include “Earn all skill points”, “Collect all chests”, “Scan all artifacts”, “Defeat all legendary creatures”.
Final Tips
Platform Quirks
This guide covers the complete core gameplay loop across all phases of progression. Master the flow of combat and exploration to become the Jedi you were meant to be.
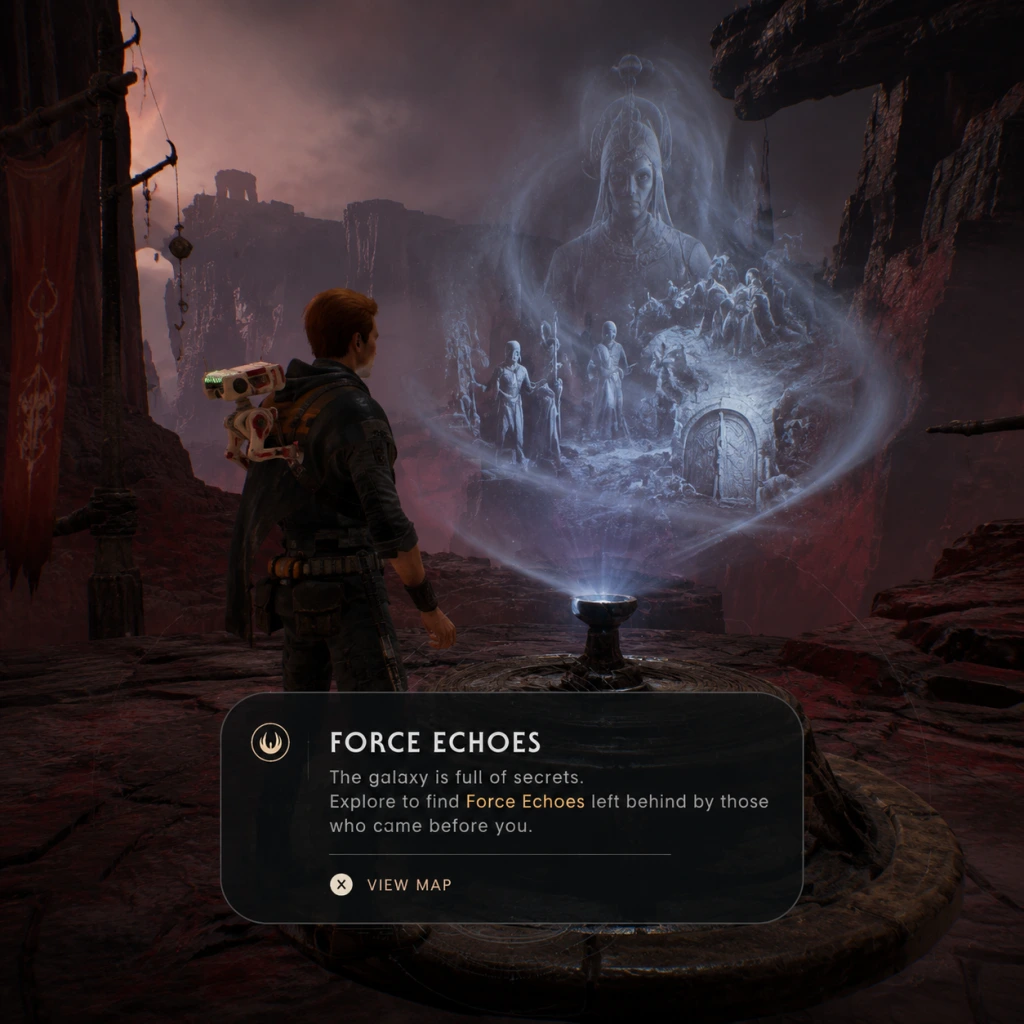
Game Tips
Game Tips: Star Wars Jedi Fallen Order
Overview
Star Wars Jedi Fallen Order blends Soulslike combat, Metroidvania exploration, and a linear narrative. Mastering its mechanics requires understanding enemy patterns, efficient resource management, and smart ability upgrades. Below are tips grouped by category, ranging from beginner to advanced.
Beginner Tips
#### 1. Master the Basics of Combat
- Parry is your best friend: Hold block (L1/LB) just before an enemy's attack connects to parry. Perfect parries stagger enemies and open them for a critical hit (the red flash on their health bar). Practice this on the first few Stormtroopers on Bogano.
- Dodge, don't just block: Heavy attacks and unblockable red-glowing strikes must be dodged (circle/B). Use double-tap dodge for a longer roll. Never stand still.
- Use the environment: Throw enemies off ledges with Force Push or pull them into hazards. On Zeffo, push Imperial officers into the abyss near the landing pad.
- Meditation points save progress: They refresh health, stims, and respawn enemies. Use them strategically, but don't skip exploration between them.
- Collect secrets before bosses: On Bogano, find the double-bladed lightsaber upgrade (requires the Scomp Link) before facing Oggdo Bogdo. It increases reach and damage.
- Stim canisters are limited: Each recharge gives only a few uses. Upgrade stim capacity through the Skill Tree (Survival tab) early. You start with 2; get to 4 as soon as possible.
- Don't hoard stims: Use one at 50% health during exploration. Save them for boss fights, but you can always respawn with full health from meditation.
- Learn enemy attack patterns: Each enemy type has a tell. Purge Troopers telegraph their overhead slam with a long wind-up; dodge left then counter.
- Use Force Slow effectively: Unlocked on Dathomir, it freezes enemies for a few seconds. Use it to interrupt a group of attackers or to get behind a shielded enemy (like a Scout Trooper's blast shield).
- Combo lock: Light attacks can be chained into a heavy attack, then a Force Push to send enemies flying. Against larger enemies, stagger them with quick slashes, then use Force Slow to land a finishing blow.
- Prioritize defensive upgrades: The "Resilience" skill (more health from stims) and "Survival" tree's "Shatter" (increased block meter) make early game easier.
- Get the "Double Jump" (Air Dash) early: From the skill tree, unlock "Air Dash" to reach new areas on Kashyyyk and Dathomir. It also helps in combat to avoid ground slams.
- Use BD-1's map icons: Return to past planets once you unlock a new ability (like the Scomp Link for hacking, or the Climbing Claws for ice walls). Green icons on the map mean loot you can now reach.
- Skill points (XP) are earned from kills and exploration: You lose all unspent XP upon death (like Dark Souls). Meditate to spend them before risky areas.
- Best early skills: "Force Push" (unlock in the Force tree), "Dash Strike" (movement + damage), and "Efficient Stims" (more health per stim).
- Avoid investing in niche skills too early: "Ranged Deflection" (reflect blaster bolts) is useful but only after you have reliable parry timing. Save points for universal combat skills first.
- Force Tier 3 upgrades: Unlock "Force Slow" (full freeze) and "Force Pull" (bring enemies closer) for crowd control. On the final planet, "Force Repulse" (area push) is invaluable against hordes.
- Lightsaber forms: Use "Single" for speed against humanoids, "Double-Bladed" for area damage and blocking blasters, and "Dual" (later) for aggressive combos. Switch mid-fight if needed.
- Animation cancel: After landing a heavy attack, you can cancel the recovery animation with a dodge or block. This allows faster combos, especially effective against the Ninth Sister.
- Farm XP and stims: At the beginning of the game, revisit Bogano's abandoned village area. Kill the three Bounty Hunters (each gives ~50 XP) and reset at the meditation point. Repeat for quick levels.
- Maximizing healing: Use stims only when you have a clear opening. Activate them immediately after a parry or dodge to avoid getting hit during the animation.
- Force management: Your Force meter recharges slowly. Use Focused Attack (tap L2/R2 while blocking) to drain enemy block meter without spending Force. Save Force for critical moments (pushing groups off ledges, interrupting attacks).
- Build for boss fights: Before the final boss (Trilla), respec skill points into survivability: max health stims, increased block meter, and "Shatter" (more damage to enemy block gauge). Equip the "Poncho" with the highest defense rating (e.g., the "Cal's Jedi Attire" from Dathomir gives +15% defense).
- Speedrunning tips: For 100% completion, use the map's fast travel points (unlocked late-game). Prioritize the "Efficiency" skill tree to reduce cooldowns on abilities.
- New Game+: After completing the game, you keep all skills, stims, and cosmetics. Start NG+ to attempt a no-death run or to test high-damage builds (e.g., full Force tree with slow).
- Parry timing varies: Fast enemies (like Scout Troopers) have quick attacks; parry early. Slow enemies (like Jotaz) need delayed parry. Practice at the meditation arena on Bogano.
- Use the environment: Force Push to send enemies into walls or off bridges. On Zeffo, the bridge over the chasm is prime real estate for instant kills.
- Block meter management: Your block gauge (blue bar) depletes when you block. If it breaks, you're staggered. Use the "Resilience" skill to make it larger, and remember to lower block between attacks to recover.
- Backtrack systematically: Each time you get a new ability (Scomp Link, Climbing Claws, Force Lift, etc.), revisit every planet. Use BD-1's map to mark chests, secrets, and echo locations.
- Shortcuts are everything: Many areas unlock shortcuts (e.g., Bogano's abandoned village has a rope slide that leads back to the start). Use them to speed up exploration.
- Find all stim canisters: There are 10 total. Locations include: Bogano (2), Zeffo (2), Kashyyyk (2), Dathomir (2), Ilum (1), Nur (1). Getting all increases stim capacity to 10.
- Skill point farming: The fastest method is killing the giant spiders on Dathomir (they give ~100 XP each). Use the meditation point near the tomb entrance to reset.
- Poncho customization: Only cosmetic, but some ponchos provide minor defense bonuses (like the "Bogana" poncho gives +5% defense). Prioritize outfits with defense for harder difficulties.
- Databank entries: Scanning enemies, flora, and items gives XP and lore. Don't neglect them; they also unlock concept art.
- Balanced Build: 3 points in Force (Push, Slow, Pull), 3 in Survival (Efficient Stims, Resilience, Shatter), 2 in Lightsaber (Dash Strike, Precision Dash). Works for all difficulties.
- Aggressive Build: Max out Lightsaber tree first (focus on combo extenders, Ranged Deflection, and Dual throw). Use double-bladed lightsaber for crowd control. Risky on harder settings.
- Defensive Build: Max Survival tree (all perks), then Force for Slow and Repulse. Use single-blade for quick attacks. Great for Grandmaster difficulty.
#### 2. Explore Everything Early
#### 3. Manage Your Stims
Intermediate Strategies
#### 4. Combat: Perfect Precision vs. Aggression
#### 5. Exploration and Upgrades
#### 6. Economy: Earning and Spending Skill Points
Advanced Optimizations
#### 7. Combat Mastery: Prestige and Combos
#### 8. Resource Efficiency: Stims and Force
#### 9. Endgame Optimizations
Grouped Tips by Category
#### Combat
#### Exploration
#### Resources & Economy
#### Builds
Conclusion
Star Wars Jedi Fallen Order rewards patience, exploration, and mastery of its combat system. Beginners should focus on parrying and dodging, intermediates on ability combos, and advanced players on optimizing builds and resource management. Remember: death is a learning tool. Meditate, respawn, and adapt. May the Force be with you.
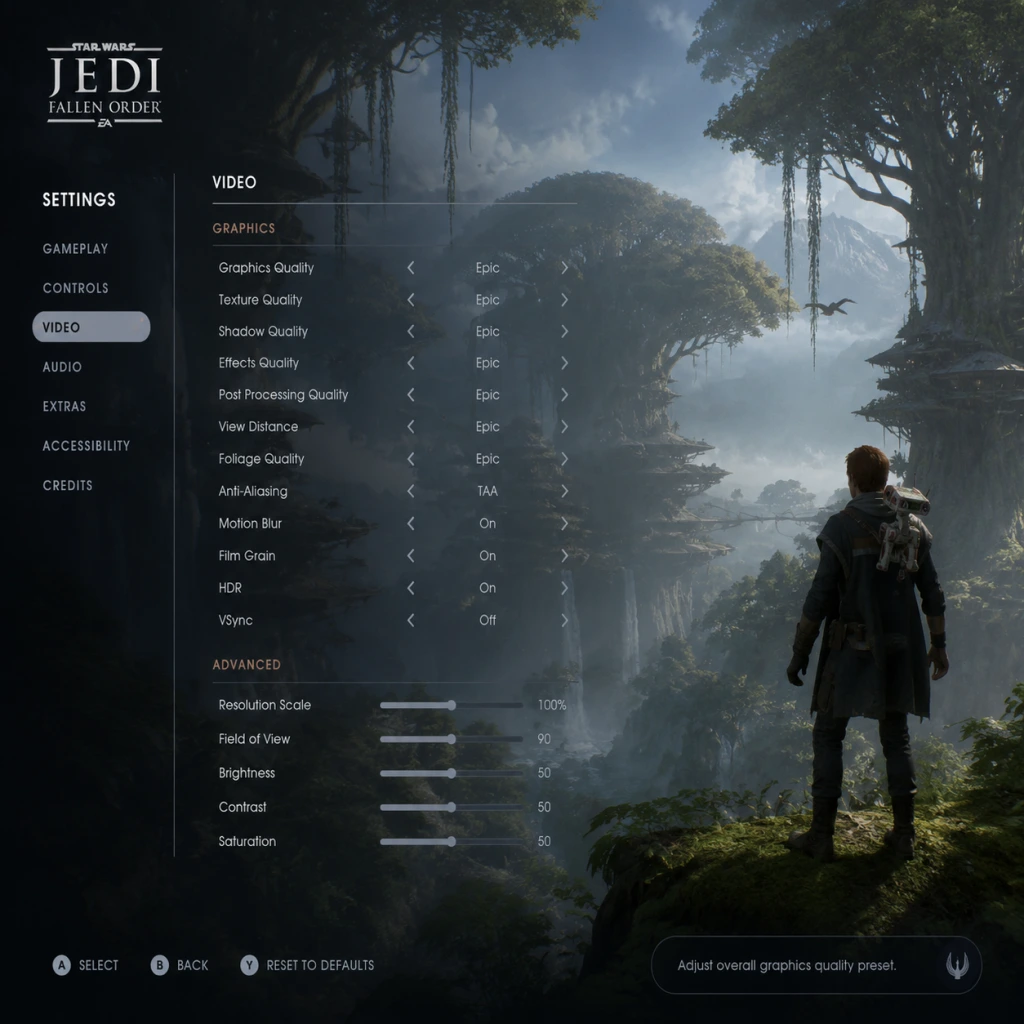
Game Settings
Game Settings Overview
Star Wars Jedi: Fallen Order offers a comprehensive settings menu covering graphics, audio, controls, accessibility, language, network, and gameplay. Proper configuration ensures a smooth performance, immersive experience, and avoids potential frustrations. This guide details each setting, recommends optimizations for different hardware tiers, and highlights commonly misconfigured options.
---
Graphics Settings
The graphics menu provides extensive options to balance visual fidelity and performance. The game uses Unreal Engine 4, which is demanding on mid-range and older hardware.
Display Mode
- Fullscreen: Best performance, exclusive access to GPU. Recommended.
- Windowed Fullscreen: Alt-tab friendly, slight performance penalty. Use if you often switch windows.
- Windowed: Useful for testing or multi-monitor setups, but reduces performance.
- Native resolution: Match your monitor's native resolution for crisp image. Lower for performance gains.
- Resolution Scale: Slider (50-100%). A quick way to improve performance. 80% with TAA looks acceptable.
- Low / Medium / High / Epic: Adjusts many settings in bulk. Recommended starting point.
- Custom: Manually set individual options for fine-tuning.
Resolution
Graphics Quality Presets
Key Individual Settings (Performance Impact: Low/Medium/High)
| Setting | Impact | Recommendation |
|---|---|---|
| View Distance | Medium | High (quality) / Medium (performance) |
| Shadow Quality | High | Medium (balanced) / Low (performance) |
| Anti-Aliasing | Medium | TAA (Epic) for best quality; FXAA (Low) if performance is tight |
| Texture Quality | Low (mainly VRAM) | High if VRAM >= 4GB; Medium if 2-3GB; Low if lower |
| Effects Quality | Medium | High for particle-rich scenes; Medium for performance |
| Post-Processing | Low | High for bloom and depth of field; Medium to save a few frames |
| Ambient Occlusion | High | Medium or Low (performance-heavy) |
| Volumetric Fog | High | Medium or Low (can obscure vision, also performance hog) |
| Motion Blur | Low | Personally toggle off for clarity; "On" adds cinematic feel |
| Film Grain | None | Personal preference; off for cleaner image |
| Chromatic Aberration | None | Off to reduce blurriness |
Recommended Presets by Hardware Tier
Low-End (e.g., GTX 1050 Ti, 8GB RAM)
- Preset: Low
- Resolution: 1080p
- Resolution Scale: 75-80%
- Turn off Motion Blur, Film Grain, Chromatic Aberration
- Texture Quality: Medium (if VRAM allows)
- Target: 30-45 FPS stable
- Preset: High
- Resolution: 1080p or 1440p
- Shadow Quality: Medium
- Ambient Occlusion: Medium
- Volumetric Fog: Medium
- Target: 50-60 FPS
- Preset: Epic
- Resolution: 1440p or 4K (with DLSS if available? No DLSS in this game, but use Resolution Scale)
- All settings maxed except possibly Motion Blur and Chromatic Aberration (personal)
- Target: 60 FPS at 1440p; 30-60 FPS at 4K (use 80% resolution scale)
- Shadow Quality: High shadows cause significant performance drops during intense combat and in dense forests. Setting to Medium retains good visuals.
- Volumetric Fog: Drops frame rate heavily on Bogano and Zeffo. Medium is a good compromise.
- Motion Blur: Can cause motion sickness for some players. Disable if you feel dizzy.
- Resolution Scale: Lower below 70% yields blurry image. Pair with TAA to reduce aliasing.
- VRAM Limit: Game may stutter if VRAM overflows. Use Texture Quality accordingly.
- Default 100%. Adjust based on your system.
- Sound effects: lightsaber swings, enemy attacks, explosions. Keep at 100% for combat awareness.
- Conversation and story moments. Set to 90-100% for clear narrative.
- John Williams score and ambient tracks. 80-100% recommended for atmosphere.
- See Language section.
- Speakers or Headphones: Select appropriately for spatial awareness.
- Stereo / Surround: Choose according to your hardware. 5.1/7.1 if supported.
- Toggle subtitles (Language section) and optionally a "Closed Captions" option for sound cues (e.g., footsteps, alarms).
- Master Volume too low: May miss audio cues (e.g., enemy ambushes, BD-1 beeps). Ensure balanced with other volumes.
- Dialogue vs SFX: If you struggle to hear conversations during combat, raise Dialogue Volume slightly above SFX.
- Default buttons: WASD movement, mouse for camera, left click attack, right click block/parry, Q for Force Push, E for Force Pull, etc.
- Recommend customization:
- Sensitivity: Adjust mouse sensitivity to your comfort (default 50%). Higher sensitivity aids quick camera turns.
- Invert Mouse Y: Toggle as personal preference.
- Supports both Xbox and PlayStation prompts.
- Dead Zones: Adjust stick dead zones if you experience drift or unresponsive inputs. Default is okay for most.
- Vibration: Toggle on/off (personal). Some players prefer off for precise combat.
- Button Mapping: Options limited; can swap jump and interact in some menus but not full remapping. Use OS-level remapping if needed.
- Parry Timing Window: Not adjustable in settings, but consistent latency matters. Use a wired controller or low-latency mouse.
- Keyboard + Mouse vs Controller: Controller is recommended for easier platforming and precision dodges. Keyboard is fine but requires practice.
- Controller Dead Zones: Too large dead zone delays response. Adjust smaller if you have a new controller.
- Input Buffering: The game has slight input lag. Don't button mash; time presses deliberately.
- Colorblind Modes: Protanopia, Deuteranopia, Tritanopia options for UI elements (health, force meters, enemy indicators).
- Subtitles: On/Off, with background opacity adjustment (50% to 100%) for readability.
- HUD Size: Normal or Large. Larger HUD helps those with visual impairments.
- Camera Shake: Toggle off to reduce dizziness during force attacks and explosions.
- Visual Feedback: Not directly adjustable, but in-game Force vision highlights objects.
- Sound settings earlier apply.
- Subtitles for All Dialog: Already included.
- Closed Captions: Adds descriptions for important sounds (e.g., \"lightsaber ignite\").
- Aim Assist: On/Off (for controller). On helps with auto-targeting in combat.
- Toggle vs Hold: Certain actions like aiming BD-1 can be set to toggle (press once) or hold. Toggle reduces strain.
- Button Mashing: Not present in game (wall running requires held button). No accessibility option for reduced repetition.
- Colorblind Modes: May cause confusion if accidentally enabled. Only enable if needed.
- HUD Size: Large may block game view for some. Default is fine.
- Camera Shake: On by default; turn off if you experience motion sickness.
- Choose from available languages (English, French, German, Italian, Spanish, etc.). Affects menus, subtitles, UI.
- Voiceover language separate from text. Default matches system language.
- For authentic experience, use English (original cast).
- On/Off. Recommended On if playing in non-native language or for better comprehension.
- Can be toggled independently per language.
- Mismatch: Setting text to English but audio to another language is possible but may cause disconnects if you want subtitles in one language and voices in another.
- Restart Required: Some language changes require a game restart to apply fully.
- Online Services: Toggle on/off for leaderboards and community challenges (optional). Game can be played completely offline.
- Data Collection: Telemetry for EA. You can opt in/out.
- Connection: Ensure stable internet if you want to sync achievements (Steam/Origin/EA app). Offline mode works fine.
- None major. Just note that if you launch offline, some achievements may not track until reconnected.
- Story Mode: Minimal challenge, forgiving parry window, enemy damage reduced. Suitable for narrative focus.
- Jedi Knight: Balanced, recommended for first-time players.
- Jedi Master: Standard challenge, tighter parry windows.
- Jedi Grandmaster: Highest difficulty, one-hit kills possible. For soulslike veterans.
- Custom: Not available. Difficulty affects enemy damage, aggression, and parry timing.
- Controller only: Toggle aim assist for BD-1. On helps track small targets.
- Applies to both camera and aiming. Set to personal preference.
- Slider for camera speed. Combine with aim assist.
- Already covered, but they are also in gameplay settings.
- Difficulty cannot be changed mid-playthrough after starting a new game! You must restart to change difficulty. Choose wisely.
- Auto-Aim may interfere with precise shots on weak points. Test both on/off.
- Controller Sensitivity too low makes camera slow in combat. Raise to 80%+ for quick turns.
- Update GPU drivers (NVIDIA Game Ready or AMD Adrenalin).
- Close background apps: especially browsers, Discord overlay.
- Disable V-Sync in-game and enable in GPU control panel if screen tearing occurs.
- Use Borderless Windowed if Fullscreen stutters (rare).
- Cap frame rate via GPU control panel (e.g., 60 FPS) to avoid fluctuation stutter.
- Disable Steam/EA overlay if having input lag.
Mid-Range (e.g., GTX 1660 Super, RTX 2060, 16GB RAM)
High-End (e.g., RTX 3070/3080, 32GB RAM)
Special Attention Points
---
Audio Settings
Audio settings are straightforward but can impact gameplay immersion and clarity.
Master Volume
SFX Volume
Dialogue Volume
Music Volume
Voice Language & Subtitles
3D Audio / Output Configuration
Subtitles & Closed Captions
Easy to Misconfigure
---
Controls Settings
Customizable key bindings for keyboard/mouse and controller. Focus on ergonomics and combat efficiency.
Keyboard & Mouse
- Dodge: Shift (default) is fine, but some prefer a thumb button (e.g., side mouse button).
- Force Abilities: Map to easy-to-reach keys: Force Slow (C), Force Push (Mouse 4), Force Pull (Mouse 5), Force Speed (V).
- Stim (heal): Near movement keys (e.g., X or R).
Controller (Xbox/PlayStation/Generic)
Special Attention Points
---
Accessibility Settings
Star Wars Jedi: Fallen Order includes several accessibility options to accommodate different needs.
Visual
Auditory
Motor/Control
Easy to Misconfigure
---
Language Settings
Text Language
Audio Language
Subtitles
Special Attention Points
---
Network Settings
Given the single-player offline focus, network settings are minimal.
Easy to Misconfigure
---
Gameplay Settings
Difficulty
Auto-Aim
Invert Y-Axis
Controller Sensitivity
Subtitles & Closed Captions
Special Attention Points
---
Summary: Starting Configuration Checklist
1. Set graphics preset based on your hardware (use recommendations above).
2. Adjust resolution and resolution scale for target framerate (60 FPS preferred).
3. Go to Audio: ensure Master Volume is balanced, Dialogue slightly above SFX if needed.
4. Configure controls: rebind Force powers to comfortable keys if on KBM, or stick to controller.
5. Accessibility: toggle any colorblind mode, adjust subtitles, disable camera shake if prone to motion sickness.
6. Language: confirm text and audio languages, enable subtitles.
7. Network: decide online sync on/off.
8. Gameplay: pick difficulty (Jedi Knight recommended for first play).
9. Save settings and test combat on Dathomir or Zeffo to gauge performance.
---
Tips for Optimizing Performance Further
---
By following this guide, you can tailor Star Wars Jedi: Fallen Order to your hardware and preferences, ensuring an immersive and fluid journey as Cal Kestis. May the Force be with your settings.
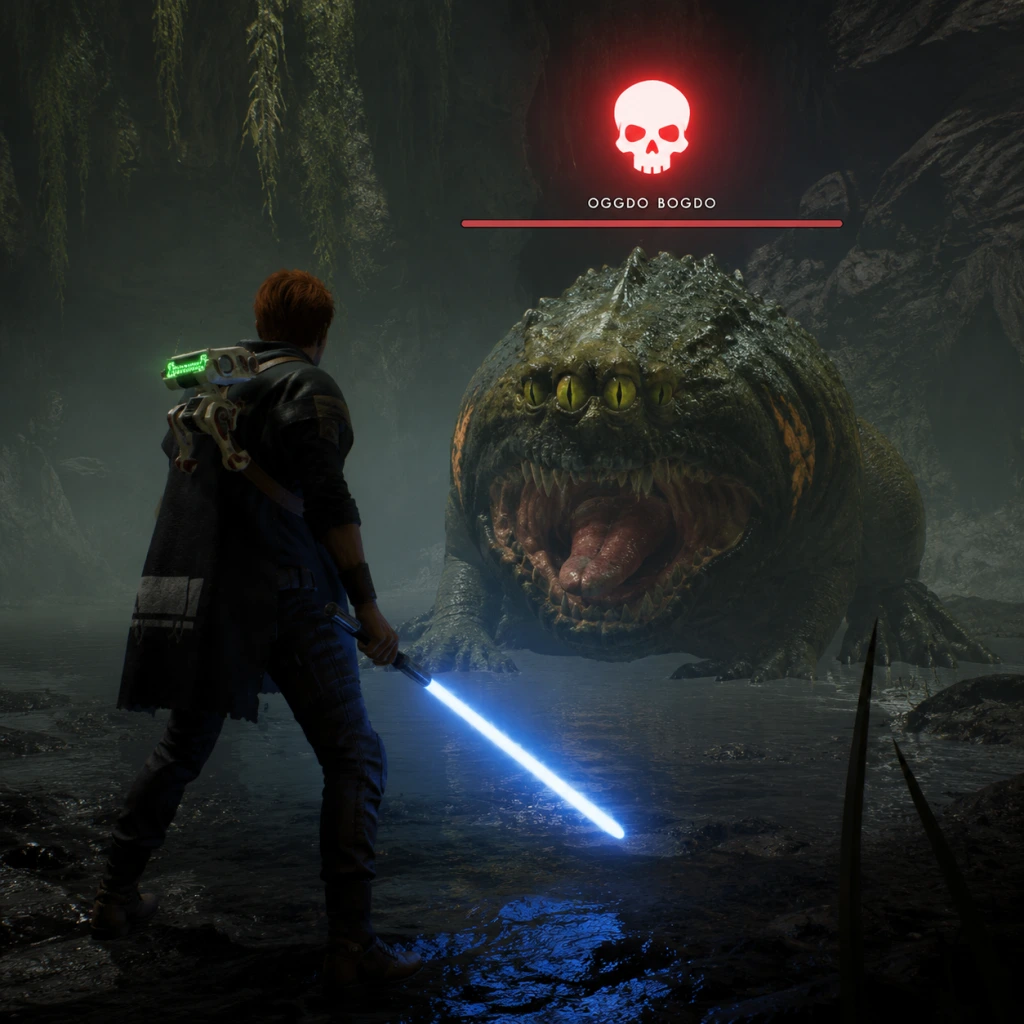
Important Notes
Important Notes for Star Wars Jedi: Fallen Order
Warnings & Pitfalls
- No Difficulty Options: The game has a single fixed difficulty. Early enemies can be punishing, especially on Zeffo. Don't be discouraged; practice parry and dodging.
- Death Penalty: Dying only loses a small amount of experience (Skill Points), but you can retrieve them by touching the spot where you died. If you die again before retrieval, they're lost permanently.
- Force Echoes Are Permanent: Once collected, they stay. However, if you miss a Force Echo while passing through an area that becomes locked later (e.g., the Tomb of Eilram on Zeffo), you must return after unlocking the required ability.
- No Fast Travel: You must backtrack on foot. Plan your route and use shortcuts (e.g., rope slides, zip lines) to speed up returns.
- Health and Stims: Resting at a Meditation Point refills health and stims but also respawns most enemies. Use Meditation Points sparingly on long treks.
- No Story Choices: The narrative is linear. There are no dialogue or moral choices that affect the ending.
- Missable Collectibles: Most chests, Force Echoes, and secrets can be collected after the story ends. However, some areas are temporarily locked after you leave a planet until you acquire specific Force powers (e.g., Force Pull, Force Push). For example:
- Cosmetics: All lightsaber parts and ponchos are permanent unlocks and can be obtained anytime post-game.
- Stim Canisters: There are 10 total. If you miss any, you can return to any planet after the final boss. No permanent miss.
- Achievement/Trophy Warnings:
- Major Spikes:
- Grinding Trap: Skill points come from enemy kills and exploration. There's no need to grind—progression is fast enough. Focus on unlocking new abilities through story (e.g., Force Push) rather than combat skills early.
- Lightsaber Mastery: The game expects you to learn enemy patterns. Spend skill points on Combat Skills early (especially Evasive Kick and Double-Bladed Lightsaber).
- Auto-Saves: The game saves frequently, but only at specific points (meditation, story triggers). If you quit without reaching a med point, you may lose progress.
- Manual Saves: Create manual saves before major bosses or long exploration segments. You can have multiple save slots.
- Cloud Saves: Activate cloud save on platforms (Steam, PSN, Xbox) to avoid losing progress due to corruption.
- Tip: Before entering a tomb or imperial facility, create a manual save. That way, if you die inside, you can reload instead of running back.
- Stims Are Lifesavers: Always look for Stim Canisters on every planet. They are the most important upgrade. On Zeffo, the first Stim upgrade is in the Wind Tunnel area.
- Slide Jump: You can jump while sliding on ramps. This is essential to reach secret areas.
- Double-Bladed Lightsaber: Unlock it on Dathomir as soon as possible (after visiting Zeffo). It deals more damage and has better crowd control.
- Force Slow Is OP: Upgrade Force Slow early; it makes boss fights much easier.
- BD-1 Upgrades: Get the Scomp Link as soon as you can on Kashyyyk to open locked doors.
- Don't Ignore Dathomir Early: The early part of Dathomir is tough but yields powerful upgrades (e.g., Wall Run extension). You can go there after Bogano.
- Meditation Points Respawn Enemies: Use them only when needed. If you are backtracking, skip meditation to avoid re-fighting enemies.
- No Online Features: The game is purely single-player. No anti-cheat or online etiquette concerns on PC (though some mods exist, they don't affect gameplay for others).
Irreversible Choices & Missable Content
- On Zeffo, the Tomb of Eilram requires Force Push to reach certain echoes.
- On Kashyyyk, the Imperial Refinery area is inaccessible until you return with Scomp Link upgrade for BD-1.
- "Data Collector" requires scanning all creatures. One creature (the Binog) is only encounterable during the story on Zeffo. If you leave without scanning it, you must replay the entire game from a save before that point or start a New Game+. New Game+ only carries over cosmetics and skill points, not creature scans.
- "Saber Collector" requires all lightsaber parts. No missables but some are in hidden locations on Bogano and Dathomir.
Difficulty Spikes & Grinding Traps
- Tomb of Eilram (Zeffo): The puzzle and the boss (Jaro Tapal flashback) can be frustrating.
- The Ninth Sister (Kashyyyk): Her fast combos and unblockable attacks require precise dodging.
- Final Boss (Trilla): Phase 2 has relentless aggression. Use Force Slow and parry.
Save Management
Things Players Commonly Regret Not Knowing Earlier
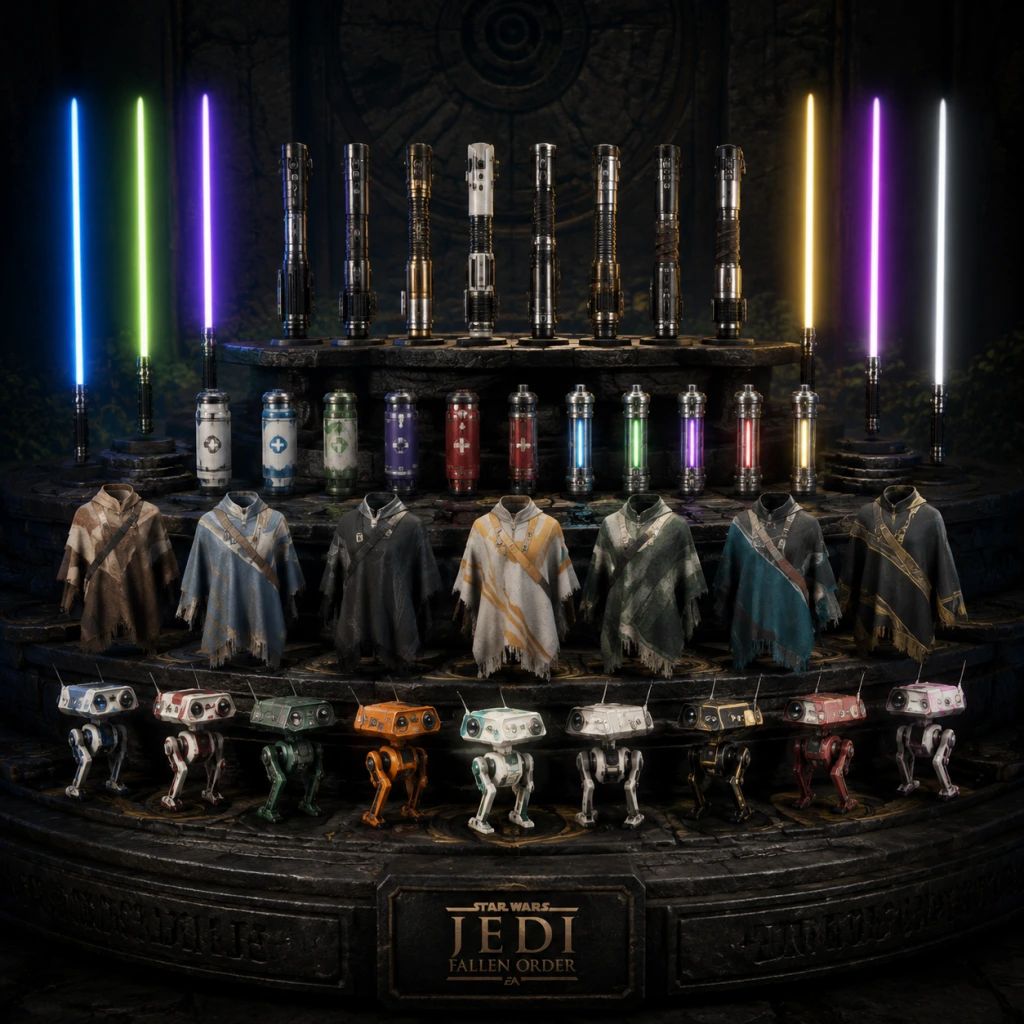
All Game Items
Overview
In Star Wars Jedi: Fallen Order, items are primarily divided into Lightsaber Upgrades, Equipment & Cosmetics, Consumables, Collectibles, Materials & Currencies, and Key Story Items. Unlike traditional RPGs, there are no armor sets or multiple weapons; instead, Cal’s progression is tied to unlocking new Force powers, lightsaber stances, and upgrades for BD-1, the Mantis, and cosmetic ponchos. This guide covers every item category, how to find each item, and how they enhance gameplay.
---
1. Lightsaber Components & Upgrades
The lightsaber is Cal's primary weapon. Its appearance can be customized with components found in chests, but its functional upgrades are unlocked via story progression and ability points.
1.1 Lightsaber Customization Parts
All lightsaber parts are purely cosmetic. They can be swapped at any workbench. Parts are found in locked chests (requiring BD-1's Scomp Link to open) or as rewards from certain Echoes.
| Part Type | Number of Variants | Example Locations |
|---|---|---|
| Emitter | 11 | Bogano: Abandoned Workshop, Zeffo: Imperial Dig Site |
| Switch | 11 | Kashyyyk: Imperial Refinery, Dathomir: Swamp of Sacrifice |
| Sleeve | 11 | Ilum: Crystal Caves, Nur: Fortress Inquisitorius |
| Material | 10 (e.g., Bronze, Chromium, Duraplast, Electrum, etc.) | Found in various chests and from some merchants |
1.2 Function Upgrades
These are passive enhancements or new combat abilities obtained from the skill tree and story.
- Saber Throw – Unlocked via story. Allows Cal to throw his lightsaber at an enemy or object. Works well against groups and distant foes.
- Stim Canister Upgrade – Increases the number of Stims BD-1 can carry (from 2 to max 10). Found by exploring and defeating certain enemies.
- Dual Lightsaber – Changes Cal’s stance to a double-bladed lightsaber. Obtained on Dathomir after defeating Malicos. Deals wide sweeping damage.
- Double-Bladed Lightsaber – Initially given on Bogano? Actually, Cal starts with one blade; the double-bladed is obtained from the workbench after finding a specific part? Correction: The double-bladed lightsaber is unlocked on Ilum during the story, giving Cal both single and double stances.
- Force Powers – Push, Pull, Slow, and Heal are all unlockable Force abilities that also affect combat and exploration. They are obtained via story progression.
- Neutral Poncho – Default, worn at start.
- Commando – Zeffo: Imperial Dig Site (chest near the Ball puzzle).
- Freedom – Kashyyyk: Origin Tree (after defeating the ninth sister).
- Outlaw – Dathomir: Swamp of Sacrifice (near the Nightbrother village).
- Shattered – Ilum: near the Crystal Caves (during the story).
- Jedi – Bogano: Abandoned Workshop (requires double jump from later skill).
- Andoa, Purifier, Vintage, etc. – Various locations; only cosmetic.
- Default – Orange.
- Scrapper – Bogano: found in the Hangar Bay (requires Scomp Link).
- Mynock – Zeffo: in the Imperial Base (near the turbine).
- Dewback – Kashyyyk: in the Shadowlands (requires Push/Pull).
- Rancor – Dathomir: near the Strangled Ancient site.
- Fodra, Haxion, etc. – Many are purchased from merchants using Credits.
- Meditation Chamber – Allows fast travel between meditation points. Cost: 1000 Credits. Time: early game.
- Refueling Probe – Unlocks additional travel options? Actually, it’s cosmetic.
- Analysis Lab – Displays lore entries and secrets. Cost: 2500 Credits.
- Workshop – Upgrades workbench for faster customization? No, it’s purely cosmetic and adds ambiance.
- Base Capacity: 2.
- Upgrade: Find Echoes or defeat bosses to increase capacity (max 10). Each upgrade is a special item like “Stim Canister Upgrade” found in the world.
- Types: Different colored seeds (e.g., Red, Blue, Green). Found in specific locations.
- Usage: Plant them in the Mantis’s terrarium for a cosmetic reward (a special outfit after planting all).
- Echoes – Blue glowing orbs that reveal past events. Scanning them adds lore entries. There are over 100 Echoes across all planets.
- Chests – Contain cosmetic items (ponchos, lightsaber parts, skins). Locked chests require BD-1’s Scomp Link.
- Force Echoes – Shorter version that unlocks journal entries.
- Databank Entries – Scattered terminals and creatures; scanning completes the databank.
- Cryptic Maps – Found in various locations, revealing hidden areas.
- The Astromech – A secret droid on Bogano that gives a cosmetic after repairing it.
- Purchase Mantis upgrades from the droid.
- Buy cosmetics from some merchants (e.g., the Haxion Brood merchant on Zeffo).
- Unlock fast travel by purchasing the Meditation Chamber upgrade.
- Scomp Link – BD-1’s upgrade allowing him to open locked doors and chests. Obtained on Bogano after scanning the tomb.
- Holomap – Gives access to the galaxy map on the Mantis. Obtained early.
- Mantis Keycard – ? There is no keycard; the ship is always accessible.
- Jedi Temple Key – Not an item; narrative progression.
- Bogano Scomp Link Upgrade – Already covered.
- Zeffo Stone Keys – Used to open vaults on Zeffo. There are three, each found in different regions.
- Kashyyyk Munitions Key – Opens the Imperial chests on Kashyyyk.
- Dathomir Obelisk Shards – Needed to open the pathway to the Nightbrother village.
- Lightsaber Upgrades + Force Powers: The Double-Bladed stance works well with Force Pull to gather enemies and then slash. Saber Throw synergizes with Slow to hit targets repeatedly.
- Stims + Meditation Points: Always refill at meditation points before boss fights. Upgrading Stims to 8+ is crucial for late-game battles (e.g., Ninth Sister, Malicos, Trilla).
- Ponchos & BD-1 Skins: No gameplay impact, but can be swapped to match the environment or personal preference.
- Seeds: Only for completionists; plant all to unlock a secret sequence and a unique skin.
- Mantis Upgrades: The Meditation Chamber is the first priority, followed by Analysis Lab for lore enthusiasts.
- Use BD-1’s Map to mark unopened chests and uncollected echoes. The map becomes fully detailed after upgrading the Mantis with the Analysis Lab.
- Prioritize Stims: On your first playthrough, increase Stims to at least 6 before tackling Zeffo.
- Lightsaber Parts: Do not stress over them; they are all cosmetic. Collect them for the achievement.
- Credits: Break every crate you see; they often yield credits. Also, defeat the optional Haxion Brood bounty hunters for extra credits.
---
2. Equipment & Cosmetics
2.1 Ponchos
Ponchos are the only wearable apparel for Cal. They provide no stat bonuses, only aesthetic variety. Found in chests or from merchants.
2.2 BD-1 Skins
BD-1’s default orange paint can be customized with different skins (cosmetic only).
2.3 Mantis Upgrades
The Mantis serves as the hub ship. Upgrades are bought from the droid in the ship’s hangar using Credits.
---
3. Consumables
3.1 Stims (Healing Charges)
BD-1 carries Stims that restore health. They are refilled at Meditation Points.
3.2 Seeds & Healing? No.
There are no health potions other than Stims.
3.3 Seeds (for Planters)
Collectible items that are purely for a secret objective. They do not provide any gameplay benefit.
---
4. Collectibles
Collectibles fall into several categories, each tied to achievements or lore.
4.1 Holomap Secrets
4.2 Seeds
As mentioned, seeds are collectibles that can be planted in the Mantis’s terrarium. There are several varieties, each in a specific biome.
4.3 Cordova’s Secrets
4.4 Achievements/Trophies
While not items, many collectibles are required for 100% completion (e.g., “Echoes of the Past”, “Databank Master”).
---
5. Materials & Currencies
5.1 Credits
Credits are the main currency. They are found in crates, dropped by enemies, and occasionally from chests. Used to:
Total Credits Needed: Around 10,000 for all upgrades (Meditation Chamber, Analysis Lab, etc.).
5.2 Skill Points (Ability Points)
Earned by gaining experience from defeating enemies and exploring. Used in the skill tree to unlock new combat abilities, Force power enhancements, and perk-like upgrades. Not an item per se, but essential for progression.
5.3 Lightsaber Materials
Only cosmetic; no crafting. Materials like “Bronze” or “Electrum” are found in chests and can be applied at the workbench.
---
6. Key Story Items & Upgrades
These are items that unlock new areas or gameplay mechanics, often tied to the main quest.
Important: These items are not carried in the inventory but are automatically applied upon acquisition. They are often required to progress through specific planets.
---
7. Synergies & Use Cases
---
8. Tips for Efficient Collection
---
This covers every item category in Star Wars Jedi: Fallen Order. For detailed locations, refer to planet-specific guides.
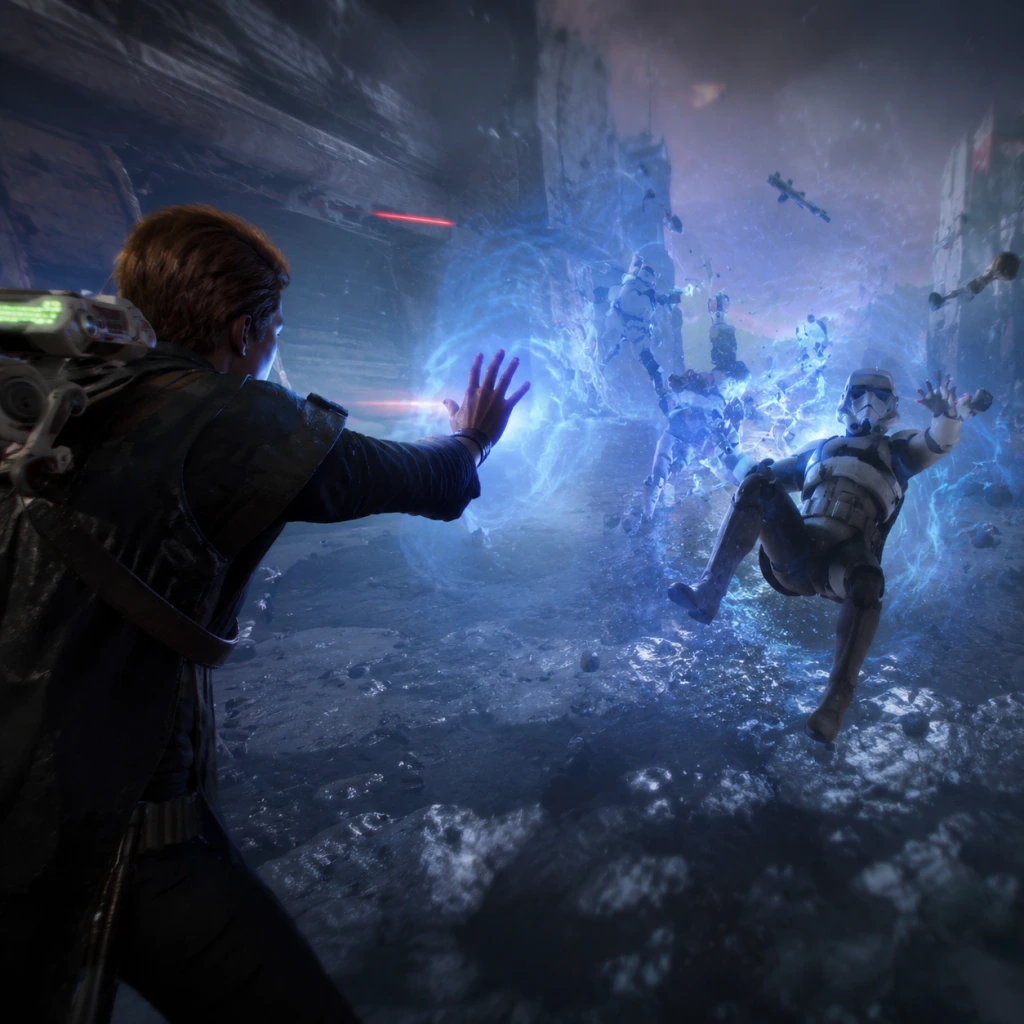
Character Skills
Character: Cal Kestis
Cal Kestis is the sole playable character in Star Wars Jedi: Fallen Order. His abilities are divided into three main skill trees (Lightsaber, Force, Survival) and a set of story-unlocked movement abilities. This guide covers every skill, ability, and special move, including upgrades, combos, synergies, and recommended builds.
---
Skill System Overview
- Skill Points are earned by gaining experience (from kills, exploration, and story progress) and spent at Meditation Points.
- Each skill tree has multiple tiers; higher tiers require a certain number of points spent in that tree.
- Abilities unlock new combat options or upgrades; some also have cooldown reductions or increased effectiveness.
- Movement abilities (Double Jump, Wall Run, etc.) are unlocked through story progression and are not part of the skill tree.
- Stim Canisters are healing items; their capacity can be upgraded in the Survival tree.
- Cost: 1 Skill Point
- Effect: A wide horizontal slash while spinning. Covers a large arc and hits multiple enemies.
- Use Cases: Crowd control, breaking enemies' guards, or when surrounded.
- Combo: Can be chained into a heavy slam by pressing the attack button again.
- Upgrade Path: N/A (single node)
- Cost: 1 Skill Point
- Effect: Lunge forward with a fast, powerful stab. Deals good damage and closes distance quickly.
- Use Cases: Initiating combat against a ranged enemy, interrupting attacks, or chasing fleeing foes.
- Combo: Can be followed by a light attack for a quick slash or a heavy attack for a spin.
- Upgrade Path: N/A
- Cost: 1 Skill Point
- Effect: Jump and perform a downward slash. Deals area damage on landing.
- Use Cases: Hitting grounded or staggered enemies, or when enemies are below you (e.g., ledges).
- Combo: Can be used after a double jump to increase range.
- Upgrade Path: N/A
- Cost: 2 Skill Points (requires Spin Attack or Dash Strike)
- Effect: Improves blaster bolt deflection accuracy and damage. Also allows deflecting multiple bolts at once.
- Use Cases: Essential against groups of ranged enemies and bosses with projectile attacks.
- Upgrade Path: N/A (passive)
- Cost: Story unlock, then upgraded in skill tree
- Effect: Throw the lightsaber like a boomerang. Hold the button to home in on a target; release to throw. The saber returns after hitting.
- Upgrades:
- Use Cases: Heavy damage to single targets, hitting flying enemies, or using range when you cannot close distance.
- Cooldown: None (only takes a fraction of a second to recall)
- Unlock: Through story on Dathomir
- Effect: Switches to a double-bladed lightsaber, changing moveset to wider sweeps and slower but more powerful hits. Better against groups.
- Skills (unlocked in tree):
- Use Cases: Crowd control, breaking multiple guards, and area denial.
- Unlock: Through story on Bogano (after learning double jump)
- Effect: Wield two lightsabers for extremely fast, low-stamina attacks. Ideal for single-target DPS and parrying.
- Skills (unlocked in tree):
- Use Cases: Dueling tough enemies, breaking enemy guards quickly, and stylish finishers.
- Defensive Stance: Reduces stamina cost for blocks and parries.
- Evasive Roll: Unlocks a quick roll (press dodge while attacking) to cancel animations.
- Aggressive Slash: Increases damage of the first hit in a chain.
- Critical Hit: Chance to deal bonus damage on heavy attacks.
- Base Effect: A wave of energy that pushes enemies away. Can knock them off ledges or stun them.
- Cooldown: ~4 seconds (reduced by Force meter usage)
- Upgrades:
- Use Cases: Creating distance, environmental kills, interrupting incoming attacks.
- Combo: Push an enemy into a wall to stun them, then follow with heavy slash.
- Base Effect: Pulls a single enemy toward you. Can also pull objects (like explosives).
- Cooldown: ~4 seconds
- Upgrades:
- Use Cases: Closing distance against ranged enemies, disarming powerful foes, pulling explosive barrels to detonate near enemies.
- Combo: Pull an enemy into a lightsaber throw or dash strike.
- Base Effect: Slows down time for a short duration, affecting enemies and projectiles.
- Cooldown: ~6 seconds
- Upgrades:
- Use Cases: Dodging fast attacks, setting up combos, dealing with multiple enemies simultaneously.
- Synergy: Activate Slow then use Lightsaber Throw or charge attacks for guaranteed hits.
- Unlock: Story progression (Kashyyyk)
- Base Effect: A powerful ground pound that damages and staggers enemies in a radius.
- Cooldown: ~7 seconds
- Upgrades:
- Use Cases: Crowd control, knocking down small enemies, opening up enemies behind shields.
- Unlock: Story progression (Ninth Sister boss fight)
- Base Effect: Completely freezes a single enemy in place for several seconds. They cannot move or attack.
- Cooldown: ~8 seconds
- Upgrades:
- Use Cases: Isolating dangerous enemies, stopping a charging brute, creating a window for lethal combos.
- Cost: Not in skill tree; gained through story (Zeffo)
- Effect: Automatically increases Force regeneration rate after using Force abilities. Improves with further story beats.
- Multiple nodes: Each node adds +10% to maximum health.
- Total: Can increase health from base 100% to 150%.
- Multiple nodes: Each node adds +10% to maximum Force meter (used for Force abilities).
- Total: Can increase Force from base 100% to 150%.
- Multiple nodes: Each node adds 1 extra Stim Canister slot (max total 6).
- Strategy: Essential for survival; prioritize if you struggle with healing.
- Parry Window: Slightly increases the timing window for successful parries.
- Block Stamina: Reduces stamina cost when blocking attacks.
- Resilience: Reduces damage taken while sprinting or dodging.
- Life Force: Gain a small health regeneration after defeating an elite enemy.
- Wall Run Stamina: Reduces stamina drain during wall runs.
- Rope Slide Speed: Increases speed while sliding on ropes.
- Unlock: Bogano (after finding the Enclave)
- Effect: Jump again in mid-air. Allows reaching higher ledges and extending aerial combos.
- Use: Essential for exploration and combat (e.g., Aerial Slash from above).
- Unlock: Dathomir (after meeting Tarfful)
- Effect: Run along walls for a short distance. Can chain from one wall to another.
- Use: Platforming traversal, bypassing gaps, and reaching secret areas.
- Unlock: Kashyyyk (after the Shadowlands)
- Effect: Slide down ropes quickly, can jump off at junctions.
- Use: Fast travel down vertical spaces, timed puzzle sections.
- Unlock: Zeffo (Tomb of Miktrull)
- Effect: Fire a short-range energy beam from BD-1 that opens certain purple-paneled doors and destroys some obstacles.
- Use: Puzzle solving and unlocking shortcuts.
- Unlock: Zeffo (Tomb of Miktrull)
- Effect: Allows Cal to breathe underwater, enabling underwater exploration.
- Use: Reaching submerged secrets and new areas.
- Unlock: Bogano (after meeting Greez)
- Effect: BD-1 can slice into panels to unlock doors, disable turrets, or reveal holomaps.
- Use: Environmental interaction; not a direct combat skill but vital for progression.
- Single Blade: Balanced for all situations; good against elites.
- Double-Bladed: Best for groups; combine with Spin Attack and Force Push.
- Dual-Wield: Best for single targets; combine with Dash Strike and Force Slow.
- Increased Force + Force Freeze: Allows more frequent freezes and longer durations.
- Parry Window + Resilience: Makes defensive play much more forgiving.
- Life Force + Stimpack: Less reliance on stims for minor damage.
- Focus: Survival (health, force), Force (max upgrades in Push, Pull, Slow).
- Skill Priority: Force meter nodes first, then Force upgrades, then Lightsaber combo nodes.
- Playstyle: Constantly use Force powers to control enemies; rely on force regeneration. Use Dual-Wield for speed.
- Focus: Even spread across all three trees.
- Skill Priority: Lightsaber skills for combo strings, then Survival for health and stim capacity.
- Playstyle: Mix of lightsaber combat and occasional Force uses. Single Blade or Double-Bladed.
- Focus: Survival tree heavy (health, stims, defensive upgrades).
- Skill Priority: Stimpack capacity and health nodes first, then Force Slow and Push for crowd control.
- Playstyle: Build for parrying and counterattacks. Use Double-Bladed for grouping enemies. Endure damage.
---
Lightsaber Skills (Skill Tree)
These skills enhance Cal's lightsaber combat, including new moves, combos, and stance-specific techniques. All lightsaber attacks consume no Force and have no cooldown, but they require stamina (dodges, blocks, and heavy attacks drain stamina).
Spin Attack
Dash Strike
Aerial Slash
Deflection (Enhanced)
Lightsaber Throw (Unlocked via story on Bogano)
- Lightsaber Mastery: Increases throw distance and damage.
- Ricochet Throw: The saber bounces to up to 3 enemies after the first hit.
Double-Bladed Stance
- Double Jump Attack: A spinning slash while jumping (uses less stamina than standard aerial attack).
- Flourish: A fast rotation that hits multiple enemies around you (requires 1 skill point).
Dual-Wield Stance
- Dual Wild Strike: A quick two-hit combo (light, light).
- Spinning Blades: A rapid flurry attack (hold attack button) that consumes stamina quickly but deals high damage.
Lightsaber Combo Nodes
---
Force Skills (Skill Tree)
Force abilities are Cal's mystical powers. They have cooldowns that are reduced by spending Force meter (the blue bar). Each power has two upgrade nodes that improve its effectiveness or add new properties.
Force Push
- Greater Push: Increases push distance and force impact (more stagger).
- Wide Push: Expands the cone of effect to hit enemies to the sides.
Force Pull
- Longer Pull: Increases range and pull speed.
- Pull Lightsaber: Pull a stunned enemy's weapon out of their hands, leaving them unarmed for a few seconds.
Force Slow (Analyze)
- Extended Slow: Increases duration of the slow effect.
- Greater Effect: Slows enemies more dramatically, making attacks extremely easy to dodge or parry.
Force Slam
- Wider Slam: Increases area of effect.
- Slam Stun: Stuns enemies hit for longer, leaving them open to attack.
Force Freeze
- Long Freeze: Increases freeze duration.
- Area Freeze: Freezes multiple enemies in a small radius.
Force Enhance (Passive)
---
Survival Skills (Skill Tree)
These skills improve Cal's durability, Force reserves, and healing efficiency.
Increased Health
Increased Force
Stimpack Capacity
Defensive Upgrades
Movement Upgrades
---
Movement Abilities (Story Unlocks)
These are not in the skill tree but are essential traversal and puzzle-solving skills.
Double Jump
Wall Run
Rope Slide
Pulse Beam
Underwater Breathing
Scomp Link
---
Combos and Synergies
Force + Lightsaber Combos
1. Pull & Throw: Pull an enemy close, then instantly use Lightsaber Throw while they're staggered.
2. Slow & Heavy: Activate Slow, then unleash a lightsaber flurry (Dual-Wield) or a charged heavy attack.
3. Push & Spin: Push enemies into a cluster, then Spin Attack to hit them all.
4. Freeze & Slam: Freeze a tough enemy, then Force Slam for massive damage if unlocked.
5. Dash & Aerial: Dash Strike into an enemy, jump, then Aerial Slash downward.
Stance Synergies
Passive Synergies
---
Recommended Builds
Aggressive Force Build
Balanced Bruiser
Defensive Survivalist
---
Skill Tree Strategy for New Players
1. Early game: Invest 1-2 points into Survival for an extra stim and health, then unlock Dash Strike and Spin Attack for combat options.
2. Mid game: Unlock Force Slow and its upgrades (invaluable against multiple enemies). Add a health node.
3. Late game: Max out Force Freeze and its upgrades. Finish lightsaber skill nodes for style.
Important: Always check for Meditation Points to spend points. Don't hoard them – early upgrades make a big difference.
---
Summary Table
| Skill Category | Key Skills | Best Use |
|---|---|---|
| Lightsaber | Spin Attack, Dash Strike, Aerial Slash, Lightsaber Throw | Combat variety, crowd control, closing distance |
| Force | Push, Pull, Slow, Slam, Freeze | Crowd control, enemy manipulation, time manipulation |
| Survival | Health, Force, Stimpack, Parry Window | Durability, healing, defense |
| Movement | Double Jump, Wall Run, Rope Slide, Pulse Beam | Exploration, puzzle solving |

Characters & Roles
Characters & Roles
Star Wars Jedi: Fallen Order is a single-player action-adventure game with a single playable protagonist, Cal Kestis. Unlike multiplayer or class-based games, there are no additional heroes, classes, or roles to unlock or switch between. However, the narrative is driven by a cast of key allies and antagonists. This guide covers every major character, their background, strengths, weaknesses, and how they influence gameplay.
---
Playable Character: Cal Kestis
Background:
Cal Kestis is a former Jedi Padawan who survived Order 66. He spent years in hiding on the junkyard planet Bracca, working as a scrapper. After using the Force to save his friend Prauf, he is discovered by the Inquisitorius and forced to flee. Cal is searching for a Holocron containing a list of Force-sensitive children to rebuild the Jedi Order. He is trained by Cere Junda and accompanied by BD-1, Greez Dritus, and later Merrin.
Strengths:
- Balanced Jedi: Cal can wield a single-bladed lightsaber, double-bladed lightsaber, or dual-wield (mid-game).
- Force abilities: Slow, Push, Pull, Lift (after upgrades), and Wall Run/Climb for navigation.
- Customizable: Skill trees allow specialization in Lightsaber combat, Force powers, or Survival.
- Fast-paced combat with parrying, dodging, and precision.
- Fragile: Low health pool; relies on blocking/parrying or dodging.
- Limited Force meter early game; must manage stamina and Force points.
- No ranged attacks (except lightsaber throw, unlocked later).
- Fighting multiple enemies simultaneously can be overwhelming.
- Lightsaber Tree: Prioritize parry counters (Precision Evade, Lasting Evasion), increased damage, and the ability to deflect more shots. Unlock Double/Dual upgrades.
- Force Tree: Max out Slow radius/duration, Push damage, Pull range, and eventually the Lift upgrade. Force powers are essential for crowd control and puzzles.
- Survival Tree: Increase health, stim canister charges, and resistance. Essential for higher difficulties.
- BD-1: Provides healing stims, hacking, and map info. Never directly fights but is essential for survival.
- Greez Dritus: Pilots the Mantis; offers no combat aid but provides a hub for upgrades and returning to planets.
- Cere Junda: Teaches Cal and occasionally helps in cutscenes, but not in gameplay combat.
- Merrin (later): Joins for a brief segment on Dathomir, using Nightsister magic to distract enemies, but is not controllable.
- Background: Former Jedi Knight who survived Order 66. She suppressed her connection to the Force due to guilt. Acts as Cal’s mentor.
- Role: Support/tutorial guide. Appears in cutscenes, gives advice, and later aids Cal on Nur.
- Strengths: Wise, experienced, strong in the Force when she reconnects. Her guidance unlocks new abilities.
- Weaknesses: Emotionally damaged, cannot fight for most of the game. Her fear attracts the Ninth Sister.
- Unlock: Always present from Chapter 1.
- Background: Four-armed Latero pilot and captain of the Stinger Mantis. Owes a debt and helps Cal’s mission.
- Role: Hub manager. On the Mantis, he provides customization (lightsaber colors, poncho dyes, ship decorations) and repairs. He also gives side missions via cantina characters.
- Strengths: Great pilot, loyal, provides humor. He maintains the ship.
- Weaknesses: Not a fighter; easily frightened. No combat role.
- Unlock: Always present from Chapter 1.
- Background: A small BD-series droid originally belonging to Jedi Master Eno Cordova. BD-1 carries the Holocron and assists Cal.
- Role: Companion droid. Provides stim healing (up to 10 charges based on discoveries), hacks panels, scans objects/enemies, projects maps, and stores databank entries.
- Strengths: Essential for exploration (unlocking shortcuts via scomp link, providing terrain info). Healing stims are vital for survival.
- Weaknesses: No combat ability; can be damaged in battle but not permanently lost. Must be repaired after taking hits.
- Unlock: Acquired at the start of the game on Bracca.
- Background: Last of the Nightsisters, a dark side witch from Dathomir. Initially hostile, she later allies with Cal to fight the Empire.
- Role: Temporary ally during the Dathomir storyline. Uses magic to distract or delay enemies, allowing Cal to pass. Also a key narrative figure.
- Strengths: Powerful magick user; can teleport and summon undead. Her protection on Dathomir is crucial.
- Weaknesses: Only assists in specific segments. Distrustful of Jedi initially.
- Unlock: Met on Dathomir as boss fight, then assists during the escape from Gorgara.
- Background: Former Padawan of Cere Junda, turned Inquisitor. She is the main antagonist, hunting Cal for the Sith.
- Role: Boss fights (multiple times) and recurring threat. She is a powerful Inquisitor with a spinning double-bladed lightsaber and Force abilities.
- Strengths: Fast, aggressive, uses both lightsaber and Force attacks (Push, Pull, Slow). Can attack from range with saber throw. Aggressive combo chains.
- Weaknesses: Overconfidence; leaves openings after combos. Vulnerable to parry and punish.
- Playstyle against her: Requires precision parrying, dodging unblockable red attacks, and using Force Slow to land hits. Her moveset is similar to Cal but faster.
- Background: A Dowutin Inquisitor with a large double-bladed lightsaber. Encounters Cal on Kashyyyk.
- Role: Mid-game boss on Kashyyyk.
- Strengths: Very high health, powerful sweeping attacks, and unblockable ground slams. Wide hitboxes.
- Weaknesses: Slow recovery after heavy attacks. Can be staggered with enough hits. Weak to Force Slow.
- Strategy: Keep moving, punish her slow sweeps, use double-bladed lightsaber to deflect blaster fire from troopers before the fight.
- Background: Former Jedi Master who fell to the dark side on Dathomir. He rules the Nightsister village and attacks Cal.
- Role: Optional boss on Dathomir (can be fought anytime after force push).
- Strengths: Uses dual lightsabers with unpredictable combos, rocks thrown, and force dashes. His attacks are fast and often staggered.
- Weaknesses: Predictable pattern after learning his combos. Vulnerable to parry and push off ledges (if available).
- Reward: Defeating him unlocks Stim upgrade (if missed earlier).
- Background: The Dark Lord of the Sith. Appears near the end of the game on the Fortress Inquisitorius.
- Role: Unbeatable boss/scripted encounter. Cal cannot defeat him; the goal is to escape.
- Strengths: Immense power—can block everything, uses Force choke, lightsaber throw, and one-hit kill attacks. Unblockable red attacks with massive reach.
- Weaknesses: None in combat; you must run away. Use environmental obstacles and BD-1’s stims to survive the chase sequence.
- Strategy: Only one phase: survive by running, wall-running, sliding, and using Force Slow on collapsing structures. Do not engage; focus on movement.
- Background: Standard Inquisitor troops (probe droids, Purge Troopers, Scout Troopers) that serve as common enemies. Not named characters but important to note.
- Strengths: Purge Troopers are elite melee units that can block lightsaber attacks; they are aggressive and use stun batons. Scout Troopers use blasters.
- Weaknesses: Purge Troopers are vulnerable to force push/pull, Scout Troopers can be deflected easily.
Weaknesses:
Playstyle:
Cal is a melee-focused warrior with force abilities used for crowd control, traversal, and puzzle-solving. Combat rewards timing (parry) and aggression mix. Use force slow to freeze enemies, then attack. Push to stagger groups, pull enemies closer. The double-bladed lightsaber is great for groups; single-blade for precise duels. Dual-wield (unlocked on Ilum) allows rapid strikes but less blocking.
Unlock Conditions:
Cal is playable from the start. The double-bladed lightsaber is unlocked during the story on Bogano (split after Zeffo). Dual-wield is unlocked on Ilum when reforging the lightsaber. All force abilities are gained through story progression: Force Slow (Dathomir), Force Push (after Zeffo), Force Pull (Kashyyyk), Force Lift (upgrade on Ilum).
Recommended Equipment & Builds (Skill Trees):
Build Example (Combat-Focused): Max Lightsaber tree for parry/damage, then Survival for health, then situational Force upgrades.
Build Example (Balanced): Distribute points evenly—focus on Force Slow and Survival stamina for extended fights.
Team Synergy:
Cal does not form a traditional party, but his companions provide narrative support:
---
Allies (Non-Playable)
#### Cere Junda
#### Greez Dritus
#### BD-1
#### Merrin
---
Antagonists (Key Enemies)
#### Second Sister (Trilla Suduri)
#### Ninth Sister (Masana Tide)
#### Taron Malicos
#### Darth Vader
#### Inquisitorius Grunts
---
Summary Table
| Character | Type | Role | Playable? | Unlock Conditions |
|---|---|---|---|---|
| Cal Kestis | Protagonist | Main playable character | Yes | Always |
| Cere Junda | Ally | Mentor, story support | No | Always |
| Greez Dritus | Ally | Hub manager, pilot | No | Always |
| BD-1 | Companion | Healer, hacker, map | No | Start of game |
| Merrin | Ally | Temporary combat support | No | Dathomir storyline |
| Second Sister | Antagonist | Recurring boss | No | Story encounters |
| Ninth Sister | Antagonist | Mid-game boss | No | Kashyyyk |
| Taron Malicos | Antagonist | Optional boss | No | Dathomir (after Push) |
| Darth Vader | Antagonist | Scripted unbeatable boss | No | Fortress Inquisitorius |
Note: There are no playable classes, heroes, or roles beyond Cal Kestis. All characters are fixed parts of the narrative. Skill trees allow build customization for Cal, but no other character is controllable. Use this guide to understand each character’s impact on the story and gameplay.
Cheats & Secrets
Cheats & Secrets
Overview
Star Wars Jedi: Fallen Order does not contain traditional cheat codes, console commands, or developer input sequences. There are no unlockable god modes, infinite health, or item spawning. The game relies on skill-based progression with a fixed difficulty curve. However, the game is rich with developer-intended secrets, Easter eggs, and hidden areas that reward exploration and keen observation. This guide catalogues all legitimate hidden content.
---
Easter Eggs
| Easter Egg | Location | How to Trigger / Description |
|---|---|---|
| Han Solo in Carbonite | Zeffo – inside a hidden chamber in the Tomb of Miktrull (requires Force Push upgrade). | After using Force Push to break the crackable wall, climb through the tunnel. In a small alcove, you’ll find a block of carbonite with a silhouette resembling Han Solo. Interact for a subtle nod. |
| BD-1’s Hidden Dance | Bogano – near the first Phonogram panel. | Equip the Holo-Tactics cosmetic for BD-1, then approach the Phonogram panel. BD-1 will occasionally perform a short dance animation when you interact with the panel. |
| The Force Awakens Reference | Kashyyyk – in the Origin Tree area. | Look for a small doll resembling a Porg (from The Force Awakens) wedged between roots. It can only be spotted with BD-1’s scanner (hold scan button near the tree). |
| Respawn Logo Easter Egg | Zeffo – in the area with the large fan blades (after gaining Push). | Break the wooden crate near the fan control panel. Inside is a card with the Respawn Entertainment logo. Scanning it plays a tiny jingle. |
| “I’ve Got a Bad Feeling About This” | Dathomir – near the Swamp of Sacrifice. | When Cal climbs the giant bone structure, there is a small nook with a datapad containing the exact phrase: “I’ve got a bad feeling about this.” |
| Greez’s Secret Tattoo | Dathomir – on the Mantis ship after completing the story. | Speak to Greez while wearing the Outlaw Drifter poncho. He’ll remark on Cal’s outfit and reveal a brief story about his own past. This is a hidden dialogue trigger. |
| Star Wars Rebels Connection | Bogano – near the Vault entrance. | Scan the Mural on the wall before entering the final vault. It shows the Loth-Wolf, a creature from Star Wars Rebels. |
Hidden Areas
| Area | Planet | Access Requirements | Contents |
|---|---|---|---|
| Swamp of Sacrifice | Dathomir | Requires Wall Run from Dathomir’s main path where you find the Infinite Wall Run upgrade. | Contains a Priorite Shard (used for lightsaber customization) and a Force Echo revealing lore about a failed Nightbrother experiment. |
| The Abandoned Mine | Kashyyyk | Requires Power Lift to reach the upper section near the Imperial Refinery. | Holds a Stim Canister upgrade for BD-1 and a Lightsaber Switch cosmetic. |
| Secluded Cave | Zeffo | After obtaining Double Jump (from Dathomir), return to Zeffo’s ice cave near the first Tomb. Use double jump to reach a high ledge. | Contains a Lightsaber Sleeve and a Databank entry on Zeffo’s fauna. |
| The Saw-tooth Caverns | Zeffo | Reachable after getting Force Pull; pull down the hanging cart in the Weather Vane area. | Contains BD-1’s Sonar upgrade (not missable but often overlooked). |
| Nydak Spawn Den | Bogano | After acquiring Air Dash (Kashyyyk), return to Bogano and find the collapsed tunnel near the Abandoned Workshop. | Inside is a Lightsaber Material (plastic texture) and a Force Echo related to a failed escape attempt. |
Developer-Intended Secrets
1. Meditation Training (Post-Game Content)
- After completing the main story, a new Meditation option appears on the Mantis holotable. This unlocks Battle Grid combat challenges against waves of enemies. You can also re-fight bosses (Second Sister, Malicos, Taron Malicos, Ninth Sister, and Oggdo Bogdo). This is the closest the game has to a “New Game+” or cheat mode.
2. Secret Tomb of Eilram (Alternate Route)
- On Zeffo, near the Ice Caves, there is a force-echo wall that requires Force Push Level 2 to open. Behind it is a hidden shrine containing a Lightsaber Emitter and a databank entry about ancient Zeffo culture. The wall is easily missed because it’s not marked on any map.
3. BD-1’s Secret Scan
- On each planet there is one object that can be scanned by BD-1 that yields a unique databank entry with developer commentary (e.g., “This wall took three artists to build”). These are considered Easter eggs. Locations:
- Bogano: The crashed ship near the starting area.
- Zeffo: The giant statue head near the Tomb of Eilram.
- Kashyyyk: The broken AT-AT at the Shadowlands.
- Dathomir: The skull of the giant beast in the Swamp of Sacrifice.
4. Phonogram Hidden Message
- On Dathomir, there is a Phonogram (collectible item) in the Swamp of Sacrifice that, when played, emits a series of beeps. These beeps translate to a numeric code. Inputting that code at the Phonogram panel on the Mantis unlocks a BD-1 skin called “Classic.” The code is 247-536-198 (found via community solution).
---
Exploit-Safe Secrets & Advanced Techniques
These are intended by developers and are considered legitimate strategies, not glitches.
- Force Slow on Bolts: While timed puzzles (like the spinning laser grid) can be cheesed by using Force Slow on projectiles. This is intentional and part of the skill set.
- Oggdo Bogdo Instant Kill: In the Bogano arena, you can lure the Oggdo Bogdo boss near the mouth of the giant skeleton. It can be killed instantly by forcing it into the gap using Force Push. This is a designed environmental kill.
- Double Jump Cancel: Use double jump followed quickly by Air Dash (after upgrading) to extend jump range. This is essential for reaching many hidden areas.
- Parry Window Exploit: Enemies with red-glowing attacks can be interrupted by throwing your lightsaber (after unlocking Lightsaber Throw). This stuns them, allowing a free hit.
---
Unlockable Cosmetics from Secrets
| Cosmetic | Source | How to Obtain |
|---|---|---|
| Inquisitor Cal (Poncho) | Complete all Meditation Training challenges on Grandmaster difficulty. | Not a cheat, but a reward for 100% completion. |
| Classic BD-1 Skin | The Dathomir Phonogram puzzle. | Input the code at the Mantis phonogram panel. |
| Adventure Lightsaber (Emitter) | Found in the Secret Tomb of Eilram on Zeffo. | Requires Force Push Level 2 and searching for the hidden wall. |
| Power Cord (Lightsaber Sleeve) | The Secluded Cave on Zeffo (requires Double Jump). | Navigate the ice platforms to reach the high ledge. |
Important Notes
- No console commands exist on any platform (PC, PS4, Xbox One, Stadia). The game has no debug menu or developer console accessible to players.
- Achievements/Trophies are not hidden; all are visible in the game menu. The hardest requires beating the game on Grandmaster difficulty and completing all Force Echos.
- Exploit-safe means these are intended game mechanics, not glitches. Using them will not corrupt saves or disable achievements.
- All hidden content is available in current versions (including the January 2024 patch). No content has been removed.
---
Final Words
While Star Wars Jedi: Fallen Order lacks traditional cheat codes, its secrets are woven into exploration and lore. The most rewarding secrets are the developer Easter eggs and the post-game Meditation Training, which effectively serves as a playground for combat mastery. Use this guide to uncover everything the developers hid in plain sight.