Star Wars Jedi: Survivor
## Star Wars Jedi: Survivor – Game Introduction **Genre:** Action-adventure, Metroidvania, Soulslike **Developer:** Respawn Entertainment **Publisher:** Electronic Arts (EA) **Release Timeline:** Announced in May 2022; released on April 28, 2023 **Platforms:** PlayStation 5, Xbox Series X|S, PC (...
Download & Installation
Star Wars Jedi: Survivor – Download & Installation Guide
This guide covers all official methods to download and install Star Wars Jedi: Survivor on PC (Steam, Epic Games Store), PlayStation 5, and Xbox Series X|S. The game is not available on Nintendo Switch or mobile devices.
---
1. Platforms & Official Sources
| Platform | Official Store | Type |
|---|---|---|
| PC | Steam, Epic Games Store | Digital download |
| PlayStation 5 | PlayStation Store | Digital download (also physical disc) |
| **Xbox Series X | S** | Microsoft Store (Xbox) |
| Nintendo Switch | Not released | N/A |
| Mobile (iOS/Android) | Not released | N/A |
---
2. System Requirements (PC)
#### Minimum Requirements (1080p / 30 FPS / Low settings)
- OS: Windows 10 64-bit (version 20H2 or newer)
- CPU: Intel Core i7-7700 / AMD Ryzen 5 1400
- RAM: 8 GB (dual-channel recommended)
- GPU: NVIDIA GeForce GTX 1060 (6 GB) / AMD Radeon RX 580 (8 GB)
- DirectX: Version 12
- Storage: 155 GB available (SSD required, HDD not supported)
- Internet: Broadband connection (for activation and updates)
- OS: Windows 10 64-bit (version 20H2 or newer) / Windows 11
- CPU: Intel Core i5-11600K / AMD Ryzen 5 5600X
- RAM: 16 GB (dual-channel)
- GPU: NVIDIA GeForce RTX 2070 (8 GB) / AMD Radeon RX 6700 XT (12 GB)
- DirectX: Version 12
- Storage: 155 GB available (NVMe SSD strongly recommended)
- Internet: Broadband connection
- PC (Steam): Steam account with the game purchased or activated.
- PC (Epic Games Store): Epic Games account with the game purchased.
- PlayStation 5: Sony PSN account (free) – the game is tied to the account.
- Xbox Series X|S: Microsoft Xbox account (free) – digital license tied to account.
- All platforms require an internet connection for initial activation and optional updates.
- PC: The game will compile shaders on first launch (may take 5–15 minutes depending on CPU). Do not interrupt this process.
- PS5/Xbox: The game will check for updates and apply any available patches before launch (ensure you are online).
- All platforms: After the first screen, you can adjust graphics (PC) or settings (console). Recommended to set Graphics Mode to Performance (60 FPS) or Quality (30 FPS with higher resolution).
- EA Account linking: On first launch, the game may prompt you to sign in with an EA Account (free) for online features (photo mode, future updates). This is optional but recommended.
- Download size: Approximately 130–150 GB (compressed).
- Installed size: Exactly 155 GB on all platforms.
- Post-install updates: Additional patches may require 10–30 GB of free space temporarily.
- Pre-load option: Steam and Epic allow pre-loading before release; the final installation still requires unpacking.
- Recommendation: Keep at least 170 GB free for safe installation and patching.
#### Recommended Requirements (1440p / 60 FPS / High settings)
> ⚠️ Important: The game requires a DirectX 12 Ultimate compatible GPU and an SSD. Installation on an HDD will cause severe stuttering and long load times.
---
3. Account Requirements
---
4. Step-by-Step Installation
#### 4.1 PC – Steam
1. Install the Steam client from [store.steampowered.com](https://store.steampowered.com) and log in.
2. Purchase Star Wars Jedi: Survivor from the Steam store or redeem a key.
3. Open your Library and find the game.
4. Click Install. Choose a destination folder on an SSD with at least 155 GB free.
5. Wait for the download to complete (Steam will download around 130–150 GB compressed, then unpack).
6. After installation, the game will appear as "Ready to play". Click Play to launch.
#### 4.2 PC – Epic Games Store
1. Install the Epic Games Launcher from [store.epicgames.com](https://store.epicgames.com) and log in.
2. Purchase the game from the Epic Store or redeem a code.
3. Go to your Library and click on Star Wars Jedi: Survivor.
4. Click Install – select an SSD location (minimum 155 GB free).
5. Wait for the download and installation (similar size to Steam).
6. Click Launch to start the game.
#### 4.3 PlayStation 5 (Digital)
1. On your PS5, go to PlayStation Store.
2. Search for Star Wars Jedi: Survivor and purchase/download (or redeem a code from the PS Store).
3. The download will begin automatically. Ensure you have at least 155 GB free on the internal SSD or an M.2 expansion (USB storage cannot be used for PS5 games).
4. Once downloaded, the game tile will appear on your home screen. Press X to launch.
> Note: Physical disc version is also available. Insert the disc, and the console will copy the data to the SSD (still requires full installation).
#### 4.4 Xbox Series X|S (Digital)
1. Press the Xbox button to open the guide, go to Microsoft Store.
2. Search for Star Wars Jedi: Survivor and purchase/download.
3. The game downloads to the internal SSD or an official Seagate expansion card (USB external drives cannot run Series X|S games).
4. You can check download progress in My games & apps > Manage > Queue.
5. Once complete, select the game from your library and press Play.
> Note: Physical disc version is also available. Insert the disc, and the console will install the game data to the SSD.
---
5. First Launch Setup
---
6. Storage Space Details
---
7. Common Installation Errors & Fixes
| Error / Issue | Platform | Cause | Solution |
|---|---|---|---|
| Disk write error / corrupt files | PC | Antivirus interference, fragmented storage, failing drive. | Disable real-time antivirus for the install folder. Run Steam/Epic as administrator. Verify integrity of game files (Steam: Properties > Local Files > Verify; Epic: Settings > Manage > Verify). If continuing, clear download cache (Steam: Settings > Downloads > Clear download cache). |
| Insufficient disk space | All | Only 155 GB free but more required for temporary files. | Free up additional space (30–50 GB), or move other files. On PC, ensure the drive is not nearly full; Windows needs room for virtual memory. |
| Shader compilation crash on launch | PC | Outdated GPU drivers or unstable CPU. | Update GPU drivers (NVIDIA: 536.99 or newer; AMD: 23.7.1 or newer). Install all Windows updates. If still crashing, try launching with `-dx12` or `-skip_intro` in launch options (PC). |
| “Fatal error” or “Unsupported GPU” | PC | DirectX 12 Ultimate missing or incompatible GPU. | The game requires a GPU that supports DirectX 12 Ultimate (feature level 12_2). Check your GPU specs. Update to latest drivers. If persistent, add `-nohdr` to launch options as a workaround. |
| Game won’t install on external HDD | Xbox / PS5 | Console requires internal SSD for current-gen games. | Use the internal storage or an official expansion card (Xbox) or M.2 SSD (PS5). Move game from external to internal via Settings > Storage. |
| EA Account login loop | All | Network issues or corrupted EA app. | PC: Repair EA app installation (Control Panel > Programs > EA app > Repair). Try running EA app as administrator. Console: Restart console and ensure internet is stable. Temporarily disable firewall. |
| Download stuck at 0% or slow | PC | ISP throttling, server congestion, or client bug. | Pause and resume download. Change download region in Steam: Settings > Downloads > Download Region (e.g., switch to a less busy region). Disable VPN. Restart router. |
| “Failed to load assets” after install | All | Corrupted game files or missing patches. | Verify game files (see above). If on console, uninstall and reinstall the game. |
8. Post-Installation Verification
After installation completes, perform these checks to ensure the game is ready:
1. Update check: Launch the game once – automatic update detection will run. Install any patches.
2. Performance test: Play the first 10 minutes of the tutorial area. Monitor FPS, loading times, and any crashes.
3. Save verification: Ensure the auto-save icon appears (saber icon) indicating saves are working. On PC, saves are located in `%USERPROFILE%\\Documents\\My Games\\Star Wars Jedi Survivor\\` (for Steam).
4. Integrity check (PC): Use Steam’s “Verify integrity of game files” or Epic’s “Verify” option even after a successful install – this can catch hidden errors.
5. Achievements/cloud saves: Confirm that cloud saving is enabled (Steam: Library > Properties > General > Cloud saves).
If no errors appear, you are ready to enjoy Star Wars Jedi: Survivor!
---
9. Troubleshooting Resources
- Official support: [EA Help](https://help.ea.com) – search for “Jedi Survivor” for known issues.
- Steam Community Hub: [Star Wars Jedi: Survivor Community](https://steamcommunity.com/app/1774580/discussions/)
- PS5 Support: [PlayStation Support](https://www.playstation.com/support/)
- Xbox Support: [Xbox Support](https://support.xbox.com)
- PCGraphics fixes: Reset the config file (`%LOCALAPPDATA%\\SwGame\\Saved\\Config\\WindowsNoEditor\\GameUserSettings.ini`) if settings are not saving.
---
Last updated: October 2023
Game Introduction
Star Wars Jedi: Survivor – Game Introduction
Genre: Action-adventure, Metroidvania, Soulslike
Developer: Respawn Entertainment
Publisher: Electronic Arts (EA)
Release Timeline: Announced in May 2022; released on April 28, 2023
Platforms: PlayStation 5, Xbox Series X|S, PC (via Steam, Epic Games Store, EA App)
Story Overview: Set five years after the events of Star Wars Jedi: Fallen Order, Cal Kestis is no longer a Padawan on the run but a seasoned Jedi Knight. As the Empire expands its grip on the galaxy, Cal must confront the darkness within himself and the galaxy. He is hunted by the relentless Imperial forces and new threats like the Bedlam Raiders. The story explores themes of survival, sacrifice, and the cost of hope.
Setting: The game spans multiple planets, including the familiar Koboh, the shattered moon of Jedha, the ocean world of Shattered Moon, and the Imperial-controlled Coruscant. Each location is richly detailed with environmental puzzles, secrets, and diverse biomes.
Main Characters: Cal Kestis (protagonist, voiced by Cameron Monaghan), BD-1 (droid companion), Merrin (force witch from Dathomir), Greez Dritus (pilot), Cere Junda (former Jedi Master), and new characters like the mysterious bounty hunter Bode Akuna and the cunning Senator Sejan. The main antagonist is the Dark Side-wielding Dagan Gera, a former Jedi who now serves the Empire.
Core Appeal: Fluid lightsaber combat, deep customization (stances, Force abilities, blaster), exploration of interconnected worlds, and a narrative that respects Star Wars canon. The game improves on its predecessor with better combat mechanics, more open-ended level design, and a richer skill tree.
Target Audience: Star Wars fans, action-adventure enthusiasts, players who enjoy challenging combat and exploration (similar to Dark Souls), and those who appreciated Fall of Order.
Game Modes: Single-player story mode only. No multiplayer or co-op modes.
Online/Offline Support: Primarily offline single-player. Online features include leaderboard for combat challenges (training arena scores) and optional account linking for achievements. No mandatory online connection.
DLC/Expansion Overview: As of the latest updates, no paid DLC expansions have been released. However, post-launch patches have added new content like the "New Game+" mode, "Perk" system, and various quality-of-life improvements. There have been rumors of a potential story DLC but nothing confirmed.
What Makes It Unique: Star Wars Jedi: Survivor is the first Star Wars game to truly allow players to adopt a Jedi’s full combat repertoire with five distinct lightsaber stances (single, dual-wield, double-bladed, blaster stance, and crossguard) combined with Force powers and a blaster. The game features a seamless open-world structure on Koboh that hubs into linear missions, offering a balance of exploration and story. It also introduces a stance-mixing system for combat depth. The narrative directly continues Cal's arc, making it a rare direct sequel in Star Wars gaming that respects player choices from the first game.
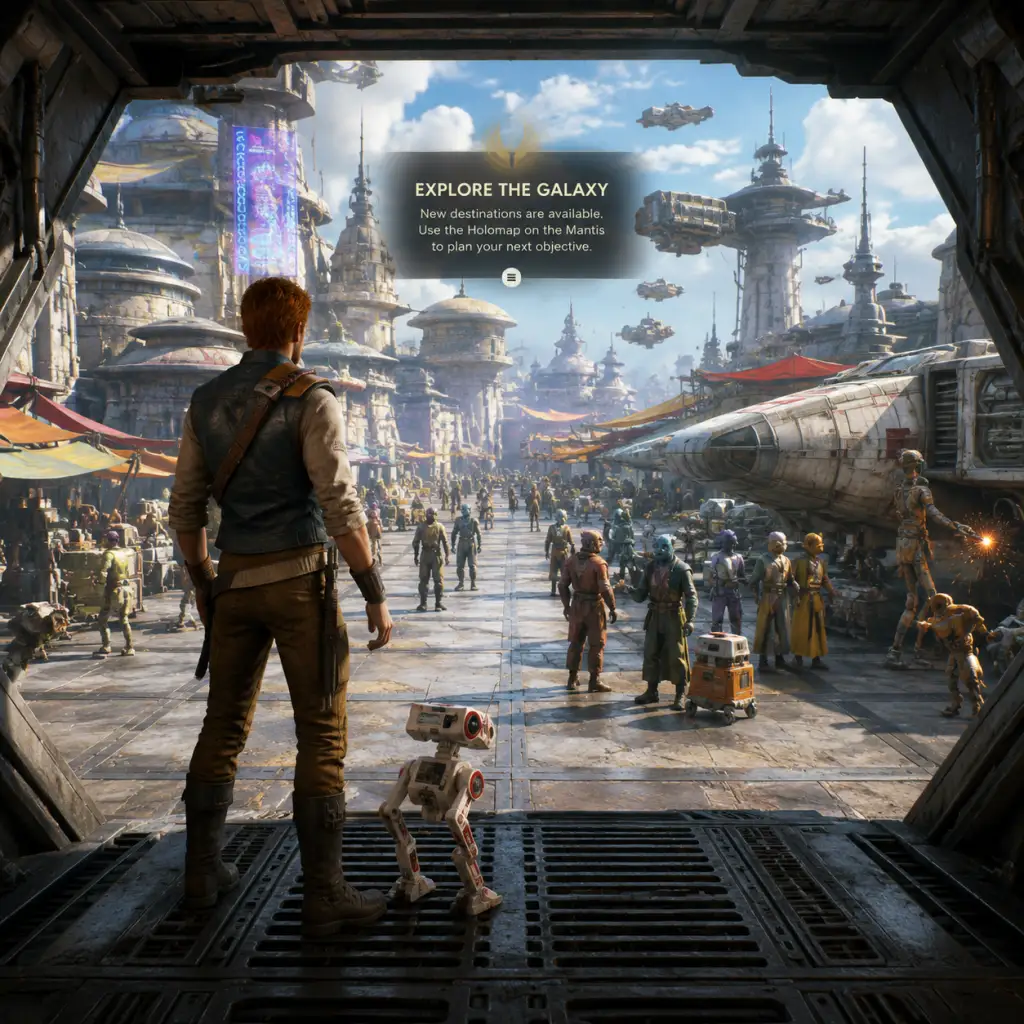
Getting Started
Star Wars Jedi: Survivor – Getting Started Guide for New Players
Welcome to Star Wars Jedi: Survivor, the sequel to Jedi: Fallen Order. This guide is designed to help you survive your first hours as Cal Kestis. Whether you're new to the series or a returning Jedi, these tips will get you on the right path.
---
First Hour Walkthrough (Spoiler-Free)
Your journey begins in media res aboard a ship, then immediately throws you into the bustling city-planet Coruscant. You'll start with basic movement and combat tutorials. This segment lasts roughly 15–20 minutes and covers:
1. Opening Cutscene – Sets up the story. You are Cal, a Jedi on the run from the Empire.
2. Linear Corridor – Follow the path, climb walls, use your lightsaber on objects.
3. First Combat Encounters – Troopers teach you attack, block, and dodge.
4. Meet Greez – Your pilot and old friend. You'll reach the Mantis (your ship) quickly.
5. Meditation Point Tutorial – Learn how to rest, heal, and spend skill points.
6. Objective: Set Course for Koboh – The main hub planet. You can explore freely after landing.
Key Tip: Don't skip the tutorial prompts – they explain parrying, Force abilities, and stances. The game expects you to master these early.
---
Character Creation? None
You play as Cal Kestis, a fully defined character. There is no character creation. However, you can customize:
- Lightsaber (blade color, hilt, emitter, switch, grip)
- Cal's Outfits (clothing, ponchos, jackets)
- BD-1 Skins (droid cosmetics)
- Styx (creature) Saddle (later in the game)
Customization is purely cosmetic and unlocked via exploration, shops, and quests. Early on, you'll find a workbench on the Mantis to change appearance.
---
Controls (All Platforms)
Below are the default control schemes. You can customize them in Settings > Controls.
#### PlayStation 5
| Action | Button |
|---|---|
| Move | Left Stick |
| Camera | Right Stick |
| Light Attack | R1 |
| Heavy Attack | R2 |
| Block | L1 |
| Parry | L1 (tap just before hit) |
| Dodge | Circle |
| Jump | X |
| Force Push | L1 + Square |
| Force Pull | L1 + Triangle |
| Use Stim / Heal | Up on D-Pad |
| Interact / Climb | Square |
| Map | Touchpad (or press Options) |
| Action | Button |
|---|---|
| Move | Left Stick |
| Camera | Right Stick |
| Light Attack | RB |
| Heavy Attack | RT |
| Block | LB |
| Parry | LB (tap) |
| Dodge | B |
| Jump | A |
| Force Push | LB + X |
| Force Pull | LB + Y |
| Use Stim / Heal | Up on D-Pad |
| Interact / Climb | X |
| Map | View button (left of Xbox logo) |
| Action | Key |
|---|---|
| Move | W/A/S/D |
| Camera | Mouse movement |
| Light Attack | Left Mouse Button |
| Heavy Attack | Right Mouse Button |
| Block | Left Shift (hold) |
| Parry | Left Shift (tap) |
| Dodge | Spacebar |
| Jump | Numpad 0 (or rebind) |
| Force Push | Left Shift + Left Mouse |
| Force Pull | Left Shift + Right Mouse |
| Use Stim / Heal | E |
| Interact / Climb | F |
| Map | M |
---
UI Overview
Your heads-up display (HUD) is minimal but essential:
1. Health Bar – Top left; green. When depleted, you die. You have a few Stim Canisters (shown below it) to heal.
2. Force Meter – Blue bar beneath health. Used for special abilities (Push, Pull, Slow). Recharges slowly.
3. Stance Indicator – Top center shows your current lightsaber stance (e.g., Single, Double-Bladed, Dual Wield, Crossguard, Blaster). Switch using D-pad left/right (console) or hotkeys (PC).
4. Experience / Skill Points – Bottom center, small numbers. Gathered from enemies and exploration. Spend at Meditation Points.
5. Compass / Waypoint – Top of screen; shows direction to current objective.
6. Interaction Prompts – Appear near objects you can use (crouch, climb, open).
7. Enemy Health Bar – Above enemies when locked on (hold L2/LT).
Note: You can toggle HUD elements in Settings > HUD if you prefer a cleaner view.
---
Essential Early Objectives
After the Coruscant prologue, once you reach the Mantis and land on Koboh, do these in order:
1. Settle at Pyloon's Saloon – This becomes your hub. Talk to Greez and Mosey for quests.
2. Visit the Workbench – Customize your lightsaber and outfit; equip perks (you unlock them later).
3. Upgrade BD-1 at the Workbench – Perform a free upgrade to unlock new slicing abilities (early money is tight, but this first one is free).
4. Complete the first main quest: "The Crash Site" – Follow the waypoint to find the downed ship. You'll learn to use the Ascension Cable and grapple points.
5. Unlock the second Stance – Enemies on Koboh use shields; equip the Double-Bladed stance to break them easily. Stances are unlocked via story progression.
6. Find the first Force Echo – Scan objects with BD-1 to learn lore and sometimes get XP.
7. Activate Meditation Points – Every time you see one, rest to save, heal, and spend skill points. Also fast travel points.
---
What to Do First / What to Avoid
#### ✅ Do First:
- Explore thoroughly on Koboh – there are secret areas, upgrade materials, and cosmetics.
- Practice parrying on weak troopers. A successful parry leaves enemies open for a powerful counterattack.
- Spend skill points as soon as you get them – they don't carry over if you die before resting (you keep them, but lose progress toward the next point). Prioritize Survival skills like increased health and stim capacity.
- Use BD-1's Scanner on every new object, creature, or area – grants XP and story logs.
- Upgrade Stims at a workbench – you'll find Stim Canister upgrades scattered around. They are crucial for boss fights.
- Rushing main story – You'll miss vital upgrades and become underleveled for later challenges.
- Ignoring the double-jump upgrade – It's found early on Koboh; you need it to reach many areas. Without it, you'll get stuck.
- Selling upgrade materials – Sell only when you have duplicates. You need them for lightsaber upgrades.
- Fighting every enemy – Sometimes running past is smarter, especially groups of Rancor or Bedlam Raiders while underleveled.
- Spending Skill Points on the wrong tree – Focus on Survival and Force first. Combat skills come later; you can't respec, so choose wisely.
#### ❌ Avoid:
---
Early Resource Priorities
Your main resources:
| Resource | Use | Where to Get | Priority |
|---|---|---|---|
| Skill Points (XP) | Unlock skills on the skill tree | Defeating enemies, exploring, completing quests | High – spend them |
| Priorite Shards (yellow crystals) | Currency for cosmetics, ship upgrades, BD-1 upgrades | Found in chests, off enemies, sold at shops | Medium – buy stim upgrades first |
| Data Disks | Unlock BD-1 cosmetic patterns | Found in hidden chests | Low – purely cosmetic |
| Components | Upgrade lightsaber parts (damage, block meter) | Salvage from enemies, chests, workbenches | High – improves combat |
| Stim Canisters | Heal yourself | Found in the world; each one increases your healing cap | Maximum priority – find all |
| Seeds / Fish | Cosmetic rewards for a sidequest | Plant on Koboh | Low – for completionists |
---
Common Beginner Mistakes
1. Button Mashing – Game punishes spam. Enemies will block your attacks and counter. Learn to parry, dodge, and wait for openings.
2. Ignoring Block Meter – Your block has a stamina gauge (shown as a small blue circle near the crosshair). When it depletes, you get staggered. Attack in bursts, not constantly.
3. Falling Off Cliffs – Cal's platforming can be floaty. Don't sprint near edges. Use BD-1's map to plan routes.
4. Not Using Force Abilities – Force Push is great for staggering, Force Pull brings enemies closer. Use them constantly.
5. Skipping Meditation Points – Always rest when you see one. You'll save your progress and refresh health/stims. But beware: resting respawns enemies.
6. Forgetting to Switch Stances – Enemies have weaknesses. Double-Bladed for crowds, Single for standard, Crossguard for heavy enemies (unlocks later).
7. Overlooking Crouch – You can hide in tall grass or crouch behind cover to sneak past enemies or get a critical hit.
8. Not Buying the "Safety Vault" Upgrade – Unlocks at the workbench; gives you a second chance when falling into pits.
---
Day-One Checklist
Before you dive into the story, do these things to set yourself up for success:
- [ ] Adjust Controls – Go to Settings > Controls and remap to your comfort (especially on PC).
- [ ] Set Difficulty – Choose Jedi Knight (normal) for a balanced experience. You can change it anytime.
- [ ] Enable Performance Mode (PS5/Xbox) – If you prefer 60fps, set Graphics Mode to Performance.
- [ ] Hear Audio Cues – Turn up SFX and dialogue; parry has a distinct sound.
- [ ] Read the Tutorials – The game pauses with tips. Don't skip them.
- [ ] Find Your First Meditation Point – Save manually after the opening.
- [ ] Open the Map – Use BD-1's map to see unexplored areas (grayed out).
- [ ] Collect Your First Stim Upgrade – On Koboh, immediately after the saloon, explore the rooftop to the right for a Stim Canister.
- [ ] Spend First Skill Point – Invest in Survival > Fortitude (more health) or Survival > Endurance (larger block meter).
- [ ] Equip Your First Perk – Once you unlock them (around 2 hours in), use perks like Resilience (damage reduction) or Poised (block meter recovery).
- [ ] Talk to All NPCs – They give lore and sometimes side quests. Mosey sells cosmetics, Gulu sells upgrades.
---
Final Words
Star Wars Jedi: Survivor is a huge game with a steep initial learning curve, but the world rewards patience and exploration. Remember: you are a Jedi in hiding – use your abilities wisely, don't be afraid to run, and always keep your lightsaber charged. May the Force be with you, young Padawan.

Core Gameplay
Star Wars Jedi: Survivor – Core Gameplay Guide
This guide breaks down the core gameplay of Star Wars Jedi: Survivor into four distinct progression tiers: Early Game, Mid Game, Late Game, and Endgame. Each tier details the main gameplay loop, combat and interaction systems, progression, exploration, quests/missions, economy, character/build growth, and endgame structure.
Main Gameplay Loop
The core loop is: Explore → Fight → Collect → Upgrade → Progress. You navigate semi-open-world planets (e.g., Koboh, Jedha), engage in lightsaber and Force combat, discover secrets (chests, Force Tears, collectibles) to earn resources (Priorite Shards, Data Disks, Skill Points), then use those resources to upgrade Cal's abilities (skill tree, stances, BD-1, lightsaber customization) and the Mantis ship (shortcut unlocks). Completing main and side quests pushes the story forward, unlocks new planets, and gradually opens previously inaccessible areas (Metroidvania-style).
---
EARLY GAME (Prologue to First Visit to Koboh’s Main Hub)
Gameplay Loop
- Linear tutorial sections on the Mantis and Coruscant.
- Introduces basic combat: single-blade lightsaber, dodge, block, parry, and Force Push/Pull.
- First visit to Koboh: open-world hub area (Rambler’s Reach Outpost) becomes your base.
- Stances: Only Single Blade available initially. Later unlock Double Bladed (from a Force Echo on Coruscant).
- Force Powers: Force Push, Force Pull, and Slow (acquired during Coruscant).
- Lightsaber Customization: Can swap colors and material (Early gets only a few parts).
- BD-1 Upgrades: Treasure Hunter (highlights crates) and Scomp Link (opens certain doors).
- Skill Tree: First few points go into Vitality (health), Block Bar (guard), and Force Meter upgrades.
- Stim Canisters: Find 2-3 throughout Coruscant and early Koboh. Each refills health and Force equally.
- Lightsaber Parts: Simple emitters and switches from chests.
- Movement: Wall run, double jump, sliding, climbing. All unlocked from start except dash (mid-game).
- Map: Basic 2D map with minimal markers. “Meditation Points” act as checkpoints and fast travel (within a planet).
- Fast Travel: Unlocked at Rambler’s Reach Outpost only after meeting a certain NPC (>!Cere!<).
- Priorite Shards: Found in crates, from enemies, and as environmental loot. Used at Doma’s shop for cosmetics and legendary bounties.
- Data Disks: Collect from chests or databanks; upgrade BD-1 at workbenches (hacking, sonar, etc.).
- Main Quests: “Rescue the crew,” “Find the compass” – linear objectives.
- Rumors: Introduced at Rambler’s Reach Outpost; small side objectives (e.g., “Investigate the crashed ship”).
- Bounties: First bounty board appears – kill or capture criminals for rewards.
- Currency: Credits (minor), Priorite Shards (main), Data Disks (BD-1 upgrades), Skill Points (XP).
- Shops: Doma’s (cosmetics, stim upgrades), Zee’s (parts), bounty rewards give unique gear.
- Crafting: Not present – upgrades are linear or skill tree based.
- Early Focus: Health and Force upgrades. Choose one stance to master (Single Bl leads to more parry windows).
- Perks: First perk slot unlocked after reaching Koboh. Use “Persistence” (regain block bar on hit) or “Efficiency” (more Force for attacks).
- No respect option yet – commitment matters.
- Complete the Coruscant prologue and first Koboh main mission (rescue >!Greez!<). Unlock the ability to upgrade the Mantis (fast travel between planets).
- Open-world exploration across multiple planets: Koboh (expanded), Jedha, >!Shattered Moon!<, >!Nova Garon!<.
- Frequent backtracking to Koboh’s caves and cliffs with new upgrades (e.g., Dash, Air Dash, Electro Dart).
- More complex combat: multiple stances, Force abilities, and larger enemy variety.
- Stances: All five become available:
- Force Powers: Mid-air Force Push, Force Lift (unlock on Jedha), Mind Trick (early mid-game on Koboh).
- Lightsaber Throw: Unlocked via skill tree (mid-game).
- BD-1 Upgrades: >!Electro Dart!< (activates batteries/panels), >!Scuba!< (water breathing), >!Sonar!< (reveals hidden paths).
- Skill Tree: Expand to unlock new combo branches and Force powers. Three substrees: Strength (HP/defense), Force (Force meter/regen), Survival (block bar/stims).
- Stim Canisters: Total up to 10 by finding all across planets (some in Force Tears).
- Perk Slots: Unlock up to 3-4 slots by finding certain collectibles (e.g., Force Tears).
- Lightsaber Customization: Full customization of hilt, emitter, switch, sleeve, material, and color (ignition crystal).
- Movement Upgrades: >!Dash!< (mid-game Koboh), >!Air Dash!< (Jedha), >!Climb!< on specific walls (unlocked automatically).
- Fast Travel: Available at all Meditation Points (after >!Cere!< unlocks it on Koboh).
- Force Tears: Challenge rooms that drop skill points or upgrades (e.g., platforming, combat puzzles).
- Secrets: Priorite Shards, Data Disks, Force Essences (perk slots), Lightsaber parts, outfits.
- Planet Progression: Each planet has a small world map with compartments; Koboh has a large open world with multiple biomes.
- Main Quests: >!Find the compass, meet the Hidden Path, confront Dagan Gera!< – mix of linear and open-ended.
- Side Quests: “Rambler’s Reach” quests: help >!Skoova!< with fish, >!Zee!< with parts, >!Doma!< with legendary bounties.
- Bounties: Higher level bounties unlock after beating early ones. Rewards include unique perks and cosmetics.
- Holotactics: Miniature combat strategy game accessed on Koboh – rewards include skill points and lore.
- Priorite Shards: Used primarily for Doma’s boutique (cosmetics) and some NPC upgrades. Can be abundant if you explore.
- Data Disks: Limited – prioritize upgrades: >!Electro Dart!< first, then >!Sonar!<.
- Skill Points: Earned via XP from combat, exploration, and Force Tears. Roughly 1 point per 1000 XP (later scaling).
- Build Diversification: Choose one primary stance and one secondary. Example: Single + Blaster for range/melee hybrid; Crossguard + Dual Wield for heavy burst.
- Perk Recommendations:
- Respec Option: At any Meditation Point you can reset all skill points (free) – try different builds freely.
- Complete main story up to >!defeating Dagan Gera on Nova Garon!<. Unlock >!Tanalorr!< as a destination (final area).
- Focus on the final planet >!Tanalorr!< and a few remaining side areas.
- High difficulty combat encounters: >!Bode!< boss fight, >!Dagan Gera phase 2!<, >!Vader!< encounter (scripted).
- Closure of major side stories (e.g., >!Jedi Training on Jedha!<).
- Stances: All five maxed, but you can only equip two at a time. Swap at Meditation Points.
- Force Powers: All powers unlocked (e.g., Force Rage from skill tree).
- BD-1: Fully upgraded (all hacks available).
- Perks: Up to 5 slots available if you collected all Force Essences.
- Skill Tree: Max out roughly 80% of nodes if you farmed Force Tears and completed side content. Priority: Force Meter upgrades, combo finishers, and unblockable attacks.
- Stim Canisters: Max 10 (or 12 with >!Doma’s upgrade!<).
- Lightsaber Customization: Can change appearance any time at workbenches.
- Tanalorr: Smaller open area with puzzles and a few Force Tears. No fast travel except meditation points.
- Backtracking: Use >!Electro Dart!< and >!Air Dash!< to reach previous unreachable chests on Koboh and Jedha.
- Gauntlets: Some optional gauntlets require precise platforming and combat (like >!The Fractured Plains!<).
- Main Quest: >!Find the compass cache, fight through Tanalorr, confront Bode!<.
- Side Quests: Most should be completed before final point of no return (game warns you). Notable: >!Help the Bedlam Raiders? (choice) – affects cosmetic rewards!<.
- Bounties: All can be finished – legendary bounties drop unique lightsaber parts.
- Endgame Economy: Priorite Shards become less relevant – you likely have enough for all cosmetic items. Data Disks may still be missing for BD-1 upgrades (if not found).
- Skill Points: Earn freely from Force Tears and combat – no cap.
- Optimal Build: Focus on one stance for damage output and another for crowd control/utility.
- Upgrade Priority: If not maxed, finish skill tree before final boss.
- Complete main story by >!defeating Bode on Tanalorr!<. Credits roll. Post-game unlocks New Game+ and free-roam ability to finish side content.
- Free exploration to 100% all planets, complete all Force Tears, bounties, and holotactics challenges.
- New Game+ (NG+) with all skills and perks retained, but enemy scaling increased.
- No new story content; focus on completionism and mastery.
- NG+: You keep all stances, Force powers, and upgrades. Enemies deal more damage and have more health. Boss fights become more punishing.
- Purity Perk (available in NG+?): Actually unlocked during normal play if you find it – quadruples damage but you die in one hit – for challenge.
- Holotactics: Complete all 10 waves for a final cosmetic reward.
- Legendary Enemies: Some appear only after story (e.g., >!Spawn of Oggdo!< on Koboh).
- No new progression beyond skill point cap (can max out every node – roughly 50-60 levels required).
- Stim Canisters: No additional after max.
- Perk Slots: All 5 available if you found all Force Essences.
- Lightsaber & BD-1: Fully customisable, but only cosmetics remain to unlock.
- Completionist Goals:
- Fast Travel: Use to quickly hop between planets from the Mantis.
- No new quests after story. However, some bounties and rumors may remain incomplete – they remain available.
- Rancor Pit: Optional boss on Koboh (can be done earlier).
- NG+: Resets all quests and collectibles? Actually NG+ keeps progress but you can re-experience story with your kit – no new quest rewards.
- Endgame Economy: Credits and Priorite Shards become useless – you can buy everything. Data Disks have no further use if BD-1 is fully upgraded.
- Skill Points: Still earnable via XP. No level cap, but no new skills after maxing tree.
- Max Build: All skills unlocked, best perks equipped. Experiment with perk combos: e.g., “Amplified Force” + “Force Meter Surge” + “Unshakeable” (block bar).
- No respec needed – you have everything.
- New Game+: Unlocked after credits. You start at the beginning of the story with all abilities (except story-gated ones like >!Dash!< – but you regain them early). Difficulty scaled up.
- Tips for NG+: Use purity if you want a glass-cannon challenge, or stick to normal Master/Grandmaster difficulties.
- Achievements/Trophies: Many require 100% exploration, legendary bounties, and completing all Force Tears.
- Post-100%: No further content – put the game down or replay at higher difficulty.
Combat & Interaction Systems
Progression
Exploration
Quests & Missions
Economy & Resources
Character/Build Growth
End of Early Game
---
MID GAME (After Koboh Hub to Before Final Planet)
Gameplay Loop
Combat & Interaction Systems
- Single: Balanced, high parry windows.
- Double Bladed: Fast crowd control, spin attacks (force based).
- Blaster: Ranged attack, can charge shots, disengage. Unlock early mid-game on Koboh.
- Crossguard: Heavy slow strikes, high damage, unblockable attacks. Found in >!phonogram side quest!<.
- Dual Wield: Fast combos, parry cancels into attacks. Unlocked on >!Nova Garon!<.
Progression
Exploration
Quests & Missions
Economy & Resources
Character/Build Growth
- Iron Will (reduces Force cost for defensive abilities).
- Efficiency (extends Force gauge by 2 seconds).
- No Stagger (immunity to stagger while attacking).
End of Mid Game
---
LATE GAME (Final Planet and Main Story Completion)
Gameplay Loop
Combat & Interaction Systems
Progression
Exploration
Quests & Missions
Economy & Resources
Character/Build Growth
- Example: Crossguard (high damage vs bosses) + Blaster (mobs and range).
- Perks: Amplify Force Meter, Increase Block Bar, and Resilience (passive HP regen).
End of Late Game
---
ENDGAME (After Main Story Completion)
Gameplay Loop
Combat & Interaction Systems
Progression
Exploration
- All chests (about 130 across all planets)
- All databank entries
- All Force Tear challenges (5 combat, 5 platforming, etc.)
- All legendary bounties (10)
- All holotactics challenges
Quests & Missions
Economy & Resources
Character/Build Growth
Endgame Structure
---
Summary Table: Progression Tiers Overview
| Aspect | Early Game | Mid Game | Late Game | Endgame |
|---|---|---|---|---|
| Stances | Single; Double Bladed (late early) | All 5 available | All 5 (maxed) | All 5 |
| Force Powers | Push, Pull, Slow | Plus Lift, Mind Trick, Throw | All unlocked | All |
| Stim Count | 2–3 | Up to 10 | Max 10 | Max 10 |
| Perk Slots | 1 | 2–3 | 4–5 | 5 |
| Open World | Limited (Koboh hub) | Multiple planets | Final planet + backtracking | Complete freedom |
| Difficulty | Easy (story mode) | Medium | Hard | Very Hard (NG+) |
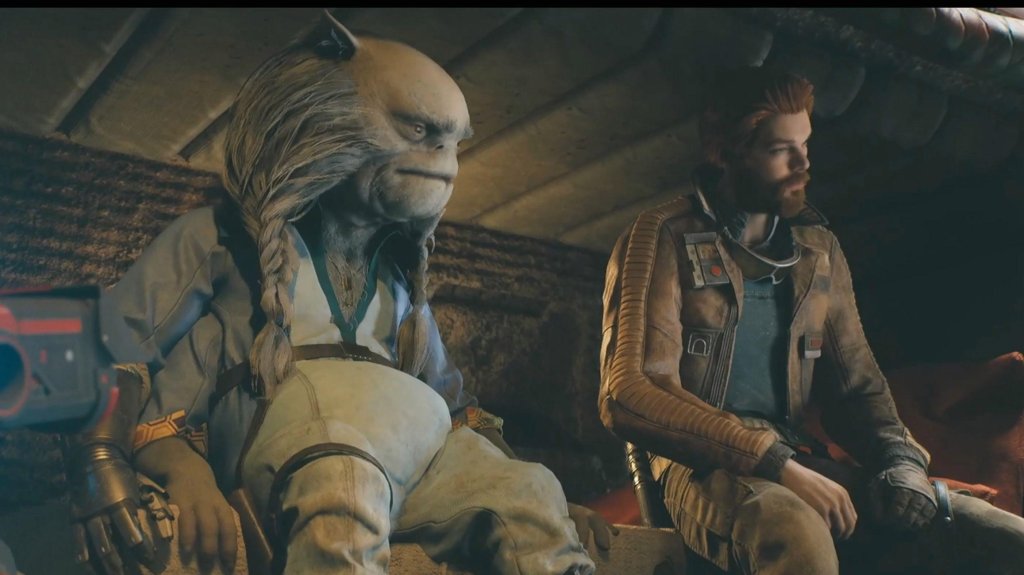
Game Tips
Game Tips
This guide provides practical tips for Star Wars Jedi: Survivor, organized by category. Tips range from beginner essentials to advanced optimizations that will help you survive as Cal Kestis.
Combat Tips
1. Master the Stance System
- Beginner: Stick with one stance initially (e.g., Single Blade) to learn enemy patterns. Switch stances by holding the weapon button.
- Intermediate: Assign two stances that complement each other (e.g., Double-Bladed for crowd control + Blaster for ranged). Use quick swap in combat to adapt mid-fight.
- Advanced: Use Crossguard stance for high damage against slow enemies, then switch to Dual Wield for fast combos against groups. Master the stance-specific Force abilities (e.g., Crossguard’s slam).
- Beginner: Hold block to reduce damage, but watch your block meter (yellow bar depletes; if it breaks, you stagger). Parry just before an attack lands to stagger enemies and open them up for a critical hit.
- Intermediate: Learn enemy attack telegraphs. Unblockable attacks have a red flash – dodge or jump away. Parry timing is tighter but more rewarding.
- Advanced: Chain parries against multiple enemies by using the ‘Parry’ ability (upgrade from skill tree). Use the ‘Shatter’ perk to increase stagger damage after parries.
- Beginner: Use Force Slow (hold R1/RB + square/X) to slow down groups, giving you time to attack or heal. Force Push/Pull are great for environmental kills (e.g., pushing enemies off cliffs).
- Intermediate: Upgrade Force meter capacity early. Use Force Lift to disable strong enemies temporarily. Combine Force Pull with a lightsaber throw for ranged damage.
- Advanced: Use ‘Force Parry’ (if unlocked) to reflect blaster bolts back at shooters. Time Force Slow just as an enemy is about to attack to cancel their animation.
- Beginner: Double-tap dodge to roll – invincibility frames are generous. Use sprint to reposition.
- Intermediate: Learn enemy combos; dodge the first hit then counter. The ‘Slide’ ability (double jump + crouch) can evade ground-level attacks.
- Advanced: Use the ‘Air Dash’ upgrade to dodge in mid-air. Combine dodge with jump to evade sweeping attacks. Practice the ‘Wall Run’ dodge to quickly change direction.
- Use BD-1’s scanner on every object, creature, and datadisc. Scanning reveals lore, material locations, and sometimes points of interest (like hidden doors).
- Tip: Scan enemies after defeating them to unlock codex entries that give combat advantages.
- Unlock meditation points early – they act as fast travel. Use the map to see which areas are connected. Always activate new meditation points when you find them.
- The map is 3D and color-coded: green = explored, yellow = incomplete secrets, red = blocked. Zoom in to see collectible icons. Use the ‘Show All’ filter to see everything in an area.
- Many areas have breakable walls (use Force Push) or hidden caves behind waterfalls. Listen for BD-1 beeping – it indicates nearby secrets. Use the ‘Echo’ ability (Force Sense) to highlight interactive objects.
- After obtaining the Relter mount on Koboh, use them to travel between high points. Relter can fly over gaps that Cal cannot jump. Upgrade Relter stamina with seeds.
- Priorite Shards are the main currency for buying cosmetic items (lightsaber parts, ponchos, BD-1 skins). Prioritize buying upgrades that improve gameplay, like increased stim canisters from Doma’s shop.
- Tip: Use the ‘Scavenger’ perk to find more shards from enemies.
- Spend your first tech scraps on BD-1 upgrades: ‘Slicer’ (opens locked doors), ‘Holotactics’ (unlocks mini-games for rewards), and ‘Mining Scanner’ (reveals hidden materials). These unlock more resources and shortcuts.
- Pick up every salvage item (scrap metal, circuits, etc.). They are used for crafting stim upgrades, health, and Force upgrades at workbenches. Sell excess scrap to Doma for shards.
- Collect seed pods from plants; there are 10 types. Plant them in the garden on Koboh (near Pyloon’s Saloon). Each planted seed gives a permanent stat boost (e.g., increased Force meter, health, or stamina). The rewards stack per type.
- At workbenches, you can upgrade: Lightsaber (increase damage), Blaster (fire rate/damage), and Survival (health/block meter). Prioritize ‘Stim Canister Advanced’ for more uses, then damage upgrades.
- Tip: The ‘Double-Bladed Spin’ upgrade is excellent for crowd control early.
- Focus on the Survivor skill tree first: increase health (vitality), block meter (endurance), and stim count. This makes early encounters forgiving.
- After unlocking the second stance, invest in both Force abilities (to manage crowds) and Lightsaber damage. Pick perks: ‘Fortified’ (more block meter) and ‘Shatter’ (parry disrupts).
- Max out Force abilities like ‘Force Lift’, ‘Force Slow Duration’, and ‘Force Throw’. Combine with the Blaster stance for ranged pressure. Use ‘Vapaad’ perk for increased Force recovery on attacks.
- Stim Efficiency: Use ‘Quick Stim’ (faster heal) and ‘Stim Pack Mastery’ (more duration).
- Damage Output: ‘Focused Rage’ (damage boost at low health) + ‘Survivor’s Instinct’ (damage boost after parry).
- Exploration: ‘Scavenger’ + ‘Resourceful’ (more salvage from enemies).
- You can reset skill points at any meditation point. Experiment with different builds for boss fights. There’s no penalty.
- On PS5 and Xbox Series X, use ‘Performance Mode’ (60 FPS) for smoother combat. Quality mode (30 FPS) offers better graphics but can feel sluggish for parry timing.
- If on PC, reduce ‘Shadow Quality’ and ‘Post-Processing’ to medium for better FPS. Turn off ‘Motion Blur’ for clarity. Set ‘View Distance’ to high to spot enemies early.
- The game is designed for controller; keyboard+mouse can be awkward for precise combos. Remap ‘Dash’ to L3 (click) for easier access.
- Priorite Shards: Revisit old areas after unlocking new Force abilities (e.g., Force Lift). Many secret chests become accessible. Use the ‘Show All’ map filter to find them.
- Unlock the ‘Mind Trick’ upgrade for BD-1 to pacify droid enemies – they drop extra shards when pacified and then destroyed.
- Scrap stacks up to 99; you can sell it to Doma for shards. Don’t hoard if you need shards for cosmetics or key upgrades.
- For late-game upgrades, you need ‘Electrum’ and ‘Mythril’. These drop from strong enemies (e.g., Mogu on Koboh) or are found in secret areas. Use the ‘Scavenger’ perk to increase drop rates.
- Before a boss, use ‘Force Slow’ on yourself (doesn’t work on yourself) – actually use items: equip ‘Damage Resist’ perk and ‘Stim’ upgrades. Consider using a Stim just before the fight starts to have a full healing reserve.
- Against multiple enemies, parry one attack then immediately dodge into another enemy’s attack to parry again. This builds up stagger quickly. Use ‘Shatter’ perk for bonus damage.
- Jump off walls and attack mid-air – this gives you extra height and avoids ground attacks. Chain wall runs across multiple walls to reach hidden areas.
- Use Force Slow to freeze enemies, then switch to Blaster stance and fire charged shots (hold trigger) for massive damage. This melts elite enemies.
- If attempting no death runs, prioritize the Survivor tree completely, use the ‘Safe Landing’ perk (reduce fall damage), and always keep a Stim for emergencies. Learn enemy patterns in safe areas first (like the training dummies on Koboh).
- [ ] Unlock all meditation points as you go.
- [ ] Scan every enemy after first encounter.
- [ ] Upgrade BD-1’s Slicer ability ASAP.
- [ ] Plant all seed types in Koboh garden.
- [ ] Assign two stances before major fights.
- [ ] Respec for boss fights if stuck.
- [ ] Use the map’s ‘Show All’ filter to locate secrets.
- [ ] Sell excess scrap for shards.
2. Blocking and Parrying
3. Force Management
4. Dodging and Movement
Exploration Tips
1. Scan Everything
2. Prioritize Fast Travel Points
3. Check the Map Often
4. Look for Hidden Caves and Walls
5. Use Relter Travel
Resources & Economy Tips
1. Manage Priorite Shards
2. Upgrade BD-1 First
3. Salvage Everything
4. Seed Pods and Gardening
5. Workbench Upgrades
Builds & Skill Tree Optimizations
1. Early Game Build: Survivor
2. Mid Game Build: Versatile Fighter
3. Late Game Build: Force Wielder
4. Perk Synergies
5. Respec Points freely
Platform & Performance Tips
1. Performance Mode
2. Graphics Settings (PC)
3. Use Controller
Economy & Progression Tips
1. Fastest Credits
2. Upgrade Mind Trick
3. Sell Excess Scrap
4. Farming Rare Materials
Advanced Optimizations
1. Boss Fights: Pre-buff
2. Parry Chain Combos
3. Wall Run Jump Attacks
4. Force Slow + Blaster
5. No Death Challenge
Checklist of Must-Do Tips
Final Advice: Patience is key. Jedi: Survivor punishes reckless aggression. Learn enemy patterns, use the environment, and don’t be afraid to retreat and heal. Explore thoroughly before progressing the main story to power up. May the Force be with you.
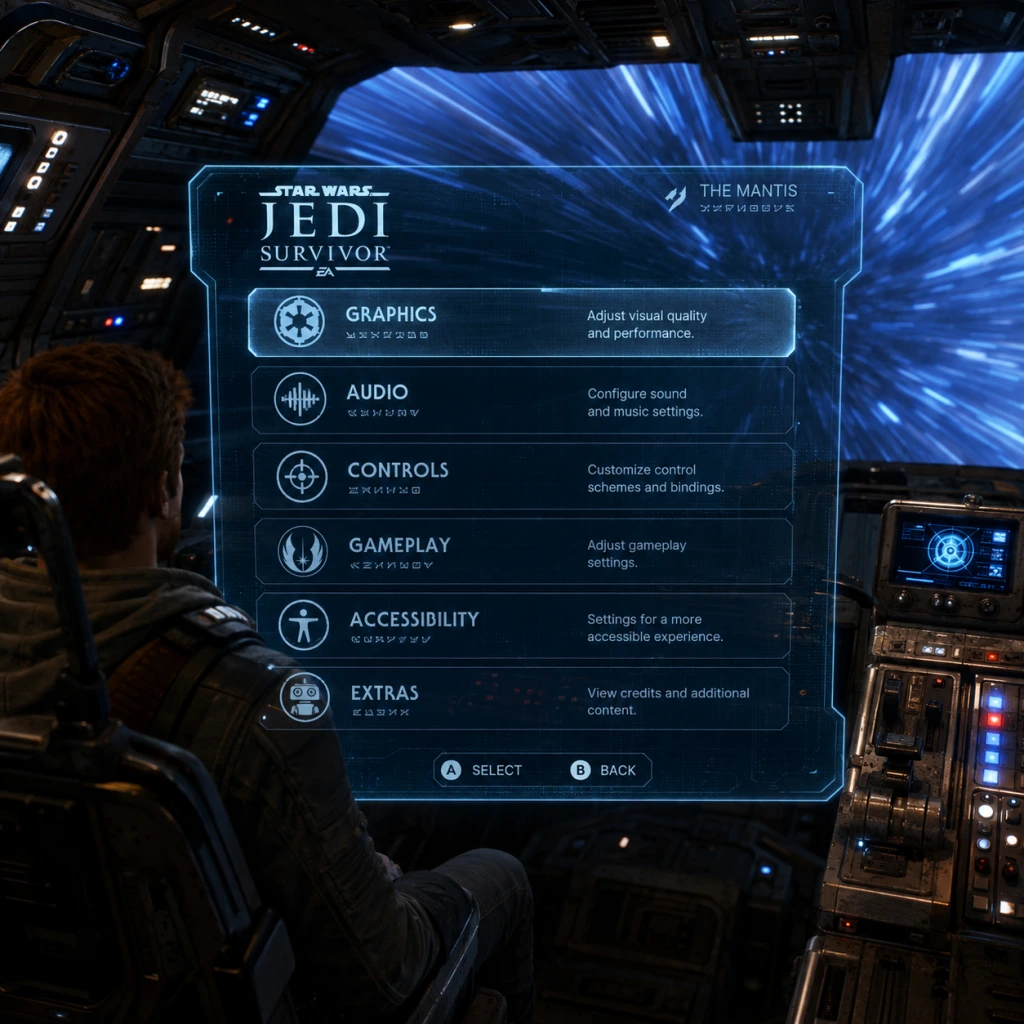
Game Settings
Star Wars Jedi: Survivor – Game Settings Guide
This guide covers every settings category in Star Wars Jedi: Survivor. We explain what each option does, provide recommended configurations for performance (low-end) and quality (high-end) hardware, and point out settings that are easy to misconfigure or that have a major impact on your experience.
---
1. Graphics Settings
#### 1.1 Display & Resolution
- Display Mode: Fullscreen (recommended for performance), Windowed Borderless (good for multi-monitor setups).
- Resolution: Set to native monitor resolution. For low-end PCs, drop to 1080p or lower.
- V-Sync: Off for lower input lag; On to eliminate screen tearing. If you have a G-Sync/FreeSync monitor, keep V-Sync On in driver and Off in game.
- Frame Rate Limit: Set to monitor refresh rate (e.g., 60, 144). Helps maintain consistency.
- HDR: Only enable if your display supports it. Adjust brightness in HDR menu.
- Graphics Quality: Ultra, High, Medium, Low, Custom. We recommend starting with the preset that matches your GPU (see table below).
- Key Custom Options:
#### 1.2 Quality Presets & Custom Options
- Texture Quality: Affects sharpness. Performance cost: Low (mainly VRAM). High-end GPUs use Ultra; low-end use High.
- Shadow Quality: Softness and detail. Performance cost: High. Set to Low/Medium on low-end.
- Global Illumination (GI): Affects lighting realism. Performance cost: Very High. Use Low or Medium on low-end.
- Reflections: Screen Space or Ray Traced. Performance cost: High. Prefer Low or Medium.
- Post Processing: Bloom, motion blur, depth of field. Performance cost: Low. Turn off motion blur if it causes motion sickness.
- Ambient Occlusion: Adds depth shading. Performance cost: Medium. Low or Medium acceptable.
- Anti-Aliasing: TAA is default. On low-end, use FXAA to reduce blur.
- Ray Tracing: Off for performance. On for visual quality (requires RTX 20/30/40 or RX 6000/7000). Very demanding.
#### 1.3 Recommended Settings by Hardware Level
| Component | Low-End (e.g., GTX 1060, i5-8400) | Mid-Range (e.g., RTX 3060, R5 5600) | High-End (e.g., RTX 4080, i7-13700K) |
|---|---|---|---|
| Overall Preset | Low (Custom tweaks below) | High | Ultra (Custom with RT) |
| Resolution | 1080p or 900p (if needed) | 1440p | 4K or 1440p with high refresh |
| View Distance | Low | High | Ultra |
| Texture Quality | High | Ultra | Ultra |
| Shadow Quality | Low | High | Ultra |
| Global Illum. | Low | Medium | Ultra (or RT GI) |
| Reflections | Low | High | Ultra (or RT reflections) |
| Post Processing | Low | High | Ultra |
| Ambient Occlusion | Low | High | Ultra |
| Anti-Aliasing | FXAA | TAA | TAA or DLSS Quality (if available) |
| Ray Tracing | Off | Off (or Low if performance allows) | On (Medium or High) |
| FPS Target | 30-45 fps stable | 60 fps | 60-120 fps |
#### 1.4 Easy to Misconfigure Graphics Settings
- Resolution Scale: Often left at 100% by mistake. Reducing to 90% or 80% can substantially boost FPS on low-end PCs.
- Upscaling Mode: Make sure to choose the correct option for your GPU (e.g., DLSS only on NVIDIA RTX). The game may default to TAAU.
- Frame Limit vs V-Sync: Enabling both can cause input lag. Use only one.
- Texture Pool: Low VRAM? Reduce texture quality. The game may crash on 6 GB cards with Ultra textures.
- Master Volume: 70-80% is a good starting point.
- SFX Volume: Keep 100% to hear combat cues.
- Dialogue Volume: 100% for story immersion.
- Music Volume: Adjust to taste; music can be intense during boss fights.
- Voice Language: Choose language for spoken dialogue (separate from text).
- Subtitles: On (recommended) even for native language to catch ambient dialogue.
- Dynamic Range: Choose “Headphones” for better spatial awareness with a headset; “Home Theater” for surround sound.
- 3D Audio (HRTF): On if supported (PS5, Xbox, PC with compatible headphones). Improves directional cues.
- Audio Output: Select your device correctly. Misconfiguration can cause crackling or low volume.
- Controller (Console/PC): Default layout is similar to Jedi: Fallen Order. Customizable.
- Mouse & Keyboard (PC): Full rebindable. Recommended to rebind Force abilities to mouse buttons or nearby keys.
- Controller Sensitivity: Start at default (e.g., 50/100). Increase gradually if aiming feels sluggish.
- Mouse Sensitivity: 400-800 DPI, in-game sensitivity 50-70. Adjust for precise parrying.
- Aim Assist: On for controller (helps in combat). Off for mouse if you prefer raw aim.
- Invert Y: Off by default. Toggle if you prefer inverted controls.
- Trigger Deadzone (Controller): Keep default (10-15%). Lower for quicker response, but risk of accidental inputs.
- Stick Deadzone: Default is fine. Increase if drifting occurs.
- Toggles vs Holds: You can switch between hold-to-run and toggle-run. Toggle is easier on thumbs.
- Lightsaber Stance Switching: Assign to a quick button (e.g., hold triangle/Y) to avoid delays.
- Force Abilities: Map each to a dedicated key/button if possible for faster use.
- Color Blind Modes: Protanopia, Deuteranopia, Tritanopia – affects UI elements and game world markers.
- High Contrast Mode: Increases visibility of objects and enemies. Helpful for low vision.
- Text Size: Small, Medium, Large. Large is recommended for readability.
- Subtitle Background: Opaque or semi-transparent to improve contrast.
- Camera Shake: Reduce or disable to prevent motion sickness.
- Motion Blur: On/Off. Off for clarity and less nausea.
- Auto-Running: On (character runs automatically forward). Helpful for players with limited fine motor control.
- Combat Assistance:
- Navigation Assistance: Highlight path to objectives (like a guiding line). On by default; can be turned off for challenge.
- Photo Mode Sensitivity: Reduce sensitivity if camera moves too fast.
- Game Text Language: Choose from available options (English, French, German, Japanese, etc.).
- Audio Language: Can be separate from text. Only voice acting language; subtitles remain in text language.
- Subtitle Language: By default follows text language, but can be changed independently.
- Menu Language: Usually same as text language, but some systems (like PS5) may have separate options.
- Online Features: On/Off. Disable if you prefer offline play (saves are local).
- Cross-Play: Not applicable (no multiplayer). The option may appear but does nothing.
- Data Sharing: Allows EA to collect telemetry – no gameplay impact. Disable for privacy.
- Connection Status: Shows if you are connected to EA servers. Not required to play single-player.
- Difficulty: Story, Jedi Knight, Jedi Master, Grandmaster (see Game Tips guide for details). This setting affects enemy damage, aggression, and parry windows. Can be changed anytime.
- Quick Travel Unlock: By default, meditation points must be discovered. No setting to change this.
- Auto-Equip Upgrades: On/Off. On automatically equips new abilities when unlocked. Off gives manual control.
- Hint System: Frequent, Infrequent, Off. Affects how often NPCs give puzzle hints. Off for purists.
- Dismemberment: On/Off. Only affects visuals (cuts on humans). Off reduces graphic violence.
- Subtitles for Gameplay: On by default – shows environment descriptions (e.g., “Wall run enabled”). Keep on for clarity.
- Weapon Holster: Automatic or Manual. Manual allows you to holster lightsaber by holding a button (stance switch).
- Camera Assist: On – camera automatically adjusts behind Cal during movement. Off gives full manual control.
- Look-Ahead Camera: On – camera tilts in direction of movement slightly. Helps with platforming. Off for fixed cinematic view.
---
2. Audio Settings
Misconfigure Note: If sound is distorted, check sample rate/bit depth in Windows sound settings (should be 48 kHz, 24-bit).
---
3. Controls Settings
#### 3.1 Input Method
#### 3.2 Sensitivity & Aim
#### 3.3 Specific Control Schemes
Misconfigure Note: The default controls sometimes assign “Dash” and “Sprint” to same button (e.g., L3 on controller). Make sure they are distinct to avoid accidental dodges.
---
4. Accessibility Settings
- Auto-Attack: On – character attacks automatically when near enemies.
- Auto-Dodge: On – automatically dodges enemies' unblockable attacks (reduces difficulty).
- Auto-Force: On – uses Force abilities at optimal moments.
Special Attention: The Combat Assistance features are easy to miss – they are in the Accessibility menu, not Difficulty menu. Enabling them makes the game much easier, so toggle carefully if you want a challenge.
---
5. Language Settings
Note: Changing audio language mid-playthrough does not affect save data.
---
6. Network Settings
Troubleshooting: If you experience crashes or load delays, disable online features. The game occasionally stutters when trying to sync achievements.
---
7. Gameplay Settings
Misconfigure Alert: The “Look-Ahead Camera” can disorient some players. If you feel motion sick, turn it off.
---
8. Special Attention Points During Setup
1. Save and Exit Properly: The game does not auto-save in menus. Always wait for the white spinning icon (meditation point auto-save) before closing.
2. Graphics Preset vs Custom: Applying a preset overwrites all custom settings. If you tweak individual options, do not later apply a preset.
3. VRAM Management: On PC, if you encounter stuttering, lower Texture Quality and Ray Tracing. The game can exceed 8 GB VRAM at Ultra.
4. Controller on PC: If using a PlayStation or Xbox controller, ensure you have the correct input type selected under Controls > Controller Type. The game may incorrectly default to keyboard.
5. DualSense Features (PC/PS5): Haptic feedback and adaptive triggers are only fully supported on PS5 and via wired USB on PC. Check your connection.
6. Audio Sync: If audio lags behind video, update audio drivers or lower audio quality in Windows.
7. Photo Mode: Accessible via both menu and shortcut. Does not pause gameplay (enemies still move) – plan your shots carefully.
8. Cloud Saves: Enabled by default on all platforms. If you play on multiple devices, ensure sync is complete before starting.
---
With these settings properly configured, you’ll have a smoother and more personalized experience in Star Wars Jedi: Survivor. Adjust as needed based on your hardware and preferences. May the Force be with your settings!
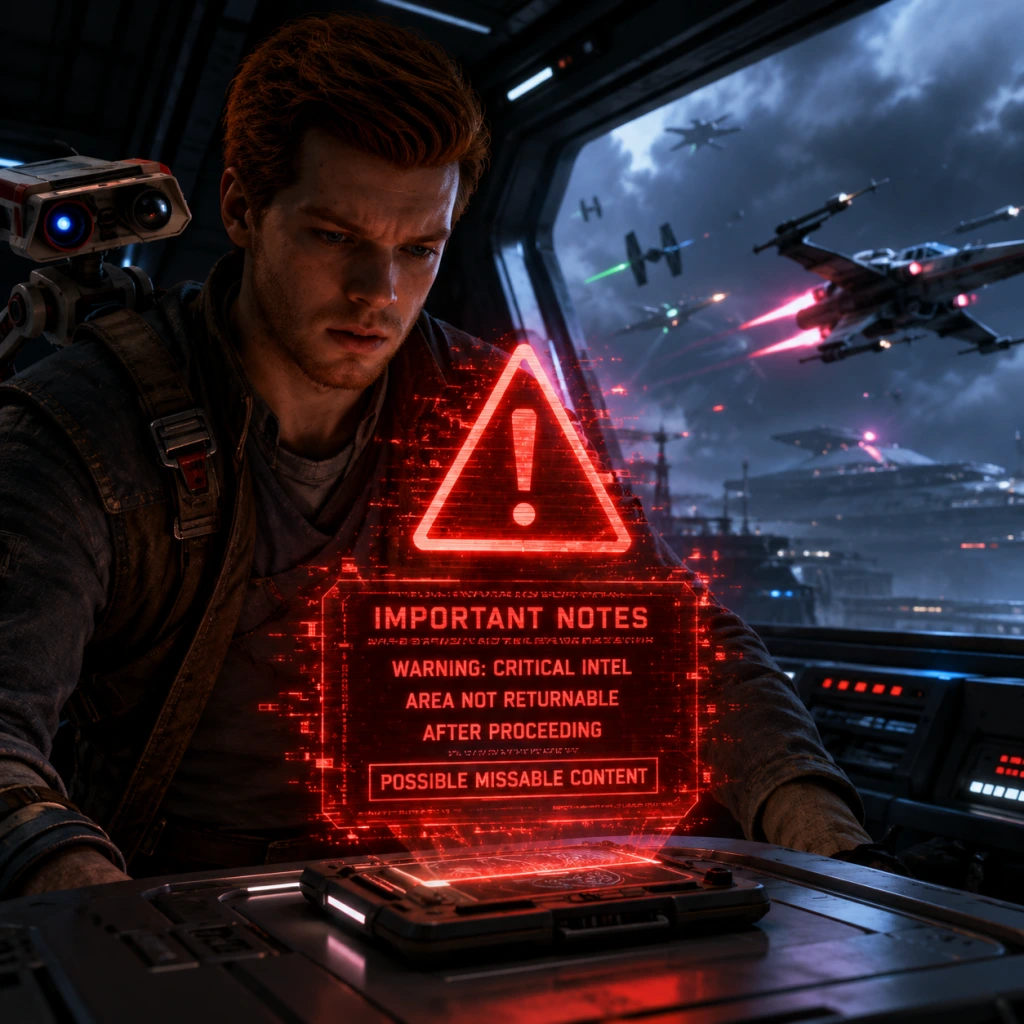
Important Notes
Star Wars Jedi: Survivor – Important Notes
This guide covers critical warnings, missable content, difficulty spikes, and other essential knowledge to help you avoid regret and save frustration during your journey as Cal Kestis.
Warnings and Pitfalls
- Performance Issues (PC): Jedi: Survivor is demanding. Even high-end PCs may experience stuttering, frame drops, or crashes, especially in open-world areas like Koboh. Update your GPU drivers, disable ray tracing if unstable, lower crowd density, and cap FPS at 60. On PS5/Xbox Series X|S, use Performance mode for smoother framerate (target 60 FPS) at the cost of some visual fidelity.
- Platforming Deaths: Cal can die from fall damage if you miss a jump or air-dash. Always double-check ledges and use the map to plan routes. The game has no fall damage to health – you instantly die if you fall off a cliff.
- Camera Issues: In tight corridors or during large enemy fights, the camera can clip into walls. Lock-on is essential but not perfect; manually adjust when needed.
- Enemy Scaling: Enemies do not scale with your level. Some areas (e.g., the Shattered Moon) contain high-level enemies early on. If you’re struggling, explore Koboh first to unlock upgrades and skills.
- Save Corruption: Rare but possible. On PC, back up your save files located in `Documents/Star Wars Jedi Survivor/Saved` periodically. On consoles, use cloud saves or USB backup.
- No Irreversible Skill Build: You can unlock every skill and Force ability by endgame – there is no respec option, but you are not locked out of anything permanently. Spend points freely.
- Missable Collectibles: After completing certain main story events, some areas become inaccessible. Specifically:
- Rumors (Side Quests): Most rumors remain available after the story, but a few tied to specific NPCs (e.g., the bounty hunter Dagan’s lair) may lock if you advance too far. Prioritize unique rumor icons with orange markers.
- Priorite Shards and Databank Entries: Many are one-time pickups. Use the map legend to track uncollected items, and check each planet’s completion percentage.
- Early Game Spike: The first few hours are tough because you lack stances, Force abilities, and health upgrades. Rely on blocking and dodging. The Ninth Sister boss on Coruscant is a major skill check – learn her attack patterns and parry.
- Mid Game Spike: The Rayvis fight on Nova Garon demands aggressive, rhythmic parrying. If you haven’t mastered the Crossguard or Blaster Stance, switch to Double-Bladed for crowd control.
- Final Boss: The last boss is a prolonged multi-phase encounter. Bring full stims, consider using the “Fortified” perk for extra damage reduction, and use the Interaction Wheel to consume stims quickly between phases.
- General Tip: If stuck, lower the difficulty temporarily (Story Mode gives more forgiving parry windows) – you can change it anytime in the pause menu.
- Skill Points (XP): You earn plenty by exploring and defeating enemies. Do not waste time repeatedly killing the same respawning enemies at a Meditation Point – it’s inefficient. Instead, clear a map zone thoroughly once.
- Materials for Upgrades: You can farm rare materials (e.g., Pristine Datacrons, Sentinel Caches) by returning to earlier areas after unlocking new Force abilities. No need to grind; the game provides enough resources to upgrade all gear.
- Credits: Money is abundant. Spend freely on cosmetics and data disks. Save Priorite Shards for the vendor on Koboh – they unlock unique gear and abilities.
- Don’t Sell Collectibles: You cannot sell items; credits come from chests and enemies. Spend early on stim canisters and skill tree unlocks.
- Single-Player Only: No multiplayer, co-op, or competitive modes. No anti-cheat software required.
- EA Account: Required for achievements/trophies and cloud saves. Linking is mandatory but does not affect gameplay.
- Leaderboards: Present for some challenge rooms (e.g., “Force Tears”). They are optional and non-intrusive. No etiquette rules apply.
- Auto-Save: The game auto-saves frequently at meditation points, story checkpoints, and when entering/exiting areas. However, auto-saves overwrite each other.
- Manual Save: You can manually save from the pause menu (Save & Quit). This creates a separate manual save slot (only one). Use it before major boss fights or exploration in missable zones.
- Backups (PC): Navigate to `%USERPROFILE%/Documents/Star Wars Jedi Survivor/SaveGames/`. Copy the entire folder to a safe location regularly.
- Console Cloud Saves: On PS5, disable auto-sync sometimes to avoid overwriting a bad save. On Xbox, ensure cloud saves are active but be cautious.
Irreversible Choices & Missable Content
- Nova Garon: Once you finish the mission there, you cannot return. All collectibles (chests, databanks, essences, treasure maps) in that area are permanently missable. Exploit fully before leaving.
- Coruscant: The opening section is linear and cannot be revisited. Miss nothing – but completionists should grab every collectible before leaving.
- Jedha (areas after sandstorm changes): Some spots become sealed after story progression. Complete side content on Jedha before finishing the main quest there.
Difficulty Spikes & Bosses
Grinding Traps & Resource Management
Online / Anti-Cheat Notes
Save Management
Things Players Commonly Regret Not Knowing Earlier
1. Fast Travel Unlocks Late: You cannot fast travel directly to most points until you unlock the Koboh Mantis Upgrade (mid-game). Until then, plan routes carefully.
2. Stance Swapping is Instant: You can have two stances equipped and switch between them mid-combat using the d-pad (console) or number keys (PC). Experiment early – don’t stick with one stance.
3. Force Abilities Open Paths: Many blocked paths require specific Force powers (e.g., Force Lift, Confuse). Return to early areas after unlocking them to discover new collectibles and shortcuts.
4. BD-1 Map Upgrade: On Koboh, find the Philosopher’s Cache to upgrade BD-1’s map to show all collectibles. Do this as soon as possible to avoid backtracking.
5. Upgrade Lightsaber Damage First: Prioritize the Lightsaber Mastery skill (increased damage) over health upgrades early – kill enemies faster to reduce damage taken.
6. Meditation Points Reset Enemies: Use them to farm resources and XP by fast traveling away and back – but it’s rarely necessary.
7. Not All Chests Are Visible: Some chests require using the Survey ability (scanner) to reveal hidden walls or floors.
8. No Enemy Scaling: If an area feels too hard, come back later. The game never punishes you for avoiding combat.
9. Rumors Are Worth It: Side quests from NPCs on Koboh often reward unique abilities, stims, or permanent health upgrades. Check the cantina regularly.
10. You Can Pause Cutscenes: Press the Menu button during cinematics to pause – useful for referencing story details or taking a break.
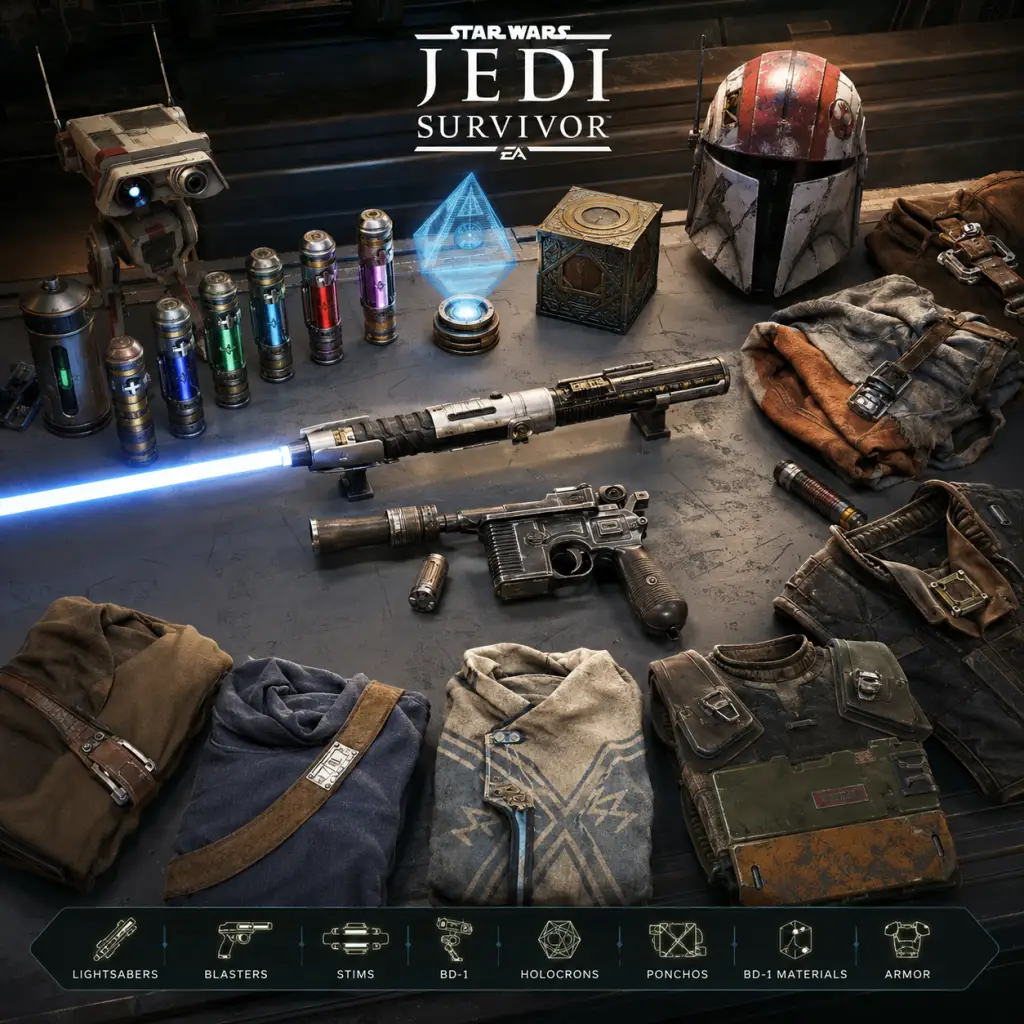
All Game Items
All Game Items
This guide catalogs every major item type in Star Wars Jedi: Survivor, including weapons, armor, consumables, materials, currencies, collectibles, and key equipment. Items are grouped logically with explanations of function, acquisition methods, optimal usage, and notable synergies or upgrades.
Weapons
Cal Kestis wields a customizable lightsaber and a blaster. Each stance offers unique combat styles.
#### Lightsaber Stances
- Single Blade: Balanced, all-purpose stance. Fast swings, good for duels. Available from the start.
- Double-Bladed: Wide sweeps for crowd control. Unlock by collecting the Double-Bladed Lightsaber upgrade from the Phon Qi Cavern on Koboh after reaching the Untamed Downs area.
- Blaster Stance: Combines lightsaber slashes with blaster shots (range attacks). Unlock from the Broken Moon after speaking with Greez on the Mantis.
- Dual Wield: Fast, aggressive combos. Unlock from the Desolate Sanctuary on Koboh after obtaining the Krrsjester’s Tomb perk.
- Crossguard: Slow but powerful, with high stagger. Unlock from the Lucent Stars region on Koboh after defeating the Spawn of Oggdo boss.
- BD-1 Blaster: Integrated into the blaster stance. Fires energy bolts. Upgraded via Blaster Overcharge and Bolt Efficiency skills from the skill tree.
- Special Ammo: Later in the game, you can acquire Electro-Darts (stuns droids) from a side quest on Jedha and Ion Charges (disables shields) from Koboh’s Boiling Bluff databank puzzle.
- Ponchos: Various colors (e.g., Purple Poncho, Scrapper Poncho). Found in chests on Koboh, Jedha, and Coruscant.
- Jackets: Outrider Jacket, Survivor Jacket – cosmetic torso changes. Earned from exploration or Bounty goals.
- Cal\'s Hair & Beard Styles: Changed at any meditation point. Unlocked by collecting Tactical Guide collectibles.
- BD-1 Skins: Custom paint jobs for BD-1. Found in chests or purchased from the Mantis upgrade shop.
- Mantis Ship Skins: Rebel Livery, Imperial Grey – purchased from Doma or earned via completion.
- Stim Canisters: Heal 35% health per use. Max 12 can be carried. Upgrade capacity by finding Stim Capacity upgrades at specific chests (9 total). Refilled at meditation points.
- Perk Stim Canisters: Temporarily boost one equipped perk for 30 seconds. Found in rare loot containers.
- Health Stim Capsules: (Not in game; health is via stims only). No other consumables exist.
- Priorite Shards: Common currency and crafting material. Dropped by enemies, found in crates. Used to buy items at Doma\'s store.
- Recruit Components: Upgrade lightsaber and BD-1. Found in metallic crates and dropped by droids.
- Jedi Scrap: Rare, used for high-end upgrades. Obtained from legendary enemies, buried chests, and Force echo puzzles.
- Precision Components: Upgrade blaster damage. Found in security chests on Jedha.
- Electro-Component: Used for blaster upgrades. Dropped by Electro-Droidekas.
- Magnetized Scrap: Used for BD-1 upgrades. Found in damp caves.
- Priorite Shards: Main currency. Spend at Doma\'s shop in Rambler’s Reach Outpost on Koboh. Also used for some workbench upgrades.
- Skill Points: Earned by gaining experience (XP) from combat and exploration. Used to unlock skills in skill trees (six categories: Single, Double, Blaster, Dual, Crossguard, Survival). Cannot be traded.
- Data Disks: Used to unlock puzzles at the Holotactics table on the Mantis. Don’t spend on cosmetics – save for Bounty missions.
- Databank Entries: Lore objects (e.g., scans of flora, fauna, characters). Scanning them fills the databank and sometimes triggers side quests.
- Force Echoes: Blue glowing points that reveal memories. Scan to gain lore and XP. Many are tied to achievements.
- Chests: Metal cubes containing cosmetics, materials, or stim upgrades. 200+ across the galaxy.
- Tactical Guides: White data pads. Collect all to unlock New Game+ and certain skill upgrades.
- Bounty Pucks: Used to start bounty missions on Koboh. Found in holotactics rewards or found in chests.
- Fish: Can be caught at the Fishing Hole on Koboh. Needed for the “Angler of the Ages” trophy.
- Music Notes: Found in hidden areas. Collect all to unlock new music for the Mantis jukebox.
- BD-1 Upgrades: Found in chests or given by quests. Include Slicer Kit (hack terminals), Projector (illuminate dark areas), Ion Dart (stun enemies), Rocket Jump (vertical boost), Goo Gun (create platforms). Each requires specific materials to craft.
- Ascension Cable: Grappling hook for traversal. Obtained automatically early in the game on Coruscant.
- Air Dash: Unlocked from the Forest Array on Koboh after defeating Rotten Madman.
- Double Jump: Unlocked from Phon Qi Cavern after getting Krrsjester\'s Tomb perk.
- Pillar Jump: Unlock from Shattered Moon after main story quest on Jedha.
- Underwater Breathing: Granted via BD-1 upgrade after visiting Oceanic Vault on Jedha.
- Force Abilities: Force Push, Force Pull, Force Slow, Force Lift, Force Slam – each unlocked through main story progression and skill tree purchases. No items required except skill points.
- Legendary Perks: Unique one-time use buffs found on dead Jedi. Example: Polished (increase attack speed after block), Chef (increase health from stims). Slot max 5.
- Holotactics Tokens: Used to play the mini-game on the Mantis. Earned from chests and databank completions.
- Nekko Saddles: Cosmetic item for Nekko mounts (not functional). Found in chests on Koboh.
- Stim Bottle Cap: Increases healing slightly. Obtained from a puzzle in Jedi Temple on Jedha.
- Force Essence: Permanent stat boosts (increase health, force, or stim capacity). Found at Essence Wells (glowing blue pools) on Koboh, Jedha, and Coruscant. Collect 20 total.
- Stim Canister + Polished Perk: Use Polished to increase attack speed after healing – combine with a fast stance like Dual Wield for burst damage.
- Electro-Darts + Blaster Stance: Stun a group of droids, then switch to double-bladed to wipe them out.
- Priorite Shards + Doma\'s Shop: Spend shards early on Stim Capacity Upgrades (red chests) rather than cosmetic items for better survivability.
- Skill Points + Survival Tree: Prioritize Resilience and Regen to reduce damage and increase force recovery.
Each stance has its own skill tree purchased with Skill Points. You can equip two stances simultaneously and swap during combat.
#### Blaster
Armor & Cosmetics
These are purely cosmetic and do not affect stats. Found in chests, holotactics rewards, or purchased from Doma\'s store.
Consumables
Materials
Used for upgrading gear at workbenches.
Currencies
Collectibles
Key Equipment & Upgrades
Special Items
Upgrades & Synergies
This guide covers all you need to know about every item in Star Wars Jedi: Survivor. Use the table of contents in your platform’s menu to navigate sections quickly.
Character Skills
Star Wars Jedi: Survivor – Character Skills Guide
This guide covers all abilities, stances, Force powers, and passive skills available to Cal Kestis in Star Wars Jedi: Survivor. Only Cal is playable, but his versatility comes from five distinct lightsaber stances, a variety of Force abilities, and three skill trees (Survival, Force, Lightsaber). Each skill is detailed with effects, unlock requirements, upgrades, combos, synergies, and recommended usage.
Skill System Overview
Skills are unlocked using Skill Points earned from combat and exploration. Spend points in three trees: Survival (health, healing, defense), Force (Force powers and upgrades), and Lightsaber (stance-specific moves and combos). Some skills are unlocked by progression or trainers (e.g., Doma Dendra in the Saloon).
---
Lightsaber Stances
Cal can wield his lightsaber in five stances, each with unique attack sets, speeds, and strengths. Switch stances at any time with the weapon wheel or mapped buttons (e.g., hold left bumper + face button). Each stance has its own skill tree within the Lightsaber tree.
Single Stance
Balanced, all-around lightsaber combat.
- Basic Attacks: Fast horizontal and vertical slashes; good damage and range.
- Hold Attack – Overhead Smash: Charging attack (hold square/X) – slow but deals high stagger and damage. Good for breaking guards.
- Sprint Attack & Jump Attacks: Standard lunges and slams.
- Air Assault: Aerial combo – jump + attack twice for a descending slash.
- Rush Attack: Dash forward (hold L3 + attack) – quick gap closer, can chain into combos.
- Unlockables: (Lightsaber tree – Single Stance branch)
- Combos: Light > Light > Light > Heavy (knockdown). Light > Hold Heavy (charge overhead). Sprint + Light > Heavy (lunging stab).
- Synergies: Works with any Force power. Best for duelists who want a mix of speed and power.
- Recommended Build: Survival tree + Lightsaber Single Stance upgrades for parry-focused play. Use with Force Slow to land charged heavies.
- When to Use: Boss fights with telegraphed attacks; 1v1 situations where you need reliable damage and block meter management.
- Basic Attacks: Spin attacks (wide arcs) – excellent against groups. Slower swings but heavy stagger.
- Hold Attack – Spin Cycle: Continuous spinning attack (hold square/X) – drains stamina but hits all around. Great for mobs.
- Sprint Attack – Lunge Spin: Lunges forward with a spin, hitting multiple enemies.
- Jump Attack – Ground Slam: Aerial slam that creates a shockwave (unlockable: Slam Shockwave – upgrades to push enemies).
- Unlockables:
- Combos: Light > Light > Heavy (swirling knockback). Sprint + Heavy (wide spin). Air > Light > Light (double aerial).
- Synergies: Force Push to scatter enemies into the spin area. Combine with Confuse (Rage) to make enemies attack each other, then mop up with spins.
- Recommended Build: Force tree upgrades for crowd control (Buff Push, Confuse duration). High stamina perks to sustain spinning.
- When to Use: Groups of 3+ enemies; shielded enemies (spins break shields quickly). Avoid in tight corridors or narrow ledges (risk of falling).
- Basic Attacks: Quick slashes with both blades – low stagger but high DPS. Short range.
- Hold Attack – Flurry (Unlockable): Rapid five-hit combo (hold attack) – deals massive damage but leaves you open. Unlock via skill point.
- Sprint Attack – Dash Slash: Quick lunge with a double slash.
- Jump Attack – Cross Slash: Aerial X-shaped attack that hits twice.
- Unlockables:
- Combos: Light > Light > Heavy (spinning finisher). Light > Hold Heavy (flurry). Dodge > Light > Heavy (gap closer + flurry).
- Synergies: Force Pull to bring enemies closer before flurrying. Use with Force Slow to guarantee full flurry.
- Recommended Build: Max out Lightsaber Dual Wield and Survival (to offset low block meter). Focus on aggression.
- When to Use: Fast enemies like bounty hunters or animals. High-risk boss fights when you know openings (e.g., after dodging). Avoid against groups due to short range.
- Basic Attacks: Slow but powerful overhead and horizontal slams. Heavy stagger, high damage per hit.
- Hold Attack – Clash Slam (Unblockable): A charged overhead slam that cannot be blocked – drains enemy block meter quickly. Unlock via skill point.
- Sprint Attack – Heavy Lunge: A powerful thrust that travels far.
- Jump Attack – Slam: Descending heavy attack that knocks down.
- Unlockables:
- Combos: Heavy > Heavy (double slam). Light > Heavy (pommel strike – fast). Sprint + Heavy > Heavy (lunging slam).
- Synergies: Force Lift to levitate enemies, then use Clash Slam to smash them into the ground. Force Push to stagger before heavy.
- Recommended Build: Max Survival (poise and health) – you'll take hits. Force tree (lift upgrades). Perk: Endurance (stamina regen).
- When to Use: Bosses with big block meters; slow, heavily armored enemies like Droidekas. Avoid against fast enemies (you'll get hit before your attack lands).
- Basic Attacks: Lightsaber slashes (similar to Single but weaker) and blaster shots (press R2/RT).
- Hold Attack – Charged Shot: Hold blaster button for a powerful energy shot that stuns. Can be charged while moving.
- Sprint Attack – Stab + Shot: A lunge stab followed by a point-blank shot.
- Jump Attack – Aerial Shot: Fires a blaster bolt while jumping.
- Unlockables:
- Combos: Light > Light > Blaster (stab + shot). Sprint + Blaster (running shot). Dodge + Blaster (side shot).
- Synergies: Force Slow to line up headshots. Use confusion to create chaos, then pick enemies from range.
- Recommended Build: Force tree (slow duration, push distance). Perks: Blaster Ammo Regeneration, Accuracy.
- When to Use: Sniping weak points (e.g., B1 droids, flying enemies). Opening fights from range before switching stances. Ammo management – blaster shots deplete a gauge that recharges over time.
- Effect: Knocks back enemies and objects. Can stagger or knock down large enemies.
- Base Unlock: Story – earned on Koboh after first visit to Mantis.
- Upgrades (Force Tree):
- Cooldown: ~8 seconds (base). Cooldown reduced by skill upgrades.
- Combo: Push > Dash > Attack (close distance after knockback). Push off ledges for instant kills.
- Synergies: Confuse + Push to shove confused enemies into others. Use with Slow to line up multiple pushes.
- When to Use: Enemies on ledges; group separation; interrupting attacks.
- Effect: Pulls objects and enemies towards you. Can stagger or stun smaller enemies.
- Base Unlock: Story – after acquiring Push.
- Upgrades:
- Cooldown: ~10 seconds.
- Combo: Pull > Attack (stun lock). Pull explosive barrels into groups.
- Synergies: Lift to keep enemy suspended, then pull to slam. Pull into your Dual Wield flurry.
- When to Use: Enemies with shields (pull disables shield). Bringing distant enemies into melee range.
- Effect: Slows down enemies and projectiles in a wide area. Duration scales with upgrades.
- Base Unlock: Story – acquired during fight with Ninth Sister on Coruscant.
- Upgrades:
- Cooldown: ~20 seconds (base).
- Combo: Slow > Charged Heavy Attack (Crossguard) > Flurry (Dual Wield).
- Synergies: Pairs with any stance – guarantees hits from slow attacks. Use to escape tight spots.
- When to Use: Groups of fast enemies; blaster trooper squads; time-limited puzzles (e.g., spinning fans). Bosses with fast combos (e.g., Bode).
- Effect: Levitates smaller enemies or objects in place. Can be upgraded to lift larger enemies.
- Base Unlock: Story – on Nova Garon after Dagan Gera fight.
- Upgrades:
- Cooldown: ~15 seconds.
- Combo: Lift > Attack (cannot attack while lifting unless Slam upgrade is used). Lift > Slam > Ground attack.
- Synergies: With Crossguard, use Slam to create openings. With Confuse, lift a confused enemy to make them a hovering distraction.
- When to Use: Removing shield enemies from groups; setting up heavy combos; avoiding deadly ground attacks.
- Effect: Temporarily turns an enemy to fight for you. Affects organic and some droids.
- Base Unlock: Story – on Jedha from Sister Tasmin.
- Upgrades:
- Cooldown: ~30 seconds (base).
- Combo: Confuse toughest enemy > Wait for it to attack its allies > Clean up survivors with Double-Bladed stance.
- Synergies: Combine with Slow to keep the confused enemy alive longer. Useful against groups of Purge Troopers.
- When to Use: Big group fights (3+ strong enemies). Boss battles with adds (confuse the adds). Avoid on bosses themselves (most are immune).
- Effect: Jump and slam the ground creating a shockwave that knocks down enemies in a large radius.
- Unlock: Spend 3 points in Force tree (after Push upgrades).
- Upgrades:
- Cooldown: ~25 seconds.
- Combo: Slam > Lift > Slam (if upgraded).
- Synergies: Use before Confuse to group enemies.
- When to Use: Crowd control when surrounded; opening move in ambushes.
- Effect: A charged version of Force Push that creates a sphere of energy pushing everything away.
- Unlock: Force skill tree (replaces Push when holding the button).
- Cooldown: ~20 seconds (shorter than Slam).
- Use Cases: Emergency escape when surrounded; knocking enemies off ledges from a distance.
- Health Increase: +25% max HP (multiple nodes).
- Stamina Increase: +25% stamina bar (multiple nodes).
- Force Meter Increase: +33% Force meter (multiple nodes).
- Increased Health Regeneration: Faster regen after taking damage.
- Resilience: Reduce damage taken while blocking (especially against unblockable attacks? Actually reduces chip damage).
- Quick Recovery: Faster recovery from knock downs.
- Enduring: While at low health, damage reduction increased.
- Healing Efficiency: Each Stimpack heals more HP.
- Prize of Peace: Killing an enemy restores some Force meter.
- Recommended Allocation: 5-7 points early for new players; 3 points for veterans for stamina.
- Force Essence: increases Force meter regen rate.
- Force Potency: increases Force ability damage.
- Long Reach: increases range of Push, Pull, and Confuse.
- Force Will: reduces cooldown of all Force abilities.
- Focused Force: Force Slow costs less meter.
- Lift -> Slam, Repulse, etc. as branch nodes.
- Recommended Allocation: 6-8 points for heavy Force users. Max cooldown reduction if you use powers often.
- Each stance has a dedicated branch (4-6 nodes per stance).
- Shared Nodes:
- Recommended Allocation: Max your primary stance branch first; then shared nodes.
- Early: Survival – 5 health nodes, 3 stamina nodes. Lightsaber – Parry Mastery, Deflection Mastery. Force – Force Essence.
- Stance: Single (balanced).
- Strategy: Focus on parrying and countering; use Stim frequently.
- Max Dual Wield branch in Lightsaber tree. Force tree – Slow duration + Focused Force. Survival – 3 stamina nodes (to sustain flurries).
- Gear: Perks that increase attack speed or combo damage.
- Use Force Slow then flurry; dodge in and out.
- Force tree – Max Push upgrades (Repulse, Slam). Lightsaber – Double-Bladed Extended Reach and Whirlwind.
- Survival – Quick Recovery, Enduring.
- Group enemies with Slam, then spin attack. Use Push to scatter.
- Max Crossguard branch – especially Guard Breaker and Unstoppable Force. Survival – all health and resilience nodes. Force – Lift + Slam (to set up heavy attacks).
- Use heavy attacks to break enemy poise; trade hits confidently thanks to high HP.
- Lightsaber – Blaster branches (Quickdraw, Ricochet). Force – Confuse duration and Contagion. Survival – Force meter increase.
- Open with Confuse on a strong enemy; then pick off others from range. Use charged shots to stun.
- Stance Switching Cancels: Switching stances during an attack animation can cancel the recovery, allowing faster combos.
- Force Combos: For example: Pull > Slow > Dual Wield Flurry. Or Lift > Crossguard Slam.
- Block Meter Management: Some stances (Dual Wield) have poor block meter – use dodge liberally.
- Upgrade Priority: Get Force Slow early for combat and puzzles. Then unlock your main stance's key moves (e.g., Clash Slam for Crossguard).
- Sell Skill Points: You can respec at the Saloon on Koboh (Doma Dendra) for a small fee.
- Precision Strike (Upgraded Overhead Smash): Hold attack longer for a faster, more powerful overhead that ignores block. Unlock at Nekko Stable trainer? Actually unlocked via skill point.
- Rapid Slashes: After a block, press attack for a quick three-hit flurry. Good for punishing aggressive enemies.
- Whirlwind Slash: Dodge + attack – spinning slash that hits multiple enemies. Good crowd control.
Double-Bladed Stance
Wide sweeps, crowd control, and spinning attacks.
- Sweeping Slash (Dodge + Attack): Wide arc after a dodge – hits enemies behind you.
- Twin Spin (Block + Attack after attack): A double spin that knocks down enemies. Unlock via skill point (requires Double-Bladed progress).
- Extended Reach: Increases base range of attacks. Passive unlock.
Dual Wield Stance
Fast, aggressive, high-damage but low defense.
- Deflect Flurry (Block + Attack after stagger): A quick counter-attack that stops enemy combos.
- Momentum Boost (Dodge + Attack): A dashing forward slash that can chain into flurry.
- Quick Draw (Pressing weapon swap during attack): Instantly switch to Blaster stance for a fast blaster shot – unique synergy. Unlock at trainer? Actually unlocked via skill point in Dual Wield.
Crossguard Stance
Slow, heavy-hitting stance with unblockable attacks and block-breaker.
- Guard Breaker (Hold block + attack): A slow but guaranteed guard break on most enemies.
- Thunder Slam (Jump + Heavy): An aerial slam that creates an area shockwave (knocks down surrounding enemies). Unlock via skill point.
- Unstoppable Force: Attacks cannot be interrupted by light hits. Passive upgrade.
Blaster Stance
Ranged and melee hybrid with a lightsaber and blaster pistol.
- Quickdraw (Block + Blaster): Instant unblockable shot after a perfect block. Unlock via skill point.
- Ricochet Shot (Hold left/right + blaster): A shot that bounces off walls – hits hidden enemies. Unlock via skill point.
- Fan the Hammer (After melee combo): Press blaster rapidly after a lightsaber combo to fire multiple shots in quick succession.
- Gunslinger’s Turret (Hold block + hold blaster): Fire continuously while moving slowly – good for suppressing fire. Unlock via skill point.
---
Force Abilities
Force powers are unlocked via story progression and the Force skill tree. Each can be upgraded to increase damage, duration, or range. Cooldowns vary (generally 10-30 seconds).
Force Push
- Repulse (Alternate): Hold activate for a powerful area push that knocks down most enemies. Unlock via Force skill.
- Force Wave: Increases push range and adds damage to knocked enemies.
- Push Momentum: Pushing an enemy into a wall deals bonus damage.
Force Pull
- Wrecking Ball (Hold): Pull a large object and throw it in a direction (requires object). Unlock via skill.
- Pull Tether: Pull enemies from a greater distance and cause them to fall.
- Lift + Pull Combo: After lifting an enemy, pulling them slams them down (requires Lift upgrade).
Force Slow
- Duration Increase: +2 seconds per level (max 8 seconds).
- Radius Increase: Affects larger area.
- Slow Projectiles: Force slow now affects blaster bolts and other projectiles (makes them dodgeable).
Force Lift
- Massacre (Hold): Lifts multiple enemies in a group. Unlock via skill.
- Grip Strength: Allows lifting of medium enemies (e.g., Purge Troopers).
- Slam (Press after Lift): Slams the lifted enemy into the ground for damage and area knockback. Unlock via skill.
Force Confuse
- Duration Increase: +5 seconds (max 20 seconds).
- Rage: Confused enemies deal more damage and attack faster.
- Contagion: Confused enemy spreads confusion to nearby enemies upon death (smaller duration).
Force Slam (Unlocked via Force Tree)
- Shockwave Amplified: Increased radius and damage.
- Slam -> Lift Combo: After slam, can immediately lift enemies for follow-up.
Force Repulse (Alternate for Push)
---
Skill Trees – Passive Skills
Survival Tree (Defense & Health)
Force Tree (Force Powers Enhancement)
Lightsaber Tree (Stance Skills & Combat Upgrades)
- Parry Mastery: Perfect parry window increased.
- Deflection Mastery: Blaster bolts reflect faster, more damage, and can reflect multiple at once.
- Block Stability: Reduced block stamina drain.
- Momentum: Attacking increases force meter build slightly.
- Evasive Maneuvers: Dodges cost less stamina and have longer invincibility frames.
---
Upgrade Unlock Order & Recommended Builds
New Player Build (Survival-Focused)
Aggressive DPS Build (Dual Wield + Slow)
Crowd Control Build (Double-Bladed + Push/Slam)
Tank Build (Crossguard)
Ranged/Stealth Build (Blaster + Confuse)
---
Advanced Tips
---
This guide covers every skill in Star Wars Jedi: Survivor. Experiment with different combinations to find your preferred playstyle. May the Force be with you.

Characters & Roles
Star Wars Jedi: Survivor – Characters & Roles Guide
This guide covers every major character in Star Wars Jedi: Survivor, including the only playable unit, Cal Kestis, as well as key allies, supporting characters, and antagonists. For each character, we detail their background, strengths/weaknesses, role in the story and gameplay, and how they synergize with Cal’s abilities. Since Cal is the sole playable character, his “class” is defined by his five combat stances, and his “build” centers on stance selection, skill upgrades, and equipment choices.
Playable Character: Cal Kestis
Cal Kestis is a Jedi Knight who survived Order 66 and has been on the run for five years. In Jedi: Survivor, he is more experienced, wielding a customized lightsaber and a growing repertoire of Force powers. He is the only character under direct player control throughout the entire game.
#### Background
- Former Jedi Padawan under Master Jaro Tapal (later killed during Order 66).
- Spent years in hiding as a scrapper on Bracca before the events of Jedi: Fallen Order.
- Rebuilt his connection to the Force, destroyed the Holocron with potential Force-sensitive children, and continued fighting the Empire.
- By Jedi: Survivor, Cal is a full Jedi Knight, still hunted by the Inquisitorius.
- Versatile Combat: Five distinct lightsaber stances allow adaptation to any enemy type.
- Force Mastery: All three Force classes (Push/Pull, Lift/Slam, Slow) are fully upgradable.
- Agility & Mobility: Wall runs, double jumps, air dashes, and climbing hooks make traversal smooth.
- BD-1 Synergy: The droid provides health/stim packs, environmental scanning, and combat hacks.
- No True Ranged Weapon: Lightsaber throws and blaster stance are the only ranged options; blaster stance has limited ammo.
- Fragile Early Game: Low health and minimal stims initially; relies on perfect parries and dodges.
- No Party System: Cal fights alone; ally support is limited to scripted moments.
- Stance Lock-In: Only two stances can be equipped at once; swapping mid-combat requires a brief animation.
- Strengths: Jack-of-all-trades; good damage, speed, and reach. Best for learning enemy patterns.
- Weaknesses: No specialized advantage; outshined by other stances in specific scenarios.
- Recommended Upgrades: Precision Release (increased block meter damage), Flourish (combo finisher with extra damage).
- Strengths: Wide sweeping attacks; excellent against groups of stormtroopers or small creatures. Fast attack speed.
- Weaknesses: Lower single-target damage; poor against armored foes.
- Recommended Upgrades: Spinning Strike (spin attack for crowd control), Asylum (parry window increase).
- Strengths: Massive damage per swing; can break enemy guards easily. Long reach.
- Weaknesses: Very slow; terrible against fast enemies; leaves you vulnerable during animations.
- Recommended Upgrades: Saber Throw (ranged heavy attack), Hardening (block stamina boost).
- Strengths: Fastest attack speed; can cancel attacks into parries. Excellent for relentless aggression.
- Weaknesses: Short range; no heavy hitting; struggles against enemies with hyper armor.
- Recommended Upgrades: Dash Strike (gap closer), Focused Parry (extended parry window during combos).
- Strengths: Ranged blaster shots (unlimited ammo but needs recharging via melee hits). Mix of lightsaber and blaster combos.
- Weaknesses: Weak melee damage; blaster shots ineffective against certain armored enemies. Requires precision to manage ammo.
- Recommended Upgrades: Quick Draw (charged shot), Charged Shot (pierces shields).
- Telekinesis: Max Pull/Push for environmental kills and disarming.
- Control: Max Lift and Slam for crowd control.
- Time: Max Slow for boss encounters and evading attacks.
- Stim Canisters: Increase max stims to 10+ via upgrades. Prioritize the “Recharge” upgrade for faster stim use.
- Perks (late game): Use “Resilience” for increased block meter, “Tactical” for faster Force regen, and “Ambidexterity” for reduced stance swap delay.
- Saber Colors: Cosmetic only; choose based on preference.
- Single Blade: Default.
- Double-Bladed: Gibidon’s first visit to the Lucrehulk (after the prologue).
- Crossguard: During the Shattered Moon mission (after obtaining the tuning fork).
- Dual Wield: Found in the Coruscant level (first visit).
- Blaster Stance: Acquired from a boss fight in the Phon’Qi caves on Jedha.
- BD-1: Essential for healing (stim packs), hacking terminals, and revealing hidden paths. BD-1’s Overcharge ability stuns droids.
- Merrin (Night Sister): Helps in scripted combat sequences; her Magick provides crowd control and revival. In gameplay, she appears in specific story segments and cannot be directly commanded.
- Cere Junda: Provides Force echoes and guidance; after certain points, she offers training sessions that grant new Force skills.
- Bode Akuna: A companion in several missions; his twin blasters can distract or deal damage, but his AI is not controllable.
- Background: Former Jedi Knight, now a Force-sensitive mentor who has closed herself off from the Force for years. She is rebuilding her strength to confront the Empire.
- Role: Provides story exposition and Force training at the Mantis’ meditation chamber. Unlocks new Force abilities (e.g., Lift, Slow, Push upgrades) as you progress.
- Strengths: Immense untapped power; her Force expertise allows her to teach Cal advanced techniques.
- Weaknesses: Emotionally scarred and hesitant to use the Force; physically weakened by age and trauma.
- Synergy with Cal: Cere’s training is the only way to learn advanced Force skills. She also rescues Cal during story beats (e.g., on the Shattered Moon).
- Background: Latero pilot and owner of the Stinger Mantis. He is now running a saloon on Koboh but still helps Cal travel between planets.
- Role: Provides ship travel, cosmetic customization at the Mantis, and occasional comic relief.
- Strengths: Skilled pilot; resourceful and loyal.
- Weaknesses: Not a combatant; stays on the ship during missions.
- Synergy with Cal: Greez’s upgrades to the Mantis (via workbench) improve BD-1’s abilities (extra stims, faster hacking).
- Background: Last of the Nightsisters of Dathomir. She has joined Cal’s crew and is hunting the High Republic survivors for answers.
- Role: Expert in Magick (Dathomirian magic). She assists in combat during scripted segments by freezing or weakening enemies. Also provides lore on the Force and the Hidden Path.
- Strengths: Powerful ranged attacks (magick bolts), teleportation ability, and crowd control. Her immunity to certain Force effects is unique.
- Weaknesses: Limited stamina in combat; her magic can be interrupted. She is often away on her own mission in the story.
- Synergy with Cal: During moments when she joins you (e.g., the Lucrehulk assault), use her to stun large groups while Cal focuses on high-value targets. Her presence allows you to bypass certain puzzles (e.g., Nightsister gates).
- Background: A mercenary and former Republic soldier who becomes a close ally. He has a family he wants to protect. Later revealed to be a Jedi survivor working for the Empire as a spy.
- Role: Companion for several main missions (e.g., Jedha, Nova Garon). He uses twin blasters and stealth to assist Cal.
- Strengths: Accurate ranged damage; can grapple to high ledges; provides covering fire during combat. His stealth ability allows him to distract enemies from a distance.
- Weaknesses: His AI is effective but not controllable. He will not tank damage; he hangs back and shoots.
- Synergy with Cal: Bode’s blaster fire is excellent for weakening enemy shields or finishing off low-health foes. Use Cal to draw aggro while Bode picks off targets. However, be cautious of friendly fire—Bode can be hit by your Force pushes.
- Background: A droid from the High Republic era, awakened by Cal on Jedha. She possesses knowledge of the ancient Jedi and the Hidden Path.
- Role: Provides lore and historical context; she can be found at various locations giving optional exposition. She gives the player the ability to scan rare creatures for rewards.
- Strengths: Extensive database; can identify historical artifacts.
- Weaknesses: Not a combatant; stationary in Pyloon’s Saloon.
- Synergy with Cal: Zee’s insights unlock new Force echo locations and collector side quests.
- Background: A quirky alien creature that Cal rescues on Koboh. He becomes a permanent resident at the saloon.
- Role: Provides humorous interactions and a side quest to find his missing items.
- Strengths: None in combat; purely cosmetic.
- Weaknesses: None.
- Synergy: None directly, but completing his quests yields cosmetic rewards.
- Background: A small droid that can be repaired using parts found throughout Koboh.
- Role: Once fixed, it will scavenge items and place them in a chest for you.
- Strengths: Automatically collects items over time.
- Weaknesses: Slow; only one chest at a time.
- Synergy: Passive money and material generation.
- Role: The ultimate threat; appears in a scripted encounter on the shattered moon. Not a standard boss—you must survive his attacks until escape triggers.
- Tactics: Use Slow to dodge his Force grabs; parry his saber strikes to avoid instant death; run and avoid direct combat.
- Role: Appears in a brief memory sequence; not a fight.
- Tactics: None.
- Role: A recurring boss; you fight her on Coruscant and later on the Shattered Moon. She wields a heavy double-bladed lightsaber and a powerful Force push.
- Strengths: High damage, unblockable combos (red attacks), strong defense.
- Weaknesses: Slow recovery after lunges; susceptible to double-bladed stance rapid attacks.
- Counter: Use Crossguard stance for heavy damage during her stun window; block her combo then punish. Dodge her red attacks.
- Role: A High Republic Jedi turned Sith-like villain; primary antagonist of the main story. Fought multiple times with escalating difficulty.
- Strengths: Fast saber combos; can use Force lift and slam; summons Stormtroopers in later phases.
- Weaknesses: Telegraphed attacks; does not block well against blaster stance.
- Counter: Dual Wield is effective for parry-canceling his combos. Use Slow to create openings.
- Role: A Mandalorian-like clan leader; final boss of the Bedlam Raiders faction. Fought in a one-on-one duel.
- Strengths: Blaster pistol (fast shots); jetpack for evasions; flamethrower attack.
- Weaknesses: Cannot block after using jetpack; vulnerable to pulls.
- Counter: Use Pull to yank him from the air; Crossguard stance to stagger him. Watch for unblockable flamethrower.
- Role: A Gen’Dai warrior from the High Republic; serves as a secondary antagonist. Fought on Jedha.
- Strengths: Regenerates health; uses a massive arm-cannon; unblockable charges.
- Weaknesses: Slow movement; can be interrupted during health regen.
- Counter: Use BD-1’s Overcharge to stun; aggressively attack during regen; Double-Bladed stance for fast hits.
- Role: Standard enemies that become mini-bosses. The Inquisitor appears on Nova Garon.
- Strengths: Lightsaber combat; force powers.
- Weaknesses: Predictable patterns.
#### Strengths
#### Weaknesses
#### Playstyle & Builds
Cal's playstyle is determined by your chosen stances. You can equip any two stances at meditation points. Skill points are used to unlock stance-specific and Force abilities. Key builds:
1. Single Blade (Balanced)
2. Double-Bladed (Crowd Control)
3. Crossguard (Heavy)
4. Dual Wield (Aggressive)
5. Blaster Stance (Ranged Hybrid)
Force Builds: Focus on one Force class:
Equipment Recommendations:
#### Unlock Conditions
Cal is available from the start. All stances are unlocked naturally through story progression:
#### Team Synergy
Supporting Characters (Allies)
These characters are not playable but play crucial roles in the story and occasionally assist in gameplay.
#### Cere Junda
#### Greez Dritus
#### Merrin
#### Bode Akuna
#### Zee
#### Turgle
#### R3-D3 (Droid Repair Side Quest)
Antagonists
While not playable, understanding each major antagonist helps you counter their unique behaviors.
#### Darth Vader
#### Second Sister (Trilla Suduri) – (Flashback/cameo)
#### Ninth Sister (Masana Tide)
#### Dagan Gera
#### Bedlam Raiders (Zan of Clan Bedlam and his sons)
#### Rayvis (Gen’Dad)
#### Imperial Commanders & Inquisitors
Conclusion
While Cal Kestis is the only playable character in Star Wars Jedi: Survivor, his deep stance system and Force abilities offer variety equivalent to multiple character classes. Allies provide invaluable support but cannot be directly controlled. Understanding each character’s strengths and weaknesses allows you to make the most of their presence during scripted encounters and to tailor your approach to the game’s diverse enemies and bosses.
Cheats & Secrets
Star Wars Jedi: Survivor – Cheats & Secrets Guide
This guide covers all known cheats, unlock codes, hidden features, Easter eggs, and developer-intended secrets in Star Wars Jedi: Survivor. The game has no traditional cheat codes, console commands, or unlock codes that grant invincibility, infinite health, or level skips. However, it contains numerous intentional secrets, hidden areas, and Easter eggs designed for discovery.
Official Cheats & Codes
Star Wars Jedi: Survivor does not include any built-in cheat codes or developer console. There are no unlock codes for instant upgrades or story skips. All gameplay unlocks are earned through normal progression or New Game+.
Hidden Features & Unlockable Modes
- New Game+ (Journey+): Unlocked after completing the story on any difficulty. Carries over all skill points, stances, cosmetics, and perks. Enemies are tougher and new rewards (like rare lightsaber components) are available.
- Purity Perk: A hidden perk added in New Game+ that dramatically increases damage dealt and taken (one-hit kills for both Cal and enemies). It is found in the Lucrehulk after meditating at a specific Fractured History point.
- Warrior Difficulty: Not hidden; all difficulties (Story, Jedi, Knight, Master, Grandmaster) are available from the start. No secret difficulty exists.
- Fast Travel: Hidden feature unlocked after obtaining the Ascension Cable. You can fast travel between any Meditation Points after visiting them once.
Exploit-Safe Secrets (Intentional Hidden Content)
These are legitimate secrets that do not rely on glitches or exploits. They reward exploration and puzzle-solving.
| Secret | Location | Reward |
|---|---|---|
| Spawn of Oggdo | Phon'Qi Caverns (Koboh) – enter through a hidden path behind a waterfall in the Derelict Dam. | Double-bladed lightsaber emitter unique part. |
| The Rancor | Coruscant Sewers – after the first elevator descent, climb a yellow pipe to a hidden alcove. | Force Tear challenge that rewards a rare BD-1 skin. |
| Fractured History | Multiple locations (Koboh, Jedha, Nova Garon) – look for cracked walls or glowing murals that trigger a vision after meditating. | Lore entries, special cosmetic items, and the Purity perk (only in New Game+). |
| Mendel the Droid | Koboh – find and repair Mendel in the Bygone Settlement, then meet him in Pyloon's Saloon. He gives a datadisc and a cosmetic after multiple encounters. | Unique droid paint job. |
| Caij's Bounty Quests | Holotable in Pyloon's Saloon after speaking to Caij Vanda. Hidden bounty targets appear on various planets. | Rare lightsaber parts and colors. |
| The Secret Fish | Obtaining the “Sylvite” fish in the Basalt Rift (Koboh) – requires climbing to a high ledge after raising water levels. | Achievement/trophy “Get That Out of Your Mouth” and special fish catalog entry. |
| Hidden Force Tears | Scattered across maps – often behind breakable walls or high ledges. Each offers a combat puzzle. | Unique cosmetics and upgrade materials. |
| The Lucrehulk’s Opaque Chamber | On the Lucrehulk during the story sequence, after the second elevator, look for a partially hidden door on the left. | Contains a chest with a pommel. |
Easter Eggs
Star Wars Jedi: Survivor is filled with nods to the larger Star Wars universe, Respawn’s previous games, and pop culture.
- “I have a bad feeling about this” – Cal says this line before a major boss fight (a Star Wars staple).
- Oggdo Bogdo Returns – The infamous frog boss from Jedi: Fallen Order is referenced through the “Spawn of Oggdo” secret and a holocall from Greez.
- Rancor Reference – Besides the hidden Rancor area, a poster in Pyloon’s Saloon advertises “Rancor Wrestling.”
- Kujet’s Tomb – A reference to the ancient Zeffo lore from the first game.
- Cal’s Scrapyard – In Pyloon’s Saloon, you can find a model of the Mantis from Fallen Order.
- BT-7274 Droid – A small, non-interactive droid in the saloon resembles BT from Titanfall 2 (Respawn’s previous title).
- Apex Legends Ref – A poster in the saloon shows an Arena-style combat advertisement with the Apex Legends logo.
- The Great River – A line from an NPC directly quotes the Star Wars: The Clone Wars character Hondo Ohnaka.
- Greez’s Cooking – Greez mentions a recipe that echoes the “Bantha milk” joke from The Mandalorian.
- Echo of the Past – A datadisc found on Jedha describes a Jedi who fought with a corrupted crystal, referencing The High Republic series.
- Post-Credits Scene – After the main story, a hidden cutscene shows Cal and Merrin discussing the future, hinting at the sequel.
- All Cosmetics Are Collectible: Every lightsaber part, BD-1 skin, and outfit is hidden in the world. None are microtransactions.
- The “Secrets” Achievement/Trophy: Awards 25G bronze / Bronze trophy for finding all secret areas (the exact definition: completing Force Tears, finding all Fractured History points, and defeating the Spawn of Oggdo).
- Helmetless Cal: Automatically unlocked after completing the story. Not hidden but often missed by players who skip the final cutscene.
- Multiple Endings? No. The game has a single canonical ending, but dialogue choices in the final mission affect the flavor of a few lines.
- New Game+ Exclusive Perks: The Purity and other hidden perks only appear in New Game+ after completing specific conditions (e.g., defeating the Spawn of Oggdo on a previous save).
- No known safe exploits or glitches exist that grant unintended advantages. Use of third-party trainers or save editors may corrupt saves.
- All secrets listed above are part of the intended game design and can be found without breaking any rules.
- The game updates (post-launch patches) have not added any cheat codes.
Developer-Intended Hidden Content
These are deliberately hidden features that the developers expected players to discover organically.
Important Notes
For a complete walkthrough of finding each secret, consult our All Game Items and Map Secrets sections.