StarCraft II: Wings of Liberty
## Game Introduction for StarCraft II: Wings of Liberty ### Overview **StarCraft II: Wings of Liberty** is a science fiction real-time strategy (RTS) game developed and published by Blizzard Entertainment. It is the sequel to the legendary 1998 title *StarCraft* and the first chapter of the *StarC...
Download & Installation
Download & Installation Guide for StarCraft II: Wings of Liberty
StarCraft II: Wings of Liberty is a real-time strategy game developed by Blizzard Entertainment. As of November 2017, the game is free-to-play, including the full Wings of Liberty campaign, access to multiplayer, and co-op modes. The other campaigns (Heart of the Swarm and Legacy of the Void) are paid DLC. The game is available exclusively on PC (Windows and Mac) via two legitimate digital storefronts: the Blizzard Battle.net desktop app and Steam.
> Note: StarCraft II is not available on PlayStation, Xbox, Nintendo Switch, or mobile devices. This guide covers only PC platforms.
---
1. System Requirements
Before downloading, ensure your computer meets the minimum or recommended specifications.
Windows Minimum
| Component | Requirement |
|---|---|
| OS | Windows 7 / Windows 8 / Windows 10 (64-bit) |
| CPU | Intel Core 2 Duo or AMD Athlon 64 X2 5600+ |
| RAM | 2 GB |
| GPU | NVIDIA GeForce 7600 GT / ATI Radeon HD 2600 XT or Intel HD Graphics 3000 |
| Storage | 30 GB free space |
| Internet | Broadband connection |
Windows Recommended
| Component | Requirement |
|---|---|
| OS | Windows 10 (64-bit) |
| CPU | Intel Core i5 or AMD FX Series |
| RAM | 4 GB |
| GPU | NVIDIA GeForce GTX 650 / AMD Radeon HD 6950 |
| Storage | 30 GB free space (SSD recommended) |
| Internet | Broadband connection |
macOS Minimum
| Component | Requirement |
|---|---|
| OS | macOS 10.12 (Sierra) |
| CPU | Intel Core 2 Duo |
| RAM | 4 GB |
| GPU | NVIDIA GeForce GT 330M / ATI Radeon HD 4670 |
| Storage | 30 GB free space |
| Internet | Broadband connection |
macOS Recommended
| Component | Requirement |
|---|---|
| OS | macOS 10.14 (Mojave) or newer |
| CPU | Intel Core i5 |
| RAM | 8 GB |
| GPU | NVIDIA GeForce GT 750M / AMD Radeon R9 M290X |
| Storage | 30 GB free space (SSD recommended) |
| Internet | Broadband connection |
2. Choosing a Platform: Battle.net vs Steam
Both platforms offer the same game content and require a Blizzard account. Differences:
| Feature | Battle.net | Steam |
|---|---|---|
| Ownership | Directly through Blizzard | Through Steam, but links to Blizzard account |
| Updates | Auto-managed by Battle.net client | Handled by Steam |
| Friends | Blizzard friends list | Steam friends list (plus Blizzard) |
| DLC Purchases | Via Battle.net shop | Via Steam store (but DLC cross-platform?) |
| Achievements | In-game only | Steam achievements + in-game |
---
3. Installation via Blizzard Battle.net (Windows/macOS)
Step 1: Download the Battle.net Desktop App
- Go to the official Battle.net website: [https://www.blizzard.com/download/](https://www.blizzard.com/download/).
- Click the Download for Windows (or Download for Mac) button.
- Save the installer file (`Battle.net-Setup.exe` or `Battle.net-Setup.dmg`).
- Run the downloaded installer.
- Follow the on-screen instructions (default installation location is recommended).
- The installer will download the latest version of the Battle.net app.
- Once installed, the app will launch automatically.
- If you have an existing Blizzard account (from Warcraft, Overwatch, etc.), enter your email and password.
- If new, click Create a Free Account and follow the registration process (email verification required).
- In the Battle.net app, click on the Games tab at the top.
- Find StarCraft II in the list (it should appear as a free game). If not, use the search bar.
- Click Install.
- Choose your installation directory (ensure at least 30 GB free).
- Click Start Install.
- The app will download and install the game. Download size is approximately 25–30 GB depending on language options.
- You can choose Install Now to start immediately, or Install Later to schedule.
- Once installation is complete, click Play in the Battle.net app.
- The game will launch. The first time, it may need to configure graphics and download additional assets (shaders, etc.).
- Log in with your Blizzard account (usually already authenticated).
- You can now access the Wings of Liberty campaign, multiplayer, and co-op.
- Go to [https://store.steampowered.com/about/](https://store.steampowered.com/about/).
- Click Install Steam and download the client.
- Install Steam and create or log in to your Steam account.
- Open Steam and go to the Store tab.
- Search for "StarCraft II" (or use this direct link: [StarCraft II on Steam](https://store.steampowered.com/app/2201840/StarCraft_II/)).
- The game is listed as Free to Play. Click Play Game or Add to Account (it will be tied to your Steam library).
- After adding, go to your Library.
- Find StarCraft II and click Install.
- Choose a download location (Steam will keep the game files).
- Click Next and then Install.
- Steam will download and install the game (similar size as Battle.net: ~30 GB).
- Click Play in Steam.
- The game will launch. On the first start, it will ask you to link your Steam account with a Blizzard account.
- A pop-up will appear: log in to your existing Blizzard account, or create a new one. This linking is mandatory.
- After linking, the game will sync your progress (campaign saves, etc.) if you already played on Battle.net.
- You can now play. Achievements will appear both in-game and on Steam.
- Blizzard Account: Required regardless of platform. You must have or create one. It’s free.
- Steam Account: Only required if you install through Steam. The Steam version still requires a linked Blizzard account.
- No subscription: Multiplayer and all game modes are free. DLC campaigns are one-time purchases.
- The full installation (including all pre-rendered cinematics and high-res textures) takes approximately 30 GB. The download is about 25–30 GB depending on language packs.
- If you later add DLC campaigns, each additional campaign (~Heart of the Swarm, Legacy of the Void) adds roughly 5–8 GB.
- Co-op commanders and other content are included within the base installation via patches.
- Deleting language packs (e.g., non-English audio) can save space. Use the Battle.net app’s Installation Viewer under Options > Installation Viewer to manage.
- On Steam, you can modify language via Steam Properties > Language.
- The game automatically detects your hardware and sets a default quality (Low, Medium, High, Ultra).
- You can adjust these in Options > Graphics:
- For optimal performance, try the Recommended button based on your system.
- Choose your preferred language for audio and text.
- Subtitles can be enabled/disabled.
- On Battle.net, you can download multiple language packs via the app settings.
- Hotkeys: You can rebind keys via Options > Hotkeys. Advanced players can use the Standard or Grid layout.
- Mouse Sensitivity: Adjust in Options > Controls.
- Network: For multiplayer, ensure your firewall allows StarCraft II.
- Immediately after logging in, you can start the Wings of Liberty campaign from the main menu.
- The game will ask if you want to watch the opening cinematic (highly recommended).
- Your campaign progress is saved automatically to your Blizzard account (cloud sync).
- Fix: Pause and resume the download. Restart the Battle.net app or Steam client. Temporarily disable antivirus or firewall (if safe).
- On Battle.net, go to Settings > Downloads and change the Download Bandwidth Limit to 0 (unlimited) or try a different region.
- Fix: Run the Scan and Repair tool.
- If that fails, uninstall and reinstall. Ensure your hard drive is not failing.
- Fix: Open Task Manager, end all processes named `StarCraft II.exe` and `Blizzard Battle.net.exe` (or `Steam.exe` if via Steam). Restart the client.
- Try running the client as Administrator.
- Fix: Ensure you have at least 35 GB free before starting. Check the recycle bin and temporary files (use Disk Cleanup).
- The installer may require extra space for decompression.
- Fix: Update your graphics drivers to the latest version.
- On very old integrated graphics, the game may not run at all (check minimum requirements).
- Fix: Disable VPN or proxy. Flush DNS (ipconfig /flushdns in Command Prompt). Restart router.
- Configure firewall to allow `StarCraft II.exe` and the Battle.net/Steam clients.
- Fix: Log out of Steam and log back in. Ensure the game is in your library (free games require adding). If using family sharing, the owner must have the game.
- Main menu bottom-left corner shows the game version (e.g., 5.0.12). Ensure it matches the latest (Blizzard updates frequently).
- On Battle.net, the app will automatically update the game. On Steam, updates are handled automatically unless you paused them.
- Click Campaign > Wings of Liberty. The first mission should be available. If not, you may need to unlock it by completing the tutorial (if first time).
- Go to Multiplayer > Quick Match (or Custom Game). Try starting a match against AI or another player. If you get a network error, check your firewall.
- On Battle.net: Options > Scan and Repair.
- On Steam: Properties > Local Files > Verify Integrity of Game Files.
- This will take a few minutes and ensure no corrupted files.
- Launch the game, go to Options > Graphics. Use the Benchmark button (available in some versions) to test performance.
- If framerate is low, lower the Graphics Quality preset to Medium or Low.
- Your campaign progress is automatically saved to Blizzard’s cloud. If you played previously, your save should sync. If not, load from a local backup or check the Blizzard account recovery options.
- For Mac users: The Mac version is fully compatible with Apple Silicon (M1/M2) via Rosetta 2, but Blizzard has not released a native ARM build. Performance is still good.
- Language Packs: You can download additional languages via Battle.net app (Options > Installation Viewer > StarCraft II > Language). On Steam, change language in game properties.
- Offline Play: StarCraft II requires online authentication on first launch and periodic checks. However, once authenticated, you can play the campaign offline (but not multiplayer). On Battle.net, you can set the app to “Go Offline” after login. On Steam, set Steam to offline mode.
- Backing Up the Game Folder: If you want to move the game to another drive, you cannot simply copy the folder. Use the Battle.net app’s “Change Install Folder” option or Steam’s “Move Install Folder” feature (Library > right-click > Properties > Local Files > Move Install Folder).
- The base game includes everything (multiplayer, co-op, etc.). You can delete unnecessary language packs, but you cannot remove game modes. The download is all-in-one.
- Yes, campaign progress, achievements, and profile stats are stored on your Blizzard account, not the platform. When you log in via Steam (linking the account), all progress will be available. Steam achievements may unlock retroactively for some but not all.
- Not directly via copy-paste. However, you can create a backup via Battle.net (Options > Installation Viewer > StarCraft II > Export) and import on your machine. On Steam, you can copy the game folder to another computer’s Steam library and then verify files, but it’s trickier.
- This often indicates a conflict with overlays (Discord, GeForce Experience). Disable overlays. Also try running the game in windowed mode (add `-windowed` to launch options in Battle.net or Steam).
Step 2: Install the Battle.net App
Step 3: Create or Log in to Your Blizzard Account
Step 4: Install StarCraft II
Step 5: Launch and Play
---
4. Installation via Steam (Windows/macOS)
Step 1: Install Steam Client (if not already)
Step 2: Navigate to StarCraft II on Steam
Step 3: Install via Steam
Step 4: First Launch via Steam
---
5. Account Requirements
---
6. Storage Space Details
---
7. First Launch Setup
After installing and logging in for the first time, you will encounter:
Graphics Configuration
- Resolution
- Graphics quality preset
- Texture quality (High requires more VRAM)
- Shadow quality, effects, etc.
Sound and Language
Game Settings
Campaign Start
---
8. Common Installation Errors and Fixes
Error: "Installation stuck at 0%" / "Download slow"
Error: "Corrupted files detected" / "An error occurred while installing"
- Battle.net: Click the game icon, select Options (gear icon) > Scan and Repair.
- Steam: Right-click StarCraft II > Properties > Local Files > Verify Integrity of Game Files.
Error: "Failed to launch" / "Application is already running"
Error: "Not enough storage space" even after freeing space
Error: "GPU driver not supported" or crash on launch
- NVIDIA: GeForce Experience
- AMD: Adrenalin
- Intel: Intel Driver & Support Assistant
Error: "BLZBNTAGT00000BB8" or network errors
Error: Steam version shows "No license" or "Product not owned"
---
9. Post-Installation Verification
After the installation completes and the game launches successfully, perform these checks to ensure everything is working:
Verify Game Version
Check Campaign Accessibility
Test Multiplayer
Verify File Integrity (Optional but Recommended)
Adjust Graphics for Performance
Check Cloud Saves (For Campaign)
---
10. Additional Tips
---
11. Troubleshooting Additional Scenarios
I want to play only the Wings of Liberty campaign but the installer downloads all content. Can I reduce size?
I previously played on Battle.net and now want to play on Steam. Will my progress transfer?
I have a slow internet connection. Can I download the game from a friend’s computer?
The game crashes after the Blizzard logo.
---
12. Final Notes
StarCraft II: Wings of Liberty is a fantastic free RTS title. Download it from either Battle.net or Steam—both are legitimate. Ensure your system meets the requirements, free up at least 35 GB of space, and have a stable internet connection. If you encounter issues, the community forums and Blizzard support are excellent resources.
Enjoy commanding the Terran Dominion, and remember: “Hell, it’s about time.”
Game Introduction
Game Introduction for StarCraft II: Wings of Liberty
Overview
StarCraft II: Wings of Liberty is a science fiction real-time strategy (RTS) game developed and published by Blizzard Entertainment. It is the sequel to the legendary 1998 title StarCraft and the first chapter of the StarCraft II trilogy. Released on July 27, 2010, for Microsoft Windows and Mac OS X, the game quickly became a cornerstone of competitive gaming and e-sports. As of November 2017, the full Wings of Liberty campaign and all multiplayer content are free-to-play, making it more accessible than ever.
Story Overview & Setting
The narrative continues the epic saga of the three galactic factions: the Terran Dominion (humans), the Zerg Swarm (insectoid aliens), and the Protoss (ancient psionic beings). Set in the 26th century, the story follows Jim Raynor, a former marshal turned rebel leader, as he fights against the tyrannical Terran Dominion led by Emperor Arcturus Mengsk. Raynor's personal quest is to rescue his old friend Sarah Kerrigan, who was infested by the Zerg and became the Queen of Blades. The campaign spans multiple planets, including the lawless frontier world Mar Sara, the Dominion capital Korhal, and the mysterious Protoss homeworld Aiur. Themes of betrayal, redemption, and the tangled web of galactic politics drive the plot.
Main Characters
- Jim Raynor – The protagonist, a rugged, charismatic outlaw leading the rebel group Raynor's Raiders.
- Sarah Kerrigan – Former psychic assassin, now the infested Zerg Queen of Blades; central figure in Raynor's motivation.
- Arcturus Mengsk – The ruthless emperor of the Terran Dominion and primary antagonist of the campaign.
- Matt Horner – Raynor's loyal second-in-command, pilot of the battlecruiser Hyperion.
- Tychus Findlay – A cigar-chomping ex-convict and Raynor's old friend, reluctantly aiding his cause.
- Zeratul – A dark Templar Protoss who warns of an ancient threat that could doom the galaxy.
- Abathur – A Zerg evolution master (introduced in later expansions, but his role is hinted in Wings of Liberty).
- RTS veterans who appreciate strategic depth and high-level micro/macro management.
- Newcomers thanks to the free-to-play model and well-designed tutorial campaign.
- E-sports enthusiasts – StarCraft II defined competitive gaming with its precise mechanics and spectator-friendly gameplay.
- Science fiction fans who enjoy a rich space opera with likable characters and political intrigue.
- Campaign (Offline / Online Co-op with mods): 29 missions divided into 3 acts. Players choose which missions to tackle, with branching paths and bonus objectives.
- Versus Mode (Online): Ranked and unranked 1v1, 2v2, 3v3, 4v4 matches, plus free-for-all and Archon mode (two players controlling one base).
- Co-op Missions (Added later for all StarCraft II owners): Cooperative missions against AI with unique commanders, but this is more prominent in the expansions.
- Custom Games: Use the powerful Galaxy Editor to create custom maps, mods, and game modes (e.g., tower defense, MOBA-style games like "Aeon of Storms").
- Challenge Mode: Timed challenges that teach advanced tactics.
- Offline: Single-player campaign and AI skirmishes can be played without an internet connection after initial installation.
- Online: Multiplayer (versus and co-op) requires an internet connection and a free Blizzard account. The game uses Battle.net for matchmaking, chat, and social features.
- Release Date: July 27, 2010
- Platforms: PC (Windows) and Mac
- Notable Patch History: The game has received regular balance patches and content updates. The most significant was the free-to-play transition in November 2017, which made the entire Wings of Liberty campaign and multiplayer free.
Core Appeal & What Makes It Unique
StarCraft II: Wings of Liberty is renowned for its polished, asymmetric faction design. Each race feels completely different yet perfectly balanced. The Terran rely on mobility and versatile units, the Zerg emphasize speed and numbers, and the Protoss field powerful but expensive technology. The game sets the gold standard for RTS mechanics: crisp controls, responsive pathfinding, and a deep tech tree. The campaign introduces choice-based progression – players earn credits and resources between missions to upgrade their army and unlock new units, offering variety and replayability. Additionally, the cinematic storytelling and voice acting are of Hollywood quality, making the single-player experience memorable. The game's competitive multiplayer is legendary, featuring a robust ladder system, map editor, and a dedicated community that has kept it alive for over a decade.
Target Audience
This game appeals to:
Game Modes
Online / Offline Support
DLC & Expansion Overview
Wings of Liberty is the base game and first part of the trilogy. The expansions are:
1. StarCraft II: Heart of the Swarm (2013) – Continues the story from the Zerg perspective, focusing on Kerrigan's redemption.
2. StarCraft II: Legacy of the Void (2015) – Concludes the saga with the Protoss campaign and introduces new multiplayer units.
3. Nova Covert Ops (2016) – A mini-campaign featuring the ghost operative Nova, available as paid DLC.
All expansions require the base Wings of Liberty client (now free) and add new units, co-op commanders, and campaign missions. However, Versus multiplayer is unified – all players, regardless of expansions, use the latest balance patch and can play together.
Release Timeline & Platforms
Conclusion
StarCraft II: Wings of Liberty stands as a masterpiece of the RTS genre. Its blend of a gripping single-player campaign, deep multiplayer, and active modding community ensures that it remains a must-play title for strategy gamers. Whether you are here for the story of Jim Raynor's rebellion, the thrill of high-level ladder matches, or the endless creativity of custom games, this game offers something unique and enduring. Download it for free today and experience the gold standard of real-time strategy.
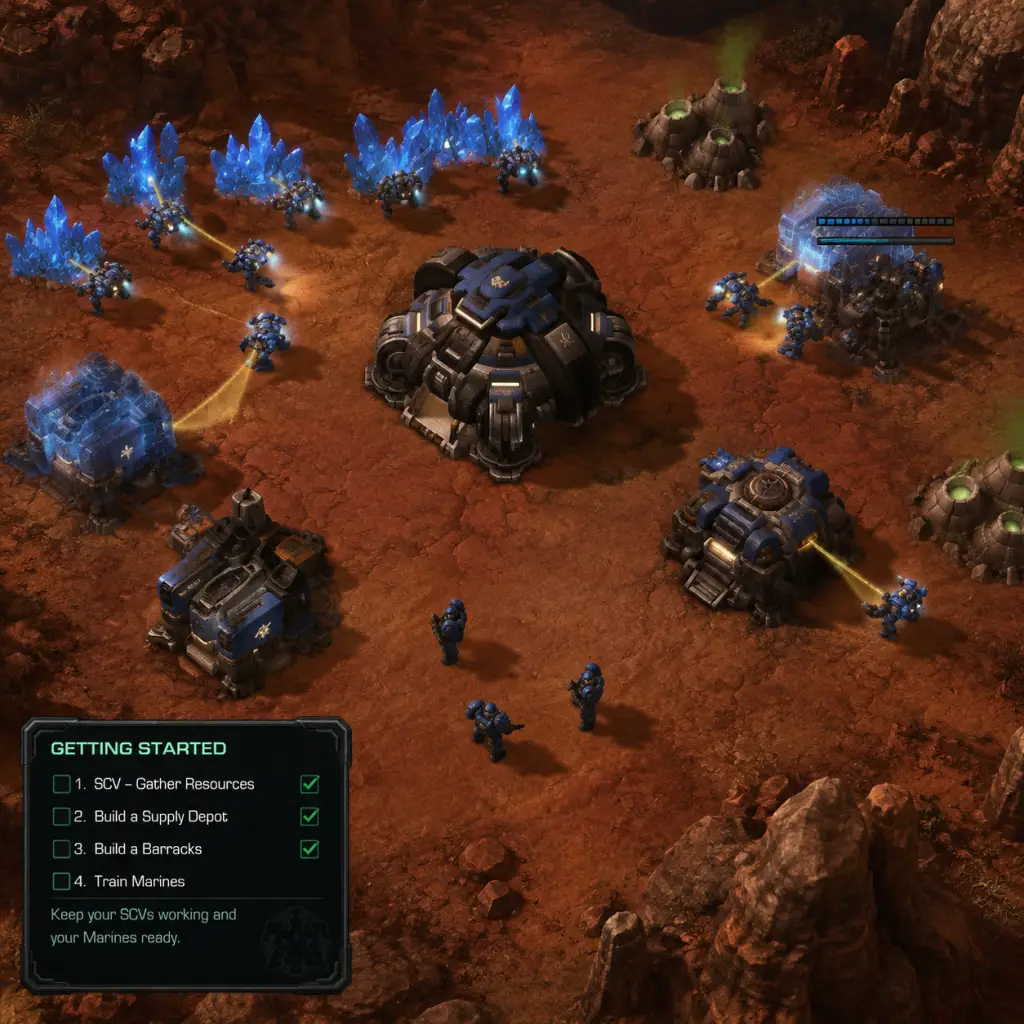
Getting Started
Getting Started with StarCraft II: Wings of Liberty
Welcome to the Koprulu Sector, Commander. StarCraft II is a real-time strategy (RTS) game where you build bases, gather resources, and command armies to destroy your opponent. This guide is designed to get you through your first hour with confidence and avoid the most common pitfalls.
Important Note: No Character Creation
StarCraft II does not have a character creation system. Instead, you choose a race (Terran, Protoss, or Zerg) each with unique units, buildings, and playstyles. As a beginner, the Terran race is often recommended because its mechanics (buildings that lift off, straightforward production) are the most intuitive. You can start the campaign as Terran immediately.
First Hour Walkthrough
1. Launch the Game – After installation, open Battle.net, select StarCraft II, and click Play. You’ll see the main menu.
2. Start the Campaign – Click Campaign → Wings of Liberty. You begin on the Hyperion, your command ship. Follow the introductory cutscene. You’ll soon be thrown into your first mission: "Liberation Day."
3. Complete the Tutorial – The campaign itself serves as an excellent tutorial. The first few missions teach you:
- How to select units (click or drag)
- How to gather minerals and vespene gas
- How to build structures and train units
- Basic combat: attack-moving and using abilities
4. If you want to skip the campaign, go to Versus → vs. AI – Select a map (e.g., Lost Temple) and start against a Very Easy AI. This is the fastest way to learn mechanics solo.
5. In your first game, focus only on this:
- Build SCVs (workers) continuously from your Command Center
- Send SCVs to mine minerals immediately (the yellow crystal nodes)
- Build a Supply Depot at 9 supply to avoid being blocked
- Build a Barracks at around 12-13 supply
- Train a few Marines and attack the AI. That’s it.
Controls on All Platforms
StarCraft II is exclusively on PC (Windows/Mac). There are no console versions. The entire game is designed for keyboard + mouse.
#### Essential Keyboard Shortcuts (Memorize These):
| Action | Default Key | Why It Matters |
|---|---|---|
| Build SCV | `S` (with Command Center selected) | Never stop producing workers |
| Attack Move | `A` then left-click on ground | Units move and attack automatically |
| Hold Position | `H` | Stops units from chasing, good for defense |
| Stop | `S` | Cancels current action |
| Select all army | `F2` | Convenient but can pull defenders away; use carefully |
| Set control group | `Ctrl+[1-9]` | Group units for quick selection |
| Jump to selected group | Double-tap `[1-9]` | Instantly centers screen on that group |
| Camera hotkeys | `F5-F8` (default for bases) | Quickly switch between bases |
User Interface (UI) Overview
1. Top of Screen:
- Resources Bar: Displays Minerals (left) and Vespene Gas (right). Supply is shown as a fraction (e.g., 18/20). Turn yellow/orange when approaching max.
- Game Timer & FPS (optional, enable in settings).
- Score & APM (Actions Per Minute) – ignore as a beginner.
2. Bottom of Screen:
- Command Card: Shows available actions for the selected building or unit (e.g., build SCV, move, stop).
- Selection Panel: Lists all selected units and their HP bars.
- Mini-map: Shows the entire map. Green dots = your units, red dots = enemies, purple = neutral. Click on mini-map to jump camera there.
3. Left/Right Sidebars:
- Objectives Panel (campaign only): Shows mission goals.
- Production Queue: Click a Barracks to see the training progress bar and cancel unit if needed.
Essential Early Objectives (First 5 Minutes)
If you play solo vs. AI or in multiplayer, follow this strict checklist:
1. 0:00 – Build an SCV from the Command Center (you start with 12 workers; your goal is always to be building one more).
2. 0:15 – Rally your starting SCVs to minerals. Right-click on a mineral patch. Keep the Command Center rally point near the minerals.
3. 0:30 – When you have 50 minerals, build a Supply Depot near your base. Place it close to your mineral line but with room to expand.
4. 0:45 – Build a Refinery on a Vespene Geyser (purple gas vent) with 3 SCVs. This is critical for advanced units but not for first few Marines.
5. 1:00 – Build a Barracks (costs 150 minerals). Place it near your Command Center but not blocking anything.
6. 1:15 – Continue producing SCVs non-stop until you have around 16-20 on minerals.
7. 1:30 – From your Barracks, build a Marine (50 minerals). Keep producing Marines one by one until you have 10+.
8. 2:00 – Build a second Command Center (or for beginners, just focus on attacking).
9. Attack with all your Marines by right-clicking on an enemy structure or unit. Use `A`-move to avoid pathing issues.
What To Do First vs. What To Avoid
| Do This First | Avoid |
|---|---|
| Constantly build SCVs | Idling your Command Center (never stop producing workers) |
| Build Supply Depots before reaching max supply | Getting supply blocked (e.g., stuck at 18/18) |
| Scout the map early with an SCV or Marine | Ignoring the opponent – even vs. AI, send a unit to see what they’re doing |
| Spend all your minerals immediately | Saving large amounts of resources – unspent minerals rot |
| Use `A`-move to attack | Using right-click on an enemy (units may chase and get separated) |
| Build production buildings (Barracks, Factory, Starport) | Building unnecessary defensive structures early (e.g., Bunkers before army) |
Early Resource Priorities
1. Minerals are king – You need them for everything: workers, supply, basic combat units. Always have 16-20 SCVs mining minerals.
2. Vespene Gas becomes important later – For most basic units (Marines, Marauders) you need gas. Start with 1 Refinery, then add more once you have ~20 workers.
3. Supply – Every time your supply hits 0/10 you need a Depot. Build one at 9/10, 19/20, 29/30, etc. Missing supply stops production instantly.
4. Expansion – After you have stabilized with 2-3 Barracks and an army, expand to a new mineral line (build another Command Center) to double your income.
Common Beginner Mistakes (And How to Fix Them)
1. Not building workers constantly – Solution: Always queue at least one SCV per Command Center. Use hotkey `S` to build and `Shift+right-click` on minerals to set rally.
2. Getting supply blocked – Solution: Build a Supply Depot when your current supply is at 9, 18, 27, etc. Check your supply number every few seconds.
3. Idle army – Solution: If you aren’t scouting or attacking, your army should be defending a choke point or moving to pressure the enemy. Use `F2` to select all and send them somewhere useful.
4. Trying to micro before macro – Beginner priority: Build workers, spend resources, maintain supply. Micromanagement (splitting Marines, using abilities) is secondary.
5. Not watching the minimap – Solution: Get in the habit of glancing at the minimap every five seconds. Red dots mean danger.
6. Panicking and spamming units – Solution: Stick to a simple opening (e.g., 1 Barracks, then expand). Chaos leads to wasted resources.
Day-One Checklist
- [ ] Play the first campaign mission (Liberation Day) to learn basics.
- [ ] Memorize the hotkeys for SCV, Attack Move, and building Supply Depots.
- [ ] Play a vs. AI match on Very Easy. Try to build workers constantly and never get supply blocked.
- [ ] Watch the replay of your game. Look for times your Command Center was idle or you had unspent minerals.
- [ ] Learn one simple build order (e.g., 1 Barracks Expand for Terran) from a reputable source like TeamLiquid or YouTube.
- [ ] Familiarize yourself with the UI: find the mini-map, resource count, and command card.
- [ ] Experiment with the other races (Protoss, Zerg) in a custom game to understand their feel.
- [ ] Join a beginner-friendly community (e.g., StarCraft II Discord) to ask questions.
Final Pro Tip
StarCraft II is a game of macromanagement (economy and production) first, micro (unit control) second. If you can out-produce your opponent with sheer numbers, you will win many early games. Keep your base building, workers constantly flowing, and always look to spend your resources. Good luck, Commander.
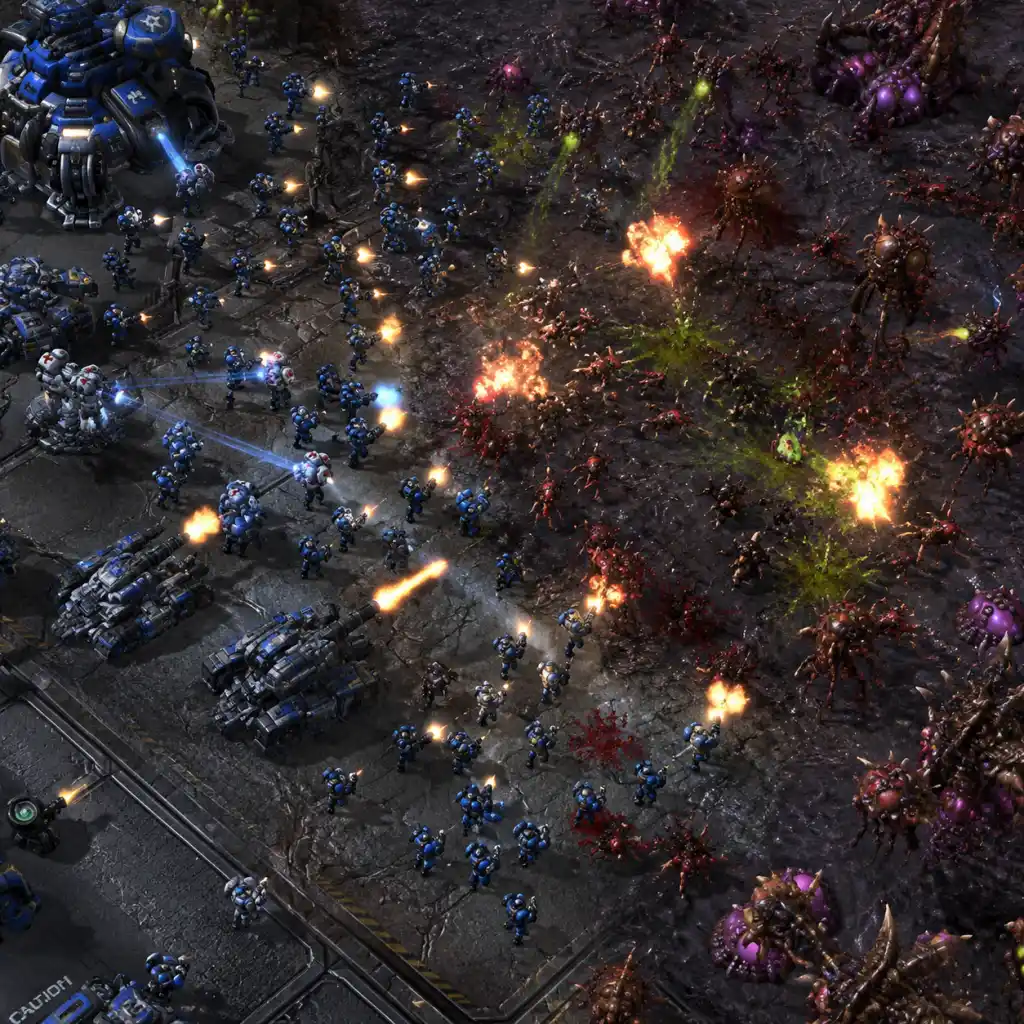
Core Gameplay
Core Gameplay Guide for StarCraft II: Wings of Liberty
StarCraft II: Wings of Liberty is a real-time strategy (RTS) game that combines base building, resource management, army composition, and tactical combat. This guide covers the core gameplay loop and progression tiers for the Terran campaign, which is the default single-player experience in the free-to-play version. New players typically progress through the campaign missions, unlocking upgrades and new units, before moving to multiplayer or custom games.
Main Gameplay Loop
The fundamental loop in every match or mission:
1. Gather Resources: Send SCVs to collect Minerals and Vespene Gas from nearby resource nodes.
2. Build & Tech Up: Construct Supply Depots, Barracks, Factories, Starports, and add-ons (Tech Lab, Reactor) to unlock units and upgrades.
3. Train Army: Produce units like Marines, Marauders, Siege Tanks, Medivacs, and Vikings.
4. Scout & Expand: Use scans, SCV scouts, or early units to reveal enemy base and expansions. Secure additional bases to boost income.
5. Engage & Destroy: Attack enemy forces and structures with a balanced army composition, using tactics like stutter-step micro, siege positioning, and spellcaster abilities.
6. Tech Upgraded: Continuously research upgrades (weapons, armor, shields, special abilities) from Engineering Bays and Armories.
7. Win Condition: Destroy all enemy structures or complete the mission objective (e.g., eliminate a specific target, survive waves, capture points).
Combat & Interaction Systems
- Unit Types: Light (Marines, Hellions), Armored (Marauders, Siege Tanks), Mechanical (Cyclones, Thors), Psionic (Ghosts). Damage modifiers apply (e.g., Marauder's Concussive Shells slow armored units).
- Micro & Positioning: Use stutter-step for ranged units to kite melee foes. Siege Tanks must be in Siege Mode for high splash damage but cannot move. Medivacs heal biological units and can drop troops. Use terrain elevation for vision advantage.
- Abilities: Stim Pack boosts Marine/Marauder damage and speed for 15 seconds (costs HP). MULE calldown provides instant resource collection. Scanner Sweep reveals invisible units.
- Spellcasters: Ghosts can EMP shield energy and Nuke. Ravens deploy Auto-Turrets and PDD (Point Defense Drone). Science Vessels (if unlocked) can Irradiate or provide defensive matrix.
- Tech Tree: Barracks builds Tier 1 units (Marine, Marauder, Reaper). Factory builds Tier 2 (Hellion, Siege Tank, Cyclone) after Barracks with Tech Lab. Starport builds Tier 2/3 (Viking, Medivac, Banshee, Raven, Battlecruiser) after Factory.
- Minerals (primary): build structures, train units, research upgrades.
- Vespene Gas (secondary): required for advanced units and most upgrades.
- Supply: each unit occupies supply (max 200). Build Supply Depots to increase cap.
- Complete missions to earn credits (money) and Protoss artifacts. Credits buy upgrades from the Hyperion armory (e.g., +1 attack per tier, increased health, new abilities). Artifacts unlock research options in the lab (e.g., Advanced Ballistics for Siege Tanks).
- Each mission grants a Mission Choice (choose which world to liberate, affecting rewards and unlock order). Some missions offer optional objectives for bonus credits.
- Unit upgrades persist across missions in the same campaign save.
- Similar resource model but no persistent upgrades. Game progression resets each match.
- Build order (BO) optimization is critical: e.g., 1-1-1 (one Barracks, one Factory, one Starport) vs. 2-1-1 (two Barracks, one Factory, one Starport).
- Expand to natural expansion around 16-20 supply for extra income.
- Hyperion Upgrades: Spend credits in the Armory to upgrade:
- Research: Artifacts unlock lab projects that grant global bonuses like +1 attack for all units, or new unit upgrades (e.g., Necklash Compound for Vikings).
- Mercenary Units: Some missions allow hiring Mercenaries (e.g., Devastators, Spectres) which are tougher versions of regular units that cost no supply.
- Commander Progression: In multiplayer Co-op mode (added later) each commander has a leveling system, but Wings of Liberty campaign does not have a player character level.
- Protoss Relics: Small glowing artifacts hidden in some maps; clicking them grants credits.
- Civilian Survivors: In missions like “Outbreak,” saving civilians earns credits.
- Resource Clusters: Unprotected mineral fields or gas geysers outside main base that can be mined by building secondary bases.
- Enemy Bases: Scouting reveals enemy tech and expansion opportunities.
- After completing all main missions (including the Char sequence), the epilogue mission “The Devil’s Playground” concludes the story. No new game+ mode.
- Players can replay any previously completed mission from the mission select screen to earn additional credits (one-time bonus) or try higher difficulty (Casual, Normal, Hard, Brutal).
- Achievements and challenge missions offer replayability.
- Ranked ladder system: 1v1, 2v2, 3v3, 4v4, and Archon Mode. Each season resets MMR.
- Leagues: Bronze, Silver, Gold, Platinum, Diamond, Master, Grandmaster (top 200).
- Custom games allow mods (e.g., Arcade maps like Desert Strike, Direct Strike).
- Co-op mode (introduced later) offers replayable missions with escalating difficulty (mutations).
- Gameplay Loop: Build 10-16 supply, collect resources, construct Barracks, produce Marines and Marauders, scout with SCV or Reaper.
- Combat: Basic A-move with Marines. Use SCVs to repair mechanical units. First mission is a tutorial; second introduces Marauders and Medivacs.
- Progression: Earn credits to buy first upgrades (e.g., Infantry Weapons +1). Unlock the Factory and Siege Tank by mission 3 or 4.
- Economy: Focus on one base; collect all Minerals and Gas near your Command Center. Build only essential tech (1 Barracks -> 1 Factory).
- Exploration: Small maps; clear enemy outposts for optional credit caches.
- Build Focus: Prioritize Marine + Marauder with Medivac support. Use Siege Tanks for defense.
- Gameplay Loop: Expand to a second base; tech up to Starport for Medivacs and Vikings. Research +1/+1 upgrades from Engineering Bay. Use multi-pronged attacks (drop a squad while pressuring front).
- Combat: Incorporate Ghosts for EMP (vs Protoss) or nukes (vs Terran). Use Banshee cloaked harassment. Siege Tanks in siege mode for defense.
- Progression: Invest in Vehicle/Ship upgrades. Unlock the Thor, Raven, and Battlecruiser. Spend credits on Hyperion upgrades like “Combat Shield” (+10 HP for Marines) and “Advanced Ballistics” (Siege Tank range).
- Economy: Maintain 2 bases; may need a third for heavy gas use (Battlecruisers require high gas). Use MULEs to boost mineral income.
- Exploration: Larger maps with hidden Protoss artifacts; use Vikings to spot high ground.
- Build Focus: Two-base pushes: Marine/Marauder/Medivac + Siege Tank + Viking vs air. For Protoss enemies, add Ghosts and Ravens.
- Gameplay Loop: 3+ bases, maxed out 200 supply army, constant upgrades to +3/+3. Use Battlecruisers as core heavy hitters with Yamato Cannon. Manage multiple control groups (1- army, 2- casters, 3- siege units).
- Combat: Large-scale engagements. Pre-spread army to avoid AoE (banelings, psi storm). Use Scanner Sweep to reveal hidden units. Activate Stim before engaging.
- Progression: All campaign upgrades maxed (except maybe a few). Unlock “Ultra-Capacitors” (+5% attack speed) and “Micro-Filtering” (+1 range for Marines). Consider using Mercenaries for tough fights.
- Economy: 3 saturated bases. Use MULEs on all bases. Float extra Command Centers to create orbital commands for more scanners.
- Exploration: Some missions like “The Dig” require destroying multiple enemy bases; scout for tech structures (Robotics Bay, Stargate) to prioritize counters.
- Build Focus: Mass Battlecruiser with Viking anti-air, or Bio (Marine/Marauder/Medivac) with Siege Tank support. Ghosts for heavy spellcasting.
- Campaign Finale: Missions “The Molten Core”, “The Gathering Essence”, “The Void Rift” (Char sequence) require maxed out tech and upgrades. Use all tools: Nuke Zerg bases, Yamato Brood Lords, EMP High Templars.
- Multiplayer: After campaign, transition to vs AI or ranked ladder. Focus on practice vs different races: Zerg (macro heavy), Protoss (tech heavy), Terran mirror. Learn build orders (e.g., 1-1-1 fast expand, 2-1-1 stim timing). Study replays to improve macro (always build SCVs, don't get supply blocked).
- Co-op: (included with free-to-play) each commander has unique units and abilities; complete weekly mutations for rewards.
- Arcade: Explore community mods for alternative gameplay.
- Early Game Example (Mission 1): Build 10 supply, 2 Barracks, train 8 Marines, attack target base with A-move.
- Mid Game Example (Mission 8 - “The Dig”): Take natural expansion, build Factory with Tech Lab for Siege Tanks, Starport for Medivacs, push up middle with Marine/Marauder/Tank ball, drop a Medivac of Marauders on the east gas to delay enemy tech.
- Late Game Example (Mission 20 - “The Essence”): Expand to 3 bases, get 2 Engineering Bays upgrading infantry weapons/armor to +3, build 10 Barracks producing Marines nonstop, produce Siege Tanks from 2 Factories, and 4 Starports for Medivacs and Vikings. Use Ghosts to EMP any Infestor energy. Attack from multiple sides using a main army and a drop squad.
- Endgame Multiplayer: Follow a standard build order: 13 supply depot, 15 barracks, 16 orbital command, 17 factory, 20 starport. Continue producing marines and marauders while expanding at 30 supply. Use the first Medivac to drop in enemy base and scout.
Progression & Economy
Resources:
Campaign Progression:
Multiplayer Economy:
Quests / Missions (Campaign)
The campaign consists of 26 missions (plus prologue and epilogue). Each mission has a primary objective (e.g., destroy an enemy base, defend a position, escort a convoy) and often optional objectives (bonus credits, Protoss artifacts, colony rescues). Completing missions grants credits and unlocks new units or upgrades. Some missions are story-critical and branch based on choices (e.g., Char or Haven).
Character / Build Growth (Campaign)
- Infantry Weapons & Armor (applies to Marines, Marauders, etc.)
- Vehicle Weapons & Armor (Hellion, Siege Tank, Thor)
- Ship Weapons & Armor (Viking, Banshee, Battlecruiser)
- Special Abilities: e.g., Advanced Medivac heal rate, +Marine HP, +Reaper speed.
Exploration (Campaign Level Design)
Campaign maps often have secondary areas to explore for bonuses:
Endgame Structure
Campaign Endgame:
Multiplayer Endgame:
Early Game (Campaign - First 5 Missions)
Mid Game (Missions 6-15)
Late Game (Missions 16-22)
Endgame (Final 4 Missions + Multiplayer)
Tips & Examples
This breakdown should help you understand the flow from novice to expert in StarCraft II: Wings of Liberty. Focus on mastering one tier before moving to the next.
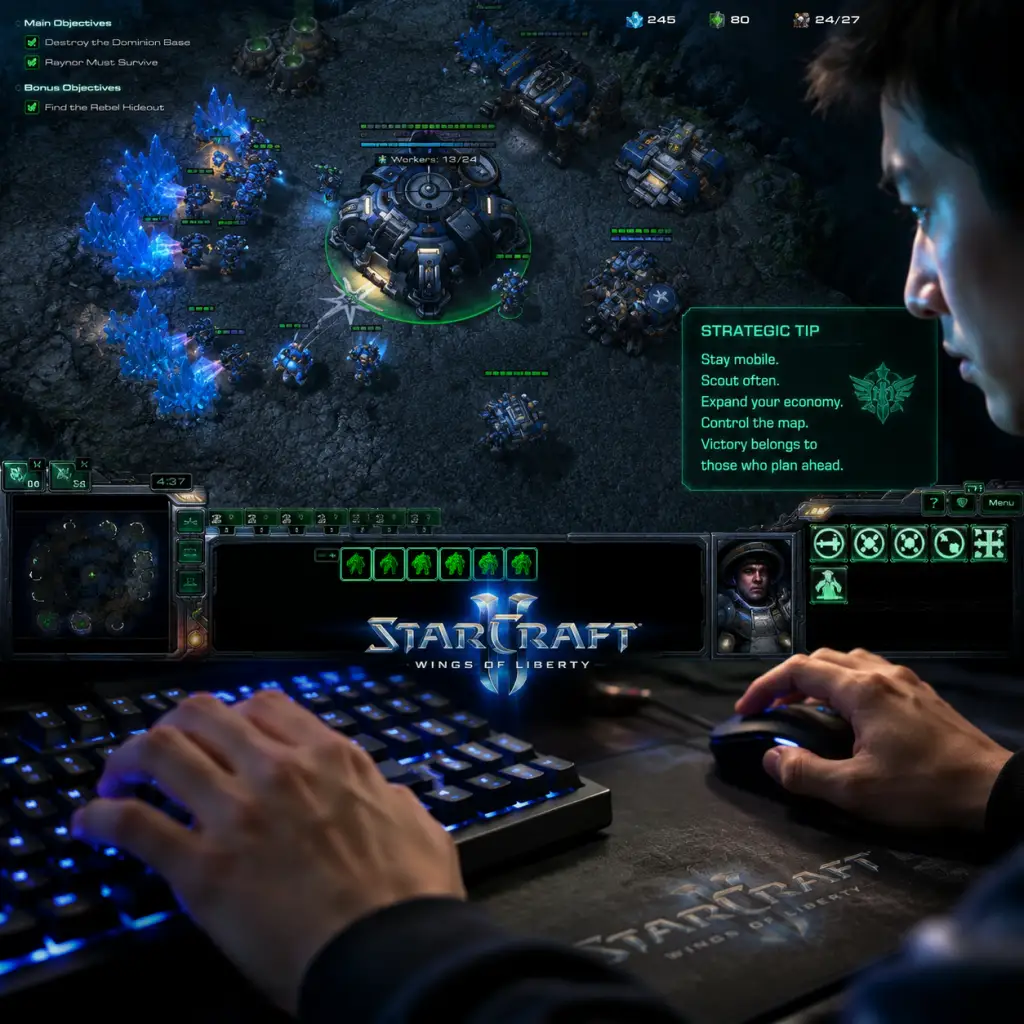
Game Tips
Game Tips for StarCraft II: Wings of Liberty
This guide compiles essential tips for players of all skill levels, from total beginners to seasoned veterans. The tips are organized by gameplay category, with deeper analysis on why each tip works and when to apply it.
---
Beginner Tips
1. Always build Probes (SCVs/Drones) continuously
- Explanation: Your economy is the foundation of everything. Never stop producing workers until you have at least 16 per base on minerals and 3 per gas geyser (later expand to 24 workers per base for optimal mineral saturation).
- Analysis: A single worker builds in ~12 seconds. Missing a cycle early costs you 10 minerals per minute per worker, which snowballs over time. Use your main building's rally point to a mineral patch and check your idle worker count (default hotkey F1) regularly.
2. Spend your resources aggressively
- Explanation: If you have over 500 minerals or 300 gas, you are floating resources that could be units, buildings, or upgrades. Build production structures (Barracks, Gateway, Hatcheries with larvae) and constantly produce units.
- Analysis: In StarCraft II, the player who spends resources more efficiently wins. Floating resources means you are not applying pressure or defending. Use hotkeys and control groups to macro quickly.
3. Use control groups for your army and production
- Explanation: Assign army units to control groups 1-5 and production buildings to 6-0 (e.g., Ctrl+1 for main army, Ctrl+5 for all Command Centers). Use double-tap to snap camera to that group.
- Analysis: This dramatically increases your ability to multitask. You can produce units from barracks while microing your army. For beginners, start with 2-3 control groups (main army, spellcasters, production).
4. Build supply depots early and often
- Explanation: Supply blockers (hitting 10/10 supply early) stop unit production. Build a supply depot around 9-10 supply (or after your 10th worker for most races). Expand your supply pylons/depots every time your supply approaches cap.
- Analysis: A supply block can lose you the game if it delays an attack or defense. Always queue supply structures a bit before you need them. For Terran, SCVs can build depots; for Protoss, a probe can build pylons; for Zerg, overlords pop out automatically but you may need to morph them earlier.
---
Resource Management & Economy
1. Optimal worker saturation per base
- Explanation: Each mineral patch supports 2 workers (optimal 16 per base for minerals). Beyond 16, workers trip over each other, giving diminishing returns. Similarly, 3 workers per gas geyser (total 3 per base) is optimal.
- Analysis: If you have 24 workers on minerals, you get only 20% more income than 16. Instead, build a new expansion and split workers. For Zerg, drone production is tied to larvae, so you must balance between workers and army.
2. Expand at the right time
- Explanation: As a rule of thumb, expand when your main base mineral patches start to deplete (around 50% left) or when you have enough army to defend a second base. Typically, expand between 2-4 minutes into the game depending on build.
- Analysis: A faster expansion gives long-term economic advantage but makes you vulnerable to early pressure. Scout your opponent’s build to decide. If they are playing greedy, punish them; if they are aggressive, delay your expansion and build units.
3. Transfer workers to new expansions
- Explanation: Don't just send workers from the command center; rally from your main base. When your new base finishes, move 4-6 workers over immediately to start mining. As the main base depletes, send more.
- Analysis: Transferring workers maximizes your income per base and keeps your main base productive until it's mined out. For Zerg, you can use the 'Gather' command or send drones from the main hatch.
4. Gas management
- Explanation: Gas is often the bottleneck for tech units and upgrades. Only take gas when you need it (e.g., for Tier 2 units). Too early gas can delay your mineral economy. For Terran, you may skip gas in the first 2-3 minutes for a fast expand.
- Analysis: Each gas geyser costs 75 minerals for the refinery/extractor/assimilator. If you don't need gas immediately, delay it. For Protoss, you need gas for cybernetics core and stalkers; for Zerg, for lair and roaches.
---
Base Building & Expansion
1. Wall off your natural expansion against early rushes
- Explanation: Use structures (depots, barracks, gateways, pylons) to create a wall that blocks enemy ground units. Leave a small gap for your workers to pass through, and block with a production building or pylon later.
- Analysis: This is crucial against Zergling floods or Zealot rushes. It forces the enemy to attack the wall or go around, buying you time. For Terran, use supply depots that can be lowered to let units through.
2. Scout for proxies and cheese
- Explanation: After your first supply depot/pylon, send an SCV/Probe/drone to scout your opponent's base. Look for signs of early aggression: early pool/hive, proxied barracks, cannon rush pylons near your base.
- Analysis: If you catch a cannon rush early (pylon + forge near your mineral line), you can pull workers to stop it. Scouting is the cheapest defense. Use the scouting worker to check common proxy locations (e.g., near your natural expansion).
3. Position production buildings for efficient rally
- Explanation: Place your barracks/gateway/hatchery closer to your natural expansion so new units can quickly reinforce the front line. Avoid placing them too far in the back of your main base.
- Analysis: Unit travel time matters. If your army is defending your third base, having production on the line reduces reinforcement delay. For Zerg, use creep spread to speed up unit movement.
---
Combat & Micro
1. Focus fire high-value targets
- Explanation: Use control groups to select part of your army and attack specific enemy units like siege tanks, colossi, or spellcasters. Use 'A-move' for general engagement but manually target dangerous units.
- Analysis: Focus fire eliminates key threats quickly, reducing enemy damage output. For example, Marines should target Colossus first, then Zealots. Use stutter-step micro for marines (move, attack, move) to kite melee units.
2. Use terrain and chokepoints
- Explanation: Position your army on ramps or behind narrow corridors to force the enemy to fight in unfavorable positions. This is especially effective against protoss deathballs or zergling floods.
- Analysis: A few Siege Tanks on a high ground ramp can decimate a much larger force. Force the enemy to unsiege or take the long way. Similarly, use cliffs for defensive advantage.
3. Spellcaster management
- Explanation: Keep Templars, Infestors, Ravens, etc. on separate control groups. Use their abilities (Storm, Fungal Growth, PDD) at critical moments. Pre-place force fields to split enemy army.
- Analysis: A well-placed Psionic Storm can turn a losing fight. However, spellcasters are squishy; keep them behind the main army and move them forward only to cast. Use 'cast and retreat' tactics.
4. Don't engage into concaves
- Explanation: A concave formation (army spread in an arc) maximizes the number of units that can fire simultaneously. Avoid clumping your army into a narrow path.
- Analysis: If you attack a terran line of marines with your zealots in a straight line, only the front zealots attack while others wait. Instead, spread your units before engaging. Use 'A-move' from a broader angle.
---
Army Composition & Unit Synergy
1. Terran: Marine + Medivac + Marauder (MMM)
- Explanation: This core composition provides high DPS (Marines), tankiness (Marauders slow mech), and healing/mobility (Medivacs). Add Siege Tanks for splash damage and Vikings for anti-air.
- Analysis: Marauders with Concussive Shells can slow enemies, making them easy pickings for Marines. Medivacs allow boosting into bases and healing after engagements. This composition is versatile against protoss and zerg.
2. Protoss: Gateway units + Colossus
- Explanation: Zealots tank damage, Stalkers provide mobility and anti-air, and Colossus deals significant splash damage. Add High Templars for Storm vs clumped armies or Archons for durability.
- Analysis: Colossus are powerful but vulnerable to Vikings and Corruptors. Protect them with Stalkers and use force fields to split enemy forces. Against mass marines, Storm is essential.
3. Zerg: Roach + Hydralisk + Infestor
- Explanation: Roaches are tanky and damage buildings, Hydralisks provide high DPS, and Infestors can fungal and spawn broodlings. Add corruptors for air superiority or Ultralisks for late-game durability.
- Analysis: This composition is strong mid-game. Infestors can also neural parasite enemy brood lords or thors. Use creep spread for mobility. Upgrade Roach speed and Hydra range at the evolution chamber.
4. Counter enemy compositions
- Explanation: Scout your opponent to see what they are building. If they are heavy mech (Tanks, Hellions), build Immortals (Protoss) or Roaches (Zerg). If they are heavy air, build Vikings (Terran) or Corruptors (Zerg) and use detection.
- Analysis: Hard counters exist: Light units take extra damage from certain attacks. For example, Hellions melt Zealots, but Immortals ignore armor. Always adapt your composition to what you scout.
---
Scouting & Information Gathering
1. Early scout: Send a worker at 13-14 supply
- Explanation: Send your 13th or 14th SCV/Probe/Drone to the enemy's base. Check if they are expanding, building an early pool, or proxying. Learn the patterns of common builds (e.g., 3-rax reaper, 4-gate, 14/14 speedling).
- Analysis: Early scout reveals exactly what your opponent is doing. If they have no expansion by the time you scout, expect an all-in. If they have a fast expansion, you can either match or punish. Keep the scout alive as long as possible.
2. Mid-game scouting with sacrifices
- Explanation: Use cheap units like Zerg overlords (position them around the map), Terran scans (use Orbital Command energy), or Protoss observers to peek at the enemy base. Sacrifice a unit to see tech structures or army composition.
- Analysis: Don't rely solely on early scout. As the game progresses, the enemy changes composition. Scan their main base to see if they are teching to lair/hive or building multiple starports. For Zerg, overlords can be left on creep or sent to strategic locations.
3. Map awareness
- Explanation: Place units on watchtowers or in high-traffic areas. Use Xel'Naga watchtowers to spot enemy movements. For Zerg, creep tumors provide vision. For Protoss, observers can patrol by expansions.
- Analysis: Knowing when the enemy moves out lets you reposition your army or prepare defenses. If you see a large force moving to your third, pull workers or prepare a concave. Map control is key to dictating engagements.
---
Build Orders & Strategy
1. Standard openings for each race
- Terran: 1-1-1 (Barracks, Factory, Starport) opening is popular for all-ins or macro. Alternatively, Reaper expand (2 Reapers into expansion) for early harassment.
- Protoss: 4-gate (4 Warpgates) is a classic timing attack, but modern builds use 3-gate expand (3 Gateways into Nexus) for macro. Also, proxy 2-gate (build gateways near enemy base) for early pressure.
- Zerg: 14/14 (14 pool, 14 gas) for speedling pressure. 15 hatch first (15 pool, 16 hatch) for fast expansion but more vulnerable. Macro builds use 3 hatch before pool.
2. Timing attacks
- Explanation: Many builds hit a timing window when upgrades and units finish simultaneously. For example, +1 attack Terran bio pushes around 7:00 with stim and combat shields. Practice hitting these timings to overwhelm unprepared opponents.
- Analysis: Timings exploit opponent's greed or lack of defenses. If you scout they are expanding or teching skip units, hit hard. For Protoss, a warp prism with 8 zealots can kill workers before defenses arrive.
3. Adapt to what you scout
- Explanation: If you see a fast third base, you can punish by attacking early. If you see a heavy early army, you must defend while expanding cautiously. Flexible builds (e.g., gas first then react) allow adjustment.
- Analysis: Hard and fast builds can lose to counters. For example, a 4-gate fails if opponent walled off with a forge and cannons. Instead, transition to expand or tech. Learn to deviate from your plan based on information.
---
Advanced Mechanics & Optimizations
1. Inject larvae efficiently (Zerg)
- Explanation: Use your Queens to inject larvae into hatcheries. Always keep a Queen at each base. Practice 'inject cycles' roughly every 40 seconds (larva spawns). Use camera hotkeys (F2-F4) to quickly jump between bases.
- Analysis: Each inject gives 3 extra larvae per hatch. Missing an inject significantly reduces your potential army size. Advanced players use 'rapid fire' inject technique or shift-queue injects on multiple hatcheries.
2. Chrono Boost cycles (Protoss)
- Explanation: Use the Nexus ability Chrono Boost to speed up production or upgrades. Prioritize key upgrades like Warpgate Research, +1 attack, or important units (e.g., Colossus). Chrono your nexuses every time energy allows.
- Analysis: Chrono Boost can shave seconds off critical upgrades. For example, a 100-second research becomes 70 seconds. Use it strategically: if you need to rush to Colossus, chrono the Robotics Facility. Balance between units and upgrades.
3. Mule drops and supply depots (Terran)
- Explanation: Use Orbital Command energy for MULEs (instant mineral income) and scans. Drop MULEs on your most rich mineral patches. For supply, use Supply Depots that can be lowered to let units pass through walls.
- Analysis: A MULE gives 225 minerals over its lifetime (~90 seconds). Prioritize MULEs over scans unless you need vision. Depot lowering is a micro trick: lower depots to let units out, then raise to block again. Useful for defending ramps.
4. Creep spread (Zerg)
- Explanation: Use Queen tumors to spread creep across the map. Creep speeds up Zerg unit movement and provides vision. Always spread from your bases outward. Place tumors in strategic locations like watchtowers or near enemy expansions.
- Analysis: Creep is essential for Zerg mobility. Once tumors are outside your main, they become hard to remove. Use tumors to connect hatcheries for faster reinforcement. Tumor placement can also block enemy expansions if placed aggressively.
5. Warpgate usage (Protoss)
- Explanation: After researching Warpgate, your Gateways transform into Warpgates. You can warp in units anywhere within psionic matrix (pylon power) after a short cooldown. Use proxy pylons near enemy base for instant reinforcements.
- Analysis: Warpgates dramatically increase Protoss ability to respond to threats. With good pylon placement, you can warp in units directly into battle. However, warping in is slower than building from a Gateway if you need quantity quickly. Manage cooldowns by queuing units at different gateways.
---
Multiplayer Etiquette & Mindset
1. Learn from losses
- Explanation: Watch replays of your losses, especially from your opponent's perspective. Identify where you fell behind (missed inject, supply block, bad engagement). Note what you could have done differently.
- Analysis: Improvement comes from understanding mistakes. Look for patterns: are you always losing to a specific timing? Check your build order vs theirs. Use the replay's UI to see resource collection and spending.
2. Practice efficient mechanics in custom games
- Explanation: Use 'training' mods or play vs AI to nail down hotkeys, macro cycles, and build orders. Aim to hit your supply benchmarks (e.g., 50 supply at 5 minutes) without looking at build.
- Analysis: Muscle memory enables you to focus on strategy. Spend 10-15 minutes daily just practicing macro: constantly produce workers, keep resources low, and expand on time.
3. Keep your composure and avoid tilt
- Explanation: StarCraft II can be stressful. When you lose a game, take a short break. Don't queue up angry. Focus on your own play rather than blaming imbalances or opponents.
- Analysis: Emotional decisions lead to bad choices (e.g., all-in when you should defend). Treat each game as a learning experience. If you feel frustrated, watch a replay or do a relaxing custom game.
4. Communication in team games
- Explanation: In 2v2/3v3/4v4, coordinate with allies. Use chat, pings, and shared control. Agree on a strategy (one goes aggressive, one defends). Share vision and alert each other about incoming attacks.
- Analysis: Team games require synergy. For example, a protoss and terran can combine force fields with siege tanks. Always help each other with defenses and expansions.
---
Final Words
Mastering StarCraft II takes time and dedication. Start with one race and one build order, then expand your knowledge. Always focus on macro (economy and production) before micro (unit control). The game is about resource efficiency and decision-making under pressure. Use these tips as a framework, but adapt to your own playstyle. Good luck, Commander!
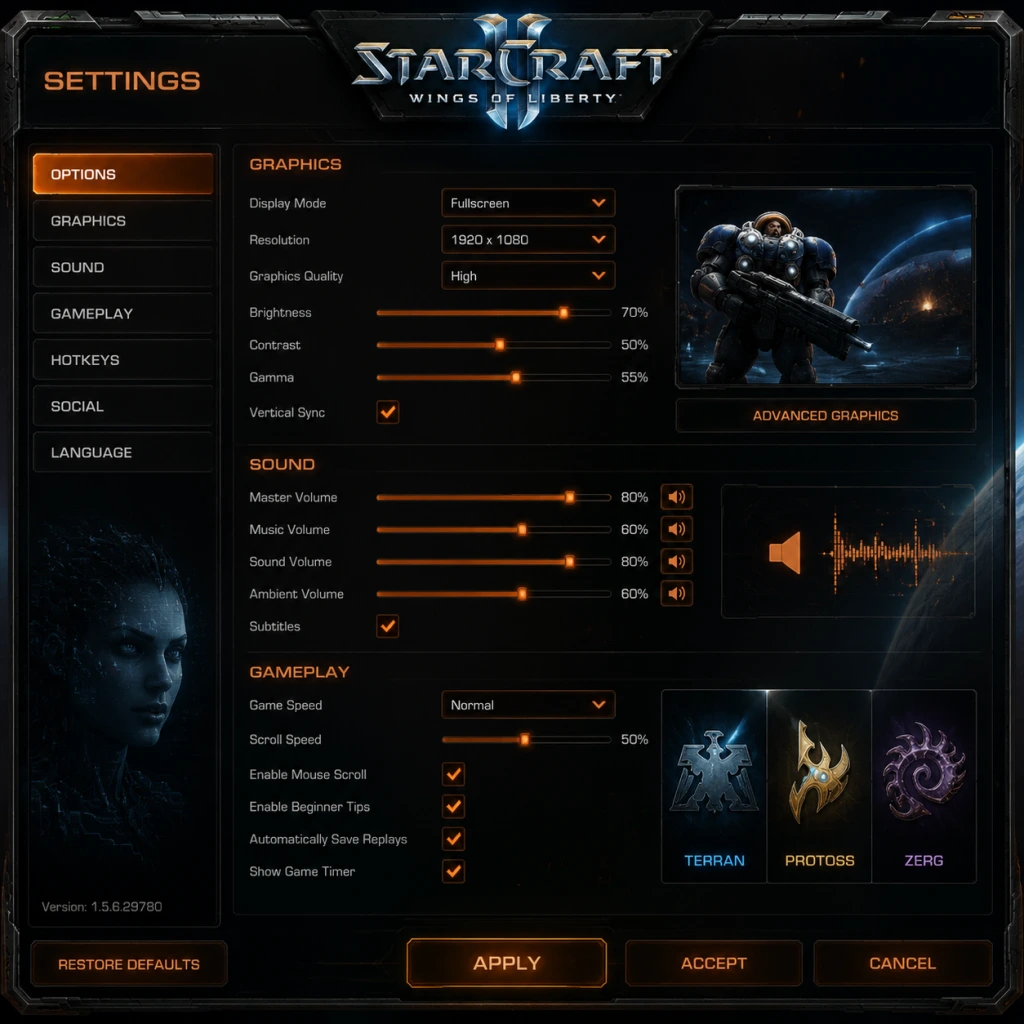
Game Settings
Game Settings Guide for StarCraft II: Wings of Liberty
StarCraft II: Wings of Liberty, now free-to-play as part of the unified StarCraft II client, offers a comprehensive settings menu accessible from the main screen (Options > Settings). This guide covers every major category—Graphics, Audio, Controls, Accessibility, Language, Network, and Gameplay—with recommended configurations for different hardware levels, pitfalls to avoid, and special attention points.
1. Graphics Settings
The graphics menu is split into three sub-tabs: Display, Video, and Sound (though Sound is covered separately). Key settings and recommendations:
#### Display
- Display Mode: Fullscreen (best performance), Windowed (alt-tab friendly), Windowed Fullscreen (borderless window, slight performance cost).
- Resolution: Native monitor resolution. For performance, use the 1920×1080 or lower if struggling.
- Refresh Rate: Match your monitor’s max (e.g., 60 Hz, 144 Hz).
- VSync: Off (recommended to reduce input lag); enable only if you see screen tearing.
#### Video (Quality Presets)
Presets: Low, Medium, High, Ultra – they set all sub-options but can be overridden individually.
| Setting | Low-End (Intel HD Graphics / low-spec) | Mid-Range (GTX 1060 / RX 580) | High-End (RTX 3070+) |
|---|---|---|---|
| Texture Quality | Low | Medium | High/Ultra |
| Shaders | Low | Medium | High |
| Lighting | Low | Low | Medium |
| Shadows | Off / Low | Low | Medium |
| Terrain | Low | Medium | High |
| Effects | Low | Medium | High |
| Reflections | Off | Off | Medium |
| Models | Low | Medium | High |
| Portraits | 2D | 3D | 3D |
| Physics | Low | Low | Medium |
| Post Processing | Off | Low | High |
| Anti-Aliasing | Off | FXAA | CMAA2 / SMAA |
- For competitive play (lowest input lag): Set everything to Low/Off except maybe Texture Quality to Medium. Disable VSync, disable triple buffering.
- For balanced quality/performance: Use Medium preset, then tweak Shadows to Low and Reflections Off.
- For max visuals: Ultra preset, but know that large battles will cause fps drops on any hardware. Lower Effects and Shadows help maintain framerates during clashes.
- Shadows have a heavy performance impact. Setting them to Off or Low yields big gains.
- Post Processing adds bloom and ambient occlusion; turn it off for clarity in competitive play.
- Portraits: 3D portraits cost extra GPU; 2D looks fine and saves resources.
- Master Volume: General level.
- Sound Effects, Music, Voice, Ambient: Independent sliders. For clarity, keep Effects high (100%), Music low (30-50%) if it distracts.
- Voice Language: Separate from text language (see Language section).
- Sound Output Device: Auto-detect or specify.
- Play Sound in Background: Recommended Off (otherwise audio may crackle if minimized).
- Channel Count: Stereo is standard; 5.1/7.1 if you have surround setup. For headsets, use Stereo.
- Voice Chat: In-game voice chat settings (push-to-talk, volume).
- If you experience audio stutter or crackling, lower Sound Quality from High to Medium or reduce Channel Count.
- Turn off Play Sound in Background to prevent audio conflicts when alt-tabbing.
- Global Hotkeys: Change any hotkey via the Hotkeys submenu (e.g., rebind Attack from A to Left Click).
- Custom Hotkey Profiles: Save and load profiles; essential for switching between races or playstyles.
- Use Legacy Hotkeys: Check this box if you prefer the original StarCraft: Brood War layout.
- Mouse Sensitivity: Adjust cursor speed; set between 50-70% for most players.
- Scroll Speed: How fast the map scrolls with edge scrolling. 50-70% recommended.
- Enable Hardware Cursor: On reduces cursor lag; off may improve compatibility on some systems.
- Invert Mouse: Rarely needed.
- Configure if you use a controller via third-party software; native support is limited.
- Keyboard: Rebind Control Groups and Camera Locations to accessible keys (e.g., rebind Camera 1 from F1 to Q). Many pros use `~` for base camera.
- Hotkey Layout: The default is "Standard (Starcraft II)". Consider using "Grid" for a simpler left-hand layout.
- Mouse: If your cursor feels sluggish, disable Mouse Smoothing (if present in your OS) and ensure Hardware Cursor is On.
- Color Blind Mode: Three options (Deuteranopia, Protanopia, Tritanopia) – changes minimap and unit colors.
- Subtitles: Enable for cutscenes and voice lines.
- UI Scale: Increase from 100% to 125% or 150% for larger text/buttons (useful on high-resolution monitors).
- Minimap Size: Slider to make minimap larger (e.g., 110-130%).
- Show Clock: Enable on screen.
- Cursor Size: Enlarge the mouse cursor (helpful for low-vision players).
- Audio Cues: Special sounds for events (e.g., production complete) – can be toggled.
- Color Blind Mode changes ally/enemy colors – test in a custom game to ensure contrast is clear.
- UI Scale may offset some menu elements – adjust in combination with Windows scaling.
- Text Language: All in-game menus, tooltips, and mission text. Options include English, Korean, Chinese, French, German, Spanish, etc.
- Audio Language: Voice over language. Can be different from text (e.g., English text with Japanese audio if available).
- Announcer Language: The unit responses and narrator – usually same as Audio.
- If you change language mid-session, a restart is required.
- Some languages (e.g., Korean) come with exclusive announcer packs for certain regions.
- Connection Details: Shows latency, bandwidth info (useful for diagnosing lag).
- Gameplay Data: Enable or disable network diagnostics.
- Ports: StarCraft II uses UDP/TCP ports 1119 and 6112-6119. If behind a strict NAT, you may need to port forward. Alternatively, use the Blizzard desktop app’s settings to optimize.
- Enable IPv6: Check if your ISP supports it; otherwise leave off.
- Speed Limit: Usually Auto; you can cap download speed for patches.
- If you experience disconnects or lag spikes, run a Network Test in the launcher (Blizzard app > Settings > Network).
- Disable Peer-to-Peer sharing for faster patch downloads if you have a fast internet connection (Blizzard app settings).
- Enable Simple Command Cards: Shows only basic commands (good for beginners).
- Display Build Grid: Shows grid lines on terrain for precise building placement.
- Enable Simplified Chat: Limits chat to pre-set phrases? (Not commonly used).
- Autosave Replays: On by default – highly recommended for post-game analysis.
- Autosave Interval: Every 10 minutes.
- Enable Ally Chat: On for team games; off for solo focus.
- Popup Notifications: Also togglable (e.g., “Your ally is under attack”).
- Minimap Pings: Toggle opacity and volume.
- Display Build Grid is critical for precise building placements (e.g., fitting depots against walls). Turn it ON.
- Turn off Help Tips to reduce screen clutter after you learn the basics.
- Autosave Replays saves every match – handy for reviewing mistakes, but can fill your disk; periodically delete old replays.
Special Attention:
2. Audio Settings
Special Attention:
3. Controls Settings
This tab includes Keyboard, Mouse, and Gamepad (if using).
#### Keyboard
#### Mouse
#### Gamepad
Special Attention:
4. Accessibility Settings
Special Attention:
5. Language Settings
Separate from Windows locale; set in Options > Language.
Special Attention:
6. Network Settings
Special Attention:
7. Gameplay Settings
Special Attention:
8. Recommended Quick Setup for Different Hardware
| System Type | Graphics Preset | Additional Tweaks |
|---|---|---|
| Low-end (laptop, Intel UHD) | Low (all sub-options Low) | Resolution 1366×768, VSync Off, Portraits 2D, Reflections Off, Shadows Off |
| Mid-range (GTX 1650, RX 570) | Medium (then drop Shadows to Low, Reflections Off) | Resolution 1920×1080, VSync Off or Fast Sync |
| High-end (RTX 3060 Ti+) | Ultra (then set Effects to High, Shadows to Medium) | Resolution 1920×1080 or 1440p, VSync Off, Post Processing Off for best competitive performance |
9. Final Setup Checklist
Before starting your first match:
- [ ] Set Graphics preset appropriate for your PC.
- [ ] Disable VSync and cap FPS via RivaTuner or driver (optional) if you want stable framerate.
- [ ] Configure hotkeys: at minimum rebind Control Group creation to something comfortable.
- [ ] Enable Display Build Grid and Autosave Replays.
- [ ] Adjust audio: lower music, higher effects.
- [ ] Set language if needed.
- [ ] Test network: run a speed test and ensure port forwarding if you have connection problems.
With these settings dialed in, you're ready to command the Koprulu Sector efficiently and with minimal technical hiccups.
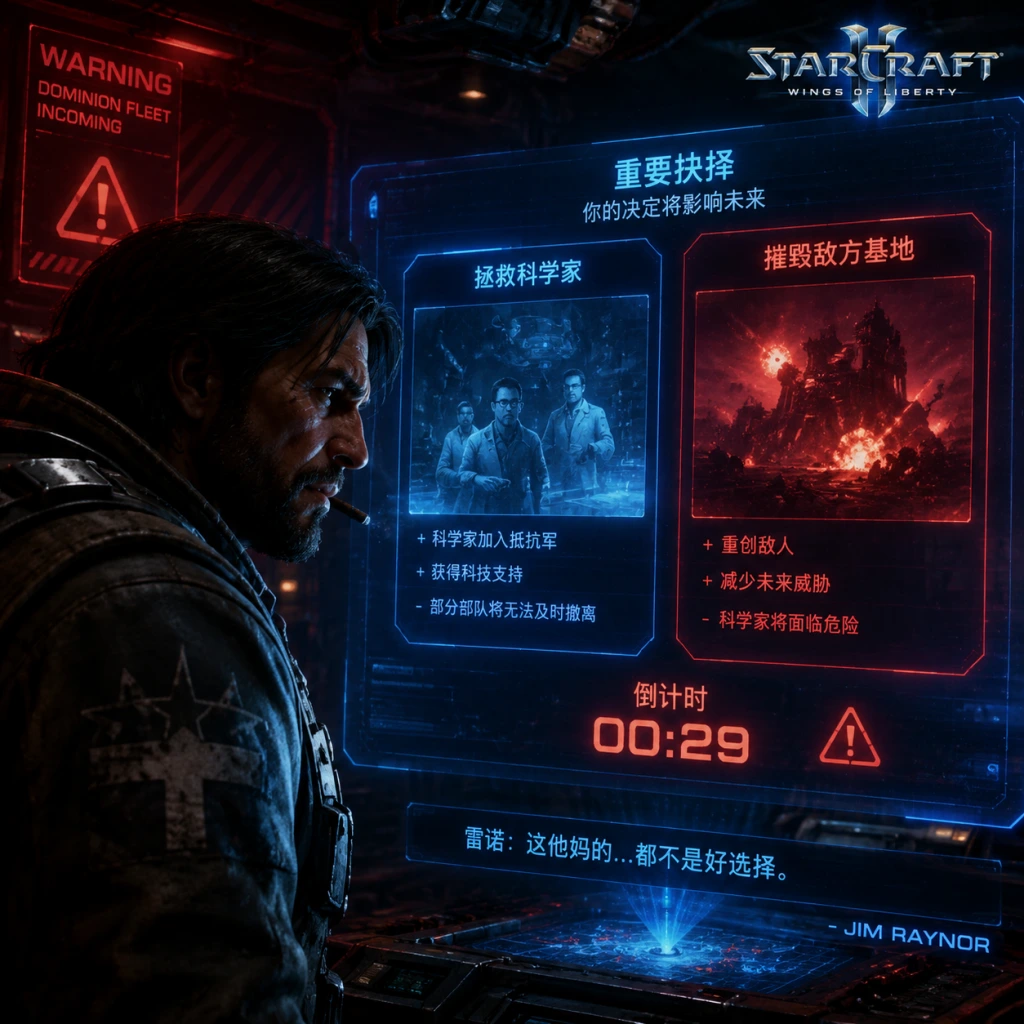
Important Notes
Important Notes for StarCraft II: Wings of Liberty
This section covers crucial warnings, pitfalls, irreversible choices, missable content, difficulty spikes, grinding traps, online etiquette, anti-cheat notes, save management advice, and things players commonly regret not knowing earlier. Read carefully to avoid frustration and optimize your experience.
---
Warnings & Pitfalls
- Resource Management: Always keep your mineral and gas income balanced. Neglecting to build SCVs early will cripple your economy. In campaign missions, it’s easy to forget to build additional Command Centers (especially Orbital Commands) to speed up income via MULEs.
- Supply Depots: Never get supply blocked. Build supply depots proactively, especially before major engagements. Running out of supply mid-battle can cost you the mission.
- Research & Upgrades: Do not ignore the Armory and Laboratory between missions. Upgrade your units and buildings regularly. Forgetting to apply upgrades (e.g., using the Armory to unlock Hellions vs. Vultures) can make later missions much harder.
- Mercenaries: The Mercenary units are powerful but expensive. Many beginners overlook them. They can turn the tide in tough missions, but save credits for essential upgrades first.
- Scouting: Use Scanner Sweeps or scan with Orbital Commands to reveal the map. In several missions (like “The Devil’s Playground”), fog of war hides enemy expansions or objectives. Failing to scout leads to ambushes.
- Branching Missions: In certain points, you must choose between two missions (e.g., “The Outlaws” vs. “The Great Train Robbery”, or “Safe Haven” vs. “Haven’s Fall”). Your choice influences story cutscenes and which missions become available later. Some achievements require specific choices.
- Armory Upgrades: Each Tier in the Armory offers two mutually exclusive options (e.g., Vulture vs. Hellion, Siege Tank shell upgrades). Once chosen, you cannot change that upgrade branch for that campaign run. Choose based on your preferred playstyle or the achievements you want.
- Laboratory Upgrades: Similar to the Armory, the Laboratory offers exclusive research paths (e.g., Marauder concussive shells vs. something else). Select wisely. If you want all upgrades, you’ll need multiple playthroughs.
- Zeratul’s Prophecy Missions: These are optional but affect the ending. If you skip them, you miss story and a powerful artifact. However, you can replay them later.
- Achievements: Many achievements have specific conditions (e.g., “The Devil’s Playground”: destroy all pirate bases). If you fail on your first try, you can replay the mission via the Mission Archives, but story choices remain locked. Do not rely on the archives to change story outcomes.
- Secret Mission: “In Utter Darkness” is a hidden Protoss mission that requires you to complete all Zeratul missions and a specific action. Missing it locks you out of some achievements and a poignant story element. Check a guide if you want to unlock it.
- Bonus Objectives: Many missions have optional objectives (e.g., collecting mineral chunks, destroying special buildings). These often grant credits or research points. Missing them means slower progression.
- Research Points: There are a limited number of Research Points (credit/research) available per campaign. Inefficient spending or ignoring side objectives can leave you under-upgraded for the final missions.
- Mission: “All In” (Endgame): The final mission on Brutal difficulty is extremely hard. Enemies attack from two fronts, and the mission is long. Save often and consider lowering difficulty if stuck.
- Mission: “The Moebius Factor”: Infested Terrans swarm your base. Without sufficient area-of-effect damage (e.g., Hellions, Siege Tanks) and anti-air, you’ll get overwhelmed.
- Mission: “In Utter Darkness”: You control Protoss armies. The swarms of Zerg are relentless. Micro and proper use of Colossus, Archons, and High Templar are critical.
- Mission: “The Devil’s Playground”: No gas geysers; you rely on “mineral patches” that also contain some gas, but income is tight. Expand quickly and build economy efficiently.
- Mission: “Supernova”: Timed radiation zones force quick expansion and constant army movement. Don’t turtle.
- Achievement Grinding: Trying to get all achievements in one playthrough will make the game tedious and ruin the story. Complete the campaign naturally, then replay specific missions for achievements.
- Multiplayer Grinding: There is no “grind” for gear or levels in StarCraft II’s multiplayer (except experience for portraits). Skill progression is the only grind. Instead, use training modes, custom games, and the unranked ladder to improve without pressure.
- Single-Player Credits: You can replay earlier missions to earn extra credits and research points, but this is rarely necessary. Prioritize efficiency over grinding.
- Manual Saves: The game autosaves before each mission, but you should create a manual save before making a story choice (e.g., selecting a branch mission). This allows you to reload and see the other outcome without replaying the whole campaign.
- Save Before Upgrades: When you enter the Armory or Laboratory, save first. If you regret a choice, reload.
- During Missions: Save frequently, especially on Brutal difficulty. Use multiple save slots to avoid losing progress if you get stuck.
- Mission Archives: After completing the campaign, you can replay any mission with the upgrades you had at that point. Story choices cannot be undone. If you want to experience a different branch, you must start a new campaign.
- Online Etiquette:
- Anti-Cheat: Blizzard uses the Warden system. Any hacks, map hacks, or automation tools will lead to permanent account bans. Do not use third-party programs that interact with the game. Replay analysis tools (like SC2Replay) are safe.
- Reporting: Use the in-game report function for toxic behavior or cheating.
---
Irreversible Choices
Several decisions in the Wings of Liberty campaign are permanent for that playthrough. You can replay missions via the Mission Archives after completion, but story choices (e.g., which faction you ally with) and some upgrades are locked.
---
Missable Content
---
Difficulty Spikes
---
Grinding Traps
---
Save Management
---
Online Etiquette & Anti-Cheat
- In multiplayer, it’s common to say “glhf” (good luck, have fun) at the start and “gg” (good game) at the end.
- Do not cheese every game (e.g., 6-pool rush, cannon rush) unless you’re practicing. It can frustrate opponents, but it’s part of the game – just don’t spam it.
- Respect map vetoes in search preferences.
- Avoid rage-quitting; leaving early forfeits sportsmanship.
---
Things Players Commonly Regret Not Knowing Earlier
1. You can right-click the minimap to move camera – essential for faster macro.
2. Orbital Command’s Scanner Sweep: Reveals a large area and can detect cloaked units. Use it instead of building missile turrets everywhere in campaign.
3. MULE vs. SCV: MULEs mine twice as fast as SCVs and expire. In campaign, they are your best friend for quick economy.
4. Upgrades apply to all units of that type – even those you haven’t built yet. Prioritize weapon/armor upgrades.
5. Control groups: Use Ctrl+1-9 to bind units/buildings. It’s not just for pro players; basic macro benefits immensely.
6. The Campaign is not strictly linear: You can choose which missions to do in some segments. Research missions on the planet interface before starting.
7. Protoss and Zerg campaigns are not in Wings of Liberty: They are separate expansions (Heart of the Swarm and Legacy of the Void). Do not expect to play them here.
8. The final mission’s difficulty scales with previous choices: If you skipped many optional missions, you’ll be under-leveled.
9. Pausing: You can pause the game (F10) in single-player. Use it to think.
10. Replays: Save replays to analyze your mistakes. This is the fastest way to improve in multiplayer.
---
Final Advice
Take your time in the campaign. Enjoy the story, but plan your upgrades and branch choices if you want specific achievements. Save before critical decisions. For multiplayer, focus on macro and scouting over flashy micro. And remember: StarCraft II is a skill-based game; there are no pay-to-win mechanics in Wings of Liberty (the free version includes the full campaign). Good luck, Commander.
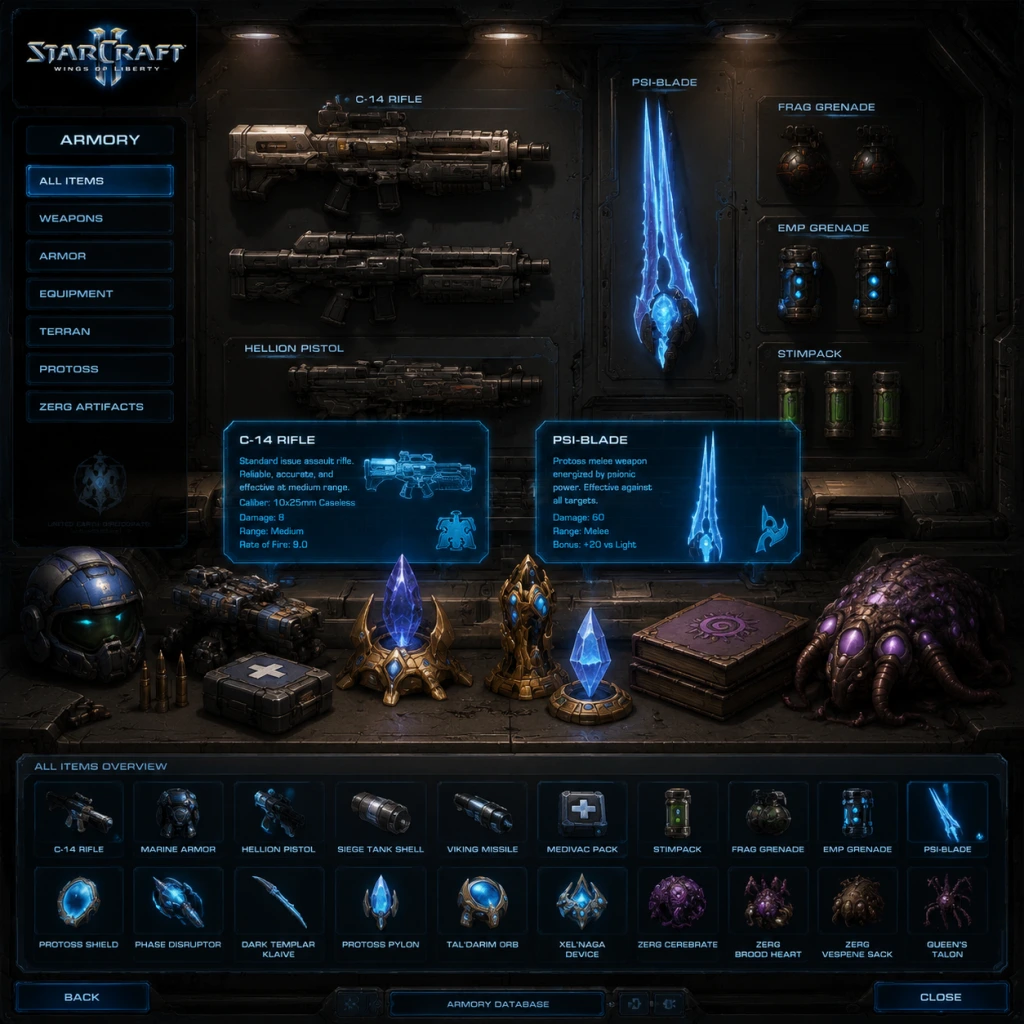
All Game Items
All Game Items for StarCraft II: Wings of Liberty
This guide covers all major items, weapons, armor, consumables, materials, currencies, collectibles, and key equipment available in StarCraft II: Wings of Liberty. Items are categorized logically with details on what each does, how to obtain it, when it is useful, and important synergies or upgrades.
Resources (Materials)
Resources are the foundation of any strategy in StarCraft II.
- Minerals: The primary resource. Used to build nearly all structures and units. Gathered by workers (SCVs, Probes, Drones) from mineral patches. Early game bottlenecks are minerals. Synergy: Always have at least 16 workers per mineral line for optimal saturation.
- Vespene Gas: The secondary resource. Required for advanced units, upgrades, and structures. Gathered from Vespene Geysers by building refineries (Terran), assimilators (Protoss), or extractors (Zerg). Essential for tech-heavy compositions like Battlecruisers or High Templar.
- Supply: Not a gather-able resource but a cap on unit count. Terran uses Supply Depots, Protoss uses Pylons, Zerg uses Overlords. Increase supply to field larger armies.
- Minerals & Vespene Gas: The two main currencies in multiplayer and campaign. No other currencies exist in standard gameplay.
- Campaign-only Currencies:
- Infantry Weapons (Tiers 1-3): +1 attack per level for Marines, Marauders, Ghosts, etc. Synergy: Marines with Stim and +3 weapons shred lightly armored units.
- Infantry Armor (Tiers 1-3): +1 armor per level. Vital for bio balls to survive splash damage.
- Vehicle Weapons (Tiers 1-3): +1 damage per level for Siege Tanks, Hellions, etc. Synergy: Siege Tanks with +3 weapons one-shot certain units.
- Vehicle Armor (Tiers 1-3): +1 armor per level. Useful for tank-heavy compositions.
- Ship Weapons (Tiers 1-3): +1 attack per level for Vikings, Banshees, Battlecruisers. Crucial for air superiority.
- Ship Armor (Tiers 1-3): +1 armor per level. Helps Vikings survive longer.
- Ground Weapons (Tiers 1-3): +1 attack for Zealots, Stalkers, etc.
- Ground Armor (Tiers 1-3): +1 armor.
- Air Weapons (Tiers 1-3): +1 attack for Void Rays, Phoenix, Carriers.
- Air Armor (Tiers 1-3): +1 armor.
- Melee Attacks (Tiers 1-3): +1 damage for Zerglings, Ultralisks, etc.
- Missile Attacks (Tiers 1-3): +1 damage for Roaches, Hydralisks, Mutalisks.
- Carapace (Tiers 1-3): +1 armor for all Zerg units.
- M.U.L.E.: Call down a mechanical unit that automatically gathers minerals at high speed. Cooldown 60 seconds. Use early/mid game to boost economy without building more SCVs. Synergy: Use on rich mineral patches only.
- Scan: Reveals an area of the map for 12 seconds. Detects cloaked/burrowed units. Cooldown 60 seconds. Essential for detecting DTs, Banshees, or burrowed Roaches. Also useful for scouting.
- Calldown: Extra Supplies: Instantly builds a Supply Depot at target location. Cooldown 60 seconds. Use to avoid supply block or to quickly wall off ramps.
- Chrono Boost: Accelerates a selected structure's production or research by 50% for 20 seconds. Cooldown 45 seconds. Use on Cybernetics Core for upgrades, or on Robo/Stargate to pump units.
- Larva Inject: Spawns 4 additional larvae at target Hatchery. Cooldown 40 seconds. Crucial for maintaining unit count. Synergy: Use macro hatch (extra Hatchery) for more larvae.
- Creep Tumor: Spreads creep to expand vision and speed up Zerg units. Cooldown 15 seconds. Place tumors in a chain to cover map.
- Secret Documents: Found in some missions (e.g., "The Outlaws"). Rewards credits.
- Specialist Units: Not collectibles, but unlockable via research.
- Armory Upgrades: Purchasable with credits. Examples: Marine Shields (+10 HP), Siege Tank Artillery (+range). Each improves specific units.
- Hyperion (Battlecruiser): Campaign hero unit with higher stats and abilities. Available in certain missions.
- Odin: Giant mech unit used in campaign. Powerful ground siege.
- Science Vessel: Support unit with abilities like Defense Matrix and Irradiate. Campaign only.
- Raven: Terran caster with Auto-Turret, Seeker Missile, and PDD. Useful for disabling enemy units.
- Mothership: Protoss capital ship with cloaking field and black hole. Extremely rare, built from Fleet Beacon.
- Weapon/armor upgrades stack multiplicatively with attack speed and abilities (e.g., Stim increases rate of fire, making weapon upgrades more valuable).
- Always prioritize upgrades according to your composition: if going bio, get infantry weapons/armor; if mech, get vehicle/ship upgrades.
- Campaign upgrades are permanent between missions but reset on new playthrough.
Currencies
- Credits: Earned by completing mission objectives and finding secret caches. Spent at the Armory and Science Lab to purchase unit upgrades and research. Obtain: mission rewards, hidden pickups. Used throughout the campaign.
- Protoss Artifacts: Special items collected during the campaign. Used to unlock and upgrade the Spear of Adun (in later expansions) but in Wings of Liberty, they are plot devices. Not a spendable currency, but required to progress story.
Weapons and Armor Upgrades
Weapons and armor upgrades increase the damage dealt and damage reduction of units. They are race-specific and stack with each tier.
Terran Upgrades (obtained from Engineering Bay for infantry, Armory for vehicles and ships):
Protoss Upgrades (Forge for ground, Cybernetics Core for air):
Zerg Upgrades (Evolution Chamber):
Obtain: Upgrade research requires the appropriate building (e.g., Engineering Bay for Terran infantry), time, and resources (minerals and gas). Higher tiers require previous tier. Useful at all stages of the game. Synergy: Upgrade timings often coincide with tech switches (e.g., +2/+2 bio into +3/+3).
Consumables (Abilities and Call-downs)
These are one-time use abilities that can be activated during combat or base management.
Terran (Orbital Command):
Protoss (Nexus):
Zerg (Hatchery/Lair/Hive):
Collectibles (Campaign Only)
Key Equipment (Unique Units and Structures)
Notes on Synergies and Upgrades
For a complete list of all unit stats and upgrade costs, refer to the in-game StarCraft II wiki or official game manual.
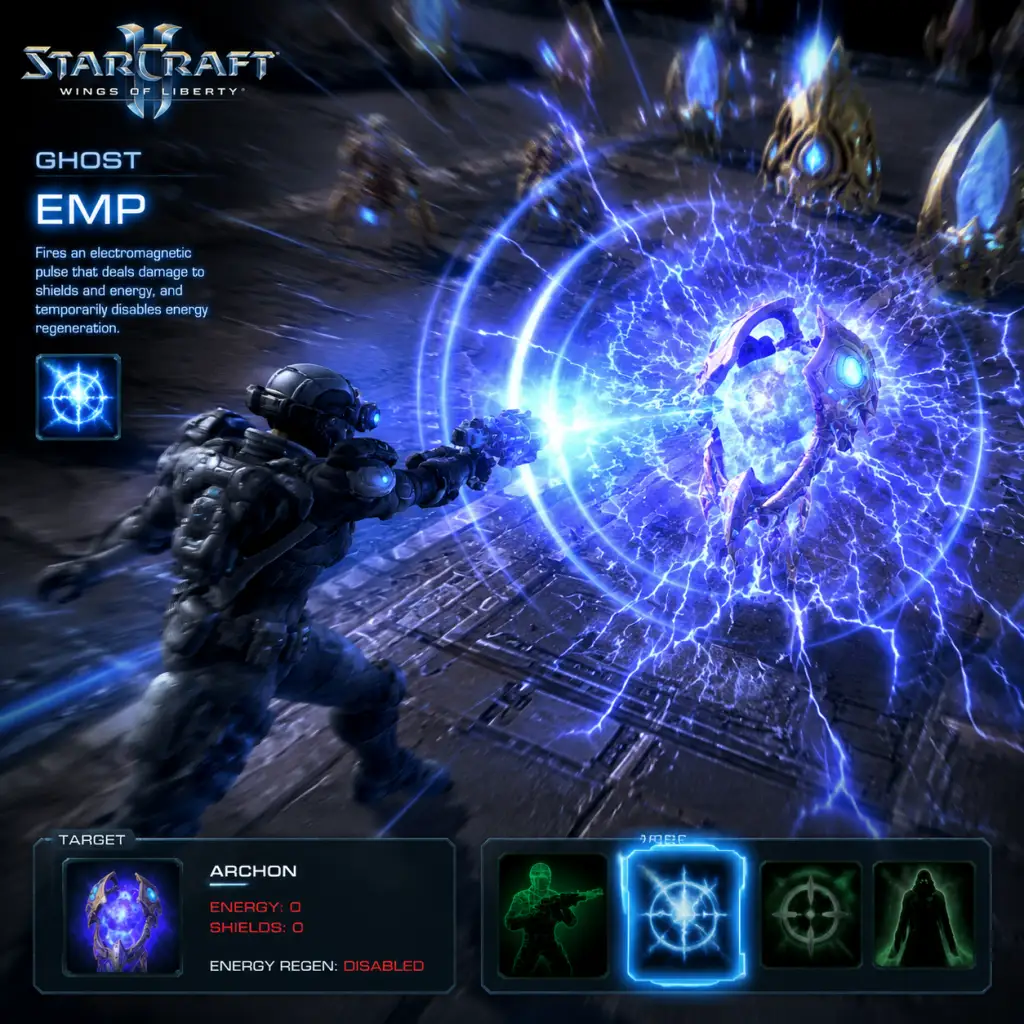
Character Skills
"content": "## Character Skills Guide for StarCraft II: Wings of Liberty
This guide covers all active abilities, spells, and special moves for every playable unit and hero character in StarCraft II: Wings of Liberty. Abilities are organized by race and then by unit or hero. For each ability, you'll find a detailed description, energy cost, cooldown, upgrade interactions, synergistic combos, recommended builds, and situational usage tips.
#### Ghost
- Upgrades: None.
- Synergies: Use to delay enemy tech or production, especially quickly – e.g., stop a Barracks from building Marines, or a Forge from researching upgrades.
- When to Use: During a push to
This guide covers all active abilities, spells, and special moves for every playable unit and hero character in StarCraft II: Wings of Liberty. Abilities are organized by race and then by unit or hero. For each ability, you'll find a detailed description, energy cost, cooldown, upgrade interactions, synergistic combos, recommended builds, and situational usage tips.
Terran Abilities
#### Ghost
- Snipe – Energy: 50 (25 with Moebius Reactor upgrade); Cooldown: none (requires energy)
- EMP Round – Energy: 75; Cooldown: none
- Cloak – Energy: 25 to activate, then drains 0.9 energy/sec; Cooldown: none
- Tactical Nuke – Energy: none; Cooldown: 6 minutes (real time) after using, but must be built at Ghost Academy; cost: 100/100
- Auto-Turret – Energy: 50; Cooldown: none (requires energy)
- Seeker Missile – Energy: 125; Cooldown: none
- Point Defense Drone – Energy: 100; Cooldown: none
- Cloak – Energy: 25 to activate, then drains 0.9 energy/sec
- Yamato Cannon – Energy: 150; Cooldown: none
- Siege Mode – Active transformation; Cooldown: 4 seconds after switching
- Assault Mode / Support Mode – Toggle with no cooldown (except transformation delay)
- Stimpack – Energy: none; Cooldown: none (but costs 10 HP per use)
- Stimpack – Same as Marine but costs 10 HP, increases attack speed by 50%
- KD8 Charge – Energy: none; Cooldown: 7 seconds
- Heal Beam – Passive while units are near; no energy cost – Not an active ability.
- Boost – Energy: 20; Cooldown: none – Increases movement speed by 50% for 7.5 seconds. Energy regeneration while boosting is disabled.
- 250mm Strike Cannons – Energy: none; Cooldown: 30 seconds – Deals heavy damage to a single target (300 damage) after a 3‑sec channel. Requires a targeting upgrade.
- Jump Jets – Energy: none; Cooldown: 15 seconds – Jump to target location, stunning enemies on impact. Useful for repositioning.
- Barrage – Campaign only: fires multiple missiles at air units.
- 250mm Strike Cannons – Same as Thor but stronger (500 damage).
- Barrage – Fires 6 missiles at air targets, each dealing 30 damage.
- Jump Jets – Leap to a location, dealing 50 damage to ground enemies on landing.
- Bunker Drop – If equipped with Bunker upgrade (campaign module), can deploy a bunker.
- Stimpack – Same as Marine.
- Assault Stance – Toggle: increases attack speed by 50% but reduces armor by 1.
- Sniper Stance – Toggle: increases range to 7 (from 5) and damage by 5, but slows movement.
- Combat Stance – Default: balanced.
- Call Down MULE – From Mercenary item? Actually, Raynor can use “MULE” from a Module (Tech Module). It calls a MULE that lasts 60 seconds and gathers minerals faster.
- Inspire – Campaign ability: nearby Marines gain +1 damage for 30 seconds. Requires a special module.
- Odin Pilot – Has the Odin’s abilities (see Odin).
- Fragmentation Grenade – Throws a grenade that deals AoE damage (40) and stuns. Cooldown 10 seconds.
- Rip-Off – Can rip off a turret from a Siege Tank (used in that mission).
- Psionic Storm – Energy: 75; Cooldown: none
- Feedback – Energy: 50; Cooldown: none
- Hallucination – Energy: 100; Cooldown: none
- Force Field – Energy: 50; Cooldown: none
- Guardian Shield – Energy: 75; Cooldown: none
- Hallucination – Same as High Templar version, but with 50 energy cost? Actually, Sentry Hallucination costs 50 energy and creates two copies? No, in Wings of Liberty, Sentry has Hallucination (cost 50 energy) that creates two copies of a unit (compared to HT’s single copy for 100).
- Charge – Passive upgrade (researched at Twilight Council)
- Blink – Energy: 50; Cooldown: 10 seconds (shared cooldown)
- Graviton Beam – Energy: 50; Cooldown: none
- Prismatic Alignment – Passive upgrade (Flux Vanes? Actually requires a research) – not an active ability in WoL. Void Ray has no active ability in Wings of Liberty multiplayer. In campaign, it can have a “Prismatic Alignment” ability that increases damage when targeting armored units? No, that’s its base behavior.
- Time Warp – Energy: 75; Cooldown: 30 seconds
- Vortex – Energy: 120; Cooldown: 60 seconds
- Interceptors – Not an active ability. The Carrier launches interceptors that attack automatically. No special spells.
- Spawn Larva – Energy: 25; Cooldown: none
- Creep Tumor – Energy: 25; Cooldown: none
- Transfusion – Energy: 50; Cooldown: none
- Fungal Growth – Energy: 75; Cooldown: no cooldown (but cost)
- Infested Terrans – Energy: 50; Cooldown: 1.5 seconds? Actually unlimited with energy
- Neural Parasite – Energy: 125; Cooldown: 5 seconds
- Contaminate – Energy: 75; Cooldown: 30 seconds
- Effect: Deals 45 damage to a single biological target. Ignores armor. Can be cast while Cloaked.
- Upgrades: Moebius Reactor reduces energy cost to 25. Ocular Implants increases sight range.
- Synergies: Use with Cloak to safely pick off High Templars, Queens, or Medivacs. Combine with Scan from orbitals to reveal enemy casters.
- When to Use: In mid-to-late game against Protoss (kill HTs) or Zerg (kill Infestors/Queens). Do not waste on low-value units.
- Effect: Fires a round that creates a 2.5 radius EMP at impact, draining all shields and energy from enemy units and structures in the area. Also disables mechanical units (e.g., Immortal shields, Sentry shields, Thor power)
- Upgrades: None specifically, but improved Ghost Academy allows multiple Ghosts.
- Synergies: Used before a bio push to strip Protoss shields and disable Sentry Force Fields. Also shuts down Zerg Infestors’ energy. Can be dropped from a Medivac.
- When to Use: Always before engaging Protoss armies. Key for removing High Templar energy; follow up with Snipe. Against Terran, use to drain Raven/Battlecruiser energy.
- Effect: Renders the Ghost invisible until decloaked or energy runs out. Cannot attack while cloaked (except if using Snipe).
- Upgrades: Personal Cloaking research at Ghost Academy reduces energy cost and drain? Actually, Personal Cloaking is a campaign tech. In multiplayer, default.
- Synergies: Combine with Snipe for deadly ambushes. Use to scout or hide near enemy bases.
- When to Use: For sneaking past defenses, sniping key units, or providing vision for Nukes.
- Effect: Deploys a nuke that lands after a 15-second delay, dealing 300 damage (upgraded to 500 with Specialized Munitions?) Actually: base 300 damage in a large radius. In Wings of Liberty multiplayer, the nuke does 300 damage plus bonus to structures.
- Upgrades: Specialized Munitions – increases damage by 100 (total 400). Also, Nuke Silo upgrade reduces cooldown.
- Synergies: Use with Cloaked Ghost or a distraction to ensure the nuke lands. Scan to reveal area.
- When to Use: Game‑ending move against a tightly packed base. Also good for wiping out a main army if they are focused elsewhere.
#### Raven
- Effect: Deploys a stationary turret that fires at nearby enemies for 60 seconds. Turret does 8 damage per shot, with 6 range.
- Upgrades: None specifically for the turret, but Raven energy regeneration can be improved.
- Synergies: Use as a mobile defense or to secure a flank. Combine with Seeker Missile for zone control.
- When to Use: During base pushes to provide covering fire, or to hold a ramp/choke while your army repositions.
- Effect: Fires a guided missile that locks onto a target, dealing 100 damage to the target and 50 area damage within 2.5 range.
- Upgrades: None.
- Synergies: Great against clumped units like Marines or Zerglings. Use after an EMP to disable Sentry shields first.
- When to Use: Mid-game to break large slow armies. Vulnerable to point defense (like Marine Stimpack + Medivac heal can negate?). Actually, Seeker can be shot down by Marine fire – so use when enemy has low anti-air or is distracted.
- Effect: Deploys a drone that intercepts up to 40 projectile attacks before disappearing. Lasts 30 seconds. Works against ranged attacks (including Psionic Storm, but not AoE effects like Fungal Growth).
- Upgrades: None.
- Synergies: Deploy before engaging Protoss to absorb Stalker or Colossus fire. Against Zerg, can block Roach/Hydra projectiles.
- When to Use: Critical when pushing into a fortified position. Protect your bio ball from heavy ranged damage.
#### Banshee
- Effect: Makes the Banshee invisible. Can attack while cloaked.
- Upgrades: Cloaking Field research at Starport – reduces energy cost and drain (in campaign it’s an upgrade; in multiplayer it’s the same as default).
- Synergies: Use for hit‑and‑run harassment on worker lines. Combine with a Raven’s Auto‑Turret for detection.
- When to Use: Early‑mid game to deny mining or snipe tech structures. Transition to late game against players without detection.
#### Battlecruiser
- Effect: After a 3‑second charge, fires a projectile that deals 300 damage (240 to shields) to a single target. Damage is doubled (600) against massive units? Actually, it’s 300 base, but with Amulet of Power upgrade in campaign it does more. In multiplayer, 300 direct damage.
- Upgrades: None in multiplayer. Campaign: Amulet of Power increases damage by 40.
- Synergies: Use to one‑shot Corruptors, High Templars, or other key units. Combine with a Medivac’s healing to keep BC alive during charge.
- When to Use: Before a fleet engagement to snipe a critical unit. Avoid using when energy is needed for Tactical Jump? No, BC has no jump in WoL.
#### Siege Tank
- Effect: Converts the Tank into a stationary artillery piece with increased range (12 vs 7) and splash damage (50% to nearby units). Cannot move.
- Upgrades: Increased attack range with Siege Tech (adds +3 range). Also, Grating (in campaign) improves damage.
- Synergies: Siege up behind a wall or on a high ground. Use with scan or Raven to spot for you. Pair with Marauders to defend the tanks from Zealots.
- When to Use: Always when defending chokepoints or pushing into enemy base. Use unsiege for mobility during reposition.
#### Viking
- Effect: Assault mode: walks on ground, attacks ground targets with high damage but short range. Support mode: flies, attacks air targets with longer range but lower damage.
- Upgrades: Corvid Reactor (campaign only) improves functionality? In multiplayer, no active ability besides morphing.
- Synergies: Assault mode for killing Colossi, Thor, or buildings. Support mode for air superiority. Switch modes as needed.
- When to Use: Use Assault mode to chase down retreating Colossi or kill Immortals. Keep in Support mode when enemy air is present.
#### Marine
- Effect: For 15 seconds, increases attack speed by 50% but costs 10 HP per activation. Can be used multiple times.
- Upgrades: Combat Shield (increases HP by 10) makes stim more forgiving. Also, Stimpack research at Barracks reduces HP cost to 5 in campaign? In multiplayer, standard 10 HP.
- Synergies: Use before engaging to maximize DPS. Combine with Medivac healing to offset HP loss. Stimpack + Stimpack is possible but not recommended.
- When to Use: Always during fights; avoid using when HP is low unless no enemy is near. Micro clumps of Marines to get maximum effect.
#### Marauder
- Effect: Increases attack speed (from 1.5 to 1.0? Actually gives attack speed bonus).
- Synergies: Use before Concussive Shell attacks to slow and kill Zealots/Ultralisks.
- When to Use: During any engagement; Marauders have higher HP so stim is safer.
#### Reaper
- Effect: Throws a grenade that stuns and knocks back units in a small radius. Deals no damage.
- Upgrades: None.
- Synergies: Use to push back Zealots or Roaches to prevent them from closing. Combos with Hellion/Hellbat? Not in WoL.
- When to Use: Early game harassment to disengage from workers; mid‑game to secure cliff jumps or break Force Fields? Actually, it can destroy Force Fields? No, it does not break force fields.
#### Medivac
- When to Use: Escape from Mutalisks or Vipers. Speed up drops. Also used for quick repositioning before a fight.
#### Thor (Campaign only, not in WoL multiplayer initially – in multiplayer, Thor has no abilities)
#### Odin (Campaign Hero)
#### Jim Raynor (Campaign Hero Unit)
#### Tychus Findlay (Campaign Hero, in “Media Blitz”)
---
Protoss Abilities
#### High Templar
- Effect: Creates a storm over a 2.5 radius for 2.81 seconds, dealing 80 damage over duration (split as 20, 40, 60, 80). Affects all units in area.
- Upgrades: Khaydarin Amulet – reduces energy cost to 50 in campaign? In multiplayer, cost is 75. Also, there’s a research for extended duration? No.
- Synergies: Use after Force Fields to trap enemies. Combine with Archon toilets (using Vortex) for massive damage.
- When to Use: Against clumped bio or Zerglings. Always try to hit multiple units. Avoid using on isolated high-HP units.
- Effect: Deals damage to a target unit equal to its current energy (either shields or energy?). Actually, Feedback removes all energy from target and deals damage equal to that energy. If used on a caster, one-shot kills if full energy.
- Upgrades: None.
- Synergies: Use on Ghosts before they EMP, on Medivacs, or on any high-energy unit. One Ghost with 200 energy – Feedback kills it if it has 200 shields? Actually, Ghost has no shield; Feedback damages HP based on energy. So Ghost with 200 energy takes 200 damage – dead.
- When to Use: Priority: Ghosts, Medivacs, High Templar, Infestors. Also on Battlecruisers with high energy.
- Effect: Creates a controllable copy of any non-hero unit you own. The copy has 0 HP (dies in one hit) but lasts 30 seconds. Can be used to deceive or tank some shots.
- Upgrades: None.
- Synergies: Use to scout, bait attacks, or block chokepoints. Combine with Sentry Hallucination to create many fakes.
- When to Use: To check for spiders ahead, or to waste enemy attacks during a retreat.
#### Sentry
- Effect: Creates a 2×3 impassable energy wall that lasts 15 seconds. Blocks movement and projectiles (but not splash).
- Upgrades: None.
- Synergies: Use to split enemy army, trap fleeing units, or prevent reinforcements. Combine with Psionic Storm to keep units in storm area.
- When to Use: Essential in Protoss defense and early pushes. Use at ramps to block expansion, or to delay enemy attacks.
- Effect: Creates a mobile shield that reduces incoming ranged damage by 2 for all friendly units within an aura (radius 6). Lasts 10 seconds. Does not affect melee damage.
- Upgrades: None.
- Synergies: Activate before engaging enemies that rely on ranged units (Marines, Roaches, Stalkers). Combo with Zealot charge to minimize damage taken.
- When to Use: Start of every major engagement, especially against Terran bio or Zerg Roach/Hydra.
#### Zealot
- Effect: Zealots gain a speed boost and charge at nearby enemies, stunning them for 0.5 seconds and dealing +20 damage on impact.
- Synergies: Combine with Guardian Shield and Psionic Storm to chew through bio.
- When to Use: Always research charge early against Terran to flank Marauders.
#### Stalker
- Effect: Teleports the Stalker up to 5 range in any direction. Cannot blink over obstacles.
- Upgrades: Blink research at Twilight Council reduces cooldown? No, in WoL it’s just a research that enables the ability.
- Synergies: Use to escape danger, chase down retreating units, or reposition during fights. Blink behind enemy lines to snipe buildings.
- When to Use: Critical for micro: blink away from siege tank fire, or blink onto high ground for harass. Use to dodge enemy abilities like Fungal Growth or Psionic Storm.
#### Phoenix
- Effect: Lifts a ground non-massive unit into the air, rendering it immobile and invulnerable for 10 seconds. The Phoenix cannot move while holding the unit, and the unit can be attacked by anti-air enemies.
- Upgrades: None.
- Synergies: Lift key units like Siege Tanks, Colossi, or Thors. Then attack the lifted unit with other air. Also eliminates the unit from the ground fight temporarily.
- When to Use: In PvT, lift Siege Tanks to allow your ground army to push. In PvZ, lift Roaches or Hydras? Actually, Hydras are massive? No, Hydras are non-massive, so can be lifted. But careful with Vipers? Not in WoL.
#### Void Ray
#### Mothership
- Effect: Creates a gravitational field on a location that slows enemy units by 50% and attack speed by 15% for 10 seconds.
- Upgrades: None.
- Synergies: Use to slow down a charging army, allowing your Colossus or HT to do more damage. Combine with Vortex for devastating combos.
- When to Use: Before engaging to disable the enemy’s mobility, especially against Terran bio or Zerg speedlings.
- Effect: Creates a black hole that draws in all units within 3 range, suspending them in stasis for 15 seconds. Units emerge at the same location after the spell ends. Does not affect massive units (Ultralisk, Thor).
- Upgrades: None.
- Synergies: Use to temporarily remove a portion of the enemy army. Then use Psionic Storm or Colossus to kill them as they emerge. Can also be used to buy time or split enemy forces.
- When to Use: Against a clumped army. Avoid if enemy has many massive units. Best combined with high AoE damage after they come out.
#### Carrier
---
Zerg Abilities
#### Queen
- Effect: Target a Hatchery/Lair/Hive to spawn 3 additional larvae instantly. Each hatchery can have a maximum of 3 queens’ larvae queued.
- Upgrades: None.
- Synergies: Always keep queens energied to inject larvae. Crucial for economy. Use with Hatcheries across bases to maintain larva flow.
- When to Use: As often as possible. Inject every hatchery as soon as energy allows.
- Effect: Spawns a creep tumor that spreads creep over time. Can be placed from a Queen or from an existing tumor. Each Queen can have up to 3 tumors active?
- Upgrades: None.
- Synergies: Spread creep to provide vision and speed buff for Zerg units. Also allows building placement.
- When to Use: Always during macro cycle. Use tumors to connect bases and enable faster army movement.
- Effect: Heals a target friendly biological structure or unit for 75 HP instantly. Has no cast range? Actually range 7.
- Upgrades: None.
- Synergies: Use on Hatcheries under attack, or on a Roach/Hydra ball to extend their lifespan. Also crucial for keeping a Crawler alive against early pressure.
- When to Use: During defense, particularly against early rushes that damage eco buildings. Also used on Ultralisks? But Ultralisks are not in WoL? They are in all expansions. However, in Wings of Liberty, Ultralisks exist in multiplayer. So yes, can heal them.
#### Infestor
- Effect: Fires a projectile that roots and damages all units in an area (2.5 radius) for 3 seconds. Deals 5 damage per second (total 15) and prevents movement. Can be upgraded with Pathogen Glands to increase damage? Actually, Fungal Growth base damage is 30 over 3 seconds (10 per second) – I need to verify. In WoL, Fungal Growth does 30 damage over 2 seconds? Let’s check reliable data: In Wings of Liberty, Fungal Growth deals 32 damage over 2 seconds, rooting. But anyway, it’s a root and damage.
- Upgrades: Pathogen Glands – increases damage by 50% (total 48). Also, Infestor energy upgrade (Carapace – increases energy by 50).
- Synergies: Use to lock down clumped armies, especially Marines. Combine with Banelings to wipe them. Also stops fleeing units. Prevents Blink/Charge.
- When to Use: Against large clumps of ground units. Very effective vs Terran bio and Protoss Zealots/Stalkers.
- Effect: Spawns two Infested Terrans that run toward the nearest enemy and self-destruct, dealing 80 damage each (total 160 if both hit). They are fragile and can be killed.
- Upgrades: None.
- Synergies: Use to break Force Fields, tank Siege Tank shots, or deal damage to buildings. Also good for scouting.
- When to Use: When you need immediate area damage or to force enemy to split their army. Also great for killing workers during a drop.
- Effect: Takes control of an enemy biological unit for 15 seconds. The unit can attack its former allies. Does not work on heroic or mechanical units.
- Upgrades: None.
- Synergies: The ultimate weapon: take a Colossus, High Templar, or a Ghost and turn it against its owner. Requires good micro to exploit.
- When to Use: Against Protoss with Immortals/Colossus. Also good for stealing Terran Siege Tanks or Medivacs. Always aim for high-value targets.
#### Overseer
- Upgrades: None.
- Synergies: Use to delay enemy tech or production, especially quickly – e.g., stop a Barracks from building Marines, or a Forge from researching upgrades.
- When to Use: During a push to
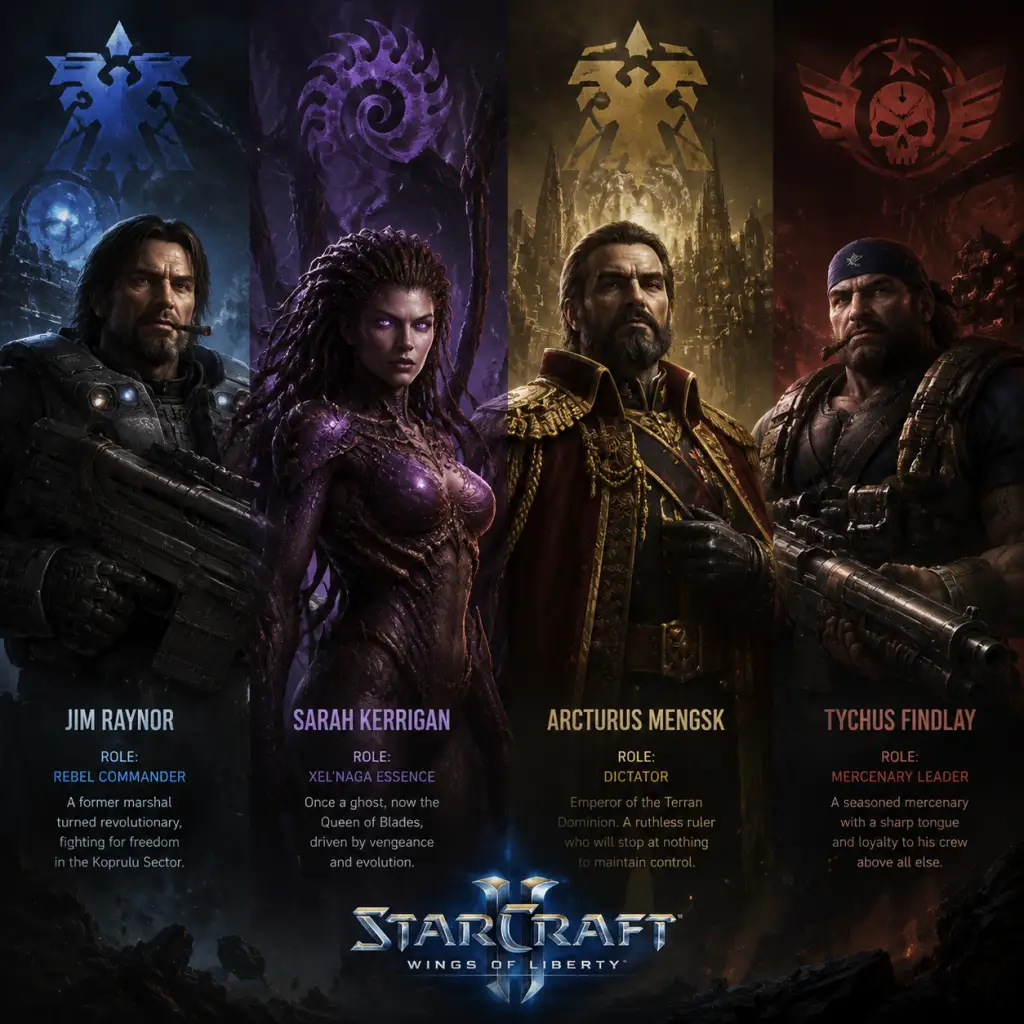
Characters & Roles
Characters & Roles Guide for StarCraft II: Wings of Liberty
This guide covers every major character (campaign heroes) and playable unit in StarCraft II: Wings of Liberty. Each entry includes background, strengths, weaknesses, playstyle, unlock conditions, recommended upgrades or builds, and team synergy. The game features three distinct races – Terran, Protoss, and Zerg – each with unique roles.
1. Campaign Heroes (Single-Player Characters)
Jim Raynor
Background: Former marshal of Mar Sara, leader of the rebel group Raynor's Raiders, and central hero of the Terran campaign. He wields a custom C-14 Impaler Gauss Rifle and pilots various vehicles (Vulture, Thor) in certain missions.
Strengths: Versatile hero with high survivability, decent damage output, and the ability to inspire nearby units (via his Hyperion battleship support in some missions). Can be upgraded with improved armor, weapons, and abilities through the Armory.
Weaknesses: Not a frontline tank; requires support from infantry and medics. Limited to ground combat unless piloting a vehicle. Vulnerable to large groups or psionic attackers.
Playstyle: Act as a mobile commander, kiting enemies while using his Call Down of the Hyperion ability (in later missions) to deal massive area damage. Stay with your army to boost morale.
Unlock Conditions: Always available from the first campaign mission onward.
Recommended Upgrades/Equipment: Prioritize Combat Shield and Stimpack for Marines to protect Raynor. Build an Armory and upgrade his weapon and armor to level 3. Equip the Moebius Reactor (for more energy) if available.
Team Synergy: Pairs well with Marine+Marauder bio balls. Use Medivacs to keep him alive. Combine with Siege Tanks for defensive pushes.
Tychus Findlay
Background: Raynor's old friend and fellow criminal, freed from prison to help fight the Dominion. Wields a massive custom minigun and wears heavy combat armor. He is a hero unit in select missions (e.g. "The Devil's Playground" and "Welcome to the Jungle").
Strengths: Extremely high damage output against ground targets, especially buildings and armored units. Very durable with high hit points and armor. Can destroy supply depots and structures quickly.
Weaknesses: Slow movement speed. No anti-air capability. Requires support against air-based threats. Cannot be healed by normal Medics (only Medivacs or repair SCVs).
Playstyle: Use as a siege breaker – send him ahead to demolish enemy bases, supported by SCVs or Medivacs for repairs. Engage at close range to maximize DPS. Avoid kiting.
Unlock Conditions: Acquired during campaign (first appearance in "The Devil's Playground"). Available only in specific missions.
Recommended Upgrades: Improve his armor and weapon as high as possible. Unlock the Mercenary upgrades (if available) to boost his damage.
Team Synergy: Pair with a strong air force (Vikings, Battlecruisers) to cover his lack of anti-air. Use Hellions or Marauders to distract enemies while Tychus focuses on buildings.
Matt Horner
Background: Commander of the Hyperion, Raynor's flagship. He provides tactical support and occasionally commands air forces in certain missions. He is not a ground hero but a supporting character.
Strengths: Expert at fleet management; grants bonuses to air units via Hyperion upgrades. His presence allows deployment of teleporting Marines (via Medivac drops) and provides Yamato Cannon strikes.
Weaknesses: Does not fight directly on the ground. Vulnerable if the Hyperion is engaged.
Playstyle: In missions where he is playable, focus on building a strong air fleet and using hit-and-run tactics. Use Hyperion's weapons for base defense.
Unlock Conditions: Available from the beginning as a supporting character, but playable only in missions like "The Outlaws."
Recommended Upgrades: Improve air unit attack and armor in the Armory. Research Advanced Ballistics for Battlecruisers.
Team Synergy: Combine Battlecruisers with Vikings for anti-air, and use Medivacs to support ground forces. Horner's air bonuses make him ideal for carrier groups.
Rory Swann
Background: Chief engineer of Raynor's Raiders. He upgrades the base's defensive structures and vehicles. He appears as a hero unit only in one mission ("The Dig") where he pilots a Thor.
Strengths: Excellent at base defense and vehicle production. His upgrades (e.g. Advanced Construction, Reinforced Immortality) improve SCVs, turrets, and mech units. In his hero form, the Thor deals massive damage to air and ground.
Weaknesses: Stationary or slow; his Thor is vulnerable to swarms without support.
Playstyle: Focus on turtling – build many Missile Turrets and Bunkers. Research Swann's upgrades to boost production speed for mech units. In combat, use Thor's Barrage ability against air groups.
Unlock Conditions: Appears as a mission hero in "The Dig." His upgrades are unlocked progressively throughout the campaign.
Recommended Upgrades: All his upgrades are passive – always get them when available. For his Thor, upgrade its weapons and armor via the Armory.
Team Synergy: Works best with a mech army (Hellions, Siege Tanks, Thors). Use SCVs to repair Swann's Thor constantly.
Gabriel Tosh
Background: A renegade Ghost, leader of the spectre group. He is a powerful psionic who can cloak and attack with psionic blades. He becomes a hero in the mission "The Moebius Factor" (if you ally with him).
Strengths: High burst damage, cloaking ability, can disable enemy units with Feedback (if you choose his path). Very mobile.
Weaknesses: Fragile; dies quickly if decloaked. Low against mechanical units. Hard to control due to cloak micromanagement.
Playstyle: Use stealth to pick off key enemy units (e.g. Siege Tanks, High Templars). Keep him moving and use the Nydus Worm (if available) for hit-and-run. Build Ghost Academies to support him.
Unlock Conditions: Must choose to side with Tosh in the "Ghost of a Chance" mission chain. Otherwise, he becomes hostile.
Recommended Upgrades: Maximize ghost cloaking and energy upgrades. Research Moebius Reactor for more energy. Use Spectre upgrades from the Academy.
Team Synergy: Combine with other cloaked units (e.g. Banshees) or use EMP to drain shields before attacking. Works well with a small strike force.
Egon Stetmann
Background: A crazed scientist who aids Raynor by providing advanced technology (e.g. the Science Vessel, the Predator). He does not fight directly but supports through research.
Strengths: Unlocks powerful upgrades like Psi-Screamer (area stun) and advanced armor. Provides detection via Science Vessels.
Weaknesses: No combat presence. Requires protection in his labs.
Playstyle: Focus on research and building Science Vessels for detection and def. Keep him safe.
Unlock Conditions: Introduced early; his labs are available from the Laboratory missions.
Recommended Upgrades: Prioritize his research that helps your army (e.g. Advanced Tactics, Science Vessel upgrades).
Team Synergy: Science Vessels provide detection and Defensive Matrix for mechanical units, enhancing any army.
Other Notable Characters
- General Warfield – Dominion commander, enemy hero (not playable).
- Sarah Kerrigan – Infested Queen, main antagonist-turned-ally later, but not playable in Wings of Liberty's campaign (except as a co-op commander in later games).
- Zeratul – Protoss Dark Templar, ally in the Zeratul missions (Prophecy). He is not directly controllable in the main campaign except in those specific missions.
2. Terran Units and Roles
The Terran race excels at versatile, defensive play with strong ranged infantry and powerful mechanical units.
SCV (Worker)
Role: Resource gathering, building construction, and repair.
Strengths: Can repair mechanical units and buildings, builds quickly.
Weaknesses: Weak in combat; no attack after early game.
Unlock: Starting unit.
Build: Always produce 20–30 SCVs for a solid economy. Upgrade via Armory (Advanced Construction).
Marine
Role: Basic ranged infantry, core of bio army.
Strengths: Cheap, fast production, good DPS after Stimpack. Can be healed.
Weaknesses: Low health, vulnerable to splash damage.
Unlock: Barracks.
Upgrades: Combat Shield (+10 HP), Stimpack (+50% attack speed). Synergy with Medivacs.
Marauder
Role: Heavy anti-armor infantry.
Strengths: Slows enemy armored units via Maulers, high damage to vehicles and buildings.
Weaknesses: Slow, expensive, weak to anti-air and light units.
Unlock: Barracks with Tech Lab.
Upgrades: Concussive Shells (slow), Combat Shield.
Reaper
Role: Fast harassment unit, early scouting.
Strengths: High mobility (can jump cliffs), good damage to workers, regenerates health.
Weaknesses: Very fragile, no anti-building damage, obsolete mid-game.
Unlock: Barracks with Tech Lab.
Upgrades: Nitro Packs (faster movement), U-238 Rounds (increased range).
Ghost
Role: Special operations, cloaked sniper, nuke delivery.
Strengths: Can cloak, use EMP to drain shields/energy, fire Nuke, high single-target damage.
Weaknesses: Expensive, fragile, long build time.
Unlock: Barracks with Tech Lab + Ghost Academy.
Upgrades: Moebius Reactor (+energy), C-20 Canister Rifle (upgraded damage).
Hellion
Role: Fast anti-light unit, early harass.
Strengths: High attack speed, hits multiple light units, great for map control.
Weaknesses: Weak to armored units, no anti-air.
Unlock: Factory.
Upgrades: Blue Flame Flamethrower (+10 damage vs light).
Hellbat (Transformed Mode)
Role: Tanky anti-light infantry (transforms from Hellion).
Strengths: High durability, area damage in melee.
Weaknesses: Slower movement, vulnerable to ranged attacks.
Unlock: Factory with Tech Lab.
Upgrades: Same as Hellion.
Siege Tank
Role: Long-range artillery, defensive backbone.
Strengths: Devastating splash damage in Siege Mode, excellent breaking defenses.
Weaknesses: Immobile while sieged, requires setup, vulnerable to air and fast units.
Unlock: Factory with Tech Lab.
Upgrades: Maelstrom Rounds (splash increase), Siege Mode (required).
Thor
Role: Massive anti-air/anti-ground unit.
Strengths: Very high HP, strong air splash, can attack ground with powerful cannon.
Weaknesses: Slow, expensive, vulnerable to swarms and kiting.
Unlock: Factory with Tech Lab + Armory.
Upgrades: High Impact Payload (anti-ground upgrade), Railgun (anti-air).
Viking (Fighter Mode)
Role: Anti-air fighter.
Strengths: Fast, high DPS vs air, can transform to ground mode for assault.
Weaknesses: Fragile, ground mode is weak.
Unlock: Starport with Tech Lab.
Upgrades: Air and ground weapon upgrades.
Banshee
Role: Cloaked ground attacker, harassment.
Strengths: Cloak, high damage to buildings and light units, mobile.
Weaknesses: No anti-air, cloak drains energy, expensive.
Unlock: Starport with Tech Lab.
Upgrades: Cloaking Field, Hyperflight Rotors (speed).
Raven
Role: Support caster, detection, area denial.
Strengths: Auto-Turret for harass, Seeker Missile big damage, interference Matrix disable, detection.
Weaknesses: Fragile, expensive, micro-intensive.
Unlock: Starport with Tech Lab.
Upgrades: Advanced Ballistics (Seeker Missile range), Durable Materials (HP).
Battlecruiser
Role: Capital ship, end-game heavy hitter.
Strengths: Very high HP, Yamato Cannon high burst, strong vs all targets.
Weaknesses: Slow, expensive, requires Starport with Tech Lab and Fusion Core.
Upgrades: Yamato Cannon, Advanced Ballistics (attack range).
Medivac
Role: Medevac transport and healing.
Strengths: Heals bio units, can pick up and drop units, fast.
Weaknesses: No attack, vulnerable to anti-air.
Unlock: Starport.
Upgrades: Caduceus Reactor (healing boost), Inertial Dampeners (speed).
3. Protoss Units and Roles
Protoss units are generally expensive but powerful, with strong shields and psionic abilities.
Probe (Worker)
Role: Gathers minerals and gas, builds structures.
Strengths: Can warp in buildings (cheaper faster construction), can be used to scout high up via cliff jumps (after upgrade).
Weaknesses: Very weak in combat.
Unlock: Starting unit.
Upgrades: None directly; research Warp Gate for faster unit production.
Zealot
Role: Melee frontline tank.
Strengths: High HP and shields, fast movement, upgraded Charge allows closing distance.
Weaknesses: No range, vulnerable to kiting and splash.
Unlock: Gateway.
Upgrades: Charge (increases attack speed and charge ability), Shields upgrades.
Stalker
Role: Mobile ranged attacker, anti-armor.
Strengths: Blink ability (jump short distance), good against armored, decent DPS.
Weaknesses: Low HP for cost, weak to light units.
Unlock: Gateway with Cybernetics Core.
Upgrades: Blink (requires Twilight Council), attack upgrades.
Sentry
Role: Support caster, crowd control.
Strengths: Guardian Shield (reduces ranged damage for army), Force Field (blocks enemies), Hallucination (deceive), can detect cloaked units if upgraded.
Weaknesses: Very fragile, energy-reliant, low direct damage.
Unlock: Gateway with Cybernetics Core.
Upgrades: Hallucination (research at Cybernetics Core), Khaydarin Amulet (energy increase).
Adept (Wings of Liberty? Actually introduced in Legacy of the Void, so not in WoL. Skip.)
Dark Templar
Role: Stealth assassin, high single-target burst.
Strengths: Permanently cloaked, deals massive damage to ground units, can become an Archon (merged with another DT).
Weaknesses: No anti-air, fragile if revealed, slow attack speed, expensive.
Unlock: Gateway with Dark Shrine.
Upgrades: None special; attack upgrades.
High Templar
Role: Psionic caster, spell damage.
Strengths: Psionic Storm (massive area damage), Feedback (drains enemy energy and deals damage), can merge into Archon.
Weaknesses: Fragile, no physical attack, slow movement.
Unlock: Gateway with Templar Archives.
Upgrades: Psionic Storm (research), Khaydarin Amulet (energy).
Archon
Role: Heavy splash damage, tanky after merging.
Strengths: High shields, strong splash damage against clumped units, immune to many debuffs.
Weaknesses: Slow, expensive (needs two casters), no anti-air (except upgraded).
Unlock: Merging two High Templars or Dark Templars.
Upgrades: Agility (movement speed) from Archives.
Immortal
Role: Anti-armor tank.
Strengths: Hardened Shield reduces damage from high-damage attacks, excellent against siege tanks and high single-target enemies.
Weaknesses: Weak against swarms of light units (lings, marines), slow attack speed.
Unlock: Robotics Facility.
Upgrades: Reclamation (auto-repair out of combat), Shield upgrades.
Colossus
Role: Area denial, anti-light swarm.
Strengths: Long-range thermal lance, attacks multiple ground targets in a line, can walk over units, powerful against massed infantry.
Weaknesses: Very weak to anti-air (air units kill it easily), expensive, slow.
Unlock: Robotics Facility with Robotics Bay.
Upgrades: Extended Thermal Lance (+range), Armor upgrades.
Phoenix
Role: Air superiority, harassment.
Strengths: Fast, can use Graviton Beam to lift enemy units (disable them), good against light air units.
Weaknesses: Low damage vs heavy air, fragile, ground attack is weak.
Unlock: Stargate.
Upgrades: Anion Pulse Crystals (speed), Graviton Beam (research).
Void Ray
Role: Anti-structure/armor damage, sustained beam.
Strengths: Damage ramps up over time (Prismatic Alignment), good vs buildings and armored, can switch targets without losing charge.
Weaknesses: Vulnerable early, low damage to light units, expensive.
Unlock: Stargate.
Upgrades: Prismatic Alignment (research), Flux Vanes (speed).
Carrier
Role: Capital ship, summoner of Interceptors.
Strengths: Once fully upgraded, releases many interceptors that auto-attack, high DPS against ground and air, tough hull and shields.
Weaknesses: Very expensive, slow to ramp up, interceptors can be shot down.
Unlock: Stargate with Fleet Beacon.
Upgrades: Interceptor build speed, Graviton Catapult (launch speed).
Tempest (Wings of Liberty? Not in WoL. Added in HotS. Skip.)
Mothership
Role: Super unit, ultimate spell caster.
Strengths: Massive hit points, can cloak all nearby units (Time Warp), black hole ability, pulls units to center.
Weaknesses: Very expensive, one-per-player limit, slow, vulnerable to feedback from High Templars.
Unlock: Fleet Beacon + large resources.
Upgrades: Time Warp (research), Enhanced Clarity (vision).
Oracle (not in WoL, skip)
4. Zerg Units and Roles
Zerg rely on fast production, map control, and overwhelming numbers.
Drone (Worker)
Role: Gathers resources, builds creep, can morph into various buildings.
Strengths: Can become any structure, quick harvest.
Weaknesses: Fragile, no combat ability.
Unlock: Starting unit.
Upgrades: None; use to build Hatcheries for expansion.
Zergling
Role: Fast melee swarm unit.
Strengths: Very fast, cheap, two per egg, high DPS in numbers, can morph to Baneling.
Weaknesses: Low HP, heavy splash kills them fast.
Unlock: Spawning Pool.
Upgrades: Metabolic Boost (speed), Adrenal Glands (attack speed).
Baneling
Role: Suicide explosive, anti-light.
Strengths: Devastating splash damage vs light units, can break buildings, roll faster on creep.
Weaknesses: Dies on use, requires Morph (from Zergling), vulnerable to ranged focus fire.
Unlock: Baneling Nest (morph from Zergling).
Upgrades: Centrifugal Hooks (speed).
Roach
Role: Durable frontline ground unit.
Strengths: High HP, can regenerate, good against infantry and light vehicles, can burrow move.
Weaknesses: Low damage vs heavy armor, slow unless on creep.
Unlock: Roach Warren.
Upgrades: Glial Reconstitution (burrow move speed), Tunneling Claws (burrow move research).
Hydralisk
Role: High DPS ranged unit, anti-air and anti-ground.
Strengths: Fast attack, good damage to all targets, can hit air.
Weaknesses: Squishy, expensive, requires Lair.
Unlock: Hydralisk Den.
Upgrades: Grooved Spines (range), Muscular Augments (movement speed).
Corruptor
Role: Anti-air specialist.
Strengths: High DPS vs air, can morph to Brood Lord, Corruption debuff (increases damage taken).
Weaknesses: No ground attack, fragile against ground attacks.
Unlock: Spire.
Upgrades: Air attack upgrades.
Overseer
Role: Detection, harass, scouting.
Strengths: Detects cloaked units, can spawn Changeling (spy), has Contaminate (disable building), fast.
Weaknesses: Cannot attack, fragile, requires Morph from Overlord.
Unlock: Lair (morph from Overlord).
Upgrades: Pneumatized Carapace (speed), Venter Sacs (spawn overlord vision).
Mutalisk
Role: Mobile harass, anti-light air/ground.
Strengths: Very fast, can bounce attacks (glaive), good for raiding workers and sniping buildings.
Weaknesses: Weak to armor, requires multiple for effect, vulnerable to splash.
Unlock: Spire.
Upgrades: Glaive Wurm (attack bounce), Attack upgrades.
Infestor
Role: Spell caster, crowd control.
Strengths: Neural Parasite (mind control enemy unit), Fungal Growth (stun and damage groups), can burrow and move, Infested Terrans (spawn attacking units).
Weaknesses: Fragile, energy-reliant, requires Hive.
Unlock: Infestation Pit.
Upgrades: Neural Parasite research, Pathogen Glands (energy).
Ultralisk
Role: Massive melee tank, area damage.
Strengths: Very high HP, deals splash in front, can push through units, resistant to small arms.
Weaknesses: Slow, vulnerable to kiting and heavy ranged attacks, expensive, requires Hive.
Unlock: Ultralisk Cavern.
Upgrades: Chitinous Plating (+armor), Anabolic Synthesis (speed).
Brood Lord
Role: Siege unit, long-range area damage.
Strengths: Launches broodlings that attack ground units, can attack from far, benefits from Corruptor morph.
Weaknesses: Very slow, weak against air, expensive, requires Hive.
Unlock: Morph from Corruptor at Hive.
Upgrades: Attack upgrades.
Swarm Host (not in WoL? Actually added in HotS. Skip for WoL.)
Viper (not in WoL, added HotS. Skip.)
Lurker (not in WoL, added LotV. Skip.)
5. Unit Roles Summary Table
| Role | Terran | Protoss | Zerg |
|---|---|---|---|
| Worker | SCV | Probe | Drone |
| Anti-Light | Hellion, Marine | Phoenix, Colossus | Zergling, Baneling, Mutalisk |
| Anti-Armor | Marauder, Siege Tank | Immortal, Stalker | Roach, Hydralisk, Ultralisk |
| Anti-Air | Viking, Thor | Phoenix, Stalker | Corruptor, Hydralisk |
| Spell Caster/Support | Raven, Ghost | Sentry, High Templar | Infestor, Overseer |
| Siege/Area Denial | Siege Tank, Thor (Barrage) | Colossus, Archon | Brood Lord, Baneling |
| Harass | Reaper, Banshee, Hellion | Dark Templar, Phoenix | Mutalisk, Zergling runby |
| Detection | Raven, Missile Turret | Observer (not in WoL? Actually Observer is in WoL), Cannon | Overseer |
| Capital Ship | Battlecruiser | Carrier, Mothership | Brood Lord (sort of) |
6. Team Synergy and Playstyle Tips
- Terran Bio (Marine/Marauder/Medivac): Highly mobile, strong with Stimpack and Combat Shield. Add Ghosts for EMP vs Protoss, or Ravens for detection. Siege Tanks provide defensive punch. Use drop play for harassment.
- Terran Mech (Hellion/Tank/Thor/Viking): Powerful but slow. Siege Tanks and Thors cluster well. Use SCVs to repair. Vulnerable to mutalisks and swarm hosts (in later games).
- Protoss Gateway (Zealot/Stalker/Sentry): Balanced army with Force Fields to split enemies. Add Colossus for splash, or High Templar for storms. Use Blink Stalkers for mobility.
- Protoss Skytoss (Carrier/Void Ray/Phoenix): Overwhelming air power. Requires strong economy and protection against anti-air (Corruptors, Vikings). Use Mothership for cloak support.
- Zerg Swarm (Zergling/Baneling/Muta): Classic mass low-tier units. Spread creep, use speed to surround, transition to Ultralisks or Brood Lords late. Infestors add control.
- Zerg Roach/Hydra: Mid-game timing attack. Roaches tank, Hydralisks damage. Expand quickly.
Remember to always scout your opponent and adapt your composition accordingly. Each race has counters – study the tech trees and practice micro for spells.
7. Campaign Hero Synergies
In campaign missions, combine Raynor with Marauders to slow enemy armored, or use Tychus with SCVs for repair. Get the Hyperion's Yamato Cannon for burst. Gabriel Tosh's cloak and Feedback can disable enemy casters. Swann's upgrades let you spam Siege Tanks and Thors effectively.
Use the Armory and Engineering Bay upgrades efficiently. For heroes, prioritize survivability and damage upgrades.
This guide covers all major characters and unit roles in the game. While not an exhaustive list of every possible variation, it provides the foundation for understanding how to play each race and utilize the campaign heroes effectively.
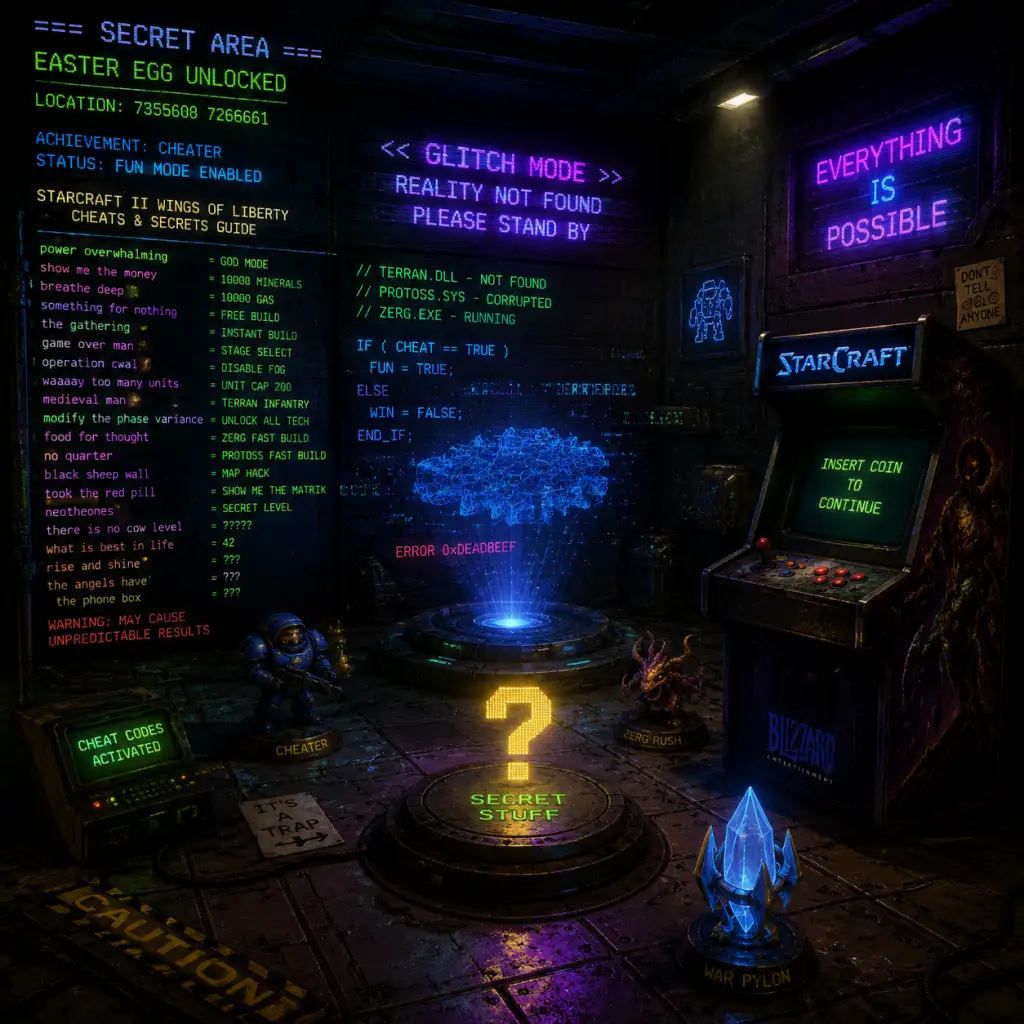
Cheats & Secrets
Cheats & Secrets for StarCraft II: Wings of Liberty
Important Notes Before Using Cheats
- Cheat codes are only available in single-player modes: Campaign, Challenge Missions, and Custom Games vs. AI (with the game set to "Single Player" or "Open" not ranked).
- Cheats disable achievements and ladder progress in that game session. They are fully safe for offline play or casual custom games.
- All codes are case-sensitive (must be typed exactly as shown) and are entered by pressing Enter to open the chat window.
- Some cheats require the game to be in a specific state (e.g., during a mission or before selecting a unit).
- Developer-intended: These codes were officially included by Blizzard for testing and fun.
---
Full List of Cheat Codes
#### Resource Cheats (Instant Effect)
| Code | Effect |
|---|---|
| `TookTheRedPill` | Gives 5,000 Minerals |
| `BunkersAndBunkers` | Gives 5,000 Vespene Gas |
| `ShowMeTheMoney` | Gives 5,000 Minerals and 5,000 Vespene Gas |
| `NeverGiveUpNeverSurrender` | Removes all resource costs for units and upgrades (free build) – stays active until deactivated |
| `IsThatACow?` | Gives all known tech tree upgrades on your current race (instant research) – works in campaign, not in multiplayer |
| Code | Effect |
|---|---|
| `MoreDotsMoreDots` | All buildings and units are built instantly (no build time) – toggle on/off |
| `SpawnMoreOverlords` | Adds 5 of every production structure for your race (e.g., Barracks, Gateway, etc.) – only use once per game to avoid clutter |
| `SoSayWeAll` | Enables all upgrades for a selected unit instantly (e.g., weapons, armor, shields) – works on a per-unit basis |
| `ConsolePlayer` | Toggles unlimited unit selection (removes the 100-unit cap) – not needed in modern version but still works |
| Code | Effect |
|---|---|
| `EyeOfSauron` | Reveals entire map (fog of war removed) – toggle on/off |
| `SpectralTomb` | Removes fog of war but leaves area already explored? Actually reveals all, but does not reveal invisible units. |
| `TerransUpTheNight` | Grants vision of all enemy units on minimap (like a permanent scan) |
| `UnlockedAndLoaded` | Unlocks all campaign missions and lets you replay any mission with any loadout (works in campaign menu) |
| Code | Effect |
|---|---|
| `You` | Defeat: Instantly loses the current mission (useful for skipping a mission) – use with caution |
| `GameOverMan` | Victory: Instantly wins the current mission – can also cause a draw if used improperly; best used when no enemies remain |
| `TywinLannister` | Enables the "Surrender" option in the menu (F10 > Surrender) – but `GameOverMan` is faster |
| `AllYourBaseAreBelongToUs` | Instant win if you are the only player left – works in custom games vs AI |
| `TechMastery` | Grants all campaign research upgrades instantly (applies to the Armory, Tech Lab, etc.) – only in campaign |
| Code | Effect |
|---|---|
| `LightsOut` | Toggles night/day cycle on some maps (visual, no gameplay effect) |
| `IHazCheezburger` | Spawns a giant hamburger (mineral caltrop) on the map – purely cosmetic |
| `SpawnCereal` | Spawns a bunch of zerglings that are friendly to you – but they are uncontrollable? Actually spawns a swarm of zerglings that attack nearest enemy |
| `WhoLetTheDogsOut` | Spawns a pack of Terran dogs (Marines with dog heads) – only in certain single-player maps? Might not work in modern version |
| `NeverMIndTheBollocks` | Toggles 'nuclear launch detected' sound on every unit click – annoying |
| `OpenSaysMe` | Opens all doors on the map that require triggers (like in campaign special doors) – may break missions |
Secret Missions & Easter Eggs
#### Secret Campaign Mission: "Piercing the Shroud"
- Unlocked on the Hyperion research station after completing all four mid-game missions from the "Haven" and "Char" branches, plus having visited the laboratory console.
- To access: On the Hyperion, go to the laboratory (left of the armory) and click on the glowing console. This unlocks the mission that reveals the hidden secret behind the Protoss and Zerg infestation. The mission is challenging – you control a small force to destroy a Zerg hive.
- Accessible from the Hyperion: in the recreation center (lower left of the ship), click on the arcade machine. You can play a full horizontal shooter mini-game with three levels. High scores are tracked. No cheats affect it.
- Zerg Mission Interactions: On the laboratory console, after certain missions, you can talk to Dr. Ariel Hanson and other characters about optional story details. Most are just lore, but one leads to the secret mission.
- Terran Dominion News: If you click repeatedly on the TV in the cantina (main hall), you get different news broadcasts that comment on your progress. Some are humorous.
- "I am a noob": In the campaign, if you type `IamAStarcraftNoob` (exact case) in chat during a mission, the game says "We know." – not an official cheat but a hidden script.
- Starcraft II Anniversary: On July 27 or during anniversaries, Blizzard sometimes spawns special portraits or decals, but not in the standard game.
- Secret Portraits: Complete all challenges on Brutal difficulty, earn all achievements, or collect all 30 Protoss artifacts in campaign to unlock exclusive portraits for your profile. These are not cheat-dependent but require secret conditions.
- Hidden Skin: If you complete the campaign on Normal or harder, you unlock the "Jim Raynor" skin for Terran units in multiplayer? No – that was a pre-order bonus. The genuine unlock is merely cosmetic.
- Infinite Resources in Early Missions: In "The Outlaws" mission, you can capture the extra SCVs from the mercenary base and keep mining until you trigger the next objective – not a cheat but an exploitative strategy.
- Skip the Char Tunnels: In the Zerg campaign, you can macro and go straight for the main base without following the tunnels – leads to a quicker victory but no secret achievement.
- Do not use cheats in multiplayer, even in custom games with friends if the game is set to "Competitive" or "Ladder" – you risk account penalties.
- Cheats deactivate achievements for that session. If you want to earn achievements, play without cheats.
- Some cheats may crash the game on certain maps (e.g., `SpawnCereal` on non-Zerg maps). Save before experimenting.
- Secret missions and Easter eggs do not require cheats – they are legitimate hidden content provided by Blizzard.
#### The Lost Viking Mini-Game
#### Hidden Dialogue and Conversations
#### Developer Commentary / Easter Egg Audio
#### Unlockable Portraits and Skins
#### Exploit-Safe Secrets (No Cheats Required)
---
How to Enter Cheat Codes
1. Start a single-player game (campaign, challenge, or custom vs AI).
2. Press Enter to open the chat input box.
3. Type the cheat code exactly as listed (case-sensitive).
4. Press Enter again. You will hear a confirmation sound or see a text response.
5. For toggles (like `EyeOfSauron`), type the same code again to reverse the effect.
---
Important Warnings
---
Conclusion
StarCraft II: Wings of Liberty offers a robust set of cheat codes for single-player fun, alongside genuine secrets like the hidden mission and the arcade mini-game. Use them responsibly to explore the game's mechanics or breeze through tough missions. For the full experience, attempt the secret missions and Easter eggs without cheats – they are rewarding challenges.