Street Fighter 6
## Street Fighter 6 – Game Introduction **Genre:** Fighting game (versus fighter, 2.5D arcade-style brawler) **Developer:** Capcom **Publisher:** Capcom **Release Timeline:** Originally announced in February 2022; released globally on **June 2, 2023**. **Platforms:** PC (Windows via Steam, Micros...
Download & Installation
Street Fighter 6 – Complete Download & Installation Guide
Street Fighter 6 is available on PC (Windows), PlayStation 4, PlayStation 5, Xbox One, and Xbox Series X|S. There is no native release for Nintendo Switch or mobile devices. This guide covers only official, legitimate sources.
1. Platform-Specific Download Sources
| Platform | Official Store(s) | Notes |
|---|---|---|
| PC | [Steam](https://store.steampowered.com/app/1364780/Street_Fighter_6/) – [Epic Games Store](https://store.epicgames.com/en-US/p/street-fighter-6) | Both require a client. Do not use third-party key resellers – risks of fraud or revocation. |
| PlayStation 4/5 | PlayStation Store (via console or web) | Also available on disc, but disc still requires initial installation and update downloads. |
| **Xbox One & Series X | S** | Microsoft Store (console or PC app) – also included with Xbox Game Pass (Standard/Ultimate) |
2. System Requirements (PC)
| Component | Minimum | Recommended |
|---|---|---|
| OS | Windows 10 (64-bit) | Windows 10/11 (64-bit) |
| CPU | Intel Core i5-8400 / AMD Ryzen 3 3300X | Intel Core i7-8700 / AMD Ryzen 5 3600 |
| RAM | 8 GB | 16 GB |
| GPU | NVIDIA GeForce GTX 1060 (6GB) / AMD Radeon RX 580 | NVIDIA GeForce RTX 2070 / AMD Radeon RX 5700 XT |
| DirectX | Version 12 | Version 12 |
| Storage | 60 GB (HDD recommended 60 GB SSD for faster loading) | 60 GB SSD (with optional high-resolution texture pack – adds ~25 GB) |
| Network | Broadband internet (download + online features) | Broadband internet |
| VRAM | 4 GB (minimum) | 8 GB+ (recommended) |
- The actual install size after all updates is approximately 80 GB (including high-res textures). Ensure you have at least 100 GB free before starting.
- An SSD is strongly recommended for World Tour mode loading times.
- Steam/Epic: No separate Capcom account is mandatory to play offline, but online features (Fighting Ground, Battle Hub, World Tour co-op events) require linking a Capcom ID.
- PlayStation & Xbox: A Capcom ID is optional but recommended for cross-progression and to access exclusive in-game bonuses. You can create one during first launch or at [capcomid.capcom.com](https://capcomid.capcom.com).
- Important: To use cross-play (play against other platforms), you must link a Capcom ID to your platform account. Without it, you can only match with players on the same platform.
3. Step-by-Step Installation by Platform
#### PC (Steam)
1. Launch Steam and log in. If you don’t have an account, create one at [steampowered.com](https://steampowered.com).
2. Go to Store and search for “Street Fighter 6”.
3. Click Add to Cart or Buy (choose Standard, Deluxe, or Ultimate Edition).
4. Complete purchase. The game will appear in your Library.
5. Click Install from the Library page.
- Choose installation directory (ensure at least 80 GB free).
- Steam will download and install. This can take 30 minutes to 2 hours depending on your internet speed.
6. After installation, click Play. The game will apply a final patch (usually small) and launch.
#### PC (Epic Games Store)
1. Open Epic Games Launcher. If not installed, download from [epicgames.com](https://store.epicgames.com/).
2. Log in to your Epic account (you may need to create one).
3. Search “Street Fighter 6” in the Store.
4. Purchase or add to library (note: Epic often has different editions).
5. Go to Library, find the game, and click Install.
- Select install location. Same storage requirements apply.
6. Wait for download and installation. Epic will verify files automatically.
7. Launch from library. You may be prompted to link a Capcom ID (see section 5).
#### PlayStation (PS4 / PS5)
1. On the console home screen, scroll to PlayStation Store.
2. Search for “Street Fighter 6”. Purchase the desired edition.
3. After purchase, the download will begin automatically (if auto-download is enabled). Otherwise, navigate to Library > Purchased > find SF6 > Download.
4. The game installs in the background. You can check progress under Downloads.
5. Once complete, the game tile will appear on the home screen. Launch it.
- PS5: Option to install only the PS5 version or also the PS4 version (if you want cross-play with PS4 players). Both can be installed separately.
6. On first launch, you may be prompted to create or link your Capcom ID.
#### Xbox (One / Series X|S)
1. From the Home screen, go to Microsoft Store.
2. Search for “Street Fighter 6”. Purchase the digital version. (If you have Game Pass, you can download directly from the Game Pass library.)
3. Click Install or Get. Choose a storage device (internal or expansion card).
4. The download and installation will proceed automatically. Progress can be seen in My games & apps > Queue.
5. After installation, launch from My games & apps or Home screen.
6. First launch: accept license agreements and log in with your Xbox account. Capcom ID linking may be required.
4. Account Requirements & Linking
5. First Launch & Initial Setup
1. Language / Region: Choose your preferred language and subtitle options.
2. Graphics Settings (PC only):
- The game will auto-detect settings. You can adjust:
- Resolution, VSync, Frame Rate (30/60/120/144)
- Quality Presets (Low, Medium, High, Ultra)
- Advanced: Shadow Quality, Anti-Aliasing, Texture Quality (High-Res Texture Pack must be manually enabled in DLC management)
- Run the Benchmark included in the main menu to test performance.
3. Capcom ID: If not already linked, you’ll be prompted to sign in or create one.
4. Controller Setup: Supports PlayStation, Xbox, and generic PC controllers. You can customize button mapping.
5. Online Mode: Create or choose your Fighter’s profile (nickname, avatar). This is used in Battle Hub and Fighting Ground.
6. Tutorial: The game offers a comprehensive tutorial. Recommended for new players.
6. Common Installation Errors & Fixes
| Error | Cause | Solution |
|---|---|---|
| Disk space insufficient | Not enough free storage. | Free up space (uninstall unused games, use Disk Cleanup). Temporary files can be deleted. SF6 needs at least 80 GB free after download. |
| Download stops or fails | Network instability, server issues. | Pause and resume download. Restart router. Use a wired connection. On Steam, clear download cache (Settings > Downloads > Clear Cache). |
| “DirectX 12 not supported” | Outdated GPU drivers or OS. | Update Windows to latest. Install latest GPU drivers from NVIDIA or AMD. Verify your GPU supports DX12 (GTX 900 series or newer). |
| Antivirus blocking installation | False positive on game files. | Temporarily disable real-time protection. Add the game folder to exceptions. |
| Game crashes on launch | Corrupted installation files, missing VC++ redistributables. | Verify game files: Steam (right-click game > Properties > Local Files > Verify integrity). Epic (click three dots > Manage > Verify). Reinstall if necessary. |
| Black screen on startup | Overlay conflicts (Discord, NVIDIA), resolution mismatch. | Disable overlays. Run in windowed mode (edit config file if needed). Update GPU drivers. |
| Slow download speed | ISP throttling, server load. | Use a wired connection. On Steam, change download region to a less busy one. Close other bandwidth-heavy apps. |
| PlayStation Network errors | PSN maintenance, account region issues. | Check [PSN status](https://status.playstation.com/). Ensure your account region matches the store region. |
| Xbox Game Pass download not starting | License activation delay. | Restart console. Sign out and back in. Go to My games & apps > Full library > Game Pass > select install. |
7. Post-Installation Verification
After installation, perform the following checks to ensure the game is ready:
1. Verify Game Files:
- Steam: Right-click game > Properties > Local Files > Verify integrity of game files.
- Epic: In Library, click the three dots next to SF6 > Manage > Verify.
- Consoles: There is no manual verification, but you can delete and reinstall if issues persist.
2. Check Version: Launch the game and look at the bottom-left corner of the title screen. It should display the latest patch version (e.g., v1.070). To update, ensure you have the latest patches applied.
3. Run Benchmark (PC): From the main menu, go to Options > Graphics Settings > Benchmark. A score of 60+ FPS on your target resolution indicates smooth performance.
4. Test Online Connectivity:
- Go to Battle Hub or Fighting Ground > Online. Attempt to find a match or join a hub. If you get error messages, check your internet connection and firewall.
- Port forwarding may be required for optimal connection: TCP 27015-27030 (Steam), UDP 88, 3074, 3478-3479 (PlayStation/Xbox). See [Capcom’s support](https://support.capcom.com/) for details.
5. Update Graphics Drivers (PC): Always ensure you have the latest drivers from NVIDIA (GeForce Experience) or AMD (Adrenalin). This prevents stuttering and crashes.
6. Enable High-Resolution Texture Pack (PC optional):
- On Steam, right-click game > Properties > DLC > check “High Resolution Texture Pack”.
- On Epic, the same DLC is typically included with Deluxe/Ultimate editions; you’ll need to download it separately from the game’s DLC page.
8. Additional Tips
- Cross-Save: You can transfer save data between Steam and Epic (via Capcom ID), but not between PC and consoles. Consoles use each platform’s cloud save.
- Physical Disc Owners: Insert the disc. The console will install the base game (copy from disc). Then you must download a large day-one patch (often 10–20 GB). Digital versions contain the patch pre-integrated.
- Game Pass Users: If you unsubscribe, the game will become unplayable. Your save data remains for 30 days after expiry, so you can resume if you resubscribe or purchase the game.
- Modding: Street Fighter 6 has official mod support on PC through Fluffy Quack’s mod manager. Mods require version matching; be cautious with online play – mods that alter gameplay may result in bans.
By following this guide, you should have Street Fighter 6 installed and running smoothly on any supported platform. For further assistance, visit [Capcom’s Official Support](https://support.capcom.com/).
Game Introduction
Street Fighter 6 – Game Introduction
Genre: Fighting game (versus fighter, 2.5D arcade-style brawler)
Developer: Capcom
Publisher: Capcom
Release Timeline: Originally announced in February 2022; released globally on June 2, 2023.
Platforms: PC (Windows via Steam, Microsoft Store), PlayStation 4, PlayStation 5, Xbox One, Xbox Series X|S. No native release for Nintendo Switch or mobile devices.
Story Overview & Setting
Street Fighter 6 introduces a new era in the world of fighting, set several years after the events of Street Fighter V. The world is alive with underground fighting circuits, street brawls, and a global tournament scene. The main story follows the rise of a new generation of fighters alongside returning legends, as the shadowy organization Amnesia manipulates events behind the scenes. The narrative is split into three distinct modes: World Tour (single-player RPG-like adventure), Fighting Ground (classic arcade and versus modes), and Battle Hub (online social hub). The setting spans a vibrant, modern Earth—from the neon-lit streets of Metro City to ancient temples and high-tech arenas.
Main Characters
The roster of 18 base fighters includes beloved veterans and fresh faces. Iconic characters like Ryu, Chun-Li, Ken, Luke (the new main protagonist), Jamie (the street dancer), Juri, Guile, Dhalsim, and Zangief return. Newcomers include Kimberly (a ninja-in-training), Manon (a French judo master), Marisa (an Italian gladiator), JP (a mysterious business tycoon), and A.K.I. (the poison-wielding assassin). Superbosses like M. Bison appear later as DLC. Each character has a unique fighting style, an upgraded Super Art system, and a new Drive System mechanic.
Core Appeal & Target Audience
Street Fighter 6 aims to welcome both series veterans and newcomers. Its core appeal lies in the accessible yet deep Drive System (using a single gauge for parries, rush attacks, and reversals) and the stunning RE ENGINE visuals. The Modern Control scheme simplifies special moves, making the game a great entry point for casual players, while Classic Controls and rich combo systems satisfy competitive enthusiasts. The target audience includes fighting game fans, esports players, character-action lovers, and anyone seeking a polished, social fighting experience.
Game Modes
- World Tour: An immersive single-player RPG mode where you create your own avatar, explore Metro City and other open-world hubs, interact with Street Fighter masters (who teach you their styles), and uncover the story of Amnesia. Features side quests, shops, and a large explorable environment.
- Fighting Ground: The traditional versus mode includes Arcade, Versus (local and AI), Training, Practice, and Combo Trials. It supports offline and online play, rank and casual matches, and a robust replay system.
- Battle Hub: An online social space where players can create avatars, chat, watch live matches on arcade cabinets, compete in casual or ranked matches, and join tournaments. It also hosts Extreme Battles with special rule modifiers.
- Online/Offline Support: Full offline modes (Arcade, Versus, Training, World Tour) and online multiplayer (Ranked, Casual, Battle Hub, Custom Rooms) with rollback netcode for smooth connections. Cross-play is available between PC, Xbox, and PlayStation platforms.
- The Drive System replaces the traditional meter-based V-Trigger and EX gauge with five powerful abilities (Drive Impact, Drive Rush, Drive Parry, Overdrive, Drive Reversal) all fueled by a single gauge, creating constant offensive and defensive options.
- Modern Controls allow one-button special moves and auto-combos, lowering the barrier to entry without sacrificing depth.
- Real-time commentary from FGC personalities (e.g., James Chen, Vicious, Aru) in matches, adding an esports-like atmosphere.
- The RE ENGINE graphics deliver hyper‑detailed character models, dynamic lighting, and environments that react to fighting.
- Cross-play and unified progression across all platforms, enabling a massive, connected player base.
DLC / Expansion Overview
Capcom has committed to a multi-year post-launch plan via the Year 1 Character Pass (4 DLC characters: Rashid, A.K.I., Ed, Akuma) and additional costumes, stages, and cosmetic items. Future expansions may add new game modes or story chapters. All gameplay content updates (balance patches, bug fixes) are free; characters and cosmetics are paid DLC or earnable via in-game currency.
What Makes Street Fighter 6 Unique
For download and installation details, please refer to the Download & Installation section earlier in this guide.
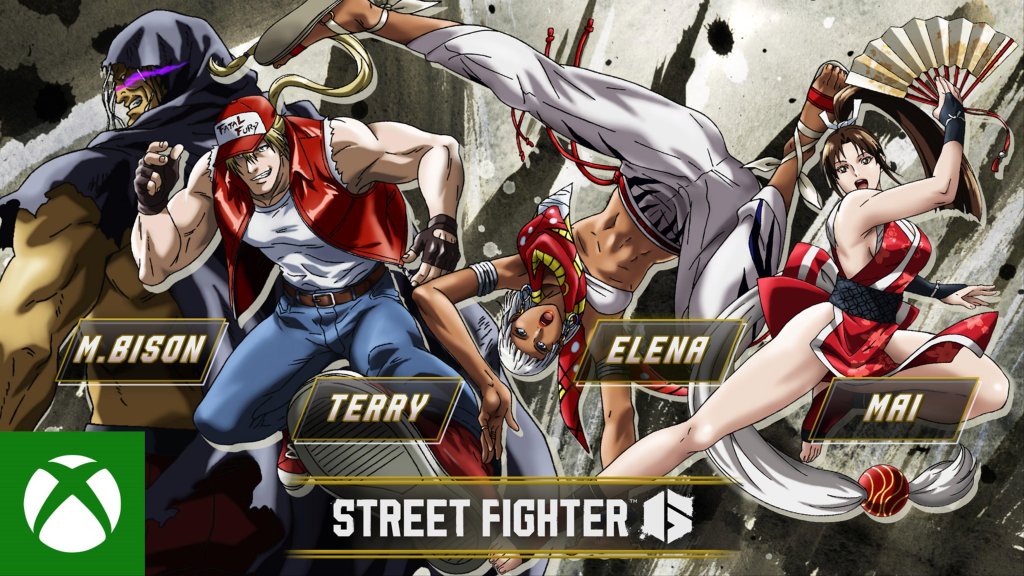
Getting Started
Street Fighter 6 – Getting Started Guide for Beginners
Your First Hour: Walkthrough
After launching Street Fighter 6, you'll land on the Main Menu. Your immediate path should be:
1. Select your platform login – If on PC, you may need to link your Capcom ID (optional, but helpful for cross-save).
2. Choose your language and region – Confirm your preferred settings.
3. Pick a control preset – You can adjust later.
4. Enter the “Training” mode (under Fighting Ground) – This is your lifeline. Capcom forces you to complete a short tutorial. Do not skip it.
5. Complete the “Character Guide” – From the Fighting Ground menu, select the Character Guide for a fighter that interests you. It teaches basic moves and specials.
6. Play through the first stage of “World Tour” (optional but recommended) – World Tour is the single-player RPG mode. Creating your avatar takes about 5 minutes, then you'll fight a few easy NPCs. This earns you early Drive Tickets and Fight Money.
7. Try one online match (Casual or Battle Hub) – After you understand the controls, jump into a casual match to feel real human pressure. Don't worry about winning.
8. Return to Training – After a match, review what you did wrong.
Character Creation (World Tour Avatar)
Street Fighter 6 does not have a traditional character creator for the roster fighters. However, World Tour mode lets you create a custom avatar:
- Face & Body: Choose from preset templates, then adjust sliders for jaw, eyes, nose, mouth, etc. Clothing is unlocked by playing.
- Fighting Style: You pick a starting fighting style based on a classic character (e.g., Ryu, Chun-Li, Luke). This determines your basic attacks and special moves. You can later learn other styles.
- Appearance: Hairstyle, skin tone, voice, and accessories can be changed anytime at shops.
- Classic (6-button layout): Light Punch, Medium Punch, Heavy Punch, Light Kick, Medium Kick, Heavy Kick – traditional for veterans.
- Modern (reduced inputs): One button for special moves (e.g., press Special + Attack direction) and an Auto-Combo button. Great for newcomers.
- Dynamic (simple): Used only in offline modes – game chooses the attack. Not recommended for learning.
Tip: Your avatar's attributes (like health and damage) improve by leveling up in World Tour. This character is separate from the main roster – you cannot use your avatar in ranked matches, only in Battle Hub casual lobbies.
Controls – All Platforms
Street Fighter 6 supports three control schemes:
#### PlayStation 4 / PlayStation 5
| Action | Classic | Modern |
|---|---|---|
| Light Punch | Square | Square |
| Medium Punch | Triangle | Triangle |
| Heavy Punch | R1 (PS5) / R2 (PS4) | R1 (PS5) / R2 (PS4) |
| Light Kick | Cross (PS5) / X (PS4) | Cross (PS5) / X (PS4) |
| Medium Kick | Circle | Circle |
| Heavy Kick | R2 (PS5) / R1 (PS4) | R2 (PS5) / R1 (PS4) |
| Special | None (use motion inputs) | L1 + attack button |
| Drive Impact | H. Punch + H. Kick (R1+R2 by default) | H. Punch + H. Kick (same) |
| Drive Parry | L1 | L2 |
| Throw | L. Punch + L. Kick (Square + Cross) | L. Punch + L. Kick (same) |
| Action | Classic | Modern |
|---|---|---|
| Light Punch | X | X |
| Medium Punch | Y | Y |
| Heavy Punch | RB (Series) / R (One old) – default RB | RB |
| Light Kick | A | A |
| Medium Kick | B | B |
| Heavy Kick | RT (Series) / R (One old) – default RT | RT |
| Special | None | LB + attack button |
| Drive Impact | RB + RT | RB + RT |
| Drive Parry | LB | LT |
| Throw | X + A | X + A |
Classic layout (can be remapped):
- WASD for movement (W=up, S=down, A=back, D=forward). Default arrows also work.
- U, I, O = Light, Medium, Heavy Punch.
- J, K, L = Light, Medium, Heavy Kick.
- Space = Jump (alternate).
- Shift = Drive Parry.
- A + D (or assignable) = Drive Impact.
- Y (or F) = Throw.
- Modern controls use similar but with a Special button (e.g., G).
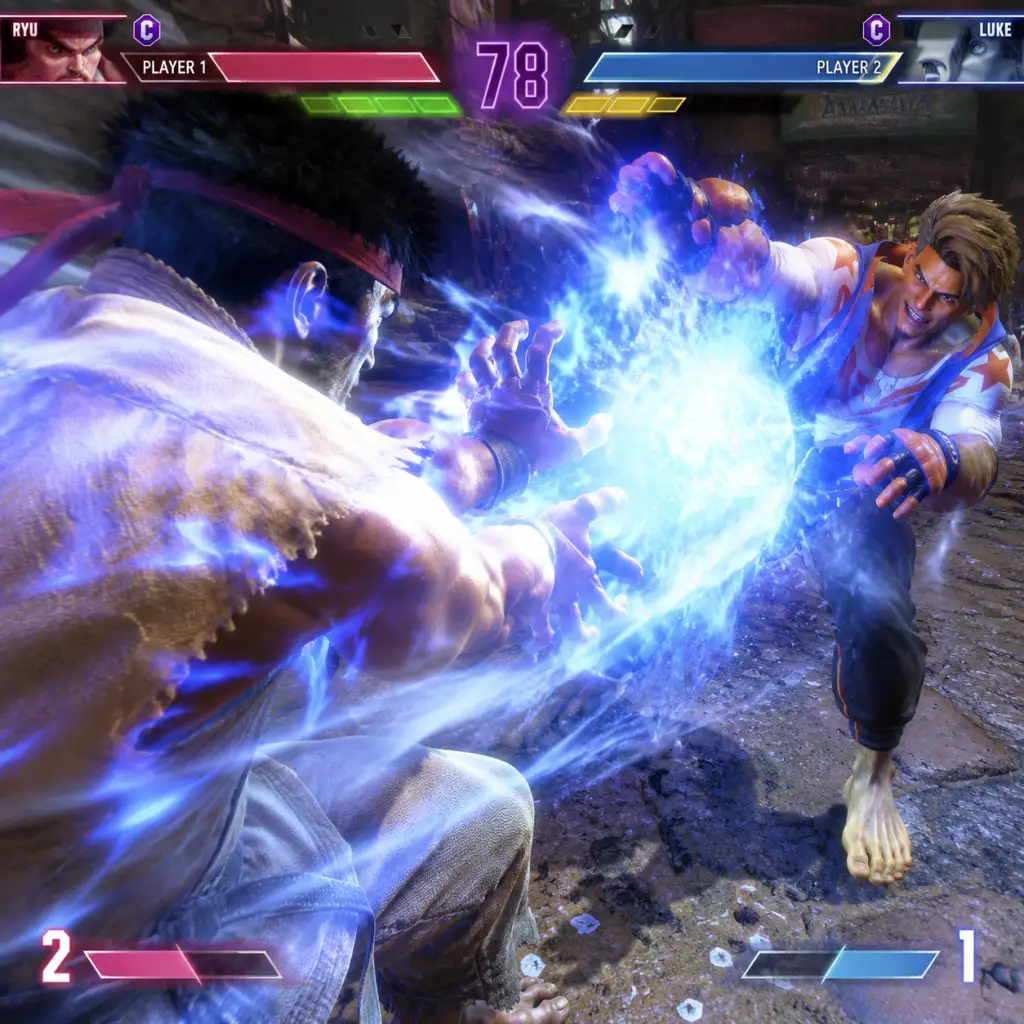
- Health Bar (top) – Your green bar on left, opponent on right. When depleted, you lose the round.
- Drive Gauge (below health, blue diamond) – Shows your Drive Meter (6 stocks). Used for Drive Impact, Parry, Rush, and Overdrive Arts. Recharges over time.
- Super Art Gauge (small bars below Drive) – Up to 3 stocks. Each stock lets you perform a level 1 Super. Full gauge = Level 3 Super.
- Timer (center top) – 99 seconds per round.
- Round Count – Best of 3 rounds by default.
- Combo Counter & Damage Indicator – Shows how many hits and damage dealt.
- Vitality (stun) bar – Small white bar under health. When it fills, you become dizzy.
- Watch the tutorial video in Fighting Ground (press Triangle/Y or equivalent).
- Use Training Mode to try all your moves on a stationary opponent.
- Learn to block low and high – Hold down-back for low attacks, back for high. Anticipate overheads.
- Use Drive Parry (L1/LB) – Helps absorb projectiles and counter Drive Impact.
- Go to Battle Hub – Even if you lose, you’ll learn more than beating AI.
- Button mashing – You will lose to anyone who blocks. Practice deliberate inputs.
- Jumping too much – New players jump constantly; experienced players will anti-air you. Jump sparingly.
- Ignoring defense – Blocking is 50% of fighting. Don’t always press buttons.
- Using full Super Art (Level 3) recklessly – It’s flashy but leaves you vulnerable if whiffed.
- Skipping Drive Impact training – This move breaks armor and leads to huge damage. Know when to use it.
- Drive Tickets – Earned from Battle Pass, challenges, and World Tour. Spend on cosmetics and avatar items. Save some for limited-time events.
- Fight Money – Used in World Tour to buy items, food (temporary buffs), and gear. Do not waste on meaningless consumables early – save for upgrading your avatar’s stats later.
- Battle Pass – Free track gives some cosmetics; paid track gives premium skins and tickets. If you’re unsure, skip paid tier until you’re committed.
- K.O. Points – Earned online. Used to unlock character colors and titles. No rush.
Tip: For PC, a controller is highly recommended. The keyboard works but requires practice for motion inputs.
UI Overview (During a Match)
Essential Early Objectives
1. Complete the Basic Tutorial (Dr. Lupo’s Training) – Teaches movement, attacks, blocking, throwing, Drive mechanics. Non-negotiable.
2. Finish one Character Guide – Unlocks a trophy and gives you a working understanding of that character’s normals and specials.
3. Play 3 matches in Fighting Ground (Arcade or Versus) – To get comfortable with the flow.
4. Spend your first 1,000 Fight Money – Buy a new costume or an extra character? Actually, characters are free in SF6! Fight Money is used for World Tour items and Battle Pass. Save it for items you like.
5. Set a Control Type – If you’re completely new, start with Modern. You can switch later. Classic is more powerful but harder.
6. Learn one simple combo – Use Training Mode to practice: e.g., Light Punch → Light Punch → Special Move (for Ryu: jab, jab, Hadoken).
What to Do First and What to Avoid
#### Do First:
#### Avoid:
Early Resource Priorities
Common Beginner Mistakes (and Fixes)
| Mistake | Why It’s Bad | How to Fix |
|---|---|---|
| Mashing buttons | Leads to easily punished attacks | Practice hitting one button at a time; use combo trials. |
| Not blocking | Takes huge chip damage from specials | Hold back or down-back. Learn to recognize blocking stances. |
| Overusing Drive Impact | Predictable, can be countered | Use it when opponent is committed to a move or in a corner. |
| Ignoring enemy Drive Impact | You get blown up | React with your own Drive Impact (punches) to trade, or Parry. |
| Letting opponent recover near you | You get thrown | Back off or use meaty attacks. |
| Never using throws | You get predictable block strings | Throw to beat guarding opponents. |
| Not anti-airing | Jump-ins do big damage | Practice: crouching Heavy Punch (or forward + special) as opponent jumps. |
Day-One Checklist
- [ ] Complete the Basic Tutorial (Dr. Lupo).
- [ ] Choose your preferred control scheme (Modern or Classic).
- [ ] Remap buttons if needed (settings → controls).
- [ ] Finish one Character Guide for your first fighter.
- [ ] Play 1 Arcade match (set to 1 round, easiest difficulty).
- [ ] Try an online Casual match (no pressure on rank).
- [ ] Spend 30 minutes in Training Mode practicing: blocking, anti-air, and one simple combo.
- [ ] Unlock the first World Tour location (Metro City) to start earning Drive Tickets.
- [ ] Set a daily goal: “I will block at least 3 attacks every match” or “I will anti-air once per round.”
- [ ] Review replays of your matches (hold Square/X to save) – see where you got hit.
- Always warm up in Training Mode for 5 minutes before online.
- Watch your opponent’s Drive Gauge – if they have no meter, they can’t Drive Impact you.
- Use the Frame Data display in Training Mode (push touchpad? check options) to understand what moves are safe.
- Join the Street Fighter beginner community for sparring. Many players are happy to teach.
Final Pro Tips:
Welcome to the fight – take it one round at a time, and soon you’ll be landing those supers!
Core Gameplay
Street Fighter 6 – Core Gameplay Guide
Street Fighter 6 blends classic versus fighting with a deep single-player RPG mode (World Tour) and a robust online hub (Battle Hub). This guide explains the core gameplay loop, combat systems, progression, exploration, quests, economy, character growth, and endgame structure, organized by player progression tiers.
---
Core Gameplay Loop
The loop depends on which mode you play:
- Fighting Ground (Classic Arcade/Training/Versus): Select character → fight rounds → earn Fighter Coins / experience → unlock colors, titles, and stages.
- World Tour (Single-Player RPG): Explore Metro City and other hubs → fight random enemies and complete quests → earn experience, money, and equipment → level up your avatar and learn new skills → challenge master fighters to learn their moves → use gear to customize stats and appearance.
- Battle Hub (Online Multiplayer): Enter hub → browse cabinets → challenge other players → earn League Points, Fighter Coins, and Hub-specific currency → climb ranked/casual ladders → participate in tournaments.
- A 6-level gauge below your health bar.
- Drive Impact (MP+MK): Armored attack that crumples on hit; costs 2 bars. Breaks parry stance.
- Drive Rush (MP+MK after a normal or special): A quick forward dash with auto-close; costs 3 bars (or 1 bar from a raw cancel). Opens combos.
- Drive Parry (MP+MK together): Absorbs attacks with perfect timing; costs 1 bar per parry. Perfect Parry gives huge advantage.
- Overdrive (OD) Special (two punch/kick buttons): Enhanced special moves; costs 2 bars.
- Drive Reversal (forward + MP+MK during block): Push opponent away; costs 3 bars.
- Accumulate meter by landing attacks and taking damage (3 segments).
- Level 3 (critical art) requires full 3 bars and low health (or any time for cinematic version).
- Standard throws break crouching guard; can be teched by pressing throw within a small window.
- Command grabs (e.g., Zangief’s) must be jumped or spaced away.
- Every fighter has a unique gimmick: e.g., Juri’s Feng Shui Engine (enhanced specials after store), Luke’s Sand Blast (charge follow-ups), Dee Jay’s Soaring Chain (feint kicks).
- Begin as a custom avatar in Metro City. Complete the Opening Prologue quest (defeat Boss of the first gym-like area).
- Main loop: Walk around city → talk to NPCs → fight random punks → complete side quests (e.g., “Get 10 Combo Count,” “Defeat 5 enemies with OD special”).
- Earn Zenny and Experience Points (EXP). Buy basic gear from the Wong Mart (stat boosts: Strength, Health, Stamina).
- Unlock fast travel (Uber) after reaching Level 5.
- Train with Master Luke (first master) to learn his moves (e.g., Flash Knuckle, Sand Blast). Each mastery level increases your bond.
- Complete Character Guide for your favorite fighter (tutorials with specific combos).
- Play Arcade Mode (short 4-match ladder) to earn classic endings and unlock alternate colors.
- Use Training Mode to practice basic combos (light > medium > heavy target combos).
- Zenny (in-game currency) earned from fights. Spend on gear and consumable items (e.g., healing salves, stat boosts).
- Fighter Coins (premium currency) can buy cosmetics, but are not required for progression.
- Unlock new locations: Nayshall (ruins), Barmaley Steelworks (industrial zone), Old Nayshall (night market). Complete main story quests (e.g., “The Demon’s Desire” against JP).
- Fight Master Fighters in each region (e.g., Ken in the Steelworks, Dee Jay in the beach area, Juri in Nayshall). Winning earns their Fighting Style and special moves.
- Style System: Equip up to 2 Fighting Styles (e.g., Luke’s style + Special moves from other masters). Customize your avatar’s move set.
- Equipment: Gear now has set bonuses (e.g., “Fighting Spirit” set increases Drive Gauge regen). Collect rare gear from boss fights.
- Side Content: Complete Sub-Stories (e.g., “The Lost Professor” – help an NPC find research). Some require specific levels or moves.
- In Versus Mode, try mirror matches to identify weaknesses.
- Ranked Play: Start climbing from Silver. Each rank has 5 leagues. Focus on anti-Drive Impact counterplay (cancel into Super or Drive Rush punish).
- Learn Safe Jumps and Meaty Attacks (timing attacks after a knockdown).
- Earn large sums of Zenny from high-level NPCs in World Tour. Buy Master Gifts (e.g., favorite food items) to increase bond for style upgrades.
- Fighter Coins can unlock Character Passes for DLC fighters (Rashid, A.K.I., Ed, etc.).
- Post-Story Content: New Mega Man-style boss battle against Boss (JP’s clone) appears. Defeat for legendary gear.
- Master Bond Max: Each master has 100 bond levels. Maxing (e.g., Luke bond 100) unlocks their Ultimate Fighting Style (enhanced versions of all moves). Requires daily gifts and sparring.
- Hazmat Gear: Farm special enemies in Old Nayshall for +crit gear pieces.
- Side Quests: “Legendary Fighters” – find secret spots to rematch masters (e.g., Zangief in the sewers).
- Arcade Mode on Highest difficulty rewards exclusive titles and colors.
- Combos: Learn advanced Drive Rush combos (e.g., c.MP > Drive Rush > b.HP > special).
- Defense: Practice Perfect Parry reaction (very tight 1-frame window) and Drive Reversal reversals.
- Ranked Climbs: Platinum and Diamond players use extensive matchup knowledge. Study frame data (use in-game Frame Chart).
- Hub Tournaments: Join Avatar Battles (your custom avatar vs others) or Normal Battles (traditional fighters). Winning tournaments grants exclusive Hub Gold and trophies.
- Shop: Spend Hub Points on avatar costumes (e.g., “Streetwear Set”), fight animations, and emotes.
- Fighter Coins now effectively used for Time-Limited Battle Pass (seasonal cosmetics).
- Zenny becomes abundant; spend on Refining Stones to upgrade gear stars (1-star > 5-star).
- New Game Plus: Reset World Tour with increased level cap (now 100) and harder enemies (Level 80+).
- Legendary Gear Drops: Bosses now drop 5-star equipment with unique abilities (e.g., “Iron Body” – reduce Damage Impact damage by 20%).
- Completionist Goals: 100% all sub-stories, bond levels, and gear collection. Trophy/Achievement “World Tour Champion” requires beating every master on max difficulty.
- Master Rank: Play in Master League (global leaderboard). Must reach 5000 LP to qualify (LP = League Points).
- Frame Data Mastery: Use third-party tools or in-game Combo Trial to learn every character’s optimal combos and set-ups.
- Character Loyalty bonus: Playing one character consistently increases Mastery Level (up to 50) which unlocks exclusive titles and colors.
- Monthly Online Tournaments: Capcom organizes official Street Fighter League events. Top players earn real-world prizes and in-game trophies.
- Custom Room: Create your own fight nights with custom rules (e.g., “Drive Impact only”, “5 rounds”).
- Avatar Gear Arena: Competitive matches with maxed-out avatars (stat cap 999 each). Trade gear in Hub market (limited to rare drops).
All modes feed into the same Drive Gauge system, which is the core combat resource.
---
Combat & Interaction Systems
Drive Gauge (Universal Resource)
Super Arts (Level 1/2/3)
Throw Loop & Guard Break
Unique Character Systems
---
Progression Tiers
Early Game (Levels 1–15 / Rank Rookie to Bronze)
Focus: Learn fundamentals, complete World Tour intro, and build your first character habits.
World Tour (single player):
Fighting Ground:
Economy:
Key Milestone: Reach Level 10 and unlock Rashid (first DLC master) via the World Tour quest “A Night of Fights.”
---
Mid Game (Levels 16–30 / Rank Silver to Gold)
Focus: Master your character’s BnB combos, explore multiple masters in World Tour, and start online ranked.
World Tour:
Fighting Ground:
Economy:
Key Milestone: Complete World Tour main story (last boss: JP) at around Level 25–30. This unlocks the Battle Hub as a fully integrated area.
---
Late Game (Levels 31–50 / Rank Platinum to Diamond)
Focus: Refine advanced tech (option selects, frame traps), optimize gear for PvP, and engage with Battle Hub events.
World Tour:
Fighting Ground:
Battle Hub:
Economy:
Key Milestone: Reach Diamond rank in online multiplayer OR complete all master bonds (unlock “The Ultimate Warrior” title).
---
Endgame (Level 50+ / Rank Master & Tournament Level)
Focus: Competitive perfection, cosmetic collection, and community events.
World Tour:
Fighting Ground:
Battle Hub:
Economy:
Fighter Coins become the primary currency for Premium Battle Pass (tiers give exclusive colors, costumes, and fighter coin refunds).
Event Coins from limited-time challenges can be exchanged for Rare Master Costumes (e.g., “Rockin’ Ryu” outfit).
Key Milestone: Achieve Master rank with multiple characters (e.g., 5 characters) to unlock the “Fighting Legend” profile frame.
---
Exploration & Quests Details
World Tour Open World: Metro City has districts (Downtown, Waterfront, China Town). Each district has unique shops, trainers, and enemies. Exploration rewards include hidden chests with gear, shortcut paths, and visual novel-style cutscenes.
Quests: Divided into Main Quests (story) and Sub Quests (optional). E.g., “A Taste of the World” (eat 10 different food items) rewards health boost. “Bodyguard” (defeat 3 gangs) rewards Zenny.
Bounties: After story, Bounty Boards** in each hub give repeatable tasks (e.g., “Defeat 10 Thugs in Nayshall”). Good for farming gear.
Economy & Shops
| Currency | Earned From | Used For |
|---|---|---|
| Zenny | Fights, quests, item sellback | Gear, consumables, gifts |
| Fighter Coins | Real money purchase, Battle Pass | Cosmetics, DLC characters, time-limited items |
| Hub Points | Online matches, tournaments | Avatar cosmetics |
| Drive Coins | Arcade wins, special events | Exclusive titles |
Character & Build Growth
- Gear Rarity: Common (gray) < Rare (blue) < Epic (purple) < Legendary (orange). Higher rarity has more stars (1-5) and bonus stats.
- Stat Focus: Strength (damage), Health (HP), Stamina (stamina regen), Special (super art damage).
- Skill Tree: Each Fighting Style has a skill tree (learn new moves automatically as you level bond). Max bond gives the style’s Ultimate move (e.g., Luke’s Ultimate Flash Knuckle).
- Respec: You can forget learned moves at any master’s training area (costs a few Zenny).
Endgame Structure Summary
1. World Tour NG+ – Grind levels 50-100, farm legendary gear.
2. Battle Hub Competitions – Ranked (Master League) and Tournament (weekly/monthly).
3. Character Mastery – Max multiple characters to 50 in Fighting Ground.
4. Cosmetic Completion – Unlock all colors, costumes, titles, and profile themes.
5. Community Events – Participate in Capcom’s official online tournaments and limited-time crossover events (e.g., Monster Hunter, Capcom other IPs).
The game’s longevity is built on the loop of learning, practicing, and competing, with World Tour providing a deep solo experience to complement the traditional fighting core.
Game Tips
Street Fighter 6 – Comprehensive Game Tips Guide
This guide covers essential tips for all skill levels and game modes: Fighting Ground (standard versus, training, arcade), World Tour (single-player RPG), and Battle Hub (online hub). Tips are grouped by category for quick reference.
---
Combat Tips
#### Beginner Fundamentals
1. Learn Your Normals First – Before specials, master your character’s standing light, medium, heavy, and crouching versions. Each normal has a specific range, startup, and recovery. Use Training Mode’s Frame Data Display to see which moves are safe on block.
2. Drive Impact (DI) Basics – DI is a powerful armored attack that absorbs one hit. Beginners: use it as a get-off-me tool or to punish predictable attacks. Be warned: a missed DI leaves you vulnerable to a punish counter.
3. Modern vs. Classic Controls – If you struggle with quarter-circle motions or charge inputs, switch to Modern Controls. You lose one normal button and deal 20% less damage on specials triggered by the Assist button, but you gain one-button specials and a dedicated Super Art button. Great for learning matchups quickly.
4. Block Low, React to Overheads – Most characters have fast low attacks (crouching light kick) that can hit if you stand block. Default to crouch blocking, then stand block only when you see an overhead (e.g., Ken’s step kick or Juri’s overhead).
5. Anti-Air Every Jump-In – Use crouching heavy punch or your character’s dedicated anti-air normal (e.g., Ryu’s crouching hard punch) whenever the opponent jumps. Practicing anti-airs in Training Mode with the dummy set to random jump will dramatically improve your defense.
#### Intermediate Strategies
1. Drive Rush Cancel (DRC) – After any Drive Rush (forward dash with two Drive Stock), you can cancel a normal into a special or Super. Use DRC to extend combos or to create plus frames on block. For example, Ryu: c.MK > Drive Rush > c.MP > Hadoken > etc.
2. Frame Traps – A frame trap is a sequence where your move recovers so fast that if the opponent tries to mash a button, they get counter-hit. Example: Chun-Li’s st.MP (6 frames of startup, +3 on block) into st.HP (9 frames startup) – the 3-frame gap catches mashing. Practice common frame traps for your character.
3. Whiff Punishing – Stand just outside your opponent’s longest poke range and dash in the moment they whiff a normal. Use your fastest medium or light attack to punish. This works well against characters who rely on long kicks like Dhalsim or Marisa.
4. Drive Reversal – Press forward + MK+HK while blocking (costs 3 Drive Stocks) to perform an invincible reversal. Use it to escape pressure safely, but be aware it can be baited and punished. Ideal for characters without a invincible DP.
5. Super Art Enders – Always finish combos with a Level 1 or Level 3 Super Art for maximum damage. Level 1 is safe on block in many cases and builds a little meter. Level 3 does massive damage and often leaves you in a good position (e.g., corner carry).
#### Advanced Optimizations
1. Option Select (OS) on Wake-Up – Program a single input that covers multiple possibilities. Example: holding down-back while inputting DP motion after a knockdown gives a safe block if they attack and a reversal if they don’t. Only use OS sparingly to avoid becoming predictable.
2. Perfect Parry (PP) – Tap forward + LP+LK (or MP+MK) exactly when an attack hits you. PP negates chip damage, gives you 11 frames of advantage, and allows a free Drive Rush combo. Practice against single-hit projectiles like Hadoken. Not recommended on multi-hit supers.
3. Drive Rush Chip Kill – When opponent has low health and no Drive Stocks, activate Drive Rush (neutral forward dash) then use a normal that forces chip damage. If they have no Drive Gauge, chip damage kills them.
4. Throw Loop Optimization – After a forward throw, dash up and do a meaty light attack (or another throw). If the opponent techs, you can shimmy (step back) and punish their tech attempt with a heavy combo. Advanced players use this to mix between throw and shimmy.
5. Corner Carry Combos – In the mid-stage, use combos that end with a knockdown and corner carry (e.g., Cammy’s spiral arrow). This forces the opponent into the corner where they have fewer escape options.
---
World Tour Exploration Tips
1. Scan Every Container – In World Tour’s open world (Metro City, Nayshall, etc.), break all barrels, crates, and vending machines. They drop Respect Points, Fighter Coins (rare), consumables, and style parts.
2. Talk to All NPCs – Many offer side quests that reward exclusive gear, emotes, or stat boosts. Use the map to track active quests. Some quests require a specific Fighter Level or Style Level.
3. Complete the Story First – Focus on main missions until you unlock World Tour hub areas (like the Beat Square or the underground). These unlock fast travel, additional vendors, and harder missions for better loot.
4. Hunt for Master Gear – After bonding with a master (e.g., Ryu, Chun-Li), they offer style-specific gear like Ryu’s headband or Chun-Li’s bracelet. Equipping these boosts your stats and unlocks special moves.
5. Use the Photo Mode – Not just for fun: some quests require taking photos of specific landmarks or characters. Bind the photo mode to a quick key to avoid menu diving.
---
Resource Management Tips
#### Drive Gauge (6 Stocks)
- Burnout Danger – When your Drive Gauge depletes completely, you enter a Burnout state: no Drive moves, 50% damage taken, and cannot block chip damage. Always keep at least 1 bar to avoid instant burnout. If you’re close to burnout, take a moment to recharge by not using Drive moves.
- Drive Rush Focus – Use Drive Rush primarily to pressure on block or extend combos. Avoid using it raw (neutral forward dash) unless you have a read, as it costs 2 bars and can be interrupted easily.
- Overdrive Cancels – Cancel a special into another special (costs 2 bars) to create tricky blockstrings or combo extensions. Overdrive is especially potent with characters like Juri or Ken.
- Level 1 Usage – Use Level 1 as a safe ender or to steal a round. It builds no meter but doesn’t waste a potential Level 3. Good for finishing low health opponents.
- Level 2 Usage – Often has unique properties (e.g., Guile’s Level 2 is a projectile that stays on screen). Use it to control space or to connect after a Drive Impact crumple.
- Level 3 Usage – Save for confirmable combos or as a reversal. Level 3 has invincibility frames and deals massive damage. Do not use Level 3 raw unless you’re sure it will hit (e.g., after a Drive Impact wallsplat).
- Ryu – Balanced, simple combos: c.MK > Hadoken, DPs for anti-air. Learn his standard BnB (c.LP > c.LP > c.MP > Shoryuken).
- Luke – Strong projectiles and easy combos: f.MP > Sand Blast. Great for learning footsies.
- Marisa – Heavy hitter with armored moves. Her Gladius (QCF+P) breaks projectiles and armor. Simple game plan: get in and press heavy buttons.
- Juri – Strong mobility with store kicks. Use Fuha stocks to enhance specials. Requires managing three stocks but pays off with high damage.
- Ken – Rushdown style with heavy damage potential. Use Dragonlash Kick for mix-ups. His Level 2 Super can catch opponents off-guard.
- Chun-Li – Excellent neutral with long pokes (c.MK, st.HK). Requires precise execution for her loops and stance combos. Her Lightning Legs have high cancel potential.
- Dhalsim – Zoning with long limbs and teleports. Requires strong spacing awareness. His command grab (forward+down+down+light punch) is a powerful surprise tool.
- Training Mode Shortcuts – Use L1+Square to reset position (PS5) or F1 on PC. Set the dummy to “Random Block” or “All Attacks” to practice reactions.
- Replay Review – After any online match, save the replay and watch from the opponent’s perspective. Identify patterns: when do they drive impact? When do they jump? Adapt next match.
- Practice Option Selects – Common OS: crouch block + DP shortcut (modern: hold down-back and tap R1). This blocks low and does DP if the opponent walks into range. Useful in the corner.
- Learn Universal Mechanics – Everyone has the same Drive system. Master Drive Parry (back+MP+MK) to avoid chip damage and create space. Also practice Drive Rush cancel from neutral: forward dash then press forward again to activate.
- Use the Combo Trials – Complete all 10 trials for your main character. They teach you optimal damage routes and special cancel timings. Even if you don’t master the hardest combos, the early trials give solid BnBs.
#### Super Art Gauge (3 Levels)
---
Builds (Character-Specific Advice)
#### Beginner-Friendly Characters
#### Intermediate Characters
#### Advanced Characters
---
Economy Tips
1. Earn Fighter Coins Efficiently – Focus on completing daily challenges in Battle Hub (play 3 matches, win 1 match) and weekly missions. These give small amounts of Fighter Coins without spending real money.
2. Invest in Drive Tickets – Use Drive Tickets earned from World Tour quests to purchase exclusive cosmetic items in Battle Hub’s shop. Skip rotating items you don’t need.
3. Character Pass vs. Season Pass – If you plan to play multiple characters, the Season Pass (4 DLC characters) is better value than buying individually. The pass also includes colors and battle passes.
4. Minimize Real Money Spend – Everything except DLC characters and some cosmetics can be earned by playing. Battle Passes cost Drive Tickets (free) or Fighter Coins (paid). Focus on free rewards first.
5. Trade Style Gear in World Tour – Sell duplicate style pieces to vendors for extra Respect Points. Use Respect Points to buy stat-boosting items or rare gear.
---
Miscellaneous Advanced Tips
---
By applying these tips across Fighting Ground, World Tour, and Battle Hub, you’ll see immediate improvement in win rate, resource efficiency, and overall enjoyment. Remember: everything in Street Fighter 6 is built around the Drive System – learn to manage it, and you’ll control the match.
Game Settings
Street Fighter 6 – Game Settings Guide
This guide covers every option in Street Fighter 6’s settings menu, from graphics to network, and explains the best choices for performance, quality, and comfort. Whether you’re on a low-end PC, a high-end rig, or a console, you’ll find optimized presets and critical tips.
Graphics Settings
Navigate to Options > Graphics to adjust visual quality. Settings are per profile but can be changed at any time.
Recommended Presets by Hardware
| Hardware Level | Preset | Additional Tweaks |
|---|---|---|
| Low-end PC | Performance (Low) | Resolution Scale 70% (or lower if below 60 FPS), VSync Off, Motion Blur Off. |
| Mid-range PC | Balanced (Medium) | Resolution Scale 100%, Textures High, Shadows Medium, Post-Processing Low. |
| High-end PC | Quality (High) | Resolution Scale 100%, Textures Ultra, Shadows High, Post-Processing High, 4K. |
| PS5/Xbox SX | Resolution Mode (4K/60) | If you prefer smoothness, switch to Performance Mode (1440p/120Hz on 120Hz display). |
| PS4/ Xbox One | Default recommended. | Turn off Motion Blur, set Resolution Scale to 100% if you can stay at 60 FPS. |
- Resolution Scale: Percentage of render resolution. Lower to boost FPS without changing UI sharpness. Easy to misconfigure: setting it below 50% makes the game very blurry; 70-85% is a good compromise on weaker hardware.
- VSync: On = eliminates screen tearing but adds input lag. Off + G-Sync/Freesync (or capping FPS) is better for competitive play.
- Frame Rate: 60 FPS is mandatory for consistent timing. If you can’t hold 60, lower other settings first.
- Shadows & Post-Processing: Shadows have minimal gameplay impact; set to Medium or Low on lower-end PCs. Post-Processing includes bloom and depth of field – turn off for clarity.
- Motion Blur: Disable immediately for competitive edge. It obscures motion in fights.
- Texture Quality: Affects character detail and backgrounds. High settings use VRAM – if you have less than 4GB, stick to Medium.
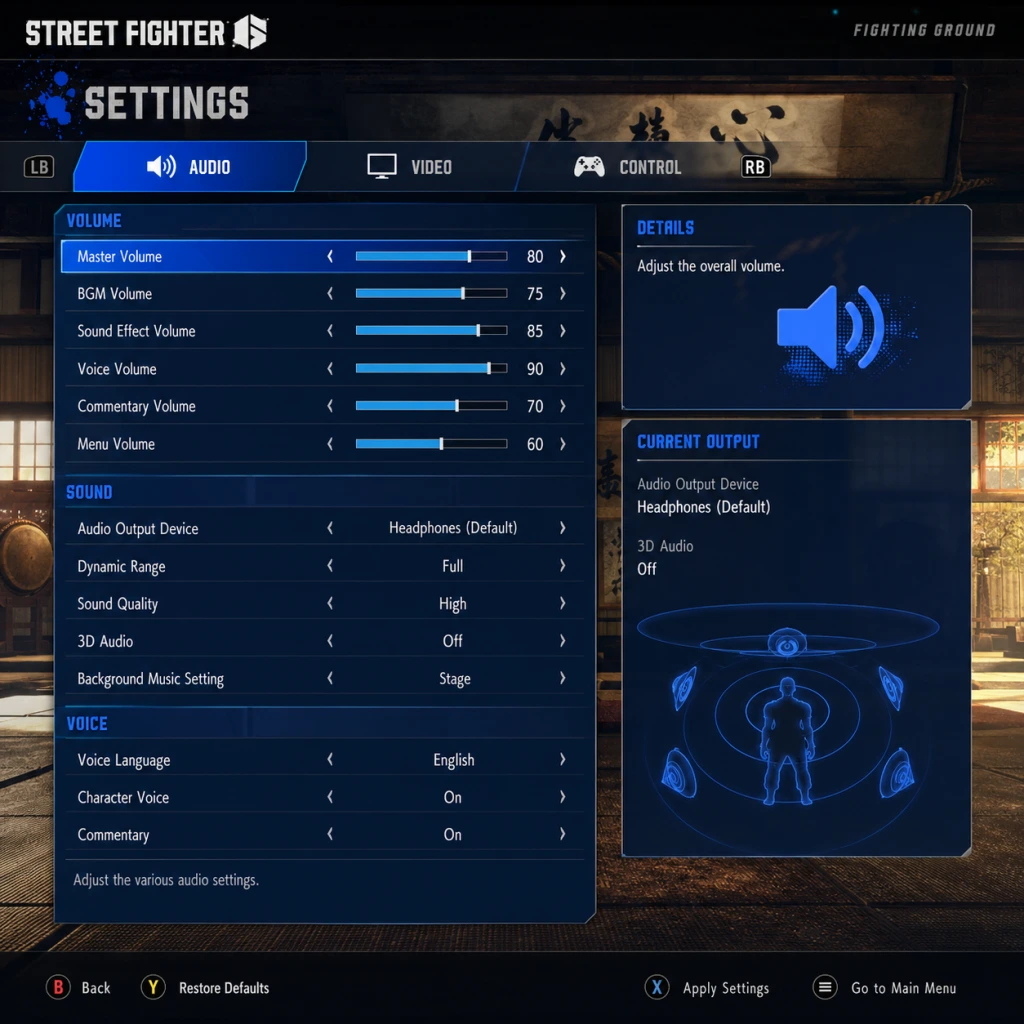
- Master Volume: Set to comfortable level (70-80%).
- Music Volume: Leave at 100% for energy; lower if you prefer sound effects over music.
- SFX Volume: Keep at 100% – crucial for hearing hit confirmations and audio cues.
- Voice Volume: 100% for announcer and character voices (helpful in tutorials and World Tour).
- Character Voice: “Battle” (English or Japanese). Many players prefer Japanese for authenticity.
- Audio Output: Choose Stereo (best for standard speakers/headphones) or Surround (if you have 5.1/7.1).
Special Attention Point: The World Tour mode’s open world areas are more demanding than the Battle Hub or Fighting Ground. If you experience stutters in World Tour, reduce Resolution Scale and Texture Quality by one step.
Audio Settings
Located under Options > Audio. Adjust for clarity and immersion.
Easy to Misconfigure: Audio Output set to Surround on stereo headphones can muddy audio. Stick to Stereo unless you have proper surround setup.
Controls Settings
Options > Controls is critical for competitive play. Customize button mapping, assist shortcuts, and controller options.
Button Layout (Modern, Classic, Dynamic)
| Style | Description | Recommended For |
|---|---|---|
| Classic | Six attack buttons (LP, MP, HP, LK, MK, HK). Full control. | Experienced players, execution practice. |
| Modern | Simplified: one button for Special, auto combos. | Beginners, players with disabilities. |
| Dynamic | One-button “smash” style – mostly for fun. | Casual, party play. |
Custom Button Mapping
- Controller Type: Select either Fighting Stick, Pad, or Keyboard.
- Assist Buttons: For Classic, assign Dash, Throw, Drive Impact, Drive Rush, etc. to shoulder buttons.
- Important: Map Drive Impact to an easily accessible button (e.g., R1 or right bumper) – it’s a critical mechanic.
- Keyboard Users: Default keys are scattered. Recommended mapping: WASD for movement, U/I/O/P for LP/MP/HP/LK, J/K/L for MK/HK/Throw. Enable Simultaneous Input if you have a mechanical keyboard.
- Vibration: On (adds immersion) – but many competitive players turn it off to reduce distraction.
- Trigger Effects (PS5/Xbox): On for tension; no performance impact.
- Color Blind Mode: Choose Protanopia, Deuteranopia, or Tritanopia. Adjusts UI colors and outlines.
- Screen Reader (PC only): Reads menu text aloud. Enable from Windows settings (Narrator).
- Visual Feedback: “On” shows button prompts during combos – helps for learning.
- Timing Assistance (Easy Input): Lengthens input windows for specials. Useful for beginners.
- Subtitles: Always On – beneficial for story and World Tour dialog.
- SFX Subtitles: Shows “Critical Art!” text when super is used – useful if sound is low.
- Controller Vibration Warning: Helps notice when you’re low on health.
- Text Language: Select your preferred language for menus and subtitles.
- Voice Language: English, Japanese, French, and more. Japanese voice acting is widely considered superior for character authenticity.
- Subtitle Language: Independent from text – set to English if you choose Japanese voices.
- Connection Type: Wired is strongly recommended over Wi-Fi. Wi-Fi adds latency and packet loss.
- Cross-Platform Play: Enable if you want to face players on other consoles/PC. Disable if you prefer same-platform (rarely needed).
- Matchmaking Region: Choose your region (e.g., “North America”, “Europe”). Set to “All” only if you want longer queues but more variety.
- Connection Speed Display: On – shows your connection quality during matchmaking.
- Allow Autosave in Online: Enable – automatically saves replay data.
- Fight Request (World Tour/Battle Hub): Set to “Auto-Reply” or “Manual”. Manual prevents interruptions.
- Battle Settings:
- Input Settings:
- Replay & Training:
- World Tour Settings:
- Performance First: For any hardware, target stable 60 FPS over visual fidelity. Use Resolution Scale and Shadows as the first knobs to turn.
- Accessibility: Spend 5 minutes to adjust color blindness, subtitles, and control scheme – they dramatically improve comfort.
- Network: Always use a wired connection and keep cross-play enabled unless you experience severe lag.
- Controls: Bind Drive Impact and Drive Rush to shoulder buttons. Practice Modern vs Classic in Training Mode before committing.
Vibration & Haptic Feedback
Accessibility Settings
Capcom includes extensive accessibility options under Options > Accessibility. These settings are easy to overlook but vital for inclusive play.
Special Attention Point: Timing Assistance is a training tool. Turn it off when you move to competitive play; it masks bad habits.
Language Settings
Options > Language controls voice, text, and subtitle languages.
Easy to Misconfigure: Setting Voice Language to Japanese but leaving Subtitles off will leave cinematics untranslated. Keep Subtitles On if using non-native voice.
Network Settings
Options > Network – essential for smooth online play.
Special Attention Point: Cross-Platform Play is on by default but can cause longer load times when connecting to PC players with slower hardware. If you notice lag spikes, try disabling it, but generally keep on for larger player pool.
Gameplay Settings
Located in Options > Game Settings – affects behavior during battles.
- Timer: Default 99 seconds. Competitive matches use this.
- Round Count: Best of 3 for ranked. Practice 3 rounds for tournament settings.
- Life Recovery (VS Mode): Usually off for competitive; on for casual fun.
- Input Delay Reduction (PC): Set to “Low” to minimize lag. May cause screen tearing if VSync is off – cap FPS instead.
- Asynchronous Input (PC): Enable if you use multiple controllers or fighting sticks. Disable if only one controller.
- Auto-Record Replays: Enable – invaluable for reviewing matches.
- Training Mode Reset: “Hold Button” is fastest.
- Camera Auto-Adjust: On – helps in crowded areas.
- Auto-Run: On – saves time traversing Metro City.
Easy to Misconfigure: Input Delay Reduction can cause instability on low-end PCs. Test in Training Mode; if you see random slowdowns, revert to default.
Final Recommendations
Now that you’ve configured your settings, jump into Training Mode to test everything. Adjust anything that feels off – the goal is to make the game invisible so you can focus on the fight.
Important Notes
Important Notes – Street Fighter 6
This section collects critical warnings, pitfalls, and insider knowledge that can save you time, frustration, and regret. Read before diving deep into the game.
Warnings and Pitfalls
Drive Impact Overuse in Neutral – New players often spam Drive Impact (DI) hoping for easy punishes. In higher ranks, opponents will punish predictable DI with their own DI or Drive Reversal. Use DI strategically, not as a crutch.
Ignoring the Tutorials – The game offers excellent tutorials for each system (Drive mechanics, parry, etc.). Skipping them leads to preventable losses. Complete the Fighting Ground -> Training -> Tutorial chapter before any competitive play.
World Tour Leveling Rush – Rushing through World Tour without spending skill points wisely can make later fights very hard. Invest early in Vitality and Special Attack nodes, and don’t neglect Style upgrades that improve your chosen Master’s moves.
Spending Drive Tickets on Cosmetics Impulsively – Drive Tickets are earned slowly. Battle Hub items rotate weekly. Many players regret buying a costume only to see a better one a few days later. Wait until near the end of a shop rotation before purchasing.
Ignoring Training Mode – Even pros spend hours in Training. At least 10 minutes of practice per session (combos, anti-airs, punish counters) dramatically improves performance.
Irreversible Choices
World Tour Character Creation – Your avatar’s name, appearance, and starting style are permanent without using a Character Edit Ticket (purchased with real money). You get one free ticket after launch – use it wisely. Consider your name and look carefully before finalizing.
Fighter Coin Purchases – Fighter Coins (premium currency) can only be refunded within 14 days of purchase if unused. Once spent on a character pass, costume, or Battle Hub item, there are no refunds.
Skill Point Allocation in World Tour – While you can eventually earn enough skill points to max everything, early misallocations force you to grind extra levels. Use a skill planner or focus on one stat path per New Game cycle.
Master Bonding Gifts – Gifts given to Masters in World Tour are consumed and cannot be retrieved. If you want to unlock a specific Master’s move quickly, save rare gifts for that Master rather than spreading them out.
Missable Content
Limited-Time Events and Fighting Pass – Street Fighter 6 runs rotating Fighting Pass seasons (~2 months each). Each pass has exclusive cosmetic items (avatars, titles, stickers) that never return. Complete all pass challenges before the season ends.
Battle Hub Shop Rotations – The boutique in Battle Hub sells exclusive color palettes, emotes, and costumes that cycle weekly. If you see an item you want, buy it; it may not return for months or ever.
Tournament Rewards – Capcom occasionally hosts in-game tournaments with unique titles. Participate during the event window to claim these.
World Tour Unique Gear – Some gear pieces are only available from specific trainers after completing their bond quests. If you fail to finish a bond quest before the post-game (after beating the final boss), you can still complete it, but certain cutscenes may be locked. No truly missable gear, but completionists should do all bond quests before leaving an area.
Difficulty Spikes
Rookie to Bronze Transition – New online players often hit a wall around Bronze rank. The jump in opponent skill is steep. Use Modern Controls to simplify execution while learning fundamentals.
World Tour Final Boss – The final boss of World Tour has high damage output and aggressive AI. Stock up on healing items (soda, hamburgers) and use your Super Art bar effectively. Consider lowering difficulty to “Classic” if stuck.
CPU Level 8 Arcade Mode – For achievement or trophy hunters, beating Arcade Mode on the highest difficulty (Legendary) is extremely tough. Use top-tier characters and abuse CPU weaknesses (e.g., constant jumping attacks).
Master Rank Online – Reaching Master rank (the highest) is a massive time investment and requires near-perfect execution. Expect to plateau multiple times. Focus on small improvements, not just win rate.
Grinding Traps
World Tour Grinding for Levels – Mindlessly beating random street thugs for XP is inefficient. Instead, replay high-level missions (e.g., “The Final Showdown” re-run) which give much more XP per minute. Also equip the “Growth” booster item from the shop.
Farming Fight Money in World Tour – World Tour gives very few Fight Money (currency for online items). The best source is Battle Hub: play ranked or casual matches, complete daily/weekly challenges. Avoid spending hours in World Tour for Fight Money.
Drive Ticket Grinding – Drive Tickets are earned mainly via Fighting Pass progression and daily login bonuses. The fastest way is to complete the battle pass challenges first, then play casual matches in Battle Hub for small ticket rewards. Do not waste time in extreme grinding mode without challenges active.
Unlocking All Character Colors – Colors for characters require Drive Tickets or real money. Prioritize colors you actually use, not completion. Some colors are locked behind fighting pass tiers, impossible to get later outside of rare reissues.
Online Etiquette and Anti-Cheat
Rage Quitting – Disconnecting during a match (by closing game or turning off internet) will temporarily ban you from matchmaking. Repeated offenses lead to permanent bans or loss of ranked progress. Always finish the match, even if losing badly.
Teabagging and Taunting – Excessive taunting (especially after a lucky win) is considered unsportsmanlike. A simple “Good Fight” at the end is preferred. Many players will block you if you spam emotes.
Connection Indicators – Before accepting a match, check the ping indicator. Should be green (good) or yellow (acceptable). Red ping (high) will cause rollback lag. It’s better to decline than to play a laggy match.
Rematch Etiquette – By default, offer a rematch after a close set. If you stomped someone 3-0, it’s polite to stop after 2-1 or just say “Good Game”. Don’t endlessly beat a weaker opponent.
Anti-Cheat System – PC version uses Capcom’s Anti-Tamper and Denuv. Cheating (using mods online, altering game files) will result in a permanent ban from online modes. Single-player mods (cosmetic only) are generally tolerated offline, but go online with them at your own risk. Capcom scans for memory modifications.
Reporting – To report toxic behavior (harassment, cheating): pause during match -> Communication -> Report. Use this for genuine offenses only, not poor gameplay.
Save Management
Auto-Save Only – Street Fighter 6 auto-saves progress to your platform’s cloud (if enabled). There is no manual save option. This means you cannot reload a save to undo mistakes.
One World Tour Save Per Profile – You have exactly one save slot for World Tour per user profile. If you want a fresh start, you must delete your current save from the system (not from in-game). This is permanent.
Save Backup (PC) – On PC, you can manually backup your save data at: `%localappdata%\StreetFighter6\Saved\SaveGames`. Copy the folder regularly to protect against corruption or accidental deletion.
Cross-Save – Street Fighter 6 does not support cross-save between platforms. Progress on PS5 won’t transfer to PC or Xbox. Choose your main platform carefully.
Cloud Save Conflicts – On Steam, if you play offline and then online, Steam may sync an old save and overwrite your latest. Always exit the game properly and let cloud sync finish before playing on another device.
Things Players Commonly Regret Not Knowing Earlier
You Can Use Modern Controls in Ranked – Many players stick with Classic out of pride. Modern Controls are perfectly valid and used by top players. Don’t be ashamed to use them—they let you focus on strategy over execution.
The Training Mode Has a “Frame Meter” – Enable it in settings to see frame advantages, startup, and active frames. This is crucial for learning matchups and combos.
World Tour and Battle Hub Are Linked – Cosmetics and stat boosts obtained in World Tour can be used in Battle Hub avatar battles. Completing World Tour gives you exclusive gear.
You Can Pause in Single-Player – In World Tour and Arcade, you can pause to change difficulty mid‑battle? Actually no—difficulty is set upon starting a mode, but you can lower it before starting a fight. Experiment with difficulty after each death.
Character Passes Are Per Season – Each year’s character pass is separate. If you miss a character, you must buy them individually with Fighter Coins later. Consider the Year 1 or Year 2 pass for long-term value.
The “Beat” Achievement is Easier with Modern Controls – The trophy/achievement for beating Arcade Mode with every character on any difficulty can be sped up using Modern+Assist combos.
You Can Customize Controller Button Mapping – In Settings -> Controls, you can remap every button, including setting a second input for Drive Impact. This can prevent accidental inputs.
Training Dummy Settings – Set the dummy to “Wake Up” actions to practice meaty pressure. Many players don’t realize you can record the dummy doing specific combos.
Network Quality Matters for Ranked – If your internet is unstable, play Casual first. Losing rank due to lag is frustrating. Use a wired connection and turn off background downloads.
The Game Has a “Matchmaking Range” Option – In ranked settings, you can choose to only match with players of similar connection quality. Enable it to avoid laggy matches.
> Final Tip: Street Fighter 6 is a marathon, not a sprint. Focus on learning one character deeply, use training mode regularly, and don’t let early losses discourage you. The community is supportive—ask questions on forums or watch replays of higher-ranked players.
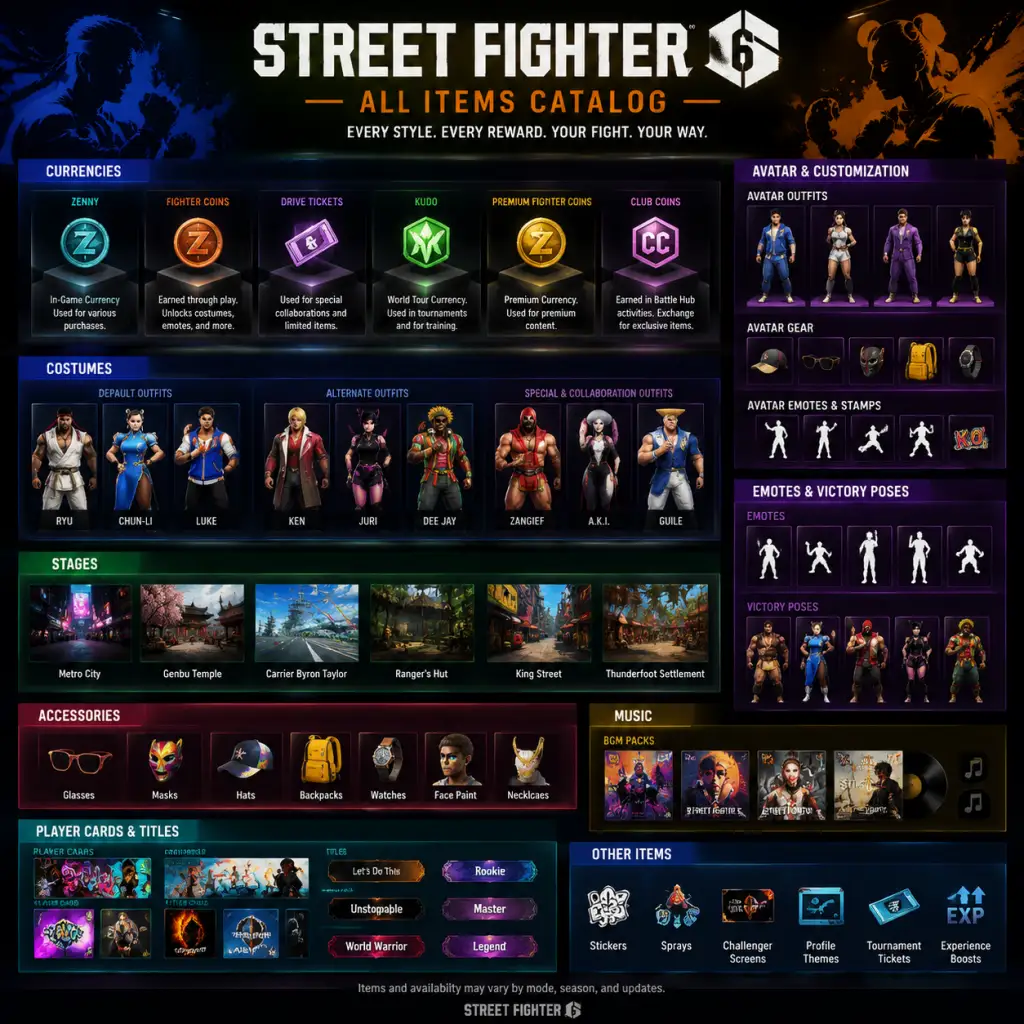
All Game Items
Street Fighter 6 – All Game Items Guide
This guide catalogues every item type in Street Fighter 6, covering currencies, consumables, equipment, materials, collectibles, and key items. While the core fighting game has no loot, the World Tour single-player RPG mode and Battle Hub online hub introduce a full item system. All information is accurate as of June 2025 (Title Update 1.10).
---
1. Currencies
Street Fighter 6 uses several currencies across different modes. None are tradable between players.
| Currency | Icon | Purpose | How to Obtain | Cap |
|---|---|---|---|---|
| Fighter Coins | Gold coin with F | Microtransaction currency for cosmetics, Fighting Pass, and some in-game items. | Real-money purchase (via platform store) | No soft cap; purchased in bundles (250, 610, 1250, 2750). |
| Drive Tickets | Blue ticket | Used in Battle Hub for cosmetic unlocks (outfits, colours, titles) and to spin the Drive Ticket Machine (random rewards). | Daily challenges, Fighting Pass tiers, special events | 999,999 |
| Zeni (World Tour) | Gold dollar bill | Main currency for buying items from vendors, repairing gear, and upgrading equipment. | Street fights, missions, selling items | 9,999,999 |
| Fighter’s Spirit (World Tour) | Red aura orb | Required to unlock certain Master moves and to train with Masters. | Completing Master quests, leveling bonds | 999 |
| Battle Pass XP | Fighting Pass icon | Progresses the seasonal Fighting Pass (free and premium tracks). | Playing any mode, completing daily/weekly missions | Infinite per season |
| Drive Gauge Charge (training dummy resource) | Small battery icon (Training Mode only) | Fills Drive Gauge for practice; not a real currency. | Infinite in Training Mode settings | N/A |
---
2. Consumables
Only available in World Tour and Battle Hub (limited). Consumables are single-use and vanish after application.
#### 2.1 Healing Items
| Item | Effect | Where to Get | Cost |
|---|---|---|---|
| Ramen Bowl | Restores 10% HP | Ramen shop in Metro City | 100 Zeni |
| Premium Ramen | Restores 30% HP | Metro City (rare vendor) or treasure chests | 500 Zeni |
| Energy Drink | Restores 100% HP + grants temporary Attack Up (+10% for 30s) | Crafted (Energy Drink x5) or sold by Master Dhalsim | 1,500 Zeni |
| First-Aid Kit | Revives you from K.O. with 50% HP (one use per fight) | Mission rewards, loot from defeated enemies | Not purchasable |
| Item | Effect | Duration | How to Obtain |
|---|---|---|---|
| Protein Powder | +20% Attack for 60 seconds | 60s | Vendors (e.g., near gyms), loot crates |
| Focus Capsule | +20% Defense for 60 seconds | 60s | Same sources as Protein Powder |
| Speed Gel | +15% movement speed for 30 seconds | 30s | Chests, rare drops from certain enemies |
| Combo Juice | Increases Drive Gauge recovery by 25% for 60 seconds | 60s | Master Ken’s training shop, World Tour missions |
| Master’s Elixir | Doubles all stat boosts for 120 seconds | 120s | Crafted from rare materials (see Materials) |
| Item | Effect | How to Get |
|---|---|---|
| Drive Ticket Machine Spin Token | One free spin on the Drive Ticket Machine | Daily login, Fighting Pass rewards |
| Battle Pass Booster | +50% Battle Pass XP for 1 hour (real time) | Premium Fighting Pass tiers (free track gives 30% for 30 min) |
| Emote Ticket | Unlocks a single emote (if owned) for use in Battle Hub | Drive Ticket spin, event missions |
---
3. Equipment (Gear) – World Tour Only
Gear in World Tour provides raw stat bonuses (Attack, Defence, HP, Speed, etc.) and sometimes special effects like “Auto-Guard on crouch” or “Increased Drive Impact damage”. Each piece has a level (1–99) and rarity (Common, Rare, Epic, Legendary). Gear level determines maximum potential stats; rarity influences number of bonus sub-stats.
#### 3.1 Headgear
- Baseball Cap (Common): +5 Defence, no sub-stats. Found: vendor in Metro City.
- Fighter’s Headband (Rare): +8 Defence, +2% Attack. Reward from early Master Chun-Li quest.
- M. Bison Visor (Epic): +15 Defence, +5% Drive Gauge recovery. Loot from M. Bison’s clones in the Bison Base.
- Legendary Akuma Mask (Legendary): +25 Defence, +10% Attack, +3% HP regen. Endgame reward from Akuma’s final bond quest.
- T-Shirt (Common): +4 HP, no sub-stats. Start gear.
- Gi Top (Rare): +10 HP, +2% Defence. Purchase from Master Ryu’s dojo after bond 3.
- Jacket of Respect (Epic): +20 HP, +5% Attack vs. larger enemies. Found in Metro City casino vault.
- Sagat’s Vest (Legendary): +35 HP, +8% Attack, +15% throw damage. Complete Sagat’s bond level 10 quest.
- Short Shorts (Common): +2 Speed, no sub-stats. Start gear.
- Fighting Pants (Rare): +5 Speed, +3% Defence. Vendor at Battle Hub for 2,000 Fight Money (Zeni).
- Ninja Tabi (Epic): +10 Speed, +5% jump height. Loot from Juri’s hidden stash locations.
- Dhalsim’s Wraps (Legendary): +15 Speed, +10% Drive Parry window extension. Drop from World Tour final boss (JP’s clone).
- Leather Gloves (Common): +3 Defence. Early vendor.
- Fire Charm (Rare): +5% fire damage (if using a fire-based style). Found in Luke’s training area.
- Amulet of the Dragon (Epic): +10% Drive Impact damage. Chest in the sewers.
- Mysterious Orb (Legendary): Charges your Drive Gauge by 1 bar every 30 seconds while idle. Crafted from 3 Rare Jewels (see Materials).
#### 3.2 Torso
#### 3.3 Legs
#### 3.4 Accessories (Gloves, Belts, Shoes, etc.)
Gear has multiple accessory slots, but only one effect per slot type.
Important: Gear can be upgraded at the Blacksmith (unlocked after Chapter 3). Upgrades cost Zeni and materials (see §4). Upgrading increases base stats but not sub-stat values. You can also transmute gear cosmetics (appearance changes) using Fashion Tickets (earned via Fighting Pass or Fight Money).
---
4. Materials
Used for upgrading gear, crafting consumables, and unlocking certain Master moves. Materials are found in chests, as enemy drops, or bought from specific vendors.
| Material | Rarity | Used For | How to Obtain |
|---|---|---|---|
| Scrap Metal | Common | Gear upgrades (low level) | Broken crates, defeated punk enemies |
| Cloth Scrap | Common | Armour upgrades (low level) | Metro City clothes stores (breakables), reward from side quests |
| Rare Leather | Rare | High-level gear upgrades, crafting Energy Drink | Drops from bounty targets (World Tour), certain Master bond quests |
| Crystal Shard | Rare | Weapon upgrade (if using weapon-based style) | Found in special locations: subway tunnels, hidden caves in Nayshall |
| Dragon Scale | Epic | Legendary gear upgrade (level 80+) | Defeat the secret boss “Supercharged Ryu” in Nayshall forest |
| Master’s Seal | Legendary | Unlock legendary gear transmog, craft Master’s Elixir | Complete all bond quests for one Master, then talk to the Master at bond 10 |
| Rare Jewel | Epic | Craft Mysterious Orb accessory, some high-level recipes | Loot from chests in JP’s finale area, rare random drop from any World Tour enemy (approx. 2% chance) |
---
5. Collectibles
These items do not affect gameplay stats but unlock cosmetic or social features. Most are tracked in your Collection Log (press Start > Extras > Collection).
#### 5.1 Emotes
- Wave (default) – Common
- Taunt (default) – Common
- Victory Pose Variants – Unlock from Fighting Pass (Premium), Drive Ticket spins, or World Tour Master bond rewards (bond 7 for each master).
- Street Fighter Classic Sticker Pack – Fighting Pass free track (tier 15). Includes Ryu’s Hadouken sticker, Chun-Li’s kick sticker.
- Capcom Collaboration Stickers – Limited events (e.g., Monster Hunter crossover gave Rathalos sticker).
- World Tour Graffiti Stickers – Found on walls in World Tour; scan them with your phone to unlock as sticker.
- Fight Title – Earned by completing Arcade mode with each character (8 titles total).
- Master of [Style] – Unlock by mastering all moves of a particular fighting style in World Tour (e.g., “Master of Ansatsuken”).
- Battle Hub Champion – Given to top 100 players in Battle Hub’s monthly-ranking event.
- BGM Tracks – Can be set as background music in Battle Hub lounges. Unlocked by playing Arcade mode with each character, buying from the in-game music store (Fight Money only), or purchasing the Season 1 Character Pass.
- Announcer Voice Sets – Alternative announcer voices (e.g., “SF2 Arcade Announcer”, “Chun-Li Japanese Voice”). Unlocked via Fighting Pass Premium track (seasonal).
- Character Concept Art – Unlock by reaching bond 5 with each Master in World Tour.
- Wallpapers – Purchasable with Fight Money (Zeni) in the Collection menu, or included with Deluxe/Ultimate edition.
#### 5.2 Stickers (for Battle Hub messages and in-game overlays)
#### 5.3 Titles (Nameplates & Badges)
Displayed next to your player name in Battle Hub and online lobbies.
#### 5.4 Music Tracks & Voice Sets
#### 5.5 Artwork & Wallpapers
All collectibles are purely cosmetic and do not affect gameplay balance. Players cannot see your collectibles unless you use them (emotes/stickers in match) or check your profile.
---
6. Key Items (World Tour Story)
These items are essential for progressing the World Tour story or unlocking specific Master quests. They cannot be sold or discarded.
| Item | Significance | Where to Find |
|---|---|---|
| Empty Journal | Given by Bosch at start. Used to note clues about the tournament. | Automatically obtained in Chapter 1. |
| Bison’s Amulet | Piece of evidence proving JP’s involvement. Dropped by defeated Shadaloo sentinel in Chapter 4. | Boss fight – Bison Sentinel (Chapter 4). |
| Forged Invitation | Grants access to the underground fighting pit in Nayshall. | Received from Marisa after bond 3 quest. |
| Master Training Scrolls (one per Master) | Unlocks the next bond level cap (bond 5 → 10). Each Master gives their scroll after bond 5 quest. | Talk to Master after reaching bond 5. |
| Key to the Ruins | Opens the locked door in the Bison Base’s lower level. | Found on a table in the Nayshall market (after Chapter 7). |
| Final Boss Keycard | Necessary to activate the elevator to JP’s final lab. | Defeat the four elite guards in Chapter 9. |
---
7. Fighting Pass Items
The seasonal Fighting Pass (90 tiers free + 30 Premium bonus tiers) distributes a mix of currencies, consumables, and cosmetics. The free track always includes:
- Drive Tickets (accumulated ~3,000 per season)
- Battle Pass XP Boosts (50% for 1 hour)
- Emotes, Stickers (every 10 tiers)
- Fight Money (Zeni) (small amounts)
- Exclusive Outfit for the season’s featured character
- Rare Stickers/Emotes
- Double Drive Ticket payouts
- Fashion Tickets (used to change gear appearance in World Tour)
Premium track (750 Fighter Coins) adds:
Best Practice: Always complete the free track to max before spending any Fighter Coins; reroll daily missions for better XP gains.
---
8. Miscellaneous Items
| Item | Type | Description |
|---|---|---|
| Fight Money | Currency | Earned in World Tour (Zeni). Used for most purchases. |
| Battle Pass XP Booster | Consumable (non-stackable, duration) | Increases XP gain from matches (only in Battle Hub lounges). |
| Combo Trial Tokens | Collectible | Completing all combo trials in Fighting Ground awards a token (cosmetic) per character. |
| Golden Drive Ticket | Currency | Special type (earned via Fighting Pass Premium tier 100). Used to buy exclusive legendary gear from a hidden vendor in Battle Hub. |
9. Important Synergies & Upgrades
- Equipment Upgrades: Use Scrap Metal + Zeni to upgrade Common gear from level 1–20, then Rare Leather + Crystal Shard for levels 21–50, and Dragon Scale for 51–80+. Beyond level 80, you need Master’s Seal + a hefty Zeni fee.
- Master’s Elixir Crafting: Combine 1x Rare Jewel + 2x Master’s Seal + 5x Focus Capsule + 5x Protein Powder. This elixir quadruples the duration of all booster effects (doubled duration on top of doubling stats).
- Legendary Accessory ‘Mysterious Orb’: Equipping it with the “Drive Gauge Master” style (from Master Ryu) results in a full Drive Gauge every 10 seconds instead of 30. Extremely powerful for World Tour boss fights.
- Fashion Tickets: These are one-time use to change the skin of a gear piece without affecting stats. Rare Fashion Tickets (earned in premium Fighting Pass) let you apply any unlocked skin to any gear slot. Save them for your final legendary set.
---
This guide covers all item types available in Street Fighter 6 across all modes. For detailed crafting recipes, refer to the World Tour Crafting Guide. Items are subject to change with future updates; check the official patch notes for new additions.
Character Skills
Street Fighter 6 – Character Skills Guide
This guide covers every skill, ability, special move, Super Art, and unique mechanic for all playable characters in Street Fighter 6. Skills are divided into universal Drive System capabilities and character-specific moves. We include inputs for Classic controls (using standard notation: LP = Light Punch, MP = Medium Punch, HP = Heavy Punch, LK = Light Kick, MK = Medium Kick, HK = Heavy Kick) and note Modern control simplified versions where relevant.
Universal Drive System Skills
The Drive System gives every character access to six core skills consuming Drive Gauge (up to 6 bars):
- Drive Impact (DI): [HP+HK] or [L2+P] (Modern). A forward-charging, armored attack. Deals heavy chip damage and crumples on hit (can be canceled into punish). One hit of armor (breaks after 2 hits). Costs 1 bar. Use to absorb pokes, punish predictable attacks, or break through pressure. Crumple allows a follow-up combo.
- Drive Parry (DP): [MP+MK] or [L2+K] (Modern). Hold to parry mid/high attacks (low attacks need crouch parry). Parrying an attack restores a small amount of Drive Gauge. Perfect Parry (timed just before hit) gives huge advantage and can be canceled into Drive Rush. Costs no bar on normal parry; Perfect Parry does not consume gauge.
- Drive Rush (DR): Press [MP+MK] after a normal cancelable move or after a Drive Parry/Perfect Parry. A quick forward dash that can be used to extend combos or close distance. Costs 3 bars (or 1 bar when canceled from a normal). DR gives +4 frames advantage on block; use for mix-ups and pressure.
- Drive Reversal (DRV): [Forward + HP+HK] when blocking or in hitstun. A knockback attack that pushes opponent away. Costs 2 bars. Use to escape pressure or punish gaps in blockstrings. Vulnerable if blocked (heavy punish).
- Overdrive (OD): Press two punch or two kick buttons simultaneously during a special move input. OD moves have enhanced properties (more hits, damage, corner carry) and cost 1 bar each. Many OD moves are safe on block or lead to conversions.
- Special Moves:
- Super Arts:
- Unique Mechanic: Poison application on many moves – increases damage over time. Her playstyle focuses on spacing, poisoning from afar, then rushing down.
- Special Moves:
- Super Arts:
- Unique Mechanic: None, but his amphibious kicks and pokes are excellent for footsies.
- Special Moves:
- Super Arts:
- Unique Mechanic: She has no projectile, relying on speed and close-range pressure. Her dive kick (Hooligan option) is key.
- Special Moves:
- Super Arts:
- Unique Mechanic: Her stance – Serenity Stream (down-down) – allows cancel into various kicks. Not a skill but a core tool.
- Special Moves:
- Super Arts:
- Unique Mechanic: Rhythm combo system – repeating attacks build a beat meter (little effect on damage but stylish). All moves can be canceled into each other with rhythm.
- Special Moves:
- Super Arts:
- Unique Mechanic: His long-range pokes and float – he can stay airborne with float (hold down in air). No gauge but critical for zoning.
- Special Moves:
- Super Arts:
- Unique Mechanic: His super armor on headbutt; also a charge character.
- Special Moves:
- Super Arts:
- Unique Mechanic: Charge inputs – all specials require charge (hold back/down for ~50 frames). Booms are essential for keeping opponent out.
- Special Moves:
- Super Arts:
- Unique Mechanic: Drink gauge (up to 4 levels) – after a drink (via command grab or taunt), his specials gain extra hits and damage. Level 4 unlocks a new move: Shiko (down-down + Kick) – a low sweep.
- Special Moves:
- Super Arts:
- Unique Mechanic: His V-Trigger like system? Actually no; he has a unique meter called Malice that builds when specials hit. At max Malice, his normals and specials have extra range and damage. Also his sentry turret (QCB + Kick) places a mine that explodes after a second.
- Special Moves:
- Super Arts:
- Unique Mechanic: Fuha Store – she can store up to three kick charges (by holding kick). Each store charges her next Fuhajin or enhances a special move. Managing Fuha is core to her damage.
- Special Moves:
- Super Arts:
- Unique Mechanic: Run stance – can cancel into overhead, low, or throw. Mix-up heavy.
- Special Moves:
- Super Arts:
- Unique Mechanic: Wind Charm – she has three wind charms that build over time or via special moves. Each charm adds extra hits to certain attacks. She can also use charm to enhance her projectile (hold punch after Condor Spire).
- Special Moves:
- Super Arts:
- Unique Mechanic: Perfect Parry is universal; Luke has no special meter. His normals are exceptionally good for footsies.
- Special Moves:
- Super Arts:
- Unique Mechanic: Medal system – she builds medals by landing her command grab. Each medal increases the damage of her command grab and some specials. Max 5 medals. Command grab is key to her gameplan.
- Special Moves:
- Super Arts:
- Unique Mechanic: Armored moves – many attacks have hyper armor (on Gladius and Scutum). She can absorb one hit and counter. High damage, slow speed.
- Special Moves:
- Super Arts:
- Unique Mechanic: Wind Jet – he can hold down after a special to create a small tornado that affects trajectory. Also his Ysaar (air fireball) is a special move (QCF + Kick in air).
- Special Moves:
- Super Arts:
- Unique Mechanic: Denjin Charge gives a powerful fireball. Otherwise, very fundamentals-based.
- Special Moves:
- Super Arts:
- Unique Mechanic: None besides command grabs. His lariat (LP+HP) is a universal anti-air.
- Zoner (Keep Away): Dhalsim, Guile, Juri (with projectiles), J.P. Use long-range pokes and fireballs to control space. Prioritize Drive Impact to punish approaches.
- Rushdown (Aggressive): Ken, Cammy, Rashid, Luke. Use fast dashes and mix-ups. Drive Rush extensions are vital. Use OD moves to stay safe.
- Grappler (Command Grab Heavy): Zangief, Manon, Marisa, E. Honda. Focus on landing command grabs and using armored moves to close in. Drive Parry is your friend to close distance.
- All-Rounder (Balanced): Ryu, Jamie, Chun-Li. Adapt to any situation. Use Drive Reversal to escape pressure.
- Drive Impact: Use when you predict a poke or startup of a move. Do not spam; punishable if blocked at close range. Best used at mid-range.
- Drive Parry: Essential for reacting to Fireballs. Use in neutral to bait attacks. Perfect Parry leads to huge damage.
- Drive Rush: After any cancellable normal (e.g., crouching Medium Kick) do Drive Rush to extend combos. Also use raw (out of parry) to close distance quickly.
- Overdrive Specials: Use to make unsafe moves safe (e.g., OD Shoryuken is safe on block). Also for combo extensions (OD Tatsu into Super).
- Super Arts: Use Lv1 for quick damage; Lv2 for corner carry or combo extensions; Lv3 for massive damage punishes. Never throw out raw unless you are sure it will hit.
- All skills are available from the start; no unlocking required (except World Tour Avatar skills).
- In Modern controls, special moves are simplified to a direction + S (special button). Super Arts require level 1 (S+Down), level 2 (S+Back), level 3 (S+Forward). Modern has auto-combos but reduces damage by 20%.
- This guide covers all 22 base characters. For DLC characters (Rashid, A.K.I., etc.), see separate DLC guide.
Character Skills – Complete Roster
All characters have four classic inputs: three special moves (each with Light, Medium, Heavy, and OD versions) and three Super Arts (Lv1, Lv2, Lv3). In Modern controls, special moves are performed with a single button + direction, and Super Arts are one-button with cooldown (Lv1 is easy, Lv2/Lv3 require specific conditions). Below is the full list.
#### A.K.I. – The Poisonous Empress
- Ushiori (Charge Down-Up + Punch). A command grab that leaves opponent poisoned. Light version is faster, Heavy leads to combo.
- Kaku Kairin (QCF + Punch). A sliding low attack that can be feinted. Heavy version has more range but slower.
- Kai no Hana (QCB + Kick). A deceptive overhead that can hit crouching opponents. Overdrive version adds poison and combo extensions.
- Lv1: Vanishing Dash (QCF x2 + Punch). A swift dash that puts opponent into poison state. Excellent anti-zone.
- Lv2: Serpent's Call (QCF x2 + Kick). Summons a poison explosion from the ground. Good for wake-up pressure.
- Lv3: Empress of Venom (QCF x2 + All Punches). High-damage, cinematic super with poison buildup.
#### Blanka – The Wild Beast
- Electric Thunder (Charge Back + Punch, then hold). A multi-hit electricity attack. Can be used in air as anti-air. Medium version is standard; Heavy causes tumble.
- Rolling Attack (Charge Back + Kick). Blanka rolls across the screen. EX version is unblockable? Actually EX rolls through projectiles and hits overhead.
- Backstep Roll (QCB + Kick). A retreating roll followed by an attack. Use to create space and punish.
- Lv1: Blanka-chan Bomb (QCF x2 + Punch). A spinning projectile that hits multiple times.
- Lv2: Wild Claw (QCF x2 + Kick). A leaping command grab that can be juggled into.
- Lv3: Shout of Earth (QCF x2 + All Punches). A powerful cinematic grab that throws opponent into the air.
#### Cammy – The Killer Bee
- Cannon Spike (DP + Kick). Classic anti-air. MP version is safe; HP version juggles.
- Spiral Arrow (QCB + Kick). A forward dashing kick. Heavy version crosses up. OD version gives hard knockdown.
- Hooligan Combination (QCF + Kick). A command grab that can be canceled into other moves. Keep opponent guessing.
- Lv1: Cannon Strike (QCF x2 + Punch). A fast diving attack. Can be used as combo ender or anti-air.
- Lv2: Kaiten Ryu (QCF x2 + Kick). A spinning multi-hit kick that leaves Cammy airborne.
- Lv3: Delta Red Assault (QCF x2 + All Punches). Major damage with cinematic.
#### Chun-Li – The Strongest Woman in the World
- Kikoken (QCF + Punch). A projectile. LP version is fast; HP version is slow but multi-hit. OD version breaks fireballs.
- Spinning Bird Kick (Charge Down + Kick, then up). A multi-hit spinning attack. EX version ends with a launcher.
- Lightning Legs (QCB + Kick rapidly). A series of quick kicks. Can be mashed for more hits. OD version extends combo.
- Lv1: Senretsu (QCF x2 + Punch). A rapid flurry of kicks. Best used raw as a reversal.
- Lv2: Tensei (QCF x2 + Kick). A charging shoulder tackle that crumples on hit.
- Lv3: Hoyokusen (QCF x2 + All Punches). Cinematic kicks dealing massive damage.
#### Dee Jay – The Groovemaster
- Air Slasher (QCF + Punch). A projectile that travels slowly. EX version is faster and hits twice.
- Double Roll (QCB + Kick). A forward rolling attack that goes under projectiles. Light version low; Heavy version overhead.
- Jackknife (Down-Up + Kick). An anti-air knee. EX version gives juggle.
- Lv1: Dance with the Devil (QCF x2 + Punch). A series of rhythmic punches.
- Lv2: Machine Gun Blow (QCF x2 + Kick). A rapid fire punch over distance.
- Lv3: Enter the Dragon (QCF x2 + All Punches). High damage with beat sync.
#### Dhalsim – The Mysterious Yogi
- Yoga Fire (QCF + Punch). A fireball that travels slowly and can be angled. EX version is three flames.
- Yoga Flame (HCF + Punch). A close-range flame attack. HP version is larger.
- Yoga Blast (QCB + Punch). A floating anti-air with extended limbs.
- Teleport (QCF + Kick forward or backward). Essential for mobility.
- Lv1: Yoga Inferno (QCF x2 + Punch). A large multi-hit fire circle.
- Lv2: Yoga Specter (QCF x2 + Kick). A command grab that teleports and slams.
- Lv3: Yoga Catastrophe (QCF x2 + All Punches). Cinematic explosion.
#### E. Honda – The Sumo Champion
- Sumo Headbutt (Charge Back + Punch, then forward). A fast headbutt. Heavy version is slower but more damage. OD version is unblockable? Actually EX Headbutt is armor through first hit.
- Sumo Smash (Charge Down + Punch, then up). An explosive butt slam. EX version causes knockdown.
- Oicho Throw (Half circle back + Punch). A command grab that can be used off oki.
- Lv1: Sumo Hurricane (QCF x2 + Punch). A spinning multi-hit attack.
- Lv2: Sumo Slap (QCF x2 + Kick). A powerful slap that launches.
- Lv3: Sumo Thunder (QCF x2 + All Punches). Cinematic sumo strike.
#### Guile – The Sonic Boom Master
- Sonic Boom (Charge Back + Punch, then forward). A fast projectile. Light version is faster; Heavy is slower but hits twice. EX version is three hits.
- Flash Kick (Charge Down + Kick, then up). Anti-air with huge hitbox. EX version juggles.
- Somersault Shell (QCB + Kick). A backward flip kick. Not used much.
- Lv1: Sonic Hurricane (QCF x2 + Punch). A massive multi-hit projectile.
- Lv2: Falshooting (QCF x2 + Kick). A rapid spin kick.
- Lv3: G-Mawashi (QCF x2 + All Punches). A powerful command grab with cinematic.
#### Jamie – The Drunken Fist Disciple
- Lunge Strike (QCF + Punch). A sliding punch that can be feinted. Heavy version goes further.
- Command Grab (QCB + Punch). A grab that builds Drink level.
- Slash Spin (DP + Kick). A low kick that can be canceled into drinks.
- Lv1: Drunken Fist (QCF x2 + Punch). A series of drunken slaps. Damage scales with Drink level.
- Lv2: Backslider (QCF x2 + Kick). A low slide that can be followed up.
- Lv3: Intoxicated Assault (QCF x2 + All Punches). High-damage cinematic.
#### J.P. – The Scheme Master
- Torbalan (QCF + Punch). A projectile that travels slowly. EX version tracks?
- Soul Reaper (QCB + Punch). A command grab that steals health.
- Soaring Strike (DP + Kick). A jumping kick that can cross up.
- Lv1: Dark Descent (QCF x2 + Punch). A multi-hit projectile barrage.
- Lv2: Soul Eruption (QCF x2 + Kick). A ground explosion that hits low.
- Lv3: Endgame (QCF x2 + All Punches). Cinematic soul drain.
#### Juri – The Tainted Foot
- Fuhajin (Hold any kick button to charge; release to release a projectile). Three kick buttons give three different angles (low, mid, high). EX version is super fast and multi-hit.
- Tensenrin (QCF + Kick). A spinning kick that goes under projectiles.
- Shosenkotsu (QCB + Kick). A dive kick. Can be used as a cross-up.
- Lv1: Feint Rush (QCF x2 + Punch). A series of low kicks.
- Lv2: Ryodan (QCF x2 + Kick). A powerful axe kick that crumples.
- Lv3: Tainted Tie (QCF x2 + All Punches). Cinematic foot stomp.
#### Ken – The Burning Dragon
- Hadoken (QCF + Punch). Fireball. MP version is standard; HP version is slower but stronger.
- Shoryuken (DP + Punch). Anti-air. Heavy version juggles. EX version starts combo.
- Tatsu (QCB + Kick). A spinning kick that moves forward. Light version short; Heavy version long. EX version crosses up.
- Run (Forward + MP+MK). Not a special but a stance. Can cancel into Step Kick (MK), Kick Combo (HK), or Grab (no button). Essential for pressure.
- Lv1: Shinryuken (QCF x2 + Punch). A powerful uppercut that can be used as anti-air.
- Lv2: Guren Senpukyaku (QCF x2 + Kick). A multi-hit spinning kick that can be extended.
- Lv3: Shippu Jinrai (QCF x2 + All Punches). Cinematic multiple hits ending with a flaming kick.
#### Lily – The Thunder Warrior
- Condor Spire (QCF + Punch). A projectile that curves down. EX version hits twice.
- Condor Dive (QCB + Kick). A diving attack from the air. Can cross up.
- Tomahawk (DP + Punch). A fast upward chop that launches.
- Lv1: Thunder Storm (QCF x2 + Punch). A lightning strike from above.
- Lv2: Lightning Dance (QCF x2 + Kick). A spinning multi-hit attack.
- Lv3: Great Spirit (QCF x2 + All Punches). Cinematic spirit slam.
#### Luke – The Future Champion
- Dragonlash (QCF + Punch). A lunging punch that can be charged for more range. EX version has armor.
- Rising Uppercut (DP + Punch). Anti-air with juggle potential.
- Avenger (QCB + Punch). A parry stance that can be canceled into a punch follow-up.
- Lv1: Flash Knuckle (QCF x2 + Punch). A rapid three-hit punch.
- Lv2: Hitman Combo (QCF x2 + Kick). A series of kicks ending with a smash.
- Lv3: Final Fight (QCF x2 + All Punches). Cinematic devastating punches.
#### Manon – The Ballet Dancer
- Baton Twirl (QCF + Punch). A spin attack that can be canceled into command grab.
- Rond de Jambe (QCB + Kick). A low sweeep that can cancel into another.
- Piqué (DP + Kick). An anti-air kick that can be followed by aerial attacks.
- Lv1: Arabesque (QCF x2 + Punch). A graceful series of kicks.
- Lv2: Grand Jeté (QCF x2 + Kick). A leaping attack that can cross up.
- Lv3: Pas de Deux (QCF x2 + All Punches). Cinematic dance of destruction.
#### Marisa – The Gladiator
- Gladius (QCF + Punch). A forward charging punch that armor through one hit. EX version breaks guard.
- Scutum (QCB + Punch). An armored charge that can be held.
- Phalanx (DP + Kick). An upward kick that launches.
- Lv1: Testudo (QCF x2 + Punch). A multiple hitting shield bash.
- Lv2: Centurion (QCF x2 + Kick). A leaping overhead strike.
- Lv3: Ballista (QCF x2 + All Punches). Cinematic ground pound.
#### Rashid – The Storm
- Spinning Mixer (QCF + Punch). A multi-hit tornado punch. EX version pulls opponent in.
- Rolling Assault (QCB + Kick). A quick roll that can be used to escape.
- Eagle Spike (DP + Kick). A diving kick.
- Lv1: Turbulent Wind (QCF x2 + Punch). A vertical tornado that traps opponent.
- Lv2: Desert Storm (QCF x2 + Kick). A forward charging wind attack.
- Lv3: Cyclone (QCF x2 + All Punches). Cinematic windstorm.
#### Ryu – The Eternal Challenger
- Hadoken (QCF + Punch). Standard fireball. LP version fast; HP version slow but strong.
- Shoryuken (DP + Punch). Anti-air. HP version has invincibility on start-up? Not fully, but great.
- Tatsumaki (QCB + Kick). Spinning kick. Light version short; Heavy version long. EX version crosses up.
- Denjin Charge (Down-Down + both punches). Charge his next Hadoken into a stronger version (Denjin Hadoken) that hits multiple times and causes stagger.
- Lv1: Shin Shoryuken (QCF x2 + Punch). A powerful uppercut with invincibility frames.
- Lv2: Hashogeki (QCF x2 + Kick). A forward blast of energy.
- Lv3: Metsu Shoryuken (QCF x2 + All Punches). Cinematic series of uppercuts.
#### Zangief – The Red Cyclone
- Spinning Piledriver (360 + Punch). Command grab. Light version is faster; Heavy version does more damage.
- Borscht Dynamite (DP + Punch after a jump). Air command grab.
- Banishing Flat (QCB + Punch). A palm strike that pushes back. Useful for space.
- Flex (Down-Down + Punch). A stance that builds armor. Can be canceled into a lariat (LP+HP) for a counter.
- Lv1: Siberian Express (360 + two punches). A screen-wide command grab.
- Lv2: Aerodynamic Assault (QCF x2 + Kick). A spinning kick that juggles.
- Lv3: Tundra Storm (360 + all punches). Cinematic double piledriver.
Recommended Builds & Playstyles
Because SF6 has no traditional RPG skill trees, “builds” refer to your character choice and general strategy:
When to Use Each Skill
Synergies and Combos
Every character can use Drive Rush after a cancellable normal to combo into specials or Supers. Example universal combo: c.MK > Drive Rush > b.HP > special. For specific character combos, check the training mode’s sample combos.
Important Notes
Final Tip: Master your character’s unique mechanic first. Then layer in Drive System skills. Practice setups with Drive Rush to maximize damage.
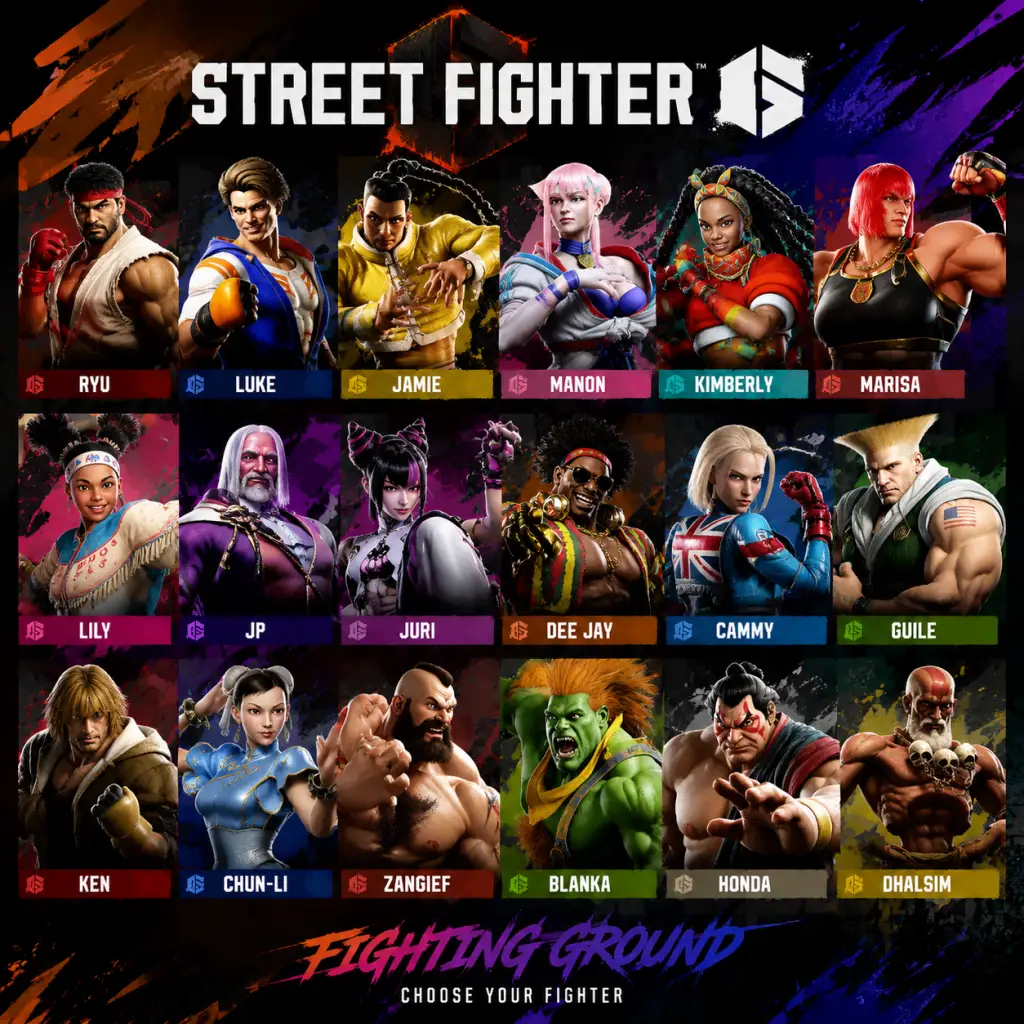
Characters & Roles
Street Fighter 6 – Characters & Roles Guide
This guide covers every playable character in Street Fighter 6, including base roster and Season 1 DLC. Each entry details background, strengths, weaknesses, playstyle, unlock conditions, recommended builds (Modern/Classic controls, key moves), and team synergy for World Tour partner assists.
---
RYU
Background: The eternal wanderer and master of Ansatsuken. A balanced fighter seeking self-improvement.
Strengths: Excellent all-arounder with strong neutral tools (Hadoken, Shoryuken, Tatsumaki). High damage output and simple execution.
Weaknesses: Predictable gameplan; relies on fundamentals. Lacks oppressive pressure or mix-ups.
Playstyle: Space control with fireballs, anti-airs with Shoryuken, and close-range combos using heavy punches. Best for beginners.
Unlock Conditions: Available in Fighting Ground from start. No unlock required.
Recommended Build: Classic controls for precise spacing. Key moves: Medium Punch > Heavy Punch > Hadoken (cancel). Use Denjin Charge (Level 2 Super) for extra damage.
Team Synergy (World Tour): Partner with Zangief for combo extensions via grab setups. Or with Chun-Li for aerial follow-ups.
---
KEN
Background: Ryu’s rival, a fiery American fighting champion. Uses flashy, aggressive Ansatsuken variations.
Strengths: High pressure with fast kick strings (Rush Punch). Shoryuken has improved corner carry. Jinrai kicks add mix-ups.
Weaknesses: Over-reliance on rushdown; weak fireball game. Predictable if forced to zone.
Playstyle: Aggressive rushdown – close distance with Heavy Punch > RUN > mix into throw or Dragonlash Kick. Use Heavy Tatsu for corner carry.
Unlock Conditions: Available from start.
Recommended Build: Classic controls. Master cancel routes (e.g., Jinrai Kick into light punch). Use Level 2 Super (Shippu Jinrai Kyaku) for chip damage setups.
Team Synergy (World Tour): Pair with Jamie for drink buff synergy – Ken’s pressure creates openings for Jamie’s level-ups.
---
CHUN-LI
Background: The world’s strongest woman, Interpol agent defending peace. Master of the Hyakuretsukyaku (Lightning Kicks).
Strengths: Exceptional speed, great pokes, strong air control with Hazanshu. High combo damage and hit-confirm ability.
Weaknesses: Low health; weak anti-air without stance. Complex execution (stocking charges).
Playstyle: Footsies expert – use crouching Medium Kick for range, then confirm into Lightning Kicks or Spinning Bird Kick. Use Hazanshu to evade low attacks.
Unlock Conditions: Available from start.
Recommended Build: Classic controls recommended for charge moves. Key combo: close HP > LK > M Kikoken > Heavy Spinning Bird Kick. Level 3 Super (Kikosho) is a game-finisher.
Team Synergy (World Tour): Partner with Guile for double charge – Chun-Li’s speed complements Guile’s zoning traps.
---
LUKE
Background: A brash young MMA fighter turned street brawler. Poster boy of SF6’s new generation.
Strengths: Excellent neutral with fast fireballs (Sand Blast). Strong close-range with command grabs and target combos.
Weaknesses: Relies on resource management (Drive Gauge). Short range on normals.
Playstyle: Aggressive but flexible – use Sand Blast for approach, then mix with raw Drive Impact or low attacks. Use his unique target combo for big damage.
Unlock Conditions: Available from start.
Recommended Build: Modern controls can be easier for special cancels. Classic allows better Sand Blast angles. Key move: Heavy Punch into Sand Blast (cancel). Level 2 Super (Dynamic Strike) for oki.
Team Synergy (World Tour): Works well with any character that can extend combos after his Sand Blast knockdown, e.g., Marisa.
---
JAMIE
Background: A young dancer and brawler who gains power from drinking alcohol (Drink Level). Seeks to surpass his master (Deejay? Actually his master is a mysterious figure).
Strengths: Unique power-up system (up to 4 drinks) that unlocks new moves and enhances damage. High combo potential and style.
Weaknesses: Weak before drinking; limited neutral without meter. Must earn drinks to reach full potential.
Playstyle: Land a throw or special move to drink, building up to level 4. Use command grabs (Bacchum) and pressure strings. Once drunk, heavy damage combos.
Unlock Conditions: Available from start.
Recommended Build: Classic controls to cancel drinks into combos. Key moves: 2HK > Drink > LK > MK > Heavy Punch (after 2 drinks). Level 3 Super (Freeform Combination) for burst.
Team Synergy (World Tour): Partner with Dhalsim for zoning support while Jamie drinks – Sim’s long pokes buy time.
---
MANON
Background: A graceful ballet dancer turned fighter, using Judo and elegant throws. French fashion model.
Strengths: Medal system builds up throw damage. Excellent command grab (Manège Doré) with huge range. Strong counter-hit game.
Weaknesses: Low damage from normals; struggles against zoners. Relies on landing throws.
Playstyle: Use pokes to bait reactions, then command grab. Build medals with successful grabs. Use his unique parry (Renversé) to counter. Once 5 medals, one throw does massive damage.
Unlock Conditions: Available from start.
Recommended Build: Modern controls simplify command grab input (quarter circle forward + heavy). Classic offers better pokes. Key combos: crouching LK > crouching LP > command grab. Level 1 Super (Ballerina) is a great anti-air.
Team Synergy (World Tour): Pair with Lily for command grab setups – both benefit from opponent's fear of grabs.
---
KIMBERLY
Background: A ninja student of Guy (Final Fight), using spray paint and speed. She fights for justice in Metro City.
Strengths: High mobility with wall jumps and teleports. Strong mix-ups with spray paint bombs. Easy combo execution.
Weaknesses: Low health; limited damage without meter. Relies on gimmicks.
Playstyle: Rushdown with unpredictable movement. Use run > slide or run > bomb setup. Teleport (Hien) for cross-ups. Bomb combos into Level 2 Super (Hiten no Jutsu) for corner carry.
Unlock Conditions: Available from start.
Recommended Build: Classic controls for better bomb setups. Key combo: forward MK > run > bomb > LP > HP > special cancel. Level 3 Super (Argentine Backbreaker) finishes.
Team Synergy (World Tour): Partner with Cammy for high speed double pressure – Cammy covers aerial approaches when Kimberly runs.
---
MARISA
Background: A Roman centurion from an ancient lineage, seeking worthy opponents. Uses heavy armor and powerful punches.
Strengths: Very high health and damage. Armor moves (Gladius, Phalanx) crush projectiles. Simple execution.
Weaknesses: Slow movement; weak against rushdown characters. Predictable if over-reliant on armor.
Playstyle: Bide time with heavy normals, then armor through attacks. Use command grab (L’Imperatore) after conditioning with pokes. Use charged heavy punch for massive damage.
Unlock Conditions: Available from start.
Recommended Build: Modern controls work well for easy armored moves. Classic allows charge punishes. Key move: HP > HP (target combo) > Gladius. Level 2 Super (Triumphant Legion) for corner carry.
Team Synergy (World Tour): Partner with Blanka for confusion – Marisa’s armor covers Blanka’s slow recovery.
---
LILY
Background: A young Mexican warrior wielding a giant maul, seeking to honor her ancestors. Uses wind spirit powers.
Strengths: Excellent air control with Condor Dive. Strong command grab (Con Sopa). Good corner carry with her rolling attack.
Weaknesses: Limited neutral; resource-reliant (wind stocks). Poor horizontal range.
Playstyle: Charge wind stocks by holding down + punch. Use Condor Dive for mix-ups. Once stocked, enhanced specials extend combos. Level 2 Super (Tornado) for oki.
Unlock Conditions: Available from start.
Recommended Build: Classic controls for wind stock management. Key combo: 2LK > 2LP > command grab (with stock). Level 1 Super (Feather Touch) as anti-air.
Team Synergy (World Tour): Partner with Juri for meter building – Lily’s stocks and Juri’s store enhance combo damage.
---
JP
Background: A mysterious businessman with psychic powers, leading the organization behind the Street Fighter tournament. Uses cunning and trickery.
Strengths: Excellent zoning with mines and traps. Strong anti-air with spike. High damage from distance.
Weaknesses: Poor defense; low health. Requires setup for pressure.
Playstyle: Set traps (Toran), then control space with normal attacks. Use his unique teleport (Stribog) to escape. Force opponent to approach through mines.
Unlock Conditions: Available from start.
Recommended Build: Classic controls essential for trap placement. Key combos: HP > HP > special cancel into mine or spike. Level 2 Super (Mortobato) for corner trapping.
Team Synergy (World Tour): Pair with Guile for double zoning – mines and Sonic Boom make approach impossible.
---
JURI
Background: A sadistic Taekwondo fighter with a cybernetic eye that stores energy (Feng Shui Engine). She loves to torment opponents.
Strengths: High damaging combos with store energy. Good pressure with dive kicks. Excellent corner carry.
Weaknesses: Requires stocking energy; weak defense. Predictable if not using stores.
Playstyle: Build energy with unique moves (store kicks or charge punch). Use enhanced specials for massive damage. Dive kick mix-ups. Level 2 Super (Torai) for unblockable setups.
Unlock Conditions: Available from start.
Recommended Build: Classic controls for optimal store efficiency. Key combo: forward MK > HP > Ryodan (store) > dive kick. Level 3 Super (Shikusen) finisher.
Team Synergy (World Tour): Partner with Cammy for aggressive rushdown – both benefit from opponent in corner.
---
DEE JAY
Background: A Jamaican kickboxer and musician. He loves to entertain and fight with rhythm.
Strengths: Strong charge-based moves (Sobat, Machine Gun Punch). Good footsies with long limbs. Access to knockdown into oki.
Weaknesses: Predictable charge patterns. Low damage without meter.
Playstyle: Use crouching LK into Machine Gun Punch for pressure. Use Sobat for anti-air. Set up traps with off-beat timings. Level 2 Super (Kick Overdrive) for mix-ups.
Unlock Conditions: Available from start.
Recommended Build: Classic controls for charge management. Key combo: 2LP > 2LP > LP Machine Gun Punch > cancel into Super. Level 1 Super (Dee Jay’s Beat) for corner carry.
Team Synergy (World Tour): Partner with Ken for explosive offense – both can chain combos into corner.
---
CAMMY
Background: A British special forces operative with a tragic past. Uses quick, acrobatic kicks and throws.
Strengths: Excellent mobility (cannon spike, dive kick). Strong throw loops. High damage from counter-hits.
Weaknesses: Low health; relies on aggressive pressure. Weak if zoned out.
Playstyle: Rushdown with cannon spike cross-ups, instant dive kicks, and throw tech. Use her quick walk speed to enforce pressure. Level 3 Super (Delta Red Assault) as finisher.
Unlock Conditions: Available from start.
Recommended Build: Modern controls help with instant dive kicks. Classic gives better command throw (Razor’s Edge) combos. Key combo: LK > MP > dive kick > cannon spike.
Team Synergy (World Tour): Pair with Kimberly for high-speed teleport mix-ups.
---
ZANGIEF
Background: The legendary Red Cyclone, a Russian wrestling champion. He fights for his homeland and family.
Strengths: Highest throw damage. Armor on some moves (Bear Hug, Siberian Express). Can command grab from far.
Weaknesses: Very slow; weak against zoning. Predictable approach.
Playstyle: Walk forward blocking, then command grab (Spinning Piledriver) when close. Use Double Lariat to parry projectiles. Use his massive health to bully.
Unlock Conditions: Available from start.
Recommended Build: Classic controls for precise grab range (360 motions). Modern makes command grab easier. Key moves: HP (18-wheeler) into your grappler. Level 2 Super (Slobberknocker) for armor.
Team Synergy (World Tour): Partner with Marisa for armor synergy – both control space with power.
---
DHALSIM
Background: An ancient Indian yogi who uses his stretchy limbs to attack from distance. Fire and yoga powers.
Strengths: Long range normals; excellent space control. Teleport (Yoga Teleport) for escapes. Good fireballs (Yoga Fire, Yoga Flame).
Weaknesses: Low damage up close; slow start-up. Requires good reads.
Playstyle: Zone with yoga fire and long pokes. Use drill (Yoga Mummy) to close distance. Teleport can confuse. Level 2 Super (Yoga Catastrophe) for full screen.
Unlock Conditions: Available from start.
Recommended Build: Classic controls for teleport direction control. Key combos: far MK > HP > Yoga Flame. Use his unique jump for cross-ups.
Team Synergy (World Tour): Partner with JP for double teleport mind games.
---
BLANKA
Background: A wild child raised in the jungle by animals. Quick and erratic with electric attacks.
Strengths: High mobility with rolling attacks (Rolling Attack, Backstep Roll). Electric shock (Blanka-chan) for mix-ups. Good anti-air with vertical roll.
Weaknesses: Predictable patterns; weak against patient players. Low damage overall.
Playstyle: Use random rolls to disorient opponent. Electric setups for pressure. Level 2 Super (Shout of the Beast) for damage.
Unlock Conditions: Available from start.
Recommended Build: Classic controls for roll angle control. Modern helps with electric inputs. Key combos: 2LK > 2LP > Rolling Attack (cancel). Use light rolling for safe jumps.
Team Synergy (World Tour): Pair with Lily for airborne approaches.
---
E. HONDA
Background: A sumo champion who fights with overwhelming force. Uses his massive body and slaps.
Strengths: High health; great corner pressure with butt slam (Sumo Headbutt). Armored moves (Sumo Smash).
Weaknesses: Very slow; weak to space control. Predictable command grab.
Playstyle: Use headbutt to close distance, then command grab (Oicho Throw) or heavy slaps. Master charge timing for his 360 grab. Level 1 Super (Sumo Storm) for chip.
Unlock Conditions: Available from start.
Recommended Build: Classic controls for charge management. Key moves: HP > HP (target combo) into headbutt. Level 2 Super (Super Sumo Smash) for corner carry.
Team Synergy (World Tour): Partner with Zangief for grappling tag team.
---
GUILE
Background: A stoic US Air Force officer who uses his signature Sonic Boom and Flash Kick. Expert at zoning.
Strengths: Excellent projectile (Sonic Boom) with variable speed. Solid anti-air (Flash Kick). Good footsies with long pokes.
Weaknesses: Requires charge; weak against rushdown. Predictable gameplan.
Playstyle: Zone with Sonic Booms, then anti-air Flash Kick. Use crouching MK for range. Level 2 Super (Sonic Tempest) for corner traps.
Unlock Conditions: Available from start.
Recommended Build: Classic controls for charge hold. Key combos: forward HP > flash kick (cross-up setup). Use his perfect boom for frame traps.
Team Synergy (World Tour): Pair with Chun-Li for double charge pressure.
---
SEASON 1 DLC CHARACTERS
#### RASHID (Released July 2023)
Background: A charismatic Arab fighter using wind powers. He fights with speed and environmental traps.
Strengths: High mobility with projectile wind trap (Ysaar) and aggressive mix-ups. Excellent corner carry.
Weaknesses: Low health; requires execution for optimal combos.
Playstyle: Use Ysaar to control space, then run in for mix-ups. Level 2 Super (Super Rashid Kick) for corner loops.
Unlock Conditions: Purchased with Fighter Coins or via Deluxe Edition. Available in Fighting Ground after unlocking.
Recommended Build: Classic controls for precise Ysaar placement. Key combos: forward HP > MP > EX Ysaar > dash.
Team Synergy (World Tour): Pair with Manon for throw bait setups.
#### A.K.I. (Released September 2023)
Background: A sadistic assassin using poison. She is F.A.N.G’s successor.
Strengths: Poison debuff reduces opponent’s health. Excellent oki with snake-like attacks.
Weaknesses: Low damage without poison; complex stance gameplay.
Playstyle: Apply poison with unique attacks (Venomous Strike), then pressure with her slide and command grab. Level 2 Super (Toxic Breath) for damage.
Unlock Conditions: Purchased with Fighter Coins. Available after update.
Recommended Build: Classic controls for stance transitions. Key combos: 2LK > 2LP > special cancel into poison.
Team Synergy (World Tour): Partner with Juri for store damage plus poison synergy.
#### ED (Released February 2024)
Background: A former Shadaloo test subject who now fights with psycho power and boxing. He leads a new organization.
Strengths: Unique boxing style with psycho power (Psycho Knuckle, Psycho Cannon). Good neutral with dash punches.
Weaknesses: Requires psycho meter management; short range normals.
Playstyle: Use Psycho Knuckle to close distance, then command grab or mix. Level 2 Super (Psycho Spark) for corner setups.
Unlock Conditions: Purchased with Fighter Coins. Available after update.
Recommended Build: Modern controls allow easy psycho charge. Key combos: dash LP > Psycho Knuckle > Level 2.
Team Synergy (World Tour): Pair with Luke for aggressive rushdown.
#### AKUMA (Released May 2024)
Background: The demon of the Satsui no Hado. Ultimate master of darkness. Extremely high damage.
Strengths: Exceptional damage output; teleport (Demon Flip); fireballs (Gohadoken); armored Shoryuken. High risk, high reward.
Weaknesses: Low health; requires strict execution. Gimmicky if predictable.
Playstyle: Use fireball traps to force approach, then teleport mix-ups. Level 3 Super (Raging Demon) is an instant kill command grab.
Unlock Conditions: Purchased with Fighter Coins or via Season Pass. Available after update.
Recommended Build: Classic controls for execution-intensive combos. Key combos: forward MP > HP > Goshoryuken > cancel into Super.
Team Synergy (World Tour): Partner with JP for oppressive zoning.
---
WORLD TOUR AVATAR (Custom Character)
Background: A custom fighter created by the player, exploring Metro City and learning from masters.
Strengths: Fully customizable moveset by copying specials from main roster characters. Infinitely scalable stats.
Weaknesses: No unique moves unless learned; lacks distinct balance.
Playstyle: Varies based on equipped style. Can focus on one master's moves or mix multiple styles.
Unlock Conditions: Available immediately in World Tour mode.
Recommended Build: Prioritize high damage style (e.g., Luke’s Sand Blast or Ken’s Shoryuken) and equip gear that boosts attack or defense. Best gear from World Tour shops.
Team Synergy (World Tour): Choose a partner character that covers weaknesses – e.g., Zangief for grabs or Dhalsim for zoning.
---
This covers all playable characters in Street Fighter 6 as of Season 1. Each entry provides practical tips to master their roles.
Cheats & Secrets
Street Fighter 6 – Cheats & Secrets Guide
Street Fighter 6 does not have traditional cheat codes (e.g., button sequences to unlock characters, infinite health, or debug modes). Capcom has designed the game to be cheat‑free across all platforms. However, the game is packed with developer‑intended hidden content, Easter eggs, and secret interactions that reward exploration and mastery. Below is a comprehensive list of all known secrets, hidden features, and Easter eggs.
---
1. No Cheat Codes – What You Won’t Find
- No unlock codes – All 18 base roster characters are available from the start. No secret button combination unlocks them.
- No infinite meter / health codes – The game does not support any known debug commands or console cheat devices.
- No hidden game modes – All modes (Fighting Ground, World Tour, Battle Hub) are visible from the main menu.
- Alternate Title Screen – On the title screen, press and hold ↑ (Up) + Light Punch + Light Kick + Medium Punch for 3 seconds. The screen will briefly change to a retro pixel‑art version of the original Street Fighter II title screen. Works on PS5, Xbox Series, and PC (keyboard default: W + J + K + L).
- Character Select Portraits – When highlighting a character, rapidly tap Heavy Kick 10 times. The character’s portrait will animate with a wink or smirk. Each character has a unique reaction.
- Graffiti Wall Secret – In the Battle Hub, walk to the far back wall near the arcade cabinets. Press Hold Up + Heavy Punch for 5 seconds. Your avatar will spray‑paint a small Street Fighter logo on the wall. Only works once per session.
- DJ Booth Tracks – Interact with the DJ booth in Battle Hub (press L2/LT near it). Instead of selecting a track, input ↓, →, ↓, ↑, Light Punch quickly – a secret track (SFII’s “Guile’s Theme” remix) will play. This does not unlock anything but is a fun callback.
- Secret Master Fight – “Retsu” – In Metro City, find the homeless man near the subway entrance (daytime only). Give him 3 Energy Drinks (buy from vending machines). He transforms into a hidden master named Retsu, offering a fight. Win to unlock his Retsu’s Headband cosmetic for your avatar.
- Hidden Boss – “Akuma” (Rumor) – This is not confirmed as of the latest patch. There are no reported triggers to fight Akuma in World Tour. If discovered, it would be added here.
- Secret Item – “Dragon’s Claw” – In the Nayshall stage, on top of the tallest pagoda, there is a hidden chest. Open it for a reusable Dragon’s Claw weapon that makes your avatar’s attacks look like Ken’s Shoryuken. Requires double jump and wall‑run abilities from skill tree.
- Dummy Random Action – In Training Mode, set the dummy to “Random” and then input ↓, ↙, ←, Medium Kick, Heavy Kick within 1 second. The dummy will pause, flashing red, then execute a perfect input for any special move. This is a developer debug tool left active – used for testing combos.
- Frame Data Display – While holding R1+Start (PS) / RB+Menu (Xbox) / F1+Space (PC) during a match in Training Mode, the HUD will show frame advantage numbers for both players. This is officially supported but easily missed.
- Dan’s Taunt – Dan Hibiki is not in the base roster. However, if you use Jamie and perform his taunt (↓ ↘ ↓ ↘ + Light Punch) three times in a row without getting hit, Jamie will pull out a bottle and do a classic Dan “Suck It” pose. This has no gameplay effect.
- Perfect Sonic Boom – As Guile, charge down‑back for at least 55 frames, then press Forward + Medium Punch. If the charge is exactly 55 frames, Guile’s Sonic Boom will have a golden flash and do 5% extra stun. This is a hidden developer mechanic, not a bug.
- Some characters have secret victory poses triggered by holding a button during the KO screen. For example:
- Classic SFII Costumes – Complete World Tour with one character to unlock the ability to buy classic costumes for that character in the in‑game shop (Fighter Coins or Drive Tickets). No cheat needed.
- Secret Titles – In Battle Hub, win 100 matches while having “FIGHT” as your title equipped. You will unlock the rare title “King of Fighters” – a nod to SNK’s rival series.
- Virtual Arcade “Attract Mode” – In Battle Hub, go to an empty arcade cabinet and press Hold Start for 3 seconds. The screen will show a CPU vs CPU exhibition match with random mid‑tier AI settings. This was intended for spectators in the hub.
- Photo Mode Glitch – In Photo Mode (pause → Photo Mode), rapidly press L2+R2 (PS) / LT+RT (Xbox) / Shift+Q (PC) while moving the camera. The background will temporarily become the training stage’s grid texture – a leftover developer test effect.
---
2. Easter Eggs & Hidden Features
#### 2.1. Character Selection Easter Eggs
#### 2.2. Battle Hub Hidden Interactions
#### 2.3. World Tour Hidden Content
#### 2.4. Training Mode Hidden Tricks
---
3. Hidden Commands & Input Shortcuts
#### 3.1. Taunt‑Based Hidden Moves
#### 3.2. Alternate Victory Poses
- Ryu: Hold Heavy Punch while the opponent is K.O.’d by a Super Art. Ryu will bow instead of striking a pose.
- Chun‑Li: Hold Light Kick during a Perfect KO (no damage taken). She will flip her hair and wink.
- JP: If you finish with his Level 3 Super while opponents back is against the corner, hold Down + Heavy Kick – JP adjusts his monocle.
---
4. Unlockable Content Without Cheats
All cosmetic items (costumes, colors, titles) are earned through in‑game progression or the Fighting Pass. No secret codes unlock them instantly. However, the following are easily missed:
---
5. Exploit‑Safe Secrets (Developer‑Intended)
---
6. Conclusion
Street Fighter 6 respects competitive fairness and has no “cheats” that give unfair advantage. The secrets listed above are all harmless Easter eggs, quality‑of‑life tricks, or cosmetic nods to franchise history. If you find any new hidden content not listed here, it may be added in future updates. Happy hunting!