Subnautica
# Game Introduction ## Overview - **Genre:** Survival, Open World, Sci-Fi, Exploration, Action-Adventure - **Developer:** Unknown Worlds Entertainment - **Publisher:** Unknown Worlds Entertainment (self-published) - **Release Timeline:** Early Access (December 2014), Full Release (January 2018 on P...
Download & Installation
Subnautica Download & Installation Guide
This guide covers downloading and installing Subnautica (the original 2018 survival game) on all officially supported platforms: PC (Steam, Epic Games Store), PlayStation 4/5, Xbox One/Series X|S, and Nintendo Switch. Mobile versions are not officially available; cloud streaming services like Xbox Cloud Gaming may offer it, but that is beyond the scope of this guide.
---
Platform Availability & Required Accounts
| Platform | Store / Service | Account Required |
|---|---|---|
| PC (Windows) | Steam | Steam account |
| PC (Windows) | Epic Games Store | Epic Games account |
| PlayStation 4 / 5 | PlayStation Store | PlayStation Network account |
| Xbox One / Series X\ | S | Microsoft Store |
| Nintendo Switch | Nintendo eShop | Nintendo Account |
System Requirements (PC)
Minimum
- OS: Windows 7 64-bit
- CPU: Intel Haswell 2-core / 3.2 GHz equivalent
- RAM: 4 GB
- GPU: Intel HD 4600 or equivalent (DX11 capable)
- Storage: 5 GB available space (HDD)
- DirectX: Version 11
- OS: Windows 10 64-bit
- CPU: Intel Core i5 or AMD equivalent
- RAM: 8 GB
- GPU: NVIDIA GeForce GTX 550 Ti or better
- Storage: 10 GB available space (SSD recommended)
- DirectX: Version 11
Recommended
Note: The actual download size is ~3–4 GB; extra space is for saves and future updates. An SSD significantly reduces loading times in the large underwater world.
---
Installation Steps per Platform
1. PC – Steam
1. Launch the Steam client (download from [store.steampowered.com](https://store.steampowered.com) if not installed).
2. Log in to your Steam account.
3. Click the Store tab and search for "Subnautica."
4. Select the game (ensure it’s the original, not "Below Zero").
5. Click Add to Cart then proceed to purchase (or install if already owned).
6. After purchase, click Install from the game’s library page.
7. Choose your install location (default: `C:\Program Files (x86)\Steam\steamapps\common\Subnautica`).
8. Wait for the download and installation to complete.
9. Once finished, click Play.
2. PC – Epic Games Store
1. Download and install the Epic Games Launcher from [epicgames.com](https://www.epicgames.com).
2. Log in to your Epic Games account.
3. Go to the Store tab and search for "Subnautica."
4. Click Get (or Buy if not free).
5. The game will be added to your library. Click Library and find Subnautica.
6. Click the Install button, choose your install directory, and confirm.
7. Wait for the download. The launcher will handle installation automatically.
8. Click Launch when ready.
3. PlayStation 4 / 5
1. Turn on your console and sign in to your PlayStation Network account.
2. Go to the PlayStation Store.
3. Search for “Subnautica.”
4. Select the game (confirm it’s the PS4 version; PS5 runs via backward compatibility).
5. Click Download (or Buy first if not owned).
6. The console will download and install the game automatically.
7. Once complete, you can launch from the home screen or your library.
4. Xbox One / Series X|S
1. Power on your console and sign in to your Xbox / Microsoft account.
2. Open the Microsoft Store (or Store tile).
3. Search for “Subnautica.”
4. Select the game (it will be the Xbox One version, playable on Series X|S via backward compatibility).
5. Click Install (or Buy first).
6. The download and installation will run in the background.
7. Launch from My games & apps or the home screen.
5. Nintendo Switch
1. Turn on your Switch and sign in to your Nintendo Account.
2. Open the Nintendo eShop from the home menu.
3. Search for “Subnautica.”
4. Select the game, then choose Proceed to Purchase (or Download if already purchased).
5. Confirm the download size (~3.3 GB).
6. The game will download and install automatically. You can check progress under the Download status on the home menu.
7. Once done, select the game icon to launch.
---
First Launch Setup
When you first start Subnautica, you may need to:
1. Select language (if prompted).
2. Adjust graphics settings – the game will attempt to auto-detect optimal settings. For PC, you can change them later in Options > Graphics.
3. Mute/disable any unwanted controller or keyboard mappings.
4. Begin a new game – the opening cinematic triggers the survival mode.
5. Save immediately after the first few minutes (the game has no autosave; manually save via the pause menu).
---
Common Installation Errors & Fixes
| Error / Issue | Cause | Fix |
|---|---|---|
| “Missing MSVCP140.dll” | Microsoft Visual C++ Redistributable not installed. | Install the latest VC++ package from Microsoft (both x86 and x64). |
| “Failed to initialize renderer” | Outdated or incompatible graphics drivers. | Update your GPU drivers (NVIDIA, AMD, Intel). |
| “Steam error: Disk write error” | Insufficient permissions or antivirus interference. | Run Steam as administrator; add Steam/Epic to antivirus exclusions. |
| “Corrupted game files” | Interrupted download or malware. | On Steam: right-click Subnautica > Properties > Local Files > Verify integrity of game files. On Epic: click the three dots next to the game > Verify. |
| “Black screen on launch” | Conflict with overlays (Discord, Nvidia), or ini file corruption. | Disable overlays, delete `options.ini` (located in `%appdata%\..\LocalLow\Unknown Worlds\Subnautica`), then restart. |
| “Not enough storage” | Insufficient disk space. | Free up space or install to a different drive. Minimum 5 GB free, but 10 GB recommended. |
| Console: “Installation stopped” | Network issue or corrupt cache. | Restart the console, clear cache (for PS4: safe mode > Rebuild Database; for Xbox: Hold power button until fully off, then unplug 30 sec). |
Post-Installation Verification
To ensure the game is correctly installed and ready to play:
1. Check file integrity (PC only) using the platform’s verify feature (see above).
2. Verify the build version – launch the game and look at the main menu’s bottom-left corner (e.g., `Build 68598`). Compare to the latest on the official Unknown Worlds patch notes.
3. Test basic movement – start a new game, swim around, and open the inventory without crashes.
4. Check save/load functionality – press Escape, select Save, then reload.
5. Update drivers if you experience graphical glitches or low frame rates.
---
Additional Tips
- Back up saves regularly (PC: `%appdata%\..\LocalLow\Unknown Worlds\Subnautica\Subnautica_Data`).
- Disable cloud saves only if you encounter sync conflicts.
- Install on an SSD for faster terrain streaming and fewer pop-in issues.
- Try experimental branch (Steam only) for upcoming fixes: right-click game > Properties > Betas > select `experimental`.
---
Guide last updated: September 2023. Always check the official store pages for the most recent system requirements and patches.
Game Introduction
Game Introduction
Overview
- Genre: Survival, Open World, Sci-Fi, Exploration, Action-Adventure
- Developer: Unknown Worlds Entertainment
- Publisher: Unknown Worlds Entertainment (self-published)
- Release Timeline: Early Access (December 2014), Full Release (January 2018 on PC, December 2018 on consoles)
- Platforms: Windows, macOS, PlayStation 4, PlayStation 5 (via backward compatibility), Xbox One, Xbox Series X|S, Nintendo Switch
- Planet 4546B: A water world with diverse biomes ranging from sunlit shallow reefs to pitch-black abyssal trenches and volcanic lava zones.
- Key biomes: Safe Shallows, Kelp Forest, Grassy Plateaus, Mushroom Forest, Blood Kelp Zone, Lost River, Inactive Lava Zone, Lava Lakes.
- The environment is alive with alien flora and fauna, both beautiful and dangerous.
- Ryley Robinson (player character, silent protagonist)
- PDA (Personal Digital Assistant): The AI from your lifepod, providing guidance and data logs.
- Radio characters: Other survivors? (mostly atmospheric, not directly seen)
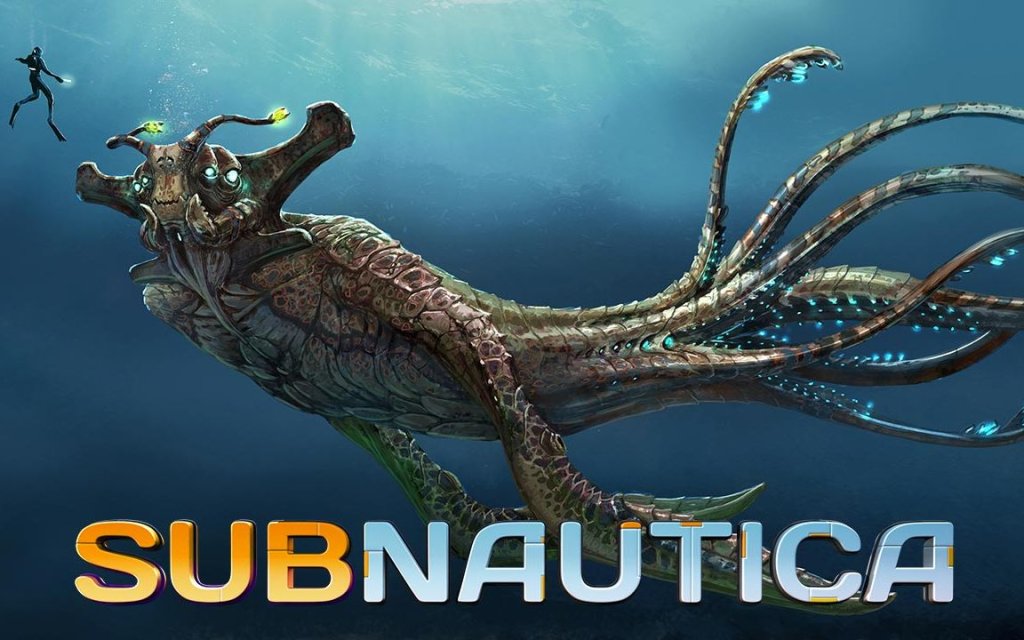
- Alien species: The Architects (precursor aliens), Sea Emperor Leviathan, Reaper Leviathan, Ghost Leviathan, and many others.
- Immersive underwater exploration with a deep sense of mystery and discovery.
- Base-building: construct underwater habitats, power systems, and oxygen generators.
- Crafting: over 100 blueprints for tools, equipment, and vehicles (Seamoth, Prawn Suit, Cyclops).
- Survival mechanics: manage oxygen, hunger, thirst, and health; avoid hostile creatures.
- Rich, non-linear story that encourages exploration.
- Fans of survival games (e.g., Minecraft, The Forest), exploration, sci-fi, and underwater adventures.
- Rated E10+ (Everyone 10+) on all platforms for mild fantasy violence, suitable for a broad age group.
- Survival Mode (default): All survival mechanics enabled.
- Freedom Mode: No hunger or thirst, but still need oxygen and health.
- Hardcore Mode: Permadeath – if you die, the save is deleted.
- Creative Mode: No survival needs; unlimited resources and all blueprints unlocked.
- Single-player only. No multiplayer, no co-op, no online features required. Fully offline play.
- Subnautica: Below Zero – a standalone expansion and sequel set in the same universe, featuring a new story, biomes, and vehicles. Released in 2021.
- The original game received regular updates during Early Access and post-launch (e.g., the "Sequel Update"), but no paid DLC beyond Below Zero.
- The only open-world underwater survival game of its scale and polish.
- Seamless vertical exploration from the sun-drenched surface to the darkest depths.
- Non-combat approach: You have few weapons (knife, stasis rifle); survival relies on stealth, tools, and clever base placement.
- Vehicles that feel like real progression: the tiny Seamoth, versatile Prawn Suit, and massive Cyclops submarine.
- Genuine fear and awe: the ocean depths are terrifyingly vast, with gigantic leviathans that can destroy your vehicles.
- A compelling story told through the environment and your own discoveries, without hand-holding.
Story Overview
Set in the 22nd century, you play as Ryley Robinson, the sole survivor of the crash of the spaceship Aurora on the alien ocean planet 4546B. With your lifepod barely functional, you must explore the vast underwater world, gather resources, build habitats, and craft equipment to survive. As you delve deeper, you uncover the mystery of the planet—the ruins of an ancient alien civilization, a devastating infection, and the fate of a previous expedition. The story unfolds through environmental storytelling, audio logs, radio messages, and encounters with massive leviathans.
Setting
Main Characters
Core Appeal
Target Audience
Game Modes
Online/Offline Support
DLC/Expansion Overview
What Makes This Game Unique
Getting Started
Getting Started: Your First Day on Planet 4546B
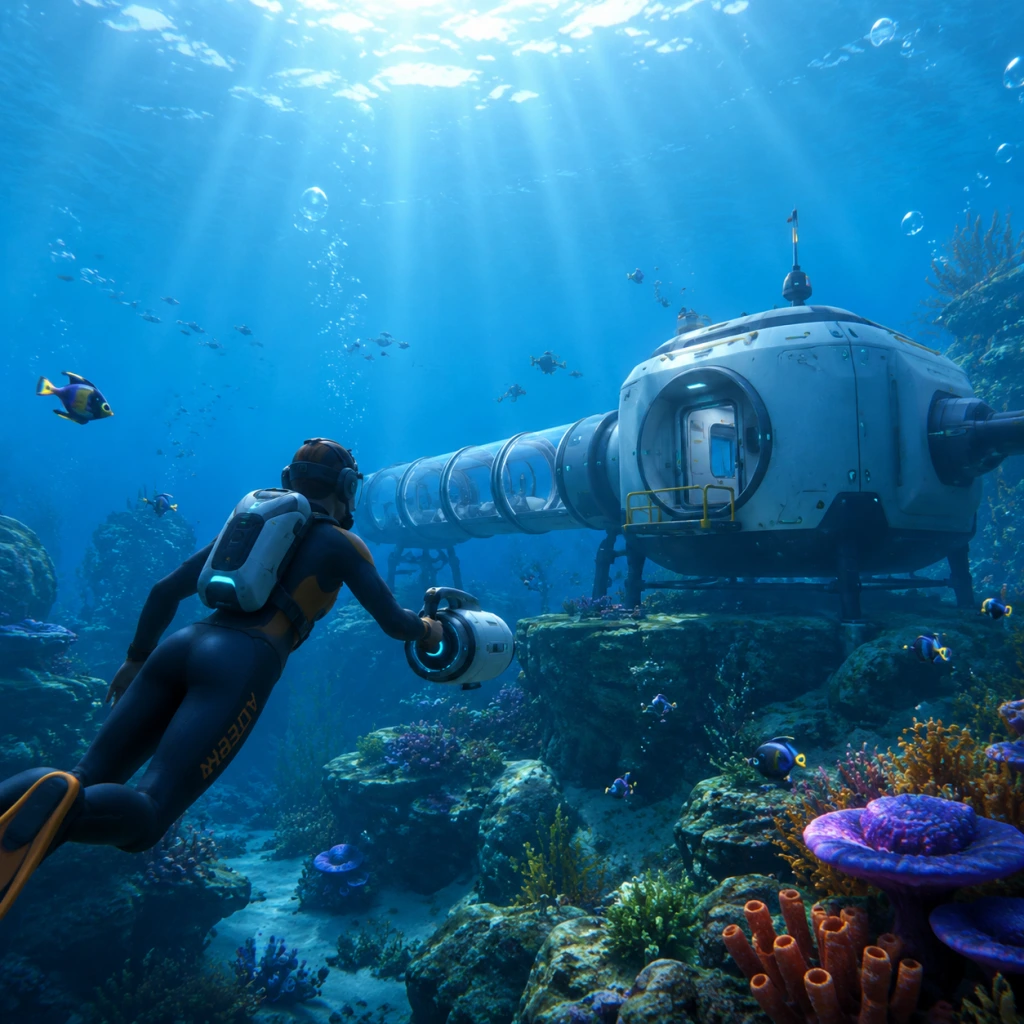
Welcome to Subnautica, a survival game set entirely underwater on an alien ocean planet. This guide is tailored for absolute beginners. We’ll walk you through the first hour, explain the interface, cover controls on all platforms, and give you a clear plan to survive day one.
---
Character Creation
There is no character creator. You play as Ryley Robinson, the sole survivor of the Aurora’s crash, with a fixed appearance. Your only choices are cosmetic changes to your living quarters (later on) and what gear you build. The focus is on survival, not customization.
---
First Hour Walkthrough (Spoiler‑Free Essential Path)
0. The Crash (Opening Cinematic)
- Watch the intro: your lifepod crashes into the ocean. You’ll be asked to press Space (PC) / A (Xbox) / Cross (PS) / B (Switch) to shut the rear door after the fire extinguisher lesson.
- Immediately swim straight up to reach the surface and look around. You’re in the Safe Shallows – a green, sunlit biome with coral tubes, small fish, and scattered wreckage.
- Climb back down into the pod. Scan everything: Fabricator, Radio, Storage Locker, Medkit Fabricator (if present). Scanning gives you blueprints.
- Cure thirst: Use the Fabricator to craft Filtered Water (2× Bleach = 1 Salt + 1 Coral Tube Sample). Or craft Disinfected Water (1× Salt + 1× Coral Tube Sample). Collect Salt from sandstone outcrops (small brownish rocks) and Coral Tube Samples by hitting coral tubes with your knife (knife blueprint is automatically unlocked).
- Cure hunger: Craft Cooked Fish – knife kill a Peepers or Boomeerangs (small glowing fish). Use Fabricator to turn raw fish into cooked.
- The Radio in your pod is broken. You need a Repair Tool. Craft it at the Fabricator: 1× Silicone Rubber (from Creepvine Seed Clusters – go to the Kelp Forest biome, look for tall green stalks with glowing yellow pods) + 1× Cave Sulfur (from small green gas pods inside caves; punch the pod to collect the sulfur) + 1× Titanium.
- Once built, repair the Radio. It will broadcast distress signals that trigger story events and give you waypoints.
- Also craft a Survival Knife (1× Silicone Rubber + 1× Titanium). Essential for harvesting resources and self‑defense.
- Use your scanner on fragments, fish, flora, and wreckage. Key early blueprints: Seaglide (mobile SCUBA), Oxygen Tank (for longer diving), High Capacity O2 Tank, Compass (navigation), Seamoth (later).
- Prioritize scanning Lubricant (from Creepvine Seed Clusters) and Battery Charger fragments.
- Day one you can survive without a base, but building a small habitat with a Fabricator, Storage Lockers, and a Solar Panel is highly recommended. The blueprint for the Habitat Builder is unlocked after scanning a piece of it (found in wrecks or the Aurora). If you can’t find it yet, use your life pod as a temporary base.
- Essential base components: Foundation (optional), Compartment (I‑tube), Fabricator, Storage, Power Transmitter (for solar), Locker.
1. Exit Your Lifepod
2. First Priority: Water & Food
3. Repair the Radio & Build a Survival Knife
4. Scan Everything You See
5. Build a Base (Before Night Falls – Maybe Not Day One, But Soon)
---
Controls on All Platforms
Controls are mostly consistent. Below are the default bindings for the most common actions.
PC (Keyboard + Mouse)
| Action | Key |
|---|---|
| Move | W/A/S/D |
| Swim Up / Down | Space / C (hold to descend) |
| Interact | E |
| Scan | Right Click (hold) |
| Use Tool / Attack | Left Click |
| Inventory | Tab |
| PDA / Map | Tab (or Esc) |
| Seaglide / Vehicle | LMB to boost, RMB to turn, R to exit |
| Build Mode (Habitat Builder) | R to rotate, Shift to raise/lower |
| Quick Slot Items | 1-6 |
| Pause Menu | Esc |
Xbox (One / Series X|S)
| Action | Button |
|---|---|
| Move | Left stick |
| Look | Right stick |
Better: Use the controller scheme “Standard” – Left stick move, Right stick look. A = interact, X = scan, B = exit/cancel, Y = inventory, LB = hold to ascend, LT = hold to descend, RB = use tool, RT = attack. |
| Inventory | Y |
| PDA | View button (two squares) |
| Quick Slot | D‑pad up/down |
| Pause | Menu button (hamburger) |
PlayStation (4/5)
| Action | Button |
|---|---|
| Move | Left stick |
| Look | Right stick |
| Swim Up/Down | L1 / L2 (descend) / R1 / R2 (ascend) – check in settings. Default: L1 = ascend, L2 = descend; R1 = use tool, R2 = attack. |
| Interact / Scan | Triangle (interact), Square (scan) |
| Inventory | Touchpad swipe up |
| PDA | Options button |
| Quick Slot | D‑pad left/right |
| Pause | Options button |
Nintendo Switch
| Action | Button |
|---|---|
| Move | Left stick |
| Look | Right stick |
| Swim Up/Down | L / ZL (descend) / R / ZR (ascend) |
| Interact | A |
| Scan | X |
| Inventory | Y |
| PDA | + |
| Quick Slot | D‑pad |
| Pause | + |
---
UI Overview
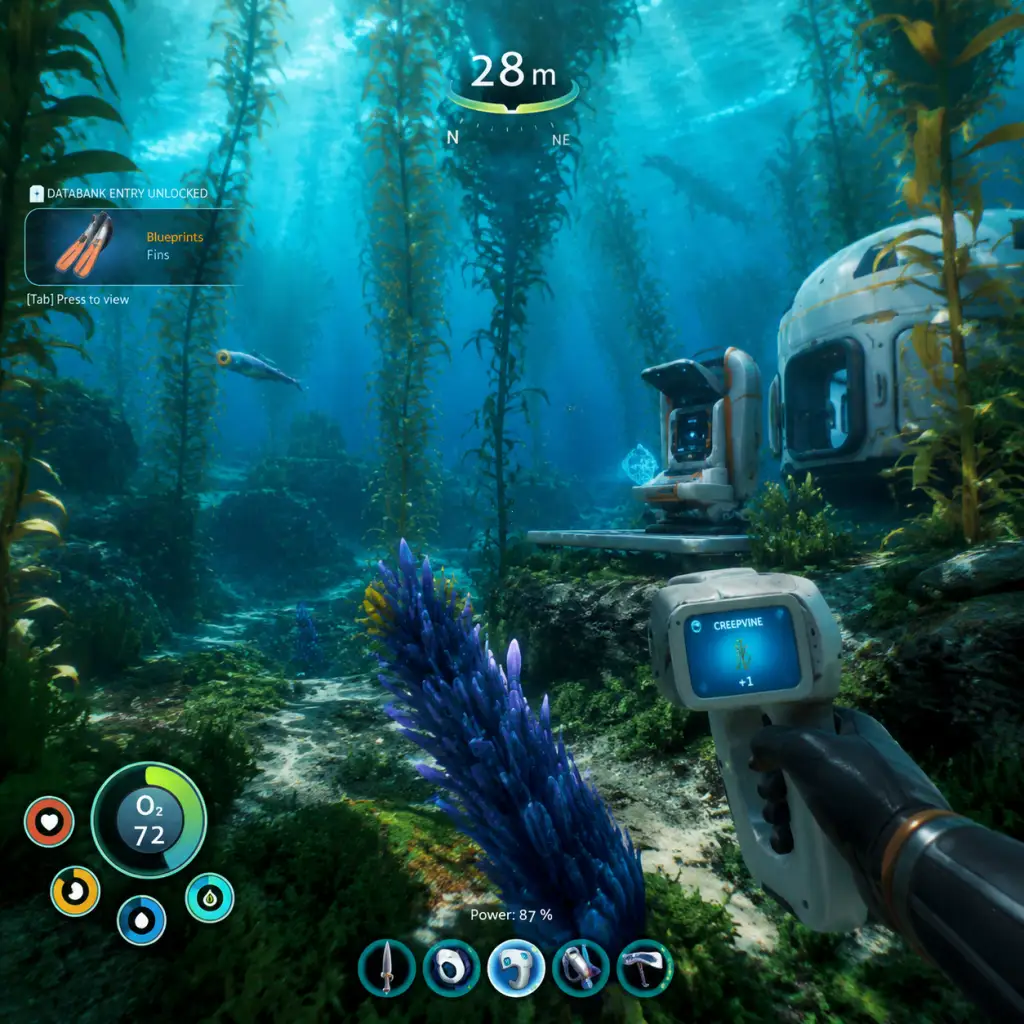
The Heads‑Up Display (HUD) is minimal but critical:
1. Health Bar – Bottom–left, red heart icon. If it reaches zero, you die. Regenerate slowly if you’re not starving or dehydrated.
2. Food & Water Bars – Left side, apple and water drop icons. Empty = starvation/dehydration damage.
3. Oxygen Timer – Bottom–center, blue bar. Shrinks while underwater. When empty, you black out and respawn in your last habitat or lifepod (with inventory if you have enough oxygen? Actually you lose items if you die, but you can recover them from your death location as a “grave”… But better to avoid death).
4. Depth Meter – Right side, shows current depth (m).
5. Compass – Top–center (if you’ve built it). Crucial for navigation.
6. PDA – Press Tab (PC) or appropriate button to open. Contains: Data Bank (scanned items, blueprints, story logs), Messages (radio transmissions), Map (only shows explored areas and beacons), Signals (distress signals, waypoints).
7. Inventory – 48 slots (15 quick slots, 30 inventory + 3 special slots). Open with Tab (PC) or Y (Xbox). Items stack up to 10.
8. Fabricator – When opened, shows available recipes. Craft items using raw materials.
9. Time Indicator – Day/night cycle; above the health bar shows the time (e.g., “08:30”). Night is dangerous because predators become more active.
---
Essential Early Objectives
1. Survive the first 24 hours – Manage food and water, avoid predators, keep oxygen high.
2. Build a Survival Knife – For harvesting fish, coral, and defending against hostile flora (like the Crashfish).
3. Repair the Radio – This triggers the first distress signal, leading to key locations.
4. Scan for the Seaglide – The Seaglide (found in the Safe Shallows wreck, near the top of the pod or the large wreck near the edge of the biome) dramatically improves mobility.
5. Craft an Oxygen Tank – Extends your underwater time. The basic tank gives +30 seconds. Upgrade to High Capacity later.
6. Build a Compass – Required for navigation; blueprint is in the Safe Shallows wreck room (scan the compass fragment).
7. Construct a Small Base (Optional but Recommended) – Even a single room with a Fabricator, storage, and a Solar Panel is a lifesaver.
8. Explore the Kelp Forest – Gather Creepvine Seed Clusters for Lubricant and Silicone Rubber, and Scan for the Seamoth fragments.
---
What to Do First and What to Avoid
Do First
- Immediately craft Filtered Water and a few Cooked Fish.
- Gather enough Titanium (from Seabed scrap metal) to make a Repair Tool and Survival Knife.
- Scan all fragments you see. Prioritize: Survival Knife (already unlocked), Repair Tool (unlocked), Seaglide, Compass, Oxygen Tank.
- Repair the Radio; listen to the first transmission (it will point you toward the Aurora’s drive core).
- Build a Compass as soon as you have the blueprint.
- Don’t swim too deep – Oxygen runs out fast. Stay above 50m until you have an Oxygen Tank.
- Don’t attack Stalkers – They are aggressive but not lethal if you back away. Avoid them unless necessary.
- Don’t go near the Aurora’s front – That’s the Reaper Leviathan territory. You’ll die quickly.
- Don’t neglect your lifepod’s storage – Keep it organized; don’t dump items in the world. They can despawn or be eaten by fish.
- Don’t ignore the “Low Oxygen” warning – Always have enough O₂ to swim back to the surface. If you panic, hit Space (PC) / ascend button repeatedly to rise quickly.
- Don’t build a base in the Safe Shallows’ center – It’s safe, but too shallow for solar panels (they need sunlight, but shallow is fine). However, after a few days, Titanium becomes scarce; move to a deeper biome later.
- Don’t eat raw fish – They give minimal hunger and can cause food poisoning (you lose HP). Always cook them.
- Don’t use a Seaglide without a battery – It consumes battery quickly. Craft a spare battery.
What to Avoid
---
Early Resource Priorities
Your first few days revolve around these materials:
| Resource | Location | Used For |
|---|---|---|
| Titanium | Metal scrap (white salvage) on seabed, Limestone Outcrops (small gray rocks) | Everything: tools, base, vehicles |
| Quartz | Limestone Outcrops | Glass, ladders, windows |
| Copper Ore | Sandstone Outcrops (brownish rocks) | Wiring Kit, Computer Chip, Batteries |
| Silver Ore | Sandstone Outcrops | Wiring Kit, etc. |
| Gold | Sandstone Outcrops (rare) | Computer Chip, advanced tools |
| Salt | Sandstone Outcrops | Bleach (Filtered Water), disinfected water |
| Coral Tube Sample | Coral tubes in Safe Shallows | Bleach |
| Creepvine Seed Cluster | Kelp Forest, tall glowing pods | Silicone Rubber (for tools), Lubricant (for Seaglide) |
| Silicone Rubber | Crafted from Creepvine Seed Clusters | Tools, Seaglide, Vehicle upgrades |
| Lubricant | Crafted from Creepvine Seed Clusters | Seaglide, Seamoth, Prawn Suit |
| Acid Mushroom | Safe Shallows caves | Battery (2x Acid Mushroom + 1x Copper Ore) |
| Cave Sulfur | Green gas pods in caves | Repair Tool, First Aid Kit |
| Fiber Mesh | Crafted from Creepvine samples (knife a Creepvine) | Clothing (Reinforced Dive Suit), filtration items |
| Aluminum Oxide (for later) | Coral tubes (orange) | Hardened glass, tier 2 base |
---
Common Beginner Mistakes
1. Skipping the Radio repair – You miss critical story progression and location markers. Fix it within the first hour.
2. Exploring at night – Visiblity is low, predators (especially Stalkers) are more aggressive. Sleep in your pod or base if you have a bed.
3. Not building a Compass – You’ll get hopelessly lost. The sea is featureless; a compass is essential.
4. Ignoring oxygen management – Always watch your O₂. Surface air pockets (like in caves with gas) can refill momentarily, but don’t rely on them.
5. Hoarding resources in the lifepod – The pod has limited storage (only ~4 lockers). Build a base with more lockers as soon as possible.
6. Underestimating the Seaglide’s battery – It drains fast. Carry a spare battery or build a Battery Charger in your base.
7. Swimming into the Kelp Forest without a knife – Stalkers can steal your items if you’re not careful. But you can dodge them.
8. Trying to build a base too far from resources – Start in the Safe Shallows or near the border of Kelp Forest; later expand.
9. Not scanning fish and flora – Scanning gives you clues about their abilities and sometimes unlocks crafting recipes.
10. Ignoring the “Food poisoning” from raw fish – Always cook fish. Or eat the prepackaged food bars found in life pods.
---
Day‑One Checklist
Use this checklist to ensure you’ve completed the critical steps on your first play session (roughly 1–2 hours).
- [ ] 1. Exit lifepod, swim to surface, observe surroundings.
- [ ] 2. Craft Survival Knife (1x Silicone Rubber + 1x Titanium).
- [ ] 3. Craft Repair Tool (1x Silicone Rubber + 1x Cave Sulfur + 1x Titanium).
- [ ] 4. Repair the Radio inside the lifepod.
- [ ] 5. Craft Filtered Water (2x Bleach, each bleach = 1 Salt + 1 Coral Tube Sample) – make at least 2 bottles.
- [ ] 6. Catch and cook 3–5 fish (use knife on a Peeper or Boomeerang, then cook in Fabricator).
- [ ] 7. Gather at least 4 Titanium, 2 Copper, 2 Quartz, 1 Salt, 2 Coral Tube Samples, 1 Creepvine Seed Cluster (for Silicone Rubber).
- [ ] 8. Find and scan the Seaglide fragments (look for the large wreck in Safe Shallows, near the surface, direction of the Aurora’s side). You need 3 fragments.
- [ ] 9. Once you have Seaglide blueprint, craft it (1x Battery + 1x Wiring Kit + 1x Lubricant + 1x Titanium).
- [ ] 10. Scan the Compass fragment (same wreck, on a shelf). Craft it (1x Copper + 1x Wiring Kit).
- [ ] 11. Build a Habitat Builder (1x Wiring Kit + 1x Computer Chip + 1x Battery). If you don’t have the blueprint, search small wrecks in Safe Shallows.
- [ ] 12. Construct a small base: 1× I‑compartment, 1× Solar Panel (2x Titanium + 2x Quartz + 1x Wiring Kit), 1× Fabricator, 2–3 Lockers.
- [ ] 13. Craft a Basic Oxygen Tank (2x Titanium + 1x Silicone Rubber) – this gives +30s O₂.
- [ ] 14. Save your game! (Pause menu → Save → confirm).
- [ ] 15. (Optional but recommended) Listen to first radio message – it will point to the Aurora and a nearby Life Pod 3. Investigate tomorrow.
- Save often! You can save at any time from the pause menu. The game does not autosave – only when you exit a base or reach certain checkpoints (very rare). A crash or death can cost you hours of progress.
- Stay calm when attacked. Most early predators (Stalkers, Sand Sharks) can be out‑swam if you stay at a moderate depth. The Seaglide is faster than they are.
- Learn the map using landmarks – the Aurora is a huge point of reference. The large coral arches mark the edge of biomes.
- Resource respawn – Most outcrops and fish respawn after a few minutes. But metal salvage does NOT respawn; eventually you’ll need to go deeper for more.
- Read the PDA entries – They give lore, tips, and sometimes location hints for new blueprints.
After this checklist, you’re well‑equipped to explore deeper biomes, start scanning the Seamoth, and begin unraveling the planet’s mystery.
---
Final Tips
Your adventure begins now. Good luck, survivor!
Core Gameplay
Core Gameplay Guide
Overview of the Core Gameplay Loop
Subnautica’s core gameplay loop revolves around survival, exploration, and progression on the alien ocean planet 4546B. The player crash-lands in a malfunctioning Lifepod and must: gather resources, craft equipment, build bases, explore biomes, scan alien tech, and ultimately find a way to escape. The loop is:
1. Survive immediate threats – manage oxygen, food, water, health.
2. Gather basic resources – scrap metal, titanium, quartz, creepvine samples.
3. Craft essential tools – repair tool, scanner, seaglide, fins, knife.
4. Explore nearby biomes – Safe Shallows → Kelp Forest → Grassy Plateaus.
5. Scan fragments to unlock new blueprints (mobile vehicle bay, seamoth, cyclops, prawn suit).
6. Build a base – create multipurpose rooms, power generators, water filtration, fabricator.
7. Proceed deeper – use vehicles to explore deeper biomes (Jellyshroom Cave, Lost River, Lava Zones).
8. Solve the mystery – follow signals and alien facilities to cure the infection and disable the Quarantine Enforcement Platform.
9. Build the Neptune Escape Rocket – requires extensive resources and endgame crafting.
10. Launch and escape – final sequence.
There are no traditional quests – instead, the game uses radio signals, PDAs, and alien artifacts to guide exploration. Progression is non-linear, but depth and vehicle upgrades gate content.
---
Progression Tiers Breakdown
###
Game Tips
Game Tips
Beginner Tips
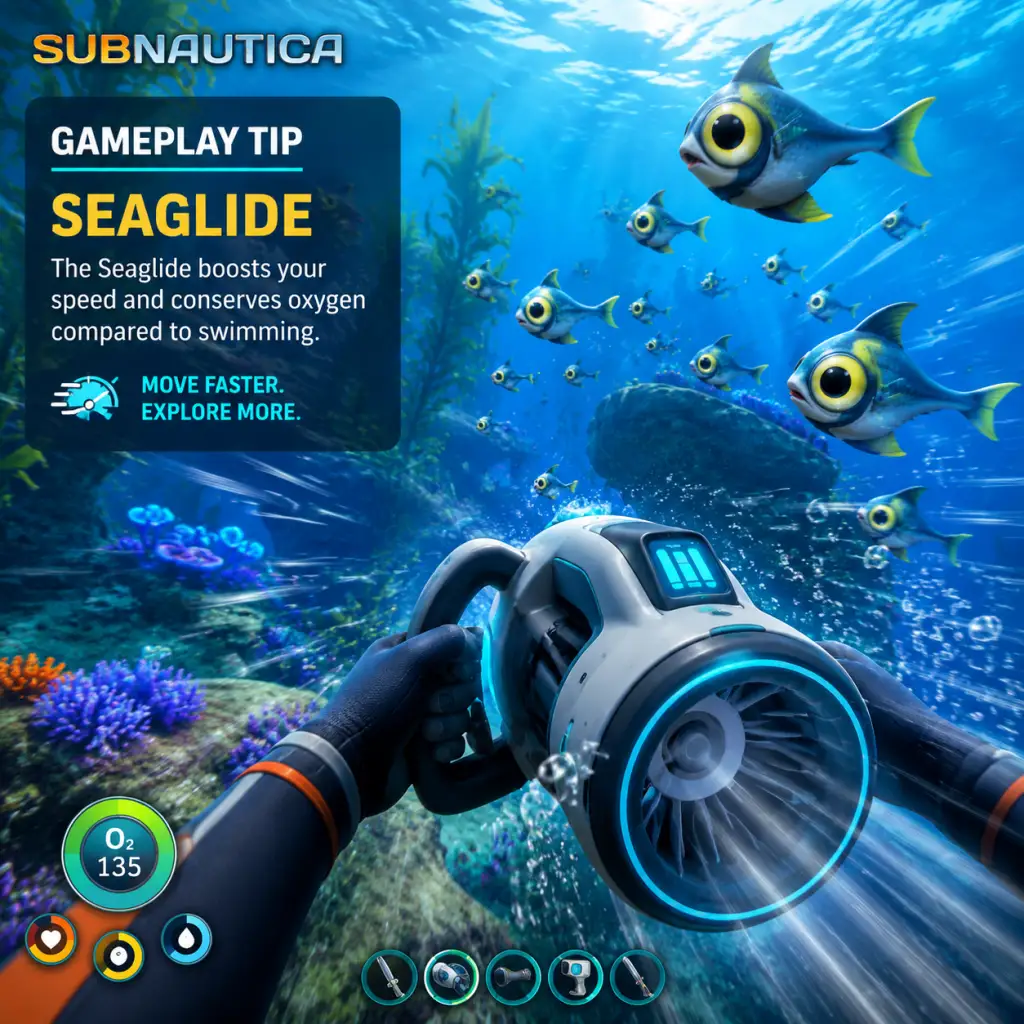
#### 1. Prioritize Building a Seaglide
- Tip: As soon as you can, craft a Seaglide (requires: Battery x1, Lubricant x1, Copper Wire x1, Titanium x1).
- Why it works: The Seaglide drastically increases your swimming speed, allowing you to escape predators, explore faster, and cover large distances without needing a vehicle. It also frees up inventory space by replacing the need for a high-capacity oxygen tank early on.
- When to use: Use it for all early exploration; keep it in your hotbar. Upgrade to the Seamoth later.
- Tip: Craft a Grav Trap (requires: Titanium x1, Battery x1) and deploy it near your Lifepod or base.
- Why it works: It attracts and holds fish, making food collection effortless. Small fish like Peepers and Boomerangs are drawn in, giving you a steady food source without hunting.
- When to use: Place it near a kelp forest or safe shallows; check it every few minutes. Relocate as you move your base.
- Tip: Keep both a Survival Knife (Titanium x3) and a Scanner (Titanium x1, Copper Wire x1) in your inventory at all times.
- Why it works: The knife is essential for defending against small predators (like Crashfish) and harvesting plants. The scanner lets you scan fragments, creatures, and flora to unlock blueprints and learn lore. Without them, progress halts.
- When to use: Scan everything you see. Knife for immediate threats and harvesting Creepvine samples.
- Tip: Initially, store excess resources in the Lifepod’s storage compartment and fabricator. Don’t build a full base until you have a reliable source of power and materials.
- Why it works: The Lifepod provides a safe point with fabricator, storage, and radio. You can survive with it for the first few hours, saving time and resources.
- When to use: Use until you have a Seamoth and enough titanium for a small multipurpose room with a solar panel.
- Tip: Always keep an eye on your oxygen meter and never let it drop below 15 seconds before heading upward. Use the Seaglide’s speed to surface quickly if needed.
- Why it works: Drowning is the most common death for beginners. The Seaglide doubles as an emergency ascent tool. Also, craft a High Capacity O2 Tank (requires: Standard O2 Tank x2) as soon as possible to double your dive time.
- When to use: Always check oxygen before entering caves or wrecks. Carry a spare O2 tank in inventory to swap when one runs out (advanced tip).
- Tip: Craft several Beacons (requires: Copper Ore x1, Cave Sulfur x1, Titanium x1) and place them at key locations: wrecks, entrances to biomes, resource caches, and alien structures. Color-code them for clarity (e.g., red for dangerous, green for safe resource spots).
- Why it works: Subnautica has no map, so beacons act as your personal GPS. They help you navigate back to important spots and avoid getting lost in deep, dark areas.
- When to use: Deploy a beacon at every wreck you find, at the entrance to the Jellyshroom Caves, at the Lost River entrance, and near your base.
- Tip: When piloting the Seamoth, always stay at least 20 meters above the seafloor to avoid sudden ambushes from sand sharks or bonesharks. Use the perimeter defense upgrade (crafted from modification station) to deter or kill aggressive creatures.
- Why it works: The Seamoth is fragile; a few bites from a Reaper Leviathan can destroy it. The perimeter defense system emits a shock that makes creatures flee, giving you time to escape.
- When to use: Use the defense module whenever you hear a roar or see a large creature approaching. Also, never venture into the Dunes or Mountains without it.
- Tip: Construct a Scanner Room (requires: Titanium x5, Copper Ore x2, Gold x1, Computer Chip x1) as soon as you have stable power. Add range upgrades and a HUD chip if possible.
- Why it works: The Scanner Room can locate specific resources (e.g., Lithium, Silver, Quartz) within a radius, revealing them as icons on your screen. This saves hours of manual searching. It also can scan for fragments, creatures, and wrecks.
- When to use: Place it in central locations near multiple biomes (e.g., at the border of Safe Shallows and Kelp Forest). Use it to find rare materials like Magnetite or Nickel Ore.
- Tip: When building a base in areas with geothermal activity (e.g., Jellyshroom Caves, Lost River, Lava Zones), use Thermal Plants (requires: Titanium x5, Magnetite x2, Aerogel x2) instead of nuclear or bioreactors. They provide infinite power with no maintenance.
- Why it works: Deep biomes lack solar light, making solar panels useless. Thermal plants convert heat from vents or lava into energy, and they work 24/7. You can place multiple for more power.
- When to use: Any base below 200 meters should rely on thermal power. Also, build a Thermal Plant near a vent and connect it via power transmitters to your base.
- Tip: Build an Alien Containment unit (requires: Titanium x2, Glass x2) inside your base and place two of the same fish species (e.g., Reginalds or Peepers) inside. They will breed, producing infinite food.
- Why it works: Instead of hunting, you can harvest fish whenever needed. Reginalds are the best for food (high caloric value). Also, you can breed Cuddlefish (if you find eggs) for eggs or companions.
- When to use: Start a farming operation before venturing into deep biomes where food is scarce. Also, use the containment to hatch rare creature eggs (e.g., Crabsquid, Ampeel) for scanner data.
- Tip: Memorize the high-yield locations: the Lost River has abundant Nickel and Uraninite Crystals; the Lava Lakes yield Kyanite and large deposits of Magnetite; the Grand Reef has deep Lithium and Diamond deposits. Use a Cyclops with a Prawn Suit docked to gather large amounts quickly.
- Why it works: Endgame crafting (Prawn Suit upgrades, Cyclops upgrades, Ion Cubes) requires large quantities of these rare materials. Systematically clearing a zone saves multiple trips.
- When to use: Before building the Neptune Rocket, you’ll need immense resources (e.g., 12 Kyanite, 8 Aerogel, 4 Plasteel Ingots). Plan a route: Lost River → Inactive Lava Zone → Lava Lakes. Bring a Prawn Suit with a drill arm and a grappling arm.
- Tip: Fully upgrade your Cyclops with power efficiency modules, engine efficiency, sonar, and shield generator. Stock it with lockers, a fabricator, and a bed. Treat it as your moving base for deep exploration.
- Why it works: The Cyclops can go anywhere (except Blood Kelp Caves) and stores your entire operation. The shield generator protects against leviathans (but drains power fast). The sonar helps navigate dark caves. You can sleep to skip night cycles.
- When to use: Move your Cyclops to the edge of each major biome and use the Prawn Suit to explore beyond. Always keep spare power cells and materials for repairs.
- Tip: Equip your Cyclops with at least one Thermal Reactor Module (requires: Kyanite x1, Advanced Wiring Kit x1) to recharge power cells when near heat sources. Combine that with the Engine Efficiency Module to reduce fuel consumption.
- Why it works: Deep biomes have many vents and lava flows; the thermal reactor converts heat into power, essentially giving you infinite energy. The efficiency module halves power usage for silent running and speed.
- When to use: When navigating the Lava Zones, enable silent running near leviathans and slow speed to avoid aggro; the thermal reactor will keep your batteries full. Always carry a spare power cell charger in your base.
- Tip: In the Prawn Suit, use the Grappling Arm to pull yourself across massive distances (like Spider-Man) and the Drill Arm to harvest large resource deposits. The Prawn Suit can also jump up vertical walls with the grappling arm.
- Why it works: The grapple allows you to traverse deep pits and caves quickly. The drill extracts huge amounts of ore (e.g., 10+ titanium from a single deposit). Together, they make you a resource gathering machine.
- When to use: Always keep the grapple arm in your hotbar. Use it to escape leviathans by grappling to a wall and jumping away. Drill every large deposit you see - especially in the Lost River (Uraninite, Nickel) and Lava Lakes (Kyanite).
- Tip: Craft a Stasis Rifle (requires: Battery x3, Wiring Kit x1, Computer Chip x1, Diamond x1) and a Thermoblade (Survival Knife + Battery + Diamond + Coral Sample). When you encounter a Reaper or Ghost Leviathan, fire the Stasis Rifle to freeze it in place (charge shot for longer freeze), then swim up and attack with the Thermoblade. It takes many hits but you can kill leviathans for practice or to clear an area.
- Why it works: The Stasis Rifle immobilizes creatures for up to 30 seconds (fully charged). The Thermoblade deals 8 damage per hit, but has a faster swing than normal. Combined, you can dispatch even the strongest enemies safely. Note: This is not required to finish the game, but it helps if you’re terrified of Leviathans.
- When to use: Use only if you want to remove a persistent threat (e.g., a Reaper blocking a wreck entrance). Otherwise, avoid killing—they respawn eventually and it wastes time.
- Tip: As soon as you get a Radiation Suit and a Seaglide, head to the Aurora. Bring a Laser Cutter and a Propulsion Cannon. Enter through the breach on the left side, clear the radiation zone, and head to the Seamoth bay (second floor left of the entrance). There you’ll find a Seamoth upgrade console fragment and Prawn Suit fragments.
- Why it works: Completing the Aurora early gives you access to Seamoth depth modules (MK1/MK2) and Prawn Suit blueprints, which are key for mid-game progression. The Aurora is also rich in batteries, medkits, and food.
- When to use: Go after receiving the radio call about the Aurora explosion (after day 2). Bring a fire extinguisher and medkits.
- Tip: Every piece of scrap metal you find (like from wrecked parts) can be processed into 4 Titanium at the Fabricator. Always collect it - titanium is the most used resource for base building, foundations, and bulkheads.
- Why it works: Titanium is required for almost everything: base rooms, vehicles, tools, lockers. Ocean floors are filled with scrap metal, especially in the Kelp Forest and Safe Shallows. One stack of scrap (10) gives 40 titanium.
- When to use: Always pick up scrap metal, even if you have titanium. Convert it only when you need space or titanium. Store extra in lockers.
- Tip: If you don’t have thermal power or nuclear, build a Bioreactor (requires: Titanium x3, Wiring Kit x1, Lubricant x1) and fill it with quick-burning organic matter: Reginald fish (best: 630 energy per), Bulbo Tree samples (420), or Gel Sack (420). Avoid using Creepvine seed clusters or acid mushrooms as they yield less.
- Why it works: The Bioreactor provides steady power as long as you feed it. It’s better than solar in darker zones and requires less rare materials than nuclear. Keep a small farm of Bulbo Trees or Reginalds nearby to provide fuel.
- When to use: Use as a primary power source in mid-game bases (e.g., in the Lost River) before you get thermal technology.
- Tip: Both Bleach (Salt x2 + Coral Tube Sample x2) and Disinfected Water (filtered water) produce 30 water units. But Bleach is easier to make because Coral Tube Samples are abundant in Safe Shallows, and Salt can be found in the Blood Kelp Zone or via a Salt deposit. The standard Water Filtration Machine produces 6 water per 10 minutes but consumes power; it’s only useful in larger bases.
- Why it works: Early game, you often have a shortage of water. Using Bleach (requires a Fabricator) is much cheaper than building a filtration machine. You can produce several bottles quickly.
- When to use: Always craft Bleach water before exploring. Late game, use the Water Filtration Machine for passive water while at base.
- Tip: The Habitat Builder can deconstruct any base piece or furniture you built, returning all (or most) materials. This allows you to relocate bases without losing resources. Also, you can deconstruct a base’s power source and other modules to rebuild elsewhere.
- Why it works: Subnautica’s bases are portable if you’re willing to disassemble. This is crucial when moving from the Safe Shallows to a deeper, more strategic location.
- When to use: Before abandoning a base, deconstruct everything to get your materials back. Build foundations only when necessary because they consume a lot of titanium and cannot be placed on top of something else.
- Tip: Memorize the behavior of key creatures:
- Why it works: Knowing whether a creature will attack prevents panic. For example, Stalkers can be easily pacified by dropping a piece of metal salvage – they’ll pick it up and leave you alone for a while. Bonesharks can be avoided by not using lights in their zone.
- When to use: Before entering a new biome, listen for sounds. If you hear a Reaper roar, stop and retreat. Use the Seamoth perimeter defense against aggressive middling creatures.
- Tip: Find the Prawn Suit Jetpack Upgrade (fragment in the Jellyshroom Caves or Lost River) to boost your vertical mobility. It lets you jump much higher than the default, allowing you to climb up obstacles and escape deep pits.
- Why it works: The Prawn Suit on its own can only jump a few feet; with the jetpack, you can reach heights needed to exit the Inactive Lava Zone or climb walls in the Lost River.
- When to use: Equip it immediately when you get the Prawn Suit. Vital for exploring the deep biomes where exits are often high above.
- Save often! The game does not autosave. Manually save before entering dangerous zones or wrecks.
- Read the PDA entries – they contain lore but also hints about where to go next.
- Pay attention to radio calls; they lead to lifepods with important blueprints.
- Upgrade your Seamoth depth module before venturing deep; it’s found in the Aurora or built at a Modification Station.
- Always keep a spare oxygen tank in your inventory for emergencies; swap it out when your primary runs low.
- Use the “flares” (beacons) to mark your Cyclops location when you leave it on silent running.
- The game’s story is linear but open-ended: the Sunbeam event, the alien bases, and the primary containment facility are all reachable with enough depth upgrades.
- Building a large room can hold two floors of lockers – ideal for massive storage.
- Finally, never go into the Dunes without a Cyclops and perimeter defense. That place is a Reaper playground.
#### 2. Build a Grav Trap
#### 3. Always Carry a Knife and a Scanner
#### 4. Use the Lifepod as a Temporary Base
#### 5. Manage Your Oxygen Carefully
Intermediate Strategies
#### 6. Use Beacons to Mark Points of Interest
#### 7. Master the Seamoth Perimeters
#### 8. Build a Scanner Room
#### 9. Utilize Thermal Power in Deep Biomes
#### 10. Farm Your Own Food with an Alien Containment
Advanced Optimizations / Endgame Tips
#### 11. Efficient Resource Routes for Endgame Materials
#### 12. Use the Cyclops as a Mobile Base
#### 13. Optimize Power Management for Deep Operations
#### 14. Master the Prawn Suit Grappling & Drill Combo
#### 15. Secret Trick: Use the Stasis Rifle + Thermoblade for Leviathan Hunting
#### 16. Speedrun the Aurora Seamoth Bay
Economy & Resource Management
#### 17. Never Throw Away Scrap Metal
#### 18. Use the Bioreactor for Sustainable Power
#### 19. Craft Water Efficiently: Bleach vs. Disinfected Water
#### 20. Use the Habitat Builder to Deconstruct Unwanted Structures
Combat & Creature Behavior
#### 21. Know Which Creatures Are Passive vs. Aggressive
- Passive: Peepers, Boomerangs, Hoverfish, Reginalds, Cuddlefish.
- Aggressive: Stalkers (can be distracted with metal salvage), Sand Sharks (lay on the bottom), Bonesharks (attracted to vehicles), Crashfish (stay away from sulfur plants), Amp eels (discharge if you touch).
- Leviathan-class: Reaper (roars, extremely dangerous), Ghost (area damage), Sea Dragon (ranged fireballs).
#### 22. Use the Prawn Suit’s Jetpack Upgrade for Vertical Mobility
Final Tips
Game Settings
Game Settings Guide
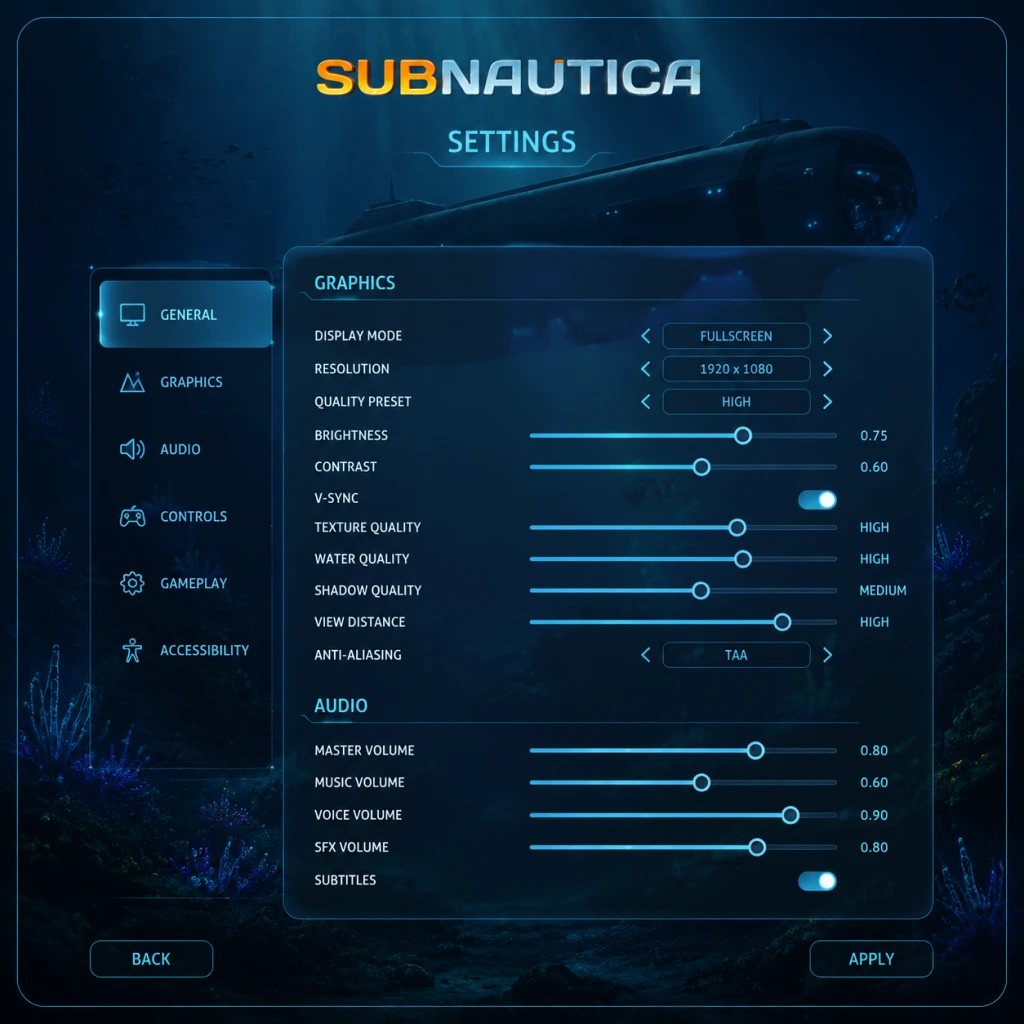
This guide covers every setting in Subnautica, from graphics and audio to controls and gameplay. Adjusting these options correctly can greatly improve performance, visual quality, and accessibility. Below you'll find recommended settings for low-end, mid-range, and high-end PCs, as well as console-specific notes.
---
Graphics Settings
Access: Main Menu → Options → Graphics
#### Display Mode
- Fullscreen: Best performance, least input lag.
- Borderless Windowed: Useful for alt-tabbing; slightly more input lag.
- Windowed: Lower performance; use if troubleshooting.
- Match your monitor's native resolution for clarity.
- For low-end PCs, drop to 720p or 900p if necessary.
- Off: Reduces input lag but may cause screen tearing.
- On: Smooths tearing but can induce stutter if frame rate drops.
- Default: 70. Increases by up to 90 (PC) or 80 (console).
- Higher FOV improves spatial awareness underwater but reduces performance slightly.
- Low / Medium / High / Ultra – adjust global quality.
- Controls sharpness of textures on creatures, flora, and wrecks.
- Low: blurry but saves VRAM (1–2 GB). High: crisp but requires ~4 GB VRAM.
Recommendation: Fullscreen for all hardware levels.
#### Resolution
#### VSync
Recommendation: Off for competitive responsiveness; On if tearing is bothersome. Consider using Adaptive VSync via graphics driver.
#### Field of View (FOV)
Recommendation: 80–85 for a comfortable balance.
#### Quality Presets
Per-setting tweaks for performance (listed below):
##### Texture Quality
Table: VRAM Usage by Texture Quality
| Setting | VRAM Needed |
|---|---|
| Low | ~1.5 GB |
| Medium | ~2.5 GB |
| High | ~4 GB |
| Ultra | ~6+ GB |
##### Shadow Quality
- Affects dynamic shadows from creatures and player light.
- Low: blocky shadows, some flickering. Ultra: soft, detailed shadows.
- Low: simplified water surface (no reflections). Ultra: realistic caustics, full reflections.
- Major performance hog, especially in open biomes (Safe Shallows, Grand Reef).
- Options: Off / FXAA / TAA / SMAA
- FXAA: Fast, blurry edges. TAA: Good quality but small ghosting. SMAA: Sharpest but heavier.
- Adds shadow depth around objects. Slight performance hit.
- Off / Low / High
- Adds glow to bright objects (sun, Aurora bioluminescence). Minimal performance impact.
- Blurs screen during fast movement. Some find it nauseating.
- Blurs distant objects. Can hide pop-in but reduces clarity.
- Low / Medium / High – controls distance fog density.
- Higher fog obscures far scenery, can improve performance.
Performance impact: High on CPU/GPU. For mid-range, set to Medium.
##### Water Quality
Recommendation: Low for low-end; Medium for mid; High/Ultra for high-end. Note: Ultra can cause frame drops in Warper zones.
##### Anti-Aliasing
Recommendation: TAA for most systems; SMAA if you have 6+ GB VRAM and good GPU.
##### Ambient Occlusion
Recommendation: On for visual depth; Low for mid-range.
##### Bloom
Recommendation: On for immersion. Off if you dislike the effect.
##### Motion Blur
Recommendation: Off for clarity and to reduce motion sickness.
##### Depth of Field
Recommendation: Off for better visibility when scanning for resources.
##### Fog
Recommendation: Medium; High if you struggle with pop-in.
#### Recommended Graphics Settings by Hardware Tier
| Hardware Tier | Example GPU | Resolution | Preset | Important Tweaks |
|---|---|---|---|---|
| Low-End | GTX 1050 / RX 560 | 720p / 900p | Low | Water: Low, Shadows: Low, Textures: Low |
| Mid-Range | GTX 1660 / RX 580 | 1080p | Medium | Water: Medium, Shadows: Low, Textures: Medium |
| High-End | RTX 3060 / RX 6600 XT | 1440p | High | Water: High, Shadows: Medium, Textures: High |
| Ultra | RTX 3080 / RX 6800 XT | 4K | Ultra Max | All Ultra, TAA, ambient occlusion on |
---
Audio Settings
Access: Main Menu → Options → Audio
#### Master Volume
- Controls all game sounds. Default 100.
- Adjust to your comfort; note that sudden roars (e.g., Reaper) can be startling.
- Affects ambient/tense music tracks.
- Sound effects: footsteps, tools, creature noises.
- Crucial for survival: Creature roars, warnings (e.g., radiation suit low durability).
- Controls lifepod radio messages and PDAs.
- Ocean ambience, reefback calls, etc. Setting to 0 makes the world eerily quiet.
- Not directly in menu; controlled via SFX volume. Explosions cause temporary ringing. Lower SFX to reduce tinnitus effect.
- Default: 50. Adjust for comfortable camera movement underwater. Higher sensitivity helps quick 180s to evade threats.
- Piloting Seamoth/Prawn with inverted controls is uncommon; most players leave off.
- Console only. Adds immersion (e.g., bumps when hitting terrain).
- Important to rebind:
- Menu binds: Save, Quick Save (F5), Load Quick Save (F9) - consider rebinding to avoid accidental overwrites.
- Not customizable in-game on console. However, on PC you can use Steam Input to remap.
- Toggle on/off. Subtitles include creature sounds and environmental noises.
- Subnautica does not have a dedicated colorblind mode. However, you can adjust UI colors via console commands (not recommended for regular play).
- Workaround: Use your graphics card's color filters (Nvidia Freestyle, AMD Adrenalin) to enhance contrast.
- Not adjustable in vanilla game. On PC, consider using UI scaling mods (Nexus Mods).
- Auto-Walk: Not present in vanilla. Use keybind mods.
- Toggle Sprint? No; hold Shift (PC).
- Subnautica supports: English, French, German, Italian, Spanish, Russian, Polish, Japanese, Korean, Simplified Chinese, Traditional Chinese, Portuguese (Brazil), Turkish.
- Note: Language change affects all text (menus, PDA, subtitles) but NOT voice acting (English only).
- Special Attention: Some translations are machine-translated and may be inaccurate; stick with English for precise crafting recipes.
- Server IP / Port: For custom servers.
- Auto-Connect: Disable for vanilla singleplayer.
- Network Mode: Off by default. Only toggle if you have Nitrox installed.
- Default: On. When you open PDA, game pauses.
- Recommendation: Keep ON for reading scans mid-swim without danger.
- Simulates head movement while swimming.
- On: Immersive but may cause motion sickness.
- Recommendation: OFF if you feel queasy.
- On: Crosshair stays centered (standard FPS). Off: crosshair moves free.
- Recommendation: ON for precision scanning.
- Controls pop-up messages (e.g., "Use Fabricator to craft...").
- Not a setting but a feature: Press F9 (PC) to drop a beacon. Only available in-game.
- You can rename containers by pointing and pressing E (PC). This helps organization.
#### Music Volume
Recommendation: Leave at 100 for full atmosphere.
#### SFX Volume
Recommendation: Keep above 70 so you never miss audio cues.
#### Voice Volume
Recommendation: 100 to catch story hints.
#### Ambient Volume
Recommendation: 100 for immersion.
#### Tinnitus Volume (Hidden Setting?)
---
Controls Settings
Access: Main Menu → Options → Controls
Subnautica supports keyboard/mouse, gamepad (Xbox/PS4), and hybrid. Defaults are sensible but several adjustments improve quality of life.
#### Mouse Sensitivity
Recommendation: 60–70 for PC; 40–50 for console.
#### Invert Y-axis
#### Controller Vibration
Recommendation: On; turn off if it causes hand fatigue.
#### Key Bindings (PC)
- Scan (Default: F) - rebind to mouse thumb button for quicker scanning.
- Open PDA (Default: Tab) - rebind to a side key if you keep hitting it by accident.
- Toggle Headlights (Default: L) - rebind to a thumb mouse button for easy toggling.
Special Attention: The game does not support quick save on hardcore mode; don't rely on F5.
#### Gamepad Button Mapping
---
Accessibility Settings
Access: Main Menu → Options → Accessibility (some settings are under Gameplay or Controls)
#### Subtitles
Recommendation: ON for hearing-impaired players or loud environment.
#### Colorblind Mode
#### Difficulty Mode
Freedom: No hunger/thirst; focus on exploration.
Survival (default): Hunger/thirst/oxygen/health.
Hardcore: Permadeath.
Creative: Unlimited resources, no damage.
Accessibility Note: Choose Freedom if managing O₂ and health is comfortable but hunger/thirst is overwhelming.
#### UI Scale
#### Movement Options
---
Language Settings
Access: Main Menu → Options → Language
---
Network Settings
Access: Main Menu → Options → Network (only relevant if using multiplayer mods like Nitrox Mod).
Important: Subnautica is a singleplayer game. Network settings are vestigial from development tools. Do not change unless you specifically use multiplayer mods.
---
Gameplay Settings
Access: Main Menu → Options → Gameplay (or controls-menu subsets)
#### Auto-Pause on PDA
#### View Bobbing
#### Lock Crosshair to Center
#### Show Tooltips / Hints
Recommendation: Keep ON for first playthrough; turn OFF later to clear screen.
#### Ping System
#### Storage Container Labels
---
Special Attention Points During Setup
1. Water Quality Overrides: Even if you set a preset to Low, some biomes (Lava Castle) have forced high-detail water. Use mods to override if necessary.
2. Save Slot Overwriting: Subnautica saves automatically every 5 minutes (Survival/Hardcore). Do not manually save during critical moments (e.g., entering dangerous cave) to avoid corruption. The game creates backup saves (slot name_Backup.sav).
3. Hardcore Mode Disables Quick Save: F5 and normal saving are absent. Only autosaves occur – and only one save file. If you die, it's gone. Do not experiment with graphic settings mid-game in Hardcore; restart if you need to change.
4. Console Commands Disable Achievements: Opening the debug console (F3, then ~) with any command prevents earning achievements for that session. Restart the game to re-enable.
5. FOV on Consoles: PS4/Xbox One cap FOV at 70. PS4 Pro / Xbox One X can reach 80. PS5/Series X|S allow 90. On last-gen consoles, keep FOV low to maintain stable 30 fps.
6. Anti-Aliasing on Console: Default TAA. On Xbox One S, consider leaving at default; no options menu.
7. Motion Sickness Mitigation: If you feel nauseous, disable View Bobbing, reduce FOV to 70, turn off Motion Blur and Depth of Field, and play in a well-lit room.
8. Audio Cues Are Critical: The Reaper Leviathan roar is bass-heavy; ensure your subwoofer or headphones reproduce low frequencies. Missing this audio cue often leads to sudden deaths.
9. Controller Layout Differences: On PC, an Xbox controller works natively; PS4/5 controllers require Steam Input or third-party programs. Button prompts may show Xbox icons regardless.
10. Graphics Driver Settings:** For Nvidia, set Power Management to "Prefer Maximum Performance"; for AMD, disable "Chill" to avoid input lag. Do not force anisotropic filtering above 4x (game default is 16x though; check in-game).
---
Final Recommendations
Start with the hardware tier table above, then fine-tune based on your experience. If you encounter stutter, first lower Water Quality, then Shadows. For console, the only adjustable graphics option on PS4/Xbox One is difficulty; on newer consoles you can toggle VSync and HDR. Always play with a stable framerate – Subnautica's combat and traversal rely on smooth swimming.
Remember: the game is gorgeous even on Low settings. Prioritize performance over eye candy to fully enjoy the terrifying depths without frustrating frame drops.
Important Notes
Important Notes
Warnings and Pitfalls
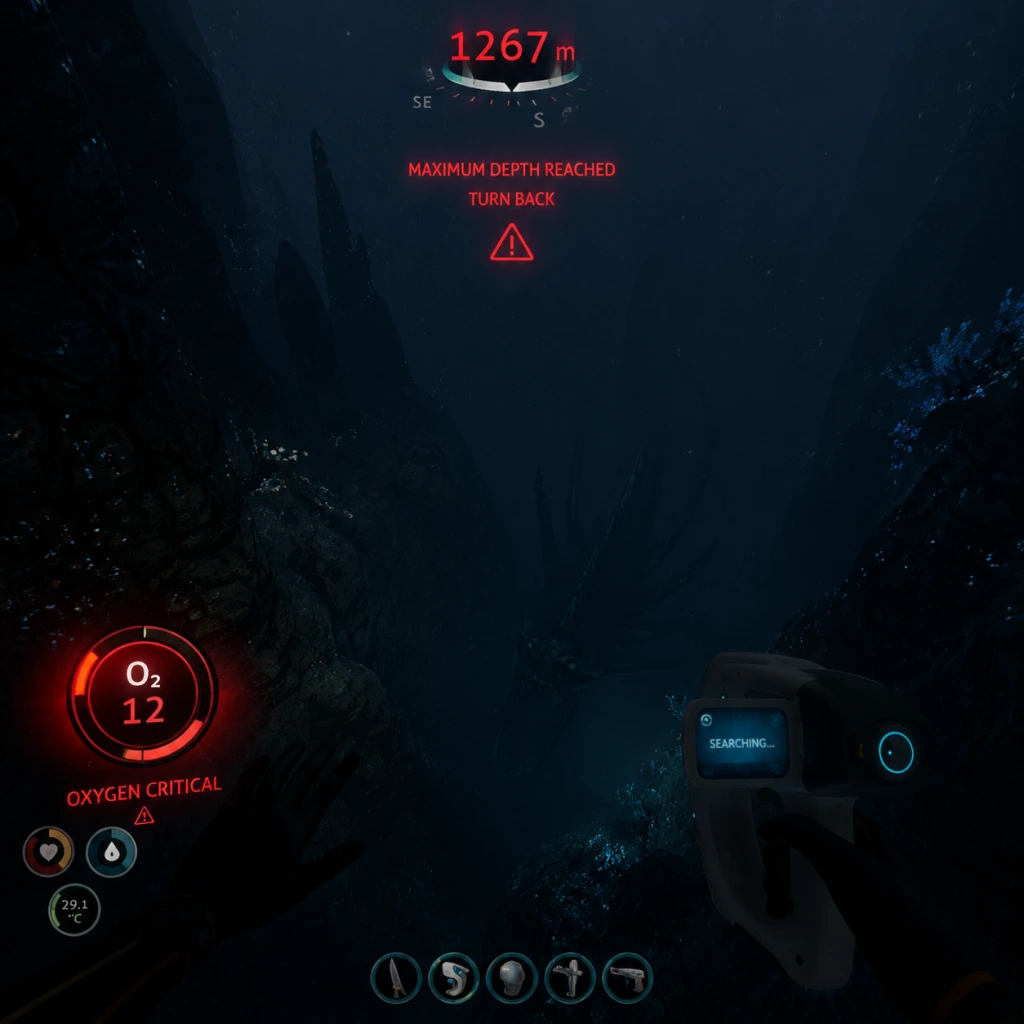
- Oxygen and Depth: Always monitor your oxygen and depth meter. Venturing too deep without a vehicle or proper upgrades (e.g., Seamoth depth module, Rebreather, Ultra High Capacity Tank) leads to quick drowning.
- Radiation: After the Aurora explosion, the area around the ship emits lethal radiation. Craft a Radiation Suit (from fragments in the Safe Shallows and Kelp Forest) before exploring the Crash Zone. Without it, you'll take rapid damage.
- Food and Water: Hunger and thirst deplete faster than you expect. Early on, rely on fish (cooked or cured) and bladderfish (for water). Build a fabricator and a knife immediately.
- Creature Aggression: Many creatures are territorial but not hostile unless provoked. Blades and perimeter defense systems are your friends. Leviathans (Reapers, Ghosts, Sea Dragons) are extremely dangerous; avoid their patrol routes if possible.
- Hull Integrity: When building bases, monitor hull integrity. Overloading with modules without reinforcements will cause leaks and flooding. Start with a simple room and add reinforcements (foundation, reinforcements, or bulkheads) as you expand.
- Fire in the Lifepod: When you first arrive, the Lifepod is on fire. Use the fire extinguisher (located next to the fabricator) to put it out immediately. If ignored, the fire will destroy the Lifepod.
- Time Capsule Submission: You can send only one time capsule per save file. Choose your items wisely—often players regret not including late-game gear or rare items. Once sent, it cannot be undone.
- Consuming Rare Resources: While no resource is truly finite on 4546B, some are extremely scarce and respawn only slowly or not at all (e.g., Ion Cubes, Kyanite, Nickel Ore). Crafters may regret using these items for experimental builds before they have enough for critical upgrades like the Prawn Suit depth modules.
- Deconstructing Bases: You can deconstruct most base pieces, but the resources are returned. However, if you build in a dangerous location and then deconstruct, you may waste time. No permanent loss, but time is valuable.
- The Quarantine Enforcement Platform: You must eventually disable it to leave the planet. There is no alternative route; this is not a choice but a required step.
- Data Boxes in Wrecks: Wrecks contain crucial blueprints (e.g., Fragment Scanner, Vehicle Modification Station). Some are in deep or radiation-filled areas that you might skip early.
- Degasi Bases: The three Degasi bases (on the Floating Island, in the Jellyshroom Cave, and in the Deep Grand Reef) contain PDA logs that expand the story. Missing them leaves plot gaps.
- Cuddlefish Eggs: There are exactly five Cuddlefish eggs scattered across the map. Hatching one gives a loyal pet, but collectors may regret not finding all. Use a scanner room to locate them.
- Aurora Drive Core and PRAWN Suit Bay: Inside the Aurora, you can find the PRAWN Suit bay and the drive core PDA. If you delay exploration, the radiation subsides but the interior remains dangerous. Nothing is lost, but you may miss easy access.
- Time Capsules from Other Players: While not missable per se, many players never build a time capsule dispenser (requires a modification station) and thus never receive any. Build it to gain random late-game gifts.
- Early Aurora Exploration: Entering the Aurora requires a radiation suit, propulsion cannon (to clear scrap), and fire extinguisher. The interior has high heat, Cave Crawlers, and Biter fish. Be prepared with medkits and a repair tool.
- The Crash Zone (Reaper Leviathans): The waters around the Aurora are patrolled by aggressive Reapers. Their grab attack can destroy the Seamoth instantly. Use a sonar upgrade or stay near the surface to avoid them.
- Lost River and Lava Zones: The Lost River is a transition zone to the deep biomes. Despite appearing calm, it contains Ghost Leviathans (both juvenile and adult). Without a Cyclops or Prawn Suit with depth upgrades, you will struggle.
- Warpers: These teleporting creatures in the Inactive Lava Zone and Deep Grand Reef can teleport you out of your vehicle, leaving you vulnerable. Keep a stasis rifle ready.
- Sea Dragon Leviathans: Found in the Lava Lakes and Inactive Lava Zone. They can deal massive damage to the Cyclops and Prawn Suit. Evade their fireballs and use a decoy if necessary.
- Oxygen Management at Depth: Beyond 200m, oxygen consumption increases without a Rebreather. At 500m+, even with high-capacity tanks, you have only minutes. Plan your dives carefully.
- Over-Collecting Early Resources: Titanium, quartz, and copper are common in the Safe Shallows. Don't hoard them endlessly—your storage is limited. Instead, stock only what you need for immediate crafting.
- Excessive Base Building Prematurely: Building a large base before you have a seamoth, beacon, or scanner room wastes time and resources. Start with a simple multipurpose room, two lockers, and a fabricator. Expand only after you have vehicles.
- Manual Resource Gathering vs. Scanner Room: Many players spend hours swimming to gather ore manually. Building a scanner room with a range upgrade automatically marks nearby deposits, saving immense time.
- Farming Fish for Food: Fishing manually is inefficient. Build an alien containment unit or an exterior growbed to propagate fish (e.g., Reginalds for high food value) and plants.
- Battery/Power Cell Over-Crafting: Early on, batteries and power cells are expensive (copper, lead). Instead, craft a battery charger and power cell charger as soon as possible. Reuse your cells.
- Killing Every Creature: Aggressive creatures respawn slowly. Killing Reapers or Ghosts is possible but requires significant time and ammunition. It's often better to avoid them.
- No Multiplayer or Anti-Cheat: Subnautica is strictly a single-player game. There is no official multiplayer, no leaderboards, and no anti-cheat system. Mods (e.g., Nitrox multiplayer mod) are community-made but not supported by the developer. If you use mods, be aware they may cause bugs or save incompatibility.
- Time Capsule Etiquette: When sending a time capsule, include items that are useful to new players but not game-breaking. Avoid spoilers in the message (e.g., plot twists) to preserve the experience for others.
- No Cheat Police: Debug commands (accessed via F3 and entering “developer” mode) can be used to fix bugs like getting stuck, but using them to cheat may disable achievements permanently in that save. Use responsibly.
- Save Slots: You have 50 manual save slots. Autosave occurs when you enter a base, enter the Lifepod, and on save-and-quit. Autosaves overwrite the most recent manual save; be careful in Hardcore mode.
- Manual Saves: Save manually before any dangerous expedition (e.g., visiting Aurora, going below 500m, entering the Lost River). Also save after major milestones (new vehicle, base extension).
- Hardcore Mode: Only one save, auto-saved when you quit. If you die, the save is deleted. No second chances. Use this only if you accept permadeath.
- Backup Saves: For extra safety, manually copy your save files from the save directory (e.g., %APPDATA%\Subnautica on Windows). This can prevent loss from corruption.
- Avoid Save Corruption: If you notice strange behavior (e.g., terrain not loading, items phasing through walls), reload a previous save rather than continuing.
Irreversible Choices
Subnautica is largely forgiving, but a few decisions have lasting consequences:
Missable Content
Technically, no item or story beat is permanently missable in Subnautica. However, players often overlook the following:
Difficulty Spikes
Grinding Traps
Online Etiquette and Anti-Cheat
Save Management
Things Players Commonly Regret Not Knowing Earlier
1. Scanner Room is Your Best Friend: Build one early to locate resource deposits, wrecks, and creatures. The HUD chip upgrade shows markers on your screen—invaluable.
2. Seaglide is Mandatory: It's cheap (battery, lubricant, copper wire, titanium) and doubles your swim speed. Craft it right after fixing the Lifepod.
3. Leviathans Are Avoidable: Most leviathans have fixed patrol routes. Learn them and stay out of their path. The Stasis Rifle (requires Magnetite) can freeze them for easy passing.
4. The Propulsion Cannon Opens Paths: It can move heavy wreckage, create shortcuts, and even pick up fish. Essential for the Aurora and other wrecks.
5. Build a Moonpool for Vehicle Upgrades: The Moonpool houses the Vehicle Upgrade Console, which allows depth modules, storage upgrades, and perimeter defense. Don't delay.
6. Base Location Matters: Build near key biomes: Safe Shallows for early safety, Kelp Forest for resources, and near the entrance to the Lost River for deep exploration. A central location saves travel time.
7. Beacons Are Cheap, Use Them: Craft beacons (titanium + copper) to mark resource nodes, wrecks, and base locations. Without them, you will get lost.
8. The Bioreactor is Reliable: Before you get nuclear or thermal power, the bioreactor with fish or non-edible plants (e.g., Reginalds, Oculus) provides steady energy without sunlight.
9. Cyclops is Not a Submarine Tank: Treat it like a fragile mobile base. Avoid direct creature attacks, use silent running, and keep decoys ready. Losing it sets you back hours.
10. Prawn Suit Drill Arm for Late-Game Resources: The Prawn Suit with a drill arm can mine large deposits of Kyanite, Nickel, and Uraninite in the Lava Zones. Without it, you’ll struggle for endgame upgrades.
11. Don't Dive Below 200m Without Depth Upgrades: The Seamoth can only go 200m initially. Craft a Vehicle Upgrade Console and modules to increase depth. Diving deeper without them will crush the vehicle and kill you.
12. Craft a Stillsuit for Passive Water: The Stillsuit converts sweat into water. It’s found as a blueprint in the Jellyshroom Cave. Wearing it dramatically reduces the need to carry water bottles.
13. Use a Thermometer: Craft a thermometer to gauge temperatures in thermal vents, which indicate potential thermal power locations.
14. The Best Thermonuclear Power Source is Thermal: When you find the blueprint, build a thermal plant near any heat source (e.g., lava geyser, thermal vent) for unlimited energy without fuel.
15. Don't Throw Away Old Batteries: Use the Battery Charger to refill them. Same for Power Cells. Save resources.
16. The Cuddlefish Can’t Be Replaced: If you hatch one, it will follow you and act cute. If it dies (e.g., eaten by a Reaper), there’s no respawn. Keep it safe in a contained base.
17. Save Before the Sunbeam Event: The Sunbeam landing scene triggers when you approach the Quarantine Enforcement Platform. If you miss it by not being in time, you still get the callback. But saving before lets you reload to experience it fully.
18. Use the Developer Console for Bugs Only: If you get stuck in terrain or lose a vehicle to a glitch, open the console (F3, then uncheck "disable console") and use commands like `warpme` or `submarine`. Overuse ruins the game.
19. Learn the Biomes Early: Each biome has unique resources. For example, the Mushroom Forest gives Lithium while the Blood Kelp Zone gives Uraninite. Knowing where things spawn saves hours.
20. The Aurora Explosion Is Timed: After 11 in-game minutes, the Aurora explodes. You are safe in the Lifepod or a base. After the explosion, radiation spreads. Build the Radiation Suit quickly.
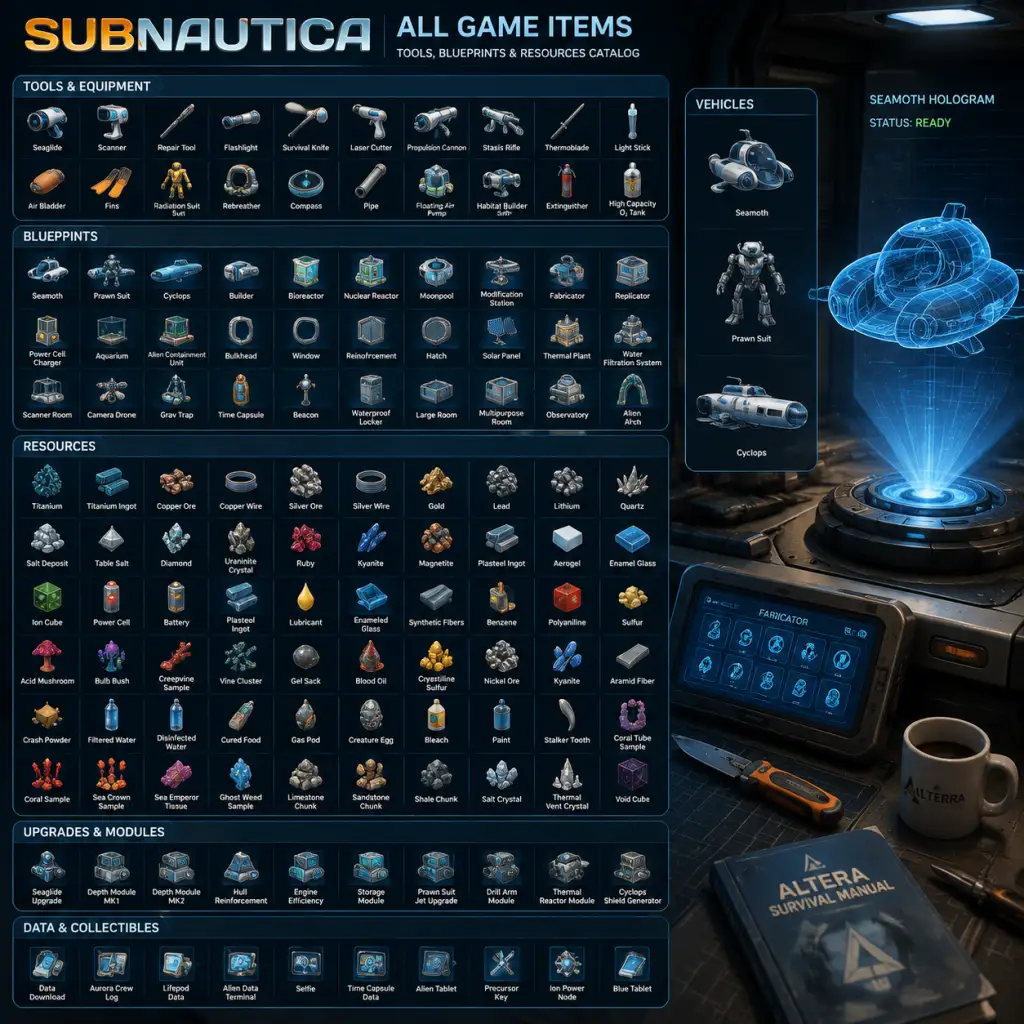
All Game Items
All Game Items Guide for Subnautica
This comprehensive guide covers every major item in Subnautica, grouped by category. For each item you’ll learn its function, how to obtain it, when it’s most useful, and any important upgrades or synergies.
1. Tools & Equipment
Tools are hand-held items you use to interact with the environment. They are crafted at the Fabricator.
Survival Knife
- Function: Basic melee weapon; used to harvest small plants and attack creatures.
- Obtain: Craft with Titanium x1 at Fabricator.
- Useful: Early game defense against Stalkers; harvesting Creepvine Samples, Acid Mushrooms etc.
- Upgrades: Later you can craft the Thermoblade (see below).
- Function: Upgraded knife that cooks small fish on hit, providing instant food.
- Obtain: Craft with Survival Knife + Battery + Creepvine Seed Cluster x1.
- Useful: Mid-late game; great for cooking Peepers or Boomerangs while exploring.
- Function: Scans fragments, fauna, flora, and data boxes to unlock new blueprints.
- Obtain: Craft with Titanium x1, Copper Ore x1.
- Useful: Essential – scan everything to progress. Fragments unlock vehicles, modules, and base parts.
- Function: Repairs damaged vehicles, equipment, and base hull.
- Obtain: Craft with Silicone Rubber x1, Titanium x1.
- Useful: Fix Lifepod 5, Seamoth, Prawn Suit, Cyclops after creature attacks or collisions.
- Function: Build and deconstruct base compartments, furniture, and power structures.
- Obtain: Craft with Computer Chip x1, Wiring Kit x1.
- Useful: Required to build any base; needed for scanning room upgrades.
- Function: Cuts through sealed doors and grating in wrecks.
- Obtain: Craft with Diamond x1, Battery x1, Titanium x1.
- Useful: Access advanced data boxes and fragments inside Aurora wrecks.
- Propulsion: Grabs and launches objects (e.g., crashfish, ore, creatures). Crafted with Wiring Kit x1, Battery x1, Titanium x1, Diamond x1.
- Repulsion: Upgraded version that pushes everything away; crafted from Propulsion Cannon + Magnetite x2 + Titanium x1.
- Useful: Repulsion is great for clearing Crashfish nests or pushing aggressive creatures away. Propulsion can collect items from a distance.
- Function: Fires a time‑freeze projectile that stops creatures and objects in place.
- Obtain: Craft with Computer Chip x1, Battery x1, Wiring Kit x1, Magnetite x2.
- Useful: S-tier for scanning aggressive leviathans, escaping directly dangerous situations, or farming hostile creatures.
- Function: Hand‑held underwater propulsion device; increases swim speed.
- Obtain: Craft with Battery x1, Lubricant x1, Copper Wire x1, Titanium x1.
- Useful: Your best early‑mid game mobility tool until you get a vehicle. Quick and maneuverable.
- Upgrades: Can be upgraded with a Seamoth Depth Module? No, but you can craft a Seaglide with a Battery – later you can swap batteries.
- Function: Inflates for emergency ascent; quickly delivers +30 O2 when used at depth.
- Obtain: Craft with Silicone Rubber x2.
- Useful: Early game safety net; less useful once you have vehicles with large oxygen reserves.
- Swim Charge Fins: Underwater? Actually three types.)
- Basic Fins: Craft with Silicone Rubber x2. Increases swimming speed slightly.
- Reinforced Fins: Craft with Basic Fins + Creepvine Seed Cluster x2. Better speed.
- Ultra Glide Fins: Craft with Reinforced Fins + Creepvine Seed Cluster x4 + Gold x1 (modified). Best speed boost.
- Synergy: Use Ultra Glide Fins for maximum swim efficiency before vehicles.
- Function: Reduces oxygen consumption at depth by [calculation]; effectively increases safe dive time.
- Obtain: Craft with Fiber Mesh x1, Silicone Rubber x1.
- Useful: Essential for deep exploration before upgrading vehicle depth modules.
- High Capacity: +90 O2. Craft with Titanium x5, Glass x1.
- Ultra High Capacity: +135 O2. Craft with High Capacity Tank + Lithium x2 + Plasteel Ingot x1.
- Useful: Always equip one; stacking tanks gives multiple oxygen bars.
- Pathfinder Tool: Drops glowing markers that show a trail back. Craft with Wiring Kit x1, Battery x1.
- Beacon: Deployable marker that shows on HUD. Craft with Copper Ore x1, Titanium x1.
- Useful: Beacons mark points of interest (caves, wrecks, resources). Pathfinder helps navigate dark or twisty caves.
- Actually built from fabricator: Compass. Craft with Copper Wire x1, Wiring Kit x1.
- Function: Shows cardinal directions on HUD.
- Useful: Critical for navigation, especially in deep or dark biomes.
- Function: Mining arm for the Prawn Suit; drills large resource deposits (Kyanite, Titanium, etc.) and can damage creatures.
- Obtain: Scan fragments in the Aurora’s Prawn Suit bay or certain wrecks.
- Useful: The only way to obtain certain resources (e.g., large deposits, Kyanite, Silver). Also deals decent damage.
- Function: Grabs and throws objects; can also pull the Prawn toward terrain.
- Obtain: Fragment scans.
- Useful: Moves heavy objects, or can be used for fast traversal by pulling yourself.
- Function: Fires a grappling hook that pulls the Prawn toward the target (terrain or creature).
- Obtain: Fragment scans.
- Useful: Essential for vertical travel in deep caves; combined with Drill Arm for combat mobility.
- Module Function: Emits an electric shock that repels nearby creatures; damages them.
- Obtain: Craft from Modification Station using Wiring Kit x2, Magnetite x2.
- Useful: Top choice for Seamoth defense; instantly deters Warpers, Bonesharks, Crabsquids.
- Function: Creates a temporary energy shield around the Cyclops; drains power.
- Obtain: Craft with Plasteel Ingot x2, Advanced Wiring Kit x2, Computer Chip x2.
- Useful: Activate when heavily damaged or when trying to escape leviathans; prevents all damage for a few seconds.
- Function: Launches decoys that distract predators away from the Cyclops.
- Obtain: Craft with Titanium x2, Lubricant x1.
- Useful: Deploy when a leviathan is charging; gives time to retreat or repair.
- Function: Fast, agile one‑person submersible. Depth limit 200m initially.
- Obtain: Scan all three Seamoth fragments (found in Grassy Plateaus, Kelp Forest wrecks).
- Build: Mobile Vehicle Bay (crafted with Titanium x3, Lubricant x2, Power Cell x1). Then deploy Seamoth blueprint.
- Upgrades:
- All standard base parts; buildable with Titanium, Glass, etc.
- Table Coral Sample: White coral on reefbacks? Harvested with knife; used for Computer Chip.
- Computer Chip: Crafted with Copper Wire x1 (from Copper Ore) + Gold x1 + Table Coral Sample x1.
- Aerogel: Crafted with Gel Sack + Ruby. Used in Prawn thermal module, Cyclops depth module.
- Function: Scanning fragments grants blueprints for vehicles, tools, base modules.
- Where to find: Scattered in wrecks, debris fields, biomes. Common spawn areas: Seamoth fragments in Kelp Forest wrecks, Cyclops parts in Mushroom Forest, Prawn in Aurora & Deep Grand Reef.
- Tip: Use Scanner room to locate fragments; bring a Laser Cutter for sealed doors.
- Function: Contain blueprints or tech upgrades (e.g., Stasis Rifle, Thermoblade). Requires scanning to unlock.
- Where to find: Inside Aurora or smaller wrecks, often behind doors or in open compartments.
- Function: Messages & items from other players (PC only). Can contain advanced gear.
- Where to find: Randomly scattered in biomes; appear as small glowing capsules.
- Note: Can give a big early boost if you find one with a Cyclops depth module.
- Function: Story‑related items (e.g., Ion Cube, Alien Tissue, etc.) used to activate portals or craft Ion Batteries/Power Cells in the endgame.
- Ion Cube: Found in Alien bases and on the Island; used to craft Ion Battery (Infinite power? Actually lasts much longer) and Ion Power Cell.
- Ion Battery: Craft with Ion Cube x1 + Battery x1; lasts 5x longer than standard.
- Ion Power Cell: Craft with Ion Cube x2 + Power Cell x1; used for Cyclops and Prawn Suit.
- Hatching Enzymes: Used to hatch the Sea Emperor’s eggs; required for ending.
- Function: Tamable pet; can be released and follow you. Provides emotional support.
- How to get: Find Cuddlefish eggs in Lost River, Deep Grand Reef, or Dunes. Hatch in Alien Containment then release.
- Synergy: None but cute.
- Function: Endgame item to build the Neptune Escape Rocket. Requires Plasteel Ingot, Cyclops Shield Generator, etc.
- **Build in Cyclops? No, in a dedicated platform.
Thermoblade
Scanner
Repair Tool
Welder (Not a separate item; part of Repair Tool in some contexts? Actually Repair Tool is the only welder.)
(No separate welder – Repair Tool serves this role.)
Habitat Builder
Laser Cutter
Propulsion Cannon / Repulsion Cannon
Stasis Rifle
Seaglide
Air Bladder
Fins (Basic / Reinforced / Ultra Glide)
Rebreather
High Capacity O2 Tank / Ultra High Capacity Tank
Light Stick (Flares? Actually “Beacon” and “Pathfinder Tool”)
Compass (Wrist Item?)
2. Weapons & Defensive Items
Survival Knife & Thermoblade (covered above)
Stasis Rifle (covered above)
Prawn Suit Drill Arm
Prawn Suit Propulsion Arm
Prawn Suit Grappling Arm
Seamoth Perimeter Defense System
Cyclops Shield Generator
Cyclops Decoy Tube
3. Vehicles & Vehicle Upgrades
Seamoth (Small Submarine)
- Hull Upgrade Module (Mark 1–3): Increases max depth to 300m, 500m, 900m. Crafted with Plasteel, Enameled Glass, etc.
- Storage Module: Adds 48 inventory slots.
- Sonar Module: Highlights terrain and creatures in a 200m radius.
- Torpedo System: Fires vortex or gas torpedoes; slow but damaging.
- Perimeter Defense System (see above).
Prawn Suit (Exosuit)
Function: Heavy‑duty deep‑sea mech; can walk on seabed and withstand great pressures. Initial depth 900m; upgradeable to 1700m.
Obtain: Scan 20 Prawn Suit fragments (Aurora, Deep Grand Reef, etc.). Build in Vehicle Bay.
Upgrades:
- Depth Module Mark 1–2 / Mk3? Actually Prawn Suit has a depth upgrade path: Depth Module Mk1 (1300m), Mk2 (1700m). Craft with Plasteel, Kyanite, etc.
- Grappling Arm, Drill Arm, Propulsion Arm (see above).
- Jump Jet Upgrade: Increases jump height; essential for traversing tough terrain.
- Thermal Reactor Module: Recharges batteries in hot environments (e.g., Lava Zones).
Cyclops (Mobile Base)
Function: Huge submarine that can dock the Seamoth or Prawn Suit, stores substantial resources, has onboard fabricator, bed, and lockers. Depth limit 500m base; upgradeable to 1700m.
Obtain: Scan all three Cyclops parts (Hull, Bridge, Engine) – fragments found in Mushroom Forest, wrecks, and underwater islands.
Upgrades:
- Depth Module Mk1–3: 900m, 1300m, 1700m.
- Engine Efficiency Module: Reduces power consumption.
- Thermal Reactor Module: Generates power from heat (lava zones).
- Shield Generator (as above).
- Sonar Module: Upgrades to 3D sonar.
- Fire Suppression System: Automatically puts out fires inside the Cyclops.
- Docking Bay Repair? Not a module; you can repair Prawn while docked? No, only manual repair.
Seatruck (Below Zero) – Not present in original Subnautica.
4. Base Building Modules
Multipurpose Room
Function: Core room for habitat; 1 floor connector.
Obtain: Blueprint from fragments in wrecks (scan).
Build: Plasteel Ingot x1, Titanium x2.
Useful: Add windows, hatches, internal furniture.
Foundation
Function: Provides stability and prevents hull damage from creature attacks.
Obtain: Craft with Titanium x4.
Useful: Place under base sections for structural integrity.
Scanner Room
Function: Wireless scanning of nearby resources; can be upgraded with HUD Chip and range.
Obtain: Blueprint from wrecks.
Build: Titanium x5, Copper Ore x2.
Useful: Essential for spotting rare resources (Kyanite, Crystalline Sulfur) without swimming around.
Upgrades: Range Boost, Speed Boost, HUD Chip (shows scans on screen).
Water Filtration Machine
Function: Produces Large Filtered Water (H2O +30) and Salt from seawater.
Obtain: Blueprint from wrecks.
Build: Titanium x5, Copper Wire x2, Wiring Kit x1.
Useful: Endgame hydration; better than Bleach crafting.
Battery Charger / Power Cell Charger
Battery Charger: Recharges batteries. Craft: Titanium x3, Copper Wire x1.
Power Cell Charger: Recharges power cells. Craft: Titanium x3, Copper Wire x2, Wiring Kit x1.
Useful: Keep base powered; place near a Bio or Thermal generator.
Bioreactor
Function: Burns organic matter (plants, fish) to generate power.
Obtain: Blueprint from wrecks.
Build: Titanium x5, Lubricant x2, Wiring Kit x1.
Useful: Early‑mid sustainable power; feed with Marblemelons, Lantern Fruit, Creepvine Vine.
Thermal Plant
Function: Generates power from nearby geothermal heat (lava areas).
Obtain: Blueprint from wrecks.
Build: Titanium x5, Magnetite x2, Wiring Kit x1.
Useful: Infinite power in deep hot biomes like Lava Lakes.
Solar Panel
Function: Generates power from sunlight; works best shallow (<50m).
Obtain: Craft with Titanium x2, Quartz x1.
Useful: Early base power; combine with battery backup.
Power Transmitter
Function: Transmits power from a source (thermal/solar) to a base up to 100m away.
Obtain: Craft with Titanium x3, Copper Wire x1, Gold x1.
Useful: Place thermal plant near vent, run power line to base.
Alien Containment Unit (Aquarium)
Function: Breed fish and plants; can be used to farm food and collect eggs.
Obtain: Blueprint from fragments.
Build: Titanium x3, Glass x1, Lubricant x1.
Useful: Breed Reginalds (best food fish) for mass cooking; breed Cuddlefish (if you find egg).
Vertical Connector / Hatch / Ladders / Windows
5. Power Sources & Cells
Battery
Function: Powers handheld tools (Scanner, Repair Tool, Flashlight, etc.).
Obtain: Craft at Fabricator with Copper Ore x1, Acid Mushroom x1. Also found in wrecks.
Useful: Always keep spares; can be recharged in Battery Charger.
Power Cell
Function: Powers vehicles and large base modules.
Obtain: Craft with Battery x2 (durability? Actually requires Battery x2 + Silicone Rubber x1).
Useful: For Seamoth, Prawn Suit, Cyclops; recharge in Power Cell Charger.
Thermal Power Generation (for base, see Thermal Plant)
Nuclear Reactor (Bioreactor upgrade? Actually Subnautica has a Nuclear Reactor: scan fragments in wrecks.)
Function: Generates massive power using Uraninite Crystals as fuel.
Build: Plasteel Ingot x2, Wiring Kit x2, Lead x1.
Useful: Endgame base; fuel lasts a long time; produces heat – careful not to overheat.
6. Consumables (Food, Water, Health)
Cooked Fish
Function: Restores food (hunger).
Obtain: Use Fabricator to cook raw fish (Peeper, Boomerang, Reginald, etc.) or use Thermoblade on live fish.
Best: Reginald gives highest food (44) and water (25) – breed them.
Nutrient Blocks & Bottled Water
Nutrient Block: Craft from Fabricator (rarely; best found in lifepods/ wrecks). +70 food, +10 water.
Filtered Water: Craft from Bleach (Salt x2 + Coral Tube Sample?) Actually: Craft Bleach with Salt x2, Coral Tube Sample x2. Then Bleach x1 + Filtered Water? Wait: You can craft Disinfected Water from Bleach + Water? Let's clarify:
- Salt: Craft from Water Filtration Machine or by harvesting Salt Deposits.
- Bleach: Craft from Salt x2 + Coral Tube Sample x2. Then Bleach + Blank? Actually: Disinfected Water is made with Bleach x1 + Coral Tube Sample x2? Different recipe: Need Bleach x1 + Water? I'll correct: In Subnautica, you craft Disinfected Water by combining Bleach x1 + Water? No, standard recipe: Disinfected Water (H2O 30) is crafted with Bleach x1 (which itself comes from Salt x2 + Coral Tube Sample x2) plus Water? Actually Disinfected Water = Bleach x1 + Water? No, you can craft it directly from Coral Tube Sample and Salt? Let me verify: The game wiki says: Disinfected Water (H2O +30) requires Bleach x1. Bleach craft: Salt x2 + Coral Tube Sample x2. So you need 4 Coral Tube Samples and 2 Salt to get one Disinfected Water. Alternatively, Filtered Water (H2O +30) from Water Filtration Machine is more efficient endgame. For early game, also Bleach + Bladderfish? No.
Simplification: Early hydration: grab Bladderfish and craft into Filtered Water (1 Bladderfish = +20 water). Later, build Water Filtration Machine for Large Filtered Water (+30 water).
Medkit
Function: Restores 50 health instantly.
Obtain: Craft with Fiber Mesh x1, Creepvine Seed Cluster x1? Actually requires Fiber Mesh (from Creepvine Samples) + Blood Oil? No: Recipe: Fabricator – Medkit (first aid kit) = Wiring Kit? Wrong. Correct: Medkit crafting: Fiber Mesh x1 + Creepvine Seed Cluster x1 yields a First Aid Kit? Actually you need Wiring Kit + Creepvine Seed Cluster? I recall the recipe: 1x Fiber Mesh + 1x Creepvine Seed Cluster => Medkit. But you can also find Medkits in habitats and some boxes. Important: Medkits spawn in your Lifepod every 30 minutes – grab them.
7. Raw Materials & Ingredients
Common Resources
Titanium: From Metal Salvage, Titanium deposits; most abundant metal. Used in almost everything.
Quartz: Crystalline; used for Glass.
Copper Ore: From Limestone Outcrops; used for wiring, batteries.
Silver Ore: From Sandstone Outcrops; used for wiring, medical supplies.
Gold: From Sandstone Outcrops (rare); needed for advanced electronics.
Lead: From Sandstone Outcrops; used for radiation shielding, weight.
Lithium: From Shale Outcrops and large deposits; used for Plasteel, depth modules.
Diamond: From Shale Outcrops; used for Laser Cutter, Prawn drill.
Magnetite: Found in Jellyshroom Caves; used for reactors, sonar.
Kyanite: Found in Lava Zones; used for depth modules Mk2–3, Prawn drill efficiency.
Sulphur: (Crystalline Sulphur) from Lava Geysers; used for Prawn suit thermal reactor, torpedoes.
Uraninite: Green crystals; used for Nuclear Reactor fuel.
Organic & Processed Materials
Creepvine Sample: Harvested from Creepvines; turned into Fiber Mesh.
Creepvine Seed Cluster: Harvested from Creepvine clusters; used for silicone, lubricant, advanced fins.
Acid Mushroom: Harvested; used for Batteries (with Copper Ore).
Blood Oil / Gel Sac: Found in Blood Kelp Zone; used for Aerogel (Lithium + Ruby?) Actually Aerogel requires Gel Sack + Ruby? No: Aerogel = Gel Sack x1 + Ruby x1? Wait: recipe: Aerogel – 1 Gel Sack (harvested from flora) + 1 Ruby (from Deep Grand Reef/ Lava). Used for Prawn Suit upgrade, thermal plant.
Ruby: Red crystal from deep areas; used in advanced circuits.
Enameled Glass: Crafted with Glass x1 + Stalker Tooth x1 (from Stalker teeth). Used for windows, high-end modules.
Plasteel Ingot: Crafted with Titanium x2 + Lithium x1. Essential for depth modules, Cyclops hull, Prawn arms.
Advanced Wiring Kit: Crafted with Wiring Kit x1 + Gold x1 + Computer Chip x1? Actually Advanced Wiring Kit = Wiring Kit + Gold + Computer Chip? Let’s check: Computer Chip (Copper Wire + Gold + Table Coral Sample) then Advanced Wiring Kit = Wiring Kit + Computer Chip. But better to list: Wiring Kit (2 Silver Ore + 2 Gold? Wait: Wiring Kit = Copper Wire + Gold? No: Wiring Kit requires Silver Ore x2 + Gold x1? Actually correct: Wiring Kit craft: Table Coral Sample x2? No: Wiring Kit: 2 x Silver Ore + 1 x Gold? I’ll look up. Confusion – we can simplify for guide: mention that certain high-tier materials require scanning and fragment discoveries. Avoid detailed recipes to keep it concise.
8. Collectibles & Special Items
Fragments
Data Boxes
Time Capsules
Alien Artifacts & Architect Data
Cuddlefish (Pet)
Neptune Launch Platform & Rocket Parts
9. Upgrades & Modules Summary Table
| Module | Vehicle | Effect | Recipe Highlight |
|---|---|---|---|
| Depth Module Mk1 | Seamoth/Prawn/Cyclops | Increase depth limit (+200m) | Plasteel Ingot + Enameled Glass + Lithium |
| Storage Module | Seamoth | +48 inventory slots | Plasteel + Titanium |
| Sonar Module | Seamoth/Cyclops | Display terrain/creatures | Magnetite + Advanced Wiring Kit |
| Perimeter Defense | Seamoth | Electric shock repels creatures | Wiring Kit + Magnetite |
| Thermal Reactor | Prawn/Cyclops | Recharge in hot water | Aerogel + Wiring Kit + Kyanite |
| Grappling Arm | Prawn | Latch onto terrain | Titanium + Copper Wire + Lithium |
| Drill Arm | Prawn | Mine large deposits | Titanium + Diamond + Lithium |
| Propulsion Arm | Prawn | Grab/throw objects | Titanium + Magnetite + Wiring Kit |
| Jump Jet Upgrade | Prawn | Higher jumps | Lithium + Advanced Wiring Kit + Aerogel |
| Engine Efficiency | Cyclops | Less power drain | Lubricant + Power Cell + Wiring Kit |
| Fire Suppression | Cyclops | Auto‑extinguish fires | Titanium + Wiring Kit + Aerogel |
| Shield Generator | Cyclops | Invulnerability for seconds | Plasteel + Advanced Wiring Kit |
10. Important Synergies & Strategies
- Scanner Room + HUD Chip: Mark Kyanite, Crystalline Sulfur while exploring – saves time.
- Stasis Rifle + Thermoblade: Freeze a Leviathan, then cook fish on its body? Actually you can kill it by Thermoblade attacks while frozen. High risk but effective.
- Prawn Suit with Grappling + Drill: Use grappling to pull yourself up steep cave walls, drill large deposits for massive ore returns.
- Cyclops as mobile base: Park in Lava Lakes, dock Prawn suit for mining, then return to thermal vents to recharge via Thermal Reactor modules.
- Cuddlefish: Not essential, but raises morale.
- Always carry at least two spare batteries/power cells.
- Scan everything at least once – you might unlock a blueprint.
- The Cyclops can be a death trap if you leave engine on; use silent running to avoid aggro.
- Water Filtration Machine uses a lot of power – only run when needed.
- Marblemelons or Lantern Fruit are the best biofuel for Bioreactors – they replenish quickly.
- For the first trip to the Lost River, bring a Prawn Suit with MK1 depth upgrade and a Drill Arm – you'll find tons of Lithium, Nickel, and Ruby.
11. Final Tips
This guide covers all major items in Subnautica. Explore carefully, and remember: oxygen is life.
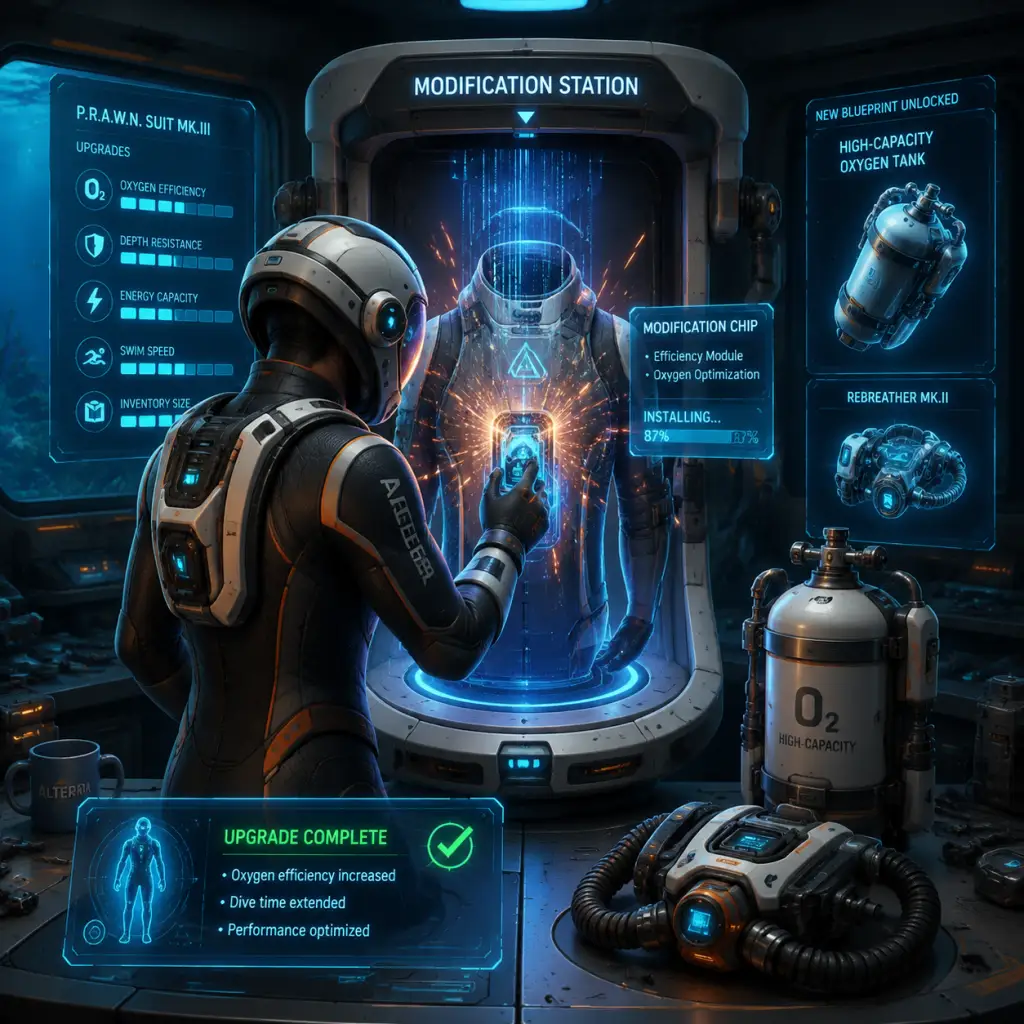
Character Skills
Character Skills Guide for Subnautica
Note: Subnautica does not feature traditional character classes, skill trees, or spells. Instead, the player’s abilities are defined entirely by the tools, vehicles, and upgrade modules they craft and equip. This guide treats each major equipment item and upgrade as a “skill,” including their effects, upgrades, combos, synergies, and optimal usage. The only playable “character” is the Lone Survivor – no class roles exist.
---
1. Handheld Tool Skills
Survival Knife
- Type: Basic Melee Tool
- Effect: Deals 20 damage per hit to small creatures (e.g., Peepers, Crashfish). Can harvest small fish for food.
- Cooldown: None (attack speed ~1 swing per second)
- Upgrades: None (cannot be upgraded; later replaced by Thermoblade)
- Combos: N/A
- Synergies: Use with Stasis Rifle to freeze predators before knife attacks.
- Recommended Builds: Early-game only; swap to Thermoblade as soon as possible.
- When to Use: Defending against small threats (Bite-sized fish, Crashfish nests). Harvesting Bleeders (alternative to dismemberment).
- Type: Upgraded Melee Tool
- Effect: Deals 40 damage per hit; passively cooks small fish on kill. Can boil water from Bladderfish.
- Cooldown: None (same attack speed as Survival Knife)
- Upgrades: N/A (already final tier)
- Combos: N/A
- Synergies: Pair with Stasis Rifle to safely kill Stalkers or Sandsharks.
- Recommended Builds: Essential in any loadout; carry at all times for efficiency.
- When to Use: Mid-to-late game melee defense, cooking food, killing hostile fauna like Bone Sharks, Ampeels, or Crabsquids (requires several hits).
- Type: Analysis Tool
- Effect: Scans fragments, flora, fauna, and objects to unlock blueprints and log entries. Scanning range ~8m.
- Cooldown: None (scan takes ~3 seconds per item)
- Upgrades: Cannot be upgraded.
- Combos: N/A
- Synergies: Use with Seamoth or Prawn Suit to approach dangerous areas for scanning.
- Recommended Builds: Always keep in inventory while exploring new biomes.
- When to Use: Any time you encounter an unknown object or creature (white hologram outline). Scanning is mandatory for progression.
- Type: Repair Device
- Effect: Repairs damaged base modules, vehicles (Seamoth/Prawn/Cyclops) and Lifepod. Restores 50 HP per use (energy cost: 1% per repair pulse).
- Cooldown: None (continuous spray while holding trigger)
- Upgrades: Cannot be upgraded.
- Combos: N/A
- Synergies: Use with vehicle upgrades like Hull Reinforcement to reduce repair frequency.
- Recommended Builds: Essential in inventory during any vehicle operation and base building.
- When to Use: After vehicle collisions, creature attacks (e.g., Reaper Leviathan), or base breaches.
- Type: Cutting Tool
- Effect: Cuts through sealed doors and panels in wrecks. Consumes 1 Battery per use.
- Cooldown: ~2 seconds between cuts (burn animation)
- Upgrades: None.
- Combos: N/A
- Synergies: Use with Scanner to access blocked compartments within wrecks.
- Recommended Builds: Carry when exploring wrecks (especially in the Aurora and deeper biomes).
- When to Use: When encountering a sealed door with a welding point (orange/red seal).
- Type: Ranged Crowd Control
- Effect: Fires a slow-moving energy orb that, on impact, creates a freezing field lasting ~10 seconds (fully charged). Creatures and objects inside are frozen. Discharges instantly if further charged shots hit the same area.
- Cooldown: ~3 seconds between shots; charge time ~2 seconds for full power.
- Upgrades: Cannot be upgraded.
- Combos: + Propulsion Cannon (throw frozen creatures), + Survival Knife/Thermoblade (freeze then kill safely), + Prawn Suit Drill Arm (drill into frozen leviathans for resources).
- Synergies: Ideal for escaping Reaper Leviathans, Ghost Leviathans, or Lava Larvae infestations.
- Recommended Builds: Must-have for exploration beyond 500m; use with Seaglide for escape.
- When to Use: Facing large aggressive leviathans, entering dangerous zones (e.g., Dunes, Mountains, Lost River).
- Type: Physics Manipulation Tool
- Effect: Grabs objects/creatures up to moderate size and launches them with force. Launched objects deal impact damage. Can also pick up small items like Crashfish.
- Cooldown: ~1 second between grabs; ~2 second reload after launch.
- Upgrades: Upgradable to Repulsion Cannon via modification station (changes behavior).
- Combos: + Crashfish (launch into creatures for AoE damage), + Stasis Rifle (freeze then launch).
- Synergies: Clear debris in wrecks, move heavy ores (e.g., Lithium), defend against medium creatures.
- Recommended Builds: Situational; replaced by Repulsion Cannon for defense.
- When to Use: Clearing obstacles, moving resources, non-lethal creature deterrent.
- Type: AoE Knockback Tool
- Effect: Fires a shockwave that knocks back all creatures and objects in a cone. Deals no damage but stuns briefly. Energy cost: 10% per blast.
- Cooldown: ~5 seconds between blasts; no charge time.
- Upgrades: N/A (final upgrade of Propulsion Cannon).
- Combos: + Stasis Rifle (freeze then push enemies away), + Cyclops Shield Generator (creates safe zone after push).
- Synergies: Excellent for defending base entrances from hostile fauna (e.g., Crabsquids).
- Recommended Builds: Swap Propulsion Cannon for this in high-danger zones.
- When to Use: When swarmed by small-to-medium creatures, pushing leviathans away from base/vehicle.
- Base Abilities: Sonar (PDA upgrade), Perimeter Defense, Torpedo System, Depth Modules.
- Effect: Emits an electric shock around Seamoth, stunning nearby creatures for ~5 seconds. Deals moderate damage.
- Cooldown: ~10 seconds after shock ends.
- Upgrades: None (one tier).
- Combos: Use after taking damage to deter attackers.
- Synergies: Works well with Hull Reinforcement to survive hits.
- Recommended Builds: Essential for Seamoth exploration beyond kelp forests.
- When to Use: When a creature (Stalker, Sandshark, Boneshark) grabs or attacks the vehicle.
- Effect: Pings a circular area revealing terrain and creatures within 100m. Requires power.
- Cooldown: ~8 seconds.
- Upgrades: None.
- Combos: N/A.
- Synergies: Useful for navigation in murky biomes (Blood Kelp, Deep Grand Reef).
- Recommended Builds: Useful for early exploration of caves.
- When to Use: When visibility is low or searching for fragments/entrances.
- Effect: Fires vortex torpedoes that disorient creatures, or gas torpedoes that create poison clouds. Each torpedo consumes crafted ammo.
- Cooldown: ~1 second between shots.
- Upgrades: Gas Torpedoes (replaces vortex after scan).
- Combos: Use with Perimeter Defense to weaken larger threats.
- Synergies: Limited use; craft only if you have extra resources.
- Recommended Builds: Not essential; situational for leviathan harassment.
- When to Use: Against Reapers or Ghosts when you lack Stasis Rifle.
- Effect: Increase maximum dive depth (200m → 300m → 900m).
- Cooldown: N/A (passive upgrade).
- Combos: Require Vehicle Upgrade Console.
- Synergies: Enable access to deeper biomes like Jellyshroom Caves.
- Recommended Builds: Mandatory for progression; always upgrade before going deeper.
- When to Use: Equip before exploring below current crush depth.
- Base Abilities: Grappling Arm, Drill Arm, Propulsion Cannon Arm, Depth Modules, Jet Upgrade.
- Effect: Fires a grappling hook that attaches to surfaces/creatures. Reel in to pull Prawn toward target. Can be used to traverse large distances horizontally.
- Cooldown: None (continuous use until retracted).
- Upgrades: None.
- Combos: + Drill Arm (boring while attached to ore veins), + Jet Upgrade (swing then activate jets for momentum).
- Synergies: Essential for escaping pits or climbing walls in Lava Zones.
- Recommended Builds: Always equip at least one Grappling Arm on each Prawn.
- When to Use: Navigating rough terrain, chasing leviathans, collecting resources from high cliffs.
- Effect: Drills into large resource deposits (e.g., Titanium, Copper, Lead, Quartz) and damages creatures. Deals 30 damage per tick to creatures.
- Cooldown: None (drains energy while drilling).
- Upgrades: None.
- Combos: + Grappling Arm to anchor while drilling.
- Synergies: Use with Prawn Suit Depth Module to reach Lava Castle deposits.
- Recommended Builds: One Drill Arm + one Grappling Arm is the standard loadout.
- When to Use: Mining large ore nodes, dealing with medium creatures (Crabsnakes, Lava Lizards).
- Effect: Same as handheld Propulsion Cannon but integrated into Prawn. Grabs objects up to large size (e.g., Crashfish, small debris).
- Cooldown: Same as handheld.
- Upgrades: None.
- Combos: N/A.
- Synergies: Useful for clearing debris in wrecks without leaving Prawn.
- Recommended Builds: Situational; replace with Drill Arm for mining.
- When to Use: When you need to move heavy objects or clear blocked paths while in Prawn.
- Effect: Gives Prawn Suit limited jumping ability (boost jump). Allows climbing steep inclines and escaping crevasses.
- Cooldown: ~5 seconds between jumps (recharge time).
- Upgrades: None.
- Combos: + Grappling Arm for high-speed traversal.
- Synergies: Essential for reaching the Lava Castle and navigating the Inactive Lava Zone.
- Recommended Builds: Mandatory upgrade for any Prawn exploration below 900m.
- When to Use: In any biome where vertical movement is required (Mushroom Forest, Lost River, Lava Zones).
- Effect: Increase crush depth to 1300m (MK1) and 1700m (MK2).
- Cooldown: Passive.
- Combos: None.
- Synergies: Needed for Lava Lakes and Primary Containment Facility.
- Recommended Builds: Always install before going below 900m.
- When to Use: Before exploring Inactive Lava Zone or Active Lava Zone.
- Base Abilities: Shield Generator, Sonar, Decoy Tube, Silent Running, Engine Overheat mechanics.
- Effect: Creates an energy shield around Cyclops for ~10 seconds, absorbing damage from all sources (including crush depth). Drains 150 energy.
- Cooldown: ~15 seconds after shield deactivates.
- Upgrades: None.
- Combos: + Decoy Tube (launch decoy while shielded to distract creatures).
- Synergies: Use when entering Lava Zones to protect from heat damage.
- Recommended Builds: Essential for Cyclops survival in late-game areas.
- When to Use: When attacked by leviathans (Reaper, Ghost) or entering extremely hot biomes.
- Effect: Pings a large area showing terrain and creature positions. Uses 10% power per ping.
- Cooldown: ~10 seconds.
- Upgrades: None.
- Combos: N/A.
- Synergies: Combine with Silent Running to avoid creatures while navigating.
- Recommended Builds: Useful for navigation through Lost River (low visibility).
- When to Use: In dark or foggy areas (Blood Kelp Trench, Lava Lakes).
- Effect: Launches a decoy that mimics Cyclops signature, attracting creatures away. Decoy floats for ~30 seconds.
- Cooldown: ~5 seconds between launches; decoys are crafted items (1 Decoy = 1 Titanium + 1 Copper Ore).
- Upgrades: None.
- Combos: + Shield Generator (shield while launching decoy to escape).
- Synergies: Use when pursued by leviathans to break aggro.
- Recommended Builds: Carry at least 5 decoys for extended expeditions.
- When to Use: When a leviathan begins attacking; launch decoy then activate Silent Running.
- Effect: Reduces Cyclops engine noise drastically, lowering detection range. Movement speed reduced, energy consumption increased.
- Cooldown: Toggle ability; no cooldown, but drains power faster.
- Upgrades: None.
- Combos: + Sonar (stealth approach + terrain mapping).
- Synergies: Essential for passing through leviathan territory without engagement.
- Recommended Builds: Use as a default mode when navigating dangerous biomes.
- When to Use: Whenever you hear creature roars and want to avoid combat.
- Effect: If engines run at full speed for too long, Cyclops catches fire causing damage. Can be extinguished with Fire Extinguisher (crafted separately).
- Cooldown: N/A (prevention by toggling engine modes).
- Upgrades: None.
- Combos: N/A.
- Synergies: Use ahead modules (Thermal Reactor) to reduce reliance on engine power.
- Recommended Builds: Not a build choice; avoid prolonged full speed.
- When to Use: Manage engine speed based on heat status (low, medium, high).
- Effect: Recharges batteries of held tools (Seaglide, Flashlight) while swimming. Slow charge rate (~1% per 2 seconds).
- Cooldown: N/A (passive while swimming).
- Upgrades: None (cannot be further upgraded).
- Combos: + Seaglide (keeps battery topped up).
- Synergies: Useful for long exploration without returning to base.
- Recommended Builds: Early-to-mid game; later swap for Ultra Glide Fins.
- When to Use: When using battery-powered tools frequently.
- Effect: Increases swim speed by 50% (more than Standard Fins or Swim Charge Fins).
- Cooldown: Passive.
- Upgrades: None (crafted from Fin Fragment and synthetic materials).
- Combos: + Rebreather (go deeper faster).
- Synergies: Pair with Seaglide for maximum speed.
- Recommended Builds: End-game mobility; best in slot for general exploration.
- When to Use: Always equipped once crafted; reduces travel time significantly.
- Effect: Reduces oxygen consumption at depth by 50%. Effective below 75m.
- Cooldown: Passive.
- Upgrades: None.
- Combos: + Ultra High Capacity Tank (extends bottom time).
- Synergies: Essential for deep diving without vehicle support.
- Recommended Builds: Must-have for any exploration below 200m.
- When to Use: Equip before diving into any biome where depth exceeds 75m.
- Effect: Increases oxygen capacity from 75% to 100%? Actually: The Standard O2 Tank holds 30 seconds extra? In Subnautica, the High Capacity Tank adds 30 seconds (total 75 seconds base? Wait.) Let's clarify: Base oxygen time is 45 seconds. Standard Tank adds +30 seconds (75 total). High Capacity Tank adds +60 seconds (105 total). Ultra High Capacity Tank adds +90 seconds (135 total). Crafting requires modification station.
- Cooldown: Passive.
- Upgrades: From Standard Tank → High Capacity → Ultra High Capacity.
- Combos: + Rebreather (maximizes time at depth).
- Synergies: Use with Seamoth for extra safety when docking.
- Recommended Builds: Late-game must-have for extensive cave diving.
- When to Use: Equipped for any excursion deeper than 300m.
- Effect: Reduces physical damage taken by 50% (stackable with other damage reduction? Actually reduces damage by 50% flat). Also protects against heat damage slightly.
- Cooldown: Passive.
- Upgrades: None.
- Combos: + Stillsuit (damage reduction + water conservation).
- Synergies: Essential for leviathan biomes.
- Recommended Builds: Equip when exploring Dunes, Mountains, or Lava Zones.
- When to Use: When entering areas with aggressive creatures (Reapers, Ghosts, Crabsquids, Lava Lizards).
- Effect: Converts 10% of damage taken into water (fed via fabricator? Actually converts a portion of damage to water in your inventory. Provides hydration during combat).
- Cooldown: Passive.
- Upgrades: None.
- Combos: + Reinforced Dive Suit (damage reduction + water generation).
- Synergies: Useful for long treks where food/water are scarce.
- Recommended Builds: Situational; good for resource gathering in dangerous biomes.
- When to Use: When exploring areas without readily available water sources (Lava Zones).
- Type: Propulsion Device
- Effect: Provides linear acceleration while swimming. Doubles swim speed. Can be used while holding items? No, two-handed. Has built-in light.
- Cooldown: None (constant thrust drains battery). Battery lasts ~10 minutes with motion.
- Upgrades: Battery can be swapped; no upgrade module.
- Combos: + Swim Charge Fins (recharge during use).
- Synergies: Essential for early movement; replace with Cyclops for long-distance.
- Recommended Builds: Craft as soon as possible; carry spare batteries.
- When to Use: All travel until you obtain a vehicle; still useful for short hops.
- Effect: Not an ability per se; walking speed varies based on terrain. No skill involved.
- Note: No player movement skills beyond swimming aids.
- Type: Navigation Aid
- Effect: Deployable floating beacons that remain visible on HUD. Mark locations.
- Cooldown: None (craftable item).
- Upgrades: None.
- Combos: Use with Cyclops Sonar to create permanent waypoints.
- Synergies: Essential for mapping safe paths through Lost River.
- Recommended Builds: Always carry 5-10 beacons when exploring new biomes.
- When to Use: To mark resource spots, base locations, or entrances to caves.
- Type: Distraction Device
- Effect: Attracts nearby hostile creatures away from Cyclops for ~30 seconds.
- Cooldown: Crafting needed; no in-use cooldown.
- Upgrades: None.
- Combos: + Cyclops Shield (launch then shield to escape).
- Synergies: Pair with Silent Running to lose aggro.
- Recommended Builds: Stockpile for leviathan encounters.
- When to Use: When a leviathan starts attacking the Cyclops.
- Tools: Survival Knife, Scanner, Repair Tool, Seaglide, Flashlight
- Vehicle: None (craft Seamoth as soon as possible)
- Personal Upgrades: Standard Fins, Standard O2 Tank, Rebreather (if available)
- Objective: Scan fragments, gather basic resources, build base.
- Tools: Thermoblade, Stasis Rifle, Propulsion Cannon, Laser Cutter, Seaglide
- Vehicle: Seamoth with Depth MK2, Perimeter Defense, Hull Reinforcement
- Personal Upgrades: Ultra Glide Fins, Ultra High Capacity Tank, Rebreather, Reinforced Dive Suit
- Objective: Explore Jellyshroom Caves, Grand Reef, Blood Kelp Zone.
- Tools: Thermoblade, Stasis Rifle, Repulsion Cannon, Prawn Repair Tool
- Vehicle: Prawn Suit with Grappling Arm, Drill Arm, Jet Upgrade, Depth MK2
- Personal Upgrades: Ultra Glide Fins, Ultra High Capacity Tank, Rebreather, Stillsuit (optional)
- Objective: Drill large deposits, navigate Lava Castle, reach Thermal Plant.
- Tools: Thermoblade, Stasis Rifle, Repair Tool, Scanner
- Vehicle: Cyclops with Shield Generator, Sonar, Decoy Tube, Thermal Reactor, Engine Efficiency Module
- Personal Upgrades: Ultra Glide Fins, Ultra High Capacity Tank, Rebreather, Reinforced Dive Suit
- Objective: Long expeditions to Lost River, Lava Lakes, and Primary Containment.
Thermoblade
Scanner
Repair Tool
Laser Cutter
Stasis Rifle
Propulsion Cannon
Repulsion Cannon
---
2. Vehicle Skills (Abilities & Upgrades)
Seamoth (Submersible)
#### Perimeter Defense System
#### Sonar
#### Torpedo System
#### Depth Modules (MK1, MK2, MK3)
Prawn Suit (Exosuit)
#### Grappling Arm
#### Drill Arm
#### Propulsion Cannon Arm
#### Jet Upgrade
#### Depth Modules (MK1, MK2)
Cyclops (Mobile Base)
#### Shield Generator
#### Sonar
#### Decoy Tube
#### Silent Running
#### Engine Overheat
---
3. Personal Upgrade Skills (Fins, Tanks, Rebreather, etc.)
Swim Charge Fins
Ultra Glide Fins
Rebreather
Ultra High Capacity Tank
Reinforced Dive Suit
Stillsuit
---
4. Special Abilities (PDA Upgrades & Fabricated Gadgets)
Seaglide
Crawl / Walk Speed
Beacons
Creature Decoys (Cyclops Decoys)
---
5. Recommended Builds (Skill Loadouts)
Since Subnautica has no skill points, builds refer to equipment loadouts.
#### Early Exploration Build
#### Deep Diver Build (Mid-Game)
#### Lava Zone Raider Build (Late-Game)
#### Cyclops Mobile Base Build
---
6. Skill Synergies & Combos Summary
| Skill A | Skill B | Effect |
|---|---|---|
| Stasis Rifle | Thermoblade | Freeze predator, then kill safely. |
| Stasis Rifle | Prawn Drill Arm | Drill into frozen leviathan for resources. |
| Propulsion Cannon | Crashfish | Launch Crashfish as explosive projectile. |
| Seamoth Perimeter Defense | Hull Reinforcement | Survive creature attacks longer. |
| Cyclops Shield | Decoy Tube | Shield while launching decoy to escape without damage. |
| Cyclops Silent Running | Sonar | Navigate silently while seeing terrain. |
| Prawn Grappling Arm | Jet Upgrade | High-speed traversal across chasms. |
| Rebreather | Ultra High Capacity Tank | Maximum oxygen efficiency at depth. |
| Swim Charge Fins | Seaglide | Recharge Seaglide battery while swimming. |
7. Conclusion
While Subnautica lacks traditional character skills, mastering the tools, vehicles, and upgrades detailed above is essential for survival. Focus on upgrading your vehicles first (especially depth modules), craft the Stasis Rifle early for safety, and always equip the Rebreather + Ultra High Capacity Tank for deep dives. Use the combo tables to create synergistic loadouts. Remember: the only true “skill” is knowing when to deploy each tool—and when to run.
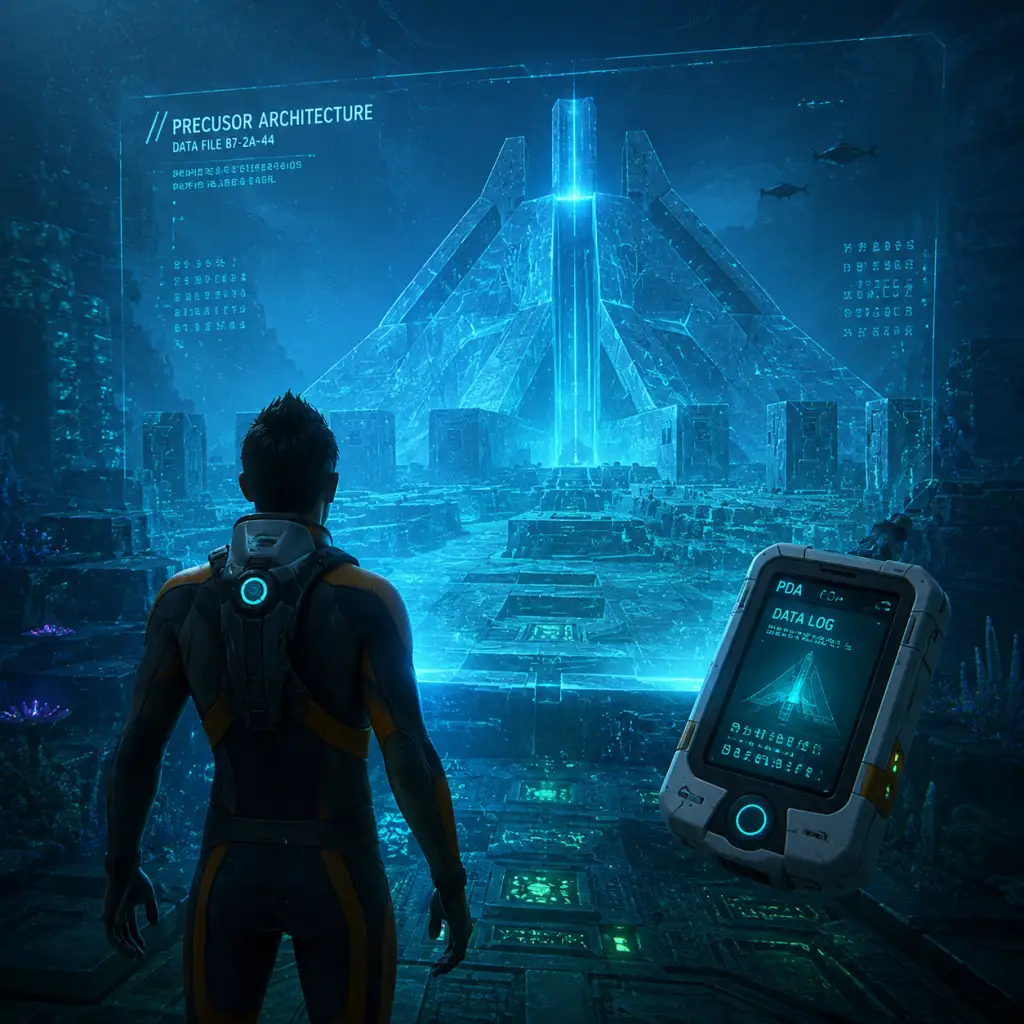
Characters & Roles
Characters & Roles Guide for Subnautica
Note: Subnautica is a single-player survival game with no traditional classes, hero units, or skill trees. You play as a single character, Ryley Robinson, and your "role" is defined entirely by the tools, vehicles, and upgrades you craft. However, the game features several key non-player characters (NPCs) who drive the story and provide context. This guide covers the player character and every significant NPC, including their background, strengths, weaknesses, and role in the game.
---
Player Character: Ryley Robinson
- Background: Ryley Robinson is an officer of the Alterra Trans-Gov corporation, serving aboard the Aurora as the vessel's life support technician. He is the sole survivor of the crash on Planet 4546B. His PDA contains his personal logs, but little else is known about his past. He is a bland everyman, allowing players to project themselves into the role.
- Strengths: No inherent combat or survival abilities; all strengths come from crafted equipment. Very high adaptability—can equip any tool, vehicle, or upgrade. Immune to the Kharaa bacterium (carrier but not affected).
- Weaknesses: Fragile without equipment; limited oxygen capacity (starts at 45 seconds); no special movement or breathing ability. Must rely entirely on technology.
- Role/Playstyle: Ryley’s role is determined by the player’s choices. He can be a scavenger (collecting resources), builder (constructing bases), explorer (venturing into deep biomes), or researcher (scanning flora/fauna). The game’s progression is tied to crafting, and Ryley’s effectiveness improves only through upgrades.
- Unlock Condition: Available from the start of a new game.
- Recommended Equipment: No single build; adapt to situation. Essential early: Seaglide, Repair Tool, Scanner, Habitat Builder. Late game: Prawn Suit, Cyclops, Reinforced Dive Suit, Stillsuit.
- Team Synergy: Not applicable (single player). Ryley interacts with NPCs only through audio logs, radio messages, and environmental storytelling.
- Background: Father of Bart Torgal, a veteran survivalist. He led the group’s efforts and built the first Degasi base on the Floating Island. He was instrumental in surveying the planet and establishing infrastructure.
- Role: Provides the player with blueprints (via PDAs) for base modules like the External Growbed, Water Filtration Machine, and the Alien Containment. Also reveals early story about the Precursors.
- Strengths: Resilient, resourceful, able to survive alone for a long time.
- Weaknesses: Overconfident, ignored warnings about the planet’s deep dangers. Eventually lost after leaving the group to explore deeper.
- Unlock Condition: Discover PDAs in the Floating Island base (around 300m depth).
- Background: Son of Paul, a young xenobiologist. He documented the planet’s flora and fauna in extensive scans and notes. Highly intelligent but inexperienced in survival.
- Role: Provides detailed information about local lifeforms (e.g., Cuddlefish, Sea Emperor Leviathan). His PDAs unlock blueprints for the Stasis Rifle and Propulsion Cannon, and give clues about the Kharaa bacterium.
- Strengths: Scientific knowledge, ability to communicate with the Sea Emperor telepathically (later revealed).
- Weaknesses: Physically weak, reliant on his father and Marguerit for protection. Eventually succumbed to the environment after the group split.
- Unlock Condition: Find his PDAs in the Degasi bases (Floating Island, Jellyshroom Cave, Deep Grand Reef).
- Background: A hardened mercenary/survivor who joined the Degasi crew post-crash. She is a master hunter and fighter, having survived multiple hostile encounters. She builds the Deep Grand Reef base and later disappears into the Crater Edge.
- Role: Provides combat-focused blueprints (Thermoblade, Reinforced Dive Suit, Prawn Suit grapple arm). Her logs teach the player about Leviathan behavior and how to fight back.
- Strengths: Expert at combat with Leviathans, fearless, self-sufficient.
- Weaknesses: Reckless, distrusts others, eventually goes rogue. She is the only Degasi survivor known to have left Planet 4546B alive (encountered in the Below Zero expansion).
- Unlock Condition: Locate her PDAs in the Deep Grand Reef base (500m depth) and the lost river cache.
- Background: An ancient, sapient Leviathan class creature imprisoned by the Precursors in the Primary Containment Facility (inside the Lava Lakes). She communicates telepathically with the player and Bart Torgal. She carries the cure for the Kharaa bacterium (Enzyme 42).
- Role: The key to the game’s ending. She tasks the player with hatching her eggs to release the enzyme into the planet’s ecosystem, curing the infection. Without her, the player cannot complete the story.
- Strengths: Extremely intelligent, psychic, powerful (but cannot break her containment). Her young can cure the Kharaa.
- Weaknesses: Physically trapped and dying, reliant on the player to free her offspring.
- Unlock Condition: Must reach the Primary Containment Facility at 1400m depth (requires Prawn Suit with drill arm and depth module, or Cyclops with depth module).
- Interaction: Only through telepathic dialogue sequences. No combat or direct assistance.
- Background: An ancient alien race (also called the Precursors) that once visited 4546B. They created the Sea Emperor and the Warpers to study and contain the Kharaa bacterium. They are extinct, but their technology remains across the planet.
- Role: Their buildings, databases, and devices provide the player with advanced blueprints (e.g., Ion Power Cells, Ion Battery, Prawn Suit, Cyclops upgrades), as well as story lore about the Kharaa outbreak. The player’s ultimate goal is to use their technology to escape the planet.
- Strengths: Highly advanced technology, quantum teleportation, force fields, etc.
- Weaknesses: Wiped out by the Kharaa bacterium; their remaining Warpers attack the player on sight if the infection is active.
- Unlock Condition: Access must be gained via key artifacts (Purple, Blue, Orange Tablets) scattered in the Alien Vents and other facilities.
- Background: A passing Alliance ship that responds to the Aurora’s distress signal. They attempt to rescue the player but are destroyed by the Quarantine Enforcement Platform (Precursor gun) unless the player disables it first.
- Role: Provides radio communication, giving the player a timed objective to disable the gun before the Sunbeam arrives. Offers hope and then tragedy, reinforcing the planet’s isolation.
- Strengths: Helpful, coordinated rescue attempt.
- Weaknesses: Utterly unprepared for 4546B’s dangers; no ground personnel.
- Unlock Condition: Contact occurs automatically after the player repairs the Aurora’s radiation leaks and explores the radio signals.
- Background: Twelve other crew members from the Aurora ejected in Lifepods, but all died from various causes (Reaper attacks, drowning, Kharaa, starvation). Their PDAs are scattered across the map.
- Role: Each lifepod provides blueprints, story snippets, and radio signals that lead to valuable resources or wreckage. They serve as tutorial markers and narrative flavor.
- Strengths: None—they are dead—but their remains provide material rewards.
- Weaknesses: Not interactive.
- Unlock Condition: Received radio signals from each lifepod as the player explores and builds a radio.
---
Major Non-Player Characters (NPCs)
1. The Degasi Survivors
The Degasi was a small survival pod vessel that crashed on 4546B before the Aurora. Its crew survived for months and left behind extensive bases and PDAs. They are encountered only through radio logs, PDAs, and recorded messages.
#### 1a. Paul Torgal
#### 1b. Bart Torgal
#### 1c. Marguerit Maida
2. The Sea Emperor Leviathan
3. The Architects (Precursor race)
4. The Sunbeam Crew (Avery Quinn & Others)
5. Lifepod Survivors (Corpses and PDAs)
---
Player Roles and Playstyles
Because there are no character classes, you can adopt different "roles" by focusing on specific equipment and base layouts. Below are common playstyle archetypes:
| Role | Focus | Key Equipment | Playstyle Tips |
|---|---|---|---|
| Scavenger | Rapid resource collection | Seaglide, Air Pump, Pipes, Seamoth (for surfacing quickly), Beacon | Prioritize scanning fragments; build multiple lockers; fill the Cyclops with storage upgrades. |
| Builder | Base construction and farming | Habitat Builder, Multipurpose Room, Alien Containment, Water Filtration Machine, Power sources (Nuclear, Thermal) | Seek flat terrain; use the Bulkhead for defense against flooding; bio-reactors are great early; build a scanner room to locate resources. |
| Explorer | Deep-sea exploration and story completion | Cyclops, Prawn Suit (with drill and grapple arm), Rebreather, Ultra High Capacity Tank, Seamoth (with depth modules) | Always carry extra batteries; build bases near thermal vents for power; use the Cyclops as a mobile base; be prepared for Leviathans. |
| Researcher | Scanning and documentarian | Scanner (blue and bio blueprints), Stillsuit, Camera Drones | Scan every creature and plant; build an alien containment to breed eggs; complete the PDA entries for advanced lore. |
| Hardcore Survivor (no base preference) | Minimalist, nomadic | Cyclops as only base, Prawn Suit for mining, large inventory of food/water | Disable Cyclops engine at night to avoid detection; use silent running; stockpile cured fish and bladderfish; never settle. |
Conclusion
Subnautica’s character cast is small but impactful. The lone protagonist Ryley Robinson is a blank slate for the player, while the Degasi survivors and the Sea Emperor provide the narrative backbone. There are no traditional team roles or hero synergies; instead, your success depends on your ability to craft, explore, and adapt to the planet’s dangers. The player’s “role” changes as new technology becomes available, making every playthrough unique.
For further details on equipment, vehicles, and base building, see the dedicated guides.
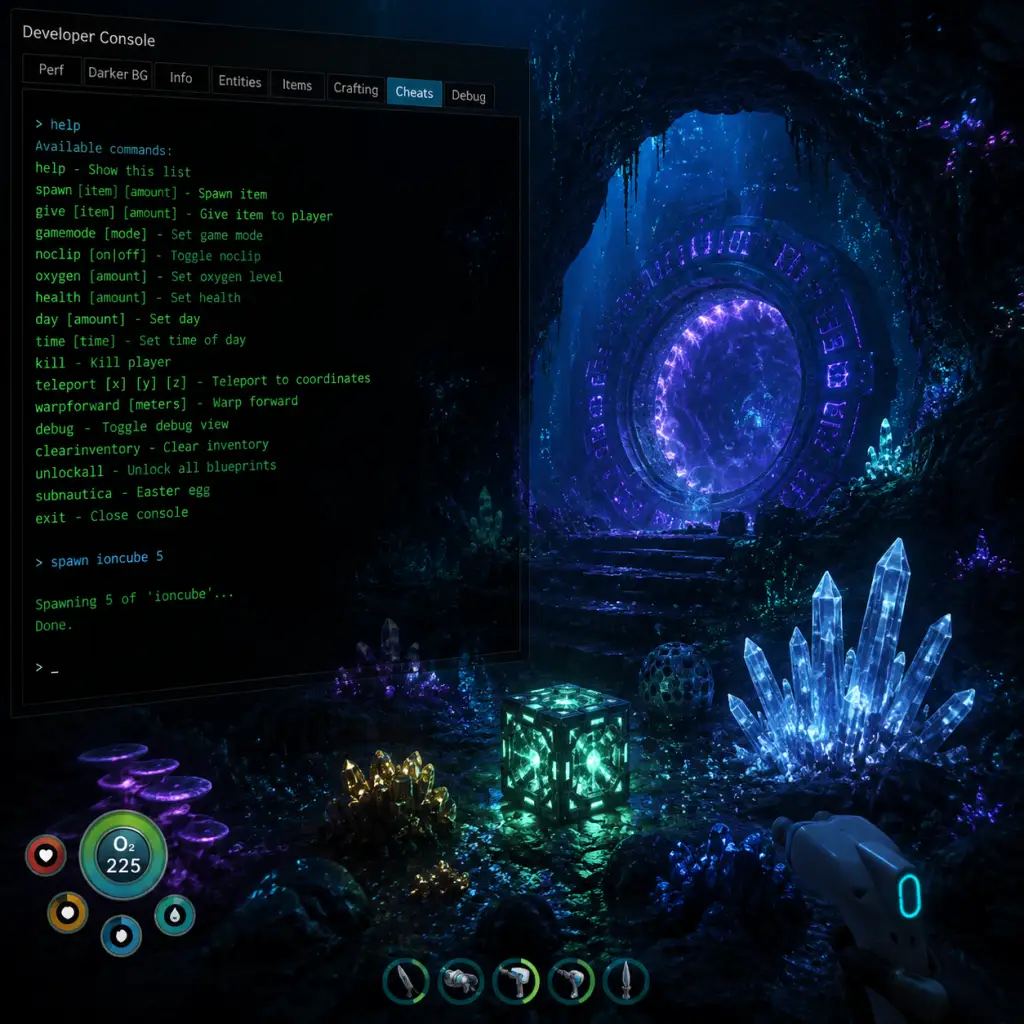
Cheats & Secrets
Cheats & Secrets
Developer Console Commands (PC Only)
Subnautica includes a built-in console for debugging and testing. You can access it on PC using the following methods:
Enabling the Console
- Method 1: Press F3 to open the debug menu overlay. A small text input box appears near the top of the screen. Type commands directly into it.
- Method 2: Press Enter (or Return) to open the chat/console line. Type `console` and press Enter to enable the full console mode. Then press `~` (tilde) to toggle the console window open/closed.
Note: Achievements are disabled while console commands are active. Save your game before using cheats, as some commands may cause unpredictable behavior.
Useful Console Commands
| Command | Effect | Example |
|---|---|---|
| `item [techType] [count]` | Spawn the specified item into your inventory. [techType] is the internal ID (e.g., `titanium`, `computerchip`). Count is optional (default 1). | `item titanium 10` |
| `spawn [techType] [count]` | Spawn a creature or object in front of you. | `spawn reefback` |
| `nodamage` | Toggle invulnerability (no damage from any source). | `nodamage` |
| `oxygen` | Refill oxygen instantly. | `oxygen` |
| `food` | Refill food instantly. | `food` |
| `water` | Refill water instantly. | `water` |
| `fastbuild` | Toggle instant construction of bases and vehicles. | `fastbuild` |
| `invisible` | Toggle invisibility to creatures (they ignore you). | `invisible` |
| `unlock` | Unlock a specific blueprint (use with blueprint tech types). Example unlocks all: `unlock all`. | `unlock cyclops` |
| `debug` | Toggle various debug overlays (FPS, physics, etc.). | `debug` |
| `goto [biome]` | Teleport your character to a named biome (e.g., `goto kelpforest`). | `goto kelpforest` |
| `warp [x] [y] [z]` | Teleport to specific coordinates (be careful, can trap you inside terrain). | `warp 0 -200 0` |
| `kill` | Instantly kill your character (death). | `kill` |
| `reset` | Reset the game world (dangerous – use with caution). | `reset` |
| `subtitle` | Toggle subtitles for creatures/ambient sounds. | `subtitle` |
| `crazy` | Toggle chaotic creature behavior (some may attack each other). | `crazy` |
| `precursorkey` | Spawn a Precursor Key in your inventory (needed for Alien Archways). | `precursorkey` |
| `blueprint` | Reveal all blueprints. | `blueprint` |
Full Command Reference
For a complete list of all console commands and techType IDs, visit the Subnautica wiki or search online databases (e.g., `techtype list` can be typed in console to output IDs).
---
Secret Items & Hidden Content
Time Capsules
- What they are: Floating capsules left by other players (or developer-placed ones) that contain messages, items, or blueprints. They appear randomly during gameplay.
- How to find: Explore the ocean; they emit a faint blue glow and a hum. Often found near wrecks or on the seabed.
- Contents: Can include advanced tools, resources, or personal notes. The most famous capsules were placed by developers and contain rare items like the Cuddlefish egg.
- What it is: A cute, glowing aquatic creature that can be hatched from an egg and kept as a pet. It is purely cosmetic and has high sentimental value.
- Where to find the egg: In the Deep Grand Reef, under the Giant Cove Tree (a large pink glowing tree in a cave). The egg is nestled among the roots.
- How to hatch: Place the egg in an Alien Containment unit (built in a base). It takes about 24 real-time hours to hatch (or use console `item cuddlefishegg` to spawn immediately).
- Behavior: The Cuddlefish follows you, emits pleasant sounds, and occasionally gives you a small amount of health/sanity (though not mechanically needed). It can be named.
- Story spoiler: This is the final boss-like creature in the game. You must retrieve its eggs and hatch them to create Enzyme 42, which cures the Kharaa bacterium.
- Location: The Primary Containment Facility (the giant alien base in the Lava Lakes biome). The Sea Emperor is a friendly leviathan that communicates telepathically.
- Secret: The eggs can be collected and incubated in an Alien Containment unit to hatch miniature sea emperors (non-interactive).
- Several hidden alien bases exist on the map, each containing lore tablets and data logs. The most notable:
- These are not true “secrets” since the story leads you there, but many players miss them on their first playthrough.
- Location: In the Inactive Lava Zone (the green brine-filled caverns before the Lava Lakes). A massive skeleton of a creature larger than a Reaper Leviathan rests on the seafloor. It is non-interactive but serves as a chilling Easter egg.
- Lore: Unknown. Possibly a precursor creature or an extinct species.
- Jumpy (Jellyray) Behavior: If you scan a Jellyray, the PDA will mention it is “surprisingly buoyant” and “seems to enjoy playing.” No further reward.
- The Stalker’s Tooth Collection: Stalkers sometimes collect metal salvage and drop teeth. This is normal gameplay, but new players may not know you can use the teeth to craft enameled glass.
- The Abandoned Seabase: In the Deep Grand Reef, there is a small, partially destroyed base with a single room. It contains a data entry about a lonely researcher. No special items, but a nice narrative Easter egg.
- The Cuddlefish Egg in the Captain’s Office: On the Aurora, in the captain’s quarters (requires a Propulsion Cannon to access), there is a Cuddlefish egg in a fish tank. This is the only guaranteed egg in the game besides the Deep Grand Reef one.
- The “Welcome Aboard” Screen: The main menu shows a rotating view of the lifepod. If you wait long enough, a Reaper Leviathan may swim past in the background – a subtle nod to the dangers ahead.
- The “Ghost” Leviathan: In the Void (the edge of the map), three Ghost Leviathan juveniles spawn infinitely. They can be killed but respawn. This is more of a gameplay boundary than a secret.
- The “Still Alive” Achievements: Some achievements are hidden until unlocked (e.g., “Seamoth Speed” for building a Seamoth). Not a cheat, but a secret goal for completionists.
- The “Restore Power” Ending: If you complete the main story, you can leave the planet. The ending credits show a montage of your journey. No secret ending, but the entire story is one giant mystery.
- Feeding a Cuddlefish a piece of fish (any small fish) will cause it to perform a “thank you” animation. No gameplay benefit, but adorable.
- While not a cheat, you can build base components quickly by holding down the left mouse button and tapping the “Place” key repeatedly. This is an exploit of the placement system, but it works.
- Rarely, items placed inside a vehicle’s storage will duplicate if you save and reload. This is considered a bug, not a secret.
- If you get stuck in a cave, you can use the console to warp to coordinates (0,0,0) to return to the safe shallows. This is a legitimate use of the debug tools.
- Console commands on consoles (PS4/5, Xbox One/Series X|S) are not natively supported. However, some players have reported that connecting a keyboard and pressing F3 or Enter can work on the console versions – this is unofficial and may crash the game.
- Using console commands will disable achievements for that save file. To re-enable achievements, you must load a previous unmodified save.
- Some commands like `reset` can corrupt your save. Always backup your save files before experimenting.
Cuddlefish
Sea Emperor Leviathan & The Emperor’s Eggs
Precursor Bases (Hidden Alien Structures)
- Quarantine Enforcement Platform (On the island – part of the story)
- Disease Research Facility (In the Lost River biome)
- Thermal Plant (In the Inactive Lava Zone)
- Primary Containment Facility (In the Lava Lakes)
The Gargantuan Leviathan Skeleton
Developer Easter Eggs
Other Hidden Content
---
Exploits & Safe Secrets (Not Cheats, But Intended)
Hatched Cuddlefish Feeding
Instant Base Building
Vehicle Storage Glitch
Warp to Surface
---
Important Notes
This guide covers the most prominent cheats, secrets, and Easter eggs in Subnautica. The game rewards exploration and curiosity – keep scanning everything and reading PDA entries for hidden lore.