Terraria
## Terraria: Game Introduction ### Overview Terraria is a 2D sandbox adventure game that blends exploration, building, crafting, and combat into an expansive open world. Often described as "2D Minecraft," Terraria offers a vastly deeper progression system, hundreds of unique enemies and bosses, and...
Download & Installation
Terraria: Comprehensive Download & Installation Guide
Overview
Terraria is a 2D sandbox adventure game with exploration, building, crafting, and combat. It is available on nearly every major platform. This guide covers official download sources and step-by-step installation for PC (Steam, Epic Games Store, GOG, Microsoft Store), PlayStation 4/5, Xbox One/Series X|S, Nintendo Switch, and Mobile (iOS/Android).
---
System Requirements (PC)
#### Minimum (for stable 30 FPS at 720p, low settings)
- OS: Windows 7, Mac OS X 10.8, Ubuntu 14.04+ (64-bit)
- CPU: Intel Core 2 Duo 2.0 GHz or equivalent
- RAM: 2 GB
- GPU: 128 MB video memory (supporting Shader Model 2.0+)
- DirectX: Version 9.0c
- Storage: 500 MB free space
- Sound: DirectX compatible
- OS: Windows 10/11, macOS 10.12+, Ubuntu 20.04+ (64-bit)
- CPU: Intel Core i5 3.0 GHz or equivalent
- RAM: 4 GB
- GPU: 256 MB video memory (supporting Shader Model 3.0+)
- DirectX: Version 11
- Storage: 1 GB free space (includes mods/saves)
- Sound: DirectX compatible
- iOS: [App Store](https://apps.apple.com/app/terraria/id640364616) (paid app)
- Android: [Google Play Store](https://play.google.com/store/apps/details?id=com.and.games505.terraria) (paid app)
#### Recommended (for 60 FPS at 1080p, high settings)
> Note for console/mobile: Requirements are fixed by the hardware; ensure your system’s firmware is up to date.
---
Platform-Specific Download & Installation
---
#### 1. PC (Steam)
Official Source: [Steam Store](https://store.steampowered.com/app/105600/Terraria)
Requirements: Steam account (free) & internet connection.
Steps:
1. Download and install the Steam client from [steampowered.com](https://store.steampowered.com/about/).
2. Create or log into your Steam account.
3. Search for “Terraria” in the Steam Store.
4. Click Add to Cart and complete purchase (or install if already owned).
5. Go to your Library, find Terraria, and click Install.
6. Choose installation directory (default is fine) and wait for download (~200 MB).
7. Launch from Library or desktop shortcut.
---
#### 2. PC (Epic Games Store)
Official Source: [Epic Games Store](https://store.epicgames.com/en-US/p/terraria)
Requirements: Epic Games account & Epic Games Launcher.
Steps:
1. Install the Epic Games Launcher from [epicgames.com](https://store.epicgames.com/).
2. Log into your Epic account.
3. In the store, search “Terraria” and click Get (free if claimed) or Buy.
4. Click Add to Library then Install.
5. Select installation path and confirm.
6. Launch from Epic Library.
---
#### 3. PC (GOG / DRM-Free)
Official Source: [GOG.com](https://www.gog.com/game/terraria)
Requirements: GOG account & GOG Galaxy (optional).
Steps:
1. Purchase Terraria on GOG.com.
2. Download the offline installer from your account’s Library (or use GOG Galaxy).
3. Run the `.exe` installer – no launcher needed during play.
4. Follow on-screen prompts (default install location recommended).
5. Launch via desktop shortcut or game folder.
---
#### 4. PC (Microsoft Store / Xbox Game Pass)
Official Source: Microsoft Store (search “Terraria”)
Requirements: Microsoft account & active Game Pass subscription (if using Game Pass).
Steps:
1. Open Microsoft Store on Windows 10/11.
2. Search for “Terraria” and select the correct title (published by 505 Games).
3. Click Install (or Get with Game Pass).
4. The download will start automatically. You can track progress in the Microsoft Store library.
5. Launch from Start Menu or the Store.
---
#### 5. PlayStation 4 / PlayStation 5
Official Source: PlayStation Store (via console or web)
Requirements: PlayStation Network account (PSN), internet connection, sufficient storage (~500 MB).
Steps:
1. On your PS4/PS5, go to PlayStation Store.
2. Search for “Terraria”.
3. Select Download (if purchased) or Add to Cart → Purchase.
4. Once downloaded, the game appears in your Games library.
5. Launch and enjoy.
> Cross-buy note: PS5 version includes the PS4 version and supports cloud saves with PS Plus.
---
#### 6. Xbox One / Xbox Series X|S
Official Source: Microsoft Store (via console), also available on Xbox Game Pass.
Requirements: Xbox Live account (free/silver), Game Pass subscription optional.
Steps:
1. Press the Xbox button → Microsoft Store.
2. Search “Terraria”.
3. Click Install (or Get if Game Pass).
4. The game will download and appear in My games & apps.
5. Launch from there.
> Note: Supports Quick Resume on Series X|S. Save data syncs via Xbox Live.
---
#### 7. Nintendo Switch
Official Source: Nintendo eShop
Requirements: Nintendo Account, internet connection, storage (approx. 500 MB on SD card or internal).
Steps:
1. From the Home menu, open Nintendo eShop.
2. Search for “Terraria”.
3. Select Proceed to Purchase / Download (if already bought).
4. Complete payment (if needed) and confirm download.
5. The game will install to your system/SD card automatically.
6. Launch from the Home screen.
> Note: Terraria on Switch supports both docked and handheld modes. Update to the latest version via the + button menu.
---
#### 8. Mobile (iOS / Android)
Official Sources:
Requirements: Apple ID or Google account, internet connection for initial download.
Steps (iOS):
1. Open the App Store and sign in with your Apple ID.
2. Search “Terraria” (by 505 Games).
3. Tap the price button → Buy (or Get if previously purchased).
4. Authenticate with Face ID / Touch ID / password.
5. Download begins; app icon appears on home screen.
6. Tap to launch (no additional setup required).
Steps (Android):
1. Open Google Play Store and sign in.
2. Search for “Terraria”.
3. Tap Install (or the price if not already owned).
4. Accept permissions as prompted.
5. After download, tap Open or find it in the app drawer.
> Note: Mobile version uses touch controls but also supports MFi controllers (iOS) and Bluetooth controllers (Android). Save data can be backed up via iCloud or Google Drive.
---
Storage Space Requirements (Approximate)
| Platform | Base Game Size | with Updates/Saves |
|---|---|---|
| PC (all stores) | 200–300 MB | ~500 MB – 1 GB |
| PlayStation 4/5 | 500 MB | ~700 MB |
| Xbox One/Series | 600 MB | ~800 MB |
| Nintendo Switch | 500 MB | ~600 MB |
| Mobile (iOS/Android) | 150 MB | ~300 MB |
---
Account Requirements Summary
| Platform | Required Account | Cost to Play |
|---|---|---|
| PC (Steam) | Steam account (free) | Purchase game |
| PC (Epic) | Epic Games account (free) | Purchase game |
| PC (GOG) | GOG account (free) | Purchase game (DRM-free) |
| PC (Microsoft Store) | Microsoft account (free) | Purchase or Game Pass |
| PlayStation | PlayStation Network account (free) | Purchase game |
| Xbox | Xbox Live account (free) | Purchase or Game Pass |
| Nintendo Switch | Nintendo Account (free) | Purchase game |
| iOS | Apple ID | Purchase game |
| Android | Google Account | Purchase game |
---
First Launch Setup
When you first start Terraria:
1. Language Selection: Choose your preferred language (English, Spanish, German, French, etc.).
2. Resolution & Window Mode: Adjust to your display (fullscreen, windowed, borderless).
3. Sound & Music: Set volume levels (default is fine).
4. Auto-Save: Always enabled (can be toggled in settings).
5. Character Creation: Tap or click “New Character” → select appearance, name, difficulty (Softcore recommended for beginners).
6. World Creation: Choose world size (Small/Medium/Large) and difficulty (Normal/Expert/Master). Medium is balanced for first play.
7. Begin Playing: Your character will spawn near the center of the world.
Recommended First Actions (tutorial):
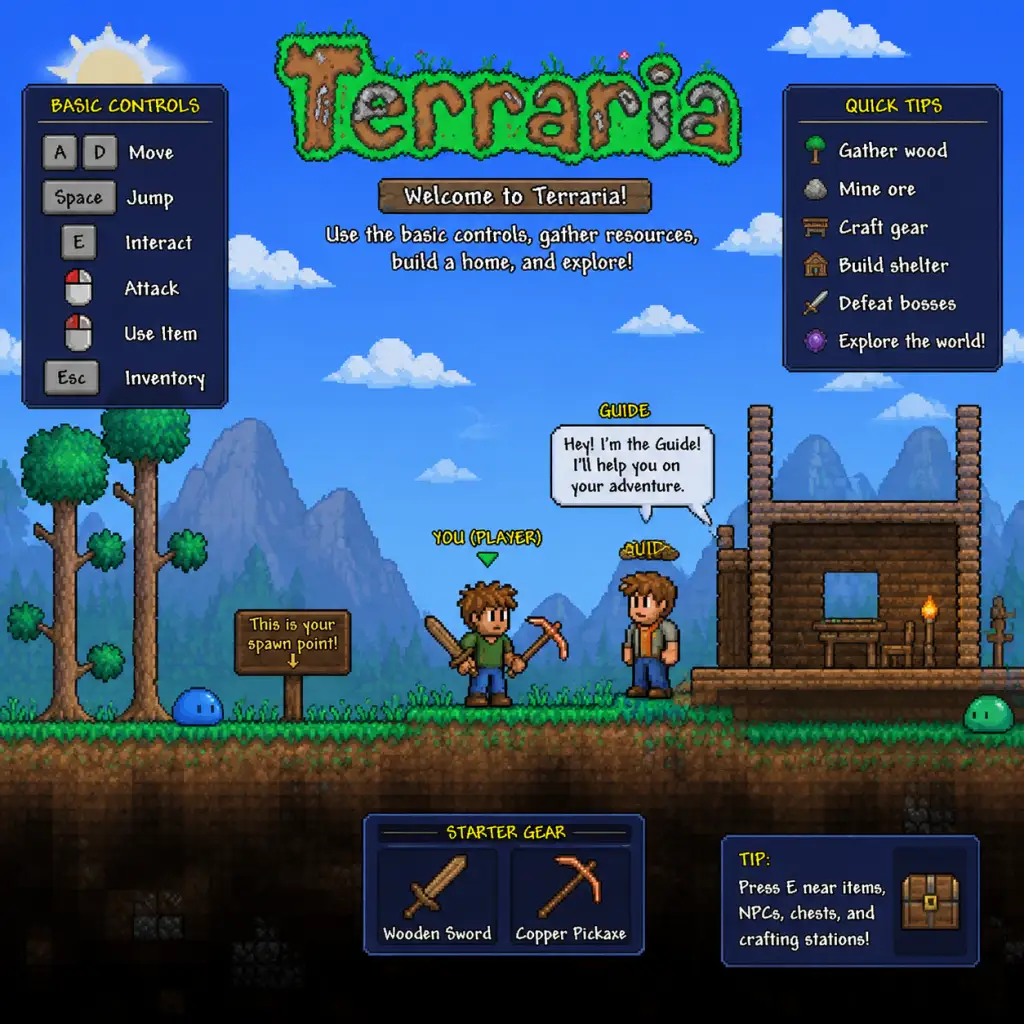
- Move with WASD (PC) / left stick (console) / touch (mobile).
- Chop trees and gather wood.
- Build a shelter before nightfall (zombies spawn).
- Craft tools and a workbench.
---
Common Installation Errors & Fixes
#### PC (All Stores)
| Error / Issue | Solution |
|---|---|
| “Insufficient disk space” | Free up space (Uninstall unused apps, clean temp files). Terraria needs at least 500 MB. |
Epic: Library → Terraria → three dots → Verify.
GOG: Re-run offline installer or use GOG Galaxy → Manage → Verify/Repair.
MS Store: Settings → Apps → Terraria → Advanced Options → Repair or Reset. |
| “Antivirus blocking installation” | Temporarily disable real-time protection during install; add Terraria folder to exclusions. |
| “Game won’t launch (no error)” | Update graphics drivers, run as administrator, disable overlay apps (Discord, Xbox Game Bar). |
| “Missing DLL/API-ms-win” | Install/update DirectX and Visual C++ Redistributables (Steam installs these automatically, but reinstall if broken). |
| “Save data not syncing” (Steam Cloud) | Right-click Terraria → Properties → Cloud → disable/enable cloud sync. Ensure internet is stable. |
#### PlayStation / Xbox
| Error | Fix |
|---|---|
| “Cannot download” (insufficient space) | Delete old games or add external storage. |
| “Corrupted data” | Go to Settings → Storage → Delete game data (save files remain) and reinstall. |
| “License not found” | Restore licenses: Settings → Account Management → Restore Licenses (PS). On Xbox, sign out and back in. |
| “Game crashes at logo” | Restart console, ensure system software is updated. |
| Error | Fix |
|---|---|
| “Error code 2005-0001” (corrupted update) | Delete game and redownload. Update via System Settings → Data Management → Software Updates. |
| “Not enough storage” | Archive other games or insert an SD card (up to 2 TB). |
| “Stuck at loading screen” | Press Home → close software → reopen. If persistent, check for corrupt data via System Settings → Data Management → Manage Software → Check for Corrupt Data. |
| Error | Fix |
|---|---|
| “App Not Installed” (insufficient space) | Free up space (iPhone: iTunes, Android: move files to SD or delete apps). |
| “Download stuck or fails” | Check internet, restart the device, clear Play Store cache (Android: Settings → Apps → Google Play Store → Storage → Clear cache). |
| “Game won’t launch / crashes on start” | Update app via store, restart device, reinstall if necessary (back up saves first via cloud). |
| “Touch controls unresponsive” | Restart game; if persists, check for updates. On Android, close other apps consuming RAM. |
Post-Installation Verification
After installation completes, perform these checks to ensure everything is working:
1. Launch the game – should reach the title screen without errors.
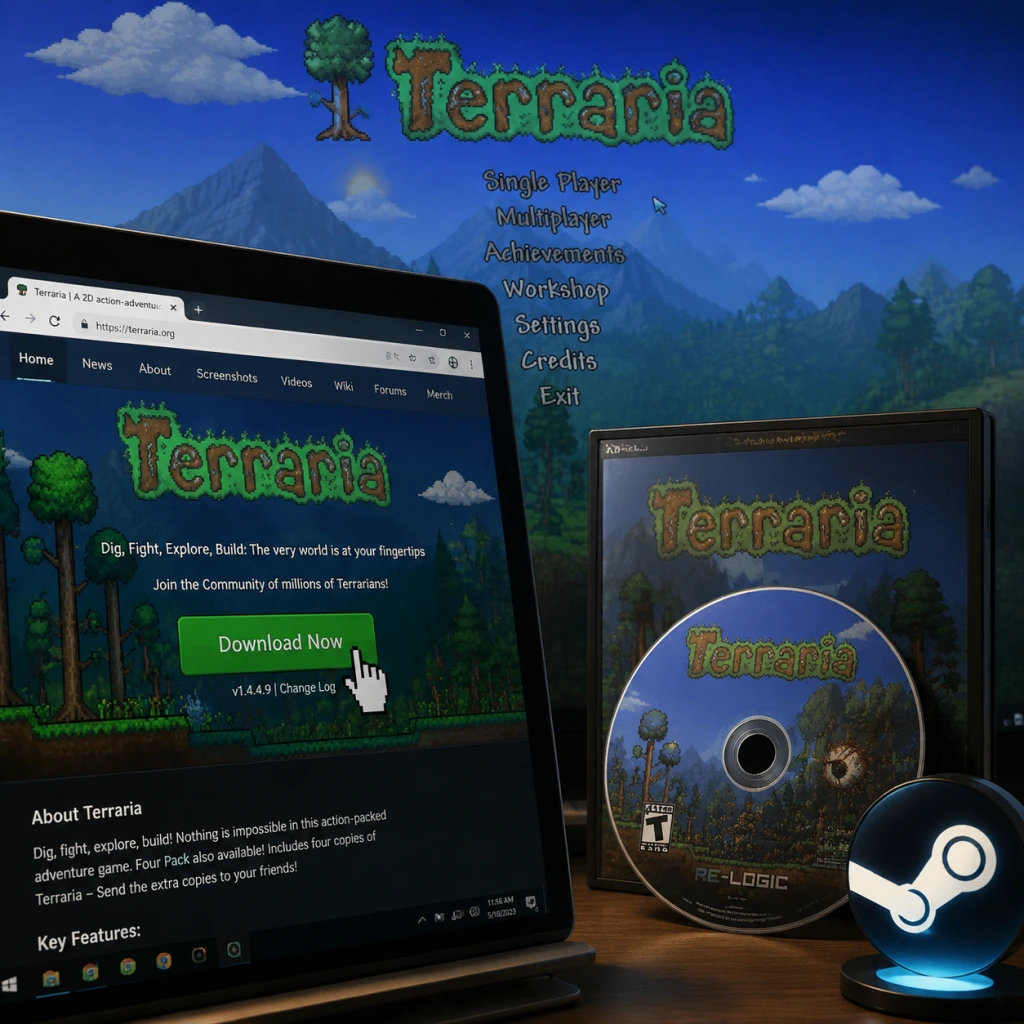
2. Check version number – on PC, visible in lower-left corner of main menu. Should match the latest (currently 1.4.4.9 or later). On consoles/mobile, version is shown in system settings or about screen.
3. Test basic input – move character, jump, open inventory (E on PC, Y on Xbox, etc.).
4. Play for 5 minutes – confirm no crashes, frame drops, or audio issues.
5. Save and exit – ensure save data is created (look for a world and player file in the appropriate folder).
6. Cloud save verification (if applicable): On PC, close game, restart Steam/Epic, launch again and check that world is present. On console, ensure save icon appears.
7. Update drivers if you experience graphical glitches (PC).
> If you encounter any persistent issues, check the official [Terraria Wiki](https://terraria.fandom.com/wiki/Terraria_Wiki) or the [Terraria Forums](https://forums.terraria.org/).
---
Additional Tips
- Modding (PC only): Use tModLoader (free on Steam) to install mods. Requires separate installation.
- Multiplayer: Ensure all players have the same game version. Use platform-specific friends lists or join via IP (PC).
- Backups (all platforms): Manually copy save files from:
- PlayStation/Xbox: Cloud save via subscription; manual copy to USB not officially supported.
- Switch: Cloud saves via Nintendo Switch Online.
- Mobile: iCloud (iOS) or Google Drive (Android) – enable in app settings.
---
Enjoy your adventure in Terraria! The game offers endless possibilities – happy building and exploring.
Game Introduction
Terraria: Game Introduction
Overview
Terraria is a 2D sandbox adventure game that blends exploration, building, crafting, and combat into an expansive open world. Often described as "2D Minecraft," Terraria offers a vastly deeper progression system, hundreds of unique enemies and bosses, and a wealth of items and mechanics that reward creativity and perseverance. Developed by Re-Logic, it has become one of the best-selling games of all time.
Genre, Developer & Publisher
- Genre: Action-Adventure, Sandbox, Survival, RPG
- Developer: Re-Logic (founded by Andrew "Redigit" Spinks)
- Publisher: Re-Logic (originally published by Headup Games on some platforms)
- Initial Release: May 16, 2011 (Microsoft Windows)
- Console & Mobile Versions: Rolled out from 2013 onward, with staggered updates across platforms.
- Journey's End (1.4.0): May 16, 2020 – the final major content update.
- Console 1.4 Updates: Released in 2021/2022 (PS4, Xbox One, Switch).
- Mobile 1.4: Arrived in 2021.
- Latest Version (1.4.4 “Labor of Love”): September 28, 2022 – added quality-of-life changes, new items, and balance tweaks.
- PC: Windows, macOS, Linux (Steam, GOG, Microsoft Store)
- Consoles: PlayStation 4, PlayStation 5 (backward compatible), Xbox One, Xbox Series X|S, Nintendo Switch
- Handheld: Nintendo 3DS (legacy version), PlayStation Vita (legacy)
- Mobile: iOS, Android (Google Play, App Store)
- Cloud/Streaming: Amazon Luna, Google Stadia (now defunct)
- Others: Windows Phone (discontinued)
- Setting: A vibrant (and dangerous) blocky world, rich with caverns, floating islands, oceans, and dungeons. The world constantly changes due to player mining, building, and the spread of Corruption/Hallow.
- Lore: Scattered books, NPC dialogue, and item descriptions hint at a history of ancient civilizations, celestial events, and a cosmic threat. The player is a hero who must prevent the Moon Lord from destroying the world again.
- Guide: The starting NPC who offers tips and crafting recipes.
- Merchant: Sells basic tools and supplies.
- Nurse: Heals the player for coins.
- Arms Dealer: Sells guns and ammunition.
- Dryad: Sells natural-themed items and warns of world pollution.
- Mechanic: Sells wiring items (mechanics, logic gates).
- Wizard, Witch Doctor, Steampunker, Cyborg, etc.: Each offers unique items and quests.
- Party Girl & Tavernkeep: Specialized NPCs with seasonal and event-related functions.
- Infinite Creativity: Build anything from simple huts to complex pixel-art castles, farm layouts, or elaborate wiring systems.
- Deep Progression: Starting with wooden tools, you mine ores, craft gear, defeat bosses, and unlock higher-tier materials – including endgame Celestial gear.
- Exploration & Discovery: Every world is unique – hidden caves, floating islands, abandoned houses, and treasure rooms reward curious players.
- Combat: Hundreds of weapons (swords, guns, magic, summons) and dozens of boss fights. Combat is fast-paced and heavily customizable via accessories and armor sets.
- Cooperative & Competitive Multiplayer: Up to 8 players (PC) can adventure together or engage in player-versus-player (PvP) battles.
- Age Rating: ESRB T (Teen) / PEGI 12 – mild violence, cartoonish gore.
- Ideal Players:
- Accessibility: The game starts simple but scales in difficulty. The Journey Mode allows players to customize difficulty, duplication, and time controls, making it accessible to younger or less experienced players.
- Online: PC uses Steamworks (with peer-to-peer or dedicated server). Console uses respective network (PSN, Xbox Live, Nintendo Switch Online). Mobile uses real-time multiplayer via WiFi or cellular data.
- Offline: Fully playable in single-player without internet.
- Cross-Platform Play: Not available – no cross-play between PC, console, or mobile due to version parity and network differences.
- 1.1 (2011): Introduced hardmode, new ores, mechanical bosses.
- 1.2 (2013): Added jungle temple, new biomes, huge item expansion.
- 1.3 (2015): Multiplayer improvements, expert mode, new events, and more bosses.
- 1.4 "Journey's End" (2020): Added journey mode, 800+ new items, wind mechanics, golf, and final boss Moon Lord rework.
- 1.4.4 "Labor of Love" (2022): Quality of life, new items, and balance changes – including the shimmer biome and many legacy fixes.
- Other: Terraria has crossover content with other games (e.g., Don't Starve, Dungeon Defenders 2) but these are in-game items, not separate expansions.
Release Timeline
Platforms
Terraria is available on:
Story Overview & Setting
Terraria does not have a traditional linear story. Instead, it features a loose, emergent narrative driven by player actions. The world is a randomly generated 2D landscape with multiple biomes (Forest, Desert, Jungle, Corruption/Crimson, Underworld, etc.). The player character appears on a small island after a mysterious event – implied to be a world destroyed by an ancient force. The Guide NPC explains the basics, but the ultimate goal is to defeat a series of progressively harder bosses, explore deeper layers, and eventually face the final boss: the Moon Lord, a Lovecraftian entity connected to the evil spreading across the land.
Main Characters
Terraria has no main protagonist beyond the customized player character. However, several friendly NPCs become central to progression:
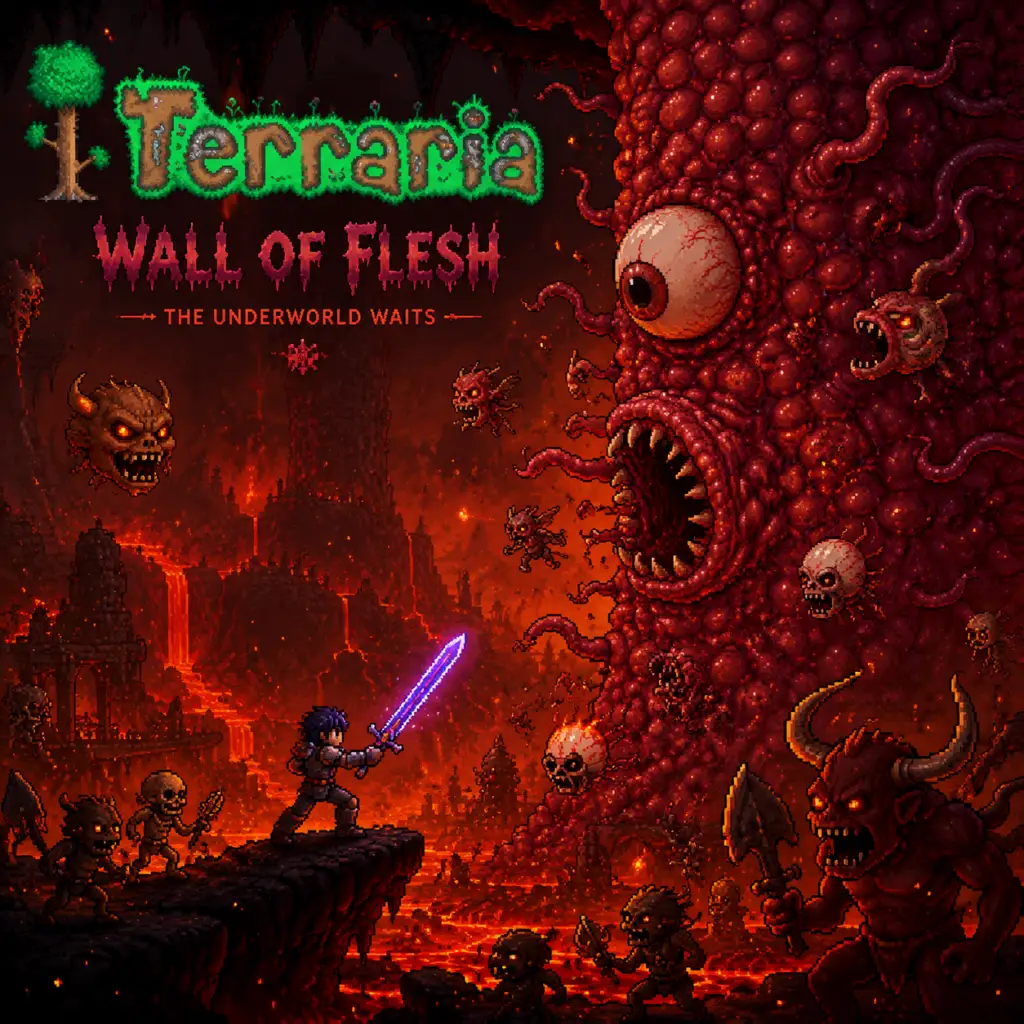
Enemies include slimes, zombies, demons, and dozens of bosses (e.g., Eye of Cthulhu, Wall of Flesh, Plantera, and the final boss Moon Lord).
Core Appeal
Target Audience
- Fans of sandbox games (Minecraft, Starbound, Lego Worlds)
- Action-adventure lovers who enjoy RPG progression
- Builders and engineers (wiring, pixel art)
- Players who enjoy exploration and loot systems (similar to Metroidvania or Action RPG)
Game Modes
1. Single Player: Full story progression solo.
2. Multiplayer: Online (Steam, console networks, mobile) or local wireless (PC/Mobile). Up to 8 players on PC, 4 on console/mobile. Players can co-op or enable PvP.
3. Difficulty Options:
- Journey Mode: Sandbox/creative – enemies scale, but you can duplicate items, adjust spawn rates, and toggle invincibility.
- Classic Mode: Normal difficulty (default).
- Expert Mode: Harder enemies, unique boss items, and better drop rates.
- Master Mode: Elite difficulty, additional boss drops, extra accessory slots, and bragging rights.
4. World Size: Small, Medium, Large – affects number of biomes and exploration time.
Online/Offline Support
DLC & Expansions
Terraria has no paid DLC. All major content updates have been free:
> ★ Note: There is also a spin-off "Terraria: Otherworld" which was canceled during development.
What Makes Terraria Unique
1. 2D Sandbox Done Right: The block-based world feels like an infinite canvas, yet the verticality and caves create a distinct Metroidvania-like progression.
2. Proportional Depth of Content: With over 5,000 items (plus weapons, armor, accessories, and crafting recipes), Terraria rivals many AAA RPGs in complexity.
3. Boss Progression as a Metagame: Each boss unlocks new materials and NPCs, guiding the player organically through a massive tech tree without an explicit quest log.
4. Modding Community: PC players have access to tModLoader (now integrated into Steam), which hosts thousands of mods from simple quality-of-life tweaks to total conversion mods (e.g., Calamity, Thorium).
5. Longevity: Re-Logic has supported the game for over a decade, delivering free updates that kept the community engaged, a rarity in the industry.
Conclusion
Terraria is a masterpiece of sandbox game design, offering an almost limitless experience of exploration, combat, and creation. Its accessibility (via Journey Mode) and brutal depth (Master Mode) mean it welcomes both casual builders and hardcore adventurers. Whether you dig for ore, build a sky castle, or fight cosmic horrors, Terraria offers a world that you will never truly finish.
Getting Started
Terraria: Getting Started Guide for New Players
Overview
This guide is written specifically for brand-new players who have never played Terraria. It covers everything you need to survive your first hour, avoid frustrating mistakes, and build a strong foundation for the rest of the game. Terraria is a 2D sandbox action-adventure game—expect to mine, build, fight monsters, explore caves, and craft gear. The world is randomly generated, so no two playthroughs are identical.
---
Character Creation
Terraria does not have deep character creation; instead, you choose from preset appearances (hair, eyes, skin, clothes). This is purely cosmetic and has no effect on gameplay. To create a character:
1. From the main menu, select Single Player (or Multiplayer if joining a friend).
2. Click New Character.
3. Choose a name (can be changed later via a character rename item).
4. Randomize or manually pick your character's look. Confirm and save.
Pro tip: You can create multiple characters and worlds. Characters keep their inventory when switching worlds, but each world is saved separately.
---
World Selection
When starting a world, choose:
- World Size: Small (recommended for beginners), Medium, or Large. Small worlds have fewer biomes but are easier to navigate.
- World Evil: Randomly generates either Crimson (red/pink) or Corruption (purple). Both have similar challenges; don't worry which you get.
- Difficulty Mode: Softcore (recommended for beginners) – you drop coins on death but keep items. Mediumcore drops items on death. Hardcore deletes character on death.
---
Controls Overview (All Platforms)
| Action | PC (Keyboard+Mouse) | Xbox / PlayStation | Nintendo Switch | Mobile (Touch) |
|---|---|---|---|---|
| Move | WASD / Arrow Keys | Left Stick | Left Stick | Touch drag / virtual stick |
| Jump | Space | A (Xbox) / Cross (PS) | B | Jump button |
| Use/Interact | Left Click (Mouse) | RT / R2 | R | Tap on target |
| Attack | Left Click (weapon) | RT / R2 | R | Tap on enemy |
| Place blocks | Right Click (holding block) | LT / L2 | L | Tap block in hotbar then tap ground |
| Open Inventory | E | Menu button (≡ or View) | X | Inventory icon |
| Quick Stack to Nearby Chests | Shift + Left Click on chest | LB + RB? (varies) | L+R? | Chest icon while near chest |
| Grapple Hook | Right Click (on a hook item) | RT / R2 while grappling | R while grappling | Tap grappling button |
| Map | M | Select button | Minus (-) | Map icon |
---
UI Overview
Your screen shows:
- Hotbar (bottom center): 10 slots for items you can quickly select (1-9 keys on PC, D-pad on console, swipe on mobile).
- Health (hearts) and Mana (stars) above hotbar. You start with 100 health (5 hearts).
- Inventory (Press E on PC): Opens backpack with slots for armor, accessories, coins, and items. Use this to craft, equip, and manage items.
- Crafting window: Appears when you open inventory. Shows what you can craft with materials in your inventory. Click an item to craft it.
- Equipment slots (left side of inventory): Head, chest, legs, 5 accessory slots, 2 social slots (cosmetic only).
- Coin slots (bottom-left): Hold copper, silver, gold, platinum coins. Coins drop on death in softcore, but you can recover them.
- Compass and Depth Meter (top-right): Shows your coordinates (depth and horizontal position). Useful for navigation.
- Buff icons (top-left): Show active buffs from potions, armor, or accessories.
- Chop down some trees (left-click on tree trunks). Wood is your most important early resource.
- Mine some stone just below the surface (left-click). You'll get Stone Blocks and some ores (Copper/Tin, Iron/Lead).
- Collect fallen items: Daybloom flowers, mushrooms, and any chests you see on the surface. Break pots underground with a pickaxe.
- Kill a few slimes for gel (you can craft torches with gel + wood).
- Walls: Use wood or dirt to create an enclosed space (at least 6 blocks tall, 8 blocks wide).
- Background walls: Craft Wood Wall (at a workbench) and place them behind your structure to prevent enemy spawns inside.
- Light: Place torches on walls or floors.
- Door or entrance: Craft a Wooden Door and place it in the wall opening.
- Workbench: Craft from 10 wood at your inventory crafting menu. Place it inside.
- Wooden Sword (7 wood) – basic weapon.
- Wooden Pickaxe (12 wood) – for mining stronger blocks.
- Wooden Axe (12 wood) – better at chopping trees.
- Torches (gel + wood) at a workbench.
- Furnace (20 stone + 4 wood at workbench) – smelts ores into bars.
- Anvil (5 iron bars at workbench) – for creating weapons and tools from bars.
- Gather more wood and stone. Craft a bed if you can (wood + silk from cobwebs, which you find underground). Beds let you set a spawn point.
- Eat any food you find (mushrooms, apples from trees) for a minor health boost.
- Stay near your house or build a campfire (3 torches + 10 wood at workbench) outside for passive health regen.
- Stay inside your shelter. Enemies cannot break through walls. If you have a door, they may open it unless you put a block behind it.
- Fight zombies and demon eyes through a small hole in the wall, or through the door (stand to the side).
- Collect dropped money and items (zombie arms, demon eyes, etc.). Keep an eye out for a Musket Ball or Gun drop – you might get lucky.
- Craft better gear if you have ores. Smelt Copper/Tin into bars, make a Copper Pickaxe or Sword at the Anvil.
- Chop trees and mine stone immediately.
- Build a shelter before dusk (day 1).
- Craft a workbench, door, and torches.
- Explore surface caves for chests and ores.
- Gather enough wood and stone for a furnace.
- Don't wander far from spawn at night without a light source or shelter.
- Don't use all your iron/lead on tools – save at least 5 bars for an anvil.
- Don't break Shadow Orbs or Crimson Hearts (found in corruption/crimson chasms) early – they can cause a meteor to land, or trigger a boss.
- Don't ignore health – if you get low on health, retreat and eat or use a campfire.
- Don't die in lava – avoid lava pools until you have an Obsidian Potion or high defense.
- Don't waste time on fishing early – it's complex; do it later.
---
First Hour Walkthrough
#### 1. Spawn and Immediate Actions
You start in the middle of a Forest biome. A Guide NPC will spawn nearby if you have a house (we'll build one soon). First, move around and look at your surroundings:
#### 2. Build a Shelter
Before nightfall (day lasts ~15 real minutes), build a small house to protect from zombies and other enemies. At minimum:
#### 3. Craft Essential Tools
With wood gathered, craft these from the inventory menu (you don't need a workbench for basic items, but some require one):
#### 4. Prepare for Night
#### 5. Survive the First Night
---
Essential Early Game Objectives
1. Build a proper house (at least 6x6 interior) with background walls, a door, and a torch. The Guide NPC will move in, providing crafting help).
2. Explore the surface to find chests, ore, and life crystals (orange floating hearts that increase max health by 20). Use underground caves.
3. Reach 200 max health (use life crystals). Once you have 200, you can summon the first boss: Eye of Cthulhu (by using a Suspicious Looking Eye at night, or it may spawn randomly).
4. Gather iron/lead to craft a Furnace and Anvil, then make better tools and armor.
5. Find a grappling hook – either craft from 15 gems + 3 iron bars at an anvil (if you find gems), or buy from merchant, or get from skeleton drops.
6. Explore the underground (caverns) for ores, life crystals, and accessories like Cloud in a Bottle or Hermes Boots.
7. Prepare for the Eye of Cthulhu: Build an arena with platforms, heart lanterns, campfires. Use ranged weapons (bow with flaming arrows) and potions (ironskin, regeneration).
---
What to Do First and What to Avoid
#### ✅ Do First:
#### ❌ Avoid:
---
Early Resource Priorities
| Resource | Use | Priority |
|---|---|---|
| Wood | Building, tools, torches, workbench | High |
| Stone | Furnace, walls, crafting basic items | High |
| Gel (from slimes) | Torches, platforms | Medium |
| Copper/Tin | Pickaxe, sword, armor (weak but okay) | Medium |
| Iron/Lead | Anvil, better pickaxe, armor, bucket | High |
| Life Crystals | Increase max health | High |
| Fallen Stars | Craft mana crystals (increases mana) | Low at start |
| Cobwebs | Silk, bed | Low |
Common Beginner Mistakes
1. Not building a house with background walls – enemies can spawn inside. Use crafted walls via workbench.
2. Opening skyware chests before reaching sky islands – they float high; use platforms or gravitation potion.
3. Misunderstanding the Guide – talk to him and click "Crafting" to see what you can make with an item in your inventory.
4. Dying to fall damage – place ropes or platforms when exploring deep caves.
5. Hoarding too many items – early inventory is tight; drop common items (like many dirt blocks).
6. Exploring the corruption/crimson without purification powder – you need to remove the spreading block to stop damage. For now, avoid chasms.
7. Not using potions – potions heal, buff, and help. Craft a bottle at workbench, fill with water at a lake, then craft potions at a placed bottle.
---
Day-One Checklist
- [ ] Chop at least 20 trees.
- [ ] Mine 50 stone blocks.
- [ ] Craft a workbench and place it.
- [ ] Craft a wooden sword, pickaxe, and axe.
- [ ] Build a basic house (walls, background walls, door, torches).
- [ ] Collect some torches (craft from wood+gel).
- [ ] Explore surface a little, find a chest if possible.
- [ ] Survive the first night inside your house.
- [ ] During night, craft a furnace (if you have stone) and possibly an anvil (if you have iron bars).
- [ ] Pick up any daybloom or mushroom you see (for potions later).
- [ ] Set spawn point with a bed (if you have silk).
- Talk to the Guide NPC (once he moves in) to learn recipes. Give him an item you want to know how to craft.
- Use the Terraria Wiki for precise information on bosses, biomes, and craftable items.
- Play on Softcore until you understand the game.
- Keep chests organized: Label them with signs or use different chests for different material types.
---
Additional Tips
---
Now you are ready to begin your adventure in Terraria. Remember: explore, craft, build, and don't dig straight down. Good luck!
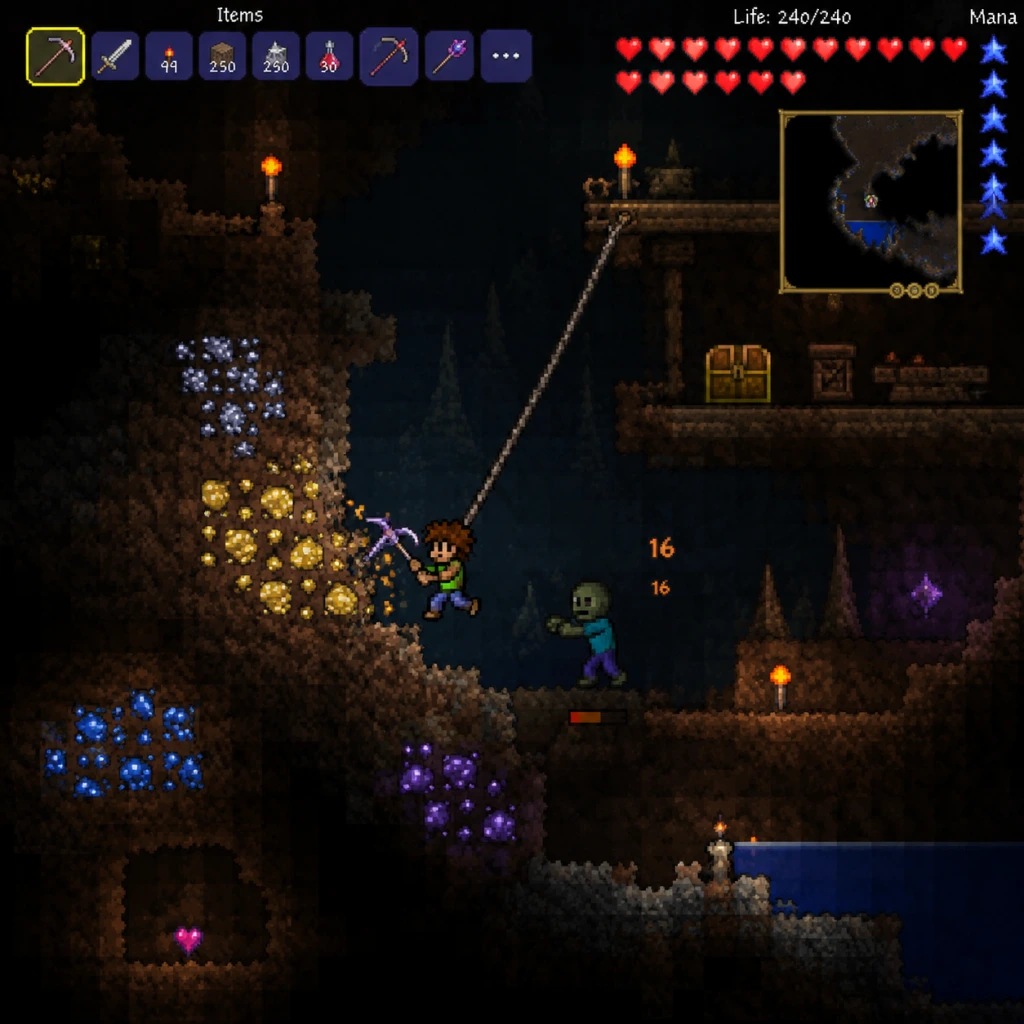
Core Gameplay
Terraria: Core Gameplay Guide
Overview
Terraria's core gameplay revolves around a loop of exploration, combat, crafting, and base building, driven by progressive boss fights. Your character grows by finding better weapons, accessories, and armor, while your world evolves through events and new biomes. This guide breaks down the experience into four major phases: Early Game, Mid Game, Late Game, and Endgame, with detailed explanations of each system.
---
Main Gameplay Loop
The fundamental loop is:
1. Explore your world to discover biomes, ores, chests, and enemies.
2. Gather resources (wood, stone, ores, life crystals, etc.).
3. Craft better gear, tools, weapons, and consumables.
4. Fight enemies and bosses to unlock new materials and progression.
5. Build/Expand your base (housing for NPCs, arenas, storage).
6. Repeat with increasing difficulty and rewards.
---
Combat & Interaction Systems
- Combat: Real-time 2D action with a variety of weapons (melee, ranged, magic, summoner). Use manual aiming, dodging, and mobility (hooks, wings, mounts).
- Defense: Armor, accessories, potions, and buffs reduce damage. Defense stat subtracts directly from incoming damage.
- Interaction: Left-click to attack/use item; right-click for special functions (e.g., placing blocks, opening doors). Interact with NPCs, crafting stations, and objects.
- Health & Mana: Max health increases with Life Crystals (max 400) and Life Fruits (beyond 400, up to 500). Mana increases with Mana Crystals (up to 200).
- Early Game: Surface/caves, first boss (King Slime/Eye of Cthulhu).
- Mid Game: Underground Jungle, Dungeon, Skeletron, Wall of Flesh (Hardmode activation).
- Late Game: Hardmode ores, Mechanical Bosses, Plantera, Golem, Lunatic Cultist.
- Endgame: Moon Lord, post-Moon Lord content, events, and challenges.
- World is static but procedurally generated with biomes: Forest, Desert, Jungle, Snow, Ocean, Underground, Cavern, Underworld, Corruption/Crimson, Hallow (Hardmode).
- Tools: Pickaxes, axes, hammers, and exploration accessories (e.g., Magic Mirror, GPS, Depth Meter).
- Hidden areas: Floating Islands, Living Trees, Sky Lakes, Underground Desert, Bee Hives.
- NPCs: Move in after meeting specific conditions (e.g., Guide: always present; Merchant: 50 silver). Each sells unique items.
- Angler: Fishing quests (daily) reward fishing gear, mounts, and rare items.
- Goblin Army / Pirate Invasion: Random events with unique loot.
- Boss Summons: Craft specific items (e.g., Suspicious Looking Eye for Eye of Cthulhu) or break certain blocks (e.g., Shadow Orbs).
- Currency: Copper, Silver, Gold, Platinum coins (stack of 100 of each lower tier).
- Income: Sell loot to NPCs, fishing, farming bosses, or crafting valuable items (e.g., Gleaming Flasks).
- Spending: Buy from NPCs (potions, blocks, weapons), reforge items, purchase ammo.
- Platinum Coins: Used for high-end NPC purchases and reforging legendary modifiers.
- Classes: Melee (swords, yoyos, flails), Ranged (bows, guns, rockets), Magic (staffs, tomes, spell books), Summoner (minions, sentries, whips).
- Hybrids: Often optimal early; specialize later with class-specific armor (e.g., Chlorophyte for ranged, Spectre for magic).
- Accessories: Up to 5 (6 with Demon Heart). Reforge for mobility, crit chance, damage, or defense.
- Skill: Manual aiming, dodging, platforming, and boss attack patterns are crucial.
- Activities: Chop trees, mine copper/tin, build a basic house, explore surface caves, gather Life Crystals.
- Key Gear: Wooden armor, Cactus armor, or Fossil armor; broadswords, bows, bombs; grappling hook.
- Bosses: King Slime (optional), Eye of Cthulhu (first major boss) – rewarded with items to summon next bosses (e.g., Demonite/Crimtane).
- Base: At least 3 NPCs (Guide, Merchant, Nurse) require houses. Build a simple wooden box with a door, background wall, chair, table, and light source.
- Tips:
- Activities: Explore Underground Jungle for Boomstick/Staff, defeat Skeletron to unlock Dungeon, gather Hellstone, summon Wall of Flesh.
- Key Gear: Shadow/Crimson armor, Night’s Edge (melee), Space Gun (magic), Minishark (ranged). Accessories: Cloud in a Bottle, Hermes Boots, Shield of Cthulhu (expert mode).
- Biomes: Corruption/Crimson, Jungle, Hell. Mine Hellstone (need Obsidian Skin potion).
- Bosses: Skeletron (guards Dungeon), Queen Bee (optional, gives beenades for Wall of Flesh), Wall of Flesh (activates Hardmode).
- Base: Expand housing for additional NPCs (Demolitionist, Dryad, Tavernkeep, etc.). Build an arena for bosses (long platforms, campfires, heart lanterns).
- Economy: Sell excess low-tier ores, farm Queen Bee for money.
- Activities: Break Demon Altars for ores, farm new enemies (e.g., Mummies, Armored Skeletons), defeat Mechanical Bosses, find Plantera’s Bulb, explore Temple.
- Key Gear: Adamantite/Titanium armor (class-specific), Lifeforce Potions, Chlorophyte armor (post-Plantera).
- Bosses: The Destroyer, The Twins, Skeletron Prime (Mechanical Bosses) → Plantera → Golem → Lunatic Cultist (summoned by killing Cultists at Dungeon entrance).
- Quests: Angler quests continue; fishing for crates (Hardmode crates contain ores).
- Build: Setup a dedicated potion farm, heart lantern/star in a bottle setups for arenas.
- Economy: Farm Destroyer for Hallowed Bars; sell excess bars or make wings.
- Activities: Defeat Moon Lord (final boss) by summoning with Celestial Sigil after defeating Lunatic Cultist and Celestial Pillars. Then tackle optional challenges: Old One’s Army, Empress of Light, Duke Fishron, Master Mode.
- Key Gear: Luminite Armor (crafted from Moon Lord drops) + endgame weapons (e.g., Last Prism, Meowmere, Stardust Dragon).
- Bosses: Moon Lord (reworks world with infinite flying mount; drops Luminite and Meowmere, etc.). Optional: Empress of Light (daytime enrage), Duke Fishron, Pumpkin Moon/Frost Moon events.
- Content:
- Builds: Fully optimize class builds with Luminite/Solar/Stardust armor, Menacing/Lucky accessories, and weapon modifiers (Godly, Ruthless, Mystic).
- Economy: Use platinum coins to reforge extensively; sell duplicate Luminite weapons.
---
Progression Overview
Progression is tied to defeating bosses and exploring deeper layers. Key milestones include:
---
Exploration
---
Quests & Missions
Terraria lacks traditional quests but has structured objectives:
---
Economy
---
Character & Build Growth
---
Progression Tiers
Early Game (Pre-Bosses to Eye of Cthulhu / King Slime)
- Always keep a stack of torches and platforms.
- Use the Guide’s “Crafting” option to see all recipes you can make.
- Avoid grabbing Demonite/Crimtane ore before you can mine it (need 65% pickaxe power).
---
Mid Game (Post-Eye / Skeletron to Hardmode)
---
Late Game (Hardmode to Lunatic Cultist)
Hardmode permanently alters the world: new biomes (Hallow, Underground Hallow/Corruption/Crimson), new ores (Cobalt/Palladium → Mythril/Orichalcum → Adamantite/Titanium), and enemies.
---
Endgame (Post-Moon Lord & Beyond)
- Old One’s Army: Defend Eternia Crystal; rewards sentry summons and powerful weapons.
- Fishing: Obtain the Golden Rod, Hotline Fishing Hook.
- Mining: Find Chlorophyte, Luminite, and farm Martian Madness for Xenopopper.
---
Summary Table
| Tier | Key Bosses | Key Biomes | Signature Gear |
|---|---|---|---|
| Early | King Slime, Eye of Cthulhu | Surface, Caves | Wooden armor, Grappling hook |
| Mid | Skeletron, Queen Bee, Wall of Flesh | Underground Jungle, Hell | Night's Edge, Space Gun |
| Late | Destroyer, Twins, Skeletron Prime, Plantera, Golem, Lunatic Cultist | Hallow, Underground Corruption/Crimson, Temple | Hallowed armor, Chlorophyte armor |
| Endgame | Moon Lord, Empress of Light, Duke Fishron, Events | Celestial Pillars | Luminite armor, Solar Eruption, Stardust Dragon |
Final Tips
- Always explore horizontally and vertically – many secrets are off the main path.
- Use the Guide to check crafting recipes at any point.
- Build an arena for each major boss (long platforms, campfires, heart lanterns, honey pools).
- Farm resources like wood, gel, and souls of light/night early in Hardmode.
- Backup your characters/worlds before major fights.
Terraria’s core gameplay offers hundreds of hours of content across these tiers. Master each phase to unlock the full sandbox experience.

Game Tips
Game Tips for Terraria
Overview
This guide collects hundreds of practical tips for Terraria, organized by category to help you survive, explore, build, and conquer. Tips range from beginner fundamentals to advanced optimizations used by speedrunners and veterans.
---
Combat Tips
#### Beginner: Learn the Dodge Mechanic
- What: Tap the ↕ key (default) to dodge most attacks on a short cooldown (1.67 seconds with full Dodge set).
- Why: Dodging avoids damage completely and is essential for surviving boss patterns.
- When: Use against slow projectiles (e.g., Eye of Cthulhu’s charges) or predictable melee attacks.
- What: Place wood platforms in arenas to jump through them without breaking fall.
- Why: Platforms let you fall through them (hold Down) but also give vertical mobility without needing wings.
- When: Essential for early boss fights like King Slime or Eye of Cthulhu.
- What: Drink one of each potion type for maximum buffs (e.g., Ironskin, Regeneration, Swiftness, Endurance).
- Why: Buffs stack multiplicatively; Ironskin (+8 defense) and Endurance (-10% damage) together reduce damage by ~15%.
- When: Always before any boss fight or dangerous exploration.
- What: Use a cosmic car key or mount that hovers horizontally (e.g., the Slime Mount) to circle Skeletron’s head.
- Why: Skeletron’s head has predictable spin attacks; circling nullifies its cursed skull projectiles.
- When: After defeating Queen Bee or obtaining the Slime Mount from King Slime.
- What: Equip two weapon loadouts via the Switch command (PC: Q or mouse wheel).
- Why: Swap between a high-damage melee weapon and a ranged backup instantly, optimizing DPS without inventory clutter.
- When: During invasions (Pirate, Solar Eclipse) or the Moon Lord fight where different phases require different ranges.
- What: Use weapons that home (e.g., Chlorophyte Bullets, Rainbow Rod) alongside a damage-increasing accessory (e.g., Avenger Emblem).
- Why: Homing allows you to focus on dodging while dealing damage, especially effective against fast enemies like Mothron.
- When: Hardmode dungeon events, Empress of Light, or when your arena has limited space.
- What: Dig a 2-wide vertical shaft from surface to Underworld (roughly 1,500 blocks deep). Use an elevator chair or rope for quick descent.
- Why: Fast access to all underground layers; essential for finding ore, chests, and the Underworld for Hardmode.
- When: After obtaining a gold/platinum pickaxe.
- What: Craft a Depth Meter (2 Gold/Platinum bars + 25 iron/lead) and combine with a Metal Detector later.
- Why: Shows ore types and unique blocks nearby; saves time mining blind.
- When: Always keep equipped while exploring.
- What: Drink a Spelunker Potion (Bottled Water + Blinkroot + Gold/Platinum Ore) to highlight all valuable items (ore, chests, crystals) in bright yellow.
- Why: Increases ore-finding efficiency by 200%+ and reveals hidden building materials.
- When: Before any major mining expedition.
- What: Use a Bow with Jester’s Arrows or a flail (e.g., Ball O’ Hurt) to break blocks above you without building up.
- Why: Floating Islands (above 400ft) have valuable loot; a Jester arrow pierces clouds and reveals islands quickly.
- When: Pre-Hardmode, after defeating Eye of Cthulhu.
- What: Use the Cosmic Car Key (from Martian Madness) or the UFO Mount to fly infinitely.
- Why: Quick surface map reveal; find all biomes, pyramids, and living trees for early loot.
- When: Hardmode, after defeating the Cultist and entering the Lunar Events.
- What: Build a hopper system (using minecart tracks and teleporters) to skip large underground areas.
- Why: Saves time traveling between biomes; useful for large worlds in multiplayer where coverage is critical.
- When: Hardmode endgame, when exploring post-Moon Lord content.
- What: Place torches every 10 blocks to avoid monster spawning; build platforms over hazards.
- Why: Monsters cannot spawn on torch-lit blocks; platforms prevent fall damage.
- When: Every underground trip.
- What: Mine all gold/platinum you see; it’s used for the best pre-Hardmode armor, tools, and hooks.
- Why: Gold armor gives 15 defense (plat 16), which is essential for early bosses.
- When: First trip underground after obtaining a copper pickaxe.
- What: Build a flat area in the cavern layer (near lava) with 200+ slime statues wired to a timer. Fill a bucket of lava to kill slimes automatically.
- Why: Gel is needed for torches, the Slime Mount, and crafting Asphalt blocks. A farm yields 200+ gel per minute.
- When: After obtaining wire and a timer (from the Mechanic). Very useful for Hardmode block crafting.
- What: When you find a large underground cabin, break all furniture (bookshelves, tables) for additional silver/gold coins and potions.
- Why: Cabinets often hold surface-level loot but breakable items contain hidden coins and rare materials.
- When: Every cabin you encounter.
- What: Once you have a pickaxe capable of mining Chlorophyte (e.g., Pickaxe Axe), use sticky dynamite to clear large areas quickly.
- Why: Chlorophyte spawns in clumps; dynamite destroys surrounding blocks and reveals all ore patches instantly.
- When: Hardmode, after defeating all three mechanical bosses.
- What: Plant Pearlstone blocks in a vertical grid (2 blocks apart) in the Hallow. Crystal Shards grow on them like glowing mushrooms.
- Why: Crystal Shards are used for great swords (e.g., Crystal Storm) and sell for 2 gold each. A farm of 200 blocks yields hundreds per hour.
- When: Hardmode, after unlocking the Hallow.
- What: A simple rectangle of wood (8 blocks high, 12 wide) with a door. Add a workbench, table, chair, and torch.
- Why: Valid housing for NPCs (they need a comfort item, a light source, and a flat surface).
- When: First night.
- What: Craft a rope from 5 chains (iron/lead) or buy it from the Merchant. Place it on the edge of your Hellevator.
- Why: Rope is quicker than ladders and lets you descend without fall damage by pressing Down.
- When: After building your Hellevator.
- What: Build a large horizontal platform (150 blocks wide) with three layers spaced 6 blocks apart. Place Heart Lanterns (from Life Crystals) and Campfires on platforms.
- Why: Both increase health regen by +1 HP per second (stacks). Critical for boss fights lasting over 3 minutes.
- When: Before fighting any boss (especially Skeletron or Wall of Flesh).
- What: Place a shallow pool of honey (4-6 blocks wide, 2 blocks deep) near your boss arena. Jump into it for 3 seconds to gain +1 HP/second regen.
- Why: Pairs with campfires; gives total +2 HP/s regen for 1 minute.
- When: Any boss fight where you can afford to stop for 3 seconds (e.g., Plantera, Golem).
- What: Wire a pair of teleporters (buy from Mechanic) and connect them to a switch. Create a hub in your base with teleporters to key locations: Hellevator, dungeon, ocean edges.
- Why: Instant travel across the world; saves 30+ minutes of walking.
- When: Hardmode after defeating Plantera (teleporters available pre-Hardmode but expensive).
- What: Craft Asphalt blocks (1 Stone + 1 Gel) and build a extremely long horizontal platform (1000+ blocks).
- Why: Running on Asphalt gives 100% increased movement speed, making you faster than most bosses. Negates many charge attacks.
- When: Post-Moon Lord, primarily for the Moon Lord fight itself or Duke Fishron.
- What: Craft Decorative Potions (e.g., Spelunker, Hunter) and sell them to the Merchant. Even basic Restoration Potions sell for 1 gold.
- Why: Quick cash early game; potions are easy to craft and NPCs buy them at 50% base value.
- When: After gathering basic herbs.
- What: Craft a Money Trough (from the Traveling Merchant) or use a Chest to store coins. Deposit all gold/silver as you get them to avoid losing on death.
- Why: On death, you drop 50% of carried coins. Storing them prevents loss.
- When: Always before entering dangerous biomes.
- What: Pre-Hardmode, marble caverns spawn Medusa and Hoplites. Medusa drops a marble block and Hoplites drop gold coins. Build a farm in the marble layer.
- Why: Hoplites drop 5-15 gold coins each; farm yields 100+ gold per hour.
- When: After defeating Skeletron (access to dungeon right next to marble areas).
- What: Note: This tip references the old duplication glitch that was fixed. Instead, use the Piggy Bank to safely store items between characters.
- Why: Avoids losing items to death or corruption. Not a dupe, but safe storage.
- When: Always.
- What: Craft Lihzahrd Power Cells from fragments dropped by Lihzahrd enemies in the Jungle Temple. Sell them to the Clothier or any vendor for 20 gold each (pre-Hardmode prices).
- Why: Each cell sells for 20 gold; a farm can produce 10+ per minute.
- When: Hardmode, after defeating Golem.
- What: Build a lava trap (statue + timer + bucket of lava) that spawns a specific enemy (e.g., the Red Devil or Mothron). Use a Conveyor Belt to collect dropped platinum coins into a chest.
- Why: Many Hardmode enemies drop platinum coins directly; a well-designed farm yields hundreds of platinum per hour.
- When: Post-Plantera, when you have access to the Solar Eclipse event.
- What: Stay away from chasms with purple/red grass until you have at least silver armor.
- Why: Corruptors/Crimera are fast and deal high damage; they also spread infection. Wait until you can survive.
- When: Pre-Hardmode, first mining trips.
- What: To summon Queen Bee, break a bee hive in the Underground Jungle. Use a bug net to catch bees and craft an Abeemination.
- Why: Queen Bee drops the Bee Mount and excellent weapons; defeating her early gives a huge power spike.
- When: After obtaining a demonite/crimtane pickaxe (level 3).
- What: In the Spider Nest, break all webs and use a Pitcher or hammer to destroy blocks. Spiders drop spider fangs.
- Why: Summoner builds require spider fangs for the Spider Staff (a strong early summon). Farm 30+ fangs for a full set.
- When: Pre-Hardmode, once you find a Spider Nest.
- What: In the dungeon, break all cracked bricks (they drop bones and coins). Open golden chests carefully – they may contain a Water Bolt or Muramasa.
- Why: Dungeon loot is essential for Hardmode; the Muramasa is required for the Night’s Edge.
- When: Before Skeletron (you can access the dungeon after defeating him).
- What: Use the minimap (M key) or full-screen map to track your location. Place markers (right-click on map) for important spots.
- Why: Prevents getting lost, especially in sprawling caves.
- When: Every session.
- What: Combine 15 gems (any type) and 15 iron/lead bars at an anvil to create a Grappling Hook.
- Why: Grappling hooks drastically improve vertical mobility, letting you escape enemies and reach high platforms.
- When: First day, after mining gems.
- What: Build a simple fishing pond (30x20 blocks of water) near your base. Craft a Fishing Rod and bait (use fireflies at night).
- Why: Fishing yields crates, potion ingredients, and rare items like Water Walking Boots or the Sawtooth Shark (a fast pickaxe).
- When: Mid-game, after getting a basic rod.
- What: Always talk to the Guide with a material item in your inventory. He shows all recipes that use that item.
- Why: Saves trial-and-error; prevents missing key upgrades.
- When: Always, especially when you find a new ore.
- What: Use the three accessory loadout slots (PC: Y key) to switch between sets: e.g., mining set, combat set, fishing set.
- Why: Quickly change accessories without opening inventory mid-activity.
- When: Before starting a new task (mining vs boss fight).
- What: Hold left-click on an item slot to auto-use it (e.g., torches, healing potions). Bind the ‘Heal’ key to your inventory’s first hotbar slot for quick health.
- Why: Faster reaction times – crucial during boss fights.
- When: Always.
- Use the ‘Berserker’s Glove’ + ‘Fire Gauntlet’ combo for melee builds: +12% melee speed and 15% damage. Stack with Mechanical Glove for total 27% damage.
- For Ranged: Use the ‘Stalker’s Quiver’ with Chlorophyte Bullets to home in on enemies. Combine with a Ranger Emblem for maximum DPS.
- For Mage: The ‘Celestial Emblem’ + ‘Mana Flower’ reduces mana cost by 8% and auto-potion. Use with the Last Prism (a post-Lunar item) for insane DPS.
- For Summoner: Use the ‘Papyrus Scarab’ and ‘Spooky Wings’ for extra minion slots. The Stardust Dragon Staff is the strongest minion.
- Build a very long horizontal platform (2000 blocks) made of Asphalt. Place three layers of platforms spaced 8 blocks apart (to dodge Phantasmal Deathrays).
- Place Heart Lanterns, Campfires, and a honey pool near the middle. Add a teleporter to a safe room with a nurse for instant healing (use wire and a switch).
- Use the ‘Cosmic Car Key’ for infinite flight – avoid the Moon Lord’s tongue attack by staying above 100 blocks.
- Place a Party Girl in a house with a flat area. She sells party items like the Bubble Machine and Streamer. These can be deconstructed for extra gel and silk, but more importantly, they sell for 20+ gold each to the Clothier (after defeating Skeletron).
- This is a grey-area exploit; may be patched in future updates. Use with caution.
#### Beginner: Use Platforms for Mobility
#### Intermediate: Potion Stacking
#### Intermediate: The ‘Bunny’ Strategy for Skeletron
#### Advanced: PvP & Class Switching
#### Advanced: ‘Homing’ Weapon Combos
---
Exploration Tips
#### Beginner: Build a Hellevator
#### Beginner: Scan with a Depth/Metal Detector
#### Intermediate: Use Spelunker Potions
#### Intermediate: The ‘Cutter’ Strategy for Floating Islands
#### Advanced: Map the Entire World with a Flying Mount
#### Advanced: ‘Hoop’ Jumping for Multiplayer Exploration
---
Resources & Gathering Tips
#### Beginner: Always Carry a Wooden Platform and Torches
#### Beginner: Prioritize Gold/Platinum Ore
#### Intermediate: Create a ‘Gloop’ Farm for Gel
#### Intermediate: Use the ‘Jack’ Strategy for Loot Rooms
#### Advanced: ‘Explosive’ Mining for Chlorophyte
#### Advanced: ‘Crystal’ Shard Farming
---
Build Tips (Base & Arena Construction)
#### Beginner: Build a Box House with Door
#### Beginner: Use a Rope for Safe Descents
#### Intermediate: ‘Arena with Heart Lanterns + Campfires’
#### Intermediate: Create a ‘Honey’ Pool for Invulnerability
#### Advanced: ‘Teleporter’ Network for Fast Travel
#### Advanced: Asphalt Runway for Boss Fights
---
Economy & Farming Tips
#### Beginner: Sell Potions You Don’t Need
#### Beginner: The ‘Money Trough’ Trick
#### Intermediate: Farm for Gold with Marble Caverns
#### Intermediate: The ‘Chest’ Duplication Glitch (Patched in 1.4.4)
#### Advanced: ‘Lihzahrd’ Bait for Selling
#### Advanced: ‘Platinum’ Coin Farming with AFK Trap
---
Exploration (Biome-Specific) Tips
#### Beginner: Avoid Corruption/Crimson Caves Early
#### Intermediate: The ‘Beeg’ Queen Bee Strategy
#### Advanced: ‘Spider’ Block Farming
#### Advanced: ‘Loot Room’ in Dungeon
---
General & QoL Tips
#### Beginner: Always Have a Map Online
#### Beginner: Craft a Grappling Hook ASAP
#### Intermediate: Use the ‘Fishing’ Forge
#### Intermediate: The ‘Guide’ to Crafting Combinations
#### Advanced: ‘Loadout’ Swapping with the Equip Menu
#### Advanced: ‘Auto-Select’ for Quick Item Use
---
Advanced Tips for Endgame
#### PvP/Boss Kill Optimization
#### Arena Design for The Moon Lord
#### Exploit: ‘Infinite’ Money with Party Girl
---
Conclusion
Terraria rewards creativity and persistence. Use these tips to save time, survive tougher enemies, and progress faster. Remember: always buff up before a boss, build a proper arena, and never underestimate the power of a Grappling Hook. Happy mining!
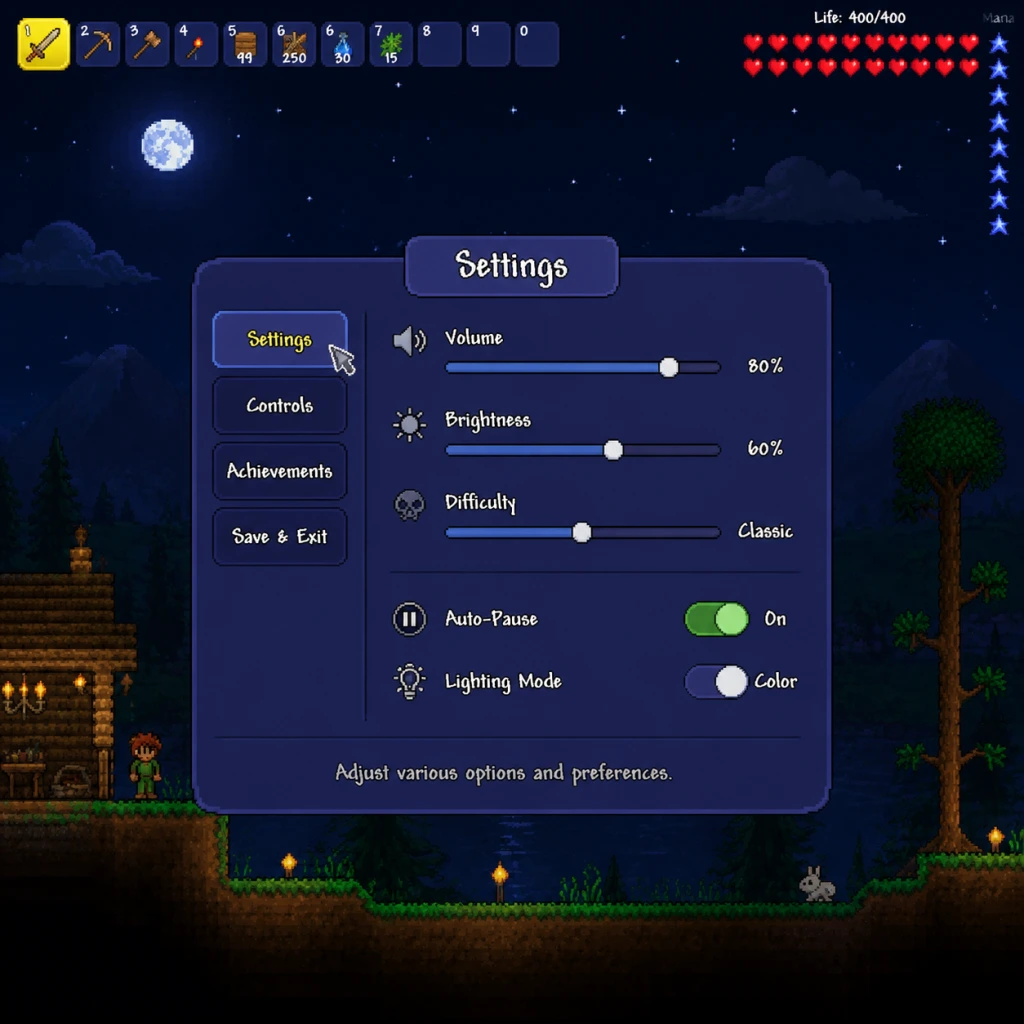
Game Settings
Game Settings
Overview
Terraria offers a wide range of settings to customize your experience, from visual fidelity and audio balance to control schemes and accessibility features. This guide explains every setting category, recommends optimal configurations for different hardware tiers, and flags common setup pitfalls. Settings vary slightly between platforms (PC, console, mobile), but core options remain consistent.
---
Graphics Settings
Graphics settings heavily impact both performance and visual clarity. Terraria uses a 2D sprite-based engine but still benefits from proper configuration.
| Setting | Description | Recommendations |
|---|---|---|
| Frame Skip | Controls how the game handles lag. Options: Subtle, Off, On. Subtle (default) smooths movement but can cause dropped frames. On skips frames to keep speed. Off reduces tearing but may cause speed slowdowns. | Low-end PC: On (maximizes smoothness). Mid-range: Subtle. High-end: Off (best visual sync). Console: Leave as default. |
| Lighting Mode | Affects how light is rendered. Options: Color (full RGB lighting), White (monochrome), Retro (chunky pixel shadows), Trippy (distorted). Color is standard. | All hardware: Color (if performance allows). Use White or Retro for a slight performance boost. |
| Background | Toggles animated parallax backgrounds. Can be set to On, Off, or Retro (lower detail). | Low-end: Off or Retro. Mid/High: On. |
| Wind | Controls wind motion on background foliage. Low impact. | Low-end: Off. Others: On. |
| Blood and Gore | Toggles gore effects. Performance-neutral but can be disabled for less distraction. | Personal preference. |
| Tile Grid | Shows a grid over blocks when placing. No performance cost. | Optional. |
| Heat Distortion | Adds shimmer effect near heat sources (lava, torches). Minor performance hit. | Low-end: Off. Mid/High: On. |
| Parallax | Controls background layer movement intensity. Low values (0-10%) reduce visual depth but improve performance slightly. | Low-end: 0%. Medium: 50%. High: 100%. |
| Quality | Only on console/mobile: Low/Medium/High preset. | Match to device specs. Low saves battery on mobile. |
- Frame Skip: Setting to "Off" on a low-end PC causes the game to run slower in heavy areas, making movement sluggish. Always test after changing.
- Lighting Mode: Retro mode disables colored light, making caves harder to navigate. Trippy mode can cause dizziness.
- Parallax: Setting to 0% removes background depth, but some players prefer it for performance.
---
Audio Settings
| Setting | Description |
|---|---|
| Master Volume | Overall sound level. |
| Music Volume | Affects background music. |
| Sound Effects Volume | Combat, item use, environment sounds. |
| Ambient Volume | Environmental sounds (wind, rain, water). |
| Voice Chat Volume | (PC) In-game voice chat. |
| Title Music | Toggle music on the main menu. |
| Sound Mode | (PC) Stereo vs Surround. Surround can improve directional awareness. |
| Disabled Sounds | List of specific sound effects you can mute individually (e.g., pickaxe, death). |
---
Controls Settings
Controls are highly customizable, especially on PC.
#### PC
- Key Bindings: Every action can be remapped. Commonly changed keys: Quick Buff (default B), Quick Heal (default H), Quick Mana (default M), Grapple (default E/Mouse thumb).
- Smart Cursor: When toggled on, automatically selects the best tool for the block you're aiming at. Can be set to toggle or hold.
- Auto-Select: Cycles through available tools in your hotbar. Usually bound to left Ctrl.
- Inventory: Can be set to pause the game when opened (Auto Pause option in Gameplay).
- Aim Mode: (On console) Stick sensitivity, deadzone, aim assist strength.
- Cursor: Adjustable size and color for accessibility.
- Controller Layouts: Several presets (Classic, Modern, etc.). Modern allows mapping hotkeys to D-pad.
- Sensitivity: Horizontal/Vertical camera speed.
- Trigger Deadzone: Adjust to prevent accidental activations.
- Vibration: On/Off, intensity.
- Touch Controls: Positions and sizes of buttons can be customized. There are also preset layouts.
- Tap to Move vs Joystick: Choose movement style.
- Auto-Swing: Toggle automatic melee attack when holding attack button.
- Smart Cursor: Leaving it on while building can accidentally mine blocks. Many players set it to a toggle key (e.g., Left Ctrl) and only enable it during combat/mining.
- Auto-Pause: If disabled, inventory management while enemies are nearby can get you killed. Recommended to enable Auto Pause in singleplayer.
- Controller Deadzone: Too low causes stick drift; too high reduces precision.
#### Console (Xbox/PlayStation/Switch)
#### Mobile (iOS/Android)
Easy to misconfigure:
---
Accessibility Settings
Terraria includes several accessibility options to accommodate various needs.
| Setting | Description | Notes |
|---|---|---|
| Zoom | Adjusts the camera zoom level (0% to 200%). Zooming out gives a wider view but makes everything smaller. | Crucial for players with visual impairments. On 4K monitors, zoom out more to see more area. |
| Cursor Scale | Enlarges the cursor. | Helpful for visibility. |
| FPS Counter | Displays frames per second. Useful for diagnostics. | No performance cost. |
| Colorblind Modes | Not natively available as a toggle, but you can change the color of wires, team indicators, and item tooltips via settings. | For true colorblind support, community mods like "Colorblind Mod" are available. |
| Text Readability | Font size options (if any). Can also be improved by UI scale. | |
Special attention: On console and mobile, UI scale options are limited; you may need to adjust system-level display scaling.
---
Language Settings
The game menu allows you to change the interface language. Available languages include English, French, German, Italian, Spanish, Chinese (Simplified/Traditional), Japanese, Korean, Portuguese (Brazilian), Russian, Polish, Turkish, and more. Language selection only changes text, not audio. Note that mods may require you to set the game back to English for proper compatibility.
---
Network Settings
Settings related to multiplayer:
| Setting | Description |
|---|---|
| Server List | Browse or add servers by IP address. |
| Host & Play | Host a game from your PC/console. Configure password, player limit, and difficulty. |
| Invite Friends | Platform-specific invite systems (Steam friends list, PSN, Xbox Live, Nintendo Switch Online). |
| Port Forwarding | Required for dedicated servers that need external connections. Terraria uses port 7777 by default (UDP). |
| Network Mode | (PC) Choose between Steam, IP, or LAN. |
| Frame Skip in Multiplayer | Set to On (or Subtle) to reduce lag-induced speed variations. |
| Latency Settings | Some versions have a "Interpolation" option to smooth other players' movement. |
---
Gameplay Settings
This section fine-tunes how the game behaves during play.
| Setting | Description | Recommendation |
|---|---|---|
| Auto Pause | When toggled on, opening any inventory menu pauses the game. Essential for singleplayer. | Singleplayer: On. Multiplayer: Off (pausing only affects you). |
| Auto Save | Automatically saves the world every few minutes. | Recommend On to prevent data loss. |
| Difficulty | Journey, Classic, Mediumcore, Hardcore (per character and world separately). | New players: Classic. |
| Journey Mode Customization | Enemy spawn rate, time freeze, god mode, etc. Only available in Journey worlds. | Experiment freely. |
| Display Name Tags | Show player names above characters. | On in multiplayer. |
| Health Bars | Show HP of enemies and NPCs. Toggleable. | On for easier combat. |
| Damage Text | Floating damage numbers. Helpful for measuring DPS. | On. |
| Map | Minimap and fullscreen map options. | Fullscreen map is useful for navigation. |
| Lock Joypad Cursor | (Console) Forces cursor to snap to grid when placing blocks. | On for precision building. |
- Auto Pause: Forgetting to enable it can lead to deaths while sorting inventory. Many deaths in Terraria happen exactly when the inventory is open.
- Journey Mode vs Classic: If you create a Journey character and join a Classic world, you lose Journey powers but keep the duplication menu. It can confuse new players.
---
Optimal Settings Recommendations
These tables provide starting points for different hardware levels. Adjust as needed.
#### Low-End Hardware (e.g., 10-year-old PC, integrated graphics, low-end laptops)
| Category | Setting | Recommendation |
|---|---|---|
| Graphics | Frame Skip | On |
| Graphics | Lighting Mode | White (or Color if playable) |
| Graphics | Background | Off |
| Graphics | Wind | Off |
| Graphics | Heat Distortion | Off |
| Graphics | Parallax | 0% |
| Graphics | Tile Grid | Off |
| Audio | Master/SFX/Ambient | Reduce to 70% to reduce CPU load (minor) |
| Controls | Auto Pause | On |
| Accessibility | UI Scale | 100% (or higher if text is too small) |
#### Mid-Range Hardware (e.g., modern laptop with dedicated GPU, desktop with GTX 1050 or equivalent)
| Category | Setting | Recommendation |
|---|---|---|
| Graphics | Frame Skip | Subtle |
| Graphics | Lighting Mode | Color |
| Graphics | Background | On |
| Graphics | Wind | On |
| Graphics | Heat Distortion | On |
| Graphics | Parallax | 75% |
| Audio | All | 100% |
#### High-End Hardware (e.g., RTX 3060+, high-refresh monitor)
| Category | Setting | Recommendation |
|---|---|---|
| Graphics | Frame Skip | Off |
| Graphics | Lighting Mode | Color |
| Graphics | Background | On |
| Graphics | Wind | On |
| Graphics | Heat Distortion | On |
| Graphics | Parallax | 100% |
| Audio | All | 100% |
| Network | Interpolation | On |
| Controls | Cursor Smoothing | (if available) On for pinpoint building |
#### Mobile Devices
- Low-end phone: Set Quality to Low, Lighting Mode to Retro or White, Background Off, Frame Skip On.
- High-end phone: Set Quality to High, Lighting Mode Color, Background On, Frame Skip Subtle. Reduce UI scale if needed.
- Xbox Series / PS5: Use default settings; they usually run at a locked 60 FPS.
- Nintendo Switch: May need Lighting Mode Retro for better performance in complex biomes. Set Frame Skip to On if slowdown occurs.
- PS4 / Xbox One: Similar to mid-range PC; keep Background On but reduce Parallax to 50% if FPS drops.
- Frame Skip Off with low FPS: The game runs in slow motion instead of stuttering. This can actually be beneficial for precise builds but makes combat harder. Only use if you consistently get 60 FPS.
- Lighting Mode Retro: Makes dark areas completely black unless you have a light source nearby. Can be frustrating in caves.
- Auto Pause Off in Singleplayer: You will die. Enable it.
- Smart Cursor Always On: Makes mining/building infuriating. Use toggle.
- UI Scale Too Small: On 1440p/4K screens, UI elements may be tiny. Increase UI Scale to at least 125% (if available) or 150%.
- Multiplayer Frame Skip: If you are experiencing rubberbanding, try setting Frame Skip to On even if you have a good PC. The host's settings often affect all players.
- Controller Stick Deadzone: Too low leads to drift; too high makes fine aiming difficult. Set to about 10-15% as a baseline.
#### Console
---
Settings to Watch Out For
---
Conclusion
Taking time to adjust settings properly can dramatically improve your Terraria experience, whether you're on a low-budget laptop or a high-end gaming rig. Start with the recommended settings for your hardware tier, then tweak individual options based on personal preference. Remember that some settings (like Frame Skip and Lighting Mode) can fundamentally change how the game feels, so experiment cautiously. For multiplayer, ensure everyone has compatible settings, especially Frame Skip and network modes, to avoid desync issues.

Important Notes
Important Notes for Terraria
Overview
Terraria is a deep game with many hidden systems, irreversible decisions, and punishing difficulty spikes. This guide collects the most critical warnings, pitfalls, and advice to help you avoid common mistakes, save time, and enjoy the game without regret.
---
Irreversible Choices & Permanent Consequences
#### Hardmode Activation (Wall of Flesh)
- Trigger: Defeating the Wall of Flesh in the Underworld permanently activates Hardmode.
- Consequences:
- Advice: Do not rush Wall of Flesh. Ensure you have:
- At world creation, you choose between Corruption and Crimson.
- Difference: Crimson is generally harder early but offers better items (e.g., Vampire Knives later). Corruption has easier enemies and useful items (e.g., Band of Starpower).
- Irreversible: You cannot change your world's evil after creation. For a full experience, you can create a separate world with the opposite evil and bring items between characters.
- Terraria does not enforce a class, but accessories, armor sets, and weapons heavily favor one of four classes: Melee, Ranged, Magic, Summoner.
- Common Regret: Wasting materials on gear for all classes early. Focus on one class until Hardmode, then diversify.
- Tip: Summoner is weak early game; many beginners find it frustrating. Consider switching to another class later.
- Missable Tip: Throwing a Guide Voodoo Doll into lava in the Underworld summons the Wall of Flesh. The Guide must be alive. If the Guide is dead, the doll does nothing.
- Warning: Some players accidentally summon the boss by throwing the doll in the wrong lava pool. Always be prepared before using the doll.
- Once you assign an NPC a house, they stay there until you manually move them (via a housing query). However, NPC happiness affects prices and pylons; you cannot undo a biomes' effect on happiness without moving them again.
- Advice: Place NPCs in preferred biomes for discounts and pylons. Check the wiki for each NPC's likes/dislikes.
- Some items are only useful in early game and cannot be acquired once you outlevel them (enemies stop dropping them or become too rare). Examples:
- Advice: Keep one of each unique item; you may need them for crafting later.
- The Angler NPC gives daily fishing quests that reward unique items (e.g., Golden Fishing Rod, Bottomless Water Bucket).
- Missable: If you skip a day, you lose the chance for that quest. Some items are only obtainable from quests.
- Tip: Complete quests as often as possible. Use a fishing power calculator or the wiki to find easy catches.
- Halloween (Oct 20 - Nov 10): Goodie Bags with rare costumes, weapons (e.g., The Horseman's Blade).
- Christmas (Dec 15 - Dec 31): Red and Green presents with holiday items (e.g., Snowman Cannon, Nutcracker).
- Tip: If you play in a world outside real time, you can manually set your system clock to trigger events. Or use Journey Mode's time control.
- Some boss summons require materials that are rare or limited (e.g., Suspicious Looking Eye from chests). If you use them all without defeating the boss, you may need to find more (they can also be crafted).
- Advice: Always craft or farm extra summon items before attempting a boss, or use multiple worlds.
- Problem: Zombies and Demon Eyes can overwhelm new players without a shelter.
- Solution: Build a small house with a door and a torch. Use wooden platforms for doors to keep enemies out while still allowing passage.
- Spike: Expected around first night if player has high HP or strong weapons. It's the first real test.
- Prep: 200+ HP, Hermes Boots, Shurikens or ranged weapons, a long flat arena (2 platforms high to dodge).
- Spike: Dungeon guardian is invincible; you must not enter the Dungeon until you defeat Skeletron at nighttime.
- Prep: Full Gold/Platinum armor, weapons with strong knockback (e.g., Enchanted Boomerang, Space Gun), Hermes Boots, and a grapple.
- Tip: Build a multi-tier arena with campfires and heart lanterns.
- Spike: Extremely long fight; must be done in the Underworld. Continual damage from lava, Hellbats, and the boss itself.
- Prep: Build a long bridge (approx. 2000 blocks) across the Underworld. Use Molten Fury with Hellfire Arrows, or a strong magic weapon. Bring Obsidian Skin and Water Walking potions.
- Spike: These are the first Hardmode bosses, much tougher than WOF. They drop Hallowed Bars and unlock the next tier.
- Prep: Hardmode armor (Mythril/Orichalcum or Adamantite/Titanium), wings (crafted from Souls of Flight + Harpy Feathers), and a large arena with campfires, heart lanterns, and heart statues.
- Tip: Use the Daedalus Stormbow with Holy Arrows for the Destroyer; it's a common efficient strategy.
- Spike: After defeating all three mechanical bosses, Plantera's Bulb spawns in the Underground Jungle. The boss is fast and deals high damage.
- Prep: Clear a large open area in the Underground Jungle (arena with platforms and heart lanterns). True Night's Edge or Terra Blade, chlorophyte armor, and a reliable movement method.
- Spike: The final boss. Requires full Solar/Stardust armor, powerful weapons (e.g., Solar Eruption, Nebula Blaze, Stardust Dragon), and an enormous arena with long flat platforms to dodge attacks.
- Prep: Build a long skybridge or use asphalt blocks for speed. Use mount (e.g., UFO, Cosmic Car Key). Bring all buff potions and a nurse NPC nearby for healing.
- Common Mistake: Spending hours mining copper/tin/iron/lead before exploring.
- Advice: You only need enough for basic armor, tools, and a grappling hook. Explore caves and find chests – they give better weapons and accessories faster.
- Some bosses are best farmed for specific drops (e.g., Eye of Cthulhu for Shield of Cthulhu, King Slime for Slime Mount). However, farming before Hardmode gives inferior versions.
- Tip: Wait until Hardmode to farm certain bosses for expert/master mode exclusive items (e.g., Queen Slime for the Hook of Dissonance).
- Fishing is very rewarding but time-consuming. New players often fish too early and ignore combat progression.
- Advice: Fish only when you need specific items (e.g., Reaver Shark for early Picksaw, or potion ingredients). Don't fish for hours; use the time to explore instead.
- Many players get lost in building elaborate houses before they have good weapons or accessories.
- Advice: Build a simple base first (rooms for NPCs, a crafting area). Spend extra time on building after defeating Plantera, when you have wings, faster tools, and unlimited materials from the world.
- Don't Grief: Do not destroy other players' builds, steal items from chests without permission, or summon bosses that others are not ready for.
- Don't Hijack NPCs: Taking an NPC out of someone else's base without asking is common rudeness.
- Use Permissions: On servers, use mods like "Server Blink" or "TShock" to protect areas and set roles.
- Journey Mode is not cheating; it's an official creative mode with powers like duplication, time freeze, and godmode. Using it on a multiplayer server without consent can ruin experience.
- Mods (tModLoader): Using mods that give unfair advantages (e.g., infinite HP, instant kill) on public servers is often banned. Always check server rules.
- Achievements: Cheated characters or worlds may break achievement triggers on Steam. To be safe, use a separate homeworld for legitimate progression.
- Trading high-level items for real money is against EULA and can get you banned on community servers. Keep trades within the game economy.
- Tip: If you want to help a friend, give them starter items (Hermes Boots, a hook, weapons), not endgame gear – it trivializes the challenge.
- Cloud Saves (Steam): Convenient but can cause conflicts if you switch devices frequently. Some users report world corruption after cloud sync errors.
- Local Saves: More stable. You can manually back up world and player files.
- Location: Typically in `%USERPROFILE%/Documents/My Games/Terraria` on Windows (Worlds and Players folders).
- Why: World corruption can happen due to crashes, power outages, or bugs (especially in large worlds).
- How: Copy the entire "Worlds" folder periodically (e.g., before major events or after each boss). Keep at least the last 3 backups.
- It's safe and common to create multiple worlds: one for main progression, one for farming specific biomes/ores, one for building creative projects.
- Advice: Share items between characters using a character that travels between worlds. This way, if your main world corrupts, you have a backup character.
- Not using the Official Terraria Wiki: The game has no internal guide for crafting recipes, boss mechanics, or NPC happiness. The wiki is essential.
- Selling Rare Items: Early on, players often sell items like Silk, Gold Bars, Pirate Maps, or Boss summoners. Keep at least one of everything until you know it's not needed.
- Using Life Crystals Too Early: Wait until you have explored a few biomes to find heart crystals naturally. You can always craft more later, but early heart usage limits early survivability.
- Ignoring Potions: Potions are game-changers. Gather herbs early and farm them (use clay pots and planter boxes). Crafting Ironskin, Regeneration, and Swiftness potions makes boss fights significantly easier.
- Not Building Arenas: Many boss fights require mobility and vertical space. Always build platforms, campfires, and heart lanterns before summoning a boss.
- Wasting Money on Useless NPCs: The Arms Dealer requires a gun, the Demolitionist requires explosives stored in inventory. Buying items from them before you need them consumes money that could buy reforges later.
- Not Using the "Smart Cursor" (Left Ctrl): This toggles a smart cursor that targets nearby blocks, ores, or chests. It speeds up mining and looting enormously.
- Not Understanding Housing Requirements: NPCs need a house with walls, a light source, a flat surface (table/chair), and one piece of comfort (chair/bench). Many new players fail to get NPCs because of missing walls.
- Exploring Underworld Early: The Underworld is dangerous without proper gear. Wait until you have at least Meteorite or Shadow armor, and a bunch of Obsidian Skin potions.
- Ignoring Armor Modifiers: Even early game, reforging accessories to Warding ( +4 defense ) or Menacing ( +4% damage ) can make a huge difference for a small gold cost.
- World is permanently changed: new biomes (Hallow, Underground Hallow), evil biome spreads rapidly, new enemies spawn everywhere.
- Pre-Hardmode ores (Copper, Iron, etc.) become nearly irrelevant; new Hardmode ores (Cobalt, Mythril, Adamantite) appear.
- Many early-game NPCs may die if their homes are corrupted.
- At least 200 maximum life (use Life Crystals).
- Full Molten or better armor.
- Strong weapons (e.g., Night's Edge, Phoenix Blaster, Imp Staff).
- A suitable arena and potions.
- A plan to contain the evil biome spread (e.g., dig tunnels around your base).
#### World Evil Selection
#### Class Specialization
#### Guide Voodoo Doll & Wall of Flesh
#### NPC Housing & Happiness
---
Missable Content & Time-Sensitive Events
#### Early-Game Rare Drops That Become Useless
- Enchanted Boomerang (chests) – replaced by better boomerangs.
- Muramasa (Dungeon) – needed for Night's Edge, but Dungeon becomes harder after Skeletron.
- Shadow Key (Shadow Chests) – only useful for its purpose; still unique.
#### Fishing Quests (Angler)
#### Seasonal Events
#### Boss Summon Items That Become Unobtainable
---
Difficulty Spikes & How to Prepare
#### First Night
#### Eye of Cthulhu
#### Skeletron
#### Wall of Flesh (WOF)
#### Mechanical Bosses (The Twins, The Destroyer, Skeletron Prime)
#### Plantera
#### Moon Lord
---
Grinding Traps & Efficient Progression
#### Over-Mining Early Game
#### Inefficient Boss Farming
#### Fishing Obsession
#### Building Before Progression
---
Online Etiquette & Anti-Cheat Notes
#### Multiplayer Behavior
#### Anti-Cheat (Journey Mode & Mods)
#### Trading & Gifting
---
Save Management & Backup Advice
#### Cloud vs Local Saves
#### Manual Backups
#### Multiple Worlds Strategy
---
Common Regrets & Things Players Wish They Knew
---
Final Words
Terraria rewards careful planning and knowledge. Use the Terraria Wiki (wiki.gg), experiment with different strategies, and don't be afraid to restart on a new world if your first one becomes too corrupted or unmanageable. Remember: nothing is truly permanent if you have backups. Enjoy the journey, and may your pickaxe never break!
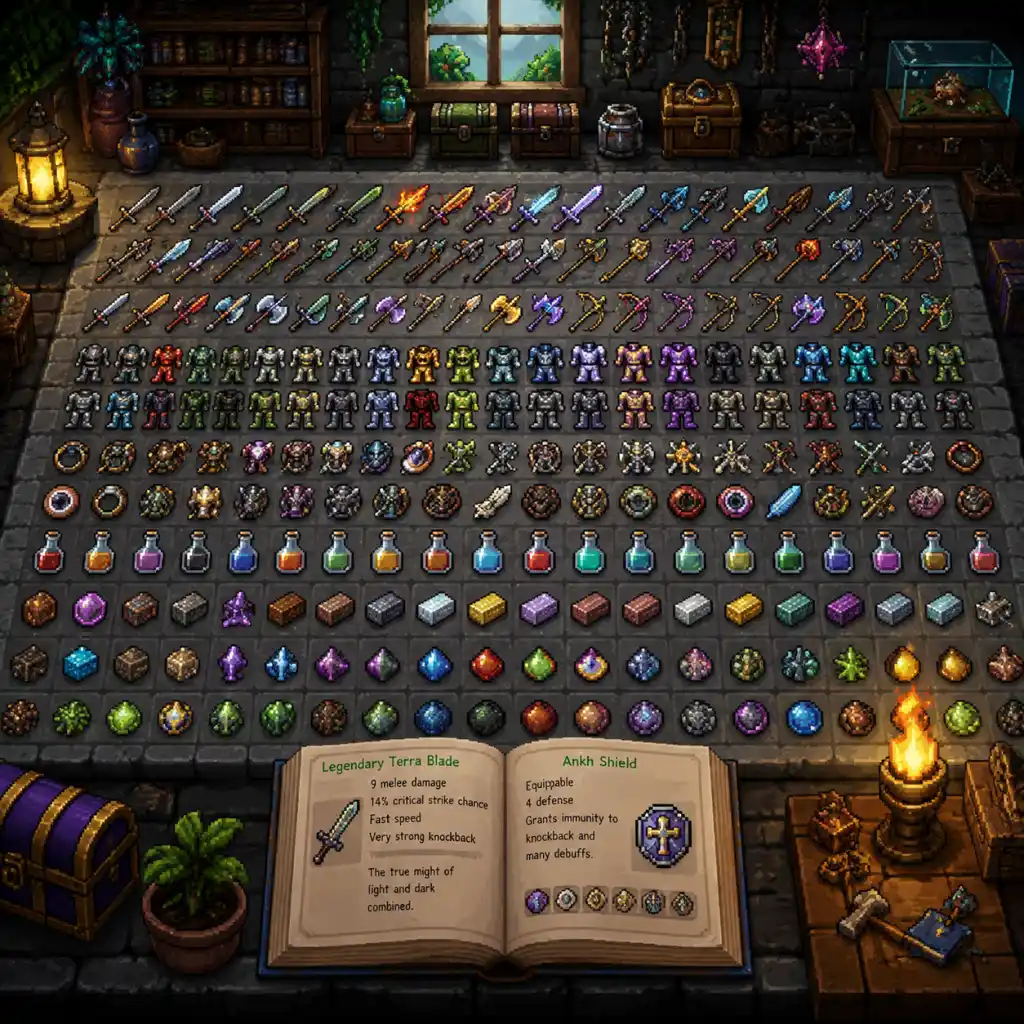
All Game Items
"content": "## All Game Items
Terraria features thousands of items across dozens of categories. This guide covers every major item type: weapons, armor, accessories, consumables, materials, currencies, collectibles, and key equipment. Items are grouped logically with explanations of what they do, how to obtain them, when they are useful, and any important synergies or upgrades. Platforms: PC (Steam, GOG), consoles (Xbox, PlayStation, Switch), mobile (iOS, Android).
---
Weapons in Terraria are divided into four main damage types: Melee, Ranged, Magic, and Summoner. Each has unique mechanics and progression paths.
Melee weapons include swords, spears, boomerangs, flails, yoyos, and shortswords. They deal contact damage and often have special effects.
Overview
Terraria features thousands of items across dozens of categories. This guide covers every major item type: weapons, armor, accessories, consumables, materials, currencies, collectibles, and key equipment. Items are grouped logically with explanations of what they do, how to obtain them, when they are useful, and any important synergies or upgrades. Platforms: PC (Steam, GOG), consoles (Xbox, PlayStation, Switch), mobile (iOS, Android).
---
1. Weapons
Weapons in Terraria are divided into four main damage types: Melee, Ranged, Magic, and Summoner. Each has unique mechanics and progression paths.
1.1 Melee Weapons
Melee weapons include swords, spears, boomerangs, flails, yoyos, and shortswords. They deal contact damage and often have special effects.
- Wooden Sword – Early game, crafted from 7 Wood at a Work Bench. Base damage 7. Useful only for first enemies.
- Copper Broadsword – Crafted from 8 Copper Bars at an Anvil. Damage 8. Slightly better than Wooden Sword.
- Enchanted Sword – Found in Enchanted Sword Shrines underground. Damage 23, shoots a sword beam projectile. Excellent early ranged melee option.
- Arkhalis – Rare drop from Enchanted Sword Shrines (instead of Enchanted Sword). Extremely fast, low damage per hit but high DPS. Effectively a rapid short-range sword.
- Night's Edge – Crafted from Blood Butcherer, Muramasa, Blade of Grass, and Fiery Greatsword at a Demon/Crimson Altar. Damage 42. A top pre-Hardmode sword. Upgrades to True Night's Edge in Hardmode.
- True Night's Edge – Crafted from Night's Edge and Broken Hero Sword at a Mythril Anvil. Damage 70. Further upgrades into Terra Blade.
- Terra Blade – Crafted from True Night's Edge, True Excalibur, and Broken Hero Sword. Damage 88. Fires a projectile. One of the best melee swords before Moon Lord.
- The Horseman's Blade – Drop from Pumpking during Halloween. Damage 150. Summons homing pumpkins on hit. Great for crowd control.
- Influx Waver – Drop from Martian Saucer (Martian Madness). Damage 100. Fires a projectile that splits on hit. Excellent DPS.
- Solar Eruption – Crafted from Solar Fragments (post-Lunatic Cultist). Damage 105. A flail that passes through blocks. Top-tier melee weapon.
- Daybreak – Crafted from Solar Fragments. Damage 150. Throws javelins that stick and deal damage over time. Very high single-target.
- Meowmere – Drop from Moon Lord. Damage 200. Fires bouncing cat projectiles. Highest melee weapon base damage.
- Star Wrath – Drop from Moon Lord. Damage 180. Calls down stars from the sky. Excellent for clearing large areas.
- Wooden Bow – Early game. Crafted from 10 Wood. Damage 4. Fires wooden arrows.
- Demon Bow / Tendon Bow – Crafted from Demonite/Crimtane Bars. Damage 14. Pierces enemies. Good for early bosses.
- Hellwing Bow – Found in Shadow Chests in the Underworld. Damage 13. Fires flaming bats that bounce and pierce. Excellent for pre-Hardmode.
- Daedalus Stormbow – Drop from Hallowed Mimics (Hardmode). Damage 17 but fires multiple arrows (2–6). With Holy Arrows, shreds Destroyer.
- Phantom Phoenix – Crafted from Hallowed Bars. Damage 32. Fires a phoenix projectile that explodes. Good crowd control.
- Tsunami – Drop from Duke Fishron. Damage 60. Fires 5 arrows in a spread. High DPS.
- S.D.M.G. – Drop from Moon Lord. Damage 77. Fastest gun. Uses bullets. Top DPS ranged weapon.
- Phoenix Blaster – Crafted from Handgun and Hellstone Bars. Damage 30. Very fast pre-Hardmode gun.
- Megashark – Crafted from Minishark, Illegal Gun Parts, Shark Fins, Souls of Might. Damage 25. 50% chance not to consume ammo. Classic Hardmode gun.
- Chain Gun – Drop from Santa-NK1 during Frost Moon. Damage 18 but extremely fast. Consumes ammo quickly.
- Electrosphere Launcher – Drop from Martian Saucer. Fires spheres that linger and damage enemies. Good for events.
- Celebration Mk2 – Drop from Moon Lord. Fires various rockets with special effects (showers, spirals). Excellent area damage.
- Rocket Launcher – Drop from Skeletron Prime. Fires rockets that explode. Moderate DPS.
- Stynger – Drop from Golem. Fires shrapnel. Good for crowd control.
- Nail Gun – Drop from Santa-NK1. Fires nails that stick and explode. High single-target.
- Wand of Sparking – Found in wooden chests. Low damage but infinite use. Good for early lighting.
- Ruby Staff – Crafted from 15 Rubies at an Iron/Lead Anvil. Damage 22. Pre-Hardmode staff that fires ruby bolts.
- Aqua Scepter – Found in Water Chests. Damage 14. Fires a stream of water that pierces. Good crowd control.
- Space Gun – Crafted from Meteorite Bars. Damage 17. Fires fast, piercing projectiles. No mana cost when worn with Meteor armor. Excellent for early Hardmode.
- Laser Rifle – Drop from Wall of Flesh. Damage 29. Fires fast green lasers. A staple early Hardmode magic weapon.
- Crystal Serpent – Fished in the Hallow. Damage 28. Fires a crystal bolt that splits. Good DPS.
- Golden Shower – Crafted from Spell Tome, Crystals, and Ichor. Damage 22. Inflicts Ichor debuff (reduces defense). Great support spell.
- Shadowflame Hex Doll – Drop from Goblin Summoner (Hardmode Goblin Invasion). Summons shadowflame skulls that home and bounce.
- Sky Fracture – Crafted from Light Shards, Crystal Shards, and Emblem. Damage 45. Fires three stars that bounce. High DPS.
- Nebula Arcanum – Crafted from Nebula Fragments. Damage 60. Creates a large, slow-moving orb that damages all enemies it passes through. Excellent for events.
- Last Prism – Drop from Moon Lord. Damage 100. Channels a rainbow beam that deals massive damage. Highest DPS in the game. Requires mana potions.
- Razorblade Typhoon – Drop from Duke Fishron. Damage 85. Fires a homing scythe disc. Great for all situations.
- Bubble Gun – Drop from Duke Fishron. Damage 40. Fires fast bubbles that bounce. Excellent crowd control.
- Lunar Flare – Drop from Moon Lord (rare). Damage 100. Fires a slow-moving orb that explodes multiple times. High area damage.
- Meteor Staff – Crafted from Meteorite Bars (post-Skeletron). Damage 27. Calls down meteors. Good for crowd control.
- Slime Staff – Rare drop from Slimes (1/10000). Summons a slime minion. Low damage but infinite minions possible.
- Finch Staff – Found in Living Wood Trees or crafted from 9 Wood. Summons a finch that pecks enemies. Good early game.
- Imp Staff – Crafted from Hellstone Bars. Summons an imp that shoots fireballs. Best pre-Hardmode summoner weapon.
- Spider Staff – Crafted from Spider Fangs (Hardmode) at a Mythril Anvil. Summons spiders that poison enemies. Good for early Hardmode.
- Optic Staff – Crafted from 12 Hallowed Bars and 2 Black Lenses. Summons two mini eyes that shoot lasers. High DPS.
- Pirate Staff – Drop from Pirate Invasion. Summons a pirate that shoots bullets. Moderate damage.
- Xeno Staff – Drop from Martian Saucer. Summons UFOs that home and shoot lasers. Fast attack speed.
- Tempest Staff – Drop from Duke Fishron. Summons a sharknado that spins and damages enemies. Excellent.
- Raven Staff – Drop from Pumpking. Summons ravens that charge and peck. Good single-target.
- Desert Tiger Staff – Crafted from Desert Fossils and Amber. Summons a giant cat that pounces. Extremely high DPS.
- Stardust Dragon Staff – Crafted from Stardust Fragments. Summons a dragon that grows longer with each summon (up to 6). Most powerful summoner weapon.
- Terraprisma – Drop from Empress of Light (enraged, daytime). Summons swords that follow the player and attack. Highest summoner DPS. Requires precise timing.
- Queen Spider Staff – Crafted from Spider Fangs. Summons stationary spiders that poison.
- Staff of the Frost Hydra – Found in Ice Chests. Fires ice bolts.
- Lunar Portal Staff – Crafted from Nebula Fragments. Creates a portal that shoots homing projectiles.
- Wood Armor – Crafted from 75 Wood. Defense 1. Basic starter.
- Cactus Armor – Crafted from 75 Cactus. Defense 2. Causes damage to enemies that touch you.
- Copper/Tin Armor – Crafted from bars. Defense 3. Slight improvement.
- Iron/Lead Armor – Crafted from bars. Defense 5. Decent for early exploration.
- Silver/Tungsten Armor – Defense 6. Better.
- Gold/Platinum Armor – Defense 8. Best pre-boss armor.
- Shadow/Crimson Armor – Crafted from Demonite/Crimtane Bars. Defense 10. Set bonus: 15% increased movement speed (Shadow) or increased melee damage (Crimson). Good for Brain of Cthulhu/Eater of Worlds fights.
- Meteor Armor – Crafted from Meteorite Bars. Defense 8. Set bonus: Space Gun costs 0 mana. Essential for early magic users.
- Jungle Armor – Crafted from Jungle Spores and Vines. Defense 6. Set bonus: increases mana maximum by 80. Good for Queen Bee and early magic.
- Necro Armor – Crafted from Bones, Silk, and Shadow Scales/Sample. Defense 7. Set bonus: 10% increased ranged damage. Pre-Hardmode ranger best.
- Bee Armor – Crafted from Bee Wax. Defense 6. Set bonus: increased minion damage and slots. For summoners.
- Molten Armor – Crafted from Hellstone Bars. Defense 16. Set bonus: 7% increased melee damage. Best pre-Hardmode melee armor.
- Obsidian Armor – Crafted from Obsidian and Silk (if available from Obsidian Skull). Defense 8. Set bonus: immunity to fire blocks and 20% increased whip speed. Good for early Hardmode summoner.
- Cobalt/Palladium Armor – Crafted from Cobalt/Palladium Bars. Defense 12/14. Palladium gives life regen on hit. Cobalt gives 10% increased velocity.
- Mythril/Orichalcum Armor – Crafted from Mythril/Orichalcum Bars. Defense 16/18. Orichalcum summons flower petals on hit. Mythril gives increased damage.
- Adamantite/Titanium Armor – Crafted from Adamantite/Titanium Bars. Defense 20/22. Titanium has a set bonus that creates a defensive barrier.
- Hallowed Armor – Crafted from Hallowed Bars. Defense 20. Set bonus: dodge chance (Holy Protection). Excellent for all classes.
- Frost Armor – Crafted from Frost Core (Ice Golems) and Hallowed Bars. Defense 19. Set bonus: melee and ranged damage, inflicts Frostburn.
- Forbidden Armor – Crafted from Forbidden Fragment (Sand Elementals) and Titanium/Adamantite Bars. Defense 12. Set bonus: sandstorm minion. For summoners and mages.
- Spectre Armor – Crafted from Chlorophyte Bars and Ectoplasm. Defense 16. Two hoods: Hood (life steal) and Mask (increased magic damage). Essential for mages.
- Turtle Armor – Crafted from Chlorophyte Bars and Turtle Shells. Defense 33. Set bonus: thorns damage. Good melee.
- Beetle Armor – Crafted from Turtle Armor and Beetle Husks. Defense 38 (shell) or 34 (scale). Shell increases defense, scale increases damage.
- Shroomite Armor – Crafted from Chlorophyte Bars and Shroomite Bars. Defense 18. Set bonus: invisible and increased ranged damage. Best ranger armor before endgame.
- Spooky Armor – Crafted from Spooky Wood (Pumpkin Moon). Defense 9. Set bonus: increased minion damage (very high). Best summoner armor before Stardust.
- Tiki Armor – Crafted from Tiki Totems (from Witch Doctor in Jungle). Defense 11. Set bonus: two extra minion slots and 30% increased minion damage.
- Stardust Armor – Crafted from Stardust Fragments. Defense 16. Set bonus: permanent guardian and increased minion damage. Best summoner armor in the game.
- Solar Flare Armor – Crafted from Solar Fragments. Defense 34. Set bonus: shield dash and increased melee damage. Best melee armor.
- Nebula Armor – Crafted from Nebula Fragments. Defense 16. Set bonus: boosts from nearby enemies (life, mana, damage). Best magic armor.
- Vortex Armor – Crafted from Vortex Fragments. Defense 18. Set bonus: stealth mode and increased ranged damage. Best ranger armor.
- Lunatic Cultist Mask – Not armor but headpiece that increases damage to cultists.
- Hermes Boots – Found in underground chests. Increases running speed. Upgradeable into Spectre Boots, Lightning Boots, Frostspark Boots, Terraspark Boots.
- Cloud in a Bottle – Found in chests. Double jump. Combine with various items for better jumps (Sandstorm in a Balloon, etc.).
- Shiny Red Balloon – Found in sky chests. Increases jump height. Combine with Cloud in a Bottle for improved jumps.
- Obsidian Skull – Crafted from Obsidian (20). Prevents fire damage from hellstone. Upgradeable into Obsidian Shield.
- Cobalt Shield – Found in Dungeon. Grants immunity to knockback. Combine with Obsidian Skull for Obsidian Shield. Then with Ankh Charm for Ankh Shield.
- Ankh Charm – Crafted from a dozen debuff-immunity accessories. Grants immunity to most debuffs. Combine with Obsidian Shield for Ankh Shield.
- Ankh Shield – Ultimate knockback and debuff immunity. Essential for all classes.
- Wings – Many types (Demon, Angel, Harpy, Leaf, Flame, Frozen, Spooky, Hoverboard, Steampunk, Solar, Nebula, Vortex, Stardust, etc.). Grants flight. Obtained from the Wall of Flesh (Hardmode) or later bosses.
- Star Veil – Crafted from Cross Necklace and Star Cloak. Creates stars when hit. Very useful for melee.
- Sweetheart Necklace – From Heart. Heals when damaged.
- Philosopher's Stone – From Mimics. Reduces potion cooldown. Combine with Band of Regeneration and others for Charm of Myths.
- Charm of Myths – Crafted from Philosopher's Stone and Band of Regeneration. Gives life regen and reduced potion cooldown. Good for all.
- Celestial Shell – Crafted from Celestial Stone and Moon Shell. Gives melee stats, life regen, and night bonuses. Top melee accessory.
- Avenger Emblem – Crafted from any class emblem and 5 Souls of Might, Sight, Fright. Increases all damage by 12%. Combine with other emblems for Destroyer Emblem (10% crit).
- Destroyer Emblem – Crafted from Avenger Emblem and Eye of the Golem. Increases damage 10% and crit 8%.
- Celestial Emblem – Crafted from Avenger Emblem and Sun/Moon Stone. Increases magic damage and mana.
- Summoner Emblems (Papyrus Scarab, Necromantic Scroll, etc.) increase minion slots and damage.
- Warrior/ Ranger/ Sorcerer/ Summoner Emblem – Drop from Wall of Flesh. 15% class damage increase. Reforge for better modifiers.
- Yoyo Glove – From Skeleton Merchant. Allows yoyos to have infinite range and a counterweight. Combine with Yoyo Bag and String for best yoyo performance.
- Yoyo Bag – Crafted from Yoyo Glove, White String, and Counterweight. Makes yoyos incredible.
- Molten Skull Rose – Crafted from Obsidian Rose and Molten Charm. Gives immunity to fire blocks and lava for 7 seconds. Useful for underworld.
- Lava Waders – Crafted from Obsidian Water Walking Boots and Lava Charm. Allows walking on water and lava. Combine with Terraspark Boots.
- Terraspark Boots – Crafted from Frostspark Boots and Lava Waders. Ultimate boots: flight, speed, lava immunity, water walking. Best-in-slot for movement.
- Celestial Shell – Already mentioned.
- Fire Gauntlet – Crafted from Avenger Emblem and Mechanical Glove. Increases melee damage, speed, and knocks back.
- Mechanical Glove – Crafted from Power Glove and Avenger Emblem. Increases melee speed and damage.
- Power Glove – Crafted from Feral Claws and Avenger Emblem. Increases melee speed and damage.
- Feral Claws – Found in Jungle Shrines. Increases melee speed.
- Pygmy Necklace – From Witch Doctor. +1 minion slot. Upgrade with Herbs for Necromantic Scroll.
- Berserker's Glove – Crafted from Power Glove and Flesh Knuckles. Increases melee speed, damage, and aggro.
- Monk's Staff – Not an accessory but a weapon. Combines with other items for the Zenith? No, Zenith is a sword.
- Frozen Shield – Crafted from Paladin's Shield and Frozen Turtle Shell. Summons a protective aura that reduces damage.
- Paladin's Shield – Dropped by Paladin in Dungeon. Protects allies and gives damage reduction.
- Frozen Turtle Shell – Dropped by Ice Tortoise. Under 25% health, gives 30% damage reduction.
- Master Ninja Gear – Crafted from Tabi and Black Belt (from Bone Lee). Allows dashing, climbing, and chance to dodge.
- Brain of Confusion – Drop from Brain of Cthulhu. 1/6 chance to confuse attackers. Also gives 10% damage reduction and a chance to dodge. Combine with other items for Master Ninja Gear? No, separate.
- Worm Scarf – Drop from Eater of Worlds. Increases damage reduction by 17%. Highly valued.
- Cross Necklace – Found in Gold Chests. Increases invincibility frames after hit.
- Star Cloak – Found in Skyware Chests. Creates stars when hit.
- Mana Flower – Crafted from Mana Potion and Nature's Gift. Automatically uses mana potions when mana is low. Combine with other items for Mana Cloak (also summons stars) or Arcane Flower.
- Nature's Gift – Found in Jungle. Reduces mana cost by 6%.
- Band of Starpower – From Shadow Orbs/Crimson Hearts. Increases mana by 20.
- Band of Regeneration – From underground chests. Increases health regeneration.
- Honey Comb – From Queen Bee. Releases bees when damaged.
- Shark Tooth Necklace – From Blood Moon Fishing. Armor penetration (defense ignored). Combine with Stinger Necklace.
- Stinger Necklace – Hive pack? Actually from Queen Bee. Increases armor penetration by 5.
- Putrid Scent – From Crimson World underground? No, from Dungeon. Increases damage and decreases aggro.
- Recon Scope – Crafted from Rifle Scope and Sniper Scope. Increases ranged damage and crit.
- Sniper Scope – Dropped by Skeleton Snipers. Increases ranged damage.
- Rifle Scope – Dropped from Ranged enemies. Allows zooming.
- Magic Quiver – From underground chests. Increases arrow damage. Combine with other quiver items for Molten Quiver.
- Molten Quiver – Crafted from Magic Quiver, Lava Charm, and Obsidian? Actually from Hellstone. Increases arrow damage and sets enemies on fire.
- Avenger Emblem – Already covered.
- Berserker's Glove – Covered.
- Flesh Knuckles – From Crimson Mimics. Increases defense and aggro.
- Stack of Coins – Not an accessory but a currency item.
- Treasure Magnet – From Dungeon. Increases pickup range.
- Lucky Coin – From Pirate Invasion. Gives coins from damage.
- Gold Ring – From Pirate Invasion. Increases coin pickup.
- Coin Ring – Crafted from Lucky Coin and Gold Ring. Combines effects.
- Greedy Ring – Crafted from Coin Ring and Treasure Magnet. Attracts coins.
- Lesser Healing Potion – From pots or crafted. Restores 50 HP.
- Healing Potion – Crafted from Lesser Healing Potion and Glowing Mushroom. Restores 100 HP.
- Greater Healing Potion – Crafted with Crystal Shards and other ingredients. Restores 150 HP. Best early-hardmode heal.
- Super Healing Potion – Crafted with Lunar Fragments and other ingredients. Restores 250 HP. Endgame heal.
- Mana Potion – Restores 50/100/150/200 mana depending on grade.
- Ironskin Potion – +8 defense. Essential for bosses.
- Regeneration Potion – Health regen increased.
- Swiftness Potion – Movement speed.
- Endurance Potion – 10% damage reduction.
- Lifeforce Potion – +20% max health.
- Rage Potion (Crimson) – 10% increased critical strike chance.
- Wrath Potion (Corruption) – 10% increased damage.
- Magic Power Potion – 20% increased magic damage.
- Mana Regeneration Potion – Increases mana regen.
- Archery Potion – 20% increased arrow damage.
- Summoning Potion – +1 minion slot.
- Battle Potion – Increases spawn rates.
- Water Walking Potion – Walk on water.
- Obsidian Skin Potion – Immunity to lava.
- Featherfall Potion – Slow fall.
- Gravitation Potion – Reverse gravity.
- Invisibility Potion – Turn invisible (partial stealth).
- Hunter Potion – See enemies on map.
- Night Owl Potion – Improved night vision.
- Shine Potion – Emit light.
- Builder Potion – Increased placement range.
- Mining Potion – Increased mining speed.
- Spelunker Potion – Shows ores and treasure on screen.
- Dangersense Potion – Highlights traps and dangerous blocks.
- Teleportation Potion – Random teleport.
- Warmth Potion – Reduced damage from cold enemies.
- Titan Potion – Increased knockback.
- Heartreach Potion – Increased health pickup range.
- Mushroom Statue (activates) spawns mushrooms but also releases spores.
- Pumpkin Pie – Crafted from Pumpkin, etc. Duration 30 min. Good early.
- Cooked Fish – Crafted from any fish. Duration 30 min.
- Fruit Juice – Crafted from fruit. Duration 30 min.
- Cooked Shrimp – From Duke Fishron? Actually crafted.
- Roasted Bird – From bird meat.
- Bacon – From pigron or crafted. Duration 45 min.
- Seafood Dinner – From multiple fish. Duration 45 min.
- Delicious Meat – From Venom Glands? Actually from Blood Moon fishing.
- Sashimi – From raw fish. Duration 30 min.
- Pad Thai – Crafted from noodles. Duration 45 min.
- Christmas Pudding – From Christmas event. Duration 45 min.
- Sugar Cookie – From Christmas. Duration 30 min.
- Pineapple Cake – From Angler quests. Duration 45 min.
- Fish Stew – From Angler. Duration 45 min.
- Lobster Tail – From Angler. Duration 30 min.
- Bowl of Soup – From Strange Plants? Actually from quests.
- Exquisitely Stuffed – The best food: crafted from multiple high-tier ingredients (Golden Delight, etc.). Duration 1 hour, provides Major improvements to all stats.
- Golden Delight – Crafted from Lava Fish and Gold. Duration 1 hour, best Well Fed.
- Bomb – From pots, chests, or purchased from Demolitionist. Explodes after a short fuse. Destroys blocks.
- Sticky Bomb – Crafted with Bomb and Gel. Sticks to surfaces. Better control.
- Dynamite – More powerful. Purchased or found.
- Sticky Dynamite – Same as Sticky Bomb with dynamite.
- Grenade – Thrown, explodes on contact. Damage to self?
- Sticky Grenade – Sticks.
- Bouncy Bomb – Bounces before exploding.
- Bouncy Dynamite – Bounces.
- Bouncy Grenade – Bounces.
- Cluster Rocket I/II – For rocket launchers.
- Proximity Mine – From Mechanic. Placeable, explodes on enemy contact.
- Land Mine – From Mechanic. Activates when stepped on.
- Explosive Bunny – Used in PvP or for fun.
- Minecart with explosives – Not consumable but explosive.
- Starfury (not explosive but star rain).
- Life Crystal – Found underground. Increases max health by 20 (up to 400).
- Mana Crystal – Crafted from Fallen Stars. Increases max mana by 20 (up to 200).
- Heart Lantern – Crafted from Chains, Life Crystals. Placed item that increases life regen nearby.
- Star in a Bottle – Crafted from Bottle and Fallen Stars. Placed item that increases mana regen.
- Campfire – Crafted from Wood. Boosts life regen in range.
- Honey – Honey blocks and honey pools. When in honey, life regen increased.
- Ammo Box – Placeable, gives +15% ammo reduction.
- Sharpening Station – Placeable, gives +12 armor penetration for melee.
- Crystal Ball – Placeable, gives +5% magic damage and increased mana regen.
- Slice of Pie – Not an item, but a buff from eating pie?
- Bewitching Table – Placeable, increases max minions for 10 minutes.
- Slice of Hell – Not applicable.
- Copper/Tin – Common early ores. Smelt into bars.
- Iron/Lead – Next tier.
- Silver/Tungsten – Better.
- Gold/Platinum – Best pre-boss. Gold/Platinum tools and armor are good.
- Demonite/Crimtane – From Eater of Worlds/Brain of Cthulhu. Used for Shadow/Crimson gear.
- Meteorite – Fallen from sky after destroying Shadow Orb/Crimson Heart. Used for Meteor armor and tools.
- Hellstone – In the Underworld. Requires Hellforge to smelt. Used for Molten armor and gear. Dangerous due to lava.
- Cobalt/Palladium – First Hardmode ores. Mined with Molten Pickaxe.
- Mythril/Orichalcum – Second tier. Requires Cobalt/Palladium Pickaxe.
- Adamantite/Titanium – Third tier. Requires Mythril/Orichalcum Pickaxe.
- Chlorophyte – Grows in Jungle after Hardmode. Mining requires Pickaxe Axe or better. Used for Turtle/Beetle armor and tools.
- Luminite – Dropped by Moon Lord. Used for Solar, Nebula, Vortex, Stardust fragments and items.
- Amber, Amethyst, Diamond, Emerald, Ruby, Sapphire, Topaz – Found underground in gems. Used for hooks, staffs (magic weapons), and gem accessories. Can be crafted into Robes or Gemspark Blocks.
- Wood (various types: Boreal, Rich Mahogany, Palm, Pearl, etc.) – Basic building and crafting.
- Gel – From slimes. Used for torches, slime items.
- Silk – Crafted from Cobwebs (7 silk per 7 cobwebs). Used for beds, armor (Necro, Bee), and more.
- Jungle Spores – From Jungle grass. Used for Jungle armor.
- Vine – From Jungle enemies. Used for hooks and armor.
- Stinger – From Hornets. Used for Bee armor, weapons.
- Bee Wax – From Queen Bee. Used for Bee armor, Beenades.
- Spider Fang – From Hardmode spiders in Jungle. Used for Spider staff and armor.
- Turtle Shell – From Giant Tortoise in Jungle. Used for Turtle armor.
- Beetle Husk – From Golem's Beetles. Used for Beetle armor.
- Ectoplasm – From Dungeon Spirits in Hardmode Dungeon. Used for Spectre armor.
- Souls (Soul of Light, Soul of Night, Soul of Flight, Soul of Might, etc.) – Dropped from various Hardmode enemies. Essential for many recipes.
- Fish – Many types for potions and food.
- Crates – Wooden, Iron, Golden, etc. Opened for ores, coins, and rare items.
- Sonar Potion ingredients.
- Fishing Pole materials.
- Work Bench – Basic crafting.
- Furnace – Smelt ores.
- Hellforge – Smelt hellstone.
- Iron/Hardmode Anvil – Craft tools and armor.
- Mythril/Orichalcum Anvil – Hardmode crafting.
Special mention: Yoyos like Yelets, Eye of Cthulhu, Terrarian (final yoyo from Moon Lord) – all yoyos can be controlled with a yoyo glove accessory. The Terrarian spawns two homing projectiles.
1.2 Ranged Weapons
Ranged weapons consume ammunition (arrows, bullets, rockets, darts). They are divided into bows, guns, repeaters, launchers, and throwables.
Throwable weapons (pre-Hardmode): Shurikens, Throwing Knives, Grenades, Beenades (summons bees). Hardmode throws into the ranger class.
1.3 Magic Weapons
Magic weapons consume mana. Many have special effects like homing, piercing, or area damage.
1.4 Summoner Weapons
Summon weapons create minions (followers) or sentries (stationary) that attack enemies automatically. Summoner is the only class that can benefit from multiple damage type bonuses simultaneously (minion slots via accessories).
Sentries (placeable):
---
2. Armor Sets
Armor provides defense and set bonuses. Some are class-specific. Hardmode and endgame sets are essential for survival.
2.1 Pre-Hardmode Armor
2.2 Hardmode Armor (Pre-Mech Bosses)
---
3. Accessories
Accessories provide passive bonuses. Many can be combined at Tinkerer's Workshop. They are crucial for survivability and damage.
---
4. Consumables
Potions, food, buffs, explosives, and other one-time-use items.
4.1 Potions (Alchemy)
Potions are brewed at a Bottled Water station with herbs and other ingredients. Common herbs: Daybloom, Moonglow, Blinkroot, Deathweed, Waterleaf, Fireblossom, Shiverthorn.
4.2 Food (Well Fed Buff)
Food gives the Well Fed buff (movement speed, damage, crit, mining speed). Higher quality food gives longer duration.
4.3 Explosives
4.4 Other Consumables
---
5. Materials
Materials are used for crafting weapons, armor, furniture, and more. They are mined, dropped, harvested, or purchased.
5.1 Ores and Bars
5.2 Gems
5.3 Plant-Based Materials
5.4 Fishing-Related Materials
5.5 Crafting Stations
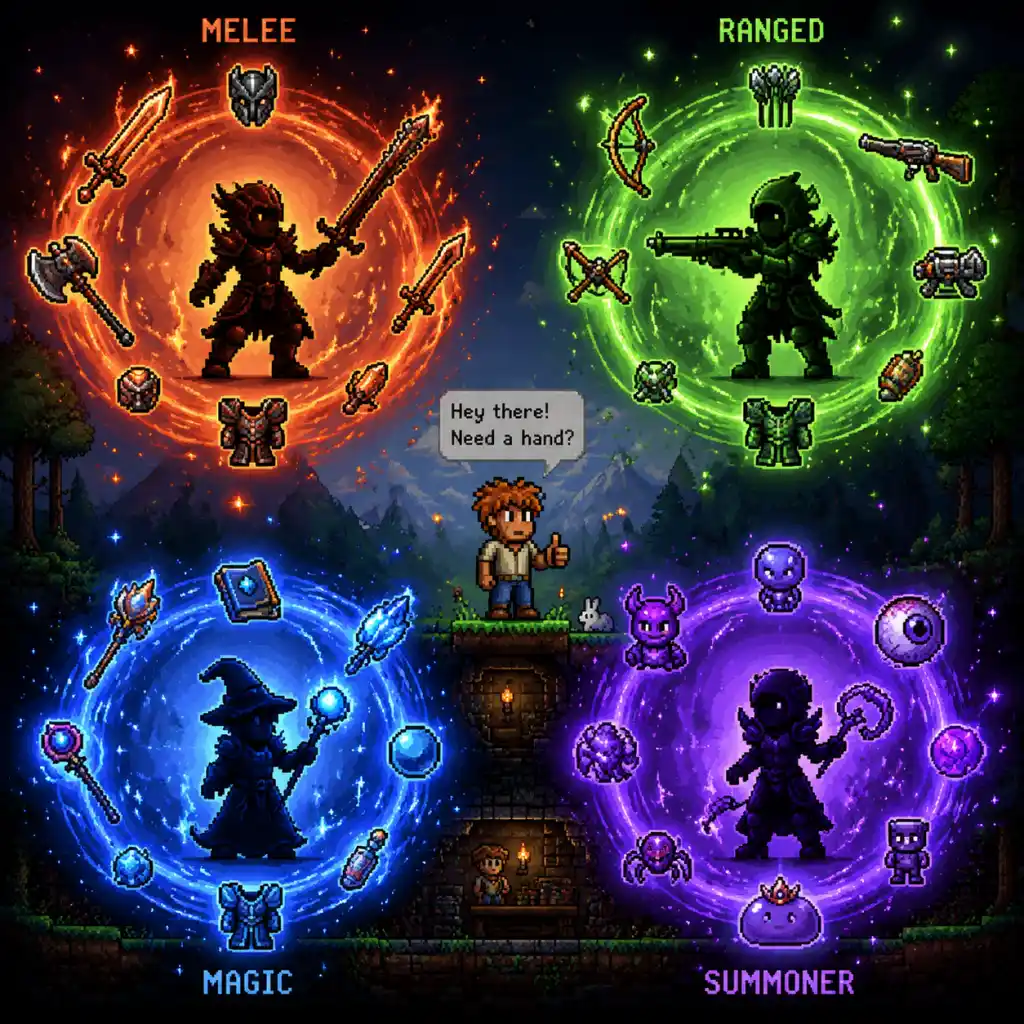
Character Skills
Character Skills and Class Abilities
Overview
Unlike traditional RPGs, Terraria does not have a fixed character class system with unlockable skill trees or active abilities. Instead, your "skills" are defined by the equipment you wear and the items you use. This guide categorizes the major combat styles (classes) and explains the key items, armor set bonuses, and accessories that function as special moves, passives, or utilities. Each "skill" described here includes its effects, acquisition method, upgrades, synergies, and optimal use cases.
General Utility Skills
These are universal abilities that any character can use regardless of class.
#### Grappling Hook
- Effect: Fires a hook that latches onto blocks, pulling you toward them. Essential for vertical mobility and escaping danger.
- Acquisition: Crafted from gems and iron/lead bars, or found in chests/purchased from Goblin Tinkerer.
- Upgrades: Better hooks (e.g., Ivy Whip, Dual Hook, Lunar Hook) have multiple hooks, longer range, higher pull speed.
- Synergies: Combine with wings to cancel fall damage or reposition mid-air. Pairs well with any class for terrain traversal.
- When to Use: Always keep a hook equipped. Use to climb cliffs, dodge attacks, or reach floating islands.
- Effect: Grants flight time and negates fall damage. Flight time scales with the wing type.
- Acquisition: Crafted from souls of flight and various boss materials (e.g., Demon/Dark/Flame Wings) or purchased (e.g., Jetpack from Steampunker).
- Upgrades: Better wings provide longer flight, hover ability, and higher speed (e.g., Solar Wings, Stardust Wings).
- Synergies: Essential for all classes. Combine with Frog Leg for increased jump speed and flight acceleration. Pair with Cobalt Shield/Ankh Shield to avoid knockback during flight.
- When to Use: Always equip once obtained. Activate by holding jump; release to glide. Use flight to avoid ground-based enemies, reach floating platforms, and maneuver during boss fights.
- Effect: Summon a rideable creature or vehicle with unique movement properties (e.g., fast horizontal speed, flight, water walking).
- Acquisition: Dropped by bosses (e.g., Blessed Apple from Unicorns for Unicorn Mount), purchased (e.g., Golf Cart from Golfer), or crafted (e.g., Drill Containment Unit).
- Upgrades: Mounts are not upgradable, but better mounts are found later (e.g., Shrimpy Truffle from Duke Fishron for infinite flight in water).
- Synergies: Use ranged/magic classes with mounts that allow strafing (e.g., Witch's Broom). The Drill Mount mines blocks while moving, useful for digging.
- When to Use: Use for long-distance travel, farming enemies, or combat when you need to outrun projectiles. Activate via mount hotkey.
- Effect: Teleports the player to the cursor position (max 50 blocks) for a small mana cost. Inflicts Chaos State debuff for 6 seconds, preventing repeated use.
- Acquisition: Rare drop (0.2% chance) from Chaos Elementals in the Hallow Cavern.
- Upgrades: No direct upgrade, but Chaos State can be bypassed with the Rod of Harmony (from Don't Starve crossover) which has no cooldown but costs more mana.
- Synergies: Essential for dodging boss attacks (e.g., Moon Lord's Phantasmal Deathray). Combine with Magic Mirror for instant escape. Pair with Mana Flower to automatically consume mana potions.
- When to Use: Use to instantly avoid damage, reposition behind cover, or cross gaps. Avoid using twice in quick succession due to Chaos State damage.
- Primary Attribute: High defense, close-range power, life regeneration.
- Key Armor Set Bonuses:
- Special Moves (Weapon-Based):
- Recommended Build: Full Solar Flare Armor, Terra Blade+Influx Waver, Flairon, Daybreak, Star Wrath (shoots stars). Accessories: Fire Gauntlet (increased melee damage and knockback), Warrior Emblem, Avenger Emblem, Celestial Shell (increases damage at night). Equip a shield (Ankh Shield) for knockback immunity.
- When to Use: Melee works in close combat vs single targets or tightly packed groups. Use Daybreak vs bosses that fly (Moon Lord) for constant DOT. Block with Brand of the Inferno if you can time attacks.
- Primary Attribute: Sustained damage from a distance, ammo management, high single-target output.
- Key Armor Set Bonuses:
- Special Moves (Weapon-Based):
- Recommended Build: Full Shroomite Armor (Helmet depending on weapon type: ranged/rocket/bullet). Weapons: Phantasm (Holy Arrows), S.D.M.G. (Chlorophyte Bullets), Celebration MK2 (Rockets). Accessories: Ranger Emblem, Avenger Emblem, Magic Quiver (boosts arrow speed and damage), Sniper Scope (increases damage and zoom), Celestial Shell.
- When to Use: Ranged is versatile for both bosses and events. Use Phantasm vs Moon Lord (stay airborne with wings). Use S.D.M.G. with Chlorophyte Bullets for homing vs moving targets. Activate Shroomite stealth when safe to deal massive damage.
- Primary Attribute: High burst damage, mana regeneration, area-of-effect spells, debuffs.
- Key Armor Set Bonuses:
- Special Moves (Weapon-Based):
- Recommended Build: Full Nebula Armor. Weapons: Last Prism, Razorblade Typhoon, Nebula Blaze, Moon Lord drops. Accessories: Sorcerer Emblem, Avenger Emblem, Celestial Emblem (increases damage and pickup range), Mana Flower (auto-potion), Arcane Flower (reduces mana cost). Pair with Magic Cuffs to restore mana on taking damage.
- When to Use: Magic excels at crowd clearing and boss fights with high mobility. Use Last Prism only when you can stand still (e.g., during boss stun phases). Use Razorblade Typhoon to attack through walls. Equip Nebula Armor to collect boosters mid-fight for sustained buffs.
- Primary Attribute: Summons minions and sentries that automatically attack enemies. Low player damage, but high total DPS.
- Key Armor Set Bonuses:
- Special Moves (Weapon-Based):
- Recommended Build: Full Stardust Armor. Weapons: Terraprisma (primary), Stardust Dragon Staff (secondary for piercing). Accessories: Summoner Emblem, Avenger Emblem, Necromantic Scroll (extra minion slot), Papyrus Scarab (extra minion slot and damage), Celestial Shell. Combine with Bewitching Table and Summoning Potion for max minions.
- When to Use: Summoner is excellent for passive damage, allowing the player to focus on dodging. Use in boss fights (summon before fight begins) and events (sentries help in towers). Terraprisma is best vs fast enemies; Stardust Dragon vs groups.
- Effect: Grants a dash ability. Double-tap left or right to dash in that direction for 34 blocks. Dash grants invincibility frames and deals 30 damage to enemies hit.
- Acquisition: Expert Mode Treasure Bag from Eye of Cthulhu.
- Upgrades: Eventually upgraded into Master Ninja Gear (adds dash, dodge chance, and climb speed).
- Synergies: Essential for dodging bosses (e.g., dodging Moon Lord's Phantasmal Attack). Combine with Ninja Gear for double dash.
- When to Use: Dash through projectiles or enemies to avoid damage. Use offensively to close distance with melee class.
- Effect: Grants dash (same as Shield of Cthulhu) plus 10% chance to dodge attacks (including projectiles). Also increases movement speed and climb speed.
- Acquisition: Combine Shield of Cthulhu, Tabi, and Black Belt at Tinkerer's Workshop.
- Synergies: Pairs with Hallowed Armor set bonus (Shadow Dodge) for additive dodge chance. Use with Brain of Confusion for extra dodge.
- When to Use: Always equip until you get endgame accessories. Dash and dodge are invaluable in all fights.
- Effect: On taking damage, 1/6 chance to confuse nearby enemies and gain brief invisibility (increased critical chance). Also grants 17% dodge chance.
- Acquisition: Expert Mode Treasure Bag from Brain of Cthulhu.
- Upgrades: Can be combined with other items for Worm Scarf (damage reduction) but not directly upgraded.
- Synergies: Overlaps with Master Ninja Gear dodge. Critical boost helps all classes.
- When to Use: Useful for classes that lack survivability (mage, summoner). Equip until you get better endgame accessories.
- Effect: At night or during a full moon, increases damage, critical strike chance, melee speed, health regeneration, movement speed, and accessory slots. Also grants increased pickup range.
- Acquisition: Combine Moon Shell and Celestial Stone at Tinkerer's Workshop.
- Upgrades: Can be combined with Sun Stone/Moon Stone, but Celestial Shell already provides both day and night effects.
- Synergies: Great for any class, especially during night boss fights (e.g., Moon Lord).
- When to Use: Always wear once obtained. The boost is significant.
#### Wings
#### Mounts
#### Rod of Discord
Class Builds and Their "Skills"
Each class in Terraria relies on specific armor sets, weapons, and accessories that grant unique combat styles. Below are the primary classes and their defining abilities.
#### Melee Class
- Beetle Armor: User can choose between Shell (bonus defense and damage reduction) or Scale Mail (bonus melee speed and damage). Activate set bonus by dealing damage.
- Valhalla Knight Armor: Grants increased life regeneration and the "Ol' Boots" sentry that damages enemies.
- Solar Flare Armor: Set bonus creates a solar shield that absorbs damage and charges, releasing an explosion of solar fragments when full.
- Terra Blade (Projectile): Swords that fire a beam projectile. Hold attack to auto-swing; projectile can pierce multiple enemies. Upgrade into Influx Waver (splits into three projectiles on hit).
- Flairon: Melee flail that shoots homing bubbles when thrown. Each bubble sticks to enemies and explodes. Excellent crowd control.
- Daybreak: Thrown javelin that sticks to enemies, dealing damage over time (60 DPS for 5 seconds). Stack multiple javelins for massive DOT.
- Block and Counter (Brand of the Inferno): A melee weapon that blocks attacks when right-click held, then deals 3x damage on release. Requires timing.
#### Ranged Class
- Shroomite Armor: Set bonus grants invisibility when standing still, increasing ranged damage by 200% and reducing enemy aggro. Moving breaks invisibility.
- Vortex Beater: Not armor, but a weapon. Fires a burst of bullets or rockets; alt fire shoots homing projectiles. With Chlorophyte Bullets, becomes homing.
- Phantasm (Bow): Fires bolts that split into homing arrows; each arrow splits further on hit. Arrows have limited lifetime. Use with Holy Arrows (stars rain down) for massive DPS.
- Celebration MK2 (Rocket Launcher): Shoots rockets that explode into 4 homing mini-rockets. Requires rocket or nail ammo. Excellent crowd control.
- S.D.M.G. (Space Dolphin Machine Gun): Rapid-fire gun with 30% chance to not consume ammo. Best with Chlorophyte Bullets for homing.
- Stealth (Shroomite Armor): Standing still activates invisibility, giving massive damage bonus and reducing detection. Move to break.
#### Magic Class
- Spectre Armor: Two hoods: Spectre Hood (increased magic damage, life steal on hits) and Spectre Mask (increased magic damage, no life steal but higher overall DPS).
- Nebula Armor: Set bonus spawns boosters (damage, speed, regeneration) when killing enemies or damaging bosses. Collect boosters to enhance stats.
- Last Prism: Continuous beam that splits into multiple smaller beams, dealing insane DPS. Consumes mana rapidly. Use with Mana Flower and Super Mana Potions.
- Razorblade Typhoon: Summons homing projectiles that pass through walls and ricochet. Excellent for events and bosses.
- Nebula Blaze: Fires homing projectiles that inflict Nebula Blaze (DOT). High single-target damage.
- Magnet Sphere: Creates an orbiting sphere that fires homing bolts. Good for sustained DPS while dodging.
#### Summoner Class
- Spooky Armor: Increases summon damage and adds extra minion slots.
- Tiki Armor: Increases summon damage and adds extra minion slots (better than Spooky).
- Stardust Armor: Set bonus grants a guardian that blocks projectiles and deals damage when struck. Also increases minion slots and damage significantly.
- Stardust Dragon Staff: Summons a dragon minion that grows longer and stronger per summon. Dragon pierces enemies and deals high DPS.
- Terraprisma: The strongest minion, obtained from Empress of Light (no damage challenge). Summons swords that dash to enemies with insane speed.
- Xenopopper: Summons alien minions that shoot lasers. Good for ranged support.
- Forbidden Armor Set Bonus: When standing in a sandstorm, summons a miniature storm that damages enemies.
Special Abilities from Accessories and Buffs
Some accessories and buffs grant active abilities akin to skills.
#### Shield of Cthulhu (Expert Mode)
#### Master Ninja Gear
#### Brain of Confusion (Expert Mode)
#### Celestial Shell
Conclusion
Terraria's "character skills" are really the items, armor sets, and accessories you choose. The most effective builds combine class-specific gear with universal utility items (wings, hooks, shields). Experiment with different combinations to find what suits your playstyle. Remember that class bonuses from armor sets (e.g., Shadow Dodge from Hallowed) are passive but game-changing. Master your movement items (dash, flight, teleport) to survive the hardest bosses. For further details, refer to the individual item guides and armor set pages.
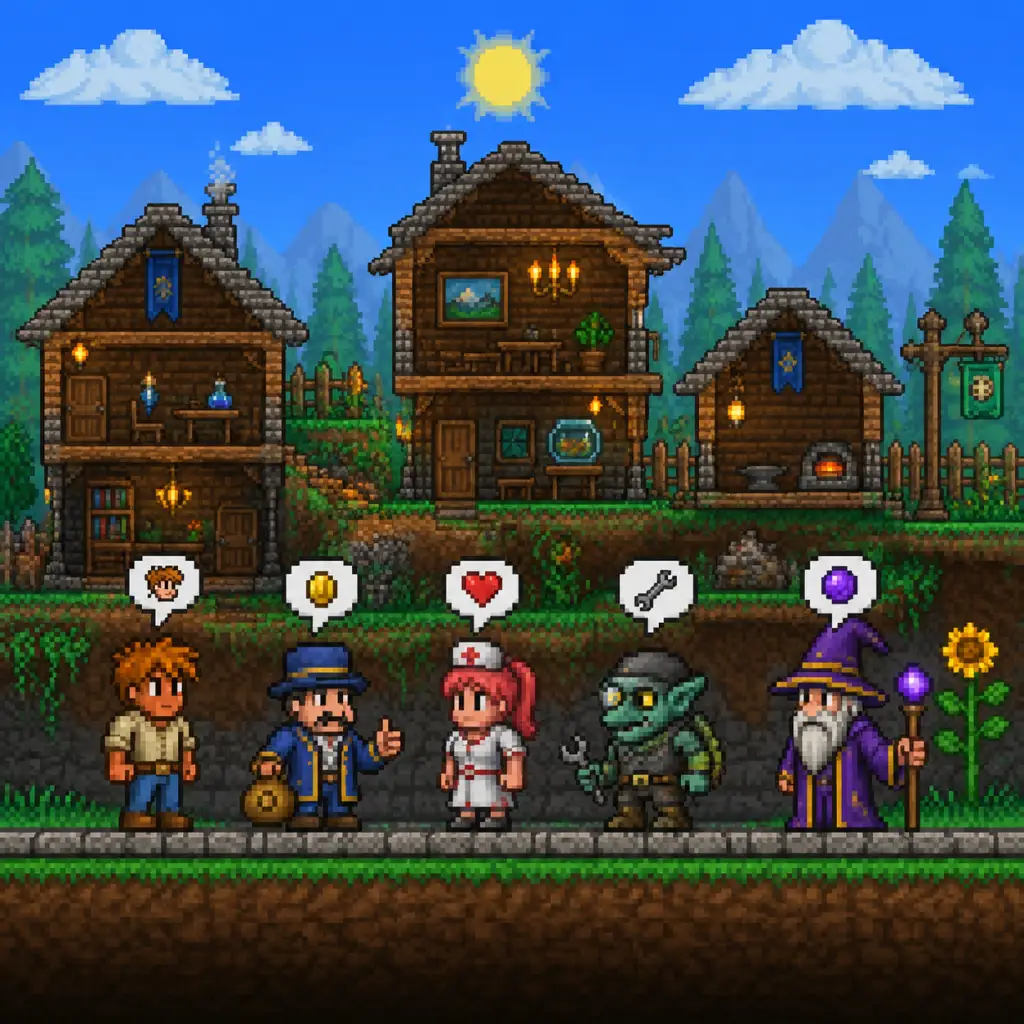
Characters & Roles
Characters & Roles
Overview
Terraria does not feature predefined character classes, heroes, or playable units with unique backstories. The player creates a completely customizable avatar with no inherent abilities or skill trees. Instead, your role is defined entirely by the equipment, weapons, and accessories you choose to equip. This guide covers every major playstyle (damage type) and the key NPCs that serve as support characters.
Player Character: The Customizable Hero
Your character starts with 100 health, 20 mana, and the ability to jump, move, and interact. There is no fixed class – you can respec at any time by changing gear. Gender, appearance, and name are purely cosmetic. Progression is tied to world state (boss kills, hardmode activation) rather than character level. All “classes” are unlocked from the start, but their effectiveness scales with gear tiers.
Class/Role Breakdown (Player)
Each damage type functions as a distinct playable role. The four primary classes are Melee, Ranged, Magic, and Summoner. A fifth class, Throwing, was fully merged into Ranged in version 1.4 (Journey's End).
#### 1. Melee Class
- Strengths: High defense, excellent survivability, powerful close-range burst damage. Best for tanking hits and controlling crowds with large weapons. Also gains long-range options (yoyos, projectiles from certain swords).
- Weaknesses: Requires close proximity to enemies, vulnerable to ranged foes and bosses that summon projectiles. Limited early-game mobility.
- Playstyle: Rush into combat, swing or pierce through groups, use shields to block. Pre-Hardmode focuses on broadswords and spears; Hardmode transitions to Terra Blade, Influx Waver, Solar Eruption, and Daybreak.
- Unlock Conditions: None – Melee is viable immediately.
- Recommended Gear (Progression Example):
- Team Synergy: Acts as frontline tank. Pairs well with a Summoner or Mage for crowd control. Can use taunts (Flesh Knuckles) to draw aggro.
- Strengths: High single-target DPS, safe distance combat, ammo versatility (arrows, bullets, rockets). Excellent for kiting and burst damage against bosses.
- Weaknesses: Low defense, ammo management, requires aiming precision. Some weapons have limited pierce or splash damage.
- Playstyle: Stay at range, use cover, switch ammo types for different enemies (e.g., Chlorophyte bullets for homing, Ichor for debuffs). Use bows, guns, and launchers.
- Unlock Conditions: None – crafting a bow or gun from ore immediately unlocks the playstyle.
- Recommended Gear:
- Team Synergy: Provides sustained DPS while Melee tanks. Benefits from Mages applying debuffs (Ichor, Cursed Flames). Summoners can provide distractions.
- Strengths: High burst damage, area-of-effect spells, mana regeneration accessories allow sustained combat. Many weapons inflict powerful debuffs (Cursed Inferno, Frostburn, Chlorophyte slow).
- Weaknesses: Very low defense, reliant on mana potions or regen items, fragile. Early game is weak due to limited mana pool and weak spells.
- Playstyle: Cast spells from a distance, use mana regeneration gear, alternate between rapid-fire and high-damage nukes. Key items: Mana Flower, Celestial Cuffs, Magnet Sphere.
- Unlock Conditions: Find a Wand or Staff (e.g., Gem Staff from gems), or buy from Wizard NPC (after capturing him).
- Recommended Gear:
- Team Synergy: Nebula armor provides team buffs via booster pickups. Can debuff enemies for greater team damage. Works well with Summoner to create a swarm of damage sources.
- Strengths: Minions automatically attack enemies, allowing the player to focus on dodging. Can summon up to 1 + extra sentries. Late-game summoner has extreme DPS (Stardust Dragon). High mobility from no heavy armor requirement.
- Weaknesses: Extremely fragile (lowest defense), minion AI can be unreliable, limited crowd control until Hardmode. Requires many minion slots.
- Playstyle: Summon minions, then dodge and support. Use whips to boost minion damage and mark enemies. Focus on stacking minion capacity accessories (Summoner Emblem, Papyrus Scarab, Necromantic Scroll).
- Unlock Conditions: Find a summoning staff (e.g., Finch Staff from living wood chest, Slime Staff from slimes), or craft Imp Staff from hellstone.
- Recommended Gear:
- Team Synergy: Provides constant damage over time and distraction. Works with any class, but especially Mages who can apply debuffs to boost minion damage. Can use sentries (e.g., Ballista) for stationary support.
- Tank Melee: Uses high defense and enemy aggro (Flesh Knuckles) to protect teammates.
- Healer/Buffer: Use the Nurse NPC (heals) and Paladin's Shield (damage redirection). In multiplayer, a mage with Spectre Hood provides life steal for allies via the "Nebula Booster" mechanic. Not a true class but a team-oriented gear set.
- Stealth Ranged: Shroomite armor grants invisibility and bonus damage when stationary – excellent for ambushes.
- Thrower (Legacy): Pre-1.4, throwing weapons (shurikens, knives, bombs) were a separate class. Now all throwing items are classed as Ranged.
- Early: Platinum Broadsword, Shield of Cthulhu (dash).
- Hardmode: Adamantite/Titanium armor (melee helm), Excalibur, Yelets yoyo.
- Post-Plantera: Beetle Shell armor (tank), Terra Blade, Eye of Cthulhu yoyo.
- Endgame: Solar Flare armor, Star Wrath, Meowmere.
#### 2. Ranged Class
- Early: Demon Bow/Tendon Bow, Musket/Undertaker with Musket Balls.
- Hardmode: Adamantite/Titanium armor (ranged helm), Megashark with Crystal Bullets.
- Post-Plantera: Shroomite armor (stealth), Sniper Rifle, Tsunami bow.
- Endgame: Vortex Beater, Phantasm (bow), Celebration Mk2 rocket launcher.
#### 3. Magic Class
- Early: Amethyst/Ruby Staff, Space Gun with Meteor armor.
- Hardmode: Hallowed armor (mage hood), Crystal Serpent, Sky Fracture, Razorblade Typhoon.
- Post-Plantera: Spectre armor (hood for lifesteal or mask for damage), Nebula Blaze, Last Prism.
- Endgame: Nebula armor, Lunar Flare, Nebula Arcanum.
#### 4. Summoner Class
- Early: Obsidian armor, Flinx Staff, Snapthorn whip.
- Hardmode: Spider armor, Spider Staff, Queen Spider Staff, Durendal whip.
- Post-Plantera: Tiki armor (defense) or Spooky armor (damage), Raven Staff, Morning Star whip.
- Endgame: Stardust armor, Stardust Dragon Staff, Terraprisma (empress of light), Kaleidoscope whip.
#### 5. Hybrid and Support Roles
While not official classes, players often adopt hybrid builds:
Non-Playable Characters (NPCs) Supporting Roles
NPCs are friendly characters that move into houses you build. Each provides unique services:
| NPC | Role | How to Unlock | Key Services |
|---|---|---|---|
| Guide | Tutorial & crafting help | House available | Shows crafting recipes (use with item) |
| Merchant | Sells basic tools | 50 silver coins in inventory | Sells torches, ropes, nets, piggy bank |
| Nurse | Healer | Player has 100+ HP | Heals player for coins, removes debuffs |
| Demolitionist | Explosives seller | Merchant + have a bomb/grenade | Sells bombs, dynamite, grenades |
| Dryad | Biome purity & evil measurement | Defeat any boss | Sells purification powder, plant-related items, tells world evil percentage |
| Arms Dealer | Ranged weapons & ammo | Have a gun/ bullets | Sells guns, bullets, illegal gun parts |
| Goblin Tinkerer | Reforging & Tinkerer Workshop | After Goblin Army | Reforges item modifiers (pricey), sells workshop |
| Wizard | Magic items | After defeating WoF, found in cavern layer | Sells spells and accessories |
| Clothier | Vanity & Skeletron | Have a clothier voodoo doll (or after Skeletron is defeated) | Sells vanity sets, changes appearance with familiar shirt |
| Mechanic | Wiring & tools | Found in dungeon (post-Skeletron) | Sells wires, switches, timers, actuators |
| Party Girl | Party-related items | Random chance after 8+ NPCs | Sells confetti, bubble machine, disco ball |
| Witch Doctor | Summoner and herb items | After defeating Queen Bee | Sells summoner weapons, armor, tiki totem, herbalism stuff |
| Pirate | Pirate-related items | After defeating Pirate Invasion | Sells cannons, pirate vanity, discount card |
| Steampunker | Steampunk items & clentaminator | After defeating a mechanical boss | Sells clentaminator, teleporter, steampunk furniture |
| Cyborg | Dye & rocket items | After defeating Plantera | Sells nanites, rocket launcher, dyes |
| Santa | Christmas items | After defeating Frost Legion or during Christmas | Sells Christmas tree, decorations |
| Truffle | Mushroom biome items | When a surface mushroom biome has a house | Sells mushroom furniture, autohammer |
| Angler | Fishing mini-game | Found in ocean, need to rescue | Gives quests, rewards with fishing gear |
| Stylist | Hair styling | Found in spider nests | Changes hair |
| Painter | Paint & painting | 4 NPCs already present | Sells paint, painting tools |
| Tax Collector | Tax collection | Purify a torturer in underworld with Purification Powder | Collects taxes from NPCs, gives coins |
| Mechanic (also) | Note: Already listed – but there is also a Steam Punker and a Traveling Merchant (not permanent). Traveling Merchant spawns randomly each day; sells unique items like DPS meter, weapon rack. |
In multiplayer, players often divide roles:
- Builder: Focuses on base construction, arenas, and wiring.
- Explorer: Maps the world, finds treasures, accesses biomes.
- Boss Killer: Carries min-maxed gear for boss damage.
- Farmer: Gathers rare materials (crates, herbs, souls).
Conclusion
Terraria’s class system is flexible – you can switch between roles at any time by changing gear. The game encourages experimentation. Choose your role based on available resources, personal preference, and team needs. For new players, Melee or Ranged are most forgiving; Magic and Summoner require more knowledge but reward with high damage output. NPCs are your allies, providing critical services for progression.
Cheats & Secrets
Cheats & Secrets
Overview
Terraria has no built-in cheat codes, console commands, or unlockable cheat menus in any official version. The game does not include a developer console for normal players. However, the game is filled with developer-intended secrets, hidden content, special world seeds, and Easter eggs that are available to all players. This guide covers every known secret and hidden feature across all platforms (PC, console, mobile). External tools (e.g., TEdit, inventory editors) can modify your game but are not part of the base experience and are not covered here.
---
1. Secret World Seeds
Special world seeds alter world generation, enemy behavior, and available items. Enter them exactly as shown (case-insensitive). These are intentional developer secrets and work on all platforms.
| Seed Name | Effect | Notes |
|---|---|---|
| "for the worthy" | Master Mode-level difficulty, all enemies buffed, more traps, chaos. | Applies expert/master exclusive drops even in classic mode. |
| "not the bees" | World filled with beehives, honey blocks, and bee enemies. Large jungle spawns. | Very chaotic; Bee Gun and Bee Armor are easy to obtain. |
| "don't dig up" | World is flipped upside down: sky is at the bottom, Underworld at the top. | Survival is tricky; exploration reversed. |
| "get fixed boi" | Combines all other seeds: “for the worthy”, “not the bees”, “don't dig up”, “celebmk10”, etc. | Extremely hard; unique music and items. |
| "celebrationmk10" | Increased loot, easy mode, everything is faster and more generous. | Special party music and fireworks; great for casual play. |
| "the constant" | Don’t Starve crossover. Hunger meter (eat food to heal), no natural health regen, special items like the “Suspicious Looking Apple” that summons a unicorn mount. | Also features a unique world generation with no dye slots. |
| "no traps" | Eliminates all traps from world generation. | Useful for building or avoiding deadly wiring. |
| "drunk world" | Both crimson and corruption generate in the same world. | Allows access to both evil biome content. |
| "zenith" | A secret seed that makes the Zenith sword craftable earlier? Actually it spawns a special structure. | Not officially confirmed by developers; best to ignore. |
| "dead man's chest" | Every chest is a dead man’s chest (explosive trap). | Extremely dangerous. |
| "everything" | ? Not an official seed; “get fixed boi” is the all-in-one seed. |
---
2. Hidden Items & Features (Developer-Intended)
These are not obvious to new players and often require specific conditions to discover.
#### 2.1 Terraprisma
- Source: Defeat the Empress of Light during daytime (7:30 AM – 4:30 PM in-game).
- Requirement: Plantera must be defeated first.
- Result: Drops the Terraprisma, one of the most powerful summon weapons. If defeated at night, she drops the Stardust Guardian.
- Tip: Use a summon build with high mobility; she becomes enraged and deals massive damage during the day.
- Source: Submerge a Rod of Discord in Shimmer liquid.
- Effect: Upgrades to Rod of Harmony – unlimited teleportation with no cooldown or damage.
- How to get Shimmer: Find the Aether biome (underground, usually near the ocean side) after defeating Moon Lord? Actually the Aether biome spawns in every world after 1.4.4 update. Look for a shimmer pool in underground caverns.
- Source: Throw a completed Cell Phone into Shimmer.
- Effect: Transforms into Shellphone, which combines the Cell Phone functions with the Magic Mirror (teleport to spawn).
- Note: The Cell Phone requires many components; once you have it, shimmer it for an upgrade.
- Location: A hidden biome called “Aether” always generates in the world. It consists of a large pool of Shimmer liquid surrounded by mossy stone.
- Discovery: Look for a vast cave with glowing teal liquid; it often appears near the ocean-side jungle or underground desert.
- Uses: Shimmer transmutes many items (e.g., Skeletron Hand → Skeletron Bone, Stardust Dragon Staff → Stardust Guardian) and can de-buff players. Also used for the above upgrades.
- Event: During a Blood Moon, fish in any liquid (even a one-block pool) to catch a Dreadnautilus, a mini-boss that drops the Sanguine Staff (powerful summon).
- Other Fish: You can also catch Blood Eel (drops a melee weapon) and Flying Fish (drops wings). All rare.
- Secret: Plant an Acorn on the same block as a Gem of the same color to grow a gem tree. Harvest gems from it.
- Party Tree: Plant an acorn on a party block to get a tree that drops party items. Party blocks are crafted from gel + glass.
- Trigger: Buy the Eternia Crystal from the Tavernkeep NPC (who appears after defeating Eater of Worlds/Brain of Cthulhu) and place it on an Eternia Crystal Stand crafted with 10 gold/platinum bars.
- Event: Defend the crystal from waves of Dungeon Defenders 2 enemies. Rewards exclusive weapons and armor.
- Trigger: A Martian Probe (flying enemy) flies away when it sees you. If it escapes, the event starts. To force it, fly high in space during hardmode.
- Rewards: The Influx Waver (yoyo), Xeno Staff (summon), and the Cosmic Car Keys (mount).
- In Expert/Master mode, bosses drop Treasure Bags containing exclusive loot. These include Developer Armor Sets (vanity) and Pets (e.g., Spooker Set from Skeletron Prime). Also the Terrarian yoyo from Moon Lord’s bag.
- Hidden: It is possible to obtain the Guide to Plant Fiber Cordage (allows harvesting vines) from a random cave chest. Not a secret, but many players miss it. Combine with other accessories to form the Cell Phone.
- “Guide Voodoo Doll”: You can kill the Guide by throwing a Guide Voodoo Doll into lava to summon the Wall of Flesh – a reference to the 1996 film The Craft.
- Boulder Trap: The iconic boulder rolling down a slope is a direct reference to the opening of Indiana Jones.
- Pirate Hat & Cape: Wearing the Pirate Hat and Pirate Cape together gives a chat message “Arrr!” – a minor Easter egg.
- Bunny Call: If you craft a Bunny Statue and wire it to a timer, you can spawn unlimited bunnies. Not an Easter egg but a community meme.
- The “Dungeon Guardian”: If you enter the Dungeon before defeating Skeletron, a fast-rolling skull (Dungeon Guardian) appears and one-shots you. It has 9999 HP – a true enrage for curious players.
- Fishing Achievement Names: Many quest fish names are puns (e.g., “Bumblebee Tuna” references a Simpsons episode).
- Town NPC Inventory: Right-clicking an NPC will show their inventory or shop, but if you click the “Help” button on the Guide, he says one of many random quotes, some referencing other games (e.g., “Don’t dig straight down” from Minecraft).
- The “Grateful” Achievement: Not an Easter egg; it’s awarded for freeing all bound NPCs.
- Party Center: The Party Girl NPC sells a Party Center item. Throwing it on the ground starts a party with balloons and music. This is intended, not a cheat.
- PC / Steam: No in-game cheats. Use external editors like TEdit at your own risk. The game does not prevent using them.
- Console (Xbox, PlayStation, Switch): No cheat codes. Some console editions have a “Debug Menu” accessible via controller inputs (e.g., hold LT+RT+LB+RB) but it only shows debug info, not cheats. Not recommended.
- Mobile (iOS/Android): No built-in cheats. Journey Mode (available on all platforms) gives god mode, duplication, and time control, but it’s a game mode, not a cheat.
- tModLoader (PC modding platform): Many mods add console commands (e.g., ”/godmode”), but these are mods, not base game.
- No “dupe glitch” exists in official versions post-1.4. Early patches had duplication bugs, but they are fixed.
- Hoiking (using sloped blocks to move through walls) is an exploit that still works, but it’s considered a bug and not developer-intended. It’s used for fast travel but not a secret.
- Piggy Bank duplication was patched. Do not rely on it.
- “All Items” seeds are not real; only the seeds listed above are official.
#### 2.2 Rod of Harmony
#### 2.3 Shellphone
#### 2.4 Aether Biome & Shimmer
#### 2.5 Dreadnautilus & Blood Moon Fishing
#### 2.6 Zen Garden & Tree Seeds
#### 2.7 The Old One’s Army
#### 2.8 Martian Madness
#### 2.9 Developer Items & Treasure Bags
#### 2.10 The Guide to Plant Fiber Cordage
---
3. Easter Eggs & References
---
4. Platform-Specific Notes
---
5. Myth-Busting & Exploits
---
Summary Table of Secrets
| Secret | How to Access / Trigger | Reward / Effect |
|---|---|---|
| Terraprisma | Kill Empress of Light during daytime | Best summon weapon |
| Rod of Harmony | Submerge Rod of Discord in Shimmer | Unlimited teleport |
| Shellphone | Submerge Cell Phone in Shimmer | All info + teleport home |
| Aether Biome | Find underground shimmer pool | Transmute items |
| Dreadnautilus | Fish during Blood Moon | Sanguine Staff |
| Old One’s Army | Buy Eternia Crystal from Tavernkeep | Exclusive Dungeon Defenders loot |
| Martian Madness | Let Martian Probe escape | Cosmic Car Keys, Influx Waver |
| Developer Items | Open Expert/Master boss treasure bags | Vanity armor, pets |
| Secret World Seeds | Enter on world creation (see table above) | Altered gameplay |