The Callisto Protocol
## Game Introduction ### Genre Survival Horror, Third-Person Action ### Developer & Publisher - **Developer:** Striking Distance Studios - **Publisher:** Krafton, Inc. ### Release Timeline - **Announcement:** December 2020 - **Initial Release Date:** December 2, 2022 - **Post-Launch Updates & DLC...
Download & Installation
Download & Installation Guide for The Callisto Protocol
Overview
The Callisto Protocol is a survival horror game developed by Striking Distance Studios and published by Krafton. It is available on PC (Steam, Epic Games Store), PlayStation 4, PlayStation 5, Xbox One, and Xbox Series X|S. It is not available on Nintendo Switch or mobile devices. This guide covers official download sources, step-by-step installation for each platform, system requirements, common errors, and post-installation steps.
---
Platform-Specific Download Sources
PC: Steam
- Store Page: https://store.steampowered.com/app/1544020
- Requires Steam client (free to download).
- Store Page: https://store.epicgames.com/p/the-callisto-protocol
- Requires Epic Games Launcher (free to download).
- PlayStation Store: Search for "The Callisto Protocol" on console or via web (store.playstation.com).
- Requires a PlayStation Network (PSN) account and internet connection.
- Microsoft Store: Search on console or via web (xbox.com).
- Requires an Xbox Live / Microsoft account.
- OS: Windows 10/11 (64-bit)
- CPU: Intel Core i5-8400 / AMD Ryzen 5 2600
- RAM: 8 GB
- GPU: NVIDIA GeForce GTX 1060 (6 GB) / AMD Radeon RX 580 (8 GB)
- DirectX: Version 12
- Storage: 85 GB available space (SSD recommended)
- Additional: DirectX 12 Ultimate compatible GPU required for ray tracing.
- OS: Windows 10/11 (64-bit)
- CPU: Intel Core i7-8700 / AMD Ryzen 5 3600
- RAM: 16 GB
- GPU: NVIDIA GeForce RTX 2070 / AMD Radeon RX 6700 XT
- DirectX: Version 12
- Storage: 85 GB SSD
- Additional: Ray tracing requires RTX 2060 or Radeon RX 6700 XT.
PC: Epic Games Store
PlayStation 4 & PlayStation 5
Xbox One & Xbox Series X|S
Note: Physical disc versions are also available for consoles. Installation from disc requires downloading a mandatory patch (usually 10–20 GB) for the complete game.
---
System Requirements (PC)
Minimum Requirements
Recommended Requirements
---
Step-by-Step Installation
PC (Steam)
1. Install Steam Client if not already installed. Download from store.steampowered.com.
2. Log in to your Steam account. (Create one if needed – free.)
3. Purchase & Add to Library: Navigate to the Store page, click "Add to Cart," complete purchase, then the game appears in Library.
4. Install: Go to Library > The Callisto Protocol > Install. Choose installation directory (ensure at least 85 GB free).
5. Wait for download and install. Steam will automatically verify files after download.
6. Launch from Library after installation completes.
PC (Epic Games Store)
1. Install Epic Games Launcher from epicgames.com.
2. Log in to your Epic Games account.
3. Purchase & Add to Library: Visit the Store page, click "Get" or "Buy," then the game is added to your Library.
4. Install: Open Epic Games Launcher > Library > The Callisto Protocol > Install. Select location (85 GB free).
5. Await download and installation. The launcher handles file verification.
6. Launch from Library.
PlayStation 4 & PlayStation 5
#### Digital Version
1. Ensure your console is connected to the internet.
2. Go to PlayStation Store from the home screen.
3. Search for "The Callisto Protocol."
4. Purchase & Download: Select the game, choose edition, confirm purchase, then select "Download."
5. Wait for download. PS4/PS5 will install automatically after download. PS5 version uses faster SSD.
6. Launch from the home screen once installation is complete.
#### Physical Disc
1. Insert the disc into the console.
2. If prompted, install the game data from the disc (approx. 40 GB).
3. Connect to the internet to download the latest patch (required for stability and performance).
4. Launch after patch installation.
Xbox One & Xbox Series X|S
#### Digital Version
1. Connect to the internet and sign in to your Xbox profile.
2. Open Microsoft Store (or search from dashboard).
3. Search for "The Callisto Protocol."
4. Purchase & Download: Click "Buy" or "Install" if already owned.
5. Monitor download progress in "My games & apps." The game installs automatically.
6. Launch from home or game library.
#### Physical Disc
1. Insert the disc. Console will prompt installation.
2. Install game data from disc (typically 40–50 GB).
3. Download mandatory update (requires internet).
4. Play after update.
---
Storage Space & File Sizes
| Platform | Base Game Size | Patch Size (approx.) | Total Required |
|---|---|---|---|
| PC (Steam/Epic) | 85 GB (no compression) | 0–15 GB | 85–100 GB |
| PlayStation 5 | 75 GB (SSD) | 5–10 GB | 80–85 GB |
| PlayStation 4 | 40 GB (disc) + 15 GB patch | 15 GB | 55 GB |
| Xbox Series X | S | 80 GB (SSD) | 5–10 GB |
| Xbox One | 40 GB (disc) + 15 GB patch | 15 GB | 55 GB |
---
Account Requirements
- Steam: Free Steam account.
- Epic Games Store: Free Epic Games account.
- PlayStation: PSN account (free, but PS Plus required for online multiplayer features; single-player does not require PS Plus).
- Xbox: Microsoft account (free; Xbox Game Pass Core or Ultimate required for online multiplayer; single-player does not need a subscription).
---
First Launch Setup
1. Language Selection: Choose language from menu.
2. Graphics Settings (PC): On first launch, the game will detect your hardware and set default quality. You can adjust later.
3. Audio Settings: Adjust volume, subtitles, and HUD preferences.
4. Controller/Keyboard Binding: Customize controls if needed.
5. Calibrate HDR (if supported): On PC, PS5, Xbox Series X|S, the game may prompt HDR calibration for proper brightness.
6. Begin New Game: Select "New Game" or "Continue." The intro cutscene will play.
Note: On consoles, no additional account linking is required. On PC, no extra launchers (besides Steam/Epic) are needed.
---
Common Installation Errors & Fixes
PC Issues
| Error | Cause | Fix |
|---|---|---|
| "Insufficient disk space" | Not enough free space | Free at least 85 GB; check drive properties. |
| "Microsoft Visual C++ Runtime Error" | Missing redistributables | Install or repair VC++ 2015-2022 from Microsoft. |
| "DirectX 12 not supported" | GPU or driver too old | Update GPU drivers (NVIDIA/AMD). Ensure GPU supports DirectX 12. |
| Crash after splash screen | Corrupted files or driver conflict | Verify game files via Steam/Epic. Update drivers. Disable overlays. |
| Stuttering / low FPS | Below requirements or background tasks | Lower graphics settings. Close other apps. Ensure SSD is used. |
- Steam: Right-click game in Library > Properties > Local Files > Verify integrity of game files.
- Epic: Library > The Callisto Protocol > three dots > Manage > Verify Files.
PlayStation Issues
| Error | Cause | Fix |
|---|---|---|
| Cannot download from Store | Network issue or account region | Restart console. Check PS Store status. Sign out and back in. |
| Installation stuck at 99% | Patch download failing | Pause/resume download. Rebuild database (Safe Mode > Option 5). |
| Disc read error | Dirty or scratched disc | Clean disc. Try offline installation then patch. |
Xbox Issues
| Error | Cause | Fix |
|---|---|---|
| Installation stopped | Network dropout | Restart console and router. Update console. |
| "0x80073CFA" error | Corrupted installation | Clear cache: Settings > System > Storage > Clear local saved games. |
| Game won't launch after disc install | Missing patch | Check for updates in My games & apps > Updates. |
Post-Installation Verification
After installation, confirm the game is fully ready:
1. Check Version: Main menu usually displays version number (e.g., v1.08). Ensure it matches latest patch notes.
2. Test Performance: Run the first 10 minutes of gameplay. Watch for crashes, audio glitches, or frame drops.
3. Achievements/Trophies: Verify that achievement system is active (requires internet for sync).
4. Ray Tracing (PC/Xbox Series/PS5): If enabled, ensure ray tracing options appear in graphics settings.
5. Save Game: Create a manual save and confirm it appears in save slots.
If any issue persists:
- Visit official support: [Striking Distance Support](https://support.strikingdistance.com)
- Check community forums (Steam Discussions, Reddit r/TheCallistoProtocol).
- Update to latest GPU drivers and console firmware.
- SSD Highly Recommended: On PC and older consoles (PS4, Xbox One), an SSD drastically reduces loading times (up to 2-minute waits on HDD).
- Pre-loading: Digital pre-orders often allow pre-loading the game before release. Check store for availability.
- Cross-Platform Saves: No cross-save support between platforms. Saves are platform-specific.
- Required Internet: A one-time internet connection is required to install the day-one patch even for disc versions.
---
Additional Tips
---
End of Guide. For the latest patch notes and troubleshooting, refer to the official website: [www.thecallistoprotocol.com](https://www.thecallistoprotocol.com).
Game Introduction
Game Introduction
Genre
Survival Horror, Third-Person Action
Developer & Publisher
- Developer: Striking Distance Studios
- Publisher: Krafton, Inc.
- Announcement: December 2020
- Initial Release Date: December 2, 2022
- Post-Launch Updates & DLC: 2023 (including the Final Transmission story DLC on June 27, 2023)
- PC: Windows (Steam, Epic Games Store)
- PlayStation: PlayStation 4, PlayStation 5
- Xbox: Xbox One, Xbox Series X|S
- Jacob Lee (voiced by Josh Duhamel) – The protagonist, a hardened cargo pilot with a mysterious past. He is resourceful and driven by survival, but initially reluctant to trust others.
- Elias Porter (voiced by Sam Witwer) – A fellow survivor and former UJC security officer. He becomes Jacob's ally, providing information and help throughout the prison.
- Dani Nakamura (voiced by Karen Fukuhara) – A disgraced UJC auditor who is determined to expose the corporation's dark secrets. She guides Jacob via radio and later becomes a key figure in the story.
- Captain Leon Ferris (voiced by Jess Salgueiro) – The brutal warden of Black Iron Prison. He is the primary antagonist, obsessed with order and control.
- Dr. Caitlyn Mahler (voiced by Kristin Lehman) – A geneticist who conducted unethical experiments on prisoners, leading to the outbreak.
- Primary: Fans of survival horror and third-person action games, particularly those who enjoyed Dead Space, Resident Evil 7/8, or The Evil Within.
- Secondary: Players looking for a cinematic, story-driven single-player experience with high production values and a focus on tension and gore.
- Age Rating: Rated M for Mature (ESRB) / 18+ (PEGI) due to intense violence, gore, and strong language.
- Single-Player Campaign: The main story mode, lasting approximately 10–12 hours on a first playthrough. Players progress through linear chapters, fighting enemies, solving environmental puzzles, and uncovering story logs.
- New Game+: Unlocked after completing the main campaign. Allows players to replay the story with all previously unlocked weapons, upgrades, and collectibles.
- Contagion Mode (Post-Launch Update): A harder difficulty setting with permadeath (save file deletion upon death) and limited resources, offering a true survival challenge. Available as free DLC.
- Hardcore Mode (Post-Launch Update): An extreme difficulty mode with tougher enemies, reduced checkpoints, and no auto-saves. Also free.
- Melee-First Combat: Unlike many survival horror games that emphasize ranged combat, The Callisto Protocol forces players to engage in tense, rhythmic melee duels. The dodge-and-strike system requires precise timing, making every encounter feel like a deadly dance.
- Gore System: The game features a hyper-detailed gore and dismemberment system. Enemies can be blasted apart limb by limb, and Jacob's own body shows visible damage, including wounds that affect gameplay (e.g., crawling with a broken leg).
- Immersive Presentation: The game uses full facial animation (utilizing the same tech from Star Wars: The Clone Wars), ray-traced lighting, and HDR support to create a photorealistic, horrifying world that rivals AAA cinematic experiences.
- Lore Integrations: The Callisto Protocol is set in the same universe as PUBG: Battlegrounds, with subtle references (e.g., a UJC logo on equipment) linking the two games—a unique cross-franchise connection.
- No HUD Minimalism: The game intentionally hides most UI elements, including health and ammo counters, forcing players to rely on visual and audio cues (like Jacob's breathing or the glow of a healing injector).
Release Timeline
Platforms
The Callisto Protocol is available on the following platforms:
Story Overview
Set in the year 2320, the game follows Jacob Lee, a cargo pilot for the United Jupiter Company (UJC). After a routine delivery to the Black Iron Prison—a maximum-security prison located on Jupiter's moon, Callisto—a sudden riot breaks out, unleashing a horrific biological outbreak. Jacob is wrongfully accused of causing the catastrophe and must fight for survival against the infected prisoners (called "Biophages") and the mysterious forces behind the outbreak. The story explores themes of corporate greed, biological experimentation, and the fragility of human morality in the face of terror.
Setting
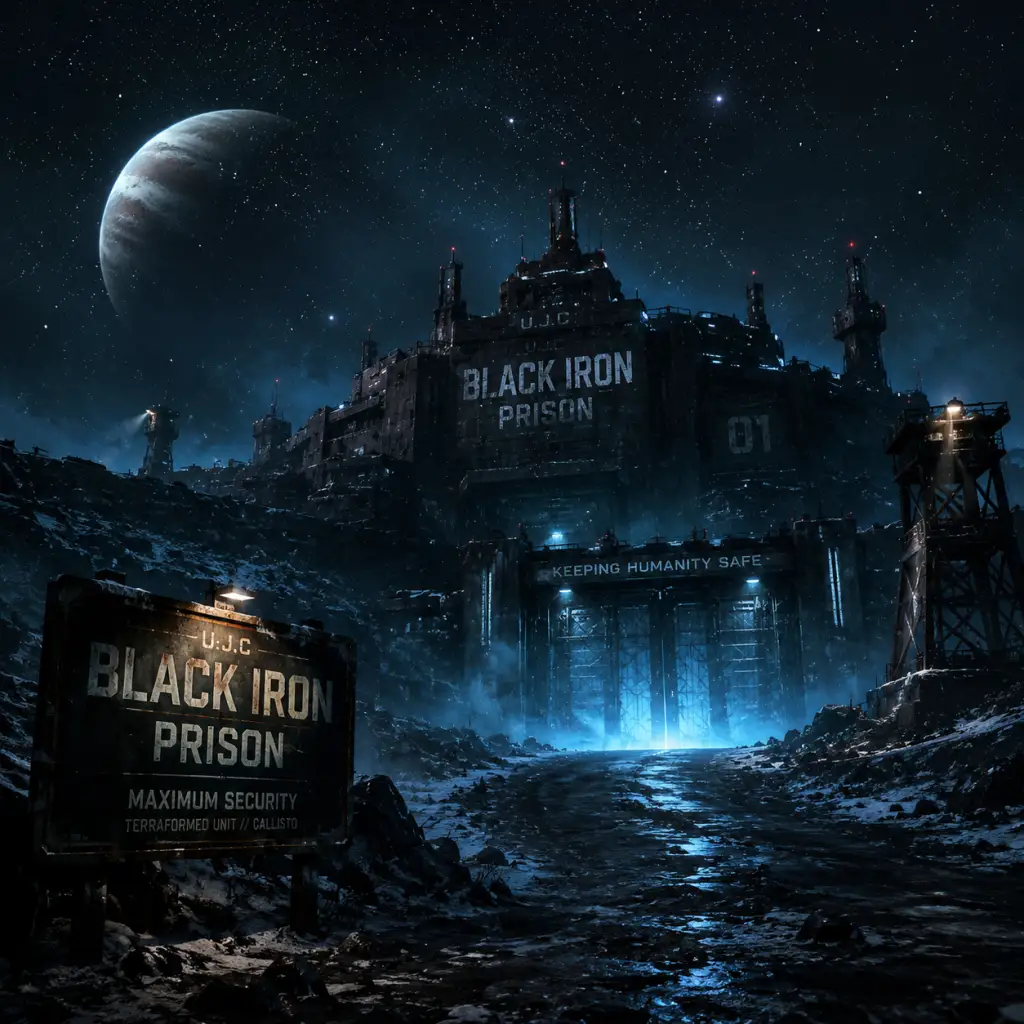
The game is primarily set inside Black Iron Prison, a sprawling, decaying penitentiary carved into the icy surface of Callisto. The prison is divided into multiple facilities—such as the Habitat, the Morgue, and the Cryo Labs—each with its own grim atmosphere and hazards. Outside the prison, Jacob briefly ventures into the frozen surface of Callisto, where the harsh environment adds to the sense of isolation. The world is heavily inspired by the Dead Space series (many key developers worked on that franchise), but with a more claustrophobic, melee-focused combat system.
Main Characters
Core Appeal
The Callisto Protocol offers a visceral, unrelenting survival horror experience with a heavy emphasis on close-quarters combat. Players must master a unique dodge-and-strike system, using a combination of melee weapons (like the stun baton) and a limited array of firearms. The game is designed to keep players on edge with limited ammo, oppressive environments, and gruesome enemy designs. The high-fidelity graphics, ray tracing, and 3D audio (especially on next-gen consoles and PC) create an incredibly immersive, terrifying atmosphere.
Target Audience
Game Modes
Online/Offline Support
The Callisto Protocol is strictly a single-player offline experience. There is no multiplayer, co-op, or online component. An internet connection is required only for initial download, patches, and optional achievements/trophies.
DLC / Expansion Overview
Three major DLC packs were released:
1. Contagion Bundle (Free, February 2023) – Adds Contagion Mode, a new harder difficulty, plus three exclusive player skins.
2. Riot Bundle (Paid, March 2023) – Includes Riot Mode, a wave-based survival arena challenge where players fight endless enemies for high scores, along with 12 new enemy types and new weapons (the Kinetic Hammer). Also includes new skins.
3. Final Transmission (Paid, June 2023) – A story expansion that takes place after the main campaign. Jacob receives a distress signal and must descend further into Black Iron Prison to reach a mysterious new character. This DLC adds new environments, enemies, a gravity gun-like weapon (the "GRP" upgrade), and multiple endings, wrapping up the narrative.
What Makes This Game Unique?
---
This introduction covers the essential aspects of The Callisto Protocol and provides a solid foundation for players new to the game.
Getting Started
Getting Started Guide for The Callisto Protocol
Welcome to Black Iron Prison
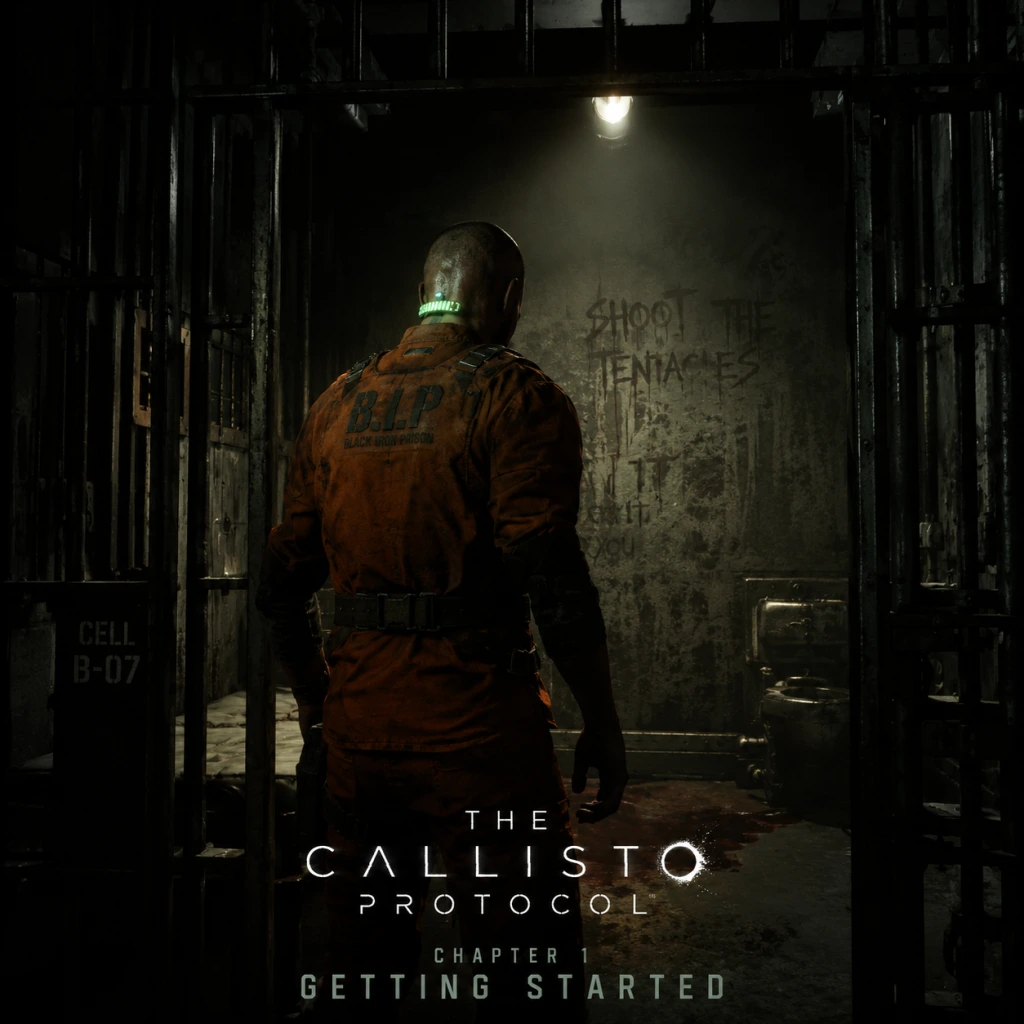
You are Jacob Lee, a cargo pilot transporting a mysterious outbreak. The introduction sequence will put you in the pilot seat, then a crash, and finally waking up in a cell. This guide covers your first hour, critical early decisions, and how to survive the horrors ahead.
---
Character Creation
There is no character creation. You play as Jacob Lee — a fully voiced, pre-defined protagonist. Your choices affect story outcomes (especially in the final chapter), but you cannot customize Jacob’s appearance, gender, or backstory.
---
First Hour Walkthrough (Spoiler-Free)
1. Prologue (5 mins): Control Jacob during the cargo ship flight. Follow prompts to check cargo and interact with AI companion. A crash sequence will start automatically — don’t fight it, just watch the cutscene.
2. Wake Up in Cell (10 mins): After the crash, you regain consciousness in a prison cell. Pick up the GRP (Grip) glove from the table. This is your first key tool for environment interaction and combat.
3. First Enemy Encounter (15 mins): You’ll encounter a biophage (mutant) in a hallway. Use the GRP to grab objects and throw them at the creature — this is your primary weapon until you get a baton. Do not try to melee without a weapon.
4. Get the Stun Baton (20 mins): Shortly after the first fight, you’ll find a stun baton on a corpse. Equip it (D-pad up on controllers, number keys on keyboard). This is your main melee weapon for a while.
5. Avoid the Blind Mutant (25 mins): A huge, blind, armoured creature will patrol a dining hall. Do not attack it. Crouch (L3 on controller, Ctrl on keyboard) and move slowly behind shelves to reach the exit. Make noise? It will one-shot you.
6. First Save Station (30 mins): You’ll reach a room with a Reforge station (save/upgrade point). Always use this when you see it.
7. Meet Elias (35 mins): A fellow survivor gives you a talking watch (holographic map). Learn to toggle the map (Hold select/back/ESC) — it highlights objectives.
8. First Real Combat Tutorial (40-45 mins): A room with a giant fan and multiple biophages. Use the GRP to pull them into the fan blades for instant kills. Saves ammo.
9. Pipe Weapon (50 mins): You can craft a makeshift shotgun (the "pipe weapon") at a workbench. Do this as soon as you have 3x Large Scrap and 1x Pipe (found in early lockers). It will help immensely.
10. End of First Hour: You should be past the fan room, have the pipe weapon, and be approaching the “Habitation Decks” area. Expect a boss encounter shortly after — use your baton and GRP combo.
---
Controls (All Platforms)
#### PlayStation 5 / PlayStation 4
| Action | Button |
|---|---|
| Move | Left Stick |
| Look / Aim | Right Stick |
| Run | Hold R2 (while moving) |
| Crouch / Dodge | L1 (hold to crouch, tap to dodge) |
| Interact / GRP (Grip) | R1 |
| Attack (melee) | R2 |
| Shoot (when weapon drawn) | L2 |
| Reload | Square |
| Switch Weapon | Triangle (tap) |
| Quick Heal | D-pad Left |
| Inventory | D-pad Down |
| Map | Touchpad (hold) |
| Reforge Station Upgrades | D-pad Right / Left |
| Action | Button |
|---|---|
| Move | Left Stick |
| Look / Aim | Right Stick |
| Run | Hold RT |
| Crouch / Dodge | LB (hold to crouch, tap to dodge) |
| Interact / GRP | RB |
| Attack (melee) | RT |
| Shoot (when weapon drawn) | LT |
| Reload | X |
| Switch Weapon | Y (tap) |
| Quick Heal | D-pad Left |
| Inventory | D-pad Down |
| Map | View button (hold) |
| Action | Key |
|---|---|
| Move | W, A, S, D |
| Look | Mouse movement |
| Run | Left Shift |
| Crouch / Dodge | Left Ctrl (hold to crouch, tap to dodge) |
| Interact / GRP | F |
| Attack (melee) | Left Mouse Button |
| Shoot / Aim | Right Mouse Button (hold to aim) |
| Reload | R |
| Switch Weapon | 1-4 number keys |
| Quick Heal | Q |
| Inventory | Tab |
| Map | M (hold) |
| Reforge Station | E (interact) |
---
UI Overview
1. Health Bar: Top-left corner. Red when damaged. Use health injectors to restore.
2. Ammo Count: Bottom-right. Shows current magazine and reserve ammo for equipped weapon.
3. GRP Energy: Bottom-center, below health. A glowing white circle — depletes when you use Grip to throw objects or enemies. Recharges over time.
4. Crosshair: Center of screen. Turns red when aiming at an enemy. White for objects.
5. Enemy Health Indicators: Occasionally appear above enemies as small red bars (especially bosses).
6. Objective Marker: A yellow diamond icon floating in the world — follow it for main story.
7. Map (Hold): Overhead view with objective waypoint, locked doors, and points of interest. Use it often.
8. Audio Cues: Use headphones. Enemy growls, breathing, and audio logs are critical for survival.
---
Essential Early Objectives
- Find the GRP glove (first room after prologue)
- Pick up the stun baton (shortly after first enemy)
- Reach the first Reforge station (save and upgrade)
- Craft the pipe weapon (requires Pipe + 3 Large Scrap)
- Meet Elias (get the map watch)
- Disable the fan safety lock (to use fan as weapon)
- Escape the dining hall without alerting the blind mutant
- Unlock doors with GRP (pull on red handles)
- Find audio logs and data pads for lore and experience (used to unlock upgrades)
- Use the environment as a weapon: GRP enemies into spikes, fans, open reactors — saves bullets.
- Dodge, dodge, dodge: Enemies telegraph attacks. Tap dodge (L1/LB/Left Ctrl) sideways when they lunge.
- Check every corner: Scrap, health injectors, and ammo are scarce but often hidden in lockers, under desks, or behind breakable containers.
- Upgrade GRP capacity first: It helps in combat and puzzles.
- Save at every Reforge station: The game auto-saves only at checkpoints — manual saves prevent long backtracking.
- Listen to audio logs: They provide background and occasionally hint at secret paths.
- Do not rush into groups of enemies: Even two biophages can kill you in seconds. Use GRP to separate them.
- Do not waste large scrap on the stun baton: Save for the pipe weapon and later upgrades.
- Do not attack the blind mutant in the dining hall: You cannot kill it. Stealth is mandatory. Crouch and move slowly.
- Do not ignore quick heals: D-pad Left (or Q on PC) uses a health injector instantly. Health packs take longer but are more efficient.
- Do not forget to reload: Ammo is scarce; you cannot afford to get caught empty.
- Do not stay in the open when a swarm is near: Find narrow corridors where enemies must funnel.
---
What To Do First / What To Avoid
#### ✅ DO:
#### ❌ AVOID:
---
Early Resource Priorities
| Resource | Priority | Why |
|---|---|---|
| Large Scrap | #1 | Used for crafting and upgrading weapons. You need 3 for pipe weapon. |
| Pipe | #1 | Unique component for pipe weapon. Found in first area (near a dead guard). |
| Health Injectors | #2 | Keep at least 2 in inventory. Use when health drops below half. |
| Ammo (Handgun/Shotgun) | #3 | Don’t hoard too much early — some ammo racks give more if you leave them until you have low ammo. |
| Small Scrap | #4 | Used for minor upgrades or sold at Reforge stations. |
| Biophasic Gel | #5 | Only needed for certain upgrades — hold onto until you have a clear plan. |
---
Common Beginner Mistakes
1. Trying to melee without timing dodges: The stun baton combos are powerful only if you dodge and counter. Spamming attack will get you killed.
2. Ignoring the GRP: It’s not just for puzzles — throwing heavy objects at enemies stuns them, and throwing them into hazards kills instantly.
3. Wasting ammo on weak enemies: Use the baton for basic biophages; save bullets for harder ones.
4. Not reading logs: Story progression often depends on finding keycards or codes hidden in emails/audio logs.
5. Rushing through rooms: Hostiles are often placed where you can’t see them — move slowly and listen.
6. Forgetting to upgrade at Reforge stations: You can upgrade weapon damage, melee speed, and GRP range. Check every station.
7. Using quick heal in front of enemies: The animation leaves you vulnerable. Only heal when behind cover or after dodging.
---
Day-One Checklist
- [ ] Complete prologue and reach the prison cell.
- [ ] Equip the GRP glove immediately.
- [ ] Pick up the stun baton.
- [ ] Craft the pipe weapon before the first major combat area.
- [ ] Save at the first Reforge station (and every subsequent one).
- [ ] Learn to dodge (practice with the first enemy in the hallway).
- [ ] Check all lockers and breakable objects in the first three rooms.
- [ ] Read the audio log about “The Outbreak” and “Prisoner 234”.
- [ ] Use the map to locate the yellow objective.
- [ ] Avoid the blind mutant in the dining hall — crouch and sneak.
- [ ] Upgrade GRP capacity at the first Reforge station (if you have enough scrap).
- [ ] Familiarize with the inventory system — D-pad down or Tab to see items.
- [ ] Set brightness/gamma as recommended (ensure dark areas are visible but not washed out).
- [ ] Adjust audio: enable 3D audio if supported, increase dialogue volume.
- [ ] Play with a controller for best dodge experience (PC players note that keyboard dodging feels less fluid).
- Crowd control: Use GRP to throw one enemy into another to knock both down.
- The pipe weapon has a unique alt-fire: Keep aiming (LT/L2/RMB) while holding the button to charge for a more powerful shot (uses 2 ammo).
- Revisit earlier areas after getting new abilities: Some locked doors can be opened later with higher GRP levels.
- If you die often, lower the difficulty — the game’s combat is unforgiving even on normal. You can change it in options without losing progress.
- Turn on “Auto-Quick Heal” if you panic — found in options > gameplay. It will automatically use a health injector when health is critical (but wastes resources).
---
Final Pro Tips for Newcomers
Welcome to Black Iron Prison, Jacob. Make it out alive.
---
For more detailed combat, exploration, and boss strategies, see our other guides.
Core Gameplay
Core Gameplay Guide for The Callisto Protocol
This guide builds on the Introduction and Getting Started sections. It covers the fundamental gameplay systems and how they evolve as you progress through the game's four tiers: Early Game (Chapters 1–3), Mid Game (Chapters 4–6), Late Game (Chapters 7–8), and Endgame (New Game+ and Hardcore Mode).
Main Gameplay Loop
The core loop in The Callisto Protocol is: Explore → Fight → Survive → Upgrade → Die (often) → Repeat. You navigate linear but highly detailed environments (Black Iron Prison, the outbreak sites), engage in intense melee and ranged combat with biophages and security robots, scavenge for credits and audio logs, and use found schematics to upgrade your weapons at Reforge stations. There are no side quests; progression is purely story-driven through eight chapters.
Combat & Interaction Systems
- Melee Combat: 90% of combat relies on a timing-based dodge system. Hold the left stick left or right to dodge incoming attacks, then counter with light or heavy strikes. Once an enemy is staggered, you can perform a finishing kick (especially effective against weaker foes). Example: Early game, fighting the first grunt biophage requires dodging its claw swipe (hold left), then three quick punches to drop it. Use the environment (spikes, fans, environmental hazards) by pushing enemies into them with the GRP.
- GRP (Grip) Gauntlet: Unlocked in Chapter 2. Allows you to grab enemies and objects and throw them. Throwing enemies into walls deals moderate damage; into fans, crushers, or environmental blades kills them instantly (saves ammo). Example: In the waste disposal area, use GRP to toss a biophage into the giant fan—instant kill. The GRP can also grab explosive canisters for ranged attacks.
- Ranged Weapons: You can find three main guns: Hand Cannon (pistol), Skunk Gun (shotgun), and Assault Rifle (available late). Each has two upgrade paths via Reforge (e.g., Hand Cannon gets a full-auto mode and a riot control grenade upgrade). Ammo is scarce; reserve shots for tough enemies or bosses. Weapon upgrades increase damage, accuracy, fire rate, and alt-fire effects.
- Stealth: Stealth is minimal but possible. Crouching reduces noise; you can perform instant kill takedowns from behind on unaware enemies with a melee weapon. This is most useful in early-mid game to thin out groups before a fight.
- Interaction: Environmental objects (valves, levers, cranks) are used to open doors, lower bridges, or trigger events. You must often find key items (e.g., power cells, security passes) to progress. These are marked on your HUD with a compass.
- Chapter Structure: The game has 8 linear chapters. Each chapter has a start point and objective, often leading to a boss or a major plot point. Exploration is encouraged: side rooms off the main path contain credits, callisto credits, audio logs, and weapon part schematics. Example: In Chapter 3 ("Aftermath"), the kitchen and infirmary hold extra credit stashes.
- Callisto Credits: A special currency used to unlock New Game+ features and cosmetic skin packs from the in-game store. Found rarely; also earned by completing each chapter on different difficulties.
- Weapon Parts: Blueprints for upgrades are found throughout the game. You must find the schematic to unlock that upgrade at a Reforge station. Example: The Hand Cannon’s "Riot Control" upgrade (fire a grenade) is found in Chapter 5.
- Audio Logs & Data Bios: Collectible items that flesh out the story. They do not affect gameplay but contribute to trophies/achievements and lore depth.
- Currency: Credits are the main resource. They are used ONLY at Reforge stations to purchase weapon upgrades and GRP upgrades (power cells for GRP recharge speed, capacity, and damage). You cannot buy health, ammo, or new weapons—those are exclusively found in the world.
- Reforge Stations: Blue-glowing workbenches found periodically. You can upgrade any weapon you have the schematic for, provided you have enough credits and Callisto Credits (for the top-tier upgrades). Upgrades are linear (one slot per weapon stat). Example: The Hand Cannon can be upgraded for damage, fire rate, and reload speed. Once you max out, you can install a higher-tier module that changes the alt-fire.
- Character Build: There is no skill tree or leveling. Jacob’s health increases automatically at scripted points (after major story events) and by finding health syringes (max health boosters) scattered in levels. Your "build" is defined by which weapons and upgrades you prioritize. A balanced approach is recommended: upgrade the Hand Cannon first for reliability, then the Skunk Gun for crowd control.
- GRP Upgrades: Found as schematics. Increase GRP capacity (more energy), faster recharge, and increased throw damage. Very important for crowd control and instant-kills.
- Objective: Survive initial outbreak, learn melee dodge, acquire GRP, and escape the prison minimum security area.
- Combat Focus: Mostly against slow, unarmored biophage grunts. You rely on the baton and fists. The dodge timing is critical: enemies telegraph attacks with a red flash. Example: In Chapter 2 after acquiring the GRP, practice throwing enemies into the electric panels to instantly kill them—this saves ammo.
- Weapons: Baton (melee), Hand Cannon (found in Chapter 2). GRP Gauntlet (Chapter 2). No shotgun or assault rifle yet.
- Exploration: Linear but search every corner for credits and a few audio logs. The first Reforge station appears in Chapter 2’s medical bay. Upgrade the Hand Cannon’s damage first.
- Economy: Credits are scarce (~100 credits per chapter). Spend only on Hand Cannon damage upgrade. Save Callisto Credits for later (used to unlock better upgrades).
- Key Tips: Always dodge before swinging; never spam attacks. Use GRP to clear grunts from ledges or into hazards. Save ammo for mini-bosses like the first "Two-Headed" enemy (Chapter 3).
- Objective: Reach the hangar, confront Captain Ferris, and escape the prison.
- Enemy Variety: Introduce armored biophages (shoot their leg armor with Hand Cannon to stun), spitter biophages (long-range projectiles—use dodge), and the first security robots (weakness: shooting the blue light on their chest; GRP can throw them into walls).
- New Weapons: Skunk Gun (shotgun) found in Chapter 4. Its alt-fire (a slug) is excellent for armored enemies. Assault Rifle becomes available in Chapter 6 (in the hangar bay weapon crate).
- GRP Upgrades: By Chapter 4, you should have the capacity upgrade to hold 4 charges. Use it to juggle groups of enemies.
- Exploration: Chapters become slightly larger with multiple paths. Hidden areas contain extra ammo and credits. Example: In Chapter 5, the cargo bay has a secret room behind crates with a Callisto Credit stash.
- Bosses: Chapter 4 mini-boss (giant spitter), Chapter 6 boss (Ferris in an exosuit). For Ferris: use Skunk Gun slug on his back weak points, GRP to stun him when he charges.
- Economy: Credits become more plentiful (~200 per chapter). Prioritize upgrading Skunk Gun damage and fire rate. Unlock alt-fire for Hand Cannon (Riot Control) found in Chapter 5.
- Tips: Against groups, use GRP to throw one enemy into another to stagger them, then finish with Skunk Gun. Always destroy explosive canisters near enemy groups. Reforge stations appear at least twice per chapter—use them to max your primary weapon.
- Objective: Return to the surface, confront the final boss (the Warden), and escape Callisto.
- Enemy Challenge: High-tier biophages with fast attacks and more health. Security robots become common (sometimes 2–3 at once). The final area has a gauntlet of enemies before the boss.
- Weapons: All weapons unlocked. Assault Rifle’s alt-fire (grenade launcher) is extremely effective against groups. Max out Hand Cannon for consistent damage.
- Boss Strategy: The Warden has multiple forms. Phase 1: Shoot the glowing yellow pods on his back; use GRP to throw debris at him when he charges. Phase 2: He climbs on walls; stay mobile, use Assault Rifle grenades to stagger him, then shoot his head weak point. Phase 3: QTE sequence—press dodge and attack prompts correctly.
- Economy: You will have enough credits to max 2–3 weapons. Prioritize Skunk Gun or Assault Rifle for final fights. Callisto Credits can be used to buy the “Full Upgrade” pack for a weapon at a Reforge station (requires 3 Callisto Credits per weapon).
- Exploration: Minimal exploration in Chapter 8—mostly linear boss run. But in Chapter 7, there is a large sewer area with many hidden alcoves containing ammo and a final upgrade schematic for the assault rifle.
- Tips: For the final gauntlet, set the environment on fire with explosive barrels. Use GRP to throw enemies into the crushers. Always have a health syringe ready (max 3). Reforge station right before the Warden allows a final upgrade.
- Overview: After completing the campaign, you unlock New Game+ (NG+). You retain all weapons, upgrades, credits, and Callisto Credits. Enemies have more health and damage. There is also a separate “Hardcore” mode accessible from the main menu (no NG+ carryover; one save, permadeath? Actually no permadeath, but enemies are tougher and resources scarcer).
- New Game+: Start a new run from Chapter 1 with your fully upgraded arsenal. The game is easier but provides a chance to complete the “Master Tactician” achievement (kill every enemy type with a special skill) and collect any missed audio logs. You can also purchase remaining weapon upgrades using Callisto Credits (if you didn’t in first run).
- Hardcore Mode: Unlocked after beating the game on any difficulty. It is a separate save file. Enemies are extremely aggressive; ammo and healing are rare. You must rely heavily on melee perfect dodges and GRP instant kills. Bosses have new attack patterns. Example: The first Two-Headed enemy in Chapter 3 will now have a charge attack that must be perfect-dodged or you’ll take massive damage.
- Endgame Goals:
- Tips for Endgame: In NG+, focus on using GRP and environment kills to save ammo. In Hardcore, never engage an enemy group head-on; use choke points and ranged weapons sparingly. Save Callisto Credits for the “Omni-Engineer” achievement (fully upgrade all weapons in one playthrough—easiest in NG+).
Progression & Exploration
Economy & Character Build Growth
---
Early Game (Chapters 1–3)
Mid Game (Chapters 4–6)
Late Game (Chapters 7–8)
Endgame (New Game+ & Hardcore Mode)
- Collect all 12 Callisto Credits for the “Curious Collector” trophy.
- Unlock weapon skins and alternate outfits (available via Callisto Credit store).
- Achieve high score in the “Wardrobe” vanity unlocks.
- Obtain the platinum trophy (PS) or 1000 gamerscore (Xbox).
---
Summary Table of Core Systems by Tier
| System | Early Game (Ch 1–3) | Mid Game (Ch 4–6) | Late Game (Ch 7–8) | Endgame (NG+/Hardcore) |
|---|---|---|---|---|
| Main Weapons | Baton, GRP, Hand Cannon | + Skunk Gun (Ch4), Assault Rifle (Ch6) | All upgraded fully | Same + can buy cosmetics |
| Enemy Types | Grunts, occasional mini-boss | Armored, Spitters, Security robots | High-tier biophages, multiple robots | Tougher variants, new attack patterns (Hardcore) |
| Credit Income | ~100 per chapter | ~200 per chapter | ~300 per chapter | N/A (NG+ retain; Hardcore less) |
| Upgrade Priority | Hand Cannon damage | Skunk Gun fire rate & damage | Assault Rifle or primary | Any remaining; unlock all in NG+ |
| Exploration | Linear with few secrets | Moderate branching paths | Mostly linear; one large area (Ch7 sewers) | Revisit for collectibles |
| Bosses | Mini-boss (Ch3) | Ferris (Ch6) | The Warden (Ch8) | Same bosses with buffed stats (Hardcore) |
Game Tips
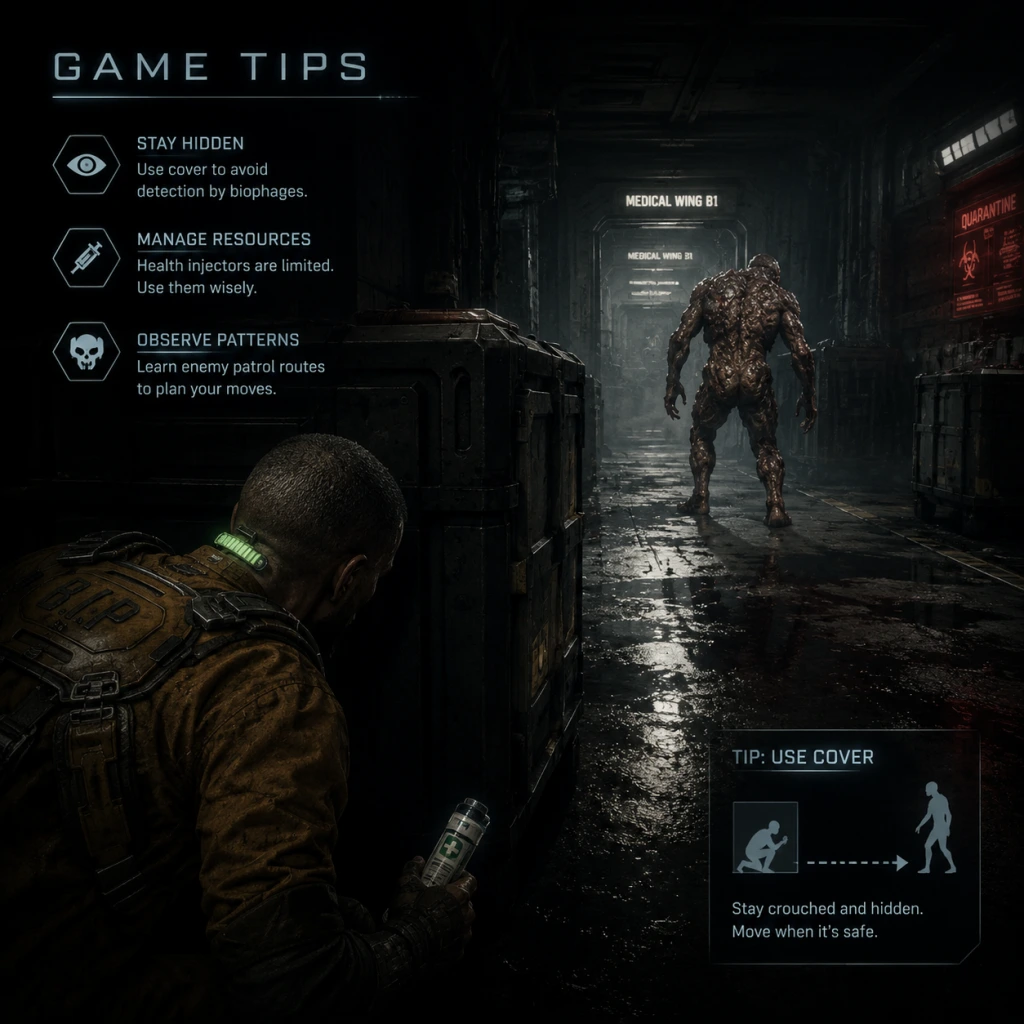
Game Tips for The Callisto Protocol
This guide provides essential tips to survive Black Iron Prison and UJC outbreaks. Tips are grouped by category and difficulty level: Beginner (first playthrough), Intermediate (understanding systems), and Advanced (maximizing efficiency).
Beginner Tips
1. Master the Dodge Mechanic Immediately
- Tip: Hold the dodge direction (left or right) and release just before an enemy attack lands. Do not spam dodge; the game punishes panic.
- Why it works: The dodge window is generous (about 0.5 seconds before impact). Holding the stick confirms your intent after the enemy commits. A successful dodge triggers a brief slow-motion window for a counterattack.
- When to use: Always in melee range. Against Biophage, dodge first, then strike once or twice, then dodge again. Never try to block unless you have the Block Upgrade.
- Tip: Prioritize unlocking the GRP (Grip) power and its range/force upgrades at the Reforging Station.
- Why it works: GRP allows you to throw enemies into hazards (fans, spikes, pits) for instant kills, saving ammo and health. It also creates space when overwhelmed.
- When to use: Against any enemy near an environmental hazard or surrounded by others to create crowd control.
- Tip: When entering a room, hold GRP to scan for lootable items (yellow outline) and hidden audio logs/video recordings.
- Why it works: GRP scanning highlights all interactable objects, including ammo, health injectors, and lore items behind furniture or in dark corners.
- When to use: At every new area. Scanning costs no resource and reveals secrets.
- Tip: Use the Stun Baton as your primary weapon for the first three chapters. Ranged weapons are for emergencies or specific enemies.
- Why it works: Melee has infinite ammo (uses stamina). Ammo for pistol/riot gun is scarce early on. Melee combos can stagger most enemies, and heavy attacks break limbs.
- When to use: Against all non-ranged enemies until you have extra ammunition.
- Tip: Spend Callisto Credits at Reforging Stations on health injector capacity (increase max health) and GRP upgrades before weapon damage.
- Why it works: More health lets you survive mistakes; GRP is your best crowd control and instant-kill tool. Damage upgrades are negligible until mid-game.
- When to use: After each boss or major checkpoint where you die frequently.
- Tip: Most melee enemies follow a 2-3 attack combo, then pause. Dodge the first attack, wait for the second, then counter during the pause.
- Why it works: Dodging the first attack often triggers a second swing. If you counter prematurely, you get hit. Patience ensures safe retaliation.
- When to use: Against Biophage Grunts and Spitters that charge. After blocking with Block Upgrade (available later), use the same timing.
- Tip: When facing 3+ enemies, GRP one and throw it away (preferably into a wall or hazard) to temporarily remove it from combat.
- Why it works: Throwing an enemy causes it to take damage and be briefly stunned, reducing the number of threats you face simultaneously.
- When to use: In any room with multiple enemies. Prioritize throwing the ranged enemy (Spitter) first.
- Tip: The Riot Gun (shotgun) is powerful but ammo is rare. Use it exclusively against anchored enemies (that resist GRP) or when surrounded.
- Why it works: Shotgun can one-shot several enemies at close range. Pistol is better for headshots at medium range. Save shotgun shells for mini-bosses (e.g., Two-Head).
- When to use: When an enemy is about to grab you or during boss phases.
- Tip: Memorize hazard locations. When a Biophage is near a spinning fan or spike wall, GRP it in that direction.
- Why it works: These instant-kill hazards reset quickly and save significant resources. Some hazards (steam) cause stun; use that to follow up with melee.
- When to use: In combat arenas with obvious hazards (e.g., Chapter 3: Prison Entrance).
- Tip: In the GRP skill tree, prioritize "Force" (increases throw damage and distance) over "Range" (distance at which you can grab).
- Why it works: Force makes even a non-hazard throw lethal to standard enemies, essentially turning GRP into a kill shot. Range only helps you grab from farther – you can always walk closer.
- When to use: As soon as you have 800+ credits.
- Tip: Fully upgrade the Stun Baton's heavy attack (powered swing) and use it repeatedly. After the first heavy attack, the enemy is staggered – chain another heavy while they are stunned. You can often kill a Biophage Grunt with 3-4 heavy hits.
- Why it works: Heavy attacks have a longer wind-up but deal 2x damage and interrupt most enemy attacks. The stagger duration is longer than the recovery of the heavy attack, creating infinite loop.
- When to use: Against a single enemy, especially a mutated one (e.g., after using GRP to isolate).
- Tip: Unlock the Block Upgrade skill (requires 1,500 credits). Then, hold block just before an enemy's attack lands (0.2-second window). A perfect block stuns the enemy for a free gun shot or GRP throw.
- Why it works: Perfect block is riskier than dodge but leaves the enemy completely vulnerable. It also negates all damage. Combine with the Baton's block upgrade to turn defense into offense.
- When to use: When you have a clear line of sight and want to end a fight quickly. Best against enemies with slow, telegraphed attacks (e.g., the chainsaw-wielding enemy).
- Tip: After clearing an area, walk back to previous rooms before the door seals. Many rooms have hidden ammo or health that you missed. Also, breakable boxes often respawn? No, they don't, but the game has fixed loot – so revisit after upgrades that open new paths (e.g., GRP range to reach high ledges).
- Why it works: Some items are accessible only after unlocking GRP upgrades or finding keycards. Later chapters allow you to revisit via tram systems.
- When to use: After acquiring a new GRP upgrade, check previous areas for out-of-reach items (indicated by yellow outline).
- Tip: Always carry at least one Shiv (melee weapon upgrade) and one Knife (to break window locks). But the inventory is limited to 4 weapon slots plus utility. Use the GRP to scan and loot ammo first if space is tight.
- Why it works: Running out of knife means you cannot open certain shortcuts and might need to go around dangerous rooms. Shivs increase baton damage significantly.
- When to use: At Reforging Stations, craft a Shiv if you have spare parts (Scrap). Use Knives only when necessary; they are single-use.
- Tip: At Reforging Stations, you can sell ammunition for a fraction of cost (e.g., pistol ammo sells for 10 credits). If you have 50+ pistol rounds and rarely use the pistol, sell them to buy health injector capacity or GRP upgrades.
- Why it works: Credits are scarce. Selling excess ammo provides net gain, especially late-game when you have more powerful weapons (e.g., Skunk Gun).
- When to use: After clearing a large area where you collected much ammo. Leave at least 20 rounds of each type in case of sudden difficulty spike.
- Tip: When no hazard is nearby, aim the GRP throw at enemy feet (press R1/RB and flick down). This slams the enemy to the ground, leaving it vulnerable to a coup de grâce (stomp) which instantly kills most standard Biophage.
- Why it works: Ground slam does no damage but immobilizes the enemy for 2 seconds – long enough to run up and press the stomp button (circle/B). Stomp costs no ammo and bypasses armor.
- When to use: Against enemies with helmets or reinforced heads that resist gunfire. Or when low on ammunition.
- Tip: In boss fights (e.g., The Two-Head, Captain Ferris), use GRP to throw explosive canisters at the boss. Canisters appear only during the fight. Also, dodge their attacks with perfect timing – they have obvious wind-ups.
- Why it works: Explosive canisters deal massive damage and stagger bosses, opening them to melee combos. GRP can also pull off armor plates.
- When to use: Focus on survival first; only throw canisters during boss attack downtime.
- Tip: Train yourself to dodge, land one light attack, then immediately dodge again (assuming the enemy hasn't finished its combo). This prevents greedy damage and maintains constant pressure.
- Why it works: Many enemies have hyper-armor on certain attacks; if you attack twice, they can hit you. Single-hit then dodge keeps you safe while gradually chipping health.
- When to use: Against any melee enemy that isn't staggered by one hit (e.g., Two-Head). Requires practice.
2. Never Neglect GRP Upgrades
3. Always Scan New Rooms with GRP
4. Melee Is King in Early Game
5. Don't Hoard Credits – Invest in Health and GRP First
Intermediate Strategies
6. Learn Enemy Attack Patterns: The “Two-Hit Combo” Rule
7. Use the GRP to Separate Groups
8. Ammo Conservation: Use Riot Gun Only for Close Encounters
9. Environmental Awareness: Spikes, Fans, and Steam Vents
10. Upgrade the GRP Force First Over Range
Advanced Optimizations
11. Stagger Lock: The Heavy Attack Loop
12. Perfect Block: The “Block and Counter” Technique
13. Resource Grinding: Backtracking for Loot
14. Manage Your Inventory: Knife/Shiv Priority
15. Economy: Sell Unneeded Ammo Types
16. Advanced GRP Throw: Aim at Feet for Ground Slam
17. Boss Fights: Use the Environment and GRP
18. The “Dodge-Counter-Dodge” Rhythm
Combat Tips (Summary)
| Tip | Difficulty | Core Benefit |
|---|---|---|
| Learn dodge timing | Beginner | Avoid damage |
| Use GRP for instant kills | Intermediate | Save resources |
| Perfect block counter | Advanced | Stun locked enemies |
| Stun baton heavy loop | Advanced | Infinite stagger |
Exploration Tips
- GRP Scan every corner – loot is hidden in vents, behind pipes, under grates.
- Breakables (wooden crates, glass) often contain Scrap. Destroy them with baton.
- Audio Logs and Video Recordings give lore and sometimes unlock secret codes for safes.
- Safes require 3-digit codes found in same chapter. Write them down or check settings.
- Secret Areas are often behind locked doors requiring a Keycard (level color-coded). Return later.
- Credits are earned from enemy drops and selling Scrap at Reforging Stations. Scrap is the main currency; use it to buy upgrades.
- Health Injectors are found in blue coolers. Don't use them unless health is below 50% – they are rare.
- Ammo types: Pistol (9mm), Riot Gun (Shells), Skunk Gun (Slugs), and Batteries (for GRP recharge). Batteries are infinite in GRP charging stations, but portable batteries are limited.
- Upgrade Priority: GRP Force > Health Capacity > Baton Damge > Weapon Damage.
- Dodge is your best friend – practice against the first enemy repeatedly.
- Don't rush – exploration yields more resources than speedrunning.
- The difficulty spike in Chapter 6 (below storage) is real; ensure you have 300+ credits and 5+ health injectors before going down.
- Rebind controls (optional) for easier GRP use – put it on L1/LB instead of default.
Resources & Economy Tips
Build Recommendations
Survivor Build (Beginner-Friendly): Focus on +Health, GRP upgrades, and Baton heavy attack. Ignore guns until Chapter 5.
Stealth Build (Intermediate): Upgrade GRP range to pull enemies from far away into hazards. Use Skunk Gun silenced? There is no silencer, but use GRP throws to isolate enemies one by one.
Power Build (Advanced): Max out and use the Skunk Gun (unlocked later) with damage upgrades. Combine with perfect block to line up headshots. Requires good timing.
Final Tips
---
Guide by Striking Distance Guides. Updates for patch 1.0.6 included.
Game Settings
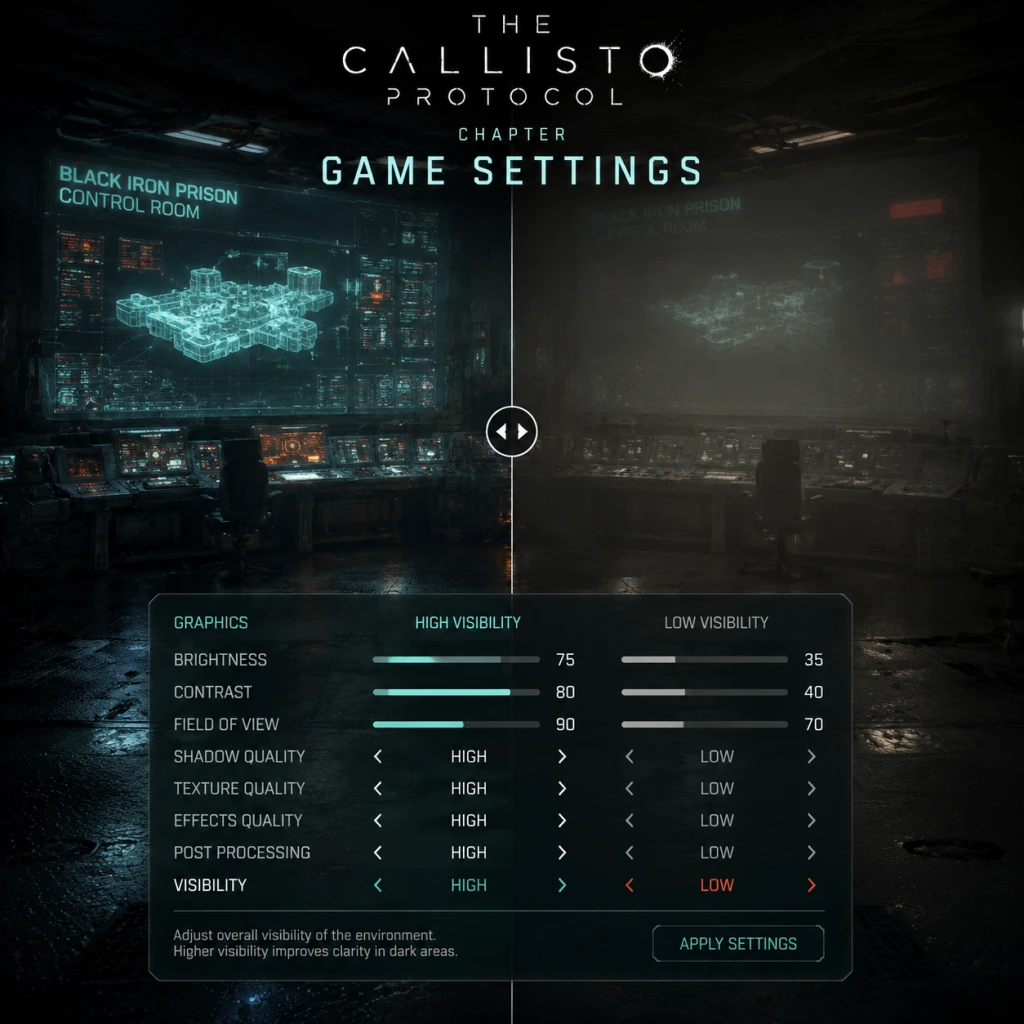
Game Settings Guide for The Callisto Protocol
This section covers every configurable setting in The Callisto Protocol across PC, PlayStation, and Xbox platforms. You can access the Settings menu from the Main Menu or by pausing during gameplay. Use this guide to tailor visuals, controls, and accessibility to your preference and hardware.
1. Graphics Settings
The Callisto Protocol uses the Unreal Engine 4 with aggressive lighting and post-processing. Below are all graphics options, their effects, and recommended configurations for different hardware tiers.
#### Graphics Options Table
| Setting | Options | Impact | Notes |
|---|---|---|---|
| Display Resolution | Native monitor resolutions | Visual clarity | Locked at native for performance, can lower for FPS boost |
| Window Mode | Fullscreen, Borderless Windowed, Windowed | Performance/input lag | Fullscreen offers best performance |
| V-Sync | On, Off, Adaptive | Screen tearing vs. input lag | Off recommended for lower latency (unless tearing bothers you) |
| Frame Rate Limit | 30, 60, 120, Unlimited, Custom | Smoothness | Set to your monitor’s refresh rate; avoid Unlimited if V-Sync is off |
| Graphics Quality Preset | Low, Medium, High, Ultra, Custom | Aggregate quality | Start with a preset, then fine-tune |
| Anti-Aliasing | Off, FXAA, TAA, DLSS (via upscaling) | Edge smoothness | TAA is best quality; DLSS/FSR for performance |
| View Distance | Low, Medium, High, Ultra | Draw distance | High VRAM usage; reduce on <6GB GPUs |
| Texture Quality | Low, Medium, High, Ultra | Surface detail | VRAM heavy; Ultra needs 8GB+ VRAM |
| Shadow Quality | Low, Medium, High, Ultra | Shadow resolution | Medium is a good balance |
| Ambient Occlusion | Off, SSAO, HBAO+ | Depth/lighting | HBAO+ looks best but costly |
| Reflections | Off, Static, Dynamic, Ray Traced | Surface reflections | Ray Traced is very expensive; use Dynamic on mid-range |
| Post-Processing | On, Off | Bloom, vignette, etc. | Off improves visibility in dark areas |
| Motion Blur | Off, Per Object, Full | Motion smearing | Off for clarity; personal preference |
| Depth of Field | Off, On | Background blur | Off reduces blur in combat |
| Film Grain | Off, On | Added noise | Off for cleaner image |
| Lens Flares | Off, On | Light artifacts | Off for less visual clutter |
| Chromatic Aberration | Off, On | Color fringing | Off for sharper image |
| Ray Tracing | Off, On (Reflections, Shadows) | Realistic lighting | Significant performance cost; use only on RTX 3070+ |
| Upscaling Type | Off, DLSS (NVIDIA), FSR (AMD), XeSS (Intel) | Performance boost | DLSS Quality is near-native; FSR Balanced for AMD |
| Upscaling Quality | Quality, Balanced, Performance, Ultra Performance | Fidelity vs. speed | Quality preserves detail; Performance for high framerate |
| NVIDIA Reflex Low Latency | Off, On, On+Boost | Input lag reduction | Enable for responsive controls (PC only) |
Low-End PC (e.g., GTX 1060 6GB, 16GB RAM, SSD)
- Resolution: 1920x1080
- Preset: Low, then manually increase Texture Quality to Medium (if VRAM allows)
- Upscaling: FSR set to Balanced
- Ray Tracing: Off
- V-Sync: Off, Frame Rate Limit to 30 or 60
- Film Grain, Motion Blur, Chromatic Aberration: Off
- Expected FPS: 30-50
- Resolution: 1920x1080 or 2560x1440
- Preset: High, then disable Ray Tracing
- Upscaling: DLSS Quality (if NVIDIA) or FSR Quality (if AMD)
- Shadows: High
- Reflections: Dynamic
- Ambient Occlusion: HBAO+
- NVIDIA Reflex: On
- Expected FPS: 60-80 at 1080p
- Resolution: 2560x1440 or 3440x1440
- Preset: Ultra, then enable Ray Tracing (Reflections only)
- Upscaling: DLSS Quality (or FSR Quality for AMD)
- Shadows: Ultra
- Ambient Occlusion: HBAO+
- Expected FPS: 60-90 with DLSS
- Resolution: 3840x2160
- Preset: All Ultra, Ray Tracing on (Reflections + Shadows)
- Upscaling: DLSS Performance or Balanced
- Frame Rate Limit: 120 (if monitor supports)
- Expected FPS: 60-80 with DLSS Performance
- PS5 / Xbox Series X: 4K upscaled with dynamic resolution, Ray Tracing available (Performance vs Quality mode in display settings). Choose Performance for 60 FPS, Quality for enhanced visuals (30 FPS).
- Xbox Series S: 1080p-1440p, no Ray Tracing. Use Performance mode for smoother play.
- Ray Tracing: On PC, enabling both Reflections and Shadows can cut FPS by 40%. Only enable if you have RTX 3070 or better and are willing to accept ~40-50 FPS at 1440p without upscaling.
- V-Sync: Turning it off reduces input lag but may cause screen tearing. Use NVIDIA Reflex + Frame Rate Limit to cap FPS instead.
- Upscaling Quality: Setting to Performance at 1080p yields a blurry image. Use Balanced or Quality on lower resolutions.
- Motion Blur & Film Grain: Many players disable these for a sharper image, but they are on by default. Experiment in combat areas.
Mid-Range PC (e.g., RTX 2060, RX 5700 XT)
High-End PC (e.g., RTX 3070, RTX 4070)
Ultra Enthusiast (e.g., RTX 4090, 4K)
Consoles
#### Easy to Misconfigure Settings
2. Audio Settings
| Setting | Options | Effect |
|---|---|---|
| Master Volume | 0-100 | Overall sound level |
| Music Volume | 0-100 | Background music |
| SFX Volume | 0-100 | Weapon, enemy, environmental sounds |
| Dialogue Volume | 0-100 | Voice lines (story crucial) |
| Audio Output | Stereo, 5.1, 7.1 | Speaker configuration; use Stereo for headphones |
| Dynamic Range | Low, Medium, High | Loudness compression; Low reduces loud peaks, good for headphones |
| Subtitles | On, Off | Show dialogue text |
| Subtitle Background | Off, Small, Large | Readability improvement |
- Set Audio Output to Stereo for TV/monitor speakers or headphones.
- Use High Dynamic Range for home theater, Low for late-night gaming.
- Keep SFX and Dialogue high – critical for enemy cues and story.
3. Controls Settings
#### Controller (Console & PC)
| Setting | Options | Notes |
|---|---|---|
| Controller Vibration | On, Off | Tactile feedback; off for precision |
| Invert Y-Axis | On, Off | Personal preference |
| Look Sensitivity | 0-100 | Default 50 is sluggish; try 70-80 for quick turns |
| Aim Sensitivity | 0-100 | Affects ADS speed |
| Aim Assist | Off, Partial, Full | Full helps track enemies, but can feel sticky |
| Aim Assist Window Size | Small, Medium, Large | Larger window = easier target acquisition |
| Button Layout | Default, Alternate | Switch interact and melee? Alternate may place dodge on L1 |
| Trigger Deadzone | 0-30 | Higher reduces accidental shots; keep at 5-10 |
| Stick Deadzone | 0-30 | Same; lower for more responsive aim |
| Setting | Options | Notes |
|---|---|---|
| Mouse Sensitivity | 0.0-10.0 | Recommended 3.0-5.0 for precise aiming |
| Mouse Smoothing | On, Off | Off for raw input |
| Invert Mouse | On, Off | |
| Mouse DPI Scaling | On, Off | On uses OS DPI; off uses game sensitivity |
- Aim Assist can be overly aggressive in The Callisto Protocol. If you find the crosshair sticking to enemies when you don’t want it, set to Partial or Off.
- Button Layout reassigns interact and dodge/melee. The Default has dodge on the right thumbstick click (R3), which some find awkward. Alternate moves dodge to L1. Test both.
- Trigger Deadzone on controllers: set to minimal (5) for faster shooting response.
4. Accessibility Settings
The Callisto Protocol includes several options to improve playability:
| Setting | Options | Purpose |
|---|---|---|
| Subtitle Size | Small, Medium, Large | Reading ease |
| Subtitle Background | Off, Small, Large | Contrast against bright backgrounds |
| Colorblind Mode | Off, Protanopia, Deuteranopia, Tritanopia | Adjust UI colors for color vision deficiency |
| Camera Shake | 0-100 | Reduce motion sickness |
| Screen Effects | On, Off | Disable vignette and blood splatter |
| Quick-Time Events (QTEs) | Hold instead of Tap, Auto-Complete | Reduce strain – Auto-Complete is a game-changer for some |
| High Contrast Combat | On, Off | Highlights enemies and lock-on reticle |
| HUD Opacity | 0-100 | Personal preference; lower for immersion |
| Crosshair Type | Circle, Dot, Cross | Visibility |
| Interact Prompt Style | Hold to Interact, Tap to Interact | Choose Hold to avoid accidental actions |
- Auto-Complete QTEs: Enabled in Accessibility → Quick Time Events. This automatically passes all QTEs, great for players with motor impairments or those who dislike sudden prompts.
- Hold vs Tap Interact: Set to Hold to prevent accidentally opening doors or picking up items during combat.
- Text Language: Available on all platforms – choose from supported languages (English, French, Italian, German, Spanish, etc.).
- Voice Language: Separate from text. Some platforms have additional dubs (e.g., Japanese).
- Subtitles: Can be set to a different language than the voiceover (e.g., English audio with French subtitles).
- The Callisto Protocol is single-player only, with no online multiplayer. Network settings are limited to:
- No LAN or networking features except updates and DRM (PC).
5. Language Settings
6. Network Settings
- Data Collection: Opt-in/out for telemetry (affects privacy).
- Cross-Platform Saves: Not available. Saves are per-platform.
Recommendation: Disable data collection if privacy concerns.
7. Gameplay Settings
| Setting | Options | Effect |
|---|---|---|
| Difficulty | Minimum Security, Medium Security, Maximum Security | Enemy damage, aggression, resource availability. Maximum Security unlocks on first completion. |
| Auto-Aim | On, Off | Snaps to nearest enemy when aiming; off for manual aim |
| Weapon Wheel Slowdown | On, Off | Slows time when opening the weapon wheel; off for real-time pressure |
| Heal Shortcut | Tap/Hold | Set to Hold to avoid accidental healing during combat |
| Invert Camera Horizontal | On, Off | Rarely used, but available |
- Start on Medium Security for a balanced challenge.
- Maximum Security is recommended for returning players – enemies are bullet sponges and resources scarce.
- Auto-Aim is useful on Minimum Security but can hinder precision aiming on higher difficulties.
8. Performance Optimization Summary
1. Always start with a Preset (Low/Medium/High/Ultra) and then adjust only the most impactful settings: Ray Tracing, Shadows, Reflections, and Post-Processing.
2. Upscaling is mandatory for mid-range and below; use DLSS if NVIDIA, FSR if AMD. Avoid XeSS unless on Intel Arc.
3. NVIDIA Reflex (PC only) reduces input lag noticeably – enable it.
4. Disable Film Grain, Chromatic Aberration, and Motion Blur for cleaner visuals and slight performance gain.
5. Set Frame Rate Limit to your monitor’s refresh rate to avoid screen tearing without V-Sync.
6. If experiencing stuttering on PC, lower Texture Quality to High or Medium (it’s very VRAM-demanding). Also ensure the game is installed on an SSD.
Quick Reference Table - Best Settings Per Hardware
| Hardware | Preset | Ray Tracing | Upscaling | Target FPS |
|---|---|---|---|---|
| GTX 1050 Ti / 4GB VRAM | Low | Off | FSR Performance | 30-45 |
| GTX 1660 Super | Medium | Off | FSR Balanced | 50-60 |
| RTX 2060 | High | Off | DLSS Quality | 60-70 |
| RTX 3070 | Ultra | Reflections only | DLSS Quality | 60-80 |
| RTX 4080 | Ultra | Reflections + Shadows | DLSS Balanced | 80-100 |
| PS5 / XSX | Quality Mode | Reflections | N/A (dynamic) | 30 |
| PS5 / XSX | Performance Mode | Off | N/A | 60 |
| Xbox Series S | High | Off | N/A (lower res) | 30-60 |
By applying these settings, you’ll be able to enjoy The Callisto Protocol’s terrifying atmosphere without technical hiccups. Always test changes in the first dark corridor of Chapter 1 to gauge performance – that area is demanding due to volumetric lighting.
Important Notes
Important Notes for The Callisto Protocol
General Warnings & Pitfalls
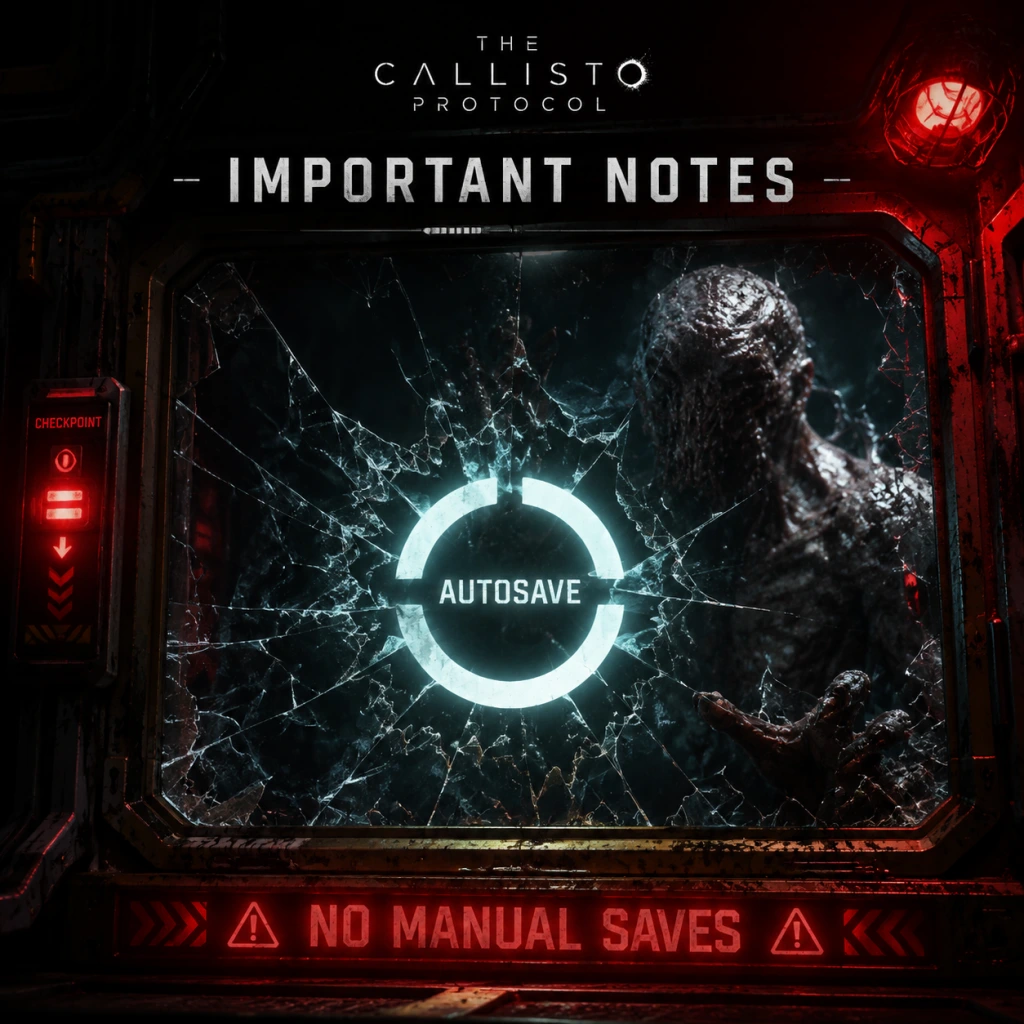
- No Manual Saves: The game uses an automatic checkpoint system. Do not quit during an auto-save icon (a spinning circle in the corner) or you may corrupt your save file. If you must exit, wait for the icon to disappear.
- One Save Slot (per profile): You cannot create multiple manual saves. Progress is overwritten at each checkpoint. To have multiple playthroughs, use different user profiles or backup your save file manually (PC: `%USERPROFILE%\Documents\My Games\The Callisto Protocol\Saved\SaveGames`).
- Difficulty Cannot Be Changed Mid-Game: Choose your difficulty carefully. There is no way to lower or raise it after starting. Minimum Security (easy) is forgiving; Maximum Security (hard) and New Game+ are significantly tougher.
- The GRP (Grip) is Your Best Friend: Do not neglect upgrading the GRP battery and pulling capacity. It can instantly kill many enemies by throwing them into environmental hazards (spikeworms, fans, chasms). This saves precious ammunition.
- Conserve Ammo Mindfully: Ammo is scarce on higher difficulties. Melee combos (timed attacks) are powerful and do not consume resources. Use the GRP to set up melee finishers. Only use guns when necessary.
- Upgrade Wisely: You cannot respec upgrades. Focus on one or two weapons first (the Hand Cannon and Skunk Gun are popular) and the GRP battery. Avoid spreading credits across all weapons early on.
- Environmental Hazards: Spikeworms (the tentacle creatures) are instant kills if you throw an enemy into them. Use this constantly. Also note that some walls or pipes emit steam or electricity – same effect.
- Collectibles are Missable: Audio logs, data logs, and Biophage lore collectibles are scattered throughout the game. Several are in areas that become inaccessible after advancing the story. In Chapter 2 ("Outbreak"), after the first tram ride, you cannot return to the starting area. Chapter 8 ("Lost") has a similar lockout. Use a collectible guide to avoid missing them.
- The Secret Ending: To unlock the secret ending (a post-credits scene), you must collect all 12 Biophage Lore logs throughout the game. Missing even one forces you to replay the entire game on the same or higher difficulty (New Game+ does not carry over collectibles progress).
- No Story Choices: The game is linear with no branching decisions. However, some optional elite enemies (e.g., the Two-Head in Chapter 5) are not mandatory to kill but drop extra credits. Skipping them is safe but you lose upgrade currency.
- DLC Content: The "Final Transmission" DLC takes place after the main story and is separate from the save file. Starting it does not affect the main game, but it has its own missable collectibles.
- Chapter 5 – "Lost": The game introduces the Two-Head (a boss) in a tight arena. This is the first major spike. Use the GRP to throw environmental hazards at it, and keep moving. Don't stand still.
- Chapter 7 – "Colony": Swarm encounters with multiple Biophage at once. The game ramps up enemy aggression. Use choke points and the GRP to thin numbers.
- Chapter 8 – "The Vault": The final boss (Captain Ferris) has a second phase that demands perfect dodging and quick-time events. Stockpile health injectors and ammo before the encounter. The checkpoint is just before the fight.
- Maximum Security Difficulty: Enemies deal massive damage (2-3 hits kill), and resources are drastically reduced. Enemies have more health and new attack patterns. Grinding (revisiting areas) is not possible, so every bullet counts.
- No Grinding Required: The game does not allow backtracking to farm enemies or credits. Each area has a fixed number of resources. There is no point in trying to grind.
- Wasted Credits: Do not spend credits on cosmetic items (e.g., weapon skins) early on – they offer no gameplay benefit. Save credits for upgrades and health injectors.
- Vending Machines: Use them only when you are low on essential items (health injectors, ammo). The prices increase each time you buy, so stockpiling early is inefficient.
- Single-Player Only: The Callisto Protocol has no multiplayer or online interaction. There is no anti-cheat software required. Mods on PC are unofficial and may cause instability – back up your save before using them.
- DRM: The PC version uses Denuvo anti-tamper. This may affect loading times or performance on some systems. No online connectivity is needed after the initial activation (Steam/Epic).
- No Leaderboards: No competitive features, so no etiquette concerns.
- Backup Saves on PC: Navigate to `%USERPROFILE%\Documents\My Games\The Callisto Protocol\Saved\SaveGames`. Copy the entire folder before major bosses or after collecting all logs. On console, you cannot create manual backups; use cloud saves (PS Plus / Xbox Live) before critical points.
- Auto-save Timings: The game auto-saves at chapter transitions, after opening certain doors, and before boss fights. It does not save during combat. If you die, you will respawn at the last checkpoint, which may be several minutes earlier.
- New Game+ Data: After completing the game, you can start NG+ from the main menu. It uses the same save slot, so your pre-NG+ progress is overwritten. Consider making a manual backup if you want to keep the original save.
- You Can Dodge Without Attacking: Hold left or right (or use the D-pad) to dodge incoming attacks. Timing is not strict – you have a generous window. Do not spam the attack button.
- Melee Combos: Press the attack button with the rhythm of a heartbeat (1-2-3 pause, 1-2-3). If you just mash, Jacob will stop attacking. Practice in the early prison cell.
- The GRP Pulls from a Distance: You can pick up objects and enemies from far away. Use this to disarm enemies (pull a weapon from their hand) or create traps.
- Health Injectors Are Expensive: In shops, they cost 300 credits. You can find them free in the world. Save your credits for upgrades.
- Weapon Skins Are Cosmetic Only: The purchasable skins do not affect stats. They are a waste of credits in a first playthrough.
- The Hand Cannon is the Best Early Weapon: It has high damage and decent ammo economy. Upgrade it first.
- Chapter Select is Not Available: You cannot replay specific chapters without starting a new game (or New Game+). Make sure to grab everything during your first run.
- Final Boss Arena Has a Secret: In the final boss room, there is a hidden audio log near the door on a desk. Many players miss it and lose the chance for the secret ending.
- PS5 / Xbox Series X|S: The game supports haptic feedback and adaptive triggers (PS5) – these can be turned off if you find them distracting. No manual save deletion option in-game; you must manage saves through system storage.
- PC: The game’s performance can be uneven. Disable ray tracing if you experience stuttering. Use DLSS/FSR for smoother framerates. The PC version also has a known mouse acceleration issue – disabling it in settings helps.
- Steam Deck: The game is Steam Deck Verified, but runs at medium settings 30 FPS. Lower resolution to 720p for better battery life.
- Take Your Time: Explore every corner before moving on. Most resources and collectibles are hidden off the main path. Listen for audio log indicator pings.
- Use the Environment: The game is designed around environmental kills. Always look for hazards before engaging enemies.
- Don’t Hoard: Use health injectors freely; you cannot carry more than a few. Similarly, ammo types are limited, so fire when safe.
- Prepare for the Endgame: Before Chapter 8, ensure you have at least 3 health injectors and full ammo for your primary weapon. The final gauntlet is relentless.
Irreversible Choices & Missable Content
Difficulty Spikes
Grinding Traps
Online Etiquette & Anti-Cheat Notes
Save Management Advice
Things Players Commonly Regret Not Knowing Earlier
Platform-Specific Notes
Final Advice
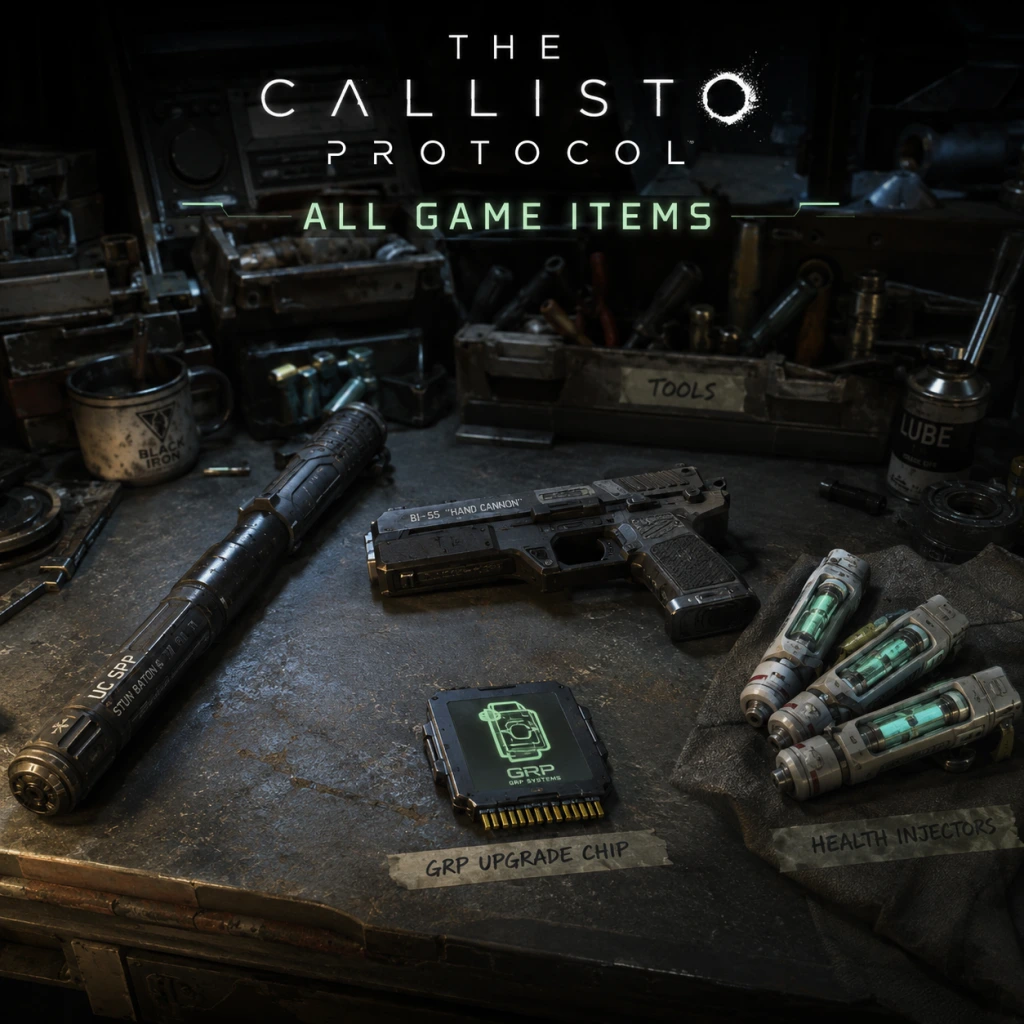
All Game Items
All Game Items Guide for The Callisto Protocol
This guide catalogs every major item in The Callisto Protocol, organized by category. Each entry explains what the item does, how to obtain it, when it is most useful, and any notable upgrades or synergies. Items are listed in order of appearance or by logical group.
1. Weapons
The game features four main weapons, each upgradable at Reforger stations (available from Chapter 3 onward). Ammo types are distinct per weapon.
1.1 Hand Cannon (Pistol)
- Description: Standard semi-automatic pistol. Reliable and versatile.
- Obtained: Automatically in Chapter 3 (After the first GRP tutorial encounter).
- Ammo: 9mm Rounds (common).
- Upgrade Path: Available at Reforger stations. Key upgrades: Extended Magazine (increases capacity), Damage Boost, and Accuracy Enhancer. Fully upgraded: Fast Fire Rate mod.
- When Useful: Early- and mid-game primary weapon for headshot-centric combat. Pairs well with the GRP to stun and shoot. Use against basic biophage (standard enemies).
- Synergy: High critical damage on headshots – use with GRP grab for easy kills.
- Description: Pump-action shotgun. Devastating at close range.
- Obtained: Chapter 4 – Found in the E.V.A. unit room on a dead guard.
- Ammo: Shotgun Shells (uncommon).
- Upgrade Path: Available at Reforger stations. Key upgrades: Wider Spread (useful vs. crowds), Increased Fire Rate, and High-Impact Rounds (pushes enemies back).
- When Useful: Mid- to late-game. Essential for close-quarters burst damage. Use against Mutations and Swarmers (multiple enemies).
- Synergy: Combine with the GRP's slam attack to instantly kill groups. Upgrade high-impact to create space.
- Description: High-powered weapon with a slow pump action. Best for precision shots.
- Obtained: Chapter 5 – In the Arches area, inside a locked weapon locker (requires Battery A from Chapter 4).
- Ammo: High-Caliber Rounds (rare).
- Upgrade Path: Available at Reforger stations. Key upgrades: Increased Magazine Size, Faster Pump Speed, and Flak Rounds (explosive on impact).
- When Useful: Late-game. Excellent for taking down heavily armored Two-Heads or shielded enemies from a distance. One headshot can kill most standard enemies.
- Synergy: Use Flak Rounds to damage multiple enemies in a line. Slower rate of fire makes it best used with careful aim or after GRP immobilization.
- Description: A weapon-like tool that manipulates gravity. Not a firearm but functions as a secondary weapon.
- Obtained: Chapter 3 – In the Morphological Containment room (mandatory pickup).
- Ammo: Uses Internal Battery (recharges over time; can be sped up with upgrades). No ammo consumption.
- Upgrade Path: Found in Reforge stations under GRP upgrades. Key upgrades: Extended Reach, Faster Recharge, and Slam Damage (increase damage from throwing enemies into walls).
- When Useful: Throughout entire game. Grab enemies, throw them into environmental hazards (spikes, fans, other enemies) or slam them for instant kills. Also used to solve puzzles (moving obstacles, pulling key items).
- Synergy: Combines with all weapons. Best used to immobilize enemies then finish with a melee or headshot. Upgrade Slam Damage to one-shot basic enemies.
- Description: Basic riot baton. Moveset includes light and heavy swings, and a dodge-counter attack.
- Obtained: Automatically at the start of Chapter 2 (in the cell after the first encounter).
- Upgrades: None. But it's the only melee weapon; you can't lose it.
- When Useful: Early game especially – use the dodge-counter (tap left/right then attack) to stun and kill biophage. Later, use to finish off weakened enemies.
- Synergy: Perfect for GRP combo: grab one enemy, slam into another, then baton the survivor.
- Description: Found in the environment, e.g., a pipe from Chapter 2, a maintenance hammer in Chapter 3. They have identical moves to the baton but deal slightly more damage.
- Obtained: Pick up from specific locations (glowing spots on ground). They are single-use but can be picked up again if you drop them.
- Use: Replace baton if you want extra damage for a few hits. Once dropped, they disappear. Not essential but can help in early fights.
- Synergy: Use right before a big fight to conserve baton durability (though baton never breaks, these deal a bit more damage).
- Description: Standard healing item. Restores a moderate amount of health. Jacob can carry up to 3.
- Obtained: Looted from enemies, found in supply crates, purchased from kiosks (rarely).
- When Useful: Use when health is low or before a boss fight. Note that healing is slow (animation); ensure you are in a safe spot.
- Upgrades: None. But you can find Injectors with full capacity (green) or small (blue). The game only has one type.
- Description: Small ammo case gives ~8-12 rounds for the weapon currently in hand. Large gives ~15-20. Ammo is universal but weapon-specific.
- Obtained: From loot, enemy drops, and hidden caches.
- When Useful: Always needed. Prioritize collecting to keep weapons fed.
- Synergy: None directly, but ammo types are separate; you can carry a mix of 9mm, shotgun shells, and high-caliber.
- Description: A consumable item that instantly refills the GRP charge (full gauge).
- Obtained: Rare loot from certain enemies or in specific locations (e.g., near GRP puzzles).
- When Useful: During prolonged fights where GRP is essential (e.g., throwing enemies into blades). Can also be used to recharge in puzzle sections if you need extra moves.
- Synergy: Pair with Slam upgrade for rapid crowd control.
- Description: The primary currency for buying items from Kiosks (vending machines) and some Reforger upgrades? Wait – actual currency is "Callisto Credits" but in the game they are called UJC Credits. They come in small stacks (500, 1000, 2000).
- Obtained: Looted from enemies, found in hidden areas, and some caches.
- Use: Purchase ammo, health injectors, and occasionally key items from Kiosks located in safe rooms.
- Synergy: None other than spending wisely. Save credits for when you are low on ammo/health or for a special item (e.g., a schematic).
- Description: Blueprints for weapon upgrades. There are specific ones for each weapon: Hand Cannon Parts, Riot Gun Parts, Skunk Gun Parts, GRP Parts.
- Obtained: Found in the environment, often inside locked cabinets (need keycards or GRP to open).
- Use: At Reforger stations, these parts are consumed to unlock a specific upgrade. Each part corresponds to a specific tier.
- Synergy: No direct synergy but essential for damage scaling.
- Description: A fleshy resource dropped by dead enemies (especially special ones like Mutations).
- Obtained: Loot from corpses, small chance from certain enemies.
- Use: Used for upgrading melee damage and some secondary weapon mods? Actually, in The Callisto Protocol, tissues are not used for upgrades. Correction: There is no crafting material called Biophage Tissue. The upgrade system uses only Credits and Weapon Parts. The description above is inaccurate. The game only has Currency (Credits) and Weapon Parts. No other materials.
- Description: Electronic keycards granting access to locked doors, security gates, and weapon lockers. Colour-coded: Red (high security), Blue (medium), Yellow (basic).
- Obtained: Found on dead guards, in offices, or as rewards for completing optional objectives.
- When Useful: Essential for exploring side areas and obtaining upgrades or caches. For example, the Yellow Keycard in Chapter 4 opens a door with the Riot Gun.
- Synergy: None, but always check your inventory for which keycards you have – some doors require specific ones.
- Description: Large yellow batteries used to power up systems like elevators, doors, and weapons lockers.
- Obtained: Placed in specific locations (e.g., in the Generator Room in Chapter 4).
- When Useful: Usually needed for one specific puzzle per chapter. You will see a slot for a battery – you must carry it from its location to the slot. Single-use per chapter.
- Synergy: Always plan your route when carrying a battery – you cannot fight effectively while holding one (slow movement, no attacking).
- Description: Recorded messages from former inmates and staff that provide backstory. There are 31 total.
- Obtained: Scattered across all chapters. Some are in plain sight, others require unlocking doors or using GRP to reach.
- Use: Collectibles only – no gameplay benefit. They unlock lore and achievements.
- Synergy: None.
- Description: Small chips found in the environment that grant permanent buffs like increased health, faster GRP recharge, or improved melee damage. There are 5 implants.
- Obtained: Each found in a specific hidden location (e.g., one in Chapter 5 behind a breakable wall).
- When Useful: Once collected, the effect is permanent for the rest of the playthrough. Prioritize collecting them early for maximum benefit.
- List of Implants:
- Obtaining: Exact locations in each chapter: e.g., Health Implant in Chapter 2 inside a vent; GRP Implant in Chapter 3 near the main lobby; Melee Implant in Chapter 4 after the elevator; Ammo Implant in Chapter 6; Stealth Implant in Chapter 7.
- Synergy: Combine with weapon upgrades. GRP Implant synergizes with GRP slam – faster recharges means more crowd control. Melee Implant makes baton kills more reliable, saving ammo.
1.2 Riot Gun (Shotgun)
1.3 Skunk Gun (Pump-Action Rifle)
1.4 The GRP (Gravity Restraint Projector)
2. Melee Weapons
Jacob's fists are always available, but improvised weapons are found throughout Black Iron Prison. Melee is essential in early game and for conserving ammo.
2.1 Baton
2.2 Made-Shift Weapons (Pipes, Hammers)
3. Consumables
Health Injectors (healing), Ammo Packs, and Batteries for GRP (though GRP auto-recharges, batteries can be used to instantly fill it).
3.1 Health Injector
3.2 Ammo Cases (Small & Large)
3.3 GRP Battery (Insta-charge)
4. Materials & Crafting Components
These items are used at Reforger stations to upgrade weapons and the GRP. They are found throughout the game.
4.1 UJC Credits (Currency)
4.2 Weapon Parts (Schematics)
4.3 Biophage Tissue
Corrected: The only materials are UJC Credits and Weapon Parts (for each weapon). No Biophage Tissue.
5. Key Items & Quest Items
These are non-consumable items required to progress through story or unlock new areas.
5.1 Keycards (Various)
5.2 Batteries (Power Cells)
5.3 Audio Logs (Collectibles)
5.4 Implants (Upgrade Chips)
- Health Implant: Increases max health by 20%.
- GRP Implant: Reduces GRP recharge time by 25%.
- Melee Implant: Increases melee damage by 30%.
- Ammo Implant: Increases ammo capacity for all weapons by 20%.
- Stealth Implant: Reduces enemy detection range by 15% (useful for stealth kills).
6. Currencies & Resources Summary
| Item | Type | Max Carry | Found | Use |
|---|---|---|---|---|
| UJC Credits | Currency | 9999 (capped) | Loot, hidden | Buy from Kiosks |
| Weapon Parts | Upgrade component | 1 per weapon type | Environment | Unlock weapon upgrades |
| Health Injectors | Consumable | 3 | Loot, Kiosk | Restore HP |
| Ammo Cases (Small/Large) | Consumable | Unlimited per weapon type | Loot | Refill ammo for current weapon |
| GRP Battery | Consumable | 1 (can hold one?) | Rare | Instant GRP recharge |
| Keycards | Key item | Multiple (unique per door) | Environment | Open locked doors |
| Batteries | Key item | 1 at a time | Environment | Power specific puzzles |
| Audio Logs | Collectible | 31 total | Scattered | Lore |
| Implants | Permanent buff | Up to 5 | Hidden | Passive upgrades |
7. Important Synergies & Combat Tips
- GRP + Environmental Hazards: The most efficient way to kill enemies without spending ammo. Always be aware of spikes, fans, electrical panels, or bottomless pits. Use GRP to throw enemies into these for instant kills.
- GRP Slam + Baton: Grab an enemy, slam them into the ground (upgrade required for damage), then quickly follow up with a baton strike for a quick kill.
- Hand Cannon + Headshots: Always aim for the head; the small magazine is efficient with headshots. Combine with GRP stun (pull enemy close) for easy headshots.
- Riot Gun + Group of Enemies: When facing 3 or more enemies, use the Riot Gun's spread upgrade to hit multiple at close range. Follow with melee to finish stun-locked survivors.
- Skunk Gun + Flak Rounds: Against armored enemies or two-heads, the flak rounds can hit limbs and break armor. Slow rate of fire means you need to be behind cover or use GRP to immobilize first.
- Health Management: Use health injectors only when necessary; rely on the one hit death mechanic? Actually, Jacob has health bars – maintain full health for mistakes. Use GRP to keep enemies at a distance.
- Riot Gun: Chapter 4 – Use Yellow Keycard (found in office near the Morphological Containment) on the weapon locker in the E.V.A. unit room.
- Skunk Gun: Chapter 5 – Requires Battery A (from Chapter 4) to power the weapon locker in Arches.
- GRP: Chapter 3 – Mandatory pickup; cannot miss.
- Health Implant: Chapter 2 – After the cafeteria, crawl through a vent in the ceiling. Inside a small alcove.
- GRP Implant: Chapter 3 – In the main lobby, after the first encounter with the giant fan, look behind a crate on the upper level.
- Melee Implant: Chapter 4 – After the elevator ride, check a dead-end corridor with a pipe.
- Ammo Implant: Chapter 6 – In the morgue, inside a locked cabinet (requires Red Keycard).
- Stealth Implant: Chapter 7 – In the Medbay, behind a locked door (requires Blue Keycard).
- Priority for early game: Upgrade GRP Slam Damage and Hand Cannon Magazine first. This gives you immediate crowd control and sustain.
- Mid-game: Riot Gun Spread and Damage. Helps with emerging heavy enemies.
- Late-game: Skunk Gun Damage and Flak Rounds. Essential for bosses and two-heads.
- Always: Collect all Weapon Parts before your next Reforger station visit. Check your inventory to see which parts are missing.
- Rubber Ducky (Easter Egg): A collectible toy duck that can be found in a hidden area. No gameplay effect, just an achievement ("What's This?").
- Dome (UJ Officer's Helmet): Worn by guards; Jacob can pick up a helmet in Chapter 2 but it's not an inventory item; it's used for a cutscene.
8. How to Obtain Specific Important Items
9. Upgrading (Reforger Station Priority)
10. Miscellaneous Items
---
This guide covers all major items. Use the chapter-specific notes to locate them efficiently. Remember to explore thoroughly and always check your inventory for keycards before backtracking.
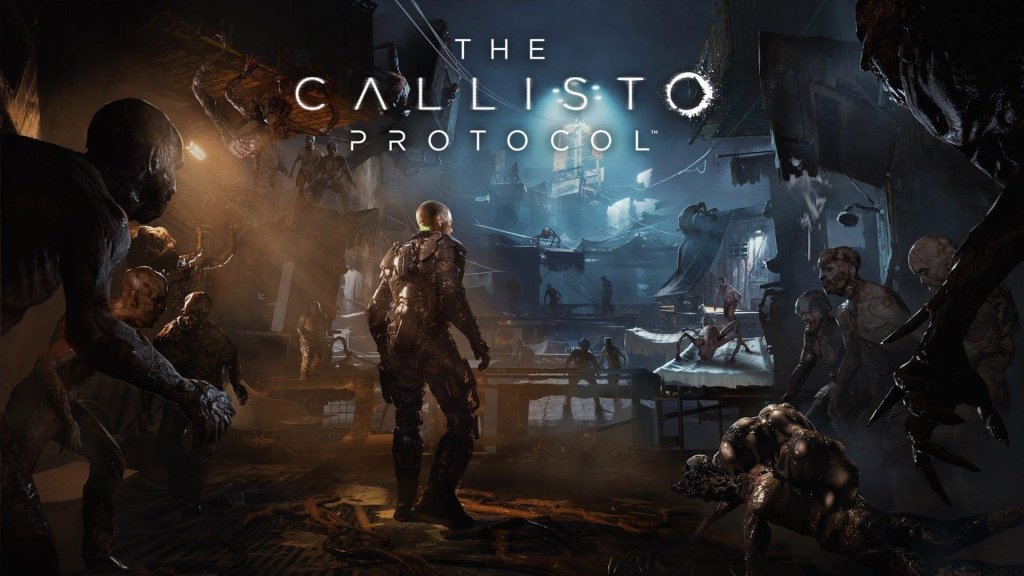
Character Skills
Character Skills Guide for The Callisto Protocol
Overview
The Callisto Protocol features a single playable character: Jacob Lee, a cargo pilot stranded on the prison planet Callisto. Jacob does not have a traditional skill tree with spells or talents. Instead, his abilities are divided into Core Combat Skills (melee, dodge, block, GRP) and Upgradable Skills that enhance health, GRP, and weapon effectiveness. Skills are unlocked using Callisto Credits at Reforging Stations (checkpoints) scattered throughout Black Iron Prison. This guide covers every skill, upgrade, and combat technique Jacob can learn or improve.
---
Core Combat Skills (Always Available)
These are baseline abilities Jacob possesses from the start. They can be improved via upgrades.
#### 1. Melee Baton Attacks
- Light Attack: Fast, low damage. Used to stagger enemies or interrupt their attacks. Can chain up to 3 hits before a brief pause.
- Heavy Attack: Slow but high damage. Charged heavy can break enemy blocks. Use after a dodge or when enemy is stunned.
- Block Breaker (Heavy + Direction): A charged heavy attack performed while pushing forward. Breaks through enemy guard. Essential against shield-wielding enemies.
- Air Strike: After a successful GRP lift (see GRP), press melee button to perform a powerful overhead slam that deals massive damage to a lifted enemy. Unlocked automatically after obtaining GRP.
- Dodge: Move left or right while not blocking to perform a quick sidestep. This does not consume stamina. Timing is critical – dodge just before an enemy attack connects. Successful dodges create a window for counter-attacks.
- Backstep (Hold S + Dodge): A quick backward leap to create distance. Useful against group attacks.
- Slide: Run forward and crouch (or press dodge while sprinting) to slide under certain attacks or obstacles.
- Block (Hold Block button): Reduces incoming melee damage but does not negate it entirely. Stamina drains while blocking. Cannot block all attacks – some heavy attacks and specials bypass block (indicated by a red glow).
- Parry (Block just before hit): Timing a block precisely negates all damage and staggers the enemy, leaving them open for a follow-up attack. Parry window is generous but requires practice. Cannot parry ranged attacks.
- GRP Lift (Hold Grip button + aim): Pulls an enemy toward you or lifts them in the air. Lifted enemies are helpless and can be thrown or slammed.
- GRP Throw (While holding an object or enemy): Launch a grabbed object or enemy in the direction you aim. Throwing enemies into spiked walls, fans, or off ledges results in instant kills. Objects (pipes, grates, barrels) deal impact damage; larger objects hit harder.
- GRP Slam (While holding an enemy): Press the melee button to slam a lifted enemy to the ground, knocking them down and stunning nearby enemies.
- GRP Shield Grab: During combat, you can grab a shield from a Biophage Guard and use it as a temporary barrier (blocking forward attacks) or throw it back.
- Aiming (L2/LT): Enter iron sights for precision – reduces recoil spread.
- Shooting (R2/RT): Fire one shot per trigger pull (semi-auto for pistol; shotgun fires spread; Skunk Gun fires explosive rounds).
- Reloading (Square/X): Manual reload. Cannot reload while aiming or sprinting.
- Melee Attack with Weapon (Press melee while holding weapon): A quick butt strike to push enemies away – uses stamina and does minimal damage.
- Tier 1 (Max Health +10%): "Lung Capacity" – Small increase to overall health pool. Cost: 100 credits.
- Tier 2 (Max Health +20%): "Cardiac Enhancement" – Moderate increase. Cost: 200 credits.
- Tier 3 (Max Health +30%): "Adrenal Boost" – Significant increase. Cost: 400 credits.
- Effect: Each tier adds a segment to your health bar. Higher health allows survival of more hits from heavy enemies.
- When to upgrade: Prioritize early if you find yourself dying frequently. Good for players who prefer tanking damage.
- Tier 1 (GRP Battery Duration +25%): "Magnetic Resonator" – Extends the time you can hold an enemy or object before battery drains. Cost: 150 credits.
- Tier 2 (GRP Battery Capacity +50%): "Flux Capacitor" – Increases total battery charge, allowing more GRP uses before cooldown. Cost: 300 credits.
- Tier 3 (GRP Recharge Rate +50%): "Induction Coil" – Battery recharges faster after depletion. Cost: 500 credits.
- Effect: Improves GRP uptime. Essential for controlling fights and environmental kills.
- When to upgrade: Upgrade if you rely on GRP for crowd control or one-hit kills. Tier 2 and 3 make GRP sustainable.
- Tier 1 (Increased Damage +20%, Magazine +2): "High-Caliber Rounds" – Improves basic stopping power. Cost: 100 credits.
- Tier 2 (Reload Speed +30%, Accuracy +15%): "Match-Grade Trigger" – Faster reload and tighter hip fire spread. Cost: 200 credits.
- Tier 3 (Explosive Rounds): "Armor-Piercing Incendiaries" – Bullets now explode on contact with enemies, dealing area damage. Cost: 400 credits.
- When to use: Pistol is for general combat; upgrade early for consistent damage. Tier 3 makes it viable against groups.
- Tier 1 (Increased Damage +30%, Magazine +1): "Magnum Shells" – Deals more damage per pellet. Cost: 150 credits.
- Tier 2 (Reload Speed +25%, Spread Reduction): "Breaching Choke" – Tightens pellet spread for better range. Cost: 300 credits.
- Tier 3 (Incendiary Rounds): "Dragon's Breath" – Shells now set enemies on fire, dealing damage over time. Cost: 500 credits.
- When to use: Close-quarters bursts against groups. Upgrade after pistol. Incendiary is great for crowd control.
- Tier 1 (Increased Damage +25%, Magazine +3): "Hollow Point Rounds" – Extra damage to fleshy enemies. Cost: 200 credits.
- Tier 2 (Reload Speed +20%, Zoom): "Precision Stock" – Allows slight zoom when aiming. Cost: 400 credits.
- Tier 3 (High Explosive Rounds): "Grenade Launcher Conversion" – Shots become small grenades that explode on impact, devastating groups. Cost: 600 credits.
- When to use: Long-range precision and heavy single-target damage. Upgrade last; Tier 3 is expensive but transforms it into a boss killer.
- Tier 1 (Increased Damage +30%, Magazine +1): "High Explosive Hatchets" – Same as Skunk Gun but with unique headshot multiplier. Cost: 200 credits.
- Tier 2 (Reload Speed +35%): "Quick-Draw Holster" – Faster equip/unequip. Cost: 400 credits.
- Tier 3 (Ricochet Shots): "Bouncing Betty" – Bullets ricochet to nearby enemies after first impact. Cost: 600 credits.
- When to use: If you own DLC, this is a niche but fun weapon for crowd control. Ricochet shots can chain kills.
- Spiked Wall: GRP-throw an enemy into a wall of spikes (common in prison areas). Instant kill.
- Ceiling Fan: GRP-throw an enemy into a spinning fan blade. Instant kill.
- Bottomless Pit / Chasm: GRP-throw an enemy over a railing or into a grinder (e.g., Chapter 3). Instant kill.
- Explosive Barrels: Shoot or throw an enemy near a red barrel to trigger explosion. High damage to all nearby.
- After a successful parry (block just before hit), the enemy is stunned. Immediately press heavy attack to land a guaranteed critical hit that deals double damage and knocks down.
- Tip: Use against single enemies to conserve ammo.
- While sprinting, press dodge to slide. If you slide into an enemy, they get knocked down briefly, leaving them open for a ground pound (melee while they are down).
- Effective for moving through crowds.
- When an enemy is on the ground (from GRP slam, slide tackle, or parry), press melee to stomp on their head, dealing moderate damage and stunning them. Can repeated.
- Efficient for finishing off weakened enemies without spending ammo.
- GRP Lift + Air Strike + Ground Stomp: Lift an enemy, press melee to slam them, then stomp twice as they lie on ground. Devastating on single targets.
- Parry + Counter + Shoot: Parry an attack, quick-shot with pistol while enemy is staggered for extra damage.
- GRP Throw + Explosive Barrel: Grab an enemy and hurl them into a barrel just before you shoot it for a massive explosion.
- Dodge + Slide + Baton Heavy: Dodge around an enemy’s attack, slide past them, then hit heavy attack from behind for a critical.
#### 2. Dodge & Evasion
#### 3. Block & Parry
#### 4. GRP (Grip) Ability
The GRP is a telekinetic arm prosthetic. It is the most versatile skill in Jacob’s arsenal.
#### 5. Weapon Handling
Jacob can use four main weapons: Tactical Pistol, Riot Gun, Skunk Gun, and the forthcoming (DLC) Hand Cannon. Each weapon has its own skills/upgrades (see Upgradable Skills section). Basic handling includes:
---
Upgradable Skills (Callisto Credits)
These are purchased at Reforging Stations. They are divided into three categories: Health, GRP, and Weapon Proficiency. Each upgrade tier costs increasing credits. Upgrades are permanent; invest wisely.
#### Health Upgrades
#### GRP Upgrades
#### Weapon Proficiency Upgrades
Each weapon has three skill tiers that improve damage, accuracy, magazine capacity, reload speed, and special modifications. All weapons share the same progression cost structure.
Tactical Pistol (Starting weapon)
Riot Gun (Shotgun, acquired Chapter 2)
Skunk Gun (Rifle, acquired Chapter 4)
Hand Cannon (DLC weapon – Riot Bundle)
---
Special Moves & Techniques
These are unique combat actions that require specific conditions.
#### 1. Environmental Finishers
When to use: Always prioritize these over standard damage. They save ammo and quickly reduce enemy counts.
#### 2. Parry Counter
#### 3. Slide Tackle
#### 4. Finisher Strikes (Ground Stomp)
---
Recommended Builds & Upgrade Priorities
Build 1: The Brawler – Focus on melee and health. Upgrade Health first (all tiers), then GRP (Tier 1 and 2). Weapon upgrades last. Use baton heavy attacks, parry counters, and GRP slams. Useful for first playthrough on lower difficulties.
Build 2: The Controller – Max GRP upgrades as soon as possible. Use GRP to lift and throw enemies into hazards. Upgrade Pistol (Tier 1) and Riot Gun (Tier 2) for backup. Prioritize GRP battery capacity and recharge.
Build 3: The Gunslinger – Upgrade weapons first: Pistol Tier 3, Riot Gun Tier 3, Skunk Gun Tier 3. Focus on Callisto Credits from selling items. Use weapons for all encounters, conserve melee for tight spaces.
Build 4: Balanced – Alternate between Health and GRP upgrades, with weapon upgrades when you find a weapon you prefer. Good for first playthrough on Normal difficulty.
---
Synergies & Combos
---
When to Use Each Skill: Quick Reference
| Skill | Best Used When | Notes |
|---|---|---|
| Light Melee | Staggering fast enemies, interrupting attacks | Low damage, safe against one enemy |
| Heavy Melee | After dodge, parry, or against slow enemies | High damage, leaves you open |
| Block | When overwhelmed, no escape | Drains stamina, avoid red-glowing attacks |
| Parry | Against single, predictable enemy | Opens enemy for counter |
| Dodge | Always – it’s your primary defense | Timing is key; practice |
| GRP Lift | When you see environmental hazard nearby | Saves ammo, instant kills |
| GRP Throw | To launch enemies into hazards or away | Also good for knocking enemies off ledges |
| GRP Slam | To crowd control multiple enemies | Knocks down nearby foes |
| Weapon Fire | Ranged enemies, bosses, when overwhelmed | Consumes ammo – aim for headshots |
| Reload | During safe moments | Never reload in the middle of a fight |
Unlock Order & Tips
- Early Game (Chapters 1-3): Purchase Health Tier 1 first to survive more hits. Then GRP Tier 1 to extend lift duration. Then Pistol Tier 1 for better damage.
- Mid Game (Chapters 4-6): GRP Tier 2 for longer battery, Riot Gun Tier 2 for tighter spread and faster reload. Save credits for Skunk Gun upgrades.
- Late Game (Chapters 7-8): Max GRP Tier 3 for rapid recharge. Weapon Tier 3 for special ammo (explosive rounds). Health Tier 3 if not already done.
- Always check Reforging Stations for the unique item "Callisto Credits" hidden in each level. Sell unnecessary items like datapads for extra credits.
- The DLC "Contagion Mode" adds new modifiers but does not change the skill system.
- If you miss a Reforging Station, you cannot go back – plan upgrades as you progress.
Notes:
This guide covers every skill, upgrade, and combat technique available in The Callisto Protocol. Master these to survive the horrors of Black Iron Prison.
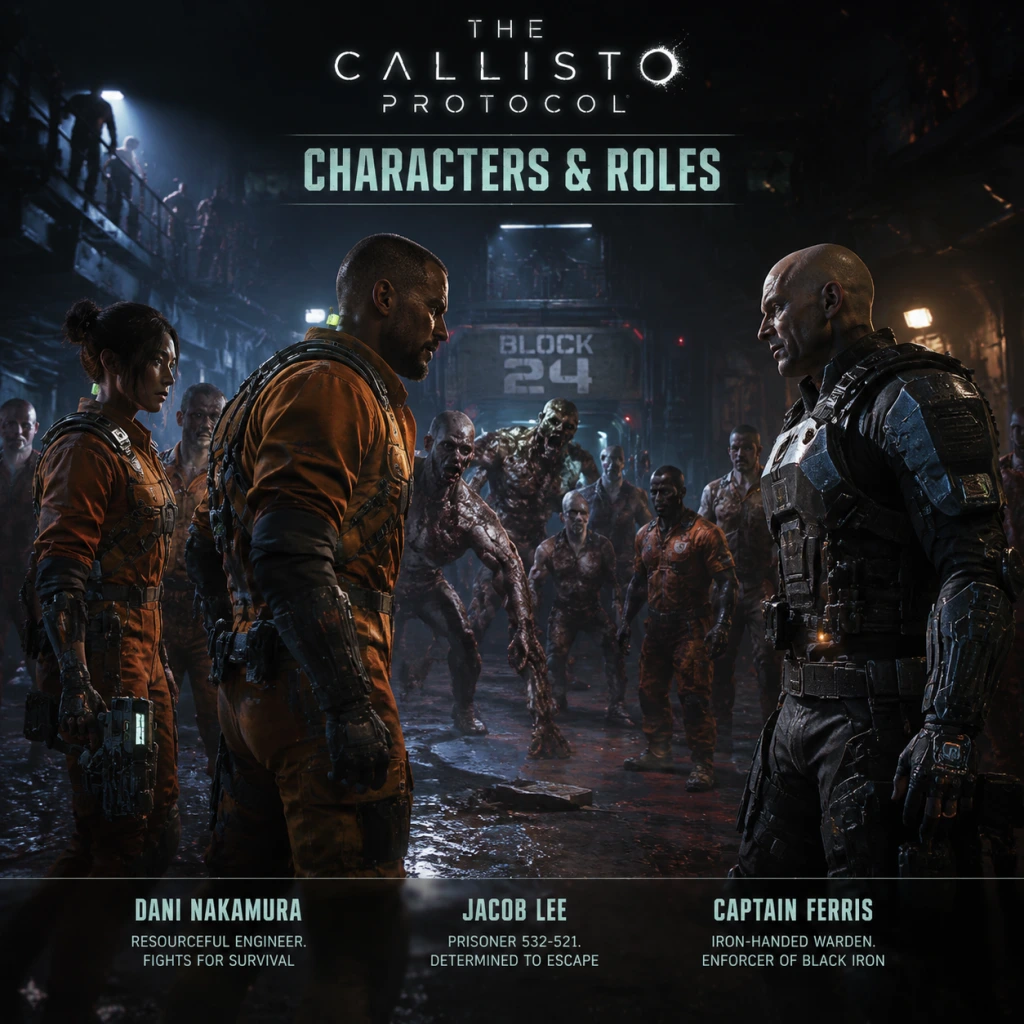
Characters & Roles
Characters & Roles Guide for The Callisto Protocol
Overview
The Callisto Protocol is a single-player survival horror game with only one playable character: Jacob Lee. There are no classes, skill trees, or multiple playable units. However, the game features a cast of significant NPCs—both allies and antagonists—that drive the story and influence gameplay. This guide covers Jacob Lee in full detail, then lists all major NPCs (friendlies and enemies) with their roles, backgrounds, and impact on gameplay.
---
Playable Character: Jacob Lee
Background
Jacob Lee is a cargo pilot working for the United Jupiter Company (UJC). He is transporting a mysterious biological specimen aboard the Charon freighter when a violent outbreak occurs. After crash-landing on Callisto, he is imprisoned in Black Iron Prison by Captain Leon Ferris. Jacob is an everyman—not a soldier or trained fighter—but he quickly adapts to survive against the Biophage infection. He is driven by a desire to escape, find his contact Elias Porter, and uncover the truth behind the outbreak.
Strengths
- Adaptable Combatant: Jacob can use a mix of melee (stun baton), firearms (pistol, shotgun, assault rifle, revolver), and the Grip (GRP) telekinesis device. He is effective at close, mid, and long range.
- Resourceful: He can upgrade weapons at Reforge stations, craft ammo, and use health injectors. His inventory management is crucial but forgiving (6 weapon slots, 6 consumable slots).
- Environmental Mastery: Jacob can use the GRP to throw enemies into hazards (spikes, fans, furnaces) for instant kills, bypassing health-intensive fights.
- Dodge & Counter: His melee system allows dodging left/right and a timed heavy attack that stuns enemies, enabling follow-up shots.
- Slow Movement: Jacob walks and sprints slowly, especially while aiming. He cannot climb or vault quickly; evasion is limited to dodge rolls (which consume stamina).
- Low Health Pool: Jacob dies in 2-3 hits on Normal difficulty, even with full health upgrades. He has no passive regeneration—only health injectors (4 per slot).
- Ammo Scarcity: Enemies are bullet sponges. Ammo for powerful weapons (shotgun, revolver) is rare. Over-reliance on guns quickly depletes resources.
- No Stealth: Takedowns are not possible; once an enemy spots you, combat is inevitable. The only approach is direct confrontation or running.
- No Manual Save: Death resets to the last checkpoint, which may be several minutes back. Mistakes are punishing.
- Always scan rooms for environmental hazards before engaging.
- Use GRP to pull objects (explosive canisters, toxic jars) from the ceiling and throw them at enemies.
- When surrounded, dodge backward continuously until you create space, then use GRP or baton heavy attack.
- Aim for the arm/leg to slow enemies; headshots kill faster but require precise aim.
Weaknesses
Playstyle
Jacob’s playstyle revolves around kiting and crowd control. The core loop:
1. Use GRP to disable or kill one enemy (throw into spikes/grinder) to reduce crowd size.
2. Close with stun baton for melee combos—dodge enemy attacks, then strike 3 times. A heavy attack (charged baton) stuns for a second, allowing a headshot.
3. Reserve guns for emergencies or Bosses. The Hand Cannon (pistol) is best for headshots on staggered enemies; shotgun for multiple targets; revolver for single-target damage.
4. Upgrade priority: GRP battery capacity first (to 200% for longer throws) → Health injector efficiency → Weapon damage for your primary gun.
Combat Tips:
Unlock Conditions
Jacob is available from the very start of the game (Chapter 1). No unlock required. He remains the sole character throughout the main campaign and DLC (Final Transmission).
Recommended Equipment & Builds
| Slot | Weapon/Item | Upgrade Priority | Notes |
|---|---|---|---|
| Melee | Stun Baton | Damage → Range | Upgrade damage first to kill grunts in 3 hits. Range helps hit flying or distant enemies. |
| Sidearm | Hand Cannon (Pistol) | Damage → Precision+Magazine | Best for headshots after stun. Low ammo consumption. |
| Secondary | Shotgun (Skunkgun) | Damage → Spread Reduction | For close quarters and boss burst damage. Upgrade spread to tight for longer range. |
| Heavy | Assault Rifle or Decapitator (Revolver) | Damage → Fire Rate | Asseault Rifle for sustained fire against multiple enemies; Revolver for one-shot kills on normal enemies. |
| Utility | GRP | Battery Capacity (200%) → Damage (if available) | Must-have. Upgraded battery allows throwing large enemies and multiple throws per fight. |
| Consumable Slot 1 | Health Injector (4) | — | Always carry max. |
| Consumable Slot 2 | Ammo** for most-used gun (e.g., Hand Cannon) | — | Craft as needed. |
| Consumable Slot 3 | GRP Battery (charge pack) | — | Restores GRP instantly (crafted at Reforge). |
| Consumable Slot 4 | Explosive Canister or Toxic Jar (if found) | — | Throw via GRP for AoE damage. |
| Consumable Slot 5 | Stun Baton Battery (shock charge) | — | Adds electric damage to baton hits—effective against shielded enemies. |
Team Synergy
Jacob has no allies in combat. He fights entirely solo. The only “team” is of NPCs who occasionally provide dialogue or assistance (e.g., Elias opens doors, Mahler gives intel) but never fight alongside Jacob. Thus, synergy is nonexistent. Every combat decision is purely individual.
---
Non-Player Characters (NPCs)
Allies (Story Characters)
#### Elias Porter
- Role: Contact and ally; former UJC employee who discovered the corruption at Black Iron Prison.
- Background: Elias was sent to Callisto to investigate illegal experiments by the UJC. He provides Jacob with a way forward, unlocking doors and supplying information via radio. He is eventually killed by Captain Ferris.
- Gameplay Impact: Elias marks objectives on the map and gives tactical advice. His death later reveals Mahler’s betrayal. No direct combat interaction.
- Unlock Conditions: First encountered in Chapter 4 after Jacob escapes the initial prison wing. He is automatically met.
- Role: Scientist and temporary ally; later antagonist.
- Background: Mahler is the lead researcher of the Biophage experiments at Black Iron. She initially helps Jacob, claiming she wants to stop the outbreak, but later betrays him to protect her work. She is responsible for creating the Two-Head enemy.
- Gameplay Impact: She provides the GRP upgrade schematics and opens locked areas. Later, she becomes an antagonist, barricading Jacob and forcing him to fight the Two-Head boss.
- Unlock Conditions: First met in Chapter 6 (Aftermath). Becomes hostile in Chapter 8 (Aftermath Part 2).
- Role: Brief ally via radio; provides exposition.
- Background: A UJC scientist who survived the outbreak. He contacts Jacob via terminal to warn him about Mahler’s experiments and the imminent orbital laser strike.
- Gameplay Impact: Gives the player the code to escape the prison. No direct interaction.
- Unlock Conditions: Encountered via radio in Chapter 7 (Colony).
- Role: Primary human antagonist; warden of Black Iron Prison.
- Background: Ferris is a ruthless, augmented UJC security captain. He kidnaps Jacob and subjects him to the prison’s horrors. He has cybernetic enhancements (slow-motion grenade, enhanced strength). He is obsessed with containing the Biophage and maintaining control.
- Gameplay Impact: Ferris is fought multiple times: first in a melee-only duel (Chapter 5: Lost), again with a machine gun in Chapter 7 (Colony), and finally as a mutated boss in Chapter 8. His attacks are telegraphed; dodge and counter with heavy baton strikes. He uses a stun grenade that slows time—dodge immediately.
- Fight Tips:
- Unlock Conditions: First encountered in Chapter 2 (Outbreak) as a non-hostile. Becomes boss in Chapter 5.
- Role: Security system; not a physical enemy.
- Background: The prison’s AI that controls turrets, doors, and traps. It attempts to kill Jacob through defense systems.
- Gameplay Impact: Poses environmental hazards (flame traps, laser grids, turrets). No direct combat.
- Unlock Conditions: First activated in Chapter 3 (Below).
#### Dr. Caitlyn Mahler
#### Duncan (UJC Scientist)
Antagonists
#### Captain Leon Ferris
- First fight: purely melee; dodge his three-hit combo, then strike.
- Second fight: use GRP to throw explosive canisters at him; shoot his exposed chest after stun.
- Final fight (mutated): avoid his tentacle swipe; shoot the glowing weak points on his back.
#### The Warden (Automated AI)
#### The Biophage (Enemy Types)
The Biophage are the infected prisoners and creatures. They are not characters with names but are categorized by type. All are hostile; no friendly Biophage exist.
| Enemy Type | Description | Weaknesses | Recommended Strategy |
|---|---|---|---|
| Grunt (Infected Prisoner) | Standard humanoid enemy. Slow, weak. | Headshots, limb shots slow them. | Melee combo (3 hits) or one heavy batton swing + headshot. |
| Spitter | Grunt variant that projectile vomits. | Same as Grunt; interrupt vomit with melee. | Dodge projectile, then close distance. |
| Blind Infected | No eyes; relies on sound. | They are alerted by noise. | Walk slowly or use GRP to throw objects to distract. Can be backstabbed? No, but you can sneak past. |
| Swollen (Explosive) | Bloated corpse that detonates when struck or when near fire. | Shoot the legs to immobilize, then shoot the belly from far. | Do not melee; shoot at a distance. Use GRP to throw into a crowd. |
| Lurker (Wall-climber) | Fast, 4-legged creature that climbs walls and leaps. | Weak to shotgun at close range. | Wait until it lands, then dodge and blast. Can be stunned with GRP toss. |
| Two-Head (Boss) | Giant creature with two heads; weak spots on both heads. | Only headshots deal damage; body shots waste ammo. | Use assault rifle or revolver; keep moving; use GRP to create space. |
| Mutated Ferris (Final Boss) | Ferris fused with Biophage; has tentacles and glowing weak points. | Shoot the glowing nodes on his back; dodge tentacle slaps. | Keep distance; use revolver; when he charges, dodge sideways. |
Special Characters (DLC & Modes)
Final Transmission (DLC)
- Jacob Lee remains playable. No new playable character.
- New NPCs: None significant; story involves Mahler’s final message and a horde-mode sequence.
- No roles change.
- No new characters. Same Jacob with permadeath and limited saves. No role differences.
Contagion Mode (Separate Difficulty)
---
Summary
The Callisto Protocol offers a deep solo survival experience through the eyes of Jacob Lee. His role is that of a reactive survivor—no specializations, but versatile enough to handle any situation with the right upgrades. NPCs are purely story-driven; enemies are varied but respond to a single consistent strategy (GRP + melee + gun for emergencies). There are no team roles or synergies. Mastery comes from resource management, environmental awareness, and practiced melee combos.
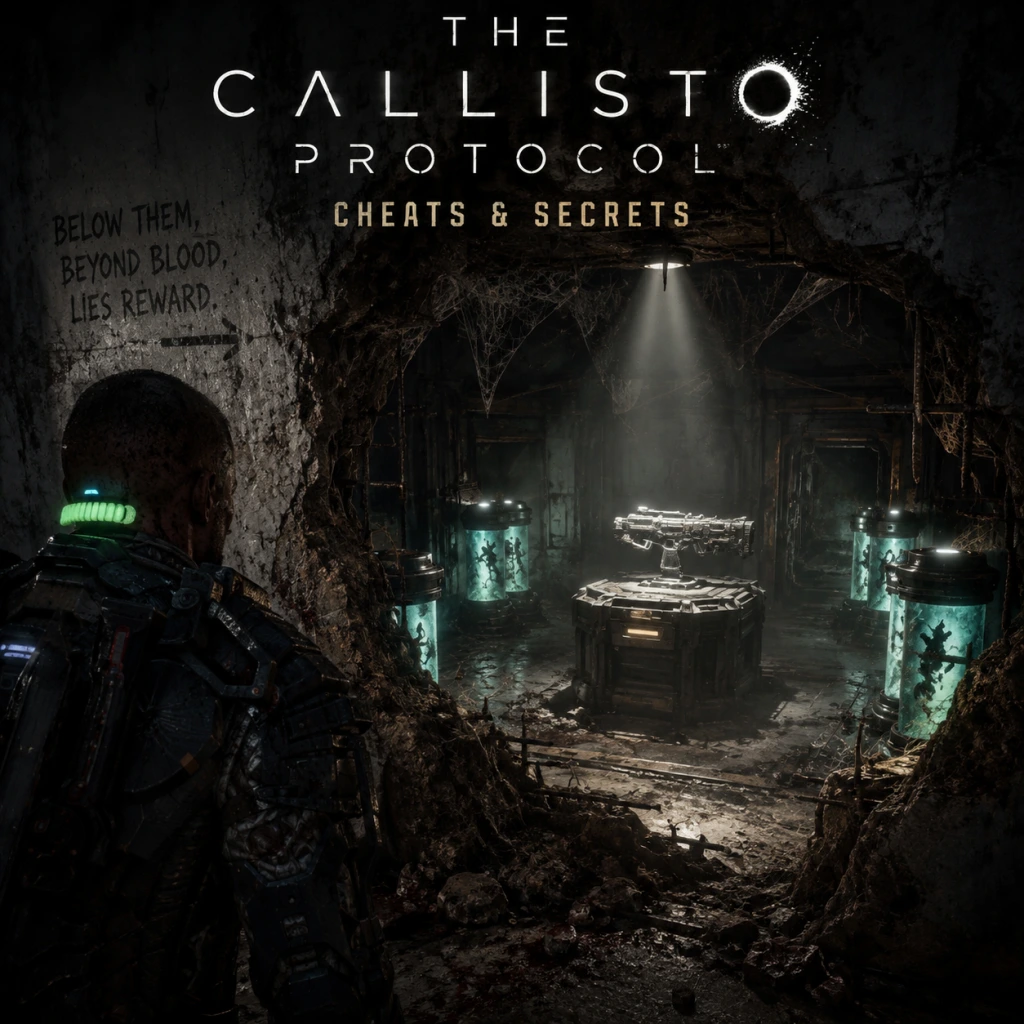
Cheats & Secrets
Cheats & Secrets for The Callisto Protocol
Overview
The Callisto Protocol does not include traditional cheat codes, developer console commands, or unlockable cheats (like invincibility or infinite ammo). The game is designed as a challenging survival horror experience with no official Cheat mode. However, there are several legitimate secrets, hidden content, Easter eggs, and unlockable features that a player can discover. This guide covers all known developer-intended hidden content, collectible rewards, and gameplay secrets.
> Note: Glitch exploits (e.g., infinite ammo duplication, skip mechanics) exist but are not covered here as they can cause save corruption or softlocks. Only safe, reproducible secrets are listed.
---
Unlockable Content & Rewards
#### New Game+
- How to Unlock: Complete the game on any difficulty. After the credits, you will be prompted to start a New Game+.
- What Carries Over: All weapons, weapon upgrades, GRP upgrades, health injectors, and currency (Callisto Credits).
- Exclusive Feature: New Game+ adds a Secret Ending achievement if you collect all 37 Audio Logs and all 39 Biophage Lore files across the playthrough. (See below.)
- How to Unlock: Beat the game on Maximum Security (the hardest default difficulty).
- Differences: Enemies deal more damage, Jacob takes more damage, resources are scarcer, and checkpoints are fewer. No other hidden difficulties are unlockable.
- Requirement: Collect all 37 Audio Logs and all 39 Biophage Lore files in a single New Game+ save file (or in the same playthrough if you 100% the base game and continue NG+).
- What It Is: A post-credits scene showing a mysterious figure (potentially setting up a sequel) that is not shown in a normal playthrough.
- Note: This is the only narrative secret in the game.
- Location: Chapter 8 – Below the habitat dome, you can look up at the shattered moon of Callisto. If you angle the camera just right, the moon resembles the Brethren Moons from the Dead Space series. This is a direct nod to the game's spiritual predecessor.
- How to See: During the outdoor section after the tram crash, stop and rotate the camera upward toward the moon. The silhouette is intentionally shaped.
- Location: Any death in the game after being killed by a Biophage's grab attack. Instead of the normal death animation, sometimes the screen flashes with the words "YOU ARE DEAD" in red, mimicking the death screen from Dead Space. This is not guaranteed—appears more frequently on Maximum Security difficulty.
- Location: Chapter 9 – After the autoclave sequence, in a side room that is easy to miss, you can find a unique Biophage variant with two heads. It has more health and deals more damage. It does not respawn.
- How to Access: Just before the final arena with the giant tentacle, look for a door labeled "Incinerator". Inside, the Two-Headed Monster spawns.
- How to Get: In Chapter 6, after unlocking the GRP (Gravity Restraint Projector), go back to the Med Bay area. In the room where you first fought the blind Biophage (the spitter), there is a broken vending machine. Interact with it repeatedly (3 times) to receive a GRP Capacitor Upgrade that increases the force and recharge rate.
- Note: This is not marked on the map and is easy to miss. It only works if you have the GRP already.
- Platform: PC version only.
- Method: At the main menu, press `~` to open the console (if supported—some updates removed it). Type `open devroom` to warp to an unfinished developer test room. This room contains various weapon models, unused enemy types, and a few collectibles. Use at your own risk—this can break your save file if you save inside.
- Tip: Do not save in the dev room; just explore and exit via the console command.
- Location: In the first chapter (Jacob's crash site), immediately after regaining control, look at the bottom of the tram terminal screen. A tiny text reads "HELLO WORLD" in retro font. This is a nod to the developer Striking Distance Studios' first game.
- How to Find: In the morgue at the very start (before you get the handcuffs), open the first drawer on the left three times. It will glitch open and reveal a hidden Audio Log titled "Prisoner 847's Last Words". This log is not counted in the collectible tracker because it is a bonus Easter egg.
- Ammo Conservation Trick: If you aim a weapon with a burst fire mode and quickly swap weapons before the burst ends, the remaining bullets are refunded. This works with the Skunk Gun (pistol) and Riot Gun. It is not a cheat but a design oversight that does not break progression.
- GRP Recharge Exploit: Hold the GRP on an enemy and release just as the charge depletes; the GRP recharges instantly. This is very useful for crowd control.
- Crate Duplication (Minor): In a few places, you can smash a crate, run away, come back, and the crate reappears, dropping resources again. This is inconsistent but known to happen in the Echo area (Chapter 4).
#### Hardcore Difficulty
#### Secret Ending (Collectible Reward)
---
Easter Eggs & Hidden References
#### "That's No Moon" - Dead Space Reference
#### "You Are Dead" Screen (Dead Space Callback)
#### Two-Headed Monster (Secret Enemy)
#### Hidden GRP Upgrade (Secret Weapon Enhancement)
#### Developer Room (PC Exclusive)
#### "Hello World" Hidden Message
#### Secret Audio Log in Chapter 1
---
Glitch-Free Exploits (Safe to Use)
> All above exploits are safe and will not corrupt your save or disable achievements.
---
Summary
The Callisto Protocol rewards exploration and completion with a secret ending and a few hidden upgrades. While there are no codes to type or buttons to press for invincibility, the game's world is filled with small secrets that enrich the lore and gameplay. Always check corners, interact with things twice, and listen for audio cues—there is usually more than meets the eye.