The Elder Scrolls V: Skyrim
## Game Introduction **The Elder Scrolls V: Skyrim** is a landmark open-world action role-playing game (RPG) developed by **Bethesda Game Studios** and published by **Bethesda Softworks**. Originally released on **November 11, 2011** (11/11/11), it quickly became one of the most celebrated and infl...

Download & Installation
Introduction
This guide covers the legal download and installation of The Elder Scrolls V: Skyrim across all major platforms. The most common modern release is Skyrim Special Edition (also known as Skyrim SE or Skyrim: Anniversary Edition after the free upgrade). The original 2011 release (Oldrim) is no longer sold new on most stores, but some keys may still exist. This guide focuses on the Special/Anniversary Edition.
Official Sources
- PC: Steam, Epic Games Store, Microsoft Store (Xbox app on PC).
- PlayStation: PlayStation Store for PS4/PS5 (backward compatible on PS5).
- Xbox: Microsoft Store for Xbox One, Xbox Series X|S (via backward compatibility or native install).
- Nintendo Switch: Nintendo eShop.
> Warning: Avoid unauthorised key resellers or pirate sites. Only purchase from official stores to ensure updates, mod support, and account safety.
System Requirements (PC)
All values assume the Skyrim Special Edition baseline; the Anniversary Edition has identical requirements.
| Component | Minimum | Recommended |
|---|---|---|
| OS | Windows 7/8.1/10 (64-bit) | Windows 10 (64-bit) |
| Processor | Intel i5-750 / AMD Phenom II X4-945 | Intel i5-2400 / AMD FX-8320 |
| Memory | 8 GB RAM | 8 GB RAM |
| Graphics | NVIDIA GTX 470 1GB / AMD HD 7870 2GB | NVIDIA GTX 780 3GB / AMD R9 290 4GB |
| DirectX | Version 11 | Version 11 |
| Storage | 12 GB available space | 12 GB available space (15 GB with Anniversary content) |
| Sound | DirectX compatible | DirectX compatible |
Storage Space
| Platform | Estimated Size |
|---|---|
| PC (Special Edition) | 12–15 GB |
| PC (Anniversary Edition) | ~15 GB |
| PlayStation 4/5 | ~20 GB (with updates) |
| Xbox One/Series | ~20 GB |
| Nintendo Switch | ~13.5 GB (cartridge + download for updates) |
Account Requirements
- PC (Steam): Steam account
- PC (Epic): Epic Games account
- PC (Microsoft Store): Microsoft account
- PlayStation: PlayStation Network (PSN) account
- Xbox: Xbox Live / Microsoft account (free for online features, Gold/Game Pass not required for single-player)
- Nintendo Switch: Nintendo Account (can purchase without, but cloud saves require Nintendo Switch Online)
- Graphics Settings (PC): The launcher will detect your hardware. You can set resolution, quality (Low/Medium/High/Ultra), anti-aliasing, and screen mode. For modding, consider turning off VSync in the launcher and enabling it via the mod manager.
- Bethesda Account (Optional): Skyrim does not require a Bethesda.net account to play, but it is needed to access Creation Club content and mods hosted on Bethesda.net. You can create one for free or skip.
- Mods: After first launch, you may want to start modding using tools like Vortex or Mod Organizer 2. For console, mods are accessed in-game via the Mods menu (requires Bethesda.net account).
- Anniversary Edition Upgrade: If you purchased the Anniversary Edition, you will receive all Creation Club items automatically. On PC, verify they are installed via the Creations menu in-game.
- Controller Support: The game supports Xbox, PlayStation, and Switch Pro controllers natively on PC. Use Steam Input if needed.
Installation Steps
PC – Steam
1. Install and launch the Steam client from [store.steampowered.com](https://store.steampowered.com).
2. Log into your Steam account.
3. Click Store and search for The Elder Scrolls V: Skyrim Special Edition (or Anniversary Edition bundle).
4. Click Add to Cart and complete purchase (or redeem a Steam key via Games > Activate a Product on Steam).
5. Once owned, the game appears in your Library. Click Install.
6. In the pop-up, choose the installation directory (default is `C:\\Program Files (x86)\\Steam\\steamapps\\common`).
7. Click Next and wait for download and installation. The progress bar appears in the Library.
8. After completion, click Play in the Library or Launch from the Steam window.
PC – Epic Games Store
1. Install and launch the Epic Games Launcher from [epicgames.com](https://www.epicgames.com).
2. Log into your Epic Games account.
3. Go to Store and search for The Elder Scrolls V: Skyrim Special Edition.
4. Purchase the game or redeem a code via Settings > Redeem Code.
5. The game appears in your Library. Click the tile, then Install.
6. Select installation path and optional component (language).
7. Click Install and wait. After finish, click Launch.
PC – Microsoft Store / Xbox App
1. Open the Xbox app (pre-installed on Windows 10/11) or Microsoft Store.
2. Sign in with your Microsoft account.
3. Search for The Elder Scrolls V: Skyrim Special Edition.
4. Click Get or Buy (or install if already owned via Game Pass).
5. Confirm installation location (default is under `WindowsApps`).
6. Download and install automatically. Launch from the Xbox app or Start menu.
PlayStation 4 & PlayStation 5
1. From the PS4/PS5 home screen, go to PlayStation Store.
2. Search Skyrim Special Edition or Skyrim Anniversary Edition.
3. Select the edition and choose Buy (or Add to Cart). Complete purchase.
4. After purchase, the game is added to your library. Click Download.
5. The download and installation run in the background. You can monitor progress from Notifications > Downloads.
6. Once installed, the game appears on the home screen. Launch to start.
> PS5 Note: PS4 version of Skyrim runs via backward compatibility. No native PS5 version exists, but performance is improved via boost mode.
Xbox One & Xbox Series X|S
1. Press the Xbox button on controller to open guide, then go to Microsoft Store.
2. Search The Elder Scrolls V: Skyrim Special Edition (or Anniversary).
3. Select the game, choose Buy or Install with Game Pass if eligible.
4. Confirm purchase or installation. The download begins automatically.
5. Track progress from My Games & Apps > Queue.
6. Once ready, launch from My Games & Apps or pin to Home.
> Xbox Series X|S: The game runs via backward compatibility. No dedicated Series version, but FPS Boost may be available (check in game settings).
Nintendo Switch
1. From the Switch Home Menu, select Nintendo eShop.
2. Sign in with your Nintendo Account.
3. Search The Elder Scrolls V: Skyrim. The edition available is the Skyrim Anniversary Edition (includes all Creation Club content).
4. Select Proceed to Purchase > Buy (or enter a download code).
5. After purchase, the download starts automatically. You can see progress on the Home screen (the game icon with a progress bar).
6. Once fully downloaded, the icon becomes playable. Launch to start.
> Physical Cartridge: Insert the game cartridge and install any required updates (prompts automatically).
First Launch Setup
Common Installation Errors & Fixes
| Error | Cause | Solution |
|---|---|---|
| Missing DLLs (e.g., X3DAudio1\_7.dll) | Missing DirectX runtime | Install DirectX End-User Runtime from Microsoft (or run `DXSETUP.exe` from the game’s `_CommonRedist` folder). |
| Skyrim SE not launching after install | Antivirus blocking executable | Add `SkyrimSE.exe` and `SkyrimSELauncher.exe` to antivirus exclusions. Also run as Administrator. |
| Steam “Missing file privileges” | Permission issue | Right‑click Steam > Run as Administrator, or reinstall to a non‑Program Files folder. |
| Epic Games “Installation Failed” | Corrupted cache or insufficient disk space | Clear Epic launcher cache (in settings). Ensure at least 20 GB free. |
| Xbox app “0x80073D02” | Corrupted Windows Store components | Run `wsreset.exe` or repair the Xbox app via Settings > Apps. |
| PlayStation “Cannot install” | Corrupted download or insufficient space | Delete and re‑download. Free up space (at least 20 GB). Restart console. |
| Nintendo Switch download stuck | Slow internet or server issue | Cancel and redownload, ensure console is docked/charged, check internet connection. |
| Game crashes on splash screen (PC) | Old mod files from previous install | Delete `Documents/My Games/Skyrim Special Edition` folder (backup saves first). Verify game files (Steam: Properties > Local Files > Verify Integrity; Epic: Manage > Verify). |
| Unable to link Bethesda.net on console | Account region mismatch or server down | Create Bethesda.net account on PC first, then log in on console. Try again later. |
Post-Installation Verification
1. Check game version: On PC, open the game and in the main menu lower left corner you will see the version number (e.g., 1.6.1170.0 for Anniversary). On console, version is usually displayed in System > Data Management.
2. Verify file integrity (PC):
- Steam: Right‑click game in Library > Properties > Local Files > Verify Integrity of Game Files.
- Epic: Click the three dots on the game tile > Manage > Verify.
- Microsoft Store / Xbox app: Use the Settings app > Apps > Skyrim > Advanced Options > Repair / Reset.
3. Test basic functionality: Launch a new game, run around the starting area (Helgen), test controls, sound, and graphics. If no crashes occur, installation is successful.
4. Enable mods (optional): If you plan to mod, install a mod manager first and ensure the game launches vanilla without issues before adding mods.
5. Save a backup: After verifying, copy your save files (located in `Documents/My Games/Skyrim Special Edition/Saves` on PC) to an external drive or cloud.
---
Note: Skyrim is a single-player game; no online subscription is required to play the main campaign. Online features (mods, Creations) require internet access and an account.

Game Introduction
Game Introduction
The Elder Scrolls V: Skyrim is a landmark open-world action role-playing game (RPG) developed by Bethesda Game Studios and published by Bethesda Softworks. Originally released on November 11, 2011 (11/11/11), it quickly became one of the most celebrated and influential RPGs of all time. Over the years, Skyrim has received multiple re-releases, most notably the Skyrim Special Edition (2016) and the Skyrim Anniversary Edition (2021), which bundle the base game along with all official DLC and dozens of Creation Club mods.
Platforms
Skyrim has been released on virtually every major platform:
- Original Release: PC (Windows), PlayStation 3, Xbox 360.
- Special Edition: PC, PlayStation 4, Xbox One, Nintendo Switch.
- Anniversary Edition: PC, PlayStation 4, PlayStation 5 (via backwards compatibility), Xbox One, Xbox Series X|S (via Smart Delivery).
- The Dragonborn (player character): Customizable hero whose destiny is to defeat Alduin.
- Alduin: The World-Eater, a massive dragon and primary antagonist.
- Delphine: A member of the Blades who helps the Dragonborn.
- Esbern: A wise, reclusive Blade scholar.
- Paarthurnax: An ancient dragon who mentors the Dragonborn in using the Thu’um.
- Ulfric Stormcloak: Leader of the Stormcloak rebellion, vying for Skyrim’s independence.
- General Tullius: Imperial commander who seeks to crush the rebellion.
- Arngeir: Greybeard leader who teaches the Dragonborn Shouts.
- Dragon Shouts (Thu’um): Unlockable powerful abilities learned from word walls.
- Endless Exploration: Over 300 hand-crafted dungeons, cities, and landmarks.
- Radiant Quest System: Procedurally generated quests that ensure near-infinite replayability.
- Mod Support: On PC and later console versions (Special Edition/Anniversary), a massive modding community adds new quests, items, graphics, and gameplay overhauls. This is a hallmark of the series.
- Strong Sense of Adventure: The world feels alive with ambient events, wildlife, and NPC schedules.
- Dawnguard: Introduces a faction war between vampire hunters and a clan of powerful vampires. Adds new locations, crossbows, and the ability to become a Vampire Lord or a Werewolf.
- Hearthfire: Focuses on homebuilding: allows players to purchase land, construct custom houses, adopt children, and hire stewards.
- Dragonborn: Takes the player to the island of Solstheim, where a new Dragon Priest threatens the world. Adds new Shouts, enemies, and an expansive new region to explore.
Story Overview
Set in the province of Skyrim on the continent of Tamriel, the game begins with the player character—an unnamed prisoner—being led to execution. The execution is interrupted by the return of Alduin, a giant black dragon prophesied to end the world. The player soon discovers they are Dragonborn, a mortal with the soul of a dragon, capable of absorbing dragon souls and using their powerful Shouts (Thu’um). The main quest involves confronting Alduin and stopping the Dragons’ return, while also navigating a brutal civil war between the Imperial Legion and the Stormcloak rebels.
Setting
Skyrim is a northern, mountainous province known for its harsh climate, ancient Nordic ruins, towering peaks, and breathtaking landscapes. Its nine holds (e.g., Whiterun, Solitude, Riften) each have distinct cultures and conflicts. The world is filled with dungeons, caves, forts, and mysterious Daedric shrines. The game’s dynamic weather system and day/night cycle add to the immersive fantasy atmosphere.
Main Characters
Core Appeal & What Makes It Unique
Skyrim’s core appeal lies in its unparalleled freedom and immersive world. Players can explore anywhere, complete quests in any order, and develop their character in virtually unlimited ways through a flexible skill-based leveling system. Key unique features include:
Target Audience
Skyrim appeals to a broad audience: RPG veterans, casual gamers, fantasy enthusiasts, and players who enjoy open-world exploration. Its accessible mechanics make it welcoming to newcomers, while its depth satisfies hardcore role-players. The game is rated M (Mature) due to violence, blood, and suggestive themes, but remains popular with older teens and adults.
Game Modes & Online/Offline Support
Skyrim is exclusively a single-player offline game. There is no online multiplayer or co-op mode. The entire experience is designed for solo play, allowing players to pause, save anytime, and fully control their adventure. The only “online” feature is creation club content downloading (in Special/Anniversary Editions) which is optional and doesn’t necessitate a persistent connection.
DLC & Expansions Overview
Skyrim has three major official DLCs, all included in the Special and Anniversary Editions:
Anniversary Edition additionally includes over 70 pieces of Creation Club content, such as new quests, weapons, armor, spells, and more.
Conclusion
Skyrim remains a towering achievement in game design, offering a vast, reactive fantasy world that encourages endless experimentation and replay. Whether you are a first-time player or returning for the umpteenth playthrough, the province of Skyrim awaits with its secrets, dangers, and stories. This guide provides everything needed to download, install, and begin your journey as the Dragonborn.
Getting Started
Getting Started: The First Hour & Beyond
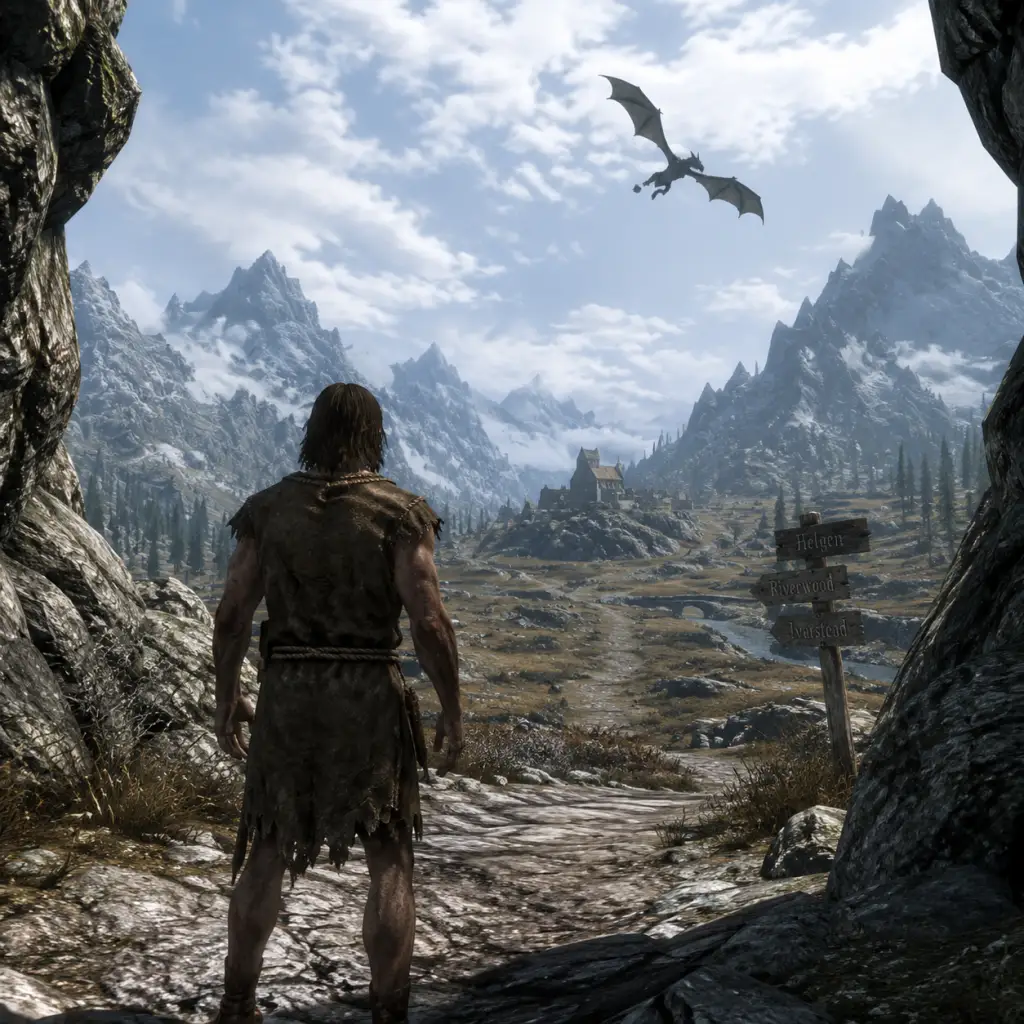
Welcome to Skyrim! This section will guide you through your first hour in the game, from character creation to your first major quests. By the end, you'll understand the core systems and have a clear path forward.
Character Creation (The Prisoner's Start)
When you begin a new game, you start as a prisoner on a cart heading to Helgen. After the opening cinematic, you'll enter character creation. This is your only chance to fully customize your character before entering the world.
Key choices:
Race: There are 10 races, each with unique starting stats, abilities, and powers. For a beginner, Nord (native to Skyrim, good for warriors) or Imperial (bonus to speech and gold) are easy picks. If you want magic, choose Breton (magic resistance) or High Elf (extra magicka). Racial bonuses matter early but become less significant later.
Gender: No gameplay impact beyond appearance and some NPC dialogue.
Appearance: You can adjust face, hair, scars, etc. Clicking "Random" is fine. You can change appearance later with the Face Sculptor in Riften (costs gold).
Name: Choose anything. It appears in menus and dialogue.
Once done, you'll experience the game's intro cutscene. After the dragon attack, you'll escape through Helgen Keep.
Controls Overview (All Platforms)
#### PC (Keyboard + Mouse)
| Action | Default Key |
|---|---|
| Move | W/A/S/D |
| Look | Mouse |
| Interact / Talk | E |
| Attack (Right Hand) | Left Click |
| Attack (Left Hand) / Block | Right Click |
| Shout / Power | Z |
| Jump | Space |
| Run | Left Shift (hold) |
| Sneak | Ctrl (toggle) |
| Draw/Sheathe Weapon | R |
| Open Inventory | Tab |
| Favorites Menu | Q |
| Quick Save | F5 |
| Quick Load | F9 |
| Map | M |
| Journal (Quests) | J |
| Wait | T |
#### Xbox (One/Series X|S)
| Action | Xbox Controller |
|---|---|
| Move | Left Stick |
| Look | Right Stick |
| Interact / Talk | A |
| Attack (Right Hand) | RB |
| Attack (Left Hand) / Block | LB |
| Shout / Power | Y |
| Jump | X |
| Run | Left Stick Click (hold) |
| Sneak | Right Stick Click (toggle) |
| Draw/Sheathe Weapon | B |
| Open Inventory | Menu (three lines) button |
| Favorites Menu | D-pad Up |
| Quick Save | Start (hold) + Select (hold) |
| Map | View button (window icon) |
| Journal | Back button (two squares) |
| Wait | N/A (use Wait option in pause menu) |
#### PlayStation (PS4/PS5)
| Action | PlayStation Controller |
|---|---|
| Move | Left Stick |
| Look | Right Stick |
| Interact / Talk | X |
| Attack (Right Hand) | R1 |
| Attack (Left Hand) / Block | L1 |
| Shout / Power | Triangle |
| Jump | Square |
| Run | Left Stick Click (hold) |
| Sneak | Right Stick Click (toggle) |
| Draw/Sheathe Weapon | Circle |
| Open Inventory | Options button |
| Favorites Menu | D-pad Up |
| Quick Save | N/A (use pause menu) |
| Map | Touchpad (left swipe) |
| Journal | Touchpad (right swipe) |
| Wait | N/A (use Wait option in pause menu) |
#### Nintendo Switch
| Action | Joy-Con Pro Controller |
|---|---|
| Move | Left Stick |
| Look | Right Stick |
| Interact / Talk | A |
| Attack (Right Hand) | R |
| Attack (Left Hand) / Block | L |
| Shout / Power | X |
| Jump | B |
| Run | Left Stick Click (hold) |
| Sneak | Right Stick Click (toggle) |
| Draw/Sheathe Weapon | Y |
| Open Inventory | + (plus) |
| Favorites Menu | D-pad Up |
| Map | D-pad Down (or - button) |
| Journal | - (minus) |
| Wait | N/A (use pause menu) |
UI Overview
Health, Magicka, Stamina bars: Bottom-left of screen. Health is red; when it reaches 0 you die (unless you have a special ability). Magicka is blue; needed for spells. Stamina is green; used for power attacks, sprinting, and blocking.
Compass: Top center. Shows cardinal directions, quest markers (diamond icons), and discovered locations. White markers = discovered, black = undiscovered but known from map.
Quest Marker: A directional arrow on the compass points toward your active quest objective. You can change active quest in the Journal (J on PC, Journal from pause menu on console).
Crosshair: Center of screen, changes based on available actions (talk, activate, pick up, etc.).
Enemy Health Bar: When you target an enemy, a red bar appears at the top-center of the screen.
Active Effects: Bottom-right shows current buffs/debuffs (e.g., Fortify, Poison).
Pause Menu: Shows inventory (Items), magic (Spells, Shouts, Powers), map, journal, stats, and system options.
Map: Large world map with discovered locations, roads, and terrain. You can fast travel from the map to any discovered location (not all, must be outside and not in combat).
Essential UI tips:
Always check your Journal (J on PC) to see current quests and switch active quest.
Use Favorites (Q on PC, D-pad Up on console) to equip weapons, spells, and shouts quickly. You can assign up to 8 favorites to quick slots.
Save often! Press F5 on PC for quick save. On consoles, open pause menu and select Save.
Essential Early Objectives (First Hour Walkthrough)
1. Escape Helgen Keep: Follow Hadvar (if you chose to go with the Imperial soldier) or Ralof (Stormcloak rebel). Both paths lead to the same main quest eventually. Loot everything you find. At the exit, choose your race and name (you already did), then grab the armor and weapons from the dead bodies or chests. Follow your chosen NPC until you exit into a forest. They will split ways; you can follow either to Riverwood.
2. Reach Riverwood: Follow the road downhill. You'll see a river and a small town. If you went with Hadvar, talk to his uncle Alvor the blacksmith. With Ralof, talk to his sister Gerdur. Both will offer you supplies and a place to rest. Sleep in the bed to save (and get a well-rested XP bonus).
3. Visit Whiterun: From Riverwood, go north along the road. You'll see the massive city of Whiterun on a hill. Enter through the main gate (follow the path). Talk to the guards; they'll direct you to Dragonsreach to see the Jarl.
4. Meet the Jarl: Go up to Dragonsreach (the large palace). Speak to Jarl Balgruuf. He'll ask you to retrieve the Dragonstone from Bleak Falls Barrow (a dungeon near Riverwood). Accept the quest.
5. Clear Bleak Falls Barrow: Return to Riverwood, then head east to the barrow. It's a linear dungeon with draugr (undead enemies). At the end, you'll find the Dragonstone and a Word Wall for the shout "Unrelenting Force" (Fus Ro Dah). Learn the word.
6. Return to Whiterun: Give the Dragonstone to the Jarl. You'll be made Thane of Whiterun (a title). Soon after, a dragon attacks Whiterun's watchtower (Western Watchtower). Go there, help the guards fight the dragon. When it dies, you absorb its soul and unlock your first full shout. The Jarl will name you Dragonborn (the legendary dragon-slayer). This completes the first chapter of the main quest.
By this point (about 1–2 hours), you have your first shout, the ability to absorb dragon souls, and a housecarl (Lydia) assigned to you as a follower.
What to Do First (After the Main Quest Start)
Follow the main quest until you unlock the full Fus Ro Dah shout (3 words). The quest will lead you to the Greybeards at High Hrothgar. This teaches you more shouts and gives you access to fast travel to High Hrothgar (useful later).
Visit the Standing Stone near Riverwood. You'll pass it on the road. Choose a stone: Warrior (combat bonus), Mage (spell bonus), or Thief (stealth bonus). You can change later at the Guardian Stones, but only one active at a time.
Join a faction (optional): Companions in Whiterun (warriors), College of Winterhold (mages), Thieves Guild in Riften, Dark Brotherhood via a quest chain starting in Windhelm. Factions provide gear, quests, and safehouses.
Clear nearby dungeons for loot and XP. Early-game good choices: Embershard Mine (south of Riverwood), Halted Stream Camp (northwest of Whiterun) – has the Transmute spell book (turns iron ore to silver and silver to gold, great for making money).
Collect alchemy ingredients (flowers, mushrooms, etc.). Berries (blue mountain flower, wheat) and mushrooms (blisterwort, glowing mushroom) can be combined for healing potions.
Spend gold wisely – save for a house (first one is in Whiterun for 5,000 gold after becoming Thane). Don't buy expensive weapons – you'll find better as loot.
What to Avoid (Beginner Pitfalls)
Don't kill chickens. Seriously. In towns like Riverwood, killing a chicken makes everyone hostile and you'll get killed or fined heavily.
Don't fight giants at low level (below level 15). They can one-hit kill you with their club. Stay away from giant camps.
Don't attack shopkeepers or guards unless you want a bounty. Bounties can be paid (expensive) or you can go to jail (lose stolen items).
Don't sell unique quest items (e.g., Dragonstone, special weapons). They may be needed later or cannot be gotten back.
Don't over-encumber yourself. Your carry weight limit is based on Stamina. When overencumbered, you can't run, sprint, or fast travel. Drop items (preferably stackable ones like common weapons) or invest in Stamina perks.
Don't ignore your health potions – they are life-savers. Buy them from alchemists or make them.
Don't shoot arrows into NPCs by accident (especially followers). It may ruin your relationship or cause hostility.
Early Resource Priorities
Gold: Loot everything sellable (especially enchanted gear, jewelry, potions). Sell to merchants. Invest in the Speech skill tree later for better prices.
Lockpicks: Always buy or loot them. Carry at least 20. They break, so save before picking hard locks.
Ore: Iron ore is common. Use Transmute spell (from Halted Stream Camp) to turn iron ore into silver then gold. Smith gold ingots into jewelry for high profit.
Ingredient: Grab every alchemy ingredient you see. Combine at alchemy tables to make potions. Health and stamina potions are most useful early.
Skill books: They give +1 to a skill. Read every book you find unless you've already maxed that skill.
Training: Pay gold to skill trainers in cities to level up faster. Each skill can be trained 5 times per character level. It's expensive but efficient.
Common Beginner Mistakes
1. Sleeping without saving – always save before entering a dangerous area or before sleeping (vampire attacks can occur while sleeping if you have Dawnguard DLC).
2. Using too many mods (especially on PC) before understanding the base game. Mods can break the game or make it unstable. Play vanilla for your first playthrough.
3. Ignoring the main quest – the main quest unlocks shouts and abilities. You can pause it later, but do at least the first few steps.
4. Selling or disenchanting unique gear without checking its value (some unique items are one-of-a-kind and can't be duplicated).
5. Trying to fight high-level enemies (like vampires, dragons, or Dwemer constructs) too early. Check enemy levels – they scale with you but not infinitely. Early game, stick to bandits and wildlife.
6. Not using followers – you can have a follower (like Lydia) who carries extra items and fights with you. Recruit one early.
7. Sticking to one weapon type – try different weapons and spells. You can always respec perks later (only with Dragonborn DLC). For best first-time experience, pick one combat style (one-handed, two-handed, archery, magic) and focus there.
Day-One Checklist (First Real Session)
- [ ] Complete character creation.
- [ ] Escape Helgen Keep.
- [ ] Visit Riverwood, talk to Alvor or Gerdur, loot the blacksmith shop (don't steal – buy or take free items).
- [ ] Activate the Standing Stone (Guardian Stones near Riverwood). Choose Warrior, Mage, or Thief.
- [ ] Clear Bleak Falls Barrow (get Dragonstone + first word of Unrelenting Force).
- [ ] Deliver Dragonstone to Jarl Balgruuf in Whiterun.
- [ ] Defeat the dragon at Western Watchtower.
- [ ] Return to Jarl – become Thane of Whiterun, get housecarl Lydia.
- [ ] Buy a house in Whiterun (optional, saves gold for later).
- [ ] Save game (manual save, not just quick save) after major events.
- [ ] Practice combat on easy enemies (mudcrabs, wolves, bandits).
- [ ] Read the skill books you find.
- [ ] Collect a few alchemy ingredients and make a health potion.
- [ ] Set your active quest to "The Way of the Voice" (continue main quest).
Now you're ready to explore Skyrim! Remember: the world is huge – don't rush. Save often, talk to everyone, and experiment with different playstyles. Enjoy your adventure, Dragonborn!
Core Gameplay
Core Gameplay
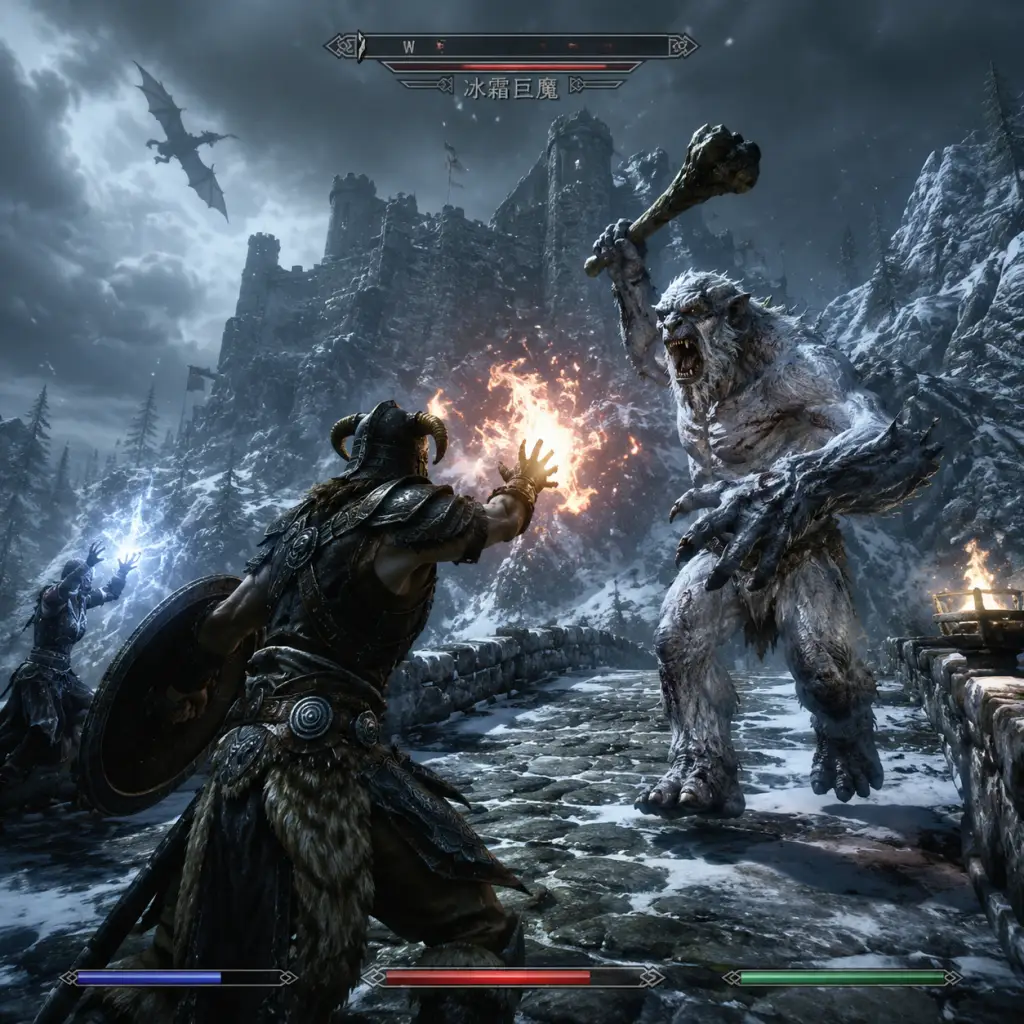
Overview of the Core Gameplay Loop
The heart of Skyrim lies in its open-world sandbox where you, the Dragonborn, explore the province of Skyrim, complete quests, fight enemies, and develop your character. The basic loop: Explore → Discover → Engage (Combat/Stealth/Speech) → Loot → Level Up → Repeat. The world responds to your actions through factions, random encounters, and a dynamic quest system.
Progression Tiers
Below, the game is broken into four progression phases, each with distinct activities, challenges, and character milestones.
---
#### Early Game (Levels 1–15)
What You’re Doing:
You escape Helgen, travel to Riverwood, start the main quest (e.g., talk to Jarl Balgruuf), and begin exploring the immediate holds. Your character is weak, low on gold, and learning mechanics.
Gameplay Loop:
- Quests: Main quest “Before the Storm” to “Dragon Rising” (your first dragon kill at the Western Watchtower). Also join a faction like the Companions in Whiterun.
- Combat: Basic weapons (iron, steel), minimal perks. You rely on health potions and cautious tactics. A single troll can be lethal.
- Exploration: Stick to roads, clear low-level dungeons like Bleak Falls Barrow (gold, shouts, Word Wall for Unrelenting Force).
- Economy: Loot everything, sell to merchants (e.g., Lucan in Riverwood). Focus on buying a house in Whiterun for storage.
- Character Build: Begin investing in one combat skill (One-Handed, Destruction, Archery) and one support (Smithing, Enchanting, Speech). Get the first few useful perks.
- Acquire the first Shout (Unrelenting Force).
- Kill your first dragon.
- Join at least one guild.
- Obtain a follower (e.g., Faendal or Sven in Riverwood, or Lydia as Housecarl).
- Quests: Main quest continues to “The Throat of the World” and “Elder Knowledge”. Faction quests reach mid-points (e.g., the Guild’s Nightingale Trilogy).
- Combat: You have better gear (dwarven, orcish, elven), more perks, and can use special abilities (shouts, spells). Combat is faster but still requires planning against magic users or multiple enemies.
- Exploration: Venture into holds like Markarth, Solitude, Windhelm, and their surrounding dangerous areas. Discover Word Walls for new shouts.
- Economy: Smithing and Enchanting become profitable. You can craft and improve gear, sell enchanted items. Buy upgrades for homes.
- Character Build: Specialize further. For example, a warrior focuses on Heavy Armor, Block, One-Handed/Two-Handed; a mage on Destruction, Restoration, Alteration; a thief on Sneak, Pickpocket, Lockpick, Illusion.
- Complete at least one faction questline fully.
- Learn multiple shouts and unlock their Words.
- Build a house (e.g., Lakeview Manor from Hearthfire).
- Acquire a Daedric artifact (e.g., Mehrunes’ Razor, Dawnbreaker).
- Quests: Main quest climax, Civil War final battles, Daedric quests for powerful artifacts. Many radiant quests become available.
- Combat: You use high-tier gear (Ebony, Daedric, Dragonbone) and have nearly maxed skills. Combat is about optimizing damage, resistances, and using shouts tactically (e.g., Slow Time, Fire Breath).
- Exploration: Legendary dungeons like Labyrinthian, Blackreach, Apocrypha (Dragonborn DLC). Solstheim (if DLC) opens.
- Economy: You have tens of thousands of gold. Crafting can produce legendary items. You no longer need to loot every coin; focus on unique items.
- Character Build: Max out primary skills and start investing in secondary ones. Enchant gear with fortify skills to break the game (e.g., Fortify Archery, Fortify Smithing loop).
- Defeat Alduin.
- Complete the Civil War questline.
- Collect multiple Daedric artifacts.
- Become thane in all holds.
- Max out several skill trees.
- Quests: Radiant quests from the Companions, College, Dark Brotherhood, and Thieves Guild. There are no new unique questlines.
- Combat: You are overpowered. Difficulty can be increased (Master or Legendary), and you can create new combat challenges using low-level gear or no enchants.
- Exploration: Revisit areas for missed items, collect all shouts, complete the Dragonborn DLC (Miraak), and find all Daedric artifacts.
- Economy: Gold is meaningless. You can craft and enchant god-tier items.
- Character Build: You can respec skills if using the Dragonborn DLC (respec at Hermaeus Mora’s altar). Try new playstyles.
- Reach Level 100 in a skill (makes it Legendary to reset).
- Obtain all Steam achievements/trophies.
- Find and read all skill books.
- Build multiple homes.
- Install mods to extend gameplay.
Key Milestones:
---
#### Mid Game (Levels 16–35)
What You’re Doing:
You have a solid build direction, a house or two, and are tackling main quest arcs (Diplomatic Immunity onward), major faction questlines (College of Winterhold, Thieves Guild, Dark Brotherhood), and exploring larger dungeons. Dragons appear more frequently.
Gameplay Loop:
Key Milestones:
---
#### Late Game (Levels 36–60)
What You’re Doing:
You’re a force to be reckoned with. Main quest is almost complete (including “Dragonslayer” and “Season Unending”). You tackle Civil War quests, Daedric quests, and legendary-tier locations. Enemies include high-level draugr, Forsworn Briarhearts, and dragons with named shouts.
Gameplay Loop:
Key Milestones:
---
#### Endgame (Levels 61+)
What You’re Doing:
You’ve essentially completed the main story and major questlines. The world remains open, but the challenge has plateaued. You pursue achievement hunting, roleplaying new builds, exploring every cave, or using mods for longevity.
Gameplay Loop:
Key Milestones:
---
#### End of Character Growth & Longevity
Skyrim’s endgame is more of a sandbox than a directed experience. Once you have maxed out skills and completed the main arcs, the game encourages roleplaying new characters or using the Legendary system to reset skills and continue gaining levels indefinitely. The world remains populated with respawning enemies and radiant quests, so there is always something to do, though the sense of progression eventually halts.
This guide covers the core progression arc of Skyrim. Use the tier outlines above to gauge where you are and what to aim for next.

Game Tips
Introduction
Welcome to the comprehensive Game Tips guide for The Elder Scrolls V: Skyrim. This section is packed with actionable advice for all playstyles and experience levels. Whether you're stepping off the cart for the first time or you're a veteran looking to optimize your Legendary Survival run, these tips will help you survive the cold, conquer dungeons, and thrive in Tamriel.
Tips are grouped by category: Combat, Exploration, Resources & Crafting, Character Builds, Economy, Quests & Factions, and Advanced Optimizations. Each major tip includes a clear explanation, deeper analysis of why it works, and when to use it.
---
Combat Tips
Master the Slow Time Shout
- Explanation: The Slow Time shout slows down everything except you for several seconds. This gives you a massive tactical advantage—you can line up perfect power attacks, dodge incoming arrows, or reposition before a giant smash.
- Why it works: Time manipulation is the most powerful crowd control in the game. It effectively doubles your damage output while negating enemy attacks.
- When to use: Against multiple powerful enemies (e.g., Draugr Deathlords, Falmer Warmongers) or during boss fights. Pair it with a two-handed weapon or dual-wield for devastating burst damage.
- Explanation: Creep into stealth, draw your bow, and aim for headshots (or center mass if you lack the perk). Stealth multiplies bow damage by 3x (with perk up to 6x).
- Why it works: Skyrim's stealth system is forgiving; enemies have poor detection in early game. Arrows are cheap and plentiful, and you can engage enemies from a distance without taking damage.
- When to use: From level 1 onward, especially in open areas and bandit camps. Switch to heavy armor later if you want to tank.
- Explanation: Hold the attack button for a power attack that does 2x damage (or more with perks) and can stagger enemies. Stamina regenerates slower, so don't deplete it entirely.
- Why it works: Staggering interrupts enemy attacks, giving you free hits. A staggered enemy is a dead enemy.
- When to use: Use power attacks after an enemy misses or when they are blocking (power attacks break blocks). Keep at least 25% stamina to dodge or sprint away.
- Explanation: Block Runner (in Block skill tree) allows you to move at full speed while blocking. If you invest in block and get this perk, you can strafe around enemies, avoiding damage while wearing heavy armor.
- Why it works: Most enemies telegraph their attacks; you can walk circles around them, then counterattack when they miss.
- When to use: Pairs well with a one-handed weapon and shield. Great for shield-based builds.
- Explanation: The Steed Stone (south of Solitude) grants +100 carry weight and removes the movement penalty from armor. Even heavy armor won't slow you down.
- Why it works: Carry weight is the biggest early game frustration. The Steed Stone also synergizes with combat mobility—you can wear heavy armor without being sluggish.
- When to use: Pick it early if you plan to wear heavy armor or need to loot everything. Swap to a different stone later when you have better weight management or want other bonuses.
- Explanation: Enchant a weapon with the Paralyze enchantment. On hit, it has a chance to freeze an enemy in place for a few seconds.
- Why it works: Paralyzed enemies are completely helpless; you can land guaranteed criticals (if you have them) or power attacks. Even high-level dragons can be paralyzed.
- When to use: Combined with a fast weapon like a dagger or sword. Great for one-on-one duels and dragon fights.
- Explanation: Recruit a follower (e.g., Lydia, J'zargo) and give them the heaviest armor and a two-handed weapon. They will draw aggro while you attack from range or sneak.
- Why it works: Ai followers are relentless; they block entrances and absorb damage. You can focus on dealing damage without risking death.
- When to use: Always have a follower when exploring dangerous areas. For stealth builds, give them a bow and keep them at a distance.
- Explanation: Discovered locations can be fast traveled to from anywhere (outside and not in combat). Exploit this to reduce travel time.
- Why it works: Skyrim's world is huge but fast travel makes it manageable. Always check your map for undiscovered markers nearby.
- When to use: After clearing a dungeon, fast travel back to a city to sell loot. Before setting out, check if a carriage outside cities can take you to major holds for a small fee.
- Explanation: Clear Skies removes any weather effects (fog, rain, snow) and reveals areas with better visibility. It also stops blizzards on mountain passes.
- Why it works: Fog and blizzards limit your view and can hide enemies or loot. Use Clear Skies to scout ahead or spot a distant cave.
- When to use: In mountain regions like the Throat of the World or during snowstorms. Great for finding unmarked locations.
- Explanation: Vampire Lord form, specific enchantments (Waterbreathing doesn't help), or the Vampire's Potion of Water Walking allow you to walk on water surfaces.
- Why it works: Many bodies of water have submerged chests or hidden passages. Water walking lets you reach islands and cross lakes without swimming (and the slowdown).
- When to use: Loot the lake near the Guardian Stones for a chest. Also useful for escaping enemies in water.
- Explanation: You can scale almost any mountain in Skyrim by jumping and walking sideways (diagonally) against the slope. Most mountains have hidden ledges.
- Why it works: The game's collision system allows you to climb steep slopes if you approach at an angle. You can bypass long roads and reach hard-to-get places.
- When to use: To reach High Hrothgar before level 10, or to get to word walls without the main quest path. Saves hours.
- Explanation: After retrieving the Dragonstone from Bleak Falls Barrow, a map appears on it showing all dragon burial mounds. Visit these to encounter dragons (both friendly and hostile).
- Why it works: Dragon souls are needed for shouts. Hunting dragons is the fastest way to get them. The map essentially provides a dragon hunt route.
- When to use: Once you have the Dragonstone (main quest), open it in your inventory to see the map. Fast travel to each burial mound to fight a dragon.
- Explanation: Reading certain skill books ("The Armorer's Challenge" for Smithing, "Song of the Alchemists" for Alchemy, etc.) permanently increases that skill by 1 level. There are 5 per skill.
- Why it works: Free skill leveling without training. Over 100 skill books exist, so you can boost all skills without effort.
- When to use: Read every unique book you find. Sell duplicates. Mark on your map which books you haven't found.
- Explanation: Buy or find the Transmute Mineral Ore spell book (often sold by court wizards). It changes iron ore to silver, then silver to gold.
- Why it works: Gold ore can be smelted into ingots and used to make gold rings, which sell for high value and level Smithing quickly.
- Where to get: Halted Stream Camp (near Whiterun) has a spell tome in the boss chest.
- Explanation: Collect ingredients like Giant's Toe, Wheat, Creep Cluster, or Blue Mountain Flower. Make expensive potions (e.g., Giant's Toe + Wheat gives a huge value potion).
- Why it works: Potion value determines Alchemy skill increase. A single expensive potion can jump you multiple levels. Sell them for massive gold.
- When to use: After clearing a cave with alchemy ingredients. This is a staple for leveling quickly and funding purchases.
- Explanation: This is an exploit. Equip gear with Fortify Alchemy, create a Fortify Restoration potion, drink it, unequip and re-equip your alchemy gear, then craft again. The effect stacks exponentially, producing absurdly overpowered items.
- Why it works: The game mistakenly applies the potion's effect to enchantments unequip/re-equip bug.
- When to use: Only if you want to break the game and create one-hit-kill gear. Not recommended for first playthrough.
- Explanation: Use a pickaxe to mine ore veins. You can also use the Elemental Fury shout (or a pickaxe with enchantments) to speed up mining.
- Why it works: Mining is slow. Elemental Fury increases attack speed, making each swing faster. Use it on a pickaxe for super-fast mining.
- When to use: When you need large amounts of ore for Smithing.
- Explanation: After killing a bandit archer, loot their arrow quiver. You can also retrieve arrows you fired (if they hit a wall or body).
- Why it works: Arrows are relatively expensive early game. Reusing arrows saves gold. Also, enemies drop higher-quality arrows as you level.
- When to use: Always loot arrows; they're weightless.
- Explanation: If you own Hearthfire (base game for SE), buy land and construct a house with a garden, apiary, and smelter. Gardens grow alchemy ingredients.
- Why it works: Unlimited supply of herbs for potions; smelter lets you turn ore into ingots without visiting a city.
- When to use: After you have 5000 gold to buy the plot. Build the smelter first for Smithing.
- Core Skills: Archery, Sneak, Light Armor, Alchemy (for poisons). Pick the Thief Stone.
- Why it works: Sneak multiplies bow damage; high Sneak lets you shoot without being detected. Requires little investment in health—just keep distance.
- Key Perks: Overdraw (bow damage), Stealth (sneak detection), Misdirection (pickpocket arrows).
- When to use: From start to endgame. Best for players who like to control engagements.
- Core Skills: One-Handed, Destruction (flame/frost), Restoration, Heavy or Light Armor. Use the Mage Stone early.
- Why it works: You deal damage in melee and at range. Restoration keeps you alive. Frost spells slow enemies.
- Key Perks: Augmented Flames (burn stacking), Impact (stagger with spells), Armsman (sword damage).
- When to use: Mid-game when you have Magicka to sustain both spells and sword. Great for versatility.
- Core Skills: Two-Handed, Heavy Armor, Block (optional), Smithing (for armor upgrades). Use the Warrior Stone.
- Why it works: High raw damage and survivability. Power attacks stagger and kill quickly. Heavy armor makes you a walking tank.
- Key Perks: Barbarian (two-handed), Juggernaut (heavy armor), Conditioning (no movement penalty from gear).
- When to use: Early game if you like charging into battle. Later, add Enchanting to fortify stats.
- Core Skills: Sneak, One-Handed (daggers), Illusion, Alchemy (invisibility potions).
- Why it works: Invisibility spells (Muffle) + Sneak + dagger backstab (15x damage with Dark Brotherhood gloves). You can one-shot most enemies.
- Key Perks: Assassin's Blade (dagger sneak attack), Quiet Casting (spells make no sound), Invisibility (expert Illusion).
- When to use: Late game after leveling Illusion. Extremely powerful but requires patience.
- Core Skills: Destruction, Restoration, Alteration, Enchanting.
- Why it works: Spells like Fireball and Incinerate deal massive area damage. Impact perk stunlocks enemies. With enchanted gear for -100% Destruction cost, you can cast infinitely.
- Key Perks: Augmented Flames/Shock/Frost, Impact, Fortify Destruction enchantments.
- When to use: After reaching level 50 in Destruction. Enchant four pieces of gear with Fortify Destruction to reach 100% cost reduction.
- Explanation: Fences (Thieves Guild members) have high gold and buy stolen goods. Save valuable items for them. Also, selling to a trainer you intend to use reduces their training fee.
- Why it works: Selling stolen items otherwise requires the speech perk Fence. Using trainers maximizes value from your stolen goods.
- When to use: Join the Thieves Guild early for fences. Train skills as you sell loot to the same merchant.
- Explanation: Investor allows you to invest 500 gold into a merchant, permanently increasing their gold. Master Trader lets you sell any item to any merchant.
- Why it works: Expert traders (like the Khajiit caravans) have ~900 gold base. Investing bumps it to 1400+, so you can sell high-value items without traveling.
- When to use: After level 50 Speech. Prioritize this if you rely on selling loot to fund houses and training.
- Explanation: Alchemy creates Fortify Barter potions (ingredients: Hagraven Claw + Salt + others). Enchanting can also add Fortify Barter to amulet/ring.
- Why it works: Better buy/sell prices mean more profit per transaction. A 20% discount on buying a house saves 1000+ gold.
- When to use: Before major purchases (houses, rare items). Stack with the speech perk Haggling.
- Explanation: Ebony ore veins are rare but valuable. Smelt into ingots, craft ebony weapons, and sell them or use them. Daedric requires Ebony + Daedra Heart.
- Why it works: Ebony weapons have high base value (~500-1000 gold each). Daedric weapons are even more expensive and powerful.
- When to use: After level 80 Smithing. Mine the Ebony vein near the Shrine of Azura. Craft bows for best profit (high value, cheap materials).
- Explanation: Train a skill (e.g., Five levels in One-Handed) then steal the gold back via Pickpocket. You buy skill levels for free.
- Why it works: Training costs gold but you can reclaim it if you have high Pickpocket and save scum. With level 100 Pickpocket and perks, it's near guaranteed.
- When to use: Once you have high Pickpocket skill and the Perfect Touch perk. Only grab training gold; leave other items to avoid detection.
- Explanation: Certain quests give large sums of gold: "The Break of Dawn" (Meridia's Beacon) rewards 2000 gold; "The Thieves Guild" final quest gives 3000. Some radiant quests give scaling rewards.
- Why it works: Gold rewards are often higher than the sell value of unique items. Prioritize these quests for quick cash.
- When to use: When you need to buy a house (5000 for Proudspire Manor) or training.
- Explanation: Complete the Thieves Guild questline (Riften) to gain fences, special armor, and the Nightingale Bow. Fences allow selling stolen goods anywhere.
- Why it works: The guild also provides a steady income via radiant quests and locations become crime capitals. The Nightingale set is excellent for stealth builds.
- When to use: Early game if you want to make money through theft. Steal everything from houses and sell to Delvin.
- Explanation: Complete the Dark Brotherhood questline for powerful armor that boosts sneak attack damage. The gloves (Ancient Shrouded Cowl missing?) give double backstab damage.
- Why it works: Combined with dagger perks, you can achieve 30x sneak damage multiplier (15x base + 2x from gloves). One-shot kill almost anything.
- When to use: Assassins and anyone wanting to eliminate high-level foes silently.
- Explanation: Complete the College questline to become Arch-Mage. You receive powerful robes that reduce all spell costs by 15% and boost Magicka regeneration by 100%.
- Why it works: This is the best mage robe in the base game. It frees up enchantment slots for other boosts.
- When to use: Pure mage builds after level 30.
- Explanation: Progress the main quest to learn "Unrelenting Force" (Fus Ro Dah) and other shouts. Killing dragons yields souls to unlock shouts.
- Why it works: Unrelenting Force is the most versatile shout—it staggers, pushes, and can even kill by knocking enemies off cliffs. Essential for combat control.
- When to use: Unlock it as soon as possible (join the Greybeards). It works on dragons and most mobs.
- Explanation: Complete the quest "A Night to Remember" (start by drinking with a stranger) to get Sanguine's Rose, a staff that summons a Dremora for 60 seconds.
- Why it works: The Dremora is a high-level tank that fights alongsSide. It's like having an extra follower without the risk.
- When to use: Any time you need a distraction. Pair with ranged builds.
- Explanation: When a skill reaches 100, you can make it Legendary. This resets it to 15, refunds all perks, and allows you to level that skill again for more XP.
- Why it works: Your character level keeps increasing (up to 81+ without mods). More levels = more perk points for other skills. You can max all skills by doing this repeatedly.
- When to use: Once you have a skill at 100 and have all the perks you need from it. Best to Legendary skills you can level easily (e.g., Alteration via Telekinesis fast travel exploit, Illusion via Muffle).
- Explanation: The Conditioning perk (Light Armor, 70) makes sprinting not consume stamina. The Steed Stone removes weight penalty. Combine with fast movement speed.
- Why it works: You can sprint across the entire map without stopping. This is a massive quality-of-life improvement for exploration.
- When to use: Once you can afford the perk and stone. Great for speedrunning or avoiding encounters.
- Explanation: Visit the Guardian Stones near Riverwood. You can only have one active at a time, but you can change them anytime. For example, use the Thief Stone to level Sneak, then switch to the Mage Stone to level Alchemy.
- Why it works: Each stone gives +20% skill gain to its category. Switching optimizes leveling for your current activity.
- When to use: Change stones before training or crafting. Sleep in a bed you own for an additional +5% (Lover's Comfort) or +10% (Marriage).
- Explanation: Enchant four pieces of gear with the same effect (e.g., Fortify Archery on head, chest, ring, necklace). The effects stack.
- Why it works: With 100% Fortify Destruction, spells cost zero Magicka. With Fortify One-Handed, you can one-shot most enemies. This is endgame power.
- When to use: After acquiring the Extra Effect perk (Enchanting 100). Craft gear with two effects each.
- Explanation: The Atronach Stone (near the College of Winterhold) gives 50% spell absorption and +50 Magicka but reduces Magicka regeneration by 50%.
- Why it works: Combined with the Breton's Dragonskin (50% absorb for 60 seconds), you can absorb nearly all incoming spells, nullifying enemy mages.
- When to use: In fights with multiple mages. The stone's negative regen is offset by high Magicka pool and potions.
- Explanation: This Daedric artifact provides a 20% better prices for barter. It's obtained from the quest "A Daedra's Best Friend".
- Why it works: It's the best single item for economy early mid-game. Switch to it before buying or selling.
- When to use: Before any major transaction. Combine with Fortify Barter potion for maximum discount.
- Explanation: Kill cams trigger when an enemy has low health and you have certain perks (e.g., Savage Strike). They deal extra damage and are cinematic.
- Why it works: They are guaranteed kills but you are briefly vulnerable. Use them to eliminate high priority targets quickly.
- When to use: When facing a single tough enemy. Beware of multiple enemies as you can't cancel the animation.
Use Stealth Archer (Early Game Dominance)
Power Attacks and Stamina Management
The Block Runner Perk
Use the Steed Stone
Enchant Weapons with Paralyze
Use Followers as Tanks
---
Exploration Tips
Use the Map Markers and Fast Travel
The Clear Skies Shout for Visibility
Water Walking Boots (Volkihar Vampire or Potions)
Climb Mountains by Walking Diagonally
Use the Dragonstone Map
Lore Books Give Skill XP
---
Resources & Crafting Tips
The Transmute Ore Spell
Alchemy Loop for Infinite Gold and Skills
The Fortify Restoration Potion Glitch (Advanced)
Mine Ore Efficiently
Salvage Arrows from Dead Bodies
Build a Hearthfire House for Garden and Smelter
---
Character Builds Tips
The Classic Stealth Archer
The Spellsword Hybrid
The Heavy Armor Two-Handed Warrior
The Nightblade (Stealth + Illusion)
The Pure Mage – Elemental Destruction
---
Economy Tips
Sell Loot to Fences and Trainers
Speech Perk Investor + Master Trader
The Barter Potion / Fortify Barter Enchantment
Mining Ebony and Daedric Smithing
The Merchant's Coin Purse and Training Loop
Quests with High Gold Rewards
---
Quests & Factions Tips
Join the Thieves Guild for Fences and Power
The Dark Brotherhood Bonus – Ancient Shrouded Armor
The College of Winterhold – Arch-Mage Robes
The Main Quest – Unrelenting Force and Dragon Souls
The Daedric Quest – Sanguine's Rose
---
Advanced Optimizations
Legendary Skills
Unlimited Sprint with the Steed Stone + Light Armor Perk
The Thief/Warrior Stone Switching
Stacking Fortify Enchantments for God-Like Gear
The Atronach Stone for Spell Absorption
Use the Mask of Clavicus Vile for Barter
Finishing Moves
---
Final Words
Skyrim rewards creativity and persistence. The tips above are proven strategies to help you master the game. Remember that the most important rule is to have fun—so if you prefer role-playing over optimization, ignore the min-maxing and enjoy the journey. That said, these tips will make even the hardest difficulties (Legendary, Survival Mode) manageable.
Good luck, Dragonborn. May your road lead you to warm sands.
Game Settings
Introduction
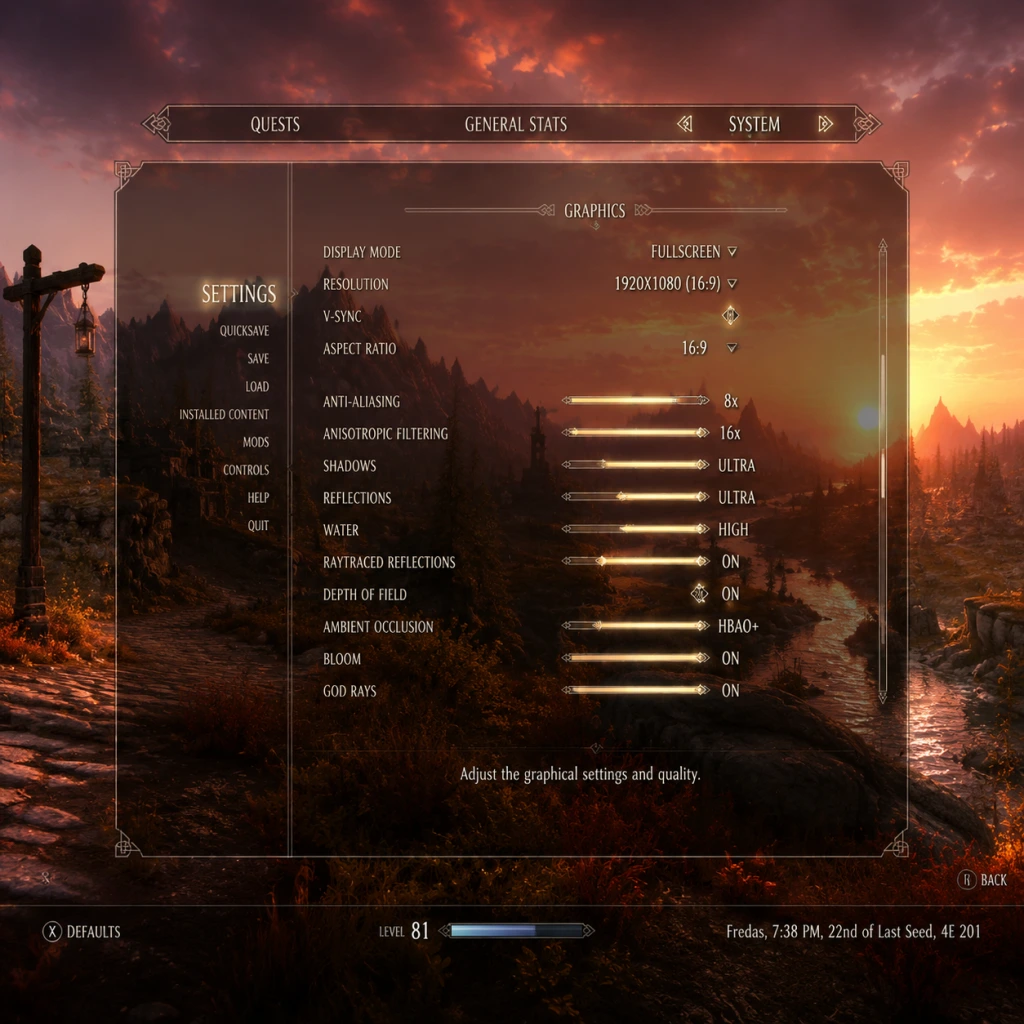
Configuring the settings in The Elder Scrolls V: Skyrim can drastically affect your performance, visual fidelity, and overall enjoyment. This guide covers all major settings categories: Graphics, Audio, Controls, Accessibility, Language, Network, and Gameplay. We'll recommend optimal settings for different hardware levels (low-end, mid-range, high-end) and highlight settings that are easy to misconfigure, such as field of view, vsync, and autosave intervals. The instructions apply primarily to the Skyrim Special Edition (and Anniversary Edition), with notes for the original 2011 release and console platforms where applicable.
Graphics Settings
PC Graphics Options (Launcher + In-Game)
The launcher provides a quick preset (Low, Medium, High, Ultra) and advanced options. For precise control, use the in-game menu (Skyrim SE and AE).
| Setting | Low-End Hardware | Mid-Range Hardware | High-End Hardware | Notes |
|---|---|---|---|---|
| Preset | Custom (Low) | Custom (Medium/High) | Custom (Ultra) | Start with a preset and adjust. |
| Resolution | 1280x720 or 1600x900 | 1920x1080 | 2560x1440 or 4K | Match native monitor resolution. |
| Aspect Ratio | Auto | Auto | Auto | Typically 16:9. |
| Anti-Aliasing | FXAA (or Off) | SMAA / TAA | TAA | FXAA blurs; TAA is sharper but costs performance. |
| Anisotropic Filtering | 4x | 8x | 16x | Improves texture sharpness at angles. |
| Texture Quality | Low | Medium | High / Ultra | VRAM dependent (2GB+ for Ultra). |
| Shadow Resolution | Low (512) | Medium (1024) | High (2048) / Ultra (4096) | High impact on performance. |
| Draw Distance | Low (~70%) | Medium (~85%) | High / Ultra (100%) | Controls object fade-in. |
| Decal Quantity | Low | Medium | High | Number of blood/burn decals. |
| Water Reflection | Low | Medium | High | Can be performance heavy. |
| God Rays | Off | On (low resolution) | On (high resolution) | Volumetric lighting; taxing. |
| Depth of Field | Off | Off | On | Blurs distant objects; personal preference. |
| Screen Space Reflections | Off | Off / On | On | Reflections on water and shiny surfaces. |
| Rain Occlusion | Off | On | On | Subtle effect. |
| Lens Flare | Off | On | On | Artistic effect. |
| VSync | Off (if no screen tearing) | Off or On | Off (use adaptive) | Common misconfiguration – VSync adds input lag. Use Fast Sync or VRR if available. Recommend turning off VSync and capping FPS to 60 via Skyrim.ini or driver. |
| Frame Rate Limit | 30 FPS (if struggling) | 60 FPS | 60+ FPS | Skyrim engine has physics issues above 60 FPS. Do not exceed 60 FPS without the SSE Display Tweaks mod. |
Important Tweaks for PC
- Field of View (FOV): Default is 65, which can cause motion sickness. To change: open `Documents/My Games/Skyrim Special Edition/Skyrim.ini`, under `[Display]` add `fDefaultWorldFOV=90` and `fDefault1stPersonFOV=90`. Start with 85–95. This is easily overlooked.
- Windowed Mode vs. Fullscreen: Borderless windowed (alt-tab friendly) can be set in `SkyrimPrefs.ini` under `[Display]`: `bFull Screen=0`, `bBorderless=1`. Otherwise, use exclusive fullscreen for slightly lower input lag.
- SSD vs HDD: Install on SSD to drastically reduce loading screens and stuttering.
- Xbox One / PS4 – Fixed 30 FPS, 1080p (boosted on One X/PS4 Pro to 4K upscaled with 30 FPS).
- Xbox Series X|S / PS5 – Backward compatible; use FPS Boost (Xbox) to unlock 60 FPS. No in-game graphics options.
- Nintendo Switch – 30 FPS, dynamic resolution (720p handheld, 900p docked). No settings.
- Master Volume: 80–100%. Turn down if using headphones.
- Music Volume: 50–70% – Skyrim's soundtrack is immersive; keep it noticeable.
- Sound Effects Volume: 70–100% – Important for combat cues.
- Voice Volume: 90–100% – Don't miss dialogue.
- Footsteps Volume: 50–70% – Helps with stealth awareness.
- Key Bindings: Rebindable via System -> Controls. Common changes:
- Mouse Sensitivity: Start at 0.5–0.7 and adjust. Lower is better for aiming bows.
- Invert Y Axis: Optional.
- Auto Run: Caps Lock toggles auto-run. If you accidentally toggle it, press Caps Lock again.
- The Sprint key is also used for Sneak when holding (if toggle is off). Check Sneak Toggle setting – if set to Hold, you must hold the button. Recommended to set to Toggle for ease.
- Power Attack: Mouse button or left/right attack with weapon swinging? Check if you have `bForceFullscreen` issues causing input lag.
- Button Mapping: Fixed on consoles; PC allows remapping via mods (e.g., Controlmap.txt editing).
- Invert Y Axis: On/Off.
- Vibration: On (recommended for immersion) – can be turned off to extend gamepad battery.
- Sneak Toggle: Default on controller is click left stick – same as Sprint? On Xbox, A is jump, X is attack, B is crouch (toggle). PlayStation uses Circle/A.
- Subtitles: Enable (under Audio). Also set Background Opacity to at least 50% for readability.
- Difficulty: System -> Gameplay -> Difficulty. Options: Novice, Apprentice, Adept, Expert, Master, Legendary. Beginner – Novice; experienced – Adept. The game scales enemies, so difficulty affects damage multipliers: on Novice you deal 2x damage and take 0.5x; on Legendary you deal 0.25x and take 4x.
- Quest Markers: System -> Display -> Show Quest Markers – Keep On for guidance; turn Off for immersion.
- Brightness: Calibrate so the Skyrim logo (in settings) is barely visible. If you can't see the shadow detail, increase.
- Closed Captions: Only subtitles for dialogue and key sounds (not environment).
- Text Language: Set in the launcher (PC) or console system language. Skyrim SE supports: English, French, German, Italian, Spanish, Japanese (subtitles), Russian, Polish, Czech, and more.
- Voice Language: For PC, you must download separate voice packs via Steam (right-click Skyrim SE -> Properties -> Language). Changing language downloads the entire voiced dialogue (~6GB).
- Original 2011 vs SE: Language options are the same. Anniversary Edition adds creation club content in the same language as the base game.
- Mod Download: Via Steam Workshop (older) or Nexus Mod Manager/in-game mod menu (SE/AE). Requires internet connection to browse and download.
- Creation Club: Anniversary Edition's paid content; requires signing in with Bethesda.net. Save game integrity – using CC mods may break saves if CC is disabled later.
- Steam Cloud Saves: Enable/disable in Steam properties. Recommended On to backup saves, but may cause conflicts if you play on multiple PCs.
- Update Settings: In Steam, set to “Only update this game when I launch it” to avoid unexpected updates breaking mods.
Console Graphics Settings
Consoles have limited options:
For console players: simply adjust brightness and subtitles. Use the Special Edition version for optimal stability.
Audio Settings
Access via System -> Audio in-game.
Advice: Use stereo headphones; the game supports 5.1/7.1 but mixing can be uneven. If using speakers, enable Dolby Digital if available in console settings. No special misconfigurations here, but ensure your OS sound device is set to 48 kHz (or higher) for best quality.
Controls Settings
Keyboard & Mouse (PC)
- Sprint: Change from Alt to Left Shift (more natural).
- Shout: Z is default, but many prefer Q or a mouse thumb button.
- Quicksave: F5 (keep). Quickload: F9 (beware of overwrites).
Easy to misconfigure:
Controller (PC & Console)
Advice: For PC, use an Xbox controller for native support; PS controllers may require third-party software. Increase stick dead zone if you experience drift.
Accessibility Settings
Skyrim's built-in accessibility is minimal, but adjust what's available:
Missing features: No colorblind mode, no text size adjuster. On PC, mods like SkyrimSE Accessibility Mod can help.
Language Settings
Caution: Changing language mid-playthrough may cause mod conflicts (especially if using text-modifying mods). Always set before starting a new save.
Network Settings
Skyrim is a single-player game with no online multiplayer. The only network-related settings are:
No misconfigurations, but note that Skyrim does NOT require internet to play.
Gameplay Settings
System -> Gameplay menu (in-game):
| Setting | Recommended | Notes |
|---|---|---|
| Difficulty | Adept (or your preference) | Change anytime. |
| Crosshair | On | Bow aiming – turn off for immersion. |
| Auto-Aim (aim assist) | On (controller) / Off (KB+M) | Console/controller only. |
| Kill Cam | On | Dramatic slow-motion on final blow. Can be disabled if it causes stutter. |
| Slow Time on Power Attack | On | Helpful for melee. |
| Show Floating Text (e.g. damage numbers) | Off | Mods can add them. Native only for pickpocket chance. |
| HUD Opacity | 100% | Lower if using transparency mods. |
| Compass (top HUD) | On | Shows direction and marker. |
| Health/Magicka/Stamina Bars | Always Visible | Can set to “Auto Hide” but distracting. |
| Active Effects | Show when affected | Useful for knowing poison/frost. |
| Autosave Interval | Every 5 minutes | Critical – Skyrim is crash-prone. Set to 5, 10, or 15 minutes. Do not rely on quicksave only. |
| Wait Menu | Hotkey T (PC) | Useful for time passing. |
- Autosave – If the game crashes, you lose progress. Set interval to 5 minutes. Also manually save often (F5 + F9). The game keeps 3 autosave slots by default; you can increase with mods.
- Difficulty – Enemies scale with your level. Changing difficulty mid-game is safe, but some players find it cheap. Choose a difficulty that lets you enjoy combat without frustration.
- Show Floating Text – Only enabled for pickpocket (chance) and skill ups. Can cause screen clutter; disable if annoying.
- Resolution: 1366x768 or 1600x900
- Preset: Low
- Disable God Rays, Depth of Field, Screen Space Reflections, Rain Occlusion
- Set Shadow Resolution to Low (512)
- Use FXAA (or Off, then use external Reshade sharpening)
- VSync Off, cap FPS to 30 via driver
- Reduce Draw Distance to <70%
- Resolution: 1920x1080
- Preset: Custom (High textures, Medium shadows)
- Enable God Rays (low), Depth of Field (if desired), Screen Space Reflections (low)
- Anti-aliasing: TAA
- Anisotropic Filtering: 8x
- Shadows: 1024–2048
- VSync Off, use adaptive vsync or cap at 60 FPS
- Draw Distance: 85%
- Resolution: 2560x1440 or 3840x2160
- Preset: Ultra (then tweak)
- All settings maxed
- Anti-aliasing: TAA (if you dislike blur, use SMAA via mod)
- Shadows: 4096 (Ultra) – beware VRAM usage
- Enable all effects: God Rays (high), Depth of Field, Lens Flare, Rain Occlusion
- VSync Off (cap at 60 FPS via driver – 120 FPS supported with mod)
- Draw Distance: 100%
- Consider installing SSE Display Tweaks and BethINI for fine-tuning.
General Recommendations by Hardware Level
Low-End (e.g., Intel UHD 620, GT 1030, Ryzen Vega 8)
Mid-Range (e.g., GTX 1060, RX 580, RTX 2050)
High-End (e.g., RTX 3060, RX 6700 XT, RTX 4080)
Conclusion
Skyrim's settings are straightforward once you know the pitfalls. The most common misconfigurations are: field of view too low (causes nausea), vsync enabled without a FPS cap (input lag), autosave interval too long (progress loss), and sprint/sneak toggle confusion. Console players have fewer options but can adjust brightness, subtitles, and difficulty. For the best experience, invest time in the ini tweaks for PC and always keep the game's engine limitations in mind (60 FPS cap unless modded). Refer to the table above for a quick start based on your hardware, and enjoy the province of Skyrim!
Important Notes
Important Notes
Save Management
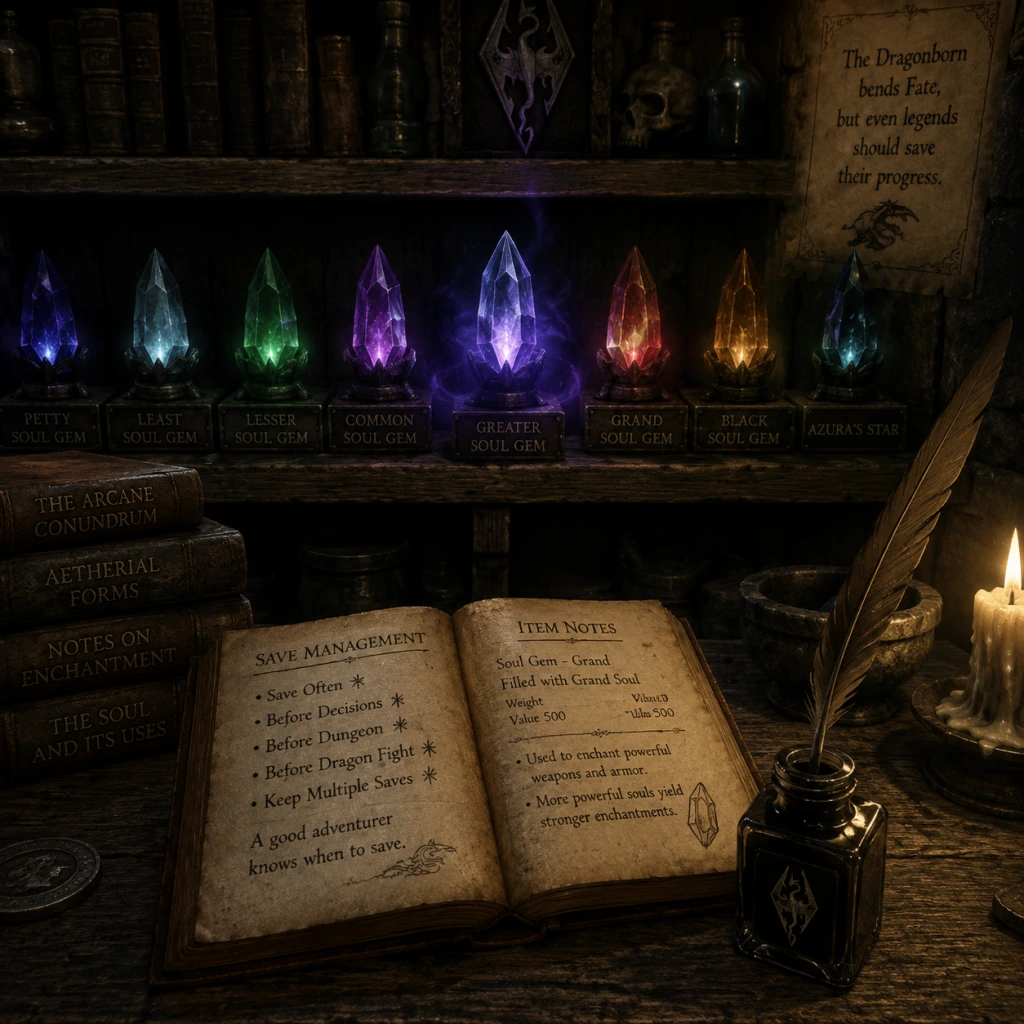
- Manual saves are your safety net. Auto-saves and quick saves are unreliable—they can overwrite each other or become corrupted (especially with many mods). Create a new manual save at the start of every session, before any major decision, and before entering a dungeon longer than a few minutes. Use at least 5–10 rotating slots.
- Do not rely only on quick saves. Quicksaves are prone to corruption and may not capture your full progress. Hard saves (via the menu) are always safer.
- On PC, use F5 for quick save and F9 for quick load by default, but set these as backups only.
- Mod users: Always test new mods on a new save file, not your main playthrough. Uninstalling mods mid-game can orphan script references and corrupt the save.
- Achievement note: On Steam, mods disable achievements unless you use the unofficial SSE Engine Fixes mod (PC). Console commands do not disable achievements by default, but using them might flag the save as modified if you later change versions.
- Civil War: Choosing the Imperial Legion or Stormcloaks is permanent for that playthrough. You cannot switch sides after starting the respective quest 'Joining the Legion' or 'Joining the Stormcloaks' (without reloading an earlier save).
- Dark Brotherhood: You can destroy the Dark Brotherhood early (by attacking Astrid in the Abandoned Shack) which permanently locks the entire guild questline and its unique rewards (e.g., Shadowmere, Cicero‘s outfit, etc.).
- Daedric Artifacts: Many Daedric quests force a one-time choice between two rewards. For example:
- Marriage: Once married, you cannot divorce. To remarry, you must kill your spouse (in-game consequences) or reload a pre-marriage save.
- Skill Perks: The Legendary perk system (added in Dragonborn DLC) allows you to reset a skill to 15 and refund all perks after reaching level 100. This makes perks effectively reversible, but the process is expensive (you lose all progress in that skill) and you may need to grind again for high-level spells/enchantments.
- Statue of Mara (for marriage) is permanent once you wear it; you can remove it but the marriage is still active.
- Become a werewolf or vampire lord: You can be cured later (via quests or shrines), but the transformation lines (e.g., Companions quest) are partially locked after curing unless you reload.
- Civil War questline: If you finish the main quest before joining a side, you can still join, but some special dialogue changes. No content is truly lost.
- Dark Brotherhood questline: Destroying the guild (as above) locks all DB content permanently for that save.
- 'The Lost to the Ages' (Aetherium Wars): Requires reading the “Aetherium Wars” book, which appears only after reaching a certain level (>= 14?) and may not spawn if you clear the wrong dungeon first.
- 'The Book of Love' (Mara quest): Easy to miss because you must visit the Temple of Mara in Riften and speak to Dinya Balu. Not triggered automatically.
- 'The Mind of Madness' (Sheogorath quest): Starts by reading the book 'Wabbajack' in the Blue Palace‘s Pelagius Wing. The book is only present if you haven’t cleared that wing yet.
- 'A Return to Your Roots' (Crimson Nirnroot): Requires collecting 30 Crimson Nirnroot in Blackreach. If you completely clear Blackreach early and leave, you can still return later, but it's easy to miss because the quest doesn‘t start until you pick the first plant (and the plants are subtle).
- College of Winterhold: Some quests lock out if certain NPCs die. For example, if you kill the mages inside the College during side quests, you may block progression.
- Thieves Guild special jobs: After joining, you must complete five jobs in each of the four major holds (Whiterun, Solitude, Markarth, Windhelm) plus 5 in Riften to become Guild Master. The special jobs appear randomly; you can miss them by never checking Delvin or Vex for new work.
- 'The Pale Lady' (Frostflow Abyss): The quest is missable if you kill the named Falmer leader before you read the journal that starts it.
- 'Rise in the East' (East Empire Company quest): Starts by speaking to the Orc in Windhelm—if you kill him first, quest is gone.
- Dragonborn DLC: The Black Book powers can be re-chosen at any Black Book after you finish the book‘s dungeon, but only one power is active at a time. The ability to reset perks via 'Winds of Change' is a separate Black Book power.
- Unique items: Many quest rewards are one-of-a-kind (e.g., Volendrung, Wabbajack, Mehrune’s Razor). If you sell them, you can buy them back only if the merchant still has them—they may respawn in the world, but not guaranteed.
- Early game: A single giant can one-shot you (level 1–10). Avoid the giant camps near Whiterun, Riften, and the Pale. Same for random dragon encounters—dragons scale but their breath attacks can kill a low-level character instantly.
- Draugr Deathlords begin spawning around level 20–25. They wield shouts (Unrelenting Force) and can stagger you repeatedly. Bring resist magic/fire/frost potions or gear.
- Falmer are tough at all levels—their poisoned arrows and high damage output make them a threat. Stock Cure Disease potions if you become infected with Falmer disease (Ataxia? Actually can cause permanent stat drain if not cured).
- Legendary difficulty is brutal: enemies have 3x damage output and take 1/3 damage. Enemies will kill you in 1-2 hits even with max armor. Only attempt after level 30+ with crafted gear.
- Boss fights:
- The “Disarm” shout from Draugr Deathlords can permanently equip your weapon away (you can retrieve it after combat). Keep a backup weapon.
- Over-leveling from crafting: Smithing, Enchanting, and Alchemy give massive XP. If you power-level them early (e.g., making hundreds of iron daggers), your character level increases rapidly, but your combat skills remain low. Enemies scale to your level, so you will face difficult foes you cannot kill effectively. Rule: Level combat skills (One-Handed, Two-Handed, Archery, Destruction, etc.) roughly in sync with your total level. Wait until at least level 20–30 before heavy crafting grinds.
- The “Fortify Restoration” loop (alchemy/enchanting exploit) can produce gear with +1,000,000% increased damage—makes the game trivial and often boring. Avoid if you want a balanced experience.
- Oghma Infinium exploit (the book that gives +5 to three skills) can be reused by opening the inventory quickly before the animation finishes. This breaks leveling and makes you overpowered instantly.
- Stealth Archer trap: The game naturally pushes you toward stealth archery because it’s extremely effective. Many players report ending up as a stealth archer unintentionally, locking themselves into a repetitive gameplay loop. If you want variety, consciously choose a different playstyle early (e.g., heavy armor warrior, pure mage, or assassin with daggers).
- Leveling pickpocket/lockpicking: They give little combat benefit but contribute to leveling. Don‘t invest heavily early.
- Skill books: You can read each book only once per skill—reading them at low levels wastes the XP bonus because the gain is flat (it’s a fixed number of skill points, which are more valuable at higher levels since you need more XP per point). Save skill books until the corresponding skill is 90+ to maximize the benefit.
- Skyrim is a single-player game—there is no official multiplayer, so standard online etiquette (e.g., in chat or cooperative play) does not apply. However, if you play with the Skyrim Together Reborn mod (unofficial multiplayer), treat it like any co-op experience: be respectful, don‘t grief, coordinate actions, and avoid stealing from other players’ chests unless PvP is allowed.
- Modding: When using mods from Nexus Mods or Bethesda.net, always read the mod page for compatibility notes. Uninstalling a mod mid-playthrough can corrupt your saves—the game will try to load scripts that no longer exist. Use [Mod Organizer 2](https://www.nexusmods.com/skyrimspecialedition/mods/6194) on PC to manage separate profiles and virtual installs.
- Console commands: Using console commands (PC) does disable achievements? Actually, mods disable achievements, not console commands. But if you use the console to add items or teleport, you may forget and not get the intended experience. Save before using console.
- No anti-cheat is built-in because it’s single-player. Cheats and exploits do not affect other players. However, if you intend to share saves or compare online, be aware that modded saves may be incompatible.
- Not buying a house early. Storage is scarce in the beginning. Buy Breezehome in Whiterun (5,000 gold + 1,800 for upgrades) as soon as possible to store loot. Without a house, you’ll be forced to drop items or carry everything.
- Selling unique items. Do not sell Daedric artifacts, dragon claws, unique weapons/armor, or quest items. Many are one-of-a-kind and cannot be re-obtained. Store them in your house chest.
- Killing named NPCs too early. Some NPCs are essential to quests (they are marked essential and cannot die). But non-essential named NPCs, if killed, may lock out related quests (e.g., killing Vittoria Vici before the wedding quest). Always check if a named NPC has a quest before killing them.
- Not saving before entering a dungeon. You may encounter an inescapable trap, a boss that one-shots you, or a quest choice you regret. Manual save at the dungeon entrance.
- Ignoring the main quest too long. While you can delay it indefinitely, some side quests only become available after certain main quest stages (e.g., Bards College quest requires you to have completed 'The Way of the Voice'). Also, dragons appear everywhere only after completing 'Dragon Rising' (level ~10). If you never do that quest, you’ll miss random dragon encounters and soul collecting.
- Over-using fast travel. You miss many random encounters (couriers, wandering merchants, vampire attacks, etc.). Walk or ride a horse between major holds to enjoy the world.
- Not learning all shouts from word walls. Many word walls are in remote locations. Use the Clairvoyance spell or online maps to find them. Shouts like Unrelenting Force and Whirlwind Sprint are incredibly useful.
- Not getting the Stones of Barenziah early. The quest 'No Stone Unturned' (start by stealing the Unusual Gem in the Thalmor Embassy or by reading the book 'The Dweller‘s of the Deep'?) rewards the Prowler’s Profit passive—increases chance of finding gems in chests. This makes you rich quickly. But collecting all 24 stones is tedious; many players ignore it and later regret not having the income.
- Not joining the Companions early. Werewolf form (even if you later cure) gives immunity to disease and a powerful transformation. The questline also awards free skill increases in heavy armor, two-handed, and smithing.
- Not using the Quick Menu for potions. Assign health potions to favorites (Q key on PC) for quick access during combat. Painful to open inventory mid-fight.
- Not doing the Thieves Guild questline early enough. You get access to fences, special merchants, and the ability to bribe guards. Also, the Nightingale armor is one of the best light armor sets.
- Over-relying on grinding combat skills by attacking friendly NPCs. Killing a chicken in Riverwood (which is a pet) causes the entire town to turn hostile and you get a huge bounty. Be careful with accidental attacks.
- Vampire stage 4: If you contract Sanguinare Vampiris and do not cure it within 3 days, you become a vampire. At stage 4, NPCs will attack you on sight. Feed on sleeping people to revert to stage 1 (but feeding lowers your reputation). Cure with a shrine of Stendarr or by completing the quest 'Rising at Dawn'.
- Werewolf rampage: If you transform in a town, citizens will run in fear and guards will attack. Feeding while in werewolf form will calm them (but you still have a small bounty).
- Standing Stones: You can only have one stone active at a time. Switching to a new stone deactivates the previous one permanently. Choose based on your build: Warrior (combat), Mage (magic), Thief (stealth) for 20% faster skill progression in those skill groups. Later you can use the Lover Stone for 15% gain in all skills, but no specific boost.
- Bounty system: Committing a crime in a hold adds bounty. You cannot fast travel while a guard is chasing you. You must either pay the fine (gold), go to jail (may lose skill progress), or escape (adds more bounty). Killing guards increases the bounty drastically.
- Merchant inventory restocking: Generic merchants restock gold and items every 48 in-game hours (or when you wait/sleep 48 hours). Unique merchants (e.g., the Khajiit caravans) restock every 24 hours.
- Skill books can only be read once per skill. If you already have that skill at 100, the book is wasted.
- Quest items may be weightless but cannot be removed from inventory until the quest ends. If you start many quests, you may accumulate dozens of quest items that clutter your inventory.
- Followers can be killed permanently if you hit them enough (friendly fire). Essential followers (e.g., Mjoll, Serana) only go unconscious and stand up later. If you want to keep a follower safe, dismiss them before combat or use console commands to make them essential.
- Marriage house skill training: After marriage, your spouse can open a store and give you a share of profits (500 gold per day in the home market). Use this as passive income.
Irreversible Choices
- 'The Black Star' (Azura‘s Star vs. The Black Star)
- 'Ill Met by Moonlight' (Ring of Hircine vs. Savior’s Hide)
- 'The Wolf Queen Awakened' (choose to kill Potema or not affects journal entry only; no gameplay impact).
- 'The Only Cure' (Spellbreaker shield → kill the orc OR get the shield and lose the orc‘s apprentice).
- You cannot obtain both in one playthrough (without console commands).
Missable Content
Difficulty Spikes
- Alduin in Sovngarde (main quest final boss): Requires using Dragonrend shout; bring high-level weapons/resistances.
- Miraak (Dragonborn DLC final boss): He regenerates health, summons dragons, and has an Unrelenting Force shout. Prepare strong magic resist and poisons.
- Ebony Warrior (level 80+): Extremely high stats, uses all shout types, and reflects damage. Requires maxed gear and strategy.
Grinding Traps
Online Etiquette / Anti-Cheat Notes
Common Regrets (What Most Players Wish They Knew Sooner)
Warnings & Pitfalls
All Game Items
All Game Items
This guide provides a comprehensive overview of every major item category in The Elder Scrolls V: Skyrim. Items are grouped logically with detailed explanations of what they do, how to obtain them, when they are useful, and any important synergies or upgrades. This covers weapons, armor, consumables, materials, currencies, collectibles, and key equipment.
---
Weapons
Weapons in Skyrim are divided by skill type (One-Handed, Two-Handed, Archery) and material quality (Iron, Steel, Dwarven, etc.). Unique artifacts often surpass standard crafting.
One-Handed Weapons
- Swords: Balanced speed and damage. Best for critical hits and perks like Armsman and Bladesman. Found everywhere.
- Daggers: Fastest swing, but low base damage. Essential for stealth assassins (15x damage with Backstab). The Blade of Woe (Daedric artifact, 12 base damage, absorb health) is top-tier.
- Maces: Slow but high armor penetration. Use with Bone Breaker perk. Mace of Molag Bal (16 base, absorb stamina/magicka) is excellent.
- Axes: Moderate speed and damage, can cause bleeding. Dawnbreaker (Daedric, 12 base, extra damage to undead, chance to explode) shines against Draugr.
- Greatswords: Fastest two-handed, good for crowd control. Chillrend (unique sword, frost damage, chance to paralyze) is obtained during the Thieves Guild questline.
- Battleaxes: Medium speed, high damage. The Longhammer (unique Orcish warhammer, 25% faster swing) is a speed demon. Volendrung (Daedric hammer, 25 base, absorb stamina) is excellent for heavy attacks.
- Warhammers: Slowest but highest damage and armor penetration. Wuuthrad (Yngol’s axe, 25 base, double damage to elves) is lore-friendly. The Ebony Blade (two-handed, lifesteal) is a Daedric artifact.
- Longbow: Standard starter. Falmer Supple Bow (light, fast) is good for stealth.
- Daedric Bow: Best base damage for non-unique. Nightingale Bow (unique, 19 base, frost damage, lifesteal) is the best non-Dragonbone bow.
- Zephyr (Dwemer replica, 30% faster draw) – obtained during the Lost to the Ages quest. Ideal for archers.
- Dragonbone Bow: Highest base damage in the base game (20), available with Dragon Smithing.
- Staff of Fireballs, Staff of Lightning Bolt, Staff of Chain Lightning: Found in loot or crafted with Enchanting. Useful for non-mages to deal magic damage. The Staff of Magnus (infinite magicka for 60 seconds during the College questline) is a unique artifact.
- Dawnbreaker (Meridia) – vs undead.
- Mace of Molag Bal – soul trap effect.
- Volendrung (Malacath) – stamina absorption.
- Ebony Blade (Mephala) – lifesteal, damage scales with NPC kills.
- Wabbajack (Sheogorath) – random effects, can turn enemies into chickens.
- Hide/Leather/Fur: Early game. Weak, but easy to craft. The Fur Armor is the only armor that can be worn by beast races (Khajiit, Argonians) without penalty.
- Elven: Good for stealth mages. Falmer Hardened Armor has better stats but is ugly.
- Glass: Second-best light armor. Glass Armor of Major Health is common loot.
- Dragonscale: Crafted from dragon scales. Best light armor in base game (armor value 41 per piece).
- Nightgale Armor: Unique set from Thieves Guild. Boots grant Muffle, gloves grant +35% lockpicking, armor improves One-Handed and bow damage. Full set is legendary for thieves.
- Shrouded Armor: Dark Brotherhood set. Includes a hood that grants a bonus to bow damage and a cowl that muffles footsteps.
- Linwe’s Armor: Light set from a Thieves Guild quest. Provides +20% one-handed damage.
- Iron/Steel: Ubiquitous early game. Steel is better. Steel Plate is heavier but has better values.
- Dwarven: Good mid-tier. Easily craftable from Dwarven metal ingots.
- Orcish: Strong but heavy. Orcish Armor is the best heavy set before Ebony.
- Ebony: High-end. Ebony Mail (unique Daedric artifact) poisons nearby enemies and muffles footsteps.
- Daedric: Best non-unique heavy armor. Requires 90 Smithing, Ebony ingots, and Daedra hearts. Excellent for tank mages (heavy armor + conjuration).
- Aetherial Crown: Unique item from Lost to the Ages. Allows you to store a second standing stone power (e.g., The Lover Stone + The Lord Stone). Must be activated.
- Mage robes: Provide magicka regen and destruction/cost reduction. The Archmage’s Robes give +15% magicka and reduce all spell costs by 15%. Master Robes are cheaper but equally potent for a single school.
- Thief Guild Armor: While not armor per se, the Guild Master’s Armor set increases lockpicking, pickpocket, sneak, and persuasion. Best for non-combat play.
- Healing Potions: Restore Health. Essential at all levels. Craft from Blue Mountain Flower + Wheat (restore health+fortify health).
- Magicka Potions: Restore Magicka. Critical for mages. Craft from Red Mountain Flower + Tundra Cotton.
- Stamina Potions: Restore Stamina. Useful for power attacks and sprinting. Craft from Juniper Berries + Garlic.
- Fortify One-Handed: Increases one-handed damage. Combine Bone Meal + Salt Pile.
- Invisibility Potion: Makes you invisible for a short time. Craft from Luna Moth Wing + Chaurus Eggs. Extremely useful for thieves.
- Paralysis Potion: Paralyzes the target for a few seconds. Craft from Canis Root + Imp Stool + Mora Tapinella. Can be applied to weapons.
- Poison of Damage Health: Apply to weapons for extra damage. Craft from Deathbell + River Betty + Salt Pile.
- Daedra Heart: Can be used in Daedric smithing. Potion effect: Damage Health, Damage Magicka Regen, Damage Stamina Regen, and Restore Magicka.
- Imp Stool: Damage Health, Lingering Damage Health, Paralysis, and Restore Stamina. Easy to find in caves.
- Jarrin Root: Only one exists (Dark Brotherhood quest). Inflict massive poison damage. Combined with other effects can create a one-shot poison.
- Iron / Corundum / Orichalcum / Moonstone / Quicksilver / Malachite / Ebony: Mined from veins. Smelt into ingots. Needed to create armor and weapons.
- Steel Ingot: Requires 1 Iron + 1 Corundum. Foundation of steel armor.
- Dwarven Metal Ingot: Smelted from Dwarven scrap metal (bent Dwemer struts, cogs, etc.). Used for Dwarven armor.
- Daedra Heart: Rare drop from Dremora, needed for Daedric smithing.
- Dragon Scales & Bones: Obtained from dragons. Required for Dragonscale armor and Dragonbone weapons with Dragon Smithing perk.
- Leather Strips: Crafted from leather. Used for many armor pieces.
- Leather: Made from animal hides (deer, wolf, bear).
- Animal Pelts: Found on predators; can be tanned into leather.
- Bear, Sabre Cat, Mammoth, and Werewolf Pelts: Needed for certain crafting or personal quests (e.g., A Daedra’s Best Friend).
- Petty, Lesser, Common, Greater, Grand: Sizes. Grand soul gems can hold the souls of humans, dragons, or mammoths.
- Black Soul Gems: Hold human (black) souls. Obtained from Necromancer altars or rare drops. Required for making certain enchantments permanent.
- Azura’s Star / Black Star: Reusable soul gem that never breaks. Choose Azura (white souls) or Black (black souls) at the end of the quest.
- Fire / Frost / Void Salts: Alchemy ingredients, also used for enchanting staves. Obtained from Atronachs.
- Deathbell: Alchemy ingredient, often used for poisons. Grows in marshes.
- Ectoplasm: Dropped by ghosts, used for fortify destruction potions and some enchantments.
- Gold (Septims): The main currency. Also used as a crafting component? (No, but you can buy items). Earned through quests, looting, selling gear. Max amount you can have is 2,147,483,647 (integer limit).
- Rare Coins: Old Nordic coins (found in tombs) and the Gold Olympe (from the Stendarr’s Beacon). Not usable as currency but can be sold for a lot.
- Favor Tokens: Unused; just quest items.
- Aetherial Crown (mentioned above): Best to combine with The Lover Stone (all skills improve 15%) plus The Lord Stone (50% magic resistance). That combination gives you the best passive defense and skill gain.
- The Black Star: Reusable soul gem that can capture human souls. Essential for constant weapon recharging without worrying about grand soul gems.
- Nightingale Bow & Armor: Set bonuses – boots muffle, gloves improve lockpicking, armor boosts weapon damage. Perfect for a stealth archer.
- Dawnguard Rune Weapons: Dawnguard weapons (crossbow, warhammer, etc.) deal extra damage to undead. Combine with Auriel’s Shield for holy warrior build.
- Sanguine Rose: Summons a Dremora for 60 seconds. Extremely strong for conjuration builds or as a distraction.
- Spellbreaker: The only shield that creates a ward. Block spells and arrows alike. Essential for anti-mage tank.
- Wabbajack: Unreliable but hilarious. Turns enemies into cheese or a Dremora lord. Can be used to one-shot high-level enemies if lucky.
- Smithing + Enchanting + Alchemy Loop: Create fortify smithing potions and fortify smithing gear to improve weapons/armor beyond legendary. This requires Fortify Alchemy enchanted gear and Fortify Smithing potions. The loop can produce damage values exceeding 10,000.
- Archery + Poisons: Apply Damage Health or Weakness to Poison + Damage Health to arrows with the Hunter’s Discipline perk (retrieve poisons). Use Sneak + Archery for maximum effect.
- One-Handed + Shield: Combine Shield Bash perk with Bash enchants (stagger). Unrelenting Force shout + shield bash = permanent stunlock.
- Mage Armor + Dragonhide: The Alteration perk Mage Armor triples armor rating from flesh spells. Dragonhide caps physical damage reduction at 80%. Can reach armor cap without wearing armor.
- Always keep at least one of each generic ingredient for the Unfathomable Depths quest (if you have the Dawnguard DLC).
- Don’t sell unique artifacts – they are irreplaceable.
- Use the Steed Stone to negate movement penalty from heavy armor.
- The Mage’s Circlet (boss loot) can be used instead of a helmet to keep the Mage Armor perk active (since it's not armor).
Two-Handed Weapons
Bows
Staves (Destruction magic)
Uniques & Daedric Artifacts
Many Daedric Princes grant powerful weapons for completing their quests:
The Dragonbane (blades sword, 14 base, extra 20-40 damage to dragons) is superb against its namesake.
---
Armor
Armor sets improve survivability and provide set bonuses when wearing multiple pieces. Light armor benefits rogues and archers; heavy armor benefits warriors and tanks. Both can reach the armor cap (567 displayed, 80% damage reduction) with perks.
Light Armor
Heavy Armor
Shields
Shields block damage and can be enchanted. Spellbreaker (Daedric shield from The Only Cure) creates a ward when blocking, ideal against mages. Auriel’s Shield (Dawnguard DLC) stores blocked energy and releases a stagger burst.
Clothing (Non-armor)
---
Consumables
Consumables restore stats, grant temporary buffs, or harm enemies.
Potions
Potions are created through Alchemy or looted. Common types:
Food
Food restores small amounts of Health/Stamina. Cooked meals are better. Elsweyr Fondue (Moon Sugar + Eidar Cheese + Ale) restores Magicka and boosts Magicka regen. Vegetable Soup (Potato + Cabbage + Leek + Tomato) gives 1 Health/Stamina per second for 720 seconds – extremely powerful for warriors.
Ingredients
Raw alchemy ingredients have four effects each (discovered by eating or testing). Some rare ingredients:
---
Materials
Materials are used for crafting (Smithing, Alchemy, Enchanting).
Ores & Ingots (Smithing)
Leather & Hides
Soul Gems (Enchanting)
Used to recharge enchanted weapons and create new enchantments.
Other Materials
---
Currencies
---
Collectibles
Stones of Barenziah
24 gems scattered across Skyrim. Collect all to unlock the Prowler’s Profit passive (find more gems in chests). Look in every burial urn, cave, and palace. Quest: No Stone Unturned (Vex in Riften). Worth it for infinite loot.
Dragon Priest Masks
Nine masks hidden in ancient dragon priest lairs. Each provides unique stats (e.g., Morokei gives +100% magicka regen, Nahkriin reduces destruction cost and grants +50 magicka). Collect all to open the Wooden Mask portal in Labyrinthian and get Konahrik (heals when low health, summons fire storm).
Daedric Artifacts
15 Daedric quests yield unique items. Each artifact is one-of-a-kind. Notable: Sanguine Rose (staff summons a Dremora), Mora’s Agony (staff that creates a telekinesis puddle), Oghma Infinium (read to gain 5 skill levels in 6 skills of your choice).
Skill Books
Each skill has 5 skill books that permanently raise that skill by 1 point (can exceed level cap). Books are scattered; refer to the Skill Books page for locations. Example: The Wolf Queen, v1 (One-Handed), 2920, Sun’s Dusk, v11 (Sneak).
Treasure Maps
Ten treasure maps (plus special Treasure Map in the Helgen Keep exit). Each map shows a location with a hidden chest containing leveled gold, gems, and random loot. Use the map to find the X. The best is potentially Treasure Map IX (reward for a quest, leads to a chest with 500 gold + leveled item).
Quest Items
Many quests give unique items that cannot be dropped (e.g., The Jagged Crown, Elder Scrolls). Often not usable once the quest is complete. Hold on to them or store them in a house.
---
Key Equipment
Special armor and weapons that provide synergies or build-defining effects:
---
Crafting & Upgrade Synergies
---
Important Notes
This guide covers every major item category. For a detailed list of every individual item ID or exact stats, refer to the UESP or the Skyrim Wiki.
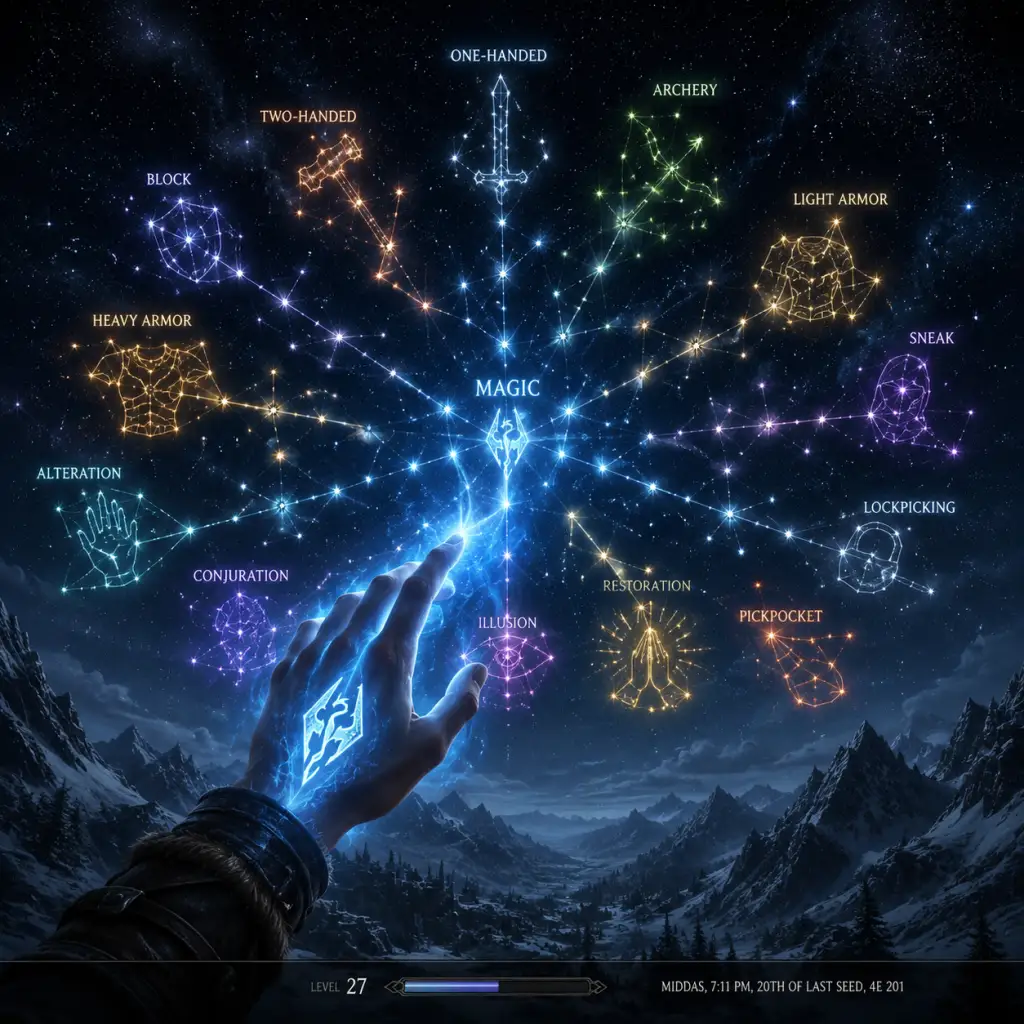
Character Skills
"content": "## Character Skills Guide for The Elder Scrolls V: Skyrim
This guide covers every skill, ability, spell, talent, and special move available to the player character in Skyrim. Unlike traditional class-based RPGs, Skyrim uses a freeform skill system where you improve skills by using them. There are 18 skills divided equally among three archetypes: Combat, Magic, and Stealth. Each skill has a tree of perks (talents) that unlock new effects or enhance existing actions. Additionally, the Dragonborn can learn Shouts (Thu'um), gain powers from Standing Stones, and leverage racial abilities. This guide describes every skill tree, notable perks, synergies, and recommended builds.
---
Skills are earned XP by performing related actions (e.g., swinging a sword improves One-Handed, casting a spell improves the corresponding magic school). Each skill has a base level (1–100) and a perk point earned every level-up (from character level). You can invest perk points into any skill tree regardless of your archetype. The three archetypes are only thematic, not restrictive.
---
#### 1. One-Handed
---
Builds are not classes but playstyle templates.
---
This guide covers every skill, ability, spell, talent, and special move available to the player character in Skyrim. Unlike traditional class-based RPGs, Skyrim uses a freeform skill system where you improve skills by using them. There are 18 skills divided equally among three archetypes: Combat, Magic, and Stealth. Each skill has a tree of perks (talents) that unlock new effects or enhance existing actions. Additionally, the Dragonborn can learn Shouts (Thu'um), gain powers from Standing Stones, and leverage racial abilities. This guide describes every skill tree, notable perks, synergies, and recommended builds.
---
Skill Overview
Skills are earned XP by performing related actions (e.g., swinging a sword improves One-Handed, casting a spell improves the corresponding magic school). Each skill has a base level (1–100) and a perk point earned every level-up (from character level). You can invest perk points into any skill tree regardless of your archetype. The three archetypes are only thematic, not restrictive.
| Skill | Archetype | Primary Use |
|---|---|---|
| One-Handed | Combat | Damage with one-handed weapons (swords, axes, maces, daggers) |
| Two-Handed | Combat | Damage with two-handed weapons (greatswords, battleaxes, warhammers) |
| Archery | Combat | Ranged physical damage with bows |
| Block | Combat | Mitigating damage with shields or weapons |
| Smithing | Combat | Crafting and improving weapons and armor |
| Heavy Armor | Combat | Defense and bonuses from heavy armor |
| Light Armor | Stealth | Defense and bonuses from light armor |
| Sneak | Stealth | Movement detection avoidance and backstab damage |
| Lockpicking | Stealth | Opening locks and finding treasure |
| Pickpocket | Stealth | Stealing from NPCs and planting items |
| Speech | Stealth | Persuasion, bribery, and better trading |
| Alchemy | Magic | Crafting potions and poisons |
| Alteration | Magic | Defensive and utility spells (armor, paralysis, telekinesis) |
| Conjuration | Magic | Summoning creatures and weapons, reanimating dead |
| Destruction | Magic | Elemental damage spells (fire, frost, shock) |
| Illusion | Magic | Mind-altering spells (calm, frenzy, invisibility) |
| Restoration | Magic | Healing, wards, and undead-bane spells |
| Enchanting | Magic | Imbuing weapons/armor with magical effects |
Combat Skills
#### 1. One-Handed
- Effect: Increases damage with one-handed weapons (swords, axes, maces, daggers). Each weapon type has a unique critical hit or bleeding effect.
- Notable Perks:
- Cooldowns: No cooldown; attacks consume stamina for power attacks.
- Upgrades: Smithing improves weapon damage; enchanting adds effects like absorb health or stamina.
- Combos/Synergies: Dual-wielding builds use high attack speed with enchantments (absorb health). Shield + one-handed for tankiness.
- Recommended Builds: Spellsword (one-handed + destruction magic), Dual-Wield Berserker (Orc racial + Dual Flurry).
- Usage: Best for close-range combat; use power attacks to stagger or finish. Maces ignore armor, axes cause bleeding, swords have higher critical chance.
- Effect: Increases damage with two-handed weapons (greatswords, battleaxes, warhammers).
- Notable Perks:
- Cooldowns: None (stamina cost).
- Upgrades: Smithing, enchantments (e.g., fiery soul trap).
- Combos/Synergies: Greatswords for speed (swing speed), battleaxes for bleeding, warhammers for armor penetration. Pair with Heavy Armor for full tank.
- Recommended Builds: Nord Berserker (Two-Handed + Heavy Armor + Block), Paladin (Two-Handed + Restoration).
- Usage: Very high single-target damage. Use Sweep for crowds. Power attacks are slow but devastating.
- Effect: Increases bow damage and zoom stability.
- Notable Perks:
- Cooldowns: None.
- Upgrades: Enchant bow with elemental damage or paralyze; Smithing to Legendary.
- Combos/Synergies: Sneaking for 3x damage with Assassin's Blade (Sneak perk). Alchemy for poison coating.
- Recommended Builds: Sniper (Stealth + Archery + Illusion for Muffle), Hunter (Light Armor + Alchemy).
- Usage: Ideal for ranged kiting or opening combat. Use eagle eye to aim, power shot to interrupt enemy spells. Use slow time (Steady Hand) for precise shots.
- Effect: Reduces damage and improves shield effectiveness.
- Notable Perks:
- Cooldowns: None (stamina cost for bashes).
- Upgrades: Improve shield via Smithing; enchant with magical resistance.
- Combos/Synergies: Works with One-Handed or even Unarmed (with Heavy Armor perk Fists of Steel). Shield charge for crowd control.
- Recommended Builds: Knight (Heavy Armor + Shield + One-Handed), Templar (Block + Restoration for Ward).
- Usage: Essential for tank builds. Use power bash to interrupt spellcasters. Shield charge clears pathways. Great against dragons (block breath attacks with Elemental Protection).
- Effect: Allows crafting and improving weapons/armor. Higher level unlocks better materials.
- Notable Perks:
- Cooldowns: None.
- Upgrades: N/A (this skill is the upgrade method).
- Combos/Synergies: Enchanting to add effects, Alchemy to create Fortify Smithing potions for legendary improvements.
- Recommended Builds: Any build benefits from smithing—essential for max damage/defense.
- Usage: Smithing is a support skill. Always temper your weapons/armor at grindstones and workbenches. Take Arcane Blacksmith to improve enchanted gear.
- Effect: Incoming damage reduction; agility penalties vanish with perks.
- Notable Perks:
- Cooldowns: None.
- Upgrades: Smithing to improve armor rating.
- Combos/Synergies: Block and Smithing for invincible tank. Enchanting for magic resistance.
- Recommended Builds: Orc Tank (Heavy Armor + Two-Handed + Block), Dragon Knight (Heavy Armor + Destruction).
- Usage: Wear heavy armor for maximum physical protection. Conditioning removes movement penalty. Reflect Blows is great against melee enemies.
- Effect: Armor rating and stamina regeneration bonuses.
- Notable Perks:
- Cooldowns: None.
- Upgrades: Smithing.
- Combos/Synergies: Sneak + Alchemy (poisons). Movement speed allows kiting.
- Recommended Builds: Rogue (Light Armor + One-Handed + Sneak), Nightblade (Light Armor + Destruction/Illusion + Sneak).
- Usage: Perfect for stealth characters who need mobility. Unhindered lets you run silently. Wind Walker keeps stamina up for sprinting.
- Effect: Detection radius; backstabs multiply damage.
- Notable Perks:
- Cooldowns: None.
- Upgrades: Use enchanted gear (Muffle enchantment) or Illusion spells (Invisibility).
- Combos/Synergies: Alchemy for poisons; Illusion for Muffle/Invisibility; Archery for Sniper.
- Recommended Builds: Stealth Archer (Sneak + Archery), Assassin (Sneak + One-Handed daggers + Illusion).
- Usage: Essential for avoiding combat. Use backstab with daggers for massive damage. Silent movement allows pickpocketing followers.
- Effect: Easier lockpicking; more gold in chests.
- Notable Perks:
- Cooldowns: None.
- Upgrades: N/A.
- Combos/Synergies: Not directly needed for combat; helps with looting.
- Recommended Builds: Any thief or treasure hunter.
- Usage: Pick locks to access hidden loot. Quick Hands lets you pick during dialogue. Wax Key is great for future re-entry.
- Effect: Stealing items from NPCs; can plant items.
- Notable Perks:
- Cooldowns: None.
- Upgrades: Use Muffle/Alchemy for distraction.
- Combos/Synergies: Alchemy (poisons), Stealth.
- Recommended Builds: Thief (Pickpocket + Sneak + Speech). Poison Assassin (Pickpocket + Alchemy).
- Usage: Steal gold, keys, and poison targets. Extra Pockets is invaluable for any build. Perfect Touch for unique armor.
- Effect: Better prices; persuasion chances; intimidation.
- Notable Perks:
- Cooldowns: None.
- Upgrades: Stand back; use enchantments (Fortify Barter).
- Combos/Synergies: Pickpocket for stolen goods; Alchemy/Enchanting for selling potions/items.
- Recommended Builds: Merchant (Speech + Alchemy + Smithing) for infinite wealth.
- Usage: Use persuasion to avoid fights. Invest in shops early for profit. Master Trader makes selling high-value items easier.
- Effect: Craft potions and poisons from ingredients.
- Notable Perks:
- Cooldowns: None.
- Upgrades: N/A; strength increases with skill level and perks.
- Combos/Synergies: Enchanting (Fortify Alchemy gear) for even stronger potions. Use in stealth for Paralysis Poisons.
- Recommended Builds: Alchemist (any build can invest), Assassin (poisons for one-hit kills).
- Usage: Brew Fortify Smithing and Fortify Enchanting potions to create god-tier gear. Paralyze and Damage Health poisons are devastating.
- Effect: Defensive and utility magic.
- Spells (examples): Oakflesh (armor), Stoneflesh, Ebonyflesh, Dragonhide (80% damage reduction), Candlelight (magic light), Magelight (orb), Telekinesis (move objects), Paralysis, Detect Life/Dead, Transmute (ore conversion).
- Notable Perks:
- Cooldowns: None; spells cost magicka.
- Upgrades: Reduces cost with skill level and perks.
- Combos/Synergies: Restoration (Healing) for survivability; Destruction (combat) but Alteration is defensive.
- Recommended Builds: Pure Mage (Alteration + Destruction + Restoration) or Battlemage (Alteration for armor + Heavy Armor).
- Usage: Cast Ebonyflesh before combat. Paralysis is excellent crowd control. Detect Life to find hidden enemies. Transmute Iron to Gold for wealth.
- Effect: Summon creatures, bound weapons, reanimate dead.
- Spells (examples): Summon Familiar (wolf), Bound Sword/Bow/Axe (ethereal weapons), Raise Zombie, Reanimate Corpse, Summon Dremora Lord, Summon Storm Thrall (master level).
- Notable Perks:
- Cooldowns: None (magicka cost).
- Upgrades: Reduce cost with perks/enchantments.
- Combos/Synergies: Use bound weapons if you lack smithing; they are weightless and can be enchanted. Reanimation for meat shields.
- Recommended Builds: Conjurer (100% summons), Necromancer (reanimation + Illusion for fear). Spellsword (Bound Sword + Destruction).
- Usage: Summon Dremora Lord for melee backup; Atronachs for ranged. Bound weapons scale with skill and perk bonuses. Twin Souls is a game-changer.
- Effect: Elemental damage spells (fire, frost, shock).
- Spells (examples): Flames, Frostbite, Sparks (apprentice); Firebolt, Ice Spike, Lightning Bolt (adept); Fireball, Ice Storm, Chain Lightning (expert); Incinerate, Icy Spear, Thunderbolt (master). Also Cloak spells (Flame, Frost, Shock) and Runes.
- Notable Perks:
- Cooldowns: None (magicka cost).
- Upgrades: Enchantments (Fortify Destruction) reduce cost. Alchemy potions fortify damage.
- Combos/Synergies: Dual-casting + Impact for perma-stagger. Use different elements based on enemy resistance (Nords resist frost, Dunmer resist fire).
- Recommended Builds: Pyromancer (Fire spells + Illusion for fear), Battlemage (Destruction + Heavy Armor), Mage (Destruction + Alteration + Restoration).
- Usage: Fire for damage over time and fear; Frost for draining stamina and slowing; Shock for damaging magicka and instant hit. Impact dual-cast is the most powerful mage tool.
- Effect: Mind-altering spells: Calm, Fear, Fury, Invisibility, Muffle.
- Spells (examples): Fury (makes enemies attack anyone), Calm (pacifies), Fear (flees), Muffle (silent footsteps), Invisibility, Rally (increases ally attack), Pacify, Frenzy, Harmony (master calm).
- Notable Perks:
- Cooldowns: None.
- Upgrades: Fortify Illusion enchantments.
- Combos/Synergies: Sneak + Invisibility for perfect stealth. Fury spells for chaos among enemies.
- Recommended Builds: Nightblade (Illusion + Sneak + One-Handed), Bard (Illusion + Speech).
- Usage: Use Muffle early to level Illusion quickly. Invisibility + Quiet Casting makes you undetectable. Calm to freeze enemies completely. Frenzy for population control.
- Effect: Healing spells, wards, turn undead, and fortify attributes.
- Spells (examples): Healing, Fast Healing, Heal Other (heals NPCs), Close Wounds, Grand Healing (area), Heal Undead (damages undead), Turn Undead (makes them flee), Repel Undead, Circle of Protection (undead cannot enter), Ward spells (magic shield), Steadfast Ward, Greater Ward, Stendarr's Aura (damages undead). Also Fortify Health, Fortify Stamina, Resist elements.
- Notable Perks:
- Cooldowns: Avoid Death once per day; others none.
- Upgrades: Enchantments (Fortify Restoration).
- Combos/Synergies: Destruction (damage) + Restoration (survive). Wards vs mages. Necromage is a stealth exploit for vampire builds.
- Recommended Builds: Paladin (Restoration + Heavy Armor + One-Handed), Mage (Restoration + Destruction), Vampire Lord (Necromage boosts).
- Usage: Essential for all hardcore survival. Healing spells are cheap. Use wards to block breath attacks and spells. Turn Undead to clear crypts. Avoid Death is a safety net.
- Effect: Imbue weapons/armor with magical effects; disenchant items to learn effects.
- Notable Perks:
- Cooldowns: None.
- Upgrades: Smithing for better base items; Alchemy for Fortify Enchanting potions.
- Combos/Synergies: Smithing + Alchemy = god-tier. Enchant armor with Fortify [skill] to boost other skills.
- Recommended Builds: Any endgame build uses Enchanting. Mage enchants Fortify Destruction; Fighter enchants Fortify Two-Handed.
- Usage: Disenchant every new item to learn effects. Create gear with Fortify Smithing and Fortify Alchemy, then craft super-potions/envoy. Extra Effect lets you have both Fortify Health and Fortify Stamina on boots, for example.
- Altmer: Highborn – Magicka regenerates 50x faster for 60 seconds.
- Argonian: Histskin – Health regenerates 10x faster for 60 seconds.
- Bosmer: Command Animal – Pacify an animal for 60 seconds.
- Breton: Dragonskin – 50% spell absorption for 60 seconds.
- Dunmer: Ancestor's Wrath – 8 fire damage/second in close range for 60 seconds.
- Imperial: Voice of the Emperor – Calms nearby NPCs for 30 seconds.
- Khajiit: Night Eye – See in darkness for 60 seconds.
- Nord: Battle Cry – Enemies flee for 30 seconds.
- Orsimer: Berserker Rage – Take half damage, deal double damage for 60 seconds.
- Redguard: Adrenaline Rush – Stamina regenerates 10x faster for 60 seconds.
- Unrelenting Force (Fus Ro Dah) – Stagger/push/ragdoll. Essential crowd control.
- Whirlwind Sprint (Wuld Nah Kest) – Short teleport. Great for evasion.
- Ethereal Shout (Feim Zii Gron) – Become ethereal for 8/12/16 seconds. Invincibility.
- Slow Time (Tiid Klo Ul) – Slow time for 6/10/14 seconds. Overpowered for combat.
- Marked for Death (Krii Lun Aus) – Drain armor/health over time. Best for high-level enemies.
- Dragonrend (Joor Zah Frul) – Forces dragons to land. Mandatory for dragon fights.
- Warrior Stone: All combat skills improve 20% faster.
- Mage Stone: All magic skills improve 20% faster.
- Thief Stone: All stealth skills improve 20% faster.
- Lover Stone: All skills improve 15% faster (stacks with other skill-specific stones? No, only with racial bonus).
- Lady Stone: +25% health and stamina regen.
- Lord Stone: +50 armor, +25% magic resistance.
- Apprentice Stone: Magicka regen 2x, but take double magic damage.
- Atronach Stone: +50 magicka, 50% spell absorption (negates all magic regen).
- Ritual Stone: Once per day, reanimate all dead around you.
- Shadow Stone: Once per day, invisible for 60 seconds (but not silent).
- Steed Stone: +100 carry weight, no armor weight penalty (overrides Conditioning).
- Tower Stone: Unlock any expert lock once per day.
- Serpent Stone: Once per day, poison target for 120 seconds (5 hp/s).
- Armsman (5 ranks): +20%/+40%/+60%/+80%/+100% damage with one-handed weapons.
- Dual Flurry (2 ranks): 20%/35% faster power attacks when dual-wielding.
- Dual Savagery: Dual-wielding power attacks do 50% bonus damage.
- Savage Strike: Standing power attacks do 25% bonus damage and have a chance to decapitate.
- Critical Charge: Power attacks while sprinting cause double critical damage.
#### 2. Two-Handed
- Barbarian (5 ranks): +20%/+40%/+60%/+80%/+100% damage.
- Great Critical Charge: Sprinting power attacks do double critical damage and have a 50% chance to paralyze.
- Sweep: Standing power attacks hit all enemies in front.
- Warmaster: Backward power attacks stagger enemies.
- Devastating Blow: Forward power attacks do 25% bonus damage and knock back.
#### 3. Archery
- Overdraw (5 ranks): +20%/+40%/+60%/+80%/+100% bow damage.
- Eagle Eye: Hold block to zoom while aiming (no perk needed; perk upgrades zoom)
- Steady Hand (2 ranks): Time slows by 25%/50% when zoomed.
- Critical Shot (3 ranks): 10%/15%/20% chance for double damage critical hits.
- Power Shot: Arrow stagger chance 50%.
- Ranger: Move faster with drawn bow.
- Quick Shot: Draw 30% faster.
#### 4. Block
- Shield Wall (5 ranks): +20%/+40%/+60%/+80%/+100% block effectiveness.
- Deflect Arrows: Arrows do no damage when blocking (with shield).
- Elemental Protection: Block reduces elemental damage by 50% (with shield).
- Quick Reflexes: Time slows during a power attack while blocking.
- Power Bash: Bash does 5x more damage.
- Deadly Bash: Bash does 5x more stamina damage and has chance to stagger.
- Disarming Bash: Chance to disarm opponent.
- Shield Charge: Sprinting with shield raised knocks down enemies.
#### 5. Smithing
- Steel Smithing: Improve steel gear.
- Arcane Blacksmith: Improve enchanted weapons/armor.
- Advanced Armors: Improve scaled, plate, and Dwarven gear.
- Glass Smithing: Improve glass gear.
- Dragon Armor: Improve dragonplate and dragonscale.
- Daedric Smithing: Improve Daedric gear.
- Ebony Smithing: Improve ebony gear.
- Orcish Smithing: Improve orcish gear.
#### 6. Heavy Armor
- Juggernaut (5 ranks): +20%/+40%/+60%/+80%/+100% armor rating.
- Fists of Steel: Unarmed damage equals base gauntlet armor rating (useful for Khajiit).
- Cushioned: Half fall damage.
- Conditioning: No weight penalty for heavy armor (run faster).
- Well Fitted: +25% armor bonus if wearing all heavy.
- Tower of Strength: Reduce stagger chance by 50%.
- Matching Set: +25% armor bonus if matching set of heavy armor.
- Reflect Blows: 10% chance to reflect melee damage back.
---
Stealth Skills
#### 7. Light Armor
- Agile Defender (5 ranks): +20%/+40%/+60%/+80%/+100% armor rating.
- Custom Fit: +25% armor if wearing all light armor.
- Unhindered: Light armor weighs nothing (no movement penalty).
- Wind Walker: Stamina regenerates 50% faster in light armor.
- Matching Set: +25% armor if matching set.
- Deft Movement: 10% chance to avoid all damage from melee attack.
#### 8. Sneak
- Stealth (5 ranks): 20%/40%/60%/80%/100% harder to detect.
- Muffled Movement: Armor makes less noise.
- Silence: Movement makes no noise.
- Light Foot: Won't trigger pressure plates.
- Backstab: Sneak attacks with one-handed weapons do 6x damage.
- Deadly Aim: Bows do 3x sneak damage.
- Assassin's Blade: Hidden daggers do 15x damage (combined with Backstab).
#### 9. Lockpicking
- Novice/Apprentice/Adept/Expert/Master Locks: Respectively allow picking locks of that level.
- Quick Hands: Can lockpick without being noticed.
- Wax Key: Automatically copies picked locks.
- Golden Touch: Find more gold in chests.
- Treasure Hunter: Higher chance to find valuable items.
- Locksmith: Starting point of lockpicks never breaks (starts from entry point).
- Unbreakable: Lockpicks never break.
#### 10. Pickpocket
- Light Fingers (5 ranks): 20%/40%/60%/80%/100% easier pickpocket.
- Night Thief: +25% pickpocket chance while sleeping victims.
- Poisoned: Can reverse-pickpocket poisons.
- Cutpurse: Pickpocket gold is 50% easier.
- Extra Pockets: +100 carry capacity.
- Misdirection: Can steal equipped weapons.
- Perfect Touch: Can steal equipped armor.
#### 11. Speech
- Haggling (5 ranks): 10%/20%/30%/40%/50% better prices.
- Allure: 10% better prices with opposite sex.
- Bribery: Can bribe guards.
- Intimidation: Intimidate persuasion rolls succeed more.
- Investor: Can invest 500 gold in a shop for permanent better prices.
- Merchant: Can sell stolen goods to any merchant.
- Fence: Can fence stolen goods to any merchant.
- Master Trader: All merchants have 1000 gold.
- Persuasion: Persuasion attempts always succeed.
---
Magic Skills
#### 12. Alchemy
- Alchemist (5 ranks): +20%/+40%/+60%/+80%/+100% potion strength.
- Physician: Healing potions restore 25% more.
- Benefactor: Positive potions are 25% stronger.
- Poisoner: Poisons are 25% stronger.
- Experimenter (3 ranks): Reveals 1/2/3 effects from tasting unknown ingredient.
- Concentrated Poison: Poisons applied to weapons last 2x hits.
- Green Thumb: Two ingredients per harvest.
- Snakeblood: 50% resistance to all poisons.
#### 13. Alteration
- Mage Armor (3 ranks): flesh spells are 2x/3x/3.5x stronger if not wearing armor.
- Alteration Dual Casting: Overcharge spells for increased magnitude/duration.
- Stability: Alteration spells last 50% longer.
- Atronach: 30% chance to absorb enemy spells (stacks with Atronach stone).
#### 14. Conjuration
- Mystic Binding: Bound weapons do more damage and dispel conjured enemies.
- Soul Stealer: Bound weapons cast Soul Trap on targets.
- Conjuration Dual Casting: Overcharge.
- Summoner (2 ranks): Summons last 2x/3x longer.
- Atromancy: Double summons distance.
- Elemental Potency: Summoned atronachs are 50% more powerful.
- Oblivion Binding: Bound weapons banish summoned creatures from Oblivion.
- Twin Souls: Summon two atronachs or reanimate two undead.
#### 15. Destruction
- Novice/Adept/Expert/Master Destruction: Half magicka cost for respective level spells.
- Intense Flames: Fire spells cause fleeing on low-health enemies.
- Deep Freeze: Frost spells paralyze on low-health enemies.
- Disintegrate: Shock spells turn low-health enemies to ash.
- Impact: Dual-casting staggers enemies (essential for mages).
- Augmented Flames/Frost/Shock (2 ranks): +25%/+50% damage for that element.
#### 16. Illusion
- Novice/Adept/Expert/Master Illusion: Half cost.
- Hypnotic Gaze: Calm spells work one higher level.
- Kindred Mage: Illusion spells work on higher-level people.
- Animage: Illusion spells work on animals.
- Quiet Casting: All spells are silent (great for stealth).
- Illusion Dual Casting: Overcharge.
- Master of the Mind: Illusion spells work on undead, Daedra, and automatons.
#### 17. Restoration
- Novice/Adept/Expert/Master Restoration: Half cost.
- Respite: Healing also restores stamina.
- Regeneration: Healing spells are 50% more effective.
- Avoid Death: Once per day, if health drops below 10%, you become ethereal and heal (survival).
- Ward Absorb: Wards absorb 25% (or 50% with perk) of enemy spell magnitude.
- Restoration Dual Casting: Overcharge.
- Recovery: Magicka regenerates 25% faster.
- Necromage: All spells are more effective against undead (but also affects self if vampire).
#### 18. Enchanting
- Enchanter (5 ranks): +20%/+40%/+60%/+80%/+100% enchantment strength.
- Insightful Enchanter: Skill increases 20% faster.
- Fire/Frost/Storm Enchanter: Respective elemental enchantments 25% stronger.
- Extra Effect: Can put two enchantments on the same item (priceless).
- Soul Squim: Soul gems power enchantments (bonus).
---
Special Abilities: Racial Powers, Shouts & Standing Stones
#### Racial Powers (once per day)
#### Dragon Shouts (Thu'um)
Shouts are learned by absorbing dragon souls. Each shout has 3 words; each word reduces cooldown and increases power. Example key shouts:
#### Standing Stones (permanent buffs until changed)
---
Recommended Build Synergies
Builds are not classes but playstyle templates.
| Build Name | Primary Skills | Secondary Skills | Stone | Key Perks | Playstyle |
|---|---|---|---|---|---|
| Stealth Archer | Sneak, Archery | Light Armor, Alchemy | Thief | Deadly Aim, Overdraw, Muffled Movement | Snipe from shadows; use poisons. |
| Assassin | Sneak, One-Handed (dagger) | Illusion, Alchemy | Shadow or Thief | Assassin's Blade, Backstab, Quiet Casting | Invisibility + backstab for one-hit kills. |
| Pure Mage | Destruction, Restoration, Alteration | Conjuration (optional) | Mage or Atronach | Impact, Mage Armor, Recovery, Avoid Death | Dual-cast Impact for stunlock; flesh spells for armor. |
| Spellsword | One-Handed, Destruction | Light/Heavy Armor, Enchanting | Warrior or Lord | Dual Flurry, Augmented Flames, Elemental Protection | Buff sword with Flame or Shock; cast spells in off-hand. |
| Battlemage | Heavy Armor, Two-Handed or One-Handed | Destruction, Restoration | Lord | Impact? No; use heavy armor perks | Charged in melee with magic backup (e.g., Cloak spells). |
| Paladin | One-Handed, Restoration, Heavy Armor | Block, Smithing | Lord, Warrior | Shield Wall, Regeneration, Avoid Death | Tank with healing; Turn Undead for extra damage. |
| Necromancer | Conjuration, Illusion, Restoration | Alchemy | Mage | Twin Souls, Master of the Mind, Necromage | Summon/raise dead; Fear spells; poison victims. |
| Thief | Sneak, Pickpocket, Speech, Lockpicking | Light Armor | Thief | Extra Pockets, Golden Touch, Fence | Invest in shops, steal everything, avoid combat. |
When to Use Each Skill (General Tips)
- One-Handed/Two-Handed/Archery: Use in all direct combat. Switch to archery for range and stealth.
- Block: Activate shield when facing melee or dragon breath. Use bash to interrupt.
- Smithing: Use at every forge to improve gear; don't forget Arcane Blacksmith.
- Heavy/Light Armor: Wear the type that matches your build; perks make a big difference.
- Sneak: Always stealth when possible; backstab/backstab archery for multipliers.
- Lockpicking: Pick every lock for loot; Unbreakable is top priority.
- Pickpocket: Use on sleeping NPCs for easy skill boosts; plant poisons on rivals.
- Speech: Haggling perk first; use persuasion in dialogue to skip fights.
- Alchemy: Experiment with ingredients to discover effects; craft Fortify Smithing/Enchanting potions.
- **Alteration
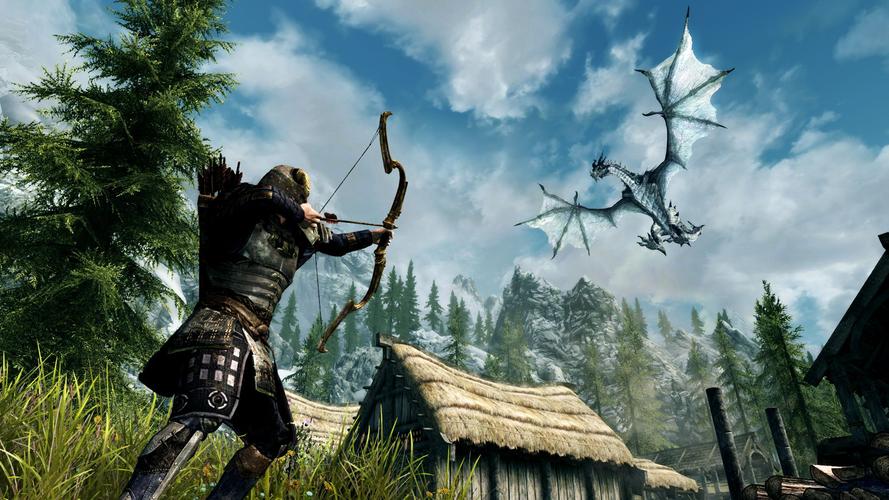
Characters & Roles
Characters & Roles Guide for The Elder Scrolls V: Skyrim
Unlike traditional class-based RPGs, Skyrim doesn’t lock you into a predefined character. Instead, it uses a freeform skill system where you develop your Dragonborn by using skills, choosing perks, and selecting equipment. This guide covers the major playable archetypes (classes) you can create, as well as the key followers (NPC companions) you can recruit. Each section describes strengths, weaknesses, playstyle, how to unlock/build, recommended gear, and team synergy for both your character and your allies.
Playable Archetypes (Classes)
Your character’s role is defined by the three major skill groupings: Warrior (Combat), Mage (Magic), and Thief (Stealth). You can specialize in one or mix them into hybrids. Below are the most effective and iconic builds.
#### 1. Warrior (Combat Focus)
- Background / Strengths: Warriors excel in direct melee and ranged combat. They have high health, heavy armor, and can deal massive physical damage. Ideal for players who like charging into battle.
- Weaknesses: Vulnerable to magic (especially destruction/illusion spells); limited crowd control against mages or dragons unless using shouts.
- Playstyle: And\. use one-handed weapons (sword + shield), two-handed weapons (greatsword, warhammer), or archery with heavy armor. Blocking and bashing are key. Perks in Heavy Armor, Block, One-Handed or Two-Handed, and Smithing.
- Unlock Conditions: None; freely choose skills at start. Recommended race: Orc (Berserker Rage) or Nord (Battle Cry).
- Recommended Equipment:
- Team Synergy: Pair with a mage follower (e.g., J’zargo or Illia) for ranged damage and healing. Or a stealth archer follower (e.g., Aela the Huntress) for distraction.
- Background / Strengths: Masters of the arcane. High magicka pool, powerful destruction spells, conjured allies, and restoration healing. Can dominate from a distance or control the battlefield.
- Weaknesses: Very fragile (low health, light armor). Running out of magicka mid-fight is deadly. Weak against silence or magic-resistant enemies.
- Playstyle: Stay at range, use Destruction spells for damage, Conjuration for summons, Restoration to heal, Alteration for armor buffs (Oakflesh). Perks in Destruction (dual casting, impact), Conjuration, Restoration, and Alteration.
- Unlock Conditions: Start with any magic skills. Recommended race: High Elf (high magicka, +50 magicka power) or Breton (magic resistance).
- Recommended Equipment:
- Team Synergy: Pair with a tank follower (e.g., Lydia or Mjoll the Lioness) to hold enemies while you cast. A restoration-focused follower like Marcurio can also heal you.
- Background / Strengths: Masters of stealth, lockpicking, pickpocketing, and backstabbing. Can one-shot many enemies from shadows. Excellent for silent gameplay and avoiding direct combat.
- Weaknesses: Very low armor and health; a single detected fight can be lethal. Ineffective against dragons or large groups unless using ranged stealth (archery).
- Playstyle: Sneak everywhere, use Sneak perks (Muffled Movement, Backstab), One-Handed with daggers for 15x sneak damage (with perk), Archery for ranged sneak attacks, Lockpicking and Pickpocket for utility. Light armor or clothes.
- Unlock Conditions: No unlock; skills available from start. Recommended race: Khajiit (night vision, claw attacks) or Wood Elf (sneak boost, arrow resistance).
- Recommended Equipment:
- Team Synergy: Avoid loud followers who break stealth (e.g., horses). Use a follower that also sneaks, like Cicero (Dark Brotherhood) or Jenassa (Whiterun). Followers with Light Armor and One-Handed work best.
- Spellsword (Warrior + Mage): One-handed weapon in one hand, spell in the other. Use Destruction for ranged damage, Restoration for healing, and heavy/light armor. Perks: One-Handed, Block (if using shield), Destruction, Heavy Armor.
- Nightblade (Thief + Mage): Sneak + illusion magic (Invisibility, Muffle, Calm). Daggers for backstab. Excellent for crowd control and escape.
- Battlemage (Warrior + Mage): Heavy armor + two-handed weapon + destruction/conjuration. Slow but powerful. Use Conjuration to summon allies, then charge.
- Ranger (Thief + Warrior): Archery + light armor + one-handed for close combat. Use Alchemy for poisons. Perks: Archery, Light Armor, Sneak, One-Handed.
- Early: Steel armor, Iron greatsword.
- Mid: Dwarven or Orcish armor, Ebony blade.
- Late: Daedric or Dragonplate armor, Daedric warhammer.
#### 2. Mage (Magic Focus)
- Apprentice robes (early), Archmage’s robes (late).
- Mage hood or Diadem of the Savant.
- Staves for extra spells.
#### 3. Thief / Assassin (Stealth Focus)
- Ancient Shrouded Armor (Dark Brotherhood questline) or Nightingale Armor (Thieves Guild).
- Daedric dagger (best sneak dagger), Mehrunes’ Razor.
- Bow: Auriel’s Bow (Dawnguard DLC) or Dragonbone Bow.
#### 4. Hybrid Builds (Examples)
Major Followers (Companions)
Followers are NPCs who can join your party (one humanoid follower at a time, plus one pet/animal if you have Hearthfire). Each has unique skills, equipment, and personality. Below are the most notable followers, their roles, how to recruit them, and best uses.
| Follower | Role / Playstyle | Strengths | Weaknesses | How to Recruit | Best Synergy |
|---|---|---|---|---|---|
| Lydia | Tank (One-Handed + Shield) | High health, heavy armor, aggressive; carries burdens. | Low magic resistance, no sneaking. | Given as Housecarl after becoming Thane of Whiterun (buy Breezehome). | Any mage or archer build; holds aggro. |
| J’zargo (Khajiit mage) | Destruction mage | High-level spells (Fireball, Chain Lightning); unlimited magicka in low-level fights. | Low health, no armor; can kill you with area spells. | Complete quest “J’zargo’s Experiment” at the College of Winterhold. | Warrior or tank builds; keep him at range. |
| Serana (Dawnguard DLC) | Necromancer / Vampire | Raises dead enemies, powerful ice spells, immune to frost, essential (cannot die). | Weak to fire, her necromancy can cause confusion. | Main quest in Dawnguard; she joins after meeting her in Dimhollow Crypt. | Any build; her necromancy provides extra bodies. |
| Aela the Huntress | Archer / Light Armor | Expert archer, high sneak, werewolf. | Low health, not good in melee. | Complete quest “The Silver Hand” in the Companions faction. | Stealth archer builds or spellsword; she adds ranged damage. |
| Cicero | Stealth / Assassin | Dual-wielding daggers, high sneak, can’t be killed (essential). | Annoying personality, low armor, limited carry weight. | After the Dark Brotherhood quest “Death Incarnate” (he survives). | Nightblade or thief builds; he follows sneak tactics. |
| Dawnguard Rune Hammer (not a follower, but a unique weapon) | Special weapon | Staves – These are not characters. | N/A | N/A | N/A |
| Barbas (dog follower) | Defensive / Distraction | Immortal (essential), staggers enemies, doesn’t count as humanoid follower. | No damage, can push you off cliffs. | From quest “A Daedra’s Best Friend” (near Falkreath). | Any build; good for tanking and keeping enemies busy. |
| Meridia’s Beacon (artifact) | Not a character – placeholder. | N/A | N/A | N/A | N/A |
- Lydia – essential only until you dismiss her; she can die in battle.
- Serana – always essential, even after quests.
- Cicero – essential after a certain point.
- Barbas – immortal.
- Dawnguard members (like Durak) – not essential.
- Warrior: Unrelenting Force (knockback), Elemental Fury (attack speed), Whirlwind Sprint (gap closer).
- Mage: Slow Time (cast more spells), Become Ethereal (survivability), Marked for Death (armor reduction).
- Thief: Throw Voice (distraction), Aura Whisper (detect life), Shadowcloak of Nocturnal (invisibility).
- Skills: Heavy Armor (all perks), Block (5/5 + Deflect Arrows + Shield Charge), One-Handed (Armsman 5/5 + Critical Charge), Smithing (up to Dragon), Enchanting (for resistances).
- Equipment:
- Shouts: Unrelenting Force, Elemental Fury, Slow Time.
- Followers: J’zargo (mage) or Serana (necromancy).
- Skills: Destruction (Dual Casting, Impact, Augmented Flames/Frost/Shock), Restoration (Regeneration, Respite), Alteration (Mage Armor perks), Enchanting (reduce Destruction cost).
- Equipment: Archmage’s Robes, Morokei (mask for magicka regeneration), Ring of Peerless Destruction, Necklace of Peerless Destruction.
- Shouts: Slow Time, Become Ethereal, Marked for Death.
- Followers: Lydia (tank) or a conjurer follower like Tolfdir (not recruitable normally – use console on PC; not recommended for console). Best: Marcurio (Riften) – he casts high-level destruction spells.
- Skills: Sneak (5/5 + Muffled Movement + Backstab + Deadly Aim), Archery (5/5 + Overdraw + Eagle Eye + Steady Hand), One-Handed (for backup dagger), Light Armor (Agile Defender 5/5 + Deft Movement).
- Equipment:
- Shouts: Throw Voice (distract enemies), Aura Whisper (detect life), Slow Time.
- Followers: Aela the Huntress (stealth archer) or Cicero (sneaky). Keep distance; never take a heavy armor follower.
- Tank (Warrior) + Mage: Let the tank take aggro while you cast safely. Give your mage follower a staff to prevent them from dying quickly.
- Archer + Tank: Your follower draws attention while you snipe from cover. Avoid companions that use loud summons.
- Assassin + Stealth Follower: Both sneaking – use followers like Cicero or Jenassa. Do not take heavy armor followers; they will get you detected.
- Mage + Barbas (dog): The dog distracts enemies, giving you time to charge spells. Excellent combo for squishy mages.
The Dragonborn (Hero Role)
Your character is the Dragonborn – a mortal born with the soul of a dragon. This role is unique because you can learn Thu’um (Shouts) from word walls, which are powerful abilities that complement any build. All skills and Shouts are tied to your character, not a separate class. Key Shouts for each role:
Recommended Equipment & Builds by Role
#### Warrior Tank Build (One-Handed + Shield)
- Armor: Dragonplate (or Ebony) – fully tempered.
- Shield: Spellbreaker (rewards from ‘The Only Cure’ quest) or Daedric shield.
- Weapon: Daedric Sword of the Vampire (absorb health).
#### Pure Destruction Mage
#### Stealth Archer (Classic Skyrim Build)
- Armor: Ancient Shrouded set (double backstab damage) or Nightingale Armor.
- Bow: Auriel’s Bow (with Sunhallowed arrows for undead) or Daedric Bow of the Stag (soul trap).
- Dagger: Mehrunes’ Razor (instant kill).
Unlock Conditions (General)
All playable archetypes are available from the start – you simply choose which skills to use. Followers require specific quests or conditions (listed in table above). No paywalls or hidden unlocks for classes; the only “unlock” is gaining access to guilds (Companions, College of Winterhold, Thieves Guild, Dark Brotherhood) which provide unique gear and trainers.
Team Synergy & Followers
Conclusion
Skyrim’s class system is a blank slate – your role evolves with your skill choices. This guide provides a framework for the most popular and effective playstyles, along with the best followers to complement them. Remember that you can respec skills (after the Dragonborn DLC, by reading the Black Book: Waking Dreams) to try new roles. Choose the archetype that matches your preferred combat style and have fun exploring the world of Skyrim!
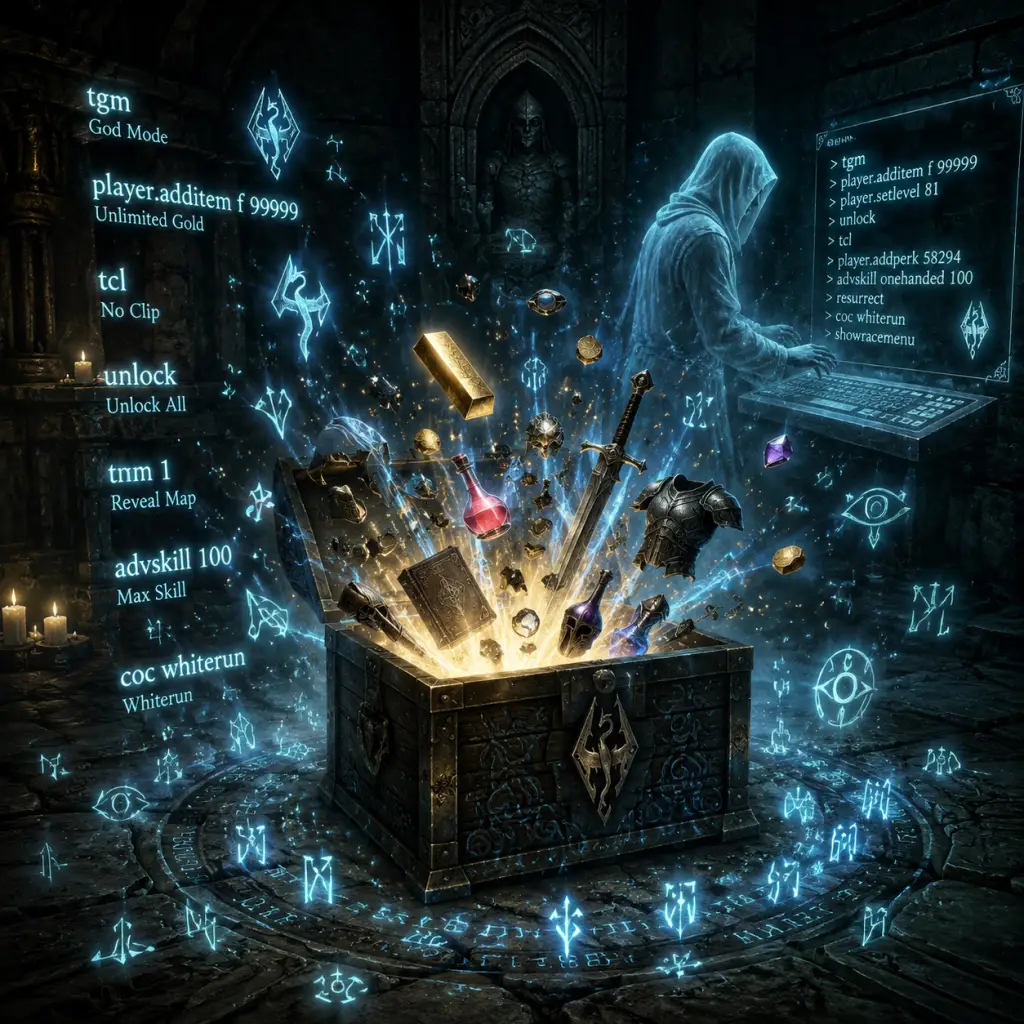
Cheats & Secrets
Introduction
The Elder Scrolls V: Skyrim offers a wealth of cheats and secrets, ranging from official developer console commands (PC only) to hidden quests, Easter eggs, and safe exploits. This guide covers all legitimate, developer-intended hidden content and known secrets. Note that console commands cannot be used on Xbox or PlayStation without mods or special devices (e.g., Mod Support on Xbox One/PS4 allows some console-like commands via mods, but not native). All cheats listed here are considered safe for single-player use, but always save before experimenting.
Console Commands (PC Only)
To open the console, press the tilde key (`) on your keyboard. Type commands and press Enter. Use `help` for a list of all commands.
Essential Commands
| Command | Effect | Example |
|---|---|---|
| `tgm` | Toggle God Mode (invincible, infinite magicka & stamina, no carry weight limits) | Just type `tgm` |
| `tcl` | Toggle No-Clip (fly through walls) | Type `tcl` to toggle |
| `player.additem <FormID> <count>` | Add any item by its base ID | `player.additem 0000000F 1000` (adds 1000 gold) |
| `player.setlevel <#>` | Set player level directly | `player.setlevel 50` |
| `player.advskill <skill> <#>` | Add skill points (XP) to a skill | `player.advskill onehanded 1000` |
| `coc <cell name>` | Teleport to a specific cell (use `coc qasmoke` for the testing hall) | `coc Riverwood` |
| `tai` | Toggle AI (makes all NPCs freeze) | `tai` |
| `tcai` | Toggle Combat AI (enemies stop fighting) | `tcai` |
| `sgtm <#>` | Set game speed multiplier (default 1.0) | `sgtm 0.5` for slow motion |
| `psb` | All spells added (magic style) | `psb` (adds every spell) |
| `unlock` | Unlock any locked target (door, chest, etc.) | Click a locked door, type `unlock` |
| `kill` | Kill the targeted NPC | Click NPC, type `kill` |
| `resurrect` | Revive a dead NPC | Click corpse, type `resurrect` |
| `showracemenu` | Open character customization again (may break quests) | Type `showracemenu` |
| `player.setav <attribute> <#>` | Set a specific attribute (Health, Magicka, Stamina) | `player.setav health 500` |
| `player.modav <attribute> <#>` | Modify an attribute by a value | `player.modav carryweight 500` |
| `setessential <baseID> 1` | Make an NPC essential (cannot die) | `setessential 000A2C8E 1` (makes Lydia essential) |
| `sqq` | Start a quest stage | `sqq MQ104 10` |
| `tdetect` | Toggle AI detection (sneak easier) | `tdetect` |
| `player.setav <skill> <#>` | Set a skill level directly (0-100) | `player.setav destruction 100` |
| `player.setav <perk> 1` | Add a perk (use `help “perk name” 4` first) | `player.addperk 000B83E5` (Adds Armsman 1) |
Full Item/Quest ID Lists
To find item IDs, use `help "item name" 4` in console. For quest IDs, use `help "quest name" 0`. Many IDs are available on UESP.net.
Hidden Console Commands
- `bat <filename>` – Execute a batch file of commands. Create a .txt file in your Skyrim folder (e.g., `cheats.txt`) with line-separated commands, then type `bat cheats`.
- `qf <QuestFormID> <stage>` – Force a quest stage.
- `cow <WorldSpace> <x> <y>` – Teleport to coordinates in a worldspace.
- `fw <FormID>` – Force weather.
- `setgs fJumpHeightMin <#>` – Change jump height.
- `getgs <game setting>` – Display current game setting.
- Location: Reachwater Rock, near Markarth. Read the book “The Legend of Red Eagle” to start.
- Secret: Finding all three word walls for the Become Ethereal shout in this dungeon is not hidden per se, but the secret is in the final boss room—a unique weapon (Red Eagle’s Fury/Bane) and a level-based reward.
- Location: Frostmere Crypt (east of Morthal). Inside, you’ll find the Pale Lady, a unique ghost, and a quest to return her sword (The Pale Blade) to her. Talking to her triggers options that lead to different endings.
- Secret: If you refuse to take her sword and instead attack her, she drops the sword anyway. The sword has a unique enchantment that causes a fear effect.
- Location: Solitude Lighthouse (north of Solitude). An unmarked location with a tragic story told via journals. The secret is the unique weapon “Windshear” (a one-handed sword) hidden in the dead captain’s quarters.
- Link: Windshear is one of the best swords in the game due to its unique stagger effect.
- Hidden Spell: In a locked chest inside the camp, you’ll find the Transmute Mineral Ore spell tome. This allows you to turn iron ore into silver, and silver into gold. This is developer-intended for smithing.
- Visual Easter Egg: Randomly encounters near Whiterun at night—a spectral horseman riding a horse. If you follow him, he may lead you to a dead body with a treasure map. This is a reference to the Legend of Sleepy Hollow.
- Dialog Easter Egg: In Solitude, a guard says “I used to be an adventurer like you, then I took an arrow in the knee.” This has become a meme. Many other guards reference popular culture.
- Random Encounter: M’aiq the Liar appears in random locations. He gives cryptic, often humorous statements that sometimes hint at cut content or previous Elder Scrolls games. He is a running gag.
- Quest: “The Mind of Madness” from Sheogorath. The Wabbajack staff has a random effect (polymorph enemies, heal, etc.). The quest also includes a reference to Oblivion and the Shivering Isles.
- Location: Near Dawnstar, a giant skeleton lies partially buried. This is a nod to the size of giants in lore.
- No Easter Egg: Actually, there is a giant statue of a dragon in the Throat of the World, but it’s not an Easter egg. However, there is a hidden message in the game’s audio files: if you reverse the music track “Dragonborn”, you can hear a message saying “We are the Dovahkiin” in reverse. This is developer-intended.
- Easter Egg: The alchemy ingredient Nirnroot glows and makes a unique sound. This is a direct callback to The Elder Scrolls IV: Oblivion. In Skyrim, there is a quest “The Nirnroot” in which you collect 30 Crimson Nirnroots for a reward.
- Hidden Quest: Collect 24 Stones of Barenziah to unlock the “Crown of Barenziah” and a permanent active effect that increases the number of gems found in containers. The quest is started by reading the book “The Kings” in the Thalmor Embassy or by stealing a stone.
- Exploit: Create a potion of Fortify Restoration (requires the alchemy perk). Equip four pieces of apparel with Fortify Alchemy enchantments (crafted early). Then:
- Result: You can create weapons and armor with millions of damage points. This is a well-known exploit (often called “Alchemy-Enchanting loop”) that has not been patched.
- Location: In Solitude, under the “Angeline’s Aromatics” shop, there is a chest that can be accessed by looking through a gap in the floor. It contains Flax, Jazbay Grapes, etc. This is unintended but provides early alchemy ingredients.
- Location: Behind the house of the Iron-Breaker family in Dawnstar, there is a giant rock. If you look under the texture, you can see a chest belonging to the Khajiit caravan. It respawns every few days with high-value items. This is considered a safe exploit.
- Exploit: If you kill a Forsworn Briarheart and loot their briarheart, then loot their corpse again after moving away and coming back, the heart may respawn. This can be repeated for infinite money (since each heart sells for ~50 gold). Not game-breaking but a small exploit.
- Location: Understone Keep in Markarth. If you stand on a certain ledge and look down, you can see a pool of water. Jumping in will trigger a high fall damage if you land wrong, but if you use the Become Ethereal shout, you can “swim” on nothing and find a hidden room with a few items. This is a developer oversight but harmless.
- Unlockable Enemies: The Falmer (betrayed Snow Elves) are only encountered in dwemer ruins. There is no way to unlock them as playable, but you can learn about their lore.
- Unlockable Powers: In the Dragonborn DLC, you can find Black Books that give you unique powers (e.g., “Companion’s Insight” – no damage to followers). These are hidden behind quests.
- Unlockable Weapons: Complete the Dawnguard questline (join the Dawnguard) to unlock crossbows that can be upgraded with explosive bolts. This is developer-intended.
- Hidden Armor Set: If you complete the Dark Brotherhood questline, you can find the Ancient Shrouded Armor set in the Sanctuary. It provides better stealth boosts than the standard armor.
- Unlockable Song: After joining the Bards College in Solitude, you can learn the song “The Dragonborn Comes” sung by the Bard. This is a scripted event and not a cheat, but it’s a hidden reward.
- Hidden Shouts: There are 27 word walls scattered across Skyrim. Each unlocks a word of a shout. Some are hidden in obscure locations like the “Throw Voice” shout behind the Solitude throne room or “Storm Call” on the Throat of the World. Finding all three words for each shout is a secret achievement.
- The “Notched Pickaxe”: A reference to Minecraft creator Notch. Found at the top of the Throat of the World, near the word wall for the “Clear Skies” shout. It can mine ore slightly faster and has a unique enchantment (increases Health by 5). This is a deliberate Easter egg.
- The “Wabberjack”: A staff from Sheogorath that has random effects. Its name is a portmanteau of “Wabbajack” and “Jack” (the player? Sheogorath’s voice actor?)
- The “Museum of the Dead”: In Windhelm, you can find a house called “House of Horrors” (Museum of the Dead is a quest location). It contains a unique artifact called the “Mace of Molag Bal”. The quest itself is a Daedric quest and is considered a hidden boss fight.
- The “Easter Egg Room” near the top of the world: Using the `coc qasmoke` console command teleports you to the “Quality Assurance Smoke Room,” a test cell with every item in the game. This is developer-only space but easily accessed with cheats.
- The “Crab” at the bottom of the Sea of Ghosts: If you dive deep enough in the Sea of Ghosts (north of Solitude), you can find a giant skeleton of a sea creature, possibly a reference to the “Mistmare” from earlier games.
- Always save before using console commands or exploits. Some commands (like `showracemenu`) can break quest progress.
- Many secrets require the Legendary Edition or Special Edition (or Anniversary Edition) for DLC content.
- For achievements/trophies, using console commands disables them (PC). To re-enable, use a mod like “Achievement Mods Enabler” or play on an alternate save.
Hidden Quests & Locations
The Lost Legend (Quest: Forbidden Legend)
The Pale Lady (Unmarked Quest)
The Lighthouse of Solitude
Halted Stream Camp (Transmute Ore Spell)
Easter Eggs & Developer References
The Headless Horseman
The Chicken of the Sea
The “M’aiq the Liar” NPC
The “Wabbajack” – Daedric Artifact
The “Skeleton of a Giant” near Dawnstar
The “Dovahkiin” Statue
The “Nirnroot” Reference (Oblivion callback)
The “Barenziah’s Treasure” Quest
Safe Exploits & Glitches (Developer-Not-Intended but Fun)
Effort was made in later patches to remove many exploits, but some remain. These are considered safe and won't corrupt saves:
The Fortify Restoration Loop
1. Create a Fortify Restoration potion.
2. Drink it.
3. Unequip and re-equip your Fortify Alchemy gear (the enchantment strength increases).
4. Repeat to create extremely powerful potions of Fortify Smithing or Fortify Enchanting.
The Merchant Chest Glitch
The Dawnstar Chest Glitch
The “Briarheart” Reset Glitch (Forsworn)
The Understone Keep Glitch (Fishing)
Unlockable Content & Hidden Features
The “Eyes of the Falmer”
The “Hermaeus Mora” Black Books
The “Dawnguard” Crossbows
The “Ancient Shrouded Armor”
The “Bard’s College” Unmarked Song
The “Word of Power” Locations
Developer-Intended Hidden Content (No Cheats Required)
Final Tips
This guide covers the most comprehensive known cheats and secrets in The Elder Scrolls V: Skyrim. Enjoy exploring the hidden side of Tamriel!