
The Last of Us
## Game Introduction **The Last of Us** is a genre-defining action-adventure and survival horror series developed by **Naughty Dog** and published by **Sony Interactive Entertainment**. Originally released for the PlayStation 3 in 2013, the franchise has been remastered and reimagined for modern pl...

Download & Installation
Overview
The Last of Us is a critically acclaimed action-adventure series developed by Naughty Dog. This guide covers The Last of Us Part I (PS5, PC) and The Last of Us Part II Remastered (PS5). The original PS3 version is no longer sold digitally, but physical discs exist. The game is not available on Xbox, Nintendo Switch, or mobile.
Platform Availability
| Platform | Version | Storefronts |
|---|---|---|
| PS5 | Part I, Part II Remastered | PlayStation Store |
| PS4 | Part I (disc only, digital delisted), Part II | PlayStation Store (Part II only) |
| PC | Part I | Steam, Epic Games Store |
| PS3 | Original (digital delisted, physical only) | N/A |
System Requirements (PC – The Last of Us Part I)
Minimum
- OS: Windows 10 (64-bit, version 1909 or later)
- CPU: AMD Ryzen 5 1500X / Intel Core i7-4770K
- GPU: AMD Radeon RX 470 (4GB) / NVIDIA GeForce GTX 970 (4GB) / Intel Arc A580
- RAM: 16 GB
- Storage: 100 GB SSD (NVMe recommended)
- DirectX: 12
- OS: Windows 10 (64-bit, version 1909 or later)
- CPU: AMD Ryzen 5 3600X / Intel Core i7-8700K
- GPU: AMD Radeon RX 5700 XT (8GB) / NVIDIA GeForce RTX 2070 Super (8GB) / Intel Arc A770
- RAM: 32 GB
- Storage: 100 GB SSD (NVMe)
- DirectX: 12
- PlayStation: Requires a PSN account (free) to download from PlayStation Store and to access online features (leaderboards, photo mode sharing).
- PC: Requires a Steam or Epic Games account. For Steam, must own the game in library; for Epic, account plus ownership. Optionally link PSN account for certain bonuses (e.g., unlocking outfits via PSN).
Recommended
> Note: The PC version requires a large initial shader compilation which takes significant time and resources. SSDs are mandatory to avoid stuttering.
Account Requirements
Step-by-Step Installation
PlayStation 5 / PlayStation 4
1. Purchase: Go to PlayStation Store on console or web. Search for “The Last of Us Part I” or “The Last of Us Part II Remastered”.
2. Download: Select “Download to Console”. Ensure you have enough free space (see storage space below).
3. Installation: Once downloaded (~80–100 GB), the game will install automatically. You can monitor progress in the game library under “Downloaded”.
4. First Launch: The game will install additional patches. After that, you may be prompted to import save data from previous versions (if applicable).
PC (Steam)
1. Install Steam: Download and install the Steam client from [store.steampowered.com](https://store.steampowered.com).
2. Purchase & Download:
- Log in to Steam.
- Go to Library → The Last of Us Part I → Install.
- Choose installation path (ensure enough free space).
- Click “Next” and let Steam download the game files.
3. Shader Compilation: During first launch, the game will compile shaders (may take 20–40 minutes). Do not interrupt.
4. Graphics Settings: On first run, you can adjust graphics presets (Ultra, High, Medium, Low) or use the built-in benchmark to optimize.
5. PSN Linking: Optionally, link your PSN account via the in-game menu to unlock pre-order bonuses or deluxe edition items.
PC (Epic Games Store)
1. Install Epic Games Launcher: Download from [store.epicgames.com](https://store.epicgames.com).
2. Purchase & Download:
- Launch Epic, log in.
- Go to Library → The Last of Us Part I → Install.
- Select install location, click Install.
3. Same shader compilation and first-launch process as Steam.
Storage Space Requirements
| Version | Platform | Download Size | Install Size | Additional (Patches) |
|---|---|---|---|---|
| Part I | PS5 | ~80 GB | ~80 GB | ~5–10 GB |
| Part I | PS4 | ~70 GB | ~70 GB | ~5 GB |
| Part I | PC | ~100 GB | ~100 GB | ~10 GB (high-res textures optional) |
| Part II | PS5 (Remastered) | ~80 GB | ~80 GB | ~5 GB |
| Part II | PS4 | ~70 GB | ~70 GB | ~5 GB |
First Launch Setup
PlayStation
- Update: The console will automatically install the latest patch (e.g., v1.1.0).
- Difficulty: Choose from Very Light, Light, Moderate, Hard, Survivor, or Grounded.
- Accessibility: Full suite available (hearing, vision, motor). Configure before playing.
- HDR: If using HDR TV, enable in system settings + in-game options.
- Graphics Preset: Select a preset based on your hardware. Use the benchmark tool to test performance.
- Upscaling: Options include DLSS (Nvidia), FSR (AMD), XeSS (Intel). Enable if needed.
- Frame Generation: Available on RTX 40-series and RX 7000 series. Use to boost FPS.
- VRAM Usage: Monitor via settings; if you exceed your GPU’s VRAM, lower texture quality.
- Shader Compilation: Let it complete 100% before entering the main menu. Do not alt-tab during compilation.
- Save Sync: Steam Cloud or Epic Cloud saves are enabled by default.
PC
> Tip: For optimal performance on PC, disable “Motion Blur”, “Film Grain”, and “Chromatic Aberration” for a cleaner image.
Common Installation Errors & Fixes
| Error | Platform | Cause | Fix |
|---|---|---|---|
| “Missing MSVCP140.dll” | PC | Missing Visual C++ Redistributables | Install “Visual C++ 2015-2022” from Microsoft. |
| “The file is corrupted” | PC (Steam) | Corrupted download | Verify game files: Steam → Right-click game → Properties → Local Files → Verify integrity. |
| “Shader Compilation Stuck” | PC | Background interference or low RAM | Close all unnecessary apps. Increase page file to 32GB. If stuck forever, restart PC and re-launch. |
| “Out of Video Memory” | PC | VRAM insufficient / texture quality too high | Lower texture quality to Medium or turn off high-res textures. Disable DLSS Frame Generation if using limited VRAM. |
| “Error CE-30005-8” | PS4/PS5 | Corrupted installation file | Delete the game and re-download. Rebuild database (Safe Mode option 3). |
| “Cannot connect to PSN” | PlayStation | Server outage or account issue | Check PSN status. Log out and log back in. |
| “PlayStation Store won’t download” | PlayStation | Insufficient space or license conflict | Free up space. Restore licenses (Settings → Account Management → Restore Licenses). |
| “Steam Cloud sync failed” | PC | Network or conflict | Disable Steam Cloud temporarily (Properties → General → Uncheck “Enable Steam Cloud”). |
| “Kernel32.dll crash” | PC | Outdated Windows/GPU drivers | Update Windows and GPU drivers to latest versions. |
Post-Install Verification
Console
- Check Version: From the game tile, press Options → Information to see version number (should match latest patch).
- Load Save: Quick start a new game; if it loads normally, installation is successful.
- Performance Test: Run through the opening sequence (e.g., Joel’s house). Look for unusual stuttering or crashes.
- Verify Files: On Steam, right-click game → Properties → Local Files → Verify integrity. On Epic, go to Library → click the three dots → Verify.
- Benchmark: Use the in-game benchmark (Options → Graphics → Benchmark). Aim for stable 30+ FPS on your target settings.
- Monitor Temperatures: Use MSI Afterburner or other tools to ensure CPU/GPU temps stay within safe limits.
- First Mission Test: Play through the prologue. If no crashing or major stuttering, install is good.
- Shader Cache: The game will compile shaders again after major GPU driver updates; this is normal.
- Cross-Platform Saves: Not supported (PS5 vs PC).
- PS5 DualSense Features: On PC, haptic feedback and adaptive triggers work only via wired connection and supported games (Part I supports it).
- Disc Versions: If you have a physical PS4/PS5 disc, you must insert it to play. The disc will trigger a large download anyway.
- Mods: The Last of Us Part I does not officially support mods. Unofficial mods exist (e.g., texture packs) but are unsupported.
PC
Additional Notes
Troubleshooting Guide
If you encounter crashes after installation:
1. Update GPU Drivers: Direct from Nvidia/AMD/Intel.
2. Disable Overlays: Disable Steam Overlay, Discord overlay, and MSI Afterburner.
3. Set High Priority: In Task Manager, find TheLastOfUs.exe → Set Priority → High.
4. Disable Xbox Game Bar: Windows settings → Gaming → Game Bar → Off.
5. Run as Administrator: Right-click game executable → Properties → Compatibility → Run as administrator.
For persistent issues, visit the official Naughty Dog support page or the game’s Steam community hub.
---
This guide is up to date as of 2024. Game updates may change some details.

Game Introduction
Game Introduction
The Last of Us is a genre-defining action-adventure and survival horror series developed by Naughty Dog and published by Sony Interactive Entertainment. Originally released for the PlayStation 3 in 2013, the franchise has been remastered and reimagined for modern platforms. This guide covers The Last of Us Part I (PS5, PC) and The Last of Us Part II Remastered (PS5). The original PS3 version is no longer sold, but these definitive editions offer the complete, enhanced experience.
Release Timeline & Platforms
| Title | Original Release | Platforms Covered in This Guide |
|---|---|---|
| The Last of Us (original) | June 14, 2013 | PS3 (discontinued) |
| The Last of Us Remastered | July 29, 2014 | PS4 (not covered) |
| The Last of Us Part I | September 2, 2022 (PS5), March 28, 2023 (PC) | PS5, PC |
| The Last of Us Part II | June 19, 2020 (PS4) | PS4 (original) & PS5 via remaster |
| The Last of Us Part II Remastered | January 19, 2024 | PS5 |
Story Overview
The Last of Us is set twenty years after a fungal pandemic caused by a mutated Cordyceps fungus has ravaged civilization. Infected humans become aggressive, zombie-like creatures. Survivors live in quarantine zones, independent settlements, or as ruthless hunters.
Part I follows Joel, a hardened smuggler, who is tasked with escorting Ellie, a young girl immune to the infection, across a post-apocalyptic United States. Their journey becomes a powerful, emotional bond as Joel grapples with his past trauma and the choice to save humanity—or protect Ellie at any cost.
Part II takes place four years later. Ellie, now 19, seeks revenge after a traumatic event. The narrative expands to a dual perspective, exploring the devastating cycle of violence and the cost of vengeance. The story is darker, more complex, and delves deeper into themes of empathy, loss, and moral ambiguity.
Main Characters
- Joel Miller (Part I) – A survivor who lost his daughter in the outbreak. Gruff, pragmatic, but capable of deep love.
- Ellie Williams – Immune to the fungus. Brave, resourceful, and fiercely loyal. Central to both games.
- Tommy (Part I & II) – Joel’s younger brother, a former Firefly who builds a life in Jackson.
- Marlene (Part I) – Leader of the Fireflies, a resistance group seeking a cure from Ellie’s immunity.
- Abby Anderson (Part II) – A member of the Washington Liberation Front (WLF). Strong, driven, and morally complex.
- Lev & Yara (Part II) – Siblings escaping the Seraphite cult; Abby forms an unexpected alliance with them.
- Cinematic Storytelling: Naughty Dog’s signature narrative design blends gameplay with seamless cutscenes, motion-capture performances, and a haunting original score by Gustavo Santaolalla.
- Emotional Depth: The relationship between Joel and Ellie is the heart of the series, rarely matched in video games. Part II expands this into a nuanced exploration of trauma and perspective.
- Realistic Survival Mechanics: Limited resources, crafting, stealth, and brutal hand‑to‑hand combat create constant tension. Enemies (infected and human) react intelligently.
- Mature Themes: The game does not shy away from violence, loss, or moral grey areas. It asks difficult questions about love, duty, and the price of survival.
- Unique Infection: Unlike typical zombies, the Cordyceps fungus creates diverse infected stages: Runners, Stalkers, Clickers, Bloaters, Shamblers (Part II), and Rat Kings (Part II). Each requires different tactics.
- Story / Campaign – Linear, narrative‑driven single‑player experience. Part I takes ~15 hours; Part II ~25 hours.
- Left Behind (Part I) – A story DLC included in Part I that shows Ellie’s past before meeting Joel. ~2 hours.
- No Return (Part II Remastered) – A roguelike survival mode where players choose a character and fight waves of enemies with permadeath. Exclusive to the PS5 remaster.
- Guitar Free Play (Part II Remastered) – Unlockable mode to play the guitar as various characters.
- Lost Levels (Part II Remastered) – Three playable cut sections with developer commentary.
- Speedrun Mode – Built‑in timer and leaderboards (Part II Remastered).
- The Last of Us Part I – Includes the Left Behind DLC as part of the base game. No additional paid DLC.
- The Last of Us Part II Remastered – Includes all previous content plus No Return (roguelike mode), three Lost Levels, and a Guitar Free Play mode. No further expansions planned.
- No paid season passes or microtransactions exist for these versions.
Setting
The games are set in a ruined American landscape: overgrown cities, abandoned buildings, and treacherous wilderness. Key locations include Boston, Pittsburgh, Salt Lake City (Part I), and Seattle, Jackson, and Santa Barbara (Part II). The environment is a character itself, with stunning detail that builds a palpable sense of dread and beauty.
Core Appeal & What Makes It Unique
Target Audience
The Last of Us is aimed at mature players (17+) who appreciate strong narratives, character-driven drama, and survival horror mechanics. It appeals to fans of cinematic single‑player games like Uncharted, God of War (2018), or Red Dead Redemption 2. The emotional weight may be too heavy for younger players or those seeking lighthearted experiences.
Game Modes
Online / Offline Support
Both Part I and Part II are fully offline single‑player games. There is no multiplayer component in the current versions. The original The Last of Us Remastered on PS4 included the Factions multiplayer mode, but that was removed for Part I and is not present in Part II. No online connection is required for gameplay, though updates and trophy synchronization need internet.
DLC & Expansions
Why Play The Last of Us?
The Last of Us is not just a game; it is an emotional journey that redefined interactive storytelling. Its masterful blend of gameplay, narrative, and atmosphere has earned it over 200 Game of the Year awards and a beloved television adaptation on HBO. Whether you are drawn to its harrowing survival challenges, its unforgettable characters, or its poignant meditation on love and loss, this series remains an essential experience in gaming.
Note: This guide focuses on the PS5 and PC versions of Part I, and the PS5 version of Part II Remastered. For the best experience, use a controller on PC and enable adaptive triggers on PS5.
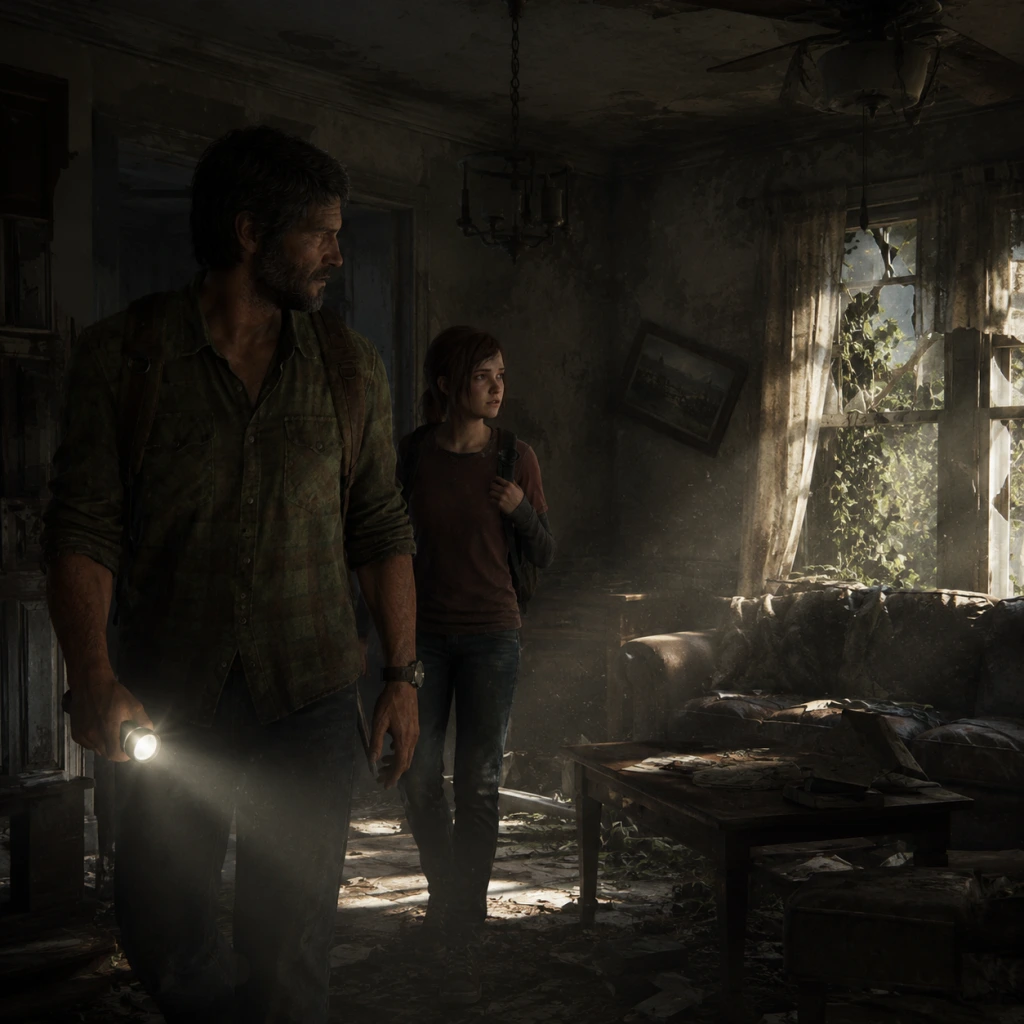
Getting Started
Overview
This guide covers The Last of Us Part I (PS5, PC) and The Last of Us Part II Remastered (PS5). New players often feel overwhelmed by the tense stealth, scarce resources, and brutal combat. This guide walks you through the critical first hour, explains every control scheme, and gives you a clear day‑one checklist so you survive the apocalypse with confidence.
---
Game Introduction
The Last of Us is a story‑driven action‑adventure set in a post‑apocalyptic world ravaged by a fungal infection. You play as Joel, a hardened survivor, tasked with smuggling a teenage girl, Ellie, across the country. Stealth, resource management, and brutal combat are central. There is no character creation—you step directly into Joel’s shoes.
---
First Hour Walkthrough (Spoiler‑Free)
1. Opening Cinematic (5 min) – Pay attention to the context: the outbreak, Joel’s trauma. No gameplay yet.
2. Tutorial Section – Sarah (15 min) – You control Sarah, Joel’s daughter, inside their house. Learn basic movement (left stick), camera (right stick), and interact (triangle on PS / E on PC).
3. Escape Sequence (10 min) – The outbreak hits. Follow Tommy, navigate chaos, avoid infected. This teaches you run and crouch (L3). Quick‑time events appear; mash the button prompt.
4. Time Skip – Boston (20 min) – 20 years later. Joel meets Tess. You learn combat basics: punching (R2), aiming (L2), and shooting (R2 while aiming). The tutorial tells you to sneak and listen mode (R1).
5. First Fight – Rooftop (10 min) – You face a few infected. Practice stealth kills (approach from behind, click R1 when prompt appears). Use bricks/bottles to distract (R2 to throw). End the hour by reaching the safe house with Tess.
Key takeaway: The first hour is linear and teaches you every core mechanic. Don’t rush—learn the controls here.
---
Character Creation
There is no character creation in The Last of Us. You play as a predetermined character (Joel in Part I, Ellie in Part II). You can unlock outfits via New Game+ or collectibles, but these are purely cosmetic and don’t affect gameplay.
---
Controls – All Platforms
PlayStation 5 (DualSense)
| Action | Button |
|---|---|
| Move | Left Stick |
| Look / Aim | Right Stick |
| Sprint | L3 (press left stick) |
| Crouch / Stand | L3 (hold while moving) |
| Listen Mode | R1 (hold) |
| Melee / Grab | R2 |
| Shoot (while aiming) | R2 |
| Aim (weapon) | L2 |
| Reload | Square |
| Interact / Pick Up | Triangle |
| Weapon Quick‑Swap | L1 |
| Craft / Backpack | Up on D‑Pad |
| Molotov / Throwable | R1 (tap) |
| Flashlight | Down on D‑Pad |
| Heal / Use Health Kit | R2 (while health kit selected) |
| Pause / Menu | Options |
PC (Keyboard + Mouse)
Default keybinds (can be remapped):
| Action | Key |
|---|---|
| Move | W,A,S,D |
| Look | Mouse movement |
| Sprint | Shift |
| Crouch / Stand | Ctrl (hold) or C (toggle) |
| Listen Mode | Q (hold) |
| Melee / Grab | E |
| Shoot | Left Mouse Button |
| Aim | Right Mouse Button |
| Reload | R |
| Interact | F |
| Weapon Quick‑Swap | Mouse Wheel or 1‑4 |
| Craft / Backpack | Tab |
| Throw Brick/Bottle | G |
| Flashlight | B |
| Heal | H (hold) |
| Pause / Menu | Escape |
---
UI Overview
Your Heads‑Up Display (HUD) is minimal and contextual:
- Health Bar – Bottom‑center. A gray circle represents health; darker segments mean injury. No numbers – watch for character limping.
- Weapon & Ammo – Bottom‑right shows equipped weapon, ammo count, and type.
- Listen Mode Indicator – When you hold R1/Q, a white ring expands from your character. Enemies silhouettes show through walls (not behind cover).
- Crafting Menu – Press Up/Tab. Shows available materials and recipes (health kits, shivs, molotovs, etc.).
- Backpack – Same menu. View items, collectibles, notes.
- Compass – Top‑center, shows cardinal directions and quest markers.
- Ammo Counter – Very subtle. Reload often.
- Context Prompts – Triangle/F appears when you can interact.
- Survive the tutorial without wasting ammo – use melee and stealth.
- Reach the Capitol Building with Tess and Ellie.
- Learn to scavenge – always search drawers, cabinets, and bodies. Resources are scarce.
- Craft a shiv as soon as you find scissors and binding – shivs open locked doors and kill clickers silently.
- Use listen mode (R1/Q) constantly to track enemies behind walls.
- Avoid direct combat – stealth is your best friend.
- Explore every room – resources are hidden everywhere.
- Break wooden boards and other obstacles with melee attacks – they often hide supplies.
- Upgrade your backpack as soon as you find enough tools (found in workbenches or tools lying around).
- Collect artifact notes – they provide lore and sometimes clues to stashes.
- Use bricks/bottles to distract enemies – throw them to create noise, then sneak past or attack from behind.
- Craft health kits early – you can carry only 3 at a time.
- Rushing through areas – you’ll miss supplies and trigger enemy ambushes.
- Wasting bullets – ammo is extremely rare. Only fire when absolutely necessary.
- Ignoring listen mode – it’s your best tool for stealth.
- Fighting infected in open spaces – lure them into corridors or use bottlenecks.
- Skipping workbenches – they let you upgrade weapon handling (reload speed, clip size, etc.).
- Neglecting the “clicker” danger – clickers are blind but deadly up close. Always kill them with a shiv or a well‑placed bullet to the head.
- Holding the flashlight on – enemies (especially infected) can see light. Toggle it off when you hear enemies nearby.
- Not using listen mode often enough – it recharges quickly and reveals enemy positions. Use it every few steps.
- Gunfighting with hunters – humans can also hear and spot you. Use stealth kills or bricks to distract.
- Standing still when infected charge – always move sideways; they lunge straight.
- Forgetting to upgrade your melee weapon – a fully upgraded bat or pipe can one‑hit kill many enemies.
- Not saving the game manually – autosave is frequent, but you can also quicksave (PC: F5, PS5: Pause > Save). Do it before a big fight.
- Ignoring environment traps – you can throw bricks at explosive barrels near enemies to trigger explosions.
- [ ] Watch the opening cutscene and control Sarah (learn movement/interact).
- [ ] Survive the escape sequence (practice running and crouching).
- [ ] Reach the Boston capitol area timeline.
- [ ] Learn combat basics: melee, aim, shoot, and stealth kill.
- [ ] Use listen mode at least 10 times to track enemies.
- [ ] Find and craft your first shiv (scissors + binding).
- [ ] Upgrade one weapon at a workbench (preferably the pistol’s reload speed or the shotgun’s clip size).
- [ ] Collect all resources in the very first apartment building (check every drawer).
- [ ] Read a note or artifact (to understand the world).
- [ ] Save the game manually after the tutorial.
- [ ] Practice stealth – kill 3 enemies without being detected.
---
Essential Early Objectives (First 2 Hours)
---
What to Do First – What to Avoid
✅ Do First
❌ Avoid
---
Early Resource Priorities
Resources are finite. Prioritise:
1. Binding – used in health kits, shivs, and molotovs. Always pick up binding.
2. Scissors – combined with binding to make shivs (essential for clickers and locked doors).
3. Rag – used for health kits and molotovs.
4. Alcohol – for molotovs and health kits. Very valuable.
5. Blades – upgrade melee weapons (only when you have a weapon to upgrade).
6. Pills – found in specific locations; use them at the skill menu (press Options -> Skills) to improve health, weapon sway, listening range, etc.
Tip: Don’t craft everything immediately. Sometimes you need a molotov for a boss‑like encounter later.
---
Common Beginner Mistakes
---
Day‑One Checklist
When you start a new game, complete these steps within your first session:
Once you’ve done these, you’re ready to face the rest of the game. Good luck, survivor.
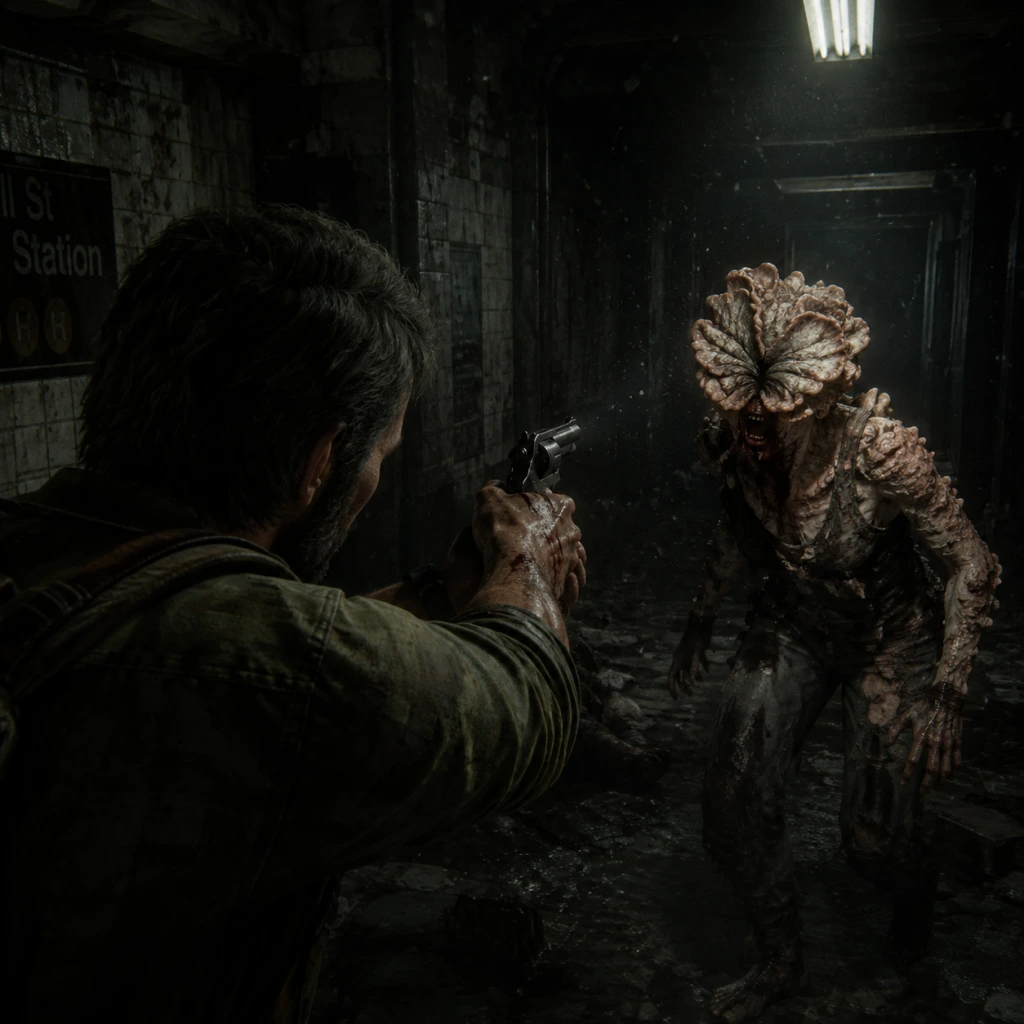
Core Gameplay
Core Gameplay Overview
The Last of Us series blends tense stealth, brutal combat, resource management, and deep environmental storytelling. The core gameplay loop involves moving through linear and semi-open areas, scavenging for supplies, engaging enemies (human and infected) through stealth or direct combat, solving simple puzzles (ladders, pallets, workbenches), and advancing a character-driven narrative. Both Part I and Part II share this loop, though Part II adds more complex human enemy AI, prone movement, and larger sandbox-like encounters.
Below is a breakdown of the core systems and how they evolve across the player's journey, organized by typical progression tiers for the series.
---
Early Game (Chapters 1–5 in Part I / First 2–3 Hours of Part II)
Main Gameplay Loop
- Exploration & Scavenging: You start with minimal gear. Explore every corner of buildings, sewers, and streets for crafting materials (alcohol, rags, bindings, blades, sugar), ammo, supplements, and parts. Early areas are relatively linear but reward thorough searching.
- Stealth as Default: With only a few bullets and no silencer, sneaking past enemies or performing silent takedowns (clickers, humans) is essential. Listen Mode (R1) highlights enemy positions through walls.
- Combat: Encounters are small (2–4 enemies). You rely on bricks/bottles to distract, then choke out or shiv. Firearms are reserved for emergencies. The first few infected (runners, clickers) teach you sound-based detection and the importance of staying low.
- Crafting & Resources: Your inventory is very limited. Craft only what you need immediately: a shiv (to open shiv doors later) or a health kit. Molotovs and upgraded melee weapons are rare treats.
- Progression Elements: You find your first suppressor upgrade manual (Part I) and skill booklet. Supplements collected let you unlock the first few skill nodes (e.g., weapon sway reduction, health upgrade). Parts are used to upgrade firearm stats (reload speed, fire rate) at workbenches.
- Listen Mode: Works poorly against clickers (they make noise but don't show on Listen Mode). Use it sparingly because it consumes a small amount of resource (none in Part II, but it's always available).
- Melee Combat: Simple punches and a limited number of weapon swings on a 2x4. Blocking and dodging are basic (Part II adds a dodge mechanic).
- Health System: A few hits kill you. Use health kits (plant+rag+alcohol) only after combat, not during, unless desperate.
- Puzzles: Simple block pushing, ladder placement, and generator puzzles (e.g., the generator in the hotel basement in Part I).
- Increased Enemy Variety: You regularly face mixed groups of infected (runners, clickers, stalkers) and human enemies (hunters, FEDRA, Seraphites, WLF). Human enemies now communicate and flank. Stalkers hide and ambush.
- Resource Scarcity Shifts: You have more ways to craft, but enemies also drop less ammo. You must choose between crafting shivs, grenades, or health kits. Skill upgrades make you slightly more efficient.
- Combat Options Expand: You can now craft silencers for your pistol and revolver (if you found the manual). You also have access to a bow in some sections (Part I) or explosive arrows (Part II). Upgraded weapons (e.g., upgraded shotgun) become powerful tools.
- Stealth vs. Aggression: You can now afford to be more aggressive if you have upgraded weapons and armor (Part II). But the game punishes recklessness—enemies call out your position, and you can be overwhelmed.
- Exploration of Hub Areas: Larger environments like Pittsburgh (Part I) or Downtown Seattle (Part II) have multiple paths, locked doors, and hidden loot. Some doors require shivs or combinations from notes.
- Skill Books & Supplement Upgrades: You have access to several skill trees: Health, Listen Mode Distance, Weapon Sway, Crafting Speed, Stealth Speed, etc. Prioritize health and crafting speed early, then stealth speed.
- Weapon Upgrades: Each firearm can be upgraded with parts: damage, fire rate, reload speed, capacity, and scope (for rifles). Pistol upgrades are cheap and very effective.
- Crafting Recipes: You unlock better recipes through manuals: smoke bombs, proximity bombs, and improved melee weapons (with blades or bindings).
- Human Enemy AI: They use suppressing fire, attempt flanking, and can be baited with sounds. Part II's AI is more advanced—they search intelligently and remember last seen positions.
- High Stakes Combat: Enemies are tougher (bloaters, armored humans, dogs in Part II). Your resources are plentiful if you've been scavenging well, but you still need to choose wisely. The game throws larger arenas and multiple waves at you.
- Full Arsenal Unlocked: You likely have every weapon (flamethrower, military sniper, crossbow, etc.) and most upgrades. You can craft almost anything. Skill trees are nearly maxed.
- Puzzles Become Minimal: The focus is on combat and narrative climax. No more generator puzzles; instead, you navigate through intense firefights and infected hordes.
- Character Abilities: Part II gives you greater mobility (prone, hill climbing, rope swinging). In Part I, you have full stealth speed and listen mode distance.
- Max Upgrades: All weapon upgrades possible by now (if you collected enough parts and manuals). Your skill tree should be almost complete. For example, level 4 listen mode shows enemies for longer and from further away.
- Special Weapons: The flamethrower (Part I) melts infected groups but consumes fuel. The crossbow (Part I) is silent and retrievable. In Part II, the silenced submachine gun is a versatile tool.
- Environmental Mastery: You know where to find ammo stashes, and you can use environmental traps (cars with alarms, explosive barrels) to your advantage.
- New Game+: The looper after completing the story. You retain all upgrades, weapons, and skill points. Enemies remain the same difficulty, but you have maximum power from the start. This is the best time to collect missed artifacts, unlock all achievements, or tackle higher difficulty levels.
- Chapter Select: Both Part I and Part II allow you to replay any chapter with your current loadout. This is useful for collectibles or revisiting favorite encounters.
- Difficulty Tiers: After beating the game, you can start a fresh playthrough on Grounded (Part I) or Grounded+ (Part II) for a true survival experience. No HUD, no Listen Mode, enemies kill in one hit, and resources are extremely scarce.
- Permadeath Mode (Part II): A challenge mode where dying resets you to the checkpoint (easy), the chapter, or the entire game. This demands perfect execution of the core gameplay loop.
- Speedrun & No Damage Runs: The community creates challenges; the game's design supports fast movement and knowledge skips.
- Grounded Mode: Listen Mode is disabled; you rely on actual sound cues (footsteps, breaths, clicking). Crafting is rare. One bullet is precious. This is the true test of the core gameplay principles.
- New Game+ Quirks: You can skip some upgrade decisions, but you cannot respec skill points. All unused supplements and parts carry over.
- Collectibles Completion: Use Chapter Select to mop up all artifacts, trading cards (Part I), coins (Part II), and training manuals. No New Game+ required for collectibles; they persist across saves.
- Start a Grounded+ playthrough from Chapter 1 (Part I) or Jackson (Part II).
- You must survive every encounter: avoid combat when possible, use resources only when necessary, and never fail a shiv door (they break after one use).
- Combine knowledge of enemy placements with perfect stealth. The satisfaction comes from executing a flawless run.
Key Systems at This Stage
Example Encounter: The Capitol Building (Part I)
You and Ellie need to cross a flooded lobby. Use Listen Mode to spot three runners. Sneak up, choke out two, then distract the last one with a bottle and melee. Resources are scarce—save your revolver bullets for the bloater you might encounter later.
---
Mid Game (Chapters 6–9 in Part I / Middle 5–10 Hours of Part II)
Main Gameplay Loop
Key Systems at This Stage
Example Encounter: The Hotel Basement (Part I) - Generator Room
You must start a generator to open a door, but it attracts a bloater and several infected. Plan ahead: place a bomb at the generator, sprint to the door, and use a shotgun to clear immediate threats. Use Listen Mode sparingly—the bloater doesn't show up. This encounter requires careful resource management and quick thinking.
---
Late Game (Chapters 10–12 in Part I / Last 5–8 Hours of Part II)
Main Gameplay Loop
Key Systems at This Stage
Example Encounter: The Hospital (Part I) - Final Firefight
You must fight through dozens of FEDRA soldiers to reach the operating room. Use your upgraded burst rifle and shotgun. Smoke bombs to blind, then flank. Your listen mode helps track the last few enemies. Save health kits for the inevitable damage.
---
Endgame (After Final Chapter - New Game+ and Challenges)
Main Gameplay Loop
Key Systems at This Stage
Example Endgame Goal: Obtain the Platinum Trophy on Grounded+
---
Summary of Core Systems by Tier
| Tier | Stealth | Combat | Resources | Upgrades |
|---|---|---|---|---|
| Early | Mandatory; few tools | Avoid; only if forced | Very scarce | Minimal – first skills and gun upgrades |
| Mid | Effective but optional | Controlled aggression possible | Moderate – need to choose craft uses | Several skills unlocked; weapons upgraded |
| Late | Powerful, but enemies adapt | Full force – multiple weapons | Abundant if scavenged well | Near max skills and weapons |
| Endgame | Mastery required (Grounded) | Precision execution | Extremely scarce on Grounded | Maxed (NG+) |
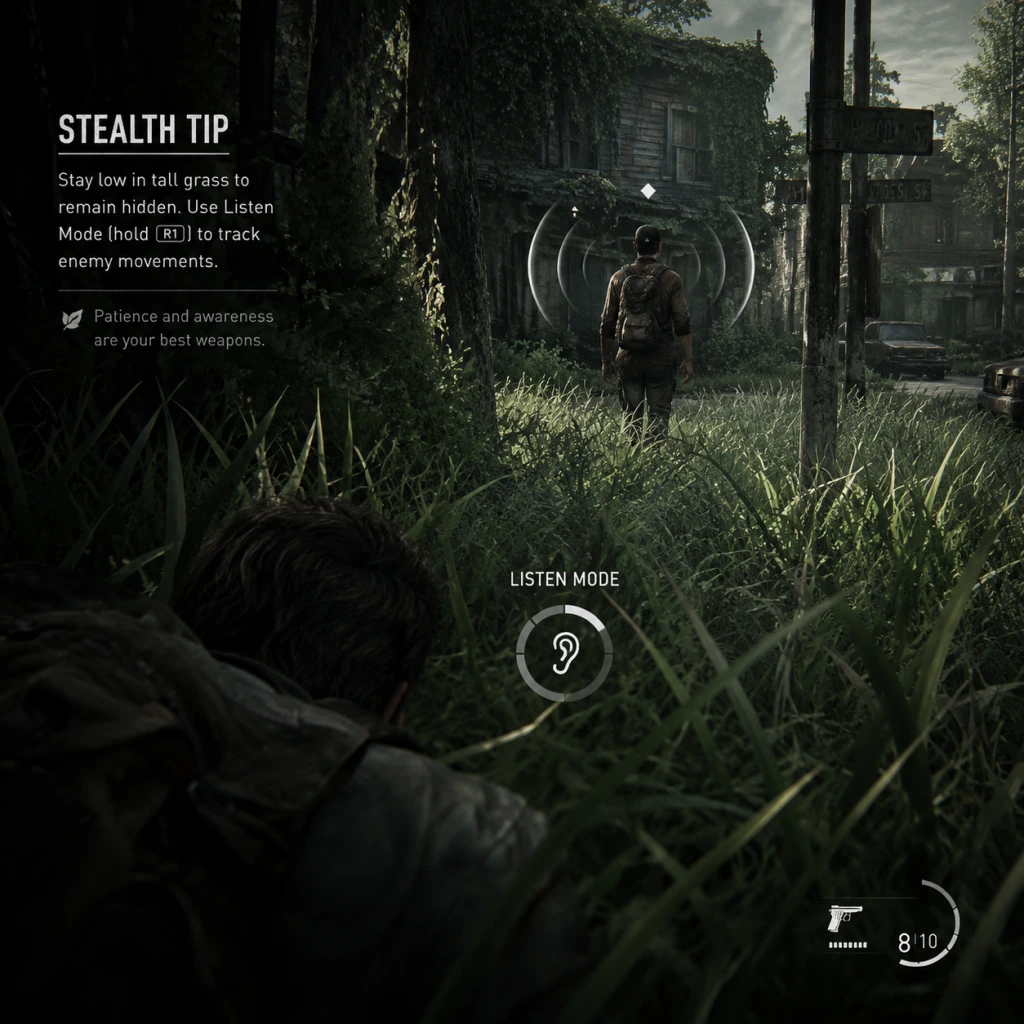
Game Tips
Game Tips for The Last of Us (Part I & Part II)
This guide provides comprehensive tips for both The Last of Us Part I and The Last of Us Part II Remastered. While core mechanics differ slightly, many principles apply to both. Tips are categorized for easy reference, with explanations of why they work and when to use them.
---
1. Stealth & Infiltration
Beginner: Crouch-walk everywhere
- Why it works: Enemies detect you mostly by sound and sight. Crouch-walking eliminates footstep noise and lowers your silhouette. Even when you think no one is near, staying crouched ensures you avoid triggering patrol routes.
- When to use: In any area with enemies, even if you plan to go loud. It costs no stamina and keeps your options open.
- Why it works: Throwing a bottle or brick against a wall or metal object produces a loud sound that attracts enemies toward that spot. This allows you to slip behind them or into the next area without direct confrontation.
- When to use: When you have limited ammo, are low on health, or need to bypass a tough encounter. Always scavenge for bricks and bottles first—they are reusable (you can pick up a brick after throwing it).
- Why it works: In Part II, enemies that enter tall grass can be grabbed and killed silently even if they are alerted (but not combat-active). By throwing a bottle just inside a patch of tall grass, you can lure one enemy there, eliminate them, and reduce the patrol count without raising the alarm.
- When to use: When facing groups of 3+ enemies; pick off the loner first, then use the distraction to isolate the next.
- Why it works: Headshots are instant kills against most human enemies (and some infected). Leg shots stagger enemies, causing them to limp and move slower, making subsequent shots easier.
- When to use: Headshots when you have a clear view and steady aim; leg shots when the enemy is running toward you or you need to buy time.
- Why it works: A heavy melee attack (square) after a stun (e.g., pistol whip, smoke bomb, or Molotov) guarantees a one-hit kill. This saves ammo and is faster than finishing a downed enemy with another shot.
- When to use: When an enemy is stunned by a smoke grenade or running through a cloud of spore-sacks; also works after a dodge+punish in Part II.
- Why it works: In both games, you can shoot explosive barrels, drop chandeliers, or knock over gas cans to cause chain reactions. In Part II, you can also push enemies off ledges or into water (drowning animation).
- When to use: When you are outnumbered and need area damage. Look for red barrels or hanging objects in every arena.
- Why it works: Once combat starts, enemies patrol and may step on items, making them impossible to pick up. Looting first ensures you don't miss crafting materials.
- When to use: Before entering any new area, sweep every drawer, cabinet, and body. Use listen mode (R1) to highlight lootable objects.
- Why it works: Cloth and binding are used for health kits, silencers, smoke bombs, and melee upgrades—all essential. Scissors and alcohol are more common, but cloth is the bottleneck for medkits.
- When to use: Always craft a health kit if you have at least 3 cloth and 1 alcohol. Keep one cloth in reserve for a silencer when facing many human enemies.
- Why it works: Selling items to traders (e.g., at the WLF FOB or Hillcrest) yields supplements and coins, which can be used to buy more valuable upgrades. Scrapping weapons is usually less efficient than selling them, unless you need parts for a specific upgrade.
- When to use: Check trader inventory before scrapping any weapon. Sell duplicates or low-rarity weapons; scrap only the ones with low sell value but high parts value.
- Why it works: The pistol holster upgrade (Parts) allows you to switch weapons faster. In many early encounters, quickly drawing your pistol versus your rifle can save your life.
- When to use: As soon as you have enough parts (e.g., 75 in Part I), upgrade the holster before weapon sway or capacity.
- Why it works: The shotgun is excellent against clickers and bloaters, which are the main threats in mid-game. Increasing its rate of fire and reload speed makes it viable in tight spots. The revolver is strong but has heavy recoil; it can wait.
- When to use: After crafting the holster, invest in shotgun upgrades (shell capacity, fire rate).
- Why it works: In Part II, you can use supplements to unlock skills like "Stealth 3" (faster crouch movement) and "Listen mode range". These allow you to stay hidden longer and spot enemies earlier. Combine with a silenced precision rifle (e.g., the hunting pistol) to eliminate targets silently from a distance.
- When to use: If you prefer stealth, invest points into stealth and listen mode upgrades first, then weapon accuracy upgrades.
- Why it works: Listen mode (R1) highlights enemy positions, lootable items, and safe containers. It also reveals hidden passages or breakable walls (marked with white X's).
- When to use: In every new area, activate listen mode for 2-3 seconds to scan for dangers and loot. It costs no resources and has no cooldown (though it drains stamina if held too long in Part II).
- Why it works: Safes contain rare parts, supplements, and schematics. Their codes are often found on notes or scribbled on walls nearby. Workbenches allow you to upgrade weapons—always find them before major encounters.
- When to use: Whenever you enter a building, search for notes with numbers (e.g., "11-7-59"). The safe is usually in the same room or nearby. Workbenches are often marked with a wrench icon on the map (if you have the map item).
- Why it works: In Part II, many areas become inaccessible after certain story events. However, you can often return to earlier zones via optional side paths or by waiting until later chapters. Collectibles like trading cards, artifacts, and coins can be missed if you rush.
- When to use: Before progressing the main story in a chapter, check the in-game collectible tracker (pause menu). If you are missing an artifact, search online for its location before moving to a point of no return.
- Why it works: Inventory is limited (pistol ammo, long gun ammo, crafting materials). Leave common items like scrap metal if your inventory is full, but always grab supplements and rare components.
- When to use: When looting, check the item type. If you already have 15 pistol bullets, skip a box of 5; take supplements and binding instead.
- In Part II, coins are the main currency for buying weapons and upgrades from traders. Prioritize buying the silencer and upgraded backpack. Also, invest in stamina upgrades (supplements) to carry more items.
- When to use: At traders, always buy the backpack upgrade first (costs 1 coin). Then buy weapon upgrades (silencer, scope, etc.). Don't waste coins on ammo—ammo drops are common.
- Some artifacts (e.g., gold coins, rare trading cards) have high sell value. Check a trader's buyback price; you can often sell artifacts that are duplicates (if you already have them in your collection) for supplements or parts.
- When to use: When you need a few more parts to upgrade a weapon, sell a rare artifact. But keep at least one copy for the collectible log (completionists).
- Recommended skills: Stealth 1-3 (crouch speed, silenced movement), Listen Mode range, Bow proficiency. Weapons: Silenced hunting pistol, bow, trap mines. Tactics: Avoid combat, use environmental kills, headshots from distance.
- Recommended skills: Melee damage, health upgrades, weapon sway reduction. Weapons: Shotgun, hammer, explosive launcher. Tactics: Smash through doors, use heavy melee to stun enemies, then finish with shotgun.
- Why it works: In certain choke points (e.g., the hotel basement), you can craft a shiv, use it on a door, then immediately die and respawn. The door remains open but the shiv is returned to your inventory. Only works in Part I; patched in Part II.
- When to use: Only if you are stuck with no shiv and need to open a door that requires one.
- Why it works: If you crouch-walk behind an enemy and they are in the middle of an animation (e.g., turning around or calling out), they won't detect you. Use this to travel through open spaces during combat.
- When to use: When you are spotted and need to reposition without being shot.
- Save often: In both games, manual saves are a lifesaver. Save before a tough combat encounter so you can retry without losing resources.
- Use photo mode for reconnaissance: In Part II, photo mode pauses the game and allows you to move the camera freely. Use it to scout enemy positions before engaging.
- Weapon durability matters: In Part II, melee weapons degrade. Use bricks to break walls instead of your machete. Keep a backup melee weapon.
- Dodge is your friend: In Part II, you can dodge (circle) melee attacks. Practice timing—dodging right before an attack stuns the enemy briefly, allowing a counter.
- Listen mode is not infinite: In Part II, holding R1 drains stamina. Use short bursts (2 seconds) to conserve stamina for sprinting.
Intermediate: Use bottles / bricks as distractions, not just weapons
Advanced: "Luring" enemies into tall grass for instant kills
---
2. Combat
Beginner: Aim for the head or leg
Intermediate: Melee+Stun combos
Advanced: Use the environment as a weapon
---
3. Resource Management
Beginner: Always loot everything before engaging enemies
Intermediate: Prioritize cloth and binding
Advanced: Salvage management in Part II — sell, not scrap
---
4. Crafting & Upgrades
Beginner: Craft a holster first
Intermediate: Upgrade shotgun before revolver in Part I
Advanced: Precision rifle upgrades for Part II stealth builds
---
5. Exploration & Environment
Beginner: Use listen mode frequently
Intermediate: Look for safes and workbenches
Advanced: Use the "backtrack" mechanic for missed items
---
6. Enemies: Types & Tactics
Infected
Runners – Fast but weak. Can be killed with one arrow or headshot. Use melee if you have a shiv or knife.
Clickers – Need a weapon upgrade or shiv for stealth kill. Never engage in melee without a shiv—they auto-kill you. Use shotgun, Molotov, or bait them into a trap.
Stalkers (Part II) – They hide and ambush. Use listen mode to track their movement. Smoke bombs stun them, allowing a quick kill.
Bloaters – Slow but extremely tough. Use fire (Molotov, flamethrower, explosive arrows). Shoot the spore sacks on their back to stagger them.
Humans
WLF – Use coordinated tactics. Focus on killing the leader (often marked with an exclamation).
Scars – They use bows and call out targets. Use smoke bombs to break their line of sight.
Clickers infected – If a human is infected, they turn after death. Burn or behead bodies quickly to prevent reanimation.
---
7. Economy (Supplies & Trading)
Beginner: Only pick up items you need
Intermediate: Use coins for trading
Advanced: Sell Artifacts for high value
---
8. Character Builds (Part II)
Ellie Build (Stealth & Precision)
Abby Build (Brute Force)
---
9. Advanced Tips & Glitches
Infinite shiv trick (Part I, specific locations)
Exploit enemy AI with "ghost" movement (Part II)
---
10. General Tips
---
This guide covers the essentials to survive and thrive in The Last of Us. Adapt your playstyle based on difficulty and resources. Good luck!
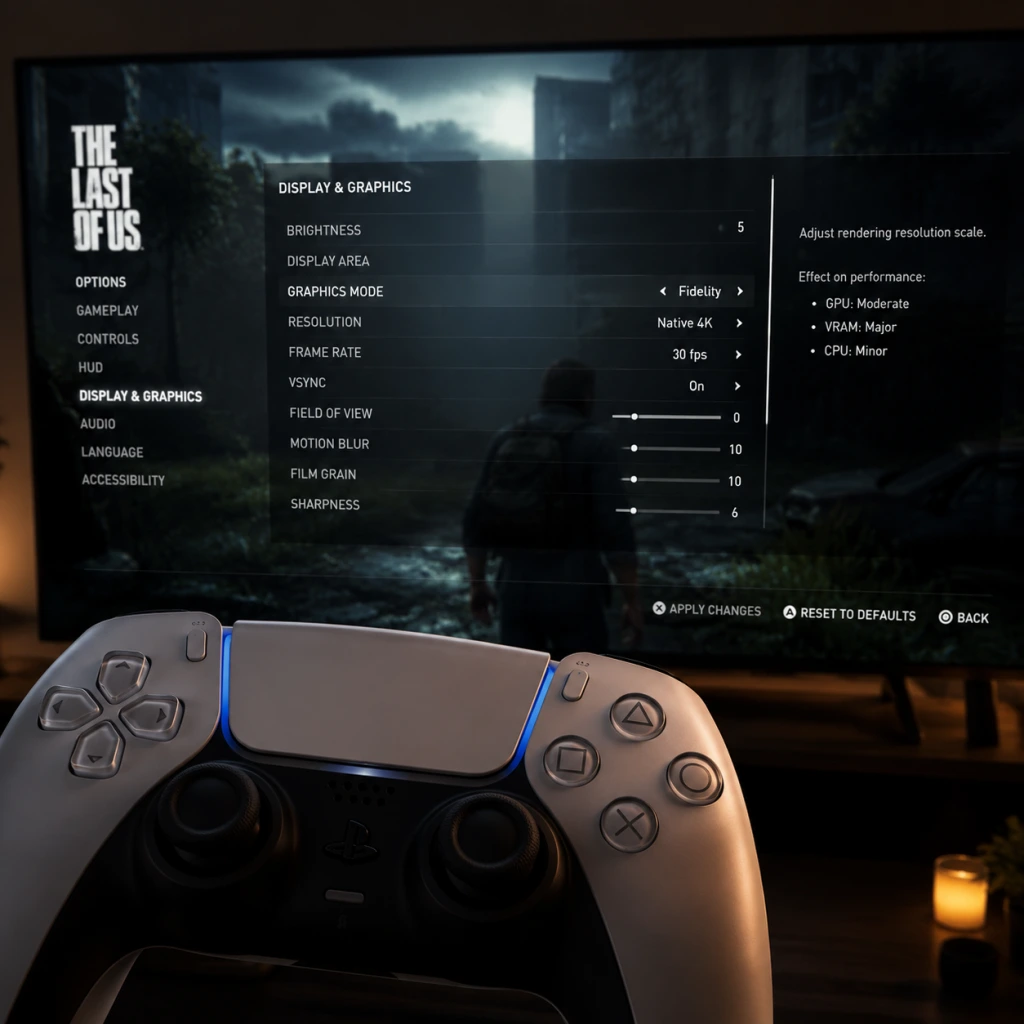
Game Settings
Game Settings for The Last of Us
This guide covers in-game settings for The Last of Us Part I (PS5 and PC) and The Last of Us Part II Remastered (PS5). Settings are divided into key categories. Optimal recommendations balance visual quality, performance, and personal preference. Settings that are easy to misconfigure are marked with ⚠️.
---
1. Graphics Settings
The Last of Us Part I (PC)
The PC version offers extensive graphics options. Use the recommended table below as a baseline. Adjust based on your specific hardware.
| Setting | Low (4GB VRAM) | Medium (6GB VRAM) | High (8GB VRAM) | Ultra (10GB+) | Notes |
|---|---|---|---|---|---|
| Texture Quality | Low | Medium | High | Ultra | ⚠️ VRAM hog. Reduce if stuttering occurs. |
| Texture Filtering | 2x | 4x | 8x | 16x | Little performance impact, set to Ultra if possible. |
| Shadow Quality | Low | Medium | High | Ultra | Medium hides detail but saves performance. |
| Ambient Occlusion | Off | SSAO | HBAO+ | HBAO+ | High impact on immersion, low performance cost on HBAO+. |
| Reflections | Off | Static | SSR (low) | SSR (high) | SSR high is costly. Use Static for solid framerate. |
| Volumetric Quality | Low | Medium | High | Ultra | Heavy in forests; set to Medium on mid-range. |
| Depth of Field | Off | On | On | On | Off improves clarity and reduces load. |
| Motion Blur | Off | Off | Off | Off | ⚠️ Turn off for sharper image and less nausea. |
| Chromatic Aberration | Off | Off | Off | Off | ⚠️ Turn off – adds visual noise with no performance gain. |
| Film Grain | Off | Off | Off | Off | Off for cleaner image. |
| Dynamic Resolution Scaling | Off | On (target 60fps) | Off | Off | Useful for stable framerate on weaker GPUs. |
| Upscaling | DLSS (Quality) or FSR (Quality) | DLSS/FSR Balanced | DLSS Quality | Off / DLAA | ⚠️ DLSS can add ghosting; FSR may cause shimmer. Test each. |
| VSync | Off (use G-Sync/Freesync) | Off | Off | Off | ⚠️ Off reduces input lag if you have adaptive sync. |
| Frame Rate Cap | 60 | 60 | 120 (if monitor) | 120/144 | Cap at monitor refresh for consistency. |
| Field of View (FOV) | Default (70) | Default | Default | Slight increase (75-80) | ⚠️ Too high may distort edges; keep modest. |
- Upscaling: DLSS (NVIDIA) and FSR (AMD/Intel) are great for performance. For best image quality, use DLSS Quality or DLAA if you have headroom. FSR may introduce aliasing; try FSR Native AA in part I.
- Motion Blur & Chromatic Aberration: These are aesthetic effects many players find distracting. Disabling them often improves perceived clarity without performance penalty.
- VRAM Management: Texture Quality heavily affects VRAM usage. If you experience stuttering, drop textures one tier. The game can crash if VRAM is exceeded.
- CPU Bottlenecks: The PC port is CPU-intensive in crowded areas. Lowering Ambient Occlusion and Volumetric Quality can help.
The Last of Us Part I (PS5)
The PS5 version offers two visual modes:
| Mode | Resolution | Target Framerate | Notes |
|---|---|---|---|
| Fidelity | 4K (2160p) | 30 fps | Highest visual quality; shadows, reflections, and draw distance are maxed. |
| Performance | 1440p (upscaled to 4K) | 60 fps | Smoother gameplay; slight drop in shadow/reflection quality. |
- Recommendation: For a first playthrough, Performance mode is strongly recommended for responsive combat. Use Fidelity if you prefer eye candy and don’t mind 30 fps.
- VRR Support: If your TV supports Variable Refresh Rate (e.g., HDMI 2.1), both modes run with a slightly unlocked framerate (Fidelity ~40-60 fps, Performance ~60-90 fps). Enable VRR in PS5 system settings for smoother motion.
The Last of Us Part II Remastered (PS5)
| Mode | Resolution | Target Framerate | Notes |
|---|---|---|---|
| Fidelity | 4K (1440p upscaled) | 30 fps | Best graphics; uses higher quality asset streaming. |
| Performance | 1440p | 60 fps | Smoother; minor texture pop-in. |
| 120 Hz Output + Fidelity | 1440p (upscaled to 4K) | 40 fps | Requires 120Hz display; a nice middle ground – 40 fps feels smoother than 30. |
| 120 Hz Output + Performance | 1440p | 60-120 fps | Unlocked framerate between 60-120. Best for responsive play. |
- Recommendation: If you have a 120Hz TV, enable 120 Hz Output in PS5 settings and select the Performance mode for the smoothest experience. Otherwise, use Performance for 60 fps.
- Note: The 120 Hz modes require HDCP 2.3 and a high-speed HDMI 2.1 cable; ensure both are met.
---
2. Audio Settings
General Audio
| Setting | Recommendation | Explanation |
|---|---|---|
| Master Volume | 70-80% | Avoid distortion. Lower if you use headphones. |
| SFX Volume | 100% | Essential for hearing enemy footsteps and clickers. |
| Music Volume | 80% | Atmos background but reduce if it masks critical sounds. |
| Dialogue Volume | 100% | Critical for story immersion. |
| Voice Language | Original English or language of choice | The performances are iconic; original cast is recommended. |
| Subtitles | On | Helps follow story in loud environments. Can be toggled in Accessibility. |
3D Audio (PS5 only)
- 3D Audio (Tempest 3D AudioTech): Available for headphones. Enables spatial audio (height, distance). For Part II Remastered, it’s particularly effective for directional threats like clicker sounds.
- Speaker vs Headphones: If using a surround sound system, set 3D Audio to Off to avoid processing conflicts. For headphones, set to On.
- ⚠️ Misconfiguration: Using 3D Audio with stereo TV speakers can cause muffled or hollow sound. Always match 3D Audio to your output device.
Audio Presets (Part II Remastered)
Part II Remastered includes a Dynamic Audio option that adjusts background music based on tension. Keep Dynamic enabled for a cinematic experience.
---
3. Controls Settings
Button Mapping
Both games allow full button remapping (PS5: System-level remapping or in-game; PC: in-game).
| Setting | Default | Alternative | Recommendation |
|---|---|---|---|
| Sprint | R1 (PS5) / Shift (PC) | L3 (click left stick) | ⚠️ Hold R1 for sprint is easier on thumbs; avoid L3 to prevent joystick drift. Keep R1. |
| Crouch | Circle (Hold) | R3 (click right stick) | Holding circle can be awkward during combat. If you prefer toggle, change to Circle (Toggle). |
| Listen Mode | R1 (Hold) | L2 or R2 | Prevent accidental activation; L2 as an alternative is comfortable. |
| Melee | Square | R2 (right trigger) | Some find square awkward; remap to R2 for faster reaction. |
Controller Settings (DualSense)
| Setting | Default | Recommended | Notes |
|---|---|---|---|
| Vibration Intensity | 100% | 70% | High vibration can drain battery and be distracting. |
| Trigger Effect (Adaptive Triggers) | On | On (for immersion) or Off (for faster shooting) | Adaptive triggers simulate gun resistance; turn off if you need faster trigger pulls. |
| Gyro Aiming | Off | Off (unless you prefer) | Available in Part II Remastered (No Return mode). Can improve aim, but takes practice. |
PC-Specific Controls
- Mouse Sensitivity: Start at 4 (on a scale of 1-10) and adjust. Lower for sniping, higher for quick turns.
- Aim Down Sights Sensitivity: 0.6-0.8 times hipfire sensitivity for precision.
- Key Bindings: The default bindings are fine, but consider mapping Listen Mode to a side mouse button for easier access.
---
4. Accessibility Settings
Both games are praised for extensive accessibility options. These are located under Options > Accessibility.
Visual Aids
| Setting | Recommendation | Purpose |
|---|---|---|
| High Contrast Display | Off (or On for visibility) | Enables high-contrast outlines for enemies/objects. Useful in dark areas. |
| Large Subtitles | On if needed | Increases subtitle size for readability. |
| Text Size | Adjust to preference | Separate from subtitles; affects menu text. |
| Screen Reader | On for visually impaired | Reads menus aloud. Works with system TTS. |
| Motion Blur Reduction | On | Reduces dizziness; same as turning off Motion Blur in Graphics. |
| Color Blind Modes | Off (choose variant if needed) | Deuteranopia, Protanopia, Tritanopia filters. |
Hearing & Audio Aids
| Setting | Recommendation |
|---|---|
| Subtitles | On. Enable Subtitles for Combat Dialogue to see enemy callouts. |
| Visual Cues for Collectibles | On – shows a subtle ping for items. |
| Sound Indicator | On – visual arrow points to direction of enemy sounds. |
| Chat to Text | Not applicable (no multiplayer). |
Gameplay Accessibility
| Setting | Recommendation | Explanation |
|---|---|---|
| Auto Pickup | Off (default) vs On | Manual pickup gives control; auto pickup can grab unwanted items. |
| Auto Lock-on (Aim Assist) | Off (for skill) or Medium (for help) | Aim assist strength slider: Off (hardcore), Medium (balanced), Strong (casual). |
| Invert X/Y Axis | Off unless you prefer. | Common for flight games, less so for third-person. |
| Toggle vs Hold | Choose for sprint, crouch, listen mode. | Hold is more intuitive but tiring. Toggle is easier on fingers. |
| Rapid Tap | Part II: On/Off | Allows rapid melee attacks by tapping; keep On for combat. |
| Enemy Awareness Indicator | On | A small icon shows when an enemy detects you (stealth games). Useful for beginners. |
| No Return (Part II) - God Mode | Off | For infinite health; only for challenge runs. |
---
5. Language Settings
| Setting | Options | Recommendation |
|---|---|---|
| Voice Language | English, French, German, Italian, Spanish, Japanese, etc. | Choose your preferred language. The English performances are outstanding. |
| Subtitle Language | Same as voice or separate | Set to match voice or your native language. |
| Menu Language | System language | Usually auto-detected; can be changed in game’s options (Part II). |
- Note: Part II Remastered supports Language Packs that can be installed separately (e.g., Japanese audio) via the PS5 settings. Ensure the pack is downloaded before selecting.
- Online Features: Enables automatic syncing of trophies, leaderboards for No Return (Part II), and photo mode sharing. Always keep On for latest updates.
- Automatic Updates: System-level. Ensure ‘Auto-Update’ is enabled in console/PC settings to receive patches.
- Data Transfer (Part I PC): None specific.
- Cross-Platform Saves: Not supported.
- Very Light (easiest) – generous resources, enemy visibility low, listening mode unlimited.
- Light
- Moderate (default)
- Hard
- Survivor – scarce resources, enemies more perceptive.
- Grounded – toughest; no listen mode, minimal HUD, very scarce supplies.
- Custom – allows per-category adjustment.
---
6. Network Settings
These games have no traditional multiplayer. Network options are limited to:
⚠️ Misconfiguration: Turning off Network Features in the PS5 system settings may block trophy sync and prevent cloud save usage. Keep them enabled unless you play offline exclusively.
---
7. Gameplay Settings
Difficulty Settings
Both games offer multiple difficulty sliders that can be customized independently:
Preset Difficulties:
Custom Settings Categories (Part I & II):
| Category | Settings | Effect |
|---|---|---|
| Player Damage | Very Light – Grounded | How much damage you take. Lower = more forgiving. |
| Enemy Damage | Very Light – Grounded | How resilient enemies are. Lower = they die faster. |
| Resources | Very Light – Grounded | Amount of ammo and supplies in the world. |
| Stealth | Very Light – Grounded | Enemy awareness and ability to lose them. |
| Listen Mode | Off / On (with speed/range options) | Enemies highlighted through walls. Can be fully disabled for challenge. |
| Aim Assist | Off – Strong | Crosshair magnetism. |
| Navigation Assistance | Off / Minimal / Full | Shows path to objective markers. |
- Part I: Moderate gives a balanced survival experience without being frustrating.
- Part II: Light or Moderate – the combat is more intense; light provides more resources but still challenging.
- ⚠️ Listen Mode: For a true survival horror experience, consider setting Listen Mode to ‘Off’ after the prologue. It dramatically increases tension.
HUD & UI Settings
| Setting | Recommendation |
|---|---|
| Health HUD | Always Visible (default) or Contextual (fades out of combat). Contextual is more immersive. |
| Ammo Counter | Always on (recommended) to track remaining bullets. |
| Objective Marker | On for first playthrough; off for immersion later. |
| Wheel Menu Input | Radial menu (hold) or Direct (button combos). Radial is slower but safer. |
| Pip-Boy Style Notes | Not applicable. |
---
8. Special Attention Points During Setup
PC Setup Pitfalls
1. Shader Compilation: The first launch will compile shaders. This can take 10-30 minutes and cause a brief stutter. Do not alt-tab or close the game during this process.
2. VRAM Oversubscription: Selecting ‘Ultra’ textures on a 6GB GPU will cause severe stuttering. Lower by one tier if you see VRAM warnings.
3. DLSS vs Native Resolution: DLSS Quality looks nearly indistinguishable from native 4K and gives major performance boost. Use it unless you have a top-tier 4090.
4. Disable HDR in Windows if not supported: In-game HDR can look washed out if Windows HDR is off. Either enable Windows HDR or turn off in-game HDR.
PS5 Setup Pitfalls
1. HDMI 2.1 Required for 120Hz: For Part II Remastered’s 120 Hz modes, your TV and HDMI cable must support HDMI 2.1. Check TV input settings and set ‘HDMI Enhanced’.
2. VRR Confusion: Even without 120Hz, VRR (48-60Hz) helps smooth out frame drops in Performance mode. Enable VRR in PS5 > Screen and Video > VRR.
3. Adaptive Triggers Wear: Constant use of adaptive triggers can cause trigger fatigue on the DualSense. Turn off in controller settings if you experience resistance fatigue.
Common Setup Mistakes
- Aiming with Motion Controls: Gyro aiming is not enabled by default; don’t accidentally flick your controller thinking it’s normal.
- Invert Y Axis: Always double-check before starting combat – accidentally inverted camera can cause disaster in stealth sections.
- Audio Sync: Ensure your TV/audio receiver is set to ‘Game Mode’ to minimize lip-sync delay.
---
By carefully configuring these settings, you can tailor The Last of Us Part I and Part II Remastered to your hardware and personal preference, ensuring the best possible experience whether you seek photorealism, high framerate, or accessibility. Refer back to this guide whenever you start a new game or upgrade your hardware.
Important Notes
Important Notes for The Last of Us (Part I & Part II)
This section covers crucial warnings, pitfalls, irreversible choices, missable content, difficulty spikes, grinding traps, and save management advice that many players regret not knowing earlier. Both The Last of Us Part I (PS5/PC) and The Last of Us Part II Remastered (PS5) are linear, story-driven games, but small oversights can lead to frustration or permanent loss of upgrades, collectibles, or narrative moments.
Warnings & Pitfalls
- Limited Resources & No Grinding – Ammo, health kits, and upgrade parts are finite. You cannot grind enemies for loot; each encounter drops only what the game intends. Overusing firearms early can leave you empty-handed against mandatory fights. Use stealth and melee attacks (bricks, bottles, shivs) whenever possible.
- Listen Mode is Critical - In both games, pressing R1 (PS) or the equivalent toggles Listen Mode, which highlights enemies through walls (Part I) or tracks footsteps/heat signatures (Part II). Always use this before engaging to plan your route. Forgetting to use it is a common cause of surprise attacks.
- Difficulty Affects Resource Economy - Higher difficulties (Survivor, Grounded, Permadeath) drastically reduce supplies, remove Listen Mode, and increase enemy damage. If you are struggling, lower the difficulty mid-game (only in Part I; Part II locks difficulty per chapter). Do not start on Grounded unless you are experienced.
- Checkpoint System Limitations - The games use generous auto-saves, but checkpoints are often placed just before major encounters. If you die minutes later, you may have to replay a long section. In Part I, manual save slots exist; use them before risky areas. Part II has no manual saves; you rely on auto-saves only, but you can back up saves via PS+ Cloud or USB on PS5.
- PC Performance Issues (Part I) - The PC port of Part I launched with severe shader compilation stutter, crashes, and poor optimization. Even with updates, large open areas still cause frame drops. Disable motion blur and reduce crowd density if you encounter issues. Always update your GPU drivers and verify game files via Steam. Consider lowering texture quality to reduce VRAM usage.
- Part I – Vaccine or Ellie? - The final choice is a scripted story decision (not a player choice). You must play as Joel and rescue Ellie. No branching narrative; the outcome is fixed. However, missing the optional final scene after credits by skipping cutscenes can lock you out of the epilogue's emotional impact.
- Part II – Ellie's Fate & Final Decision – At the end of Part II, Ellie makes a pivotal choice regarding Abby in the theater. This is a single-player linear story; you cannot change the outcome. Many players find this controversial; accept that the narrative is fixed.
- Character Upgrade Paths – Both games have upgrade trees (weapons, skills, supplements). Once you spend pills (Part I) or unlock a skill (Part II), you cannot respec. Prioritize essential upgrades: "Weapon Sway Reduction" (all games), "Health Upgrades" (first two levels), and "Listen Mode Distance" (Part I). In Part II, unlock "Prone Dodge" and "Stamina" early.
- Training Manuals (Part I) – Scattered in the world, these manuals unlock additional upgrade tiers for weapons. If you miss one, you cannot upgrade that weapon past a certain point. Example: Missing the "Shotgun Upgrade Manual" in the University of Eastern Colorado means the shotgun can only upgrade two of its four slots. Always explore thoroughly.
- Collectibles – Artifacts, trading cards (Part I), coins (Part II), and optional conversations are missable. Once you leave an area, you cannot return. Use chapter select to replay, but chapter select resets your story progress to that chapter's start, erasing later progression if you save over your main file. Better to use separate save slots or track collectibles on a first playthrough to avoid losing upgrades.
- Optional Conversations – Both games reward exploration with character dialogue that deepens backstory. In Part I, Ellie and Joel comment on graffiti, locations, and notes. Missing a conversation does not lock you out of trophies (some are tied to all conversations in Part I), but it reduces narrative immersion. Example: In the "Bill's Town" chapter, reading the note on Frank's body triggers an optional conversation with Ellie. If you burn the note before talking, you lose the scene.
- Trophies & Achievements – Several trophies require collecting all artifacts, trading cards, or firefly pendants (Part I). Part II has similar trophies for coins, training manuals, and safe combinations. Starting on a difficulty that disables Listen Mode or increases enemy density makes collecting easier? No; collectibles are present on all difficulties, but higher difficulty makes it harder to explore safely.
- Weapon Upgrades – In Part I, workbenches are placed in specific safe rooms. If you miss a workbench entirely (unlikely), you cannot upgrade that weapon. Part II allows upgrading at any safe room bench, so no missable workbenches.
- Safe Codes (Part II) – Some safes require codes found in notes or environmental clues. If you skip a note, you cannot open the safe. Example: The safe in the "Hillcrest" area code is on a note inside the garage. Open the safe for valuable supplies and collectibles.
- Part I – The Hotel Basement (Pittsburgh) – This stealth section with a generator, stalkers, and a bloater is notorious for sudden difficulty. Run to the keycard immediately, avoid combat unless necessary. Use a smoke bomb to cover escape to the door.
- Part I – The University Ellie Section – The sniper encounter and the subsequent runner/bloater fight can overwhelm players. Save shotgun shells and molotovs for the bloater.
- Part I – The Winter Blizzard (Ellie) – Ellie's smaller stature and lack of upgraded health make the cannibal fight tough. Use bricks/bottles to stun and then melee.
- Part II – The Rat King (Hospital) – This spawn of multiple infected (bloater, stalkers) is the single hardest enemy in the series. Use all pipe bombs, shotgun blasts, and flares. Hit its weak spots (bulging fungi) and back away. On Grounded, this fight can take 30+ attempts.
- Part II – The Seraphite Island – Stealth sections with constant patrols and snipers. Use prone movement and grass cover. Enemies have unpredictable patrol paths; save often.
- No Infinite Farming – Enemies do not respawn except in scripted repeat encounters (e.g., runners in open areas of Part II). Killing enemies does not yield extra supplies beyond what is placed. Do not waste ammo trying to "clean" an area; loot what you need and move on.
- Crafting Overuse – Crafting health kits, shivs, and melee upgrades consumes resources. Save sugar and alcohol for health; use shivs only for locked doors (Part I) or stealth kills (Part II). Don't craft shivs for melee attacks unless you have excess.
- Part II – Workbenches & Upgrades – Some players spend all parts on weapon upgrades immediately. But certain upgrades like "Holster Speed" are nearly useless. Prioritize "Damage" and "Stability" first. Similarly, skill upgrades: "Crafting Speed" is a waste; invest in "Field Surgery" (health kits heal more) and "Crafting" (unlock new recipes).
- Part I (PS5/PC) – Manual saves are available from the pause menu. Use multiple save slots before each major chapter or before collecting a missable artifact. If you miss a collectible, you can reload an earlier manual save without losing hours of progress. On PC, the game uses cloud saves via Steam; disable if you want to manually manage.
- Part II (PS5) – No manual save slots; the game uses a single auto-save that updates continuously. However, you can back up your save data via Settings > Saved Data and Game/App Settings > Saved Data (PS5) > Console Storage to USB or Cloud. Before a critical section (e.g., Rat King), back up the save. If you die after a checkpoint and want to reload earlier, you can restore the backup.
- Chapter Select (Both) – After completing either game, Chapter Select lets you replay any chapter with your current upgrades and collectibles. But be careful: selecting a chapter overwrites your current progress if you save after replaying. Always start a new save file for Chapter Select runs, or use a separate profile.
- No online etiquette to follow.
- Part I PC has no anti-cheat software; modding is possible but disable mods if you want achievements. Using mods may corrupt your save or crash the game.
- Leaderboards (speedrun) are not official; third-party tracking exists but is optional.
- Not Exploring Enough - Many players rush through story and miss crucial upgrade manuals or safes, leading to underpowered weapons. Example: In Part I, the "Upgrade Training Manual 2" in the University's dorms permanently limits your weapon upgrades if missed.
- Sloppy Scavenging - Failing to fully search every room (check corners, behind shelves, breakable doors) causes ammo shortages later. Use the flashlight to spot glint on pickups.
- Ignoring Weapon Sway Reduction - This upgrade is non-negotiable. Without it, aiming feels sluggish and inaccurate. Spend pills/parts on it first.
- Using Full Auto Spray - Firing guns without aiming (hip-fire) is wildly inaccurate. Always aim down sights (ADS) unless point-blank.
- Not Practicing Stealth - Trying to fight every encounter head-on leads to death and resource drain. Use stealth to thin numbers, then finish stragglers.
- Part II – Not Using the Prone Crawl - Prone movement is introduced late but is essential for grass stealth. Players who forget to use it get spotted constantly.
- Overreliance on Listen Mode - On higher difficulties, Listen Mode is unavailable (Part I Grounded) or has a cooldown (Part II). Learn to read enemy footsteps and visual cues without it.
- Skipping Cutscenes - The story is the core of The Last of Us. Skipping cutscenes on a first playthrough robs you of emotional context. Missable dialogue during gameplay also provides backstory.
Irreversible Choices
Missable Content
Difficulty Spikes
Grinding Traps
Save Management Advice
Online Etiquette & Anti-Cheat (If Relevant)
The Last of Us series is entirely single-player, single-client (no online multiplayer modes – Factions was removed from Part I remastered and not present in Part II). Therefore:
Common Regrets Players Mention
By keeping these notes in mind, you can avoid the most common frustrations and enjoy the harrowing journey of Ellie and Joel to its fullest.
All Game Items
Overview
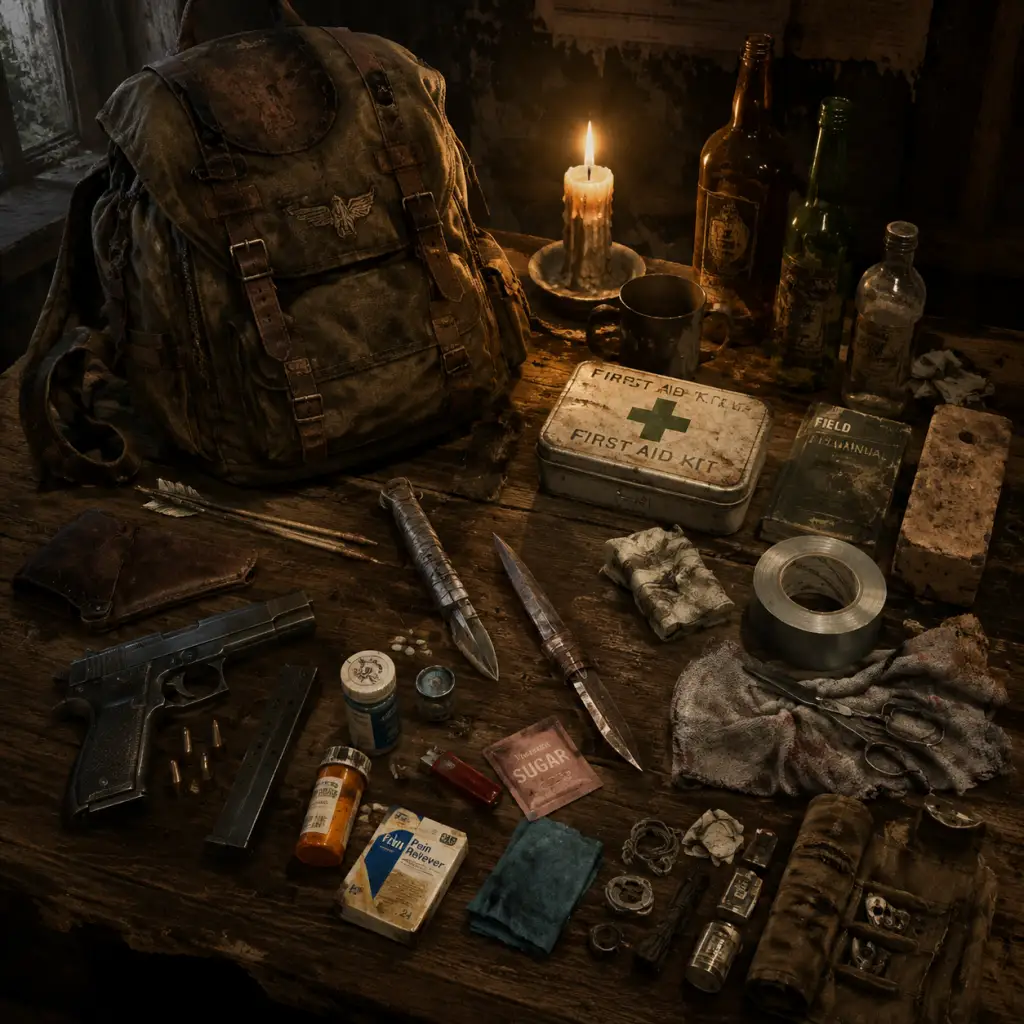
This guide covers all significant items in The Last of Us Part I (PS5, PC) and The Last of Us Part II Remastered (PS5). Items are grouped into categories: Weapons, Crafting Items & Resources, Consumables, Key Equipment, Collectibles, Upgrades & Tools, and Special Items. Each entry includes the item's function, how to obtain it, when it is most useful, and any important synergies or upgrades. Differences between the two games are noted where applicable.
---
Weapons
Firearms
| Weapon | Game(s) | Description | How to Obtain | When Useful | Upgrades / Synergies |
|---|---|---|---|---|---|
| 9mm Pistol | Part I, Part II | Standard semi-automatic pistol. Good rate of fire, low damage per shot. | Part I: Found during prologue; Part II: Obtained early from Jesse. | Use against runners and stalkers; excellent for headshots. | Part I: Upgradable to higher fire rate, larger magazine, and reduced recoil. Synergizes with silencer (Part II only). |
| Revolver | Part I, Part II | Heavy handgun. High damage but slow fire rate and reload. | Part I: Found in Bill's Town; Part II: Found in Seattle Day 1 (Ellie). | Effective against clickers and humans; one-shot headshot. | Part I: Upgrade for faster reload and increased stability. Part II: Can be fitted with scope from upgrade bench. |
| Hunting Rifle | Part I, Part II | Bolt-action rifle. Very high damage, long range, slow fire rate. | Part I: Obtained after meeting Bill; Part II: Found in Seattle Day 1 (Ellie). | Ideal for taking down armored enemies and distant threats. | Part I: Upgrade magazine capacity, fire rate, and scope. Part II: Can use high-caliber rounds from upgrade bench. |
| Shotgun | Part I, Part II | Pump-action shotgun. Devastating at close range. | Part I: Found in the sewers with Sam and Henry; Part II: From the workbench in Seattle Day 2 (Abby). | Clears rooms, kills multiple enemies in one blast. | Part I: Upgrade for increased shell capacity and wider spread. Part II: Upgrade to semi-auto fire mode. |
| Bow | Part II only | Silent weapon that retrieves arrows from enemies. | Obtained from the WLF base in Seattle Day 1 (Ellie). | Perfect for stealth; arrows can be recovered. | Upgrade draw speed and arrow capacity. Synergizes with explosive arrow crafting. |
| Rifle (Semi-Auto) | Part II only | Faster than hunting rifle, uses medium-capacity magazine. | Found in the forest near the WLF camp (Abby). | Versatile mid-range option. | Upgrade fire rate, magazine, and accuracy. |
| SMG (Submachine Gun) | Part I only | Fully automatic, weak per hit but high rate of fire. | Found in the lab at the University. | Horde management, suppressing fire. | Upgrade magazine size and stability. |
| Flamethrower | Part I only | Short-range weapon that ignites enemies. | Found in the final chapter of Part I (Lakeside Resort). | Effective against infected and groups; panic weapon. | No upgrades, but can refuel from flammable resources. |
| Crossbow | Part I (Left Behind DLC) | Silent, retrievable bolts. | Obtained during Left Behind DLC. | Stealth kills and distraction. | Limited upgrades; bolts can be crafted. |
Melee Weapons
| Weapon | Game(s) | Description | How to Obtain | When Useful | Notes |
|---|---|---|---|---|---|
| Bottle / Brick | Both | Thrown to distract or stun enemies. | Found on ground in most areas. | Essential for stealth; lure enemies away or stun an approaching enemy for a melee takedown. | Can be combined with melee for a silent kill (e.g., brick + knife). |
| Baseball Bat | Both | Standard melee weapon with low durability. | Found on enemies or in environments. | Backup when ammo is low. | Can be upgraded with nails/razor blades (Part I) or bindings (Part II) for extra damage. |
| Machete | Both | High damage, moderate durability. | Part I: Found in Chapter 6 (Waitress); Part II: Found on Seraphites. | Kills humans and infected quickly. | Part I: Upgrade with melee parts to add sharpening effect. |
| Pipe | Both | Similar to bat but longer reach. | Scavenged from pipes on walls or dropped by enemies. | Good for outrunning infected while swinging. | Upgrade with tape and scissors for extra damage. |
| Knife / Shiv | Both | Silent kill weapon for clickers and human enemies from behind. | Part I: Shiv crafted from bindings + scissors; Part II: Knife is infinite (Ellie) or crafted (Abby). | Essential for stealth; clicker kills are only possible with shiv/knife. | Part I: Shiv breaks after one use; Part II: Ellie's knife is permanent but upgradeable. |
| Hatchet | Part II only | Powerful one-handed axe. | Obtained from WLF soldiers. | Good balance of speed and damage. | Upgrade with blade sharpener at workbench. |
Throwable & Explosives
| Item | Game(s) | Description | How to Obtain | When Useful | Synergies |
|---|---|---|---|---|---|
| Smoke Bomb | Both | Blinds and disorients enemies, allowing a takedown. | Crafted from sugar (or alcohol) + explosive (Part I); found rarely. | Escape or create distraction in open combat. | Follow up with a melee attack while enemy is stunned. |
| Molotov Cocktail | Both | AoE fire damage over time. | Crafted from rag + alcohol + binding (Part I) or rag + alcohol (Part II). | Crowd control, burning multiple enemies. | Combine with gasoline puddles for extra spread. |
| Stun Bomb | Part II only | Flashbang effect that stuns all enemies in radius. | Crafted from can + battery + gunpowder (rare). | Breaker for enemies that are about to attack you. | Use before a heavy attack or to run past blockers. |
| Explosive Arrows | Part II only | Bow modification that detonates on impact. | Crafted from arrow + explosive (gunpowder + can) at workbench. | High-damage stealth option for groups. | Requires bow; upgrades increase blast radius. |
| Pipe Bomb | Part I only | Timed explosive that detonates after a delay. | Crafted from binding + explosive (sugar + can). | Area denial, clearing rooms. | Hold before throwing to cook the fuse. |
Crafting Items & Resources
Common Resources (both games)
- Rag / Cloth: Used for molotovs and health kits. Found in drawers, laundry rooms. Scarce.
- Alcohol / Antiseptic: Crafting molotovs, smoke bombs. Often found in bathrooms or kitchens.
- Binding / Tape: Used for shivs, molotovs, pipe bombs. Found on desks, in drawers.
- Sugar / Blasting Caps: Crafting smoke bombs (Part I) and explosive arrows. Found in kitchens, tool sheds.
- Scissors: Needed for shivs. Found in offices, scattered.
- Can: Used for trap mines (Part II) or smoke bombs (Part I). Found in pantries.
- Battery: Powers stun bombs (Part II) and essential for flashlight upgrades. Rare.
- Gunpowder: Crafting ammunition. Added to pipe bombs or explosive arrows. Found in armories.
- Parts / Scrap: Used for weapon upgrades and crafting (Part I: small gears; Part II: scrap metal). Abundant in workbenches.
- Medicine Pills / Supplements (Part I): Used in the upgrade menu to boost health, listen mode speed, crafting speed, and weapon sway. Found in cabinets, on bodies.
- Skill Books / Upgrade Manuals (Part I): Found in the world; each permanently boosts a specific skill (e.g., faster shiv kill, increased explosive damage).
- Training Manuals (Part II): Found throughout; unlock new crafting recipes and upgrade options at workbenches (e.g., armor penetration, silencer crafting).
- Plant Material (Part I only): Mixed with alcohol to make health kits (only Part I concept is different; Part II uses medical grade + alcohol).
Unique Resources
---
Consumables & Healing
| Item | Game(s) | Description | How to Obtain | When Useful |
|---|---|---|---|---|
| Health Kit (Part I) | Crafted from alcohol + plant material. Restores health to full. | Craft or find in medical cabinets. | After heavy combat. | |
| Medkit (Part II) | Crafted from alcohol + medical supplies (found in drawers). Heals partially. | Crafted or found; also found as bandages. | Use during safe moments. | |
| Bandage (Part II) | Single-use healing item that stops bleeding. | Looted from enemies or cabinets. | Quick heal mid-combat. | |
| Supplements (Part I) | Collectible pills that permanently upgrade Joel's stats. | Found in medicine bottles. | Spend at upgrade menu when available. | |
| Health Booster (Part II) | Immediate heal over time. | Found rarely in emergency kits. | Use when desperate. | |
| Energy Drink (Part II) | Temporarily increases stamina regeneration. | Vending machines, gift shops. | Sprint away from packs. |
Key Equipment & Tools
- Backpack: Automatically equipped; allows carrying items. Part I: Upgrade capacity by finding backpacks in the world (e.g., Bill gives one). Part II: Capacity increases with skill unlocks.
- Listening Mode: Base ability; upgrade range via supplements (Part I) or skill investment (Part II).
- Flashlight: Always available; can be upgraded with battery for longer duration (Part I only).
- Workbench (Part II): Not an item but a station for weapon upgrades and crafting. Part I uses upgrade benches.
- Clicker Shank/Shiv: Crafted melee weapon for killing clickers silently. Part I: breaks after one use. Part II: Ellie's knife is permanent; Abby crafts shivs for clickers.
- Trap Mine (Part II): Placed explosive that detonates when enemies cross. Crafted from can + gunpowder + explosives. Extremely effective for chokepoints.
- Collectible Type: Note, Pills, Training Manual (Part I: Skill Books), Comic Book (Part I), Artifact (Part I), Coin (Part II), Trading Card (Part II)
- How to Obtain: Search every desk, body, and shelf.
- Importance: Needed for 100% completion and specific trophies (e.g., "Museum of Argh!" for collecting all comic books in Part I).
- Description: Collectible coins scattered across Seattle. There are 52 coins in total.
- Acquisition: Found on shelves, desks, on dead bodies. Often in hidden rooms.
- Why Collect: Unlock a safe in the theater with a unique weapon (the suppressed 9mm pistol) and a trophy.
- Description: A set of 45 fictional trading cards inspired by various IPs. Each card is a reference to Naughty Dog's other games (e.g., Uncharted, God of War).
- Acquisition: Found in child's rooms, shops, on enemies. Some are missable.
- Why Collect: Trophy, no gameplay effect but fun Easter eggs.
- Description: 12 issues of a fictional comic series \"The Last of Us\" (meta-reference). Found in each chapter.
- Acquisition: Hidden in various locations (e.g., under beds, behind filing cabinets).
- Why Collect: Trophy and Ellie's dialogue comments.
- Parts (Part I) / Scrap (Part II): Used at workbenches (Part II) or upgrade benches (Part I) to improve weapon attributes: fire rate, magazine capacity, recoil, scope, silencer, etc.
- How to Obtain: Loot from enemies, found in toolboxes, sold by traders (Part I only at neutral zones? Not really, but there are upgrade stations).
- Synergies: Ammo conversion (e.g., Part II can change pistol ammo to revolver ammo) and dual upgrades for same weapon.
- Description: 12 skills across three trees (Survival, Stealth, Combat). Each level requires Pill/Supplement points (now called Training Points).
- Example Skills:
- Unlock via Training Manuals: Find manuals in the world to unlock new recipes (e.g., explosive arrows, stun bombs, trap mines, silencers).
- Example: The \"Search for the Shooting Range\" manual unlocks the ability to craft silencers.
- Pills / Supplements (Part I): Experience points for upgrading Joel's abilities. Used at any safe room upgrade menu.
- Parts (Part I): Currency for weapon upgrades at upgrade benches. Found as small gears.
- Scrap (Part II): Combined metal pieces used for weapon upgrades and crafting some items. Found in piles, from disassembled weapons.
- Training Points (Part II): Gained from finding training manuals and completing certain actions. Used to unlock skill levels.
- Guitar (Part II): Not a weapon; used in ambient gameplay to play songs. Found at safe houses.
- Cardboard Cutouts (Part II): Hidden collectibles in specific chapters. No function but trophy.
- Faces (Part II): Collectible masks found on the Mother's day? Actually, there are \"Safe Combination\" notes that unlock safes with useful loot.
---
Collectibles
Artifacts / Notes / Letters
Both games feature hundreds of notes, letters, and documents that expand the story. They are scattered throughout chapters. No gameplay effect but important for lore and trophies/achievements.
Coins (Part II)
Trading Cards (Part II)
Comic Books (Part I)
---
Upgrades & Tools
Weapon Upgrade Parts (both games)
Skill Trees (Part II)
- Survival: Faster healing, recipe discovery, explosive resistance.
- Stealth: Enhanced listening range, faster prone movement, quiet takedowns.
- Combat: Increased melee damage, weapon sway reduction, faster reload.
Crafting Recipes (Part II)
---
Currencies
---
Special Items
---
Conclusion
Mastering the inventory and knowing when to use each item is critical in The Last of Us. Always conserve resources, upgrade weapons that fit your playstyle, and explore every nook for collectibles and crafting materials. Part II introduces more dynamic crafting and dual upgrade paths, while Part I focuses on permanent ability upgrades via supplements. Use this guide to plan your scavenging and upgrading for maximum survival."

Character Skills
Character Skills Overview
The Last of Us series does not feature traditional RPG skill trees or spells, but it does have a robust character upgrade system using supplements (pills in Part I, supplement tablets in Part II). These upgrades permanently enhance core abilities such as health, stealth, crafting, and combat. Additionally, each playable character has access to unique special moves (e.g., shiv door opening, dodge, prone) that are unlocked through progression or finding specific tools. This guide covers all character-specific upgrades and abilities for The Last of Us Part I (Joel) and The Last of Us Part II Remastered (Ellie and Abby).
---
The Last of Us Part I – Joel’s Upgrades
Joel can improve his abilities by collecting pills found throughout the world. These are spent at any upgrade menu (accessible via pause) in four categories, plus a unique Shiv Master skill.
1. Max Health
- Effect: Increases Joel’s maximum health bar. Each upgrade adds a segment. Total of 5 upgrades.
- Cost: 50 / 75 / 100 / 125 / 150 pills (increasing).
- Synergies: Essential for higher difficulty – more health allows fewer healing items and more survivability during firefights.
- Recommended Build: Upgrade to at least level 3 early; max out by mid-game.
- Effect: Increases the distance at which Joel can hear enemies through walls (visible as white silhouettes). Four upgrades.
- Cost: 25 / 35 / 50 / 75 pills.
- Synergies: Pair with Stealth kills – knowing enemy positions allows silent takedowns.
- When to Use: Constantly activated in tense areas. Upgrade early to avoid surprise ambushes.
- Effect: Reduces the time required to craft items (health kits, shivs, molotovs, nail bombs, smoke bombs, arrows). Three upgrades.
- Cost: 30 / 40 / 60 pills.
- Synergies: Faster crafting means you can heal or create tools mid-combat. Useful in action-heavy sections.
- Recommended Build: Not a priority early; upgrade after health and listening mode are decent.
- Effect: Speeds up the first-aid animation. Three upgrades.
- Cost: 30 / 40 / 60 pills.
- Synergies: Combined with crafting speed, allows quick recovery during firefights.
- When to Use: Valuable if you rely on health kits often; otherwise low priority.
- Effect: In the PS5/PC Part I remaster, pills also reduce weapon sway when aiming. Three levels. (Not present in original PS3/PS4).
- Cost: 25 / 50 / 75 pills.
- Synergies: Great for long-range weapons like the Hunting Rifle and Bow.
- Recommended Build: Useful if you prefer precision shooting; skip if you use shotguns/melee heavily.
- Unlock: Requires finding Shiv Master training manuals (Part I has one manual that unlocks both abilities).
- Effects:
- Cost: Uses a shiv (1 blade + 1 binding).
- Synergies: Shiv doors provide resources; shiv kills save ammo. Prioritize finding the manual early.
- When to Use: Always carry a shiv for doors. Use shiv kills on Clickers when low on ammo.
- Brick/Bottle Stun: Throw brick/bottle at enemy to stun them → follow-up melee kill. No cooldown, consumes item.
- Melee Combo: Press square repeatedly for a quick attack; hold triangle for a heavy attack. Works with 2×4, pipe, machete (breakable).
- Dodge (Part I does not have a dedicated dodge; movement is used to evade).
- Prone: Allows crawling under obstacles and grass for stealth. Unlocked after the first encounter with the WLF in Seattle Day 1 (Ellie) / after finding the Hunting Pistol (Abby).
- Dodge: Press L1 during combat to evade attacks. Unlocked early in both campaigns.
- Vault/Jump: Context-sensitive climbing and jumping.
2. Listening Mode Distance
3. Crafting Speed
4. Healing Speed
5. Weapon Sway Reduction (Part I Enhanced)
6. Shiv Master (Special Ability)
- Shiv Doors: Jammed doors can be forced open with a shiv, revealing valuable supplies.
- Shiv Instant Kills: Allows Joel to instantly kill a Runner or Clicker from behind using a shiv (instead of struggling).
Other Special Moves
---
The Last of Us Part II – Ellie & Abby’s Skills
In Part II, each character has a unique skill tree divided into three categories: Survival, Stealth, and Crafting. Each tree contains multiple skills with up to 3 ranks (levels). Supplements are shared across both characters, but their skill trees are independent. Additionally, both characters unlock prone and dodge as innate abilities.
Shared Innate Abilities
Ellie’s Skill Trees
#### Survival (Ellie)
| Skill | Effect | Ranks | Cost per rank | Synergies |
|---|---|---|---|---|
| Health | Increases maximum health by 25% per rank. Max 3 ranks. | 3 | 25 / 50 / 100 | Essential for all builds. |
| Healing Speed | Increases healing speed by 20% per rank. Max 3. | 3 | 20 / 40 / 80 | Combine with crafting speed for quick recovery. |
| Listen Mode Distance | Expands listening range by 20% per rank. Max 3. | 3 | 15 / 30 / 60 | Must-have for stealth players. |
| Skill | Effect | Ranks | Cost | Synergies |
|---|---|---|---|---|
| Faster Movement While Prone | Crawl speed increased by 40% per rank. Max 2. | 2 | 20 / 40 | Essential for prone stealth kills. |
| Prone Stealth Kill | Unlocks stealth kill from prone (only possible after unlocking rank 1). Rank 2 makes it faster. | 2 | 30 / 60 | Allows you to kill enemies while lying in grass. |
| Pendulum (or Stealth Movement Speed) | Movement speed while crouched increased by 15% per rank. Max 2. | 2 | 20 / 40 | Lets you reposition quickly without being seen. |
| Skill | Effect | Ranks | Cost | Synergies |
|---|---|---|---|---|
| Crafting Speed | Reduces crafting animation time by 20% per rank. Max 3. | 3 | 20 / 40 / 80 | Good for all, especially when crafting mid-combat. |
| Explosive Shells (or Ammo Efficiency) | Chance to salvage used ammo? Actually, Crafting Efficiency increases yield from resources (e.g., 3 arrows instead of 2). Max 2. | 2 | 20 / 40 | Saves resources; valuable on Grounded. |
| More Crafting Recipes | Unlocks additional recipes: stun bomb, explosive arrow, etc. Max 1. | 1 | 50 | Unlocks powerful tools; high priority. |
Abby’s Skill Trees
Abby’s skill names differ slightly but serve the same purpose. For brevity, only unique skills are highlighted.
#### Survival (Abby)
- Health (same as Ellie) – 3 ranks.
- Healing Speed (same) – 3 ranks.
- Listen Mode Distance (same) – 3 ranks.
- Brawler (unique): Unlocks a special melee combo after a dodge. Rank 1: faster follow-up, Rank 2: deadly follow-up. Cost: 30/60. Synergy with melee builds.
- Faster Prone Movement – 2 ranks.
- Prone Stealth Kill – 2 ranks.
- Pendulum (crouched speed) – 2 ranks.
- Mark Enemies (unique): Allows you to tag enemies while aiming (like holding R1 to mark). Rank 1: marks for 3 seconds; Rank 2: marks for 5 seconds. Cost: 20/40. Synergy with long-range combat.
- Crafting Speed – 3 ranks.
- Crafting Efficiency – 2 ranks.
- Incendiary Ammo (unique): Unlocks crafting of incendiary shotgun shells. Cost: 50. Very powerful against human enemies.
- Brick/Bottle Stun → Melee: Throw, then press Triangle for heavy melee. Can one-hit kill humans on lower difficulties.
- Molotov + Smoke Bomb: Smoke obscures vision; throw molotov for area denial.
- Chessed up melee: In Part II, when a melee weapon is about to break, the final hit does extra damage.
- Dodge + Attack: Dodge an enemy swing, then immediately press Square for a counter-attack (uses stamina).
- Prone Stealth Kill: From grass, press Triangle while hidden to grab and kill silently – uses no ammo.
- Explosive Arrow: If crafting tree is upgraded, Ellie can craft explosive arrows for the bow (craft from rag + binding + gunpowder + canister).
- Part I: Prioritize Listening Mode Distance and Shiv Master. Use shivs on doors for resources. Upgrade health moderately.
- Part II: Max Stealth tree first (prone speed, steal kill, crouched speed). Supplement with Crafting Efficiency to save resources.
- Part I: Health > Weapon Sway > Crafting Speed. Use pills on all categories evenly.
- Part II: Max Survival health, then Crafting (especially recipe unlock). Use ammo and melee often.
- Part I: Max Health and Listening Mode only. Ignore crafting/healing speed – wait out animations.
- Part II: Crafting Efficiency and recipe unlock. Avoid health upgrades until late – you can’t heal much anyway.
- Part I: Pills are limited; you cannot max all skills in one playthrough. Focus on health and listening mode for a first run. Shiv Master is mandatory for doors.
- Part II: Supplements are plentiful, especially on lower difficulties. Play through all areas thoroughly to max all three trees. Abby’s skill trees are separate from Ellie’s, so farm supplements in both campaigns.
- Missable Skills: In Part II, the More Crafting Recipes skill (Ellie) is essential for explosive arrows – get it early. Abby’s Mark Enemies is useful for sniper sections.
- No Cooldowns: Skills are passive; special moves require resources (bricks, bottles, shivs, ammo). Use wisely.
#### Stealth (Abby)
#### Crafting (Abby)
---
Special Moves & Combos
Available in Both Parts
Part II Exclusive Combos
Recommended Builds
Stealth Focus (Both Parts)
Combat All-rounder
Resource Conservation (Grounded)
---
Skill Upgrade Tips
---
Conclusion
Mastering character skills in The Last of Us is key to survival. Whether you prefer a stealthy ghost approach or a heavy-handed brawler, prioritize upgrades that match your playstyle. Remember that supplements are finite, so plan your build accordingly. Use the special moves (dodge, prone, shiv door) to gain tactical advantages. For further details, refer to the Game Settings and Game Tips sections of this guide.
---
End of Character Skills Guide

Characters & Roles
Characters & Roles Overview
Unlike traditional class-based games, The Last of Us focuses on a small cast of deeply developed characters, each with distinct survival roles in the single-player campaign. This guide covers all playable characters (both story-controlled and AI companions) across The Last of Us Part I and The Last of Us Part II Remastered. While there are no explicit classes, each character’s unique skills, upgrades, and equipment shape their effective role: Stealth Specialist, Brawler, Medic, Trapper, or Scout. Understanding these roles helps you optimize gameplay and narrative immersion.
---
Playable Characters in The Last of Us Part I
Joel Miller
- Background: A hardened survivor from Texas who lost his daughter Sarah at the outbreak. He becomes a smuggler and later tasked with escorting Ellie across the post-apocalyptic United States. Joel is a veteran survivor with decades of experience in killing and scavenging.
- Role: All-Rounder / Brawler – Joel excels at close-quarters combat and can adapt to any situation. He has high health and access to powerful upgradeable weapons.
- Strengths:
- Weaknesses:
- Playstyle:
- Unlock Conditions: Automatically playable from Chapter 1 (the prologue with Sarah) and throughout the main story.
- Recommended Equipment / Builds:
- Team Synergy: Works best with Ellie as a backup scout. Use Ellie to distract or provide covering fire. In combat, position yourself between enemies and Ellie to protect her.
- Background: A fourteen-year-old girl who is immune to the Cordyceps infection. She travels with Joel across the country. In the Winter chapter, she becomes playable.
- Role: Stealth Assassin / Scout – Ellie is smaller and faster, relying on stealth and agility. She can use a bow and has unique takedowns.
- Strengths:
- Weaknesses:
- Playstyle:
- Unlock Conditions: Playable during the Winter chapter (Ellie’s segment) starting at Chapter 8 (The University) to Chapter 11 (Lakeside Resort). Also playable in the Left Behind DLC.
- Recommended Equipment / Builds:
- Team Synergy: With Joel as companion (AI), use Ellie to clear rooms silently before Joel enters. In Winter, there is no partner; she is solo against David’s hunters. Rely on traps and the bow.
- Background: Joel’s 12-year-old daughter. Users play as her during the opening prologue on Outbreak Day.
- Role: Purely Narrative – No combat. Only movement and simple interactions.
- Strengths: None (cannot fight).
- Weaknesses: Cannot defend herself; instant death if caught.
- Playstyle: Follow Joel’s instructions, stay close, and interact with objects quickly. This section is a tutorial for movement and immersion.
- Unlock Conditions: Automatically at start of game. Unskippable.
- Recommended Equipment / Builds: N/A.
- Team Synergy: N/A. Joel is the protector; just stay near him.
- Background: A standalone prequel story set before Part I, showing Ellie’s time with her friend Riley in the Boston quarantine zone.
- Role: Stealth & Puzzle Solver – Same as Winter Ellie but with more emphasis on environmental puzzles and a brick-throwing combat alternative.
- Strengths:
- Weaknesses:
- Playstyle:
- Unlock Conditions: Playable from the main menu after completing Part I, or automatically if playing the Remastered/Part I version.
- Recommended Equipment / Builds:
- Team Synergy: Riley provides cover fire and can open certain doors. Use her to flank enemies or draw aggro.
- Background: Five years after Part I, Ellie is a 19-year-old immune survivor living in Jackson, Wyoming. Driven by a traumatic event, she embarks on a violent journey of revenge. She is the primary playable character for roughly three-quarters of the game.
- Role: Stealth Infiltrator / Trapper – Ellie has a dodge mechanic, crawl, and prone movement. She can craft traps, silenced weapons, and use a variety of explosives.
- Strengths:
- Weaknesses:
- Playstyle:
- Unlock Conditions: Playable from the start (Prologue: Jackson) through most of the game except for Abby’s sections (Days 1-3).
- Recommended Equipment / Builds:
- Team Synergy: When teamed with Dina or Jesse, Ellie is the primary attacker. Let companions draw fire while you flank. In stealth segments, companions stay hidden unless detected.
- Background: A muscular soldier from the Washington Liberation Front (WLF). She is driven by her own revenge story. Her gameplay sections form the other half of the narrative, set in Seattle.
- Role: Brute / Tank / Brawler – Abby is physically stronger than Ellie, with higher health, stronger melee attacks, and access to heavy weapons.
- Strengths:
- Weaknesses:
- Playstyle:
- Unlock Conditions: Playable during Abby’s sections: Day 1 in Seattle through the end of the game (including the theater confrontation and Santa Barbara). Also the Rat King boss fight.
- Recommended Equipment / Builds:
- Team Synergy: When accompanied by Lev or Yara, Abby is the frontline fighter. Lev can provide cover fire and scouting. Use Lev’s bow to silently kill enemies before Abby charges in.
- Background: A Seraphite child who escapes her strict religious group. She becomes Abby’s ally and moral compass. In one brief section (the boat chase), players control Lev.
- Role: Scout / Support – Lev is agile, can use the bow, and has no desire for excessive violence. She often provides tactical advice.
- Strengths (as AI):
- Weaknesses:
- Playstyle (playable segment): In the boat chase, Lev uses a boat and a rifle. Short segment; just follow the path.
- Unlock Conditions: Fully AI companion from Abby Day 1 through Day 3. Playable briefly during the Harbor section (Chapter: The Boat).
- Recommended Equipment / Builds: N/A (AI controlled). For playable segment, use the rifle to take out enemies on docks.
- Team Synergy: Abby protects Lev. Lev can fire arrows from elevated positions. Keep enemies off Lev to maintain stealth.
- Background: Lev’s older sister, also a Seraphite. She is wounded early but later helps Abby. You briefly play as Yara in a flashback.
- Role: Bruiser / Secondary Warrior – Yara is larger and more aggressive than Lev, but less adept at stealth.
- Strengths:
- Weaknesses:
- Playstyle (playable segment): During the flashback (Chapter: The Forest), Yara fights off WLF soldiers with a pistol and melee. Use the environment to flank.
- Unlock Conditions: AI companion during Abby’s Day 2 (before Yara dies). Playable briefly in the flashback.
- Recommended Equipment / Builds: For her playable segment, there’s no customization; just shoot and bash.
- Team Synergy: Yara is a distraction; Abby can flank while Yara draws fire.
- Background: Ellie’s friend and Dina’s ex-boyfriend from Jackson. He joins Ellie’s journey to help find Tommy.
- Role: Tactical Support – Jesse is a capable fighter with a rifle and pistols. He often provides covering fire.
- Strengths:
- Weaknesses:
- Playstyle: Let Jesse engage enemies while you flank; his presence reduces the number of enemies you have to kill.
- Unlock Conditions: AI companion from Ellie Day 2 (Seattle Downtown) until Day 3 (Hillcrest). He also appears in the flashback.
- Recommended Equipment / Builds: N/A.
- Team Synergy: Ellie is the stealth specialist; Jesse is the firepower. Use his noise to draw enemies away from your path.
- Background: Ellie’s girlfriend, a resourceful Jackson resident. She joins Ellie’s journey but later returns to Jackson.
- Role: Trapper / Medic – Dina can craft traps and health items. She also has a knack for finding supplies.
- Strengths:
- Weaknesses:
- Playstyle (AI): Dina will often pick off enemies with her revolver. She can also heal Ellie (story-based).
- Unlock Conditions: AI companion from Prologue through Day 1. Playable in a brief flashback (the party) as herself? No, only Ellie is playable. Dina is always AI.
- Recommended Equipment / Builds: N/A.
- Team Synergy: Use Dina to cover your back; she is less prone to being detected than Jesse. In the synagogue section, she provides crucial fire support.
- Background: Joel’s younger brother, a former Firefly turned Jackson leader. He joins Ellie in the early revenge quest but becomes separated.
- Role: Sniper / Scout – Tommy is an expert marksman with a hunting rifle.
- Strengths:
- Weaknesses:
- Playstyle: Stay at range; use the rifle to take out enemies before they get close. Use listen mode to track.
- Unlock Conditions: Playable during the flashback (Chapter: The Patrol) – you control Tommy and Ellie? Actually, you control Ellie but Tommy is AI. There is no playable Tommy segment. Correction: Tommy is never playable. He is only AI companion. (In the Patrol section, Ellie is playable; Tommy is AI.) So Tommy is not a playable unit. But he is a major character. We will include him as AI.
- Team Synergy: Tommy provides sniper cover; Ellie should clear the immediate area while Tommy eliminates distant threats.
- Traits: Starts with a hunting pistol and bow. Abilities: Dodge, prone, silencer crafting.
- Role: Stealth Glass Cannon.
- Strengths: Silent kills, trap crafting.
- Weaknesses: Low health, no heavy weapon start.
- Traits: Starts with a large pistol and shotgun. Abilities: Kick, inability to prone, higher health.
- Role: Aggressive Brawler.
- Strengths: High health, powerful kick, shotgun.
- Weaknesses: No prone, louder movement.
- Traits: Starts with revolver and shotgun. Abilities: Melee upgrade, cannot dodge (no dodge button).
- Role: Heavy Survivor.
- Strengths: Quick melee kills, durable.
- Weaknesses: No dodge, limited stealth.
- Traits: Starts with revolver and melee weapon. Abilities: Faster crafting and healing.
- Role: Medic/Support.
- Strengths: Heals faster, craft efficiency.
- Weaknesses: Lower starting weapons.
- Traits: Starts with rifle and pistol. Abilities: Increased accuracy while moving.
- Role: Marksman.
- Strengths: Good with ranged weapons.
- Weaknesses: Poor close combat.
- Traits: Starts with hunting rifle and revolver. Abilities: Longer listen mode, can spot traps.
- Role: Sniper/Scout.
- Strengths: Excellent range, awareness.
- Weaknesses: Melee penalties.
- Traits: Starts with bow and small pistol. Abilities: Faster crawl speed, silent kill bonus.
- Role: Stealth Specialist.
- Strengths: Superior stealth, fast movement.
- Weaknesses: Very low health.
- Traits: Starts with pistol and flame thrower? (Check: She starts with a hunting pistol and molotov). Abilities: Increased fire damage resistance.
- Role: Support/Burnisher.
- Strengths: Fire resistance, molotovs.
- Weaknesses: Limited ammo.
- High starting health and upgrade potential (via pills).
- Can craft shivs for stealth kills and opening shiv doors.
- Effective with shotguns, rifles, and melee weapons.
- Slower movement compared to Ellie in Part II.
- No dodge mechanic (only sprint and vault).
- Stealth is viable but less forgiving than later characters.
- Stealth-CQB Hybrid: Use bricks/bottles to distract, then shiv or choke enemies. Reserve bullets for sudden fights.
- Gunslinger: Upgrade revolver and hunting rifle, use listen mode to peek around corners.
- Resourceful Scavenger: Always search every drawer and closet; Joel’s inventory size is moderate.
- Early Game: Shotgun from Bill’s Town; upgrade revolver for damage and fire rate.
- Mid Game: Hunting rifle for distance; keep a melee weapon (machete or pipe) with a binding for extra durability.
- Late Game: Flamethrower or assault rifle (depending on weapons found). Upgrade health and weapon sway reduction first.
Ellie Williams (Part I – NPC companion & playable flashback)
- Ability to use the bow (silent weapon; retrievable arrows).
- Can craft shivs and smoke bombs.
- Faster movement and smaller hitbox.
- Lower health than Joel; cannot take many hits.
- No access to Joel’s heavy weapons (shotgun, rifle) until the end.
- Limited melee durability.
- Sniper from Shadows: Prioritize the bow; upgrade arrow capacity and accuracy. Always retrieve arrows.
- Hit-and-Run: Use sprint and slide (in Part II mechanics, but not in Part I; in Part I she has no slide). In Part I Winter, use the environment to loop around enemies.
- Scavenger: Search every corner for supplements and ammo; Ellie’s listen mode is slightly better range than Joel’s.
- Bow: Upgrade arrow capacity to 4 or 5; draw speed upgrades are vital.
- Shiv: Always carry a shiv for clickers; use shiv doors to get extra pills and ammunition.
- Skills: Prioritize listen mode distance and weapon sway reduction for the bow.
Sarah Miller (Prologue only)
Ellie Williams (Left Behind DLC – playable)
- Same bow skills from Part I.
- Access to water gun for non-lethal distractions.
- Unique chemistry with Riley (co-op AI).
- Very limited ammo and health.
- Riley can help but is not invulnerable; she will retreat if injured.
- Stealth Focus: Use bricks and bottles to herd infected. The water gun can distract Clickers without making noise.
- Traps: Use nail bombs and smoke bombs to control enemy movement.
- Bow is key; upgrade draw speed.
- Nail bombs are powerful against groups.
---
Playable Characters in The Last of Us Part II Remastered
Ellie Williams (Main protagonist)
- Can go prone and crawl through grass; crouch walking is silent.
- Can dodge melee attacks and perform counter-attacks.
- Access to silencers (crafted from rags and suppressors).
- Crafting includes explosive arrows, trip mines, and traps.
- Lower health upgrade capacity than Abby; requires more supplements for same HP.
- No heavy weapon specialization (cannot use the flamethrower efficiently).
- Melee weapons break quickly.
- Prone Assassin: Use tall grass and prone to sneak past enemies or get behind them for silent takedowns.
- Trap Master: Place trip mines at chokepoints; use explosive arrows from distance.
- Brawler (risky): Use dodge and counters to defeat enemies in open combat, but ammo is scarce.
- Weapons: Upgrade the hunting pistol (for silenced headshots) and the bow (once unlocked). Silenced submachine gun is excellent for clearing rooms.
- Crafting: Prioritize silencers, explosive arrows, and health kits.
- Skills: Upgrade listen mode distance, weapon sway, and health capacity. Stealth-related upgrades (crawl speed) are very helpful.
Abby Anderson (Second protagonist)
- Can stun enemies with a powerful kick (hold square).
- Can upgrade health to higher levels; starting HP is higher.
- Can use heavy weapons like the flamethrower, crossbow, and shotgun more effectively.
- Faster sprint speed.
- Cannot go prone (only crouch). This limits stealth options.
- Larger hitbox makes it harder to hide behind small cover.
- No silencer for most weapons; stealth is more difficult (but still possible with bow/crossbow).
- Aggressive Pursuit: Use sprint and kick to break enemy defenses. Follow up with a melee execution.
- Crossbow Sniper: The crossbow is silent; use it from distance to thin enemy numbers. Upgrading the crossbow’s damage and fire rate is key.
- Heavy Weapons: Flamethrower is devastating against infected and humans; shotguns for close encounters.
- Weapons: Crossbow (highly recommended), hunting rifle, shotgun, and the flamethrower for late-game.
- Skills: Upgrade health, weapon sway, and melee damage. The “hold breath” skill helps with crossbow accuracy.
- Pills: Spend on stamina (for sprinting up ledges) and health.
Lev (AI companion – Abby’s sections, partially playable in a small segment)
- Can distract enemies and perform silent takedowns.
- Her bow is effective and retrievable.
- Can open certain paths.
- Low health; if injured, she will limp and slow down Abby.
- No heavy weapons.
- Cannot be directly controlled most of the time.
Yara (AI companion – Abby’s Day 2, also playable briefly)
- Can use melee weapons effectively.
- Has a pistol with limited ammo.
- Injured arm limits her ability to climb or hold weapons properly (story-wise).
- Less stealthy.
Jesse (AI companion – Ellie’s Day 2 and 3)
- Good marksmanship; can take down enemies from distance.
- Can revive Ellie if she is downed (in certain sections? Actually, no – in Part II, companions cannot revive you. But Jesse provides fire support).
- Knowledge of Seattle.
- AI can sometimes be reckless and get spotted.
- Cannot be directly controlled.
Dina (Playable in flashback and AI companion)
- Can craft nail bombs and health kits.
- Good with a rifle.
- Provides emotional support (no in-game effect).
- Injured later in the story; performance is limited.
- Cannot be controlled in most sections (only in the Jackson prologue, you play as Ellie, but Dina is companion).
Tommy (Playable briefly in Part II flashback)
- Exceptional rifle accuracy.
- Can spot enemies from distance.
- Limited playable time (only the Jackson flashback).
- No close-combat specialties.
---
Multiplayer/No Return (Part II Remastered) – Playable Characters
The Last of Us Part II Remastered features a roguelike survival mode called No Return where players can choose from several characters beyond the main duo. Each has unique traits and starting equipment.
Ellie (No Return)
Abby (No Return)
Joel (No Return – unlockable)
Dina (No Return – unlockable)
Jesse (No Return – unlockable)
Tommy (No Return – unlockable)
Lev (No Return – unlockable)
Yara (No Return – unlockable)
Unlock Conditions for No Return characters: Complete specific challenges (e.g., finish a run with Ellie to unlock Joel, etc.). Full details available in the No Return unlockables guide.
---
Summary Table of Roles
| Character | Game | Role | Key Ability | Weakness |
|---|---|---|---|---|
| Joel (Part I) | TLOU1 | All-Rounder Brawler | High HP, shiv | Slow movement |
| Ellie (Part I) | TLOU1 | Stealth Scout | Bow, speed | Low health |
| Sarah | TLOU1 | Narrative | None | Defenseless |
| Ellie (Part II) | TLOU2 | Stealth Trapper | Prone, dodge, traps | Low HP max |
| Abby | TLOU2 | Brute Tank | Kick, heavy weapons | No prone |
| Lev (AI) | TLOU2 | Support Scout | Bow, distraction | Fragile |
| Yara (AI/playable) | TLOU2 | Secondary Brawler | Melee, pistol | Injured, limited |
| Jesse (AI) | TLOU2 | Tactical Support | Rifle, cover fire | Can be reckless |
| Dina (AI) | TLOU2 | Medic/Support | Crafting, healing | Injured later |
Final Tips for Mastering Character Roles
- Switch playstyle per character: If you are struggling with Ellie’s low health, use prone and stealth rather than open combat. For Abby, lean into her strength by learning the kick combo (square then push triangle).
- Listen mode is universal: All characters have listen mode; upgrade it early for both Joel/Ellie and Abby. It reveals enemy outlines and patrol routes.
- Don't ignore companions: While companions cannot die, they can give away your position. In stealth, avoid making noise that triggers your companion’s reaction.
- No Return characters: Experiment with each character’s unique trait to find your favorite for higher difficulty runs. Joel’s durability and Abby’s aggression are easier for beginners; Lev and Dina require precision.
- Upgrade priority: Always upgrade health first for any character; then weapon sway or listen mode distance. For Ellie (Part II), upgrade the dodge ability early.
- Teamwork in story: When you have an AI partner, let them take the first shot to create a distraction, then move to flank. This works for both Ellie/Dina and Abby/Lev.
Cheats & Secrets
Cheat Codes
The Last of Us series does not include any traditional cheat codes (e.g., invincibility, infinite ammo, level select). Neither The Last of Us Part I nor Part II Remastered features console command inputs or button sequences that unlock cheats. The developers intentionally omitted these to preserve the intended survival horror experience.
Unlock Codes
No unlock codes exist. All extra content—such as character models, concept art, and behind-the-scenes videos—is unlocked by progressing through the story, finding collectibles, or completing the game on specific difficulties. For example:
- The Last of Us Part I: Complete the game on any difficulty to unlock the Model Viewer and Concept Art gallery. Collect all optional conversations, artifacts, and Firefly pendants to unlock additional bonus content.
- The Last of Us Part II Remastered: Progress through the story to unlock character models. Finding all trading cards, artifacts, and coins unlocks supplementary media. There is no code entry system.
- Part I & Part II Remastered: Access via the pause menu (PS5: Touch Pad; PC: default 'P' key) when not in combat. Offers free camera, filters, depth of field, character pose adjustments, and frame removal. No unlock required.
- Unlocked after completing the game once. Allows playing through the entire story with permadeath per chapter, per act, or whole game. Not a cheat, but a hidden difficulty modifier intended for expert players.
- Unlocked after completing the game once. Adds an in-game timer visible during gameplay. Tracks overall time and per-chapter splits.
- After beating the game, the Extras menu unlocks toggles like infinite ammo, infinite crafting, one-hit kills, slow motion, and bullet speed modifiers. These are developer-intended “cheats” that disable trophies.
- The standalone prequel chapter is included in The Last of Us Part I by default, but in the original releases it was a hidden unlock. Now accessible from the main menu once Part I's story is started.
- Part I: Complete the game on Survivor difficulty to unlock Grounded mode. This ultra-hard difficulty removes the HUD, listening mode, and drastically reduces resources. It is not visible until unlocked.
- Part II Remastered: Grounded mode is available from the start, but Grounded+ requires beating the game on Grounded once.
- After completing the story once, New Game+ is available. Character upgrades, weapon upgrades, and collectibles carry over. No code needed; just select “New Game+” from the main menu.
- In the hotel basement encounter where you must start the generator, if you stand in the elevator shaft before the bloater appears, the AI will sometimes fail to enter the shaft, letting you shoot it safely. This is a hidden exploit related to pathfinding, though patched in later versions.
- Resource Duping Glitch (Part I, PSN/PS5): At any workbench, quickly exit the upgrade menu and open it again while holding the upgrade button. Occasionally, the resource cost refunds partially. This can be done once per upgrade point.
- Infinite Shiv Door Exploit (Part I): In the subway tunnels with clickers, you can melee a door without using a shiv if you stand at a 45-degree angle and spam attack. Works on most shiv doors, but may not work on all (used for speedruns).
- Fast Item Drop (Part II Remastered): Press triangle to drop a currently equipped item, then quickly press R2 to pick it up again—doing so while under enemy fire may let you cancel stun animations. Only works in combat.
Hidden Features & Developer-Intended Hidden Content
Photo Mode (Both Games)
Permadeath Mode (Part II Remastered)
Speedrun Mode (Part II Remastered)
Game Modifiers (Part II Remastered)
Left Behind DLC (Part I)
Grounded Mode (Part I & Part II)
New Game+ (Both Games)
Zombie AI Behavior Easter Egg (Part I)
Easter Eggs
The Last of Us Part I
1. Jak and Daxter Reference: In the museum (after the university), look at the dinosaur exhibit. A Velociraptor skeleton bears a subtle ‘Naughty Dog’ logo on its base. Nearby, a stuffed Jak and Daxter plushie lies on a bench.
2. Crash Bandicoot: In Joel’s house (prologue), you can find a Crash Bandicoot toy in Sarah’s room, and later in Bill’s town, a Crash plushie is on a bed.
3. Uncharted Reference: In the sewers after the dam, Ellie will comment on a poster that resembles Uncharted’s treasure hunter, and Joel may joke about it.
4. Giraffe Dream Sequence: The famous giraffe scene in Fall is not an Easter egg per se, but a subtle narrative call-back to early concept art and promotional imagery.
5. Developer Graffiti: In the Pittsburgh suburbs, spray-painted messages like “GD” (for Game Director) appear on walls—inside jokes from the team.
6. Hidden Note in the Suburbs: A note from a survivor references “the sewer king” which alludes to a cut character or AI behavior.
The Last of Us Part II Remastered
1. Ellie’s Guitar Theme: In the prologue, Ellie hums the game’s main theme while playing guitar. If you strum a specific chord sequence (E minor, C, G, D), the game rewards you with an extra line of dialogue from Joel.
2. Abby’s Dad Reference: In the stadium base, you can find a photo of Abby’s father with a young Abby, foreshadowing major plot reveals.
3. Dina’s Necklace: Throughout the game, Dina’s necklace changes depending on the chapter—a subtle continuity Easter egg that reflects her emotional state.
4. Trading Card Homages: The in-game trading cards (Part II) feature characters inspired by Naughty Dog’s previous titles. For example, “The Firefly” card resembles Nathan Drake, and “Scarface” references Tommy from Uncharted.
5. Uncharted 4’s Pirate Ship: In the Santa Barbara area, a derelict boat bears the name “The Devil’s Pelvis,” a call-back to Uncharted 4’s pirate lore.
6. Bowling Ball Glitch: In the stadium, you can find a bowling ball that doesn’t interact with the environment normally. If you carry it to a specific alley, the game plays a short bowling sound effect—hidden developer audio.
7. Rat King in Museum: In the hospital basement where you fight the Rat King, look closely at the petri dishes in the lab; one slides off the table if you bump it, causing a scared reaction from Ellie later.
8. Fun Fact: The game’s title screen changes subtly over time—after finishing the game, the flowers in the background wilt or shift, representing Ellie’s mental state.
Exploit-Safe Secrets & Glitches
These are safe, repeatable exploits that do not corrupt saves or break progression:
> Note: Naughty Dog patched many early exploits. Always back up saves before attempting any glitch on PC or PS5.
Unlockable Content Summary
| Game | Unlockable | Requirement |
|---|---|---|
| Part I | Joel’s Model | Complete the game |
| Part I | Ellie’s Model | Complete the game |
| Part I | Concept Art Gallery | All collectibles |
| Part I | Left Behind | Included in Part I |
| Part II Remastered | Permadeath Mode | Complete game once |
| Part II Remastered | Speedrun Timer | Complete game once |
| Part II Remastered | Infinite Ammo Modifier | Complete game once (Extras menu) |
| Part II Remastered | New Game+ | Complete game once |
| Part II Remastered | Character Models (e.g., Owen, Mel) | Story progression + collectibles |
Final Notes
While there are no classic cheat codes, The Last of Us series offers deep hidden content through difficulty unlocks and Easter eggs. The most rewarding secrets are found by exploring every corner, listening to optional conversations, and completing the game multiple times. For trophy hunters, note that using built-in modifiers like infinite ammo disables all trophies for that playthrough.