
The Last of Us Part II
## Overview **The Last of Us Part II** is a critically acclaimed action-adventure survival horror game developed by **Naughty Dog** and published by **Sony Interactive Entertainment**. Released on **June 19, 2020** for the **PlayStation 4**, it received a native **PlayStation 5** version on **Janua...

Download & Installation
Overview
The Last of Us Part II is a Sony Interactive Entertainment title currently exclusive to PlayStation platforms (PS4 and PS5). It is not available on PC, Xbox, Nintendo Switch, or mobile devices through any official or legitimate means. Any claims of PC, Xbox, or mobile versions are from unofficial sources only. This guide covers installation on PlayStation 4 and PlayStation 5, including disc-based and digital downloads.
---
Official Download Sources
| Platform | Source | Type |
|---|---|---|
| PlayStation 4 | PlayStation Store (digital) | Digital |
| PlayStation 4 | Retail disc (physical) | Physical |
| PlayStation 5 | PlayStation Store (digital) – PS5 native version | Digital |
| PlayStation 5 | PS4 disc backward compatible + free PS5 upgrade | Physical / Digital |
| PlayStation 5 | PS Plus Extra / Premium (streaming / download) | Subscription |
---
System Requirements
Since the game is console-exclusive, traditional PC-style system requirements do not apply. Below are the necessary console and storage specifications.
PlayStation 4
- Console: PS4, PS4 Slim, PS4 Pro
- OS: System software 6.50 or later (updated to latest recommended)
- Storage: 80 GB minimum free space (original PS4 version)
- Disc drive: Required for physical edition
- Console: PS5 or PS5 Digital Edition
- OS: System software 20.02-02.50.00 or later
- Storage: 80 GB minimum free space (PS4 version); ~74 GB for PS5 native Remastered
- Disc drive: Required only for PS4 disc version (backward compatible)
- Internet: 15 Mbps minimum for 720p; 50 Mbps for 4K streaming
- Latency: < 50ms recommended
- Controller: DualShock 4 or DualSense
- PS Plus subscription: Extra or Premium tier
- PlayStation Network (PSN) account is mandatory for any digital download, disc installation (for updates and online features), or streaming.
- Parental controls: If under 18, a parent/guardian must approve the download (game is rated M for Mature).
- PS Plus subscription is required for streaming (Premium) or downloading via Extra tier, but not for buying the game digitally or playing from disc (though online features like Factions mode? Note: Part II does not have a separate multiplayer mode; any online features require PSN but not Plus).
PlayStation 5
PlayStation Plus Extra / Premium (Cloud Streaming)
---
Step-by-Step Installation
1. Digital Download (PS Store)
On PS4:
1. Turn on your PS4 and sign in to your PlayStation Network (PSN) account.
2. Navigate to PlayStation Store from the home screen.
3. Search for "The Last of Us Part II."
4. Select the game and choose Add to Cart (if purchasing) or Download (if already owned).
5. Confirm the purchase or download.
6. The game will begin downloading. You can monitor progress from Notifications > Downloads.
7. Once downloaded, the game will install automatically. Wait for the installation to complete (indicated by a progress bar under the game icon).
8. Launch the game from the home screen.
On PS5 (Digital / Remastered):
1. Sign in to your PSN account on PS5.
2. Open the PlayStation Store.
3. Search for "The Last of Us Part II Remastered" (or the PS4 version).
4. Select Download (if owned or purchased).
5. The game will download and install. The PS5 will show a progress bar below the game tile.
6. After completion, the game is ready to play.
Note: If you own the PS4 digital version, you can upgrade to the PS5 Remastered version for $10 (as of 2024). Follow the store prompt to claim the upgrade.
2. Physical Disc Installation
On PS4:
1. Insert the game disc into the PS4 disc drive with the label facing up.
2. The system will automatically recognize the disc and begin installation (copying data to the hard drive).
3. A progress bar appears on the home screen. Installation can take 20–40 minutes depending on drive speed.
4. Once the bar completes, the game will be playable. You must keep the disc in the drive to play.
On PS5 (backward compatible with PS4 disc):
1. Insert the PS4 disc into the PS5 disc drive.
2. The PS5 will copy the necessary data from the disc (it installs the PS4 version of the game).
3. After installation, you will be offered a free PS5 upgrade (if available). Select Upgrade to download the Remastered version.
4. You must keep the PS4 disc in the drive to play the upgraded PS5 version.
3. PlayStation Plus Extra / Premium (Streaming & Download)
Download (PS Plus Extra):
1. Ensure you have an active PS Plus Extra or Premium subscription.
2. On your PS4 or PS5, go to PlayStation Plus > Game Catalog.
3. Search for "The Last of Us Part II" and select Download.
4. Follow the same download steps as a digital purchase.
Cloud Streaming (PS Plus Premium only):
1. From the PS5 home screen, select PlayStation Plus > Game Catalog > The Last of Us Part II.
2. Choose Stream instead of Download.
3. The game will launch instantly via cloud streaming. No local installation is needed, but a strong internet connection is required.
---
Account Requirements
---
First Launch Setup
1. After installation, launch the game.
2. The screen will display initial copyright and logo screens. Press any button to continue.
3. Language selection: Choose your preferred language for audio and subtitles.
4. Brightness calibration: Adjust the screen brightness until the left icon is barely visible and the right icon is fully visible. Press X to confirm.
5. Accessibility options (optional): Configure subtitle size, color-blind modes, controller layout, etc. You can skip this by pressing Options > Skip.
6. The game will now load the main menu. Select New Game to begin.
Important: The game may prompt you to download an update (patch). It is highly recommended to install the latest update for bug fixes and performance improvements. Allow it to download and install before playing.
---
Common Installation Errors & Fixes
| Error | Cause | Solution |
|---|---|---|
| CE-30022-7 | Damaged disc or dirty lens | Clean the disc with a soft cloth; check for scratches. Reboot console. |
| CE-32938-7 | Insufficient storage space | Delete unused games or media. Need at least 80 GB free. |
| CE-36329-3 | Corrupted data during install | Delete the partial installation, restart console, and reinstall. |
| NW-102954-2 | Network failure during download | Check internet connection; restart router; pause/resume download. |
| Upgrade not showing (PS5) | No free upgrade for PS4 disc? | Ensure you have the correct disc (Region 1/All?). Go to game hub > three dots > View Product > select upgrade path. |
| Game crashes on first launch | Outdated system software | Update PS4/PS5 to latest firmware via Settings > System Software Update. |
| Stuck at "Copying Add-on Content" | Background download still running | Wait until all downloads complete; check Notifications. |
| Cannot stream (PS Plus Premium) | Region restriction or subscription expired | Verify subscription status; use supported region (game available only in certain countries). |
Post-Installation Verification
To confirm the game is installed correctly:
1. Check version: From the game tile on the home screen, press Options > Information. Look for version number. Latest recommended: 1.09 (PS4) / 1.000.010 (PS5 Remastered).
2. Verify file size:
- PS4 original: ~78 GB
- PS4 with all updates: ~85 GB
- PS5 Remastered: ~74 GB
3. Test game launch: Open the game; you should see the main menu with options: New Game, Load Game, Options, etc. No error messages.
4. Check trophies: If synced to PSN, go to Profile > Trophies > The Last of Us Part II. If list appears, installation succeeded.
5. Run a short gameplay session: Start a New Game and play through the opening sequence (approximately 5 minutes). No crashes or unusual stuttering indicates a healthy install.
---
Additional Notes
- Cross-platform play: Not applicable; game is offline single-player only.
- Disc vs Digital: Digital versions may require an initial download even from disc (patches). Physical copies still need disc inserted.
- Mods: No official mod support.
- Future availability: The game may be delisted from PS Store in the future; but once purchased, it remains in your library.
Game Introduction
Overview
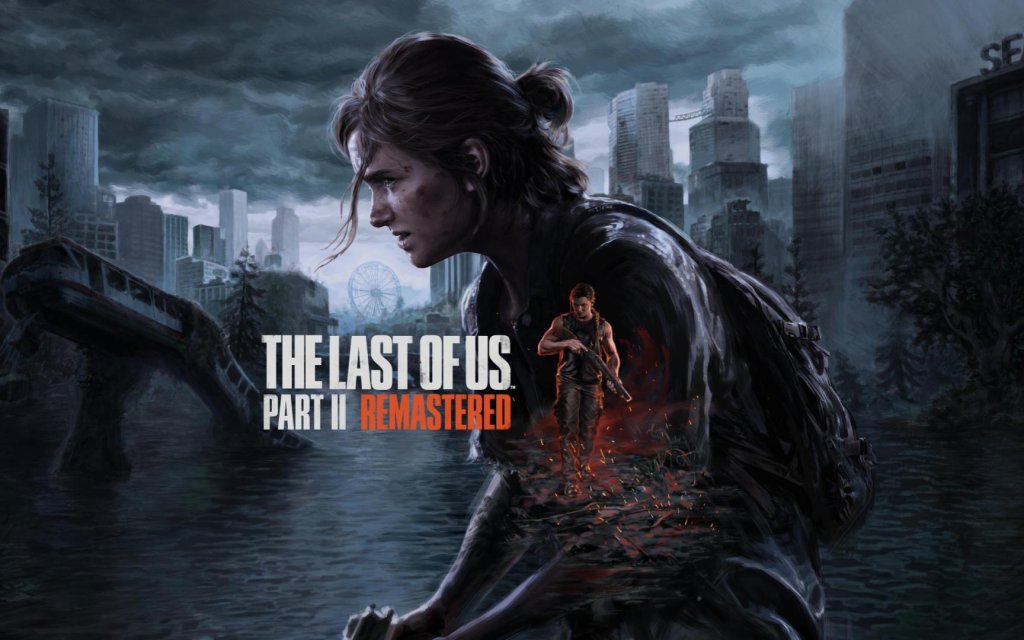
The Last of Us Part II is a critically acclaimed action-adventure survival horror game developed by Naughty Dog and published by Sony Interactive Entertainment. Released on June 19, 2020 for the PlayStation 4, it received a native PlayStation 5 version on January 19, 2024 (as part of The Last of Us Part II Remastered). The game is a direct sequel to The Last of Us (2013) and continues the story of Ellie and Joel in a post-apocalyptic United States.
---
Genre & Core Appeal
- Primary Genre: Action-Adventure / Survival Horror
- Sub-Genres: Stealth, Third-Person Shooter, Cinematic Narrative
- Core Appeal: The game is renowned for its emotionally devastating story, nuanced character arcs, and ultra-realistic graphics. It blends tense stealth gameplay with visceral combat and a deep, branching narrative that forces players to confront moral ambiguity. The remastered PS5 version adds 60 FPS performance mode, 4K resolution, DualSense haptic feedback, and new features like Guitar Free Play and Lost Levels (unused story content).
- Ellie – The protagonist, a hardened survivor. Complex, vengeful, and resourceful.
- Joel – Ellie’s father figure, haunted by his past actions.
- Abby – A playable character with her own storyline, driven by a personal vendetta.
- Tommy – Joel’s brother, a former Firefly.
- Dina – Ellie’s partner, who follows her on the Seattle journey.
- Jesse – A friend from Jackson, father to Dina’s child.
- Lev & Yara – Sibling survivors from the Seraphite cult, central to Abby’s arc.
- The Wolves (WLF) – A militarized faction based in Seattle.
- The Seraphites (Scars) – A religious cult controlling parts of the city.
- Single-Player Campaign: The primary experience, a 25–30 hour story-driven adventure. Offline only; requires no internet connection.
- No Multiplayer: Unlike the first game, Part II does not include a multiplayer mode (Factions). However, a standalone The Last of Us multiplayer game is in development.
- Remastered Additions (PS5):
- Mature gamers (rated M for Mature) due to intense violence, gore, sexual content, and strong language.
- Fans of narrative-driven experiences who value character development and emotional storytelling over pure gameplay.
- Survival horror enthusiasts who enjoy stealth, resource management, and tense combat.
- New players may start here, but the story heavily references the first game; playing The Last of Us Part I is strongly recommended.
- PlayStation 4 (original release)
- PlayStation 5 (native remaster via The Last of Us Part II Remastered)
- Not available on PC, Xbox, Nintendo Switch, or mobile. A PC port of Remastered was announced in late 2024 but has no confirmed release date.
---
Story Overview
Set five years after the events of the first game, The Last of Us Part II follows a now-19-year-old Ellie and a 56-year-old Joel living in the relative safety of Jackson, Wyoming. The story begins with a shocking event that shatters their peace, sending Ellie on a brutal quest for revenge across the post-pandemic ruins of Seattle. The narrative is told from multiple perspectives, including that of Abby, a character whose own motivations and backstory are explored in parallel. The game forces players to see the conflict from both sides, challenging traditional notions of heroism and vengeance.
---
Setting
The game takes place primarily in Seattle, Washington, over the course of three days, as well as flashbacks to other locations (Jackson, Wyoming; Salt Lake City, Utah; and various coastal areas). The environment is lushly overgrown, with nature reclaiming abandoned buildings and highways. Detailed, photorealistic environments include flooded suburbs, desolate downtown areas, a sprawling hospital, and an underground terrorist stronghold. The weather, lighting, and reactive AI create an immersive, oppressive atmosphere.
---
Main Characters
---
Game Modes & Online/Offline Support
- Guitar Free Play – Play a fully interactive guitar in multiple locations.
- Lost Levels – Three playable sections cut from the original release with developer commentary.
- Speedrun Mode – Track your completion time.
- No Return – A new roguelike survival mode with randomized encounters, playable characters, and leaderboards (exclusive to Remastered).
---
DLC & Expansions
The base game did not receive any story DLC. The only major expansion is The Last of Us Part II Remastered (2024), which is not a paid DLC but a native PS5 version with graphical upgrades and new modes. No other expansions have been announced. The Remastered version is available as a separate purchase or a $10 upgrade for PS4 owners.
---
What Makes the Game Unique
1. Emotional Complexity: The game is infamous for its challenging narrative that forces players to empathize with characters they may initially despise. It explores trauma, revenge, and the cycle of violence.
2. Unmatched Presentation: Stunning visuals, lifelike facial animations (using Naughty Dog’s proprietary system), and a hauntingly beautiful score by Gustavo Santaolalla.
3. Accessibility: One of the most accessible AAA games ever, with over 60 accessibility options including high-contrast mode, auto-lock aim, audio cues for navigation, and fully customizable controls.
4. Adaptive AI: Enemies are smarter and more reactive; they search in packs, use call-outs, and mourn their fallen comrades.
5. Dual Protagonist Structure: The game splits its story into two halves (Ellie’s and Abby’s), allowing players to experience both sides of the conflict.
6. Graphical Fidelity: The PS5 remaster supports 4K at 60 FPS with ray-traced shadows and reflections, making it one of the best-looking games of its generation.
---
Target Audience
---
Platform Availability
---
Release Timeline
| Version | Platform | Release Date |
|---|---|---|
| The Last of Us Part II | PS4 | June 19, 2020 |
| The Last of Us Part II Remastered | PS5 | January 19, 2024 |
Download & Installation
As noted in the previously confirmed guide sections, the game is a Sony Interactive Entertainment title currently exclusive to PlayStation platforms (PS4 and PS5). It is not available on PC, Xbox, Nintendo Switch, or mobile devices through any official or legitimate means. For download and installation details, refer to the dedicated sections in this guide.
---
This guide is intended for informational purposes. All trademarks and copyrights belong to their respective owners.
Getting Started
Getting Started
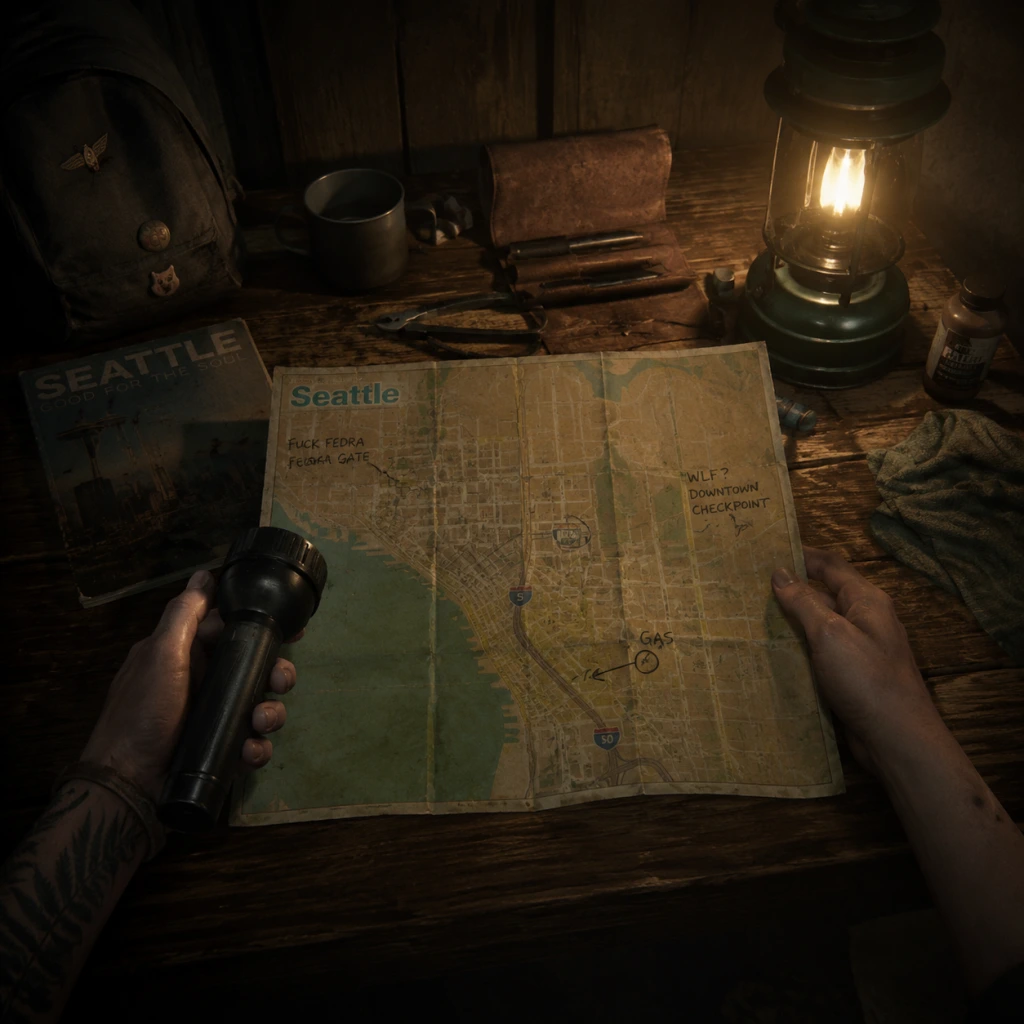
This guide is for brand-new players of The Last of Us Part II on PlayStation 4 or PlayStation 5. The game is a single-player, story-driven survival action game with no character creation—you play as Ellie (and later as Abby). Your goal is to survive hostile environments, scavenge resources, and progress through a deeply emotional narrative.
---
First Hour Walkthrough
1. Prologue (Jackson, Wyoming – Winter)
- You start as Ellie in the settlement of Jackson. You cannot die here; just follow the linear path.
- Key actions: Walk around, talk to characters (Dina, Tommy, Jesse). This is pure tutorial and story setup.
- No combat yet; enjoy the atmosphere.
2. Opening Cutscene – A flashback to Joel and Tommy. Then you attend a party with Dina.
- What to do: Follow Dina, pet a dog (Buckley), go to the barn.
- Avoid: Ignoring story prompts; all are mandatory but give world-building.
3. First Patrol (with Dina) – You leave Jackson on horseback.
- Controls introduced: Movement (L3), Horse controls (R1 to trot, R2 to gallop, L2 to stop/dismount).
- First fight tutorial: A small group of infected appear.
- You have a pistol and a melee weapon (the axe Dina gives you).
- Practice targeting (L2) and shooting (R2).
- Stealth kill from behind: Approach an unaware enemy and press Triangle.
- Tip: Use the listen mode (R1) to see enemy locations through walls (white outline).
4. Exploring the Synagogue – Dina and Ellie search for supplies.
- First safe: Combination lock puzzle (Code: 25-1-17). Open safe for supplements (skill points).
- Loot everything: Bottles, rags, alcohol, bindings. These are crafting materials.
5. Returning to Jackson – Linear walk/ride back. The first hour ends.
---
Character Creation
No character creation exists. You control Ellie for the vast majority of the game, and later Abby (around 10–12 hours in). Their appearance, skills, and weapons are fixed by the story. All progression comes from upgrade trees (skills and weapons) found by collecting supplements and parts.
---
Controls (All Platforms)
The Last of Us Part II is available on PS4 and PS5 with identical control layouts (PS5 uses DualSense features but mapping is the same). Below is the default control scheme:
| Button | Action |
|---|---|
| Left Stick (L3) | Move / Press to run (sprint) |
| Right Stick (R3) | Camera / Press to melee attack (when weapon drawn) |
| Cross (X) | Jump / Climb / Context action (open doors, pick up items) |
| Circle (O) | Crouch / Stand up / Dive (in water) |
| Square (□) | Reload (hold) / Interact (loot containers) |
| Triangle (△) | Pick up / Melee attack (when unarmed) / Execute stunned enemy |
| L1 | Listen Mode (highlight sounds and enemies through walls) |
| L2 | Aim weapon (hold) / Block (when unarmed) |
| R1 | Switch weapon (tap) / Heal (hold + use medkit) |
| R2 | Shoot / Attack (with melee weapon) / Accelerate in horse |
| Options | Pause menu (Inventory, Map, Skills, Weapons, Journal) |
| Touchpad | Open Map (single tap) / Journal (hold) |
| D-Pad Up | Switch to pistol |
| D-Pad Down | Switch to long gun (rifle, shotgun, bow) – based on current weapon |
| D-Pad Left | Switch to throwable (brick, bottle, Molotov, smoke bomb) |
| D-Pad Right | Switch to melee weapon (when not already equipped) |
- Stealth is king. Use crouch (Circle) and listen mode (L1 often, but only when standing still).
- Quick weapon switching (R1) cycles through your two main weapons. Use D-Pad for specific types.
- Hold L1 to heal when you have a bandage (crafted from rags). Don’t waste health kits until needed.
- DualSense features (PS5 only): Haptic feedback gives subtle alerts (e.g., pulling back a bow string feels tense). Adaptive triggers resist when weapons are damaged or when aiming. Not essential but immersive.
- Health – The screen shows no health bar. Look for Ellie’s physical state:
- Ammo counter – Shows current magazine / total for the equipped weapon (e.g., 4/20).
- Weapon wheel – Tap R1 to see currently equipped weapons. Hold R1 to bring up quick select (not full wheel). Use the Options menu for full inventory.
- Crafting icon – When you have materials for a craftable item, a small icon appears near the bottom-right (e.g., knife icon for a shiv). Open inventory (Options) to craft.
- Minimap – Top-right corner, appears only when inside large interiors or areas with infected. Not always present.
- Waypoint marker – A faint white dot/line guiding you to the next story objective. Follow it if lost.
- Listen Mode – Activates a sonar-like pulse that highlights:
- Loot everything, always. Every drawer, cabinet, shelf may contain:
- Collect all supplements – Use them immediately in the Skills menu (Options > Skills). Prioritize:
- Upgrade your weapons at workbenches – Parts found. Upgrade priority:
- Craft often – In the inventory menu, craft: medkits (rags + alcohol), shivs (bindings + scissors), smoke bombs (rag + sugar), Molotovs (rag + alcohol + bottle). Always keep one medkit and one shiv (for locked doors).
- Explore fully before moving to the next story beacon. Safes and hidden areas often contain skill magazines (permanent buffs) and extra parts.
---
UI Overview
The Heads-Up Display (HUD) is minimalist and contextual. Understanding it is critical:
- No damage: normal movement.
- Light damage: occasional blood spatter on edges.
- Heavy damage: screen gets desaturated, blood splatters heavily; listen for heavy breathing.
- Heal prompt appears when heavily injured or when you have a medkit.
- Special weapons (rifles, shotguns) show separate counts.
- Enemies (white outlines).
- Lootable containers (yellow).
- Interactive objects (blue/green).
- Resources (glowing white).
Important: The UI never tells you exactly how much health you have. Pay attention to visual/audio cues. Always carry a crafted medkit.
---
Essential Early Objectives (First 2–3 Hours)
1. Survive the Prologue – Pure story. No decisions.
2. Complete the patrol with Dina – Use stealth for infected; loot the synagogue (safe code: 25-1-17).
3. Return to Jackson and attend the dance – Cuts to next morning.
4. First major combat encounter – After leaving Jackson, you infiltrate a building. Use stealth, bricks/bottles for distractions.
5. Obtain the hunting bow – Found in a convenience store after the first WLF encounter. Essential for silent kills.
6. Enter the first open hub (Downtown Seattle) – You can explore here. Prioritize finding workbenches and safes.
---
What to Do First (Priorities)
- Supplements (skill points) – they look like small green vials with a plus sign.
- Parts (gun upgrade currency) – metal pieces.
- Crafting materials: alcohol, rags, bindings, sugar, explosives (rare).
- Ammo and weapons (fixed spawns).
- Precision (swap shoulders while aiming) – Huge for peeking around corners.
- Healing (improves medkit efficiency) – Saves resources.
- Stealth (quieter movement) – Helps avoid detection.
- Pistol (muzzle break or reload speed) – You use it most early on.
- Bow (draw speed) – Silent headshots are gold.
---
What to Avoid (Common Mistakes)
1. Rushing into combat – Stealth is always better. Enemies are smart; they will flank and call for backup. If detected, run and reposition.
2. Ignoring listen mode – Use R1 frequently. It shows patrol routes and loot. Consumes no resource.
3. Wasting ammo on basic infected – Use melee or stealth. Save bullets for humans or clickers.
4. Not crafting medkits – You can’t buy them. Always have at least one.
5. Skipping safe combinations – Every safe gives valuable loot. Write down combos (they can be found nearby).
6. Forgetting to switch weapons – You can only carry two guns at a time (pistol + long gun). Manage wisely.
7. Not reading the journal – Ellie writes notes that reveal clues and combinations. Check Options > Journal.
8. Overusing molotovs on small groups – Save for bloaters or heavy enemy groups.
9. Trying to kill everyone – Some areas are meant to be stealthed through. You don’t need to clear every room.
10. Not exploring before story trigger – Once you pass a point of no return, you cannot revisit. Loot thoroughly.
---
Early Resource Priorities (First 5 Hours)
| Resource | Priority | Use |
|---|---|---|
| Rags | High | Medkits, smoke bombs, shivs (with bindings) |
| Alcohol | High | Medkits, Molotovs |
| Bindings | Medium | Shivs (doors), essential for melee upgrades |
| Sugar | Medium | Smoke bombs (distraction) |
| Explosive items (e.g., gunpowder) | Low (first hours) | Craft ammo (rare early). Conserve until you have many parts. |
| Supplements | Always collect | Skill points – spend immediately. |
| Parts | Always collect | Weapon upgrades at workbenches. |
---
Common Beginner Mistakes (Detailed)
- Ignoring the playable flashback sections – These are not skippable and provide context. Don’t just mash through dialogue; pay attention for story clues and loot locations.
- Holding R2 too long when pulling bow – The bow can be held for precision but consumes stamina (visual shake). Release quickly for snap shots.
- Not using bricks/bottles – Throw them (tap L2 then R2) to distract or stun an enemy. Bricks can also be used as melee weapons.
- Forgetting to disable traps – Human enemies place trip mines. Look for laser lines; crouch under or shoot the red barrel to destroy them.
- Underestimating clickers – They kill in one grab. Always have a shiv or use a melee weapon to escape if they grab you. Stealth is mandatory.
- Sprinting through water – Noise alerts enemies. Walk/crouch in water.
- Not using the map – In open areas, the map shows your location and areas of interest. Press Touchpad to view.
- Selling/trading items – You cannot; there are no merchants. All loot is used for crafting or upgrades.
- Assuming you can play as Joel – Joel is playable only in a short flashback. The game is Ellie’s story.
- [ ] Set difficulty – Choose Moderate (balanced). Survival (hard) restricts resources and listen mode, and Permadeath is not recommended for first playthrough.
- [ ] Enable subtitles – Already on by default. Keep them on for environmental voice lines.
- [ ] Adjust controller sensitivity – Default is fine. If you want quicker aiming, go to Settings > Controls > Aim Sensitivity (increase to 4–5).
- [ ] Understand listen mode – Hold L1 when still; it recharges after use (blue bar). Use it sparingly in combat to avoid cooldown.
- [ ] Memorize safe code for first safe – 25-1-17 (in the synagogue). Write it down.
- [ ] Check for skill magazines – In the first hub (Downtown Seattle), look for a magazine that grants a permanent upgrade (e.g., faster healing). Search the bookstore and bank.
- [ ] Collect all coins/pins – Not plot-essential, but feeds the trophy “That’s All I Got” and some safes.
- [ ] Save often – The game autosaves frequently, but you can manual save from Options > Save (only one save slot per playthrough). No need to micromanage.
- [ ] Plan for at least 25–30 hours – The story is long. Don’t rush.
- [ ] Avoid story spoilers – The game is best experienced blind. Do not look up guides beyond this beginner walkthrough.
- Play on a good TV/headset – Audio cues are vital: clicking of clickers, footsteps, whistles.
- Don’t be afraid to die – Deaths are cheap; retry from last checkpoint (fair checkpoints). Learn from mistakes.
- Interact with everything – Don’t just rush to objective markers. Open all drawers, break glass, search bodies.
- Manage horse stamina – When riding, hold X (pat) to calm the horse, but this is minor.
- Read notes and letters – They often contain safe combinations or lore.
- Expect emotional impact – The story is mature, violent, and somber. Take breaks if needed.
---
Day-One Checklist
Before you play your first session, do this:
---
Final Tips for Newcomers
Welcome to The Last of Us Part II. Survive, scavenge, and keep moving forward.
Core Gameplay
Overview of Core Gameplay Loop
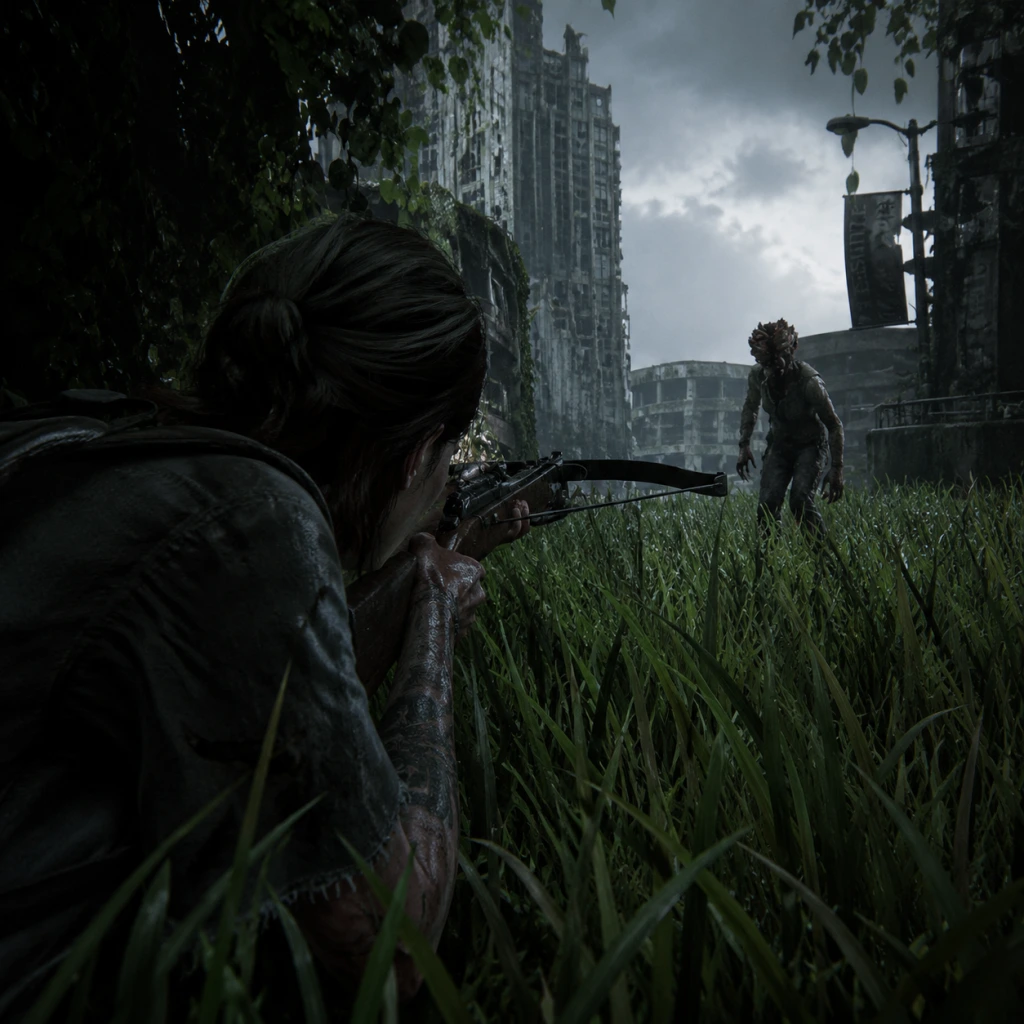
The Last of Us Part II is a linear, story-driven action-adventure survival horror game. The core loop revolves around exploration, combat, and crafting while navigating infected (zombie-like creatures) and hostile human factions. You play as both Ellie and Abby at different chapters. The game emphasizes stealth, resource management, and environmental puzzles. There is no open world; levels are carefully crafted corridors with optional side paths and collectibles.
- Exploration: Search every corner for supplies (ammo, scrap, supplements, gun parts, crafting materials) and optional collectibles (artifacts, trading cards, coins, journal entries).
- Combat: Engage enemies either stealthily (silent takedowns, bow, suppressed pistol) or aggressively (shotgun, rifle, Molotovs). The AI is highly adaptive—they flank, communicate, and search intelligently.
- Crafting & Upgrading: At workbenches, use parts and supplements to upgrade weapons and skills. Craft healing items, ammo, shivs, and throwables using raw materials.
- Quests/Missions: There are no side quests in the traditional sense. The story is linear with optional branching paths for collectibles. The main missions are chapter-based (e.g., Seattle Day 1-3 for Ellie, then Abby’s campaign).
- Economy: No currency. All resources are scavenged. Scrap (metal) is used for weapon upgrades. Supplements are used for skill upgrades. Ammo and crafting parts are finite per area—manage carefully.
- Character / Build Growth: Two skill trees: Survival and Stealth, each with 3 tiers. Weapons can be upgraded up to Level 3 with specific parts. Your build is determined by which skills you prioritize (e.g., improved listen mode, faster crafting, larger holster).
- Endgame: After completing the story, you can load Chapter Select to replay any chapter and find missed collectibles. New Game+ lets you replay the entire game with all upgrades and weapons (except story-locked items) on any difficulty, unlocking two new difficulties: Grounded and Permadeath.
- Story Context: You begin as Joel and Tommy, then switch to Ellie in Jackson. The traumatic event sets Ellie on a revenge path to Seattle.
- Gameplay Focus: Tutorialization. You learn basic movement (prone, jump, dodge), stealth (listen mode, grass hiding), crafting (Molotov, health pack), and combat (pistol, bow, limited melee).
- Weapons & Upgrades: You acquire the Revolver (6 shots, slow reload), Bolt-Action Rifle (4 rounds, powerful but slow), and Bow (silent, retrievable arrows). Workbenches offer Tier 1 upgrades: increased fire rate, scope, etc. Scrap is scarce; prioritize one or two weapons.
- Skills: Start with a few skill points. Focus on Survival skills: faster healing, more health. Stealth skill: quieter movement. Supplements are rare; you’ll earn ~15-20 supplements per chapter.
- Crafting: Always carry a Shiv (1 blade + 1 binding) to open locked doors with supplies. Craft at least 2 health kits before major fights. Conserve pistol ammo; use bow and melee for infected.
- Example: In the Supermarket encounter (early Seattle Day 1), use stealth to avoid unnecessary combat. Loot every shelf for supplements and scrap. If you alert the infected, use the shotgun (found nearby) but know it’s loud and attracts more.
- Key Tips:
- Story Context: Ellie hunts for Abby. Encounters the WLF (Washington Liberation Front) and Seraphites (cult). The game introduces Abby as a playable character with her own skill tree and weapons.
- Gameplay Focus: Unlocks more advanced combat mechanics: prone + dodge + jump (vaulting over obstacles). You face both human enemies (with dogs that track you) and new infected types (Stalkers, Bloaters, Shamblers). Levels become larger and more open, with verticality.
- Weapons & Upgrades: New weapons for Ellie: Hunting Pistol (powerful but loud), Silenced SMG (from workbench), Flamethrower (for Bloaters). For Abby: Crossbow (silent but retrievable), Burst Rifle (three-round burst), Stun Gun (non-lethal disable). Upgrade to Tier 2: larger magazines, quicker draw.
- Skills: Unlock second tier skills: Increased craft speed, Improved listen mode radius, Dodge timing window. Supplements become more plentiful (30-40 per chapter). Choose either a stealth or combat route; hybrid is viable.
- Crafting: You can now craft Traps (mines) and Smoke Bombs (stun enemies). Use traps for chokepoints. Ammo crafting becomes crucial; pick up gunpowder and brass regularly.
- Example: In Seattle Day 2 (Ellie) – The Fire Station, you must navigate a building with both WLF soldiers and infected. Use the environment: blow up cars with a revved-up generator? Or quietly pick off enemies one by one. If detected, retreat and use smoke bombs to escape and reset.
- Key Tips:
- Story Context: Abby’s story climaxes with the Seraphite island confrontation. Ellie follows Abby to the Rattlers’ territory in Santa Barbara. The narrative forces you to make moral choices (but actual gameplay remains linear).
- Gameplay Focus: The game becomes brutally difficult. Enemies are more aggressive, dogs are relentless, and ammo is scarce. The Rat King boss fight (Abby’s Day 3) is one of the most intense combat encounters in the game. You must use everything you’ve learned.
- Weapons & Upgrades: Fully upgraded weapons available. For Ellie: Auto Pistol (full-auto sidearm), Rifle with Silencer (if you found parts). For Abby: Military Pistol (9-round magazine), Flamethrower (full upgrade). Tier 3 upgrades include Quick reload, Increased damage, Scope Zoom.
- Skills: Max out one tree. Survival final skill grants Health Regeneration (slow, but saves resources). Stealth final skill grants Silent Sprint (move faster while crouched). You’ll have enough supplements to nearly max both trees if you explored thoroughly.
- Crafting: Improvise. With limited resources, focus on health kits and one type of throwable. The Rifle with armor-piercing rounds is invaluable against armored Rattlers. Shivs are less important now (few locked doors, but some safes remain).
- Example: In The Rat King fight in the hospital basement (Abby’s Day 3), you must cycle through all weapon types: shotgun for close blasts, rifle for headshots, pipes for melee after staggering. The creature has multiple stages—use corners to break line of sight. Save your absolute best crafted ammo for this fight.
- Key Tips:
- Post-Story Content: The game saves a Chapter Select option on the main menu. You can replay any chapter from a checkpoint to collect any missed supplies, artifacts, trading cards, or coins. There is no free roam; once you finish, the game resets to the title screen.
- New Game+: Unlocked after any completion. You carry over all weapon upgrades, skill points (if you collected all supplements), and crafting materials. Two new difficulty options become available:
- Achievements: Many trophies require finding all collectibles, upgrading all weapons, and completing the game on the hardest difficulties. Use Chapter Select to mop up missed items.
- Build Optimization: In New Game+, you can max all skills and weapons quickly since you start with everything unlocked. Focus on perfecting your playstyle: stealth runs (no detection), no-kill runs (impossible on all encounters? Actually some forced kills), or speedruns.
- Example: To get the “Break a dog’s neck” trophy, replay Ellie’s Seattle Day 2, encounter the first WLF checkpoint with dogs, and perform a stealth kill from behind. Use New Game+ on Easy for quick collection runs.
- Final Note: The emotional weight of the story cannot be skipped. Even in gameplay, the design reinforces themes of consequence and brutality. Enjoy the journey.
---
Progression Tiers
Early Game
Scope: Jackson prologue → Ellie’s Seattle Day 1 (first ~8-10 hours).
- Listen mode is your best friend; use it constantly to mark enemies through walls.
- Bottles and bricks can distract enemies (throw to create noise) or break glass for stealth attacks.
- Doors can be opened or broken; check for blocked paths.
---
Mid Game
Scope: Ellie’s Seattle Days 2-3 → The Theater → Transition to Abby (Days 1-2). Around hours 10-18.
- Upgrade your holster to carry a third weapon (e.g., pistol + rifle + shotgun).
- Practice switching weapons quickly via the D-pad (hold to go directly to a specific weapon).
- Use the Rope (sometimes) to create ziplines or swing across gaps—manual aim required.
---
Late Game
Scope: Abby’s Seattle Day 3 → Ellie’s return to the Theater → Final confrontations. Hours 18-25.
- In the final Santa Barbara section (Ellie), the Rattlers have attack dogs that can sniff you out. Equip the silenced SMG to take out dogs from a distance.
- Use listen mode to track dogs’ movement patterns; they often circle the area.
- Melee weapons degrade quickly; pick up pipes or machetes from fallen enemies.
---
Endgame
Scope: After completing the main story (campaign ends after the final farmhouse scene).
- Grounded: Extreme scarcity; no listen mode, HUD minimal; enemies are deadly.
- Permadeath: If you die, you restart from chapter, act, or entire game (choose). Combine with Grounded for ultimate challenge.
Game Tips
Overview
This guide provides a comprehensive set of tips for The Last of Us Part II, covering everything from your first hours to late-game optimization. The tips are grouped by category (Combat, Exploration, Resources, Crafting & Upgrades, Stealth, Economy, and General Strategies) and include beginner, intermediate, and advanced advice. Each tip explains why it works and when to apply it.
---
Combat Tips
Beginner: Use Listen Mode Religiously
- What: Hold R1 to briefly highlight enemies (including infected) through walls, showing their position and movement.
- Why: It prevents you from walking into ambushes and helps you plan your approach. The game is designed around this mechanic; ignoring it makes encounters much harder.
- When: Use constantly when you suspect enemies are nearby, especially in forests, buildings, and dark areas. Note that infected runners will appear as dots that move erratically.
- What: After stunning an enemy with a thrown brick or bottle, immediately rush in for a melee kill (press square).
- Why: The stun gives you a guaranteed one-hit kill on most human enemies and some infected (excluding bloaters). This conserves ammo and is faster than shooting.
- When: Use when you have a brick or bottle and are within 10-15 meters of a single enemy. Perfect for eliminating isolated patrols.
- What: Sprint and slide (press circle while sprinting) under tables, through windows, or behind cars to break line-of-sight.
- Why: Enemies (especially infected) have limited pathfinding and will take longer to follow through tight spaces. This buys you time to heal, reload, or reposition for a stealth kill.
- When: Whenever you are detected in a room or corridor with cover. Also use before crafting if you are in a hurry.
- What: Human enemies often have unique animations when calling out to allies, reloading, or inspecting a disturbance. These moments often leave them stationary for a second.
- Why: Headshots are instant kills on most human enemies (except heavily armored ones). Waiting for these pauses guarantees an easy kill.
- When: Observe enemy behavior from stealth for a few seconds before engaging. Also use when you have a rifle or revolver with good precision.
- What: Craft explosive arrows (requires arrow + canister) and fire them into enemies that are stationary or charging at you.
- Why: The explosion staggers even the largest enemies, giving you time to follow up with shotgun blasts or heavy melee. The Rat King boss fight is much easier with a few explosive arrows.
- When: Save explosive arrows for boss-tier enemies or groups of 3+ infected. Use them when you are outnumbered and need a quick crowd control.
- What: Use R2 to open drawers, cabinets, lockers, and even trash piles. Most contain resources (scissors, alcohol, rags, binding) that are essential for crafting.
- Why: Resources are scarce, especially on harder difficulties. Missing just one drawer might mean not having enough parts to craft a health kit or silencer.
- When: Always fully clear a room before moving on. Listen for the sound of a drawer opening—if it doesn't make that sound, it's probably empty.
- What: The game often places collectible notes, coins, and artifacts near workbenches or safe zones. These also indicate areas with high resource density.
- Why: The developers designed levels so that important items are usually found along the critical path or in rooms with a notable landmark (like a dead body or a glowing light).
- When: After any major encounter, look for a workbench or a safe (combination via notes). The supplements (Pill capacity) nearby are often hidden behind breakable walls or locked doors.
- What: Pause the game and enter Photo Mode (press both sticks). You can free-roam the camera without time limit.
- Why: This allows you to see around corners, locate enemies, and spot lootable objects without risking detection. It is completely safe and does not alert AI.
- When: Use in any area where you suspect traps or multiple enemies. Particularly useful in the hotel and subway sections of Seattle Day 1.
- What: Some walls have white cracks or are marked with graffiti. Attacking them with a melee weapon (like an axe) or a bomb will destroy them, revealing hidden rooms.
- Why: These rooms often contain safes, workbenches, or rare crafting resources like gunpowder and scrap metal.
- When: If you see a suspicious wall in an alley or basement, always try to break it. Note that you may need a heavy melee weapon (e.g., pipe, hammer) to do it efficiently.
- What: If you have a bow and arrows, you can silently kill infected from a distance without raising alarms. The bodies will disappear (despawn) after a while.
- Why: This allows you to thin out groups before you even enter a combat zone, making the stealth approach trivial. On harder difficulties, this saves a ton of resources.
- When: At the start of any encounter with infected (e.g., the bank, the school gym), take high ground and pick off runners. Save arrows for helmeted enemies later.
- What: The first priority with alcohol and rags should always be a health kit. You can carry up to 3.
- Why: Health is the most precious resource. Without a kit, a single hit from a runner can kill you on Survivor+ difficulty. Always have at least two kits.
- When: Craft immediately when you have the ingredients, unless you are full. After taking damage, top up your stock.
- What: Silencers are consumable and break after a few shots. They are best used on the 9mm pistol or the hunting pistol. However, the game gives you a crafted silencer only after you find the silencer schematic (which is quite late).
- Why: Early game, it's better to use bricks and bottles for stealth. Crafting silencers early wastes alcohol that you could use for molotovs or health kits. Save silencers for long-range stealth kills.
- When: Only craft silencers after you have the hunting pistol or a rifle, and you are in a section with many human enemies (e.g., Hillcrest).
- What: When you pick up a weapon from a dead enemy or find it on the ground, its parts are automatically added to your inventory (you don't need to manually loot them).
- Why: Parts are used to upgrade weapons at workbenches. More parts means faster upgrades. Enemies often drop weapons with parts that you cannot see otherwise.
- When: After a fight, walk over all dropped weapons even if they are duplicates; you automatically collect their parts.
- What: There are several training manuals hidden throughout the game (e.g., the one in the bank vault). Each manual unlocks a new recipe or improves crafting efficiency (e.g., 2 molotovs from 1 alcohol).
- Why: These manuals dramatically reduce resource consumption. For example, the first manual reduces the alcohol needed for molotovs from 2 to 1. This is a game-changer.
- When: Seek out these manuals as early as possible. They are often in optional areas. The bank vault manual is available during Seattle Day 1 (Ellie) in the downtown bank.
- What: Gunpowder and scissors are used for making ammo (pistol ammo, rifle ammo, etc.) and also for upgraded melee weapons (with binding). However, ammo is plentiful on Normal but scarce on higher difficulties.
- Why: On Survivor and Grounded, melee weapons with binding are very durable and can one-hit kill most enemies. It's better to use melee than waste bullets. Reserve gunpowder for explosive arrows or shotgun shells against bosses.
- When: On harder difficulties, avoid crafting handgun ammo unless you have no melee weapon. Instead, pick up ammo from enemies or use the bow.
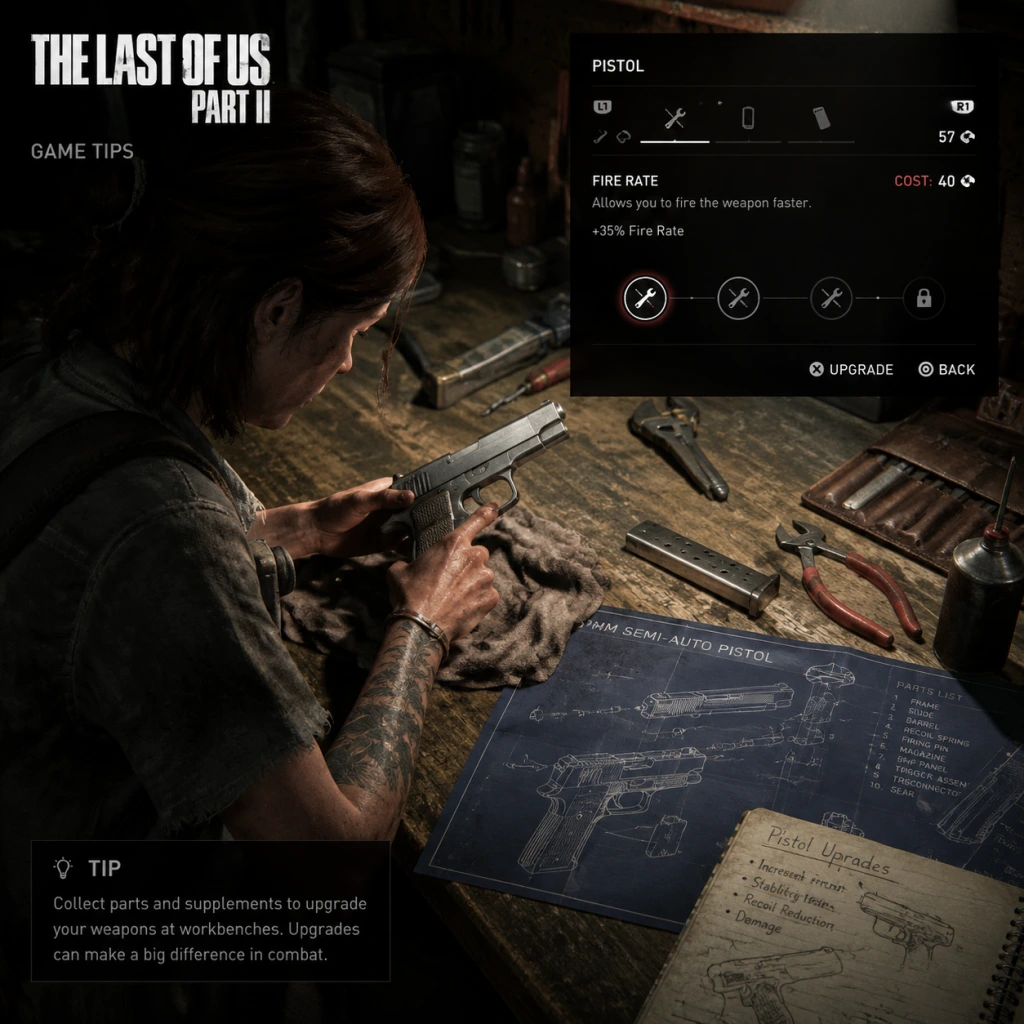
- What: At the earliest workbench (usually after arriving at the open world hub in Seattle Day 1), put your first parts into the 9mm pistol's reload speed.
- Why: Faster reload means you can get back into the fight quicker. The pistol is your most-used weapon throughout the game. The reload speed upgrade makes a noticeable difference in firefights.
- When: As soon as you have 60 parts (cost for early upgrade). Do this before damage upgrades, because more damage is wasted if you can't reload fast enough.
- What: The hunting pistol's scope upgrade (available later) turns it into a medium-range sniper. Put parts into stability and zoom.
- Why: This weapon can one-shot headshot most human enemies and even some special infected (like stalkers) if you hit the head. The scope makes it viable for long-range stealth.
- When: Prioritize after you find the hunting pistol (around Seattle Day 2, Ellie). It becomes your primary stealth weapon.
- What: Upgrade the pipe bomb to have a longer fuse or a remote trigger (via training manual). Then throw it near a group of enemies and wait for them to cluster.
- Why: This allows you to wipe out entire patrols in one explosion. The remote trigger version lets you detonate precisely when enemies are grouped, saving you from premature detonations.
- When: Use in tight corridors or when you hear enemy chatter about searching for you. Position yourself behind cover and time the explosion for maximum damage.
- What: Hold L1 to crouch and move slowly (or press L1 to toggle). Even when you think you're safe, crouch-walk to minimize noise.
- Why: Enemies (especially infected) can hear your footsteps if you run. Crouch-walking makes you completely silent unless you step on glass or metal.
- When: Always, unless you are sprinting away from danger. In tall grass, you can even stand up slowly (press L1 again) without being seen.
- What: Throw a bottle or brick at a hard surface (like a wall or metal container) away from you. Enemies will investigate the sound.
- Why: This allows you to isolate a single enemy from a group, then kill them silently. On Survival difficulty, this is essential because enemies are more aware.
- When: When you see a patrol of 2-3 enemies, throw a brick far to one side, then take out the last guard who comes to check.
- What: Human enemies have a narrow cone of vision (about 120 degrees) and are nearly blind in extreme darkness. Infected have better hearing but still poor peripheral vision.
- Why: You can crouch-walk directly behind an enemy if you stay outside their vision cone. Use this to move through crowded rooms without detection.
- When: When the enemy is facing away and you are within 10 meters, slowly approach from behind. If you are in tall grass, you can even stand up and shank them.
- What: Each brick and bottle counts as a weapon slot (you can carry up to 3). They are reusable if you pick them up after throwing, but you can always find more.
- Why: They are infinite non-lethal resources that don't use ammo. You can stun enemies, break doors, and distract dogs. Always keep your inventory full.
- When: After any encounter, scavenge for bricks/bottles on the ground. If you have room, pick them up.
- What: Supplements increase your maximum health (Pill capacity). Buy two upgrades early to get to 150% health, then stop.
- Why: The early health upgrades give you a significant survivability boost, but later upgrades become expensive and reduce the number of supplements you need for other skills like Listen Mode range.
- When: Prioritize health until you have 150% (two upgrades). Then invest in Listen Mode distance or crafting speed depending on your playstyle.
- What: Some safes contain currency (coins, silver bars) that you can exchange at certain traders? Wait, The Last of Us Part II does not have a currency system—scrap and supplements are the only resources. There is no trading. So this tip is invalid. Instead:
- What: You can only hold 3 of each craftable item (except ammo which is unlimited). Avoid crafting a fourth pipe bomb or molotov until you use one.
- Why: Resources are wasted if you craft an item you cannot pick up. The game automatically drops extras? No, it prevents you from crafting. So watch your inventory.
- When: Check your inventory before crafting. If you have 3 health kits, do not craft another unless you are about to use one.
- What: If a fight becomes overwhelming, sprint away and find a hiding spot (like a locker or a high grass field). Enemies will search but eventually give up.
- Why: You can then re-engage on your terms. This is particularly useful against the Rat King boss, where you can circle back to heal.
- When: Use whenever your health drops below 30% or you are surrounded.
- What: Stalkers are infected that hide and ambush you. The hunting pistol's high damage and scope allow you to spot and kill them before they get close.
- Why: Stalkers are immune to headshots from weaker weapons? Actually, they are vulnerable to headshots but have high HP. The hunting pistol one-shots them with a headshot.
- When: In areas like the hotel basement or the school gym, equip the hunting pistol and listen for their growls. When you see one, aim carefully.
- What: The WLF dogs can sniff you out. Listen mode shows their location as a moving dot. They can detect you even in tall grass if you move.
- Why: To avoid dogs, stay still when they are close. Use a bottle to distract them. Listen mode pulses every 3 seconds; use those intervals to plan your movement.
- When: In any area with dogs (e.g., Hillcrest, Santa Barbara), constantly use Listen Mode and stay crouched. If a dog is coming your way, throw a bottle away from your hiding spot.
- What: If you read a note with a safe combination, the safe will remain unlocked for that playthrough even if you die and reload. You don't need to memorize the code.
- Why: If you die after reading the note but before opening the safe, the code is still known. So you can safely save and proceed without fear of losing the data.
- When: Always read notes/comics with safe codes. They are stored in your Journal under the Collectibles tab.
Intermediate: Combine Melee with a Brick/Bottle
Intermediate: Use the Environment to Create Distance
Advanced: Exploit Enemy Animations for Headshots
Advanced: Use Explosive Arrows on Bloaters and the Rat King
---
Exploration Tips
Beginner: Search Every Single Drawer and Cabinet
Beginner: Follow the Trail of Currency (Scrap and Supplements)
Intermediate: Use the Photo Mode to Scout
Intermediate: Break Breakable Walls with Melee or Explosives
Advanced: Use the Bow to Permanently Clear Areas Early
---
Resources and Crafting
Beginner: Prioritize Crafting Health Kits
Beginner: Never Craft Silencers Until You Have a Pistol with a Scope
Intermediate: Scavenge Every Weapon for Parts
Intermediate: Use the Training Manual for Efficient Crafting
Advanced: Save Gunpowder and Scissors for Last Resort
---
Weapon Upgrades and Build
Beginner: First Upgrade the Pistol's Reload Speed
Intermediate: Max Out the Hunting Pistol's Scope
Advanced: Use the Pipe Bomb with Trigger Upgrade
---
Stealth and Enemy AI
Beginner: CrouchWalk Everywhere
Intermediate: Use Bricks and Bottles to Lure Enemies into Killzones
Advanced: Exploit the AI's Cone of Vision
---
Economy and Resource Management
Beginner: Always Carry Three Bricks/Bottles
Intermediate: Use the Pill Capacity Upgrade Wisely
Advanced: Sell Old Collectibles for Scrap
Advanced: Minimize Crafting Duplicates
---
General Advanced Strategies
Beginner: Don't Be Afraid to Run Away
Intermediate: Use the Hunting Pistol Against Stalkers
Advanced: Time Your Listen Mode Pulses Against Dogs
Advanced: The Safe Combination Documents Are Not Permaworld
---
Conclusion
The Last of Us Part II rewards careful planning and resource management. Use these tips to master its combat, exploration, and crafting systems, regardless of difficulty. Remember that there is no single 'correct' build—experiment with different weapon upgrades and crafting recipes to find what suits your playstyle. Most importantly, enjoy the story.
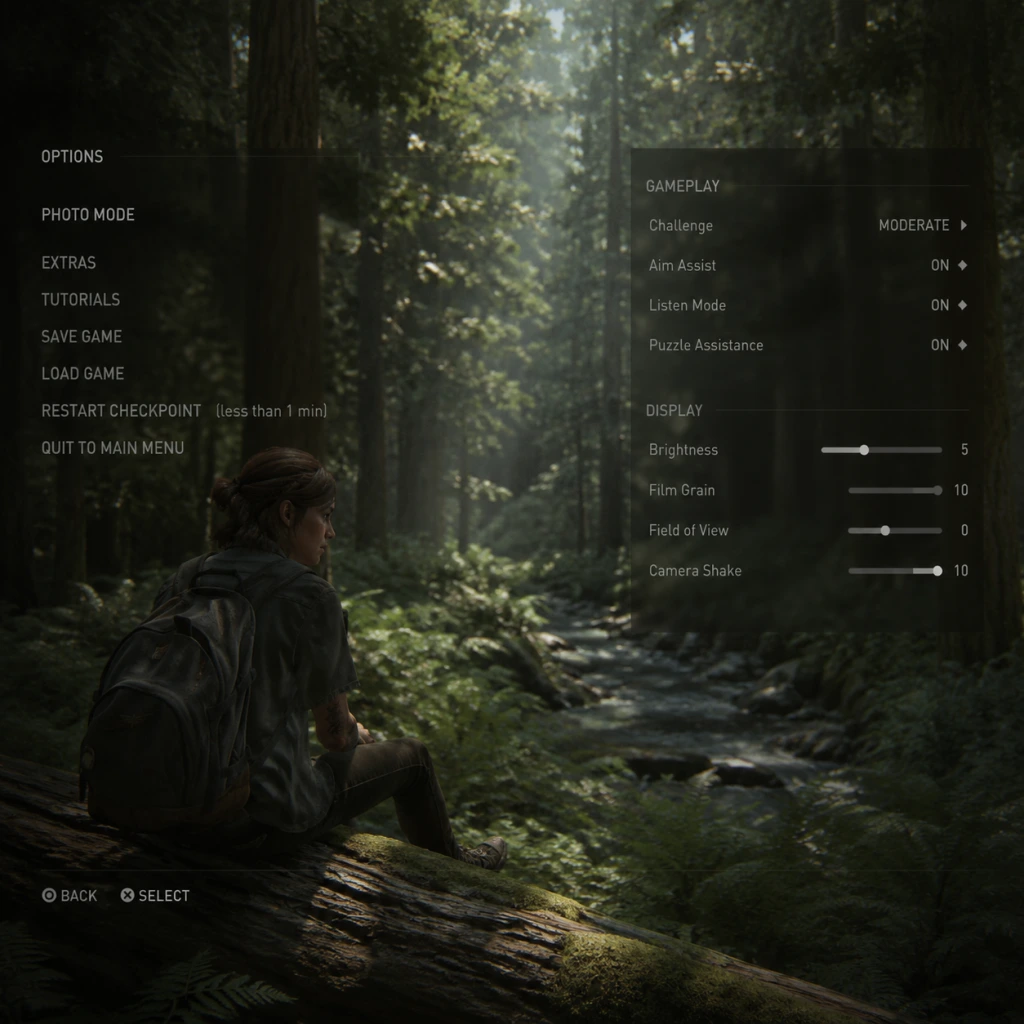
Game Settings
Overview
The Last of Us Part II offers a comprehensive settings menu that allows you to tailor the experience to your hardware, playstyle, and preferences. Since the game is exclusive to PlayStation 4 and PlayStation 5, the available options vary slightly between platforms. This guide covers every setting category — Graphics, Audio, Controls, Accessibility, Language, Network, and Gameplay — with clear explanations, platform-specific recommendations, and tips to avoid common misconfigurations.
---
Graphics Settings
Platform-Specific Modes
PS4 (Base):
- Resolution Mode: 1080p (or 1920×1080), 30 FPS, higher graphical fidelity (better shadows, textures, draw distance).
- Performance Mode: 1080p, 60 FPS (unlocked, but targets 60), slight reduction in some effects (e.g., ambient occlusion, shadow quality).
- Resolution Mode: 1440p upscaled to 4K, 30 FPS, highest visual quality.
- Performance Mode: 1080p, 60 FPS (more stable than base PS4).
- PS4 Pro Performance Mode: 1440p~1800p dynamic resolution, 60 FPS, with improved loading and stable framerate.
- Native PS5 Patch (2021 update): 1440p~1800p dynamic, locked 60 FPS, higher-quality textures and draw distance than PS4 Pro Performance Mode, faster loading.
- PS4 Base: Use Performance Mode for smoother gameplay; the visual trade-off is minimal. Resolution Mode can feel sluggish during combat.
- PS4 Pro: Choose Performance Mode for 60 FPS, as the resolution difference is barely noticeable on a 1080p TV. Use Resolution Mode only if you have a 4K display and prefer visual consistency over framerate.
- PS5: The game automatically runs in the enhanced mode (60 FPS with high settings). No manual toggle needed; just ensure your console’s display settings are set to “Game Mode” for low input lag.
- Brightness: Adjust until the logo in the calibration screen is barely visible. Default is usually fine.
- HDR (High Dynamic Range): If your TV supports HDR, enable it. Increase paper white (up to 800–1000 nits) and adjust black level so shadows are dark but retain detail. Misconfiguration: Setting paper white too low leads to washed-out highlights; too high loses detail in bright scenes (e.g., sunlight). Use in-game HDR calibration tool.
- Film Grain: Adds a cinematic film texture. Many players prefer turning it off for a cleaner image.
- Chromatic Aberration: Simulates camera lens distortion. Turn off for sharper visuals.
- Vignette: Darkens edges. Turn off to reduce peripheral darkness.
- Motion Blur: Blurs objects during camera movement. Can cause disorientation for some; consider turning off or setting to low.
- Camera Shake: Intensity of screen shake during explosions or heavy footsteps. Set to taste; some players turn it off for comfort.
- Master Volume: Set to a comfortable level (70–80% is typical).
- Music Volume: Default 100%; reduce if music overpowers dialogue.
- Sound Effects Volume: Keep high for environmental cues (e.g., clickers, footsteps).
- Dialogue Volume: Set to 100% for clear story and contextual hints.
- Speaker Configuration:
- Audio Output: Choose between Linear PCM (uncompressed, best quality) or Bitstream (Dolby/DTS). Use PCM if your receiver supports it.
- 3D Audio (PS5 only): Enable Tempest 3D Audio for pinpoint positional cues. Highly recommended for headphones. Misconfiguration: If using TV speakers, 3D Audio may sound hollow; disable it.
- Subtitles:
- Controller Layout: Default (Naughty Dog standard). Customizable in Accessibility menu (see below).
- Invert Look: Controls camera pitch inversion. Default: normal. Change if you prefer flight-stick style.
- Vibration Intensity: Affects DualShock 4 / DualSense haptics (PS5: adaptive triggers). Can reduce for longer sessions or if vibration distracts.
- Trigger Effect Intensity (PS5 only): Adjust resistance of L2/R2 for drawing bow, shooting, etc. Set to strong for immersion, weak for comfort, or off for rapid fire.
- Camera Speed: Sensitivity for looking around. Default 5/10. Increase for faster target acquisition; decrease for precision aiming (common in stealth).
- Aiming Sensitivity: Separate from camera speed. Start at 5/10 and adjust after first few firefights.
- Aim Assist:
- Auto-Aim (only on Very Easy difficulty): Always on; cannot change.
- Camera Follow: When turning, camera snaps to a direction. Off is default; On reduces manual turning.
- Context Actions: Default is press/tap. Can enable Hold to Interact to prevent accidental interactions during combat.
- Motion Sickness Reduction: Reduces camera shake, field-of-view adjustments (FOV cannot be changed natively, but reduction is done via camera motion options).
- High Contrast Display: Makes enemies, items, and characters highly visible with configurable colors (e.g., enemies in red, allies in blue). Four presets: Default, High Contrast, Left/Right Visual Field adjustments.
- Magnifier: Hold PS button to zoom; sub-option for zoom level (move cursor).
- Tinnitus Visual Indicator (optional): Shows a visual pulsing when hearing damage occurs.
- Subtitles: As above.
- Closed Captions: On/Off with style options (Speaker ID, Sound Descriptions).
- Directional Indicators: Arrows appear around the player icon for sounds (e.g., enemy footsteps). Three modes:
- Alert Signs: Exclamation marks above off-screen enemies that are aware of you. Essential for deaf/hard-of-hearing players.
- Audio Cues (PS5 only): Visual flash for audio logs.
- Hold vs Tap: Change hold duration for interact (60ms to 2s). Increase for accidental tap prevention.
- Button Mapping: Remap any button or stick. Pre-made presets:
- Auto-Pickup: Automatically collect ammo and supplies when walking over them. Highly recommended to turn On to reduce repetitive button presses.
- Auto-Equip Melee Weapon: When you pick up a weapon, it equips automatically. On/Off.
- Camera Assist: Automatically rotates camera toward enemies (for motor difficulties). Three intensities: Off, Light, Strong.
- Lock-on Aim: As in Controls, but persists across difficulty modes. Enable if fine motor control is limited.
- Quick Turn: Double tap down to spin 180 degrees. On by default.
- Navigation Assistance: Highlights the correct path with a glowing or dotted line. Three modes: Off, Light (path only), Full (path + arrow).
- Puzzle Hints: Can toggle hints for environmental puzzles. On/Off.
- Combat Accessibility:
- Text Speed: For subtitle and menu text scroll speed.
- Menu Narration: Screen reader for menus (PS4 accessibility feature must be enabled).
- Audio Language: Choose from English, French, German, Italian, Spanish (EU), Spanish (LATAM), Japanese, Portuguese (Brazil), Polish, Russian, Arabic, Turkish, Czech, Hungarian, Dutch, Greek, Korean, Simplified Chinese, Traditional Chinese, Thai.
- Subtitle Language: Independent from audio; can mix (e.g., English audio + Spanish subtitles).
- Menu Language: Determined by PS system language; cannot be changed in-game.
- Online Features: Enable to allow game updates, photo mode sharing, and optional data collection. Must be enabled to download the free 60 FPS PS5 patch and any bug fixes.
- Photo Mode Upload: You can share photos from Photo Mode to social media (requires PS Network).
- Automatic Downloads: Set to On (default) to auto-download updates.
- Allow Player-Generated Content: N/A (no user content).
- Very Light – Focus on story; minimal enemy aggression, infinite ammo, one-hit kills optional.
- Light – Easy combat; ample resources.
- Moderate – Balanced challenge (default).
- Hard – Scarce resources, smarter enemies.
- Survivor – Extremely limited resources, no HUD, heightened enemy senses.
- Grounded – No HUD, minimal resources, enemies one-shot you, no Listen Mode.
- Custom – Adjust the following sub-categories individually:
- First-time players: Start on Moderate with default settings. Adjust down if stuck, up if too easy.
- Exploration-focused: Use Light difficulty so you can enjoy the world without stress.
- Veteran players: Try Hard for a rewarding challenge, or Survivor for a tense experience.
- Accessibility: Use Custom to fine-tune: e.g., keep Enemy Damage high but Player Damage low if you want a power fantasy without being overwhelmed.
- Auto-Equip Weapon: On/Off – when picking up a weapon, it takes the current slot. Enable for convenience.
- Show Crafting Information: Toggle detailed tooltips when crafting. On recommended.
- Resource Highlight: When aiming, resources (plants, cans) are highlighted with a faint glow. On by default; turn off for harder scavenging challenge.
- Autosave Only: The game saves at checkpoints; you can also manual save (not in combat). There are no settings to adjust save frequency.
- Continue vs Chapter Select: Use Continue to resume at last checkpoint. Chapter Select for replaying story sections (progress overwrites).
- Accessible via Options > Photo Mode. Not a setting, but an in-game tool. Options include field of view, filters, poses, exposure, depth of field, etc.
PS4 Pro:
PS5 (Backward Compatible):
Recommendation:
Sub-Graphics Options (available on all platforms)
---
Audio Settings
- TV Speakers (stereo or 2.0).
- Headphones (stereo) — recommended for immersive 3D audio.
- Surround Sound (5.1 or 7.1) — for home theater setups. Must be set in PS system settings first.
- Subtitles: On/Off.
- Closed Captions: Adds descriptions of sounds (e.g., “glass shatters”). Recommend On for accessibility or language learning.
- Subtitle Size: Small/Medium/Large. Larger is easier to read.
Special Attention: Audio mix is crucial for resource gathering (listen for clickers in vents) and stealth. Test headphone settings early in the game’s prologue.
---
Controls Settings
- Off: No magnetism.
- Lock-on: Strong auto-aim. Not recommended for skilled play.
- Light: Subtle reticle drag. Best balance for most players.
- Window: How tightly the aim assist works (Small/Medium/Large). Default Medium.
Misconfigured Setting: Aim Assist is often left on “Lock-on” by new players, making combat too easy and removing the challenge. Set to Light or Off for a more rewarding experience. Similarly, Camera Speed too low will make you slow to respond to flanking enemies.
---
Accessibility Settings
The Last of Us Part II is a gold standard for accessibility. These options are grouped in a separate menu and can be toggled at any time.
Vision
-
Hearing
-
- Directional (Arrow) – shows direction.
- Directional & Distance – also shows distance (close/far).
- Off.
Motor / Dexterity
-
- Default.
- One-handed (Left) – moves all crucial actions to left side (e.g., shoot with L1).
- One-handed (Right) – similar for right side.
- Custom – full remapping.
Cognitive
-
- Enemy Awareness Meter: Shows how aware enemies are (diamond shape). Helps players track stealth.
- Invisibility Toggle: Can make player completely invisible (for story-only enjoyment).
- One-Hit Kill: Press a button to instantly kill all enemies in an encounter (for re-trying scenes or narrative focus).
- Infinite Ammo & Crafting: For players who want to avoid resource management.
Special Attention: The Navigation Assistance is easy to miss. If you feel lost, enable “Navigation Assistance – Full” to see the objective path. Conversely, if you enjoy exploration, keep it Off. Also, Auto-Pickup is a game changer for resource collection — enable it immediately.
---
Language Settings
Recommendation: Play with original English audio if you wish to preserve the intended performance. Subtitles can be turned on for clarity, even in your native language.
---
Network Settings
The Last of Us Part II is a single-player-only game with no multiplayer or cooperative modes. However, there are some network-related options:
Misconfiguration: If you turn off online features, you will not receive the performance-enhancing patches. Keep Online Features enabled.
---
Gameplay Settings
Difficulty Options
TLOU2 offers five difficulty presets, plus many custom sliders. You can change difficulty at any time from the Pause menu.
Presets:
- Player Damage (Very Light / Light / Moderate / Hard / Survivor / Grounded)
- Enemy Damage (same scale)
- Ally Damage (same scale)
- Resources (Plentiful / Moderate / Scarce / Very Scarce / None)
- Stealth (Very Easy / Easy / Moderate / Hard / Very Hard)
- Agility (how quick enemies react) – Slow / Normal / Fast / Very Fast
- Listen Mode (distance of Echo-location) – Normal / Far / Very Far / No Listen Mode
- Aim Assist (On / Off / Light / Lock-on)
- Navigation Assistance (Off / Light / Full)
Recommendations:
Inventory & Crafting
Game Save
Photo Mode
---
Misconfigurations to Watch Out For
1. Leaving Aim Assist on “Lock-on” – remove all challenge; switch to “Light” or “Off”.
2. Film Grain + Chromatic Aberration + Vignette all ON – drastically reduces visual clarity; turn off at least Film Grain and Chromatic Aberration.
3. HDR Calibration Skipped – results in washed-out or crushed blacks. Always use the in-game calibration tool.
4. Network Features Disabled – prevents patches and the PS5 60 FPS update.
5. Navigation Assistance set to “Full” – can spoil exploration if left on; toggle off after going through an area you know.
6. Auto-Pickup turned OFF – forces you to manually pick up every item, which is tedious. Enable it.
7. Subtitle Size too small – if you rely on subtitles, set to Large for quick reading.
8. Vibration Intensity Too High – can cause hand fatigue; reduce if nessacary.
9. Trigger Effect Intensity (PS5) set to “Strong” – can be strenuous for rapid-fire weapons; adjust to “Weak” if you experience discomfort.
10. Camera Speed too low – makes combat sluggish; start at 6/10 and adjust.
---
Quick Reference Table: Optimal Settings by Platform
| Setting | PS4 (Base) | PS4 Pro | PS5 |
|---|---|---|---|
| Graphics Mode | Performance | Performance | Enhanced (auto) |
| Resolution | 1080p | 1080p (upscaled on 4K) | 1440p~1800p dynamic |
| Frame Rate Target | 60 FPS | 60 FPS (stable) | 60 FPS (locked) |
| HDR | On if supported | On if supported | On (use calibration) |
| Film Grain | Off | Off | Off |
| Chromatic Aberration | Off | Off | Off |
| Motion Blur | Off or Low | Off or Low | Off or Low |
| Vignette | Off | Off | Off |
| 3D Audio (headphones) | N/A | N/A | On (recommended) |
| Auto-Pickup | On | On | On |
| Aim Assist | Light | Light | Light |
| Navigation Assistance | Off (first play) | Off | Off |
Final Setup Checklist
1. Connect to the internet and ensure Online Features are enabled.
2. Install the latest game update (check for PS5 patch if on PS5).
3. Calibrate your display brightness and HDR.
4. Choose your Graphics Mode (Performance recommended).
5. Set Audio to Headphones (stereo) or your system configuration. Enable Subtitles and Closed Captions.
6. Adjust Camera Speed and Aim Sensitivity to your comfort.
7. Set Aim Assist to Light.
8. Turn Auto-Pickup ON.
9. Enable any Accessibility features you need (Navigation Assistance, High Contrast, etc.).
10. Choose your preferred difficulty (Moderate or Custom).
11. Save your settings (automatically applied).
Your settings are now optimized for an enjoyable and immersive journey through The Last of Us Part II. Remember, you can change almost any setting from the pause menu at any time, so feel free to experiment as you play.

Important Notes
"content": "## Overview
The Last of Us Part II is a linear, story-driven, single-player game with no multiplayer or online components. As such, there are no anti-cheat concerns or online etiquette to worry about. However, the game has many subtle mechanics, irreversible story decisions, missable collectibles, and difficulty spikes that can catch new players off guard. This section highlights the most critical pitfalls and practical advice to save you frustration and regret.
The Last of Us Part II is a linear, story-driven, single-player game with no multiplayer or online components. As such, there are no anti-cheat concerns or online etiquette to worry about. However, the game has many subtle mechanics, irreversible story decisions, missable collectibles, and difficulty spikes that can catch new players off guard. This section highlights the most critical pitfalls and practical advice to save you frustration and regret.
Warnings
- Emotional & Mature Content: The game deals with extremely dark themes, graphic violence, and moral ambiguity. Some scenes may be disturbing. There is no warning system in-game; you experience everything directly.
- No Manual Saving During Cutscenes: You cannot manually save while a cutscene plays. If you exit during a cutscene, you may lose progress. Wait until gameplay resumes.
- Autosave Overwrites Carefully: The game autosaves frequently, but only one autosave slot is maintained. If you manually save over your autosave, you lose that backup. Always use a separate manual save slot for important checkpoints.
- Difficulty Affects Resource Scarcity: On higher difficulties (Survivor, Grounded), resources are much rarer, enemies are deadlier, and hearing/listening mode is disabled (Grounded). Plan accordingly.
- Wasting Large Resources on Full Health: Do not use a health kit (requires cloth and alcohol) when you are only slightly injured. Instead, wait for health to regenerate partially or use a bandage (if available). Save full kits for emergencies.
- Over-reliance on Guns: Ammo is finite on all difficulties. Melee attacks, bottles, bricks, and stealth kills are often more resource-efficient. Don't fire unless you have a clear shot or must.
- Ignoring Crafting Recipes Early: You unlock new weapon upgrades and crafting recipes as you find manuals. The smoke bomb and stun bomb are incredibly useful but require a manual. Seek them out.
- Sprinting in Enemy Areas: Running triggers noise that attracts infected and human enemies. Crouch-walk to stay hidden. Even in combat, sprinting drains stamina and reduces accuracy.
- Not Using Listen Mode: By default, press R1 to toggle listen mode (except on Grounded difficulty). It reveals enemy locations through walls. Use it every few seconds to avoid ambushes.
- Story Decisions Are Fixed: You cannot change Ellie’s or Abby’s choices. The narrative is linear with no branching paths. However, some optional dialogues and interactions affect the emotional tone but not the plot.
- Permanent Character Deaths: Major character deaths are scripted and cannot be prevented. Don't waste resources trying to save them in gameplay; focus on your own survival.
- Skill Upgrades Cannot Be Respecced: Once you spend a supplement (skill point) on a skill, you cannot undo it. Choose wisely. Prioritize Stealth (prone movement speed, silent crawling) and Survival (crafting recipes) early.
- Weapon Upgrades Are Permanent: Using parts to upgrade a weapon (e.g., recoil, scope) is final. If you sell or discard a weapon (rare), the upgrades are lost. However, you keep all weapons from chapter to chapter unless explicitly taken away in story.
- Collectibles: The game has over 200 collectibles: artifacts, trading cards, coins, journal entries, and workbench tools. Many are only available in certain chapters and cannot be revisited after you progress. Use a guide if you aim for the Collector’s Trophy (Artifacts, Coins, etc.) or the Platinum Trophy.
- Optional Conversations: Some dialogue with companions is missable if you advance too quickly. Press Triangle when prompted near a companion to trigger optional lines.
- Workbench Tool Upgrades: There are several workbench tools (e.g., the Welder, Lockpick) hidden in optional areas. These allow you to upgrade your weapons further. Missing them locks you out of max upgrades.
- Safe Codes: Many safes require codes found on nearby notes or in rooms. If you leave an area without opening the safe, you may not be able to return later. Search thoroughly before moving on.
- The Rat King (Abby, Chapter 11): This is one of the hardest mandatory boss fights. It is a massive, fast, multi-stage infected. Use flamethrower (if upgraded) or pipe bombs. Keep moving and listen for audio cues. Save heavy ammo for the second phase.
- Hillcrest (Ellie, Chapter 5): A large open area with multiple human enemies and dogs. The dog’s tracking ability makes stealth very difficult. Use bottles to distract, and take out dogs first (they are tough but have lower HP than humans).
- Forest Ambush (Abby, Chapter 8): A tight space with Seraphites (cult members) that can one-shot you with arrows. Use smoke bombs to disorient and melee. Keep your health high.
- No Forced Grinding: The Last of Us Part II does not require grinding levels or experience. Progression is story-locked. However, resource gathering can feel tedious if you try to avoid combat. The best approach is to loot carefully and craft only what you need.
- Over-farming Resources: Don't spend hours backtracking for scraps. Resources respawn only in certain areas after plot events, but not infinitely. Move forward; the game provides enough to finish if you manage wisely.
- Upgrade Economy: You get a set number of supplements and parts per playthrough (exactly enough to max everything only on New Game+). In a first playthrough, prioritize upgrades that suit your playstyle. Do not waste parts on weapon upgrades you rarely use.
- Manual Save Often: The game allows manual saves at any time (except during cutscenes or dialog). Create a new save file at the start of each chapter and before major encounters. This lets you reload if you miss a collectible or die unexpectedly.
- Keep at Least Two Save Slots: Use one for your main progression and another as a checkpoint before a difficult fight. The autosave can be overwritten by mistake if you die repeatedly.
- After Beating the Game: The game prompts you to save a clear data file. Do not overwrite your chapter saves if you want to replay specific sections for collectibles. Use New Game+ to replay with upgrades intact.
- You Can Prone: Pressing Circle while crouching makes you go prone. This is vital for stealth under cars, through grass, and to avoid detection. Many new players forget this until late game.
- Bottles & Bricks: These are not just for stunning enemies. You can throw a bottle to break glass (creating noise), or use a brick to break locked doors. Always carry one if possible.
- Dodge (Triangle): In melee, dodge is essential. Enemies have telegraphed melee attacks; pressing Triangle at the right time dodges and leaves them open. Practice in the combat tutorial (if you find it).
- Healing While Prone: If you are hidden and injured, go prone, then use a health kit. The animation is slightly faster and safer.
- Silencing the Crossbow: The crossbow is silent but has limited bolts. Hunters and dogs can still follow blood trails if you shoot and the enemy runs away. Use it for kills only.
- Interactible Windows: Many windows with bars can be broken with melee weapons or bricks. Look for yellow markings (tape) that indicate climbable or breakable surfaces.
- New Game+ Unlocks: After finishing the game once, you can start New Game+ retaining all weapons, upgrades, and collectibles progress. This is the only way to unlock all trophies in one playthrough (if you missed something).
Pitfalls
Irreversible Choices
Missable Content
Difficulty Spikes
Grinding Traps
Save Management Advice
Things Players Commonly Regret Not Knowing Earlier
All Game Items
Overview
This guide covers every significant item in The Last of Us Part II, organized by category. Items are exclusive to either the protagonist Ellie or Abby unless noted as available to both. Obtainability, usage tips, and upgrade synergies are included. Since the game is a single-player story with no armor system (clothing is cosmetic only), this guide focuses on functional gear.
---
Weapons
Weapons are divided into Ellie’s arsenal and Abby’s arsenal, each with unique firearms and melee weapons. Most can be upgraded at workbenches using Parts. Weapon upgrades are permanent and carry over within a playthrough.
Ellie’s Weapons
| Weapon | Ammo Type | Description | Obtain | Synergies/Upgrades |
|---|---|---|---|---|
| 9mm Pistol | 9mm | Standard semi-auto pistol. Good rate of fire, moderate damage. | Default weapon; start of game. | Upgrade fire rate & magazine size for crowd control. Synergizes with silencer (craftable with materials). |
| Revolver | .44 Magnum | High damage, slow fire rate, high stopping power. | Found in downtown Seattle (Ellie Day 2). | Upgrade for increased accuracy and holster speed. One-shot headshots on most humans. |
| Hunting Pistol | .44 Magnum | Scoped, single-shot pistol. Excellent ranged precision. | Found in Seattle’s Hillcrest area (Ellie Day 2). | Upgrade scope zoom and stability. Best for silent long-range kills if not scoped? Actually no silencer. |
| Semi-Auto Rifle | 5.56mm | Versatile mid-range rifle. Can be upgraded to semi-auto marksman. | Obtained from Tommy in Jackson prologue. | Rate of fire upgrade makes it a DPS beast. |
| Bolt-Action Rifle | .308 | High damage, slow fire rate, long range. | Found in Seattle’s TV station (Ellie Day 3). | Upgrade scope and reload speed. One-shot infecgdands (?) One-shot clickers. |
| Shotgun | 12 Gauge | Pump-action shotgun. Devastating at close range. | Found in Seattle’s Capitol Hill (Ellie Day 2). | Upgrade for increased magazine size and fire rate. Use for tight encounters with infected. |
| Double-Barrel Shotgun | 12 Gauge | Two shots, extremely high spread. Massive burst damage. | Found in Santa Barbara’s Rattler area (Ellie Day 3). | Upgrade for improved accuracy (reduces spread) and reload speed. Melts human enemies. |
| Crossbow | Crossbow Bolts | Silent, retrievable bolts. Can stick to surfaces. | Found in Seattle’s Hospital (Ellie Day 2). | Upgrade draw speed and bolt capacity. Excellent for stealth; retrieve bolts after kills. |
| Bow | Arrows | Silent, retrievable, limited range. | Found in Seattle’s Downtown (Ellie Day 2). | Upgrade draw speed and stability. Ideal for silent takedowns of infected. Arrows can be recovered. |
| Stun Bomb | N/A (Thrown explosive) | Temporarily stuns and deafens enemies. | Crafted (can + bindings + explosive powder) or found. | Useful for bypassing groups or setting up molotov kills. Upgrades (Ellie skill) increase radius. |
| Smoke Bomb | N/A (Thrown) | Creates a smoke screen for escape or stealth. | Crafted (alcohol + binding) or found. | Upgrades increase duration. Synergizes with stealth kills. |
| Pipe Bomb | N/A (Thrown explosive) | High damage, timed explosive. | Crafted (can + explosive powder + binding) or found. | Upgrades increase blast radius. Best for crowd control or blowing up walls. |
| Molotov Cocktail | N/A (Thrown incendiary) | Ignites area, deals fire damage over time. | Crafted (alcohol + cloth + binding) or found. | Upgrades increase damage and spread. Excellent against infected (especially stalkers) and humans. |
Abby’s Weapons
| Weapon | Ammo Type | Description | Obtain | Synergies/Upgrades |
|---|---|---|---|---|
| Tactical Shotgun | 12 Gauge | Semi-auto shotgun. Fast fire rate, moderate damage. | Default weapon (Abby’s campaign). | Upgrade for larger magazine and faster reload. Best for close quarters. |
| Hunting Shotgun | 12 Gauge | Pump-action, higher damage than tactical. | Found in the Aquarium (Abby Day 1). | Upgrade for reduced spread and improved fire rate. |
| Rifle (AK-47) | 7.62mm | Full-auto assault rifle. High recoil, high damage. | Found in the Seraphite Island (Abby Day 2). | Upgrade for stability, capacity. Suppressor can be crafted. Good for firefights. |
| Sniper Rifle | .308 | Bolt-action, extremely long range, high damage. | Found in the Marina (Abby Day 2). | Upgrade scope zoom and reload speed. One-shot most enemies. |
| Crossbow | Bolts (same as Ellie’s) | Identical to Ellie’s crossbow. | Obtained from dead WLF soldier at the FOB (Abby Day 1). | Same upgrades. Useful for stealth. |
| Revolver | .44 | Same revolver Ellie can use. | Found in the Stadium? Actually Abby gets revolver from Lev’s bow? No, revolver is found by Ellie. Abby does not get revolver. | Not available to Abby. |
| Pipe Bomb / Molotov / Smoke / Stun | Same as Ellie | All throwables are shared and crafted. | Same recipes. | Same upgrades. |
---
Crafting Materials
Materials are found throughout the world in desks, drawers, bodies, and containers. They are used to craft consumables and upgrades. All materials are shared between characters.
| Material | Used For | Found Commonly In | Notes |
|---|---|---|---|
| Alcohol | Molotovs, Smoke Bombs (pair) | Kitchens, bars, bathrooms | Scarce early on; prioritize for molotovs. |
| Cloth | Health Kits, Molotovs, Silencers | Laundries, closets, bodies | Health kits are vital; silencer cloth cost is low. |
| Binding | Pipe Bombs, Stun Bombs, Smoke Bombs | Toolboxes, desks | Essential for bombs; often combine with explosive powder. |
| Explosive Powder | Pipe Bombs, Stun Bombs, Ammo? (No) | Toolboxes, military vehicles | Only used for bombs. |
| Can | Pipe Bombs, Stun Bombs | Kitchens, trash cans | Pair with explosive powder and binding. |
| Rags | Health Kits, Silencers | Restrooms, trash piles | Same as cloth? Actually rag is a separate item? In TLOU2, cloth is cloth. No rags. Only cloth. |
| Elastic | Stun Bombs | Medical areas | Only for stun bombs. |
| Supplements (not crafting material but currency) | Skill upgrades | Found in drawers, dead bodies | Used in skill tree (see below). |
| Parts (not crafting) | Weapon upgrades | Toolboxes, workbenches | Used at workbenches to improve weapon stats. |
| Blade/Scissors | Shivs (Ellie only) | Desks, lockers | Shivs are used to unlock doors that require a shiv. They degrade after one use. Crafted with blade + binding + cloth? Actually shiv is crafted from blade + binding + cloth. |
---
Consumables
Health Items
| Item | Effect | How to Obtain |
|---|---|---|
| Health Kit | Restores a chunk of health. Can be crafted (cloth + alcohol? No, cloth + alcohol + binding? Actually health kit is cloth + alcohol? In TLOU2, Health Kit is crafted from Cloth + Alcohol. | Crafted or found. Found in medical cabinets. |
| Bandage (not in game) | N/A | Replace with Health Kit. |
Tools & Equipment
| Item | Description | Notes |
|---|---|---|
| Lockpick | Used to open locked doors and safes. Some are single-use, others infinite? In TLOU2, lockpick is a tool that breaks after one use. Found in the world. | Can craft? Not craftable. Must find replacements. |
| Keycards | Open specific locked doors (e.g., WLF keycard, Seraphite keycard). | Often required for story progression or optional areas. |
| Safe Key | Opens specific safes containing loot. | Found nearby or on enemies. |
| Shiv | Used to open switchblade doors (Ellie only). Consumed on use. | Crafted from blade + binding + cloth. |
| Gas Mask | Protects against spores in certain areas. Only present in Abby’s campaign. | Automatic acquisition; must wear in specific zones. |
| Lantern | Lights dark areas; used underwater? No, only for dark spaces. | Found in Ellie’s backpack? Actually you can pick up a lantern in some sections. |
| Magnifying Glass | Used to examine artifacts/trading cards? No, not needed. | Unnecessary. |
Ammo Types (not a consumable per se but pickups)
9mm, .44 Magnum, .308, 5.56mm, 7.62mm, 12 Gauge, Arrows, Bolts. Ammo is scarce on harder difficulties.
---
Collectibles
The Last of Us Part II has a huge number of collectibles that contribute to the game’s lore and trophies. They are grouped into categories:
Artifacts
Paper documents, notes, and letters that flesh out the story. Over 100 in total. Found in all areas.
Trading Cards
Sets of cards depicting characters and scenes from a fictional universe. There are 55 trading cards in Seattle and Santa Barbara. Collecting all unlocks a trophy.
Coins
A complete set of 39 WLF coins (or “Sheriff coins”) found throughout Ellie’s and Abby’s routes. Collecting all unlocks a trophy.
Journal Entries (Ellie only)
Automatic entries written by Ellie as story events happen. No active collection needed.
Safe Codes
Combinations for safes that contain valuable loot. Codes are found on artifacts or hinted at. Opening all safes is not required for a trophy but provides resources.
Workbenches
Locations where you can upgrade weapons. Interacting with all workbenches is not required for a trophy, but they are marked on the map.
---
Currency & Upgrade Systems
Parts
Used exclusively at workbenches to upgrade weapons. Each weapon has up to 5-6 upgrades (damage, magazine size, fire rate, stability, recoil, holster speed, scope). Parts are found in toolboxes, workbenches, and some bodies. They are scarce; prioritize upgrades for your most-used weapons.
Supplements
Used in the skill tree (menu). There are two skill trees: Survival (upgrading health, crafting speed, listen mode distance) and Stealth / Combat (upgrading melee damage, silenced kills, dodge timing, etc.). Supplements are found in desks, bodies, and as random loot. Maxing all skills requires New Game+ or careful distribution.
---
Special Equipment & Key Items
- Backpack: Upgrades (increased capacity) are unlocked via skill tree. Not a physical item.
- Switchblade: Ellie’s knife used for stealth kills and opening shiv doors. It is indestructible.
- Abby’s Arms: She uses her fists for stealth takedowns; no knife until later she gets a knife from Lev. No permanent melee weapon for Abby except the knife she obtains in Day 2.
- Always scavenge thoroughly. Use listen mode to highlight items.
- Craft health kits proactively; you can carry up to 3 (upgraded to 4 via skill).
- Melee weapons are strong but limited; use them against humans and infected in emergencies.
- Upgrade weapons that match your playstyle: stealth users benefit from silenced pistols/bow, aggressive players from shotguns and rifles.
- Collectibles do not affect gameplay but unlock trophies and lore.
- On higher difficulties, resources are scarce; prioritize crafting bombs and molotovs for tough encounters.
---
Tips for Item Management
---
This guide covers items up to the final patch (1.08). New Game+ carries over all upgrades and collectibles progress.
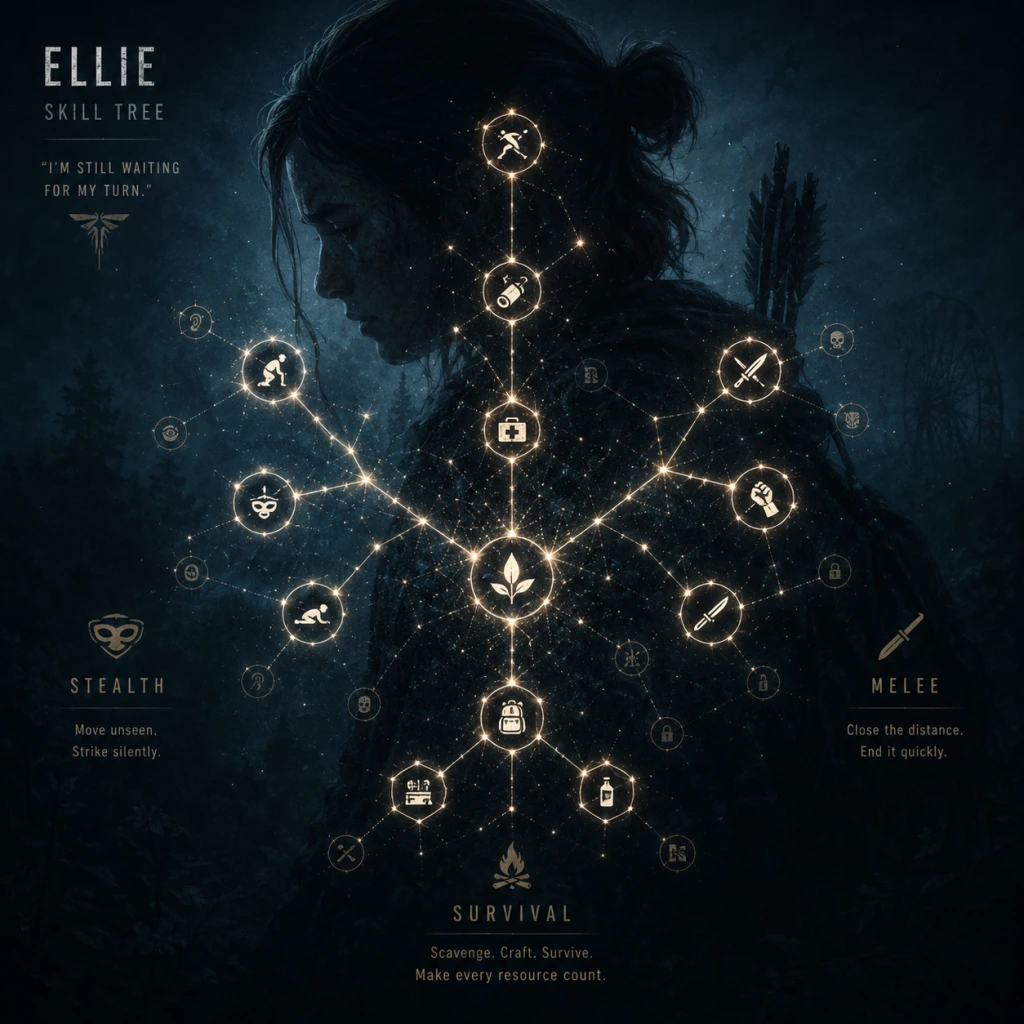
Character Skills
Overview
In The Last of Us Part II, both Ellie and Abby have a skill tree system that allows you to unlock and upgrade abilities by spending supplement pills found throughout the world. Each character has three distinct skill trees: Stealth, Combat, and Survival. Each skill has multiple tiers that increase its effectiveness. The game does not have traditional spells, cooldowns, or combo systems—skills are passive or active improvements that enhance your core actions. Both characters share the same skill categories but have different specific skills tailored to their playstyles.
Skills are upgraded at any time from the pause menu. You can reset skills only by starting a New Game+ (skills carry over). There is no penalty for spreading points across trees, but focusing on one tree early can significantly alter your approach.
Ellie's Skills
Stealth Tree
Ellie’s Stealth tree focuses on remaining undetected, moving silently, and taking down enemies without alerting others.
| Skill | Tier 1 | Tier 2 | Tier 3 | Cost per tier (pills) |
|---|---|---|---|---|
| Hold Breath | Hold breath while aiming to steady the reticle. | Increased hold duration. | Further increased duration. | 30 / 60 / 90 |
| Prone Stealth | Move faster while prone. | Crawl through tall grass without being seen. | N/A (max level 2) | 30 / 60 |
| Listen Mode Distance | Increase listen mode range by 25%. | Increase by 50%. | Increase by 75%. | 30 / 60 / 90 |
| Crouch Speed | Move faster while crouching. | N/A | N/A | 40 |
- Hold Breath: Crucial for long-range shots. Tapping L2 while aiming slows your breathing and steadies the crosshair. Higher tiers allow you to hold longer, useful for headshots with the hunting pistol or rifle.
- Prone Stealth: Prone is a core mechanic for avoiding detection. Speeding up prone movement (Tier 1) lets you reposition quickly. Tier 2 makes you invisible in tall grass—enemies will not see you even if they look directly at your position. Essential for stealth runs.
- Listen Mode Distance: Listen mode (R1) highlights enemies and their sound cues. Expanded range gives you more situational awareness, especially when scouting large areas. Great for planning routes.
- Crouch Speed: A simple but massive quality-of-life upgrade. Crouch-walking faster reduces the time you spend in exposed positions.
Synergies & Usage:
Ellie’s Stealth tree is ideal for players who prefer avoiding direct firefights. Combine Prone Stealth Tier 2 with Crouch Speed to slip past enemies undetected. Listen Mode Distance helps you track patrols, while Hold Breath ensures one-shot kills from afar. Use stealth to conserve ammo and health.
Combat Tree
The Combat tree improves Ellie’s offensive capabilities—firearms, melee, and damage output.
| Skill | Tier 1 | Tier 2 | Tier 3 | Cost per tier |
|---|---|---|---|---|
| Weapon Sway | Reduce weapon sway by 25%. | Reduce by 50%. | Reduce by 75%. | 30 / 60 / 90 |
| Faster Healing | Healing speed increased by 25%. | 50% faster. | 75% faster. | 30 / 60 / 90 |
| Bottle/Brick Stun Duration | Increase stun duration from thrown distractions. | Further increase. | N/A | 40 / 80 |
| Tackle Damage | While sprinting, pressing L1 performs a heavy tackle that staggers enemies. | Tackle does more damage. | Tackle can break doors. | 40 / 80 / 120 |
- Weapon Sway: Reduces the natural wobble when aiming, making it easier to hit moving or distant targets. Maximizing this makes Ellie’s rifles and pistols extremely accurate.
- Faster Healing: Health packs (bandages) take time to apply. Faster healing lets you recover in the middle of combat without being interrupted as easily. Vital for aggressive play.
- Bottle/Brick Stun Duration: Thrown bottles or bricks can stun enemies briefly. Extended duration gives you time to run up for a melee kill or escape. Great for setting up stealth takedowns.
- Tackle Damage: Sprinting into an enemy with L1 knocks them down. Higher tiers deal damage and can break down wooden doors (saving time). Useful for closing distance and creating openings.
Synergies & Usage:
Combat skills suit players who fight head‑on. Max Weapon Sway first to improve gun accuracy. Tackle Damage combined with a machete or pipe can one‑hit kill many enemies. Bottle/Brick Stun pairs with Tackle to safely close in. Faster healing keeps you in the fight longer.
Survival Tree
The Survival tree focuses on resources, crafting, and health.
| Skill | Tier 1 | Tier 2 | Tier 3 | Cost per tier |
|---|---|---|---|---|
| Crafting Speed | Increase crafting speed by 25%. | 50% faster. | 75% faster. | 30 / 60 / 90 |
| Health Upgrade | Increase maximum health by 25%. | 50% increase. | 75% increase. | 30 / 60 / 90 |
| Scavenging | Increase the amount of resources found from every container. | More resources. | Even more. | 40 / 80 / 120 |
| Medicine Crafting | Craft health kits with fewer resources. | N/A (flat reduction) | N/A | 50 |
- Crafting Speed: Crafting (e.g., making medkits, shivs, smoke bombs, arrows) takes time. Faster crafting means less vulnerability in the open. A must for anyone who crafts often.
- Health Upgrade: Flat increase to your max HP. Particularly valuable on higher difficulties where damage is severe. Improves survivability.
- Scavenging: Every searchable container yields more supplies. This is a passive snowball effect—more resources mean more crafting, healing, and ammo. Prioritize early to build a stockpile.
- Medicine Crafting: Reduces the materials needed to craft a health kit (from 3 to 2 alcohol+rags). Excellent for conserving resources when healing is frequent.
Synergies & Usage:
Survival skills are universally useful. Scavenging pays dividends throughout the game. Combine with Health Upgrade to create a tankier Ellie. Crafting Speed is invaluable during frantic encounters—you can craft a medkit mid‑firefight. Medicine Crafting saves resources for other items.
Abby's Skills
Abby’s skill trees mirror Ellie’s in structure but have different names and effects, reflecting her stronger physique and different combat style.
Stealth Tree
Abby’s Stealth tree emphasizes her ability to remain hidden despite her larger frame.
| Skill | Tier 1 | Tier 2 | Tier 3 | Cost per tier |
|---|---|---|---|---|
| Hold Breath | Same as Ellie – steady aim while breathing. | Increased hold time. | Further increase. | 30 / 60 / 90 |
| Prone Stealth | Same – faster prone movement. | Full invisibility in tall grass. | N/A | 30 / 60 |
| Listen Mode Distance | Same – increased detection range. | +50% range. | +75% range. | 30 / 60 / 90 |
| Crouch Speed | Same – faster crouch walking. | N/A | N/A | 40 |
Usage:
Abby is bigger and louder, making stealth harder without upgrades. Prioritize Prone Stealth Tier 2 as early as possible to compensate. Crouch Speed helps her reposition quickly.
Combat Tree (Abby)
Abby’s Combat tree focuses on her brute strength and heavy weapons.
| Skill | Tier 1 | Tier 2 | Tier 3 | Cost per tier |
|---|---|---|---|---|
| Weapon Sway Reduction | Same as Ellie – reduces sway. | 50% reduction. | 75% reduction. | 30 / 60 / 90 |
| Faster Healing | Same as Ellie – faster bandage use. | 50% faster. | 75% faster. | 30 / 60 / 90 |
| Bottle/Brick Stun Duration | Same as Ellie – longer stun. | Further increased. | N/A | 40 / 80 |
| Knockout Punch | While unarmed, press Triangle to deliver a powerful punch that knocks enemies down. | Punch does more damage. | Punch can break doors. | 40 / 80 / 120 |
- Knockout Punch replaces Ellie’s Tackle. Abby can punch instead of using a tackle. The punch is faster to execute and doesn’t require sprinting. It can stun or kill weak enemies outright. At Tier 3 it can smash locked doors (same utility as Ellie’s Tackle).
Synergies & Usage:
Abby excels at close-quarters combat. The Knockout Punch uses no stamina and can be chained with melee attacks. Bottle/Brick stun + Knockout Punch is a reliable one‑two combo. Weapon Sway helps with her heavier guns (rifle, shotgun). Faster Healing is crucial because Abby often finds herself in the thick of battle.
Survival Tree (Abby)
Abby’s Survival skills differ slightly.
| Skill | Tier 1 | Tier 2 | Tier 3 | Cost per tier |
|---|---|---|---|---|
| Crafting Speed | Same as Ellie. | 50% faster. | 75% faster. | 30 / 60 / 90 |
| Health Upgrade | Same – max HP increased. | +50% HP. | +75% HP. | 30 / 60 / 90 |
| Scavenging | Same – more resources. | More resources. | Even more. | 40 / 80 / 120 |
| Craft More Ammo | When crafting ammo, you get a bonus round. | Two bonus rounds. | N/A | 50 / 100 |
- Craft More Ammo: Abby’s unique survival skill. Every time she crafts ammo (for pistols, rifles, shotguns, etc.), she produces an extra round per tier. Tier 2 yields +2 rounds. This is especially good for shotguns and rifles, where ammo is scarce.
- Prioritize Scavenging early to snowball resources.
- Get Crouch Speed and Prone Stealth Tier 1 for utility.
- One or two points in Faster Healing for survival.
- Then specialize based on your preferred encounters.
- Pills are plentiful if you explore thoroughly. Check every drawer, desk, and corpse.
- In New Game+, all skills carry over, so you can max every tree if you collect enough pills.
- On higher difficulties (Survivor, Grounded), Listen Mode Distance and Prone Stealth are almost mandatory for avoiding detection.
- Abby’s Knockout Punch can destroy wooden doors, saving time and letting you surprise enemies from alternative routes.
- Medicine Crafting (Ellie) and Craft More Ammo (Abby) are permanent resource savings—invest in them mid‑game.
Synergies & Usage:
Craft More Ammo synergizes with Scavenging to keep Abby’s guns fed. Combine with Health Upgrade to become a durable juggernaut. Crafting Speed lets you whip up ammo between fights. Prioritize Scavenging and Craft More Ammo to maintain combat effectiveness.
Recommended Builds & Upgrade Order
Stealth-Focused Ellie
1. Prone Stealth Tier 2 (90 pills) – Unlock invisibility.
2. Crouch Speed (40 pills) – Speed up stealth movement.
3. Listen Mode Distance max (180 pills) – Awareness.
4. Hold Breath max (180 pills) – Accurate kills.
5. Then invest in Combat (Weapon Sway) or Survival (Scavenging).
Aggressive Abby
1. Knockout Punch Tier 1 (40 pills) – Get the punch immediately.
2. Knockout Punch Tier 2 (80 pills) – More damage.
3. Craft More Ammo Tier 1 (50 pills) – Extra ammo.
4. Faster Healing Tier 1 (30 pills) – Sustain.
5. Scavenging max (240 pills) – Fund all other upgrades.
6. Later max Weapon Sway and Hold Breath for ranged fights.
Balanced (Both Characters)
General Tips
This guide covers every unlockable skill for both protagonists. Use the upgrade paths that match your playstyle, and remember that you can combine skills across trees for maximum effectiveness.

Characters & Roles
Characters & Roles
The Last of Us Part II is a single-player, story-driven game with two primary playable characters: Ellie and Abby. While the game features a rich cast of supporting characters, only Ellie and Abby are directly controlled. Each has unique strengths, weaknesses, playstyles, and upgrade paths. This guide covers both protagonists and key non-playable allies, providing actionable advice for maximizing their effectiveness in combat and exploration.
---
1. Ellie
Background
Ellie is the deuteragonist of The Last of Us Part II. She is immune to the Cordyceps infection and survived the events of the first game with Joel. Driven by vengeance after a traumatic event, she embarks on a brutal journey through Seattle. Her gameplay reflects her agility, resourcefulness, and emotional volatility.
Strengths
- High mobility: Sprint speed and dodge responsiveness are superior to Abby’s.
- Stealth expertise: Faster crouch movement, quieter footsteps, and better hiding-spot usage.
- Versatile loadout: Benefits from a wide range of weapons including suppressed pistols, bows, and explosives.
- Skill tree flexibility: Three dedicated trees (Survival, Stealth, Combat) allow tailored builds.
- Lower health: Takes slightly more damage from heavy attacks compared to Abby.
- Limited raw power: Melee damage is lower, and she cannot shoulder-barge through wooden barricades (must use melee or explosives).
- No innate heavy weapon proficiency: Must rely on upgrades for accurate rifle handling.
- Weapons: Suppressed 9mm pistol (start), hunting pistol (powerful), bow (stealth), and shotgun (upgrade for close range).
- Skill priority: Max Stealth tree early (especially Hold Breath and Faster Crouch). Then Survival (more health, faster healing) before Combat (better weapon sway and melee).
- Upgrades: Focus suppressor on pistol, upgrade holster for faster weapon switch, and prioritize stamina (for sprinting) at workbenches.
- Crafted items: Smoke bombs for disoriented enemies, health packs, and silencers for pistols.
- Brute force: Higher melee damage, ability to push through enemies and shatter doors with shoulder charge (requires upgrade).
- Better health: Base health is higher than Ellie’s, allowing sustained aggression.
- Weapon variety: Heavier firearms like assault rifles and shotguns feel more natural, and she can hold larger weapons longer before stamina runs out.
- Quick time events: Stronger in scripted melee encounters (e.g., fistfights).
- Slower movement: Sprint speed and crouch-walk are slower, making stealth less effective.
- Stealth penalties: Detection noises are louder; takes more damage when detected from behind.
- No bow: Lacks a silent long-range option (has crossbow but with limited ammo and longer reload).
- Weapons: Silenced SMG (excellent up close), hunting rifle (long-range headshots), and shotgun. Crossbow is situationally useful but slow.
- Skill priority: Max Heavy tree first (shoulder charge, knockdown, increased melee damage). Then Survival (more healing items, faster crafting) and Stealth last (only for quieter movements).
- Upgrades: Upgrade the SMG’s magazine capacity, the rifle’s scope, and backpack size for extra inventory slot.
- Crafted items: Pipe bombs (devastating against groups), smoke grenades (for shock and awe), and armor vests (from workbench).
Weaknesses
Playstyle
Ellie excels in methodical, stealth-oriented encounters. Use the environment to thin enemy groups before engaging. Her dodge is quick and effective against melee enemies. The bow allows silent kills from a distance, but arrows are scarce. Her crafted explosives (mines, nail bombs) can turn tight situations. Late-game, she becomes a formidable combatant with upgraded weapons and skills.
Unlock Conditions
Ellie is playable from the very start of the game (Prologue: Jackson) through her entire campaign (Day 1, 2, 3 in Seattle and later Santa Barbara). No unlock is required.
Recommended Equipment & Builds
Team Synergy (AI Companions)
Ellie is frequently accompanied by Dina (Seattle Day 1), Jesse (Seattle Day 2), and Tommy (briefly). These AI allies provide distraction and extra firepower but cannot be directly commanded. Use them as bait: let Dina draw fire while you flank, or use Jesse’s marksmanship to cover your stealth kills. In combat, stay close to companions for revives (if playing on lower difficulties).
---
2. Abby
Background
Abby is the second playable protagonist, a former Firefly and daughter of the surgeon killed by Joel. Her campaign takes place over three days in Seattle, running parallel to Ellie’s. She is physically stronger and more direct in combat, reflecting her military background.
Strengths
Weaknesses
Playstyle
Abby plays best as a relentless hunter. Use her strength to smash down doors and create shortcuts. Engaging in aggressive shootouts is viable thanks to her health pool. Her skill tree includes a unique “Heavy” branch that unlocks shoulder charge and powerful knockdown attacks. You can still stealth but must be more patient and use distractions (bottles, bricks) to make openings.
Unlock Conditions
Abby becomes playable midway through the game after Ellie’s Day 3 (Seattle). You assume control of Abby during her own Day 1 in the same city. This is a mandatory story shift; no trick required.
Recommended Equipment & Builds
Team Synergy (AI Companions)
Abby is joined by Lev (most of her campaign) and Yara (briefly). Lev is a skilled archer who provides silent kills from a distance. Use Lev to mark enemies (when you spot them) and let him take out isolated guards. Yara is stronger in close combat. Follow their lead to discover hidden paths and pick up enemy positions. Reviving them is easier due to the larger health pool.
---
3. Key Non-Playable Characters (NPCs)
While you cannot control these characters, understanding their roles enhances gameplay and story.
| Character | Role in Gameplay | Impact on Player Strategy |
|---|---|---|
| Joel | Prologue companion (Jackson). Assists in combat but cannot be healed. | Use his covering fire to clear patrols. Follow him for safe routes. |
| Dina | Ellie’s companion (Seattle Day 1). Has a horse and can ride off to set up ambushes. | When Dina rides away, you gain a tactical advantage: enemies split attention. She can also find health packs for you. |
| Jesse | Ellie’s companion (Seattle Day 2). Skilled sharpshooter. | Jesse will headshot unaware enemies. Use his presence to test dangerous areas—he’s tough and heals himself over time. |
| Tommy | Ellie’s companion (final part of Ellie’s campaign). Expert rifleman. | Tommy provides suppressive fire and can break enemy lines. He has a limited health pool, so keep enemies off him. |
| Lev | Abby’s companion (Day 1 onward). Stealth archer. | Lev can kill enemies silently if you distract them. He also has unique dialogue giving lore and tactical hints. |
| Yara | Abby’s sister-like figure (Day 1). Strong melee fighter. | Yara will charge enemies, creating openings for Abby to shoot. She can also destroy barricades. |
4. General Tips for Both Characters
- Listen Mode: Essential for both to see enemy outlines through walls. Use it frequently but be aware it drains stamina while active.
- Crafting Balance: Always carry health packs, smoke bombs, and one explosive. For Ellie, prioritize silencers; for Abby, prioritize pipe bombs.
- Weapon Upgrade Priority: The workbench upgrades (holster speed, reload speed, stability) benefit both characters. Spend parts wisely—you cannot get them all in one playthrough.
- Skill Tree Reset: There is no respec; plan your build early. For Ellie, Stealth first; for Abby, Heavy first.
- Enemy Types: Human enemies (WLF, Scars) react differently. WLF use dogs (trackers) that can follow your scent; Scars are melee-focused and use smoke. Adapt your playstyle accordingly.
---
5. Conclusion
The Last of Us Part II offers two distinct character experiences. Ellie rewards patience and precision; Abby rewards aggression and strength. Mastering each requires shifting your mindset, but the game provides ample tools for both. Use the AI companions wisely, upgrade according to your playstyle, and don’t be afraid to experiment with different weapons. There are no classes to unlock—only the gradual evolution of your own combat philosophy.
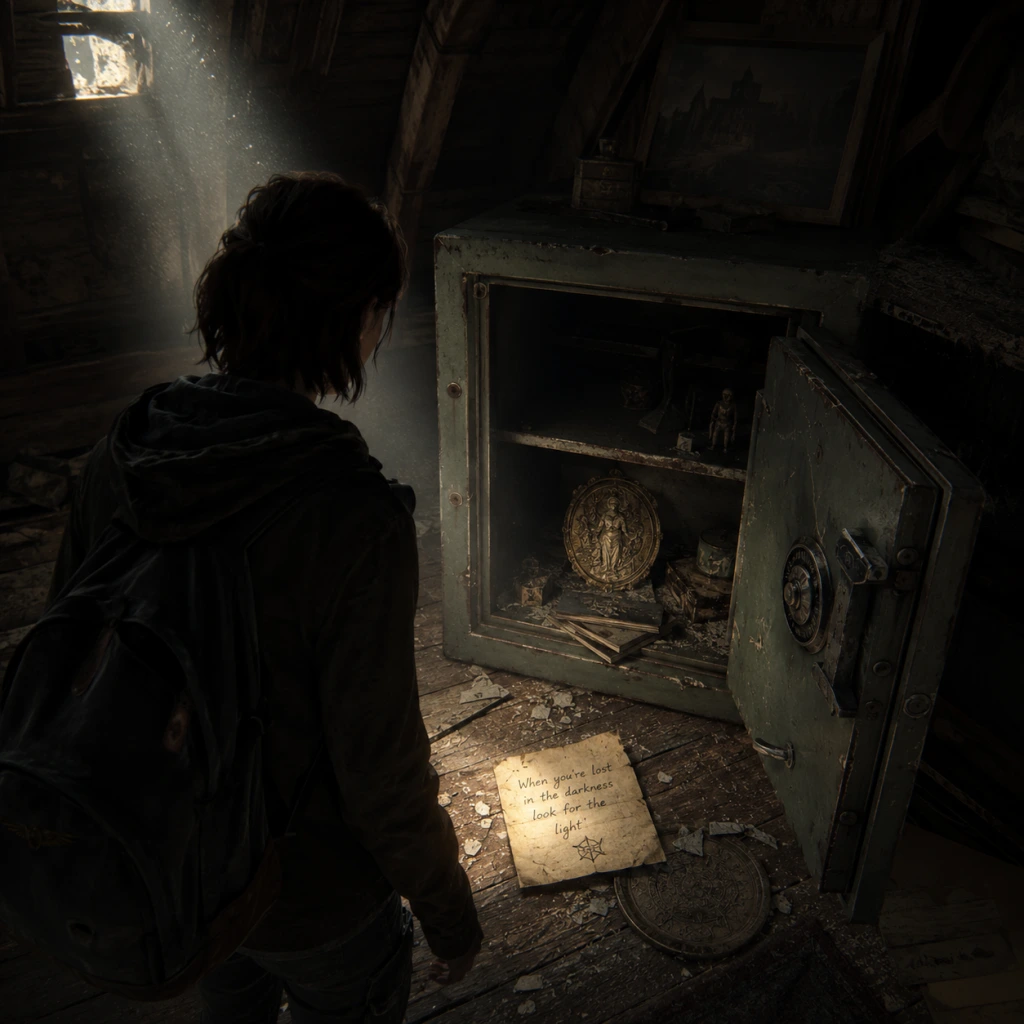
Cheats & Secrets
Overview
The Last of Us Part II does not contain any traditional cheat codes, debug menus, or console commands accessible during regular gameplay. Naughty Dog designed the game without such features. However, there are several developer-intended hidden features, Easter eggs, and secret interactions that reward thorough exploration. Additionally, the game’s extensive accessibility options allow players to enable effects that function similarly to cheats (e.g., infinite ammo, one-hit kills), though these are officially listed settings and not hidden secrets. This guide covers all legitimate hidden content, including Easter eggs, references to other Naughty Dog titles, and optional story details.
---
Hidden Settings (Cheat-Like Accessibility Options)
The Accessibility menu, accessible from the main screen or pause menu, includes several toggles that dramatically reduce difficulty. These are not secrets but can be used to mimic cheat codes:
- Infinite Ammo (under Gameplay Modifiers): All weapons have unlimited ammunition.
- One-Hit Kills (under Gameplay Modifiers): Any enemy (including bosses) dies in a single hit.
- Infinite Crafting (under Gameplay Modifiers): Crafting does not consume resources.
- Invisible While Prone (under Gameplay Aids): Enemies cannot detect you while you are lying down.
- Auto-Aim and Auto-Dodge: Available in Combat or Navigation settings.
- Location: Chapter 10 – “The Ski Lodge” (Abby). After entering the main lodge, go to the back office on the first floor. There is a small break room with a poster on the far wall showing a character eating a nacho platter, labeled “Macho Nacho”. This is a direct reference to the fictional film series from the Uncharted franchise.
- How to find: From the main lobby, head through the door behind the front desk, then turn left into the office. Look behind the desk on the back wall.
- Location: Chapter 7 – “Hillcrest” (Ellie). In the basement of a house on the northeast side of the neighborhood, inside a locked room. The note reads, “I’m a dinosaur” – a beloved line from the first game’s “Sam & Henry” chapter.
- How to find: Begin at the Hillcrest safe house (where you meet Jesse). Exit and head left, then take the second right. Look for a house with a basement entrance. Inside, a note on a desk repeats the phrase.
- Location: Chapter 14 – “The Marina” (Ellie). On the boat dock, inside a small shed near the water. A cassette recorder plays a scientist’s log about the early spread of the fungus.
- How to find: After the cutscene where Ellie and Dina enter the marina area, inspect the dock shed closest to the entrance. The recorder is on a shelf.
- Location: Chapter 8 – “The Hospital” (Abby). After descending into the lower levels, you encounter the Rat King, a massive, multi-part infected creature. This is a mandatory boss fight but is often considered a secret encounter because it is heavily foreshadowed and visually shocking. No specific trigger; it’s part of the main story.
- Location: Chapter 9 – “The Seraphites” (Ellie, first visit). In the school library, on a pillar near the main staircase, there is a small, faded graffiti that reads “PS4” in the classic PlayStation logo font.
- How to find: Enter the library, head to the central staircase, and look at the pillar directly to your left. You may need to use a flashlight to see it clearly.
- Fighting the Seraphite Sisters: In the encounter where Ellie fights two women armed with axes (Chapter 5 – “The Seraphites”), if you stealth kill one without alerting the other, the surviving sister will shout unique, panicked dialogue that plays only if you use that specific strategy.
- Ellie’s Drawings: As you progress, Ellie’s journal automatically updates with sketches. Some drawings appear only if you missed certain optional conversations or failed to interact with specific objects. For example, not talking to Dina about her past in the synagogue before leaving will result in a blank page instead of a drawing.
- Rat King’s Face: Using Photo Mode during the Rat King’s death animation allows you to zoom in on its face, revealing detailed modeling not easily seen in combat.
- Invisible Objects: Some environmental objects (like certain collectibles) disappear after being picked up, but Photo Mode can capture them in their original positions if you activate it before interacting.
- Dina’s Tattoo: Near the start of the game (Chapter 1 – “Jackson”), talk to Dina while she is at her patrol post. If you ask about her tattoo, she will show it. Later in the game, a related note becomes available in the synagogue.
- The Library Key: In Chapter 9 – “The Seraphites”, you can find a hidden key behind a loose brick in the library. This key opens a locked drawer in the same room containing a note with the code to a safe later in the chapter (safe rewards: rare crafting materials). The key itself is missable if you leave the area.
- The “Dog” Grave: In Chapter 6 – “Downtown Seattle”, there is a fenced-off dog cemetery. If you read all the gravestones, you unlock a hidden journal entry from Ellie reflecting on her own dog (from The Last of Us Part I).
- The Dreaded Room: In Chapter 12 – “The Aquarium” (Abby), there is a room with a padlocked door. The combination is found later in the same chapter (code: 3-7-1). Inside, you find a note about a character named “Izzy” and a rare pistol upgrade. This area is entirely optional.
- The Nursery: In Chapter 11 – “The Farm” (Ellie, epilogue), you can return to Ellie’s nursery after the final cutscene. Inside, there is a drawing of Joel and Ellie that you cannot see during the main story. To see it, replay the chapter from the chapter select menu after finishing the game.
To enable: From the pause menu, go to Options → Accessibility → Gameplay Modifiers and toggle on the desired settings. These options do not disable trophies or achievements.
---
Easter Eggs & Developer-Intended Hidden Content
1. Uncharted Reference – “Macho Nacho” Poster
2. The Last of Us Part I Callback – “I’m a Dinosaur” Note
3. Hidden Recording of the Cordyceps Origin
4. The “Rat King” – Not an Easter Egg, But a Secret Boss Fight
5. Easter Egg Graffiti – “PS4” Logo
6. Unused / Secret Dialogue Lines
7. Photo Mode Secrets
---
Developer-Intended Hidden Story Content
Optional Conversations & Missable Journal Entries
Area-Affecting Secrets
---
Conclusion
While The Last of Us Part II lacks traditional cheat codes, it rewards curious players with hidden details, references to other Naughty Dog games, and optional story threads that deepen the narrative. The accessibility options can be used to bypass difficulty, and the missable Easter eggs offer an incentive to explore thoroughly. No trophies are locked behind these secrets, but discovering them adds to the game’s rich atmosphere.