The Legend of Zelda: Breath of the Wild
## Game Introduction **The Legend of Zelda: Breath of the Wild** is an action-adventure game developed and published by **Nintendo** for the **Nintendo Switch** and **Wii U**. Released worldwide on **March 3, 2017**, it launched as a flagship title for the Nintendo Switch and as a final major relea...
Download & Installation
Platform Availability
The Legend of Zelda: Breath of the Wild is officially released exclusively for Nintendo Switch and Wii U. It is not available on PC, PlayStation, Xbox, or mobile platforms. Any claims otherwise refer to unofficial emulation, which violates Nintendo's terms of service and is not covered in this guide.
---
Official Download Sources
Nintendo Switch
- Digital: Nintendo eShop on the Nintendo Switch console.
- Physical: Game card from authorized retailers (e.g., Amazon, Best Buy, GameStop).
- Digital: Nintendo eShop on the Wii U console.
- Physical: Disc from authorized retailers.
Wii U
Note: Both versions are identical in content, but the Switch version runs at a higher resolution (900p docked, 720p handheld) compared to Wii U (720p).
---
Step-by-Step Installation
Nintendo Switch (Digital)
1. Ensure System Update: Go to System Settings → System → System Update and install the latest firmware.
2. Open Nintendo eShop: From the HOME menu, select the eShop icon.
3. Sign In: Use your Nintendo Account (or create one if needed).
4. Search for Game: Use the search function or browse the "The Legend of Zelda" section.
5. Purchase & Download: Select "Proceed to Purchase" and confirm. The download begins automatically.
6. Monitor Download: Check download progress from the HOME menu (highlight the downloading icon).
7. Play: Once complete, the game icon appears on the HOME menu. Select to launch.
Nintendo Switch (Physical)
1. Insert Game Card: With the console powered on or in sleep mode, insert the game card into the slot (label facing forward).
2. Download Updates (if any): The console will prompt to download the latest update. Select "Download".
3. Launch: The game icon appears. Select to start playing.
Wii U (Digital)
1. Update Console: Go to System Settings → System Update and install the latest firmware.
2. Open Nintendo eShop: From the Wii U Menu, select the eShop icon.
3. Sign In: Link your Nintendo Network ID.
4. Locate the Game: Search for "Breath of the Wild".
5. Purchase & Download: Confirm purchase and download. The download can be checked in Download Management.
6. Install: After download, the game appears on the Wii U Menu. Launch to play.
Wii U (Physical)
1. Insert Disc: Place the disc into the Wii U disc drive (top slot).
2. Install Update: If prompted, download the latest patch.
3. Play: The game icon appears on the Wii U Menu.
---
System Requirements (Console Specifications)
Nintendo Switch
| Aspect | Minimum / Base | Recommended / Docked |
|---|---|---|
| Storage | 13.4 GB free space (digital) | 32 GB internal or microSD (for DLC & updates) |
| Internet | Required for initial download & updates | Broadband for DLC (Expansion Pass) |
| Controller | Joy‑Cons (included) | Pro Controller recommended |
| Display | 6.2" 720p handheld | 1080p docked via HDMI |
| Account | Nintendo Account (free) | Nintendo Switch Online optional |
Wii U
| Aspect | Minimum | Recommended |
|---|---|---|
| Storage | 13 GB free space (digital) | 32 GB Deluxe model or external USB HDD |
| Internet | Required for digital download & updates | Broadband for DLC |
| Controller | Wii U GamePad (included) | Pro Controller for alternative play |
| Display | 720p via HDMI or composite | 1080p scaling supported |
| Account | Nintendo Network ID (free) | N/A |
Storage Space
- Digital Download Size: Approximately 13.4 GB on both Switch and Wii U.
- Updates / DLC:
- Total with all content: ~18–19 GB.
- Recommended: At least 25 GB free on Switch (internal or microSD) and 20 GB on Wii U (system memory or external drive).
- Nintendo Account (email-based, free to create) required for eShop purchases and digital downloads. No subscription needed for base game.
- Nintendo Switch Online (optional) required only for online features like leaderboards or if a future online component is added (currently none).
- Nintendo Network ID (NNID) required for eShop access and digital purchases. Free to create.
- Version 1.6.0 update: ~2.2 GB (Switch).
- Expansion Pass (DLC 1 & 2): ~2.5 GB total.
---
Account Requirements
Nintendo Switch
Wii U
---
First Launch Setup
1. Language Selection: Choose from available languages (English, French, German, Spanish, etc.).
2. Brightness Calibration: Adjust screen brightness to make the logo barely visible (crucial for certain shrines).
3. Control Scheme: The game teaches basic controls during the opening cutscene. No separate configuration needed.
4. System Link (Wii U): The game uses the GamePad for inventory and map; no extra pairing.
5. Installation of Shaders (Switch): On first boot, the game may compile shaders – this is normal and takes a few minutes.
6. Save Data: Create a save slot. The game autosaves frequently.
---
Common Installation Errors & Fixes
| Error | Platform | Cause | Fix |
|---|---|---|---|
| Insufficient storage space | Both | Not enough free space for download/update | Delete unused software or add a microSD (Switch) / external HDD (Wii U). Ensure format is correct (FAT32 for Switch, Wii U formats automatically). |
| Download stuck or slow | Both | Poor internet connection or eShop congestion | Pause and resume download. Move console closer to router or use wired connection. Check Nintendo server status. |
| Corrupted data / error code | Switch | File corruption during download | Go to System Settings → Data Management → Manage Software → Select game → Check for Corrupt Data. If found, redownload. |
| Cannot launch game after download | Switch | System software outdated | Update system firmware via System Settings → System → System Update. |
| eShop connection error (e.g., 2155-8007) | Both | Account region mismatch or server outage | Ensure account region matches the game’s region. Try later. Re-link account. |
| Physical card not recognized | Switch | Dirty contacts or faulty cart | Clean contacts with a dry cloth. If persists, contact Nintendo support. |
| Wii U disc read error | Wii U | Dirty disc or drive issue | Clean disc with microfiber cloth. If continues, consider Wii U repair. |
| DLC not showing after purchase | Both | DLC not downloaded or not linked to correct account | Redownload from eShop → Redownloadable Software. Ensure same account used. |
Post-Installation Verification
After installing, perform these checks to confirm a successful setup:
1. Launch the Game: The title screen should appear without errors. A short cinematic starts.
2. Check Version Number: From the title screen menu, select Options → Version. Latest is 1.6.0 (May 2023).
3. Test Controls: Move Link using the left stick, interact with objects (A button). Verify sound and vibration.
4. Save & Load: Create a manual save from the pause menu. Then reload from the title screen → Load Game.
5. DLC Verification (if purchased): In-game, press X on the map to open the DLC quest list. You should see "The Legend of Zelda: Breath of the Wild – Expansion Pass" active.
6. Performance: Ensure stable 30 fps (both platforms) with no excessive stuttering. On Switch, check for overheating.
7. Storage Check: On Switch, go to System Settings → Data Management → Manage Software → Breath of the Wild. Total size should be ~13.4 GB base + updates.
---
Additional Notes
- PC / Emulation: The game can technically be played on PC via the Cemu emulator (Wii U version) or Yuzu/Ryujinx (Switch version), but these require a legally obtained game dump and a powerful computer. This guide does not cover emulation; it is not an official platform. Use at your own risk and only if you own the original game.
- Cross-Save: Not available between Switch and Wii U versions.
- Download Codes: If you purchased a digital code from a retailer, redeem it on the eShop (Select "Enter Code").
- Pre-Install on New Switch: If you bought a Nintendo Switch bundle that includes the game pre-installed, simply power on and follow on-screen prompts.
Game Introduction
Game Introduction
The Legend of Zelda: Breath of the Wild is an action-adventure game developed and published by Nintendo for the Nintendo Switch and Wii U. Released worldwide on March 3, 2017, it launched as a flagship title for the Nintendo Switch and as a final major release for the Wii U. The game redefines the classic Zelda formula with an open-world design, deep physics interactions, and a non-linear narrative, earning universal acclaim and numerous Game of the Year awards.
Genre & Core Appeal
- Genre: Action-adventure, open-world, survival, and puzzle-solving.
- Core Appeal: Unprecedented freedom to explore a vast, living Hyrule. Players can climb almost any surface, glide with a paraglider, cook meals, and solve environmental puzzles using real-world logic. The game emphasizes player agency: the main quest is optional, and the final boss can be faced immediately after the tutorial.
- Premise: The kingdom of Hyrule has fallen to the Calamity Ganon, a primal evil that re-emerges every 10,000 years. Link, the chosen hero, awakens from a 100-year slumber in the Shrine of Resurrection with no memory of his past. He must regain his strength, explore the ruined land, and defeat Ganon to restore peace.
- Narrative Style: Minimal cutscenes; story is revealed through exploration, memories recovered by visiting specific locations, and conversations with the few surviving characters. The narrative is fragmented, encouraging players to piece together the history of Hyrule and Link's personal story.
- Hyrule is a post-apocalyptic, open-world environment featuring diverse biomes: from the temperate Great Plateau and lush Hyrule Field to the fiery Death Mountain, frozen Hebra Mountains, arid Gerudo Desert, and the mysterious Lost Woods. The world is densely packed with secrets, shrines, towers, enemy camps, and wildlife. Dynamic weather (rain, thunderstorms, snow, sandstorms) affects gameplay, and day-night cycles influence enemy behavior and creature spawns.
- Link – The silent protagonist and Hero of the Wild. Equipment can be changed freely, and stats are tied to clothing and food rather than leveling.
- Princess Zelda – The wise and scholarly ruler who fought Ganon 100 years ago. Her story is unveiled through memories. A key figure in the plot, but not a playable character.
- Impa – Village elder in Kakariko Village, provides guidance and the main quest book.
- The Four Champions – Mipha (Zora), Daruk (Goron), Revali (Rito), and Urbosa (Gerudo) – each provides a unique ability after completing their respective Divine Beast quests.
- Ganon (Calamity Ganon) – The main antagonist, a monstrous manifestation of pure malice that has corrupted Hyrule. The final boss encounter is accessible at any time after leaving the Great Plateau.
- Single-Player Campaign: The primary mode. No multiplayer or co-op. The game is entirely offline.
- No New Game+: Once the final boss is defeated, a star appears on the save file and the player is returned to before the final battle, but no new content unlocks.
- The Legend of Zelda: Breath of the Wild – The Master Trials (DLC Pack 1): Adds Trial of the Sword (a survival challenge unlocking a permanent weapon upgrade), Master Mode (harder difficulty with regenerating enemy health and floating enemies), Hero’s Path Mode (a map overlay showing your traversal path), and more.
- The Legend of Zelda: Breath of the Wild – The Champions’ Ballad (DLC Pack 2): Adds a new story quest featuring the four Champions, a new dungeon (the Divine Beast of Wind?), the One-Hit Obliterator challenge, the Master Cycle Zero (a motorcycle), and additional cutscenes.
- Offline: The entire game can be played without an internet connection. All content is on the cartridge or digital download.
- Online: No mandatory online features. Optional internet connection is needed for downloading DLC, software updates, and registering gameplay records on Nintendo’s online service. No multiplayer or leaderboards exist. Amiibo functionality allows NFC interactions to spawn items or treasure, but is not required.
- Primary: Fans of action-adventure, open-world exploration, and puzzle games. Suitable for ages 10+ (ESRB E10+ for fantasy violence and mild suggestive themes).
- Secondary: Longtime Zelda enthusiasts, new players, and anyone interested in a non-linear, immersive world with a high degree of player freedom.
- The Physics Engine: Nearly every object can be manipulated using Sheikah Slate abilities: Magnesis (move metal objects), Stasis (freeze objects to store kinetic energy), Cryonis (create ice pillars), and Remote Bombs. Players can chop trees, roll boulders, and use fire to create updrafts—solutions to puzzles are often creative and emergent.
- Exploration Over Guided Paths: No map markers for most quests; instead, players rely on environmental cues and NPC hints. The game encourages climbing every mountain, looking off the beaten path, and discovering shrines, Korok seeds, and hidden lore.
- Weapon Durability System: All weapons, shields, and bows have limited durability and will break. This forces players to adapt, scavenge, and experiment with different tools. This controversial but deliberate design keeps combat fresh and discourages hoarding.
- Non-Linear Main Quest: The final boss can be fought immediately after the tutorial area, and the four Divine Beasts can be completed in any order—or ignored entirely. The story is what you make of it.
- Living World: Wildlife interacts with the ecosystem; weather affects combat and traversal; enemies have daily routines; and the world feels alive rather than static.
Story Overview
Setting
Main Characters
Game Modes
Online & Offline Support
Target Audience
What Makes This Game Unique
Download & Installation
(Refer to the previously confirmed section titled "Download & Installation" for platform-specific availability and installation steps.)
---
This overview captures the essential elements that make The Legend of Zelda: Breath of the Wild a landmark title in gaming history—a masterpiece of open-world design that rewards curiosity, creativity, and perseverance.
Getting Started
First Hour Walkthrough
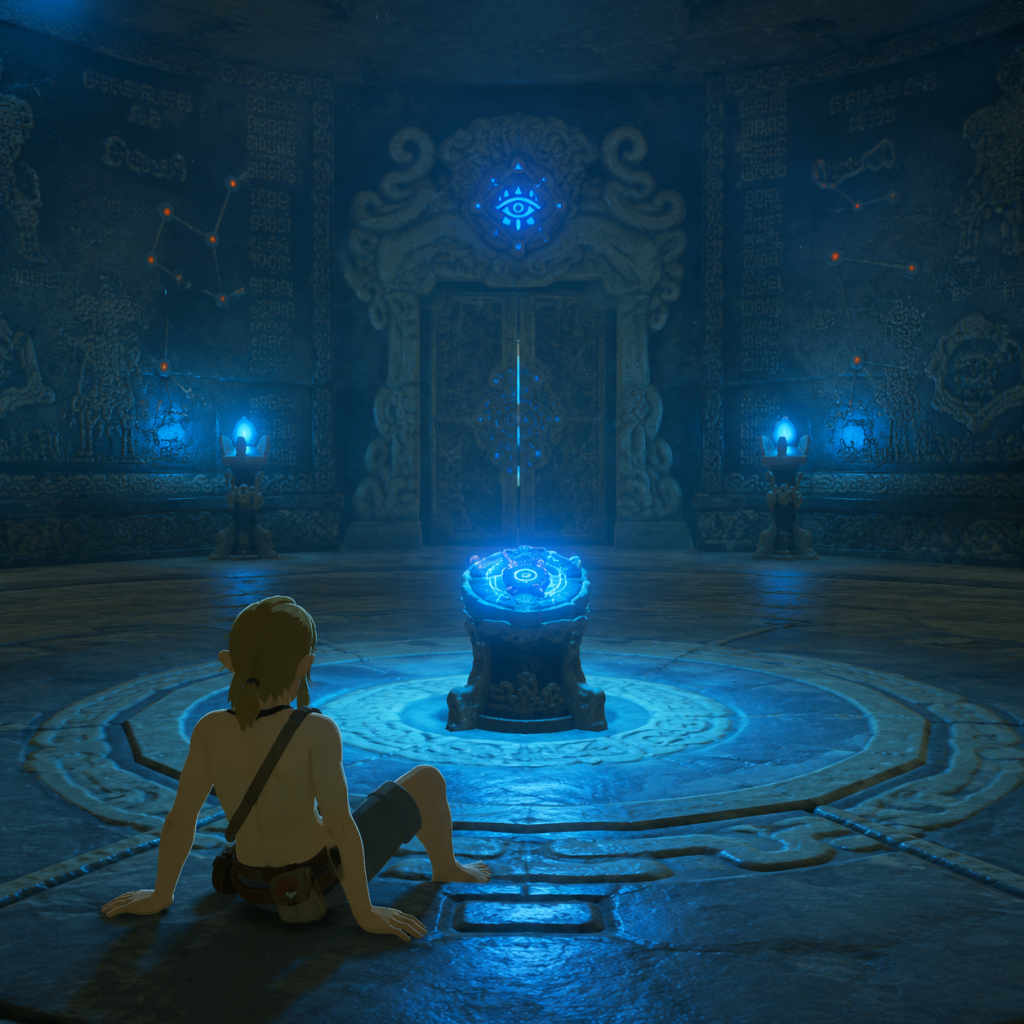
When you first start the game, you'll wake up in the Shrine of Resurrection on the Great Plateau. This is the tutorial area and you cannot leave until you complete it.
Step-by-Step:
1. Wake up – You'll see a short cutscene. After that, grab the Sheikah Slate from the pedestal in the room. This is your main tool.
2. Exit the shrine – Walk outside and follow the path. You'll meet an Old Man near a campfire. Talk to him (press A). He gives basic survival tips.
3. Activate the first tower – Head to the glowing orange tower in the distance. Climb it (press B to jump, hold B to climb faster). At the top, interact with the terminal to unlock the map of the Great Plateau.
4. Complete the four shrines – The Old Man mentions four shrines that activate the paraglider. They are located on the plateau: Oman Au (Magnesis), Ja Baij (Bomb), Owa Daim (Stasis), and Keh Namut (Cryonis). Find each, solve the puzzle, and claim the Spirit Orbs.
5. Get the Warm Doublet – Before or after the shrines, climb to the top of Mount Hylia. The Old Man will give you the Warm Doublet if you cook him a Spicy Meat and Seafood Fry (recipe: Raw Meat + Hyrule Bass + Spicy Pepper). Or you can buy it from the Hateno Village shop later. Alternatively, you can tough out the cold with food/elixirs.
6. Return to the Temple of Time – After finishing all four shrines, go back to the Temple of Time. The Old Man reveals himself as King Rhoam and gives you the Paraglider. Now you can leave the Great Plateau.
Tip: Avoid combat with the Stone Talus or skeletons at night – just run. Focus on exploring and completing shrines.
Character Creation
No character creation exists. You play as Link, a male Hylian. You cannot change gender, appearance, or name. However, you can:
- Change clothing and armor (e.g., Hylian Tunic, Stealth Set).
- Use Amiibo to unlock cosmetic armor (e.g., Twilight Cap).
- Later dye armor at the Kochi Dye Shop in Hateno Village.
Link starts with 3 hearts and one full stamina wheel (green). You can upgrade these using Spirit Orbs at Goddess Statues.
Controls (Nintendo Switch & Wii U)
The controls are nearly identical on both platforms. The table below maps button functions:
| Button | Action |
|---|---|
| A | Interact, talk, pick up, read, accept prompt |
| B | Jump (tap), climb faster (hold), cancel |
| X | Attack (swing weapon) |
| Y | Use Rune (press to equip Sheikah Slate rune, hold to use) |
| L | Hold to ZR-target (lock on), or press to throw weapon |
| ZL | Hold to Z-target an enemy, then use L stick to strafe |
| ZR | Hold to crouch (stealth), press while holding ZL to parry |
| R | Use map (go to map view). However, on Switch, - opens the main menu (map/inventory). On Wii U, - (minus) does the same. |
| Right Stick (R3) | Press to crouch (same as ZR hold? Actually ZR is shield/parry. For crouch: press Right Stick) |
| Left Stick (L3) | Press to sprint (hold while moving) |
| D-Pad Up | Quick slot: select weapon (hold to open inventory) |
| D-Pad Down | Quick slot: select shield |
| D-Pad Left | Quick slot: select bow and arrows |
| D-Pad Right | Quick slot: select shields (same as down?) Actually, D-pad Right selects items (food, elixirs) |
| + (Start) | Pause menu (quests, album, system) |
| - (Select) | Open map (Sheikah Slate map view) |
| Motion Controls | Used for aiming bows (gyro aiming). You can disable this in Options -> Controls -> Motion Controls -> Off. |
| Touch Screen (Switch only) | Navigate map, zoom, place markers. Not required. |
| Wii U GamePad | Off-TV play supported; touch screen works for map. |
UI Overview
- Top Left: Hearts (green), stamina wheel (green circle), temperature gauge (blue/red arrows). If temperature is too cold/hot, a warning icon appears.
- Top Center: Stealth indicator – when crouching, an eye icon shows how visible you are (closed eye = hidden, open = spotted).
- Top Right: Noise meter – a wave icon appears when you make noise (walking, running, sliding); yellow arrows = loud.
- Bottom Right: Weapon/Bow/Shield slots showing current equipment and durability (faint outline = near breaking). Below that, runes (Magnesis, Bomb, Stasis, Cryonis) – press Y to cycle.
- Minimap (bottom left): Shows terrain, icons for shrines (orange), towers (blue), towns (star), and waypoints you set. You can place custom map pins (press A on map screen).
- Pause Menu: Press + to access:
- Heart containers – each full heart=4 quarters. Lose hearts = damage. Eat food to recover.
- Stamina wheel – depletes when sprinting, climbing, swimming, or using charged attacks. Wait or eat stamina food to refill. If it runs out, you'll pause and can't climb/sprint.
- Rune slot – shows which rune is active (e.g., Magnesis icon). Hold Y to activate, then press A to use (e.g., lift metal object).
- Arrow count – visible on the bow icon when you open quick menu with D-pad Left.
- Explore – The world is full of secrets, shrines, and koroks. Check every hill and ruin.
- Talk to NPCs – They give quests, tips, and lore.
- Complete shrines – They reward Spirit Orbs (permanent upgrades) and often teach combat techniques or puzzles.
- Climb high places – Activate towers to reveal map regions. Use scope (press R-stick while aiming bow or map) to mark interesting spots.
- Collect resources – Wood, flint, ore, apples, mushrooms, meat. Cook them.
- Save often – Manual saves (press + -> System -> Save). Autosave triggers often but manual is safer.
- Fighting Guardians – The spider-like robots with laser beams. They one-shot early players. Avoid them until you have strong weapons and good dodge timing. On the Great Plateau, there's one near the Temple of Time – just stealth around.
- Fighting Lynels – Centaur-like monsters in open fields. They are endgame content. Run away or avoid.
- Wasting weapons on breakable objects – Don't use your best sword on crates or ore deposits. Use bombs or a hammer from Bokoblins.
- Ignoring temperature – If you're cold, you'll lose hearts over time. Equip warm clothes, cook spicy food, or carry a lit torch (hold R to use as a heat source). Similarly, extreme heat requires cooling potions or Gerudo Voe set.
- Rushing main quests without exploring – The game encourages wandering. You'll miss valuable equipment and upgrades.
- Not marking the map – Use the scope (while on a tower or high ground) to tag shrines, towers, and interesting places. Press A to place a pin. This helps navigation.
- Trying to fight every encampment – Stealth is more effective. Sneak around or use bombs to scatter enemies.
- Not using runes in combat – Stasis locks enemies, bombs knock them off cliffs, Magnesis can throw metal boxes.
- Not cooking before a fight – Always eat a meal with attack up or defense up before a tough battle.
- Falling from heights – Use Paraglider (gotten after Great Plateau) to glide down. Press B while in air to open it.
- Ignoring the scope – You can mark targets from far away. Helps avoid running into danger.
- Not saving before challenging areas – If you die, you lose progress since last save.
- Selling ancient materials – Ancient Screws, Gears, Shafts are needed for upgrades; save them until you know what to do.
- Breaking weapons on stone – Use bombs on ore deposits, not weapons.
- Not upgrading the Sheikah Slate – Get camera rune early from Hateno Lab – it helps with sidequests and finding hidden items.
- Map (Sheikah Slate view, full map with zoom)
- Inventory – weapons, bows, arrows, shields, materials, food, key items. Each item has durability (weapons/shields) and description.
- Adventure Log – quests (main, side, shrine).
- Album – photos taken with the Sheikah Slate camera rune.
- System – save, load, options, amiibo.
HUD Elements:
Essential Early Objectives
1. Get off the Great Plateau – Complete the four shrines and obtain the Paraglider (see First Hour walkthrough). This opens the entire world.
2. Head to Kakariko Village – After leaving the plateau, follow the main quest marker east. This village introduces the story, gives you the Sheikah Slate + Camera Rune, and starts the main quest "Seek Out Impa".
3. Visit Hateno Ancient Tech Lab – After meeting Impa, she'll direct you to Hateno Village. This unlocks the Sheikah Slate upgrades (camera, album, ancient tech). You'll also get the Paraglider fabric if you didn't get it earlier? No that's DLC. But you get the camera and ability to track shrines.
4. Complete the first Divine Beast (Vah Ruta) – Located in Lanayru region. This is the recommended first giant dungeon. But you can choose any order.
5. Upgrade Stamina and Hearts – Find Goddess Statues (e.g., in Temple of Time, Hateno Village, Great Plateau). Use 4 Spirit Orbs for one upgrade. A good balance: 2-3 stamina upgrades first for climbing, then hearts.
6. Learn to cook – Cooking is critical. Combine ingredients in a cooking pot (found near stables/villages). Experiment: raw meat+apples = dubious food; proper recipes like spicy peppers+meat = cold resistance. Always cook to maximize effects.
7. Use Runes – Magnesis (move metal), Bombs (break rocks, defeat enemies), Stasis (freeze objects/enemies temporarily), Cryonis (create ice pillars on water). Practice on the Great Plateau.
What to Do First vs. What to Avoid
Do:
Avoid:
Early Resource Priorities
1. Food & Elixirs:
- Apples (common, heal 1/2 heart).
- Hearty ingredients (e.g., Hearty Radish, Hearty Salmon) – cook alone for full recovery + temporary hearts.
- Spicy Peppers – for cold resistance.
- Endura ingredients – for stamina replenish (e.g., Endura Carrot, Staminoka Bass).
- Mushrooms (e.g., Stamella Shroom) – stamina recovery.
- Meat (Raw Meat, Raw Bird Drumstick) – cook for hearty meals.
2. Materials for Upgrades:
- Wood (trees) – needed for many side quests and cooking fires.
- Flint (break ore deposits with sledgehammer) – used with wood to create fire.
- Ore (Amber, Opal, Ruby, Sapphire) – sell for rupees or upgrade armor. Early game: sell Amber for quick cash.
- Monster parts (Bokoblin fangs, horns) – used in elixirs (combine with critter + monster part)
3. Rupees:
- Sell gemstones (Amber, Opal) to merchants. Don't sell rare ones (Ruby, Diamond) until you know armor upgrades.
- Complete side quests (e.g., "Find the Missing Sheikah Heirloom" in Hateno).
4. Weapons:
- Always carry a torch (from campfires) – useful for lighting torches, burning grass, melting ice.
- Korok Leaf – found in trees near water; lets you blow small rafts.
- Bows – early game find Boko Bows from enemies. Use them to hunt animals (deer, birds) for meat.
- Shields – Pot Lid is weak but can parry. Upgrade to Boko Shield from enemies.
5. Stamina vs. Hearts:
- First few upgrades: put 1-2 into stamina to climb more. Then hearts to survive battles.
Common Beginner Mistakes
Day-One Checklist
On your first day of playing (real-world time or first few hours), aim to complete:
1. ⌛ Exit Shrine of Resurrection – Sheikah Slate acquired.
2. ⌛ Meet the Old Man – Get introduction.
3. ⌛ Activate the Great Plateau Tower – Map revealed.
4. ⌛ Complete all four shrines – Get Spirit Orbs.
- Oman Au (Magnesis)
- Ja Baij (Bombs)
- Owa Daim (Stasis)
- Keh Namut (Cryonis)
5. ⌛ Obtain the Warm Doublet – Either by cooking Spicy Meat and Seafood Fry or by buying later.
6. ⌛ Return to Temple of Time – Get Paraglider from King Rhoam.
7. ⌛ Glide off the Great Plateau – Head southeast toward the Dueling Peaks stable.
8. ⌛ Visit the first stable – Register a horse (if you find one), and get a free Warm Doublet? No, that's later. But you can buy a stamina potion from Beedle.
9. ⌛ Reach Kakariko Village – Main quest marker. Talk to Impa to advance story and get camera rune hint.
10. ⌛ Craft one hearty meal – For safety.
11. ⌛ Save your game – Manual save after every major milestone.
Bonus optional: Mark nearby shrines from tower tops. Gather 5-10 apples and mushrooms. Cook everything you can to learn recipes.
Remember: The world is yours to explore. Don't be afraid to wander off the beaten path – that’s where the magic happens.
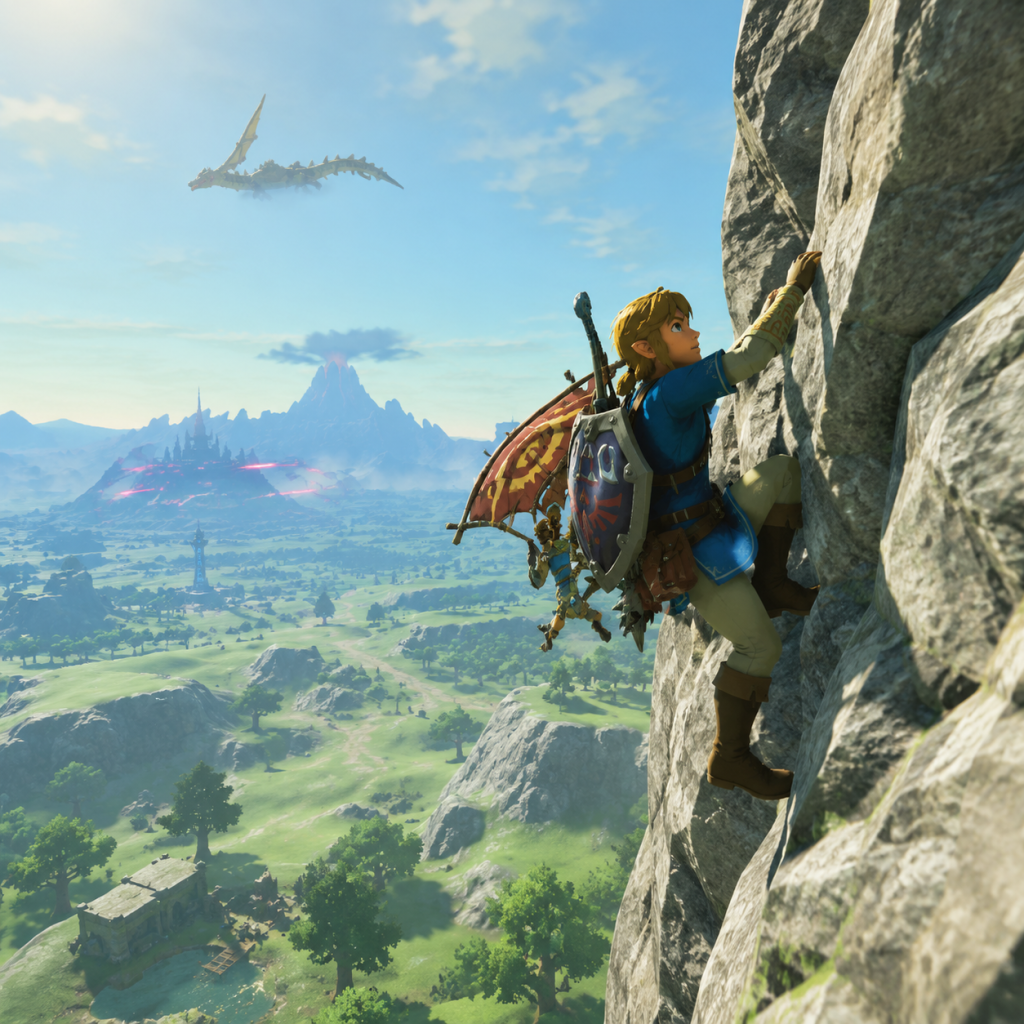
Core Gameplay
Core Gameplay Overview
The Legend of Zelda: Breath of the Wild revolutionizes the classic Zelda formula with an open-world design centered on freedom, discovery, and systemic interaction. The core gameplay loop is: Explore → Overcome challenges → Gain strength → Explore more dangerous areas. This loop is driven by four key systems: the physics engine, weather/climate, weapon durability, and the Sheikah Slate runes. Below is a tiered breakdown of how this loop evolves across player progression.
---
Early Game (Great Plateau to First Divine Beast)
Main Gameplay Loop
- Explore the Great Plateau (tutorial area) and then Hyrule Field, learning to climb, glide, and use runes.
- Overcome combat with basic weapons (tree branches, Boko clubs), solve simple shrines, and defeat weak enemies like Bokoblins and Chuchus.
- Gain Spirit Orbs (from shrines) to increase hearts or stamina, plus basic armor and weapons.
- Return to central areas (Dueling Peaks, Kakariko Village) to unlock the main quest: defeat Ganon by freeing the four Divine Beasts.
- Weapon Durability: Every weapon (including shields and bows) breaks after a set number of hits. Early game you’ll rely on enemy drops and chests. Example: a Boko Club breaks after ~6 hits.
- Runes (Magnesis, Cryonis, Stasis, Bomb): Learned on the Great Plateau. These are essential for puzzles and combat. Magnesis lifts metal objects to strike enemies; Stasis freezes enemies temporarily for follow-up attacks.
- Parrying & Perfect Dodge: Use shield parry (A button while shielding) just before an enemy strike to stun them. Backflip/side hop at the right moment triggers Flurry Rush (slow-motion counterattack).
- Stealth: Crouch (L3) to reduce noise; sneakstrike deals 8x damage. Early game this is crucial against stronger enemies like Blue Bokoblins.
- Weather: Hot areas require heat resistance (e.g., spicy elixir or flameproof armor). Cold areas require cold resistance (e.g., warm doublet or chilly elixir). Rain makes climbing slippery.
- Hearts & Stamina: Trade four Spirit Orbs at any Goddess Statue (e.g., Temple of Time on Great Plateau) for one heart container or one-fifth of a stamina wheel. Recommended: 5-6 hearts first, then stamina.
- Paraglider: Obtained from the Old Man after completing Great Plateau shrines. Essential for reaching distant areas.
- Tower Activation: Activate Sheikah Towers to reveal map regions. Early towers include Great Plateau, Dueling Peaks, and Hateno.
- Shrines: 120 total, each a mini-dungeon. Early game, focus on those near the Great Plateau and Dueling Peaks. Example: “Trial of Power” on Great Plateau teaches combat with a Guardian.
- Korok Seeds: Hidden throughout Hyrule; collect 45 to expand weapon/shield/bow inventory (via Hestu). Early game, aim for 2-3 inventory slots.
- Stable: Register horses at stables (e.g., Dueling Peaks Stable). Horses ease travel but cannot be summoned everywhere.
- Main Quest: “Free the Divine Beasts” – Speak to Impa in Kakariko Village, who gives you the first objective: destroy one of four Divine Beasts. Recommended first: Vah Ruta (Zora’s Domain) or Vah Medoh (Rito Village).
- Side Quests: Early simple ones include “The Hero’s Cache” (collect 100 rupees), “Find the Fairy Fountain” (expand armor upgrades).
- Shrine Quests: Some require exploration (e.g., “The Sheikah Stone Slate” on Great Plateau).
- Rupees: Earned from chests, selling gems (e.g., Amber, Opal), cooking meals, and completing quests. Early game, sell Amber (10 rupees each) for quick cash.
- Cooking: Combine ingredients in a cooking pot. Example: “Hearty Stew” (Raw Meat + Hyrule Herb + Rock Salt) restores 4 hearts. Elixirs: monster parts + critters (e.g., Bokoblin Horn + Hot-Footed Frog = Hasty Elixir).
- Armor Purchases: Hateno Village has basic armor sets (e.g., Hylian Set – 780 total rupees). Use for defense.
- No leveling system. Growth is entirely loot- and skill-based.
- Armor Upgrades: Great Fairy Fountains (e.g., one near Kakariko) allow upgrading armor with materials. Early upgrades require low-tier parts like Bokoblin Horns.
- Skill: Learning to parry Guardian beams or perfect dodge Lynels is a major component of growth.
- The final boss, Calamity Ganon, is accessible from the start if you head straight to Hyrule Castle, but extremely difficult.
- Early game goal: complete Great Plateau, get paraglider, unlock first Divine Beast (preferably Vah Ruta for Mipha’s Grace – self-revive).
- Explore new regions (Gerudo Desert, Hebra Mountains, Akkala) with upgraded stamina and gear.
- Overcome tougher enemies: Lizalfos, Moblins, Silver variants, and minor Guardians.
- Gain champion abilities (Mipha’s Grace, Daruk’s Protection, Revali’s Gale, Urbosa’s Fury), better weapons (Royal, Knight, Ancient), and upgraded armor.
- Return to towns to start new Divine Beast quests and gather resources.
- Elemental Arrows: Fire (ignites), Ice (freezes), Shock (stuns + drops weapon). Effective against specific enemies (e.g., Ice arrows vs Fire Lizalfos).
- Guardian Weapons: Obtain from defeated Guardians or chests. High damage but rare. Use Ancient Arrows (bought from Robbie for 200 rupees each) to one-shot Guardians.
- Lynels: Mini-bosses; mid game you can farm them for powerful weapons (Savage Lynel gear). Requires Flurry Rush mastery.
- Horse Combat: Use a one-handed sword on horseback for spin attacks; bow for mounted archery.
- Stamina Wheel: 2 wheels is recommended for climbing and paragliding. Trade Spirit Orbs until you have 2 full wheels (10 upgrades = 40 orbs).
- Hearts: 13+ hearts allows you to pull the Master Sword (from Korok Forest). The sword has 30 base damage and does not break, but runs out of energy and needs “recharging” for 10 minutes.
- Inventory Slots: Collect 45-90 Korok Seeds; unlock 7-10 weapon slots, 7-10 shield slots, 7-10 bow slots.
- Regional Towers: Each region has a central Sheikah Tower (e.g., Ridgeland, Lanayru, Hebra). Activate to reveal map.
- Divine Beast Quest: Each Beast has a pre-quest in the region. Example: For Vah Naboris (Gerudo), you must complete “The Thunder Plateau” quest to get the Gerudo Desert map.
- Faron Region: Great for farming hearty durians (full health recovery + extra hearts). Found near Lakeside Stable.
- Main Quest: Second & Third Divine Beasts. Recommended order: Vah Medoh (Revali’s Gale – vertical lift), Vah Rudania (Daruk’s Protection – auto-shield), Vah Naboris (Urbosa’s Fury – AoE lightning).
- Side Quests: Mid game memorable ones include “The Stolen Heirloom” (Hateno Village), “The Eye of the Sunken Colossus” (eventide-style island), and “The Three Giant Brothers” (Tabantha region).
- Shrine Quests: Many have riddles (e.g., “The Spring of Power” requires offering a specific material).
- Gems: Sell Rubies (210 rupees), Sapphires (260), Topazes (180), Diamonds (500) for large sums. But Diamonds are also needed to repair Champion weapons at Tarrey Town (post-Divine Beast).
- Food Sales: Meals with 5 ingredients sell for high prices (e.g., Gourmet Meat skewers sell for 300+ rupees).
- Ancient Gear: Collect Ancient Screws, Gears, and Shafts; sell to Robbie at the Akkala Ancient Tech Lab for rupees or use to buy Ancient arrows and upgrade Ancient Armor.
- Champion Abilities: Revali’s Gale (updraft) and Urbosa’s Fury (AoE damage) are particularly powerful for combat and exploration.
- Armor Sets: Obtain Snowquill Set (Rito Village) for cold resistance and Rubber Set (Faron) for shock resistance. Upgrade at Great Fairies for set bonuses (e.g., Unfreezable, Shockproof).
- Master Sword: Obtain by requiring 13 hearts (or temporary boost from Hearty foods). The sword’s glowing form does 60 damage near Guardians or Ganon.
- Hyrule Castle becomes partially accessible for loot; major enemies inside include Silver Lynels and Guardian Stalkers.
- Defeating all four Divine Beasts halves Calamity Ganon’s health and disables his opening attack.
- Preparing for the endgame: collecting Ancient armor (high defense + guardian resistance) or Barbarian armor (attack up).
- Explore every corner, including Hyrule Castle interior, the Lost Woods, and all overworld bosses (Stone Talus, Hinox, Molduga).
- Overcome Gold enemies (Master Mode) or high-tier Silver/Lynels.
- Gain best gear: Ancient Bow (70 durability, long range), Hylian Shield (800 defense, highest shield), all armor upgrades to max (4 stars).
- Return to central areas to complete remaining side quests, find all shrines, and collect Korok seeds.
- Ancient Proficiency: Ancient Armor set bonus + Ancient weapons/bows = 80% damage boost vs Guardians. Effective for farming.
- Barbarian Legacy: Barbarian armor (Faron, Akkala, Hebra labyrinths) gives Attack Up +3 set bonus, great for any weapon.
- Headshots with Bows: Critical hits stun most enemies. Use multishot bows (Lynel Bow, Great Eagle Bow) for maximum damage.
- Elemental Combos: Freeze + Shatter with a two-handed weapon deals triple damage. Shock + metal weapons in rain creates AoE stun.
- All 120 Shrines: Completing all shrines yields the Champion’s Tunic (automatically reveals enemy health bars) and the final reward: a fully upgraded Sheikah Slate. This also gives max hearts (30) if you trade all orbs for hearts (stamina can be maxed via gear swapping).
- All 900 Korok Seeds: Max inventory slots: 13 weapons, 13 shields, 13 bows. Also gives a gold poop (useless but achievement).
- Master Sword Upgraded: After completing “The Hero of Time” DLC, you can upgrade the Master Sword to 60 base damage always.
- Hyrule Castle: Full exploration yields the Hylian Shield (locked chest in the lockup), Royal Guard weapons, and the Bow of Light (only in final battle). Beware of the constant Guardian patrols; use Stasis+ to freeze them.
- DLC Content: “The Champions’ Ballad” adds new shrines, an extra Divine Beast (Master Cycle Zero), and upgraded Champion Abilities (shorter cooldowns).
- Eventide Island: A trial where you lose all gear and must recover orbs. Reward: a Gold Rupee (300 rupees) and a Korok Seed.
- Main Quest: Destroy Ganon. Once all Divine Beasts are freed, Impa gives the final main quest: defeat Calamity Ganon at Hyrule Castle.
- Side Quests: Late game includes “The Hero’s Sword” (proves you have Master Sword), “The Dragon’s Gift” (collect all three dragon parts), and “The Legend of the Great Fairy” (upgrade all Great Faries to max).
- Shrine Quests: The final shrine quest “The Cave of Ordeals” (not in base game) is not present; instead, DLC offers the “One-Hit Obliterator” trial.
- Maximum Rupees: Sell high-value meals (e.g., 5 Hearty Durians cooked = “Hearty Steamed Fish” sells for 480 rupees). Use a bow of light farming method (not efficient). Alternatively, farm Talus for gems (sell diamonds).
- Material Farming: Star fragments (used for upgrades) can be farmed by waiting at a bonfire until 9 PM and scanning the sky. They fall randomly.
- Armor Upgrades: Final upgrade tier requires rare materials: Lynel Hoof, Lynel Guts, Giant Ancient Cores, and Star Fragments.
- Max Hearts: 30 hearts (requires 120 Spirit Orbs).
- Max Stamina: 3 wheels (requires 10 upgrades = 40 orbs; if you already have 30 hearts, you need to respec with the Horned Statue in Hateno).
- All Armor Sets Maxed: Upgrade every set to 4 stars for high defense (max 88 with Ancient Armor). Set bonuses like “Unfreezable” or “Heat Resistance” become permanent.
- Champion Abilities Upgraded (DLC): Cooldowns reduced from 12-18 minutes to 6-9 minutes. Very helpful in endgame.
- The final boss, Calamity Ganon, has two phases: first a giant pig form (attack its weak point – the center eye), then a beast form. Use a bow with bomb arrows or Ancient Arrows for extra damage.
- Dark Beast Ganon is a second phase where you shoot light arrows at its forehead while riding a horse (or using Revali’s Gale).
- Post-credit: after beating Ganon, you return to your last save with a star on your file. No post-game world changes except added “Defeated Ganon” count. DLC exclusive: “The Champions’ Ballad” final boss is Monk Maz Koshia, more challenging.
- Explore with maximum freedom: you have all abilities, best gear, and know the map.
- Overcome self-imposed challenges: speedruns, no death runs, low% runs.
- Gain only cosmetic rewards (e.g., Kilton’s monster masks, DLC rewards like the Travel Medallion).
- Master Mode (DLC): Enemies heal over time, regenerate health, and there are floating platforms with stronger enemies. Gold variants appear (Gold Bokoblin = highest tier).
- Trial of the Sword (DLC): A 3-floor combat challenge where you start naked and must survive waves of enemies. Rewards permanently upgrade the Master Sword to 60 base damage.
- Horse Taming: The Royal White Horse and Giant Horse (Ganon’s horse) can be tamed for ultimate mounts. The Giant Horse can’t be nudged and has max strength.
- No further growth: Max stats already achieved. The only remaining goals are completionist: all Korok seeds, all armor upgrades, all monster medals (Kilino’s medals for killing every type of overworld boss).
- Monster Medals: Defeat every Talus (40 total), Hinox (40 total), Molduga (4 total), and Stone Talus (40? check) to get medals from Kilton at the Fang and Bone (Skull Lake).
- DLC Side Quests: Complete all EX side quests (e.g., “EX The Ancient Bridle” for horse gear that teleports your horse).
- Completing the Map: All 15 towers, all 120 shrines, all 900 Korok seeds, all stable locations, all fairy fountains, all labyrinth chests.
- Hyrule Compendium: Buy from Robbie at Hateno Ancient Tech Lab (50 rupees each) or take photos with camera rune. Filling the compendium yields a secret prize (a picture of Link with a Sheikah Slate frame).
- Eventide Replay: You can return to Eventide Island anytime, but it’s no longer a trial.
- No new main quests. After defeating Ganon, the only persistent goal is completing all side quests (including shrine quests and DLC quests).
- DLC Final Boss: Monk Maz Koshia is the true endgame challenge. Use Urbosa’s Fury and Daruk’s Protection to survive his phases.
- The Master Cycle Zero: DLC reward that lets you summon a motorcycle (functions like a horse but can climb short cliffs and use fuel).
- Money becomes trivial: You’ll have 999,999 rupees by selling excess gems. The only meaningful purchases are Ancient Arrows for farming Guardians or Lynels.
- Material Excess: Use duping glitches (no longer patched in version 1.5.0? check) for infinite materials, but not necessary.
- Fully min-maxed: Max damage possible: Barbarian armor (Attack Up +3) + Level 3 attack food (Mighty Bananas +4) + Ancient Bow with Ancient Arrows = huge output.
- Tier 4 Gear: All armor upgraded to 4 stars (max 88 defense per piece). Plus Hylian Shield (800 defense, unbreakable with repair at Tarrey Town).
- Max Inventory: All 13 slots for weapons, shields, bows. Carrying duplicates of best items (e.g., 5 Savage Lynel Swords, 3 Royal Guard Bows, etc.).
- No New Game+. You restart from the same save with all items and map data.
- Speedrun Tools: Players can practice glitches like wind bombs (launch Link with bomb + bow) for faster travel.
- Modded Content (PC emulator only): Not officially supported. On Switch/Wii U, you play as-is.
- Hard Mode Alternative: Start a new file in Master Mode (DLC) for a fresh challenge with regenerating enemies and a different first boss (Silver Lynel on Great Plateau).
Combat & Interaction Systems
Progression
Exploration
Quests & Missions
Economy
Character/Build Growth
Endgame Structure (Early Game Perspective)
---
Mid Game (After First Divine Beast to Third Divine Beast)
Main Gameplay Loop
Combat & Interaction Systems
Progression
Exploration
Quests & Missions
Economy
Character/Build Growth
Endgame Structure (Mid Game Perspective)
---
Late Game (After All Four Divine Beasts to Final Boss Prep)
Main Gameplay Loop
Combat & Interaction Systems
Progression
Exploration
Quests & Missions
Economy
Character/Build Growth
Endgame Structure (Late Game Perspective)
---
Endgame (Post-Ganon / 100% Completion / Master Mode)
Main Gameplay Loop
Combat & Interaction Systems
Progression
Exploration
Quests & Missions
Economy
Character/Build Growth
Endgame Structure (Still a sandbox)
---
Summary Table: Core Systems by Tier
| System | Early Game (1-10 hrs) | Mid Game (10-30 hrs) | Late Game (30-80 hrs) | Endgame (80+ hrs) |
|---|---|---|---|---|
| Main Loop | Explore Plateau, solve shrines, collect weapons | Explore regions, free Divine Beasts, complete regional quests | Fully explore map, farm materials, upgrade gear | 100% completion, self-challenges, DLC trials |
| Combat | Boko clubs, parry basics, sneak strikes | Elemental arrows, Flurry Rush, Lynel hunting | Ancient weapons, multishot bows, Barbarian set | Trial of the Sword, Master Mode gold enemies |
| Progression | 5-8 hearts, 1 stamina wheel, paraglider | 13 hearts + Master Sword, 2+ stamina, Champion abilities | Max hearts/stamina, all armor 4-star, all shrines | Max inventory, all DLC rewards, all medals |
| Exploration | Great Plateau, Dueling Peaks, Kakariko | Regional towers, Divine Beast dungeons, Eventide | Hyrule Castle, Lost Woods, All labyrinths | 100% map, sky/underwater (none), DLC areas |
| Quests | Tutorial shrines, 1 Divine Beast main quest | 2-3 Divine Beasts, regional side quests (20-30) | Final main quest: Destroy Ganon, all side quests (90+) | All shrine quests, DLC EX quests |
| Economy | Sell Amber, basic meals, buy Hylian set | Sell gems, cook gourmet meals, buy Ancient arrows | Sell top-tier meals, farm star fragments | Rupees maxed, only buy Ancient Arrows |
| Build | No real build, just hearts vs stamina | Champion abilities define playstyle | Specialized armor sets (Ancient, Barbarian, Stealth) | Full min-max with food stacking |
| Endgame | Very early, not recommended | Hyrule Castle prep | Beat Calamity Ganon, start DLC | Post-Ganon completion, Master Mode restart |
Final Tips for Each Tier
- Early: Cook “Hearty Steamed Mushroom” (Hearty Radish + mushroom) for full recovery + extra hearts. Avoid combat until you have 5+ hearts.
- Mid: Use Revali’s Gale to skip rain climbing. Upgrade Sheikah Sensor (Hateno Lab) to find bugs or fish for elixirs.
- Late: Upgrade Champion’s Tunic (remember to buy it from Impa) to see enemy health.
- Endgame: If you own the DLC, complete The Champions’ Ballad first for the Master Cycle Zero – it makes travel very fast.
This guide covers all core gameplay aspects of Breath of the Wild across all progression tiers. Adapt your playstyle to the tier you are in, and Hyrule will feel fresh for hundreds of hours.
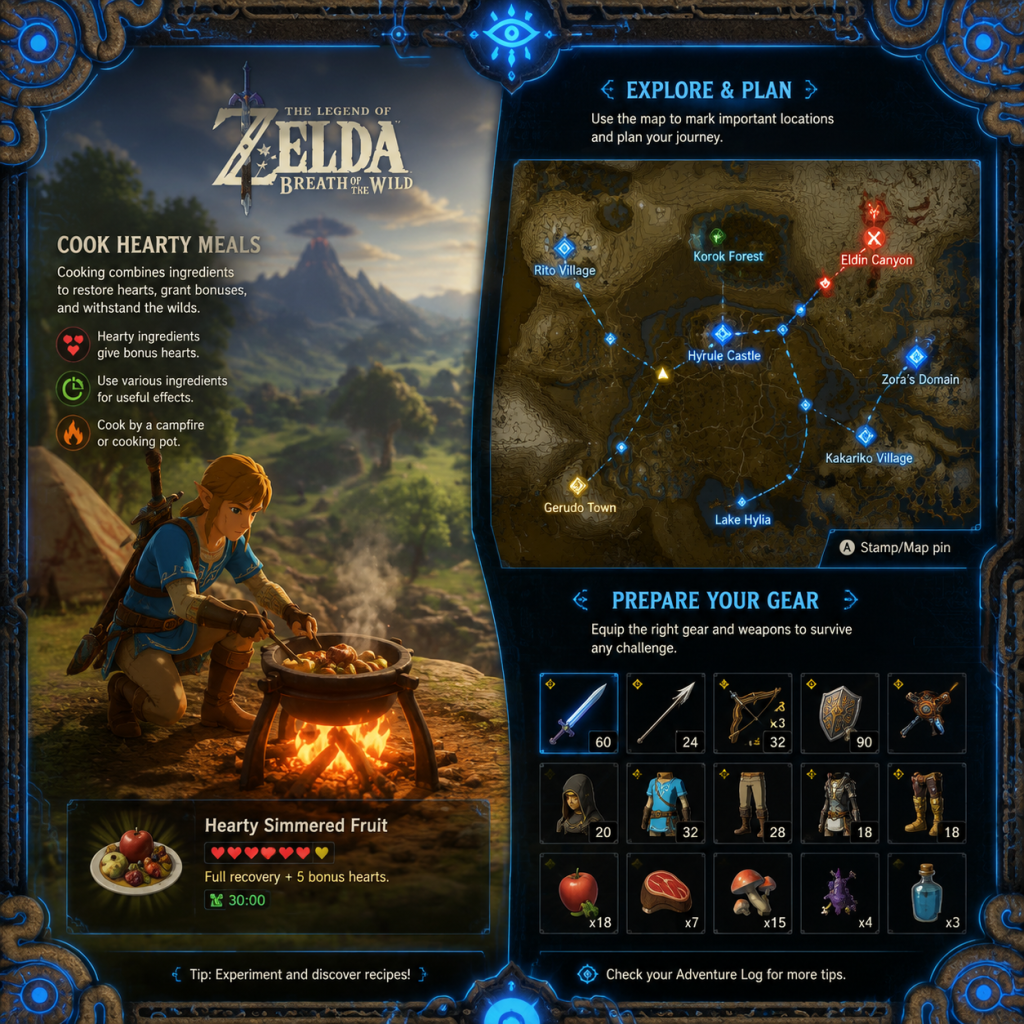
Game Tips
Game Tips: The Legend of Zelda: Breath of the Wild\n\nThis comprehensive tips guide covers everything from your first steps on the Great Plateau to endgame optimization. Each tip includes the what, why, and when to use it, grouped by category.\n\n---\n\n### Beginner Tips\n\n#### 1. Pick Up EVERYTHING – Especially Korok Seeds and Items\n- Explanation: Every collectible in the world has a use. Korok Seeds are found by solving small puzzles (e.g., lifting a rock, chasing a light, completing a circle of stones). They can be traded to Hestu for expanding your weapon, bow, and shield inventory.\n- Why it works: More inventory means you can carry more durability-heavy weapons, reducing the need to constantly swap or break items. Early expansion is critical.\n- When: From the moment you leave the Great Plateau, always be on the lookout. Hestu first appears near Kakariko Village, but you can also find him at a few stables after the first meeting.\n\n#### 2. Cook Health and Stamina Recovery Meals Immediately\n- Explanation: Combine any edible ingredient (apple, mushroom, herbs) with a piece of meat or fish to create a meal. Using a cooking pot (found at stables, towns, and some camps) allows you to combine up to five ingredients.\n- Why it works: Raw ingredients heal very little. Cooked meals provide massive HP recovery and temporary buffs (e.g., extra hearts, stamina, attack up, defense up). Always cook before heading into dangerous areas.\n- When: Use as soon as you get a cooking pot and ingredients. Prioritize Hearty ingredients (hearty radish, hearty bass) for full recovery + extra yellow hearts.\n\n#### 3. Talk to Everyone – Especially the Old Man on the Great Plateau\n- Explanation: NPCs give crucial hints, side quests, and lore. The Old Man (who later reveals himself as King Rhoam) teaches you about cooking, paraglider, and the four shrines that unlock your exit.\n- Why it works: Many tips in the game are not in the pause menu. For example, he tells you to cook a specific meal (spicy meat and seafood fry) to get the warm doublet for cold resistance.\n- When: Do this immediately on the Great Plateau. In the open world, always talk to travelers and stable owners for rumors of shrines and side quests.\n\n#### 4. Mark the Map Liberally with Stamps\n- Explanation: The Sheikah Slate allows you to place stamps (star, skull, leaf, etc.) on the map. Use them to mark locations of interest: Lynels, dragon spawn points, treasure chests, cooking pots, ore deposits, and Korok puzzles you can't solve yet.\n- Why it works: The world is huge and easy to forget where a useful spot is. Stamps reduce backtracking and help plan routes.\n- When: Start on the Great Plateau. Whenever you see something you want to return to, stamp it. Later, you can also use the Hero's Path mode (DLC) to see your movement history.\n\n---\n\n### Combat Tips\n\n#### 5. Master Perfect Dodge and Flurry Rush\n- Explanation: Press ZR (hold) to lock onto an enemy, then backflip (backward on left stick + X) when the enemy attacks horizontally, or side hop (left/right + X) for vertical attacks. Successful timing triggers a slow-motion window where you can unleash a flurry of strikes with Y.\n- Why it works: Flurry Rush deals massive damage and fully stops the enemy's attack chain. It also makes you invulnerable during the animation. Against fast enemies (Lizalfos, Lynels), it's the safest damage option.\n- When: Practice on Bokoblins and Moblin first. Use against any enemy with telegraphed attacks. Perfect for Lynels (their charge and slam attacks).\n\n#### 6. Parry with Your Shield – For Instant Kills\n- Explanation: Hold ZR to raise shield, then press A just before an enemy's melee or projectile hits. If timed correctly, you deflect the attack, stunning the enemy and opening them to a critical hit (press Y while they are stunned). Guardians' laser beams can be reflected back to kill them instantly.\n- Why it works: Parrying costs no durability on the shield, and against Guardians it's the only reliable early-game method to destroy them (one perfect parry sends the beam back, killing them instantly).\n- When: Use against Guardians, Hinoxes when they throw rocks, and any one-handed sword enemy. For beginners, practice on Bokoblins in the Great Plateau.\n\n#### 7. Utilize Elemental Weaknesses\n- Explanation: Elements in the game (Fire, Ice, Lightning) cause extra effects:\n - Fire: Melts ice, keeps you warm, deals burn damage over time.\n - Ice: Freezes enemies, shattering them on hit or allowing a one-hit kill.\n - Lightning: Stuns enemies; metal weapons attract lightning during storms (can be used to your advantage by dropping metal weapons near enemies).\n - Shock: Disarms enemies (they drop weapon) and stuns.\n- Why it works: Freezing an enemy and then hitting with a strong weapon (e.g., claymore) instantly shatters them for massive damage. Shock weapons make fights trivial because enemies fumble. Lightning during storms can clear whole camps.\n- When: Use elemental weapons based on environment. Fire against ice enemies (like ice Lizalfos), ice against fire enemies. Lightning against any group of enemies.\n\n#### 8. Stealth Attacks Multiply Damage\n- Explanation: Sneak up behind an unaware enemy and press Y for a stealth strike. This deals 8x damage (or instant kill for smaller enemies). Use Sheikah armor set (upgradeable) to increase stealth.\n- Why it works: One stealth kill removes a threat without alerting others. It saves weapon durability and time.\n- When: Always approach camps from above or the side. Use at night when monsters sleep. Works great on Guardian Stalkers? No, they detect via sight. But on all humanoid monsters.\n\n#### 9. Use Bullet Time with Bows\n- Explanation: While in midair (from a jump, gliding, or climbing), draw your bow by holding ZR and you'll enter slow-motion (Bullet Time). This slows time drastically, allowing precise shots.\n- Why it works: Easy headshots on moving enemies, or hitting distant targets. Also, while paragliding, you can rain arrows from above safely.\n- When: Use when jumping off a cliff, diving off a horse, or leaping from a wall. Best combo: use Revali's Gale (Champion ability) to get airborne, then Bullet Time for multiple shots.\n\n#### 10. Shield Surfing for Mobility and Combat\n- Explanation: Hold ZR to raise shield, then press A while in a run to surf down slopes. This conserves stamina and increases speed. You can also shield surf into enemies to knock them down.\n- Why it works: Fast travel downhill without stamina drain. Can be used to escape combat or set up attacks.\n- When: Use on any grassy or rocky slope. Great for crossing Hyrule Field quickly. Also, surfing on sand with the Sand Seal shield (DLC) is essential in the Gerudo region.\n\n---\n\n### Exploration Tips\n\n#### 11. Always Have a Paraglider\n- Explanation: You cannot leave the Great Plateau without the Paraglider (given by the Old Man after completing the four shrines). It is the most essential tool for exploration.\n- Why it works: Enables gliding over gaps, descending safely from high places, and using updrafts to gain height.\n- When: Use whenever you need to cross ravines, descend from towers, or escape combat. Upgrade stamina early to maximize glide distance.\n\n#### 12. Climb in the Rain – Use Anti-Slip Potions or Gear\n- Explanation: Rain makes surfaces slippery, causing you to slide. Wear the full Climbing Gear set (upgrade bonus: climb speed) or drink a Hasty Sauce (speed boost) to mitigate. But rain still reduces grip.\n- Why it works: Some areas (e.g., Zora's Domain approach) force you to climb in rain. Using the set bonus reduces slip frequency.\n- When: Always keep climbing gear upgraded. If you lack it, use a Rain Dance (no, not that one) – just wait under a tree or build a fire to pass time until the rain stops.\n\n#### 13. Use the Sheikah Sensor+ to Find Shrines\n- Explanation: After completing the Hateno Ancient Tech Lab upgrade, you can activate the Sensor+ to locate shrines (set to "Shrine"). The slate will beep and the controller vibrates as you get closer.\n- Why it works: Many shrines are hidden underground or behind breakable walls. The sensor guides you exactly.\n- When: Unlock as soon as you reach Hateno Village (after leaving Great Plateau). Essential for completionists.\n\n#### 14. Paragliding + Updrafts = Infinite Glide\n- Explanation: Enemies, torches, and certain plants (e.g., Fireproof lizards) create updrafts. You can also create your own by lighting a campfire or using a flame sword. Glide into the wind to gain altitude.\n- Why it works: Extends travel distance without touching the ground. In Hebra and Death Mountain, updrafts are abundant.\n- When: Use Revali's Gale (Champion ability) for a quick updraft. Also, when exploring mountains, look for smoke columns.\n\n#### 15. Fast Travel via Shrines and Towers\n- Explanation: Every activated shrine and tower becomes a fast travel point. Activate them early to build a network.\n- Why it works: Saves immense travel time. Even if you cannot complete a shrine, just touch the pedestal to register the teleport point.\n- When: As soon as you see a new tower or shrine, run to it. Climb the Sheikah Towers for map data and points.\n\n#### 16. Use the Map to Identify Landmarks\n- Explanation: The in-game map shows terrain, towns, stables, and towers. Zoom in to see trees and small details. Use the scope (hold R) to mark visible shrines and points of interest.\n- Why it works: Better navigation. You can spot shrines from far away by looking for orange glow.\n- When: Any time you're on a high point (tower, mountain). Extremely useful for planning routes.\n\n---\n\n### Resource Management & Economy\n\n#### 17. Sell Gems Only When Necessary – They Are Needed for Upgrades\n- Explanation: Gems (ruby, sapphire, diamond, topaz, amber, opal, luminous stone) are used to upgrade armor at Great Fairy Fountains. Each fairy needs specific gems.\n- Why it works: Spending gems on rupees early may hinder your ability to max out armor. Instead, sell cooked meals and monster parts for rupees, as they have less upgrade value.\n- When: Save gems until you have maxed all armor sets. The Diamond Circlet requires diamonds, so keep at least 10 of each.\n\n#### 18. Cook Five Different Ingredients for Max Buff Duration\n- Explanation: Cooking with five distinct ingredients of the same effect type (e.g., five ironshrooms for defense up) yields a dish with the highest possible duration (30 minutes) and strong effect level. Mixing different effects cancels them out.\n- Why it works: Longer buffs mean you don't need to eat repeatedly during exploration. Most importantly, you can stack a food buff with armor bonuses (but not double food buffs).\n- When: Plan ahead: cook a 30-minute defense meal before a tough boss, or an attack meal before farming Lynels.\n\n#### 19. Monster Parts Are More Valuable Than You Think\n- Explanation: Bokoblin fangs, Lizalfos tails, Moblin guts, etc., can be sold for rupees or used in elixirs. Also, the Kilton shop in Skull Lake buys many monster parts at high prices.\n- Why it works: Monster parts are abundant. Selling extra parts (especially from Hinoxes and Lynels) yields thousands of rupees.\n- When: Keep 10-20 of each for armor upgrades (e.g., stealth armor requires Bokoblin parts). Sell the rest to Kilton or Beedle.\n\n#### 20. Ore Deposits Are Random Respawns – Mark Them\n- Explanation: Luminous stone deposits (blue ore) and other ore nodes respawn after a Blood Moon (every ~2 hours of play). Mark them on your map to farm regularly.\n- Why it works: You need luminous stones for the Zora set and diamonds for repairs. Farming a consistent route yields steady income.\n- When: After each Blood Moon, revisit your marked ore spots. Use a sword with high durability (e.g., Royal Broadsword) to break them.\n\n#### 21. Use the Master Sword for Mining and Tree Cutting\n- Explanation: The Master Sword never breaks (it only runs out of energy and recharges after 10 minutes). You can use it to mine ore, cut trees, and break crates without worrying about durability.\n- Why it works: Saves your other weapons for combat. Also, the sword glows near Guardians and Malice, tripling its damage.\n- When: After acquiring the Master Sword (13 hearts required). Immediately equip it as your main tool.\n\n---\n\n### Cooking & Elixir Guide\n\n#### 22. The Five-Cardinal Cooking Principle\n- Explanation: Every cooking effect (hearty, energizing, tough, etc.) is determined by the first ingredient's primary effect. Adding multiple of the same effect strengthens it. There are five effect tiers: none, tiny, small, medium, large, plus duration.\n- Why it works: To get maximum effect, use 4-5 of the same ingredient with the desired effect. For example, 5 mighty bananas = level 3 attack up for 10 minutes. Add a dragon part (horn, claw, scale) or star fragment to extend duration to 30 minutes.\n- When: Always use dragon parts for long-lasting buffs before big fights. Farm Farosh (at Lake Hylia) for easy horn shards.\n\n#### 23. Hearty, Enduring, and Energizing Meals Are Instant Full Heals\n- Explanation: Ingredients with "Hearty" (e.g., hearty radish) or "Enduring" (e.g., enduring carrot) in the name produce a meal that fully restores HP and adds temporary yellow hearts/endurance. Energizing meals restore some stamina but not full.\n- Why it works: You don't need to carry many healing items. One hearty meal can bring you from 1 heart to full 20 hearts plus 5 yellow ones. This saves inventory space.\n- When: Keep a stack of hearty meals for emergency healing. They are especially helpful against Lynels and bosses.\n\n#### 24. Elixirs Are for Buffs That Don't Interfere with Armor\n- Explanation: Elixirs (made with monster parts + critters) offer buffs just like food, but they are separate from meals – you cannot have both a food buff and an elixir buff active simultaneously. The most recent one overrides the previous.\n- Why it works: Elixirs are often cheaper to make than meals if you have monster parts. They also provide different effects like heat resistance (fireproof lizard) or cold resistance (warm darner).\n- When: Use elixirs for environmental resistance (heat, cold, electricity) because you might need that armor slot for other bonuses. Also, use them for speed or stealth boosts.\n\n---\n\n### Upgrades & Progression\n\n#### 25. Prioritize Stamina Over Hearts Initially\n- Explanation: You can exchange Spirit Orbs (from shrines) for a heart or a stamina vessel at the Goddess Statues. Focus on stamina first (up to two full wheels) because climbing, gliding, and swimming rely on stamina. Hearts can be supplemented with food.\n- Why it works: You can always cook hearty meals for temporary hearts, but you cannot circumvent stamina limits. A full stamina wheel enables you to climb longer mountains and glide across large gaps.\n- When: Get 10-13 hearts first to pull the Master Sword (13 needed), then switch to stamina. For intermediate players, aim for full stamina before max hearts.\n\n#### 26. Upgrade Armor at Great Fairy Fountains\n- Explanation: There are four Great Fairy Fountains scattered across Hyrule (outskirts of Kakariko, behind Dueling Peaks stable, near Tabantha Bridge stable, and in the desert above the Great Fairy's fountain). Each requires rupees to unlock. Once unlocked, you can upgrade armor sets using materials.\n- Why it works: Upgraded armor grants set bonuses (e.g., full Climbing Gear gives climb speed x2, full Sheikah gives stealth). Higher defense reduces damage taken drastically.\n- When: Unlock all four fountains as soon as possible. Upgrade the Soldier's Armor (bought in Hateno) for early defense, and the Ancient Armor (from Akkala Tech Lab) later for Guardian resistance.\n\n#### 27. Complete All 120 Shrines for Full Hearts + Stamina\n- Explanation: There are 120 shrines in the base game (plus 16 in DLC). Each gives one Spirit Orb. You need 4 orbs for one heart/stamina upgrade. With 120 orbs, you can max out both hearts and stamina (30 hearts, 3 full stamina wheels) – actually you can trade orbs for hearts/stamina up to max, but you cannot have both max due to limited orbs. Plan accordingly.\n- Why it works: Max hearts make you nearly invincible; max stamina makes climbing/gliding effortless. Endgame content like the Trial of the Sword becomes manageable.\n- When: Make a list of shrine locations and complete them in any order. Use the Sensor+ to find missed ones.\n\n---\n\n### Economy & Rupee Farming\n\n#### 28. Snowball Bowling in Hebra\n- Explanation: Near the Hebra Mountains, there is a mini-game (Pondo's Snowball Bowling). You roll a snowball down a hill to knock down pins. Hitting all ten gives 300 rupees each time. It's the fastest rupee farm in the game.\n- Why it works: After a few attempts, you can consistently hit all pins. 300 rupees per minute or more. It's mind-numbing but efficient.\n- When: Use when you need a lump sum (e.g., for Great Fairy upgrades). Requires no combat or resources.\n\n#### 29. Hunting in the Great Plateau for Meat\n- Explanation: The Great Plateau has abundant wildlife (boar, deer, birds). Hunt them with arrows or bombs, cook the meat (plain or with herbs) and sell it. Each prime meat sells for 30-60 rupees cooked.\n- Why it works: Easy, safe, and renewable. Good for early game.\n- When: On the Great Plateau before leaving. Also revisit after Blood Moons.\n\n#### 30. Sell Rare Gems Only After Maxing Armor\n- Explanation: Rubies, sapphires, and diamonds are needed for specific armor upgrades (e.g., Ruby Circlet requires 2 rubies per upgrade, Diamond Circlet requires diamonds). Selling them early is a mistake.\n- Why it works: You might need 15 of each gem to fully upgrade the jewelry sets. Farm them instead via ore nodes and Talus fights.\n- When: Once you have 20+ of a gem, consider selling surplus for 500+ rupees each.\n\n---\n\n### Advanced Techniques & Optimizations\n\n#### 31. Wind Bomb (Flying Glitch) for Fast Travel\n- Explanation: This is an advanced exploit: while gliding, press B (cancel paraglider) and immediately throw a round bomb, then detonate it behind you. The explosion propels you forward at high speed. Repeat to cross large distances.\n- Why it works: Much faster than running or horse riding. Requires precise timing and stamina management.\n- When: Use only after mastering basic movement. Good for speedrunning or reaching far locations quickly.\n\n#### 32. Shield Surf on Sand in Gerudo Desert\n- Explanation: In the desert, you can use a Sand Seal (the creature) to surf on sand. You need to shoot one with an arrow, then mount it and ride to surf across dunes. Alternatively, use the Sand Seal Shield (DLC) to surf without a seal.\n- Why it works: Extremely fast travel in desert where walking is slow.\n- When: Essential for completing the Gerudo region. Use to reach the Yiga Hideout and Vah Naboris.\n\n#### 33. Use Bomb Arrows in Rain – They Are Always Lit\n- Explanation: In rain, fire arrows and bomb arrows become useless because they are extinguished. But bomb arrows still detonate on impact because they are mechanical, not fire-based. Rain also boosts electric attacks (metal weapons attract lightning).\n- Why it works: Bomb arrows can be used in rain for AoE damage, while other arrows fail.\n- When: During thunderstorms or rain, switch to bomb arrows or electric arrows.\n\n#### 34. The Thunder Helm – Immunity to Lightning\n- Explanation: Complete the Gerudo main questline to obtain the Thunder Helm (as Riju's heirloom). It makes you immune to lightning strikes. You must earn it by completing all 7 side quests in Gerudo Town.\n- Why it works: Lightning can instantly kill you if you're holding metal weapons. With this helm, you can ignore storms entirely. Also helps in the Yiga Hideout.\n- When: Get it as soon as you reach Gerudo Town. Essential for the Divine Beast Vah Naboris fight.\n\n#### 35. Use the Bow of Light vs Ganon\n- Explanation: During the final boss fight against Calamity Ganon and Dark Beast Ganon, you receive the Bow of Light (infinite arrows, special light arrows). Use it exclusively for the final phases.\n- Why it works: It deals massive damage and is the only weapon that can hit Dark Beast Ganon's weak points effectively.\n- When: Save your strongest weapons for the earlier phases; rely on the Bow of Light for the dark beast.\n\n---\n\n### Divine Beasts & Main Quests\n\n#### 36. Complete the Four Divine Beasts Before Facing Ganon\n- Explanation: Each Divine Beast (Vah Ruta, Vah Rudania, Vah Medoh, Vah Naboris) gives you a Champion Ability (Revali's Gale, Mipha's Grace, Daruk's Protection, Urbosa's Fury). They also weaken Calamity Ganon by reducing his HP.\n- Why it works: Without them, Ganon has 8000 HP; with all four, he has 2000 HP (in the first phase). The abilities are game-changing: Mipha's Grace revives you from death (once per 20 min), Revali's Gale lifts you into the air, Daruk's Protection blocks attacks, Urbosa's Fury stuns enemies.\n- When: Tackle them in any order. Recommended order: Vah Ruta (water blight) → Vah Rudania (fireblight) → Vah Medoh (windblight) → Vah Naboris (thunderblight). Thunderblight is hardest, so leave it last.\n\n#### 37. Champion's Ballad (DLC) Gives Extra Abilities\n- Explanation: The DLC adds a new questline that upgrades each Champion Ability to a short cooldown version (approx. 3-4 minutes instead of 9-24 minutes). Also provides the Master Cycle Zero (a motorcycle).\n- Why it works: Quick cooldowns allow spamming abilities. The motorcycle is faster than horses and can drive on any terrain.\n- When: Do this after completing all four Divine Beasts (mid to late game).\n\n---\n\n### Miscellaneous Pro Tips\n\n- Sneakstrike Chains: If you backflip after a sneakstrike and stay hidden, enemies will investigate the sound, allowing consecutive sneakstrikes for unlimited damage.\n- Throw Weapons for Quick Finishes: Press R to throw a weapon; this deals double damage and is useful when weapon durability is low or to finish off an enemy.\n- Use Magnesis to Identify Treasure Chests: Metal chests are common underwater or underground. Magnesis (Sheikah module) highlights them, and you can lift them to open or grab.\n- Stasis to Stop Enemies Temporarily: Stasis+ upgrade allows you to freeze enemies for a few seconds, giving free hits. Great for Lynels.\n- Bombs Break Ore and Crates Without Weapon Durability: Use remote bombs to break ore deposits and wooden crates. Saves weapon wear.\n- Fairy Fountains Are Not Just for Upgrades: They also restore your health to full when you pray at them (plus they offer a free heal before battle).\n- Lynels Are Terrifying But Farmable: Best strategy: upgrade Stasis to +, freeze Lynel, shoot it in the face with an arrow (staggers), mount it and hit with a strong weapon (no durability loss while mounted). Repeat.\n- Elephant Statues in Zora's Domain: You can offer luminous stones to get Mipha's grace upgrade? No, that's not a thing. But you can trade 10 luminous stones for a diamond by Zora's domain? Actually, a Zora near the symbol offers a diamond trade for 10 luminous stones. Use this to get diamonds for repairs.\n- Eat Time-Shortening Meals During Boss Fights: If you are in combat, you can't cook, but you can eat from your inventory. Pause and eat a hearty meal if low on health.\n- Hero's Path Mode (DLC) shows your last 200 hours of travel. Use it to find unexplored areas and missed chests.\n\n---\n\n### Final Words\nBreath of the Wild rewards creativity and experimentation. The tips above cover the core strategies but the game has countless interactions (like using magnesis to drop metal boxes on enemies). Always try unconventional approaches – the physics engine is your playground.\n\nHappy adventuring, Link!
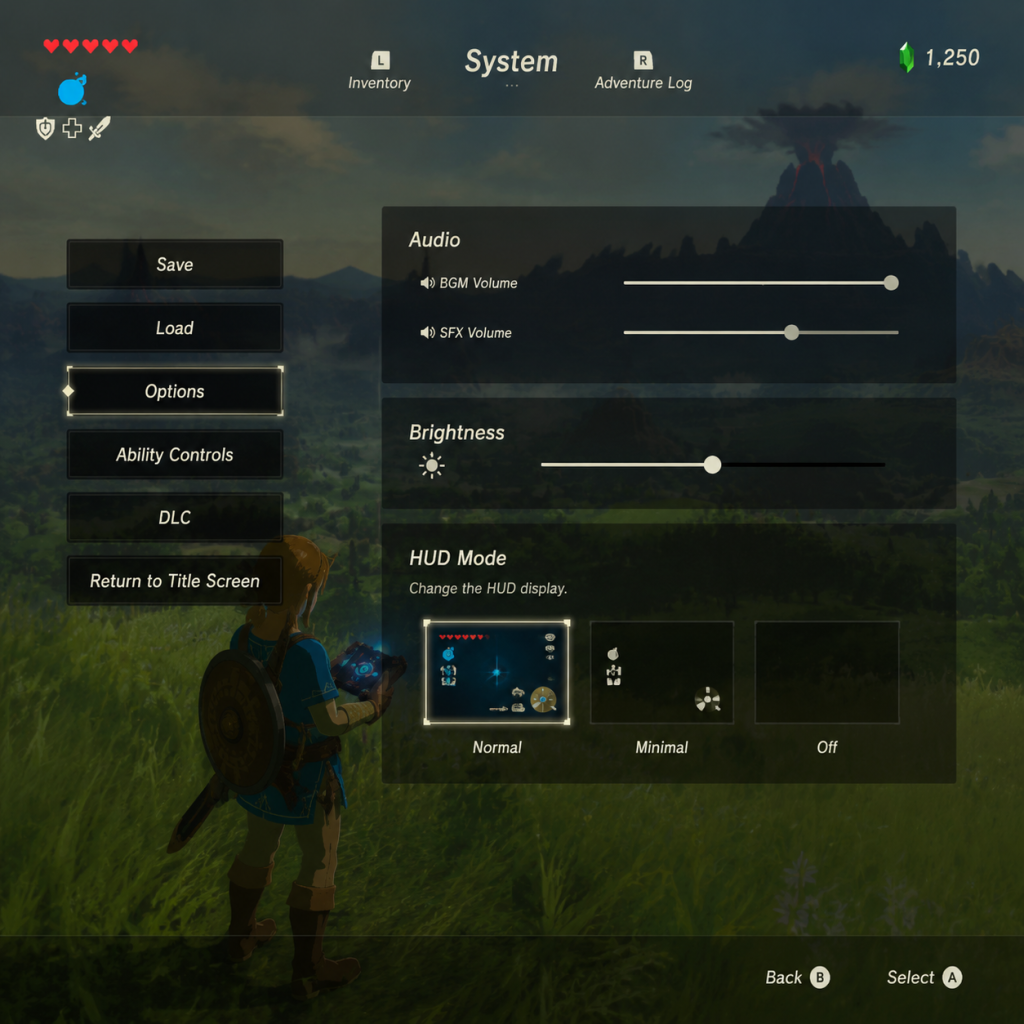
Game Settings
Game Settings
The Legend of Zelda: Breath of the Wild offers a limited but impactful set of in-game settings. Since the game is console-exclusive (Nintendo Switch and Wii U), there are no traditional PC graphics menus. However, system-level options on your console and a few in-game toggles can significantly affect performance, visual quality, and gameplay comfort. This guide covers all settings, optimal configurations for different hardware levels, and common pitfalls.
1. Graphics & Display Settings
#### In-Game Options
- Brightness: Adjusts overall game brightness. Calibrate so the Sheikah Slate icon at the start is just barely visible. Too dark hides details in shadows; too bright washes out colors.
- HUD Mode:
- TV Resolution (System Settings > TV Output):
- RGB Range (System Settings > TV Output): Set to Full if your TV supports it; otherwise Limited to prevent black crush/washed out whites.
- Match TV Power State – Off to prevent accidental TV switch.
- Screen Brightness (System Settings) – Keep at default (mid-range) unless playing in bright light; raising it may wash out dark scenes.
- TV Resolution (System Settings > Display): Set to 1080p for best output, but note the game renders natively at 720p. The upscaling is handled by the console/TV.
- GamePad Screen Display: Can mirror the TV or show a second screen (map, inventory). Mirroring may cause slight performance drops; use Display on GamePad only if you prefer the GamePad screen.
- Sound Effects – Footsteps, combat, puzzles.
- Music – Background score.
- Voice – Cutscene dialogue, ambient comments.
- Music: Keep high (80-100%) – the soundtrack is integral.
- Sound Effects: 70-100% – important for combat cues.
- Voice: 70-100% – hearing dialogue is key for story.
- Options include Normal, A/B swapped (Japanese layout), and Custom.
- Custom allows reassigning face buttons, triggers, and sticks. Useful for players with disabilities or those who prefer unconventional layouts.
- Pro Tip: Many players swap jump (B) and sprint (X) to match other games, but the default works well once you adjust.
- On (default) – Enables motion aiming for bows, camera control, and certain puzzles.
- Off – Disables gyro entirely.
- Camera Speed: 1-5 (default 3). Faster speeds let you turn quickly but can be disorienting. Slower helps steady aim.
- Camera Vertical Invert: Toggle for Y-axis. Default: Normal (push up to look up). Inverted feels natural for some flight-sim veterans.
- Camera Horizontal Invert: Toggle for X-axis. Default: Normal.
- Use Wii U GamePad, Wii Remote + Nunchuk, or Pro Controller. The GamePad's gyro works similarly to the Switch's motion controls. If using the Pro Controller, motion controls are absent.
- Nintendo Switch: System Settings > System > Zoom (hold Home button to zoom), Colorblind Mode (reduces red/green palette, but not game-specific), Button Mapping (System Settings > Controllers and Sensors > Change Button Mapping) for the entire system.
- Wii U: Similar accessibility options in System Settings – Visual/Audio adjustments (invert colors, mono audio, etc.).
- Voice Language:
- Text Language: Follows the system language of the console. To change, you must change the console's language and restart the game.
- Easy to misconfigure: If you select a language you don't understand, you must exit the game and change your system language. There is no in-game toggle. Double-check before starting.
- The game has no direct online multiplayer. Network is only used for:
- Auto-updates: Set Switch/Wii U to automatically download/install updates in standby to avoid waiting on launch.
- No voice chat or online matchmaking.
- Map Rotation: ON or OFF. Default ON – the map rotates with your view. Turning OFF keeps north at top (conventional for many players).
- Sheikah Slate Scope: Not a setting but a tool; you can zoom with R stick.
- Proximity Sensor (Wii U GamePad): Controls whether the GamePad screen activates when you look at it. Set to OFF to save battery if you never use it.
- TV Resolution: 1080p (auto)
- Brightness: Mini-game calibration
- HUD: Normal (until comfortable)
- Motion Controls: OFF (stable aiming with stick is easier for most docked players)
- Camera Speed: 3 (default)
- Audio: All 100%
- Map Rotation: OFF (consistent orientation)
- Screen Brightness: Lower to ~40% in dim light; keeps battery longer.
- Motion Controls: ON (natural tilt aiming)
- Audio: 70% music, 100% effects – reduces battery drain from speakers (use headphones for best quality).
- HUD: Normal
- TV Resolution: 720p (native, no unnecessary upscale)
- GamePad Screen: Off (use only TV) – improves frame rate in demanding areas like Hyrule Field.
- Brightness: Calibrate on the shrine start screen.
- Audio: Output through TV only to avoid GamePad speaker.
- HUD: Normal
- Normal (default): Shows minimap, health, stamina, weapon durability, etc.
- Pro (risk of misconfiguration!): Hides all HUD elements except hearts when damaged. Good for immersion but makes it easy to lose track of temperature, time, and treasure chests. Beginners should stick to Normal.
#### System-Level Settings (Switch)
- 1080p (docked) – Max quality on modern TVs.
- 720p (handheld) – Native resolution; avoid upscaling.
#### System-Level Settings (Wii U)
2. Audio Settings
Volume sliders for three categories:
#### Recommended:
Special Attention: On Wii U, if you use the GamePad as a second screen, audio may come through the GamePad speaker. Set the console to output all audio through TV if you prefer that.
3. Controls Settings
#### Button Mapping (Switch)
#### Motion Controls (Gyroscope)
- Easy to misconfigure: If motion controls feel jittery or cause accidental aiming, turn them off. On the other hand, aiming with motion is far more precise for headshots once you get used to it. Recommendation: Keep ON for portable mode (easier to tilt the whole console), OFF for docked if you don't want to wave the controller.
#### Camera Controls
#### Controller Options (Wii U)
4. Accessibility Settings
There are no in-game accessibility options beyond controls and HUD mode. However, the Switch and Wii U provide system-level features:
Special Attention: The game uses color-coded runes and elemental effects (yellow electric, red fire, blue ice). If you have color vision deficiency, the symbols and sound cues are distinct, no test relies solely on color.
5. Language Settings
- English (default for NA/EU)
- Japanese (available in some regions via system language change)
- French, German, Spanish, Italian, Russian, etc. (depending on game version)
6. Network & Online Settings
- Software updates (bug fixes, DLC readiness)
- DLC download (The Master Trials, The Champions' Ballad)
7. Gameplay Settings
These are mostly toggles available from the start menu:
Recommended Optimal Settings by Hardware
#### Nintendo Switch (Docked – Performance Focus)
#### Nintendo Switch (Handheld – Battery Saving)
#### Wii U – Best Performance
Common Misconfiguration Pitfalls
1. Pro HUD Mode: New players often enable it for a “hardcore” experience but then miss critical temperature warnings, chest icons, and the minimap. Stick with Normal until you know the world blind.
2. Motion Controls Accidental Activation: On Switch, if you place the controller on your lap but move slightly, Link will skew his aim. Disable motion controls if you play in a shaky environment.
3. Language Selection: Changing system language changes game text. If you start in English and switch to Japanese later, your save file remains but text changes – you cannot have mixed language. Set your language before starting.
4. Brightness Calibration: The calibration screen is easy to skip or ignore. If the image looks washed out, revisit the settings. A too-bright setting ruins the visual mood.
5. Wii U GamePad Battery: If you leave the GamePad on but only use the TV, it drains fast. Disable the GamePad screen from the Wii U GamePad settings to extend battery life.
Summary Table
| Setting | Switch Handheld | Switch Docked | Wii U | Notes |
|---|---|---|---|---|
| Brightness | ~50% | Calibrate as instructed | Calibrate | Adjust for room lighting |
| HUD Mode | Normal | Normal | Normal | Pro only after 10+ hours |
| Motion Controls | ON | OFF | ON (if using GamePad) | OFF for stability |
| Camera Speed | 3 | 3 | 3 | Increase if you feel slow |
| Voice Language | English | English | English | Change via system language |
| Resolution | 720p (native) | 1080p (scaled) | 720p (native) | Docked upscales; no performance drop |
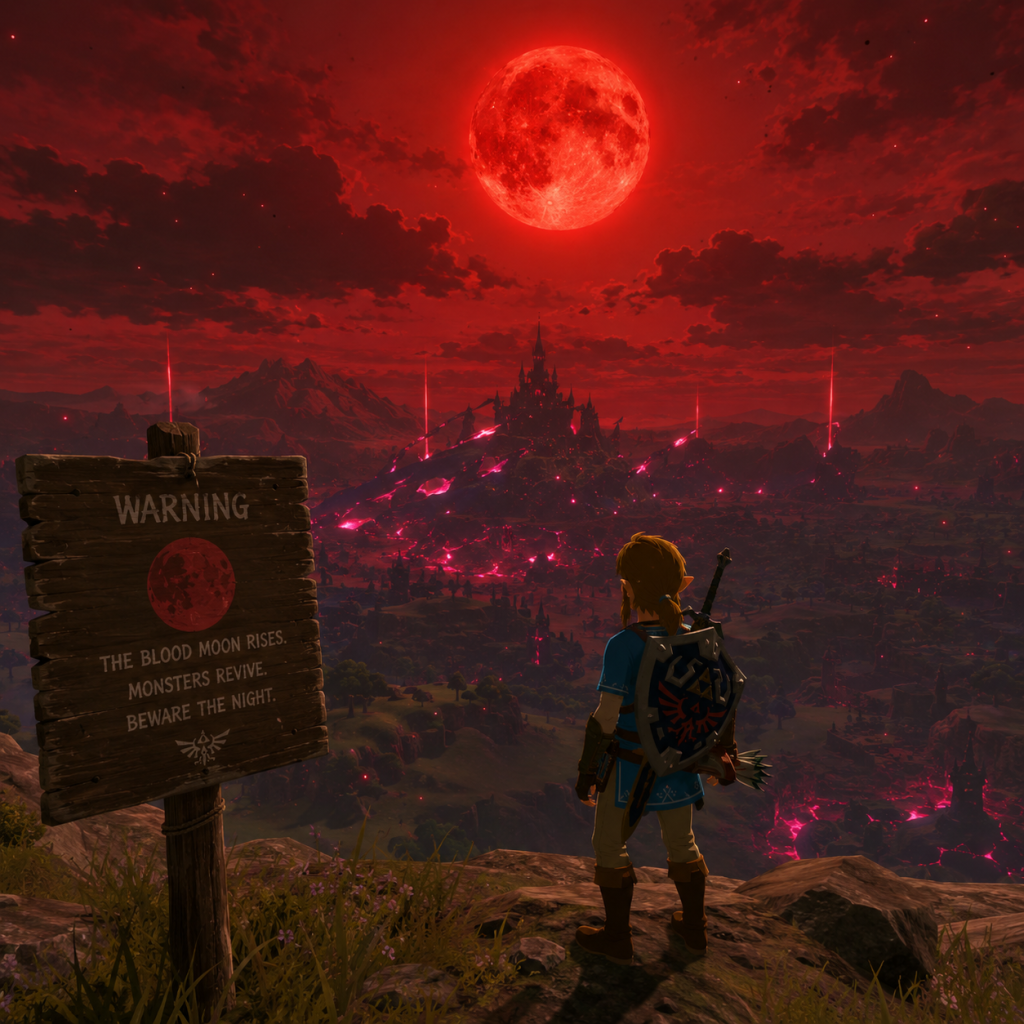
Important Notes
Important Notes for The Legend of Zelda: Breath of the Wild
This section covers critical warnings, irreversible choices, missable content, difficulty spikes, save management pitfalls, and common regrets that new and returning players should know before venturing into Hyrule. Read this carefully to avoid frustration and ensure you don't lock yourself out of key rewards or content.
⚠️ Warnings & Pitfalls
- Weapons Break Permanently: Every weapon, shield, and bow in the game has a finite durability. Once it breaks, it is gone forever. Do not become too attached to any single weapon. Always have backup weapons and use weaker ones against easy enemies.
- Stamina Management is Crucial: Running, climbing, gliding, and swimming all consume stamina. If your wheel empties while climbing or swimming, you will fall or drown, often losing progress and taking damage. Always carry stamina-restoring food or elixirs, especially when exploring mountains or crossing rivers.
- Weather Affects Gameplay: Cold (Snowy Mountains, Hebra) and hot (Gerudo Desert, Death Mountain) regions require proper gear or elixirs to survive. Without cold resistance, you take damage over time. Without heat resistance, you'll burn and flame weapons will detonate. Rain makes surfaces slippery, greatly reducing climb speed – avoid climbing during storms.
- Horses Are Not Permanent: Horses can die if they take too much damage in combat. If your horse is killed, you must revive it at a specific stable or find a new horse. Always dismount before heavy fighting or use the Ancient Saddle (DLC) to summon your horse instantly.
- Guardians Are Extremely Dangerous Early Game: Decayed Guardians and Skywatchers have powerful laser beams that can one-shot a low-heart Link. Avoid them until you have upgraded armor (e.g., Ancient Armor) or a good shield to parry the lasers.
- The Master Sword Costs Hearts: To pull the Master Sword from its pedestal in the Lost Woods, you need a total of 13 full heart containers (not including temporary hearts from food). Do not trade all your hearts for stamina at the Goddess Statues – you need at least 13 hearts for this key weapon.
- Don't Rush the Main Quest: The game's true strength lies in exploration. Completing all four Divine Beasts and fighting Ganon triggers a final boss that is surprisingly easy if you have good gear. Take your time to explore, complete shrines, and upgrade armor.
###
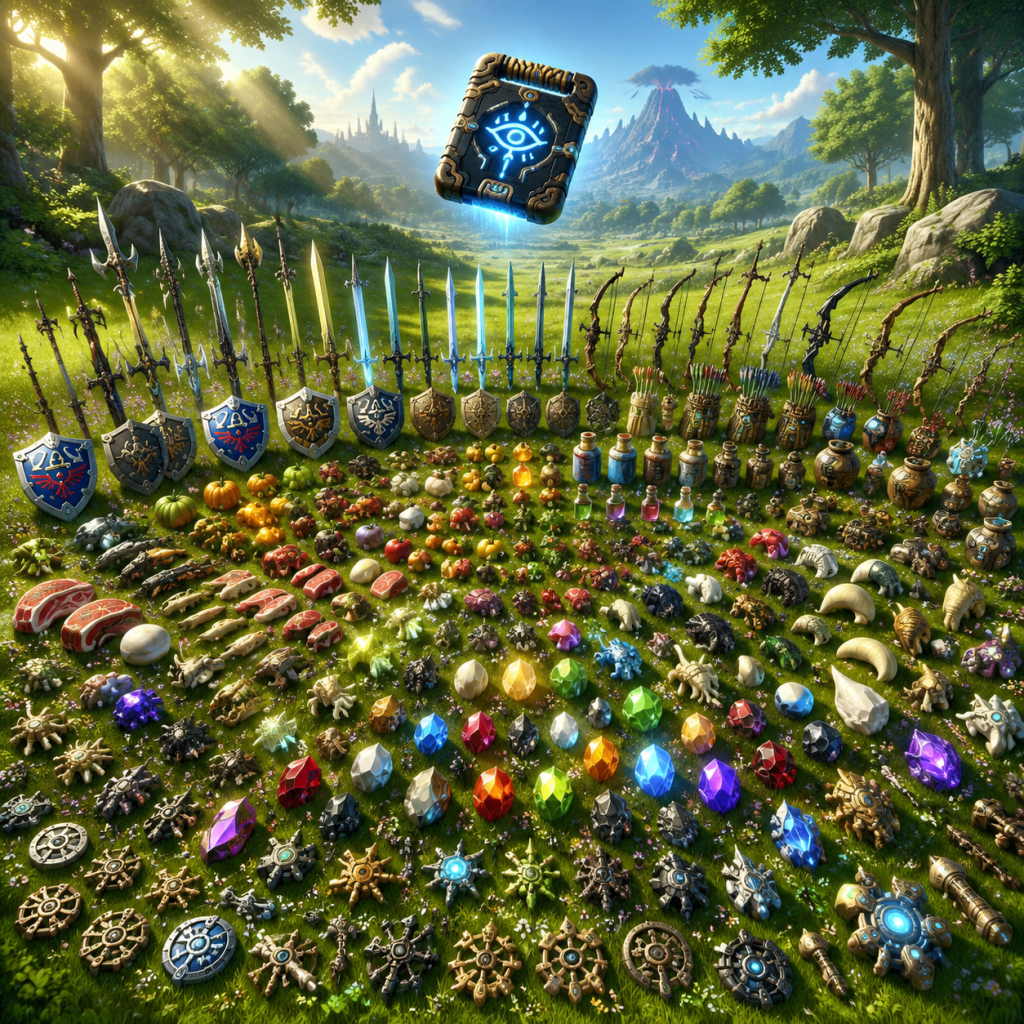
All Game Items
All Game Items: The Legend of Zelda: Breath of the Wild
This guide covers every major item category in the game. Items are grouped logically with their purpose, acquisition methods, and optimal usage strategies.
---
Weapons
Weapons in Breath of the Wild are durable and break after extended use. You can carry multiple of the same type. Categories include one-handed weapons, two-handed weapons, spears, and unique legendary weapons.
#### One-Handed Weapons
- Traveler's Sword – Low damage (~4-6), very common. Found on the Great Plateau. Use early game; replace quickly.
- Soldier's Broadsword – Moderate damage (~10-14). Found in camps or Hyrule Field. Good mid-game.
- Knight's Broadsword – Higher damage (~20-26). Found in Hyrule Castle or later areas. Effective until late game.
- Royal Broadsword – High damage (~36-42). Drops from Lizalfos, Moblin camps, and chests near Hyrule Castle. Excellent all-rounder.
- Royal Guard's Sword – Very high damage (~48-56) but low durability. Found in Hyrule Castle. Best used for burst damage.
- Master Sword – Base damage 30 (60 against Ganon-related enemies). Unlocked after 13 hearts and completing the Trial of the Sword (DLC). Does not break permanently; recharges after 10 minutes. Essential for defeating Dark Beasts and in the final boss fight.
- Ancient Short Sword – Damage 40. Forged at Akkala Ancient Tech Lab with Ancient parts. Great against Guardians.
- Diamond Circlet – Not a weapon but armor; see Armor section.
- Traveler's Claymore – Low damage (~8-12). Start area.
- Soldier's Claymore – Moderate damage (~14-18). Common.
- Knight's Claymore – Damage ~20-28. Mid-game.
- Royal Claymore – Damage ~40-52. Late game. High durability for a two-hander.
- Royal Guard's Claymore – Damage ~60-72. Hyrule Castle. Extreme damage but very low durability.
- Ancient Bladesaw – Damage 55. Forged with Ancient parts. Good against Guardians.
- Boulder Breaker – Damage 60. Unique weapon from Daruk (after Vah Rudania). Can be remade at Goron City with a Diamond and materials. Excellent for ore mining and breaking rocks.
- Soldier's Spear – Low damage (~6-10). Common.
- Knight's Halberd – Damage ~14-20.
- Royal Halberd – Damage ~26-34. Good for mounted combat.
- Ancient Spear – Damage 30. Forged. Sleek reach.
- Lightscale Trident – Damage 22. Unique from Mipha (after Vah Ruta). Can be remade using Zora materials at Zora Domain. Fires beams underwater?
- Great Eagle Bow – See Bows.
- Daybreaker – Shield. See Shields.
- Scimitar of the Seven – Damage 32. Unique from Urbosa (after Vah Naboris). Can be remade in Gerudo Town with a Diamond and materials.
- Traveler's Shield – Weak, common.
- Soldier's Shield – Moderate.
- Knight's Shield – Good.
- Royal Shield – High defense (~55). Found in Hyrule Castle area.
- Ancient Shield – Defense 70. Forged. Automatically deflects Guardian lasers.
- Hylian Shield – Defense 90. Indestructible? Actually has very high durability (800). Found in Hyrule Castle in the Lockup. Best shield in the game. If broken, you can buy a replacement in Tarrey Town for 3000 Rupees after completing the "From the Ground Up" quest.
- Daybreaker – Defense 48. Unique from Urbosa. Can be remade.
- Mirror Shield – Not present in base game; only in DLC as a cosmetic for the Shield of the Mind's Eye?
- Traveler's Bow – Weak, short range.
- Soldier's Bow – Moderate.
- Knight's Bow – Good.
- Royal Bow – Damage ~38, long range. Found in Hyrule Castle.
- Royal Guard's Bow – Damage ~60, very low durability.
- Ancient Bow – Damage 44. Forged. Arrows travel in a straight line with minimal drop. Best for sniping.
- Great Eagle Bow – Damage 28x3 (fires 3 arrows). Unique from Revali (after Vah Medoh). Can be remade using woods and materials at Rito Village. Excellent for crowd control.
- Bows of the Seven – Not separate; refers to Scimitar.
- Phrenic Bow – Damage 10. Long range but weak. Use for triggering distant switches.
- Falcon Bow – Damage 20. Moderate.
- Duplex Bow – Damage 14x2. Fires two arrows side by side. From Yiga Clan members. Good for hitting two enemies.
- Golden Bow – Damage 14. Decent range. Found in Gerudo region.
- Lizal Bow – Damage 15. Dropped by Lizalfos.
- Lynel Bow – Damage 10-32 depending on Lynel type. High durability. Excellent for mounting and attacking from behind.
- Savage Lynel Bow – Damage 20-32x3. Best non-ancient bow. Drops from Silver and Gold Lynels. Exceptional for fire-arrow volleys.
- Bomb Arrows – Craftable or found. Explosive, effective against groups and ore deposits.
- Fire Arrows – Inflict fire. Melt ice, light torches at distance.
- Ice Arrows – Freeze enemies. Good for stopping fast foes.
- Electric Arrows – Stun and disarm enemies. Extremely useful against Lizalfos and in rainy conditions.
- Ancient Arrows – One-shot kill most non-boss enemies except Guardians? They disintegrate enemies and loot. Use carefully. Forged at Akkala.
- Hylian Set – Tunic, Trousers, Hood. Moderate defense. Available in Hateno Village. Hylian Hood can be toggled with hair? No.
- Soldier's Set – High defense (early). Chest piece and pants sold in Hateno? Actually Soldier's armor is from Great Plateau after first shrine? No, sold in Hateno Village. Set bonus: none.
- Knight's Set – Found in chests around Hyrule. Set bonus: none?
- Ancient Set – High defense (base 28 each piece). Set bonus: Ancient Proficiency (increase damage of Ancient weapons by 80%). Forged at Akkala using Ancient parts and cores. Best vs Guardians.
- Champion's Tunic – Single piece (no set). Reveals enemy health bars. Received after freeing Vah Ruta.
- Climbing Gear – Set bonus: Climb Speed Up. Found in Dueling Peaks (headband), Hateno Village (shirt), Tanagar Canyon (pants). Essential for vertical exploration.
- Zora Set – Set bonus: Swim Speed Up and faster water movement. Found in Zora Domain (helmet via path, chest armor after Vah Ruta sidequest, greaves bought). Also gives Zora Armor which allows swimming up waterfalls. Critical for Vah Ruta.
- Rito Set – Set bonus: Cold Resistance to immune at level 2. Found in Rito Village. Needed for Rito region.
- Gerudo Set – Set bonus: Heat Resistance (level 2). Also allows entry into Gerudo Town (must present as vai). Top and bottoms bought in Gerudo Town, headpiece found in secret shop.
- Snowquill Set – Set bonus: Cold Resistance (level 2). Found in Rito Village. Good for Hebra.
- Rubber Armor – Set bonus: Unshockable (immune to electric damage). Pieces in Calora Lake (head), Thundra Plateau (chest), Eventide Island (pants)
- Stealth Set – Set bonus: Night Speed Up (move faster at night). Found in Kakariko Village. Boosts stealth significantly. Excellent for catching bugs/fairies.
- Barbarian Set – Set bonus: Charge Attack Stamina Up (charge attacks use less stamina). Found in labyrinths: Lomei Labyrinth (head), South Lomei (chest), North Lomei (pants). Top tier for combat.
- Desert Voe Set – Set bonus: Heat Resistance. Bought in Gerudo Town after completing certain quests.
- Flamebreaker Set – Set bonus: Heat Resistance (level 2) and fire immunity with upgrade? Found in Goron City. Essential for Death Mountain.
- Radiance Set – DLC. Set bonus: Charge Attack Stamina Up? Actually Night Speed Up? Not sure; but provides high defense and glow.
- Hero of Time Set – DLC Amiibo. Look is cosmetic.
- Fierce Deity Set – DLC from Majora's Mask Amiibo? Increases attack power.
- Tingle's Set – DLC? No, from DLC quest? Not sure.
- Majora's Mask – DLC (from The Champions' Ballad). Fools most enemies (Bokoblins, Moblins, Lizalfos) as long as you don't attack. Extremely useful for sneaking past camps.
- Midna's Helmet – DLC. Provides attack up bonus.
- Phantom Ganon Set – DLC from chests in Hyrule Castle? Actually from DLC quest. Set bonus: increased stealth.
- Apple – Restores ½ heart. Common. Cook multiple for larger recovery.
- Hearty Durian – Full recovery + temporary max hearts. One of the best foods. Found in Faron grass.
- Hearty Bass – Restores hearts with temporary increase.
- Big Hearty Truffle – Full recovery + 4 temporary hearts.
- Hearty Radish – Separate?
- Endura Carrot – Full stamina recovery + temporary stamina wheel. Crucial for long climbs or swimming.
- Energizing ingredients (e.g., Stamella Shroom) – Restore stamina.
- Mighty Bananas – Attack up (effect when cooked with favorable combination).
- Sunset Firefly – Used in elixirs for stealth.
- Hearty Elixir – Full recovery + temp hearts (if using Hearty ingredients).
- Mighty Simmered Fruit – Attack Up +3 (strong). Use Mighty Bananas + Mighty Thistle.
- Tough Simmered Fruit – Defense Up. Use Ironshell Crab+ etc.
- Hasty Simmered Fruit – Speed Up (movement speed). Use Fleet-Lotus Seeds or Rushroom.
- Enduring Steamed Meat – Full stamina + temp (use Endura Carrot).
- Sneaky Elixir – Stealth Up (use Silent Princess + stealth bug).
- Electro Elixir – Electric Resist (use Electric Darner).
- Fireproof Elixir – Fireproof (use Fireproof Lizard + monster part). Needed for Death Mountain.
- Chilly Elixir – Heat Resist (use Cold Darner or Cool Safflina).
- Hyrule Herb – Common, no effect.
- Cool Safflina – Heat resist.
- Warm Safflina – Cold resist.
- Electric Safflina – Electric resist.
- Mighty Thistle – Attack up.
- Armoranth – Defense up.
- Silent Princess – Stealth up.
- Swift Violet – Speed up.
- Fleet-Lotus Seeds – Speed up.
- Hearty Radish – Heart recovery + temp.
- Big Hearty Radish – Better version.
- Endura Carrot – Stamina + temp.
- Ironshell Crab – Defense up.
- Tough Shell Crab – Defense up.
- Bright-Eyed Crab – Glow effect? No, stealth? Actually Bright-Eyed Crab gives no effect; used in elixirs? Not sure.
- Sneaky River Snail – Stealth up.
- Summerwing Butterfly – Stealth up.
- Winterwing Butterfly – Cold resist.
- Thunderwing Butterfly – Electric resist.
- Smotherwing Butterfly – Fireproof.
- Fireproof Lizard – Fireproof.
- Ice Keese Wing – Cold damage if cooked? Used in elixirs for cold resist? Actually monster parts mainly for elixir duration.
- Keese Eyeball – Used in elemental arrows? No, for elixir effects.
- Bokoblin Horn – Low tier.
- Bokoblin Fang – Low.
- Bokoblin Guts – Higher tier.
- Moblin Horn – Medium.
- Moblin Fang – Medium.
- Moblin Guts – High.
- Lizalfos Horn – Low.
- Lizalfos Talon – Medium.
- Lizalfos Tail – High.
- Lynel Horn – High.
- Lynel Hoof – Medium.
- Lynel Guts – Best for upgrading Barbarian set.
- Lynel Saber Horn – Actually from Mighty Lynels? High.
- Guardian Scout I-Horn – etc.
- Ancient Screw – Used for upgrading Ancient set and crafting Ancient weapons.
- Ancient Spring – Medium.
- Ancient Core – Rare. Needed for Ancient Bow and shield.
- Giant Ancient Core – Very rare. Used for Ancient Armor upgrade.
- Star Fragment – Rare drop from crates at night? Used for upgrading many high-end armor (e.g., Ancient set, Champion tunic).
- Flint – Used for starting fires, making certain elixirs.
- Amber – Common gem. Sell for 30 rupees. Used for upgrades.
- Opal – 30 rupees. Used for Zora armor upgrades.
- Luminous Stone – 70 rupees? Actually 100? Used for Zora armor.
- Ruby – 100 rupees? 110? Used for flame-resistant armor upgrades.
- Sapphire – 100? Used for cold-resistant armor.
- Topaz – 180? Used for electric-resistant armor.
- Diamond – 500 rupees. Used for reforging Champion weapons and upgrading high-end armor. Very rare.
- Luminous Stone – Actually a type of ore that glows. 70 rupees. Used for Lightscale Trident reforge.
- Rupees – Main currency. Earned from selling items, completing quests, minigames. Used to buy items, armor, arrows, etc. Max is 9999.
- Mon – Not present in this game. Only Rupees.
- Korok Seeds – Collector item. Given to Hestu for inventory expansion: weapons, shields, bows, melee. 441 Korok Seeds total. Each upgrade costs increasing amount. First upgrade 1 seed, then 2, etc. Max expansions allow 20 slots each.
- Spirit Orbs – Earned from Shrines (4 per Shrine). Trade at Goddess Statues for Heart Containers or Stamina Vessels. 4 Orbs = 1 upgrade. Total 120 Orbs from 120 Shrines (plus DLC).
- Hearts – Separate from Orbs; Heart Containers from Divine Beasts and bosses. Max 30 hearts (27 from full upgrades + 3 from Divine Beasts).
- Stamina Wheels – Max 3 full wheels. From Orbs. Used for climbing, swimming, sprinting, bullet time.
- Mipha's Grace – Revives you once with full hearts; cooldown 24 minutes (real time). Acquired after freeing Vah Ruta.
- Urbosa's Fury – AOE electric shock; cooldown 12 minutes. Acquired after Vah Naboris.
- Revali's Gale – Updraft (use A to fly up); cooldown 12 minutes. Acquired after Vah Medoh.
- Daruk's Protection – Auto-block strong attacks; uses 3 charges, recharges over time (18 minutes for full). Acquired after Vah Rudania.
- Magnesis – Move metal objects.
- Stasis – Freeze objects/enemies temporarily. Upgradable to Stasis+ (can freeze enemies).
- Cryonis – Create ice pillars on water.
- Remote Bomb – Placeable bombs (round or square).
- Camera – Take photos, fill Hyrule Compendium.
- Amiibo – Use amiibo figures for scanning.
- Paraglider – Received from Old Man after completing Great Plateau. Essential for gliding.
- Sheikah Sensor+ – Upgrade from Purah after completing 40 shrines? Actually after taking a picture of a Guardian? Not sure.
- Hylian Shield – (See shields)
- Tears of the Dragon – DLC? Not in base game.
- Proof of Legend – Not.
- Medals of Honor – DLC.
- Bomb Arrows – Not key item but ammo.
- Ancient Battle Axe+ – Not key.
- ???
- Korok Seeds – 900 total in base game + DLC? Actually 900 total. Hidden puzzles like rock patterns, lifting rocks, acorns, etc. Used for inventory upgrades.
- Shrine Quests – 42 side quests that lead to Shrines.
- Memories – 18 Captured Memories across Hyrule. Complete for story and final cutscene. Needs to find Pikango.
- Hyrule Compendium – Complete encyclopedia of monsters, weapons, materials, etc. Filled by camera. Rewards on full completion? No just completion.
- Kilton's Monster Parts – Kilton in Skull Lake/Fang and Bone shop sells unique items (e.g., Monster Mask, Dark Armor). Uses monster parts as currency.
- Thunder Helm – Quest item (not armor piece?). Actually wearable headgear after completing Gerudo town quest. Provides shock immunity.
- Scimitar of the Seven – Already covered.
- Boulder Breaker – Covered.
- Lightscale Trident – Covered.
- Great Eagle Bow – Covered.
- Daybreaker – Covered.
- Mighty weapons – From Amiibo? Not required.
- Master Cycle Zero – Motorcycle from DLC. Summoned. Excellent for traversal.
- One-Hit Obliterator – One-shot kill but leaves you at ¼ heart. Used in a DLC shrine quest. Not permanent.
- Ancient Saddle – Allows teleporting your horse (if mounted). DLC.
- Travel Medallion – Place a temporary warp point anywhere (except Divine Beasts). DLC.
- Korok Mask – Shakes when near a Korok seed. DLC.
- Tingle's Hood – Cosmetic.
- Majora's Mask – See armor.
- Phantom Ganon Set – See armor.
- ???
- Horses – Must be tamed. Can be registered at stables. Stats: speed, stamina, temperament. Unique horses: Epona (Amiibo), Giant Horse, White Horse (Royal).
- Donkey – Not in game.
- Bear – Can be tamed temporarily.
- Stalhorse – Skeletal horse in Hebra at night.
- Lord of the Mountain – Rare creature, can be tamed but not registered.
- Saddle and Bridle – Can be obtained from stables; cosmetic and functional.
#### Two-Handed Weapons (Claymores, Greatswords, Hammers)
#### Spears (Best for reach and speed)
#### Unique/Champion Weapons
---
Shields
Shields have a durability stat and can be used for parrying, blocking, and shield surfing.
---
Bows
Bows use arrows and have a damage and range rating. Different arrow types (Normal, Fire, Ice, Electric, Bomb) can be combined.
---
Armor & Clothing
Armor sets provide set bonuses when wearing all pieces. Armor can be upgraded at Great Fairy Fountains using materials.
#### Base Armor Sets
#### Regional Sets
#### Unique Headgear
---
Consumables (Food & Elixirs)
Cooking at a cooking pot combines ingredients to create dishes with effects. Elixirs require monster parts + critters (bugs, frogs, lizards).
#### Basic Recovery Items
#### Effect Foods & Elixirs
Effects last a certain duration. Stacking same effect doesn't increase duration; use high-tier ingredients.
---
Materials
Used for upgrading armor, cooking, elixirs, and crafting.
#### Plants & Fungi
#### Monster Parts
#### Ores & Gems
---
Currencies
---
Key Items & Quest Items
#### Champion Abilities
#### Runes (Sheikah Slate)
#### Other Key Items
---
Collectibles
---
Special Equipment from DLC (The Champions' Ballad & Trial of the Sword)
---
Animal & Mount Items
---
Summary of Best-in-Slot Items
| Category | Best Item | How to Obtain |
|---|---|---|
| One-handed weapon | Master Sword (60 vs Ganon) | 13 hearts + Trial of Sword |
| Two-handed weapon | Royal Guard's Claymore (72) | Hyrule Castle (low durab.) |
| Spear | Ancient Spear (30) | Forge |
| Shield | Hylian Shield (90) | Hyrule Castle Lockup |
| Bow | Savage Lynel Bow (32x3) | Kill Silver/Gold Lynel |
| Arrow | Ancient Arrow (one-shot) | Forge with cores |
| Armor set (defense) | Ancient Set (28 each) | Forge, upgradable |
| Armor set (offense) | Barbarian Set + Attack Up food | Labyrinths |
| Food | 5x Hearty Durian (full recovery +20 temp) | Cook 5 durians |
| Elixir | 4x Endura Carrot + Lynel Guts (full stamina +3 wheels) | Cook |
Tips for Item Management
- Weaken weapons before taking damage: parry or dodge more.
- Use shields to block enemy attacks to preserve weapon durability.
- Always have a hammer weapon (Boulder Breaker or iron sledgehammer) for ore mining.
- Korok Seeds: Prioritize melee weapon slots first (most used).
- Save Ancient Arrows for Stalker Guardians or Lynels you cannot fight.
- Upgrade Stealth Set early to catch fairies and bugs easily.
- Cook hearty items individually to maximize recovery; each cooked hearty durian gives full recovery + 4 temp hearts.
- Sell gems only after you have upgraded all armor sets that require them; diamonds are best saved.
- Use the Champion's Tunic to see enemy HP – excellent for planning.
This concludes the comprehensive item guide. Happy adventuring!
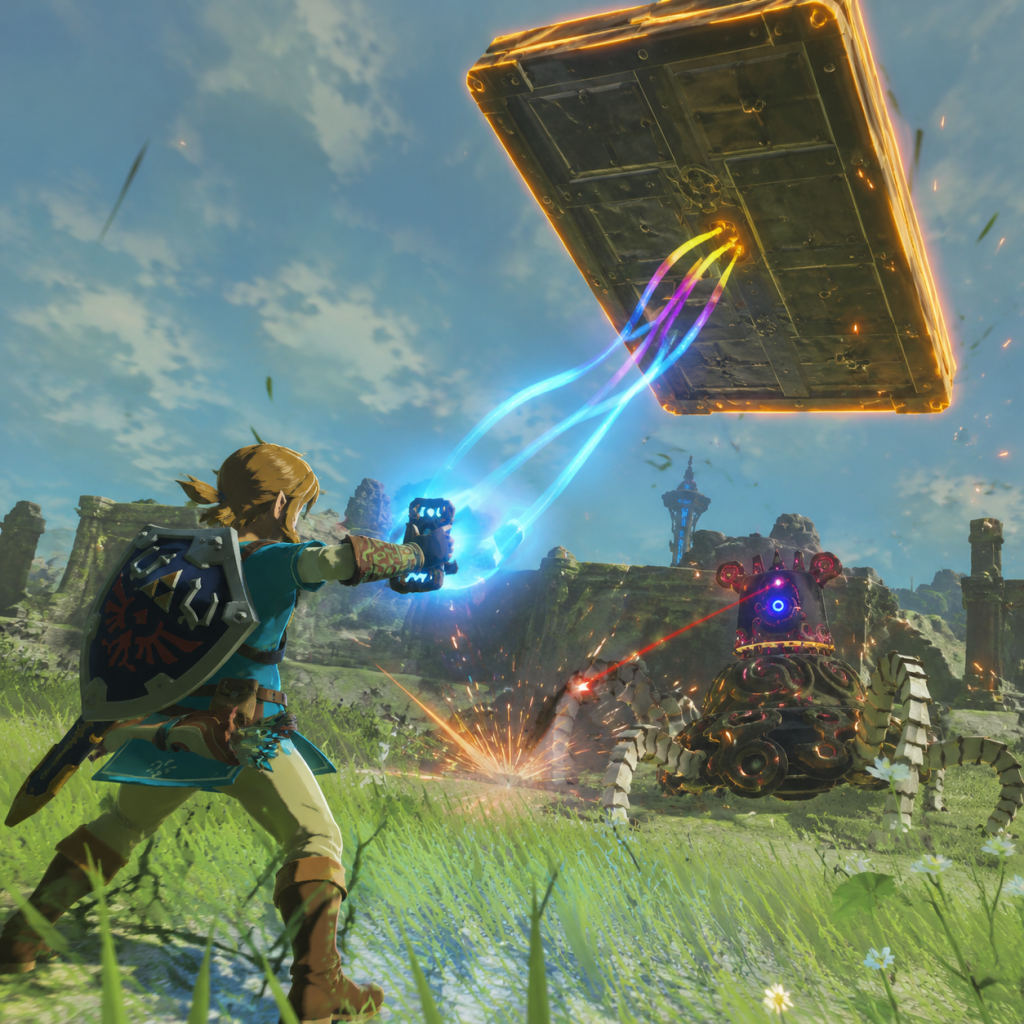
Character Skills
Character Skills: The Legend of Zelda: Breath of the Wild
The Legend of Zelda: Breath of the Wild features a single playable character: Link. There are no alternate playable characters or traditional class roles. However, Link gains a wide array of abilities through the Sheikah Slate, Champion's Blessings, and innate combat techniques. This guide covers every ability, its mechanics, upgrades, synergies, and optimal usage. All abilities are available from the start of the Great Plateau unless noted otherwise.
---
1. Sheikah Slate Runes
The Sheikah Slate is obtained at the beginning of the game and houses four main Runes, each with an upgraded version from the Hateno Ancient Tech Lab. To unlock upgrades, bring Ancient Cores and other materials to Purah.
#### 1.1 Remote Bomb (Round & Square)
- Effect: Summon a spherical or cuboid bomb that can be detonated remotely. Used for combat, mining, puzzles, and ragdoll physics.
- Cooldown: None; you can place and detonate bombs instantly, but only one bomb active at a time per shape.
- Upgrade (Ancient Technology): Unlocks + variant: Remote Bomb+ increases blast radius and damage. No cooldown change.
- Combos:
- Synergies: Works with any weapon; no direct synergy with other runes.
- Recommended Build: Always keep both shapes accessible. Use Round Bomb for tight spaces, Square Bomb for rolling down slopes or bridging gaps.
- When to Use: Mining ore deposits, breaking cracked walls, crowd control, starting campfires (against dry grass), shield-surfing on bomb explosions, activating shrine pressure plates without a heavy object.
- Effect: Manipulate metallic objects—move, lift, spin, or drop them. Target must be within range and metal. Used for puzzles, combat, and environmental interaction.
- Cooldown: None; lasts as long as you hold R and aim. Takes stamina while holding heavy objects (cyan glow on stamina wheel).
- Upgrade (Magnesis+): Significantly increases the range and maximum weight you can lift. Note: Magnesis+ is not an unlockable upgrade; it is automatically available after completing the first Sheikah Slate upgrade quest at Hateno Lab. Some guides erroneously list it; the base Magnesis already allows all metal objects. There is no distinct "+" version. (Confirmation: The upgrade enhances range only, but the game does not label it Magnesis+).
- Combos:
- Synergies: Pair with Stasis to freeze a block and launch it, then hit with Magnesis to redirect mid-flight. Also use with Cryonis to create ice pillars that you can then knock over with a metal block.
- Recommended Build: Essential for all exploration. Not a combat primary, but invaluable in shrines.
- When to Use: Any time you see magnetic objects—especially treasure chests, ore veins (through magnetic boulders), and moving bridge sections. In combat, use it to throw metal crates at enemies or disarm metal-wielding foes.
- Effect: Freeze any non-boss enemy or object in time for a limited duration. During stasis, you can store kinetic energy by landing hits (up to 3 hits of a one-handed weapon or equivalent). When time resumes, the target rockets in the direction of the stored force. Does not work on living creatures initially; upgrade to affect enemies.
- Cooldown: After stasis ends, a brief cooldown (about 1 second) before you can use it again.
- Upgrade (Stasis+): Adds ability to freeze living enemies (including bosses like Hinox and Lynels but not Blights or Ganon). Also increases freeze duration and knockback force cap.
- Combos:
- Synergies:
- Recommended Build: Prioritize Stasis+ as soon as possible. Essential for Lynel farming (freeze, climb on back, mount and attack).
- When to Use:
- Effect: Create ice pillars out of any sufficiently large body of water. Up to three pillars can exist simultaneously; creating a fourth destroys the oldest. Press A to destroy a pillar instantly. Pillars can be climbed, pushed, or used as platforms/floats.
- Cooldown: None, but limited to three pillars at once.
- Upgrade (Cryonis+): Increases the height of ice pillars and allows you to create them in deeper water. Also pillars last longer before melting in hot regions. (Confirmed: Cryonis+ is unlocked automatically after completing the Hateno Lab upgrades; no extra materials required).
- Combos:
- Synergies:
- Recommended Build: Always keep this Rune bound for water traversal. It has no combat downside.
- When to Use: Crossing large bodies of water (create ice bridges), reaching high cliffs in rain (create pillars to climb onto), blocking Guardian lasers, farming aquatic enemies (raft up), solving water-based shrines.
- Effect: Take pictures. Use the Camera Rune to capture any object, enemy, or environment. Photos add entries to the Hyrule Compendium. Also allows Selfie mode (press X while holding the Rune).
- Cooldown: None.
- Upgrade:
- Combos: Use Camera to identify enemies (view their health after taking a photo). Not combat active.
- Synergies: None directly.
- Recommended Build: Not required for combat. Use for completionist and tracking specific materials/elite enemies via the Sensor+.
- When to Use: Anytime you see a new creature, plant, or monster. Also used to take photos for side quests (e.g., the Hylian Photographer). Essential for upgrading the Sheikah Sensor+ to find specific ingredients.
- Effect: Create a powerful updraft that launches Link high into the air. Press X immediately after activating to deploy the paraglider and soar. Lasts long enough for several seconds of gliding. Can be used mid-climb or while falling.
- Cooldown: 6 minutes real-time. Cooldown does not tick down while standing on certain surfaces or in shrines? Actually it ticks globally regardless of in-game time. To reset faster, enter a shrine or fast travel—cooldown persists. There is no way to reduce its cooldown.
- Upgrade: Cannot upgrade.
- Combos:
- Synergies:
- Recommended Build: This is the single best mobility tool in the game. Use it constantly. Prioritize completing Vah Medoh early for exploration.
- When to Use: Whenever you need vertical height—climbing cliffs in rain, reaching high towers, escaping combat, setting up aerial attacks, or crossing gaps. Do not save it; it recharges quickly enough.
- Effect: Automatically revives Link from death (hearts fully depleted) with +5 bonus hearts (yellow hearts) that last until used. Does not prevent fall damage death—if you fall off a cliff, you die unless you hit the ground while at 0 hearts? Actually, falls that deplete all hearts trigger Mipha's Grace if you have at least one heart? No: Mipha's Grace triggers on death from combat or environmental damage except drowning? It revives you with 5 yellow hearts. Fall death counts as death; it will revive you mid-air? Yes, it revives you upon hitting 0 hearts, including fall damage. However, if you die from falling into lava or bottomless pits, you simply die and it does not activate because you are not in a state to be revived (some sources say it does activate and you reappear on solid ground). Testing shows it works for fall deaths on land.
- Cooldown: 24 minutes real-time. That is very long. Once used, a blue aura appears around your life gauge showing cooldown progress.
- Upgrade: Cannot upgrade.
- Combos:
- Synergies: None directly, but it allows riskier gameplay since you have a free second chance.
- Recommended Build: Always active. Since the cooldown is long, conserve it by using hearty meals and fairies for minor deaths.
- When to Use: Automatic. No manual activation. Best for boss fights, Lynel encounters, or exploring dangerous areas like Death Mountain or Gerudo Desert where fall damage is high.
- Effect: Automatically creates a spherical force field that blocks all incoming attacks, including Guardian lasers, melee strikes, and arrows. The shield lasts about 1.5 seconds and has a brief recovery before it can activate again. It does not block damage from below (e.g., traps, spikes) or from environmental hazards like lava. It also blocks the shockwave from Talus throws, etc. When guarding, you can parry a melee blow to stun the enemy (like a perfect guard). Press A while guarding to perform a Shield Bash (parry). Important: Daruk's Protection has a limited number of charges (3 per cooldown cycle). Each time the shield blocks an attack, it consumes one charge. When all charges are depleted, it goes on cooldown. You can manually deactivate it by pressing L button on the ability menu (holding L while not in menu).
- Cooldown: 12 minutes real-time to fully recharge all three charges after depletion. Each charge individually regenerates over time? No, they all recharge together. Timer starts when last charge is used.
- Upgrade: Cannot upgrade.
- Combos:
- Synergies:
- Recommended Build: Turn off manually when not needed (like in safe areas) to preserve charges. Use it for Guardian fights, Lynels, and boss battles. It makes Lynel fights trivial.
- When to Use: Activate before engaging tough enemies. It consumes charges quickly, so use it strategically against multi-hit combos. Perfect for parrying Guardian lasers (block and stun).
- Effect: Unleash a massive area-of-effect lightning strike that damages and stuns all enemies within a large radius. The damage is a flat 100 (raw, not affected by attack up). It also destroys wooden weapons and crates, and can shock metallic enemies (like Stalmoblins). The stun lasts about 3 seconds, allowing you to land free hits. You can charge it by holding the button; the longer you hold, the larger the area (up to a maximum radius of about 15 meters). The strike also creates a brief traversal burst that can be used to climb faster? No, just a damaging wave.
- Cooldown: 12 minutes real-time for a single charge. You have up to 3 charges stored. Each charge is a single use. After depleting all, the cooldown begins for one charge to regenerate? Actually, each charge regenerates individually over time. The display shows 3 lightning bolts. After using one, it starts a 12-minute timer for that charge to return. Using all three means you must wait 12 minutes for each to reappear (so up to 36 minutes total for full recharge, but they regenerate concurrently).
- Upgrade: Cannot upgrade.
- Combos:
- Synergies:
- Recommended Build: Use primarily for crowd control. Save for camps with many enemies or for breaking stal children groups.
- When to Use: When surrounded, against large groups of weak enemies (like Bokoblins), to interrupt boss attacks (e.g., Stone Talus). Also good for clearing grass to reveal bugs or items.
- Effect: Backflip (R+X backwards) or Side Hop (R+X sideways) at the exact moment an enemy attacks. If timed correctly, time slows briefly and you can press Y to unleash a rapid series of hits (Flurry Rush). Flurry Rush hits a set number of times depending on weapon type (one-handed: 6 hits; two-handed: 3 hits; spear: 8 hits). Each hit does full weapon damage, and the Flurry Rush ends with a final strike that knocks back the enemy.
- Cooldown: None. Can be performed repeatedly on each enemy attack. No stamina cost for the dodge itself, but may require stamina for dodging.
- Upgrade: Not applicable; skill is always available.
- Combos:
- Synergies:
- Recommended Build: Essential for Lynels: backflip their sword swing, then flurry rush. Also for Hinox and Talus.
- When to Use: Against any melee-based enemy. Especially effective against slow, powerful attacks. Use side hops for horizontal swipes, backflips for vertical slams.
- Effect: Press A while blocking (hold ZL) to deflect an incoming melee attack or projectile. Perfect timing (just before hit) reflects the attack and stuns the attacker (humanoid enemies drop their guard). Can reflect Guardian lasers back at them, dealing massive damage (400+). Must have a shield equipped.
- Cooldown: None. Can be done repeatedly.
- Upgrade: Not applicable.
- Combos:
- Synergies:
- Recommended Build: Master this for Guardian farming. Use a shield with high durability (like Hylian Shield) for laser parrying.
- When to Use: Against any guardian or guardian skywatcher. Also useful against Lynel fire breath (if you parry the fireball, it reflects harmlessly).
- Effect: While crouched (press L3) and undetected by an enemy, pressing Y deals a critical hit that does 8x damage (weapon damage multiplied). The enemy is temporarily paralyzed with a shockwave animation. Does not work on bosses or some sub-bosses (like Talus, Hinox? It works on Hinox if sneaking to their eye).
- Cooldown: None.
- Upgrade: Not applicable.
- Combos:
- Synergies:
- Recommended Build: Use for farming elite weapons from silver enemies. Always attempt sneak on Wizzrobes.
- When to Use: Clearing monster camps without aggroing multiple enemies. Stealth sections in the Yiga Clan Hideout. Getting a first hit on any unaware enemy.
- Effect: While shield is equipped (any shield), jump and press A in midair to ride on the shield down slopes. Gives massive speed boost. Drains shield durability over time. Can use weapons while surfing? You can shoot arrows or throw weapons.
- Cooldown: None.
- Upgrade: Not applicable.
- Combos:
- Synergies:
- Recommended Build: Use any cheap shield (e.g., Pot Lid) for travel. Rarely worth sacrificing a good shield.
- When to Use: Quick traversal down mountains, crossing desert sand dunes, avoiding combat in enemy camps (surf through). Also for shield-surfing challenges in Hebra.
- Effect: Hold Y to charge a heavy attack.
- Cooldown: None.
- Upgrade: Not applicable.
- Combos:
- Synergies:
- Recommended Build: Not essential but good for groups.
- When to Use: When surrounded by weak enemies, or to break ore deposits (two-handed spin).
- Effect: Press Y while in the air after a jump or paraglider descent. Causes Link to slam down with his weapon, dealing damage based on weapon type. Two-handed weapons have a shockwave that can break rocks and stun enemies. Spears do quick stab.
- Cooldown: None.
- Upgrade: Not applicable.
- Combos:
- Synergies:
- Recommended Build: Good for initiating combat from above.
- When to Use: When you have height advantage, or to break a Hinox eyeball (jump from paraglider onto its stomach).
- Effect: Scan compatible Amiibo (NFC) to summon certain items, weapons, or even unique gear like the Fierce Deity Sword or Wolf Link. Each Amiibo can be used once per day (real time). Outcomes are random but can be reloaded via save scumming.
- Cooldown: Once per 24-hour real-time cycle per Amiibo.
- Upgrade: Not applicable.
- Combos:
- Synergies:
- Recommended Build: If you have Amiibos, use daily for exclusive gear (Epona, Twilight Bow, Fierce Deity Set).
- When to Use: At the start of a play session; best on save file to collect rare drops like Star Fragments.
- Effect: Place a custom waypoint marker on the map. You can teleport to that marker at any time (costs no fast travel fee). Only one medallion active at a time. Placing a new one destroys the old marker. It appears as a diamond icon.
- Cooldown: None. Placement is immediate.
- Upgrade: Not applicable.
- Combos:
- Synergies:
- Recommended Build: Essential for efficient farming and traversal.
- When to Use: Mark a difficult shrine, a good hunting spot, or a boss you'll farm later. Also to quickly return to a location after a blood moon.
- Effect: Spawn a motorcycle that can be summoned anywhere (except on water? It can go on shallow water but not deep). It has fuel (uses apples, or any fruit/veggie as fuel; most efficient: Endura Carrots). It can drift and climb steep slopes. Does not break like weapons.
- Cooldown: None, but costs fuel. Fuel consumption is constant while riding.
- Upgrade: Not applicable.
- Combos:
- Synergies:
- Recommended Build: Use for long-distance land travel. Saves weapon durability.
- When to Use: Any time you need to cross Hyrule Field quickly. Avoid in forests.
- Effect: Hold B to sprint. Drains stamina wheel.
- Cooldown: None, stamina regenerates when not sprinting.
- Upgrade: Increased max stamina via Stamina Vessels (from Shrines).
- Combos: Sprint jump to cover distance.
- Synergies: Revali's Gale saves stamina when climbing.
- When to Use: All the time out of combat.
- Effect: Hold A while on any climbable surface. Movement consumes stamina. While climbing, you can jump (B) to reach ledges, costing extra stamina.
- Cooldown: None.
- Upgrade: Climbing Gear (armor set) reduces stamina cost. Also Climbing Boots (DLC: from Hawa Koth Shrine) speed up climbing.
- Combos:
- When to Use: Essential for vertical exploration.
- Effect: Press X while airborne to deploy paraglider. Sinks slowly depending on wind. You can steer by tilting left stick. Hold B to dive (increase speed). Press A to fold glider.
- Cooldown: None.
- Upgrade: Cannot upgrade paraglider, but wind condition helps.
- Combos:
- When to Use: After any high jump, inevitable for crossing chasms.
- Effect: Hold A on water surface to swim. Can dive by pressing Y. Stamina drains quickly. When stamina runs out, Link starts drowning and loses hearts. Zora Armor allows swimming up waterfalls.
- Cooldown: None.
- Combos:
- Upgrade: Zora Armor (obtained in Vah Ruta quest) grants swim speed and waterfall climbing.
- When to Use: Crossing lakes or rivers, but avoid prolonged swims without stamina.
- Early Game Priority:
- Combat Build: Focus on upgrading Stasis+ and mastering Flurry Rush. Use two-handed weapons for Stasis+ launches.
- Exploration Build: Revali's Gale first, then Mipha's Grace, then Travel Medallion (DLC).
- Stealth Build: Sneakstrike + Sheikah Armor + Urbosa's Fury for clearing camps silently.
- Bomb Launch Bow: Place bomb, pull bow midair after detonating to skip fuse delay.
- Bomb Parry: Detonate bomb in front of a projectile to knock it away (advanced).
#### 1.2 Magnesis
- Metal Weapon Throw: While holding a metal weapon with Magnesis, press A to fling it at enemies with great force.
- Metal Block Combat: Use large metal boxes as shields or to crush enemies repeatedly.
#### 1.3 Stasis
- Cost: 3 Ancient Cores, 2 Ancient Shafts, 1 Ancient Screw (at Hateno Lab after upgrading at least one other rune).
- Stasis+ Launcher: Freeze an enemy, hit it 3 times with a heavy weapon (like a Royal Claymore), then watch it fly into a wall or off a cliff.
- Stasis+ Golf: Use a Korok Leaf or Flameblade to hit frozen enemies into water/lava.
- Magnesis: Freeze a metal crate, hit it to store energy, then use Magnesis to guide its flight path.
- Bomb: While enemy is frozen, place a bomb near them; detonate right as stasis ends for double impact.
- Urbosa's Fury: Freeze a group, then use Urbosa's Fury to hit all at once.
- Before Upgrade: Only on breakable objects, boulders, and treasure chests. Use to scan for enemies (slight highlight).
- After Upgrade: Freeze any dangerous foe to get free hits, bypass shields, or launch them. Also stops charging enemies (e.g., Lynels, Guardians).
#### 1.4 Cryonis
- Cryonis Launch: Create a pillar under an enemy on water to launch them upward.
- Cryonis Shield: Create pillars in front of incoming Guardian lasers—they block the beam (though pillar breaks).
- Ice Wall Surfing: Create pillars in front of you while shield surfing on water to skip across.
- Stasis: Freeze an enemy on water, then create a pillar underneath to lift them out.
- Magnesis: Place a metal box on a pillar, then freeze it with Stasis+ and hit it to send flying.
- Revali's Gale: Use pillar as a starting point to gain higher vertical distance with Revali's Gale.
#### 1.5 Camera (and Camera Run / Selfie)
- Camera is actually a separate Rune from the four main ones. You acquire it from Purah at Hateno Lab after completing the first Sheikah Slate upgrade.
- No direct upgrade. However, you can later upgrade the Slate to allow range detection for certain animals (via the Sensor+ upgrade from Purah again). This is not a skill but a Slate feature.
---
2. Champion's Blessings (DLC-Free Abilities)
After completing each of the four Divine Beasts, Link receives a unique Champion Ability. These are bound to the L button (or the D-Pad on Switch) and have a cooldown. They are incredibly powerful and should be used liberally.
#### 2.1 Revali's Gale (Vah Medoh)
- Bullet Time: Activate Revali's Gale, jump off, pull bow for slow-motion air shots.
- Shield Surf Launch: While shield surfing uphill, activate Revali's Gale to launch yourself higher.
- Paraglider: Essential combo—use updraft then glide long distances.
- Bombs: Drop bombs from above on enemies.
- Stasis+: Freeze a target while airborne, then strike as you land.
#### 2.2 Mipha's Grace (Vah Ruta)
- Fairies: If you have a fairy in your inventory, it will heal you before Mipha's Grace triggers. So if you want to save Mipha, hold fairies.
#### 2.3 Daruk's Protection (Vah Rudania)
- Shield Bash Parry: While Daruk's Protection is active, press A as an enemy strikes to parry, which stuns them for a few seconds. This is even safer than normal shield parry because the shield blocks automatically.
- Aggressive Play: Use it as a free block while attacking relentlessly.
- Flurry Rush: Parrying an attack with Daruk's Protection can trigger flurry rush window? No, flurry rush only from standard shield parry (A) or perfect dodge. But you can chain parry into a counter.
- Urbosa's Fury: While shield is up, you can drop a Fury without fear of interruption.
#### 2.4 Urbosa's Fury (Vah Naboris)
- Aerial Combo: Use Revali's Gale, then activate Urbosa's Fury while falling to strike enemies from above.
- Stasis+ Setup: Freeze multiple enemies, then use Urbosa's Fury to shock them all instantly.
- Thunderblade: If you have a weapon with shock damage, the stun from Fury can be extended with your own shocks.
- Metal Items: If enemies are holding metal weapons, the lightning can chain and hit multiple foes.
---
3. Combat Techniques (Universal Skills)
These are not granted by the Slate or Champions; they are innate moves Link can perform with any weapon or shield. Mastery of these is essential.
#### 3.1 Perfect Dodge & Flurry Rush
- Headshot: After a Flurry Rush, you can often follow up with an arrow to the face.
- Weapon Swap: Switch to a two-handed weapon mid-Flurry Rush to deal more damage? No, Flurry Rush locks your current weapon.
- Cryonis Pillar: Time your backflip onto an ice pillar to dodge a Guardian laser.
- Mipha's Grace: Allows aggressive dodging without fear of dying from mistiming.
- Daruk's Protection: Can be used as a safety net while practicing perfect dodges.
#### 3.2 Shield Parry
- Headshot after parry: After parrying a humanoid, shoot them in the face for a stun.
- Flurry Rush: Parrying melee? Parrying melee creates a stun but does not trigger Flurry Rush directly; you need to dodge or use a separate timing.
- Daruk's Protection: If you have it active, parry timing is forgiving (shield will block anyway).
- Ancient Shield: The Ancient Shield auto-deflects Guardian lasers without manual parry.
#### 3.3 Sneakstrike
- Sneakstrike chain: On sleeping enemies, you can sneakstrike repeatedly by quickly moving to their side before they turn around. This is optimal for farming Lizalfos tails.
- Waking enemy: If an enemy wakes but hasn't fully alerted, you can sneakstrike again.
- Sheikah Armor Set: Upgraded Sheikah armor gives night speed boost and stealth bonus.
- Stealth Foods: With max stealth (3 bananas), you can sneak right next to enemies.
#### 3.4 Shield Surfing
- Aerial Bow: While surfing off a ramp, pull bow for bullet time.
- Bomb Launch: Place a bomb and surf over it; detonate to launch yourself.
- Revali's Gale: Activate while surfing to gain height.
- Sand/Snow Boots: Not directly.
#### 3.5 Charged Attacks
- One-Handed: Spin attack with weak hits until release, then a final spin that stuns. Cost stamina.
- Two-Handed: Spin attack, slow but powerful. Stamina drain per spin.
- Spear: Continuous thrusts until stamina runs out; ends with a thrust.
- Urbosa's Fury: Spin attack can be interrupted by Urbosa's Fury for massive damage.
- Spin into Bomb: While spinning, throw a bomb and detonate.
- Heavy Weapons: Use with two-handed weapons for crowd control.
#### 3.6 Jump Attack
- Bullet Time: Jump, pull bow for slow-mo, then land with a moment to do a jump attack.
- Revali's Gale: Jump from updraft for a powerful descending attack.
---
4. Special Abilities from Equipment & Upgrades
#### 4.1 Amiibo Rune (Sheikah Slate)
- Wolf Link (from Twilight Princess HD Amiibo): Summons a wolf companion that fights for you. He has health (based on your save data from Twilight Princess HD) and can hunt/attack. He does not scale with difficulty.
- Bombs: Use with Wolf Link to distract enemies.
#### 4.2 Travel Medallion (DLC: The Champions' Ballad)
- Stasis+ Launch: Place medallion near a camp, teleport away, return later.
- Farming Routes: Mark rare spawns like Lynels or dragon parts.
#### 4.3 Master Cycle Zero (DLC: The Champions' Ballad)
- Bullet Time: Drive off a ramp and shoot bow while airborne.
- Revali's Gale: Use while on cycle for a boost.
- Snow/Sand: Excellent on flat surfaces. Works on snow but not sand? Actually it works on all terrain.
---
5. General Traversal & Movement Skills
#### 5.1 Sprint
#### 5.2 Climbing
- Revali's Gale: Use while climbing to get updraft.
#### 5.3 Gliding
- Bullet Time: While gliding, pull bow for slow motion.
- Revali's Gale: Transition into glide.
#### 5.4 Shield Surf (see above)
#### 5.5 Swimming
- Cryonis: Create ice pillars to rest.
---
6. Recommended Builds & Ability Prioritization
Since Link can use all abilities simultaneously, there is no skill tree. However, you can prioritize obtaining certain abilities early for an easier game:
1. Stasis+ (after first Divine Beast or even before: farm Ancient Cores).
2. Revali's Gale (second Divine Beast: Vah Medoh).
3. Daruk's Protection (third: Vah Rudania).
4. Urbosa's Fury (last, but useful).
5. Mipha's Grace (first if you die often; but it's automatic).
---
7. Ability Management Menu
Hold the L button to bring up the abilities wheel on the left side. You can toggle each champion ability on/off by highlighting and pressing A. This is crucial for Daruk's Protection (disable when not needed to save charges) and Mipha's Grace (no toggle). Revali's Gale and Urbosa's Fury can be toggled on/off to avoid accidental activation (especially Fury when you meant to use the camera).
---
8. Miscellaneous: Cooking, Runecraft, and Skills
While not traditional skills, Cooking is a core mechanic that directly enhances Link's capabilities. Max hearts, stamina, and buffs come from meals. There are no level-up skills; all progression is through gear, upgrades, and player mastery. This guide covers the direct action abilities only.
---
Summary Table of Abilities
| Ability | Type | Effect | Cooldown | Upgradeable |
|---|---|---|---|---|
| Remote Bomb | Slate Rune | Place & detonate bombs | None | + (range/damage) |
| Magnesis | Slate Rune | Move metal objects | None | + (range) |
| Stasis | Slate Rune | Freeze objects/enemies | ~1 sec | + (affects enemies) |
| Cryonis | Slate Rune | Create ice pillars | None | + (height/duration) |
| Camera | Slate Rune | Take photos | None | None |
| Revali's Gale | Champion | Updraft wind | 6 min | No |
| Mipha's Grace | Champion | Auto-revive + hearts | 24 min | No |
| Daruk's Protection | Champion | Auto-block (3 charges) | 12 min | No |
| Urbosa's Fury | Champion | AoE lightning stun (3 charges) | 12 min/charge | No |
| Flurry Rush | Combat | Slow-mo counterattack | None | No |
| Shield Parry | Combat | Deflect attacks | None | No |
| Sneakstrike | Combat | 8x damage from stealth | None | No |
| Shield Surf | Movement | Ride shield down slopes | None | No |
| Charged Attack | Combat | Hold Y for heavy attack | None | No |
| Jump Attack | Combat | Air slam | None | No |
| Travel Medallion | DLC | Place teleport marker | None | No |
| Master Cycle Zero | DLC | Summon motorcycle | Fuel | No |
This guide covers every skill, ability, and special move available to Link in The Legend of Zelda: Breath of the Wild. Mastery of these tools, combined with knowledge of their cooldowns and synergies, will make your journey through Hyrule much more enjoyable and efficient.
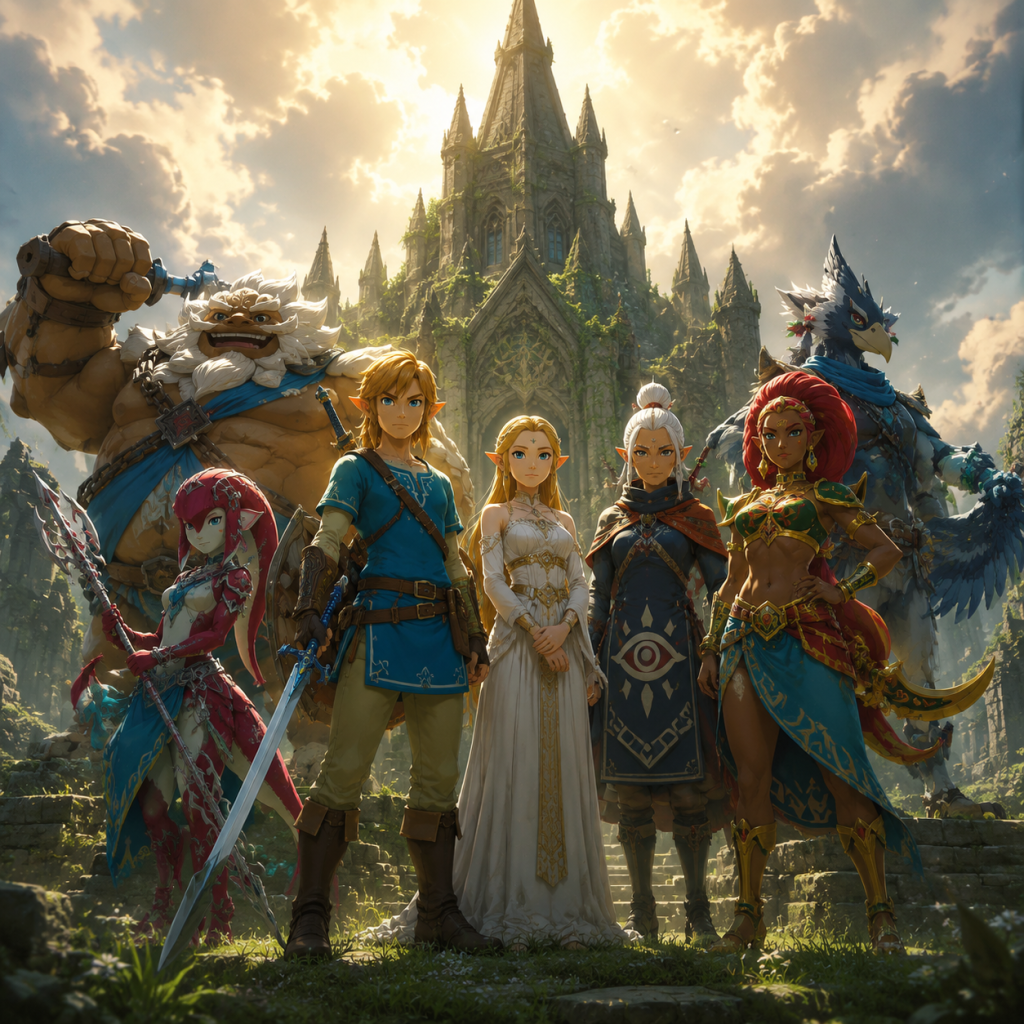
Characters & Roles
Characters & Roles: The Legend of Zelda: Breath of the Wild
This guide covers all major characters, their roles, and how they fit into the game. Since Link is the sole playable character, this section emphasizes his capabilities and the supporting cast's narrative and gameplay significance.
---
Playable Character
#### Link – The Hero of Hyrule
- Background: Link is a 17-year-old Hylian knight, chosen by the Master Sword to defeat Calamity Ganon. He awakens from a 100-year slumber in the Shrine of Resurrection with no memory of his past, but retains his innate combat prowess and courage.
- Role: Player avatar; all actions are performed as Link. He is a silent protagonist whose memories are recovered through \"Memories\" quests.
- Strengths: Incredible versatility. Link can use any weapon, shield, bow, and rune ability. He climbs, swims, glides, and rides horses. His stamina and health can be upgraded via shrines and Goddess Statues.
- Weaknesses: No permanent unlockable classes – all abilities are earned temporarily (Champion Abilities) or permanently (runes). Link cannot wear heavy armor without stamina penalties, and he is fragile early on.
- Playstyle: Highly adaptive. Players can choose stealth, direct combat, elemental tactics, environmental manipulation, or pure exploration. The only limitation is Link's stamina and health.
- Unlock Conditions: Link is available from the start. No unlock required.
- Recommended Equipment/Builds:
- Champion Abilities (special moves granted after freeing Divine Beasts):
- Team Synergy: Not applicable; Link works alone. However, he can tame horses, which serve as mounts, and use Sheikah Slate runes (Magnesis, Stasis, Cryonis, Remote Bombs) that interact with the environment.
- Role: The rightful heir to the throne of Hyrule, wielder of the sealing power, and head of the Sheikah research team. She is not playable but appears in cutscenes and memory locations.
- Background: Eldest daughter of King Rhoam. She struggled to unlock her sealing magic for years, feeling pressure to stop Calamity Ganon. After the Calamity struck, she held Ganon at bay within Hyrule Castle for 100 years.
- Significance: She guides Link through her diary, voice in the final battle, and provides the Light Bow in the final boss fight (not usable otherwise). Her memories are collectibles.
- Background: Zora princess, skilled healer, and Link’s childhood friend. She had a crush on Link. She died 100 years ago in the Calamity, but her spirit remains in Vah Ruta.
- Champion Ability: Mipha’s Grace – revives Link with extra hearts when his health reaches zero (cooldown ~24 minutes).
- Role: Healer support (narrative). Weak in direct combat compared to others.
- Background: Arrogant Rito warrior, master archer, felt overshadowed by Link. He perfected the technique \"Revali's Gale\".
- Champion Ability: Revali’s Gale – creates a vertical wind current that lifts Link into the air, perfect for paragliding or bullet time arrows.
- Role: Aerial mobility specialist.
- Background: Massive Goron warrior, close friend of Link, known for his protective shield technique \"Daruk's Protection\".
- Champion Ability: Daruk’s Protection – auto-deflects up to three incoming attacks, including guardian lasers, then recharges.
- Role: Tank/defense support.
- Background: Gerudo chief, formidable warrior, close to Zelda’s mother. She wielded lightning attacks and her technique \"Urbosa's Fury\".
- Champion Ability: Urbosa’s Fury – an AOE electric shock that stuns and damages all nearby enemies. Recharges after each use.
- Role: Crowd control/damage dealer.
- Role: The first major NPC Link meets on the Great Plateau, who is actually King Rhoam’s ghost. He provides the paraglider and tutorial objectives.
- Significance: Reveals the backstory and points Link toward the main quests. Cannot be interacted with after leaving the Great Plateau (his diary appears later).
- Role: Elder of Kakariko Village, leader of the Sheikah, and Zelda’s trusted advisor. She is the primary quest giver for main storyline (Find the Champions, Free the Divine Beasts).
- Significance: Gives Link the Sheikah Slate + runes, and tasks him with the \"Destroy Ganon\" main quest. Her granddaughter Paya also interacts with Link.
- Role: Ancient spirit tree in Korok Forest, guardian of the Master Sword. He evaluates Link’s worthiness to pull the sword.
- Significance: If Link has 13 hearts, he can obtain the Master Sword. Also provides hints about the Lost Woods and shrines.
- Role: Sheikah researcher in the Hateno Ancient Tech Lab, Impa’s younger sister who de-aged herself by accident. Upgrades the Sheikah Slate runes (Camerapedia, Hero’s Path mode, etc.).
- Unlock Conditions: Complete the main quest \"Locked Mementos\" and bring her the required materials.
- Role: Sheikah researcher at the Akkala Ancient Tech Lab, specializing in ancient weapons and armor. Provides the Ancient set and upgrades to the Stasis rune (Stasis+).
- Unlock Conditions: Complete the main quest \"The Priceless Maracas\" and side quests.
- Role: Mysterious monster parts merchant who appears at certain towns at night after Link frees a Divine Beast. Sells monster masks, cosmetic gear, and the \"Monster Stamp\" item.
- Significance: Only vendor for rare items like the Dark Hood, and allows Link to disguise as Bokoblins/Lizalfos/Lynels.
- Role: Traveling merchant encountered at stables and villages. Sells common supplies, arrows, elixirs, and bugs (at higher prices than other shops).
- Significance: Useful for quick restocking, especially arrows. Notable for his beetle obsession.
- Background: Four giant spirits locked in cocoons across Hyrule. When awakened with rupees (increasing costs: 100, 500, 1000, 10000), they upgrade armor sets to higher defense levels.
- Role: Enhanced armor customization. Each fairy adds a star level to armor, from ★ to ★★★★ (four fairies max).
- Role: Forest spirits scattered across Hyrule. Hestu (a large Korok) can increase Link’s inventory slots for weapons, shields, and bows in exchange for Korok Seeds.
- Significance: Inventory expansion is vital for long-term play. There are 900 Korok Seeds total.
- Role: Antagonistic Sheikah splinter group serving Ganon. They attack Link on sight, disguised as travelers, or in full Yiga uniform. They also have a hideout in Gerudo Desert.
- Key Members: Sooga (blademaster, Master Kohga’s right hand), Master Kohga (leader, encountered in the Yiga Clan Hideout). Defeating Kohga yields the Thunder Helm (cosmetic) and access to a shrine.
- Role: Rito bard who plays accordion and appears at various stables and villages. He sings songs that reveal hidden shrines and lead to side quests (\"The Hero’s Cache\").
- Significance: Kass is the secondary quest giver for shrine-related riddles. He appears in the end credits after defeating Ganon.
- Role: Builders in Tarrey Town, a major side quest. Bolson contracts Link to help construct houses and recruit villagers. After Tarrey Town is complete, Bolson sells a Piece of Heart and grants the unique \"Hylian Homeowner\" side quest.
- Location: Hyrule Castle Sanctum. Appears as a giant pig-like beast after Dark Beast Ganon in phase 2.
- Role: Final boss. Link must defeat him to end the game. He uses malice tentacles, laser beams, and projectiles. Phase 1 is inside the castle; Phase 2 is outside on the plain.
- Weakness: Ancient Arrows (phase 1), Light Bow and arrows (phase 2), Urbosa’s Fury stuns him. Hit his glowing weak points.
- Location: Hyrule Field, after Calamity Ganon’s shield is broken.
- Role: Giant shadow beast that charges and releases malice pools. Zelda provides the Light Bow, and you must shoot four glowing weak points on his forehead and back.
- Strategy: Use Revali’s Gale to gain height, then shoot with bomb or ancient arrows. Urbosa’s Fury can also help clear malice.
- Waterblight Ganon (Vah Ruta): Uses a spear and ice attacks. Weak to bomb arrows and fire weapons.
- Windblight Ganon (Vah Medoh): Hovering in air, fires wind blasts and lasers. Use Revali’s Gale or paraglide to get close, then shoot arrows.
- Fireblight Ganon (Vah Rudania): Flails a sword and shield, spews fire. Use ice/water weapons to cool him down.
- Thunderblight Ganon (Vah Naboris): Extremely fast, uses electric attacks and teleports. Use magnesis to drop metal boxes on him, or use ancient arrows when stunned.
- Role: Mini-bosses that roam the world, particularly around Hyrule Field and Lanayru Great Spring. They are the hardest common enemies.
- Types: Red (easy), Blue, White, Silver (hard). White and Silver drop savage gear. Golden Lynels appear in Master Mode.
- Strategy: Use Stasis+ to freeze, then attack with highest damage weapon. Flurry Rush after dodging. Parrying their charges and mounts works. They drop valuable weapons and parts.
- Role: Giant rock golems with a crystal weak point on top. Found in specific locations. Defeating them yields gems and ore.
- Tip: Climb on top of them and attack the crystal. Use bombs to stun, then climb quickly.
- Role: Giant cyclops enemies. Hinox are alive, Stalnox are skeletal at night. Weak point is the eye. Stun them by shooting the eye, then attack. They drop weapons, shields, and Hylian Shield (one-time in a chest).
- Role: Sandworm boss found in Gerudo Desert. You must bait it with bombs or arrows while standing on elevated platforms. Once it leaps, shoot its belly.
- Role: Ancient Sheikah robots corrupted by Ganon. They have one eye as a weak point. Perfect parrying their laser reflects it for a kill. Ancient arrows also work. They drop ancient parts for upgrades.
- Early Game: Traveler's gear, Wooden Bow, Soldier's Broadsword, Hylian Shield (found later). Prioritize stamina vessels.
- Mid Game: Knight's gear, elemental weapons (Great Flameblade, Frostspear), multi-shot bows (Lynel Bow).
- Late Game: Ancient Armor set, Master Sword, Savage Lynel weapons, Ancient Bow, upgraded Barbarian Armor for attack boost.
- Mipha’s Grace: Auto-revive once per cooldown.
- Revali’s Gale: Create an updraft for gliding.
- Daruk’s Protection: Auto-block three attacks.
- Urbosa’s Fury: AOE electric shock.
---
Major Non-Playable Characters (NPCs)
These characters are central to the story, provide quests, or aid Link indirectly. They are not playable but have distinct roles.
#### Princess Zelda
#### The Four Champions
These are the legendary pilots of the Divine Beasts. Each grants Link a Champion Ability after their respective Divine Beast is freed.
##### Mipha – Champion of the Zora
##### Revali – Champion of the Rito
##### Daruk – Champion of the Gorons
##### Urbosa – Champion of the Gerudo
#### King Rhoam (as the Old Man)
#### Impa
#### The Deku Tree
#### Purah
#### Robbie
#### Kilton
#### Beedle
#### The Great Fairies
#### The Koroks
#### The Yiga Clan
#### Kass
#### Bolson (and Karson)
---
Major Enemy Characters (Bosses & Mini-Bosses)
These are significant opponents with distinct roles in the game world.
#### Calamity Ganon (Main Boss)
#### Dark Beast Ganon (Phase 2 of Final Boss)
#### The Blight Ganons (Divine Beast Bosses)
Each Divine Beast is piloted by a champion, but Calamity Ganon’s blight has taken their form. Link faces the blight inside the beast.
#### Lynels
#### Talus (Stone Talus, Igneo Talus, Frost Talus)
#### Hinox & Stalnox
#### Molduga
#### Guardian Stalkers/Skywatchers/Turrets/Sentinel
---
Unlock Conditions for All Major Abilities & Equipment
| Ability/Item | Unlock Condition |
|---|---|
| Paraglider | Get from Old Man after completing 4 shrines on Great Plateau |
| Sheikah Slate (runes) | Obtain from Old Man during tutorial; Magnesis from Oman Au Shrine, remote bombs from Ja Baij, stasis from Owa Daim, cryonis from Keh Namut |
| Camera + Album | Purchase from Purah at Hateno Lab (3 Ancient Screws, 3 Ancient Shafts, 1 Ancient Core) |
| Hero's Path Mode | Same as Camera, requires more materials |
| Master Sword | 13 full hearts; pull from pedestal in Korok Forest |
| Champion Abilities | Complete each Divine Beast main quest (Vah Ruta, Vah Medoh, Vah Rudania, Vah Naboris) |
| Ancient Armor | Purchase from Robbie at Akkala Lab after completing "The Priceless Maracas" quest (materials: Ancient parts + rupees) |
| Hylian Shield | Chest under Hyrule Castle (lockup) after defeating a Lynel or using stealth; can be repurchased from Granté in Tarrey Town if lost |
| Taming Horses | Approach a horse, soothe it, and ride to a stable to register (cost 20 rupees). |
| Inventory Slots | Give Korok Seeds to Hestu (first encounter near Kakariko, later at Korok Forest). |
Team Synergy (Narrative vs. Gameplay)
While Link operates alone, the Champions provide passive cooperative effects:
- Mipha’s Grace acts as a failsafe healer.
- Revali’s Gale boosts mobility for scouting and bullet time.
- Daruk’s Protection mitigates damage from surprise attacks.
- Urbosa’s Fury clears mobs and stuns bosses.
- Link: Versatile explorer, combatant, puzzle solver.
- Champions: Provide global passive upgrades (once acquired) – essential for making late-game easier.
- Key NPCs: Impa, Purah, Robbie, Hestu, Kilton, Beedle, Great Fairies – offer upgrades, quests, shop access.
- Bosses: Gatekeepers of story progression and high-tier loot.
Together, they cover combat, survival, and exploration. There is no direct character swapping, but selecting which Champion Ability to use (all active simultaneously) is crucial. Players often turn off abilities they want to save for specific encounters (e.g., disabling Daruk’s Protection to parry Guardian lasers).
---
Summary of Character Roles in Gameplay Loop
This guide covers all major characters and their roles in the world of Hyrule. No other playable classes exist; the depth comes from Link’s ability set and the supporting cast’s contributions.
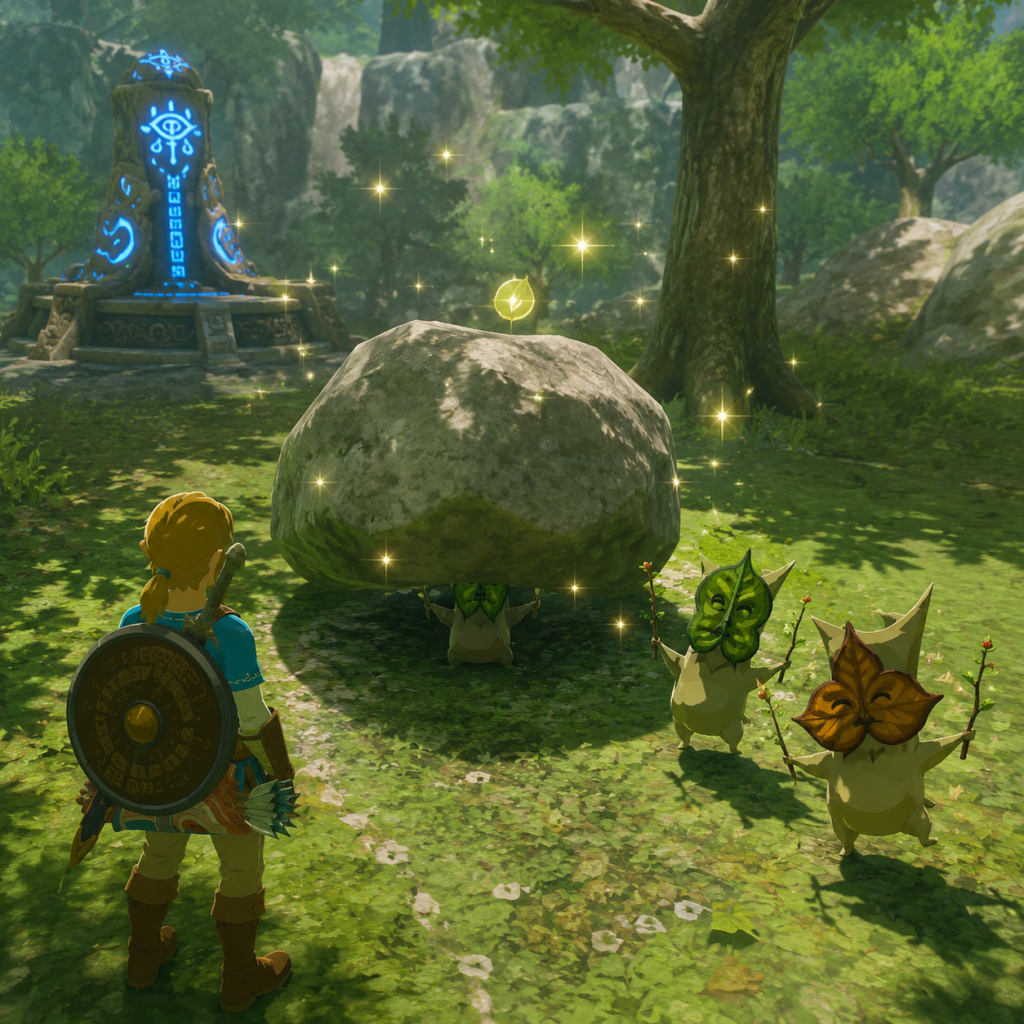
Cheats & Secrets
Cheats & Secrets: The Legend of Zelda: Breath of the Wild
The Legend of Zelda: Breath of the Wild has no traditional cheat codes, debug menus, or unlock codes. However, it is packed with developer-intended hidden content, Easter eggs, and exploit-safe secrets. This guide covers all official hidden features and secrets that do not rely on glitches or modifications.
---
Amiibo Unlocks (Official Developer-Intended Content)
Amiibo figures unlock exclusive items when scanned using the Nintendo Switch NFC reader (or Wii U GamePad). Each amiibo can be scanned once per day. Compatible amiibo and their rewards:
| Amiibo | Unlockable Item(s) | Notes |
|---|---|---|
| Link (Archer) | Twilight Bow (random), arrows | High-damage bow, infinite if re-scanned daily |
| Link (Rider) | Epona (horse), Trousers of the Wild, etc. | Epona appears at a stable; unique stats |
| Link (Skyward Sword) | Sword of the Sky (Fierce Deity set piece), Fierce Deity armor gradually | Full set provides attack up |
| Link (Majora's Mask) | Fierce Deity Sword, armor pieces | Same as above but different pieces |
| Link (Ocarina of Time) | Biggoron's Sword, Mirror Shield (Hero of Time set pieces) | Collectible weapons/armor |
| Link (Twilight Princess) | Epona (if not scanned earlier), Twilight Bow (alternate chest) | Duplicate rewards possible |
| Zelda (Breath of the Wild) | Ancient Shield, Ancient Bow, Ancient Arrow, Ocarina of Time (as a key item for a secret?) | Actually the ocarina is not usable, but she drops random chests |
| Guardian | Ancient parts, weapons | Chests containing guardian loot |
| Bokoblin | Bokoblin mask, weapons | Mask for stealth near Bokoblins |
| Wolf Link (Twilight Princess HD) | Wolf Link companion (requires Link's health from Twilight Princess HD save data) | Follows Link, attacks enemies, finds items |
---
Secret Tricks and Exploit-Safe Secrets
These are intended mechanics that function as hidden secrets:
- Pull the Master Sword Early: The Master Sword in the Korok Forest requires 13 full heart containers. If you have only 12 hearts, you can cook a dish that grants temporary hearts (e.g., Hearty Durian + Hearty Radish = Hearty Meal) to reach 13 temporarily. The game counts current hearts including temporaries, allowing you to pull the sword even without permanent 13 hearts. This works but consumes the temporary hearts instantly.
- Hylian Shield Acquisition: The Hylian Shield is hidden in Hyrule Castle's Lockup. To reach it, complete the side quest "The Stolen Heirloom" to get the Royal Guard's Uniform (optional), then proceed to the lockup via the docks under the castle. The shield is inside a metal chest. It has high durability but can be replaced at Tarrey Town's vendor if lost.
- True Ending: To see the full ending credits scene, you must collect all 18 memories (including the final memory at Hyrule Castle) before defeating Calamity Ganon. The memories are obtained via the Captured Memories main quest. Without all memories, the ending is slightly truncated.
- Secret Final Memory: The 18th memory is located in Hyrule Castle's Sanctum (the room where you fight Ganon). It triggers after the boss battle if you have all other memories. It shows Link and Zelda before the Great Calamity.
- Blood Moon Reset: The Blood Moon occurs periodically every 2–3 in-game hours. It resets enemy camps and resource spawns. If you want to force a Blood Moon to respawn specific loot, you can fast travel repeatedly or wait. There is no exploit to avoid it, but you can use it to farm.
- Shield Surfing Anywhere: Shield surfing is not limited to snow or sand. You can shield surf on grass, stone, or even water (briefly) by holding ZL and pressing A while in the air. Shield surfing on grass is slower but works. Use a shield with high durability (e.g., Ancient Shield) to avoid breaking.
- Cooking Secret Recipes: Cooking certain ingredient combinations yields special effects or dialogue hints. For example:
- The Lord of the Mountain: A glowing secret horse with high stats appears on Satori Mountain only when the mountain glimmers (random intervals). You must sneak and tame it with stamina. It cannot be registered at stables because it is a spirit.
- Giant Horse & White Horse: Hidden horses:
- Hinox on Great Plateau: A Stalnox (skeletal Hinox) spawns on the Great Plateau at night after you leave the Shrine of Resurrection. It drops valuable loot (Royal Weapons). You can return to the plateau at any time to fight it.
- Temple of Time Statue: The massive statue in the Temple of Time depicts the Hero of Time from Ocarina of Time. Its design matches the original statue from that game.
- Goddess Hylia Statue: Statues of Hylia appear in various locations, referencing Skyward Sword.
- The Forgotten Temple: The temple holds a giant statue of the Goddess Hylia and a hidden area with a Hylia reference.
- Misko's Treasure: A series of side quests referencing the treasure of the pirate Misko, which includes items like the Phantom Ganon armor (DLC), but in base game it's just treasure maps.
- Lonely Island & the Strange Tree: On a small island south of Lake Hylia (near the Great Plateau), there is a lone tree with a hidden Korok seed. This is a reference to Link's Awakening's lonely tree.
- Sheikah Tech References: The Sheikah Slate is a clear reference to the Sheikah from Ocarina of Time.
- The Champion's Ballad DLC adds many Easter eggs like the Majora's Mask (as a wearable item), Tingle's outfit, and Korok Mask. These are not in the base game but are official content.
- A Hylian Recitation: In Hyrule Castle's library, there is a thin book titled "The Legend of Zelda" that mentions the series' lore. Reading it causes a small cutscene.
- Skull Kid Cameo: In the Lost Woods, you can see a Skull Kid sitting on a stump. He reacts if you approach wearing the Majora's Mask (DLC only).
- Twilight Princess References: The Twilight Bow (from amiibo) and the Mirror Shield (Hero of Time set) reference Twilight Princess.
- Wind Waker Tingle: The Tingle outfit returns in DLC. In base game, the Tingle Island reference is absent.
- The Ancient Armor Set: Found in various labyrinths: Lomei Labyrinth Island, South Lomei Labyrinth, North Lomei Labyrinth. Each piece requires solving the maze and defeating a Scout guardian. The set grants ancient proficiency (weapon damage up for ancient weapons).
- The Diamond Circlet: Found in a hidden chest in Gerudo Town's Secret Club (after joining the club). Gives resistance to guardian lasers.
- The Royal Guard's Sword: Hidden in Hyrule Castle's Docks area, behind a metal door that requires Magnesis. It has high attack but low durability.
- The Forest Dweller's Sword: Found in a hollow tree in the Lost Woods. It is a weak sword but has a hidden property of being effective against creatures weak to nature? No, but it's a collectible.
- The Hylian Shield Duplication: After breaking the Hylian Shield, you can buy a new one from Granté in Tarrey Town for 3,000 Rupees. This is the only way to get it again.
- The Sheikah Sensor+: Upgraded sensor from Purah at Hateno Ancient Tech Lab. It can track any registered item (e.g., apples, treasure chests). This is a key upgrade for finding hidden items.
- Photo Gallery: The camera rune can take photos of anything. Photos are stored in the Hyrule Compendium. Taking a photo of a specific object (e.g., a Molduga) completes an entry.
- Time of Day: Resting at a campfire lets you pass time to morning, noon, or night. This is useful for avoiding Blood Moons or triggering specific events.
- Horse Whistle: Hold down the D-pad up to call your horse. The horse must be within earshot and not separated by a gap.
- Sleeping for Full Heal: Sleeping in a bed (any bed) fully restores health and provides temporary yellow hearts if the bed is comfortable (e.g., inns).
- The Sheikah Slate Rune Upgrades: Each rune can be upgraded at the Hateno Ancient Tech Lab:
- Dubious Food (any critter + monster part + fruit) – sells for low price but can be used to troll NPCs.
- Tough Meat & Mushroom Skewer – combines two same-effect ingredients for stronger buff.
- Rock-Hard Food (using Flint + anything) – inedible, but used in a side quest.
- Giant Horse appears in the Hateno Tower region woods (near Oseria Plain). It requires nearly full stamina to tame and cannot wear bridles.
- White Horse is part of the side quest "The Royal White Stallion" near Outset Stable. It has high stats and can be registered.
---
Easter Eggs and Developer References
Breath of the Wild contains many nods to past Zelda games:
---
Hidden Items and Quests
---
The True Ending and Memory Requirements
To unlock the full ending cutscene:
1. Complete the Main Quest: Captured Memories by finding all 18 memories scattered across Hyrule.
2. The final memory is inside Hyrule Castle's Sanctum and becomes available only after locating the other 17.
3. Then defeat Calamity Ganon (and optionally Dark Beast Ganon). The ending will show additional scenes with Zelda and the Champions.
If you miss even one memory, the ending will be shorter. No other conditions affect the ending.
---
Miscellaneous Hidden Features
- Remote Bomb+ – larger blast radius.
- Cryonis+ – creates multiple ice blocks.
- Magnesis+ – longer range.
These upgrades are essential for advanced exploration.
---
Developer Room / Unused Content (No Exploits)
There is no developer room accessible in the final game without glitches. However, unused items like the Hylian Tunic (different color) exist in the game files but cannot be obtained normally. They are considered cut content.
Summary
Breath of the Wild focuses on discovery through exploration rather than cheats. All listed secrets are intentional and safe to use. For cheats (stat boosts, invincibility), players must rely on amiiibo or in-game cooking items (e.g., Hearty food for max hearts, speed potions). The most impactful secrets are the Master Sword early pull, Hylian Shield location, and true ending requirements.