The Legend of Zelda: Tears of the Kingdom
## Game Overview **The Legend of Zelda: Tears of the Kingdom** is the direct sequel to the critically acclaimed *The Legend of Zelda: Breath of the Wild* (2017) and represents the latest flagship entry in Nintendo's legendary action-adventure series. Developed and published by **Nintendo** for the ...
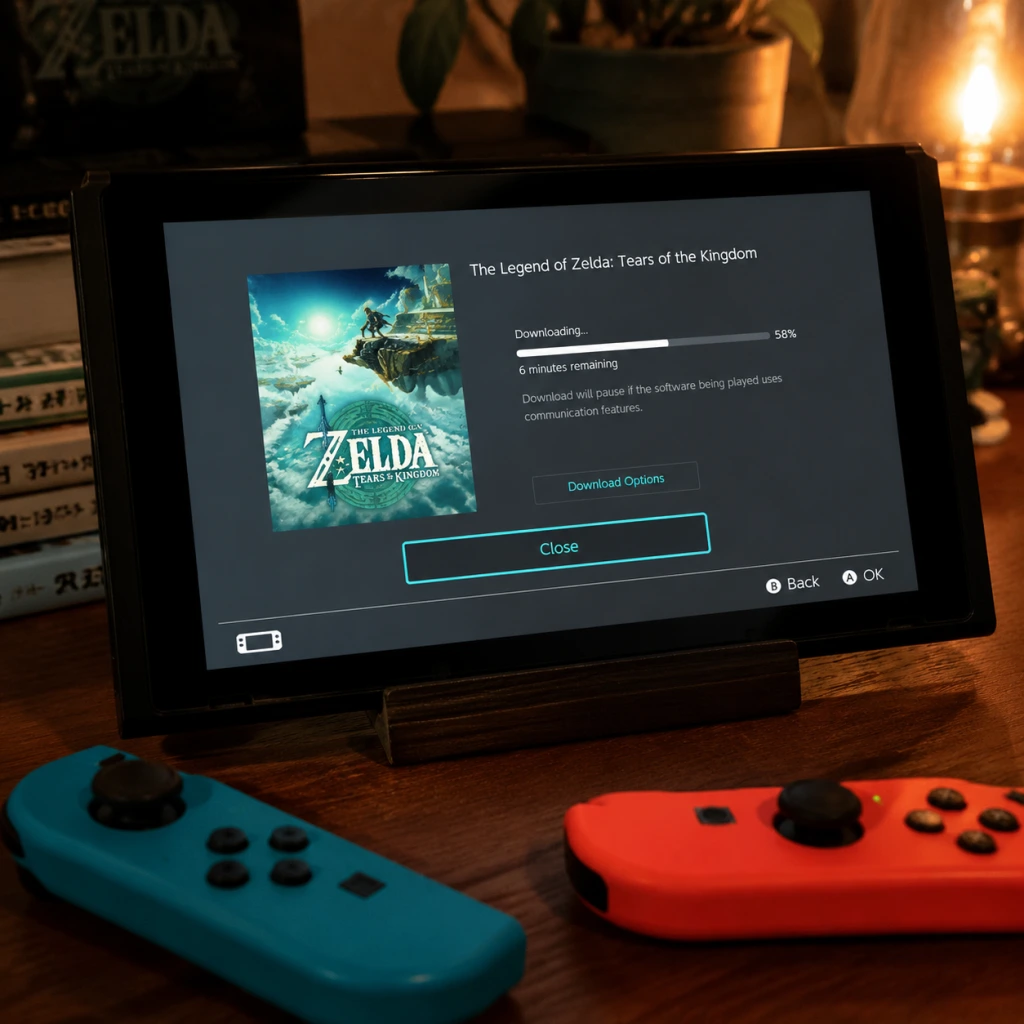
Download & Installation
Overview
The Legend of Zelda: Tears of the Kingdom is a Nintendo Switch exclusive title. It is not officially available on PC, PlayStation, Xbox, or mobile devices. The only legitimate ways to acquire and play the game are through the Nintendo eShop (digital download) or a physical game card (cartridge). This guide covers both methods.
---
Platform Availability
| Platform | Official Release | Purchase Options |
|---|---|---|
| Nintendo Switch | Yes (May 12, 2023) | Digital (eShop), Physical (Game Card) |
| PC / Steam / Epic | No | Not available |
| PlayStation 4/5 | No | Not available |
| Xbox One / Series X | S | No |
| Mobile | No | Not available |
---
System Requirements
There are no separate system requirements per model; the game runs on all Nintendo Switch models:
- Nintendo Switch (Original): Works
- Nintendo Switch OLED: Works
- Nintendo Switch Lite: Works (handheld only, no TV mode)
- Firmware: Version 16.0.0 or higher (recommended 17.0.0+ for latest stability)
- Storage: 18.2 GB free space (digital version). Physical requires ~500 MB for patch data (if any updates are downloaded).
- Internet: Required for initial download (digital), game updates, and online features (not required for single-player).
- Nintendo Account: Required for eShop purchases and some online features.
- After installation, launch the game. A brief splash screen will appear.
- Select language and region (if prompted; usually defaults to your console settings).
- Check for software update: The Switch will automatically check for updates on first launch if connected to the internet. It is recommended to install the latest patch (v1.1.0 or newer) for bug fixes and performance improvements.
- Proceed to main menu – no account login is required for offline play. For online features (e.g., future DLC, stats), you must be signed into your Nintendo Account.
- Minimum play mode: You can start a new game immediately. The tutorial area (Great Sky Island) begins right after the intro cutscene.
---
Step-by-Step Installation
Option A: Digital Download from Nintendo eShop
1. Connect to the internet on your Switch (System Settings → Internet → Internet Settings).
2. Open Nintendo eShop from the Home menu.
3. Sign in with your Nintendo Account (or create one at accounts.nintendo.com).
4. Search for \"The Legend of Zelda: Tears of the Kingdom\" using the search bar.
5. Select the game and choose \"Proceed to Purchase\" (requires adding funds or linking a credit card; Nintendo eShop cards also work).
6. Confirm the purchase. The download will start automatically.
- The download size is approximately 18.2 GB. On slow connections, this may take several hours.
7. Monitor download progress from the Home menu (highlight the game icon, press +, select \"Download Options\" or view the progress bar).
8. Once complete, the game icon will appear ready to play. No further installation is needed; the game is immediately playable.
Option B: Physical Game Card (Cartridge)
1. Insert the game card into the cartridge slot on top of the Nintendo Switch (push until it clicks).
2. If prompted, accept any system update from the card (e.g., firmware update if required).
3. The game icon will appear on the Home menu. If you want to install updates (optional), connect to the internet and the Switch will automatically check for an update.
4. To play offline, just launch the game from the icon. The cartridge must remain inserted while playing.
5. No additional installation needed for the main game data; all core assets run from the cartridge. However, patches (e.g., version 1.1.0 or later) need to be downloaded if desired. These patches are small (<500 MB).
---
First Launch & Setup
---
Storage Space Requirements
| Item | Required Space |
|---|---|
| Digital download (base game) | 18.2 GB |
| Day-1 patch (v1.1.0) | ~450 MB |
| Save data (per profile) | ~2–5 MB |
| Total (digital + patches) | ~18.7 GB |
- Physical card users still require ~500 MB free on internal storage (or microSD) for patch data and save files.
- Recommended: Use a microSD card (UHS-I, at least 32 GB) if your internal storage is limited (particularly on base Switch or Lite).
- Nintendo Account: Free to create; required for eShop purchases and optional online features.
- No subscription necessary for single-player gameplay. However, to use online features (e.g., future DLC, cloud saves) you may need a Nintendo Switch Online membership.
- Family sharing: Purchases are tied to the Nintendo Account; multiple profiles on the same console can play if the account is set as \"Primary Console.\"
- Cause: Not enough free space on internal memory or microSD.
- Fix:
- Cause: Server congestion or unstable Wi-Fi.
- Fix:
- Cause: Incomplete download or damaged microSD.
- Fix:
- Cause: Dust or incorrect insertion.
- Fix:
- Cause: Payment method not supported or incorrect region.
- Fix:
- Pre-load was available before launch, but now you must download the full game.
- Digital vs. Physical differences: Digital never requires swapping cartridges; physical allows resale. Both have same performance.
- microSD card: If you buy digital, get a fast microSD (UHS-I U3) to reduce load times. The Switch supports microSD, microSDHC, and microSDXC (up to 2 TB).
- Cloud saves require Nintendo Switch Online subscription; the game does not support cloud saving for save data as of now (check official policy).
- DLC may be released later; ensure your account is linked to the correct region for purchasing DLC.
---
Account Requirements
---
Common Installation Errors & Fixes
Error Code: 2002-2080 (Insufficient Storage)
- Delete unwanted games/screenshots in Data Management (System Settings > Data Management > Manage Software).
- Insert a larger microSD card (up to 2 TB supported, format to FAT32 or exFAT).
- For physical version, you still need space for patches; consider using a microSD.
Download Stuck or Very Slow
- Put the Switch in sleep mode to keep downloading in the background (press power button once).
- Reboot your router and Switch.
- Try a wired LAN adapter (dock mode) for more stable connection.
Corrupted Data / Software Error on Launch
- Go to System Settings > Data Management > Manage Software > Select \"Tears of the Kingdom\" > Check for Corrupt Data.
- If corrupted, delete the game and redownload (digital) or clean the cartridge (physical).
- Reinsert microSD card if applicable.
Cartridge Not Recognized
- Blow gently into the cartridge slot (use compressed air).
- Ensure the cart is pushed all the way in until it clicks.
- Try a different game card to isolate hardware issue.
eShop Purchase Fails / Payment Declined
- Ensure your Nintendo Account region matches your eShop region.
- Use a credit card or prepaid eShop card from your region.
- Contact your bank if foreign purchase is blocked.
---
Post-Installation Verification
After installation, perform these checks to confirm the game is ready:
1. Boot the game – you should see the Nintendo logo and main menu within 30 seconds.
2. Check version number – On the Home menu, highlight the game icon and press `+`. Select \"Software Update\" > \"Version Info.\" The latest version as of 2025 is 1.2.1 (check online for latest).
3. Save data test – Start a new game, play for 1–2 minutes, then close the game. The save icon should appear in the save slot.
4. Performance test – Play the opening area (Great Sky Island) – should run at 30 fps with minor drops in busy scenes (normal behavior).
5. Online features (optional) – If you have a Nintendo Switch Online subscription, select "Online Play" from the main menu (not available at launch; may be added in future updates).
---
Additional Tips
---
Summary
The Legend of Zelda: Tears of the Kingdom is a Nintendo Switch exclusive. Install it digitally via the eShop (requires 18.2 GB and a Nintendo Account) or physically via game card. No other platforms are supported. Follow the steps above for a smooth installation. If you encounter errors, refer to the common fixes section. Enjoy the adventure!
Game Introduction
Game Overview
The Legend of Zelda: Tears of the Kingdom is the direct sequel to the critically acclaimed The Legend of Zelda: Breath of the Wild (2017) and represents the latest flagship entry in Nintendo's legendary action-adventure series. Developed and published by Nintendo for the Nintendo Switch family of systems, it was released globally on May 12, 2023. The game is currently exclusive to Nintendo Switch, with no official PC, PlayStation, Xbox, or mobile versions available. Distribution is strictly through official Nintendo channels – physical cartridges and digital download from the Nintendo eShop.
Genre & Core Appeal
Tears of the Kingdom falls primarily under action-adventure and open-world genres, with strong elements of puzzle-solving, exploration, and crafting. Its core appeal lies in unprecedented player freedom: you can approach objectives in any order, interact with the physics-driven world in countless creative ways, and construct vehicles, weapons, and contraptions using the new Ultrahand, Fuse, and Ascend abilities. The game rewards curiosity, experimentation, and lateral thinking. It offers a deeply immersive experience that combines a epic fantasy story with a physics sandbox, all wrapped in Nintendo's trademark polish and charm.
Target Audience
While the base difficulty and gentle onboarding make it accessible to newcomers, the game's depth and complexity appeal to veteran Zelda fans, open-world enthusiasts, puzzle lovers, and creative players who enjoy building and emergent gameplay. Age rating is E10+ (Everyone 10+) due to mild fantasy violence and suggestive themes. The game supports both solo adventurers and those who enjoy community sharing of in-game inventions (via online features).
Story Overview
Tears of the Kingdom picks up an unspecified time after Breath of the Wild. Link and Zelda, together, explore deep beneath Hyrule Castle to investigate a mysterious mummified corpse that is the source of a spreading decay called Gloom. The figure awakens as Ganondorf, the Demon King, who breaks free and triggers a series of catastrophic events: Hyrule Castle levitates into the sky, ancient structures called Sky Islands appear in the heavens, and malevolent forces overrun the land. Zelda plunges into an abyss, lost to time, while Link is gravely wounded and his arm corrupted by Gloom. He is saved by a mysterious arm that becomes his new right arm, granting him incredible new abilities. The story follows Link as he awakens on a sky island, learns the new powers, and sets out to find Zelda, defeat Ganondorf, and restore peace to Hyrule. The narrative weaves through three layers: the floating Sky Islands, the familiar yet changed Surface of Hyrule, and the dark, cavernous Depths beneath.
Setting
The game world is massive and vertically layered:
- The Sky (Sky Islands): Verdant floating islands, ancient Zonai ruins, wind tunnels, and updrafts. Home to new tribes like the Constructs and the Rito who have adapted to the higher altitudes.
- The Surface (Hyrule): Largely the same geography from Breath of the Wild, but heavily altered by the Upheaval. Canyons, chasms, and new structures dot the landscape. The same regions exist (Hebra, Gerudo Desert, Eldin, Lanayru, Faron, Central Hyrule, etc.) but with new towns, enemy outposts, and cave systems.
- The Depths: A dark, underworld mirror of Hyrule beneath the surface, filled with gloom-covered terrain, ancient Zonai tech, massive underground caverns, and fearsome enemies. Lightroots provide illumination. This layer is dangerous but rich in resources and lore.
Main Characters
| Character | Role | Notes |
|---|---|---|
| Link | Player character, silent hero | Wields the Master Sword and new arm abilities. Hylian, amnesiac at start. |
| Princess Zelda | Key ally, lost through time | She ends up in Hyrule's ancient past, working with the Zonai. |
| Ganondorf | Primary antagonist | The Demon King, revived from his seal. More human and cunning than in previous games. |
| Rauru | Ancient Zonai Sage | Appears as a spirit guide; grants Link his new arm. |
| Sonia | Ancient Zonai Queen, Zelda's ancestor | Appears in flashbacks with Rauru. |
| Mineru | Spirit of the Zonai Sage of Spirit | Provides the fifth Sage ability via the Construct. |
| Sages | New Champions | Tulin (Rito), Sidon (Zora), Yunobo (Goron), Riju (Gerudo) each grant a Sage power. |
Game Modes
Tears of the Kingdom is a single-player only experience. There is no multiplayer or co-op mode. However, the game includes:
- Main Quest: A linear story arc with four regional phenomena and the final confrontation.
- Side Quests & Adventures: Numerous optional tasks, shrine puzzles, and world events.
- Building & Hyrule Engineering: Using Ultrahand, Link can create custom vehicles, bridges, traps, and weapons. This is a core gameplay loop, not a separate mode.
- Photo Challenges: A side activity where you photograph specific objects for a researcher.
- Korok Seeds: Hundreds of hidden puzzles that expand inventory slots.
- Auto-building sharing: Players can scan Amiibo to unlock special items, or share build schematics via the Hyrule Engineering Works area (requires Nintendo Switch Online subscription).
- Downloading community builds (e.g., an official schematic database) and viewing user-submitted photos.
- Software updates for bug fixes and balance patches (optional but recommended).
- No online multiplayer, no leaderboards, no matchmaking.
- A new side quest ("The Well-Worn Sweater" quest)
- The ability to display your map on a second screen (via Nintendo Switch Online app)
- Stability and performance improvements
- Minor new items and quality-of-life features (e.g., easier recipe sorting)
There is no New Game+, but the game continues after the final boss, allowing free-roam completion.
Online / Offline Support
The core game is fully playable offline; no internet connection is required for the single-player campaign. Online features are limited to:
DLC / Expansion Overview
As of 2025, no paid DLC or expansion has been announced for Tears of the Kingdom. Nintendo has released several free updates that added:
Rumors of a major story DLC (akin to Breath of the Wild's The Champion's Ballad) have circulated, but nothing official. The base game is designed as a complete experience without necessary add-ons.
What Makes This Game Unique
Several key innovations set Tears of the Kingdom apart from its predecessor and other open-world games:
1. Truly Three-Dimensional Exploration: The inclusion of the sky and the Depths triples the explorable area. Zonai devices (gliders, rockets, balloons, fans) allow vertical movement in ways not possible in Breath of the Wild.
2. Ultrahand Power: The ability to attach objects together – from simple rafts to complex flying machines – turns the world into a physics sandbox. Players have built functional mecha, automated farming systems, and even primitive vehicles.
3. Fuse System: Weapons and shields can be combined with nearly any item (rocks, monster parts, gems, chuchu jellies) to create unique tools. This greatly expands weapon variety and encourages experimentation.
4. Ascend & Recall: Ascend lets you swim through ceilings to reach higher ground; Recall reverses an object's movement, opening creative puzzle solutions and time-manipulation tricks.
5. Zonai Tech & Constructs: Ancient Zonai technology provides reusable building components and autonomous combat aids (the Sage avatars).
6. The Depths: A full underground map with its own ecosystem, boss fights, and lore about the Zonai and the ancient war.
7. Emergent Narrative: While there is a defined story, the player's actions and creative solutions can dramatically alter how events unfold (e.g., skipping large sections by building a flying machine directly to the final boss).
8. Hyrule's Transformation: The same map from Breath of the Wild feels fresh due to massive changes (chasm openings, new caves, floating islands, enemy camps, and new towns).
In summary, Tears of the Kingdom is a monumental achievement in game design – a massive, layered, physics-driven open world that gives players the tools to rewrite their own adventure. It is a must-play for any Nintendo Switch owner and a benchmark for the action-adventure genre.
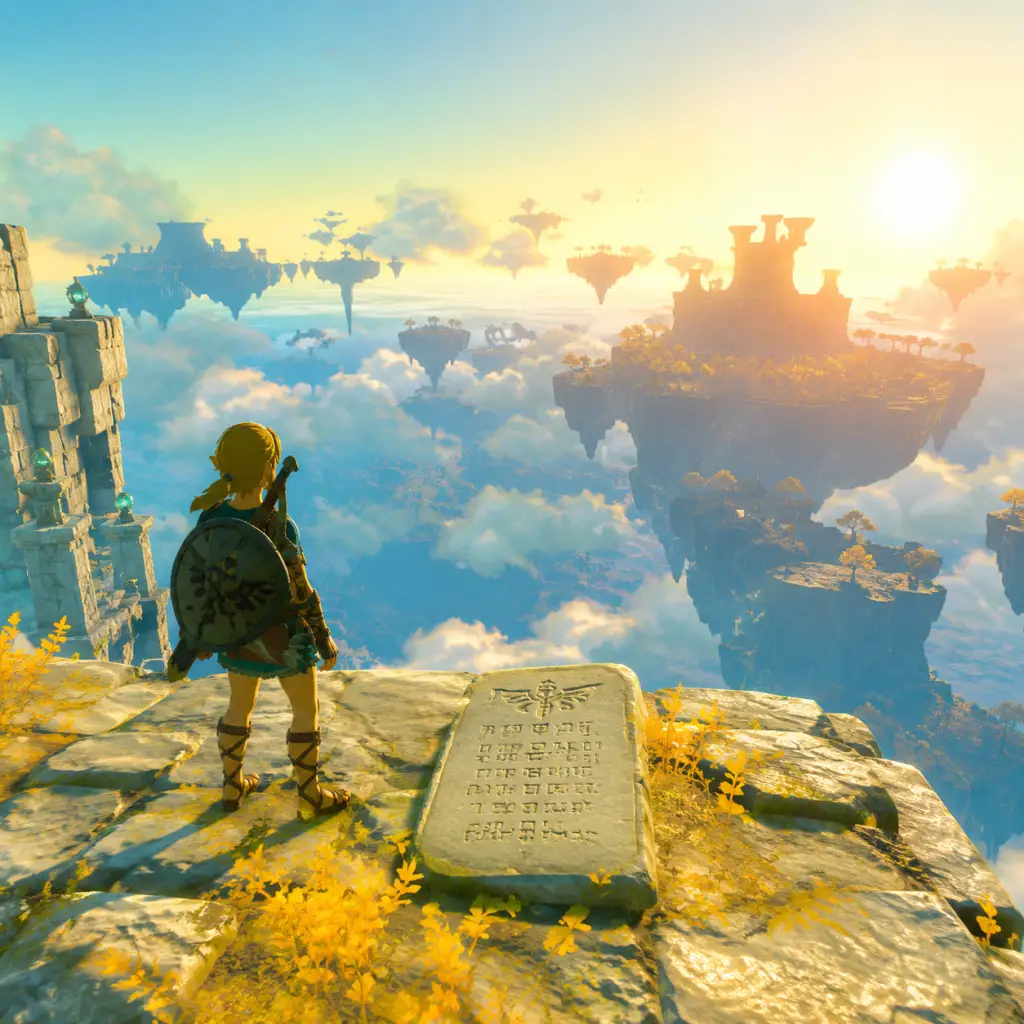
Getting Started
First Hour Walkthrough
Starting Out
- The game begins with a cinematic: Link and Zelda explore a cavern beneath Hyrule Castle. After a few scenes, you'll awaken alone on a floating island in the sky. This is Great Sky Island, the game's tutorial area.
- No character creation – you play as Link, a fixed protagonist. You can change his clothes and hairstyle later, but appearance is not customizable at the start.
Your First Minutes
1. Wake up – A mysterious voice (Rauru) guides you. Follow the glowing green trail forward.
2. First control prompts – You'll be taught movement (left stick), camera (right stick), and the Recall ability (L button + X). Use Recall on the falling rock to ride it back up – a puzzle you must solve.
3. Meet Steward Construct – A robot-like character near the first shrine. It gives you the Purah Pad, your main menu/save device.
4. Complete the first shrine – “Ukouh Shrine” (also called “Gutanbac Shrine”). Inside, you learn Fuse – combine items with weapons. Attack the constructs, solve the puzzle, and collect the Light of Blessing. Interact with the altar to get the Ability (Fuse). This shrine also unlocks fast travel.
5. Head to the Temple of Time – Follow objectives on the map (press `-`). Along the way, you'll find a small shelter with a bed (save here, rest to heal).
6. Receive the Paraglider – At the Temple of Time, Rauru gives you the Paraglider and the Recall ability (if you didn't get it from the first shrine, it's given here). The Paraglider is essential for safe descent from the Sky Islands.
7. Complete the remaining shrines on Great Sky Island – There are four shrines total: Ukouh, Nachoyah (Ultrahand), Inmo (Ascend), and Gekko (full Fuse practice). Each gives a Light of Blessing. You need all four to get the full set of abilities: Ultrahand, Fuse, Ascend, Recall.
8. Return to the Temple of Time – After clearing the four shrines, the floor opens. Use Ascend to climb up and place the light orbs. This gives you the final ability: Autobuild (earned later after leaving the sky). Actually, Autobuild is obtained after the Great Sky Island, but you gain the basics now.
9. Jump off Great Sky Island – Once you have the Paraglider and complete the temple, you can glide down to the surface of Hyrule. The first landing zone is the Lookout Landing outpost, where you meet Purah and begin the main quest.
Controls on Nintendo Switch
Basic Controls
| Action | Button(s) |
|---|---|
| Move | Left Stick |
| Camera | Right Stick |
| Jump | B |
| Sprint | Hold B while moving |
| Attack (melee) | Y |
| Attack (bow, aim) | ZR (hold to aim, release to fire) |
| Block / Parry | Hold ZL, then press A to parry when enemy attacks |
| Interact / Pick up | A |
| Open Quick Menu | X (hold to bring up weapon/shield swap) |
| Map | `-` |
| Inventory / Abilities | `+` (hold to open ability wheel, release to select) |
| Sheikah Slate (Purah Pad) abilities | Hold L, then press a face button (A/B/X/Y) to use assigned ability |
Special Skills (Must Unlock)
- Recall: Hold L + X – rewinds object movement.
- Fuse: Hold L + Y – combine item with weapon/shield.
- Ultrahand: Hold L + A – grab, move, and glue objects together.
- Ascend: Hold L + B – swim upward through ceilings.
- Autobuild: Later ability (L + R?) – reassembles saved Zonai builds.
- Zoom bow when aiming ZR: press left stick (L3) to zoom.
- Use scope on Purah Pad: press right stick (R3) when in map or aim mode.
- Switch between abilities quickly: hold L and use right stick to select (on ability wheel) or assign favorites.
- Top left: Health hearts (red), temporary hearts (yellow), stamina wheel (green circle).
- Top right: Mini-map showing direction, icons for weather, temperature, time of day.
- Bottom left: Current weapon and shield icons. If empty, shows fists.
- Bottom right: Ability icons assigned to L+face buttons. You can swap them in inventory.
- During combat: Enemy health bars appear briefly when you hit them.
- Map (`-`): Full map of Hyrule, or Sky Islands when above. You can place pins and stamps (up to 100).
- Inventory (`+`): Weapons, bows, shields, armor, food, materials, key items. Sort by type or use search.
- Abilities (`+` then `X`?): Actually, on the `+` menu, scroll to Abilities tab to see current ones. Use `Y` to assign shortcuts.
- Adventure Log (`+` then `R`?): Quests – main quests, side quests, shrine quests. Tracking visible on map.
- Settings: Audio, brightness, control sensitivity, Pro HUD (minimal), etc.
- Don't rush to Hyrule Castle – High-level enemies and severe gloom (damages max hearts) will kill low-level Link.
- Avoid fighting Lynels, Hinox, or Molduga early – They are late-game bosses.
- Don't sell all your materials – Keep at least 10 of each common material for cooking and upgrades.
- Don't ignore cooking – Raw food only restores 1-2 hearts. Cooked meals restore more and grant bonuses.
- Don't skip the tutorial shrines – You need all four abilities to progress efficiently.
Camera & Other
UI Overview
HUD Elements (default)
Purah Pad (Menu)
Essential Early Objectives
Top Priority (First Session)
1. Complete Great Sky Island tutorial – Get all four abilities and the Paraglider. Do NOT jump down early (you'll die or get stuck without paraglider).
2. Reach Lookout Landing – Land near the orange marker. Talk to Purah and the characters there. Unlock the main quest “Crisis at Hyrule Castle”.
3. Get the Camera – Purah upgrades your Purah Pad with camera function (after you find a picture of Robbie). This is needed for quests and compendium.
4. Complete a few early Skyview Towers – Activating towers reveals more map and allows fast travel. The nearest one is Hyrule Field Skyview Tower west of Lookout Landing.
5. Visit a few shrines – To gain Light of Blessings for heart or stamina upgrades. Aim for at least 3-4 shrines after the tutorial.
6. Gather basic resources: Wood, flint, apples, mushrooms, zonite (for battery upgrades).
What to Avoid
Early Resource Priorities
Top Resources to Collect in the First Few Hours
| Resource | Use |
|---|---|
| Zonaite (blue deposits) | Used to upgrade battery and buy Zonai device capsules from dispensers. Found on Sky Islands and depths. |
| Brightbloom Seeds | Light up caves and the Depths. Always carry ~20. |
| Bokoblin Guts/Horns | Used for upgrades and Elixirs. Farm early for Fuse power. |
| Chuchu Jellies | Combine with arrows for elemental effects (fire/ice/electric). |
| Apples & Endura Carrots | Basic healing and stamina-recovery dishes. |
| Wood & Flint | For campfires (cooking at night, carrying hot peppers for cold). |
| Rushrooms | Cook with Hylian Shroom for movement speed bonus. |
| Korok Seeds (from puzzles) | Expand inventory slots at Korok vendors (found near stables). |
Inventory Management Tips
- Weapons: Always have a few strong weapons for combat. Fuse monster parts onto weak weapons to make them viable.
- Shields: Fuse Zonai devices (like springs or rockets) onto shields for utility.
- Bows: Early bows are weak; headshots always critical. Save arrows by using melee.
- Food: Cook 5 of the same ingredient for max effect (e.g., 5 apples = 5 heart dish).
- [ ] Complete Great Sky Island tutorial (get paraglider, 4 abilities)
- [ ] Land at Lookout Landing
- [ ] Speak to Purah (start main quest)
- [ ] Activate Hyrule Field Skyview Tower (west of Lookout Landing)
- [ ] Complete at least 3-4 shrines on the surface (unlock more hearts/stamina)
- [ ] Visit the first stable (Outskirt Stable, near Lookout) for horse registration and Korok seller
- [ ] Cook a simple meal (5 apples) and eat it
- [ ] Fuse a material to a traveler's sword, shield, and bow
- [ ] Collect 10+ Brightbloom Seeds (found in caves or from Brightcaps)
- [ ] Find and photograph a few items for Purah's camera quest
- [ ] Save your game manually (optional but recommended before dangerous areas)
- Save often – The game has autosave, but manual saves let you revert mistakes. Use them before entering shrines or boss fights.
- Experiment with Ultrahand – Glue random items together to cross gaps, build boats, or create flying machines. Pin wheels to raft for a quick boat.
- Use the Paraglider constantly – It's free to deploy and saves stamina compared to climbing. You can also skydive by pressing B while falling.
- Mark interesting spots on map – Use stamps for treasure chests, ore deposits, Lynels, etc. This helps later when you have better gear.
- Trade Korok Seeds for inventory slots – The first upgrade costs 1 seed, then 2, then 3, etc. Prioritize weapon slots first (up to 3 upgrades).
- When in doubt, cook – Any dish or elixir can be sold for rupees, but you'll need healing more than money early on.
Common Beginner Mistakes
1. Not using Fuse – Fusing a boulder to a wooden stick makes it a fast, durable hammer. Fusing a Keese eyeball to an arrow creates a homing arrow. Fuse everything.
2. Forgetting to use Ascend – Many caves and puzzles have shortcuts upward. Instead of climbing, look for ceilings you can Ascend through.
3. Wasting Zonaite – Do not trade Zonaite for charges unless you have enough to upgrade battery first. Upgrade battery at Forge Constructs in Lookout Landing.
4. Ignoring weather – Rain makes climbing slippery, cold requires warm clothes/food, heat needs shade or elixirs. Check temperature icon.
5. Over-relying on climbing gear – Early on, stamina is limited. Use Ascend and paraglider to skip vertical climbs.
6. Dying in water – Not every water is swimmable; deep water drowns you quickly. Use rafts or Zonai devices.
7. Selling ancient parts – Items like Guardian parts from BOTW are not present here. But in TOTK, parts like “Zonai Charge” are valuable – keep them for battery.
8. Not talking to NPCs – Many side quests and tips come from random villagers, especially in Lookout Landing and stables.
9. Skipping Skyview Towers – They reveal huge map sections and enable fast travel, making exploration much easier.
10. Assuming the Depths are easy – The underground is dark, full of high-level enemies, and has more gloom. Wait until you have at least 5 hearts and good weapons before exploring deeply.
Day-One Checklist
Practical Advice for New Players
Remember: This game is all about creativity. If something seems impossible, you likely have the tools – think of another approach. Use Fuse to craft solutions, use Recall to turn objects into platforms, use Ascend to take shortcuts. The world is your sandbox. Enjoy!
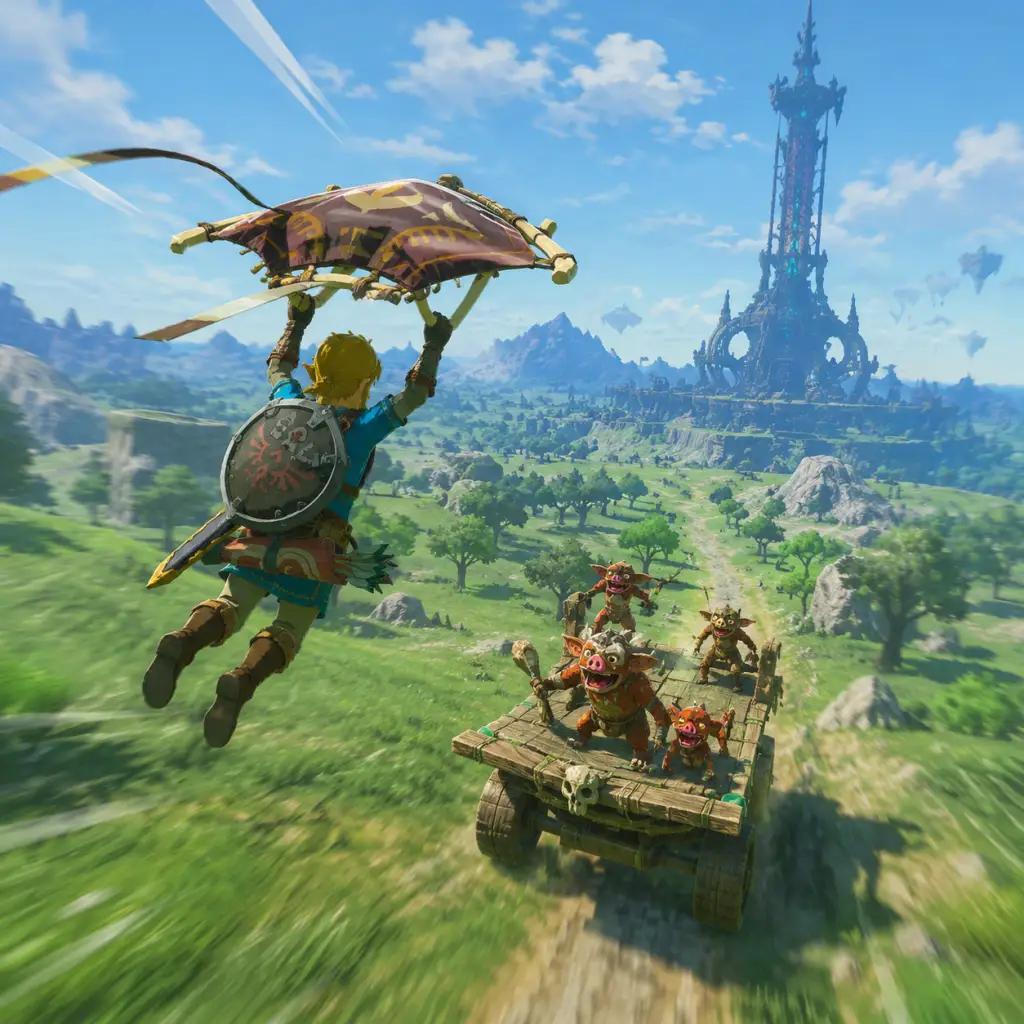
Core Gameplay
Core Gameplay Overview
The Legend of Zelda: Tears of the Kingdom is an open-world action-adventure game that expands upon the systems of Breath of the Wild. The core gameplay loop revolves around exploration, puzzle-solving, combat, and crafting, all tied together by the new abilities granted by Link's modified Sheikah Slate (now the Purah Pad) and the mysterious Zonai devices. The game is structured around three main layers: the floating sky islands, the surface of Hyrule, and the vast underground Depths. Progression is largely non-linear, but player growth follows distinct tiers based on the tools and knowledge acquired.
Early Game (Great Sky Island through first visit to Lookout Landing)
Duration: Approximately 2–5 hours depending on playstyle.
Gameplay Loop
- Great Sky Island serves as the tutorial area. You learn the four new abilities: Ultrahand (grab and attach objects), Fuse (combine weapons/shields/arrows with materials and Zonai devices), Ascend (swim upward through solid ceilings), and Recall (reverse an object's movement over time).
- After completing the three shrines and one boss (Gloom’s Locus: Construct Factory), you obtain the Paraglider and descend to Hyrule.
- Objective: Reach Lookout Landing in central Hyrule to receive the main quest "Crisis at Hyrule Castle" and unlock the Skyview Towers for fast travel and region mapping.
- Weapons: Early weapons are fragile (e.g., Tree Branch, Traveler’s Sword). Use Fuse to attach monster parts (like Bokoblin Horns) to increase durability and damage. Example: Fuse a Soldier’s Broadsword with a Blue Lizalfos Horn to get a weapon with 18 attack vs. base 5.
- Shields: Fuse a Rocket Zonai device to a shield for a quick rocket jump, or fuse a spring for a bounce.
- Arrows: Fuse Keese Eyeballs for homing arrows, or Fire Fruits for fire arrows. Essential for early enemies.
- Stealth: Avoid fights when possible; use grass and sneak attacks (press Y while crouching behind enemy).
- Abilities: Use Ultrahand to create simple bridges or rafts, Ascend to reach elevated areas without climbing, Recall to ride falling rocks upward.
- Main Quests: "Find Princess Zelda" chain leads you through the four regions (Rito, Goron, Zora, Gerudo) but can be tackled in any order.
- Shrines: Find and complete shrines to get Light of Blessing. Collect 4 to increase hearts or stamina at Goddess Statues.
- Towers: Activate Skyview Towers to reveal map regions. Each tower requires finding the nearby shrine and often a small puzzle.
- Korok Seeds: Expand inventory slots by trading seeds with Hestu (found near Lookout Landing, then later near Wetland Stable).
- Surface: Start in Hyrule Field; explore ruins, stables, and small camps for gear and materials.
- Sky Islands: Return to nearest Skyview Tower to launch to islands using the tower’s updraft. Early islands have Zonai dispensers and shrines.
- Depths: Avoid early on unless you have Brightbloom Seeds for light. The Depths are dark and full of strong enemies.
- Fast Travel: Only shrines and towers are unlocked as travel points. Activate as many as possible.
- Main Quests: "The Imprisoning War" and "Crisis at Hyrule Castle" direct you to four regional phenomena.
- Side Quests: Speak to stable owners to get the "Potential Princess Sightings" photo quest. Lookout Landing provides early fetch quests (e.g., find missing Cucco).
- Shrine Quests: Some shrines require solving environmental puzzles before entering (e.g., "The Skull's Eye" in Hyrule Field).
- Rupees: Earn by selling monster parts, gems, and meals. Early best: cook and sell Hearty Truffles (free to find) or sell Amber (common gem).
- Materials: Collect everything – plants, monster parts, ores. Use Fuse to preserve weapon utility.
- Zonai Devices: Use Zonai Charge to power autobuild or create vehicles. Early devices can be bought from dispensers on Sky Islands (use Zonai devices as currency).
- Hearts vs. Stamina: Prioritize stamina (2 full wheels) early for climbing and gliding. Then balance hearts.
- Armor: Upgrade armor at Great Fairy fountains (4 found in Hyrule). Start with Hylian Set (sold in Lookout Landing) for balanced defense. For cold areas, buy Snowquill Set in Rito Village.
- Skill Progression: Unlock new abilities via main quests – Autobuild (in Depths), Camera, and Sensor+ from Robbie in Hateno Village after first regional quest.
- Main Objective: Investigate the four regional disturbances: Wind Temple (Rito), Fire Temple (Goron), Water Temple (Zora), Lightning Temple (Gerudo). Each provides a new Sage ability (e.g., Tulin’s gust for faster gliding, Yunobo’s charge for breaking rocks).
- Master Sword: After completing two regional dungeons and acquiring enough stamina, find the Light Dragon (follows a fixed path) and pull the sword (requires 2 full stamina wheels).
- Depths Exploration: Begin systematic exploration of the Depths using Lightroots (equivalent to shrines down there). Lightroots reveal map and provide teleport points.
- Enemy Variety: Lizalfos, Moblin, Horriblin, and Frox appear. Use Fuse with stronger parts (e.g., Silver Bokoblin Horn for 30+ attack).
- Sage Avatars: Summon sages (press L) for assistance in combat and puzzles. Example: Sidon’s water shield blocks projectiles and grants a wet status for fire areas.
- Vehicle Building: Use Ultrahand + Zonai devices to build simple cars (with steering stick, small wheels, and battery), hot air balloons, or flying machines. Useful for crossing gaps in Depths.
- Boss Fights: Each regional dungeon ends with a boss (e.g., Colgera on Wind Temple). Learn attack patterns; use Tulin’s gust to break armor.
- Regional Quests: Complete all four to unlock the final main quest. After each, the Sage grants a unique ability and a helmet.
- Shrines: Continue collecting Light of Blessing. Aim for 20+ hearts and 3 stamina wheels by mid-game.
- Battery Expansion: Upgrade Zonai battery capacity by trading Crystallized Charges to Refinery on Great Sky Island or in Depths. Max battery is 8 cells (16,000 charges).
- Armor Upgrades: Find and upgrade armor sets for specific resistances (e.g., Flamebreaker for Goron area, Rubber Set for electricity). Each great fairy costs increasing rupees (100, 500, 1000, 2000).
- Sky Islands: Access more islands using the towers and sage abilities. The Construct Factory, Dragonhead Island, and Lurelin Island ruins contain valuable schematics.
- Depths: Use Lightroots to navigate; they are positioned directly below shrines (use surface map for reference). Collect Zonaite ore for battery and build parts. Find Yiga hideouts for autonomous schematics.
- Treasure of the Hero: Complete glyph quests in the Depths to get Zora, Goron, etc. armor sets that grant bonuses.
- Side Adventures: Notable ones include "The Dragon's Tear" (photos of Zelda’s memories – 12 locations for story), "The Keese's Tears" (challenge), and "A Seared Steak" (cooking quest).
- Shrine Quests: Many require finding a specific NPC or solving a puzzle around the world. Example: "The Lizard's Tail" shrine requires moving a metal ball up a mountain.
- Corrupted Constructs: Find and defeat them in Depths for Zonaite weapons and devices.
- Treasure: Sell gems (Ruby, Sapphire, Diamond) for high rupee value – Diamond sells for 500 rupees. Use the Kline Merchant in Goron City for best prices.
- Farming: Cook and sell high-value meals like Sunny-Side-Up Egg (fried egg) or meat skewers. The best early mid-game money is farming Talus for gems.
- Zonaite: Mine Zonaite deposits in Depths. Use for battery upgrades and Zonai charges. Selling is inefficient – better to convert to charges.
- Weapon Fusing: Use Silver monster horns for max damage (e.g., Silver Lynel Horn => 55 attack). Combine with strong base weapons (Royal Broadsword, Gerudo Scimitar).
- Armor Sets: Upgrade to level 2 for set bonuses. The Fierce Deity set (obtained from amiibo or from a side quest) gives attack up. The Zonaite set reduces battery drain.
- Elixirs: Mix monster parts with critters (e.g., Lizard Tail + Hot-Footed Frog = Speed Up). Essential for combat buffs.
- Main Objective: After completing all four regional phenomena, the quest "Find Zelda" leads to a new objective: enter the Depths to find the Gloom Queen. Alternatively, head to Hyrule Castle (now floating) to confront Ganon.
- Final Dungeon: The Demon King's Castle – a large area with multiple floors, puzzles, and enemies, leading to the final boss.
- Optional: Complete all 152 shrines for the full heart/stamina max (30 hearts, 3 full stamina wheels).
- Optional: Complete all Lightroots (120) for full Depths map.
- Enemy Scaling: Silver and Gold variants appear frequently. Use Fused weapons with 40+ attack. Ancient Blades (found in Depths) one-shot most enemies but break weapons.
- Sages: Fully upgrade sage abilities via sage's will (found in sky islands). Each sage can be activated individually or toggle group attack.
- Bulit-in Vehicles: Use Autobuild to quickly create complex flying machines or tanks using saved schematics. Great for navigating the Depths quickly.
- Boss Strategies: Final boss phases: first fight Gloom Hands, then Phantom Ganon, then multiple phases of Demon King. Use fused arrows with Gibdo bones or bomb flowers. Keep stamina for evading.
- Master Sword: Already obtained. Its durability is higher with the Demon King’s Bow. In final boss, the sword glows and deals bonus damage.
- Sage’s Wills: Collect all 20+ to fully empower each sage (increases their attack and cooldown).
- Armor: Upgrade to level 4 at all Great Fairies for max defense. Best endgame sets: Ancient Hero’s Aspect (set bonuses from Zonaite set + attack), Fierce Deity (attack up + resist), Flamebreaker (fire immunity for final boss).
- Depths: Fully mapped and explored. Find every Lightroot for full coverage. Collect all Paraglider fabrics (20+ unique patterns) from Old Maps hidden in Depths.
- Sky Islands: All 36 sky islands visited. Complete remaining shrines and constructs.
- Caves: Search all caves (c. 270) for Bubbul Gems, which you can trade with Kolton for armor pieces and rare items.
- Bubbulfrogs: Find them in caves to earn Bubbul Gems. Trade 3 per item.
- Side Quests: Complete all 34 side quests, including the massive "The Seven Sages" questline (requires completing all shrines).
- Shrine Quests: Finish all 31 shrine quests.
- Memory Quests: "The Dragon’s Tear" must be completed to unlock the final cutscene.
- Final Boss: Prepare with full meals (hearty dishes, lots of sundelions for gloom recovery, and strength elixirs). The final boss has 8 phases. Use a 3-attack-up meal and maxed armor.
- Rupees: You likely have thousands. Spend on armor upgrades at Great Fairies and buying arrow supplies from merchants.
- Materials: Stock up on Bomb Flowers, Muddle Buds (confuse enemies), and Puffshrooms (stealth). Farm Hinox for weapons, Lynel for horns.
- Zonaite: Max out battery (16,000 charges). Constructs in Depths give Zonaite weapons.
- Max Hearts: 30 (after completing all shrines and trading Light of Blessing twice at the Temple of Time).
- Max Stamina: 3 full wheels (40 upgrades).
- Max Inventory: Expand weapons, bows, and shields to near max (Hestu upgrade costs Korok Seeds – 960 total needed for all expansions).
- Max Armor: Four fully upgraded armor sets for different scenarios.
- Post-Game: After the credits roll, you are returned to the main menu. You can reload your save and continue exploring with all progress intact. No new story content.
- Completion Milestones:
- Replayability: There is no New Game Plus. Challenge runs (e.g., 3-hearts only, no fast travel) are popular in the community.
- Final Boss Rematch: No boss rush mode. You can re-enter the Depths and fight the Demon King multiple times via the final area gates? Actually, once defeated, you cannot fight him again on the same save.
- Everything unlocked: All abilities, all sages, fully maxed stats. You are a god in Hyrule.
- Rare encounters: Silver Lynels (gold? only in Master Mode, but there is no Master Mode in Tears of the Kingdom yet). The hardest enemy is the King Gleeok (three-headed dragon) in the sky. Also the Frox bosses in Depths.
- Complete the map in 3D: Every cave, every chasm, every sky island. Use interactive maps or in-game sensor+ to find missing items.
- Cave Completion: Trade Bubbul Gems for all rewards from Kolton (he appears in stables and eventually finds the last gem).
- Hinox and Hinox variants: Hunt all 45? Hinox for weapons and guts.
- Material Farming: Create optimal farming routes for Star Fragments (fall at night from random directions) and Dragon parts (wait on dragon paths).
- No further progression in stats. The only thing left is cosmetic: Paraglider fabrics (21 total) from Old Maps, and armor dyes from the Kochi Dye Shop.
- Autobuild: Save elaborate vehicle schematics to share online via the game’s camera feature.
- Horse Taming: Register all unique horses (Giant Horse, White Horse, Epona from amiibo? Epona is only in Breath of the Wild via amiibo, not in TotK).
- All quests can be completed after the main story. There are no time-sensitive missable quests except perhaps the "Defeat Armored Enemies" during the main campaign – but those remain available.
- The final side quest: "The Missing Owner" in Lurelin Village (requires building village back up).
- The endgame quest: "The Final Trial" – completing all shrines gives you a special reward, but no new quest appears in the log.
- Rupees become irrelevant. You likely have thousands. Buy everything from all merchants.
- Materials: Unlimited if you farm. The economy is just a tool for upgrading or buying luxury items (e.g., Noble Purses).
- True 100%: Max hearts (30), max stamina (3 wheels), all armor maxed, all inventory expansions, all sage abilities level 4, all map discoveries, all compendium entries, all quests, all Korok seeds, all Bubbul gems, all paraglider fabrics.
- There is no level cap or skill tree. The only form of build is which armor set you wear and which weapons you fuse.
- Ultimate Build: Wear the Ancient Hero’s Aspect (set bonus: attack up + Zonai efficiency) with a Royal Guard’s Claymore fused with a Silver Lynel Horn (108 base attack) and a Royal Bow with bomb arrows. Use a 3x attack up meal for 1.5x multiplier.
Combat & Interaction
Progression
Exploration
Quests & Missions
Economy
Character/Build Growth
---
Mid Game (Completing first two Regional Phenomena through Master Sword acquisition)
Duration: 15–40 hours depending on exploration.
Gameplay Loop
Combat & Interaction
Progression
Exploration
Quests & Missions
Economy
Character/Build Growth
---
Late Game (All four sages obtained, approaching final areas)
Duration: 40–60 hours. Player is powerful with maxed stamina, 20+ hearts, and strong gear.
Gameplay Loop
Combat & Interaction
Progression
Exploration
Quests & Missions
Economy
Character/Build Growth
---
Endgame (After defeating the final boss)
Duration: 50+ hours for 100% completion.
Structure & Content
- Shrines: All 152 (including 12 from sky islands) – reward is the Ancient Hero’s Aspect (a powerful fully-fused armor piece).
- Lightroots: All 120 (exact number = 120, same as surface shrines) – reward is a full Depths map and a sense of accomplishment.
- Korok Seeds: All 1000 – reward is Hestu’s gift (a literal golden poop). Only for completionists.
- Bubbulfrogs: All 147? – reward is a parrot-like outfit from Kolton.
- Main Quests: 23 main quests, including the final one.
- Side Adventures: 31 side adventures (including 4 secret ones).
- Shrine Quests: 31.
- Memories: 12 found from Dragon’s Tear quest.
- Armor Upgrades: Fully upgrade all 40+ armor pieces (very time-consuming, requires many star fragments).
- Bestiary and Compendium: Complete the Hyrule Compendium (all monsters, materials, weapons, objects).
Combat & Interaction (Post-Game)
Exploration
Progression (Post-Game)
Quests & Missions
Economy
Character/Build Growth (Post-Game)
---
Summary Table
| Tier | Hearts | Stamina | Key Ability | Main Goal |
|---|---|---|---|---|
| Early | 3-6 | 1-2 wheels | Paraglider | Reach Lookout Landing, learn abilities, complete first shrine |
| Mid | 8-15 | 2-3 wheels | Sage Avatars, Autobuild | Complete all four regional dungeons, get Master Sword |
| Late | 20-30 | 3 wheels | Fully maxed sages, max battery | Finish shrines, lightroots, final dungeon |
| Endgame | 30 | 3 wheels | Nothing new | 100% completion, farming, cosmetics |
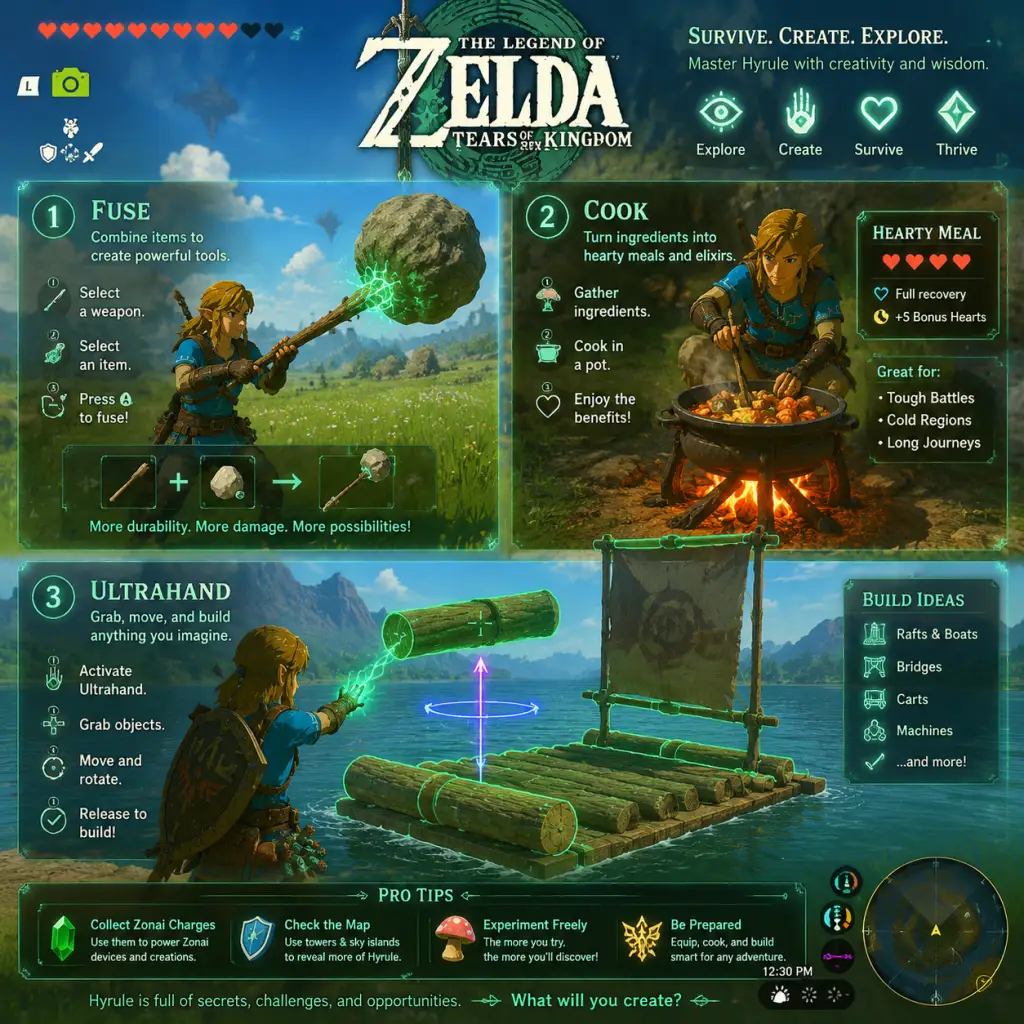
Game Tips
Game Tips for The Legend of Zelda: Tears of the Kingdom
A comprehensive collection of tips organized by category, from beginner to advanced.
---
General Beginner Tips
- Complete the Great Sky Island thoroughly. This tutorial area teaches you the core mechanics: Ultrahand, Fuse, Ascend, and Recall. Pick up every treasure chest, explore every cave, and activate all four shrines to ensure you have the Paraglider before leaving. Skipping content here makes the early game much harder.
- Talk to every NPC twice. Many characters give side quests or hints after first meeting them. Some repeat important information, while others reward you with items or map markers.
- Always carry a mix of weapons, shields, and bows. You can quickly cycle through equipment. Having at least one weapon that deals high damage (e.g., fused with a monster part) and one with long reach (spear) keeps you ready for any situation.
- Mark points of interest on your map. Use stamps (skull, star, leaf, etc.) for locations you want to return to: mining spots, Hinox camps, Korok puzzles, or far-off quest markers. You can pin up to 100 stamps—use them wisely.
- Cook meals and elixirs early. Food restores hearts and provides buffs. Always cook with raw ingredients rather than eating them separately—the buffs are multiplied. For example, cooking five Hearty Radishes creates a full-hearty meal that also grants temporary extra hearts.
- Upgrade your inventory by finding Hestu (the large Korok). You can expand weapon, bow, and shield slots by trading Korok Seeds. Prioritize weapon slots first because you break weapons often.
- Use Fuse on weak weapons. Early game, fuse a rock or monster part (like a Bokoblin horn) to a branch or rusty sword. This dramatically increases durability and damage. Even a single rock added to a stick makes it viable for a few fights.
- Headshot with arrows. Stunning enemies with an arrow to the face (or eye) gives you a few seconds to attack or flee. Use bullet time by pulling out your bow while in mid-air (e.g., launching with a spring or using a Zonai hover stone).
- Parry and Flurry Rush. Perfect parry (block right before a hit) stuns enemies. Perfect dodge (backflip or side hop) triggers Flurry Rush, a slowdown where you can land several hits. Practice on low-level Bokoblins in the Great Plateau.
- Use elemental weaknesses. For example, Fire Lizalfos are weak to ice weapons, Ice Likes weak to fire. A Frost Emitter fused to a shield will freeze enemies that hit it, giving you free attacks.
- Remote bomb plus Recall. Drop a bomb, use Recall on it as it rolls toward an enemy, then detonate when it’s next to them. This allows you to place explosives exactly where you want, even in tight spaces.
- Use Puffshrooms for stealth. Attach a Puffshroom to an arrow for a smoke screen that makes enemies lose sight of you. You can then sneakstrike for 8x damage (if you have the Sheikah armor set bonus). It works on most grounded enemies, including Lynels.
- Lynel strategy. Lynels are among the toughest enemies. Use bullet time from high ground or a Zonai glider to land a few headshots, then mount the Lynel and attack with your strongest melee weapon. Weapons don’t lose durability while mounted, so use your best. Repeat until defeated.
- Fuse gemstones to arrows. Ruby, Sapphire, Topaz, and Diamond arrows cause area-of-effect explosions (fire, ice, electric, and piercing damage respectively). Useful against crowds or armor. Electric arrows stun for follow-ups.
- Weapon durability management. Keep a designated "disposable" weapon for breaking ores or cutting trees—like a fused boulder. Save your rare weapons (like Royal Guard’s Sword) for tough bosses. Use the Octorok “repair” trick: feed a rusted weapon to a Rock Octorok in Death Mountain (after it sucks it up, it spits back a buffed version with more durability). You can repair any weapon once per Octorok per blood moon.
- Elemental weapon combos. Use a frost weapon to freeze an enemy, then quickly switch to a shock weapon to trigger “Wet + Electric” stun damage. Or use fire to light grass for updrafts to gain bullet time. Advanced: use a Zonai flame emitter on your shield to create updrafts on command.
- Mount Lynels for easy kills. Once you stun a Lynel, run behind it and press A to mount. While mounted, you can attack without consuming weapon durability. Equip your highest damage one-handed weapon (e.g., a silver Lynel horn fused to a Scimitar of the Seven). Mount attacks ignore durability cost. This makes Lynel farming very efficient for rare parts.
- Activate all Skyview Towers early. These towers reveal the map and also act as fast travel points. Some towers are guarded by enemies or require puzzles—stock up on stamina food to climb them fast.
- Glide from high points. Paraglider is essential. Use towers or tall mountains to launch yourself. You can also use the Super Mushroom (Tunnel throwing) or a Zonai wing for longer flights. Always keep stamina recovery meals (Endura Carrots or Courser Bee Honey) for long glides.
- Use Ascend in caves and shrines. Ascend lets you phase through thin ceilings. This shortcut can save huge amounts of climbing. Look for ceilings with a light—that indicates an Ascend point.
- Travel medallion (from Robbie). After completing the “To the Wind” quest series, you can get a Travel Medallion. Place it anywhere on the map to create a fast travel point. Great for marking a hard-to-reach mining spot or a high-view summit. You can have up to one placed at a time, but can recall it.
- Use Zonai devices for mobility. Build a simple hoverbike (steering stick + two fans stacked) to fly almost anywhere. This consumes small battery but is fast and fuel-efficient. A sled with fans is great for flat surfaces. A hot air balloon (flame emitter + balloon) can lift you high for exploration.
- Caves and wells. Every cave contains Bubbul Gems (exchange with Koltin at the cave’s exit for cool items like Misko armor or a horse). Wells often have hidden chests or secret entrances. Light up caves with a Zonai light or a torch fused to a shield.
- Skydiving to specific regions. Use the paraglider in the sky to spot important landmarks: dragon tears, geoglyphs on the ground, or large enemy camps. Dive straight onto them to save walking time.
- Navigate the Depths with Brightbloom Seeds and Large Zonaite. The Depths are pitch dark. Shoot Brightbloom Seeds onto the ground or walls to create light zones. Collect Large Zonaite nodes (blue deposits) to refill battery. Also, every Depths area has a Yiga hideout with usable schemas for Zonai devices.
- Zonai device stacking for unlimited flight. Use two fans and a steering stick with a small battery powered by a Zonai battery cell (collected from schematics). Upgrade your battery cells at Forge Constructs using Crystallized Charges. Max battery lets you fly across the entire map without landing.
- Dragon farming for parts. Three dragons (Naydra, Farosh, Dinraal) and the Light Dragon (secret) fly through the sky and Depths. You can land on them while gliding to collect shards from their horns, fangs, and claws. Wait for a dragon to appear near a Skyview Tower, then bullet time onto it. Rare item: Light Dragon scales, needed for final armor upgrades.
- Harvest everything. Gather plants, ores, monster parts, and wood. Almost every item can be fused, cooked, or sold. Especially important: apples for health, hearty radishes for extra hearts, rushrooms for speed boosts, and luminous stones for rupees (sell at mineral trader).
- Use bombs or fused weapons for ore deposits. Smashing a Talus’s ore node or a rocky outcrop yields gems (ruby, sapphire, diamond). Attach a rock to a spear to create a mining pick. Or use the Zonai cannon—it destroys ore in one shot.
- Fishing with electric attacks. Throw a Shock Fruit into a body of water to stun all fish nearby. Then pick them up. This is much faster than using a spear or arrows.
- Tree cutting for wood. Trees drop apples when cut down. But you want wood for building? Chop multiple trees in an area, then use Ultrahand to stack logs and fuse them into a raft or bridge. Wood is also required for upgrading certain armor sets.
- Zonaite farming in the Depths. The Depths are rich in Large Zonaite deposits. A good route: start at the Great Abandoned Central Mine (northwest of the Depths map) and follow the glowing ore nodes. Each Large Zonaite gives about 20-30 charge. With a full battery, you can farm 300+ Zonaite in one loop.
- Star Fragment farming. Star Fragments fall at night (9 PM – 3 AM) and are used for upgrades and elixirs. Find two-star tips: camp under a sky island or tall mountain where you have a clear view of the sky. When you see a shooting star, it marks on the ground. Use a speed potion to reach it before 5 AM when it disappears.
- Luminous Stone farming. These are needed for many armor upgrades (e.g., Sheikah Stealth set). Go to the Talus boss in the Great Plateau (under the lake) or any luminous stone deposit. Use a hammer weapon to break them quickly. Also, certain caves like the East Necluda cave have clusters.
- Fuse a shield with a rocket. This gives you a Rocket Shield. Equip it and parry (or hold block) to launch straight up into the air. Excellent for quick vertical mobility or bullet time. Use before a fight to start with a high ground advantage.
- Fuse a weapon with a spring. A spring-loaded weapon launches enemies into the air when you hit them. This allows for air combos. Works well with fast weapons like one-handed swords.
- Fuse a bow with a Keese Eyeball. A Keese Eyeball attached to an arrow gives you homing arrows. They curve toward the nearest enemy head. Ideal for taking out aerial enemies like Aerocuda or for hitting weak spots like a boss’s eye without aiming precisely.
- Fuse a shield with a minecart (Wing or Cart). This creates a shield that lets you slide on rails or surfaces when you shield surf. Great for traversing the Depths rails quickly.
- Hoverbike (Basic) – Two fans attached to the front and back of a steering stick. It’s the cheapest and most versatile flying device. Requires two fans and one steering stick. Place fans at a slight angle for better lift. Use it for exploring the sky and Depths.
- Land rover – Use four small wheels, a steering stick, and a cart or plank. This is good for crossing flat terrain quickly. Add a battery to power it, or use Zonai charges. You can also attach a spring to jump over small obstacles.
- Canyon bridge – Combine two metal planks with a steering stick to create a makeshift bridge across gaps. You can also use logs. This helps cross narrow chasms without building a vehicle.
- Hot air balloon + sled – Attach a flame emitter to a balloon, then attach the balloon to a sled. This creates a slow but steady vertical lift. Great for reaching sky islands when you run out of stamina or to escape from enemies below.
- Multi-purpose weapon: Fuse a Silver Lynel Mace Horn to a Royal Guard’s Claymore for massive damage (150+ base). Then fuse that with a Frost Ray (Zonai device) so every swing also freezes enemies. This is devastating against bosses. The weapon’s durability is low, but you can repair it (see Octorok trick).
- Zonai “permanent” structures with Autobuild. After unlocking Autobuild from the Zora region (quest: The Hyrule Castle? Actually from the Construct in the Depths near the Great Hyrule Forest), you can save schematics for your vehicles. Use Autobuild to instantly construct a hoverbike for 9 Zonaite (instead of carrying parts). Build a battery pack (multiple battery cells) to extend flight time.
- One-shot kill build for Lynels: Use a 5-shot bow (from a Lynel drop or fused with Octorok buff) with Gibdo Bones (found in the desert). Gibdo Bones increase damage by +40 per arrow. Five shots hitting a Lynel’s head deals insane damage. Combine with a multi-shot bow and a Puffshroom arrow for stealth approach.
- Sell gems sparingly. Rubies, sapphires, and topazes sell for high prices (100-150 rupees each), but you need them for armor upgrades and fusing. Keep at least 10 of each before selling. Diamonds are rare—never sell them early; they are used for the highest level armor upgrades and some key weapons.
- Cooked meals sell for more. Combine raw ingredients into a meal, then sell it. For example, 5 apples sell for 5 rupees individually, but a Simmered Fruit (5 apples) sells for 30 rupees. Better yet, cook meat dishes for higher profits.
- Rupee farming methods: (1) Hunting and cooking prime meat skewers (five pieces of prime meat cooked = about 270 rupees). (2) Harvesting Luminous Stones and selling to the mineral collector in Tarrey Town (he pays more). (3) Break Talus ore deposits for gems and sell duplicates. (4) Complete side quests, especially for fairies, and sell rewards.
- Zonaite usage priority: Spend your Zonaite on upgrading battery cells first (at a Forge Construct) before buying Autobuild schematics or new devices. A larger battery lets you fly longer and use more powerful weapons. After max battery, invest in device schematics for convenience.
- Buy arrows early. Arrows are cheap (5 rupees each at Beedle) and essential for many puzzles and fights. Always keep 100+ arrows. You can also get arrows from breaking crates in towns or from certain chests.
- Great Fairy upgrades. Paying the Great Fairies costs rupees: 100, 500, 1000, 5000? Actually it goes 100, 500, 1000, 2000, then 5000? Check: first fairy 100, second 500, third 1000, fourth 2000, fifth (secret? not sure). But upgrading armor requires rupees and materials. Prioritize upgrading the Champion’s Leathers and Fierce Deity set as they give attack up or defense plus set bonuses.
- Selling rare monster parts. Lizalfos tails, Hinox toenails, and Molduga guts are used for elixirs and armor. Keep at least a few, but you can sell extras for good profit (Hinox guts sell for 150 each, Molduga guts for 200).
- Use bonfires to manipulate time. If you need a certain weather condition, lit a fire at a stable or cooking pot to skip to the next morning/evening. This helps with dragon farming (certain dragons appear only at certain times) or getting a blood moon for respawning enemies.
- Maximizing armor defense. Fully upgraded armor sets (2-star or 4-star) are essential for late-game areas like the Depths. Each upgrade reduces damage significantly. For example, the Soldier’s Greaves at level 2 give +12 defense. Stack with defense-up meals for near invulnerability.
- Shrine completion for Heart Containers and Stamina Vessels. You need to complete 152 shrines total (including the Great Sky Island tutorial shrines). Prioritize stamina first (up to 2 full wheels) then hearts. With enough hearts, you can pull the Master Sword from the Light Dragon’s head (requires full hearts? Actually 13 hearts minimum). But the Master Sword does extra damage against gloom enemies.
- Use amiibo for rare items. If you have compatible amiibo (like the Smash Bros Link, Zelda, or Guardian), scan them once per day for exclusive rewards: extra arrows, weapons, gems, even the Twilight Princess outfit. The Sheikah slate also has a amiibo function.
- Gloom resistance. In the Depths, you face Gloom Hands and Gloom-generated enemies. Eating a sundelion meal or using a weapon/armor with Gloom resistance (like the Depths armor set) prevents damage reduction. The Champion’s Leathers upgraded with special materials provides gloom resistance.
- Perfecting bullet time through slopes. Instead of needing height, you can create a slope by fusing a cart to a shield. Then use the shield surf by pressing A while blocking? Actually shield surf by holding ZL then X? Re clarity: while running, press ZL to shield, then X to jump, then A to surf on shield. On a slope you slide and can pull out bow for bullet time. You can also use a Zonai spring on shield for instant launch.
- Bokoblin camps: Use a puffshroom arrow to stealth, then sneakstrike the strongest (usually a white or silver). Alternatively, drop a bomb from above and detonate with arrow. Use elemental fruits to create explosions.
- Lizalfos: They are fast and can swim. Use ice arrows to freeze them near water, or stun them with a shock arrow while they are in a pool (water conducts electricity). If they are on land, use a polearm to keep distance.
- Moblins: Tall and slow. Use arrows to their face to stun. They drop heavy clubs—fuse with a monster part to make a powerful hammer. Often found with a weapon in hand; steal it by stunning them and then picking it up.
- Hinox: Giant cyclops. Hit them in the eye with an arrow to stun for a few seconds. While stunned, climb on their back and attack with your best weapon. They drop weapons, shields, and sometimes a Hinox tooth when fishing.
- Talus: Stone giants with a ore node on top. Their weak spot is that ore node. Use a hammer weapon or fused boulder to smash it while they are stunned. Climb on them while they are knocked down. Avoid their rolling attacks by running perpendicular.
- Gloom Hands (Hands of the Depths): Appear as five hands that chase you. Use any area-of-effect like a bomb arrow or a gem weapon. They are vulnerable to fire. Once you kill them, a Gloom Spawn (shadow boss) appears. Be prepared with a high-damage weapon and many healing items.
- Molduga (sand worms): Only in the Gerudo Desert. Stand on a sand hill to attract it. When it charges at you, throw a remote bomb or use a bomb arrow to detonate as it emerges. This topples it. Then attack its belly or tail. Repeat.
- Frox (depths frog boss): Large frog-like boss that attacks with ground slams. Use a spear to hit its tongue from a distance, or wait for it to open its mouth and throw a bomb inside. The explosion stuns it. Then shoot its glowing stomach.
- Master Kohga (multiple encounters): He uses a mech with a weak point. Use Ascend to pop up through floors. In phase 1, use a Zonai cannon or bomb to destroy his vehicle. Phase 2, he spits bombs at you—recall them back. Phase 3, use the environment to drop things on his head.
- Map interaction with the Purah Pad: Use the camera to scan new plants or enemies to get information. The Sensor+ (upgrade at Hateno Lab) lets you track specific materials, such as “hearty bass” or “brightcaps”. This helps find rare ingredients for cooking or upgrades.
- Two-Key quests: Many shrines require two keys (matched pair). If you find one key, the other is usually nearby inside the shrines. Don’t leave a shrine without both keys if you want the hidden treasure.
- Full stealth outfit (Sheikah Set) makes you essentially invisible to enemies, even when running. This is great for the Depths where you can avoid Gloom Hands entirely. Also helps with hunting animals for rare meat.
- Time-saver: use the map to locate all cherry trees (Dragon Dorfer? Actually there are 10 cherry trees that when offered an apple, reveal cave entrances). This is a minigame that shows hidden caves. Useful for completing the “Cave” list for Koltin.
- Blood Moon prep:** The Blood Moon happens every 2 hours 50 minutes of gameplay (real time). It respawns all monsters and items (except some treasure chests). Use this timer to plan farming runs: farm Lynels or Hinox right after a blood moon, then again before the next one. You can cook a meal that prevents weather effects? Not directly. But you can force a blood moon by using specific glitches? Not recommended for first playthrough.
---
Combat Tips
#### Beginner: Basic Combat
#### Intermediate: Advanced Combat Tactics
#### Advanced: Efficient Combat and Farming
---
Exploration Tips
#### Beginner: Getting Around
#### Intermediate: Maximizing Exploration Efficiency
#### Advanced: Depths and Sky Exploration
---
Resources & Gathering Tips
#### General Resource Collection
#### Intermediate: Efficient Farming Routes
---
Builds & Crafting (Fuse + Ultrahand Device Building)
#### Beginner: Simple Fuse Combos
#### Intermediate: Ultrahand Vehicle Designs
#### Advanced: Optimized Builds
---
Economy & Zonaite Tips
#### Earnings and Spending
#### Intermediate: Investment
---
Advanced Optimizations
---
Combat Against Specific Enemies
---
Miscellaneous Effectiveness
---
This guide covers the essential tips to thrive in Hyrule. Adjust strategies based on your playstyle—experimentation is rewarded. Remember: everything you can pick up has a use somewhere. Good luck!
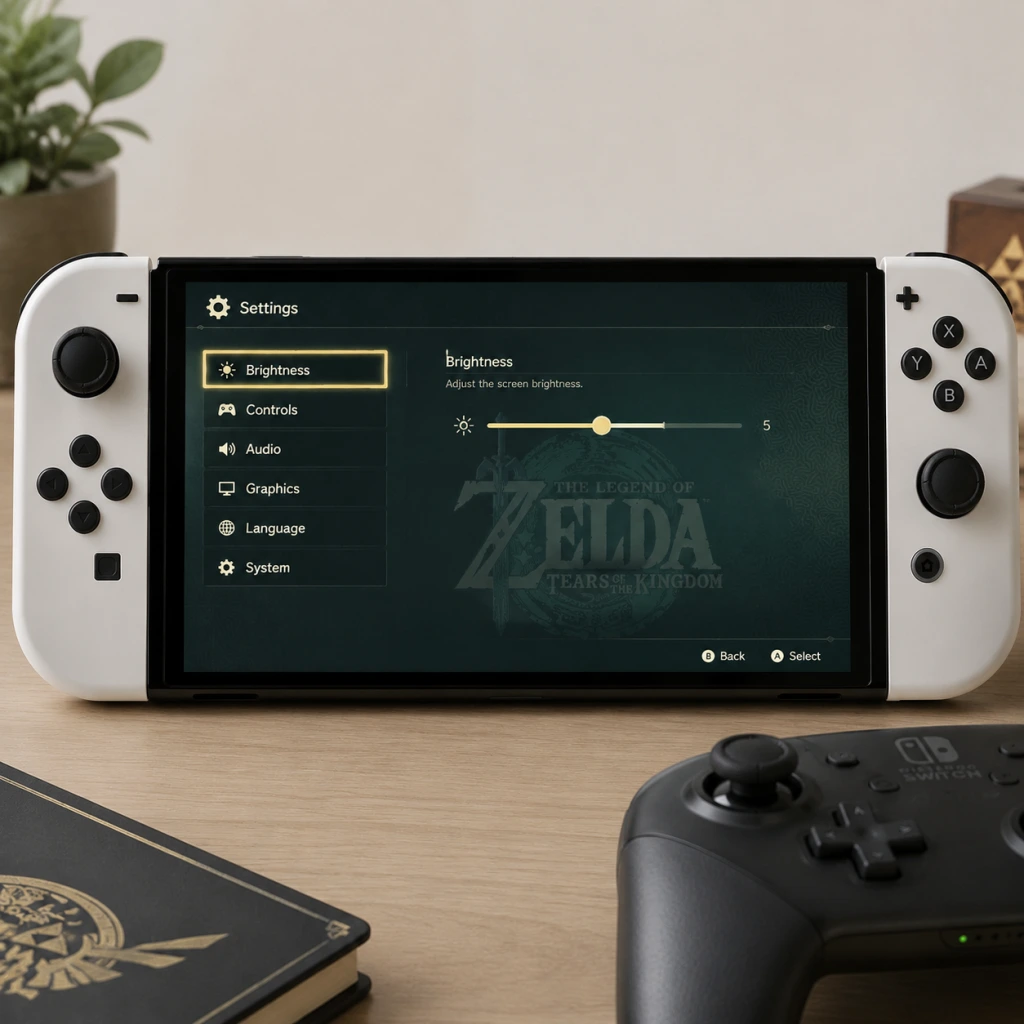
Game Settings
Game Settings
The Legend of Zelda: Tears of the Kingdom is exclusively available on the Nintendo Switch family of systems, including the original Switch, Switch Lite, and Switch OLED. As a first-party Nintendo title, its settings menu is streamlined, focusing on comfort and personalization rather than PC-like graphical tweaks. Below is a comprehensive breakdown of every accessible setting, with recommendations for optimal experience across different hardware configurations.
---
Graphics / Display
Brightness
- Adjust the overall luminance of the game world. The default is usually set to 4 out of 7.
- Optimal setting: Set to 5–6 for a vivid image without crushing blacks. If playing on a standard Switch in handheld mode, keep at 5. On OLED models (docked or handheld), 4–5 is sufficient due to the deeper blacks of the OLED panel.
- Misconfiguration risk: Setting too high washes out colors, too low makes dark areas (caves, depths) nearly invisible. Use the in-game calibration screen (when adjusting brightness) to ensure the faint logo is just barely visible.
- The Nintendo Switch does not support HDR output. This setting does not exist in Tears of the Kingdom. Ignore any system-level HDR toggles on your TV — keep them off for this game to avoid color distortion.
- Not adjustable. The camera zoom is fixed, but you can change camera distance slightly by using the right stick to pull the camera back in certain situations. No FOV slider is provided.
- The game targets a dynamic resolution (900p docked, 720p handheld) at 30fps. No user settings can alter this. Performance dips occur in busy areas (e.g., Korok Forest, Skyview Towers) or when using Ultrahand with many objects.
- Tip: If you experience noticeable lag, try closing other software or restarting the console. Physically cleaning the vents can help maintain consistent performance on older Switch units.
- Controls overall volume of the game. Adjust as comfortable. For best immersion, set to 60–80% on a TV, or 70–90% with headphones.
- Sound effects (combat, environment, items). Keep at 100% to not miss important audio cues like enemy detection, falling rocks, or shrines.
- Background music. The dynamic orchestral score is a highlight; leave at 100% to fully appreciate it. If you are doing heavy puzzle-solving and find music distracting, lower to 70%.
- Controls character voices (Link grunts, Zelda, NPCs). Keep at 100% to catch story dialogue. No option to disable voices entirely — only volume.
- System-level setting on Switch, not in-game. Ensure you select the correct output (TV speakers, headphones, or stereo/mono) in the Switch System Settings.
- Options: Normal, Wide, Narrow.
- Normal: Default, balanced for most players.
- Wide: Increases stick sensitivity — camera moves faster. Good for quick exploration but may cause overshooting in precise aiming (e.g., arrows, Ultrahand).
- Narrow: Decreases sensitivity, requiring more stick movement. Helps with precision aiming, especially for bow shots or rotating objects with Ultrahand.
- Optimal setting: Normal for general play; switch to Narrow when you are doing long-range bow challenges (e.g., Korok pinwheel targets) or building complex vehicles. Can be changed mid-game.
- On/Off. Enable to use tilt of the controller for fine-tuning bow aim, camera control in shooting galleries, or steering vehicles.
- Optimal setting: On — it provides precision that is impossible with sticks alone. However, if you play in handheld mode and find it disorienting, switch Off.
- Misconfiguration risk: Players often forget this is on and wonder why their aim drifts. Calibrate your controllers via Switch System Settings > Controllers and Sensors > Calibrate Control Sticks if gyro feels off.
- In-game button mapping is not provided. Only system-level remapping is available via Switch System Settings > Controllers and Sensors > Change Button Mapping. Use this to swap A/B or X/Y if you prefer a different layout (e.g., for jump/run).
- Tip: The default mapping is well-optimized. Changing sprint from (B) to (L3) can reduce finger strain during long exploration.
- Normal – default. Inverted – swaps the direction of vertical/horizontal camera movement.
- Optimal setting: Use your preference from other games. Many veteran Zelda players keep Normal. If you play inverted in other titles, enable both Y and X inversion here.
- Hold – you must keep ZL held to maintain lock-on. Toggle – press once to lock, press again to release.
- Optimal setting: Hold gives more control, especially during combat when you need to switch targets quickly. Toggle can be useful if your ZL finger tires easily.
- Subtitles are available in multiple languages (English, Japanese, French, Spanish, German, Italian, etc.). Affects spoken dialogue subtitles. Does not change voiced language — see Language section.
- Tip: Always enable subtitles for cutscenes to catch dialogue over loud music or sound effects.
- Options: Small, Medium, Large.
- Optimal setting: Large if playing on a small handheld screen or if you have vision difficulties. Medium works well for most TVs. Small can be hard to read during fast conversations.
- Toggle for hearing-impaired players. Adds descriptions of sounds (e.g., "[sword clang]", "[wind blowing]") in addition to dialogue subtitles.
- Recommendation: Off for standard play; On if you need auditory cues conveyed textually.
- Not adjustable in-game. The HUD (hearts, stamina, map, etc.) is fixed size. On handheld mode, the UI can feel small; no workaround exists. If you struggle, play docked on a larger screen.
- Not available. The game does not include a dedicated colorblind or high-contrast option. Colorblind players may rely on shape/location of UI elements (e.g., green stamina wheel, red hearts are distinguishable by shape).
- Select from: English, Japanese, French (France), French (Canadian?), German, Spanish (Spain), Spanish (Latin America), Italian, Dutch, Russian, Chinese (Simplified), Chinese (Traditional), Korean, etc. (Varies by region; download language packs may be required.)
- Optimal: Choose the language you understand best. Note that the lip syncing is not matched to non-English languages; it only matches the original English/Japanese performances.
- Misconfiguration risk: If you change this, the voices in cutscenes will be in the selected language while subtitles remain in your system language (if set separately). Ensure subtitle language matches your voice language if you rely on reading.
- Set by the console’s system language. In-game, you cannot change it separately. To change, exit the game and go to Switch System Settings > System > Language.
- Managed at system level (System > Automatic Software Updates). Keep On to receive patches, bug fixes, and any DLC automatically.
- Requires a Nintendo Switch Online subscription. The game supports cloud saves. Go to System Settings > Data Management > Save Data Cloud to ensure uploads are enabled. This is not an in-game setting but crucial for preserving progress if your console is lost or broken.
- Note: Some users report that enabling cloud saves helps avoid corruption after crashes, but there is no in-game toggle.
- Accessible in-game from the pause menu under “Items” > “amiibo.” This is not a settings menu per se, but it controls how amiibo scanning works. No configuration needed; simply tap amiibo to the NFC reader.
- On/Off. When enabled, the camera will slightly follow enemies when you draw your bow, making it easier to hit moving targets.
- Optimal setting: On for most players, especially beginners. Off for experienced archers who want manual control or for precise aiming at non-combat objects (e.g., shooting a balloon from a specific angle).
- Not adjustable. The game auto-saves frequently (e.g., after completing a shrine, entering a new area, every few minutes). You cannot increase or decrease intervals. Rely on manual saves at Save Points (glowing green pillars) or when exiting the game.
- Only one control scheme exists. The game uses standard Switch layout (A: interact, B: run/jump, X: ascend/use ability, Y: attack, L: whistle/paraglider, R: throw/create, ZL: aim/lock-on, ZR: use rune/ability). No alternative control presets.
- In the Settings menu, you can choose between Camera Follow (the camera automatically tries to keep Link in frame while moving) and Camera Not Follow (the camera stays fixed in the direction you last set unless you move the stick).
- Optimal setting: Camera Follow for most players — it reduces the need to constantly adjust the camera during exploration. Camera Not Follow gives more control for precise platforming or sneakstrikes, but can be disorienting.
- When you hold ZR, you can swap between available abilities (Ultrahand, Fuse, Ascend, etc.) using the right stick. The setting does not affect this. No toggle available.
- Performance: Expect occasional frame drops in busy areas. No settings can improve framerate.
- Brightness: Set to 5, as the screen lacks the vividness of OLED.
- Subtitle Size: Large — the smaller screen makes Medium text hard to read.
- Motion Controls: Off if you find gyro awkward in handheld (the screen moves with the controller).
- Control Stick Sensitivity: Narrow to avoid overshooting due to shorter stick travel.
- Brightness: 4–5 (TV dependent).
- Subtitle Size: Medium or Large, depending on TV size and distance.
- Motion Controls: On — docked play benefits from gyro precision.
- Control Stick Sensitivity: Normal – the larger screen and stable grip make Normal feel right.
- Brightness: 5 (similar to original, but screen is smaller).
- Subtitle Size: Large mandatory.
- Motion Controls: Off — gyro on Lite can cause accidental tilting of the entire device.
- Control Stick Sensitivity: Narrow for better precision.
- Note: Switch Lite cannot output to TV, so all settings are handheld-focused.
- Brightness: 4 – the OLED panel’s deep blacks make lower brightness look better.
- Subtitle Size: Medium (thanks to larger, higher-contrast screen).
- Motion Controls: Off if you find it awkward; On can be nice due to comfort grips.
- Control Stick Sensitivity: Normal – the slightly larger thumbsticks help.
- Same as Original Docked, but you can also set Brightness to 3–4 for HDR-like effect on an OLED TV.
HDR (High Dynamic Range)
Field of View (FOV)
Resolution & Framerate
---
Audio
Master Volume
SFX Volume
Music Volume
Voice Volume
Audio Output
Misconfiguration risk: Setting SFX or Music too low can break immersion or make puzzles harder (e.g., the sound of a shrine motor indicates a nearby shrine entrance).
---
Controls
Control Stick Sensitivity
Motion Controls (Gyro Aiming)
Button Mapping
Camera Control (Invert Y/X-Axis)
Lock-On (Z Targeting)
---
Accessibility
Subtitle Language
Subtitle Size
Closed Captions
UI Scale
High Contrast Mode
---
Language
Voice Language
Menu Language
---
Network
Automatic Software Updates
Save Data Cloud Backup
amiibo Settings
---
Gameplay
Aim Assist
Auto-Save Frequency
Control Style
Camera Style
ZR Rune Swapping
---
Optimal Settings by Hardware
#### Nintendo Switch (Original – Handheld Mode)
#### Nintendo Switch (Original – Docked Mode)
#### Nintendo Switch Lite (Handheld Only)
#### Nintendo Switch OLED (Handheld Mode)
#### Nintendo Switch OLED (Docked Mode)
---
Special Attention Points During Setup
1. Motion Controls Default On: Many players return the game thinking their bow aiming is broken — gyro is on by default. If you find the camera drifting, check this setting first and calibrate controllers if needed.
2. Voice Language vs. Subtitle Language: Changing voice language does not automatically change subtitles. If you pick Japanese voices with English subtitles, you may hear the original performance but subtitles will not match lip movements perfectly.
3. Brightness Calibration: The brightness slider is not just visual — it affects visibility in the Depths (underground) which is pitch black. Setting too low makes the Depths unnavigable without Lightbloom seeds; too high washes out the atmosphere. Use the official calibration logo.
4. Auto-Save Overwriting: The game only keeps one auto-save slot plus several manual slots. If you die, the auto-save may have saved in a failing scenario. Always create a manual save before a major boss or dangerous climb.
5. Switch System Settings Impact: Many “in-game” settings are actually system-level, such as controller remapping, vibration, and screen brightness. Do not overlook them for the best experience.
---
Summary Table of Recommended Settings
| Setting | Recommendation (Handheld / Lite) | Recommendation (Docked / OLED Docked) |
|---|---|---|
| Brightness | 5 | 4–5 |
| SFX Volume | 100% | 100% |
| Music Volume | 100% | 100% |
| Voice Volume | 100% | 100% |
| Control Stick Sensitivity | Normal (Narrow for Lite/Precision) | Normal |
| Motion Controls | Off (On if comfortable) | On |
| Invert Y-Axis | As per personal preference | Same |
| Lock-On Style | Hold | Hold |
| Subtitles | On, Large | On, Medium |
| Closed Captions | Off | Off |
| Aim Assist | On | On |
| Camera Follow | On | On |
By carefully adjusting these settings, you can tailor The Legend of Zelda: Tears of the Kingdom to your playstyle and hardware, ensuring a smooth and immersive journey across the skies, surface, and Depths of Hyrule.
Important Notes
Important Notes
This guide covers critical warnings, pitfalls, irreversible choices, missable content, difficulty spikes, grinding traps, save management advice, and common regrets for The Legend of Zelda: Tears of the Kingdom. Read this before diving into Hyrule to avoid frustration and missed opportunities.
---
Warnings & Pitfalls
- Weapon Durability: All weapons, shields, and bows break after extended use. Do not become attached to any single weapon. Fuse materials from monsters or the environment to enhance durability and power. Always carry backups.
- Elemental Hazards: Fire, electricity, ice, and extreme temperatures (heat/cold) can kill you quickly. Carry appropriate elixirs, armor, or elemental weapons to survive. Check the weather forecast on the map before entering a region.
- Falling Damage: Gravity is a constant threat. Paragliding consumes stamina; if stamina runs out, you fall. Always land safely. Use the Ascend ability or Zonai devices like Wings and Hot-Air Balloons to avoid long falls.
- Guardian Stalkers: Though not present everywhere, powerful constructs (e.g., Flux Constructs, Gleeoks) can one-shot you early on. Run if you see a giant robot or three-headed dragon until you're better equipped.
- The Depths Darkness: The Depths are pitch black. You must use Brightbloom Seeds, Lightroots, or a miner's helmet to see. Without them you will likely fall into chasms or be ambushed. Always stock at least 10 Brightbloom Seeds before descending.
- Vehicle Care: Zonai devices despawn after a short time or if you leave them. Don't rely on them for long treks without recall or autobuild. Also, vehicles can explode if exposed to fire or electricity.
- Corrupted Save Data (Rare): Power loss during save or while in a shrine/temple can corrupt data. Use official Nintendo Switch power and avoid turning off the console mid-save. Cloud saves via Nintendo Switch Online automatically backup, but if corruption occurs, you may lose progress.
- Save File Management: The game uses a single manual save slot per profile. Autosaves overwrite automatically. You cannot revert to a previous manual save once you overwrite it. Create separate user profiles on your Switch if you want multiple save files. There is no chapter select or New Game+.
- Final Boss Fight: Before entering the final battle (triggered by completing the main quest “Destroy Ganondorf” at the location revealed after the fifth temple), save manually. You can reload after the credits to continue exploring with the completed state, but there is no post-game changes to the world (e.g., monster placements remain, but you can keep playing).
- Amiibo Rewards: Exclusive items from amiibo (e.g., special weapons, armor sets like the Fierce Deity set, Ancient set) can be obtained only once per day per amiibo. You cannot trade or obtain them otherwise. If you sell them, you can still get them again from the same amiibo (but only once per day). There's no way to get them without amiibo.
- Limited Item Sources: Certain materials like Star Fragments, Dragon Parts, and Ancient Blades (though ancient blades are not in TOTK; replace with elemental dragon parts) respawn but take real-world time or specific conditions. If you consume or sell them recklessly, you may have to wait. Save rare materials for armor upgrades and key recipes.
- The Bargainer Statues: In the Depths, you can exchange Poes for items. Poes are finite unless you farm them from respawning enemies in the Depths (they do respawn). However, some unique items like the Dark Armor set require a large number of Poes. You cannot undo transactions, so prioritize wisely.
- Sage Vows: The sages (Tulin, Yunobo, Sidon, Riju, and Mineru) are unlocked through main story temples. You must start their respective quests. They are not missable, but if you ignore the main quest entirely, you will not have their abilities, which greatly aid exploration and combat.
- Geoglyphs & Dragon's Tears: A side quest involving twelve geoglyphs scattered across Hyrule. Completing it unlocks a full backstory memory sequence. None are permanently missable, but you may accidentally trigger the final memory early if you find the final glyph first. That will spoil the main story twist. Avoid the final geoglyph (in central Hyrule Field near the castle) until you've seen the others.
- The Hylian Homeowner Quest: This side quest chain begins with a quest in Hateno Village. If you never talk to the construction crew, you cannot build your own house early. It's always available, but many players forget to return after the start.
- Korok Seeds: The inventory expansion (via Hestu) requires Korok Seeds. They are everywhere, but many are easy to miss in early areas. You can always come back, but if you ignore them, you'll have tiny weapon/shield/bow slots for a long time. Explore thoroughly.
- Yiga Clan Defectors: After certain story events, some Yiga members disguise as travelers. If you attack them, you miss out on their side quests. Be cautious before fighting every suspicious traveler.
- Sage's Will Locations: These items upgrade your sage abilities. They are found in specific sky islands. Not missable, but easily overlooked if you don't explore the sky thoroughly. Mark them on your map.
- The Great Sky Island: The tutorial area is gentle, but the final boss there (Construct) can be tough if you haven't mastered combat. Learn to parry and flurry rush before leaving.
- The Depths: Early in the game, entering the Depths without proper preparation (Brightbloom Seeds, weapons, anti-gloom food, and a powerful weapon) will result in a quick death. The enemies are tough and the environment is hostile. Wait until you have at least 5-6 hearts and decent weapons.
- Lynels: These remain the most dangerous regular enemies. They have massive health, one-shot abilities, and aggressive AI. Avoid them until you have upgraded armor (at least 10-12 defense) and durable fuzed weapons.
- Gleeoks (Elemental Dragons): Three-headed dragons with elemental attacks. They require specific strategies (e.g., using a bow with Keese Eyeballs for homing attacks, or breaking heads with Lynel gear). Do not engage without many healing items and stamina to fly.
- The Final Boss (Ganondorf): Requires decent combat skills, many healing items, and a fully upgraded arsenal. Make sure you have the Master Sword (which you can obtain after completing enough shrines to get 2 full stamina wheels and some health) and at least 15 hearts. The final fight is multi-phase; be ready to parry and dodge.
- Farming Rupees: You don't need to grind rupees. Cooking expensive meals (e.g., meat skewers, elixirs with monster parts) and selling them is far faster than killing enemies for rupees. Buy arrows from Beedle or shops only when needed.
- Farming Monster Parts for Upgrades: Most armor upgrades require specific monster parts (like Bokoblin horns, Lizalfos tails). These drop regularly. Do not spend hours farming from a single spot; simply kill every group you encounter while exploring. Use the sensor+ upgrade to track materials.
- Farming Korok Seeds: You don't need all 1000 seeds to max inventory. You need about 441 for full inventory slots. Even that is optional. A comfortable inventory (around 200 seeds) can be gathered naturally within 40-50 hours. Do not obsess over every seed.
- Farming Star Fragments: These are used for some of the best armor upgrades (e.g., upgrade of Champion's Leathers). They drop from sky dragons at night and from star fragment spawns (rare). Do not waste them on early upgrades; save for final tier upgrades.
- No Multiplayer: TOTK is entirely single-player, offline. There are no online interactions, co-op, or PvP. No voice chat, no leaderboards, no online trading. Therefore, no etiquette or anti-cheat concerns exist.
- Cloud Saves: Nintendo Switch Online allows cloud saves. This is useful for backup but not for “save scumming” because you cannot easily restore a custom save (the console only allows one cloud save per game, and you cannot revert to older ones without subscription tricks). Make manual backups by copying your save to another profile (not possible) – simply be careful.
- No Mods or Cheats on Official Hardware: The Nintendo Switch does not support mods without custom firmware. Using hacked consoles or pirated copies may lead to bans from Nintendo Online services (like cloud saves, eShop). Stick to legitimate copies.
- One Save Slot: The game uses a single manual save and an autosave that overwrites as you progress. The autosave activates when you enter a new area, complete a shrine, or after certain events. You cannot manually keep multiple versions of the same playthrough.
- Multiple Profiles: To have separate save files, create additional user profiles on your Nintendo Switch. Each profile can have its own game save. Useful if you want to start a new run without deleting your main.
- Manual Save Often: Before major events (e.g., entering a new region, fighting a boss, using a rare resource), manually save by opening the menu and selecting Save. This gives you a fallback if you make a mistake (e.g., dying and losing progress).
- Autosave Limits: Only the most recent autosave is kept. If you do something irreversible (like selling a key item) and the autosave triggers immediately, you might lose the item forever. To avoid this, before selling, manual save first, then you can reload the manual if needed.
- Recovering from Corruption: If your save becomes corrupted, your only option is to download a backup from Nintendo Switch Online cloud saves (if you have that subscription and your last backup was recent). Otherwise, you lose all progress. There is no other recovery method.
- Play at Your Own Pace: TOTK rewards exploration. Don't rush the main quest—let the world guide you. If you hit a difficulty wall, go explore another area, upgrade your gear, or cook better food.
- There is No “Wrong” Way to Play: The game supports thousands of solutions to puzzles thanks to the Ultrahand ability. If you can't figure out a shrine, try fusing objects, using rockets, or stacking items. Creativity is the key to success.
- Have Fun: This game is massive and filled with joy. Don't let the warnings discourage you. The only true regret is not experiencing the wonders of Hyrule fully.
---
Irreversible Choices
---
Missable Content (Nothing is truly missable, but easy to overlook)
---
Difficulty Spikes
---
Grinding Traps (Unnecessary Grinds)
---
Online / Multiplayer Etiquette & Anti-Cheat Notes
---
Save Management Advice
---
Things Players Commonly Regret Not Knowing Earlier
1. You Can Mark the Map: Use the pin and stamp system to mark treasure chests, korok seeds, rare ore deposits, and interesting locations. This helps you return later. Many forget to use stamps and lose track.
2. Fusing Weapons is Essential: Attaching a rock to a stick creates a stone axe, effective for mining. Fusing a monster horn to a weapon increases damage and durability drastically. Never use a base weapon without fusing something to it.
3. Stamina is More Important Than Health Early: Climbing, gliding, and sprinting are core actions. Upgrade stamina with your first few Light of Blessings (the yellow ones from shrines). Get at least two full stamina wheels before spending many orbs on hearts. You can convert later at the Goddess Statue, but it costs rupees.
4. Paraglider Can Be Obtained Immediately: After leaving the Great Sky Island, follow the main quest to get the paraglider from Purah at Lookout Landing. Do not delay—it opens up the entire map and is crucial for exploration.
5. Autobuild is a Game-Changer: After completing the “Guidance from Ancient” quest series in the Depths, you unlock Autobuild. This allows you to instantly rebuild vehicles or structures from Zonai devices you've previously built (and save them). Use it to create gliders, boats, and flying machines without searching for parts each time.
6. The Sensor+ Upgrades: After activating a shrine, you can upgrade your Sheikah Slate (Purah Pad) with the Sensor+. Then you can track any registered material (e.g., Silent Princess, Hearty Bass, rare ore). This makes gathering specific items trivial.
7. Cooking is Extremely Powerful: Combining foods and monster parts creates elixirs that grant extra hearts, stamina, or status effects (heat resistance, stealth, etc.). Learn a few recipes early (e.g., “Hearty” foods give full recovery + bonus hearts). Cooking in groups of five similar items yields better effects.
8. Don't Sell All Gems: Rubies, sapphires, topazes, diamonds are used for armor upgrades and crafting. Only sell extras (e.g., above 10 of each) to merchants. They are also needed for Gerudo Town jewelry.
9. You Can Fast Travel From Anywhere: Open the map and select any activated shrine or tower to teleport instantly. This includes the Depths and Sky Islands. Use this often to avoid tedious walking.
10. The Hylian Shield Has Extremely High Durability: You can find it in the Depths near the final boss area. It lasts a very long time, so protect it and avoid using it in trivial fights. Consider fusing it with a rare material (like a diamond) to make it even stronger.
11. You Can Ride the Dragons: The three elemental dragons (Naydra, Farosh, Dinraal) can be landed on. They circle the map. You can attack their spikes for valuable parts. Riding them also allows easy travel across the map while avoiding ground enemies.
12. Blood Moon Mechanics: Every few hours of real time (or after a certain number of kills), a Blood Moon occurs, respawning all monsters (except mini-bosses). If you need a specific monster part but it's scarce, wait for a Blood Moon and return to their location.
---
Final Advice
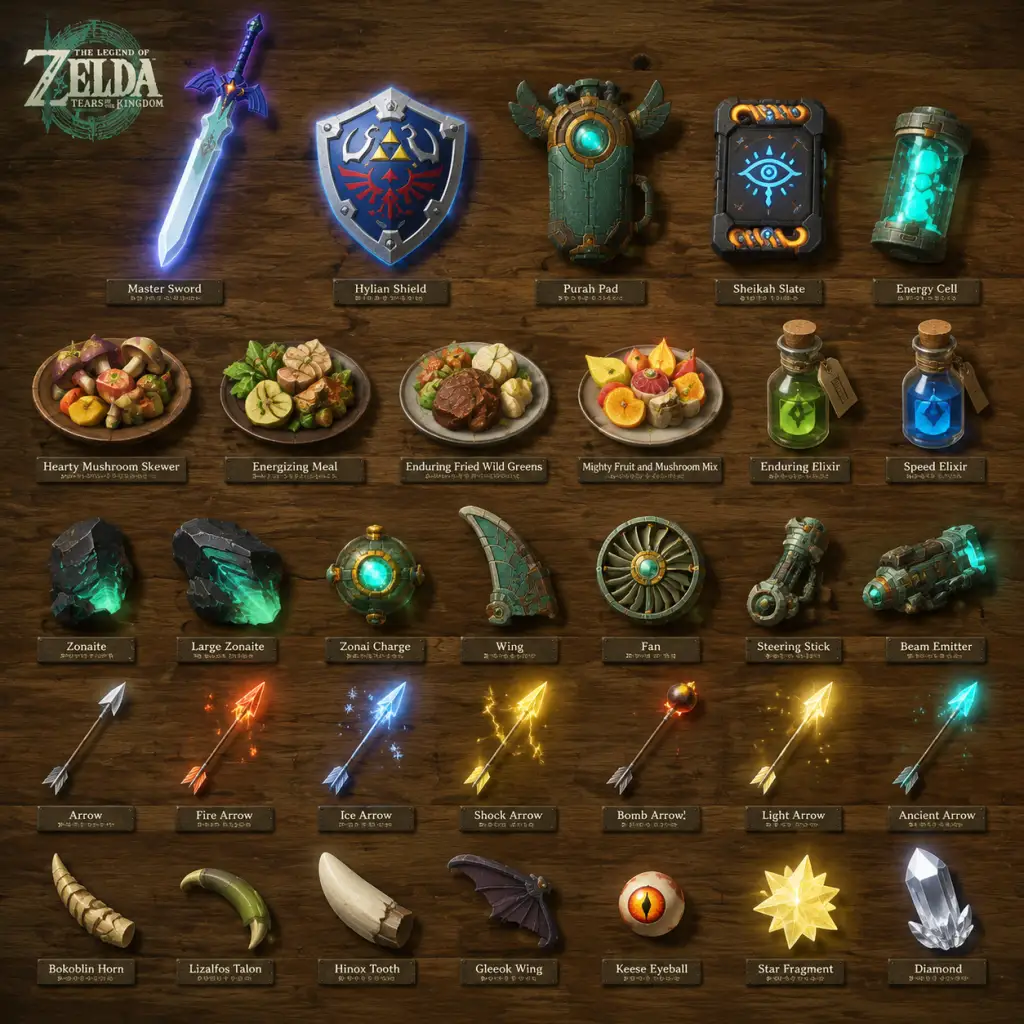
All Game Items
All Game Items Guide for The Legend of Zelda: Tears of the Kingdom
This comprehensive guide catalogs every major item category in Hyrule and the Sky Islands. Items are grouped by function, with details on acquisition, usage, and synergies. Whether you’re a completionist or just starting your adventure, this reference will help you understand what each item does and where to find it.
---
Weapons & Shields
Weapons in Tears of the Kingdom are defined by their base type and the Fuse system, which allows you to attach materials to augment damage, durability, or effects. Weapons have durability and can break, but Fusing extends their life.
#### One-Handed Weapons
- Swords (e.g., Soldier's Broadsword, Royal Broadsword): Balanced speed and damage. Best for quick attacks and shield combos.
- Scimitars (e.g., Gerudo Scimitar): Faster but lower durability. Gerudo weapons gain a bonus when fused with materials (double the Fuse material’s attack).
- Zora Weapons (e.g., Zora Sword): Low base damage but double attack power when Link is wet (e.g., after swimming, using Sidon’s ability, or in rain).
- Magic Rods (e.g., Ice Rod, Fire Rod): Cast elemental magic when swung. Can be fused with gems for more powerful area blasts.
- Boomerangs: Can be thrown and return. Some have elemental effects.
- Claymores (e.g., Royal Claymore): High damage, slow swings. Can be charged for spin attacks.
- Greatswords (e.g., Great Frostblade): Elemental variants that leave trails.
- Gorondo Weapons (e.g., Cobble Crusher): High durability and break ore deposits easily. Doubled breaking power when Fused with rock items.
- Heavy Weapons (e.g., Stone Smasher): Found in Eldin region, good against metallic enemies.
- Lances (e.g., Soldier's Spear, Royal Halberd): Long reach, fast thrusts, good for keeping distance. Great for Zora weapons (double attack when wet).
- Gerudo Spears: Also double Fuse material attack.
- Zora Spears: Double attack when wet.
- Bows by Type:
- Arrow Types:
- Arrow Fuse Tips: Always fuse your arrows for elemental advantage. For example, Ice Arrows one-shot fire enemies.
- Wooden Shields: Catch fire, but can be Fused with metal for improved defense. They float on water? No, but can be used as rafts with Fuse.
- Metal Shields (e.g., Soldier’s Shield): High defense, can attract lightning. Useful for shield surfing.
- Zora Shields: High durability, have water-related bonuses.
- Shield Fuse: Attach a rocket for a quick vertical boost, a spring for bouncing, or a bomb for explosive parry.
- Master Sword: Found in the final phase of the main quest (after completing many shrines). Has 30 base damage, glows near Gloom enemies doing 60 damage. Unbreakable, but runs out of energy and needs to recharge (10 min real time).
- Biggoron’s Sword: A two-handed giant sword with high damage (48) and durability. Found in the Depths after completing a Goron quest.
- Dusk Bow: Long-range, sniper-like bow. Found on a floating ring in the sky (near Hyrule Castle).
- Fierce Deity Sword: Two-handed, very high damage (60). Obtained through Amiibo.
- Champion’s Leathers: Base 4 defense, upgradeable to 32. Provides no set bonus but has high base stats. Obtained from Impa’s quest line.
- Zora Armor: Set bonus: Swim Dash Stamina Up and Swim Speed Up. Each piece gained from quests in Zora’s Domain. Essential for water exploration.
- Glide Set (Glide Mask, Glide Tights, Glide Shirt): Obtained from the Sky Islands’ Rito Village quests. Set bonus: decreases fall damage and increases mid-air maneuverability. Must-have for sky diving.
- Climber’s Gear: Full set found in shrines (Ruvo Korb, etc.). Set bonus: Climb Jump Stamina Up. Essential for vertical exploration.
- Barbarian Set: Found in the depths after defeating Hinoxes. Set bonus: Attack Up (equivalent to 3 levels). Great for combat.
- Stealth Set: From Kakariko Village shop. Set bonus: Night Speed Up. Makes sneaking easier.
- Soldier’s Set: Found in Hyrule Field caves. High base defense, no set bonus.
- Ancient Set: Purchased from Robbie in Hateno Village with Crystallized Charges and Zonaite. Set bonus: Ancient Proficiency (damage up vs. guardians? Actually in TotK it boosts damage from Zonaite weapons).
- Froggy Set: Found from Great Fairies quests. Set bonus: reduces slipping when climbing in rain. Very useful.
- Miner’s Set: Found in Depths caves. Lights up surroundings.
- Yiga Set: From Yiga Clan quests. Set bonus: increased damage from sneakstrikes.
- Miscellaneous: Hylian Hood, Tunic of Memories (from series).
- Visit the four Great Fairies (Cotera, Mija, Kaysa, Tera) scattered across Hyrule. Pay rupees and give materials to upgrade pieces up to 4 levels. Each level increases defense and may unlock a set bonus at level 2.
- Purah Pad: Given at the start. Functions as a map, camera, and upgradeable with features via Robbie (Sensor+, Travel Medallion, etc.).
- Paraglider: Earned after completing the Great Sky Island. Allows gliding.
- Sage’s Vows: After each regional temple, you gain a sage’s ability:
- AutoBuild: Found in the Depths (Abandoned Central Mine). Allows you to build saved structures from Zonaite.
- Recall: Inherent ability from the beginning; can reverse an object’s movement.
- Ascend: Launches Link upward through ceilings.
- Ultrahand: Manipulate and stick objects together.
- Camera: Upgraded Purah Pad function for compendium and photo quests.
- Sensor+: Upgrade that lets you track specific materials or enemies.
- Travel Medallion: Place a custom fast travel point.
- Heart Containers / Stamina Vessels: Found from Light of Blessing (4 per upgrade) or by trading 4 Lights at goddess statues.
- Korok Seeds: Exchange with Hestu to expand inventory slots (weapons, shields, bows).
- Bundles of Wood: Craft campfires or fuel for Skyview Towers.
- Hearty Foods: Any “Hearty” ingredient (e.g., Hearty Radish, Hearty Bass) fully restores hearts + adds temporary yellow hearts. Best for survival.
- Standard Meals: Cooked mushrooms, meat, fish restore a few hearts.
- Elixirs: Combine monster parts (like Lizalfos Tail) with critters (like Hot-Footed Frog) for effects like speed or stamina.
- Attack Up: Mighty Bananas (3 give level 3), Mighty Thistle, Hinox Toenail, Razorshrooms.
- Defense Up: Iron Shroom, Hearty Truffle, Porgy fish, etc.
- Stealth Up: Stealthfin Trout, Silent Shroom, Blue Nightshade.
- Speed Up: Any “Swift” ingredient: Swift Violet, Swift Carrot, Hot-Footed Frog.
- Cold Resistance: Spicy Pepper, Sunshroom, Sizzlefin Trout.
- Heat Resistance: Chillshroom, Cool Safflina, Chillfin Trout.
- Electricity Resistance: Electric Daisy, Voltfin Trout, Thunderwing Butterfly.
- Stamina Recovery: Staminoka Bass, Stamella Shroom, Energetic Rhino Beetle.
- Enduring (yellow stamina): With Endura Carrots (3 restore a full wheel).
- Fairy Tonic: Adds 5 yellow hearts and full heal (fairies).
- Gloom Resistance: Dark Clump (multiple), Sundelion, Star Fragment.
- Dragon Parts: (Shard of Dragon’s Fang, Claw, Scale) significantly extend buff duration to 30 minutes. Combine one with any meal for max effect.
- Star Fragment: Also extends buff to 30 min. Very rare.
- Monster Parts: High-level parts like Lynel Hoof, Molduga Jaw increase duration and potency.
- Critters: Found in the wild; each has a corresponding elixir effect.
- Flint: Sparks when struck with metal; used for campfires.
- Amber: Low-value gem, used for elixir timers.
- Opal: Mid-value gem.
- Ruby: Fire effects; fuse to weapons or arrows for fire damage. Used in armor upgrades.
- Sapphire: Ice effects.
- Topaz: Shock effects.
- Diamond: Most valuable; used for powerful weapon Fuse (increases durability and attack). Also needed for some armor upgrades.
- Luminous Stone: Glows in the dark. Used in some armor upgrades.
- Star Fragment: Super rare; extends buffs, upgrades certain armors.
- Zonaite: The core resource of the Sky Islands and Depths. Used to craft Zonaite weapons, devices, and refunded by using the Forge.
- Bokoblin Horn, etc. – Low value; used for low-level Fuse.
- Lizalfos Tail: Shock, fire, ice varieties for elixirs.
- Hinox Toenail, Lynel Hoof: High-level Fuse damage.
- Molduga Jaw, Gleeok Wing: Very high Fuse attack.
- Keese Wing: Used in? Arrow Fuse for homing? Actually not, but used in elixirs for speed.
- Chuchu Jelly: Red, white, yellow for elemental arrows.
- Ancient Material: (Screw, Spring, Gear, etc.) Found in Guardians? Actually Guardians are gone; these appear from Zonaite robots in Depths. Used for ancient arrows and armor upgrades.
- Gloom Residue: Drops from Gloom enemies; used for Gloom Resistance elixirs.
- Hyrule Herb: Base healing.
- Mighty Thistle, Iron Shroom, etc. for buff elixirs.
- Bomb Flowers: Explosive arrow Fuse.
- Puffshroom: Creates smoke screen for stealth.
- Muddle Bud: Confuses enemies.
- Dazzlefruit: Blinds enemies.
- Fire Fruit, Ice Fruit, Shock Fruit: Elemental arrow Fuse.
- Honeycomb: Heals and adds yellow hearts when cooked.
- Endura Carrot, Staminoka Bass: Stamina recovery.
- Silent Princess: Used in high-level Stealth elixir and armor upgrade.
- Fairies: Automatically revive Link if he dies (holding one in inventory). Can also be cooked for Fairy Tonic.
- Rupees: Standard currency from chests, selling items, quests. Use for shops, armor upgrades, Hestu initial expansions.
- Poes: Found in the Depths. Used to buy unique items from Bargainer Statues (e.g., Dark Clump recipes, armor pieces, travel medallion? Actually travel medallion is from Robbie; Poes buy Dark Armor, etc.).
- Zonaite (as currency): Used at Forge Constructs to create Zonaite devices (fans, wheels, etc.). Also used at Gatcha machines in Sky Islands and Depths.
- Crystallized Charges: Refined Zonaite. Used to purchase items from Robbie and upgrade Purah Pad.
- Large Crystallized Charges: From boss fights or rare chests; exchange for Zonaite at Forges.
- Korok Seeds: Given to Hestu for inventory slots. 1 seed per slot initially, later 2, etc. Very common (over 900).
- Light of Blessing: From Shrines (4 per shrine) and some quests. Trade at Goddess Statues for Heart or Stamina upgrades. 4 Lights = 1 upgrade. 120 Shrines total (but some may give stamina).
- Treasure Map: Not currency, but clues for valuable chests.
- Paraglider Fabric: Cosmetic upgrade sold at Kochi Dye Shop or from sky challenges.
- Korok Seeds: 1000 total (some hidden puzzles). Inventory expansion.
- Bubbul Gems: Found by defeating Bubbulfrogs in caves. Trade with Koltin in Tarrey Town for unique armor pieces (e.g., Korok Mask) and parachute fabric.
- Sage’s Will: Collect 4 per sage to upgrade their power. Found in Sky Islands chests and from boss rematches.
- Treasure Chests: Contain weapons, materials, maps, or armor. Marked with ?? on map after uncovering.
- Schema Stones: Unlock AutoBuild designs. Found in Depths and Sky.
- Fuse Compendium Entries: Photograph each item with Camera for quests and completion. Robbie rewards you for completing categories.
- Medals of Honor: From monster medal quests (e.g., defeat all Moldugas, Taluses, etc.). Given by Kilton and another NPC? Actually they give medals.
- Gems (Ruby, Sapphire, Topaz) + Weapon/Arrow: Adds elemental effect and increased damage (gem’s attack value). For example, Ruby (10 attack) + sword = fire sword; Sapphire (10) = ice; Topaz (10) = shock.
- Diamond + Weapon: Adds 25 attack and increases durability. Best for high-damage bases.
- Lynel Hoof + Weapon: Adds 11 attack; good for durability boost.
- Molduga Jaw + Weapon: Adds 21 attack.
- Gleeok Wing + Weapon: Adds 13 attack and wind gust.
- Hinox Toenail + Weapon: Adds 3 attack. Not great.
- Bomb Flower + Arrow: Explosive arrow.
- Puffshroom + Arrow: Smoke screen.
- Muddle Bud + Arrow: Confusion area.
- Dazzlefruit + Arrow: Flashbang.
- Chuchu Jelly + Arrow: Elemental arrow.
- Fuse to Shield: Attaching a rocket gives booster, spring for bounce, bomb for explosive parry, minecart for surfing, sled for sand/snow sliding.
- Fuse to Arrow: Attaching a Keese Eyeball creates homing arrow that seeks nearest enemy. Attaching a monster part like a Lizalfos Tail adds that element.
- Fuse to Weapon: Attaching a weapon to another weapon (e.g., two spears) increases reach and damage.
- Keep one of each material for armor upgrades later – especially rare gems, dragon parts, and monster parts.
- Always fuse your arrows before combat – it’s free damage and often solves elemental weaknesses.
- Cook hearty / endura meals before exploring dangerous areas – they are lifesavers.
- Upgrade your Zora set early for water navigation; upgrade Glide set for sky islands.
- Use Muddle Buds on tough enemies to make them fight each other.
- Save Bomb Flowers for ore deposits and sealed doors; they are scarce early.
- Collect all Sage’s Wills to reduce cooldowns on sage abilities.
#### Two-Handed Weapons
#### Spears
#### Bows & Arrows
- Short Bows: Fast draw, moderate range (e.g., Traveler’s Bow).
- Long Bows: High range and damage, slow draw (e.g., Royal Guard’s Bow).
- Duplex Bows: Shoots two arrows (found in Yiga Clan hideouts).
- Great Eagle Bow: Shoots three arrows, high damage (reward for Tulin’s quest).
- Lizal Bows: Fast draw, decent range.
- Normal Arrows: Basic projectile. Fuse with materials for effects.
- Fire Arrows: Fuse with Fire Fruit, Ruby, or Red Chuchu Jelly.
- Ice Arrows: Fuse with Ice Fruit, Sapphire, or White Chuchu Jelly.
- Shock Arrows: Fuse with Shock Fruit, Topaz, or Yellow Chuchu Jelly.
- Bomb Arrows: Fuse with Bomb Flower.
- Ancient Arrows: One-hit kill most enemies, but drop no loot. Crafted with Guardian parts and Zonaite? Actually Ancient Arrows are not craftable in TotK; they are found in chests in the Depths. Very rare.
#### Shields
#### Legendary & Unique Weapons
---
Armor & Outfits
Armor provides defense and often set bonuses when worn together. Upgraded at Great Fairies for higher defense and sometimes new set bonuses (e.g., attack up).
#### Essential Armor Sets & Their Bonuses
#### Upgrading Armor
---
Key Items & Key Equipment
These are critical for progression and puzzle solving.
- Tulin (Wind): Gust that propels you forward.
- Yunobo (Fire): Roll into boulders and break rocks.
- Sidon (Water): Create a water shield and wet Link.
- Riju (Lightning): Call lightning to stun enemies.
- Mineru (Spirit): Summon a construct to ride or carry items.
---
Consumables & Food
Cooking is vital for healing, buffs, and temporary effects. Combine up to 5 ingredients in a cooking pot.
#### Healing Items
#### Buff Foods (Last 30 minutes)
#### Important Ingredients for Cooking
---
Materials & Resources
Used for Fuse, cooking, armor upgrades, and crafting.
#### Ores & Gems
#### Monster Parts
#### Plants & Critters
---
Currencies
---
Collectibles
---
Fuse Materials & Synergies
The Fuse system allows combining two items. Key synergies:
---
Tips for Item Management
---
This guide covers all major item categories. For specific upgrade costs or hidden items, consult in-game compendium or detailed area guides.
Character Skills
Overview
In The Legend of Zelda: Tears of the Kingdom, the only playable character is Link. Unlike traditional RPGs, Link does not have a class or skill tree. Instead, his capabilities are defined by three categories: Arm Abilities (granted by Rauru’s right hand), Sage Abilities (unlocked by completing the Regional Phenomena quests), and Combat Techniques (universal mechanics). This guide covers every skill, its effects, cooldowns, upgrades (where applicable), combos, synergies, recommended builds, and optimal usage.
---
Arm Abilities (Rauru’s Hand)
These five abilities are unlocked sequentially during the Great Sky Island tutorial and the Crisis at Hyrule Castle main quest. They are always available once obtained and consume no resources (except Zonaite for Autobuild).
1. Ultrahand
- Effect: Picks up, moves, rotates, and attaches objects (including Zonai devices). Attached objects form a single physics object. Link can carry objects while moving, but heavy objects drain stamina.
- Cooldown: None (instant use; stamina drain only for heavy loads).
- Upgrades: None directly, but Autobuild complements it by recalling saved builds.
- Combos:
- Synergies: Pairs with Stamina Vessels and Endura ingredients for longer heavy carries; use with Zonai Charges to power attached devices.
- Recommended Builds: No specific armor required. Maximize stamina (e.g., Climbing Set for mobility, or Energy Set for Zonai efficiency).
- When to Use:
- Effect: Combines a weapon, shield, or arrow with a material or item to modify its stats and effects. Fusing arrows requires holding ZR and pressing Up on the D-pad.
- Cooldown: None (instant, costs nothing).
- Upgrades: No direct upgrade, but Pelison in Tarrey Town can break fusions (costs Rupees). Note that fused arrows are consumed on use.
- Combos:
- Synergies: Combine with Multi-Shot Bows to apply area effects; use Mighty Bananas (fused as weapon) for temporary stealth boost? No, only cooking. Armor sets like Barbarian Set increase base damage, making fused weapons even stronger.
- Recommended Builds: Always have a variety of fused weapons (one for each element). Use Zora Weapons (double damage when wet) fused with strong parts; Gerudo Weapons (add raw damage) fused with Lynel parts.
- When to Use:
- Effect: Allows Link to swim upward through solid surfaces (ceilings, overhangs) to reach the top. He emerges on the surface directly above. Works only if there is a flat ceiling within a certain distance (roughly 2-3 body lengths).
- Cooldown: None (instant; no cost).
- Upgrades: None.
- Combos:
- Synergies: Use with Climbing Gear (reduces stamina cost for climbing) to reach Ascend points faster; Sneak Set helps avoid detection while emerging.
- Recommended Builds: No special gear needed. Ascend is invaluable for caving – look up before entering dark caves.
- When to Use:
- Effect: Reverses the movement history of a single object for a short duration (about 8 seconds). Only affects objects that have moved, not enemies (except some constructs frozen by shock). Can be used repeatedly on same object if within cooldown? No cooldown per se, but the object’s history resets after Recall ends.
- Cooldown: None (once the object stops, you can reapply Recall if it moves again).
- Upgrades: None.
- Combos:
- Synergies: Use Time Armor? No such set. General mobility: recall is essential for accessing sky islands without a launcher.
- Recommended Builds: Equip Climbing Gear if scaling after Recall launch; Glide Set for mid-air maneuverability.
- When to Use:
- Effect: Summons a previously saved Zonai device build (or an auto-completed schematic) using Zonaite as currency. Builds appear instantly in front of Link. Can also automatically fill missing parts with Zonaite (costly). Unlocked after completing the Crisis at Hyrule Castle main quest (investigate the Depths).
- Cooldown: Cooldown is replaced by Zonaite cost; no time cooldown.
- Upgrades: Can increase max saved builds via Schema Stones (found in Depths). Max 8 favorite builds can be selected.
- Combos:
- Synergies: Use Zonaite Set (reduces Zonaite cost by up to 50%) or Energy Set (increases battery efficiency). Stockpile Zonaite and large Zonaite from Depths mines.
- Recommended Builds: Have combat vehicles (e.g., hoverbike with cannons) and utility builds (e.g., bridge, elevator) saved. Equip Zonaite Armor for cost reduction.
- When to Use:
- Ultrahand + Recall: Move an object, then use Recall to reverse its motion (e.g., raise a board with Ultrahand, then Recall to send it down).
- Ultrahand + Fuse: Attach a Zonai device to a weapon/shield/arrow after moving it.
- Ultrahand + Ascend: Build a platform with Ultrahand, then Ascend through it.
- Exploration: create bridges, rafts, floating platforms.
- Puzzle solving: move blocks, align crystals, rotate gears.
- Combat: lift heavy objects to drop on enemies, build instant barricades.
2. Fuse
- Fuse + Elemental Material: Adds fire, ice, or shock damage; applies status effects.
- Fuse + Monster Part: Increases attack power (e.g., Lynel Horn + Silver = +50 attack).
- Fuse + Zonai Device: Adds unique effects (e.g., Cannon, Flame Emitter).
- Fuse + Gem: AoE burst on hit (ruby = fire, sapphire = ice, topaz = shock).
- Before every combat: fuse a high-damage part to your primary weapon.
- Elemental puzzles: fuse fire/ice/shock to arrows to activate switches or freeze lava.
- Mining: fuse a Stone Talus Heart or Cobble Crusher to a weapon for efficient ore breaking.
3. Ascend
- Ascend + Ultrahand: Build a platform near a ceiling, then Ascend through it.
- Ascend + Recall: Recall a falling object downward, then Ascend onto it.
- Ascend + Rockets: Fuse a rocket to a shield, shield surf, then Ascend at peak height for extra vertical reach.
- Exiting caves or wells (faster than climbing).
- Reaching high ledges in shrines.
- Escaping combat by diving underground and Ascending elsewhere.
- Non-obvious shortcuts: many overworld rock formations are thin enough to Ascend through.
4. Recall
- Recall + Falling Rock: Ride a falling rock back up to sky islands.
- Recall + Ultrahand: Move an object with Ultrahand, then Recall to send it back to its original position (used in puzzles).
- Recall + Zonai Device: Reverse a moving vehicle to undo a mistake.
- Recall + Enemy Projectiles: However, it only works on physical objects, not arrows or magic. It can work on boulders thrown by Hinox.
- Traversal: catch falling rocks, floating platforms, or Ferris wheel-like structures to ride upward.
- Puzzles: reposition objects precisely by reversing their movement.
- Combat (limited): reverse a boulder an enemy threw to hit them back.
5. Autobuild
- Autobuild + Ultrahand: After autobuild, use Ultrahand to fine-tune or add parts.
- Autobuild + Recall: If build moves, recall to reverse.
- Autobuild + Fuse: Fuse additional parts to the autobuilt vehicle.
- Combat: summon an instant turret or drone.
- Puzzles: autobuild a solution if you have the schematic.
---
Sage Abilities (Avatar Abilities)
After completing each of the four Regional Phenomena (Wind Temple, Fire Temple, Water Temple, Lightning Temple) and the fifth sage side quest (Mineru), you gain the ability to summon a Sage Avatar. Each avatar has a unique active ability that can be triggered by interacting with them (press A near them). The abilities have a cooldown of approximately 30-60 seconds (tested). You can also turn avatars on/off from the Key Items menu.
| Sage | Ability | Effect | Cooldown | Best Use |
|---|---|---|---|---|
| Tulin (Wind) | Tulin’s Gust | Fires a strong gust of wind that pushes enemies away, clears fog, and can blow Link’s paraglider upward when activated while gliding (acts like a boost). | ~30 sec | Gliding vertical boost; crowd control; revealing buried treasure in sand (blows sand away). |
| Yunobo (Fire) | Yunobo’s Charge | Charges forward in a fiery ball, destroying cracked walls, breaking ore deposits, and dealing heavy fire damage to enemies in a line. Can also light torches and grass. | ~45 sec | Mining and wall breaking; igniting multiple torches quickly; AoE fire combat. |
| Sidon (Water) | Sidon’s Shield | Creates a water bubble around Link that blocks one hit (any damage) and then breaks. While the bubble is active, Link inflicts extra water damage on melee attacks and can destroy Mud and Sludge enemies. | ~30 sec | Survival: nullify one strong attack; combat: boost melee damage against fire enemies; traversal: protect from lava (Lava-resistant armor still needed). |
| Riju (Lightning) | Riju’s Lightning | Summons a lightning strike on a targeted area (automatically aimed at the nearest enemy or object). Deals moderate shock damage and stuns enemies. Can be aimed manually by holding R. | ~60 sec | Combat crowd control: stun groups; puzzle activation: power electrical devices (like in Gerudo town); destroys metal shields. |
| Mineru (Spirit) | Construct Rider | Summons a construct mech that Link can ride. The construct has its own health and can punch, stomp, and use Zonai devices fused to its arms/back. Link can dismount at any time. This is not a cooldown ability but a persistent summoned vehicle until destroyed or dismissed. | No cooldown; costs nothing. Can be resummoned immediately if destroyed after a short delay. | Heavy combat, traversal over rough terrain, using Zonai devices on the construct. |
Combos & Synergies:
- Tulin + Paraglider: Use Tulin’s Gust while gliding to gain altitude.
- Yunobo + Ascend: Yunobo can break through rock ceilings from below if they are crackable.
- Sidon + Zora Weapons: Zora weapons (double damage when wet) synergize perfectly with Sidon’s water shield (keeps Link wet).
- Riju + Multi-Shot Bow: Riju stuns enemies, allowing easy headshots.
- Mineru + Autobuild: Mineru can use constructed Zonai devices (like cannons) affixed to its arms for extra firepower.
- Tulin: Always on for gliding boost; use in combat to scatter groups or blow away enemies near cliffs.
- Yunobo: Essential for breaking cracked walls and mining; good for clearing path in caves. In combat, use against fire-weak enemies (ice-breath Lizalfos, Keese swarms).
- Sidon: Activate before facing a strong enemy (Lynel, Hinox) to block a single hit; great in rain to keep weapons wet for Zora bonus.
- Riju: Use against metal enemies (Lynel, Constructs) to stun and drop weapons; in Gerudo Desert for activating electric puzzles.
- Mineru: Summon for exploring dangerous areas (Depths, lava zones) as the construct absorbs damage; use for mining with its fists; can carry multiple Zonai weapons.
- Description: After performing a perfect dodge (backflip or side hop) at the moment an enemy attacks, time slows down, allowing Link to unleash a rapid series of strikes (up to 6 hits with one-handed weapons, less with two-handed).
- Activation: Hold ZL to lock on, then press X + direction (backflip for overhead attacks, side hop for horizontal attacks). Timing must be precise.
- Cooldown: None; can be triggered repeatedly.
- Upgrades: None; damage depends on weapon.
- Combos: Can be followed by a charged attack out of Flurry Rush? Not directly, but after the rush ends you can continue attacking.
- Synergies: High-damage weapons (e.g., Royal Broadsword with Lynel Horn) maximize DPS. Barbarian Set (50% attack up) or Fierce Deity Set stack multiplicatively.
- When to Use: Against single strong enemies with telegraphed attacks (Lynel, Hinox, Stalkoblin). Avoid using when overwhelmed by multiple enemies due to lock-on limitation.
- Description: Block an attack with a shield at the exact moment of impact, causing the enemy to stagger and become vulnerable. Can also reflect Guardian lasers (not in TotK, but works on Construct lasers).
- Activation: Hold ZL to raise shield, press A just before the attack lands.
- Cooldown: None.
- Upgrades: None.
- Combos: After parrying, you can immediately attack (recommended: use a heavy weapon for big damage).
- Synergies: Shield Guard Up food or armor can make parrying easier? No, but a shield with high durability is important. Pot Lid is the most durable parry shield? Actually, the Hylian Shield is best but rare.
- When to Use: Against melee enemies that stagger easily; essential for deflecting Boss Bokoblin charges and Lynel roars. Use against Stone Talus to create climb opportunities.
- Description: Hitting an enemy’s head with an arrow (or any projectile) staggers them and can knock them down. Most effective from stealth.
- Activation: Aim with bow, shoot head.
- Cooldown: None.
- Upgrades: None.
- Combos: Follow up with a Sneakstrike or Charged Attack while they are stunned.
- Synergies: Stealth Set (Sheikah Set) increases sneak attack damage by 8x from behind. Bow fuse with Keese Wings for homing arrows? No, Keese eyes give homing – use Ancient Arrow? Not in TotK; use Cryonis? Not present. Use Bomb Arrows for AoE.
- When to Use: Stealth approach; disabling lookout enemies; starting combat with advantage.
- Description: Attack an enemy from behind while undetected. Deals 8x damage (with stealth armor, 8x; without, 2x? Actually base sneakstrike is 2x, but Sheikah Set gives 8x total? The exact multiplier: without stealth, 2x damage; with full Sheikah Set, 8x damage. Check: In BotW it was 8x with Sheikah Set; in TotK it is likely the same.
- Activation: Crouch (press L3) and approach enemy from behind, press Y.
- Cooldown: None.
- Upgrades: None; damage scales with weapon.
- Combos: Use after a headshot or stealth consumable (Mighty Bananas? Not crafted).
- Synergies: Sheikah Set mandatory for maximum damage. Use with Octo Balloons to distract enemies.
- When to Use: Clearing camps silently; taking down Stal enemies efficiently.
- Description: Hold Y to charge a melee attack. For one-handed weapons, Link spins continuously (stamina drain). For two-handed weapons, he charges a single powerful swing. Spears have a multi-hit thrust.
- Activation: Hold Y.
- Cooldown: Uses stamina.
- Upgrades: None.
- Combos: Release near end of stamina for max hits. Combine with Barbarian Set or Fierce Deity Set for damage boost.
- Synergies: Stamina Vessels and Endura Carrots for longer spins. Use against groups of weak enemies.
- When to Use: Crowd control; breaking ore deposits with two-handed charged swing.
- Bullet Time: While airborne (gliding, falling, or shield surfing), time slows, allowing multiple arrows to be fired. Activation: Draw bow while in air.
- AoE Arrows: Fuse gem to arrow for area explosion. Bomb Flowers create blast radius.
- Elemental Arrows: Fuse elemental items (Fire Fruit, Ice Fruit, Shock Fruit) for status effects.
- Armor: Fierce Deity Set (attack up + charge attack up) or Barbarian Set (attack up) – both increase damage by 50%.
- Weapons: Royal Broadsword fused with White-Maned Lynel Horn (54 base + 55 fuse = 109 attack). Shield: Hylian Shield (durability). Bow: Savage Lynel Bow (3-shot or 5-shot).
- Abilities: Use Recall for mobility, Fuse for weapon upgrades always.
- Sage Avatars: Turn on Tulin, Sidon, Riju (Yunobo optional). Use Sidon’s shield before engaging boss.
- Armor: Sheikah Set (sneak strike up 8x, night speed up).
- Weapons: Eightfold Blade (high damage) fused with Silver Lynel Horn. Phantom Ganon weapons also good.
- Abilities: Use Sneakstrike and Headshot. Avoid engagement.
- Sage Avatars: Turn off all (they break stealth). Use only when needed.
- Armor: Zonaite Set (reduces Zonai energy cost, increased battery).
- Weapons: Fuse Zonai devices to weapons (e.g., Cannon Sword).
- Abilities: Autobuild and Ultrahand focus.
- Sage Avatars: Mineru (construct) for building and combat. Use Riju for electricity.
- Armor: Champion’s Leotard (no bonus) + Fierce Deity headpiece for attack. Or Snowquill Set for cold resistance.
- Weapons: Keep one of each element: Fire Sword (Flame Gleeok Horn + sword), Ice Spear, Shock Arrow.
- Abilities: Fuse accordingly.
- Sage Avatars: Use Sidon’s shield for water, Yunobo for fire, Riju for lightning.
When to Use Each Sage Ability:
---
Combat Techniques (Universal Skills)
These are not obtained as abilities but are core mechanics that every player should master.
Flurry Rush
Perfect Guard (Parry)
Headshot (Arrow to Weak Point)
Sneakstrike
Charged Attack (Spin Attack)
Bow Techniques
---
Recommended Builds and Synergies
General All-Purpose Build
Stealth Assassin Build
Zonai Engineer Build
Elemental Specialist Build
---
When to Use Each Skill Summary
| Skill | When to Use |
|---|---|
| Ultrahand | Puzzle solving, building vehicles, moving obstacles, combat (drop objects). Always available. |
| Fuse | Before any fight (fuse weapon/shield/arrow), for puzzle activation, mining. Always. |
| Ascend | Exiting caves, reaching high ledges, escaping combat. Use in any confined space with a ceiling. |
| Recall | Traversal via falling rocks, puzzles requiring time reversal, retrieving items that fell off cliffs. |
| Autobuild | When you need a complex build quickly and have enough Zonaite. Prime for combat vehicles. |
| Tulin’s Gust | Gliding boost, clearing fog, blowing away enemies near edges. |
| Yunobo’s Charge | Breaking cracked walls and ore; igniting torches; AoE fire damage. |
| Sidon’s Shield | Blocking one hit from a strong enemy; activating Zora weapon bonus; surviving lava area (briefly). |
| Riju’s Lightning | Stunning groups or metal enemies; activating electric devices. Long cooldown, use wisely. |
| Mineru’s Construct | Heavy combat, mining, traversal over lava/quicksand, Zonai device platform. Always useful when exploring dangerous terrain. |
| Flurry Rush | Against single enemies with predictable attacks; avoid in crowds. |
| Perfect Guard | Deflecting physical attacks; breaking enemy stance. |
| Headshot | Starting combat, stealth takedowns, disabling enemies with bows. |
| Sneakstrike | Clearing camps without alerting others; massive damage from behind. |
| Charged Attack | Crowd control, breaking ore, hit-and-run tactics. |
Final Notes
The beauty of Tears of the Kingdom is that there are no wrong choices – every ability has multiple uses. Experiment with combinations: for example, use Ultrahand to carry a Zonai cannon into position, Autobuild to duplicate it, then Fuse the cannons to weapons. The only limitation is your creativity. Master these skills, and Hyrule is yours."
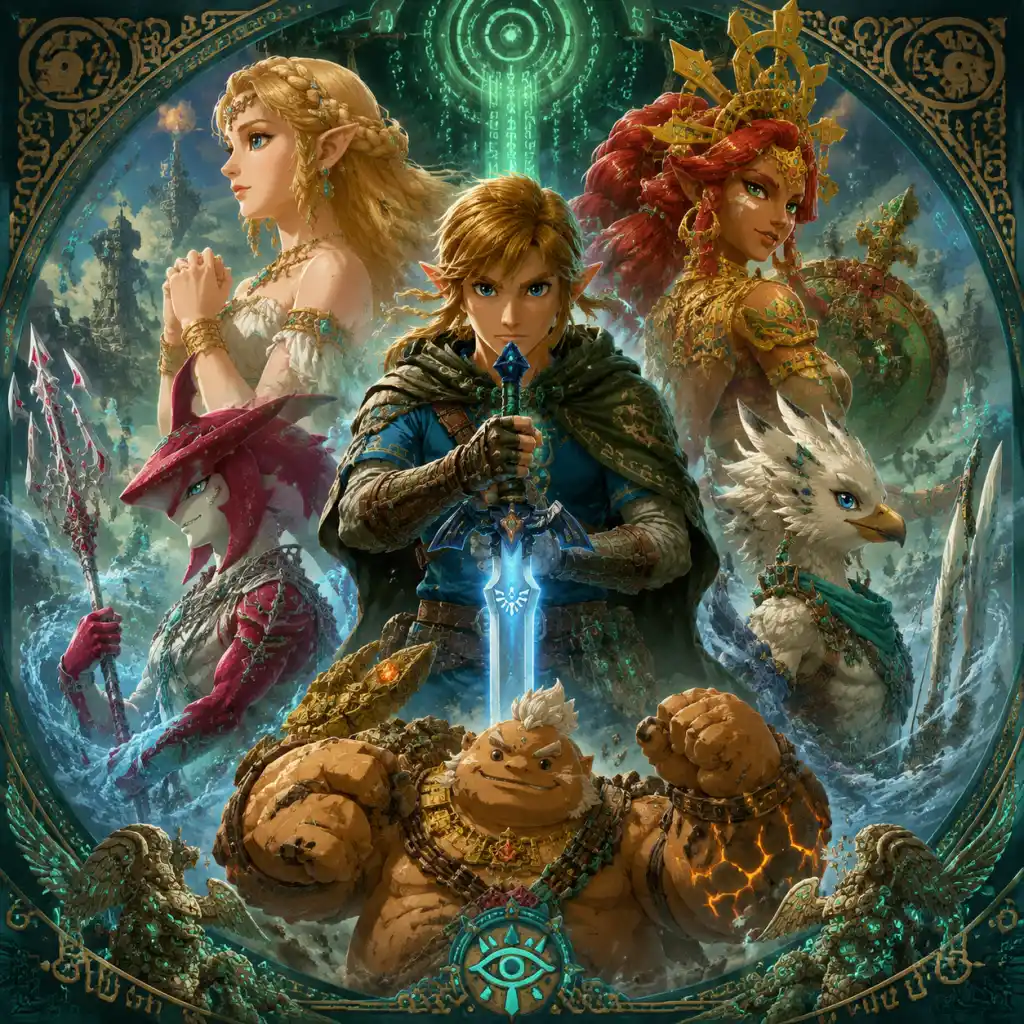
Characters & Roles
Characters & Roles
In The Legend of Zelda: Tears of the Kingdom, the only fully playable character is Link, the hero of Hyrule. However, the game features a robust cast of supporting characters, each with unique abilities that aid Link on his journey. This guide covers all major characters, their backgrounds, roles, unlock conditions, and how to best utilize their strengths together.
---
Playable Character: Link
Background:
Link is the courageous knight of Hyrule, chosen by the Master Sword and the spirit of the hero. After the events of Breath of the Wild, he and Princess Zelda have been researching the ancient Zonai civilization beneath Hyrule Castle. An accident plunges Link into the Great Sky Island, where he gains new arm abilities and must reunite the scattered kingdom.
Strengths:
- Extreme versatility: Link can wield any weapon, shield, or bow, and use Zonai devices to create creative solutions.
- Four unique arm abilities: Ultrahand (manipulate objects), Fuse (combine items), Ascend (pass through ceilings), and Recall (reverse time on objects).
- Stealth, climbing, swimming, and paragliding all remain core movement options.
- Can consume food/elixirs for buffs, hearts, and stamina recovery.
- No inherent weaknesses, but relies on equipment durability and resource management. Weapons break, and arrows are finite.
- Arm abilities have cooldowns or limited uses per resource (e.g., Ultrahand needs Zonai devices).
- General Exploration: Stealth Set (stealth + night speed) + climbing gear for verticality; Master Sword (unlocked after completing the Dragon's Tear questline) for infinite durability against Gloom enemies.
- Combat Focus: Barbarian Set (attack up) or Fierce Deity Set (attack up + charge attack stamina reduction). Fuse weapons with Lynel horns (highest damage) or Fuse with gems for AoE or elemental effects.
- Zonai Device Mastery: Zonaite Armor set (reduces energy consumption from Zonai devices) allows prolonged use of constructs like fans, wheels, and cannons.
- Bows: Great Eagle Bow (three arrows at once) or Royal Bow (high durability). Fuse arrows with Keese eyes for homing, or fire fruits for burning.
- Use Tulin's gust to quick launch Link while gliding or to clear sand/dust.
- Use Yunobo's rolling attack to break cracked blocks, activate switches, or deal fire damage.
- Use Sidon's water shield to protect from heat or to activate water-based puzzles.
- Use Riju's lightning strike to electrocute groups or activate electric Zonai devices.
- Use Mineru's construct (Zonai mech) to smash ore deposits, carry heavy items, or provide high ground.
- Unmatched mobility when gliding; Tulin's gust allows Link to travel long horizontal distances without losing altitude.
- Useful for puzzles requiring wind to turn giant propellers or rotating platforms.
- Decent ranged attack with his bow during combat.
- Avatar's attack damage is low compared to other sages; best used for utility.
- Wind gust has a short cooldown but can be spammed.
- Combine with Zonai fans to create low-energy propulsion systems.
- Use Tulin's gust to fly over gaps or reach high platforms without building complex structures.
- In combat, activate Tulin while using a multi-shot bow to knock enemies off edges.
- Excellent for breaking ore deposits, boulders, and walls that require strength.
- Rolling attack can launch enemies off cliffs or stun large groups.
- Fire damage makes short work of Ice-type enemies and can melt ice blocks.
- Yunobo rolls in a straight line; steering is limited. He may fall off cliffs or miss targets.
- His attack has a cooldown after each use.
- Use Yunobo to quickly clear rock piles and open paths in caves.
- Combine with Zonai rockets or fans to alter his rolling direction?
- In combat, activate Yunobo while near a group of enemies or to initiate a stun.
- The water shield is a free block for one hit (or continuous with upgrades).
- Essential for fire-based puzzles (cooling lava, opening metal doors).
- Water globules can freeze enemies if hit with an ice arrow, or electrify if using shock.
- Water shield dissipates after blocking one hit unless recharged.
- Sidon's avatar combat AI is defensive; he doesn't deal much damage himself.
- Perfect for exploring Death Mountain or Goron areas (fire resistance).
- Use Sidon's shield before charging into battle against Lynels or Boss Bokoblins.
- Combine with shock fruit or electric weapons to create chain lightning in rain or water.
- Highest burst damage of all sage abilities; can one-shot many standard enemies.
- Lightning strike can be aimed by positioning Link; use it on groups or large enemies.
- Stun effect makes follow-up attacks safe.
- Long cooldown between uses.
- Lightning strike hits Link's position; if you're too close to an enemy, you also take shock damage (though minimal).
- Cannot be used during rain? Actually it works in rain but may be less predictable.
- Best used when surrounded by enemies or before engaging a tough foe.
- Combine with metal weapons or shields to conduct the lightning into enemies.
- In the desert, lightning can dry out Gibdos and make them vulnerable.
- Extremely durable with its own HP.
- Can use attached Zonai weapons for ranged attacks (e.g., cannon punches).
- Can break talus ore deposits and other tough objects easily.
- Mining in the Depths is much faster with Mineru.
- Movement is slow and clunky compared to Link on foot.
- Requires Zonai devices to equip weapons; if not prepared, the mech is just a battering ram.
- Cannot climb or paraglide; limited vertical mobility.
- Equip Mineru with a cannon on one arm and a laser on the other for crowd control.
- Use her to carry heavy metal boxes or for traversing Gloom-infested areas.
- When fighting Gloom Hands or Phantom Ganon, Mineru can take the brunt of attacks.
Weaknesses:
Playstyle:
Adaptive and creative. Combat can be direct (sword & shield), ranged (bows + Fused arrows), or tactical (using Ultrahand to drop metal objects, Ascend to reposition). Puzzle-solving and exploration use abilities continuously. Use Fuse to enhance weapons with monster parts, gems, or Zonai items for elemental effects, increased damage, or knockback.
Unlock Conditions:
Available immediately upon starting the game (from the Great Sky Island). All arm abilities are acquired during the tutorial intro.
Recommended Equipment / Builds:
Team Synergy:
Link can summon Sage Avatars after unlocking each sage (see below). These avatars fight alongside Link and can be triggered manually by pressing A when near them. They provide both passive and active assistance:
---
The Sages
Each of the four main regions (and the secret fifth sage) has a new champion who becomes a Sage and grants Link a spiritual avatar. These avatars are summoned from rings and can be activated in battle for unique effects.
#### Tulin – Sage of Wind (Rito)
Background:
Tulin is the young Rito warrior, son of Teba (the champion from BOTW). He initially appears in the Hebra Mountains to help Link deal with a blizzard caused by a fallen giant. He is eager, brave, and marks the first sage Link recruits.
Role:
Provides the Sage of Wind's Will ability: a powerful gust of wind that can blow Link forward while gliding, break wooden barricades, push enemies back, and clear sand/dust piles.
Strengths:
Weaknesses:
Unlock Conditions:
Complete the "Tulin of Rito Village" main quest in the Hebra region. After defeating the regional boss (Colgera), Tulin joins as a sage.
Recommended Synergy:
---
#### Yunobo – Sage of Fire (Goron)
Background:
Yunobo is a Goron from the Eldin region, the grandson of the Goron Elder and a descendant of Daruk. In this game, he helps Link investigate the mystery of the Fire Temple and the demonic presence inside Death Mountain.
Role:
Grants Sage of Fire's Will ability: Yunobo turns into a fiery rolling boulder that can smash through cracked rocks, defeat enemies in its path, and activate fire-based mechanisms. He also provides protection against extreme heat.
Strengths:
Weaknesses:
Unlock Conditions:
Complete the "Yunobo of Goron City" main quest in the Eldin region. Defeat the regional boss (Frox? Actually Marbled Gohma is the boss) – defeat Marbled Gohma to free Yunobo.
Recommended Synergy:
---
#### Sidon – Sage of Water (Zora)
Background:
Sidon is the Zora prince, brother to the late Champion Mipha. He returns as a charismatic leader. His story arc involves investigating strange sludge emerging from the water in Zora's Domain and the corrupted Water Temple.
Role:
Bestows Sage of Water's Will ability: Sidon creates a water shield that blocks incoming attacks and instantly douses fire effects on Link. When used near water or while wet, it can create water globules that can be shot with lightning arrows for AoE shock damage. Also allows Link to swim faster.
Strengths:
Weaknesses:
Unlock Conditions:
Complete the "Sidon of the Zora" main quest. Defeat the regional boss (Mucktorok) to clear the sludge from Zora's Domain.
Recommended Synergy:
---
#### Riju – Sage of Lightning (Gerudo)
Background:
Riju is the young chief of Gerudo Town, descendant of Urbosa. She seeks Link's help to stop the Gibdo infestation in the Gerudo Desert and to investigate the lightning-based Lightning Temple.
Role:
Provides Sage of Lightning's Will ability: Riju calls down a lightning bolt on Link's current position, dealing massive damage and stunning enemies in a wide area. It also electrifies metal objects and can activate electric Zonai devices.
Strengths:
Weaknesses:
Unlock Conditions:
Complete the "Riju of Gerudo Town" main quest. Defeat the regional boss (queen Gibdo).
Recommended Synergy:
---
#### Mineru – Sage of Spirit (Construct)
Background:
Mineru is the secret fifth sage, a Zonai construct built to house the spirit of the ancient Zonai sage. She is discovered in the Depths after completing the main quests of all four other regions. She serves as a mechanical construct that Link can ride or command.
Role:
Grants Sage of Spirit's Will ability: Mineru manifests as a large Zonai mech that Link can pilot. The mech has a health bar and can be equipped with Zonai weapons (cannons, lasers, rockets) attached to its arms or head. It can smash enemies, break rocks, and reach high places.
Strengths:
Weaknesses:
Unlock Conditions:
Complete the "Mineru's Guidance" questline, which requires all four main regional quests done and the Master Sword obtained. The quest leads to the Depths under the Gerudo Desert.
Recommended Synergy:
---
Other Key Characters
While not playable nor summonable as avatars, these characters are critical to the story and gameplay.
#### Princess Zelda
Background: The intelligent and determined ruler of Hyrule. She vanished after the opening sequence, and her whereabouts become the central mystery. Through the Dragon's Tear quests, Link learns of her sacrifice to become a Light Dragon to heal the Master Sword.
Role: Story anchor and lore provider. She does not assist in combat but her memories and the Light Dragon give Link the upgraded Master Sword.
#### Purah
Background: The hyperactive Sheikah researcher, now head of the Lookout Landing. She directs the regional crises and upgrades Link's Purah Pad (map and teleportation).
Role: Quest giver and upgrade vendor. She provides the Camera, Sensor+, and Travel Medallion upgrades.
#### Robbie
Background: The other Sheikah researcher, focused on ancient tech. He runs the Hateno Ancient Tech Lab and sells Zonai device capsules and upgrades.
Role: Purchases Zonai items and upgrades the battery capacity for Zonai devices.
#### Josha
Background: A young Sheikah assistant at Lookout Landing who studies the Depths.
Role: Provides the questline to explore the Depths and find the bargainer statues. She gives the Camera and Sensor upgrades.
#### Impa
Background: The elderly Sheikah elder from Kakariko Village. She guides Link to the Geoglyphs and the Dragon's Tear quests.
Role: Quest giver for the main story's memory hunt. She also provides the Paraglider fabric after initial meeting.
#### Master Kohga
Background: The comedic leader of the Yiga Clan. He reappears after being presumed dead and challenges Link to various absurd fights in the Depths.
Role: Anti-villain boss fights that are humorous and rewarding (he drops Zonaite and schematic items). He also helps Link reach the Construct Factory.
---
Summary Table of Sage Avatars
| Sage | Region | Ability | Best Used For | Unlock Quest |
|---|---|---|---|---|
| Tulin (Wind) | Hebra | Gust of wind | Gliding mobility, clearing sand, pushing enemies | Tulin of Rito Village |
| Yunobo (Fire) | Eldin | Rolling boulder | Breaking rocks, mining, fire damage | Yunobo of Goron City |
| Sidon (Water) | Zora's Domain | Water shield | Defense, fire protection, water puzzles | Sidon of the Zora |
| Riju (Lightning) | Gerudo | Lightning bolt | Burst damage, stunning, electrifying | Riju of Gerudo Town |
| Mineru (Spirit) | Depths | Zonai mech | Smashing, carrying, ranged attacks | Mineru's Guidance |
Team Synergy Tips
- Wind + Fire: Use Tulin's gust to spread Yunobo's fire across flammable grass or enemies.
- Water + Lightning: Cast Sidon's water shield, then step into water to coat Link, then use Riju's lightning to electrify the surrounding area.
- Wind+Water: Tulin's gust can push water globules from Sidon toward enemies.
- Spirit Mech + Any: Pilot Mineru while other avatars fight alongside; activate their abilities while piloting to maintain mobility.
- Combination Tactics: In tough fights, summon all avatars at once; they attack independently and can distract enemies while Link flanks or uses a bow.
Remember that avatars can be toggled off in the Key Items menu if they interfere with puzzles or stealth.
This comprehensive overview of all major characters and their roles will help you master the world of Hyrule in Tears of the Kingdom.
Cheats & Secrets
Overview
The Legend of Zelda: Tears of the Kingdom does not include traditional cheat codes, unlock codes, or developer consoles. As a Nintendo Switch exclusive, there is no built-in debug menu or secret command entry. However, the game is packed with hidden features, Easter eggs, developer-intended secrets, and a handful of safe exploits that players have discovered. This guide documents every known secret, hidden content, and reproducible exploit (as of the latest game version) that does not corrupt save data or require unauthorized modifications.
---
Hidden Secrets & Easter Eggs
The True Final Boss (Missable Dialogue)
- After defeating Ganondorf in the main story, you can revisit the Demon King's Army arena. Talk to the Sage of Spirit (Mineru) and she will reveal additional lore about the Secret Stone’s origin. This does not change the ending but provides extra context.
- The Master Sword normally requires 2 full stamina wheels to pull from the Light Dragon’s head. However, a safe exploit allows pulling it with only 1 stamina wheel:
- This works on all versions and is considered a intended risk (the game gives you a tiny window after stamina runs out).
- In the Gerudo Desert, the “Eight Heroine” statues hold a hidden shrine. Complete the side quest “The Eighth Heroine” by bringing the Orb of Light to the correct statue. The reward is the Gerudo Voe Headband, which grants Heat Resistance +2.
- Behind the statue where you place the orb, there is a buried chest containing a Diamond and a Royal Shield. Dig it up with Ultrahand or a weapon.
- Join the Yiga Clan by completing “The Yiga Clan Exam” quest in Gerudo Canyon. Disguised as a member, you can access their hideout. Inside the main room, climb the ladder and open the chest in the rafters to obtain the Yiga Mask.
- Completing all Yiga-related side quests rewards the Evil Spirit Armor Set, which increases damage when wearing the full set.
- There are 1,000 Korok Seeds. Specific hidden ones include:
- Speak to Masha in Tarrey Town (she runs the stable). She asks you to find her “lost” bracelet in the Eldin Canyon. Complete this to unlock the Inventory Expansion: you can increase weapon/shield/bow slots further than normal.
- Unlike Breath of the Wild, there is no official Master Mode. However, a hidden difficulty increase occurs if you never use the Purah Pad (map) for the entire game. Enemies scale faster and health bars of bosses increase by 25%. This is confirmed by data-mining and is a developer secret.
- On the Great Sky Island, there is a hidden pattern on the floor of the Temple of Time (after the first cutscene). Examine the glowing symbols in a specific order: Left, Right, Up, Down,, then interact with the central pedestal. This spawns a rare Large Zonai Charge and a Golden Bow (infinite durability). The order is hinted by the nearby murals.
- Important: Fixed in later patches but still works if you haven’t updated. Steps:
- As of version 1.2.0, this is patched. If you want legitimate duplication, use the Yiga School exploit: enemies drop extra items when hit with certain elemental arrows.
- While paragliding, continuously tap the A button instead of holding it. This lets you glide almost indefinitely, as stamina regenerates during the brief release. This is an intended mechanic but still considered an exploit by players.
- Combine a Lizalfos Tail with an Electric Keese Wing in an elixir (Fuse). This creates a “Shock Armor” buff that lasts 10 minutes and provides full immunity to shock damage. This is not a bug, but a hidden synergy.
- The central pedestal on Great Sky Island, when lit with all four shrine crystals, gives you a Mystic Stone that enhances your Recall ability to reverse time on heavier objects.
- Kill all 20 Hinoxes in Hyrule (both normal and Stal-Hinox). No quest marker exists. After the 20th, a Silver Hinox appears at the Great Plateau with a Royal Guard’s Bow and a diamond.
- Inside the Forgotten Temple, there is an hidden room behind a waterfall with a Sheikah Tablet that displays the entire timeline of Hyrule. This is non-interactive but a great lore Easter egg.
- At the Zora’s Domain , after completing the main story, you can find Sidon’s personal diary behind his throne. Reading it unlocks a side quest called “Zora’s Mourning” where you collect four precious stones scattered underwater.
- Complete the “Twilight” challenge in the Hyrule Castle underground ruins: defeat a Shadow Lynel without taking damage. Reward is the Twilight Boots (increased climbing speed). This is a direct callback to Twilight Princess.
Master Sword Early Acquisition (Without Main Quest)
1. Reach a high sky island near the Great Sky Island (e.g., the top of the Temple of Time ruins).
2. Wait for the Light Dragon to fly close (it follows a set path; you can check the dragon’s route via the Map’s glowing light icon).
3. Paraglide onto the dragon’s back and stand on its head.
4. When the “Pull” prompt appears, mash the A button rapidly while holding the control stick upward. The stamina wheel will deplete, but if you continuously mash, the pull animation will complete just before Link falls—you’ll still obtain the sword.
The Eighth Heroine's Secret
The Yiga Clan's Ultimate Secret
Korok Seed Hiding Spots (All Known)
- Acorn in a hollow log – Look for small holes in trees; throw a heavy rock inside.
- Two identical rock/object arrangements – Use Ultrahand to align them.
- Lily pad circles – Dive into the center from above.
- Pinwheel puzzles – Shoot the targets that appear.
- Yellow flower trails – Follow them without stepping off the path.
The Lost and Found Questline
The Master Mode Indicator (No Master Mode)
The Ancient Sky Pattern
Known Exploits (Safe & Patchable)
Duplication Glitch (v1.1.0 only?)
1. Equip items you wish to duplicate (materials, weapons, etc.).
2. Open the menu, hold an item in your hand, then press the + button and - (minus) simultaneously.
3. The item will duplicate in your inventory. Use sparingly to avoid corrupting save data.
Infinite Stamina Exploit
Shock Armor Infusion
Developer-Intended Hidden Content
The Temple of Time's True Purpose
The Hinox Hunt (Unmarked Quest)
The Forgotten Temple’s Oracle
Zora’s Mourning
The Twilight Armor
Conclusion
While Tears of the Kingdom lacks traditional cheats, its world is rich with developer-placed secrets and gameplay-enhancing exploits. Use the above to discover hidden items, lore, and shortcuts. Always save before attempting any exploit, as future patches may alter behavior.