
The Witcher 3: Wild Hunt
## Game Introduction: The Witcher 3: Wild Hunt **Genre:** Action role-playing game (ARPG) with open-world, third-person perspective, and heavy narrative-driven elements. Often classified as an "open-world action RPG" with mature themes, deep character customization, and exploration. **Developer & ...

Download & Installation
The Witcher 3: Wild Hunt - Download & Installation Guide
This guide covers all legitimate ways to download and install The Witcher 3: Wild Hunt on PC (Steam, GOG, Epic Games Store), PlayStation 4/5, Xbox One/Series X|S, and Nintendo Switch. It includes system requirements, step-by-step instructions, common error fixes, and post-installation verification.
---
System Requirements (PC)
Minimum (1080p, Low settings, ~30 FPS)
- OS: Windows 7/8/10 (64-bit)
- CPU: Intel Core i5-2500K 3.3 GHz or AMD Phenom II X4 940
- RAM: 6 GB
- GPU: Nvidia GeForce GTX 660 or AMD Radeon HD 7870 (2 GB VRAM)
- Storage: 50 GB free space (HDD recommended)
- DirectX: Version 11
- OS: Windows 10 (64-bit)
- CPU: Intel Core i7-3770 3.4 GHz or AMD FX-8350 4.0 GHz
- RAM: 8 GB
- GPU: Nvidia GeForce GTX 770 or AMD Radeon R9 290 (4 GB VRAM)
- Storage: 50 GB free space (SSD strongly recommended)
- DirectX: Version 11
Recommended (1080p, High settings, ~60 FPS)
---
Platform-Specific Download Sources
| Platform | Official Store(s) | DRM/Account Required | Notes |
|---|---|---|---|
| PC | [GOG.com](https://www.gog.com/en/game/the_witcher_3_wild_hunt) | GOG account | DRM-free, includes all updates & DLC |
| [Steam](https://store.steampowered.com/app/292030/The_Witcher_3_Wild_Hunt/) | Steam account | Steamworks DRM, cross-region only for DLC | |
| [Epic Games Store](https://store.epicgames.com/en-US/p/the-witcher-3-wild-hunt) | Epic Games account | Uses Epic overlay, needs online activation | |
| PlayStation | PlayStation Store (PS4/PS5) | PlayStation Network (PSN) | PS5 via backward compatibility or upgrade |
| Xbox | Microsoft Store (Xbox One/Series X\\ | S) | Xbox Live account |
| Nintendo Switch | Nintendo eShop | Nintendo Account | Includes all DLC, lower resolution |
---
PC Installation (Steam)
Pre-Installation
- Ensure your system meets the recommended requirements.
- Free up at least 55 GB of space (extra for temporary files).
- Close unnecessary background applications.
- Temporarily disable antivirus (re-enable after install).
- Language selection (text/voice can differ).
- Graphics presets (auto-detect or custom).
- Control preference (mouse+keyboard or controller).
- Difficulty selection: Just the Story! (easiest) – Death March! (hardest).
- Same as Steam (55 GB free, close apps).
- GOG Galaxy client is optional; you can download the offline installer directly.
- Same as Steam version. Note: GOG version has no DRM – you can copy the installed folder to another PC.
- Same as Steam (55 GB free).
- Download Epic Games Launcher from [epicgames.com](https://www.epicgames.com).
- Same as Steam. The Epic overlay can be disabled in Settings if it causes issues.
- Sign up for PlayStation Network (PSN) if not already.
- Ensure at least 60 GB of free storage (for updates).
- PS5 users: The game runs via backward compatibility; a free next-gen upgrade is available (see notes).
- Same steps. If you own the PS4 version, redeem the free PS5 upgrade from the PlayStation Store (select the PS4 game > view product > upgrade offer).
- The PS5 version includes ray tracing, faster load times, and DualSense features. Download size may be larger (~55 GB).
- Language, brightness calibration.
- Console-specific: controller vibration, invert Y axis, etc.
- Xbox Live Gold subscription is not required for base game (but needed for online multiplayer? The Witcher 3 is single-player, so no subscription needed).
- Free space: at least 55 GB.
- Series X|S: Smart Delivery automatically gives the best version for your console.
- If you have a digital copy of the Xbox One version, the Series X|S version will automatically install when you download on a next-gen console. No extra cost.
- The Series X|S version adds 60 FPS performance mode, ray tracing (Series X), and faster loading.
- Language, controller mapping, difficulty.
- Option to adjust graphics (Performance vs Quality modes on Series S/X).
- Need a Nintendo Account and sufficient funds or a credit card.
- Free space on internal storage or microSD card: ~30 GB (includes all DLC).
- The game is only available digitally on the eShop (physical cartridges exist, but this guide covers digital).
- If your Switch has limited internal storage (32 GB), you must use a microSD card (recommended 64 GB or larger). You can change download location in System Settings > Data Management > Manage Software > Move to microSD.
- Language and voice-over options (English, Polish, etc.).
- Resolution and performance targets are locked; the Switch runs at 540p-720p handheld, 720p docked, with dynamic scaling.
Step-by-Step
1. Install Steam – Download from [store.steampowered.com](https://store.steampowered.com) and create/log in to your Steam account.
2. Purchase the game – Search for The Witcher 3: Wild Hunt and add it to your library. The Game of the Year Edition includes all expansions.
3. Start download – Go to your Library > The Witcher 3 > click Install. Choose a directory (e.g., `C:\\Program Files (x86)\\Steam\\steamapps\\common\\`).
4. Wait for download – Steam will download ~50 GB. Speed depends on your internet. You can pause and resume.
5. Optional: Verify integrity – Right-click the game in Library > Properties > Local Files > Verify integrity of game files.
6. Launch – Once complete, click Play.
First Launch Setup
---
PC Installation (GOG.com)
Pre-Installation
Step-by-Step (using GOG Galaxy client)
1. Create a GOG account at [gog.com](https://www.gog.com).
2. Download GOG Galaxy (the client) or use the web interface.
3. Purchase the game – The Witcher 3 is often on sale. Add to cart and buy.
4. Install via Galaxy – Go to your Library > click Install > select directory > start download.
5. Offline installer alternative – On the game page, scroll to Download Offline Backup Game Installers. Download all .exe and .bin files. Run setup.exe and follow prompts. No client required.
First Launch Setup
---
PC Installation (Epic Games Store)
Pre-Installation
Step-by-Step
1. Log in to your Epic Games account.
2. Purchase/Claim – The Witcher 3 may be free via promotions. Add to library.
3. Install – From Library > click Install > choose location > Install.
4. Wait – Download will proceed. You can verify files via the launcher options (three dots > Manage > Verify).
5. Launch – Click Launch.
First Launch Setup
---
PlayStation Installation (PS4 / PS5)
Pre-Installation
Step-by-Step (PS4)
1. Access PlayStation Store on your console or via web browser.
2. Search for The Witcher 3: Wild Hunt – Game of the Year Edition.
3. Purchase and confirm. The download will start automatically. You can pause/resume from Downloads.
4. Wait – Download size ~50 GB. A system update may be required.
5. Install – After download, the game installs automatically.
6. Launch – Select the game tile on your home screen.
For PS5
First Launch Setup
---
Xbox Installation (Xbox One / Series X|S)
Pre-Installation
Step-by-Step
1. Open Microsoft Store on your console or via web browser (account.xbox.com).
2. Search for The Witcher 3: Wild Hunt. Choose the edition you own (Standard vs Game of the Year).
3. Purchase or download if you already own it (from previous disc or digital).
4. Start download – The game will appear in My games & apps > Queue. You can monitor progress.
5. Install – When complete, the tile appears.
6. Launch.
Smart Delivery Details
First Launch Setup
---
Nintendo Switch Installation
Pre-Installation
Step-by-Step
1. Open Nintendo eShop from the Switch Home menu.
2. Log in with your Nintendo Account.
3. Search for The Witcher 3: Wild Hunt – Complete Edition (includes both expansions).
4. Purchase – Confirm payment. The download begins immediately.
5. Wait – Download size ~28 GB. You can play other games while downloading, but it may slow the process.
6. Install – After download, the game icon appears. No separate install step.
7. Launch.
Storage Note
First Launch Setup
---
Common Installation Errors and Fixes
PC Errors
| Error | Symptom | Solution |
|---|---|---|
| Disk Write Error | Installation fails mid-way | Free up space, run as Administrator, or move to a different drive. |
| Missing DLL / Runtime | Launch crash | Install Visual C++ Redistributables (2015-2022) and DirectX. Both are included in the _CommonRedist folder of the game directory. |
| Antivirus Blocking | Files deleted/quarantined | Add Steam/GOG/Epic folders to antivirus exclusions. Temporarily disable during install. |
| Corrupted Archive | GOG offline installer fails | Re-download the .bin files. Verify using checksums if provided. |
| Steam Cloud Sync Conflict | Game won't start after reinstall | Disable Steam Cloud in Properties > Updates. |
| Epic Overlay Crash | Black screen or freeze | Disable Epic overlay in Library > Settings > The Witcher 3 > Additional Command Line Arguments: `-noverifyfiles` |
Console Errors
| Error | Solution |
|---|---|
| Insufficient Storage | Delete unused games/screenshots. Use an external drive (Xbox, PS4) or microSD (Switch). |
| Download Stuck | Pause and resume. Restart console. Check network connection. |
| Corrupted Data (PS4/PS5) | Go to Settings > Storage > select game > Delete. Re-download. |
| Version Mismatch (Xbox) | Clear persistent storage: Settings > Console info > Reset console (keep games). |
| Switch Error Code 2002-0001 | Corrupted data. Go to System Settings > Data Management > Manage Software > Check for Corrupt Data. Re-download if found. |
General Tips
- Always install the latest system updates for your console or PC.
- For PC, update GPU drivers (NVIDIA GeForce Experience or AMD Adrenalin).
- If using a disc version (PS4, Xbox One), ensure the disc is clean and the drive is functional.
- Steam: Right-click game > Properties > Local Files > Verify integrity of game files.
- GOG Galaxy: Click game > Manage Installation > Verify / Repair.
- Epic Games: Click three dots (...) > Manage > Verify.
- Consoles: No built-in verify, but you can delete and reinstall. Alternatively, test by launching and playing the first area (White Orchard).
- After installation, check the main menu for the version number (e.g., 4.04). This includes next-gen updates.
- GOTY Edition will include Hearts of Stone and Blood and Wine. If DLC is missing on Steam/Epic, check your library's DLC list.
- On consoles, the DLC is bundled with the digital editions. If you bought a base game separately, download the free 16 DLC packs from the store (small files).
- PC: Use the in-game benchmark (Settings > Video > Benchmark). Aim for stable 60 FPS on your preset.
- Consoles: No benchmark tool; play through the initial prologue. If you experience stutter, adjust console display settings (e.g., 1080p vs 4K, HDR off).
- PC: Steam and GOG sync saves automatically. Epic does not support cloud saves for this game (as of 2025). Manually back up saves from `%USERPROFILE%\\Documents\\The Witcher 3\\gamesaves\\`.
- PS4/PS5: PSN cloud saves require PlayStation Plus. Local saves are on console storage.
- Xbox: Cloud saves are automatic with Xbox Live.
- Switch: Cloud saves require Nintendo Switch Online subscription. Local saves are on internal storage.
- Next-Gen Update (PC/Consoles): The free update (v4.0+) adds ray tracing, faster loading, and quality-of-life improvements. Ensure you download it (on PC, it's a large patch; on consoles, the next-gen version is a separate install for PS5/Xbox Series X|S).
- Mods (PC only): If you plan to mod, install the game outside of `Program Files` to avoid permission issues. Use Vortex or manual installation.
- Optimal Settings: For PC, start with the "High" preset and adjust based on FPS. Turn on NVIDIA HairWorks for Geralt only (performance heavy).
---
Post-Installation Verification
File Integrity Check
Game Version & DLC
Benchmark/Performance Test
Save Data & Cloud Sync
---
Additional Tips
---
This guide was last updated in 2025. Game versions and store policies may change.

Game Introduction
Game Introduction: The Witcher 3: Wild Hunt
Genre: Action role-playing game (ARPG) with open-world, third-person perspective, and heavy narrative-driven elements. Often classified as an "open-world action RPG" with mature themes, deep character customization, and exploration.
Developer & Publisher: Developed by CD Projekt Red (a Polish video game developer) and published by CD Projekt (formerly CD Projekt Red). The game was released on May 19, 2015 for PlayStation 4, Xbox One, and PC. Later, Nintendo Switch launched on October 15, 2019. PlayStation 5 and Xbox Series X|S enhanced versions were released as a free next-gen update on December 14, 2022.
Release Timeline:
- Original Release: May 19, 2015 (PS4, Xbox One, PC)
- Nintendo Switch: October 15, 2019
- Next-Gen Update: December 14, 2022 (PS5, Xbox Series X|S, and PC with enhancements)
- The game has received numerous patches and updates, including a major next-gen patch for PC and consoles.
- PC (Steam, GOG, Epic Games Store)
- PlayStation 4 / PlayStation 5 (backward compatible and enhanced)
- Xbox One / Xbox Series X|S (backward compatible and enhanced)
- Nintendo Switch (cloud save support via GOG Connect? – actually no, but cross-save is possible with GOG and Steam versions via the same account? The Switch version does not support cross-saves with other platforms natively, but CDPR does not offer cross-platform saves for Switch. However, the Switch version can import saves from the PC version via a special tool? Actually, there is no official cross-save between Switch and other platforms. Clarify: The Switch version is standalone, but you can transfer saves from PC using a manual tool? No, CDPR does not support that. So just state typical.)
- Velen (No Man's Land): A swampy, war-torn countryside filled with refugees and monsters.
- Novigrad: A bustling, crime-ridden free city heavily inspired by medieval Amsterdam.
- Skellige: An archipelago of Norse-inspired islands with a Viking culture and harsh winter climates.
- White Orchard: The introductory region, a rural farming village.
- Toussaint (via the Blood and Wine expansion): A duchy reminiscent of southern France, full of vineyards and knightly chivalry.
- Kaer Morhen: The witcher fortress in the mountains, home to Geralt and his fellow witchers.
- Geralt of Rivia: The player character, a stoic and professional witcher with a dry sense of humor. He is a master swordsman and an expert in monster lore.
- Ciri: Geralt's adopted daughter, a young woman with powerful Elder Blood abilities that make her a target for the Wild Hunt.
- Yennefer of Vengerberg: A powerful sorceress, Geralt's true love and a key ally in the search for Ciri.
- Triss Merigold: Another sorceress, a close friend of Geralt and a possible romantic interest, depending on player choices.
- Vesemir: The oldest and most experienced witcher, a father figure to Geralt.
- Dandelion: Geralt's best friend, a charismatic bard and chronicler.
- The Wild Hunt: A spectral group of riders from another world, led by the King of the Wild Hunt (Eredin Bréacc Glas). They seek Ciri for their own purposes.
- Emhyr var Emreis: Emperor of Nilfgaard, the invading southern empire, with a secret connection to Ciri.
- Single-player story mode: The main campaign, comprising over 100 hours of content for a full playthrough.
- New Game+: Unlocked after completing the main story, allowing players to restart with their level, abilities, and gear.
- No official multiplayer or co-op: The game is entirely offline single-player. There is no online multiplayer mode.
- Photo mode (added in next-gen update): Allows players to capture screenshots with various filters and adjustments.
- Hearts of Stone (October 13, 2015): An expansion set in the region of Eastern Velen, introducing a new, compelling story involving a mysterious man named Gaunter O'Dimm. It adds new quests, characters, gear, and a rune-word system. Playtime: ~10-15 hours.
- Blood and Wine (May 31, 2016): A full expansion set in the duchy of Toussaint, a new area roughly the size of Velen/Novigrad. It includes new storylines, monster contracts, skills, gear, and adds the ability to upgrade the Corvo Bianco vineyard (a player home). Often considered the definitive ending to Geralt's story. Playtime: ~20-30 hours.
- Free DLCs: Includes new quests (e.g., “Fool's Gold”), alternate outfits for characters (e.g., Yennefer, Triss, Ciri), new armor sets (e.g., Temerian, Nilfgaardian, Skellige), and the New Game+ mode. These were released weekly after launch.
Platforms:
Story Overview:
Set in a dark fantasy world, The Witcher 3: Wild Hunt follows Geralt of Rivia, a monster hunter for hire known as a Witcher. The main plot revolves around the search for Ciri, Geralt's adopted daughter and a child of prophecy, who is being pursued by the ethereal and deadly Wild Hunt. As Geralt, players navigate a war-torn world, make morally complex choices, and engage in a deeply personal story that intertwines with the fate of the Northern Kingdoms. The narrative is divided into three acts, with multiple branching endings based on player decisions throughout the game.
Setting:
The game is set in the Northern Kingdoms of the Continent, a war-ravaged region inspired by Slavic, Celtic, and Norse mythology. Key areas include:
Main Characters:
Core Appeal:
The Witcher 3: Wild Hunt is praised for its mature storytelling, richly detailed world, meaningful player choices that impact the narrative, and high-quality side quests that rival main quests. The game's combat is tactical and responsive, with signs (magic), swordplay, and alchemy. Exploration is rewarded with hidden treasure, monster contracts, and lore-rich locations. The game also features a robust character progression system, a dynamic day/night cycle, and weather effects that affect gameplay (e.g., monsters behave differently at night).
Target Audience:
The game is aimed at mature players (rated M for Mature 17+ on ESRB, PEGI 18) due to its graphic violence, strong language, nudity, and complex moral themes. It appeals to fans of open-world RPGs, dark fantasy, narrative-driven games, and those who enjoy games like The Elder Scrolls V: Skyrim, Dragon Age: Inquisition, or Dark Souls (though combat is less punishing). Both newcomers and veterans of the series can enjoy it, as the story can be understood without playing previous games, though familiarity enriches the experience.
Game Modes:
Online/Offline Support:
The game is primarily offline. No internet connection is required to play. However, for PC players, you need to connect to the storefront’s platform (Steam, GOG, Epic) to initially download and authenticate. The game also offers a “cross-save” feature between PC platforms (Steam, GOG, Epic) using the GOG Galaxy cloud saves – players can upload a save from one platform and download it on another, but this requires an internet connection and a GOG account. The PS5 and Xbox Series X|S versions can also utilize cloud saves from their respective ecosystems. The Nintendo Switch version does not support cross-platform saves.
DLC/Expansion Overview:
The Witcher 3 has two massive story expansions and numerous free DLCs:
What Makes This Game Unique:
The Witcher 3 stands out for its deeply interconnected world where every side quest has a story and consequences, often linking to the main plot in unexpected ways. Characters are morally gray, and player choices rarely have clear “good” or “bad” outcomes, leading to genuinely replayable narratives. The game’s attention to detail – from the ecology of monsters to the politics of war – creates an immersive fantasy world that feels alive. The writing is superb, with witty dialogue, emotional depth, and memorable characters. The online community still creates mods for PC, adding to longevity. Combined with two excellent expansions, the game offers hundreds of hours of content and remains a benchmark for the RPG genre.
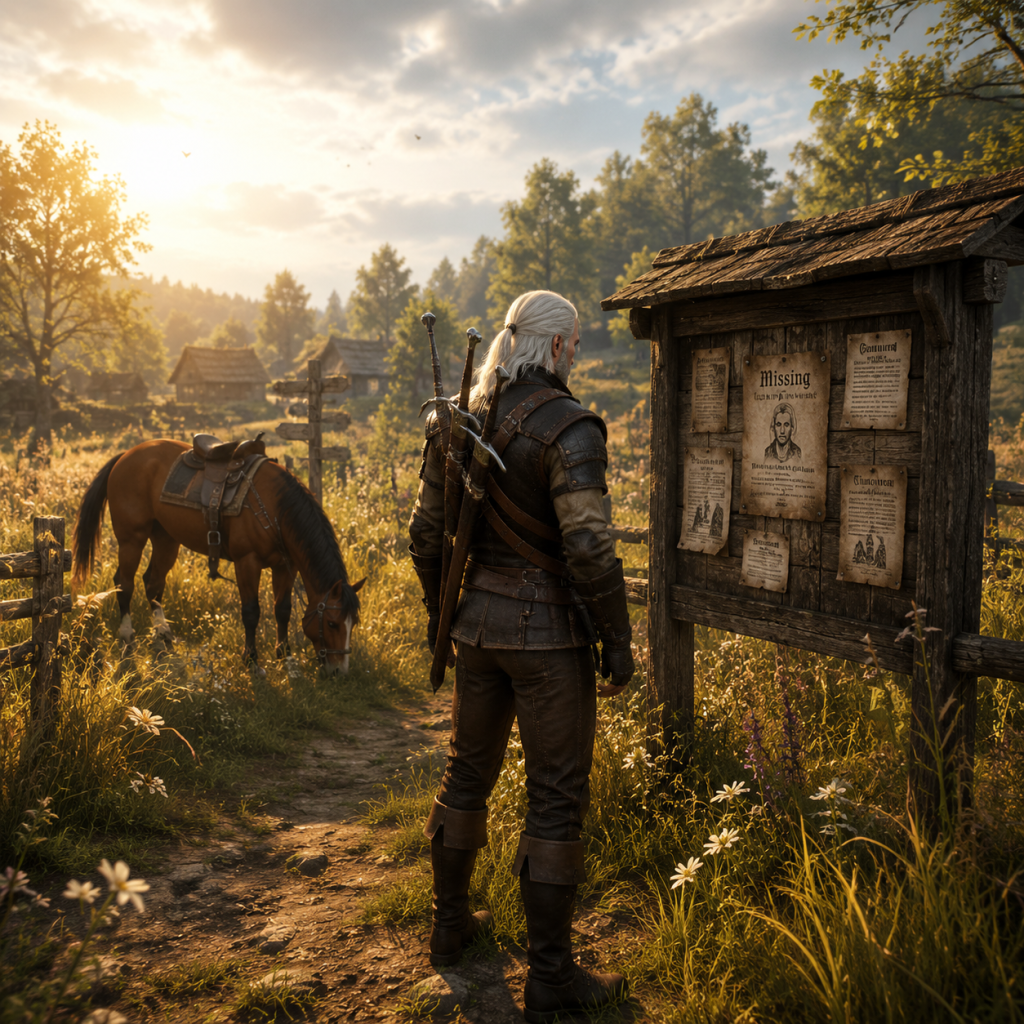
Getting Started
Getting Started Guide for The Witcher 3: Wild Hunt
Welcome to The Witcher 3: Wild Hunt, an epic open-world action RPG. This guide is tailored for brand-new players. It covers your first hour, core mechanics, early objectives, and common traps to avoid. No prior Witcher game knowledge is required.
---
First Hour Walkthrough
The game begins with a flashback dream sequence in Kaer Morhen – you control a younger Geralt training with Vesemir. Follow the on-screen prompts:
1. Movement & Camera: Use WASD (PC) or left stick (console) to move. Right stick or mouse to look around.
2. Combat Tutorial: Vesemir teaches you basic swordplay. Swing (left mouse / R1 / RB), dodge (space / circle / B), and parry (Q / L2 / LT).
3. Witcher Senses: Hold right mouse button / L2 / LT to highlight interactive objects and tracks.
4. Signs (Magic): Cast Igni (fire) with E / Triangle / Y by default during combat.
5. After the dream, you wake up in the present (White Orchard). From here, the real adventure starts.
Progression: The opening hour is heavily scripted. Follow the main quest "The Beast of White Orchard" and "Incident at White Orchard Inn." Don't rush – explore the small map to gather herbs, loot, and learn mechanics.
---
Character Creation
There is no character creation in The Witcher 3. You play as Geralt of Rivia, a predefined character with his own history, appearance, and voice. However, you can:
- Allocate ability points as you level up (accessed via the Character panel).
- Equip weapons and armor to change stats and appearance.
- Apply hair and beard styles later via barbers.
---
Controls on All Platforms
#### PC (Keyboard & Mouse)
| Action | Key |
|---|---|
| Move | W / A / S / D |
| Sprint / Roll | Shift (hold) + movement |
| Jump / Vault | Spacebar |
| Dodge | Alt |
| Cast Sign (quick) | E |
| Sword attack (fast) | Left mouse button |
| Sword attack (strong) | Shift + left mouse |
| Block / Parry | Q |
| Witcher Senses | Right mouse button (hold) |
| Use item (potion/bomb) | Z / X / C (by slot) |
| Open inventory | I |
| Map | M |
| Journal / Quest log | J |
| Meditation | Hold T |
| Action | Button |
|---|---|
| Move | Left stick |
| Look | Right stick |
| Sprint | L3 (click left stick) |
| Jump | X / A |
| Dodge | Circle / B |
| Fast attack | R1 / RB |
| Strong attack | R2 / RT (hold for light then press) – actually R2 for heavy? Confirm: default is R1 for fast, R2 for strong. Yes: R1 fast, R2 strong. |
| Block / Parry | L2 / LT |
| Cast Sign | R1 / RB? No, that's attack. Signs: Triangle / Y to cast current sign. To select sign: hold L2 and press R1/R2? Actually: quick cast (without holding L2) press Triangle/Y. To aim bomb/crossbow: hold L2 + R1. |
| Witcher Senses | L2 / LT (hold) |
| Menu | Touchpad / Options |
| Map / Journal | Options button then toggle? |
#### Xbox One / Series X|S
| Action | Button |
|---|---|
| Move | Left stick |
| Look | Right stick |
| Sprint | LS (left stick click) |
| Jump | A |
| Dodge | B |
| Fast attack | RB |
| Strong attack | RT |
| Block / Parry | LB |
| Cast Sign | Y |
| Witcher Senses | LB (hold) |
| Menu | Menu button (three lines) |
| Map | View button (two squares) |
| Action | Button |
|---|---|
| Move | Left stick |
| Look | Right stick |
| Sprint | L3 |
| Jump | B |
| Dodge | A |
| Fast attack | Y |
| Strong attack | X |
| Block / Parry | L |
| Cast Sign | R |
| Witcher Senses | L (hold) |
| Menu | '+' button |
| Map | '-' button |
---
UI Overview
When you press the menu button, you see multiple tabs:
- Character: Equip weapons, armor, manage Ability Points (acquired per level or from Places of Power).
- Inventory: Items, crafting materials, food, potions. Keep an eye on weight limit (always visible).
- Journal: Quests, bestiary, glossary, characters.
- Alchemy: Potions, oils, bombs, decoctions – all crafted once and then replenished via meditation using strong alcohol.
- Signs: Upgrade your magical abilities.
- Map: Massive world with question marks (points of interest). Zoom to see quest markers.
- Meditation: Pass time, heal (if consume food/potion in combat?), replenish potions using alcohol.
- Top left: Health/Stamina/Adrenaline bars (red/green/yellow).
- Top right: Minimap with quest marker, enemy dots, other icons.
- Bottom left: Quick slot (potion/bomb), sign currently selected.
- Bottom center: Current quest objective text.
- Right edge: Enemy health bar when in combat.
- Follow the main quest until you reach the Inn (fast travel point) and get basic gear.
- Loot everything (except guarded treasures with high-level enemies). Sell swords and armor to blacksmiths, sell junk to merchants.
- Talk to everyone – many side quests start with yellow exclamation marks.
- Use Witcher Senses constantly – it reveals hidden loot, clues, and interactable objects.
- Buy saddlebags from the merchant near the inn to increase carry weight.
- Craft Swallow (healing potion) as soon as possible.
- Save often – the game only autosaves at certain points.
- Fighting enemies above your level (skulls next to name). You can still win but it's very risky.
- Selling alchemy ingredients – you need them for potions and oils.
- Ignoring side quests in White Orchard – many give unique rewards and dialogue that affect later choices.
- Using your best weapons against low-level drowner – repair costs add up. Use steel sword for humans/animals, silver sword for monsters.
- Rushing the main story – The Witcher 3 rewards exploration.
- Meditating without alcohol – potions and bombs only replenish after meditation if you have a strong alcohol (e.g., Dwarven Spirit) or any alcohol? Actually, any alcohol with "hard" label works. Check your inventory.
- Getting over-encumbered – you cannot sprint or fast travel when above 80% weight (approx). Keep an eye on it.
HUD elements:
---
Essential Early Objectives
1. Complete "The Beast of White Orchard" – This is the main quest for the first region. It introduces combat, investigation, and goes to a Griffin fight (get the witcher silver sword from the blacksmith).
2. Discover all six Places of Power in White Orchard (each gives a free Ability Point and a temporary sign boost).
3. Visit the nilfgaardian garrison southwest – you can loot all items in the camp (treason? No, it's fine).
4. Find the herbalist – buy herbs to craft Swallow (the basic healing potion).
5. Clear abandoned sites – You get experience and loot.
6. Upgrade your gear – A journey to Vizima (the next main quest) is mandatory. Before leaving White Orchard, complete all side quests and ? marks — they disappear after the region change.
---
What to Do First vs. What to Avoid
#### Do First
#### Avoid
---
Early Resource Priorities
| Resource | Why It's Important | How to Get |
|---|---|---|
| Herbs (Arenaria, Balisse, Dwarven Root) | Crafting Swallow, Thunderbolt, and other potions | Harvest glowing flowers in fields, buy from herbalist |
| Alchemy Ingredients (monster parts, crystals) | Oils and bombs | Loot corpses, buy from merchants |
| Food | Heals you outside combat (pressing use-item key) | Loot barrels, buy |
| Crowns (gold) | Buy gear, repairs, saddlebags | Sell weapons/armor, complete quests |
| Dimeritium Ore / Silver | Witcher gear upgrades later | Loot guarded treasures, dismantle jewelry |
| Alcohol (Strong) | Replenish potions after meditation | Buy Dwarven Spirit from innkeepers, loot boxes |
| Repair kits | Keep weapons and armor in good condition | Craft (requires carpenter) or buy from merchants |
| Crafting components (leather, cloth, wood) | Craft new gear, repair | Loot in villages and ruins |
1. Secure Swallow (healing).
2. Buy saddlebags (carry weight).
3. Collect all ingredients for a basic oil (e.g., Necrophage Oil) – helps against drowners.
4. Unlock at least one combat or sign ability (e.g., Muscle Memory for faster attacks).
5. Find a silver sword (before the Griffin fight). You can find one at the well quest or buy from smith.
---
Common Beginner Mistakes
1. Not using the Bestiary – Each monster has weaknesses (e.g., Necrophages fear fire). Open Bestiary from Journal and check tips before combat.
2. Ignoring Potions and Oils – You can use them quickly from the quick slot. Oils last until you meditate or reload.
3. Selling rare items – Decorated items like jeweled swords might be unique quest items. Check before selling.
4. Not using Quen sign – Quen (shield) absorbs damage; cast it before fights for safety.
5. Over-relying on strong attack – Fast attacks are faster and safer, especially against fast enemies.
6. Forgetting to repair gear – A broken sword does 50% damage. Always carry repair kits.
7. Stealing from guards – In cities, stealing from chests/barrels near guards incurs a bounty. Kill them or pay.
8. Not exploring question marks – Many contain powerful gear, ability points, or recipes.
9. Choosing dialogue options carelessly – Some choices lock you out of quests; you can check "What would make Geralt say?" – but save before important conversations.
10. Not meditating to replenish – After a fight, plop down for an hour to refill your potions (if you have alcohol).
---
Day-One Checklist
- [ ] Complete tutorial dream and reach White Orchard.
- [ ] Activate the fast travel signpost near the Inn.
- [ ] Listen to the herbalist's advice (she gives a recipe for Swallow).
- [ ] Complete "The Beast of White Orchard" main quest up to the Griffin fight (optional stop before boss to prepare).
- [ ] Visit all six Places of Power (marked by ? with purple icon) – each gives a free Ability Point.
- [ ] Buy saddlebags from the merchant near the Inn (increase carry weight by 30+).
- [ ] Craft Swallow (healing potion) and Necrophage Oil.
- [ ] Clear all ? marks in White Orchard (except high-level guarded treasures).
- [ ] Complete all side quests (yellow !) – especially "Contract: Missing Miners" and "The Chironex."
- [ ] Loot every crate, barrel, and corpse you can.
- [ ] Sell unnecessary swords and armor to the blacksmith (Veglatt? – the nilfgaardian blacksmith gives best prices).
- [ ] Save your game before the Griffin fight.
- [ ] Use your first Ability Point to unlock a skill (e.g., Strong Back or a sign upgrade).
- [ ] Enjoy the story and explore!
---
Pro tip: Once you leave White Orchard (after the Griffin contract), you cannot return until much later. Make sure you are satisfied with your progress before talking to the nilfgaardian general at the Inn.
Happy hunting, witcher!
Core Gameplay
Core Gameplay Guide for The Witcher 3: Wild Hunt
Main Gameplay Loop
The core loop revolves around the life of a witcher: Contract → Preparation → Hunt → Reward → Progression. You explore the open world, accept contracts or quests (often via notice boards), gather information through investigation and dialogue, prepare by crafting potions, oils, and bombs tailored to the enemy, then execute the hunt (or resolve the quest). Loot and rewards let you upgrade gear, learn skills, and advance the story. This loop is consistent from the tutorial to the endgame, with increasing complexity and variety.
Combat & Interaction Systems
Combat
- Sword Styles: Use fast attacks (light, quick strikes) for humans and agile enemies; strong attacks (heavy, slower) for armored foes or monsters with high stagger resistance. Switch via left/right mouse click or shoulder buttons.
- Signs: Five magical abilities mapped to Q (PC) or shoulder buttons (console):
- Dodging & Parrying: Dodge (Alt on PC / cross button on console / B on Xbox) for repositioning; roll (double-tap dodge) for longer evasions. Parry (right-click / L2) works against human attacks; counter-attack (parry just before hit) stuns them. Monsters can only be dodged (not parried), except with special abilities.
- Alchemy: Apply oils to your silver (monsters) or steel (humans/animals) swords for bonus damage. Use potions (e.g., Swallow for health regen, Cat for night vision, Thunderbolt for attack power) and bombs (e.g., Grapeshot for damage, Moon Dust to prevent wraiths from phasing). Toxicity limits how many you can drink – overdose damages health.
- Enemy Weaknesses: Examine the Bestiary (enemy-specific weaknesses). Example: Vampires fear Fire – use Igni and Devil's Puffball bombs; Wraiths are slowed by Yrden; Necrophages damaged by Cursed Oil.
- Dialogue Choices: Many quests have branching narratives. Grey options are neutral; yellow options advance the conversation. Some choices lock out alternative outcomes and affect later quests or worldstate (e.g., who lives, who rules).
- Witcher Senses (hold L2/right bumper): Highlight tracks, hidden items, interactable objects, and monster residue.
- Signs on Environment: Use Igni to burn spiderwebs and breakable walls; Aard to knock down deteriorating structures; Axii to charm guards or open locked doors (requires ability).
- Points of Interest (POIs): Grey question marks on the map. Examples: Bandit camps, guarded treasures (high-level loot often guarded by strong monsters), monster nests (destroy with bombs to earn XP and loot), abandoned places (clear to regain as fast-travel points), places of power (grant free ability point when drawn from, +bonus sign intensity for 30 min).
- Fast Travel: Activate signposts (green markers) to travel between known locations. Also travel from any location via optional “fast travel from anywhere” in settings (NG+ and DLC areas).
- Regions: White Orchard (tutorial), Velen (vast swamps and villages), Novigrad (city), Skellige (islands), Kaer Morhen (fortress). Each has distinct environments, monsters, and quest styles.
- Horse (Roach): Use for faster travel across land; call by whistling. Combat on horseback is weaker but useful for hit-and-run. Upgraded horse gear (from quests) improves stamina and control.
- Main Quests (yellow markers): Drive the story. Completion often locks certain side quests if unresolved (check journal for time-sensitive ones).
- Side Quests (exclamation marks): Offer lore, unique gear, and decisions that impact the ending.
- Witcher Contracts (blue markers from notice boards): Specialized monster hunts with detailed investigation before combat. Reward diagrams, coin, and unique mutagens.
- Treasure Hunts (blue markers): Lead to diagrams for witcher gear sets (Feline, Griffin, Ursine, Wolven, etc.). Each set has Enhanced, Superior, Mastercrafted, and Grandmaster tiers.
- Crowns (Currency): Earned from quests, selling loot, and contract rewards. Early game is tight; sell excess weapons and armor to blacksmiths (best rates), dismantle valuable junk for crafting components. Avoid repairing low-tier gear – save for good sets.
- Crafting: Blacksmiths craft weapons; Armorers craft armor. Both require diagrams and materials. Loot from defeated enemies and chests provides most ingredients. Key materials: leather scraps, ingots, monster parts (e.g., monster eyes, claws).
- Alchemy: Potions, oils, and bombs are crafted once and then refilled using Dwarven Spirit (strong alcohol) during meditation. You never need to re-craft them. This makes alchemy investment sustainable.
- Leveling: Gain XP from quests (main quests give more), killing enemies (diminishing returns), and completing POIs. Each level grants 1 ability point, plus additional points from Places of Power (up to 30+ points).
- Skill Tree (12 slot total for active skills, 4 groups): Combat (red), Signs (blue), Alchemy (green), General (brown). Invest points to unlock abilities; place them in active slots to take effect. Mutagen slots (1 per group initially, up to 4 via expansions) amplify damage or sign intensity based on matching colors (e.g., red mutagen boosts combat damage).
- Build Archetypes:
- Mutagensis: Mutagens are found from monsters. Greater mutagens drop from high-level foes and certain quests. Correct color matching in skill slots yields significant bonuses (e.g., Greater Red mutagen +3 Combat abilities = +60% attack power).
- Focus: Master basic combat, learn alchemy, complete main quest up to “Bloody Baron”. Prioritize Places of Power for free ability points.
- Main Gameplay Loop: Accept every notice board quest in White Orchard. Do all side quests before leaving (they disappear). Use potions sparingly; craft Swallow and Tawny Owl (stamina regen). Oils: Hanged Man's Venom (humans), Necrophage Oil (common ghouls/drowners).
- Build Tips: Unlock Quen (holding) and dodge upgrades. Put first few points into Muscle Memory (fast attack) or Exploding Shield (Quen upgrade). Save skill points until you decide a build. Use a couple of red mutagens to boost attack.
- Economy: Loot everything but ignore heavy armors (too much weight). Sell to merchants in Novigrad for higher prices. Repair only your starting witcher silver sword when it breaks. Buy the Temarian saddlebag (from merchant near the first village) for +70 inventory.
- Top Tip: Fight the noonwraith contract “The Devil by the Well” – teaches investigation + Yrden use. Use Yrden trap to make her attackable.
- Focus: Advance main story to Novigrad (Ciri search) and first Skellige visit. Side quests like “The Master of the Arena” and “Lord of Undvik”. Start collecting diagrams for Feline (light) or Griffin (medium) witcher gear.
- Gameplay: More complex monsters (e.g., werewolves, vampires, wraiths). Use Oils more frequently – will become essential. Start crafting bombs (Grapeshot for early AoE). Quen and Axii for crowd control.
- Skill Build: If Combat, invest in Whirl (spin attack) or Rend (heavy charge) after basic tree. For Signs, take Melt Armor (Igni) and Sustained Glyphs (Yrden). Add Acquired Tolerance (Alchemy) to raise toxicity cap and use 1–2 decoctions (e.g., Leshen Decoction for sign intensity).
- Economy: Now you can sell loot more reliably. Always carry a repair hammer and armor workbench to craft enhanced potions. Invest in saddlebags for your horse (from races or merchants).
- Exploration Tip: Skellige's sea is dense with smuggler caches – use a boat and loot them for expensive items (smuggled goods sell well in Novigrad).
- Focus: Complete the main story arcs – Battle of Kaer Morhen, Final Preparations, and endgame choices. All side quests that affect the ending must be done before “The Isle of Mists” main quest (automatic failure).
- Combat: Enemies become tougher – use Superior oils and enhanced bombs. Access Mastercrafted witcher gear (requires crafting diagrams from treasure hunts). For example, Mastercrafted Feline gives high crit and attack power.
- Build Optimization: Now you have around 30 ability points. Specialize: if Combat, take Cat School Techniques from General tree; if Signs, use Conductors of Magic (adds sword damage based on sign intensity). Alchemy builds take Heightened Tolerance and Killing Spree (crit chance on kill).
- Economy: Money becomes easier; sell unwanted mastercrafted gear to blacksmiths. Buy top-tier runestones (e.g., Greater Runestones) to enhance weapons.
- Key Missions: “The King's Gambit” (Skellige ruler choice), “Final Preparations” (choose allies). Keep a save before “Battle of Kaer Morhen” – characters may die based on earlier quests.
- Content:
- Build Growth: Unlock mutations – the most powerful change. For example, Euphoria increases attack power and sign intensity based on toxicity, ideal for alchemy builds. Piercing Cold creates an icy Aard that can freeze enemies. Respec at a potion of clearance if needed (sold by merchant in Novigrad or the Pellar in Velen).
- Endgame Activities:
- Economy: Money is abundant; sell high-value loot in Toussaint's master armorers. Dismantle monster parts for high-end crafting components (e.g., Dark Essence, Mutagens).
- Always: Read the Bestiary before fighting a new monster. Use the correct sign, oil, and bomb – it halves the difficulty.
- Save Often: Uses multiple slots. The game has no autosave for critical decisions; manual saves let you revert choices for different outcomes.
- Weight Management: Loot only what you need; store excess in the stash (available at inns and signposts) accessed from the map screen.
- Gwent: Even if not your interest, playing a few rounds early gives unique cards and quests that can affect the endgame (e.g., the “Gwent: To Everything – Turn, Turn, Turn” quest).
- Igni – Fire damage, burns, can destroy blocked doors.
- Aard – Knockback, can stagger and open enemies to finishers; also collapses weak walls.
- Quen – Protective shield (absorb one hit or fully negate damage with upgrades). Essential for survival.
- Yrden – Magic trap that slows enemies; useful against wraiths and fast-moving foes.
- Axii – Temporary stun/enemy conversion (can open dialogue paths).
Interaction
Exploration & World
Quests & Missions
Quests are tiered into:
Economy & Crafting
Character & Build Progression
- Combat Swashbuckler: Focus on fast attacks, dodge, light armor (Feline gear), high crit. Use Cat School Techniques.
- Sign Griffin: Max Griffin gear (medium armor), high sign intensity, Yrden traps, Igni spam. Use Griffin School Techniques and Conductors of Magic.
- Alchemy Tank: Ursine heavy armor, skill tree centered on toxicity (Heightened Tolerance, Acquired Tolerance), decoctions (e.g., Ekhidna, Troll). Use Euphoria mutation (Blood and Wine) for massive damage boost.
- Hybrid: Mix two trees – e.g., Combat/Alchemy for strong attacks with oil bonuses, or Signs/Alchemy for crowd control.
Player Progression Tiers
EARLY GAME (Levels 1–10) — White Orchard & Velen
MID GAME (Levels 11–20) — Novigrad & Skellige Arrival
LATE GAME (Levels 21–30) — Kaer Morhen & Main Story Climax
ENDGAME (Level 30+, Post-Main Story & Expansions)
- New Game+: Unlocked after main story ending. Retains skills, gear, and alchemy, but monsters scale with your level. All quests reset at higher difficulty. Recommended to start immediately or after completing DLCs.
- Expansions:
- Hearts of Stone (recommended level 30+): Adds the charming rogue Gaunter O'Dimm, new gear (Viper school, Sword of the Seven Cats), runewright (enchantments), and tough boss fights.
- Blood and Wine (recommended level 35+): Transports you to the sunny duchy of Toussaint. Adds Mutations (e.g., Euphoria, Metamorphosis) – unlock during the main quest “The Beast of Beauclair”. Also adds Grandmaster witcher gear (the highest tier) and the Corvo Bianco vineyard (player home with renovations and Gwent tournaments).
- Complete all remaining contracts and treasure hunts in both expansions.
- Collect all Grandmaster diagrams; craft a full set (e.g., Grandmaster Ursine for max tank).
- Finish the “Gwent: Big City Players” questline and become Gwent champion.
- Explore every ? on the Toussaint map (many guarded treasures with unique relics).
- Participate in the Tournament (Blood and Wine) and win the grand prize.
- Renovate Corvo Bianco fully (requires coin and resources) – adds storage, buffs from planted herbs, and a place to display trophy heads.
Final Tips
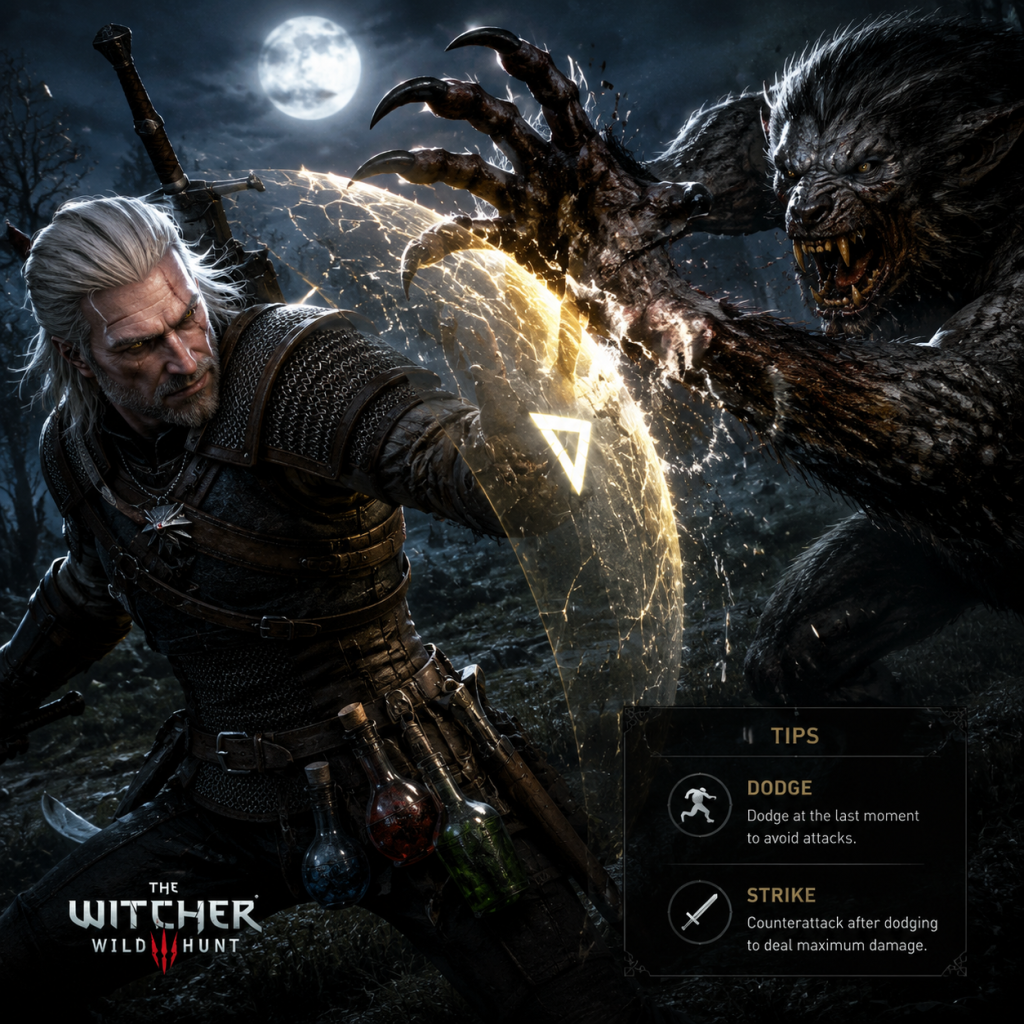
Game Tips
The Witcher 3: Wild Hunt - Game Tips
Combat Tips
Beginner: Core Mechanics
- Dodge (Space/X) is your best friend. Unlike rolls, dodges cost little stamina and interrupt enemy combos. Use side-dodges to circle behind slower foes.
- Parry (Q/L1) works only against humans with swords or small weapons. Time it right to knock them open for a fast attack.
- Fast vs. Strong attacks. Fast attacks deal less damage but are quicker and interrupt medusa strikes. Strong attacks break guards and stagger larger enemies, but leave you vulnerable.
- Quen (Y/Triangle) first. Always cast Quen before engaging. It absorbs one hit completely and prevents knockback. Recast during lulls.
- Apply oils before every fight. Open your inventory and apply the bestiary-appropriate oil. It increases damage by 50% and stacks with other buffs.
- Yrden for wraiths and elementals. Place it where enemies phase or charge. The slowdown allows you to land hits safely.
- Igni for shield bearers and flammable foes. A fully-charged Igni can set multiple enemies on fire, causing panic and damage over time.
- Aard for staggering and environment kills. Use Aard to knock enemies off cliffs or into traps. It also interrupts flying enemies.
- Stack decoctions with synergy. Ekimmara decoction (HP on hit) + Water Hag decoction (50% more damage at full HP) + Tawny Owl (stamina regen) = near-invincible combat mage.
- Use bombs to control crowds. Northern Wind freezes enemies, allowing instant finishers. Dragon Dream coats them in gas that explodes when ignited by Igni.
- Exploit enemy weaknesses. Check the bestiary mid-fight. If an enemy is sensitive to Necrophage oil, pop a Blizzard potion to slow time and chain critical hits.
- Perfect parry timing for humans. Practice parrying just before the swing lands. Successful parries open enemies for an instant kill prompt (skull icon).
- Question marks (?) are Points of Interest. They always contain loot, quests, or treasure. Visit every one on your way to main objectives.
- Fast travel from any signpost. You can also fast travel from your boat, horse, or even mid-quest if a signpost is nearby. No need to return to Novigrad manually.
- Use Roach to auto-navigate on roads. Hold down the gallop button (Shift/L3) and Roach will follow the path. Great for long trips while you glance at the map.
- Check underwater for smugglers' caches. In Skellige, hundreds of black dots in the sea are smuggler caches. Dive with Killer Whale potion for infinite underwater breathing.
- Climb every tower. Many towers and ruins have ledge-climbing spots. At the top, you often find treasure chests or Witcher gear diagrams.
- Listen for wind chimes and animal sounds. Some hidden quests activate only when you approach specific areas. For example, the "Possession" quest in Skellige starts when you hear screaming near a house.
- Fast travel to main quest hubs after major story beats. Side quests can disappear if you progress too far. Check your quest log for a red clock icon (time-sensitive).
- Use the minimap to spot guarded treasures. Treasure guards are usually higher-level. Mark them, level up, then return for guaranteed Witcher gear.
- Clear Skellige's sea points last. They give lots of relics and money but are tedious. Do them when you need cash for the Runewright (30,000+ crowns).
- Complete all contracts in an area before moving on. Contracts give mutagens, formulas, and unique swords. Group them by region: White Orchard, Velen, Novigrad, Skellige, Toussaint.
- Loot everything, but avoid guards. In cities, stealing in front of guards gets you fined or attacked. In the wild, loot every chest, corpse, and sack. You'll need herbs, monster parts, and junk to sell.
- Dismantle junk at a craftsman. Silver swords, old armor, and monster teeth yield components. Dismantle items with high value components like dimeritium or orichalcum.
- Pick every herb you see. Herbs are used in potions, oils, and bombs. Aerenaria, Celadine, White Myrtle, and Balisse Fruit are common. Run through fields and meadows.
- Buy every formula and diagram from merchants. Even if you don't need it, stock up. Some rare formulas (e.g., Superior White Gull) are only sold by specific alchemists in Novigrad or Skellige.
- Upgrade bombs and potions. Enhanced, Superior, and Mastercrafted versions are much stronger. Each tier requires the previous one and more ingredients.
- Use the "Potion of Clearance" to respec. Buy it from Keira Metz (Velen) or Gremist (Skellige) for 1,000 crowns. Respeccing refunds all ability points.
- Craft Witcher gear sets. Griffin (signs), Cat (fast attacks), Wolf (balanced), Bear (tank), and Viper (poison/damage). Each set has bonuses at 3/6 pieces. Start gathering diagrams as soon as you reach level 11 (Griffin) or 17 (Cat).
- Enchant armor and swords at the Runewright (Hearts of Stone DLC). Enchantments like "Invigoration" (damage boost at full HP) or "Levity" (armor counts as light) transform builds. Costs escalate to 30,000 crowns.
- Craft superior Oils and Potions early. Superior potions have longer duration and stronger effects. For example, Superior Golden Oriole makes you immune to poison and heals from it.
- Dump points into Muscle and Resolve first. These increase HP and stamina, making early combat forgiving. Then specialize in one tree: Combat (Sword), Signs, or Alchemy.
- Equip the Griffin School Techniques ability. It boosts sign intensity by 20% when wearing medium armor. Perfect for sign-focused builds.
- Unlock "Gourmet" perk (Brown skill). It extends food health regeneration for 20 minutes. Amazing for beginners who don't want to use potions constantly.
- Combine Combat + Alchemy for maximum damage. Use "Cat School Techniques" (light armor) and "Hunters Instinct" (critical hits from sword attacks doubled while under alchemy effects).
- Use Ekimmara decoction to get HP back on every hit. Together with the "Melt Armor" sign, you sustain through any fight.
- Prioritize fast attacks over strong attacks. Fast attacks proc bleed and critical effects faster. Strong attacks are only good for shielded enemies or charged attacks.
- Craft the Superior Northern Wind bomb. It freezes enemies solid, letting you chain finishers. Combine with the "Heart of the Woods" mutation from Blood and Wine for 50% toxicity.
- Stack decoctions: Ekimmara, Water Hag, Alghoul. You'll have massive damage (50%+ from Water Hag) and constant HP regen. Use Tawny Owl to maintain stamina.
- Use the Metamorphosis mutation. It boosts critical hit chance by 10% per active decoction. With 4 decoctions, you can crit over 50%!
- Sell weapons to blacksmiths, armor to armorsmiths. They pay more for their specialty. Sell junk to general merchants. Never sell crafting ingredients.
- Do every contract. Contracts pay 200-500 crowns plus rare loot. Always negotiate payment up to the max (some allow haggling).
- Pick up and sell all relics. Extra swords and armor you find can be sold. Only keep gear for your level or crafting.
- Buy the Runewright's services early (Hearts of Stone). Spend 5,000, then 10,000, then 15,000 crowns. The enchantments pay off in late game.
- Collect every Gwent card and win tournaments. Gwent prizes include unique cards and up to 1,000 crowns per tournament. Plus, you can bet on matches.
- Sell mutagens you don't need. Green mutagens for Health, blue for Signs. If you have extra, sell to alchemists. Red mutagens are valuable.
- Clear the Hanse bases in Blood and Wine. Loot all weapons and armor, then fast travel away (don't kill leader). The enemies respawn. Repeat for infinite loot to sell.
- Invest in the Corvo Bianco vineyard. The upgrades require 10,000+ crowns but generate passive income of 100+ crowns per day from the vineyard harvest.
- Gambling in Toussaint. Use the gold exploit with Northern Realms deck: play against merchants and bet max. Keep winning till they run out of money.
- Quick save (F5) before every major fight or dialogue. The game autosaves infrequently. A manual save prevents lost progress from wrong choices or unexpected difficulty.
- Create multiple save files. Keep one before entering a new region, one before a main quest, and one for experimentation. This allows backtracking.
- Play Gwent early. Collect cards from innkeepers, merchants, and side quests. Northern Realms deck (with tight bond units) is the easiest to win with. Use spies and decoys to draw cards.
- Buy all cards from merchants. They often sell unique cards. Prioritize "Dandelion" and "Yennefer" cards for boosts.
- Listen to NPCs. Side quests often have multiple outcomes based on your choices. Some affect the entire ending (e.g., the Bloody Baron, the state of Skellige).
- Use Axii dialogue options. If you invest points in Axii (Delusion), you can bypass persuasion checks and avoid fights. Great for role-playing.
- Play on Sword and Story or Blood and Broken Bones for a balanced experience. Death March is for veterans; it reduces enemy health regen and makes potions vital.
- Install quality-of-life mods: "Friendly HUD" (hide clutter), "Auto Apply Oils" (automatic bestiary oil), "All Quest Objectives" (show all quests on map). They don't affect balance.
- Complete all Scavenger Hunts for Witcher gear before facing the final boss. The Legendary Mastercrafted sets are the best in the base game.
- Craft Superior Blizzard potion. It slows time during combat when you kill an enemy. Useful for the final battle against the Wild Hunt generals.
- Save before entering the Isle of Mists. This triggers the point of no return. Make sure all side quests you care about are finished.
Intermediate: Sign & Oil Usage
Advanced: Alchemy Combos & Critical Burst
Exploration Tips
Beginner: Reading the Map
Intermediate: Hidden Treasures & Secrets
Advanced: Efficient Completion
Resources & Crafting Tips
Beginner: Looting Essentials
Intermediate: Alchemy & Crafting Recipes
Advanced: Gear Progression
Builds Tips
Beginner: General Advice
Intermediate: Hybrid Build
Advanced: Euphoria Build (Blood and Wine)
Economy & Money Tips
Beginner: Making Crowns
Intermediate: Investing
Advanced: Money Milking
General Pro Tips
Save Often
Gwent Strategy
Dialogue Choices Matter
Difficulty & Mods (PC)
Endgame Preparation
---
These tips cover the full spectrum from your first hour to post-game New Game+. Experiment with different builds and approaches - The Witcher 3 rewards adaptability and preparation.
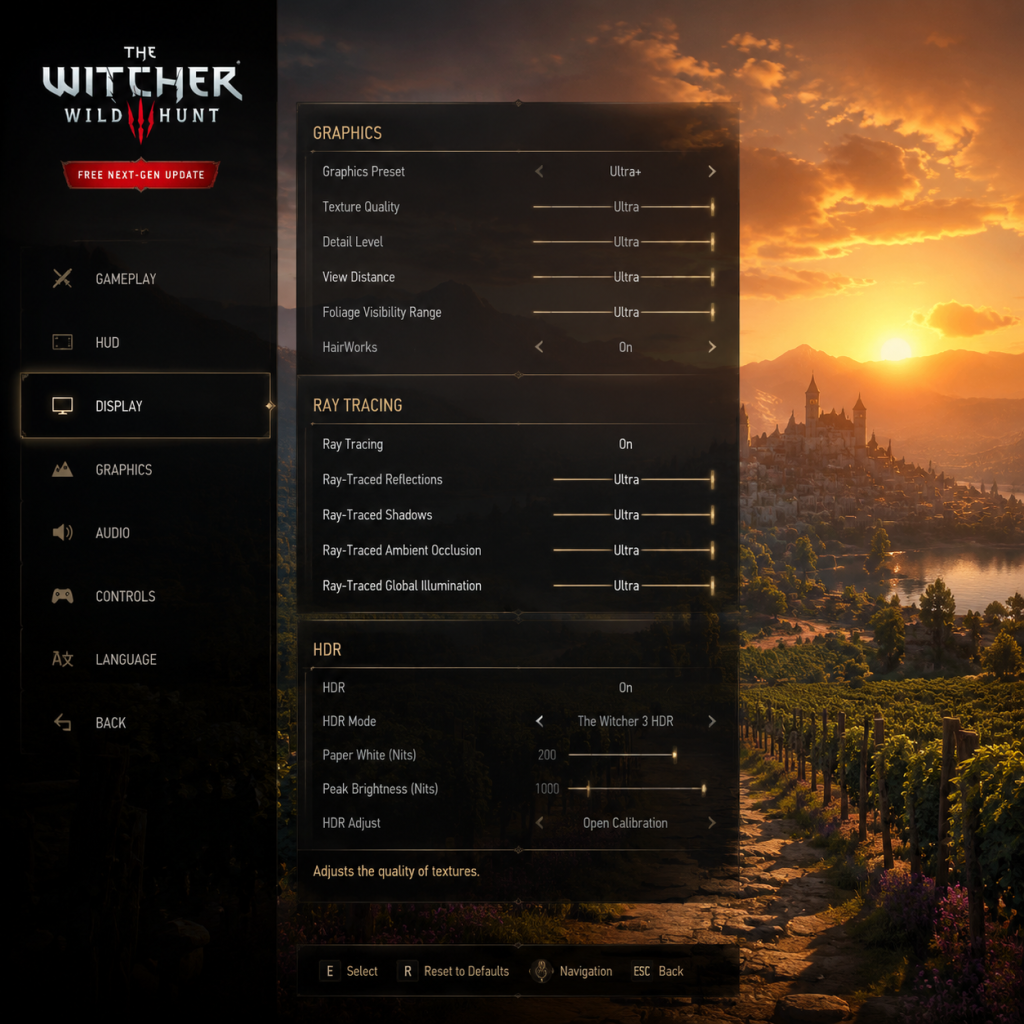
Game Settings
Game Settings Guide for The Witcher 3: Wild Hunt
Overview
The Witcher 3: Wild Hunt received a major Next-Gen Update (version 4.0+) in late 2022, introducing ray tracing, DLSS/FSR, and many new settings. This guide covers all settings categories and provides optimized recommendations for different hardware tiers. The game is available on PC (Steam, GOG, Epic), PlayStation 4/5, Xbox One/Series X|S, and Nintendo Switch. Settings may vary by platform.
Graphics Settings
Key Options
- Display Mode: Fullscreen, Borderless Window, Windowed. Fullscreen offers best performance.
- Resolution: Native monitor resolution recommended unless using dynamic scaling.
- Frame Rate Cap: Set to monitor refresh rate (60, 120, 144, etc.).
- V-Sync: On to avoid screen tearing; off can reduce input lag with G-Sync/FreeSync.
- Graphics Preset: Low, Medium, High, Ultra/Ultra+. Custom tweaking often yields better performance/quality balance.
- Dynamic Resolution Scaling (DRS): Automatically lowers resolution during heavy scenes. Enable for consistent FPS.
- NVIDIA HairWorks: Simulates detailed hair/fur. Extremely demanding. Low/Off on midrange or below; High on high-end with overhead.
- Ambient Occlusion: SSAO (low), HBAO+ (medium/high), RT Ambient Occlusion (extremely demanding). For most, HBAO+ offers good quality.
- Anti-Aliasing: TAA, FXAA Off. TAA recommended; FXAA blurs slightly.
- Texture Quality: Affects VRAM. Ultra requires 4-6GB+. Low/Medium for 2-4GB cards.
- Shadow Quality: Low to Ultra. Medium is good balance.
- Terrain Quality: Affects grass detail and draw distance.
- Water Quality: Low to Ultra. High looks nice without huge cost.
- Foliage Visibility Range: Controls how far grass/trees render. Lowers for performance.
- Level of Detail (LOD): Affects model detail distance. Keep high for quality.
- Background Characters: On/Off. Off saves performance.
- Ray Tracing: RT Reflections, RT Shadows, RT Ambient Occlusion, RT Global Illumination (only in DX12 mode). Very GPU intensive. On high-end cards only.
- DLSS / FSR / XeSS: Upscaling technologies. DLSS Quality or Balanced on RTX; FSR on AMD/others. Performance mode for higher FPS.
- Sharpening: Optional; can improve clarity.
Optimized Settings by Hardware Tier
| Setting | Low-End (GTX 1050 Ti, 2-4GB VRAM, 1080p) | Mid-Range (RTX 2060, 6GB, 1080p-1440p) | High-End (RTX 3070, 8GB, 1440p) | Ultra (RTX 4090, 4K) |
|---|---|---|---|---|
| Preset | Low (then tweak up) | High (then tweak down) | Ultra+ with RT | Ultra+ with RT |
| Resolution | 1080p or 900p | 1080p or 1440p | 1440p or 4K DLSS Performance | 4K native or DLSS Quality |
| DRS | On (target 30-60 FPS) | On if needed (target 60 FPS) | Off (stable FPS) | Off |
| HairWorks | Off | Off | Low (or Off) | Low (or Off) |
| Ray Tracing | Off | Off | On (Reflections + Shadows only) | All RT on (may need DLSS) |
| DLSS/FSR | N/A (too old) or FSR Performance | FSR Quality or DLSS Balanced | DLSS Quality or FSR Quality | DLSS Quality |
| Textures | Medium | High | Ultra | Ultra+ |
| Shadows | Low | Medium | High | Ultra |
| Ambient Occlusion | Off | SSAO | HBAO+ | RT AO or HBAO+ |
| Foliage | Medium | High | Ultra | Ultra+ |
| Water | Low | High | High | Ultra |
Audio Settings
- Master Volume / Music Volume / SFX Volume / Dialogue Volume: Adjust relative levels. Dialogue should be prominent for story.
- Subtitles: On/Off. Highly recommended to enable even if you understand the language, for clarity during combat and accents.
- Subtitles Language: Match voice or separate.
- Audio Dynamic Range: Headphones, TV, Speakers. Choose Headphones for best directional audio.
- Spatial Audio: Windows Sonic, Dolby Atmos (supported on Xbox/PC for compatible headphones). Enhances immersion.
- Language: Interface and Voice language packs (English, Polish, French, German, Chinese, Japanese, etc.). Note that voice language affects lip-sync only for Polish (original) and English. Others may have slight mismatch.
- Sensitivity: Mouse sensitivity for camera. Adjust to personal taste.
- Invert Y axis: Off by default.
- Key Bindings: Fully customizable. Common remaps: dodge to mouse side button, sign selection to keys.
- Quick Sign Casting: A critical setting. In Next-Gen update, you can enable "Quick Casting" (hold a key and press mouse button to cast sign without opening radial menu). Recommended to enable for smoother combat.
- Interaction Delay: Default is fine.
- Sensitivity and Inversion: Similar.
- Button Mapping: Presets (Standard, Alternate, etc.). "Alternate" changes dodge to B and roll to A+B? Check inside game.
- Vibration: On/Off.
- Trigger Dead Zone: Adjust if triggers are too sensitive.
- Stick Dead Zone: Important for fixing stick drift. Increase slightly if camera moves without input.
- Quick Sign Casting (Controller): Hold RB (Xbox) or R1 (PS) and press face button to cast sign. Enable in gameplay settings.
- Aim Assist: For crossbow and signs. Can be adjusted or turned off.
- Difficulty Level: Choose from "Just the Story!", "Story and Sword!", "Blood and Broken Bones!", "Death March!". Lower difficulties auto-pause meditation and reduce enemy aggression. Death March forces you to be tactical.
- Auto-apply Oils: (Next-Gen addition) Automatically applies correct oil to your sword when entering combat. Saves inventory management.
- Auto-apply Blade Enhancement: Similarly applies blade oils.
- Auto-loot: Not available by default – only through mods.
- Subtitle Size: Adjustable in Options -> Video -> HUD Configuration. Larger sizes help readability.
- Color Blind Modes: Not officially built-in, but HUD customization can help. Some users rely on mods.
- Camera Options: Set default distance during combat/exploration (close/far). "Combat Camera Distance" far recommended.
- Motion Blur: On/Off. Turn off for clarity; on for cinematic feel.
- Depth of Field: On/Off. May cause eye strain; off for accessibility.
- Fish-Eye Effect (Cat Potion): Can be disabled in settings (Rendering tab?).
- Controller Remapping for special needs.
- Interface Language: Choose display text language.
- Voice Language: Multiple options. Downloadable language packs via Steam/GOG.
- Subtitles Language: Can be different from voice. Useful to hear original voice while reading native language.
- Speech Volume: Subcategory.
- Cloud Saves: Enable in GOG Galaxy, Steam Cloud, or Epic to sync across devices.
- Automatic Updates: Keep enabled to receive patches and DLC.
- Community Content (console/PC): Enable user-generated markers? (Not sure if standard). On PC, Steam Workshop does not exist; mods are manual.
- GOG Galaxy Overlay: Useful for screenshots/friends.
- Quick Sign Casting: As mentioned in Controls, enable for faster combat.
- Controller Schemes: Standard vs. Alternate. Alternate changes dodge to B, roll to LB+RB. Try both.
- Autosave Frequency: Every 5, 10, 15 minutes, or manually only. Set to frequent if you tend to die often.
- Meditation Auto-heal: Only on lower difficulties. On Death March, meditation does not heal.
- Level Scaling: Enable to make enemies scale with your level, keeping challenge. Some quests become easier without. Recommend off for first playthrough.
- HUD Configuration: Toggle mini-map, health bars, quest objectives, enemy health, XP notifications, etc. You can hide elements for immersion or show all for information.
- Combat Camera: Auto switch to close-up during combat. Can be set to manual.
- Lock-on: Auto or Manual: Auto-lock targets closest enemy; manual lock with a button. Many prefer manual.
- Aiming Sensitivity: For crossbow and signs.
- First time players: Set difficulty to "Story and Sword!", enable subtitles, enable Quick Sign Casting, set autosave to 5 min, turn off HairWorks, use High preset (or Ultra on strong PCs), and adjust DRS if needed.
- Performance seekers: Low preset, DRS on, all extra effects off, prioritize 60 FPS even on low-end.
- Visual purists: Max out except HairWorks, RT on, use DLSS Performance if necessary, and accept 30-45 FPS if hardware cannot hit 60.
Special Attention: The Polish voice acting is widely praised as the original, but English is also excellent. If you want authenticity, choose Polish audio with English subtitles. Audio dynamic range setting "Headphones" is optimal for most players and can help hear faint footsteps and whispers.
Controls Settings
Mouse & Keyboard
Controller (Gamepad)
Special Attention: The Quick Sign Casting feature (introduced in Next-Gen update) is essential for fluid combat. Without it, you must open radial menu slowing down fights. Enable it immediately. For controllers, stick dead zone adjustments can eliminate drift issues without replacing hardware.
Accessibility Settings
Language Settings
Special Attention: Voice and interface language are separate. If you want Polish voices with English UI, set Interface to English, Voice to Polish. Ensure subtitles match.
Network Settings
(Note: The Witcher 3 is single-player, no multiplayer. Network settings are limited.)
Special Attention: If you use Steam, ensure cloud saves are active to protect progress. For GOG Galaxy, the "Cross Save" feature allows transferring saves between PC and Nintendo Switch (if you own both versions).
Gameplay Settings
Special Attention: Autosave frequency should be set to 5 minutes if you are on Death March difficulty. Level Scaling should be used cautiously: some witcher gear quests become impossible if enemies scale too high. HUD elements like the mini-map can be scaled or turned off. Many players disable the mini-map for greater exploration immersion.
Settings That Are Easy to Misconfigure
1. HairWorks: Disabled by default but many enable it for beauty. It can tank FPS. If your FPS drops below 30, turn it off.
2. Dynamic Resolution Scaling (DRS): Default is off. Turning it on can smooth out performance dips without major visual degradation. Good for mid-range.
3. Quick Sign Casting: Not obvious in menus. Look under Gameplay or Controls. Without it, combat feels clunky.
4. Controller Dead Zone: If your controller has drift, adjusting dead zone can fix it. Many don't know this option exists.
5. Subtitle Size: Very small by default. Change to large if you have difficulty reading text.
6. Auto-apply Oils: New option in Next-Gen update. If you forget to apply oils manually, enable this.
7. Ray Tracing: It's tempting to turn everything to maximum, but RT can cut FPS in half. Only enable on powerful systems with upscaling.
8. Voice Language Pack: If you download Polish but didn't install it, it may default to something else. Check in settings after install.
Final Recommendations
Remember that personal preference matters; tweak settings individually until you find the balance between visual quality and smooth gameplay.
Important Notes
Important Notes for The Witcher 3: Wild Hunt
This section contains critical warnings, pitfalls, irreversible choices, missable content, difficulty spikes, grinding traps, save management advice, and common regrets. Read carefully to avoid losing progress or making locked-in decisions that affect your entire playthrough.
Irreversible Choices & Consequences
The Witcher 3 has several major branching story decisions that have lasting effects on quests, characters, and endings. Always manual save before any choice that feels significant.
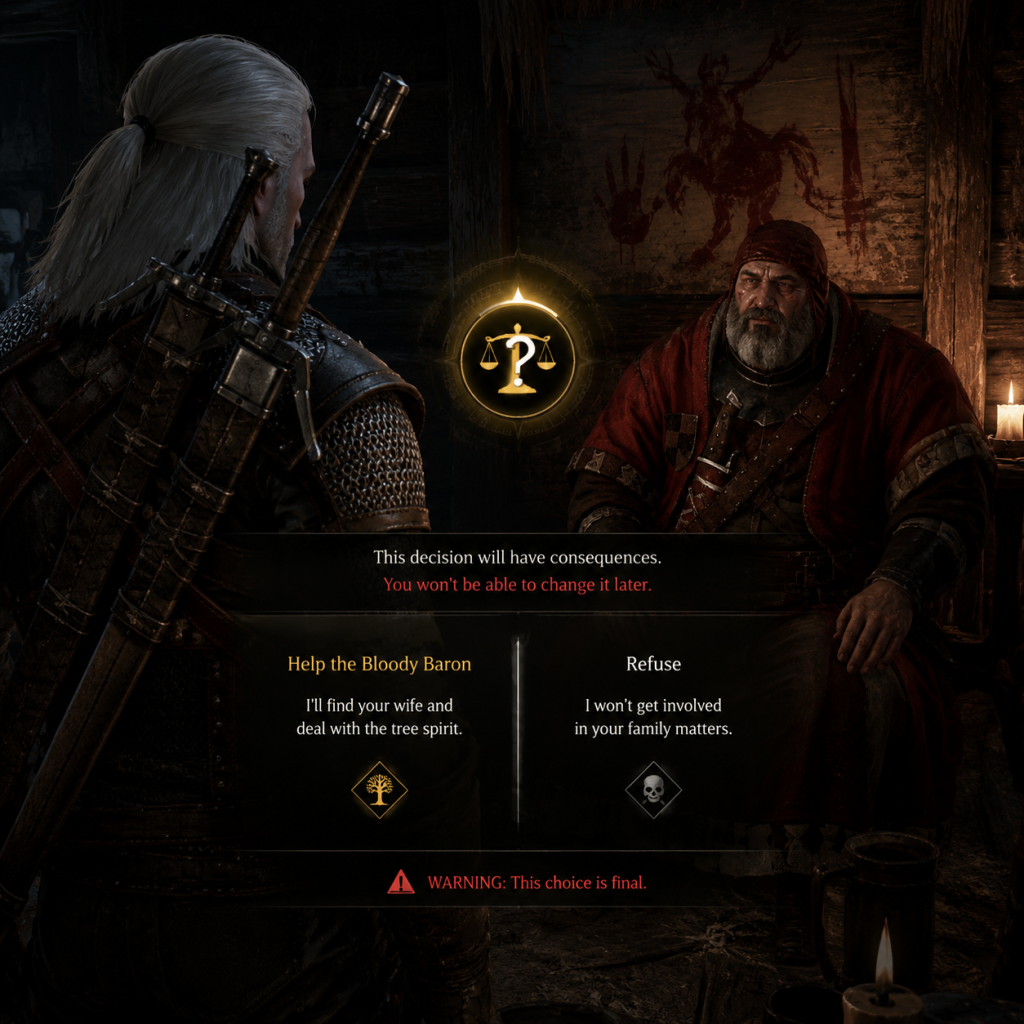
- Bloody Baron Questline (The Family Matters / Ladies of the Wood): Your actions determine the fate of the Baron, his wife Anna, and the orphans. The choice to free the tree spirit or kill it directly affects Anna’s sanity, the Baron’s survival, and the fate of Downwarren. Save before entering the Whispering Hillock.
- Ciri’s Fate: The ending of the game (Ciri becomes a witcher, empress, or dies) depends on five key dialogue choices during main quests. Examples: the snowball fight, visiting Skjall’s grave, encouraging her to calm down, not taking money from Emhyr, and accompanying her to see the Lodge. One wrong choice can lock you into the bad ending.
- Romances: You can only commit to one of the primary romance options (Triss Merigold or Yennefer) if you want a permanent romance. Trying to romance both without completing their quests can lead to being shackled together by Yennefer and then dumped by both. Save before the final romance scene in each path.
- Dijkstra vs. Roche (Reason of State): Your choices during the quest “An Eye for an Eye” and later “Redania’s Most Wanted” determine whether Dijkstra, Roche, or Radovid rules. This choice locks out future quests and affects the Northern Realms’ ending slides. Save before meeting with Dijkstra at the bathhouse.
- Hearts of Stone (Ira Merigold’s fate?): The final decision with Gaunter O’Dimm, and whether you save Olgierd or not, gives unique rewards (e.g., the Viper Venomous silver sword or the Caretaker’s shovel). There is no easy way to reverse this.
- Blood and Wine (Ending): You can let Syanna die, kill Detlaff, or save both. The ending affects the fate of Toussaint and determines whether Dettlaff’s victims survive. Save before entering the final conversation.
- All Side Quests Involving Romance (Triss’s “Now or Never”, Yennefer’s “The Last Wish”): “Now or Never” must be completed before you sail to Skellige for the first time (“The King is Dead” – passage to Skellige). “The Last Wish” must be completed before you head to the Isle of Mists (the point of no return). Failing these locks you out of those romance paths.
- Gwent Collecting: Many Gwent cards are only obtainable during specific quests or from merchants who die or disappear. Playable characters like the Bloody Baron, Lambert, and others have unique cards. If you defeat the Baron before he leaves, you can get his card. Also, the “Gwent: Collect ‘Em All” quest is missable if you skip certain innkeepers.
- Witcher Gear Diagrams: Some diagrams (especially in Toussaint) are in restricted areas that become inaccessible after certain quests. For example, the Grandmaster Wolven gear requires exploring a cave during the “There Can Be Only One” quest. Do these scavenger hunts before finishing the main Blood and Wine story.
- Contract: The Mystery of the Byways Murders (Skellige): This contract becomes unavailable after you complete the main quest “Echoes of the Past”.
- Treasure Hunts: For example, the “Hidden in the Swamp” treasure in Velen is tied to a soldier who may die. Always check the notice board and do quests promptly.
- The “Scavenger Hunt: Wolf School Gear” – one diagram is in a cave near Kaer Morhen that you cannot return to after the final battle.
- Early Game (Level 1–5): Wolves, drowners, and noonwraiths can kill you in 2–3 hits. Always dodge, use Quen, and keep food/potions ready. The Griffin in the “The Beast of White Orchard” fight is tough if you ignore signs and oils.
- The Crones of Crookback Bog (Level ~7): Their minions and the fight itself can be overwhelming if you arrive under-leveled or without specter oil.
- Imlerith (Main Story, Level ~20): This boss has a shield that must be broken, and his teleport attacks require precise dodging. Many players get stuck here.
- Eredin (Endgame, Level ~30): The final boss fight is fast-paced; you need upgraded potions and a dodge-heavy strategy. Using Quen is critical.
- Hearts of Stone: The Caretaker (Level ~34–38): This boss regenerates health and is immune to many tactics. You must hit him consistently and dodge his summons. The Ofieri Mage in the same DLC is also notoriously hard.
- Blood and Wine: Dettlaff (Level ~48+): One of the hardest fights in the game. His bat swarm attack can one-shot you if you don’t dodge properly. Use the “Black Blood” potion to damage him when he bites you.
- Over-Leveling: Completing too many side quests early can cause main quests to turn gray (low XP), but the real trap is wasting time on repetitive monster nests. Focus on quests at or near your level for best XP.
- Buying Gear: Never purchase swords or armor from blacksmiths early on (except maybe the Temerian set in White Orchard). Loot everything and craft Witcher gear instead, which is always stronger.
- Selling Wisely: Sell weapons to blacksmiths (they pay more for weapons), armor to armorers, junk to general merchants. Broken weapons/tools can be dismantled to get rare components like dimeritium or monster teeth.
- Hoard Crafting Materials: Don’t sell monster parts, orens, or crafting components like steel ingots. They are needed for Witcher gear and runes. However, you can safely sell food that you don’t need.
- Gold Management: Money is tight early on. Use collected junks like seashells (which break into pearls) and loot everything that isn’t nailed down. Avoid spending on upgrades until you have Witcher gear diagrams.
- Dismantle vs. Sell: Use the “dismantle” option for items that seem valuable but are actually used in high-end schematics (e.g., monster claws, teeth). Check the craftsman’s wares before selling.
- Manual Saves: Create manual saves at these critical moments:
- Multiple Slots: Use at least 3–5 rotating manual save slots. Autosaves overwrite quickly. The game only keeps a limited number of quick saves.
- Cloud Saves: If you have a GOG account, enable cross-platform saves to transfer between PC and console (PS4/5, Xbox, Switch). This is useful but can lead to confusion if you load a save from another platform with different DLC.
- Do Not Rely on Autosave: Autosaves often trigger after a conversation choice, but not before. If you make a mistake, you may have to replay an entire quest sequence. Always manually save before major decisions.
- Learn Gwent Early: The Gwent card game is entirely optional but a major side activity. If you ignore it until late game, you will miss many unique cards from merchants who die or disappear. Start playing as soon as you reach the White Orchard inn.
- Always Use Oils and Potions: The game’s combat becomes much easier if you consistently apply bestiary oils (which are infinite once crafted) and drink Swallow/Tawny Owl potions. You can meditate to refill potions using strong alcohol (e.g., Dwarven Spirit) – always keep a supply.
- Upgrade Quen: The Quen sign shield is the most versatile defensive tool. Upgrading it (through skill points) allows it to heal you or reflect damage. Many players neglect this and then struggle in boss fights.
- Explore Question Marks (?): Not all map markers are worth it, but many hidden treasures contain diagrams, rare weapons, or recipes. In Skellige, the smuggler caches in the water are tedious but can yield valuable loot to sell.
- Don’t Min-Max Immediately: You can respec your character using the “Potion of Clearance” sold by the merchant in Novigrad (near the Passiflora) for 1000 crowns. So you can experiment with skills without permanent regret.
- Repair Your Gear: Weapons and armor degrade over time. Repair them using your own repair kits (crafted or looted) or at any blacksmith/armorer. A broken weapon deals much less damage and can break mid-combat.
- Use the Bestiary: The in-game bestiary gives enemy weaknesses, which oils, bombs, or signs to use. Check it before taking on a tough monster contract.
- DLC Order: Hearts of Stone can be played anytime after reaching level 30 (but is best after main story). Blood and Wine should be played last, as it is set several years after the main story and offers a fitting epilogue.
- Single-Player Only: The Witcher 3 is a single-player game with no multiplayer components. There are no online etiquette rules aside from sharing saves or mods.
- Mods: The PC version supports mods via Nexus Mods or the in-game mod manager (after next-gen update). Mods do not trigger any anti-cheat. Use common sense: avoid mods that break quest progression unless you have backup saves.
- Console Commands (PC): You can enable developer console via config file. This can be used to cheat (add gold, items, etc.) but can corrupt your save. Always save manually before using commands.
- Cross-Save Account: If you use GOG’s cross-save feature, ensure you are logged into the correct account on all platforms. Sharing saves across platforms is safe but may cause issues with DLC content not installed on all platforms.
- No Anti-Cheat: There is no anti-cheat software. Feel free to use trainers or cheats for personal enjoyment, but avoid using them if you care about achievements; the game does not disable them though.
- PC (Steam/GOG/Epic): The next-gen update (v4.0+) added ray tracing, DLSS/FSR, and increased system requirements. Disable ray tracing on mid-range cards (GTX 1060/RX 580) for stable 60 FPS. Save files are located in `%USERPROFILE%\Documents\The Witcher 3\gamesaves`. Steam cloud saves can conflict with GOG cross-save – disable one to avoid confusion.
- PlayStation 4/5: The PS5 version (next-gen) offers 60 FPS with ray tracing disabled. Save transfer from PS4 to PS5 is supported via the GOG account link. Old PS4 saves cannot be used on PS5 without conversion (use the in-game option).
- Xbox One/Series X|S: Similar to PlayStation – next-gen update available for free if you own the game. Smart Delivery automatically applies. Save transfers work via GOG account.
- Nintendo Switch: Runs at 30 FPS with reduced graphics. No cross-save with other platforms unless you have the GOG account feature (limited). The Switch version does not receive the next-gen update.
Missable Content & Time-Sensitive Quests
Many quests auto-fail after you progress the main story past certain points. Complete these before the associated critical main quest.
Difficulty Spikes & When to Expect Them
The game’s difficulty is not linear. Expect sudden jumps.
Grinding Traps & Economy Pitfalls
Save Management Best Practices
- Before accepting a main quest that seems final (e.g., “The Isle of Mists”)
- Before romancing either Triss or Yennefer
- Before the final battle with the Wild Hunt
- Before any choice that feels morally ambiguous
Common Regrets & What to Know Early
Players frequently wish they had known the following from the start:
Online Etiquette & Anti-Cheat (Platform Specific)
Platform-Specific Notes
Final Tip: Take your time. The Witcher 3 is a long game (100+ hours with expansions). Don’t rush the main story. Immerse yourself in the world, do side quests that seem interesting, and save often. Happy hunting!
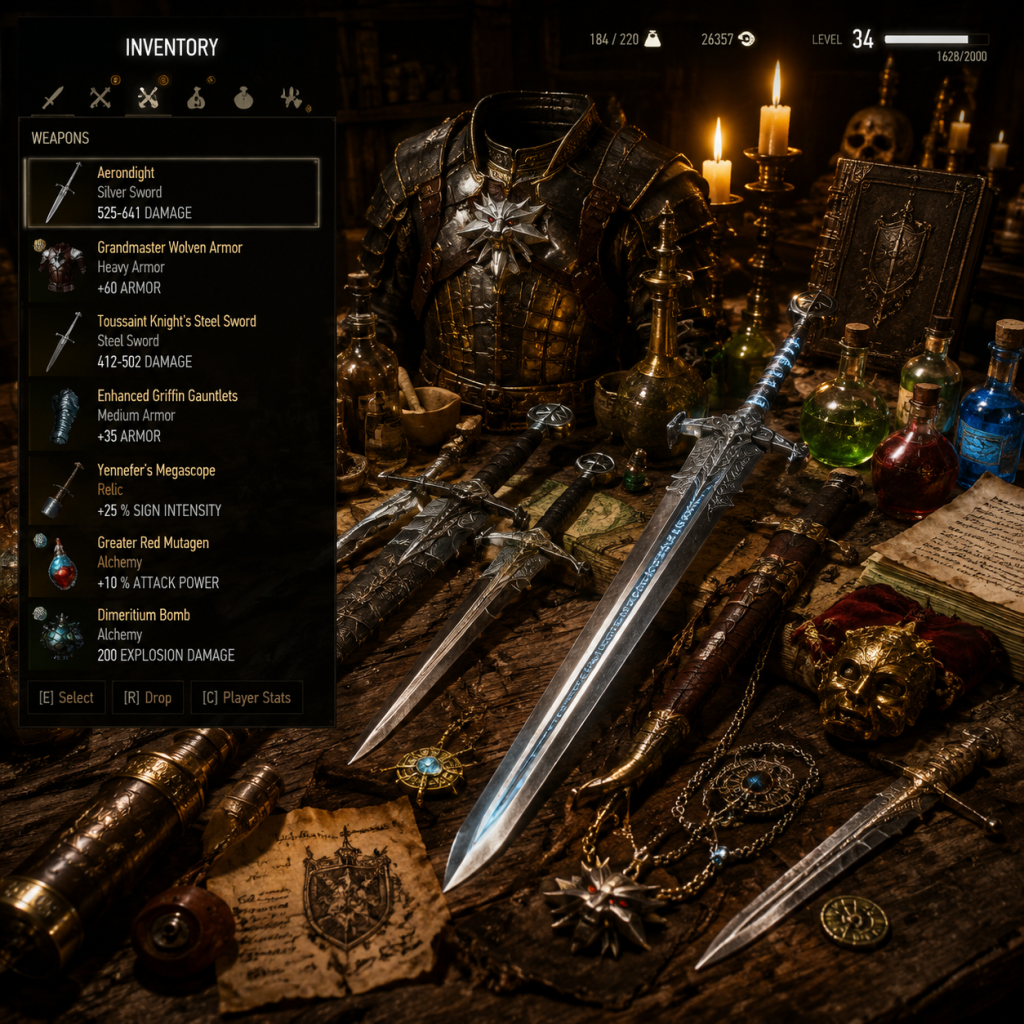
All Game Items
All Game Items Guide for The Witcher 3: Wild Hunt
This guide covers every major item category in The Witcher 3: Wild Hunt, including the Blood and Wine and Hearts of Stone expansions. Items are grouped logically with details on acquisition, use cases, and important synergies. All information applies to the base game and the Next-Gen Update (v4.0+).
1. Weapons
Weapons in The Witcher 3 are divided into Steel Swords (for humans, beasts, and non-magical foes) and Silver Swords (for monsters, wraiths, and supernatural enemies). Geralt can also use a crossbow, bombs, and a few other melee weapons.
1.1 Steel Swords
| Sword Name | Type | Damage (Approx.) | How to Obtain | Best Used For | Synergies/Upgrades |
|---|---|---|---|---|---|
| Witcher Steel Swords (Base) | Crafted | Varies | Crafted from diagrams (e.g., Viper, Griffin, Cat, Bear, Wolf, Manticore). Levels scale with diagram tier. | Humans, non-monster enemies | Upgrade via master or grandmaster craftsmen. Synergizes with corresponding Witcher armor sets for set bonuses. |
| Hjalmar's Steel Sword | Relic | High | Reward from the quest "The Lord of Undvik" (Skellige). | Early-mid game human enemies | Good stats but no set bonus; can be sold or dismantled later. |
| Sword of the Wandering Knight | Relic | Very High | Found in the Hearts of Stone open world (near the "Viper School" ruins). | High-level human foes | Not upgradable; excellent base damage but no special effects. |
| Aerondight (Blood and Wine) | Silver | Legendary | Obtained from the quest "There Can Be Only One" (Blood and Wine). | All enemies after fully charged | Scales with level; gains permanent damage bonus when you kill without taking damage. Synergizes with any armor set. |
| Toussaint Steel Sword | Relic | Very High | Crafted by the Grandmaster Smith in Beauclair (Blood and Wine). | Endgame human enemies | Part of the Toussaint armor set; grants set bonus when worn with Toussaint armor. |
1.2 Silver Swords
| Sword Name | Type | Damage | How to Obtain | Best Used For | Synergies/Upgrades |
|---|---|---|---|---|---|
| Witcher Silver Swords (Base) | Crafted | Varies | Diagrams found across the world. | Monsters of all types | Best in slot when upgraded to Grandmaster tier. Set bonuses with corresponding armor. |
| Moonblade | Relic | High | Looted from certain high-level wraiths or in the Hearts of Stone region. | Wraiths and cursed monsters | Increases crit chance against wraiths. |
| Bloodsword | Relic | Very High | Obtained from the Hearts of Stone main quest. | Vampires and necrophages | Grants bleeding effect. |
| Aerondight (Silver) | Unique | Legendary | See above. | All enemies when charged | Best silver sword in the game; upgradeable via killing without damage. |
| Gesheft | Relic | High | Dropped by the Ofieri merchant's guard in the Hearts of Stone expansion. | Strong monsters | None special; good stats but outclassed by witcher gear. |
1.3 Other Weapons
- Crossbow: Used to shoot down harpies, drowners, and to detonate barrels. Upgrades (e.g., Trophy Crossbow) improve damage. The Ofieri Crossbow is craftable and very strong.
- Bombs: Grapeshot, Dimeritium Bomb, Moon Dust, etc. Each bomb type has specific uses (see Consumables section).
- Torch: Lights dark areas, can be thrown to ignite gas clouds.
2. Armor
Armor is categorized by weight class (Light, Medium, Heavy) which affects stamina regeneration and movement. Full Witcher armor sets provide set bonuses at higher tiers (Mastercrafted, Grandmaster).
2.1 Witcher School Armor Sets
Each school has a unique appearance, weight class, and bonuses. Diagrams are found in treasure hunts starting at level 11 (Griffin) and scaling to level 40+ (Grandmaster).
| School | Weight | Bonus (3 pieces) | Bonus (6 pieces) | Best For |
|---|---|---|---|---|
| Griffin | Medium | Sign intensity +20% | Yrden trap expands and slows enemies | Sign-heavy builds, especially Yrden & Igni |
| Cat | Light | Attack power +20% | Every 5 hits, +10% crit chance for 5s (stack up to 5 times) | Fast attacks and critical hit builds |
| Bear | Heavy | Quen intensity +20% | Adrenaline gain +10% (stack up to 3 times) | Tanky builds with strong attacks |
| Wolf | Medium | Attack power +20%, Sign intensity +20% | +10% faster stamina regen, +10% adrenaline gain | Hybrid builds (balanced signs/attacks) |
| Viper | Light | Poison resistance +20% | No 6-piece bonus (only 2 sets exist: basic and upgraded) | Slashing and poisoning enemies; very high critical hit |
| Manticore | Light | Critical hit chance +20% | Critical hit damage +50%, bomb damage +50% (Blood and Wine) | Alchemy and bomb builds |
| Toussaint | Heavy | Damage reduction +20% | Armor piercing +20% (Blood and Wine) | Endgame heavy armor with high protection |
2.2 Relic and Unique Armor
- Nilfgaardian Armor Set: Obtained from early quests (e.g., "The Nilfgaardian Connection"). Light armor, good for early game.
- Temarian Armor: Crafted from quest reward (e.g., the "Armorer" quest in Novigrad). Medium armor with decent protections.
- Ofieri Armor (Hearts of Stone): Crafted from diagrams in auction house or from the Ofieri merchant quest. Unique appearance.
- Hansa Armor (Blood and Wine): Random drop from Hanse bases. Decent stats.
- New Moon Armor: Found in the Hearts of Stone main quest (the wedding). Light armor with critical hit bonuses.
- Swallow: Health regeneration over time. Most basic healing potion.
- White Raffard's Decoction: Instant heal +33% HP. Better than Swallow in combat.
- Thunderbolt: +30% attack power. Essential for melee builds.
- Tawny Owl: Faster stamina regen. Use before combat or signs.
- Blizzard: Slows time. Requires toxicity management.
- Full Moon: Temporarily increases max vitality. Good for boss fights.
- Cat: See in darkness. Useful in caves.
- Golden Oriole: Heals from poison (turns poison into health). Very useful against poisoned creatures.
- White Honey: Clears all toxicity and potion effects. Use after combat.
- Ekhidna Decoction: Damage dealt heals you for 10% of damage. Top-tier healing.
- Ekimmara Decoction: Reduces damage taken while attacking by 15%. Good for tank.
- Katakan Decoction: +25% critical hit damage and +10% critical hit chance. Best for crit builds.
- Foglet Decoction: Increases damage by 15% when enemy is under status effect (e.g., burning, poisoned).
- Water Hag Decoction: +50% damage when at full health. Excellent for one-shot builds.
- Ancient Leshen Decoction: +15% damage for each active decoction (max 4). Stackable.
- Archgriffin Decoction: Each hit reduces enemy armor by 1% (stack up to 30% for 5 seconds). Great vs. high-level foes.
- Hanged Man's Venom: Humans and non-humans.
- Necrophage Oil: Drowners, ghouls, etc.
- Cursed Oil: Wraiths, werewolves.
- Elementa Oil: Golems, elementals.
- Beast Oil: Wolves, bears.
- Draconid Oil: Dragons, wyverns.
- Hydragena Oil: Vampires (both lesser and higher).
- Insectoid Oil: Spiders, endriaga.
- Ogroid Oil: Cyclopses, ice giants.
- Relict Oil: Leshens, chimeras.
- Grapeshot: Explodes with fire damage. Good for groups. Upgrades increase radius.
- Dimeritium Bomb: Negates magic (enemies cannot use signs). Excellent against mages and wraiths.
- Moon Dust: Stops vampires from regenerating and prevents wraiths from becoming ethereal.
- Northern Wind: Freezes enemies. Useful for crowd control.
- Devil's Puffball: Poison cloud. Does damage over time.
- Samum: Flashbang effect - stuns enemies for a few seconds.
- Dancing Star: Ignites enemies. Good against necrophages and werewolves.
- Dragon's Dream: Creates gas cloud that explodes if ignited. Tricky but powerful.
- Bread, Roasted Meat, Chicken Leg: Basic heal over time.
- Water, Dwarven Spirit: Remove poison? No, water just heals. Dwarven Spirit is used for alchemy refills but can be drunk for minor toxicity.
- Excellent Food (e.g., Bacon, Ham, Pork): Heal about 50HP over 10s.
- Wolfsbane Potion (alchemy item, not food): Actually a potion.
- Common: Linen, Leather Scraps, Timber, Iron Ore, Steel Ingot, etc. Bought from smiths or looted.
- Magic Items: Meteorite Ore, Dimeritium, Cursed Stones, etc. Obtained from monster loot or dismantling magic gear.
- Relic Items: Enriched Dimeritium, Tormented Leather, etc. Used for Grandmaster gear. Rare.
- Alchemy Ingredients: Aether, Essence of Wraith, Monster Blood, etc. Used for potions/decoctions.
- Dwarven Spirit: Used to refill all consumables during meditation. Always keep a stock of 50+.
- Alcohest: Similar to Dwarven Spirit but not used for refills? Actually Dwarven Spirit is the main refill item. Alcohest can be brewed but is not needed if you have Dwarven Spirit.
- Aether: Used in superior potions.
- Queberth: Rare, used in some decoctions.
- White Gull: Required for potions like Superior Swallow. Crafted from specific alchemy.
- Monster Mutagens (Green, Red, Blue): Used to upgrade skills in the skill tree (via mutagens) and also for decoctions. Green = Alchemy, Red = Combat, Blue = Signs.
- Greater Mutagens: Dropped by powerful monsters (e.g., Fiends, Leshens). Used for top-tier decoctions.
- Runestones: Ignite, Frost, Shock, Bleed, Poison, Stun, etc. Increase chance to apply status.
- Greater Runestones: Better chance/damage.
- Glyphs: Quen Intensity, Yrden Duration, Igni Damage, Aard Knockdown, Axii Insta-kill, etc.
- Greater Glyphs: Stronger bonuses.
- Crowns: The standard currency. Used for everything: shops, crafting, bribes, rewards. Earned from quests, loot, selling items, and treasure.
- Orens: Used in the Heart of Stone expansion for some vendors (e.g., the auction house). Can be looted or sold to certain merchants (e.g., the banker in Novigrad's Heiress).
- Florens: Nilfgaardian currency. Can be exchanged at the Vivaldi's bank in Novigrad or used with some Nilfgaardian vendors. Appears mainly in the base game.
- Septims: Not present in Witcher 3. (Oblivion reference).
- Temerian Crowns: Mentioned but not used.
- Neutral Cards: Geralt, Ciri, Yennefer, etc.
- Nilfgaard Faction: Spies, siege, etc.
- Northern Realms: Tight bond, heroes.
- Scoia'tael: Ambush, archers.
- Monsters: Muster, weather cards.
- Skellige (from Blood and Wine): New mechanics.
- Bestiary: Learn monster weaknesses and oils.
- Alchemy Guide: Reveals potion formulas (some books teach formulas).
- Witcher Gear Diagrams: Not books but treasure hunt notes found in chests.
- Griffin Trophy: +5% damage to monsters.
- Leshen Trophy: +10% sign intensity.
- Chort Trophy: +5% resistance to monster damage.
- Nekker Warrior Trophy: +5% gold from containers.
- Griffin School: Base diagrams in White Orchard (near the well). Enhanced in Velen, etc.
- Cat School: Base diagrams in Novigrad (the cave near the bridge).
- Bear School: Base diagrams in Skellige (Kaer Trolde cave).
- Wolf School: Base diagrams in Kaer Morhen (during the main quest).
- Viper School: Base diagrams in White Orchard (tomb). Enhanced in Hearts of Stone.
- Manticore School: Blood and Wine only (outside Beauclair).
- Toussaint: Base diagrams from Beauclair smith.
- Ciri's Sword: Zirael? Not obtainable. But there is Geralt's Silver Sword from the start.
- The Moonblade: From the quest "The Truth is in the Stars".
- Hattori's Sword: Obtained after completing the master blacksmith quest for Hattori (Novigrad). A decent steel sword.
- Roach's Saddlebags: Increase carry weight. Buy from merchants or find.
- Roach's Blinders: Visual only.
- Roach's Trophy: See 6.5.
- Loot Bag: Permanent item that expands inventory? Not directly. But you have unlimited inventory space for quest items. Miscellaneous items have weight.
- Water Mesh: Used to collect water from fountains? Actually not.
- Repair Kits: Repair weapons/armor at any time. Crafted or bought. Very useful.
- Dismantling Tool: Auto-disassemble? Not in game.
- Witcher Set Bonuses: Wearing 3 pieces from one school gives first bonus, 6 gives second (Grandmaster). Mixing sets is possible but breaks bonuses. Best to stick with one school.
- Alchemy + Combat: Use decoctions (e.g., Ekhidna) + potions (Thunderbolt) + oils = massive damage. The Acquired Tolerance skill lets you drink more. Synergy skill boosts mutagen effects.
- Sign Builds: Griffin armor + glyphs for sign intensity + Tawny Owl potion + griffin school bonus. Use Yrden trap to slow enemies.
- Critical Builds: Cat armor + runestones for bleeding + Katakan decoction + Thunderbolt. Focus on fast attacks with high crit chance.
- Tank Builds: Bear armor + Quen glyphs + Ekhidna decoction + White Raffard's. Use heavy attacks and absorb damage.
- Keep only 2-3 sets of armor (one for combat, one for signs? But weight is limited). Use stash chests (at inns, Corvo Bianco vineyard) to store excess gear.
- Always carry healing potions (Swallow/White Raffard) and one oil for common enemies.
- Dwarf Spirit is essential; loot every bottle.
- Sell junk weapons/armor that are not witcher gear. Witcher gear is always worth keeping for upgrades.
- Do not dismantle rare monster mutagens (Greater) unless you need them; they are used for superior decoctions.
- Books and notes are safe to read and then sell if needed (they have no further use).
3. Consumables
3.1 Potions
Potions are crafted using alchemy formulas (some found, some learned from books). They require Dwarven Spirit (alcohol) to refill during meditation. Key potions:
Upgrades: Enhanced and Superior versions increase duration, effect, and toxicity threshold. Find formulas from merchants or loot. All potions can be brewed with alchemy materials.
3.2 Decoctions
Decoctions are long-lasting (30 minutes) and highly toxic. They are made from monster mutagens. Each grants a powerful passive effect:
Note: You can only have one decoction active unless you use the Acquired Tolerance skill to increase toxicity cap. Decoctions last until meditation or using White Honey.
3.3 Oils
Oils are applied to swords to increase damage against specific monster types. They last for 20 hits or until meditation. Craft and upgrade (Enhanced, Superior) for better bonuses.
Upgrades increase damage bonus. Use appropriate oil before fights for up to 50% more damage at Superior tier.
3.4 Bombs
Bombs are crafted with alchemy. Each has a specific use:
Bombs can be upgraded to Enhanced and Superior to increase damage and radius. They replenish during meditation (if you have Dwarven Spirit).
3.5 Food and Drink
Used for health regeneration out of combat. No toxicity. Best early game healing. Examples:
Food is better than potions for early game because it doesn't use toxicity. Consume before meditation to keep health up.
4. Materials
4.1 Crafting Components
Used to craft weapons, armor, and items. Sorted by rarity:
Important: Always dismantle excess gear at a smith to get rare components. Do not sell crafting materials unless you have 100+.
4.2 Alchemy Ingredients
Required for potions, oils, and bombs. Collected from plants (celandine, arenaria, etc.), monster parts (nekker hearts, drowner brains), and looted from bodies. Key ingredients:
4.3 Runestones and Glyphs
Can be inserted into weapon and armor slots (max 3 on each piece with crafting upgrades). Runestones modify weapons, glyphs modify armor. Types:
Can be crafted by blacksmiths (if you have the diagram) or found as loot. Best to slot runestones that match your build (e.g., Bleed for critical build, Ignite for sign build).
5. Currencies
The Witcher 3 uses multiple currencies, but the main one is Crowns (Crowns). Other currencies are legacy items from previous games or DLCs.
Money tips: Sell junk (tools, pelts, swords you don't use) to merchants. Always haggle for contract rewards. The Geralt's Goodies merchant in Novigrad pays top Crown for relic armor.
6. Collectibles
6.1 Gwent Cards
Gwent is a separate card game within The Witcher 3. Cards are collected from merchants, innkeepers, quests, and special opponents. There are 120+ cards in the base game plus expansions. Key categories:
How to collect: Play every merchant you meet, buy cards from innkeepers, win tournaments (e.g., in Novigrad, Passiflora) and complete Gwent-related quests (e.g., "A Matter of Life and Death" for a Ciri card).
6.2 Books and Notes
Books provide lore, hints, and sometimes increase skills (e.g., A Treatise on the Axii Sign). Some books trigger quests or reveal locations. Notable:
6.3 Treasure Maps
Found on notice boards or looted. Start scavenger hunts for witcher gear, relic weapons, hidden treasures.
6.4 Quest Items
Unique items that cannot be removed from inventory until the quest is complete. Examples: Boat of the Sun (from multiple quests), Dandelion's Lute, The Mask of Uroboros. They are not useful after the quest but cannot be sold.
6.5 Trophies
Slain monster heads can be equipped on Roach (mount). Each gives a passive bonus:
(and many others). Collect from contracts or random monster kills. Switch trophies based on current activity.
7. Key Equipment
7.1 Witcher Gear Diagrams (Treasure Hunts)
12 sets of diagrams (6 schools x 2 tiers for most) plus Toussaint and Ofieri. Find them in specific locations:
7.2 Quest Equipment
7.3 Mount-Related Equipment
7.4 Tools
8. Useful Synergies and Upgrades
Upgrades: All witcher gear can be upgraded from Basic -> Enhanced -> Superior -> Mastercrafted -> Grandmaster (Blood and Wine). Each tier increases stats and requires higher level. Diagrams found in higher-level regions (e.g., Skellige for Enhanced). The Grandmaster tier requires level 40+ and rare materials like Enriched Dimeritium.
9. Inventory Management Tips
This guide covers every item type that significantly affects gameplay. For specific diagram locations, refer to the interactive map or quest guides. Happy hunting, witcher!
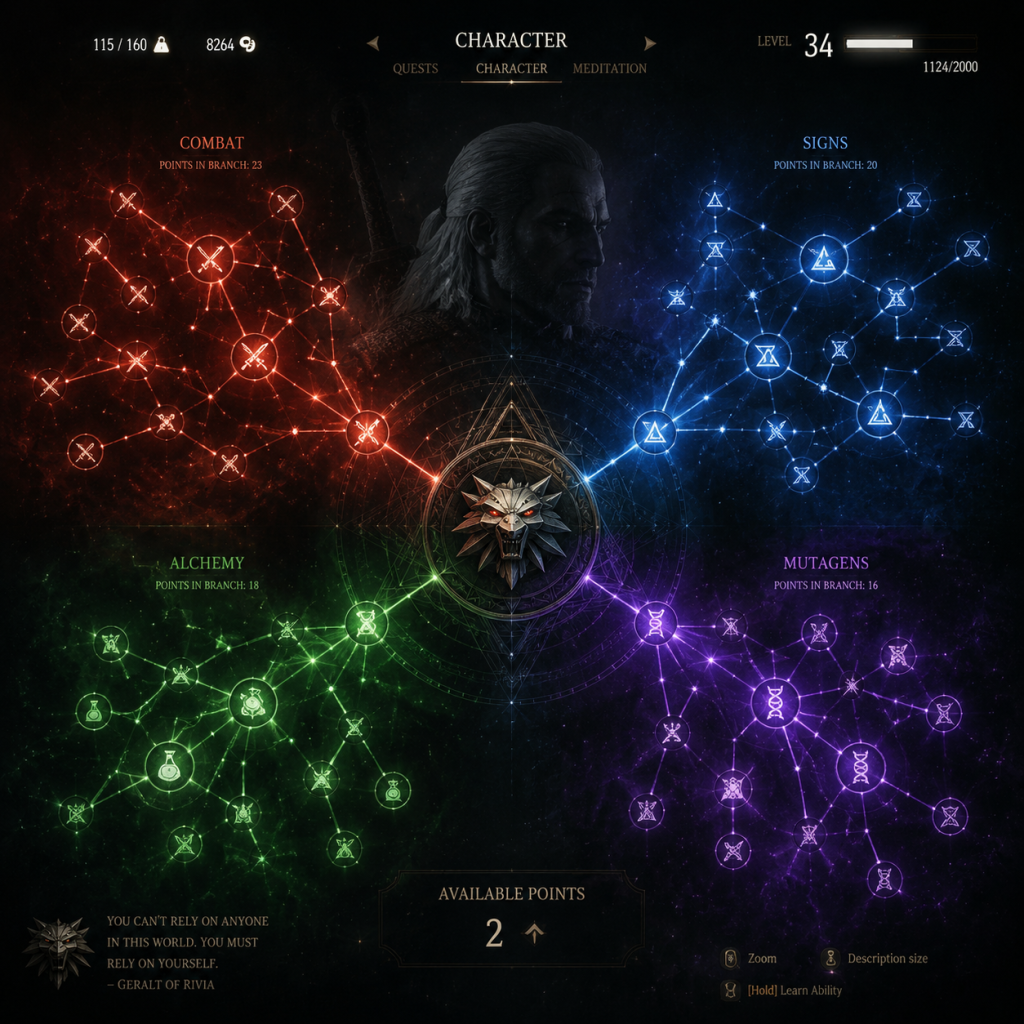
Character Skills
"content": "# Character Skills Guide for The Witcher 3: Wild Hunt
Geralt of Rivia is the sole playable character in The Witcher 3 (with brief interludes as Ciri). His abilities are organized into four skill trees: Combat, Signs, Alchemy, and General (also called Mutagens or Abilities). Skills are unlocked using Ability Points (AP) gained from leveling up (1 per level), Places of Power (1 each), and certain quest rewards. You can equip up to 12 active skills across 12 slots (4 per tree tab), but you must manually place a skill into a slot for it to take effect. Additionally, you can slot up to 3 (later 4 with a mutation) colored mutagens into the mutagen panels to boost health or other stats based on the matching color of equipped skills in that column. The Blood and Wine expansion introduces Mutations, which are powerful passive bonuses that replace the mutagen system and require unlocking with Greater Mutagens and ability points.
Overview of the Skill System
Geralt of Rivia is the sole playable character in The Witcher 3 (with brief interludes as Ciri). His abilities are organized into four skill trees: Combat, Signs, Alchemy, and General (also called Mutagens or Abilities). Skills are unlocked using Ability Points (AP) gained from leveling up (1 per level), Places of Power (1 each), and certain quest rewards. You can equip up to 12 active skills across 12 slots (4 per tree tab), but you must manually place a skill into a slot for it to take effect. Additionally, you can slot up to 3 (later 4 with a mutation) colored mutagens into the mutagen panels to boost health or other stats based on the matching color of equipped skills in that column. The Blood and Wine expansion introduces Mutations, which are powerful passive bonuses that replace the mutagen system and require unlocking with Greater Mutagens and ability points.
Key Mechanics
- Skill Slotting: Only skills placed in the 12 active slots work. Skills in the tree but not slotted are inactive.
- Mutagen Synergy: Equipping skills of the same color (red = combat, blue = signs, green = alchemy) in the same column boosts a connected mutagen. For maximum benefit, use three same-color skills in a column with a matching Greater Mutagen (e.g., three red skills + Greater Red Mutagen = +50% attack power instead of +10%).
- Upgrading Skills: Each skill has 5 ranks (except some general skills). You invest AP to rank up a skill. At rank 5, a skill becomes "mutated" (or upgraded) and often gains a secondary effect (e.g., Aard can become a close-range shockwave).
- Cooldowns: Most signs have cooldowns and stamina costs. Combat and alchemy skills are passive or triggered, not cooldown-based.
- Effect: Increases Fast Attack damage by 5% per rank (max 25%). At rank 5, also increases Fast Attack critical hit chance by 5%.
- Cooldown: N/A (passive).
- Upgrades: None beyond rank 5.
- Synergies: Works well with any Fast Attack build. Pairs with Precise Blows for crit chance.
- Recommended Builds: Sword-focused builds, especially for enemies with high HP.
- When to Use: Always active if slotted. Core for damage dealers.
- Effect: Increases Fast Attack critical hit chance by 2% per rank (max 10%). At rank 5, also reduces damage taken by 20% for 2 seconds after a critical hit.
- Cooldown: N/A.
- Synergies: Combines with Muscle Memory and Killshot (Strong Attack) for high crit rate.
- Recommended Builds: Crit-focused builds, especially with Cat School Techniques.
- When to Use: Always active; crucial for enemies weak to piercing damage.
- Effect: Hold Fast Attack to perform a spinning attack that hits multiple enemies. Each rank increases damage per hit by 5% (max 25%) and reduces stamina cost by 10% per rank? Actually, the stamina cost is flat: 20 stamina per second. Rank 5 reduces the stamina cost by 5% per rank? Let me correct: At rank 1, damage per hit is 100% of Fast Attack. Each rank adds 5% damage. At rank 5, damage is 120% per hit. Additionally, rank 5 grants immunity to stagger while spinning.
- Cooldown: N/A (uses stamina continuously; can stop early).
- Upgrades: None, but rank 5 improves stagger immunity.
- Synergies: Use with Fleet Footed (dodge) to avoid damage while spinning. Can combo with Rend for alternating attacks.
- Recommended Builds: Crowd control builds, especially against packs of drowners or humans. Avoid against single large foes due to stamina drain.
- When to Use: When surrounded, or to interrupt human enemies' attacks. Not effective against shielded enemies or those with high block.
- Effect: Increases damage reduction while dodging by 15% per rank (max 75%). At rank 5, also reduces damage taken by 50% for 1 second after a dodge.
- Cooldown: N/A.
- Synergies: Essential for melee-focused builds to survive.
- Recommended Builds: Any melee build, especially on higher difficulties.
- When to Use: Always active if slotted; enables aggressive play.
- Effect: Increases Strong Attack damage by 5% per rank (max 25%). At rank 5, also increases Strong Attack critical hit damage by 25%.
- Cooldown: N/A.
- Synergies: Pairs with Killshot and Rend.
- Recommended Builds: Strong attack builds, especially against armored enemies.
- When to Use: Always active.
- Effect: Increases Strong Attack critical hit chance by 2% per rank (max 10%). At rank 5, a critical hit from Strong Attack knocks down enemies (humanoids) for 2 seconds.
- Cooldown: N/A.
- Synergies: Works with Strength Training and Rend.
- Recommended Builds: Armor-piercing builds; knockdown allows finishing moves.
- When to Use: Always active. Use strong attacks on shielded enemies to break guard.
- Effect: Hold Strong Attack to charge a powerful strike. Each rank increases charge speed by 10% (max 50%) and damage by 10% per rank? Actually: Base damage is 200% of a Strong Attack. Each rank adds 25% damage (max 300%). At rank 5, also ignores 25% of enemy armor.
- Cooldown: N/A (uses stamina to charge; drained while holding).
- Upgrades: Only rank 5 bonus.
- Synergies: Use with Cat School Techniques for crit boost. Can be followed by a fast attack for a combo.
- Recommended Builds: High-damage single-target builds, especially for boss fights.
- When to Use: Against slow enemies or bosses with large openings. Avoid in crowded fights.
- Effect: Strong Attacks reduce enemy armor by 5% per hit, stacking up to 25% per rank? Actually: Each Strong Attack reduces enemy physical resistance by 20% for 5 seconds. Each rank extends duration by 1 second (max 9 seconds) and increases the debuff by 5% per rank? Wait, let's recall: Rank 1: -20% for 5s. Each rank adds +5% reduction and +1s duration. At rank 5: -40% for 9s.
- Cooldown: N/A.
- Synergies: Excellent with Rend and Killshot to maximize damage against armored foes.
- Recommended Builds: Any build that relies on physical damage against heavily armored enemies (e.g., golems, Nilfgaardian soldiers).
- When to Use: Against high-armor enemies; maintain stacks.
- Effect: Increases Adrenaline Point gain by 5% per rank (max 25%). At rank 5, entering combat grants 1 Adrenaline Point.
- Cooldown: N/A.
- Synergies: Adrenaline fuels certain skills like Whirl and Rend? Actually, Adrenaline is used for some skills and for Undying (auto-revive).
- Recommended Builds: Any build that uses Adrenaline skills.
- When to Use: Always active if slotted.
- Effect: When health drops to 0, consume 1 Adrenaline Point to restore 25% of max health per rank (max 100% at rank 5, but limited: at rank 5, restores 100% and also makes you immune to damage for 1 second). Cooldown: 60 seconds after use.
- Cooldown: 60 seconds after proc.
- Upgrades: Only rank 5 improves healing and adds immunity.
- Synergies: Combine with Resolve to ensure Adrenaline is available.
- Recommended Builds: Survivability build, especially for Death March.
- When to Use: Passive safety net.
- Effect: While parrying, arrows are deflected back, dealing 10% of the arrow's damage per rank (max 50% at rank 5). At rank 5, also reflects arrows in a 180-degree arc.
- Cooldown: N/A.
- Synergies: Use with Parry skill? Actually, parry is base ability.
- Recommended Builds: Useful against bandits with bows.
- When to Use: Hold block while facing archers.
- Effect: Attacks that hit a target from behind cause bleeding. Bleed damage is 10% of attack damage per second for 5 seconds. Each rank increases bleed duration by 1 second (max 10s) and bleed damage by 5% per rank? Actually: Basic bleed = 20% weapon damage per tick. Ranks increase damage per tick by 5%? Let's simplify: At rank 1, bleed lasts 5s, deals 20% of attack damage per second. At rank 5, bleed lasts 10s and deals 40% of attack damage per second.
- Cooldown: N/A.
- Synergies: Combine with Backstab (if exists? Actually, backstab is not a skill but a mechanic) and fast attack builds.
- Recommended Builds: Assassin-style builds that focus on dodging behind enemies.
- When to Use: When you can circle behind enemies, especially humanoids.
- Effect: Pushes enemies and can knock them down. Deals minimal damage but can open enemies for finishing moves.
- Cooldown: 8 seconds (base).
- Stamina Cost: 25.
- Skill Upgrades:
- Synergies: Use with Rage Management (Adrenaline-to-Stamina conversion) to spam Aard. Combine with Piercing Cold mutation (Blood and Wine) for frost damage.
- Recommended Builds: Crowd control build for large groups. Aard Sweep is excellent for clearing packs.
- When to Use: Against groups of bandits or drowners. Alternate mode is best when surrounded.
- Effect: Places a magic trap on the ground that slows enemies and damages them over time. Also, it reveals ghost-type enemies (like wraiths) and allows you to hit them.
- Cooldown: 10 seconds (base).
- Stamina Cost: 20.
- Skill Upgrades:
- Synergies: Essential for wraiths and noonwraiths. Combine with Greater Blue Mutagen for high sign intensity.
- Recommended Builds: Defender build; use Yrden to control space against fast enemies.
- When to Use: Always against specters. Alternate mode is useful for stationary defense.
- Effect: Creates a shield that absorbs damage. While active, health regenerates slowly. Absorbs one hit (or multiple hits if upgraded).
- Cooldown: 12 seconds (base). Duration: 30 seconds or until shield breaks.
- Stamina Cost: 15.
- Skill Upgrades:
- Synergies: Use with Passive Regeneration (general skill) for constant healing. Best defensive sign.
- Recommended Builds: Mandatory for any build on higher difficulties. Active Shield is great for boss fights.
- When to Use: Cast before entering combat. Refresh when needed. Active mode for facing strong single enemies.
- Effect: Sprays a cone of fire that deals damage over time and can set enemies on fire (causing panic).
- Cooldown: 8 seconds (base).
- Stamina Cost: 30.
- Skill Upgrades:
- Synergies: Good against enemies weak to fire (like wraiths, drowners?) Actually, many monsters have fire resistance; check bestiary. Melt Armor is useful for armored humans.
- Recommended Builds: Sign intensity builds with Pheromones? Actually, Igni benefits from sign intensity.
- When to Use: Against groups, or to interrupt enemy attacks. Fire Stream is powerful against humanoids.
- Effect: Stuns an enemy for a few seconds, allowing a free hit. Can also be used in dialogue to persuade or intimidate.
- Cooldown: 15 seconds (base).
- Stamina Cost: 40.
- Skill Upgrades:
- Synergies: Great for social encounters. Puppet is useful in crowded fights to create distractions.
- Recommended Builds: Not essential for combat, but Axii Intensity is useful for dialogue.
- When to Use: Against single strong enemies to get a free hit. Puppet in large battles.
- Effect: Oils last 10% longer per rank (max 50% duration increase). At rank 5, also increases oil damage bonus by 25%.
- Cooldown: N/A.
- Synergies: Essential for any build using oils (which is all builds).
- Recommended Builds: Mandatory for alchemy builds.
- When to Use: Always active.
- Effect: While an oil is applied, you take 5% less damage from the monster type the oil is for, per rank (max 25% damage reduction). At rank 5, also reduces damage from all sources by 5%.
- Cooldown: N/A.
- Synergies: Combine with Poisoned Blades.
- Recommended Builds: Survival builds for monster-heavy areas.
- When to Use: Always active if oil is applied.
- Effect: Increases oil damage bonus by 10% per rank (max 50%). At rank 5, oils have a 50% chance to apply a random debuff (e.g., poison, bleeding).
- Cooldown: N/A.
- Synergies: Max out for maximum damage.
- Recommended Builds: All alchemy builds.
- When to Use: Always active.
- Effect: Each known recipe (potion, bomb, decoction) increases maximum toxicity by 1 per rank (max 5 per rank). At rank 5, also increases tolerance to toxicity by 10%.
- Cooldown: N/A.
- Synergies: Allows using more decoctions simultaneously, which is key for alchemy builds.
- Recommended Builds: Toxicity builds (e.g., Euphoria mutation).
- When to Use: Always active; the more recipes you have, the better.
- Effect: Increases the toxicity threshold before damage by 10% per rank (max 50%). At rank 5, also reduces damage taken while over toxicity by 20%.
- Cooldown: N/A.
- Synergies: Helps survive high toxicity levels.
- Recommended Builds: For builds that use multiple decoctions.
- When to Use: Always active.
- Effect: Each potion consumed heals 10% of max health per rank (max 50%). At rank 5, also gives a 10% damage boost for 10 seconds after drinking a potion.
- Cooldown: N/A.
- Synergies: Works with all potions, especially strong health potions like Swallow.
- Recommended Builds: Survival and healing builds.
- When to Use: Always active; enhances potion efficiency.
- Effect: Potion duration increased by 10% per rank (max 50%). At rank 5, also increases decoction duration by 20%.
- Cooldown: N/A.
- Synergies: Maximizes uptime of buffs.
- Recommended Builds: Any build that relies on decoctions.
- When to Use: Always active.
- Effect: Drinking a potion has a 5% chance per rank (max 25%) to trigger a random secondary effect (e.g., health regen, stamina regen, damage buff). At rank 5, also increases the chance to 30%.
- Cooldown: N/A.
- Synergies: Useful for unpredictable bonuses.
- Recommended Builds: Not essential but can be fun.
- When to Use: Always active if slotted.
- Effect: Bombs deal 10% more damage per rank (max 50%). At rank 5, also causes bombs to apply a status effect based on bomb type (e.g., poison, burning).
- Cooldown: N/A.
- Synergies: Essential for bomb-centric builds.
- Recommended Builds: Crowd control with Northern Wind (freeze) or Dancing Star (fire).
- When to Use: Always active.
- Effect: Bombs thrown explode into 3 smaller bombs that each deal 30% damage? Actually: Each rank increases number of sub-bombs by 1 (max 5 at rank 5). Each sub-bomb deals 20% of the original bomb's damage. At rank 5, sub-bombs also have a chance to apply the bomb's effect multiple times.
- Cooldown: N/A.
- Synergies: Combines with Cleansing for massive AoE damage.
- Recommended Builds: Area denial builds.
- When to Use: Against groups.
- Effect: Each rank increases bomb capacity by 1 (max +5). At rank 5, also reduces bomb cooldown by 20%.
- Cooldown: N/A.
- Synergies: Allows more bombs per rest.
- Recommended Builds: Bomb-heavy builds.
- When to Use: Always active.
- Effect: Adrenaline Points can be used to cast signs instead of stamina. Each rank reduces the stamina cost of signs by 5%? Actually: At rank 1, Adrenaline Points can be used to cast signs (spends 1 Adrenaline Point). Each rank increases the amount of stamina replenished by 10% per rank? Simplified: Rank 5 allows you to cast signs with Adrenaline Points only, without stamina cost.
- Cooldown: N/A.
- Synergies: Excellent with sign builds or when stamina is low.
- Recommended Builds: Sign-heavy builds, especially with Whirl or Rend.
- When to Use: Always active; enables constant sign casting.
- Effect: Increases damage by 5% for each active Adrenaline Point (max 3 points, so up to 15% at rank 1? Actually: Each rank increases the damage bonus per Adrenaline Point by 5%? Let's check: Rank 1: +5% per Adrenaline Point. Each rank adds +2%? Probably: At rank 5, +25% per Adrenaline Point, so max 75% damage increase with 3 points.
- Cooldown: N/A.
- Synergies: Requires generating Adrenaline quickly (via Resolve or combat).
- Recommended Builds: High-damage builds.
- When to Use: Always active; boost damage significantly.
- Effect: Increases maximum health by 100 per rank (max 500). At rank 5, also regenerates 1% of max health per second out of combat.
- Cooldown: N/A.
- Synergies: Good for survivability.
- Recommended Builds: On higher difficulties.
- When to Use: Always active.
- Effect: Health regenerates 0.5% of max per second out of combat per rank (max 2.5% per second). At rank 5, also regenerates 0.5% per second in combat.
- Cooldown: N/A.
- Synergies: Combine with Quen for constant regen.
- Recommended Builds: All builds, especially for convenience.
- When to Use: Always active.
- Effect: Potion and decoction effects continue after toxicity falls below the threshold? Actually: Delayed Recovery prevents the loss of decoction benefits when toxicity drops too low? I think it's: Each rank increases the time before a decoction effect fades after toxicity drops below the required level by 10% (max 50%). At rank 5, also reduces the rate at which toxicity decreases by 10%.
- Cooldown: N/A.
- Synergies: Useful for maintaining decoctions longer.
- Recommended Builds: Alchemy builds using many decoctions.
- When to Use: Always active.
- Effect: Increases stamina regeneration by 5% per rank (max 25%) and reduces sign stamina cost by 5% per rank? Actually: Each rank increases stamina regeneration by 5% and reduces sign stamina cost by 5% (max 25% each). At rank 5, also increases sign intensity by 10%.
- Cooldown: N/A.
- Synergies: Essential for sign-heavy builds.
- Recommended Builds: Signs build with Griffin armor set (set bonus enhances further).
- When to Use: Always active if using signs.
- Effect: Increases critical hit damage by 10% per rank (max 50%) and increases critical hit chance by 5% per rank? Actually: Rank 1: +10% crit damage, +2% crit chance. Each rank adds +10% crit damage and +2% crit chance. At rank 5: +50% crit damage, +10% crit chance. Additionally, with light armor equipped, damage is increased by 20% per rank? Wait, the description varies. The actual game effect: For each piece of light armor worn, attack power increases by 20%. But the skill itself does not mention that; that's a set bonus. The skill Cat School Techniques increases critical hit damage and chance. At rank 5, also increases attack power by 20% when wearing light armor.
- Cooldown: N/A.
- Synergies: Best paired with feline gear and fast attack build.
- Recommended Builds: Critical hit builds with light armor.
- When to Use: Always active.
- Effect: Increases attack power for each active skill in the Combat and Signs trees? Actually: Each rank increases sword damage by 5% and sign intensity by 5% (max 25% each). At rank 5, also increases stamina regeneration by 10%.
- Cooldown: N/A.
- Synergies: Good for hybrid builds.
- Recommended Builds: Balanced Combat+Signs builds.
- When to Use: Always active.
- Effect: For each piece of heavy armor, increases attack power by 10%? Actually: The skill increases Vitality (health) by 5% per rank (max 25%) and reduces damage taken by 5% per rank (max 25%). At rank 5, also increases health by 150.
- Cooldown: N/A.
- Synergies: Works with Ursine armor set.
- Recommended Builds: Tank builds with heavy armor.
- When to Use: Always active if using heavy armor.
- Effect: When entering combat, gain 1 Adrenaline Point. Each rank increases the duration of Adrenaline boost? Actually: Each rank increases damage during Adrenaline points by 5%? Let's recall: Battle Trance is a general skill that increases damage by 10% per Adrenaline Point? No, it's similar to Focus but for sign intensity? I think it's: Each rank increases sign intensity by 5% for each active Adrenaline Point. At rank 5, also increases stamina regeneration by 10% per Adrenaline Point.
- Cooldown: N/A.
- Synergies: Sign builds with Adrenaline generation.
- Recommended Builds: Evocation builds.
- When to Use: Always active.
- Effect: Increases dodge distance by 5% per rank (max 25%). At rank 5, also makes dodging silent (enemies don't hear you).
- Cooldown: N/A.
- Synergies: Helps positioning.
- Recommended Builds: Assassin-style builds.
- When to Use: Always active if you rely on dodging.
- Effect: Increases maximum toxicity by 10 per rank (max 50). At rank 5, also reduces the toxicity penalty from potions and decoctions by 25%.
- Cooldown: N/A.
- Synergies: Essential for high-toxicity alchemy builds.
- Recommended Builds: Euphoria mutation builds.
- When to Use: Always active.
- Effect: When Quen shield breaks, it explodes dealing damage equal to 10% of absorbed damage per rank (max 50%). At rank 5, also staggers enemies in a small radius.
- Cooldown: N/A.
- Synergies: Quen builds.
- Recommended Builds: Defensive but with some offensive feedback.
- When to Use: Always active if using Quen.
- Effect: Increases sign intensity by 5% per rank (max 25%). At rank 5, also increases chance to apply a sign's secondary effect (e.g., Igni's burning) by 10%.
- Cooldown: N/A.
- Synergies: Sign builds.
- Recommended Builds: Pure sign builds.
- When to Use: Always active.
- Effect: Each point of current toxicity increases attack power by 0.5% and sign intensity by 0.5%. With maximum toxicity (100+), this can be a massive boost (e.g., 50%+ to both).
- Unlock: Requires 3 green skills (alchemy) in the three active slots of one column? Actually, you need to have 3 Greater Mutagens: one of each color? The unlock conditions are same for all: you need to place a specific combination of skills in the three mutagen slots (each slot requires a skill of a specific type). For Euphoria, you need 3 green abilities in the three mutagen slots.
- Synergies: Absolutely broken with alchemy builds. Use high-toxicity decoctions (Ekimmara, Water Hag, etc.) and potions like Thunderbolt to reach high toxicity.
- Recommended Builds: Alchemy-heavy builds; best for Death March.
- When to Use: Always active once unlocked; core for damage output.
- Effect: Adrenaline Points now also increase sign intensity (1.5% per point) and decrease sign stamina cost by 10% per point. Additionally, gaining Adrenaline also grants a small heal.
- Unlock: 3 red skills in the three mutagen slots.
- Synergies: Combat builds with signs
---
Combat Tree (Red Skills)
The Combat tree enhances Geralt's swordplay, mobility, and physical resilience. Skills are mostly passive or on-hit effects.
Fast Attack Skills
1. Muscle Memory (Rank 1–5)
2. Precise Blows (Rank 1–5)
3. Whirl (Rank 1–5)
4. Fleet Footed (Rank 1–5)
Strong Attack Skills
1. Strength Training (Rank 1–5)
2. Killshot (Rank 1–5)
3. Rend (Rank 1–5)
4. Sunder Armor (Rank 1–5)
Combat Misc / Defense
1. Resolve (Rank 1–5)
2. Undying (Rank 1–5)
3. Arrow Deflection (Rank 1–5)
4. Crippling Strikes (Rank 1–5)
---
Signs Tree (Blue Skills)
Signs are magical spells that consume stamina. Each sign has an alternate mode (secondary effect) unlocked by placing the sign in a skill slot and reaching rank 5, which grants a "mutated" version. Most sign skills have a cooldown (separate from stamina) and can be upgraded to reduce cooldown or enhance effect.
Aard (Telekinesis/Force Push)
1. Aard (Base sign, not a skill—skills upgrade it. The sign skill is Aard Sweep and Aard Intensity)
- Far-Reaching Aard (Rank 1–5): Increases range by 5% per rank (max 25% at rank 5). At rank 5, also increases knock-down chance by 10%.
- Aard Sweep (Rank 1–5): Changes Aard to a 360-degree wave. Each rank increases knock-down chance by 5% (max 25%). At rank 5, all enemies hit take 50 damage (scales with sign intensity?).
Yrden (Magic Trap)
2. Yrden (Base sign)
- Yrden Intensity (Rank 1–5): Increases trap damage by 10% per rank (max 50%) and trap radius by 5% per rank (max 25%). At rank 5, also increases slow effect by 20%.
- Magic Trap (Rank 1–5): Yrden turret: fires bolts at enemies within the trap for 50% of sign intensity damage per bolt. Each rank increases bolt fire rate by 10% (max 50%). At rank 5, bolts also stun for 1 second.
Quen (Magical Shield)
3. Quen (Base sign)
- Quen Intensity (Rank 1–5): Increases damage absorption by 10% per rank (max 50%) and shield duration by 5% per rank (max 25%). At rank 5, shield also reflects 20% of absorbed damage.
- Active Shield (Rank 1–5): Hold sign button to channel a shield that heals 1% of max health per second per rank (max 5% at rank 5) while draining stamina. At rank 5, also staggers enemies that attack the shield.
Igni (Fire Stream)
4. Igni (Base sign)
- Melt Armor (Rank 1–5): Igni reduces enemy armor by 5% per hit (stacks up to 25%). Each rank increases armor reduction by 5% (max 50% reduction). Duration: 10 seconds. At rank 5, also reduces monster resistance.
- Fire Stream (Rank 1–5): Turns Igni into a continuous stream that deals constant fire damage and pushes enemies back. Each rank increases damage per second by 10% (max 50%). At rank 5, also ignites enemies faster.
Axii (Mind Control)
5. Axii (Base sign)
- Axii Intensity (Rank 1–5): Increases stun duration by 10% per rank (max 50%) and increases chance to turn an enemy into an ally for 15 seconds? Actually, the alternate mode Puppet is the main upgrade.
- Puppet (Rank 1–5): Axii can turn an enemy into a temporary ally that fights for you. Each rank increases ally damage by 10% (max 50%) and duration by 2 seconds (max 12 seconds). At rank 5, the puppet also has increased health.
---
Alchemy Tree (Green Skills)
Alchemy focuses on potions, oils, bombs, and decoctions. Skills are passive and enhance alchemy items.
Oil Skills
1. Poisoned Blades (Rank 1–5)
2. Protective Coating (Rank 1–5)
3. Superior Oils (Rank 1–5)
Potion Skills
4. Acquired Tolerance (Rank 1–5)
5. Heightened Tolerance (Rank 1–5)
6. Refreshment (Rank 1–5)
7. Steeled Sky (Rank 1–5)
8. Side Effects (Rank 1–5)
Bomb Skills
9. Cleansing (Rank 1–5)
10. Cluster Bombs (Rank 1–5)
11. Efficiency (Rank 1–5)
---
General Tree (Beige Skills)
General skills provide passive bonuses and are not tied to a specific mutagen color (they count as colorless, but can be any color? Actually, general skills have no color, so they do not contribute to mutagen synergy. They can be placed in any slot but do not activate mutagen bonuses unless paired with a neutral mutagen? There is no neutral mutagen. So they are best placed in the third column if you don't have a third colored skill. Many general skills are vital.
1. Rage Management (Rank 1–5)
2. Focus (Rank 1–5)
3. Survival Instinct (Rank 1–5)
4. Passive Regeneration (Rank 1–5)
5. Delayed Recovery (Rank 1–5)
6. Griffin School Techniques (Rank 1–5)
7. Cat School Techniques (Rank 1–5)
8. Wolf School Techniques (Rank 1–5)
9. Bear School Techniques (Rank 1–5)
10. Battle Trance (Rank 1–5)
11. Sly Steps (Rank 1–5)
12. Metabolic Control (Rank 1–5)
13. Exploding Shield (Rank 1–5)
14. Conductivity of Magic (Rank 1–5)
---
Mutations (Blood and Wine Expansion)
Mutations are powerful endgame passives that replace the normal mutagen system. They are unlocked via a quest in Blood and Wine. Each mutation has a unique effect and requires specific skills placed in the mutagen slots (instead of colored mutagens). You can only have one mutation active at a time. Here are all mutations:
1. Euphoria
2. Adrenaline Rush

Characters & Roles
Characters & Roles in The Witcher 3: Wild Hunt
The Witcher 3: Wild Hunt features one primary playable character (Geralt of Rivia) and one secondary playable character (Ciri) during specific story missions. The game has no formal classes, but Geralt’s skill system allows for distinct playstyles (roles). Additionally, numerous major NPC allies join you in quests, providing combat support and narrative depth. This guide covers every major character, their background, strengths, weaknesses, playstyle (where applicable), unlock conditions, recommended equipment or builds, and team synergy.
1. Geralt of Rivia (Main Playable Character)
Background: Geralt, also known as the White Wolf, is a witcher of the Wolf School. He is a mutant trained from childhood to hunt monsters. The game follows his search for Yennefer and his adopted daughter Ciri, while being pursued by the Wild Hunt.
#### Playable Roles (Build Archetypes)
Geralt’s skills are divided into three main trees: Combat, Signs, and Alchemy. Most players specialize in one or two, but hybrid builds are viable. Below are the four primary roles.
---
##### Role 1: Combat-Focused (Swordsman)
- Strengths: High melee damage, strong critical hits, excellent crowd control with Whirl and Rend (from Blood and Wine). Good stamina management for fast attacks.
- Weaknesses: Low sign intensity, poor resistance to magic or status effects; relies on dodging and parrying since armor is light to medium.
- Playstyle: Aggressive, fast-paced. Use fast attacks against single targets, strong attacks against shielded foes. Whirl (hold fast attack) shreds groups; Rend (hold strong attack) delivers massive single-target damage. Dodge and roll extensively.
- Unlock Conditions: Immediately available. Requires investment in Combat tree (red skills).
- Recommended Equipment: Any high-damage sword (e.g., Aerondight, Toussaint Steel Sword). Armor: Feline (cat school) for attack power or Ursine (bear) for survivability (less optimal for pure combat). Skills: Razor Focus, Precision Blow, Whirl, Rend, Fleet Footed.
- Team Synergy: Best with allies who can distract or tank, e.g., Yennefer (crowd control with Yrden) or Dandelion (bard songs boost morale, but not in combat). In quests like “The Battle of Kaer Morhen,” focus on the front line.
- Strengths: High sign intensity, strong crowd control (Igni burn, Yrden snare, Axii confusion), excellent against groups and specific monster weaknesses (e.g., Aard vs. wraiths).
- Weaknesses: Lower physical damage, very stamina-dependent; long cooldowns if not managed with potions (like Tawny Owl). Vulnerable when stamina is empty.
- Playstyle: Use signs proactively. Cast Yrden before engaging to slow enemies, Igni to ignite groups, Aard to stagger or knockdown, Quen for shield. Use Axii for human enemies. Rotate signs based on enemy type.
- Unlock Conditions: Available from start. Invest in Signs tree (blue skills) and equip gear with sign intensity bonuses e.g., Griffin School armor.
- Recommended Equipment: Griffin School armor (increases sign intensity). Skills: Intensity, Far-Reaching Aard, Melt Armor (Igni), Exploding Shield (Quen), Delusion (Axii). Use Tawny Owl decoction for stamina regen.
- Team Synergy: Works well with alchemy-based allies who can apply poison (like Keira Metz) or with combat allies who benefit from slowed enemies (Yrden). In “The Battle of Kaer Morhen,” use Axii on Wild Hunt hounds.
- Strengths: Extremely high survivability, massive damage through bombs and oils, immunity to many status effects, and the ability to heal continuously with decoctions. Potions can be upgraded to heal fully.
- Weaknesses: Requires preparation (crafting ingredients). Slow start if not invested in alchemy perks. Heavy reliance on toxicity management.
- Playstyle: Always have bombs, oils, and a selection of decoctions. Apply oil before fights. Use bombs to disable (Dancing Star for burn, Dimeritium Bomb for magic). Drink decoctions like Archgriffin (damage based on stamina used) or Ekhidna (heal when spending stamina). Use Swallow and Raffard’s for healing.
- Unlock Conditions: Available from start. Requires Alchemy tree (green skills) and crafting of potions. Recommended to invest early in Acquired Tolerance to increase max toxicity.
- Recommended Equipment: Manticore School armor (boosts alchemy and criticals). Skills: Poisoned Blades (oil damage), Synergy (mutagen bonuses), Killing Spree (critical strikes after kill), and Frenzy (time slow when enemies attack).
- Team Synergy: Self-sufficient; any ally complements. Best with Ciri (blink) and Lambert (bombs) for explosive team attacks.
- Strengths: Flexible, adapts to any situation. Balances melee, signs, and alchemy.
- Weaknesses: Jack of all trades, master of none. Requires careful skill slot management (max 12 slots without DLC mutagens).
- Playstyle: Pick core skills from each tree. Example: Whirl (Combat) + Gourmet (Alchemy, food regen) + Exploding Shield (Signs). Use heavy armor from Ursine for tankiness.
- Recommended Equipment: Ursine or Viper armor (balanced stats). Skills: Mix and match based on preference.
- Team Synergy: Works with any party composition. Good for players who dislike specializing.
- Strengths: High mobility (teleports appear, dodge blinks), devastating area attacks (stealth combo, dash stab), can instantly execute some humanoid enemies with a finishing move. Her power “Charged Strike” knocks down enemies.
- Weaknesses: No equipment customization (fixed skills and stats), cannot use signs or potions. She has lower health than Geralt and cannot heal during combat except through food (limited). Poor vs. large groups if not using crowd-control teleport attacks.
- Playstyle: Aggressive hit-and-run. Use teleport to close distance, do a quick combo, then teleport away. Use the “Blink” dodge (Ciri’s dodge) to avoid damage and reposition. When surrounded, perform a teleport burst (hold dodge button) that staggers enemies. Must rely on food for healing.
- Unlock Conditions: Progress main story: available during “Blood on the Battlefield” (Velen), “The Child of the Elder Blood” (Skellige), and “The Battle of Kaer Morhen” etc. Not open-world; only in specific missions.
- Recommended Equipment: None – her stats are fixed. However, in the final battle, equip her with a sword if possible (story gives you the option to choose one weapon during “The Battle of Kaer Morhen” – choose the silver blade for ghost enemies).
- Team Synergy: Best paired with Geralt (spam signs while she teleports), and with mages like Yennefer for crowd control. Her teleport can break enemy lines so allies can flank.
---
##### Role 2: Sign-Oriented (Witcher-Warlock)
---
##### Role 3: Alchemy Master (Pharmacist)
---
##### Role 4: Hybrid Build
---
2. Ciri (Secondary Playable Character)
Background: Ciri is Geralt’s adopted daughter and the heiress to the Elder Blood. She possesses powerful teleportation and time/space manipulation abilities. She becomes playable in several story-critical flashback and present-time missions.
---
3. Major Characters (Allies & Supporting Cast)
These characters play key roles in the story or join Geralt in combat during specific quests. They are not directly controllable but provide unique benefits.
| Character | Role in Gameplay | Strengths | Weaknesses | Unlock / Availability | Recommended Belongings / Build (if any) | Synergy |
|---|---|---|---|---|---|---|
| Yennefer of Vengerberg | Sorceress, romantic interest, quest giver | Powerful offensive magic (Igni, Aard, Yrden), can teleport, heals Geralt in some scenes, provides protection spells. | Occasionally arrogant, can aggro enemies without control. | Part of main quests (White Orchard to end). Also romance path. | No equipment control. In the Battle of Kaer Morhen, she uses fireballs and ice spells. | Great with any Geralt build; her Aard can knock down enemies for you to finish. Use her in the battle to clear groups. |
| Triss Merigold | Sorceress, romantic interest, quest giver | Healing magic (can instantly revive Geralt?), fire spells, charm. | Less combat-proven than Yennefer; often caught in dangerous traps. | Introduced in Novigrad quests; romance option. | No customization. She uses healing and fire spells. | Synergizes with alchemy builds (fewer healing items needed) or with combat-heavy Geralt. |
| Dandelion | Bard, poet, informant | No direct combat. Provides lore, songs, and emotional support. His inn (The Rosemary and Thyme) is a safehouse. | Useless in fights; often gets Geralt into trouble. | From Novigrad main quest onward. | None. | Requires protection; best used as a quest objective. |
| Zoltan Chivay | Dwarf, rebel, friend | Muscle in fistfights, distracts enemies, helps in combat during “The Battle of Kaer Morhen” with a crossbow. | Slow, not very durable. | After Novigrad main quests. | Crossbow and dwarven axe (cutscenes). | Good as a brawling partner; synergizes with Sign builds using Axii to confuse enemies while Zoltan smashes. |
| Vesemir | Elder witcher, mentor | Experienced combatant, uses aard sign, provides witcher advice. | Dies in the main story (can’t be saved). | Kaer Morhen (early game). In battle, he fights alongside you. | No customization. | Fantastic teacher; in the Battle of Kaer Morhen, he helps with traps and melee. |
| Eskel | Witcher (Wolf School), foster brother | Good all-around fighter (similar to Geralt), uses Igni and Yrden. | No unique abilities; less adaptable than Geralt. | Kaer Morhen reunion (Act 2). | None. | Pair with other witchers for a coordinated assault. |
| Lambert | Witcher (Wolf School), rude but capable | Specializes in bombs and offensive alchemy, cynical remarks. | Low patience, sometimes refuses to cooperate. | Kaer Morhen (Act 2). | None. He uses bombs and a silver sword. | Excellent synergy with alchemy Geralt – share bomb recipes and tactics. |
| Keira Metz | Sorceress, inhabitant of Velen | Heals and casts magical barriers; uses a magical spear. | Selfish; can be killed if quests are failed. | Side quests in Velen (“A Favor for a Friend”). | No player control. | Her healing sphere is invaluable; keep her alive for the battle at Kaer Morhen. |
| Iorveth | Scoia’tael leader (only appears in Witcher 2; has a cameo in Witcher 3 via one of the flashbacks, but not a major gameplay ally) | (N/A) | (N/A) | Not an active companion. | – | – |
---
4. The Wild Hunt (Antagonists – Not Playable)
While not playable, these characters drive the story and appear in boss fights.
- Eredin Bréacc Glas – King of the Wild Hunt, final boss. Uses teleportation, ice magic. Weak to fire and bombs. Fight him on the Undvik beach.
- Imlerith – General, muscle. Tough melee encounter with heavy armor. Use Yrden to slow him and Igni to break his shield.
- Caranthir – Mage of the Wild Hunt. Uses ranged magic. Close gap quickly with dodge and use Aard to interrupt his spells.
- Geralt of Rivia (Neutral) – 6 power, 1 shield.
- Ciri (Neutral) – 6 power, spy.
- Yennefer (Nilfgaard) – 5 power, command ability.
- Triss Merigold (Northern Realms) – 7 power.
- Eredin (Monsters) – 11 power, hero card.
---
5. Gwent-Related Characters
The game’s card game Gwent has collectible cards representing characters. Notable ones include:
For a full Gwent character list, see the Gwent section in the All Game Items guide.
---
6. Summary of Playable Units
| Unit | Playable? | Open-World | Customizable | Unlocks |
|---|---|---|---|---|
| Geralt | Yes (main) | Always | Skills, gear, mutations | From start |
| Ciri | Yes (temporary) | Limited (missions only) | No | Story progression |
---
7. Team Synergy Tips
- Alchemy Geralt + Yennefer: Yennefer’s area damage softens enemies, allowing you to apply oil weapons for massive occasional hits. Use Superior Swallow and let her heal you.
- Combat Geralt + Lambert: Both focus on melee and bombs – control crowd with Lambert’s grapeshot, then Whirl through the survivors.
- Any Geralt + Keira Metz: Her healing dome and ranged magic allow you to ignore defensive gear and maximize offensive skills.
- Ciri + Triss: In the few missions where they appear together, Triss can dish out damage while Ciri teleports to finish isolated targets.
- Geralt: Always available at start of any playthrough.
- Ciri: Unlocked through main story quests: “Blood on the Battlefield” (Velen), “The Child of the Elder Blood” (Skellige), “The Battle of Kaer Morhen” (Kaer Morhen), and “The Final Trial” (endgame).
- Yennefer: First appears in White Orchard after the prologue. Becomes a steady ally in Skellige.
- Triss: Appears in Novigrad after you complete “A Matter of Life and Death.”
- Dandelion: Met at his inn in Novigrad during “The King of Beggars” questline.
- Zoltan: Found in Novigrad during “The Lord of Undvik” (actually in Novigrad earlier).
- Vesemir: At Kaer Morhen from the start of the game.
- Eskel and Lambert: Arrive at Kaer Morhen during “The Battle of Kaer Morhen” preparations.
- Keira Metz: First met at her hut in Velen during side quest “Wandering in the Dark.”
- Roche: Met in Novigrad during “An Eye for an Eye.” Available through the whole Act 2.
---
8. Unlock Conditions for All Characters (Summary)
---
9. Conclusion
While you only directly control Geralt (and occasionally Ciri), the rich cast of characters in The Witcher 3 serves as support, emotional anchors, and combat aids. Choosing your build (Combat, Signs, Alchemy, or Hybrid) defines your gameplay experience, and aligning with certain allies can make tough encounters much easier. Remember that some characters can die based on your choices, affecting later quests and the battle at Kaer Morhen. Prioritize their side missions to ensure a full team for the final assault.
Pro Tip: Before the mission “The Battle of Kaer Morhen,” ensure you have helped Vesemir, Eskel, Lambert, Keira, and Roche with their personal quests. Having them all present massively increases your chances of survival and provides narrative rewards.

Cheats & Secrets
Cheats & Secrets for The Witcher 3: Wild Hunt
Introduction
The Witcher 3: Wild Hunt does not have traditional built-in cheat codes like older games. However, PC players can access a powerful developer console, while all platforms feature numerous Easter eggs, hidden secrets, and developer-intended content. This guide covers everything from console commands to secret quests and obscure references.
---
PC Developer Console
Enabling the Console
On PC (Steam, GOG, Epic Games Store), you must manually enable the console:
1. Navigate to your game installation folder (usually `The Witcher 3\bin\config\base`).
2. Open the file general.ini with a text editor.
3. Add this line under the `[General]` section:
```
DBGConsoleOn=true
```
4. Save the file. If the `[General]` section doesn't exist, create it.
5. Launch the game. Press the tilde (`~`) key (or `F2` on some keyboard layouts) to open the console.
Alternatively, for the GOG version, you can use a command line argument: `-debugconsole`.
Important Notes
- Using console commands may disable achievements if you have mods that alter gameplay. Vanilla commands generally do not affect achievements, but be cautious.
- The console is not case-sensitive for most commands.
- Commands that spawn items or teleport might cause instability; save before using.
Essential Console Commands
| Command | Effect | Example |
|---|---|---|
| `addmoney(X)` | Adds X crowns (gold). | `addmoney(999999)` |
| `addskillpoints(X)` | Adds X ability points. | `addskillpoints(100)` |
| `levelup` | Levels up Geralt once. | `levelup` |
| `spawn('item_id', X)` | Spawns X copies of an item. | `spawn('gwint_card_monster_nekkrer', 1)` (Nekker Warrior Gwent card) |
| `spawn('npc_id')` | Spawns a character e.g., `spawn('wolf3')` for a wolf. | Not recommended for NPCs; may crash. |
| `cleardevelop` | Removes all Perks, Skills, and mutations; resets ability points. | `cleardevelop` (use with caution) |
| `discoverall` | Reveals all points of interest on the world map (including ? markers). | `discoverall` |
| `showmapall` | Reveals the full map (all regions). | `showmapall` |
| `additem('item_id')` | Adds one item to inventory. | `additem('sq202_letter_mh')` (letter item) |
| `removeitem('item_id')` | Removes an item from inventory. | `removeitem('gwint_card_001')` |
| `setlevel(X)` | Sets Geralt's level to X (useful for scaling). | `setlevel(100)` |
| `god` | Toggles god mode (invulnerable, infinite stamina). | `god` |
| `wtf` | Toggles infinite weight capacity. | `wtf` |
| `killall` | Kills all enemies in the current area. | `killall` (may break quests) |
| `teleport(X,Y,Z)` | Teleports to specific coordinates (rarely used; use `teleport` with location names instead). | `teleport(100,200,300)` |
| `teleport('location_name')` | Teleports to a named location (e.g., `'novigrad'`, `'skellige'`). | `teleport('kaer_morhen_courtyard')` |
| `enablecheats(1)` | Enables cheat mode (deprecated in newer versions; use `god` instead). | `enablecheats(1)` |
| `whoscalling` | Shows the current quest stage info (debug). | `whoscalling` |
| `showall` | Shows all map markers and quest objectives. | `showall` |
| `ciri` | Temporarily changes player character to Ciri (may be buggy). | `ciri` |
Item ID Resources
Full item ID lists can be found on the Witcher 3 wiki. Common examples:
- `gwint_card_xxx` for Gwent cards (e.g., `gwint_card_monster_nekker`).
- `mh101_witcher_sword` for the Viper school silver sword.
- `sq202_trophy_head` for quest items.
- For certain pre-order bonuses, a unique code could be redeemed on the CDPR website to unlock items like the Temerian armor set. These are now mostly expired or included in the Game of the Year edition.
- Temerian Armor Set – code for the full set (now usually part of the base game via quest).
- Nilfgaardian Armor Set – similar.
- No console unlock codes exist.
- Alternate Movement Style (Next-Gen Update): In Settings > Gameplay > Movement Response, switch to "Alternative" for more responsive controls (especially for Roach).
- Alternative Camera Settings: Next-Gen added an option for a closer over-the-shoulder camera during combat.
- Photo Mode (Next-Gen): Press both thumbsticks (L3+R3) on console, or `U` on PC, to open a full photo mode with filters and depth of field.
- Quick Sign Casting (Next-Gen): In Settings > Gameplay, enable "Quick Sign Casting" to allow casting signs without opening the radial menu (hold RB/L1 + face button).
- "The Matrix": In White Orchard, near the bridge, you can find a beehive hanging from a tree. Shoot it down with a crossbow, and a bee will fall out. Later, you can find a dead bee surrounded by bears – a nod to "The Matrix" (the bee is a secret reference to the "Bee Movie" meme? Actually, it's a reference to a Reddit post. More accurately, the bee Easter egg is from the "Witcher 3" subreddit: writers added a beehive that drops a bee if shot with a crossbow – a reference to an old internet meme.)
- "Shrek": In Velen, near the "Inn at the Crossroads," there is a quest called "The Lord of the Mire" – a reference to the character from "Shrek 2" (Lord Farquaad). The quest is not directly an Easter egg, but the swamp area has a donkey that looks similar to Donkey from Shrek?
- "Half-Life": In the Novigrad sewers, you can find a skeleton holding a crowbar, wearing glasses, and surrounded by headcrab-like creatures – a clear homage to Gordon Freeman.
- "Game of Thrones": There is a character named "Elsa" (a reference to Frozen) but also a dead man named "King of the Wild Hunt"? Actually, the Wild Hunt itself is from Slavic mythology, but several NPCs reference GoT: for instance, a man named "Geralt" in a brothel? Not sure.
- "Pulp Fiction": In a basement in Novigrad, you can find two dead bodies in a pose similar to the "Pulp Fiction" dance scene (Vincent and Mia).
- "Monty Python": In Skellige, you can find a quest involving a rabbit ("The Truth Is in the Stars") which references the Killer Rabbit of Caerbannog.
- "Cyberpunk 2077" Connection: After installing the Blood and Wine DLC, inside the painting world of "Beyond Hill and Dale," you can find a character named "Rita Wheeler"? Actually, there's a hidden room in Toussaint that contains a model of the Cyberpunk 2077 city.
- "The Legend of Zelda": A reference to the "It's dangerous to go alone! Take this." – you can find a rusty sword in a stone in White Orchard.
- "Mona Lisa": In the house of the Pellar in Velen, a painting of him and his goat resembles the Mona Lisa.
- "The Vanishing Trader": In Novigrad, you can start a quest by finding a note near the Temple of Eternal Fire. It's a reference to the vanishing traders in other RPGs.
- "The Path of the Warriors": In Skellige, there is a hidden questline related to the four distinct warrior paths.
- "The Golem's Fate": In the basement of the University in Oxenfurt, a hidden golem can be freed, starting a mini-quest.
- "The Cursed Bean": A hidden quest involving a bean trader in White Orchard.
- Unique Gwent Cards: Some Gwent cards are only obtainable through specific quests or hidden vendors. For example, the "Zoltan: Brave" card is obtained after completing the "Following the Thread" quest.
- Secret Tournament: In Blood and Wine DLC, there is a hidden Gwent tournament at the Beauclair Palace.
- Ciri's Fate: Depending on your choices, Ciri can become a witcher, the Empress, or die. To get the "Witcher Ciri" ending, you must take her to the emperor, but also choose certain dialogue options during the game. It's not a cheat, but a hidden condition.
- Yennefer's Alternative Look: If you have the alternative outfit DLC, you can enable it in the main menu.
- Infinite Weight: Using the console command `wtf` is the only safe way. In early versions, you could stack saddlebags indefinitely, but that was patched.
- Multiple Equipped Items: A glitch allowed equipping more than one sword in the same slot, but was fixed.
- Gwent Card Duplication: An exploit using the blacksmith to duplicate cards, now patched. Use console commands for PC instead.
- Always explore points of interest – many hidden quests and loot are found at unmarked locations.
- Use Witcher Senses to find interactive objects, hidden compartments, and loot.
- Read books and notes – they often contain hints to hidden treasures.
- Visit every NPC – some have unique dialogue that triggers hidden quests.
- New Game+ – carry over your gear and skills for a second playthrough; some hidden items scale to your level.
---
Console-Exclusive Cheats (No Longer Available)
Older versions (pre-4.0) on Xbox One/PS4 had no cheat codes. The Next-Gen update removed all debug options on consoles. No modern console version has official cheat codes.
---
Unlock Codes & Hidden Features
Official DLC Unlock Codes (PC/CDPR Website)
Hidden Gameplay Features
---
Easter Eggs & Developer-Intended Hidden Content
Classic Pop Culture References
Developer Room (Developer's World)
There is a hidden area called "Developer's World" or "The World of the Devs." To access it on PC, you must use the console command `open 'prolog_lobby'` or similar. This area contains developer props, test items, and NPCs. It is not accessible without commands. On consoles, this is impossible.
Secret Quests & Encounters
Hidden Gwent Cards
Secret Endings & Alternate Scenes
Exploits (Developer-Intended? Some patched)
---
General Advice for Secrets
---
Conclusion
The Witcher 3 is rich with secrets, but official cheats are limited to the PC console. Use the commands responsibly, and enjoy the countless hidden gems scattered across the Continent. Happy hunting!