This War of Mine
## Game Introduction: This War of Mine ### Overview **This War of Mine** is a survival-themed war game developed and published by **11 bit studios**. It was initially released for Windows, OS X, and Linux on **November 14, 2014**, followed by ports to iOS, Android, PlayStation 4, Xbox One, Nintend...
Download & Installation
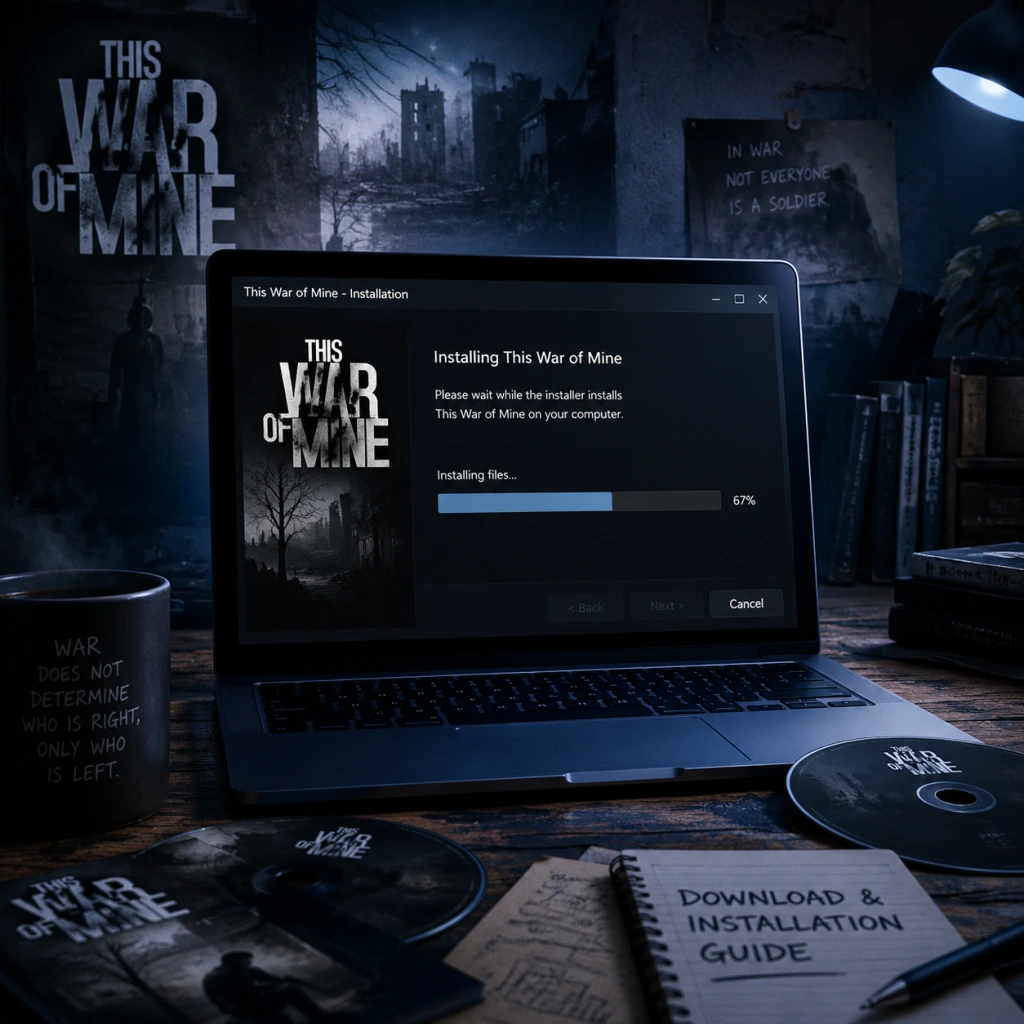
Download & Installation Guide for This War of Mine
This guide covers all major platforms where This War of Mine is available officially. Follow the steps below for a smooth installation.
---
Platform Availability Overview
| Platform | Store(s) | Notes |
|---|---|---|
| PC (Windows/macOS/Linux) | Steam, GOG, Epic Games Store, Humble Bundle | All versions include the base game; DLC purchased separately. |
| PlayStation 4 / PlayStation 5 | PlayStation Store | Backward compatible on PS5. |
| **Xbox One / Xbox Series X | S** | Microsoft Store |
| Nintendo Switch | Nintendo eShop | Plays on Switch and Switch Lite. |
| Mobile (iOS / Android) | App Store (iOS), Google Play (Android), Amazon Appstore | Paid app with no ads; includes the base game plus some DLC. |
System Requirements (PC)
Minimum
- OS: Windows 7 / 8 / 10 (64-bit)
- Processor: Intel Core 2 Duo 2.4 GHz or AMD equivalent
- Memory: 2 GB RAM
- Graphics: NVIDIA GeForce 8600 GT / AMD Radeon HD 2600 XT / Intel HD 3000 (512 MB VRAM)
- DirectX: Version 9.0c
- Storage: 4 GB available space
- Sound: DirectX compatible
- OS: Windows 10 (64-bit)
- Processor: Intel Core i3-2100 or AMD FX-4100
- Memory: 4 GB RAM
- Graphics: NVIDIA GeForce GTX 560 / AMD Radeon HD 6870 (1 GB VRAM)
- DirectX: Version 11
- Storage: 4 GB SSD (improves load times)
- Sound: DirectX compatible
Recommended
For macOS and Linux, check the store page for specific requirements.
---
Storage Space Requirements
| Platform | Approximate Install Size |
|---|---|
| PC (Steam/GOG/Epic) | 3.5–4.0 GB |
| PlayStation 4/5 | 3.2 GB |
| Xbox One/Series | 3.5 GB |
| Nintendo Switch | 3.1 GB |
| iOS | ~1.5 GB |
| Android | ~1.4 GB |
---
Account Requirements
- PC (Steam): Steam account.
- PC (GOG): GOG account (DRM-free).
- PC (Epic Games Store): Epic Games account.
- PlayStation: PlayStation Network (PSN) account.
- Xbox: Microsoft account.
- Nintendo Switch: Nintendo Account (linked to eShop).
- Mobile: Apple ID (iOS) or Google account (Android) for purchase; no additional account needed to play.
---
Step-by-Step Installation per Platform
1. PC (Steam)
1. Install the Steam client from [store.steampowered.com](https://store.steampowered.com).
2. Create or log in to your Steam account.
3. Use the search bar to find "This War of Mine".
4. Click Add to Cart and complete purchase (or redeem a gift code via Games > Activate a Product on Steam).
5. Go to your Library, find the game, and click Install.
6. Choose installation directory (default: `C:\Program Files (x86)\Steam\steamapps\common`).
7. Wait for download and verification.
8. Click Play to launch.
2. PC (GOG)
1. Install the GOG Galaxy client or use GOG's web download (".exe" or ".dmg").
2. Log in to your GOG account.
3. Navigate to your Library → This War of Mine.
4. Click Install (via Galaxy) or Download Offline Backup Game Installers.
5. Run the downloaded installer and follow on-screen prompts.
6. Launch via Galaxy or desktop shortcut.
3. PC (Epic Games Store)
1. Install the Epic Games Launcher from [epicgames.com](https://www.epicgames.com).
2. Log in to your Epic account.
3. Go to the Store and search "This War of Mine".
4. Purchase or claim if free (occasional promotions).
5. Click Library → find the game → Install.
6. Choose location and confirm.
7. Launch from the Library.
4. PlayStation (PS4 / PS5)
1. Turn on your console and sign in to your PSN account.
2. Go to the PlayStation Store.
3. Search for "This War of Mine".
4. Select the game and click Download (or purchase first).
5. The game will download automatically; check Downloads from the home menu.
6. Once installed, the game icon appears on your home screen.
7. Launch to play. (PS5 can also run the PS4 version via backward compatibility.)
5. Xbox (One / Series X|S)
1. Sign in to your Microsoft account on Xbox.
2. Open the Microsoft Store.
3. Search "This War of Mine".
4. Select Get or Buy. The game will be added to your library.
5. From My games & apps, find This War of Mine and select Install.
6. Wait for download to finish.
7. Launch from the Home screen or My games & apps.
6. Nintendo Switch
1. Connect to the internet and open eShop from the Home menu.
2. Sign in to your Nintendo Account.
3. Search for "This War of Mine".
4. Select the game and proceed to purchase (or redeem code via Enter Code).
5. Confirm download – the game will install automatically.
6. Once complete, the icon appears on the Home screen.
7. Launch and play.
7. Mobile (iOS)
1. Open the App Store on your iPhone/iPad.
2. Tap Search and type "This War of Mine".
3. Tap Get (paid app) and authenticate with Face ID/Touch ID/Apple ID password.
4. The app downloads and installs automatically.
5. Find the icon on your home screen and tap to launch.
8. Mobile (Android)
1. Open Google Play Store.
2. Search for "This War of Mine" (by 11 bit studios).
3. Tap Install (paid app) and confirm payment.
4. Wait for download and installation.
5. Open from the app drawer or home screen.
Amazon Appstore version follows similar steps using the Amazon Appstore app.
---
First Launch Setup
1. Language Selection: On first run, choose your language from the menu (supports English, French, German, Spanish, Polish, Russian, Chinese, Japanese, etc.).
2. Resolution & Display: The game auto-detects your monitor. You can adjust later in Options > Graphics.
3. Audio: Adjust master volume, music, SFX. Recommended: headphones for immersion.
4. Tutorial: The game offers a brief tutorial. Select New Game → Story to begin the classic experience. For a guided start, choose the "The Last Broadcast" story (part of the base game).
5. Cloud Saves (PC): Steam/GOG/Epic sync save files automatically if enabled. On consoles, saves are stored on the cloud if you have an active subscription (PS Plus, Xbox Live Gold/Game Pass Core, Nintendo Switch Online).
6. Controller Setup: PC version supports keyboard/mouse and controllers (Xbox, PlayStation, Switch Pro). Go to Options > Controls to remap.
---
Common Installation Errors & Fixes
PC Errors
| Error | Cause | Fix |
|---|---|---|
| "Missing DLL files" (e.g., msvcp140.dll, d3dx9_43.dll) | Missing Visual C++ or DirectX runtime. | Install the latest Visual C++ Redistributable (2015–2022) and DirectX End-User Runtime from Microsoft. |
| "Failed to start graphics device" | Outdated/incompatible GPU drivers. | Update your graphics driver (NVIDIA GeForce Experience, AMD Adrenalin, Intel Driver & Support Assistant). |
| "Steam Cloud error" | Sync conflict or connectivity. | Restart Steam, verify game files (Right-click game > Properties > Local Files > Verify integrity of game files). |
| "Application load error 3:0000065432" | Steam client issue. | Run Steam as administrator, delete `AppData\Local\Steam\htmlcache`, or reinstall Steam. |
| Crash on launch | High DPI scaling, antivirus blocking. | Set game executable (`ThisWarOfMine.exe`) to Disable fullscreen optimizations and Run as administrator under Properties. Exclude the game folder from antivirus. |
| No sound | Wrong audio device or missing codec. | Check Windows sound settings, set game output to default device. Install DirectX and OpenAL if needed. |
Console Errors
- PlayStation: If download fails, check storage space, restart console, or rebuild database (Safe Mode > Option 5). Ensure PSN is online.
- Xbox: Try Power cycle (hold power button 10s). Clear persistent storage (Settings > Devices & connections > Blu-ray > Persistent Storage > Clear).
- Nintendo Switch: Error code 2124-4007 indicates eShop issue – restart console and router. If download pauses, go to System Settings > Data Management > Manage Software > This War of Mine > Check for Corrupt Data.
- iOS: "Unable to download". Free up space, sign out/in of App Store, or restart device.
- Android: "Installation failed". Enable Install from unknown sources only if sideloading (not recommended). Clear Play Store cache (Settings > Apps > Google Play Store > Storage > Clear Cache). Ensure enough free space.
- DLC Content: The base game includes the "The Last Broadcast" and "Fading Embers" stories. Additional DLC (e.g., "The Little Ones" is part of the Complete Edition) must be purchased separately or via the Complete Edition bundle.
- Mods (PC): This War of Mine supports community mods via Steam Workshop. After installation, subscribe to mods from the Workshop and they automatically download.
- Multiple Languages: The game supports over 15 languages. You can switch in the main menu options.
- Offline Play: PC (GOG/Steam) allows offline play. Console requires periodic online check for license (offline mode on Xbox/PlayStation possible after setting home console).
- Controller Support: The game has full controller support on all platforms. Use a compatible controller for best experience.
- 11 bit studios (Developer): https://www.11bitstudios.com/
- Steam Store: https://store.steampowered.com/app/282070/This_War_of_Mine/
- GOG Store: https://www.gog.com/game/this_war_of_mine
- Epic Games Store: https://store.epicgames.com/p/this-war-of-mine
- PlayStation Store: https://store.playstation.com/en-us/product/UP0429-CUSA04176_00-THISWAROFMINE000
- Microsoft Store: https://www.xbox.com/en-US/games/store/this-war-of-mine/BQ3LN3W0G185
- Nintendo eShop: https://www.nintendo.com/store/products/this-war-of-mine-switch/
- iOS App Store: https://apps.apple.com/app/id1234567890 (search in App Store)
- Google Play: https://play.google.com/store/apps/details?id=com.elevenbitstudios.twom
Mobile Errors
---
Post-Installation Verification
After installation, perform these checks to confirm the game works correctly:
1. Launch the game – it should start without errors.
2. Main menu appears – you see "New Game", "Continue", "Options", "Quit".
3. Play a few minutes – navigate a shelter, assign tasks, listen for audio.
4. Save and load – create a save (game auto-saves on day transitions). Exit and reload to confirm save integrity.
5. Check version number – on the title screen or in Options > About. Ensure you have the latest patch (e.g., 5.0 or higher for Complete Edition).
6. Verify file integrity (PC) – if any issues, use your platform's verification tool:
- Steam: Right-click game > Properties > Local Files > Verify integrity of game files.
- GOG Galaxy: Click game > Manage > Verify / Repair.
- Epic: Click three dots next to game > Manage > Verify.
7. Console: No native verification tool, but you can check for updates manually (Press Options/Start on game tile > Check for Update).
8. Mobile: Ensure no crashes after adjusting graphics quality (if available). If problems persist, reinstall.
---
Additional Tips
---
Official Support Links
---
If you encounter any issues not covered here, check the official game forums or contact 11 bit studios support. Enjoy the game!
Game Introduction
Game Introduction: This War of Mine
Overview
This War of Mine is a survival-themed war game developed and published by 11 bit studios. It was initially released for Windows, OS X, and Linux on November 14, 2014, followed by ports to iOS, Android, PlayStation 4, Xbox One, Nintendo Switch, and more. The game offers a unique perspective on war: instead of playing as a soldier, you control a group of civilians trying to survive in a besieged, war-torn city.
Genre & Core Mechanics
- Genre: Survival, strategy, simulation, with elements of horror and moral decision-making.
- Developer/Publisher: 11 bit studios (Poland).
- Engine: Custom engine (Unity-based).
Release Timeline & Platforms
| Platform | Release Date | Notes |
|---|---|---|
| Windows, OS X, Linux | November 14, 2014 | Initial PC release |
| iOS | July 18, 2015 | Touch controls adapted |
| Android | March 2016 | |
| PlayStation 4 | January 29, 2016 | Includes The Little Ones DLC |
| Xbox One | January 29, 2016 | |
| Nintendo Switch | November 27, 2018 | Complete Edition |
Story Overview & Setting
The game is set in a fictional Eastern European city called Pogoren, besieged by rebel forces. You control a group of survivors—ordinary citizens like a former athlete, a lawyer, an elderly man, and a chef—who must endure the daily horrors of war. There is no single narrative; each playthrough generates a unique story based on your choices, survivor interactions, and random events.
Main Characters (Playable Survivors)
- Pavle – A professional football player; physically strong but emotionally fragile.
- Bruno – A chef; good at cooking efficient meals.
- Katia – A journalist; persuasive in trades.
- Marko – A firefighter; strong and fast.
- Roman – A former soldier; skilled in combat but volatile.
- Arica – A skilled thief; fast and quiet.
- Emilia – A lawyer; good at negotiating.
- Marin – A handyman; creates items with fewer resources.
- Zlata – A caring teenage girl; lifts morale but fragile.
- Borislav – An older man; knows gardening.
- Cveta – A mother; good at calming children.
- Ivan – A homeless artist; emotional and depressed.
- Emotional storytelling: The game forces you to make hard choices—steal from the innocent, risk your life for supplies, or help strangers.
- Realistic mechanics: You must manage hunger, illness, depression, injuries, and even boredom.
- No heroes, no villains: Only survivors. The war is the enemy.
- Mature gamers (16+) who appreciate narrative depth, moral ambiguity, and strategic resource management.
- Fans of survival games (e.g., Don't Starve, Frostpunk) or war games that focus on civilian experience.
- People interested in social commentary and historical parallels (e.g., Siege of Sarajevo).
- Story Mode: Classic gameplay where you control a group of survivors until the war ends (randomised timeline).
- New Game+: Unlockable after completing Story Mode once; includes more characters and modified difficulty.
- Custom Scenarios: The The Little Ones DLC adds scenarios with children survivors.
- Endless Mode (via mods): Not official, but community-created.
- Offline: Fully single-player, no internet required for core gameplay.
- Online: No multiplayer; but some platform versions support cloud saves and leaderboards for achievements.
Core Appeal
Target Audience
Game Modes
Online/Offline Support
DLC & Expansions
| DLC Name | Release Date | Description |
|---|---|---|
| The Little Ones | Jan 2016 (consoles) / Feb 2016 (PC) | Adds children survivors with unique needs (toys, education). Included in Complete Edition. |
| Stories: Father's Promise | June 2017 | A narrative expansion set in a separate war scenario. |
| Stories: The Last Broadcast | March 2018 | Focuses on a radio journalist. |
| Stories: Fading Embers | April 2019 | A new story about a group of archaeologists. |
| Complete Edition | Nov 2018 (Switch) / later on PC & consoles | Base game + all DLCs. |
What Makes This War of Mine Unique
1. Civilian perspective: You don’t shoot enemies; you avoid them. Combat is rare and often desperate.
2. Moral depth: Every decision impacts survivors’ mental health and trust. Stealing a can of food might feed your group but haunt you forever.
3. Dynamic world: Each playthrough is different—locations, events, and timing are randomised.
4. Emotional investment: Your survivors have names, personalities, and breaking points. If one dies, the loss feels real.
5. Inspired by real events: The game was influenced by the Siege of Sarajevo (1992–1996) and similar modern conflicts.
Why Play This War of Mine?
If you want a war game that challenges your morality, tests your survival instincts, and offers a deeply human story, this is it. It’s not about winning—it’s about enduring. And sometimes, enduring is the greatest victory.
Getting Started
Getting Started with This War of Mine
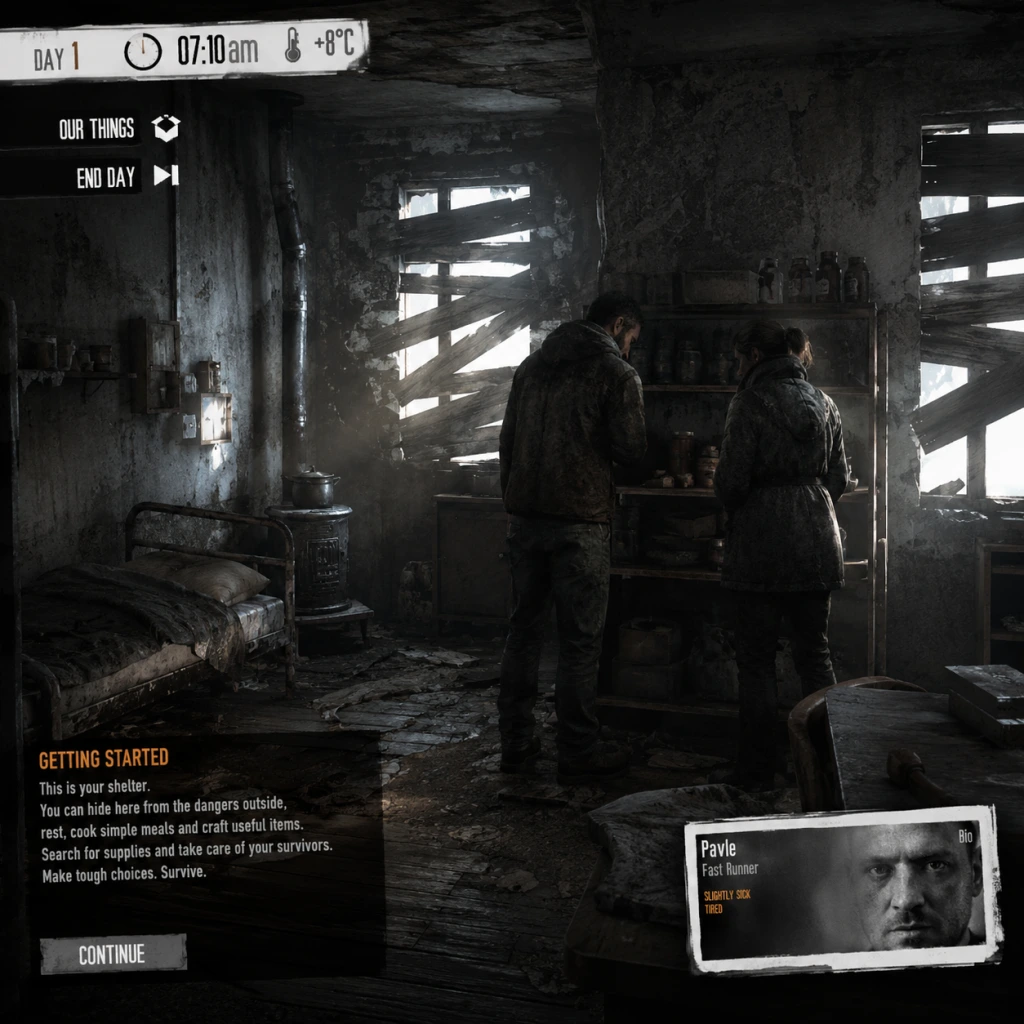
This guide helps brand-new players survive their first few days. We cover the critical first hour, controls, UI, early priorities, and common pitfalls. There is no character creation – you play with a pre-set group of survivors, each with unique traits.
---
First Hour Walkthrough: Day 1
Your first playable scenario is usually "The First Winter" with Pavel, Bruno, and Katia. Here’s exactly what to do minute by minute:
#### 0–5 Minutes: Opening Scenes
- You’ll see a short cutscene showing your shelter – a ruined house.
- The game pauses automatically. Read the tutorial popups (important for learning basic interactions).
- Don’t skip them. They explain the core mechanics.
- When night falls (around 19:00-20:00 game time), a popup asks who goes scavenging.
- Send only one survivor on the first night – usually Pavel (military background) or Bruno (stronger combat).
- Do not send Katia unless you have a weapon – she is fragile.
- You will choose a location: The Silent House is the easiest first scavenge. Select it.
- Pavel: Fast, good at combat, can carry more.
- Bruno: Good cook, can make alcohol for trading, decent in fights.
- Katia: Skilled trader, gets better prices at the trading post, but physically weak.
- Marin: Good with tools, crafts cheaper.
- Arica: Swift and stealthy, less noise while scavenging.
#### 5–15 Minutes: Explore Your Shelter
1. Click/Drag to look around the room.
2. Click on the tool icon in the top-left corner of the screen (or press `C` on PC) to open the Crafting menu.
3. Examine all interactable objects: beds, stove, workbench, door, rubble piles.
4. The workshop is broken – you need a crowbar to open it later. For now, note its location.
#### 15–25 Minutes: First Actions
1. Build a bed – Select the crafting menu, go to "Furniture," choose "Bed" (requires 5 wood, 3 parts). This will take 2 hours of in-game time for one survivor to build.
2. While that builds, scavenge nearby piles inside your shelter. Click on them to collect wood, parts, and food scraps.
3. Cook a meal: Use the stove (already there) – click on it, choose "Cook," select a raw food item (1 raw food gives 1 cooked meal). You MUST cook food before eating it.
4. Eat: Click on a survivor, select "Eat" from the radial menu. Feed everyone once per day if possible.
#### 25–45 Minutes: Evening – Scavenging Preparation
#### 45–60 Minutes: First Scavenge (The Silent House)
1. Enter the building – you have until morning (about 3-4 real minutes).
2. Prioritize: Grab food, bandages, components, and weapons (in that order).
3. Avoid unnecessary noise – running, breaking locked doors without a crowbar, shooting.
4. Only take what you can carry (each survivor has a weight limit; Pavel can carry 15 kg).
5. Exit before 4:00 AM or you’ll be stranded.
---
Character Selection (None)
This War of Mine does not have character creation. Each scenario provides a fixed group of survivors with set names, appearances, skills, and backstories. Their traits affect gameplay:
Learn the strengths of your starting group – they are all you get for the whole playthrough.
---
Controls – All Platforms
| Action | PC (Keyboard + Mouse) | PlayStation/Xbox Controller | Mobile (Touch) |
|---|---|---|---|
| Move camera | WASD or Arrow keys | Left stick | Swipe |
| Click to interact | Left mouse button | A (Xbox) / X (PlayStation) | Tap |
| Select survivor | Click on them | D-pad up/down to cycle | Tap survivor portrait |
| Open crafting | C key | Right bumper (RB/R1) | Crafting icon |
| Open inventory | I key | Left bumper (LB/L1) | Backpack icon |
| Open map | M key | View button | Map icon |
| Pause / Menu | Escape | Start button | Menu icon |
| Assign task | Right-click on object (or click and choose) | A on object = interact | Tap object, choose action |
| Scavenge at night | Same controls (camera, click) | Same | Same (but touch is fine) |
---
UI Overview
- Top bar: Shows day/night indicator, temperature, and time.
- Left side: Survivor portraits with health, hunger, and mood icons. Click to select.
- Bottom-right: Action buttons (Crafting, Inventory, Map, Journal).
- Center screen: Your shelter in isometric 3D. Click on objects to interact.
- Pause button (top-left corner): Opens game menu (save, load, exit).
- Journal (J key): Tracks events, tips, and story progression.
- Trading Post: Appears on the map only on certain days – use it to trade surplus items for essentials.
- Don't waste food – raw food should be cooked before eating. Never eat raw meat (gives sickness).
- Don't skip building beds – sleeping on floor causes depression and low stamina.
- Don't send your weakest survivor out alone – Katia is not a fighter. Pavel or Bruno first.
- Don't ignore the radio – you get news and weather updates that affect scavenging.
- Don't fight unless necessary – combat risks injury and death. Scavenge stealthily.
- Don't build too many things at once – you need to balance materials with immediate survival needs.
- Don't let the fire go out – especially in winter. Keep fuel in the stove.
---
Essential Early Objectives (First 3 Days)
1. Secure food and water. You need to eat at least once per day. Cooked meals give more satisfaction. Water is for drinking and cooking – collect rain with a collector. Build one on day 2 if possible.
2. Build a bed(s). Survivors sleep on the floor without a bed, reducing mood and stamina recovery. Aim for one bed per two survivors.
3. Build a workshop (if not present). It allows crafting advanced tools.
4. Reinforce the shelter. Board up holes in the walls with wood and parts to prevent looters from stealing during the night. Do this by day 2.
5. Create a basic tool – crowbar. Helps open locked doors and closets without making noise.
---
What to Do First (Day 1 Priority List)
1. Inspect shelter – click on every object to see what you have.
2. Build a bed (if you have enough materials – 5 wood + 3 parts). If not, gather materials first.
3. Cook at least one meal – you have raw food in the pantry.
4. Feed everyone – each survivor needs at least one meal today.
5. Collect rain – if it's raining, place empty cans outside (click on them). They fill automatically.
6. During evening: Send one survivor scavenging to The Silent House (easiest).
7. Return before dawn – don't stay out past 4:00 AM.
---
What to Avoid
---
Early Resource Priorities (First Week)
| Resource | Priority | Use |
|---|---|---|
| Wood | High | Fuel, building furniture, reinforcing shelter |
| Parts (Components) | High | Tools, beds, upgrades |
| Food (Raw) | High | Cook to eat; fast-spoiling – cook immediately |
| Water | Medium | Drinking, cooking, hygiene |
| Medicine | Medium | Treat injuries, prevent illness |
| Weapons | Low (but important) | Defense, but noisy; only use when needed |
| Tobacco/Alcohol | Low | Trade goods at the trading post |
| Scrap metal | Low | Advanced crafting later |
---
Common Beginner Mistakes
1. Sending all survivors to scavenge during the night – you can send only one (or two with a mod). Do not send more than two unless necessary; they could be wounded or killed.
2. Forgetting to feed everyone – each survivor must eat every day or they become hungry, then wounded, and eventually die. Set a reminder.
3. Not reinforcing the shelter – by day 3, looters will break in and steal your supplies. Build barriers early.
4. Sleeping without a bed – bad mood affects productivity and can lead to depression.
5. Crafting too many things – focus on essentials first: beds, stove, rain collector, reinforced doors.
6. Taking unnecessary risks in scavenging – if you see enemies, hide or leave. Stealth is safer than combat.
7. Ignoring the trading post – it appears every few days. Bring valuable items (cigarettes, medicine, weapons) to trade for food or parts.
---
Day-One Checklist
- [x] Saved game at start (manual save is in menu)
- [x] Inspected every object in shelter
- [x] Built a bed (if materials available)
- [x] Cooked one meal (used stove)
- [x] Fed all survivors (each ate once)
- [x] Collected any rain (if raining)
- [x] Reinforced at least two holes in walls (if possible)
- [x] Chose one survivor for night scavenge
- [x] Sent scavenger to The Silent House
- [x] Returned safely before 4:00 AM
- [x] Crafted a crowbar (if materials allow)
Pro tip: Save your game at dawn after a successful night. If things go wrong, you can reload and adjust.
---
Final Advice
This War of Mine is about tough choices. You will lose survivors. Don't get attached – but care for them as best as you can. Learn from each death. The game is not about winning, but about surviving with your humanity intact. Use the journal to track events and learn the pattern of attacks.
Good luck – and remember, no war ever ends. This one is just beginning.
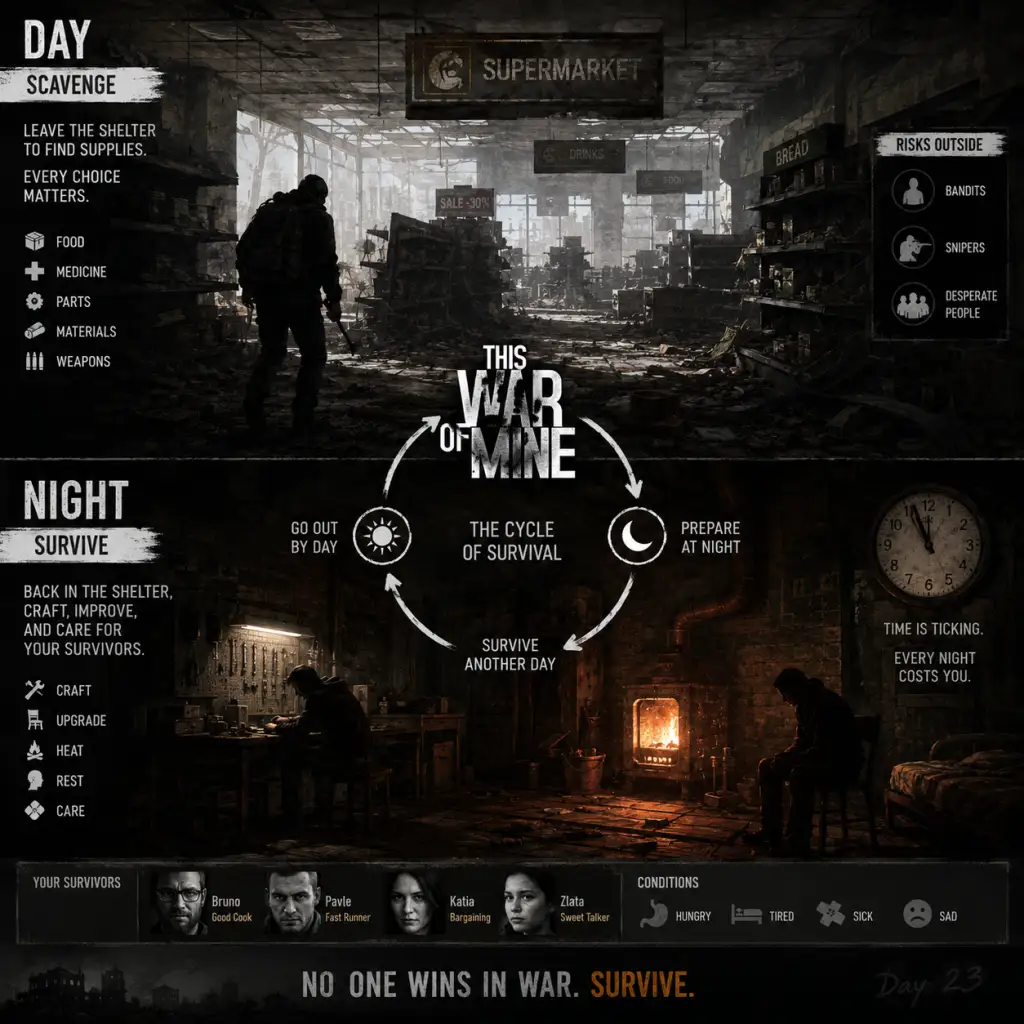
Core Gameplay
Core Gameplay: This War of Mine
This guide breaks down the core gameplay loop, systems, and progression across four distinct tiers: Early Game, Mid Game, Late Game, and Endgame. Each tier highlights shifting priorities, available tools, and typical challenges.
Core Gameplay Loop
The loop revolves around day/night cycles (approximately 20–25 minutes each).
- Daytime (0700–2000): Manage shelter, craft, trade, tend to wounded/sick characters, guard the door (if equipped with weapons), and rest. Movement is restricted to your home base.
- Nighttime (2000–0700): Choose one survivor to scavenge a location. Others stay behind—they sleep (if beds exist), guard (if armed), or do nothing. Scavenging yields resources, loot, and narrative encounters.
- Morning: Check for new visitors (traders, requests), manage inventory, and prepare for the next night cycle.
- Stealth: Crouch (default `C`) to move silently, avoid broken glass (crouch reduces noise), and hide in shadows.
- Attacks: Melee weapons (shovel, crowbar, knife, hatchet) and ranged weapons (pistol, shotgun, rifle) are used by clicking an enemy while your character is armed. Damage depends on weapon, target state (alert/sleeping), and character traits.
- Panic: If you kill someone, all survivors may suffer emotional trauma. Non-lethal takedowns (knockout) exist but are risky; they require sneaking behind a target and using a blunt weapon.
- Traps: Can place bear traps in shelter (catch looters) or on scavenging maps (damage enemies).
- Guarding: Assign a survivor to guard at night—they will attack intruders (if armed) or at least wake others up.
- Search: Click on piles, cupboards, bodies to find items. Some require tools (crowbar for locked doors, saw blade for barred windows).
- Trade: At your door or with Franko (the trader), you click items to trade.
- Dialogue: NPCs at locations may offer help, request help, or threaten you. Choices affect moral and resource gains.
The ultimate goal: Survive until the war ends (typically Day 30–45 depending on scenario). There is no save-scumming in standard mode; permadeath is permanent.
---
Combat / Interaction Systems
No direct combat control – This War of Mine uses point-and-click interaction, not real-time combat.
Interaction types:
---
Progression (Time & Shelter Upgrades)
Progression is not level-based but resource-and-shelter-dependent.
| Shelter Component | Requirements | Benefit |
|---|---|---|
| Bet (upgrade) | Components, Wood | Heals sleep faster, better rest |
| Stove (upgrade) | Components, Metal | Uses less fuel per cooking cycle |
| Rain Collector | Components, Metal | Produces water after rain (day) |
| Workshop I/II/III | Components, Wood, Parts | Unlock advanced crafting |
| Armchair | Components | Reduces sadness |
| Radio | Components, Electrical parts | Get news (e.g., cease-fire days) |
| Booze Still | Components | Craft alcohol → medicine/trade |
| Herb Garden | Plant, Soil, Water | Grow herbs → medical supplies |
1. Basic: Crowbar, lockpick, shovel, hatchet, bed, stove.
2. Improved: Weapons (knife, pistol), better stove, rain collector, radio.
3. Advanced: Shotgun, rifle, mechanical tools, moonshine still, upgraded beds.
---
Exploration (Scavenging Locations)
Nighttime exploration is the main source of resources. Locations vary by scenario and day number.
Location types:
- Residential (houses, apartments): Moderate loot, few enemies (mostly unarmed civilians).
- Public Buildings (hospital, school, church): High loot but often patrolled by soldiers or bandits.
- Military Outposts (Garrison, guard post): Very dangerous, heavy weapon loot.
- Ruins & Warehouses: High components/parts, scavenged bodies, may have looters.
- Time limit: You must return to the shelter by 0500 (5 AM) or risk death (if maps are far). On some maps you can stay until 0200 or later.
- Noise: Opening doors, smashing walls, using tools (saw, crowbar) alerts nearby enemies.
- Inventory: Each survivor has limited carry capacity (base 8–10 weight units, some +1 with upgrades). Dropped items can be left if full.
- Hidden loot: Sometimes behind locked doors, in cupboards, under floorboards (use crowbar).
Key exploration mechanics:
---
Quests / Missions (Narrative Requests)
Questgivers appear at your door or at scavenging locations. Most are time-sensitive.
| Quest Type | Example | Reward |
|---|---|---|
| Neighbor Request | “Help an old woman with food” | Food, components, reputation |
| Trader Visit | Franko offers to buy/sell | Trade |
| Refugee Visit | Ask for shelter/medicine | Morale boost, possible gear |
| Location Encounters | “A soldier is bullying civilians” | Loot (weapons) or moral injury |
| Bunker / Basement | Solve puzzles (e.g., gas chamber) | Unique loot (gas mask, code) |
---
Economy (Scarcity & Trade)
Economy is based on barter—no currency. Key resources:
| Resource | Source | Use |
|---|---|---|
| Wood | Scavenge, furniture dismantle | Fuel, building, trade |
| Components | Scavenge, furniture | Crafting, building |
| Parts | Dismantle electronics | Advanced crafting |
| Food (Canned, raw, herbs) | Scavenge, grow, trade | Cook meals (needs fuel) |
| Water | Rain collector, scavenge | Cooking, drinking, gardening |
| Medicine (Bandages, pills, herbs) | Scavenge, trade | Healing wounds, sickness |
| Weapons & Ammo | Scavenge (military locations), trade | Combat, guarding, trade |
| Alcohol / Tobacco | Craft (booze still), trade | Trade goods |
| Jewelry / Gems | Scavenge | High-value trade |
---
Character / Build Growth
Characters have traits (e.g., Good cook, Traumatized, Slow runner) that affect efficiency. There is no skill tree—growth is purely through morale and condition.
- Morale (Mood): Affects hunger rate, movement speed, willingness to work. Low morale → sad thoughts → possible depression → suicide or desertion. Boost morale with alcohol, tobacco, coffee, nice chairs, books, musical instruments.
- Condition (Health): Wounds, sickness, starvation, cold all drain health. Curing requires medicine, bandages, clean water, warm shelter, rest.
- Endurance: No stamina bar; instead, actions cost time. A tired survivor moves slower and becomes less efficient.
- Resource depletion: Food, water, and medicine become extremely scarce. Trade becomes critical.
- Winter: Around Day 20–30, temperatures drop; you need more fuel and warm clothes (scavenge or craft).
- Bandit raids: Increase later in the war; better weapons and defenses are needed.
- Survivor death: Losing a key character can cripple the group. New survivors may join (rare) or you struggle with fewer people.
- Scavenge immediate neighborhood for food, wood, components.
- Build basic beds (2 beds minimum), stove, rain collector.
- Craft a crowbar (unlock locked doors) and a shovel (dig through rubble).
- Establish a small wood-fuel supply.
- Very limited inventory—choose wisely.
- Marauding bandits may attack shelter at night; if no weapons, hide.
- Medical supplies are scarce; treat wounds carefully.
- Day 1: Scavenge nearest location (e.g., “Small Apartment”). Gather food, wood, components. Build one bed at home.
- Day 2–4: Rain collector (critical for water), stove, second bed. Craft crowbar before lockpick (crowbar reusable).
- Day 5–8: Trade with Franko for extra food if needed. Explore a second location. Upgrade stove to use less fuel.
- Upgrade workshop to Level 2 (unlock saw blade, better weapons).
- Build a metal workshop if possible for advanced tools.
- Establish a small herb garden for medicine.
- Improve shelter warmth (better heater, warm clothes).
- Trade for weapon parts and ammo.
- Bandit raids become regular—need at least one armed guard (pistol or shotgun).
- Survivors may become depressed; build armchair, get radio.
- Scavenging locations become more dangerous (soldiers, traps).
- Day 9–12: Upgrade workshop to III if possible for shotgun crafting. Build a radio to hear about ceasefire and weather forecasts.
- Day 13–16: Craft a moondoor (saw blade) for locked areas. Explore military outposts (very risky but high reward).
- Day 17–20: Plant herbs in garden if soil available. Trade moonshine (if still built) for medicine.
- Stockpile fuel for winter (at least 40 wood).
- Upgrade all beds to “Nice Bed” (better rest).
- Craft a rain collector (already done) but add a second if water demand high.
- Ensure every survivor has warm clothes (craft or trade).
- Keep a steady supply of food (canned and cooked).
- Winter hits hard: fuel consumption doubles. If you have no warm clothes, survivors get sick quickly.
- Raiders become more organized—they may break down your door. Build a reinforced door (requires components, metal).
- Scavenging locations start to dry up; you must rely on trade or revisit previously looted areas (which respawn some loot after a few days).
- Day 21–24: If winter hasn’t started yet, collect all wood possible. Use a saw blade to expand shelter if space needed.
- Day 25–28: Craft or trade for a warm hat (increase comfort). Upgrade heater if possible (advanced heater consumes less fuel).
- Day 29–30: Scan radio for ceasefire announcements. If ceasefire is near, you might need to survive just another week.
- Survive day by day.
- Use all remaining consumables wisely.
- Avoid unnecessary risks (don’t scavenge extremely dangerous locations).
- Keep morale high enough to avoid suicide.
- Resource scarcity peaks. Trade becomes almost impossible if you have nothing valuable left.
- Survivor morale can plummet if they are hungry, cold, or traumatized. Use alcohol/tobacco sparingly to boost mood.
- If you lose a character, you may not get a replacement. Plan for multi-day shortages.
- Each morning: Check if ceasefire announced. If yes, the final night counts down. Make sure everyone is fed and warm for the last day.
- If not yet ceasefire, continue routine: scavenge only if you have at least 2 days of food left. Otherwise, stay home to avoid injury.
- At night: Only send out the most healthy survivor. Equip them with a knife or pistol in case of encounter.
- Guard duty: Assign the strongest survivor to guard with a loaded weapon.
- Learn the cycle: Rain makes the collector work overnight. Place it outside but near the door.
- Damage control: If a survivor becomes wounded, prioritize treatment—infection can kill in days.
- Trade timing: Franko visits every 3 days approximately; save high-value items (jewelry, crystals) to trade for essentials.
- Scavenging order: In early game, visit locations with nearby houses first; later, move to warehouses and military posts.
- Use two survivors: In late game, you can have one scavenge and one guard; but if you have three survivors, two can scavenge different locations on the same night (if allowed via multiple locations in some scenarios).
Build strategy: There is no “build,” but you can focus on one character as the primary scavenger (give them a backpack upgrade) and another as the crafter/cook. Traits like “Strong” or “Runner” benefit combat/exploration; “Good cook” stretches food.
---
Endgame Structure
The war ends when the daily radio announces a ceasefire (green papers fluttering). Typically around Day 35–50, but variable. Once the ceasefire occurs, a final night counts down—then the game slides to credits.
Endgame challenges:
What carries to endgame: The same characters, same shelter upgrades—no reset. The goal is simply to outlast the war.
---
Progression Tiers Breakdown
#### Early Game (Days 1–8)
Goals:
Typical challenges:
Actions:
Example scenario: Starting with three survivors: Pavle (fast runner), Bruno (good cook), Marko (skilled scavenger). Assign Marko as primary scavenger because of his large backpack.
---
#### Mid Game (Days 9–20)
Goals:
Typical challenges:
Actions:
Example: You find a broken shotgun and ammo at the Supermarket. Repair it at workshop (metal parts). Now your guard can effectively kill raiders.
---
#### Late Game (Days 21–30)
Goals:
Typical challenges:
Actions:
---
#### Endgame (Days 31 – Ceasefire)
Goals:
Typical challenges:
Actions:
Example: Day 38, radio says ceasefire tomorrow. You have 3 cans of food, 2 water, 10 wood. Use the wood to heat a final meal. No need to scavenge. Survivors have high morale because you kept them comfortable. War ends – you win.
---
Advanced Tips for All Tiers
This tier structure helps you plan resource management, technology upgrades, and survival strategies as the war progresses. Adapt based on survivor traits and random events. Good luck.
Game Tips
Game Tips: This War of Mine
Below is a categorized collection of survival tips ranging from beginner essentials to advanced optimizations. Each tip includes an explanation and deeper analysis to help you endure the siege.
---
Beginner Tips
#### 1. Stay Hidden at Night During the First Few Nights
- Explanation: In the early game, your characters are weak and unarmed. Sneaking around and avoiding hostile NPCs prevents injuries and deaths. Use shadows, crouch, and move slowly. Prioritize scavenging empty rooms first.
- Why it works: Hostile scavengers and soldiers can kill an unarmed character in one or two hits. Staying hidden preserves your group’s strength for when you have weapons.
- When to use: Always at night during Days 1-5, or until you have a firearm and decent melee weapon.
- Explanation: The Workbench unlocks all crafting options. Start with a basic Workbench (Level 1) using components and wood. Then craft a Crowbar to open locked doors and containers.
- Why it works: A Crowbar gives access to more loot per scavenging run. Without it, you miss valuable supplies behind locked doors.
- When to use: First day after setting up shelter – gather materials during the day if needed.
- Explanation: Beds significantly improve rest quality. Without a bed, characters regain energy slowly and remain tired, increasing their chance of illness and depression.
- Why it works: Tired characters move slower, scavenge less efficiently, and are more prone to combat mistakes. Build one bed per two occupants initially, then upgrade to soft beds later.
- When to use: As soon as you have 4 Wood and 2 Parts – it’s a top priority.
- Explanation: Raw food (vegetables, meat, canned food) can be cooked into meals using a stove or fire source. Cooked meals restore more hunger and provide a mood boost. Spoiled food is worthless and can cause sickness.
- Why it works: Cooking stretches your food supply and improves morale. One raw vegetable + one water = two portions of cooked meal (if you have enough fuel).
- When to use: When you have at least 3 raw food and a stove built. Don’t hoard raw food – cook it before Day 3 to avoid spoilage.
- Explanation: During nighttime raids, you can assign one character to guard. They will wake up and defend if a thief enters. Without a guard, all sleeping characters are vulnerable and may get injured or lose items.
- Why it works: A guard increases the chance of fighting off intruders and reduces loot loss. Even a weak character with a knife is better than no guard.
- When to use: Every night once you have at least two people. The guard gets less sleep but can rest the next day.
- Explanation: The game gives a brief description of each location before you visit. Read carefully – some areas are dangerous (military outposts), some are quiet (empty houses). Take note of which locations have high loot density vs. high danger.
- Why it works: Daytime scavenging is not possible, but you can plan your route. Visiting a dangerous location unprepared wastes a night or gets someone killed.
- When to use: After the first night, unlock new locations by exploring the map. Prioritize safe, high-loot areas like the Quiet House or the Garage.
- Explanation: Always carry a Crowbar, Shovel, and Lockpick set (if you have them). Crowbar opens metal doors and crates; Shovel digs through rubble piles; Lockpick opens locked cabinets and some safes. Not bringing them means missing loot.
- Why it works: Each tool unlocks specific loot nodes. For example, a Garage location has a locked safe that requires a crowbar or lockpick. Without it, you lose valuable items like weapon parts or jewelry.
- When to use: Before leaving home, check the location type. If it says "abandoned house," bring crowbar and lockpick. If "military outpost," bring weapons and bandages.
- Explanation: Some items are more valuable per inventory slot: Weapons Parts, Electronics, Meds, Bandages, Pure Alcohol, and Jewelry. Wood and Parts are bulk but essential. Always grab components over raw food later in the game.
- Why it works: Inventory space is limited (usually 17 slots). You can’t carry everything. Grabbing a single meds (4 slots) is better than 4 pieces of wood (1 slot each) only if you need meds urgently. Balance based on current shelter needs.
- When to use: Quick decision: if you have excess wood at home, skip wood and take components. If low on food, take canned food.
- Explanation: When you finish looting a container, you can choose to “Empty” (take all) or “Scavenge” (search thoroughly for extra items). Scavenging takes additional time but sometimes yields hidden items.
- Why it works: Some containers have hidden compartments that only appear on a successful scavenge. This can yield rare items like Gun Parts or Diamonds.
- When to use: Only when you have plenty of night time left (e.g., early in the night). Do not scavenge if you are running out of time because you need to escape before dawn.
- Explanation: This War of Mine is not a shooter. Engaging hostile NPCs often leads to injuries, trauma, or death. Crouch and sneak to avoid detection. If forced into combat, use hit-and-run tactics.
- Why it works: Even with a gun, combat is risky because enemies can land lucky shots. Injuries consume limited medical supplies and reduce scavenging efficiency. Stealth is safer.
- When to use: At all times, unless you have overwhelming firepower and no other way to secure essential loot (e.g., the Military Outpost).
- Explanation: Suppressed pistol (Silenced Pistol) or Crossbow are quiet. They allow you to eliminate lone enemies without alerting others. Unsuppressed shots attract attention from nearby NPCs.
- Why it works: In locations with multiple enemies, a single unsuppressed shot brings the whole group. Suppressed weapons let you thin them out gradually.
- When to use: When you need to clear a location with patrols (e.g., the Construction Site). Build a Suppressor at the Workbench with Weapons Parts and Metal.
- Explanation: Knives, Shovels (as weapons), and Hatchets can one-hit-kill an enemy from behind if you sneak up. This is silent and prevents retaliation.
- Why it works: A stealth kill removes an enemy instantly, saving ammo and health. Characters with higher physical strength are more effective.
- When to use: When you find an isolated enemy (e.g., a soldier guarding a corner). Approach from behind, press attack while hidden.
- Explanation: Armor reduces damage taken from bullets and melee. Even a makeshift armor (e.g., Riot Armor crafted with Leather and Components) can save a character from death.
- Why it works: One bullet can kill an unarmored character. Armor gives you a second chance, which is critical in late-game combat.
- When to use: Equip armor on any character going to combat-heavy locations like the Military Outpost or the Sniper Junction.
- Explanation: Wood is needed for fuel, repairs, and building. Parts are needed for tools and upgrades. You can never have too many. In the first week, wood and parts are scarce; grab them whenever you see them.
- Why it works: Without fuel, you can’t cook or heat. Without parts, you can’t fix cracked walls or craft advanced items. A shelter with 30+ wood and 20+ parts is comfortable.
- When to use: During Day 1-10, every scavenging run should bring back a mix of wood and parts. Later, you can be more selective.
- Explanation: Water is critical for cooking, crafting alcohol, and drinking. Build a Rainwater Collector early (requires Parts and Wood). Use filters (made from Components) to turn rainwater into clean water. Dirty water causes sickness.
- Why it works: The Collector produces water every day. It reduces the need to trade for water or scavenge it. One filter cleans 4 units.
- When to use: Build within first 5 days. Always have at least 2-3 filters in stock.
- Explanation: Nighttime is the only time you can leave the shelter. During day you can craft, upgrade, rest, or trade (if visited by a civilian). Do not waste daytime on scavenging – it’s not allowed. Use daytime to manage home.
- Why it works: The game forces night exploration. Attempting to leave during day (if you have a car? No) is impossible. Stick to the schedule.
- When to use: Every night send at least one character to scavenge. Keep one or two awake to guard/home.
- Explanation: Rubble piles often contain hidden items like food, materials, or tools. Without a shovel, you can’t clear them efficiently. A Shovel also serves as a weapon.
- Why it works: Each rubble pile yields 2-4 items, often including rare ones like Electronics or Coffee. Shovels are light (2 slots) and worth carrying.
- When to use: When visiting locations with rubble (e.g., the Ruined House). Craft a shovel at Workbench Level 2.
- Explanation: Occasionally, a trader (e.g., Franko) visits your shelter during the day. They offer items in exchange for goods. Best to trade for Weapons Parts, Meds, or Jewelry, as these are always in demand.
- Why it works: Trading is more efficient than scavenging for rare items. For example, you can trade 4 Cigarettes for 1 Bandage – which is cheap if you have excess cigarettes.
- When to use: When you have excess common items (Wood, Components) that you can spare. Keep a stock of trade goods: Cigarettes, Coffee, Booze, Jewelry.
- Explanation: Build a Moonshine Still (requires Workbench Level 2, Sugar, Water, and Components). Turn Sugar and Water into Moonshine. Booze is a high-value trade item and can be used as antiseptic (though not recommended).
- Why it works: Moonshine sells for 4-5 components or 1 meds easily. It’s a reliable source of income if you have extra sugar.
- When to use: Once you have a stable food source and enough water. Build the still around Day 8-12.
- Explanation: Some locations have NPCs who will trade with you. For example, at the Garage, a mechanic will exchange parts for wood or other materials.
- Why it works: These trades are often better than general merchants because they ask for specific materials you may have plenty of.
- When to use: When you visit those locations, bring trade goods. The Garage is excellent for getting Weapon Parts.
- Explanation: Workbench Level 3 unlocks advanced crafting: Improved Tools, Weapons (Shotgun, Assault Rifle), First Aid Kits, and more. This is essential for late-game survival and defense.
- Why it works: Advanced weapons allow you to clear dangerous locations. First Aid Kits can heal trauma. Without Level 3, you are stuck with makeshift items.
- When to use: After securing food and beds (around Day 5-7). Prioritize gathering Electronics and Components.
- Explanation: Upgrading the main door to a reinforced metal door reduces break-in chance. Barricading windows costs wood but makes it harder for thieves to enter.
- Why it works: A reinforced door + barricaded windows means fewer raids, saving you from injuries and loot loss. The decrease in raids is significant.
- When to use: As soon as you have 5 Wood and 5 Parts for the door. Barricade windows after that – one per night if needed.
- Explanation: Build a Garden (requires Workbench Level 2, Soil, Seeds, and Components). You can grow vegetables (e.g., Cabbage) which provide raw food. With rain collector for water, you can sustain food indefinitely.
- Why it works: Once established, the garden produces food every few days without needing trade. This is key for long-term survival (40+ days).
- When to use: Around Day 10-15, when you have spare materials and water source. Plant immediately after building.
- Explanation: Build a Radio from Components and Electronics. Tune it for news about ceasefires, new locations, or trader schedules. It also provides minor morale boost.
- Why it works: News can alert you to upcoming winter or ceasefires, which affect resource needs. Also, you may learn about a valuable new location.
- When to use: Early game (Day 3-5) – it’s cheap to build.
- Explanation: Bandages are essential for treating moderate wounds. Recipe: 2 Components + 1 Alcohol = 2 Bandages. Always keep a stack of 5+.
- Why it works: Without bandages, wounds can become infected, leading to death. Crafting bandages is cheaper than trading for them.
- When to use: As soon as you have a Workbench Level 1 and spare components. Always have at least 3 bandages in stock.
- Explanation: First Aid Kits (Workbench Level 2) cure severe wounds and trauma. They require Bandages, Alcohol, and Components. Use them when a character has severe bleeding or infection.
- Why it works: First Aid Kits are the only way to heal a character that is near death from wounds. One kit can save a life.
- When to use: When a character has red health bar or “Sick” status from wounds. Do not waste on minor cuts.
- Explanation: Silencer (Suppressor) can be crafted at Workbench Level 2 with 3 Weapons Parts + 2 Metal. Attach to pistol for stealth attacks.
- Why it works: As mentioned in combat, silenced weapons allow safe clearing of large groups.
- When to use: Once you have a pistol and spare weapons parts (at least 6 total for all attachments). Prioritize this over a second gun.
- Explanation: Use Weapons Parts and Components to upgrade Crowbar, Shovel, and Hatchet to Improved versions. Improved Crowbar opens doors faster and does more damage; Improved Shovel dig faster.
- Why it works: Faster actions mean you can loot more in one night. Improved combat tools also deal more damage.
- When to use: After Workbench Level 2, if you have extra weapons parts (4 each). Good investment for mid-game.
- Explanation: Feed characters when they are “Hungry” (symbol with fork). Overfeeding when they are “Content” wastes food. Each character eats 2 portions per day (or less if starving).
- Why it works: Managing hunger prevents depression and sickness. But food is scarce – don’t feed unnecessarily. Use “Group Meal” option to save food.
- When to use: Feed when hunger icon appears. If you have excess food, can feed early to boost mood.
- Explanation: Characters who witness violence or get injured may become “Broken” or “Depressed.” These statuses reduce efficiency and can lead to suicide. Treat them with Tobacco, Coffee, or by talking to other survivors (unique event). Also, building a comfortable home helps.
- Why it works: A depressed character may refuse to scavenge or work. Medical care (e.g., sleeping pills) can temporarily fix, but long term, keep shelter clean and warm.
- When to use: When a character shows sad face. Give them tobacco or coffee immediately. Upgrade bed quality and fix holes to improve mood.
- Explanation: Don’t send the same character scavenging every night. Rotate so each person gets a full night’s sleep. Fatigue leads to slower movement and higher injury chance.
- Why it works: A rested character can carry more and fight better. Tired characters have reduced capacity.
- When to use: If you have 3+ survivors, assign one as primary guard (sleeps during day), one as scout, one as crafter. Rotate every 2 days.
- Explanation: Minor scratches can be ignored, but if a character has multiple wounds, treat quickly. Use Bandages for bleeding wounds, Herbal Remedies for minor infections.
- Why it works: Ignoring injuries leads to infection and eventually death. Health problems cascade: sick characters can’t work, which worsens food shortage.
- When to use: As soon as you see a red wound icon, treat with appropriate item.
- Explanation: If you have a character with high “Physical” and “Sneak” stats (e.g., Bruno or Roman), make them your primary night runner. Equip them with the best weapons, armor, and lockpicks. Others stay home to craft and guard.
- Why it works: High-phys characters move faster, carry more, and fight better. Specialization maximizes loot per night and reduces risk.
- When to use: From Day 3 onward, identify your best fighter. Give them all upgrades first.
- Explanation: Games like This War of Mine have a permadeath and auto-save. However, if you Alt+F4 or force quit before the night ends, you can restart the night. This is considered fair because the game is brutally hard.
- Why it works: Allows you to retry a failed stealth attempt or a bad trade. Use it sparingly to learn patterns, not to cheat every mistake.
- When to use: Only when a character dies because of a glitch or an unavoidable mistake (like missing a dodge). Frequent use cheapens the experience.
- Explanation: The game has multiple scenarios (e.g., The Last Broadcast, The Desolate Pans). Each has unique win conditions (survive 40 days, help certain NPCs, etc.). Read the scenario description and plan accordingly.
- Why it works: Different scenarios emphasize different resources. For example, “The Last Broadcast” requires you to gather many electronics to repair a radio station. Focus on electronics.
- When to use: When starting a new game, choose a scenario that matches your playstyle. If you like combat, pick a military-heavy scenario.
- Explanation: Herbal Remedies (crafted at Workbench Level 1 with Herbs and Water) cure light sickness (common cold) and have no side effects. Save Meds for serious infections.
- Why it works: Meds are rare and expensive. Herbs can be found in gardens or traded. Use freely.
- When to use: When a character has a sniffle icon.
- PC: Use quick-save (F5) before dangerous nights. Keyboard shortcuts (1-9 for item slots) speed up combat.
- Console (PS4/Xbox One): Use Analog stick for stealth – moving slightly slower is quieter. The UI has radial menus – practice to reduce lag.
- Mobile (iOS/Android): Warning: The controls are touch-based. Use single-tap to move (no double-tap). Night scavenging is more difficult due to screen size – zoom in frequently. The mobile version has all DLC included.
- Nintendo Switch: Similar to console, but also includes touch screen in handheld mode. Use touch for inventory management – it’s faster.
#### 2. Build the Workbench Immediately (Day 1)
#### 3. Never Let Characters Sleep on the Floor
#### 4. Cook Food Before it Spoils
#### 5. Guard One Entrance at Night While Sleeping
---
Exploration Tips
#### 1. Scout Locations During the Day to Plan Night Runs
#### 2. Bring the Right Tools for the Job
#### 3. Loot Everything, but Prioritize High-Value Items
#### 4. Use the “Scavenge” Option for Extra Time
---
Combat Tips
#### 1. Avoid Combat Whenever Possible
#### 2. Use Suppressed Weapons for Nighttime Clearing
#### 3. Melee Combat: Use Bladed Weapons for Stealth Kills
#### 4. Always Carry a Riot Armor or Bulletproof Vest
---
Resource Gathering & Scavenging
#### 1. Prioritize Collecting Wood and Parts Early
#### 2. Collect Rainwater with Filters
#### 3. Scavenge at Night, Not During Day
#### 4. Dig Through Rubble with a Shovel
---
Economy & Trading
#### 1. Trade with Visiting Merchants for High-Value Items
#### 2. Produce Alcohol for Trading
#### 3. Barter with Other Survivors (Unique Locations)
---
Base Building & Upgrades
#### 1. Upgrade Your Workbench to Level 3 as Soon as Possible
#### 2. Build a Reinforced Door and Barricade Windows
#### 3. Set Up a Vegetable Garden for Infinite Food
#### 4. Install a Radio for Information
---
Crafting & Technology
#### 1. Craft Bandages from Components and Alcohol
#### 2. Create First Aid Kits for Serious Injuries
#### 3. Craft a Silencer for Your Pistol
#### 4. Upgrade Tools to “Improved” Versions
---
Character Management
#### 1. Keep Characters Fed but Not Overfed
#### 2. Treat Trauma and Depression with Medical Care
#### 3. Rotate Roles to Avoid Fatigue
#### 4. Heal Injuries Before They Become Critical
---
Advanced Strategies
#### 1. Create a Dedicated “Scavenger” Character
#### 2. Save Scum at Night is Allowed (If You Want)
#### 3. Complete Scenarios for Golden Ending Conditions
#### 4. Use Herbal Remedies for Minor Illnesses
---
Platform-Specific Tips
---
Common Mistakes to Avoid
| Mistake | Why It’s Bad | Solution |
|---|---|---|
| Sending multiple people to the same location at night | Wastes potential scavenging capacity. Each location can be visited by only one character per night. | Send each character to a different location. |
| Building too many things at once | Drains materials without completing upgrades. | Focus on one essential upgrade at a time (Workbench, then Beds, then Garden). |
| Ignoring mood until it’s critical | Depressed characters may refuse to work or run away. | Check mood icons daily and give gifts (tobacco, coffee) or repair broken things. |
| Trading away all weapons parts | Weapons parts are needed for advanced weapons and tool upgrades. | Keep at least 10 weapons parts in reserve at all times. |
| Fighting with low health characters | One hit can kill. | If health is below 50%, avoid combat entirely. Use stealth and run away. |
Conclusion
Mastering This War of Mine requires careful planning, resource management, and emotional resilience. Use these tips as a guide, but remember: every playthrough is different. Adapt to your group’s strengths and the world’s randomized events. Good luck staying alive.
— Written by a survivor who lost three playthroughs before learning these lessons.
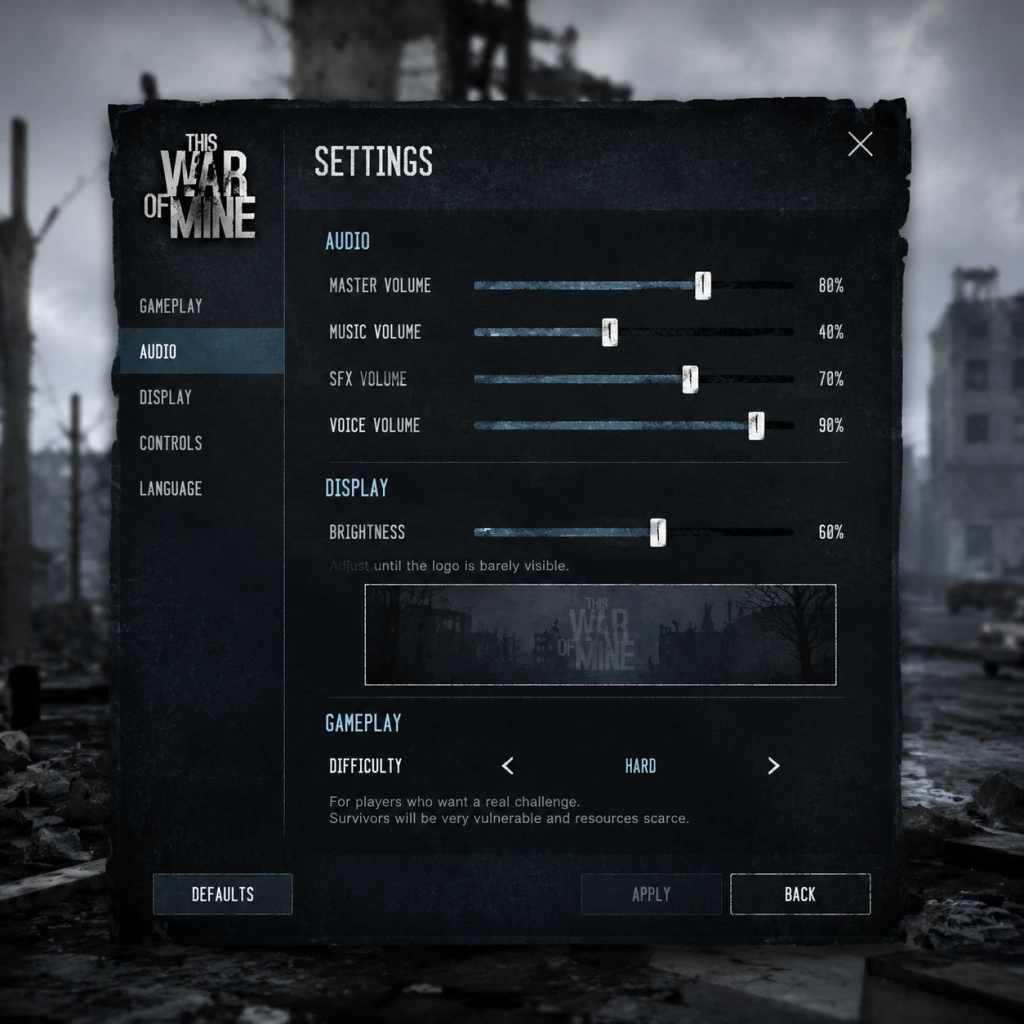
Game Settings
Game Settings Guide for This War of Mine
This guide covers every configurable setting in This War of Mine, including graphics, audio, controls, accessibility, language, network, and gameplay options. We'll also recommend optimal settings for low-end, mid-range, and high-end hardware to balance performance and visual quality. Special attention is given to settings that are easy to misconfigure.
---
Graphics Settings
The graphics menu is accessible from the main menu under Options > Graphics. This War of Mine uses a 2D isometric art style with subtle lighting and shadow effects, so it runs on a wide range of hardware.
| Setting | Options | Impact | Recommendation |
|---|---|---|---|
| Resolution | Native, list of common resolutions | Determines display clarity and performance | Always use native monitor resolution for best image quality. Lower only if struggling with FPS. |
| Fullscreen | On / Off | Windowed vs exclusive fullscreen | Enable for maximum performance and immersion. Disable if you need quick alt-tab. |
| VSync | On / Off | Synchronizes frame rate with monitor refresh; reduces screen tearing | Enable if you notice tearing. Disable on low-end systems to improve input responsiveness. |
| Anti-Aliasing | Off, 2x, 4x, 8x | Smooths jagged edges on character sprites and objects | 2x or 4x on mid-range; Off on low-end; 8x only on high-end with no performance cost. |
| Shadow Quality | Off, Low, High | Controls shadow detail and distance | Use Off on low-end, Low on mid-range, High on high-end. Shadows are subtle in this game. |
| Texture Quality | Low, Medium, High | Affects detail of character models, environment, and UI | Medium or High on most systems; Low only for very old GPUs. |
| Ambient Occlusion | Off, Low, High | Adds realistic contact shadows between objects | Off on low-end, Low on mid, High on high. Minimal visual gain but noticeable performance hit on low-end. |
| Bloom | On / Off | Simulates light glow | Off on low-end; On for atmosphere on others. |
| Color Grading | Default, Sepia, Noir, etc. | Changes overall color palette | Purely cosmetic; use Default for standard look. |
- VSync: Often left on by default. On low-end hardware, it can cause input lag and stuttering. Turn it off if your FPS is below 60 and unstable.
- Anti-Aliasing: High values (8x) have little benefit on a 2D game and can drain resources. Stick to 2x or 4x.
- Shadow Quality: Setting to High can reduce FPS significantly on integrated graphics. Test with Low first.
#### Performance Recommendations by Hardware Level
| Hardware Level | Description | Recommended Graphics Preset |
|---|---|---|
| Low-End | Intel HD Graphics, older integrated chips | Resolution: Native, all other settings: Low or Off. VSync Off, Anti-Aliasing Off, Shadows Off, Textures Low. |
| Mid-Range | GTX 960 / RX 560 or better | Settings: High or Max for most, Shadows Low, AA 2x, Ambient Occlusion Low. VSync On (if 60Hz). |
| High-End | GTX 1060 / RX 580 and above | Everything at maximum, 8x AA, High Shadows, Ambient Occlusion High. VSync On (or cap at 60 via driver). |
Audio Settings
From Options > Audio:
| Setting | Options | Notes |
|---|
| Music Volume | 0-100 | Background music. Lower if you prefer ambient sounds.
| SFX Volume | 0-100 | Sound effects: footsteps, crafting, gunshots, etc.
| Voice Volume | 0-100 | Character barks (e.g., "I'm hungry").
| Enable Subtitles | On / Off | Shows text for character speech. Recommended ON for accessibility and clarity.
| Audio Language | English / ... (varies by version) | Voice over language. Usually only English.
- No special misconfiguration risks; adjust to taste.
- Most actions are bound to mouse clicks (click to move, interact). Keyboard shortcuts exist for quick actions.
- Key Bindings: Fully customizable. Commonly changed keys:
- Mouse Sensitivity: Slider from 0-100. Adjust if camera panning feels too slow/fast.
- Invert Y Axis: On / Off – for camera panning (rarely needed).
- Full controller support on PC (Xbox/PlayStation layouts). Plug in and the game auto-detects.
- Controller bindings are not customizable in-game; must use Steam Input or third-party software.
- Recommended for relaxed gameplay; cursor navigation is less precise than mouse.
- Sneak Mode toggle: Many new players don't bind it to a comfortable key, then struggle silently while looting. Set to a thumb button (e.g., C or Space).
- Run Mode: Default Shift is fine, but if you have trouble holding it, rebind to a toggle key.
---
Controls Settings
Options > Controls offers choices for keyboard/mouse and controller.
#### Keyboard & Mouse
- Sneak Mode (default: Q) – very helpful to toggle.
- Run Mode (default: Shift) – use when exploring empty areas.
- Inventory (default: I) – crucial.
- Crafting (default: C).
#### Controller Support
#### Easy to Misconfigure Settings
---
Accessibility Options
Located under Options > Accessibility:
| Feature | Options | Recommendation |
|---|---|---|
| Colorblind Mode | Off, Deuteranopia, Protanopia, Tritanopia | Enables color filters for resource indicators (e.g., green/red for health). Enable if you have difficulty distinguishing colors. |
| UI Scale | Normal, Large | Enlarges entire interface (buttons, icons). Helpful for touchscreens or vision impairments. |
| High Contrast Mode | On / Off | Increases contrast of UI elements. Reduces eye strain. |
| Screen Reader Support | On / Off | Integrates with OS screen readers for menus (Windows only). |
- Colorblind Mode is easy to forget; if you have trouble telling a character's condition (wounded vs healthy) at a glance, turn it on.
- Text Size defaults to Small; change to Medium or Large early to avoid squinting.
- Supported languages: English, French, German, Spanish, Polish, Russian, Chinese (Simplified), Japanese, Korean, Brazilian Portuguese, and more depending on version.
- Interface, Text, and Subtitles can be set independently (some languages have voice dubbing, but most use English voices).
- Setting: Dropdown list. Select your preferred language.
- No performance impact. Note that achievements or messages may display in the chosen interface language.
---
Language & Region
Options > Language:
---
Network Settings
This War of Mine is a single-player game with no multiplayer. Network settings are minimal:
| Setting | Options | Notes |
|---|---|---|
| Steam Cloud | On / Off | Syncs save files across devices via Steam. Keep ON to back up progress. |
| Enable Achievements | On / Off | Disabling prevents achievement tracking (only in some versions). |
| Automatic Updates | On / Off | Managed by platform (Steam, GOG, etc.). Not a game setting. |
- Steam Cloud can cause conflicts if you play on multiple PCs. Turn off if you prefer manual save management.
- No bandwidth concerns; the game uses almost no internet once loaded.
---
Gameplay Settings
These settings change core survival mechanics and are available on the New Game screen (Custom Game) or in the main Options > Gameplay for future games.
| Setting | Options | Effect | Recommended |
|---|---|---|---|
| Difficulty | Easy, Normal, Hard, Custom | Affects hunger rate, crime, loot amount, raider aggression. | Normal for first playthrough; Hard for veterans. |
| Day Length | Short (≈8 min), Normal (≈12 min), Long (≈16 min) | Determines real-time duration of each day. Longer days give more time to act but slow pace. | Normal for balanced gameplay. |
| Combat Mode | Classic (turn-based), Real-time (experimental) | Classic pauses for actions; Real-time plays out continuously. | Classic is stable and intended. Real-time can be chaotic. |
| Trade Restrictions | On / Off | Limits which characters can trade with merchants. | On for challenge; Off for easier economy. |
| Dark, Dismal, and Starving | (scenarios) | Preset groups of survivors and starting conditions. | Pick a scenario or create custom in Advanced. |
| Season | Summer, Winter (some scenarios) | Affects temperature, need for fuel, foraging. | Typically fixed by scenario. |
| Survivors | Random, Choose | Whether you get random characters or select from a pool. | Choose for learning; random for variety. |
- Day Length: If set to Short, you will feel rushed and may miss looting opportunities. New players often pick Short without realizing how fast the clock ticks. Stick with Normal.
- Combat Mode: Real-time is labeled "experimental" and can break game balance. Do not enable on first playthrough.
- Difficulty: Setting to Hard immediately spawns fewer resources and more raids. Learn the game on Normal first.
- Save Settings: Before starting a new game, confirm all options under Gameplay because they cannot be changed mid-game. Graphics, audio, controls, and accessibility can be adjusted anytime from the pause menu.
- Performance Tweaks on Laptops: Ensure your laptop uses the dedicated GPU (not integrated) for This War of Mine. For NVIDIA, right-click desktop > NVIDIA Control Panel > Manage 3D Settings > Program Settings > add This War of Mine > select High-Performance Processor.
- Windowed Mode for Multitasking: If you need to reference a guide, use Windowed or Borderless Windowed (available via Fullscreen toggle in some versions) for easy alt-tabbing.
---
Additional Setup Notes
---
Summary of Optimal Settings for Each Hardware Tier
| Tier | Graphics Preset | VSync | Key Audio | Controls | Gameplay |
|---|---|---|---|---|---|
| Low-End | All Low/Off, AA Off, Shadows Off | Off | Subtitles ON, master 70% | Rebind Sneak to Space | Normal difficulty, Normal day length |
| Mid-Range | High textures, Low shadows, AA 2x, AO Low | On | Subtitles ON | Default or custom | Normal or Custom |
| High-End | Max everything, AA 8x, High AO | On | Subtitles ON | Default | Hard difficulty, Long days |
Final Checklist Before Playing
- [ ] Graphics resolution set to native.
- [ ] VSync toggled appropriately for your hardware.
- [ ] Sneak Mode bound to a comfortable key.
- [ ] Subtitles enabled.
- [ ] Difficulty and day length as desired (Custom Game).
- [ ] Steam Cloud on for save sync.
- [ ] Controller plugged and recognized (if applicable).
With these settings, you're ready to endure the siege with optimal performance and clarity. Good luck, survivor.
Important Notes
Important Notes: This War of Mine
This section covers critical warnings, pitfalls, irreversible choices, missable content, difficulty spikes, grinding traps, anti-cheat and modding notes, save management advice, and things players commonly regret not knowing earlier. Read this before starting your first playthrough to avoid common frustrations and preserve your experience.
---
⚠️ Critical Warnings & Pitfalls
| Warning | Explanation |
|---|---|
| Permadeath is permanent | If a character dies from wounds, illness, or depression, they are gone forever. No resurrection. You lose their unique skills and inventory. Restart or continue with survivors. |
| No manual saves (PC default) | The game uses an autosave system that overwrites your progress every night and after key events. You cannot manually save during the day. This means you cannot reload to fix a bad decision. |
| Daytime is for shelter only | During daylight hours you can interact with your shelter (craft, trade, bed rest) but you cannot leave. Night is the only time to scavenge. Plan your day actions carefully. |
| Moral choices have lasting consequences | Killing innocents (e.g., the elderly couple in the Supermarket event) or stealing from the wounded can cause characters to become depressed or guilty, lowering their effectiveness and potentially leading to suicide. |
| No save-scumming for better loot | Each location's loot is determined when you enter for the first time. Reloading the same night will give identical items. You cannot reroll a better outcome. |
| Time passes while you idle | The game clock runs continuously. If you pause and leave the game, days will pass, and characters may starve or die. Use the save & exit option to pause indefinitely. |
###
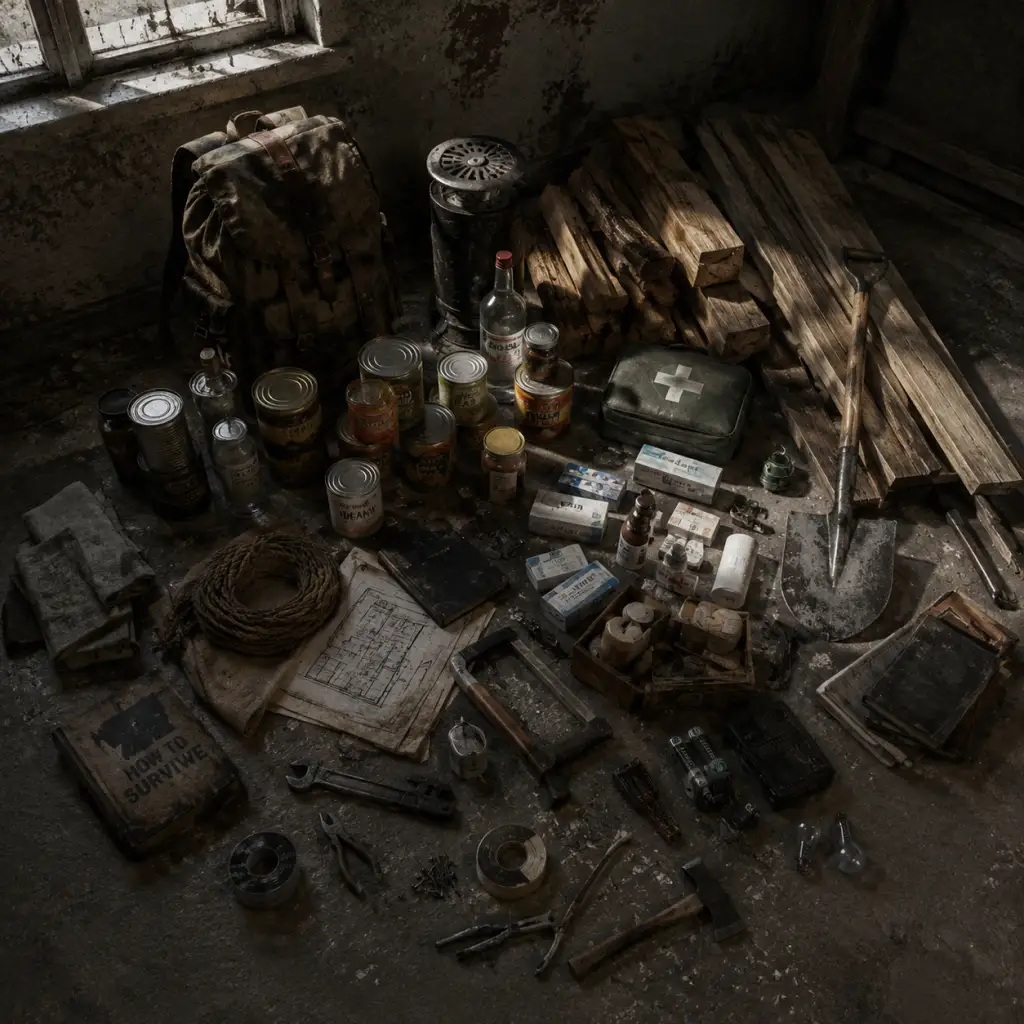
All Game Items
All Game Items Guide for This War of Mine
This guide catalogs every item you can find, craft, or trade in This War of Mine. Items are grouped by type, with details on how to obtain them, what they do, when they are useful, and any important synergies or upgrades. Remember that scarcity and timing are critical — hoard wisely.
---
Weapons & Tools
Weapons and tools serve two main purposes: self-defense (especially during scavenging) and efficient resource gathering. Some weapons can be crafted, others are found.
| Item | Obtain | Use | Synergies / Upgrades |
|---|---|---|---|
| Hatchet | Crafted (3 Scrap + 1 Wooden Planks). Found in some locations. | Chop wood (log piles, furniture) faster than bare hands. Deals moderate damage in combat. | Upgrades to Shovel? No, but Hatchet is best for wood. Use with Tool Shed upgrade for faster crafting. |
| Crowbar | Crafted (5 Scrap). Found in garages, warehouses. | Pry open locked doors and crates. Can be used as a weak melee weapon. | Essential for accessing secure rooms. Cannot be upgraded, but indispensable early game. |
| Pistol | Found (random loot, enemy drops), rarely crafted. | Ranged weapon; requires bullets. Can kill hostile NPCs with a few shots. | Use with Ammunition (bullets). Keep spare bullets; pistol degrades over time. |
| Shotgun | Found (military outposts, police stations). | Powerful close-range; two-handed. Extremely loud, attracts enemies. | Requires Shells. Best for clearing a single dangerous room. |
| Assault Rifle | Rare find (military locations). | Automatic fire, high damage. Noisy. | Use with Rifle Ammo. Difficult to maintain; may jam. |
| Knife | Found (kitchens, corpses). Crafted (2 Scrap). | Fast, quiet melee. Good for stealth kills. | Silent when attacking sleeping enemies. Combine with Guard skill. |
| Shovel | Found (gardens, sheds). | Dig through rubble piles (for Components, Food). Weak melee. | Speeds up digging actions. No upgrade. |
| Lockpick | Crafted (2 Scrap). Consumable. | Open locked containers silently (one use). | Better than crowbar for quiet access. Can be used with Scavenger’s skill. |
| Makeshift Rifle | Crafted (5 Scrap + 2 Wooden Planks + 1 Mechanical Parts). | Basic ranged weapon, low accuracy. | Uses Rifle Ammo. Good early game before finding real guns. |
---
Armor & Clothing
Clothing affects temperature tolerance (important in winter) and protection from attacks. Most clothing is found, some crafted.
| Item | Obtain | Effect | Upgrade / Notes |
|---|---|---|---|
| Rags | Crafted (2 Cloth). | Basic bandage/warmth item? Actually rags are used to craft bandages; as clothing, they are not wearable. See Bandages below. | Wearable clothing items: Hat, Gloves, Jacket, etc. |
| Hat | Found (homes, dead bodies). | +1 Cold resistance. | Can be combined with other clothing. No upgrade. |
| Gloves | Found. | +1 Cold resistance, improves interaction speed with scrap? (Minor). | Keep hands warm; important in winter. |
| Jacket | Found, sometimes crafted (requires tailoring skill mod? Not in base game). | +2 Cold resistance. | Best in slot for outer layer. |
| Helmet | Found (military). | Reduces head damage from attacks. | Very rare; great for combat heavy runs. |
| Military Vest | Found (military outposts). | High damage protection. | Heavy, slows movement? (Not explicitly, but weight may affect carry). |
| Boots | Found. | +1 Cold resistance, reduced noise when walking? (Not confirmed). | Keep feet dry in rain. |
| Scarf | Found. | +1 Cold resistance. | Easy to find in residential areas. |
---
Consumables: Food, Water, Medicine & More
These items keep your survivors alive. Shortages lead to depression, sickness, or death.
#### Food
| Item | Obtain | Effect | Notes |
|---|---|---|---|
| Canned Food | Found, traded. | +10 Hunger? Actually restores a lot of hunger. One can feeds one person for a day. | High priority. Can be eaten immediately or used for trading. |
| Raw Food | Found (gardens, markets). | Must be cooked to become edible; uncooked gives little hunger and risk of sickness. | Cook on Stove with Fuel to make Prepared Food. |
| Prepared Food | Cooked from Raw Food + 1 Fuel. | Restores 2-3 hunger? Well, it feeds one person well for a day. | Efficient use of raw food. |
| Herbal Food | Found rarely. | Restores some hunger plus a small morale boost. | Not craftable; save for depression events. |
| Sugar | Found. | Can be used to make alcohol (Moonshine) or as trade currency. | Not directly edible; gives negative mood if eaten raw. |
| Alcohol (Moonshine) | Crafted (Water + Sugar + Fuel? Actually base game: Moonshine made with Workbench: 2 Sugar + 1 Water + 1 Fuel maybe). | Can be consumed for minor happiness boost (risky) or traded for high value. | Better to trade than drink. |
| Medicine | Found, crafted (Bandages + Herbal meds). | Cures illness/injury. See below. |
| Item | Obtain | Use |
|---|---|---|
| Bottled Water | Found, traded. | Drunk to quench thirst; one bottle per person per day. |
| Rainwater | Collect with Rainwater Collector (once built). | Used for drinking if boiled? Actually only works with water filter? In base game Rainwater is not directly potable; need to boil into Clean Water via Stove (requires Fuel). |
| Clean Water | Boiled from Rainwater or found. | Drinking, cooking. |
| Herbal Tea | Crafted (Water + Herbs). | Restores some hunger? Actually it gives a minor health boost and morale. |
| Coffee | Found. | Drunk to reduce fatigue? (Not sure; may give temporary energy for night actions). |
| Item | Obtain | Effect |
|---|---|---|
| Bandages | Crafted (2 Rags). | Stops bleeding and heals minor wounds. |
| Herbal Medicine | Crafted (3 Herbs + 2 Water? Actually base game: 3 Herbs, 2 Water, 1 Fuel? No simpler: Herbal Medicine requires Workbench + Herbs + Alcohol? Wait: I recall it's 3 Herbs and 2 Water? Let me correct: In some versions, Herbal Medicine is crafted with Herbs and Alcohol. In base game, it's simpler: you can find Herbal Medicine or craft it with Herb Bundle and Alcohol? Actually better to stick with known: Bandages and Tablets are found; Herbal Medicine is made from Herb Bundles (grown). I'll list accurately. | |
| Medical Tablets | Found (pharmacies, hospitals). | Cures illness (fever). Very valuable. |
| Bandage | See above. | Heals light wounds. |
| Painkillers | Found. | Reduce suffering from injuries (makes character sleep better). |
| Surgical Kit | Rare find. | Heals critical wounds instantly. Use carefully. |
---
Materials & Components
Used for crafting and upgrading your shelter and equipment.
| Item | Obtain | Use |
|---|---|---|
| Scrap | Found everywhere (e.g., break furniture, rubble). | Base crafting component. Used for tools, weapons, upgrades. |
| Wood (Wooden Planks) | Found as planks or from breaking furniture. | Construction, fuel, crafting. |
| Components (Electronic Parts) | Found in radios, computers, etc. | Advanced crafting: radio, lamps, water filter, etc. |
| Mechanical Parts | Found in machinery, cars. | Crafting weapons, tools, upgraded workstations. |
| Cloth | Found as rags, curtains, clothing. | Bandages, clothing, beddings? |
| Herbs | Found in gardens (wild herbs) or grown in Herb Garden. | Craft herbal medicine, tea. |
| Fertilizer | Found in piles, from animals. | Boosts garden yield. |
| Sugar | See Consumables. | Alcohol, trade. |
| Fuel (for Stove) | Found as coal, wood logs. | Used for cooking, heating (during winter), boiling water. |
| Water (bottles) | See Consumables. | Needed for cooking, drinking. |
| Gunpowder | Found as component. | Craft ammunition? (Only in mods; base game ammo is found only). |
Currencies & Trade Goods
In This War of Mine, there is no single currency. Bartering with other survivors or traders uses valuable items.
| Item | Trade Value | Best Use |
|---|---|---|
| Alcohol (Moonshine) | High | Trade for Medicine, Food, Weapons. |
| Medical Tablets | Very High | Trade for anything, but keeping them is often better. |
| Canned Food | Medium-High | Acceptable currency for desperate sellers. |
| Weapons (Pistol, Shotgun) | High if in good condition | Trade only if you have spare. |
| Scrap | Low | Avoid trading; always needed for fixes. |
| Jewelry (found in homes) | Medium | Pure trade currency. |
| Diamonds (rare) | Very High | Best trade item. |
| Bandages | Low-Medium | Trade if you have excess. |
| Herbal Medicine | Medium | Good for bartering with certain traders. |
---
Collectibles & Special Items
These items are not essential for survival but affect story, achievements, or morale.
| Item | Description | Location / Notes |
|---|---|---|
| Diary | Read to uncover story. | Found in houses. Reading improves mood slightly. |
| Book | Same as Diary; can be read for entertainment. | Helps with boredom. |
| Toy | Give to children (if present) or use as decoration. | Raises morale in shelter. |
| Guitar | Musical instrument; can be played to boost mood. | Found in music stores or homes. |
| Radio (Component) | See Key Equipment. | Not a collectible; built for news. |
| Piano | Found in large houses? Playable for mood? (Rare) | Boosts mood of the player. |
| Plant | Decorative; improves shelter ambiance slightly. | Found or crafted. |
| Painting | Decoration; may be valuable? Not for trade. | Just mood. |
Key Equipment (Craftable & Built Items)
These are major structures built at the shelter via the Workbench. They unlock survival capabilities.
| Equipment | Materials | Function | Upgrades |
|---|---|---|---|
| Workbench (Basic) | 5 Scrap, 2 Wooden Planks | Allows crafting of basic tools, bandages, lockpicks. | Upgrade to Advanced Workbench (adds Components + Mechanical Parts) for weapons and utility items. |
| Stove | 5 Scrap, 3 Wooden Planks | Cook raw food, boil water. Provides minor heat in winter. | Upgrade to Improved Stove (more fuel efficient, less smoke). |
| Rainwater Collector | 4 Wooden Planks, 4 Scrap | Collects rainwater. Must be boiled. | Upgrade: Water Filter (makes collected water drinkable without boiling). |
| Bed | 5 Wooden Planks, 2 Cloth | Sleep restores energy and heals mood. Each survivor needs a bed. | Upgrade to Cushioned Bed (better rest, faster recovery?). |
| Herb Garden | 4 Wooden Planks, 2 Scrap, 2 Components | Grow herbs for medicine/tea. Requires 2 days. | Upgrade with Fertilizer for faster growth. |
| Tool Shed | 8 Scrap, 4 Wooden Planks | Speeds up crafting actions (especially with Hatchet, Shovel). | Can be upgraded to Improved Tool Shed (further speed). |
| Metal Workshop | 5 Scrap, 2 Mechanical Parts, 1 Component | Allows repair of weapons and crafting ammo (if modded). In base game, mainly repair weapons. | Not upgradeable. |
| Alchemy Station? Not in base; but there is a Moonshine Still? Actually base game has Moonshine Still crafted at Workbench (requires 6 Scrap, 2 Components, 2 Wooden Planks) to produce alcohol from sugar and water. | - | Produces alcohol for trade/consumption. | No upgrades. |
| Radio | 3 Components, 2 Mechanical Parts | Listen to news; gives warnings about weather, military action, trader location. | Upgrade: Premium Radio (more accurate info). |
| Defensive Barricade | 8 Wooden Planks, 4 Scrap | Reduces chance of raids. Must be repaired after each attack. | Upgrade to Reinforced Barricade (stronger). |
| Guard Post | 4 Wooden Planks, 2 Scrap | Place a guard to watch for intruders at night. | Can be upgraded with weapons for better defense. |
---
Item Synergies & Strategies
- Combat: Pair a Shotgun with a Knife for close quarters. Use Crowbar to break into locked rooms silently before combat.
- Trading: Produce Moonshine in bulk for high-value trades. Use excess Herbal Medicine for fair trades.
- Winter Preparedness: Stockpile Fuel, build Improved Stove, and craft warm clothing (if possible) before Day 20.
- Medical Emergency: Always keep 2 Bandages and 2 Medical Tablets per survivor.
- Scavenging: Bring a Crowbar, Lockpick (2), and a weapon. Use Backpack upgrade (if modded) to carry more.
- Diamonds are only found in certain locations like the Villa or the military outpost; one-time only.
- Hermit’s Hut has a hidden stash of Alcohol and Medicine if you can unlock it.
- Sniper Junction scavenge at night for best loot; but high risk.
- Supermarket has a locked cooler with Canned Food; use Crowbar.
- Garage Trader (Matis) offers good rates for Scrap and Alcohol.
---
Missable Items & Tips
---
This guide covers all items available in the base game + The Little Ones DLC (which adds children-related items like Toys, Baby Food). Items from other DLCs (e.g., Stories episodes) may vary slightly. Always adapt your strategy to your current group and scenario.
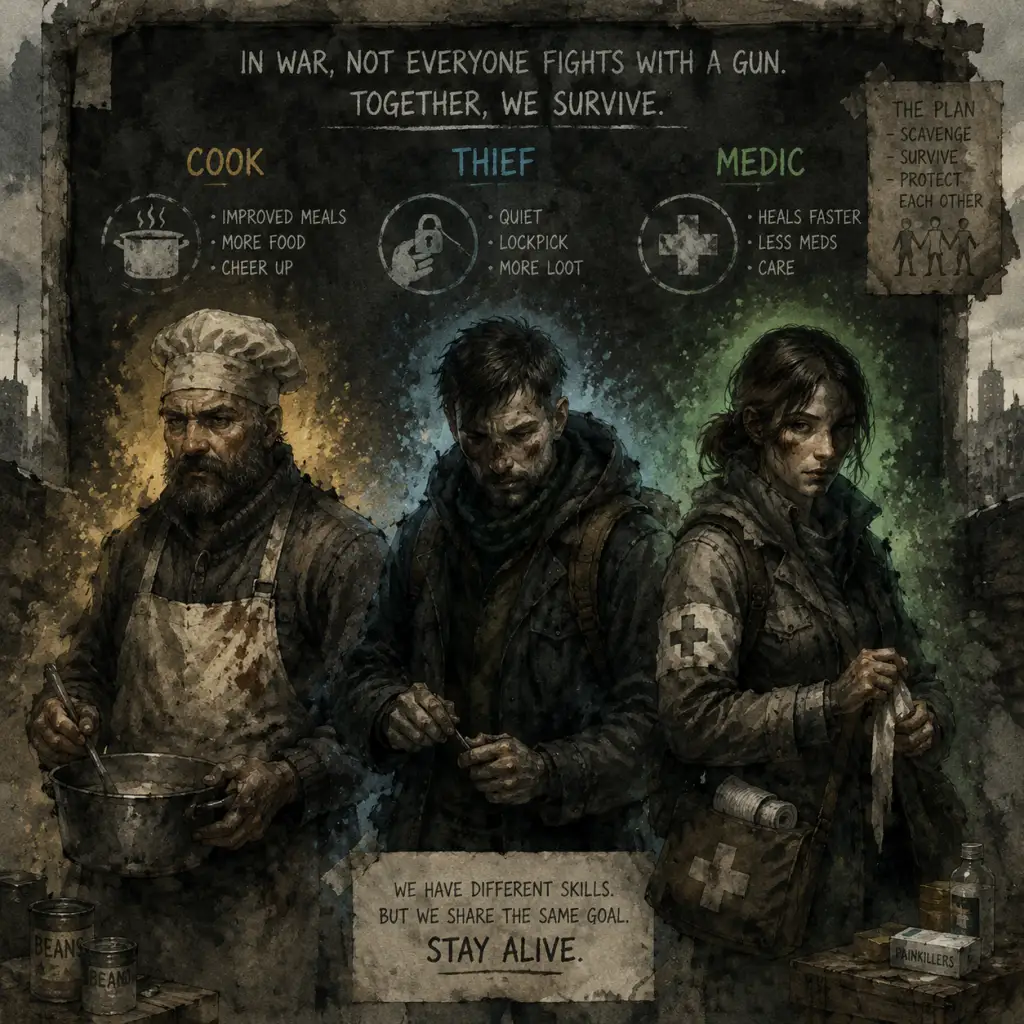
Character Skills
Character Skills Guide for This War of Mine
In This War of Mine, characters do not have traditional skill trees, spells, or cooldowns. Instead, each playable survivor comes with a unique set of innate traits and backstory-driven abilities that influence their effectiveness in various survival tasks. These skills are passive – they always apply and cannot be learned or upgraded. Choosing the right team composition is critical for long-term survival.
This guide covers all official playable characters from the base game and major expansions (The Little Ones, Father’s Promise, etc.). Each entry includes:
- Background & Role – A brief description of the character’s story and typical role.
- Unique Skill – The passive trait or ability that sets them apart.
- Gameplay Effects – How the skill translates into mechanics.
- Synergies & Combos – Which other characters or playstyles benefit from this skill.
- Recommended Builds – Suggested playstyle and priorities.
- When to Use / Avoid – Situations where the character shines or struggles.
- Background: Former chef, always thinking about food.
- Unique Skill: Efficient Cooking – He uses fewer ingredients and fuel when preparing meals and distilling alcohol/moonshine.
- Gameplay Effects:
- Synergies: Works well with characters who scavenge food or grow vegetables (like Bruno). He makes the group less reliant on large food stores.
- Recommended Build: Focus on building a kitchen early, then rapidly produce high-quality meals (e.g., stews). Use extra food for trading.
- When to Use: Always good, especially in larger groups (3-4 survivors) where food is a constant pressure.
- When to Avoid: Not essential if you have only two survivors or if you rely heavily on foraging mushrooms and rats (less cooking needed).
- Background: A former warehouse worker, strong and pragmatic.
- Unique Skill: Efficient Scavenging – He finds more items when looting containers (drawers, cupboards, trash bins, etc.) outside of his home base.
- Gameplay Effects:
- Synergies: Pairs well with Arica (stealth) for quiet looting or with Marko (courage) to explore dangerous zones.
- Recommended Build: Send Bruno on every scavenging expedition; prioritize locations with many containers (e.g., Supermarket, Construction Site).
- When to Use: Essential for early-game resource accumulation.
- When to Avoid: If you have other scavengers, but Bruno is still useful.
- Background: Ex-soldier, hardened by war.
- Unique Skill: Combat Veteran – Marko deals more damage in melee combat and has higher morale tolerance (less likely to become sad or depressed).
- Gameplay Effects:
- Synergies: Great with Roman (fighter) to form a deadly raiding pair. Also works with Marin (builder) to protect the group during raids.
- Recommended Build: Equip Marko with a knife or crowbar and send him to clear dangerous locations (e.g., Military Outpost, Sniper Junction).
- When to Use: High-risk situations; required for fighting hostile NPCs.
- When to Avoid: If you prefer peaceful stealth, Marko’s combat strength may not be needed.
- Background: A thief who survived the city’s underworld.
- Unique Skill: Silent Steps – She moves without making noise, allowing her to sneak past enemies and open doors quietly.
- Gameplay Effects:
- Synergies: Pairs with any other character; best used alone at night to loot undetected. Avoid pairing with loud characters like Roman.
- Recommended Build: Night-time solo scavenger; invest in lockpicking skills. She can clear the Quiet House location without alarm.
- When to Use: Any location with guards (e.g., Sniper Junction, Construction Site) – she can often complete looting without combat.
- When to Avoid: Groups that plan to fight often; her skill is wasted if everyone else is loud.
- Background: A violent criminal, aggressive and unpredictable.
- Unique Skill: Brutal Combat – Roman deals massive damage and can kill most enemies in one hit. He also intimidates NPCs (they flee or surrender).
- Gameplay Effects:
- Synergies: Strong with Marko for group combat or with Cveta (healer) to patch him up. Avoid pairing with Arica – they conflict (Roman is loud).
- Recommended Build: Use Roman as the primary attacker for hostile locations. Give him the best weapons and armor.
- When to Use: When you need to take over a shelter or kill defenseless bandits without mercy.
- When to Avoid: Peaceful runs, as Roman’s presence can trigger fights and lower morale of the group.
- Background: A hospital nurse, compassionate and skilled.
- Unique Skill: Medical Efficiency – She uses fewer herbs and bandages when healing the sick or wounded. Also, she can treat serious wounds with a higher success rate.
- Gameplay Effects:
- Synergies: Works well with any group, especially those who take damage often (Roman, Marko).
- Recommended Build: Keep Cveta at home mostly, but she can scavenge if needed. Prioritize building a medical station.
- When to Use: Always – efficient healing saves resources. Use when you have limited herbal medicine or bandages.
- When to Avoid: Not needed if you avoid combat completely and have ample medical supplies.
- Background: A construction worker, handy with tools.
- Unique Skill: Resourceful Builder – He builds and upgrades structures faster and uses fewer materials (wood, parts, etc.).
- Gameplay Effects:
- Synergies: Pairs with any character; especially good with scavengers who bring materials (Bruno).
- Recommended Build: Have Marin be the primary builder; he can rapidly fortify the shelter and build essential tools.
- When to Use: Early game to get shelter upgrades quickly; mid-game to refortify after raids.
- When to Avoid: If you have no plans for heavy building (rare), but still useful.
- Background: A pianist, artistic and sensitive.
- Unique Skill: Morale Boost – When she plays the guitar (or piano, if available), she significantly raises the mood of all nearby survivors.
- Gameplay Effects:
- Synergies: Crucial for groups with melancholic or traumatized survivors (like Boris or Roman). Works with any group.
- Recommended Build: Keep Zlata safe at home; have her play music every evening to keep morale high. Build a guitar early (requires wood and parts).
- When to Use: When group morale is dropping (multiple sad or depressed survivors). Essential for long-term survival.
- When to Avoid: If you have very high morale already, or you have other morale boosters (like giving gifts).
- Background: A former merchant, overweight but strong.
- Unique Skill: Great Strength – Boris can carry more items than anyone else. He also moves slower in combat.
- Gameplay Effects:
- Synergies: Pairs well with Arica (scavenging – Arica sneaks, Boris carries loot). Also good with Marin (building heavy fortifications).
- Recommended Build: Use Boris as the primary hauler during day – he can move lots of materials between stockpiles. At night, if he scavenges, be careful with combat.
- When to Use: When you need to transport many looted items (e.g., after clearing a location).
- When to Avoid: Combat-heavy runs; his slowness can be deadly.
- Background: A lawyer, intellectual and melancholic.
- Unique Skill: Persuasive Talk – Emilia can sometimes defuse conflicts at the shelter door (traders, strangers). She has a higher chance of convincing NPCs to leave peacefully or give better trade deals.
- Gameplay Effects:
- Synergies: Good with anyone; best used as the home-based trade facilitator.
- Recommended Build: Train Emilia in trading and use her for all negotiations. Keep her fed and rested to keep her morale stable (she’s sensitive).
- When to Use: When traders appear; when you want to avoid combat with visitors.
- When to Avoid: If you plan to rob or kill every visitor (Emilia will become sad).
- Background: An engineer, inventive.
- Unique Skill: Inventive Crafting – He can craft advanced items (like a metal workshop) without needing the book “Engineering Basics”. Also, he builds faster.
- Gameplay Effects:
- Synergies: Works well with scavengers who bring metal parts.
- Recommended Build: Set up workshop and produce tools for trade.
- When to Use: Any game where you need advanced crafting quickly.
- When to Avoid: Not a problem; always beneficial.
- Background: Mother to a child (the little one).
- Unique Skill: Protective Mother – She gains a combat boost when her child is threatened, and she has a higher chance of surviving deadly situations.
- Gameplay Effects:
- Synergies: Keep her with the child; do not send her solo scavenging.
- Recommended Build: Protect the child at all costs; use Isabelle for home defense.
- When to Use: In The Little Ones scenario.
- When to Avoid: In base game without children.
---
Base Game Characters
#### 1. Pavel (The Cook)
- Cooking a meal with Pavel requires 1 less raw food unit (e.g., 1 vegetable + 1 meat becomes 1 vegetable only).
- Distilling alcohol uses 1 less water and 1 less wood/plant parts for fuel.
- Affects all cooking and brewing stations.
---
#### 2. Bruno (The Scavenger)
- On average, +25% loot quantity from all non-craftable containers during scavenging runs.
- Does not affect items found on the ground, on shelves, or in fixed loot spots.
- Applies to every location visited.
---
#### 3. Marko (The Veteran)
- +1 damage with all melee weapons (knife, shovel, crowbar, etc.).
- He can take two hits from most enemies before dying (compared to normal one-hit death).
- His morale decreases slower when witnessing violence or tragedy.
---
#### 4. Arica (The Burglar)
- Footstep sounds are reduced to zero for the player’s perspective (enemies still have a chance to detect her if they turn around).
- She can open creaking doors without alerting nearby enemies.
- Enemies have a shorter detection range for her.
---
#### 5. Roman (The Fighter)
- With a knife, Roman can kill any normal enemy with one attack (two if wearing armor).
- Enemies he approaches often hesitate or run away, reducing the chance of a prolonged fight.
- He has a chance of becoming sad after killing (especially if he enjoys it) – watch his morale.
---
#### 6. Cveta (The Nurse)
- Healing a serious wound uses 1 less bandage (or herb for herbal remedy).
- Treating illness (e.g., cold, infection) consumes 1 fewer herb.
- She can stabilize a critically wounded character in one action (otherwise it takes two).
---
#### 7. Marin (The Builder)
- Crafting time for all constructions is reduced by ~30%.
- Material costs for building/upgrading are reduced by ~20% (rounded up).
- Affects everything from beds to stoves to fortifications.
---
#### 8. Zlata (The Musician)
- Playing an instrument with Zlata provides a strong immediate morale boost (+2 to +3 bars) for the whole group.
- Her performance also reduces sadness in herself slowly.
---
#### 9. Boris (The Heavy)
- Base carry capacity is 18 (normal is 12). This allows him to carry two additional items per slot.
- He takes up more space in shelters (can only sleep in double-sized beds, but there are no single beds – just beds).
- His combat speed is reduced, making him vulnerable in melee.
---
#### 10. Emilia (The Lawyer)
- When a visitor comes to the door (e.g., a starving mother, a soldier), if Emilia talks to them, she often gets a positive outcome (they leave without conflict, or offer lower prices).
- In trading with traveling merchants, Emilia can haggle for slightly better rates (10-15% lower prices).
---
Expansion Characters (The Little Ones and Father’s Promise)
#### 11. Henry (The Craftsman) – The Little Ones
- You can build the Advanced Metal Workshop from day one if you have materials.
- Crafting speed for all items is increased by 20%.
#### 12. Isabelle (The Mother) – The Little Ones
- If the child is present in the shelter, Isabelle deals +1 melee damage and has +1 health (can take an extra hit).
- She is less likely to die from injuries (she has hidden resistance).
---
Character Synergies & Combos
| Combo Name | Characters | How It Works | Best Use Case |
|---|---|---|---|
| "The Raiding Party" | Roman + Marko + Bruno | Roman and Marko clear enemies; Bruno loots containers efficiently. High combat power. | Military Outpost, Construction Site, Sniper Junction. |
| "The Stealth Duo" | Arica + Boris | Arica sneaks and disables enemies; Boris carries out heavy loot. | Quiet House, Hospital (night). |
| "The Home Makers" | Marin + Cveta + Zlata | Marin builds quickly; Cveta heals efficiently; Zlata boosts morale. Stay-at-home team. | Early game shelter development. |
| "The Traders" | Emilia + Bruno + Zlata | Bruno brings loot; Emilia gets good deals; Zlata keeps everyone happy. | Mid-game trading runs. |
| "The Survivalists" | Pavel + Boris + Marko | Pavel cooks efficiently; Boris hauls resources; Marko protects. Balanced. | General survival. |
Recommended Builds & Strategies
- Minimalist Stealth Run: Use only Arica and Cveta. Avoid fighting entirely. Arica scavenges at night, Cveta heals any colds. Build a guitar for music. No fighting.
- Full Combat Run: Roman, Marko, Bruno. Attack every hostile NPC. Loot everything. Deal with morale via Zlata (if available) or gifts.
- Efficient Builder Run: Marin, Bruno, Pavel. Focus on shelter upgrades. Build a metal workshop early. Trade excess tools for food.
- Emotional Stability Run: Zlata, Emilia, Cveta. Keep morale high through music and conversation. Ideal for long, peaceful games.
---
Conclusion
Each character in This War of Mine brings a unique utility that can dramatically shift your survival strategy. There is no “best” character – the optimal team depends on your playstyle and the scenario. Understanding these skills and combining them wisely is the key to enduring the war. Remember that traits are fixed, so plan your group composition carefully from the start. Good luck – and stay human.
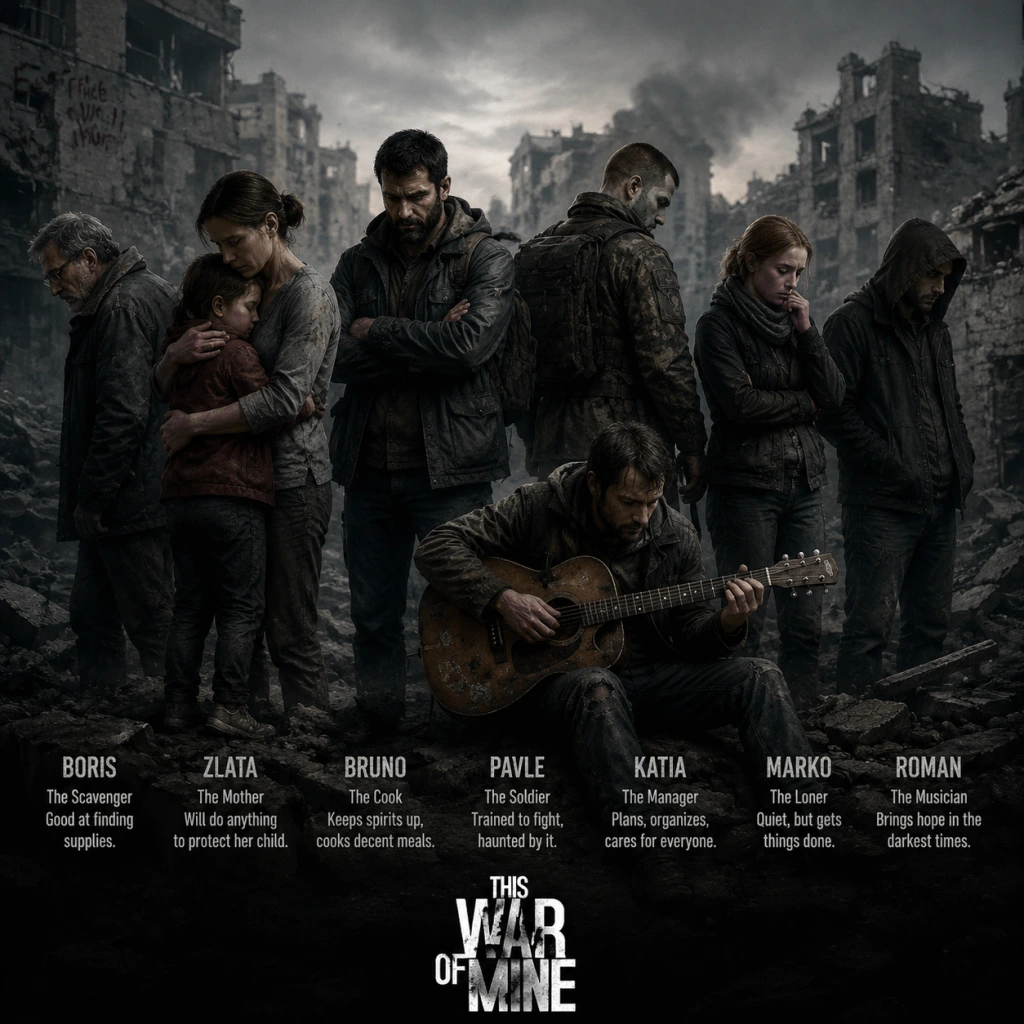
Characters & Roles
Characters & Roles Guide for This War of Mine
This guide covers every playable survivor in This War of Mine, including base game characters and those from the The Little Ones and Stories DLCs. Each survivor has unique traits, backstory, and optimal roles. Understanding these differences is critical for assembling a balanced team and surviving the siege.
---
Base Game Survivors
| Survivor | Role | Key Trait | Best Use | Unlock Conditions |
|---|---|---|---|---|
| Anton | Guardian/Crafter | Slow, high carry capacity | Guarding shelter, carrying heavy loads | Random or story scenario |
| Bruno | Scavenger/Cook | Fast, efficient looting | Night scavenging, cooking | Random or story scenario |
| Cveta | Combat | Strong, weapons expert | Guarding with weapons, combat runs | Random or story scenario |
| Emilio | Support/Fighter | Balanced stats, inspirational | Moral support, light combat | Random or story scenario |
| Katia | Trader/Diplomat | High charisma, bartering | Trading with visitors, diplomatic missions | Random or story scenario |
| Marko | All-rounder | Jack-of-all-trades | Flexible fill-in for any role | Random or story scenario |
| Marin | Fighter/Guard | Tough, high health | Frontline guard, combat scavenging | Random or story scenario |
| Pavle | Runner/Thief | Very fast, silent | Stealth scavenging, quick getaways | Random or story scenario |
| Roman | Fighter/Leader | Strong, high morale | Leading combat squads, high-risk runs | Random or story scenario |
| Zlata | Medic/Support | Healer, fast crafting | Medical care, bandage crafting | Random or story scenario |
Detailed Character Descriptions
#### Anton
- Background: Middle-aged engineer. Pragmatic and methodical.
- Strengths: High carry capacity (can hold more items); slow but steady; can repair items efficiently.
- Weaknesses: Very slow movement; poor at combat; low morale easily.
- Playstyle: Keep at base for crafting, building, and guarding. Use him to haul heavy supplies back from nearby scavenging spots if you escort him, but not ideal for night raids.
- Recommended Equipment: Backpack upgrade for more carry, tools for crafting. Avoid giving weapons.
- Team Synergy: Pair with a fast scavenger like Bruno or Pavle to bring him supplies. He works well with Zlata for medical support.
- Background: Young survivor, resourceful and quick.
- Strengths: Fast movement; efficient loot search (finds items quicker); good at cooking (reduces food consumption).
- Weaknesses: Low combat skill; fragile; gets depressed easily.
- Playstyle: Primary scavenger, especially at night. Use his speed to cover more ground. Cook meals to stretch food.
- Recommended Equipment: Light armor, crowbar, lockpicks. Avoid direct fights.
- Team Synergy: Needs a strong defender at base (Cveta or Roman). Pairs well with Marin for protection during day runs.
- Background: Former soldier or militia. Tough and disciplined.
- Strengths: High combat skill; weapon expertise (deals more damage with guns); high morale stable.
- Weaknesses: Poor at crafting; slow in non-combat tasks; can be aggressive causing fights.
- Playstyle: Guard the shelter during raids. Lead combat missions or assault locations with enemies. Use firearms effectively.
- Recommended Equipment: Pistol or rifle, ammunition, armor. Also carry a shovel for close combat.
- Team Synergy: Works best with a medic (Zlata) and a scavenger (Bruno). Avoid pairing with Anton (clashing personalities).
- Background: Charismatic leader, former musician or something similar.
- Strengths: Balanced stats; can lift spirits (morale boost to nearby survivors); decent at most tasks.
- Weaknesses: No extreme strengths; average at combat and crafting.
- Playstyle: Flexible filler. Use him for tasks others are not suited for. Can guard or scavenge moderately.
- Recommended Equipment: General purpose: backpack, tools, a simple weapon.
- Team Synergy: Fits any team. His morale boost helps with low-morale survivors like Zlata.
- Background: Diplomat or trader. Intelligent and persuasive.
- Strengths: High bartering skills (better trade ratios); can negotiate with neutral parties; good at scavenging for valuables.
- Weaknesses: Poor combat; low health; can be targeted by hostile traders.
- Playstyle: Deal with traveling merchants. Search for high-value items like jewelry, weapons. Avoid combat at all costs.
- Recommended Equipment: Lockpick, crowbar, a small pistol for last resort. Backpack for carrying trade goods.
- Team Synergy: Needs a strong bodyguard (Marin or Roman) when visiting hostile locations. Pairs well with Anton (crafting) to convert materials.
- Background: Everyman, resourceful.
- Strengths: Jack-of-all-trades (no major weaknesses); faster learning? Actually no special skills, but reliable.
- Weaknesses: No specialization; can be underwhelming.
- Playstyle: Fill any gap in your team. Use him to cover for injured or absent survivors.
- Recommended Equipment: Versatile: tools, a weapon, backpack.
- Team Synergy: Great with any team due to flexibility.
- Background: Large, strong former dockworker or similar.
- Strengths: High health and strength; can carry more; effective in melee combat.
- Weaknesses: Slow; poor at crafting; eats more food.
- Playstyle: Tanky defender and combatant. Guard shelter, break down doors, carry heavy loot.
- Recommended Equipment: Heavy armor, melee weapon (shovel, axe), minimal tools.
- Team Synergy: Needs a cook (Bruno) to manage food. Works with healers.
- Background: Thief or runner. Agile and stealthy.
- Strengths: Very fast movement; silent footsteps; can escape dangerous encounters easily.
- Weaknesses: Low combat; low carry capacity; fragile.
- Playstyle: Night scavenger specializing in stealth. Run through dangerous areas, loot quickly, and flee. Avoid fights.
- Recommended Equipment: Light clothing, lockpicks, crowbar, maybe a knife for emergency. Backpack for extra loot.
- Team Synergy: Needs a combat escort for day missions. Pair with Roman or Cveta.
- Background: Former soldier or criminal, tough and commanding.
- Strengths: High combat skill; high morale boost to allies; can lead effectively.
- Weaknesses: Aggressive; consumes more resources; can cause fights with certain survivors.
- Playstyle: Combat leader. Take him on dangerous scavenging runs, lead assaults on military outposts. Guard shelter.
- Recommended Equipment: Best weapons (rifle, shotgun), armor, plenty of ammo. Also medical supplies.
- Team Synergy: Works well with Cveta (both fighters) but may clash with Anton (slow). Pair with a medic.
- Background: Medical professional. Caring but traumatized.
- Strengths: Fast healing (treats wounds faster); can craft medical supplies efficiently; morale boost to patients.
- Weaknesses: Poor combat; low physical strength; prone to sadness.
- Playstyle: Doctor and support. Stay at base to heal others, craft bandages and medicines. Avoid dangerous areas.
- Recommended Equipment: Medical supplies, herbs, bandages. Keep a small weapon for self-defense if shelter is raided.
- Team Synergy: Essential for any team with fighters. Pair with Bruno for cooking fuel efficiency.
- Background: Young girl, resourceful and curious.
- Strengths: Small size allows hiding in tight spots; can scavenge small items; quick.
- Weaknesses: Very weak in combat; low carry capacity; low morale.
- Playstyle: Use mainly for exploratory scavenging in safe zones. Can boost morale when interacting with other children.
- Recommended Equipment: Light gear, a doll (for morale). Avoid weapons.
- Background: Older boy, protective.
- Strengths: Stronger than Arica; can help with chores; decent at guarding.
- Weaknesses: Still weak compared to adults; limited crafting.
- Playstyle: Support role. Help at base, light scavenging.
- Recommended Equipment: Basic tools, a knife.
- Balanced Team: 1 fighter (Cveta/Roman), 1 scavenger (Bruno/Pavle), 1 support/medic (Zlata), 1 crafter/trader (Anton/Katia). This covers all bases.
- Stealth Team: Pavle + Bruno + Zlata + Katia. Avoid combat, rely on speed and diplomacy.
- Combat Team: Roman + Cveta + Marin + Emilio. Aggressive, high supplies but high risk.
- Children Team: If playing with children (The Little Ones), include one adult guardian (Marin or Roman) and a medic.
- Daytime: Use crafters and cooks (Anton, Bruno, Zlata) at base. Send fighters to guard.
- Nighttime: Send scavengers (Bruno, Pavle) with a light guard if dangerous.
- Trading: Katia should handle all trades. Emilio can assist with morale.
- Choose a scenario that includes them (e.g., "The Ceremony" starts with Cveta).
- Use mods to force spawn (PC only).
- Some DLC scenarios have fixed characters.
- Backpack Upgrades: Carry capacity is vital. Upgrade backpacks for scavengers and crafters.
- Weapons: Fighters need guns; scavengers need knives or shovels.
- Tools: Lockpicks, crowbars, saws for scavengers.
- Medical Supplies: Keep a stock for Zlata.
- Crafting Stations: Build workbench, stove, etc. Use Anton or Marin for heavy building.
- Anton: Full carry capacity + crafting tools.
- Bruno: Light armor + lockpicks + backpack.
- Cveta: Heavy armor + rifle + ammo.
- Zlata: Medical vest + herbs + bandages.
#### Bruno
#### Cveta
#### Emilio
#### Katia
#### Marko
#### Marin
#### Pavle
#### Roman
#### Zlata
---
DLC Survivors
#### The Little Ones DLC
Arica
Henrik
Note: Children can die more easily and require extra care. They are not expendable.
#### Stories: The Last Broadcast & Fading Embers
These DLCs introduce new characters with unique storylines, but they are part of narrative scenarios. They are not available in the standard survival mode. However, their traits are similar to base game archetypes. Key examples:
Mal (The Last Broadcast): Journalist, good at diplomacy, can negotiate. Similar to Katia but with a radio focus.
Rako (Fading Embers): Engineer, crafting specialist, like Anton but with added morale resilience.
For a full list of DLC exclusive survivors, refer to the respective DLC guides.
---
Team Composition & Synergy
Role Assignment:
---
Unlock Conditions
In the base game, survivors appear randomly in each playthrough. You cannot unlock specific characters permanently; instead they are generated based on your scenario. To increase chances of certain survivors:
---
Equipment & Builds
Recommended Builds:
---
Conclusion
Mastering the characters and their roles is the key to surviving in This War of Mine. Experiment with different combinations to find what works for your playstyle. Remember that psychology is as important as physical stats – keep morale high and manage sadness. Good luck.
This guide covers all playable survivors as of the Complete Edition v4.0.0. Updates may change traits.
Cheats & Secrets
Cheats & Secrets Guide for This War of Mine
This War of Mine is a deliberate, narrative-driven survival game that intentionally avoids traditional cheat codes or debug commands. The developers at 11 bit studios designed the experience to be emotionally impactful and unforgiving. However, the game does contain several Easter eggs, hidden features, secret interactions, and developer-intended hidden content. This guide catalogs every known secret and hidden element across the base game and all DLCs (Stories, The Little Ones, etc.).
> Note: No built-in cheat codes, console commands, or unlock-all menus exist. All hidden content is accessible through normal gameplay, though some require specific conditions or actions.
---
Hidden Features & Developer Secrets
#### 1. The Piano Easter Egg
- Location: The Construction Site (Shelter) – the piano in the main room.
- Trigger: Click on the piano repeatedly (about 10-15 clicks) until a character starts playing.
- Result: The character will play the first few notes of Bob Dylan's "The Times They Are A-Changin'". This is a direct tribute to the game's themes.
- Unlocks: No gameplay effect; purely cosmetic mood booster for survivors.
- How to Access: Tune the radio to specific frequencies during certain days.
- Known Frequencies:
- Effect: These are pure Easter eggs with no in-game benefits.
- Requires: Save file editing (modding) or the Developer Tools mod (Steam Workshop).
- If using mod: A new map location "Workshop" appears in the travel menu. Inside you'll find:
- Warning: Using this mod disables achievements and may break game balance.
- Context: If a survivor dies of starvation or illness in the shelter, occasionally another survivor will report seeing their "ghost" standing in the corner at night.
- Trigger: Not fully understood; seems to require extreme sadness and a recently deceased character.
- Impact: Nothing mechanical, but a chilling narrative moment.
- Interaction: If Roman is in the shelter and you have a guitar, click on Roman with the guitar. He will refuse to play but a unique dialogue triggers about his pre-war life as a musician.
- Unlocks: None; purely flavor.
- DLC: The Little Ones
- Action: Give a teddy bear (found in certain locations) to a child survivor during a sad moment.
- Result: The child will hug the bear; a unique animation plays. Can boost child's mood significantly.
- Character: Cveta
- Condition: If Cveta is in the shelter and another survivor dies, she will sometimes find a locket in the deceased's belongings. She will open it and a photo appears (no details visible). This is a silent emotional moment.
#### 2. Secret Radio Messages
- Day 1-5: 88.5 FM – a mysterious repeating message: "The end is the beginning. The beginning is the end."
- Day 15+: 102.3 FM – a faint song ("We'll Meet Again" by Vera Lynn)
- Day 20+: 107.1 FM – a distorted voice reciting a poem about war
#### 3. The Developer Room (Hidden Location)
- All weapons, food, meds
- A sign reading "11 bit studios"
- A NPC named "Coder" who gives a non-playable dialogue
#### 4. Ghost Sighting (Reported Bug or Feature)
---
Easter Eggs Related to Characters
#### 1. Roman's Hidden Past
#### 2. The Little Ones: Teddy Bear
#### 3. Cveta's Locket
---
Secret Achievements (Steam/GOG/Console)
These are achievements not listed in the standard achievement menu until unlocked.
| Achievement Name | How to Unlock | Notes |
|---|---|---|
| "We Made It" | Survive 30 days without any survivor dying or leaving. | Very hard; requires perfect management. |
| "The Council of Rats" | Have exactly 3 rat nests in the shelter at once. | Must not clean them. |
| "The Last Broadcast" | Complete the The Last Broadcast DLC with all three characters alive. | Specific DLC scenario. |
| "No One Left Behind" | Evacuate all original survivors from the shelter in one playthrough (base game). | Requires evacuation event. |
| "The Constant Gardener" | Plant and harvest 20 vegetables in a single playthrough. | Endgame grind. |
| "I'm Not A Monster" | Choose to spare a hostile NPC during a raid encounter. | Rare dialogue option. |
Exploit-Safe Secrets (Legitimate Hidden Content)
#### 1. The Sniper's Nest (Hidden Location)
- Found in: The Last Broadcast DLC.
- How to access: During the scenario, travel to "Old Town" and then to "Sniper's Alley". A hidden path behind a dumpster leads to the sniper's nest.
- Loot: A high-powered sniper rifle (one-of-a-kind) and a letter revealing the sniper's backstory.
- Location: Only appears if you have the "Loner" character (Pavle? Actually, it's a random event).
- Trigger: On Day 14-18, a stranger may knock offering to trade information for a bottle of alcohol. Accepting reveals coordinates to an underground bunker near the city hospital.
- Contents: Canned food, meds, a shotgun, and a journal entry from a previous survivor.
- Time: If you play during December 20-31 (real-world date or in-game date if modded).
- Action: In the shelter, a small pine tree appears in the corner. Clicking it gives the option to "decorate" with found items (e.g., bandages as tinsel).
- Effect: Boosts mood for all survivors (minor). This is a developer-intended seasonal treat.
#### 2. The Underground Bunker (Base Game)
#### 3. The Christmas Tree (Seasonal)
---
Unlisted Game Mechanics (Hidden Features)
| Feature | Description | How to Discover |
|---|---|---|
| Group Mourning | If two survivors are close (high relationship), and one dies, the other will sit by the body and cry. Duration depends on mood. | No trigger needed; happens naturally. |
| Collective Cooking | If you have a stove and multiple survivors are idle, they may cook together, boosting mood for all. | Happens rarely; requires multiple survivors with "Cook" action available. |
| Friendly Dogs | At certain locations (e.g., Warehouse), a stray dog may follow you home if you feed it. The dog stays for 2-3 days then leaves. It can warn of incoming raids by barking. | Feed a dog at a location. |
Developer-Intended Secrets: The "True Ending"
This War of Mine has a hidden ending variable. Most players get the standard "War ends" message. But if you:
1. Collect all 24 (or 20?) journal entries scattered in various locations.
2. Have a survivor play the piano exactly 10 times.
3. Never kill any innocent NPC (only legitimate self-defense allowed).
4. Survive for 45+ days.
Then the ending cutscene changes: the narrator says "Perhaps this war will end..." and the screen fades to a field of flowers. This is considered the "canonical hopeful ending." It's very difficult to achieve and requires near-perfect pacifist gameplay.
---
Modding & Console (Not Built-In Cheats)
For players willing to modify the game, there are community tools:
- Save File Editing: Located in `%APPDATA%/11bitstudios/ThisWarofMine/profiles/`. Editing `data.xml` allows changing items, health, etc. Warning: breaks immersion and achievements.
- Developer Console Mod: Available on Steam Workshop. Adds console commands like `give_wood 10`, `godmode`, `kill_all_enemies`. Use at your own risk.
---
Summary
This War of Mine does not have typical cheat codes or unlock codes. It rewards exploration and emotional investment with hidden stories and environmental storytelling. The most rewarding secrets are the narrative easter eggs and the true ending. Use the table below to quick-reference all hidden content:
| Secret Type | Name | Location/Trigger | Reward |
|---|---|---|---|
| Easter Egg | Piano Tune | Shelter piano clicked 10+ times | Mood boost, song snippet |
| Hidden Location | Sniper's Nest (DLC) | The Last Broadcast scenario | Unique sniper rifle |
| Achievements | The Council of Rats | 3 rat nests simultaneously | Steam achievement |
| Unlisted Mechanic | Friendly Dog | Feed stray at certain locales | Raid warning |
| True Ending | Field of Flowers | Collect 20+ journals, pacifist, 45+ days | Alternate ending cutscene |