Tom Clancy's Rainbow Six Siege
## Game Introduction for Tom Clancy's Rainbow Six Siege ### Genre Tactical first-person shooter (FPS) with heavy emphasis on strategy, team coordination, and environmental destruction. Often classified as a competitive tactical shooter or hero shooter due to its unique operator system. ### Develop...
Download & Installation
Download & Installation Guide for Tom Clancy's Rainbow Six Siege
Supported Platforms
- PC: Windows (via Steam, Ubisoft Connect, or Epic Games Store)
- PlayStation 4 & PlayStation 5
- Xbox One, Xbox Series X|S
- Not available on Nintendo Switch or mobile devices.
- Ubisoft Store / Ubisoft Connect (https://store.ubisoft.com)
- Steam (https://store.steampowered.com)
- Epic Games Store (https://store.epicgames.com)
- PlayStation Store (PS4/PS5)
- Microsoft Store (Xbox One/Series X|S)
Official Download Sources (Legitimate Only)
> Important: Always purchase directly from the official stores or authorized retailers. Third‑party key resellers may sell illegitimate or region‑locked keys.
System Requirements (PC)
| Component | Minimum (30 FPS, 720p Low) | Recommended (60+ FPS, 1080p High) |
|---|---|---|
| OS | Windows 7 SP1, Windows 8.1, Windows 10 (64‑bit) | Windows 10 (64‑bit) |
| CPU | Intel Core i3-560 @ 3.3GHz or AMD Phenom II X4 945 | Intel Core i5-2500K @ 3.3GHz or AMD FX-8120 @ 3.1GHz |
| RAM | 6 GB | 8 GB |
| GPU | NVIDIA GeForce GTX 460 or AMD Radeon HD 5870 (DirectX 11) | NVIDIA GeForce GTX 670 / GTX 760 / GTX 960 or AMD Radeon HD 7970 / R9 280x |
| VRAM | 1 GB | 2 GB |
| Storage | 85 GB HDD (SSD recommended) | 85 GB SSD |
| DirectX | Version 11 | Version 11 |
| Network | Broadband internet (6 Mbps+) | Broadband internet (6 Mbps+) |
Storage Space
- PC: ~85 GB on HDD; SSD strongly recommended for faster loading.
- PlayStation: ~70‑80 GB (PS5 requires less due to compression).
- Xbox: ~80‑90 GB (Series X|S optimized with SSD).
- Ubisoft Account: Mandatory on all platforms. Create one at https://account.ubisoft.com.
- Platform Accounts: Steam account (if buying on Steam), Epic Games account (if buying on Epic), PlayStation Network account, or Xbox Live account.
- Subscription (Console): PlayStation Plus (for PS4/PS5 multiplayer) and Xbox Game Pass Core / Ultimate (for Xbox) are required to play online.
- Fix: Manually reinstall Ubisoft Connect from https://ubisoftconnect.com. Run as administrator.
- Delete the folder `%localappdata%\Ubisoft Game Launcher` and reinstall.
- Fix: Pause and resume. Restart your router. Disable VPN/proxy. Switch download server (Ubisoft Connect: Settings → Downloads → Change server; Steam: Settings → Downloads → region).
- Run launchers as administrator.
- Fix: Verify game files.
- Redownload if verification finds issues.
- Fix: Install/update BattlEye manually (found in game folder under `BattleEye`). Run `Install_BattlEye.bat` as admin.
- Whitelist BattlEye and RainbowSix.exe in antivirus/firewall.
- Error code [0x00000011] usually fixed by reinstalling BattlEye.
- Fix: Check server status at https://status.ubisoft.com. Restart launcher and network.
- If using Windows Firewall, allow `RainbowSix.exe` and `UbisoftConnect.exe` inbound/outbound.
- Forward ports: TCP: 443, 80, 13000, 13005, 13200; UDP: 6015, 12000, 14001, 14008, 14020, 14044.
- Fix: Completely close both launchers. Open Ubisoft Connect first, log in, then relaunch the game from your platform’s library. The link should proceed.
- PS4/PS5: Rebuild database (safe mode) or delete and redownload.
- Xbox: Hard reset (hold power button), clear persistent storage (Blu‑ray settings). Ensure game fully installed from “Manage game & add‑ons”.
- SSD recommended: Rainbow Six Siege loads much faster on an SSD – crucial for the drone phase and operator selection.
- Disable overlays: Other overlays (Discord, NVIDIA GeForce Experience) may cause crashes; disable if you encounter issues.
- Background downloads: Pausing any large downloads during play reduces lag.
- Free weekend / trial: The game occasionally has free weekends; progress carries over if you purchase later.
Account Requirements
Step‑by‑Step Installation
#### PC (Ubisoft Connect)
1. Install Ubisoft Connect from https://ubisoftconnect.com.
2. Log in with your Ubisoft account.
3. Navigate to the Store tab, search for Tom Clancy’s Rainbow Six Siege, and purchase or claim (if you have a key).
4. Go to Games → My Games and click Download.
5. Choose installation folder (default: `C:\Program Files (x86)\Ubisoft\Ubisoft Game Launcher\games`). Ensure at least 85 GB free.
6. Wait for download and installation. You can pause/resume.
7. After completion, launch the game from Ubisoft Connect or desktop shortcut.
#### PC (Steam)
1. Install Steam from https://store.steampowered.com.
2. Log in and go to Store → search “Rainbow Six Siege” → purchase or use a product key (Activate a Product… under Games menu).
3. Go to Library → Right‑click Tom Clancy’s Rainbow Six Siege → Manage → Install.
4. Choose install location (Steam libraries).
5. The game will download and then automatically launch the Ubisoft Connect installer (must have). Follow prompts to link your Steam and Ubisoft accounts.
6. Once linked, the game will install via Ubisoft Connect as well (Steam acts as a launcher).
7. Launch through Steam Library.
#### PC (Epic Games Store)
1. Install the Epic Games Launcher from https://www.epicgames.com/store.
2. Log in and search for Rainbow Six Siege, purchase or redeem a code.
3. Go to Library → click Install under the game.
4. Choose install directory.
5. The launcher will download the game and then prompt you to install Ubisoft Connect (if not already).
6. Link your Epic and Ubisoft accounts when prompted.
7. Launch from Epic Games Launcher.
#### PlayStation 4/5
1. Ensure console is connected to the internet and has enough free space.
2. Go to PlayStation Store (via dashboard).
3. Search for Rainbow Six Siege.
4. Select the edition you want (Standard, Deluxe, etc.) and purchase.
5. Click Download to add to your download queue.
6. The console will download and install automatically. You can monitor progress from the home screen.
7. Once installed, launch the game. You will be prompted to sign in to or create a Ubisoft account.
#### Xbox One / Series X|S
1. Ensure Xbox is online and has storage space.
2. Open Microsoft Store (or the “Store” tab).
3. Search for Rainbow Six Siege.
4. Purchase or install via Game Pass if available.
5. Select Install → choose internal or external drive.
6. The download will begin. You can play when ready (a partial install may allow menus but not full gameplay).
7. On first launch, log in with your Xbox Live account and link your Ubisoft account.
First Launch Setup
1. Profile & Ubisoft Connect overlay: The game will request activation of Ubisoft Connect (press F2 or similar). Log in to synchronize progress.
2. Play Tutorial: The first time you play, you’ll be asked to complete the Situations (PvE tutorials). Highly recommended for learning controls.
3. Controller / Keyboard Settings: Adjust sensitivity, button layout (Options → Controls → Controller or Keyboard).
4. Graphics Settings: Go to Options → Graphics. Set display mode (Fullscreen recommended), resolution, and quality presets. Lower settings improve performance.
5. Audio: Select your output device and adjust chat/voice volumes.
6. Account Linking Rewards: Link Twitch, Amazon Prime Gaming, or other services for exclusive skins/operators.
7. Network Test: The game will perform a connection test. If you have strict NAT, configure UPnP or port forwarding (see common errors).
Common Installation Errors & Fixes
#### 1. “Ubisoft Connect failed to install” or “Missing DLL”
#### 2. Download stuck at 0% or slow
#### 3. “The file is corrupt” or “Installation failed”
- Steam: Library → right‑click game → Properties → Local Files → Verify integrity of game files.
- Ubisoft Connect: Games → Rainbow Six Siege → Properties → Verify files.
- Epic: Library → click three dots → Manage → Verify.
#### 4. Anti‑cheat (BattleEye) errors
#### 5. “Unable to connect to Ubisoft servers”
#### 6. Installation hangs after account linking (Steam/Epic)
#### 7. Console installation errors
Post‑Installation Verification
1. Launch the game and wait for the main menu.
2. Check game version: In the menu, bottom‑left corner shows the current seasonal update (e.g., Y9S1).
3. Test multiplayer: Go to Quick Match (Casual) – you should find a match within a few minutes. If stuck in queue, check NAT type (should be Open or Moderate).
4. Check updates: The game will auto‑update. Run the launcher regularly to ensure latest patches.
5. Performance benchmarks: Use in‑game FPS counter (Options → Display → FPS Counter). Aim for stable 60 FPS on your hardware.
6. Graphics stability: Run the “Benchmark” tool from Options → Graphics to test system stability.
Additional Tips
For further support, visit [Ubisoft Help](https://support.ubisoft.com) or the official [Rainbow Six Siege subreddit](https://reddit.com/r/Rainbow6).
---
Guide last updated: 2025‑04 (assume current year as of writing)
Game Introduction
Game Introduction for Tom Clancy's Rainbow Six Siege
Genre
Tactical first-person shooter (FPS) with heavy emphasis on strategy, team coordination, and environmental destruction. Often classified as a competitive tactical shooter or hero shooter due to its unique operator system.
Developer & Publisher
- Developer: Ubisoft Montreal (with support from Ubisoft studios worldwide)
- Publisher: Ubisoft
- Original Release: December 1, 2015 (Windows, PlayStation 4, Xbox One)
- Next-Gen Enhancements: December 2020 (PlayStation 5, Xbox Series X|S)
- Ongoing Content: The game follows a seasonal model with four seasons per year, each introducing new operators, map reworks, and balance changes. As of 2025, the game is in Year 10, with continuous updates and Year Pass releases.
- PC: Windows (via Ubisoft Connect, Steam, Epic Games Store)
- PlayStation 4 & PlayStation 5
- Xbox One, Xbox Series X|S
- Cross-platform play is available between consoles of the same family (PS4–PS5, Xbox One–Xbox Series X|S), but not between PC and consoles in standard matchmaking.
- Attackers: Breach, secure, and eliminate. Examples: Ash (fast breacher), Thermite (hard breacher), Thatcher (gadget disruption).
- Defenders: Fortify, ambush, and hold. Examples: Castle (reinforced barricades), Mute (signal jamming), Rook (armor plates).
- Tactical Depth: No radar or health regen; communication and map knowledge are essential.
- Destructible Environments: Walls, floors, and ceilings can be breached, shot through, or reinforced, creating dynamic sightlines.
- High Skill Ceiling: One-shot headshots, recoil management, and gadget timing reward practice.
- Team-Based: Success depends on coordination, operator synergy, and callouts.
- Constant Evolution: New operators, map reworks, and balance patches keep the meta fresh.
- Multiplayer (PvP):
- Ranked & Unranked: 5v5 with Bomb-only, stricter rules, and longer rounds.
- Quick Match: Casual 5v5 with all three modes randomly selected.
- Arcade: Rotating limited-time modes (e.g., Golden Gun, Headshot Only) for fun.
- Player vs. Environment (PvE):
- Online: Required for all multiplayer modes and most content. Dedicated servers with matchmaking for all modes.
- Offline: Only the “Situations” tutorial solo mode and a local “Custom Game” option (with bots) are available offline. No single-player campaign.
- Cross-play: Limited as described above; party systems are platform-specific.
- Year Pass: Grants early access to new operators, exclusive cosmetics, and a discount on in-game currency.
- Seasonal Updates: Every three months—two new operators, a map rework or new map, new weapon skins, charms, and game balance changes.
- Cosmetic DLC: Elite uniforms, weapon skins, and bundles purchasable with real money or in-game currency (Renown).
- Special Events: Limited-time modes with unique rules and exclusive cosmetics (e.g., “Rainbow is Magic,” “Doktor’s Curse”).
- All gameplay-affecting content (operators) can be unlocked with Renown earned through play, ensuring no pay-to-win.
- Destruction as a Core Mechanic: Unlike most FPS games, walls, floors, and even ceilings are fully destructible, allowing for unprecedented tactical freedom. Holes can be used for sightlines, breaching, or ambushes.
- Operator Gadget Synergy: Combining gadgets (e.g., Thatcher disabling enemy electronics so Thermite can breach reinforced walls) is essential for high-level play.
- Intelligence & Pre-round Phase: A 30-45 second prep phase allows Defenders to reinforce walls and place traps, while Attackers use drones to scout. This phase sets up the entire round.
- No Respawns: In standard PvP modes, death is permanent for the round, heightening tension and stakes.
- Long-Term Support: Ubisoft’s commitment to a decade of content has turned Siege into a live-service game that continually evolves, with operator reworks, map adjustments, and new mechanics (such as the addition of secondary gadgets and the introduction of the “Left Behind” mechanics).
Release Timeline
Platforms
Story Overview
Tom Clancy’s Rainbow Six Siege places players in the boots of the international counter-terrorism unit “Rainbow,” tasked with neutralizing global threats. While the single-player content is minimal (a series of tutorial scenarios called “Situations”), the narrative backdrop unfolds through the game’s ongoing seasonal events, operator bios, and the overarching “White Mask” terrorist group. The core conflict revolves around the mysterious “Parabellum” organization, the “White Masks,” and the internal politics of Rainbow itself. The story is mostly told through operator lore, cinematics tied to new seasons, and the “Outbreak” limited-time event (now archived).
Setting
The game takes place in a variety of real-world-inspired locations, from an Oregonian ranch house and a university in Japan to a skyscraper in Dubai and a nightclub in Brazil. Maps are meticulously designed for competitive play, with destructible walls, floors, and ceilings that shape every encounter.
Main Characters (Operators)
Rainbow Six Siege features a roster of over 70 playable characters called “Operators,” each belonging to a Counter-Terrorism Unit (CTU) from a specific country (e.g., FBI SWAT, SAS, GIGN, Spetsnaz, GSG9, SAT). Operators are split into two roles:
Every operator has a unique gadget and primary/secondary weapons, encouraging diverse team compositions.
Core Appeal
Target Audience
Primarily competitive FPS gamers who enjoy strategic, slower-paced, high-stakes gameplay. Also appeals to fans of tactical shooters like the original Rainbow Six series, Counter-Strike, and Valorant. Suitable for players aged 16+ due to realistic violence and tactical complexity.
Game Modes
- Bomb: The primary competitive mode. Attackers must plant and detonate a defuser; Defenders prevent the plant or defuse it.
- Secure Area: Attackers capture and hold a specific room; Defenders must retake it.
- Hostage: Attackers extract a hostage; Defenders protect it.
- Training Grounds (formerly Terrorist Hunt): Solo or co-op against AI enemies, used for practice and daily challenges.
- Event Modes: Occasional PvE events like “Outbreak” or “M.U.T.E. Protocol” offer unique objectives and stories.
Online & Offline Support
DLC / Expansion Overview
Rainbow Six Siege does not have traditional paid expansions. Instead, content is delivered through seasonal “Year Passes” and battle passes:
What Makes This Game Unique
Rainbow Six Siege stands as a pillar of the tactical shooter genre, offering unparalleled depth and a unique blend of destruction, strategy, and teamplay that has kept its community engaged for years. Whether you’re a newcomer learning the ropes or a seasoned veteran pushing ranks, the game offers a rewarding, ever-changing experience.
Getting Started
First Hour Walkthrough for Tom Clancy's Rainbow Six Siege
Your first 60 minutes should be spent learning the core mechanics, not jumping into multiplayer. Here’s the optimal path:
1. Launch the Game → After splash screens and initial account linking (Ubisoft Connect required), you’ll be dropped into the main menu.
2. Complete the Situations → This is a single‑player tutorial series (6 missions). Play all of them, especially the first two ("Hereford Base" and "House"). You’ll earn Renown (in‑game currency) and unlock basic gadgets/operators.
3. Play Through the “Discovery” Playlist → A separate matchmaking mode for beginners that uses only a limited map pool and disables friendly fire. Play at least 2‑3 matches here to understand round flow (Preparation Phase → Action Phase → Eliminate Hostages/Bomb/Diffuser).
4. Try Terrorist Hunt (now called “Training Grounds”) → Solo or co‑op against AI. Use this to practice your aim, learn map layouts, and test operator abilities without pressure.
5. Watch the in‑game “How To” videos → Found under the “Options” menu → “General” → “How To”. They cover destruction, gadgets, droning, and callouts.
After the first hour, you’ll have a basic understanding and should move to Quick Match (unranked) for real PvP experience.
---
Character / Operator Creation
There is no character creation in Rainbow Six Siege. You play as one of the many Operators, each with unique gadgets, weapons, and roles. Operators are divided into two teams:
- Attackers (blue team) – Use drones, breach charges, and hard breachers.
- Defenders (orange team) – Reinforce walls, deploy traps, use intel gadgets.
- Start with the Recruit (free, no gadget) – Use only for early practice.
- Complete Situations to unlock Sledge (Attacker) and Rook (Defender) for free.
- Spend your initial Renown on Thatcher (Attacker – EMP grenades) and Mute (Defender – signal jammer). These are foundational for team play.
You cannot customise a physical character – only choose an Operator and equip them with a primary weapon, secondary weapon, and two gadgets (plus a unique ability). Unlocking new Operators costs Renown or R6 Credits (premium currency).
Getting your first Operators:
---
Controls on All Platforms
Default Controls (On Foot)
| Action | PC (Keyboard & Mouse) | PlayStation (DualShock 4 / DualSense) | Xbox (Controller) |
|---|---|---|---|
| Move | W, A, S, D | Left Stick | Left Stick |
| Look / Aim | Mouse | Right Stick | Right Stick |
| Sprint | Shift (hold) | L3 (press stick) | L3 |
| Crouch | Ctrl (toggle) or C | Circle (hold for toggle in options) | B |
| Prone | Z (toggle) | Circle (hold while moving) | B (hold) |
| Reload | R | Square | X |
| Fire | Left Mouse Button | R2 | RT |
| ADS | Right Mouse Button | L2 | LT |
| Use Gadget | Middle Mouse Button | L1 (or press R2/RT? check in-game) | LB |
| Switch Gadget | Q | Triangle | Y |
| Ping | Z (default) | D-Pad Up | D-Pad Up |
| Drone (Attacker) | 5 (switch to drone) | D-Pad Left (hold) | D-Pad Left (hold) |
| Camera (Defender) | 5 (if available) | D-Pad Right (hold) | D-Pad Right (hold) |
| Reinforce Wall | F (hold) | X (hold) | A (hold) |
| Barricade | F (tap) | X (tap) | A (tap) |
| Melee | V | R3 (stick) | RS (stick) |
---
UI Overview (Heads‑Up Display)
When playing, your screen shows:
- Top Center – Operator rank icon, HP bar, armour indicator, and special ability cooldown.
- Bottom Left – Ammo counter (current / total) and fire mode (semi/auto/burst).
- Bottom Right – Gadget icon (e.g., smoke grenade, barbed wire) with inventory count.
- Bottom Center – Objective icon (bomb/hostage/secure area) and distance to it.
- Compass (top edge) – Shows cardinal directions and objective markers; use for callouts (e.g., “Enemy north of stairs”).
- Kill Feed (top right) – Shows eliminations, assists, and team kills.
- Round Timer (top center) – Counts down from 3 minutes (or less depending on mode).
- Team Info (left side) – List of alive teammates with health, operator icon, and ping status.
- Microphone indicator – Green dot when talking; red when muted.
- Attackers place drones on the map; Defenders reinforce walls, set traps, and rotate gadgets.
- Defenders see a 3D map overlay temporarily.
- Attackers see drone feed on main screen (press `5` to switch to drone view).
- The above HUD is active, plus objective markers update.
- Attackers can redeploy a single drone per round.
- Defenders can use static cameras (e.g., security cams) via `5` (hold).
- Play the Situations – Free Renown and operator unlocks.
- Complete the Discovery Playlist – Safe environment with friendly fire off.
- Watch “How To” Videos (in Options) – Explains destruction, pinging, etc.
- Join a Community/Discord – Many Siege communities offer coaching for new players.
- Practice with Recruit first – No stress of ability management.
- Focus on two Operators – Master one Attacker (e.g., Sledge) and one Defender (e.g., Rook) before expanding.
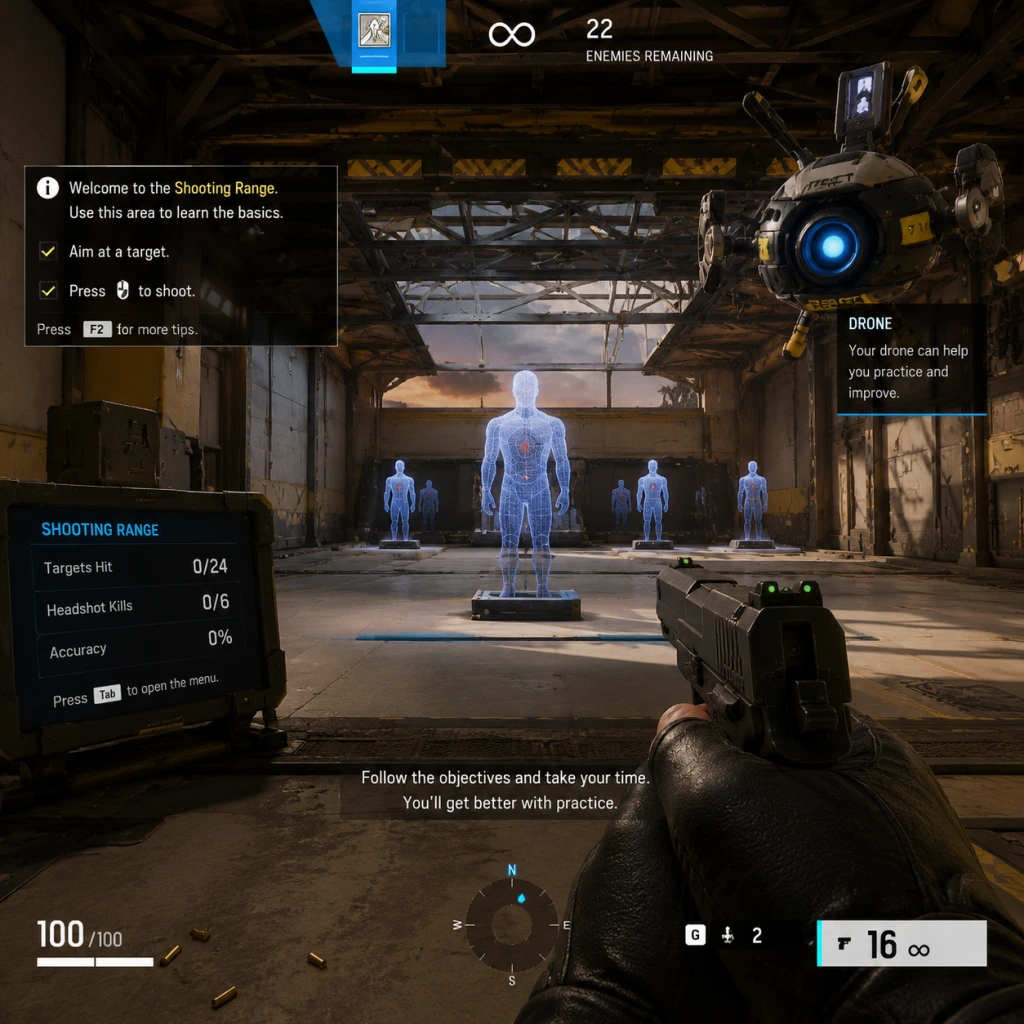
- Use the Shooting Range (in Settings → Accessibility) – Test weapons and recoil patterns.
- Jumping into Ranked – You need level 50+ and full map knowledge; stick to Quick Match or Unranked.
- Team Killing – Even accidental – it damages team morale and can get you banned.
- Reinforcing all walls – Especially between two bomb sites (leave a soft wall for rotation).
- Peeking the same angle twice – Experienced players will pre‑fire you.
- Ignoring the drone phase – Attackers must drone to avoid ambushes.
- Spending Renown on cosmetics first – Unlock all “base” operators (cheap 1000 Renown) before buying skins.
- Using all gadgets immediately – Save barbed wire for windows, not doorways; place shock wire near gadgets, not randomly.
- Reinforcing between bomb sites – In Bomb mode, you need rotations between the two bombs. Leave the connecting walls soft (unreinforced) unless you plan to anchor from one site.
- Destroying friendly gadgets – Don’t shoot Teammate’s traps (like Lesion mines) or drones.
- Chasing kills – Your priority is the objective, not eliminations. Over‑extending leaves your team vulnerable.
- Not using the compass – Callouts like “Blue stairs” or “Red room” help teammates. Practice using map room names.
- Forgetting to lean – On PC, press `Q` and `E` to lean; on console, click the thumbstick. Leaning reduces your hitbox exposure.
- Ignoring sound – Siege is audio‑driven. Wear headphones: footsteps, gadget sounds, and environmental noises (e.g., breaking barricades) give away enemy positions.
- No drone usage – Attackers often forget to drone before entering a building. Use your drone every round.
- Standing still – Always be moving (even slightly) to avoid headshots. Use crouch and prone sparingly.
- [ ] Install Rainbow Six Siege and link your Ubisoft account.
- [ ] Complete all 6 “Situations” missions. (Tip: Set difficulty to Normal, then try Hard for extra Renown.)
- [ ] Play 2–3 matches in the “Discovery” playlist.
- [ ] Visit the Shooting Range (Options → Accessibility → Shooting Range) to test weapons and recoil.
- [ ] Unlock at least two Operators: Sledge (Attacker) and Rook (Defender) are free. Then buy Thatcher and Mute (1000 Renown each).
- [ ] Read the in‑game “How To” videos (General Settings).
- [ ] Change your controls (optional but helpful):
- [ ] Complete two “Daily Challenges” from the Battle Pass menu (earn extra Renown).
- [ ] Join an official Rainbow Six Discord (or a friend’s squad) and play a few rounds with voice chat.
- [ ] Review this guide again after your first 10 matches – you’ll have context for the advanced tips.
During Preparation Phase (first 45 seconds):
During Action Phase:
---
Essential Early Objectives
As a brand‑new player, focus on these goals before worrying about advanced strats:
1. Learn Basic Maps – Start with “House”, “Hereford Base”, and “Clubhouse”. Run through them in Terrorist Hunt to memorise room names and stair locations.
2. Master the Primary Gadget – For Attack: use Drones to scout (don’t rush). For Defense: place traps/jammers in choke points (doorways, windows).
3. Understand Destruction – Walls and floors can be destroyed with breaching charges, shotguns, or Sledge’s hammer. Bullets also break wood/barricades; reinforced walls require hard breachers (Thermite, Hibana, Ace) to break.
4. Communicate – Use the ping system (D-Pad Up or Middle Mouse) to mark enemies. If you have a mic, give short callouts: “One on stairs, red stairs.”
5. Stay with Your Team – Don’t roam (wander alone) until you know callouts and map flows. Stick near the objective on Defense, and push together on Attack.
---
What to Do First and What to Avoid
✅ DO:
❌ AVOID:
---
Early Resource Priorities
Renown is earned by playing matches, completing challenges, and winning. Spend wisely:
1. Unlock Operators (1000–2000 Renown each):
- Priority Attackers: Sledge (free), Thatcher (EMP), Ash (fast breacher), Twitch (drone with taser).
- Priority Defenders: Rook (free), Mute (jammer), Bandit (shock wire), Jäger (anti‑projectile).
2. Purchase Attachments – Use Renown on sights (especially 1x scopes), grips, and muzzle attachments. Always buy the Flash Hider (reduces muzzle flash) or Compensator (reduces horizontal recoil).
3. Operator Gadget Upgrades – Only after you have the core operators. Don’t waste Renown on cosmetic charms or uniforms early.
> R6 Credits (premium currency) – Save these for the “Battle Pass” or a Year Pass discount; never spend on renown boosts or cheap skins.
---
Common Beginner Mistakes
---
Day‑One Checklist
Here’s your actionable first‑day checklist:
- Set prone to toggle (not hold).
- Increase vertical sensitivity to 15, horizontal to 25.
- Bind “Ping” to a convenient key (e.g., Middle Mouse or D‑Pad Up).
Remember: Siege has a steep learning curve. Don’t get discouraged if you die often – every death is a lesson. Focus on learning, not winning. Good luck, Operator!
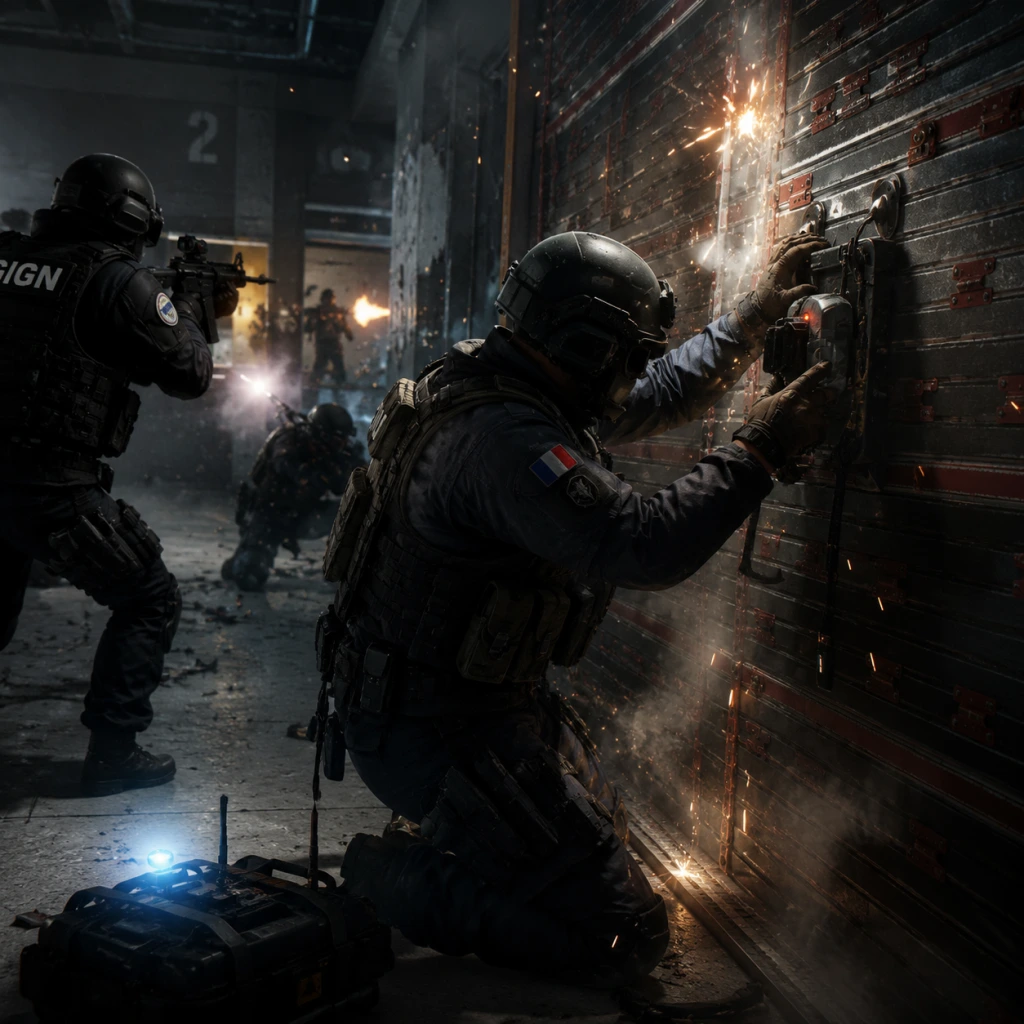
Core Gameplay
Core Gameplay Overview
Tom Clancy's Rainbow Six Siege is a 5v5 tactical first-person shooter centered on small-scale, high-destruction combat. The main gameplay loop revolves around Attacking vs. Defending across multiple rounds. Each match has up to 12 rounds (first to 4 wins) with a bomb defusal scenario. The key systems—combat, destruction, operator abilities, and economy—evolve as you progress from a beginner to a veteran.
---
Player Progression Tiers
Early Game (Levels 0–20)
Main Gameplay Loop:
- Play the Situations or Training Grounds (vs. AI) to learn basic mechanics.
- In Multiplayer (Quick Match), you’re typically assigned basic operators (Recruit) or one unlocked starter operator.
- Rounds consist of: Prep Phase (20 seconds for Attackers to scout) and Action Phase (3 minutes) to breach and secure the bomb site.
- Weapon handling: Simple hip-fire and ADS. No strafing penalties; movement speed depends on armor rating.
- Destruction: Basic wall breaches using breaching charges or shotguns. Soft walls are easy, reinforced walls require hard breachers.
- Gadgets: Use unique gadgets (e.g., Mute's jammers, Sledge's hammer) but limited to a single unlocked operator.
- Account levels unlock new operators, weapon attachments, and cosmetic items. First 5–10 hours earn enough renown to buy a few basic operators (e.g., Ash, Rook, Jäger).
- Battle Pass provides early cosmetics and operator boosters.
- Map knowledge starts very limited. Stick to a few maps (e.g., House, Bank, Clubhouse). Learn common spawn points, objective rooms, and camera locations.
- Use Support Mode or custom games to walk around without enemies.
- Situations act as tutorial missions (10 scenarios) teaching breaching, defusing, and gadget use.
- Weekly challenges (e.g., "Get 15 kills as Defender") reward small renown.
- Renown is the primary currency, earned per match. Use it to unlock operators (500–1,500 renown) or weapon skins.
- R6 Credits are premium currency for cosmetic bundles and operators (for impatient players).
- Unlock first operator: Start with 6 base operators (e.g., Ash, Thermite, Rook, Jäger). Buy one that fits your playstyle.
- Weapon attachments (scopes, grips, barrels) become available as you level up. Prioritize Aim Down Sights (ADS) speed and recoil control attachments.
- No traditional leveling – operators do not gain XP; you unlock them permanently.
- Endgame is not relevant. Focus on learning fundamentals: callouts, crosshair placement, and drone usage.
- Avoid Ranked mode until you have at least 10 operators and basic map knowledge.
- Transition to Unranked or Ranked (after level 30) for more structured matches.
- Rounds require tighter team coordination: breach synergy (Thermite + Thatcher), roaming defense, and objective denial.
- Time management becomes critical – attacking with 30 seconds left forces desperate plays.
- Peeker’s advantage becomes noticeable. Master lean mechanics and crouch spamming.
- Sound whoring is essential: destroy barricades, walk slowly, and listen for footsteps.
- Gadget combos: Use hard breachers (Thermite, Hibana) with anti-utility ops (Thatcher, Twitch) to open reinforced walls.
- Unlock ~20 operators; save renown for season pass or new operators (25,000 renown each).
- Grind for Alpha Packs (cosmetic loot boxes) from match wins. Duplicates give renown.
- Renown farming via daily challenges and battle pass tiers (free track gives operator skins).
- Memorize common pixel peeks and runout spots on 10–15 maps.
- Learn camera locations for Attackers and Defender cameras (default cams, Valkyrie’s black eyes, Maestro’s turrets).
- Use Drone phase efficiently to scan objective and find traps (e.g., Frost mats, Kapkan traps).
- Community Challenges offer large renown bonuses. Participate in seasonal events (e.g., "Rainbow Is Magic") for unique modes.
- Ranked Placement Matches determine your starting MMR – win 10 matches for a rank (Copper to Champion).
- Spend renown on operators first, then weapon attachments and cosmetics. Avoid spending R6 Credits on low-tier skins.
- Battle Pass Seasonal Premium ($10) gives 10+ operators, weapon skins, and 600 R6 credits back.
- Operator pool expands: unlock hard breachers (Maverick, Ace), vertical play ops (Buck, Sledge), trap ops (Lesion, Ela), intel ops (Valkyrie, Maestro).
- Loadout optimization: Choose between low-recoil SMGs (e.g., MP5) vs. high-damage rifles (e.g., AK-12). Attachments like vertical grip reduce recoil; compensator or muzzle brake control horizontal spray.
- Gadget synergy: If teammates pick hard breach + Thatcher, pick a flank watch (Nomad) or anti-utility (Kali).
- Ranked Season (3–4 months) where you climb the ladder. Rewards include seasonal skins and Ranked charm based on final rank.
- Endgame for mid-tier: Complete the Battle Pass, unlock all base operators, and aim for Platinum rank.
- High-level ranked (Platinum–Diamond) or Champions Queue (level 100+).
- Rounds become highly strategic: default positions, utility dump on key walls, 2-minute drone phase for perfect info.
- Meta changes every season (e.g., operator bans, weapon reworks). Adapt to new picks and bans.
- Advanced movement: Crouch-jump vaults, dropshotting (nerfed but still exists), and quick peeks.
- Gadget destroy timing: Shoot Jäger’s ADS arrows, disable Melusi’s banshees, avoid needing to waste utility.
- Reinforce strategically: Not every wall, but choke points and hatches. Play vertical angles from missing floors.
- Unlock all current operators (64+ including year passes). No more renown needed for operators unless new ones release.
- Alpha Packs become excess – use to craft legendary skins. No further account progression except cosmetic collection.
- Master every map including callouts for room names (e.g., "CCTV" on Oregon, "VIP" on Coastline).
- Learn vertical play on maps like Oregon (breach floor above objective from kitchen).
- Use camera placements that are not obvious – high corners, under desks, behind soft walls.
- Esports on-screen events (e.g., Six Invitational, Six Major) give exclusive cosmetic bundles. No in-game missions beyond weekly challenges.
- Bug fixes and balance patches serve as content updates – no story missions.
- Renown pileup: buy all cosmetics from shop (except seasonal skins which rotate).
- R6 Credits only spent on event packs or battle passes (boosts for new season operators).
- Marketplace (player trading) allows selling duplicate skins for premium currency (some exclusive sets can be bought/sold).
- Operator mastery – you main 2-3 operators per side (e.g., Ace + Zofia on attack, Mozzie + Mute on defense).
- Loadout tweaks per map: on Bank, use ACS12 shotgun with Acog on attackers for long sightlines; on Skyscraper, SMG-11 secondary for close range.
- Gadget-specific strategies: Use Maverick’s blowtorch to create tiny holes (mav trick). Warden’s glasses to counter flashbangs during smoke pushes.
- Champions Rank (highest MMR) – top 500 players worldwide. Matchmaking uses region and MMR.
- Seasonal reset to diamond/champion depending on performance. Daily grind to maintain rank.
- Pro League / Sweat Custom – join third-party leagues (e.g., ESL, FACEIT) for cash prizes.
- Apex of Siege – Champions Queue, Pro League scrims, or ranked at 4500+ MMR.
- Rounds revolve around utility economy: each side spends gadgets (flashbangs, nades, claymores) carefully. Often the last 30 seconds are a frantic plant vs. deny.
- Operator bans are mandatory: pick/ban phase to remove meta ops (e.g., Mira, Valk, Smoke).
- Perfect crosshair placement at head height (common angles).
- Pre-fire every common spot. Use sound cues to wallbang (shooting through soft walls based on footsteps).
- Gadget synergy at its peak: Thatcher + Thermite + Maverick for wall opening; Maestro + Clash + Smoke for area denial.
- No further account progression beyond champion titles (seasonal) or esports rank emblems.
- Operator mastery is maxed – you can flex any operator but stick to top-tier picks.
- Know every pixel angle (e.g., tiny gap in the floor on Kafe to shoot from below).
- Use camera spots that are nearly invisible (e.g., Valkyrie cams in the leaves of a plant pot).
- Map exploits (if any) become meta until patched.
- None. Endgame is purely competitive. No PvE content except occasional special events (like classic rainbow is magic) that attract all players.
- Renown is irrelevant – already own everything. Focus on shiny cosmetics like black ice skins, seasonal headgears.
- R6 Credits for esports bundles or special event packs (e.g., Outbreak packs).
- Marketplace high-value items: rare skins can sell for $200+ via player trading (real money not officially supported but occurs).
- Niche operator setups: For example, Kali with low-recoil sniper + suppressed SMG secondary for silent kills on Coastline.
- Gadget placement memory – know all possible Valk cam spots, Maestro turret positions, and Ela trap locations by heart.
- Role specialization – you become known as a frag hunter (entry fragger), flex support, or hard support (plant carrier) on your team.
- Champion Rank – top 1% of players. Resets each season; you must maintain activity to avoid decay.
- Immediate threats of champion queue – long queue times (5–10 minutes) and facing well-known pro players.
- Third-party tournaments (e.g., FACEIT, Gamers8) with cash prizes and Org contracts.
- Endgame is never-ending: every 3 months a new season brings operator reworks, map reworks, and balance changes that shift the meta.
- Headshots are instant kill. Body damage is 30–100 depending on weapon and armor. Limb damage is lower.
- Armor Rating: 1-speed (3-armor) ops take slightly less damage but move slow. 3-speed (1-armor) ops fast but fragile.
- Weapons are mostly realistic with high recoil, small magazines (20-30 rounds). Reloading cancels if you press fire again.
- Soft Materials: Wood walls, plaster, barricades, hatches – can be broken with melee, shotguns, or breaching charges.
- Reinforced Walls: Only hard breachers (Thermite, Hibana, Ace, Maverick) can open. Soft breach gadgets do not work.
- Lethal Destruction: Kali’s CSRX 300 sniper can punch through soft walls. Grenades create large holes.
Combat & Interaction Systems:
Progression:
Exploration:
Quests/Missions:
Economy:
Character/Build Growth:
Endgame Structure (Early perspective):
---
Mid Game (Levels 20–80)
Main Gameplay Loop:
Combat & Interaction Systems:
Progression:
Exploration:
Quests/Missions:
Economy:
Character/Build Growth:
Endgame Structure:
---
Late Game (Levels 80–150)
Main Gameplay Loop:
Combat & Interaction Systems:
Progression:
Exploration:
Quests/Missions:
Economy:
Character/Build Growth:
Endgame Structure:
---
Endgame (Level 150+ and/or Champions)
Main Gameplay Loop:
Combat & Interaction Systems:
Progression:
Exploration:
Quests/Missions:
Economy:
Character/Build Growth:
Endgame Structure:
---
Core Mechanics Deeper Dive
Main Gameplay Loop (All Tiers)
1. Operator Selection (45s) – Pick your operator based on team composition and map.
2. Preparation Phase – Defenders set up reinforcements, gadgets, and cameras. Attackers use drones to locate objective and identify operators.
3. Action Phase (3:00) – Attackers breach, clear rooms, defuse bomb. Defenders hold, roam, and retake.
4. Round End – Win by eliminating entire team, defusing bomb, or preventing defuse (timeout).
5. Switch Sides after 6 rounds. First to 4 rounds wins match.
Combat System
Destruction System
Economy
| Currency | Use | Earned By |
|---|---|---|
| Renown | Operators, skins, packs | Matches, challenges, battle pass |
| R6 Credits | Premium cosmetics, boosters | Purchased with real money |
| Alpha Packs | Cosmetic loot | Random match wins, battle pass |
Progression Tips
- For Early Game: Play Situations fully; unlock operators that match your role (Ash for fragging, Rook for support).
- For Mid Game: Buy hard breach ops first (Thermite, Hibana). They are essential in most team comps.
- For Late Game: Specialize in 3-4 operators per side. Master their gadget placements.
- For Endgame: Watch pro league to learn meta rotations and utility management.
---
Endgame Beyond Levels
Ultimately, Rainbow Six Siege’s core gameplay loop remains consistent across all levels. The difference lies in decision-making speed, communication, and utility economy. Whether you’re a Copper V struggling to find the bomb or a Champion outmaneuvering pros, the fundamentals of breaching, peeking, and droning stay the same. Master the basics early, refine the details in mid-game, and compete at the highest level in endgame.
Game Tips
Game Tips for Tom Clancy's Rainbow Six Siege
Below is a comprehensive set of tips organized by category. They range from beginner fundamentals to advanced optimizations, all designed to improve your effectiveness in close-quarters tactical combat.
---
Beginner Tips (Foundation)
1. Play the Tutorials & Situations First
Before jumping into multiplayer, complete the in-game Situations mode. It teaches you basic movement, aiming, gadget usage, and destruction. Each situation focuses on a specific skill (e.g., breaching, defending bomb sites). This will save you from frustration against experienced players.
2. Learn the Operator Roles
Operators are divided into Attackers and Defenders, each with unique gadgets. Start with simple operators:
- Attackers: Sledge (breaches walls with hammer), Thatcher (disables defender gadgets).
- Defenders: Rook (provides armor plates to teammates), Mute (jams drones and gadgets).
These operators have straightforward abilities that let you focus on gunplay and map knowledge.
3. Use Your Drone Wisely (Attack)
During the prep phase, drive your drone into the objective room to locate the defuser bomb site, but then hide it in a safe location (e.g., under furniture) so you can use it later to scout. On attack, use your second drone sparingly—save it for clearing rooms or checking traps.
4. Reinforce the Right Walls (Defense)
Not every wall needs reinforcement. Prioritize walls that connect the objective room to the outside or adjacent rooms where attackers can breach. Leave some unreinforced to create rotation holes between rooms. A common mistake is reinforcing every wall, which traps your team inside.
5. Communicate, Even Without a Mic
Use the ping system (default middle mouse button or up on d-pad) to mark enemy locations, traps, or useful areas. Ping on the floor or object to avoid giving away your position. Use text chat for callouts if you don’t have a microphone.
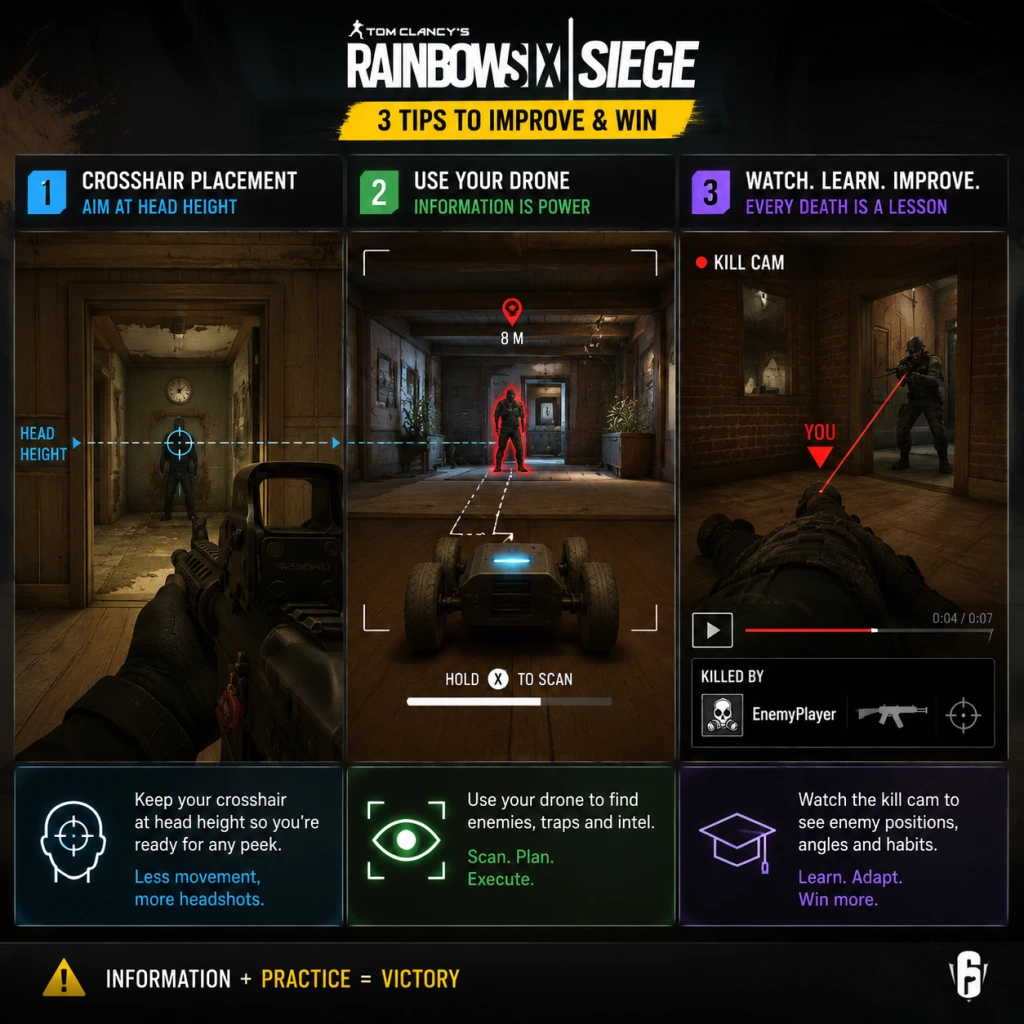
6. Practice Crosshair Placement
Always keep your crosshair at head height (about 1.8 meters from the ground) and aim around corners where enemies might peek. In Siege, headshots are instant kills. Good crosshair placement drastically reduces reaction time needed.
---
Combat Tips
7. Pre-fire Common Angles
When you expect an enemy behind a wall or at a window, start firing a short burst as you round the corner. This increases your chance of landing a headshot even before you fully see the enemy. Use it when you have intel (e.g., from a drone or audio cue).
8. Peeker’s Advantage
Due to network latency, the player who peeks (moves around a corner to shoot) has a slight delay advantage over the stationary player holding the angle. To counter this, hold tight angles or quick-peek to bait shots. Never sit still behind a soft wall—enemies can wallbang you.
9. Use Sound to Your Advantage
Siege has directional audio. Pay attention to footsteps, gadget sounds, barricade breaking, and reloading. Wear a good headset. Crouch walk to reduce noise, but understand that running is loud. You can use sound to fake movement: run one way then crouch-walk back.
10. Learn to Quick Peak
To check a corner without exposing your whole body, lean left/right (Q/E on PC) and quickly move out and back. This is called a “jiggle peak.” It gives you a snapshot of the area while making you a harder target. Practice in Terrorist Hunt mode.
11. Crouch & Prone at the Right Time
Crouching reduces your profile but slows movement. Use it when holding tight angles. Prone is rarely useful except for hiding behind low cover or when planting the defuser in a tricky spot (e.g., behind a shield). Avoid proning in the open—you become an easy headshot.
12. Wallbanging (Shooting Through Walls)
Many walls and floors are destructible. If you know an enemy is behind a soft wall (e.g., via a drone or sound), fire a burst through it. The same applies to floors above or below. Use a weapon with high penetration such as DMRs or LMGs. Be mindful that some walls are reinforced (bulletproof) or metal (not penetrable).
---
Attacker Tips
13. Drone Efficiently
In the prep phase, drive your drone into the objective to spot the bomb site, but then back it into a safe corner. On the main phase, use your secondary drone to clear rooms before entering. If you lose your drone, you lose that intel source. Advanced trick: jump your drone over door gaps to avoid detection.
14. Breaching Order & Collaborating with Hard Breachers
If you have a hard breacher like Thermite, Hibana, or Ace, they need support from Thatcher or Kali to disable defender electronic gadgets (like Mute jammers or Bandit batteries). Coordinate with your team: “Thatcher EMP on the garage wall, then Thermite breach.”
15. Plant the Defuser Smartly
When planting, choose a spot that is partially covered (e.g., behind a shield or soft wall) and where you have cover. Announce your plant to the team so they can cover you. Do not plant out in the open unless you have smoke grenades and a clear escape route.
16. Use Vertical Gameplay
Attackers can destroy hatches and floors to shoot into the objective from above. Operators like Buck and Sledge excel here. Open the floor above the bomb site and shoot at defenders below. This gives you a powerful angle without exposing yourself to multiple defender sightlines.
17. Deal with Gadgets (Gadget Clearers)
Operators like IQ, Thatcher, and Kali are essential for disabling defender gadgets (e.g., Valkyrie cameras, Maestro turrets, bulletproof cameras). If your team lacks a gadget clearer, use grenades or Ash charges to destroy them from range. Always prioritize utility over kills.
---
Defender Tips
18. Set Up a Strong Roam
Roamers (defenders who leave the objective) should hold important map areas (like stairs or connecting corridors) to waste attacker time. Operators like Vigil, Caveira, and Rook can roam effectively. Don’t roam too far—you need to be able to rotate back to the objective if needed.
19. Anchor the Objective
Anchors (defenders who stay on site) should hold the bomb site with utility like Maestro’s evil eye, Echo’s yokai, or Mira’s black mirrors. Place traps (Lesion mines, Kapkan traps, Frost mats) at common entry points. Communicate when attackers are pushing.
20. Use Barricades Wisely
Barricading doors slows attackers and gives you audio cues when they break them. However, barricading too many doors can block your own rotations. Leave some barricades unreinforced or only partially reinforced (by hitting them once) so you can quickly vault through.
21. Cams and Intel
Use default cameras to spot attackers. If they are destroyed, rely on operator gadgets (Valkyrie cams, Maestro turret, bulletproof cameras). Always scan enemies (red ping) only briefly; instead, use yellow pings to mark their location without revealing your camera’s position. As Valkyrie, hide cams in unexpected places like foliage or behind signs.
22. Rotations and Hatches
Create rotation holes between adjacent rooms using Shotguns or impact grenades. This allows you to move without exposing yourself to windows. Always close hatches above the site to prevent attackers from dropping down. Use reinforced hatches to protect objectives below.
23. Trap Placement Tips
Place Kapkan traps on windowsills or doorframes at knee height—attackers rarely check that low. Lesion’s Gu mines should be placed near common pathways and drones drone paths. Frost mats are most effective around shield corners or directly behind vaultable windows.
---
Map Knowledge & Exploration
24. Learn the Callouts
Learn the common room names (e.g., “Red Stairs,” “Library,” “Garage,” “Basement”) for each map. This speeds up communication. You can find map guides online or create custom lobbies to explore. Start with the most played maps: Consulate, Oregon, Clubhouse, Coastline, Border.
25. Know the Default Camera Locations
Each map has default cameras (usually in hallways or large rooms). Memorize their positions so you can either destroy them as an attacker or avoid them as a defender. Use Valkyrie cams to replace destroyed ones.
26. Understand Common Rush Routes
Attackers often rush from spawn points toward the objective via shortest paths. Defenders should pre-place barbed wire or traps on those routes. As an attacker, consider alternative long rotates to avoid defender setup.
27. Soft vs. Hard Walls
Soft walls are made of wood, plaster, or drywall – penetrable by bullets and explosives. Hard walls are reinforced with steel – require hard breachers or specific gadgets (like Maverick’s blowtorch) to breach. Always identify which walls you can shoot through.
28. Exploitation of Hatches
Hatches connect floors. Attackers can open them from below with a breaching charge. Defenders should close them with reinforcement or use gadgets to block. If you’re defending below a hatch, be aware attackers might drop down; consider placing a trap below.
---
Resource Management & Economy
29. Loadout Choices Affect Your Playstyle
Your weapon and attachments should match your role. For example:
- Attacker with an ACOG scope: Suited for long-range engagements and holding angles.
- Defender with SMG and close range: Use holographic sight and a laser (if desired) for hip-fire accuracy.
Always choose a secondary gadget (smoke, flash, claymore, etc.) that complements your operator. For instance, if you are Thermite, bring smokes to cover the breach.
30. Weapon Attachments Matter
Muzzle attachments:
- Flash Hider: Reduces vertical recoil; best for most full-auto weapons.
- Compensator: Reduces horizontal recoil; good for tapping or burst.
- Silencer: Hides tracers and reduces sound – use only for sneaky flanks, but reduces damage range.
Grip: Vertical grip for recoil reduction (most common), angled grip for faster ADS speed (but more recoil). Learn your weapon’s recoil pattern in the shooting range.
31. Reinforcement Management (Defense)
Each defender has two reinforced walls. Use them wisely; for example, if you’re Mira, you want to reinforce walls around your black mirror. If you’re a roamer, you may not need to reinforce at all – leave that to anchors. Communicate who reinforces which walls.
32. Use Barbed Wire and Deployable Shields
Barbed wire slows attackers and gives audio cues when they step into it. Place it at doorways or stairs. Deployable shields can block sightlines or protect a bomb planter. Don’t block your own team’s movement.
---
Operator Builds & Loadouts (Best Pairings)
33. Hard Breach Duos
- Thermite + Thatcher: Classic. Thatcher EMP disables jammers, Thermite blows the wall.
- Hibana + Maverick: Hibana opens smaller holes (3 pellets), Maverick can silently cut holes for line of sight.
- Ace + Kali: Ace’s gadget can be shot out, so Kali’s sniper can destroy defender gadgets from range.
34. Roamer Combos
- Vigil + Mute: Vigil can hide from drones, Mute stops them from entering certain areas.
- Caveira + Pulse: Caveira interrogates for intel, Pulse can scan through walls to locate attackers.
35. Support Attacker Loadout
Bring a claymore to cover your flank while you drone. As Thatcher, you can swap your secondary gadget for smokes to conceal the hard breacher’s animation. As Finka, equip the Spear .308 with an ACOG for longer-range support.
36. Anchor Defender Loadout
Depends on site:
- For small rooms, use shotguns (Echo’s Supernova, Maestro’s ALDA LMG).
- For open sites, use high RoF SMGs (Rook’s MP5, Doc’s MP5). Always bring a deployable shield or bulletproof camera if available.
---
Advanced Strategies & Optimizations
37. Droning as a Team
Organize: one attacker drones ahead while the other covers. The droner should park the drone around a corner, then relay info to the teammate. Do not both drone at the same time—risk of both being destroyed.
38. Shield Operators (Montagne, Blitz, Fuze with shield)
Shield operators should not stand still. Crouch-walk or sprint and then deploy shield. Blitz can blind enemies then melee. Montagne can extend his shield to cover the entire body while teammates plant. Use the shield to block doorways.
39. C4 (Remote Explosive) Usage
Defenders can place C4s on walls or ceilings to blow up attackers below. Throw a C4 and detonate mid-air over a shield or behind cover. Practice the cook timing: 3 seconds after throwing, it explodes. You can also use it to destroy breach charges.
40. Countering Common Tactics
- Ying’s Candela: Look away or use Warden’s glasses.
- Blitz Flash: Melee his shield to push it aside and shoot his exposed legs.
- Capitao’s Smoke: Move quickly through it or use a smoke to hide your movement.
- Jackal’s Tracking: Stop walking for a few seconds to stop the ping; crouch walking leaves footprints but at slower pace.
41. Breach Denial
As Bandit or Kaid, you can electrify reinforced walls to destroy breaching gadgets. Place a Bandit battery on the wall at the last second (bandit trick) to destroy Thermite’s charge as it deploys. Kaid can electrify hatches from a distance with his claw.
42. Osa’s Transparent Shield (Attacker)
Osa can place a shield that she can look through. Use it to hold tight angles on windows or hallways. It can be shot out over time, so reposition after a few shots. Place it on a doorway to deny defenders from peeking.
43. Amaru’s Grapple (Attacker)
Use Amaru to quickly enter windows or hatches. But beware: the grapple makes a loud noise and exposes you. Best used as a surprise after drones clear an area. Coordinate with a teammate to draw attention.
44. Melusi’s Banshees (Defender)
Place Banshees near doorways or windows to slow attackers and create audio cues. Attackers can shoot them, so place them behind soft walls or in blind spots. They are especially effective during the plant phase.
45. Aruni’s Laser Gates (Defender)
Aruni’s gates destroy gadgets and drones, and deal damage to attackers. Place them at choke points. They require a cooldown after being activated. Use them to protect reinforcements or rotate paths.
---
Economy in Siege (Renown & Shop)
46. Spend Renown on Operators First
Save your renown (earned currency) to unlock operators. Start with year 1 or year 2 operators because they are cheap and strong. Avoid buying cosmetic packs until you have a solid operator pool. Each operator costs 1,000–25,000 renown depending on release year.
47. Use Battle Pass for Currency
The Battle Pass (if you purchase it) provides renown boosts and exclusive cosmetic items. Free track also gives some renown and Alpha Packs. Focus on completing weekly challenges to maximize renown gain.
48. Buy Alpha Packs Only When You Have Surplus
Alpha Packs give random cosmetics. They cost 5000 renown each. Only buy them after you own all useful operators. Alternatively, earn them through gameplay (winning matches, completing challenges).
---
Conclusion
Rainbow Six Siege rewards map knowledge, teamwork, and constant learning. Start with basic operators and communication, then gradually incorporate advanced tactics like vertical play, gadget countering, and site setups. Practice in Terrorist Hunt to hone aim and movement. Remember: every death is a lesson—watch the kill cam to see what you did wrong. Good luck, and see you on the battlefield!.
Game Settings
Game Settings Guide for Tom Clancy\'s Rainbow Six Siege
Properly configuring your settings is crucial for competitive performance in Rainbow Six Siege. This guide covers every settings category—graphics, audio, controls, accessibility, language, network, and gameplay—with detailed recommendations for different hardware tiers and common pitfalls.
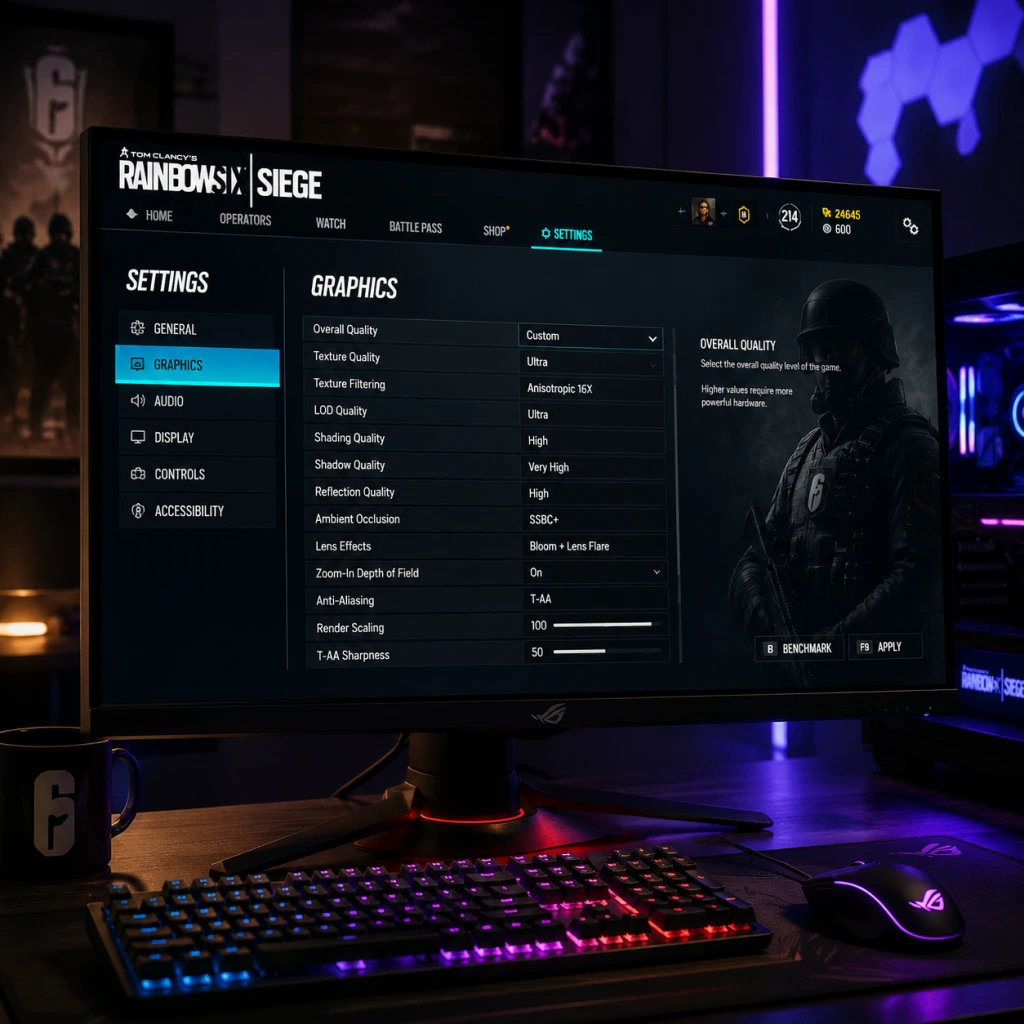
Graphics Settings
Graphics directly affect visibility, frame rate, and input lag. Siege is CPU-bound at high frame rates; even low-end GPUs can push 60 FPS if CPU is strong. Aim for 144+ FPS if possible for smoothness.
#### Display & Resolution
- Display Mode: Fullscreen (lowest input lag) > Borderless Windowed (alt-tab easier, slight lag) > Windowed (not recommended).
- Aspect Ratio: 16:9 gives widest FOV; 4:3 stretches targets horizontally (often used by pros for bigger head hitboxes). 16:10 is a middle ground.
- Resolution: Native monitor resolution (e.g., 1920x1080) for clarity; lower resolution (e.g., 1280x720) boosts FPS but reduces sharpness.
- Refresh Rate: Match your monitor\'s max (e.g., 144Hz, 240Hz). Enable in Windows display settings first.
#### Advanced Graphics
| Setting | Low-End (60 FPS) | Mid-Range (100-144 FPS) | High-End (200+ FPS) | Notes |
|---|---|---|---|---|
| Texture Quality | Low | Medium | High/Ultra | VRAM heavy; if \<4GB VRAM keep Low. |
| Texture Filtering | 1x | 4x | 8x | Minor performance impact; 4x is fine. |
| LOD Quality | Low | Medium | High | Affects detail draw distance; low helps spot enemies. |
| Shading Quality | Low | Low | Medium | Shadows and lighting; low reduces clutter. |
| Shadow Quality | Low | Low | Medium | Higher shadows make enemies easier to see in dark corners. |
| Reflection Quality | Off | Low | Medium | Mirror effects; can distract; low/off for performance. |
| Ambient Occlusion | Off | SSBC | SSBC+ | Adds depth; SSBC is a good balance. |
| Lens Effects | Off | Off | Off | Bloom, flares; purely cosmetic & can obscure targets. |
| Zoom-In Depth of Field | Off | Off | Off | Blurs background when ADS; hinders peripheral vision. |
| Anti-Aliasing | T-AA (Low) | T-AA (Low) | T-AA (High) | T-AA blurs; use T-AA (Low) for clarity. FXAA is less blurry but aliased. |
| Render Scaling | 50-75% | 100% | 100% | Lower = less GPU load but blurry. Only for extremely weak GPUs. |
| T-AA Sharpness | 0.5-0.7 | 0.5 | 0.3 | Fine-tune after choosing T-AA; too sharp = jagged edges. |
- VSync: Off at all costs. It adds input lag. Use G-Sync/FreeSync instead if you have tearing, but ensure frame rate is capped a few FPS below refresh rate.
- Frame Rate Limit: Set to your monitor\'s refresh rate (e.g., 144) or unlimited if temps are okay. Uncapped can cause screen tearing but minimal lag.
- Field of View (FOV): Default 60 is narrow; 90 is the sweet spot for peripheral awareness without fish-eye.
- Aspect Ratio & FOV: 4:3 stretches horizontally, making heads appear wider; many pros use 4:3 with FOV 84-90. 16:9 gives more horizontal view but smaller heads. Experiment in training grounds.
- Master Volume: 100% (adjust OS volume).
- SFX Volume: 100% (footsteps, gunshots, gadgets).
- Dialogue Volume: 80-100% (operator lines, callouts).
- Music Volume: 0-20% (can mask footsteps; many pros lower to 0).
- Voice Chat Volume: 100% (team communication).
- Voice Chat Record Mode: Open Mic (default) or Push-to-Talk (recommended to avoid background noise).
- Voice Chat Recording Volume: 100% (adjust in Discord/Windows afterward).
- Dynamic Range: Night Mode compresses audio, making quiet sounds (footsteps) louder. Hi-Fi preserves range but requires good headphones. TV is balanced. Most competitive players use Night Mode.
- Sound Mode: 3D Audio (HRTF) — use this. Disable any “Surround Sound” in headset software; Siege\'s HRTF works best with stereo headphones.
Audio Settings
Sound cues are vital for information. Siege uses HRTF (Head-Related Transfer Function) for 3D audio; no need for surround virtualizers.
Misconfiguration Alert: If you use Windows Sonic or Dolby Atmos, disable them in Windows spatial sound. They conflict with Siege\'s own HRTF and reduce directional accuracy.
Controls Settings
Customize your controls for speed and comfort. Default layout is decent but can be improved.
#### Key Bindings (Keyboard & Mouse)
| Action | Default | Recommended | Reason |
|---|---|---|---|
| Lean Left/Right | Q / E | Q / E (or mouse side buttons) | Keep default for quick peeks; rebinding to side buttons frees keyboard hand. |
| Prone | Z | Ctrl (hold) or C (toggle) | Easier to go prone quickly. |
| Crouch | Ctrl | C (hold) | Hold-to-crouch lets you uncrouch faster; toggle can cause mis-timing. |
| Walk | Left Shift | Left Shift (hold) | Default fine; some swap to Caps Lock. |
| Gadget 1 & 2 | Mouse 4/5 | Mouse 4/5 (or G/H) | Keep on mouse for fast use. |
| Push to Talk | B | V (thumb) | Closer to movement keys. |
| Primary Gadget | 3 | Scroll wheel down | Quicker than reaching for 3. |
| Secondary Gadget | 4 | Scroll wheel up | Same logic. |
| Drone/Camera | Mouse button (extra) | Q or E (alternate) | Avoid moving hand off movement keys. |
- DPI: 400 or 800 DPI (most common among pros). Higher DPI makes fine adjustments harder.
- In-Game Sensitivity:
- Aim Down Sights (ADS) Sensitivity: Set to Relative (not Absolute) so muscle memory transfers across magnifications.
- Mouse Acceleration: Off in Windows (Enhance Pointer Precision) and in-game (none).
- Raw Input: On (bypasses Windows mouse smoothing).
- Stick Layout: Default (Left stick move, right stick look). Many use L2/R2 for ADS/Shoot.
- Stick Deadzone: 5-10 (lower for responsiveness; too low causes drift).
- Trigger Deadzone: 0-5 (minimal).
- Vibration: Off — it causes input delay and distracting feedback.
- Controller Sensitivity: Start at 20-30 vertical, 30-40 horizontal, ADS 25-35. Adjust upward as you get comfortable.
- Colorblind Mode: Protanopia, Deuteranopia, Tritanopia — changes team colors (blue/orange instead of red/green). Helps distinguish friend from foe. Enable in Settings > Accessibility.
- Subtitles: On for all audio (story missions, dialogue).
- Camera Shake: Off — reduces disorientation from explosions.
- Controller Button Layout: Can remap all buttons for physical limitations.
- Narrator (PC): Not built-in, but Ubisoft Connect overlay can be used with third-party screen readers.
- High Contrast Mode: Not a setting, but T-AA Sharpness at 0.5 and Digital Vibrance in GPU driver (NVIDIA 50-70% / AMD Saturation) can enhance visibility.
- Game Text: Supports many languages (English, French, German, Spanish, etc.). Choose in Settings > General > Language.
- Voice Chat Language: Not a separate setting; voice is always the spoken language of players.
- Subtitle Language: Independent of text language.
- Audio Language: Separate option — choose English for consistency with callouts, or native language for immersion.
- In-Game Voice Lines: Operators speak their native language by default; you can change to English only via Voice Over Language setting (English).
- Data Center Selection: Automatic (picks best ping). You can manually select a specific data center in Settings > Network > Data Center (useful if connecting to a region with high ping or to play with friends).
- Network Connectivity: Choose LAN if on a wired connection, Wi-Fi if on wireless (the game adjusts some settings). Wired is strongly recommended.
- Bandwidth: Not configurable in-game, but ensure your router QoS prioritizes game traffic.
- Port Forwarding: Not required, but enabling UPnP reduces NAT issues. For strict NAT, forward ports: UDP 3074, UDP 6015, TCP 3074.
- Disable Nagle\'s Algorithm: Reduces packet delay. Run in CMD as admin: `netsh interface tcp set global autotuninglevel=disabled` (or use custom scripts).
- Disable Windows Game Mode: Sometimes interferes with network priority. Turn off in Windows Settings > Gaming > Game Mode.
- Close Background Bandwidth Hogs: Steam downloads, streaming, etc.
- Always Show: Operator health, ammo count, compass — enable all. Compass helps callout directions (e.g., “Red stairs”).
- Hit Indicator: On — shows when you damage an enemy (X icon).
- Kill Feed: On — essential to know who died and how.
- Drone / Camera HUD: On — shows battery life and spectating when dead.
- Observation Tool HUD: On — shows number of drones left.
- Mini Map: On — but reduce opacity so it doesn\'t block vision.
- Scoreboard: H toggle — keep default.
- Matchmaking Type: Standard (ranked/unranked) or Quick Match. Choose based on playstyle.
- Map Preference: Uncheck maps you dislike (only affects casual queues; not available for Ranked).
- Game Mode: Bomb (primary competitive mode), Secure Area, Hostage. Uncheck non-preferred modes to increase chances of your favorite.
- Kill Cam: On (learn from your death) — but in Ranked, only team killcams are shown.
- Replay Mode: After match, you can review full game — enable auto-recording if you want to review.
- Spectator HUD: When dead, you can toggle overhead view (F7) or free camera (F8).
- Gadget Placement Preview: On — shows trajectory before throwing (e.g., Valkyrie cam, C4).
- Drone Boost: On — double tap shift to sprint drone for a short time.
- Auto Match Up: Off — prevents accidentally joining a new round after timeout.
- Prefer to Skip Map Ban Phase: Only relevant in Ranked; set to Yes to skip if you don\'t care about bans (saves time).
- Resolution: 720p or 900p
- All graphics: Low/Off
- T-AA Low, Render Scaling 75%
- Field of View: 75 (lower FOV = higher FPS)
- Shadows: Low
- Aim for 60-90 FPS
- Resolution: 1080p
- Textures: Medium, Filtering: 4x, Shadows: Medium
- LOD: Medium, Shading: Low
- T-AA Low, Sharpness 0.5
- FOV: 90
- Aim for 100-144 FPS
- Resolution: 1440p or 1080p at 240Hz
- Textures: High, Filtering: 8x, Shadows: High
- LOD: High, Shading: Medium
- Ambient Occlusion: SSBC
- T-AA High, Sharpness 0.3
- FOV: 90
- Aim for 144+ FPS (144Hz) or 200+ FPS (240Hz)
- Resolution: 1440p or 4K on high refresh
- Textures: Ultra, Filtering: 16x
- Everything High/Ultra except Lens Effects/Depth of Field Off
- T-AA High, Sharpness 0.2
- FOV: 90
- Aim for max refresh rate (240/360)
- [ ] Launch a Terrorist Hunt (Training Grounds) solo.
- [ ] Adjust mouse sensitivity until you can do a comfortable 180° turn with one swipe.
- [ ] Test audio: walk on different surfaces (wood, metal, carpet) and ensure directional sound is clear.
- [ ] Check FPS counter (Ctrl+Shift+F) — aim for stable frames above your monitor refresh rate.
- [ ] Play a Quick Match to test controls under pressure.
- [ ] If using controller, adjust deadzones to avoid drift.
- [ ] Verify VSync is off and G-Sync/FreeSync is on if available.
- [ ] Set voice chat push-to-talk if you have background noise.
- Horizontal/Vertical: 5-15 (adjust to your comfort; lower = more precise).
- ADS (Aim Down Sights): 30-50 (relative to hipfire; 50 is 1:1 for 1x sights).
- Scope Sensitivity (1.0x): 50-60 for older scopes; ACOG (2.5x) often set to 30-40.
Misconfiguration Point: Mouse Smoothing (in-game setting) should be Off — it adds input lag. Also ensure your Windows pointer speed is 6/11 (default) and Enhanced Pointer Precision disabled.
#### Controller Settings (Console / PC w/ Controller)
Accessibility Settings
Siege includes several options to accommodate different needs.
Special Attention: If you have difficulty seeing enemies through smoke, set Shading Quality to Low — it reduces volumetric smoke density. Also, turn Lens Effects Off to remove glare.
Language Settings
Tip: Keep game audio language as English to understand enemy callouts (e.g., “Hostage secured!”) and operator abilities.
Network Settings
Network configuration impacts ping, packet loss, and connection quality. Siege uses Ubisoft servers and a client-server model.
#### In-Game Network
#### PC-Specific Network Optimizations
Misconfiguration: Data Center Auto may route you through a distant server if your ISP routes poorly. Manually select a data center (e.g., `eus2` for US East) after checking pings in-game (press Ctrl+Shift+F to see FPS and ping).
Gameplay Settings
These settings affect matchmaking, HUD, and game behavior.
#### HUD Options
#### Matchmaking Preferences
#### Spectator & Camera
#### Gameplay Tweaks
Optimal Settings by Hardware Level
#### Low-End (GTX 1050 / RX 560, 8GB RAM, i5-6400)
#### Mid-Range (GTX 1060 / RX 580, 16GB RAM, i7-8700)
#### High-End (RTX 2070 Super / RX 5700 XT, 16GB RAM, Ryzen 5 3600)
#### Ultra (RTX 3080 / RX 6800 XT, 32GB RAM, Ryzen 7 5800X)
Settings That Are Easy to Misconfigure (Summary)
1. VSync: Must be Off — adds 10-20ms input lag.
2. Mouse Smoothing/Accleration: Both Off — destroys muscle memory.
3. Dynamic Range: Use Night Mode for footstep audio, not Hi-Fi.
4. Aspect Ratio: 4:3 stretches enemies, but reduces horizontal FOV. Many pros use 4:3 with FOV 84-87.
5. ADS Sensitivity: Set to Relative (not Absolute) for consistency across scopes.
6. Data Center: Auto might give bad ping; manually select a good one.
7. Frame Limit: Set to max monitor refresh rate or unlimited (if you can handle tearing). Never enable VSync.
8. Colorblind Mode: Even if not colorblind, enabling a mode (Deuteranopia) changes team colors from pale blue to vibrant orange — easier to see enemies against backgrounds.
9. Controller Vibration: Off — reduces input delay and helps with aim precision.
Final Checklist After First Setup
Remember: Siege is a game of milliseconds. Every setting that reduces input lag or improves visual clarity gives you an edge. Start with the recommendations above, then fine-tune to your personal preference in the Shooting Range.
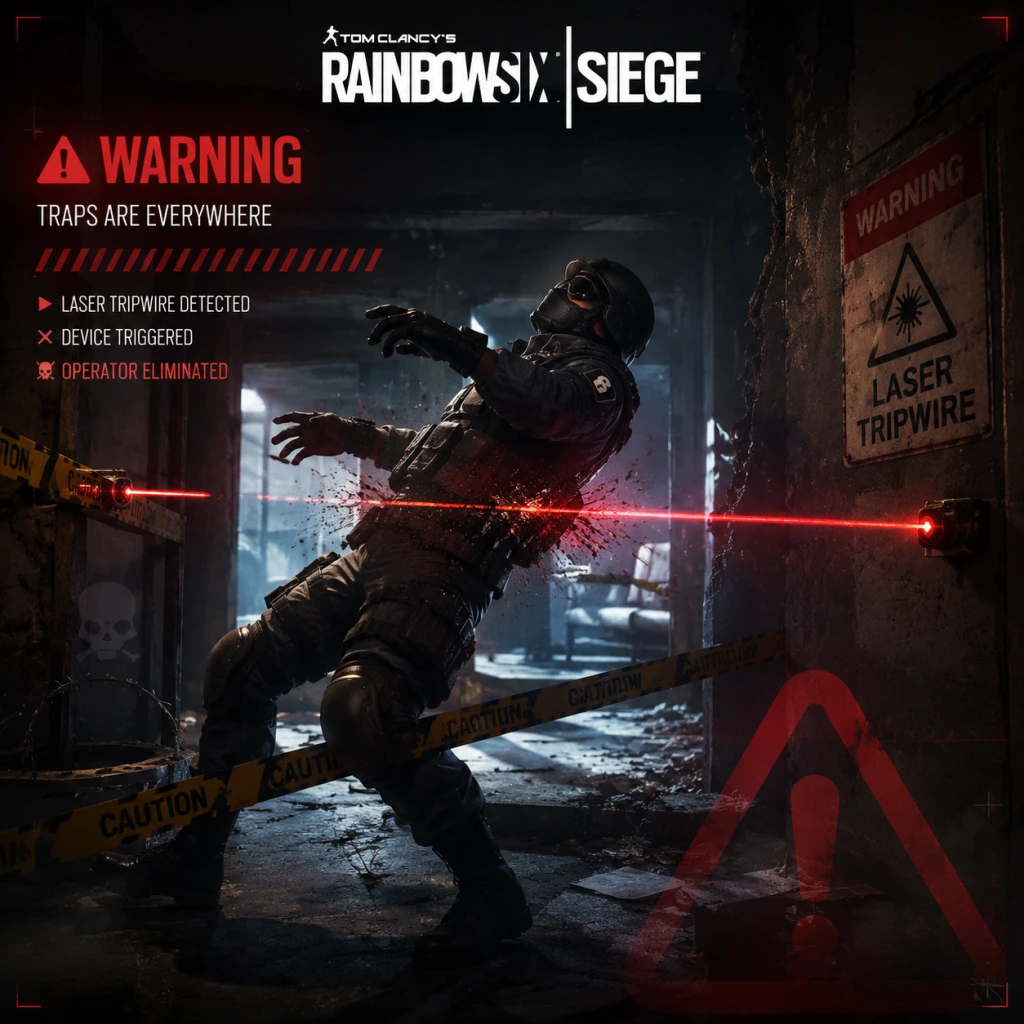
Important Notes
Important Notes for Tom Clancy's Rainbow Six Siege
This section collects warnings, pitfalls, irreversible choices, missable content, difficulty spikes, grinding traps, online etiquette, anti-cheat notes, save management, and things players commonly regret not knowing earlier. Read carefully to avoid frustration and save time.
⚠️ Warnings & Pitfalls
- Matchmaking Penalty: Leaving a match early (ranked or unranked) incurs a 15-minute ban for the first offense, escalating to 1 hour, 2 hours, 10 hours, and even longer for repeat offenses. Even a single disconnect can trigger this if you don't rejoin in time.
- No Reconnect for Casual: If you disconnect from a Quick Match or Arcade match, you cannot rejoin. For Ranked and Unranked, you can reconnect within the same round if you return before the round ends (or during prep phase).
- Team Killing: Accidental or intentional team kills result in a “Reverse Friendly Fire” penalty. The game will automatically reflect damage you deal to teammates after a warning. Repeated team killing leads to bans (15 min to perma).
- Voice Chat Toxicity: Ubisoft uses a reporting system. Harassment, hate speech, or loud music can lead to chat bans (text or voice) or even account action. Mute toxic players quickly via scoreboard.
- Ubisoft Connect Overlay Issues: Sometimes causes crashes or performance drops. Disable “In-Game Overlay for supported games” in Ubisoft Connect settings if you experience problems.
- Cross-Play Limitations: Full cross-play exists between PC (Ubisoft Connect, Steam, Epic) and between consoles (PlayStation & Xbox). PC and console players cannot party together. Your account progress does not transfer across platforms.
###
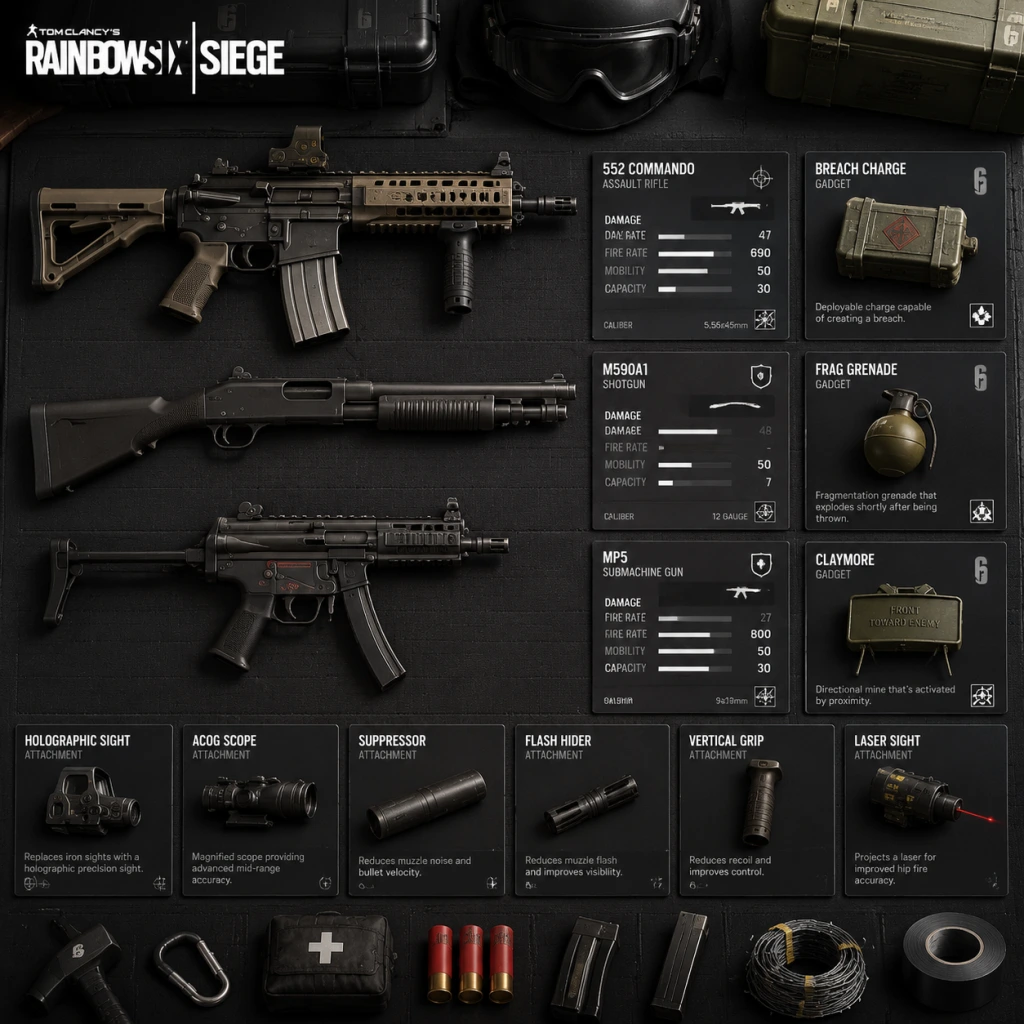
All Game Items
All Game Items Guide for Tom Clancy's Rainbow Six Siege
This guide covers every item type in Rainbow Six Siege, from operator gadgets and weapons to cosmetics and currencies. Items are grouped logically with explanations of function, acquisition, and optimal use.
---
1. Operator Gadgets (Primary Abilities)
Each Operator has a unique gadget that defines their role. Gadgets are unlocked by purchasing the Operator with Renown or R6 Credits.
Attackers
| Operator | Gadget | Function | Use Case |
|---|---|---|---|
| Sledge | Breach Hammer | Destroys wooden floors, walls, and barbed wire | Soft breach, create vertical angles |
| Thatcher | EMP Grenade | Disables electronic gadgets (ADS, cameras, etc.) | Prep site for hard breachers; synergizes with Thermite/Hibana |
| Ash | Breaching Round | Destroys barricades, soft walls, and castle barricades from range | Quick vertical or horizontal entry |
| Thermite | Exothermic Charge | Breaks reinforced walls (hard breach) | Must-use for reinforced site entry; combo with Thatcher or Twitch |
| Hibana | X-Kairos Launcher | Fires pellets that detonate to break reinforced hatches/walls | Versatile hard breach; can open small kill holes |
| Twitch | Shock Drone | Fires taser to disable enemy gadgets and damage operators | Gadget denial, scouting, anti-Mute/Castle |
| Montagne | Extendable Shield | Full-body shield that protects him and teammates | Plant carrier, bait, or corridor control |
| Fuze | Cluster Charge | Attaches to destructible surfaces, then fires grenades into the room | Area denial, clearing corners on bomb site |
| Glaz | Flip Sight (OTA) | Turns sniper scope into thermal vision through smoke | Smoke pushes, plant cover; combo with Capitão |
| Blitz | Flash Shield | Flash-tastic – blinds enemies when sprinting with shield | Aggressive room clearing, solo push |
| IQ | Electronics Detector | Scans for gadgets through walls (phones, batteries, traps) | Intel, anti-Valkyrie/Pulse/Echo |
| Buck | SK4-8 Shotgun (underbarrel) | Destroys floors, walls, and barricades | Vertical play, open sight lines quickly |
| Blackbeard | Rifle-Shield | Mountable face shield that protects head from shots | Hold tight angles, peek windows |
| Capitão | Crossbow & Asphyxiating Bolts | Fire smoke or fire bolts (area denial) | Smoke plant, fire to flush defenders |
| Y1 Operators | (See above – all Year 1 ops) | ||
| And more (over 70 operators) |
Defenders
| Operator | Gadget | Function | Use Case |
|---|---|---|---|
| Smoke | Remote Gas Grenade | Deploys poisonous gas that damages attackers over time | Area denial, plant denial, time wasting |
| Mute | Signal Disruptor | Jams drones, gadgets, and breaches in a radius | Anti-intel, hard breach denial; combo with Bandit |
| Castle | Armor Panels | Reinforce barricades to be bulletproof | Block lines of sight, slow attacks; weak to breaching rounds |
| Pulse | Cardiac Sensor | Portable heartbeat sensor through walls | Wallbang intel, flank watch |
| Doc | Stim Pistol | Fires stim that heals teammates (40HP per shot) | Sustain, reviving downed teammates; can overheal to 140HP |
| Rook | Armor Pack | Provides +20% damage resistance and bleedout protection | Team-wide durability; always useful |
| Kapkan | Entry Denial Device | Laser tripwire on doorways/windows – explodes when triggered | Passive kills, map pressure |
| Tachanka | “Shumikha” Launcher | Fires incendiary grenades (fire area denial) | Zone control, plant denial, synergy with Smoke |
| Bandit | Shock Wire | Electrifies barriers, barbed wire, and deployable shields | Hard breach denial (bandit tricking) |
| Jäger | Active Defense System (ADS) | Shoots down grenades, flashes, smokes in a radius | Grenade denial; place near objective or shield |
| Valkyrie | Black Eye Camera | Throwable bulletproof camera (sticks to surfaces) | Extra intel off-site; counter: IQ or Twitch |
| Caveira | Silent Step + Interrogation | Silent walk and pistol; interrogate downed enemy for team wallhack | Flank, roam, information gathering |
| ... (all others) |
---
2. Secondary Gadgets
These are equipped in addition to primary gadgets and weapons. Each operator has two choices.
Attackers
| Gadget | Effect | When useful |
|---|---|---|
| Frag Grenade | High-explosive timer grenade | Clearing tight rooms, killing defenders behind cover |
| Flashbang | Blinds defenders in blast radius | Entry fragging, pushing site |
| Smoke Grenade | Creates opaque smoke screen | Plant cover, hide movement, combo with Glaz |
| Claymore | Laser tripwire mine, kills attacker | Cover flanks, protect defuser plant |
| Breach Charge | Explosive that opens soft walls | Quick rotations, open new sight lines |
| Stun Grenade | (same as flashbang) | |
| Hard Breach Charge | Small thermal charge that breaks reinforced walls | Backup hard breach; takes time to deploy |
| EMP Impact Grenade | (Thatcher only) |
Defenders
| Gadget | Effect | When useful |
|---|---|---|
| Barbed Wire | Slows movement, makes noise | Slow rushes, funnel attackers into kill zones |
| Deployable Shield | Bulletproof half-cover | Block doorways, create headglitch spots; can be electrified by Bandit/Kaïd |
| Nitro Cell (C4) | Remote explosive, sticky | Destroy shields, kill enemies through soft floors, eliminate planters |
| Proximity Alarm | Beeps when enemy walks through laser | Intruder warning, flank watch |
| Impact Grenade | Throwable explosive | Open rotation holes in soft walls, destroy utility |
| Bulletproof Camera | Deployable camera that can shoot lasers to block vision | Extra intel, anti-gadget (can destroy drones) |
| Observation Blocker | Deployable opaque wall (disposable) | Block windows/doors from vision, plant fake intel |
---
3. Weapons
Rainbow Six Siege has a vast arsenal. Every operator has a unique weapon set. Below are categories with examples.
Primary Weapons
| Category | Examples | Caliber (RoF) | Notes |
|---|---|---|---|
| Assault Rifles | R4C (Ash), AK-12 (Fuze), C8 (Buck), F2 (Twitch) | 5.56-7.62mm, 700-980 RPM | All-rounder; best for most players |
| SMGs | MP5 (Doc/Rook), MP7 (Bandit), 9mm C1 (Frost) | 9mm-.45, 600-900 RPM | High RoF, low recoil, good for close range |
| Shotguns | M870 (Pulse), Supernova (Hibana), SASG-12 (Kapkan) | 12 gauge | One-shot kill up close; destroy walls quickly |
| LMGs | 6P41 (Finka), M249 SAW (Capitao) | 7.62mm, 600-700 RPM | Large magazine, fire support; slow reload |
| Marksman Rifles | 417 (Twitch), SR-25 (Blackbeard) | 7.62mm, semi-auto | High damage at range; scoped |
| DMRs | Mk 14 EBR (Dokkaebi), AR-15.50 (Maverick) | 5.56-7.62mm, semi-auto | Similar to marksman but versatile |
| Other | Para-308 (Capitão), SPEAR .308 (Finka) | .308, 690 RPM | Low recoil but moderate damage |
Secondary Weapons
| Category | Examples | Caliber | Notes |
|---|---|---|---|
| Pistols | P226 MK 25 (Spetsnaz), 5.7 USG (FBI), D-50 (Desert Eagle) | 9mm-.50 | Backup; headshot one-shot |
| Machine Pistols | SMG-11 (Sledge/Thatcher), Bearing 9 (Hibana/Echo) | 9mm, 900-1200 RPM | Very fast fire rate; used as primary often |
| Revolvers | .44 Magnum (Kaid), LFP586 (Valkyrie) | .44, .357 | High damage, slow fire |
| Shotgun Sidearms | BOSG.12.2 (Vigil) | 12 gauge, double-barrel | Two shots; slug rounds (one-hit chest kill) |
---
4. Attachments
Attachments modify weapon performance. Each weapon has specific attachment slots.
Sights
| Sight | Magnification | Use Case |
|---|---|---|
| Red Dot (reflex) | 1x | Close range, quick acquisition |
| Holo (reflex) | 1x | Wider sight picture, popular |
| Reflex | 1x | Small housing, large center dot |
| ACOG (only on certain weapons) | 2.5x | Long angles, peeking; removed from many 3-speed ops |
| Magnified (Holo + 1.5x or 2.0x) | 1.5x (some defenders) | Mid-range advantage |
| (New) Thermal | 3x (Glaz only) | Through smoke |
Barrel Attachments
| Attachment | Effect | Best on |
|---|---|---|
| Flash Hider | Reduces muzzle flash + horizontal recoil | Full-auto rifles, SMGs |
| Compensator | Reduces vertical recoil (first few shots) | High-RoF weapons (e.g., F2, SMG-11) |
| Muzzle Break | Reduces recoil of first shot, helps reset | Marksman rifles, pistols |
| Suppressor | Eliminates sound & muzzle flash; reduces bullet velocity by ~15% | Stealth plays, flanking |
| Extended Barrel | Increases damage range (minimal) | Long-range maps (rarely used) |
Grips
| Grip | Effect | Use |
|---|---|---|
| Vertical Grip | Reduces hipfire spread + vertical recoil | General use |
| Angled Grip | Speeds up ADS transition time | Aggressive entry, fast peeking |
| Horizontal Grip | Reduces horizontal recoil (new) | Some weapons benefit |
| No Grip | – | – |
Underbarrel (Some weapons)
- Laser Sight: Tightens hipfire spread – gives away position (visible red dot). Use for shotguns or when hipfiring.
- Universal Skins: Apply to any weapon. Examples: Black Ice, Glacier, Gold Dust.
- Community Skins: Available via Battle Pass or seasonal events.
- Pro League Skins: (Discontinued) Rare, tradeable (if in inventory).
How to obtain: Most attachments are unlocked by leveling up the weapon or operator – use Renown. Some are default. Spend in the loadout menu.
---
5. Customization (Cosmetics)
Cosmetics do not affect gameplay but allow personalization.
Weapon Skins
Operator Cosmetics
| Type | Description | How to Obtain |
|---|---|---|
| Headgear | Hats/helmets/masks | Alpha Packs, Store (Renown or Credits), Battle Pass |
| Uniform | Full-body outfit | Same as headgear |
| Charm | Small icon dangling from weapon | Battle Pass, challenges, esports drops |
| Weapon Attachment Skin | Color applied to grips, sights, etc. | Battle Pass, event packs |
| Victory Animation | End-of-round pose | Premium content (R6 Credits) |
- Operator cosmetic sets can be bought with Renown (cheaper) or R6 Credits.
- Seasonal skins (e.g., “Blood Orchid”) were limited; now only via Alpha Packs if previously unowned.
- Elite Skins are unique bundles with custom uniform, headgear, victory animation, and weapon skin. Cost 1800 R6 Credits each.
- Function: Main in-game currency. Used to buy operators (1,000 for Recruit up to 25,000 for newest ops), cosmetic sets, some legendary Alpha Packs.
- How to earn: Completing matches, challenges, Battle Pass progression, daily/weekly challenges. Also from renown boosters (purchased with R6 Credits).
- Max: No cap.
- Function: Premium currency. Buy operators, Elite sets, Battle Pass tiers, Alpha Packs (loot boxes), and booster packs.
- How to earn: Real-money purchase (bundles), Battle Pass premium track (some credits earned).
- Exchange: 120 R6 Credits = ~$1 (varies).
- Each season lasts ~3 months. Free and Premium tracks.
- Premium Track: Unlock new operator (if released), weapon skins, charms, renown boosters, Alpha Packs, and R6 Credits.
- Tiers: 100 tiers. XP earned by playing modes.
- Cost: Free (limited rewards) or 1200 R6 Credits (~$10).
---
6. Currencies and Battle Pass
Renown
R6 Credits
Battle Pass
---
7. Alpha Packs & Loot System
Alpha Packs are random loot boxes containing cosmetic items (headgear, uniform, weapon skin, charm).
| Rarity | Drop Rate | Examples |
|---|---|---|
| Common | ~70% | Weapon skins (gray/blue) |
| Uncommon | ~25% | Epics (purple) |
| Rare | ~4% | Legendary (gold) – Black Ice type |
| Duplicate Protection | None (duplicates become renown) | – |
- Win matches (small chance per round win – increases with consecutive losses).
- Buy with Renown (10,000 per pack) or R6 Credits.
- Battle Pass & challenges reward Alpha Packs.
- Function: Placed on destructible walls/hatches to make them bulletproof and resistant to explosives (except hard breachers).
- Quantity: 2 per defender (except Wamai who has 4? Actually all defenders have 2 base, plus some have extra via gadget? Standard 2.)
- How to use: Hold interact (F on PC) on an unbreachable wall/hatch. Placed during preparation phase.
- Synergy: Bandit/Kaïd can electrify; Mute jams hard breach charges.
- Function: Scout rooms, mark enemies, locate objective.
- Quantity: 2 per attacker (1 for Twitch – her shock drone).
- Use: Deploy at start of round. Move freely (quietly or fast). Can jump.
- Counter: Mute jammers, Mozzie’s pest launcher, or bulletproof cameras.
- Bulletproof Camera: Deployable, sticky, can shoot lasers (disables drones/gadgets).
- Valkyrie’s Black Eye: Stick to surfaces – bulletproof glass.
- Maestro’s Evil Eye: Rotating turret that can fire laser; destroys hard breach gadgets?
- Echo’s Yokai: Flying drone that can stun enemies (sonic burst).
- Barbed Wire: Deal damage + slow. Can be electrified.
- Deployable Shield: Full-body cover. Can be placed on doorways; reinforced shields (like Mira) are different.
- Attacker: Thermite’s Exothermic Charge, Hibana’s X-Kairos, Maverick’s Blowtorch (creates small hole), Ace’s S.E.L.M.A. (throws and sticks).
- Defender counters: Mute jammer, Bandit/Kaïd electricity, Kaïd’s electroclaw (throws on top of walls).
Important: Alpha Packs do not contain operators, boosters, or currency except renown duplicates.
---
8. Key Equipment (Map & Round Items)
Reinforcements
Drones (Attacker)
Observation Tools (Defender)
Barbed Wire & Shields
Hard Breach Equipment
---
9. Consumables / Boosters
Rainbow Six Siege has very few consumables affecting gameplay. Boosters are time-limited Renown gains.
| Item | Effect | Duration | Cost |
|---|---|---|---|
| Renown Booster | +100% Renown earned from matches | 1 day / 7 days / 30 days | 200 / 800 / 2000 R6 Credits |
| Battle Pass Boost | Extra XP for Battle Pass progression | Same as booster packages | Included in Premium Battle Pass sometimes |
---
10. Collectibles
Rainbow Six Siege has no in-game collectibles like lore items or treasures outside of cosmetics. However, the following are considered collectible:
- Operator Biographies: Viewable in operator menu (no gameplay effect).
- Weapon Charms: Thousands available, sorted by rarity. Some are event-exclusive (e.g., Halloween or Siege Esports charms).
- Legendary Alpha Pack Items: Extremely rare weapon skins like “Gold Dust” or “Black Ice” (if you didn’t have them from old packs).
- Elite Skin Sets: 20+ operators have elite skins; complete collection is a long-term goal.
- Prioritize buying operators with Renown (don’t waste R6 Credits on operators you can unlock for free).
- Attachments are critical – always run a sight (ACOG if available on that weapon) and a flash hider/compensator based on recoil.
- Alpha Packs are best saved for after you own many cosmetics to avoid duplicates – but they’re random anyway.
- Battle Pass is the best value if you play regularly – you get all seasonal new operators and exclusive skins.
---
Final Tips
This guide covers all item types in Rainbow Six Siege. For specific weapon stats or latest operator gadgets, refer to the in-game loadout or official patch notes.
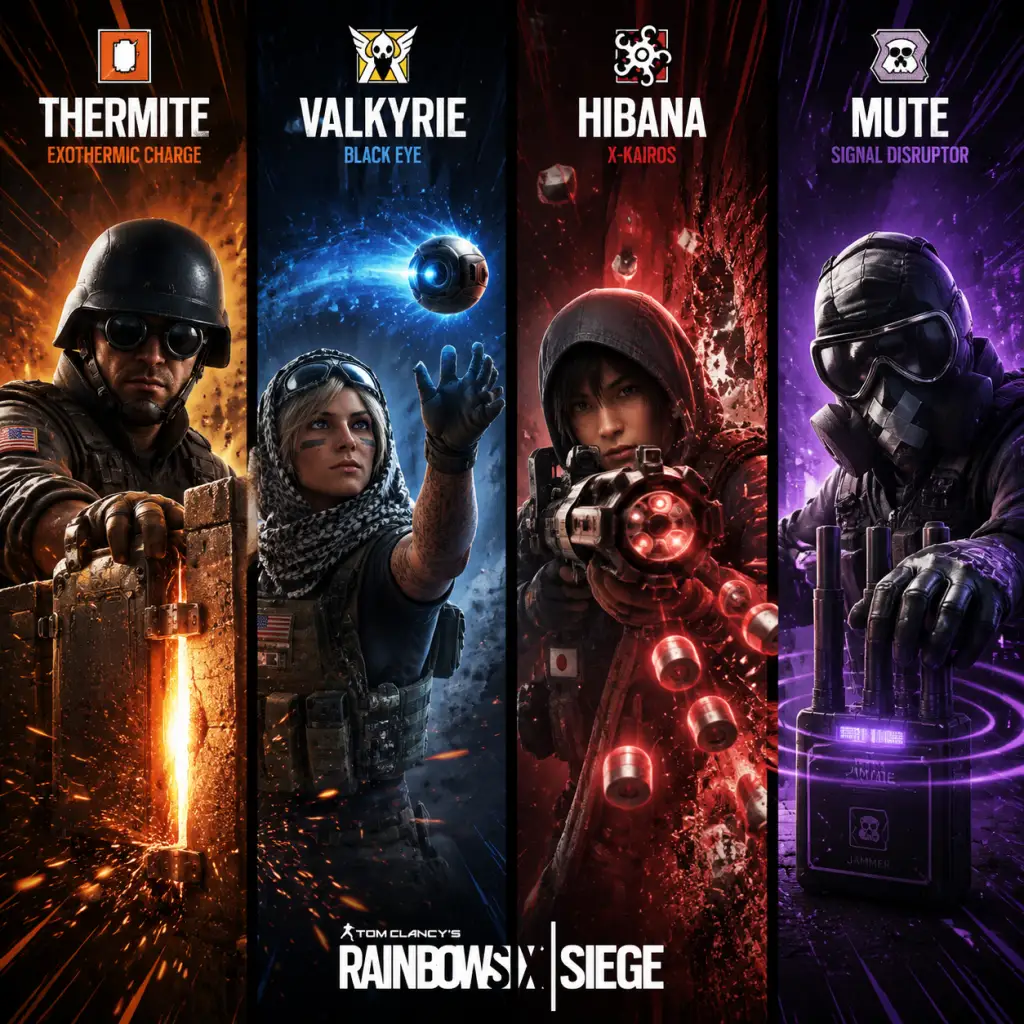
Character Skills
"content": "# Character Skills Guide for Tom Clancy's Rainbow Six Siege
This guide covers every playable Operator in Rainbow Six Siege, detailing their unique gadgets (skills), secondary gadgets, and tactical usage. Operators are divided into Attackers and Defenders. Each skill is described with its effect, cooldown/recharge, recommended synergies, and optimal loadout tips. Note that Siege does not have traditional \"spells\" or \"talents\"; instead, each Operator has one primary gadget and one secondary gadget (chosen from a pool). Upgrades are limited to weapon attachments—no ability upgrades exist. Cooldowns refer to gadget recharge time if applicable, or one-time use.
This guide covers every playable Operator in Rainbow Six Siege, detailing their unique gadgets (skills), secondary gadgets, and tactical usage. Operators are divided into Attackers and Defenders. Each skill is described with its effect, cooldown/recharge, recommended synergies, and optimal loadout tips. Note that Siege does not have traditional \"spells\" or \"talents\"; instead, each Operator has one primary gadget and one secondary gadget (chosen from a pool). Upgrades are limited to weapon attachments—no ability upgrades exist. Cooldowns refer to gadget recharge time if applicable, or one-time use.
Attacker Skills
Sledge
- Ability: Breaching Hammer
- Type: Active, melee
- Effect: A large sledgehammer that can break reinforced hatches, wooden barricades, and soft walls (3 hits to break a soft wall through one side). Also destroys deployable shields and certain gadgets in one hit.
- Cooldown/Use: Infinite uses; no cooldown. However, swinging animation is slow and leaves Sledge vulnerable.
- Synergies: Works well with Thermite or Hibana for creating multiple entry points. Pairs with a hard breacher to open both soft and hard surfaces.
- Recommended Loadout: Primary: M590A1 (shotgun) for close-quarters destruction or L85A2 (rifle) for versatility. Secondary: P226 Mk 25. Secondary Gadget: Stun Grenades or Frag Grenades (if available in season). Use hammer to open lines of sight or surprise enemies from above.
- Ability: EMP Grenades
- Type: Throwable
- Effect: Throws an EMP grenade that disables all electronic gadgets in a 4.5m radius for 15 seconds. Disables: ADS (Jäger), Magpie (Wamai), Shock Wire (Bandit/Kaïd), Signal Disruptor (Mute), Evil Eye (Maestro), but does not destroy them. However, it does destroy Gu mines (Lesion), Grzmot mines (Ela), and Yokai drones (Echo) if directly hit. Also temporarily disables player optics (2.5 sec) if within blast.
- Cooldown/Use: 3 EMP grenades per round; no recharge. Once thrown, effects are immediate.
- Synergies: Essential for hard breachers (Thermite, Hibana, Ace) as it disables Bandit/Kaïd batteries and Mute jammers. Also good against trap operators (Lesion, Ela, Kapkan).
- Recommended Loadout: Primary: AR33 (rifle) or L85A2. Secondary: P226 Mk 25. Secondary Gadget: Claymore or Smoke Grenade. Always coordinate with your hard breacher to time EMP throws.
- Ability: R4-C / G36C? No, her ability is the M120 CREM (breaching round)
- Type: Active, launcher
- Effect: Fires a projectile that explodes on contact, destroying wooden barricades, unreinforced walls, and certain gadgets (e.g., deployable shields, barbed wire). Does not destroy reinforced walls. The explosion is small but enough to open a kill hole.
- Cooldown/Use: 2 breaching rounds per round; one-time use.
- Synergies: Great with Sledge for soft destruction; can pair with Zofia for quick entry. Use to destroy Mira windows from a distance.
- Recommended Loadout: Primary: R4-C (high recoil) or G36C (easier control). Secondary: 5.7 USG or M45 MEUSOC. Secondary Gadget: Smoke Grenade or Breach Charge. Ash is a fast entry fragger; prioritize using rounds for rotation or killing enemies behind soft cover.
- Ability: Exothermic Charge
- Type: Deployable, explosive
- Effect: A large thermite charge that can breach a reinforced wall, reinforced hatch, or reinforced floor. Creates a large hole (approx 2m x 1m) that can be walked through. Also destroys any gadgets attached to the surface (e.g., Bandit batteries, Mute jammers, Kaid electroclaws).
- Cooldown/Use: 1 charge per round; takes 5 seconds to deploy and detonates automatically after placement. Thermite is vulnerable during placement.
- Synergies: Must be paired with Thatcher (to disable enemy electronics) or Maverick (for alternative entry). Works with Twitch to destroy shock wires. Also good with Capitao (smoke cover) for protection while planting.
- Recommended Loadout: Primary: 556xi (rifle) or M1014 (shotgun). Secondary: 5.7 USG. Secondary Gadget: Smoke Grenade (to cover the breach) or Claymore. Always communicate with your team to ensure the wall is clear before planting.
- Ability: Shock Drone (RSD-1)
- Type: Remote-controlled drone
- Effect: Deploy a small wheeled drone that can shoot electric darts that deal 1 damage (very small) but destroy most enemy gadgets (e.g., Mute jammers, Bandit batteries, Valkyrie cams, Lesion mines). Also can damage and destroy evil eyes (Maestro) and Yokai drones (Echo). The drone has 2 health points and can be shot. Can jump and climb up hatches.
- Cooldown/Use: 2 shock drones per round. Each drone has 10 darts. Darts recharge? No, each drone has a set number of darts (10). Once darts are used, drone can still be used for scouting.
- Synergies: Pairs excellently with hard breachers (Thermite, Hibana) to destroy Bandit/Kaid batteries. Also useful against trap operators. Use early game to clear electronic defenses, then save a drone for late-game intel.
- Recommended Loadout: Primary: F2 (rifle, high fire rate) or 417 DMR (for range). Secondary: P9. Secondary Gadget: Claymore or Smoke Grenade. Learn drone paths; avoid common drone spots.
- Ability: Extendable Shield (Le Roc)
- Type: Deployable shield (tactical)
- Effect: A full-body ballistic shield that can be extended to cover Montagne's entire front, making him nearly invincible from the front (but vulnerable from sides/back). When extended, he cannot melee or use primary weapon, but can use secondary (pistol) if not fully extended (partial extension). Extending contracts the shield width; can cover teammates behind him.
- Cooldown/Use: No cooldown; toggle extend.
- Synergies: Works with team to plant the defuser; Montagne can shield the planter. Also used for scouting and pinning enemies. Pair with Glaz or Capitao for smoke and shoot while shielded.
- Recommended Loadout: Primary: Extendable Shield is his gadget; no primary weapon. Secondary: Revolver (LFP586) or P9. Secondary Gadget: Smoke Grenade (to obscure vision while advancing). Always move slowly and use voice chat to coordinate pushes.
- Ability: HDS (Hand-held Display Sight) thermal scope on OTs-03 (DMR)
- Type: Passive/Weapon attachment
- Effect: The OTs-03 sniper rifle has a thermal scope that highlights enemies through smoke screens and dimly lit areas. Enemies appear as bright white figures (heat signature). Also highlights red when looking at enemies. The scope has variable zoom (2.5x to 5x).
- Cooldown/Use: Always active when using the OTs-03.
- Synergies: Excellent with smoke operators (Capitao, Ying, Smoke) to shoot through smoke. Also works with Zofia (concussion mines) to disorient enemies then pick them off. However, Glaz is slow and vulnerable at close range.
- Recommended Loadout: Primary: OTs-03 only. Secondary: GSH-18 or PL-15. Secondary Gadget: Smoke Grenade (maximize thermal usage) or Claymore. Hold long angles and reposition after every shot.
- Ability: APM-6 Cluster Charge
- Type: Deployable, explosive
- Effect: A cylindrical cluster charge that deploys on a breakable or reinforced wall, floor, or ceiling. After deployment, it launches 5 fragmentation grenades in a circular pattern into the room on the other side. Each grenade deals lethal damage in a radius. The charge can be destroyed before detonation (takes 5 seconds to arm).
- Cooldown/Use: 3 charges per round (each cluster charge deploys 5 grenades). No recharge.
- Synergies: Best used on objectives with multiple defenders. Pair with Twitch or Thatcher to destroy Mute jammers. Also good with Yinq to cause chaos. Always use on floors above the objective for maximum area coverage. Watch for teammates in the room.
- Recommended Loadout: Primary: Ballistic Shield (6P41 LMG is not his primary? Actually his primaries are 6P41 LMG or AK-12). Secondary: PYa (pistol). Secondary Gadget: Smoke Grenade or Breach Charge. Fuze is slow; call out before using.
- Ability: Electronics Detector (RED Mk III)
- Type: Passive, gadget scanner
- Effect: IQ’s wrist-mounted device reveals all electronic gadgets (e.g., Valkyrie cams, Pulse’s heartbeat sensor, Mute jammers, Bandit batteries, Lesion mines, Echo drones) within a 360-degree radius up to 20 meters. The device can be toggled on/off and highlights gadgets through walls. She can also see Pulse's heartbeat sensor and Vigil's ERC-7 (but not Vigil himself).
- Cooldown/Use: Always active when equipped; no cooldown. Swapping to her gadget takes time and renders her primary weapon unusable (only pistol can be used while scanning).
- Synergies: Essential for clearing Valk cams and Pulse threats. Works with hard breachers to locate Bandit/Kaïd batteries. Pair with Dokkaebi (to disable phones) to force defenders to stay still.
- Recommended Loadout: Primary: AUG A2 (rifle) or Commando 552. Secondary: 5.7 USG or PL-15. Secondary Gadget: Claymore or Breach Charge. Use IQ to clear major intel gadgets before pushing.
- Ability: SK-4 Breaching Shotgun (underbarrel)
- Type: Active, underbarrel attachment on his primary rifle (C8-SFW) or shotgun (CAMRS DMR). Actually on C8-SFW only.
- Effect: A shotgun mounted under the C8-SFW that can fire 3 shells in quick succession. Each shell breaks soft walls, floors, hatches, and barricades. It has limited range. Also destroys gadgets and deals some damage to enemies.
- Cooldown/Use: 15 shells total across 5 reloads (each reload gives 3 shells). No recharge beyond ammo pickup from crates or through secondary gadget (not recommended).
- Synergies: Works with soft destruction teams (Sledge, Zofia). Use to open floors from above or create sight lines. Excellent for vertical play—open the floor above objective and rain fire.
- Recommended Loadout: Primary: C8-SFW (rifle) with SK-4. Secondary: MK1 9mm (pistol). Secondary Gadget: Stun Grenades or Frag Grenades. Buck is versatile but require recoil control; use SK-4 sparingly.
- Ability: Rifle Shield
- Type: Deployable shield attached to primary weapon
- Effect: A transparent ballistic shield that mounts on Blackbeard's primary weapon (Mk17 CQB or SR-25 DMR). It can absorb up to 60 damage (initially 80, but nerfed). When aimed down sights, the shield covers the head and upper torso. It breaks after taking enough damage. Can be swapped between weapons (if you carry both). The shield slows movement significantly when aiming.
- Cooldown/Use: 2 shields per round; each shield is single use (once broken, cannot repair). You can swap between shields from inventory.
- Synergies: Excellent for holding tight angles and peeking windows. Pairs with Glaz (to survive while scoped). Use to contest long corridors. However, shield is weak against explosives and melee.
- Recommended Loadout: Primary: Mk17 CQB (high recoil) or SR-25 DMR (for range). Secondary: D-50 (pistol). Secondary Gadget: Smoke Grenade or Claymore. Always use shield when peeking; replace after it breaks.
- Ability: Tactical Crossbow
- Type: Launcher, two arrows
- Effect: A crossbow that fires two types of arrows: Smoke bolts (create a smoke screen) and Fire bolts (incendiary area denial). Smoke bolts last 5 seconds and are thicker than regular smoke grenades. Fire bolts create a pool of fire that lasts 7 seconds and deals damage to enemies passing through. Each type has 1 bolt initially (total 2 bolts). Can carry both types at the same time?
- Cooldown/Use: 3 crossbow bolts per round (usually 2 smoke, 1 fire or configuration changes by season). No recharge.
- Synergies: Great for planting the defuser (smoke cover) and for area denial (fire). Pair with Glaz for thermal smoke shooting. Combine with Ying's candela for confusion. Also works with Fuze to obscure cluster charge placement.
- Recommended Loadout: Primary: PARA-308 (rifle) or M249 (LMG). Secondary: PRB92 (pistol). Secondary Gadget: Claymore or Breach Charge. Use fire bolts to flush out anchors or deny defuser disable.
- Ability: X-KAIROS Launcher
- Type: Projectile, explosive
- Effect: Fires 6 small pellets that attach to a reinforced wall, hatch, or floor. After a short delay, the pellets explode, creating a circular hole (about 1m diameter) that can be crouched through if multiple pellets are placed. The pellets can be detonated simultaneously or in groups. Also destroys gadgets attached to the surface.
- Cooldown/Use: 3 launchers per round? Actually Hibana has 2 X-KAIROS clusters (each contains 6 pellets). Each cluster can be detached and deployed on separate surfaces. Pellets detonate after 3 seconds or manually? They detonate automatically after 5 seconds, but you can trigger early by shooting the cluster.
- Synergies: Essential for opening reinforced hatches and small holes. Works with Thatcher (EMP) or Twitch (shock drone) to clear Bandit/Kaïd. Also good for creating sight lines at head height. Pair with Maestro (on attack? No) or Ying to cover angles.
- Recommended Loadout: Primary: Type-89 (high recoil, high damage) or SuperNova (shotgun). Secondary: P229 (pistol). Secondary Gadget: Stun Grenades or Breach Charge. Use on hatches for a quick entry; aim for the top edge to create a vaultable hole.
- Ability: Eyenox Model III
- Type: Passive, tracking
- Effect: Jackal wears a helmet that can scan footprints left by defenders. When he activates the scanner, footprints are highlighted in red (recently made) or other colors for older. Scanning a footprint reveals the defender’s identity and pings their location every few seconds while they are still moving. The scan lasts about 10 seconds. Defenders receive a warning that they are being tracked (pings show on their screen).
- Cooldown/Use: 3 scans per round. Each scan takes about 3 seconds to process. Footprints remain visible for a limited time.
- Synergies: Excellent for hunting roamers. Pair with Cav (if he scans her, she still can silent step? but if her foot prints are hidden?). Actually Cav's silent step prevents footprints from being left. Jackal counters Cav because her ability nullifies footprints? No, Cav's Silent Step does not leave footprints, so Jackal cannot track her when that ability is active. Good with Dokkaebi (phone call) to force defenders to move and leave footprints.
- Recommended Loadout: Primary: C7E (rifle) or PDW9 (SMG). Secondary: USP40 (pistol). Secondary Gadget: Smoke Grenade or Claymore. Scan before entering objectives; prioritize tracks leading away from objective.
- Ability: Candela (Cluster Flash)
- Type: Throwable, timed
- Effect: A cluster flashbang that can be cooked and thrown or rolled. After detonation, it releases 7 small flashbangs that blind and deafen any defenders looking at them. The flashes also affect Ying's teammates if they look at them. Ying can also set the candela on a surface (like a door frame) and it will flash when bumped (proximity) or after a timer.
- Cooldown/Use: 3 candelas per round. No recharge.
- Synergies: Ideal for entering rooms and clearing corners. Pair with Glaz (smoke + flash) to disorient then shoot. Also with Blitz or Montagne (shield push). Works with Capitao fire bolts for area denial after flash.
- Recommended Loadout: Primary: T-95 LSW (LMG) or Six12 (shotgun). Secondary: Q-929 (pistol). Secondary Gadget: Smoke Grenade (to cover your entrance) or Claymore. Cook the candela for 3-4 seconds before throwing to minimize escape time.
- Ability: M762 Rifle (primary) has underbarrel launcher for two types of grenades: Concussion (impact) and Impact (explosive)
- Type: Underbarrel launcher
- Effect: Fires either a concussion grenade (blinds and deafens enemies in radius, similar to Ela’s Grzmot but area) or an explosive impact grenade (deals damage and destroys soft walls, hatches, and gadgets). The concussion grenade also disorients with a loud buzzing sound. She carries 2 concussion and 2 impact grenades per round.
- Cooldown/Use: Total 4 grenades; each is individual shot from the launcher. No recharge.
- Synergies: Versatile operator. Use impact to destroy barbed wire, shields, or open rotation holes. Concussion to clear corners. Pair with Buck for soft destruction, or with Maestro? For team, combine with Breach charges for extra rotation. Good for self-clearing if no Thatcher.
- Recommended Loadout: Primary: M762 (rifle) or LMG-E (if available). Secondary: RG15 (pistol). Secondary Gadget: Claymore or Breach Charge. Prioritize using impacts for opening lines of sight and saving concussions for room entry.
- Ability: Logic Bomb (phone call)
- Type: Global, electronic
- Effect: Activates a phone call to all defenders, causing their phones to ring audibly and vibrate on their screen. Defenders can stop the ringing by interacting (pressing a button) for about 2 seconds. While ringing, they cannot sprint, and the sound gives away their position. Also, after Dokkaebi kills a defender who has a phone (all defenders have phones), she can hack the defender's phone to access the defender's camera feeds (like Valkyrie cams, Maestro turret, Echo drone) for the rest of the round. The hack is a one-time operation per kill.
- Cooldown/Use: 2 Logic Bombs per round. Each bomb rings for about 10 seconds, but defenders can stop it early. The camera hack is passive after killing a defender.
- Synergies: Excellent with Lion (EE-ONE-D) to force defenders to stay still or get detected. Pair with Jackal (track while ringing) or Finka (boost). Also good with Capitão (fire to flush out ringing defenders).
- Recommended Loadout: Primary: Mk 14 EBR (DMR) or BOSG.12.2 (slug shotgun). Secondary: SMG-12 (machine pistol) or C75 Auto. Secondary Gadget: Smoke Grenade or Breach Charge. Use logic bomb before pushing; hack cameras after a kill to gain intel.
- Ability: EE-ONE-D Drone
- Type: Global, timed
- Effect: A hovering drone that scans the entire map. During the scan, any defender that moves more than 2 meters will be detected (highlighted and pinned on screen). Movement includes walking, running, and rappelling. Standing still or slowly crouch-walking (at very slow speed) avoids detection. The scan lasts 3 seconds. Defenders hear a warning sound before and during scan.
- Cooldown/Use: 2 scans per round. Each scan has a 15-second cooldown between uses.
- Synergies: Pair with Dokkaebi (phone call) to force defenders to move or stay still. Also with Capitao fire to force movement. Works with Glaz to shoot detected enemies through smoke. Good for final pushes in post-plant.
- Recommended Loadout: Primary: V308 (rifle) or LMG? Lion uses V308 and 417 DMR. Secondary: P9 or PMM? Actually Lion has P9. Secondary Gadget: Claymore or Stun Grenade. Use scan when you know enemies are near but not pinned.
- Ability: Adrenaline Surge
- Type: Global, self-buff
- Effect: Activates a nanobot injection that buffs all attackers for about 20 seconds. Effects: Health regeneration (heals 20 HP instantly and over time), higher weapon handling (reduce recoil, increase reload speed), quicker revive speed, and slight movement speed increase (but reduces ADS time). Also counters the effects of smoke/neurotoxin from Smoke's gadget and Lesion's Gu mines (reduces damage). Each surge also slightly increases health past max (up to 140? No, just heals up to full). Finka can use three surges per round. The surge has a global cooldown of 30 seconds between uses.
- Cooldown/Use: 3 surges per round.
- Synergies: Great for rushing or late-round pushes. Works with Lion (scan while surged) and Dokkaebi (phone call). Also helps teammates that need health after trade. Can revive downed teammates faster (but requires teammate to be near).
- Recommended Loadout: Primary: Spear .308 (rifle) or 6P41 (LMG). Secondary: GSh-18 (pistol). Secondary Gadget: Stun Grenade or Breach Charge. Use surge before entering a room or to counter Lesion/Smoke.
- Ability: Blowtorch (Suri)
- Type: Active, torch
- Effect: A small blowtorch that can burn through reinforced walls, hatches, and floors creating a small hole (about 30cm diameter) that can be shot through. The torch makes a distinct hissing sound that defenders can hear. Maverick can also use it to open a crouch-able hole if given enough time (about 20 seconds over a line). The torch can also destroy Bandit batteries, Kaid claws, and Mute jammers if applied directly.
- Cooldown/Use: Infinite fuel per round; but the torch overheats after about 10 seconds of continuous use (need to cool down for 5 seconds). Fuel does not deplete; unlimited.
- Synergies: Independent hard breacher that doesn't need Thatcher. Pairs with Thermite or Hibana to open a hole after Maverick creates the initial line. Good with IQ (to check for gadgets) and Twitch (to destroy electronics). Use torch to create head-height sight lines.
- Recommended Loadout: Primary: AR-15.50 (DMR) or M4 (rifle). Secondary: 1911 TACOPS (pistol). Secondary Gadget: Smoke Grenade or Claymore. Practice making small holes for peeking, then larger ones for entry.
- Ability: Airjabs
- Type: Deployable, proxmity trigger
- Effect: Small canisters that stick to surfaces. When an enemy walks within 2m, the airjab detonates, firing a compressed air blast that knocks the defender away and disorients them (0.5 second stun). The blast does no damage but pushes the defender in the direction the airjab was placed. Airjabs can be destroyed by shooting or explosives.
- Cooldown/Use: 3 airjabs per round. No recharge.
- Synergies: Excellent for covering flanks and denying run-outs. Place on stairwells or behind doors. Works with Gridlock (Trax) to create a layered denial. Also with Zofia (concussion) to disorient longer.
- Recommended Loadout: Primary: AK-74M (rifle) or ARX200 (rifle). Secondary: PRB92 (pistol). Secondary Gadget: Claymore or Breach Charge. Place airjabs on common flank routes; you can hear the sound of a defender being launched.
- Ability: Trax Stingers
- Type: Deployable, area denial
- Effect: Large hexagonal mats that deploy on the ground. When thrown, they expand into a sheet of sharp spikes that cover an area about 3m x 3m. Defenders walking on the spikes take damage (10 damage per tick) and move slowly. The spikes also make noise when stepped on. Trax can be destroyed by melee (3 hits), explosives, or gunfire (30 bullets? It takes many shots).
- Cooldown/Use: 3 Trax canisters per round. Each canister creates 3 mats (total 9 mats?). Actually each canister deploys one large mat that covers the area. So total 3 large mats.
- Synergies: Pairs with Nomad (airjab) to protect flanks. Also with Capitao (fire) and Smoke (poison) for multi-layer denial. Good for post-plant to prevent defuser disable.
- Recommended Loadout: Primary: M249 SAW (LMG) or F90 (rifle). Secondary: Super Shorty (shotgun) or SDP 9mm (pistol). Secondary Gadget: Smoke Grenade or Claymore. Place Trax near defuser to make it costly for defenders.
- Ability: HEL Presence Reduction
- Type: Active, stealth
- Effect: A device that makes Nøkk invisible to drone cameras and enemy gadgets that rely on sound and movement detection? Specifically, when active, she makes no footstep sound, and she is not detected by Lion's drone, Alibi's prismas, or by cameras (including Yokai, Evil Eye, Valkyrie, Maestro, etc.). However, she is still visible to the naked eye and to Pulse's heartbeat sensor, and she can still be heard if she sprints or fires. The ability has a limited duration (about 12 seconds) and a cooldown of 8 seconds after deactivation (energy recharge).
- Cooldown/Use: Energy bar that depletes while active; recharges when not active. Total active time per round about 20-30 seconds if used efficiently.
- Synergies: Great for flanking and sneaking. Pairs well with Caveira (interrogation) but Caveira is defender. On attack, use with Dokkaebi (phone call) to find isolated defenders. Also effective against trap-heavy defenses (Lesion, Kapkan) because traps still trigger but you can avoid cams.
- Recommended Loadout: Primary: FMG-9 (SMG) or Six12 SD (shotgun). Secondary: D-50 (pistol). Secondary Gadget: Frag Grenades or Stun Grenade (if available). Use before entering a room to avoid drone spotting.
- Ability: Garra Hook
- Type: Active, grappling hook
- Effect: A hook that can be used to quickly ascend through hatches (to the floor above) or pull Amaru up to windows and balconies. The hook also allows her to vertically reppel? It's a one-shot movement tool. She can only hook upward to breakable hatches or open windows. The hook has a wind-up time of 1.5 seconds and makes a sound.
- Cooldown/Use: 1 hook per round; once used, can't be recovered. Also she can carry 2 secondary gadgets? No.
- Synergies: Good for rapid vertical entry, especially on top-floor objectives. Pair with Nomad or Gridlock to secure the landing. Use with Ying (flashbang) to disorient before you arrive. Fast rotation between floors.
- Recommended Loadout: Primary: G8A1 (LMG) or ITA12L (shotgun). Secondary: SMG-11 (machine pistol) or ITA12S (shotgun). Secondary Gadget: Claymore or Smoke Grenade. Plan your grapple path carefully; you are vulnerable during the climb.
- Ability: CSRX 300 (special sniper rifle) with high explosive rounds
- Type: Active, weapon
- Effect: A bolt-action sniper rifle that fires a single high-caliber round. It has a unique scope with variable zoom. The bullet is extremely powerful, capable of penetrating reinforced walls and hatches? Actually, the CSRX 300's primary function is to destroy enemy gadgets (like Bandit batteries, Mute jammers, Kaid claws) with a single shot. However, it also deals massive damage to defenders (one-shot down at any range, but not always kill if hit lower body). The rifle has a slow cycle rate (approx 1 round per 1.5 sec).
- Cooldown/Use: 12 rounds total (4 extra magazines? Actually she has 12 rounds overall; can reload). No ability cooldown; it's her primary weapon.
- Synergies: Works like Thatcher for gadget destruction but requires line of sight. Pair with hard breachers (Thermite, Hibana) to remove electronics from a distance. Also good with Twitch (drone) for intel. Use the explosive tip to destroy shields and walls?
- Recommended Loadout: Primary: CSRX 300 (only). Secondary: SPSMG9 (machine pistol). Secondary Gadget: Claymore or Breach Charge. Use as a hard support; mark gadgets for your team.
- Ability: Gemini Replicator
- Type: Active, hologram
- Effect: Deploys a holographic copy of Iana that can walk, sprint, and vault. The hologram moves with the player's input (like a drone but on foot). It can be shot, but does not reveal the real Iana's location. The hologram lasts until destroyed or until Iana cancels it. It also pings enemies if they shoot it (
Thatcher
Ash
Thermite
Twitch
Montagne
Glaz
Fuze
IQ
Buck
Blackbeard
Capitão
Hibana
Jackal
Ying
Zofia
Dokkaebi
Lion
Finka
Maverick
Nomad
Gridlock
Nøkk
Amaru
Kali
Iana
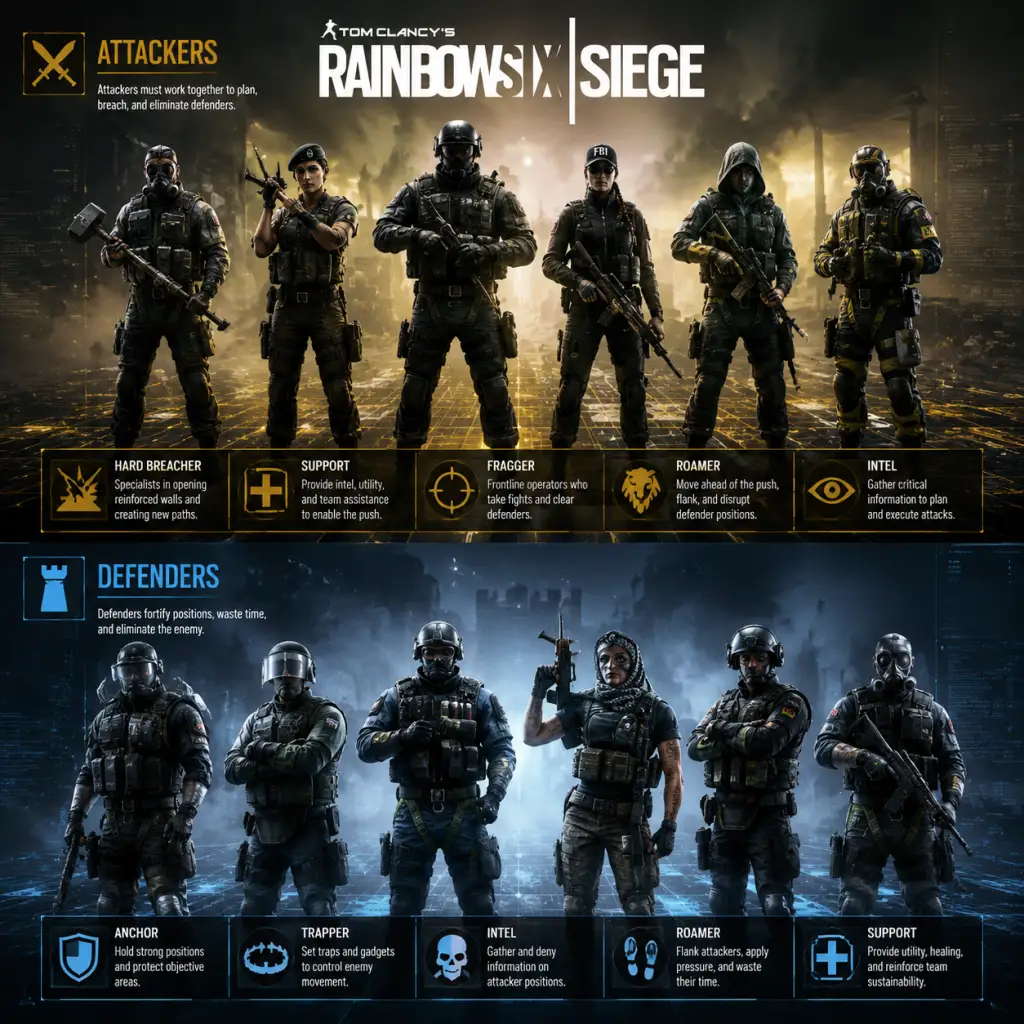
Characters & Roles
"content": "# Characters & Roles Guide for Tom Clancy's Rainbow Six Siege
This guide provides a comprehensive overview of every playable Operator in Rainbow Six Siege, including their background, strengths, weaknesses, recommended playstyle, unlock conditions, loadout suggestions, and team synergy. Operators are divided into Attackers (5v5 offensive side) and Defenders (5v5 defensive side). Each Operator brings a unique gadget and role to the team, making composition critical.
---
This guide provides a comprehensive overview of every playable Operator in Rainbow Six Siege, including their background, strengths, weaknesses, recommended playstyle, unlock conditions, loadout suggestions, and team synergy. Operators are divided into Attackers (5v5 offensive side) and Defenders (5v5 defensive side). Each Operator brings a unique gadget and role to the team, making composition critical.
---
Attacking Operators
Sledge
- Background: Scottish SAS breacher, uses a Tactical Breaching Hammer to destroy soft walls, barricades, and hatches.
- Strengths: High destruction versatility, silent breaching, good gun (L85A2).
- Weaknesses: No hard breach; vulnerable while hammering.
- Playstyle: Flank and open sightlines; use hammer for vertical play.
- Unlock: Free (base game).
- Recommended Loadout: L85A2 with ACOG + SMG-11 secondary; Frag Grenades.
- Team Synergy: Works well with Hard Breachers (Thermite, Hibana) to open reinforced walls after creating sightlines.
- Background: British SAS, deploys EMP grenades that disable electronic devices.
- Strengths: Counters bandit batteries, Mute jammers, Kaid claws; essential for hard breach.
- Weaknesses: Low fragging potential; EMP has limited throw range.
- Playstyle: Support—clear electronics for hard breachers; use AR33 or L85A2.
- Unlock: Free (base game).
- Recommended Loadout: L85A2 + Claymore; EMPs are mandatory.
- Team Synergy: Mandatory with Thermite/Hibana/Maverick; pairs with Twitch for combo denial.
- Background: Israeli FBI SWAT, fires explosive breaching rounds via her M120 CREM launcher.
- Strengths: Fast speed, strong gadget for soft destruction, great gun (R4-C or G36C).
- Weaknesses: No hard breach; fragile (1 armor).
- Playstyle: Entry fragger—rush objective, destroy Castle barricades, open sightlines.
- Unlock: Free (base game).
- Recommended Loadout: R4-C with ACOG + M45 MEUSOC; Breach Charges for extra destruction.
- Team Synergy: Works with hard breachers; can open top of walls for vertical angles.
- Background: US Navy SEAL, uses Exothermic Charge to breach reinforced walls and hatches.
- Strengths: Essential hard breacher; high damage AR (556xi).
- Weaknesses: Slow (1 speed), vulnerable while placing charge, easily countered by Bandit/Mute/Kaid.
- Playstyle: Plant the charge on reinforced walls after Thatcher clears electronics; support teammates.
- Unlock: Free (base game).
- Recommended Loadout: 556xi with ACOG + SMG-11; Claymore for flank cover.
- Team Synergy: Requires Thatcher/Twitch/Kali for electronic denial; pair with hard support or flex operator.
- Background: French GIGN, remote drone (RSL-17 Shock Drone) that can zap enemy gadgets and damage operators.
- Strengths: Long-range gadget denial, intel, harassment; good F2 rifle.
- Weaknesses: Drone is fragile and loud; limited charges.
- Playstyle: Use drone early to destroy cameras, traps, Bandit batteries; then push with F2.
- Unlock: Free (base game).
- Recommended Loadout: F2 with ACOG (high recoil—use compensator) + Pistol; Claymore or Breach Charge.
- Team Synergy: Deny defender electronics for hard breach (Thatcher alternative).
- Background: French GIGN, deploys an extendable full-body shield (Le Roc).
- Strengths: Immense survivability; can block doorways and provide cover for plant.
- Weaknesses: Slow, no weapon while extended, vulnerable to nitros.
- Playstyle: Support—extend shield to push enemies or protect planter; communicate with team.
- Unlock: 1,000 Renown.
- Recommended Loadout: Revolor (for tight angles) + P9; Smoke Grenades for plant cover.
- Team Synergy: Plant-oriented operators (Glaz, Ying); use flashes to clear corners.
- Background: Russian Spetsnaz, carries a flip-up scope (HDS) on his OTS-03 marksman rifle that reveals enemies through smoke.
- Strengths: Long-range precision, smoke synergy, can spot enemies in smoke.
- Weaknesses: Close-range vulnerability, slow fire rate.
- Playstyle: Stay back, use smoke grenades to create obscurity, pick off enemies through smoke.
- Unlock: 1,000 Renown.
- Recommended Loadout: OTS-03 with HDS scope + PMM; Smoke Grenades.
- Team Synergy: Plant strategies with Ying (candela) or Capitão (fire bolts to burn ADS).
- Background: Russian Spetsnaz, deploys a cluster charge that fires explosive pucks through soft surfaces.
- Strengths: Area denial, high damage potential, can clear rooms.
- Weaknesses: Loud gadget, cannot use on reinforced surfaces; slow.
- Playstyle: Place cluster charge on soft wall/floor above objective; detonate after enemies relocate.
- Unlock: 1,000 Renown.
- Recommended Loadout: AK-12 (best AR in game) + PMM; Breach Charges.
- Team Synergy: Works with Thatcher to disable Bandit/Mute on floors; vertical play with Buck.
- Background: German GSG9, shield operator with flash shield that blinds enemies on close range.
- Strengths: Fast (2 speed), flash ability, good for pressuring objectives.
- Weaknesses: Shield blocks vision, vulnerable to nitros, side-vulnerable when sprinting.
- Playstyle: Rush—sprint with shield, flash, then melee or shoot with pistol.
- Unlock: 1,000 Renown.
- Recommended Loadout: P12 + Flash Shield; Smoke Grenades (cover approach).
- Team Synergy: Entry fragger; can be paired with Ying for double flash.
- Background: German GSG9, carries an Electronics Detector (RED) that reveals gadgets and Vigil's cloak through walls.
- Strengths: Hard counter to Pulse, Valkyrie, Mute, etc.; can shoot gadgets through soft surfaces.
- Weaknesses: Low fragging potential without gadget; vulnerable while using scanner.
- Playstyle: Stay behind lines, scan and call out gadgets; then eliminate them with pistol or primary.
- Unlock: 1,000 Renown.
- Recommended Loadout: 552 Commando with ACOG + P12; Claymore.
- Team Synergy: Deny defender intel (valk cams, maestro turret); pair with Thatcher for deep electronic denial.
- Background: Canadian JTF2, uses Skeleton Key underbarrel shotgun for soft destruction.
- Strengths: Excellent vertical play (break floor from above), versatile AR (C8-SFW).
- Weaknesses: High recoil, limited shotgun range.
- Playstyle: Open floor/ceiling to rain fire from above; use shotgun for hatches and rotations.
- Unlock: 10,000 Renown or 600 R6 Credits.
- Recommended Loadout: C8-SFW with ACOG + D-50; Claymore (cover flanks).
- Team Synergy: Vertical support with Fuze or Sledge; pairs with soft breachers like Zofia.
- Background: US Navy SEAL, equips a rifle shield that protects his head when aiming.
- Strengths: Incredible peeking safety, can hold angles, strong MK17 CQB rifle.
- Weaknesses: Slow with shield, shield breaks quickly, limited mobility.
- Playstyle: Hold tight angles from windows/doors; peek to trade or pick off enemies.
- Unlock: 10,000 Renown or 600 R6 Credits.
- Recommended Loadout: MK17 with ACOG + D-50; Flash Grenades or Claymore.
- Team Synergy: Covers plant or lines of sight; good with shield ops (Montagne).
- Background: Brazilian BOPE, fires crossbow bolts that can be incendiary (fire) or smoke.
- Strengths: Area denial, fire blocks revives and gadgets, smoke creates vision blocks.
- Weaknesses: Limited bolts, slow fire rate, no hard breach.
- Playstyle: Use fire bolts to flush enemies from cover; smoke bolts for plant; support.
- Unlock: 10,000 Renown or 600 R6 Credits.
- Recommended Loadout: PARA-308 with ACOG + precision LMG; Claymore.
- Team Synergy: Plant with Ying (candela) or Glaz (through smoke); counter trap ops (Lesion, Frost).
- Background: Japanese SAT, fires X-Kairos pellets that can open multiple small reinforced holes or one large one.
- Strengths: Hard breach from distance, flexible (can open hatches or walls).
- Weaknesses: Slow reload, pellets can be destroyed by Mute/Kaid, requires accuracy.
- Playstyle: Find reinforced surface, place pellets, detonate; then push through or create lines of sight.
- Unlock: 10,000 Renown or 600 R6 Credits.
- Recommended Loadout: Type-89 with ACOG + SMG-12; Claymore or Flash.
- Team Synergy: Requires Thatcher/Kali to ensure successful breach; works with Zofia for vertical.
- Background: Chinese SDU, deploys Candelas (flash-charge devices) that can be thrown or stuck to surfaces.
- Strengths: Powerful flash, can clear rooms, can be cooked to detonate mid-air.
- Weaknesses: Vulnerable while cooking, flash can blind teammates.
- Playstyle: Use candelas to clear objective; then rush with LMG or shotgun.
- Unlock: 10,000 Renown or 600 R6 Credits.
- Recommended Loadout: M249 or T-95 LSW (best LMG) + Q-929; Smoke Grenades for plant.
- Team Synergy: Plant strategies with Glaz (smoke) or Capitão; clear traps with Twitch.
- Background: Spanish GEO, uses Eyenox scanner that can track defender footprints.
- Strengths: Intel-based roaming counter, can ping roamer locations repeatedly.
- Weaknesses: Loud scanner, vulnerable while scanning, can be countered by Cav's silent step.
- Playstyle: Scan footprints to hunt roamers; call out positions. Use C7E assault rifle.
- Unlock: 10,000 Renown or 600 R6 Credits.
- Recommended Loadout: C7E (2nd best AR) + USP40; Claymore or Smokes.
- Team Synergy: Roamers counter; pairs with Dokkaebi (global phone call) to disorient defenders.
- Background: Polish GROM, carries an M762 assault rifle with underbarrel launcher that fires impact concussive and explosive rounds.
- Strengths: Versatile—concuss nades can disrupt, explosives for soft destruction; can self-revive once per round.
- Weaknesses: Loud launcher, limited ammo, no hard breach.
- Playstyle: Entry fragger or flex—use concuss to breach/defuse, explosives to destroy gadgets.
- Unlock: 10,000 Renown or 600 R6 Credits.
- Recommended Loadout: M762 with ACOG + RG15; Claymore.
- Team Synergy: Breach support for hard breach; works with Buck for vertical.
- Background: South Korean 707th, can call defender phones globally (interrupt gadget use) and hack cameras after killing a defender.
- Strengths: Intel denial, can mark enemies with call, camera access after hack.
- Weaknesses: Call can be cancelled by Mute/Echo; vulnerable while hacking.
- Playstyle: Use logic bomb early to stress defenders; then rush with MK14 EBR or BOSG.12.2.
- Unlock: 10,000 Renown or 600 R6 Credits.
- Recommended Loadout: MK14 EBR (low recoil DMR) + SMG-12; Claymore or Smokes.
- Team Synergy: Works with Jackal to track roamers; pair with IQ to find hidden phones.
- Background: French CBRN, uses EE-ONE-D drone that scans area—defenders moving during scan get scanned (revealed).
- Strengths: Area denial, plant cover, can lock down rotations.
- Weaknesses: Long cooldown, can be cancelled by Mute; defenders can stay still.
- Playstyle: Activate scan when enemies are likely moving (plant, retake); coordinate with team.
- Unlock: 10,000 Renown or 600 R6 Credits.
- Recommended Loadout: V308 (high mag) + LFP586; Claymore.
- Team Synergy: Plant assist with Ying or Glaz; area control with Capitao.
- Background: Russian Spetsnaz, provides global health boost to all teammates; can revive downed allies at distance.
- Strengths: Team survival, overheal, can revive without risk.
- Weaknesses: Boost reduces teammate recoil control slightly, loud gadget, can't boost enough on own.
- Playstyle: Activate boost before pushes or after taking damage; use LMG (Spear .308) for suppression.
- Unlock: 10,000 Renown or 600 R6 Credits.
- Recommended Loadout: Spear .308 with ACOG + GSH-18; Breach Charges.
- Team Synergy: Works with Ash, Zofia, Ying for aggressive pushes; counters Frost mats (boost prevents down but careful).
- Background: US Delta Force, uses a blowtorch to silently carve holes in reinforced walls.
- Strengths: Silent hard breach, can create vision slits or kill holes, versatile.
- Weaknesses: Slow process, requires precision; vulnerable while torching; limited fuel.
- Playstyle: Torch a small hole to peek then shoot defenders; or open larger breach for team.
- Unlock: 15,000 Renown or 600 R6 Credits.
- Recommended Loadout: M4 with ACOG + .44 Mag Semi-Auto; Claymore.
- Team Synergy: Self-sufficient hard breach; but still benefits from Thatcher for Bandit trick denial.
- Background: Moroccan GIGR, fires airjab launchers that push enemies when triggered.
- Strengths: Area denial, anti-flank, can push enemies off positions or into traps.
- Weaknesses: Limited airjabs (3), cannot destroy gadgets.
- Playstyle: Place airjabs on common flanking paths; use for plant cover or to dislodge enemies.
- Unlock: 15,000 Renown or 600 R6 Credits.
- Recommended Loadout: ARX200 or AK-74M with ACOG + .44 Mag; Breach Charges.
- Team Synergy: Protects planters; works with Glaz to push defenders out of smoke.
- Background: Australian SASR, deploys Trax stingers that cover ground with spikes and slow enemies.
- Strengths: Area denial, slow movement, can block rotations; high durability (3 armor).
- Weaknesses: Slow, limited engagement range.
- Playstyle: Place Trax on stairs or doorways; use with M249 SAW for suppression.
- Unlock: 15,000 Renown or 600 R6 Credits.
- Recommended Loadout: M249 SAW or F90 (high mag AR) + SDP 9mm; Claymore.
- Team Synergy: Plant defense; works with Nomad to control flanks.
- Background: Danish Jaeger Corps, uses HEL device that makes her invisible to cameras (Val, Maestro, etc.) and reduces noise.
- Strengths: Stealth, flanker, can bypass intel-gathering defenders.
- Weaknesses: Weak primary (FMG-9 or Six12 SD), no breaching capabilities.
- Playstyle: Sneak around, avoid cameras, take out roamers or flank to objective.
- Unlock: 15,000 Renown or 600 R6 Credits.
- Recommended Loadout: FMG-9 (with suppressor) + D-50; Frag Grenades (if available) or Claymore.
- Team Synergy: Deny intel from Valk, Maestro; pair with IQ to identify cameras.
- Background: Peruvian GEO, uses a grappling hook launcher to quickly ascend or enter windows.
- Strengths: Extreme vertical mobility, speed, surprise factor.
- Weaknesses: Loud landing, vulnerable during swing, one-shot gadget.
- Playstyle: Rush upper floors or windows; use G8A1 LMG for sustained fire.
- Unlock: 15,000 Renown or 600 R6 Credits.
- Recommended Loadout: G8A1 with ACOG + SMG-11; Breach Charges.
- Team Synergy: Entry fragger; can be combined with Ying for flash-assisted entry.
- Background: Indian Force One, uses CSRX 300 bolt-action rifle that deals massive damage and destroys gadgets (including reinforced walls) on impact.
- Strengths: Long-range precision, gadget destruction (one-shot Bandit/Kaid/Mute), can penetrate shields.
- Weaknesses: Slow fire rate, low ammo, terrible close-range.
- Playstyle: Stay far back, pick off defenders and destroy electronics from range.
- Unlock: 20,000 Renown or 600 R6 Credits.
- Recommended Loadout: CSRX 300 (with scope) + SPSMG9 (full-auto secondary) + Claymore.
- Team Synergy: Hard breach enabler (like Thatcher), but requires careful positioning.
- Background: Dutch KMar, creates a holographic clone that can move to gather intel and draw fire.
- Strengths: Ability to scout rooms safely, bait shots, fake pushes.
- Weaknesses: Clone can be destroyed (reveals position), low durability.
- Playstyle: Send clone into objective to spot defenders; then push with G36C or ARX200.
- Unlock: 15,000 Renown or 600 R6 Credits.
- Recommended Loadout: ARX200 (best) or G36C + MK1 9mm; Claymore or Smokes.
- Team Synergy: Intel gathering with Dokkaebi or Jackal.
- Background: Norwegian PST, uses S.E.L.M.A. aqua-breacher that can penetrate reinforced walls from range (like a grenade launcher but with water).
- Strengths: Hard breach from distance, can open multiple walls, versatile.
- Weaknesses: Gadget can be destroyed by Bandit/Kaid; slow to deploy.
- Playstyle: Stand back, toss S.E.L.M.A. at reinforced wall; then push with AK-12 or M1014.
- Unlock: 20,000 Renown or 600 R6 Credits.
- Recommended Loadout: AK-12 (excellent) + P9; Breach Charges or Claymore.
- Team Synergy: Hard breach that works with Kaid/Mute denail; pair with Thatcher.
- Background: American (Sam Fisher from Splinter Cell), uses Argun launcher that shoots sticky cameras through soft surfaces.
- Strengths: Camera intel from inside, gadget can destroy defender gadgets, can look both sides.
- Weaknesses: Camera easy to spot and shoot; limited (4).
- Playstyle: Place cameras on soft walls or floors to get sightlines; shoot gadgets.
- Unlock: 20,000 Renown or 600 R6 Credits.
- Recommended Loadout: MP7 (high ROF) + 5.7 USG; Claymore or Smokes.
- Team Synergy: Intel with Iana, Lion; can destroy bandit batteries externally.
- Background: Argentinian FBI, uses RCE-RATERO drone that can be detonated to destroy gadgets and damage enemies.
- Strengths: Remote destruction, can bypass Mute/Kaid zones, explodes on command.
- Weaknesses: Drone slow, loud; limited (4).
- Playstyle: Drive drone into objective and detonate near traps or enemies; then push.
- Unlock: 20,000 Renown or 600 R6 Credits.
- Recommended Loadout: AR33 or G36C + SDP 9mm; Claymore.
- Team Synergy: Clear traps for plant; works with Thatcher to remove electric barriers.
- Background: Croatian, uses Talon-8 clear shield that can be placed on surfaces or held to provide deployable cover.
- Strengths: Provides temporary cover, can be placed on windows or doorways, can shoot through it.
- Weaknesses: Shield has weak HP, can be destroyed by explosives; blocks vision when placed.
- Playstyle: Place shield to create safe sightlines or protect planter; hold angles.
- Unlock: 20,000 Renown or 600 R6 Credits.
- Recommended Loadout: 556xi or PDW-9 + PMM; Claymore or Smoke.
- Team Synergy: Plant protection with Montagne; cover for Thermite’s breach.
- Background: Belgian, uses R.O.U. (Rolling Orbital Unleashed) that rolls along surfaces and emits a smoke screen that also pings enemies.
- Strengths: Mobile smoke, area denial, can obscure vision and reveal defenders.
- Weaknesses: Smoke can be shot, R.O.U. can be destroyed; limited duration.
- Playstyle: Launch R.O.U. into objective to create smoke and mark enemies.
- Unlock: 20,000 Renown or 600 R6 Credits.
- Recommended Loadout: POFP92 (LMG) or AR200 + LFP586; Claymore.
- Team Synergy: Plant smoke with Glaz or Ying; area control with Capitao.
- Background: Singaporean, uses Kawan Hive launcher that fires a canister releasing nanobots that mark enemies in an area.
- Strengths: Area denial, intel (can see enemies through walls if marked).
- Weaknesses: Marking can be cleared by Mute; canister can be destroyed.
- Playstyle: Fire hive into common positions to mark defenders; then push.
- Unlock: 20,000 Renown or 600 R6 Credits.
- Recommended Loadout: SIV (SMG) or HK416C + 5.7 USG; Claymore.
- Team Synergy: Intel with Iana or Lion; pairs with Dokkaebi for phone hack.
- Background: Brazilian (from BOPE?), uses Vitoria drone that can hack defender gadgets to turn them friendly.
- Strengths: Can hack traps, cameras, and even Echo’s drone; versatile intel.
- Weaknesses: Drone is fragile; hacking takes time; limited (3).
- Playstyle: Send drone to hack gadgets, then use them against defenders.
- Unlock: 20,000 Renown or 600 R6 Credits.
- Recommended Loadout: PARA-308 or V308 + P226 MK 25; Claymore.
- Team Synergy: Counter trap-heavy defense; works with IQ to identify gadgets.
- Background: Unknown (mythical?), uses D.E.A.D. (Device for Enemy Activity Detection) that highlights the furthest enemy from objective when activated.
- Strengths: Global ping on a single defender, good for hunting roamers.
- Weaknesses: Only pings one enemy, long cooldown, can be countered by Mute.
- Playstyle: Activate to locate roamer, then pursue with LMG or AR.
- Unlock: 25,000 Renown or 600 R6 Credits.
- Recommended Loadout: LMG (M249) + SMG-12; Claymore.
- Team Synergy: Roamer hunting with Jackal; intel with Dokkaebi.
- Background: Danish—placed here for completeness; uses a deployable device that emits a toxic smoke when triggered, slowing and damaging enemies.
- Strengths: Area denial, trap, high damage over time.
- Weaknesses: Device can be shot; limited (2).
- Playstyle: Place traps in high-traffic areas; detonate remotely or on enemy step.
- Unlock: 25,000 Renown or 600 R6 Credits.
- Recommended Loadout: MPX (low recoil) + Super Shorty; Barbed Wire.
- Team Synergy: Works with Smoke for area denial; combo with Lesion.
- Background: British SAS, uses 6 SMG-11 gas grenades that create a toxic cloud dealing damage over time.
- Strengths: Area denial for plant, can stop pushes; strong SMG-11 secondary.
- Weaknesses: Limited range, cloud visible; vulnerable while throwing.
- Playstyle: Deny late-round plants; hold narrow chokepoints with shotgun (M590A1) and SMG-11.
- Unlock: Free (base game).
- Recommended Loadout: M590A1 + SMG-11; Barbed Wire or Shield.
- Team Synergy: Plant denial with Echo or Maestro; combo with Goyo for fire area.
- Background: British SAS, places signal disruptors that jam enemy drones and some gadgets (including hard breaching charges).
- Strengths: Hard counter to drones and many gadgets; can block Hibana, Thermite, Ace.
- Weaknesses: Jammer radius limited; vulnerable to explosions.
- Playstyle: Place jammers near reinforced walls and common drone paths; use MP5K or shotgun.
- Unlock: Free (base game).
- Recommended Loadout: MP5K with ACOG + P226 MK 25; Nitro Cell.
- Team Synergy: Protects reinforced walls with Bandit/Kaid; paired with Echo to deny plant.
- Background: FBI SWAT, places armored barricades that can absorb significant damage and slow attackers.
- Strengths: Blocks vision, slows entry, can be reinforced with Mute.
- Weaknesses: Can be destroyed by Sledge, Ash, explosives; blocks friendly movement too.
- Playstyle: Castle windows and doors to direct attackers; use UMP45 or M1014 shotgun.
- Unlock: Free (base game).
- Recommended Loadout: UMP45 (weak but stable) + M45 MEUSOC; Impact Grenades.
- Team Synergy: Works with Mute (jammer stops drones under gaps) and Frost (traps behind).
- Background: FBI SWAT, uses a heartbeat sensor that detects enemy hearts up to 9m through walls.
- Strengths: Wallhacks for close-range, can prefire enemies.
- Weaknesses: Sensor requires line of sight, vulnerable while scanning; low armor.
- Playstyle: Roam or lurk near objective; peek with shotgun (M1014) or UMP45.
- Unlock: Free (base game).
- Recommended Loadout: M1014 + M45 MEUSOC; Nitro Cell.
- Team Synergy: Intel for Caviera (silent step) or heavy roamers.
- Background: French GIGN, uses a stim pistol that can heal himself or teammates from range.
- Strengths: High sustain, can overheal (140 HP), can self-revive if downed.
- Weaknesses: No gadget for destruction; relies on team damage.
- Playstyle: Stay near objective, heal teammates; use MP5 or SG-CQB (shotgun).
- Unlock: Free (base game).
- Recommended Loadout: MP5 with ACOG + P9; Barbed Wire or Shield.
- Team Synergy: Works with Rook (armor) for supreme tankiness; supports anchor operators.
- Background: French GIGN, places an armor plate pack that gives all teammates +20% damage reduction on torso.
- Strengths: Simple team-wide benefit; can take more hits.
- Weaknesses: Armor doesn't prevent headshots; pack can be destroyed.
- Playstyle: Drop armor early, then anchor objective with MP5 or P90.
- Unlock: Free (base game).
- Recommended Loadout: P90 with ACOG + LFP586 (revolver); Barbed Wire.
- Team Synergy: Universal; pairs well with any anchor (Doc, Maestro, Echo).
- Background: Russian Spetsnaz, places tripwire traps that detonate an explosive when tripped.
- Strengths: High damage, can slow rushes; traps invisible when placed carefully.
- Weaknesses: Loud deployment, traps can be shot; only 6.
- Playstyle: Trap doorways and windows; use 9x19VSN SMG or SASG-12 shotgun.
- Unlock: 1,000 Renown.
- Recommended Loadout: 9x19VSN with ACOG + PMM; Nitro Cell.
- Team Synergy: Fill gaps between Mute jammers; works with Frost for trap combos.
- Background: Russian Spetsnaz, originally a stationary LMG, now uses a Shumikha launcher that fires incendiary grenades.
- Strengths: Area denial, fire damage over time, can burn attackers out.
- Weaknesses: Limited ammo (5 rounds), slow fire rate, exposed while reloading.
- Playstyle: Fire incendiary into objective or choke points to force movement.
- Unlock: 1,000 Renound.
- Recommended Loadout: 9x19VSN or DP-27 (buffed LMG) + GSH-18; Barbed Wire.
- Team Synergy: Area denial with Smoke or Goyo; prevents plant.
- Background: German GSG9, places ADS (Active Defense System) that shoots down thrown grenades and projectiles.
- Strengths: Hard counter to frag grenades, flashbangs, Ying's candelas; good weapon (416-C Carbine).
- Weaknesses: Can be destroyed by explosives or melee; has limited charges (3 per ADS).
- Playstyle: Place ADS near objective to protect from projectiles; then roam or anchor.
- Unlock: 1,000 Renown.
- Recommended Loadout: 416-C with ACOG + P12; Barbed Wire.
- Team Synergy: Essential for protecting plant; works with Bandit for utility denial.
- Background: German GSG9, places car batteries on reinforced walls to shock and destroy gadgets (breaching charges, thermite charges).
- Strengths: Can trick (bandit trick) by putting battery on wall as enemy places charge; good MP7.
- Weaknesses: Requires aggressive play; can be killed while tricking; battery can be destroyed by Twitch/EMP.
- Playstyle: Hold reinforced walls and place battery when enemy tries to breach; use MP7 with ACOG.
- Unlock: 1,000 Renown.
- Recommended Loadout: MP7 with ACOG + P12; C4 or Barbed Wire.
- Team Synergy: Works with Mute to block both shocks and jams; counter to hard breachers.
- Background: Canadian JTF2, places Welcome Mats that trap enemies who step on them (downing them).
- Strengths: Surprise, can down multiple enemies; good 9mm C1 SMG.
- Weaknesses: Mats can be shot; visible if placed in obvious spots.
- Playstyle: Place mats under windows, behind doorways, or near objectives.
- Unlock: 10,000 Renown or 600 R6 Credits.
- Recommended Loadout: 9mm C1 (low recoil) + Super 90 (shotgun); Barbed Wire.
- Team Synergy: Trap combos with Kapkan; protect flanks.
- Background: US Navy SEAL, deploys three sticky cameras that provide vision in any location.
- Strengths: Unprecedented intel; can throw cameras outside or inside.
- Weaknesses: Cameras can be found and destroyed; limited to 3.
- Playstyle: Place cameras in key positions (above objective, outside windows); then roam.
- Unlock: 10,000
Thatcher
Ash
Thermite
Twitch
Montagne
Glaz
Fuze
Blitz
IQ
Buck
Blackbeard
Capitão
Hibana
Ying
Jackal
Zofia
Dokkaebi
Lion
Finka
Maverick
Nomad
Gridlock
Nokk
Amaru
Kali
Iana
Ace
Zero
Flores
Osa
Sens
Grim
Brava
Deimos
Fenrir
---
Defending Operators
Smoke
Mute
Castle
Pulse
Doc
Rook
Kapkan
Tachanka
Jäger
Bandit
Frost
Valkyrie
Cheats & Secrets
Cheats & Secrets Guide for Tom Clancy's Rainbow Six Siege
Are There Cheat Codes?
No. Rainbow Six Siege has no traditional cheat codes, console commands, or unlock codes. The game is purely multiplayer-focused with a strict anti-cheat system (BattlEye) and no single-player campaign that would support such features. All rewards—operators, cosmetics, attachments—are earned through gameplay (Renown) or microtransactions (R6 Credits). There are no hidden button sequences or text-based codes that unlock content.
Unlock Codes & Secret Commands
- No unlock codes exist. Every operator, weapon, and cosmetic is obtained via the in-game shop or Battle Pass progression. You cannot “unlock everything” with a code.
- No developer console commands in the retail version. The only commands are for spectator modes and custom games (e.g., `infinite health` is not available). R6 does have a “R6Fix” test server, but no cheat commands.
- No secret menus or debug modes accessible to players.
- Location: On the map Kafe Dostoyevsky, in the freezer room (basement), look behind a stack of boxes on a shelf. A small pink plushie (often called the “Pink Rathian” from Monster Hunter) sits there.
- How to find: Break the boxes in the freezer room (near the red door to kitchen). Jump onto the shelf and look behind the boxes.
- Note: This was added as a cross-promotion with Monster Hunter World (both Ubisoft/Capcom).
- Location: On the old version of Hereford Base (before rework), there was a hidden room accessible only by destroying a specific wall in the basement garage.
- How to access: In the basement garage, destroy the wall opposite the main garage entrance (the one with padded white tiles). This revealed a small, empty room with graffiti on the walls.
- Note: The room was removed in the Hereford Base rework (Operation Grim Sky). It was likely a developer testing area left in by accident.
- Location: On Coastline, in the VIP room (floor 2), inside the locked bar area. Look behind the counter on a shelf.
- How to find: Destroy the glass bar display; a small sleeping cat model sits on a shelf. It cannot be shot or interacted with.
- Note: Possibly a reference to “Janitor” or just a cute addition.
- How to obtain: This charm was a limited-time reward during the 2019 April Fools event “Rainbow is Magic.” Players who completed a special playlist earned a rainbow horse charm.
- Status: No longer obtainable. It is purely cosmetic and not a secret code.
- Location: On Chalet, in the trophy room (basement), a small piranha plant (Super Mario reference) sits in a fish tank.
- How to find: Break the glass of the large fish tank in the right corner. The plant is inside, next to a toy.
- Note: Another cross-promotion with Nintendo? Unconfirmed but widely accepted.
- Location: On Oregon, in the kitchen (basement), inside a cabinet near the refrigerator.
- How to find: Open the cabinet doors; a small teddy bear sits on a plate.
- Note: Possibly just a prop.
- Location: On Theme Park, in the Haunted House section, there is a small break room with birthday decorations and a cake with “Mira” written on it.
- How to find: Enter the building near the bumper cars; look for a door with a sign “Happy Birthday Mira.” The room is locked from the outside but can be viewed through windows.
- Note: This was added to celebrate Mira’s (operator) birthday or the map dev team.
- Several maps have posters of operators pinned on walls. For example, Caveira posing on a poster in Favela. These are not cheat codes but fun references.
- No secret operators or hidden gameplay mechanics. Every operator is officially released and purchasable.
- The “Super 90” shotgun rate-of-fire exploit was patched long ago. Not a secret, just a bug.
- “Lord Tachanka” meme – Tachanka’s turret is intentionally weak as a joke. No secret unlockable version exists.
- Easter eggs tied to seasonal events: For example, the “Halloween” event maps have hidden Easter eggs (e.g., a ghost figure in House). These are time-limited.
Hidden Features & Easter Eggs
Despite no cheats, Ubisoft has hidden several Easter eggs and developer-intended secrets across maps and events. These are harmless discoveries that pay homage to pop culture, Rainbow Six lore, or other Ubisoft games.
#### 1. The Pink Plushie (Kafe Dostoyevsky)
#### 2. The Secret Room (Hereford Base – Classic)
#### 3. The Cat (Coastline)
#### 4. “Rainbow is Magic” Charm
#### 5. The Piranha Plant (Trophy Room - Chalet)
#### 6. Teddy Bear (Oregon)
#### 7. The “Mira’s Birthday” Room (Theme Park)
#### 8. Operator Posters & Graffiti
Developer-Intended Secrets
Conclusion
Rainbow Six Siege is a cheat-free game by design. All content is earned through progression or paying. The only “secrets” are cosmetic Easter eggs that do not affect gameplay. If you encounter anyone claiming to have cheat codes or unlock codes, they are either scams or mods/hacks that violate the game’s terms of service and will result in a permanent ban.
Pro tip: Focus on improving your skills rather than searching for cheats. The satisfaction of out-playing opponents legitimately is far greater than any hidden command could provide.