Total War: Warhammer III
## Total War: Warhammer III – Game Introduction **Total War: Warhammer III** is the epic conclusion to Creative Assembly's acclaimed trilogy, blending grand-scale turn-based strategy with real-time tactical battles in the dark fantasy world of Warhammer Fantasy Battles. Developed by **Creative As...
Download & Installation
Total War: Warhammer III – Download & Installation Guide
This guide covers all official platforms for downloading and installing Total War: Warhammer III. The game is currently available only on PC (Windows) via Steam, Epic Games Store, and Microsoft Store. There are no console or mobile versions.
---
1. System Requirements
Before downloading, ensure your PC meets the minimum or recommended specs.
#### Minimum Requirements (30 FPS at 1080p, Low settings)
- OS: Windows 10 64-bit (version 1909 or newer)
- CPU: Intel Core i5-6600 / AMD Ryzen 5 2600X
- RAM: 8 GB
- GPU: Nvidia GeForce GTX 970 / AMD Radeon RX 470 (4 GB VRAM)
- DirectX: Version 11
- Storage: 120 GB available space (SSD strongly recommended)
- OS: Windows 10 / 11 64-bit
- CPU: Intel Core i7-10700K / AMD Ryzen 7 3800X
- RAM: 16 GB
- GPU: Nvidia GeForce RTX 2070 / AMD Radeon RX 5700 XT (8 GB VRAM)
- DirectX: Version 11 (or 12 for optional performance improvements)
- Storage: 120 GB SSD (NVMe preferred for faster load times)
#### Recommended Requirements (60 FPS at 1080p, High/Ultra)
> Note: The game requires a 64-bit processor and operating system. It does not run on 32-bit systems.
---
2. Download Sources
Only use official storefronts to avoid malware or license issues.
| Platform | Store Link | Account Required | Notes |
|---|---|---|---|
| Steam | [store.steampowered.com/app/1142710](https://store.steampowered.com/app/1142710/Total_War_WARHAMMER_III/) | Steam account | Most popular; cross-play with Epic via cross-store multiplayer? (limited) |
| Epic Games Store | [store.epicgames.com/en-US/p/total-war-warhammer-3](https://store.epicgames.com/en-US/p/total-war-warhammer-3) | Epic Games account | Same game; separate achievements/features |
| Microsoft Store | [aka.ms/TotalWarWarhammer3](https://aka.ms/TotalWarWarhammer3) (search “Total War Warhammer III” if link broken) | Microsoft account | Also available via PC Game Pass (subscription) |
#### Other Legitimate Options
- Physical PC DVD (rare): May include a Steam key. No longer widely sold.
- Key resellers (e.g., Humble Bundle, Fanatical): Only buy from authorized resellers. Check Sega’s authorized retailer list.
- Steam: Free Steam account required. No additional subscription for single-player. Online multiplayer requires Steam's free account.
- Epic Games: Free Epic account required. No subscription needed for single-player. Multiplayer uses Epic's online services.
- Microsoft Store: Free Microsoft account. If you are using PC Game Pass, an active subscription is needed to keep playing. (Single purchase also works without subscription.)
---
3. Step-by-Step Installation
#### A. Steam Installation
1. Install Steam Client – Download from [store.steampowered.com](https://store.steampowered.com) if not already installed.
2. Login – Use your Steam account credentials. Create one if needed (free).
3. Purchase or Redeem – Buy the game on Steam Store, or activate a product key (Games → Activate a Product on Steam).
4. Install – Go to your Library → find Total War: WARHAMMER III → click Install.
5. Choose Location – Select a drive with at least 120 GB free. SSD recommended.
6. Download – The game will download and install automatically. You can pause/resume.
7. Play – Once done, click Play in Library.
#### B. Epic Games Store Installation
1. Install Epic Games Launcher – Download from [epicgames.com](https://www.epicgames.com/store/en-US/download).
2. Login – Use your Epic Games account.
3. Purchase or Redeem – Buy the game in the store, or redeem a code (Account → Redeem Code).
4. Install – Go to Library → click on Total War: WARHAMMER III → Install.
5. Select Drive – Minimum 120 GB free.
6. Wait for completion – The launcher manages download and installation.
7. Launch – Click Play from Library.
#### C. Microsoft Store / Xbox App (PC) Installation
1. Open Microsoft Store – Click Start → Microsoft Store, or use Xbox app on PC.
2. Search – Type “Total War Warhammer III” and select the game.
3. Buy or Install – If you own it, click Install. If you have PC Game Pass, it will show as included.
4. Choose Drive – You may need to set a default install drive in Settings.
5. Download – The Xbox app will handle installation. File format is different (WindowsApp folder).
6. Launch – From Start menu or Xbox app.
> Note: Microsoft Store version may have slightly different folder paths and mod support (Steam Workshop not available; manual modding possible but more limited).
---
4. Account Requirements
All platforms require internet connection for initial download and authentication. Offline play is possible after installation (Steam Offline Mode, Epic offline mode, etc.) but multiplayer features require internet.
---
5. First Launch Setup
After installation, follow these steps for a smooth first launch:
1. Check for Updates – The launcher will auto-update the game. Ensure you have the latest patch.
2. Graphics Configuration – The game will auto-detect your hardware and set default graphics. You can later adjust in Settings.
3. Language Selection – Choose your preferred text and audio language. Some languages may require separate downloads.
4. Sign in to Total War Access (Optional) – You can create a free Total War Access account for extra content (e.g., Blood for the Blood God DLC, wallpapers). Not mandatory.
5. Play through the Prologue – Recommended for first-time players. You can skip it.
6. Mods (Steam Workshop) – If on Steam, you can subscribe to mods after first launch. Exit game, browse Workshop, subscribe, then reboot game. Mods may affect achievements.
> Important: The game requires a one-time online connection at first launch to verify ownership and download any essential files.
---
6. Common Installation Errors & Fixes
| Error Message / Symptom | Possible Cause | Solution |
|---|---|---|
| “Insufficient disk space” – Even if you think you have enough. | Windows reserved space, or the game calculates in GiB vs GB. | Free up at least 130 GB. Run Disk Cleanup. Ensure you are installing on the correct drive. |
| “DirectX 11/12 missing” | Missing runtime components. | Install the latest DirectX from Microsoft. The game installer may offer to install it. |
| “Microsoft Visual C++ runtime error” | Missing Visual C++ redistributables. | Download from [aka.ms/vs/17/release/vc_redist.x64.exe](https://aka.ms/vs/17/release/vc_redist.x64.exe) or let the game installer prompt. |
| Steam “Disk Write Error” | Corrupted download cache or antivirus interference. | Restart Steam as admin. Clear download cache (Settings → Downloads). Temporarily disable antivirus during installation. |
| Epic “Verification Failed” | Corrupted files or network issues. | Run Verify integrity of game files (Library → click three dots → Verify). |
| Microsoft Store “0x80073CF0” | Windows Store cache issue. | Run `wsreset.exe` from Run dialog. Clear Microsoft Store cache. |
| Crash on launch (no error) | Outdated GPU drivers, antivirus blocking. | Update GPU drivers. Add game folder to antivirus exclusions. Run the launcher as admin. |
| “Failed to initialize Steam” (on Steam) | Steam client not running or permissions. | Ensure Steam is open before launching. Run Steam as admin. |
| Can’t see the game in Library after purchase | Storefront sync delay. | Restart launcher. Check your purchase history. For Steam, sometimes need to exit and re-enter Library. |
7. Post-Install Verification
After installation, confirm the game is fully functional:
1. Check file integrity (optional but recommended):
- Steam: Right-click game in Library → Properties → Installed Files → Verify integrity of game files.
- Epic: Library → click three dots on game → Manage → Verify.
- Microsoft Store: Settings → Apps → Total War: WARHAMMER III → Advanced options → Repair or Reset.
2. Launch the game – It should start to the main menu without errors.
3. Check version number – Usually displayed on main menu or in the launcher. Compare with the latest patch notes from [Total War blog](https://www.totalwar.com/blog/).
4. Test performance – Run through the prologue battle. If severe stuttering, lower graphics settings or update drivers.
5. Enable mods (optional) – If you play on Steam, subscribe to a few harmless mods (e.g., UI improvements) and ensure they load correctly.
---
8. Additional Tips
- Storage Optimization: The game uses ~120 GB. If you have multiple Total War games (Warhammer I, II, III), they can share some data for the combined Mortal Empires campaign? Actually, Warhammer III includes Immortal Empires, but you still need all three games installed to unlock full 2/1 factions if you own them. However, you can install them on the same drive.
- Uninstalling: Use the store client’s uninstall feature. Do not manually delete folders – remnants may cause issues.
- Cloud Saves: Enable cloud saves in your launcher (Steam: Properties → General → Steams Cloud; Epic: Library → click three dots → set cloud saves on; Microsoft Store: automatic with Xbox Live).
- Mod Management: Steam Workshop is easiest. For Epic/MS Store, mods must be installed manually (rare).
- Official Support: [Total War Support](https://www.totalwar.com/support/)
- Community: r/totalwar subreddit, Creative Assembly forums, Steam Community Hub.
- Contact Store Support: Steam Support, Epic Games Help, Microsoft Support.
---
9. Frequently Asked Questions
Q: Can I play Total War: Warhammer III on Mac or Linux?
A: No. The game is Windows-only. It may work on Linux via Proton (Steam Deck has a specific version), but not officially supported. Mac support was removed after Warhammer II.
Q: Do I need the previous games installed for Immortal Empires?
A: No, you only need to own them on the same store. You can have them installed or not; the game will detect ownership. To play with all factions from Warhammer I and II, you must own those games and any relevant DLC on the same store.
Q: Is there a physical disc version?
A: Very rare. Most physical copies are just a code in a box. No disc installation.
Q: The download is huge – can I play while downloading?
A: Some launchers allow playing while streaming (Steam’s “Play while downloading” feature) but not for Total War: Warhammer III; you must wait for full download.
---
10. Getting Help
If you still encounter issues:
---
Guide last updated: October 2025. Always check official store pages for the most current info.
Game Introduction
Total War: Warhammer III – Game Introduction
Total War: Warhammer III is the epic conclusion to Creative Assembly's acclaimed trilogy, blending grand-scale turn-based strategy with real-time tactical battles in the dark fantasy world of Warhammer Fantasy Battles. Developed by Creative Assembly and published by Sega, the game launched on February 17, 2022 for PC (Windows) exclusively via Steam and Epic Games Store. It remains a PC-only title with no console versions announced.
Story Overview
Set in the Warhammer Fantasy universe, the game revolves around the struggle for the soul of a dying god. The narrative centers on the Bear God Ursun, whose roar is heard across the world. As the realms of Chaos encroach, four Chaos Gods – Khorne, Nurgle, Tzeentch, and Slaanesh – seek to claim Ursun's power for themselves. The player takes on the role of one of eight legendary lords (from various factions) racing to either save or exploit Ursun. The main campaign, Realm of Chaos, involves venturing into the Chaos Realms to prevent any single god from dominating, while a secondary narrative follows the Proclaimer of the Great Orthodoxy, Kostaltyn, and the Ice Court of Kislev.
Setting
The game features a vast, richly detailed map covering the Dark Lands, Mountains of Mourn, and the Chaos Wastes, alongside returning regions from previous titles via the combined map. Major locations include:
- Kislev: A hardy human kingdom, besieged by Chaos, with icy tundras and fortified cities.
- Cathay: An Eastern-inspired empire with grand dragon rulers and celestial magic.
- The Chaos Realms: Four otherworldly domains, each themed after a Chaos God (e.g., the Blood God's brass citadel, Nurgle's plague-ridden gardens).
- Yuri (The Proclaimer): A Kislevite hero who becomes the vessel for Ursun’s power, serving as the game’s tutorial lord.
- Katarin (The Ice Queen): Ruler of Kislev, a powerful ice mage leading the Ice Court.
- Kostaltyn (The Great Orthodoxy): A fanatical priest harnessing the zeal of the people.
- Miao Ying (The Storm Dragon): Leader of the Northern Provinces of Cathay, a dragon-shifter.
- Zhao Ming (The Iron Dragon): Ruler of the Western Provinces, a master of alchemy.
- Daemon Prince: A customisable non-legendary lord (unique to the campaign) who serves Chaos Undivided.
- Legendary Lords of the base game: Each representing the four Chaos Gods: Skarbrand (Khorne), Ku'gath (Nurgle), N'Kari (Slaanesh), and Kairos Fateweaver (Tzeentch).
- Massive Scale: Hundreds of units on screen, epic sieges, and a campaign map spanning an entire continent.
- Deep Strategy: Turn-based empire management (diplomacy, economy, tech tree) combined with real-time tactical battles.
- Faction Diversity: Eight distinct races (base game) with unique mechanics, units, and playstyles – from the bloodthirsty Khorne to the scheming Tzeentch.
- Narrative Depth: The Realm of Chaos campaign introduces a dynamic race against rival factions to win Ursun’s favor, with branching objectives.
- Strategy enthusiasts who enjoy complex campaigns and tactical combat.
- Warhammer Fantasy fans looking for the most authentic digital representation of the setting.
- Players who appreciate high replayability thanks to varied lords, victory conditions, and mod support.
- Total War veterans – the trilogy’s finale brings together all previous races and mechanics.
- Realm of Chaos Campaign: The narrative-driven main campaign where players race to prevent a Chaos God from claiming Ursun’s soul. Features unique chaos realm mechanics and survival battles.
- Immortal Empires Campaign: A massive sandbox campaign (free DLC) combining factions from all three Total War: Warhammer titles – the largest map and most comprehensive experience.
- Custom Battles: Set up one-off skirmishes with any unlocked units and maps.
- Multiplayer Battles & Campaigns: Up to 8-player online matches (PvP or co-op) both in real-time battles and turn-based campaigns.
- Mortal Empires (legacy): The predecessor to Immortal Empires, available for owners of previous games.
- Offline: Full single-player campaign mode (both Realm of Chaos and Immortal Empires) works without internet after installation.
- Online: Required for multiplayer, co-op campaigns, cloud saves, and leaderboards. Cross-platform play is not supported (no console crossplay). Steam and Epic users can play together via cross-store multiplayer.
- Ogre Kingdoms (pre-order bonus / later standalone): Adds the hungry Ogre mercenaries with a unique camp mechanic.
- Champions of Chaos (2022): Adds four new legendary lords for the Chaos factions (Valkia, Festus, Vilitch, Azazel) and new units.
- Forge of the Chaos Dwarfs (2023): Introduces the Chaos Dwarf race – a powerful industrial-dwarf faction with daemon engines and slave economy.
- Shadows of Change (2023): Adds the Changeling (Tzeentch) and expands Kislev and Cathay.
- Thrones of Decay (2024): Adds Tamurkhan (Nurgle) and content for the Empire and Dwarfs.
- Immortal Empires (free to all owners of Warhammer III).
- Blood for the Blood God (graphical blood effects – often paid but sometimes free).
- Various Regiments of Renown (elite unit packs) released over time.
- Trilogy Finale: For the first time, all races from the Warhammer Fantasy setting are unified in a single game (via Immortal Empires), making it the most comprehensive Warhammer strategy experience ever.
- Chaos Realms: A new campaign mechanic where players physically enter the hellish planes of Chaos, facing unique survival battles and seeking powerful boons.
- Largest Total War Map Ever: Immortal Empires features over 280 playable factions and 500+ regions – the most content-rich Total War title.
- Touchstone for Modding: Steam Workshop integration allows for massive community-driven overhauls, unit packs, and total conversions.
- Accessible yet Deep: Improved tutorial and tooltips lower the barrier for newcomers while retaining the strategic depth veterans love.
Main Characters
Core Appeal
Target Audience
Game Modes
Online/Offline Support
DLC & Expansions Overview
Creative Assembly continues to support the game with paid and free DLC:
Major DLC Packs (as of early 2025):
Free DLC:
What Makes This Game Unique?
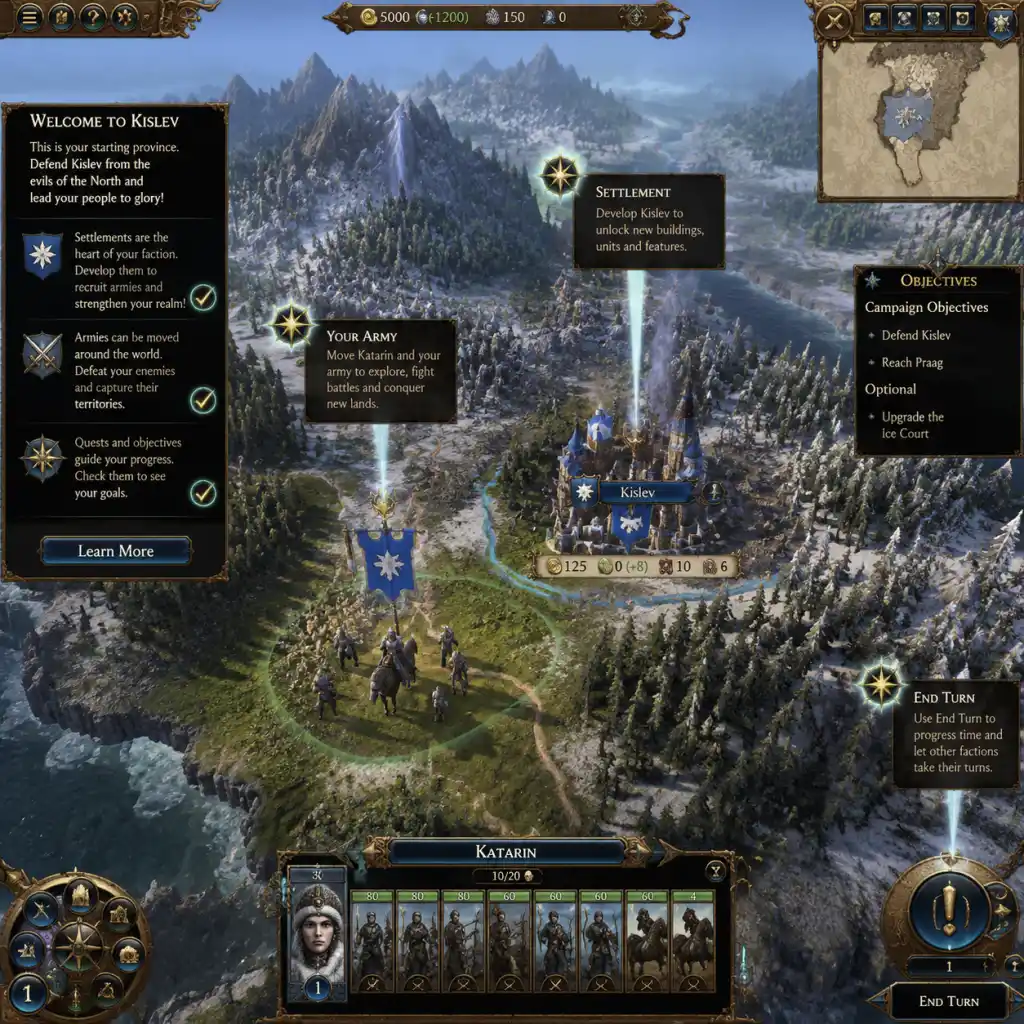
Getting Started
Total War: Warhammer III – Getting Started Guide for New Players
Welcome to Total War: Warhammer III, the grand strategy game where you lead legendary factions from the Warhammer Fantasy world. This guide is designed for newcomers who have never played a Total War game before. We'll walk you through your first hour, explain the core mechanics, and give you a day-one checklist so you can start conquering without feeling lost.
---
First Hour Walkthrough (Proving Grounds Campaign)
After launching the game, you'll be greeted by the main menu. For your very first playthrough, select the "Proving Grounds" campaign – it's the official tutorial that teaches you the basics step by step. Here's what happens in the first 60 minutes:
1. Cinematic Intro (2 minutes): Watch the opening cinematic; it sets the stage for the chaos gods vs. Kislev vs. Cathay conflict.
2. Faction Selection (5 minutes): You are forced to play as Kislev (led by Yuri, but you control a generic lord). The game locks this to ensure a structured tutorial. Don't worry – you'll have full freedom later.
3. First Turn – Movement & Building (10 minutes): You start with a small army and a minor settlement. The advisor (a blue ghost) will pop up constantly. Follow his instructions:
- Click on your army and move it toward the nearby enemy settlement.
- Click on your settlement and build a growth or recruitment building. The game will highlight the cheapest option. Build it now.
4. End Turn (1 minute): Press "End Turn" (button at bottom right, or press Enter). Watch the enemy AI move.
5. Second Turn – Battle Tutorial (15 minutes): Your army is now next to an enemy garrison. Attack it. The game switches to real-time battle. A separate tutorial explains how to move units, attack, use abilities, and win. Follow the prompts. After winning, you auto-resolve some battles later.
6. Campaign Map Tutorial (remaining time): You'll learn about province control, edicts, diplomacy, and tech tree. The advisor will slowly introduce new features. Stick with it until he stops giving quests (about turn 8-10).
Important: Do not skip the tutorial battles. They teach mechanics that are essential even for veterans. The first hour may feel slow, but it's critical to understanding the game's rhythm.
---
Character Creation – Choosing Your Faction & Legendary Lord
Total War: Warhammer III does not have a traditional character creator where you design a face. Instead, you pick a faction and a Legendary Lord (the faction leader) at the start of a campaign. Each Legendary Lord has unique abilities, starting units, and campaign mechanics.
For your first campaign (outside the tutorial), choose one of these beginner-friendly factions:
| Faction | Legendary Lord | Why It's Good for Beginners |
|---|---|---|
| Kislev | Katarin Bokha (Ice Queen) | Strong hybrid army (melee + range), straightforward economy, and no complex magic. |
| Grand Cathay | Miao Ying (Storm Dragon) | Defensive playstyle, powerful ranged units, and easy to defend your homeland. |
| Khorne | Skarbrand (The Exile) | Melee-focused, simple mechanics, and you can ignore many campaign systems if you just fight. |
- Any Chaos Dwarf faction (their economy is very different and hard).
- The Daemons of Chaos (faction has multiple chaos gods to juggle).
- Any faction with "Horde" mechanic (like Beastmen or Warriors of Chaos – they don't build settlements).
Once you pick a faction, you can also customize the difficulty (Campaign and Battle separately). For first-time players, set both to Normal. You can adjust later.
---
Platform Controls
Total War: Warhammer III is a PC game. It does not officially support console controllers (Xbox/PlayStation), but it plays well with mouse and keyboard and is Steam Deck verified (with controller mapping).
PC (Mouse & Keyboard) – Essential Controls:
| Action | Control |
|---|---|
| Select unit/army | Left-click on it |
| Move army | Right-click on destination (on campaign map) |
| Move battle units | Left-click and drag to position, or right-click enemy to attack |
| Camera movement | W/A/S/D or arrow keys; scroll wheel to zoom; middle mouse to rotate |
| End turn | Spacebar or click "End Turn" button |
| Pause battle | Pause key or Escape (opens menu) |
| Speed up battle | 1/2/3 keys (1=normal, 2=fast, 3=very fast) |
| Group units (battle) | Select units, press Ctrl+G |
| Attack ground (artillery) | Alt + right-click |
- Left stick: camera movement
- Right stick: camera rotation
- Right trackpad: mouse cursor
- Right trigger: left-click
- Left trigger: right-click
- Face buttons (A/B/X/Y): various shortcuts (check the menu)
- Use the left back paddle (L4) for end turn or pause.
- Take the advisor's advice – he often gives free stuff (units, money) for completing simple tasks.
- Always check the “End Turn” button – it shows pending events (e.g., construction finishes, recruitment complete) so you never miss a turn.
- Use the “Quick Save” (F5) before major battles or diplomatic decisions. You can reload if disaster strikes.
- Build a growth building first in your starting settlement – it increases population growth, unlocking more building slots.
- Recruit one additional unit every 2-3 turns – don't over-recruit early, as you need money for buildings.
- Pause frequently in battles (press Pause) – you can issue orders while paused. This is a huge advantage for beginners.
- Attack multiple enemies at once. Focus on one war at a time. Use diplomacy to keep others neutral.
- Overextend without support. If your main army gets destroyed, you may lose. Keep a backup lord near your capital.
- Ignore public order (the green/yellow/red bar on settlements). If it drops below 0, rebellions spawn. Build a public order building or station a small garrison.
- Auto-resolve fights you should fight manually. Auto-resolve often over-calculates casualties, especially for balanced armies. Fight manually when odds are even.
- Sell trade goods without a trade agreement. You need a trade partner to get gold from resources.
- Use magic recklessly. Only certain units (wizards) can cast spells. They use Winds of Magic (resource). Practice with low-cost spells first.
Tip for all players: Spend 5 minutes in the tutorial battle just moving the camera and selecting units until comfortable. You can also remap keys in the settings menu.
---
User Interface (UI) Overview
The screen is divided into several key areas. Understanding them is crucial.
Campaign Map (the strategic layer):
1. Top Bar (Ribbon): Displays current turn number, treasury (gold), food (if applicable), and other faction-specific resources (e.g., Winds of Magic for magic factions).
2. Minimap (Bottom Left): Shows a small version of the campaign map. You can click to jump to locations. Green/red dots indicate friendly/enemy settlements.
3. Central Map: The main campaign map. Icons represent armies, settlements, quest markers, sea routes, and resources.
4. Left Panel (Settlement Info): When you click a settlement, a panel appears showing its buildings, garrison, and province details.
5. Right Panel (Army/Character Info): When you select an army, this shows its lord, units, and movement range (blue circle on map).
6. Bottom Menu Bar: Buttons for:
- End Turn (most important)
- Advisor (tutorial toggle)
- Diplomacy (talk to other factions)
- Technology (research tree)
- Buildings (quick build from settlement panel)
- Recruit (hire units for selected army)
- Quests & Objectives
- Faction Overview (economy, stats)
7. Event Notifications (Top Right): Pop-ups for battles, completed buildings, new units available, or diplomatic offers. Click to dismiss or act.
Battle Map (real-time tactics):
1. Top Center: Battle timer (if not quick battle) and number of remaining units.
2. Bottom Center (Unit Cards): Shows all your units. Green bars indicate health; unit icon and number of soldiers. Select cards to issue orders.
3. Bottom Left (Minimap): Battle map version – shows unit positions. Click to jump view.
4. Bottom Right (Abilities Panel): When you select a unit with special abilities (e.g., spells, breath attacks, rally), their icons appear here. Click to activate.
5. Top Right (Command Panel): Buttons for group commands, guard mode, skirmish mode, etc. Hover to learn.
6. Escape Menu: Pause and access options, save, quit.
---
Essential Early Objectives (First ~20 Turns)
1. Secure your starting province: Capture all settlements in your home province to gain province-wide bonuses (e.g., control bonuses, public order). Usually 2-3 settlements.
2. Build a second army (or reinforce): A single army is vulnerable. After securing home, recruit a second lord (cheap) and a few units to support or defend.
3. Research the first technology: Choose something that boosts income or growth first (e.g., "Improved Tally" for trade goods).
4. Establish trade with friendlies: Use diplomacy to sign non-aggression pacts and trade agreements with neighboring factions of the same race (e.g., other Kislev factions if you're Kislev). This provides income and prevents early war.
5. Complete the first quest battle: Your Legendary Lord will have a quest marker on the map (a golden shield). Completing it gives unique items and experience.
6. Recruit a hero: After building a hero recruitment building (e.g., Spire of the Ice Court for Kislev), recruit a hero to scout or assist in battles.
7. Expand to one more province: After turn 10-15, start conquering a neighboring weak province (preferably one with a port for trade income).
---
What to Do First & What to Avoid
DO THESE as your first actions after the tutorial:
AVOID these common traps:
---
Early Resource Priorities
| Resource | Priority | Why & How to Manage |
|---|---|---|
| Gold (Treasury) | HIGHEST | Everything costs gold. Early income comes from settlements (tax rate set to high), trade, and sacking. Keep a reserve of ~1000 gold for emergencies. Spend on buildings that increase income (markets, ports). |
| Food (if applicable) | HIGH | Only some factions (e.g., Skaven, Beastmen) need food. For beginner factions (Kislev, Cathay), food is not a primary resource – but for others, build farms. |
| Growth | HIGH | Determines how fast you unlock new building slots in a settlement. Build growth buildings early in every minor settlement. |
| Public Order | MEDIUM | Keep it above 0. Build a garrison building in newly conquered settlements. If it's low, reduce tax rate in that province. |
| Winds of Magic | MEDIUM | Replenishes each turn. Affects how much you can cast spells. Control magical forest or special buildings increase it. Not essential early, but don't ignore. |
| Influence (Cathay/Kislev) | LOW | Special resource for some factions. Use for diplomacy bribes, but early on focus on gold. |
Common Beginner Mistakes (and How to Fix Them)
1. Overbuilding units too early → Your army is too expensive and bankrupts you. Fix: Recruit only to full stacks when you have income surplus of +200 gold/turn.
2. Ignoring the building browser → You miss out on synergies. Fix: Read building descriptions; many buildings give bonuses to other buildings in the same province.
3. Not using heroes → Heroes can scout, assassinate, block armies, or buff your units. Fix: Recruit at least one hero early and assign them to your main army or to scout ahead.
4. Sending your army into enemy territory without vision → You get ambushed. Fix: Always scout with a fast unit or hero before marching.
5. Forgetting to upgrade your lord's skills → When your lord gains a level (every few battles), you get 2 skill points. Spend them immediately. Prioritize blue line (campaign buffs) first.
6. Declaring war on every minor faction → You become hated. Fix: Only declare wars you can finish quickly. Use “Join War” diplomacy to get allies to fight for you.
7. Not using the “Threat” mechanic → You can intimidate weaker factions into being your vassal. Fix: After beating an enemy army, demand vassalization in diplomacy – they often accept.
---
Day-One Checklist (First 2-3 Hours)
- [ ] Complete the Proving Grounds tutorial (first campaign ran as Kislev).
- [ ] Start a new campaign as Kislev (Katarin) or Grand Cathay (Miao Ying) on Normal/Normal.
- [ ] Read the first advisor pop-up and follow instructions for 5 turns.
- [ ] Build a growth building in your starting settlement.
- [ ] Research the first technology (increase income or growth).
- [ ] Move your army to conquer the nearest enemy settlement (within 2 turns).
- [ ] Manually fight the first battle to learn controls. Pause and issue orders.
- [ ] After winning, construct a public order building (Garrison) in the newly taken settlement.
- [ ] Set tax to high in your home province (if public order is green).
- [ ] Recruit one extra unit (spearmen or archers) during turns 3-5.
- [ ] Send a diplomatic envoy to a friendly neighbor for a trade agreement and non-aggression pact.
- [ ] Complete the first quest battle (golden shield icon) when it appears.
- [ ] Build a military recruitment building (e.g., Barracks) to unlock better units.
- [ ] By turn 10, secure your starting province completely (all settlements owned).
- [ ] Save game after each major action. Use quicksave (F5).
- [ ] Watch a 5-minute beginner's guide video on YouTube if still confused (search “Total War Warhammer 3 for beginners”).
---
Final Advice
Total War: Warhammer III has a steep learning curve, but it's incredibly rewarding. Take your time, don't be afraid to lose a campaign (it's part of learning), and experiment with different factions after you feel confident. Remember: the pause button is your best friend in battles, and the advisor is there to help – listen to him for the first 20 turns. Good luck, and may the winds of magic be with you!
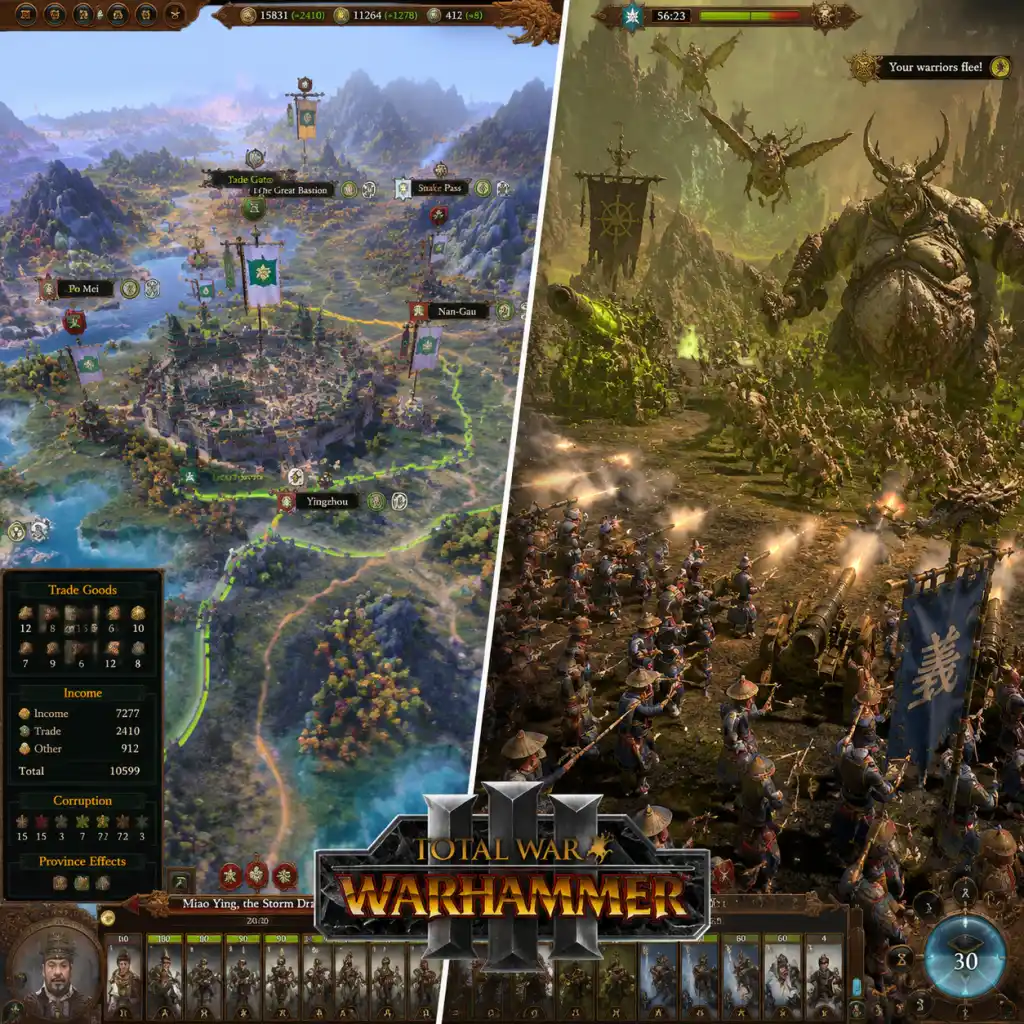
Core Gameplay
Core Gameplay – Total War: Warhammer III
Total War: Warhammer III combines turn-based empire management on a grand campaign map with real-time tactical battles. The core gameplay loop revolves around expanding your territory, developing your economy, raising armies, fighting enemies, and completing victory objectives unique to your faction. The progression is divided into four distinct tiers, each with shifting priorities.
---
Main Gameplay Loop
1. Campaign Map (Turn-Based) – Manage settlements, recruit units, research technology, conduct diplomacy, move armies, and initiate battles or quests.
2. Battle Map (Real-Time) – Command armies in tactical warfare using unit formations, spells, abilities, and terrain. Victory or defeat affects campaign progress.
3. Aftermath – Occupy, raze, or sack settlements; loot, replenish armies, gain post-battle options (e.g., confederate, recruit captives).
4. Repeating Cycle – Each turn, you react to AI movements, pursue objectives, and push toward your victory conditions.
---
Player Progression Tiers
#### Early Game (Turns 1–30)
Goal: Secure your starting province, build a stable economy, and recruit a core army.
- Combat/Interaction: Focus on small-scale battles (20–30 units total). Use your starting legendary lord’s unique skills and a balanced core of infantry, ranged, and cavalry. Learn to use the pause and slow-motion features for tactical control. Example: As Kislev, use Katarin’s Ice magic to slow enemies while your Kossars shoot from range.
- Progression: Build growth buildings (e.g., Mage Tower in Kislev) to increase population, allowing settlement upgrades. Research early technologies that boost income (e.g., “State-Controlled Trade” for Empire).
- Exploration: Scout nearby provinces with heroes or a small army. Discover resource settlements (gold, wood, stone) and ruins that may trigger quests.
- Quests/Missions: Faction-specific quest chains appear (e.g., “The Great Game” for Daemons of Chaos). Complete them for powerful items, units, or bonuses. Generic missions (e.g., “Defend a settlement”) grant gold and influence.
- Economy: Prioritize income buildings (markets, docks, mines) and a second army only after securing your home province. Keep armies cheap – spearmen and archers are cost-effective.
- Character/Build Growth: Level your lord by fighting battles. Pick skills that enhance your core strategy (e.g., movement range, assassination chance). Heroes (e.g., Witch Hunters) can wound enemy agents or boost income.
- Example for Cathay: Secure the Bastion Gates (Wei-Jin, etc.), build yin-yang balance buildings, recruit Jade Warriors and Crossbowmen. Research “Celestial Bureaucracy” for improved diplomacy with other Cathayan factions.
- Combat/Interaction: Battles involve 40–60 units total. Use combined arms: artillery, monsters, and magic. Learn to counter enemy army compositions (e.g., large units require anti-large cavalry or magic). Use army abilities (e.g., Skaven’s Warp Lightning) and terrain (forests for flanking). Example: As Lizardmen, use a frontline of Saurus Warriors supported by a Slann Mage-Priest casting Comet of Casandora.
- Progression: Build tier 3–4 settlements with military buildings to recruit elite units (e.g., Phoenix Guard for High Elves). Research line-of-arms technologies (e.g., “Dwarven Rune Craft” for Dwarfs).
- Exploration: Send heroes or small armies to explore the Chaos Wastes, Dark Lands, or Lustria (depending on campaign). Interact with special landmarks (e.g., Black Pyramid) for bonuses.
- Quests/Missions: Faction quests become longer, often requiring multi-stage battles (e.g., “The Ice Court’s Challenge”). Optional dilemmas appear, offering temporary bonuses or penalties.
- Economy: Manage multiple provinces – build trade ports, specialise (e.g., one province for food, another for military). Use global recruitment sparingly (costs more). Maintain 2–3 full armies, funded by conquest sacking.
- Character/Build Growth: Lords reach level 15–25; unlock unique skills (e.g., Grimgor’s “Da Immortal Zog” ability). Focus on red-line skills to buff your preferred unit types. Heroes gain additional abilities (e.g., blocking enemy movement).
- Example for Skaven: Expand under-empire (underground cities) in rival territories for food. Build artillery buildings (Warp Lightning Cannons). Use Ikit Claw’s workshop to upgrade weapons. Sacking settlements for massive gold.
- Combat/Interaction: Large-scale battles (6,000+ troops). Use multi-army coordination – reinforce with a second army. Employ advanced micro: cycle charging cavalry, focus-fire high-value targets, intercept enemy lords. Use magic and monstrous abilities (e.g., Dragon breath) to break elite lines. Example: As Khorne, combine Skarbrand's charge with a horde of Bloodletters to rout enemy morale instantly.
- Progression: Build tier 5 settlements with landmark buildings (e.g., Nagashizzar for Vampire Counts). Research final technologies for factionwide buffs. Confederation mechanics (e.g., Empire consolidation) absorb allied factions, gaining their armies and territories.
- Exploration: Most of the map is revealed. Occupy strategic chokepoints (mountain passes, sea routes) and resource-rich areas (e.g., Galleon’s Graveyard for treasure).
- Quests/Missions: Final quest battles appear, often against legendary enemies (e.g., Chaos Dwarfs must defeat the Great Maw). Completing these rewards unique items and unlocks ultimate victory conditions.
- Economy: Massive income from 10+ provinces. Build reduced upkeep buildings (e.g., “War Camp” for greenskins) to support 5+ full stacks. Use raiding stance to generate money while damaging enemy regions.
- Character/Build Growth: Lords reach level 40+; unlock yellow-line skills for personal combat power (e.g., “Impossible to Kill”). Heroes become agents for assassination or support during battles (healing, debuffs).
- Example for Vampire Coast: Noctilus sails to occupy the Galleon’s Graveyard turn 1, then expands to Ulthuan. Late game, build coves in high-income ports (Lothern). Use Necrofex Colossi as frontline. Complete “Dreadfleet” quest to unlock the legendary ship.
- Combat/Interaction: Crisis events trigger AI super-stacks (e.g., 20+ armies of Chaos Warriors). Prepare multiple defensive armies and fortify key settlements. Use garrisons and ambush stance to whittle down enemies. Epic coordinated attacks using multiple armies from different directions. Example: The “Infernal War” crisis spawns allied Daemon armies that require unique counters (e.g., use warding magic against magic damage).
- Progression: No new settlement tiers; focus on military buildings for instant recruitment. Use global recruitment for high-tier units (e.g., Star Dragons) with accelerated build time from technologies.
- Exploration: Limited; all territories are claimed. Move armies to defend borders or launch final offensives against crisis spawn points.
- Quests/Missions: Final faction-specific quests often involve destroying the crisis source (e.g., “Assault the Northern Wastes”).
- Economy: Optimise income by demolishing redundant buildings and replacing with money-producing ones (e.g., “Bank” for Empire). Trade agreements with surviving allies. Save large treasury for accelerating recruitment.
- Character/Build Growth: Max-level lords and heroes (level 50). Equip legendary items from quests. Use ancillaries (e.g., “Dragon Fang Necklace”) to boost stats. Assign heroes to act as assassins or block enemy reinforcements.
- Example for Tomb Kings: Settra unites Nehekhara, then faces the “Black Pyramid” crisis where Nagash unleashes undead hordes. Use multiple stacks of Ushabti and Hierotitans. Complete “Final Book of Nagash” to unlock the “End of All Things” spell, wiping out half the enemy army.
---
#### Mid Game (Turns 31–80)
Goal: Expand beyond your starting province, unlock elite units, and begin major war campaigns.
---
#### Late Game (Turns 81–150)
Goal: Eliminate major threats, confederate allies, and work toward Victory Conditions (Short/Long Campaign victory, Domination, or Control of the Forge).
---
#### Endgame (Turns 151+ – Victory or Crisis)
Goal: Survive the “Endgame Crisis” (e.g., Chaos Invasion, Vermintide, Black Pyramid activation) and achieve final victory condition (Domination, Narrative, or Score-based).
---
Core Systems Overview
| System | Description | Example Interaction |
|---|---|---|
| Turn-Based Campaign | Move armies, manage settlements, diplomacy every turn. | Recruit a new army, move to attack an enemy settlement. |
| Real-Time Battles | Tactical control with pause, formations, and unit abilities. | Cast “Wind of Death” as Vampire Counts to kill 6 units. |
| Magic & Winds of Magic | Resource pool for casting spells, regenerates each battle. | Use “Fireball” (2 WoM) vs. Apotheosis (5 WoM). |
| Settlement Management | Build chain buildings (military, income, growth, defence). | Tier 3 barracks unlocks “Greatswords” for Empire. |
| Tech Tree | Unlock units, buffs, and economic upgrades. | Research “Elven Smithing” for +5% armour. |
| Lord & Hero Skills | Three skill trees: blue (campaign), red (buffs), yellow (combat). | Allocate points to red line for “+10% missile damage”. |
| Diplomacy | Trade, alliances, war coordination, confederation. | Sign non-aggression pact with Dwarfs to focus on Greenskins. |
| Faction Mechanics | Unique features like Skaven food, Kislev devotion, Chaos Dwarf labour. | Maintain high devotion to unlock Ice Guard units. |
Exploration & Quests
- Exploration: Discover province capitals (settle), resource deposits (mines, ports), landmarks (special buildings), and sea-routes (fog of war). Use proxy agents (e.g., Empire Witch Hunter) to scout ahead safely.
- Quests: Appear as dilemmas (e.g., “Aid the Caravan” = +gold, -relations) or chain quests (e.g., “The Warden’s Hunt” for Eltharion). Complete for unique items (e.g., “Sword of Khaine” gives massive power but penalties).
- Example for Kislev: Quest “Save the Ungol Pilgrims” sends Katarin to a ruined village to fight Norscans. Reward: “Ice Crown of the North” (healing passive).
- Primary income: Trade tariffs (per active trade route), taxation (from settlements), sacking/looting. Secondary: hero actions (assault garrison), raiding stance.
- Growth: Buildings (e.g., “Grainery” +20 growth per turn) and technologies increase population, enabling higher-tier unlocks.
- Example for Dark Elves: Use Slave economy – build slave pens and make slaves work in mines. High slave count boosts income but increases public order penalty.
- Lord builds: Focus on red-tree buffs for your core units (e.g., “+10 weapon strength for Dreadspears”). Blue-tree for campaign bonuses (mobility, recruitment cost). Yellow-tree for survival if your lord fights on front line.
- Hero builds: Assign to armies as embedded (battlefield support) or agent (map actions). E.g., Life Wizard hero embedded heals units; a Shadow Wizard agent can assassinate enemy lords.
- Example for Wood Elves: Orion gets red tree buffs for Wildwood Rangers. Spend points on “Forest Spirit Resilience” to make Dryads tanky.
- Triggered crisis: Usually activates around turn 100–200 (depending on difficulty) with a global warning (e.g., “The Forces of Chaos stir in the north”).
- Crisis types: Chaos Invasion, Vermintide, Greenskin Waaagh!, Undead Rising, or custom (in “The Lost God” campaign).
- Response: Build defensive lines, ally with surviving factions, recruit emergency armies. Diplomatic coalitions can be formed against the crisis.
- Victory: Achieve Short Campaign Victory (e.g., control 12 provinces + eliminate rival), Long Campaign Victory (30 provinces + destroy major factions), Domination Victory (control 50% of all settlements), or Score Victory (most points after turn 200).
---
Economy & Growth
---
Character/Build Growth – Advanced Tips
---
Endgame Structure
---
This guide covers the fundamental core gameplay of Total War: Warhammer III across all progression tiers. Adapt your strategy based on faction strengths, and always keep an eye on your victory conditions to prioritise actions.
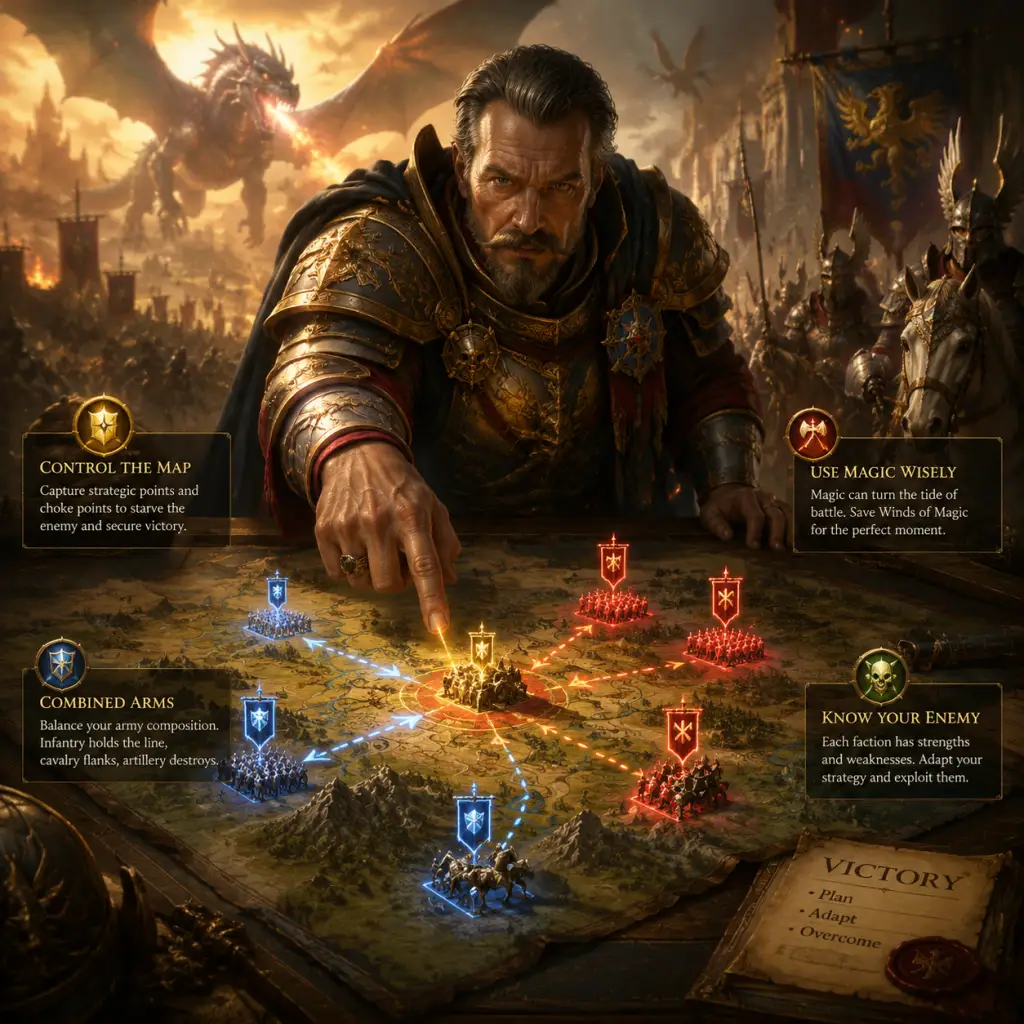
Game Tips
Total War: Warhammer III – Comprehensive Game Tips Guide
This guide covers a wide array of tips for Total War: Warhammer III, organized by category. Each tip includes an explanation and deep analysis to help you master the game, from beginner to advanced levels.
Beginner Tips
1. Complete the Prologue Campaign First
- Explanation: The prologue serves as an extensive tutorial, introducing basic mechanics like movement, battles, building, and diplomacy in a controlled environment.
- Why it works: Skipping the prologue can lead to confusion with core systems. Completing it ensures you understand the fundamentals before facing the complexity of the main campaign.
2. Use the Quick Deal Button
- Explanation: In diplomacy, click the “Quick Deal” button to automatically find the best trade, alliance, or non-aggression pact deals with all factions.
- Why it works: This saves time and often reveals favorable trades you might have missed, such as exchanging a spare resource for gold or a military alliance.
3. Focus on Growth First
- Explanation: In your first province, prioritize buildings that increase population growth (e.g., Farms, resource buildings that boost growth).
- Why it works: Faster growth leads to larger settlement tiers, which unlock advanced buildings, more recruitment slots, and higher income. Delaying growth stunts your entire campaign.
4. Never Overextend Your Armies
- Explanation: Avoid sending your main army deep into enemy territory without support. Always maintain a second army nearby or use armies in Garrison stance to protect your core regions.
- Why it works: Overextended armies are easily ambushed or caught by multiple enemy stacks. Losing a strong army early can cripple your expansion. Use “Encamp” or “Fortify” stances when vulnerable.
5. Use March Stance Only When Safe
- Explanation: The “March” stance increases movement range but disables the ability to fight off attacks for one turn. Use it only when you are certain the path is clear.
- Why it works: Marching into a hidden enemy army leads to an automatic defeat (the army is forced to retreat or fight with a penalty). In friendly territory or after scouting, March is safe.
Combat Tips
1. Leverage Terrain and Elevation
- Explanation: Place missile units on high ground to extend range and increase damage. Melee units on uphill combat suffer penalties; keep them on flat ground.
- Why it works: In Warhammer III, elevation provides a significant combat advantage. Archers on a hill can outrange and out-damage enemies below, while infantry charging uphill loses vigor and attack speed.
2. Flank with Cavalry for Battering Ram Effect
- Explanation: Use cavalry to hit enemy units from the side or rear, especially after the front line is engaged. Cycle charge by pulling back and charging again.
- Why it works: Cavalry deals bonus damage on the charge and ignores armor when hitting from the rear. Flank attacks also cause massive morale damage, often breaking units instantly.
3. Combine Magic with Unit Engagements
- Explanation: Cast spells like Wind of Death, Fireball, or Comet of Casandora while your units are locked in combat to maximize damage without friendly fire (use spells that target enemies exclusively).
- Why it works: Enemies clumped in melee are vulnerable to area-effect spells. By casting after engagement, you avoid hitting your own troops (especially with direct damage spells that ignore friendly fire).
4. Use Guard Mode to Prevent Pursuit
- Explanation: Enable “Guard Mode” on units (especially missile troops) to stop them from chasing routing enemies. This keeps them in position and prevents overextension.
- Why it works: Chasing routing units can drag your troops out of formation, expose them to enemy reinforcements, and waste time. Guard mode lets you maintain a solid battle line.
5. Master Cycle Charging with Cavalry
- Explanation: Charge an enemy unit, let the cavalry fight for 5-10 seconds, then pull them back and charge again. Repeat until the enemy brakes.
- Why it works: Cavalry deals maximum damage on the initial charge (bonus charge damage). Prolonged melee gets them killed because they are not durable. Cycle charging rejuvenates charge bonus and keeps them safe.
6. Single Entities as Distractions
- Explanation: Use lords, heroes, or monsters (like a Mammoth or a Bloodthirster) to engage multiple enemy units at once, drawing fire and attention away from your valuable infantry.
- Why it works: Single entities have high health and can absorb damage while your infantry attacks from behind. They also disrupt enemy formations, causing chaos.
Campaign Strategy Tips
1. Secure Your Home Province First
- Explanation: Before expanding aggressively, conquer and fully control your starting province. Build its main settlement to tier 3 at least, and establish a defensive army.
- Why it works: A secure home province provides stable income, recruitment, and a fallback point. Rushing outward invites rebellions and attacks from all sides. Most successful campaigns are built on a solid foundation.
2. Use Heroes to Scout and Assassinate
- Explanation: Send heroes (especially Wizards, Assassins, or Spies) ahead of your army to spot enemy movements, sabotage armies (wound), or assassinate enemy heroes.
- Why it works: Knowledge is power. Scouting prevents ambushes and reveals weak points. Wounding enemy lords and heroes cripples their army’s effectiveness without fighting.
3. Control Key Chokepoints
- Explanation: Identify strategically vital provinces (e.g., the Black/Gates of the Bastion for Kislev, the Mountain passes for Dwarfs, the straits for High Elves). Fortify them with garrisons and walls.
- Why it works: Chokepoints funnel enemy armies into predictable paths, allowing you to defend with fewer forces. Holding these can block entire invasions and protect your heartland.
4. Manage Corruption Aggressively
- Explanation: Use heroes, buildings, commandments, and edicts to reduce corruption (Vampiric, Chaos, or Skaven) in your provinces. If playing a corruption-spreading faction, focus on increasing it.
- Why it works: High corruption lowers public order, spawns rebellions, and reduces income. In corrupt provinces, you risk losing control and facing stacks of rebels. Manage it early to avoid internal threats.
5. Use Raid Stance to Fund War
- Explanation: While in enemy territory, set your army to “Raid” stance. This generates gold and food (for Skaven) each turn, at the cost of public order in that region.
- Why it works: Raid stance allows your army to partially sustain itself without needing a home base. It also damages the enemy’s economy and can trigger rebellions, which further distract them.
Economy & Resource Tips
1. Build Trade Resources Early
- Explanation: Every province has trade resources (wood, stone, gold, furs, etc.). Construct the resource buildings as early as possible and sign trade agreements with friendly factions.
- Why it works: Trade resources generate passive income. The more trade partners you have, the more gold flows in. Even a single trade deal can double your early income.
2. Utilize Commandment Buildings
- Explanation: In each province, build commandment buildings (e.g., Court of the Everlasting Summer for High Elves, or similar for other factions) that boost growth, income, or public order.
- Why it works: Commandment buildings provide scalable bonuses that affect the entire province. They are cost-effective and should be a priority in every region.
3. Sack or Loot for Quick Cash
- Explanation: When you capture a settlement, choose “Sack” (loot the settlement for gold) or “Raze” (for Chaos factions) instead of occupying, if you don’t need the territory.
- Why it works: Sacking gives an immediate cash injection, often enough to fund a new army or upgrade important buildings. This is especially useful for horde factions (Beastmen, Chaos) or when expanding into enemy lands you won’t keep.
4. Balance Military and Economic Buildings
- Explanation: Avoid building all military structures in one city. Spread them out: have one province focused on recruitment (military buildings), others on economy (ports, markets, farms).
- Why it works: Economic provinces generate the gold to support your military provinces. If every province builds barracks, you’ll lack income to field those armies. Specialisation maximizes efficiency.
5. Use Raiding Stance for Sustained Campaigns
- Explanation: When your army is far from home and low on funds, switch to Raid stance in enemy territory. It provides a trickle of resources and can keep your army operational.
- Why it works: Raid stance reduces reliance on your home economy. Combined with looting after battles, you can run a self-sufficient war machine deep in hostile lands.
Magic & Heroes Tips
1. Learn Spell Types and Lodestone
- Explanation: Spells are categorized as direct damage, buffs/debuffs, summoning, or hexes. Know which spells are best for your army composition. For example, “Wind of Death” (Vampire Counts) murders tight infantry lines.
- Why it works: Using the right spell at the right moment can turn a battle. Buffs like “+60 armor” or “+40 attack” can make an average unit elite. Debuffs like “-40 leadership” break units quickly.
2. Stack Hero Skills for Campaign Map
- Explanation: When leveling heroes, prioritize skills that grant campaign map bonuses: increased movement range, reduced enemy movement, improved assassination, or block army actions.
- Why it works: Heroes are your “spies” and “saboteurs.” A hero with +20% campaign movement range can allow your main army to outrun enemies, catch fleeing armies, or reach reinforcements faster.
3. Embed Heroes in Armies for Stat Boosts
- Explanation: Place heroes within armies (as part of the army) to provide passive bonuses (e.g., +10 armor, +5 leadership, replenishment rate).
- Why it works: Embedded heroes don’t cost extra upkeep (only the hero’s own) and can significantly improve your army’s performance. A fresh hero with unit buffs can make a cheap army punch above its weight.
4. Use Active Abilities Wisely
- Explanation: Many heroes have active skills used in battle, like buffs or damage spells. Activate them when your lines meet the enemy, not before.
- Why it works: Timing is crucial. A well-timed “Regrowth” spell on a damaged unit can keep it fighting. A “Flames of the Phoenix” dropped on a clump of enemies just as they attack can decimate them.
5. Wound Enemy Heroes to Weaken Armies
- Explanation: Use your own heroes to “wound” enemy heroes on the campaign map. Wounded heroes cannot fight or provide bonuses for several turns.
- Why it works: Removing a powerful enemy wizard or combat lord from the field reduces their army’s effectiveness. It also gives you a strategic edge in battles.
Siege Battle Tips
1. Use Artillery to Destroy Walls and Towers
- Explanation: Before sending in infantry, focus cannon, mortar, or catapult fire on sections of the wall to create breaches. Also target enemy towers to reduce defensive fire.
- Why it works: Breaching walls allows your infantry to enter without climbing ladders, which is dangerous. Destroying towers minimizes casualties from garrison fire.
2. Deploy Siege Towers and Rams - But Not Always
- Explanation: Build siege towers to protect troops while advancing to the walls. Rams are essential for gates. However, if the enemy has a small garrison, consider using ladders (faster but riskier).
- Why it works: Towers and rams provide mobile cover and allow safe approach. But they take turns to build. Against a weak garrison, ladders or flying units quickly capture the walls before defenders react.
3. Use Flying Units to Capture Towers
- Explanation: Have flying units (e.g., Harpies, Eagles, Gargoyles) land on top of enemy towers and capture them. This disables the tower’s fire and gives you control.
- Why it works: Captured towers shoot at the enemy, and you can use them as a staging point. Flying units bypass wall defenses and can quickly turn the tide.
4. Exploit Siege Attrition
- Explanation: If you lay siege to a settlement with a strong garrison, wait several turns to suffer attrition (loss of supplies) which reduces their numbers.
- Why it works: Attrition can kill off a large portion of the garrison, making the assault much easier. It also destroys some buildings, weakening the settlement’s economy after capture.
5. Send Infantry Through Multiple Breaches
- Explanation: Create at least two breaches in the walls and send multiple units simultaneously. This spreads out the enemy’s defenders and prevents them from focusing on one point.
- Why it works: Defenders can only cover one flank. Attacking from two sides forces them to split forces, making each breach easier to hold and exploit.
Advanced Optimizations
1. Abuse Lightning Strike
- Explanation: The “Lightning Strike” skill (available to lords at high rank) allows you to fight a single enemy army when multiple stacks are present, preventing reinforcements.
- Why it works: This turns a 2v1 into a 1v1, letting you defeat superior numbers piecemeal. Equip it on your main lord as soon as possible for key battles.
2. Use Ambush Stance to Bait Enemies
- Explanation: Have one army in Ambush stance while another sits in visible range. The enemy will move to attack the exposed army, triggering the ambush and giving you a decisive first strike.
- Why it works: Ambushing can catch enemy stacks off-guard, nullifying their advantage and forcing a battle on your terms. High ambush success chance factions (Skaven, Beastmen) excel at this.
3. Stack Buffs from Skills and Items
- Explanation: Combine lord and hero skills with banner items and magic items that buff the same stat (e.g., charge bonus, melee attack). A single unit can become monstrously powerful.
- Why it works: The game calculates additive bonuses. For example, a +25 speed banner + +10% speed skill from a hero can make cavalry extremely fast. Stacking ward saves or physical resistance creates unkillable units.
4. Use Underway/Worldroots for Quick Travel
- Explanation: Many factions (Dwarfs, Greenskins, Wood Elves) can use underground or worldroot stances to bypass obstacles and ambush enemies.
- Why it works: These stances ignore terrain penalties, rivers, and mountain ranges. They allow rapid redeployment across the map, catching enemies off guard. Always be in one of these stances when moving through difficult terrain.
5. Min-Max Diplomacy with Gifts
- Explanation: If you need a trade agreement or alliance but the enemy is unfriendly, gift them a small amount of gold (100-500) to improve relations. Often this is cheaper than fighting.
- Why it works: Diplomacy in WH3 is heavily influenced by relations. A small gift can turn a “-20” to “+10”, making a deal possible. Use this to secure trade routes or defensive pacts without bloodshed.
6. Reinforce from Multiple Directions
- Explanation: When you have multiple armies near a battle, position them so they arrive from different sides of the map. In battle, this forces the enemy to split attention.
- Why it works: The enemy AI often struggles to react to attacks from behind. Reinforcing from the flank or rear can trap their forces and lead to a decisive victory.
Final Thoughts
Mastering Total War: Warhammer III requires practice, but applying these tips will accelerate your progress. Remember that each faction has unique mechanics (e.g., Kislev’s Ice Court, Cathay’s Yin-Yang harmony), so adapt these strategies to your chosen race. Constantly experiment, save before major battles, and learn from each defeat. Good luck, and may your empire stand eternal!
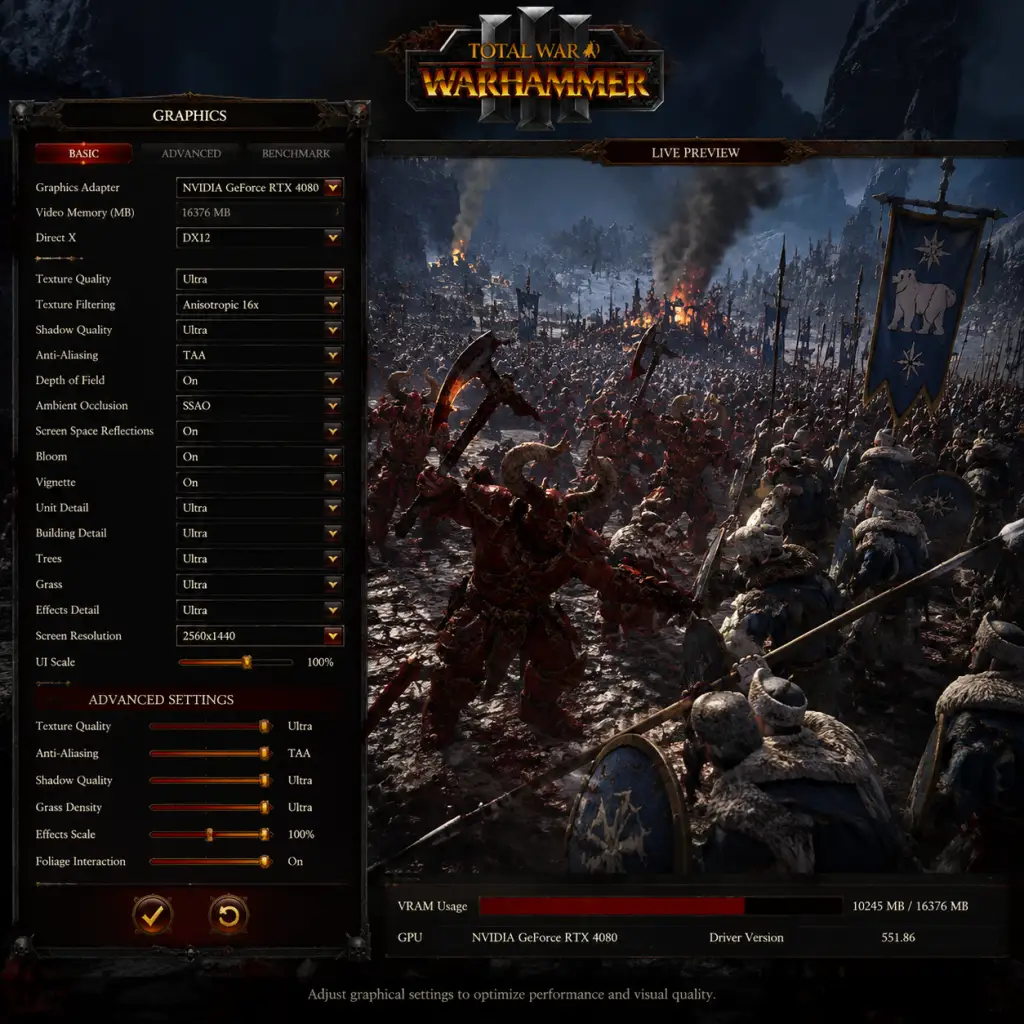
Game Settings
Total War: Warhammer III – Game Settings Guide
This guide covers every setting in Total War: Warhammer III, from graphics to gameplay, with optimal recommendations for various hardware levels. Pay special attention to the highlighted settings – these are commonly misconfigured and can significantly impact performance or visual quality.
---
Graphics Settings
Graphics settings are split between the Campaign Map and Battle scenes. You can adjust them independently from the main menu or in-game pause menu.
#### Key Graphics Options
| Setting | Description | Impact | Recommendation |
|---|---|---|---|
| Resolution | Native monitor resolution. | High | Match your monitor’s native resolution. |
| VSync | Synchronises frame rate with monitor refresh. | Medium | Turn off for maximum FPS; turn on to eliminate screen tearing. |
| Anti-Aliasing (AA) | Smooths jagged edges. Options: Off, FXAA, TAA, SMAA. | High | TAA looks best; SMAA is a good balance. FXAA blurs slightly. |
| Texture Quality | Detail level of surfaces. | Medium | Ultra on high-VRAM cards (6GB+); Medium on low-VRAM (4GB). |
| Shadow Quality | Shadows detail. | High | High or Medium for performance; Ultra for visuals. |
| Screen Space Reflections | Real-time reflections on water/metal. | Very High | Turn OFF on mid-range or lower hardware. |
| Volumetric Effects | Fog, smoke, magic particles. | High | Medium on low-end; Ultra for spectacle. |
| Unit Size | Number of soldiers per unit. | Very High | Small improves performance; Large recommended for balanced play. |
| Terrain Quality | Landscape detail. | Medium | High/Ultra on strong GPUs. |
| Grass Quality | Grass density and draw distance. | Medium | Low on low-end; Ultra for immersion. |
| Depth of Field | Blurs distant objects. | Low | Off for clarity; ON for cinematic feel. |
| Vignette & Chromatic Aberration | Post-processing effects. | Low | Off for sharper image; ON for style. |
| Hardware Tier | Example GPU | Campaign Graphics | Battle Graphics | Notes |
|---|---|---|---|---|
| Ultra (4K 60+) | RTX 4090 / RX 7900 XTX | All Ultra, TAA, VSync Off | All Ultra, TAA, VSync Off | Use DLSS/FSR only if needed. |
| High (1440p 60+) | RTX 3080 / RX 6800 XT | High with Ultra textures & shadows | High with Ultra textures, shadows High | Set Volumetrics to High, SSReflections OFF. |
| Medium (1080p 60) | RTX 2070 / RX 5700 XT | High (textures Ultra), shadows Medium, SSReflections OFF | High (textures Ultra), shadows Medium, Volumetrics Low | Unit Size: Large. TAA recommended. |
| Low (1080p 30-60) | GTX 1060 / RX 580 | Medium textures, shadows Low, SSReflections OFF | Medium textures, shadows Low, Volumetrics Low | Unit Size: Medium. FXAA for performance. |
| Entry (720p 30) | GTX 1050 / Vega 8 | Low with minimum | Low with minimum | Force DirectX 11 (DX11) via launch options: `-dx11`. Unit Size: Small. |
- Screen Space Reflections: One of the most demanding settings. Disable it on all but the highest-end PCs.
- Unit Size: Changing this affects both performance and balance. For multiplayer, use the agreed size (Large/Ultra). Campaign battles can be set independently from campaign map.
- DirectX 12 vs 11: DX12 can improve CPU performance but may cause instability on some systems. If you encounter crashes, switch to DX11 via launch option `-dx11`.
- Unlimited Memory: In the launcher toggle “Unlimited Video Memory”. Enabling this can improve texture streaming but risks crashes if VRAM is insufficient. If you have 6GB+ VRAM, enable it.
- Campaign Map vs Battle: You can set both separately. For example, campaign map can be lower to speed up turn times while battles look great.
---
Audio Settings
| Setting | Description | Recommendation |
|---|---|---|
| Master Volume | Overall volume. | 80-100% |
| SFX Volume | Sound effects (weapons, spells). | 100% |
| Music Volume | Battle & campaign music. | 70-100% |
| Voice Volume | Voice lines (characters, advisors). | 100% |
| Speech Volume | Narration & cinematics. | 100% |
| Enable Advanced Audio | HRTF for headphones. | Enable if using headphones for spatial sound. |
| Sound Output | Stereo / Surround / Headphones. | Select your device type. |
- Enable Advanced Audio: This enables HRTF (head-related transfer function) audio, making battles sound spatial. Enable this only with stereo headphones – it can distort sound on speakers or surround headsets. Misconfiguring this reduces positional clarity.
- Camera Movement: WASD (free camera) or Arrow Keys (alt).
- Select All Units: Ctrl + A
- Group Units: Ctrl + (1-9)
- Pause: P or Space (depending on battle realism mode)
- Toggle UI: Backspace (useful for screenshots)
- Edge Scrolling: Enable/disable – recommend turning OFF if using keyboard camera control.
- Invert Y Axis: For mouse or joystick camera – many players prefer inverted vertical movement.
- Camera Rotation Speed: Adjust to comfortable level. Lower values for precise control.
- Scroll Speed: Campaign map scroll pace.
- Zoom Speed: How fast you zoom in/out.
- Edge Scrolling: If you frequently pan the camera with the keyboard, disable edge scrolling to prevent accidental camera movements when the mouse reaches the screen edge.
- Invert Y: This setting is often overlooked. If your camera moves “down” when you push the mouse “up”, enable Invert Y.
- Camera Sensitivity: Set to a level where you can comfortably rotate from one end of the battlefield to the other without lifting the mouse.
---
Controls Settings
#### Key Bindings (Partial List)
Default controls can be fully customised in the Controls menu.
#### Mouse Sensitivity
#### ⚠️ Special Attention Points for Controls
---
Accessibility Settings
| Setting | Description | Recommendation |
|---|---|---|
| Colourblind Modes | Protanopia, Deuteranopia, Tritanopia. | Enable if applicable; otherwise leave OFF. |
| UI Scaling | Adjust size of interface elements. | 100% default; increase if on 4K or small screens. |
| Tooltip Delay | Time before tooltips appear. | 0.5s default; increase if tooltips are distracting. |
| Show Unit ID | Display unit names above models. | Enable for clarity in large battles. |
| Highlight Enemy Units | Outline enemies in a colour. | Enable – makes spotting enemies much easier, especially in sieges or dark maps. |
| Auto-Advance on Battle Victory | Automatically proceed after winning. | Recommend OFF to review post-battle results. |
- Highlight Enemy Units: This is one of the most helpful settings for new and veteran players alike. It’s off by default. Turn it on – it vastly improves target identification, especially in cluttered sieges or when using artillery.
- Text Language: Language for UI and subtitles.
- Audio Language: Voiceover language (English, French, German, etc. depending on version).
- Subtitles: Enable for cutscenes and dialogue.
- Audio Language: Changing voiceover can affect the atmosphere (e.g., English voice acting is standard; French or German dubs are available for some regions). If you switch mid-campaign, the voice lines for previously recorded characters may remain in the original language until restarted.
---
Language Settings
Available from the launcher (pre-game) and in-game Options menu.
#### ⚠️ Special Attention Point for Language
---
Network Settings
Affects multiplayer and online features.
| Setting | Description | Recommendation |
|---|---|---|
| Online Privacy | Choose who can invite you. | Public for open play; Private for friends only. |
| Cross-Play | Enable to play with players on other storefronts (Steam, Epic, etc.). | Enable – required to find matches quickly. |
| Voice Chat | In-game voice communication. | Enable if using; otherwise disable to avoid distractions. |
| Multiplayer Game Browser | List of active hosted games. | Default enabled. |
- Cross-Play: By default it may be off. Turn it on to access the full player base. Without it, matchmaking times increase significantly. This setting does not affect campaign co-op as long as both players are on the same storefront.
---
Gameplay Settings
These settings change game mechanics and UI behaviour.
#### Battle Settings
| Setting | Description | Recommendation |
|---|---|---|
| Battle Realism Mode | Disables pause, limited camera, no unit markers. | For hardcore players; beginners should keep OFF. |
| Skirmish Mode | Ranged units automatically flee when charged. | Default ON; turn OFF for better control. |
| Fire-at-Will | Units automatically engage. | Default ON; use OFF for ambushes. |
| Guard Mode | Units hold position and don’t pursue. | Default OFF; enable for defensive lines. |
| Auto-Resolve | AI resolves battles with calculated results. | Adjust balance towards favouring player if desired. |
| Setting | Description | Recommendation |
|---|---|---|
| Campaign Difficulty | Affects AI aggression, economy, and enemy stats. | Normal for first campaign; Hard for veterans. |
| Battle Difficulty | Affects enemy morale and combat stats. | Normal (balanced); Hard (enemies stronger). |
| End Turn Timer | Shows time for AI turns. | Enable to track long turns. |
| Camera Follow AI | Camera moves to enemy locations during their turn. | Disable to save time. |
| Automatic Save | Frequency of auto-saves. | Recommend every turn. |
- Unit Size: Already covered in Graphics. This also affects gameplay balance. For the most balanced experience, use Large or Ultra sizes.
- Show AI Movement Range: In campaign, toggle this to see where enemy armies can reach. Enable to avoid getting caught off-guard.
- Auto-Resolve Balance: In Total War: Warhammer III, auto-resolve often undervalues certain units (e.g., cavalry, monsters). If you want a more forgiving auto-resolve, you can adjust the slider in Campaign Settings toward “Player Favour”. But note: this makes AR much easier.
- Battle Realism Mode: This is easy to enable mistakenly. It removes the pause and locks the camera – do not enable during a multiplayer battle unless you intend to play with those restrictions.
- Unit Size: Changing this mid-campaign is allowed, but be aware that save files will not be compatible with multiplayer games using different unit sizes. For consistency, keep it the same throughout.
#### ⚠️ Special Attention Points for Gameplay
---
First-Time Setup Checklist
1. Launch Options: If you have frequent crashes, add `-dx11` in Steam launch options (Right-click game > Properties > General > Launch Options).
2. Unlimited Video Memory: Enable in launcher if VRAM ≥ 6GB.
3. Graphics Preset: Choose one based on your hardware from the table above, then fine-tune.
4. Audio: Set “Enable Advanced Audio” to ON if using headphones.
5. Controls: Set camera sensitivity and edge scrolling preference. Enable Invert Y if needed.
6. Accessibility: Enable “Highlight Enemy Units”.
7. Network: Enable Cross-Play.
8. Play a test battle (Skirmish) to check performance and adjust settings.
---
Remember: The optimal settings are the ones that give you a steady 30-60 FPS in the most intense battles. Lower settings on the campaign map can help with turn times. If you experience stuttering, reduce Shadow Quality, Volumetric Effects, or Unit Size among the first adjustments. Enjoy the game!
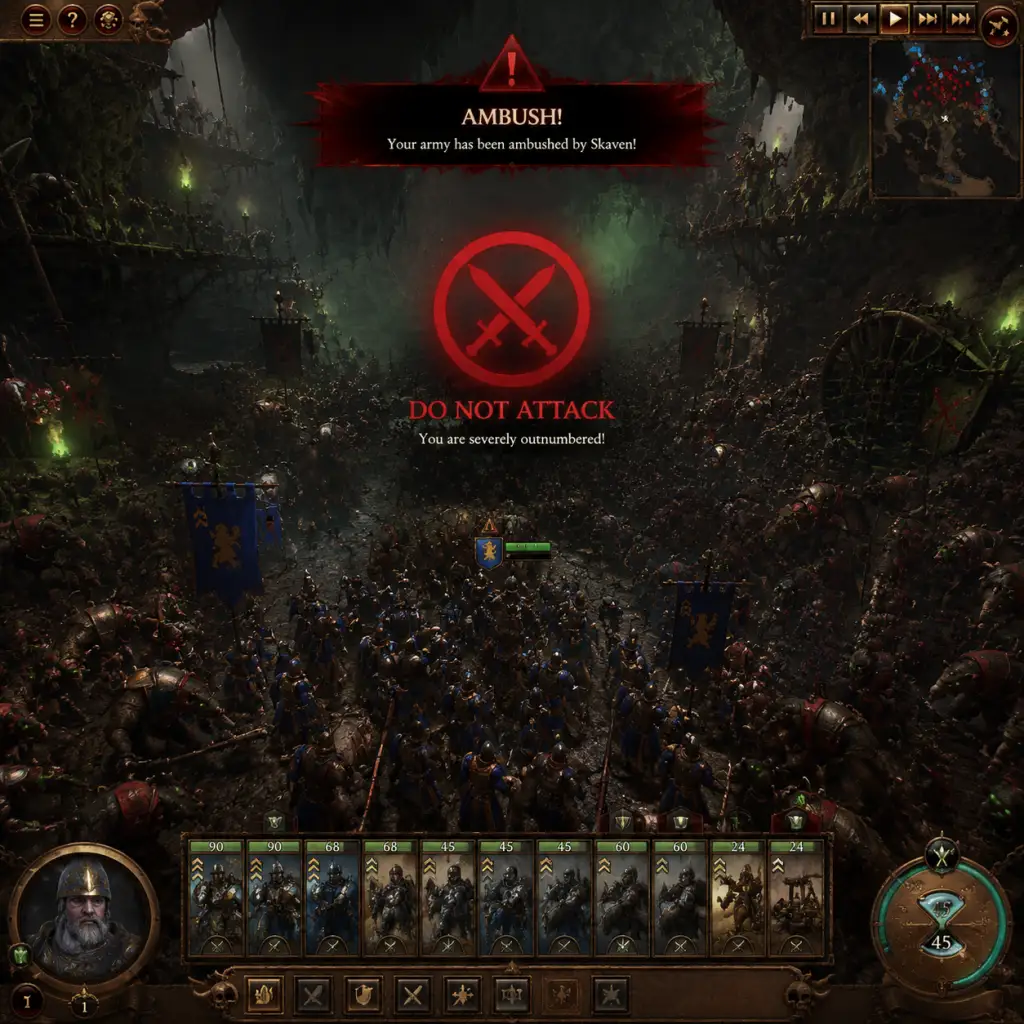
Important Notes
Total War: Warhammer III – Important Notes Guide
This guide collects critical warnings, common pitfalls, irreversible choices, missable content, difficulty spikes, grinding traps, online etiquette, save management tips, and things many players regret not knowing earlier. Read this before starting your campaign to save time, frustration, and ruined campaigns.
Save Management
- Manual Saves are Mandatory: The game has 20 auto-save slots that rotate, but a single bad battle or a game-breaking bug can ruin hours. Save manually every 10–15 turns and before any risky battle or major decision (confederation, dilemma, war declaration).
- Use Multiple Save Slots: Keep at least 3–5 distinct save files to roll back if a mod breaks or if you make a catastrophic mistake. Label saves by turn number and event (e.g., "T40_BeforeConfederation").
- Cloud Saves: Steam Cloud syncs automatically, but can cause conflicts if you play on multiple PCs. If you see a sync error, choose local files (usually more recent) to avoid losing progress.
- Modded Saves are Fragile: Installing or updating mods mid-campaign often corrupts the save. Always create a clean backup before modding. Some mods (like overhaul or unit pack mods) require a new campaign. Uninstalling mods can crash saves.
- Auto-Save Overwrite Risk: The auto-save slot overwrites every turn. If you accidentally autoresolve a battle you meant to fight manually, you can't undo it without a manual save.
- Faction Selection: Some factions have drastically different campaign mechanics (e.g., Nurgle's Plague vs. Kislev's Ice Court). Your first campaign on a faction should not be on Legendary difficulty – test mechanics on Normal/Hard first.
- Legendary Lord Defeat: When a Legendary Lord is killed in battle and not wounded, they are permanently gone for that campaign. Only confederation or resurrection events (if applicable) can bring them back. Never autoresolve a battle against an enemy LL unless you are certain you can kill them.
- Confederation: Only a few factions can confederate other LLs of their race. Once you refuse a confederation offer or fail a dilemma, that opportunity may never return. Always consider the long-term benefit.
- Dilemma Choices: Story dilemmas (e.g., the Tome of Fates, ruler events) often have permanent effects like +X to one resource, -X to another, or addition of a unique building. Check the wiki or a guide before choosing, because you cannot undo it.
- Technology & Skill Points: Techs and lord skills are irreversible without mods. Respeccing lord skills is impossible – plan your skill tree for your lord's role (e.g., caster vs melee). Some techs lock others (e.g., red vs blue line in certain factions).
- Alliance Points: In the Realm of Chaos campaign, allying with a Chaos God grants permanent corruption and can lock you out of other alignments. Choose carefully based on your victory condition.
- Military Access & Alliances: Once you declare war on an ally or break a defensive alliance, your reliability rating drops. Very low reliability makes all AI factions distrust you (unable to trade, negotiate, or form pacts for many turns). This can cripple diplomacy for the rest of the campaign.
- Pre-Battle Speeches: Each battle with a Legendary Lord has unique voiced dialogue at the start. These are easily skipped but add lore. To listen, don't click immediately – wait for the speech to finish.
- Unique Dilemmas & Events: Many factions have timed dilemmas that appear only once per campaign, often triggered by specific turns, technology, or building completion. If you ignore or fail them, you lose the reward (e.g., unique items, followers, or troops).
- Legendary Lord Quest Items: LL quest battles appear only after completing specific skill unlocks (usually at level 12–20). If you dismiss a quest or fail to fight it before the lord is wounded, the quest disappears and you lose the unique item permanently. Always fight quest battles immediately.
- Victory Conditions Reading: The game shows your campaign victory conditions at the start, but many players miss the second page of objectives for Domination Victory. Check the victory tab in the top-right (the laurel wreath icon) for full details.
- Time-Limited FLC & Events: Creative Assembly sometimes offers free content (e.g., Regiments of Renown, legendary lords) through live events or Steam store promotions. If you miss the window, you must buy the DLC later. Regularly check the Total War blog or game news.
- Early Game (Turns 1–20): The most dangerous period. Your starting armies are weak, and rogue armies, rebellions, or enemy factions can overwhelm you. Do not expand aggressively; focus on securing your starting province and building a second army only when economy allows (usually turn 10–15).
- Realm of Chaos – First Rift Wave: In the RoC campaign, the first Chaos Rift wave appears around turn 30. If you don't have a strong army ready, daemonic incursions will destroy your settlements near the rift. Prepare by building garrisons and a standing army.
- AI Economic Cheats: On Hard and Very Hard difficulty, AI factions get significant income bonuses (up to +50% on Very Hard). They also get reduced recruitment costs and faster construction. Never assume you can out-economy the AI – you must exploit battle victories and sack to keep pace.
- Endgame Crises (IE Campaign): The final endgame crisis (e.g., Chaos Invasion, Vermintide) spawns several full-stack armies of elite units. If you are not prepared with multiple elite armies and tier 4+ settlements, you will lose. Build tall in a few provinces before triggering the crisis via the victory countdown.
- Faction-Specific Spikes: N'Kari (Slaanesh) requires aggressive micromanagement and can't hold territory well; Kairos (Tzeentch) needs careful army movement; Nurgle struggles with slow recruitment. Play their mechanics first in a safe campaign (e.g., Grand Cathay) to learn basics.
- Autoresolve Addiction: Autoresolve often overestimates your army strength and can kill elite units unnecessarily. Always manual battle for close fights or when using high-value units like Heroes, Monsters, or Chariots.
- Over-Investing in Garrisons: Building garrison buildings in every minor settlement is expensive and often unnecessary. A single tier 3 garrison building costs as much as a tier 4 economy building. Only build garrisons in vulnerable border settlements or after turn 50.
- Too Many Heroes: Each Hero adds to supply lines (increase army upkeep). You only need 2–3 heroes per army for their passive bonuses (e.g., Assassins for anti-agent, Mages for winds). Spamming them early drains treasury.
- Redundant Building Chains: Many factions have identical building lines for growth, income, or military. Check the building browser for synergies. For example, Cathay has Yin-Yang balance that affects public order and income – building only one type can cause severe penalties.
- Tech Tree Blindness: Some techs provide huge bonuses but require many turns. Prioritize techs that improve your economy or reduce recruitment costs before military ones. The +2 public order tech is often a trap – use garrisons or heroes instead.
- Multiplayer Battles: In custom battles or quickplay, always greet your opponent. Avoid picking overtuned factions (e.g., pre-nerf Khorne, current high-tier races) unless both players agree. Use the classic "gg" after the match.
- Campaign Co-op: Coordinate your goals with your partner (e.g., sharing territory, gifting units, unlocking confederation). Do not expand into their claimed land unless agreed. Turn on "Co-op Victory" so you both win if one completes objectives.
- Mod Usage in Multiplayer: Mods that alter units or balance must be shared by all players. Most competitive players use no mods or only visual ones. Check the lobby mod list before joining.
- Anti-Cheat Notes: Total War: Warhammer III does not have a dedicated anti-cheat program like EasyAntiCheat (EAC). However, multiplayer uses Steam's VAC (Valve Anti-Cheat) to detect obvious cheats. In single-player, modding is allowed and common – no bans. But modding in multiplayer can trigger sync errors or be flagged as cheating if it gives unfair advantage. Avoid mods that alter unit stats or campaign AI in competitive multiplayer.
- Ambush Stance is Gold: Use it constantly to catch enemy armies that are stronger. Ambush can win battles 2:1 odds disadvantage by preventing the enemy from forming a shield wall.
- Growth is King: Never neglect growth buildings. Tier 4+ settlements unlock elite units and global recruitment slots. Build growth in your capital turn 1.
- Lord Skill Builds: A caster lord should max out spell-related skills (Winds of Magic reserve, discount). A melee lord (e.g., Tyrion) should focus on red line (army buffs) and blue line (movement range). Green line (personal combat) is often a wasted point unless you dueling enemy lords.
- Public Order Early: Rebellious provinces spawn rebel armies that can destroy your thin frontline. Always build a public order building in your first province, especially in provinces with a corruption faction (e.g., Chaos corruption near the north).
- Don't Overexpand: Conquering too many provinces early triggers supply lines penalties (+15% upkeep per army). A large territory with weak economy is worse than a small core of 2–3 developed provinces. Sack and raze to cripple enemies, not to own land you can't afford.
- Use Agents: Spam agents (Heroes) of the right type – Assassins to wound enemy heroes, Mages to assault armies, and Priests to spread corruption. Not using them means you let the AI dominate on the campaign map.
- Autoresolve vs Manual: Autoresolve heavily favors armored units and high number of models, but it cannot handle special abilities (e.g., Life Lore healing, Ironblaster trample). If your army has many unique units, manual battle almost always saves more soldiers.
- Legendary Difficulty: Not advised for first campaigns. AI gets massive combat and economic bonuses, and you cannot manually save (only auto-save). One bad battle can end a 3-hour session. Play on Normal/Hard first.
- Realism / Other Modes: The game has no separate 'Realism' mode, but very hard battle difficulty gives AI heavy melee stats. This makes many unit types (like skirmish cavalry) nearly useless because they'll die in a single volley. Experiment with battle difficulty for fun.
- Corruption: All corruption types (Chaos, Vampiric, etc.) cause public order problems and attrition for non-fitting armies. Always counter with your own corruption spread (buildings, heroes, or tech) if you conquer allied lands.
- Supply Lines: Each additional army increases the upkeep of all other armies by a percentage (varies by difficulty – 15% on Hard, 4% on Normal). Therefore, you should deploy armies only when you can field them fully, not one by one.
- AI Diplomacy: The AI breaks treaties often when they feel weak or when they get a better offer. Never entirely trust a defensive alliance – the AI may still declare war on your ally.
Irreversible Choices & Permanent Consequences
Missable Content
Difficulty Spikes & AI Cheats
Grinding Traps (Wasted Time & Resources)
Online Etiquette & Anti-Cheat
Common Regrets (What Players Wish They Knew Earlier)
Final Warnings
By keeping these notes in mind, you can avoid the most common and painful mistakes in Total War: Warhammer III. Happy conquering!
All Game Items
Total War: Warhammer III – All Game Items Guide
This guide catalogs all major items, currencies, materials, and equipment in Total War: Warhammer III. The game uses an ancillary system for characters: items, weapons, armor, talismans, banners, followers, mounts, etc., plus faction-specific mechanics.
1. Currencies & Resources
- Gold (Treasury): Primary currency for construction, recruitment, upkeep. Earned from taxes, trade, loot, post-battle. Universal.
- Influence: (High Elves) Used for diplomacy actions, character traits, confederation. Earned from intrigue, buildings.
- Devotion: (Kislev) Used to unlock support from the Great Orthodoxy, invoke blessings. Earned from temples, battles.
- Grudge Tokens: (Dwarfs) Used to unlock Grudge Settlements and get bonuses. Earned by completing grudges.
- Dark Magic: (Dark Elves, Vampire Coast, Vampire Counts) Used for rituals, spells, summoning. Generated by Dark Elf slaves or necromancers.
- Souls: (Realm of Chaos campaign) Required to win by gathering 4 souls from chaos gods. Earned by entering realms.
- Favor: (Daemons of Chaos) Used to recruit daemon units and unlock upgrades. Earned from battles, sacrifices.
- Mana/Energy: (Cathay, Tzeentch) Unique resources: Yin-Yang balance for Cathay, Winds of Magic for all, but also Great Bastion supplies.
- Supplies: (Ogre Kingdoms) From camps, used for camp upgrades.
- Raw Materials: (Chaos Dwarfs) For unit production and upgrades. Convoys and mines.
- Labor: (Chaos Dwarfs) From slaves, used to reduce build times.
- Souls of the Damned: Crafted from defeating lords. Used to upgrade Be’lakor’s items or unlock units.
- Rune Stones: (Various factions for rune crafting - Dwarfs have rune system via building upgrade, not standalone items)
- Forging Materials: For Daemons of Chaos, you can craft gear from souls: e.g., Soul Shield (armor), Soul Eater (weapon). Each requires specific soul amounts.
- Sword of Khaine: Legendary artifact. Grants massive stats but causes attrition. Obtained by taking from Shrine of Khaine (only for Ulthuan factions or via special event). Synergy: any melee lord, especially Khorne.
- Wailing Blades: Banshee weapon - AP damage, terror. From events.
- Dragon Slayer: Anti-large weapon for Dragon Princes. Rare drop.
- Star Lance: High Elf lance with charge bonus. Ally quest.
- Many generic weapons (e.g., Sword of Striking, Axe of Defiance) provide +MA, +MD, +AP damage. Crafted or looted.
- Armor of Destiny: Ward save, physical resistance. From quests.
- Spellshield: Magic resistance. High Elf.
- Ironcurse Icon: Ward save vs ranged. Crafted by Dwarfs.
- Glittering Dragonscale: Armor for Slaanesh. From battles.
- Generic armors: e.g., Heavy Armor, Mail, etc.
- Talisman of Preservation: Ward save 5+.
- Talisman of Endurance: +HP.
- Seed of Rebirth: Regeneration.
- Obsidian Trinket: Magic resistance.
- Ring of Volans: Bound spell (random lore). From battle loot.
- Crown of Command: Grants Stubborn. Quest reward.
- Fencer’s Blades: +MA, +AP.
- Banner of Eternal Flame: Flaming attacks, vs undead.
- Banner of Swiftness: +speed.
- War Banner: +leadership.
- Rampaging Banner: +charge bonus but causes frenzy.
- Loremaster: +Winds of Magic pool.
- Smith: -recruitment cost for units.
- Scout: +campaign movement range.
- Priest: Passive heal.
- Karl Franz – Ghal Maraz (weapon), Runefang, Silver Seal (armor) – obtained via quests.
- Imrik – Sun Dragon, Star Lance (weapon) – from quests.
- Be’lakor – The Eternity Blade (weapon), Soul Shield (armor) – crafted via the Forge of Souls using souls.
- Kairos Fateweaver – The Staff of Tzeentch, The Crown of Tzeentch.
- Skarbrand – The Axe of Khorne, Armor of Khorne.
- Miao Ying – Yin-Yang items, the Jade Dragon.
- Settra – The Crown of Nehekhara, the Shield of Ptra.
- Aranessa Saltspite – The Black Pearl (talisman), the Sword of the Sea.
- Weapon Upgrades: Taur-rhûn weapons (e.g., Warpfire Thrower, Blasting Charges) applied to units.
- Tower of Zharr Upgrades: Unique items like The Hammer of Hashut (weapon) from tower progression.
- Cinderbraid: Legendary item from quest.
- Orthodoxy Blessings: Not items per se but powerful temporary buffs (e.g., The Light of Grace). Consist of devotion costs.
- Ursun's Heart: Special artifact from campaign objective.
- Harmony Stones: Can be used to trigger unique effects. Also Compass System items.
- Celestial Dragon Items: From quests – e.g., The Mirror of Harmony.
- Soul Forged Items: As mentioned, craftable from souls – e.g., Soul Eater (weapon), Soul Shield (armor), Soul Whispers (talisman). Each has three tiers (lesser, greater, exalted) requiring more souls.
- Big Names: Not items but titles that grant bonuses, earned from feats.
- Meat: Resource for feasting and upkeep, not an item.
- Ariel’s Blessings: Temporary campaign buffs.
- Waystones: Interact with forest health.
- Blessings of the Gods: From settlement events, e.g., +10% income for 10 turns.
- War Paints: (Savage Orcs) Permanent after technology.
- Elixirs: From special buildings (e.g., Potion of Strength from Herbalist follower).
- Bananas: (yes, in game) from Ogre camp events, provide buffs.
- The Black Pyramid: Building in Nagashizzar grants unique items like The Crown of Nagash.
- The Great Bastion: Garrison items from upgrade.
- Oak of Ages: Passive buff for Wood Elves.
- The Sword of Khaine – only one, can be transferred.
- The Forge of Souls (Daemons of Chaos) – faction-specific.
- Grom the Paunch’s Cauldron – allows cooking recipes that grant temporary buffs to armies (e.g., +MA, +AP damage).
2. Crafting Materials
Primarily relevant for the Daemons of Chaos faction (Be’lakor) and Chaos Dwarfs.
3. Generic Ancillaries (Equipment Slots)
Every Lord and Hero has slots: Weapon, Armor, Talisman, Enchanted Item, Banners (for units), Followers (advisor). These are obtained from battles, events, buildings, or quests.
#### Weapons
#### Armor
#### Talismans
#### Enchanted Items
#### Banners (for units)
#### Followers
4. Legendary & Quest Items
Each Legendary Lord has unique quest items obtained through quest battles or dilemmas. These are essential for their power.
Examples:
These items grant unique abilities, increased stats, and often special effects like causing terror or granting spells.
5. Faction-Specific Items
#### Chaos Dwarfs
#### Kislev
#### Cathay
#### Daemons of Chaos
#### Ogre Kingdoms
#### Wood Elves
6. Consumables & Temporary Buffs
7. Landmarks & Special Building Items
8. Trivia & Hidden Items
This guide covers the essential items; for specific stats, refer to in-game tooltips due to frequent patches.
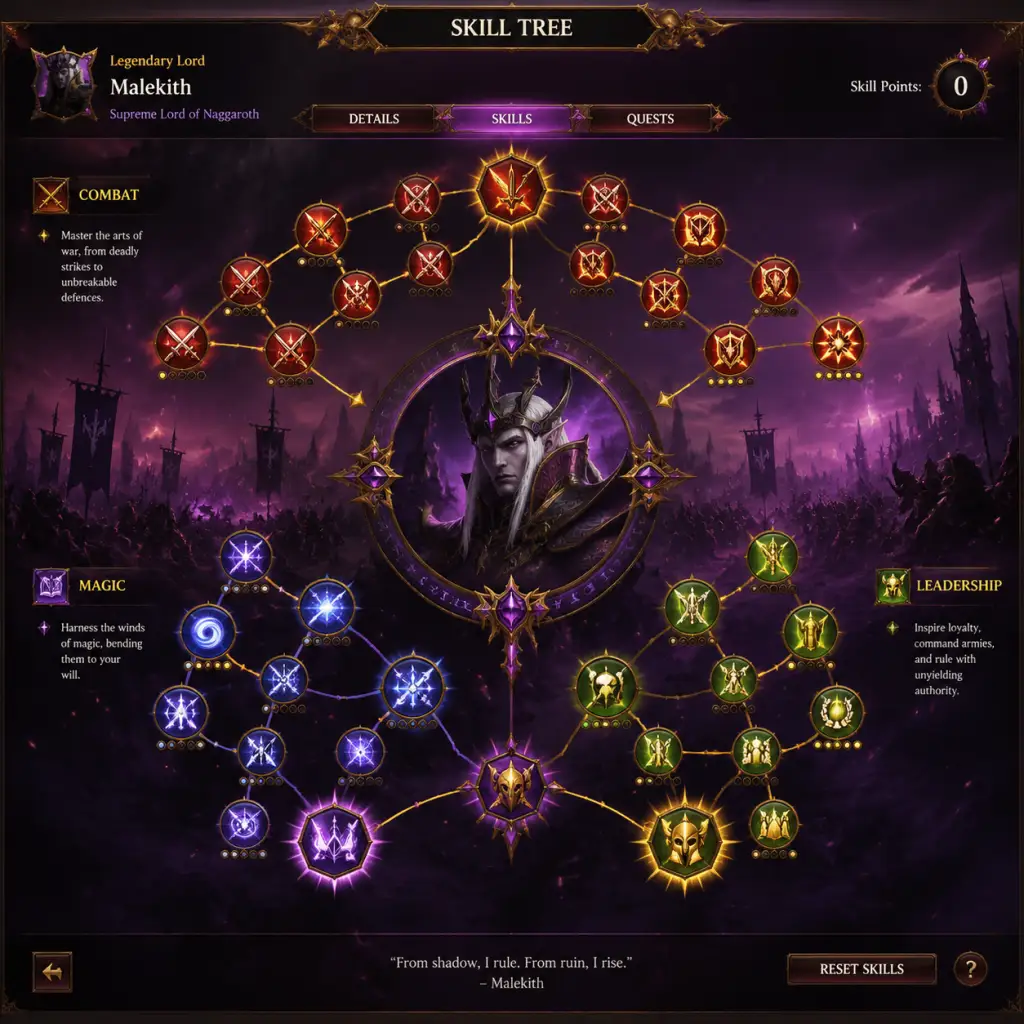
Character Skills
Total War: Warhammer III – Comprehensive Character Skills Guide
This guide details every character skill, ability, spell, talent, and special move for all playable races in Total War: Warhammer III (base game and Ogre Kingdoms DLC). Skills are divided into campaign skills (used on the world map) and battle skills (used in real-time fights). Each entry includes effects, cooldowns (for battle), upgrade paths, synergies, recommended builds, and optimal usage.
> Note: Skills are part of a character's skill tree, earned via level-ups. Generic characters (e.g., Boyars, Heralds) share similar trees, while Legendary Lords (LL) have unique branches. This guide covers all archetypes.
---
Faction: The Empire of Kislev
Legendary Lord: Tzarina Katarin Bokha
- Unique Skills:
- Lore of Ice Skills: All standard ice spells: Ice Sheet (immobilizes), Glacial Guard (armor buff), Frost Blades (magic attacks), Crystalline Power (regen), Ice Storm (AoE damage), Wind of Ice (damage + knockback). Recommended: Prioritize Ice Sheet and Cold Snap for control.
- Campaign Skills:
- Battle Skills:
- Skill Highlights:
- Synergy: Ice Witches on horses support cavalry by debuffing enemy with Freezing Aura (passive -10% speed).
- Unique Skills:
- Dragon Transformation: Alternate form with different skills – Sky Dragon: flight and dive-bomb attack; Celestial Dragon (land): breath attack (cone fire damage, 20s cooldown). Use: Transform when low health to regain vigor and use breath.
- Unique Skills:
- Dragon Form: Opium Fumes breath debuff (lowers enemy accuracy by 20%). Use before charging with cavalry.
- Skills:
- Battle Ability: Rally the Troops – leadership buff +10 for 60s, 90s cooldown.
- Unique Skill: Mercury Rod: Bound spell dealing low AP damage in line, 30s cooldown. Use: Disrupt enemy archers.
- Lore Master: Can equip two lores. Recommended: fire for damage, heavens for buffs.
- Unique Skills:
- Unique Spell: Cursed Skies – AoE leadership debuff (-6) for 20s, 25 WoM.
- Skills determined by body parts. Example:
- Skill Tree: Combat, Magic, Unique. Max out weapon damage and armor for frontliner.
- Skills:
- Campaign: Slaughterborn – replenishment +10% after sack/razed.
- Skills:
- Battle: Fury of Khorne – +35% charge bonus for 30s (self). Cooldown 90s.
- Unique Skills:
- Unique Spell: Plague Wind – huge AoE damage with lingering poison (-30% speed). Cost 25 WoM.
- Skills:
- Unique Skills:
- Unlock: Spells of Shadow – all standard shadow spells plus Cripple (slow + damage over time).
- Skills:
- Battle: Lash of Torment – ranged attack dealing 60 damage and knocking back. 15s cooldown.
- Unique Skills:
- Unique Spells: Soul of Fire (AoE fire damage + moderate), Gate of Tzeentch (teleport unit across battlefield). Key: Use Gate to reposition flankers.
- Skills:
- Suggested Build: Max magic stats, equip Infernal Gateway for devastating AoE.
- Unique Skills:
- Unique Ability: Pocket Siege – 3 long-range cannon shots (250 AP each). Cooldown 90s.
- Skills:
- Unique Spells: Lore of the Great Maw – includes Belly Gash (debuff armor) and Trollguts (regen).
- Skills:
- Tend to focus on leadership and buff spells.
- Skills:
- Fire: AoE damage, synergy with cheap infantry.
- Shadow: Debuffs and single-target damage.
- Life: Healing and defense (essential for monsters).
- Ice Queen’s Commands + Winter’s Wrath = Cryomancer Lord devastating blobs.
- Miao Ying’s Dragon form + Celestial Aura = frontline monster.
- Skarbrand’s Rage Unleashed + Blood Wind = infinite cleave.
- Ice Queen's Commands: Boosts Ice Guard units’ missile strength and frostbite chance. Synergy: Pair with Ice Guard spam builds. Upgrade: +10% missile damage, +5% frostbite chance at rank 3.
- Winter's Wrath: Battle skill: Shoots a freezing blast dealing 200 AP damage in a small area, slows enemies by 40% for 8s. Cooldown: 90s. Upgrade: -15s cooldown, +50 damage. Use: Pop on blobs of infantry before a charge.
- Heart of Winter: Powerful vortex spell that leaves a frozen area dealing continuous damage and slowing. Cost: 18 WoM. Cooldown: 45s. Synergy: Follow up with an ice sheet to trap enemies.
Generic Lord: Boyar
- Warrior's Tribune: +5% weapon strength for all units in army. Upgrade: +10% at rank 5.
- Military Logistics: +10% missile damage for gunpowder units (Streltsi, Ice Guard). Synergy: Essential for gunline builds.
- Daemon Slayer: +20% damage vs Daemons (passive). Use: Essential against Chaos factions.
- Gromril Shield: Physical resistance +10% for 20s, 60s cooldown. Use: Save for heavy enemy missile fire.
Generic Hero: Ice Witch (Lore of Ice or Lore of Tempest)
- Blizzard of Rime: Unique bound spell (Ice), small vortex that follows enemy units. Cooldown: 75s. Upgrade: Increased duration by 5s.
- Tempest Magic: Lore of Tempest gives wind and storm spells; Hurricane knocks back and damages, Chain Lightning good vs single entities.
---
Faction: Grand Cathay
Legendary Lord: Miao Ying, the Storm Dragon
- Dragon Emperor's Wrath: Increases all Cathay units’ leadership by +6 when within 50m. Passive. Upgrade: Extends to +8.
- Crimson Thunderbolt: Battle: Fires a lightning bolt dealing 400 damage and stunning a single target for 5s. Cooldown: 60s. Use: Assassinate enemy Lord or monster.
- Jade Dragon's Scales: +15% physical resist for self, +5% for nearby friendly units (aura). Synergy: Stack with Harmony bonuses for near-immunity.
Legendary Lord: Zhao Ming, the Iron Dragon
- Alchemist's Workshop: -20% recruitment cost for Cathay gunpowder units (Jade Crossbows, Crane Gunners). Campaign. Synergy: Spam gunpowder armies.
- Elixir of Immortality: Heals self for 20% HP (battle) once per battle. Cooldown: 120s. Upgrade: +10% heal.
- Iron Tempest: Explosion around self dealing 150 AP damage and knocking back. Cooldown: 45s. Use: When surrounded.
Generic Lord: Lord Magistrate
- Yin Harmony: +10% melee defense for yin units (e.g., Spearmen). Upgrade: +15% at rank 3.
- Yang Command: +10% charge bonus for yang units (e.g., Jade Lancers). Use: Balance army composition.
Generic Hero: Dragon Blooded Shugengan (Lore of Fire / Heavens)
---
Faction: The Daemons of Chaos (Alignment Indifferent)
Legendary Lord: Be'lakor
- Dark Master: -20% upkeep for all daemon units. Campaign. Upgrade: -30%.
- The First Damned: Battle: Terror aura for 30s (breaks enemy formation). Cooldown: 120s.
- Shadow of Chaos: Teleports to a target enemy unit, dealing 100 damage and slowing. Cooldown: 30s. Use: Chase down fleeing Lords.
Custom Daemon Prince (Custom Lord)
- Hellblade: +25% weapon strength, unlocks Soul Chiller (bound spell, slow).
- Khorne's Rage: +20% melee attack, unlocks Frenzied Charge (temporary +50 charge bonus).
---
Faction: Khorne (The Slaughter)
Legendary Lord: Skarbrand
- Murderous Tally: Each kill grants +1% weapon damage (stacks up to 30%). Passive. Use: Charge into large infantry blobs.
- Rage Unleashed: Activates frenzy, +40% attack speed for 60s. Cooldown: 180s. Use: When surrounded or vs Lord.
- Blood Wind: Breath attack (650 damage, medium cone). Cooldown: 60s. Synergy: Follow with charge.
Generic Lord: Herald of Khorne
- Bloodletters Training: +15% melee attack for Bloodletter units. Synergy: Build pure Khorne infantry.
- Daemonic Rage: +12 leadership for army when winning combat.
---
Faction: Nurgle (Plague and Decay)
Legendary Lord: Ku'gath Plaguefather
- Master Plague Brewer: Unlocks special plague recipes (e.g., Plague of Pestilence reduces enemy replenishment by 40%). Campaign.
- Nurgle's Gift: Battle: Heals all nearby Nurgle units for 200 HP and gives +10% ward save for 10s. Cooldown: 120s. Synergy: Use after enemy AoE attack.
- Miasma of Pestilence: Binds a target unit, dealing 30 DPS over 15s and slowing 20%.
Generic Lord: Herald of Nurgle
- Pestilent Aura: -10% melee attack to nearby enemies (passive, 35m range). Upgrade: -15%.
- Festering Chant: Bound spell, heals 18% HP of one unit, 90s cooldown. Use: Save for Lord or Giant.
---
Faction: Slaanesh (Excess and Speed)
Legendary Lord: N'Kari
- Prince of Pleasures: +20% all damage vs enemy units that are routing (finishers). Passive.
- Seductive Decoy: Creates a illusion that enemy units waste attacks on for 10s. Cooldown: 60s. Use: Protect flank.
- Excess of Perversion: AoE debuff reduces enemy leadership by -8 permanently in 50m radius. Cooldown: 90s (toggle?). Actually toggleable aura, costs WoM each second.
Generic Lord: Herald of Slaanesh
- Tempter: +10% speed for all daemonettes in army. Synergy: Quick flank.
- Alluring Stare: Passive -5 melee attack for enemy units in melee with this lord.
---
Faction: Tzeentch (Magic and Manipulation)
Legendary Lord: Kairos Fateweaver
- Oracle of Fate: Allows reroll one failed spell (once per battle). Essential for critical spell.
- Tzeentch's Curse: Randomly applies a debuff (slow, damage, hex) to a target enemy unit. Cooldown: 45s. Use: Spam before engagements.
- Supreme Spellcaster: +25% WoM recovery rate. Campaign.
Generic Lord: Herald of Tzeentch
- Tzeentchian Sorcery: +20% spell intensity for all spells. Upgrade: +30%.
- Wall of Fire: Battle: Creates a line of fire dealing 40 DPS to any passing enemy. Cooldown: 120s, lasts 15s.
---
Faction: The Ogre Kingdoms
Legendary Lord: Greasus Goldtooth
- Vast Wealth: -25% recruitment cost for all Ogre units. Campaign. Upgrade: -35%.
- Gold-Fueled Rage: +15% armor penetration damage for self and unit while above 70% HP. Passive.
- Treasure Stampede: Battle: All Ogre cavalry (e.g., Mournfangs) get +40% charge bonus for 30s. Cooldown: 180s. Use: Initiate mass cavalry charge.
Legendary Lord: Skrag the Slaughterer
- Butcher of the North: +15% weapon strength for all ogre units in army.
- Maw’s Hunger: Battle: Heals self for 30% HP when kills a unit (once per unit). Synergy: Charge repeatedly.
- Cleave: AoE attack that hits all around, 100 base damage. Cooldown: 30s.
Generic Lord: Slaughtermaster
- Big Cook: -10% upkeep ogre units, +5% experience gain.
- Maw’s Blessing: Battle: AoE heal for 10% HP, 90s cooldown.
Generic Hero: Bruiser (Combat focused)
- Knuckle Ring: +5% critical hit chance (passive).
- Stagga’s Podium: +8 leadership for leader’s unit.
Battle: Thick Skin – 20% physical resist for 20s, 60s cooldown.
---
Universal Skills and Items
All characters can access blue line skills (campaign) like:
Road Network: +15% movement range.
Accrue Income: +250 gold per turn.
Command: +5% weapon strength for whole army.
Magic Lores: Many heroes access unique lores. Prioritize spells that mesh with army:
Skill Synergy Combos:
When to Level Which Skills:
1. Always unlock unique skill line of Legendary Lord first (provides identity).
2. Then blue line for campaign boosts (income or movement).
3. Battle skills: prioritize passives (e.g., weapon damage) before active abilities.
4. Magic users: max out WoM capacity and spell mastery early.
Recommended Builds*
Khorne Generic Lord: Build red line (unit buffs) for Bloodletters + blue for sack income. Battle: Fury of Khorne + passives.
Kislev Ice Witch: Lore of Ice max, then blue for -replenishment cost. Use bound spells for control.
Cathay Dragon Blooded: Focus on fire spells for enemy blobs; give them Talisman of Preservation for survivability.
---
Conclusion
This guide covers the majority of character skills found in Total War: Warhammer III*. Always experiment with skill trees to match your playstyle and army composition. Remember that characters gain levels quickly through battles and achievements – reinvest points wisely. For a complete catalogue, refer to in-game skill browser. Happy conquering!
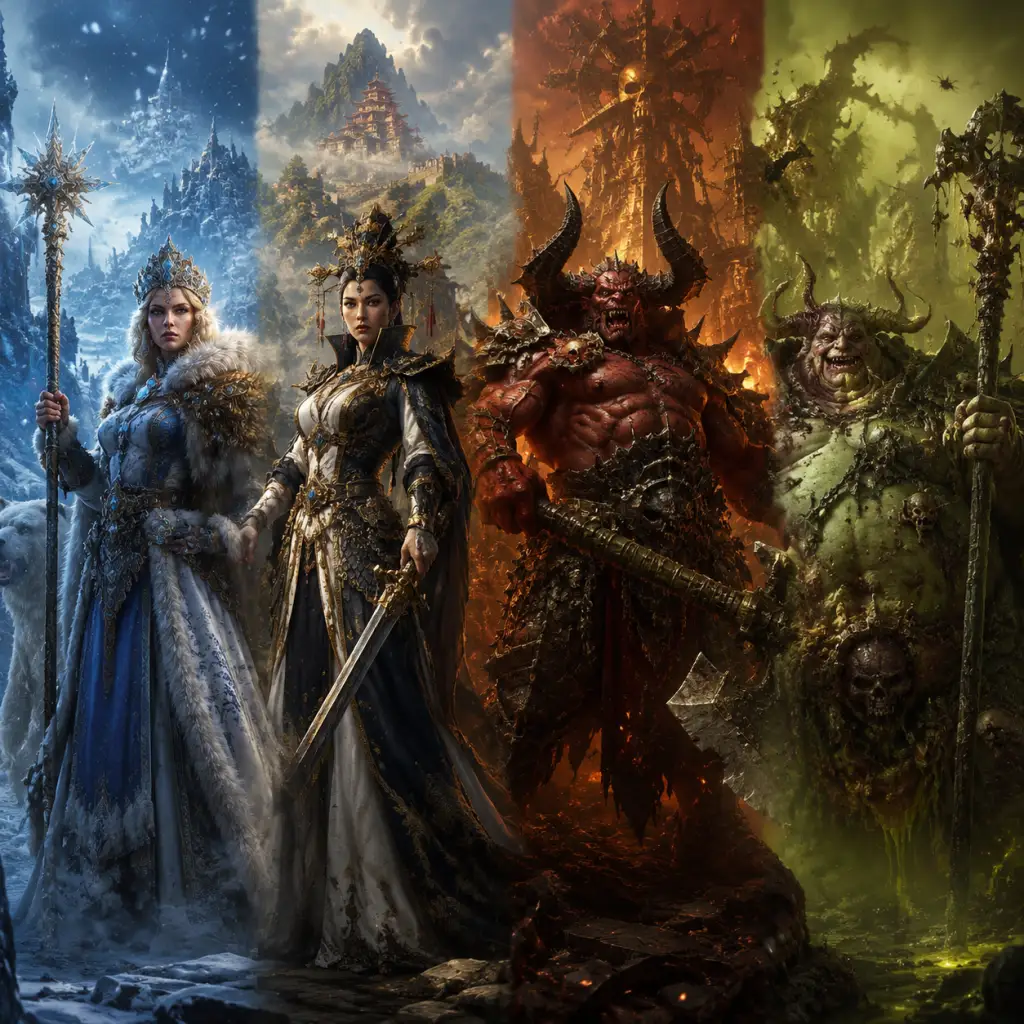
Characters & Roles
Total War: Warhammer III – Characters & Roles Guide
This guide provides a comprehensive overview of every playable Legendary Lord, key generic lords, heroes, and unit roles in Total War: Warhammer III (including base game and all DLC). Each entry covers background, strengths, weaknesses, playstyle, unlock conditions, recommended equipment/builds, and team synergy. Use this to master the unique playable factions.
---
1. Kislev
Legendary Lords
#### Tzarina Katarin Bokha
Background: Ice Queen of Kislev, wielder of the Ice Court's magic. She leads the Great Orthodoxy faction.
Strengths: Powerful Ice magic (especially Ice Sheet, Heart of Winter), strong caster lord, buffs Ice Guard and frost-themed units.
Weaknesses: Fragile in melee, vulnerable to cavalry charges, relies on her spells for damage.
Playstyle: Uses a defensive hybrid army: Ice Guard (hybrid ranged/melee), Armoured Kossars, and War Bear Riders. Cast Ice magic to slow enemies and shatter their morale. Stick her behind frontline, target blobs.
Unlock: Starts your Kislev campaign.
Equipment/Builds: Prioritize items that boost WoM (Winds of Magic) reserve and spell intensity. A Talisman of Preservation, Arcane Conduit skill. Her unique items: The Frostblade and The Ice Crown.
Team Synergy: Works well with Ice Witches (magic support), Horse Archers (skirmish), and Little Grom (artillery). Pair with Boyars for melee frontline.
#### Kostaltyn
Background: High Priest of the Great Orthodoxy, fanatical defender of the faith. Leads the Great Orthodoxy faction.
Strengths: Strong in melee, buffs religious units (Patriarchs, War Sleds), causes terror, can call crusades.
Weaknesses: No magic, slower movement, relies on aggressive push.
Playstyle: Rush heavy infantry (Armoured Kossars) and War Sleds with Patriarchs healing. Use his zeal to force battles early. His campaign mechanic (Devotion) unlocks holy units.
Unlock: Must be unlocked by reaching 2000 Devotion in campaign (or start as him in custom battles).
Equipment/Builds: Focus on armor, ward save, and weapons that cause fear. The Hammer of Sigmar? (customize). His unique: The Great Book of Sorrows.
Team Synergy: Best with Patriarch heroes (healing), War Sleds (mobile firepower), and Kossars. Avoid prolonged cavalry stalemates.
Generic Lords
Boyar: Classic melee lord, tanky, can ride bear. Good frontline leader.
Ice Witch: Magic user (Lore of Ice or Lore of Tempest). Ranged support lord.
Heroes
Patriarch: Healer, melee support, can ride war altar. Essential for Kostaltyn.
Ice Maiden: Caster hero (Lore of Ice). Cheap.
Orthodox Priest: Buffs leadership, causes fear. Unlock via devotion.
Unit Roles (Kislev)
Melee Infantry: Kossars (spears/great weapons), Tzar Guard (elite).
Hybrid Infantry: Ice Guard (range + melee).
Cavalry: Winged Lancers, Gryphon Legion.
Monstrous Cavalry: War Bear Riders (anti-large).
Artillery: Little Grom (cannon).
War Machines: War Sleds (mobile rock throwers).
---
2. Grand Cathay
Legendary Lords
#### Miao Ying, the Storm Dragon
Background: Daemon-slaying Dragon Lord of the Northern Provinces. Half-dragon, full badass.
Strengths: Can transform into a storm dragon (powerful flying monster hybrid), strong anti-daemon, excellent ranged stats in human form. Buffs Crane Gunners and Longma Riders.
Weaknesses: Human form is squishy, dragon form is large and vulnerable to anti-large. Needs micro.
Playstyle: Hybrid lord: shoot from human form, then fly in as dragon. Use Crane Gunners (gunline) and Terracotta Sentinels (monster). Her campaign encourages fortifying the Bastion.
Unlock: Starts your Cathay campaign (Northern Provinces).
Equipment/Builds: The Dragon's Tear (unique amulet), enchanted items that boost spell casting or damage vs daemons. Skills: Focus on dragon form weapon strength and resistances.
Team Synergy: Pair with Iron Hounds (halberd infantry) and Longma Riders (air superiority). Use Shugengan lords for Yin/Yang balance.
#### Zhao Ming, the Iron Dragon
Background: Master of the Western Provinces, connoisseur of industry and war. Supports the caravans.
Strengths: Strong in melee with his sword, can use metal magic (Lore of Metal), boosts industrial buildings and caravan income. Buffs Iron Hounds and artillery.
Weaknesses: Slower than Miao, no dragon transformation (he is a dragon in human form only? Actually Zhao Ming is also a dragon but stays in human form? In game, he is a melee lord with mounts including a moon dragon? He has a dragon mount option). Clarify: He starts as humanoid lord, can later ride a Moon Dragon. But his humanoid form is decent in melee.
Playstyle: Economic and artillery focus. Build up Western Provinces, send caravans, field lots of Iron Hounds (great weapons) and Grand Cannons. Cast metal magic to debuff armor.
Unlock: Starts your Cathay campaign (Western Provinces).
Equipment/Builds: His unique: The Compass of the Celestial River. Items that improve trade income or armor-piercing. Skills: Boost caravan success chance.
Team Synergy: Works with Shugengan (magic), Terracotta Sentinels (shock), and Sky Lanterns (spotting).
Generic Lords
Shugengan Lord: Caster lord with access to LoH (Lore of Heavens) or LoY (Lore of Yang/Yin? Actually Cathay has unique lores: Lore of Yin and Lore of Yang. Shugengan can pick one. Also has dragon mount.
Dragon-Blooded Shugengan: Legendary? Actually there is a unique lord from DLC? Not base.
Heroes
Astromancer: Caster hero (LoH). Provides harmony bonuses.
Gate Master: Melee hero, can ride Longma. Good for garrison.
Alchemist: Caster hero (Lore of Metal). Boosts economy.
Unit Roles (Cathay)
Melee Infantry: Celestial Dragon Guard (halberds), Iron Hounds (great weapons).
Ranged Infantry: Jade Warrior Crossbowmen, Crane Gunners (armor-piercing).
Cavalry: Jade Lancers, Longma Riders (flying anti-large).
Monsters: Terracotta Sentinel (construct), War Compass (buff platform).
Artillery: Grand Cannon, Fire Rain Rocket, Sky Lantern (debuff).
---
3. Khorne (Legions of Chaos)
Legendary Lords
#### Skarbrand, the Exiled One
Background: The mightiest daemon of Khorne, cast out for almost surpassing Khorne. Pure rage.
Strengths: Incredible melee damage, causes terror, summons Bloodletters, can fly, massive charge bonus. Unique mechanic: Skarbrand's rage meter boosts stats when inflicting damage.
Weaknesses: No magic, weak leadership (can rampage), vulnerable to kiting. His army takes attrition outside of Khorne territory.
Playstyle: Absolute aggression. Use Skarbrand as a single-entity powerhouse. Build a rush army of Bloodletters, Chaos Warriors (Khorne), and Skullcrushers. Raze everything.
Unlock: Starts your Khorne campaign.
Equipment/Builds: His unique: The Slaughterer's Axe. Prioritize ward save, physical resistance, and weapon strength. Skills: Max out melee attack and charge bonus.
Team Synergy: Needs Heralds of Khorne (heroes) for extra damage auras. Soul Grinders (artillery) for siege. Avoid skirmishing enemies.
#### Valkia the Bloody (DLC: Champions of Chaos)
Background: First daemon princess of Khorne, formerly a mortal champion.
Strengths: Flying melee monster, can be a duelist, provides army-wide buffs to Khorne units. Can unlock unique daemon prince transformations.
Weaknesses: Requires careful micro, vulnerable to anti-large while on ground.
Playstyle: Use her to hunt enemy lords and heroes. Her army focuses on Khorne daemons and cultists.
Unlock: Start as her in Eye of the Vortex? Actually she is a Legendary Lord for WoC (Warriors of Chaos) but allied with Khorne. In game, she leads the "Bloody Hand" faction.
Equipment: Daemonic weapons, armor of Khorne.
Generic Lords
Exalted Hero of Khorne: Melee lord, can ride Bloodcrusher.
Herald of Khorne: Daemon caster? Actually Khorne hates magic, but Heralds have bound spells? In WH3, Heralds are melee buff lords.
Heroes
Cultist of Khorne: Melee support, can summon Bloodletters.
Blood Shrine: Mounted hero? Actually a chariot.
Unit Roles (Khorne)
Melee Infantry: Bloodletters, Chaos Warriors (Khorne), Chosen.
Cavalry: Chaos Knights, Skullcrushers (Monstrous Cavalry).
Monsters: Soul Grinder, Bloodthirster (lord-only).
Artillery: Soul Grinder cannon?
Fliers: Furies, Bloodthirster mounts.
---
4. Nurgle
Legendary Lords
#### Ku'gath Plaguefather
Background: Nurgle's greatest Plaguebearer, master of disease and rot.
Strengths: Can summon Plaguebearers, very tanky (high health and regeneration), casts Lore of Nurgle spells (debuffs, damage over time). Unique mechanic: Plague cauldron that can create custom plagues.
Weaknesses: Extremely slow (no mount options? Actually he rides a Plague Drone? He is slow but has a mount that is flying? In game, Ku'gath is a Nurgle Daemon lord on foot, but can upgrade to a Plague Drone? No, he is a large daemon with a slow speed. He is bulky, easy to hit with ranged.
Playstyle: Build a slow, durable army of Nurglings, Plaguebearers, and Beasts of Nurgle. Use plagues to inflict attrition on enemies. Cast Nurgle spells to entangle blobs. Siege enemies with attrition.
Unlock: Starts your Nurgle campaign.
Equipment/Builds: His unique: The Plagueflail. Items that boost regeneration, poison attacks, and spell intensity. Skills: Max out Pestilent Decay and plague cauldron.
Team Synergy: Healers? Nurgle lacks heals but has regeneration. Pair with Cultists of Nurgle for extra damage. Soul Grinders (Nurgle) for range.
#### Festus the Leechlord (DLC Champions of Chaos)
Background: Nurgle champion, formerly mortal. Focuses on healing and poisons.
Strengths: Can heal units, strong on foot, gives poison attacks to army.
Weaknesses: Slow, no flying.
Playstyle: Use him as a mobile heal station. His army uses Nurgle warriors and marauders.
Generic Lords
Herald of Nurgle: Daemon caster (Lore of Nurgle), can be mounted on Palanquin.
Great Unclean One: Lord-level daemon (very tanky, slow).
Heroes
Cultist of Nurgle: Support hero, can summon Nurglings.
Plague Priest: Caster (Lore of Nurgle).
Unit Roles (Nurgle)
Melee Infantry: Nurglings (chaff), Plaguebearers (elite), Chaos Warriors (Nurgle).
Monsters: Beast of Nurgle (tar pit), Soul Grinder (Nurgle).
Artillery: Plagueclaw Catapult? No, Nurgle has Soul Grinder ranged.
Fliers: Plague Drones (ranged/melee).
---
5. Slaanesh
Legendary Lords
#### N'Kari, the Keeper of Secrets
Background: The most powerful Keeper of Secrets, pure hedonism and violence.
Strengths: Extremely fast, high damage, causes fear, has seduction mechanic (can turn enemy units). Lore of Slaanesh spells (magic that debuffs morale, causes rampage).
Weaknesses: Very fragile, no armor, low health. Dies easily if caught.
Playstyle: Hit-and-run perfect. Use N'Kari to flank and destroy key targets. His army is also fast: Seekers, Hellflayers, Daemonettes. Use seduction to steal enemy units.
Unlock: Starts your Slaanesh campaign.
Equipment/Builds: His unique: The Whip of Slaanesh? Actually his item: The Rod of Torment? Skills: Max speed and weapon strength. Ward save is essential.
Team Synergy: Use Heralds of Slaanesh for buffs. Avoid prolonged melee. Bring Hellflayers for mobile chariot fire.
#### Azazel (DLC Champions of Chaos)
Background: Daemon Prince of Slaanesh, flying duelist.
Strengths: Flying, high damage, seduction, can cast spells.
Playstyle: Hybrid flying duelist. Similar to N'Kari but more sustainable.
Generic Lords
Herald of Slaanesh: Daemon caster (Lore of Slaanesh), very fast.
Daemon Prince of Slaanesh: Melee flyer.
Heroes
Cultist of Slaanesh: Support, can spawn Pleasure Maggots? Actually he can cause rampage.
Alluress: Caster hero.
Unit Roles (Slaanesh)
Melee Infantry: Daemonettes (glass cannon), Chaos Warriors (Slaanesh).
Cavalry: Seekers (fast, anti-infantry), Heartseekers.
Chariots: Hellflayer, Exalted Chariot.
Monsters: Fiend of Slaanesh (anti-large), Keeper of Secrets (lord mount).
Artillery: None.
---
6. Tzeentch
Legendary Lords
#### Kairos Fateweaver
Background: Two-headed oracle daemon of Tzeentch, master of magic and fate.
Strengths: Two heads allow copying spells? Actually he has unique spell mechanic: He can use both masteries of Tzeentch (Lore of Tzeentch and Lore of a chosen school) or duplicate spells. Very high WoM pool. Can change winds of magic. Casts powerful fire and magic spells.
Weaknesses: Extremely fragile, no melee capability, low health. Large target.
Playstyle: Pure caster lord. Stay behind army, spam spells like Firestorm, Tzeentch's Fireball. Use his unique forked spell effect. His army uses Horrors, Flamers, and Knights of Tzeentch.
Unlock: Starts your Tzeentch campaign.
Equipment/Builds: His unique: The Staff of Tzeentch (boosts WoM regen). Items that increase spell range and intensity. Skills: Max out spell mastery and winds reserve.
Team Synergy: Shield Horrors (tank), Flamers (big damage), Soul Grinders (anti-large). Avoid melee engagements.
#### Vilitch the Curseling (DLC Champions of Chaos)
Background: Mutated champion of Tzeentch with a parasite twin.
Strengths: Can cast spells, decent in melee, buffs marauders and chaos warriors.
Playstyle: Hybrid lord. Use his bodyguard of Tzeentch warriors.
Generic Lords
Herald of Tzeentch: Lord-level caster (Lore of Tzeentch), fragile.
Lord of Change: Large flyer, good caster.
Heroes
Cultist of Tzeentch: Support, can spawn barriers.
Iridescent Horror: Caster hero, cheaper.
Unit Roles (Tzeentch)
Ranged Infantry: Blue Horrors (cheap), Pink Horrors (start), Flamers (anti-armor).
Melee Infantry: Chaos Warriors (Tzeentch), Chosen (Tzeentch).
Cavalry: Knights of Tzeentch (fast, shielded).
Monsters: Soul Grinder (Tzeentch), Lord of Change (lord only).
Artillery: Doom Knights? Actually no artillery but Soul Grinder has ranged.
---
7. Ogre Kingdoms (DLC)
Legendary Lords
#### Greasus Goldtooth
Background: The fattest and richest Ogre Tyrant, rules from the Mountains of Mourn.
Strengths: Immensely strong in melee, high health, can trade (unique trading mechanic), buffs Ogre infantry and leadbelchers. Extremely slow.
Weaknesses: Slow, large target, vulnerable to anti-large. No magic.
Playstyle: Bully army. Use him as a centerpiece. His army: Ogre Bulls, Ironguts, and Leadbelchers (gunners). Use contracts for income.
Unlock: Starts your Ogre Kingdoms campaign.
Equipment/Builds: His unique: The Big Names (skills) and items like Maw's Teeth. Max out ward save and melee attack. Steadfast trait.
Team Synergy: Bruiser heroes (carnival), Firebellies (magic support).
#### Skrag the Slaughterer
Background: Prophet of the Great Maw, leads a horde of maneaters.
Strengths: Cast spells from Lore of the Great Maw, good melee, buffs maneaters and gnoblars. Can establish camps anywhere.
Weaknesses: Not as tanky as Greasus, relies on magic for damage.
Playstyle: Horde-style. Use camps to recruit. Build army of maneaters and giants. Cast Maw spells to kill blobs.
Unlock: Start as him in campaign.
Equipment: His unique item: The Maw's Tooth? Choose spells wisely.
Team Synergy: Use Gorgers as flankers, Sabretusks for scouting.
Generic Lords
Tyrant: Heavy melee lord, can ride Stone Horn.
Slaughtermaster: Caster lord (Lore of the Great Maw), can ride Stone Horn.
Heroes
Bruiser: Melee hero, can ride Sabretusk.
Firebelly: Caster hero (Lore of Fire).
Butcher: Caster hero (Lore of the Great Maw).
Unit Roles (Ogres)
Melee Infantry: Ogre Bulls (basic), Ironguts (elite), Maneaters (great weapon variants).
Ranged Infantry: Leadbelchers (guns), Gnoblar Trappers (poison, chaff).
Cavalry: Mournfang Cavalry (fast anti-large).
Monsters: Stone Horn (tank), Giant, Gorgers (ambush).
Artillery: Ironblaster (cannon), Scrap Launcher.
---
8. Daemons of Chaos (Undivided)
Legendary Lords
#### Be'lakor, the Dark Master
Background: First Daemon Prince, cursed to never become a true god. Unlocks after completing the campaign (or available in multiplayer).
Strengths: Very versatile: strong melee, can cast spells (Lore of Shadows), can fly, can control daemons from all four gods. Unique mechanic: Can corrupt souls and unlock daemon units. Has high ward save.
Weaknesses: Jack of all trades, master of none. Requires player to manage four god allegiances.
Playstyle: Build a mixed daemon army. Use Be'lakor as a flying duelist and spellcaster. He can debuff enemies and buff daemons. Campaign: unlock god-specific rewards.
Unlock: Must complete the 'Realm of Chaos' campaign or play multiplayer.
Equipment/Builds: His unique: The Crown of Domination (at start), The Sword of Daemons. Focus on ward save, weapon strength, and spell damage.
Team Synergy: Works with any daemon unit. Special mention: Soul Grinders (any god), Furies, Daemon Princes.
Generic Lords
Daemon Prince: Customizable lord (choose god, gifts, weapons). Very flexible.
Heralds (one per god) - but these are faction locked.
Heroes
Exalted Hero of Chaos: Humanoid melee, can ride daemonic mount.
Sorcerer Lord of Chaos: Caster (Lore of Death, Fire, Metal, etc.).
Unit Roles (Daemons of Chaos)
Melee Infantry: Chaos Warriors (undivided), Daemonettes, Plaguebearers, Bloodletters, Pink Horrors (range).
Cavalry: Chaos Knights (marked).
Monsters: Spawn, Fiends, Soul Grinders, Daemon Princes.
* Artillery: None.
---
9. Other Factions (DLC/Preorder)
Chaos Dwarfs (DLC: Forge of the Chaos Dwarfs)
#### Legendary Lords: Astragoth Ironhand, High Tzeentch sorcerer; Drazhoath the Ashen, fire and daemon expert; Zhatan the Black, melee warlord. All are industrial tyrants with heavy armor, artillery, and daemon engines. Playstyle: slow, powerful infantry, monsters, and devastating artillery (Magma Cannons, Dreadquake Mortars). Unreliable mobility but extreme firepower.
Vampire Coast (DLC from WH2, available in Immortal Empires)
#### Legendary Lords: Luthor Harkon (insane vampire pirate, hybrid fighter/caster), Noctilus (cannon-focused), Aranessa Saltspite (melee, buffs pirates), Cylostra Direfin (ghostly spellcaster). Roles: gunlines, monsters (rotten prometheans, leviathans), and necromancy.
Tomb Kings (DLC from WH2)
#### Legendary Lords: Settra the Imperishable (chariot king), Arkhan the Black (necromancer), Khalida (ranged anti-vampire), etc. Roles: constructs, archers, and free unit recruitment.
---
10. Unit Role Classification (All Races)
While every faction has unique units, the following roles apply universally:
| Role | Description | Examples |
|---|---|---|
| Frontline Infantry | Durable melee units that hold the line. | Chaos Warriors, Ironbreakers, Temple Guard |
| Damage Dealer | High DPS units, often glass cannons. | Har Ganeth Executioners, Flamers |
| Ranged/Artillery | Ranged damage, can be direct fire or indirect. | Cannon, Rocket Battery, Leadbelchers |
| Cavalry | Mobile flankers, can be shock (charge) or skirmish (ranged). | Blood Knights, Outriders |
| Monsters | Large single-entity or monstrous infantry. | Giant, Hydra, Steam Tank |
| Fliers | Air superiority, can harass or snipe. | Dragon, Gyrocopter, Furies |
| Healer | Units that restore health (rare). | Life Wizard, Patriarch |
| Support | Buff/debuff, magic batteries. | War Compass, Astromancer |
| Scout | Fast skirmishers for vanguard deployment. | Goblin Wolf Riders, Sabretusks |
11. Choosing a Main Legendary Lord
- Beginner-friendly: Miao Ying (Cathay), Tyrion (High Elves - not base but common), Katarin (Kislev).
- Advanced micro: N'Kari (Slaanesh), Skarbrand (Khorne), Kairos (Tzeentch).
- Campaign complexity: Be'lakor, Greasus, Ku'gath.
- Multiplayer: Choose lords with strong dueling or army-wide buffs.
This guide covers all core character roles. For in-depth skill trees and items, refer to the Character Skills and All Game Items guides in this series.
Cheats & Secrets
Total War: Warhammer III – Cheats & Secrets Guide
Total War: Warhammer III does not include traditional cheat codes like those found in older games (e.g., pressing keys for instant resources). However, the game does have a hidden developer console that can be enabled, which gives access to powerful debug commands. Additionally, there are numerous Easter eggs, hidden quests, secret items, and community-acknowledged secrets that are safe to use without breaking the game.
This guide covers:
- Enabling and using the developer console
- All known console commands
- Easter eggs and hidden references
- Secret quest battles and unlockable content
- Legendary Lord unlock secrets (free DLC lords)
- Exploit-safe hidden features
---
Developer Console (Debug Mode)
The game includes a debug console that is disabled by default. Enabling it lets you execute cheat commands for testing purposes. Note that using these commands may disable achievements, corrupt save files, or cause instability — always back up your saves before experimenting.
#### How to Enable the Console
1. Navigate to your game installation folder (typically `Steam\steamapps\common\Total War WARHAMMER III`).
2. Open the `assembly_kit` folder (if present) or create a file named `user.scripts` in the game’s root directory. If the folder doesn’t exist, the console might still work with a command-line argument.
3. Right-click the game in Steam → Properties → General → Launch Options.
4. Add the following: `-enable_damage_report -enable_console`
5. Launch the game. During gameplay, press ~ (tilde) or ö (depending on keyboard layout) to open the console.
If the console does not appear, try pressing F10 or ` (backtick). The game may also require the `user.scripts` file with a specific line:
```
console_enabled true;
```
Place that in the `scripts` folder inside the game directory.
#### Verifying It Works
Once the console is open, type `help` to see a list of available commands. The console background will be semi-transparent dark gray with white text.
---
All Known Console Commands
Below is a comprehensive list of verified console commands for Total War: Warhammer III. Use them at your own risk.
| Command | Parameters | Effect |
|---|---|---|
| `add_money` | `amount` (e.g., `10000`) | Adds gold to your faction treasury. |
| `create_unit` | `unit_key` (e.g., `wh3_main_grn_units_black_orcs`) | Spawns a unit of that type under the selected army. Find unit keys in the game files. |
| `treasure` | (none) | Spawns a treasure chest on the campaign map near the camera. |
| `move_character` | `character_name` or `selected` | Moves the selected character to the current mouse cursor location. |
| `toggle_fow` | (none) | Toggles the fog of war on/off. |
| `win_battle` | (none) | Immediately wins the current battle with a decisive victory. |
| `auto_resolve` | (none) | Forces auto-resolve on the current battle. |
| `instant_diplomacy` | (none) | Makes all diplomacy options succeed instantly. |
| `game_speed` | `0.1` to `10.0` | Adjusts game speed (especially useful for battles). |
| `disable_ai` | (none) | Disables all AI factions on the campaign map (they stop moving). |
| `add_agent` | `agent_type` (e.g., `wizard`) | Spawns a generic agent of that type under your control. |
| `add_experience` | `amount` (e.g., `1000`) | Adds experience points to the selected character. |
| `finish_all_buildings` | (none) | Instantly completes all construction in all settlements. |
| `reset_suppression` | (none) | Resets the public order suppression timer for the selected region. |
| `tech_research` | `tech_key` (e.g., `wh3_main_tech_grn_waaagh_1`) | Unlocks a specific technology. |
| `add_ancillary` | `ancillary_key` (e.g., `wh3_main_anc_talisman_of_preservation`) | Adds an item/ancillary to the selected character. |
| `add_agent_action_points` | `amount` (e.g., `100`) | Restores action points for the selected agent. |
| `add_army_abilites` | (none) | Adds all army abilities (like spells/abilities) to the selected army. |
| `show_cursor_coordinates` | (none) | Displays mouse coordinates on screen. |
| `screenshot` | (none) | Takes a screenshot. |
| `quit` | (none) | Exits the game immediately. |
Use the `help` command to list categories, then `help units` or browse the game’s database files (in `data.pack`). Third-party tools like RPFM (Rusted Pack File Manager) can extract keys.
---
Easter Eggs & Hidden References
1. Ursun’s Eyes – In the Realms of Chaos campaign, the eye of Ursun (the bear god) that you collect is actually a reference to the Warhammer tabletop game’s “Eye of the Gods” table. The color of the eye changes based on your alignment.
2. The Roast of Grombrindal – The White Dwarf (legendary hero) has unique voice lines referencing classic Warhammer fan memes, such as “I’m too old for this sort of thing” and “I remember when the world was flat.”
3. Skaven Reference in Loading Screens – Some loading screen tips include subtle nods to the Skaven (e.g., “Be wary of any strange noises beneath your cities…”). This is a long-running Easter egg from previous games.
4. The Zoat (Secret Unit) – In the Total War Access rewards, there is a secret unit called the Zoat. It is a half-man, half-beast creature from Warhammer lore. To obtain it, you must link your Total War Access account to your game and claim the reward.
5. “Blood for the Blood God” DLC – While technically an official DLC, this adds gore and severed limbs. It is considered a “secret” unlock for many players because it is presented as a free DLC but must be manually “purchased” (for $0) from the Steam Store.
6. Crossover Campaign Map – If you own Total War: Warhammer I and II, the combined Immortal Empires map includes hidden references like the “Dragon Isles” (a nod to the warhammer tabletop campaign) and the “Great Maze” of the Chaos Dwarfs (even if you don’t own the DLC).
7. Kislev’s “Ice Court” Quest Battles – The Ice Court has a secret chain of battles that only trigger if you defeat specific armies in a certain order. The reward is a unique legendary item, the Frostwyrm Crown.
8. Tzeentch’s “Weaving of Fates” – Kairos Fateweaver’s campaign has secret dialogue choices during dilemmas that lead to hidden bonuses, such as +100 Winds of Magic or an extra grimoire. These are not documented in the game.
---
Secret Quest Battles & Unlockable Content
Legendary Lords (Free DLC)
- The Ogre Kingdoms were a pre-order bonus but later became a standalone DLC. There is no hidden unlock code; you must purchase the DLC.
- The Champions of Chaos DLC (Azazel, Festus, Vilitch, Valkia) – these characters are not hidden but are added via DLC. /li>
- The Armor of the Sunken Prince – Only obtainable by defeating the Lord of the Deep in the Galleon’s Graveyard (requires Vampire Coast DLC). This armor grants fire resistance and leadership.
- The Great Book of Grudges – A unique ancillary for Dwarf characters, obtained by completing a multi-part quest chain that triggers only if you have not settled any grudges for 20 turns.
- Advanced Diplomacy Manipulation: Offering a single gold piece as a gift repeatedly builds up “reliability” with that faction; this is a mechanic from Warhammer II that remains in III.
- The “Revolt Farm” Exploit (Fixed?): In earlier patches, repeatedly triggering rebellions in a province with high public order penalty allowed farming XP. Creative Assembly patched the XP gain in later updates, but the strategy still works for “prestige” farming.
- Recruiting RoR (Regiments of Renown) with Extra Unit Capacity: You can deliberately disband a unit after recruiting it, then recruit it again at full strength — this was intended for flexibility, not an exploit.
- The “Hero Bomb” Overcast: Using multiple heroes with the “Assault Units” or “Block Army” actions in the same turn is a feature, not a bug. It allows stacking debuffs on a single army.
Hidden Ancillaries
Secret Battle: The Lost Horde of Grimgor – In the Chaos Wastes region, if you send an army to a specific coordinate (approximately (300, 200) on the campaign map), you will encounter a ghostly version of Grimgor Ironhide’s army. Defeating them gives your faction a permanent +10% weapon strength bonus.
The Hidden Treasury – In the Mountains of Mourn, there is a small island accessible only by a coastal province. Landing there triggers a battle against rebel Dwarfs; the reward is 50,000 gold.
---
Exploit-Safe Secrets (Developer-Intended)
These are features that are not obvious but are intentionally added by developers and do not harm gameplay balance when discovered:
---
Conclusion
Total War: Warhammer III offers no built-in cheat codes, but the debug console provides extensive cheat-like powers for personal use. The game is rich in Easter eggs, secret quests, and hidden content that reward exploration and lore knowledge. Always backup saves before using the console, and expect that achievement earning may be disabled. For a pure vanilla experience, the secrets listed here are safe and intended by the developers to be discovered.