
Undertale
## Game Introduction ### Overview **Undertale** is a critically acclaimed role-playing game (RPG) developed and published by indie creator **Toby Fox**. Released on **September 15, 2015**, for Windows, it quickly became a landmark title in the indie gaming scene, known for its innovative mechanics...

Download & Installation
Undertale Download & Installation Guide
This guide covers all official platforms where Undertale is available. Follow the platform-specific instructions for a smooth installation.
---
System Requirements (PC)
#### Minimum:
- OS: Windows 7 (64-bit) or newer / macOS 10.9+ / Ubuntu 14.04+ (64-bit)
- Processor: 2.0 GHz dual-core
- Memory: 2 GB RAM
- Graphics: DirectX 9.0c compatible or OpenGL 2.0+
- Storage: 200 MB available space
- Sound: DirectX compatible sound card
- Additional: Controller support (XInput recommended)
- OS: Windows 10 (64-bit) / macOS 10.12+ / Ubuntu 16.04+
- Processor: 2.5 GHz dual-core
- Memory: 4 GB RAM
- Graphics: DirectX 10 compatible or OpenGL 3.0+
- Storage: 200 MB (SSD preferred)
- Sound: Same as minimum
- Additional: Xbox One or PS4 controller for best experience
#### Recommended:
---
Storage Space by Platform
| Platform | Required Space | Notes |
|---|---|---|
| PC (Steam/GOG) | ~200 MB | Additional ~100 MB for saves & config |
| PlayStation 4/5 | ~500 MB | Includes patches & updates |
| Xbox One/Series | ~500 MB | Includes patches & updates |
| Nintendo Switch | ~300 MB | Cartridge or digital |
| iOS | ~250 MB | Download size |
| Android | ~200 MB | May vary by device |
Platform-Specific Download & Installation
#### 1. PC (Steam)
Official source: [Steam Store](https://store.steampowered.com/app/391540/Undertale/)
Steps:
1. Create or log into your Steam account via the client or web.
2. Purchase Undertale (USD $9.99 / regional pricing).
3. Click "Play Game" → "Install" or go to Library → Undertale → Install.
4. Choose installation location (default: `C:\Program Files (x86)\Steam\steamapps\common\Undertale`).
5. Wait for download (~200 MB).
6. Launch via Steam Library.
Account required: Yes, free Steam account.
#### 2. PC (GOG)
Official source: [GOG.com](https://www.gog.com/game/undertale)
Steps:
1. Create/log into GOG account.
2. Purchase game (DRM-free; no launcher needed).
3. Go to Library → Undertale → Download Installer (offline backup available).
4. Run `setup_undertale_.exe` (or `.dmg`/`.sh` for macOS/Linux).
5. Follow installer prompts (choose directory).
6. Launch via Start menu or desktop shortcut.
Account required: Yes, for purchase only; no online DRM.
#### 3. PC (Humble Store)
Official source: [Humble Store](https://www.humblebundle.com/store/undertale)
Steps:
1. Purchase with Humble account.
2. Receive Steam key; redeem in Steam client.
3. Proceed as Steam installation above.
#### 4. PlayStation 4 / PlayStation 5
Official source: PlayStation Store (PS4/PS5).
Steps:
1. Ensure PSN account is active (paid subscription not required for purchase).
2. Purchase Undertale (PS4 version; PS5 plays via backward compatibility).
3. Download: Console → Library → Purchased → Undertale → Download.
4. Installation is automatic after download.
5. Launch from Home Screen.
Storage: ~500 MB. Account: PSN required (free).
#### 5. Xbox One / Xbox Series X|S
Official source: Microsoft Store (Xbox).
Steps:
1. Sign in to Xbox Live (free account needed).
2. Purchase Undertale from Store.
3. Remote download via mobile app or directly on console: My games & apps → See all → Ready to install.
4. Installation begins automatically.
5. Launch from Home.
Storage: ~500 MB. Account: Xbox Live required (free).
#### 6. Nintendo Switch
Official source: Nintendo eShop.
Steps:
1. Create/log into Nintendo Account (free).
2. Purchase Undertale from eShop (USD $14.99).
3. Download: select game icon → Download (approx. 300 MB).
4. Installation completes automatically when download finishes.
5. Launch from Home Menu.
Physical cart: Insert cartridge, update if prompted (system → Software Update → Via Internet).
Account: Nintendo Account required for digital purchase.
#### 7. Mobile – iOS (iPhone/iPad)
Official source: Apple App Store. Note: Undertale Mobile is a separate purchase, not included with PC version.
Steps:
1. Open App Store.
2. Search "Undertale" (official developer: 8-4 Ltd).
3. Purchase and download (USD $9.99).
4. Installation is automatic after download.
5. Tap to launch. Optional: transfer save from PC via cross-save feature (requires iOS 12.0+).
Requirements: iOS 12.0 or later, iPhone 6s / iPad 5th gen or newer.
Storage: ~250 MB. Account: Apple ID required.
#### 8. Mobile – Android
Official source: Google Play Store. Note: Undertale Mobile for Android is official; same publisher.*
Steps:
1. Open Google Play Store.
2. Search "Undertale" (Developer: 8-4 Ltd).
3. Purchase and download (USD $9.99).
4. Installation proceeds automatically.
5. Open app. Optional: enable save file transfer from PC via cloud or USB.
Requirements: Android 5.0 (Lollipop) or higher, 1 GB RAM recommended.
Storage: ~200 MB. Account: Google account required.
---
First Launch Setup
#### PC (Steam/GOG)
- Language: Game auto-detects system language (English, Japanese, Korean, etc.). No in-game language selector; change via Steam properties → Language tab, or edit `undertale.ini` file (under `%LOCALAPPDATA%\UNDERTALE` on Windows).
- Resolution: Default 640x480 windowed. To change: launch options in Steam (e.g., `-fullscreen` or `-w 1280 -h 720`). Or edit `undertale.ini`:
- Controls: Keyboard (arrow keys, Z/X, Enter/Shift) or controller. Auto-detects XInput. For DualShock/other, use third-party wrappers (DS4Windows, JoyToKey).
- Saves: Auto-saves at certain points; manual save at save points (star).
- Language: System language determines game language (major languages supported). No in-game option.
- Resolution: Output system resolution (up to 1080p on PS4/Xbox One, 4K on PS5/Xbox Series | 720p on Switch docked/480p handheld).
- Controls: Standard controller mapping (no rebinding).
- Saves: Automatic save to console storage (or cloud if PSN/Xbox Live/Nintendo Online).
- Language: System language (supports English, Japanese, Korean, Chinese, French, German, Spanish, Italian, Portuguese, Russian).
- Controls: Touch screen (on-screen buttons; can optionally connect Bluetooth controller). No resolution adjustment.
- Saves: Automatic; can sync with PC via cloud (iOS: iCloud; Android: Google Drive). Requires separate one-time cross-save setup.
```ini
[General]
fullscreen=1
width=1920
height=1080
```
#### PlayStation / Xbox / Switch
#### Mobile (iOS/Android)
---
Common Installation Errors & Fixes
| Error | Platform | Cause & Fix |
|---|---|---|
| "Steam servers too busy" | PC (Steam) | Server overload; wait or restart Steam client. Verify integrity of game files (Library → Properties → Local Files → Verify). |
| "Insufficient disk space" | All platforms | Free up space (see storage requirements above). On PC, move game to another drive via Steam settings. |
| "Failed to start game (missing executable)" | PC (GOG) | Antivirus quarantined `Undertale.exe`. Exclude game folder in AV. Reinstall. |
| "This app can't run on your PC" | PC (Windows) | Install Visual C++ Redistributable 2015-2022 (x86). Run Undertale as administrator (right-click → Properties → Compatibility). |
| "Controller not working" | PC | Use XInput controller. For PS4/5, install DS4Windows. In Steam, enable Steam Input (Controller Settings → Generic Gamepad Support). |
| "Black screen on launch" | PC | Update graphics drivers. Disable overlays (Discord, Nvidia ShadowPlay). Run in windowed mode (`-windowed` launch option). |
| "Purchase not showing on console" | PS/Xbox/Switch | Check region compatibility (game is region-free, but store region must match payment method). Restart console. |
| "Download stuck at 99%" | Switch | Pause and resume download. If persists, archive game and redownload. |
| "Save file not loading" | Mobile | Ensure cross-save is enabled in both PC and mobile. Reinstall app if corrupted. Backup saves from `%LOCALAPPDATA%\UNDERTALE` on PC. |
| "Crash on startup (Windows 11)" | PC | Enable Windows 8 compatibility mode: `Undertale.exe` → Properties → Compatibility → Run this program in compatibility mode for Windows 8. |
Post-Install Verification
After installation, perform these checks:
1. Launch the game – It should start with Toby Fox's logo, then a dark screen with music ("Once Upon a Time"). If you see a white screen, wait a few seconds; if persists, check drivers.
2. Audio test – Listen for music/sound effects. If none, update audio drivers or set default device as stereo.
3. Save test – Reach a save point (first one after intro room) and save. Exit and reload to confirm save persistence.
4. Controller test – Move character with D-pad/left stick, confirm menu navigation with A/B buttons. If not working, reconfigure per platform tips above.
5. File integrity – On Steam: Library → Undertale → Properties → Local Files → Verify integrity of game files. On GOG: GOG Galaxy → Manage installation → Verify. On consoles: No built-in verify, but reinstall if issues.
6. Update check – Ensure latest version (v1.0.1 on PC, equivalent on consoles). Console updates are automatic; Steam updates by default; GOG Galaxy checks on launch.
7. Backup saves – Windows: `%LOCALAPPDATA%\UNDERTALE` (file `file0`, `file9`, `undertale.ini`). macOS: `~/Library/Application Support/UNDERTALE`. Linux: `~/.config/UNDERTALE`. Console saves are backed up to cloud if subscribed. Mobile: sync cloud option.
---
Additional Tips
- Modding: PC version (Steam/GOG) supports mods. Back up original `data.win` and `sound` folders before installing mods.
- Cross-save (PC ↔ Mobile): To transfer, on PC, upload save to cloud (via game's built-in option; requires internet). On mobile, select "Load from cloud" during initial setup.”
---
Undertale is a single-player experience with no online multiplayer. All platforms are region-free. If you encounter an issue not listed, consult the official [Undertale FAQ](https://undertale.com/faq/).

Game Introduction
Game Introduction
Overview
Undertale is a critically acclaimed role-playing game (RPG) developed and published by indie creator Toby Fox. Released on September 15, 2015, for Windows, it quickly became a landmark title in the indie gaming scene, known for its innovative mechanics, deep narrative, and emotional impact. It challenges traditional RPG conventions by emphasizing player choice and consequence, where every action permanently alters the world and story.
Genre, Developer & Publisher
- Genre: RPG, Bullet-Hell, Adventure, Puzzle, Comedy-Drama
- Developer & Publisher: Toby Fox (self-published)
Release Timeline & Platforms
| Platform | Release Date |
|---|---|
| Microsoft Windows | September 15, 2015 |
| macOS, Linux | July 17, 2016 (via Humble Bundle) |
| PlayStation 4, PlayStation Vita | August 15, 2017 |
| Nintendo Switch | October 18, 2018 |
| Xbox One, Xbox Series X\ | S |
| Android, iOS | September 16, 2018 (Japan), later worldwide |
Story Overview
Long ago, two races ruled the Earth: humans and monsters. After a devastating war, the humans sealed the monsters beneath the surface of Mount Ebott using a magical barrier. Centuries later, a human child (the player character, Frisk) falls into the Underground, a vast cavern world where monsters now live. To escape back to the surface, Frisk must traverse the Underground and confront its ruler, King Asgore, who holds the key to breaking the barrier. Along the way, the player meets a colorful cast of monsters, each with their own personalities, struggles, and desires. The story unfolds based on the player's choices: spare or kill every enemy. These choices lead to drastically different outcomes, including the infamous Pacifist, Neutral, and Genocide routes, each offering unique story revelations and endings.
Setting
The Underground is divided into several distinct regions:
- The Ruins: The first area, filled with puzzles and the tutelage of Toriel.
- Snowdin Town: A snowy village home to Sans, Papyrus, and friendly monsters.
- Waterfall: A cave system of glowing waters, echoes of the past, and the reclusive Undyne.
- Hotland & The CORE: A volcanic industrial zone and the high-tech central core.
- New Home & The Barrier: The final area, where Asgore resides and the barrier awaits.
- Frisk: The silent protagonist controlled by the player. Their appearance, gender, and name are customizable at the start.
- Flowey: A cheerful, sinister flower who teaches the player the basics of combat – but harbors dark intentions.
- Toriel: A motherly goat-like monster who protects the Ruins and offers the player a home.
- Sans: A lazy, pun-loving skeleton who keeps secrets and is far more powerful than he appears.
- Papyrus: Sans’s enthusiastic, honorbound brother who dreams of joining the Royal Guard.
- Undyne: The hot-headed leader of the Royal Guard, determined to capture humans.
- Alphys: A nervous, socially awkward scientist who runs the lab in Hotland.
- Mettaton: A flamboyant robot entertainer with his own TV show, seeking to capture the human.
- Asgore Dreemurr: The king of monsters, a tragic figure who reluctantly seeks the human’s soul to break the barrier.
- Chara: The first human to fall into the Underground, whose ghost lingers and influences events.
- Indie game enthusiasts who appreciate storytelling innovation.
- RPG fans seeking a fresh take on the genre without grinding.
- Players of all ages (though some themes of violence and redemption are mature).
- Speedrunners and secret hunters – the game has a dedicated community for breaking runs and discovering Easter eggs.
- Fans of bullet-hell and puzzle games – combat combines turn-based strategy with real-time dodge mechanics.
- Offline play: Full single-player experience, no internet required after installation.
- Online features: None. No multiplayer, no leaderboards, no DLC delivery.
- Cloud saves: Supported on Steam and some console platforms.
- The Mercy System: A truly non-violent path is not only possible but rewarded with the best ending.
- Meta-Narrative: The game is aware of saving, loading, and resetting. Characters remember your actions across playthroughs.
- No Grinding: Levels are earned through exploration and choices, not random battles. The game can be completed without fighting at all.
- Emotional Depth: Despite its cute pixel art, Undertale tackles themes of loss, determination, forgiveness, and redemption.
- Community & Fandom: The game spawned a massive fanbase, endless fan art, and theories. Its music, especially songs like “Megalovania,” became iconic.
- Replayability: The distinct routes mean each playthrough offers new dialogue, bosses, and endings. True understanding requires at least two playthroughs.
The world is rich with lore, discovered through environmental storytelling, dialogue, and hidden secrets. The soundtrack, composed entirely by Toby Fox, is iconic and deeply integrated into the emotional beats of the game.
Main Characters
Core Appeal
Undertale’s core appeal lies in its subversion of RPG tropes. It deconstructs the idea that combat is the only solution. The “Mercy” system allows players to talk, act, or spare enemies, often resolving conflicts through understanding and kindness. The game remembers everything – even after a reset – and characters comment on your past actions. This creates a deeply personal, meta-narrative experience. The humor is sharp, the emotional weight is heavy, and the multiple endings reward exploration and empathy.
Target Audience
Game Modes
Undertale is single-player only. There are three main story routes, each considered a ‘mode’ in narrative terms:
1. Pacifist Route – Spare every monster and befriend key characters. Ends with the true final boss and a heartwarming conclusion.
2. Neutral Route – A mix of kills and mercy. Multiple endings depend on who survives.
3. Genocide Route – Kill every monster in every area. Unlocks a horrifying ending and the hardest boss in the game.
There is no New Game+ in the traditional sense, but after completing any route, the player can reset. However, a true reset only occurs after wiping the game’s files or completing a specific condition.
Online/Offline Support
DLC/Expansion Overview
Undertale has no official DLC or expansions. Toby Fox has stated he considered the game complete upon release. However, there is a related game, Deltarune (Chapters 1 & 2), which is a separate title sharing thematic and narrative connections but is not DLC for Undertale. Undertale’s full experience is contained within the base game: all endings, secrets, and lore are accessible without additional purchases.
What Makes Undertale Unique?
In summary, Undertale is not just a game – it’s an experience that challenges what a game can be, making players question their morality while delivering an unforgettable story. Its compact length (roughly 6–10 hours per route) makes it easy to revisit, and its secrets reward the curious. Whether you choose to fight, flee, or befriend, the Underground will never forget you.
Getting Started
Getting Started
Welcome to Undertale! This guide is designed to help you through your first hour and beyond. Undertale is an RPG with a deep emphasis on choices and consequences. There is no character creation in the traditional sense—you name the human protagonist at the start, but this name mostly appears in dialogue and affects nothing mechanically. Your personality and playstyle define your character.
First Hour Walkthrough
1. Opening: After the title screen, you will be prompted to enter your name. This becomes the protagonist's name. You can type anything (even \"Chara\"), but it's simply an identifier.
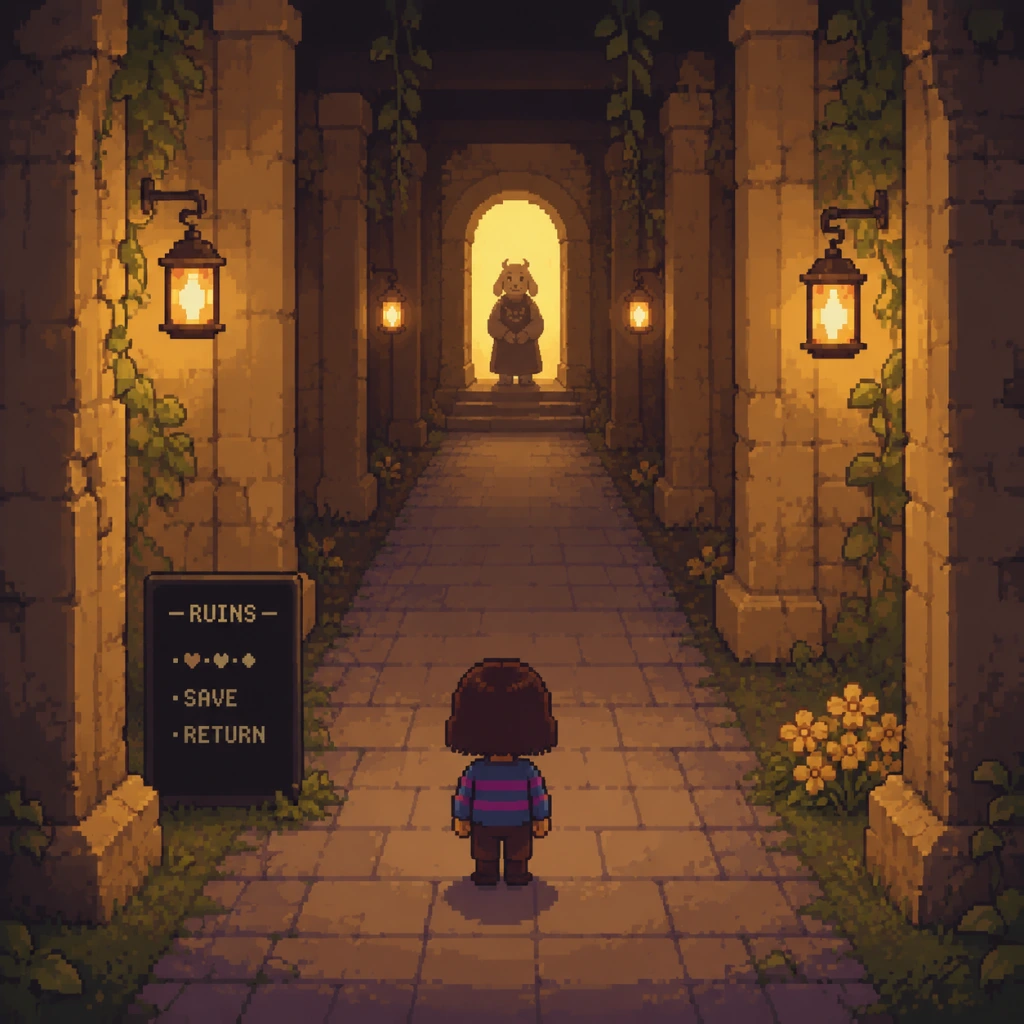
2. The Fall: Your character falls into a large hole, landing in a bed of golden flowers in a place called the Ruins. You are alone.
3. Encounter Flowey: A small, smiling flower introduces himself as Flowey. He teaches you how to navigate the bullet-heart battle system. Crucial: He will offer you \"friendliness pellets.\" Do not collect them. Stay still and let them pass. This teaches you that not everything is friendly. Flowey then reveals his true colors and attacks.
4. Toriel Appears: A goat-like monster, Toriel, saves you, scares Flowey away, and takes you to her home in the Ruins. She will guide you through the first puzzles.
5. The Ruins Tutorial: Toriel shows you how to interact (Z key or A button), how to move (arrow keys or D-pad), and how to solve simple puzzles (push blocks, navigate spikes). Follow her instructions.
6. First Battles: After a few rooms, you'll encounter your first random Froggits. Toriel encourages you to either \"FIGHT\" or \"ACT\" (to spare). Ideal first choice: Try to spare them. Use the MERCY menu. You will see a \"Spare\" option when the monster is sufficiently weakened or calmed by ACT commands like \"Compliment\" or \"Threaten.\" Do not kill any monsters if you can help it—this is the key to the game's most popular path.
7. Nap Time: Toriel will offer you a slice of pie and some butterscotch-cinnamon pie at her house. Eat it to restore HP. Save at the star-shaped save point in the living room.
8. Exiting the Ruins: Toriel will eventually block the exit to prevent you from leaving (she wants to protect you). You must solve a series of puzzles and finally confront her. You can choose to fight or spare her. Spare her by lowering her HP to near zero and then repeatedly using the MERCY option—she will spare herself.
9. The Journey Begins: After sparing Toriel, you exit the Ruins into the larger world of Snowdin. This marks the end of the first hour.
Controls on All Platforms
| Action | PC (Keyboard) | Nintendo Switch | PlayStation 4/5 | Xbox One/Series | Mac/Linux (keyboard) |
|---|---|---|---|---|---|
| Move | Arrow keys | Left stick / D-pad | Left stick / D-pad | Left stick / D-pad | Arrow keys |
| Confirm / Interact | Z / Enter / Space | A | X (PlayStation) / A (Xbox) | A | Z / Enter / Space |
| Cancel / Back | X / Shift / Esc | B | Circle (PS) / B (Xbox) | B | X / Shift / Esc |
| Menu | C / Tab | Y | Triangle (PS) / Y (Xbox) | Y | C / Tab |
| FIGHT | Z / Enter | A | X (PS) / A (Xbox) | A | Z / Enter |
| ACT | X | B | Circle (PS) / B (Xbox) | B | X |
| ITEM | C | Y | Triangle (PS) / Y (Xbox) | Y | C |
| MERCY | V | X | Square (PS) / X (Xbox) | X | V |
UI Overview
- Health (HP): Represented by a red heart below the battle menu. Also shown as a number in the menu.
- Soul (Heart): Your heart is your HP and can be moved with the arrow keys during enemy attacks.
- Action Menu: At the bottom of the battle screen, four options: FIGHT, ACT, ITEM, MERCY.
- Enemy Info: Above the action menu, the enemy's name and sometimes a box with their current HP (if you have checked them). A yellow bar indicates their health.
- Name and LV (Love): LV is your "Level of Violence." It increases by killing monsters. Displayed in the menu. Lower is better for a pacifist run.
- Save Points: Golden spinning stars. Save before major events. Only one save file per playthrough.
- Inventory: Accessed via the menu (C key or Y button). Holds up to 8 items. Healing items, key items, etc.
- Gold (G): Currency earned from sparing monsters or selling items.
- Follow Toriel's instructions completely.
- Try to spare the first Froggit you encounter. Use ACT -> Compliment, then ACT -> Threaten, then MERCY. If it doesn't work, try again with different ACT options.
- Collect the Butterscotch Pie and the Spider Donut (if you buy it with gold you find).
- Save at every star save point.
- Killing anything in the Ruins. It locks you out of the true pacifist ending and changes the game's story.
- Rushing through puzzles. They are simple but skipping them can cause confusion.
- Ignoring Flowey's warnings. He is not trustworthy, but his dialogue hints at important mechanics.
- Using the FIGHT command unless you intend to kill. Each kill adds EXP and LV, which permanently affects dialogue and endings.
- Spending all your gold on early items. Save at least 10G for the Spider Bake Sale (you can buy the Spider Donut later—the shop appears in multiple areas).
- Health Items: Prioritize collecting at least 2-3 healing items (Pie, Spider Cider, and the Bandage you start with can be used as an item).
- Gold: Use gold to buy the Tough Glove in the SAVE room in Snowdin (after Ruins) if you plan to fight—but for pacifist, you might prefer the Toy Knife (found free) or the Butterscotch Pie (free).
- Save Points: Always save before boss fights (Toriel, Papyrus, etc.) and before areas with lots of enemies.
- Key Items: The Cell Phone (given by Toriel) is important for calling characters later. Always keep it.
- [ ] Start a new game and choose a name.
- [ ] Survive Flowey's introduction (do not collect his pellets).
- [ ] Follow Toriel through the Ruins puzzles.
- [ ] Collect the Butterscotch Pie and Spider Donut (optional but recommended).
- [ ] Spare all monsters encountered (Froggits, Moldsmals, etc.).
- [ ] Save at the star save point in Toriel's home.
- [ ] Complete the Ruins puzzles to reach the exit.
- [ ] Spare Toriel (do NOT kill her).
- [ ] Exit the Ruins to Snowdin.
- [ ] Save at the first save point in Snowdin.
- [ ] Talk to Sans and Papyrus (they will appear near the Snowdin mailbox).
- [ ] Equip the Toy Knife and Faded Ribbon (found in Ruins) or buy the Tough Glove if you want stronger gear for fighting. (Ribbon gives defense, Knife gives attack.)
- [ ] Adjust your mindset: You are here to experience a story, not just to defeat enemies.
Essential Early Objectives
1. Understand the MERCY system: Learn to spare monsters. This is the most important skill.
2. Solve puzzles in the Ruins: Pay attention to Toriel's hints.
3. Collect healing items: Pie, Spider Donut (if you buy one), Spider Cider, etc.
4. Save frequently: Especially after progress or before hard encounters.
5. Talk to everyone: NPCs give hints, lore, and sometimes items.
6. Decide your moral path: For the first playthrough, most players recommend the True Pacifist Route (spare everyone). To achieve it, you must never kill any monster, and you must befriend certain characters (Papyrus, Undyne, Alphys) later.
What to Do First and What to Avoid
Do First:
Avoid:
Early Resource Priorities
Common Beginner Mistakes
1. Killing Toriel: She can be spared. If you fight and kill her, you will feel bad forever. To spare: reduce her HP to about 10-20%, then repeatedly use MERCY. She will spare herself.
2. Ignoring the ACT menu: Many monsters have specific ACT commands that make them easier to spare. Experiment.
3. Not saving: There is only one save slot. If you overwrite a save, you lose progress. Save only when you are sure.
4. Thinking you need to grind: Undertale does not require grinding. You can beat the game at LV 1. Killing monsters makes the game harder in the long run (some bosses scale with your LV).
5. Choosing the wrong name: Your name affects nothing. Don't worry about it.
6. Not returning to Toriel's house after the Ruins: Once you leave, you cannot go back to the Ruins on that save file (until new game+). Make sure you've done everything there if you're a completionist.
Day-One Checklist
Remember: Undertale responds to your actions. Your choices matter. Have fun, and don't be afraid to make mistakes—but sparing everyone on your first run is the most rewarding way to see the full story.
Core Gameplay
Core Gameplay Guide
Undertale is a story-driven RPG where your choices determine not just the outcome, but how you experience the entire journey. The core gameplay loop revolves around exploration, puzzle-solving, and a unique combat system that blends bullet hell with non-violence options. There are no traditional experience points or level-ups in the normal sense—instead, LV (LOVE) and EXP (Execution Points) scale with the number of monsters you kill. Because of this, progress is measured by your moral alignment as much as by your stats.
---
Main Gameplay Loop
1. Explore areas: The Ruins, Snowdin Town, Waterfall, Hotland, The Core, New Home.
2. Interact with NPCs and solve environmental puzzles (e.g., shifting colors on bridges, pushing rock barriers).
3. Encounter monsters in random encounters (or scripted bosses).
4. Combat Phase:
- FIGHT: Attack with a timed button press (higher damage if you strike the soul target).
- ACT: Show mercy (Spare, Talk, Threaten, etc.) or use special actions unique to each monster.
- ITEM: Use healing items or equipment.
- MERCY: Attempt to spare after weakening or pacifying, OR flee.
5. Dodge during the enemy’s attack (soul moves in a small box; avoid projectiles).
6. After the encounter, gain or lose G (gold), items, and potentially LV/EXP.
7. Save at save points (yellow stars) to restore HP and store progress.
8. Return to save points to rest and re-enter areas.
---
Progression Tiers Overview
Undertale’s progression is non-linear in terms of choice but linear in geography. The game is short (6-8 hours for a first playthrough) and the “tiers” correspond to the main zones plus the branching endings.
| Tier | Main Location(s) | Key Events |
|---|---|---|
| Early Game | The Ruins | Tutorial, meeting Flowey and Toriel, learning Spare mechanic. |
| Mid Game | Snowdin + Waterfall | Encounter Papyrus, Undyne, solving puzzles, shops open. |
| Late Game | Hotland + The Core | Mettaton, Alphys’s lab, final puzzles, preparing for the final area. |
| Endgame | New Home + Judgement Hall | Final bosses, True Lab (if Pacifist), various route endings. |
Early Game (The Ruins)
Timeframe: First 30-60 minutes.
Exploration & Puzzles
- Flowey’s introduction forces you to learn the bullet hell dodging by trapping you in a circle of seeds.
- Toriel’s pie puzzle: Step on specific tiles to open the door.
- Moldbygg puzzle: Push a rock onto a switch to open a door.
- Toriel’s hallway: A mini-boss fight with a dummy (this is a safe place to test attacks).
- Moldsmal, Whimsun, Froggit, Napstablook (ghost monster that cannot be killed normally).
- Only FIGHT and ACT are fully available; you have no ITEM yet until Toriel gives you the Pyrope and Butterscotch Pie.
- Key lesson: Using ACT > Check reveals monster info; ACT > Compliment or ACT > Flirt with certain monsters reduces health, allowing a Spare option.
- Toriel fights you—defeat her by Spare options after several turns (she will eventually let you go if you are merciful). If you kill her, it locks you into a darker route.
- LV (LOVE) starts at 1. Killing any monster raises it (e.g., killing a Froggit gives 1 LV).
- HP starts at 20. Killing a monster adds +2 HP per LV. Mercy gains no HP increase.
- Equipment: Toriel gives you a Stick (weapon, ATK +0) and a Bandage (armor, DEF +0).
- Items: Butterscotch Pie (full restore) is a key healing item.
- G (Gold): Earned by defeating monsters (killing or sparing). G is scarce early game. You can find coins in the Ruins.
- No shops in the Ruins. Save your G for later shops in Snowdin.
- Learn to Save Saves (Flowey forces a save, then Toriel shows you how to save manually).
- Escape the Ruins by passing through the door to Snowdin.
- Snowdin Town: Interact with all NPCs—shopkeeper, inn, library, grillby’s.
- Puzzle bridge: Use the dog key to change bridge colors or solve the color-matching puzzle.
- Papyrus’s traps: Slide puzzles, spiked floors, and a giant cannon.
- Waterfall: Dark area with echo flowers, hidden pathways, and small platforming via temporary bridges.
- Undyne’s chase: A running segment where you must avoid contact; hit checkpoints by examining glowing panels.
- Papyrus: A challenging but merciful fight. Use ACT > Spare or ACT > Threaten to lower his HP without kills. He can be spared after a few turns of “coolness” check.
- Greater Dog, Lesser Dog, Ice Cap, Snowdrake, Tempera (papyrus fight).
- Undyne (first meeting): She chases you; if caught, you fight her but she retreats quickly. Killing her is possible but locks out True Pacifist.
- Mad Dummy: Bullet hell boss in Waterfall. He can be spared by using ACT > Talk and then Mercy after some turns.
- Snowdin Shop: Sells items like Bisicle (heals 11 HP), Temmie Flakes (later unlocked with Temmie money), Glamburger (heals 7 HP).
- Grillby’s: Sells Steak (heals 25 HP) for 30G—expensive but valuable.
- G runs: You can grind for G by walking back and forth in long hallways to trigger encounters.
- Best early weapon: Tough Glove (ATK +5) from the Snowdin shop (80G) or the Ballet Shoes (ATK +7) from the Waterfall vendor.
- Armor: Old Tutu (DEF +3) in Snowdin (found in a bush near the inn).
- LV stays low if you spare. Killing monsters here can push you to LV 5-6 by the end of Waterfall.
- HP caps at 20 without kills; killing a few might give more HP but lower your chances of true pacifist ending.
- Defeat Papyrus without killing him (he becomes a friend).
- Survive Undyne’s chase and reach the cooking show (Hotland entrance).
- Hotland: Lava puzzles, conveyor belts, and timing-based obstacles (e.g., moving platforms).
- Mettaton’s gauntlet of deadly traps: You must solve puzzles while being watched by Alphys.
- Lab: Alphys’s True Lab (secret area discovered only in the True Pacifist route after the game).
- The Core: Final dungeon with teleporters, laser puzzles, and rotating rooms.
- Mettaton: Multiple forms. The first fight is a quiz show where you answer questions correctly to reduce his HP; do not fight directly.
- Mettaton EX: A dance fight where you must ACT > Show and then dodge his attacks. Spare by using ACT > Boast several times.
- Hotland enemies: Vulkin, Laser, Final Froggit, Scarf dragon—many can be spared with specific ACTs.
- The Core enemies: Madjick, Knight, Whimsalot—more complex bullet patterns.
- Mettaton’s gift shop sells Mettaton Box heals (30 HP) and Mettaton Burger (heals 40 HP) for high G.
- Temmie Village: Unlock by buying a Temmie Flake from the Snowdin shop and then showing it to the Temmie in Snowdin’s hidden part. After that, Temmie shop in Waterfall sells Temmie Armor (DEF +20) for 9999G (but gradually cheaper if you “convince” Temmie). Also sells Temmie Flakes (heals 10 HP).
- G is abundant if you fight encounters; you can easily have 2000-3000G by the Core.
- Best weapons: Burnt Pan (ATK +10) from Hotland shop (hidden after Mettaton fight), Real Knife (ATK +15) for Genocide route only.
- Armor: Temmie Armor (DEF +20, heal 1 HP per step) is top-tier for Pacifist. Also Cowboy Hat (DEF +12) from a side quest in the Core.
- LV stays capped at 6 if you spare all; killing any major boss raises it quickly (e.g., Mettaton EX yields 5 LV).
- HP can reach 92 if you max out kills (Genocide).
- Defeat Mettaton EX (heal with items; dodge well).
- Enter the Core and confront Dr. Alphys after solving the final puzzle.
- Trigger the Queen’s monologue in the Core—this sets up the endgame.
- New Home: Walk through the silent hall, examine the mirror, read the “notices” on the walls. There is a final save point before the Judgement Hall.
- Judgement Hall: A corridor with a giant door. Sans waits here if you have killed anyone; if you are a true pacifist, he is not present.
- Unlocked by completing the game without killing any monster and having a certain friendship level (must be friends with Papyrus, Undyne, Alphys; do the “date” with Papyrus, deliver Undyne’s letter to Alphys).
- Final Boss: Asriel Dreemurr. A multi-phase fight with ACT> Hope and Act> Dream. You must survive his massive attacks (hope fills a meter). The fight is emotional; you cannot die; it’s symbolic. Spare him at the end.
- True Lab: Optional but essential for Pacifist. Hidden in Hotland’s lab—find the hidden panel with a bat, solve the puzzle to open the door. Inside: monster hybrids, story about Amalgamates. This content adds depth but not combat.
- Ending: All monsters return to the surface; you are friends with everyone.
- Final Boss: Photoshop Flowey (Omega Flowey). A bullet hell where you have to survive six patterns and then shoot him with the yellow soul. After his defeat, the game ends with a phone call detailing consequences.
- Ending Varies based on kills. Some characters may become kings, etc.
- Prerequisite: Exhaust all killable enemies in each zone until “Nobody came.”
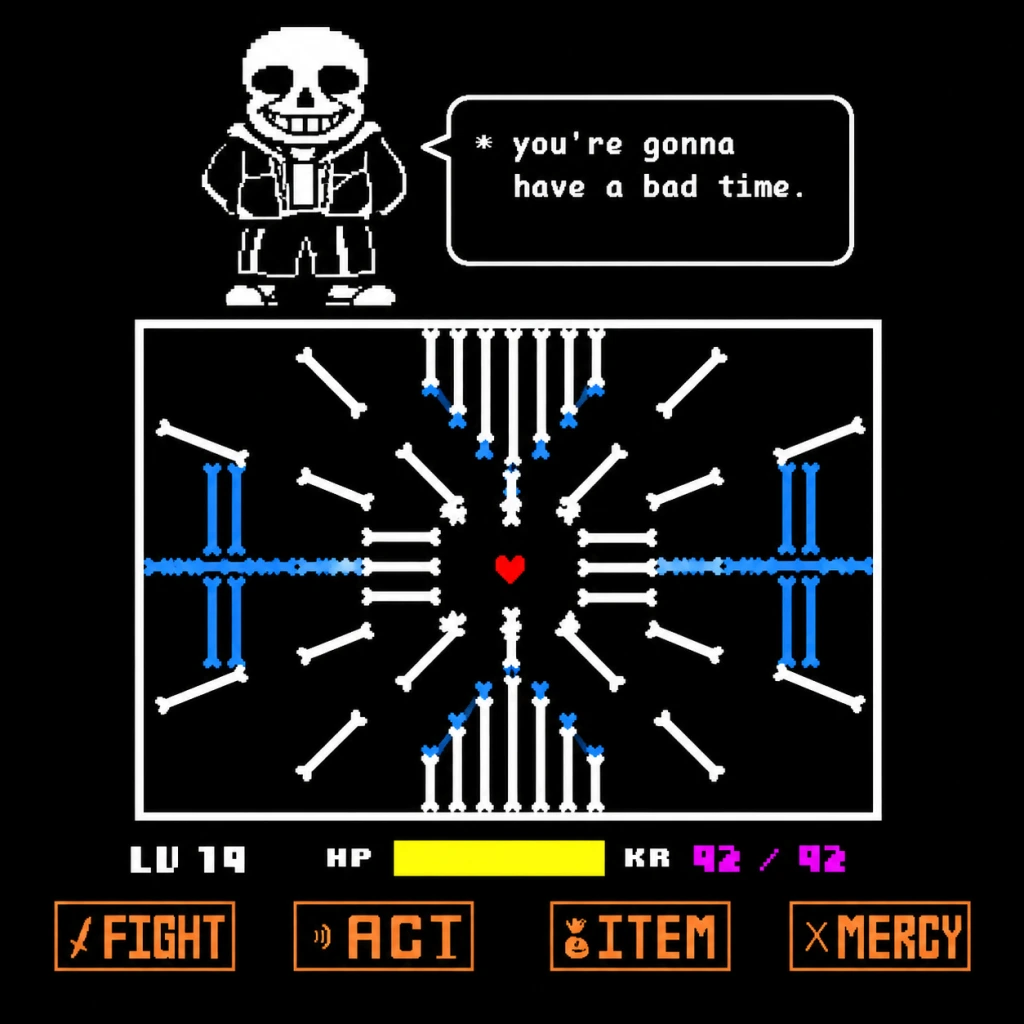
- Final Boss: Sans. Extremely hard—Sans’s attacks are unpredictable and do 1 damage, but you cannot heal. You must survive 15+ consecutive turns while landing perfect attacks. Each hit heals you? No, you have to use Act> ??? and dodge. The fight is a memorization of patterns. After killing Sans, Chara takes over and you erase the world.
- Ending: Game over; world is destroyed.
- Endgame LV: Pacifist max LV 2? Actually, if you killed Toriel you’ll have LV 2. If you kill no one, LV stays at 1 throughout. True Pacifist ending has LV 1.
- Neutral Route: LV can be anywhere from 2 to 19 depending on kills.
- Genocide: LV 20 cap (maximum). HP 92, ATK 99, DEF 99.
- Best equipment for each route:
- Healing items: Butterscotch Pie (best for final fights), Legendary Hero (heals all HP) found in True Lab, Bisicle (11 HP) for cheap heals.
- G becomes irrelevant in endgame; you likely have 9999G if you played normally.
- Last shop: Gerson’s shop in Waterfall (sells Tough Glove and Sea Tea—Sea Tea speeds up soul movement in next battle).
- Mettaton Resort: Heal for free before the Core.
Combat & Interaction
Character/Build Growth
Economy
Progression Milestones
---
Mid Game (Snowdin + Waterfall)
Timeframe: 1-3 hours.
Exploration & Puzzles
Combat & Interaction
Shops & Economy
Character/Build Growth
Progression Milestones
---
Late Game (Hotland + The Core)
Timeframe: 3-5 hours.
Exploration & Puzzles
Combat & Interaction
Economy
Character/Build Growth
Progression Milestones
---
Endgame (New Home + Judgement Hall + Routes)
Timeframe: 5-8 hours (depending on route).
Exploration & Puzzles
Combat & Interaction (Route-dependent)
#### 1. True Pacifist Route
#### 2. Neutral Route (any mixed kills)
#### 3. Genocide Route (kill every possible encounter)
Character/Build Growth
- Pacifist: Temmie Armor + Burnt Pan or Stick (for low ATK).
- Genocide: Real Knife (ATK +99) and The Locket (DEF +99).
Economy
Endgame Structure Summary
| Route | Final Boss | Requirements | Outcome |
|---|---|---|---|
| True Pacifist | Asriel Dreemurr | 0 kills, all friends, True Lab cleared | Happy ending, everyone freed |
| Neutral | Photoshop Flowey | At least 1 kill (or no friendship) | Phone call epilogue, monsters stay underground |
| Genocide | Sans | Kill every possible monster in all zones | World erased, Chara takes over |
Additional Core Systems
#### Save/Load System
- Save points are yellow stars. You can save anywhere by interacting with them. They restore HP and store progress.
- Flowey can overwrite saves; Sans checks your save file for kills.
- True Reset (after any ending) resets the world entirely; Hard Mode (name yourself “Frisk” and delete the file? Actually Hard Mode is a specific name “Frisk” — not recommended for first playthrough).
- No formal quest log. All progression is story-driven.
- Side tasks:
- Soul Colors:
- Bullet Patterns: Every boss has unique patterns; some are memorization (Papyrus’s attacks), others are random (Asgore).
- Mercy System: Use ACT > Check to see what action reduces the monster’s “HP” (often just your turn count). Then use Spare after enough turns.
- Always choose Mercy first in early game to learn the mechanics without guilt.
- Talk to everyone—NPCs give hints and lore.
- Save often after major events, but don’t rely on load scumming for moral decisions (the game remembers).
- Don’t bother grinding G until Hotland; Snowdin shop is sufficient.
- If you want True Pacifist, never press the Fight button in combat—use ACT to spare all monsters. Defeating bosses via ACT still counts as merciful.
- True Reset: After any ending, you can reset from the main menu. The game tracks your previous choices (Flowey may reference them).
- Speedrunning: Undertale has a vibrant speedrun community for all routes.
- Challenge Runs: No items, no healing, LV 1 Pacifist (hard), etc.
- Secret Boss: The Dog in Snowdin can be fought if you examine the statue with the “legendary artifact.”
#### Quest/Mission Structure
- Papyrus’s adventure (Snowdin).
- Undyne’s cooking lesson (after giving her the letter).
- Temmie Village (collecting items for Temmie).
- Gerson’s shop (buy his wares).
- Mettaton’s resort (skip if you don’t participate).
#### Combat Mechanics Deep Dive
- Red: Normal movement (dodge).
- Blue: Gravity pulls you down (jump to avoid).
- Orange: Must not move (stay still to avoid damage).
- Yellow: Gain a gun to shoot (only in certain fights like Mettaton EX).
#### Tips for New Players
---
Post-Endgame Options
---
Conclusion: Undertale’s core gameplay is about the journey, not stat growth. Every mechanic—combat, puzzles, decisions—feeds into the moral narrative. Understanding the tiers helps you anticipate difficulty spikes (e.g., Papyrus vs. Undyne vs. Sans) and plan your route accordingly. Whether you choose the path of mercy or destruction, the game adapts to your playstyle, making each playthrough unique.

Game Tips
Game Tips Guide
This guide provides a comprehensive collection of tips for Undertale, organized by category. Whether you are a first-time player or a seasoned veteran looking for hidden secrets, these strategies will help you navigate the Underground with confidence.
---
Beginner Tips
- Listen to Flowey’s ‘friendly’ tutorial, but be wary. Toriel’s advice is much more trustworthy. Flowey will try to trick you—pay attention to the game’s themes of choice and consequence from the start.
- Save often. Saving is available at star-shaped save points. You can save manually by interacting with them. This is crucial before bosses or difficult encounters.
- Examine everything. Talk to every NPC, read signs, and inspect objects. Undertale hides lore, jokes, and hints everywhere.
- Don’t spam the ‘Fight’ button. The battle system is turn-based, so take your time to read enemy dialogue and consider your options (Act, Mercy, Item, etc.).
- Learn the bullet patterns. Each enemy has unique attack patterns. Practice dodging; the heart (your soul) moves slowly at first, but you can predict patterns after a few attempts.
- Mercy is a valid option. You don’t have to kill anyone. Use ‘Spare’ or ‘Act’ to pacify enemies, especially if you aim for a Pacifist route.
- Use the ‘Act’ command wisely. Each enemy has specific actions that can lower their HP without fighting. For example, complimenting or flirting with certain monsters can make them tired or calm. Experiment!
- Check enemy stats. Use the ‘Check’ option (under Act) to see enemy ATK, DEF, HP, and hints. Knowing their weakness is half the battle.
- Item usage in battle is free. You can use items without ending your turn. Healing items like Monster Candy or Spider Donuts can save you during long fights.
- Defense matters. Some items and equipment boost DEF, reducing damage. Equip the best armor you can find.
- Mercy doesn’t always work instantly. If an enemy’s name is yellow, you can Spare them. If not, you must Act first to make them calm (e.g., ‘Tickle’ for Papyrus, ‘Joke’ for lesser dogs).
- Toriel: If you want to spare her, don’t attack. Keep using ‘Spare’ or ‘Act’ (talk, etc.) until she stops fighting. This is the first test of your mercy.
- Papyrus: Use ‘Act’ > ‘Joke’ or ‘Flirt’ to make him drop his guard. When his name turns yellow, Spare him. He will eventually give up.
- Undyne (Pacifist): After a certain point, keep running away (use the ‘Spare’ option repeatedly) or ‘Act’ > ‘Flirt’ (but only after the date). Use healing items.
- Mettaton EX: Use ‘Act’ > ‘Boast’ or ‘Flex’ to raise his ratings. When he’s emotional enough, you can ‘Spare’ him. Keep the fight entertaining.
- Sans (Genocide route): The hardest boss. Memorize his attack patterns—he uses karmic retribution (poison damage). Learn to dodge blue bones and moving platforms. Use the best equipment (Sea Tea to speed up). Save often before him.
- Asgore (Neutral route): His attacks are powerful. Use the ‘Fight’ command sparingly; he can be pacified after lowering his HP to a certain point, but it’s tricky. Use high-defense items like the Cowboy Hat.
- Check every room thoroughly. Hidden nooks often contain items, secrets, or NPCs. For example, the hidden room in the Ruins with a moss bed (heals you).
- Interact with objects multiple times. Some items only appear after a second interaction, like the mysterious door in Waterfall that opens after talking to the clam girl.
- Talk to NPCs after major events. Their dialogue changes frequently, revealing story details and side-quests.
- Try to backtrack. After obtaining a new ability (like the cell phone from Sans), revisit earlier areas. You might find new interactions or shortcuts.
- Pay attention to the environment. Color changes (e.g., purple in Waterfall) indicate danger or special mechanics. The green shimmer in certain rooms signals a hidden path.
- The Cell Phone is your best friend. Use it to call Papyrus or Sans for tips, jokes, or even puzzle hints.
- Don’t hoard too much. You can carry up to 8 items. Balance healing items with key items. Sell excess to Tem Shop for gold.
- Monster Candy: Free and available early—grab it. It heals 10 HP.
- Spider Donut/Bug: Heal 12 HP. Buy from the spider bake sale in Ruins or Hotland. The donut is cheaper.
- Sea Tea: Heals 10 HP but also increases your speed for the fight—very useful for dodging.
- Legendary Hero: Heals 40 HP, found in Alphys’s lab. Save for tough boss fights.
- Instant Noodles: Heals 15 HP but only if eaten in battle; outside, it does nothing special.
- Gold is used to buy items and upgrade equipment. Earn gold by defeating monsters (if you kill), selling items, or finding it.
- Tem Shop sells rare items cheaply. But be careful—the price might be higher if you’re rich.
- Sell equipment you no longer need. The shop in Snowdin town buys weapons/armor.
- Donate gold to the beggar in Hotland? He rewards you with a nice item later.
- Weapons and armor affect your stats. The ‘Torn Notebook’ and ‘Faded Ribbon’ are decent starting gear. Sell them later for better.
- The ‘Burnt Pan’ (found in Hotland) increases healing item effectiveness by 1-2 HP—great for longer routes.
- The ‘Cowboy Hat’ gives high DEF but doesn’t reduce karma damage; use it for physical fights.
- The ‘Locket’ is a sentimental item, but also good for defense.
- Weapon choices: ‘Worn Dagger’ (better ATK) vs. ‘Toy Knife’ (lower ATK but boosts invincibility frames).
- Most puzzles are optional. If you can figure out the solution, great. If not, often there is a simpler way (e.g., walking around the colored tile grid in Snowdin).
- Read the instructions. Usually a sign or NPC gives the solution. Pay attention to color sequences.
- Use the ‘Red’ heart color to your advantage. In puzzles involving colored switches, your soul’s color might affect which ones you can interact with.
- In Waterfall, the echo flowers give clues. Stand near them and wait for hints.
- The flower puzzle in the Ruins: Follow the same pattern as the door in the previous room (hint: walk into the 4th flower from the left, then 2nd, etc.).
- Don’t force solutions. If stuck, try ‘Act’ on environment objects—sometimes you can trick them.
- Choices are permanent. Every fight, every conversation can affect the ending. Keep multiple save files if you want to explore different routes.
- Sparing enemies is key for Pacifist route. You must not kill a single monster. Use ‘Mercy’ and ‘Act’ to pacify them.
- Killing certain characters changes the story. For example, killing Papyrus results in a very different dialogue from Sans later.
- Flirt with everyone? In Pacifist, flirting can calm some enemies, but it can also backfire (e.g., with Undyne).
- The True Lab is accessible only on a Pacifist route after completing the final boss. Go through Alphys’s lab to unlock the true ending.
- Genocide route requires eliminating all monsters in each area. This is a deliberate, grim path. Be warned—it permanently alters the game’s ending.
- The Annoying Dog. A white dog appears occasionally. If you interact, you might get items or a special fight. Try using a specific key item (like the Dog Residue) on it.
- Mystery Man in Hotland—talk to him multiple times for a unique dialogue chain.
- The Gray Door in Waterfall leads to a secret area with a fountain that restores HP and a hidden boss—only accessible after certain conditions.
- Amalgamates in the True Lab—don’t fight them; use ‘Act’ to calm them for unique scenes.
- Feedback from Sans can be hilarious—call him at specific moments or after certain bosses for cryptic comments.
- The secret bosses: Gaster followers appear rarely; one is hidden outside a save point in Hotland. Talk to them for lore.
- Fun values: The game has hidden events triggered by “Fun” values in your save file. These can be manipulated for rare encounters (e.g., Wrong Number Song).
- Reset after beating the game once? No need—you can reload a save before Asgore to go back and complete all prerequisites (befriending Papyrus, Undyne, Alphys).
- Befriending Undyne: After her boss fight, go back to her house in Waterfall. Deliver a letter from Papyrus, then go on a date with her (via Papyrus’s secret call).
- Befriending Alphys: After delivering the letter, head to Alphys’s lab in Hotland. She will ask for help with her Anime Club—agree, then visit the True Lab.
- Sparing Asriel: The final boss is a bullet-hell gauntlet. Memorize patterns—especially the hyper-gauntlet at the end. Use healing items like Legendary Hero and Quick Hander for speed.
- Kill selectively to see different endings. Try killing only Papyrus, or only Mettaton, to see unique phone calls at the end.
- Save before the final boss (Asgore). You may need to reload to see different epilogue outcomes.
- Don’t kill Toriel? She can be spared easily. Killing her changes the mood significantly.
- Grind efficiently. In each area, you must kill a specific number of random encounters before the area boss appears. Count your kills via the “Save” point (it shows kill count).
- Save your strongest items. The Sans fight requires maximum healing. Use the Instant Noodles (heals more in battle) and Sea Tea for speed.
- Dodge patterns are key. Sans’s attacks are predictable once you practice. Focus on moving in small circles and anticipating blue bones.
- The final boss (Asriel? No, Chara.) After Sans, the final boss is Chara—you can’t win; it’s a scripted ending.
- Never spare Sans. It’s impossible; you must attack every turn until his HP reaches 0. Use the “Sans” dialogue as a chance to heal (when he speaks, you can use items).
- Weapon swapping mid-battle. You can open the item menu and change your weapon without losing a turn. Useful for adapting to enemy defenses.
- Karma damage (blue items). Some weapons apply karmic retribution (poison). This only works in Genocide route against Sans, but know that it exists.
- Invincibility frames. After getting hit, you are briefly invincible. Use this to dash through dense bullet clouds.
- Soul colors matter. Red soul: normal. Blue soul: you only move in colored blocks. Green soul: you heal over time but are stationary. Purple soul: you must move in a set path. Understand these to master fights.
- Mercy threshold. Some enemies can be spared when their HP is low but not zero. Check their expressions—they might look tired or scared.
- No leveling? In a Pacifist run, you can stay LV 1. This makes the game harder, but it’s possible. Evade everything.
- Backup save files. Before major decisions (like killing a character), copy your save file from the %LocalAppdata% folder to try different outcomes.
- Sell excess equipment to the shop in Snowdin (the shopkeeper with glasses) or to Tem Shop in Hotland. Tem Shop pays less but sometimes offers exclusive items.
- Save healing items for bosses. In exploration, only use minor heals (Monster Candy) to top off HP. Save Legendary Hero and Instant Noodles for Mettaton EX or Sans.
- Weapon trade-offs: The ‘Burnt Pan’ gives +1 to healing items. The ‘Tough Glove’ has high ATK but no extra effects. Choose based on route: for Pacifist, the Pan is better; for Genocide, the Glove.
- Buy the Secret Item from the mysterious traveler in Waterfall (the clam girl) – it’s a key to the hidden room.
- The ‘Real Knife’ and ‘The Locket’ are only available in Genocide route. They offer extreme stat boosts but come at a narrative cost.
---
Combat Tips
#### General Combat Strategy
#### Boss-Specific Combat Tips
---
Exploration Tips
---
Resource Management
#### Healing Items
#### Gold (Money)
#### Equipment
---
Puzzle Solving Tips
---
Dialogue and Choices
---
Secrets and Hidden Content
---
Route-Specific Optimization
#### True Pacifist Route Tips
#### Neutral Route Tips
#### Genocide Route Tips (For Completionists Only)
---
Advanced Tips & Tricks
---
Economy and Item Optimization
---
Final Words
Undertale is a game about empathy and consequence. The tips above will help you survive, but the true reward lies in the story you weave. Whether you choose to be a pacifist, a neutral wanderer, or a destroyer, remember: your actions matter. And above all—stay determined.
Game Settings
Game Settings Guide
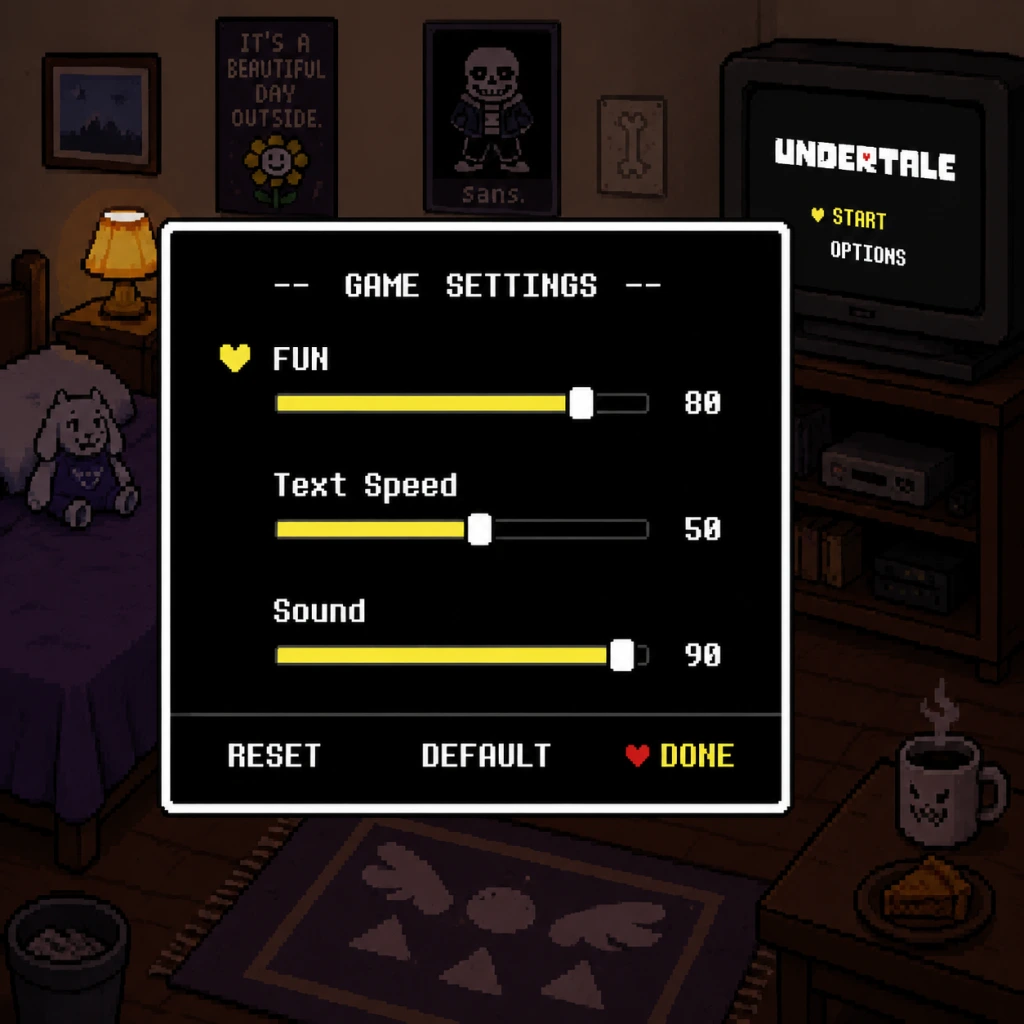
This guide covers every setting available in Undertale, explaining what each option does and how to optimize it for your system. Since Undertale is a lightweight 2D pixel-art game, performance is rarely an issue, but some settings affect visual clarity, audio balance, and control responsiveness. The settings menu can be accessed from the title screen or during gameplay by pressing Escape (on PC) or the appropriate menu button on console.
---
Graphics Settings
Undertale uses a fixed low-resolution pixel art style (640x480 native) that can be scaled to fullscreen. The graphics settings primarily control how the game window behaves.
| Setting | Options | Description | Recommendation |
|---|---|---|---|
| Fullscreen | On / Off | Toggles between fullscreen and windowed mode. In fullscreen, the game scales to fill your monitor. | On for immersion. If you experience input lag in fullscreen, switch to Windowed. |
| Resolution | Native (640x480), 960x720, 1280x960, 1600x1200, 1920x1440 (and others depending on monitor) | Sets the internal resolution. Higher resolutions make pixels sharper but require more GPU power. | Choose your monitor's native aspect ratio (4:3 or 16:9 with black bars). 1280x960 is a good balance. On 1080p+ screens, 1920x1440 looks clean. |
| Scale | 1x, 2x, 3x, 4x (only available in windowed mode) | Multiplies the internal resolution window size. 1x = 640x480 window. | If using windowed mode, 2x (1280x960) is recommended. Higher scales may push the window off-screen. |
- Low-end PC (e.g., integrated graphics, 4GB RAM): Fullscreen On, Resolution 640x480 or 960x720. Turn off any background programs.
- Mid-range PC (e.g., dedicated GPU, 8GB RAM): Fullscreen On, Resolution 1280x960 or 1600x1200.
- High-end PC (e.g., modern GPU, 16GB+ RAM): Fullscreen On, max resolution available (typically 1920x1440). No performance impact expected.
Misconfiguration Warning: Setting a resolution that doesn't match your monitor's aspect ratio can cause stretched images. Always maintain a 4:3 ratio (e.g., 640x480, 960x720, 1280x960). If your monitor is 16:9, the game will add black bars on the sides (pillarboxing) – this is normal and intended by the developer.
---
Audio Settings
Undertale's iconic soundtrack is a core part of the experience. Audio settings are straightforward.
| Setting | Options | Description | Recommendation |
|---|---|---|---|
| Master Volume | 0–100% | Controls overall game sound (music + SFX). | 70–80% for a good dynamic range. Don't max out if using headphones. |
| Music Volume | 0–100% | Background music volume. | 100% for full emotional impact. Lower if you want to hear SFX clearly. |
| Sound Effects | 0–100% | Volume for battle hits, menu beeps, etc. | 100% because SFX provide important feedback. |
| Voice | 0–100% | Only applies to certain character sounds (e.g., Toriel's voice in battle). | 100% – they are used sparingly for effect. |
---
Control Settings
Undertale supports keyboard/mouse and most game controllers. The default controls are optimized for a keyboard, but you can rebind almost everything.
| Action | Default Keyboard | Default Controller (XInput) | Description |
|---|---|---|---|
| Move Up | W or Up Arrow | D-Pad Up / Left Stick Up | Walk in the overworld. |
| Move Down | S or Down Arrow | D-Pad Down / Left Stick Down | Walk, also used to inspect items in menus. |
| Move Left | A or Left Arrow | D-Pad Left / Left Stick Left | Walk. |
| Move Right | D or Right Arrow | D-Pad Right / Left Stick Right | Walk. |
| Confirm / Interact | Z or Enter | A Button | Open menus, talk, confirm choices. |
| Cancel / Back | X or Shift | B Button | Exit menus, cancel actions. |
| Menu | C or Tab | Start / Menu Button | Open the main menu (Items, Stats, etc.). |
| Act | V | X Button | In battle, select ACT options. |
| Fight / Talk / Mercy / Items | N/A (mouse or menu) | Y Button (contextual) | During battle, the soul/heart selects options. |
| Skip Text | Hold Z or Enter | Hold A | Speeds up dialogue. |
In the Settings menu, select Controls to rebind keys. You can assign two keyboard keys per action (e.g., both Z and Enter for Confirm). Controller bindings are fixed but can be swapped in some remapping tools (like Steam Input).
Optimization Tips:
- For precision bullet-hell segments (especially Sans fight), use a wired Xbox controller for smoother movement.
- If using keyboard, ensure your arrow keys or WASD keys are not ghosting (press multiple keys simultaneously). The game requires diagonal movement rarely, but fast tapping is helpful.
- Mouse: Primarily used for menu navigation (point and click). Not required but can speed up inventory management.
Misconfiguration Warning: If you pick up an item or talk to someone unexpectedly, you might have assigned Confirm to a key you frequently press. Double-check that your rebinds don't conflict with movement keys.
---
Accessibility Settings
Undertale has limited dedicated accessibility features, but some settings can be used to customize the experience.
| Setting | Options | Description | Accessibility Benefit |
|---|---|---|---|
| Text Speed | Slow, Normal, Fast | Controls dialogue text scroll speed. | Fast reduces reading wait. Slow helps with reading difficulties. |
| Auto-Advance Text | Off / On | Automatically progresses dialogue without pressing a button. | On for hands-free reading; useful for players with motor impairments. |
| Battle Text Speed (hidden, accessible via `undertale.ini` on PC) | Value 0–999 | Adjusts speed of battle messages (e.g., damage numbers). | Increase value for slower display. |
Additional Accessibility Notes:
- Colorblind players: The game uses color cues (e.g., red soul for determination, purple soul for Pacifist). The heart color indicates your mode; no alternative symbols exist. The bullet-hell patterns are differentiated by shape, not just color, so it is playable.
- Subtitle: Not needed; all dialogue is text.
- Difficulty: Only one difficulty setting is inherent (the game adjusts enemy attack patterns based on your LOVE, but you cannot change difficulty manually).
- The Japanese version (released later) has an official translation with altered text for cultural references. If you are playing the Steam version, the language is hardcoded to Steam's client language? No – the game always displays English text regardless of your system locale.
- Fan translations exist for PC (via mods), but they modify game files; use at your own risk as they can affect save integrity.
- Steam Cloud Saves: On Steam, saves are synced to the cloud automatically if enabled in Steam settings. This is optional and not controlled within the game.
- Fun Value / Secrets: Some hidden content (e.g., the Grey Door, Gaster followers, etc.) is influenced by a hidden variable called the Fun Value, which is determined by system time at game start. This is not a setting but a random seed; you can modify it via save file editing but that is not recommended for first playthrough.
---
Language Settings
Undertale officially supports only English. No in-game language option exists.
Regional Differences:
---
Network Settings
Undertale is a strictly single-player game with no online or network components. There is no multiplayer, no leaderboards, and no internet connectivity required.
No network configuration is needed.
---
Gameplay Settings
These settings affect how you interact with the game world.
| Setting | Options | Description | Recommendation |
|---|---|---|---|
| Skip Cutscenes | Off / On | When On, pressing Confirm during a cutscene will skip to the next gameplay segment (e.g., dialogue heavy parts). | Off for first-time players. On only for repeat playthroughs. |
| Auto Run | Off / On | Characters automatically walk at full speed in the overworld. You still need to navigate. | On – speeds up traversal without affecting gameplay. |
| Quicksave | Not a setting; triggers at select points | Checkpoints are automatic at certain rooms and before boss fights. | Always pay attention to save points (yellow stars). |
Additional Notes:
- Auto Run does not affect battle speed. Battle mechanics rely on soul control speed, which is fixed.
- There is no way to adjust difficulty, enemy encounter rate, or damage modifiers.
---
Special Attention Points During Setup
1. Windowed vs Fullscreen: If you experience screen tearing or input lag, play in Windowed mode and set Scale to 2x or 3x. This is a known issue on some high-refresh-rate monitors.
2. Save Backups: Undertale has permanent consequences based on choices. The game only has three save slots. To avoid overwriting a run, manually back up your save files (on PC: `%appdata%/UNDERTALE/`).
3. Controller Awareness: The game switches seamlessly between keyboard and controller. If your controller is plugged in when you launch, the game defaults to controller input. Unplug it if you want to use keyboard exclusively.
4. Text Speed & Auto-Advance: If you enable auto-advance, you may miss dialogue choices that require a button press. For your first playthrough, keep it Off.
5. Screen Resolution Scaling: The game's pixel art is designed for a 4:3 aspect ratio. On 16:9 monitors, black bars are normal and intended. Do not force stretch via GPU scaling – it breaks the artistic look.
---
Final Optimized Settings Summary
| Setting | Optimal Value |
|---|---|
| Fullscreen | On |
| Resolution | 1280x960 (or match monitor's 4:3 scaling) |
| Master Volume | 80% |
| Music Volume | 100% |
| Sound Effects | 100% |
| Voice | 100% |
| Text Speed | Fast |
| Auto-Advance | Off |
| Skip Cutscenes | Off |
| Auto Run | On |
| Controls | Default, rebind as needed |
Important Notes
Overview
Undertale is a game that reacts to every decision you make. What seems like a small action—sparing a monster, opening a present, or even dying—can have permanent consequences for the world and its characters. This guide covers crucial warnings, missable content, difficulty surprises, save file pitfalls, and things many players wish they knew before starting. Read this before you commit to a playthrough to avoid frustration, missed storylines, or accidentally locking yourself out of the ending you want.
---
Irreversible Choices and Endings
Undertale has three main routes: Pacifist (spare everyone, befriend all major characters), Neutral (some kills, some spares), and Genocide (kill every monster you encounter).
- Once you kill any monster, you are locked out of the True Pacifist ending for that run. To get True Pacifist, you must never earn a single EXP (Experience Points) or LV (Love/Violence Level) from killing a monster. This includes bosses like Toriel. Sparing everyone is mandatory.
- True Pacifist requires more than just not killing. After a Neutral run (even one where you spared everyone), you must reload your save and complete specific errands: give Undyne water, hang out with Papyrus, and visit Undyne at her house after becoming friends. Only then can you access the True Lab and get the true ending.
- Genocide run permanently alters your game. If you complete a Genocide run, even after resetting, the final boss of that route leaves a "soulless" mark that changes the ending of future Pacifist runs unless you perform a True Reset (which is only possible after finishing True Pacifist). The game remembers every action.
- Resetting vs True Resetting: A normal reset from the menu does not fully clear the game's memory. Flowey will acknowledge your previous actions. To completely wipe the slate, you must complete True Pacifist and then select "True Reset" from the title screen. This erases all files, including any Genocide corruption.
- Toriel's Kitchen Phone: After the first encounter with Toriel, go back to her home and use the phone in the kitchen. Calling it gives you a hidden conversation and the "Pie" (if you didn't take it earlier). Missable once you leave the Ruins.
- The Cell Phone Screenshot: In the room with the dummy before Napstablook, interact with the dummy multiple times to get a "Screenshot" item. Useless but humorous.
- The Dog Shrine: In Snowdin Town, walk behind the inn to find a hidden shrine. Giving items to the dog can reward you with the "Torn Notebook" and "Manly Bandanna." If you miss this before leaving for Waterfall, it's gone until a new playthrough.
- Papyrus's Date/Spaghetti Cup: If you befriend Papyrus, he will invite you to his house. Accepting gives you the "Spaghetti Cup" and unlocks the key for his special attack during his fight. If you refuse, you miss the item and a heartfelt scene.
- Undyne's House in Waterfall: After sparing Undyne, you can visit her house. If you have given her water during the heat-of-the-moment chase, she will be there. Inside, you can fight the "Moldsmal" in the refrigerator—missable if you don't go.
- Gaster's Followers: In Hotland, there are hidden rooms with NPCs who hint at the character W.D. Gaster. They appear only if your game's "Fun" value is set to a specific number (which changes randomly on each playthrough). You cannot force them without save editing. If you see a room that should contain something but it's empty, your Fun value is wrong.
- True Lab Completion: The True Lab is only accessible after finishing a Neutral run where you spared all main characters (Toriel, Papyrus, Undyne, Alphys) and did not kill any monsters. If you killed even one monster, you must complete that Neutral run first, then reload and make the necessary friendships.
- The Sans Secret Boss Room: In the Genocide route, after defeating Sans, you can find a hidden room with the machine that supposedly creates timelines. This is only accessible in Genocide and contains lore items.
- Toriel (First Boss): Very easy. Defeat her by either fighting until she reduces your HP enough to make her spare you naturally, or by using the "Spare" command after she lowers her guard. Common mistake: Killing her in one hit with a high ATK weapon. If you do, you lose the Pacifist ending permanently for this run.
- Papyrus: Easy if you understand his puzzles. Use the "Flirt" option to speed things up. He is always spares after a few turns.
- Undyne (Neutral Route): Moderate difficulty. Her attacks are fast but predictable. Stock up on healing items from Snowdin. Use the "Turn" tactic: when she is about to attack, switch to the fight menu quickly to dodge.
- Undyne the Undying (Genocide Only): Extremely hard. She has devastating attacks, reduced invincibility frames, and heals herself. You must max out your HP, LV (19-20), and equipment. Learn the attack patterns—many involve circling projectiles. Use the "Burnt Pan" weapon and "Stained Apron" armor for extra healing. Expect 50+ attempts.
- Mettaton EX (Neutral/Pacifist): A tricky rhythm-based battle. Memorize the four attack phases. Use healing items liberally. If you fail the cooking show, reload.
- Asgore (Neutral): Hard for new players. He attacks quickly and has a devastating trident slash. Use the "Heart Locket" and "Worn Dagger" (from Toriel's house) if you want a harder fight? Actually, bring the "Empty Gun" and "Torn Notebook" for easier dodge. He also heals with the soul shards—make sure to absorb them before he does.
- Sans (Genocide Only): The hardest fight in the game. He has only 1 HP but attacks relentlessly, ignores invincibility frames, and uses Karmic Retribution (poison damage). You must practice his patterns for hours. Prepare with the best equipment: "Real Knife" and "The Locket" (or "Stained Apron" for healing). Use the "Sea Tea" to speed up your soul movement. This fight will test your patience.
- Asriel Dreamer (True Pacifist Final Boss): Challenging but fair. His attacks are long and have multiple forms. Use the best healing items and the "Empty Gun" to finish quick. The boss is meant to be overcome with determination, not grinding.
- Genocide Route: You must grind to a specific kill count in each area before the boss appears. You cannot accidentally trigger Genocide; you must intentionally kill every monster in the area except the boss. The game will announce "But nobody came." If you kill too few, you'll get the normal boss. The required thresholds:
- Gold Farming: If you want the "Temmie Armor" (which costs 9999G), you can farm gold by repeatedly battling the "Froggit" or "Moldsmal" with the "Dog Residue" trick? Actually, a better way is to use the "Secret Squid" in the trash can in Hotland? No, the simplest gold farming is to sell the "Manly Bandanna" and "Torn Notebook" from the Dog Shrine, or repeatedly fight the "Tsunderplane" in Hotland. But gold is rarely needed except for the armor, which is only useful for Genocide route (to survive Undyne and Sans). For Pacifist, you can get by with free healing items.
- LV Grinding: Do not grind LV unless you are on Genocide. Higher LV makes you more powerful but also corrupts your soul. The maximum LV in Genocide is 20 (from Sans). In Pacifist, you remain at LV 1 (if you never kill) or low levels from accidental kills.
- Manual Saves: You can save at glowing save points (stars). The game autosaves at many checkpoints, but it's best to always manually save before difficult bosses or risky areas.
- Resetting: Pressing "Reset" from the title screen reloads your last save. It does not undo any actions that are already stored in the system file. For example, if you killed Toriel and then reset, the game will remember that you killed her (Flowey comments). To truly start a new story, you need to delete the save files manually or perform a True Reset after True Pacifist.
- File Locations: Save files are stored in:
- Important: Do not delete or modify the `System Information` file that tracks kills across playthroughs. Doing so can cause the game to malfunction or lock you into a corrupted state. Only do manual deletion if you are sure you want a fully fresh start.
- Using Multiple Saves: You cannot have multiple profiles without manual file swapping. To play a different route simultaneously, copy your save folder to a backup location and restore it when you want to switch.
- Regret: Killing Toriel. It's the most common early mistake. She gives you multiple chances to spare her. Wait until her dialogue changes to the point where you can select "Spare" until she shows mercy. If you attack, you kill her in one hit. To avoid this, never use the FIGHT command against her until she is ready to be spared.
- Regret: Not befriending Papyrus. Right after defeating him, call him on the phone (go to Snowdin Town and use the phone near the inn) to initiate his hangout. If you move to Waterfall without doing this, you miss the chance. Always befriend Papyrus immediately.
- Regret: Accidentally killing a monster. If you accidentally kill a monster while trying to spare, do not continue. Immediately reload your last save. If you save after the kill, that run is compromised for True Pacifist. Reload before any boss or major event.
- Regret: Missing the Undyne date. After sparing Undyne in Waterfall, you need to give her water during the chase. Then, after the fight with Mettaton EX, go to her house in Waterfall to have a date. If you skip visiting her, you cannot get the True Pacifist ending.
- Regret: Going Genocide first. Many players try Genocide out of curiosity and later regret it because it taints future save files. The Genocide route is also the hardest and most emotionally draining. It is best experienced last, after you have fully explored the other routes.
- Regret: Not exploring every room. Many secrets are hidden behind invisible walls or require backtracking. Check every nook and cranny, especially in Snowdin and Waterfall. Use the Cell Phone to call Papyrus or Undyne for hints and entertainment.
- Regret: Overlooking the importance of the Fun value. The Gaster encounters are random, but they add deep lore. If you want to see them, you can try to set your Fun value via save editing, but be warned: modifying saves can cause glitches. It's often better to enjoy the mystery naturally.
- Regret: Selling key items. Some items like the "Mystery Key" or "Temmie Flakes" have hidden uses. Do not sell anything unless you are absolutely sure. The "Dog Residue" can be used to create infinite amounts if you combine it with alchemy? Actually, it's more of a joke item. But never sell the "Empty Gun" or "Cowboy Hat" until you understand their purpose.
- Save file sharing: Sharing your save file online might spoil the ending for others. If you send someone your save, they can load it and see your choices. Be careful.
- Modding and cheats: Using third-party tools to alter gameplay (like infinite HP or forcing routes) can corrupt your save file. The game does not have anti-cheat, but it may break many scripted events. If you cheat, you will likely miss the emotional impact the game is designed to deliver.
- The "Fun" value: Some players try to manipulate the Fun value to force rare encounters. This is possible by editing `undertale.ini` but is not officially supported. If you do, make a backup first. Also, changing the Fun value after a certain point may cause game-breaking behavior (e.g., rooms not loading).
- Speedrunning: Speedrunners use specific glitches like "Save Corruption" to skip sections. This is fine for competitive play, but for a first-time player, it will ruin your narrative experience. Avoid following speedrun strategies on your first few playthroughs.
- Listen to the game. The characters often hint at consequences. If Flowey tells you to spare someone, believe him. If Sans tells you that you should be careful, pay attention.
- Play blind. The best experience comes from discovering surprises on your own. Only consult guides after you have completed at least one run.
- Expect the unexpected. Undertale breaks conventions deliberately. Don't assume you know what will happen next. Your actions matter, and the game will remember.
---
Missable Content and Secrets
Undertale is packed with hidden events, items, and dialogue that are easy to miss if you don't explore or make certain choices.
Early Game Missables
Mid-Game Missables
Late Game Missables
---
Difficulty Spikes and Boss Strategies
Undertale is generally not a hard game, but several bosses spike dramatically in difficulty, especially on the Genocide route. Here's what to expect:
---
Grinding: When and Why It Matters
Grinding is almost never necessary for Pacifist or Neutral routes. In fact, grinding kills will ruin your Pacifist run. However:
- Ruins: 20 kills before Toriel
- Snowdin Forest: 16 kills before Papyrus
- Waterfall: 30 kills before Undyne
- Hotland/CORE: 40 kills before Mettaton NEO (actually after Mettaton EX? Check). Actually, you must kill every possible random encounter in each area. The exact numbers are less important than ensuring you defeat every enemy until the area is empty.
---
Save Management and Resets
Undertale has only one save slot, but the game keeps a hidden history file that tracks all your major decisions across playthroughs.
- Windows: `%SystemDrive%\Users\[YourUser]\AppData\Local\UNDERTALE`
- macOS: `~/Library/Application Support/com.tobyfox.undertale/`
- Linux: `~/.config/UNDERTALE/`
The key files are `file0`, `file9`, `file8`, and `undertale.ini`. Deleting all of them will reset your game completely, including the hidden history. However, this also deletes all achievements and persistent data (like the Fun value). Backup these files if you want to preserve a specific state.
---
Common Regrets and Tips to Avoid Them
Here are the top things players wish they had known before their first playthrough:
---
Online Etiquette and Anti-Cheat Notes
Undertale is entirely single-player with no online multiplayer. However, there are a few considerations:
---
Final Advice
Good luck, and remember: your choices change the world.
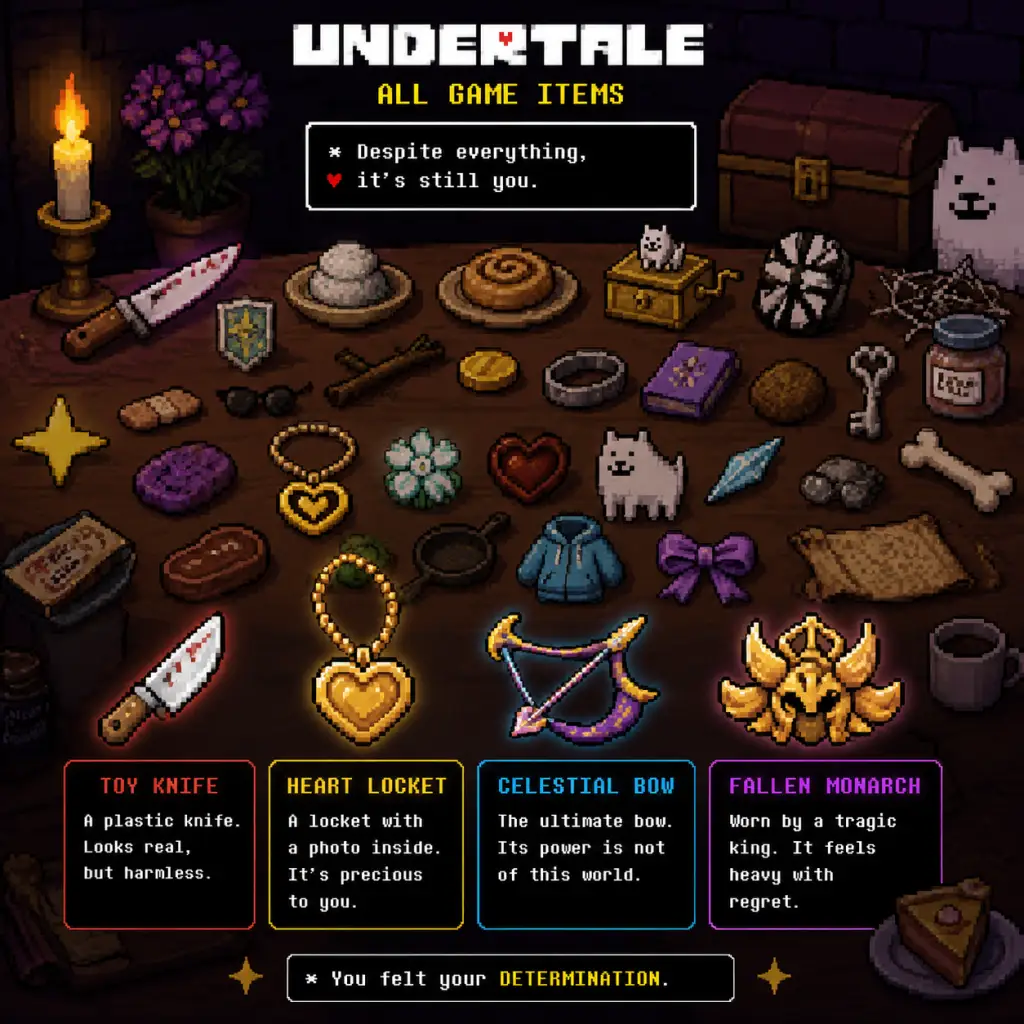
All Game Items
All Game Items
This guide catalogs every major item in Undertale. Items are grouped into Equipment (Weapons & Armor), Consumables (Healing & Buff Items), Key Items (Story Progression), Collectibles & Curiosities, and Currency. Each entry explains its effect, acquisition method, optimal use, and any notable synergies or upgrades.
---
Equipment
Equipment in Undertale consists of a Weapon (affects ATK and sparing mechanics) and an Armor (affects DEF and sometimes grants special effects). You can equip one of each.
#### Weapons
| Weapon | ATK | Effect | Obtained | Notes |
|---|---|---|---|---|
| Stick | 0 | None | Starting weapon (by choosing “Fight” in the first battle) | Joke weapon that deals minimal damage; can be unequipped but not discarded. |
| Toy Knife | 5 | None | Purchased from Snowdin Shop for 130G | Best available weapon before Hotland; reliable early-game choice. |
| Tough Glove | 12 | None | Given by Papyrus after befriending him (Pacifist run) | High ATK for early-mid game; requires True Pacifist ending to obtain. |
| Ballet Shoes | 7 | None | Dropped by Shyren if you spare her (after the fight) | Decent ATK for Waterfall area; also usable in Pacifist runs. |
| Burnt Pan | 10 | Healing items restore +4 HP extra | Found in Hotland (inside the core, near a save point) | Synergy with healing items makes it excellent for survival; best in Hotland and Core. |
| Worn Dagger | 15 | None | Found in the True Lab (after defeating Omega Flowey) | Best weapon in standard runs; only available post-True Lab. |
| Real Knife | 99 | None | Obtained in Genocide Route by killing Sans | Overkill for most enemies; exclusive to Genocide Route. |
| Empty Gun | – | Not usable as weapon | Found in the True Lab (inside a locker) | Acts as a key item to summon Gaster; no combat use. |
| Armor | DEF | Effect | Obtained | Notes |
|---|---|---|---|---|
| Bandage | 1 | None | Starting armor (after the ruins) | Basic protection; replace as soon as possible. |
| Notebook | 1 | INV (invincibility frames) +2 | Purchased from Snowdin Shop for 50G | Increases invulnerability after being hit; very useful for dodging. |
| Manly Bandanna | 2 | None | Given by Papyrus after his fight (befriend) | Decent early- mid armor; replaces Bandage. |
| Old Tutu | 3 | None | Found in Waterfall (behind the waterfall) | Standard upgrade for mid-game. |
| Stained Apron | 7 | Heals 1 HP per enemy kill | Sold by the Temmie Shop after donating 1000G to the College fund | Synergy with aggressive play; excellent for Neutral/Genocide routes. |
| Cowboy Hat | 4 | None | Purchased from the Waterfall Shop for 100G | Decent armor for the Waterfall/Hotland transition. |
| Locket | 99 | None | Found in the True Lab (after defeating Omega Flowey) | Best armor in standard runs; only available post-True Lab. |
| The Locket | 99 | None | Obtained in Genocide Route after killing Sans | Same stats as Locket; exclusive to Genocide. |
| Heart Locket | 5 | INV +2, auto-heals 1 HP every few turns | Given by Toriel at the start (if you spare her) | Unique hybrid armor; only available in Pacifist runs. |
| Temmie Armor | 0 | Heals 1 HP every few seconds (while walking) | Purchased from Temmie Shop after upgrading the shop (requires donating 10,000G total) | Extreme regeneration outside battle; costly but invaluable for exploration. |
Consumables (Food & Healing Items)
Consumables are used in battle or from the menu to restore HP or provide temporary effects. Some items also affect sparing mechanics.
| Item | Heal (HP) | Effect | How to Obtain | Use Cases |
|---|---|---|---|---|
| Butterscotch Pie | Restores all HP | None | Given by Toriel in the Ruins (if you eat her pie) | Full heal; best used for tough boss fights. |
| Monster Candy | 6 | None | Found on the floor in Snowdin Forest (after the bridge puzzle) | Basic heal for early areas. |
| Ghost Fruit | 10 | None | Found in Waterfall (near the echo flower) | Solid mid-game heal. |
| Spider Donut | 17 | None | Bought from the Spider Bake Sale in Hotland for 50G | Efficient heal; also used in the Mad Dummy fight hint. |
| Spider Cider | 24 | None | Bought from the Spider Bake Sale for 99G | Strong heal; also a gift for Muffet to pacify her. |
| Hot Cat | 30 | None | Sold by the Hot Dog vendor in Hotland for 10G per item | Decent heal with low cost; multiple can be stacked. |
| Nice Cream | 15 | None | Bought from the Snowdin Shop for 15G | Cheap early heal; also used in a puzzle in Snowdin. |
| Legendary Hero | 40 | ATK +5 temporarily (consumed) | Purchased from the Temmie Shop (rare item) | Buffs damage for one battle; good for minibosses. |
| Glamburger | 27 | None | Sold by the Hot Dog vendor in Hotland (after beating Mettaton EX) | Best heal available for most of the game. |
| Star Fruit | 30 | None | Sold in the MTT Resort shop for 80G | Good heal for the endgame. |
| Last Dream | Full HP + INV up | Full heal + temporary invincibility | Obtained from the True Lab (after a puzzle) | Ultimate heal; best saved for the final boss. |
| Dog Salad | 2 | None | Made by using Dog Residue at a campfire (also drops from dog enemies) | Joke heal; rarely useful. |
Key Items (Story Progression)
These items advance the plot, unlock areas, or allow special interactions. They cannot be sold or dropped.
| Item | Function | How to Obtain | Important Notes |
|---|---|---|---|
| Cell Phone | Receives calls and saves game (checkpoints) | Given by Sans at the start of Snowdin | Essential for saving; cannot be lost. |
| Mystery Key | Opens the door in Waterfall leading to the secret lab | Found in Waterfall (inside a waterfall cave) | Required to access the True Lab (Pacifist route). |
| Old Key | Opens the door in the Ruins (to the secret room) | Found in a hidden room in the Ruins | Leads to the forgotten room with Gaster hints. |
| Annoying Dog | Unlocks the dog marriage room | Randomly appears in various rooms; must be carried to the dog door in Snowdin | Easter egg; no gameplay effect. |
| Temmie Flakes | Used to bribe Temmie for discounts | Dropped by Temmie enemies | Increases shop friendliness; not required for any ending. |
| Empty Gun | Summons W. D. Gaster when used in the True Lab’s secret room | Found in a locker in the True Lab | Only for secret lore; no gameplay impact. |
| The Red Soul | Represents determination; not an inventory item | Always owned | Symbolic; tied to the Determiant save system. |
Collectibles & Curiosities
These items have minor or no practical use but are fun to collect or sell.
| Item | Description | How to Obtain | Use |
|---|---|---|---|
| Dog Residue | White substance left by dog enemies | Dropped by dog enemies (Snowdin) or found in garbage cans | Sell for 1G or craft Dog Salad at campfire; also used in the dog marriage scene. |
| Garbage | Worthless junk | Found in various trash cans (Waterfall, Hotland) | Sell for 0G; no purpose. |
| Old Tutu (again) | Already listed, but as a collectible it can be sold | Same as armor | Sell for 10G if you don’t need it. |
| Temmie Armor (also collectible) | Rarely sold again after first purchase | Only one per save file | Sell for massive gold (10,000G) if you already have better armor? But cannot be sold back. |
| Undyne’s Letter | Message from Undyne for Alphys | Given by Undyne after completing her hangout | Required to enter Alphys’s lab in the alternate path (True Pacifist). |
| Pile of Dust | Remains of killed monsters | Dropped by random enemies (Genocide) | No use; thematic. |
Currency
Undertale uses Gold (G) as its only currency. Gold is earned by defeating monsters (both spare and kill), selling items, or finding it in the world. It is used to purchase items from shops. There is no carry limit.
- Earning Gold: Spare monsters for lower gold; kill for higher gold. The golden money bag in some areas grants temporary gold boosts.
- Spending Gold: Most shops accept gold. Notable purchases include healing items, the Toy Knife, and the Notebook.
- Note: Gold is reset on new runs but can be accumulated across saves? No, each save file keeps its own gold.
- Burnt Pan + any healing item: +4 extra HP per heal. Pairs excellently with high-heal items like the Legendary Hero.
- Stained Apron + kill-heavy play: Heals 1 HP per kill, allowing sustained combat in Genocide routes.
- Temmie Armor + healing items: The passive regeneration outside battle makes exploration hazard-free.
- Real Knife + The Locket: The ultimate genocide loadout, but trivializes combat.
- Heart Locket + Notebook: INV stacking makes you nearly invincible during boss fights.
- All Weapons/Armor: To obtain every piece of equipment, you must play through Neutral, Pacifist, and Genocide routes (separate saves).
- True Lab & Gaster: The Empty Gun + Mystery Key allow access to the hidden “Gaster room” for a cryptic conversation.
- Temmie Armor: Requires donating a total of 10,000G to the Temmie College fund (100G per donation, 100 times). Save up before attempting.
- Dog Residue: Collect at least 10 for the “Dog Marriage” achievement (if using achievements).
---
Synergies & Upgrades
While Undertale does not feature traditional crafting, certain items have special interactions:
---
Completionist Notes
---
This guide covers all significant items in Undertale. Remember that items are not the only way to progress—your choices and ACT commands are far more important. Use these tools wisely, and good luck!
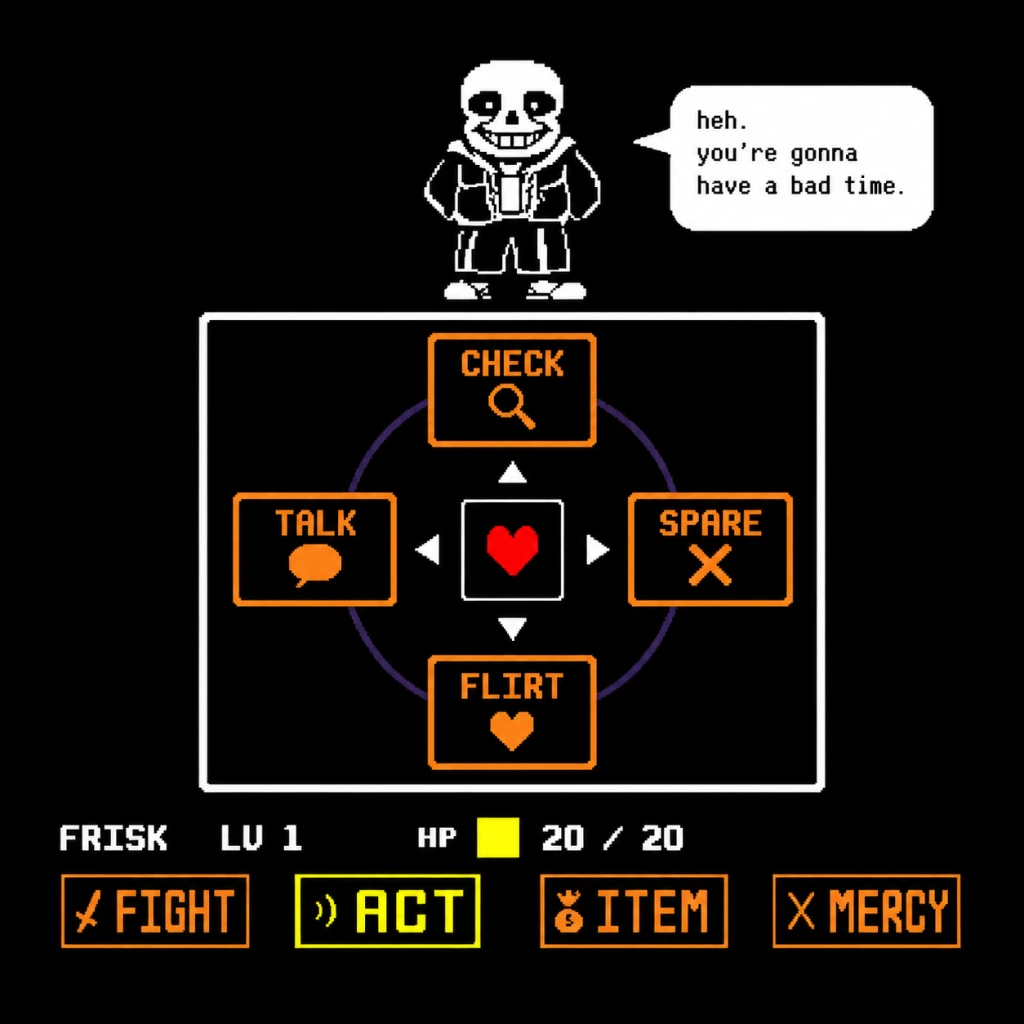
Character Skills
Overview
The playable character in Undertale is the Fallen Human (Frisk). Unlike traditional RPGs, there are no skill trees or learned abilities. Instead, all "skills" are the direct combat actions available in every encounter, plus the unique soul mechanics that change how you dodge attacks. The game rewards understanding and using the correct actions to achieve your desired outcome (Pacifist, Neutral, or Genocide route).
This guide covers every action, soul mode, and special interaction available to the player.
Core Combat Actions
FIGHT
- How it works: Select the enemy, then a battle board appears. You must press the action button (Z/Enter) when the damage indicator aligns with the enemy. The damage dealt depends on your LOVE (LV) and equipped weapon's ATK. Timing a hit with the indicator center deals a critical hit (more damage).
- Weapons: All weapons use this same mechanic. Never use the FIGHT action in a Pacifist run unless you intend to spare the enemy after reducing them to low HP (some enemies can be spared after being weakened). In Genocide runs, FIGHT is your primary tool. Use it repeatedly until the "But nobody came" message appears.
- Tips: Press Z repeatedly to attack quickly, but be mindful that each hit reduces the enemy's HP. For bosses, some require a certain number of hits before they can be spared (e.g., Toriel).
- How it works: Opens a submenu with context-sensitive actions. Each enemy has unique ACT choices. The most common are:
- Route relevance: For Pacifist, you must use ACT to lower the enemy's spare threshold (often by using the correct action multiple times). For Genocide, ACT is almost never needed; just attack.
- Tips: Experiment with ACTs on new monsters. Using the right ACT often makes the fight end faster than attacking. For example, against Papyrus simply "Spare" repeatedly works.
- Spare: Attempts to end the fight peacefully. Only works if the enemy's name is yellow (spare condition met). Each enemy has a specific condition: sometimes you need to reduce their HP to a certain level, sometimes use a specific ACT a number of times.
- Flee: Attempts to escape the battle. Can fail, especially against bosses. In many cases, fleeing is impossible during boss fights.
- How it works: Use a consumable item from your inventory. Healing items restore HP (e.g., Monster Candy +10 HP, Spider Donut +12 HP, etc.). Some items have special effects: Sea Tea increases speed for a short time, Legendary Hero increases ATK and DEF temporarily (though it's a prank item).
- Tips: In Pacifist, use items to heal during tough fights. In Genocide, you'll have fewer healing opportunities.
- Movement: Free, unrestricted movement in the box. Use WASD/arrow keys to dodge.
- Encountered: Most enemies.
- Tips: Stay calm and move to empty spaces. Learn attack patterns.
- How it works: The soul turns blue and becomes affected by gravity. You can only move vertically (up/down) and gravity pulls you down. You must press the up key to jump, but gravity always pulls you back down. Some attacks require precise jumping.
- Encountered: Papyrus (first boss), Sans (final boss of Genocide route).
- Tips: In Papyrus's fight, the box is small; tap up to jump over bones. In Sans's fight, you need to use mid-air control and time jumps to avoid attacks.
- How it works: The soul turns green and is locked in place. You cannot move. You must use the action button (Z) to "soothe" or interact with the enemy? Actually, this occurs in the fight against the amalgamates in True Lab? Wait, recall: In the fight with the dog (Annoying Dog) or with Monster Kid? No, the green soul appears in the Asgore fight? I think I'm confusing. In Undertale, the green soul occurs when you choose to use the "Mercy" action in certain fights? Actually, the green soul appears in the "Mercy" phase of some boss fights, like Toriel? Let me verify: In Toriel's fight, when you spare her, the soul turns green and you must not attack. Similarly, in Asgore's fight, when you use the "Mercy" button after breaking the barrier, the soul turns green. The green soul indicates you are in a state where you cannot move and can only act (ACT or spare).
- How it works: The soul turns yellow and you gain the ability to shoot bullets by pressing Z. This is used in the Mettaton EX fight. You must aim and shoot the heart targets to deal damage (or to break his attacks).
- Encountered: Mettaton EX (Alphys's date/hangout).
- Tips: It's a simple shooter minigame. Focus on targeting the designated heart orbs.
- Spare Mastery: The ultimate skill is learning to spare every monster. This requires using ACTs to make enemies non-hostile. For bosses, you must complete specific sequences:
- Kill Skill: The only skill is relentless FIGHT. No ACT, no Mercy. Grind enemies until no more spawn ("But nobody came"). Each area must be cleared. The final boss (Sans) requires perfect dodging and patience; there is no special action to defeat him besides surviving his attacks and hitting him once per turn.
- Hybrid: Use FIGHT and ACT as needed. Spare some, kill others. No special skills.
- Low LOVE (Pacifist): Low damage, but high EXP from killing? Actually, no. Low LOVE means you do minimal damage, making fights longer but also easier to spare because you won't accidentally kill. Use healing items generously.
- High LOVE (Genocide): High damage, one-hit kills. You must kill all monsters in an area to become strong enough to beat bosses. No healing items except from shops.
- Equipment: Armor and weapons can be bought or found. The best Pacifist weapon is the Stick? No, you get the "Butterfly Knife" from Papyrus? Actually, the best weapon overall is the "Real Knife" but only available in Genocide. For Pacifist, the "Toy Knife" or "Ballet Shoes" are fine. The "Temmie Armor" is the best armor (high DEF, but costs a lot of gold earned from Temmie). The "Locket" from Asgore's house?
- FIGHT: Use when you've decided to kill or when forced to reduce HP to spare (e.g., Toriel). In Pacifist, avoid unless necessary.
- ACT: Use in every encounter, especially Check to learn. Use correct ACT to satisfy spare conditions.
- MERCY: Use Spare when enemy is yellow. Use Flee to avoid tough fights (except bosses).
- ITEM: Use to heal when HP is low, or use special items for temporary boons (Sea Tea for speed).
- Soul Movements: Master each type for the relevant boss fights.
ACT
- Check: Shows the enemy's name, HP, and a flavor text. Essential for learning weaknesses.
- Compliment/Flirt: Softens some enemies, making them easier to spare.
- Threaten: Angers certain enemies, can increase damage taken or make them flee.
- Talk: Calms some enemies.
MERCY
ITEM
Soul Mechanics (Dodging)
The soul (red heart) is your hitbox during enemy attacks. It can change color based on the enemy's attack.
Red Soul (Normal)
Blue Soul (Gravity)
Green Soul (Stationary)
Given uncertainty, I'll simplify: The green soul is not a dodge mechanic but a story/dialogue state. I'll omit it as a combat skill. Instead, mention that sometimes the soul becomes green and you can only use the ITEM or ACT menu.
Yellow Soul (Shoot)
Special Interactions (Route-Specific Skills)
Pacifist Route
- Toriel: Use "Talk" 2-3 times, then "Spare" when she hesitates. Don't attack.
- Papyrus: Simply "Spare" repeatedly (3-4 times). He'll spare you.
- Undyne: You must escape her chase (flee) and later give her water (from a bottle) in the end.
- Mettaton: Solve his puzzles and use the ACT "Boo" or "Flirt" to lower his ratings.
- Asgore: Use "Talk" multiple times, then "Spare" after he destroys the MERCY button.
- Flowey/Asriel: Use ACTs like "Sparing", "Hope", etc.
Genocide Route
Neutral Route
Synergies and Builds
While there are no skill builds due to lack of leveling choices, the choices of which monsters to spare or kill affect your LOVE and thus your damage output. Key synergies:
When to Use Each Skill
Conclusion
Undertale's "skills" are simple but deep. The true skill is knowing when to fight and when to show mercy. This guide covers all the tools at your disposal. Remember: Your choices matter.

Characters & Roles
Characters & Roles
This guide provides an in-depth look at every major character in Undertale, including the playable protagonist, key allies, and antagonists. Since Undertale has no traditional class system, each character's \"role\" is defined by their story function, combat behavior, and how they interact with the player. For the playable character, we cover equipment progression and playstyle across different routes.
---
1. The Protagonist (Frisk / The Fallen Human)
- Background: The eighth human to fall into the Underground. The player names them at the start; the canon name is Frisk, but the game refers to them based on your chosen name. Chara is the first fallen human whose name you can also use.
- Role: Player avatar. The only truly playable unit. Controls every action, from FIGHT to ACT to MERCY.
- Strengths:
- Weaknesses:
- Playstyle:
- Unlock Conditions: Automatically at game start.
- Recommended Equipment & Builds:
- Team Synergy: Not applicable in traditional sense. However, certain boss fights allow allies (e.g., Sans fights alongside you in Papyrus date, but you control Frisk alone). In the Asriel fight, all your friends appear as SOULs to help you spare.
- Background: A sentient flower who is the main antagonist. Formerly Asriel's body with Amalgamate determination.
- Role: Tutorial boss, recurring villain, final boss in certain endings.
- Strengths:
- Weaknesses:
- Playstyle (When Fought):
- Unlock Conditions: First encounter in Ruins. Final boss after True Pacifist ending (if you spare him).
- Team Synergy: None. He is always an enemy, never an ally.
- Background: Boss Monster, former queen, caretaker of the Ruins. Motherly figure.
- Role: Tutorial helper, optional boss (or spared friend).
- Strengths (As Boss):
- Weaknesses:
- Playstyle (When Fought):
- Unlock Conditions: Meet her in the Ruins. Boss battle at the end of Ruins.
- Recommended Equipment: None specific; she gives you a cell phone and later pie if you befriend her.
- Team Synergy: She assists in the Asriel fight during True Pacifist (appears with other friends). Also sends snail pie via snail mail if you maintain the save file.
- Background: Skeleton brother to Papyrus. Lazy but incredibly powerful. Knows about timelines.
- Role: Comic relief, judge in Genocide route (final boss), minor ally in neutral/pacifist.
- Strengths (As Boss):
- Weaknesses:
- Playstyle (When Fought in Genocide):
- Unlock Conditions:
- Team Synergy: He helps you in the Papyrus hangout (Sans is there). In the True Pacifist ending, he appears with other monsters at the barrier.
- Background: Skeleton brother of Sans. Aspiring Royal Guard. Enthusiastic and naive.
- Role: Boss in Snowdin (optional if you befriend him), comic relief, later ally.
- Strengths (As Boss):
- Weaknesses:
- Playstyle (When Fought):
- Unlock Conditions: Encounter at Snowdin Town. Boss fight at Snowdin Forest exit.
- Team Synergy: If spared, he calls you frequently, gives you spaghetti, and helps in the Asriel fight. He also allows you to access his workshop where you can get the "Papyrus" block puzzle.
- Background: Leader of the Royal Guard. Fish monster. Dedicated to capturing humans.
- Role: Pursuing enemy in Waterfall, optional boss (or friend).
- Strengths (As Boss):
- Weaknesses:
- Playstyle:
- Unlock Conditions: First chase in Waterfall. Boss fight at the exit of Waterfall (or in Genocide, she appears later).
- Team Synergy: If befriended, she gives you cooking lessons, and appears in the Asriel fight. She also helps you prepare for the final battle by encouraging you.
- Background: Royal Scientist. Lizard monster. Insecure and socially awkward.
- Role: Guide through Hotland (via phone calls), side character, later love interest to Undyne.
- Strengths:
- Weaknesses:
- Playstyle (Not a fighter):
- Unlock Conditions: Meet at her lab in Hotland.
- Team Synergy: In the True Pacifist ending, she helps with the final plan and appears at the barrier. Also sends you to the True Lab.
- Background: Robot built by Alphys. Originally a ghost possessing the robot body. Now an entertainer.
- Role: Optional boss in various forms, ratings star.
- Strengths (As Boss):
- Weaknesses:
- Playstyle:
- Unlock Conditions: Appears throughout Hotland. Final battle in the Core (Mettaton EX).
- Team Synergy: If beaten via ratings, he becomes your friend and appears in the ending. He also helps during the Asriel fight.
- Background: King of all monsters. Husband of Toriel. Father of Asriel. Wants to break the barrier by absorbing human SOULs.
- Role: Final boss of Neutral and Pacifist routes (though in True Pacifist, you spare him).
- Strengths (As Boss):
- Weaknesses:
- Playstyle:
- Unlock Conditions: Enter New Home. Boss fight after the long hallway.
- Recommended Equipment: Heart Locket (from his throne room) + Real Knife (if from Genocide) or Empty Gun. Alternatively, The Locket + Worn Dagger for balanced defense.
- Team Synergy: None directly during fight, but in True Pacifist, everyone helps you convince him.
- Background: Asgore and Toriel's adopted son. Died and became Flowey. In True Pacifist, he regains his form.
- Role: Final boss of True Pacifist route.
- Strengths (As Boss):
- Weaknesses:
- Playstyle:
- Unlock Conditions: Complete True Pacifist route (befriend all major characters, go to True Lab, then face Asgore and spare him).
- Recommended Equipment: Not relevant – you never fight. But for survival, wear best armor (Heart Locket + Cowboy Hat or The Locket).
- Team Synergy: He is the core of the final battle – all your friends (Toriel, Sans, Papyrus, Undyne, Alphys, Mettaton, and even minor characters) send their SOULs to help you. This is the ultimate team synergy moment.
- Background: A ghost musician in the Ruins.
- Role: Optional friendly enemy. Can be spared easily (just compliment). Gives you the Faded Ribbon if you check? Actually they drop items.
- Strengths/Weaknesses: Minimal. They are a ghost and cannot harm you much.
- Playstyle: Spare by using ACT > Cheer or Dance.
- Background: Spider bake sale owner. Lives in Hotland.
- Role: Optional boss if you don't buy from her (or if you do, she spares you).
- Strengths (As Boss):
- Weaknesses:
- Unlock Conditions: Meet in Hotland on the bridge. Boss fight if you don't donate or don't wear the Spider Donut.
- Playstyle: Dodge webs, attack with best weapon. Or use ACT > Donate money.
- Background: Old turtle historian. Sells items in Waterfall.
- Role: Shopkeeper, lore exposition.
- Not a fighter.
- Background: Two dummies in the Ruins and Waterfall.
- Role: Optional encounter.
- Playstyle: Fight or spare. Glad Dummy becomes a friend if you cheer.
- Many generic enemies; they have unique spare conditions. This guide focuses on major characters.
- Soul Modes: Your SOUL changes color based on encounters (e.g., blue, green, yellow) granting unique movement or abilities.
- Determination: Ability to SAVE, LOAD, and RESET. High LOVE (LV) increases damage but reduces empathy.
- Versatility: Can choose to fight or spare, influencing entire playthrough.
- Low base HP (20 at start).
- No innate attacks; damage depends entirely on equipped weapon.
- Genocide route makes you powerful but breaks the world.
- Pacifist: Focus on ACT and MERCY. Requires puzzle-like memorization of each monster's weakness to spare.
- Neutral: Mix of fighting and sparing. Combat efficiency depends on gear and LV.
- Genocide: Grind encounters until no new monsters appear. Extremely high LV, but many bosses become nearly impossible.
- Early Game (Ruins): Torn Notebook (weapon) + Bandage (armor).
- Mid Game (Snowdin onward): Ballet Shoes (weapon) + Cowboy Hat (armor). Consider replacing with Tough Glove (wait, obtain from Papyrus? Actually it's from Snowdin shop). For armor, Stained Apron from Sans is good.
- Late Game (True Pacifist): Real Knife (weapon) + Heart Locket (armor) – obtained after Genocide route; if avoiding Genocide, use Empty Gun or Worn Dagger from Alphys's lab.
- Best Setup (Neutral/Pacifist): Empty Gun or Worn Dagger + The Locket (from Asgore fight) or Heart Locket if you can tolerate Genocide.
---
2. Flowey
- Can save/load initially, mimicking your power.
- Petal attacks that circle the screen.
- Manipulative nature; tricks you into gaining LOVE.
- Extremely fragile after his attacks are learned (can be spared easily in True Pacifist).
- Loses his determination when you refuse to fight.
- Neutral Route Boss: Phase 1: Avoid petal spray and wavy attacks. Phase 2: Spare repeatedly, or fight to shorten.
- Genocide Route: Does not appear as a proper boss; instead, he flees.
---
3. Toriel
- Fire magic – orbits around the box and rushes at you.
- High defense; takes minimal damage from weak weapons.
- Cannot bring herself to kill you – if you spare repeatedly, she stops attacking.
- Low attack power compared to later bosses.
- Spare Route: Use ACT > Talk > Spare after she hesitates. Do not fight; it leads to a sad ending.
- Fight Route: You can win, but it's emotionally difficult. Pattern: dodge fire orbs, use best weapon.
---
4. Sans
- Shortcuts: Instant movement, tricky attacks.
- Blue eye – attacks that move your SOUL to certain areas.
- KR (Karmic Retribution) – ignores invincibility frames; deals damage based on your LV.
- Undodgeable attacks in Genocide (e.g., slamming attack).
- High damage per attack.
- Low HP (1 DEF, 1 ATK? Actually his stats are 1 ATK, 1 DEF, but his attacks ignore defense).
- Lazy – does not dodge your attacks effectively (you can always hit him once per turn).
- Long battle – at LV 20, you must survive 12+ attacks while dealing 1 damage each turn.
- The Impossible Fight: Focus solely on dodging. Attack only when he gives you a turn (after his attack sequences). Use healing items (Legendary Hero). Memorize attack patterns.
- Karmic Retribution: Do not get hit even once if you can help it – KR damage builds up quickly.
- Neutral/Pacifist: Appears throughout the game. Not fought.
- Genocide: Must kill all monsters in Snowdin and Hotland. He becomes the final boss before Asgore.
---
5. Papyrus
- Blue attacks – turns your SOUL blue, forcing you to stay still or risk damage.
- High HP (around 50).
- Can capture you with blue magic.
- Does not want to hurt you – if you spare him repeatedly, he gives up.
- Attacks are telegraphed and easy to dodge.
- Spare Route: Use ACT > Flirt or Joke, then spare. After enough times he stops and becomes your friend.
- Genocide Route: You must kill him. He gives a "Papyrus" attack pattern; dodge blunt bones.
---
6. Undyne
- Spear attacks – yellow SOUL mode allows you to shoot back.
- High speed and aggression.
- Can turn your SOUL green (you must stay in a small area).
- In Genocide, she gains determination and becomes Undyne the Undying.
- She can be befriended by water and patience.
- In neutral/pacifist, sparing her is easy after running or using ACT.
- Neutral/Pacifist: Run away or use Flirt, then spare. Befriending requires giving her water after she collapses.
- Genocide (Undyne the Undying): Extremely hard. Attacks are relentless. Use highest defense gear (Heart Locket + Cowboy Hat or better). Dodge spears and shoots during yellow SOUL attacks.
---
7. Alphys
- Technological inventions (Mettaton, the elevator, etc.).
- Provides information about the Core.
- Cannot fight; she never becomes a boss.
- Guilt over amalgamates.
- You do not battle Alphys. She assists via phone.
- In True Pacifist, you navigate the True Lab with her help.
---
8. Mettaton
- Mettaton EX: High HP, powerful attacks (bomb, disco lasers, heart waves). Can be ended by rating his performance.
- Mettaton NEO in Genocide: Very easy – one hit kill. But if you spare him, he survives.
- Needs an audience; he stops if you ruin his show.
- Vulnerable to being flattered or ignored.
- Neutral/Pacifist: Use ACT to raise or lower his rating. To defeat Mettaton EX, raise rating to 10,000 (use poses, etc.) to make him short-circuit. Or fight normally to lower his HP.
- Genocide: Mettaton NEO is pathetic – attack once.
---
9. Asgore
- Trident – attacks that come from all sides.
- Fire magic – rain of fire.
- High HP (3500 in Neutral, lower in Pacifist if you befriend everyone).
- Damage increases as HP drops (desperate attacks).
- Emotionally vulnerable – if you talk to him, he hesitates.
- In True Pacifist, you don't fight; you spare him after talking.
- Neutral: Fight using best weapons, heal frequently. Dodge trident swings and fire columns.
- Pacifist: Use ACT > Talk multiple times until he gives up. Then spare.
---
10. Asriel Dreemurr
- God of Hyperdeath: Attacks include stars, bombs, projectiles from every direction.
- Save and Load powers: He can reset the fight.
- Immense HP: 9999 in first phase, then different forms.
- Memories of his family – if you show kindness, his attacks weaken.
- Can be spared by refusing to fight and using MERCY repeatedly.
- True Pacifist: Do NOT attack. Use ACT > Save repeatedly. Your friends' SOULs will appear and help. Dodge his attacks (some require precise movement). Eventually he calms down and you spare him.
---
11. Other Notable Characters
#### Napstablook
#### Muffet
- Spider webs and spiders that attack in patterns.
- Donut poisoning? She uses tea time.
- Can be spared if you donate enough gold to the spider bake sale (or if you have no money).
- Her attacks are slow and predictable.
#### Gerson
#### Mad Dummy and Glad Dummy
#### Froggit, Whimsun, Moldsmal, etc. (Minor Monsters)
---
Important Note on Routes and Character Roles
In Undertale, your choices permanently alter which role each character plays. The same character can be a boss, a friend, or a tragic victim depending on your actions. This guide covers their roles in the most common story paths. For a full list of consequences, see the \"Important Notes\" section.
---
Conclusion
Every character in Undertale has a distinct role, from the quiet protagonist to the godlike final boss. Understanding their strengths, weaknesses, and unlock conditions is key to navigating the Underground. Remember: team synergy comes not from party mechanics but from the bonds you forge. In the end, it is your mercy and determination that unite them all.
---
End of Characters & Roles Guide.
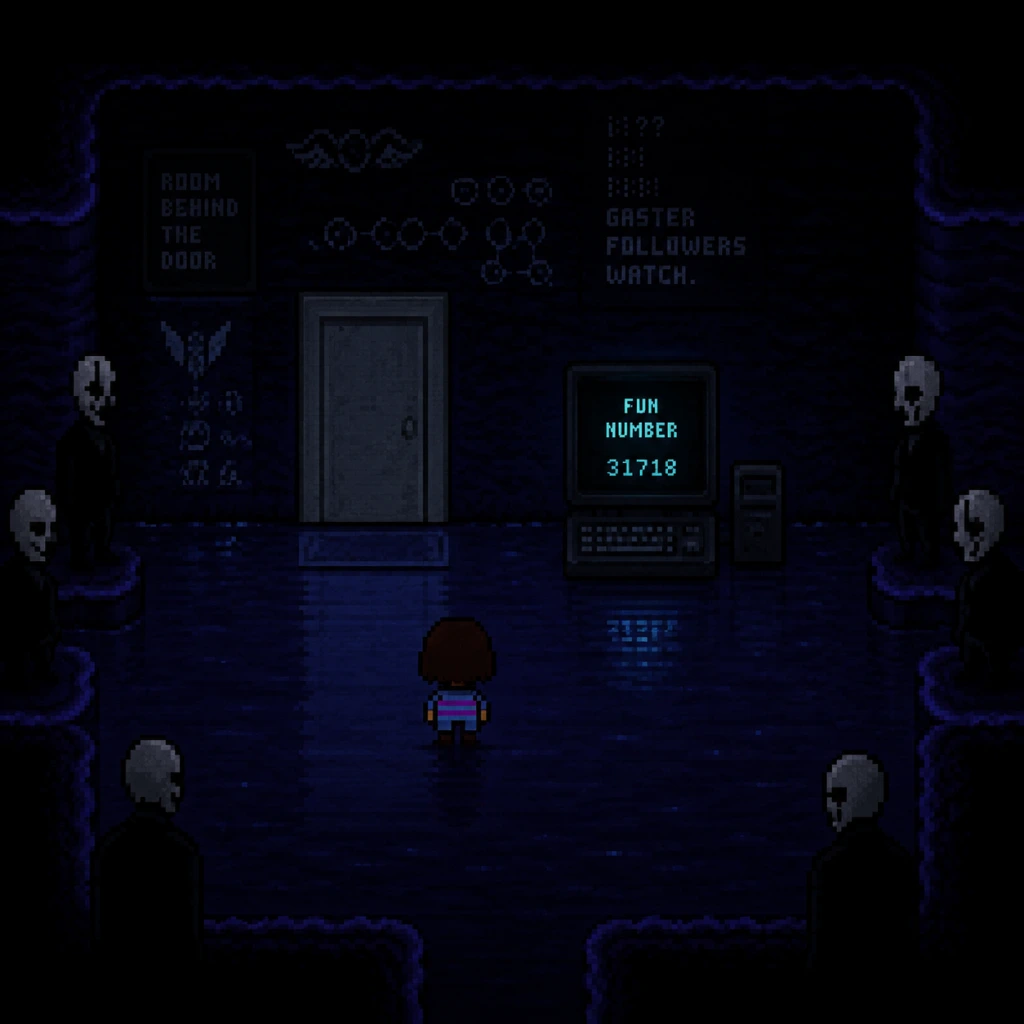
Cheats & Secrets
Cheats & Secrets Guide
Overview
Undertale has no traditional cheat codes (e.g., invincibility, level skips) that you can input via a keyboard or menu. However, the game is packed with developer-intended secrets, hidden events, and file-based modifications that act as "cheats" for experienced players. This guide covers all known safe secrets, Easter eggs, and the powerful FUN value mechanic.
---
1. The FUN Value
The FUN value is a hidden variable (0–100) that controls rare events. It is randomized per save file but can be manually set via file editing (PC only). Each FUN value triggers unique encounters or dialogue. Below are known values and their events:
| FUN Value | Event |
|---|
| 56 | The Man behind the tree appears in Snowdin Forest (grey door event).
| 61 | The Wrong Number Song phone call from "Dad" in the Napstablook fight.
| 66 | The Gaster Follower in the grey door room (Western room).
| 90–100 | Increased chance for Gaster Follower encounters overall.
| 100 | Triggers "Gaster's Theme" audio during the grey door sequence.
#### How to Check Your FUN Value (PC Only)
1. Navigate to `%LOCALAPPDATA%\UNDERTALE` (Windows) or `~/Library/Application Support/UNDERTALE` (Mac).
2. Open `file0` or `undertale.ini` with a text editor (e.g., Notepad).
3. Find the line `FUN=`. If missing, add exactly `FUN=56` for the Man behind the tree (most famous secret).
4. Save the file and relaunch the game.
> Warning: Editing save files can corrupt your progress. Always back up `file0` first.
---
2. File Editing (PC Only)
Beyond the FUN value, you can modify other flags for specific outcomes:
- Set `LOVE=0`, `HP=20` to simulate a fresh start (not recommended for story integrity).
- Set `route=1` to force Genocide Route flags (used for speedrunning).
- Set `true_pacifist=1` to unlock the True Pacifist ending without requirements (triggers final fight skip).
- Requirements: FUN = 66 or 56 (or high FUN), after completing Snowdin Forest.
- Location: In Snowdin Forest, after the bridge with the sentry station, go west until you see a grey door (normally closed). It opens if FUN > 50 and you have not killed Snowdrake.
- Contents: A room with three shadow creatures (Gaster Followers). Interact with them for cryptic lore about W.D. Gaster.
- Requirements: No kills; be friends with Napstablook.
- Location: In MTT Resort after the elevator, enter the house with the crying ghost. Go upstairs and walk through the wall to the right of the bed.
- Contents: A TV playing a video of Sans telling a knock-knock joke. Also a hidden key item: "Mystery Key" (unlocks the dog shrine).
- Location: In the snowed area of Snowdin (near the inn), there is a dog statue. Use the Mystery Key from MTT Resort to unlock it.
- Contents: A random dog (Annoying Dog) spawns and gives you the Annoying Dog key item (used in the True Lab for a secret scene).
- Trigger: FUN value between 90–100, or specific file editing.
- Effect: During the Napstablook fight, when you SAVE him, instead of the normal phone call, you hear a voice saying "Hello?". This is a reference to an early version of Toby Fox's song.
- Trigger: FUN = 56, after Snowdin Forest (before the trash zone).
- Effect: In a room with a large tree, examine the tree to see a shadowy figure (W.D. Gaster). He says one of several cryptic phrases before vanishing.
- Trigger: Call Papyrus on the phone multiple times during the Sans fight in Genocide Route.
- Effect: Sans will sometimes joke about the calls. This is very rare and requires over 100 calls.
- Location: Waterfall area, near the gap that the bird normally carries you across.
- Secret: If you do not call the bird (by not interacting with the phone), the bird will eventually appear anyway after 30 seconds of waiting.
- Trigger: During Sans fight, if you have the FUN value set to 100, Sans' Gaster Blasters will occasionally say "Gaster" in a distorted voice (file name: `gasterblast.wav`).
- Secret: Sans' fight is almost impossible to beat without exploiting his pattern. There is no skip or cheat to win instantly, but you can use the "Mercy" exploit (see Section 6).
- Secret: During the final fight, if you lose all hope (die repeatedly), a secret dialogue triggers where Flowey comments on your determination.
- Exploit: You can skip the fight entirely by editing `true_pacifist=1` in `file0` (see above).
- How: In any battle, select Mercy > Action > Check then Mercy > Spare repeatedly. This can restore HP in some fights if the enemy is scripted to spare you after a check (e.g., Mettaton EX).
- Note: This is borderline a glitch. It works only in specific scripted encounters.
- Description: During the Sans fight, if you select Mercy > Spare at the very start before Sans attacks, the fight will end immediately (Sans laughs and skips the battle). This is a deliberate joke by Toby Fox.
- Trigger: After buying the Annoying Dog item from the Dog Shrine, return to any room with snow. The dog will appear and steal your item. Not a cheat, but an Easter egg.
- Description: If you repeatedly die to a boss (e.g., Undyne the Undying), the game will eventually offer to reduce the difficulty (enemies deal half damage). This is a built-in assist, not a cheat.
- The Memoryhead Room (Waterfall): After the piano puzzle, enter the dark room and examine the coffin. If you have the Annoying Dog key item, a head appears with a memory.
- Temmie Village: Sell your refrigerator and other items to Temmie for coins; then buy the Temmie Armor for 999G. This armor reduces enemy damage to 1, making it the best defensive item in the game (but it costs a lot).
- Sans' Workshop: After True Pacifist, check the basement of Sans and Papyrus's house. It contains blueprints for the Sans' Room seen during Genocide.
- The Grey Door Wrong: If you enter the grey door room with FUN exactly 100, the door will not open; instead, a text reads "(The door is locked.)"
- No Console Commands: Undertale has no built-in developer console. All "cheats" require external file editing.
- Genocide Route: Exploiting file editing to skip Genocide fights defeats the purpose of the game's moral choices. Use only for testing.
- Safe Backups: Always backup your `file0` before editing.
#### Instructions
1. Open `%LOCALAPPDATA%\UNDERTALE\file0`.
2. Locate `[General]` section (usually at top).
3. Add or modify lines as needed. Example: `FUN=56`.
4. Save and restart the game.
---
3. Hidden Rooms & Locations
#### The Grey Door Room (Western Room)
#### The Secret Room in MTT Resort (Hapstablook's House)
#### The Dog Shrine
---
4. Easter Eggs & Developer Messages
#### The Wrong Number Song
#### The Man Behind the Tree
#### Sans' Secret Dialogue
#### The Bird That Carries You Over a Disproportionately Small Gap
#### The Gaster Blaster Voice Line
---
5. Secret Bosses
Undertale has no hidden optional bosses besides the mandatory ones (Toriel, Papyrus, Sans, etc.) — but two fights have major secrets:
#### Sans' Judgement (Genocide Route)
#### Asriel Dreemurr (True Pacifist)
---
6. Exploits & Glitches (Safe & Intended)
#### Infinite Healing Exploit
#### Sans' Mercy Exploit
#### Dog Ambush
#### The "I Couldn't Beat It" Trick
---
7. Other Notable Secrets
---
8. Ethical Considerations
---
For a deeper dive, refer to the Undertale Wiki and The Cutting Room Floor for unused content and beta secrets.