V Rising
## Game Introduction **V Rising** is a dark fantasy, open-world survival action RPG developed and published by **Stunlock Studios**. The game first launched in **Early Access on Steam in May 2022** and received its **full 1.0 release in May 2024**. As of 2025, it is **exclusively available on PC vi...

Download & Installation
Download Sources
V Rising is currently available only on PC via the Steam platform. There are no official versions for Epic Games Store, PlayStation, Xbox, Nintendo Switch, or mobile devices as of 2025. Any claims otherwise are from unofficial or potentially malicious sources.
- Official Source: [Steam Store Page](https://store.steampowered.com/app/1604030/V_Rising/)
- Legitimate Source: Steam is the sole official distribution platform.
- OS: Windows 10 64-bit
- Processor: Intel Core i5-6600 (3.3 GHz) or AMD Ryzen 5 1500X (3.5 GHz)
- Memory: 12 GB RAM
- Graphics: NVIDIA GeForce GTX 970 (4 GB) or AMD Radeon R9 290X (4 GB)
- DirectX: Version 11
- Storage: 20 GB available space
- Additional: SSD recommended; internet connection required for online play.
- OS: Windows 10 64-bit
- Processor: Intel Core i7-10700K (3.8 GHz) or AMD Ryzen 7 5800X (3.8 GHz)
- Memory: 16 GB RAM
- Graphics: NVIDIA GeForce RTX 2080S (8 GB) or AMD Radeon RX 6800 (16 GB)
- DirectX: Version 11
- Storage: 20 GB SSD
- Additional: SSD required; stable broadband internet connection.
- A Steam account is mandatory to purchase and install V Rising.
- The game is a paid title (check current pricing on Steam). No subscription is needed.
- For online multiplayer, a stable internet connection and a free Steam account suffice.
- If you already have an account, log in.
- If new, click "Create a New Account" and follow the registration process (email verification required).
- Once installed, the Play button will appear in your Library.
- Click it to start the game.
---
System Requirements
Ensure your PC meets the following specifications before downloading. These are taken from the official Steam page.
Minimum Requirements
Recommended Requirements
---
Account Requirements
---
Step-by-Step Installation for PC (Steam)
1. Install Steam
1. Go to [store.steampowered.com](https://store.steampowered.com).
2. Click "Install Steam" in the top-right corner.
3. Download the Steam setup file (`SteamSetup.exe`).
4. Run the installer and follow the on-screen instructions (choose installation folder, language, etc.).
5. Once installed, launch Steam.
2. Create or Log In to Your Steam Account
3. Purchase V Rising
1. In the Steam client, use the search bar (top-right) to find "V Rising".
2. Click on the official store page.
3. Click "Add to Cart" and proceed to checkout.
4. Complete payment using your preferred method (credit/debit card, PayPal, Steam Wallet, etc.).
5. After purchase, the game will be added to your Steam Library.
4. Download and Install the Game
1. In your Steam Library, locate "V Rising" in the left sidebar.
2. Click on it, then click the Install button (blue button on the right).
3. Choose the installation directory (default is `C:\Program Files (x86)\Steam\steamapps\common\V Rising`). You can change it if needed.
4. Steam will begin downloading the game files. Wait for the process to complete.
5. Installation is automatic once the download finishes. No additional steps required.
5. Launch the Game
---
First Launch Setup
On first launch, the game will perform initial setup:
1. Language Selection: Choose your preferred language (English, French, German, etc.).
2. Graphics Settings: The game will detect your hardware and suggest defaults. You can adjust resolution, quality presets, etc., from the main menu later.
3. Account Linking (optional): You may be prompted to link a Stunlock Studios account for cloud saves and leaderboards. This is not mandatory for offline play.
4. Tutorial Prompt: The game will ask if you want to play the tutorial or skip it (recommended for new players).
5. Online Mode: You can choose to play on official servers, private servers, or offline (solo).
---
Common Installation Errors and Fixes
| Error / Issue | Cause | Solution |
|---|
| Steam download stuck or slow | Network congestion, Steam server load, or corrupt cache. | Pause and resume the download, restart Steam, or change download region in Steam Settings > Downloads > Download Region.
| "Missing executable" or launch fails | Antivirus may have quarantined a game file. | Add Steam and the V Rising folder (`...steamapps\common\V Rising`) to your antivirus exclusions. Then verify game files (see Post-Installation Verification).
| DirectX error | Outdated or missing DirectX runtime. | Install the latest DirectX from Microsoft's official site, or run `DXSETUP.exe` inside the game's `_CommonRedist` folder.
| Crash on startup | Incompatible graphics drivers or corrupted config files. | Update GPU drivers (NVIDIA/AMD). Delete the `settings` folder in `%appdata%\V Rising` (backup first).
| Black screen on launch | Fullscreen mode conflict or GPU driver issue. | Press `Alt+Enter` to switch to windowed mode temporarily. Update drivers.
| Steam not recognizing V Rising as installed | Integrity issue or wrong library folder. | Go to Steam > Settings > Downloads > Steam Library Folders, ensure the correct drive is listed. Then verify game files.
| Network connection errors in multiplayer | Firewall blocking the game. | Allow `VRising.exe` and `VRisingServer.exe` through Windows Firewall.
---
Post-Installation Verification
After installation, it's good practice to verify that the game files are intact. This can resolve many hidden issues.
How to Verify Game Files on Steam
1. Open your Steam Library.
2. Right-click V Rising and select Properties.
3. Go to the Installed Files tab.
4. Click Verify integrity of game files....
5. Steam will scan and automatically re-download any missing or corrupted files.
6. Wait for the process to complete (may take several minutes).
Additional Checks
- Check for updates: Ensure the game is up to date. Steam auto-updates but you can manually check by right-clicking > Properties > Updates.
- Test performance: Launch the game and run through the tutorial or a quick game session to confirm stability.
- Cloud save sync: If you enabled Steam Cloud, verify that your saves are syncing correctly (look for a cloud icon next to the play button).
- PlayStation / Xbox: No official console versions have been announced. Do not trust any installer claiming to be a console version.
- Nintendo Switch: Not available.
- Mobile (iOS/Android): No mobile version exists. Beware of fake apps.
- Epic Games Store: V Rising is not available on EGS. Only purchase via Steam.
---
Platform Availability Notes
---
For further support, visit the official [V Rising Discord](https://discord.gg/vrising) or the [Steam Community Hub](https://steamcommunity.com/app/1604030).
Game Introduction
Game Introduction
V Rising is a dark fantasy, open-world survival action RPG developed and published by Stunlock Studios. The game first launched in Early Access on Steam in May 2022 and received its full 1.0 release in May 2024. As of 2025, it is exclusively available on PC via Steam, with no console or mobile versions announced. The following introduction covers every aspect of the game, from story to modes, and explains why it has captivated players worldwide.
Genre
- Primary: Open-world Survival Action RPG
- Secondary: Base Building, Sandbox, PvP / PvE
- Combat: Isometric, skill-based, real-time with dodging and aiming
- Your Vampire Lord: Fully customizable in appearance and abilities, with no predefined personality—your choices define your legacy.
- V Blood Carriers: Over 60 boss creatures (including Dracula himself in the full release) that serve as major antagonists. Each offers unique blood types, abilities, and rewards when defeated.
- Humans & The Church of Luminance: The main hostile faction of priests, soldiers, and hunters dedicated to destroying vampires. They patrol towns and strongholds.
- Creatures & Rivals: Werewolves, bandits, ghosts, mystical beasts, and other vampire lords (in PvP servers).
- Vampiric Power Fantasy: Feed on blood to gain temporary buffs, transform into mist or wolf forms, use shadow magic, and command the night.
- Fortress Building: Construct elaborate castles with walls, floors, traps, servant coffins, and decorative items. Defend your base from raiders.
- Dynamic Combat: Isometric view with manual aiming for spells and weapons. Timing, positioning, and resource management matter more than grinding.
- Progression Through Bosses: Defeating V Blood carriers unlocks new crafting recipes, spells, and building tiers, making exploration essential.
- Player-Driven Economy & Politics: In online servers, players trade, form clans, declare wars, and compete for territory.
- Survival games (e.g., Valheim, ARK, Conan Exiles)
- Isometric action RPGs (e.g., Diablo, Path of Exile)
- Dark fantasy and vampire lore
- Both PvE-only players who enjoy cooperative building and boss hunting, and PvP players who relish base raiding and territorial conflict.
- PvE Mode: No player-versus-player combat. Focus on cooperative boss hunting, base building, and exploration. Combat is against AI enemies only.
- PvP Mode: Full loot PvP with open-world and castle raids. Players can attack other vampires, steal resources, and claim territory. Two sub-types:
- Private Servers: Host your own game with custom rules (e.g., day length, resource rates, PvP enabled/disabled). Supports offline solo play (single-player local world).
- Online: Persistent online servers (both official and community-run) with up to 40 concurrent players. Requires internet connection and a server to join.
- Offline: Play solo in a private world that pauses when you log off. All content is accessible without internet. Progress is saved locally (plus optional cloud save via Steam).
- Co-op: Up to 4 players in a private game; public servers allow larger groups via clans.
- Legacy of Castlevania (May 2024): A major paid expansion adding Castlevania-themed cosmetics, weapons, a new castle facade, and a unique V Blood carrier (Simon Belmont). This crossover brings iconic vampire-hunter gear to Vardoran.
- Cosmetic Packs (Paid): Optional DLCs such as the Founder’s Cosmetic Pack, Dracula’s Legacy Pack, and various weapon skins. These are purely visual and do not affect gameplay.
- Free Content Updates: Stunlock regularly adds new V Blood carriers, regions (e.g., Mortium, the cursed forest), spells, building sets, and quality-of-life improvements at no cost.
- Seamless Blend of Genres: It takes the base-building and survival grind of Valheim and combines it with the fast-paced, skill-based combat of an isometric ARPG, all wrapped in a vampire theme that deeply integrates blood mechanics into every system—from healing to crafting.
- Blood as a Resource: Different creatures have different blood types (Warrior, Brute, Scholar, etc.) and purity levels. Feeding on them grants temporary bonuses, such as increased speed, damage, or resource yield. This encourages constant hunting and tactical feeding.
- Castle Building with Purpose: Your castle isn’t just a home; it’s a hub for refining resources, imprisoning humans as blood sources, summoning servants, and defending against raids. The building system is grid-free and highly customizable.
- No Levels, Only Abilities: You don't gain XP; you learn spells and unlock gear by defeating bosses. Progression is tied directly to exploration and combat mastery, not grinding.
- Dynamic Day/Night Cycle: As a vampire, you burn in sunlight. During the day you must stay in shadow or inside your castle, while night is your time to hunt. This creates tense strategic planning.
Setting & Story Overview
You awaken as a newly risen vampire, weakened and centuries after your prime. The world of Vardoran is a vast, gothic landscape filled with human settlements, ruined castles, dangerous creatures, and other supernatural forces. Your goal: rebuild your vampire empire, conquer the land, and defeat the most powerful beings (V Blood carriers) to unlock ancient vampiric powers. The narrative is driven by exploration and boss progression rather than a linear scripted campaign. Dracula’s shadow looms over the lore, but the story is yours to write as you rise from the ashes.
Main Characters & Factions
Core Appeal
Target Audience
This game appeals to fans of:
Game Modes
- Standard PvP: Continuous conflict.
- Solo/Duo PvP: Restricted party sizes for balanced small-group play.
Online & Offline Support
DLC & Expansions Overview
What Makes V Rising Unique?
For further details on downloading and installing the game, see the Download & Installation section elsewhere in this guide.

Getting Started
Getting Started: Your First Night as a Vampire
Welcome to V Rising, fledgling. This guide is designed to help you survive your first hour, avoid common pitfalls, and establish a solid foundation for your reign of darkness. We’ll cover character creation, controls on all platforms (PC keyboard/mouse and controller), the user interface, essential early objectives, what to avoid, resource priorities, and a day-one checklist.
First Hour Walkthrough: Survive the Tutorial & Claim Your Castle
1. Introduction Cutscene & Awakening:
- The game begins with a cinematic. You are a weakened vampire, recently awakened from a centuries-long slumber. You’ll appear in a crypt near the Farbane Woods region.
- Immediately, a ghostly narrator (Dracula’s spirit) guides you. Follow the glowing waypoint.
2. Character Creation (if any):
- V Rising has no character creation. Instead, you choose a Vampire Archetype from four presets: Rogue, Warrior, Spellcaster, or Dracula. These only affect starting gear (weapons and a couple of spells) and appearance (hair, face, outfit). All are viable; choose the look you like. Later you can unlock more appearance options via in-game items.
- After selection, you spawn with:
- A weapon (Sword, Axe, Mace, or Scythe depending on archetype)
- Two basic spells (e.g., Veil of Shadows for dodge, and a skill like Blood Strike)
- No armor (you’ll need to gather cloth and leather early)
3. The First Steps (0-10 minutes):
- Follow the Tutorial Waypoint: It will lead you to your first major objective: place your Castle Heart. This is the core of your base. You’ll find a designated spot with a glowing blue light. Press E (or interact button) to place it. Your castle is now anchored.
- Gather Bone and Stone: Around the starting area, you’ll see small piles of bones (white) and stones (grey). Hold RMB (or attack) to break them. Collect: 10 Bones, 10 Stone. Also, gather Blood Essence (red orbs) from killing small creatures like deer or wolves. You need 5 Blood Essence to activate your first Blood Altar.
- Craft Basic Stations: Open your build menu (B key / D-Pad Up) and place a Simple Workbench and a Simple Furnace. Craft: Copper Ingots (copper ore + stone), Simple Shelter Floor (for protection against sunlight).
- First Day-Night Cycle: It’s likely still daytime. Stay in shade or your castle interior! Sunlight deals massive damage. If caught, sprint to shade. The first day lasts about 20 minutes of real time. Use it to mine copper and stone near your base.
4. First Fight & Resource Run (10-30 minutes):
- Kill the Werewolf and the Bandits: Near your base are weak enemies like Wolves, Deer, and Bandits. Practice your dodge (spacebar / A button) and attack combos. Killing a creature gives Blood Essence and Raw Hide (from animals) or Coins (from bandits).
- Upgrade Weapons: At the Simple Workbench, craft a Copper Axe and Copper Sword. This drastically improves resource gathering and combat.
- Find V Blood Bosses: In your build menu, interact with the Blood Altar (placed in your castle). It shows boss locations. Your first target is Alpha Wolf (Level 10) or Errol the Stonecutter (Level 15). Track them, but don’t fight yet. Collect more resources.
- Gather Wood & Fiber: Use the axe on trees (oak, pine) and fiber from bushes. You need Wood Planks (from sawmill) and Coarse Thread (from loom).
5. Nighttime Emerges (30-60 minutes):
- Hunt V Blood Bosses: Once you have decent gear (Iron-tier recommended), hunt the first boss. Each boss drops a V Blood item that unlocks new recipes (e.g., Castle Heart upgrades, new structures). The first boss is often Goreswine the Ravager (Level 20) near the Farbane Woods.
- Expand Your Base: Use the Build Hammer to add walls, floors, storage chests, a Blood Altar, a Tomb (for servants later), and a Simple Bed (buff).
- Craft Armor: Unlock Iron Armor via the Tailoring bench. Craft a full set (chest, legs, boots) for survivability.
- Secure a Source of Blood: Build a Blood Press to extract blood from hearts (dropped by animals) for health potions.
Controls on All Platforms
V Rising is available on PC only. Controls differ for keyboard/mouse vs. controller (Xbox/PS4/PS5 support via Steam).
#### PC Keyboard & Mouse
| Action | Key |
|---|---|
| Move | WASD |
| Attack / Primary Interact | Left Mouse Button |
| Aim / Secondary Interact | Right Mouse Button |
| Spell 1 | Q |
| Spell 2 | E |
| Ultimate (Spell 3) | R |
| Dash / Dodge | Spacebar |
| Interact | F |
| Use Item (e.g., potion) | 1-8 number keys |
| Open Inventory | Tab |
| Open Build Menu | B |
| Open Map | M |
| Journal / Quests | J |
| Blood Altar | O |
| Emote | T |
| Toggle Walk | Caps Lock |
| Zoom Camera | Scroll Wheel |
| Rotate Camera | Hold Middle Mouse + Move |
| Quick Craft | Left Alt + Click |
| Action | Button |
|---|---|
| Move | Left Stick |
| Look / Aim | Right Stick |
| Attack (Primary) | RT |
| Secondary Attack / Aim | LT |
| Spell 1 | LB |
| Spell 2 | RB |
| Ultimate | Y + LB/RB (hold) |
| Dash / Dodge | A (while moving) |
| Interact | X |
| Jump | (not present – less relevant) |
| Open Inventory | Select (View) |
| Build Menu | D-Pad Up |
| Map | D-Pad Right |
| Journal / Quests | D-Pad Left |
| Use Item (potion slot) | D-Pad Down |
| Use Main Hand Weapon Skill | B |
| Quick Swap Weapon | Hold A |
User Interface (UI) Overview
- Top Left: Health bar (red), Blood meter (red diamonds), Blood Type (e.g., Creature, Brute). Blood type affects stats. Blood Essence (blue bar) is used for building and spells.
- Top Center: Time of day icon (sun/moon) and current weather. Sunlight icon appears when exposed – take cover immediately.
- Top Right: Mini-map (press M to expand). Shows your castle icon, nearby nodes, enemies (red dots).
- Bottom Left: Action bar with 8 slots for consumables (potions, blood vials, scrolls). Drag items from inventory.
- Bottom Center: Health, Energy (yellow for abilities), and weapon durability. Durability degrades with use – repair at workbench.
- Bottom Right: Weapon slots (primary + secondary), spells (2 active + ultimate), and a quick-craft button.
- ESC Menu: Pauses game in single-player; options for settings, leave game, etc.
- Journal (J): Your quest log. Shows current objectives, V Blood bosses tracked, and unlock progress.
- Blood Altar (O): Shows all V Blood bosses, their level, location, and rewards you’ve unlocked.
- Immediately gather 20 bones + 20 stones + 5 Blood Essence to place your Castle Heart.
- Stay near your base during first daylight; explore up to 100m radius only.
- Kill only animals and weak bandits for first 30 minutes; avoid bears, wolves in packs, or high-level (20+) roaming mobs.
- Upgrade your weapon to Iron before fighting any Level 20+ boss.
- Build storage chests early – inventory fills fast.
- Do NOT venture into far regions (Dunanley Farmlands, Silverlight Hills) before Level 30 – enemies will one-shot you.
- Do NOT leave your castle at sunrise unless you have a roof. Sunlight deals 10% HP per second.
- Do NOT ignore blood types – Creature blood gives faster movement, Brute gives extra damage, Warrior gives armor. Switch blood by feeding on appropriate mobs.
- Do NOT hoard all materials – craft quickly; resources respawn daily.
- Do NOT fight multiple enemies at once – ranged enemies kite you; use dodge and corners.
Essential Early Objectives
1. Place Your Castle Heart (within 5 minutes of spawning).
2. Build a Simple Workbench and craft a Copper Axe.
3. Gather 100 Stone, 100 Wood, 50 Copper Ore, 50 Animal Hide – these feed initial crafting.
4. Defeat your first V Blood boss (Alpha Wolf or Goreswine) to unlock Workbench II.
5. Craft Leather Armor (chest and legs) to survive enemy hits.
6. Build a Blood Press and create Blood Vials for healing.
7. Expand your castle to at least 2 rooms (crafting area, storage).
8. Unlock the Paper Press via Errol the Stonecutter (for parchment, needed for recipes).
What to Do First & What to Avoid
Do First:
Avoid:
Early Resource Priorities
| Resource | Why | Where to Find |
|---|---|---|
| Bone | Craft bone armor, torches, first tools | Ground piles, skeletons |
| Stone | Base foundations, furnaces | Rock outcrops, boulders |
| Copper Ore | Copper ingots for weapons & tools | Copper veins (bright orange) in Farbane Woods |
| Wood | Planks, walls, torches | Trees (pine, oak) |
| Animal Hide | Leather armor, housing decorations | Deer, wolves |
| Blood Essence | Activate structures, spells, base | All enemies drop; higher-level mobs give more |
| Coins | Buy recipes from vendors (e.g., later paper press) | Bandits, chests |
Common Beginner Mistakes
1. Placing Castle Heart in an open area – It must be under a roof or in natural shade. Morning sun will destroy it if exposed. Always place it inside a cave or under a tree canopy (but better to build walls quickly).
2. Ignoring durability – Weapons break mid-combat. Always carry a spare or repair at workbench. Check durability icon (bottom center) turning orange.
3. Fighting without blood – Your blood meter depletes as you use abilities. Feed on enemies to refill. If empty, you cannot use spells.
4. Not using the Blood Altar – Many new players don’t place it. It tracks bosses needed for progress. Place it early.
5. Overextending at night – Night is safe from sun, but powerful night creatures spawn. Stay near base until you have good armor.
6. Skipping the tutorial prompts – They teach crafting, building, and mounting. Pay attention.
7. Trying to build a palace immediately – Start with a 2x2 room with walls and roof. Large bases waste resources early.
8. Not using the quick-craft feature – Hold Left Alt and click an item in inventory to auto-craft missing components.
Day-One Checklist (First Real-Time Day – approx. 24 minutes)
- [ ] Awaken, choose archetype, and place Castle Heart.
- [ ] Gather 10 Bone, 10 Stone, 5 Blood Essence.
- [ ] Build Simple Workbench and craft Copper Axe and Copper Sword.
- [ ] Build Simple Furnace and smelt 8 Copper Ingots.
- [ ] Build a Simple Blood Altar and activate with 10 Blood Essence.
- [ ] Hunt down and kill Alpha Wolf (Level 10 – near the starting crypt) to unlock the next tier.
- [ ] Gather 50 Wood, 50 Stone, 20 Animal Hide.
- [ ] Craft Leather Armor (chest and legs) at Simple Tailoring Bench.
- [ ] Build a Blood Press and create 5 Blood Vials (healing).
- [ ] Build a Simple Bed for resting buff (increased health regeneration).
- [ ] Close your base with walls and a roof (stone walls + wooden roof).
- [ ] Spend the first night exploring the surrounding Farbane Woods, gathering more resources, and killing bandits for coins.
- [ ] Unlock the Paper Press (by defeating Errol the Stonecutter, Level 15) before day ends.
Note: If you complete this checklist within your first 24-minute day-night cycle, you’re ahead of the curve. The game is a marathon, not a sprint. Take your time, enjoy the atmosphere, and remember: the sun is your only enemy more dangerous than any vampire hunter.
Good luck, vampire. Build your castle, conquer the land, and claim your throne. The world of Vardoran awaits.

Core Gameplay
Core Gameplay Overview\n\nV Rising is a dark fantasy survival action RPG where you play as a newly risen vampire. The core gameplay loop revolves around the eternal cycle of a vampire: hunt for blood, gather resources, build your castle, defeat V Blood carriers (bosses), unlock new powers and technologies, and expand your territory. Combat is real-time, isometric, and skill-based, requiring precise dodging, weapon combos, and spell management. Progression is tightly tied to defeating named bosses (V Blood) which unlock Castle Heart upgrades, new recipes, forms, and abilities. Exploration is open-world but gated by gear level, encouraging players to gradually push into more dangerous zones. The economy is player-driven with some NPC vendors, and character builds revolve around weapon choice, spell schools, gear sets, and blood type bonuses.\n\nBelow, the gameplay is broken down into four progression tiers: Early Game, Mid Game, Late Game, and Endgame. Each tier explains the core loop, combat and interaction systems, progression unlock path, exploration zones, quests/missions, economy, character/build growth, and endgame structure.\n\n---\n\n## Early Game (Gear Level 0–20, Farbane Woods)\n\n### Gameplay Loop\n- Your first nights involve scavenging basic resources (stone, wood, bones, animal hide) from the world around your starting camp.\n- Build a simple Tier 1 castle with a Castle Heart, walls, floors, a tomb, and workstations (e.g., Blood Press, Sawmill).\n- Complete the journal objectives (essentially tutorial quests) to unlock essential structures: the Scarecrow for fish oil, the Water Well for infinite water, and the Study for first research.\n- Hunt animals and human NPCs for blood, which restores health and provides temporary buffs depending on creature type (e.g., Warrior blood increases physical damage, Rogue blood improves movement speed).\n- Defeat early V Blood carriers such as the Werewolf Champion, Bandit Wolf Pack, Lidia the Chaos Archer, and Grayson the Armorer. Each drops a unique item (e.g., Grayson’s recipe for the Armorer’s Craft).\n\n### Combat & Interaction Systems\n- Weapons: Mace (stagger focus), Axes (AoE cleave and bleed), and Swords (balanced) are the earliest options. Combat relies heavily on left-click attacks and the weapon’s special abilities (e.g., Mace’s “Rupture” AoE).\n- Spells: You start with Veil of Blood (dash) and Chaos Volley (projectile burst). These are your only spells until you unlock more via V Blood kills. Spells have cooldowns and mana cost.\n- Interaction: Use `E` to harvest, open chests, fill blood vials, or drain blood from enemies. Press `Tab` to open your inventory. The “blood altar” lets you track nearby humans.\n- Combat tips: Dodge telegraphed attacks (orange AoE circles). Use terrain to break line-of-sight. Always loot blood vials from defeated enemies.\n\n### Progression\n- Castle Heart Tier 1: Unlocked automatically after building your first castle heart. Allows basic structures and up to ~30 tiles.\n- Research: Build a Study and consume paper to unlock recipes. Early research targets: Stone Brick, Plank, Whetstone, Simple Workbench upgrades.\n- Gear: Craft bone- and stone-tier equipment from monsters and refined materials. Your first major goal is to craft full Copper gear (sword, mace, armor) for improved stats.\n- Unlocks: Defeating Grayson the Armorer unlocks the Smelter to produce Copper Ingots, enabling Tier 1 gear upgrades.\n\n### Exploration\n- Region: Farbane Woods (starting zone). Low-level enemies (bandits, wolves, deer).\n- Points of Interest: Bandit strongholds, the Anfractuous Mine (copper, iron), various crypts and caves.\n- Gates: The zone borders are blocked until you reach gear level ~20. Early game you cannot cross into Dunley Farmlands.\n\n### Quests & Missions\n- Castle Journal: The main questline. Tasks include: “Build a Tomb”, “Place a Blood Altar”, “Refine Planks and Stone Bricks”, “Defeat your first V Blood”.\n- V Blood Journal: Each boss you defeat adds a page; completing a page gives a passive bonus (e.g., increased health, blood drain efficiency).\n\n### Economy\n- Vendors: No early-game NPC vendors. Economy is entirely loot-based: sell junk items to the rare human trader (random spawn) for coins you cannot use yet.\n- Blood Vials: The primary currency for blood-related trades later. Store high-quality blood in vials for healing or potions.\n- Resources: Focus on gathering stone, wood, and plant fiber for cloth. Craft cages to capture humans for blood farming.\n\n### Character & Build Growth\n- Blood Types: Early on, any blood is fine. Prioritize quality (the percentage). High-quality Warrior blood (+15% physical power) helps with early bosses. Use the Blood Altar to track and drain humans with desirable blood types.\n- Weapon Specialization: Stick with one weapon type. The Axes’ AoE is excellent for clearing camps; the Mace’s stun is good against single targets.\n- Spells: Chaos Volley is your main damage; Veil of Blood is your only escape. Unlock the “Ward of the Damned” (shield spell) from a V Blood for added survivability.\n- Gear Sets: Craft full copper armor for defense; wear cloth items for spell power if using magic.\n\n### Endgame Structure (of Early Game)\n- The early game concludes when you have defeated Grayson the Armorer and crafted full Copper gear. You should have a small castle with a Blood Press, Sawmill, Study, and Tomb. Next, you’ll push into Dunley Farmlands for iron and cloth.\n\n---\n\n## Mid Game (Gear Level 30–60, Dunley Farmlands & Cursed Forest)\n\n### Gameplay Loop\n- Expand your territory: build a secondary castle or upgrade your main castle to Tier 2 (Castle Heart upgrade allows larger structures).\n- Gather Iron Ore and Cotton for new gear and structures. Build a Grinder and Chemistry Station.\n- Start capturing servants (ghouls or vampire thralls) to defend your castle or gather resources while you’re offline.\n- Defeat mid-tier V Bloods like Beatrice the Tailor (unlocks Dark Silver crafting), Bane the Shadowblade (unlocks mace upgrade), Maja the Soul Mage (unlocks new spells), and Terah the Geomancer (unlocks Tier 2 recipes).\n- Upgraded weapons unlock new abilities (e.g., Sword’s Whirlwind, Reaper’s AoE).\n\n### Combat & Interaction Systems\n- New Weapons: Crossbow (ranged damage), Reaper (AoE sweep), Sceptre (support spells). Use crossbow for safe damage on bosses.\n- Spell Combos: Unlock Frost spells (slow/freeze), Chaos spells (burst damage), Blood spells (heal/damage). Combine Chaos Volley with Frost Barrier for AoE control.\n- Interactions: Use the Charm spell (if unlocked) to convert animals into your allies. Place saw blades and other traps in your castle for defense.\n- Boss Tactics: Mid-game bosses have multiple phases. Learn their attack patterns. Bring blood potions. Use terrain to avoid ranged attacks.\n\n### Progression\n- Castle Heart Tier 2: Requires defeating Terah the Geomancer (level 40 boss). Allows larger foundation, more tiles, Tier 2 walls (stronger).\n- Research Bench: Unlock experimental research (using scrolls) to get merciless weapon/armor recipes.\n- Gear: Iron-tier gear (strength) and Dark Silver-tier gear (magic) become available. Aim for full Iron or Dark Silver armor.\n- Unlocks: Defeating Beatrice gives the Tailor’s recipe, unlocking Cotton Yarn and Dark Silver chainmail.\n\n### Exploration\n- Dunley Farmlands: Level 30–50 enemies. Rich in iron nodes, cotton plants, and lots of humans for blood farming. Contains the “Iron Mine” for large ore deposits.\n- Cursed Forest: Level 50–60. Deadly creatures, poison plants, and high-tier loot. Early mid-game you can enter the edge for gloom shrooms and ghost essence.\n- Silverlight Hills (partial): Level 50+ but dangerous due to silver damage mechanic; you need silver resistance potions or golden jewelry to survive.\n\n### Quests & Missions\n- Castle Journal: New tasks: “Build a Servant Coffin”, “Capture a Thrall”, “Defeat Terah the Geomancer”.\n- V Blood Hunt: Mid-game V Bloods grant specific unlocks. Example: Defeating Bane unlocks the “Soul Stone” for crafting ultimate spells.\n- Exploration Journal: Discover landmarks (e.g., the Monastary, the Cursed Church) for bonus XP.\n\n### Economy\n- NPC Vendors: The “Precious Metals” trader in Dunley sells silver coins for rare materials. Trade excess iron ingots for silver coins, then buy dark silver ingots.\n- Servants: Send your servants on missions to gather materials (cotton, leather, gems) while you play. Upgrade their gear to improve mission success.\n- Blood Market: Collect high-quality blood from humans (especially creatures with “Scholar” blood for spell builds) and sell to other players on PvP servers, or use in potions.\n- Gem Dust: From selling gems to the vendor; then buy inventory expansions.\n\n### Character & Build Growth\n- Blood Builds: By now you should specialize. If using magic, seek Scholar blood (spell power + cooldown reduction). If physical, Warrior or Brute blood. Rogue blood for movement speed in PvP.\n- Weapon Specialization: Choose two weapons to upgrade. Example: Reaper for PvE farming, Crossbow for bossing. Upgrade both to Iron tier.\n- Spells: Unlock the Ward of the Damned (shield), Chaos Barrier (AoE knockback), and Blood Rite (heal). For Frost, get Frost Vortex (AoE slow). Start using ultimate spells (e.g., Veil of Shadows - damage on dash).\n- Gear Sets: Mix of iron and dark silver items. Prioritize the set bonus: want at least 2 pieces of the same set for extra stat (e.g., +15% spell power from Dark Silver).\n\n### Endgame Structure (Mid Game)\n- The mid game ends when you have defeated Terah the Geomancer (unlocking Tier 2 castle), built a servant army, and crafted a full set of Iron gear. You should now explore the Cursed Forest and Silverlight Hills for late-game materials.\n\n---\n\n## Late Game (Gear Level 60–80, Silverlight Hills & Hallowed Mountains)\n\n### Gameplay Loop\n- Siege Warfare: Build a siege golem (requires gloom shrooms and stonemasonry) to destroy enemy castle barriers in PvP servers. In PvE, you still need golems for high-level areas (e.g., Dracula’s castle).\n- High-Resource Runs: Farm Primordial Essence from Silverlight gargoyles, Gloom Shrooms from the Cursed Forest depths, and Soul Shards from elite bosses.\n- Defeat Dracula’s Generals: V Bloods like Solarus the Sunbringer (level 75), The Winged Horror (level 77), and Octavian the Voidwalker (level 80).\n- Max out Castle: Upgrade to Tier 3 Castle Heart (from defeating a late-game boss, e.g., Solarus). Allows huge foundations, T3 walls (immune to regular siege), and advanced workstations.\n\n### Combat & Interaction Systems\n- Weapon Mastery: All five weapons are viable. Use Sword for mobility, Mace for defense, Reaper for AoE, Crossbow for safe damage, Sceptre for support in groups.\n- Spell Modifiers: Use Jewel Gems (from V Bloods and bosses) to modify spells’ effect. Example: Add a stun to Chaos Volley or make Ward of the Damned heal allies.\n- Ultimate Spells: Every school has an ultimate spell (e.g., Chaos Storm, Frost Matter, Blood Moon). These have long cooldowns but huge impact.\n- PvP Combat: Late-game PvP involves ritual casts, baiting dodges, using environment. Key spells: Silence, Dispel, Group Shield. Always carry blood vials and healing potions.\n- Siege Actions: Use the Build Hammer to place siege equipment (catapults, ballistae) during castle raids. Coordinate with allies.\n\n### Progression\n- Castle Heart Tier 3: Requires defeating Solarus the Sunbringer (level 75 boss in Silverlight Hills). Unlocks T3 walls, T3 workstations (e.g., Legendary Forge).\n- Legendary Weapons: Crafted at the Legendary Forge using Primordial Essence, Dark Silver, and special boss drops. Each legendary has a unique weapon skill (e.g., Ghoul Cleaver’s leech).\n- Armor: Merciless Dark Silver armor or Dracula’s armor set (from late-game bosses). Aim for full set bonuses.\n- Research: Unlock the “Advanced Alchemy” station for powerful potions (e.g., Blood Frenzy, Dark Silver resistance).\n\n### Exploration\n- Silverlight Hills: Silver damage mechanic – wear golden jewelry or drink silver resistance potions. Lots of werewolves, gargoyles, near the Fortress of Dracula.\n- Hallowed Mountains: Endgame zone (level 80+). Home to Dracula’s castle and the final boss. Requires gear level 80+ to survive.\n- Cursed Forest interior: Deep part with high-tier enemies and trees that drop blessed wood.\n- Secret Bosses: Find hidden V Bloods like The Scourge in a cave for unique jewel drops.\n\n### Quests & Missions\n- Castle Journal: “Build a Siege Golem”, “Defeat Solarus the Sunbringer”, “Enter the Hallowed Mountains”.\n- V Blood Journal: Each late-game boss adds powerful passive bonuses: +50 health, +5% movement speed, etc.\n- Path of the Vampire: A multi-stage quest to unlock the ultimate vampire form (e.g., Bat swarm attack).\n\n### Economy\n- Player Trading: Active on PvP servers; trade primordial essence, legendary materials, weapons. No global market, so use trade chat.\n- Vendor Items: Sell high-end gems to vendors for gold coins, which buy rare crafting items like "Rotten Bone" for potions.\n- Servant Missions: Send level 80 servants to gather gloom shrooms or dark silver ingots from the Cursed Forest.\n- Coin to Gem Dust: Convert excess gold coins into gem dust at a 10:1 ratio, used for item upgrading.\n\n### Character & Build Growth\n- Blood Quality: Aim for 100% quality blood from specific creatures (e.g., Scholar from mages, Warrior from knights). Use the Blood Altar to find perfect targets. Higher quality gives bigger bonuses and extra ability power.\n- Weapon Specialization: Fully level two weapons to legendary. For PvE, Reaper + Crossbow. For PvP, Sword + Mace.\n- Spell Loadout: Two spells + one ultimate. Popular combos: Chaos Barrier + Frost Vortex + Blood Moon. Use jewels to add utility (e.g., damage reduction to Ward of the Damned).\n- Gear Setup: Full merciless dark silver for max defense. Swap to Dracula’s set for increased spell power. Use rings and amulets for bonus stats.\n\n### Endgame Structure (Late Game)\n- Late game is about preparation for the final boss, Dracula. You need full legendary gear, max-level spells, and a strong castle to survive. Defeating Solarus, The Winged Horror, and Octavian unlocks the final V Blood journal entry.\n\n---\n\n## Endgame (Gear Level 80+, Post-Dracula)\n\n### Gameplay Loop\n- Defeat Dracula: The final V Blood (level 85). After defeating him, you unlock the ability to create "Vampiric" gear (tier 4 legendary weapons with custom stats). You also gain the Mist Form (teleport) and ultimate Bat Swarm ability.\n- Challenge Mode: Enable “Brutal” difficulty on V Bloods for upgraded versions with new attacks and better loot (e.g., jewel gems with unique modifiers). Farm these for best-in-slot items.\n- PvP Castle Sieges: In multiplayer servers, endgame involves sieging rival castles for loot and resources. Build the strongest castle with T3 walls and servant guards.\n- Completionist Goals: Collect all outfits, all cosmetic forms (bat, wolf, bear, human, mist), max out all blood forms, unlock all spells and jewels.\n\n### Combat & Interaction Systems\n- Mastery: You can switch between any weapon and spell loadout seamlessly. The combat system allows for near-infinite customization.\n- Brutal Bosses: These have new phases and more health. Example: Brutal Dracula uses a “blood explosion” that covers half the arena – you must dodge perfectly. Use the new “Mist” form to become invulnerable briefly.\n- PvP: Top-tier players use perfect combo rotations: e.g., Chaos Barrier (knockback) → Frost Vortex (freeze) → Blood Moon (AoE damage).\n- Interactions: Use the “Dominate” spell to take over a human permanently as a follower. Max out your servant army with cutthroat or furious servants for defense.\n\n### Progression\n- Vampiric Gear: Requires Dracula’s Soul Shard and masses of primordial essence. Weapons have randomized secondary stats; re-roll at the Legendary Forge using gem dust.\n- Castle Heart Tier 4: There is no official Tier 4, but after Dracula you can upgrade castle cosmetics and build the “Draculine” throne for prestige.\n- All Forms: Unlock the “Shadow Wolf” form (fast movement), “Chaos Bat” (AoE damage), “Human Form” (untransform to walk among NPCs), and “Mist” (teleport).\n- Unlock All Abilities: Every spell school can be maxed out with jewels, giving you access to every modifier and ultimate.\n\n### Exploration\n- Fully Explored Map: No new zones, but hidden caves and secret bosses exist (e.g., The Forsaken at the bottom of the Cursed Forest).\n- Soul Shard Farming: Repeatedly kill elite enemies in the Hallowed Mountains for soul shards, needed for legendary upgrades.\n- Brutal Boss Arenas: These open after normal defeat. Located in the same spots but with a Brutal activation option.\n\n### Quests & Missions\n- V Blood Journal: Complete the Dracula page for a massive bonus (+100 health, +10% movement speed).\n- Achievement Hunting: “Collect all V Bloods”, “Kill a Brutal boss without taking damage”, “Own a tier 3 castle”.\n- No Main Quests Remaining: Endgame is self-directed: PvP, base-building, or challenge runs.\n\n### Economy\n- Maxed Economy: You have excess of all resources. Trade only for rare jewel modifiers or flawless legendary weapons.\n- Vendor Items: Buy all cosmetic recipes from the special vendors that appear after Dracula (e.g., the Blood Lady in Silverlight sells a dark throne).\n- Servant Missions: Assign servants to gather high-tier items like “Ancient Rose” (used in potions) or “Gloom Shroom Essence” for siege golems.\n- No Money Goal: The only real economy goal is to acquire maximum gem dust for re-rolling weapon stats.\n\n### Character & Build Growth\n- Perfect Build: Choose a direction: pure physical DPS (Warrior blood + Reaper/Sword), pure magic (Scholar blood + Chaos/Frost spells), or hybrid (Rogue blood for speed). Each is viable.\n- Gear Optimization: You want every item to have perfect secondary stats: for mage, +spell power and +spell cooldown reduction; for warrior, +physical power and +attack speed.\n- Blood Form Mastery: Use the “Form” hotkeys to switch between forms for different situations: Wolf for travel, Bat for crowd control, Mist for invulnerability.\n- Ultimate Abilities: You can equip one ultimate from any school (e.g., Blood Moon for healing, Chaos Storm for AoE damage).\n\n### Endgame Structure\n- After defeating Dracula, you have “beaten” the game’s narrative. Endgame continues indefinitely through challenge mode runs, PvP combat, and base perfection. Many players aim to collect all legendary items or become the strongest vampire on the server.\n\n---\n\n## Summary\n\nThe core gameplay of V Rising is a seamless blend of survival, action combat, and RPG progression, organized into clear gear-level tiers. Each tier introduces new zones, bosses, mechanics, and builds. The game rewards adaptation and mastery of its systems, from the first copper sword to the ultimate mist form. Use this breakdown to plan your path from fledgling to V Blood legend.

Game Tips
Game Tips
Welcome to your comprehensive guide for mastering V Rising. Whether you’re a fledgling just waking from your tomb or a seasoned vampire lord, these tips will help you survive, thrive, and dominate the world of Vardoran. Tips are grouped by category and tagged by experience level: Beginner (first 10 hours), Intermediate (mid-game), and Advanced (endgame, PvP, high-level optimization).
General Survival & Early Game
1. Always Keep a Tomb Shelter in Your Inventory (Beginner)
- Tip: Craft a basic wooden tomb and carry it with you. If you die during the day, you can place it in shade and use it to sleep until night.
- Why: Daylight is lethal to vampires. Even if you have a coffin at your base, you might be far away. A portable tomb lets you skip the sun from anywhere.
- When: Use it as soon as you die and the sun is up. Place it under a tree or inside a ruin.
- Tip: Drink blood from enemies or use Vermin Salve to keep your blood level above 50%. At low blood, you deal less damage and have reduced movement speed.
- Why: Blood quality affects your abilities. Even 100% blood is far better than 30%. Prioritize feeding on humans with high percentage and good blood type.
- When: Feed before any major fight or exploration. Keep a stack of blood vials for emergencies.
- Tip: Place your castle near a river, lake, or coast. Water sources provide fish for recipes, and you can build Fishing Poles early for additional food.
- Why: Water also allows you to collect water bottles for your garden and gives easy access to fish oil (used in many recipes).
- When: Scouting for your first base location. Prefer the Farbane Woods region for balanced resources.
- Tip: Before a boss fight, spend a minute just dodging and watching its moves. Most have telegraphed attacks with wind-up animations.
- Why: V Rising bosses are punishing. A single misstep can cost half your health. Knowing when to dash, block, or counter is more important than raw damage.
- When: Use this for V Blood bosses, especially Son of the Styx (poison) and Beatrice the Scholar (AoE fire).
- Tip: Equip Thorns Aura (obtained from the Spider boss) before facing groups like gravediggers or werewolves.
- Why: Thorns reflect damage and stun enemies that hit you. It’s excellent for clearing mobs without taking direct damage.
- When: Switch to this aura when exploring caves or during events like the Dunley Farmlands invasion.
- Tip: Some bosses are weak to specific weapons: swords for fast attacks, axes for bleeding, maces for stagger. Check the V Blood menu for details.
- Why: Using the right weapon increases damage up to 30%. For example, use axes against the Bear boss to stack bleed, or crossbow against flying enemies.
- When: Always match your weapon to the boss’s listed weakness before the fight.
- Tip: Use the map markers to note important spots: copper/gold nodes, boss spawns, merchants, and fishing pools.
- Why: You’ll revisit these places many times. Markers save you from aimlessly wandering.
- When: As soon as you discover a resource-rich area like the Silverlight Hills (sulfur) or Cursed Forest (ghost yarn).
- Tip: Paper is found in bookcases, desks, and libraries. Use it to unlock research in the Study or Alchemy Table.
- Why: Research points unlock recipes for advanced gear, potions, and castle decorations. Paper is also needed for scrolls and maps.
- When: Loot every desk you see from the very start. A stack of 20+ paper is essential for mid-game progression.
- Tip: Build the Servant Coffin and convert human prisoners into servants. Send them on missions to gather resources while you’re offline.
- Why: Servants can bring back rare materials like Grave Dust, Scourgestone, and even V Blood drops. This dramatically accelerates endgame crafting.
- When: After unlocking the servant mechanic (defeat the Bandit Wolf boss). Prioritize recruiting high-blood-quality humans (80%+).
- Tip: The merchant in the town of Dunley buys almost anything: stone, wood, iron. Prices fluctuate daily.
- Why: Instead of hoarding thousands of stone, sell them for Silver Coins. Use silver to buy rare items like Radium Alloy or Troll Bane.
- When: After you have enough stone for your castle upgrades (e.g., 10 stacks) and need quick cash for advanced materials.
- Tip: Plant Snowberries, Fire Blossom, or Spidersilk in a large garden with irrigation. Harvest and sell the produce.
- Why: Rare plants like Snowberries are used in potions and sell for high prices. A well-maintained garden can generate thousands of silver per game day.
- When: After unlocking Horticulture and having a stable water supply. Best for endgame players who can defend their garden from raids.
- Tip: Place Castle Teeth (spikes) in doorways and corridors. They deal damage and slow enemies, including players in PvP.
- Why: Defenders have home advantage. Forcing attackers to navigate a maze of spikes can turn the tide.
- When: When building a PvP base or expecting a raid. Also useful against mob attacks on your castle.
- Tip: Instead of buying cloth from vendors, build a loom and process plant fibers. It’s cheaper and faster in the long run.
- Why: Cloth is needed for armor, gear upgrades, and decoration. Plant fibers are abundant in every region.
- When: After defeating the Bandit Archers for the loom blueprint. A critical intermediate step.
- Tip: Different blood types grant unique perks: Brute (increased damage), Rogue (critical chance), Warrior (armor penetration). Equip all gear to match one type for synergy.
- Why: For example, 100% Brute blood combined with gear that boosts brute damage can double your melee output. Ideal for farming bosses or PvP.
- When: After you have the ability to capture and drain high-quality humans from all blood types. Build a prison to keep them.
- Tip: Use your dash ability right after a weapon swing to cancel the animation’s endlag. This allows you to attack faster and dodge simultaneously.
- Why: In high-level PvP or against aggressive bosses, this technique lets you maintain DPS while being evasive. Practice in a safe area first.
- When: Once you are comfortable with basic combat. Bind dash to a comfortable key (e.g., spacebar).
- Always carry a stack of blood vials and a crossbow. Crossbow deals good damage at range while you kite enemies. Blood vials let you heal mid-fight.
- Join a clan for shared resources and faster progress. In PvP servers, clan mates can revive you and defend your castle.
- Don’t ignore fishing. The fish provide buffs like increased movement speed or mana regeneration – invaluable for long expeditions.
- Unlock the Vermin Nest early. It produces infinite critters for blood harvesting and can be placed anywhere.
2. Never Ignore the “Blood Drain” Mechanic (Beginner)
3. Build Your Castle Near a Water Source (Beginner/Intermediate)
Combat & Boss Fights
4. Learn Boss Attack Patterns by Observing Without Engaging (Beginner/Intermediate)
5. Use Thorns Aura for Melee Swarms (Intermediate)
6. Exploit Boss Weaknesses with Correct Weapon Type (Intermediate/Advanced)
Exploration & Resource Gathering
7. Mark High-Value Locations on Your Map (Beginner)
8. Farm Paper for Knowledge Points Early (Intermediate)
9. Use Servants to Farm While Offline (Advanced)
Economy & Trading
10. Sell Excess Resources to the Merchant in Dunley Farmlands (Intermediate)
11. Create a Dedicated Garden for Gold Profit (Advanced)
Base Building & Defense
12. Build “Fangs” at Entry Points to Thwart Invaders (Intermediate)
13. Use the Loom to Convert Fibers Into Woven Cloth Early (Intermediate)
Advanced Builds & Gear
14. Stack Blood-Type Bonuses for Specific Roles (Advanced)
15. Master the Art of the “Dash Attack” Cancel (Advanced)
Final Pro-Tips for All Players
Remember: the sun is your enemy, but knowledge is your ally. Use these tips to rise from a lowly bat to a true vampire lord.
Game Settings
Game Settings
This guide covers every setting category in V Rising, from graphics and audio to controls and network options. Use the sections below to optimize your experience, whether you are on a low-end laptop or a high-end desktop. Pay special attention to the misconfiguration warnings — certain settings can drastically affect performance or gameplay if set incorrectly.
---
Graphics Settings
Graphics are the most impactful category for performance and visual fidelity. V Rising uses a bright, stylized art style with dynamic lighting and shadows. Adjust the following settings based on your hardware.
Recommended Settings by Hardware Level
| Setting | Low (Integrated GPU) | Medium (GTX 1060 / RX 580) | High (RTX 2060 / RX 5700) | Ultra (RTX 3070+ / RX 6800+) |
|---|---|---|---|---|
| Resolution | 1280×720 | 1920×1080 | 2560×1440 | 3840×2160 |
| Display Mode | Fullscreen | Fullscreen | Fullscreen | Fullscreen |
| VSync | Off | Off | Off | Off (use if screen tearing) |
| Frame Rate Limit | 30 FPS | 60 FPS | 60 FPS | 120+ FPS (set to monitor max) |
| Overall Quality Preset | Low | Medium | High | Ultra |
| Texture Quality | Low | Medium | Ultra | Ultra |
| Shadow Quality | Low | Medium | High | Ultra |
| Anti-Aliasing | Off or FXAA | FXAA | TAA (High) | TAA (Ultra) |
| Ambient Occlusion | Off | Off | Low | High |
| Reflection Quality | Off | Low | Medium | High |
| Post-Processing | Low | Medium | High | Ultra |
| Foliage Quality | Low | Medium | High | Ultra |
| Terrain Quality | Low | Medium | High | Ultra |
| Water Quality | Off | Low | Medium | High |
| Bloom | Off | Off | On | On |
| Motion Blur | Off | Off | Off | Off (personal preference) |
| Depth of Field | Off | Off | Off | Off (can be distracting) |
| Subsurface Scattering | Off | Off | On | On |
| View Distance | Low | Medium | High | Ultra |
| Foliage Density | Low | Medium | High | Ultra |
Individual Setting Details
- Resolution & Display Mode: Always use Fullscreen for best performance. Borderless Windowed may reduce FPS by 5–10%.
- VSync: Turn off unless you experience screen tearing. If you get tearing, enable VSync or use a frame rate cap slightly below your monitor’s refresh rate.
- Frame Rate Limit: Capping at 60 FPS is recommended for most setups. On low-end hardware, 30 FPS provides a smoother experience than fluctuating higher numbers.
- Overall Quality Preset: Start with Medium and adjust individual settings up/down. The preset is a good baseline but not fully optimized.
- Anti-Aliasing: FXAA is lightweight but blurs textures. TAA is sharper but more costly. On low-end, FXAA is fine; on high-end, use TAA.
- Shadow Quality: Has a major performance impact. Set to Low on weak GPUs; shadows still appear acceptable.
- Ambient Occlusion: Adds depth but costs performance. Leave Off on low-end; High on high-end.
- Reflection Quality: Minimal visual gain; set to Off or Low for FPS boost.
- Post-Processing: Includes effects like lens flare and color grading. Low saves performance with little visual loss.
- Foliage Quality & Density: Heavy on CPU/GPU in forest areas. Set to Low if you see stuttering in wooded zones.
- Bloom & Motion Blur: Personal preference; turn Off for clarity and performance.
- Subsurface Scattering: Makes skin look realistic. Almost no performance hit on modern GPUs; keep On if available.
- Shadow Quality set to High on low-end GPUs can halve FPS. Always start with Low or Medium.
- Foliage Density at Ultra combined with View Distance at Ultra may cause stuttering even on mid-range PCs. Tune down if you experience dips in open fields.
- Frame Rate Limit set higher than your monitor’s refresh rate wastes power and can cause screen tearing without VSync. Match to monitor (e.g., 60, 144).
- Display Mode: Never use Windowed if you need full screen; it reduces FPS and adds input lag.
⚠️ Misconfiguration Warnings
---
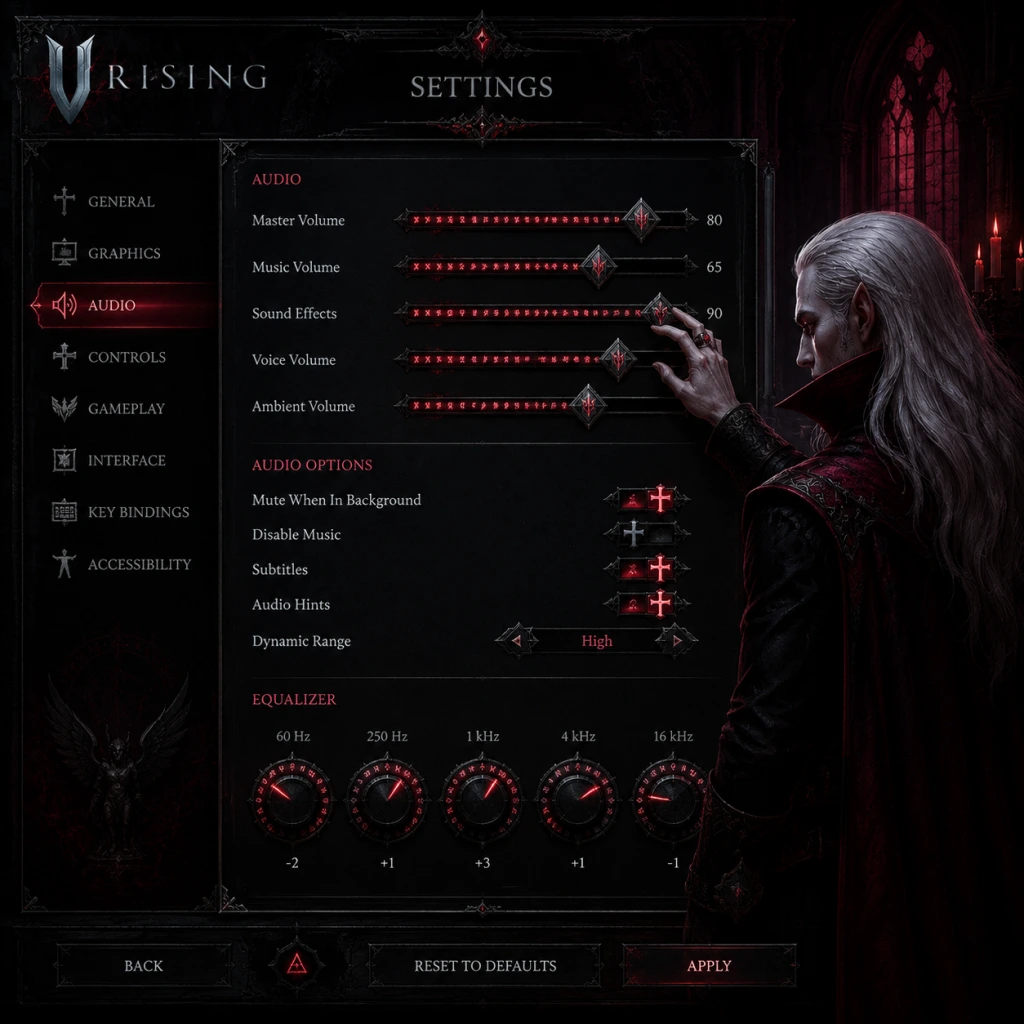
Audio Settings
Audio settings are straightforward but can impact gameplay (e.g., hearing enemy footsteps).
| Setting | Recommended Value | Notes |
|---|---|---|
| Master Volume | 80–100% | Adjust to comfort |
| SFX Volume | 100% | Combat sounds, footsteps |
| Music Volume | 50% | Background music (can be lower if distracting) |
| Voice Volume | 100% | NPC dialogues, quest prompts |
| Ambient Volume | 80% | Wind, animals, environment |
| UI Volume | 100% | Inventory clicks, alerts |
| Audio Device | Default System | Ensure correct output, e.g., headphones |
| Sound Mode | Stereo / Headphones | Choose based on setup; Headphones for directional audio |
| Spatial Audio | On (if supported) | Improves awareness of enemy direction |
Special Attention
- Sound Mode: Setting to Headphones when using speakers can make audio tinny. Match your hardware.
- Spatial Audio: Turn Off if you experience echo or distortion; it works best with surround sound systems or dedicated headphone 7.1.
- Camera Rotation: Mouse wheel click + drag or hold Middle Mouse Button. Default is fine.
- Ability Keys: Q, E, R, F, 1–5. You will use these frequently.
- Dodge: Spacebar. Important for survivability.
- Attack: Left Click. Hold for charged attack (on weapons that support it).
- Interact: F.
- Jump: Spacebar (same as dodge? No – there is no jump in V Rising; dodge is standard). Note: There is no jump. Spacebar performs dodge roll or dash.
- WASD for movement. Tip: Enable Click-to-Move in Gameplay Settings if you prefer point-and-click movement.
- Quick Slot Hotkeys: 1–0 for inventory items. Assign health potions to 1 for quick access.
- Left Stick: Movement
- Right Stick: Camera rotation
- Face Buttons: A – Interact, B – Back/Cancel, X – Primary Attack, Y – Secondary Attack
- Bumpers/Triggers: LB – Ability 1, RB – Ability 2, LT – Dodge (recommended remap?), RT – Use Quick Slot
- D-Pad: Left/Right – Cycle Quick Slots, Up/Down – Inventory shortcuts
- Start: Pause Menu, Select: Map
- Keybind for Ultimate Ability: Default is R. Many players rebind to something easier to reach during combat, like a mouse side button.
- Dodge on Mouse: Some rebind dodge to a thumb button. Useful for fast combat.
- Toggle Walk: Default by pressing the movement key lightly? Actually, there is no dedicated walk toggle; movement speed is always run. Use Shift to sneak? No sneaking – but you can use C to toggle crouch? No crouch. Consider this: There is no walk toggle. You are always running. But you can use C to change to a slower movement? No. So ignore.
---
Controls Settings
V Rising supports keyboard & mouse, gamepad (Xbox, PlayStation, Switch Pro), and custom keybindings.
Keyboard & Mouse
Gamepad (Controller)
Customization Tips
---
Accessibility Settings
V Rising offers several options to make the game more accessible.
| Setting | Recommended | Purpose |
|---|---|---|
| Subtitles | On | Display NPC dialogue text |
| Subtitle Background | On | Improves readability |
| Colorblind Mode | Off | Choose from Protanopia, Deuteranopia, Tritanopia |
| Screen Shake | Off (if prone to motion sickness) | Reduces camera shake |
| Head Bobbing | Off | First-person-like movement bob in third-person; turn off for comfort |
| Auto-Aim (Melee) | On (if struggling with aiming) | Helps lock onto enemies |
| Auto-Aim (Ranged) | On (if using ranged weapons) | Mild aiming assistance |
| Invert Camera Y-Axis | Off | Personal preference |
| Camera Sensitivity | 50% | Adjust mouse/controller camera speed |
⚠️ Misconfiguration Warnings
- Auto-Aim set to High can makeaiming too sticky, leading to missed opportunities for headshots or precise hits. Start with Low or Off and increase only if needed.
- Screen Shake and Head Bobbing should be turned off if you experience nausea or dizziness. They add no gameplay benefit.
- Language: Choose from available languages (English, French, German, Spanish, Russian, Chinese, Japanese, Korean, etc.). This affects all UI text, subtitles, and voiceovers.
- Voiceover Language: Separate from text language. Some players prefer English VO with another language text.
- Note: Changing language restarts the game. Save progress first.
---
Language Settings
---
Network Settings
These settings affect online connectivity for both Online (PvE/PvP) and Private/LAN gameplay.
| Setting | Recommended | Explanation |
|---|---|---|
| Region | Auto (or closest region) | Choose the server region nearest to you for lowest ping. |
| Server Browser Filter | Various | Use to filter by game mode (PvP, PvE, Solo, Duo, Squad, etc.), ping, population, and name. |
| Connection Type | Direct Connection | For joining via IP address in private lobbies. |
| LAN Games | On or Off | Toggle visibility of local network servers. |
| Online Connection | Always | You can choose to play offline (solo) or online. |
| Show Online Status | On | Lets friends see you are playing. |
| Communication Method | Push-to-Talk or Voice Activity | Options for in-game voice chat (if enabled on server). |
| Push-to-Talk Key | V (default) | Change if you prefer another key. |
| Voice Chat Volume | 100% | Adjust volume of other players. |
| Server Timers | N/A | Not a setting; depends on server rules. |
Special Attention
- Region Selection: If you join a server far from your region, you will experience high ping (200+ ms). This makes combat very frustrating, especially in PvP. Always check the server's ping before joining.
- Voice Chat: Many players disable voice chat due to toxicity or background noise. Use Push-to-Talk to avoid accidental broadcasting.
---
Gameplay Settings
These settings alter how the game plays and interacts with you.
| Setting | Recommended | Description |
|---|---|---|
| Movement Mode | WASD (default) or Click-to-Move | Choose your preferred control style. WASD is faster for combat. |
| Camera Mode | Locked or Unlocked | Locked keeps camera behind character; Unlocked allows free rotation. Unlocked is better for situational awareness. |
| Auto-Move | Off | Auto-run feature; bind to a key if used often. |
| Quick Slot Behavior | Hold/On | Set to Hold to use quick bar items without consuming immediately? Actually, behavior is single press. Just leave default. |
| Pickup Mode | Gather All or Individual | Gather All picks up everything; Individual requires clicking each item. Use Gather All for efficiency. |
| Auto-Equip Weapons/Armor | Off | Prevents accidentally equipping low-tier loot. |
| Show Tutorial Tips | Off (after first hour) | Disable once you know basics. |
| Minimap Rotation | Fixed or Rotating | Rotating aligns minimap with camera direction; Fixed keeps north up. Fixed is easier for navigation. |
| Damage Numbers | On | Show floating damage numbers. |
| Health Bars | Always On | See enemy health even when not targeting. |
| Player Nameplates | Always On | Identify other players. |
| Show World Markers | On | Icons for quests, resources, points of interest. |
| Cast On Release | Off | For abilities that charge; if On, ability fires when you release the key. Off = fires on press. |
| Target Lock | Toggle or Hold | Toggle locks target until unlocked; Hold requires holding key. Choose based on preference. |
⚠️ Misconfiguration Warnings
- Movement Mode – Click-to-Move can feel unresponsive in combat. Stick to WASD for precise dodging.
- Pickup Mode set to Individual will slow you down dramatically. Always use Gather All.
- Cast On Release – If set to On, you may accidentally hold an ability too long and miss the timing. Off is more responsive.
- Target Lock – Novices may accidentally lock onto an enemy while trying to escape. Bind the lock key to a less intrusive button, or use Toggle with a clear unbind key.
---
Summary of Performance vs. Quality Priorities
| Goal | Settings to Adjust |
|---|---|
| Maximum FPS (e.g., competitive PvP) | Overall Preset: Low; Disable Shadows, Reflections, Ambient Occlusion, Bloom, Motion Blur, Depth of Field; Texture Quality: Low; View Distance: Low; Foliage: Low; Resolution Scale: 100% (do not lower below 100% as it causes blur) |
| Single-Player / Co-op Quality | Overall Preset: High; Shadows: High; Textures: Ultra; Anti-Aliasing: TAA; Ambient Occlusion: On; Foliage: High; View Distance: High |
| Balanced (recommended) | Overall Preset: Medium; Shadows: Medium; Textures: High; Anti-Aliasing: FXAA or TAA Low; Ambient Occlusion: Off; Foliage: Medium; View Distance: Medium |
| 4K / Ultra Settings | Preset: Ultra; Res: 3840×2160; TAA Ultra; All shadows/reflections on; Bloom On; Expect 30–60 FPS on high-end cards. Use DLSS/FSR if available (V Rising does not support DLSS officially; use upscaling via GPU driver). |
Final Setup Checklist
Before starting, launch the game and go to Options and verify:
1. [ ] Display Mode: Fullscreen
2. [ ] Resolution: Native to monitor
3. [ ] Frame Rate Limit: Matches monitor refresh rate (e.g., 60, 144)
4. [ ] Overall Quality Preset: As per hardware level
5. [ ] Audio Sound Mode: Headphones/headset if using one
6. [ ] Controls: Rebinded dodge and abilities to comfortable keys
7. [ ] Accessibility: Subtitles On, Screen Shake Off
8. [ ] Gameplay: Movement Mode WASD, Pickup Mode Gather All, Target Lock off or toggle
9. [ ] Network: Region selected manually if auto gives high ping
Now you are ready to rise as an optimized vampire lord. Happy hunting!

Important Notes
Important Notes
Warnings & Pitfalls
- Castle Decay: If you do not interact with your Castle Heart (by placing it or entering its radius) within 24 hours (real time) on official servers, your castle will decay and eventually be destroyed. On private servers, this timer can be adjusted. Always claim territory you intend to maintain; an unclaimed castle heart leaves your base vulnerable.
- PvP Zones: In PvP servers, you are always at risk beyond your castle walls. Once you leave your territory, you can be attacked at any time. Do not carry all your valuable resources when exploring; store them in secure chests inside your castle.
- Blood Moon Events: During a Blood Moon, all V Blood carriers become significantly stronger (increased health, damage, and aggression). This is a temporary difficulty spike – avoid boss fights during a Blood Moon unless you are over-geared or prepared for a challenge.
- Territory Conflicts: Building a castle too near another player’s claimed territory can cause border disputes. Respect other players’ space in PvE servers; in PvP, expect conflict. Always scout an area before committing your Castle Heart.
- Shard Carrying: Soul Shards (e.g., from Solarus, Adam) are extremely heavy and cannot be stored in regular chests. Carrying them makes you an inviting target in PvP. If you have a shard, store it immediately in a Shard Pedestal within your castle or drop it if you cannot defend it.
- Castle Heart Relocation: While you can destroy your Castle Heart to move it, this will demolish your entire castle and return only a portion of materials. Consider this irreversible in a practical sense – plan your base location carefully before building.
- Servant Transformation: Turning a human into a servant is permanent. Once a servant, that character cannot be reversed. Choose your thralls wisely, especially high-level ones.
- Skill Respec: You can reset all your unlocked abilities and spells for a cost (usually a specific resource). However, any spent research points (from papers, scrolls) are lost. Save research for end-game gear; do not waste early points on low-tier equipment you will quickly replace.
- Joining a Clan: Once you join a clan, you cannot leave with any shared castle resources. The clan leader can kick you and keep everything. In solo play, avoid joining clans unless you fully trust the members.
- Limited-Time Events: The "Blood Moon" and "Hallow" events occur on a real-time schedule (e.g., during Halloween, full moons). They offer exclusive cosmetics and recipes. Check the official Discord or in-game calendar to know when they are active.
- Seasonal Servers: Some official servers reset after a season (e.g., each season is ~3 months). Characters and bases on these servers are wiped. Transfer your items to a permanent server before the wipe if you want to keep them.
- V Blood Discoveries: Although all V Bloods are permanently available in the world, some are located in high-level zones you might skip. You can always return to kill them later, but their recipes are essential for progression – do not neglect lower-tier bosses like Keystone the Bandit King if you want the early siege golem blueprint.
- Farbane Woods to Dunley Farmlands: The jump in enemy level (~25 to ~40) is harsh. You will need at least Tier 2 gear (Iron tier) and a fortified castle. Do not wander into Dunley with cloth armor.
- Silverlight Hills Radiation: Silverlight Hills has an anti-vampire radiation effect that rapidly drains your health unless you have >30% resistance (from armor or potions). Entering this zone unprepared is a death sentence.
- Cursed Forest: The curse reduces vision, spawns aggressive mobs, and has a scaling damage-over-time effect. Bring plenty of healing spells and curse-resistant gear (e.g., Hollowfang set).
- Endgame Bosses: Solarus, Adam the First, and the Dragon Boss are brutal. They require max gear (bloodmoon or above), a full group of coordinated players, and perfect execution. Solo attempts are only for the most skilled players.
- Over-Farming Early Game Resources: Do not spend hours gathering stone and wood in Farbane when you will soon unlock iron and leather. Focus on minimal base construction and rush to unlock better gear stations.
- Leather Grinding: Early leather (from regular wolves and deer) is slow. Instead, build a Vermin Nest (unlocked from a boss) to passively produce leather. This saves hours of manual hunting.
- Ignoring Servants: Sending servants on missions provides a steady income of resources. Many new players ignore this system and later regret not setting it up earlier. Start training servants as soon as you unlock the Prisoner Cage (level ~30).
- Gear Progression Creep: Upgrading every piece of equipment to max tier before progressing is unnecessary. You can skip some tiers (e.g., go from iron directly to dark silver) if you carefully manage repairs and keep backup weapons.
- V Rising uses Easy Anti-Cheat (EAC) : You cannot use mods or third-party software while playing online. Any tampering with game files may result in a permanent ban from official servers.
- PVE Servers: Do not steal boss kills from other players. If you see someone fighting a V Blood, wait your turn or ask to join. Killing a boss before another player can get the final hit will frustrate the community.
- PVP Etiquette: If you gank a low-level player, expect retaliation or reputation damage. Many servers have unspoken rules about not attacking players below a certain gear score. Respect territory boundaries unless you are openly at war.
- Voice Chat: Be respectful in global chat and voice channels. Harassment or hate speech can lead to server bans.
- Offline/Solo Save Location: For local (solo) games, your save file is stored at:
- Private Server Saves: If you host your own dedicated server, save files are in the server directory. Back up the entire ‘Saves’ folder. Use automated backup scripts if possible.
- Cloud Saves: Steam Cloud is enabled by default. If you play on multiple PCs, ensure cloud sync completes before closing the game to avoid corruption.
- Character Deletion: Deleting a character is permanent. There is no undo. Double-check before clicking ‘Delete Character’ in the menu.
- Blood Types & Quality: Having the correct blood type (e.g., Warrior blood for melee damage, Rogue for crit) and high quality (80%+) dramatically increases your power. Carry a blood container to store high-quality blood from enemies for boss fights. Do not rely on low-quality blood.
- The “G” Emote: Pressing ‘G’ allows you to trade with other players quickly. Many new players do not know this and miss out on easy resource exchanges.
- Quick Slot Binding: You can assign items (e.g., blood vials, potions) to hotkeys 1-8. Press ‘B’ to open the blood vial slot. This saves precious seconds in combat.
- Building Ramp: Use wooden ramps to vault over enemy walls in PvP. Many players forget to block this by placing doors or barriers at the top of their outer walls.
- Taming Horses: Horses can be tamed by feeding them plant fibers. A fast horse is essential for traversing large zones quickly. Build a Stable early.
- Vampire Bat Form: The Bat Form (unlocked later) lets you transform into a swarm of bats and travel rapidly. It is a life-saver for escaping ganks or covering long distances. Prioritize unlocking it.
- Siege Golem: You can build a siege golem to destroy enemy castle doors. This is a must for raiding. Without it, you cannot crack stone walls effectively.
- Fish & Fishing: Fishing is not just for food – it yields rare items, scrolls, and even unique weapons. Build a Fishing Spot near your base and fish regularly.
- Castle Interior Layout: Do not place your Castle Heart in the open where it can be targeted. Hide it behind multiple layers of walls. If it is destroyed, your whole base collapses.
- Loot from Bosses Reset: If you die after defeating a V Blood but before looting its body, the loot stays. But if you log out and back in, the body may despawn. Loot immediately.
Irreversible Choices
Missable Content & Time-Sensitive Events
Difficulty Spikes
Grinding Traps
Online Etiquette & Anti-Cheat
Save Management
- `%AppData%\..\LocalLow\Stunlock Studios\VRising\Saves\v1.0\` (Windows)
- Back up this folder regularly (especially before major patches) to prevent progress loss.
Things Players Commonly Regret Not Knowing Earlier
Pro Tip: Always keep a few Bone Walls (crafted from bones) in your inventory. In PvP, they can be placed to block projectiles or create instant cover.
All Game Items
All Game Items
This guide provides a comprehensive catalog of every major item in V Rising (1.0). Items are grouped by category: Weapons, Armor, Consumables, Materials, Currencies, Collectibles, and Key Equipment. Each entry includes a description, acquisition method, usage tips, and notable upgrades or synergies.
---
Weapons
Weapons determine your primary attack style and are crafted at the Weapon Bench (or higher workstations). Each weapon type has a unique special ability (Q) and a secondary ability (E). All weapons can be upgraded through tiers: Copper, Iron, Dark Silver, Sanguine, Tainted, Ethereal, and Legendary (max level).
| Weapon Type | Special Ability (Q) | Secondary Ability (E) | Best For |
|---|---|---|---|
| Sword | Whirlwind (AoE spin) | Charge (dash + slash) | All-round damage, mobility |
| Axe | Frenzy (fast combo) | Execute (leap + slam) | Melee DPS, PvE clear |
| Mace | Ground Slam (AoE stun) | Blood Spike (ranged bleed) | Crowd control, bleeding |
| Spear | Harpoon (pull + root) | Volley (projectiles) | Stuns, kiting, PvP |
| Reaper | Sweep (wide arc) | Scythe Throw (ranged return) | AoE farming, sustain |
| Crossbow | Rain of Bolts (AoE) | Piercing Shot (line) | Ranged DPS, safe damage |
| Slashers | Shroud (invisibility) | Backstab (teleport strike) | Stealth, burst damage |
| Pistols | Point Blank (shotgun) | Stun Shot (cone) | Close range burst, PvP |
| Longbow (T3+) | Multishot (spread) | Explosive Arrow (AoE fire) | Sustained ranged damage |
| Greatsword (T3+) | Cleave (big sweep) | Rush (charge + uppercut) | Heavy melee, knockback |
- How to Obtain: Craft at Weapon Bench using planks, ingots, and leather. Higher tiers require gems, scourgestone, or legendary fragments.
- Useful When: Always. Keep at least one weapon type upgraded for your playstyle. Swords are versatile for new players; Reaper is best for farming resources.
- Upgrades: Each tier increases base damage and unlock new spell slots (see Spell Gems below). Legendary weapons have unique passive bonuses (e.g., chance to heal on hit).
- Headgear, Chest, Legs, Boots, Gloves – standard 5-piece set. Full set bonuses at max tier.
- Workers’ Set (leather/cloth): Bonus to resource yields (wood, stone). Early game.
- Scout Set (light armor): Increased movement speed. Great for farming maps.
- Guardian Set (heavy armor): Physical damage reduction. Good for tanking.
- Warden Set (medium armor): Holy resistance, bonus health. Useful against holy mobs.
- Bloodmoon Set (Tainted): Lifesteal on melee hits. PvP meta.
- Dawnbreaker Set (Ethereal): Extra damage to undead/creatures of light.
- Legendary Armor: One-of-a-kind sets with unique effects (e.g., Spectral Set grants invisibility on dodge).
- Can be crafted or found. Provide minor stat bonuses (e.g., movement speed, magic find).
- Notable: Cloak of the Hidden (slight invisibility when standing still).
- Rings: Increase spell power, resource yield, or resistance. Crafted at the Jeweler.
- Amulets: Boost health, energy regeneration, or reduce cooldowns. Rare drops from V Blood carriers.
- How to Obtain: Craft at Armor Workbench or loot from V Blood bosses, chests, or randomized drops in high-level zones (Cursed Forest, Silverlight Hills).
- Upgrades: Use Scourgestone, Gems, and Spectral Dust to roll stats at the Jewelcrafting station. Higher tiers allow gem sockets (Ruby, Sapphire, topaz etc.) for additional bonuses.
---
Armor
Armor sets provide defensive stats, resistance to damage types (Physical, Holy, Fire, etc.), and passive bonuses. Armor is crafted at Armor Workbench using similar materials to weapons. Sets are tiered: Copper, Iron, Dark Silver, Sanguine, Tainted, Ethereal, Legendary. Additionally, you can equip Cloaks and Accessories.
#### Armor Pieces
#### Major Armor Sets
#### Cloaks
#### Accessories (Rings, Amulets)
---
Consumables
Consumables are single-use items that provide temporary buffs or effects. Crafted at Alchemy Table, Furnace, or Fabricator. Some are looted from enemies.
| Item | Effect | How to Obtain | When Useful |
|---|---|---|---|
| Blood Rose Potion | Heal 100 HP instantly. | Craft (1 Blood Rose + 1 Sulphur) | Emergency healing in combat. |
| Greater Blood Rose Potion | Heal 400 HP. | Craft (3 Blood Rose + 3 Sulphur) | Boss fights, tough fights. |
| Healing Elixir | Heal over time (10s). | Craft (Blood Rose + Plant Fiber + Water) | Pre-combat sustain. |
| Spell Power Elixir | +15% spell damage for 30min. | Craft (Scourgestone + Empty Potion Vial) | Before boss battles. |
| Resistance Potions | +20% resistance to one element (Fire, Holy, etc.) for 10min. | Craft (specific gem dust + water) | Zone traversal (e.g., Holy Resistance for Silverlight). |
| Blood Essence | Recovers 50% of Blood Pool (used for spell casting). | Craft at Alchemy Table using animal blood. | Essential for spell-heavy builds. |
| Medusa’s Gaze | Freezes enemies in place for 3s. | Drop from Medusa (V Blood). | PvP or crowd control. |
| Wraithbone | Summons temporary skeleton allies. | Craft at Fabricator using bones. | Distraction in fights. |
| Spectral Dust | Buffs movement speed and damage for 10s. | Loot from spectral enemies (Cursed Forest). | Speed farming or PvP escape. |
| Veil Potion | Short dash that removes debuffs. | Rare drop from high-level mobs. | PvP or dodging boss mechanics. |
| Fish Dishes | Provide +10% to a specific stat (e.g., +10% move speed from Blood Bass). | Cooking fish at campfire. | Cheap long-term buffs. |
- Synergies: Combine resistance potions with zone-specific armor (e.g., Holy resistance potion + Silverlight area).
- Stone → Stone Bricks (Furnace)
- Wood → Planks (Sawmill)
- Hide → Leather (Tannery)
- Bone → Bone Dust (Grinder) – used for spells.
- Iron Ore → Iron Ingot (Furnace)
- Copper Ore → Copper Ingot
- Gold / Silver → Ingots for high-tier gear.
- Scourgestone: Crafted from Stone Bricks + Sulphur. Used for most high-tier weapons and armor.
- Dark Silver Ingot: Required for T4 weapons. Smelt Dark Silver Ore (found in Silverlight Hills).
- Sanguine Ingot: From Sanguine Ore (Cursed Forest). Used for T5 gear.
- Tainted Ingot: From Tainted Ore (endgame zones). Used for T6.
- Gem Dust: Crushing gems at Grinder. Used in potions and stat rerolls.
- Primal Essence: Dropped by legendary creatures. Used for Legendary crafting.
- Spectral Silk: From spectral enemies. Used for Ethereal armor.
- Blood Rose: Common red flower, used in potions and healing items.
- Ghost Lily: White flower found in cursed areas. Used in high-end potions.
- Fire Lily: Red-orange, used in fire resistance potions.
- Iron Ore, Copper Ore, Dark Silver Ore, Sanguine Ore: Mined with pickaxe.
- Wood: Chopped from trees – various types (regular, ironwood, ancient wood).
- Fish: Caught with fishing rod at water bodies. Cooked for buffs.
- Radium Alloy: Rare drop from radiated enemies. Used in Legendary crafting.
- Vampire Blood: Dropped by high-level human enemies. Used in blood potions.
- Frosthollow Crystal: From frost areas. Used for cold resistance.
---
Materials
Materials are the building blocks of crafting and building. They are gathered, looted, or refined.
#### Basic Refined Materials
#### Advanced Materials
#### Natural Resources
#### Special Materials
---
Currencies
V Rising uses multiple currencies for trading, crafting, and progression.
| Currency | How to Obtain | Use |
|---|---|---|
| Coins (Gold) | Loot from chests, enemies, sell items to merchants | Buy items from traders (e.g., The Devourer’s shop). |
| Blood (Blood Pool) | Drain blood from enemies, fill blood vials | Fuel spells, activate passives (blood type). |
| Essence (Spell Currency) | Convert blood essence at Alchemy Table | Replenish Blood Pool for spell casting. |
| Scraps | Salvage weapons/armor at Workbench | Recycle old gear for materials. |
| Research Points | Defeat V Blood bosses (unique) | Unlock new recipes at Research Table. |
| V Blood (Soul Power) | Defeat V Blood bosses | Increase your V Blood level (unlock new spells, powers). |
| Cursed Shards | Loot from Cursed Forest mobs | Trade at the Cursed Altar for special items. |
| Sulfur | Mining sulfur deposits | Craft gunpowder (explosives) and high-tier materials. |
| Diamonds (Gems) | Mining gem nodes, looting treasure goblins | Socket into gear for extra stats (Ruby, Sapphire etc.) |
| Fragments (Legendary) | Defeat Legendary bosses | Combine to craft Legendary items. |
Collectibles
These are tracked items that unlock lore, cosmetics, or permanent upgrades.
- V Blood Carriers (Boss Souls): Defeating each V Blood boss drops a soul that increases your V Blood level. Required to unlock new spell options and traverse to new zones.
- Tomes of Knowledge: Blue books found in dungeons and towers. Reading them grants permanent passive bonuses (e.g., +5 HP).
- Gardening Seeds: Rare seeds for special plants (e.g., “Eternal Rose” for infinite blood rose).
- Fishing Loot: Unique fish that can be displayed or used for special potions.
- Rare Dyes: Used to change castle or outfit colors. Found in chests.
- Skins/Transmogs: Unlocked via V Blood kills, achievements, or shop. Cosmetic only.
---
Key Equipment (Special Items)
Items that are not weapons or armor but essential for gameplay.
| Item | What It Does | How to Obtain | Importance |
|---|---|---|---|
| Castle Heart | Core of your base. If destroyed, your castle decays. | Craft from Stone Bricks + Planks (early) | Required to build any structures. |
| Waygate | Teleportation pad. Connect multiple gates for fast travel. | Craft at Advanced Workbench | Essential for travel. |
| Sawmill | Refines wood into planks. | Craft | Needed for all wooden structures. |
| Furnace | Smelts ores into ingots. | Craft | Core metalworking. |
| Tannery | Turns hides into leather. | Craft | Core material for armor. |
| Alchemy Table | Craft potions and refine blood. | Research | Makes consumables. |
| Research Table | Unlocks recipes by consuming research points. | Craft | Progression system. |
| Jewelcrafting Station | Reroll stats, socket gems on gear. | Advanced research | Endgame min-maxing. |
| Blood Altar | Track and hunt V Blood bosses. | Built automatically after tutorial | Boss progression. |
| Tomb of the Damned | Summon skeletons from nearby corpses. | Craft at high-level workbench | Defend your castle (PvE/PvP). |
| The Devourer (Trader) | Merchandise exchange for silver coins. | Found in Silverlight Hills | Buy rare materials (e.g., Scrolls). |
| Soulstone | Revives you once at full health upon death (single use). | Drop from high-level V Blood | Life saver in boss fights. |
| Spell Gems | Equip to weapon slots to unlock spell abilities. Each gem corresponds to a school (Chaos, Storm, Blood, Unholy, Illusion). | Research at Alchemy Table + Gem Dust | Customize spell loadout. |
| Vampire Hunter Caches | Special chests containing high-tier gear. | Found in hidden locations | Reward exploration. |
Final Notes
- Upgrading: Most items can be upgraded from tier to tier using higher materials. You do not need to re-craft from scratch – use the Upgrade option at workstations.
- Synergies: Pair weapon types with spell gems (e.g., Mace + Blood gems for lifesteal builds).
- Durability: Weapons and armor degrade over time. Use Repair Kits (crafted at workbench) to restore at a smithy.
- Trading: In some servers (PvE, roleplay), players can trade items via the Trade Station.
- Seasons/Events: The game occasionally adds limited-time items (e.g., Halloween cosmetics). No loot boxes.
This guide covers all essential items in V Rising. For detailed crafting recipes, damage values, or updates, refer to the in-game codex or Stunlock Studios’ patch notes.
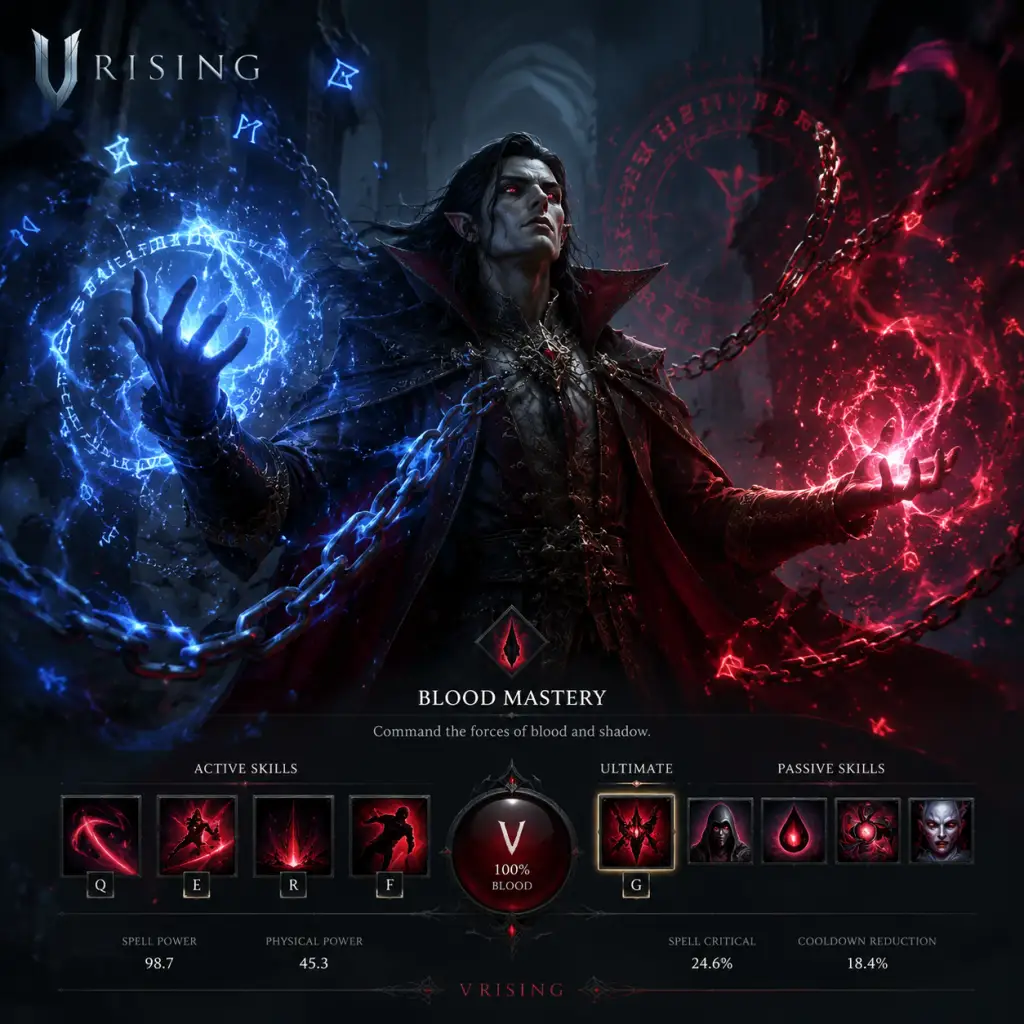
Character Skills
Character Skills
In V Rising, your vampire is defined by the combination of weapon skills, magic spells, vampire powers, and blood type abilities. This guide covers every active and passive ability available to you, with detailed descriptions, cooldowns, synergies, and builds.
1. Weapon Skills
Each weapon type provides two active abilities (bound to `Q` and `E`) and a special attack (right-click). Weapon skills are independent of your spell slots and scale with weapon stats.
| Weapon | Q Ability | E Ability | Special Attack (Right-Click) | Best Use Case |
|---|---|---|---|---|
| Sword | Shockwave Strike – Sends a piercing projectile that deals magic damage and slows. Cooldown: 4s. | Whirlwind – Spin in place, dealing damage in a 3m radius. Cooldown: 8s. | Lunging Strike – Lunge forward, damaging the first enemy hit. | Sustained melee damage and chasing. Build: Physical crit. |
| Axe | Fracture – Throw a spinning axe that travels in an arc, damaging multiple enemies. Cooldown: 6s. | Rend – A quick overhead slam that deals heavy damage and applies a bleed. Cooldown: 10s. | Cleave – Wide horizontal slash hitting all enemies in front. | Wave clear and bleed stacking. Build: Bleed/DoT. |
| Mace | Smash – Slam the ground, creating a shockwave that stuns enemies. Cooldown: 8s. | Whirlwind – (Same as Sword? No, Mace has a different Whirlwind – it's a AoE spin with knockback.) Actually, Mace E: Shattering Strike – A powerful slam that breaks shields and armor. Cooldown: 12s. | Pulverize – Charged attack that deals bonus damage to structures. | Crowd control and breaking shields. Build: Siege/CC. |
| Spear | Impale – Thrust forward, damaging all enemies in a line. Cooldown: 5s. | Harpoon – Throw a harpoon that pulls the target toward you. Cooldown: 10s. | Piercing Charge – Rush forward, impaling the first enemy. | Single target burst and gap closer. Build: Assassin. |
| Reaper | Scythe Swing – Wide swing that damages and slows enemies. Cooldown: 5s. | Reap – Pull enemies toward you with a spectral scythe. Cooldown: 8s. | Harvest – Damage all enemies in a cone, deals extra damage to low-health targets. | Crowd gathering and execute. Build: AoE farming. |
| Scythe | Slash – Quick horizontal slash. Cooldown: 3s. (Same as Reaper? No, Scythe is two-handed with different skills) Actually, Scythe Q: Sweep – Sweep your scythe in a wide arc. Cooldown: 4s. E: Soul Rend – A channeled attack that damages enemies in front and heals you for a percentage of damage. Cooldown: 12s. Special: Death Whirl – Spin rapidly dealing damage around you. | Self-sustain and AoE damage. Build: Sustain/Spell vamp. | ||
| Bow | Arrow Volley – Fire a volley of arrows in an arc, damaging enemies. Cooldown: 6s. | Rain of Arrows – Call down arrows in a targeted area. Cooldown: 12s. | Power Shot – Charged shot with increased range and damage. | Ranged harassment and AoE. Build: Ranged DPS. |
| Crossbow | Bolt Shot – Fire a bolt that pierces enemies. Cooldown: 5s. | Bolt Rain – Fire a spread of bolts in a cone. Cooldown: 10s. | High Velocity Shot – Fires a fast projectile with high crit chance. | Burst damage and kiting. Build: Crit/Precision. |
| Slashers (Daggers) | Slice – Quick strike that applies a stacking bleed. Cooldown: 2s. | Shadow Step – Dash a short distance, leaving a decoy that explodes after 2s. Cooldown: 8s. | Backstab – Teleport behind the target and stab (if used from behind, deals triple damage). | High mobility and single target assassination. Build: Stealth/Crit. |
| Pistols | Pistol Shot – A fast bullet that can hit multiple enemies in a line. Cooldown: 3s. | Fan the Hammer – Rapidly fire a burst of shots in a cone. Cooldown: 8s. | Headshot – Aimed shot that deals bonus damage if it hits a stationary target. | Ranged burst and mobility (dodge roll). Build: Kiting/Spell hybrid. |
| Greatsword | Rending Slash – A heavy chop that applies a slow and armor shred. Cooldown: 6s. | Executioner’s Swing – A charged attack that deals increased damage to enemies below 30% health. Cooldown: 12s. | Charge – Rush forward, knocking back enemies. | Execute and tanky melee. Build: Tank/Execute. |
---
2. Magic Spells
You can equip up to 3 spell slots (two basic spells on `R` and `F`, and one ultimate on `R` while ultimate is active). There are five magic schools, each containing 2 basic and 2 ultimate spells. Spells are unlocked by defeating specific V Blood carriers.
| School | Spell Name | Type | Description | Cooldown | Synergies / Combos |
|---|---|---|---|---|---|
| Blood | Blood Bolt | Basic | Fires a bolt of blood that damages and heals you for 20% of damage dealt. | 4s | Great for sustain; combos with Blood Rite for extra healing. |
| Blood | Blood Rite | Basic | Summon a blood fountain that heals all nearby allies over time and grants movement speed. | 8s | Use before engaging or to sustain in fights. |
| Blood | Blood Storm | Ultimate | Create a storm of blood in a large area, damaging enemies over time and healing you for 50% of damage. | 60s | Strong AoE, best used with crowd control to keep enemies inside. |
| Blood | Heart Strike | Ultimate | Teleport to a target enemy, dealing massive single-target damage and healing you to full if it kills. | 75s | Assassination ability; great for finishing V Blood. |
| Chaos | Chaos Volley | Basic | Fire a spread of three bolts that each deal chaos damage. | 5s | Excellent for bursting down groups; procs Chaos Burn. |
| Chaos | Chaos Bolt | Basic | Shoot a single homing bolt that deals high damage. | 6s | Single target pressure; use for kiting. |
| Chaos | Chaos Barrage | Ultimate | Summon a meteor shower that rains down chaos projectiles over a large area. | 60s | Massive AoE, good for clearing rooms or boss fights. |
| Chaos | Power Surge | Ultimate | Channel a beam of chaos that damages the first enemy hit, with increasing damage over time. | 45s | High single target DPS, but requires precise aim. |
| Illusion | Veil of Illusion | Basic | Become invisible briefly and leave a decoy that explodes when destroyed. | 6s | Escapes, initiations, and repositioning. |
| Illusion | Illusionary Wall | Basic | Create a wall of illusions that slows enemies passing through and deals damage. | 10s | Area denial; combos with Chaos spells for safe casting. |
| Illusion | Spectral Guard | Ultimate | Summon two spectral guards that taunt enemies and attack them. | 70s | Great for tanking bosses or splitting aggro. |
| Illusion | Deadly Illusion | Ultimate | Create a clone of yourself that attacks your target; if the clone dies it explodes. | 60s | Confuse enemies and add burst. |
| Unholy | Unholy Strike | Basic | Call a skeletal hand from the ground that damages and slows enemies in a line. | 5s | Good poke and slow. |
| Unholy | Deathly Coil | Basic | Summon a voracious rat that explodes on contact, dealing damage and applying a poison. | 8s | Sustained damage over time; synergizes with Minion build. |
| Unholy | Summon Skeleton | Ultimate | Raise three skeleton warriors that fight for you for 30s. | 90s | Extra damage and body blocking. |
| Unholy | Army of the Dead | Ultimate | Summon a small army of skeletons and bats that charge forward and explode. | 100s | Massive AoE burst; use in chokepoints. |
| Storm | Lightning Discharge | Basic | Release a burst of lightning in a cone, damaging enemies and stunning them briefly. | 6s | Instant crowd control; great interrupt. |
| Storm | Static Shield | Basic | Create a lightning shield around you that damages enemies who hit you. | 12s | Defensive ability; combos with Storm ultimate. |
| Storm | Thunderbolt | Ultimate | Call down a lightning bolt on a target area, dealing high damage and stunning. | 45s | Single target burst int and CC. |
| Storm | Storm of the Heavens | Ultimate | Summon a persistent storm that damages and slows enemies in an area. | 60s | Area denial; good for controlling objectives. |
---
3. Vampire Powers
These are special abilities unlocked through V Blood progression. They are passive or toggle/cooldown based and often require Blood essence to use.
| Power | Unlock Source | Effect | Usage |
|---|---|---|---|
| Mist Form | Alpha the White Wolf (V Blood) | Turn into a mist of bats, becoming invulnerable and moving quickly. Lasts 3s, cooldown 12s. | Escape, crossing gaps, or avoiding damage. |
| Dominate Human | Several V Bloods (e.g., Grayson) | Charm a human to be your thrall. Costs blood essence. | Base building, gathering, combat aid. |
| Dominate Vermin | Various V Bloods | Charm a rat small creature to follow you and reveal enemies. | Scouting and detection. |
| Dominate White Wolf | Alpha the White Wolf | Tame a wolf to fight alongside you. | Combat pet. |
| Summon Dusk Caller | Night Marshall Styx (V Blood) | Summon a bat swarm that distracts enemies and heals you. | Utility. |
| Drain Blood | Early game (unlocked by default) | Feed on an incapacitated enemy to gain blood and recover health. | Sustenance and healing. |
| Bat Form | (Base ability) | Transform into a small bat to fly (costs Blood essence). | Travel and exploration. |
| Exposure | (Passive) | Reduces the penalty from sunlight when moving quickly. | QoL for daytime travel. |
4. Blood Types
Your current blood type (from feeding) grants passive bonuses and an active ability (unlocked at >50% blood quality). There are six blood types:
| Blood Type | Passive Bonus | Active Ability (Requires >50% quality) | Best for |
|---|---|---|---|
| Worker | +% Work Speed, +% Resource Yield | Worker's Strength: Increases resource yield from gathering for 30s (60s cooldown). | Farming, base building. |
| Rogue | +% Movement Speed, +% Critical Hit Chance | Rogue's Step: Become ethereal for 2s and pass through enemies (45s cooldown). | Kiting and escape builds. |
| Brute | +% Physical Power, +% Armor | Brute's Vigor: Gain a shield that absorbs damage for 6s (60s cooldown). | Tank and melee builds. |
| Warrior | +% Attack Speed, +% Travel Speed (mounted) | Warrior's Charge: Lunge forward, damaging and knocking back enemies (30s cooldown). | Melee DPS and mobility. |
| Scholar | +% Spell Power, +% Spell Cooldown Reduction | Scholar's Recall: Reset the cooldown of your next spell instantly (45s cooldown). | Magic-focused builds. |
| Creature | +% Health Regeneration, +% Max Health | Creature's Frenzy: Enter a berserk state, dealing bonus damage as magic damage for 5s (60s cooldown). | Hybrid or sustain builds. |
---
5. Recommended Builds
Here are three popular builds that synergize well with the skills above.
- Battlemage (Spell Caster): Weapon: Bow/Crossbow/Pistols. Spells: Chaos Volley + Blood Rite + Chaos Barrage. Blood: Scholar (95%+). Vampire Power: Mist Form. Play at range, spam spells, use Blood Rite for healing. Scholar's Recall resets Chaos Volley for burst.
- Bleed Assassin: Weapon: Slashers (Daggers). Spells: Illusionary Wall + Chaos Bolt + Spectral Guard. Blood: Rogue (85%+). Use Slashers' backstab and bleed stacking, Veil of Illusion for escapes, Spectral Guard to distract. Rogue's Step to dodge.
- Tank/Siege: Weapon: Mace or Greatsword. Spells: Unholy Strike + Static Shield + Summon Skeleton. Blood: Brute. Hold the line with shield, use skeletons for meat shields, Mace's Smash for stuns. Brute's Vigor for extra defense.
- Weapon skills are always available; spells need to be assigned in the Spell Book (press `Y`).
- You can have up to 3 spells: two basics (bound to `R` and `F`) and one ultimate (`R` again when ultimate is ready, or assign a separate key).
- Vampire Powers (like Bat Form) are in the Ability wheel (`Ctrl`+`Space` or bound to a hotkey).
- Blood type abilities are activated by pressing `B` (or the assigned key) when above 50% blood quality.
- Combos: For example, use Chaos Volley (slow) then Thunderbolt (stun) to lock down an enemy. Or use Veil of Illusion to reposition and then Harpoon (Spear) to pull an enemy into your team.
---
6. Controls and Tips
Mastering these skills will let you adapt to any situation in Vardoran. Experiment with different combinations and find your playstyle.
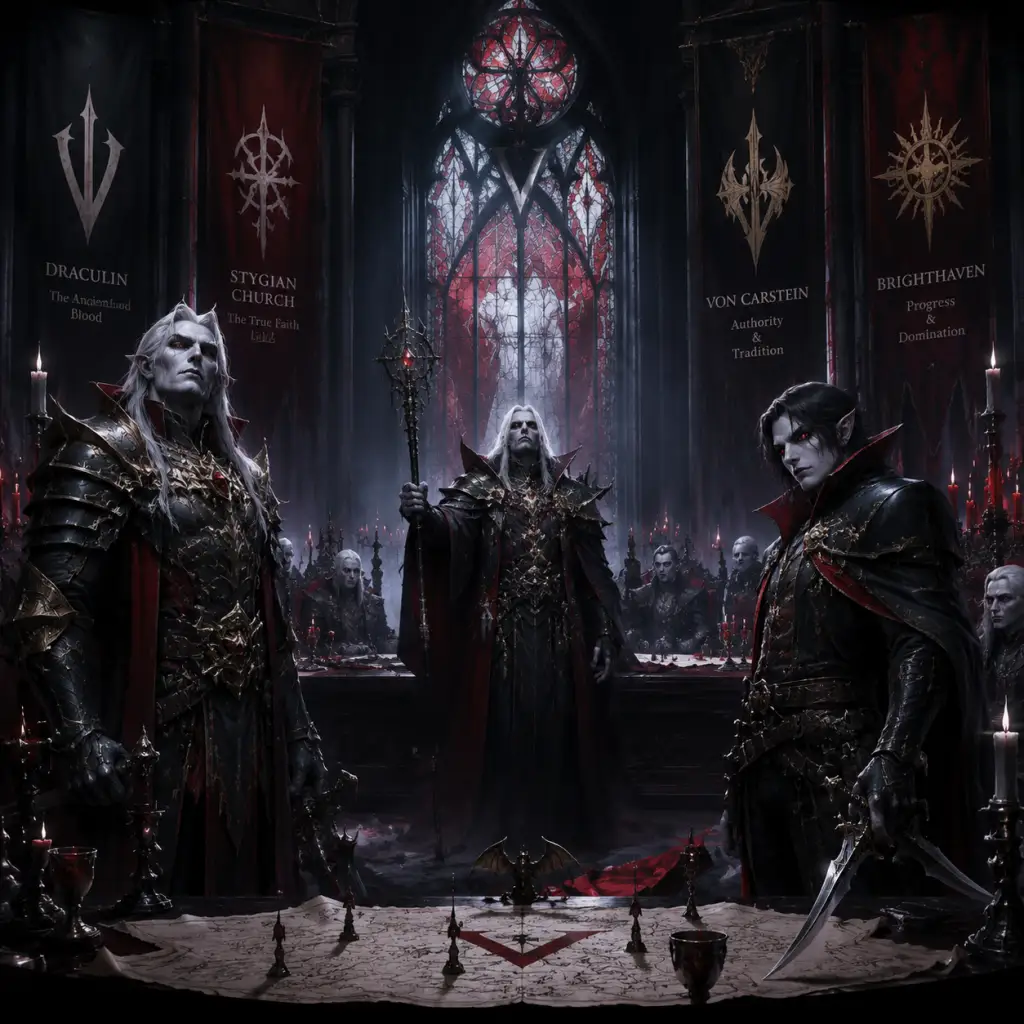
Characters & Roles
Characters & Roles Overview
In V Rising, you do not choose a predefined character class. Instead, your vampire lord is a blank slate whose abilities and playstyle are shaped by three key systems: Blood Type, Spell Loadout, and V Blood Powers earned from defeating major vampire lords. This guide breaks down every major character, role, and playable unit in the game, from your customizable vampire to the legendary V Blood carriers whose powers you will steal.
---
1. The Vampire Lord (Player Character)
Background
You are a newly awakened vampire, emerging from a centuries-long slumber in the crumbling ruins of Vardoran. Stripped of your former power, you must hunt, build, and conquer to reclaim your throne. Your appearance, gender, and starting cosmetic options are chosen at character creation, but your actual strengths come from what you feed on and what powers you acquire.
Playstyle
Entirely flexible. You can be a melee bruiser, a ranged spellcaster, a stealthy assassin, or a hybrid. Your Blood Type and chosen spells define your role in any given moment.
Unlock Conditions
Available immediately upon starting a new game. No prerequisites.
Recommended Equipment / Builds
No single best build; tailor gear and weapons to your chosen Blood Type and preferred spells. For a beginner-friendly all-rounder, use a Sword (mobility) with Chaos Volley and Ward of the Damned.
Team Synergy
In co-op, your team can cover multiple Blood Types. For example, a Warrior tank with Brute blood, a Rogue damage dealer with Scholar blood, and a support with Warrior blood (for shield).
---
2. Blood Types (Playable Roles)
Blood Types are essentially your class system. Each type provides a unique passive bonus and active ability (Blood Rage, Blood Mend, etc.) that scales with the blood's quality percentage (from 1% to 100%). You acquire a Blood Type by feeding on a human with that blood type. The higher the percentage, the stronger the bonuses.
2.1 Worker Blood
- Background: Common laborers, peasants, and craftsmen. Their blood is rich with resilience born of toil.
- Strengths: Excellent resource gathering (increased yield from mining, woodcutting, etc.), faster castle building, and reduced damage from environmental hazards (e.g., sun, garlic).
- Weaknesses: Minimal combat bonuses.
- Playstyle: Use Worker blood when farming materials or expanding your castle, not for fighting bosses.
- Unlock Conditions: Feed on any NPC with a gray name or "Worker" title (e.g., "Peasant", "Lumberjack").
- Recommended Equipment: None specific; equip for survival (e.g., Cloak of the Damned for sun protection).
- Team Synergy: Dedicate one player to Worker blood during base-building sessions; switch to a combat blood for fights.
- Background: Soldiers, guards, and knights. This blood flows with discipline and combat prowess.
- Strengths: Physical damage reduction, increased shield effectiveness, and a powerful Blood Mend that heals a percentage of max health.
- Weaknesses: No damage amplification.
- Playstyle: Tank and frontline. Use heavy weapons like Axes or Maces, and spells that reduce incoming damage (e.g., Mist Trance, Ward of the Damned).
- Unlock Conditions: Feed on guards, bandit soldiers, or any enemy with "Guard" or "Soldier" in the name.
- Recommended Equipment: Heavy armor (e.g., Hollowfang set), shield if using Sword + Shield, health regeneration potions.
- Team Synergy: Pair with a Rogue or Scholar blood ally who deals damage from range while you hold aggro.
- Background: Thieves, assassins, and hunters. Their blood is quick and elusive.
- Strengths: Increased movement speed, critical hit chance, and stealth bonuses. The active ability Blood Whip (or Veil) grants a dodge that also deals damage.
- Weaknesses: Low survivability; cannot take sustained damage.
- Playstyle: Hit-and-run, burst damage, and kiting. Use fast weapons (Swords, Daggers) and mobility spells (Chaos Dash, Frost Dash).
- Unlock Conditions: Feed on bandit archers, thieves, or any enemy with "Rogue" or "Hunter" title.
- Recommended Equipment: Light armor (e.g., Shadow set), weapons with crit chance bonuses, movement speed trinkets.
- Team Synergy: Flank enemies while Warrior blood holds the line; use stealth to revive downed allies.
- Background: Mages, priests, and scholars. Their blood is attuned to magical energies.
- Strengths: Increased spell damage, reduced spell cooldowns, and higher spell critical strike chance. The active ability Blood Rage (damage amplification) or Blood Mend alternative depending on patch.
- Weaknesses: Fragile; no physical defense bonuses.
- Playstyle: Pure caster. Spam offensive spells (Chaos Volley, Sanguine Coil, Undead Commander) and control the battlefield.
- Unlock Conditions: Feed on mages, clerics, or any enemy with "Scholar" or "Mage" in the name (e.g., "Vampire Scholar", "Lightning Priest").
- Recommended Equipment: Cloth armor (e.g., Void set), weapons with spell power (e.g., sword of the High Priest), jewelry with cooldown reduction.
- Team Synergy: Stay behind the Warrior blood tank; use AoE spells to clear groups while Rogue blood picks off stragglers.
- Background: Barbarians, ogres, and savage creatures. This blood is primal and unrelenting.
- Strengths: High health regeneration, lifesteal on attacks, and bonus damage against low-health enemies. The active ability Blood Rage (damage and attack speed).
- Weaknesses: Slow movement speed; vulnerable to kiting.
- Playstyle: Sustain fighter. Engage in melee, rely on lifesteal to outlast opponents. Use slow but hard-hitting weapons like Greatswords or Maces.
- Unlock Conditions: Feed on bandit brutes, bears, or any enemy with "Brute" or "Brawler" title.
- Recommended Equipment: Heavy armor with health regen bonuses (e.g., Terror set), two-handed weapons, potions of restoration.
- Team Synergy: Acts as a secondary tank and DPS; Scholar blood can buff your lifesteal with spells like Chaos Volley (fire synergy).
- Background: A rogue vampire archer with frost powers, once a servant of Octavian.
- Strengths: Ranged frost attacks, slowing arrows.
- Weakness: Low health and melee vulnerability.
- Reward: Ice Block spell (freeze self to heal and become immune) and Frost Portal (teleport that leaves a slow field).
- Unlock Condition: Defeat her in Farbane Woods south of the Antique Dungeon.
- Recommended Gear: Fire resistance potions, ranged weapons or shields to close distance. Any combat blood type works; Scholar blood for frost spell synergy.
- Team Synergy: One player tanks her arrows with shield, another deals damage from behind.
- Background: Human bandit warlord who hates vampires, not a vampire himself.
- Strengths: Heavy armor, area damage with mace, summons adds.
- Weakness: Slow movement, no ranged attacks.
- Reward: Bandit Armor Set recipe (medium-tier gear) and Shatter spell (AoE physical damage).
- Unlock Condition: Defeat him in his bandit camp east of the Dunley Farmlands border.
- Recommended Gear: Silver resistance if using silver weapons; any blood type with mobility to dodge his swings.
- Team Synergy: Have one player draw aggro while others kill adds.
- Background: A paladin vampire who wields holy magic—a traitor to the vampire cause.
- Strengths: High holy damage, healing, teleportation, and a radiant beam that can one-shot.
- Weakness: None; extremely tough. Must use unholy spells to counteract holy.
- Reward: Divine Aura (buff to resist holy) and Winged Horror transformation (bat-like flying form). Also unlocks an extra spell slot.
- Unlock Condition: Defeat all previous major V Blood carriers including Octavian and Lord Styx.
- Recommended Gear: Void armor set (unholy resistance), unholy spells like Sanguine Coil and Undead Commander, high Scholar blood for spell damage.
- Team Synergy: All players must coordinate dodging his beam; one tank with shield and Warrior blood can absorb hits.
- Background: The ancient vampire progenitor, imprisoned for millennia. Final boss of the game.
- Strengths: Master of all blood magic, phases with unique attacks (blood clones, giant bat, chaos storm).
- Weakness: None; requires perfect play.
- Reward: Dracula's Form (transform into Dracula with unique abilities) and Blood Moon ultimate spell.
- Unlock Condition: Gather all V Blood shards from previous bosses and enter his castle in the Ruins of Mortium.
- Recommended Gear: Full endgame legendary gear (e.g., Soulshards, Dark Silver weapons), highest quality blood of any type (100%), potions of ultimate power.
- Team Synergy: This fight is balanced for solo or group; in groups, assign one player to interrupt his casts (e.g., using Chaos Volley), one to manage adds, and all to avoid AoE.
- Background: Humans turned into vampire servants by using Dominate Human ability. They are not player-controlled but can be assigned to defend your castle or gather resources.
- Roles: Castle defense (enemies attack them), resource farming (sent on missions), or decoration.
- Strengths: Infinite stamina when guarding, scale with gear.
- Weaknesses: Cannot be directly commanded in combat outside castle.
- How to Unlock: Build a Tomb and a Servant Coffin; use the ability on a human (requires high blood percentage of any type to turn properly).
- Recommended Equipment: Give them crossbows or swords, and armor sets that match their blood type bonuses.
- Background: Riding animals that you can tame from stables found in Dunley Farmlands or higher.
- Role: Mount for fast travel and combat mobility.
- Strengths: Greatly increased travel speed; can be used to trample enemies (deals low damage).
- Weaknesses: Cannot fight dismounted while on horse; horse can be killed.
- How to Unlock: Find a horse in the wild (white, brown, black variants) and approach it; mount automatically. No taming needed. Can store in castle via a Stable.
- Recommended Equipment: Horse armor (barding) reduces damage to the horse; no player gear required.
- Background: A vampire power earned from defeating a V Blood carrier (e.g., Frostmaw the Matriarch).
- Role: Temporary transformation into a bat for flying over obstacles and faster travel.
- Strengths: Can fly over water and terrain, very fast.
- Weaknesses: Cannot attack, can be interrupted by silence effects, drains blood meter.
- How to Unlock: Defeat the V Blood boss that grants Bat Form (Level 40-45 boss in Silverlight Hills).
- Recommended Use: Use for exploration and escaping ganks; not for combat.
2.2 Warrior Blood
2.3 Rogue Blood
2.4 Scholar Blood
2.5 Brute Blood
---
3. Major V Blood Carriers (Key NPCs)
V Blood carriers are the legendary vampires and creatures you must defeat to unlock permanent abilities (spells, forms, and building recipes). While not playable themselves, they define your character's growth. Here are the most influential ones.
3.1 Keely the Frost Archers (Farbane Woods, Level 20)
3.2 Grayson the Bandit King (Farbane Woods, Level 30)
3.3 Solarus the Immaculate (Cursed Forest, Level 70)
3.4 Dracula (Endgame Boss, Level 90)
(Note: There are dozens of other V Blood carriers; these are the most impactful for character progression.)
---
4. Other Playable Units
4.1 Servants (Thralls)
4.2 Horses
4.3 Bat Form
---
Conclusion
In V Rising, your "class" is fluid and evolves with every V Blood you consume and every blood type you equip. Mastering the synergy between blood types, spells, and gear is the key to becoming the ultimate vampire lord. Experiment with different combinations and adjust based on the threats you face in Vardoran.
Cheats & Secrets
Cheats & Secrets
Admin Console (Developer Commands)
V Rising includes a built-in developer console that allows server administrators (and single-player game hosts) to execute cheat commands. This is the only official way to access cheats, and it is fully supported for private / local games. These commands do not work on official or ranked servers unless you are the server admin.
#### How to Enable the Console
1. Single-player / Local Host: Press F1 (default key) to open the console while in-game. If it does not open, ensure you have launched the game with the `-console` launch option (see below).
2. Dedicated Server: Add the `-console` launch parameter to the server executable. Then press F1 on the server machine to open the console. Alternatively, use RCON (Remote Console) with tools like [V Rising RCON Tool](https://github.com/Arcoders/V-Rising-RCON-Tool).
Launch Option Setup (Steam)
- Right-click V Rising in your Steam Library -> Properties -> General -> Launch Options.
- Add the following: `-console`
- Launch the game. The console will now open with `F1`.
---
List of Admin Commands
All commands are case-insensitive. Type the command and press Enter.
| Command | Effect | Example |
|---|---|---|
| `adminauth` | Authenticates you as admin (only needed if you have set an admin password in `ServerHostSettings.json`). Usage: `adminauth YourPassword` | `adminauth mysecretpass` |
| `ban` | Ban a player by name. Syntax: `ban <playername>` | `ban Player123` |
| `banuser` | Ban a player by SteamID. Syntax: `banuser <steamid>` | `banuser 76561197960287930` |
| `kick` | Kick a player by name. | `kick Player123` |
| `giverecipe` | Unlock a specific recipe (by internal ID). You can find ID lists online. | `giverecipe "Recipe_BloodPotion"` |
| `giveitem` | Spawn an item. Syntax: `giveitem <itemID> <amount>` | `giveitem "Item_BloodEssence" 100` |
| `givesoulshard` | Spawn a Soul Shard (boss drop). Syntax: `givesoulshard <shardID>` (e.g., `shard_0` for Winged Horror). | `givesoulshard shard_0` |
| `godmode` | Toggle invulnerability. Reduces damage taken to zero. | `godmode` (toggle) |
| `heal` | Fully restore health & blood. | `heal` |
| `hidegather` | Toggle resource node visibility (for builders). | `hidegather` (toggle) |
| `listplayers` | List all connected players with their names and IDs. | `listplayers` |
| `massunlock` | Unlock all currently available tech (recipes) in the game (including all buildable items). | `massunlock` |
| `roomlock` | Lock the current room in a castle (used in building to prevent accidental removal). | `roomlock` (toggle) |
| `saveworld` | Force a manual save of the world. | `saveworld` |
| `setatmosphere` | Change the time of day / weather. Syntax: `setatmosphere <name>` (e.g., `day`, `night`, `storm`). | `setatmosphere night` |
| `setlevel` | Set your character level (affects spell power, health, etc.). Syntax: `setlevel <level>` (max 90 in 1.0). | `setlevel 90` |
| `setrank` | Set your PvP rank (blood rank displayed in lobby). | `setrank 5` |
| `showsettlementinfo` | Toggle display of settlement info (for debugging). | `showsettlementinfo` |
| `teleportto` | Teleport to a specific map coordinate. Syntax: `teleportto <x> <y>` | `teleportto 1000 2000` |
| `teleporttoplayer` | Teleport to a specific player by name. | `teleporttoplayer Player123` |
| `time` | Show current game time. | `time` |
| `unban` | Unban a player by name. | `unban Player123` |
| `unlockallskins` | Unlock all cosmetics / skins (armor, weapons, castle decorations) that are normally earned through progression or events. | `unlockallskins` |
| `wp` | Toggle wireframe mode (for developers). | `wp` (toggle) |
---
Secrets & Hidden Content
V Rising does not have traditional cheat codes (like konami code), but it does contain several developer-intended secrets and easter eggs.
#### 1. Secret Boss: "The Behemoth" (Hidden Level 85)
Located in the Cursed Forest (south-west of Farbane Woods). There is a hidden arena inside a giant tree. To access, you must defeat the Terramancy boss (Gorecrusher) first. Then, at the tree near the coordinates (approximately X: 1200, Y: 900), use a Blood Key (craftable from Blood Essence) on a hidden altar. This spawns a level 85 boss called "The Behemoth" which drops a rare decor recipe for a giant skull.
#### 2. Easter Egg: Rat King Pet
In the Cursed Forest, inside the cave at coordinates (X: 1100, Y: 750), there is a small hole in the wall. Crawl through (in bat form) to find a room with a giant rat. Interact with it to receive the "Rat King" pet transformation. This is a purely cosmetic form.
#### 3. Hidden Achievement: "Blood & Chocolate"
On the map, find the sunken ship in Farbane Woods (near the copper mine). Inside the ship's captain's quarters, there is a locked chest. The key is dropped by a unique NPC named "Captain Blacktooth" who spawns randomly at night in the same area (only when the moon is full in real-time? Actually, the condition is not fully known; try farming during night cycles). Opening the chest gives a unique recipe for "Chocolate Cake" and unlocks the Steam achievement.
#### 4. Developer Room (Unused)
There is an inaccessible room beneath the castle of Dracula's Fall (endgame zone). Using the console command `teleportto 0 0` will take you to a void area with developer billboards and weird textures. This is likely leftover testing space and not a reward.
#### 5. Secret Dialogue: Laughing Guards
If you stand idle near the guards in Brighthaven (the human city) for 30 seconds, one guard may say: "You look pale. Have you seen the sun lately?" This is a reference to vampires.
#### 6. V Blood Carriers with Unique Drops
Some V Blood bosses are not shown on the map until you find their shrines. For example, "The Unclean" is hidden in a cave north of the Dunley Farmlands. Defeating him awards the "Unholy Shield" spell, which is the only source of that spell.
---
Exploit-Safe Secrets (Legitimate Hidden Content)
- Hidden Cave in Cursed Forest (mentioned above for Rat King).
- Secret Passage in Brighthaven - Inside the cathedral, there is a fake wall behind the organ. Hit it with a weapon (sword or axe) to reveal a tunnel leading to a small treasury with gold and gems.
- Moon Phase Effects - Certain bosses (like the Werewolf in Dunley) are only present during a full moon in-game (visible in sky). This is a hidden mechanic, not a cheat.
- Fishing Spots - There are rare circular ripples in water bodies (especially in the Silverlight Hills). Fishing there yields unique items like "Ancient Fish" which can be traded for a cosmetic crown.
- Admin commands are the only official cheats. They are intended for server administration, building, and testing.
- Using `massunlock` or `unlockallskins` in a multiplayer server may disrupt progression for others; use responsibly.
- No console commands work on official PvP or PvE servers unless you are the admin.
- Easter eggs and secrets are part of the game's intended content and do not require cheats to access.
---