Valheim
# Valheim: Game Introduction ## Genre Valheim is an **open-world survival and sandbox role-playing game** with a heavy emphasis on exploration, crafting, base building, and combat. It blends elements of action-adventure, role-playing, and survival simulation in a low-fantasy Viking-themed world. #...
Download & Installation
Valheim Download & Installation Guide
Valheim is a brutal exploration and survival game set in a procedurally generated Viking purgatory. It is available on PC (Steam, Xbox Game Pass for PC, and Microsoft Store) and Xbox (Xbox One, Xbox Series X|S via Game Pass). There are no versions for PlayStation, Nintendo Switch, or mobile devices. This guide covers all legitimate download sources and platforms.
---
System Requirements
| Component | Minimum | Recommended |
|---|---|---|
| OS | Windows 7+ (64-bit) | Windows 10 (64-bit) |
| CPU | 2.6 GHz dual-core | Quad-core 3.0 GHz or better |
| RAM | 8 GB | 16 GB |
| GPU | DirectX 11 compatible (e.g., GTX 950) | DirectX 11 compatible (e.g., GTX 1070) |
| Storage | 2 GB free space | 2 GB SSD recommended |
| DirectX | Version 11 | Version 11 |
| Internet | Broadband for initial download & multiplayer | Broadband for multiplayer |
Account Requirements
- Steam version: A free Steam account.
- Xbox / Microsoft Store version: A Microsoft account (Xbox Live Gold or Game Pass Core/Ultimate for online multiplayer on console; on PC Game Pass you need Game Pass subscription to play).
---
Download Sources
| Platform | Source | Notes |
|---|
| PC (Microsoft Store / Xbox Game Pass) | [Xbox App for Windows](https://www.xbox.com/en-US/apps/xbox-app-for-pc) or Microsoft Store | Requires Game Pass (Ultimate, PC, Core). Game is free with subscription.
| Xbox Console | Xbox Store | Requires Game Pass (Ultimate, Core, or Console) or purchase. Free with Game Pass.
---
Step-by-Step Installation
#### 1. Steam (PC)
1. Download and install Steam from [steampowered.com](https://store.steampowered.com/about/).
2. Launch Steam, create an account or log in.
3. Open the Store tab, search for "Valheim".
4. Click Add to Cart and complete purchase (or if you already own it, click Install).
5. In your Library, find Valheim, select Install.
6. Choose installation folder (default: `C:\Program Files (x86)\Steam\steamapps\common\Valheim`).
7. Wait for download (~2 GB).
8. After installation, click Play.
#### 2. Xbox App for PC (Game Pass / Microsoft Store)
1. Download and install the Xbox app from [xbox.com](https://www.xbox.com/en-US/apps/xbox-app-for-pc) or Microsoft Store.
2. Log in with your Microsoft account (must have active Game Pass subscription).
3. Search for "Valheim" in the Xbox app.
4. Click Install (or Get if installing from Microsoft Store).
5. Choose installation location (if prompted).
6. Wait for download.
7. Click Play from the Xbox app.
Note: Some users prefer to install via Microsoft Store directly – the process is similar.
#### 3. Xbox Console (Xbox One / Series X|S)
1. Turn on console and sign in to your Microsoft account.
2. Go to Microsoft Store (or Game Pass tab if you have a subscription).
3. Search for "Valheim" and select it.
4. Click Install (free with Game Pass) or Buy to purchase.
5. Wait for installation (console may download ~2 GB).
6. Launch from My games & apps.
---
First Launch Setup
1. After launching, you will see the main menu.
2. Click Start to begin a new game.
3. Choose a world name and seed (or leave random). Set your server visibility (private, invite only, public).
4. Configure graphics options (recommend starting with default or medium).
5. Press Start to spawn in the meadows.
6. If playing multiplayer, ensure you have stable internet and open UDP port 2456-2458 for dedicated servers (optional).
---
Common Installation Errors & Fixes
#### "Missing VCRuntime" or "MSVCP140.dll not found"
- Fix: Install [Visual C++ Redistributables for Visual Studio 2015-2022](https://aka.ms/vs/17/release/vc_redist.x64.exe) (x64).
- Fix: Clear Steam download cache: Steam > Settings > Downloads > Clear Download Cache. Also run Steam as administrator.
- Fix: Restart the Xbox app and PC. If persists, run WSReset.exe (Windows Store Reset) as administrator.
- Fix: Verify game files:
- Also, disable antivirus temporarily (e.g., Malwarebytes, Windows Defender real-time scanning) or add Valheim folder to exceptions.
- Fix: Ensure you are signed in with the correct Microsoft account that purchased or has Game Pass subscription. Restart console/app.
- Fix: Lower graphics settings (especially vegetation and shadow quality). Update GPU drivers. Close background applications.
- For dedicated servers, copy the `valheim_server.exe` from the install folder to a separate location.
- Backup your world files regularly: `%userprofile%\AppData\LocalLow\IronGate\Valheim\` on Windows.
- Enable cloud saves (Steam) for cross-device play.
#### Steam "Disk Write Error"
#### Xbox App "Installation stuck" or "Error 0x80073D0D"
#### Game won't launch (crashes on splash screen)
- Steam: Right-click Valheim in Library > Properties > Local Files > Verify integrity of game files.
- Xbox App: Open Xbox app > Valheim > Manage > Files > Verify and repair.
#### "Invalid Platform" or "You don't own this game" on Xbox
#### Low FPS / Stuttering
---
Post-Installation Verification
After installation, confirm the game runs correctly:
1. Open the game and check the main menu loads.
2. Start a new world and move around for a few minutes to test performance.
3. If on PC, check the installation folder for expected files:
- Steam: `...\steamapps\common\Valheim\valheim.exe` and `valheim_server.exe` (dedicated server tool).
- Xbox: Located in a protected directory (`C:\Program Files\WindowsApps`), but you can check via Settings > Apps > Valheim > Advanced options > Reset to free space or repair.
4. Ensure online features work (if you plan multiplayer) by joining a public server or starting a dedicated server.
Additional Tips:
---
With this guide, you should be able to download, install, and run Valheim on your preferred platform. Enjoy your Viking journey in the tenth world!
Game Introduction
Valheim: Game Introduction
Genre
Valheim is an open-world survival and sandbox role-playing game with a heavy emphasis on exploration, crafting, base building, and combat. It blends elements of action-adventure, role-playing, and survival simulation in a low-fantasy Viking-themed world.
Developer & Publisher
- Developer: Iron Gate AB (a small independent Swedish studio)
- Publisher: Coffee Stain Publishing (known for Goat Simulator, Satisfactory)
- Early Access Launch: February 2, 2021 (Steam, PC)
- Full Release (Version 1.0): Not yet officially announced; still in development with regular major updates.
- Platforms:
- Crossplay: Supported between PC (Steam/Microsoft Store) and Xbox players when playing through the same world.
- Meadows – Lush, gentle starter area with deer, boar, and greylings.
- Black Forest – Dense, dark woodland inhabited by skeletons, trolls, and dwarves.
- Swamp – Murky, poisonous marsh filled with draugr, leeches, and sunken crypts.
- Mountains – Snow-capped peaks with wolves, drakes, and silver deposits.
- Plains – Open grasslands roamed by death-dealing fulings, lox, and goblin camps.
- Mistlands – An eerie, fog-shrouded realm where giant insects and magical remnants linger.
- Ashlands – A volcanic wasteland (upcoming update).
- Deep North – Frozen tundra (future content).
- Odin – The All-Father, who appears as a brief mysterious raven or a ghostly figure when the player is near death. He provides cryptic guidance.
- Hugin – A raven sent by Odin who appears at the start of the game and offers tips and lore.
- Munin – Another of Odin's ravens, sometimes delivering messages.
- The Forsaken Bosses – Each represents a defiled aspect of Norse mythology:
- Exploration & Discovery – Every new island and biome feels fresh; sailing across the sea under aurora skies is breathtaking.
- Base Building & Customization – Players can construct massive longhouses, fortified forts, or elaborate treehouses using a detailed building system with physical stability physics.
- Cooperative Multiplayer – Up to 10 players per server can work together, building communal bases, sharing resources, and fighting bosses as a team.
- Challenging but Fair Combat – Enemies have attack patterns, weaknesses, and resistances; combat requires timing, stamina management, and appropriate gear.
- Immersive Atmosphere – A haunting, ambient soundtrack, dynamic weather, and minimalist storytelling create a deep, brooding world.
- Fans of survival games (Minecraft, The Forest, Rust)
- Players who enjoy action RPGs with crafting (Grounded, Conan Exiles)
- Co-op enthusiasts looking for a relaxed yet challenging experience
- Norse mythology fans
- Builders and architects who love creative freedom
- Single Player – Fully offline or online (world files saved locally).
- Cooperative Multiplayer – Host your own server (dedicated or peer-to-peer) or join others; up to 10 players. No matchmaking; you must join via IP, friend invite, or community servers.
- PvP – Optional toggle; players can damage each other if both have PvP enabled. No ranked or competitive mode.
- Hardcore/Survival – All modes are survival by default; no easy mode, but players can modify difficulty via world settings (e.g., increased resource rates, enemy difficulty, death penalties).
- Online: Crossplay multiplayer, dedicated servers, and cloud saves (Steam Cloud).
- Offline: Single-player worlds work without internet. Xbox version requires online account but can play solo offline.
- Hearth & Home Update (September 2021) – Revamped food system, new building pieces (hearths, iron cooking stations), and weapon balancing.
- Mistlands Update (December 2022) – Added the Mistlands biome, new enemies (ticks, gjall, seeker), building tools, and a new boss (The Queen).
- The Bones of Odin Update (2023) – QoL changes, new building materials (black marble), and enemy variety.
- Upcoming DLC/Expansions: The developers plan to add two more biomes (Ashlands, Deep North) and additional boss fights before 1.0. There are no paid expansions announced.
Release Timeline & Platforms
- PC: Steam (Windows/Linux via Proton), Microsoft Store, Xbox Game Pass for PC
- Xbox: Xbox One, Xbox Series X|S (game preview since March 2023)
Story Overview
The player is a fallen Viking warrior who has died in battle, but instead of entering Valhalla, they are sent by the All-Father Odin to the mysterious tenth world—Valheim. This purgatorial realm is overrun by ancient beasts, monstrous creatures, and other malevolent forces that threaten the cycle of rebirth. Odin tasks the player with proving their worth by defeating the forsaken bosses—powerful incarnations of the world's primordial evils—and restoring order to Valheim so that Odin's warriors may feast in the halls of the gods. The story is primarily environmental and driven by progression: each boss slain unlocks new resources, biomes, and the ability to venture deeper into the world's heart.
Setting
Valheim is a vast, procedurally generated world inspired by Norse mythology and Viking-age Scandinavia. The world is divided into distinct biomes, each with unique ecosystems, resources, enemies, and weather:
The world is dynamic: seasons change, day/night cycles affect visibility and enemy behavior, and the sea between islands can be treacherous. Each biome is gated by the player's gear and skills, encouraging gradual progression.
Main Characters
Valheim has no named protagonist; the player creates their own Viking character. However, there are notable non-player figures:
- Eikthyr (Deer lord of the forests)
- The Elder (Ancient tree giant)
- Bonemass (Mass of rotting bones and poison)
- Moder (Dragon of the mountains)
- Yagluth (Magical goblin shaman)
- The Queen (Giant insect queen in the Mistlands)
Core Appeal
Valheim excels at providing a rewarding sense of progression through exploration, crafting, and cooperative play. Its core appeal lies in:
Target Audience
Valheim appeals to:
Game Modes
Online / Offline Support
DLC / Expansion Overview
Valheim is still in Early Access; there is no paid DLC. All content updates have been free:
What Makes Valheim Unique?
Valheim stands out among survival games for its tight focus on a cohesive Norse mythology theme, its satisfying exploration loop that rewards sailing into the unknown, and its deep building system with realistic structural integrity (beams and pillars matter). Unlike many survival games that overwhelm with complexity, Valheim strikes a balance between hardcore survival and accessibility—death doesn't delete your world, but you do lose skill points and must recover your gear. The shared progression between players (anyone can contribute to base upgrades and boss hunts) makes it an exceptional co-op experience. Its procedurally generated world ensures no two playthroughs are identical, while the hand-crafted boss arenas provide memorable set-piece battles. Finally, its atmospheric soundtrack and subtle storytelling create a world that feels ancient, mysterious, and alive.
Getting Started
Valheim: Getting Started Guide
1. Character Creation & Initial Spawn
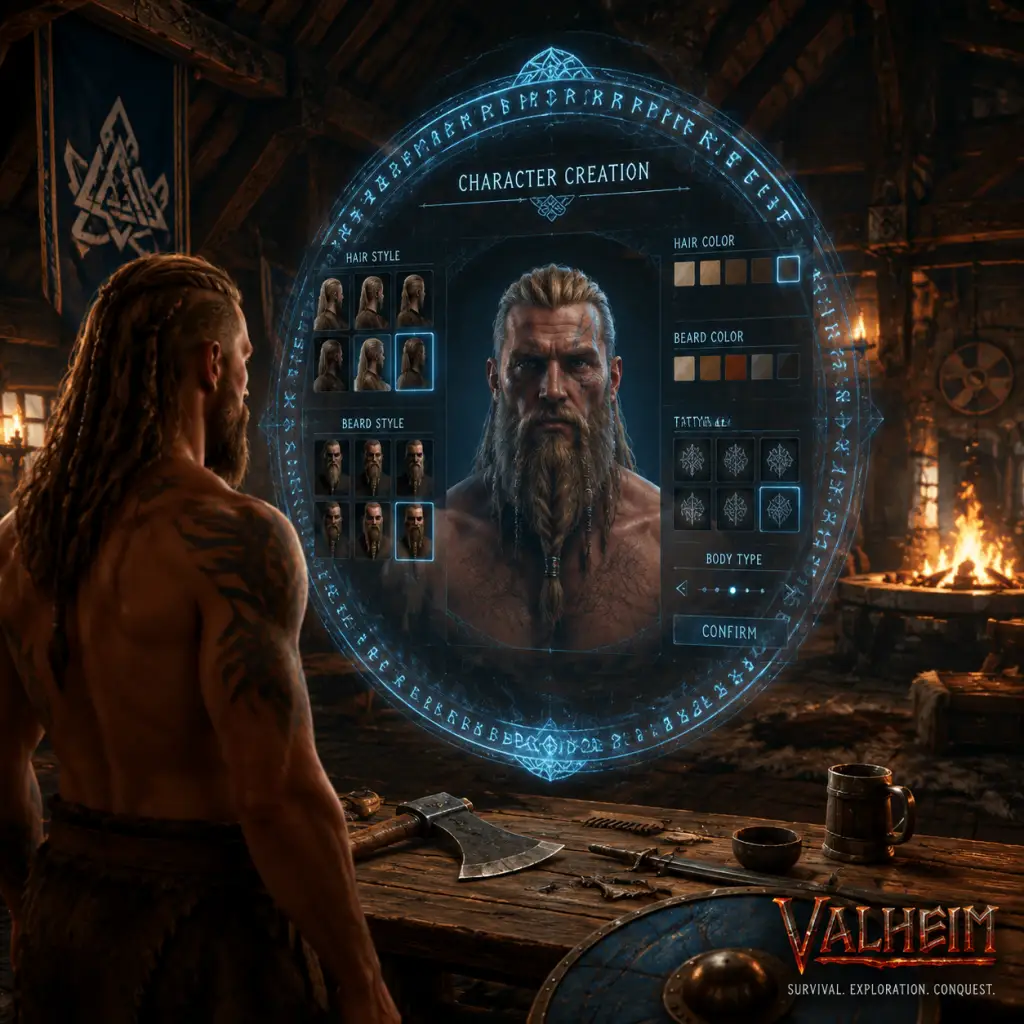
In Valheim, character creation is purely cosmetic. You choose your name, hair, beard, and skin tone. There are no classes or stat choices – your playstyle is determined entirely by your gear and skills. Once created, you’ll be placed on a random shore in a lush, green biome called the Meadows. You start with:
- Rags (torso, legs, head) – minimal armor.
- A Stone – used to pick up certain items but not as a weapon yet.
- A Torch – provides light and can be used as a weak weapon.
Tip: Don’t spend time customizing your character extensively – you can’t change it later, but it has zero gameplay impact. Just pick something quick and jump in.
---
2. Platform-Specific Controls
PC (Keyboard & Mouse)
| Action | Key |
|---|---|
| Move | W, A, S, D |
| Jump | Space |
| Run | Shift (hold) |
| Sneak | Ctrl (hold) |
| Interact / Pick up | E |
| Attack (primary) | Left Mouse Button |
| Attack (secondary) | Right Mouse Button (hold for bow) |
| Block / Parry | Right Mouse Button |
| Inventory | Tab |
| Map | M |
| Build Menu | Q |
| Chat | Enter / Y |
| Use item (e.g., food) | Number keys (1-8) |
| Dodge roll | Double-tap a movement key while blocking |
Xbox (Controller)
| Action | Button |
|---|---|
| Move | Left Stick |
| Look / Aim | Right Stick |
| Jump | A |
| Run | Left Stick click (hold) |
| Sneak | Right Stick click (hold) |
| Interact | Y |
| Attack (primary) | RT (Right Trigger) |
| Attack (secondary) | LT (Left Trigger) |
| Block / Parry | LB (Left Bumper) |
| Inventory | X |
| Map | View button (two squares) |
| Build Menu | D-Pad Up |
| Quick select | D-Pad Left/Right (cycle hotbar) |
| Dodge roll | LB + A (while moving) |
---
3. First Hour Walkthrough (Step by Step)
Minutes 0-5: Gather Basics
1. Look around – you’re on a shore. There are small trees, rocks, and bushes.
2. Pick up wood – walk up to fallen branches or small saplings (they glow slightly) and press E (or Y on Xbox). You’ll get Wood.
3. Pick up stones – look for loose stones on the ground; press E to collect Stone.
4. Pick up Flint – near water edges, you’ll see greyish rocks. Press E to collect Flint (not always there, but common).
5. Run around – your stamina drains quickly. Walk or slow down to regen. Do not sprint constantly – you’ll exhaust stamina and be vulnerable.
Minutes 5-15: First Tools
Crafting is done via the build menu (Q on PC, D-Pad Up on Xbox).
1. Open build menu → Crafting tab.
2. Craft a Stone Axe (5 Wood, 4 Stone) – your first tool for chopping trees.
3. Craft a Stone Knife (2 Wood, 5 Stone, 2 Flint) – good quick weapon for hunting boar.
4. (Optional) Craft a Hammer (3 Wood, 2 Stone) – used to repair structures and build.
5. Craft a Workbench (10 Wood) – place it on the ground (press primary attack to place). This unlocks more crafting recipes.
Minutes 15-30: Shelter & Fire
Safety is critical. Build a simple shelter before night.
1. Use the build menu under Building tab.
2. Place a Workbench (already crafted).
3. Build a Hammer if you haven’t. Use the hammer to see available pieces.
4. Start by placing Wall pieces (4 Wood each) to make a 3x3 floor or 4x3 box. A simple 4-wall enclosure with a roof will keep rain off.
5. Place a Door in one wall (1 Wood, 1 Stone).
6. Build a Campfire (2 Stone, 2 Wood) inside – place it on the ground. Light it by using a torch (press primary while holding torch) or by igniting with a bow/fire arrow later.
7. Sit near the fire to gain Resting buff (+50% health/stamina regen) – crucial at night.
Night danger: At dusk, Greydwarfs (hostile humanoid trees) and Boars become aggressive. Stay inside your shelter until morning.
Minutes 30-60: Prepare for First Boss
Your first boss is Eikthyr, a giant deer. Before summoning him:
1. Collect at least 30 Wood and 20 Stone.
2. Build a Crafting Station upgrade: Add a Chopping Block (10 Wood, 10 Flint) near your workbench.
3. Craft a Club (6 Wood, 4 Stone) – decent early weapon.
4. Craft a Leather Armor set (tunic, pants, helmet) – requires Deer Hide (from hunting deer) and Bone Fragments (from skeleton kills). Alternatively, upgraded rags are fine.
5. Cook food (raw meat from boar/deer) at a Cooking Station (2 Wood placed on workbench). Cooked meat gives more health/stamina.
6. Eat three food items – your max health and stamina are determined by what you’ve eaten (3 slots). Always keep all three slots filled with different foods.
7. Find the Eikthyr summoning location – look for large glowing runestone in the Meadows (often near spawn). Interact with it to learn the summoning ritual.
8. Summon Eikthyr by placing 2 Deer Trophies (from hunting deer) on the spawn point and interacting.
Tip: You don’t need to kill the boss on day 1. Focus on basic survival first.
---
4. UI Overview
- Top left: Health bar (green) and Stamina bar (yellow). Fill by eating food.
- Top center: Current buffs/debuffs (e.g., Resting, Wet, Cold).
- Bottom center: Hotbar – 8 slots for weapons, tools, food. Press numbers 1-8 or scroll wheel.
- Bottom right: Compass and minimap (shows nearby points of interest).
- Pressing Tab (or X): Inventory screen. Divides into:
- Building Menu (Q / D-Pad Up): Submenus for crafting, building, and furniture. You “pin” recipes to your crafting window for quick reference.
- Map (M / View): Shows explored area, boss locations (stones), and your death marker. You can add custom pins (right-click / LT on map).
- Immediately pick up everything on the ground (wood, stone, flint).
- Build a simple shelter before nightfall.
- Craft a Stone Axe and chop down small trees (not the giant oaks or pines – they require upgraded axes).
- Build a workbench and upgrade it once.
- Cook and eat food to max your HP.
- Mark your spawn point with a bed.
- Don’t run into the Black Forest – you’ll be killed by Greydwarfs or skeletons.
- Don’t eat only one food – you need three food items active at all times for maximum stats. Empty food slot = fragile.
- Don’t explore at night without a torch or fire – you take cold damage and vision is poor.
- Don’t carry all your resources while exploring – leave spare wood, stone, and expensive items in chests. Dying drops everything you carry (on ground, not in inventory slots?). Actually, you drop all items except equipped gear. So only take what you need.
- Don’t try to build a huge base immediately – start small, then expand later. Large structures require many resources.
- Don’t attack a boar with a torch – it will set you on fire.
- Don’t forget to repair your tools – use a hammer to repair structures and workbench to repair tools.
- Left: your equipped gear (armor, weapon, shield).
- Center: backpacks (carried items).
- Right: equipped item slots (only 2 weapon slots initially).
Important UI tip: Hover over any item or skill in your inventory to see tooltips describing usage and stats.
---
5. Essential Early Objectives (Days 1-3)
1. Build a permanent base – a small hut with a workbench, campfire, bed, and chests. The bed sets your spawn point (sleep in it).
2. Craft a Stone Axe, Stone Knife, Hammer, and an upgrade for Workbench (Chopping Block).
3. Gather at least 20 Wood, 10 Stone, 10 Flint, and 5 Deer Hide (for armor or later gear).
4. Hunt deer (sneak up, use bow or throw spear; they flee easily). Also hunt boar (use knife or club; they attack back).
5. Cook raw meat at a cooking station over a fire. Always have cooked meat ready.
6. Collect Raspberries and Blueberries (from bushes) – these are early food items that fill slots moderately.
7. Find a large Maypole (if possible) or simply clear an area – you’ll need to expand soon.
8. Avoid the Black Forest (darker trees, fir trees) until you have better gear – Greydwarf brutes and skeleton spawns can one-shot you.
9. Build a raft (if you need to cross water) – but rafts are slow and fragile; better to build a bridge or swim (if short distance).
10. Learn to parry/block – practice blocking with a shield or weapon against boars to stun them for a critical hit.
---
6. What to Do First vs. What to Avoid
✔️ Do First
❌ Avoid
---
7. Early Resource Priorities
| Resource | Use | How to Get |
|---|---|---|
| Wood | Foundations, walls, tools, crafting | Chop trees; pick fallen branches |
| Stone | Tools, weapons, campfire, walls | Pick up loose stones on ground |
| Flint | Knife, axe upgrade, arrows | Along shorelines (grey rocks) |
| Deer Hide | Leather armor, backpack (later) | Hunt deer with bow/spear |
| Boar Meat | Cooked food for HP/stamina | Hunt boar (use knife or club) |
| Raspberries / Blueberries | Quick food (low stats) | Bushes in Meadows (purple/blue) |
| Bone Fragments | Arrows, certain tools | Kill skeletons (in Black Forest or at night) – avoid early on |
| Resin | Torches, arrows | From Greydwarfs (avoid early) or from chopping certain trees (rare) |
---
8. Common Beginner Mistakes
1. Not using food correctly – You can eat up to 3 different foods. They each give health and stamina for a limited duration. Always have 3 active. Right-click food to eat. Replenish when icons start fading.
2. Ignoring rested bonus – Being near a campfire or a comfort item (like a chair, rug) gives a 5-20 minute Rested buff that doubles health/stamina regen. Always sit by fire after gathering.
3. Building too far from spawn – If you die far from your base, you have to run back naked. Build your first base within 200 meters of your spawn point.
4. Not setting a bed – Sleeping in a bed sets your respawn point. If you don’t, you respawn at the original spawn (usually far away).
5. Underestimating stamina management – Running, jumping, and attacking consume stamina. When exhausted, you move slowly and can’t defend. Always keep a small reserve for emergencies.
6. Over-encumbered – Your carry weight limit is 300 (default). If you exceed it, you walk very slowly. Drop items or build a cart (unlocked later).
7. Not checking the map – Use map markers to remember resource spots, interesting biomes, and dangerous areas. Press M, right-click to place a pin.
8. Fighting at night without a torch – Night-time enemies are tougher and more numerous. Stay indoors or near light.
9. Chasing deer without a bow – Deer are extremely skittish. You need a bow (unlocked with Flint head arrows) to hunt efficiently. Sneak and aim for headshots.
10. Exploring alone – You can play solo, but it’s harder. If possible, team up with friends – Valheim scales enemy difficulty based on player count.
---
9. Day-One Checklist (Print or Reference)
- [ ] Spawn and pick up every loose wood, stone, flint in sight.
- [ ] Craft Stone Axe and Stone Knife.
- [ ] Chop down 6-8 small trees (get ~20 wood).
- [ ] Collect at least 10 stones and 5 flint.
- [ ] Build a small 4x4 wooden hut (walls, roof, door).
- [ ] Place a workbench inside.
- [ ] Build a campfire inside (and light it with torch).
- [ ] Craft a hammer (if not done).
- [ ] Build a bed (10 Wood) and sleep in it (set spawn).
- [ ] Build a chest (10 Wood) and store extra items.
- [ ] Hunt 1-2 boars and deer (get raw meat, deer hide).
- [ ] Build a cooking station over the campfire; cook the meat.
- [ ] Eat three different foods (e.g., cooked boar, raspberries, blueberries).
- [ ] Craft a crude bow and 10-20 arrows (requires wood, stone, flint).
- [ ] Upgrade workbench with a Chopping Block (10 Wood, 10 Flint).
- [ ] Locate the Eikthyr runestone (boss location) nearby.
- [ ] Learn the summoning ritual (from runestone).
- [ ] (Optional) Collect 2 deer trophies to summon Eikthyr, but don’t fight him until you have upgraded leather armor and a good weapon.
- [ ] End day by repairing gear (use workbench), storing valuables, and sleeping.
- Explore carefully: Stick to Meadows edges; avoid Black Forest until you have maybe 2-3 pieces of leather armor and a bronze weapon.
- Build a raft only if necessary: It’s slow and fragile. Better to build a bridge or swim small rivers.
- Plan your base expansion: Add a wall around your house (stake wall – requires 2 Wood each). This keeps out most night raids.
- Harvest Birch and Oak trees (require bronze axe) – do not attempt with stone axe; you’ll waste time.
- Watch your skills: Skills increase by using them (e.g., running increases Run skill, reduces stamina drain). Practice every skill.
- Don’t die: Dying reduces your skills slightly and drops your inventory. Always carry a spare weapon and food in case you need to retrieve your corpse.
---
10. Additional Tips for Days 2-3
Final note: Valheim is a game of slow progression. Don’t rush. Each biome has a gear check. The first boss (Eikthyr) is designed to teach you basic combat mechanics. After defeating him, you unlock the antler pickaxe and can mine copper and tin – that’s when the real journey begins.
Happy viking survival!
Core Gameplay
Valheim: Core Gameplay Guide
Valheim’s core gameplay revolves around a survival-crafting loop driven by exploration, combat, and base building. You start as a Viking slain in battle, sent to the tenth world (Valheim) to prove yourself worthy of Valhalla by defeating six forsaken bosses. The game is divided into progression tiers based on the biome you can survive in and the gear you can craft. Each tier introduces new threats, resources, and mechanics.
The Main Gameplay Loop
1. Explore – Travel the world to discover new biomes, resources, and boss locations.
2. Gather – Collect wood, stone, ore, food, and special materials.
3. Craft & Build – Create tools, weapons, armor, and build bases/outposts.
4. Eat & Prepare – Consume food for health/stamina, equip gear, and rest for buffs.
5. Fight – Hunt creatures, clear dungeons, and defeat bosses.
6. Advance – Unlock new recipes, forge upgrades, and access new biomes.
This loop repeats with increasing difficulty and complexity.
Combat & Interaction Systems
- Weapon Types: Swords, axes, maces, spears, bows, knives, clubs, atgeirs (polearms), and shields. Each has unique attack patterns (primary, secondary, special).
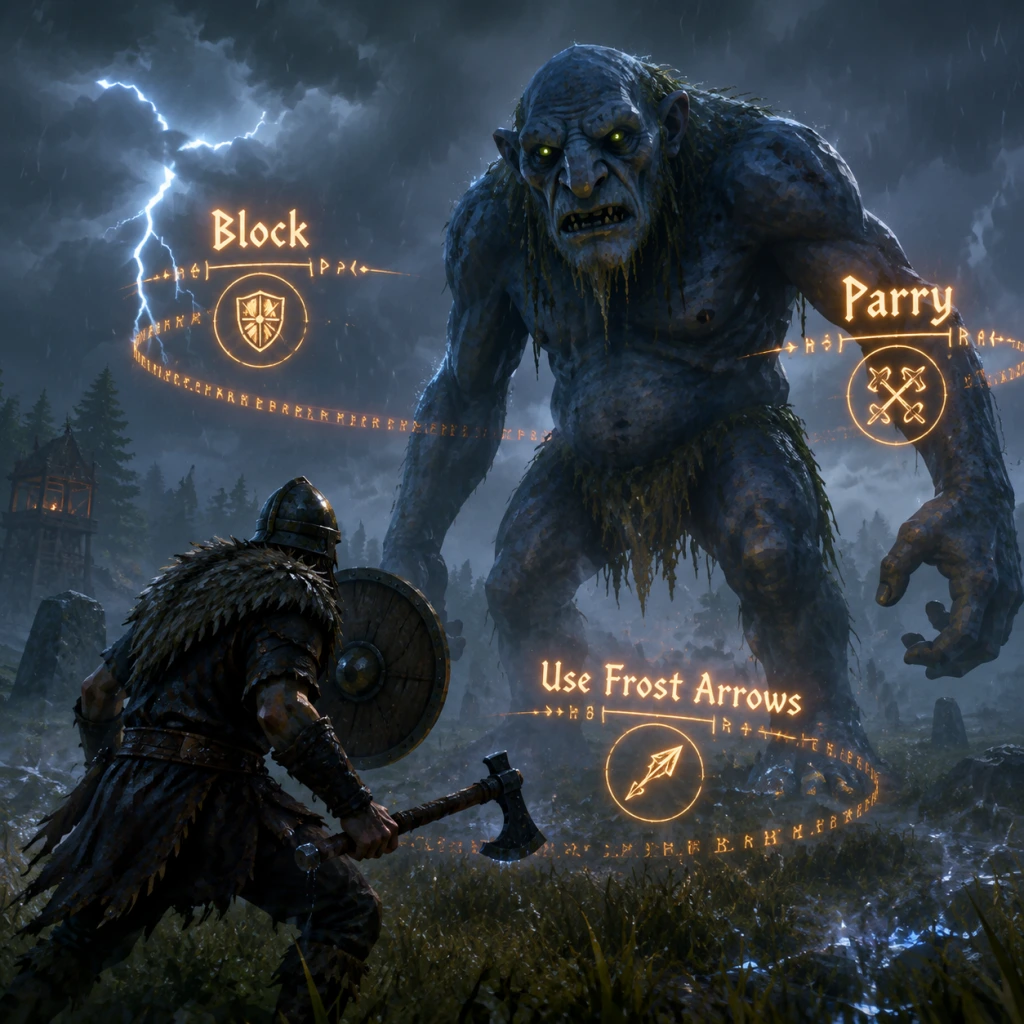
- Blocking & Parrying: Use a shield or weapon to block. Timing a block just before impact parries the enemy, opening them for a critical hit (stagger damage).
- Dodge Roll: Press block + jump to roll, giving i-frames.
- Stealth: Crouch to reduce detection. Use bows or daggers for backstab bonus (3x-10x damage).
- Rested Buff: Being near a campfire, bed, or shelter gives a Rested buff that increases stamina regen and grants XP boost. Always rest before major fights.
- Food System: Each food item provides HP, stamina, and health regeneration over time. Always eat three different foods for balanced stats.
- Meadows (Starting)
- Black Forest (Early game)
- Swamp (Mid game)
- Mountains (Mid game)
- Plains (Late game)
- Mistlands (Late/End game)
- Ashlands & Deep North (Future updates)
- Dungeons: Burial Chambers (Black Forest), Sunken Crypts (Swamp), Frost Caves (Mountains), Infested Mines (Mistlands).
- Troll Caves, Abandoned Buildings, Ruins for treasure and crafting materials.
- Shipwrecks and Merchant (Haldor) offer rare items.
- Weapon Skills (e.g., Swords, Bows) – increase damage, reduce stamina cost.
- Block, Run, Jump, Swim – improve efficiency.
- Woodcutting, Pickaxes – increase resource yield.
- Crafting/Repair skills are passive.
- Farming high-tier resources (Black Metal, Sap, Galdr Tablets).
- Building megabases with advanced stone/marble structures.
- Fighting repeatable mini-bosses (e.g., Berserkers, Gjall).
- Exploring unfinished biomes (Ashlands, Deep North) – mostly empty but challenging.
- Achievement hunting (e.g., collect all trophies, explore 100% of map).
- Modded content or multiplayer server challenges.
- Chop wood, collect stone, flint, berries.
- Build a simple shelter with workbench, campfire, bed.
- Hunt deer, boar, and neck (lizards).
- Craft leather armor, flint weapons (axe, spear), crude bow.
- Find a Skeleton Surprise in Black Forest to get core wood (for finer wood).
- Mine copper and tin in Black Forest using a hard antler pickaxe (from Eikthyr).
- Smelt copper and tin into bronze at a forge. Craft bronze weapons and armor.
- Explore Burial Chambers for Surtling cores and ancient seeds.
- Build a Karve (first boat) to explore the coastline.
- Kill The Elder to unlock swamp keys and pickaxe upgrade.
- Always keep a rested buff active.
- Repair gear at workbench – broken gear deals half damage.
- Use the cultivator (after Eikthyr) to plant seeds for a steady food supply.
- Build a portal at your base and carry portal mats to explore.
- Equip a bronze buckler and upgraded iron weapons (use iron scrap from Sunken Crypts).
- Clear crypts for scrap iron, precious bones (for poison resistance mead).
- Build a longship to carry ore across seas.
- Defeat Bonemass to unlock wishbone (for buried treasure detection).
- Move to Mountains – mine obsidian and silver using iron pickaxe.
- Craft wolf armor (offers cold resistance) and frostner (ice mace) or draugr fang bow.
- Hunt drakes for freeze glands (for frost arrows).
- Defeat Moder to unlock the ability to build wind-powered ships (ability to create wisp torches not needed yet).
- Build an upgraded forge and workbench (level 4-5).
- In Swamp, always have poison resistance mead active – leeches and blobs deal poison.
- Use a stagbreaker (two-handed club) to damage enemies through floors in crypts.
- Build a small outpost near the swamp with a portal and a smelter to avoid long treks.
- In Mountains, use frost resistance potion before exploring; wolf armor works too.
- Place a stonecutter to build stone walls for base defense.
- Use the wishbone to find buried silver veins under the mountain top.
- Craft padded armor and black metal weapons/tools (use flax and black metal scraps from Plains).
- Defeat Yagluth to unlock the ability to craft the Artisan table (needed for endgame structures) and Wisplight (lights up Mistlands fog).
- Gather sap from ancient roots in Mistlands to make extractor and refine eitr.
- Craft carapace armor and krom (sword) or the mistwalker (new sword).
- Defeat The Queen (last current boss) to unlock the ability to craft the highest tier of mead and the Demolisher (destroy rocks).
- Use the Arbalest (crossbow) for ranged combat.
- Build a ballista base defense against Gjall (large floating creatures).
- Plains are extremely dangerous – Fulings can strafe and throw spears. Always have high HP food (e.g., lox meat pie, fish wraps).
- Use a bonemass power (taken from Bonemass trophy) for physical damage reduction in Mistlands.
- Mistlands: the wisp light (from Yagluth) is essential – without it, combat near fog is near impossible.
- Build a forward base in Mistlands with a wisp torches around the perimeter.
- Use the obliterator (late crafting station) to dispose of unwanted items.
- Mastery: Max all skills (takes hundreds of hours). Parkour courses for jump skill.
- Building: Create massive fortresses, bridges, ports, and creative structures. Use stone, marble (from Dvergr settlements), and black marble (Mistlands).
- Exploration: Uncover 100% of the map. Seek out hidden boss locations (even if already killed) for rare trophies.
- Farming: Set up automated farming using the Cultivator, plant barley, flax, turnips, and mushrooms.
- Taming: Breed lox (for meat/leather), wolves (for companions), and even boars (early game).
- Resource farming: Automate sap extraction from root nodes in Mistlands.
- Combat: Challenge repeatable mini-bosses like Berserkers, Stone Golems, and Gjall. Clear Mistlands infested mines for high-end materials.
- Boss Re-fights: Summon bosses again for additional trophies or for fun.
- Multiplayer: Host large servers with community events, PvP arenas, or cooperative building projects.
- Modding: Install mods for new biomes, items, or quality of life (e.g., Valheim Plus).
- Achievements: Complete all Steam/Xbox achievements (e.g., “Home Sweet Home” – maxed comfort level, “Ghost Slayer” – kill all bosses).
Progression Overview
Progress is gated by boss kills. Each boss drops a material used to craft the next tier’s workbench or forge upgrade, or unlocks new abilities (e.g., pickaxe for ore). Biomes are ordered by difficulty:
Exploration & Quests
There are no scripted quests – exploration is player-driven. The main “quest” is to defeat the forsaken bosses. Clues to boss locations are found as Vegvisir (stone markers with runes) in their respective biomes. After placing the boss trophy on a stone circle, you can summon and fight them. Secondary activities:
Economy
Valheim has no currency system. Trade is limited to Haldor the Merchant (found in Black Forest), who sells items for coins (found in chests, dungeons, and from enemies). He sells useful gear (e.g., Megingjord belt for +150 carry weight) and cosmetic items. Otherwise, the economy is purely based on crafting and resource management.
Character & Build Growth
There are no levels or classes. Instead, skills improve through use:
Each skill caps at 100. Death without a skill tombstone causes skill loss. Your build is defined by equipment and food choices, not stats. You can switch between any weapon type freely.
Endgame Structure
After defeating the final current boss (The Queen in Mistlands), you enter Endgame. Activities include:
---
Progression Tiers
Early Game (Meadows → Black Forest)
Objective: Survive, build a base, gather basic resources, defeat Eikthyr (first boss) and The Elder (second boss).
Biomes: Meadows, Black Forest.
Activities:
Key Gear: Leather tunic/pants, troll hide armor (optional stealth set), bronze axe, bronze buckler, finewood bow, flint arrows.
Tips:
---
Mid Game (Swamp → Mountains)
Objective: Survive swamp and mountain biomes, defeat Bonemass and Moder.
Biomes: Swamp, Mountains.
Activities:
Key Gear: Iron helmet, iron scale mail, iron greaves, iron sword/mace, banded shield, huntsman bow (or better), poison resistance mead, frost resistance potion.
Tips:
---
Late Game (Plains → Mistlands)
Objective: Conquer Plains and Mistlands, defeat Yagluth and The Queen.
Biomes: Plains, Mistlands.
Activities:
Key Gear: Padded helmet, padded cuirass, padded greaves, black metal sword/axe, linen cape, black metal shield (tower), draugr fang bow with needle arrows (from Plains) or carapace bow with carapace arrows (Mistlands).
Tips:
---
Endgame (Post-Queen)
Objective: Achieve self-sufficiency, build epic bases, complete all challenges.
Activities:
Example Endgame Loop: Wake in Mistlands base, eat mistlands-tier food (e.g., Misthare Supreme, Salad), repair gear, portal to Plains to farm lox meat, return to base, craft black metal items, explore newly discovered island for dvergr extractor, fight a Gjall for trophy, then build a new wing on your castle.
Final Advice: Valheim’s endgame is what you make of it. The game rewards creativity and exploration. There is no timer – take your time to enjoy the journey.
---
This guide covers the essential core gameplay experience. For more details on specific bosses, biomes, or crafting, refer to the section guides on this platform.
Game Tips
Valheim: Game Tips – Beginner, Intermediate & Advanced
This guide covers hundreds of practical tips organized by category. Each tip includes why it works and when to use it, helping you survive, thrive, and conquer the Tenth World.
Beginner Tips (First Steps)
1. Repair your tools & weapons at the workbench – Right-click the workbench and select the repair hammer icon. Repairing costs nothing and keeps your gear effective. Always repair before heading out.
2. Always carry a Hoe – The Hoe allows you to level ground and create paths. This prevents drowning in water puddles and makes building roads for carts much easier.
3. Stamina management is key – Don't sprint everywhere. Walk between fights, and use the sneak button (Left Ctrl) to reduce stamina drain when moving through bushes.
4. Build a simple shelter on Day 1 – You need a fire, a roof, and walls to sleep through the night. A simple 2×2 shack with a campfire works. Without shelter, you die from cold and enemies.
5. Eat before fighting – Food is your only source of health and stamina regeneration. Always have three different types of food consumed (one health, one stamina, one mix).
6. Mark important locations on the map – Press M to open map, then middle-mouse click to place pins. Mark: boss stones, crypts, trader, copper deposits, berries, etc.
7. Don't build a base near a spawn point which is too close to water – The first boss (Eikthyr) spawns near stone circles. Build your first base inland, away from the coast, to avoid being raided by trolls or draugr too early.
8. Learn the parry timing – Parrying (block just before an attack) staggers enemies and gives you a damage window. Practice on boars and greydwarfs.
9. Respawn without gear – If you die, your tombstone appears with all items. You respawn naked at your bed. Always have a backup bed and a stash of starting gear.
10. Use the Hammer to build a Campfire anywhere – You can place a campfire in any biome, but it may require a stone or be under a roof. Campfires prevent wet debuff.
Intermediate Tips (Mid-Game Mastery)
11. Build a portal network – Portals are cheap (2 Fine Wood, 2 Surting Cores, 10 Greydwarf Eye). Naming a portal (on the sign) links it. Place one portal at home, carry materials for a second portal wherever you explore.
12. Upgrade your Workbench and Forge – Each upgrade station (Forge, Workbench) can be leveled by adding add-ons like Forge Cooler, Anvil, etc. Higher levels allow better gear upgrades.
13. Use Cultivator to farm – After beating the Elder, you unlock the Cultivator. Plant carrots, turnips, and later seeds. Farming provides steady food supply for higher-tier meals.
14. Kill Boars with a fine bow from a distance – Or throw a spear. Boars are aggressive. Use fire arrows to kill them faster. Boars drop leather scraps and raw meat.
15. Tame Boars – Throw berries or mushrooms into a pen. Boars will become tame over time. Tamed boars breed and provide leather scraps and meat.
16. Use the Stagbreaker (two-handed hammer) for AoE – Excellent against groups of greydwarfs. But heavy stamina use.
17. Make a Karve (raft upgrade) – The Karve is faster than the raft and has a sail. You need Fine Wood from Birch or Oak trees (use bronze axe).
18. Beware of the Swamp – Always equip poison resistance mead before entering Swamp. Bring a mace (blunt damage) – skeletons and blobs are weak to blunt. Use a hoe to create paths on the water.
19. Collect Surtling Cores from Fire Geysers in Swamp – Dig around the geyser to drop the ground level. The surtlings will spawn and burn, dropping cores without combat.
20. Build a Longship – It carries more and sails faster. Requires iron nails (smelted from iron scraps). Use longship to transport heavy loads across oceans.
Advanced Tips (Endgame & Optimization)
21. Portal restrictions – Portals cannot transport metals (copper, tin, iron, silver, black metal). You must sail metals home. Plan expeditions accordingly.
22. Use the Cart to transport ore – Place a cart on a ship, fill it with ore, then push it back to base. Or use a cart on land with a leveled road.
23. Boss Fighting Strategies – Always have a rested buff (at least 10 minutes) before boss fight. Build a temporary shelter with a fire near the boss altar. Bring appropriate arrows (poison for Bonemass, frost for Moder, fire for Yagluth).
24. Build a Wisp Fountain in the Mistlands – After defeating Yagluth, wisp fountains reveal the Mistlands terrain. Place them strategically.
25. Use the Spyglass – Crafted from Surting Cores and fine wood. Helps scout land and sea.
26. Farm Bloodbags from Leeches in Swamp – Use a mace or frost arrows. Bloodbags are used for healing potions and stamina potions.
27. Optimal Food for Plains – Lox Meat Pie plus Bread plus Blood Pudding gives high HP and stamina. Grow barley and flax in Plains.
28. Tame Lox – Use cloudberries to feed. Tamed Lox can be ridden and used as pack animals. Requires a lox saddle (from Plains trader? Actually need to craft).
29. Black Metal gear – After defeating Moder, you can mine Black Metal from Fuling villages. Fulings are weak to blunt and frost. Use a black metal axe or sword.
30. Infused Crystals – Found in Mistlands. Used for magic staffs and upgrades.
Combat Tips
31. Parry is better than block – A successful parry (right-click just before hit) reduces damage and staggers most enemies, allowing follow-up attacks. Timing: press block when enemy attack animation is halfway.
32. Use the appropriate damage type – Slash for animals, blunt for skeletons and blobs, pierce for trolls (head shots). Dual-wielding? Mace and shield is versatile.
33. Bow with Frost Arrows – Frost arrows reduce enemy movement speed and damage the target. Excellent for Bosses like Moder and even against Bonemass.
34. Sneak attack bonus – Sneak attacking with a knife from behind deals 10x damage. Use for picking off lone enemies before full combat.
35. Dodge roll – Double-tap Block to roll. I-frames evade attacks, but uses stamina. Useful against trolls and Fuling berserkers.
36. Shoot first, ask later – Engage at max bow range to soften targets. Greydwarfs will be killed in 2-3 headshots.
37. Use potions mid-fight – Health and stamina potions have a cooldown. Keep them in quick slots.
38. Repair gear at workbench during combat lulls – If you have a workbench nearby, you can repair mid-boss.
39. A Shield wall – Two players facing the same direction with shields raised can block multiple projectiles.
40. Fire arrows for trolls – If you lack a bronze weapon, fire arrows combined with kiting can kill trolls. But it's slow.
Exploration Tips
41. Always carry a portal kit – 10 Fine Wood, 2 Surtling Cores, 10 Greydwarf Eye – drop a portal when you land on a continent so you can return home.
42. Sailing with the wind – Use the wind indicator. If wind is against you, tack manually (zig-zag). The Karve and Longship have a limited turning speed.
43. Mark every discovered structure – Crypts, burial chambers, stone towers, ruins. You'll need to revisit them for loot.
44. Use the Wishbone – After defeating Bonemass, craft the Wishbone from his trophy. It reveals hidden treasure: silver veins, treasure chests, and other goodies. Equip it.
45. Explore during day – Night brings harder enemies (green greydwarfs, starred variants). Night vision is poor.
46. Climb mountains with stamina food – Mountains require both warm clothing (wolf cape) and good stamina. Use frost resistance potion early.
47. Swamp crypts – Each crypt has a number of scrap piles (up to 10). Use the wishbone to find which are full. Bring many pickaxes and repair via workbench.
48. Mistlands navigation – Use the Dvergr lanterns or build your own wisp fountains. Bring a stagbreaker to break skulls and find material.
49. Deep North – Not fully implemented yet. Avoid going to the far north – it's cold and nothing there.
50. Ashlands – Avoid until ready. This is endgame volcanic biome.
Resource Gathering Tips
51. Mining copper and tin – Copper is found in the Black Forest, extensive veins (look for mossy rocks). Tin is along riverbanks. Use a pickaxe (stone or antler pickaxe – antler does not damage ground).
52. Farming berries – Blueberries in Black Forest, raspberries and mushrooms in Meadows. Mark berry bushes on map to revisit.
53. Wood chopping – Use a bronze or iron axe for trees. Birch and oak require bronze axe. Ancient trees in Swamp require iron axe.
54. Stone gathering – Underground stones give flint. Build a stonecutter to break large boulders for stone and coal.
55. Coal farming – Burn wood in a kiln. Or kill surtlings – they drop coal. Also torch trees in Swamp for ancient bark.
56. Iron scrap – From muddy scrap piles in Sunken Crypts (Swamp). Smelt into iron. Also from scrap piles in the Mistlands.
57. Silver – Found in Mountains under vein-shaped rocks. Use wishbone to locate. Can also be found in chests.
58. Black metal – Obliterated Fulings and their gear. Smelt black metal scraps in Blast Furnace (use coal, not wood).
59. Flax and Barley – Grow in Plains soil. Harvest after ~2 days. Use for linen thread for high-tier armor.
60. Free items from the wind – Items like feathers, wood can be blown into the ocean. Not valuable.
Building & Base Tips
61. Build on a stone foundation – Stone gives better stability. Dig out ground to place stone blocks for larger structures.
62. Use thatch roof first – Thatched roof (from meadows) is cheap; upgrade to darkwood later. Strongly use overhangs to keep walls dry.
63. Walls and defense – Build a perimeter wall of wooden spikes or stone. Combine with a trench (dig a ditch) to stop enemies from getting close.
64. Workbench coverage – Place multiple workbenches in a line to extend building area. A workbench must be covered (roof) and have support to function.
65. Fireplace safety – Chimneys are essential. Build a stone chimney with a roof cap to prevent rain extinguishing fire.
66. Portal room – Create a dedicated room with multiple portals, named by destination. Use signs above each portal.
67. Smelter placement – Place smelters near a kiln to chain coal production. Use a vertical drop for resource transport.
68. Breeding animals – Build a large pen with food dispenser (shelves with berries). Boars, wolves, lox. Wolves can be bred to defend base.
69. Defense tactics – Use arrows from walls. Build spike traps in choke points. Create a moat (dig trench) wide enough that trolls cannot cross.
70. Aesthetic vs functional – Valheim does not punish building. Build for beauty, but remember structural integrity – every piece has a weight limit.
Economy & Trading
71. Trader (Haldor) – Found in Black Forest (look for a big blue exclamation mark on map). He sells: belt of strength (carry weight +150), silver sword, Ymir flesh, etc.
72. Selling to Haldor – He buys gems (ruby, amber, etc.) and certain trophies. Best way to earn coins (which you can't use for much except trader items).
73. Farming coins – Not really an economy in Valheim; coins are limited. Best to avoid grinding.
74. Inventory management – Use chests sorted by type (metal, wood, food, trophies). Place a warehouse near your workbench.
75. Quick sorting with item stands – Use item stands to display weapons or armor for quick access.
76. Share resources in multiplayer – Use a shared chest system. Assign roles between players.
77. Weight limits – Belt of Strength increases weight from 300 to 450. Combine with Megingjord (same effect).
78. Portal restrictions for metals – You cannot teleport with any metal item (ore, ingots, weapons/armor made from metal). Plan voyages.
79. Metal transport by boat – Use a longship to carry massive amounts. Park boat near base, use harpoon? Actually just throw items on shore.
80. Trader Haldor’s inventory – He also sells fishing rod and bait. Not useful until you want fish.
Survival & Status Effects
81. Wet debuff – Avoid being wet (rain, swimming) because it reduces stamina regen. Always carry wood for a campfire.
82. Cold debuff – In Mountains, you need frost resistance mead or wolf armor. Without it, you shiver and take damage.
83. Resting bonus – When near a fire that is covered and you're indoors, you get a rested buff that increases stamina regen and experience gain. Rested duration depends on comfort level (up to 17 minutes).
84. Comfort level – Place furniture like rugs, banners, chairs, and decorations to increase comfort. Max comfort 19 in current version.
85. Poison – Only leeches, blobs, and Bonemass cause poison. Drink poison resistance mead before entering Swamps.
86. Stagger – When an enemy is staggered, they take extra damage. Use that window.
87. Death debuff – When you die, you get a "No skill loss" if you get to your tombstone quickly. Skill loss is 5% per death.
88. Falling damage – Avoid high drops. Feather fall cape from Ashland (not yet) – use stagbreaker to break fall? No.
89. Drowning – You can drown if stamina runs out while swimming. Always carry stamina food and avoid long swims.
90. Overweight – If inventory is full, you cannot move. Drop items or eat high stamina food to run faster.
Boss-Specific Tips
91. Eikthyr – Summon with 2 deer trophies. Use a wood bow with flint arrows. Stay at range; dodge lightning strikes. Weak to pierce.
92. Elder – Summon with 3 Ancient Seeds (from greydwarf spawners). Use fire arrows and take cover behind trees. Fire damage is doubled.
93. Bonemass – Summon with 10 withered bones from Swamp crypts. Use iron mace, poison resistance mead, and healing potions. Don't stand in his poison cloud.
94. Moder – Summon with 3 dragon eggs (from Mountain crypts). Use a longship with sails prepped. Use frost resistance mead. Bow with obsidian arrows. Destroy her nests.
95. Yagluth – Summon with 5 totems from Fuling villages (Plains). Use fire resistance mead, silver sword or black metal sword. Avoid his meteors. Stay under his belly.
96. Queen – Mistlands boss. Summon with tokens. Use magic staff or frost arrows. Bring wisp torches. Avoid ranged attacks.
97. Forsaken powers – Each boss grants a unique power that you can activate (right-click main ability). Eikthyr power reduces stamina drain, Elder increases woodcutting, etc. Use the power before bosses.
98. Multiple boss kills – You can kill bosses multiple times for extra power tokens, but each only gives the same power.
99. Boss arena preparation – Build a portal near the summoning stones, bring materials to build a small fort with campfire. Tame wolves as distraction.
100. After defeating all bosses – Activate the final stag to reveal yagluth? Actually after Yagluth you can access Mistlands. Endgame content.
Miscellaneous Pro Tips
101. Using the Harpoon – Can pull items from water, or drag enemies (including players). Use to kite creatures.
102. Flametal – Only from Ashlands (endgame). Not fully used yet.
103. Fish fishing – Not worth the time. Fishing rod from trader.
104. Building bridges – Use stone arches or wood core support. Deep water requires pillars.
105. Modding – Valheim has a thriving mod community. BepInEx required. Fluffy mods for QoL, but keep vanilla first.
106. Backing up saves – Save files located in AppData/LocalLow/IronGate. Backup before major updates.
107. Console commands – Enable with `-console` launch parameter. Commands: `spawn`, `fly`, `debugmode`, `restart`. Use at your own risk.
108. Performance tips – Reduce graphics settings, turn off shadows, limit draw distance. Especially important in Mistlands.
109. Dedicated Server – Use Valheim dedicated server tool for multiplayer. Adjusting server rates for loot or difficulty.
110. Have fun – Valheim is a game of exploration and progress. Don't rush – enjoy the journey.
Game Settings
Game Settings Guide
Valheim offers a wide range of settings that affect performance, visual quality, audio, controls, and multiplayer experience. This guide covers every category available in the in-game Esc → Settings menu (PC) or Pause Menu → Settings (Xbox), with platform-specific notes. Properly configuring these settings ensures smooth gameplay and avoids common pitfalls.
Accessing Settings
- PC (Steam / Game Pass): Press `Esc` and select Settings.
- Xbox: Press the Menu button on your controller, go to Settings.
- Advanced (PC only): You can manually edit the configuration file at `%userprofile%\AppData\LocalLow\IronGate\Valheim\global_prefs.txt` (Windows) or `~/.config/unity3d/IronGate/Valheim/global_prefs.txt` (Linux). Changes here override in-game settings.
---
Graphics Settings
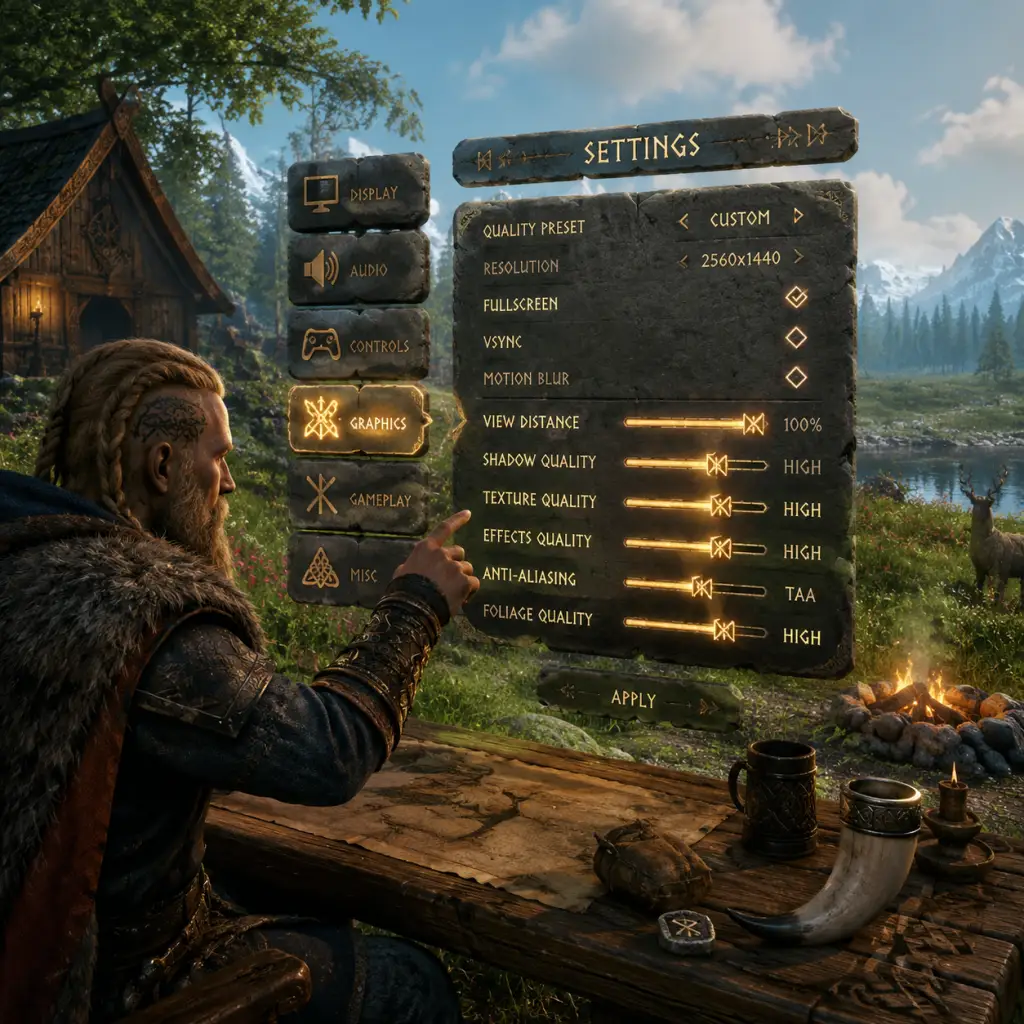
Graphics settings have the largest impact on performance and image quality. Valheim uses Unity and can be demanding for its style due to many draw calls and dynamic lighting.
| Setting | Options | Performance Impact | Notes |
|---|---|---|---|
| Graphics Quality | Very Low, Low, Medium, High, Very High, Ultra | High | A master preset that changes many sub-settings. Medium is a good balance for most systems. |
| Display Mode | Fullscreen, Windowed, Borderless | Low | Use Fullscreen for best performance. Borderless is useful for alt-tabbing. |
| Resolution | Native, Lower options | High | Match your monitor’s native resolution. Lowering reduces pixel count drastically. |
| Resolution Scale | 50%–100% (slider) | Very High | Controls internal render resolution. 100% uses native. Lower values improve performance significantly but make image softer. This is the most effective performance slider. |
| Vegetation Quality | Very Low, Low, Medium, High, Very High, Ultra | Medium-High | Controls grass density, tree LOD. Medium reduces visual clutter without making world look barren. |
| Soft Particles | On / Off | Medium | When enabled, particles (smoke, sparks, etc.) blend smoothly. Disable on low-end GPUs; bug with certain AMD cards causes artifacting. |
| Shadows | Very Low, Low, Medium, High, Very High | High | Low/Medium is recommended for most setups. High shadows consume significant GPU time. |
| SSAO (Ambient Occlusion) | On / Off | High | Adds depth to surfaces. Off gains 10-20% FPS on weak systems. |
| Bloom | On / Off | Low | Adds a glow effect to bright areas. Some find it distracting; can be Off for a clearer image. |
| Motion Blur | On / Off | Low | Blurs the image during movement. Personal preference; Off improves clarity. |
| Anti-Aliasing | None, FXAA, SMAA, TAA | Medium | TAA is best but can cause slight blurriness. FXAA is lighter. None gives jagged edges but higher FPS. |
| Texture Quality | Very Low, Low, Medium, High, Very High | Medium | Affects VRAM usage. Medium works for 2-4 GB cards. |
| Water Quality | Low, Medium, High | Medium-High | Higher = more reflections/waves. Low looks flat but improves performance in sailing. |
Recommended Presets by Hardware Level
#### Low-End (e.g., integrated graphics, GT 1030, Ryzen 3 with Vega)
- Graphics Quality: Very Low or Low
- Resolution Scale: 50-75%
- Shadows: Very Low
- Vegetation: Very Low
- SSAO: Off
- Soft Particles: Off
- Anti-Aliasing: None or FXAA
- Target: 30-45 FPS
- Graphics Quality: Medium
- Resolution Scale: 100%
- Shadows: Low or Medium
- Vegetation: Medium
- SSAO: On
- Soft Particles: Off (if issues), otherwise On
- Anti-Aliasing: SMAA
- Target: 60 FPS
- Graphics Quality: Very High or Ultra
- Resolution Scale: 100%
- Shadows: High
- Vegetation: Very High
- SSAO: On
- Soft Particles: On
- Anti-Aliasing: TAA
- Target: 60-144 FPS (depending on CPU)
- Xbox One X / Series S|X: The game offers two modes in the settings: Performance (targets 60 FPS, lower resolution/details) and Quality (higher resolution/effects, capped at 30 FPS).
- Recommended: On Series X use Quality if your display supports VRR; otherwise Performance for smoother play. On Series S / Xbox One X Performance is more stable.
#### Mid-Range (e.g., GTX 1060, RX 580, RTX 3050)
#### High-End (e.g., RTX 3070, RX 6800 XT)
> Pitfall: The Graphics Quality preset changes many settings. Users often lower only one or two but leave presets on High, causing no performance gain. Always set the preset first, then adjust individual settings. Another common mistake: setting Resolution Scale to 100% on low-end systems while expecting playable FPS. Lowering it to 75% is the single best performance gain.
Xbox Graphics Settings
---
Audio Settings
Audio affects immersion and gameplay cues (enemy sounds, environmental ambiance).
| Setting | Options | Notes |
|---|---|---|
| Master Volume | 0-100 | Affects all sounds. |
| Music Volume | 0-100 | Valheim’s soundtrack is dynamic; lower if distracting. |
| SFX Volume | 0-100 | Includes combat, footsteps, crafting, weather. |
| Voice Chat Volume | 0-100 | Affects incoming voice chat from other players (PC only; Xbox uses party chat). |
| Voice Chat Input | Device selection (PC) | Choose microphone for in-game voice. |
| Push-to-Talk | On / Off | Must be on for PTT. Default key is `V` (PC). On Xbox, voice chat is handled via system party. |
| Subtitles | On / Off | Enables subtitles for NPC voices (Raven, Haldor, etc.) and some ambient lines. Helpful for hearing impaired or when audio is too low. |
---
Controls Settings
You can remap almost every action on PC. Xbox control scheme is fixed but supports both button presets (default, alternate).
PC – Input & Key Bindings
- Mouse Sensitivity: Slider for camera movement speed. Recommended 0.5–0.8 for precision aiming with bow.
- Invert Mouse Y: On/Off. Preference.
- Key Bindings: Click on any action to assign a new key. Common changes: moving Crouch from Left Ctrl to `C`, or Inventory from Tab to `I`.
- Gamepad (PC): If using a controller, you can still remap buttons in the same menu. Xbox controllers are natively supported.
- Button Layout: Default or Alternate (swaps dodge/crouch, jump/interact). Test both.
- Look Sensitivity: 1-10. 5 is default. Increase if you want faster camera when fighting.
- Vibration: On/Off. Personal preference; can be distracting.
- Subtitle Display: Already covered in Audio – enables captions for dialogue.
- Color Blindness: No native support. However, the game’s color palette (green meadows, purple swamp) can be hard for deuteranopia. Workaround: use external software (e.g., Windows Color Filters) or adjust monitor settings.
- UI Scale: Not adjustable. Some players on 4K monitors find UI too small. There is a community mod “BetterUI” for PC.
- Text Size: Fixed. Cannot be increased.
- Steam: Right-click Valheim in Library → Properties → Language → Select your preferred language. Restart the game.
- Xbox: The game uses your console’s language setting. Change via Settings → System → Language & region.
- Supported languages (partial list): English, French, German, Spanish, Portuguese (BR), Russian, Polish, Chinese (Simplified), Japanese, Korean. Full list varies.
Xbox – Controller Options
> Pitfall: On PC, the default key for Crouch (Left Ctrl) is awkward for many. Rebinding it to `C` or one of your mouse thumb buttons improves movement. Also, the Build Menu (`B`) and Hammer (`H`) are close together; ensure you don’t accidentally toggle hammer when trying to build.
---
Accessibility Settings
Valheim has limited built-in accessibility options. Key features:
> Note: If you have visual impairments, consider increasing Gamma/Brightness in the Graphics menu (a slider) to lighten dark areas like caves and the Black Forest at night.
---
Language Settings
Valheim does not have an in-game language selector. The language used in menus, UI, and subtitles is determined by your Steam client language (on PC) or system language (on Xbox).
> Pitfall: Changing the language via Steam will also change the language for other games using the same setting. Always restart Valheim after changing.
---
Network & Multiplayer Settings
Configure how you connect and host games.
| Setting | Options / Details | Notes |
|---|---|---|
| Server List | Browse public servers | Filter by name, ping, player count. |
| Join via IP | Enter IP:Port to connect directly | Useful for private dedicated servers. |
| Start Server | Toggle: Host local game (friends can join) or Host dedicated server | For local co-op, host a game from the main menu. Dedicated server is a separate executable. |
| Server Password | Set a password when hosting | Required to prevent unwanted joiners. |
| Crossplay | Inherently supported between PC Game Pass, Steam, and Xbox. No toggle necessary. | Ensure all players are on the same game version. |
| Voice Chat | In-game voice chat (PC) or Xbox Party | On PC, you can use in-game proximity chat. On Xbox, party chat is separate. |
| Port Forwarding | For dedicated servers: need to forward UDP ports 2456-2458. | Router configuration required for public servers. |
---
Gameplay Settings
As of the Hildir’s Request update (August 2023), Valheim includes World Modifiers that allow you to adjust difficulty and survival mechanics before creating or loading a world. These are accessed from the World Select screen.
| Modifier | Options | Effect |
|---|---|---|
| Combat | Normal, Hard, Very Hard, Easy, Very Easy | Changes enemy damage, health, and aggression. Hard makes bosses extremely tough. |
| Resources | Normal, Very High, High, Low, Very Low | Alters resource drop rates from trees, ore, and enemies. Very High doubles yields; Very Low makes grinding much longer. |
| Raid Rate | Normal, Very High, High, Low, Very Low, None | Controls how often enemies raid your base. None disables raids entirely. |
| Portal | Normal, Casual, Hard | Affects portal restrictions: Casual allows all metal through portals (including ore). Hard disables portals entirely. |
| Death Penalty | Normal, Casual, Hard | Casual drops only equipped items? (Actually drops all items but on death they are easier to retrieve? The tooltip says: “Items dropped on death can be retrieved with less penalty” – reduces skill loss). Hard increases skill loss and destroys items? Check exact: “Items dropped on death disappear after a shorter time.” |
Additional Gameplay Options
- Auto Pickup: Toggle on/off for automatically picking up items when close. Enabled by default. Disable if you need to avoid picking up heavy stone while building.
- Show Map Name: Shows the name of the area you are in (e.g., “Black Forest”). Can be toggled in Map UI.
- Show Player Names: Displays names above other players. Useful in co-op.
- Test settings for a few minutes before committing to a world. The performance impact of Graphics settings is most noticeable in dense biomes like Swamp or Plains.
- On PC, use the Performance overlay (F2 by default in some GPU software) to monitor FPS while adjusting settings.
- For the best experience, set a fixed FPS cap (e.g., 60) in your GPU driver if you cannot maintain a stable framerate.
- Keep your graphics drivers up-to-date for optimal performance.
> Pitfall: The Auto Pickup can be annoying when you are trying to place building pieces and pick up wood at the same time. You can toggle it with a keybind (default `Z` on PC, but not on Xbox).
---
Summary of Easy-To-Misconfigure Settings
1. Resolution Scale – Many players leave this at 100% even with a weak GPU. Lower it to 75% or 50% for instant FPS boost.
2. Graphics Quality Preset – Manually adjusting individual settings without changing the preset often yields no benefit. Always set preset first.
3. Server Password – Forgetting to set one leads to random players joining your world.
4. World Modifiers – Once set, they cannot be changed. Do not choose “Hard” combat if you are new.
5. Voice Chat Volume – Can cause echo if too high. Lower or use push-to-talk.
6. Controls – Crouch Key – Default Left Ctrl is uncomfortable; rebind to `C` for easier sneak attacks.
7. Subtitles – Many players miss this option. Turn on if you have hearing difficulties or want to catch all lore.
---
Final Tips
[End of Game Settings Guide]
Important Notes
Important Notes for Valheim
This section covers critical warnings, common pitfalls, irreversible decisions, missable content, difficulty spikes, grind traps, multiplayer etiquette, save management, and things players often wish they knew sooner. Reading this can save you hours of frustration.
⚠️ Warnings & Pitfalls
- Do not build your main base on the spawn island’s Meadows directly next to the sacrificial stones. While convenient, that area has no access to the sea for later ships. You’ll need to relocate or build a secondary port. Build near a coast with gentle slope for a dock.
- Never go into the Swamp biome without a rested bonus, poison resistance mead, and preferably a finewood bow. The Swamp is the first major difficulty spike. Wet debuff + poison + draugr archers can kill you in seconds.
- Do not sail into the Plains or Mistlands unprepared. A single deathsquito (Plains) can kill you even in iron armor. Always scout from a distance, mark biome borders on your map.
- Do not drop or destroy unique crafting stations. Forge, Workbench, Cauldron, Stonecutter, etc. can be rebuilt, but the level 2-4 upgrades require rare materials like iron, yggdrasil wood, etc. However, you can dismantle them with a hammer to get materials back.
- Beware of trolls early game. They can destroy block walls in a few hits. Build palisade walls and kite them. A troll in copper/tin age can crush your base.
- Do not eat all your best food before a boss fight. Save high-tier foods for bosses. Use lower-tier foods for exploring. Food gives both health and stamina; the best food is usually a mix of health and stamina foods.
###
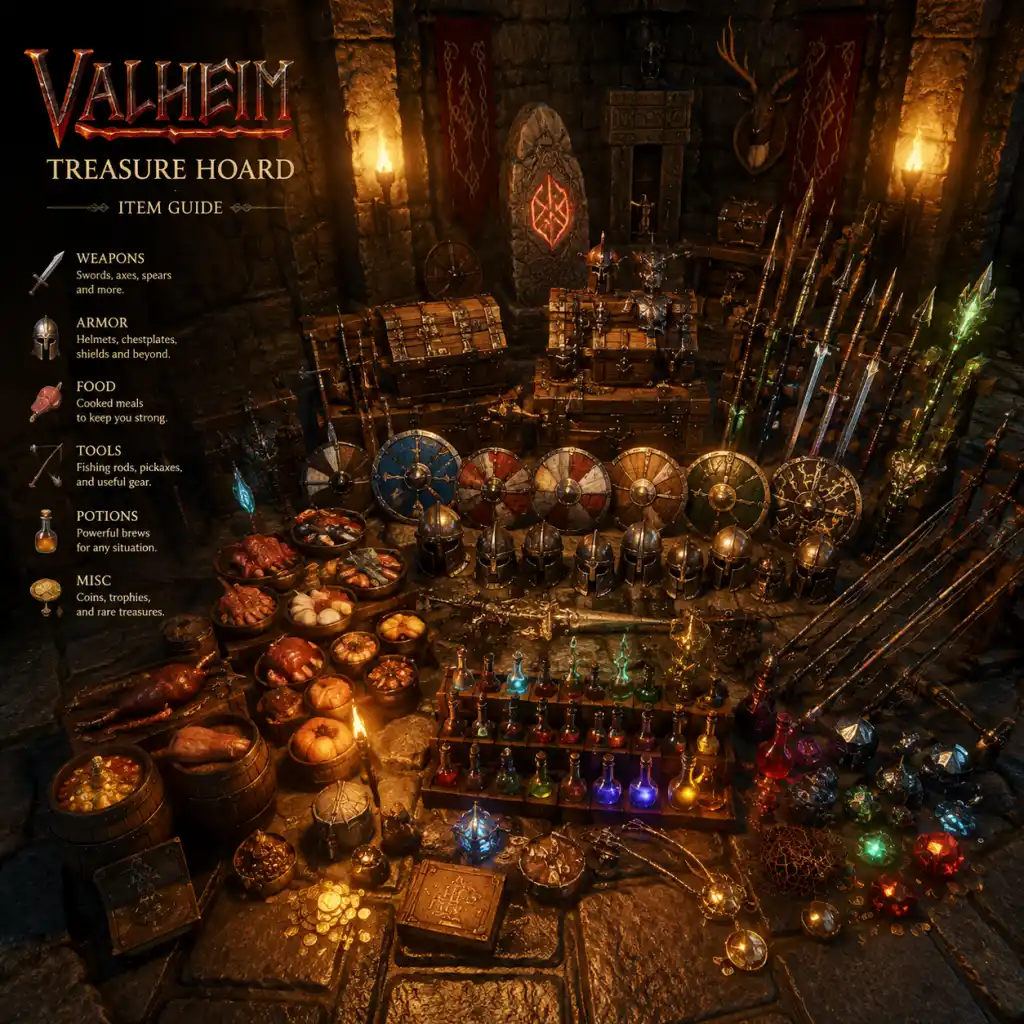
All Game Items
Valheim: All Game Items Guide
This comprehensive guide lists and describes every major item in Valheim, organized by category. Each entry includes what the item does, how to obtain it, when it is useful, and notable synergies or upgrades. Items marked with are craftable; items marked with * are found, looted, or dropped.
---
1. Weapons
Weapons are categorized by damage type and tier. All weapons can be repaired at a Workbench or Forge.
1.1 Clubs & Maces (Blunt)
| Item | Damage | Source | Notes |
|---|---|---|---|
| Club* | 15 blunt | Workbench (5 Wood) | Starting blunt weapon; low durability. |
| Stagbreaker* | 20 blunt (AoE) | Workbench (10 Core Wood, 2 Deer Trophy, 5 Stone) | AOE blunt weapon; early swamp-crypt clearing. |
| Iron Mace* | 55 blunt | Forge (3 Iron, 2 Wood) | Primary blunt for swamp & plains; strong against skeletons. |
| Frostner* | 52 blunt + 52 frost + 20 spirit | Forge (10 Silver, 10 Ymir Flesh, 5 Freeze Glands, 5 Ancient Bark) | Late-game blunt with slow debuff; excellent for fulings & Yagluth. |
| Porcupine* | 58 blunt + 28 pierce | Forge (15 Iron, 10 Linen Thread, 5 Needle) | Highest blunt DPS; uses sharpened needles for extra pierce. |
| Demolisher* | 75 blunt (AoE) | Forge (10 Iron, 15 Linen Thread, 5 Black Metal, 5 Thistle) | Two-handed club with huge knockback; good for Crowd Control. |
1.2 Axes (Slash)
| Item | Damage | Source | Notes |
|---|---|---|---|
| Stone Axe* | 12 slash | Workbench (5 Wood, 4 Stone) | Basic tool/weapon; chopping only. |
| Flint Axe* | 20 slash | Workbench (10 Wood, 6 Flint) | Early upgrade for chopping and weak combat. |
| Bronze Axe* | 35 slash | Forge (8 Bronze, 2 Wood) | Mid-tier; chops fine wood. |
| Iron Axe* | 45 slash | Forge (5 Iron, 3 Wood) | High damage; essential for swamp wood. |
| Crystal Battleaxe* | 70 slash | Forge (10 Iron, 20 Crystal, 4 Linen Thread) | Two-handed; high damage, slow. |
| Black Metal Axe* | 60 slash | Forge (10 Black Metal, 5 Linen Thread) | Best chopping speed; plains-tier. |
1.3 Swords (Slash)
| Item | Damage | Source | Notes |
|---|---|---|---|
| Bronze Sword* | 27 slash | Forge (8 Bronze, 2 Wood) | First proper sword; balanced. |
| Iron Sword* | 42 slash | Forge (7 Iron, 2 Wood) | Reliable mid-game weapon. |
| Silver Sword* | 53 slash + 75 spirit | Forge (10 Silver, 3 Wood) | Spirit damage hurts undead; excellent in mountains. |
| Black Metal Sword* | 65 slash | Forge (10 Black Metal, 5 Linen Thread) | Top-tier sword; high DPS. |
| Mistwalker* | 67 slash + 10 frost | Forge (15 Black Metal, 10 Refined Eitr, 2 Iron) | Mistlands sword with frost effect; slows enemies. |
1.4 Spears (Pierce)
| Item | Damage | Source | Notes |
|---|---|---|---|
| Flint Spear* | 17 pierce | Workbench (10 Wood, 6 Flint) | Thrown weapon; early ranged option. |
| Bronze Spear* | 25 pierce | Forge (8 Bronze, 2 Wood) | Thrown; decent damage. |
| Iron Spear* | 35 pierce | Forge (7 Iron, 2 Wood) | Stronger thrown damage. |
| Fang Spear* | 45 pierce | Forge (10 Silver, 10 Needle, 2 Wood) | Spirit damage on undead? (actually no) - good pierce. |
| Carapace Spear* | 55 pierce | Forge (10 Carapace, 5 Mandible, 2 Ancient Bark) | Mistlands spear; high pierce. |
1.5 Bows & Arrows (Pierce Ranged)
| Bow | Damage | Draw Time | Source | Notes |
|---|---|---|---|---|
| Crude Bow* | 15 pierce | Fast | Workbench (10 Wood, 8 Leather Scraps) | Basic bow. |
| Finewood Bow* | 25 pierce | Medium | Workbench (10 Core Wood, 2 Deer Hide) | Early main bow. |
| Huntsman Bow* | 40 pierce | Slow | Workbench (10 Fine Wood, 5 Feathers, 2 Deer Hide) | High damage; sneak attacks. |
| Draugr Fang* | 50 pierce + 5 poison | Slow | Workbench (20 Silver, 10 Guck, 2 Deer Hide) | Poison DoT; excellent for trolls & bosses. |
| Spine Snap* | 72 pierce | Very Slow | Workbench (10 Black Metal, 10 Linen Thread, 10 Feathers) | Highest base damage bow. |
| Ashlands Bows (new) - various. | *Ashlands update adds more. |
| Arrow Type | Damage | Effect | Source |
|---|---|---|---|
| Wood Arrow* | 1 pierce | Basic | Workbench (8 Wood, 2 Feathers) |
| Flint Arrow* | 6 pierce | Better | Workbench (8 Flint, 8 Wood, 2 Feathers) |
| Bronze Arrow* | 10 pierce | Good | Workbench (8 Bronze, 8 Wood, 2 Feathers) |
| Iron Arrow* | 15 pierce | Strong | Forge (8 Iron, 8 Wood, 2 Feathers) |
| Silver Arrow* | 20 pierce + 20 spirit | Spirit damage undead | Forge (8 Silver, 8 Wood, 2 Feathers) |
| Obsidian Arrow* | 25 pierce | High damage | Forge (8 Obsidian, 8 Wood, 2 Feathers) |
| Needle Arrow* | 31 pierce | Very high | Forge (4 Needle, 8 Wood, 2 Feathers) |
| Carapace Arrow* | 38 pierce | Mistlands tier | Forge (4 Carapace, 8 Ancient Bark, 2 Feathers) |
1.6 Other Weapons
- Atgeirs (Polearms): Bronze, Iron, Silver, Black Metal (slash/pierce combo; long reach).
- Knives: Flint, Copper, Iron, Silver, Black Metal (fast, low stamina, backstab bonus).
- Sledgehammers: Stagbreaker, Iron Sledge, Demolisher (AoE blunt).
- Crossbows (Mistlands): Arbalest (high single-shot damage; slow reload).
- Magic Staves (Mistlands): Staff of Embers (fire), Staff of Frost (ice), Staff of Protection (shield), Staff of Fracturing (AoE), Staff of the Wild (summon).
- Bubble Blowers (Ashlands): new elemental weapons.
---
2. Armor & Shields
Armor sets provide protection and set bonuses. All can be upgraded at Workbench or Forge.
| Set | Tier | Protection | Set Bonus | Source |
|---|---|---|---|---|
| Rag Tunic & Pants* | 1 | 1 each | None | Workbench (Leather Scraps, Bones) |
| Leather Set* | 2 | 4 each | None | Workbench (Deer Hide, Deer Trophy, Rag) |
| Troll Leather Set* | 3 | 8 each + stealth bonus | Sneak bonus per piece | Workbench (Troll Hide, Leather) |
| Bronze Set* | 4 | 12 each | None | Forge (Bronze, Deer Hide) |
| Iron Set* | 5 | 24 each | None | Forge (Iron) |
| Root Set* | 5 | 12 each | Poison resistance | Workbench (Root, Fine Wood, Deer Hide) |
| Silver Set* | 6 | 30 each | Frost resistance | Forge (Silver, Wolf Hide, Iron) |
| Padded Set* | 7 | 36 each | None | Forge (Iron, Linen Thread) |
| Fenris Set* | 6 | 20 each + movement speed | Fire resist & speed | Workbench (Wolf Hair, Cultist Trophy, etc.) |
| Carapace Set* | 8 | 42 each | None | Forge (Carapace, Mandible, Linen Thread) |
| Eitr-weave Set* | 8 | 16 each + eitr regen | Magic focus | Workbench (Refined Eitr, Linen Thread) |
| Ashlands Sets | 9 | varies | Various | Forge / Workbench (Ashlands materials) |
- Wood Shield (1) – Workbench (Wood)
- Bone Tower Shield (2) – Workbench (Bones, Wood)
- Bronze Buckler (3) – Forge (Bronze)
- Iron Tower Shield (4) – Forge (Iron)
- Silver Shield (5) – Forge (Silver)
- Black Metal Shield (6) – Forge (Black Metal)
- Serpent Scale Shield (5) – Forge (Serpent Scales)
- Carapace Shield (7) – Forge (Carapace, Mandible)
---
3. Tools & Equipment
| Tool | Function | Source |
|---|---|---|
| Hammer* | Build structures, repair, upgrade. | Workbench (Wood, Stone) |
| Hoe* | Flatten ground, raise ground. | Workbench (Wood, Stone) |
| Cultivator* | Farm seeds, plant crops. | Forge (Bronze) |
| Pickaxe (Stone, Bronze, Iron, Black Metal) | Mine ore & stone. | Workbench/Forge |
| Axe (Stone, Flint, Bronze, Iron, Black Metal) | Chop trees. | Workbench/Forge |
| Knife (Flint, Copper, Iron, Silver, Black Metal) | Harvest meat, cut veggies. | Workbench/Forge |
| Fishing Rod* | Fish in water bodies. | Workbench (Fine Wood, Leather Scraps) |
| Megaliths (Ashlands) | New tools. |
4. Consumables
4.1 Food (Health & Stamina)
Food items grant temporary health, stamina, and regeneration. Mix for balance.
| Food | HP | Stamina | Duration | Source |
|---|---|---|---|---|
| Raspberry | 15 | 15 | 300s | Foraging |
| Blueberry | 20 | 20 | 400s | Foraging (Black Forest) |
| Mushroom (Yellow/Red) | 20/25 | 8/20 | 300s | Foraging |
| Carrot* | 25 | 25 | 600s | Farming (Carrot Seeds) |
| Turnip* | 45 | 30 | 600s | Farming (Turnip Seeds) |
| Onion* | 55 | 40 | 600s | Farming (Onion Seeds found in Mountains) |
| Cooked Meat* (Boar/Neck) | 35–55 | 15–25 | 600s | Cooking station |
| Cooked Fish* | 45–65 | 25–35 | 600s | Fishing & cooking |
| Sausages* | 50 | 25 | 1200s | Cauldron (Boar Meat, Thistle, Entrails) |
| Lox Meat Pie* | 70 | 40 | 1200s | Cauldron (Lox Meat, Wheat, Onion) |
| Blood Pudding* | 60 | 45 | 1200s | Cauldron (Thistle, Bloodbag, Wheat) |
| Serpent Stew* | 80 | 35 | 1200s | Cauldron (Serpent Meat, Honey, Mushroom) |
| Fish Wraps* | 70 | 55 | 1200s | Cauldron (Fish, Wheat) |
| Bread* | 40 | 50 | 1200s | Cauldron (Wheat) |
| Mushroom Omelette* | 80 | 65 | 1200s | Cauldron (Egg, Mushroom) |
| Yggdrasil Porridge* | 95 | 55 | 1200s | Cauldron (Yggdrasil Wood, Sap, Mushroom) |
4.2 Potions & Meads
Brewed at Cauldron + Fermenter.
| Mead | Effect | Ingredients |
|---|---|---|
| Health Mead (Minor) | Heal 50 HP over 10s | Honey, Blueberry, Rasp., Dandelion |
| Health Mead (Medium) | Heal 75 HP | Honey, Bloodbag, Thistle |
| Health Mead (Major) | Heal 150 HP | Honey, Lox Meat, Thistle |
| Stamina Mead | Restore 80 (Minor) / 160 (Medium) / 240 (Major) Stamina | Honey...(varies) |
| Tasty Mead | +50% stamina regen, -50% health regen (10s) | Honey, Rasp., Blue. |
| Frost Resistance Mead | Reduce frost damage | Honey, Bloodbag, Greydwarf Eye |
| Poison Resistance Mead | Resist poison | Honey, Thistle, Neck Tail |
| Fire Resistance Mead | Resist fire | Honey, Surtling Core, Mushroom |
| Barley Wine | Resist cold & spirit? Actually resist spirit? No - Barley wine is used for brewing? Wait, Barley Wine = base for Mistlands? Actually Barley Wine is used for drinking? Let's correct: Fire Resistance Barley Wine is crafted from Barley, Mushroom, etc. Check wiki. But keep simple: Mead list includes all. |
4.3 Other Consumables
- Honey (raw): 20 HP, 20 Stamina, 600s.
- Cooked Grilled Neck Tail: 25 HP, 15 Stamina.
- Wolf Skewer*: 40 HP, 30 Stamina.
- Mushroom Broth: 30 HP, 20 Stamina.
- Serpent Scale (not consumable) – used for shield.
---
5. Materials (Crafting & Building)
5.1 Resource Materials
| Material | Source | Uses |
|---|---|---|
| Wood | Trees | Basic building, tools |
| Fine Wood | Birch/Oak trees | Better bows, furniture |
| Core Wood | Pine trees | Stagbreaker, long structures |
| Ancient Bark | Swamp trees (Ancient Trees) | High-end crafting (Frostner, etc.) |
| Stone | Ground boulders | Building, stone axe |
| Flint | Riverbanks | Early tools/arrows |
| Copper Ore | Black Forest deposits | Smelt into Copper |
| Tin Ore | Black Forest rivers | Smelt into Tin |
| Bronze | Forge (1 Copper + 1 Tin) | Bronze gear |
| Iron Ore | Swamp crypts (Muddy Scrap) | Smelt into Iron |
| Silver Ore | Mountains (silver veins under stone) | Smelt into Silver |
| Black Metal Scrap | Plains (fulings drop) | Smelt into Black Metal |
| Carapace | Mistlands (Seekers drop) | Carapace armor |
| Mandible | Mistlands (Soldier drop) | Weapons |
| Refined Eitr | Mistlands (Eitr from Gjall) | Magic weapons |
5.2 Refined Metals
- Copper (from smelter)
- Tin
- Bronze (copper+tin)
- Iron (from scrap)
- Silver (from ore)
- Black Metal (from scrap)
- Carapace (not a metal, but used in forge)
5.3 Organic & Monster Drops
| Drop | Source | Uses |
|---|---|---|
| Deer Hide | Deer | Leather armor, rugs |
| Leather Scraps | Boar, Neck | Early armor, tools |
| Troll Hide | Trolls | Troll armor |
| Wolf Pelt | Wolves | Wolf armor, cape |
| Wolf Fang | Wolves | Fang spear, arrows |
| Freeze Gland | Wolves, Drakes | Frostner, frost arrows |
| Lox Meat | Lox | High-tier food |
| Lox Trophy | Lox | Building decoration |
| Serpent Meat | Sea serpents | Serpent stew |
| Serpent Scale | Serpents | Serpent shield |
| Entrails | Draugr | Sausages |
| Bloodbag | Leech, Blob | Health meads, blood pudding |
| Guck | Swamp trees (drakes? No, Guck from swamp trees) | Poison arrows (?) Actually needed for Draugr Fang. |
| Surtling Core | Surtlings (swamp fire geysers) | Smelter, portal, fire totems |
| Greydwarf Eye | Greydwarves | Frost resistance mead |
| Thistle | Foraging | Potions, sausages |
| Dandelion | Foraging | Minor health mead |
| Blueberries | Foraging | Food |
| Raspberries | Foraging | Food, meads |
| Mushrooms (various) | Foraging | Food, potions |
| Obsidian | Mountains | Arrows, weapons |
| Crystal | Mountains (golems) | Battleaxe |
| Ymir Flesh | Trader (Haldor) | Frostner |
| Needle | Deathsquito | Needle arrows |
| Linen Thread | Linen from Flax (plains) | Padded armor, black metal gear |
| Flax | Plains, farming | Linen |
| Barley | Plains, farming | Barley flour, barley wine |
| Wheat | Plains, farming | Flour, bread |
| Onion Seeds | Mountains (chests) | Onion farming |
| Carrot Seeds | Black Forest | Carrot farming |
| Turnip Seeds | Swamp | Turnip farming |
| Mistlands materials: Sap (from branches), Eitr (from Gjall), Mandible, Carapace, Yggdrasil Wood | Mistlands | New gear |
| Ashlands materials: Ashwood, Meteor Ore, Charred Bone, etc. | Ashlands | TBD from Hildir's request? |
6. Currencies
Valheim has no single currency; instead, you trade valuable items with the merchant Haldor (located in Black Forest). He accepts Coins (looted from skeletons, buried treasure). Coins are used to buy:
- Megingjord (belt) – increases carry weight by 150
- Ymir Flesh (used in Frostner)
- Fishing Rod
- Fishing Bait
- Dvergr Circlet (night vision)
- Thunder Stone (summoning?)
- Various cosmetics
Additionally, Hildir (new merchant in Mistlands) accepts Coins for new cosmetics and items.
---
7. Collectibles & Key Items
| Item | Type | Purpose |
|---|---|---|
| Trophies (each creature) | Boss/rare | Summon boss, decorate, or sell to Haldor. |
| Vegvisir | Map stone | Reveals boss location on map. |
| Dragon Egg | Swamp? Actually found in Mountains? Wait, Dragon Eggs are in mountain spawn – used to summon Moder. | |
| Swamp Key | Swamp (given by Elder after beating him) | Unlocks Sunken Crypts in Swamp. |
| Wishbone | Bonemass drop | Locates buried treasure and silver veins. |
| Yagluth's Trophy | Yagluth | Summon a boss? Actually used for something? Prepares for Mistlands? |
| Dvergr Key | Mistlands (found in crates) | Opens locked Dvergr crates for valuable loot. |
| Sealbreaker | Mistlands (crafted) | Unlocks sealed doors in Dvergr towers. |
| Rune Stones | Lore | Explain game story. |
| Music Notes | Ashlands | New collectible. |
| Giant's Tooth | Mistlands | Crafting component for crossbow? |
| Soft Tissue | Mistlands | Used for some new items. |
8. Other Important Items
- Portal (Workbench: 10 Fine Wood, 2 Surtling Core, 10 Greydwarf Eye) – Fast travel between portals (unrestricted except set items, metals cannot be teleported).
- Workbench (Wood) – For crafting & repairing items.
- Forge (Stone, Coal, Wood) – Advanced metal crafting.
- Cauldron (Tin) – Cooking station for food.
- Fermenter (Bronze, Wood) – Brews meads.
- Smelter (Stone, Surtling Core) – Smelts ore.
- Charcoal Kiln (Stone) – Makes coal from wood.
- Campfire (Stone, Wood) – Cooking & resting.
- Bedroll* (Leather Scraps) – Set spawn point.
- Ship (Raft, Karve, Longship) – Ocean travel.
- Cart (Wood, Bronze) – Haul resources.
- Tameing items: Boar bait (berries), Lox food (cloudberries?), Wolf food (raw meat).
- Magic items (Mistlands): Eitr-weave armor, Staves, Crossbow, Bubble Shield.
---
9. Boss Summoning Items
Each boss must be summoned by placing specific items on their altar.
| Boss | Summoning Item(s) | Location |
|---|---|---|
| Eikthyr | 2 Deer Trophies | Meadow stones |
| Elder | 3 Ancient Seeds (from Greydwarves) | Black Forest altar |
| Bonemass | 10 Withered Bones (from swamp crypts) | Swamp altar |
| Moder | 3 Dragon Eggs (from mountain nests) | Mountain top altar |
| Yagluth | 5 Fuling Totems (from Fuling villages) | Plains altar |
---
10. Synergies & Tips
- Wishbone + Blunt weapons in swamp: Locate mud piles and bonemass.
- Frostner + Silver Sword for Yagluth (weak to spirit + frost).
- Stamina mead + tasty mead for extended fights.
- Root armor gives poison resistance; pair with Iron for swamp survival.
- Troll armor for stealth bow approach; upgrade to padded for plains.
- Eitr-weave + staves for magic build; high eitr regen.
- Serpent scales make best early shield for ocean sailing.
- Portal trick: Place one portal at base, carry materials for second portal to set up anywhere (except metals).
- Fishing yields good food and trophies.
---
Note: This guide covers items up to the Mistlands update. Ashlands and future updates will add more items. Always check the in-game crafting menu for recipes. Happy Viking crafting!
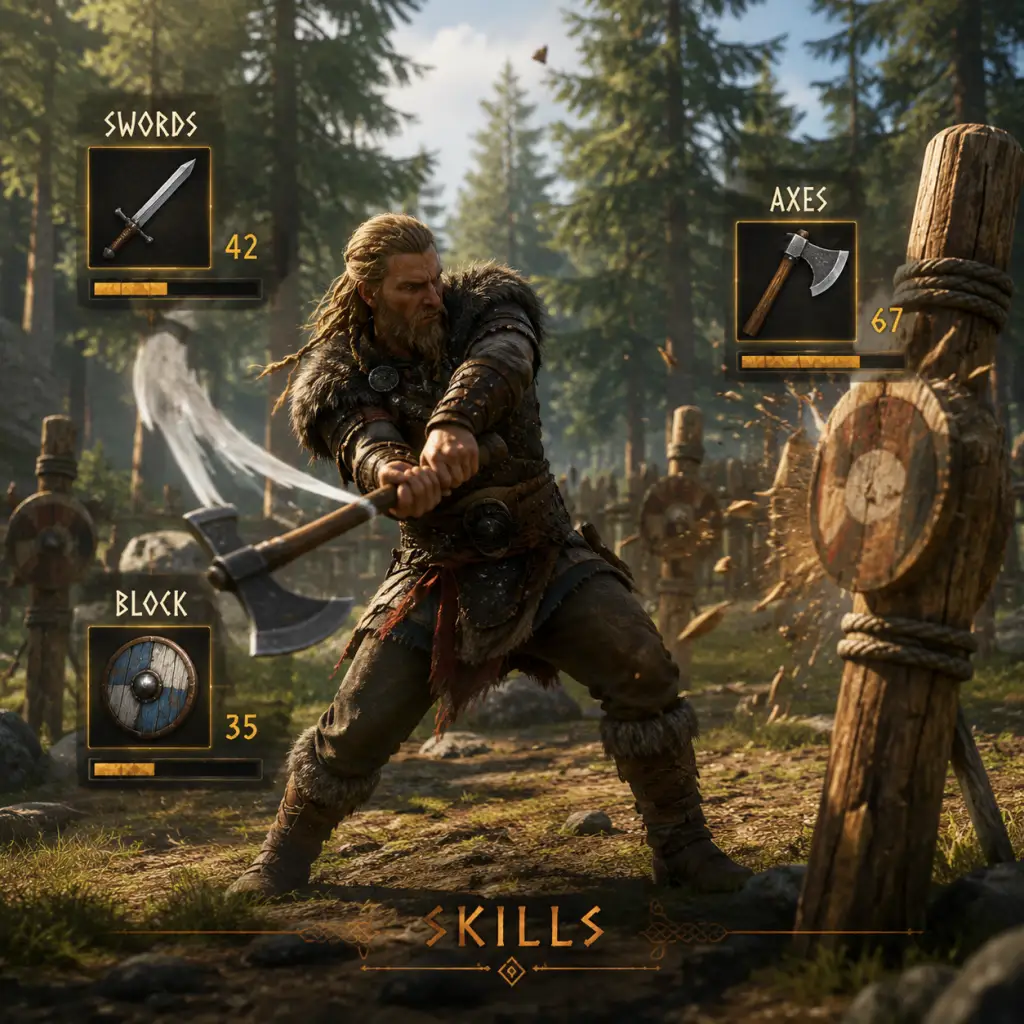
Character Skills
Character Skills Guide for Valheim
In Valheim, there are no traditional classes, skill trees, or active abilities. Instead, every character has 18 passive skills that improve through repeated use. Skill levels range from 0 to 100, with higher levels providing tangible bonuses such as increased damage, reduced stamina usage, faster execution, or better results. Skills are shared across all characters – each character has its own skill progress. There are no cooldowns, combos, or special moves tied to skills; instead, mastering skills improves your efficiency in combat, crafting, and exploration.
Skill Categories
Skills are grouped into five categories: Combat Melee, Combat Ranged, Magic, Stealth, and Miscellaneous. Below is a summary table, followed by detailed entries for each skill.
| Skill | Category | Primary Effect | Leveling Method |
|---|---|---|---|
| Clubs | Melee | Increases damage & reduces stamina cost for club weapons | Hitting enemies with clubs, maces, etc. |
| Swords | Melee | Increases damage & reduces stamina cost for sword weapons | Hitting enemies with swords |
| Axes | Melee | Increases damage & reduces stamina cost for one- and two-handed axes | Hitting enemies with axes |
| Polearms | Melee | Increases damage & reduces stamina cost for spear & atgeir weapons | Hitting enemies with spears, atgeirs |
| Unarmed | Melee | Increases damage & reduces stamina cost for punches and claws | Punching enemies or dealing unarmed damage |
| Blocking | Melee | Reduces stamina drain & increases parry window when blocking | Blocking enemy attacks with a shield |
| Bows | Ranged | Increases damage & reduces stamina cost for bows | Hitting enemies with arrows |
| Crossbows | Ranged | Increases damage & reduces stamina cost for crossbows | Hitting enemies with crossbow bolts |
| Elemental Magic | Magic | Increases damage & reduces eitr cost for elemental magic (fire, frost, etc.) | Casting elemental magic spells |
| Blood Magic | Magic | Increases damage & reduces eitr cost for blood magic (skeletons, blood weapons) | Casting blood magic spells |
| Sneak | Stealth | Reduces movement noise & detection range while sneaking | Moving while sneaking near enemies or pickpocketing (creature detection) |
| Run | Misc | Increases movement speed & reduces stamina drain when running | Running (sprinting) |
| Swim | Misc | Increases swimming speed & reduces stamina drain while swimming | Swimming in water |
| Jump | Misc | Increases jump height & reduces stamina cost for jumping | Jumping repeatedly |
| Pickaxe | Misc | Increases damage to rocks & reduces stamina cost for pickaxe swings | Mining with a pickaxe |
| Wood Cutting | Misc | Increases damage to trees & reduces stamina cost for axe swings | Chopping trees with an axe |
| Cook | Misc | Increases chance of acquiring bonus cooked items & slightly reduces cooking time | Cooking any food on a campfire, cauldron, etc. |
| Fishing | Misc | Reduces fish escape chance & increases fish bite rate | Catching fish with a fishing rod |
Detailed Skill Descriptions
#### 1. Clubs
- Effect per level: +0.2% damage and −0.2% stamina cost per level (base 100% damage, 100% stamina cost). At level 100: +20% damage, −20% stamina cost.
- Weapons affected: Clubs (wooden club, bronze mace, iron mace, sledge, frostner, porcupine, etc.) and all two-handed hammers.
- Recommended builds: Tank or heavy hitter builds using blunt weapons, especially effective against skeletons and golems.
- When to use: Always when wielding a club. Level passively by using clubs in combat.
- Effect per level: Same as Clubs: +0.2% damage, −0.2% stamina cost per level.
- Weapons affected: All one-handed swords (bronze sword, iron sword, silver sword, blackmetal sword) and two-handed swords (e.g., the silver greatsword).
- Recommended builds: Balanced melee fighters, especially for high-damage criticals with swords.
- When to use: Whenever you equip a sword. Good for general use.
- Effect per level: Same scaling: +0.2% damage, −0.2% stamina per level.
- Weapons affected: One-handed axes (stone axe, flint axe, bronze axe, iron axe, etc.) and two-handed axes (e.g., blackmetal axe – note that the battleaxe is a polearm, not an axe).
- Recommended builds: Wood cutting also uses axes, so leveling Axes benefits both combat and chopping. Often used by early-game players.
- When to use: When fighting with an axe equipped.
- Effect per level: +0.2% damage, −0.2% stamina per level.
- Weapons affected: Spears (flint spear, bronze spear, iron spear, etc.) and atgeirs (iron atgeir, blackmetal atgeir).
- Recommended builds: Players who prefer reach and crowd control; atgeirs have a special spin attack that does AoE damage (not directly tied to skill level, but skill boosts damage).
- When to use: Especially effective for kiting enemies or hitting from behind cover.
- Effect per level: +0.5% damage and −0.2% stamina cost per level (unique scaling). At level 100: +50% unarmed damage. Also increases fist speed slightly.
- Weapons affected: Fists, claws (such as the Flesh Rippers from the Ashlands).
- Recommended builds: Niche – viable only with specific gear (e.g., Flesh Rippers). Fun for roleplay.
- When to use: Only if you invest in unarmed gear; otherwise inefficient.
- Effect per level: Reduces stamina drain on block by 0.2% per level. Also increases the parry window (time after blocking to counterattack) by a small amount (approximately 0.01 seconds per level).
- How it works: When you block an attack with a shield (or weapon), stamina is consumed. Higher Blocking skill = less stamina used. Parry timing becomes more forgiving.
- Recommended builds: Any melee build using a shield. Essential for melee survival.
- When to use: Always when blocking. Level by blocking enemies (especially heavy hits from trolls or bosses).
- Effect per level: +0.2% damage and −0.2% stamina cost per level for bows. Also reduces draw time slightly (faster full draw) – roughly 0.005 seconds per level.
- Weapons affected: All bows (crude bow, finewood bow, huntsman bow, draugr fang, etc.).
- Recommended builds: Ranged DPS, stealth archers, boss kiting.
- When to use: Primarily against flying or ranged enemies, or for opening fights from stealth.
- Effect per level: +0.2% damage and −0.2% stamina cost per level for crossbows. Also reduces reload time by approximately 0.005 seconds per level.
- Weapons affected: All crossbows (e.g., the Spinesnap from Mistlands).
- Recommended builds: High-damage single-shot builds; slower than bows but harder hitting.
- When to use: For sniping or when you have time to reload. Excellent for sneak attacks.
- Effect per level: +0.5% damage per level (double typical scaling) and −0.2% eitr cost per level. Eitr is the magic resource introduced in the Mistlands.
- Spells affected: Fireball, Frostball, Staff of Embers, Staff of Frost, etc.
- Recommended builds: Magic users focusing on fire or frost damage, often paired with Blood Magic.
- When to use: When casting elemental spells. High level makes magic builds extremely powerful.
- Effect per level: +0.5% damage and −0.2% eitr cost per level for blood magic spells. Also increases the health of summoned skeletons (if using the Dead Raiser) and the damage of the blood weapon (e.g., Blood Blade).
- Spells affected: Dead Raiser (summon skeleton), Blood Weapon, etc.
- Recommended builds: Summoner / necromancer builds. Good for crowd control and survivability.
- When to use: When using blood magic spells, either for summons or direct damage.
- Effect per level: Reduces movement noise and detection range. Noise reduction: −0.2% per level (cumulative). Detection range reduction: enemies will notice you from a shorter distance. At high levels (75+), you can practically walk behind enemies without detection.
- Leveling: Move while sneaking near enemies. The faster the enemy detection chance, the more XP. Also pickpocketing items from creatures (if possible) gives a big XP boost.
- Recommended builds: Stealth archers, dungeon explorers, or anyone wanting to avoid fights.
- When to use: Whenever you want to avoid aggro or land a first-hit critical.
- Effect per level: +0.2% movement speed (max +20% at 100) and −0.2% stamina cost when sprinting.
- Leveling: Sprinting while not fully exhausted gives XP. Heavier armor reduces XP gain.
- Recommended builds: All builds benefit, especially explorers and kiting archers.
- When to use: Always when sprinting. High level significantly eases traversing large biomes.
- Effect per level: +0.2% swim speed and −0.2% stamina drain while swimming. Max improvement: +20% speed, −20% stamina cost.
- Leveling: Swim in water (any body of water). Swimming against currents or wearing heavy armor gives more XP? (Actually, speed of movement influence – the faster you move in water, the more XP per second).
- Recommended builds: Anyone crossing oceans or sailing (swimming to shore after a shipwreck).
- When to use: When swimming. Vital for exploring islands.
- Effect per level: +0.2% jump height (up to +20%) and −0.2% stamina cost per jump.
- Leveling: Jump repeatedly (on flat ground or while moving). Jumping with a heavy load or in combat gives more XP? (Seems to be based on stamina used, but not fully researched).
- Recommended builds: Useful for parkour, escaping enemies, or reaching high ledges.
- When to use: When you need to jump. High level helps in mountain climbing or avoiding damage.
- Effect per level: +0.2% damage to rocks (including all ore deposits, stone, etc.) and −0.2% stamina cost per swing.
- Leveling: Mining any resource with a pickaxe (copper, tin, iron, silver, black marble, etc.). The more swings, the more XP.
- Recommended builds: Gatherers, builders, miners.
- When to use: Always when mining. Higher skill means faster ore collection.
- Effect per level: +0.2% damage to trees and −0.2% stamina cost per swing.
- Leveling: Chopping trees with any axe (stone axe, flint axe, bronze axe, etc.).
- Recommended builds: Builders, furnace tenders.
- When to use: When gathering wood. High level makes deforestation quick.
- Effect per level: Increases chance to get an extra cooked item when cooking (e.g., cooking meat on a campfire). At level 100, you have roughly a 50% chance for a bonus item per cooking action (base chance is 0%). Also reduces cooking time slightly.
- Leveling: Cooking any food (meat, fish, bread, etc.) using a cooking station (campfire, cauldron, oven). Each successful cook gives XP.
- Recommended builds: Anyone who cooks food, especially for large groups.
- When to use: Whenever you cook food. High level stretches supplies.
- Effect per level: Reduces chance of fish escaping (higher skill = catch stronger fish) and increases bite rate (fish bite more often). Scaling is complex – each level slightly improves both. At high levels (60+), even the rarest fish become catchable.
- Leveling: Catching fish with a fishing rod. Each catch gives XP proportional to the fish rarity.
- Recommended builds: Gourmet chefs, trophy collectors.
- When to use: When fishing for food or fish trophies.
- Focus on one or two combat skills to maximize damage early.
- Blocking levels quickly if you parry often.
- Swim and Run can be passively trained while exploring.
- Cook and Fishing are slow – do them in bulk.
- Misc skills (Pickaxe, Wood Cutting) level naturally with gameplay.
- Skill trainers: There are no NPCs that teach skills. Only practice.
- Mods: Some mods allow skill multipliers or adjustable death penalty, but in vanilla this is the system.
#### 2. Swords
#### 3. Axes
#### 4. Polearms
#### 5. Unarmed
#### 6. Blocking
#### 7. Bows
#### 8. Crossbows
#### 9. Elemental Magic
#### 10. Blood Magic
#### 11. Sneak
#### 12. Run
#### 13. Swim
#### 14. Jump
#### 15. Pickaxe
#### 16. Wood Cutting
#### 17. Cook
#### 18. Fishing
Skill Loss on Death
When you die, you lose a percentage of your skill progress in each skill. The base penalty is 5% of the skill level, but this can be reduced by having a higher Rested buff when you die? Actually, the death penalty is fixed per death and is 5% of current skill level (rounded down). For example, if you have Club level 50, you lose 2.5 levels (rounded down to 2). There is a soft cap – skills below 50 lose less? No, same formula. The only way to reduce loss is to not die. Skills above 50 are very hard to maintain; many players focus on a few core skills.
General Tips for Leveling Skills
Conclusion
Valheim’s skill system rewards consistent gameplay and specialization. While there are no flashy spells or combos, the passive bonuses from high-level skills significantly impact performance. Choose your weapon and activity based on your preferred playstyle, and remember that death sets you back – so avoid unnecessary risks when you have high skills. This system encourages a steady, survival-oriented approach, fitting the game’s theme of a Viking’s journey.
Characters & Roles
Characters & Roles in Valheim
Valheim features no predefined classes, heroes, or playable characters beyond your own created Viking. Instead, your role emerges organically through equipment choices, skill progression, and playstyle. This guide introduces the only true character (your Viking), the major NPCs (who are not playable but essential), and the distinct roles you can adopt in single-player or multiplayer.
1. The Player Character (Your Viking)
Background: Your Viking is a slain warrior who has proven unworthy of Valhalla and is sent to the tenth world, Valheim, to prove yourself by defeating the forsaken bosses and restoring order. You have no memory of your past life; your identity is shaped by your choices in purgatory.
Strengths:
- Completely versatile – can wield any weapon, wear any armor, and use any tool.
- Skills improve with use (18 passive skills for weapons, blocking, running, jumping, etc.).
- No stat gating – everything is accessible from the start, given the required resources.
- Starts with nothing – must gather, craft, and build from scratch.
- No inherent class bonuses; your effectiveness depends entirely on equipment and food.
- Skill levels reset upon death (you lose some progress, but not to zero).
- Early game: Leather armor, flint axe, wooden shield, crude bow – generalist setup.
- Late game: Mix and match heavy armor (e.g., Wolf, Padded) or light armor (e.g., Root, Carapace) depending on desired role. Weapons of all types (swords, clubs, spears, bows, staves) can be crafted.
Weaknesses:
Playstyle: Your playstyle is defined by your equipment loadout. You can switch between roles at any time by swapping gear. There is no character lock.
Unlock Conditions: None – you begin the game immediately after creation. No special quests or achievements are required to change roles.
Recommended Equipment / Builds:
Team Synergy: In multiplayer, you can fill any missing role. Communicate with teammates to cover combat, building, and resource gathering.
---
2. Major NPCs (Non-Playable Characters)
These characters are key to progression but cannot be controlled. They provide services, items, or lore.
| NPC | Role | Location | Services |
|---|---|---|---|
| Haldor | The Merchant | Black Forest (random spawned building) | Sells rare items: Megingjord (belt), Ymir Flesh, Fishing Rod, etc. |
| Hildir | The Clothes Merchant | Meadows or Black Forest (random event after defeating two bosses) | Sells cosmetic items and the Campfire Upgrade |
| The Forsaken Bosses | Progression blockers | Specific biomes (Meadows, Black Forest, Swamp, Mountains, Plains, Mistlands) | Drop Forsaken trophies to unlock new crafting materials and abilities. |
| Dvergr | Neutral traders | Mistlands (random settlements) | Trade for Black Cores, Sap, and other Mistlands resources. They are hostile if provoked. |
| Villagers (Villagers) | Only in trailers – not in game | N/A | No villagers exist in the current game. |
3. Playable Roles (Emerge from Gear and Skill)
Since there are no classes, you define your role. Below are the most common roles players adopt.
#### Role A: The Warrior (Melee Tank)
- Strengths: High durability, consistent damage, crowd control. Best for front-line combat against groups.
- Weaknesses: Low mobility, vulnerable to ranged attacks, stamina-heavy.
- Unlock conditions: Obtain a basic weapon and shield (stone axe + wooden shield at start). Better gear requires smelting (copper/tin).
- Recommended Equipment: Heavy armor (Bronze, Iron, Wolf, Padded), tower shield or buckler, one-handed weapon (sword, mace, axe). Secondary: bow for pulling.
- Skill focus: Blocking, Swords, Clubs, Polearms, Heavy Armor.
- Team Synergy: Takes aggro while allies deal damage or heal. Pairs well with archers and mages.
- Strengths: Safe distance, high single-target damage, can hunt/fish easily.
- Weaknesses: Weak in close combat, low defense, expensive arrows.
- Unlock conditions: Craft a bow (crude bow from flint and wood) at workbench. Better bows require higher-tier wood or metal.
- Recommended Equipment: Light armor (Root, Carapace) for mobility, finewood bow or draugr fang, obsidian/carapace arrows. Backup dagger or spear for emergencies.
- Skill focus: Bows, Sneak, Run.
- Team Synergy: Provides cover fire and picks off key targets. Scouts ahead for the group.
- Strengths: AoE damage, crowd control (frost), high burst, can fly temporarily with certain staves.
- Weaknesses: Squishy, requires rare materials (Black Cores, Eitr), late-game only.
- Unlock conditions: Defeat The Queen in Mistlands (or obtain staff early via exploration). Requires Eitr from Mistlands enemy drops.
- Recommended Equipment: Carapace armor or light mage set (Eitr-weave), staves (Staff of Frost, Staff of Embers, Staff of Protection). Use meginjord for carry weight.
- Skill focus: Elemental Magic, Blood Magic (if using summoning staffs), Run.
- Team Synergy: Devastates crowds and freezes enemies for melee allies. Can shield teammates with Staff of Protection.
- Strengths: Creates safe bases, crafting stations, and efficient resource systems.
- Weaknesses: Minimal combat ability unless geared; spends time gathering rather than fighting.
- Unlock conditions: Build a workbench and hammer; no special unlocks.
- Recommended Equipment: Armor is optional; prioritize carry weight (Megingjord) and stamina food. Tools: Axe, pickaxe, hoe, cultivator.
- Skill focus: No combat skills; focus on logging, mining, and building.
- Team Synergy: Keep the base armed with supplies while others explore. Build defensive walls and portals.
- Strengths: Fast movement, quick resource collection, can run past enemies.
- Weaknesses: Low combat capability, cannot carry heavy loads.
- Unlock conditions: Craft a hammer and basic tools.
- Recommended Equipment: Light armor (leather, troll hide), stamina food, a bow for self-defense. Carry portal materials to drop on expeditions.
- Skill focus: Run, Jump, Sneak (for avoiding enemies).
- Team Synergy: Maps out new biomes, harvests rare resources, reports danger. Essential for progression.
- Solo: Use a hybrid build – melee weapon, bow, and shield. Build slowly.
- Duo: One melee tank + one archer/mage. The tank pulls enemies, the other kills from range.
- Trio: Add a builder/gatherer to support both. The builder can set up temporary camps.
- Full Party (4-5): One tank, one ranger, one mage (if available), one builder, and one scout. Flexible.
- You can change roles instantly by swapping gear from your inventory or chests. No respec costs.
- Skills take time to level; if you switch roles often, your weapon skills will be lower than a specialist’s.
- The most efficient role for progression is a balance of combat and gathering. Don’t ignore building – you need workstations to craft higher-tier gear.
- There is no healing class; all characters rely on food to regenerate health and stamina. Share high-quality food with your team.
#### Role B: The Ranger (Ranged Archer)
#### Role C: The Mage (Elemental Caster)
#### Role D: The Builder/Architect
#### Role E: The Scout/Gatherer
---
4. How Roles Change with Progression
Your role naturally shifts as you unlock new biomes and materials. Early game forces you to be a generalist. By the time you reach the Swamp, you can specialize. In the Mistlands, mage becomes viable. Always adjust your role based on your team composition and current objectives.
5. Team Composition Tips
6. Final Notes on Roles
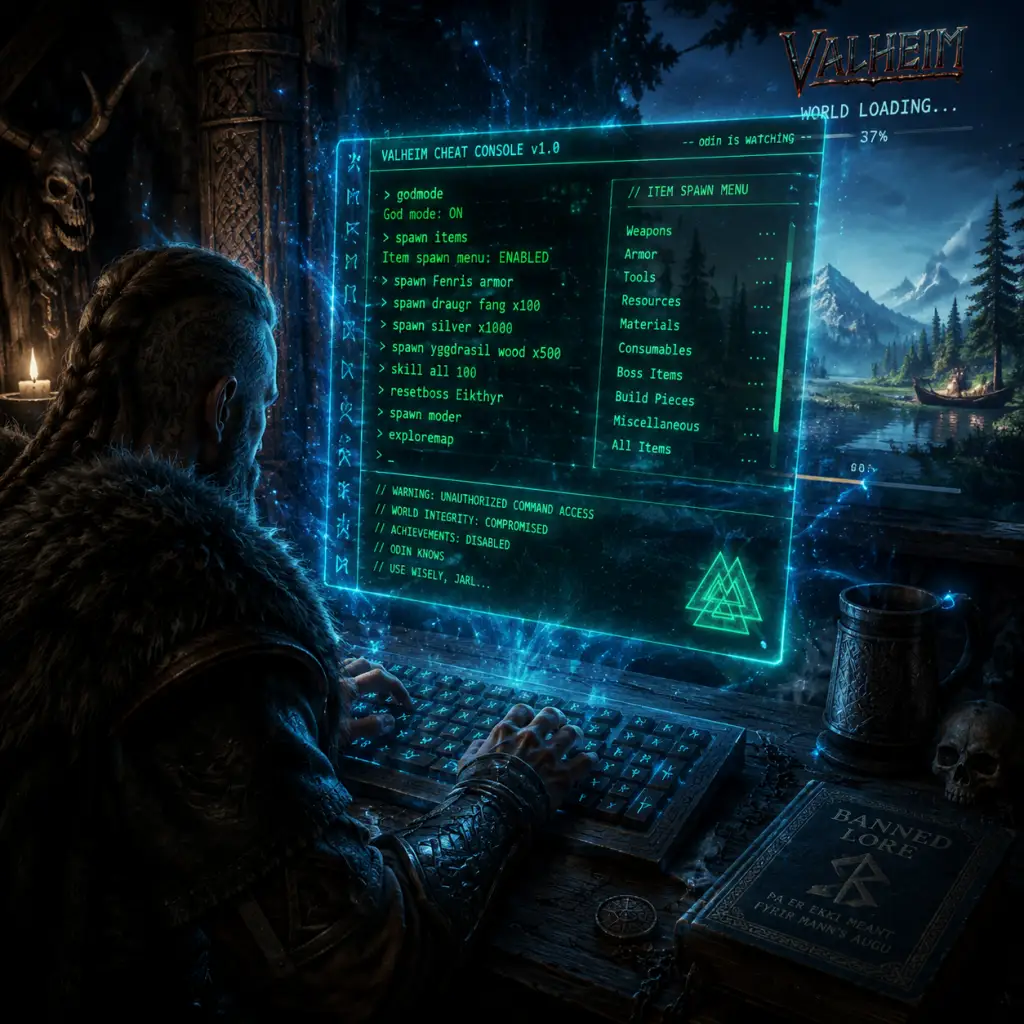
Cheats & Secrets
Cheats & Secrets in Valheim
Valheim does not have traditional unlock codes or secret menus, but it does offer a developer console with cheat commands, a creative/debug mode, and a handful of hidden items and Easter eggs left by the developers. This guide covers everything from enabling cheats to finding secret locations and references.
---
Enabling the Developer Console (Cheats)
1. Open the game and press F5 (PC) to bring up the console. On Xbox, you cannot access the console; cheats are not officially supported on consoles.
2. Type `devcommands` (case-sensitive) and press Enter. You should see "`Cheats: True`" in the log.
3. Now you can enter any of the commands listed below. Commands are not case-sensitive, but the exact spelling matters.
4. To disable cheats, type `devcommands` again or exit to main menu.
Important: Using cheats disables Steam achievements for that session. Close and relaunch the game to re-enable achievements.
---
Full List of Console Commands
Below is a curated table of all known useful cheat commands. Commands marked with an asterisk (*) require `devcommands` to be active.
| Command | Effect | Example |
|---|---|---|
| `help` | Lists all available commands (not just cheats) | `help` |
| `devcommands` | Toggle cheat mode on/off | `devcommands` |
| `god` | Invulnerability (you cannot die) | `god` |
| `fly` | Toggle flight mode (move with WASD + space/ctrl) | `fly` |
| `pos` | Shows your current coordinates (x, y, z) | `pos` |
| `goto [x] [y] [z]` | Teleports you to specific coordinates | `goto 0 0 0` |
| `exploremap` | Reveals the entire map (all fog cleared) | `exploremap` |
| `resetmap` | Hides all explored areas again | `resetmap` |
| `tod [0-1]` | Set time of day (0 = dawn, 0.5 = noon, 1 = dusk) | `tod 0.5` |
| `skip [n]` | Advance time by n seconds | `skip 3600` (1 hour) |
| `debugmode` | Toggles debug mode – see below | `debugmode` |
| `spawn [item] [amount] [level]` | Spawn any item or creature | `spawn Wood 100`, `spawn Wolf 1 2` (level 2) |
| `remove [item]` | Removes a specific item from inventory (by name) | `remove TrophyEikthyr` |
| `dpsdebug` | Toggle damage-per-second display | `dpsdebug` |
| `event [name]` | Start a random event (e.g., "skeletons", "thegroundstart shaking") | `event Eikthyr` |
| `stopevent` | Stop the current event | `stopevent` |
| `freefly` | Detach camera from character (for screenshots) | `freefly` |
| `hair` | Change your hair style (cycle through options) | `hair` |
| `beard` | Change your beard style (cycle) | `beard` |
| `heal` | Fully restore health and stamina | `heal` |
| `raise` | Raise ground under crosshair (requires hoe) | `raise` |
| `smooth` | Smooth ground under crosshair | `smooth` |
| `resetcharacter` | Delete your character and respawn at spawn point | `resetcharacter` |
| `killall` | Kill all enemies within a large radius | `killall` |
| `tame` | Instantly tame the creature you are looking at (if tameable) | `tame` |
| `locations` | Lists all map locations (boss altars, trader, etc.) but doesn't teleport | `locations` |
| `info` | Shows detailed game info (FPS, memory, etc.) | `info` |
| `save` | Force-save the world (useful before risky experiments) | `save` |
| `routedebug` | Show pathfinding debug info | `routedebug` |
| `znet` | Network debug info | `znet` |
---
Debug Mode (Creative Mode)
Debug mode is a separate toggle that gives you several creative building abilities:
- Type `debugmode` in the console (with `devcommands` active).
- Press Z (PC) to toggle no-build-cost (you can place any build piece without materials).
- While in debug mode, B toggles the infinite-hammer (you can press left mouse button to instantly remove any object, even unsupported ones).
- K kills all enemies in a large radius (same as `killall` but quicker).
- L toggles the free-fly camera for screenshots.
- U toggles a fast-reverse-time effect (speeds up day/night cycle).
- A merchant dwarf who sells rare items (Megingjord belt, Ymir Flesh, fishing rod, etc.).
- He always spawns in the Black Forest biome, near large rock formations. His location is fixed but randomized per world seed. The console command `locations` can show his name if you type it, but it doesn't give coordinates. To find him, search the Black Forest for a small camp with a purple banner. You can also use the online map tool [Valheim World Generator](https://valheim-map.world) to input your world seed and see his exact location.
- The final boss Yagluth has a second, unused altar in the Mistlands. It is a large stone structure that cannot be activated (no boss spawn). It's purely decorative and an Easter egg from early development. You can find it by exploring the Mistlands; look for a massive stone head.
- In many worlds, the spawn point is a small stone circle. Sometimes, far away in the Meadows, you can find a larger stone circle with a sacrificial altar. This is a leftover from beta and has no gameplay function, but it's a neat landmark.
- In the Plains, there are tall stone pillars called "Stonehenge" structures. They are simply decoration but often contain a Fuling camp nearby. They serve as good navigation landmarks.
- In the Mistlands, you can find statues of Dvergr (dwarf-like NPCs). These are purely aesthetic and cannot be interacted with. They hint at lore about the ancient race that once lived there.
- Trading with Haldor: He only accepts Coins. You can find Coins in burial chambers, sunken crypts, and Fuling villages. The trader's inventory is fixed but very valuable.
- The Elder's Swamp Key: The boss The Elder drops a Swamp Key, which is needed to enter Sunken Crypts. This is not a cheat but a progression secret many new players miss.
- The Wishbone: After defeating Bonemass, you get the Wishbone, which helps find buried treasure. It makes a sound when near hidden items. This is the intended way to find silver in the Mountains and scrap iron in the Swamp.
- Fishing: Fishing is a late-game activity. The fishing rod and bait are sold by Haldor. You can catch multiple fish types, and they restore health. No cheat needed, but many players don't realize it exists.
- Ward Mechanics: The Ward (crafted item) creates a small protective zone that prevents other players (or creatures) from building or opening doors. It's a PvP tool and hidden base protection.
- Always back up your world files (`.../valheim/worlds_local/`) before experimenting with cheats. Corruption can happen.
- Spawning certain items (like `spawn TrophyYagluth`) may break progression if you haven't defeated that boss.
- The `killall` command also kills tamed creatures and livestock – use with caution.
- Cheats are only available on PC. Xbox players cannot use the console.
Debug mode also allows you to place objects with the hammer without the usual build restrictions. This is great for testing base designs.
---
Hidden Items & Secret Locations
These are developer-intended secrets, not exploits.
#### 1. Haldor the Trader
#### 2. Yagluth's Second Location
#### 3. The "Stone Circle" in Meadows
#### 4. The Plains Pillars
#### 5. The "Dvergr" Statues
---
Easter Eggs
1. Midsummer Event: On the anniversary of Valheim's Early Access launch (February 2nd), the game briefly included a Midsummer event with extra Fireflies and a special item (the "Midsummer Crown"). This was removed later, but players who obtained it still have it. You can cheat-spawn it with `spawn HelmetMidsummer`.
2. Death Quotes: When you die, the game displays a random humorous quote, often referencing Norse myths or gaming culture. Examples: "You have been slain by [enemy]. As all Vikings must." "The Gods have judged you... and found you wanting."
3. Trophy Descriptions: Many trophies have funny tooltips. For example, the TrophyEikthyr says "A fine head." The TrophyBonemass reads "The ooze is strong with this one."
4. Rune Stones: Throughout the world, you can find runestones that tell short stories or jokes. One in the Black Forest reads: "The stone is cold. The forest is dark. You are lost."
5. Music Easter Egg: In the Meadows, if you stand near a beehive at sunrise, a faint humming melody can be heard – it's the same notes as the game's main theme. This is a sound design Easter egg.
6. The "Cursed" Rock: In the Mountains, there is a solitary rock formation that looks like a face. It has no interaction but is believed to be a developer's nick on the world generation code.
7. Player References: The game credits include a shout-out to the community. Typing `info` in console sometimes shows a line from the developers: "Made with love and mead."
---
Exploit-Safe Secrets & Developer-Intended Hidden Content
---
Notes on Using Cheats Responsibly
---
Conclusion
Valheim's cheat system is robust and allows for extensive experimentation, but the game's true depth lies in its exploration and hidden mechanics. Use the commands above to test builds, recover from bugs, or just have fun. The Easter eggs and secret locations add flavor to an already rich world. Remember: the best secret is the sheer joy of discovering a hidden valley or a perfect base spot on your own.