
Valorant
## Game Introduction: Valorant ### Overview Valorant is a **free-to-play, 5v5 character-based tactical shooter** developed and published by **Riot Games**. Released on **June 2, 2020**, the game combines precise gunplay from classic shooters like Counter-Strike with unique agent abilities reminisce...
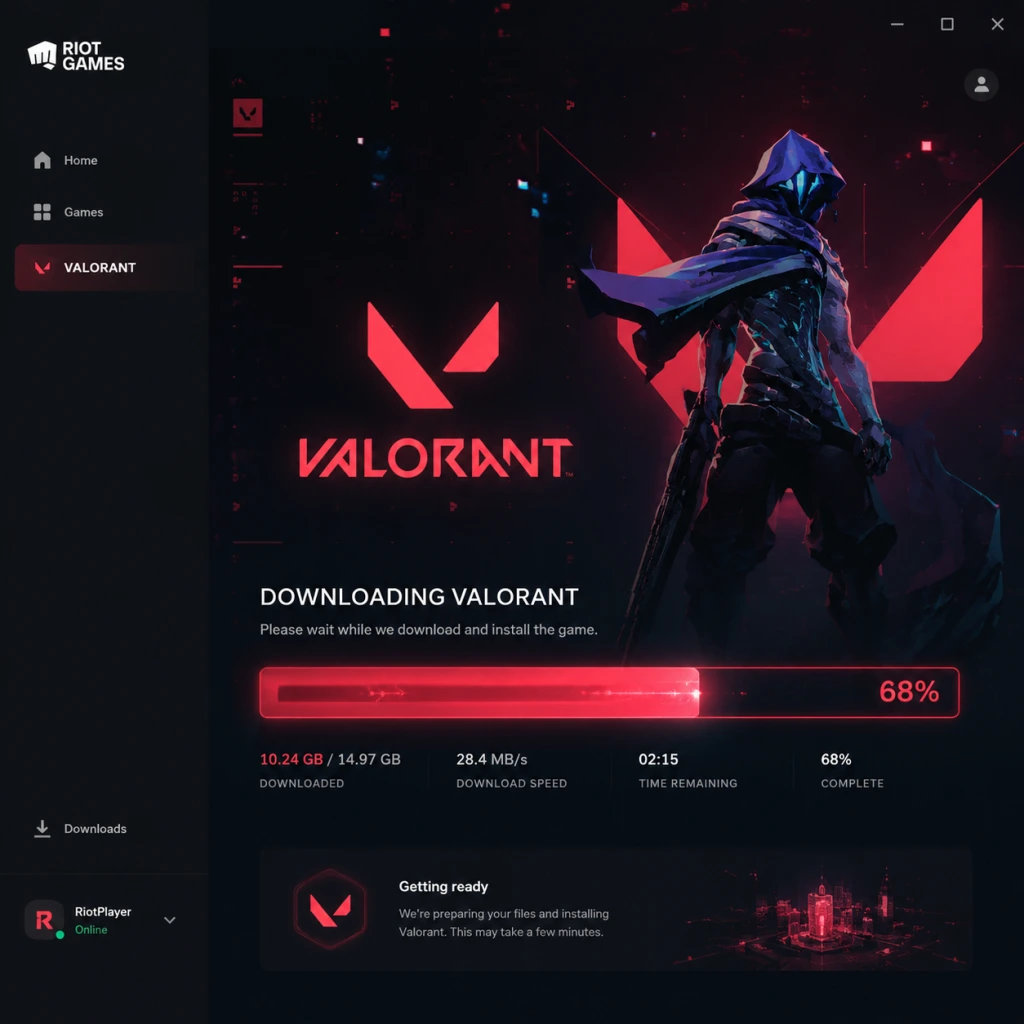
Download & Installation
Download & Installation Guide for Valorant
Valorant is a free-to-play 5v5 tactical shooter developed and published by Riot Games. It is currently available only on PC (Windows). There are no official console (PlayStation, Xbox, Nintendo Switch) or mobile versions. The game is not available on Steam or Epic Games Store; it is exclusively distributed through the Riot Games client (Riot Client). This guide covers legitimate installation for PC, system requirements, account setup, first launch, common issues, and post-install verification.
---
System Requirements
Minimum Requirements (for playable performance at low settings, 30+ FPS)
- OS: Windows 10 (64-bit) or Windows 11 (64-bit)
- CPU: Intel Core 2 Duo E8400 or AMD Athlon 200GE
- RAM: 4 GB
- GPU: Intel HD 4000 or AMD Radeon R5 200 series (1 GB VRAM)
- VRAM: 1 GB
- DirectX: Version 11
- Storage: 20 GB available space (SSD strongly recommended)
- OS: Windows 10 (64-bit) or Windows 11 (64-bit)
- CPU: Intel Core i3-4150 or AMD Ryzen 3 1200
- RAM: 8 GB (16 GB ideal for multitasking)
- GPU: NVIDIA GeForce GT 730 or AMD Radeon R7 240 (1 GB VRAM)
- VRAM: 1 GB or more
- DirectX: Version 11
- Storage: 20 GB SSD
- Windows 7, 8, 8.1 are not supported.
- The game uses Vanguard anti-cheat, which requires a compatible 64-bit OS and Secure Boot enabled (Windows 11).
- SSD is highly recommended to reduce loading times and stutters.
- A valid email address
- A unique username and password
- Date of birth (must be 18+ in some regions for certain features, but the game is rated T for Teen)
- Regional server selection (e.g., NA, EU, Asia, etc.) – choose carefully as progress is tied to the region (you can change region later but with limitations).
- The Riot Client will start downloading the game files (~10–15 GB). Download speed depends on your internet connection.
- During download, you can pause/resume. Do not close the client.
- Once download completes, the installer will verify and extract files. This may take 5–15 minutes.
- Vanguard Installation: After Valorant files are ready, Vanguard will be installed. It will prompt you to restart your computer. This is mandatory; the game will not launch without Vanguard running.
- Vanguard runs as a background service. Right-click the system tray icon (shield icon) and ensure it shows "Vanguard is running".
- If Valorant fails to launch, check Windows Services (`services.msc`) that `vgk.sys` is running. You may need to restart Vanguard from the tray icon.
- From Riot Client, click the Play button. The game should start without errors.
- Wait for the splash screen and login. If Vanguard has an issue, you will see a popup with error code (see below).
- Cause: Often due to other anti-cheat software or security programs interfering (e.g., Faceit, ESEA, Malwarebytes).
- Fix: Temporarily disable/uninstall conflicting software. Restart computer, then run Valorant installer again. If still failing, manually uninstall Vanguard via Control Panel, restart, and reinstall Valorant.
- Cause: Firewall or antivirus blocking Riot Client, or DNS issues.
- Fix:
- Cause: Vanguard kernel driver not loaded properly (often after Windows update or driver change).
- Fix:
- Cause: The installer reports less than 20 GB free, even if you have enough.
- Fix: Ensure you have at least 25 GB free on the installation drive (the extra space is for temp files). Clean up temporary files using Disk Cleanup. Move installation to a drive with more space.
- Cause: Corrupted installer or low system resources.
- Fix:
- Cause: Outdated graphics drivers, overlay conflicts (Discord, Nvidia GeForce Experience).
- Fix:
- Cause: Trying to install on unsupported OS (32-bit, Windows 7/8/8.1).
- Fix: Upgrade to Windows 10/11 64-bit.
- Steam / Epic Games Store – Riot has not released Valorant on these platforms.
- PlayStation – No console version exists; all rumors are false.
- Xbox – No console version.
- Nintendo Switch – Not available.
- Mobile (iOS/Android) – No mobile version; only a mobile companion app for stats/shop.
- Always update your graphics drivers regularly via the manufacturer's website (NVIDIA, AMD, Intel). Riot often optimizes for the latest drivers.
- For the best performance, close background apps like browsers, streaming software, and other games.
- If you encounter persistent issues, check the official Valorant support page: [https://support-valorant.riotgames.com/](https://support-valorant.riotgames.com/)
- The game's community is active on Reddit ([r/VALORANT](https://www.reddit.com/r/VALORANT/)) for troubleshooting help.
Recommended Requirements (for stable 60+ FPS at medium/high settings)
Notes
---
Account Requirements
You need a Riot Games account to play Valorant. You can create one for free on the official website ([https://signup.riotgames.com/](https://signup.riotgames.com/)) or during the first launch of the Riot Client.
What you need:
---
Step-by-Step Installation Guide for PC
Step 1: Download the Riot Client Installer
1. Go to the official Valorant website: [https://playvalorant.com/](https://playvalorant.com/)
2. Click the "Play Now" or "Download" button (usually top-right).
3. The installer `Install Valorant.exe` (approx. 80 MB) will download automatically.
Important: Only download from the official website. Riot does not distribute through third-party stores.
Step 2: Run the Installer
1. Locate the downloaded file (typically in `Downloads` folder).
2. Double-click `Install Valorant.exe`. If prompted by User Account Control (UAC), click Yes.
3. The Riot Client installer will launch. It will first download the Riot Client itself (about 300 MB).
4. Once the Riot Client is installed, you will be prompted to create an account or log in. If you already have an account, sign in.
5. After logging in, the client will ask you to install Valorant. Click Install.
6. Choose your installation directory (default is `C:\\Riot Games\\VALORANT`). Note that Vanguard (the anti-cheat) will install alongside Valorant, and it requires a system restart.
Step 3: Installation Process
Step 4: First Launch Setup
1. After restart, launch Valorant via the Riot Client (or desktop shortcut created by installer).
2. The game will check for updates (patches are usually small).
3. You will be asked to select your region (if not done earlier) and accept the Terms of Service and Privacy Policy.
4. The game may perform a one-time calibration (shader compilation) on first run.
5. You can now configure graphics settings (Resolution, Quality, etc.) in the Settings menu.
6. Complete the tutorial (optional but recommended).
---
Post-Installation Verification
Check Game Integrity
1. Open the Riot Client, click on your profile icon in the top-right, go to Settings.
2. Under Valorant tab, click Repair to initiate a file integrity check. This will re-download any corrupted or missing files.
Verify Vanguard Status
Launch the Game
---
Common Installation Errors & Fixes
1. Vanguard Installation Failed / Error 128
2. Stuck at 0% / Download Not Starting
- Add `Riot Client.exe`, `VALORANT.exe`, and `Vanguard` to firewall exceptions.
- Flush DNS: Open Command Prompt as admin, type `ipconfig /flushdns`.
- Temporarily disable antivirus.
- Use a wired connection or switch to a different network.
3. Error Code VAN 1067 / VAN 68
- Restart computer.
- Right-click Vanguard tray icon, click Exit Vanguard, then restart Riot Client.
- If persistent, repair Vanguard via Riot Client Settings > General > Repair.
4. Insufficient Disk Space
5. Installation Freezes at "Extracting"
- Delete the downloaded installer and re-download fresh.
- Close other applications to free up RAM.
- Run the installer as administrator.
6. Game Crashes on Launch with No Error
- Update GPU drivers to latest version (especially for Valorant-specific updates).
- Disable overlays in Discord, ShadowPlay, etc.
- Set Valorant and Riot Client to run as administrator.
7. "This app can't run on your PC"
---
Installing on Other Platforms (Not Available)
Valorant is not available on:
Beware of fake installers claiming to be \"Valorant for mobile\" – they are scams.
---
Final Tips
---
This guide was last updated for Valorant Patch 10.0 (January 2025). Installation steps may change with future updates.
Game Introduction
Game Introduction: Valorant
Overview
Valorant is a free-to-play, 5v5 character-based tactical shooter developed and published by Riot Games. Released on June 2, 2020, the game combines precise gunplay from classic shooters like Counter-Strike with unique agent abilities reminiscent of hero shooters like Overwatch. Valorant is available exclusively on PC (Windows) and is a purely online multiplayer title with no offline modes. It has no paid expansions or DLC; instead, monetization comes from optional cosmetic purchases, a Battle Pass system, and the in-game Valorant Points (VP) currency.
Developer & Publisher
- Developer: Riot Games
- Publisher: Riot Games
- Platform: PC (Windows only)
- Release Date: June 2, 2020 (global launch; beta began April 7, 2020)
- Duelists – Entry fraggers (e.g., Phoenix, Jett, Reyna)
- Controllers – Area denial and smoke (e.g., Brimstone, Viper, Omen)
- Initiators – Information gatherers (e.g., Sova, Skye, KAY/O)
- Sentinels – Defensive specialists (e.g., Sage, Cypher, Killjoy)
- Competitive FPS veterans seeking a new challenge
- Players transitioning from Counter-Strike or Overwatch
- Esports enthusiasts (Valorant has a thriving competitive scene with VCT – Valorant Champions Tour)
- Fans of hero shooters who want more precision-based gunplay
- Unrated – Standard mode: best-of-24 rounds, teams swap sides after 12 rounds, first to 13 wins
- Competitive – Ranked mode with a rating system (Iron to Radiant); same rules as Unrated but stricter matchmaking and rank adjustments
- Swiftplay – Condensed version with first to 5 wins, shorter matches (~15 minutes)
- Spike Rush – Fast-paced mode with random loadouts, a single spike, and small map pool (~8 minutes)
- Escalation – Arcade mode where teams progress through weapon/ability tiers; first to finish wins
- Deathmatch – Free-for-all, 10 players, first to 40 kills (warmup/practice mode)
- Custom Games – Create private lobbies for practice, tournaments, or fun
- Battle Pass (seasonal, ~$10) – grants skins, player cards, sprays
- Skin Bundles (individual or pack, via VP)
- Agent Contracts – free progression rewards (unlock new agents, skins, titles)
- Radiant Points – earnable via gameplay for some cosmetics
- One-tap headshot potential with a slower time-to-kill than Overwatch but faster than many hero shooters
- Agent abilities that are utility-based, not damage-focused (smokes, flashes, walls, info, healing) – no ultimate abilities that one-shot
- Weapon economy system (buy guns and shields each round) inspired by CS:GO
- Anti-cheat system (Vanguard) – kernel-level driver that runs at boot, praised for strict enforcement
- Competitive integrity – tight matchmaking, visible ranks, premier tournaments fully integrated into the client
- Accessible performance – optimized for low-end PCs, high framerates, and refresh rates up to 240Hz+ with reduced input lag
- Free-to-play with no pay-to-win – all gameplay-affecting content (agents, maps) is obtainable through gameplay
Story Overview & Setting
Valorant takes place in a near-future Earth where a mysterious energy source called Radiante has transformed certain individuals, granting them supernatural abilities. These individuals, known as Radiants, are the foundation of a clandestine organization called the Valorant Protocol. The Protocol is a shadowy task force assembled from agents around the world to prevent global catastrophes caused by Radiante instabilities, rival factions, and threats from alternate dimensions. The core narrative is revealed through episodic cinematics, agent lore cards, and seasonal events, though the main gameplay focuses on tactical combat rather than plot progression.
Main Characters (Agents)
Valorant features a roster of Agents, each with unique abilities and backstories. Agents are categorized by their role:
As of 2025, there are over 20 agents, each with distinct personalities tied to real-world regions, such as Brimstone (USA), Phoenix (UK), and Yoru (Japan). New agents are added every few months via free updates.
Core Appeal & Target Audience
Valorant appeals to players who enjoy high-skill, tactical, team-based shooters with a modern twist. Its core audience includes:
The game emphasizes teamwork, communication, strategic ability usage, and mechanical aim. It is designed to be easy to pick up but difficult to master, with a steep learning curve that rewards practice and game sense.
Game Modes
Valorant offers several modes, all with a 5v5 format:
Online / Offline Support
Valorant is online-only. It requires a persistent internet connection and a Riot Games account. There is no offline mode for single-player, practice range, or training. The training mode (Practice Range) and custom games with bots still require a server connection, though you can queue solo.
DLC / Expansion Overview
Valorant has no paid expansions or traditional DLC. All gameplay content—new agents, maps, weapons, and game modes—is delivered through free updates. Monetization is purely cosmetic:
New content typically arrives with each Act (every ~2 months) and includes a new agent, a new map (occasionally), Battle Pass refresh, and balance changes.
What Makes Valorant Unique?
Valorant stands out by marrying precise, counter-strike-style gunplay with tactical ability usage. Key differentiators:
Valorant has become a staple of the tactical shooter genre and a dominant force in esports, with a committed community and ongoing support from Riot Games.
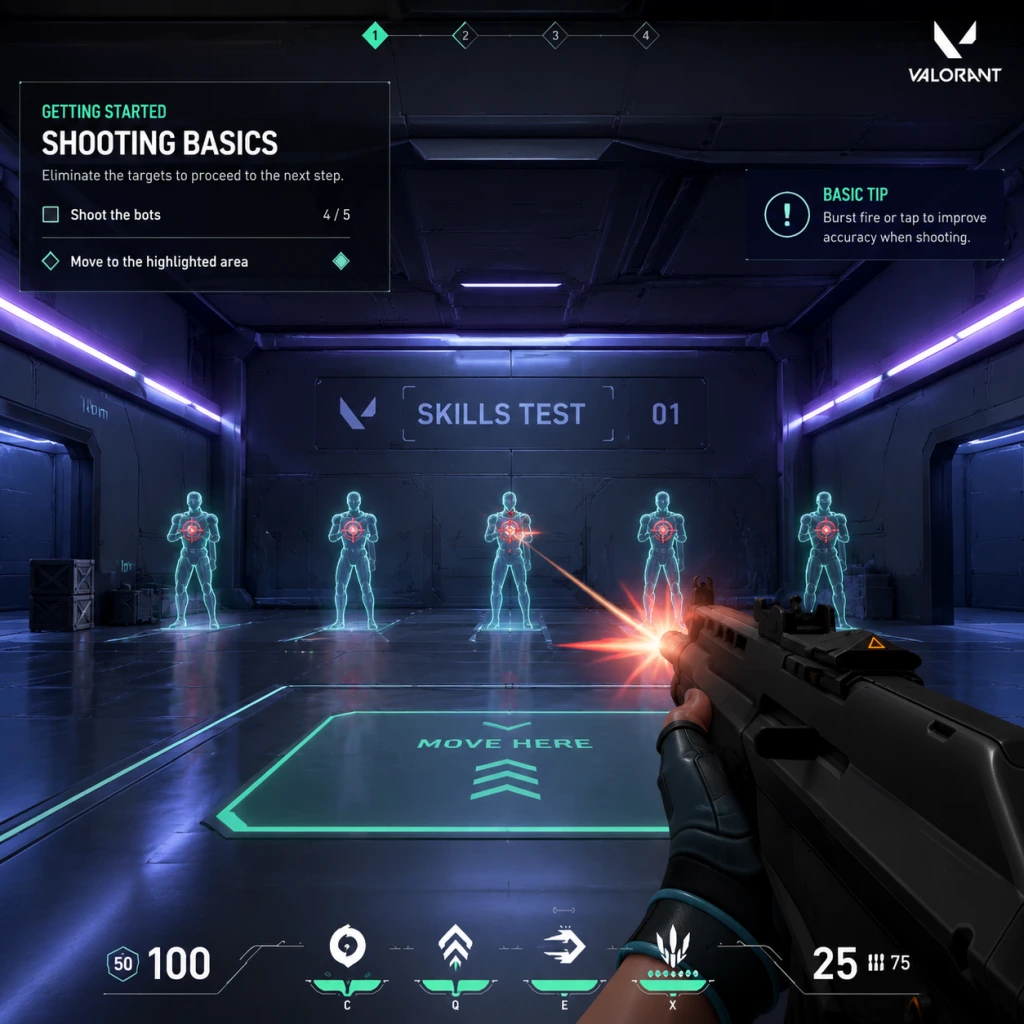
Getting Started
Getting Started Guide for Valorant
Welcome to Valorant! This guide is designed to get you through your first hour, help you avoid common pitfalls, and set you up for success. Valorant is a free-to-play 5v5 tactical shooter only available on PC (Windows). There is no character creation; instead, you unlock "Agents" with unique abilities.
First Hour Walkthrough
1. Install and Launch – After installing via the Riot Client, log in with your Riot account. The game will download a small update. Launch the game.
2. Initial Tutorial (Mandatory) – You are automatically taken through the Shooting Range tutorial. This teaches basic movement, shooting, and ability usage. Complete it fully—it only takes about 5–10 minutes. You cannot skip it.
3. Agent Selection – After the tutorial, you are prompted to choose your first Agent. You start with 5 locked agents; you can unlock one for free immediately. Recommendations for beginners: Phoenix (self-healing, easy to use), Sage (healer, supportive), or Brimstone (simple smokes). Do not pick Reyna or Jett yet – they require precise mechanics.
4. First Match (Unrated) – The game places you into an Unrated match (classic 5v5, no rank pressure). Expect to be matched with other new players. Use this time to learn map layouts, economy (when to buy), and communication.
5. Post-Match Rewards – After the match, you earn XP (Account XP and Agent XP). Leveling your account unlocks more agents (via Agent Contracts). Leveling your agent unlocks cosmetics. Do not spend your first currency (Radianite Points) yet.
6. Become Familiar with the Shop – After your first match, explore the Store, Battle Pass, and Collection tabs. Do not buy anything yet – focus on earning free currency first.
Character Creation (Agents)
Valorant does not let you customize a player character. Instead, you choose from a roster of Agents – each with 4 unique abilities (one signature ability, two purchases, and one ultimate). New players unlock their first Agent free during the tutorial. To unlock more agents, you:
- Earn Account XP (by playing matches or completing daily/weekly missions) to level up your account. Each level gives a Kingdom Credit – 8,000 Kingdom Credits (KC) unlock a specific agent.
- Complete Agent Contracts: Activate an Agent Contract from the Agents tab, then play matches to earn Agent-specific XP. After reaching Tier 5, you unlock the agent permanently (faster than accumulating Kingdom Credits for most).
Tip: Start by unlocking Sage, Brimstone, or Phoenix – they are forgiving. Avoid high-skill agents like Jett, Reyna, or Chamber until you understand core mechanics.
Controls (PC Only – No Console)
Valorant is only on PC. The default keyboard and mouse controls are:
| Action | Key |
|---|---|
| Move | W, A, S, D |
| Aim / Shoot | Mouse (left click to shoot, right click for ADS – only on some weapons) |
| Jump | Spacebar |
| Crouch | Left Ctrl |
| Walk (silent) | Left Shift |
| Use / Plant Spike | E |
| Ability 1 | C |
| Ability 2 | Q |
| Signature Ability | E (tap) – also activates some abilities |
| Ultimate Ability | X |
| Reload | R |
| Cycle Weapons / Buy Menu | B (buy menu during buy phase) |
| Communication (voice) | V (push to talk), U (team text), Y (all text) |
| Ping / Map | Left mouse button on minimap, or press Z for wheel |
UI Overview
After launching a match, your screen includes:
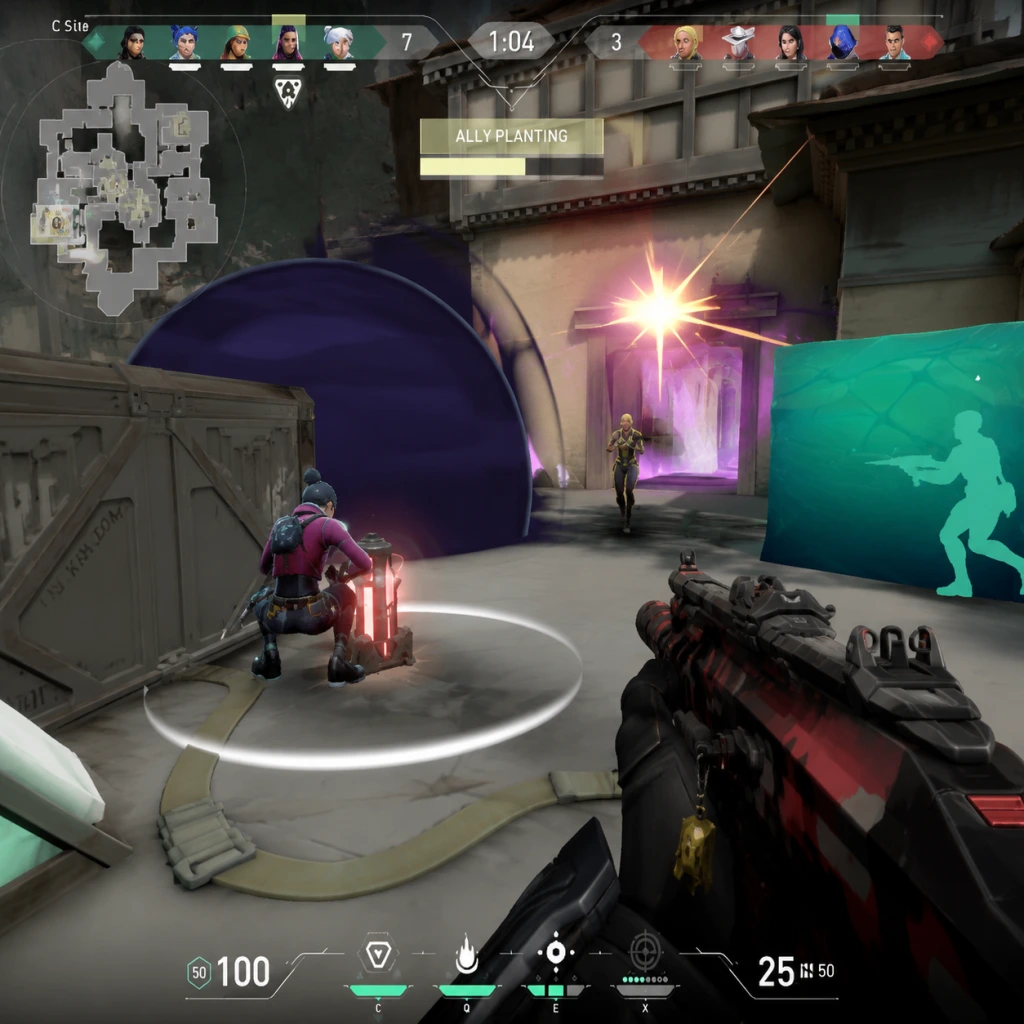
1. Minimap (Top-left) – Shows allies (green dots), enemies (red dots when spotted), and objective sites (A/B). Learn to check it often.
2. Kill Feed (Top-right) – Shows kills, abilities used, and spike plant/defuse.
3. Health & Abilities (Bottom center) – Your health (blue bar), shield (thin blue bar), ability cooldowns (icons), and ultimate points (dots).
4. Weapon & Ammo (Bottom right) – Current weapon, ammo count, and reload prompt.
5. Economy (Bottom center, above health) – Your credits during buy phase. Buy armor, weapons, and abilities.
6. Spike (bottom center) – If you are the spike carrier, a small icon appears.
7. Radar / Ability Icons – Surrounding the crosshair for agent abilities.
8. Enemy Location Tips – Gunfire and footsteps trigger directional arrows.
Before the round, the Buy Phase shows a store overlay (press B) – you have 30 seconds to buy.
Essential Early Objectives
- Learn 2–3 maps: Start with Bind and Ascent. Practice callouts (e.g., A Long, B Short).
- Master crosshair placement: Always aim at head height while moving. Do not aim at the floor.
- Understand economy: Don't buy expensive rifles (Vandal/Phantom) every round if you have low credits. Know when to save (rounds where you lose) and when to force-buy (at 4,000 credits).
- Use abilities: As a beginner, spam your basic abilities (C and Q) often – they recharge or can be bought. Don't hoard them.
- Communicate: Use the ping system (Z) or voice (V) to share enemy location. No toxicity.
- [ ] Complete the Shooting Range tutorial.
- [ ] Unlock your first Agent (recommend Phoenix or Sage).
- [ ] Play 1–2 Unrated matches to get familiar with controls.
- [ ] Adjust mouse sensitivity to comfortable level (e.g., 0.5 at 800 DPI).
- [ ] Enable Raw Input Buffer in settings for better aiming.
- [ ] Adjust crosshair: Settings → Crosshair → Use a beginner preset like cyan crosshair with center dot.
- [ ] Set up keybindings to your liking (e.g., change walk to toggle if preferred).
- [ ] Play a round in the Shooting Range to practice spraying patterns (Vandal and Phantom).
- [ ] Activate an Agent Contract (e.g., Sage) from the Agents tab – you'll unlock the agent after reaching Tier 5.
- [ ] Do not spend money on cosmetics; earn free skins through battle pass or events.
- [ ] Watch a 5-minute beginner video (optional) on map callouts.
- Don't sprint everywhere: Walking (Shift) reduces noise. Running gives away position.
- Don't buy heavy armor every round: Sometimes light armor (400 credits) is enough if you are saving.
- Don't peek into corners without checking: Use clearing angles with slight mouse movements.
- Don't buy an Odin or Ares every round – they are expensive and noisy; learn rifle play first.
- Don't spam abilities wastefully: Use smokes and flashes when teammates push, not randomly.
- Don't play ranked immediately: You need account level 20 (several hours) and at least 5 agents unlocked. Until then, play Unrated and Spike Rush to learn.
- Kingdom Credits (KC): Earned from daily missions (first win gives 1,000 KC). Use to unlock agents (8,000 each). Do NOT spend on anything else – agents are essential for ranked and variety.
- Radianite Points (RP): Rare premium currency. Never spend on radianite for upgrading skins unless you are a paying player. Save for later.
- Valorant Points (VP): Purchase-only. Beginners should not buy VP. If you do, use only for battle pass (1,000 VP) – it gives skins, radianite, and XP.
- Account XP: Levels unlock additional agents (via Kingdom Credits). Prioritize daily missions (first win).
- Agent XP: Complete Agent Contracts to unlock new agents faster. Activate one contract at a time until you have multiple unlocked.
- Crosshair placement (head level)
- Economy management (buy when team does, save when you lose)
- Communication (ping enemies)
- Using at least one ability per round
What to Do First (Day One Checklist)
What to Avoid
Early Resource Priorities
Common Beginner Mistakes
1. Peeking while walking: Always peek using A/D (strafe) while counter-strafing (tap opposite key to stop instantly). Do not hold W while peeking.
2. Reloading after every kill: Often unnecessary. Ammo is plentiful; reload only when safe or out of combat.
3. Not using abilities: Many beginners forget to heal (Sage), flash (Phoenix), or smoke (Brimstone). Bind ability keys to your mouse1/4 if easier.
4. Ignoring the minimap: Glance at it during rotations to track teammates and potential enemy positions.
5. Overcommitting to a fight: If you take damage, fall back to heal or trade. Dying unnecessarily hurts your team's economy.
6. Buying the same weapon every round: Learn when to buy different weapons – sometimes a Sheriff and light armor is better than saving for Vandal.
7. Spraying from long range: Tap or burst at long distances (3-4 bullets). Spraying is only effective close range.
Summary for Day One
Play 3–4 Unrated matches. Focus on:
After day one, you will understand the basics. Over the next week, practice agents one at a time. Good luck – and have fun!
Core Gameplay
Core Gameplay Guide for Valorant
Valorant is a 5v5 character-based tactical shooter where two teams (Attackers and Defenders) compete in round-based matches. The core gameplay revolves around precise gunplay, unique agent abilities, team coordination, and strategic economy management. Unlike open-world games, there is no exploration or quest system; instead, progression is tied to unlocking agents, earning cosmetic rewards, and climbing the competitive ladder. Below is a breakdown of the main systems and how they evolve across player progression tiers.
Main Gameplay Loop
- Match Structure: Each match consists of up to 25 rounds (first to 13 wins). Teams switch sides after 12 rounds.
- Objective: Attackers must plant the Spike (bomb) and defend it until detonation. Defenders prevent the plant or defuse after planting.
- Round Flow: Buy Phase (30 seconds) → Action Phase (up to 1m45s) → Post-Round (brief break).
- Core Loop: Earn credits by killing enemies, completing objectives, or winning rounds → Buy weapons, shields, and abilities → Execute or defend strategies using gunplay and abilities → Repeat.
- Gunplay: First-person shooter with recoil patterns, spray control, and movement accuracy penalties. Weapons include sidearms, SMGs, shotguns, rifles, snipers, and machine guns. Headshots are lethal from most weapons.
- Abilities: Each agent has 4 abilities: 2 Basic (buy each round), 1 Signature (free every round after a cooldown or kill), and 1 Ultimate (earned through 6-8 kills or orb pickups). Abilities are not primary damage dealers; they complement gunplay (flashes, smokes, recon, healing).
- Interaction: Players can pick up dropped weapons, interact with the Spike (plant/defuse), and use teleporters on certain maps.
- Damage Model: Body armor reduces damage. Shields (Light/Heavy) provide 25/50 extra health (HP max 150).
- Account Progression: Earn XP from matches and daily/weekly missions to unlock Agents (via Agent Contracts) and level up the Battle Pass for cosmetics.
- Ranked Progression: Play Competitive mode after reaching Account Level 20. Ranks: Iron → Bronze → Silver → Gold → Platinum → Diamond → Ascendant → Immortal → Radiant. Each rank (except Radiant) has 3 tiers.
- Agent Unlocks: New players start with 5 free agents (Brimstone, Jett, Phoenix, Sage, Sova). Others require 8,000 Kingdom Credits (earned by playing) or 1,000 Valorant Points (premium currency).
- In-Match Economy: Each player earns credits per round: base + bonus for kills/spike plant/defuse. Prices range from 200 (Light Shields) to 4,700 (Operator sniper). Team coordination is critical—buy together, save together.
- Economy Management: Teams decide to "full buy" (rifles + shields + abilities), "light buy" (SMG/Shotgun + light shields), or "save" (only sidearm, maximize future round budget). Proper economy results in better weapons/abilities in later rounds.
- Agent Selection: Choose 1 agent per match. Agents are not leveled; their abilities are fixed. "Build" is purely loadout (weapon + shields + abilities).
- No Skill Trees: There is no character growth beyond unlocking more agents. All progression is horizontal—more options, not power increases.
- Loadout Customization: Players select weapon, secondary, armor, and ability charges during Buy Phase. No permanent attachments or upgrades.
- Daily Missions: Simple tasks like "Play 2 games" or "Get 10 headshots" for XP.
- Weekly Missions: Larger objectives (e.g., "Win 5 rounds with Agent X") that reward Battle Pass XP and Kingdom Credits.
- Agent Contracts: Specific missions to unlock a new agent (e.g., "Deal 5,000 damage with abilities").
- Maps: 9 active maps (e.g., Ascent, Bind, Haven). Each has unique callouts, chokepoints, and line-of-sight angles. No open-world exploration; players memorize layouts for strategic advantages.
- No Side Content: Outside matches, players only navigate menus—Shop, Collection (skins, agents), Career, and Settings.
- Competitive Mode: The primary endgame. Players grind ranked tiers for seasonal rewards, titles, and prestige. High-level play emphasizes team communication, map awareness, and economy management.
- Tournaments: Built-in Tournament Mode for teams of 5 (unranked and ranked). Third-party leagues (VCT: Valorant Champions Tour) for professional play.
- Cosmetic Grind: Unlock skin finishes, gun skins, player cards, and sprays through Battle Passes or direct purchase. No gameplay advantage.
- Focus: Learn basic mechanics—movement, shooting, spike handling, and one primary agent per role.
- Gameplay Loop: Play Unrated or Spike Rush. Practice using Vandal/Phantom rifles. Learn 2-3 agents (e.g., Jett, Sage, Brimstone) and their basic ability combos.
- Economy: Buy light shields + Spectre SMG most rounds. Avoid saving unless heavily outmatched. Example: Round 1 = Classic + Light Shields; Round 2 if win = Spectre + Heavy Shields.
- Progression: Complete daily/weekly missions and Agent Contracts to unlock new agents (e.g., Killjoy or Skye). Play the tutorial and practice range for 10 minutes daily.
- Endgame Prep: Reach Account Level 20 to unlock Competitive mode. Avoid comp until you can consistently top-frag in Unrated.
- Focus: Master 2-3 agents per role (Duelist, Initiator, Sentinel, Controller). Improve crosshair placement and communication.
- Gameplay Loop: Play Competitive exclusively. Learn to call out enemy locations (e.g., "One at B main"). Practice recoil patterns for Vandal/Phantom.
- Economy: Team-buy coordination becomes essential. Example: On attack, buy Vandal + Heavy Shields + Cypher’s Trapwires. If team lacks credits after a loss, suggest a save round.
- Progression: Unlock 5-7 agents total. Grind to Gold rank to earn Act rank badge. Complete Battle Pass for skins and Radianite Points (for skin upgrades).
- Endgame Prep: Watch pro VODs to learn map executes. Focus on agent synergy (e.g., Brimstone smokes + Sova recon on Ascent A site).
- Focus: Advanced strategy—lineups, one-way smokes, lurk plays, and ultimate economy. Build a consistent 5-stack (pre-made team).
- Gameplay Loop: Play Competitive with voice comms. Execute 3-5 predefined strategies per map (e.g., Split A fast with Viper wall + Skye flash).
- Economy: Advanced management—track enemy team’s credit average to force-buy when they are low. Example: If you know enemies saved last round, you can out-buy them even with 3,000 credits (Light Armor + Spectre).
- Progression: Unlock all agents. Reach Immortal 1+ to appear on leaderboards. Earn Act Acts rewards (exclusive gun buddy).
- Endgame Prep: Join a casual amateur team (e.g., in-game Tournament Mode). Practice set plays and counter-strats.
- Focus: Peak performance—micro-movement (jiggle peeking), utility efficiency, and mental game. Consistency in every round.
- Gameplay Loop: Play Competitive or scrims in custom lobbies. Use professional-level economy—e.g., force buying classic + light shields on eco rounds to maximize damage for low cost.
- Economy: Coordinate ultimate usage with economy (e.g., if Sova has drone and ultimate, avoid buying extra utility to save creds for next round).
- Progression: Compete for Radiant rank (top 500 of your region). VCT qualifiers for aspiring pros. Skins and Radianite become cosmetic flex only.
- Endgame Structure: Rank reset every Act (2 months). Tactical growth through aim trainers (Aim Lab, Kovaak’s) and VOD review. No additional gameplay loops beyond mastering the existing systems.
Combat / Interaction Systems
Progression Systems
Economy
Character / Build Growth
Quests / Missions
Exploration
Endgame Structure
---
Core Gameplay by Player Progression Tiers
Early Game (Account Level 1–20, No Ranked)
Mid Game (Account Level 20–50, Competitive Ranks Iron to Gold)
Late Game (Account Level 50+, Ranks Platinum to Immortal)
Endgame (Account Level 100+, Ranks Ascendant to Radiant, or Professional)
---
Summary Table: Progression Tier At-a-Glance
| Tier | Account Level | Rank Range | Key Activities | Economy Focus | Agents Known |
|---|---|---|---|---|---|
| Early Game | 1–20 | Unrated / No Rank | Learn basics, unlock first agents | Buy Spectre + Light Shields most | 2–3 |
| Mid Game | 20–50 | Iron – Gold | Ranked grind, team coordination | Team buy plans, occasional saves | 5–7 |
| Late Game | 50–100 | Platinum – Immortal | Advanced strats, 5-stack, lineups | Enemy economy tracking | 10+ |
| Endgame | 100+ | Ascendant – Radiant | Max efficiency, scrims, tournament play | Ultimate/eco sync | All agents |
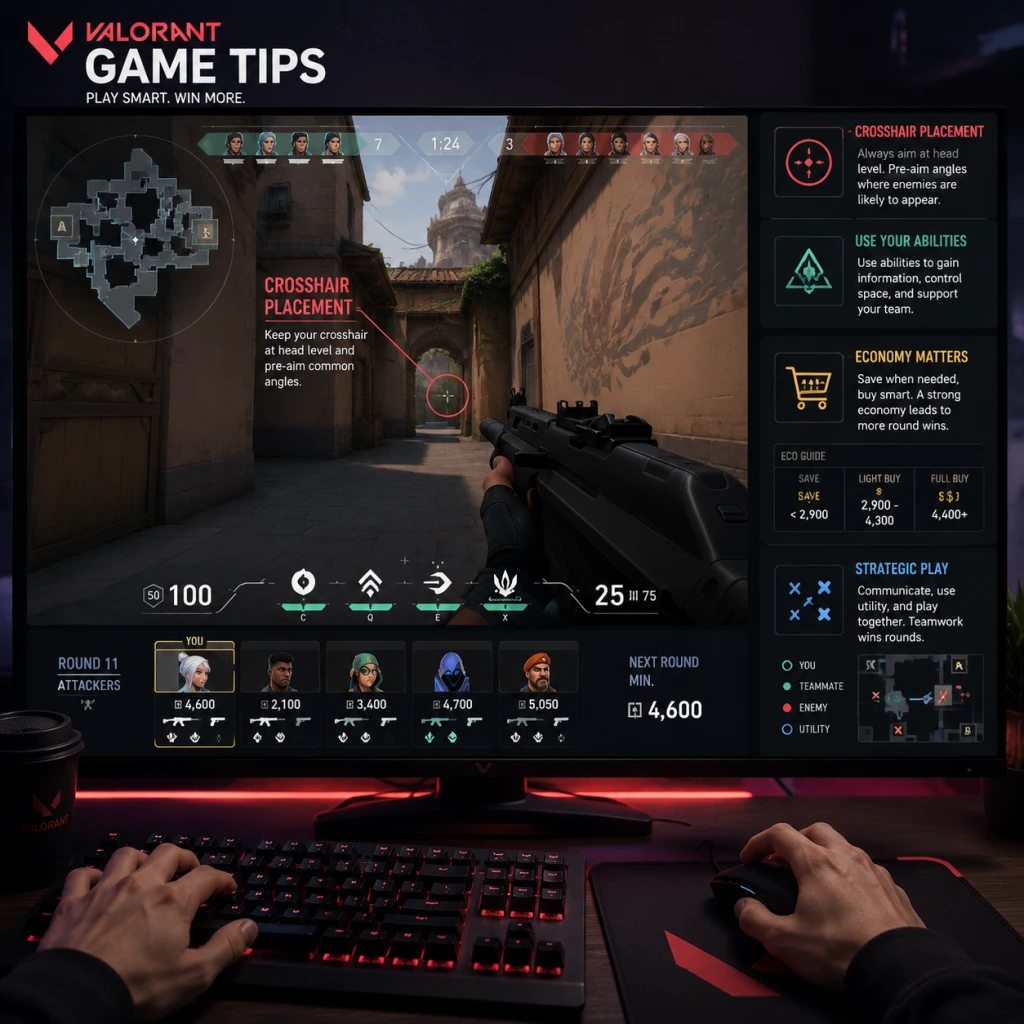
Game Tips
Game Tips for Valorant
Introduction
Valorant is a deep tactical shooter where mastering gunplay, abilities, economy, and teamwork is essential. This guide categorizes tips by skill level and gameplay aspect to help you improve from beginner to advanced.
Beginner Tips
1. Crosshair Placement at Head Height
Always keep your crosshair at the height where an enemy’s head would appear (roughly neck level). This minimizes vertical adjustment needed when you see an opponent. Practice this in the Range or Deathmatch.
2. Master Counter-Strafing
To shoot accurately, you must be stationary. Use counter-strafing: tap the opposite movement key when stopping. For example, if moving right (D), tap A quickly to stop instantly. This lets you fire accurately while remaining a smaller target.
3. Learn the Economy (Buy Phase)
In early rounds, save for a full buy (shield + rifle). Never buy heavy shields if you can’t afford a rifle. As a beginner, prioritize Phantom or Vandal over SMGs unless you’re eco-ing. Communicate with your team about buys.
4. Start with Simple Agents
Agents like Sage, Brimstone, or Phoenix have straightforward abilities. Avoid complex controllers (Astra) or information-based initiators (Sova) until you understand map flow. Focus on fundamentals first.
Combat Tips
5. Jiggle Peeking vs. Wide Swinging
- Jiggle peek: Tap A then D repeatedly to peak a corner slightly. Use when you only need information (e.g., checking a corner) without committing.
- Wide swing: Run far past the corner while crouching or spraying. Best when you know an enemy is close and you want to catch them off guard. Use wide swings in close-range fights with shotguns or SMGs.
- One-tap: Excellent with Vandal at long range due to one-hit headshot. Only use when crosshair is on their head.
- Burst (2-3 shots): Good for Phantom at medium-long range to maintain accuracy.
- Spray: Close-range or when you have element of surprise. Crouch while spraying to reduce spread slightly.
- Plant the spike where it’s visible from one angle but not from others (e.g., on-site boxes). This forces defenders to expose themselves.
- When defusing, always check for fake defuse baiting. A common trick: start defusing, then cancel after hearing footsteps, wait, then defuse again once enemy peeks.
- Save: If your team has less than 3500 credits total and you lost the previous round, save by buying nothing or only a pistol. This ensures a full buy next round.
- Force buy (round 2 win = light buy): If you won pistol round, force buy on round 2: Spectre/Daggers+Light Shields. Do not buy heavy shields yet.
- Full buy: Round 3 or 4: Vandal/Phantom + Heavy Shields + full utility. Adjust if your economy is disrupted.
- Duelists: Often first to die? Save more. But they need rifles for entry. Prioritize rifle over heavy shield if necessary.
- Controllers/Initiators: Utility is expensive (e.g., Omen’s smokes cost 100 each). You may need to sacrifice shield for enough smokes. Always have at least one smoke in late rounds.
- Sentinels: Cheap utility (Sage walls, Cypher trips), so you can afford better weapons. Save your traps for post-plant defense.
- Never use an ultimate just to get a kill if it won’t secure a round (e.g., Jett’s Bladestorm on one enemy). Save for crucial moments: retake, plant, or clutch.
- Combine ults: Brimstone’s Orbital Strike + Sova’s Recon Bolt to flush enemies out of safe zones.
- Track enemy ultimates. If you know a Sage has Resurrection, bait or counter with Cypher’s Neural Theft to reveal her location.
- Place smokes to cut off lines of sight, not just to hide. Example: On Ascent A site, smoke Heaven and CT spawn to isolate the site.
- One-way smokes: Place a smoke on a box edge so you can see enemies’ feet while they can’t see your head (only works in certain spots). Practice these in custom games.
- When playing Omen, using Paranoia through thin walls can catch enemies off guard.
- As Jett, Phoenix, or Reyna, your job is to create space. Use dashes/flashes to take control of a site. Don’t lurk; be aggressive early in the round.
- Use your ability to clear a common angle before dry peeking. Example: Phoenix’s Flash around a corner then entry.
- Bunny hop: Jump while moving, then jump again immediately upon landing to maintain momentum. Useful for crossing open areas faster but not for shooting.
- Jump peek: Run toward a corner, jump, and peek while airborne to spot enemies without committing. Your body is lower than a normal peek, making it harder to hit. Works best with small angles.
- Walk (shift) to be silent when near enemies. Running gives away position.
- Listen for reload sounds, ability casts (e.g., Phoenix’s Curved ball has a distinct “bouncing” sound), and spike defuse audio (tick-tick).
- Use sound to infer enemy location: footstep patterns (climbing, jumping down), weapon pickups, etc.
- Pre-aim at common hold angles as you move. When rounding a corner, your crosshair should already be at head level where an enemy could be.
- Use the minimap to adjust crosshair for spawn peek locations. For example, on Bind, you can pre-aim B Long from tunnel.
- If you’re the last alive with the spike, don’t plant immediately. Wait for enemy positions to be revealed. Use the spike as bait: place it to lure defenders, then reposition.
- On attack, if you plant in a position with multiple sightlines (e.g., default plant on Ascent A), you can play for picks from safety.
- Give clear, concise callouts: “B Main, two, one was hit”. Avoid “they’re over there”.
- Use pings for location without speaking if your mic is off. Ctrl+click pings enemy locations, double-click for “danger”.
- When spectating, don’t backseat unless asked. Short info like “one behind you” is acceptable.
- Light shields (400 credits) give 25 extra health. Buy them early rounds.
- Heavy shields (1000 credits) give 50 health. Always buy after round 2 if you can afford a rifle.
- Never buy heavy shields if you can’t afford a rifle, unless you’re playing an operator (sniper) at close range?
- Plant the spike with a right-click to place it silently (no audio cue). Use this when you want to be sneaky, e.g., after a fake plant.
- Left-click plants make a planting sound; use when you want to draw defenders close.
6. Spray Control Patterns
Each gun has a unique spray pattern (recoil pattern). Practice the first 10-15 bullets of the Vandal and Phantom in the Range. For the Vandal, pull down slightly and then left-right. Learn to reset by releasing fire briefly.
7. One-Tap vs. Burst vs. Spray
8. Use Ability Combos in Duels
Combine utility with gunplay. Example: Phoenix’s Hot Hands (Curveball) blinds, then peek. Or Brimstone’s Stim Beacon increases fire rate, making you win face-to-face fights. Time your ability to end just before you engage.
Map Control & Knowledge
9. Learn Callouts for Each Map
Use in-game map landmarks (e.g., A Long, B Short, Heaven, Hell, Cubby). Clear communication saves time and prevents confusion. In Unrated, you can open the map (M) to see names.
10. Use Utility to Clear Corners
Instead of dry peeking dangerous angles, use abilities to gather info: Sova’s Recon Bolt, Cypher’s Tripwires, or Skye’s Trailblazer. This avoids giving away your position and keeps you safe.
11. Planting/Defusing Tips
Economy Tips
12. Know When to Save vs. Force Buy
13. Buy Together as a Team
Coordinate buys so everyone can full buy simultaneously. If half your team buys while half saves, you’ll have unequal firepower. Use the buy phase timer to say “buy” or “eco”.
14. Role-Specific Economy
Agent Abilities & Synergies
15. Use Ults Wisely
16. Controller Smoke Tips
17. Duelist Entry Fragging
Advanced Optimizations
18. Movement Tech: Bunny Hop & Jump Peek
19. Sound Cues Matter
20. Advanced Crosshair Placement
21. Spike Management
Team Coordination
22. Trading Kills
Always stick with at least one teammate. If they die, immediately peek the same angle to trade the kill. This minimizes the enemy’s advantage. Train this in premade teams.
23. Defaulting: How to Start Rounds
Instead of rushing a site immediately, spread out across the map during the first 30 seconds to gather info. Use utility to check common paths. If you find a weak link, pivot to that site. This is called “defaulting”.
24. Communication Best Practices
Resources (In-Game)
25. Ultimate Orbs
Two ultimate orbs spawn each round, one near each site. Collect them to fuel your ultimate. Learn spawn locations on each map. As a duelist, prioritize picking up orbs near your entry site.
26. Health & Shield Choices
27. Spike Planting Mechanics
Conclusion
These tips cover the foundations of Valorant. Focus on one category at a time, practice in the Range or Deathmatch, and review your VODs to identify mistakes. Consistent improvement comes from deliberate practice and teamwork.
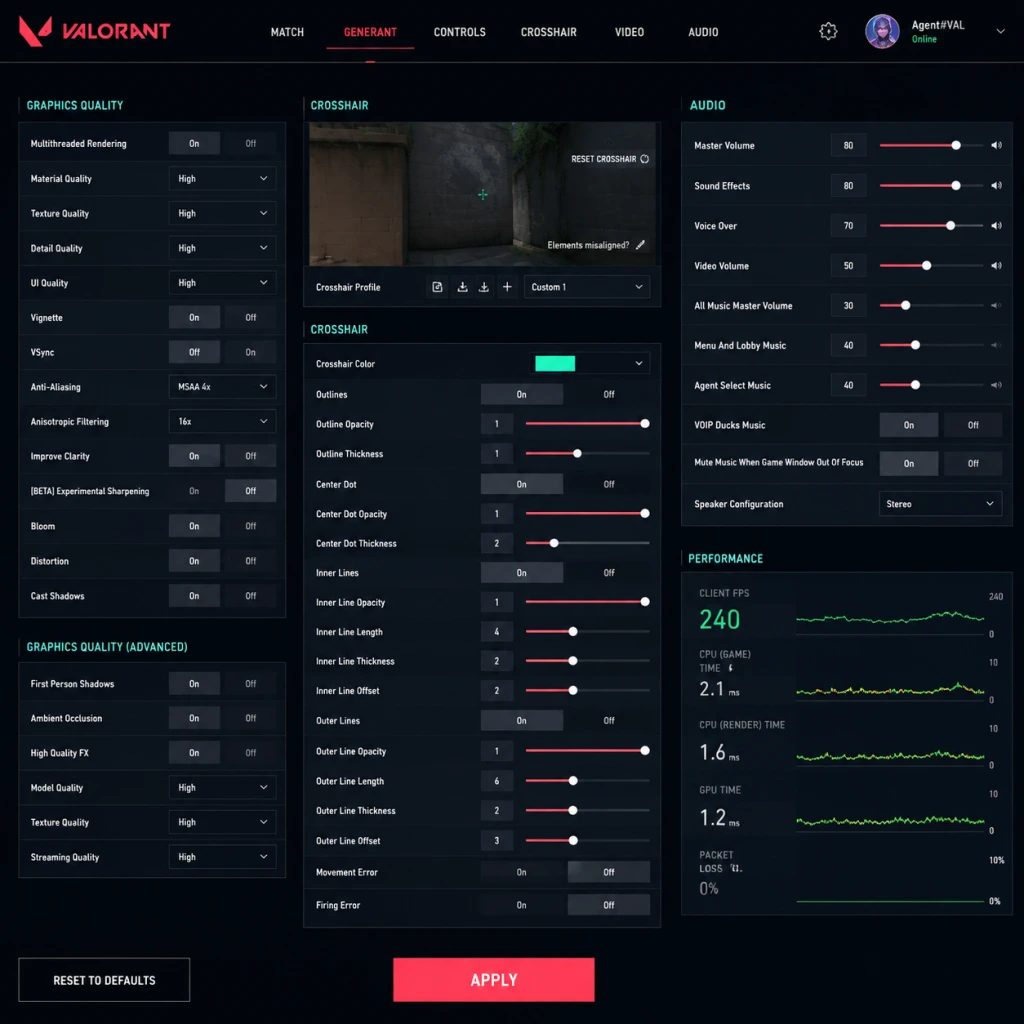
Game Settings
Game Settings Guide for Valorant
Introduction
Valorant offers a wide range of settings that directly impact performance, visual clarity, and gameplay responsiveness. This guide covers all major categories—graphics, audio, controls, accessibility, language, network, and gameplay—and provides optimal recommendations for different hardware levels. Special attention is given to settings that are commonly misconfigured and can put you at a disadvantage.
---
Graphics Settings
Graphics settings affect visual quality and frame rate. Valorant benefits from high and stable FPS (frame rate), especially on high-refresh-rate monitors (144Hz+). Lowering certain settings can improve enemy visibility and reduce input lag.
#### Optimal Settings by Hardware Level
| Setting | Low-End (60 FPS target) | Mid-Range (144 FPS target) | High-End (240+ FPS target) |
|---|---|---|---|
| Display Mode | Fullscreen | Fullscreen | Fullscreen |
| Resolution | Native (e.g., 1920x1080) | Native | Native |
| Aspect Ratio | 16:9 | 16:9 | 16:9 |
| Limit FPS | Off (or match refresh rate) | Off | Off |
| Multithreaded Rendering | On (if supported) | On | On |
| Material Quality | Low | Low | Low |
| Texture Quality | Low | Medium | High |
| Detail Quality | Low | Low | Low |
| UI Quality | Low | Low | Low |
| Vignette | Off | Off | Off |
| VSync | Off | Off | Off |
| Anti-Aliasing | None | MSAA 2x | MSAA 4x |
| Anisotropic Filtering | 1x | 2x | 4x |
| Improve Clarity | Off | Off | Off |
| Bloom | Off | Off | Off |
| Distortion | Off | Off | Off |
| Shadow Quality | Off | Low | Medium |
| Show Corpses | Off | Off | Off |
- Fullscreen always for best performance and lowest input lag.
- Limit FPS: Set this to off or to match your monitor’s refresh rate (if you want to reduce GPU load). For competitive play, leave it off to get maximum FPS.
- VSync MUST be Off — it adds significant input lag.
- Material, Detail, UI, Vignette all set to Low to minimize visual clutter and maximize FPS.
- Bloom & Distortion should be Off — they obscure vision and have no competitive benefit.
- Anti-Aliasing: MSAA 2x is a good balance for mid-range; high-end can use 4x. Avoid FXAA (blurry).
- Anisotropic Filtering: Low values sharpen textures at angles; higher values cost FPS.
- Shadow Quality: Off or Low gives better contrast in bright areas; shadows rarely matter in tactical play.
- Corpses: Off to reduce clutter and potential visual distraction.
- Improve Clarity: Off — it can introduce a blurry effect.
#### This setting can be found in Settings → Video → Graphics Quality.
---
Audio Settings
Audio is critical for hearing footsteps, abilities, and gunfire. Proper configuration gives positional awareness.
| Setting | Recommended | Notes |
|---|---|---|
| Master Volume | 70-80% | Adjust to comfortable level; avoid 100% to prevent distortion. |
| SFX Volume | 100% | Essential for game audio. |
| Music Volume | 0-20% | Reduces distraction from bomb/round music. |
| Voice Chat Volume | 80-100% | Important for team communication. |
| HRTF | On | Head-related transfer function simulates 3D sound over stereo headphones. Critical for directional cues. |
| Mute Everyone (Voice Chat) | Off (or bind to toggle) | Temporary muting can be useful for toxic players. |
| Speaker Configuration | Stereo (Headphones) | Do not use 5.1/7.1 virtual surround; HRTF works best with stereo. |
- HRTF is often misunderstood. It creates a virtual surround effect using only two speakers. Enable it – it significantly improves left/right and front/back distinction for footsteps and gunshots.
- If you use a gaming headset with built-in virtual surround, you may need to disable the headset’s software and use Valorant’s HRTF instead for best results.
- Test audio in the Practice Range by walking around and shooting to verify directional audio.
#### This setting can be found in Settings → Audio.
---
Controls Settings
Controls determine aim, movement, and ability execution. Mouse settings are the most crucial for aim consistency.
#### Mouse & Keyboard
| Setting | Recommended | Explanation |
|---|---|---|
| Mouse Sensitivity | 0.3-0.6 @ 800 DPI (or equivalent eDPI = 240-480) | Lower sensitivity allows more precise aim. Most pros use eDPI (DPI × sensitivity) between 200-500. |
| DPI | 800-1600 | Higher DPI with lower in-game sensitivity reduces pixel skipping. |
| Polling Rate | 1000 Hz | Maximum for smooth tracking. |
| Raw Input Buffer | Off | Not needed if RawInput is On (default). |
| Window Mouse Acceleration | Off (Windows) | Must be disabled in Windows Mouse Properties → Pointer Options → Enhance pointer precision → Unchecked. |
| Key Bindings | Use defaults initially | Customize abilities to reach comfortably. Common changes: bind Spike plant/defuse to mouse button, shift for walk, control for crouch. |
| Crosshair | Use a crosshair that is visible but small | Pixel-thin crosshairs (1/2/2/2) with a gap help with precise aim. Use a color like cyan or green for high contrast. |
Valorant has partial controller support, but mouse and keyboard is strongly recommended for competitive play. If using a controller, set:
- Controller Vibration: Off
- Aim Sensitivity (Controller): Start at 3-5, adjust.
#### This setting can be found in Settings → Controls → Mouse & Keyboard (or Controller).
---
Accessibility Settings
These settings improve visibility and hearing for players with disabilities.
| Setting | Recommended | Notes |
|---|---|---|
| Colorblind Modes | Off / Tritanopia / Protanopia / Deuteranopia | Choose based on your deficiency. Changes minimap, HUD, and ability colors. |
| Minimap Colorblind Mode | Off / Colorblind | Separate toggle for minimap. |
| Subtitle Language | Off / Preferred language | Subtitled dialogue for abilities and game announcer. |
| Show Damage HUD | On | Shows damage numbers and armor break visual. |
| Camera Shake | On (default) | Off reduces motion sickness for some. |
- Colorblind modes affect the minimap’s friendly/enemy colors. For non-colorblind players, leave them Off to avoid confusing color swaps.
- If you are colorblind, test each mode in the Practice Range to see which gives you the clearest distinction.
#### This setting can be found in Settings → Accessibility.
---
Language Settings
Valorant supports multiple languages for text and voice.
| Setting | Selection |
|---|---|
| Text Language | Your preferred language (affects UI, menus, chat, subtitles) |
| Voice Language | Same as text or separate (affects agent voice lines and announcer) |
- Changing voice language can be distracting if you learn agent callouts. Stick to one language for consistency.
- You may need to restart the game after changing these settings.
#### This setting can be found in Settings → Language.
---
Network Settings
Network settings can reduce lag and packet loss. Note: Valorant’s network settings are limited; most tweaks happen outside the game.
| Setting | Recommended | Explanation |
|---|---|---|
| Network Buffering | Minimal | Reduces input delay but may cause packet loss if your internet is unstable. If you experience rubber-banding, set to Moderate or Maximum. |
| Show Network Stats | On | Shows FPS, ping, packet loss, and jitter in the top-left corner. Useful for diagnosing issues. |
| Limit FPS in Menus | Off | Not directly network, but high FPS in menus does nothing. Leave at default (144). |
| Limit FPS in Background | Off | Save resources when alt-tabbed. |
| Raw Input (Buffer) | On | Bypasses Windows mouse acceleration and provides low-level input. Already on by default. |
- Use a wired Ethernet connection over Wi-Fi.
- Close bandwidth-heavy applications (streaming, downloads).
- Reduce bufferbloat with Quality of Service (QoS) in your router.
- Disable VPN or gaming proxies – they usually increase ping.
#### This setting can be found in Settings → Video → Network (or General).
---
Gameplay Settings
These settings affect in-game behavior and HUD.
| Setting | Recommended | Explanation |
|---|---|---|
| Auto-Equip After Purchase | Off | Prevents accidentally equipping a weapon you just bought; allows you to keep your previous weapon until you swing. |
| Auto-Equip After Round | On | Equips last owned weapon automatically at round start. |
| Reveal Minimap Region | On | Shows which part of the map you are looking at; helpful for orientation. |
| Minimap Size | 1.1-1.2 | Slightly larger improves map awareness. |
| Minimap Zoom | Default (0.9) | Adjust to see more of the map. |
| Show Ability Use Alerts | On | Notifies when an ally uses an ability (e.g., Phoenix flash). |
| Pull Weapon While Using Ability/Moving | On | Weapon model draws faster when abilities finish. |
| Show Team Upgrades | On | Displays ultimate status; helpful for comms. |
| Toggle Walk | Off | Use hold-to-walk (shift key) for better control. |
| Toggle Crouch | Off | Use hold-to-crouch (Ctrl) for precise peek timing. |
| Damaged HUD Radius | Default (0.7) | Show health/armor around crosshair when damaged; personal preference. |
- Auto-Equip After Purchase is a common pitfall. If you buy a new weapon and immediately run into enemy fire, you might swap to the new weapon and get caught off-guard. Keep it Off so you can choose when to equip.
- Crosshair is not strictly a gameplay setting but is critical. Use a crosshair profile that is bright, small, and has a small gap to see enemy heads. Settings can be imported using crosshair codes (e.g., from pro players).
- Max FPS with VSync off, low graphics, and raw input.
- HRTF on for audio clarity.
- Appropriate sensitivity and no mouse acceleration.
- Accessibility options only as needed.
- Minimal network buffering and off auto-equip.
#### This setting can be found in Settings → General (or Gameplay).
---
Conclusion
Properly configuring Valorant settings can give you a significant edge in both performance and awareness. Focus on:
Always test new settings in the Practice Range before taking them into competitive matches. Adjust based on your hardware and personal comfort.
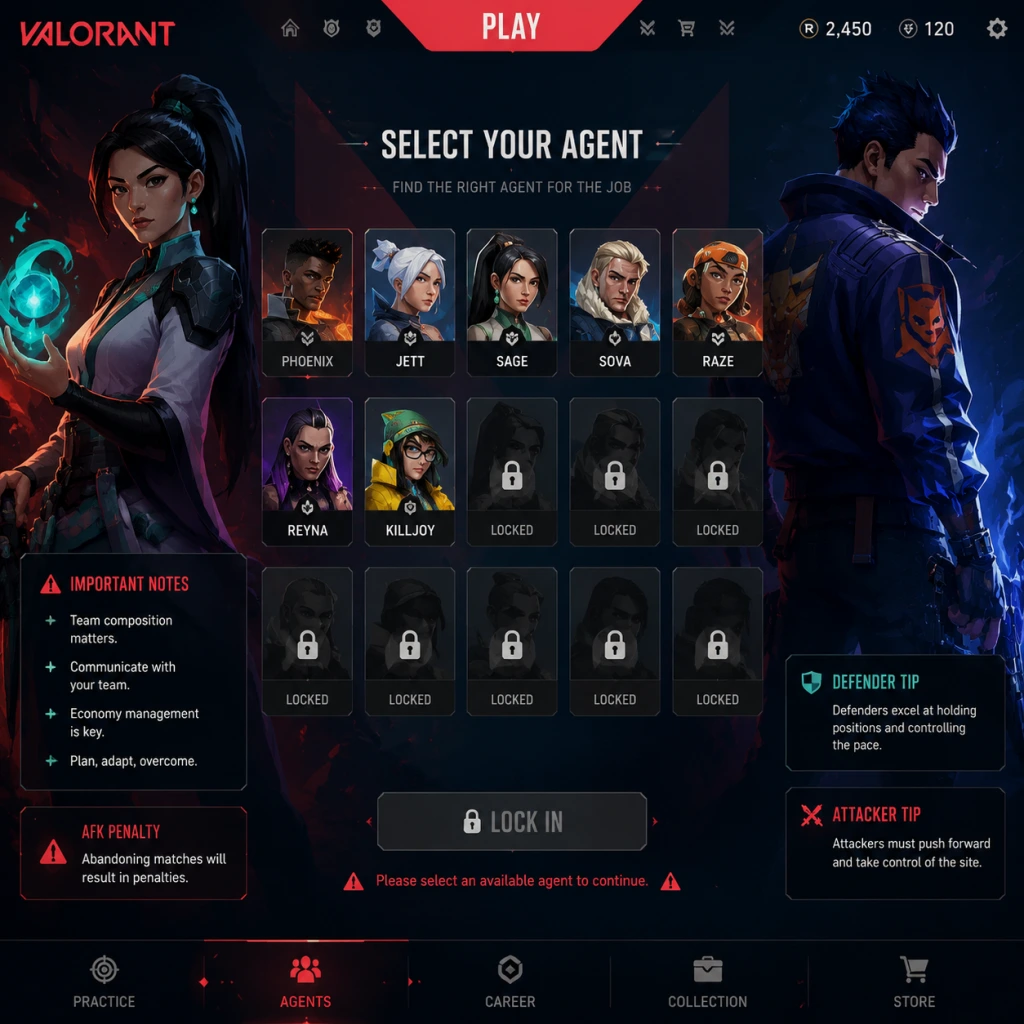
Important Notes
"content": "## Important Notes for Valorant
1. Crosshair Placement: Always keep your crosshair at head height (waist-up) and pre-aim corners. New players who aim at the ground miss kills.
2. Sound Queues: Footsteps, abilities, and reloads are loud. Use headphones. Many deaths happen because players don’t hear enemy movement.
3. Spike Plants: Planting the spike in the open (not behind cover) is a trap. Always plant in a safe spot or one you can retake. Novices often plant in the middle of the site and die.
4. Ultimate Orbs: Each map has 2 ultimate orbs that give your ultimate a charge. Learn where they are and contest them. They can turn the tide.
5. Economy System: Save for a light armor + Spectre or Sheriff when eco’ing. Don’t buy Heavy Shield if you have less than 3,900 credits for a rifle next round.
6. Agent Roles: Valorant agents are split into Duelists, Initiators, Controllers, and Sentinels. A balanced team composition (at least 1 of each) increases win rate. Regret: queuing without a smoker (Controller) on maps like Bind or Ascent.
7. Spray Control: Bullet spray in Valorant is random after the first 4-5 bullets. Tap or burst (2-4 shots) for accuracy. Spraying at range misses 90% of shots.
8. Peek Timing: Peeking while walking makes noise and gives away your position. Use Shift (walk) to sneak around corners. Regret: sprinting around every corner and dying.
9. Training Modes: The Practice Range and Deathmatch are free and fast ways to warm up and improve aim. Most pros do 10-15 minutes of deathmatch before ranked. Skip this and you’ll be rusty.
10. Skinned Weapons Don’t Improve Performance: Skins are purely cosmetic. Don’t spend real money expecting to shoot better—spend it only if you enjoy the look.
Irreversible Choices & Content You Can’t Get Back
- Agent Unlocks: You unlock agents by spending either 8,000 Kingdom Credits (earned in-game) or 1,000 Valorant Points (premium currency). Once unlocked, an agent is permanently yours. You cannot return or exchange them. Choose wisely based on your playstyle—unlocking an agent you never play is a common regret.
- Skin Purchases & Battle Passes: Weapon skins, melee items, and cosmetics bought from the store or Battle Pass are non-refundable and non-transferable between accounts. The Battle Pass only rewards items during its active act (roughly 2 months). Once the act ends, exclusive skins and titles are gone forever (unless a future re-run, which is rare).
- Contract Progression: Each agent has a free contract (Tier 1-10) that awards cosmetics and a playercard. You can switch active contracts at any time, but progressing on multiple simultaneously is not possible. If you change contracts halfway, progress on the previous one is paused, not lost. However, any purchase of XP boosts or bonus tiers via VP is irreversible.
- Ranked Placement: Your first 5 ranked games determine your initial rank. These games are high-stakes. A poor performance can lock you into a low rank that takes many wins to climb out of. Play your placements after you are confident in your skills, not as soon as you unlock Competitive mode (account level 20+).
- Wasting Economy: New players often buy rifles (Vandal, Phantom) every round without saving. This leads to broken economies and losses. Always communicate with your team about buying/ saving (eco rounds). Regret: not learning buy phases—force buys when your team has less than 2,900 credits each cripple the team.
- Ignoring the Practice Range: Many players jump straight into matches. The Practice Range is vital for learning spray patterns, agent abilities, and movement (hopping, counter-strafing). Regret: hundreds of hours spent dying because you didn’t practice crosshair placement.
- Neglecting Agent Abilities: Valorant is not just a gun game. Each agent has unique abilities that win rounds. Regret: using abilities randomly or forgetting to use them at all. Learn your agent’s utility lineups (e.g., Sova shock darts, Viper walls).
- Solo Queue Rage: Playing ranked alone (solo queue) can be frustrating due to teammate communication and skill variance. Many players regret not forming a premade team of 2-5 for better synergy and reduced toxicity.
- Battle Pass Progression: The Battle Pass requires daily play to finish. XP is earned by playing games, completing daily missions, and weekly missions. Don’t buy XP boosts unless you are very close to the end of the pass; they often don’t save time. Regret: grinding mindlessly in Deathmatch for hours—it gives less XP per minute compared to Unrated or Competitive (roughly 5,000 XP per win, 20-30 min).
- Agent Contract XP: To max an agent’s contract (Tier 10), you need 675,000 XP with that agent active. That’s about 135 wins at 5,000 XP each. Switching contracts frequently delays completion. Regret: unlocking contract tiers with VP—expensive and not worth it unless you have money to burn.
- Account Level Grind: Competitive is locked until account level 20 (approximately 40-60 hours of gameplay). There is no shortcut. Regret: not using this time to improve mechanics and learn maps.
- Vanguard Anti-Cheat: Valorant uses Riot Vanguard, a kernel-level anti-cheat that runs on startup. It is known to conflict with certain drivers (e.g., motherboard RGB software, some VPNs, or older hardware). If you have crashes, you may need to disable or uninstall conflicting software. Do not disable Vanguard during play—you will be kicked and penalized. It is safe and widely used.
- Voice & Text Chat Toxicity: Toxic behavior (slurs, harassment, griefing) is banned. You can mute and report players. Regret: engaging with trolls instead of muting them—it only tilts you. Use /mute all at the start if you are sensitive.
- AFK & Queue Dodging: Leaving a match early (AFK) results in matchmaking bans increasing with frequency (15 min, 1 hr, 24 hrs, etc.). Queue dodging in agent select (last-second abandon) incurs a small timeout. Regret: leaving a game because you don’t like the map—you still get the penalty.
- Ranked Match Penalties: In ranked, if you dodge agent select, you lose 3-4 RR (rank rating) and get a timeout. If you go AFK during the match, you lose RR and can get a temporary ban. Do not alt-tab during loading; it can cause you to miss spike planting/defusing.
- Learning Agents: Some agents have high skill floors (e.g., Jett’s updraft, Raze’s satchel jumps, Yoru’s teleport). New players often pick them and struggle. Recommended: Start with straightforward agents like Brimstone, Sova, Sage, or Phoenix.
- Map Knowledge Newcomers: Each map has callouts, angles, and lineups. The difficulty spikes when you face a team that uses utility well. Use the “Custom Game” mode to walk alone and learn bomb sites, spike plant spots, and common camping positions.
- Ranked Climbing: The jump from Silver to Gold, or Platinum to Diamond, is noticeable. The skill disparity in aim and game sense increases. Regret: not analyzing your own gameplay—record your rounds to see why you died (e.g., reloading at bad times, peeking with low HP).
- Agent Countering: Some agents hard counter others (e.g., Reyna vs. Phoenix—Reyna can flash, Phoenix can heal). If you don’t adjust your playstyle, you will lose duels. Study common counters.
- Battle Pass Exclusive: Every Act Pass (2 months) has exclusive player cards, gun buddies, weapon skins, and titles. If you don’t complete the pass by the deadline, those items are gone. You cannot buy them later.
- Night Market & Daily Offers: The Night Market appears occasionally and offers random skins at discounted prices. You can only buy up to 6 skins per Night Market. Don’t waste VP on a skin you don’t want—wait for the next market.
- Event Passes: Limited-time events (e.g., Valorant Champions, Arcane) have their own free pass with exclusive cosmetics. You must play during the event period to earn them.
- Kingdom Credits: Earned from daily and weekly missions. They cap at 10,000 Kingdom Credits. You cannot exceed this cap, so spend them on agent unlocks instead of letting them overflow.
- Account Linking: Valorant is tied to your Riot Games account. If you lose your account credentials, you lose all progress, skins, rank, and unlocks. Enable 2FA via Riot’s account page and do not share your login.
- No Cloud Saves for Settings: Your in-game settings (crosshair, keybinds, video) are stored locally (in %APDATA%\\...\\Valorant\\Saved\\Config\\Windows). If you reinstall the game or switch PCs, you lose them. Manually back up the “Windows” folder or use Riot’s “Presets” feature (available in settings) to save crosshair and controls to your account.
- Replay Files: Valorant does not save match replays on your local drive. You must manually use third-party software (OBS, ShadowPlay) to record. Riot has promised a replay system for years but not yet implemented. Regret: losing a sweet clutch clip with no way to re-watch.
Pitfalls & Common Regrets
Grinding Traps & XP Efficiency
Online Etiquette & Anti-Cheat Notes
Difficulty Spikes & How to Prepare
Missable Content & Time-Limited Events
‘Save Management’ (Account Progress & Data)
Things Players Commonly Regret Not Knowing Earlier
1. Crosshair Placement: Always keep your crosshair at head height (waist-up) and pre-aim corners. New players who aim at the ground miss kills.
2. Sound Queues: Footsteps, abilities, and reloads are loud. Use headphones. Many deaths happen because players don’t hear enemy movement.
3. Spike Plants: Planting the spike in the open (not behind cover) is a trap. Always plant in a safe spot or one you can retake. Novices often plant in the middle of the site and die.
4. Ultimate Orbs: Each map has 2 ultimate orbs that give your ultimate a charge. Learn where they are and contest them. They can turn the tide.
5. Economy System: Save for a light armor + Spectre or Sheriff when eco’ing. Don’t buy Heavy Shield if you have less than 3,900 credits for a rifle next round.
6. Agent Roles: Valorant agents are split into Duelists, Initiators, Controllers, and Sentinels. A balanced team composition (at least 1 of each) increases win rate. Regret: queuing without a smoker (Controller) on maps like Bind or Ascent.
7. Spray Control: Bullet spray in Valorant is random after the first 4-5 bullets. Tap or burst (2-4 shots) for accuracy. Spraying at range misses 90% of shots.
8. Peek Timing: Peeking while walking makes noise and gives away your position. Use Shift (walk) to sneak around corners. Regret: sprinting around every corner and dying.
9. Training Modes: The Practice Range and Deathmatch are free and fast ways to warm up and improve aim. Most pros do 10-15 minutes of deathmatch before ranked. Skip this and you’ll be rusty.
10. Skinned Weapons Don’t Improve Performance: Skins are purely cosmetic. Don’t spend real money expecting to shoot better—spend it only if you enjoy the look.
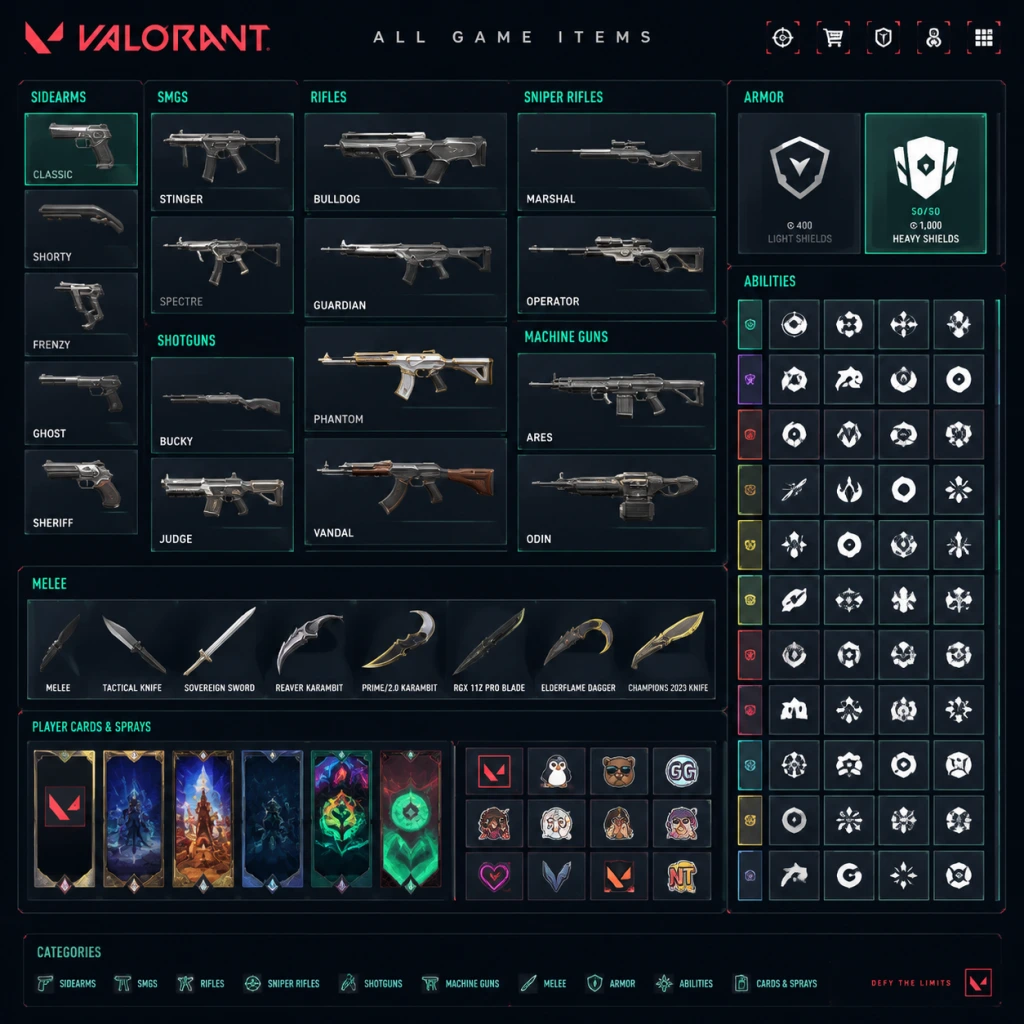
All Game Items
All Game Items Guide for Valorant
This guide covers every major item type in Valorant, including weapons, armor, the Spike, ultimate orbs, currencies, and cosmetic collectibles. Items are grouped logically with explanations of how to obtain them, when they are useful, and any relevant upgrades or synergies.
---
1. Weapons
All weapons are purchasable at the start of each round using Credits. Each weapon has a specific cost, damage profile, fire rate, and spray pattern. Weapons can be upgraded visually using Variant Upgrades and Skin Levels (cosmetic only), but gameplay stats remain unchanged.
| Category | Weapon | Cost (Credits) | Primary Use Case |
|---|---|---|---|
| Sidearms | Classic | 0 (free) | Default pistol, reliable at close range. |
| Shorty | 150 | Cheap shotgun sidearm for close-range eco rounds. | |
| Frenzy | 400 | Full-auto pistol for aggressive close fights. | |
| Ghost | 500 | Silent, accurate pistol for stealthy plays. | |
| Sheriff | 800 | High-damage revolver, one-tap headshots at medium range. | |
| SMGs | Stinger | 950 | Fast fire rate, great for close-quarters and eco rounds. |
| Spectre | 1600 | Versatile SMG, effective at close to mid range; common buy on anti-eco rounds. | |
| Shotguns | Bucky | 850 | Semi-auto shotgun, strong in tight spaces. |
| Judge | 1850 | Full-auto shotgun, devastating at close range. | |
| Rifles | Bulldog | 2050 | Burst-fire rifle, good for mid-range on a budget. |
| Guardian | 2250 | Single-fire heavy rifle, high damage per shot. | |
| Phantom | 2900 | Full-auto assault rifle, silenced, fast fire rate. | |
| Vandal | 2900 | Full-auto assault rifle, higher damage but no silencer; one-tap headshot at any range. | |
| Sniper Rifles | Marshal | 950 | Light sniper, one-shot kill with headshot at any range; cheap for eco rounds. |
| Operator | 4700 | Heavy sniper, one-shot body kill; used in full-buy rounds. | |
| Machine Guns | Ares | 1550 | Light machine gun, high magazine capacity but slow fire rate; good for suppressing. |
| Odin | 3200 | Heavy machine gun, high damage and fire rate; effective for wallbanging and holding angles. |
- Variant Upgrades: Change weapon color (e.g., Red, Black, White). Obtained by spending Radianite Points and unlocking through Battle Pass or store.
- Skin Levels: Some skins have upgradable effects (finishers, sound changes, VFX). Each level requires Radianite Points.
---
2. Armor (Shields)
Armor provides extra hit points (HP) that absorb damage before health is reduced. It is purchased with Credits at the buy menu. There are two tiers:
| Armor Type | Cost (Credits) | Shield HP | Notes |
|---|---|---|---|
| Light Shields | 400 | 25 | Cheap, useful for eco rounds or when saving credits. |
| Heavy Shields | 1000 | 50 | Full protection; essential for full-buy rounds. |
- When to buy: Always buy Heavy Shields if you have enough Credits after buying a rifle. Light Shields are acceptable on SMG/shotgun buys or when saving for next round.
- Synergies: Armor stacks with Agent abilities that grant temporary HP or damage reduction (e.g., Sage’s Barrier Orb, Phoenix’s Blaze).
- Role: The Attackers (5 players) receive one free Spike at the start of each round. It must be planted on a designated site (A or B) to win the round after the bomb detonates.
- Obtaining: Automatically given to a random attacker (or last player who picked it up) at round start. Can be dropped and picked up by any teammate.
- Use: Plant by holding the interact key (default `4`) on a spike plant zone. Defenders must defuse it before detonation.
- Role: Neutral objects that spawn in fixed locations on each map. Interacting with one grants 1 point toward your Agent’s ultimate ability (usually requires 6-8 points to charge).
- Obtaining: Walk over the orb. Each orb can be collected by one player per round.
- When useful: Prioritize collecting orbs early to gain ultimate advantage. Some Agents (like Sova or Skye) can reveal orb locations with abilities.
---
3. Key Equipment
#### Spike (The Bomb)
#### Ultimate Orbs
---
4. Currencies
| Currency | Icon | Earned How? | Used For |
|---|---|---|---|
| Credits | $ | Round income (depends on win/loss, kill/death, and economy bonuses) | Purchasing weapons, shields, and abilities during the buy phase. |
| Radianite Points | ⚡ | Battle Pass tiers, XP contracts, or purchased with Valorant Points | Upgrading weapon skins (variants, levels) and purchasing some cosmetics. |
| Kingdom Credits |
Character Skills
"content": "## Character Skills Guide for Valorant
This guide covers every playable Agent (as of Act 9, Episode 5) and their unique abilities. Agents are categorized by their primary role: Duelist, Initiator, Controller, or Sentinel. Each ability is detailed with its function, cost, cooldown, duration, usage tips, combos, and synergies.
---
Duelists are self-sufficient fraggers who create space and entry for their team. They rely on mobility, flashes, and damage abilities to win duels.
#### Jett
This guide covers every playable Agent (as of Act 9, Episode 5) and their unique abilities. Agents are categorized by their primary role: Duelist, Initiator, Controller, or Sentinel. Each ability is detailed with its function, cost, cooldown, duration, usage tips, combos, and synergies.
---
1. Duelists
Duelists are self-sufficient fraggers who create space and entry for their team. They rely on mobility, flashes, and damage abilities to win duels.
#### Jett
- Role: Duelist (Mobile Entry)
- Q - Updraft: Instantly propels Jett upward. Cost: 150 creds. Charges: 2 (max). Cooldown: None (used on activation). Usage: Use to reach high angles, dodge abilities, or surprise enemies off angles. Combo with Blade Storm for aerial kills.
- E - Tailwind: Instantly dash in the direction Jett is moving. Cost: Free (recharges after 2 kills). Charges: 1 (recharges on 2 kills). Cooldown: 12 seconds after use (if not recharged). Usage: Escape gunfights, reposition after peeking, or dodge utility. Best used aggressively after a kill.
- C - Cloudburst: Throw a projectile that expands into a vision-blocking cloud on impact. Cost: 200 creds. Charges: 2 (max). Duration: 4 seconds. Usage: Obscure enemy vision for entry or to plant/defuse. Smoke can be manipulated by movement; does not block sound.
- X - Blade Storm: Equip a set of 5 throwing knives that deal 150 damage to the head, 50 to body, 25 to legs. Cost: 7 Ultimate Points. Duration: Until all knives are used or weapon swap. Usage: One-tap enemies at close-mid range. Use with Updraft for aerial picks. Reset on kill.
- Combos: Updraft + Blade Storm = easy headshots from above. Tailwind + Cloudburst = smoke and dash through for surprise.
- Synergies: Works well with Breach (stuns) or Skye (flash) to entry safely.
- Recommended Build: Always buy Cloudburst (2 charges). Upgrade Updraft if extra mobility needed. Ultimate is essential.
- Role: Duelist (Self-Heal, Flash)
- Q - Curveball: Equip a flare that curves left or right and blinds enemies after a short windup. Cost: 250 creds. Charges: 2 (max). Duration: Blind lasts ~1.5 seconds. Usage: Pop flash around corners; call out to teammates to avoid self-blind. Ideal for clearing close angles.
- E - Hot Hands: Throw a fireball that creates a healing zone on impact. Cost: Free (recharges after 2 kills). Charges: 1. Duration: 8 seconds (zone). Usage: Heal yourself and damage enemies standing in it. Can be used to deny space or heal after a duel.
- C - Blaze: Cast a wall of fire that blinds and damages enemies passing through. Cost: 200 creds. Charges: 1. Duration: 8 seconds. Usage: Block vision, entry through smoke, or create one-way cover. Healing effect if Phoenix stands in it.
- X - Run It Back: Mark your current location. If Phoenix dies during the ultimate, he respawns at the marked spot with full health (but loses abilities used). Cost: 6 Ultimate Points. Duration: 10 seconds. Usage: Aggressive entry; take a risk knowing you have a second life. Reveals enemy positions if you are killed.
- Combos: Curveball flash + Hot Hands to heal while pushing. Blaze wall to isolate a site.
- Synergies: Works with Skye (heal) or Sage (res) for extended survivability.
- Recommended Build: Always buy both Curveball charges. Use Hot Hands on cooldown. Ultimate for decisive rounds.
- Role: Duelist (Sustain, Leech)
- Q - Devour: Consume a soul orb dropped by an enemy kill or assist to rapidly heal up to 100 HP. Cost: Free (no charge). Charges: 4 (max stored orbs). Duration: Heal over 3 seconds. Usage: Heal after a kill to stay in fight. Overheals beyond 100? No, max 100. Use only when safe.
- E - Dismiss: Consume a soul orb to become intangible (cannot shoot but can move) for 2 seconds. Cost: Free. Charges: 4 stored. Duration: 2 seconds. Usage: Escape after a kill or reposition. Do not use if you can shoot safely.
- C - Leer: Throw an eye that nearsights all enemies looking at it. Cost: 200 creds. Charges: 2 (max). Duration: 2 seconds (eye can be shot). Usage: Peek while enemies are nearsighted; destroy eye quickly to counter. Use to clear angles.
- X - Empress: Enter a frenzy mode: fire rate increased, reload speed increased, and automatically equip a soul orb on kill (no need to consume manually). Cost: 6 Ultimate Points. Duration: 8 seconds. Usage: Chain kills with faster fire rate. Use Devour/Dismiss during ult without consuming orbs? Actually, during Empress, kills automatically grant heal and dismiss without consuming orbs.
- Combos: Leer + peek with Empress. Dismiss after kill to avoid trade.
- Synergies: Works with initiators like Sova to gather info and then Reyna cleans up.
- Recommended Build: Leer is essential for entry. Use Devour/Dismiss only with kills. Ultimate is win-more.
- Role: Duelist (Explosives, Area Denial)
- Q - Blast Pack: Place a satchel that explodes after a short delay or when shot. Cost: Free (recharges after 2 kills). Charges: 1 (but can hold multiple? Actually, has 2 charges? Check: Raze has 2 Blast Packs by default, recharges? No, she buys them? She has 1 charge, cooldown? Actually, Blast Pack has 1 charge that recharges after 2 kills? Wait, Raze's Blast Pack is a signature ability that has 2 charges by default and recharges after kills? Let's correct: Raze's Q - Blast Pack: Has 2 charges. Cost: 200 creds? No, signature abilities are free but have cooldown. Raze: Blast Pack costs 200 creds for a charge? Actually, all signatures have a base cost (0 creds) but can be upgraded? In Valorant, signature abilities (E) are free and have a cooldown (or kills recharge). For Raze, E is Paint Shells (grenade). Q is Blast Pack (purchasable for 200, max 2 charges). So: Q = Blast Pack (buyable), E = Paint Shells (free, cooldown 2 kills). I'll correct below.
- Corrected abilities for Raze:
- Combos: Blast Pack jump + Paint Shells = airburst. Boom Bot + Showstopper = clean up after Vuln.
- Synergies: Works with Sova (recon) to know where to nade.
- Recommended Build: Always buy Boom Bot. Blast Packs for mobility. Ultimate for eco rounds.
- Role: Duelist (Flanker, Deception)
- Q - Blindside: Equip a flash that bounces off surfaces and detonates, blinding enemies. Cost: 200 creds. Charges: 2 (max). Duration: ~1.5 seconds. Usage: Bank around corners or over walls. Can be charged to shorten bounce?
- E - Gatecrash: Send a teleport anchor; activate to teleport to the anchor location. Cost: Free (recharges after 2 kills). Charges: 1. Cooldown: 30 seconds after use. Usage: Flank, rotate fast, or escape. Makes noise when placed and when teleporting.
- C - Fakeout: Send a fake footstep audio that can also be shot to appear like a clone. Cost: 100 creds. Charges: 2 (max). Usage: Deceive enemies into turning or wasting utility.
- X - Dimensional Drift: Enter a parallel dimension; Yoru becomes invisible and intangible to enemies but can see them. He can place a Gatecrash anchor and then teleport out. Cost: 7 Ultimate Points. Duration: 10 seconds. Usage: Scout enemy positions, set up flanks, or get behind enemy lines. Cannot shoot while in Drift.
- Combos: Dimensional Drift + place Gatecrash behind enemy = teleport and surprise. Fakeout + Blindside to confuse.
- Synergies: Works with Omen (smoke) to hide teleport sound.
- Recommended Build: Blindside for entry, Fakeout for info, Ultimate for decisive flanks.
- Role: Duelist (Speed, Relentless)
- Q - Relay Bolt: Throw an energy bolt that passes through walls and stuns enemies hit. Cost: 200 creds. Charges: 2 (max). Duration: Stun for ~0.85 seconds. Usage: Clear corners, stop defuse, or peeking enemies.
- E - High Gear: Sprint fast with slide, can slide once per activation. Cost: Free (recharges after 2 kills). Charges: 1. Cooldown: 10 seconds after sprint ends. Usage: Rush into site, dodge shots, or rotate quickly. Can slide to maintain speed.
- C - Fast Lane: Deploy two walls of energy that block vision and damage enemies passing through. Cost: 200 creds. Charges: 1. Duration: 6 seconds. Usage: Create cover for entry or delay enemies.
- X - Overdrive: Unleash a beam of energy in a cone that kills on hit. Cost: 7 Ultimate Points. Duration: 10 seconds (beam can be toggled). Usage: Spray into a group or hold a chokepoint. Aim for head level. Can be combined with High Gear slide to move while firing.
- Combos: Fast Lane + High Gear slide + Overdrive = fast entry with damage.
- Synergies: Works with Kay/O (suppress enemy abilities while Neon rushes).
- Recommended Build: Relay Bolt for stuns, Fast Lane for entry, Ultimate for close quarters.
- Role: Initiator (Recon, Intel)
- Q - Shock Bolt: Fire a bolt that deals damage in an area. Cost: 150 creds. Charges: 2 (max). Damage: Up to 90 on direct hit. Can be bounces. Usage: Tag enemies behind cover, clear corners, or finish low HP.
- E - Recon Bolt: Fire a bolt that reveals enemies in a large radius. Cost: Free (recharges after 2 kills). Charges: 1. Duration: Bolt lasts until destroyed or after scanning. Usage: Scout key areas, check corners, or gather info after plant. Can be destroyed.
- C - Owl Drone: Control a drone that can fire a dart to reveal enemies. Cost: 300 creds. Charges: 1. Duration: 10 seconds. Usage: Scout ahead safely, especially on offense. Dart reveals location briefly.
- X - Hunter's Fury: Fire three global-range energy blasts that deal damage and reveal enemies hit. Cost: 7 Ultimate Points. Usage: Use to clear tight spaces, kill low HP, or get info across the map. Can be wall-bang.
- Combos: Recon Bolt + Shock Bolt = free damage on revealed enemies. Owl Drone info + ultimate.
- Synergies: Works with Raze (nade combos), Phoenix (flash), or any Duelist.
- Recommended Build: Shock Bolts for damage, Recon Bolt essential, Owl Drone for intel, Ult for retakes.
- Role: Initiator (Healing, Flash, Intel)
- Q - Flash of Light: Send a trident that flashes all enemies in its line of sight. Cost: 200 creds. Charges: 2 (max). Duration: Blind ~1.5 seconds. Usage: Flash around corners; can be charged to extend range. Avoid self-flash.
- E - Guiding Light: Send a hawk that can be directed to fly forward and then explode, revealing nearby enemies. Cost: Free (recharges after 2 kills). Charges: 1. Duration: 3 seconds. Usage: Scout rooms safely. If enemy is in range, they are marked for 2 seconds.
- C - Trailblazer: Control a Tasmanian tiger that leaps and explodes, dealing 30 damage and concussing enemies hit. Cost: 300 creds. Charges: 1. Duration: 8 seconds (until detonation). Usage: Clear tight spaces, stop pushes, or delay enemies.
- X - Seekers: Summon three seekers that track the nearest enemies (excluding Skye). They stun on contact for ~2 seconds. Cost: 7 Ultimate Points. Duration: Seekers last until they hit an enemy or die. Usage: Use to clear a site, force enemy movement, or retake. Can be shot down.
- Combos: Guiding Light + Flash combo. Trailblazer into a room followed by flash.
- Synergies: Works well with any Duelist needing info.
- Recommended Build: Flash of Light is priority. Guiding Light free. Trailblazer optional. Ultimate for retake.
- Role: Initiator (Suppress, Info, Disable)
- Q - Flash/drive: Toss a flash that detonates after a short delay; can be charged to stick to surfaces. Cost: 250 creds. Charges: 2 (max). Duration: Blind ~1.2 seconds. Usage: Flash around corners or stick to walls for pop flash.
- E - Zero/point: Equip a suppress knife that throws in a straight line; on impact, it creates a suppression zone, silencing all enemy abilities in an area. Cost: Free (recharges after 2 kills). Charges: 1. Duration: 4 seconds (zone). Usage: Suppress key utility (e.g., Breach stun, Omen smoke). Can be destroyed.
- C - Frag/ment: Throw a grenade that explodes after a short timer, dealing 90 damage on direct hit and creating a damage zone. Cost: 200 creds. Charges: 1. Usage: Area denial, clear corners, or finish kills.
- X - NULL/CMD: Overload with radianite; KAY/O becomes invincible for 8 seconds, pulsing out suppression waves every 1.5 seconds that suppress enemies and reveal their location. Cost: 6 Ultimate Points. Duration: 8 seconds (cannot shoot). Usage: Push into a site, disable all enemy abilities, gather intel. Can be revived by teammate? Actually, KAY/O can be revived by Sage if killed during ult. Usage: Use as a sacrificial push or to counter heavy utility.
- Combos: Zero/point + flash + frag to clear site. Ultimate + team push.
- Synergies: Sage (revive) makes ult even stronger.
- Recommended Build: Flash for entry, Zero/point for suppression, Frag for damage, Ult for crucial rounds.
- Role: Initiator (Stuns, F Lashes)
- Q - Aftershock: Fire a charge that delivers an explosion through walls, dealing high damage. Cost: 150 creds. Charges: 2 (max). Damage: 150 per explosion? Actually, deals 120 damage in a cone. Usage: Use to clear corners or force enemies out.
- E - Flashpoint: Equip a flash that detonates after a short delay; can be charged to bounce off walls. Cost: Free (recharges after 2 kills). Charges: 1. Usage: Blind enemies around corners. Charge to throw over walls.
- C - Fault Line: Equip a seismic charge that creates a shockwave through walls, stunning enemies. Cost: 200 creds. Charges: 1. Usage: Stun enemies in a long line; great for post-plant or retake.
- X - Rolling Thunder: Deploy a massive devastating earthquake that concusses all enemies in a huge cone. Cost: 7 Ultimate Points. Duration: 3 seconds (stun). Usage: Use when pushing onto a site; best with team follow-up.
- Combos: Flashpoint + Fault Line combo for double stun. Aftershock to kill stunned enemies.
- Synergies: Works with Jett or Phoenix to entry after stuns.
- Recommended Build: Aftershock for damage, Flashpoint for entry, Fault Line for area stun, Ult for site take.
- Role: Initiator (Haunt, Fear, Reveal)
- Q - Prowler: Summon a dark creature that rushes forward and can be controlled to leap and apply decay. Cost: 200 creds. Charges: 1. Duration: 3 seconds (until used). Usage: Decay reduces enemy health temporarily. Use to push enemies out or follow up.
- E - Haunt: Place a spectral eye that reveals enemies in its line of sight; can be recalled. Cost: Free (recharges after 2 kills). Charges: 1. Duration: 3 seconds (active). Usage: Scout areas, gather intel. Enemies revealed briefly.
- C - Shrouded Step: Toss a dark orb that creates a wall of shadow that blocks vision and also reveals enemies that pass through? Actually, Shrouded Step: Throw a shadow orb that creates a vision-blocking zone but also decays enemies inside. Cost: 100 creds. Charges: 2 (max). Duration: 5 seconds. Usage: Cut off sightlines, apply decay to enemies pushing through.
- X - Nightfall: Unleash a dark wave that travels across the map, revealing all enemies hit and applying decay; also deafens them. Cost: 7 Ultimate Points. Duration: Wave travels entire map. Usage: Use at round start to get global info and weaken enemies. Can be halted by walls.
- Combos: Haunt + Prowler to catch revealed enemies. Nightfall + team push.
- Synergies: Works with any Duelist for free picks.
- Recommended Build: Haunt is essential. Prowler for clearing. Shrouded step for blocking. Ult for map-wide info.
- Role: Initiator (Creature Control)
- Q - Wingman: Send a ghost that goes forward and can be directed to flash (if aimed at enemy) or to plant/defuse spike. Cost: 200 creds. Charges: 1. Duration: 3 seconds (flash) or until plant/defuse. Usage: Use to flank flash or to safely plant/defuse. Can be destroyed.
- E - Dizzy: Deploy a wingman? Actually, Dizzy is E: Gekko's signature ability: a flying creature that blasts a pulse that blinds enemies in its area. Cost: Free (recharges after 2 kills). Charges: 1. Usage: Pop flash from above. Can be recalled? No.
- C - Mosh Pit: Throw a grenade that creates a damaging zone after a delay; deals up to 90 damage. Cost: 250 creds. Charges: 1. Usage: Clear corners, deny defuse, or force movement.
- X - Thrash: Call in a giant triceratops that charges forward, stunning and damaging enemies in its path. Cost: 7 Ultimate Points. Duration: 3 seconds (stun). Usage: Use for site take or retake; can kill if low HP.
- Combos: Dizzy flash + Mosh Pit to kill blind enemies. Wingman to plant while team pushes.
- Synergies: Works with any Duelist; Wingman can spike plant while you watch.
- Recommended Build: Dizzy is signature, buy Wingman and Mosh Pit. Ult for post-plant.
- Role: Controller (Smoke, Molotov, Stim)
- Q - Stim Beacon: Deploy a beacon that grants allies fire rate increase and reload speed when near it. Cost: 150 creds. Charges: 1. Duration: 8 seconds. Usage: Place before pushing onto a site for faster kills.
- E - Sky Smoke: Open a map to place three smoke clouds that land after a short delay. Cost: Free (recharges after 2 kills). Charges: 3 per round. Usage: Block enemy vision on site execution. Can be placed from anywhere on the map.
- C - Incendiary: Fire a grenade that creates a fire zone dealing damage over time. Cost: 200 creds. Charges: 2 (max). Duration: 8 seconds. Usage: Deny defuse, clear corners, or slow pushes.
- X - Orbital Strike: Call in a massive artillery strike that deals high damage in a large area. Cost: 7 Ultimate Points. Duration: 3 seconds (strike). Usage: Clear a bomb site, force enemies out, or secure a post-plant.
- Combos: Sky Smoke + Incendiary to block entry and then burn enemies. Orbital Strike after smokes.
- Synergies: Works with all Duelists needing smoke cover.
- Recommended Build: Always save at least one smoke. Incendiary for retake. Stim for site take.
- Role: Controller (Poison, Wall, Decay)
- Q - Snake Bite: Launch a canister that breaks on impact, creating a poison pool that decays enemies. Cost: 200 creds. Charges: 2 (max). Duration: 6 seconds. Usage: Deny angles, clear corners, or block defuse.
- E - Toxic Screen: Deploy a long wall of toxic gas that blocks vision and decays enemies passing through. Cost: Free (recharges after 2 kills). Charges: 1 per round (can be refilled? No, you have 2 walls? Actually, Viper's E places one wall that can be activated/deactivated; she can place two walls? Wait: Viper has one wall that she can toggle on/off. She has 2 'fuel' bars that recharge. She can also place one smoke (Q) and one wall (E) that both drain fuel. Correction: Viper's E is a wall that she places; she has one that she can toggle. She also has a smoke (C) that is placed as a third ability? Actually, Viper's C is a smoke that she can place and toggle. So: E = Toxic Screen (wall), C = Poison Cloud (smoke). Both share fuel. Let's list correctly:
- X - Viper's Pit: Deploy a large toxic cloud that decays enemies inside and hides Viper's position. Cost: 7 Ultimate Points. Duration: 8 seconds (can be extended with fuel). Usage: Plant spike inside, or retake a site. Enemies take decay damage over time.
- Combos: Snake Bite + Toxic Screen to create deadly crossfires. Viper's Pit + Snake Bite for area control.
- Synergies: Works with Sova to reveal enemies inside pit.
- Recommended Build: Always have fuel for wall. Buy Poison Cloud for extra smoke. Snake Bite for utility.
- Role: Controller (Smoke, Paranoia, Teleport)
- Q - Shrouded Step: Teleport Omen a short distance; can be used to reach high ledges. Cost: 100 creds. Charges: 1 (recharges after 30 seconds). Usage: Flank, reposition, or escape. Makes sound.
- E - Dark Cover: Throw a shadow orb that bursts into a smoke cloud on impact. Cost: Free (recharges after 2 kills). Charges: 2 (total per round; but rechargeable during round? Actually, Omen's smokes cost nothing and he has two that recharge over time? He can hold two and they recharge after a cooldown? Let's correct: Omen's E is Dark Cover, he has 2 charges that recharge after 30 seconds each. So he can use up to 2 per round without buying. Can buy extra? No. Usage: Place smokes from a distance. Can be curved.
- C - Paranoia: Equip a shadow projectile that nearsights all enemies it hits. Cost: 200 creds. Charges: 1. Duration: 2 seconds. Usage: Blind enemies before entry. Goes through walls.
- X - From the Shadows: Teleport Omen anywhere on the map after a brief channel; becomes intangible and can be cancelled. Cost: 6 Ultimate Points. Duration: Channel lasts 4 seconds. Usage: Flank, rotate, or scout. If Omen is killed during channel, he doesn't teleport.
- Combos: Paranoia + Dark Cover = push through smoke blind to enemies. Shrouded Step to enter tricky spots.
- Synergies: Works with any flash initiator.
- Recommended Build: Dark Cover is free; recharge often. Buy Paranoia for entry. Shrouded Step for mobility.
- Role: Controller (Stars, Graviton, Nebula)
- Q - Nova Pulse: Place a star that can be activated to stun enemies. Cost: 200 creds. Charges: 5 (max stars, but each star placed consumes one charge; recharge rate per round? Astra has a pool of stars that reset each round. She can place up to 5 stars on the map. Usage: Use to stun key positions.
- E - Nebula: Place a star that can be activated to create a smoke cloud. Cost: Free (star placed). Charges: same pool. Usage: Smoke key areas.
- C - Gravity Well: Place a star that can be activated to pull enemies in and then explode. Cost: 100 creds. Charges: same pool. Usage: Displace enemies or pull them out of cover.
- X - Astral Form / Cosmic Divide: Activate to enter astral form; place up to 5 stars, then use a utility to create a large wall that blocks vision and dampens sound. Cost: 7 Ultimate Points. Duration: 5 seconds (wall). Usage: Control large areas; block vision and sound.
- Combos: Nova Pulse into Gravity Well to stun and pull. Nebula to cover approach.
- Synergies: Works with Initiators to follow up on stuns.
- Recommended Build: Stars are free each round; use wisely. Buy Gravity Well for control. Ultimate for site takes.
- Role: Controller (Water, Cover)
- Q - High Tide: Deploy a water wall that blocks vision and dampens sound; can be curved. Cost: 200 creds. Charges: 2 (max). Duration: 8 seconds. Usage: Create moving cover for team.
- E - Cove: Deploy a sphere of water that blocks vision and slows bullets inside; only headshots? No, it absorbs bullets and reduces damage? Actually, Cove is a protective bubble that blocks vision and provides cover; it also absorbs projectiles. Cost: Free (recharges after 2 kills). Charges: 1. Duration: 5 seconds. Usage: Protect teammates planting or defusing.
- C - Cascade: Send a wave that passes through walls and concusses enemies hit. Cost: 150 creds. Charges: 1. Usage: Stun enemies through walls before entry.
- X - Reckoning: Mark an area; after a delay, a massive wave slams down, concussing and slowing enemies in the area. Cost: 7 Ultimate Points. Duration: 3 seconds. Usage: Area denial and setup for team.
- Combos: High Tide + Cascade to push through water. Cove for spike defuse.
- Synergies: Works with Sova to know where to use Cascade.
- Recommended Build: High Tide for wall, Cove for protection, Cascade for stun, Ult for retake.
- Role: Controller (Smoke, Revival, Damage)
- Q - Pick-Me-Up: Consume a dropped soul to heal yourself and gain temporary decay-to-health? Actually, Clove's abilities revolve around soul orbs. Let's detail: Clove is a controller that can revive allies and use smoke.
- Combos: Pick-Me-Up after kill, Ruse to cover revive.
- Synergies: Works with sentinels like Sage for double revive.
- Recommended Build: Ruse for smoke, Meddle for area denial, Ult for game-changing revive.
- Role: Sentinel (Healer, Wall, Slow)
- Q - Slow Orb: Throw a slow orb that detonates on impact, creating a slowing field. Cost: 200 creds. Charges: 2 (max). Duration: 5 seconds. Usage: Slow enemies pushing, defuse, or retake.
- E - Healing Orb: Heal an ally (or self) for 60 HP over 3 seconds. Cost: Free (recharges after 2 kills). Charges: 1. Usage: Keep teammates alive, especially after duels.
- C - Barrier Orb: Create a solid wall of ice that blocks movement and vision
#### Phoenix
#### Reyna
#### Raze
- Q - Blast Pack: Place a satchel that explodes after ~2 seconds or on shot. Cost: 200 creds per charge (max 2). Cooldown: None (purchased). Usage: Launch yourself or enemies, clear corners, destroy utility. Combine with Paint Shells for combo.
- E - Paint Shells: Throw a cluster grenade that deploys sub-munitions. Cost: Free (recharges after 2 kills). Charges: 1. Duration: Explosions over 2 seconds. Usage: Clear tight spaces, force enemies out of cover, or finish low health enemies.
- C - Boom Bot: Deploy a robot that travels in a straight line, bouncing off walls, and explodes on contact with an enemy, dealing 60 damage and applying vulnerability. Cost: 250 creds. Charges: 1. Usage: Clear corners, check for campers, or force movement. Vulnerable debuff increases damage taken by 20%.
- X - Showstopper: Equip a rocket launcher with one shot that deals massive splash damage (up to 150 direct hit). Cost: 7 Ultimate Points. Usage: One-shot multiple enemies, clear tight chokepoints, or secure a site.
(Continue similarly for other Duelists: Yoru, Neon)
#### Yoru
#### Neon
---
2. Initiators
Initiators gather info and dislodge enemies from positions, enabling team pushes.
#### Sova
#### Skye
#### KAY/O
#### Breach
#### Fade
#### Gekko
---
3. Controllers
Controllers use smokes and area denial to control sightlines and chokepoints, enabling team movement.
#### Brimstone
#### Viper
- E - Toxic Screen: Place a wall of gas. Cost: Free. Charges: 1 (per round). Duration: As long as fuel lasts (activated). Usage: Block sightlines across map. Can be toggled on/off.
- C - Poison Cloud: Place a cloud of gas. Cost: 200 creds. Charges: 1. Duration: As long as fuel lasts. Usage: Smoke an area.
#### Omen
#### Astra
#### Harbor
#### Clove
- Q - Pick-Me-Up: Use a soul orb to heal 100 HP over time and gain a speed boost. Cost: 150 creds. Charges: 2 (max). Usage: Heal after a kill.
- E - Ruse: Place a smoke cloud that can be triggered again to move it? Actually, Ruse is a global smoke that can be placed on the map. Cost: Free (recharges after 2 kills). Charges: 2 (max). Usage: Place smokes from a distance.
- C - Meddle: Fire a projectile that, on impact, creates a zone that decays enemies and slows them? Cost: 200 creds. Charges: 1. Usage: Slow and weaken enemies.
- X - Not Dead Yet: Revive a dead ally at full health after a channel; can only be used once per match? No, it's an ultimate with cost 7 points. Usage: Revive a key player.
---
4. Sentinels
Sentinels specialize in defense, holding sites and providing utility like walls, slows, traps, and heals.
#### Sage
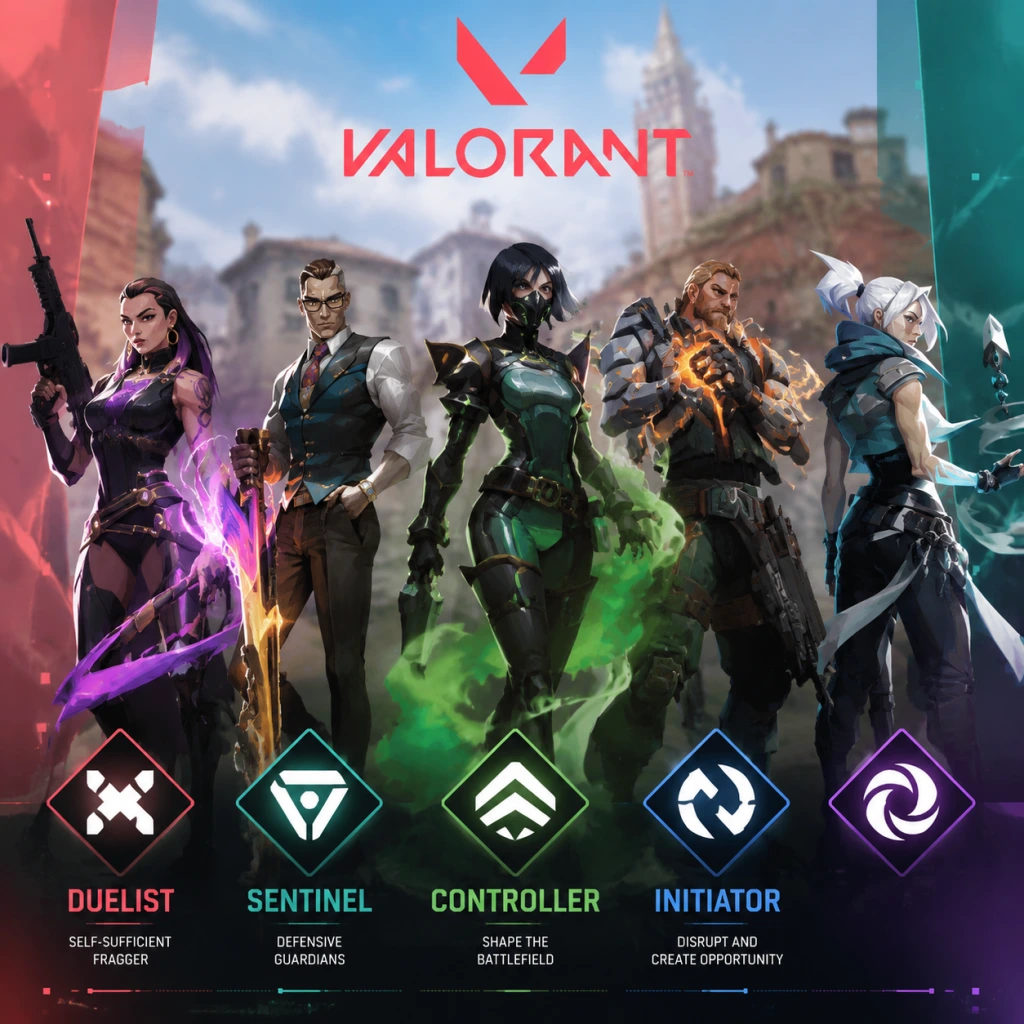
Characters & Roles
Characters & Roles Guide for Valorant
Introduction
Valorant features a diverse roster of Agents, each with unique abilities that define their role on the team. Agents are divided into four primary roles: Duelist, Initiator, Controller, and Sentinel. Understanding these roles and each Agent’s strengths, weaknesses, and team synergy is essential for building a balanced composition and executing effective strategies. This guide covers every Agent currently available (as of Act 9, Episode 5), their unlock conditions, playstyle tips, and role-specific recommendations.
Role Overview
- Duelist: Self-sufficient fraggers who excel at entry fragging and creating space. Their abilities focus on mobility, self-heals, and damage. Examples: Jett, Phoenix, Reyna, Raze, Yoru, Neon, Iso.
- Initiator: Supportive agents who gather information and set up engagements for the team. Their abilities include flashes, recon, and utility to clear angles. Examples: Sova, Breach, Skye, KAY/O, Fade, Gekko.
- Controller: Masters of area denial and map control. They use smokes, walls, and slows to block vision and manipulate sightlines. Examples: Brimstone, Viper, Omen, Astra, Harbor, Clove.
- Sentinel: Defensive specialists who anchor sites and protect teammates. Their abilities include healing, traps, and revival. Examples: Sage, Cypher, Killjoy, Chamber, Vyse, Deadlock.
- Free Agents: New players unlock 5 Agents for free after completing the introductory tutorial: Brimstone, Jett, Phoenix, Sage, Sova.
- Unlocking More Agents: All other Agents can be unlocked via:
- New Agent Releases: New Agents are unlocked via their own contract (free track) or VP purchase. They are usually available to everyone after a short exclusivity period for Battle Pass owners.
- Background: A South Korean wind-controller who uses her mobility to dash through danger and take aggressive angles.
- Strengths: Extremely agile; high skill ceiling; can entry frag with Updraft and Tailwind; Blade Storm (ultimate) is a powerful eco-round weapon.
- Weaknesses: Low health (150); relies on movement rather than abilities for survival; vulnerable when abilities are on cooldown.
- Playstyle: Play on the front line. Use Tailwind to peek corners, Updraft to gain height advantages, and Cloudburst (smoke) to block vision briefly. Save Blade Storm for eco rounds or clutch situations.
- Recommended Builds: No equipment builds, but prioritize light shields and a Phantom/Vandal for consistency. Use Cloudburst to create one-way smokes.
- Team Synergy: Works well with initiators who can clear angles before her entry (e.g., Sova recon, Skye’s Trailblazer). Combos with Brimstone for post-plant smokes.
- Background: A fiery British agent with self-sustaining abilities who can heal himself and deal area damage.
- Strengths: Self-healing (Blaze, Curveball); excellent at clearing corners with Curveball (flash); ultimate (Run It Back) provides a free engage with revived health.
- Weaknesses: Predictable flashes; abilities are loud; vulnerable when flash is on cooldown.
- Playstyle: Use Curveball to blind enemies and push. Place Blaze (wall) to heal or block vision. Use Hot Hands (molotov) for area denial or self-heal. Ultimate is best used to entry and get information without risk.
- Recommended Builds: No specific equipment; use Classic/Spectre for close-range and Vandal for longer engagements. Use Blaze aggressively to close distance.
- Team Synergy: Pairs well with Sova (recon darts to flash through) or Breach (stuns to set up Phoenix’s flash).
- Background: A Mexican vampire who thrives on kills, gaining health and invisibility from defeated enemies.
- Strengths: Self-sufficient; can heal after kills (Devour); become intangible and invisible (Dismiss); ultimate (Empress) increases fire rate and provides near-invisibility.
- Weaknesses: Requires kills to be effective; no team utility; fragile without orbs.
- Playstyle: Play cautious until you get a pick. Use Leer (eye) to blind enemies and then peek. After a kill, use Devour to heal or Dismiss to reposition. Empress is devastating in 1v1 situations.
- Recommended Builds: Prefer weapons with high fire rate (Spectre, Phantom). Use Dismiss to escape after trading.
- Team Synergy: Works best in aggressive compositions with initiators who can damage enemies (e.g., Breach stun, KAY/O flash) to set up Reyna’s kills.
- Background: A Brazilian explosives expert who uses grenades, satchels, and a rocket launcher to clear space.
- Strengths: High area damage; excellent at clearing tight spaces; Boom Bot (drone) provides intel; Showstopper (rocket) is a guaranteed kill in a radius.
- Weaknesses: No self-heal; abilities can be countered by movement; Paint Shells (grenade) has long delay.
- Playstyle: Use Boom Bot to check corners and pressure enemies. Use Paint Shells to flush out campers. Blast Pack (satchel) can be used for vertical movement or to reposition. Showstopper is great for anchoring or retaking sites.
- Recommended Builds: Short to medium range weapons (Spectre, Phantom). Use Blast Pack to boost into higher angles.
- Team Synergy: Combos with Breach (stun into Paint Shells) or Skye (Trailblazer to push enemies into Raze’s explosives).
- Background: A Japanese dimensional manipulator who uses decoys, teleports, and flashes to confuse enemies.
- Strengths: High outplay potential; Fakeout (decoy) can bait enemies; Blindside (flash) is powerful; ultimate (Dimensional Drift) allows silent scouting.
- Weaknesses: High skill floor; abilities have long cooldowns; vulnerable during teleport.
- Playstyle: Use Fakeout to mimic footsteps and trigger reaction. Use Gatecrash (teleport) to flank or escape. Flash through smokes. Dimensional Drift is excellent for lurking and gathering intel.
- Recommended Builds: Phantom for stealthy shots. Use teleports to create crossfire angles.
- Team Synergy: Needs initiator utility to clear angles before teleporting (e.g., Sova dart, Gekko Dizzy).
- Background: A Filipino speedster who runs at lightning speed, using her abilities to slide, sprint, and stun enemies.
- Strengths: Extremely fast movement; can slide and shoot simultaneously; High Gear (speed boost) allows fast rotations; Overdrive (ultimate) fires chain lightning.
- Weaknesses: Loud footsteps; requires precise movement; vulnerable while sprinting.
- Playstyle: Use Relay Bolt (stun) to slow enemies, then slide in while firing. Use High Gear to rotate quickly or chase kills. Overdrive is lethal in close quarters.
- Recommended Builds: SMGs (Spectre, Stinger) benefit from her speed. Use slide to dodge enemy fire.
- Team Synergy: Pairs well with Omen (smokes for cover) or Breach (stuns to set up her sprint).
- Background: A Chinese fixer who can create protective barriers and absorb damage to gain a killing edge.
- Strengths: Can create a shield (Double Tap) that absorbs one hit; Contingency (wall) provides temporary cover; ultimate (Kill Contract) forces a 1v1 duel.
- Weaknesses: Shield only blocks one bullet; wall is stationary; ultimate can be countered by team movement.
- Playstyle: Use Double Tap before engaging to win gunfights. Use Contingency to block sightlines or create cover for planting. Ultimate is best used to isolate a key enemy.
- Recommended Builds: Rifle of choice (Vandal for one-taps). Use shield aggressively.
- Team Synergy: Works with controllers (e.g., Brimstone smokes) to create one-way shields.
- Background: A Russian recon specialist who uses arrows to reveal enemies and shock them.
- Strengths: Excellent intel gathering; Recon Bolt (arrow) can reveal multiple enemies; Shock Bolt deals damage at range; ultimate (Hunter’s Fury) combos with recon.
- Weaknesses: Arrows are telegraphed; no self-defensive tools; vulnerable while scanning.
- Playstyle: Learn lineups for Recon Bolt on common angles. Use Shock Bolt to clear corners or flush enemies. Save ult for post-plant to delay defuse.
- Recommended Builds: Phantom for accuracy; use Recon Bolt before entering site.
- Team Synergy: Combos with anyone who needs intel (e.g., Jett, Reyna). Works with Sova shock + Brimstone molly for area denial.
- Background: A Swedish criminal with bionic arms who creates seismic charges to stun and disorient enemies.
- Strengths: Large-area stuns (Flashpoint, Aftershock); prolonged stun (Fault Line); ultimate (Rolling Thunder) knocks down enemies.
- Weaknesses: No intel; abilities require line of sight; slow casting.
- Playstyle: Use Flashpoint around corners to blind enemies for pushes. Use Aftershock to clear angles. Fault Line is best for retakes. Rolling Thunder is great for site executes.
- Recommended Builds: Shotguns (Judge) or SMGs for close-range. Use stuns to close distance.
- Team Synergy: Perfect with Jett (flash + dash) or Raze (stun into explosives).
- Background: An Australian nature healer who sends out animal companions to scout, flash, and heal.
- Strengths: Versatile: healing, scouting (Trailblazer), and flashing (Guiding Light); Trance (heal) provides team sustain; ultimate (Seekers) tracks enemies.
- Weaknesses: Heal is self-only if needed; abilities can be dodged; long cooldowns.
- Playstyle: Use Trailblazer to check corners and concuss enemies. Use Guiding Light to flash around cover. Healing is best used between rounds or after trades. Seekers are excellent for hunting down low-health enemies.
- Recommended Builds: Guardian or Vandal. Use Trailblazer to clear before entering.
- Team Synergy: Supports duelists like Phoenix and Reyna who lack team utility.
- Background: A robot fighting machine from a dystopian timeline, designed to suppress enemy abilities.
- Strengths: Suppresses all enemy abilities in a radius (NULL/CMD); flash (Flash/Drive) and knife (FRAG/MENT) for info; ultimate gives a free revive if downed.
- Weaknesses: Suppression leaves him vulnerable; abilities have long cooldowns; no self-heal.
- Playstyle: Use ZERO/POINT (knife) to check corners and deny utility. Use FLASH/DRIVE to flash teammates in. FRAG/MENT (molotov) for area denial. Ultimate is great for retakes as it allows a second chance.
- Recommended Builds: Phantom or Vandal. Use knife before pushing.
- Team Synergy: Counters sentinels (Cypher, Killjoy) by disabling traps. Combos with Breach for full stun/flash combos.
- Background: A nightmare-controlling Turkish bounty hunter who uses haunt and prowlers to track and debilitate enemies.
- Strengths: Ability to track enemies through walls (Haunt); Prowlers that can nearsight enemies; ultimate (Nightfall) disables enemies in a large area.
- Weaknesses: Haunt is loud; Prowlers can be shot; abilities require precision.
- Playstyle: Use Haunt to reveal positions, then follow up with Prowlers to push blinded enemies. Use Seize (eye) to root enemies. Nightfall is great for site pushes.
- Recommended Builds: Operator (sniper) for long-range picks after Haunt. Use flash angles for Prowler pushes.
- Team Synergy: Works with any Duelist (e.g., Jett, Raze) for entry after Nightfall.
- Background: An LA eco-warrior who uses his creature companions to disrupt and collect resources.
- Strengths: Dizzy (flyer) can concuss enemies; Wingman (planting buddy) can plant/defuse; Mosh (molotov) creates slowing zone; ultimate (Thrash) disables an enemy and allows pickups.
- Weaknesses: Companions can be killed; Wingman is slow; abilities have short range.
- Playstyle: Use Dizzy to scout and concuss. Use Wingman to safely plant or defuse. Mosh is for area denial. Thrash is excellent for initiating fights or securing a pick.
- Recommended Builds: SMG for close range. Use Wingman aggressively to bait enemies.
- Team Synergy: Supports sentinel play (Wingman defuse). Pairs with Breach for additional stuns.
- Background: A veteran U.S. commander with orbital smokes and a powerful airstrike.
- Strengths: Three smokes that last 19 seconds; Stim Beacon increases fire rate; ultimate (Orbital Strike) clears large areas.
- Weaknesses: Smokes are line-of-sight blocked; no mobility; ultimate can be avoided with movement.
- Playstyle: Use Sky Smoke to block key sightlines for site executes. Use Stim Beacon for entry fraggers. Orbital Strike is best for post-plant or retakes.
- Recommended Builds: Vandal for medium range. Use Sky Smoke to fake smokes.
- Team Synergy: Classic controller support. Works with Jett (smoke to dash through) or Sova (post-plant lineups).
- Background: A toxic-wielding chemist who can shape a controllable wall of acid and poison her enemies.
- Strengths: Poison abilities deal damage over time; Smoke Launcher is reusable; Pit (ultimate) creates a large gas cloud that drains health.
- Weaknesses: Requires fuel management; wall and smoke are stationary once placed; low health.
- Playstyle: Use Toxic Screen (wall) to split the map. Use Poison Cloud to one-way smoke. Snake Bite (molotov) for area denial. Pit is excellent for retaking a site.
- Recommended Builds: Operator for long range through one-way smoke. Manage fuel carefully.
- Team Synergy: Pairs with Cypher (traps inside Pit) or Killjoy (utility in smoke).
- Background: A mysterious ghost-like agent who uses darkness to teleport, blind, and create smokes.
- Strengths: Versatile smokes (long duration); Paranoia (flash) can disable enemies; Shrouded Step (teleport) for repositioning; ultimate (From the Shadows) for global map control.
- Weaknesses: Paranoia is slow; teleport has audio cue; smokes are small radius.
- Playstyle: Use Paranoia to blind enemies before entry. Use Dark Cover (smoke) to block vision. Use Shrouded Step to off-angle or escape. Use Teleport to fake rotates.
- Recommended Builds: Phantom for stealth. Use Paranoia through walls.
- Team Synergy: Works with any Duelist. Teleport can be used to flank while Sova reveals.
- Background: A cosmic guardian who uses star nodes to create smokes, stuns, and pulls from anywhere on the map.
- Strengths: Global ability placement; Nebula (smoke), Nova Pulse (stun), Gravity Well (pull); ultimate creates a wall that blocks audio and vision.
- Weaknesses: Requires star management; slow to react; star cooldowns.
- Playstyle: Place stars in key positions before round starts. Use Gravity Well to hold corners. Use Nova Pulse for info. Ultimate can be used to isolate enemies.
- Recommended Builds: No special equipment. Use stars for default positions.
- Team Synergy: Needs teammates to communicate star placements. Works with Sova for lineups.
- Background: An Indian monsoon controller who uses water barriers, slows, and geysers to control space.
- Strengths: Large walls (Cove, Cascade) that block bullets; slow bubble (High Tide); ultimate (Harbor’s Wrath) creates a moving wall.
- Weaknesses: Walls can be shot through (Cove bulletproof); slow wind-up; abilities have long cooldowns.
- Playstyle: Use Cove to block vision and create safe zones. Use Cascade for horizontal control. High Tide slows enemies. Ultimate for splitting sites.
- Recommended Builds: Phantom or Vandal. Use Cove to plant safely.
- Team Synergy: Works with Raze (wall + explosives) or Phoenix (wall + heal).
- Background: A Scottish necromancer who uses life-draining abilities to heal herself and deceive enemies.
- Strengths: Self-heal on kill; Ruse (decoy) creates fake smoke; ultimate revives herself; Pick-Me-Up provides temp shield.
- Weaknesses: Decoy is obvious; no area smokes; vulnerable without kills.
- Playstyle: Use Ruse to fake smokes. Use Pick-Me-Up after kills for extra HP. Self-heal conservatively. Ultimate is best used when you have position advantage.
- Recommended Builds: SMG for close fights. Use decoy to bait enemies.
- Team Synergy: Pairs with Reyna for self-sustain compositions.
- Background: A Chinese healer who can heal allies, create barriers, and slow the battlefield.
- Strengths: Heal (Healing Orb) keeps teammates alive; Barrier Orb (wall) blocks pathways; Slow Orb (slow) delays enemies; Resurrection (ultimate) revives a dead teammate.
- Weaknesses: No offensive abilities; barrier can be destroyed; slow has small radius.
- Playstyle: Stay alive as the healer. Place Barrier Orb to split site entries. Use Slow Orb to delay rushes. Save Resurrection for clutch situations.
- Recommended Builds: Phantom for accuracy. Use Barrier Orb to block common chokepoints.
- Team Synergy: Essential for any comp. Works with Sova (info + heal) or Break (stun + revive).
- Background: A Moroccan surveillance expert who places cameras and traps to monitor enemy movements.
- Strengths: Spycam (camera) allows vision; Trapwire (tripwire) reveals and concusses enemies; Cyber Cage (cage) blocks vision and audio; Neural Theft (ultimate) reveals all enemies.
- Weaknesses: Stationary traps; camera can be shot; no self-heal.
- Playstyle: Set up Trapwire on common paths. Use Spycam for info in key angles. Use Cyber Cage to block vision after a tripwire triggers. Ultimate is best after a kill to get full intel.
- Recommended Builds: Operator (sniper) to hold long angles with trap coverage.
- Team Synergy: Pairs with Killjoy for double trap setups. Works with Viper (smoke + trip).
- Background: A German engineering prodigy who deploys turrets, bots, and grenades to lock down the map.
- Strengths: Turret (Alarmbot) detects enemies and slows; Nanoswarm (nade) deals damage; ultimate (Lockdown) detains enemies in a large radius.
- Weaknesses: Utility can be destroyed; turret has limited range; vulnerable while setting up.
- Playstyle: Place Alarmbot and Turret to cover flanks. Use Nanoswarm for post-plant. Ultimate for retakes or locking down a site.
- Recommended Builds: Judge (shotgun) for close-range site defense.
- Team Synergy: Combos with Cypher for trap-heavy holds. Works with Brimstone (smoke + turret).
- Background: A French weapons designer who uses custom pistols, traps, and a teleport to duel enemies.
- Strengths: Headhunter (pistol) is powerful; Rendezvous (teleport) provides mobility; Trademark (trap) slows enemies; Tour de Force (ultimate) is a special sniper.
- Weaknesses: Teleport has cooldown; trap can be destroyed; ultimate is expensive.
- Playstyle: Use Headhunter for eco rounds. Use Rendezvous to off-angle and escape. Use Trademark to cover flanks. Tour de Force for long-range picks.
- Recommended Builds: Operator for ultimate synergy. Use teleport to stay alive.
- Team Synergy: Works as a secondary sentinel. Pairs with Sage for healing after teleports.
- Background: A Venetian materialist who can create metallic walls, magnets, and a chaos-inducing vortex.
- Strengths: Razorvine (wall) damages and slows; Maelstrom (vortex) applies a decay debuff; ultimate (Annihilation) pulls enemies into a fatal whirlpool.
- Weaknesses: Wall is destructible; vortex is slow to activate; ultimate can be dodged.
- Playstyle: Use Razorvine to block paths. Use Maelstrom for area control. Ultimate is best in tight corridors.
- Recommended Builds: Vandal for consistent damage. Use wall to create one-way smokes.
- Team Synergy: Works with Omen (smoke + wall) or Brimstone (stim + wall).
- Background: A Norwegian security specialist who uses barriers and drones to lock down areas.
- Strengths: Sonic Sensor (trip) deafens and highlights enemies; Barrier Mesh (wall) blocks vision; GravNet (slow) slows enemies; ult (Annihilation) is a vortex that kills.
- Weaknesses: Abilities have limited range; barrier can be broken; ultimate is slow.
- Playstyle: Place Sonic Sensor on common paths. Use Barrier Mesh to block sightlines. GravNet to delay pushes. Ultimate for site retakes.
- Recommended Builds: Phantom for accuracy. Use Sonic Sensor near chokepoints.
- Team Synergy: Combos with Vyse for double wall setups.
- Standard Balanced Comp: 1 Duelist, 1 Initiator, 1 Controller, 2 Sentinels (or 1 Sentinel + 1 Flex).
- Aggressive Comp: 2 Duelists, 1 Initiator, 1 Controller, 1 Sentinel.
- Defensive Comp: 1 Duelist, 1 Initiator, 2 Controllers, 1 Sentinel (e.g., Viper + Brimstone for double smoke).
- Utility Comp: Use initiators with high info (Sova, Fade) paired with sentinels for trap setups.
Unlock Conditions
- Agent Contract: Earn XP by playing to progress through a free contract (each Agent has its own contract). Requires 8,000 Kingdom Credits to unlock the Agent after reaching Tier 5 (or 10 for newer Agents, but typically 8,000).
- Direct Purchase: Spend 1,000 Valorant Points (VP, premium currency) to instantly unlock any Agent.
Detailed Agent Breakdown
#### Duelists
##### Jett
##### Phoenix
##### Reyna
##### Raze
##### Yoru
##### Neon
##### Iso
#### Initiators
##### Sova
##### Breach
##### Skye
##### KAY/O
##### Fade
##### Gekko
#### Controllers
##### Brimstone
##### Viper
##### Omen
##### Astra
##### Harbor
##### Clove
#### Sentinels
##### Sage
##### Cypher
##### Killjoy
##### Chamber
##### Vyse
##### Deadlock
Role Composition Tips
Conclusion
Mastering each Agent’s role and abilities is key to climbing in Valorant. Experiment with different Agents to find your preferred playstyle, and communicate with your team to build effective compositions. Remember that unlocking Agents requires patience (free track) or investment (VP), so prioritize Agents that fit your role. Good luck!
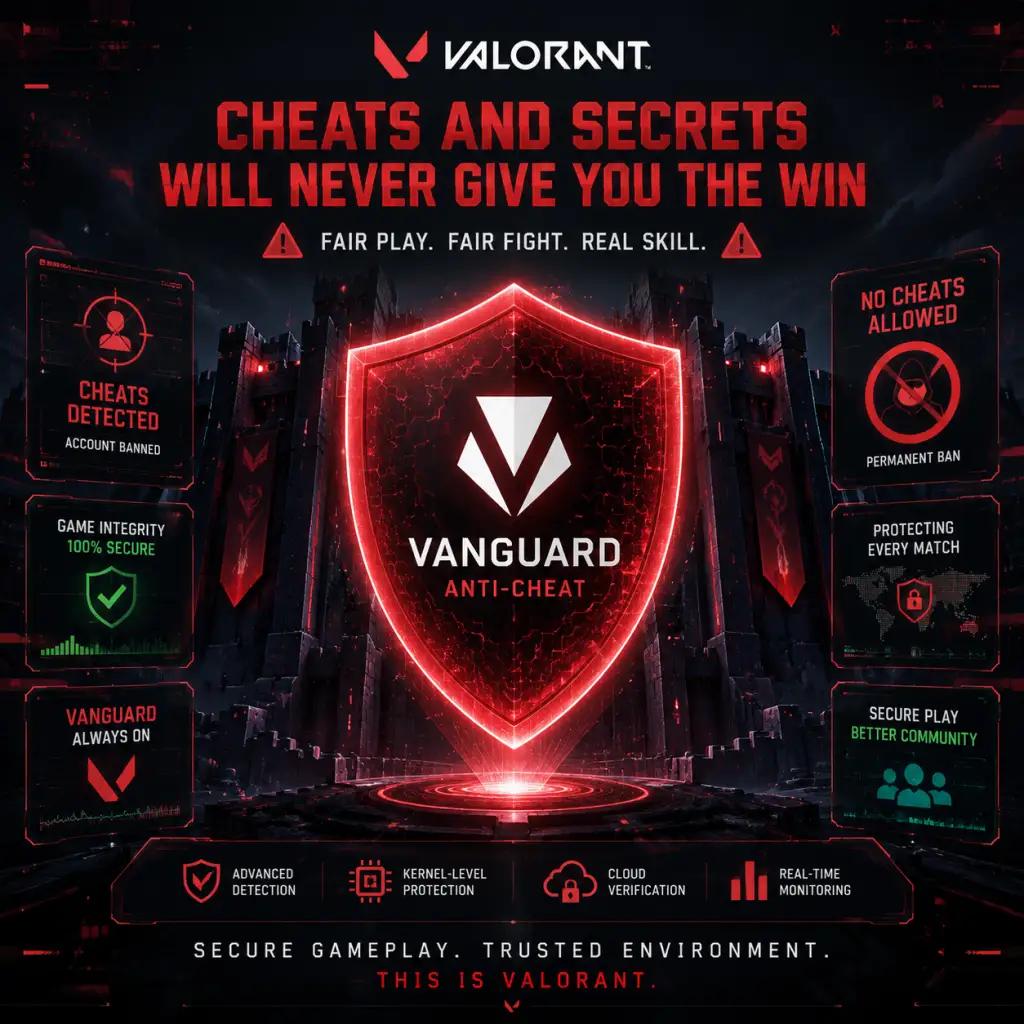
Cheats & Secrets
Cheats & Secrets Guide for Valorant
Introduction
Valorant is an online multiplayer tactical shooter with a strict anti-cheat system (Vanguard). There are no traditional cheat codes, unlock codes, or console commands available to players. Any attempt to use third-party cheats will result in an immediate and permanent ban. This guide instead focuses on legitimate Easter eggs, hidden interactions, and developer-intended secrets that can be discovered without violating the game’s Terms of Service.
---
Easter Eggs (Discoverable by All Players)
These are hidden or humorous elements placed by Riot Games across various maps and agents.
#### Map-Specific Easter Eggs
- Ascent – Radio Player: In the mid-market area (near B site), there is a small radio. If you shoot it, it will play a short tune. You can also interact with some radios in other parts of the map.
- Bind – Soccer Ball: Near the B site entrance (in the hookah area), there is a ball that can be kicked around by shooting or using melee. It makes realistic bouncing sounds.
- Haven – Church Bells: On the Haven map, the church tower bells ring at the start of each round. If you shoot the bells, they will produce a metallic clang, but no special trigger.
- Icebox – Antarctic Flag: On the Icebox map, you can find a penguin plushie on a crate near the B site. Also, the map has a hidden shipwreck Easter egg visible from certain angles.
- Breeze – Hidden Ball: On the Breeze map, near the A site bridge, there is a small ball that can be kicked (similar to the Bind soccer ball).
- Fracture – Arcade Machine: In the defender spawn area, there is an arcade machine with a playable mini-game? Actually, it is just decorative, but it has blinking lights.
- Pearl – Hidden Morse Code: Under the B site water, there is a small underwater cavern with a blinking light that emits Morse code. Deciphered, it spells out “RIOT.”
- Lotus – Ancient Symbols: On the Lotus map, you can find hidden symbols on walls that match the in-game lore about the “Radiant” universe. These are triggered by specific ability interactions? Not confirmed.
- Sunset – Hidden Diner Sign: Near the A site, there is a neon sign for a diner that flickers when shot.
- Breach – Fake Laugh: When Breach uses his ultimate (Rolling Thunder), if you quickly toggle his voice line, he may let out a strange, almost robotic laugh—an intentional bug or hidden feature.
- Cypher – Surveillance Camera: Cypher’s Trapwire (ability) can reveal hidden messages on certain map objects. For example, on Ascent, placing a Trapwire on the crate near A heaven will show a small ‘R’ symbol.
- Killjoy – Alarm Bot Dances: If you place Killjoy’s Alarmbot on top of certain interactive objects (like the Bind soccer ball), the bot will rotate erratically, mimicking a dance.
- Sage – Orb Song: When Sage uses her healing orb on a teammate while near the Ascent radio, the radio may play a distorted version of the healing sound.
- Reyna – Voice Line Reference: Reyna’s “I am a God” voice line is a reference to her backstory; no hidden activation needed.
- Gun Buddy References: Many gun buddies are direct references to other Riot games (e.g., “PORO” from League of Legends, “Valorant’s First” for early adopters). Some have hidden animations—for example, the “TactiFriends” buddy moves its head when you inspect the weapon.
- Player Card Hidden Messages: Some player cards have hidden numbers or phrases when viewed in a specific order (e.g., the “Duelist” series card has a faint “1v5” text).
- VCT Championship Trophies: In the practice range, you can find small replicas of the VCT champions’ trophies scattered around.
- Spike Plant Animations: When planting the spike in specific locations (e.g., on the Haven church altar), the agent will perform a unique animation (like a prayer). This is purely visual.
- Team-Up Reactions: When certain agents are on the same team, they may have unique voice line interactions. Example: Phoenix and Sage have a banter about Phoenix’s fire and Sage’s ice.
- Kill-Related Lines: Some agents have rare voice lines upon getting a kill with a specific weapon or ability. Example: Jett says “Nice try, bozo” when killing with a headshot.
- Radiant Realm Dialogue: In the Lore, agents often reference the “Radiant” realm; these lines play randomly during pre-round.
- Agent Unlocks: No hidden unlock codes—agents are purchased with Kingdom Credits or Valorant Points. There is no secret free agent code.
- Skin Variants: Some weapon skins have hidden color variants that can only be unlocked by leveling up the battle pass (e.g., the “Glitchpop” skin line has a rare platinum variant).
- Shooting Range Targets: In the practice range, if you shoot all six targets in a specific order (shown on the wall), a hidden “Bumper Car” minigame activates? Actually, no—that is a myth. The only hidden feature is a small island behind the range with a few targets and a radio.
- Spawn Room Easter Eggs: In the spawn room, there is a computer monitor that displays a text file if you get close. It says “Hello World.”
- No Console Commands: Valorant has no developer console available to players. All settings are adjusted via the in-game menu.
- No Cheat Codes: Unlike single-player games, Valorant does not have any code to toggle god mode, unlock all skins, or reveal enemy positions.
- Third-Party Programs: Any software claiming to provide cheats (aimbots, wallhacks) is illegal and will trigger Vanguard bans.
- While the in-game menu offers many crosshair presets, you can import crosshairs from other players via a code (e.g., `0;P;c;5;t;1;o;1`). This is not a secret but a sharing feature.
- There is a hidden option to change crosshair color to any hex code by manually editing the settings file, but this is not officially supported.
- In the audio settings, there is a hidden option to enable audio visualizers (bars that react to sound) but it is only available in custom games with cheats enabled? Actually, no—this is incorrect. Visualizers are not in the game.
- Riot has released official Valorant wallpapers and concept art on their website; some are exclusive to newsletters.
#### Agent-Specific Easter Eggs
#### Cosmetic and Lore Easter Eggs
---
Developer-Intended Secrets (Safe to Use)
These are hidden features that Riot has acknowledged or that are part of the game’s lore, not exploits.
#### Hidden Voice Lines
#### Unlockable Content via In-Game Currency
#### Practice Range Secrets
---
Cheat Codes & Unlock Commands (None Exist)
---
Other Hidden Features
#### Crosshair Customization Hidden Options
#### Audio Visualizers
#### Wallpaper Collection
---
Conclusion
Valorant intentionally has no cheat codes to ensure fair competitive play. The hidden content consists mainly of Easter eggs and developer jokes. Players are encouraged to explore maps and listen to agent interactions for fun surprises. Remember: using external cheats or exploits is against the rules and will get your account permanently banned. Stay respectful and enjoy the game as intended.