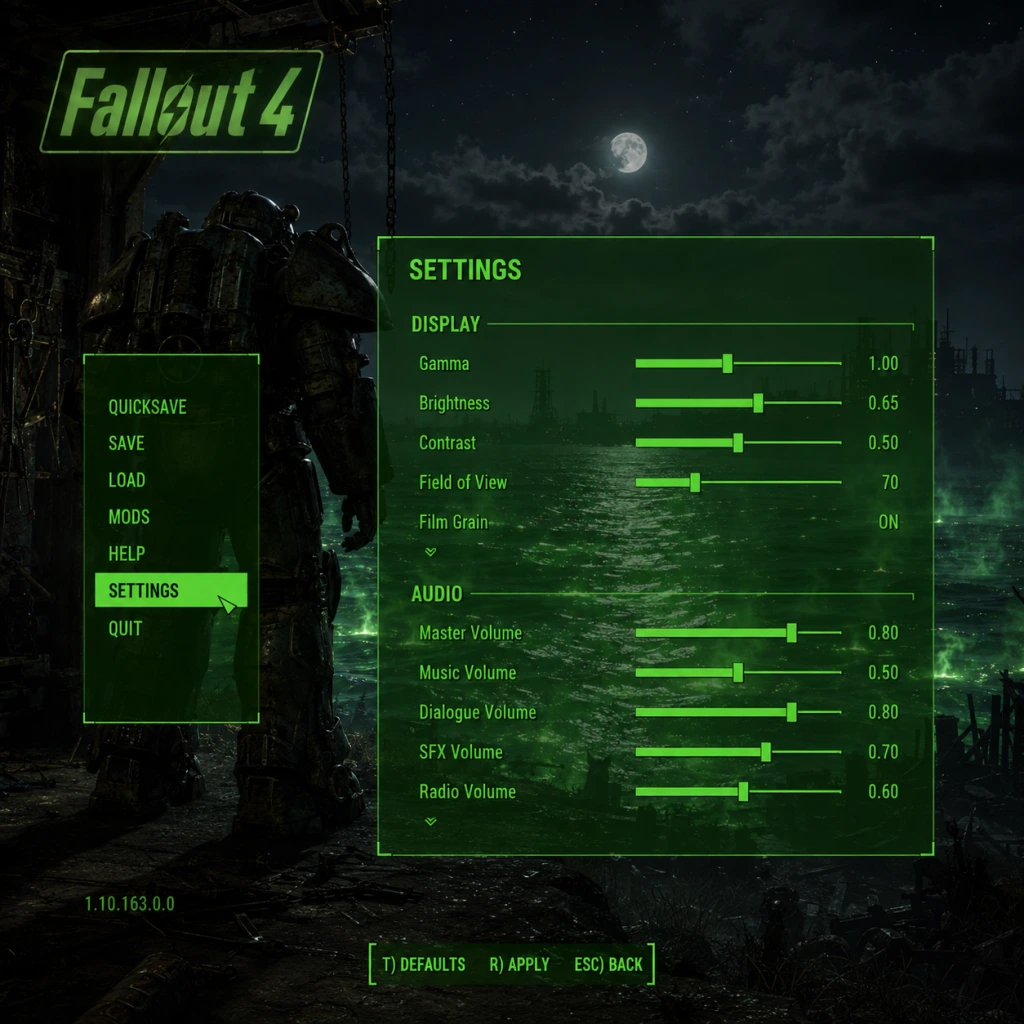
Game Settings
Fallout 4: Comprehensive Game Settings Guide
This guide covers every setting category in Fallout 4 — Graphics, Audio, Controls, Accessibility, Language, Network, and Gameplay — with expert recommendations for performance and quality across different hardware tiers. Special attention is given to settings that are easy to misconfigure or have unusual behavior.
---
Graphics Settings
Graphics settings dramatically affect performance and visual fidelity. The game uses Bethesda’s Creation Engine, which is CPU-bound in many areas (especially downtown Boston).
#### Key Graphics Settings and Their Impact
| Setting | Impact on Quality | Impact on Performance | Notes |
|---|---|---|---|
| Resolution | High | High | Native resolution is best; use Upscaling (e.g., FSR, DLSS with mods) to boost FPS. |
| Antialiasing (TAA) | Smooths edges | Medium | TAA is standard; FXAA is lighter but blurrier. Use TAA low for best balance. |
| Anisotropic Filtering | Texture clarity at angles | Low | Set to 16x for almost no performance cost. |
| Shadow Quality | Shadow detail/distance | High | Medium recommended; Ultra drops FPS heavily in built-up areas. |
| Shadow Distance | How far shadows render | High | Lower this to Medium or Low in Boston for smoother gameplay. |
| Decal Quantity | Number of persistent decals | Low | High values can cause memory issues; Medium is safe. |
| Lighting Quality | Light complexity | Medium | Medium offers good visuals without major FPS hit. |
| God Rays | Volumetric light shafts | Very High | Disable or set to Low — one of the biggest performance drains. |
| Depth of Field | Blur distant objects | Low | Personal preference; disabling improves clarity and slightly boosts FPS. |
| Ambient Occlusion | Contact shadows | Medium | SSAO (default) fine; HDAO+ is heavier. |
| Screen Space Reflections | Reflections on water/metal | High | Set to Low or Off for significant FPS gain in reflective areas. |
| Rain Occlusion | Rain sound obstruction | Low | Minimal performance impact; keep on. |
| Motion Blur | Blurs during movement | Low | Many players disable for clearer view; no real performance gain. |
| Lens Flare | Sun flare effects | Low | Disable if you find it distracting. |
| Weapon Debris | Bullet casings, fragments | Medium | Disable — notorious for causing stuttering on all hardware. |
| Texture Quality | Sharpness of textures | Medium (VRAM dependent) | Use High if you have ≥4GB VRAM; otherwise Medium. |
| Actor Detail | NPC model detail | Medium | High increases draw calls; Medium reduces CPU load. |
| Water Quality | Water transparency & reflections | Medium | Low removes underwater visibility; keep at least Medium. |
Low-End (e.g., GTX 1050 / Ryzen 3 / 8GB RAM)
- Preset: Low (then tweak up sparingly)
- Resolution: 1280×720 or 1600×900
- Upscale: Use FSR via mod or set render scale to 75%
- God Rays: OFF
- Weapon Debris: OFF
- Shadow Quality: Low
- Shadow Distance: Low
- Decal Quantity: Low
- Texture Quality: Medium (if VRAM is 4GB)
- Target: 30–45 FPS stable
- Preset: Medium (then adjust)
- Resolution: 1920×1080
- God Rays: Low
- Weapon Debris: OFF
- Shadow Quality: Medium
- Shadow Distance: Medium
- Texture Quality: High (if ≥6GB VRAM)
- Ambient Occlusion: SSAO
- Target: 60 FPS most areas, drops to 45–50 in Boston
- Preset: High (custom)
- Resolution: 2560×1440 or 1920×1080 with max mods
- God Rays: Low (still too heavy at High)
- Weapon Debris: OFF (still causes stutter)
- Shadow Quality: High or Ultra (if CPU is strong)
- Shadow Distance: High (but drop to Medium in Boston)
- All other settings: High/Ultra
- Use Nvidia Reflex (mod) to reduce input lag
- Target: 60 FPS stable at 1440p
- Preset: Ultra but with manual tweaks
- Resolution: 3840×2160
- God Rays: Medium (Ultra is still heavy)
- Weapon Debris: OFF (still buggy)
- Shadow Quality: Ultra
- Shadow Distance: Ultra (be prepared for 40 FPS in Boston)
- Use high-quality texture mods
- Target: 60 FPS with occasional dips
- Weapon Debris: Always disable — it causes random stutters and crashes on all hardware. The setting is named "Weapon Debris" under Advanced options.
- God Rays: The performance cost is exponential; set to Low or Off unless you have a top-tier system and accept frame drops.
- Shadow Distance: Very high CPU usage. In downtown areas, lower this to Medium (even on high-end PCs) to smooth out frame pacing.
- Interface Transparency: Under Display settings, this is not a graphics setting per se but affects HUD opacity. Default is fine; don’t set it to 0 if you want to see your compass and HP.
- Upscaling / Render Scale: The game has a built-in "Render Scale" slider (under Advanced). Setting it below 100% reduces resolution internally. This is not an FSR/DLSS solution; it’s just upscaling. Many players mistake it for supersampling. Use with caution — setting too low (e.g., 50%) makes the game extremely blurry.
- Master Volume: Overall volume level.
- Music Volume: Background music (ambient, combat).
- SFX Volume: Sound effects (gunshots, footsteps, explosions).
- Voice Volume: Dialogue and NPC speech.
- Radio Volume: For the in-game radio (Diamond City Radio, etc.).
- Output Device: Select your speakers/headphones.
- Sound Quality: Options are "Mono", "Stereo", "Surround 5.1", "Surround 7.1". Choose based on your hardware. Stereo is safe for most headphones. Surround can cause muffled dialogue if your system isn’t properly configured.
- If dialogue sounds too quiet or imbalanced, increase Voice Volume relative to SFX.
- The radio can be distracting during exploration; consider turning it off for better immersion in environmental audio.
- Key Bindings: Fully customizable. Common rebind: Melee attack to mouse side button, VATS to Q, Quick Save to F5.
- Mouse Sensitivity: Adjust for look speed. Default 15 is often too high; many prefer 8–12.
- Mouse Smoothing: Can cause input lag; disable for more responsive aiming.
- Invert Y-Axis: For flight sim enthusiasts; off by default.
- Controller Sensitivity: Separate from mouse sensitivity and applies when a controller is plugged in.
- Vibration: Enable/disable for controllers.
- The game has full support for Xbox One/Series and PlayStation 4/5 controllers (wired or Bluetooth).
- V.A.T.S. Targeting Stick Sensitivity: Controls how quickly the targeting reticle moves in V.A.T.S. Use default or reduce if you overshoot targets.
- Look Sensitivity: Adjust for camera speed.
- Swap Trigger Buttons for Aim/Shoot: Some players swap LT/RT with LB/RB for faster firing.
- Mouse Smoothing (listed under Advanced Controls) is enabled by default and adds input lag. Turn it off.
- Auto-Sprint (under Gameplay): If enabled, you sprint by pressing forward once? No — it’s actually a toggle for always running. Make sure it’s off unless you want to always sprint.
- V.A.T.S. Critical Hit (key binding): By default, press F (or RT+space on controller). This is often triggered accidentally if you mash space during V.A.T.S. Rebind to a less convenient key if needed.
- Subtitles: Under Display -> Subtitles. Enable to show spoken dialogue as text. Also has a separate toggle for "Dialogue Subtitles" and "Radio Subtitles".
- Closed Captions: Not available natively, but subtitles include sound descriptions (e.g., [gunshot]) when enabled.
- Colorblind Modes: None. You must rely on mods (e.g., “Colorblind Aid” mod).
- Difficulty: Adjustable anytime. See Gameplay section. Lower difficulty reduces damage taken; more accessible for reaction time concerns.
- Aim Assist (Controller only): On by default. Helps with tracking enemies. Can be turned off in Controls.
- V.A.T.S. Pause: The V.A.T.S. system pauses time (except in Survival mode), allowing players with slower reflexes to target enemies.
- Font Size: Not adjustable. Recommended to increase HUD size via mods if needed.
- Quick Save: Use F5 (PC) or hold select (console) to quicksave frequently, reducing frustration from unexpected deaths.
- Subtitles do not appear for radio broadcasts unless you enable “Radio Subtitles” separately.
- The game lacks a text-to-speech function; visually impaired players may require mods like “Fallout 4 Speech Recognition” or external screen readers (with limited support).
- Available Languages (on PC via Steam): English, French, German, Italian, Spanish, Polish, Russian, Japanese, Chinese (Simplified), and more depending on your region.
- Voice Language: Usually matches text language. Some versions (e.g., Russian) have full voice acting; others (e.g., Japanese) have only subtitled dialogue with English voices.
- Changing Language: On Steam, right-click game -> Properties -> Language tab. On consoles, language is tied to system language.
- If you change language after starting a save, dialogue and subtitles will switch, but previously played audio remains in the original language until re-encountered. Not game-breaking but immersion-breaking.
- The game does not support separate text/voice languages natively. Mods can enable multi-language support but may cause instability.
- Creation Club: Requires internet connection to browse and download mods from Bethesda's official store. Can be disabled in main menu under Mods -> Creation Club -> Settings (toggle “Online” off).
- Mod Browser: In-game mod manager (Bethesda.net) requires internet. You can also install mods manually from Nexus Mods without internet.
- Cloud Saves: Steam and Xbox support cloud saves. Ensure this is enabled in your platform settings to backup your progress.
- No Multiplayer: Fallout 4 is single-player only. No co-op or competitive modes.
- If you have slow internet, disable Creation Club auto-downloads to avoid stutter when browsing mods.
- Cloud saves can sometimes conflict if you play on multiple PCs; manual saves are recommended before major mod installations.
Mid-Range (e.g., GTX 1660 / RTX 2060 / Ryzen 5 / 16GB RAM)
High-End (e.g., RTX 3070 / RTX 4070 / Ryzen 7+ / 32GB RAM)
Ultra / 4K (e.g., RTX 4090 / Intel i9 / 64GB RAM)
#### Settings That Are Easy to Misconfigure
---
Audio Settings
Audio settings control volume, output device, and sound quality.
Recommended: Keep all sliders at 100% except Radio (50% if you want to hear environmental sounds). Set Sound Quality to Stereo unless you have a verified surround setup.
Special Attention:
---
Controls Settings
Control settings allow rebinding keyboard/mouse and controller inputs.
#### Keyboard & Mouse
#### Controller (Xbox / PlayStation)
Special Attention:
---
Accessibility Settings
Fallout 4 does not have a dedicated accessibility menu, but several options aid different needs.
Special Attention:
---
Language Settings
Language selection affects text and voice.
Special Attention:
---
Network Settings
Fallout 4 has very limited network features:
Special Attention:
---
Gameplay Settings
Gameplay settings affect the game’s core loop and difficulty.
| Setting | Effect | Notes |
|---|
| Survival Mode | Overhaul: no fast travel, limited saving (sleep only), hunger/thirst/sleep needs, increased lethality. Can be toggled on/off via difficulty menu, but once enabled, you cannot revert to non-Survival without losing progress (unless using mods).
| Auto-Save on Wait | Saves when you wait (rest). | Keep on.
| Auto-Save on Travel | Saves when fast traveling (not in Survival). | Keep on.
| V.A.T.S. Freeze Time (under Controls) | When enabled, time stops in V.A.T.S. In Survival mode, time always flows slowly but not completely frozen.
| Dialogue Subtitles | Show subtitles for conversations. | On recommended.
| Radio Subtitles | Subtitles for radio. | Off by default; enable if you want to read lyrics.
| Compass | Shows direction and quest markers. | Can be toggled in Display.
| HUD Opacity | Adjusts transparency of HUD elements. | Default 80% is good; 0% removes HUD.
| Pip-Boy Light | Brightness of the flashlight. | Can be changed via console command (f pipboylightfade) but not in menu.
| Subtitles (Audio) | Toggle all subtitles. | Separate from Dialogue Subtitles.
#### Recommended Difficulty Settings
- First Playthrough: Normal — balanced challenge and loot.
- Story Focused: Very Easy — enemies die quickly, minimal survival stress.
- Veteran: Hard or Very Hard — bullet sponges; encourages tactical VATS usage.
- Hardcore: Survival — requires planning, resource management, and careful saving.
- Survival Mode disables the console (PC) and quicksaves. It also multiplies damage taken significantly. Do not enable Survival Mode mid-game unless you are prepared for permadeath-like consequences.
- Auto-Save can be disabled — it’s highly recommended to keep both auto-save options ON (except in Survival where they don’t work) to prevent losing progress.
- V.A.T.S. Freeze Time is a personal preference; some players prefer it off for a more action-oriented experience.
- Always start with a predefined preset (Low/Medium/High) and then tweak up or down based on your FPS target. Use a performance monitor (e.g., MSI Afterburner) to see which settings are bottlenecks.
- Disable Weapon Debris first if you experience stuttering — it’s the biggest cause of uneven frame pacing.
- If you have a G-Sync/FreeSync monitor, enable V-Sync in the game (or via driver) to prevent screen tearing, but be aware of added input lag.
- For console players: On Xbox One X / PS4 Pro, use 1080p mode for steady 30 FPS; on Xbox Series X/S, use the FPS Boost (if available) for 60 FPS. On PS5, the game runs via backward compatibility at 30 FPS (no official 60 FPS patch).
- If you plan to mod, install the game outside of Program Files (e.g., C:\Games) to avoid permission issues.
Special Attention:
---
Final Tips for New Players
---
With these settings tuned to your hardware and preferences, Fallout 4 will run smoother, look better, and be more enjoyable. Remember that the game is not perfectly optimized, so occasional frame drops in downtown Boston are normal even on high-end systems.