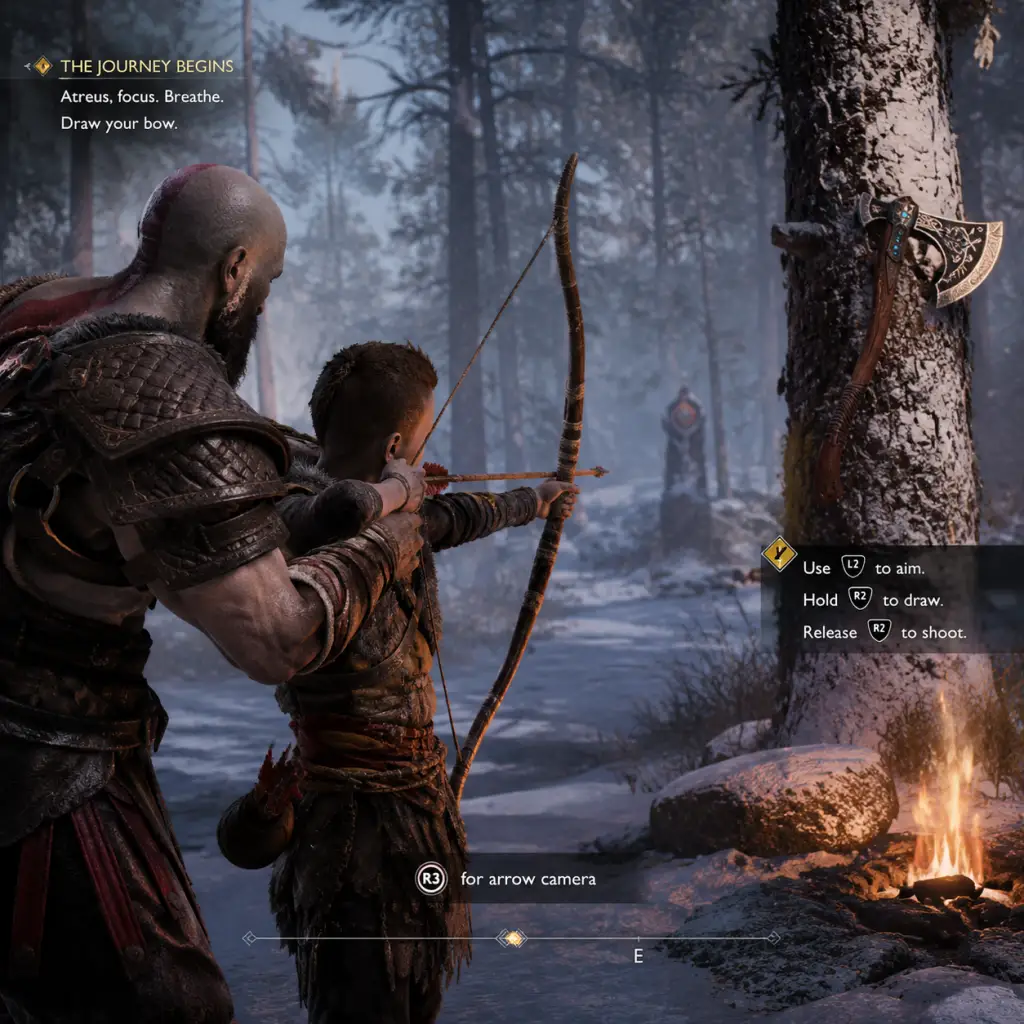
Getting Started
Getting Started Guide for God of War Ragnarök
This guide is tailored for brand-new players. Whether you're playing on PS4, PS5, or PC, the core experience is the same. By the end of this guide, you'll be ready to face the Fimbulwinter.
Introduction to the World and Story
God of War Ragnarök continues where 2018's God of War left off. You play as Kratos, the Greek God of War, now living in Midgard with his teenage son Atreus. Three years have passed since the last game; the world is locked in Fimbulwinter (a prelude to Ragnarök). The Norse gods are hunting them. Your goal: survive, protect Atreus, and confront the prophecy of Ragnarök.
First Hour Walkthrough (No Major Spoilers)
1. The Prologue – You start inside your home in Midgard. Follow the on-screen prompts to walk around, pick up items, and listen to Kratos and Atreus. A brief tutorial teaches basic movement and interaction.
2. Training Sequence – Atreus challenges you to a sparring match. This is a safe environment to practice: light attacks, heavy attacks, blocking (L1), dodging (O), and Atreus's arrow commands (square). Don't worry about losing; it's scripted.
3. The First Threat – A mysterious figure arrives (you'll learn who later). A short combat encounter follows. Use your shield (hold L1) and dodge. The game will prompt you to use Runic Attacks (L1 + R1 or L1 + R2) once you unlock them.
4. Leaving Midgard – You'll travel through a Hidden Path to reach the dwarven realm of Svartalfheim. The journey includes light puzzle-solving (moving chains, lowering bridges). Your first enemy groups outside the mine teach crowd control.
5. Arrival at Sindri's House – After a cutscene, you meet the dwarves Sindri and Brok. This is your first shop. Interact with the table (shop menu). You can now upgrade your Leviathan Axe, buy armor (go for the best you can afford – Steadfast armor is decent early), and purchase resources.
6. Exploring Svartalfheim – From the shop, you have a large open mountain area. Follow the main objective marker (golden trail) to progress the story, but don't rush – check every side path for chests, lore, and crafting materials.
7. First Boss (The Bear) Optional but Recommended? – If you follow the main path, you'll encounter a proto-boss (a large bear-like creature). This is a skill check; use your shield, dodge its lunges, and use Atreus's arrows to stun it. Defeating it rewards a rare resource.
By the end of the first hour, you'll be in Svartalfheim with basic gear, a few skills unlocked, and a clear objective.
Character Creation? No – But You Have Choices
There is no character creation. You control Kratos (fixed appearance, voice, and personality). However, you do customize:
- Difficulty – Choose from: Give Me Story (very easy), Give Me Grace (easy), Give Me Balance (normal – recommended), Give Me No Mercy (hard), Give Me God of War (very hard). You can change it anytime in the pause menu.
- Subtitles and Accessibility – Full options for text size, colorblind modes, audio cues, and control remapping.
- Armor Visuals – Later, you can transmog armor looks from the Gear menu.
Controls: All Platforms
#### PlayStation 5 / PlayStation 4 (DualSense / DualShock 4)
| Action | Button | Notes |
|---|---|---|
| Move | Left Stick | |
| Camera | Right Stick | |
| Light Attack | R1 | |
| Heavy Attack | R2 | Hold to charge. |
| Block / Parry | L1 | Tap parry at right moment. Hold for block. |
| Dodge / Roll | O | Tap to dodge, double-tap + direction to roll. |
| Interact / Pick up | Square | Also for Atreus commands when double-tapped. |
| Atreus Arrow (Stun) | R3 (press right stick) | Mark enemies for Atreus to shoot. |
| Sprint | L3 (press left stick) | |
| Runic Attack (Weapon Special) | L1 + R1 (light) or L1 + R2 (heavy) | Cooldown based. Check UI icons. |
| Spartan Rage | L3 + R3 (press both sticks) | Activated when rage meter full. Powerful attacks. |
| Switch Weapon | D-Pad Right (Leviathan Axe) / D-Pad Down (Blades of Chaos) / D-Pad Left (Draupnir Spear - later) | You get Axe first. Blades after ~2 hours. |
| Use Action Item (e.g., relics) | D-Pad Up | |
| Quick Turn | Circle + Down on Right Stick | e.g., O + R-stick down. Very useful. |
| Climb / Jump | X |
#### PC – Keyboard & Mouse
Default bindings (can be remapped in Settings > Controls):
| Action | Key / Mouse | Notes |
|---|---|---|
| Move | W, A, S, D | |
| Camera | Mouse | Sensitive – adjust in settings. |
| Light Attack | Left Click | |
| Heavy Attack | Right Click | Hold to charge. |
| Block / Parry | Shift | Hold to block, press at impact to parry. |
| Dodge | Space | |
| Interact / Atreus Command | E | Double-tap E for Atreus to stun arrow. |
| Atreus Arrow (Stun) | Middle Mouse Button? Or P on keyboard. Check Settings > Controls for exact. | |
| Sprint | Ctrl | |
| Runic Attack (Light/Heavy) | Q (light) or E (heavy) after unlocking? Actually default is 1 and 2. | Check in Options > Controls. |
| Spartan Rage | V (or Ctrl+Shift?) | |
| Switch Weapon | Tab (cycle) or 3,4,5. | |
| Quick Turn | C (or toggle) | |
| Jump / Climb | F |
If using a controller on PC, layouts are similar to console: Left stick move, right stick camera, A/X jump, etc. The game will auto-detect and show the appropriate button prompts.
User Interface (UI) Overview
- Health Bar (top-left) – Kratos's health. Red segments deplete, green heals.
- Rage Meter (below health) – Fills with attacks; when full, press L3+R3 to activate Spartan Rage (heals, deals damage, staggers enemies).
- Atreus's Health (left side, near Kratos's health) – Small bar. He can be knocked out but revives.
- Weapon Icon (bottom-left of screen) – Shows current weapon. Press D-Pad to switch.
- Runic Attack Icons – Below weapon icon, shows cooldown status for your equipped light and heavy runic attacks.
- Quest Tracker (top-right) – Shows active quest name and optional objectives.
- Compass (top of screen) – Shows direction of main objective (golden marker), side quests (blue), and points of interest (orange/white).
- Hacksilver & Resources (top-right) – Gold coins and materials piling up.
- Enemy Health Bars (above enemies) – Shows damage and stagger state. Yellow means staggered; blue means armored.
- Loot Pop-ups – When you kill enemies or open chests, items appear on screen briefly.
- Stun Indicators – When an enemy has a glowing ring around them, they can be stunned (press R3 or heavy attack).
- Explore thoroughly around Sindri's workshop. Secret caves, climbable walls, and ledge puzzles hide resources.
- Use Atreus's arrows constantly – they stun enemies and reveal interaction points.
- Upgrade your weapon at the shop before leaving for the next area.
- Listen to Kratos and Atreus's conversations for lore hints and puzzle clues.
- Save manually at Mystic Gateways often (especially before big fights).
- Adjust your difficulty if you're not having fun – there's no shame in lowering it to enjoy the story.
- Spending all Hacksilver on cosmetic armor – Early gear upgrades are far more impactful.
- Neglecting to upgrade your Leviathan Axe – It's your main weapon for the first third of the game. Upgrade the Blade and Runic slots when you can.
- Rushing through combat – Enemies are aggressive. Block, dodge, and wait for openings. Button mashing leads to death.
- Ignoring Atreus – He is a powerful ally. Use R3 to mark enemies for stun arrows, and later use his special abilities (like summoning animals) to turn the tide.
- Skipping side content early – The first few side quests give unique upgrades (like the Lunda's armor set) that trivialize early enemies.
- Trying to brute force puzzles – If a puzzle isn't working, you may be missing a required tool. Check your codex for hints or look for glowing interactables.
- [ ] Complete the Prologue (home in Midgard) and the train with Atreus.
- [ ] Reach Sindri's Workshop in Svartalfheim.
- [ ] Upgrade your Leviathan Axe at the shop (spend Hacksilver on the best Handle available).
- [ ] Purchase the Steadfast Armor chest piece (or the best you can afford).
- [ ] Spend XP on at least two key skills: one for the Shield (Countering Stance) and one for the Axe (Frozen Kick).
- [ ] Complete the first Favor: "The Weight of Chains" (optional but strongly recommended).
- [ ] Open all chests in the immediate area near Sindri's (including the Legendary Chest behind a fire gate – use the Blades later if you have them; if not, mark it and return).
- [ ] Practice parry on the first two enemies you fight after the shop (the Nightmares). Try to get at least 3 successful parries.
- [ ] Set your preferred difficulty – I recommend "Give Me Balance" for a balanced challenge. Change in Settings > Game.
- [ ] Adjust accessibility settings – Enable subtitles, area prompts, or auto-pickup if desired.
- [ ] Save manually at the Mystic Gateway (gold rune portal).
- [ ] Explore at least one optional area (e.g., the cliff side to the left of the shop) to find a Nornir chest.
- [ ] Defeat the optional bear boss (The Guardian) if you encounter it; it rewards a good resource and a sense of accomplishment.
- [ ] Read the Codex – Open it and browse the 'Enemies' section to learn about the first few enemy types.
Essential Early Objectives
1. Follow the Golden Path – This leads you to major story beats, new abilities, and critical gear.
2. Learn Combat Fundamentals – Practice parrying smaller enemies (like Nightmares or Draugr). Use your shield! Don't rely on dodging only.
3. Unlock Atreus's Abilities – He learns new arrows (Sigil arrows, later Sonic arrows) and special attacks from skill trees. Experiment.
4. Visit Sindri's Shop – As soon as you can, buy the best armor available (often the Steadfast set or a single piece). Upgrade your Leviathan Axe Handle as early resources permit.
5. Open Every Chest – Especially red chests (offering rare materials) and blue chests hacksilver. Also smash pots and breakables.
6. Complete the First Favors (Side Quests) – After reaching Svartalfheim, a favor called "The Weight of Chains" appears. It rewards great early XP and Hacksilver.
7. Spend XP on Key Skills – Focus on: "Relentless Runic Attack" (speeds up runic cooldowns), "Countering Stance" (parry skill), and "Frozen Kick" (Leviathan Axe heavy attack upgrade). Skills with a shield icon are parry-related.
What to Do First and What to Avoid
#### ✅ Do:
#### ❌ Avoid:
Early Resource Priorities
Resources are tight at first. Prioritize:
1. Hacksilver – Buy the best armor (Steadfast set) and upgrade your weapon when possible. Do not buy cosmetic items until you have a comfortable stock.
2. Dust of Realms – Used for upgrading the Leviathan Axe and Blades. Collect from all chests and from specific resource nodes (glowing blue rocks).
3. Skap Slag – Rare; used for high-level upgrades. You get some from the first boss. Save for now – you'll need it for mid-game gear.
4. Luminous Alloy and Haze Weave – Appear later; once available, prioritize buying these from the shop if you see them.
5. XP (Experience) – Earned from kills, quests, and lore discoveries. Spend early points on:
- Leviathan Axe: "Frozen Kick" (heavy attack that kicks into an enemy, great for breaking shields).
- Shield: "Countering Stance" (allows parries with more forgiveness) and "Guardian's Revenge" (an immediate attack after parry).
- Atreus: "Arrow Shatter" (arrows explode on impact) and "Stun Arrows" (increase stun build-up).
Common Beginner Mistakes
1. Not using the shield properly – Parrying is key. Practice on the first spear-throwing Nightmares. Hold L1 to block, but tap just before an attack hits to parry. Successful parries stun enemies and open them to damage.
2. Forgetting Atreus arrows – The R3 button (or middle mouse) marks an enemy. Atreus will shoot three stun arrows. This builds the Stun meter; when full, you can perform a Stun Grab (press R3 near the glowing enemy) for a devastating finisher.
3. Neglecting gear upgrades – The difference between upgraded and non-upgraded gear is huge. Early on, upgrade your chest armor first (increases defense and runic bonuses).
4. Spamming light attacks – Mix in heavy attacks and runic attacks. Runic attacks (L1+R1/R2) have long animations but huge damage and crowd control. Use them when enemies are grouped.
5. Ignoring puzzles that give permanent health/rage upgrades – Look for Golden Apples (increase max health) and Horn of Blood Mead (increase max rage). They're hidden in optional chests. Don't leave them behind.
6. Not reading the Codex – Press the Touch Pad (PS) or M (PC) to open Codex. It explains enemy weaknesses, puzzle types, and lore. Very helpful.
7. Changing difficulty too often – While you can change anytime, bouncing between difficulties can ruin the intended challenge. Pick one and stick with it for a few hours before swapping.
8. Selling uncommon resources – Never sell crafting materials until you're sure you have excess. They're used for upgrades.
9. Ignoring exploration – The first area in Svartalfheim has several Legendary Chests (Nornir chests) that require solving short rune-puzzles. Try to solve them – they give powerful runic attacks.
10. Frustration with the camera being close – The over-the-shoulder camera is tight. Use quick turn (Circle + down on R-stick) to spot enemies behind you. No lock-on is perfect, but you can press R3 to lock onto a specific target.
Day-One Checklist
Check off each item as you complete it to ensure a strong start:
Once you've completed this checklist, you'll be well-prepared for the treacherous path ahead. Remember, Ragnarök waits for no one – but with patience and practice, you can master both Kratos and Atreus.
Good luck, and welcome to Fimbulwinter.