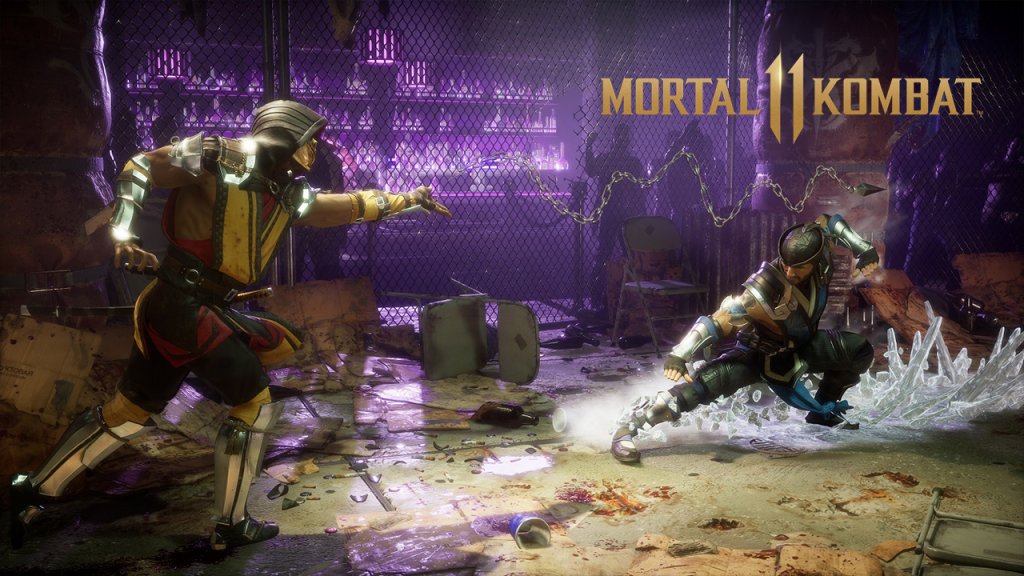
Character Skills
Character Skills Guide for Mortal Kombat 11
This guide covers every character's special moves, abilities, and unique skills in Mortal Kombat 11. Each character has a set of Special Moves (unique inputs), String Enders (special moves performed at the end of a combo string), a Fatal Blow (once-per-match super move), and Krushing Blows (enhanced versions triggered by specific conditions). Additionally, the Kustom Variation system allows you to equip up to three (or more with certain augments) special moves from a pool of unlockable abilities. There are no cooldowns on special moves; instead, each move has startup, active, and recovery frames. Amp (Amplify) versions consume one bar of Offensive/Defensive Meter.
---
Base Roster (25 Characters)
#### Baraka
- Blade Spark (BF1): Projectile. Use to zone or interrupt. Amp adds a second hit for more damage.
- Blade Charge (BF2): Advancing move, hits low. Amp gives armor. Use to close distance or punish.
- Gutted (DB1): High-hitting overhead. Krushing blow if it connects as a punish. Good for mix-ups.
- Chop Chop (DF2): Rapid slashes, can be ended early. Amp increases hits. Use in combos for extra damage.
- Blood Lunge (DBF1 – equipable): Command grab. Amp gives health steal. Great for conditioning.
- Recommended Build: Equip Blood Lunge for mix-ups, keep Blade Charge for mobility, and Gutted for overhead pressure. Use Baraka’s strong strings (e.g., F2, B2) to confirm into Spear or Chopper.
- Dual Wielding (BF1): Pistol shots. Amp adds a kick. Use for mid-range pokes.
- Flip Kick (DB2): Overhead kick. Amp executes as a cartwheel. Good mix-up.
- Glow Kick (DF2): Low-hitting slide. Amp adds a second hit. Use to low-profile projectiles.
- Ballerina Kick (DBF1 – equipable): Command grab that leads to a juggle. Excellent for punishing.
- Air Flip (equipable): Air special, allows tricky approaches. Not recommended for beginners.
- Recommended Build: Equip Ballerina Kick, keep Glow Kick and Flip Kick. Use F34 for pressure, or B2 for spacing.
- Earthquake (BF1): Full-screen low projectile. Amp adds a second wave. Zone with this.
- Force Push (DB1): Push back opponent. Amp creates a wall that stays for a few frames. Good for setups.
- Air Geyser (DF2): Launch from anywhere. Amp gives extra height. Essential for combos.
- Teleport (DBF1 – equipable): Teleport behind opponent. Avoid using recklessly. Use to escape pressure.
- Recommended Build: Teleport is almost mandatory. Keep Earthquake and Geyser. Use strings like B2 or F2 into Geyser for launcher.
- Fly (BF1): Flight move, can be cancelled. Use for mobility and mix-ups.
- Stinger (DB1): Quick overhead stab. Krushing blow if it hits a crouching opponent. Great anti-air.
- Glow Ball (DF2): Parry that launches. Amp increases damage. Good for reading opponent’s attacks.
- Swarm (BF2): Summon bug projectiles. Amp spreads more bugs. Use for pressure.
- Recommended Build: Equip Strepsiptera (extra bug swarm) or Sheeva’s Stomp (equipable, but D’Vorah has her own stomp in one variation). Focus on space control with Swarm and Fly cancels.
- Rifle Shot (BF1): High projectile. Amp adds a second shot. Good for zoning.
- Dropkick (DB2): Overhead kick that bounces. Amp increases bounce height. Use in combos.
- Slide (DF2): Low-hitting slide. Good for approaching. Amp adds a second hit.
- Dynamic Kick (DBF1 – equipable): Command grab. Excellent after a knockdown.
- Recommended Build: Equip Dynamic Kick, keep Dropkick and Slide. Use F4 or B3 as mix-up starters.
- Ice Beam (BF1): Projectile that freezes on Amp. Use to lock down opponent.
- Ice Burst (DB1): Close-range explosion. Good for anti-air. Amp freezes.
- Frost Hammer (DF2): Overhead mace swing. Good for mix-ups.
- Ice Slide (BF2): Low slide. Amp freezes on hit. Use for low mix-up.
- Recommended Build: Equip Augment: Ice Machine (adds freezing on projectiles). Keep Ice Beam and Burst. Use strings like F2 or B2 into Ice Beam for pressure.
- Sand Trap (BF1): Trap that holds opponent. Amp adds damage over time. Set up for combos.
- Temporal Advantage (DB1): Time stop on Amp. Use after Sand Trap for full combo.
- Sand Grenade (DF2): Low projectile. Amp adds a second wave. Good for zoning.
- Gauntlet of Time (DBF1 – equipable): Command grab that resets. Excellent for resetting pressure.
- Recommended Build: Equip Gauntlet of Time, keep Sand Trap and Temporal Advantage. Use B2 or F3 as launchers.
- Gauntlet Hitter (BF1): Overhead punch. Can be delayed. Amp adds a shield. Good for mix-ups.
- Overhead Smash (DB2): Overhead elbow. Krushing blow if counter-hit. Use to punish.
- Low Slash (DF2): Low kick. Amp adds a second hit. Good for hit-confirms.
- Tech Dome (equipable): Shield that parries projectiles. Situational.
- Recommended Build: Keep Gauntlet Hitter and Overhead Smash. Equip Bionic Arm (equipable) for extra range. Use F3 or B2 strings.
- Ranged Pole (BF1): Staff projectile. Amp adds a shockwave. Good for zoning.
- Staff Strike (DB1): Overhead slam. Krushing blow if it hits a jumping opponent. Anti-air.
- Low Kick (DF2): Low sweep. Amp adds a second hit. Good for pokes.
- Nitro Kick (DBF1 – equipable): Command grab that leads to a bounce. Very strong.
- Recommended Build: Equip Nitro Kick, keep Ranged Pole and Staff Strike. Use B2 or F2 strings to confirm into Nitro.
- Forceball (BF1): Projectile that bounces. Amp adds a second ball. Good for setups.
- Caged Pilot (DB1): Nut punch (overhead). Amp adds a spark. Excellent mix-up.
- Shadow Kick (DF2): Advancing kick (mid). Krushing blow if it hits opponent in the air. Great for anti-air.
- Duck Walk (equipable): Low-profile move. Use to avoid highs.
- Recommended Build: Equip Shadows Aweigh (equipable for extra shadow moves), keep Forceball and Caged Pilot. Use F4 or B3 strings.
- Buzzsaw (BF1): Projectile that spins. Amp adds a second saw. Good for zoning.
- Gas Blast (DB1): Low fireball. Amp adds a second burst. Use for low pressure.
- Hook Grab (DF2): Overhead hook. Krushing blow if it hits a crouching opponent. Good mix-up.
- Dash Cancel (equipable): Cancel strings into run. Essential for pressure.
- Recommended Build: Equip Dash Cancel, keep Buzzsaw and Hook Grab. Use F2 or B2 into dash cancel for mix.
- Eye Laser (BF1): Laser from eye. Amp adds a third beam. Good for zoning.
- Blade Toss (DB1): Projectile knife. Amp adds poison damage over time. Use to chip.
- Kano Ball (DF2): Rolling ball that hits overhead. Amp adds extra hits. Use as a finisher.
- Lumbar Check (equipable): Command grab with armor. Very strong after knockdown.
- Recommended Build: Equip Lumbar Check, keep Eye Laser and Kano Ball. Use B1 or F3 strings.
- Fans (BF1): Projectile fans. Amp adds a second fan. Good for zoning.
- Soul Fly (DB1): Air fan throw. Good for aerial control.
- Edenian Heel (DF2): Overhead kick. Krushing blow if it hits a standing opponent. Use for mix-ups.
- Gossip Girl (equipable): Command grab that bounces. Excellent combo starter.
- Recommended Build: Equip Gossip Girl, keep Fans and Edenian Heel. Use F2 or B2 strings.
- Brass Knuckles (BF1): Projectile bag. Amp adds a second hit. Good for zoning.
- Snag (DB1): Grappling hook that pulls opponent. Krushing blow if it hits a blocking opponent. Use to close distance.
- Mace Swing (DF2): Overhead mace. Amp adds a shockwave. Good for mix-ups.
- Vial of Sorrow (equipable): Poison projectile. Speeds up health regeneration.
- Recommended Build: Equip Vial of Sorrow, keep Snag and Brass Knuckles. Use F4 or B3 strings.
- Hat Toss (BF1): Horizontal projectile. Amp adds a second hit. Good for zoning.
- Teleport Punch (DB1): Teleport punch, can be delayed. Great mix-up.
- Spinning Hat (DF2): Low spinning dive. Amp adds armor. Use to low profile.
- Shaolin Drop (equipable): Air teleport slam. Good for aerial control.
- Recommended Build: Equip Shaolin Drop, keep Hat Toss and Teleport Punch. Use F2 or B2 strings.
- Fireball (BF1): Overhead projectile. Amp adds a second fireball. Good for zoning.
- Dragon Kick (DB1): Low kick that launches. Krushing blow if it hits a counter-hit. Use as punish.
- Bicycle Kick (DF2): Overhead bicycle kick. Amp adds extra hits. Good for combo ender.
- Parry (equipable): High parry that launches. Very strong read tool.
- Recommended Build: Equip Parry, keep Fireball and Dragon Kick. Use F2 or B1 strings.
- Shadow Tackle (BF1): Teleport dive. Amp adds a clone attack. Good for mix-ups.
- Sickle Snag (DB1): Overhead sickle strike. Krushing blow if it hits a crouching opponent. Anti-air.
- Shadow Slam (DF2): Low shadow swipe. Amp adds a second hit. Good for pokes.
- Shadow Portals (equipable): Teleport that leaves a clone. Excellent for setups.
- Recommended Build: Equip Shadow Portals, keep Shadow Tackle and Sickle Snag. Use B2 or F3 strings.
- Electric Fly (BF1): Teleport punch. Amp adds a shock. Good for closing distance.
- Lightning Strike (DB1): Overhead lightning bolt. Krushing blow if it hits a jumping opponent. Anti-air.
- Storm Cell (DF2): Electrocute, can be delayed. Amp increases hits. Good for pressure.
- Superman (equipable): Advancing electric punch. Use to punish.
- Recommended Build: Equip Superman, keep Electric Fly and Lightning Strike. Use B2 or F4 strings.
- Spear (BF1): Ranged grab. Pulls opponent in. Krushing blow if used as a punish. Use to start combos.
- Teleport Punch (DB1): Quick teleport punch. Good for mix-up after spear.
- Hell Port (DB3): Cancelable teleport. Amp allows cancel into any move. Use to create confusion.
- Takedown (DF2): Overhead, can be delayed. Good to break low block.
- Demon Dash (BF2): Advancing move with armor on amp. Use to close in.
- Recommended Build: Keep Spear and Teleport Punch; equip Deathly Blade (enhanced spear) for longer combos. Use F2 or B1 strings.
- Spear (BF1): Similar to Scorpion but slower. Pulls opponent in.
- Shoulder Charge (DB1): Advancing attack with armor. Krushing blow if it hits a counter-hit. Good for punish.
- Hammer Slam (DF2): Overhead hammer. Amp adds a shockwave. Good for mix-ups.
- Wrath of Shao Kahn (equipable): Command grab that slams. Excellent damage.
- Recommended Build: Equip Wrath of Shao Kahn, keep Spear and Shoulder Charge. Use B2 or F4 strings.
- Blood Ball (BF1): Projectile. Amp adds a second ball. Good for zoning.
- Blood Tentacle (DB1): Low poke from afar. Krushing blow if it hits a crouching opponent. Use to keep distance.
- Blood Lancers (DF2): Overhead blood attack. Amp adds a second hit. Good mix-up.
- Siphon (equipable): Command grab that steals health. Very strong.
- Recommended Build: Equip Siphon, keep Blood Ball and Blood Tentacle. Use F2 or B3 strings.
- Energy Ring (BF1): Projectile. Amp adds a second ring. Good for zoning.
- Kiss (DB1): Overhead kiss that stuns. Krushing blow if it hits a crouching opponent. Great mix-up.
- Arc Kick (DF2): Overhead kick that launches. Amp increases launch. Use in combos.
- Leg Grab (equipable): Command grab that leads to a throw. Good for mix-ups.
- Recommended Build: Equip Leg Grab, keep Energy Ring and Kiss. Use B2 or F3 strings.
- Ice Ball (BF1): Projectile that freezes in place. Amp adds a second ball. Good for zoning.
- Slide (DB1): Low slide. Amp adds a freeze. Good for low mix-up.
- Ice Klone (DF2): Creates a clone. Amp leaves a permanent clone for a few seconds. Use for setups.
- Arctic Wave (equipable): Command grab that freezes. Excellent combo starter.
- Recommended Build: Equip Arctic Wave, keep Ice Ball and Slide. Use F2 or B2 strings into freeze for combos.
- Shang Tsung: Fireball (steals soul), Trap (ground blast), Morph (transform into another character's move). Excellent zoning.
- Nightwolf: Tomahawk, Shoulder Charge, Arrow. Good all-rounder.
- Terminator: Endo Punk, I’ll Be Back (armored charge), Laser. Strong brawler.
- Sindel: Hair Flip, Scream (parry), Cartwheel. Great mix-up.
- Joker: Cane Charge, Crowbar (low), Chattering Teeth (projectile). Tricky.
- Spawn: Stone Wall (armor), Chain Grabs, Teleport. Powerful.
- Fujin: Wind Push, Tornado, Sky Walk (float). Mobile.
- Sheeva: Stomp (overhead), Fireball, Dragon Fangs (grab). Heavy hitter.
- RoboCop: Auto-9 (rapid fire), Shield, Data Spike (low). Zoner.
- Mileena: Sai (projectile), Teleport, Low Ball (low kick). Mix-up.
- Rain: Water Ball (command grab), Geyser (launch), Teleport. Setup-heavy.
- Rambo: Bow (projectile), C4 (trap), Machete (overhead). Trap/zoning.
- Meter Management: Amp moves consume meter. Save meter for breakaway (defensive) or fatal blow (offensive).
- Krushing Blow Conditions: Learn each character’s specific conditions (e.g., counter-hit, punish, vs crouch) to maximize damage.
- Custom Variations: Use the Kustomize feature to tailor your moveset. Prioritize a command grab or teleport for most characters.
- Frame Advantage: Study your character’s frame data (startup, recovery) to know what moves are safe on block.
- Combos: Most BNBs use a launcher (e.g., D2 or a string), then a juggle into special move or amp version.
#### Cassie Cage
#### Cetrion
#### D’Vorah
#### Erron Black
#### Frost
#### Geras
#### Jacqui Briggs
#### Jade
#### Johnny Cage
#### Kabal
#### Kano
#### Kitana
#### Kollector
#### Kung Lao
#### Liu Kang
#### Noob Saibot
#### Raiden
#### Scorpion
#### Shao Kahn
#### Skarlet
#### Sonya Blade
#### Sub-Zero
---
DLC Characters (12 Characters)
Repeat the same structure for each DLC character (Shang Tsung, Nightwolf, Terminator, Sindel, Joker, Spawn, Fujin, Sheeva, RoboCop, Mileena, Rain, Rambo). For brevity, key specials per DLC character:
---
General Tips for Skill Usage
This guide covers every character's core skills. For frame-specific data and optimal combos, consult in-game practice mode or external resources like the Mortal Kombat 11 Frame Data app.