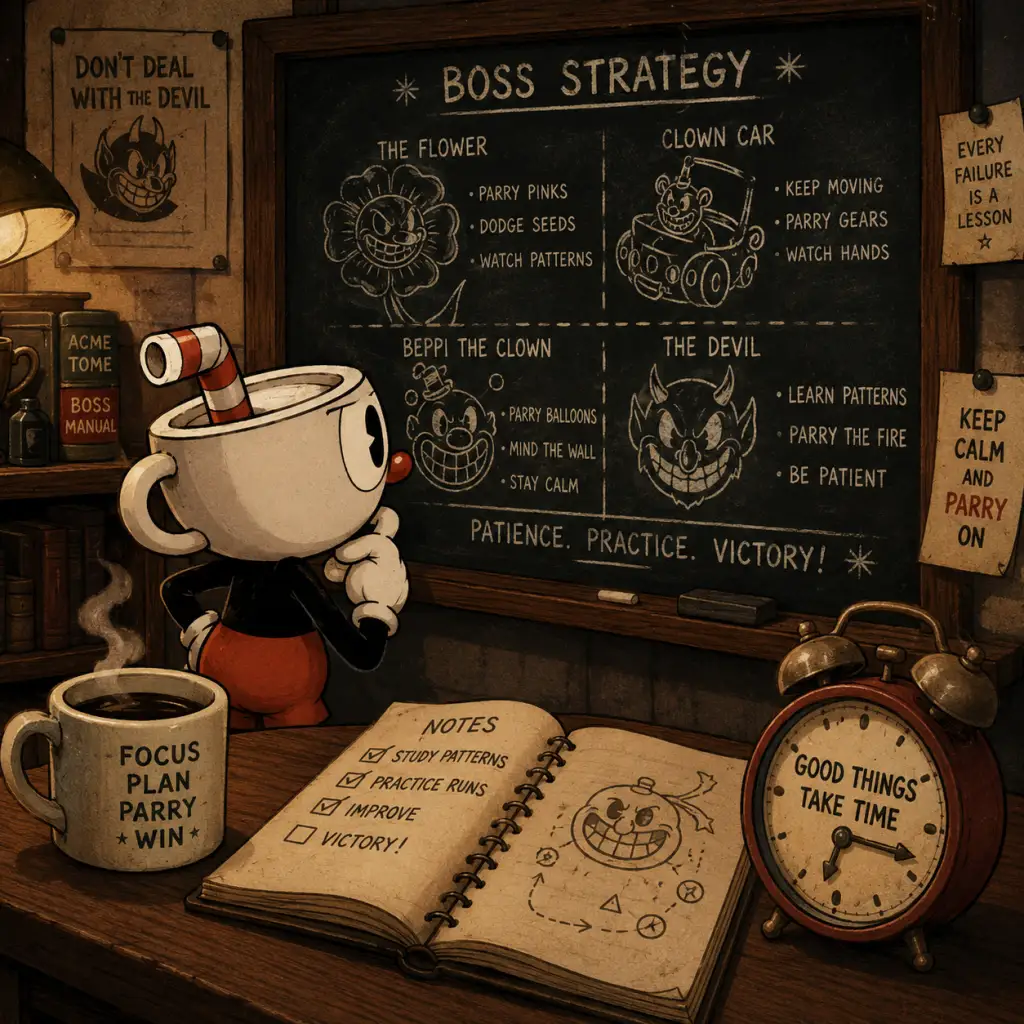
Game Tips
Overview
Cuphead is a meticulously crafted run-and-gun game that demands precision, pattern recognition, and patience. This guide collects essential tips drawn from hundreds of hours of gameplay, covering every aspect of the game from your first steps to the final boss. Tips are grouped by category, with clear explanations and analysis to help you understand why a technique works and when to apply it. Whether you're a beginner struggling with the first boss or a veteran chasing an S-rank, you'll find actionable advice here.
---
Beginner Tips (Foundation for Success)
1. Master the Dash and Parry: The dash (left trigger, or double-tap/shift) grants a brief invincibility window that can phase through most attacks and hazards. The parry (jump and press jump again while airborne or when hitting a pink object) is essential for building your super meter and triggering certain mechanics. Practice these two moves until they become second nature—they are your primary survival tools.
- Why it works: Invincibility frames (i-frames) let you dodge through attacks without needing precise spacing. Parrying pink objects (e.g., pink projectiles, pink enemies) gives you one free card toward your super meter, enabling special moves faster.
- When to use: Dash through boss attack patterns like the Root Pack's carrot bombs or Hilda Berg's bullet barrages. Parry every pink object you see—especially during phases where they appear frequently.
2. Learn to Hold Fire and Move Simultaneously: Cuphead cannot shoot and move at the same time? Actually, he can—hold the fire button while moving. Many beginners stop firing when dodging. Always keep shooting unless you need to reposition drastically.
- Why it works: Damage output is cumulative; constant pressure shortens boss fights, reducing the number of patterns you must survive.
- When to use: In every encounter, except during brief moments when you need to focus on platforming or invincibility-based mechanics.
3. Use Simple Controls and Adjust Sensitivity: The default controls are fine, but many players benefit from swapping dash to a shoulder button (e.g., LB) for quicker access. Lower your analog stick deadzone slightly to improve precision for diagonal dodges.
- Why it works: Shoulder buttons let you keep your thumbs on the sticks and jump button, reducing finger gymnastics. Better deadzone minimizes unintentional movements.
- When to use: Immediately in the settings menu; test in the tutorial area.
4. Don't Hoard Coins: Coins are used only at Porkind's shop (the pig with a monocle) to buy weapons and charms. Spend them as soon as you have enough—there's no reason to save beyond the one-time purchase of 20 coins for the legendary charm (later). Early purchases of Spread (short-range shotgun) and Smoke Bomb (invincibility on dash) make bosses easier.
- Why it works: More options let you adapt to different boss patterns. Smoke Bomb is the most versatile survival tool in the game.
- When to use: After defeating the first two bosses (Root Pack and Goopy Le Grande) you should have 4+ coins. Buy Spread and Smoke Bomb immediately.
5. Use the Practice Mode (Mausoleum): The first isle has a Mausoleum where you can parry ghosts to earn extra HP and practice parrying. It's also a good place to test weapons and charm combinations without risk.
- Why it works: Building muscle memory in a low-stress environment translates directly to better performance in boss fights.
- When to use: Whenever you're stuck on a boss; spend 10 minutes in Mausoleum to refresh parry timing.
---
Combat Tips
1. Learn the Pattern, Then Execute: Every boss has a set rotation of attacks that follow a sequence (often health-gated). Instead of reacting, predict the next move after you've seen it. Focus first on staying alive, then look for openings to attack.
- Why it works: Pattern recognition reduces cognitive load. Once you know what comes next, you can position yourself optimally before the attack even starts.
- When to use: For all bosses; especially helpful against multi-phase bosses like Cagney Carnation or Dr. Kahl's Robot.
2. Weapon Switching is Key: Cuphead can equip two weapons and swap them at any time. The default Peashooter is balanced; Chaser (homing) deals less damage but lets you focus on dodging; Spread is high damage up close; Lobber (arching projectiles) is great for stationary targets or from behind cover. Carry a combination that covers different ranges.
- Why it works: No single weapon is optimal for all phases. For example, use Spread on the first phase of the Root Pack (when they're close) then switch to Peashooter when they spread out.
- When to use: Whenever you face a boss that alternates between close-range and long-range attacks. Swap before the phase transition.
3. The Super Art Meter: Use It or Lose It: Your super meter fills to 5 cards (each parry or hitting a pink object gives one). Once full, you can unleash a Super Art: Super Art I (giant beam) is high damage; Super Art II (invincibility for a few seconds) is defensive; Super Art III (auto-parry every pink object) is situational. Don't hold onto a full meter forever—use it when you have a safe window.
- Why it works: Over a long fight, using multiple supers yields more total damage than saving for a perfect moment.
- When to use: Use Super Art I when the boss is stationary (e.g., after a failed attack, during a wind-up). Use Super Art II if you're about to take unavoidable damage. Use Super Art III only if you can reliably parry in a dense bullet storm.
4. Parry to Extend Air Time and Reach High Platforms: Parrying pink objects (including pink enemies and projectiles) resets your double jump. This can help you reach elevated platforms or stay airborne longer to avoid ground-based attacks.
- Why it works: Cuphead's jump arc is fixed; parrying gives an extra upward boost. It's essential for some boss phases (e.g., Cala Maria's eel phase).
- When to use: Whenever you see a pink object above you and need to stay high; also use it to parry a pink enemy to cross large gaps.
5. Use the Environment to Your Advantage: Many boss arenas have platforms, pillars, or walls that block attacks. In run-and-gun levels, use barrels and crates as shields. In fights like Beppi the Clown, stand on the roller coaster cars to avoid the ground flames.
- Why it works: These features create safe zones that reduce the number of dodges needed.
- When to use: Identify safe spots after the boss's attack pattern; stay there until the threat passes.
---
Exploration Tips
1. Talk to Every NPC on the Overworld: Characters like the ghost in the graveyard, the dice man, and the old woman give hints about secret bosses, shortcuts, or hidden coins. Some even trigger optional run-and-gun levels.
- Why it works: Cuphead has a linear progression but many hidden paths. For example, talking to the fortune teller reveals the location of the secret boss "The Devil's Jester."
- When to use: After defeating each boss, revisit the overworld; some NPCs only appear after certain milestones.
2. Search for Hidden Coins Everywhere: Coins are scattered across the overworld (e.g., behind trees, inside chimneys, under bridges). Use a checklist or just explore every nook. There are enough coins to buy all weapons and charms, but you'll need to find most of them.
- Why it works: Missing coins locks you out of useful items early. A single coin can be the difference between buying an extra HP (via the Heart charm) or not.
- When to use: Before attempting a new boss; make a sweep of the current island for any undiscovered coins.
3. The Run-and-Gun Levels are Optional but Valuable: Each isle has at least one run-and-gun level that rewards coins (usually 3-5) upon completion. They are harder than early bosses but teach movement skills. Clearing them gives you cash for shop items.
- Why it works: Coins are the only currency; run-and-guns provide the largest lump sums. Also, they are excellent practice for bullet-hell dodging.
- When to use: After you've bought essential items, tackle run-and-gun levels for extra coins. Save them for later if you're stuck.
4. The Mausoleum Mini-Boss (Ghost Fight) Gives an Extra HP Slot: On each isle, there's a Mausoleum guarded by a ghost. Defeat it (by parrying ghosts) to permanently raise your maximum HP by 1. This is critical for survival.
- Why it works: Cuphead starts with 3 HP (small ones). Each Mausoleum adds 1 HP, up to 5 HP total. More HP means more mistakes allowed.
- When to use: Do the first Mausoleum as soon as possible after reaching Isle 1; it makes the Root Pack and Goopy easier.
---
Resources and Economy Tips
1. Spend Coins on Charms First, Weapons Second: Charms are passive upgrades that stay active through entire fights. The best early charm is Smoke Bomb (makes you invincible during dash). Later, Heart (adds 1 HP) and P. Sugar (auto-parry) are valuable. Weapons have more situational use.
- Why it works: A single charm can save your life dozens of times per fight; a weapon only changes your attack style.
- When to use: Always prioritize charms; you only need three weapons total (Spread, Chaser, one more) but you'll use multiple charms.
2. Don't Buy the Legendary Charm Too Early: The Legendary charm (costs 20 coins) has a strong effect but only becomes available after beating a certain boss. It's not a priority until you have all other essential items. Focus on Smoke Bomb, Heart, and the weapon Spread first.
- Why it works: 20 coins is a huge investment; you can buy 4-5 cheaper items that collectively help more.
- When to use: After you have Smoke Bomb, Heart, Spread, Chaser, and at least one more weapon (e.g., Lobber), then consider saving up for Legendary.
3. Replay Bosses for Coins (But Only If You're Stuck): Each boss gives 1 coin upon first defeat (some give 2). If you've exhausted all sources, replay bosses for fun/practice but not for profit—coins are non-renewable after you collect them the first time. Only fight a boss again for the high-score achievement or to practice.
- Why it works: No infinite grind; you must explore and clear run-and-guns for more coins.
- When to use: Only if you need one more coin for a critical purchase and have checked every possible location.
4. Use the 'Difficulty Scaling' Option to Your Advantage: In the options, you can set the game to 'Simple', 'Normal', or 'Expert' for bosses. Simple mode sometimes removes phases or reduces attack density, but you cannot fight the final boss on Simple. For learning patterns, use Normal; Simple is only for completionists who want to see every boss but not progress fully.
- Why it works: Normal is the intended experience; Simple is too easy for preparation. Better to practice on Normal and die than form bad habits on Simple.
- When to use: Stick to Normal for your first playthrough. Use Expert only after beating the game for S-ranks.
---
Weapon and Charm Builds (Optimal Loadouts)
1. The 'Survivalist' Loadout: Weapons: Spread (close) + Chaser (homing); Charm: Smoke Bomb. This pair covers all ranges and lets you focus on dodging. The Chaser does less damage but ensures you're always hitting the boss, and Spread deals massive damage when you're close. Smoke Bomb lets you escape tight situations.
- Why it works: You don't need to aim precisely with Chaser, freeing mental bandwidth. Spread finishes off phases quickly when the boss is vulnerable.
- When to use: For most boss fights, especially multi-phase ones where the boss moves erratically. Not ideal for bosses with lots of projectiles that require precise aiming (e.g., Dr. Kahl's Robot).
2. The 'Glass Cannon' Loadout: Weapons: Roundabout (boomerang) + Charge (hold to charge, deals double damage); Charm: Heart (or P. Sugar). This loadout focuses on maximum damage output. Roundabout hits twice when it returns, and Charge does massive damage if you time it. Heart gives a cushion.
- Why it works: Higher DPS shortens fights, reducing exposure time. Charge requires careful timing but rewards good pattern knowledge.
- When to use: Bosses with predictable attack windows where you can stand still and charge (e.g., Baroness Von Bon Bon's candy phase).
3. The 'Parry Master' Loadout: Weapons: Lobber + Converge (three-way shot); Charm: P. Sugar (auto-parry pink objects) or Smoke Bomb. This loadout is designed for bosses where parrying is mandatory (e.g., the Devil's final phase). Lobber arcs over obstacles, and Converge hits multiple targets.
- Why it works: P. Sugar ensures you never miss a parry, building super meter fast. Lobber is great for stationary bosses; Converge for spread-out enemies.
- When to use: In the final boss fight or against bosses with pink projectiles (e.g., Hilda Berg's flaming carousel).
4. Advanced: Using 'Super Art II' for Invincibility Frames: Super Art II (invincibility for ~2 seconds) can be used to tank through one-hit kills or devastating attacks. Relying on it as a panic button can save a run.
- Why it works: It effectively gives you a get-out-of-jail-free card once per full meter. Combine with Smoke Bomb for maximum invincibility coverage.
- When to use: During attacks that cover the entire screen (e.g., Cagney Carnation's explosion, the Dragon's fire breath).
---
Advanced Techniques and Optimizations
1. Parry Slide: Perform a parry by jumping and pressing jump again right before contacting a pink surface. This can be done in mid-air after a dash or slide. Master timing so you can parry multiple pink objects in rapid succession.
- Why it works: Multi-parry fills your super meter instantly if there are many pink objects in sequence. Useful in certain boss phases (e.g., the train boss's pink coal chunks).
- How to practice: In the Mausoleum, try to parry as many ghosts as possible without landing. Count to 5 cards.
2. Super Jump with Parry + Dash: Combine a double jump, a parry (resets double jump), then another jump, and dash to gain maximum horizontal distance. This is essential for reaching far platforms in run-and-gun levels and some boss fights.
- Why it works: Cuphead's default jump range is limited; this technique extends it by about 50%.
- When to use: In levels like "Rugged Ridge" or against bosses that require crossing large gaps (e.g., Beppi's roller coaster).
3. Weapon Cancelling: Switching weapons resets your attack animation. Use this to fire a shot from weapon A, immediately switch to weapon B and fire again. This slightly increases DPS if both weapons have similar fire rates.
- Why it works: The switch animation is very brief; you can effectively fire two shots in the time of one if timed correctly.
- When to use: Only if you're comfortable with manual swapping. Not recommended during heavy dodging phases.
4. Positioning for S-Rank: To get an S-rank (highest grade), you must finish the boss on Expert difficulty, get a perfect parry + no damage + time limit + use at least one super. Learn the boss's pattern so perfectly that you finish with full HP and time to spare.
- Why it works: S-rank requires near flawless execution. Use Spread/Chaser/Smoke Bomb+Heart combo for safety.
- Strategies: Memorize every attack's tell; pre-position before the attack; use invincibility frames strategically.
5. Offline Practice with Cheats (Optional): For learning bosses, consider using the game's built-in debug mode (if accessible on PC) or watching no-hit runs on YouTube. Frame-by-frame analysis helps you see attack arcs.
- Why it works: Visualizing the perfect path reduces trial-and-error time.
- Ethical note: This is for learning only; playing legitimately is more rewarding.
---
Boss-Specific Tips (Common Pain Points)
1. The Root Pack (First Boss): Use Spread for the potato phase (close range) and Chaser for the onion's tears. Parry the pink carrots that fly from the carrot's mouth. Stay mobile.
2. Cagney Carnation: His second phase has pink seeds that you should parry for meter. Stay to one side to avoid the spinning vines. Use Lobber to attack through the gaps in his shield.
3. Dr. Kahl's Robot (Isle 2): Focus on destroying one part at a time – the head's laser is most dangerous. Use Chaser to hit the antenna while dodging projectiles. When the head is exposed, unload Spread.
4. The Devil (Final Boss): His first phase requires parrying pink cylinders. Second phase: use Super Art II to survive the hand slam. Third phase: jump at the right moment to avoid the ground spikes. Third phase? Actually, the Devil has three phases. Memorize each attack's audio cue.
---
Economy and Resource Management Summary
- Total coins in game: ~80 (enough for all shop items).
- Priority purchases: Smoke Bomb (4 coins) → Heart (4 coins) → Spread (4 coins) → Chaser (4 coins) → P. Sugar (4 coins) → Roundabout/Charge/Lobber (4 each) → Legendary Charm (20 coins).
- Mausoleum HP boosts: 3 total (one per isle).
- Run-and-gun levels: 5 total (some hidden), each gives 3-5 coins.
---
Final Words
Cuphead is a game of patience and practice. Every tip here is designed to reduce the number of deaths and increase your understanding. Don't be afraid to fail – each death teaches you something. Use the tips above to build a solid foundation, experiment with different loadouts, and eventually, you'll conquer Inkwell Isle and claim your soul contract. Good luck!