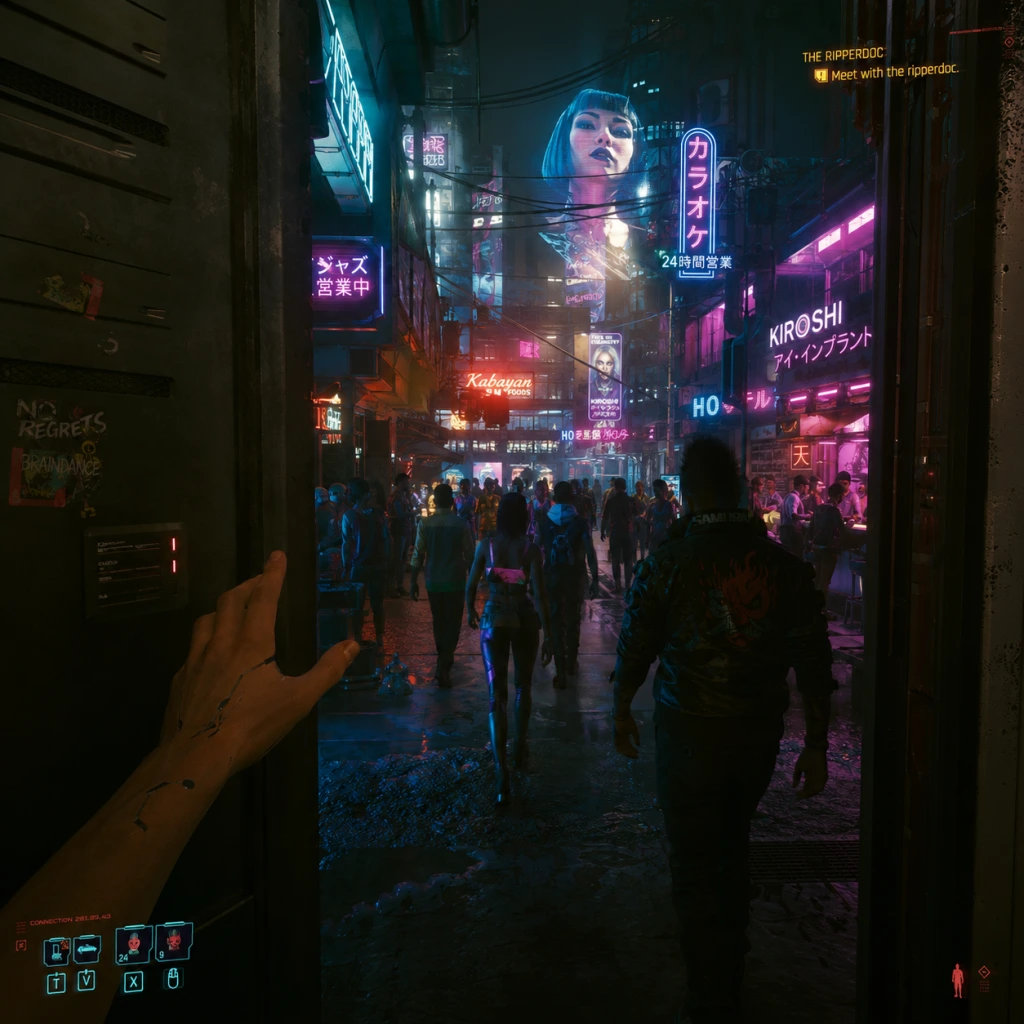
Getting Started
Getting Started: Your First Night in Night City
Welcome to Cyberpunk 2077, an open-world RPG set in the dystopian metropolis of Night City. This guide is designed for brand-new players, covering the critical first hour, character creation, controls, UI basics, and essential early strategies to avoid frustration and get you on the path to becoming a legendary merc.
---
1. The First Hour Walkthrough (Light Spoilers)
Your journey begins after a brief cinematic. You will be in control of V, a mercenary in the back of a car with Jackie Welles, your best friend. Mission: The Rescue – this is the tutorial. Follow these steps:
1. Car Ride: Listen to Jackie’s dialogue. No interactivity yet.
2. Arasaka Warehouse: Exit the car. The game teaches movement (WASD on PC, left stick on consoles) and basic interaction (E on PC, X on PlayStation, A on Xbox).
3. Stealth Section (optional): You can either sneak past guards or go loud. The tutorial suggests stealth—crouch (Ctrl on PC, L3 click on consoles) and avoid detection. Use the scanner (Tab on PC, touchpad on PlayStation, view button on Xbox) to highlight enemies and loot.
4. First Combat: You get a pistol. Aim with RMB (PC), L2 (PS), LT (Xbox). Shoot at the training target, then fight a few easy enemies. Use cover (Q on PC, auto-cover near walls on consoles).
5. Jackie & the Bot: Follow Jackie through the warehouse. Eventually, you confront a giant robot (Mech). Do not try to fight it head-on – the game expects you to use the environment (explosive barrels) or wait for Jackie’s plan.
6. Escape: After the cutscene, you escape through a garage. Jump into the driver’s seat (F on PC, triangle on PS, Y on Xbox) and drive to the drop point. The driving mechanics are arcade-like; brake early and steer gently.
7. Aftermath: You meet Viktor at the ripperdoc clinic. This is your first chance to install cyberware. Follow the on-screen prompts. Then you are free to explore.
Key tip: During the tutorial, pick up everything that glows (ammo, health items, junk). Junk can be sold later for fast cash.
---
2. Character Creation (Life Path & Attributes)
Before starting, you choose a Life Path (Nomad, Street Kid, or Corpo). This affects the prologue (first ~30 minutes) and some dialogue options, but the main story remains the same. For beginners, Street Kid offers the most straightforward introduction to Night City. Nomad has a desert starting area (good for learning driving), and Corpo starts in an office (more dialogue-heavy).
Attribute Points: You get 7 points to distribute among five stats:
| Attribute | Primary Use | Good for Beginners? |
|---|---|---|
| Body | Health, blunt weapons, shotguns | Yes – gives more HP and melee survivability |
| Reflexes | Handguns, blades, movement speed | Yes – improves gunplay and dodging |
| Technical Ability | Crafting, tech weapons, opening doors | Yes – unlocks crafting early, useful for resources |
| Intelligence | Quickhacks, breach protocol, netrunning | If you like hacking, can be strong but needs points |
| Cool | Stealth, cold blood, sniper rifles | Optional – good for stealth builds but complex |
---
3. Controls – All Platforms
Below are the default controls. You can customise them in settings.
#### PC (Keyboard + Mouse)
| Action | Key |
|---|---|
| Move | W A S D |
| Look | Mouse |
| Sprint (hold) | Left Shift |
| Jump / Mantle | Space |
| Crouch (toggle) | Ctrl |
| Dodge (double-tap) / Slide | C (crouch while sprinting) |
| Interact / Pick up | E |
| Attack (shoot / melee) | Left Mouse |
| Aim (hold) | Right Mouse |
| Reload | R |
| Weapon Wheel (hold) | Alt |
| Quickhack / Scanner | Tab |
| Inventory | I |
| Map | M |
| Journal | J |
| Cyberware Menu | U |
| Vehicle: Accelerate | W |
| Vehicle: Brake / Reverse | S |
| Vehicle: Handbrake | Space |
| Action | Button |
|---|---|
| Move | Left Stick |
| Look | Right Stick |
| Sprint (hold) | L3 (click left stick) |
| Jump | X |
| Crouch (toggle) | Circle (hold to slide) |
| Interact | Triangle |
| Attack | R2 |
| Aim (hold) | L2 |
| Reload | Square |
| Weapon Wheel | L1 (hold) |
| Quickhack (hold) | R1 (hold + target) |
| Scanner | Touchpad (tap) |
| Inventory | Options (then navigate) |
| Map | Touchpad (swipe up) |
| Vehicle: Accelerate | R2 |
| Vehicle: Brake | L2 |
| Vehicle: Handbrake | L1 |
| Action | Button |
|---|---|
| Move | Left Stick |
| Look | Right Stick |
| Sprint (hold) | LS (click left stick) |
| Jump | A |
| Crouch (toggle) | B (hold to slide) |
| Interact | Y |
| Attack | RT |
| Aim (hold) | LT |
| Reload | X |
| Weapon Wheel | LB (hold) |
| Quickhack (hold) | RB (hold + target) |
| Scanner | View button |
| Inventory | Menu button (then navigate) |
| Map | View button (swipe?) – check in-game |
| Vehicle: Accelerate | RT |
| Vehicle: Brake | LT |
| Vehicle: Handbrake | LB |
4. UI Overview
Your Heads-Up Display (HUD) shows:
- Health bar (top-left): green. When damaged, it turns red; below it is a stamina bar (yellow) and a cyberware energy bar (blue for quickhacks).
- Mini-map (top-right): shows nearby enemies (red dots), quest markers (yellow diamond), and points of interest.
- Ammo counter (bottom-right): current magazine / total reserve.
- Quick Access (bottom-center): weapon, quickhack, grenade slots (switched with mouse wheel or d-pad).
- Objective tracker (top-left area): current mission step.
- Scanner overlay (hold Tab / touchpad): highlights loot, enemies, hackable objects, and breach points.
- The Journal (J) tracks main jobs, side jobs, gigs, and NCPD scanner hustles. Always check it!
- The Map (M) can filter vendors, fast travel points, and quests. Fast travel is unlocked from the start via metro stations (blue icons).
- Inventory (I) shows weapons, clothing, cyberware, and consumables. You can dismantle or sell items.
- Visit the Ripperdoc (Viktor) – install a free cyberdeck (if you didn’t choose a netrunner path, you get a basic one). This enables quickhacks.
- Sell or dismantle junk (under “Backpack” > “Junk”) to make quick eddies (money).
- Loot everything – vending machines, containers, bodies. Be thorough.
- Complete the side gig “The Ride” (given by Mama Welles) for a free vehicle and some early XP.
- Find the “Automatic Love” main mission after meeting Judy – this opens up the world and rewards.
- Charging into high-level areas – the map shows skulls or red icons for enemies above your level. Stay in Watson district for now.
- Ignoring cyberware – cyberware slots are limited. Invest in a “Frenzied Cyberware” (heal on kill) or “Biotic Coolant” (reduce cyber cooldown) early.
- Selling all clothes – keep clothing with mod slots or high armor. You can upgrade them later.
- Wasting perk points – you cannot respec perks easily (except with a paid item later). Only unlock perks you understand. Avoid “increases sneak attack damage by 5%” until you commit to stealth.
- Starting with “Very Hard” difficulty – beginners should pick “Normal” or “Hard” at most. Very Hard requires optimal builds and gear.
Key UI tips:
---
5. Essential Early Objectives
After the prologue, the main story quest “The Rescue” remains. Follow it to meet Dex and receive your first major job. But before you dive in, do these:
---
6. What to Do First & What to Avoid
#### Do First:
1. Spend attribute points wisely – do not spread too thin. Focus on 2-3 attributes.
2. Upgrade your starting pistol (or buy a better one from a gun vendor near V’s apartment).
3. Unlock fast travel points – every metro station you discover becomes a fast travel point. Use them to traverse the city quickly.
4. Do NCPD Scanner Hustles (blue icons on map) – they are easy combat encounters that reward loot, experience, and street cred. Great for levelling up early.
5. Read shards – lore and skill shards provide XP and crafting recipes. Pick up every shard you see.
#### Avoid:
---
7. Early Resource Priorities
| Resource | Priority | Why |
|---|---|---|
| Eddies (money) | High | Buy ammo, healing items, better weapons, and cyberware. Early money comes from selling junk and completing NCPD hustles. |
| Ammo | Medium | You will run out of ammo quickly if you spray. Use cover and aim for headshots. Craft ammo after unlocking the “Grease Monkey” perk in Technical Ability. |
| Health Items | High | MaxDoc and Bounce Back are essential for survival. Always carry 5+ each. Buy from vendors when low. |
| Component Parts | Medium | Needed for crafting and upgrading weapons. Dismantle unwanted weapons and junk. |
| Cyberware Capacity | Low early | You start with 2-3 slots. Focus on upgrading your cyberdeck (if netrunner) or arm implants (gorilla arms for melee). |
8. Common Beginner Mistakes
1. Not using quickhacks – even non-netrunners can use “Ping” to locate enemies and objects. Bind it to a slot and use it constantly.
2. Driving too fast – Night City traffic is aggressive. Slow down for corners; use handbrake (Space / L1 / LB) to drift.
3. Ignoring the camera system – you can hack cameras (breach protocol) to see enemy positions and disable them. Always look for terminals.
4. Not saving often – the game autosaves frequently, but manual saves (F5) are cheap. Quick save before every mission.
5. Selling iconic weapons – iconic weapons (with a gold border) are unique and can be upgraded later. Store them in your stash.
6. Choosing wrong dialogue – while some choices have consequences, don’t stress. The game is forgiving; just be consistent with your character’s personality.
7. Overlooking crafting – even if you aren’t a tech build, crafting ammo and grenades saves money. Unlock the “Technical Ability” perk “Mechanic” early for component recycling.
---
9. Day-One Checklist
Complete these tasks in your first play session (2-3 hours):
- [ ] Do NOT skip the prologue – complete “The Rescue” and all tutorial prompts.
- [ ] Choose a life path (recommend Street Kid) and allocate attributes (3 Body, 2 Reflexes, 2 Technical Ability).
- [ ] Visit Viktor the Ripperdoc and install the free cyberdeck.
- [ ] Sell all junk items (from inventory) to a vendor (the gun shop or food stand near V’s megabuilding).
- [ ] Dismantle any duplicate weapons you don’t need – you get components.
- [ ] Equip a pistol and a submachine gun (if found).
- [ ] Unlock 2-3 fast travel points by discovering metro stations (blue pillars).
- [ ] Complete “The Ride” side gig for a free car.
- [ ] Do at least 3-4 NCPD Scanner Hustles in Watson (yellow or blue icons).
- [ ] Read all skill shards and lore shards you picked up.
- [ ] Quick save before every major encounter.
- [ ] Visit a Ripperdoc and install basic cyberware (e.g., “Optic Camo” or “Strong Arms”).
- [ ] Turn off “Pinky” (the tutorial helper) in settings if you find it annoying.
---
Final tip: Cyberpunk 2077 is a marathon, not a sprint. Explore at your own pace, experiment with playstyles, and don’t be afraid to reload a save if you backed yourself into a corner. Night City rewards curiosity. Happy hunting, merc!