Game Tips
Game Tips for Dragon Ball FighterZ
This guide provides a comprehensive collection of tips categorized by core aspects of the game. Each tip includes a clear explanation, why it works, and when to apply it. The tips range from beginner-friendly fundamentals to advanced optimization strategies.
---
1. Combat Fundamentals (Beginner & Intermediate)
#### 1.1 Master the Universal Combo Structure
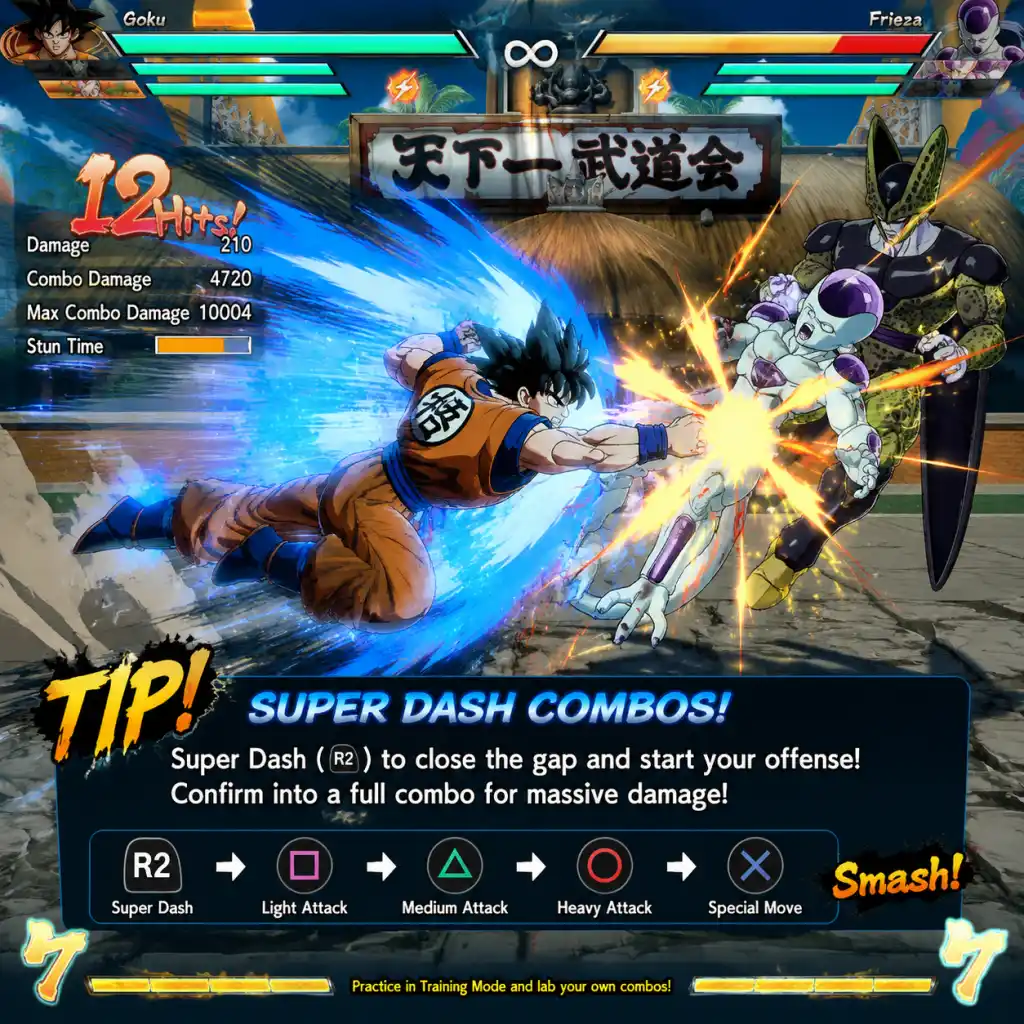
- Tip: Every character can use a basic ground combo: 2L (crouching light) → 2M (crouching medium) → 5M (standing medium) → 5H (standing heavy) → Super Dash (S or quarter-circle forward + H). After the Super Dash, press Light twice to teleport behind the opponent, then continue with a jump cancel combo.
- Why: This universal route works for all characters and builds damage and meter. It’s the foundation for more advanced combos.
- When: Use this in neutral or after a knockdown to confirm hits. Avoid autocombo (mashing Light) as it scales damage poorly.
- Tip: Use Super Dash (quarter-circle forward + H) sparingly. It is easily punishable by 2H (down-heavy) which gives a full combo. Instead, use Super Dash to close gaps after a hard knockdown or when the opponent is recovering.
- Why: Raw Super Dash in neutral is a risky habit. Good players will anti-air you every time.
- When: Use Super Dash only when you have a read (e.g., opponent is whiffing a move, or you see them start a super).
- Tip: Look up or lab a standard 0-bar, midscreen combo for your point character. Example for Goku: 2M → 5M → jc (jump cancel) → j.L → j.L → j.2H → Super Dash → j.L → j.M → j.2H → j.L → j.L → j.2H → j.236L (Kamehameha).
- Why: Consistent BNB combos maximize damage without requiring meter. They build blue life (recoverable health) on the opponent, making your offense more rewarding.
- When: Use this combo after any grounded confirm (e.g., 2M hit, 5H hit, or after a Dragon Rush).
- Tip: Dragon Rush (L+M together) is a command grab that works on ground and air. It can be teched by pressing L+M at the same time (same input). But in a scramble or after a blocked string, Dragon Rush catches opponents who are holding block too long.
- Why: It forces the opponent to guess between blocking and teching. If they tech, you both reset to neutral—no risk. If they fail, you get a knockdown and can set up oki.
- When: Use after a blockstring that ends with a slight gap (e.g., after 5LL). Also use as a tick throw after a jab reset.
- Tip: Vanish (quarter-circle back + S) is an invincible reversal that costs 1 bar. It can be used on wake-up to escape pressure. However, it is punishable if blocked (opponent can reflect or 2H you).
- Why: Vanish is a high-risk tool. In competitive play, players bait it and punish. Use it only when the opponent is extremely aggressive and you need to reset.
- When: Rarely on wake-up; better to use reflect or guard cancel tag (2 assists) as safer options.
- Tip: Sparking Blast (L+M+S together) activates a temporary buff: infinite combos, increased damage, fast health regen, and better air options. Use it to extend combos mid-screen or to come back from a deficit.
- Why: Sparking allows you to cancel normal moves into other normals or specials on hit, enabling loops. It also lets you cancel ki blasts into Super Dash.
- When: Activate Sparking after a confirmed hit to start a ToD (Touch of Death) combo, or when you are down to one character to maximize comeback potential.
- Tip: On wake-up, you can delay your tech (press nothing) to avoid high-low mix-ups. This makes the opponent’s okizeme harder. However, you lose the invincibility of a normal tech.
- Why: Most players set up safejumps or meaty attacks. Delaying tech shifts your wake-up timing, potentially causing their meaty to whiff. Then you can punish.
- When: Use after a hard knockdown when the opponent is at a distance where a meaty is expected. Not recommended against characters with strong command grabs (e.g., Android 16).
- Tip: Understand that cross-ups in DBFZ are limited. Most characters cannot cross up easily. Use low attacks (2M) and overheads (6M, but 6M is universal) sparingly. The universal overhead (forward + H) costs no meter but is -6 on block.
- Why: Overheads are reactable. Mix-ups often rely on stagger pressure (gaps in blockstrings) or using assists to cover a high/low.
- When: Use 6M when you have an assist covering your approach, or after conditioning the opponent to block low. For a low, use 2M early in a blockstring.
- Tip: Each assist type (Beam, DP, Get-off-me) has specific uses. Beam assists (e.g., Goku’s Kamehameha, Bardock’s Riot Javelin) have long range and are great for neutral and combo extensions. Invincible assists (e.g., Vegeta’s Super Dash kick) help in blockstrings. Use assists to make your offense safer or to convert stray hits.
- Why: Assists reset the neutral and allow you to continue pressure. For example, call a beam assist immediately after a blocked 5H to make it safe.
- When: Use assists at the end of blockstrings to prevent the opponent from punishing your recovery. In combos, call assist after a Smash (knockdown animation) to extend the combo before the opponent hits the ground.
- Tip: With Sparking active, learn looping combos for your team. Many characters can repeat the sequence: launch, j.M, j.L, j.2H, Super Dash, j.M, j.L, j.2H, etc. ending with a super. For example, Vegito can do: 5M → 5H → 236L (Ki Blast) → Sparking → 5M → 5H → jc → j.L → j.M → j.2H → Super Dash → repeat.
- Why: Sparking loops maximize damage and often kill. They require precise timing, but mastering one per team is crucial for competitive play.
- When: Use after activating Sparking from a confirm. If you have 7 bars and Sparking, you can kill any character mid-screen.
- Tip: Arrange your team in order: Point (first) wants to build meter and does well with assists. Mid (second) can use meter but also builds for anchor. Anchor (third) is the comeback character that uses 7 bars efficiently and can function solo.
- Examples: Point: Kid Buu, Bardock; Mid: Cell, Goku; Anchor: Base Vegeta, Android 21.
- Why: This structure optimizes meter usage and survivability. Point characters often have strong neutral and mix-ups. Anchors have powerful level 3 supers that can turn the tide.
- When: Build your team accordingly. Avoid putting two meter-hungry characters together unless you have a battery (e.g., Base Goku or SS Vegeta) on point.
- Tip: Choose characters whose assists complement your point’s game plan. For example, if you play Gotenks (point), his Ghost Oki benefits from a beam assist (like Adult Gohan) to lock down opponents. A character with a DP assist (like Cooler) can help you anti-air.
- Why: Good assist synergy allows you to convert hits that would otherwise be safe for the opponent. It also makes blockstrings gapless.
- When: Test assist calls in training mode. Check if your assist can extend combos (e.g., after a Smash) and if it covers gaps in your pressure.
- Tip: Some characters generate more meter than others. SS Vegeta (point) builds meter with his rapid kicks and assist. Base Goku’s Kaioken helps build bar. Use a battery on point to fund your mids and anchor.
- Why: In DBFZ, meter determines combo length, reversals, and supers. Having a battery ensures you always have options.
- When: If your team relies on EX moves or level 3 supers, consider including a battery.
- Tip: EX moves (e.g., quarter-circle forward + L+M) cost 1 bar and often have extra properties: invincibility, better damage, or speed. Use them to make blockstrings safe or to punish whiffs.
- Examples: Bardock’s EX Riot Javelin (236L+M) is an invincible reversal. Frieza’s EX Death Saucer (236L+M) orbs the opponent for oki.
- Why: EX moves are powerful but expensive. Use them only when necessary—e.g., to close a round or turn a bad situation into offense.
- When: Use EX moves in neutral to beat projectiles, as a punish tool, or to extend combos for extra damage.
- Tip: Level 3 supers (e.g., Goku’s Super Spirit Bomb) cost 3 bars but often have cinematic properties, high damage, and can be used as a reversal (invincible on startup). Many level 3s, like Bardock’s, can be combo’ed into from a Dragon Rush.
- Why: Level 3 supers are comeback tools. They also (in most characters) heal blue health or provide a unique benefit (e.g., Tien’s Tri-Beam costs health).
- When: Use level 3 to finish a round, as a reversal (if invincible), or after a Sparking blast combo to max damage.
- Tip: During a combo, aim to spend meter only if it gives a significant damage boost (e.g., 20% more) or secures a kill. For example, use vanish to extend a combo only if it leads to a super that kills. Otherwise, save meter.
- Why: Meter is a limited resource. Wasting it can leave you without options for defensive evasive maneuvers or level 3 supers.
- When: In the middle of a combo, if you have 1 bar, consider whether a vanish + super will kill. If not, end the combo without meter spend.
- Tip: Reflect (forward + S) is a universal defensive tool that parries all strikes (except command grabs and supers). It has 6f startup, but the active frames are very wide. Use it to escape pressure.
- Why: Reflect beats auto-combo and most jump-ins. If the opponent expects a reflect, they can bait it by delaying a button.
- When: Use reflect when cornered or after a blocked 5L. After a successful reflect, you can punish with 5L or 2M.
- Tip: Backdash (quick double-tap back) has invincibility on startup. Use it to escape pressure, avoid cross-ups, or reset neutral. It is especially strong after a blocked Command Grab.
- Why: Backdash creates space and makes the opponent whiff. It costs no meter.
- When: Use after a blocked attack that leaves you at minus frames (e.g., after blocking a Heavy) or to avoid an incoming mix-up.
- Tip: While blocking, press L+M+Assist (two assists together) to perform a Guard Cancel Tag. This consumes all your blue life (recoverable health) and switches your point character with an assist, who does an invincible attack.
- Why: It’s a high-cost reversal that can turn the tide, but it leaves your point vulnerable to being snapped in later. Use sparingly when cornered.
- When: Use when you have at least two characters alive and need to escape pressure. It’s risky because the opponent can bait it and punish.
- Tip: If you are in a blockstun, you can use Super Dash to escape certain setups (e.g., after a ki blast). It's not invincible but can catch opponents who are not prepared.
- Why: It’s a risky but effective way to challenge pressure.
- When: Use against characters with slow recovery on their blockstrings (e.g., after a beam attack).
- Tip: Set the dummy to record a common blockstring (e.g., 5LL → 2M → 5H → assist call) and then practice punishing the gap or reflecting.
- Why: This simulates real match situations. You learn to react to attacks and find the best punish.
- When: Do this for 10 minutes every session to sharpen your defense.
- Tip: In DBFZ, IAD (instant air dash) is 956 or 754 direction for forward/backward. This allows quick cross-ups and mix-ups. Practice j.M after IAD for an instant overhead.
- Why: IAD overheads are very hard to react to. They are a staple for aggressive players.
- When: Use IAD after a knockdown or when the opponent is recovering. It works best with characters who have good air normals (e.g., Cell, Bardock).
- Tip: 2H (down-heavy) is the universal anti-air. It beats Super Dash, jump-ins, and most aerial approaches. It launches the opponent for a full combo.
- Why: A reliable anti-air is essential. Without it, you will get destroyed by jump-in spam.
- When: Use 2H when the opponent is above you or when you predict a Super Dash. Practice timing in training mode.
- Tip: Use a wired connection. In settings, set the matchmaking to “Same Region” and “Good Connection” only. This reduces lag and makes your gameplay consistent.
- Why: Lag can make combos unreliable and ruins the experience. A stable connection is crucial for reacting to 2H.
- When: Always do this before queuing for ranked.
- Tip: Know which of your moves are safe on block (e.g., Goku’s 5M is -4, so it’s safe if not canceled into a special). Use Dustloop or the game’s training mode to check frame data.
- Why: Blockstrings are only effective if they are gapless. If you use a move that is minus, the opponent can punish you.
- When: Study frame data for your point and assists. Create blockstrings that are at least -2 or better.
- Tip: During a match, take note of what the opponent does after a knockdown. Do they always tech forward? Do they use reflect on wake-up? Adjust your oki accordingly.
- Why: DBFZ rewards adaptation. If you stick to the same patterns, good players will read you.
- When: Actively watch your opponent’s wake-up habits and adjust your meaty or cross-up attempts.
- Tip: When you are down to your last character, save Sparking for a moment when you get a hard knockdown or a touch of death opportunity. Activate Sparking to end the round in one combo.
- Why: Sparking with 7 bars can kill any character from a single confirm. Use it when you have a guaranteed opening.
- When: Activate Sparking after landing a 2H or a Dragon Rush with your anchor.
- Tip: Zeni is earned from matches and used to buy Cosmetics (colors, lobby avatars, stamps) and Capsules. Save Zeni for character colors you actually want. Avoid wasting on random capsules that give duplicates.
- Why: Capsules are RNG and can be frustrating. Purchase specific items from the shop instead.
- When: If you want a specific color (e.g., Android 21 Lab Coat), buy it directly from the shop when available.
- Tip: The Arcade Mode and Story Mode (Android 21 Saga) give large Zeni rewards and unlock some characters. Complete them to boost your economy.
- Why: These modes also teach you the game’s mechanics and provide a stress-free environment to practice.
- When: Play through story mode early to unlock all base roster characters and earn Zeni for cosmetics.
- Tip: Z-Coin is premium currency earned from events or purchased. Use it for exclusive colors and lobby items. Avoid unnecessary purchases.
- Why: Most content can be earned in-game; Z-Coin is optional.
- When: Only spend Z-Coin on items you can’t earn otherwise, such as premium color sets.
- PC: Disable motion blur and background animations for better performance. Use Steam Input or Xbox Controller for consistent dpad inputs.
- PlayStation 5: The PS5 version runs at 4K/60fps with near-zero input lag. Use the controller’s dpad for precise quarter-circle inputs.
- Xbox Series X: Same as PS5. Ensure your TV is in Game Mode.
- Nintendo Switch: Use a wired controller (Pro Controller) if possible. The Switch version has slightly higher input lag; practice IAD timing accordingly.
- Practice Combos Daily: Muscle memory is key. Spend 20 minutes every day executing your BNB combos from both sides.
- Watch Pro Matches: Observe players like SonicFox, GO1, or Fenrich to learn neutral and team synergy.
- Participate in Local Events: Even online, joining Discord tournaments helps you grow faster.
- Stay Positive: Losing is learning. Review replays of your losses to see where you got opened up.
#### 1.2 Super Dash Is a Tool, Not a Crutch
#### 1.3 Learn Your Character’s Optimal BNB (Bread & Butter)
#### 1.4 Use Dragon Rush to Open Defenses
#### 1.5 Vanilla Reversals & Their Risks
---
2. Advanced Combat & Combos (Intermediate & Advanced)
#### 2.1 Optimize Damage with Sparking Blast
#### 2.2 Delay Teching for Mix-Ups
#### 2.3 Cross-Up Protection & Blocking High/Low
#### 2.4 Using Assists for Extensions & Pressure
#### 2.5 Sparking Loops & ToD Combos
---
3. Team Composition & Synergy
#### 3.1 Point, Mid, Anchor Roles
#### 3.2 Assist Synergy
#### 3.3 Battery Characters for Meter Economy
---
4. Meter Management & Economy
#### 4.1 When to Use EX Moves
#### 4.2 Saving Meter for Level 3 Supers
#### 4.3 Optimal Meter Usage in Combos
---
5. Defense & Movement
#### 5.1 Reflect Is Your Best Friend
#### 5.2 The Importance of Backdash
#### 5.3 Guard Cancel Tag (2 Assists)
#### 5.4 Super Dash Escape Option
---
6. Training & Practice
#### 6.1 Use Training Mode Record & Playback
#### 6.2 Practice Instant Air Dashes (IAD)
#### 6.3 Learn Your Character’s Anti-Air (2H)
---
7. Online Play & Competitive Tips
#### 7.1 Check Your Connection & Set Matchmaking
#### 7.2 Learn Frame Data for Your Team
#### 7.3 Adapt to Your Opponent’s Habits
#### 7.4 Use Sparking as a Comeback Tool
---
8. Economy & Unlockables
#### 8.1 Spend Zeni Wisely
#### 8.2 Earn Zeni Through Arcade & Story Mode
#### 8.3 Use the Z-Coin Store (Paid DLC)
---
9. Platform-Specific Tips
---
10. Final Pro Tips
With these tips, you’ll go from a beginner to a formidable player. Good luck and have fun in Dragon Ball FighterZ!