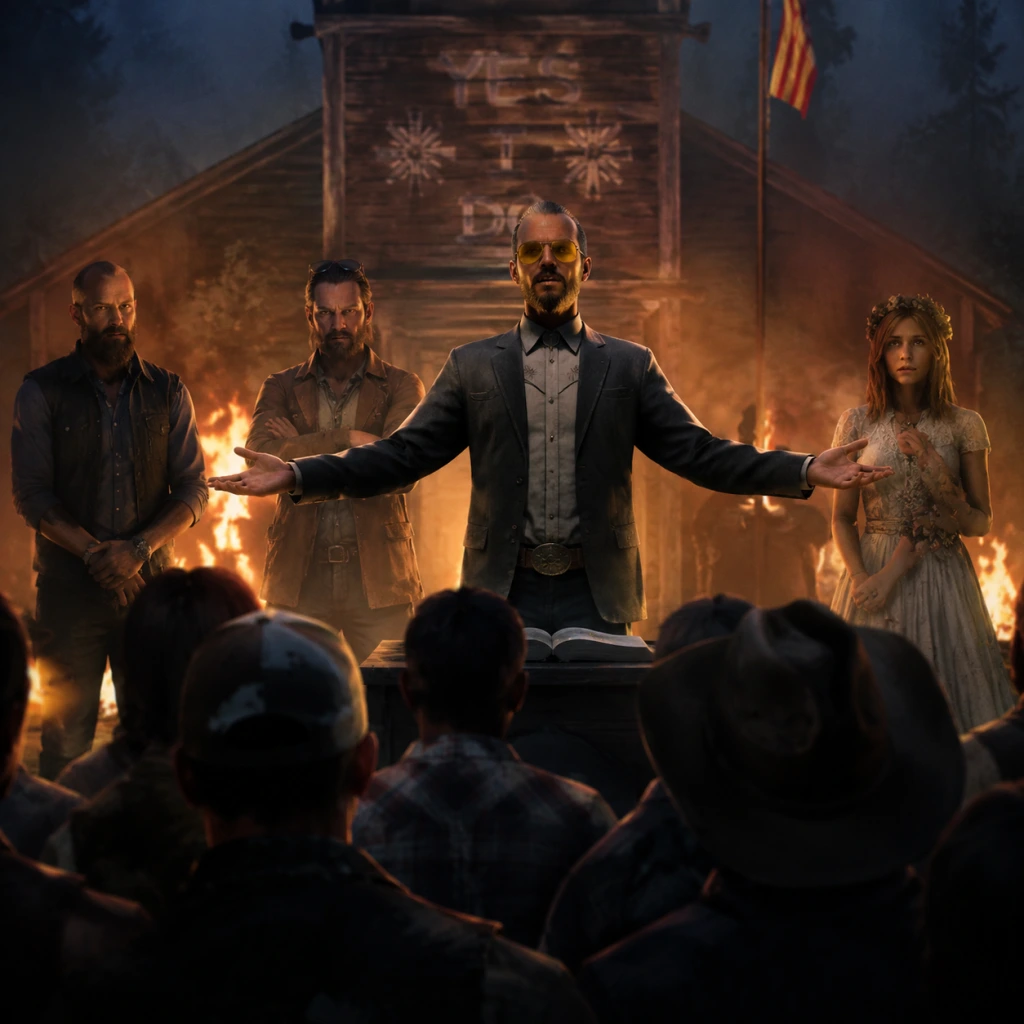
Characters & Roles
Characters & Roles Guide for Far Cry 5
While Far Cry 5 does not feature traditional classes or playable heroes like in a multiplayer shooter, it offers a rich cast of major story characters, allies (Guns for Hire), and antagonists. This guide covers every significant figure—their backgrounds, strengths, weaknesses, playstyles, unlock conditions, recommended equipment, and synergy with the player character (the Deputy). Even the Deputy, though a silent blank slate, has a defined role and growth path through Perk Points.
---
1. Player Character: The Deputy
- Background: You are a newly appointed Deputy Sheriff in Hope County, Montana. Initially unnamed and customisable only by gender and appearance (no gameplay impact). You are thrust into the conflict when you attempt to arrest Joseph Seed, the charismatic leader of the doomsday cult Eden’s Gate.
- Role: Flexible combatant and problem solver. You can specialise through Perk Points in stealth, guns blazing, survival, or a hybrid. There are no locked classes—your playstyle evolves as you unlock perks.
- Strengths: High adaptability; silent protagonist allows player immersion; access to all weapons and vehicles; ability to hire up to two companions (Guns for Hire) and use Fangs for Hire (animals).
- Weaknesses: No unique abilities that other characters don’t have; lacks innate healing or special attacks until perks are unlocked; early game can feel fragile.
- Playstyle: Fully customisable. Stealth players should invest in Sneak and Lockpicking; assault players should prioritise Health, Ammo Capacity, and Sliding. For a balanced loadout, focus on Grenade Harasser, Automatic Weapons, and Boomer (dog companion).
- Unlock Conditions: Immediate at game start.
- Recommended Equipment:
- Team Synergy: Works with any combination. The Deputy should fill gaps: if your Guns for Hire are long-range, go close-quarters; if they are heavy gunners, pick a sniper or stealth approach.
- Background: Former preacher who founded Eden’s Gate. Believes he is chosen to save humanity from an impending collapse. He leads the cult with fanatical charisma. His three adult children (Jacob, John, Faith) control separate regions.
- Role: Main villain and final boss. Appears throughout the story to taunt the player. Not directly fought until the end.
- Strengths: Inspires loyalty; manipulates events from behind; uses brainwashing and Bliss (a hallucinogenic drug) to control people. Has a massive cult army.
- Weaknesses: Overconfident; relies on his lieutenants; vulnerable to direct confrontation after they are eliminated.
- Playstyle (as enemy): Avoids direct combat until very end. In the final confrontation, he attacks with a knife in close quarters; it’s more of a QTE sequence than a traditional fight.
- Unlock Conditions: You fight him only after defeating all three lieutenants and triggering the endgame. No special equipment needed—just survive his melee attacks and press prompts.
- Recommended Equipment: None specific—stock up on health syringes because the fight is short but tense. Use a shotgun during the initial stages (while cultists are present).
- Team Synergy: Not applicable as a companion.
- Region: Whitetail Mountains (north).
- Background: Ex-military, survivalist. He runs a training regimen called “The Judgement” where he brainwashes captives into becoming “wolves” (elite soldiers). He uses conditioning and puzzle-like mind games.
- Strengths: Tactical genius; leads elite Wolf soldiers; uses snipers, ambushes, and booby traps. His region is densely forested and mountainous, favouring long-range combat.
- Weaknesses: Arrogance; his own conditioning backfires when players break free; weak to stealth and headshots (he doesn’t have superhuman durability).
- Playstyle (facing him): He triggers a unique boss fight involving a blizzard, limited visibility, and waves of Wolves. Use cover, listen for his footsteps, and shoot him quickly (he is not heavily armoured).
- Recommended Equipment: Silenced sniper rifle, shotgun for close-range, flares to see in snowstorm. Perk: Takedown Master to silently kill Wolves.
- Unlock Conditions: Complete all main missions in Whitetail Mountains; he is confronted in the bunker at the end. Requires Jacob’s resistance meter to be filled.
- Region: Holland Valley (central west).
- Background: A lawyer and former prosecutor. He runs the cult’s legal and economic operations in Hope County. He is sadistic and enjoys tormenting people through “the Reaping” (asset seizure and psychological torture).
- Strengths: Charismatic and manipulative; controls the region’s economy; uses heavy vehicles (trucks, planes) and hired thugs. His outposts are well-defended.
- Weaknesses: Pride and need for control; physically average; weak in direct combat—relies on his plane and then a small army.
- Playstyle (facing him): First, a dogfight in the sky (you in a plane, he in an attack helicopter/plane). Use the plane’s machine guns to disable his vehicle. After crashing, he fights on foot with a pistol. He can be shot easily but his cultists swarm.
- Recommended Equipment: Grab a plane from a runway; upgrade its armour and guns via the shop. For the ground fight, bring an LMG or assault rifle with a drum magazine to clear his minions.
- Unlock Conditions: Complete main missions in Holland Valley; resistance meter maxed.
- Region: Henbane River (south).
- Background: The only non-blood sibling; she was a drug addict recruited by Joseph. She produces the Bliss drug that keeps followers placid. She appears innocent but is deeply manipulative and psychologically unstable.
- Strengths: Excels at psychological warfare; uses Bliss to create illusions, clones of herself, and hallucinations. Her cultists are often sprayed with Bliss, making them erratic.
- Weaknesses: Physically frail; relies on illusions and hit-and-run tactics; can be countered by anti-hallucination measures (wearing sunglasses? Not in game—just shoot the real one).
- Playstyle (facing her): A three-phase boss fight where she spawns multiple copies. Only one is real. Shoot the one that laughs or glows. Also, waves of Bliss-fueled cultists attack. Use fire (flamethrower, Molotovs) to burn illusion-based enemies?
- Recommended Equipment: Shotgun or SMG for close quarters; health upgrades to survive her damage over time. Use the camera to tag the real Faith.
- Unlock Conditions: Complete Henbane River main missions.
- Background: Pilot and farmer. He owns an airfield and uses his plane (named “The Wrath”) to bomb cult positions. He’s patriotic, sarcastic, and protective of his family.
- Role: Air support Guns for Hire. He flies overhead and strafes enemies or parachutes into combat.
- Strengths: Excellent crowd control; can bomb groups of enemies; high damage output; good against vehicles.
- Weaknesses: Vulnerable on the ground (he doesn’t wear heavy armour); his plane can be shot down; not available indoors.
- Playstyle: Summon him when you are outdoors facing many enemies. He provides airstrikes on your marked targets. He also carries a sidearm if he lands.
- Unlock Conditions: Complete his introductory mission at the Rye & Sons Aviation airfield early in Holland Valley. Then, after completing his personal story, he becomes a permanent Guns for Hire.
- Recommended Equipment: Give him a weapon? He uses only his plane and a pistol. No customisation.
- Team Synergy: Pairs well with Grace (sniper) for long-range support or Boomer (dog) for spotting. Use him to soften up outposts before you breach.
- Background: Former Olympic biathlete and hunter. She lives in a remote cabin and uses a custom sniper rifle. She’s stoic, efficient, and a crack shot.
- Role: Long-range sniper Guns for Hire.
- Strengths: Exceptional accuracy; stays at range and picks off enemies silently; provides cover from a distance.
- Weaknesses: Melee weakness; slow to reposition; can be flanked. Not useful in close quarters.
- Playstyle: Position her on a hill or rooftop before you approach an outpost. Let her eliminate priority targets (snipers, heavies). She can also take out alarms from afar.
- Unlock Conditions: Complete her side missions in the Whitetail Mountains region (after meeting her at her cabin).
- Recommended Equipment: She spawns with her own sniper. You cannot change her weapon, but you can upgrade her via the “Guns for Hire” menu (increases health, damage).
- Team Synergy: Best paired with a close-range companion like Sharkey (helicopter) or Peaches (stealth). Avoid pair with Hurk (explosives) because they compete for long-range targets.
- Background: Recurring Far Cry series character. Big, loud, and explosive-obsessed. He carries a rocket launcher and has a passion for blowing things up.
- Role: Explosive demolition expert. He fires rockets at vehicles and groups.
- Strengths: High area damage; effective against armored vehicles and helicopters; very loud and distracting.
- Weaknesses: Low accuracy; friendly fire risk; runs out of rockets quickly; vocal and may alert enemies.
- Playstyle: Summon when you need to destroy a convoy, helicopter, or a heavily fortified building. He will also throw grenades. Keep your distance because his explosions can hurt you.
- Unlock Conditions: Complete his first mission at the beginning of the game (near the starting island). After that, recruit him via the Guns for Hire menu once available.
- Recommended Equipment: No customisation—he uses an RPG and frag grenades.
- Team Synergy: Works well with any companion, but be careful with stealth builds. Pair him with Boomer to mark enemies so Hurk doesn’t waste rockets on nothing.
- Background: A friendly Australian Cattle Dog that belonged to a deceased survivor. He’s highly trained to hunt and retrieve.
- Role: Fangs for Hire (animal companion). He marks enemies, loots items, and attacks on command.
- Strengths: Silent; marks enemies automatically on your HUD; picks up loot (money, ammo) from dead bodies; subtle takedowns on isolated enemies; never alarm unless ordered.
- Weaknesses: Can be killed (if not upgraded); not strong against armoured enemies; cannot drive or use vehicles.
- Playstyle: Use Boomer as your primary scout. He reveals enemy locations even through walls. Send him to loot areas after a fight. He can also fetch items.
- Unlock Conditions: Found early in the game—during the mission “Liberation” or shortly after, you can rescue him from a cultist cage near the beginning area. Once freed, he permanently joins.
- Recommended Equipment: No equipment. Upgrade his health and attack damage via the Guns for Hire menu (under Fangs for Hire).
- Team Synergy: Pairs with any human companion. Especially useful with stealth players or snipers. Boomer + Grace = flawless long-range scouting.
- Background: A mountain lion captured by the cult. After being freed, she becomes a deadly stealth predator.
- Role: Fangs for Hire (animal). Specialises in silent assassinations of human enemies.
- Strengths: Very fast; kills most normal enemies instantly with a neck bite; can be directed to take down targets without alerting others. Regenerates health quickly.
- Weaknesses: Cannot handle large groups; vulnerable to heavy gunfire; does not mark enemies or loot.
- Playstyle: Send Peaches to eliminate isolated guards in outposts. She is excellent for clearing a path. Use her ability to chain takedowns (one per enemy, but she can kill several in quick succession if they are close).
- Unlock Conditions: Found in the Whitetail Mountains region, near the “Peaches” named location. You need to free her from a cage and then complete a short taming mission.
- Recommended Equipment: None.
- Team Synergy: Best with a human companion who can provide cover fire, like Nick Rye or Grace. Avoid using her with Hurk (explosions scare her? Actually no, but she may get killed by friendly fire).
- Background: A helicopter pilot and mechanic. He is laid-back, loves flying, and provides aerial taxi and support.
- Role: Helicopter pilot Guns for Hire. He brings a helicopter armed with rockets and minigun.
- Strengths: Excellent for travel; provides aerial firepower; can drop you off on rooftops; good against ground targets and vehicles.
- Weaknesses: Helicopter can be shot down; useless indoors; cannot assist in stealth situations.
- Playstyle: Call Sharkey when you need to traverse the map quickly or when assaulting a large compound. He will circle above and provide suppression while you clear the area.
- Unlock Conditions: Found in the Henbane River region. Complete his side missions (starting with “Sharkey’s Helicopter”) to unlock him.
- Recommended Equipment: None—he uses a standard attack helicopter with upgrades you can purchase from the shop.
- Team Synergy: Pairs with Boomer for spotting targets or with Hurk for explosive chaos. Avoid pairing with Grace because her sniper is less effective with helicopter noise attracting enemies.
- Background: Hurk’s mother. She is a brash, heavy-drinking woman who operates a helicopter transport service. She’s also a pilot.
- Role: Guns for Hire (helicopter pilot) similar to Sharkey but with a different personality.
- Strengths: Same as Sharkey—provides helicopter support and transport. She also carries a machine gun and can be ordered to land.
- Weaknesses: Same as Sharkey.
- Playstyle: Similar to Sharkey. Summon for air support or quick travel.
- Unlock Conditions: Complete her side missions in Holland Valley (she appears near the Drubman residence).
- Recommended Equipment: None—uses helicopter.
- Team Synergy: Use with long-range companions like Grace to mark targets for her rockets.
- Background: A pastor who lost his church to the cult. He is a leader of the Resistance and a skilled fighter. He uses a double-barrel shotgun.
- Role: Firearms expert Guns for Hire. He fights on foot with a shotgun and works as a close-quarters brawler.
- Strengths: High damage at short range; sturdy; can take a beating; provides moral support (dialogue).
- Weaknesses: Limited range; vulnerable to multiple enemies; not great for stealth.
- Playstyle: Use him as a bodyguard when clearing buildings or tight spaces. He will push aggressively.
- Unlock Conditions: Recruited automatically during the main story after rescuing him from the church. He is a permanent Guns for Hire after his introductory mission.
- Recommended Equipment: No customisation.
- Team Synergy: Works well with Grace (range coverage) or Boomer (scouting). Avoid with Hurk—too much chaos.
- Background: Bartender at the Spread Eagle bar. She lost her family to the cult and now fights with a submachine gun.
- Role: Mid-range skirmisher Guns for Hire.
- Strengths: Good rate of fire; balanced stats; provides healing items occasionally.
- Weaknesses: Mediocre damage; not specialised in any field.
- Playstyle: She is a jack-of-all-trades. Use her when you need a reliable backup that can hold her own in firefights.
- Unlock Conditions: Complete her side missions in the Henbane River region.
- Recommended Equipment: None.
- Team Synergy: Works with any composition. Pair with Boomer for loot, or with Sharkey for mobile support.
- Background: Leader of the Whitetail Militia. He is a confident, tactical fighter who uses an assault rifle.
- Role: Assault infantry Guns for Hire.
- Strengths: Competent with standard rifles; can target enemies effectively; leads militia groups during missions.
- Weaknesses: Not unique; essentially a well-rounded soldier.
- Playstyle: Use him as a regular fighter. He’s reliable but not exceptional.
- Unlock Conditions: Recruited during the story in Whitetail Mountains—after completing several militia missions.
- Recommended Equipment: None.
- Team Synergy: Good with all companions. Fills a generic combat role.
- Guns for Hire: You can recruit generic Resistance fighters from outposts or safehouses. They have randomised names, weapons (pistol, rifle, shotgun, SVD sniper, etc.), and one of three roles:
- Strengths: Cost no money; infinite availability; can be dismissed any time.
- Weaknesses: No unique abilities; lower stats than named characters; generic dialogue.
- Unlock Conditions: Available after liberating any outpost and completing the tutorial.
- Recommended Equipment: You can buy weapons for them from the Shop (in the Perk menu).
- Team Synergy: Versatile; use to fill gaps in your squad.
- Fangs for Hire (animals): In addition to Boomer and Peaches, you can also recruit:
- Strengths/Weaknesses: Each animal excels in different situations—bears for chaos, wolves for speed.
- Unlock Conditions: Rescue them from cages and complete taming missions.
- For Stealth Runs: Hire Boomer (spotting) + Grace (sniper) or a generic sniper. Avoid loud companions.
- For Open Combat: Nick Rye (airstrikes) + Hurk (rockets) + Cheeseburger (tank). Chaos ensues.
- For Versatility: Grace + Sharkey (air support and ground coverage).
- For Loot Farming: Boomer (picks up money and ammo) + Mary May (healing items).
- Weapons: AK-47 (reliable all-rounder) or ARC (sniper/revolver). For stealth: suppressed MBP .50 (sniper). For chaos: LMG or flamethrower.
- Perks: Early picks—Grenade Harasser (more throwables), Medkit Capacity (more heals), Brewery (craft more alcohol for Molotovs). Later—Paraglider and Wingsuit for mobility.
- Companions: Boomer (highlights enemies and loot) or Peaches (stealth takedown) for early game; later, Sharkey (pilot helicopter) or Hurk (explosives expert).
---
2. Antagonists (The Seed Family)
#### 2.1 Joseph Seed (The Father)
#### 2.2 Jacob Seed
#### 2.3 John Seed
#### 2.4 Faith Seed
---
3. Allied Characters (Resistance Members & Guns for Hire)
These characters can be recruited as companions (Guns for Hire) or serve as mission-givers. Each has a unique personality, weapon preference, and special ability.
#### 3.1 Nick Rye
#### 3.2 Grace Armstrong
#### 3.3 Hurk Drubman Jr.
#### 3.4 Boomer (Dog)
#### 3.5 Peaches (Mountain Lion)
#### 3.6 Sharkey (Jesse Sharkey)
#### 3.7 Adelaide Drubman
#### 3.8 Jerome Jeffries
#### 3.9 Mary May Fairgrave
#### 3.10 Eli Palmer
---
4. Generic Guns for Hire & Fangs for Hire
- Sniper: Long-range, can mark enemies.
- Heavy: Carries an LMG, high health, slow.
- Marksman: Balanced.
- Cheeseburger (Bear): Tanky, attracts fire, does heavy damage but is slow and loud. Found in Whitetail Mountains.
- Timber (Wolf): Aggressive, fast, similar to Boomer but less loot-focused. Found in Holland Valley.
---
5. How to Maximise Character Synergy
Remember: You can have two companions active at once (one human + one animal OR two humans). Experiment with combinations to suit your current mission.
---
6. Best Loadouts for the Deputy with Specific Companions
| Companion Pairing | Deputy Weapon Choices | Perk Focus | Playstyle Tips |
|---|---|---|---|
| Boomer + Grace | Silenced sniper + suppressed pistol | Stealth, Takedown, Reduced Noise | Let Boomer mark enemies, Grace eliminates snipers, you clear the rest. |
| Hurk + Nick | LMG + rocket launcher or grenade launcher | Heavy weapons, extra ammo, blast resistance | Call airstrikes then move in with LMG. |
| Sharkey + Peaches | SMG + shotgun + silencer (for backup) | Mobility, grappling hook, parachute | Use Sharkey to travel, then Peaches for stealth kills. |
| Cheeseburger + Jerry | Flamethrower + shotgun | Health regen, armour | Send Cheeseburger to draw fire, Jerry flanks. |
7. Summary Table of All Major Characters
| Character | Type | Role | Unlock Region | Best For |
|---|---|---|---|---|
| Deputy | Player | Flexible | N/A | All situations |
| Joseph Seed | Antagonist | Final Boss | Endgame | End story |
| Jacob Seed | Antagonist | Region Boss | Whitetail Mountains | - |
| John Seed | Antagonist | Region Boss | Holland Valley | - |
| Faith Seed | Antagonist | Region Boss | Henbane River | - |
| Nick Rye | Guns for Hire | Airstrike support | Holland Valley | Open combat |
| Grace Armstrong | Guns for Hire | Sniper | Whitetail Mountains | Stealth/long-range |
| Hurk Drubman Jr. | Guns for Hire | Explosives | Starting area | Vehicle destruction |
| Boomer (dog) | Fangs for Hire | Scout/looter | Starting area | Stealth/info |
| Peaches (cat) | Fangs for Hire | Stealth assassin | Whitetail Mountains | Silent eliminations |
| Sharkey | Guns for Hire | Helicopter pilot | Henbane River | Aerial attack |
| Adelaide Drubman | Guns for Hire | Helicopter pilot | Holland Valley | Aerial attack |
| Jerome Jeffries | Guns for Hire | CQC shotgunner | Henbane River | Close quarters |
| Mary May | Guns for Hire | General fighter | Henbane River | Versatile backup |
| Eli Palmer | Guns for Hire | Assault infantry | Whitetail Mountains | Reliable firepower |
| Cheeseburger (bear) | Fangs for Hire | Tank | Whitetail Mountains | Distraction |
| Timber (wolf) | Fangs for Hire | Aggressive melee | Holland Valley | Fast attack |
Note: Generic Guns for Hire and Fangs for Hire are not listed in detail because they lack unique story backgrounds. However, they are still valuable for filling specific roles (e.g., a generic sniper when Grace is unavailable).
By understanding each character’s strengths and weaknesses, you can build a team that complements your playstyle and dominates Hope County. Remember to upgrade your companions via the Guns for Hire menu (accessible from the Campaign Map) to increase their health, damage, and unlock special abilities.