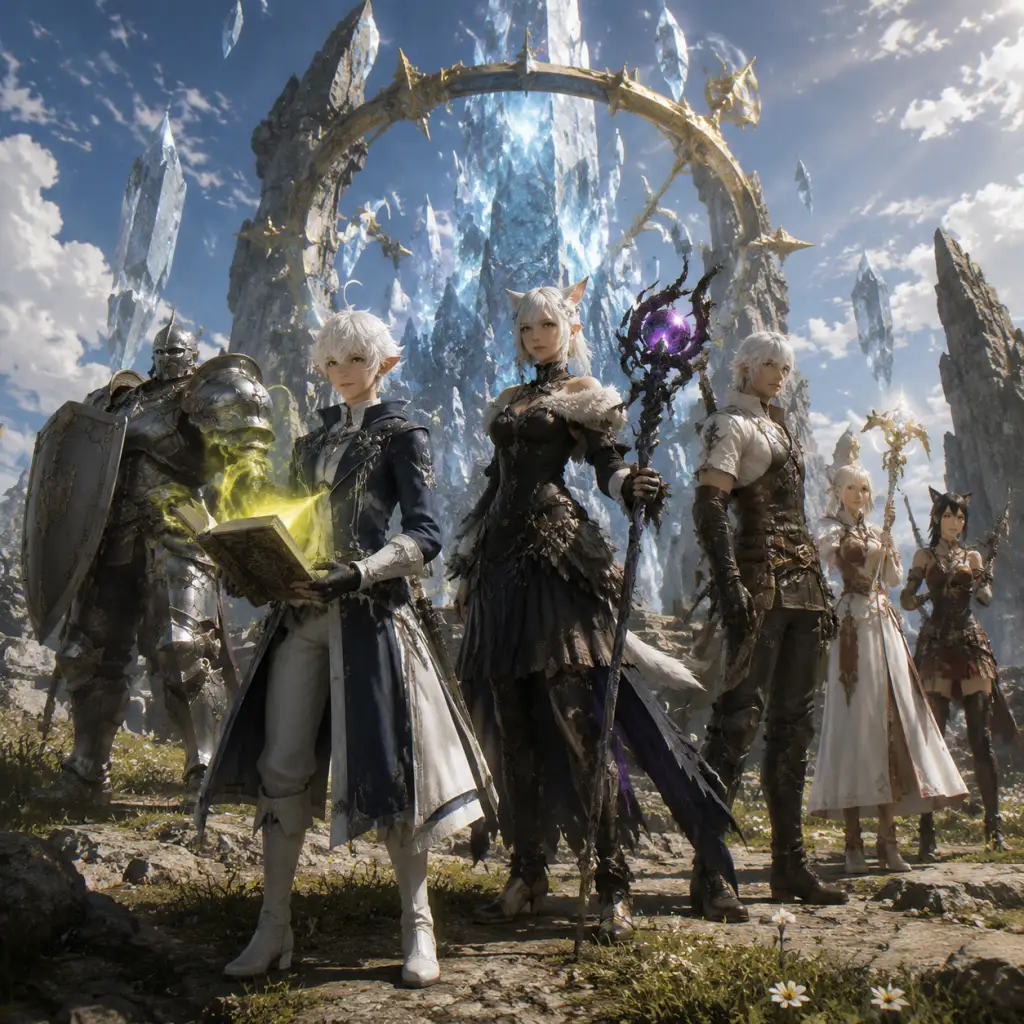
Characters & Roles
Characters & Roles Guide for Final Fantasy XIV: A Realm Reborn
This guide covers every playable role and the major non‑playable characters that define the story of Final Fantasy XIV: A Realm Reborn (ARR). You will learn about each job (advanced class) available in the base game, their strengths, weaknesses, playstyle, unlock conditions, recommended equipment, and team synergy. The guide also introduces the key NPCs of the Scions of the Seventh Dawn and other pivotal figures.
---
I. The Player Character – The Warrior of Light
Your custom‑created avatar is the central hero of Eorzea. While you have no fixed class, you can freely switch between all jobs on a single character after completing the level 10 class quest. As the story progresses, you become known as the Warrior of Light—a beacon of hope against the Garlean Empire and the Primals. There is no restriction on race, gender, or appearance for any job.
---
II. Playable Jobs & Roles
Each job falls into one of four roles: Tank, Healer, Melee DPS, Physical Ranged DPS, or Magical Ranged DPS. All ARR jobs reach a maximum level of 50 (later expansions raise the cap). Below is the complete list of ARR jobs:
| Role | Base Class | Job | Unlock Level | Unlock Quest (starting location) |
|---|---|---|---|---|
| Tank | Gladiator | Paladin | 30 | New Gridania (Lulutsu) – Paladin's Pledge |
| Tank | Marauder | Warrior | 30 | Limsa Lominsa (Fergusson) – Pride of the Warrior |
| Healer | Conjurer | White Mage | 30 | Gridania (E‑Sumi‑Yan) – Sylph‑management |
| Healer | Arcanist | Scholar | 30 | Limsa Lominsa (K'lyhia) – Forgotten but Not Gone |
| Melee DPS | Pugilist | Monk | 30 | Ul'dah (Gagaruna) – Sisters of the Path |
| Melee DPS | Lancer | Dragoon | 30 | Gridania (Healer's Hall) – Eye of the Dragon |
| Melee DPS | Rogue | Ninja | 30 (requires Disciple of War level 10) | Limsa Lominsa (Lonwoerd) – My First Daggers (requires Rogue unlocked via The Rogue's Gallery at level 10) |
| Physical Ranged DPS | Archer | Bard | 30 | Gridania (Sihwi) – Bard's Banquet |
| Magical Ranged DPS | Thaumaturge | Black Mage | 30 | Ul'dah (Cocobuki) – Taking the Black |
| Magical Ranged DPS | Arcanist | Summoner | 30 | Limsa Lominsa (K'lyhia) – Forgotten but Not Gone (shared with Scholar) |
---
III. Tank Jobs
#### Paladin
- Background: A holy knight sworn to protect the innocent. Paladins wield a sword and shield, drawing on the power of light to defend allies.
- Strengths: Highest overall mitigation with physical block via shield; excellent party‑wide damage reduction (Divine Veil, Passage of Arms); strong emergency heals (Clemency); reliable stuns (Shield Bash).
- Weaknesses: Lower damage output compared to Warrior; requires precise cooldown management to avoid taking spike damage; limited mobility.
- Playstyle: Keep the boss facing away from the party, use your weapon skill combo (Fast Blade → Riot Blade → Royal Authority) to build enmity, rotate defensive cooldowns (Rampart, Sentinel, Hallowed Ground) for tankbusters. Use Cover to protect a squishy party member.
- Unlock Conditions: Gladiator level 30 → complete the quest Paladin's Pledge (Ul'dah). Requires Gladiator level 30 and having completed the level 30 Gladiator class quest.
- Recommended Equipment: At level 50, aim for the iLvl 90 Artifact Armor (from job quests) or the iLvl 70 Darklight Gear (from dungeons/tomestones). Best weapon: iLvl 90 Curtana (relic weapon) or iLvl 80 Allagan Blade (from The Binding Coil of Bahamut).
- Build Stats: Primary: Strength. Secondary: Critical Hit & Determination for a balanced build.
- Team Synergy: Pairs well with any healer; the physical block helps against physical‑damage enemies. Combines with Warrior for double tank (Paladin main tank, Warrior off‑tank).
- Background: A berserker from the icy north who channels inner rage to become an unstoppable force. Uses a greataxe to deal heavy damage and self‑heal.
- Strengths: Highest single‑target burst damage among tanks; excellent self‑healing (Inner Beast, Storm's Path); powerful crowd control via Holmgang (prevents death); high health pool.
- Weaknesses: Fewer party‑wide damage reduction abilities than Paladin; no block (only parry); rage management requires attention.
- Playstyle: Build Wrath gauge through weapon skills (Heavy Swing → Maim → Storm's Eye/Path), then spend Wrath on Inner Beast (defense) or Fell Cleave (damage). Use Defiance for increased enmity and healing received. Equilibrium provides a self‑heal and a TP refresh.
- Unlock Conditions: Marauder level 30 → complete the quest Pride of the Warrior (Limsa Lominsa).
- Recommended Equipment: iLvl 90 Artifact Armor; weapon: iLvl 90 Bravura (relic) or iLvl 80 Allagan Axe.
- Build Stats: Primary: Strength. Secondary: Critical Hit & Determination.
- Team Synergy: Works well with a single healer due to its self‑sustain. Synergizes with other tanks for cooldown rotation. Ideal as an off‑tank that swaps during high‑damage phases.
- Background: A pure healer attuned to the element of water and the power of light. Draws on the blessings of the Elementals of Gridania.
- Strengths: Highest raw healing output (Cure II, Medica II, Regen); powerful burst healing with Benediction (full heal); excellent area‑of‑effect (AoE) healing; ability to raise allies instantly (Raise).
- Weaknesses: Low mobility; limited damage mitigation options; no shielding; mana management can be tight during prolonged fights.
- Playstyle: Keep Regen on the tank, use Cure II for single‑target heals, Medica/Medica II for party heals, and use Benediction as an emergency. Use Fluid Aura for knockback interrupt. Offensive spells (Stone, Aero) to contribute damage when safe.
- Unlock Conditions: Conjurer level 30 → complete the quest Sylph‑management (Gridania).
- Recommended Equipment: iLvl 90 Artifact Armor; weapon: iLvl 90 Stardust Rod (relic) or iLvl 80 Allagan Cane.
- Build Stats: Primary: Mind. Secondary: Piety (enough to sustain MP) then Critical Hit & Determination.
- Team Synergy: Complements any tank; best with Warrior due to self‑heals reducing burden. Essential for progression raiding where heavy healing is needed.
- Background: A tactician who commands a fairy companion to heal and shield allies. Originates from the lost civilization of Nym.
- Strengths: Powerful shields (Adloquium, Succor) that prevent damage; pet fairy provides passive healing; damage mitigation via Sacred Soil; ability to increase healing received via Fey Illumination.
- Weaknesses: Direct healing is weaker than White Mage; pet can be unpredictable; requires proactive play (pre‑shielding).
- Playstyle: Keep Adloquium on the tank, use Succor for party shields, place Sacred Soil under the party for AoE damage. Let your fairy (Eos) handle light healing, use Embrace manually when needed. Offense via Ruin/Bio and Energy Drain to restore MP.
- Unlock Conditions: Arcanist level 30 → complete the quest Forgotten but Not Gone (Limsa Lominsa). Requires Arcanist 30 and the level 30 class quest done.
- Recommended Equipment: Same as Summoner (shared gear sets). iLvl 90 Artifact Armor; weapon: iLvl 90 The Last Resort (relic) or iLvl 80 Allagan Grimoire.
- Build Stats: Primary: Mind. Secondary: Critical Hit (improves shield chance) & Determination.
- Team Synergy: Excellent with any tank, especially Paladin for additive mitigation. Pair with a White Mage for hybrid healing—scholar shields before big hits, white mage tops off afterward.
- Background: A martial artist who harnesses the power of chakra. Monks specialize in fast, multi‑hit combos with positional requirements.
- Strengths: Highest single‑target sustained DPS in ARR; strong attack speed and damage buffs (Greased Lightning, Twin Snakes); no cast times (instant attacks).
- Weaknesses: Must maintain Greased Lightning stacks (3‑stack damage boost) or DPS drops heavily; requires precise positioning for rear/flank bonuses; very vulnerable to knockbacks and disconnects.
- Playstyle: Perform the basic combo (Bootshine → True Strike → Demolish) from the rear, then the flank combo (Dragon Kick → Twin Snakes → Snap Punch) from the flank. Keep Demolish dot up and maintain Greased Lightning via Dragon Kick/Demolish. Use Perfect Balance to quickly gain 3 stacks.
- Unlock Conditions: Pugilist level 30 → complete the quest Sisters of the Path (Ul'dah).
- Recommended Equipment: iLvl 90 Artifact Armor; weapon: iLvl 90 Sphairai (relic) or iLvl 80 Allagan Claws.
- Build Stats: Primary: Strength. Secondary: Skill Speed (enough for comfortable rotation) then Critical Hit & Determination.
- Team Synergy: Benefits from Bard's Foe Requiem (increased magic damage? Actually Monk is physical, but Foe Requiem increases magical damage taken—no effect. Better with Dragoon's Battle Litany (increased critical hit rate).
- Background: An elite spear‑wielding knight from Ishgard. Dragoons leap into the air and deliver devastating piercing attacks.
- Strengths: High burst damage with jump attacks; strong AoE potential (Doom Spike, Dragonfire Dive); self‑buffs (Heavy Thrust, Blood of the Dragon) increase damage.
- Weaknesses: Jump animations root you in place—can be deadly in movement‑heavy fights; slower attack speed than Monk; positional requirements (disembowel from flank, chaos thrust from rear).
- Playstyle: Keep Heavy Thrust buff up (flank), use the combo (Vorpal Thrust → Full Thrust) from the rear, and use Disembowel → Chaos Thrust from the flank for dot. Activate Blood of the Dragon to enhance jumps, use Life Surge to guarantee a critical hit. Geirskogul for AoE.
- Unlock Conditions: Lancer level 30 → complete the quest Eye of the Dragon (Gridania).
- Recommended Equipment: iLvl 90 Artifact Armor; weapon: iLvl 90 Gae Bolg (relic) or iLvl 80 Allagan Lance.
- Build Stats: Primary: Strength. Secondary: Critical Hit & Determination. Skill Speed to a cap.
- Team Synergy: Excellent with Bard (Battle Voice + Foe Requiem doesn't affect physical, but Bard still helps). Dragoon provides piercing resistance down via Disembowel (10% piercing damage bonus) which benefits Bard (ranged physical) and other Dragoons.
- Background: Shadowy spies from the Far East. Ninjas use dual daggers and hand signs to cast ninjutsu—powerful elemental attacks.
- Strengths: High burst damage via Trick Attack (vulnerability up); excellent mobility (Shukuchi teleport); ability to enmity dump (Smoke Screen); utility with Goad (TP restore) and Shadewalker (transfer enmity to tank).
- Weaknesses: Complex mudra system (three hand signs) requires practice; lower sustained damage than Monk if Trick Attack misses; positionals (rear for Aeolian Edge, flank for Armor Crush).
- Playstyle: Maintain Huton buff (attack speed) via Armor Crush from flank, use the combo Spinning Edge → Gust Slash → Aeolian Edge from rear. Weave mudras: typical opener uses Fuma Shuriken (1 mudra), then Raiton (2 mudras) or Katon (AoE). Use Trick Attack every 60 seconds for party damage window.
- Unlock Conditions: Requires Disciple of War level 10+ first, then complete The Rogue's Gallery (Limsa Lominsa) to unlock Rogue class. Level Rogue to 30, then complete My First Daggers to unlock Ninja.
- Recommended Equipment: iLvl 90 Artifact Armor; weapon: iLvl 90 Yoshimitsu (relic) or iLvl 80 Allagan Daggers.
- Build Stats: Primary: Dexterity. Secondary: Critical Hit & Determination. Skill Speed for Huton timing.
- Team Synergy: Trick Attack is a massive raid DPS cooldown—synergizes with any burst window. Pair with Dragoon for piercing boost (Ninja is slashing? Actually Ninja uses slashing damage, so no benefit). Works with Warrior (slashing resistance down) for added damage.
- Background: A wandering archer who inspires allies with song. Bards are the only physical ranged DPS in ARR, specializing in support and consistent damage.
- Strengths: Always active (no cast times), high mobility; party support via songs (Mage's Ballad, Army's Paeon, The Wanderer's Minuet); secondary healer (Peloton, Refresh, Nature's Minne); excellent for kiting.
- Weaknesses: Lower raw DPS than melee; songs drain MP; no burst damage; requires managing song timers and procs.
- Playstyle: Refresh Foe Requiem for magic damage boost (costs MP). Use Straight Shot for crit buff, then alternate Heavy Shot and procs (Bloodletter, Rain of Death). Keep Windbite and Venomous Bite dots up. Activate appropriate song: Mage's Ballad for mana regen, Army's Paeon for ability cooldown reduction, The Wanderer's Minuet for party TP regen.
- Unlock Conditions: Archer level 30 → complete the quest Bard's Banquet (Gridania).
- Recommended Equipment: iLvl 90 Artifact Armor; weapon: iLvl 90 Artemis Bow (relic) or iLvl 80 Allagan Bow.
- Build Stats: Primary: Dexterity. Secondary: Critical Hit & Determination. Skill Speed as needed.
- Team Synergy: Essential for healers (Mage's Ballad) and melee (Army's Paeon). Foe Requiem benefits Black Mage and Summoner (magic damage). Pairs well with Dragoon (piercing debuff) and Ninja (Trick Attack window).
- Background: A destructive wizard who channels immense aether to unleash fire and ice spells. Black Mages sacrifice mobility for raw power.
- Strengths: Highest single‑target burst damage in ARR (Fire IV? Actually Fire IV is Heavensward; ARR uses Fire III and Fire I rotations); huge AoE potential (Flare); self‑buffs via Astral Fire and Umbral Ice.
- Weaknesses: Long cast times and immobility; mana management is critical; must switch between Fire (high damage) and Ice (mana regen) phases; vulnerable to interrupts.
- Playstyle: Maintain Astral Fire (fire spells) for damage and Umbral Ice (ice spells) for mana regen. Rotation: Fire III → Fire I x3–4 → Blizzard III → Blizzard I → repeat. Use Thunder dot (Thunder II/III) for extra damage. Flare for AoE (costs all mana, use Convert to regain).
- Unlock Conditions: Thaumaturge level 30 → complete the quest Taking the Black (Ul'dah).
- Recommended Equipment: iLvl 90 Artifact Armor; weapon: iLvl 90 Stardust Rod? Actually Black Mage uses a staff. iLvl 90 Thyrus (relic) or iLvl 80 Allagan Cane (shared with White Mage). Note: Black Mage uses a two‑handed staff (weapon type: Two‑handed Thaumaturge's Arm). Examples: iLvl 90 Stardust Rod (relic) or iLvl 80 Allagan Cane.
- Build Stats: Primary: Intelligence. Secondary: Critical Hit & Determination. Spell Speed to reduce cast times.
- Team Synergy: Benefits greatly from Foe Requiem (magic damage increase). Bard's Mage's Ballad helps with mana. Use Mana Shift (role action) to give MP to healer.
- Background: A scholar who uses arcane gemstones to summon and command primals—Ifrit, Garuda, Titan. Summoners deal damage over time and burst through pets.
- Strengths: Strong DoT pressure (Bio, Miasma, Shadow Flare); high burst with Bane (spread DoTs) and Fester; pet provides extra damage; excellent for fights with multiple targets.
- Weaknesses: Pet can die and must be resummoned; DoT uptime is crucial; lower mobility than Black Mage? Actually Summoner can move while casting DoTs? DoTs are instant, but Ruin has cast. Moderate mobility.
- Playstyle: Maintain Bio II, Miasma, and Bio on the target. Use Ifrit for single‑target, Garuda for AoE/push, Titan for tanking. Use Garuda's Contagion to extend DoT duration, then pop Fester. Bane to spread DoTs to nearby enemies. Use Aetherflow for mana and Fester charges.
- Unlock Conditions: Arcanist level 30 → complete the quest Forgotten but Not Gone (Limsa Lominsa) — same as Scholar. After unlocking Scholar, talk to K'lyhia again to get the Summoner job crystal.
- Recommended Equipment: iLvl 90 Artifact Armor; weapon: iLvl 90 The Last Resort (relic) or iLvl 80 Allagan Grimoire.
- Build Stats: Primary: Intelligence. Secondary: Critical Hit & Determination.
- Team Synergy: Works with Bard (Foe Requiem) and other DoT users. The pet provides a second aggro target. Good for solo play and farming.
#### Warrior
---
IV. Healer Jobs
#### White Mage
#### Scholar
---
V. Melee DPS Jobs
#### Monk
#### Dragoon
#### Ninja
---
VI. Physical Ranged DPS
#### Bard
---
VII. Magical Ranged DPS
#### Black Mage
#### Summoner
---
VIII. Major Non‑Playable Characters (NPCs)
These characters drive the story of A Realm Reborn and appear throughout the main scenario. While not playable, understanding their roles helps you appreciate the narrative.
#### The Scions of the Seventh Dawn
| Character | Role | Background | Key Traits |
|---|---|---|---|
| Thancred Waters | Scion leader / Spy | A charming rogue from the streets of Ul'dah. Master of infiltration and gunblade (later becomes Gunbreaker, not in ARR). | Quick‑witted, flirtatious, devoted to the Scions. Often works alongside Minfilia. |
| Y'shtola Rhul | Archmage / Scholar | A powerful sorceress from the Sharlayan colony. Expert in aetherial theory and arcane magic. | Calm, intellectual, uses black/white magic. Often provides exposition. |
| Yda Hext | Pugilist / Brawler | A fiery fighter from Gridania. Known for her short temper and physical prowess. | Impulsive, emotional, skilled in hand‑to‑hand combat. Later revealed to be Lyse Hext after her sister's death. |
| Papalymo Totolymo | Thaumaturge / Mage | A diminutive Lalafell with a sharp intellect. Uses fire and ice magic. | Sarcastic, protective of Yda. Dies later in the story. |
| Alphinaud Leveilleur | Scion diplomat / Arcanist | A young Elezen prodigy from Sharlayan. Commands a carbuncle and leads expeditions. | Idealistic, articulate, becomes a central figure in later expansions. In ARR he is 16 years old. |
| Alisaie Leveilleur | Scion / Red Mage | Alphinaud's twin sister. More brash and action‑oriented. In ARR she is a student of the Arcanists' Guild but later becomes a Red Mage. | Stubborn, skilled in rapier combat. Not much screen time in ARR. |
| Minfilia Warde | Antecedent of the Scions | A descendant of the Warde family, she leads the Scions from the Waking Sands. | Compassionate, wise, serves as a quest giver. Later becomes the Oracle of Light. |
| Urianger Augurelt | Archon / Scholar | A mysterious Elezen who speaks in archaic English. Expert in ancient lore and aether. | Cryptic, loyal, later designs the means to travel to the First. |
| Tataru Taru | Scion administrative / Alchemist | A Lalafell who handles finances and later becomes a skilled secret agent. | Cheerful, resourceful, often underestimates her own abilities. |
| Character | Role | Notes |
|---|---|---|
| Gaius van Baelsar | Garlean Legatus | Primary antagonist of ARR, leader of the XIVth Imperial Legion. Wields a gunblade and pilots a magitek armor. |
| Lahabrea | Ascian | The main Ascian antagonist, manipulating events from the shadows. |
| Theodoric | King of Ruin | Ruler of Ala Mhigo, later deposed. Not directly encountered in ARR but heavily referenced. |
| Moenbryda | Scion / Researcher | Introduced later in ARR, a close friend of Urianger. Her sacrifice is pivotal. |
| Cid nan Garlond | Chief Engineer | A Garlean defector who aids the Scions with airships and technology. |
IX. Summary of Roles in Combat
| Role | Responsibilities | Example Jobs |
|---|---|---|
| Tank | Maintain aggro, absorb damage, position enemies. | Paladin, Warrior |
| Healer | Restore HP, remove debuffs, mitigate damage through shields/regen. | White Mage, Scholar |
| Melee DPS | Deal high physical damage up close, often with positionals. | Monk, Dragoon, Ninja |
| Physical Ranged DPS | Deal damage from range, provide party support, no cast times. | Bard |
| Magical Ranged DPS | Deal magical damage from range, often with cast times and mana management. | Black Mage, Summoner |
X. Unlocking All Jobs – Quick Reference
To unlock any ARR job, you must first level the corresponding base class to level 30 and complete all class quests up to that point. Then visit the appropriate guild location and accept the job unlock quest. Key points:
- Arcanist: unique – After unlocking Scholar at level 30, simply speak to K'lyhia again to obtain the Summoner job crystal.
- Rogue/Ninja: You must be at least level 10 in any Disciple of War class to unlock the Rogue class in Limsa Lominsa. After leveling Rogue to 30, you unlock Ninja.
- All job unlock quests are permanent and can be completed at any time.
- Weapon: Relic weapon (iLvl 90) from your job quest chain. Alternatively, the Allagan Weapon from Coil Turn 5.
- Armor: Mix of Darklight Gear (iLvl 70, sold by Auriana in Mor Dhona) and Artifact Armor (iLvl 55–70). The best body piece is from The Binding Coil Turn 1–4.
- Jewelry: Allagan accessories (iLvl 90) from Coil or Mythril accessories (iLvl 70) from dungeon drops.
- 2 Tanks (one main, one off)
- 2 Healers (one primary, one secondary)
- 4 DPS (mix of melee, physical ranged, magical).
- Bard + Dragoon: Dragoon's piercing debuff boosts Bard's damage by 10%.
- Warrior + Ninja: Ninja's slashing debuff (via Dancing Edge? Actually Ninja has no slashing debuff; Warrior provides Storm's Eye slashing debuff. No, Warrior has Storm's Path/Storm's Eye? Storm's Eye gives 10% slashing damage taken debuff. So Warrior + any slashing DPS (Ninja uses slashing) is good. But Ninja's Trick Attack benefits all.
- Scholar + Paladin: Strong mitigation combination.
- Black Mage + Bard: Foe Requiem boosts Black Mage's damage significantly.
- Switch jobs freely: After unlocking multiple jobs, you can switch in any city's adventurers' guild or in inn rooms. Level them to experience all playstyles.
- Cross‑class actions are removed in later patches (Stormblood). In ARR, each job can take actions from other classes. For example, Paladin benefits from Conjurer's Protect? No, protect is not cross‑class. Actually in ARR, cross‑class actions are limited to sub‑level 30. Use guides from that era if you're replaying original ARR content.
- Role actions (introduced in patch 4.0) are not part of ARR. For authentic ARR experience, focuses on job‑specific actions.
---
XI. Recommended Equipment at Level 50
For all jobs, the best gear (item level 90) comes from the Relic Weapon quests (start with A Relic Reborn), the Allagan gear from The Binding Coil of Bahamut Turn 5 (iLvl 90), and Mythril gear from dungeons. The Artifact Armor (from job quests at 45, 50) is iLvl 55–70 but is visually iconic. For a quick gearing guide:
---
XII. Team Synergy & Party Composition
A standard 8‑player party in ARR is:
Best synergy combos:
---
XIII. Final Tips
This guide covers everything a new or returning player needs to understand the characters and roles of Final Fantasy XIV: A Realm Reborn. Choose the role that fits your style and enjoy the journey to becoming Eorzea's hero!